


kpnuts
-
Posts
1,034 -
Joined
-
Last visited
Content Type
Profiles
Forums
Gallery
Events
Everything posted by kpnuts
-
Gundam FXA-05D /RX-178 super Gundam by kpnuts Bandai
kpnuts replied to kpnuts's topic in Non-ship/categorised builds
Hi all well this is really enjoyable what a great kit (dont know about accuracy bit fit is superb) -
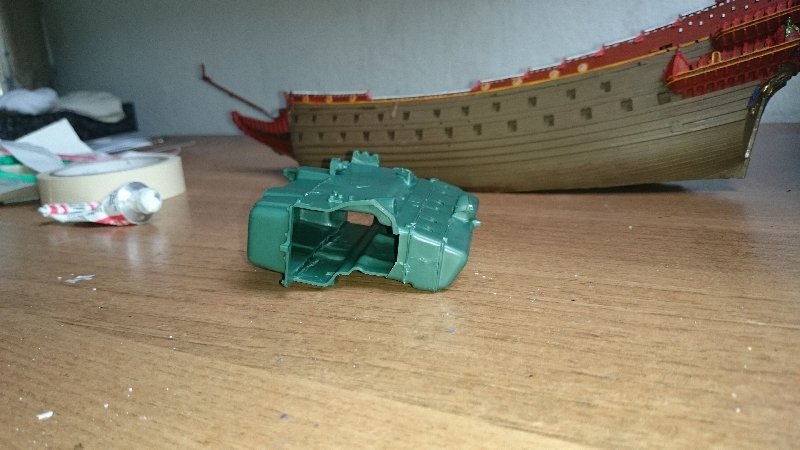
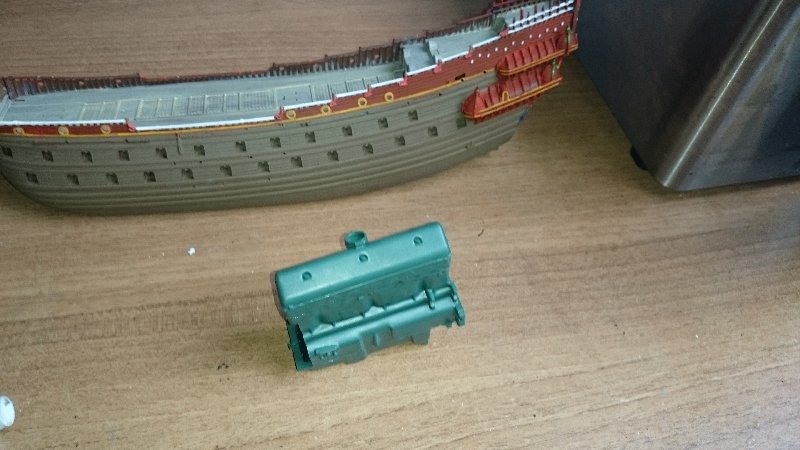
Hi all well it was supposed to arrive on the 30th, lucky me it arrived early. What a great kit I've not used one drop of glue the fit it purfect (only downside is the kit has stickers instead of decals). I'm going to depict it rotting in a field I've read these tend not to rust much but I will be adding some. This will really stretch my skills as my normal rusting techniques are done exclusively with enamels and pastels, obviously I cant use enamels on this plastic so will have to adapt and invent. I've made a start on the weathering, I really think I will enjoy this first forage into gundam.
- 11 replies
-
- 11
-

-
Citroen Traction Avant by kpnuts - FINISHED - Heller - 1/8
kpnuts replied to kpnuts's topic in Non-ship/categorised builds
I would like to point out that I completed this dio some time ago and since finding this section I thought it would be nice to post it as a wip to show how I did it. So here is the next installment.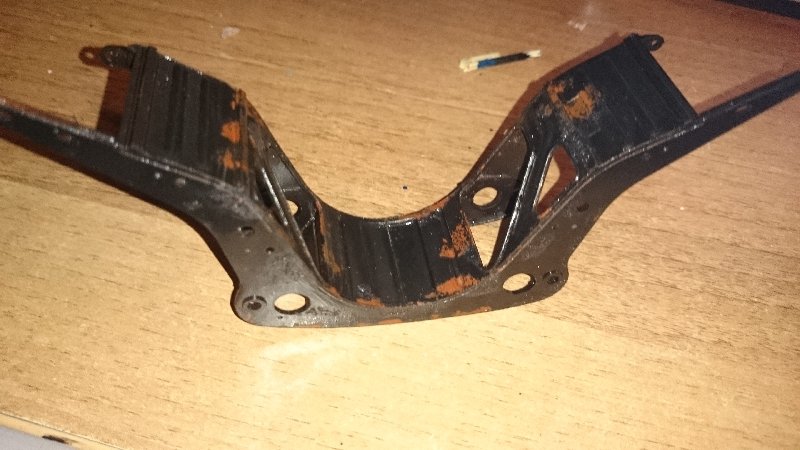
- 86 replies
-
- 11
-
-
Citroen Traction Avant by kpnuts - FINISHED - Heller - 1/8
kpnuts replied to kpnuts's topic in Non-ship/categorised builds
Ok so heres the next installment.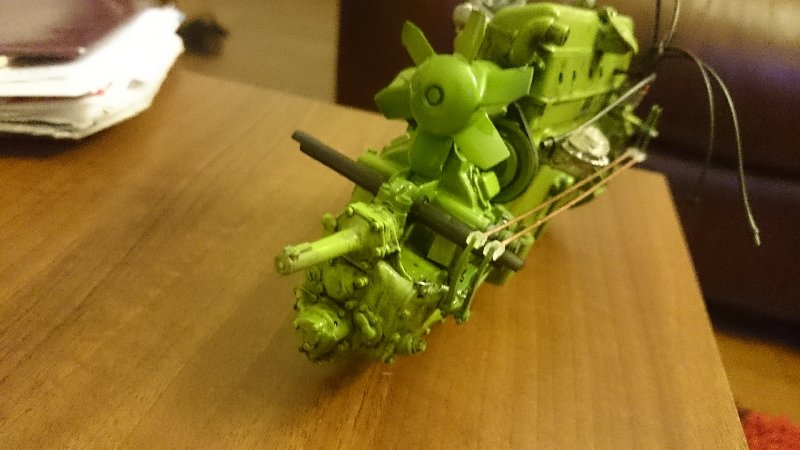

- 86 replies
-
- 15
-
-
AH64 A Helicopter by kpnuts - Academy - 1/48 - PLASTIC
kpnuts replied to kpnuts's topic in Non-ship/categorised builds
Anyway what a load of rubbish this kit is (wish I hadn't started it) After herculean efforts to get the landing gear pods to fit I thought I had it then after priming the b#$$%y thing pinged apart again. The cockpit glass is a stupid 3 part thing which I managed eventually to glue together only to find after priming it had pinged apart again (I only hope that was after the primer and the cockpit isn't full of primer. -
AH64 A Helicopter by kpnuts - Academy - 1/48 - PLASTIC
kpnuts replied to kpnuts's topic in Non-ship/categorised builds
It's mainly fit issues I had to slice fair amounts off the cockpit to get the fuselage to fit round it and all of the parts so far have needed bits shaved and adjusted to get them to fit together. -
AH64 A Helicopter by kpnuts - Academy - 1/48 - PLASTIC
kpnuts replied to kpnuts's topic in Non-ship/categorised builds
Well this was supposed to be light relief from the Cutty Sark I think I will be doing the Cutty as light relief from this. What an awful kit I thought sorting the mistakes my brother did on the Cutty was a challenge that was a walk in the park. Anyway here is progress so far.- 32 replies
-
- 10
-
-
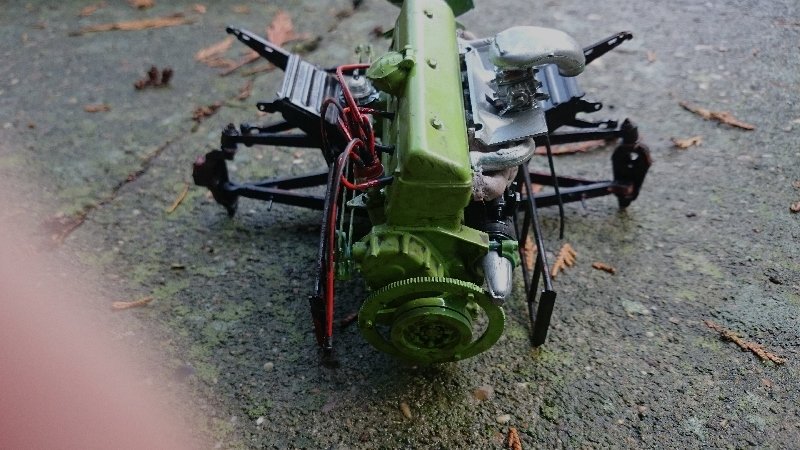
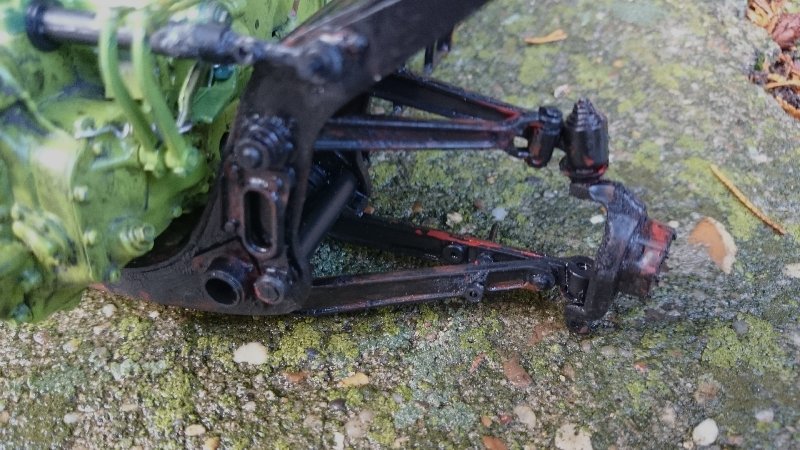
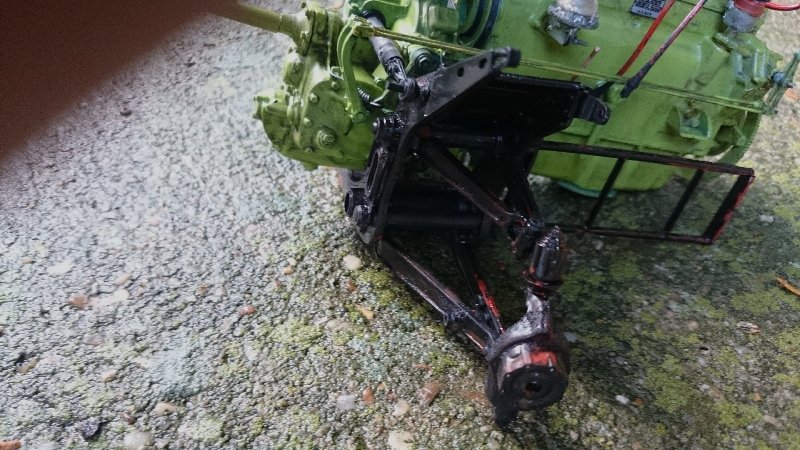
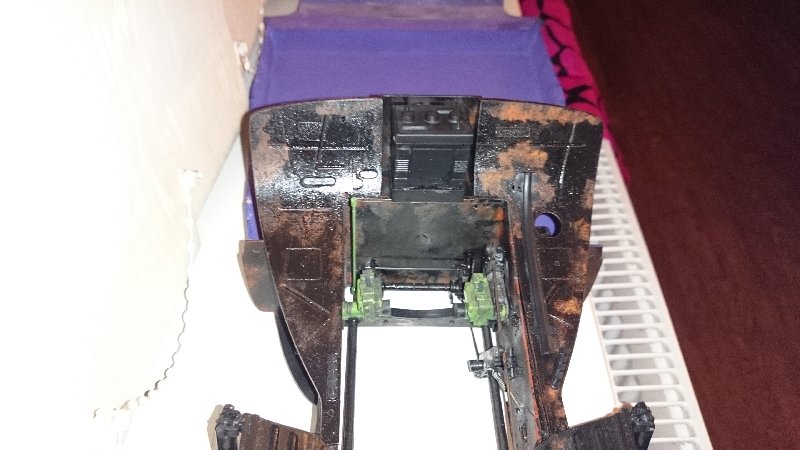
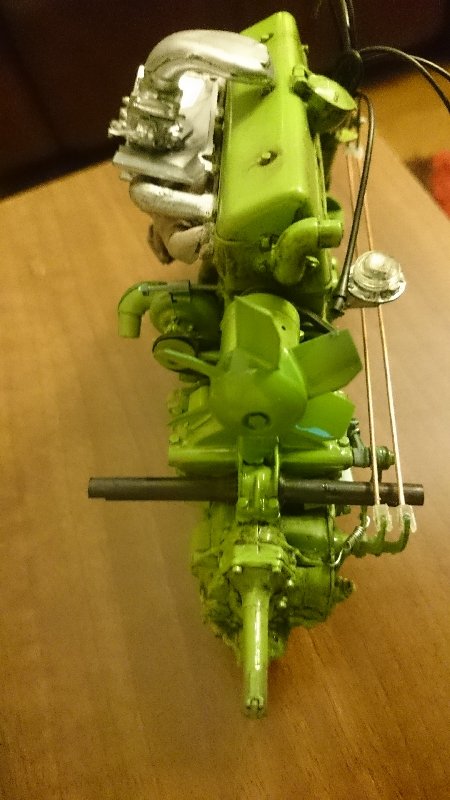
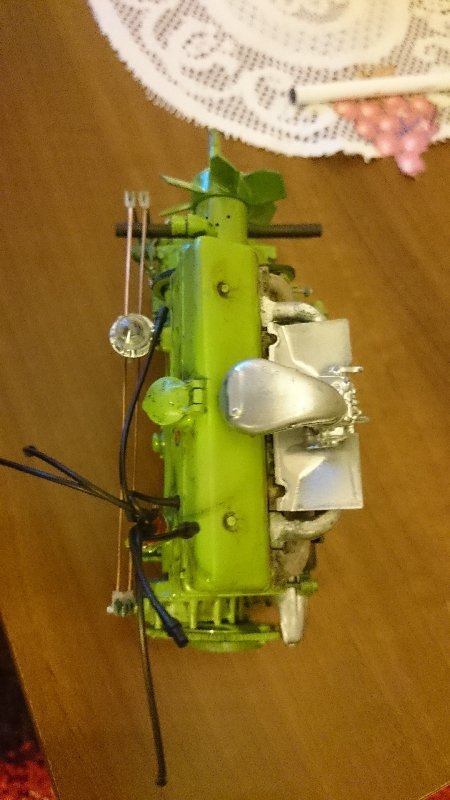
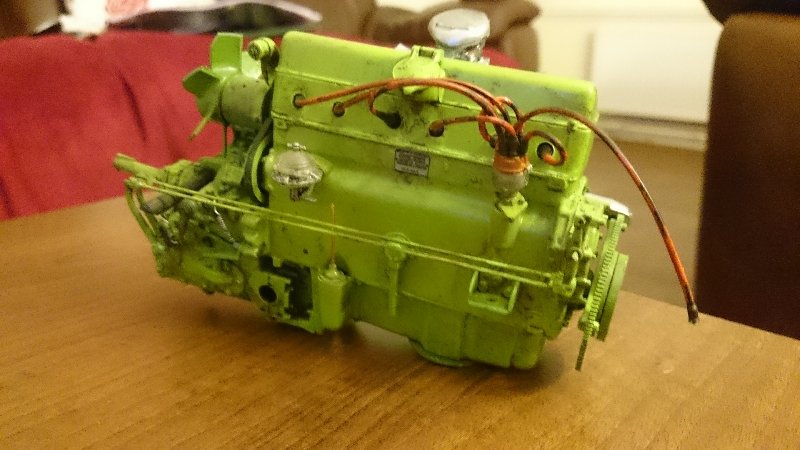
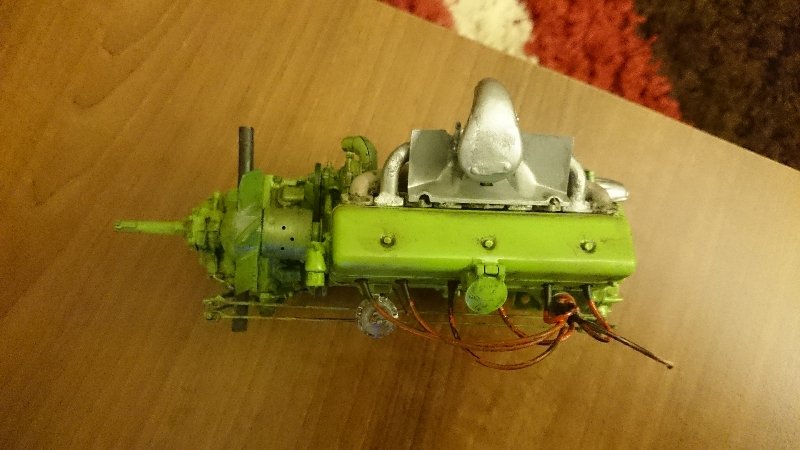
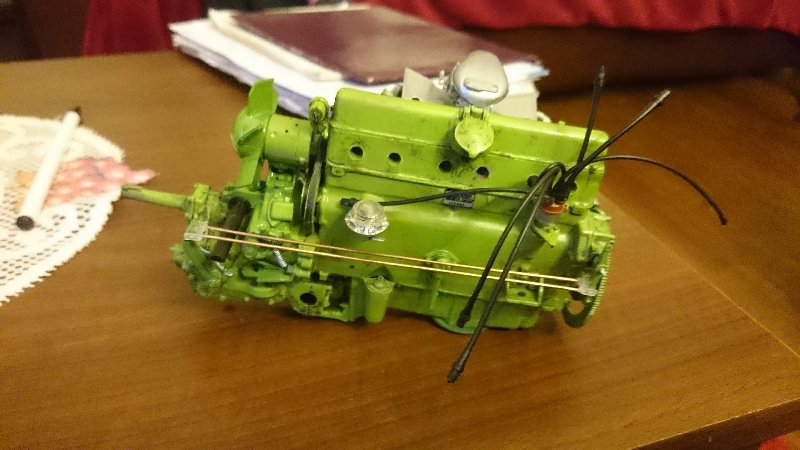
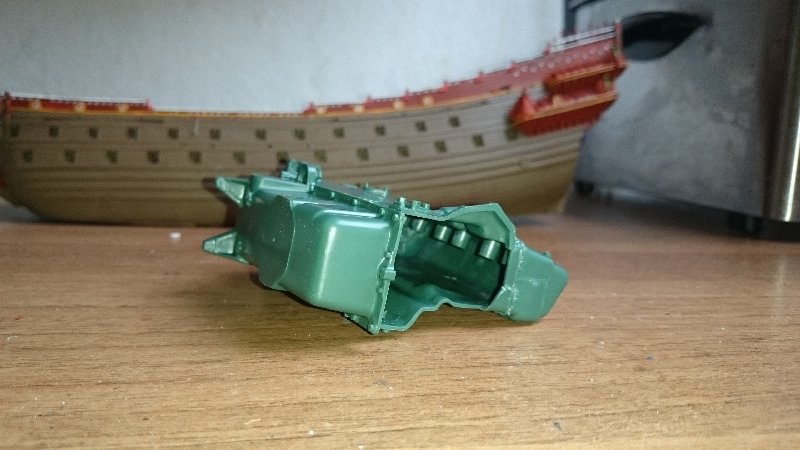
Hi all since I've found this section I thought I would post pics of what I consider my best build ever. I will post it as a wip although its actually finished (I love old rusty things and my initial ideas to build it in the middle of a field with a tree growing out of it, but I was given a better idea of building it as a kind of last running jaolpy that the French resistance could find for a last mission) So to start (I read loads saying the engine is warped and needs loads of bracing tabs to make it fit together well (initially I thought I was lucky but I've built this kit twice and both times the fit was purfect) I took pics to prove there was no bracing.

-
Hi ok so I ordered a gundam as some relief from the Cutty Sark bare with me, after scanning the stash for some light relief nothing took my fancy so I ordered a gundam (never built one before and it looked fun) Would be delivered by the 6th, now it's the 30th rescan of the stash, hey I've never built a helicopter before, how hard could that be, might even be fun. Answer very hard, anyway onwards and upwards.
- 32 replies
-
- 10
-
-
Made one of the ships launches and added some upper shrouds.
- 82 replies
-
- 5
-
-
- artesania latina
- cutty sark
- (and 1 more)
-
Hi all bit more done got the coppering room done (changed the top door as using the kit one and adding the embellishments made the door ridiculously thick) and the central ward room also more rigging on the sail (probably doesn't even notice) but it's there You cant really tell but some swearing was involved in the practically invisible rigging you cant even see on the sails.
- 82 replies
-
- 5
-
-
- artesania latina
- cutty sark
- (and 1 more)
-
Hi all finished the first yard. And before I get comments about the order I'm building this in I know it's not per instructions but hey they are pretty useless anyway. I've added the first real sail. I know it will get in the way of a lot of the rigging but I intend to tie it up out of the way temporarily. I know the lines from the base of the sail which go toward the stern will get in the way but I will leave them till last. Apart from the instructions i really like this kit (yes I know it's not an accurate depiction of the Cutty Sark) It will still be a lovely model of a clipper ship anyway.
- 82 replies
-
- 5
-
-
- artesania latina
- cutty sark
- (and 1 more)
-
Thanks Samson a real help, I've made a start on the first yard .
- 82 replies
-
- 5
-
-
- artesania latina
- cutty sark
- (and 1 more)
-
I am totally confused with building the yards on this I dont know which bits to use the instructions are pretty much useless assuming you know what bits are what. I've tried googling for detail of them and all the pics that come up are either too blurred to see or are from behind the mast help please anyone got a picture of the built yard on this kit.
-
Hi all continuing to plod on with this Made a start on the main mast.
- 82 replies
-
- 5
-
-
- artesania latina
- cutty sark
- (and 1 more)
-
Hydraulic Dredge by Steve Harvath
kpnuts replied to Steve Harvath's topic in - Build logs for subjects built 1851 - 1900
Very interesting and coming along great. -
Hi all was about to start on the fore mast, but then thought I better sort all the lower stuff before going in an upwards direction. So first I thought about the problem of doing the portholes heres my answer to getting them all in the right place. Then to do the rudder.
- 82 replies
-
- 4
-
-
- artesania latina
- cutty sark
- (and 1 more)
-
Hi all let me start this update by saying (in the politest possible way) **agonized outburst of "special words"**. Let me explain. I do my modeling in the spare bedroom, I lay a piece of vinyl down on the floor immediately round my work bench and on top of the bench I put the container with all the brass pieces on the bed behind me after removing some parts needed for my next bit of work I set to adding some of the stanchions on the bow and heard this noise as if a plastic container of billions of bits had fallen on the floor, imagine my surprise when turning round to find that is exactly what had happened and of course as it was BEHIND me and not around the vinyl protection area it had fallen on a shag pile carpet, of course the lid came off. So after moving the bed (carpet was under it) shaking the carpet out I got this. And after several hours This So on with the update. I'm really chuffed with how it's going (I should point out check ALL the stanchinons BEFORE gluing them in place as some of the holes are not clear and removing and drilling them after they are glued in place is no easy task.
- 82 replies
-
- 4
-
-
- artesania latina
- cutty sark
- (and 1 more)
-
Looking good, I love these Mississippi steamers.
-
More done on the bowsprit a start on the dreaded rigging (all be it a very very tiny start)
- 82 replies
-
- 4
-
-
- artesania latina
- cutty sark
- (and 1 more)
-
Done some of the panels round the top rails and made a start on the bowsprit, even added the figurehead.
- 82 replies
-
- 6
-
-
- artesania latina
- cutty sark
- (and 1 more)
-
A great looking model (and quite different from mine, looks like a more accurate version)
- 207 replies
-
- 1
-
-
- billing boats
- cutty sark
- (and 1 more)