MORE HANDBOOKS ARE ON THEIR WAY! We will let you know when they get here.
×


ChrisLinden
-
Posts
139 -
Joined
-
Last visited
Content Type
Profiles
Forums
Gallery
Events
Everything posted by ChrisLinden
-
Hi Jerry thanks for the kind words. Ive been having a hard time focussing on the hobby, we are redecorating the house so we can put it on sale, and i started a new company which took up a lot of time and energy. I hope i can build again soon!
-
Hello, I recently posted an extensive tutorial on how to paint cast metal ornaments for ship models. In this tutorial I will skip the basics of preparing and priming your model detailed in the previous tutorial, and instead skip straight to painting some small scale historic figures. Step 1: color block The first step after priming your model is to block in its basic colors. Simply use a fine brush and paint the elements of the figure in the color you want. I advise to use a small amount of colors as this makes it easier and results in a better looking model. Using more than 4 or 5 different colors is usually a bad idea, as it will confuse the viewer and look amateuristic. Note: For this tutorial I used a white primer because it photographs easier. Normally I would use a black primer as its easier to get good coverage. A white primer is harder to cover with colored paints, often needing two coats to get good coverage. Step 2: Wash After you have applied the colors on your model it does not look great... yet. A very easy way to bring out the details in your figure is to apply a wash. This is a specialised, watery thin ink that runs into the recesses of your model while staying clear of the raised areas (sort of). Paint manufacturers like Citadel and Vallejo have a range of these, in various colors and I can highly recommend them. The trick with washes is to be very generous in applying them. Use a larger brush and "flood" your figure, allowing the ink to run over it and into all the recesses. If a certain area is heavily flooded, use a brush to wipe it into different areas of your model until you get an even coverage. Don't be put off if it looks "too much", after drying the effect is much more subtle. In fact you could use a second layer of wash after drying to get more intense shadows. Usually one application is enough though. Washes take a long time to dry (relatively speaking for acrylic paint) so you can speed things up with a blow dryer if you want. I used Agrax Earthshade (brown) shade from Citadel on the entire figure. You could use different color washes on each section but I wanted to get this aged, slightly yellowed painting look anyway. Usually its not worth the trouble using a blue wash on blue parts etcetera unless you are aiming for a specific result. 99% of the time I use a black wash or a brown wash for everything. Step 3: Highlights Once the wash has dried your figures will look pretty good. One could stop here, if you are happy with the level of detail. However, with a bit more work the models can look even better. By adding some highlights you further bring out the details and "depth" in your models. You could argue that the natural lighting falling onto your model is already doing that, but experience learns that small figures need "a little help" to augment this lighting. We do this by adding highlights to areas of the model that would naturally "catch" light. Usually the raised areas. To make highlights simply apply a lighter color of the one underneath with a fine brush. Using acrylic paint its very easy to mix up a nice range of colors quickly. Be sure to thin down your paint a little bit wit water so it flows easily. Don't paint straight from the pot as it will give a blotchy result and often is a struggle to apply. In the picture above I added lighter browns to the raised wrinkles in the trousers. I used a beige color to touch up the shirt of the guy on the right and the flesh/face parts on both figures. You can already see the model coming to life. Let's add some more detail highlights: I mixed some lighter blue and touched on the jacket in places. Don't overdo it, just a few small fine lines here and there is all it needs. I used white to clean up parts on the left guy, his belts and ends of the jacket arms. I used a gray to highlight the black hat and boots, with a fine pure white dot on the boots to suggest "gloss". The shirt of the guy on the right was finished using some lighter beiges. Finished & Some Thoughts Here's some pictures of the finished figures, which took less than 1 hour to paint up. Some final thoughts I'd like to share on painting miniatures like this: Small scales: As you can see from the examples above, small figures like these don't hold up well when photographed up extremely close. The result can look disappointing when in reality when viewed from a normal distance they look fine/great. Keep in mind that when painting on a very small scale (these are 1:85 I believe) it is really difficult to paint each individual detail. Often the detail is simply not present in the cast model, because of its small size. Things like eyes, lips or even hands are merely "suggested" at than really sculpted. This calls for a more "suggested" style of painting too. You should aim to get an overal look of a figure, letting the shadows and highlights doing its work. By keeping things a bit vague you let our brain "fill in the blanks" often giving a much better effect than trying to paint in all details. Overdoing the highlights or trying to paint in eyes or other small details often results in a weird cartoonish look. Another couple of figures I did on this scale: Take it easy Don't worry too much about making things perfect. Even if you do a color block and 1 layer of wash, your models will already look great. Applying the small highlights is something learned with practise. I encourage you to give it a try, as you might be surprised about yourself. Even if you do it in a basic fashion it will provide awesome results. Whatever you do I assure you you can do better than just flat-coated figures with awful shiny Humbrol. Love to hear your experiences, if you paint something up using my tutorial post some pictures here for us to see!
-
Thanks for the compliments guys. Busy week again, will report back with progresss as soon as i can
-
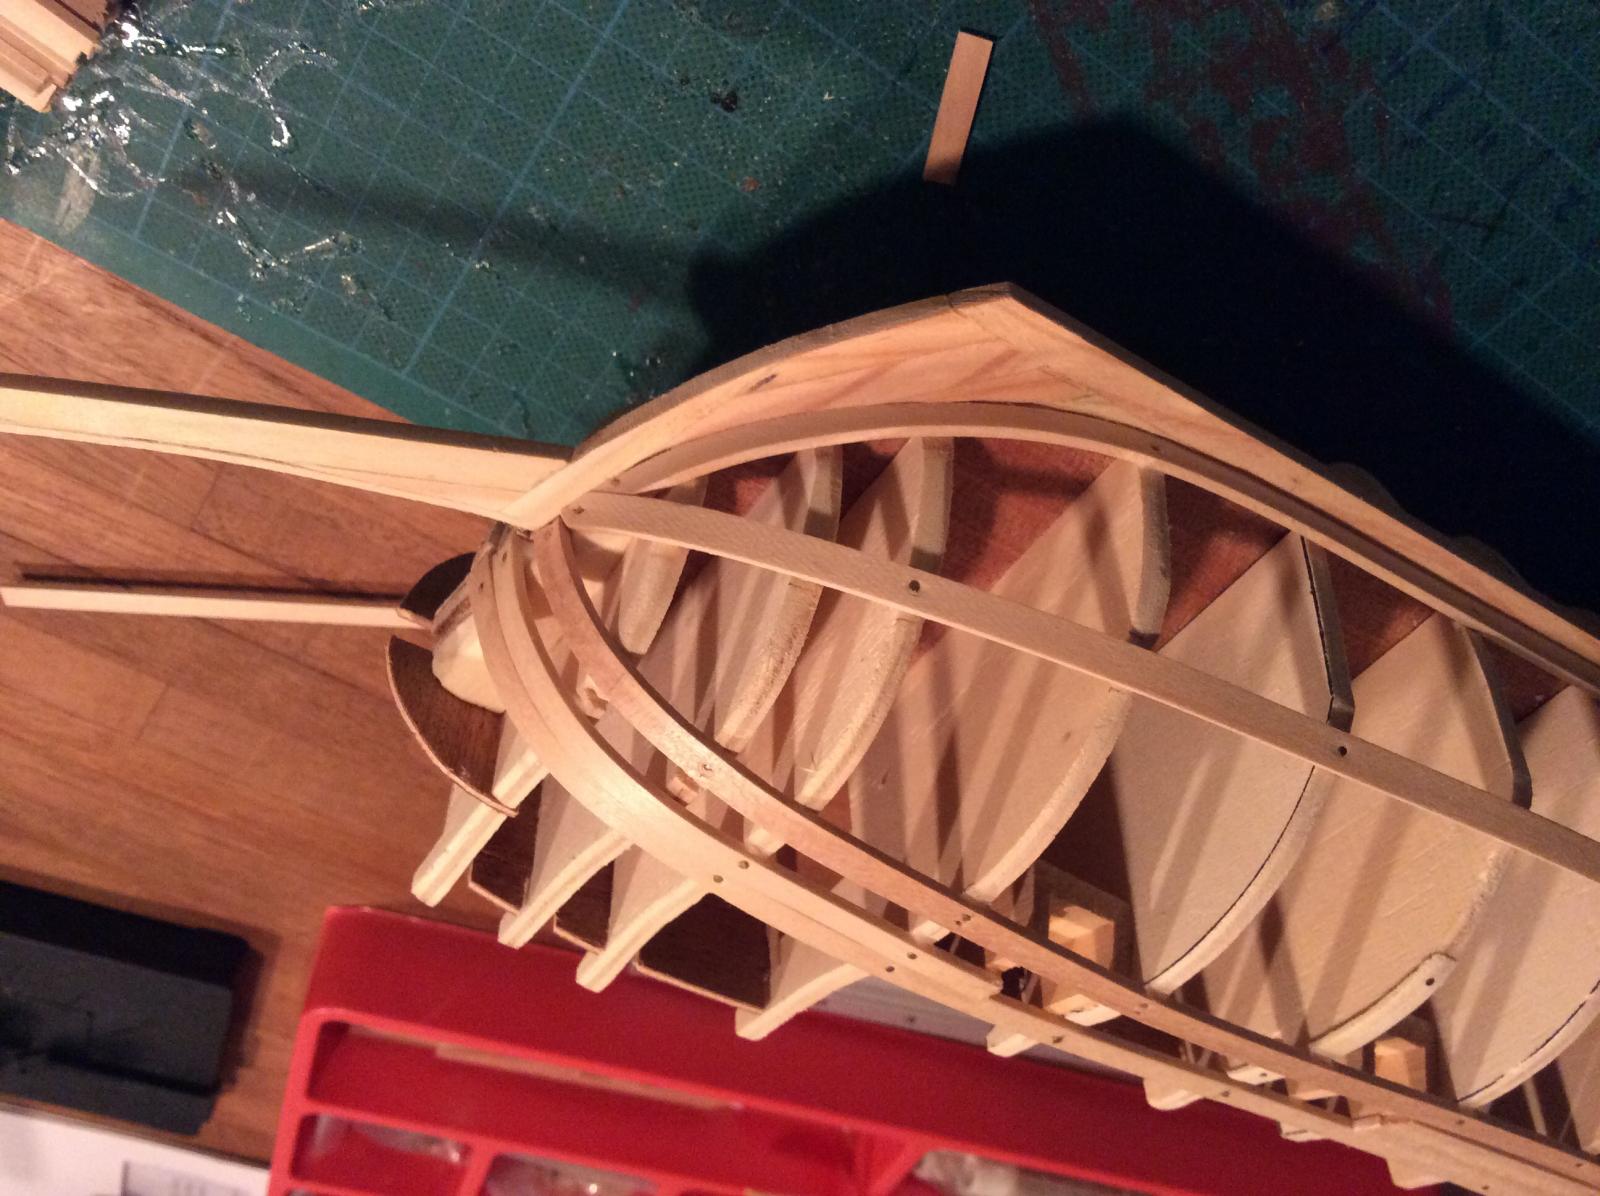
No clue why my ipad is flipping the pics upside down sorry lol!
-
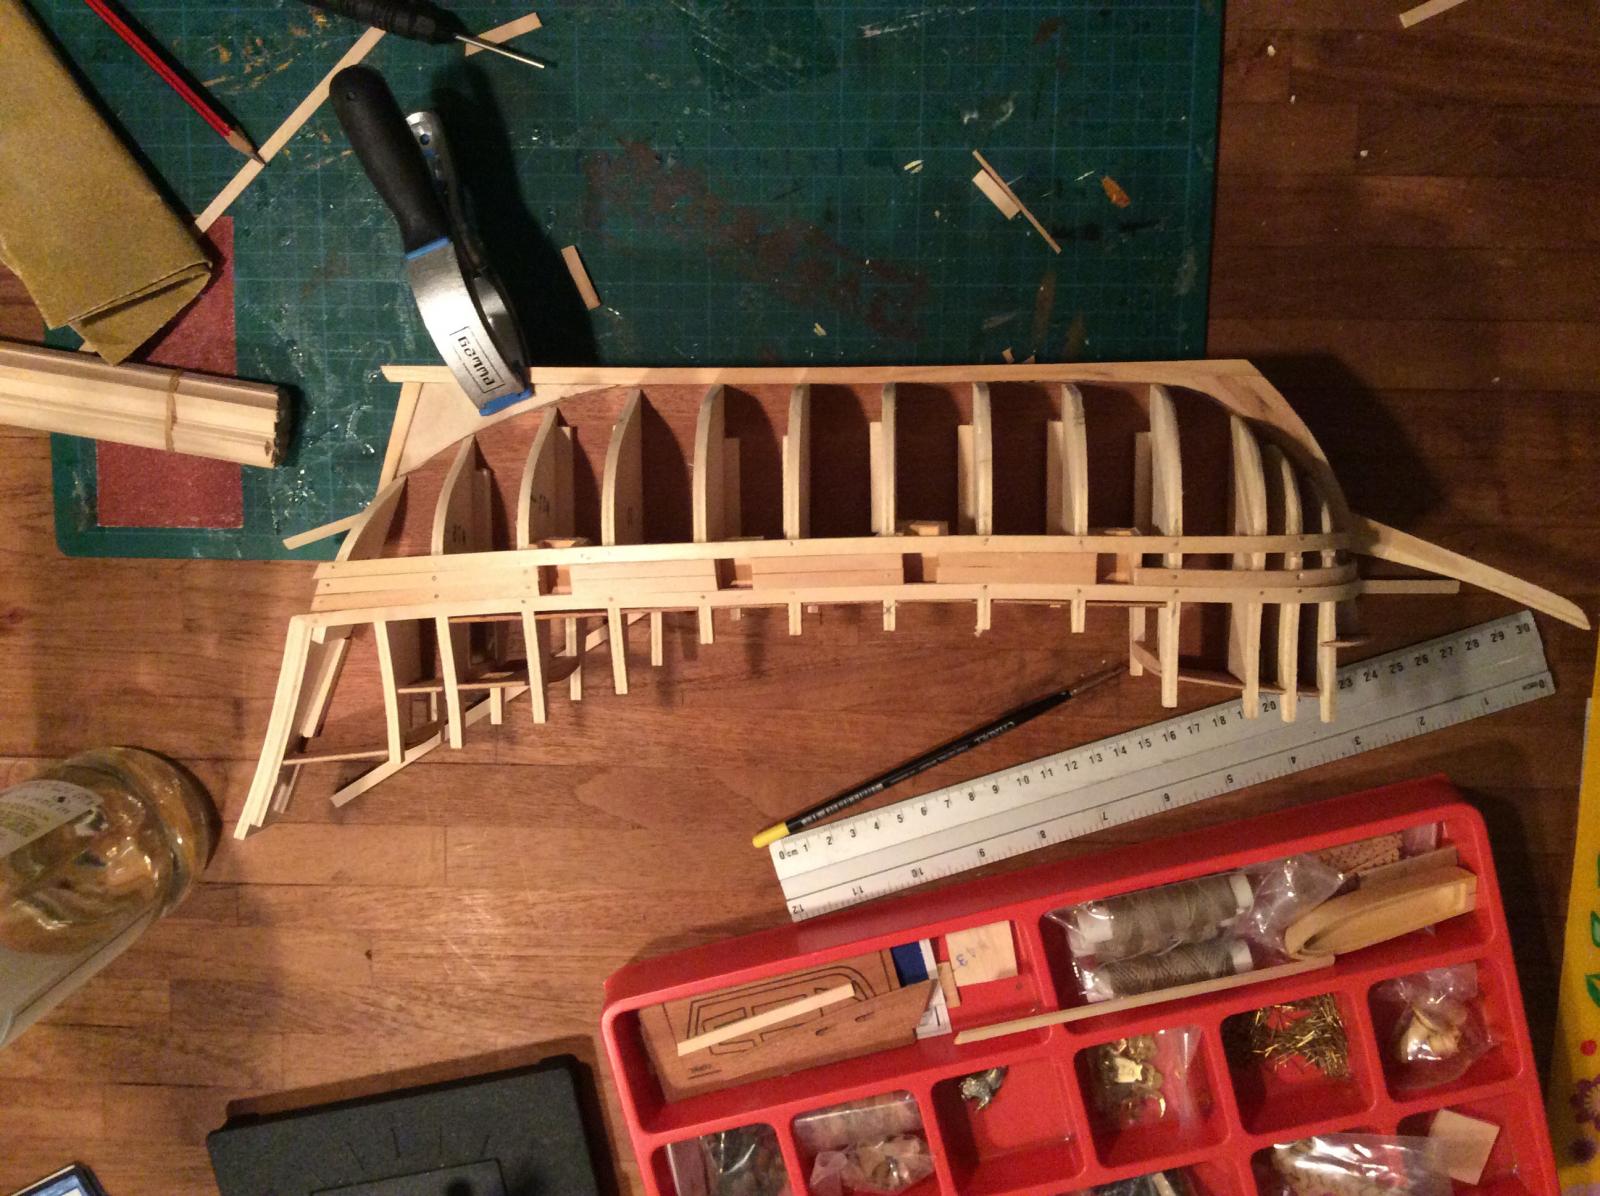
I had a busy time at work. But found some time to build on this model. Started the first planking, always a fun part to do. Keeping it really rough right now as the plank thickness gives me a lot of breathing room to sand it to a smooth surface. I expect this to finish soon, then i will start to work more delicately.


- 10 replies
-
- 3
-

-
- corel
- halve maen
- (and 1 more)
-
I've taken some time to decide how to approach this build. I've toyed with the idea to completely scratch and redo the hull/keel but finally settled on only remaking part of the false keel to allow for better planking and a slightly more realistic feel. I sawed off parts of the keel part provided in the kit, then replaced those with new scratch made parts. It was fun to do and certainly got me more interested to maybe try a complete scratch plank on frame model sometime. Not much progress so far, but will pick up the pace soon. I've also made a tiny workbench in our 2x3m shed, not much but at least keeps the family peace
- 10 replies
-
- 3
-
-
- corel
- halve maen
- (and 1 more)
-
Thanks, glad you appreciate. I can make more tutorials on this topic but entering winter time i only have the weekends to catch daylight and take good photographs of the painting stages
-
I just posted a tutorial on how i paint ornaments. Will post another one soon on how to manage small details with relative ease. I am a "warhammer" miniature painter that recently picked up wooden ship building
-
Introduction My name is Chris van der Linden. I have roughly 15 years experience with painting metal and plastic miniatures. I started the wooden modelship building hobby only recently, about 2 years ago and noticed a lot of people are struggling with how to paint their cast metal ornaments to a satisfying standard. I decided to write down my experience on this topic for everyone to enjoy. Note: this tutorial focusses on metal colored finish right now. I will add an additional explanation on how to do different colors. Easy for anyone One thing I have learned is that painting is not as difficult as it seems. Sometimes people are amazed at the small details, believing they need a 1-haired brush and loupe to pull it off. This is NOT the case. Even with 2 simple steps you can have great looking (repeatable) results. Disclaimer Please use this guide and techniques to your own discretion. Always use a tester if you are unsure about the results. Each situation and personal preference is different. I can say however that I have used all of these techniques a lot without problems. I provide these tips for your satisfaction, this is by no means "they best way" to do it... 1. What paints to use? Painting cast metal parts has its origins in "tin miniatures" painting, the toy soldiers we all remember. A common misconception is that painting on metal requires Humbrol or Oil paints. This is not true anymore. Brands like Citadel and Vallejo have developed acrylic (water based) paints that have exceptionally good coverage even on un-treated metal parts. This is great because they are much easier to work with. Humbrol is tricky to thin down and mix with other colors, requires turpentine to wash and takes long to dry. Oil paint takes even longer to dry... Long story short: I always work with water based acrylic paints from Citadel and Vallejo on metal cast parts. It dries fast, is easy to thin down, mix and work with. Add your wife/girlfriend's blowdrier and you can work even faster Citadel paints tend to have rather funny names because they are used for fantasy/sci-fi minatures. So a certain red might be "Blood Red" or "Merchrite Red". This is their alternative for having "paint numbers". Both these brands also offer specialist paints such as instant rust, metallic colors, texture paints and weathering powders. 2. Preparation a. Removing Flash / Mold Lines As a result of the casting process most models have Flash and Mold lines. These are unwanted and you get a nicer looking part if you take some time to remove these. Flash is a bit of excess material that has run in between mold parts, usually giving a thin sort of "outcropping". Remove with a sharp knife or file. Mold lines are thin lines where the two mold parts are joined. Most of the times these run along the "sides" of a miniature and can be easily filed down to a smooth surface. b. Shape your part before you paint Some cast metal parts (depending on their material) can be deformed easily. Sometimes they are already slightly out of shape, deformed coming out of the box. Before you start painting, make sure you shape your part so it fits on your ship. Take as much time as you need because after painting you can't do this anymore. Paint chips easily. c. Wash/rinse your parts (optional) During the casting process so called "release agents" are used to ensure the cast pieces come free from the mold easily. This is a greasy kind of substance sometimes left on the miniature part. It can cause trouble during painting. If you want you can wash your cast parts gently in warm water with a bit of dishwater soap. Then wash clean with water and let it dry on a cloth. Use a blow drier if you are as impatient as me... 3. Primer While paints such as Citadel and Vallejo give pretty good coverage on metal parts straight away, it usually helps to primer your castings first. This not only helps prevent paint chipping, it gives a perfect 'undercoat' for your paint work. I always use acrylic paint spray cans to prime my metal and plastic parts. Depending on the colors used lateron, I either prime with matte black, or gray. Black being ideal for darker colors such as green, brown, gold etc. Gray being a perfect base for colors such as Blue, Red, Yellow. a. DIY sprayboot (for free) An easy way to prime your metal castings is to place them on a cardboard box. You can use a piece of double sided tape to "lightly fix" them in place. The box will allow you to turn your models around, without needing to touch the parts with your hands. (see what I did there lol). If you cut the front pane of a box out and place the castings inside it, you have a cheap DIY spray "boot". b. Correct way to spray Go outside, then spray the parts from about 30cm distance. Don't keep the nozzle pressed continually. This will un-neededly flood your fine model. Try to do short "puffs" while turning the box around, covering all angles. This will give a thinner coverage, avoiding flooding your castings. c. Avoid warm sun One thing that can give bad coverage is spray painting in warm direct sunlight. Due to the heat, the gas with paint bubbles will partially dry in "mid air" while traveling towards your model. This will cause tiny droplets to form, giving a coarse finish. 4. Painting Now that you have prepared and primed your castings, it is time to paint. Whoot! a. Make it easy for yourself Often the parts you need to paint are quite small, making them difficult to handle. Smudging your own work. An easy fix is to stick a piece of double sided tape or gummy on old paint bottle. Then stick your model/miniature/ornament on top of that. Now you can hold and maneuvre this thing, without having to hold the actual casting. This is also somewhat less strainful on the hands during long paint jobs. b. Color block Likely your model will now look black or gray. The first painting step is to apply what we call a "color block". This basically is a solid appliance of the "main" color of the object. When done you have a full opaque colored object, not looking very impressive... yet .... In this picture above: top brown parts are primed, then painted brown base color. Bottom right is the original "bling" casting. C. Wash / Ink Now comes the million dollar trick that will take you 90% of the way. Most miniature painters use what they call a "wash" or ink. This is a water thin paint that flows onto the model easily, ending up darkening the recesses, while staying clear of the raised areas. This gives two results: The model becomes darker overall. Plan ahead for this, use a ligther color block if needed to begin with. It also gives a lot of your detail without manually painting. So all the small details in your cast ornament suddenly "spring to life" without any talent needed. Citadel offers specialised washes in different colors which are absolutely amazing. Use a larger brush and royally "flood" your model with the wash. It dries up subtler than it initially looks so don't be afraid to go bold with this. Washes and inks do take longer to dry. Set the painted part aside and give it a few hours to dry. You can speed this up using a blow dryer, but be gentle. d. Add highlights Once the wash has dried you can add highlights to your paint work. This is optional. You can go all out and add many levels of highlights, but usually one "step" is enough. You can simply use your main color block color, with 25% white or lighter shade color mixed in. Use a fine brush and paint some of the raised areas that you think should "catch light" in a natural situation. e. Drybrush technique Alternatively you can use what is called the "Dry brush" technique. For this take a larger brush, then load your brush with the highlight color paint. But instead of painting, first rub it allmost dry on a tissue so virtually no paint comes off the brush. Then "wipe" across the surface of your casting, the little paint that is still in the brush will "catch on" the raised areas of your model, not the lower deeper parts. This is an easy way to apply detailed highlights without having to manually paint them, which requires a more steady hand. Drybrushing gives a more "chalky" grittier look. Painting highlights by hand, a more smooth silky look. Apply to your own taste or skill level. Examples of finished results < I am collecting photos right now - will be updated -
- 9 replies
-
- 16
-
-
Hi Mike, Well I am really new to this hobby. I painted miniatures to a professional standard for years, but working with wood is only a year now. At first I just could not believe how bad certain aspects of ship model "kits" are. Running a company of 15 staff myself with big customers, I just can't believe these manufactures can "get away" with these kinds of things. that said, yeah its a lot of troubleshooting and a lot also has to do with my relative in-experience with this hobby. I learn as I go and the Friesland is a too ambitious project for me maybe in hindsight. Glad you like my approach to the ornament painting. I will post a guide later this week for everyone to enjoy. The aging of the wood is experimental. I have no clue how it holds up over time, so use at your own discretion. I was never a fan of the super clean transparent laquer finish of most model ships, so I am really trying to go for old and beaten.
-
Ok I will post the guide in English there for everyone to enjoy.
-
The inks / paints are from Citadel, a brand known from the Warhammer miniatures
-
Hi schnu, You are doing a good job. Making replacement parts, solving issues, thinking outside of the box. That will bring you far in this hobby!
-
I am thinking of buying new wood for the first planking as the wood in the kit is almost 2 mm thick. Which is really thick for a small model like this. My planking wood on the big Friesland model wasn't even this thick. Problem is that I want to cut away parts of the false keel to embed the planking and have it "level" out with the keel. But there's no way I can do this with this thick planking, as the keel is only 4 mm thick to begin with. Does anyone else recognise this problem?
-
Continued work on the galleon section. I decided not to use the prefab parts of the Mamoli kit, instead create my own custom pieces. I created the curved wooden pieces with a profile by glueing 2 wide strips and one 1x1 mm strip together. This took the better part of a day to finish, wow I underestimated that. Once in place I aged the wood for a first base look with Nuln Oil from Citadel paints. I will go back later to add more ornamental details and highlight effects. The parts for the anchor lifting provided with the kit are pretty ugly and simplistic. I put some extra work on them so they can actually hold some rigging ropes later. I am not an expert on how this works so I just used some reference photo's as a guide. The aging of the wood and general "finish" of everything is pretty patchy right now. I will need to go back later on and clean up a lot of rough looking things. For now I am happy to make some progress, It is quite a challenging build to begin with, given my low experience.
-
Hi Gunther, my pleasure. I've written a more in depth explanation on my experience with painting ornaments/miniatures. Its in Dutch, but this is a Google Translated link: https://translate.google.com/translate?hl=nl&sl=auto&tl=en&u=http%3A%2F%2Fwww.modelbouwforum.nl%2Fforums%2Fhistorische-zeilschepen%2F203149-how-schilderen-van-miniaturen-ornamenten.html The translation is pretty poor (ornaments becomes thumbnails etc) if there is interest I can re-write the tutorial in English and post it here on MSW. Although I do not know the correct place to put such a topic/thread, tips are welcome.
-
Allright this is how far I am now, one year into building. From this point on this will be a "live" build log.
-
Hull planking sort of finished Finished the hull planking sort off, some gunports still need to be cut out etc. Painted the underwatership in a off white color. Used a slightly more yellowed tone to match the "old" painting look Green planking Adding the green planking to the top part of the hull. Decided to repaint these parts because the colored wood provided in the kit were already "off" and losing more color during building. Fun shot for atmosphere, guns dryfit for pleasure haha Started adding the details "railings" dont know the correct terminology: Good picture of my aged wood and re-painted green planks: Bow Galleon Started working on the galleon at the front of the ship. People at the Dutch forum kindly pointed out that the part provided by Mamoli is too long, resulting in the lion head being WAY above the deck railing. This should not be the cause. I ended up taking off 2 cm, and it is still too long but I did not dare take of more. If you build this kit, look at this from the beginning so it is easier to fix. My front mast would have run into the lion head if I had not discovered this. Made a wedge to bend the wood for the galleon area. I decided to add more detail than what the kit suggets. Using some thin strips to create a profiled strip Also I deviated from the Mamoli plans because the way they suggest the galleon is not how these ships were built (or so I have been told). I opted for a more realistic approach, within what is possible on my own build. This also meant the metal flowery detail ornaments did not fit anymore. So I cut off large sections and then flattened them to fit, using a hammer After painting this should look nice again...
-
Stern backside ornaments I continued work on the backside details of the ship. First I painted the ornaments: I then fitted the parts to the ship. I am not sure how Mamoli intended these to "fit" but the word "Fit" was the least "fitting" when working on this... lol I kinda added some supports below the angled ornaments and filled up some parts. I have no idea if this is correct but it *works*. Everything put together: Gallery Top Windows (redo) To maximize my LEDs and see through windows I decided to make these from scratch. The solid parts of Mamoli I removed. I had some plastic window parts from a medieval model Warhammer kit, happened to have 2 identical ones. Yay. I cut a whole through the not-funny-hard wood, but finaly managed. Then built up a new window.
-
Outer Hull Planking Started on the outer hull planking. As I am new to this hobby I found it quite challenging. All the more because Mamoli's drawings are not entirely accurate when it comes to the wales, gunport placements and so on... Aging of the wood I wanted to achieve an "old" look for this ship, so I used a non-orthodox method of staining, again using Citadel paints (Warhammer paint). Their inks are great for staining your wood, but make sure to do testers as the results are really different from ink to ink. This is my tester, using Nuln Oil (black ink) and Agrax Earthshade (brown ink)
-
Stern Gallery Interior To maximize my see through windows and LEDs I decided to scratch build a small interior for the stern section. I had to remove more of the hull / keel / bullwarks to allow for this. After I created enough room for the interior I made a "floor" section with an interior on top of it. I assembled and painted it outside of this ship, when finished a placed it inside the ship and glued in place: Peeking through one of the windows:
-
Finishing hull first planking Now that the LED wires and lights are placed and checked they work (for now haha) I can finish the first planking, closing the hull Because I want to make wooden gunports for this section, I replaced the planking with a custom part. Also more sturdy so saved me quite some troubles. Only forgot to add one more port to the right... haha Started placing the cannon ports and cannon carriages. Barrels will be glued on from the outside lateron in the build. Painted some more brown to cover up led wires and save on planking duties. To easily batch paint small stuff, stick a piece of double sided tape on a block of wood or cardboard box. Now you can easily move around a dozen of things without touching the models themselves: Now that the carriages are in place I can add the other decks and start planking those. Because of the LED wiring I constantly had to think twice before "closing" a section off before moving on... Where as some inner sections were painted brown, the visible sections were planked normally: Finishing front deck planking:
-
Main deck planking Started planking the main deck. Pretty straightforward. Painted the inner bullwarks brown, instead of planking it all because it will be barely visible in the end. Added top ornament to stern, dry fitted the back window part ornament. As with all the provided ornaments, none really fit well so a bit of fudging is required. More work on the backside. Note I completely re-paint all metal ornaments, my process and used paints described below if you like to try this aged "look" instead of the all out bling. Painting ornaments - My Way Undercoat / prime your metal parts with Citadel paint (Warhammer paint). I used Scorched Brown as a base. This is waterbased acrylic paint, and as opposed to common belief this does hold perfectly on metal parts. The Cital paints are specifically designed for (metal) miniature painting and they work very well for these kinds of things. I then drybrushed a 50/50 mix of gold color and brown over the ornaments. This leaves some brown in the recesses, a subdued metal on the raised edges. Finally I washed it with a brown ink called Agrax Earthshade. This is a fluid pigment ink that dries dark in the recesses, giving a beautiful contrast. Finally overbrush with pure gold to taste. I kept things very "dull" for starters. After wash/ink has dried: Finished base look of ornaments, before adding additional color variations: Main deck planking and deck supports Progress on the main deck and deck supports. Placing LED wires Together with my friend we spent 2 evenings wiring the LEDs. They run through the bullwarks from back to front. That's why I kept the first planking open towards the bottom all this time, to allow more freedom of working on the LED wires.
-
Finished opening up the stern section to allow for the windows and LEDs. Painted it in a brown color as a base to work from: Finished window piece for the stern gallery. Used some clear plastic as a finishing touch. Will look good with LEDs behind it. Putting it in place: LEDs circuitry A friend of mine who is good with electronica helped put my LED stuff together. A small chip with a dimmer and on off switch. Powered by a 9V battery, all hidden below the (in my case removable) grating on the main deck. It can light for several hours, so its intended for occasional showing, not having it permanently on plugged into the wall socket. Gallery Window roofs structure The parts provided by Mamoli need quite some work to fit. The bottom needs to be curved and then the whole piece needs some filling/shaping. This took the better part of an afternoon, also because this wood is hard as nails. Thanks again GreatGalleons for giving me helpful pointers through your build. Added the wood strip detailing:
-
Stern Gallery windows Inspired by GreatGalleon's work to improve the look of the windows on this section. I did the same, although not nearly as neatly as he did. But overal an improvement to what Mamoli suggests for the kit. Because I will place LEDs throughout the ship I opened up the gallery sides and stern, to allow full "looking through" potential. Looks rough now, but will be cleaned up later. Basically I removed as much as I could without compromising the hull integrity too much not sure what Mamoli intended with these "parts" in my box First hull planking progress shot: