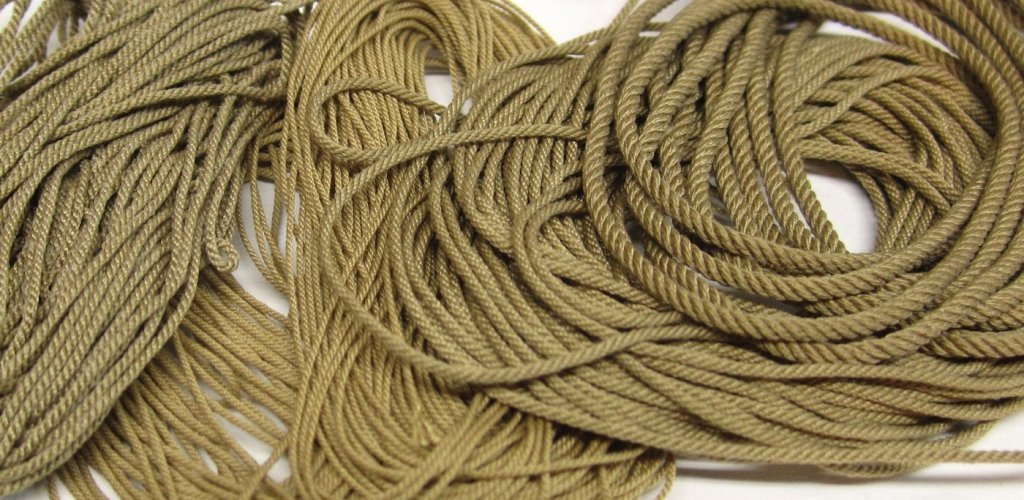
Gregory Posted November 6 #1 Posted November 6 (edited) Per my discussion with @Ronald-V over in Chuck's Syren Store topic, I will try to give a description of my rope maker and it's output. First, here is my original rope maker. I realized the shortcoming of kit provided line when I built my first wood ship kit in 1994. I found the basics of rope making in Ships of Scale Magazine, along with a few books that were my only source of information back then. Just for fun, here is one of the the rope making ideas from a book - Ship Modeling From Stem to Stern by Milton Roth. One of my go-to's back then, but I have since found it had a lot of not so sound information, mixed in with the useful stuff. Here is some of the " Not so sound " information from Roth. While the principle is OK up to a point, unless you were making rope out of rubber bands, this design would fail. The upright on the right, which would be the ' looper ' on a working ropemaker, needs to be moveable, not fixed as shown here. As the strands are wound, and the rope begins to set up, it contracts, and becomes somewhat shorter than the original strands. I wonder how many people built this, and experienced the snapping of the strands. Here is the latest version of my Rope Maker. ( Rope walk ) I believe this is what is called the Frolic style, but I didn't know that when I made it. I put images of the gears on the outside, because they are sandwiched inside the framework I made of plywood. I will explain the named components, then show a little more detail about how it works. 1. The Whorls. The strands of thread are attached here. The whorls spin ( wind ) the strands to put a reverse tension on them. Then, when that tension is released, the strands will twist together and lay up into rope. This is the basis for full size rope making. I believe the Rope Rocket has 3 whorls and of course makes great rope. I added a 4th, which I rarely use, but it gives some flexibility with recipes. 2. The Traveler. The traveler for my rope maker is essentially a sled, to which is attached the looper. 3. The Looper. The strands are all attached together on the looper. It will spin freely when the rope begins to lay up. I'm using a little Fishing Swivel Snap Ball Bearing. 4. The Topper. The topper keeps the strands separated while tension is put on the strands. Once the rope starts to lay up, it will slide toward the whorls, with the rope coming after it. Here is the driver for the whorls. It is a DC motor with a 20V power supply. There is a variable speed, reversable regulator. A good electric drill could be used, as with my original set-up, but I use this motor for other purposes. My gearbox is made from Lego Technic gears. Those hooks (re-purposed eye screws ) have to be welded solid. If they move in the shaft you won't have even tension on the strands, which is essential for rope making. I'm reluctant to provide detailed construction instructions or parts list, because I think other builders can come up with a more refined machine. My goal is to show what can be done with simple parts, while achieving some very good rope. The traveler is on Teflon pads so that it slides easily. The diver's weight is necessary to keep it from sliding too easily. All to keep tension during the making. I use two colors of Gutermann polyester thread of various maras. For light colored rope I use 2827 and for dark 446. Here are the various sizes ( Maras ) I have for making different size rope. I use Chuck's rope size chart to help with my rope making. I think there is also a recipe chart somewhere, but I have been making my own by hit and miss, because I may not use the same thread Chuck does. To start making rope I tie my thread to the looper and run it to the whorls, looping back and forth. For this example I am using three doubled strands of Mara 100. This is the looper end. The topper holding the strands apart prior to laying up. Untitled.mp4 Here is a little video to show the set-up before the making process. The strands are about 31 inches before the rope is made. The clamp keeps the topper from flipping over or falling out. When you first start spinning the threads, you are spinning the opposite of the way the yarns in the thread are laid up. I have found this to be clockwise for the thread I am using. This makes the threads sag a little, so you have to adjust the tension a little at this point by moving the traveler away from the whorls. Again, this is something you have to experiment with early on as you learn to make rope with this type of rope maker. A shot of the rope starting to lay up. This is at the whorls after the topper has been removed. I cut the rope from the whorls, holding it to keep from unraveling, and wrap it round the center drive shaft eye. I realize I could have provided more pics of the various stages. I'll try to respond to any special requests for more info. Spinning the rope in the direction of the lay while keeping the looper from turning, 'hardens' the rope. This is with the other end of the rope attached to the center eye, as mentioned above. The traveler will move toward the whorls at this point. How much to spin it is trial and error until you get a feel for it. If you spin too much, the rope will start to gnarl up. Here is the finished rope. Maybe a little over .5mm. The final length was about 21 inches, so about 2/3 the length of the strands I started with. I don't know how this compares to the Rope Rocket, but I know Chuck makes 30 foot lengths of rope. For me that would mean starting with 45 foot strands.😄 I put this presentation together rather quickly, so I apologize if it is not that helpful. Please let me know if you feel I can add some detail or other information that would be helpful. Edited November 6 by Gregory JpR62, Ronald-V, Desertanimal and 3 others 5 1 “Indecision may or may not be my problem.” ― Jimmy Buffett In Progress: HMS Resolution ( AKA Ferrett ) On Hold: Rattlesnake In the Gallery: Yacht Mary, Gretel, French Cannon
Ronald-V Posted November 6 #2 Posted November 6 (edited) Thanks, Gregory for your detailed explanation! It's pretty clear how everything works, but just like in Chuck's rope walk videos... I think I'll only see if I have more questions once I actually try it. It seems like something you really need to try to see if I've got it all figured out. But I definitely understand the basics now. And you really used materials you can find anywhere, like Lego gears...perfect! Again, thanks for explaining, will bookmark this for when I need it! 🙏 Edited November 6 by Ronald-V Tumblehome and Gregory 2 Build log HMS Sphinx 1:64 Vanguard Models Instagram page "ronaldcreations"
Tumblehome Posted November 6 #3 Posted November 6 A project I've been wanting to try for a long time, thanks Gregory. A complete tutorial would be more than helpful, please.. because I'm dumb! Gregory 1
Gregory Posted November 6 Author #4 Posted November 6 8 hours ago, Tumblehome said: A complete tutorial would be more than helpful, please.. I appreciate the interest. I'll try to make a more comprehensive video that I can post at YouTube. Might take a few days. ( or weeks ) I'll put together a new gearbox to show more about how it's made. Ronald-V, Ryland Craze and Tumblehome 1 2 “Indecision may or may not be my problem.” ― Jimmy Buffett In Progress: HMS Resolution ( AKA Ferrett ) On Hold: Rattlesnake In the Gallery: Yacht Mary, Gretel, French Cannon
Snug Harbor Johnny Posted November 6 #5 Posted November 6 This is close to a full-sized 'demo' rope making rig I used to take to historic sites for special events. Mine had 3 planetary gears of wood (I've seen vintage cast iron rigs that have 4 spindles, so either 3 or 4 strand rope can be made) mounted on a vertical harness maker's vise, a movable tailstock that could be set any distance from the headstock, and a rope maker's 'top' with a hanging weighty to keep it from revolving. As the strands tightened with spinning, the rope would self-make as the top progressed from the tailstock (on wheels - with a leather flap and weight hanging off the back to maintain tension, yet still allow the tailstock to move forward as the rope spinning shortened the length of the strands between head and tail stock). One difference is that the gathered strands at the tail stock were on a 'swivel' that could also counter spin as the rope was laid. to automatically balance the forces. That way, once the rope was done, there was very little 'whipping' of the rope to take out excess twist force. The final step was to 'set' the rope by attaching one end to a post (or tree) and pulling on the rope as much as possible. It would then stretch out a little during the setting process. I have no picture or videos of the demos, since I could not DO the tasks and take pictures at the same time - and I had no photographer. The ggreat thing about Chucks Rope Rocket (and he may eventually be able to re-source parts to resume selling units), is that you can make lengths as long as the distance you have available. You don't need a table that long - just a stand for the geared spinning end, and a table at the other end long enough to accommodate the lessening of strand length in part 2 of his method (no 'top' is required). Part one is just spinning to get a tension, and in theory - for a given working length and strand composition this would be a finite number of turns. Yeah, try counting that, so I just let the drill spin the strands like crazy until the stand with the spinning head starts to want to fall over - and thats tight enough. Then at end 2 on the table, I get a hold of it before unclamping (not good to lose it, or it will shoot away from you and ruin everything), turning (in the proper direction to lay rope from the center of the ru outward), applying the drill and counter spinning - letting the hand holding the tail rig move it along as the pressure dictates, and the rope looks complete. In theory (again), if the counter twist matches the initial spinning twists - perfect rope just falls off once cut and tied. But there will always bee some imbalance - with associated 'kinking'. This is fixed by 'whipping' the rope to remove any imbalance - and then it looks just fine with no kinks. BUT, then I 'set' the scale rope (just as in full size rope) by tying one end to something (or just stepping on one end) and pulling the other taught. You can 'feel' the rope stretching and relaxing as it get 'set' just so. Its really a learned skill. Lastly, with Gutermann or Metler poly, one put coils of scale rope on a cookie sheet into a preheated oven (325 deg. F) for 5 - 7 minutes to heat set. Then there will be a minimum of ravel when cut during use. Do not overbake or you might melt the poly and ruin the rope. Gregory and Ronald-V 2 Completed builds: Khufu Solar Barge - 1:72 Woody Joe Current project(s): Gorch Fock restoration 1:100; Billing Wasa (bust) - 1:100; Great Harry (bust) 1:88 ex. Sergal 1:65
Chuck Posted November 6 #6 Posted November 6 16 hours ago, Gregory said: but I know Chuck makes 30 foot lengths of rope. For me that would mean starting with 45 foot strands.😄 Actually my head stock and tail stock are 43 feet apart when I make my 30 foot lengths of rope. You were pretty close. LOL Gregory 1 Chuck Passaro - MSW Admin Sloop Speedwell - POF scratch Block Island Boat - POF scratch HMS Winchelsea - POB scratch build HM Cutter Cheerful - POB scratch build Royal Barge - POF scratch Medway Longboat- POF Scratch SYREN SHIP MODEL COMPANY
Gregory Posted November 6 Author #7 Posted November 6 3 hours ago, Snug Harbor Johnny said: One difference is that the gathered strands at the tail stock were on a 'swivel' that could also counter spin as the rope was laid. , Assuming the 'tailstock" is what I call my 'traveler', There is also a swivel that I described above. This allows the rope to twist and lay up in it's effort to overcome the tension of the twisted strands. I'll try to provide a video of it spinning later . Snug Harbor Johnny 1 “Indecision may or may not be my problem.” ― Jimmy Buffett In Progress: HMS Resolution ( AKA Ferrett ) On Hold: Rattlesnake In the Gallery: Yacht Mary, Gretel, French Cannon

Recommended Posts