Andrew J.
-
Posts
95 -
Joined
-
Last visited
Content Type
Profiles
Forums
Gallery
Events
Everything posted by Andrew J.
-
 That’s quite the display case! Absolutely befitting the beauty inside. Thanks for the tips, that’s kind of how I was thinking it might be done.
 -
Absolutely ridiculous how beautiful this is. There's just something I really love about this style of rig. I love how you've done the sails; the wire reinforcements definitely seem to provide the desired effect. Are you familiar with the movie Joe vs. the Volcano? One of Tom Hanks' and Meg Ryan's lesser-known and underappreciated romantic comedies. At one point they're sailing on the Pacific on a similar vessel, called the Tweedle Dee in the movie (Spike Africa in real life). There's this one shot at sunset with a lovely sweeping string motif that has always really struck me. Seeing your last couple updates of the sails all coming together reminds me of that.
-
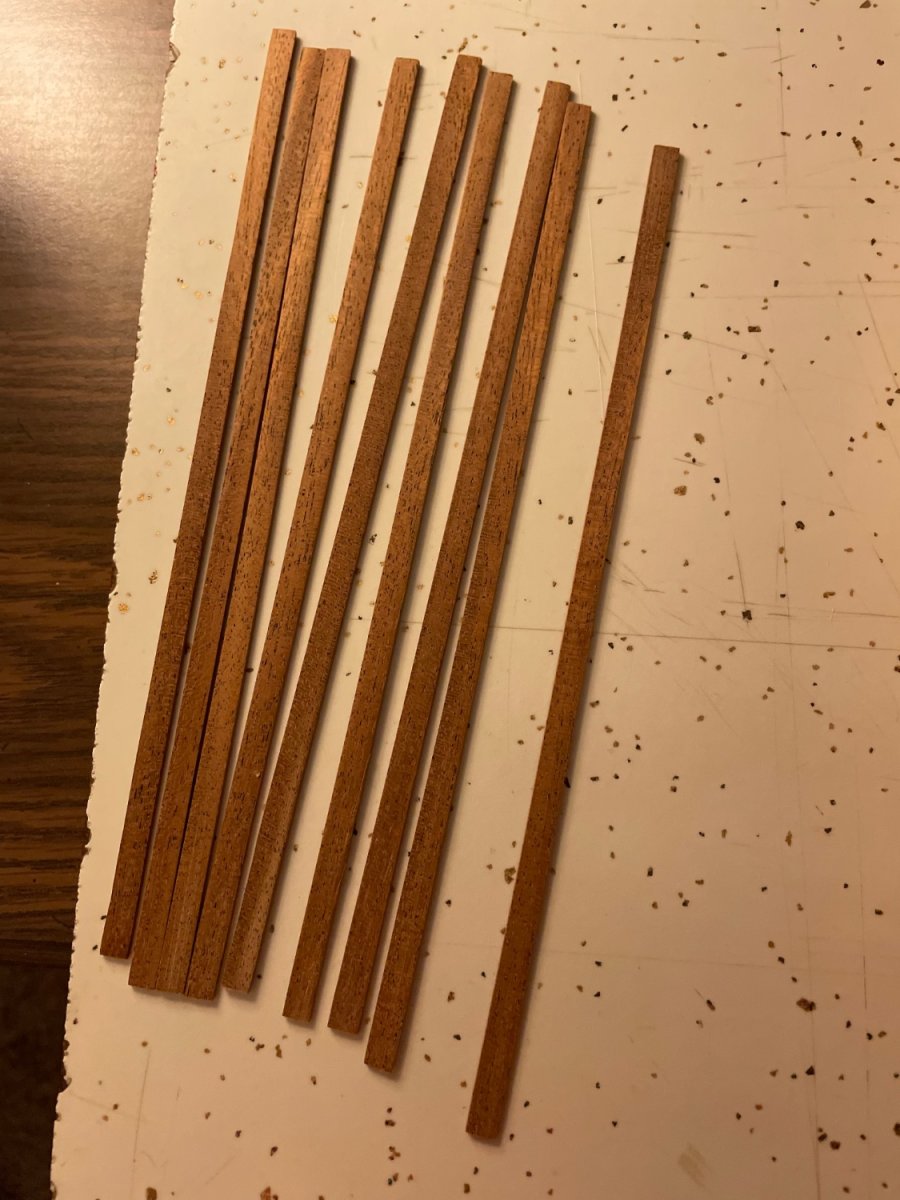
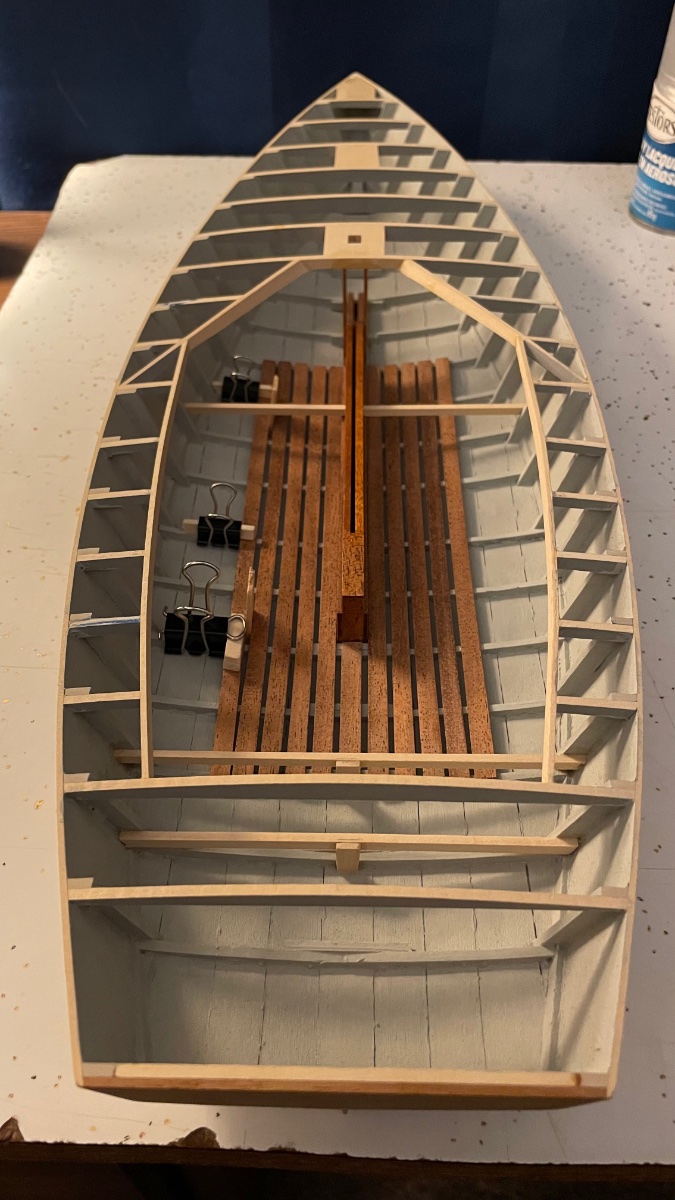
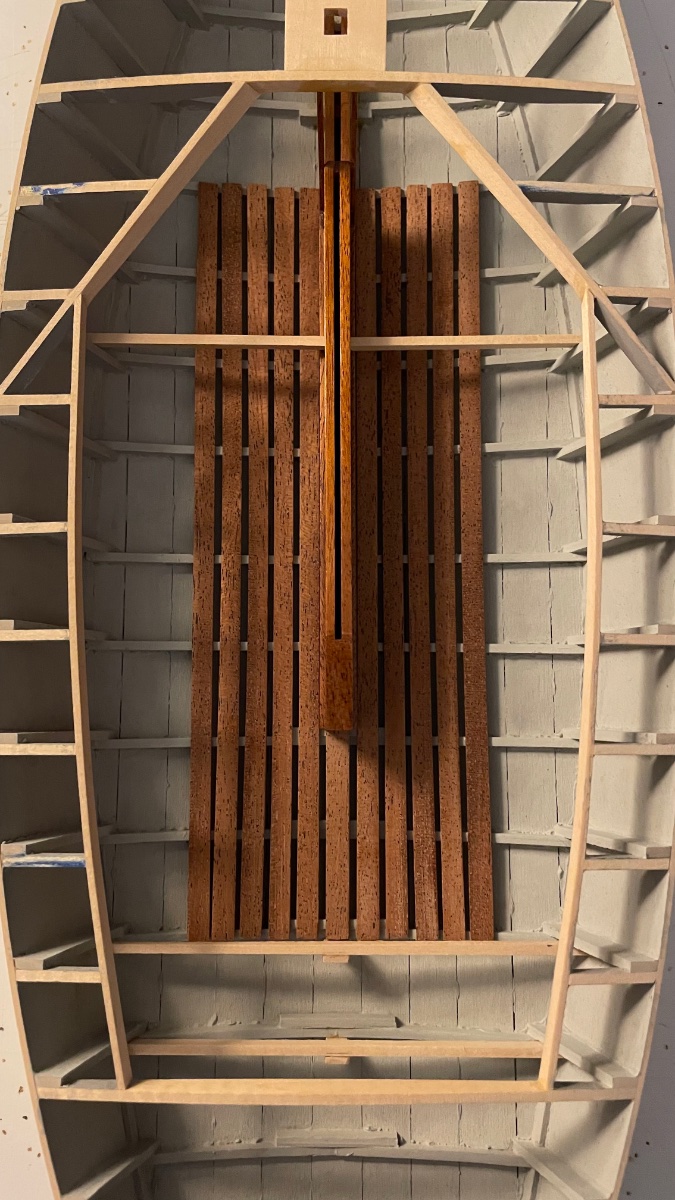
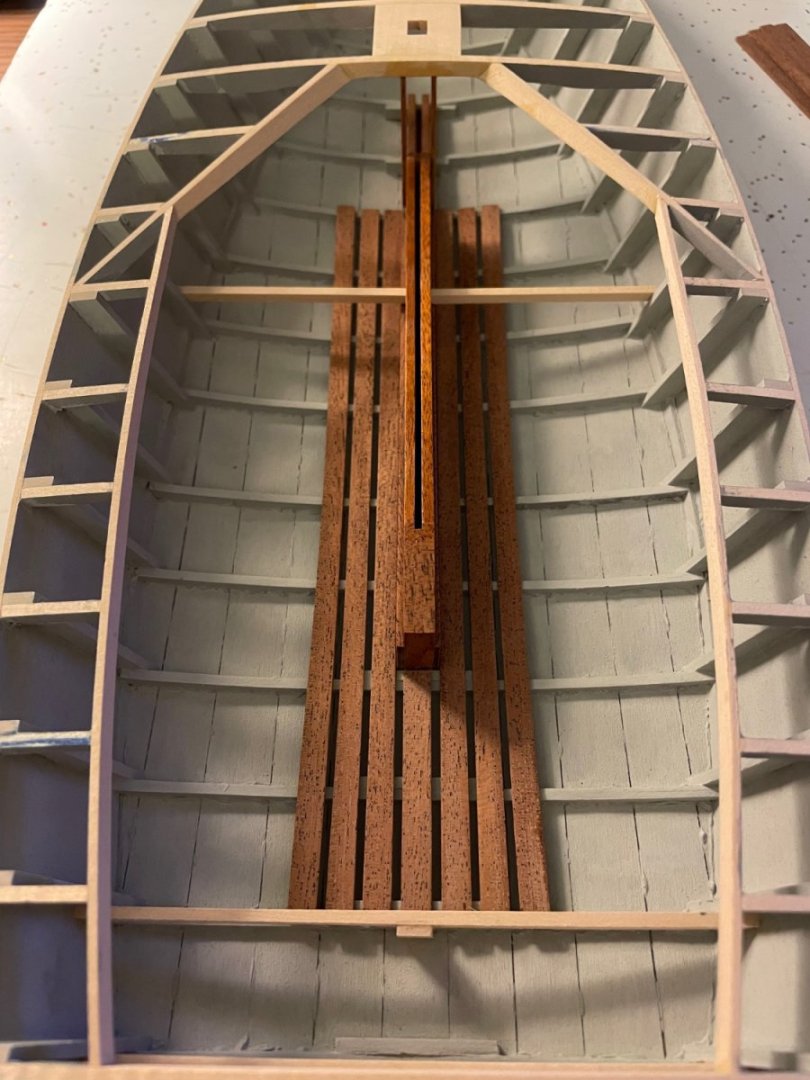
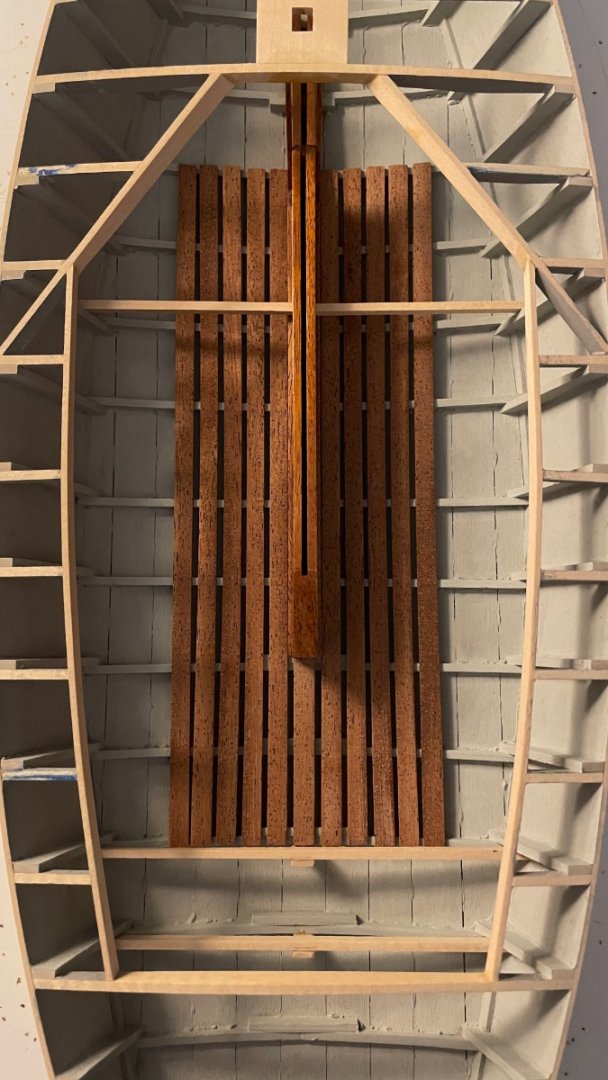
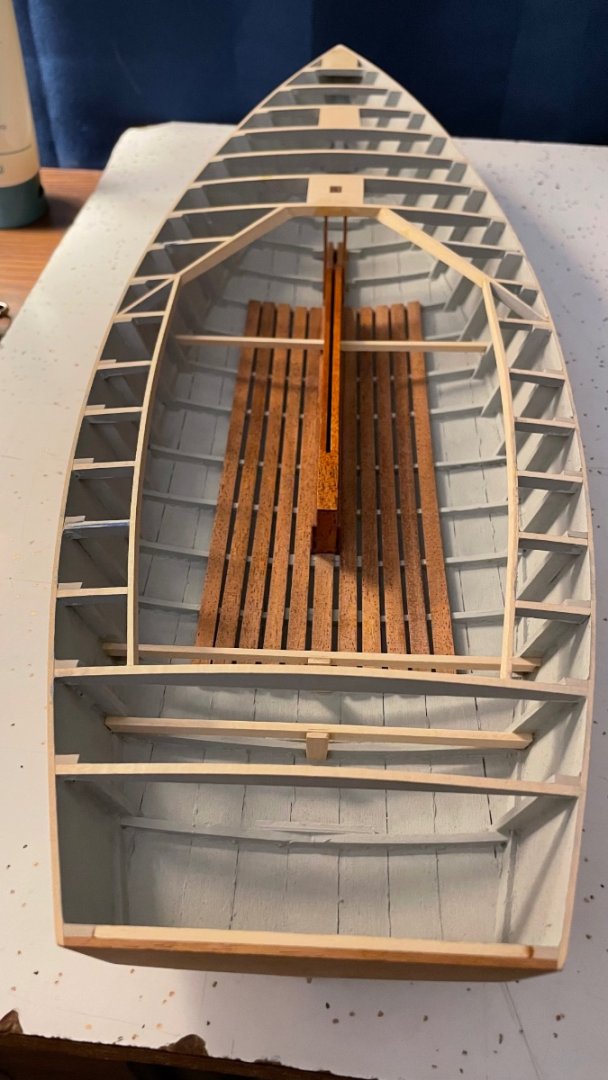
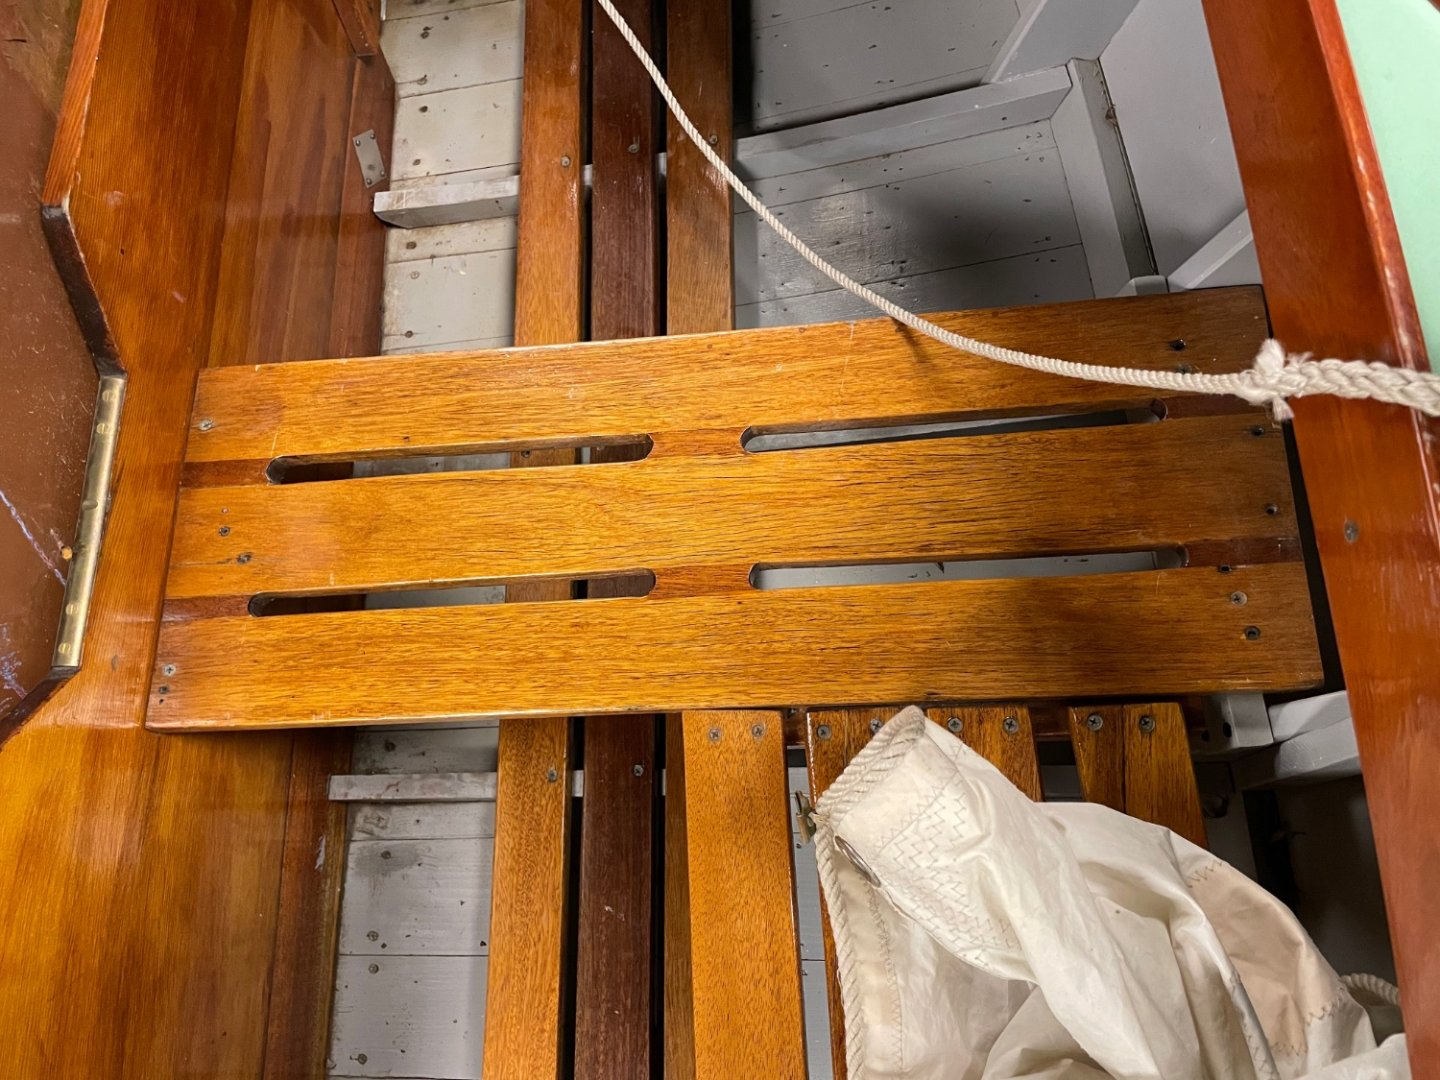
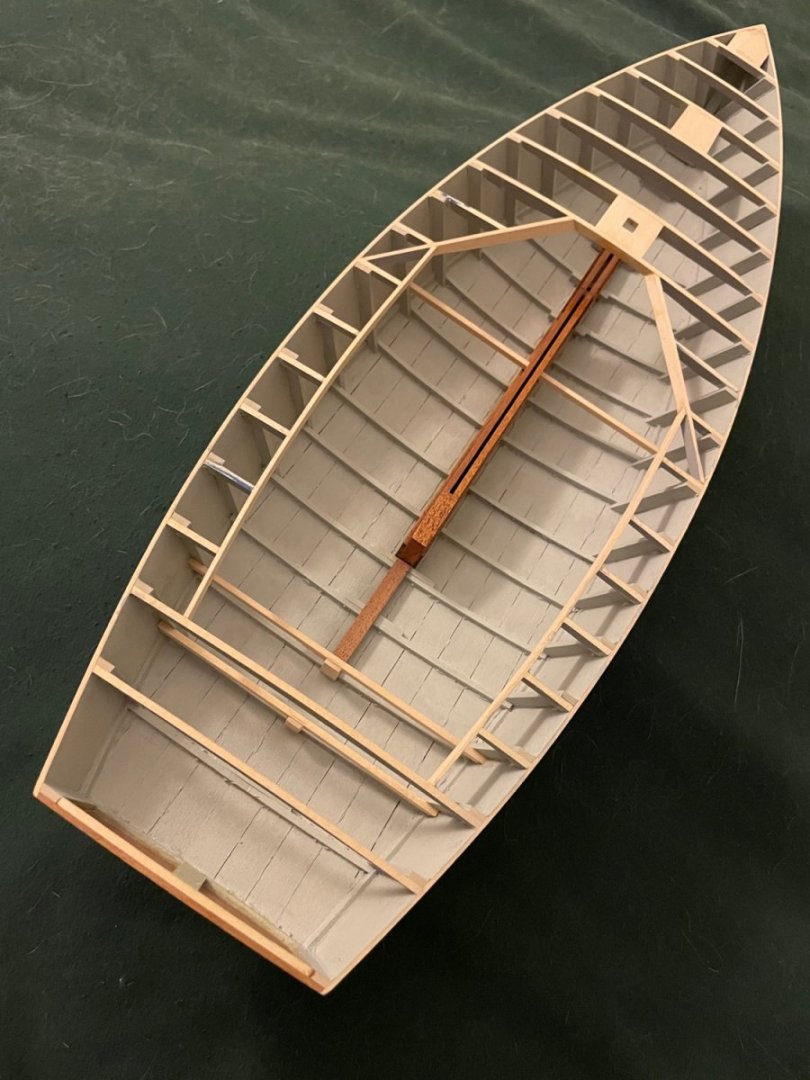
The most significant progress on the boat itself in almost a year and a half! I made the floorboards Friday night, installed most of them on Saturday, and just finished up a few minutes ago! The outermost ones aren’t as straight as I might have liked, but I think those ends will be obscured well enough by the seats so I won’t worry about it too much. I’ll throw some polyurethane on them throughout this week, hopefully, and then the seats will be next!

-
It only just now occurs to me that it will be easier to scribe the waterline with the boat upside down, so tomorrow’s project will be building another cradle that holds it upside down with the waterline parallel to the workbench.
-
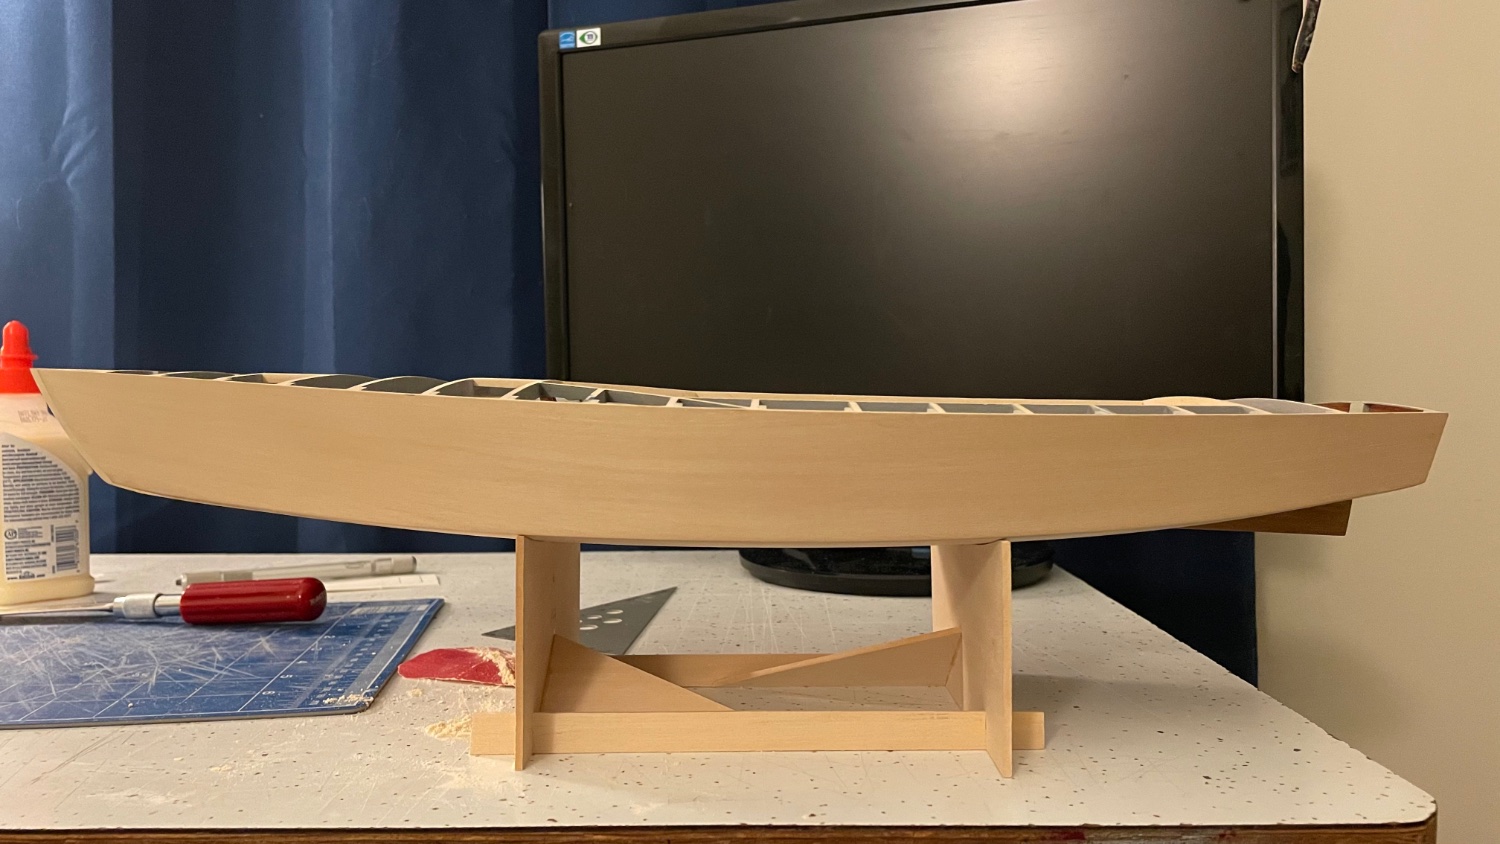
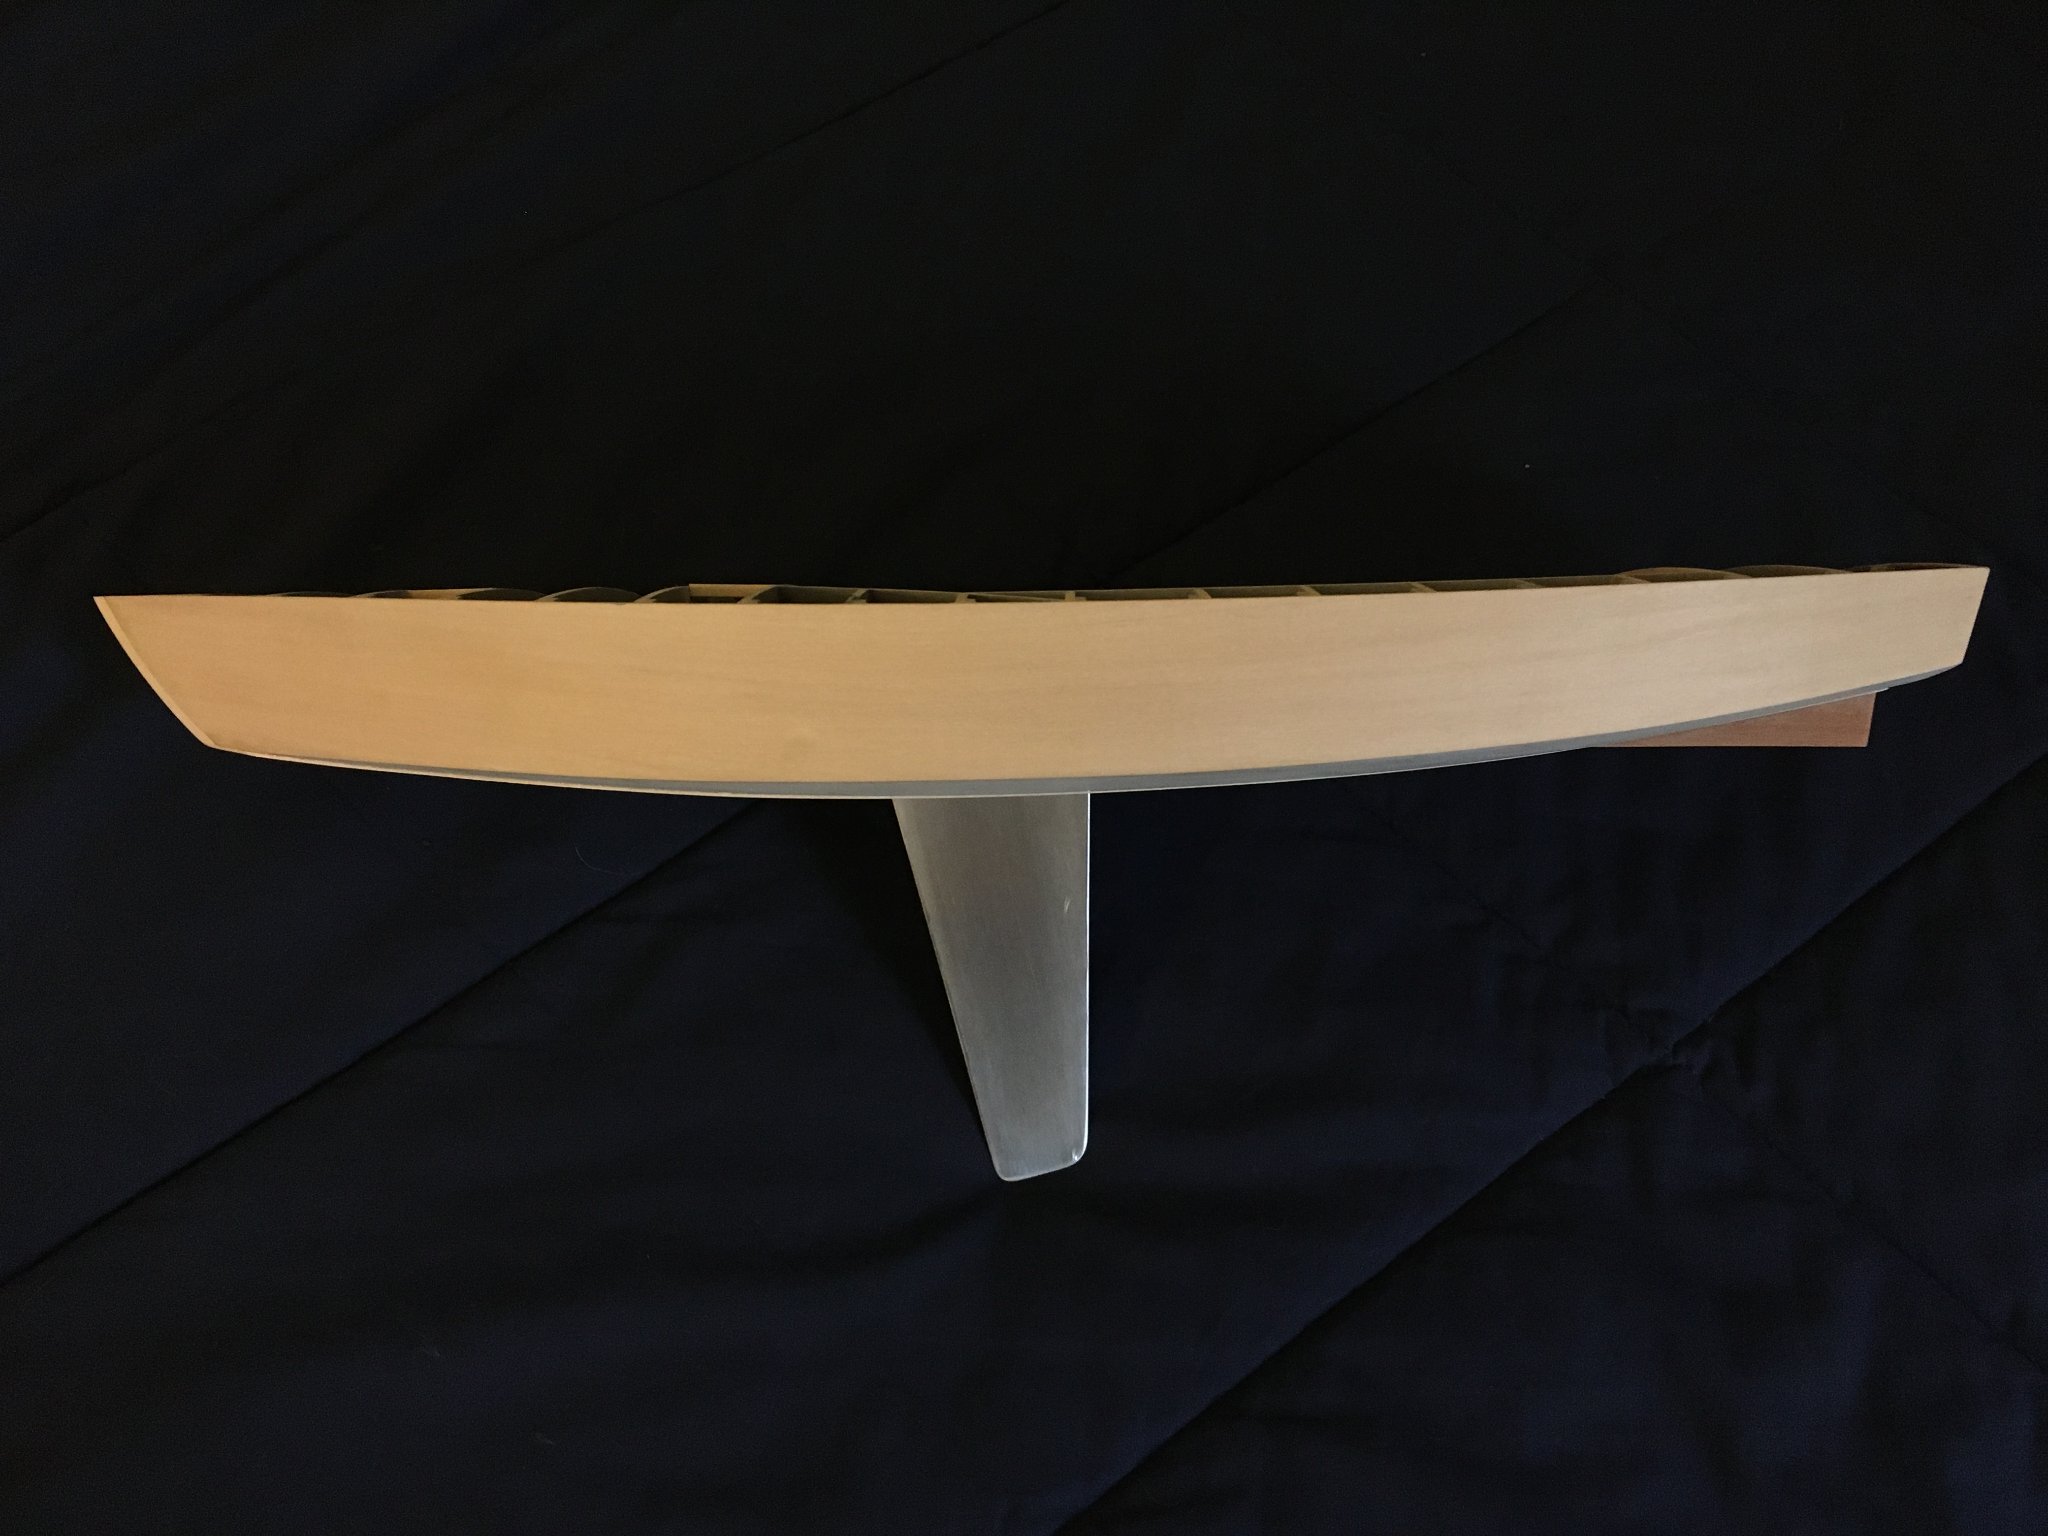
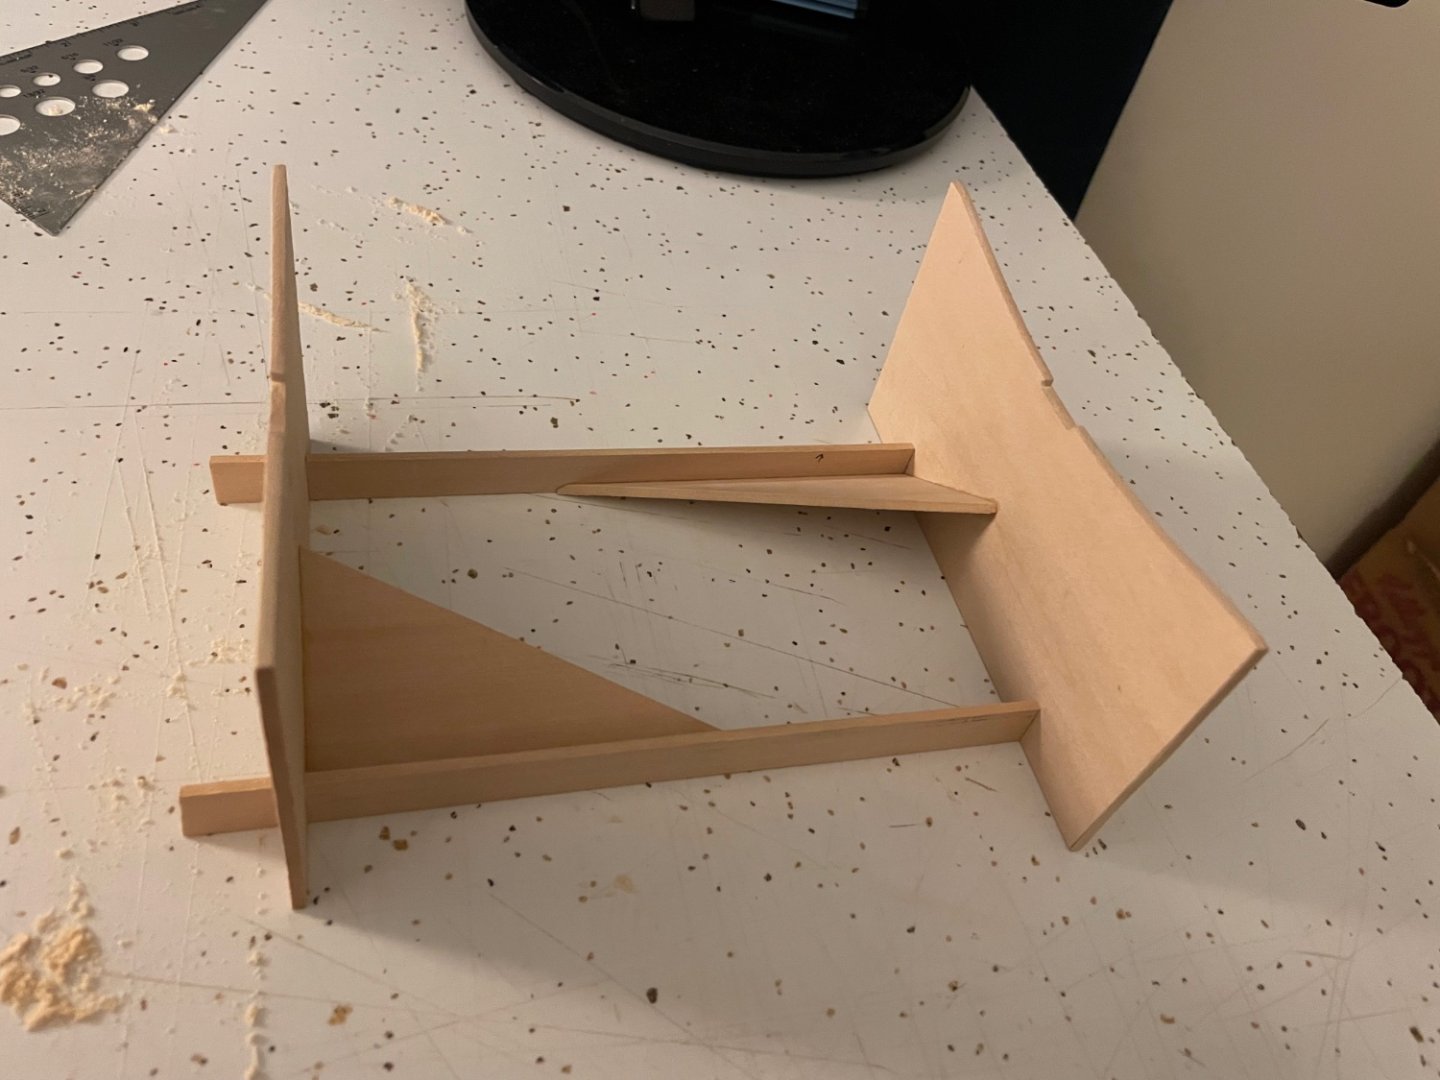
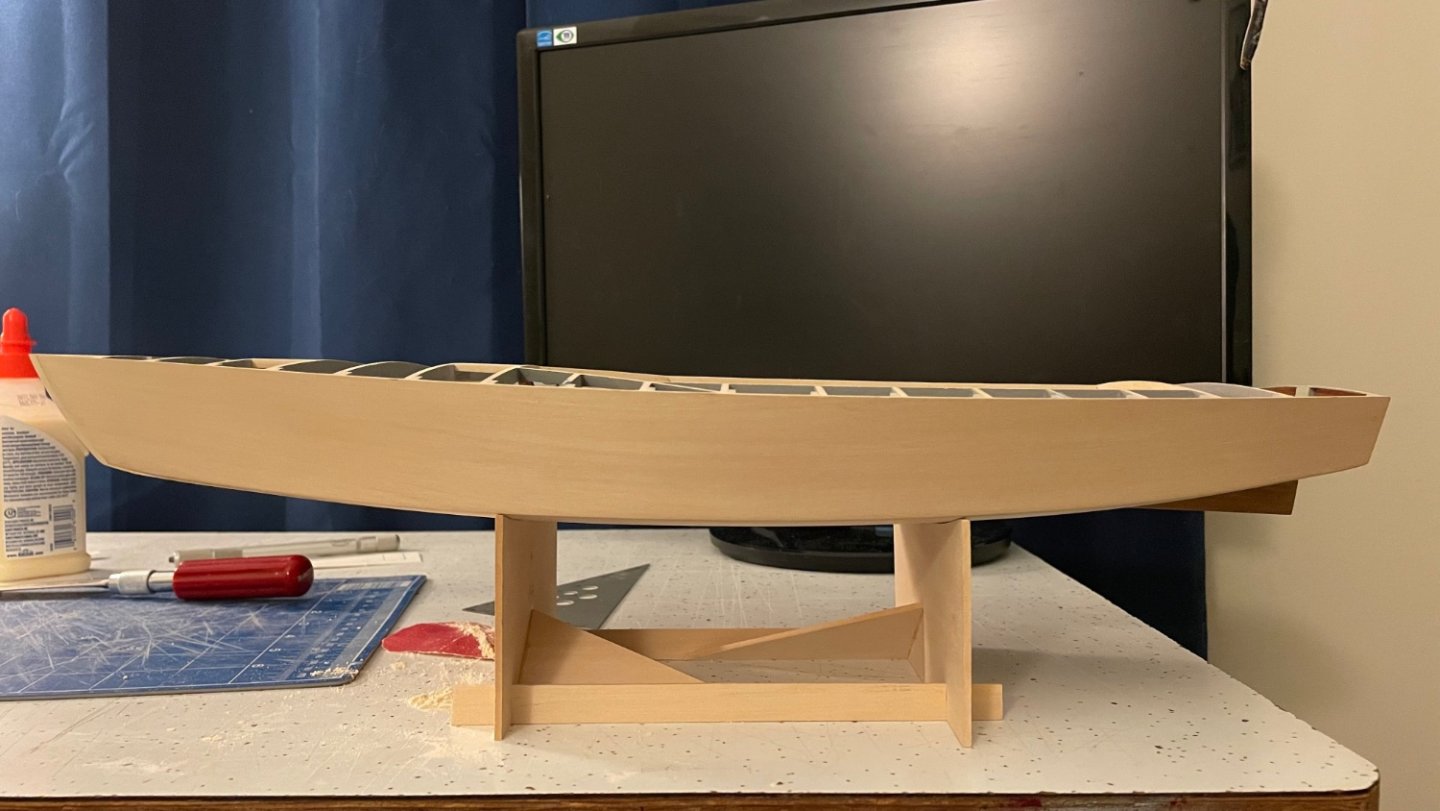
My first boat related project in many months! I finally felt an urge to put something together and I felt compelled to build this rudimentary stand. I’m still working out in my head how I’ll do the final display, but I wanted to put this together to get some idea of how the cradle will work and where on the hull the supports will line up. It’s hard to say now where the center of gravity will be when it’s finished, so this may change, but for now I have them at frames 4 and 7. This temporary stand will come in particularly handy when it comes time to mark the waterline. The waterline is parallel to the baseline in the plans and this stand makes the boat level, so I should be able to set up a pencil in a jig at the right height and scribe the waterline all the way around. It’ll be a long time yet ‘til she gets any paint, but I’m really looking forward to that. But I also need to try not to get too caught up in steps that far ahead and focus on what needs to be done first, so please wish me luck.
-
That is the most immaculately detailed and rigged model ship I’ve ever seen. I’ve just been a lurker on this log for a while, but it’s been amazing watching it come together!
- 3,515 replies
-
- 1
-

-
- clipper
- hull model
- (and 2 more)
-
I have to confess I was already planning on doing a similar color scheme to yours even before you posted your build log. I was thinking dark blue topsides with a light tan or cream deck, but with copper anti-fouling paint on the bottom, so that will be a good way to tell them apart if I ever finish mine It'll be a long time yet until I get to painting, but do you have any tips on marking the waterline? You really nailed it!
-
I feel like I should find a new adjective, but "absolutely stunning" is always the first thing that pops into my head when I see what you've created here. Looking forward to seeing what you do for a stand. I'm thinking of trying something with plexiglass or lexan, kind of like the display stand I got for my Lego Millennium Falcon, so it looks like it's just floating there.
-
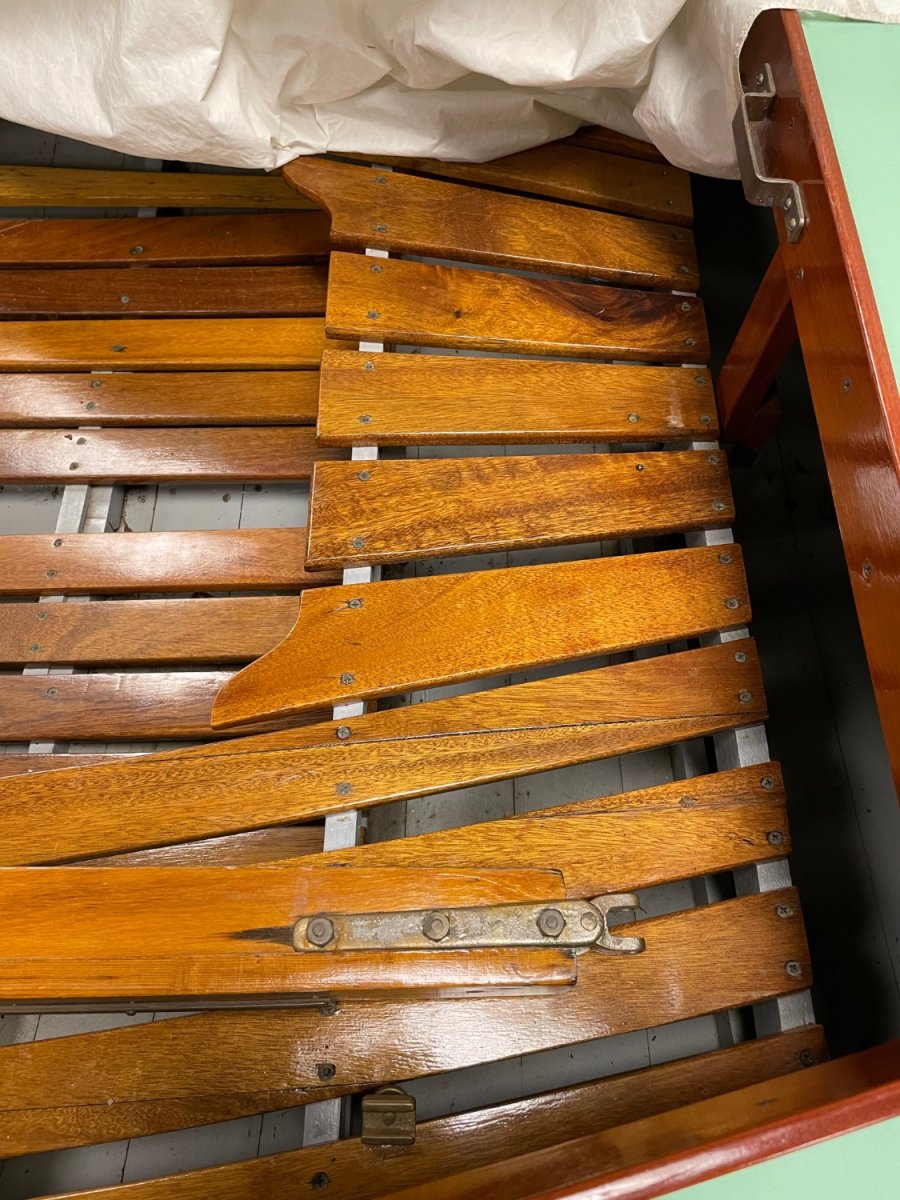
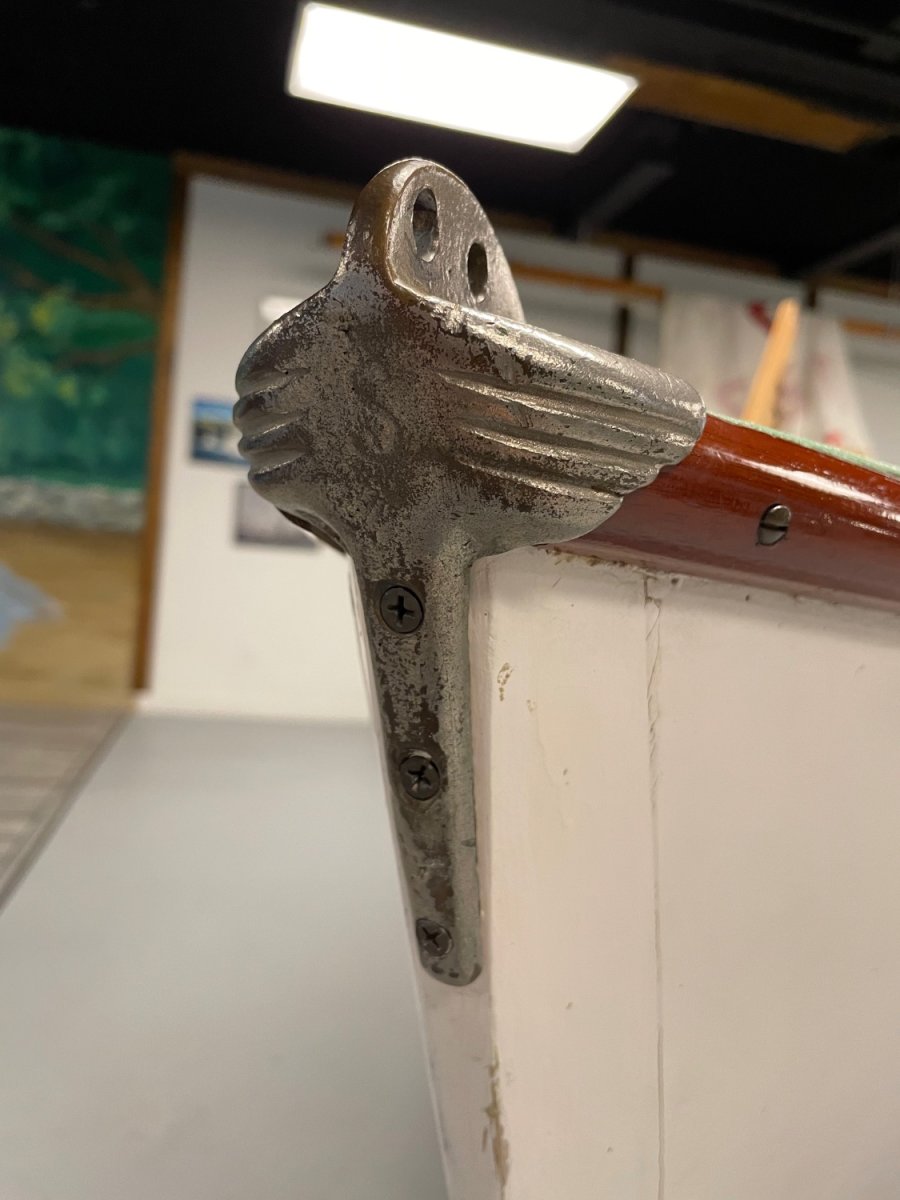
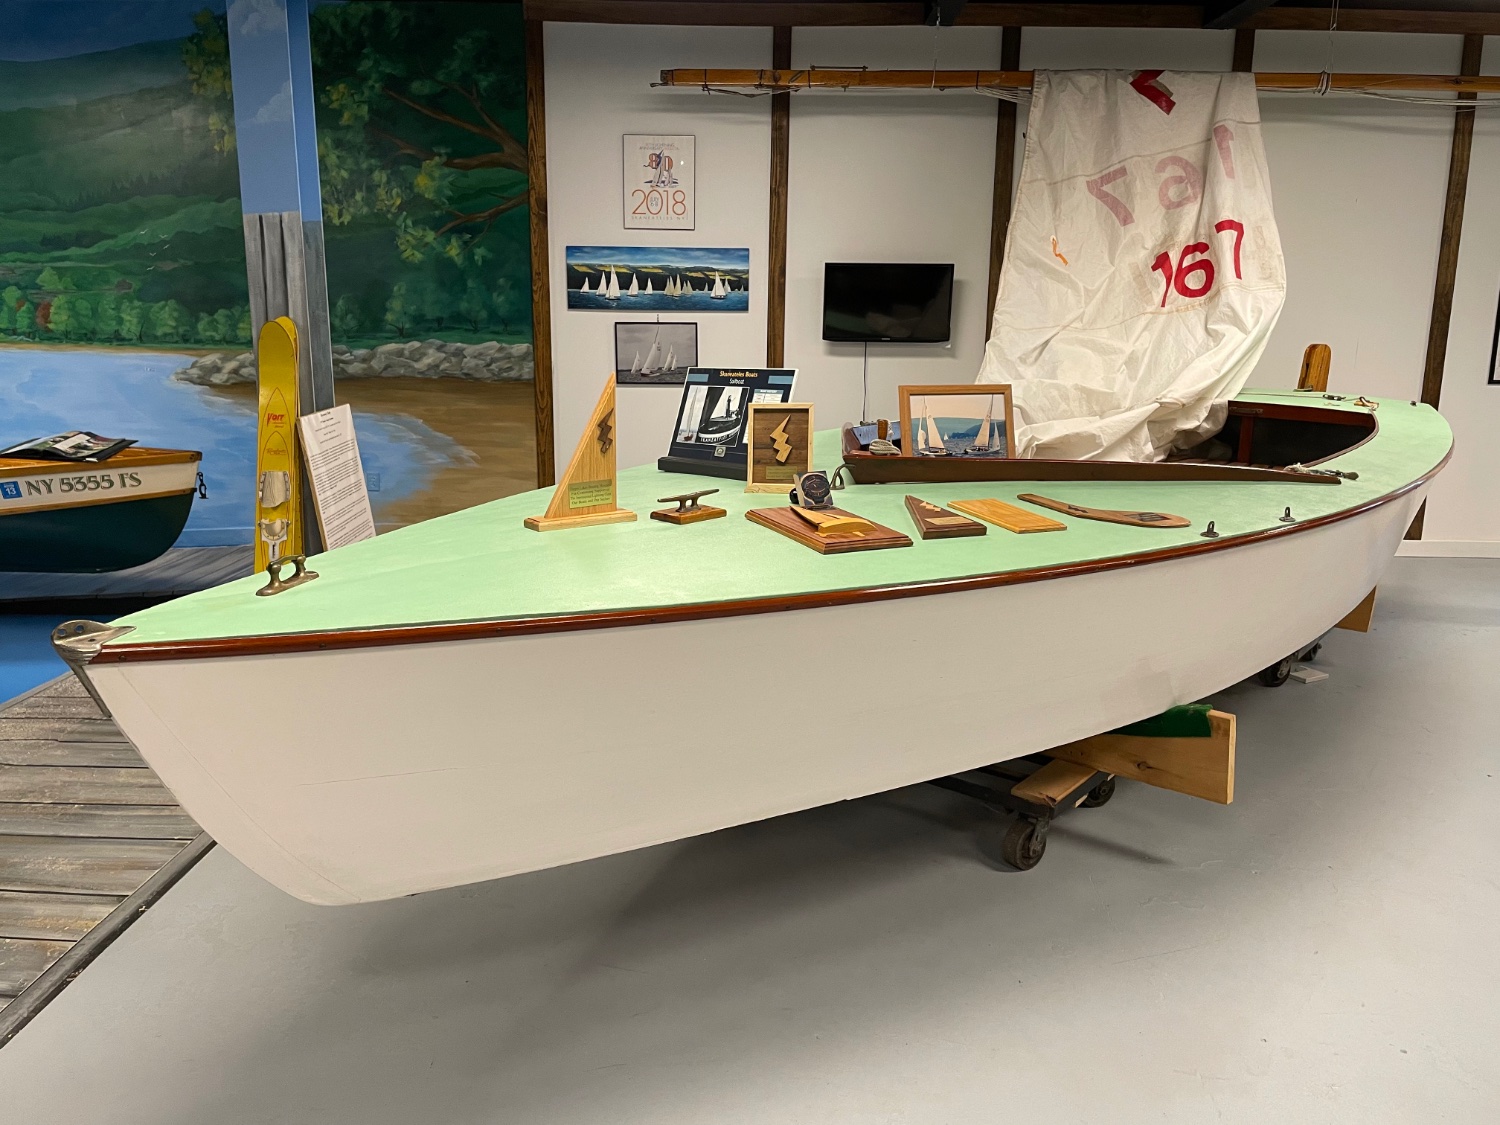
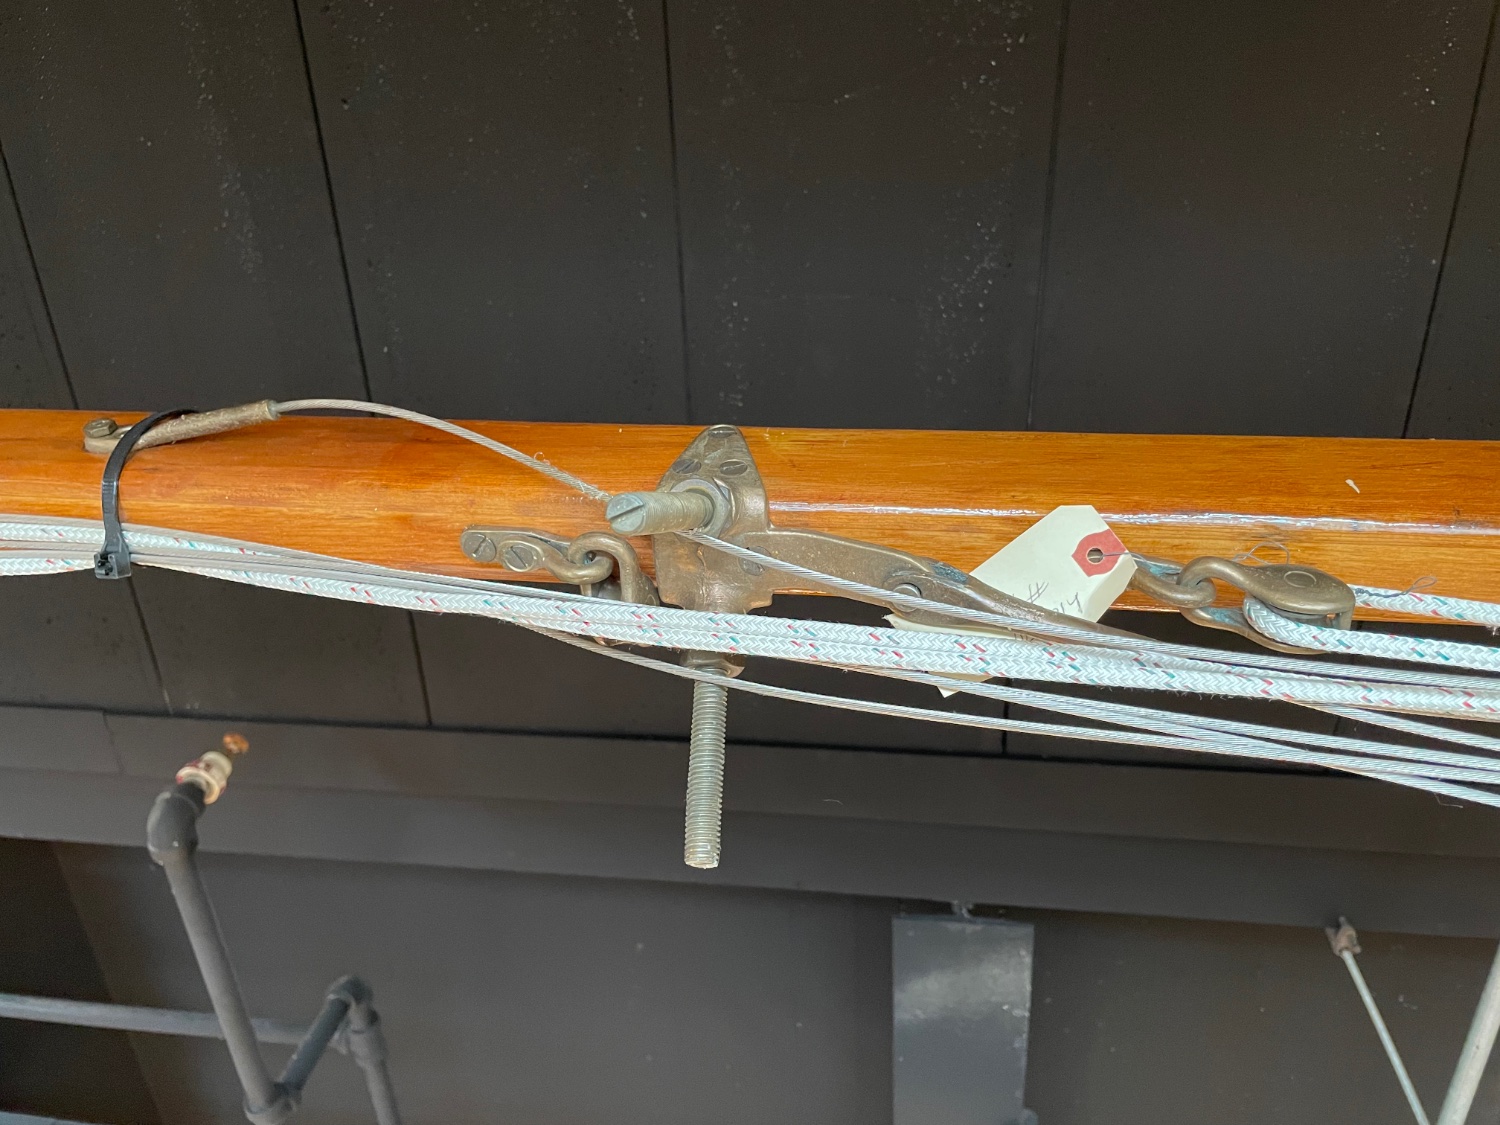
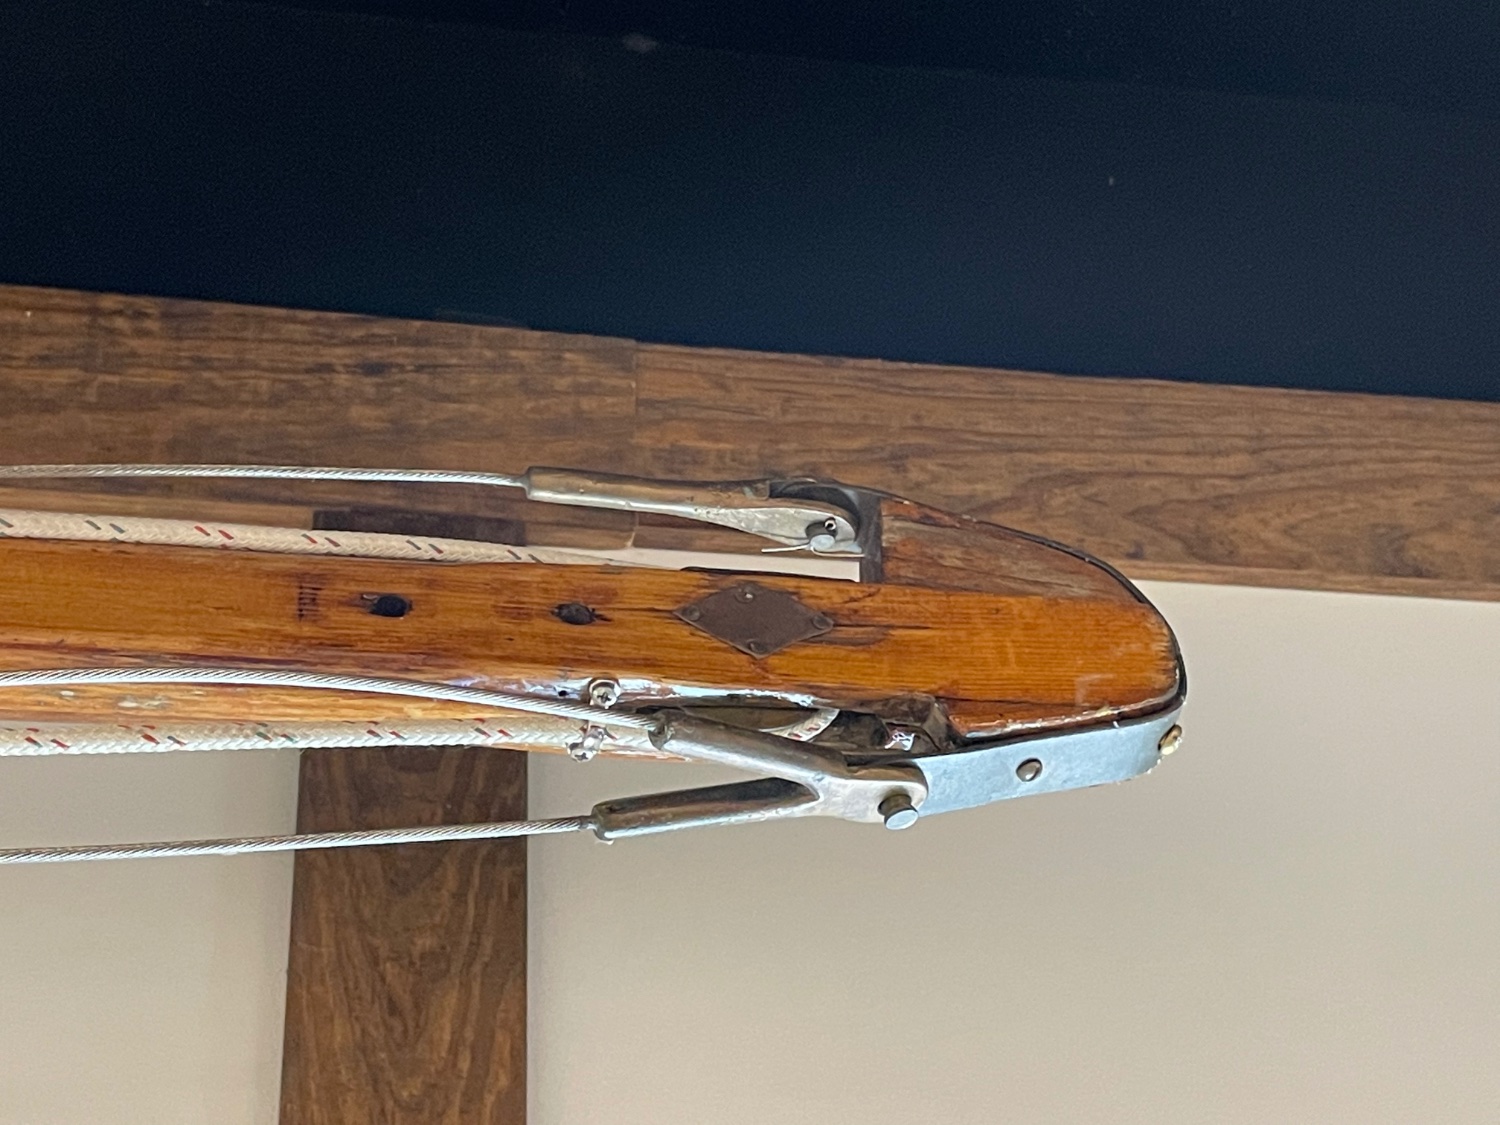
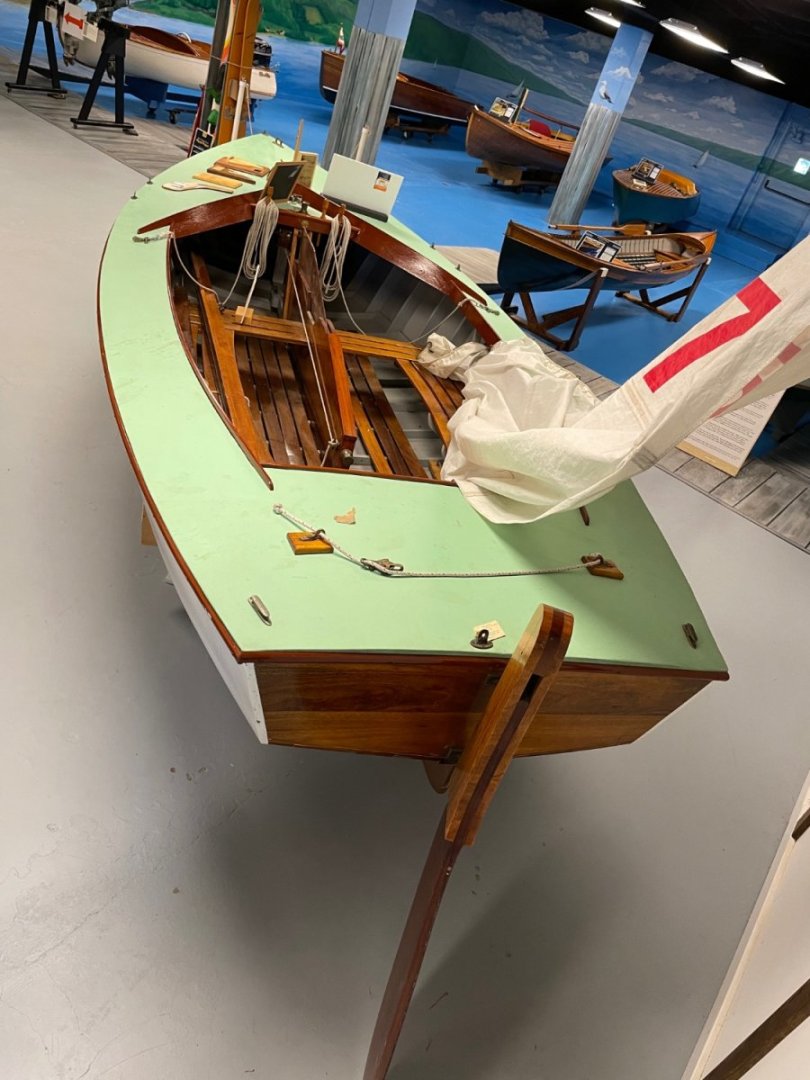
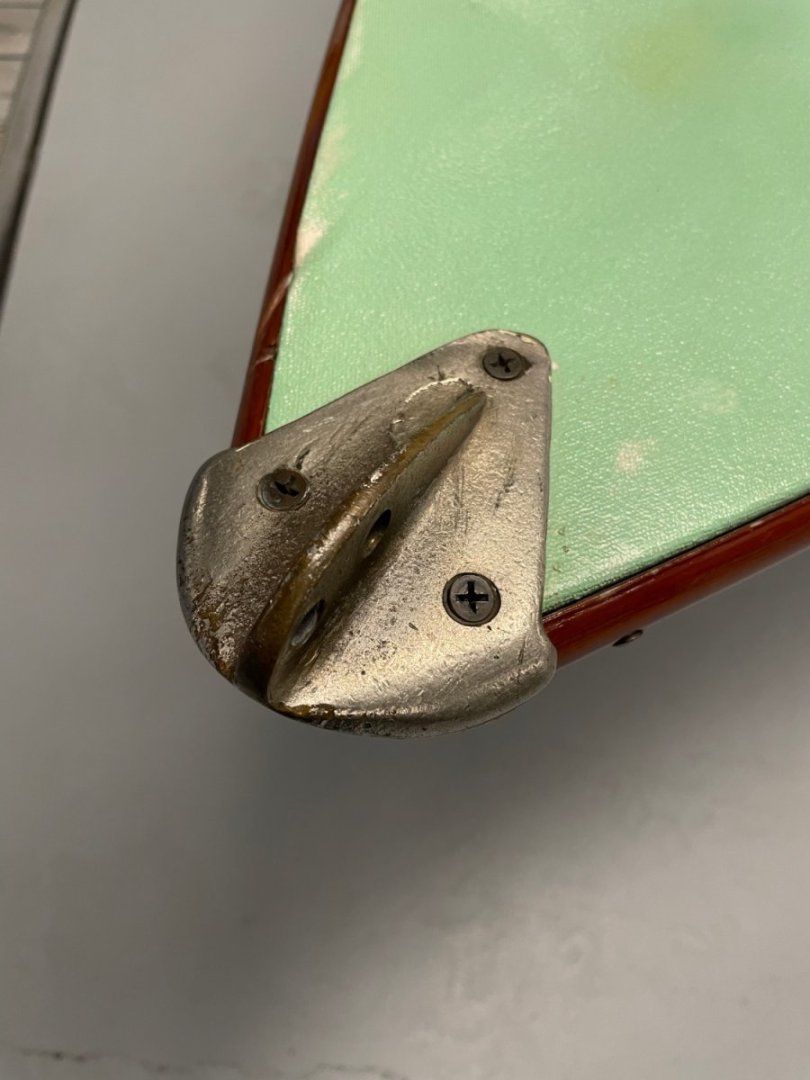
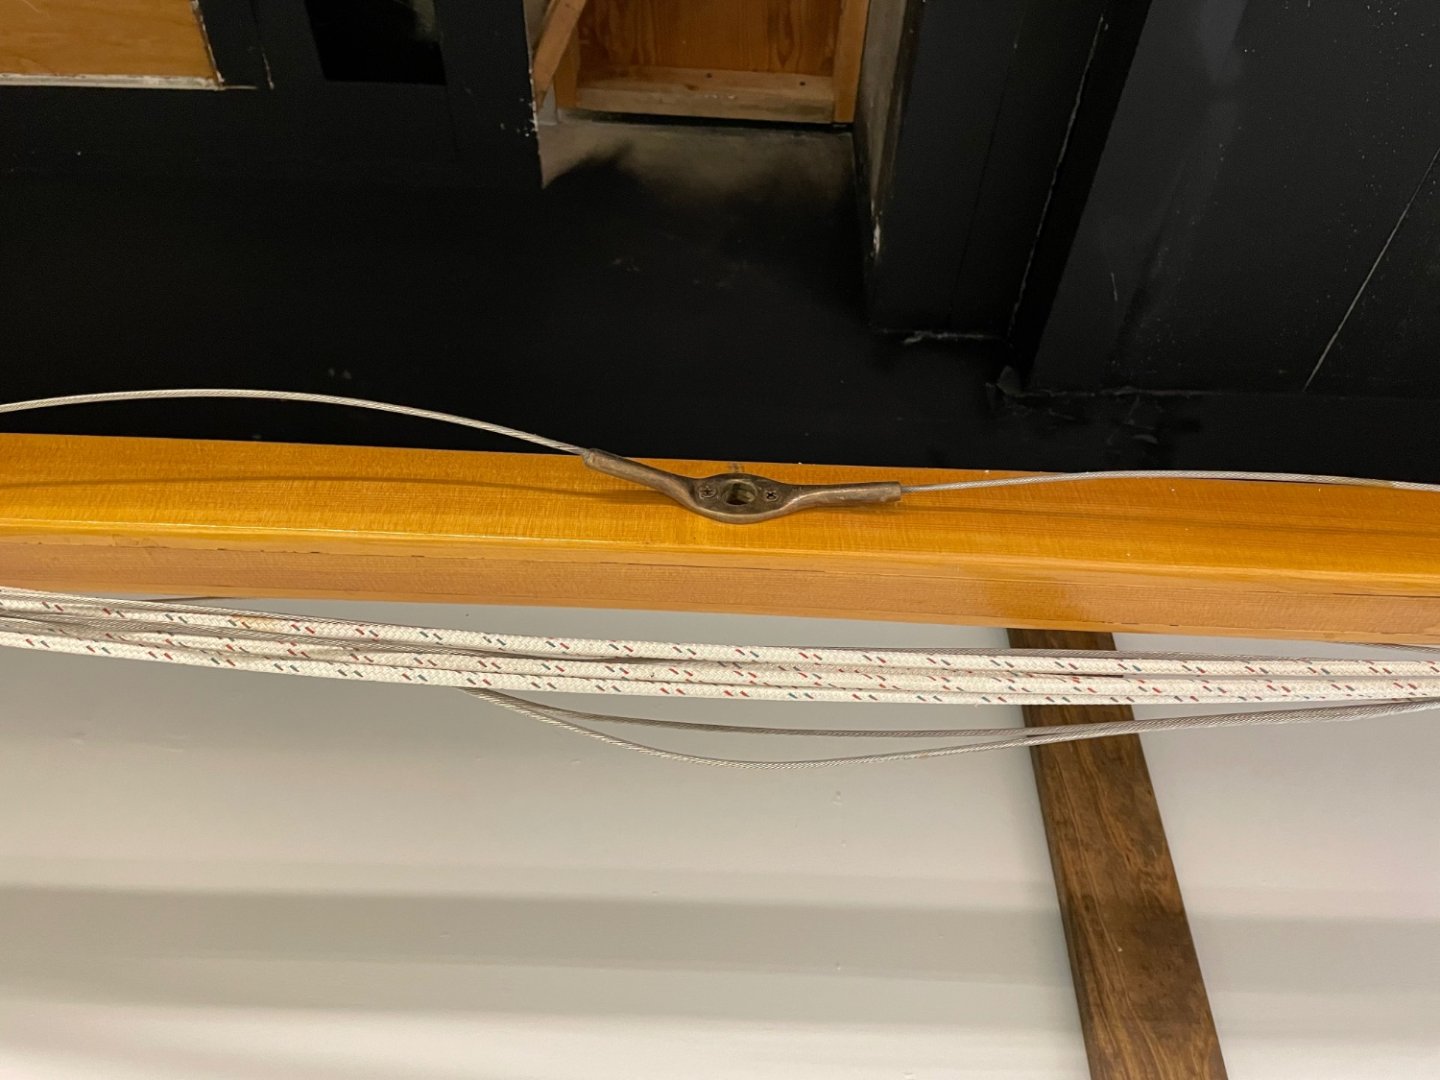
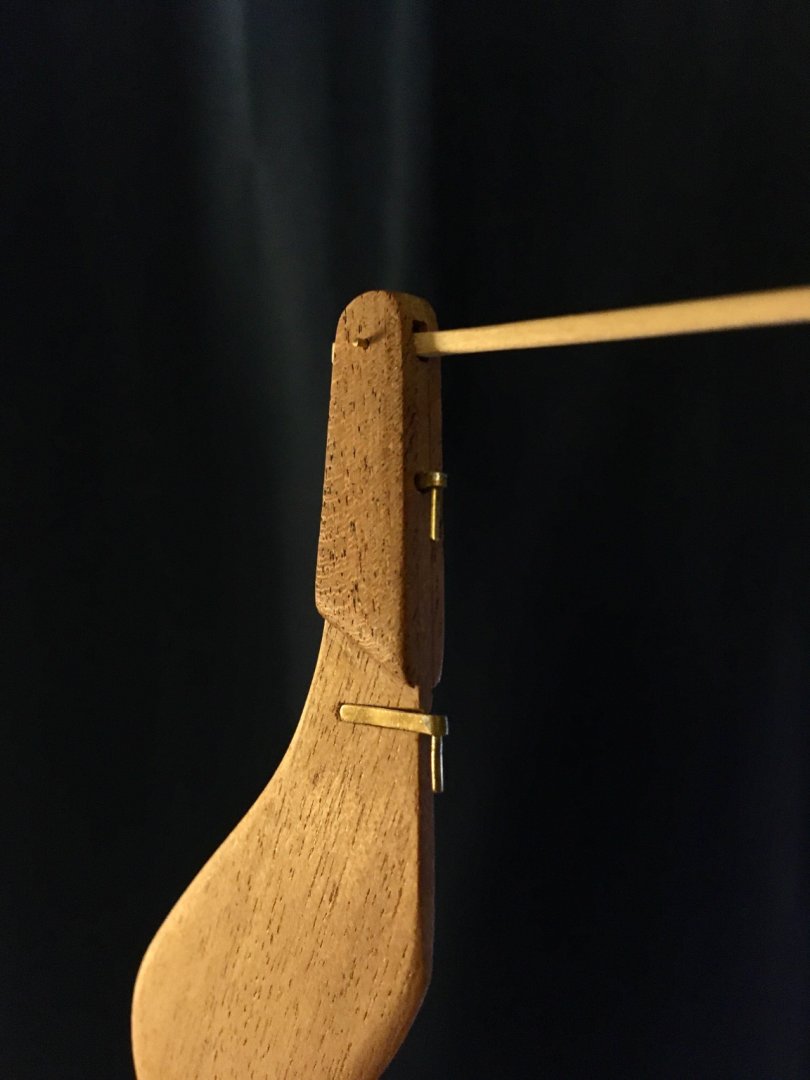
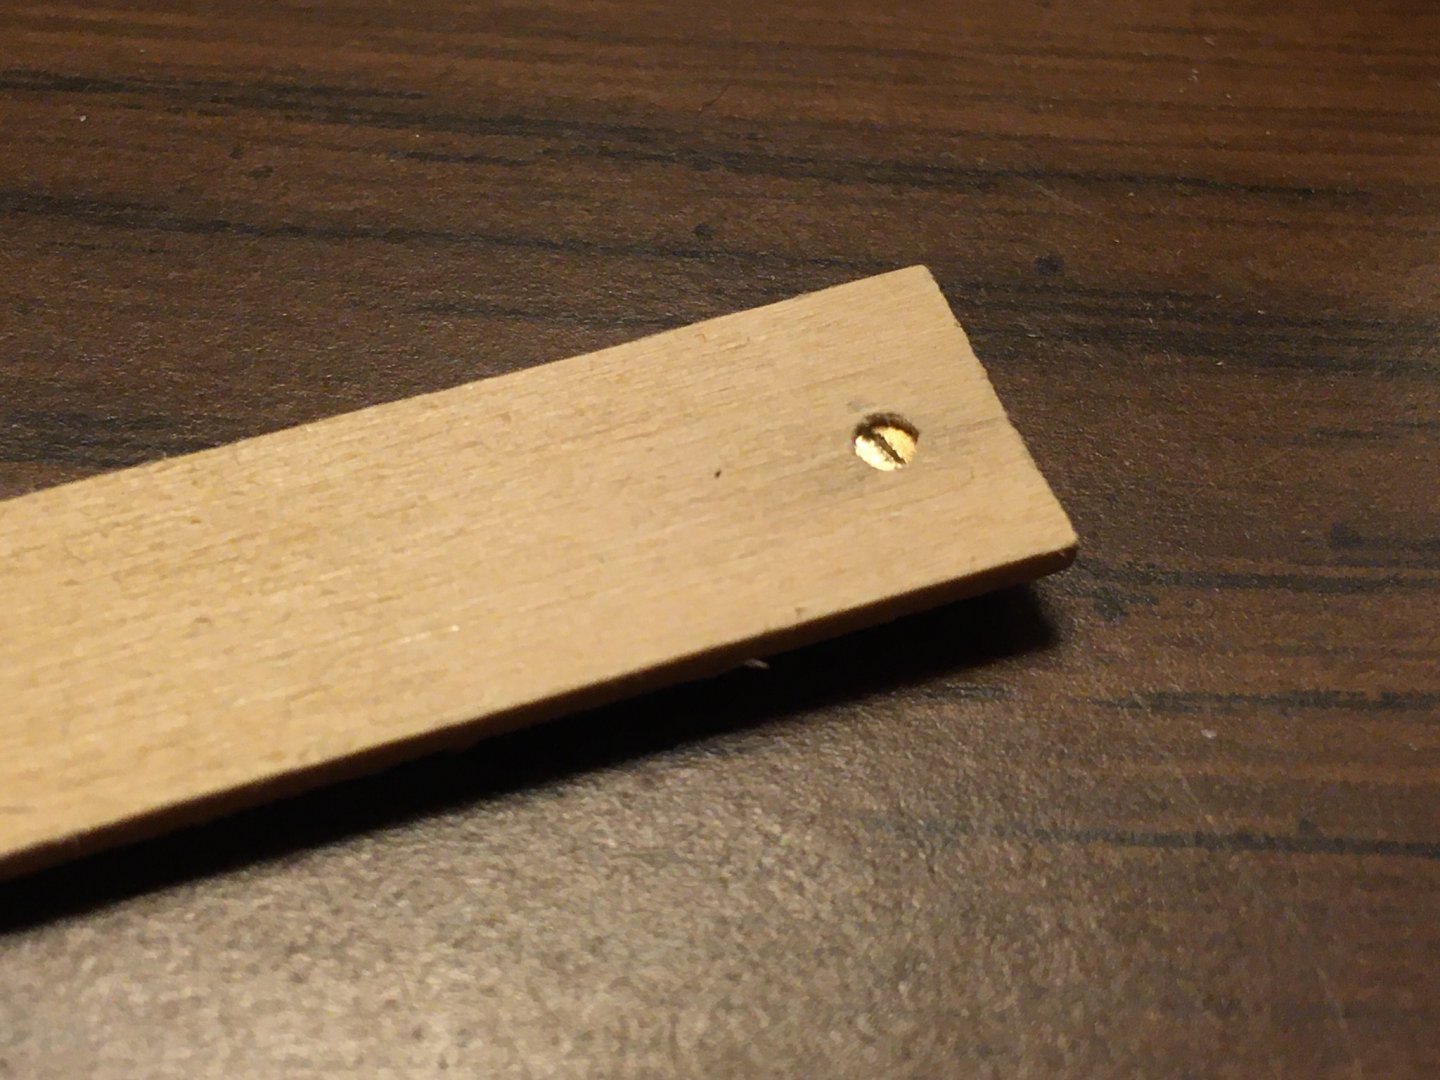
Upon inspection of #167, it appears several aspects of my build already differ from methods used by Skaneateles. I’m still happy to call my model a proudly home built boat with a nod to Skaneateles styling, particularly in the design of the seats and the custom headstay fitting. It’s going to be a challenge fabricating the mast hardware, it’ll be interesting to see what I can come up with!


-
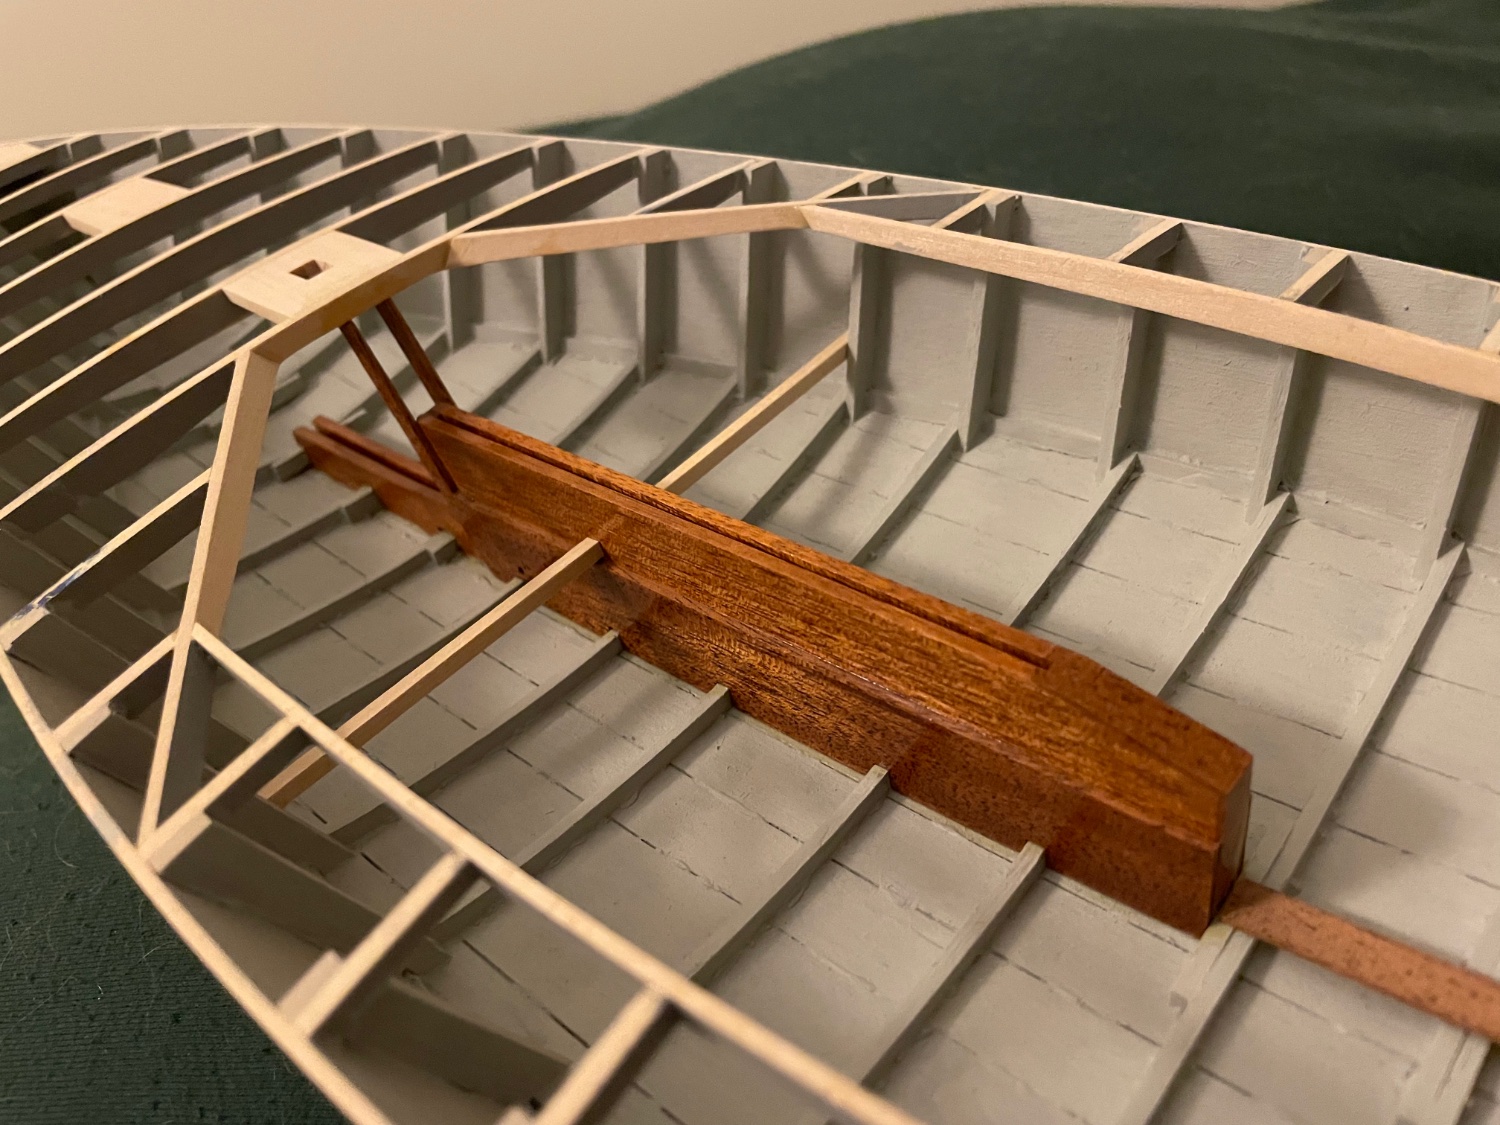
It’s still been a number of months since I actually made any progress, but I just realized I had done some work on the centerboard trunk since I last updated here, as well as the beginnings of the seat supports, so I figured I’d share. I’m going to the Finger Lakes Boating Museum tomorrow to see #167, which was meticulously restored a few years ago. It’s a Skaneateles built boat exactly like I’m trying to recreate, so I’m looking forward to taking lots of hi-res close ups for reference! It’ll be interesting to see what kind of differences there are between it and #1 since that was the prototype and 167 is a full on production run boat.

-
Unfortunately it's been quite some time since I made any progress. I really have to be in the right head space to work on it, and I don't want to work on it just because I feel like I have to. Seeing your progress is a great inspiration though, so my motivation might be coming back soon. We shall see! I don't have access to a lathe or any kind of fancy tools like that, so if there's any chance you might be up to creating another one of those centerboard drums for me, I would be happy to pay you for your time and skill. Please feel free to private message me if that's something you would be willing to do.
-
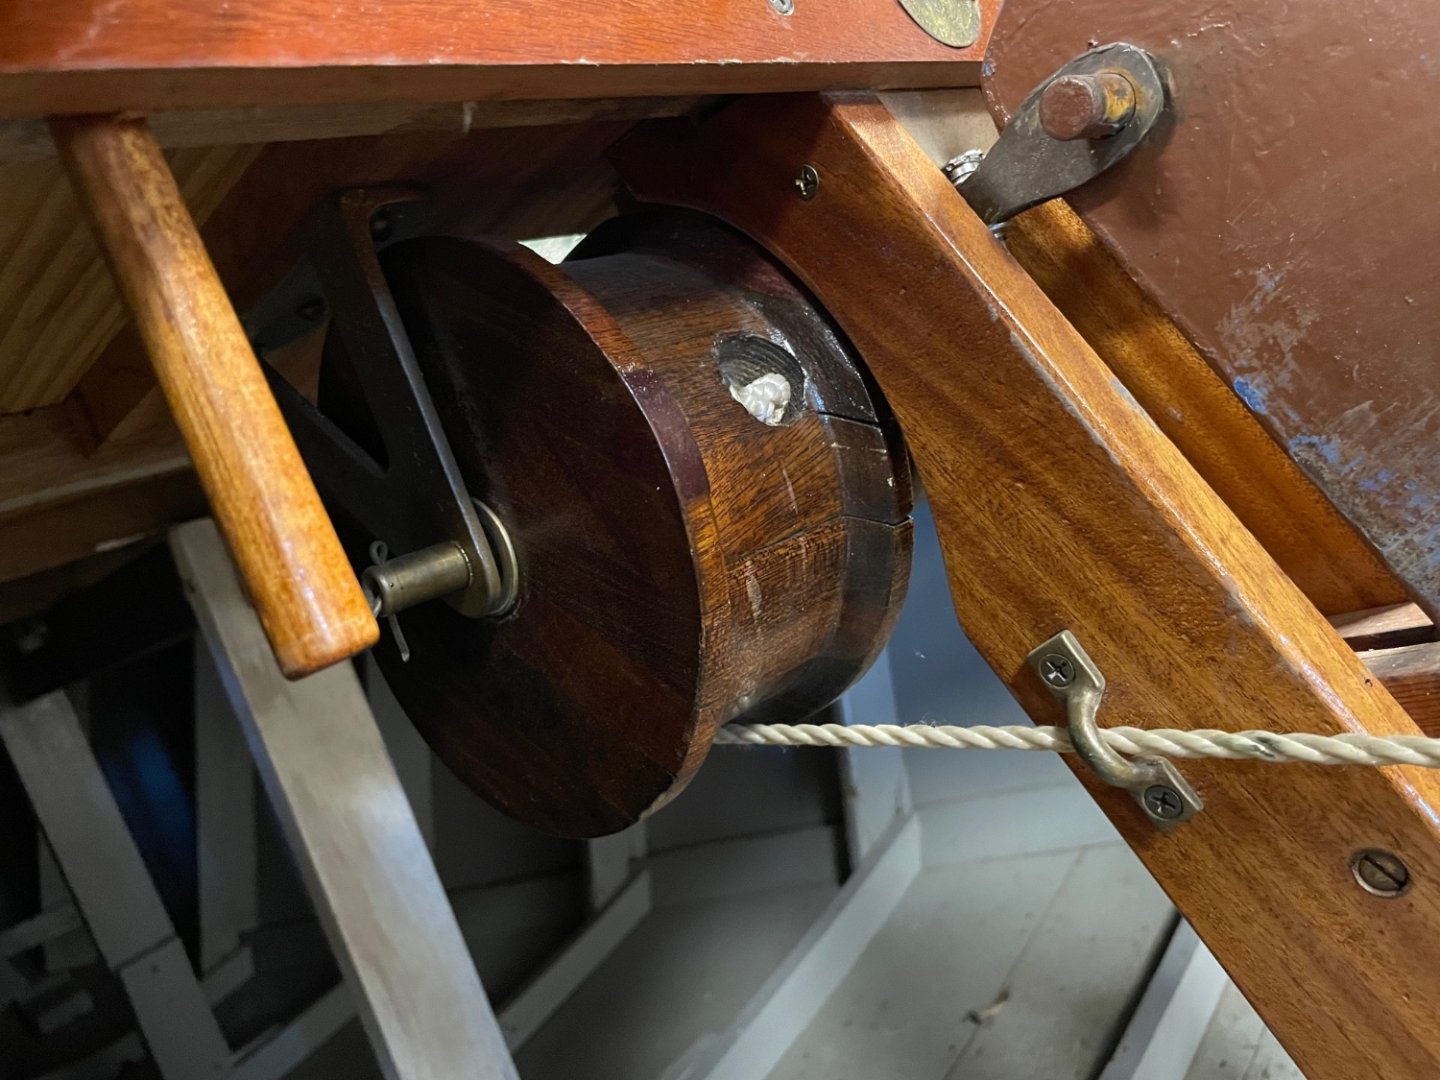
That is absolutely stunning! I would love to see details about how you made the centerboard drum. That's something I've been puzzling over for quite some time now. And the rudder hardware looks especially excellent I must say!
-
Wonderful job on the seats and floor boards! I hope to make mine look as good when I get to them.
-
Always happy to see a fellow Lightning builder! Looking forward to seeing the restoration.
-
So happy to hear of a new Lightning builder! I'm so glad this content can be useful to you. I wish there had been more online content around when I started that kit, and I still wish there were more people out there who would share their Lightning models. Best of luck to you, and I hope you'll feel comfortable starting a build log for us to enjoy with you.
-
It's been a few months since she was on the workbench, but she hasn't been forgotten. A little bit of progress on the seat supports, but nothing really worth posting about just yet. Have you been able to make a start on yours yet?
-
Thank you all so much for your continued interest and kind words! It's so cool to have real Lightning owners and sailors following along here, and to see that this build is bringing such nostalgia and wonderful memories to you guys. It really makes my heart happy to see that I'm doing things right.
-
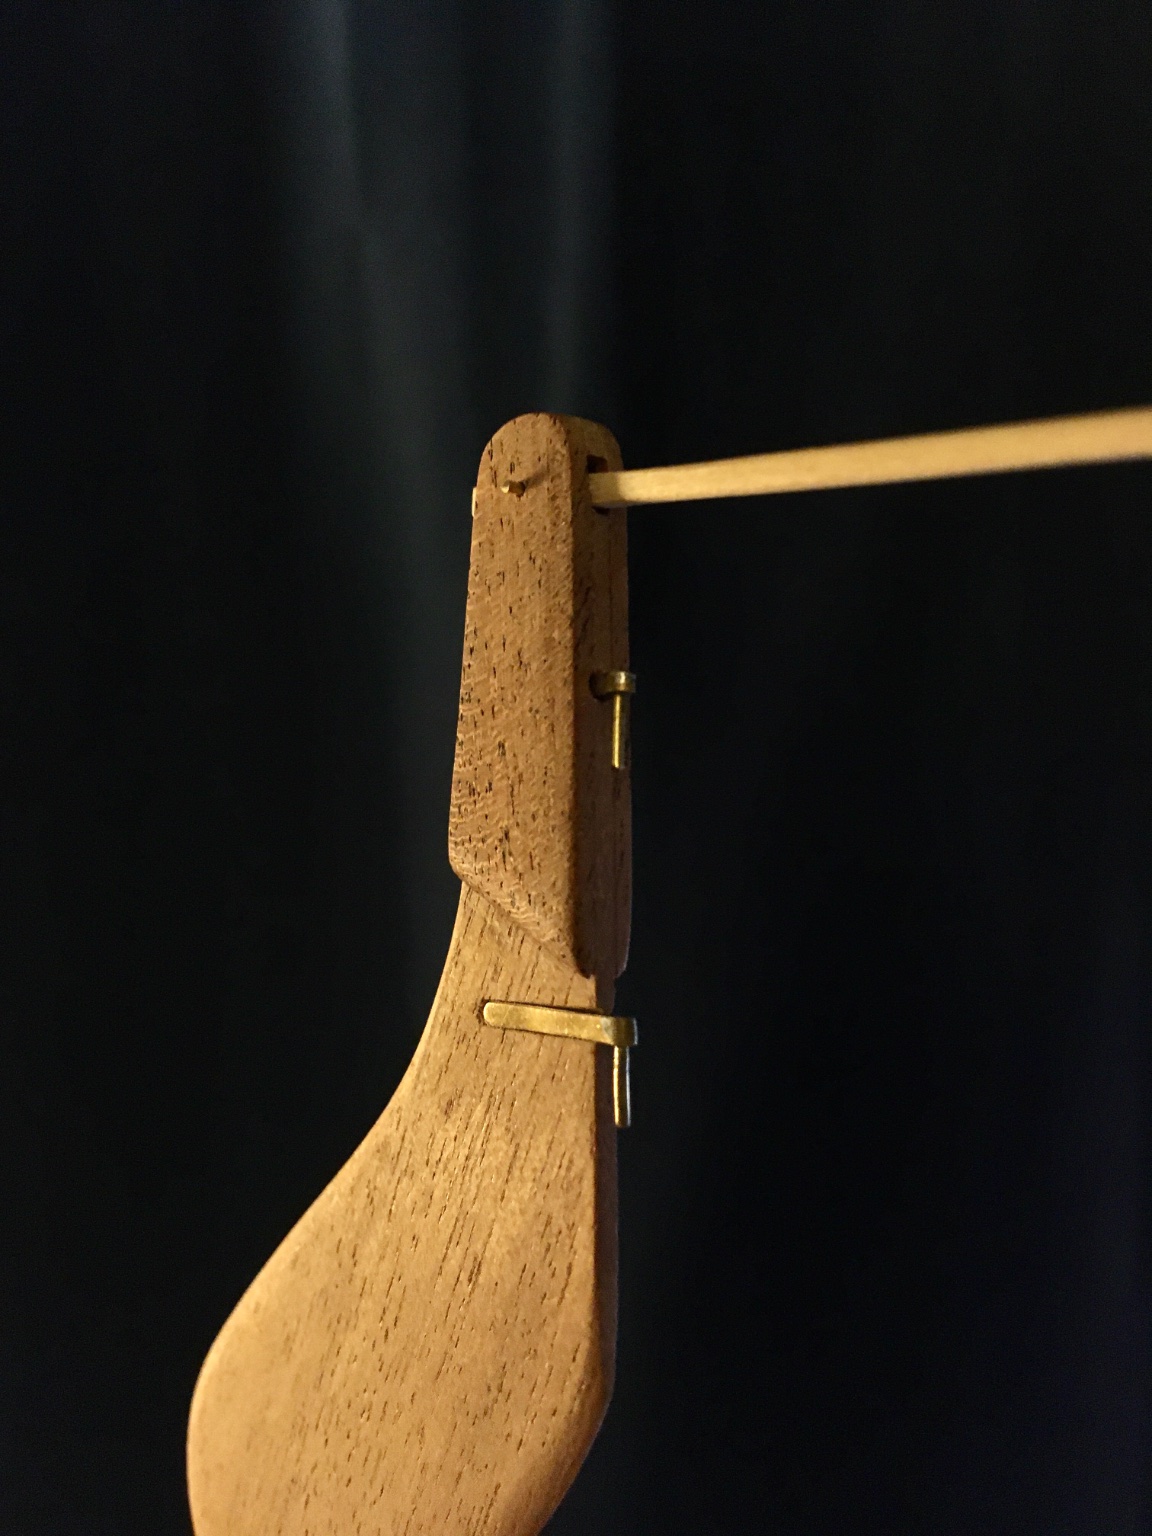
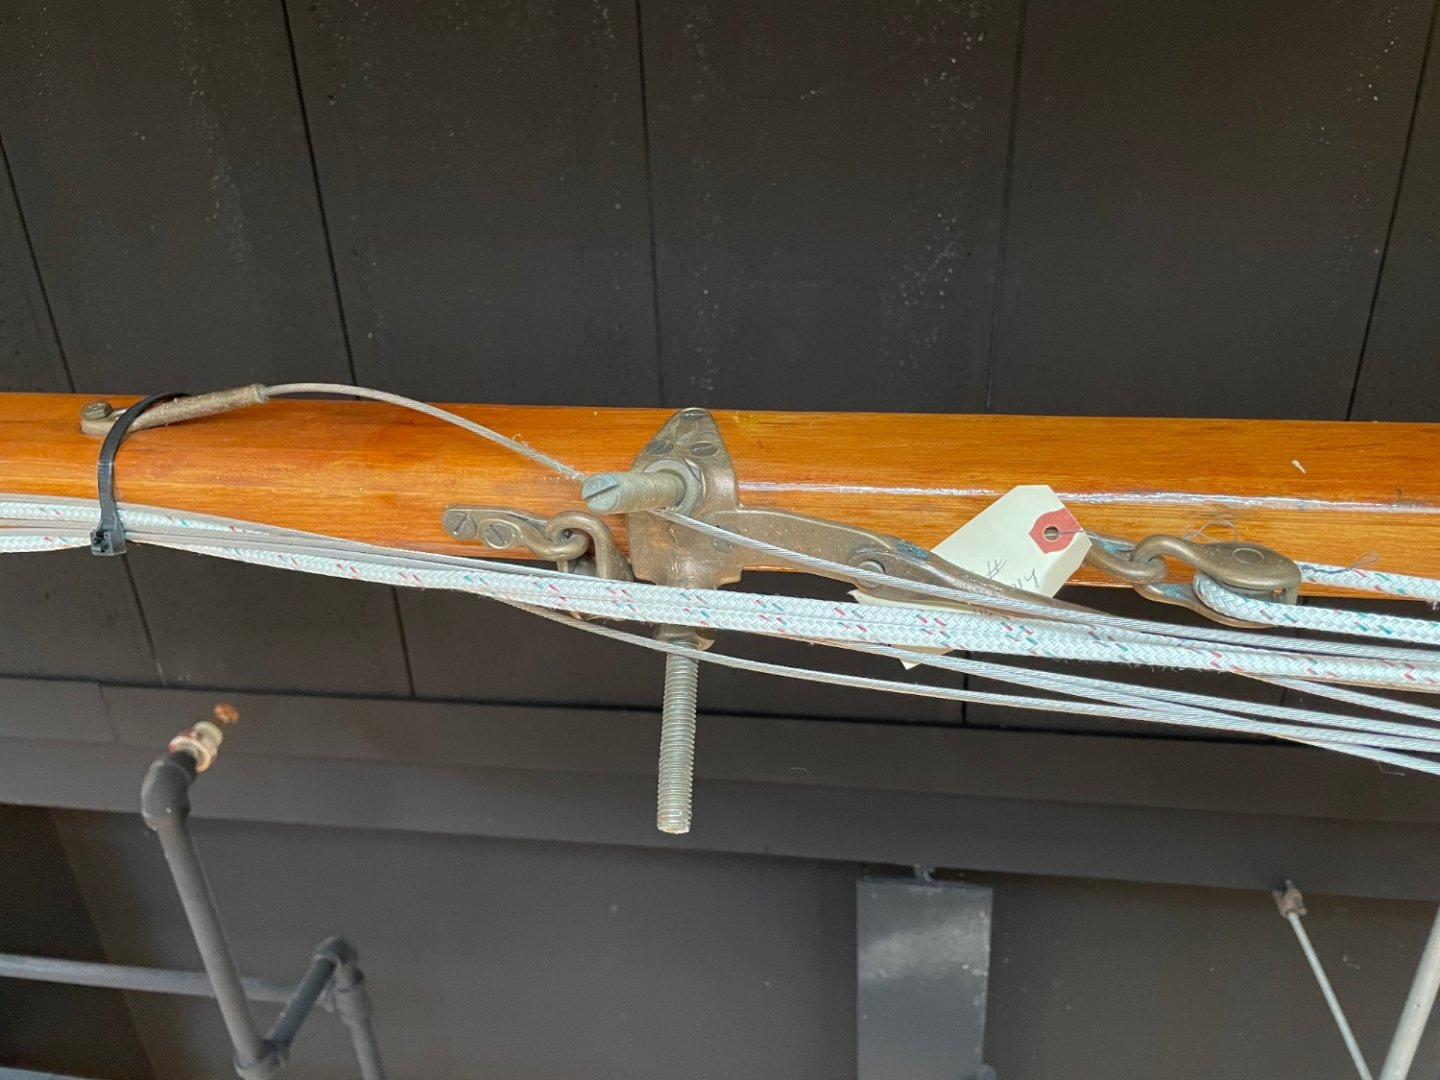
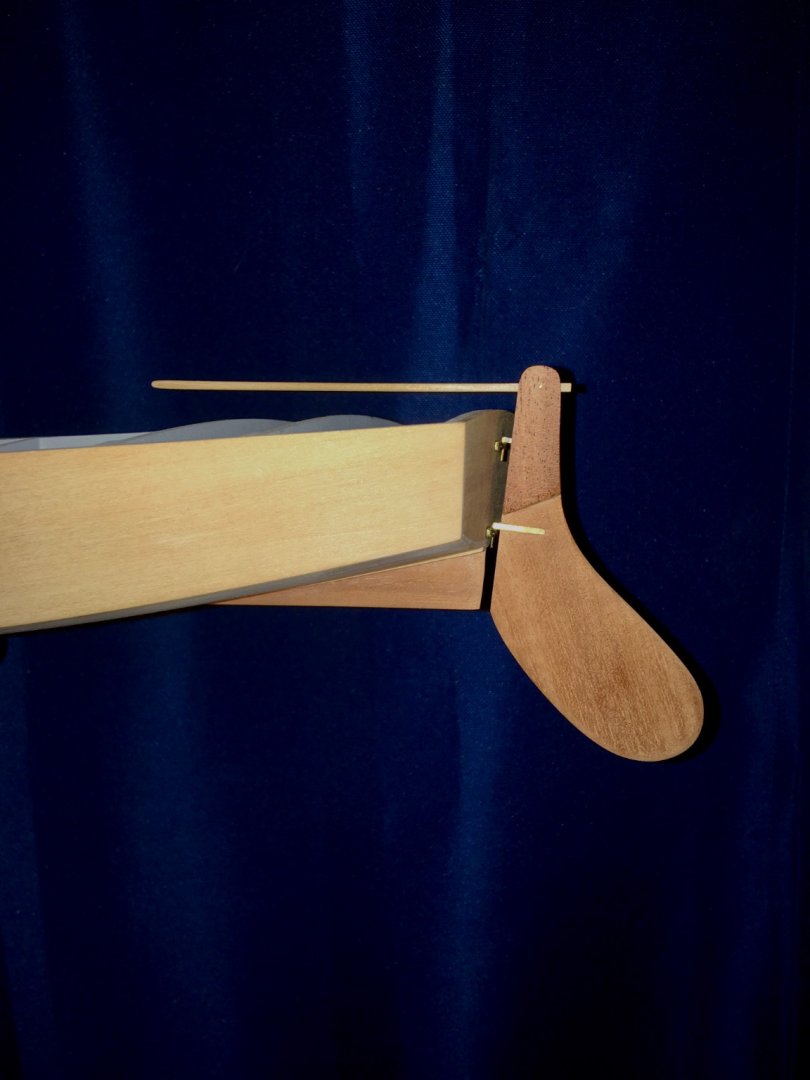
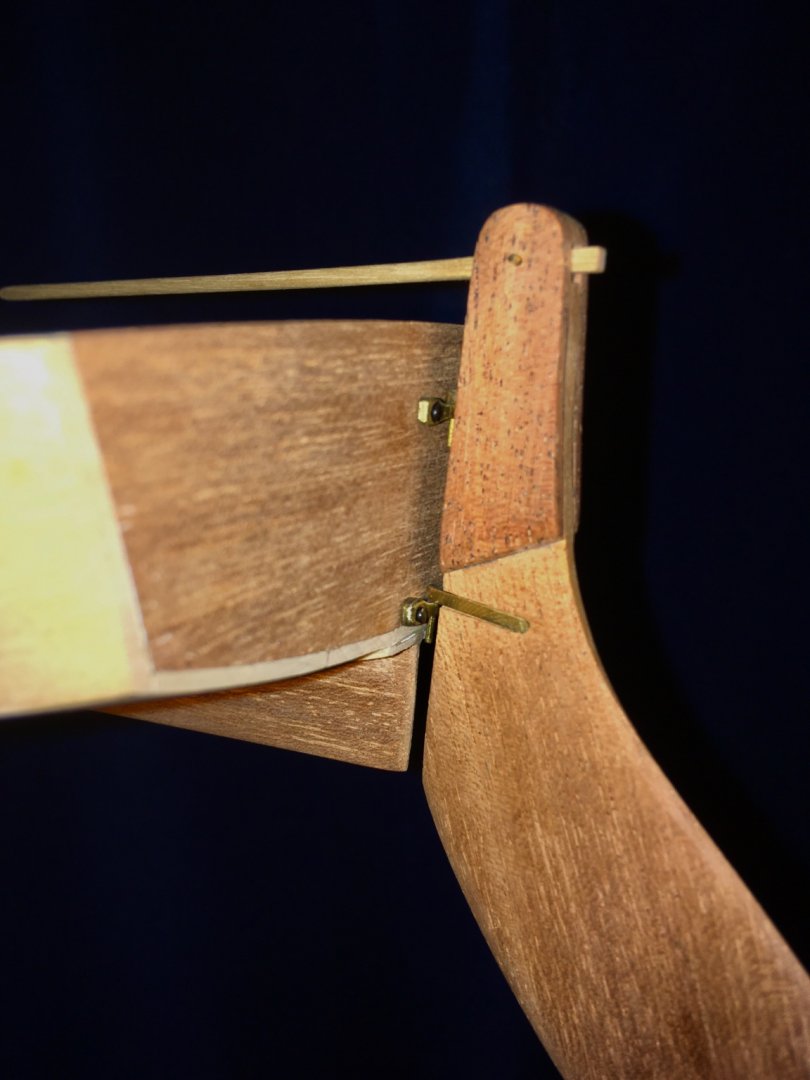
Rudder and hardware dry fit successful! I’m so glad I’m still able to use the pintles and gudgeons I made for the first Lightning five years ago!
-
Yes, that’s the Dumas kit, which I attempted first but didn’t finish because I didn’t think it was accurate enough. The link to that build log is in the first post of this log. I may yet finish that model some day to try sailing in the pool or something.
-
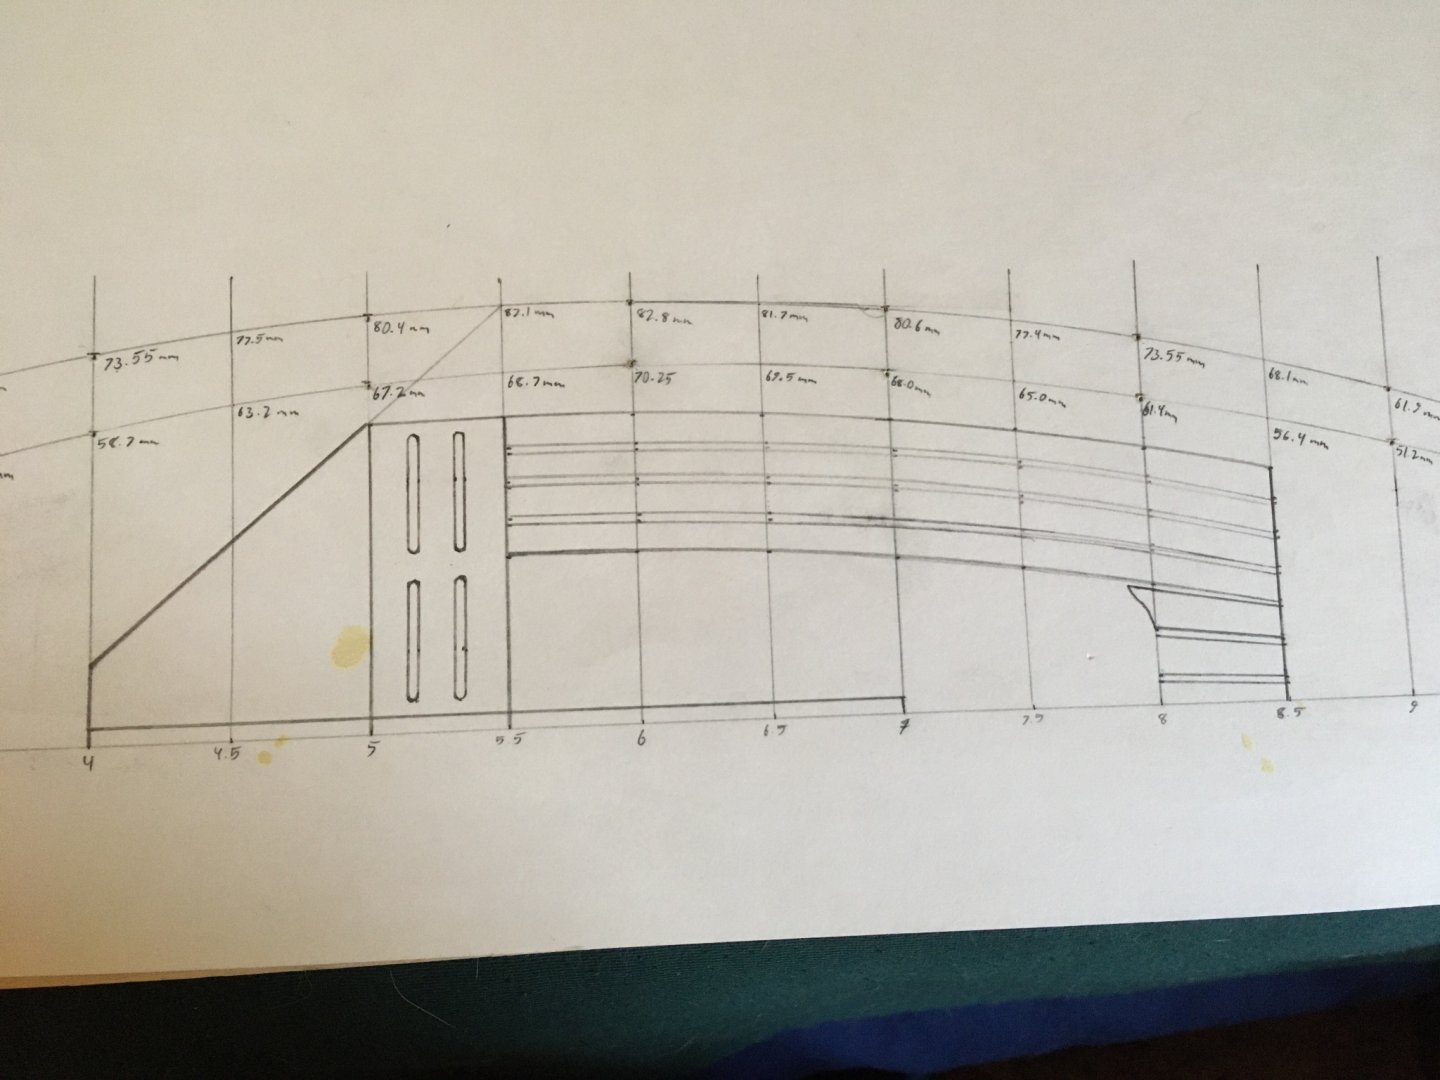
It’s been a while since I put pencil to paper to plan out parts but I had fun drafting the seats! Now I can trace templates from here to transfer to the mahogany. If you were following my old log, you might remember that I was originally planning on this being a replica of #1 as a gift to the Skaneateles Country Club. This is no longer the plan and I’m just building it for my own pleasure, so I’ve decided not to replicate the cobbled together seats and floor boards of the prototype.
-
That would be so cool if I could! I'm not sure it would be a good idea, though. I didn't think to varnish the inside faces of the centerboard trunk before assembling it, so I think the wood might get damaged if it got wet.
-
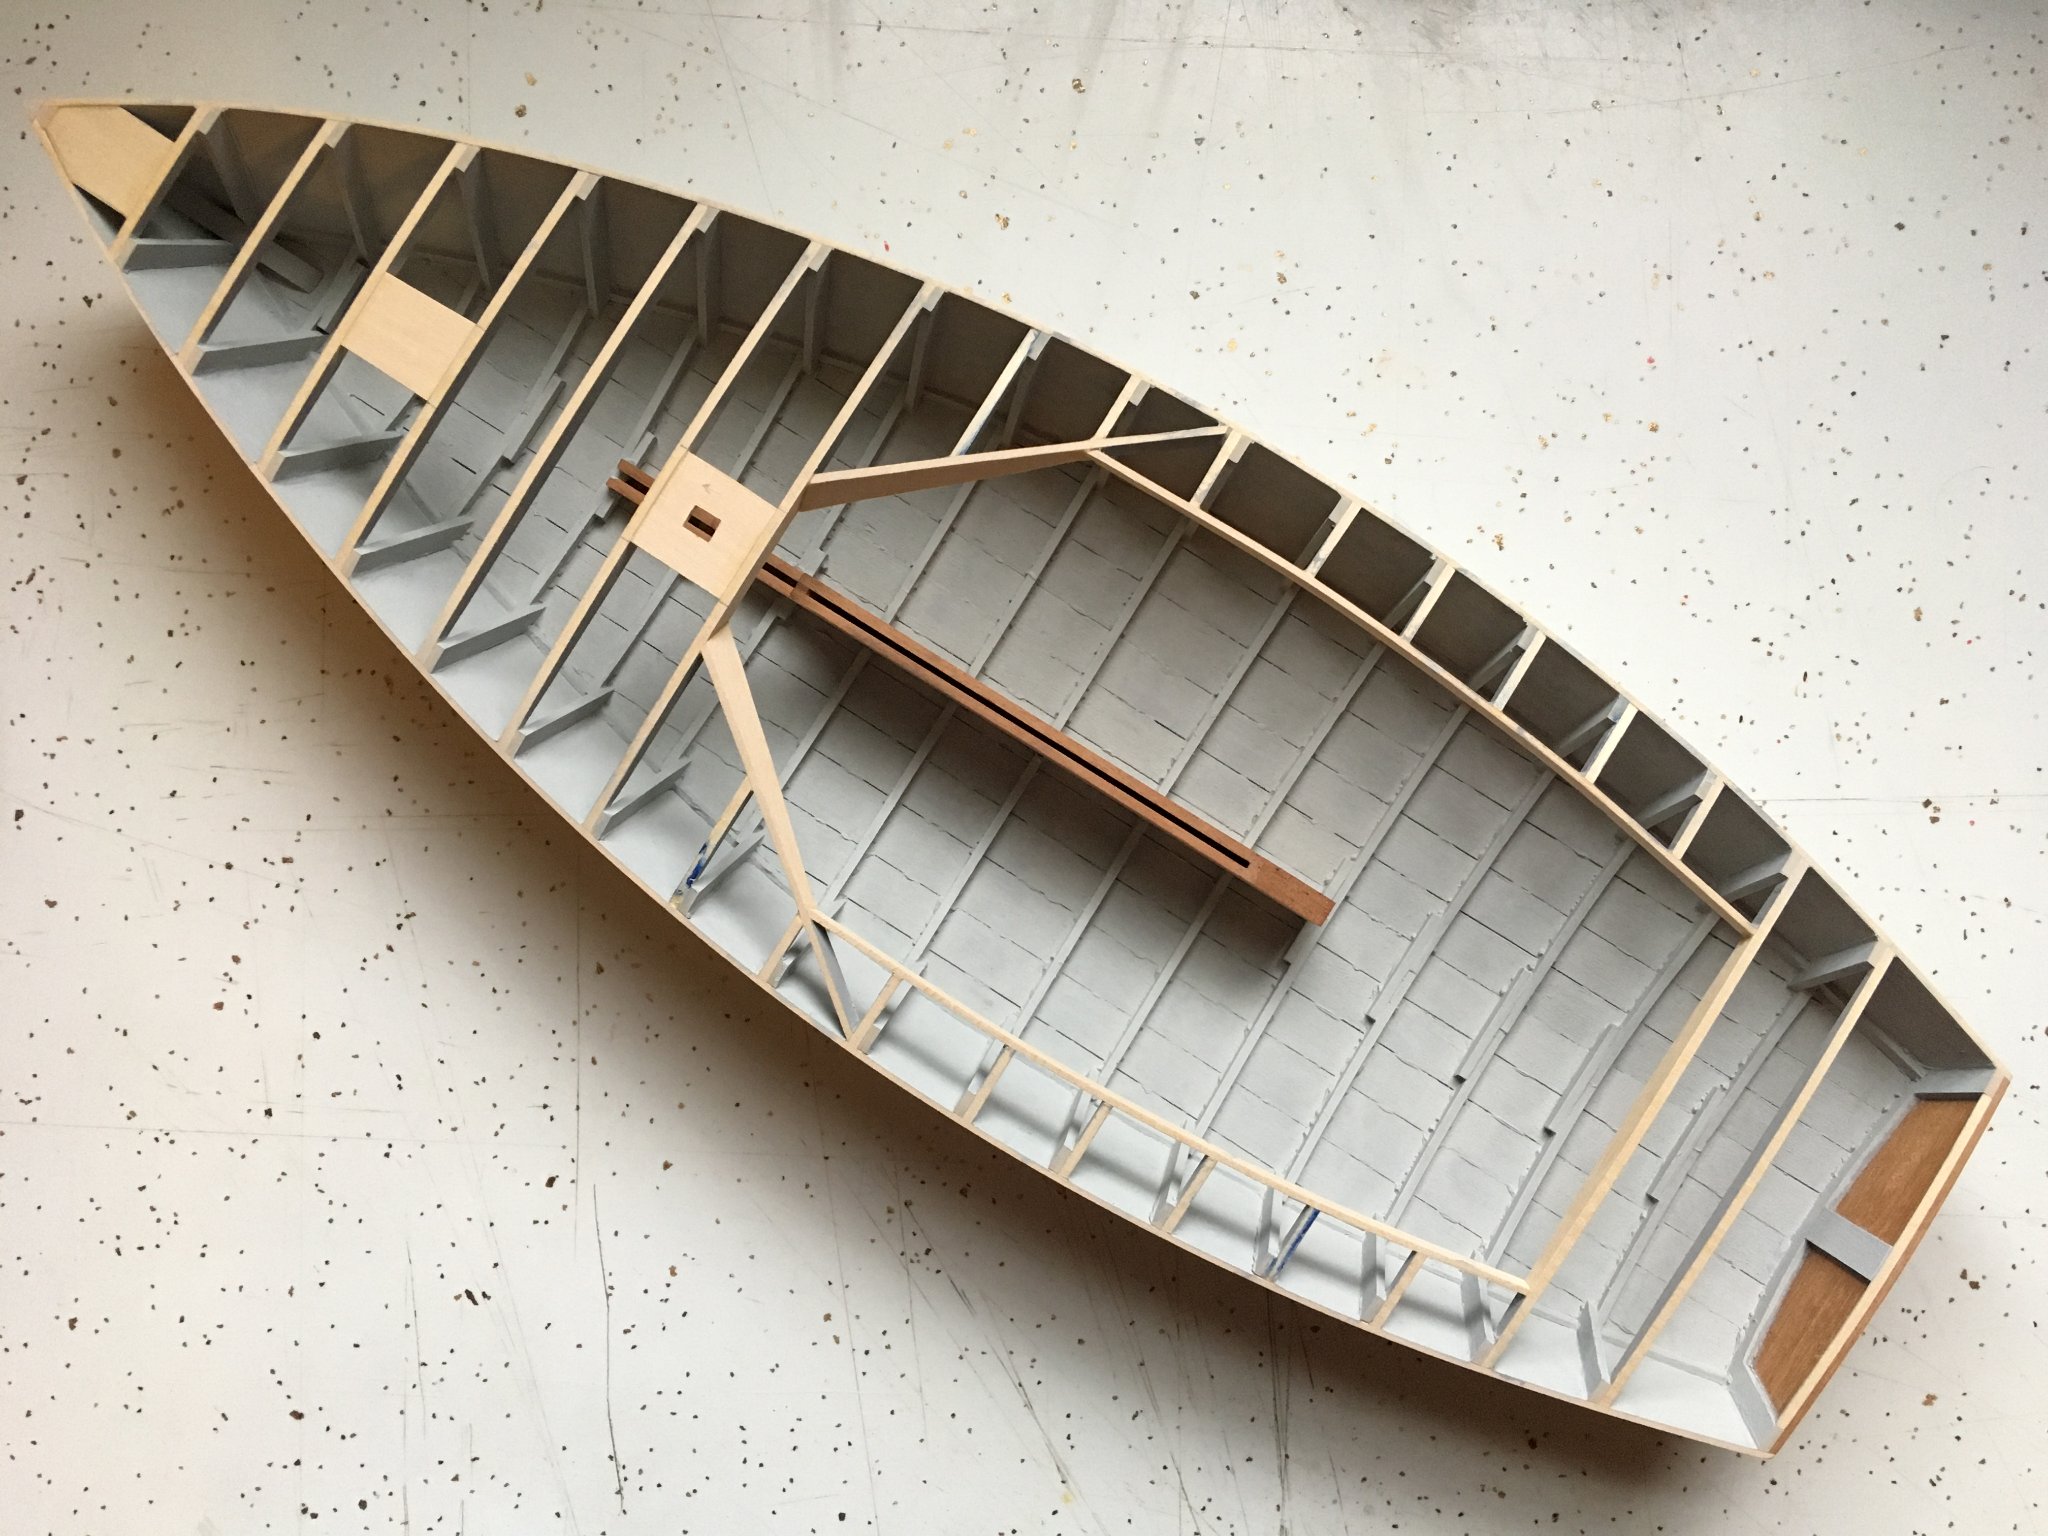
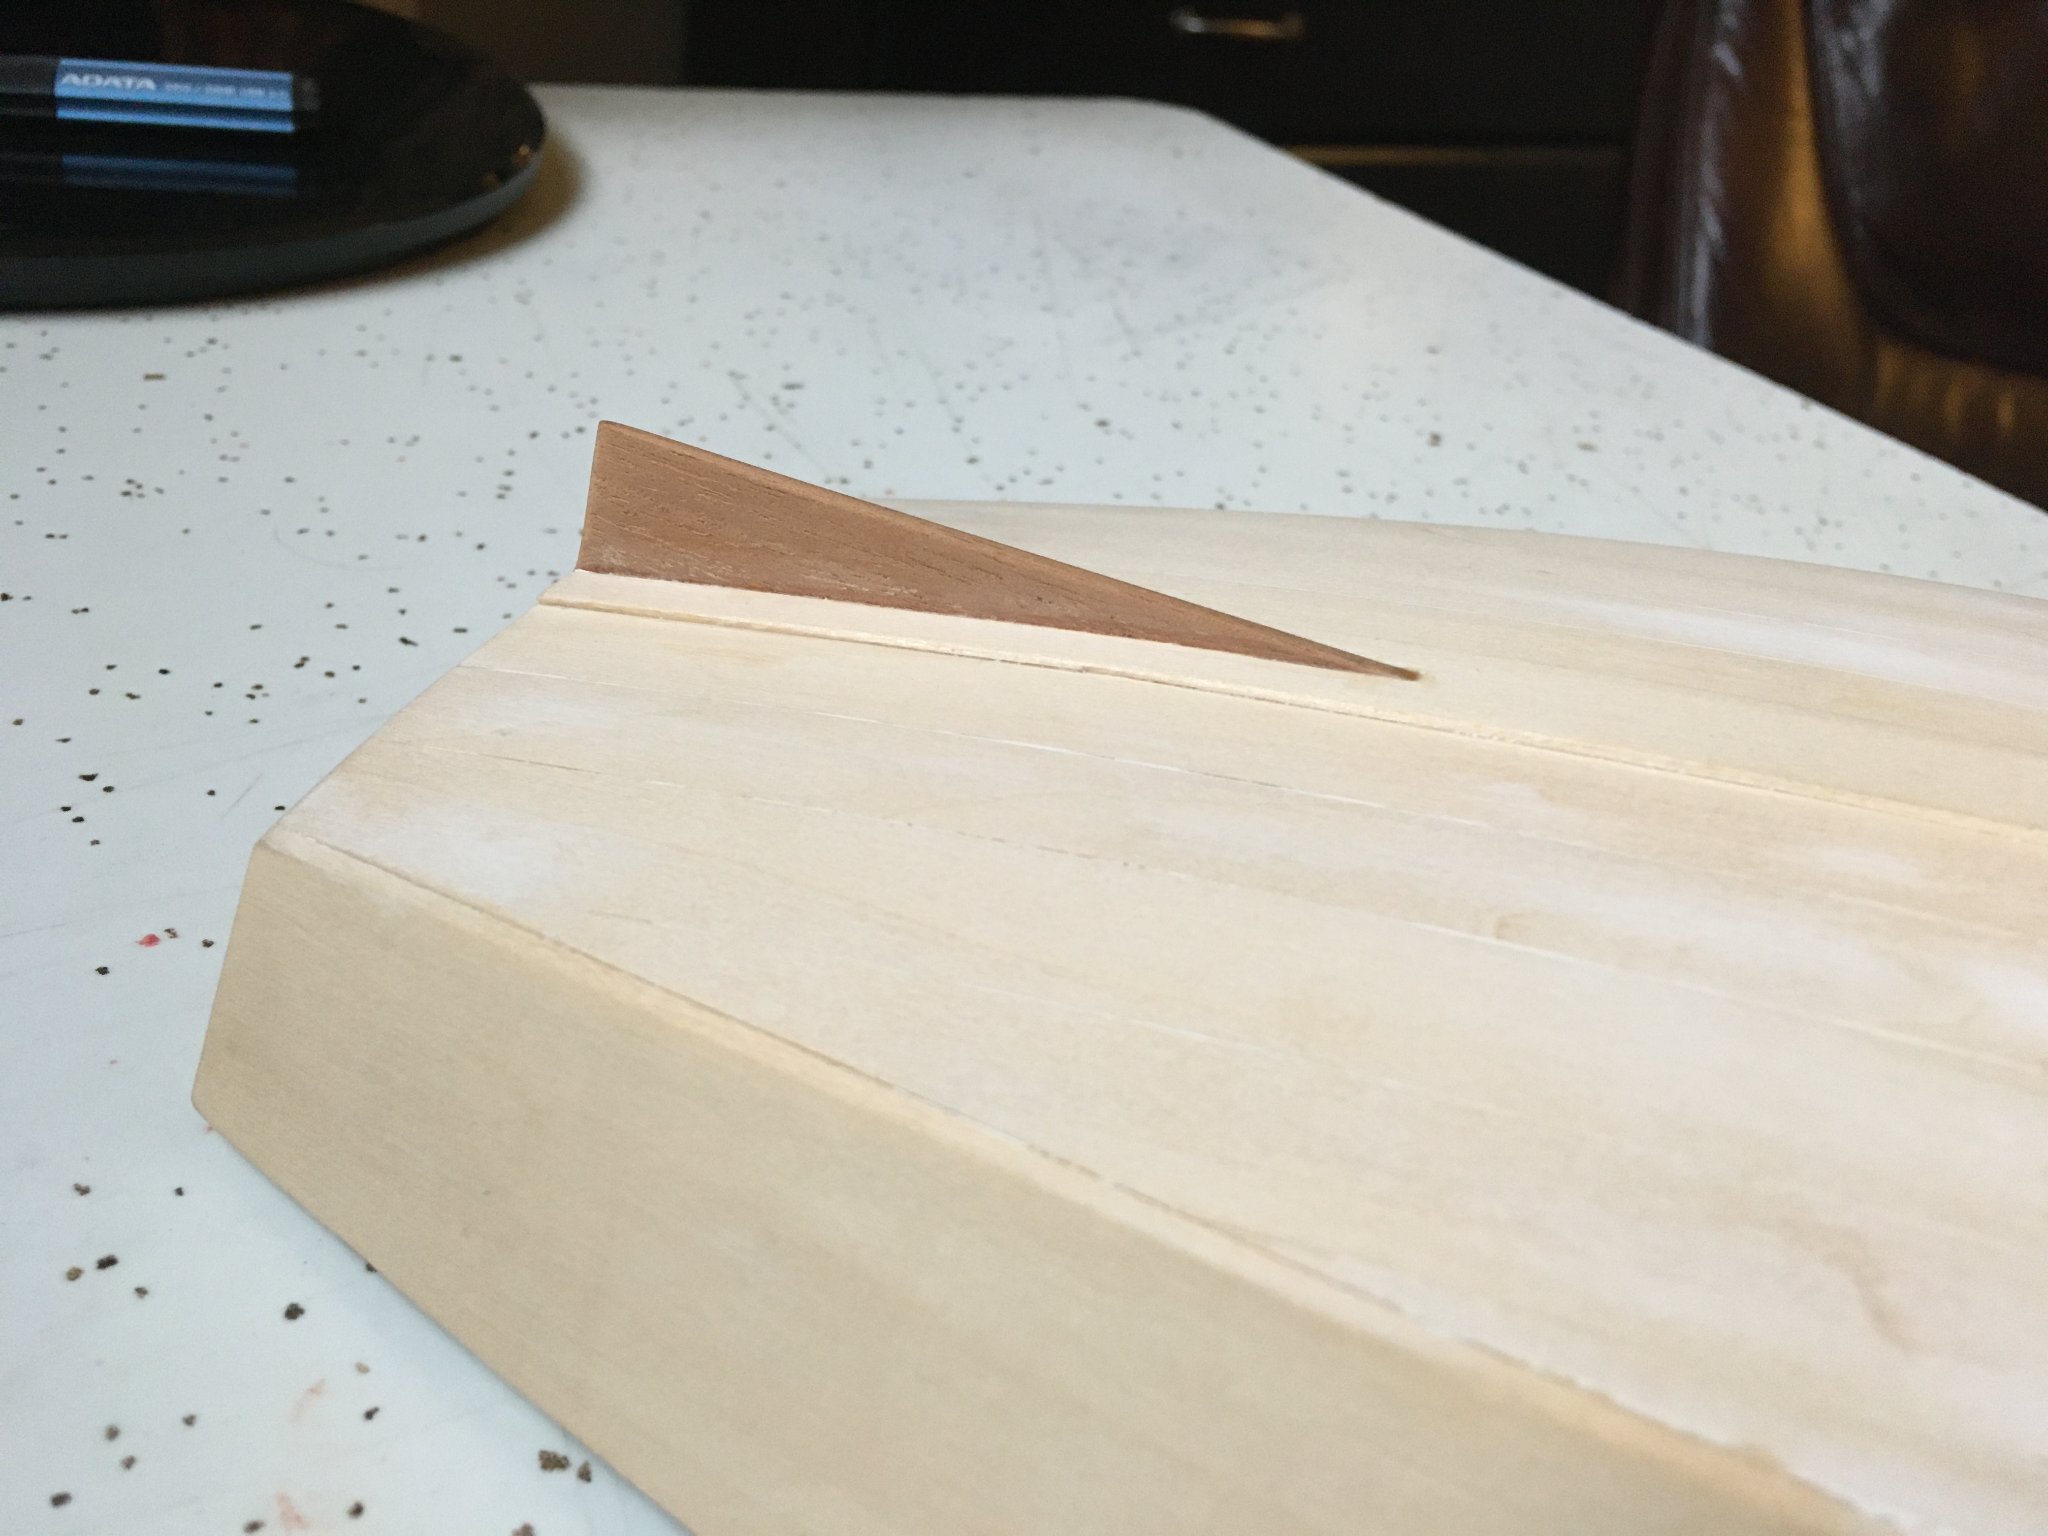
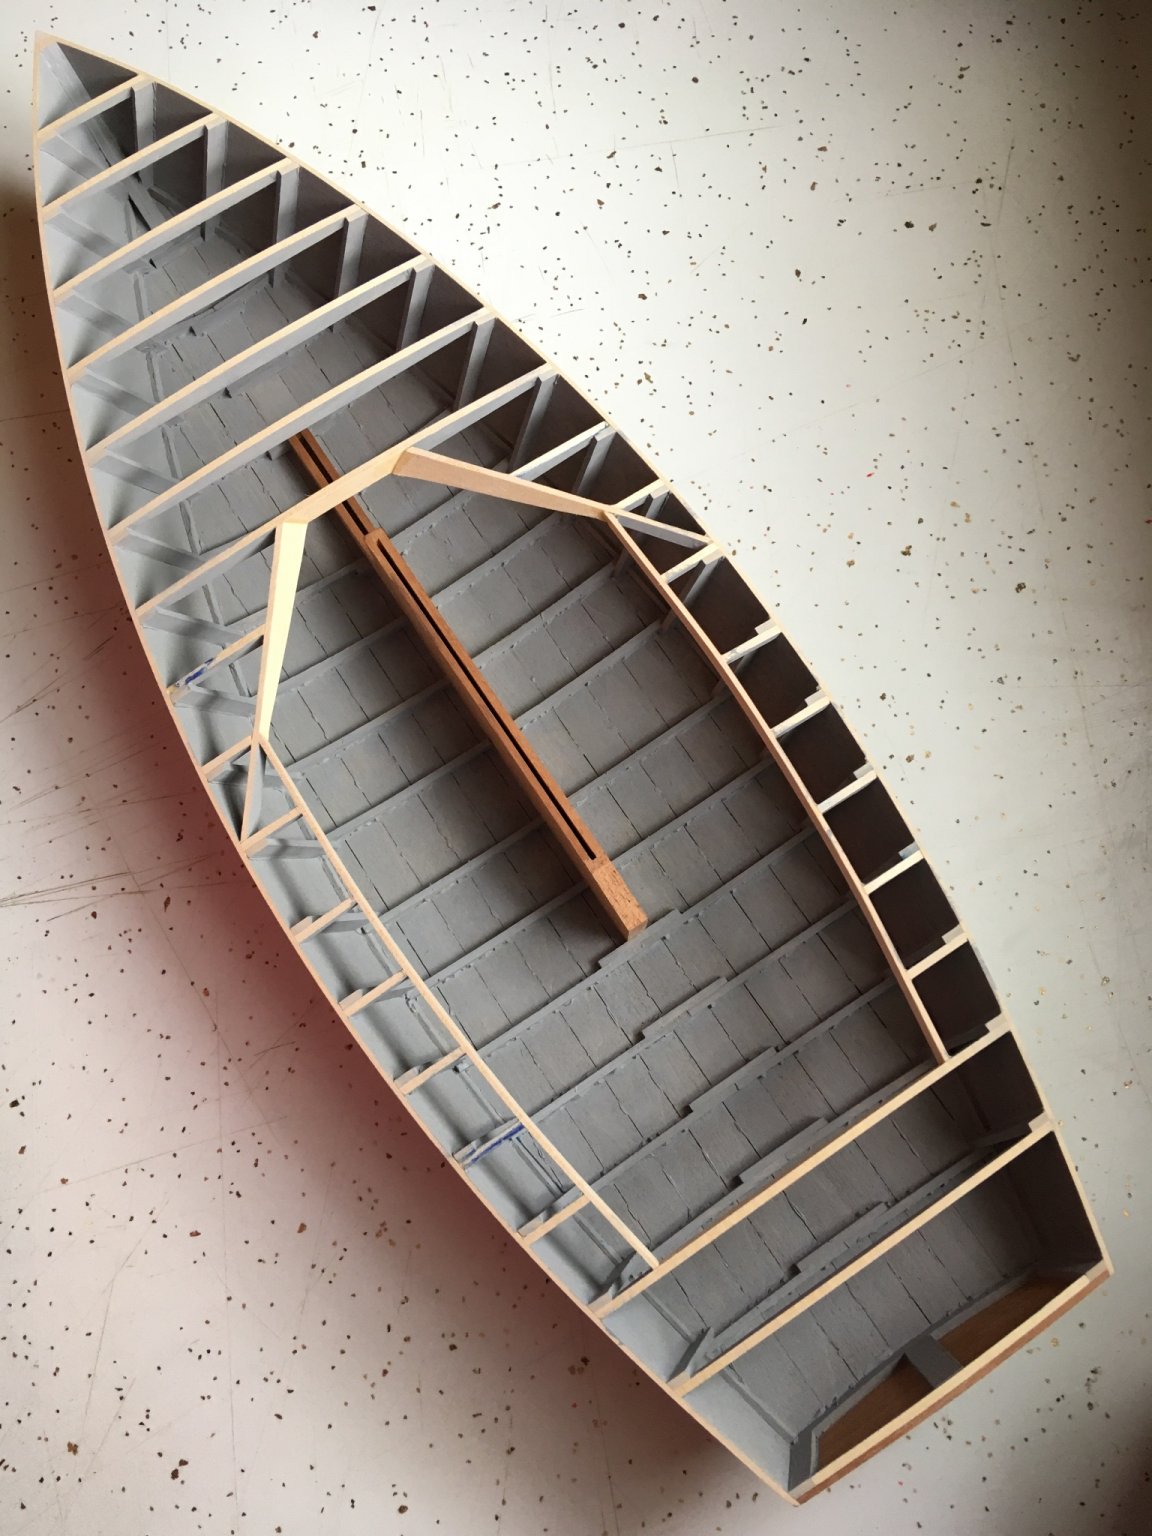
Well I went through my paint stash and just happened to find a light grey that I didn't remember having that just happened to be the exact shade that I was expecting the first one to be! So I went ahead and repainted. I am very happy with how the inside looks now. I also got the deck fitting blocking and mast partner installed, as well as the skeg. Throw the centerboard in there for a quick mock-up and she's starting to look like a proper Lightning!


-
Not my prettiest paint job ever, but a necessary step nonetheless. Unfortunately I couldn’t find a good way to clean up the excess glue from the planking and bottom frames, but most of it will be covered by the floorboards and seats anyway. I had expected it to be a lighter grey based on the color of the lid of the paint jar, but oh well.

-
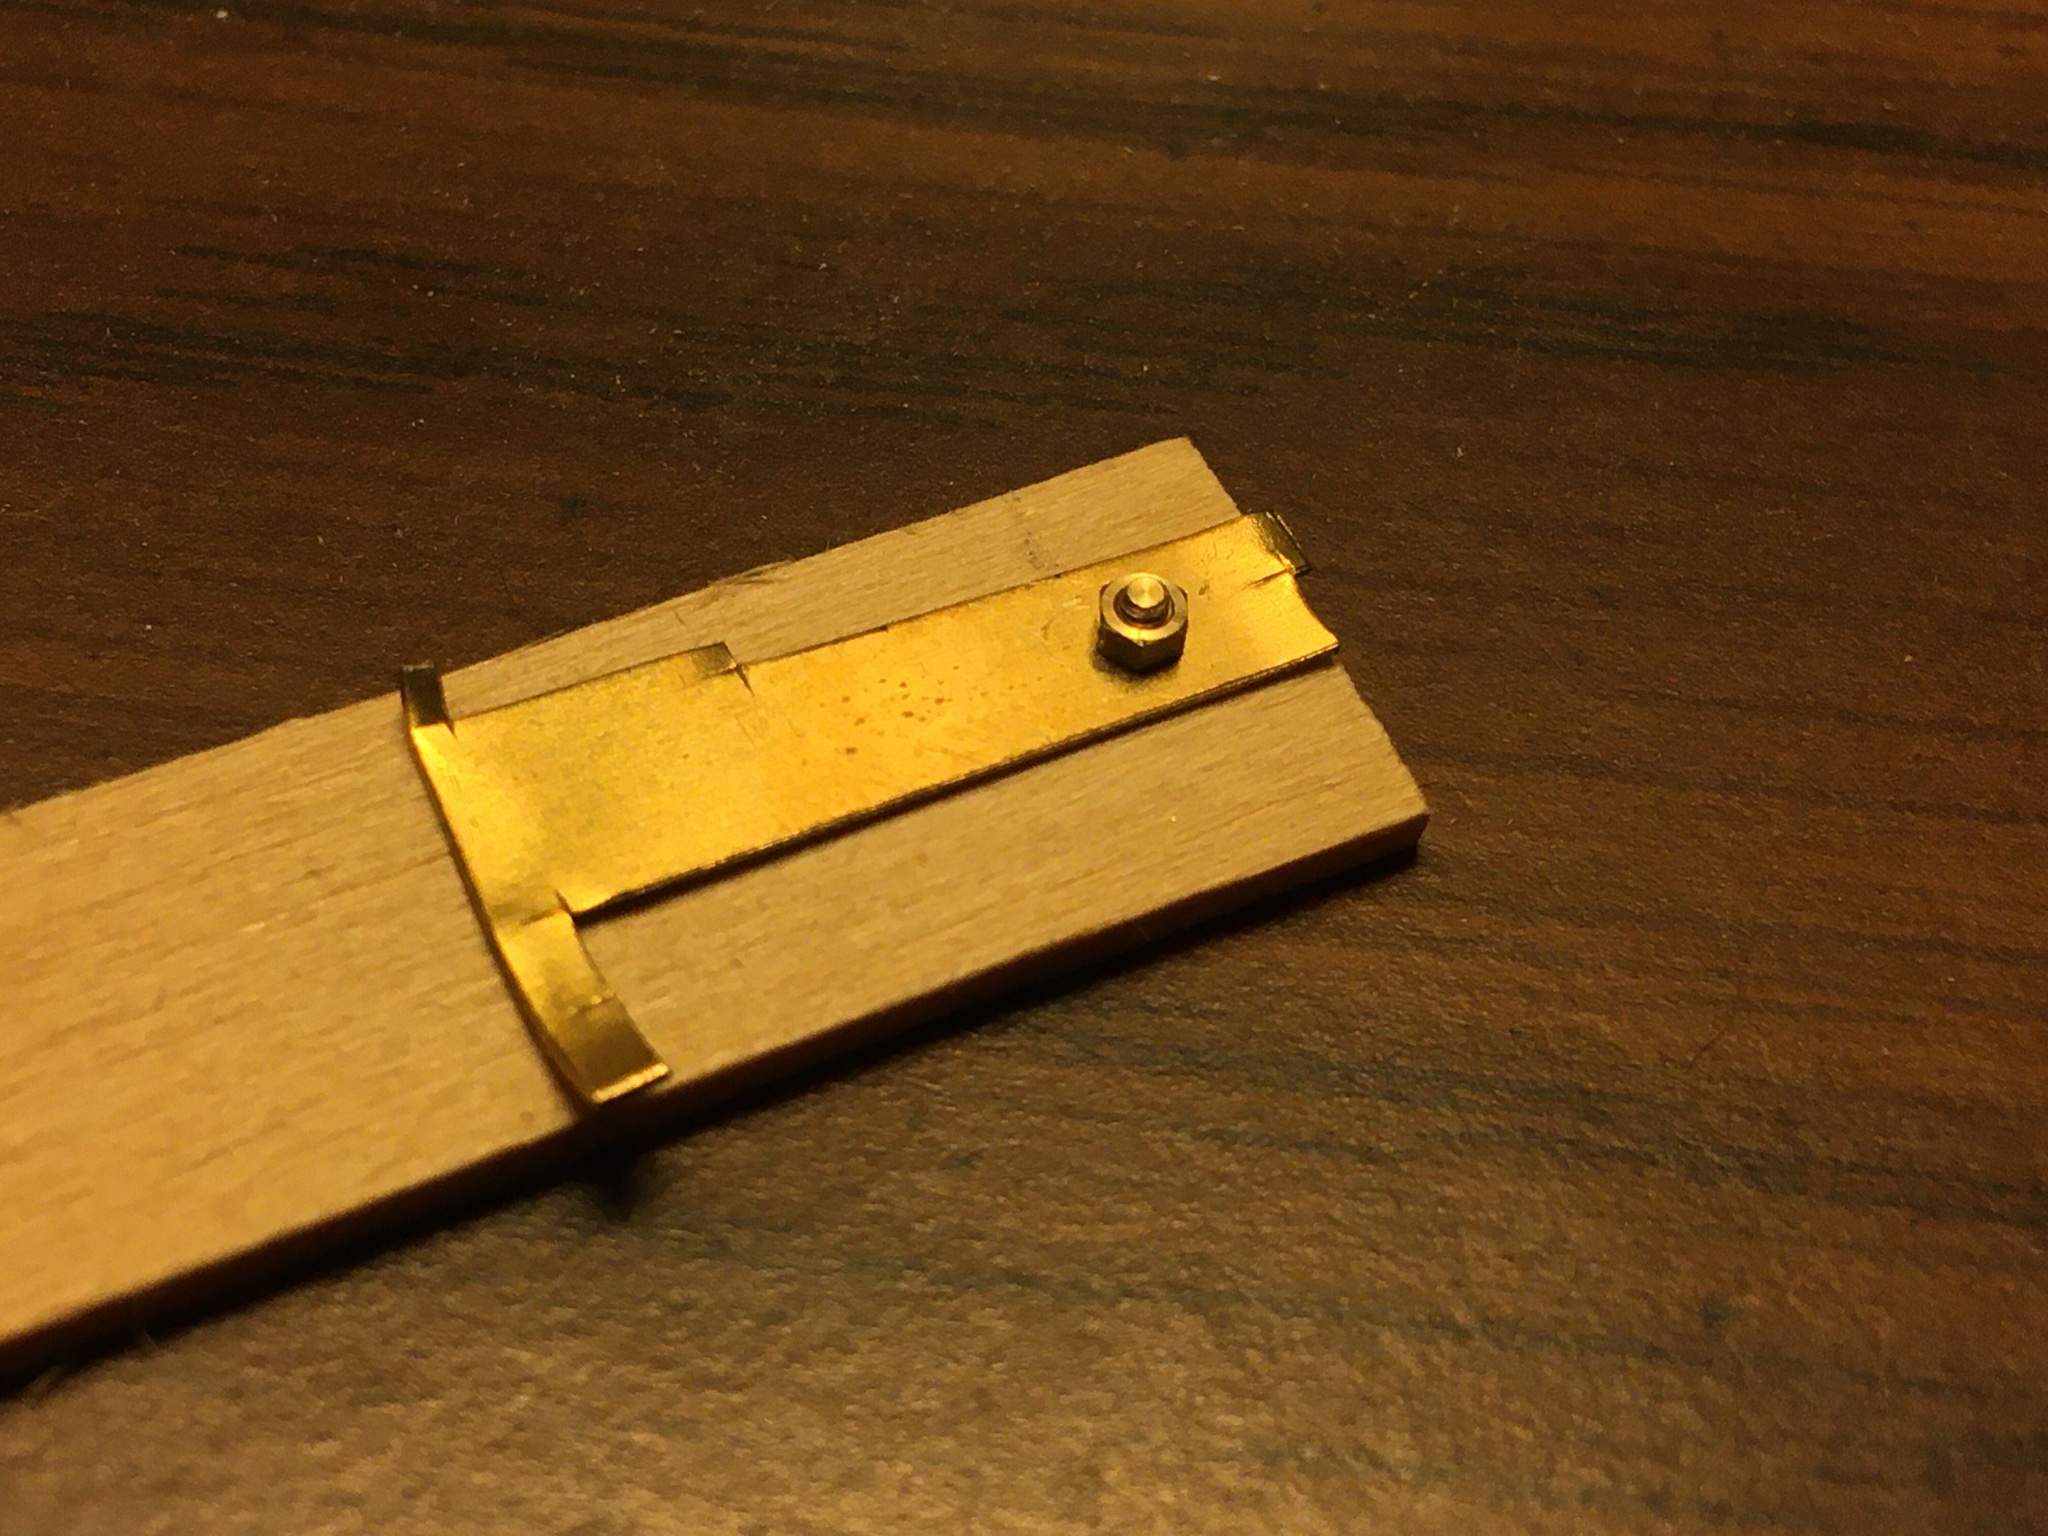
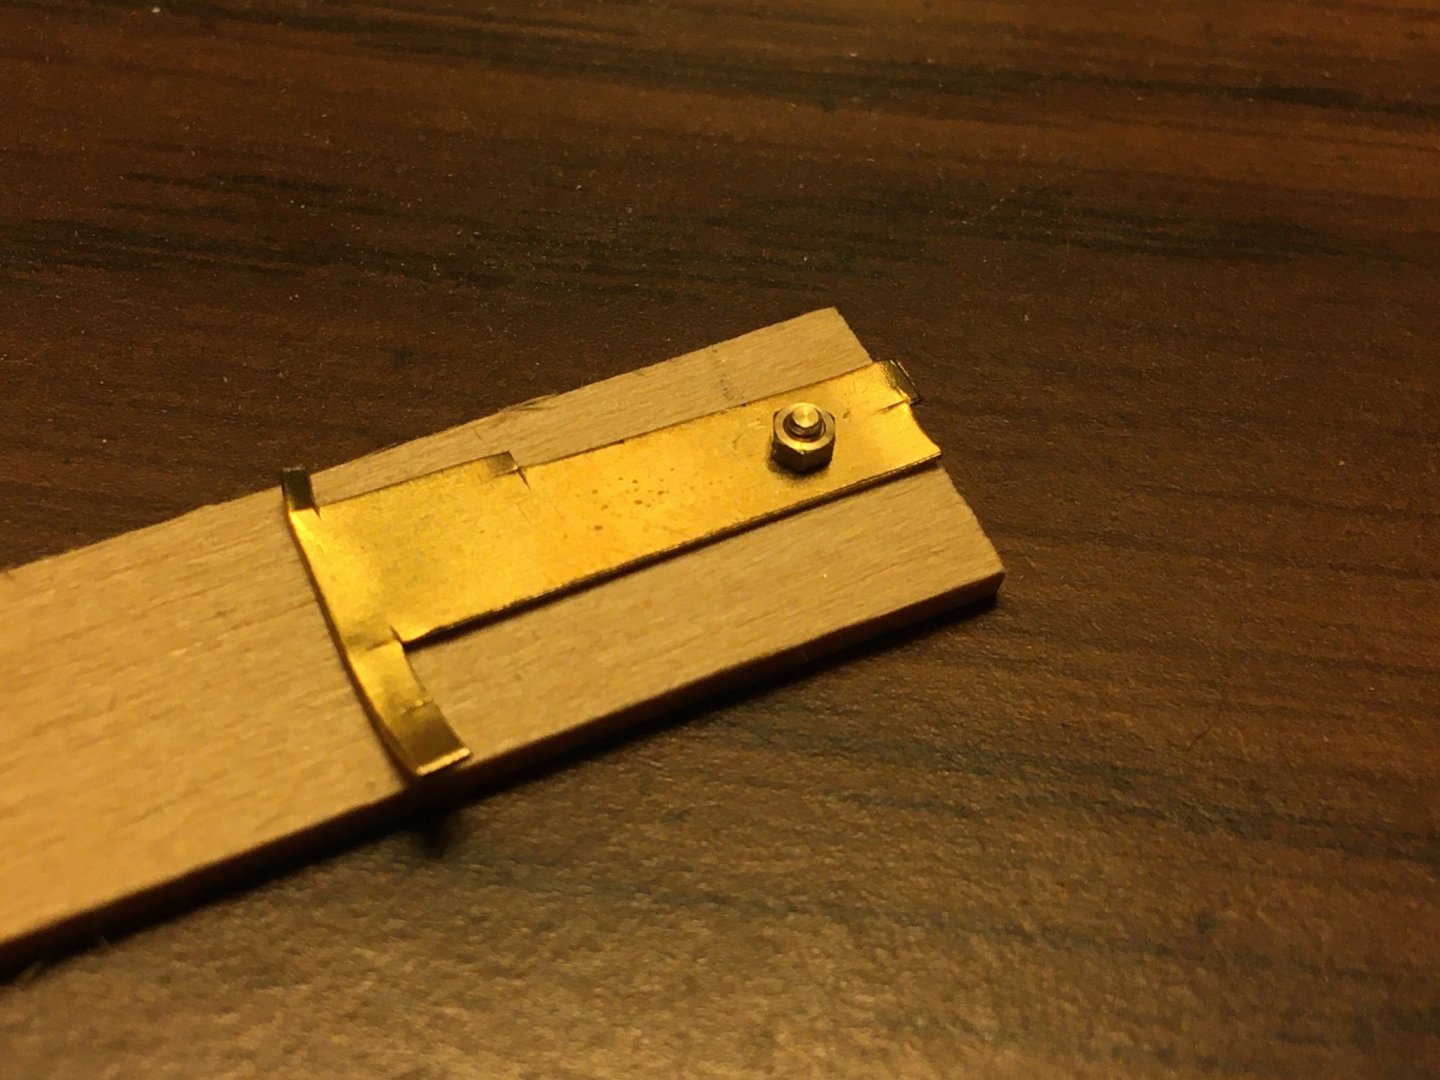
Initial trial of chainplate attachment successful! I went with the Micro-Mark 00-90x1/8 screws and nuts. The flat head screws countersink nicely into the 1/16” planking with just enough thread poking through to accept the brass strip and the nut! Let’s just hope the actual planking on the boat behaves itself as well as this test piece did! I won’t have to countersink the heads quite as far as this I don’t think. Just enough to be able to fill and fair. I’m thinking probably 4 screws per chainplate will be sufficient.
-
The book is absolutely incredibly helpful, I don't think I would have known where to begin without it! It outlines in detail the lofting technique to draw your full size lines to obtain your half station measurements and how to set up the building jig and all of that stuff. It's written specifically for amateur builders who are looking to build their own Lightning in their garage or backyard. (See above reply for the link). The specifications manual they provide free for download is also very helpful, as it's the only place I was able to find a specified measurement for the width the deck around the sides of the cockpit. https://s3.amazonaws.com/ClubExpressClubFiles/93488/documents/Specifications_287597677.pdf?AWSAccessKeyId=AKIA6MYUE6DNNNCCDT4J&Expires=1617910107&response-content-disposition=inline%3B filename%3DSpecifications.pdf&Signature=ExOzPsedzB40nAT%2FgwcLEprtL6Y%3D