
LJP
-
Posts
73 -
Joined
-
Last visited


-
 LJP reacted to a post in a topic:
Peerless by Cathead - 1:87 - 1893 sternwheel Missouri River steamboat
LJP reacted to a post in a topic:
Peerless by Cathead - 1:87 - 1893 sternwheel Missouri River steamboat
-
LJP reacted to a post in a topic:
Peerless by Cathead - 1:87 - 1893 sternwheel Missouri River steamboat
-
LJP reacted to a post in a topic:
Peerless by Cathead - 1:87 - 1893 sternwheel Missouri River steamboat
-
LJP reacted to a post in a topic:
SS Klondike II by John Ruy - 1/8” = 1’ - 1/96 scale Sternwheeler Riverboat
-
LJP reacted to a post in a topic:
Peerless by Cathead - 1:87 - 1893 sternwheel Missouri River steamboat
-
Canute reacted to a post in a topic:
SS Klondike II by John Ruy - 1/8” = 1’ - 1/96 scale Sternwheeler Riverboat
-
mtaylor reacted to a post in a topic:
SS Klondike II by John Ruy - 1/8” = 1’ - 1/96 scale Sternwheeler Riverboat
-
Ras Ambrioso reacted to a post in a topic:
Peerless by Cathead - 1:87 - 1893 sternwheel Missouri River steamboat
-
FriedClams reacted to a post in a topic:
SS Klondike II by John Ruy - 1/8” = 1’ - 1/96 scale Sternwheeler Riverboat
-
John Ruy reacted to a post in a topic:
SS Klondike II by John Ruy - 1/8” = 1’ - 1/96 scale Sternwheeler Riverboat
-
 Really looking forward to your first scratch build. It is great that you were able to get a set of detailed plans. I was able to see the outside of the boat when I was in Whitehorse in the mid-1990s but the boat was already closed for the day and we left too early the next morning. LJP
 -
LJP reacted to a post in a topic:
Peerless by Cathead - 1:87 - 1893 sternwheel Missouri River steamboat
-
LJP reacted to a post in a topic:
Peerless by Cathead - 1:87 - 1893 sternwheel Missouri River steamboat
-
LJP reacted to a post in a topic:
Peerless by Cathead - 1:87 - 1893 sternwheel Missouri River steamboat
-
LJP reacted to a post in a topic:
Peerless by Cathead - 1:87 - 1893 sternwheel Missouri River steamboat
-
LJP reacted to a post in a topic:
Peerless by Cathead - 1:87 - 1893 sternwheel Missouri River steamboat
-
mtaylor reacted to a post in a topic:
Peerless by Cathead - 1:87 - 1893 sternwheel Missouri River steamboat
-
Canute reacted to a post in a topic:
Peerless by Cathead - 1:87 - 1893 sternwheel Missouri River steamboat
-
FriedClams reacted to a post in a topic:
Peerless by Cathead - 1:87 - 1893 sternwheel Missouri River steamboat
-
John Ruy reacted to a post in a topic:
Peerless by Cathead - 1:87 - 1893 sternwheel Missouri River steamboat
-
Cathead reacted to a post in a topic:
Peerless by Cathead - 1:87 - 1893 sternwheel Missouri River steamboat
-
Hi Cathead, Great job! Another alternative on the stacks is K&S aluminum "pipes". They are stable, can be drilled, and have the open structure that you are looking for. You can still use the plastic bands. Keep up the good work, LJP
-
Hi Eric, As steamschooner mentioned, the reference that I found was that the decks were "canvas, painted and sanded". This is what was done on the S. S. Moyie when four layers were removed during renovation. I like your idea of scribing the underside of the boiler deck, That provides a good representation while really simplifying the process. Keep up the great work., LJP
-
Hi Cathead, I missed your build until now but definitely will follow it. GREAT WORK. Love the topic - a model that others have not done before. Working from just photos is not easy. This is especially true where the layout changes over the years and you need to decide what period to follow. Specifically I love how you built the guards. These are a real pain to build. Awaiting your next update... LJP
-
Your collective support is amazing. Thanks again. Kurt, I have attended the Wisconsin Maritime Museum model contest several times. The level of construction exhibited is well beyond my Thistle. The regrettable part is many years ago I kit bashed a Thermopylae clipper which could have been entered into the contest. That said, I may display Thistle at Manitowoc through the Wisconsin Scale Boating Association (WSBA) of which I am a member. I agree that it is unusual and will draw interest. There are several other WSBA events where I will display it. My next project is the neglected “Honey, Do…” list items I had successfully avoided. But my next boat project is the logical choice: the predecessor of Thistle, the J.H. Crawford. During the Thistle build, I was able to obtain a wonderful quartering stern view of J. H. Crawford from the Dave Thompson Collection at Steamboats.com. I will need to create J. H. Crawford plans as Crawford really looked different (and was 14 feet shorter) than Thistle. I look forward to that build as I now have experience to rely upon. But that build will not be fast either. Cathead, your models are incredible. Like you I will enjoy my model in my home. I have already given thought to where it will go when I no longer need it. There are several city museums or county historical societies which Thistle regularly visited during its life. I would hope that it will reside in one of those because of its connection. Roger, thank you for your insights. I have visited your whaleback Meteor and museum. Definitely worth the visit but I never saw the plastic Titanic. If you wish to build an interesting sternwheeler with both a Fox River Valley and Duluth connection, the Henrietta (1879) was a government boat, later sold to local Fox River Valley interests as a packet, and sold a second time in 1895 and ran excursions on the St. Louis River from Duluth to Fond du Lac (yours, not mine). Its barged-out hull is in the Thunder Bay graveyard. Keith & MCB, thanks for you confirmation – it really means much. LJP
-
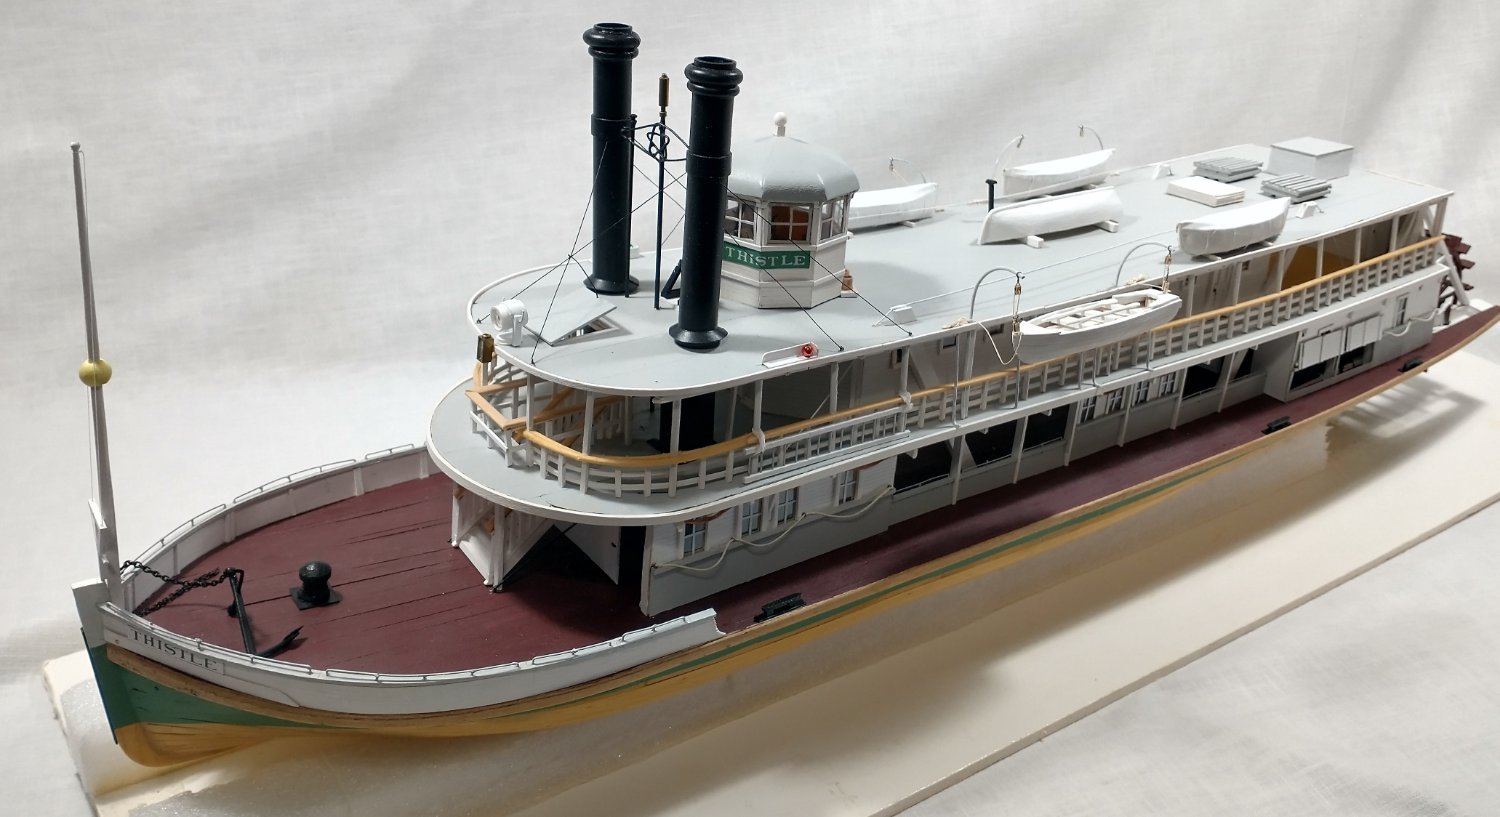
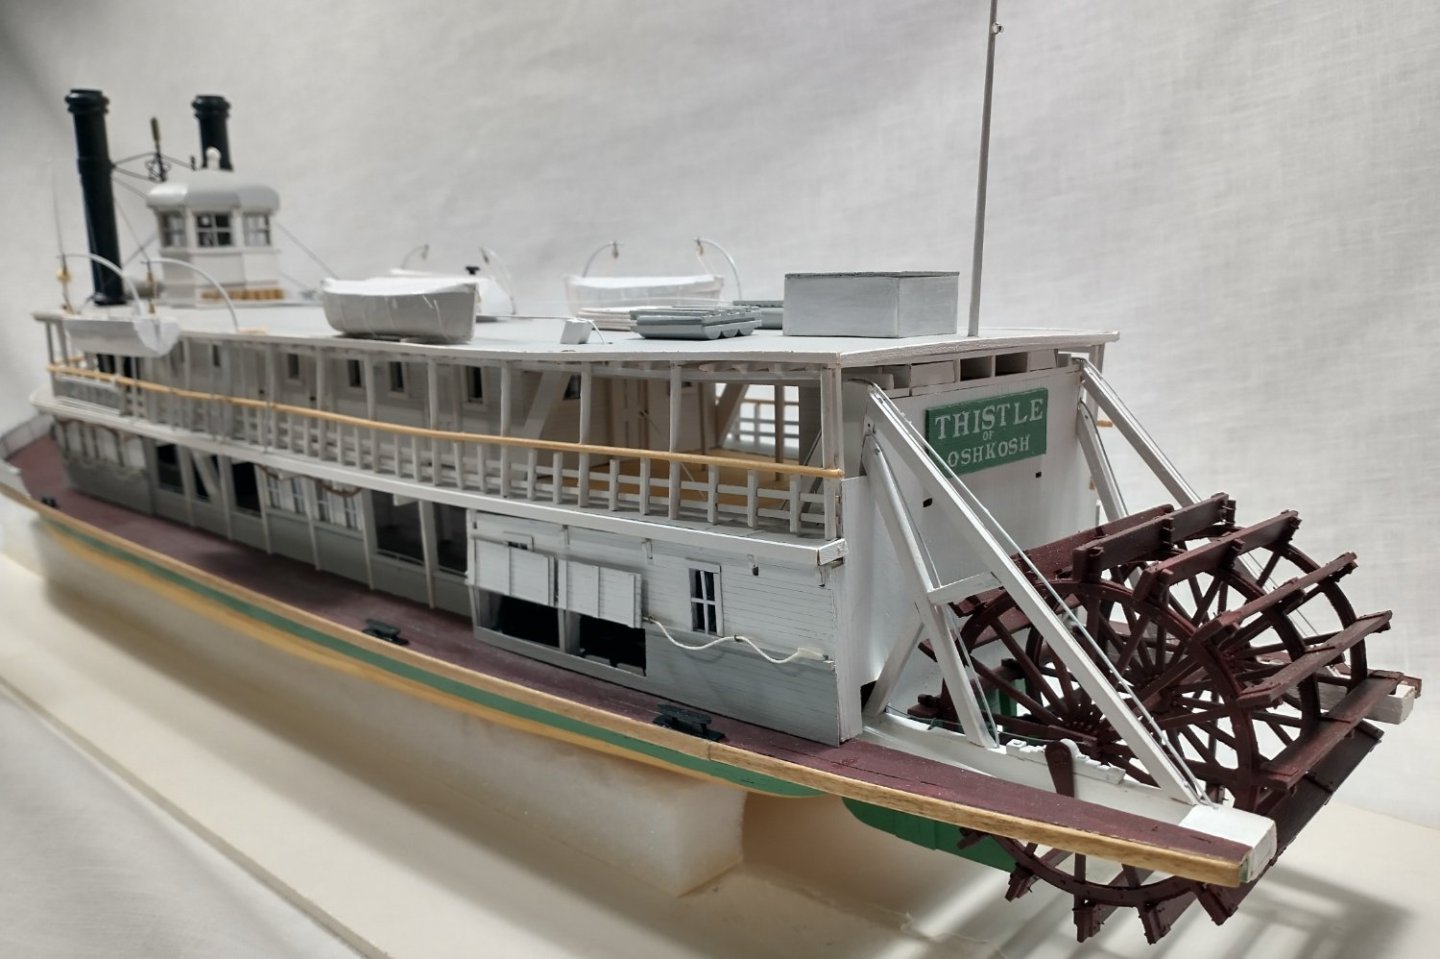
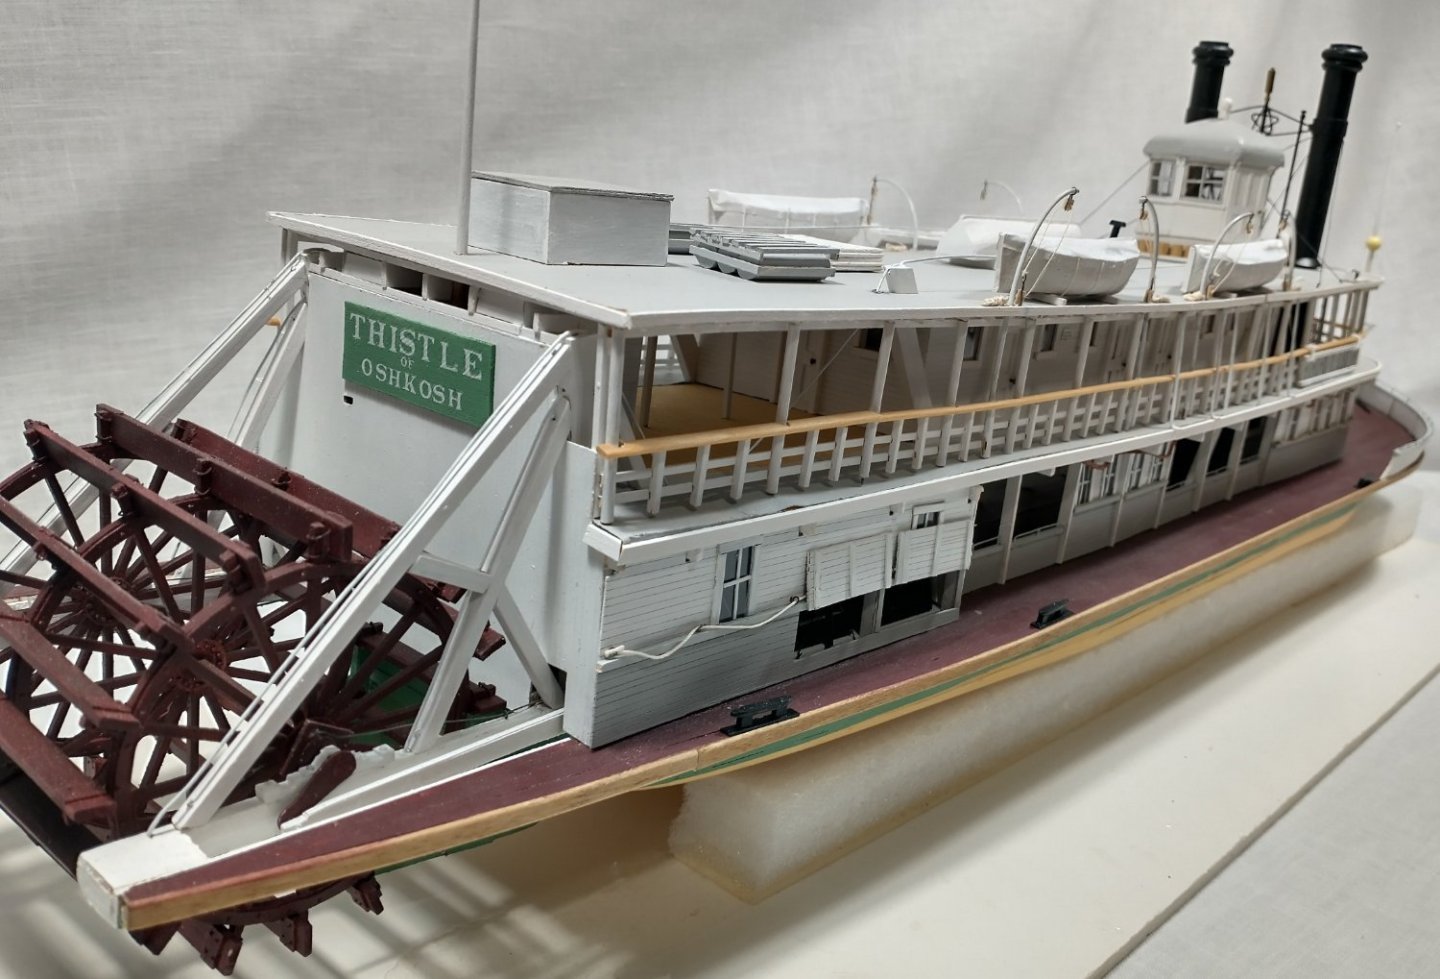
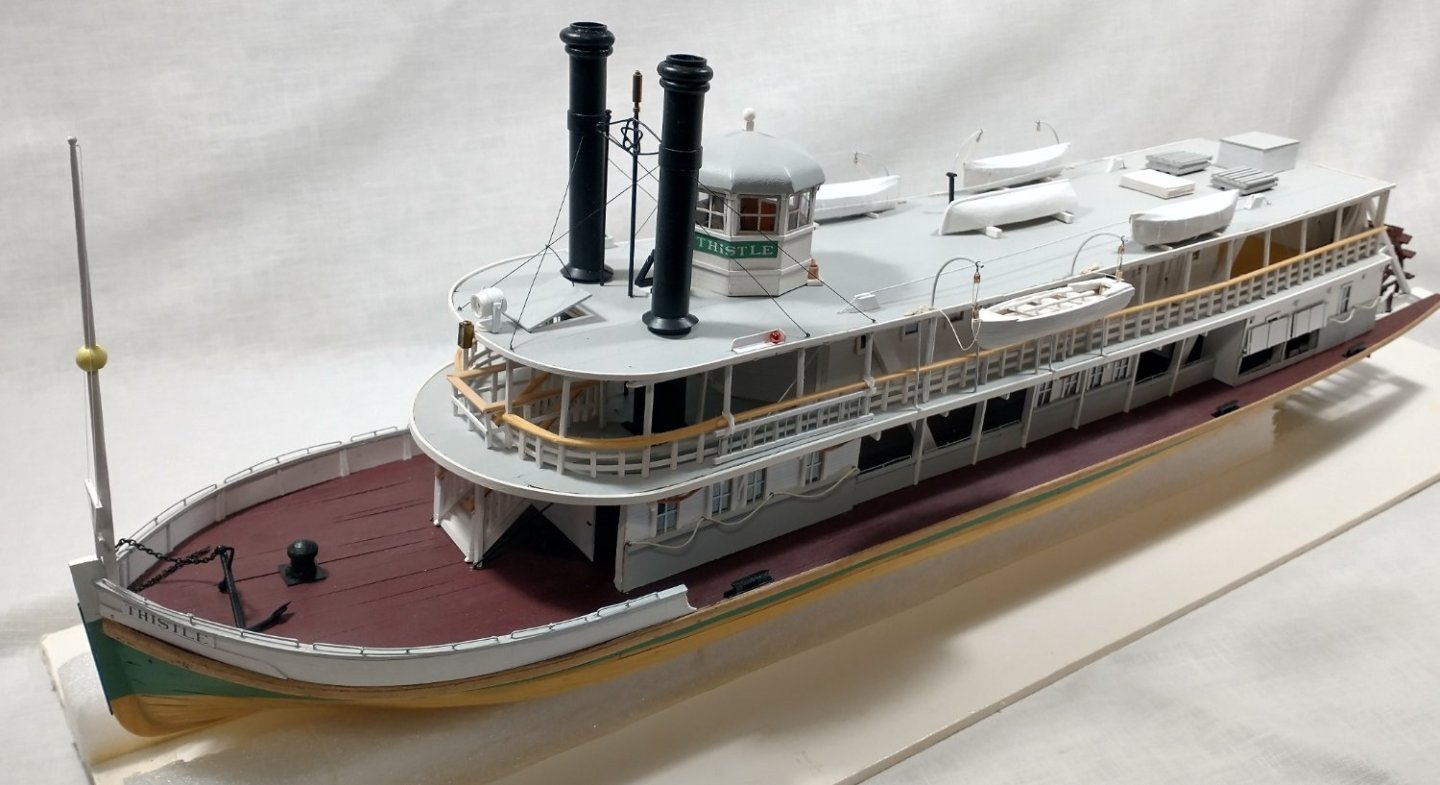
I give you Thistle I would like to start by thanking all of you have who have encouraged me and followed my build over these past two years. To say that I have learned a lot, from drafting the plans to the actual build, would be an understatement. This was my first true scratch-built model and I am glad that I did it. I have discovered ways to do things wrong that truly amaze even me. I have also discovered that the eyes are not as sharp as they once were and the fingers less nimble. While Thistle will never be in a contest, the soon to be cased Thistle will proudly reside next to my fireplace. Thank you all again. LJP

-
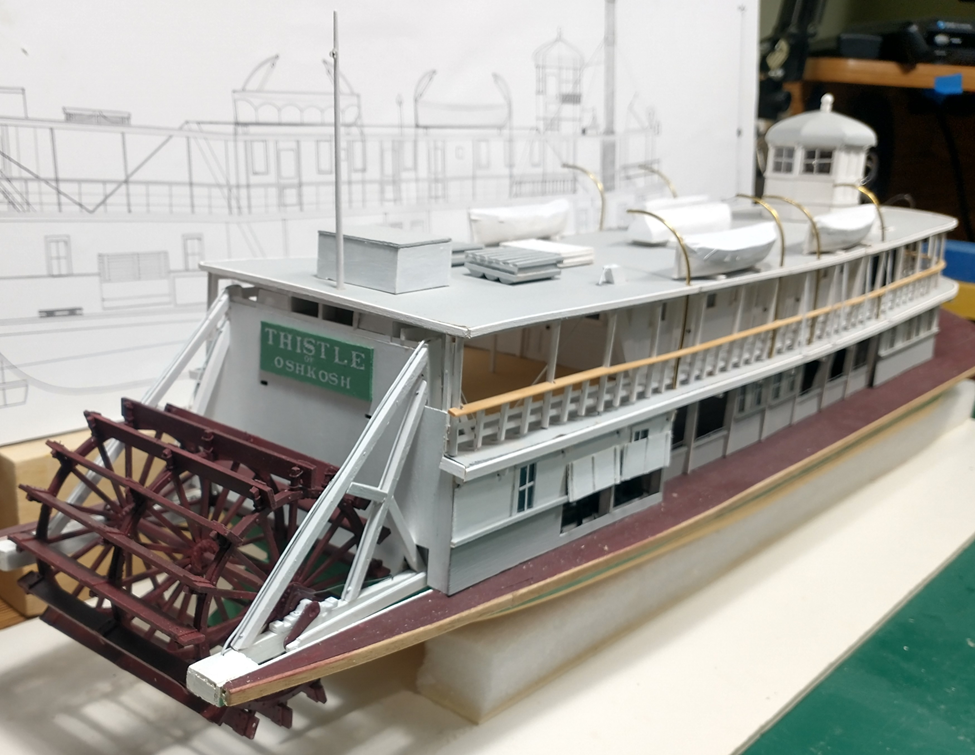
I am finally getting close to the end of my Thistle build after two years. The hurricane deck was finished with the addition of fire buckets and the bell. The boiler deck had "Official Notices" in 2 height font attached. A ladder to the pilothouse was added along with the two ladders attached to the railings. The latter were the federal fire requirements after the General Slocum disaster. The main deck had the canvas coverings attached above the bulwarks, although they are hardly noticeable. Firehoses were added to the underside of the boiler deck. The firehoses were located under the hurricane deck in the early years. The change may have also been a requirement due to Slocum. Safety ropes were affixed to the boiler and engine superstructures. Lastly, kevels (a/k/a cleats) were attached to the main deck. So what is left is on the main deck at the bow. A capstan, anchor, bulwarks and jackstaff are still needed to finish the project. But again, during summer, modeling takes time. I hope to finish in August - the month Thistle (as the J.H. Crawford) was launched in 1894, and as Thistle was sent to the breakers in 1915. That I started and finished the build and will finish it in August is pure coincidence.

-
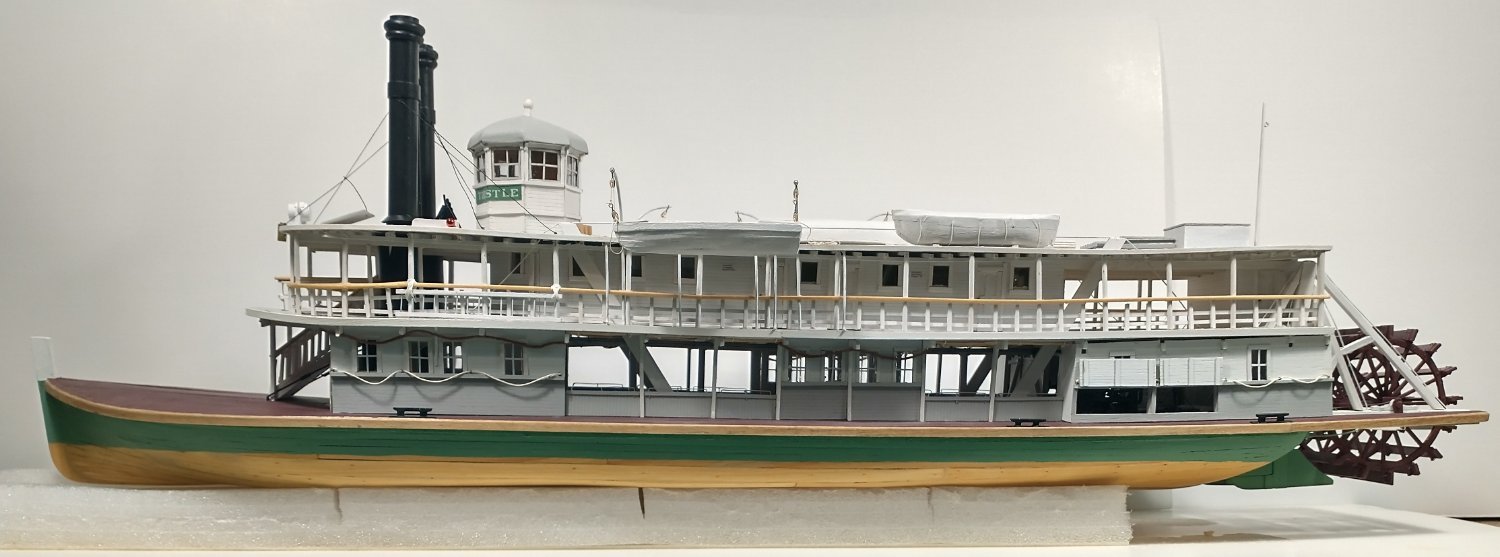
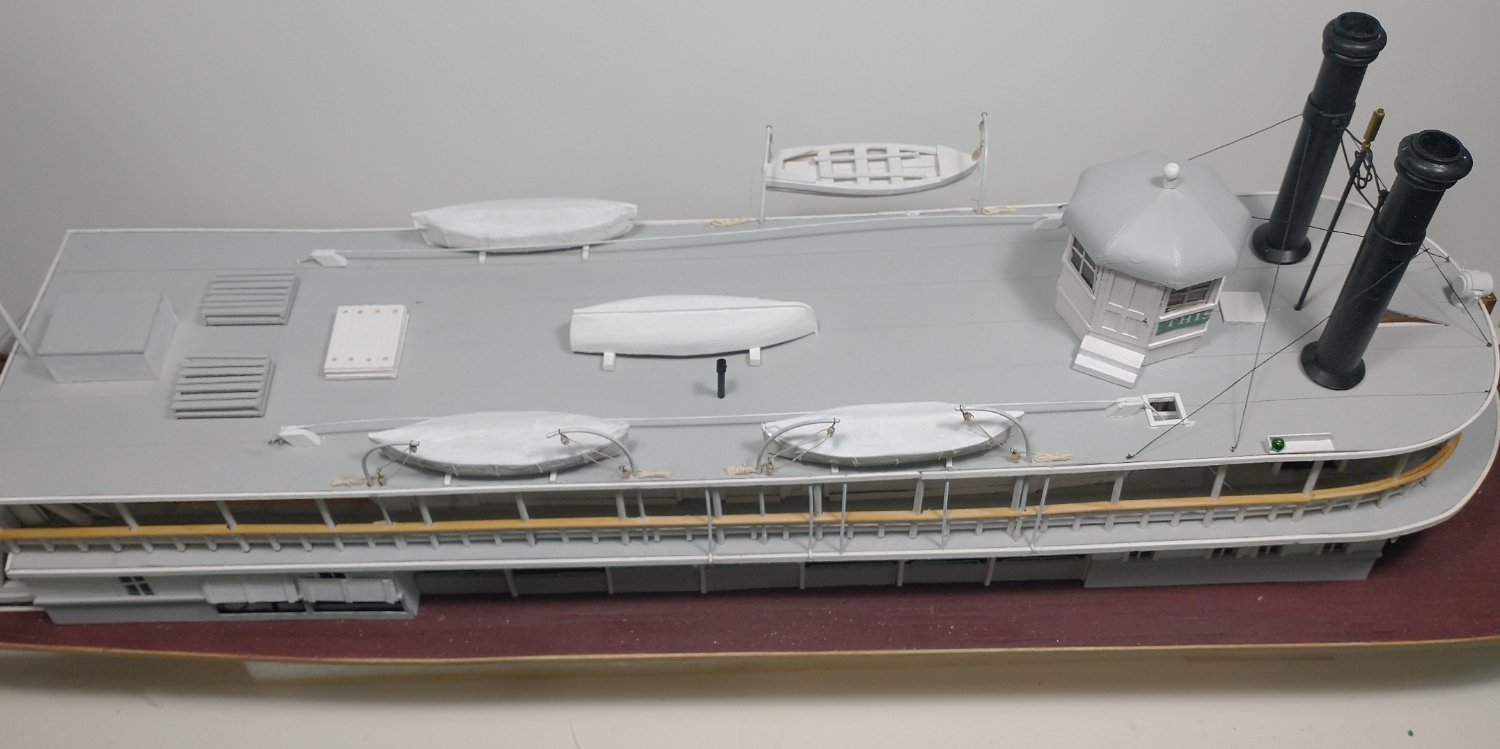
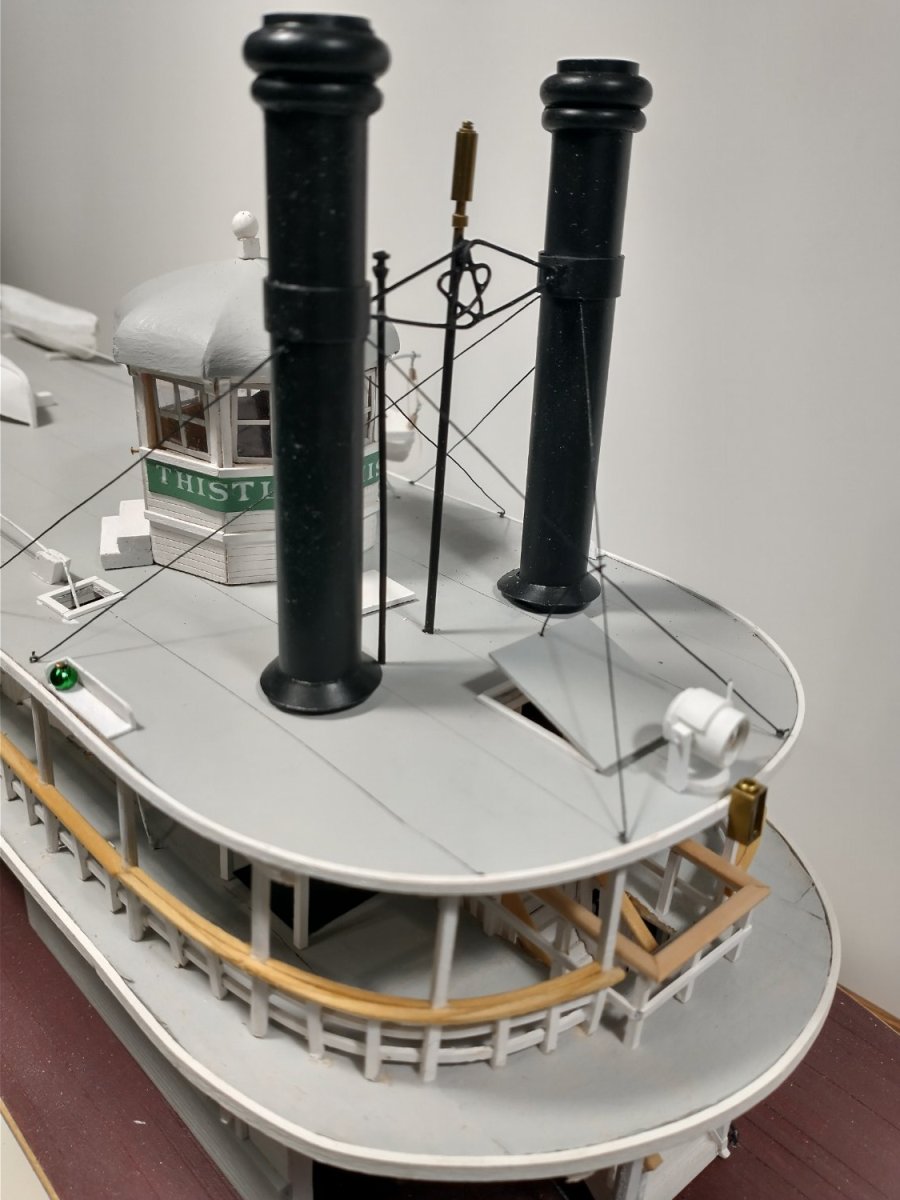
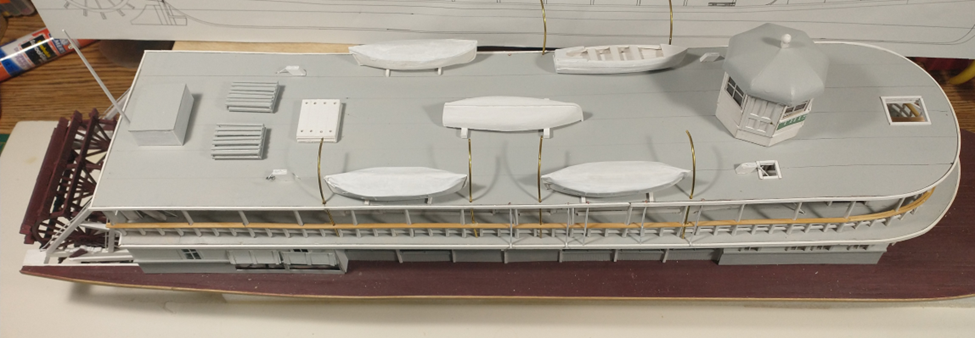
Cathead & John, thanx for the kind words. I really get little modeling done in summer but I have pretty much finished the hurricane deck except for the bell and lots of paint touch-up. After I complete that it on to final touches on the boiler deck: ladders, hoses, placards &c. Two different perspectives, the latter photo is wonky due to the photo's perspective. The stacks were a bit of a challenge. The stacks themselves are 1/2" K&S aluminum tube with the tops of half round Evergreen or Plastruct. The spreader is shaped copper wire with the whistle and vent brass tubing. There will still need to lots of things done on the main deck but Thistle looks like a sternwheeler and an end is getting closer after nearly two years.

-
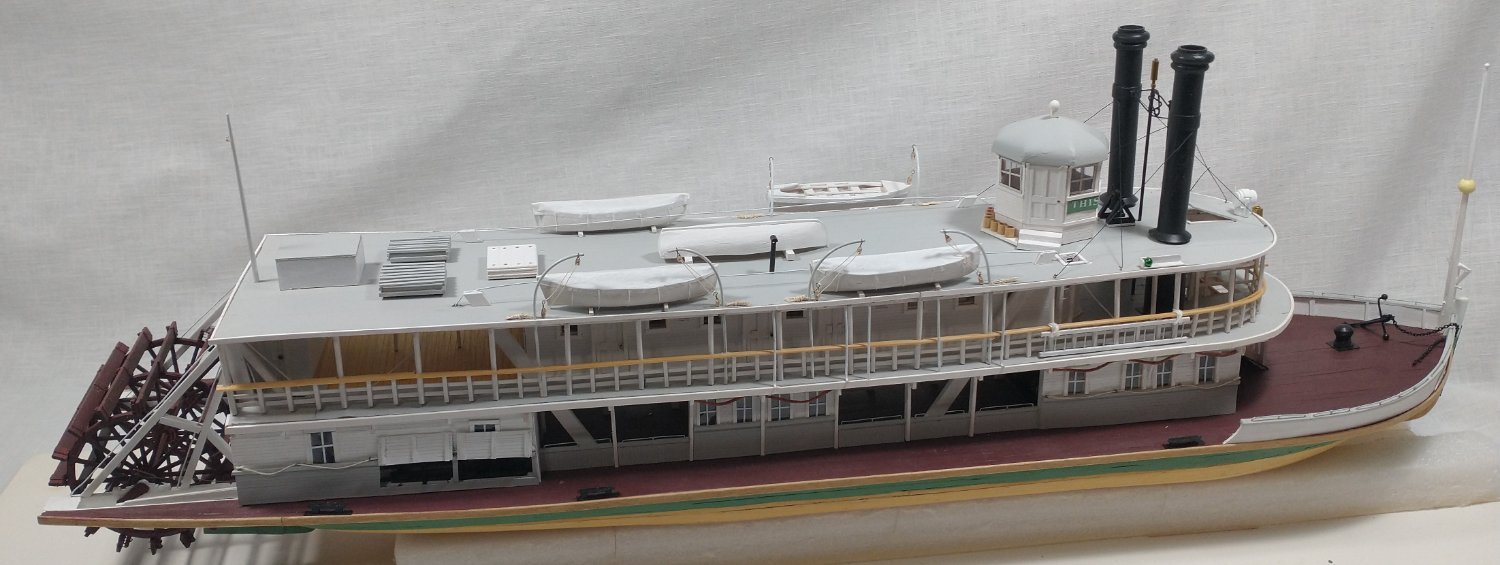
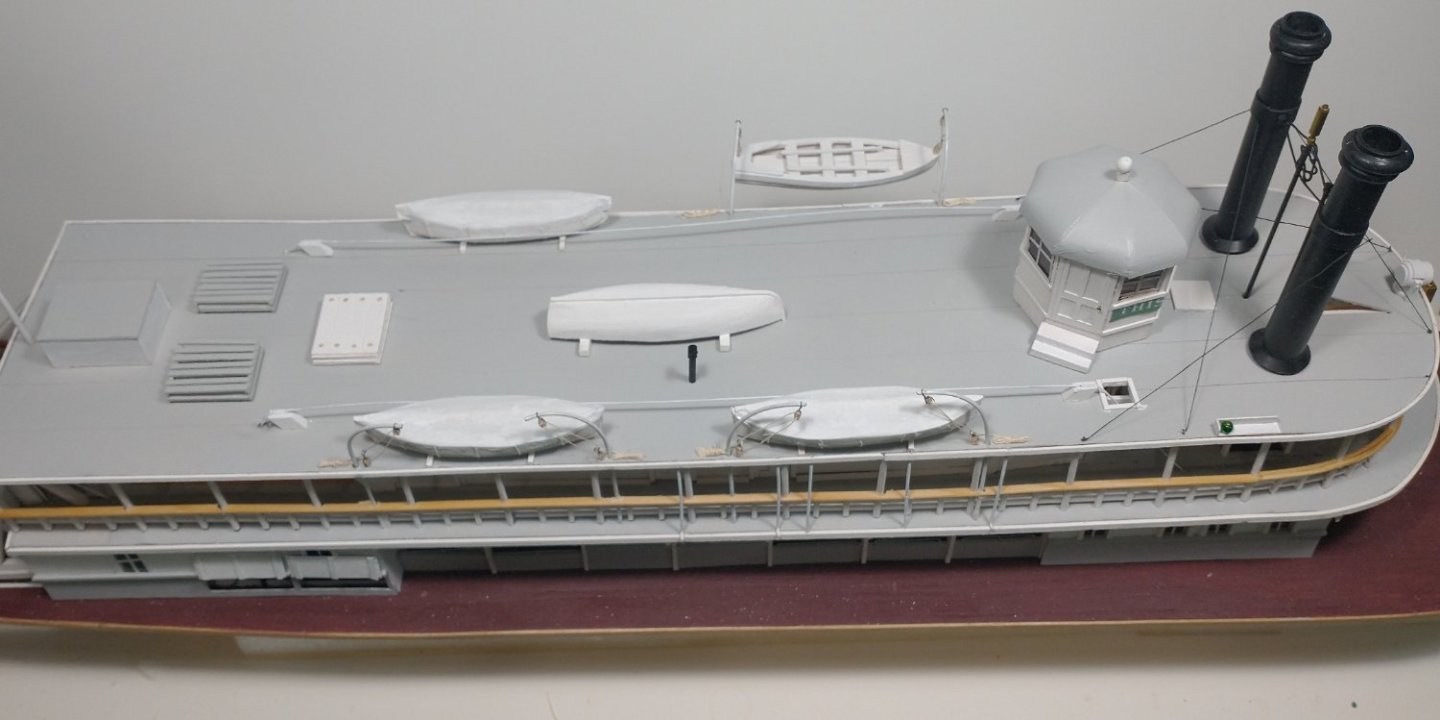
boboandlucy, Thanks for your kind comments on the pilothouse. It was a bit of a challenge to make. An updated hurricane deck. I have added the verge pole, water tank, rafts, safety planks, and five boats ,along with the unfinished davits. All are just placed and not affixed to the deck. I have lots of detail work that still needs to be done here. I did add the three drains from the hurricane to boiler deck, along with the two additional hurricane deck supports for the forward life boat. I am thinking about adding the stacks and then coming back to do the detail work. It is starting to look like a sternwheeler but still has a long way to go. Once the hurricane deck is complete, I still need to do all of the bulwarks, capstan and jackstaff at the bow. And tons of little odds and ends that I have yet to start.
-
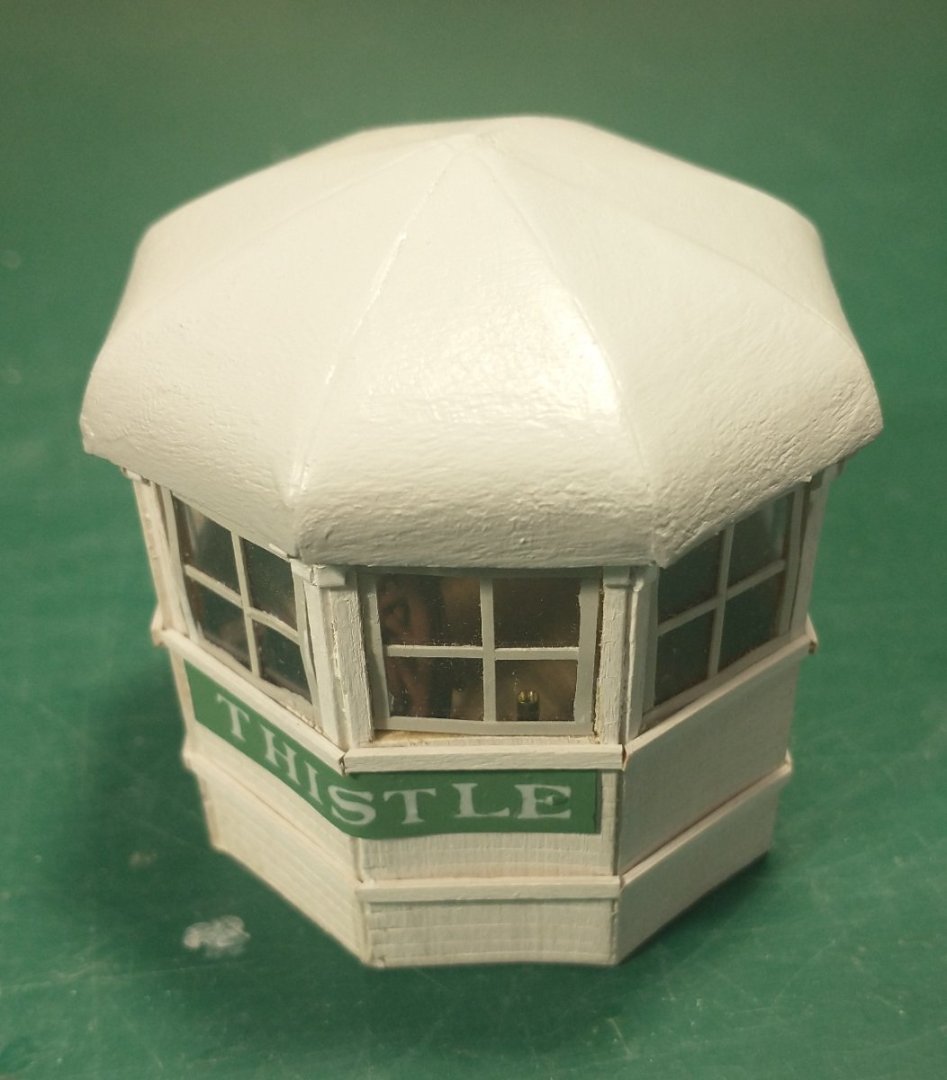
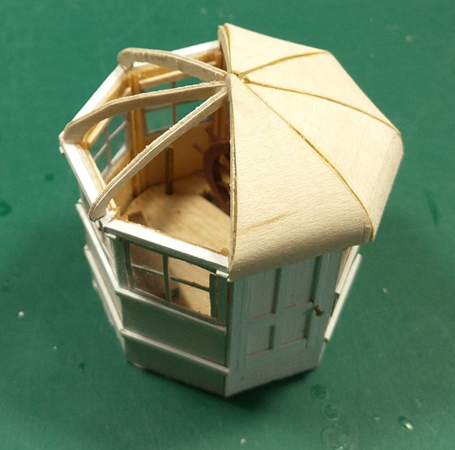
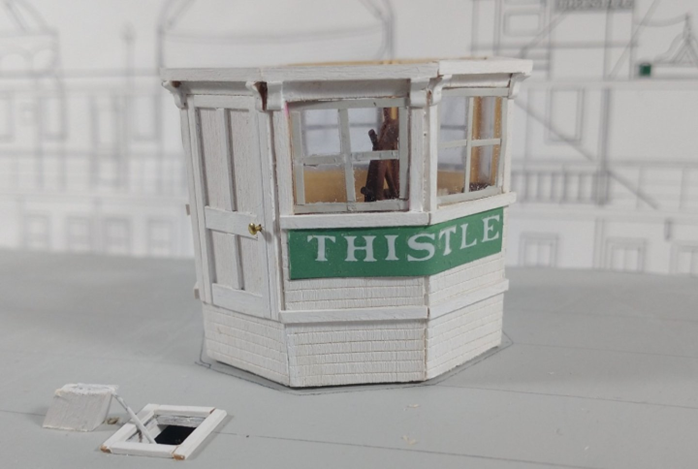
The pilothouse roof is on. For the roof supports I used 1/32 birch plywood. This is much stronger than the 1/32 basswood that I had used for the superstructure panels. The roof panels are 3/84 maple veneer. I soaked then in water so I could bend them at the base of the roof. The panels were standard with a little trimming to fit. The finished product after sanding, sealing and painting. I still need to add the filial on top and make the stirs to the pilothouse For the next project, I will start at the stern of the deck and build all of the attachments; verge pole, water tank, rafts and safety planks, and five boats. Some of this will go quickly but the boats may take some time.
-
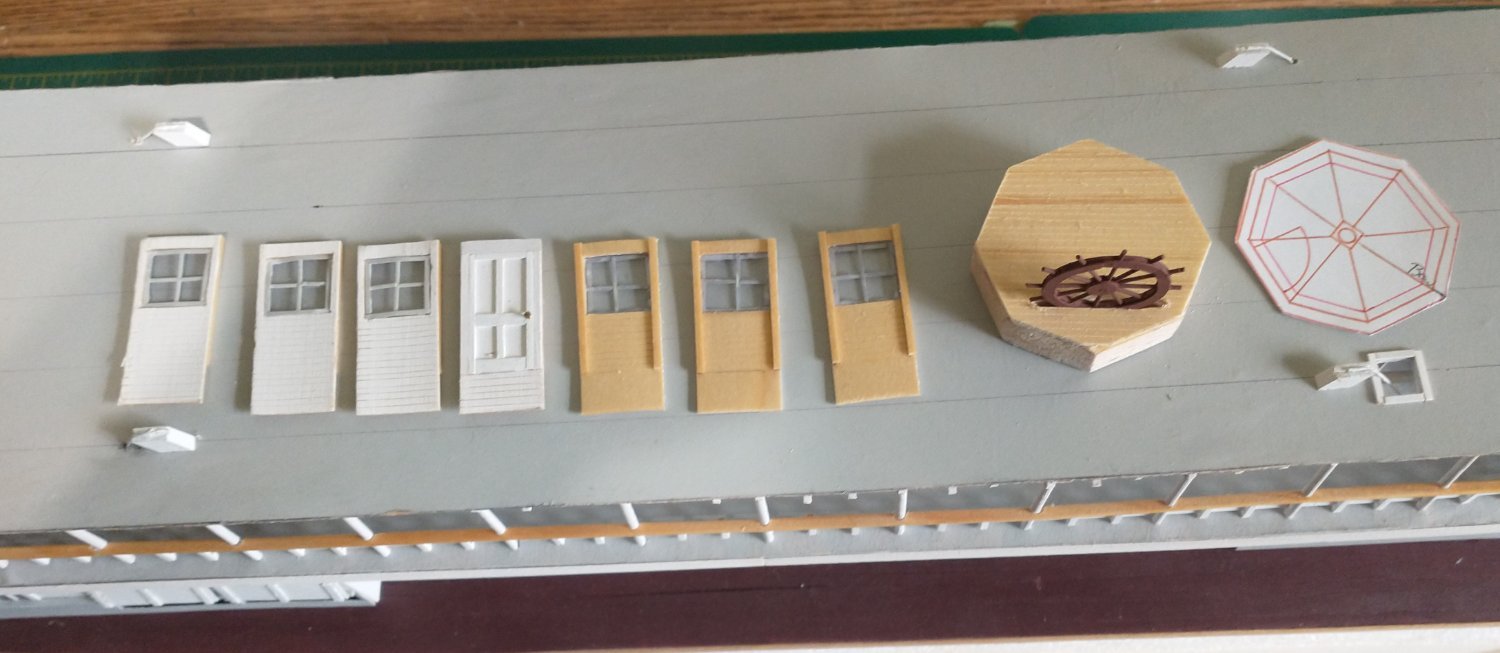
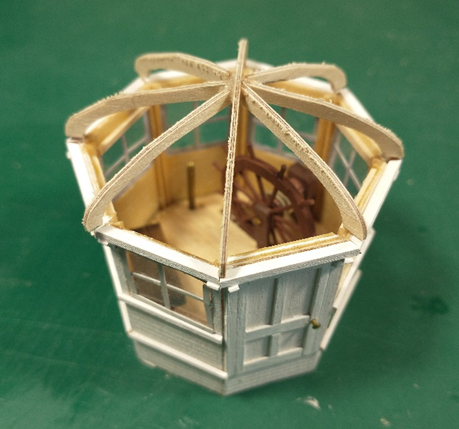
I assembled the pilothouse. Again, took longer and several attempts. Still not really satisfied with it but I will now finally start the roof. I still need stairs to the door. The interior photo shows the wheel, part of the lazy bench and the radiator. Speaking tube is hidden in this photo. I am not certain if there was a compass. There were references to Thistle missing its landing in the dark or in fog so I wonder if there was one or if it was not used.
-
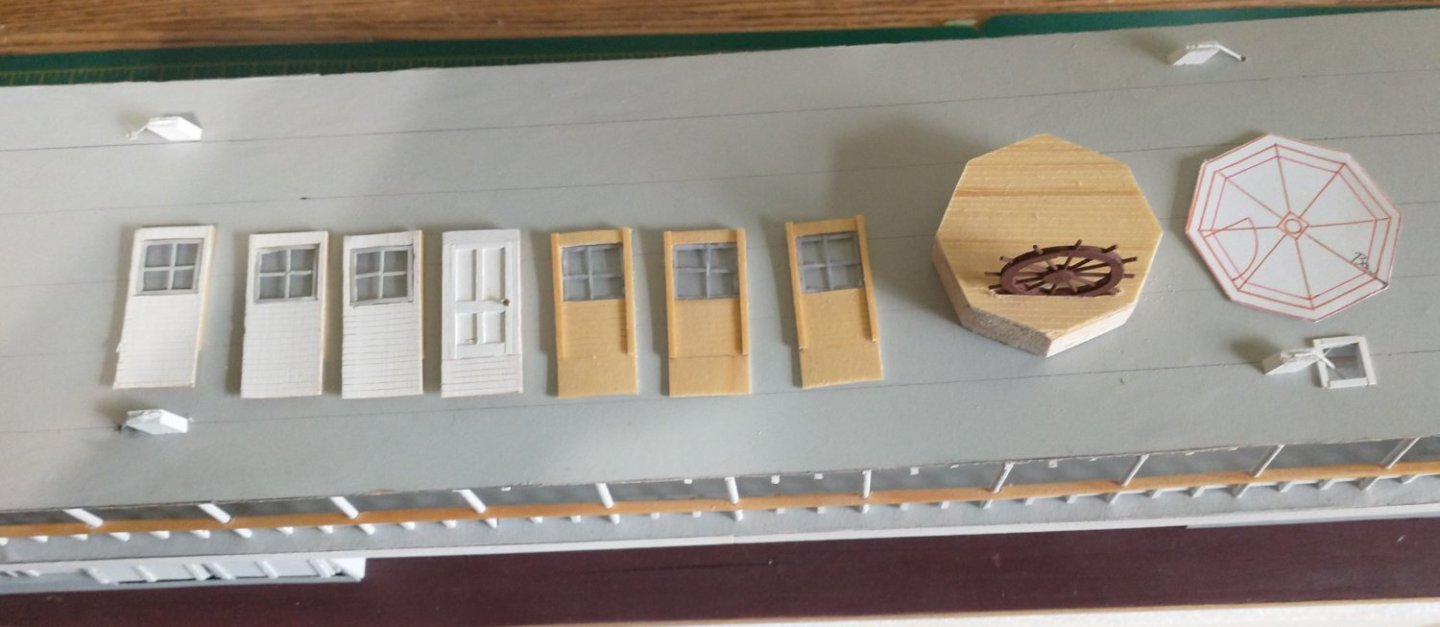
I have built the panels and the base along with the wheel. The wheel was "about six feet across" and Bates said 2 spokes per foot diameter so I needed 12 spokes. This looks about right for the number of spokes per photos. Photos also had the wheel about mid-height of the pilothouse windows so I needed to cut into the base to shorten the height of the wheel. Several other photos had the pilot standing outside the pilothouse on the port side while steering. The wheel is close enough to the windows to allow this. I intend to affix the panels to the base, add in all of the pilothouse parts and pieces (wheel, lazy bench, radiator, speaking tube &c.) and then start on the roof. I expect the roof will take a few attempts before I get it right. Some photos did show a visor but I have found none with breast board. I will probably include neither as the pilothouse windows will be closed.
-
G'Day! I am back from over five weeks with Tassies, Aussies and Kiwis. [a/k/a my family duties] The countries are wonderful but it is really the people that are the most wonderful. But care must be taken at the pubs with the locals and the consumption of "stubbies". It may be another week or so before I can dig out and get back to modeling.
-
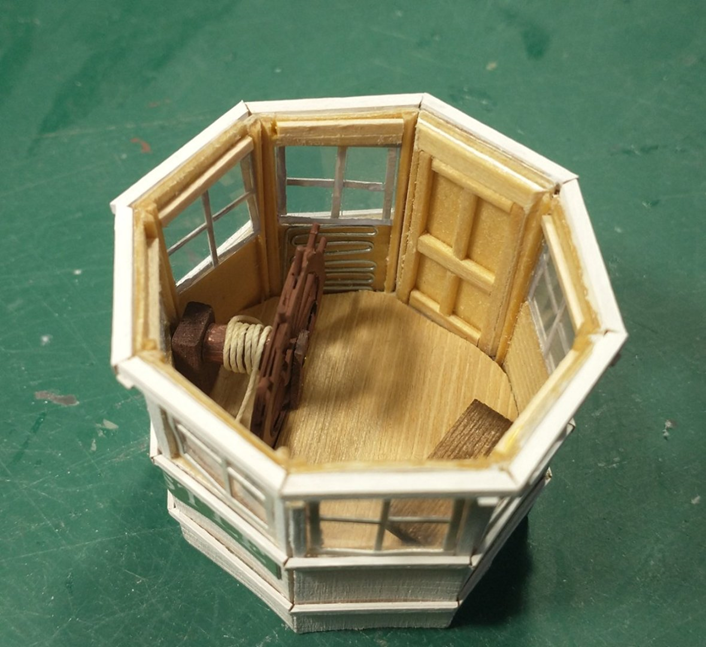
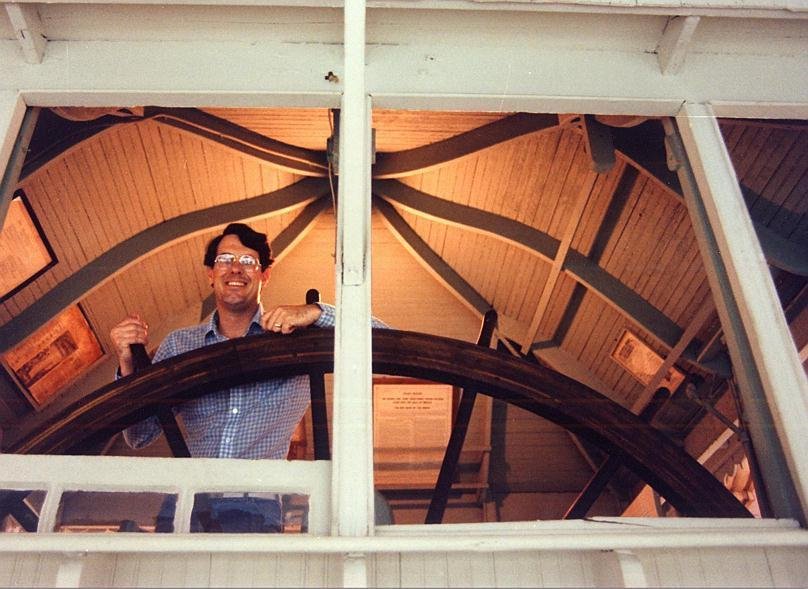
I have started on the pilothouse. I will break this project into two parts, the roof, and everything else. This is how far I have gotten on the "everything else". No photos yet because... I started with an eight-sided balsa and basswood floor base that will provide support to the panels. The floor and base need a cutout for the described "about six feet across" wheel which is about 1/3 below floor level. The actual Thistle wheel may still be at the Oshkosh Yacht Club, but I have not followed up on this lead yet. I had built the eight panels, seven with windows and a single door panel. It will be interesting to properly attach those into a hex layout even with the aforementioned base. Unfortunately, I am not satisfied with the initial results, especially the windows. Back to the drawing board and a re-do. The unstarted interior will be fairly simple: wheel, lazy bench, compass, speaking tubes, pulls for the bell & whistle, and a radiator. There was not a stack for a pilothouse stove so I will go with a radiator. Period radiators appear to be pipes run back and forth as on Yukon steamboats rather than the traditional 1920s free-standing radiator noted on Moyie. The interior will be boiled linseed oil instead of the sea green paint espoused by the Moyie preservation. The roof will be a challenge and I will save that for last. There are a few photos that will assist me in the roof process. From Online Steamboat Museum Dave Thomson Collection [Steamboats.com/museum] an excellent photo of the underside of the Golden Eagle pilothouse. Although this is a square pilothouse, it gives a great idea what the underside of the roof a real pilothouse would have looked like. No idea who the "pilot" at the wheel is. Note the legal requirements posted to the ceiling in order to passive-aggressively fulfill federal requirements of required certificates etc. being conspicuously posted. I have extended "family duties" that will prevent me from working on the model for at least the next several weeks. But I will get back to things as soon as I can.
-
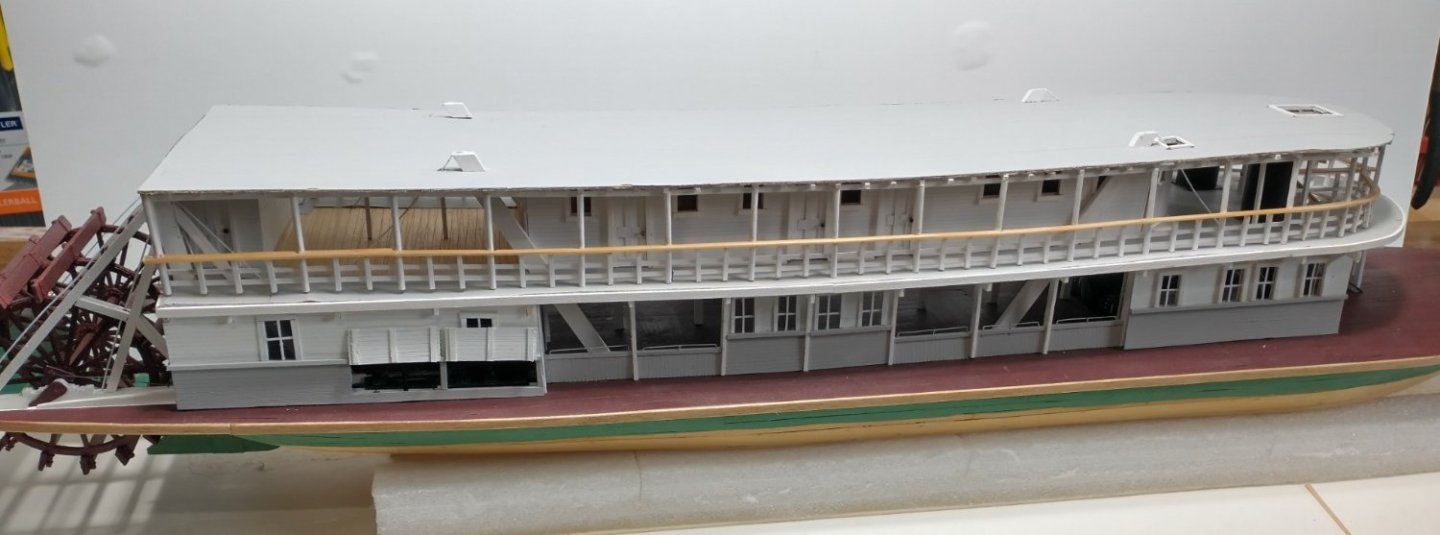
The hurricane deck is now attached. I used Midwest 1/64 birch plywood, scored and painted white on the underside, spray adhesive and tracing paper painted grey on the top. You cannot tell from the photo but the top is lined to simulate the canvas seams. Now I need to build and then add numerous things to the deck: stacks & pipes, a bell, pilothouse, boats, rafts, water tank, verge and numerous other small items. The I can add the hog chains and complete the facing.