MORE HANDBOOKS ARE ON THEIR WAY! We will let you know when they get here.
×


KennyH78
-
Posts
248 -
Joined
-
Last visited
Content Type
Profiles
Forums
Gallery
Events
Everything posted by KennyH78
-
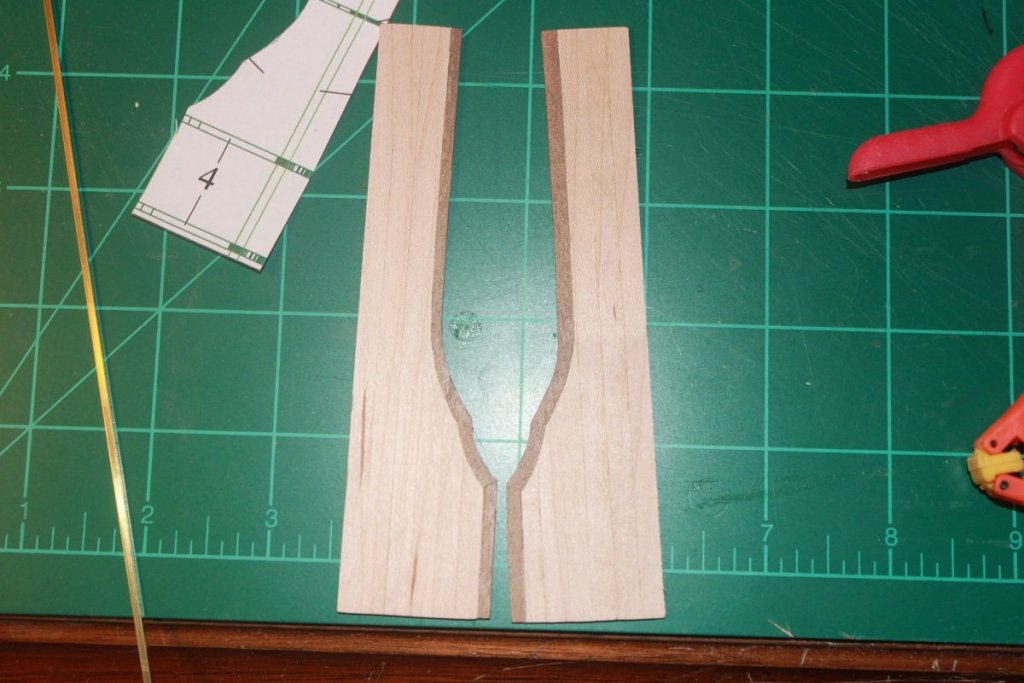
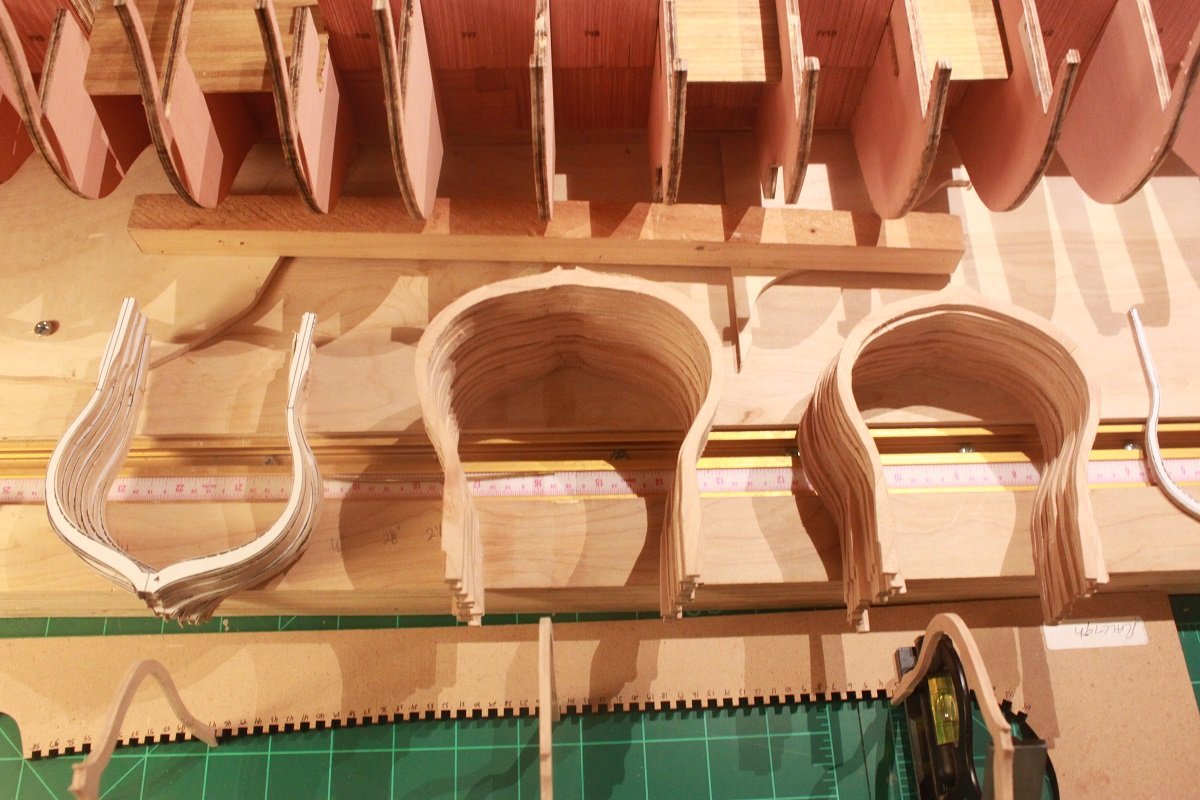
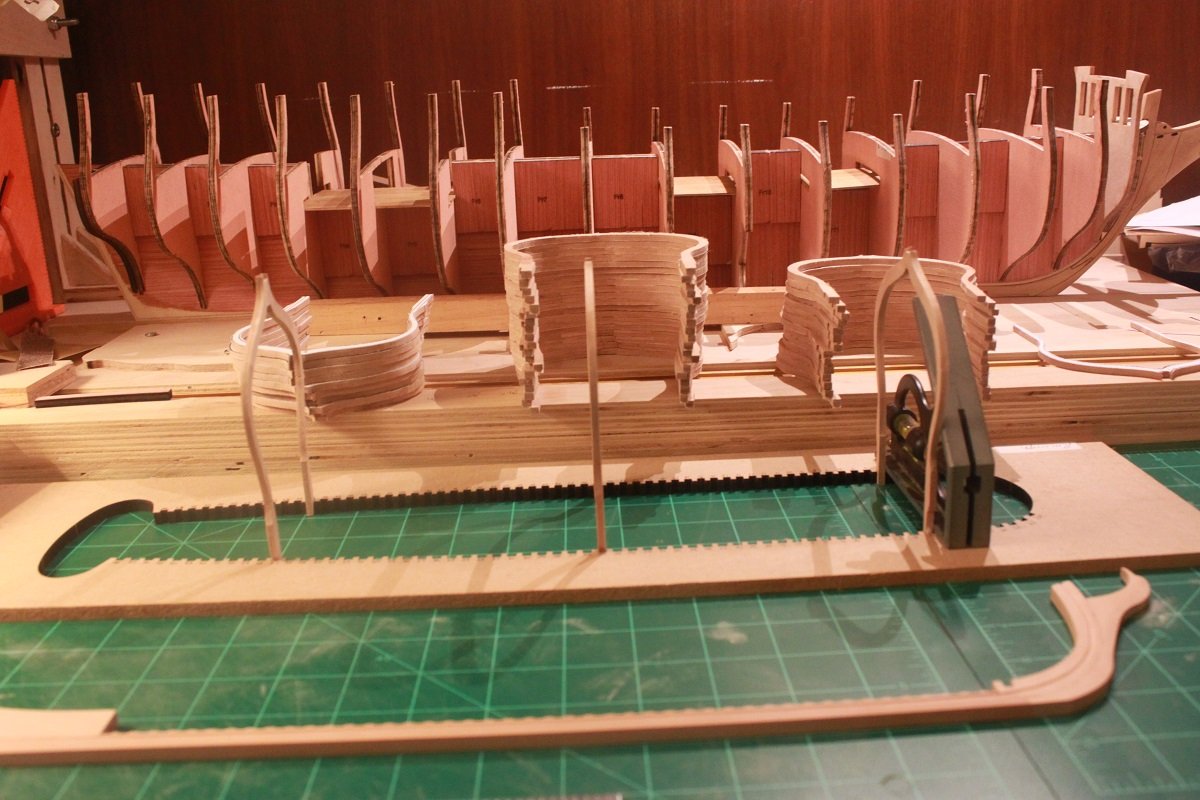
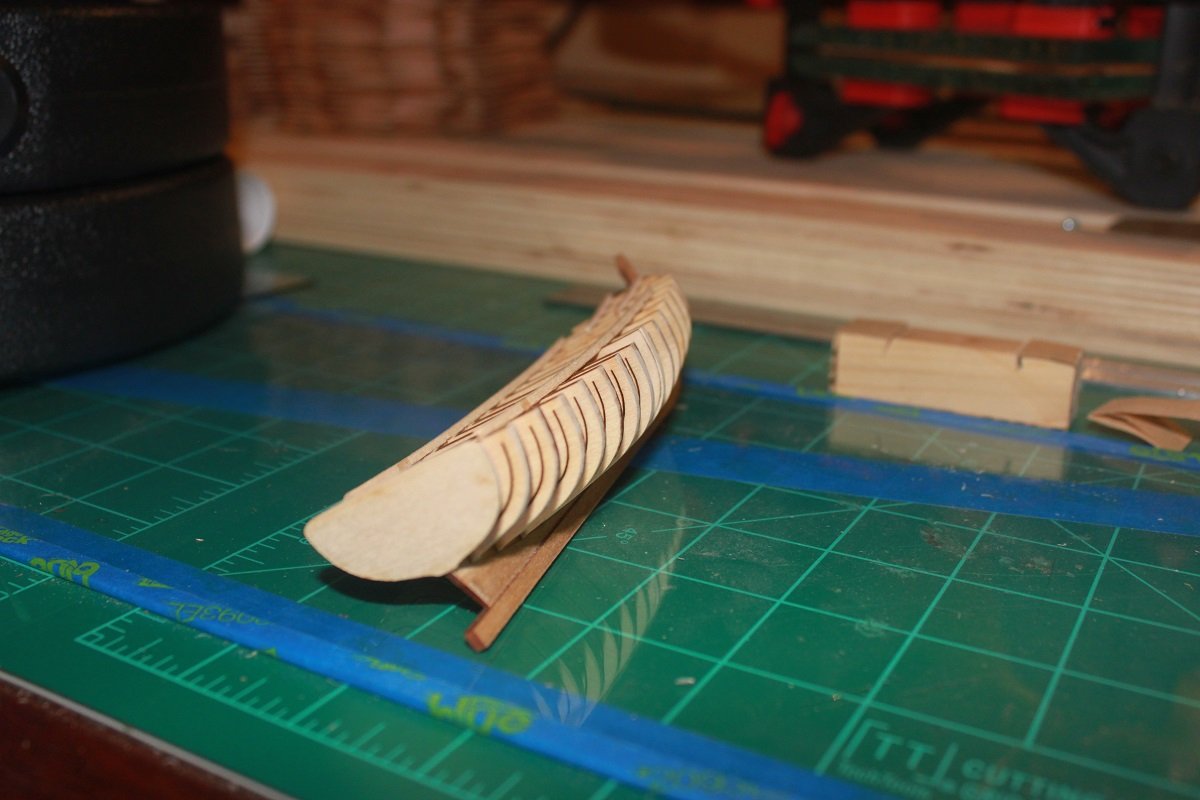
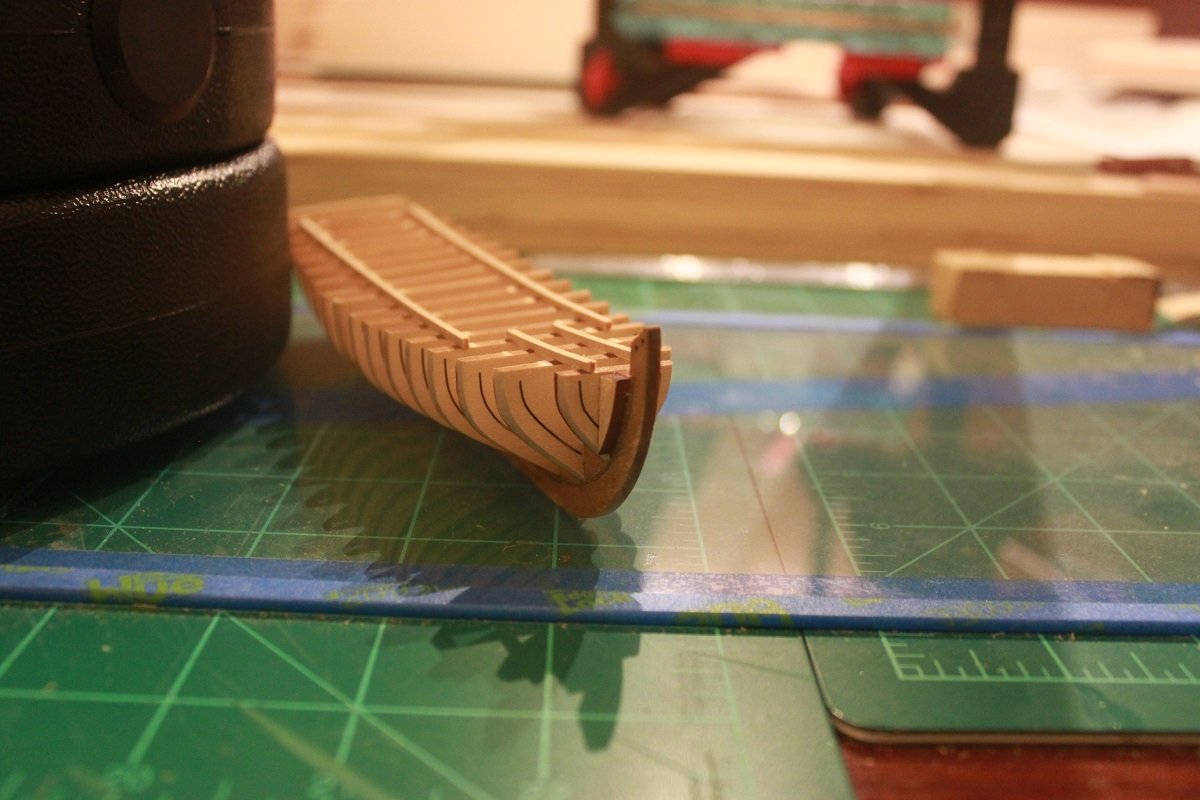
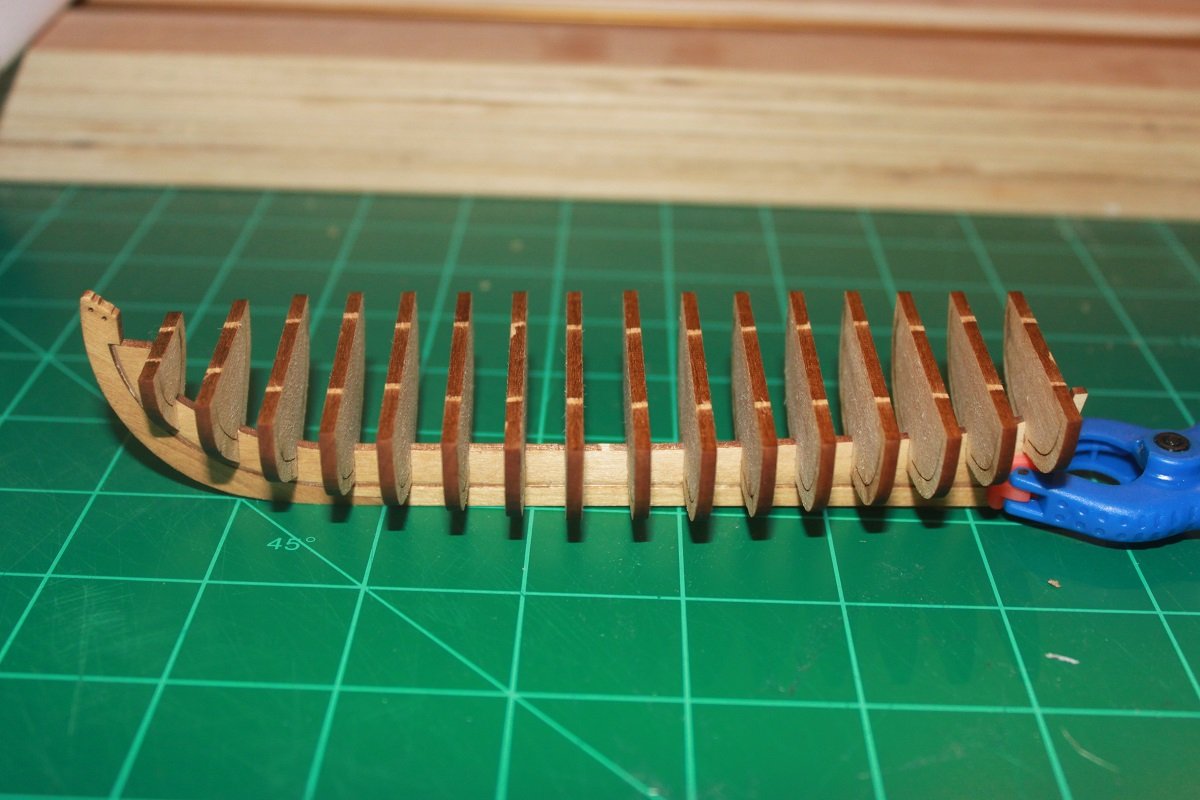
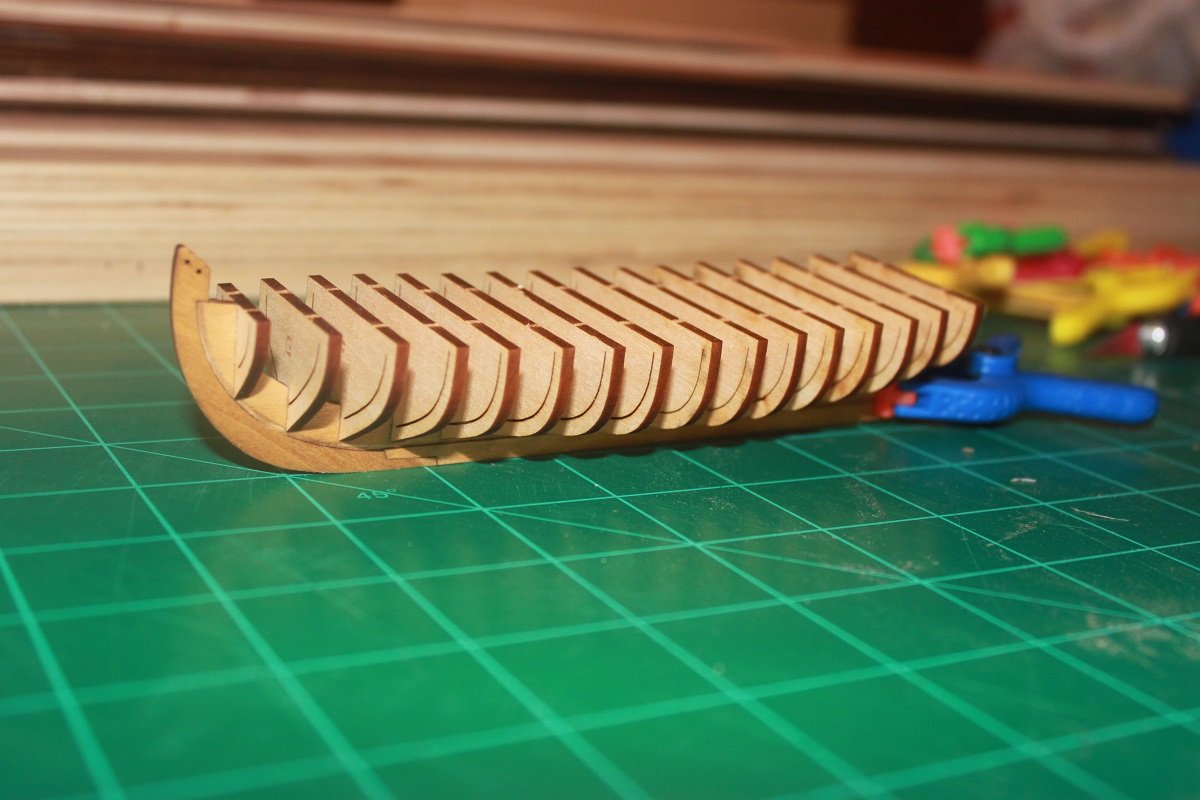
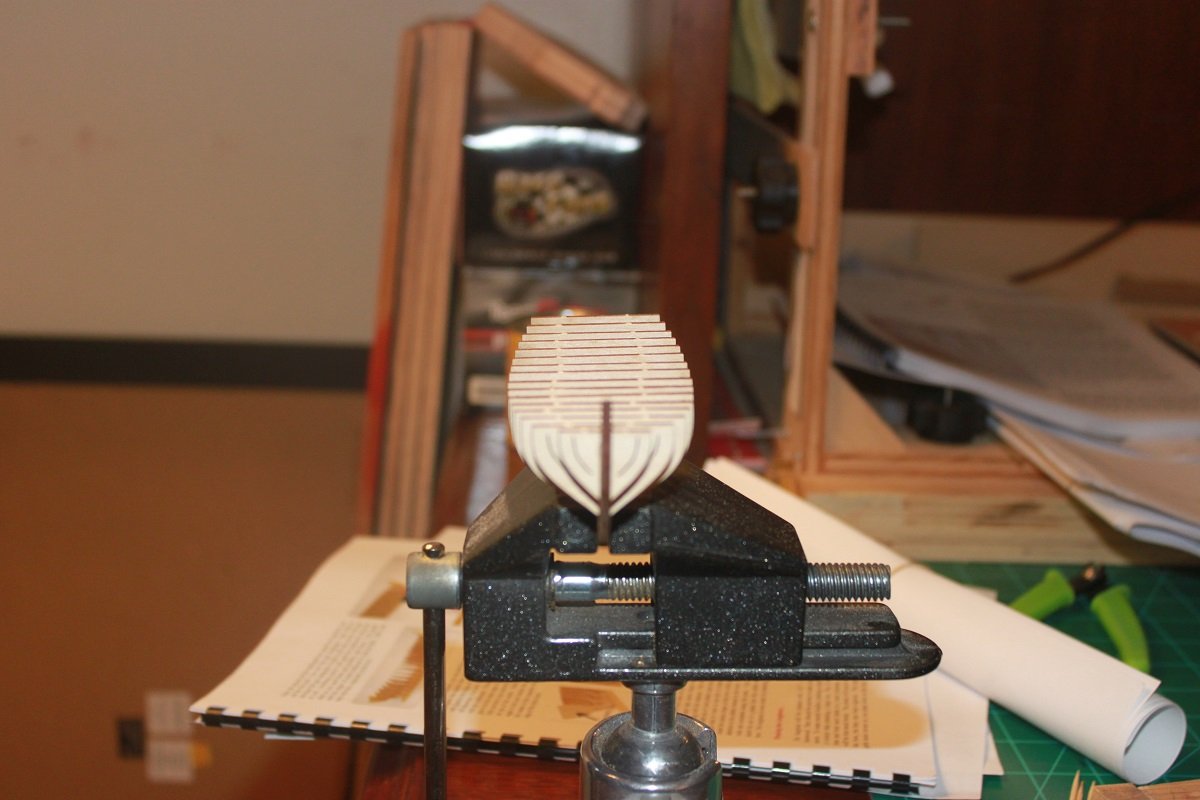
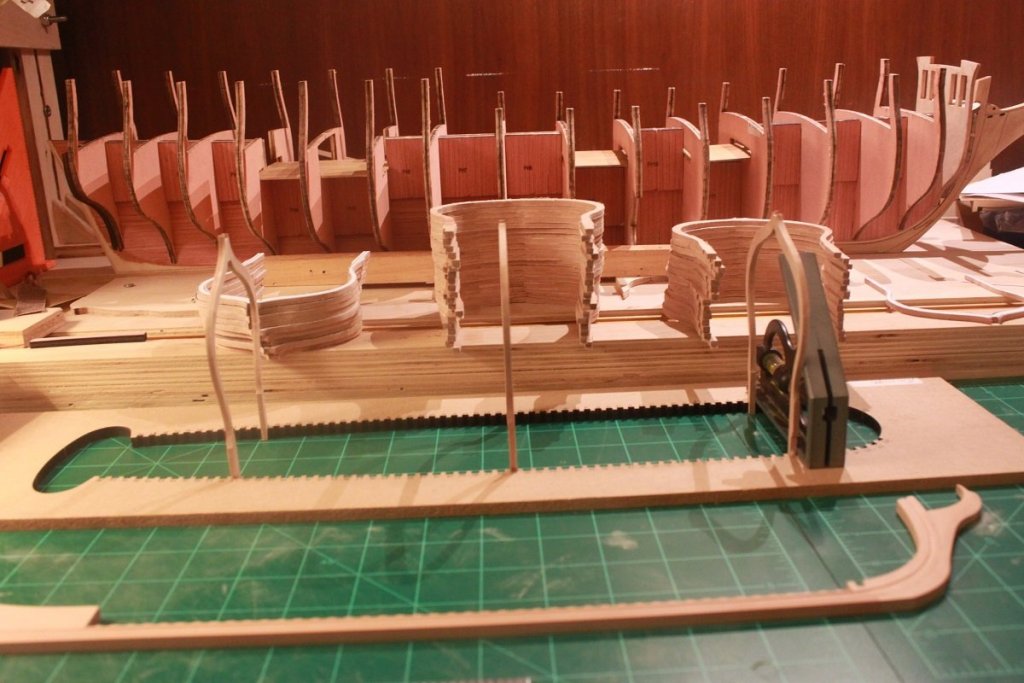
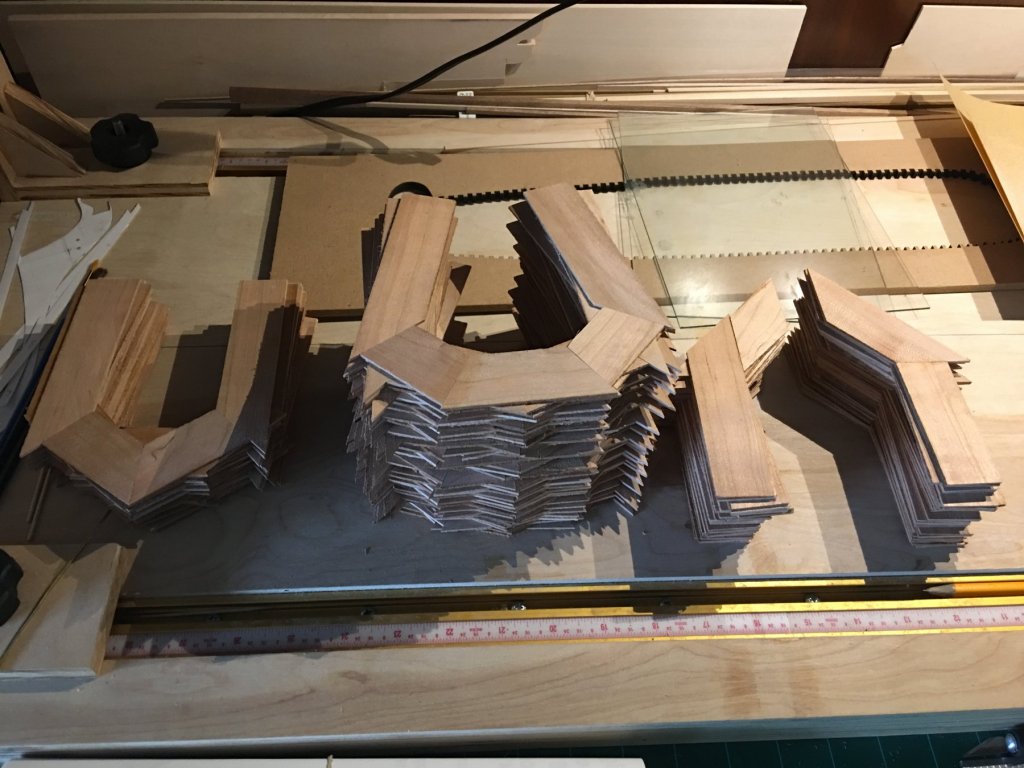
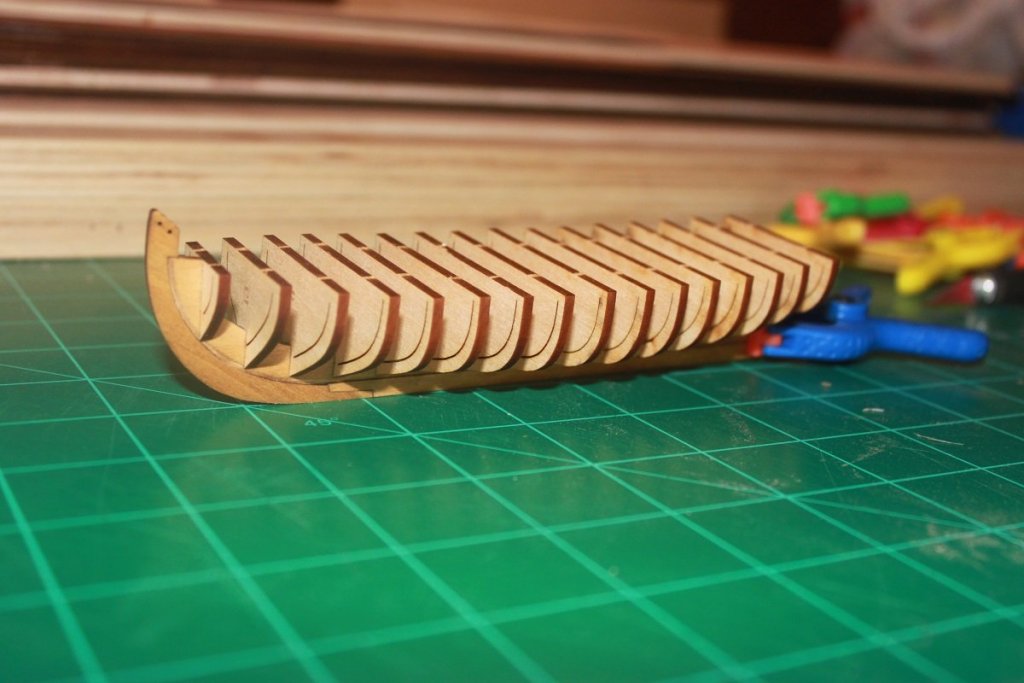
 So for the last 3-4 days I have been making the saw fly. All of the square frames are now shaped to within 1/16" (give or take a little) of their final shape. I used a combination of the scroll saw, disc sander and a mini drum sander chucked into my bench top drill press to get them to this point. I have also installed frames 3, 25, and 47 into the frame jig. Once the glue is dry on those three frames, I will add the keel assymbly to it and start installing the rest of the square frames. The half and cant frames will be cut out and installed once the square frames are all installed. I also need to redo frame 2 since I totally missed that the bottom of the frame is not whole. The pictures can explain it better than I can. So without further ado, here are the pictures as she sits now. As always, any and all comments are welcome.
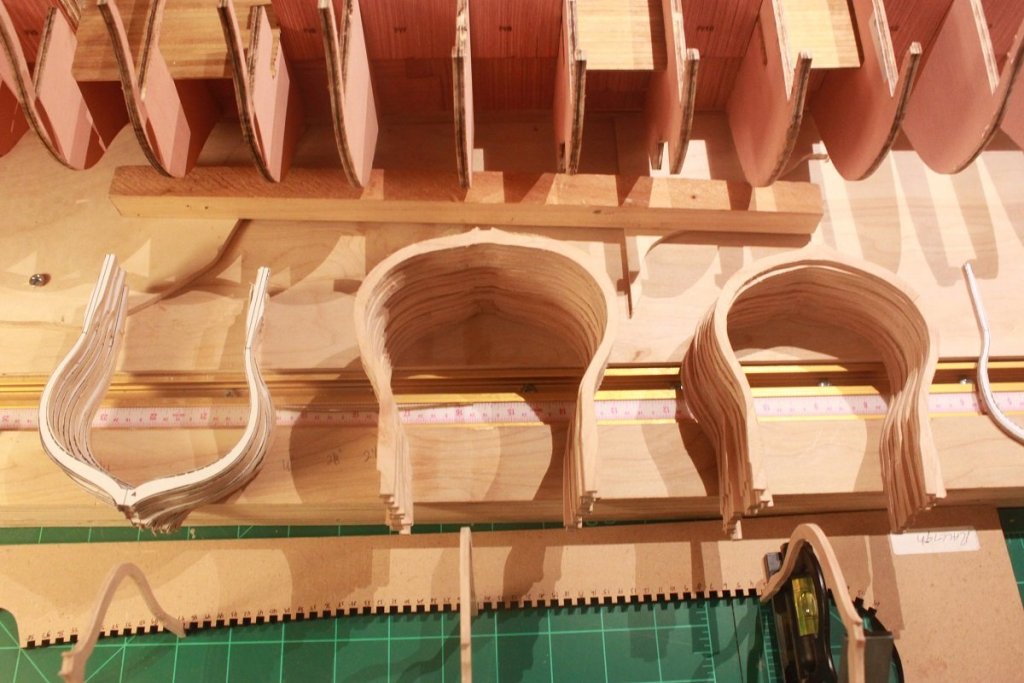

- 47 replies
-
- 11
-

-
Dan, thanks for the tips. I have already shaped the stem and deadwood. I do plan to check the rabbet and deadwood to ensure that the planking will sit nice and flush. Thanks to to everyone else for the likes
-
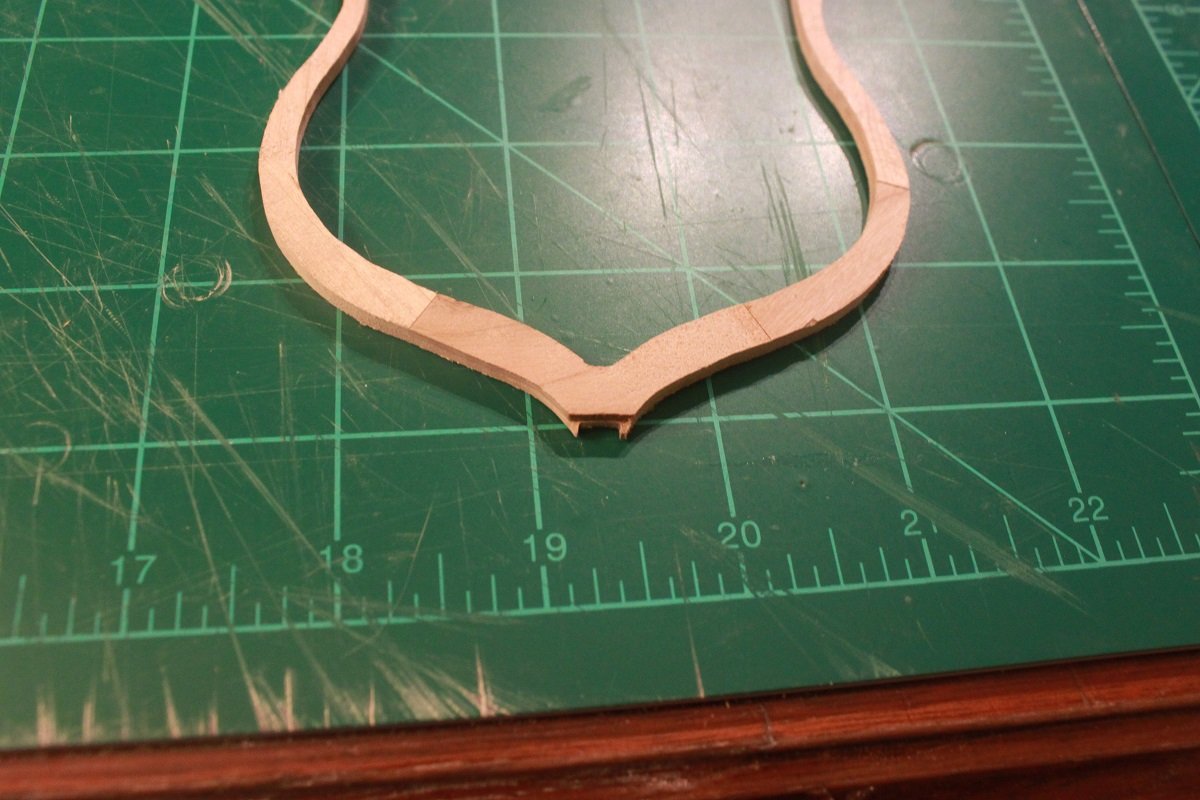
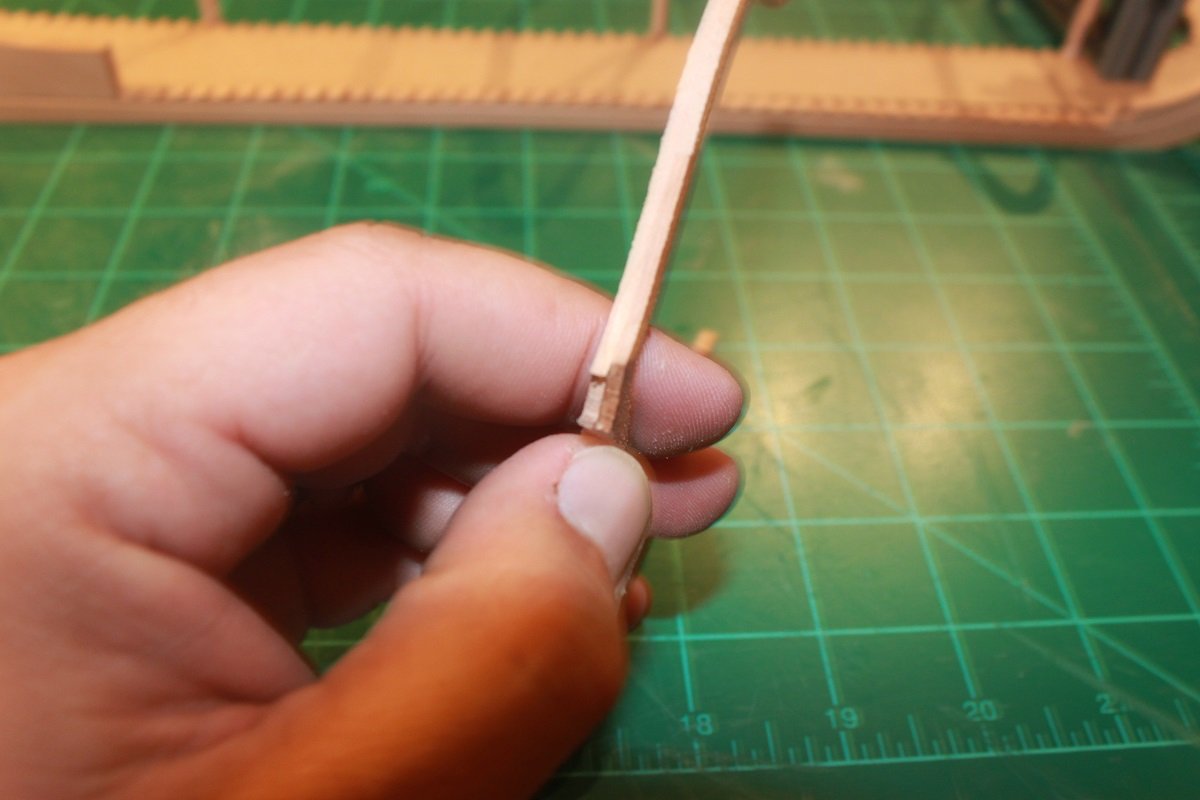
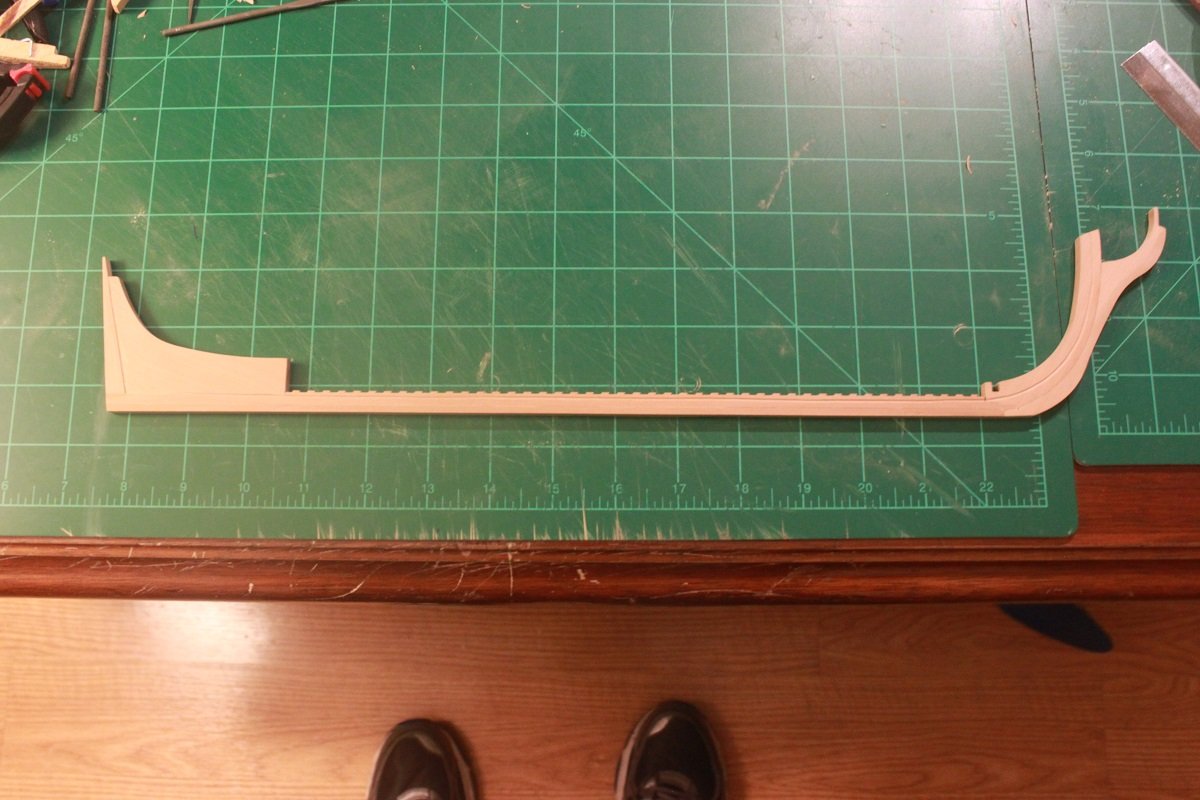
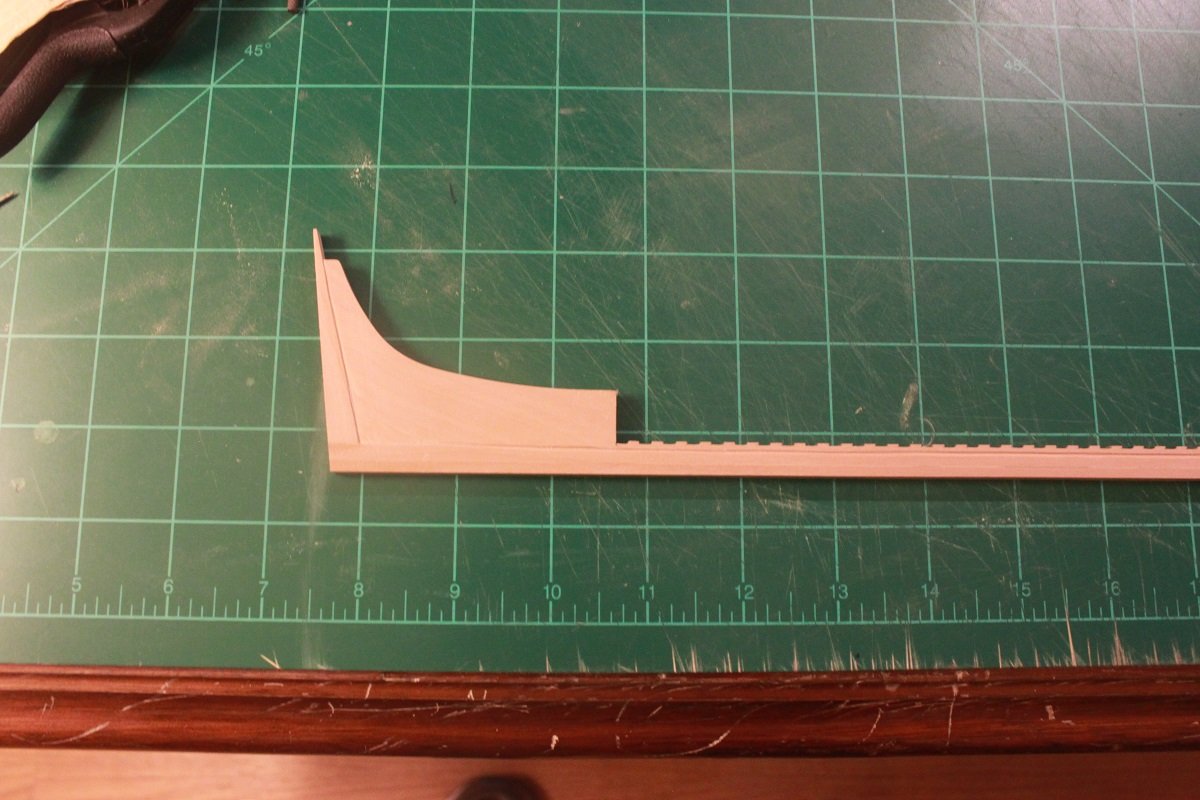
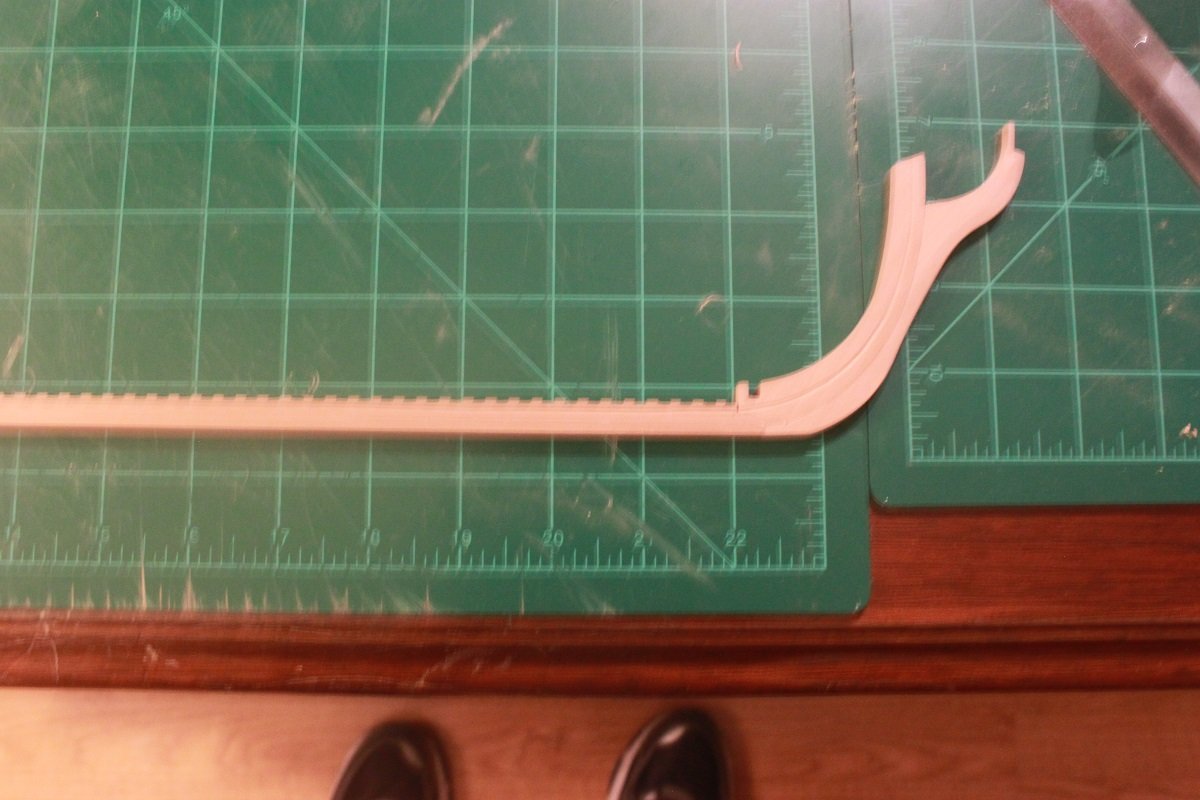
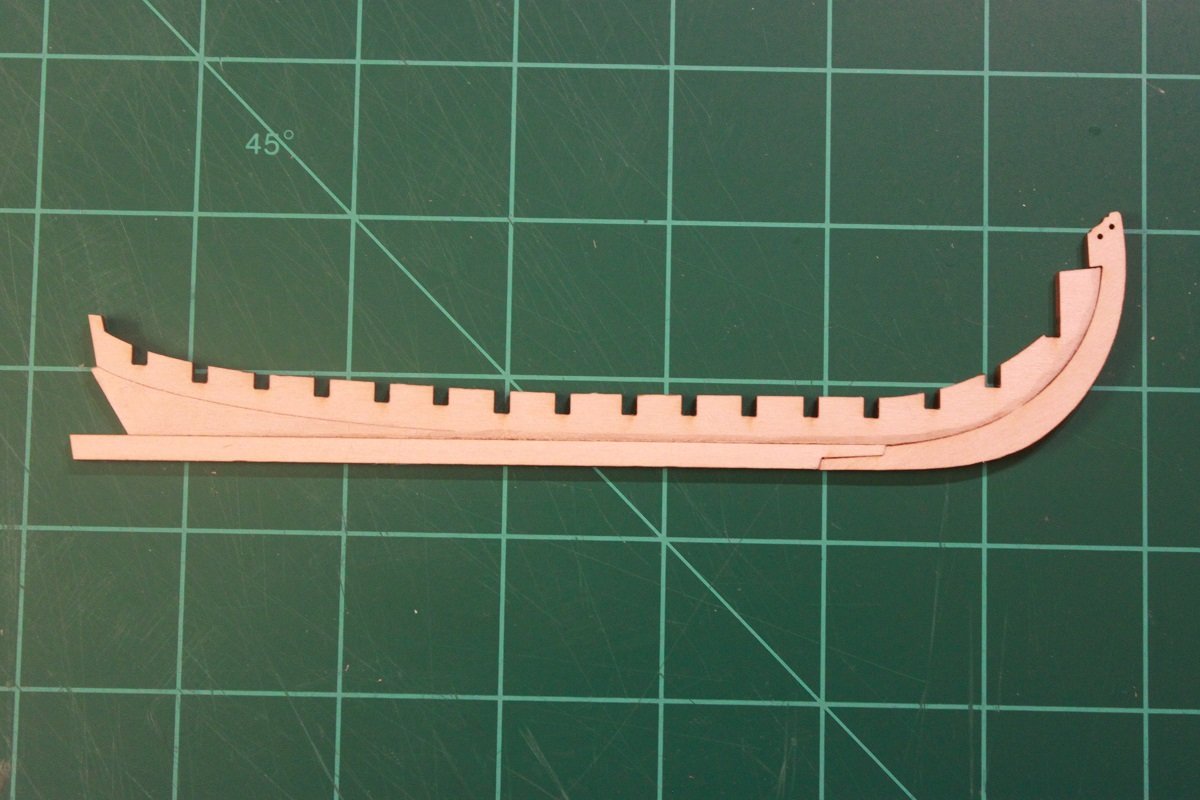
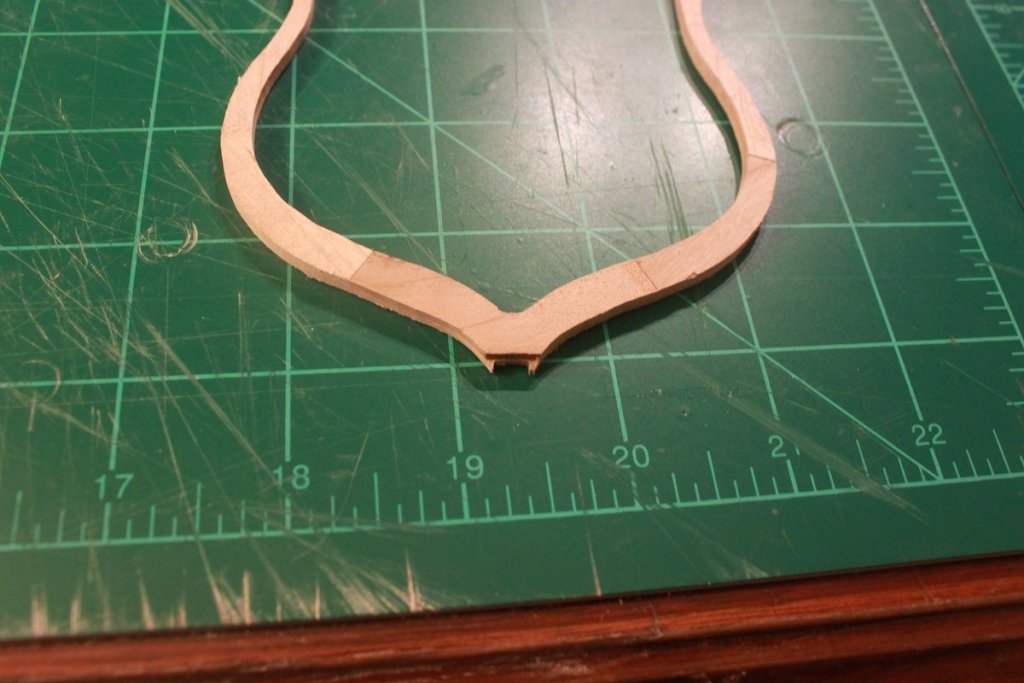
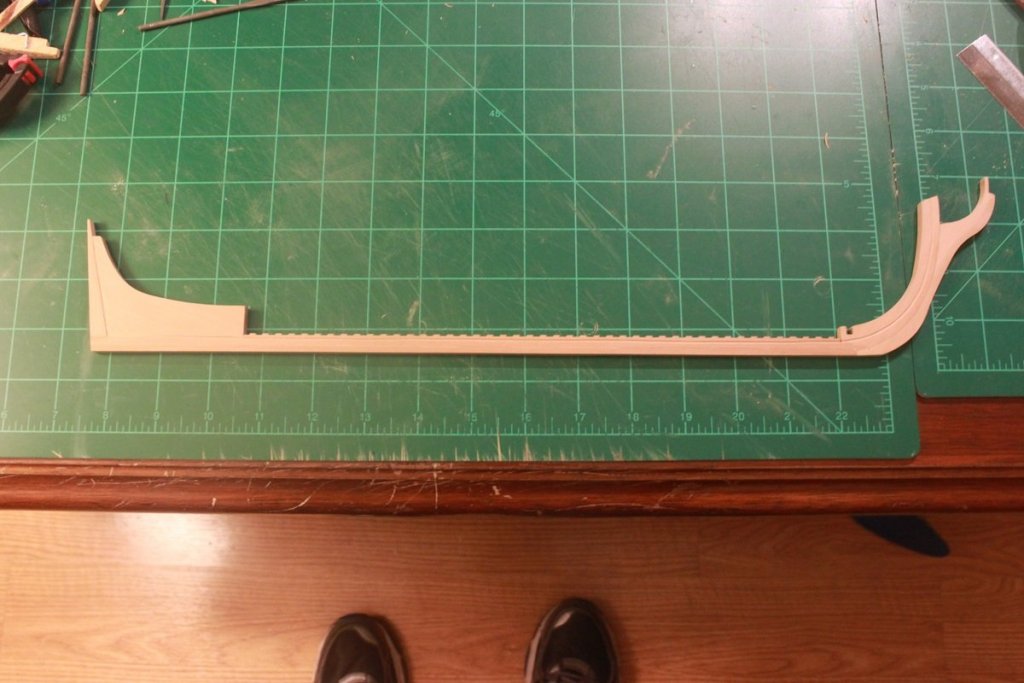
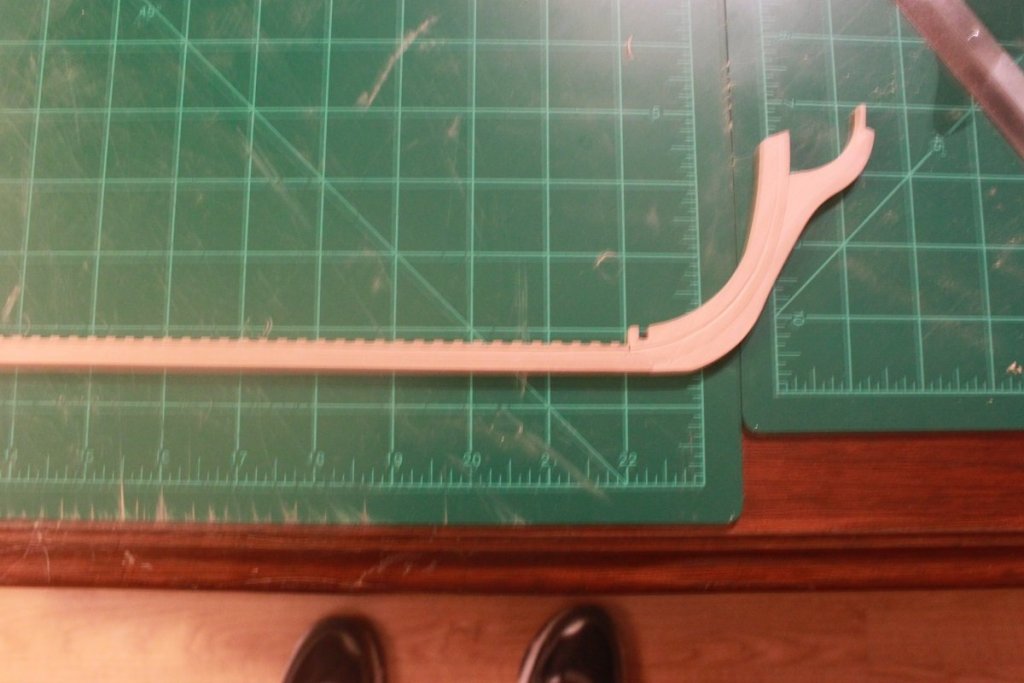
Before cutting any of the frames, I decided to make the backbone. It is now complete, I was terrified when it was time to cut the rabbet, but a V-gauge chisel made it easy. It's not perfect, but I'm happy with it. So without further ado, here are the pictures. Tomorrow I start cutting frames and I'm hoping I don't screw any of them up, but I am expecting to have to remake at least a few of them.

- 47 replies
-
- 10
-
-
I have a short progress report, planking of the hull has started. I am taking my time with this and will post pics once the hull is planked. I currently have 1 and 1/2 planks installed on the port and starboard sides.
- 50 replies
-
- 2
-
-
- 18th century longboat
- model shipways
- (and 1 more)
-
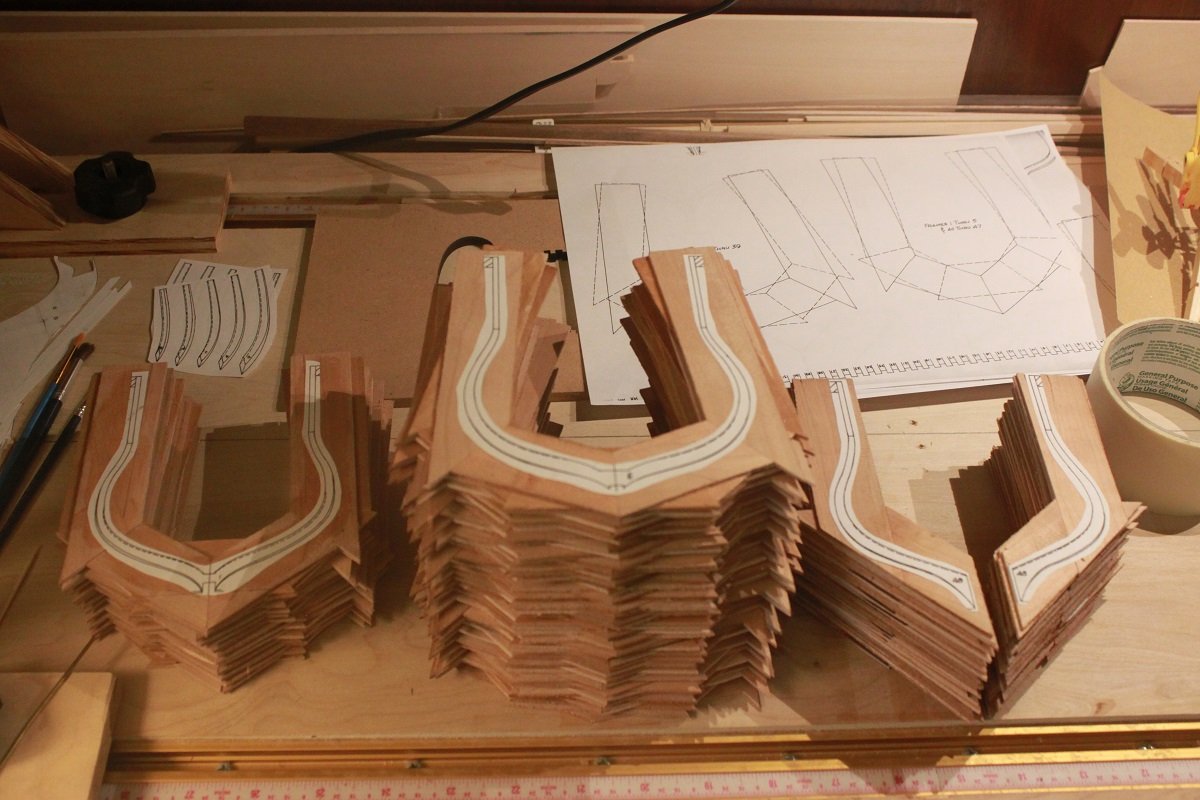
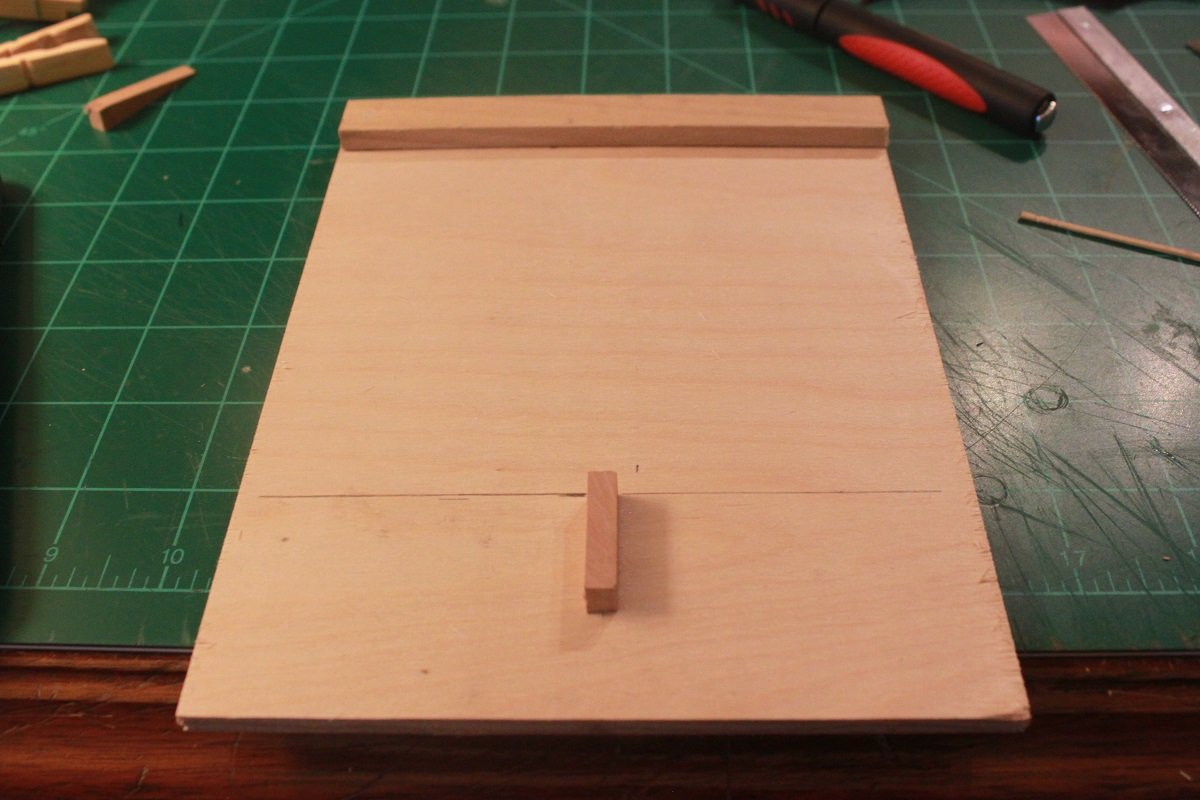
All of the templates are glued to the blanks. I used rubber cement, I figure if it worked for Hahn, then it should work for me. I don't think that any of the paper templates stretched, but I plan to check the frames against the plans once they are cut. I also built me a jig to ensure that all of the frames are cut to the same height. I plan to start cutting the frames in the next day or two (work and life depending). I have also started to remove all of the laser char on the pieces for the keel. Pics of the keel will be posted once that is all cleaned up and glued together. So without further ado, here are a couple of pics of the jig and the current state of the frames.


-
Mark, Since I am very paranoid of screwing something up and not having the plans intact to fix it, I went and had a full set of the plans copied and then I am copying the parts that I need for the frames and such from those on my printer/copier at home. I'm pretty sure that I will have to redo a lot of things before the Raleigh will be completed.
-
Made some progress, all of the cram blanks are glued up. Tonight I will start transferring the patterns of the grams to the blanks. I plan to cut them out and glue them to blank with rubber cement. Then it will be time to make the blanks rounded on the bottom and squaring them up for height in a keel/frame height jig. Before long, I just may be able to start laying the keel and building the hull.
- 47 replies
-
- 11
-
-
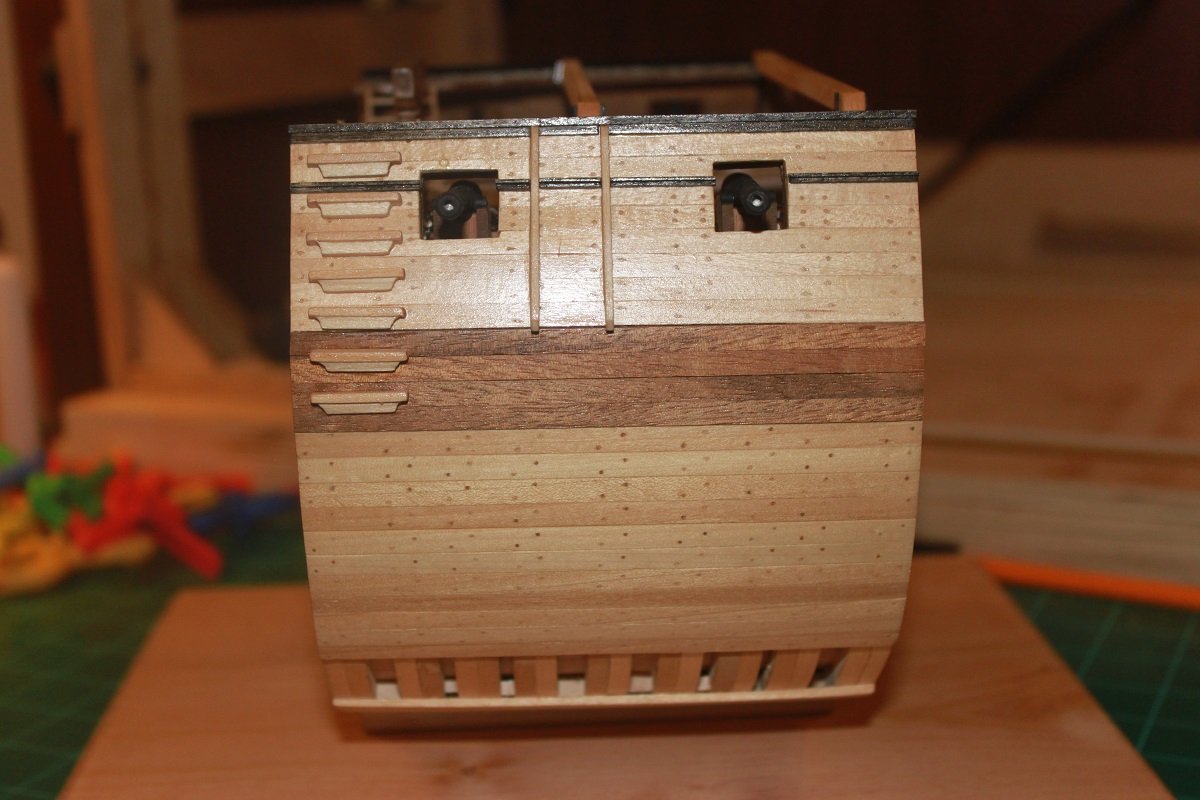
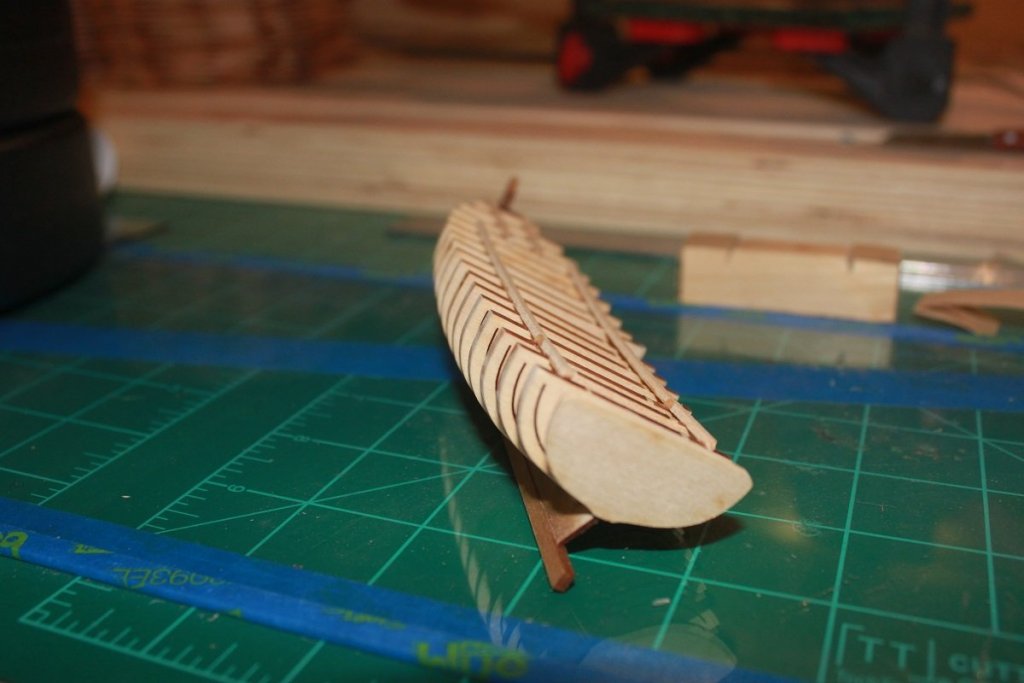
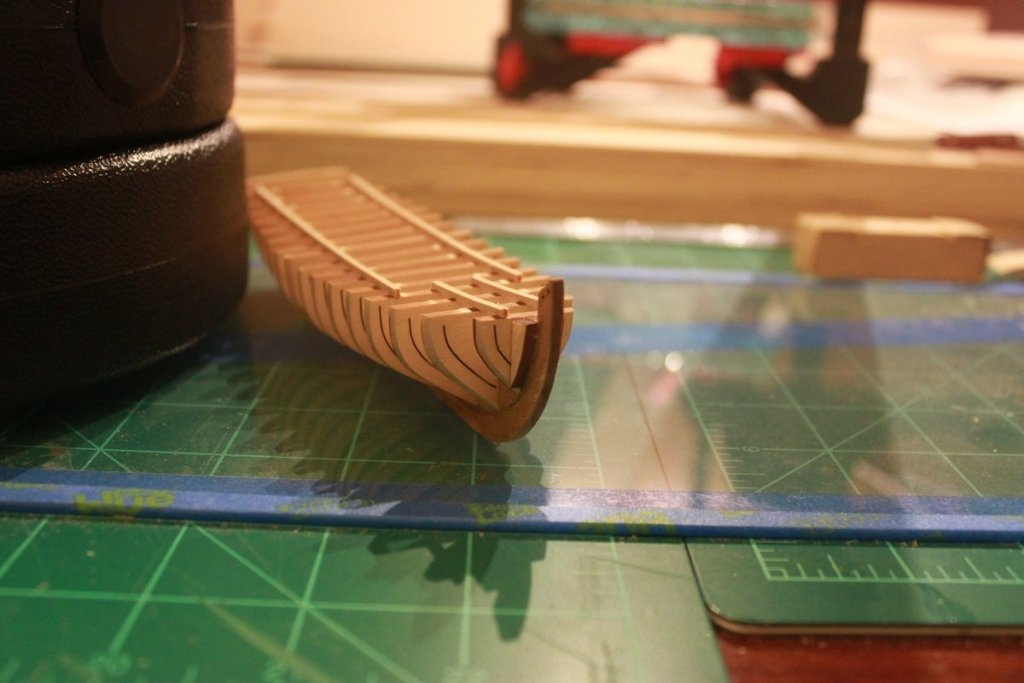
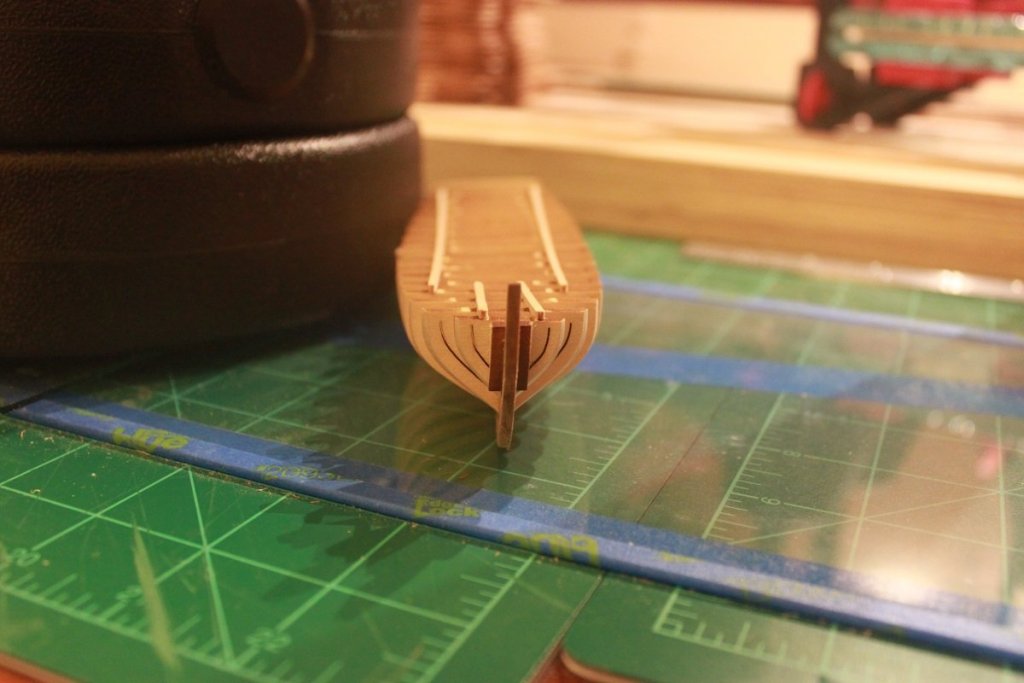
I have some progress to report. I got the hull faired, but not without breaking one bulkhead. The repair was easy though, it was a clean break and easily glued back on. I even have trouble finding the one that broke off. I also got the transom piece installed and the bow fillers. Those will be faired once the glue has had ample time to cure. Anyways, here are the pictures. As always, any and all comments are welcome.

- 50 replies
-
- 8
-
-
- 18th century longboat
- model shipways
- (and 1 more)
-
Even in today's Air Force, hearing loss is prevalent. Most of us wear hearing protection, but that only helps so much when you are working around jet engines running all the time on the flight line
-
I will be pulling up a chair as well. I have the same kit, but am waiting for new bulkhead former since the one in my kit was warped
-
I pretty much came to that conclusion. The instructions don't mention anything about stiffeners, but I felt that they needed to be added.
- 50 replies
-
- 2
-
-
- 18th century longboat
- model shipways
- (and 1 more)
-
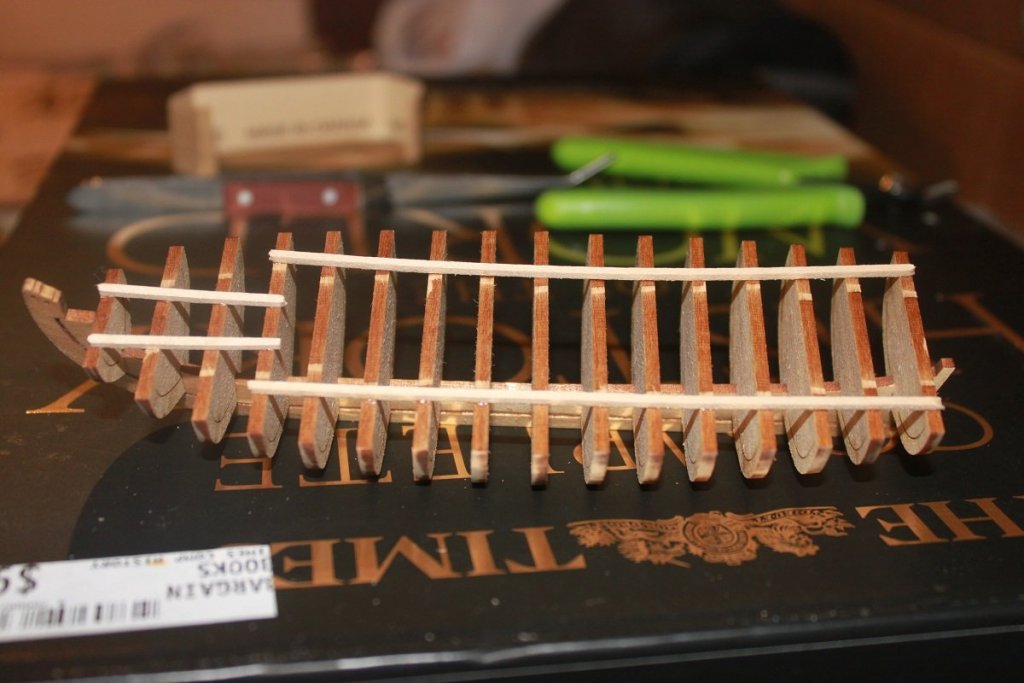
Well, I have a little progress to report. After letting the glue dry on the bulkheads for a couple of days, I went to fair the hull. I started sanding with 220 grit very lightly, but the basswood keel was letting the individual bulkheads move. So in an attempt to stiffen it up, I grabbed some scrap basswood and glued them to the top of the bulkheads on the portion that will be cut away later. I think that that will stiffen it up a lot and then I will be able to fair the hull properly. Going to let that dry up and get to fairing the hull tomorrow.
- 50 replies
-
- 5
-
-
- 18th century longboat
- model shipways
- (and 1 more)
-
Mike, Greg, thanks for the tips. I actually did plan on making the jig you described. Hahn talked about the same jig in his article on the build of the Raleigh in the NRJ. I also planned on purchasing a disc sander along with a micro table saw and thickness sander. Although I wish I could afford the Byrnes models, but unfortunately I can't (don't get paid all that much in the Air Force and we are a single income family of 5). But I am receiving my last re-enlistment bonus next week and will be spending part of that at Micro Mark for those three tools plus accessories; the rest is going to the kids. Maybe someday I will be able to afford the Cadillac of mini power tools. As for an oscillating spindle sander, I will be using my bench top drill press for that. Anyways, back to gluing up blanks.
-
Mark, I have been quietly following your Licorne build and learning a lot, what a marvelous build it is. I plan to leave it in the board for as long as possible. So I haven't cut a single frame from the blanks yet and had to do my first re-do. The first 18 blanks that I glued up with the clamps had gaps in them. So back to the table saw I went to cut more pieces. I also ran out to the dollar store and bought a few $2 5x7 frames for the glass. I am now using them with some weights to glue up the blanks. Still hoping to be able to start cutting frames by the end of this weekend. The other decision that I am wrestling with is weather to fully plank the hull or build it as Hahn. I asked the Admiral what her preference is and she hasn't really answered me. Going to have to ask again in the morning; or just make the decision myself.
-
Chuck, I wrestled with which forum to post my log in for a day or so; but the way I see it is that the timbering minus the laser cut keel is just strips of wood than a couple of blocks for carving the decorations. That is no different than ordering milled strips from somewhere else in my opinion
-
Thanks for all the comments and likes. Mike, the timbering did not come with pre cut blanks. I cut those on the table saw with a jig that I made out of plywood using the method that Hahn used. The timbering came with cherry strips that were about 2' X1" x 1/8". I will definitely look into the glass plates for laminating though, thanks for the tip. Mark, one of the reasons I chose the Raleigh is because I wanted to build one that was not heavily modeled. I have searched and could not find a single build log for her. I just hope that I can build a good model. Having Hahn's article from the NRJ in vol 41 sure helps though. Her history was another reason I picked it. She was the first frigate of the 13 that the Continental Congress ordered to be floated, but sat in dock for over a year because they could not procure cannons for her. Her sister ship, the Hancock, was captured by the British within 2 weeks of setting sail. Raleigh actually sailed to France with Alfred to procure properly sized cannons. She set sail with a set of cannons that were not of the right size and number on her maiden voyage.
-
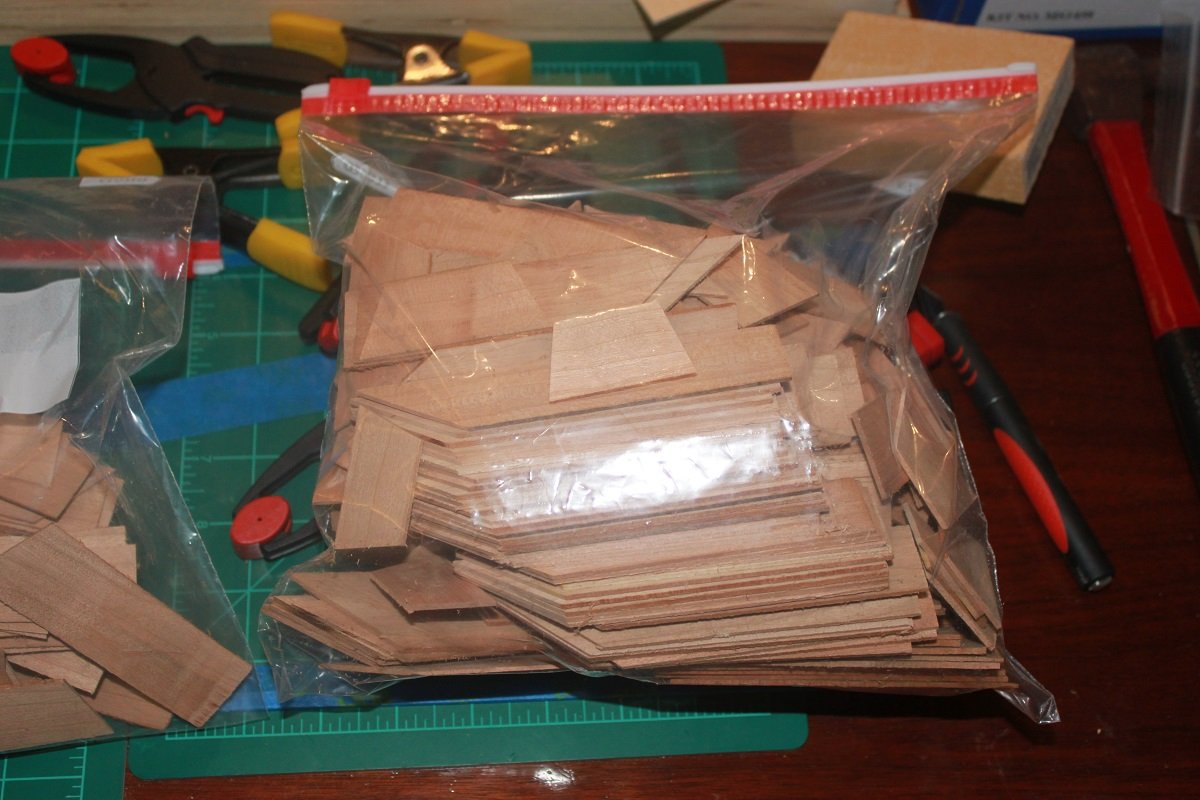
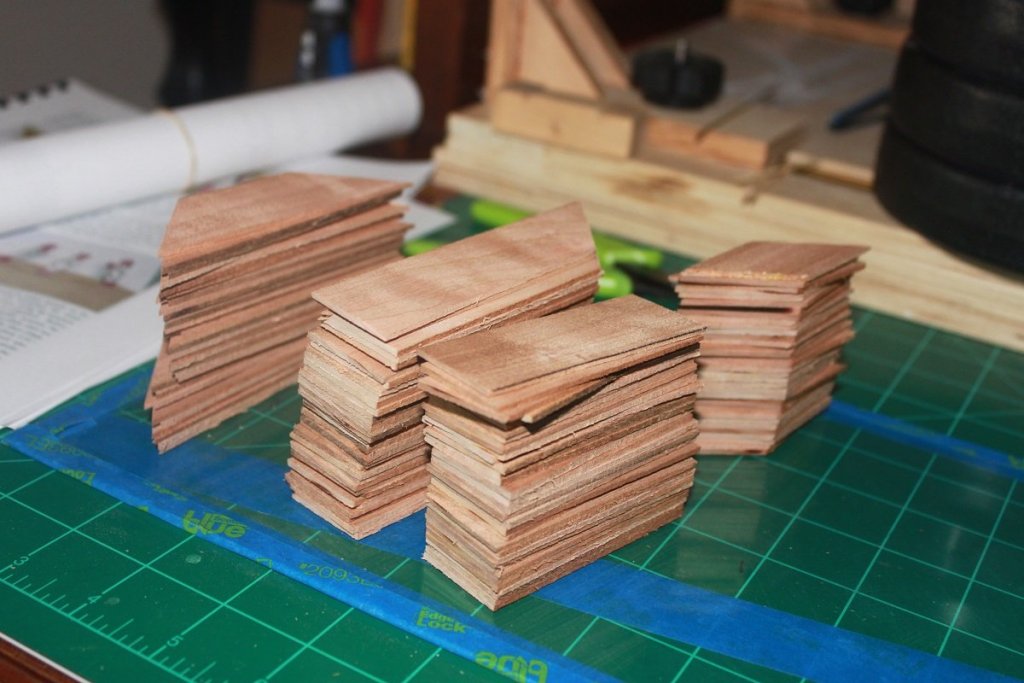
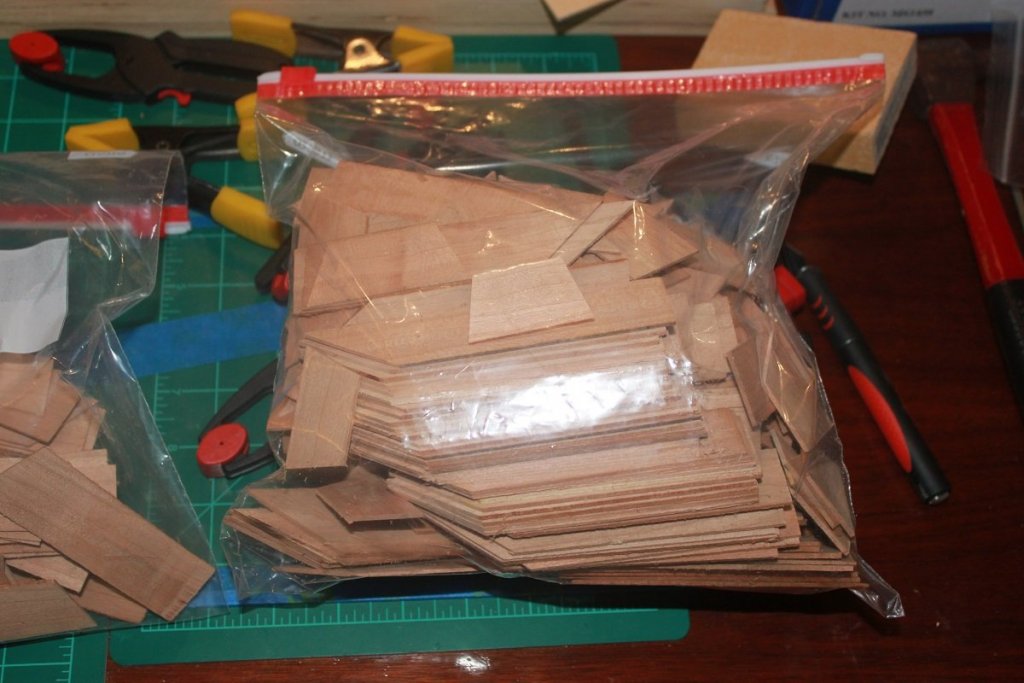
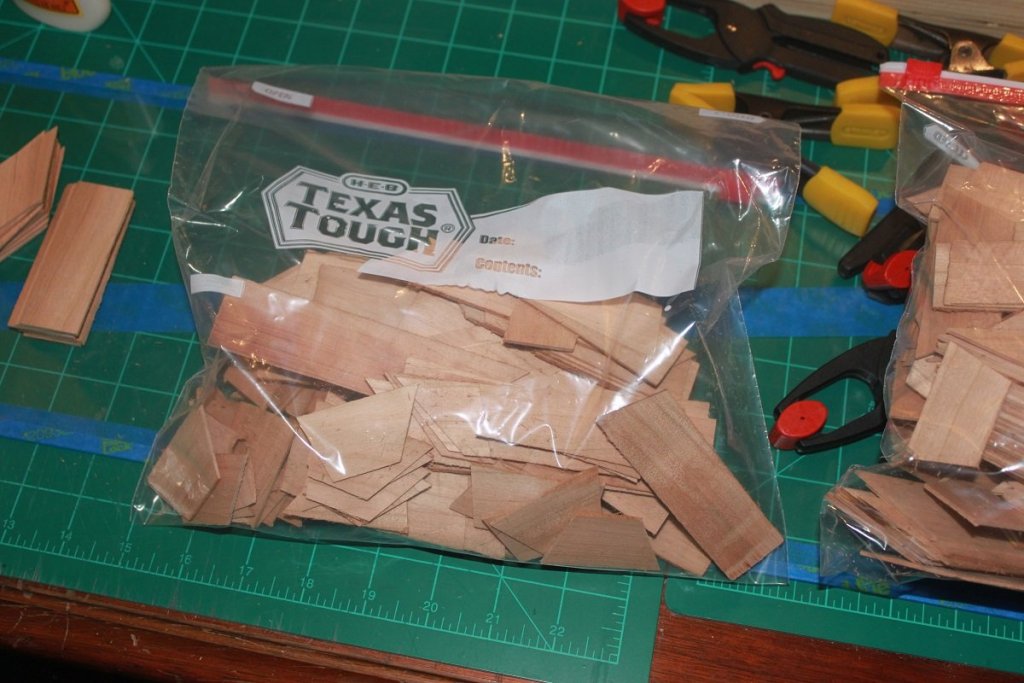
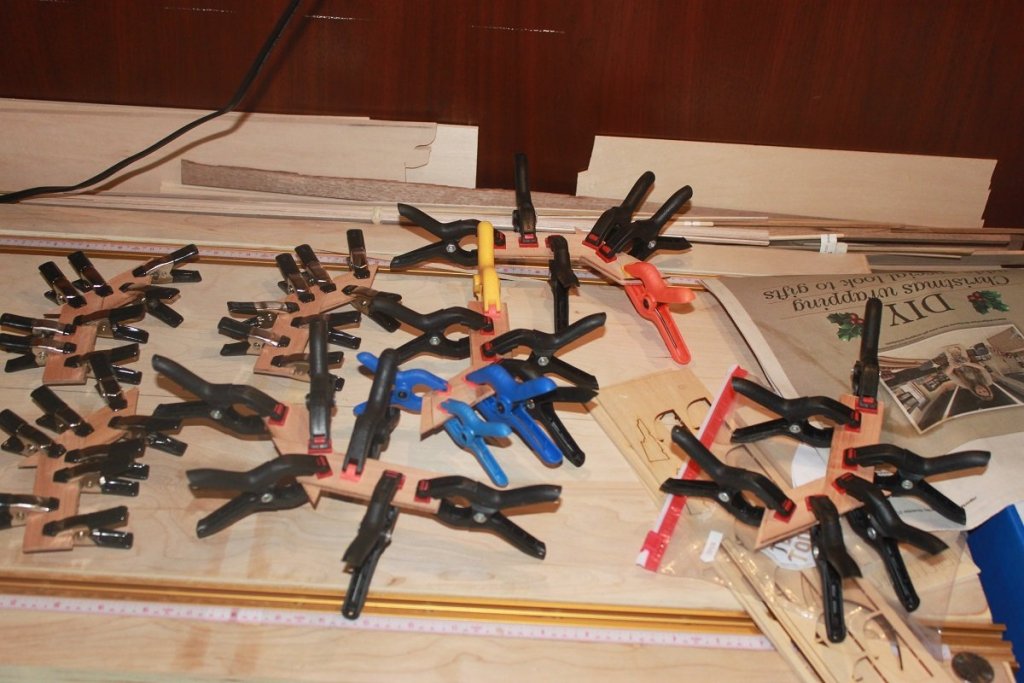
I had originally decided to build my Confederacy kit from Model Shipways before building the Raleigh, but once I opened the box and put the bulkhead former together I noticed that it was warped. Emailed Model Expo and have a new one on the way. Since that build is on hold and the fact that I want to build and not wait; I've decided to start my US Frigate Raleigh build from the Hahn plans that I have. The plans and timbering came from the Lumberyard. The ship will be in 1:96 scale. The timbering is cherry for the frames, keel and stem and holly for the decking. The timbering did come with some laser cut parts for the stem, stern and keel. Guess I'm kinda cheating, lol. I really hope that I am up for the challenge of a Hahn style build. So far, I have cut the 1/8 cherry strips into the pieces to make the frame blanks and have started gluing the frame blanks for the cant and half frames. There are 33 of those and 78 full frames. I suspect that it will take roughly about a week to finish gluing up all of the blanks. Anyways, on to the pics. As always, any and all comments are welcome. All the pieces for the half and cant frames, 34 each. The pieces for the center full frames, 33 each. The pieces for the rest of the full frames, 12 each. Some of the half and cant frame blanks glued up and drying.
- 47 replies
-
- 15
-
-
Glad to have you all along for the ride. I got the bulkheads glued on. Took my time to ensure that they are as straight and correct as they should be. Going to let that dry up for till at least tomorrow, may even wait until Tuesday before I start the fairing process just to ensure that the wood glue has enough time to cure up. Anyways, here are the pictures of how she currently sits.


- 50 replies
-
- 9
-
-
- 18th century longboat
- model shipways
- (and 1 more)
-
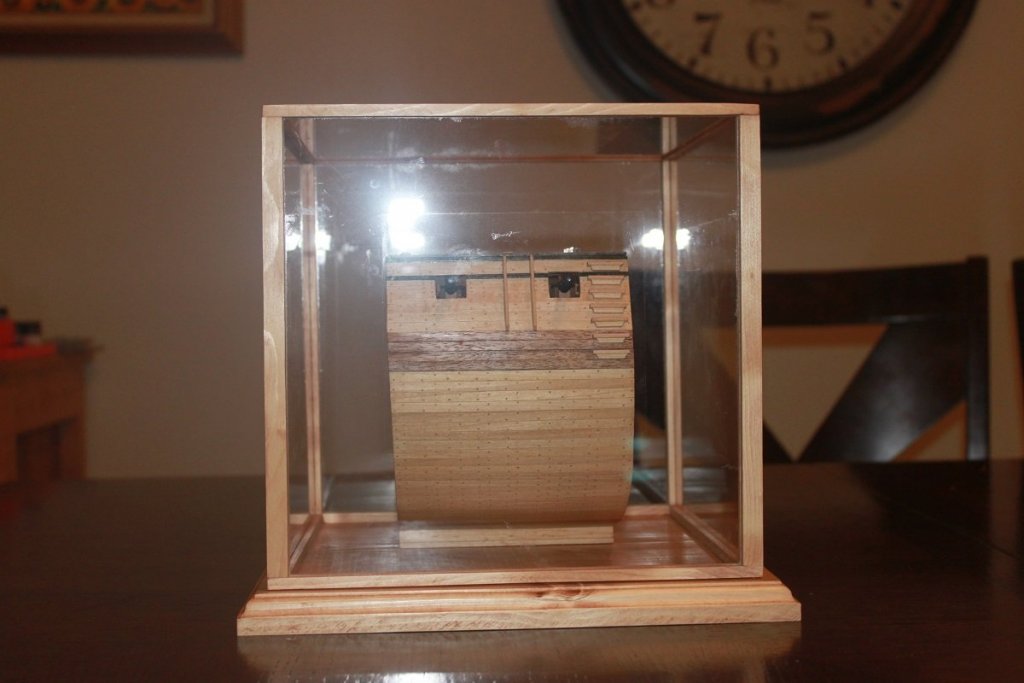
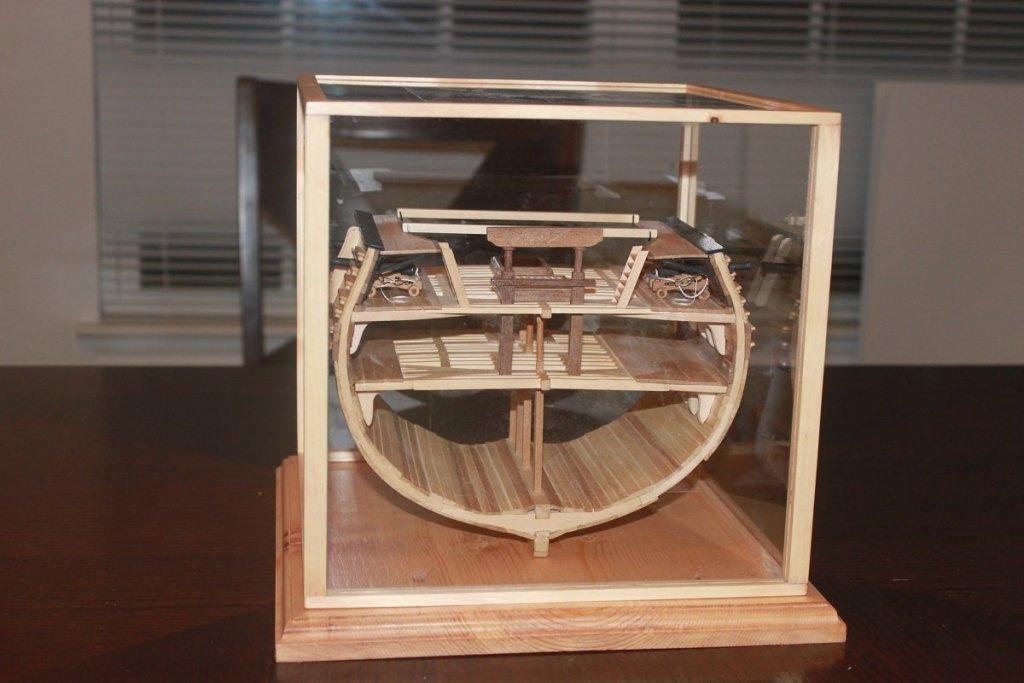
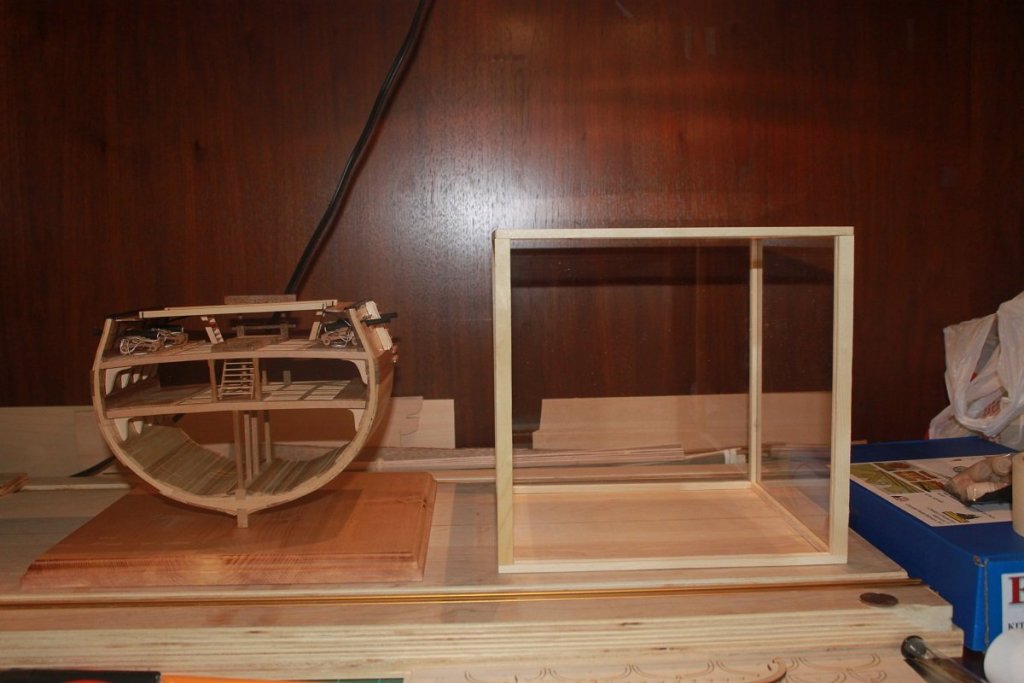
The case is finished and carefully pulled over the model, sealing in the model for forever (I hope). Now I just need to find the time to take it to my Dad who lives 3 hours away. I'm sure he will love it (he has no clue that I am going to give it to him). Anyways, here are the pics.....


-
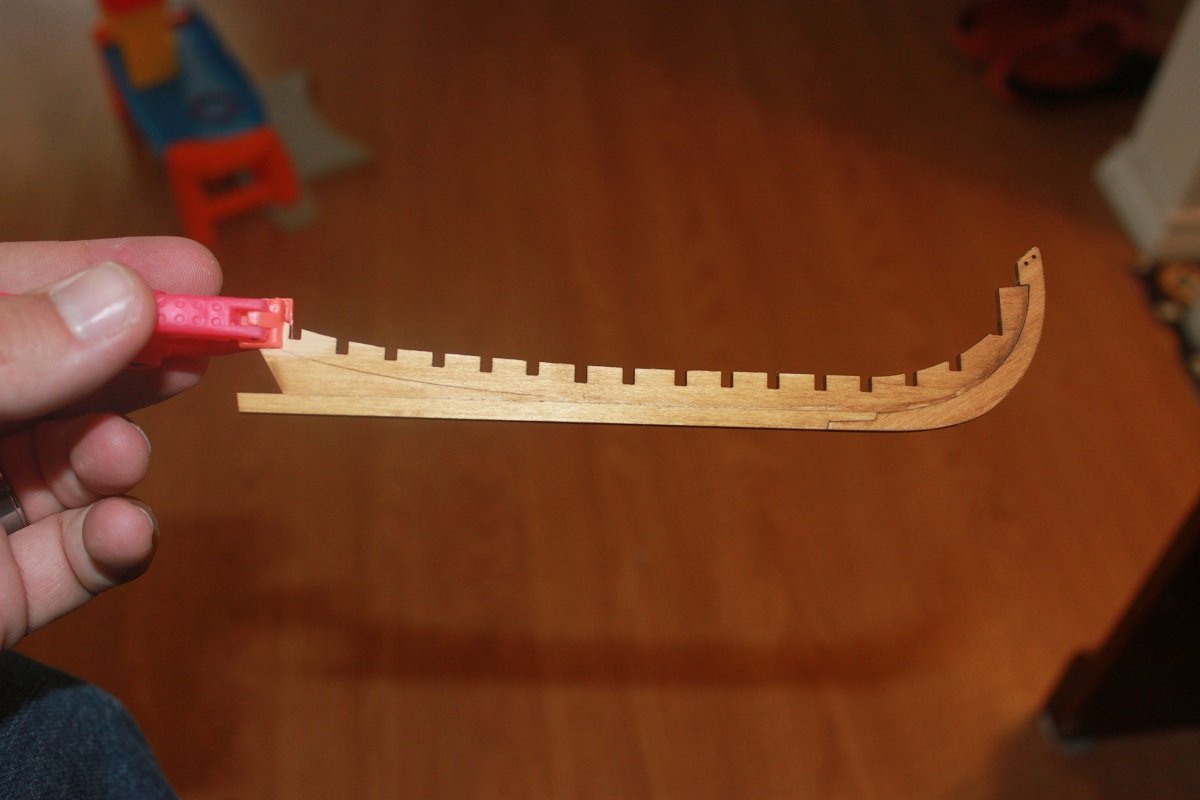
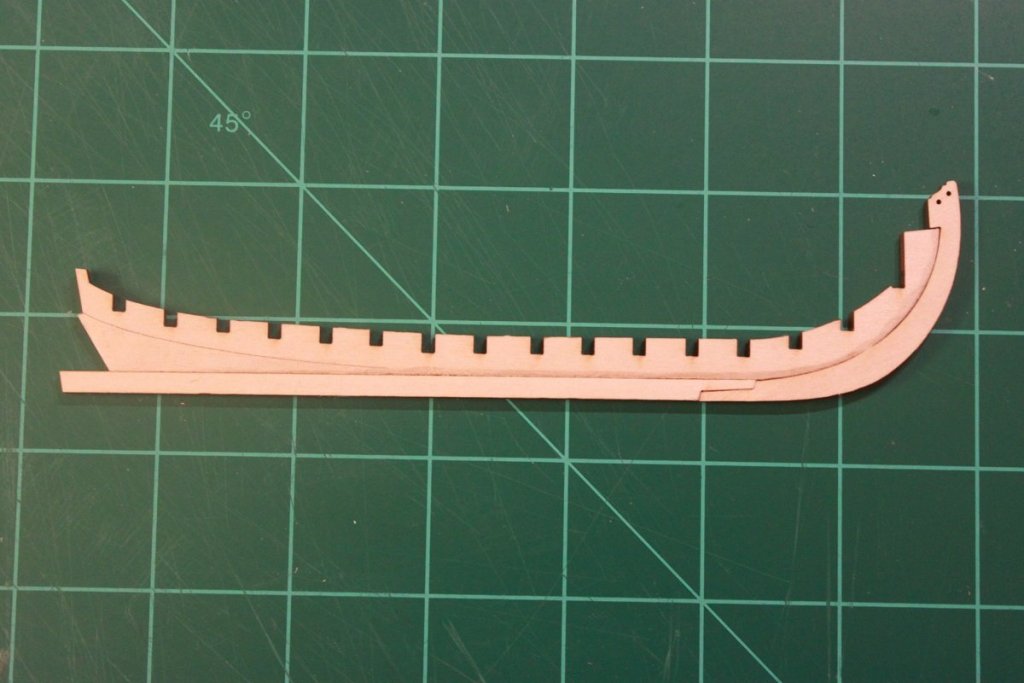
Since I have finished my Triton cross section and am unsure of which kit I want to start at the moment (Model Shipways Confederacy or Lumberyard's USF Raleigh (Hahn plans)), I figured I'd at lease start to build the 18th Century Longboat kit that I have. I've already cut the false keel from the laser cut parts sheet and cut the rabbet and then glued the stem and keel to the false keel. Once that was dry, I went ahead and stained the assymbly with some Golden Oak stain. Once that is dry, it will be time to glue on the bulkheads.

- 50 replies
-
- 8
-
-
- 18th century longboat
- model shipways
- (and 1 more)
-
Thanks Mark. The case is almost done. Just waiting on the stain to dry on the pine and then I need to finish it off with some wipe on poly.
-
Thank you so much for the comments and likes. Christian, there are plans for a POB full build of the Triton; but that will be a while before I start it. I currently have a piece of Castello Boxwood that is acclimating to the climate in Texas which I will mill down and use for the Triton full build. I also need to find some Holly and order a Byrnes tables saw and thickness sander. In the mean time I am going to put together the Model Shipways 18th Century Longboat kit. It's still a toss up on whether to start the Model Shipways Confederacy kit or the Lumberyard's US Frigate Raleigh kit (Harold Hahn plans and milled lumber from the Lumberyard). Decisions, decisions....... Tony, it may seem like it was fast, but I started this build in 2014, then had to take a break to finish up school and for 3 surgeries for carpal and cupital tunnel. Once I was able to start it back up (after earning my degree) I really wanted to get it finished. Now to go finish the case and get the model ready to give to my Dad.
-
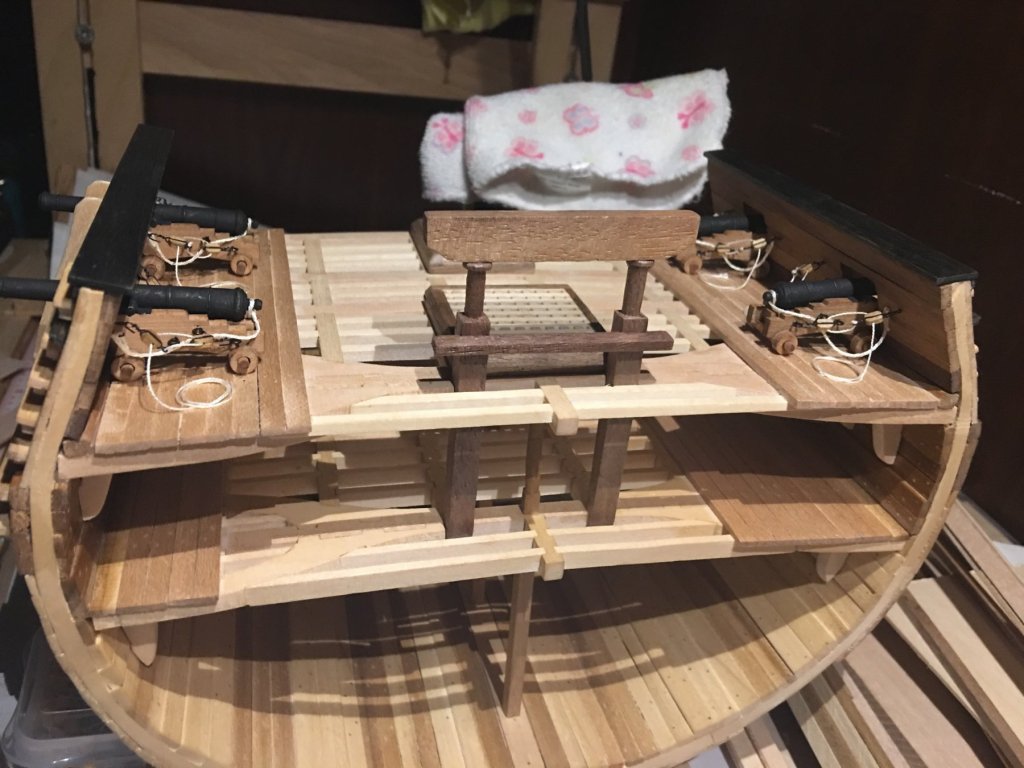
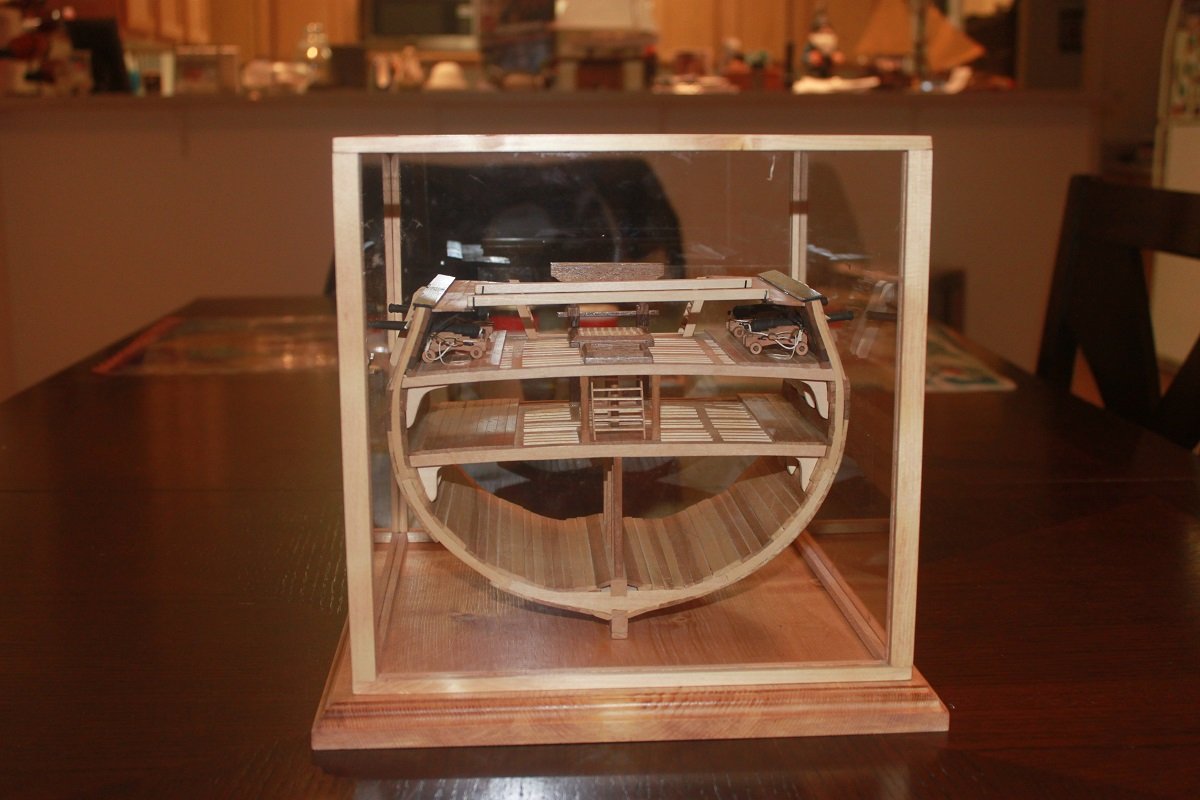
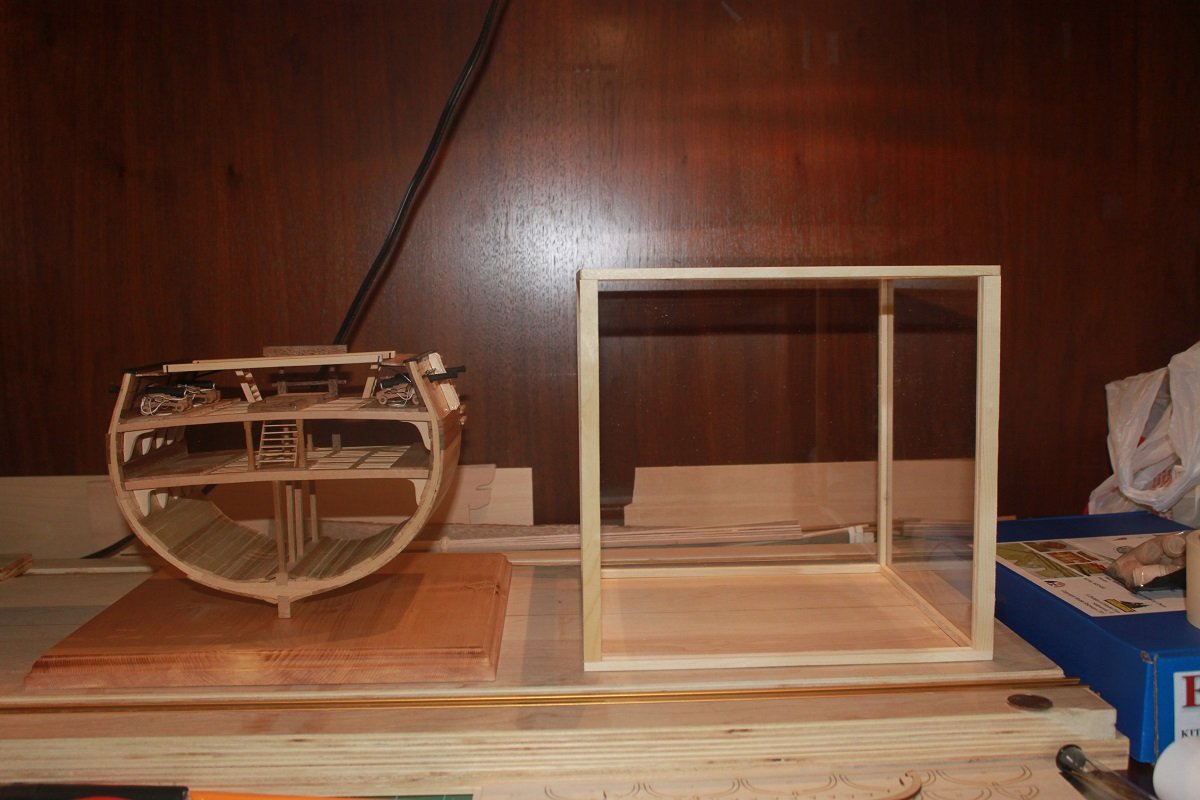
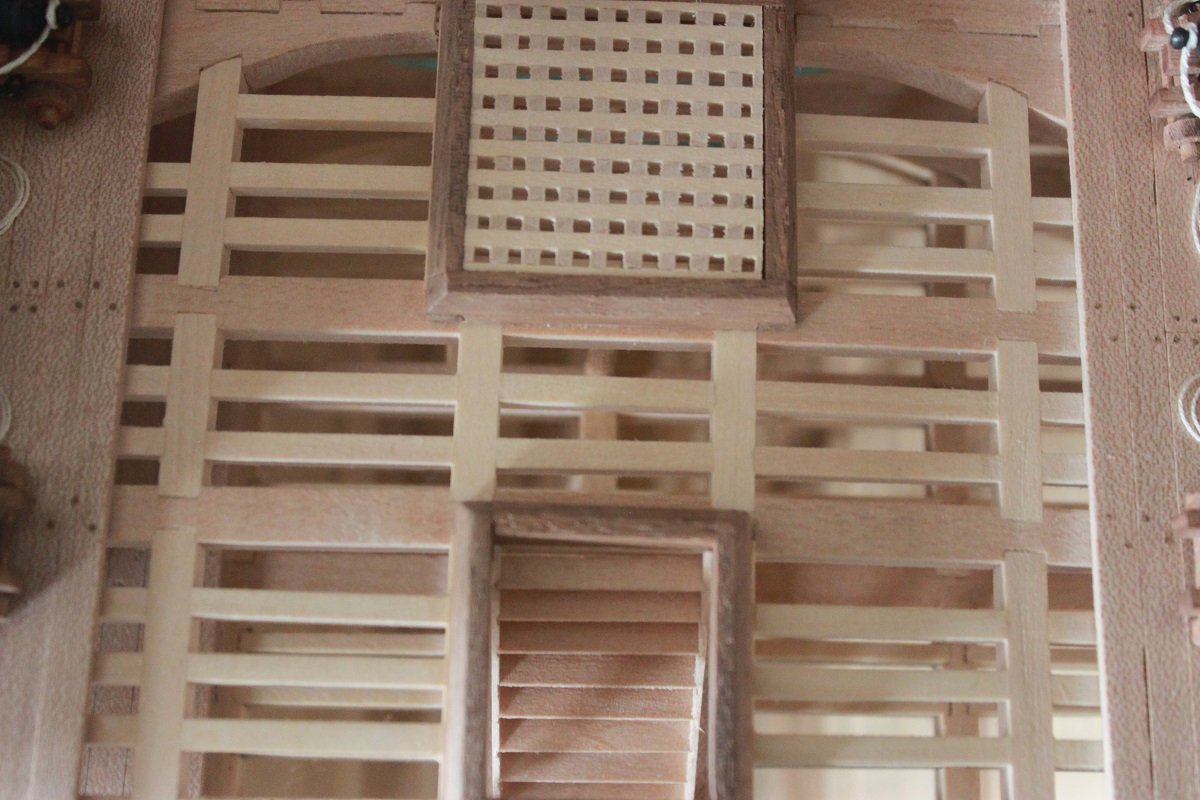
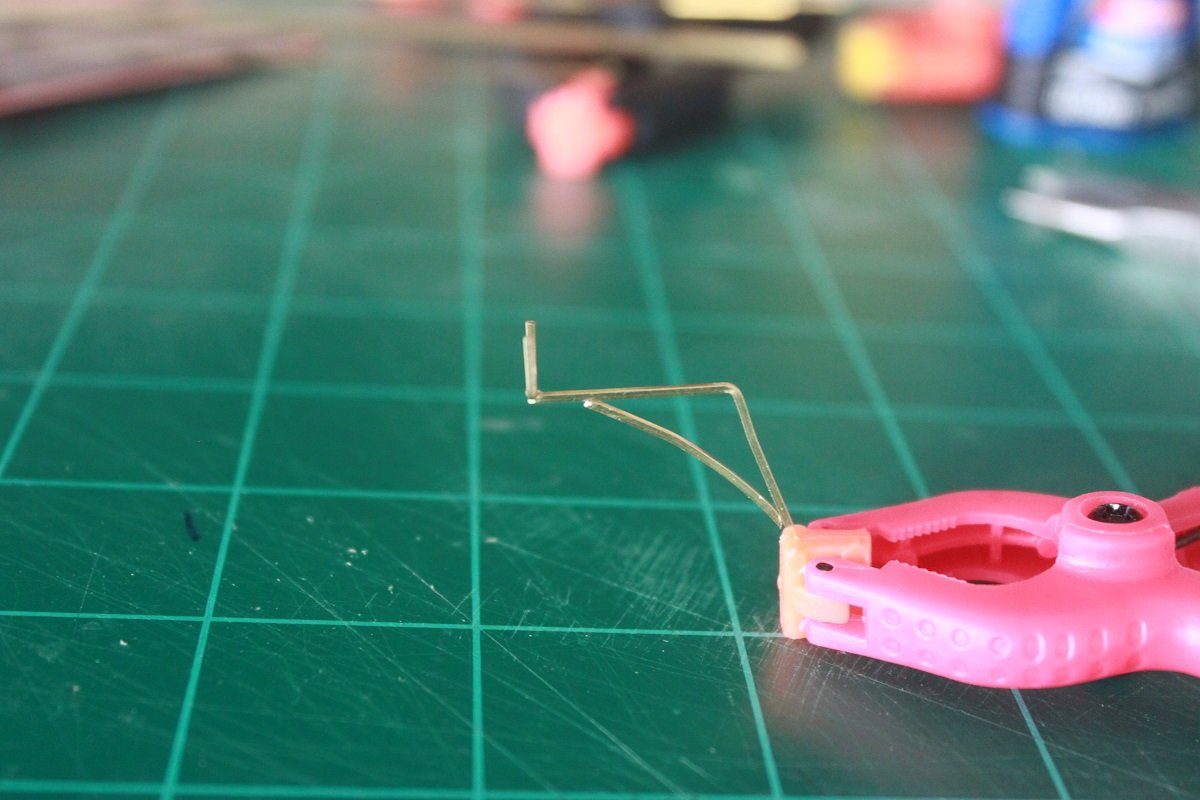
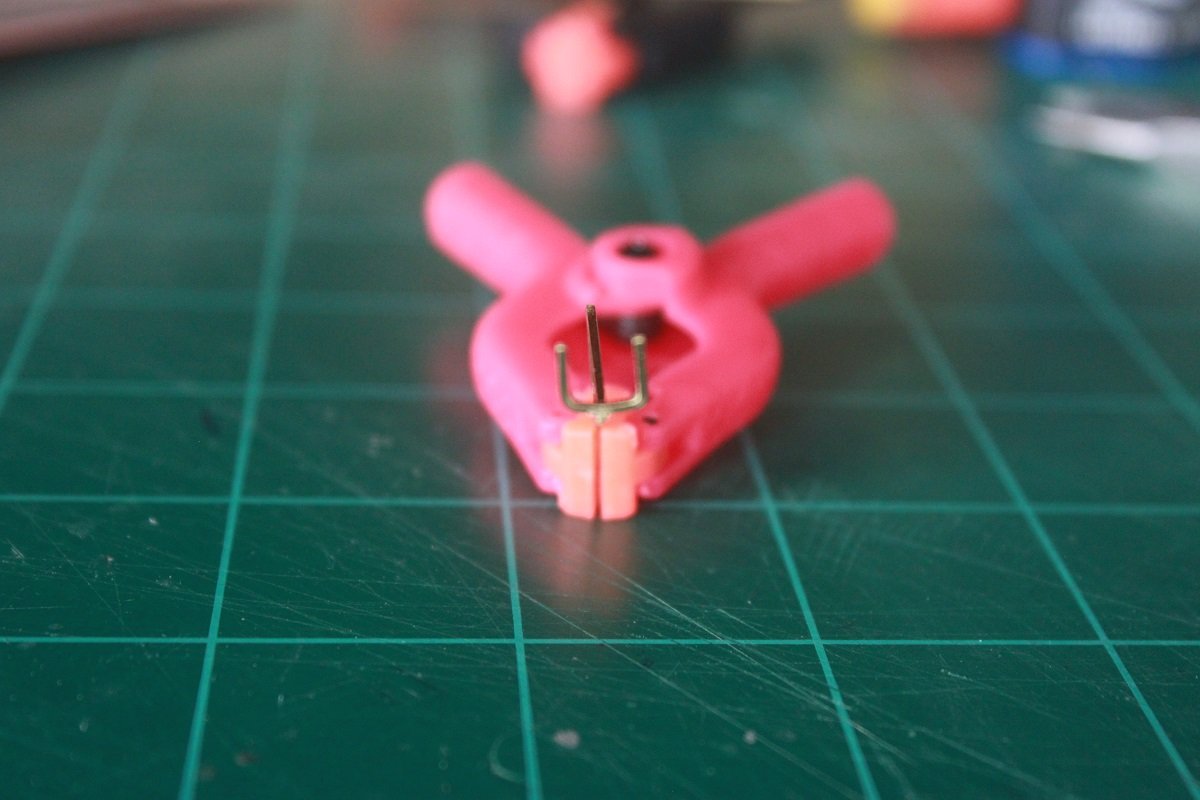
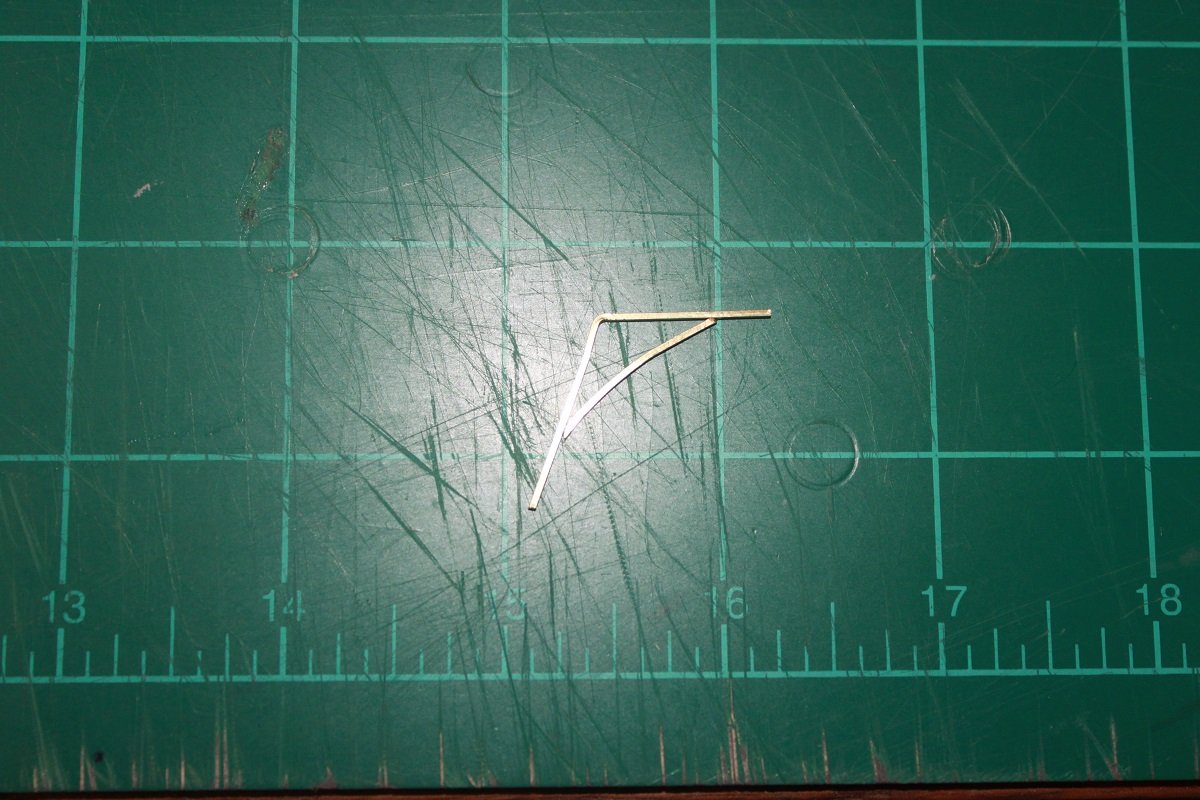
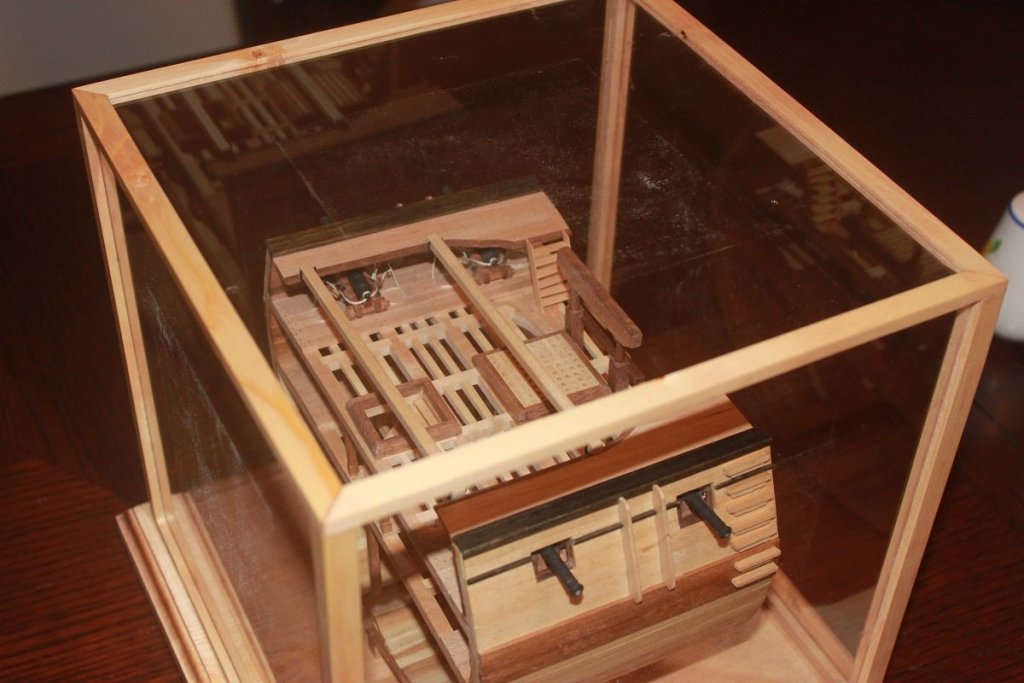
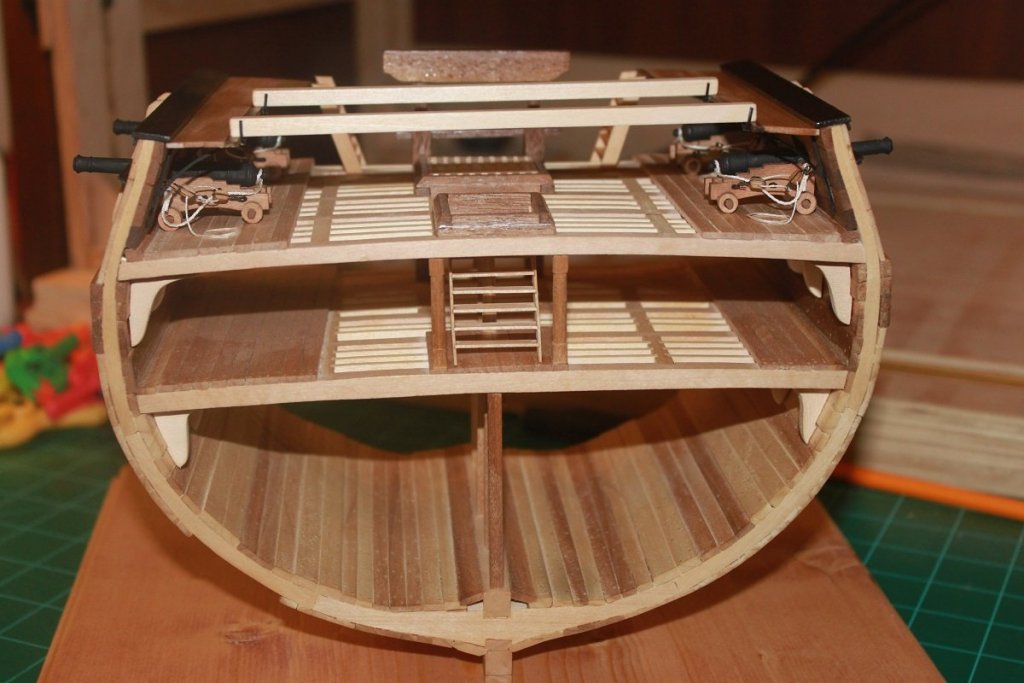
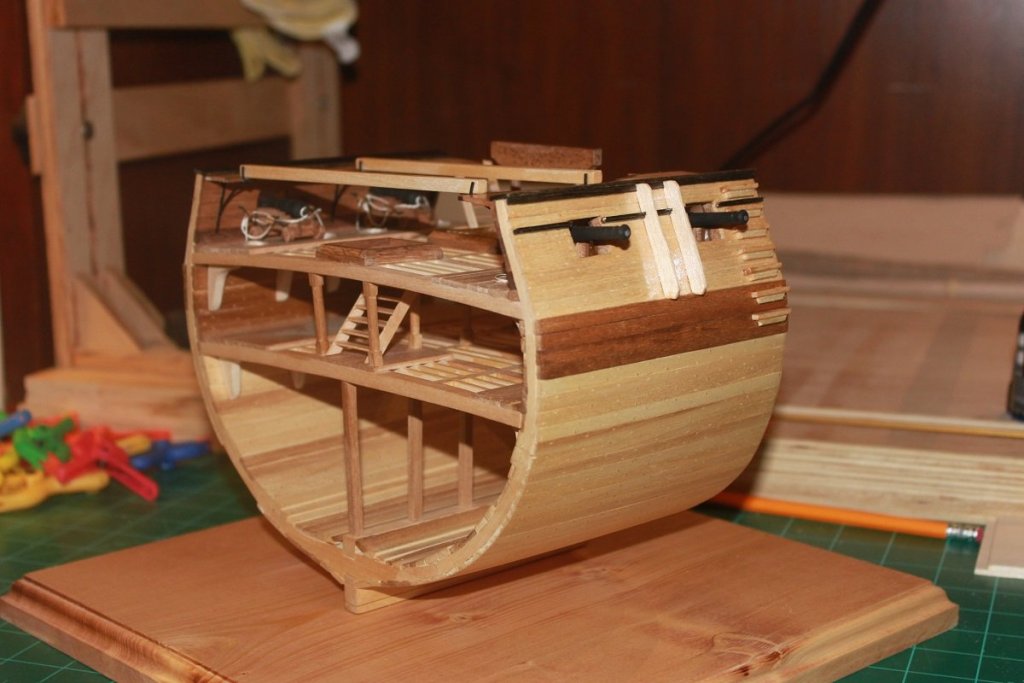
The cross section is finished. I made the crutches from brass square stock and painted them black and then installed them on the gangways. I then installed the gangways on the cross section along with the ladders. Put a coat of wipe on poly on and attached it to the base with three short pieces of 1/16" brass rod. I also made a case to go over the model. The base and case is made from pine. I have apply cherry stain to the base and I will also stain the case with cherry. The case will be attached to the base with some 1/16" brass rod to keep it from sliding around. Anyways, here are the pictures. I will post some of the case once that is completed.


-
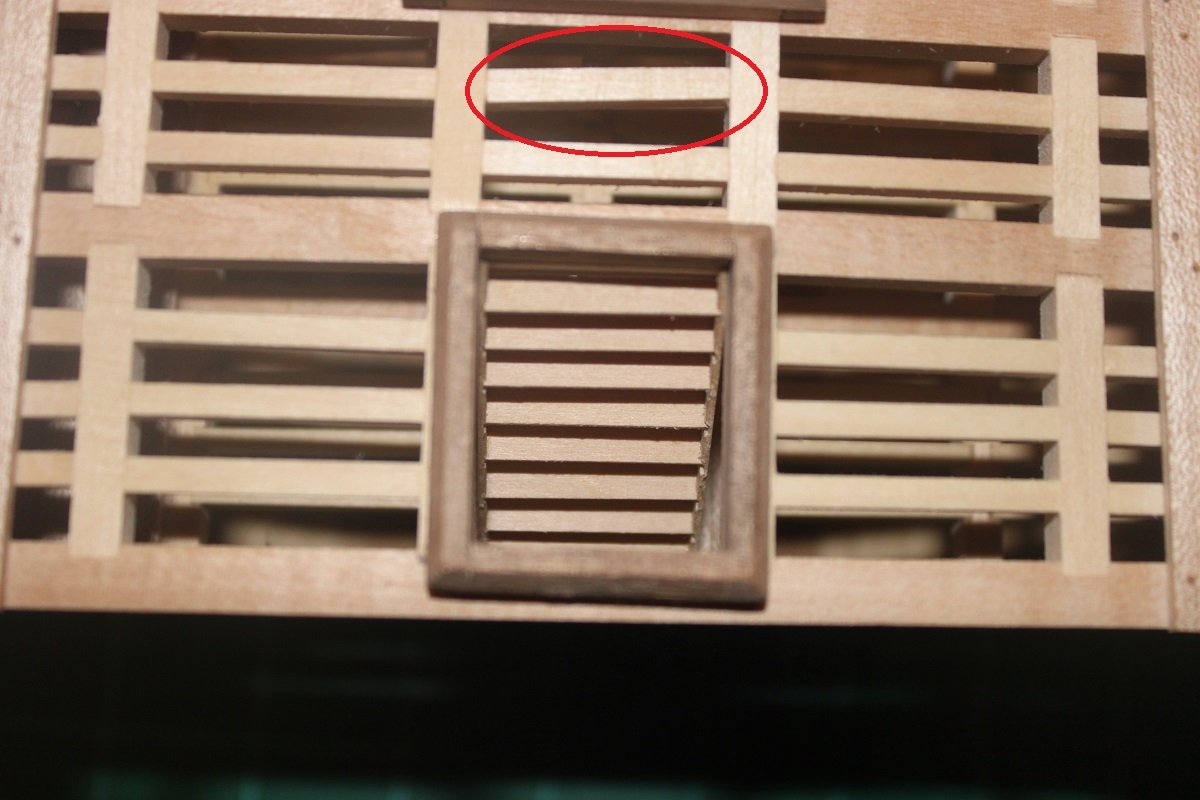
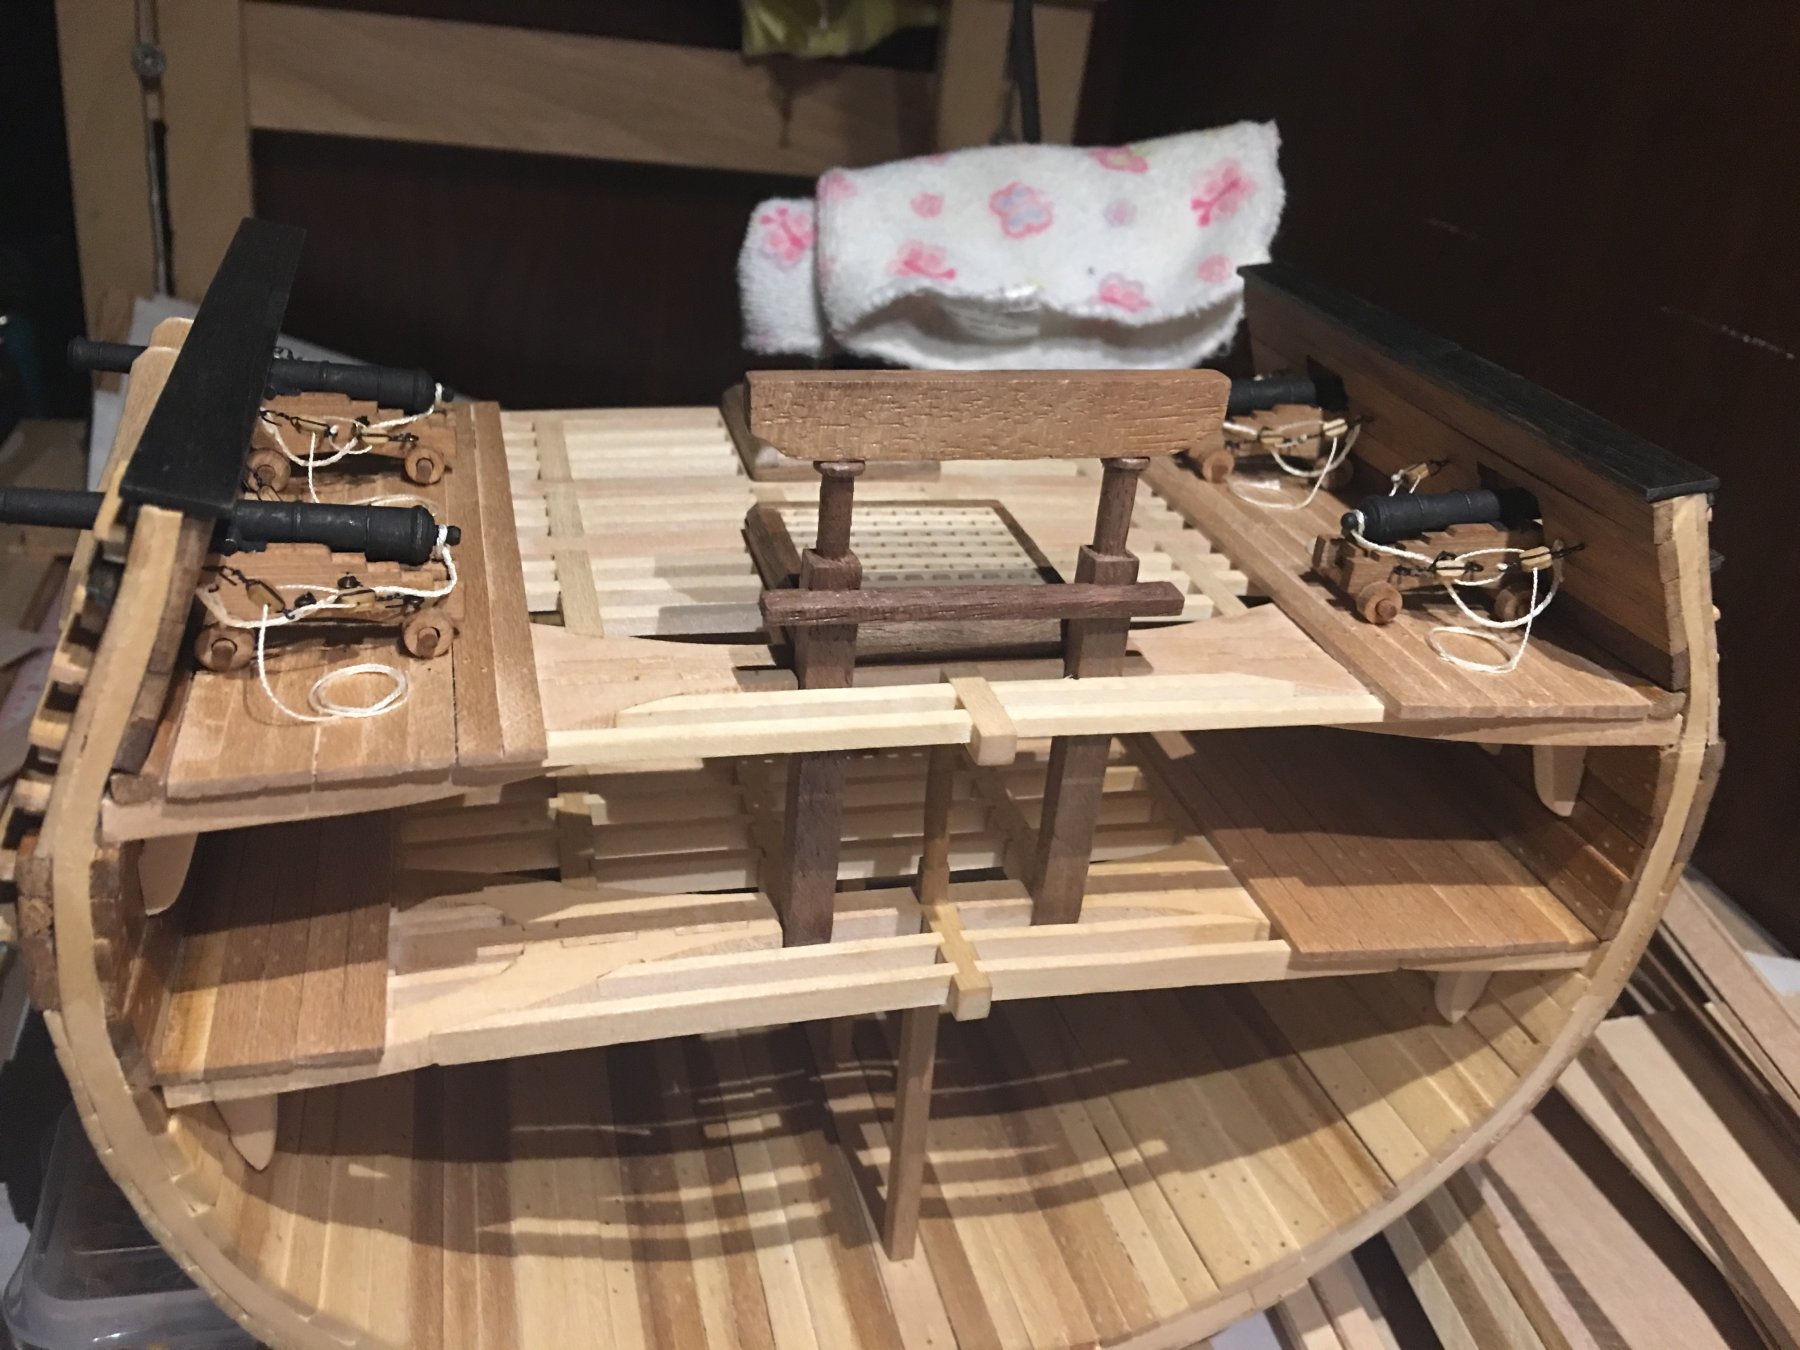
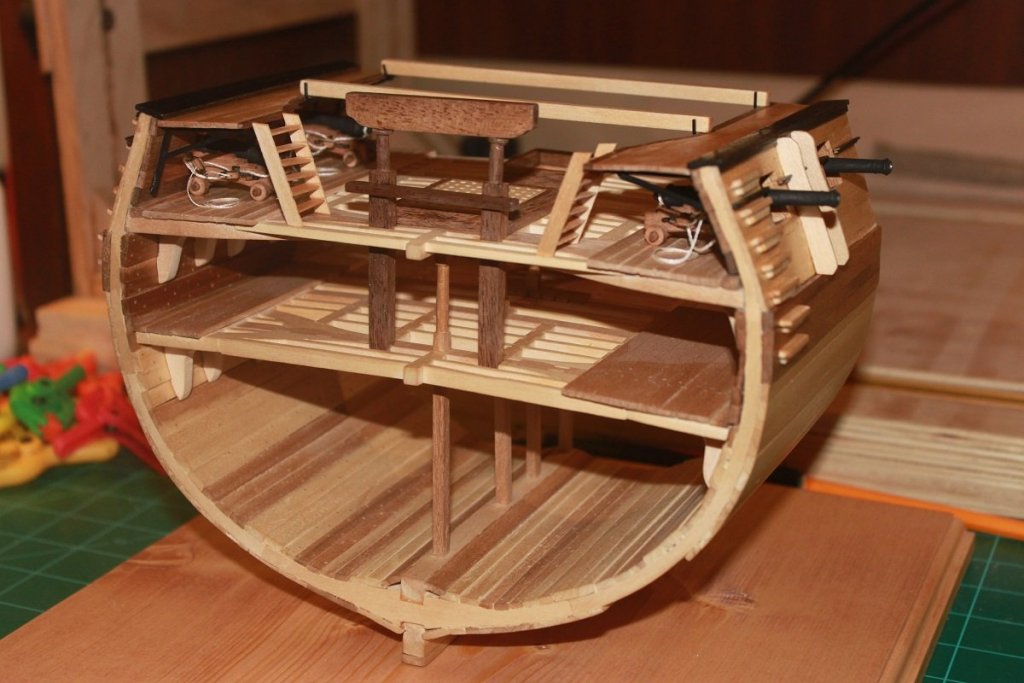
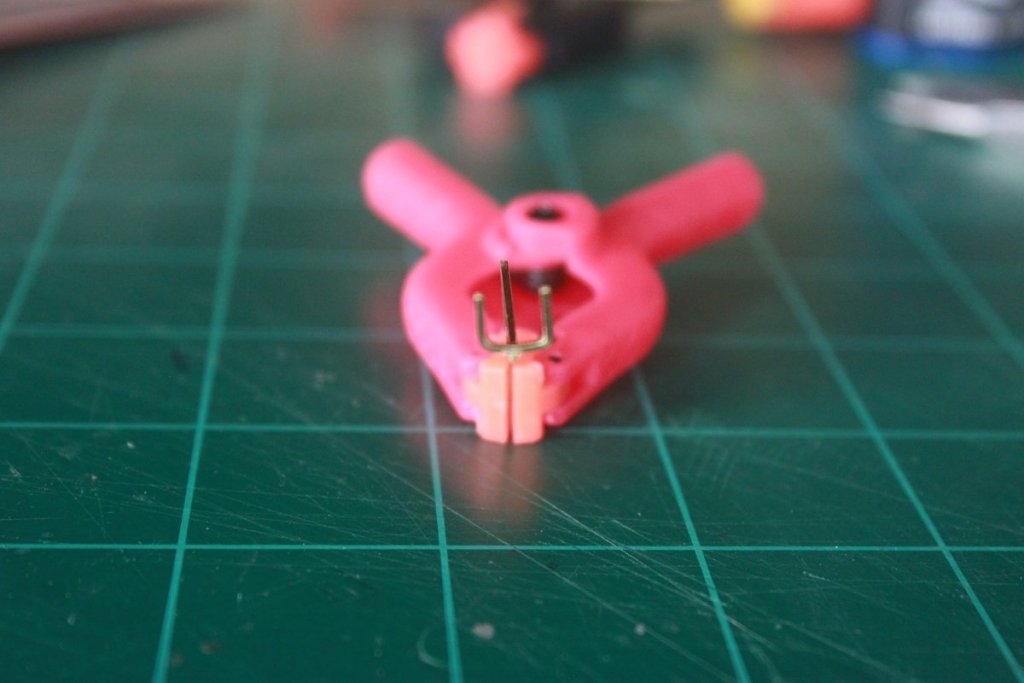
So it was pointed out to me that I had a crooked ledge on the gun deck. Thanks to dvm27 for pointing that out. I can't believe that I missed that. When I went to fix it, I found that the ledge in question wasn't even glued in, which was a win for me. It was easy to fix, just popped it out applied glue and set it back into place and made sure it was straight. I also finished up one of the crutches for the gangway, I think it came out pretty good. I am going to make the rest using the same process. Now I just need to figure out how to blacken them chemically; I'm open to suggestions since I have never tried that before. (I'm not sure how well black paint will stand up on the crutches. Anyways, here are some more pictures....

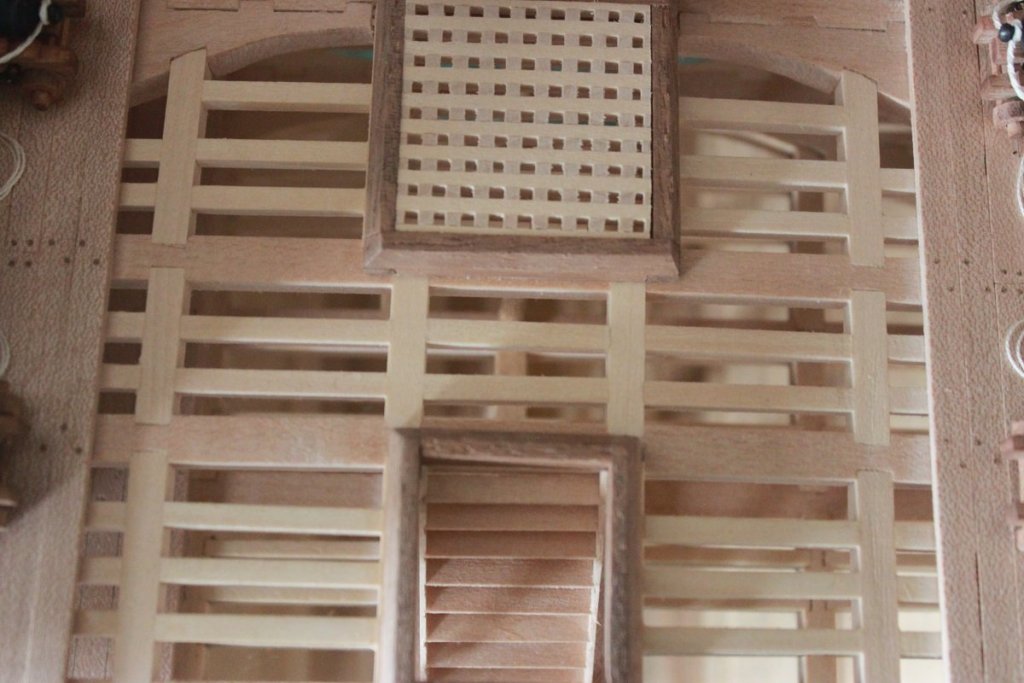


-
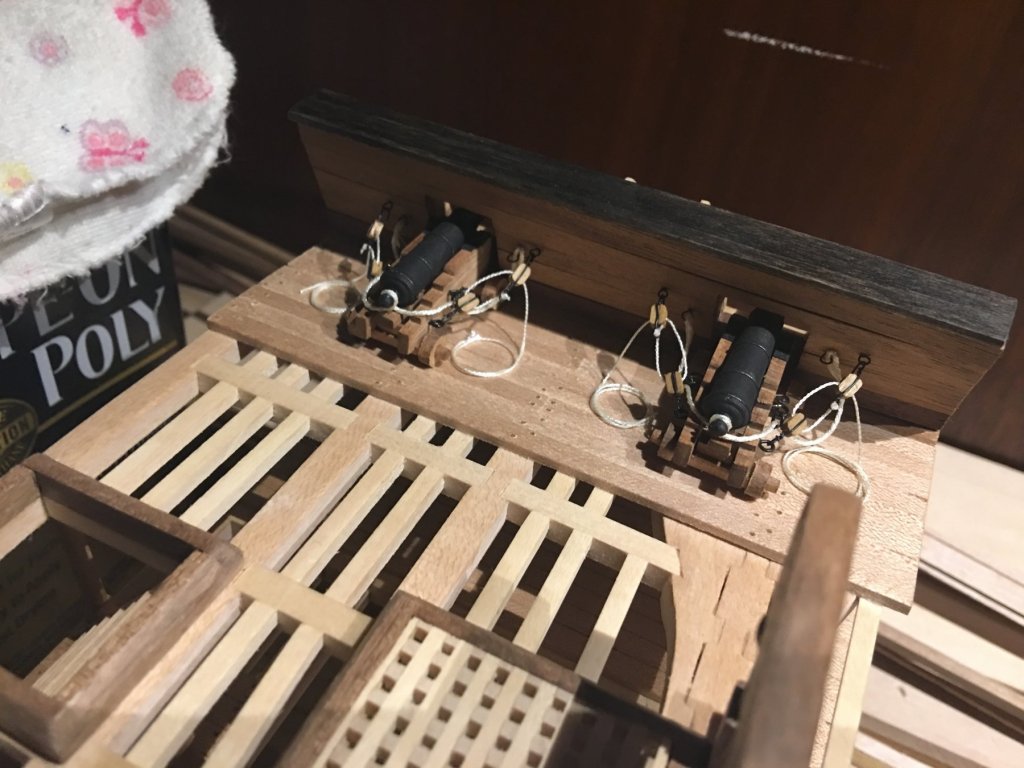
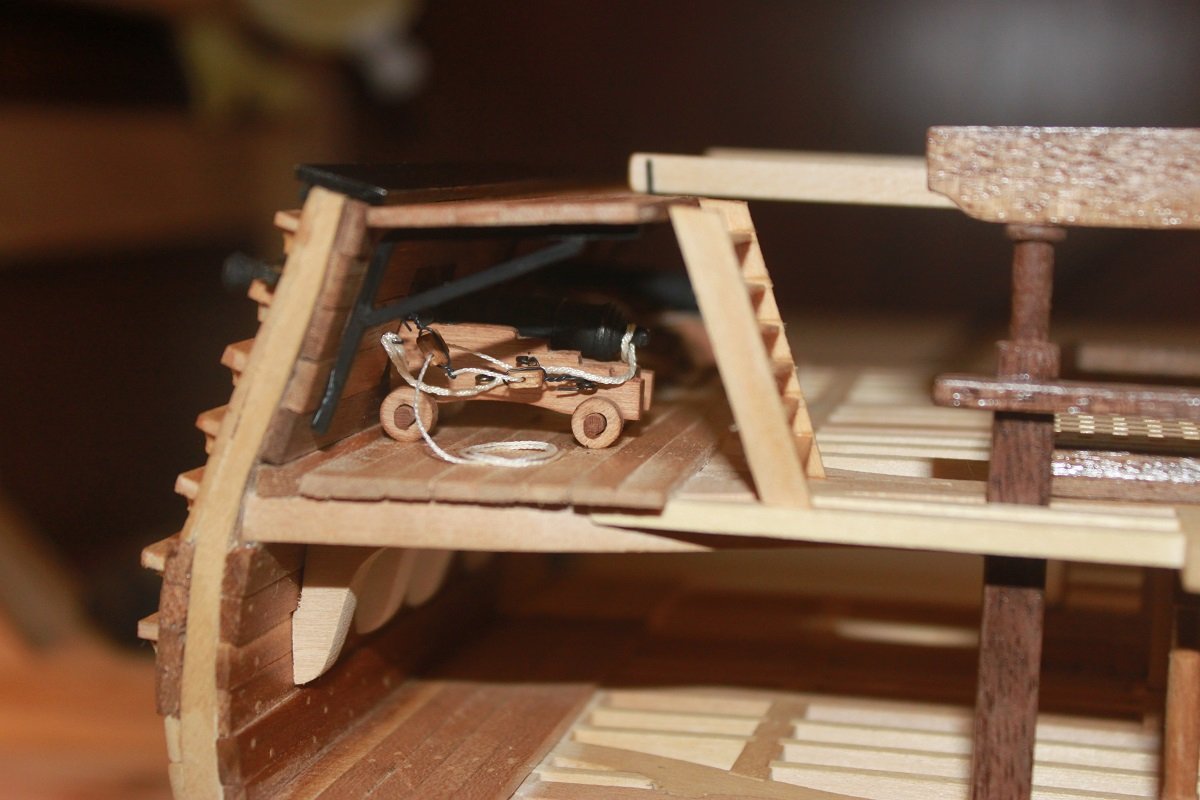
Finished rigging the guns and built the gangway platforms. Working on the crutches now. I am going to build one out of brass tubing, but will have to use CA glue since I don't have the equipment to do silver solder. Once it's built, I'll paint it black. If I don't like the way it looks, I'm going to make them out of wood. I am also thinking about how to make the case for this model. Once it is complete, it will be gifted to my Dad.