HOLIDAY DONATION DRIVE - SUPPORT MSW - DO YOUR PART TO KEEP THIS GREAT FORUM GOING! (Only 13 donations so far - C'mon guys!)
×


KennyH78
-
Posts
269 -
Joined
-
Last visited
Content Type
Profiles
Forums
Gallery
Events
Everything posted by KennyH78
-
 Matt, just read through your whole log in 1 day; and I must say that your model of Winnie looks really good. I can only hope to build one just as good as yours. I will be following along now, even though I'm a little late to the party.
 -
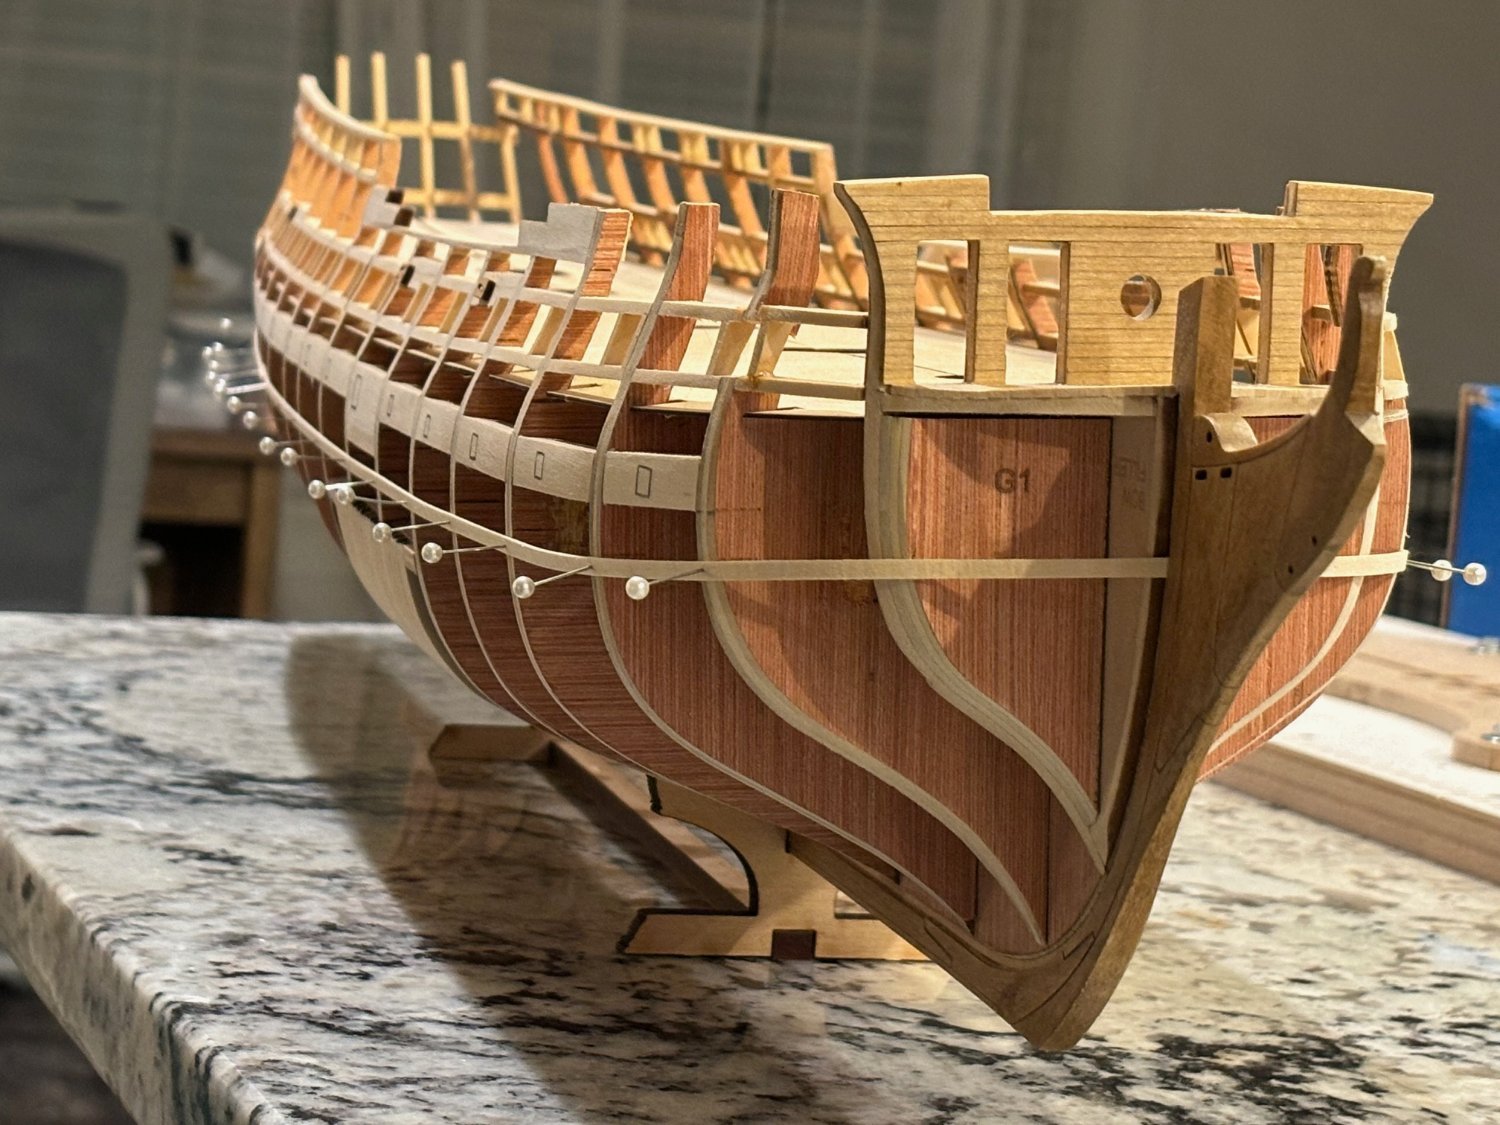
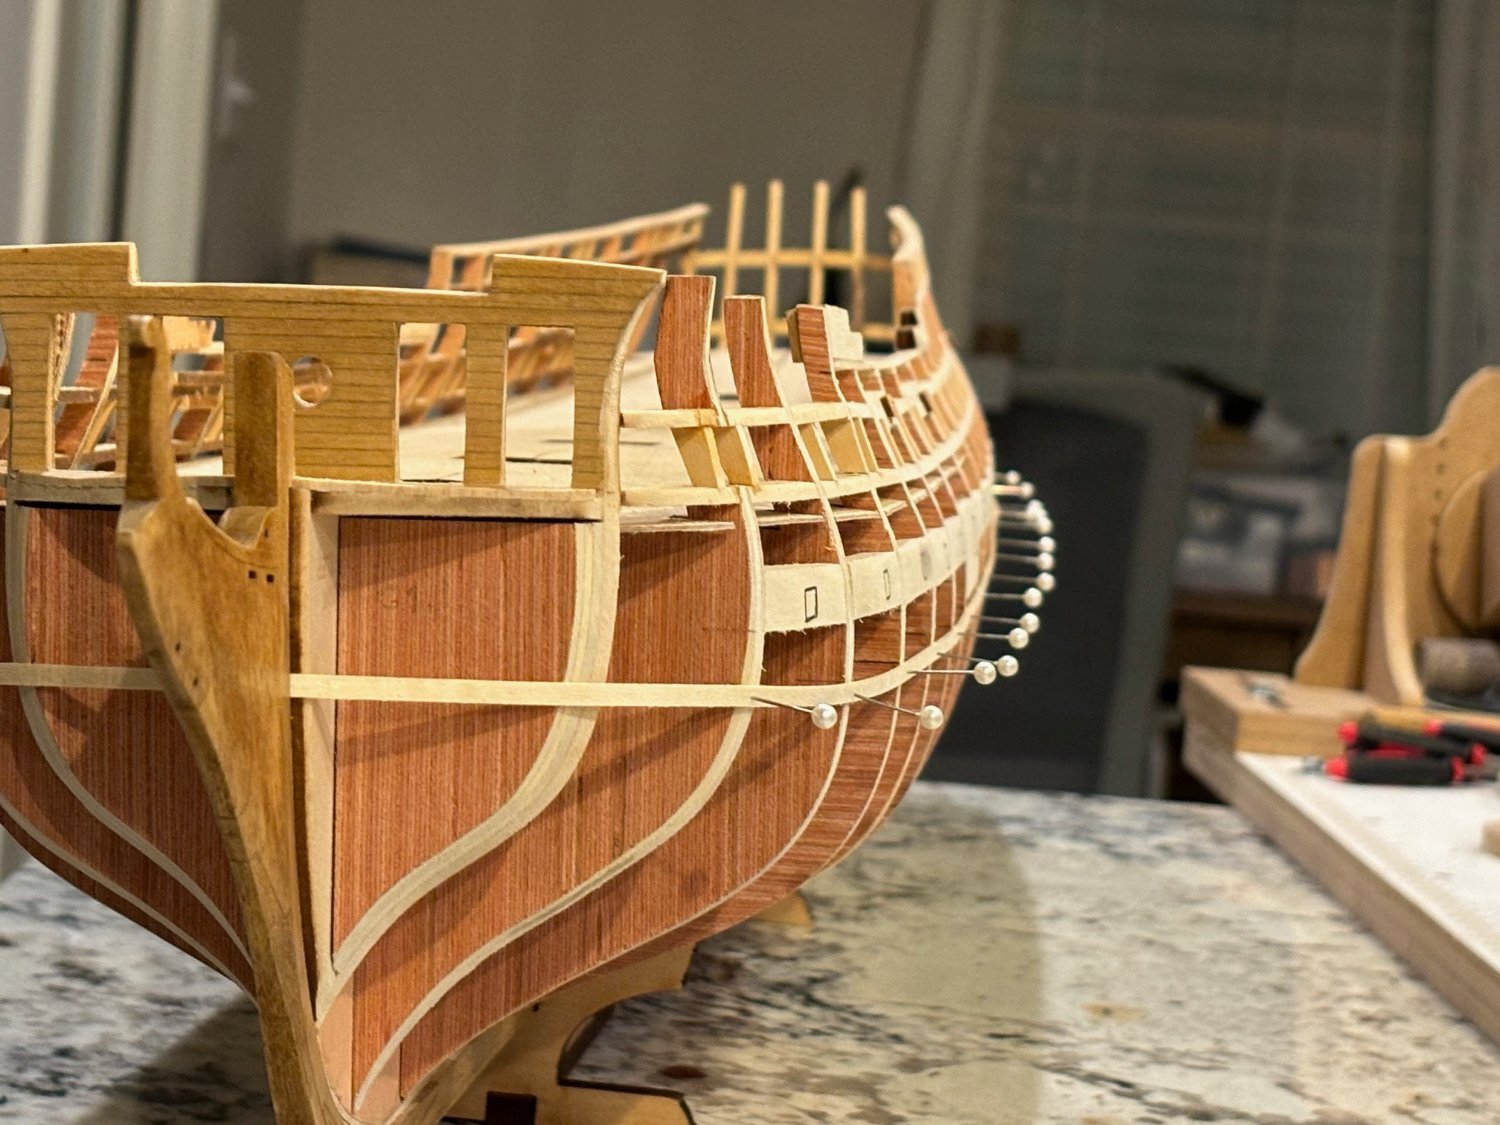
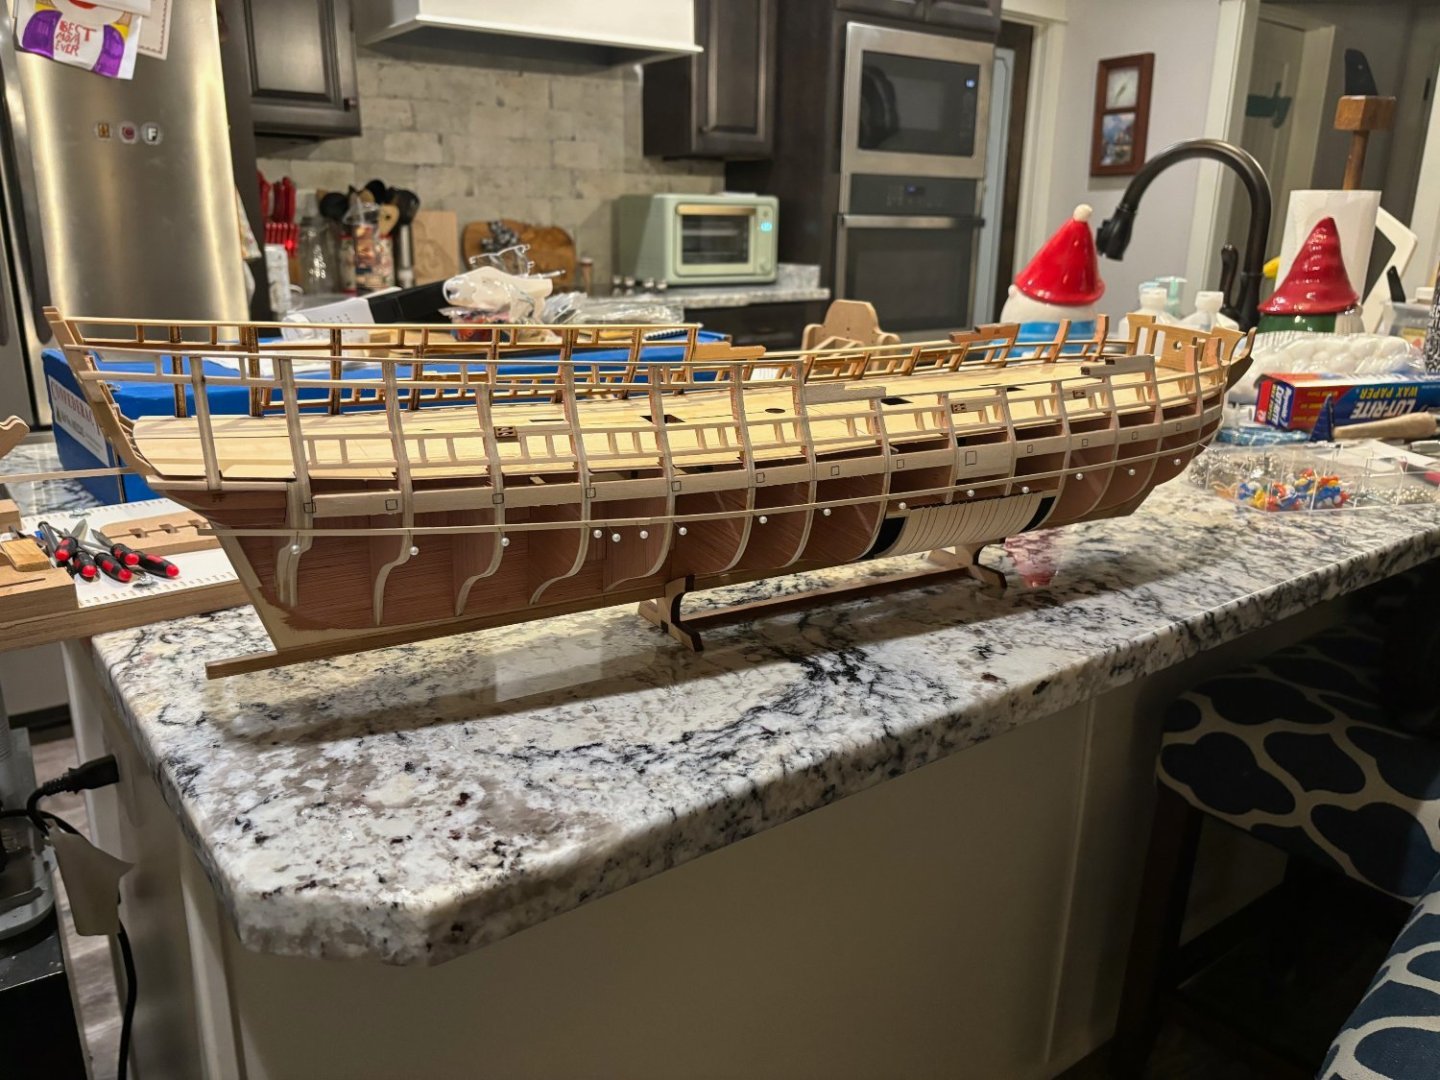
Hull planking above the wales is in full swing. I have the port side completed through the channel wales. I did have to redo the bow on the port side about 3 times before I was happy with it. The starboard side is about halfway done to the point of the port side. Once I get it there, I will continue to plank up to the sheer line on both sides. Progress is slow, but I'm learning a lot and having fun.

-
Jim, I must say that your Winnie looks absolutely amazing thus far. I only hope that my build will come out looking that good. I am about to start cutting out the bulkheads. I also purchased the NRG half hull planking kit. Guess I should get cracking on it to get some good planking practice in.
-
Hull planking above the wales has begun! I have completed the lower counter and have completed 4 strakes on the port side. I started with the top strake of the wales, then added the black strake above it and have also gotten 2 more strakes completed above the black strake. All of this work was completed in about 8-10 hours total over 2-3 days. I am taking my time and checking the plans frequently for each strake.


-
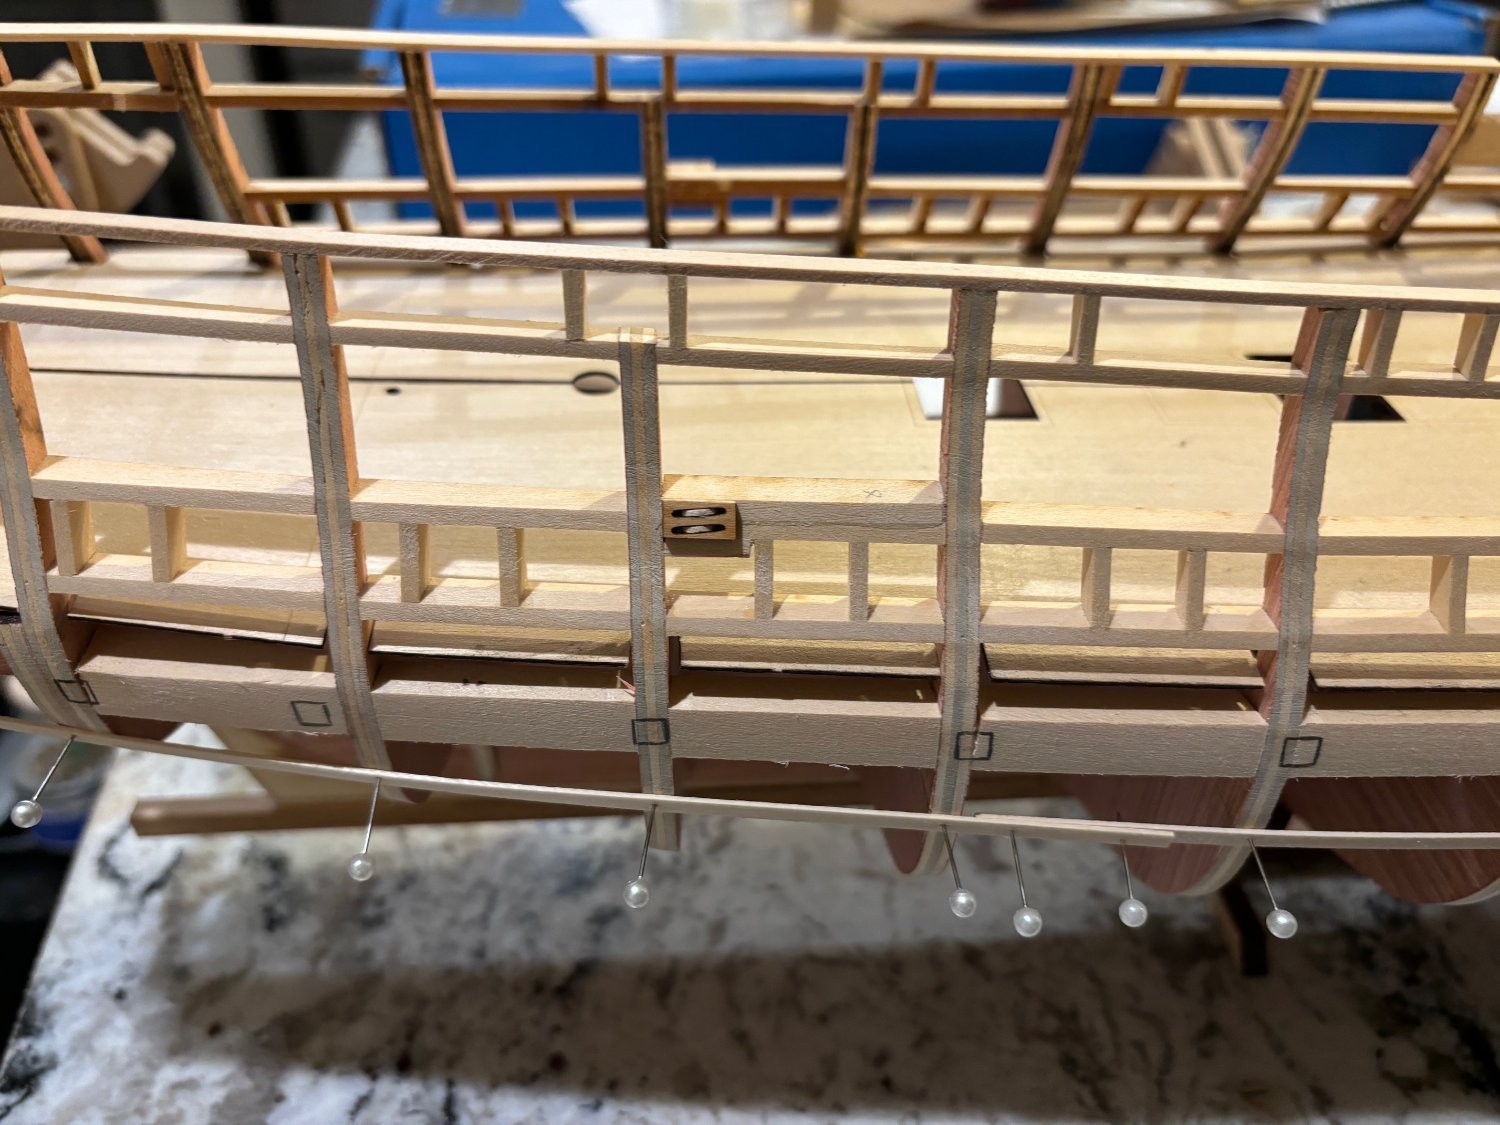
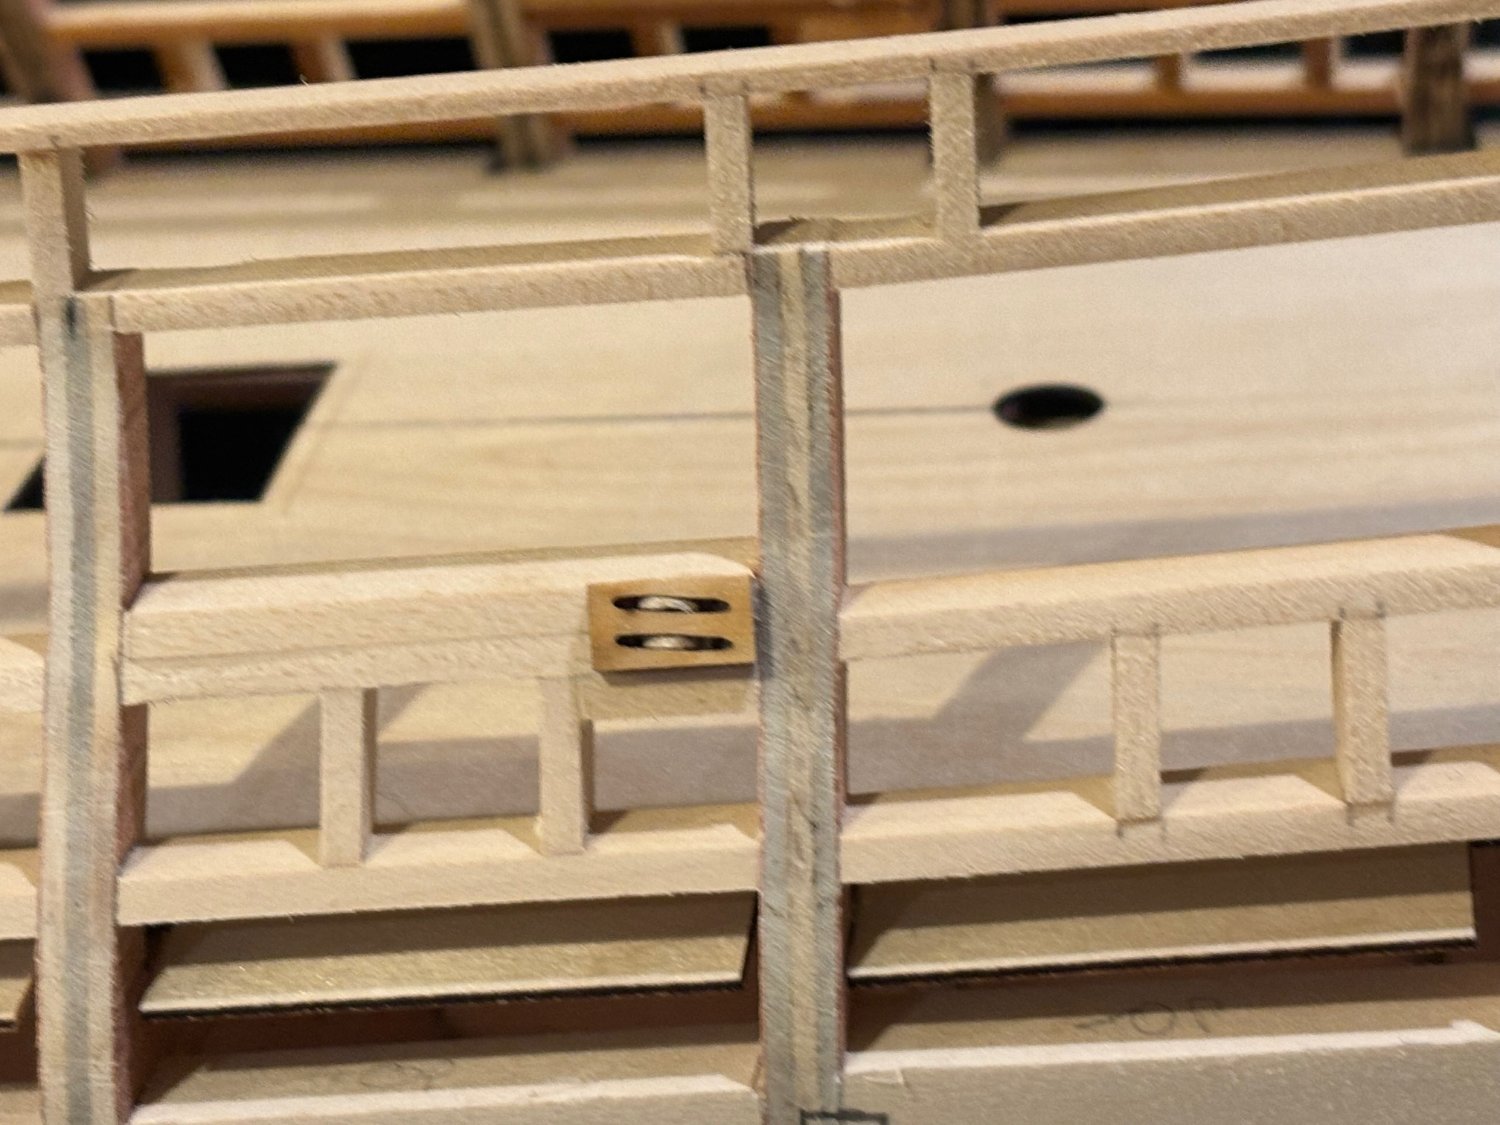
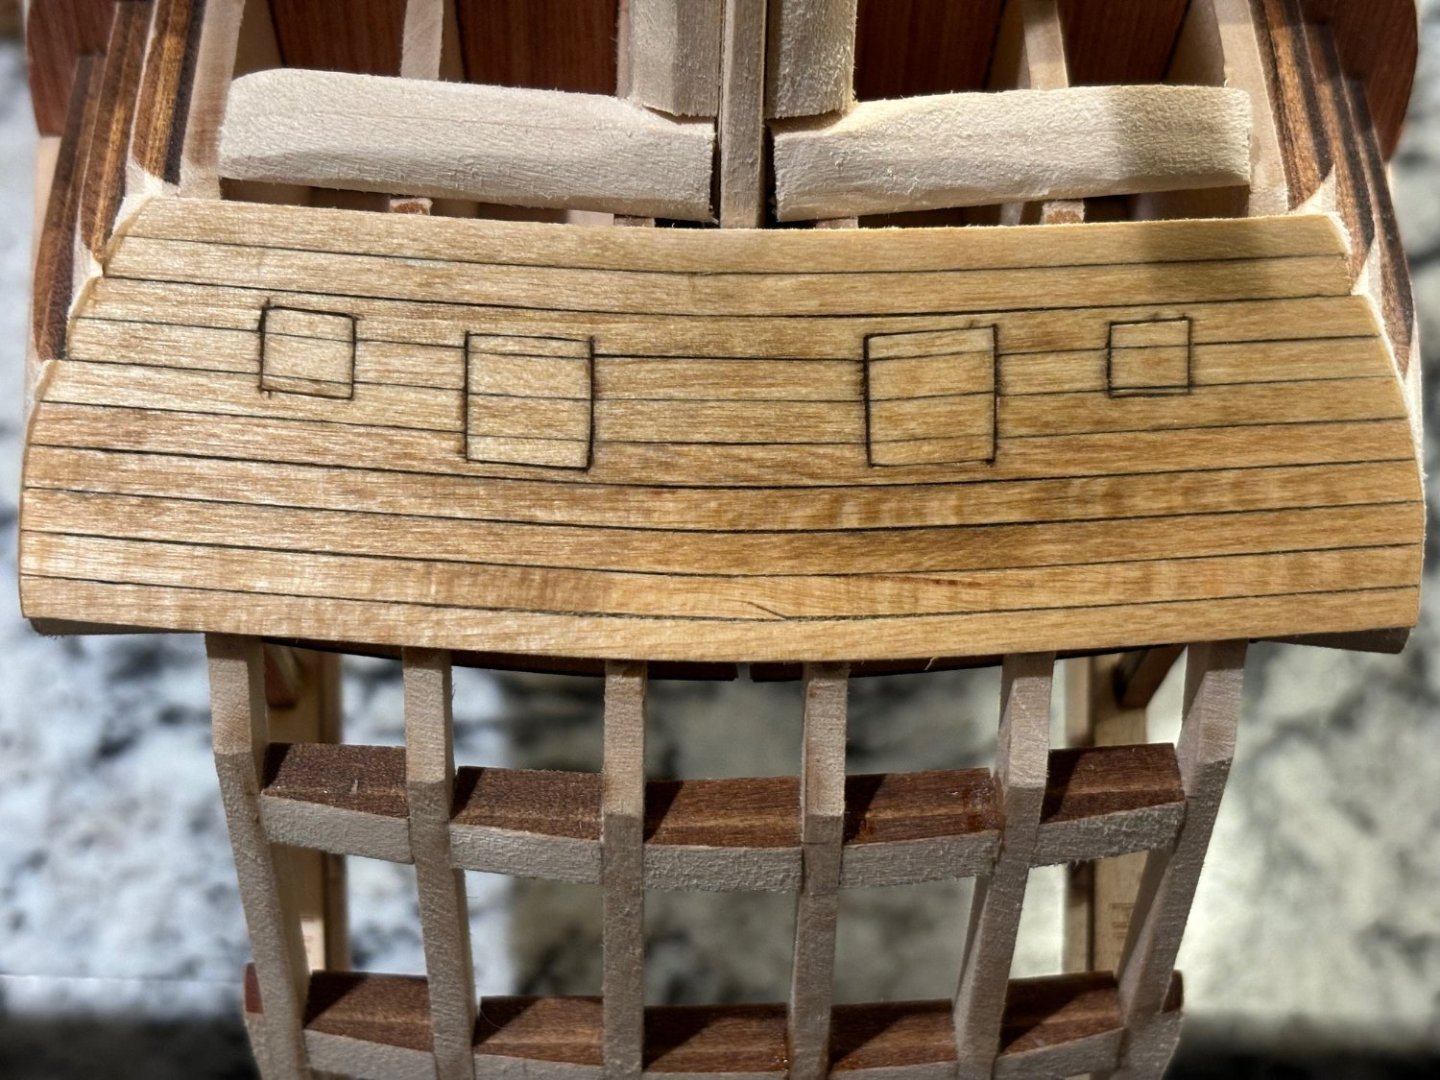
Huge milestone achieved today. I finished up the simulated hull sheaves and that means that it is now on to Chapter 5; planking the hull. I started by running a batten on both the port and starboard sides at the reference marks to establish a smooth run for the top of the wales. Tomorrow I plan to get the gun ports painted red and start planking the lower counter. I do have to admit that I love the lines on here. She is a very majestic looking ship in my opinion.


-
That's a good distance. I only ask because I have family there. My mother's side of the family. Haven't been back in a very long time. Too expensive to fly from the States.
-
Servus! Welcome to MSW. How far is Augsburg from Eschenbach opf from you? Lovely looking model as well.
-
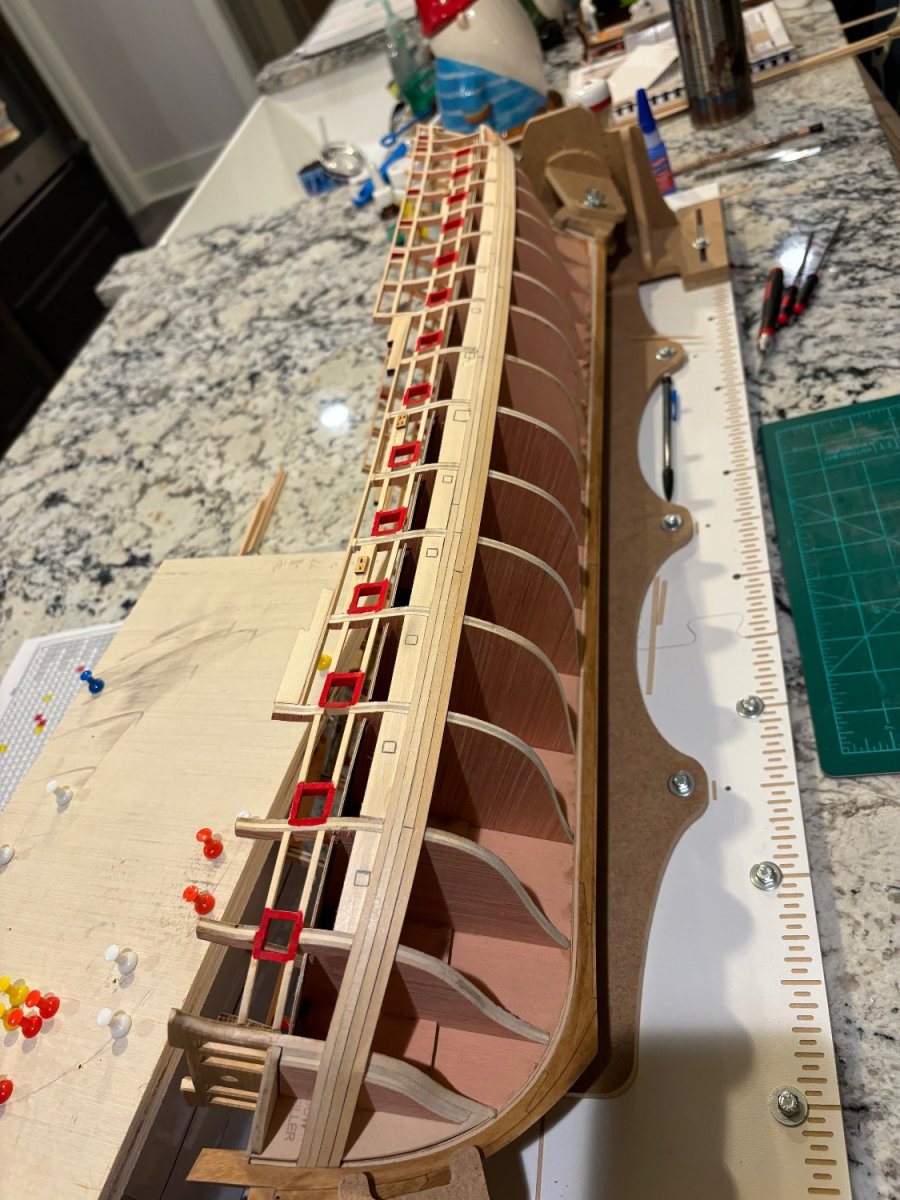
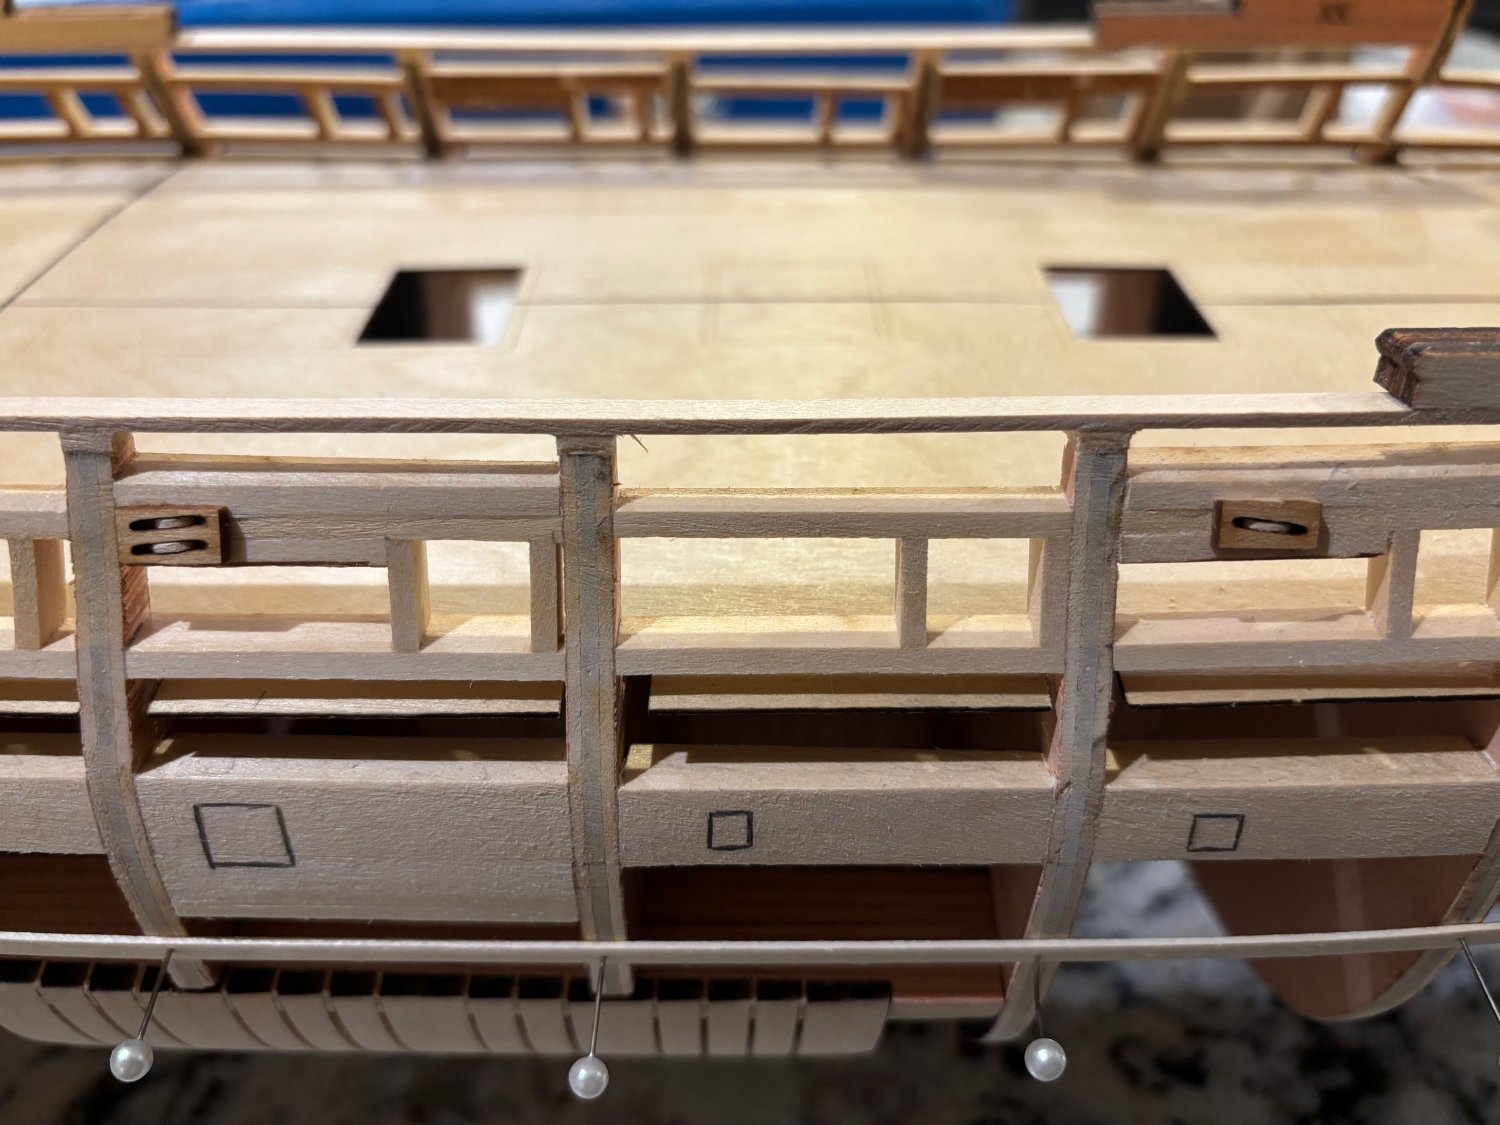
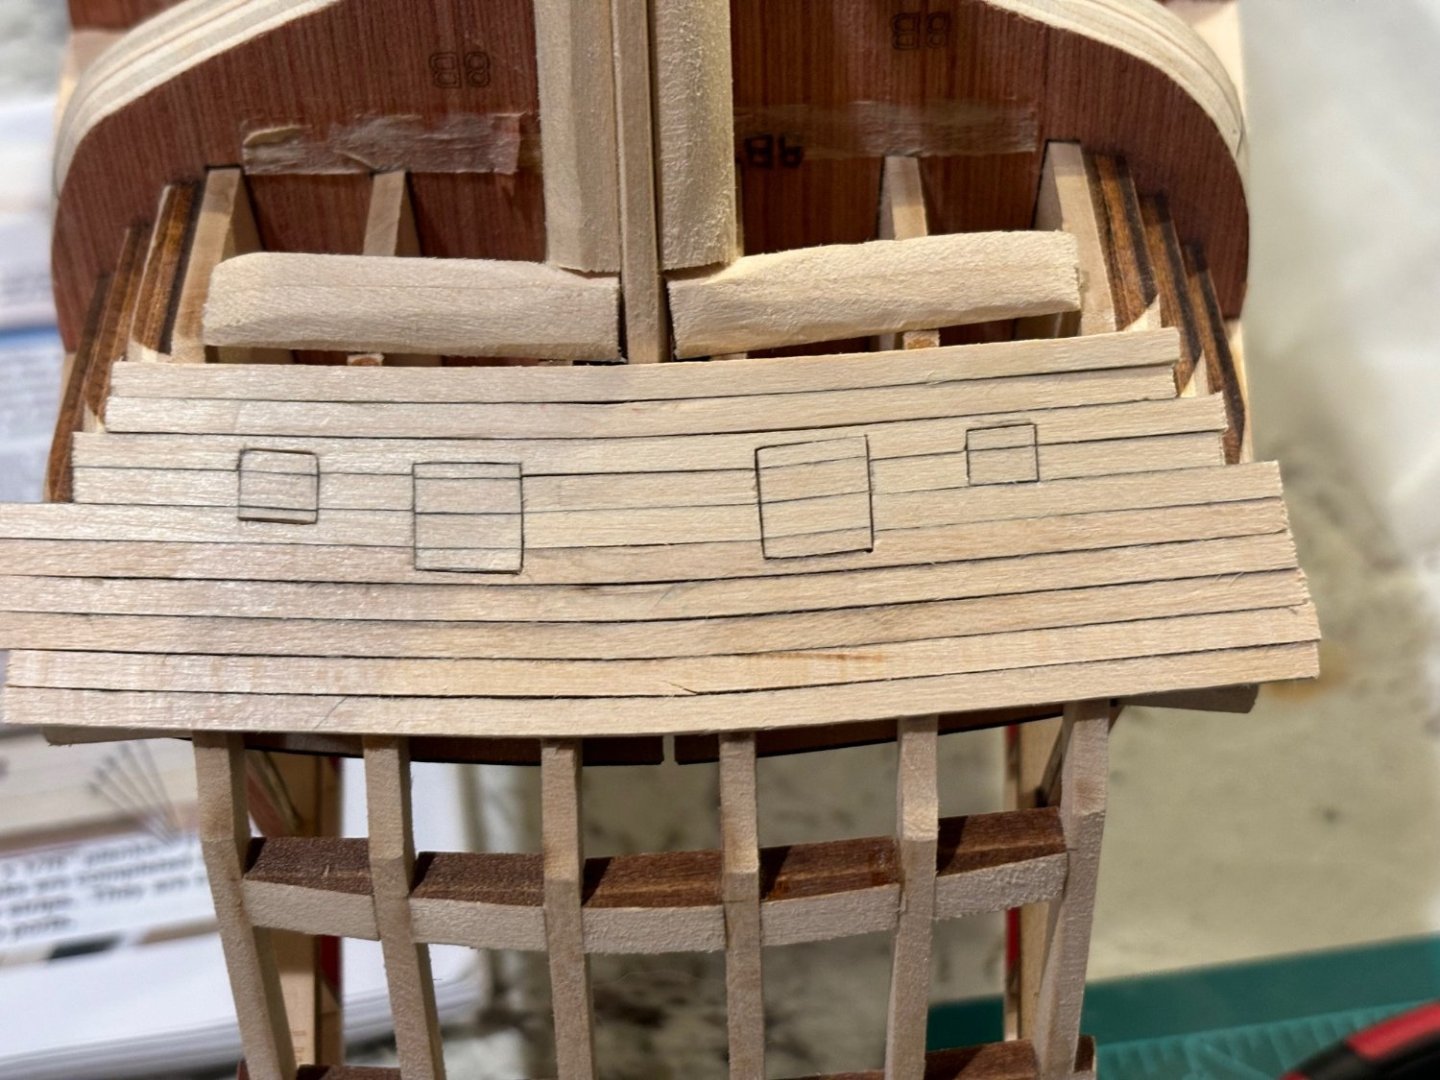
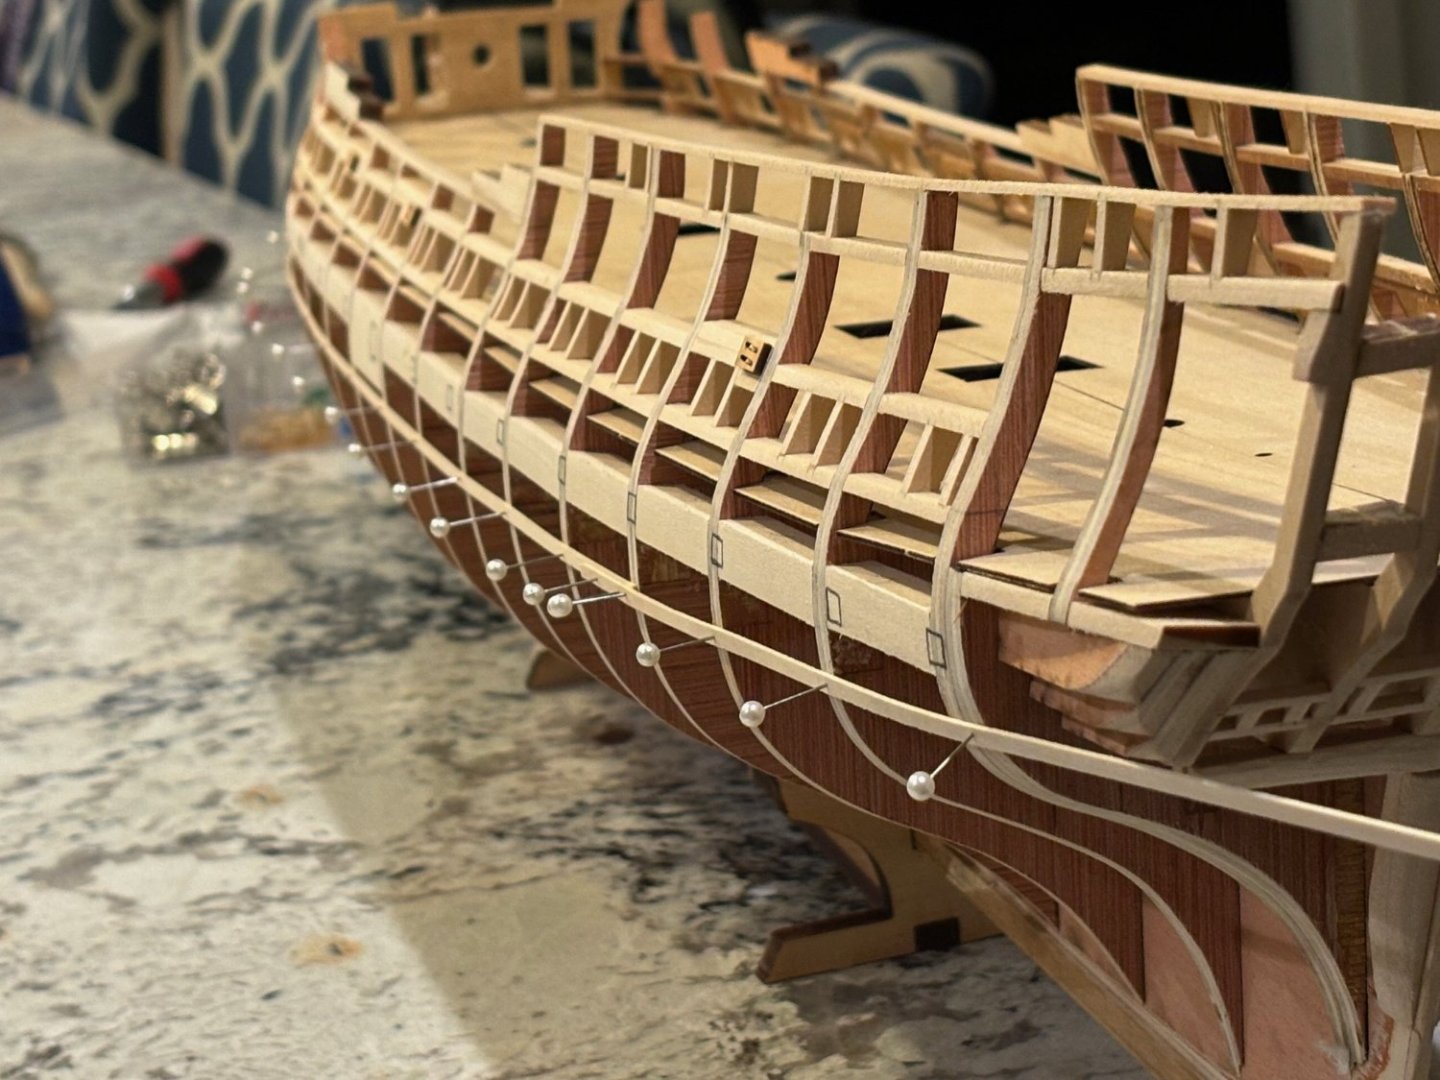
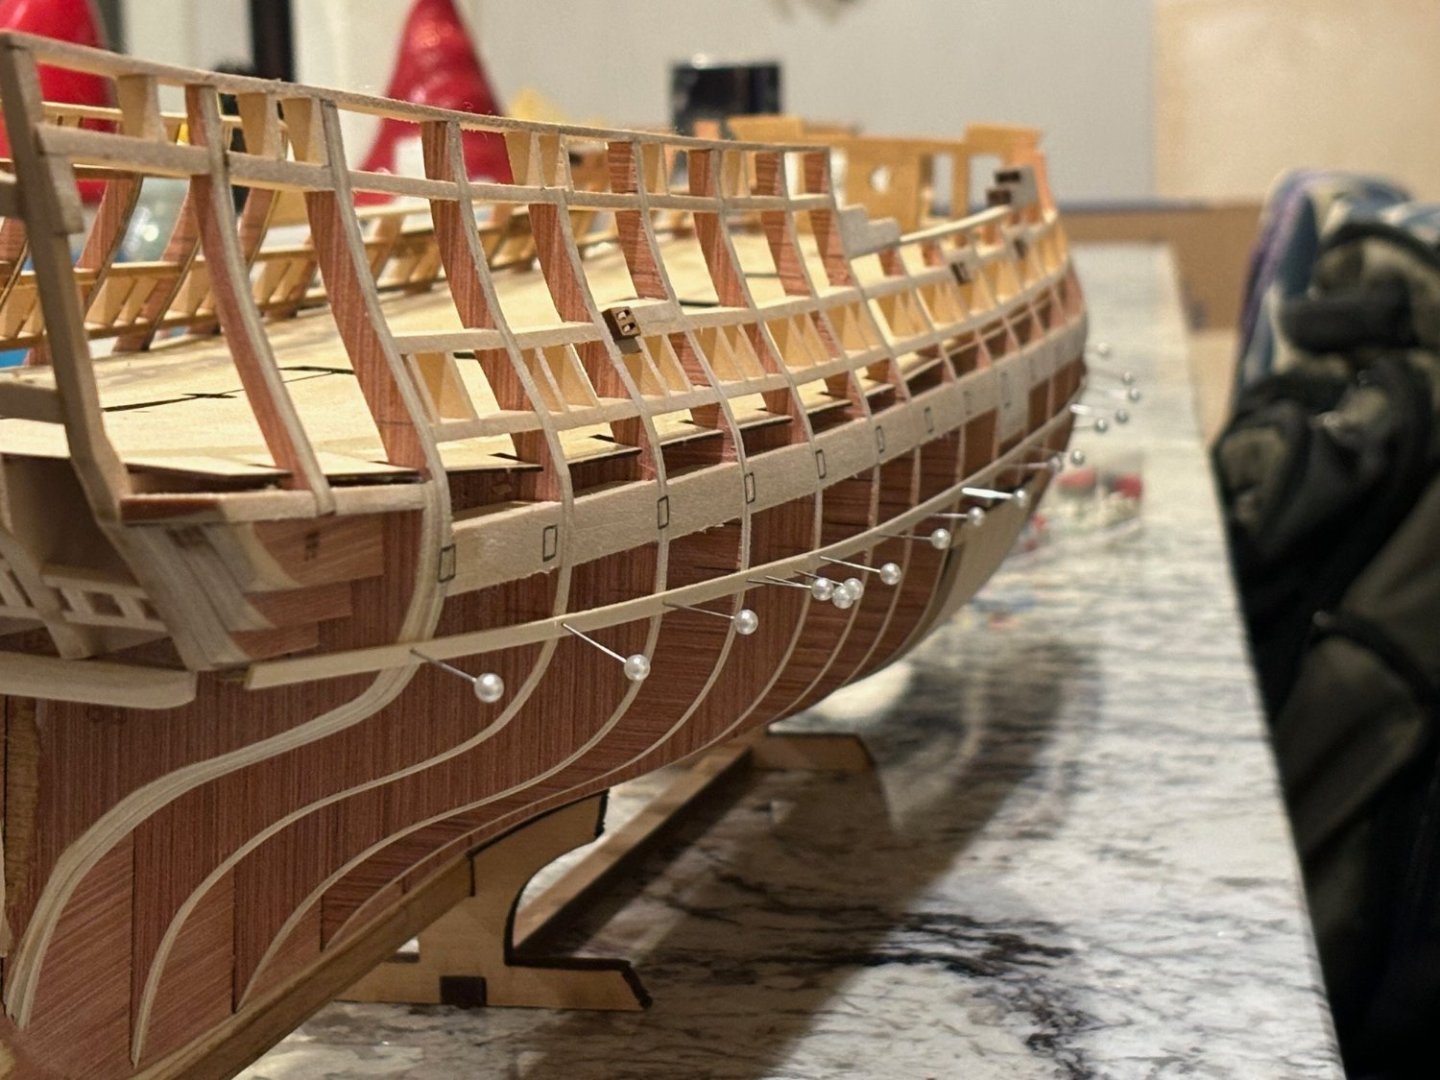
I got the dip in the fwd part of the false deck and the sheer line straightened out. Took a couple of shims to get it right, but it looks a lot better now. I then proceeded with finishing the fairing on the sweep ports and installing the extra framing pieces needed to install the hull sheaves. Getting very close to having her ready for planking. That will be a huge milestone for me.


-
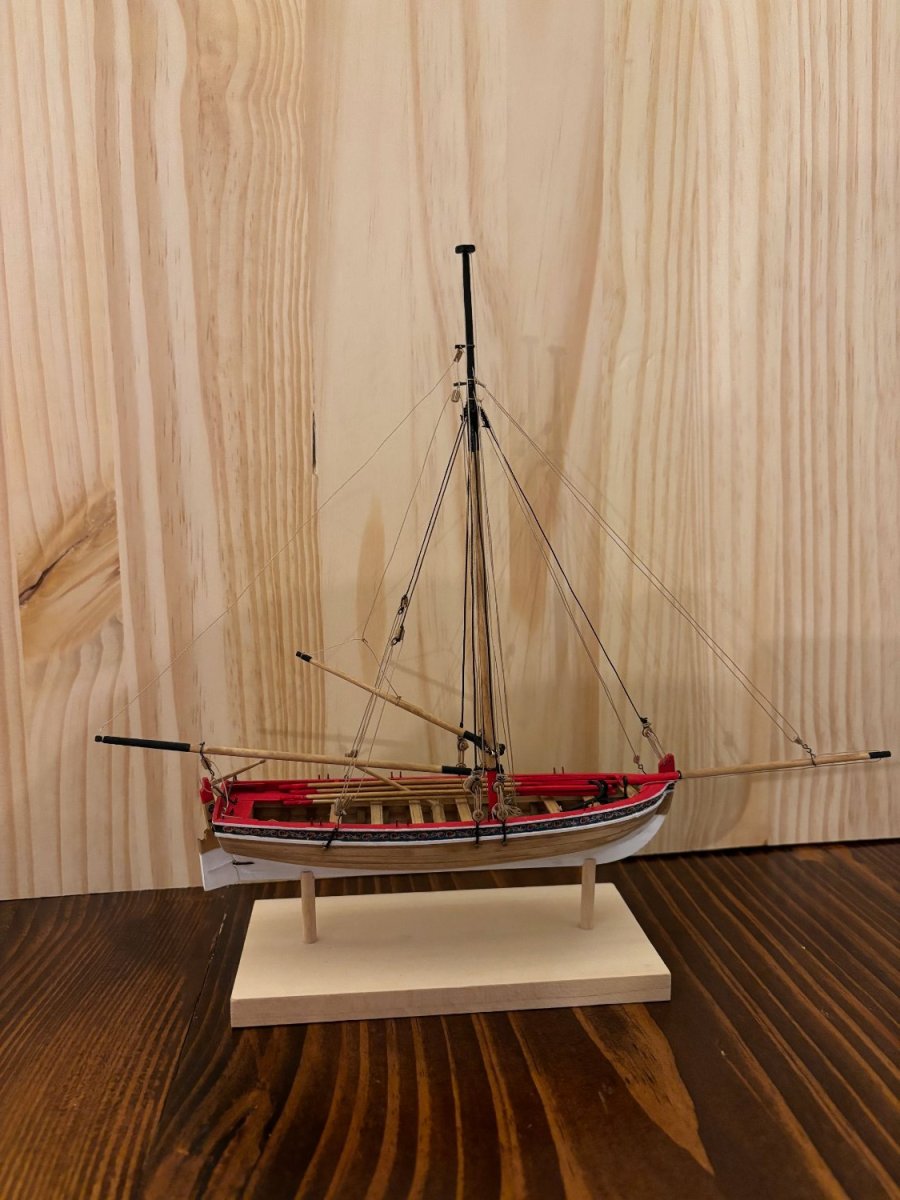
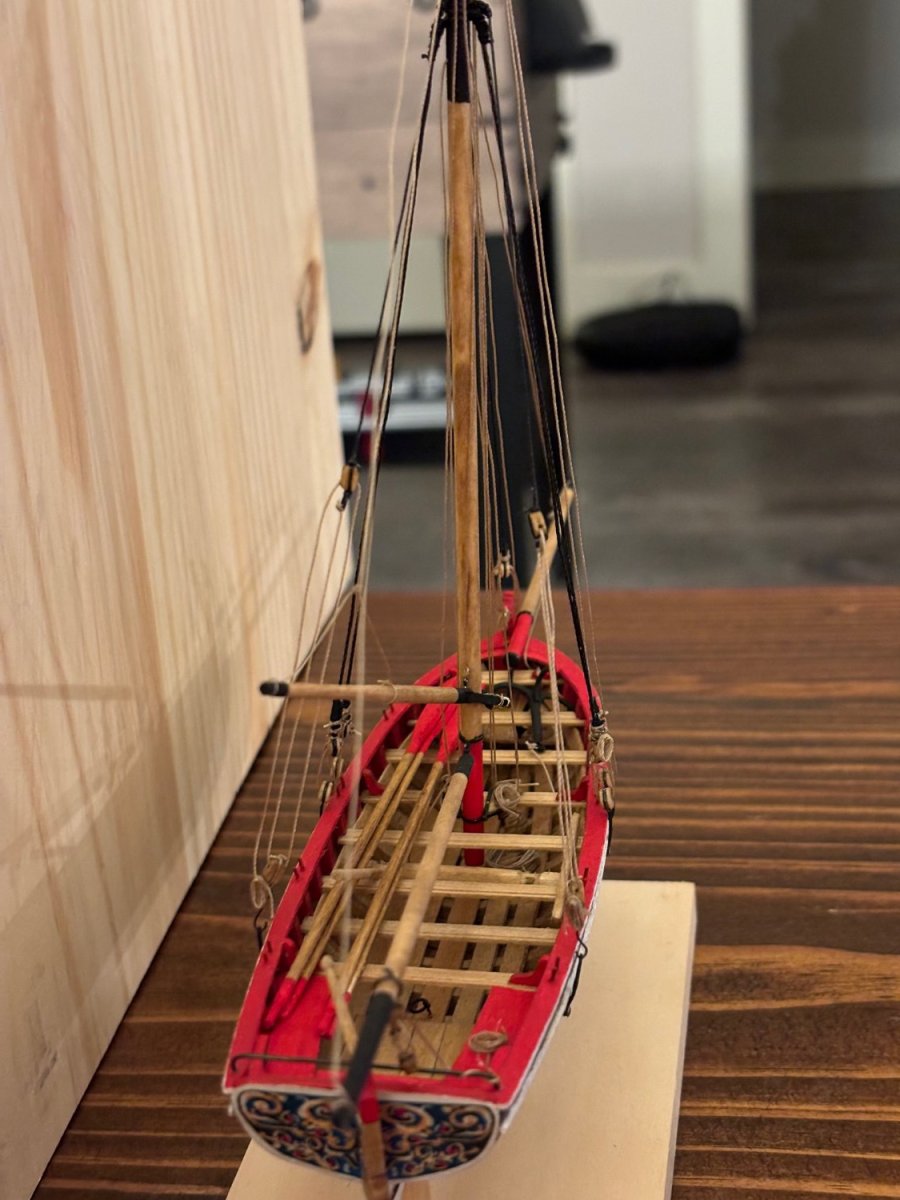
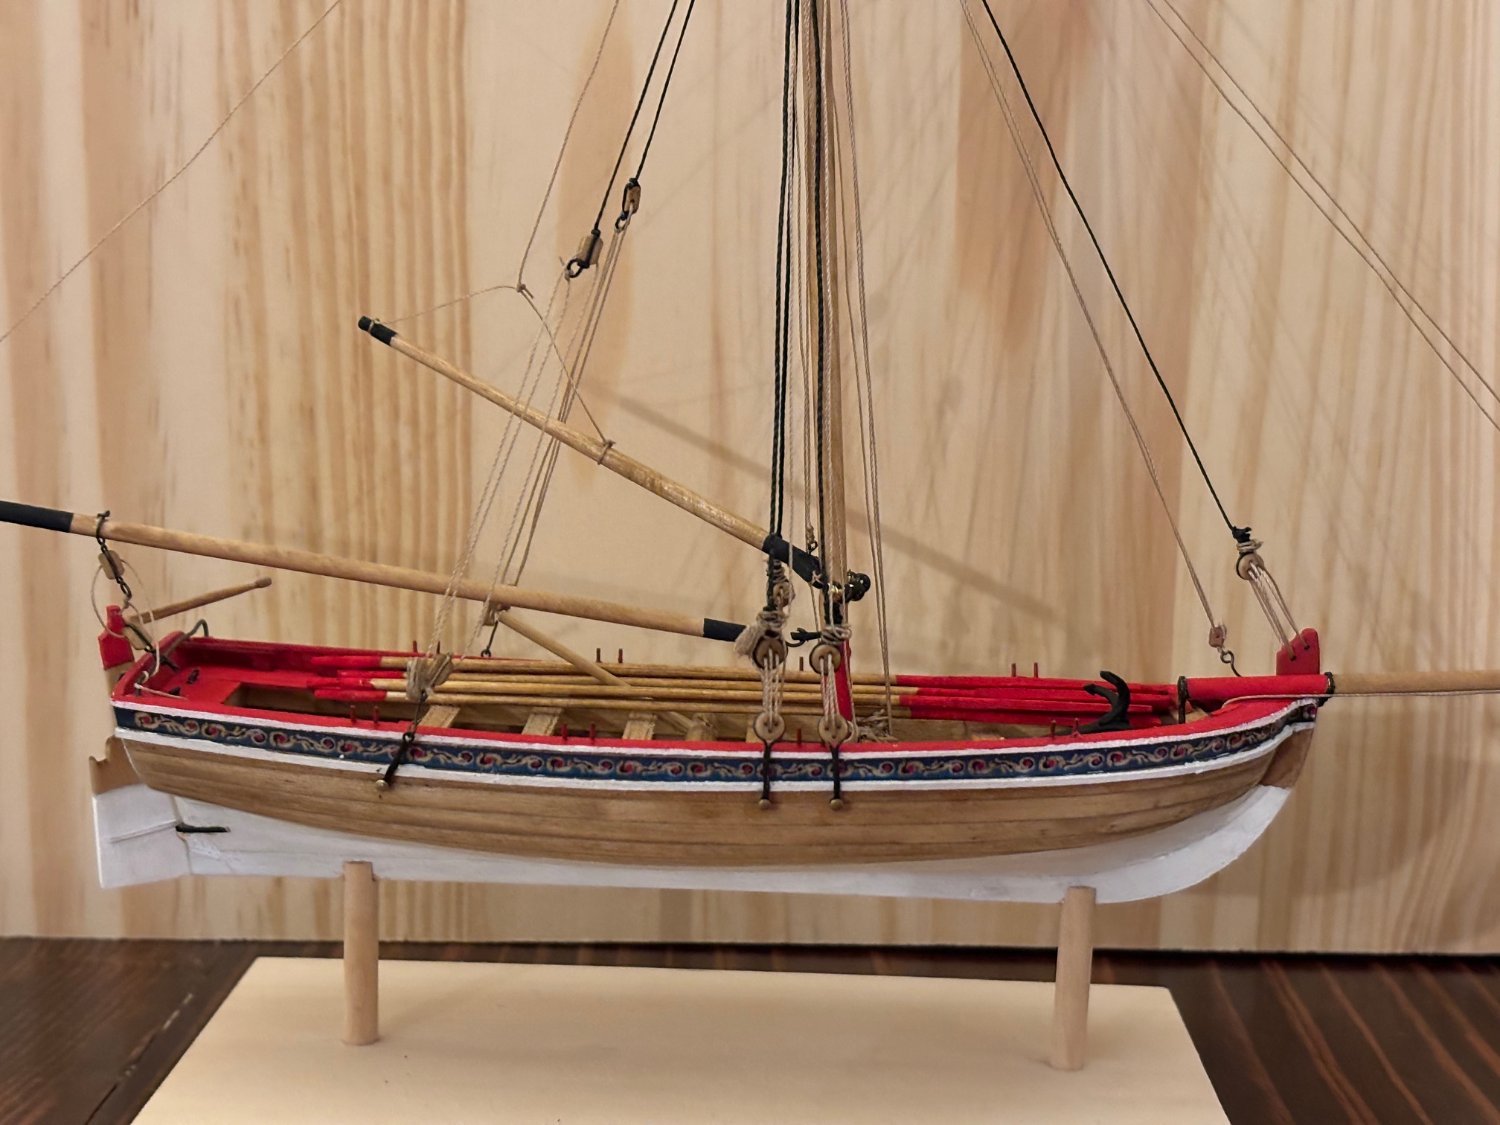
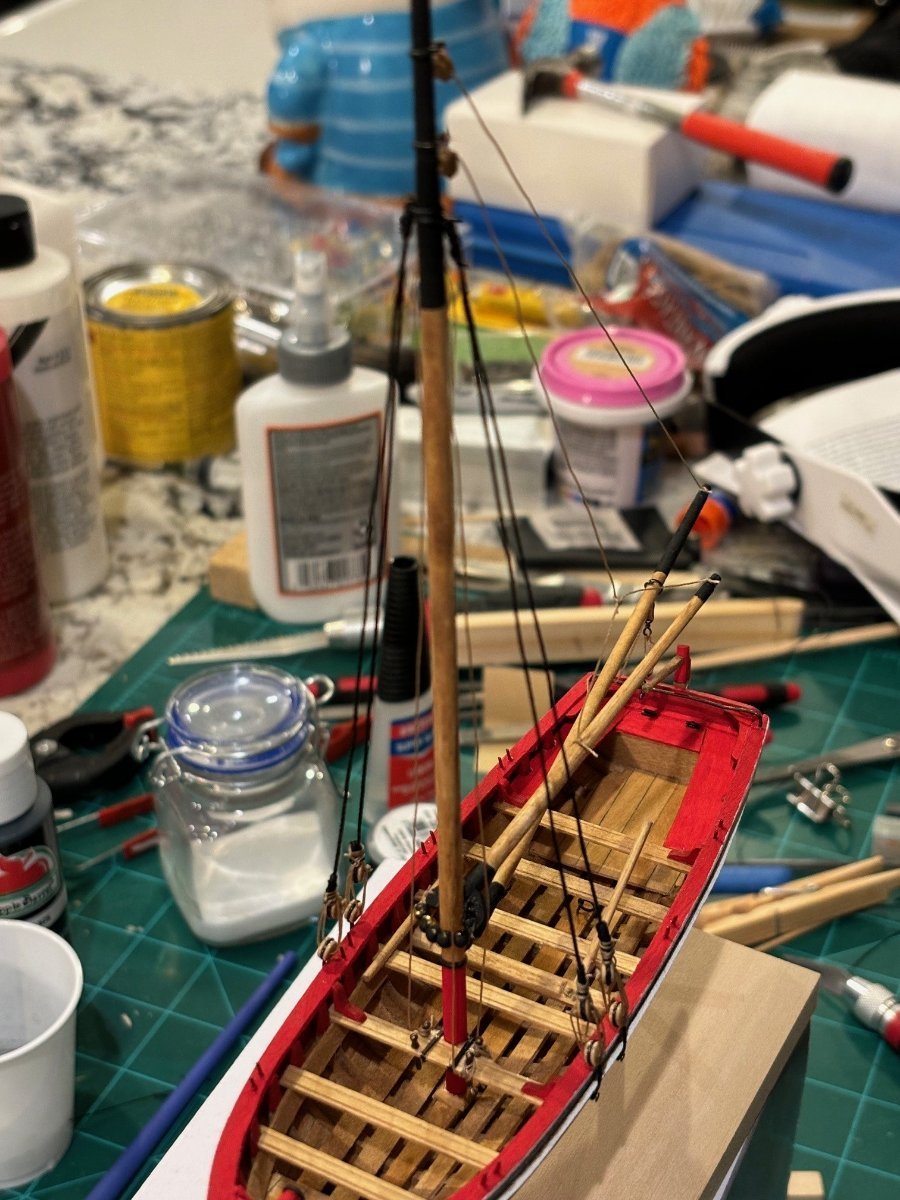
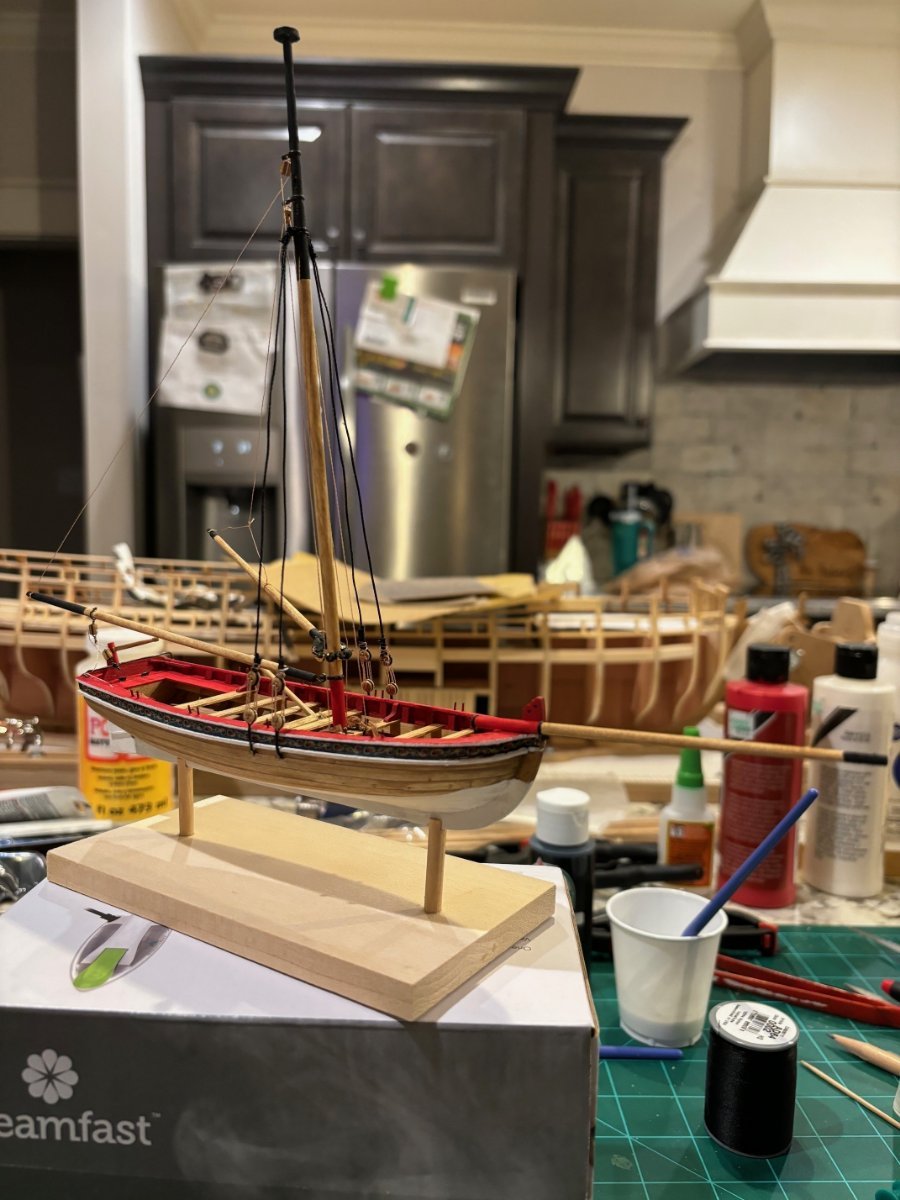
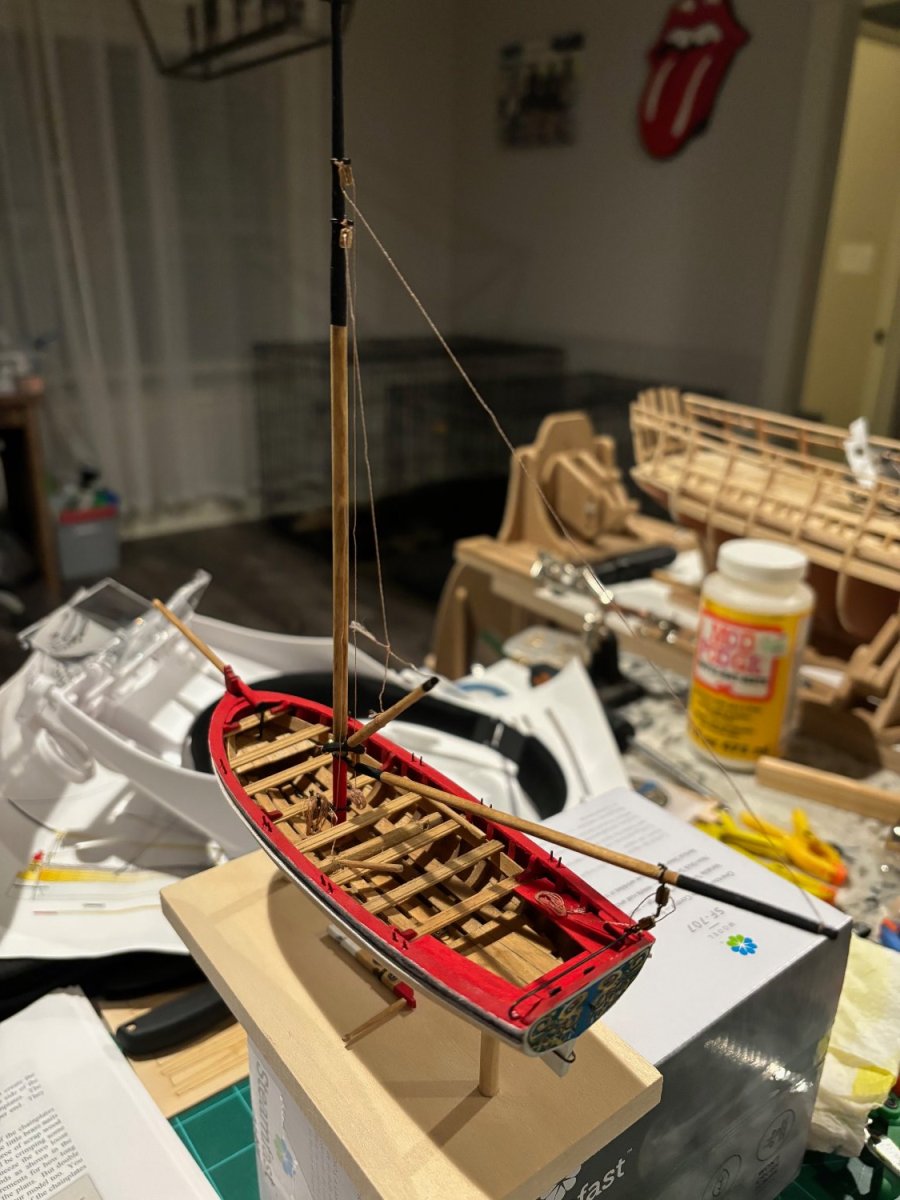
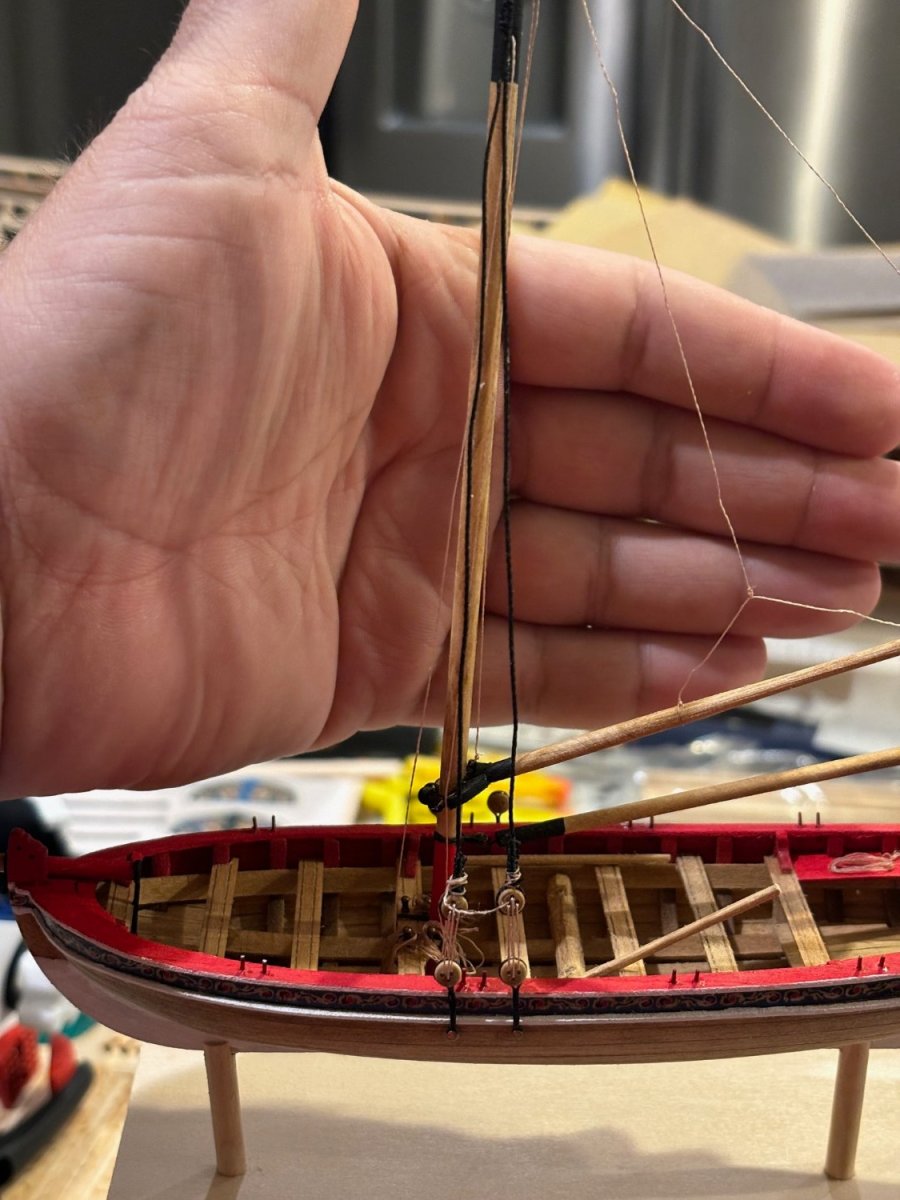
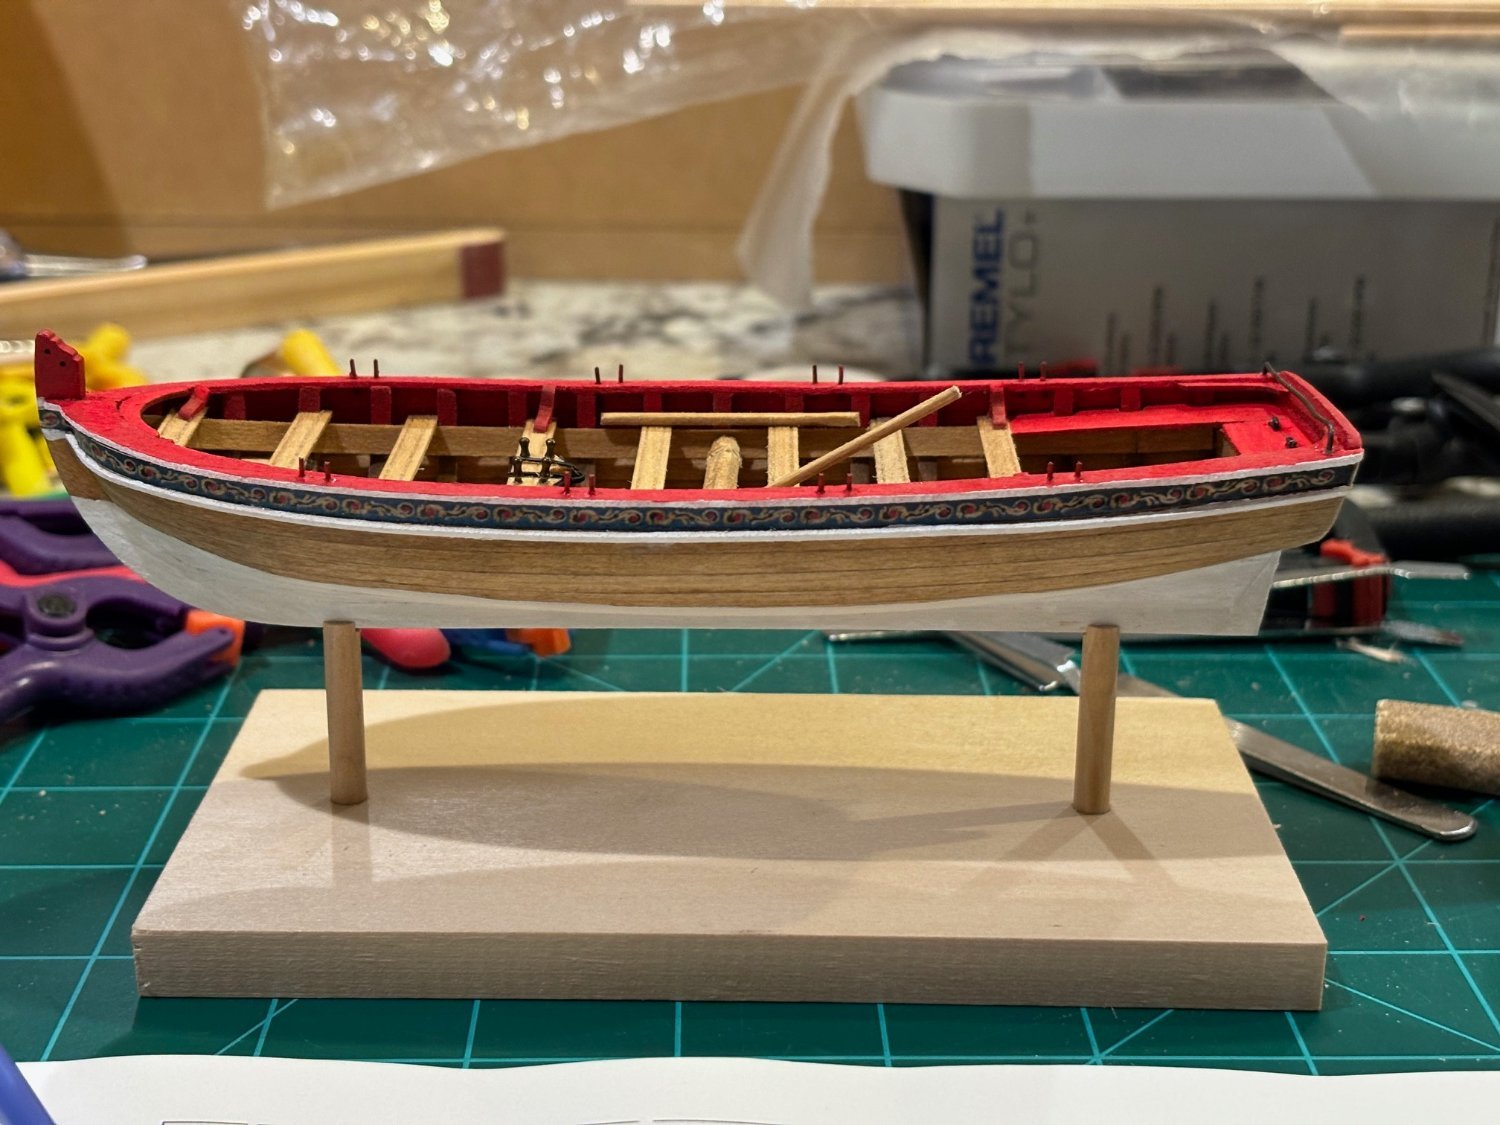
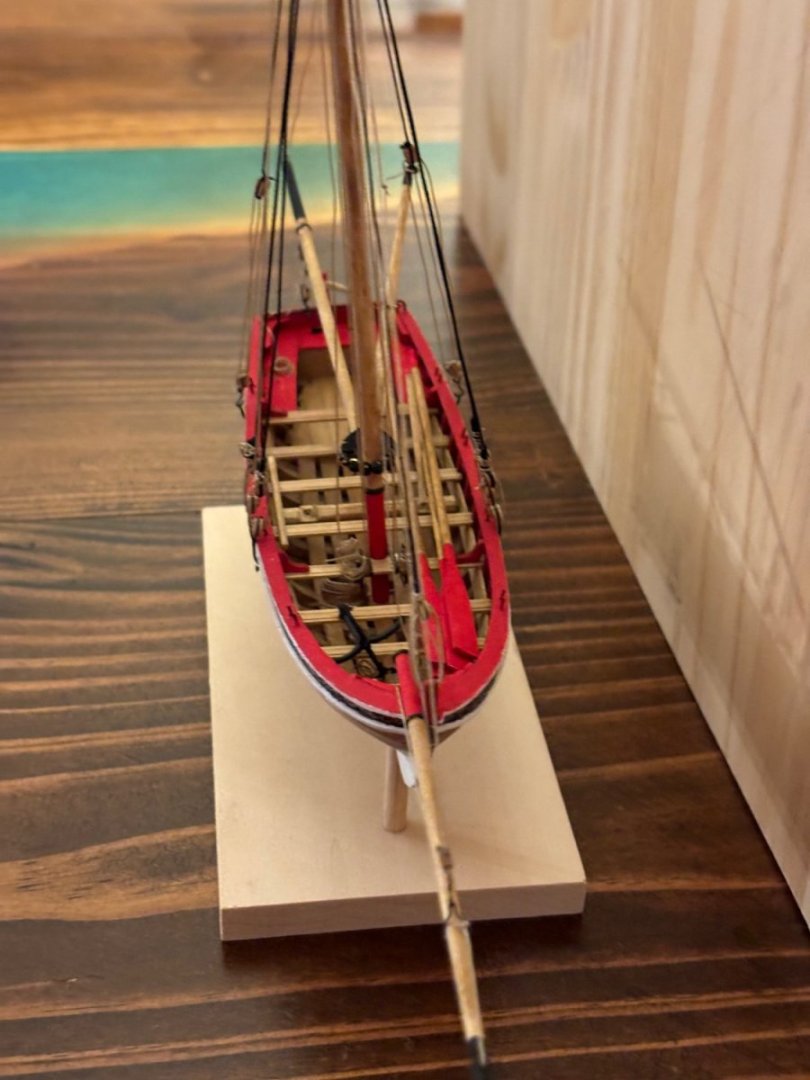
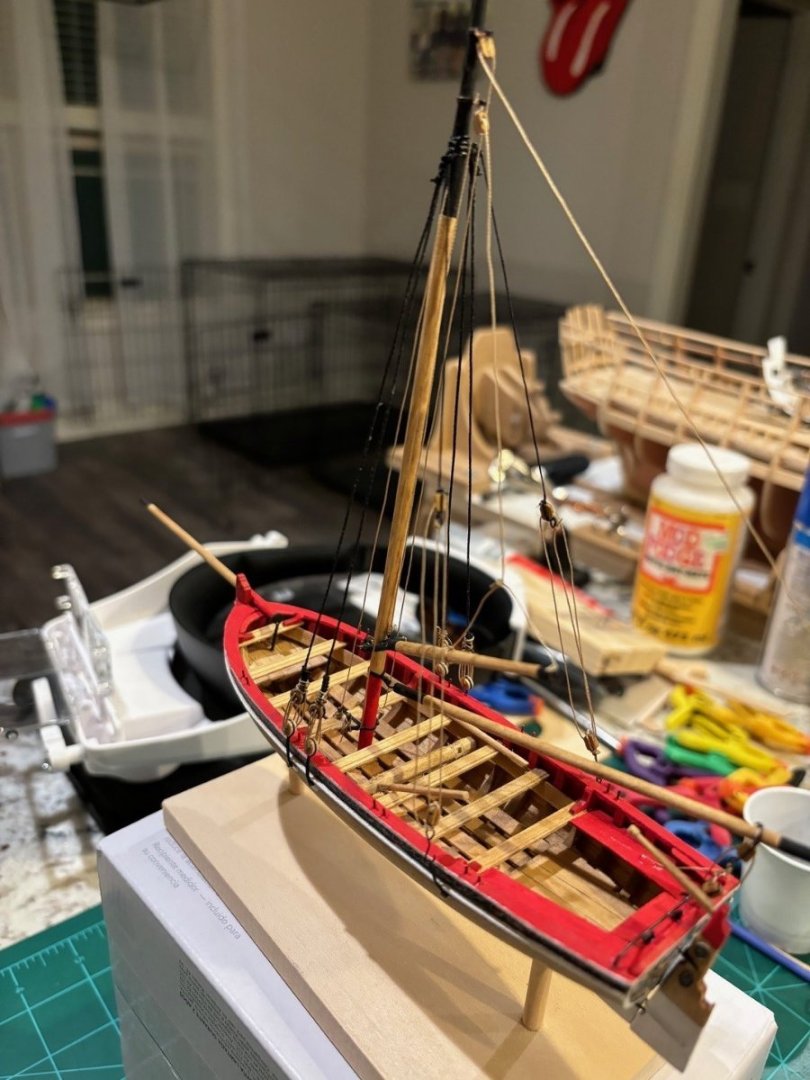
Happy New Year to everyone! I hope that 2024 brings all of you good fortune. I have finished the longboat. The rigging was a little nerve racking to get done at this size, especially since this is the first model that I have rigged. I kept knocking the boat around while trying to get all of the lines rigged with some resemblance of tension on them. Luckily I didn't break anything. Anyways, here are the pictures of the completed model. Now to build the display case shelf for her and to shift my attention mostly to my USF Confederacy build.


- 50 replies
-
- 8
-

-
- 18th century longboat
- model shipways
- (and 1 more)
-
Thanks, this has been a fun build. I can't wait to get it finished and on display. That way I can concentrate more on the Confederacy which can be seen in some of the photos. Also, the Stones are cool. I like most early rock-n-roll and Lego (got a huge Lego Star Wars collection). And we have two GSDs (German Shepherd Dogs). Axel (the photo is kinda grainy; pulled it off of my iPhone) Bella (she is very submissive/loyal when it come to me)


- 50 replies
-
- 2
-
-
- 18th century longboat
- model shipways
- (and 1 more)
-
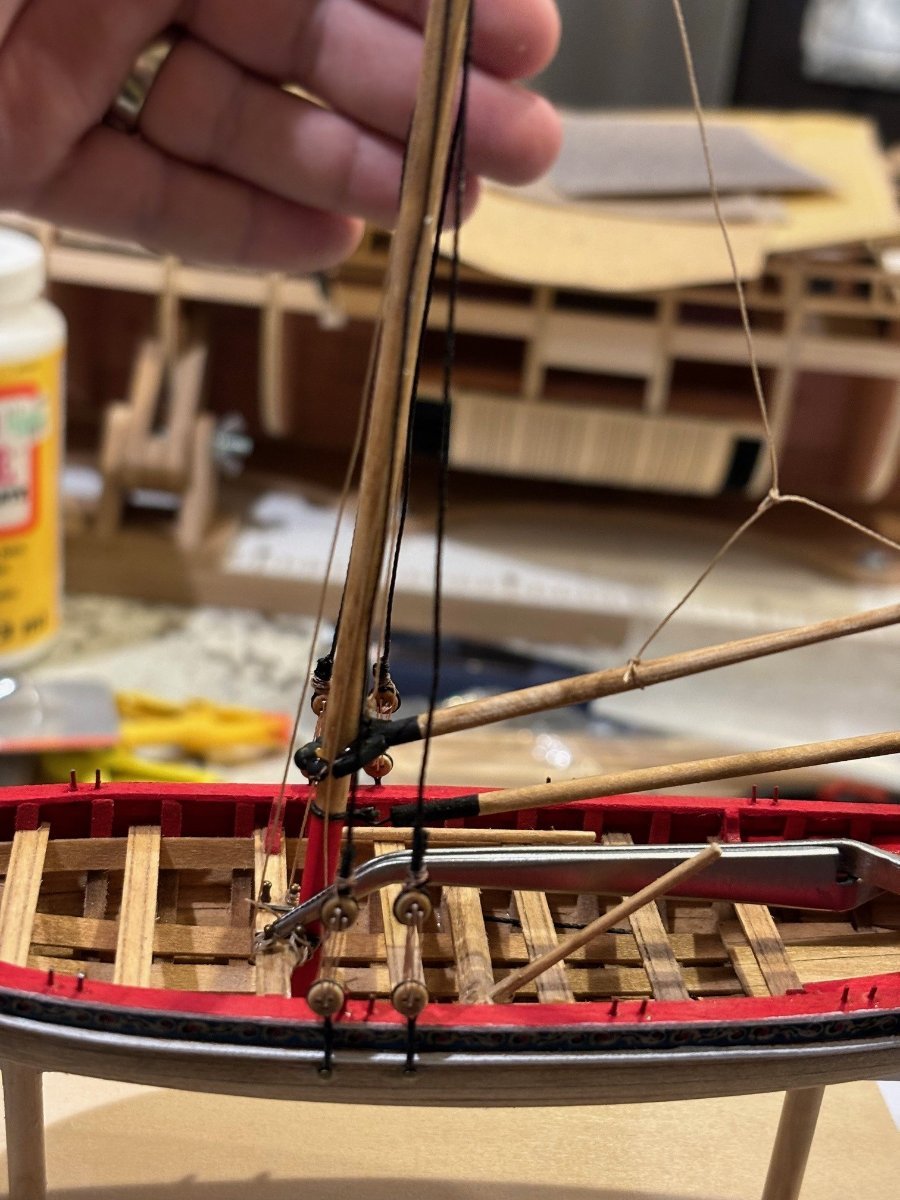
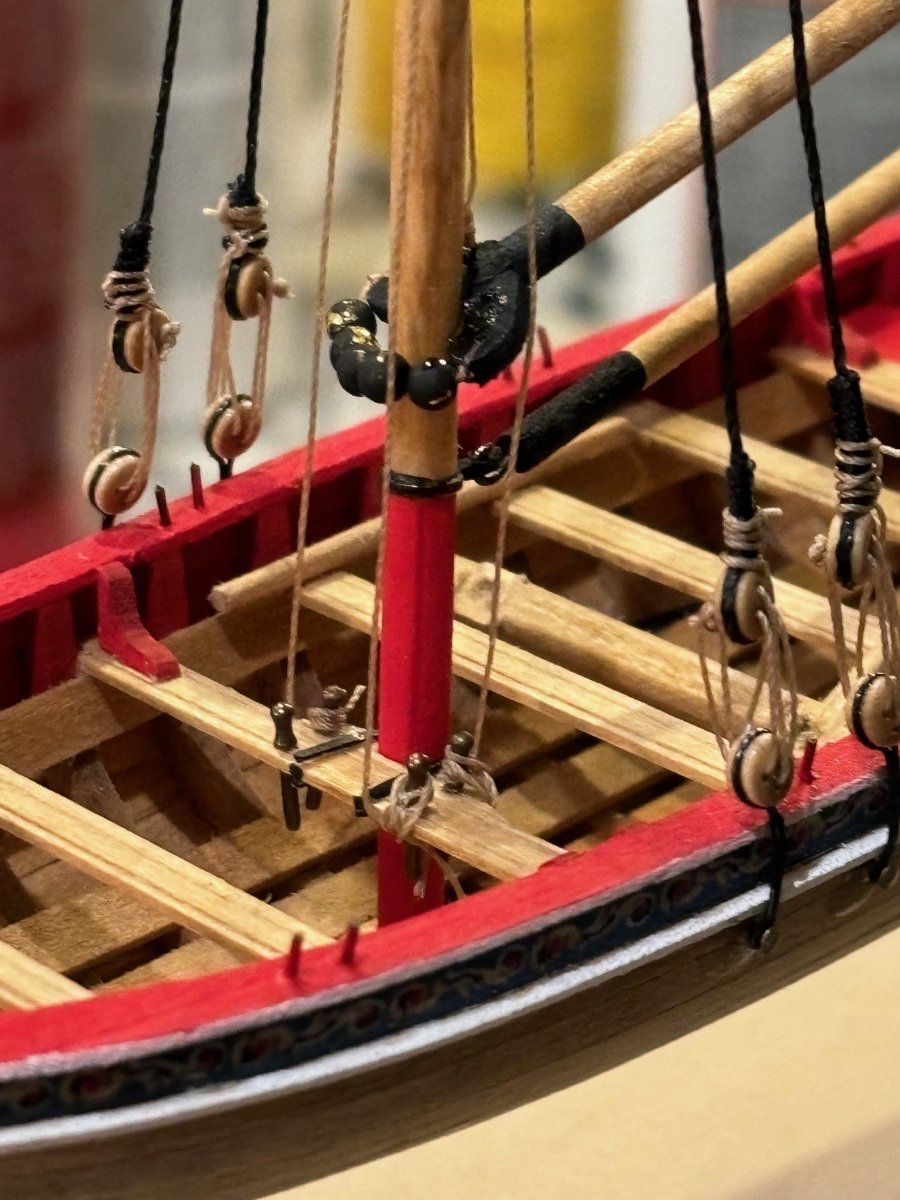
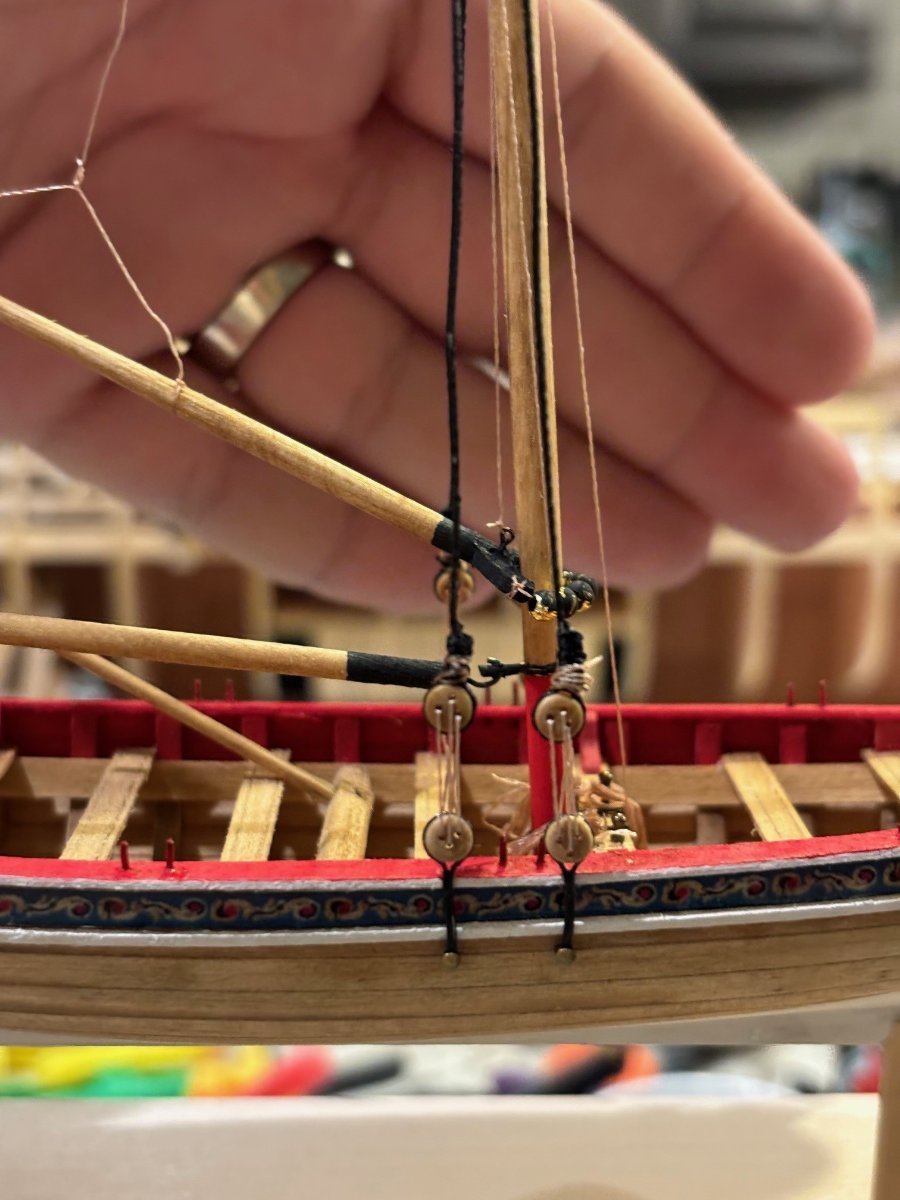
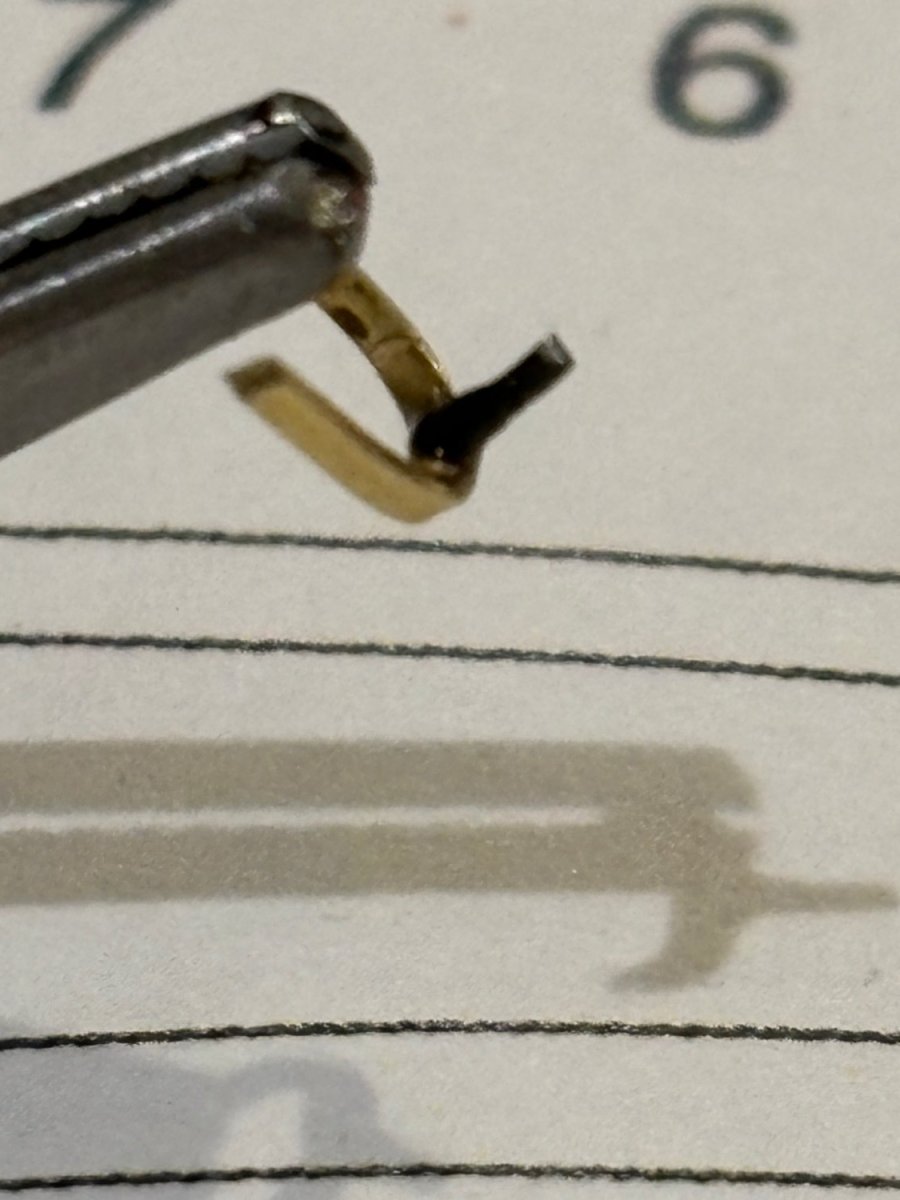
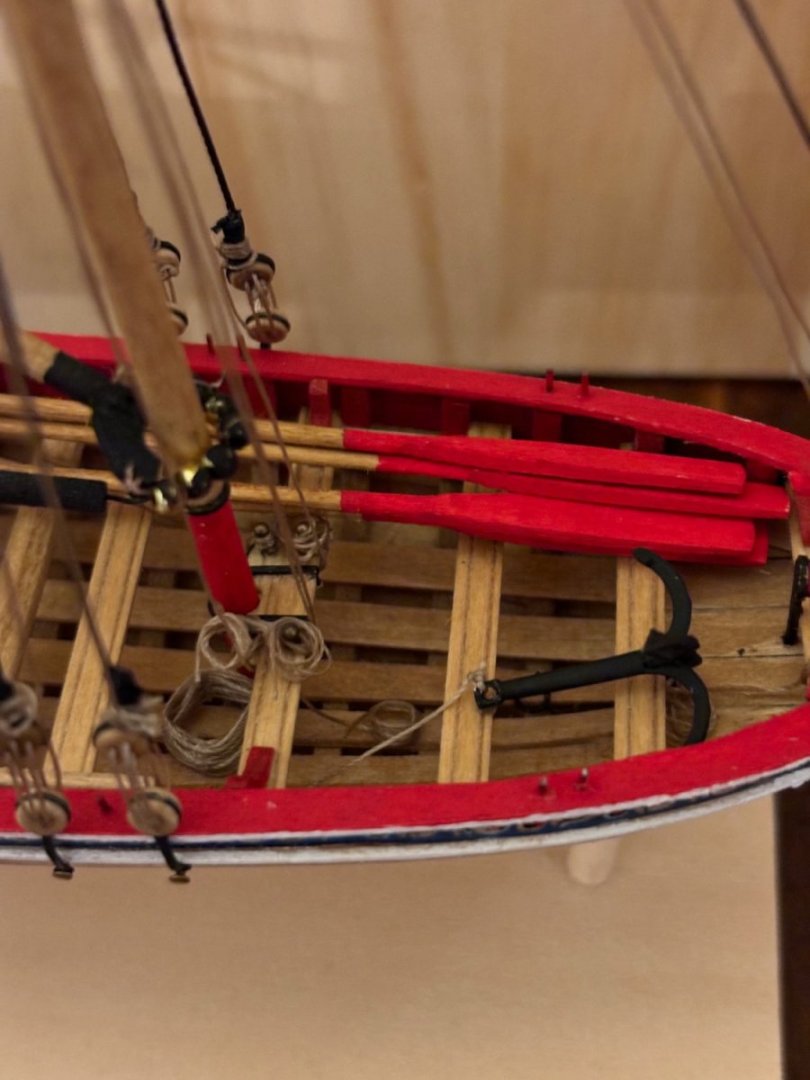
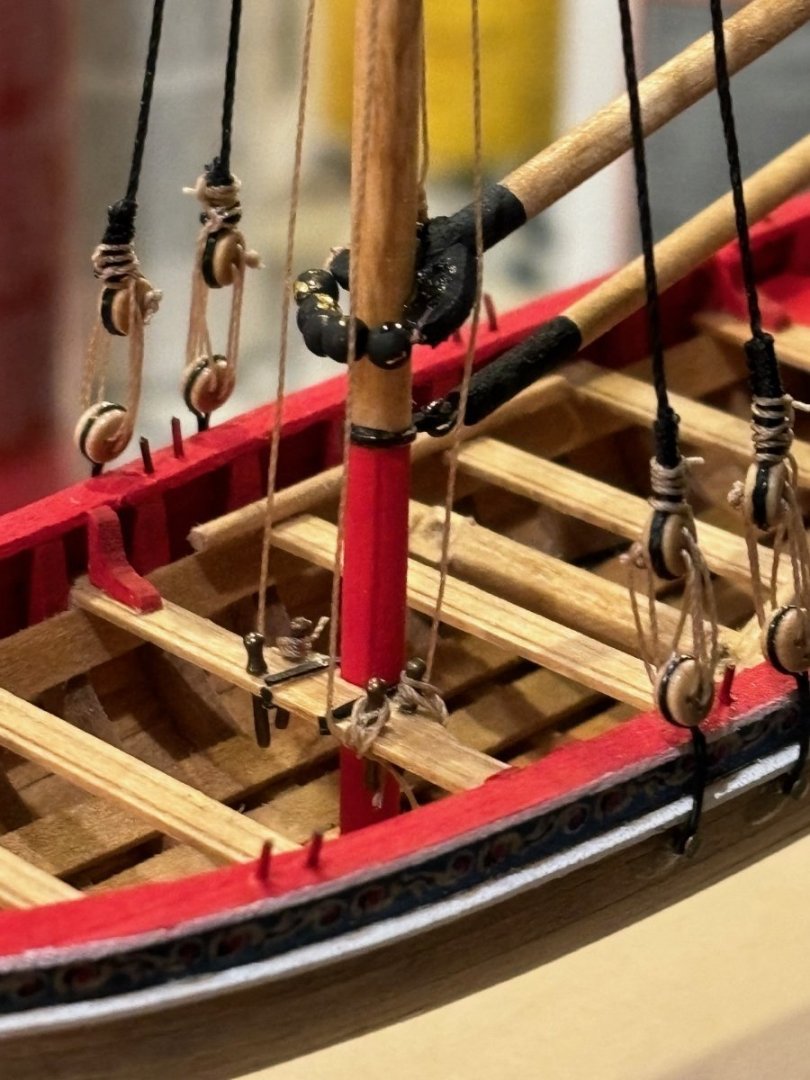
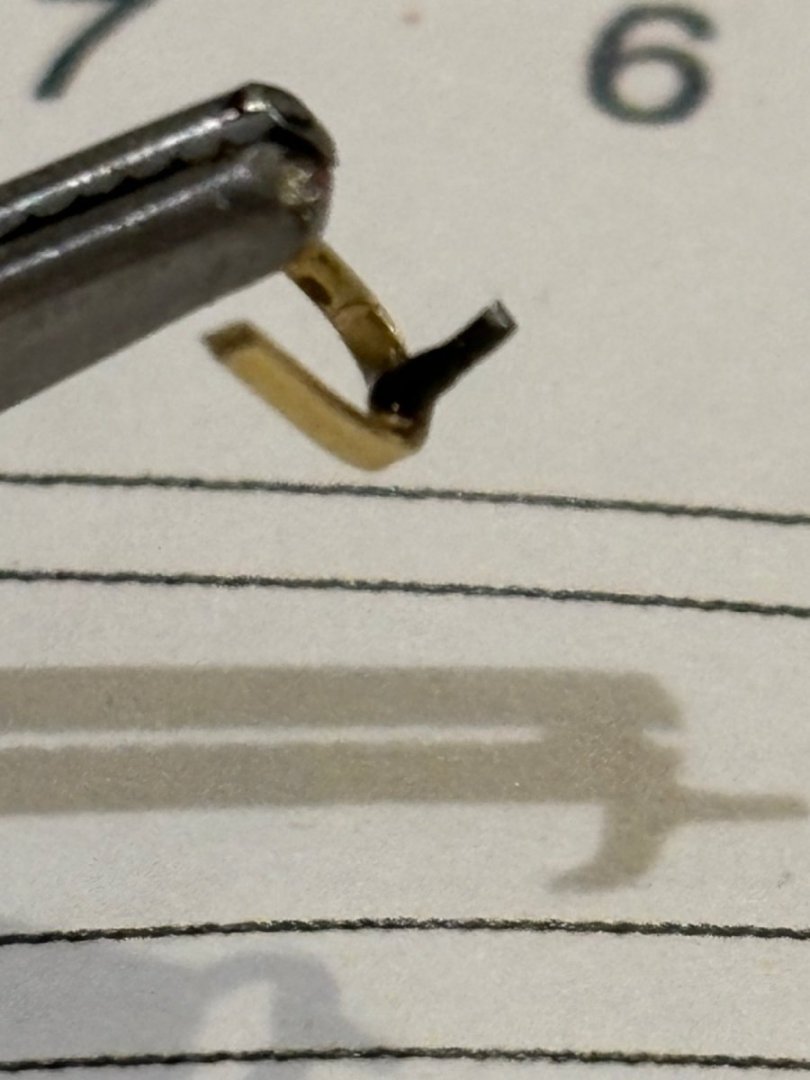
I was able to spend a couple of hours to work on rigging the backstays today. Making the tiny hooks to strop to the blocks was a pain, but I did my best. Next step to get the rest of the rigging done on the front of the boat. I'm getting excited because this build is finally coming to together and will be finished soon.
- 50 replies
-
- 4
-
-
- 18th century longboat
- model shipways
- (and 1 more)
-
Thanks, the wife lets me build in there because it keeps me close to the family. She knows that if I was told to go build in the garage, then I would never be in the house lol.
- 50 replies
-
- 3
-
-
- 18th century longboat
- model shipways
- (and 1 more)
-
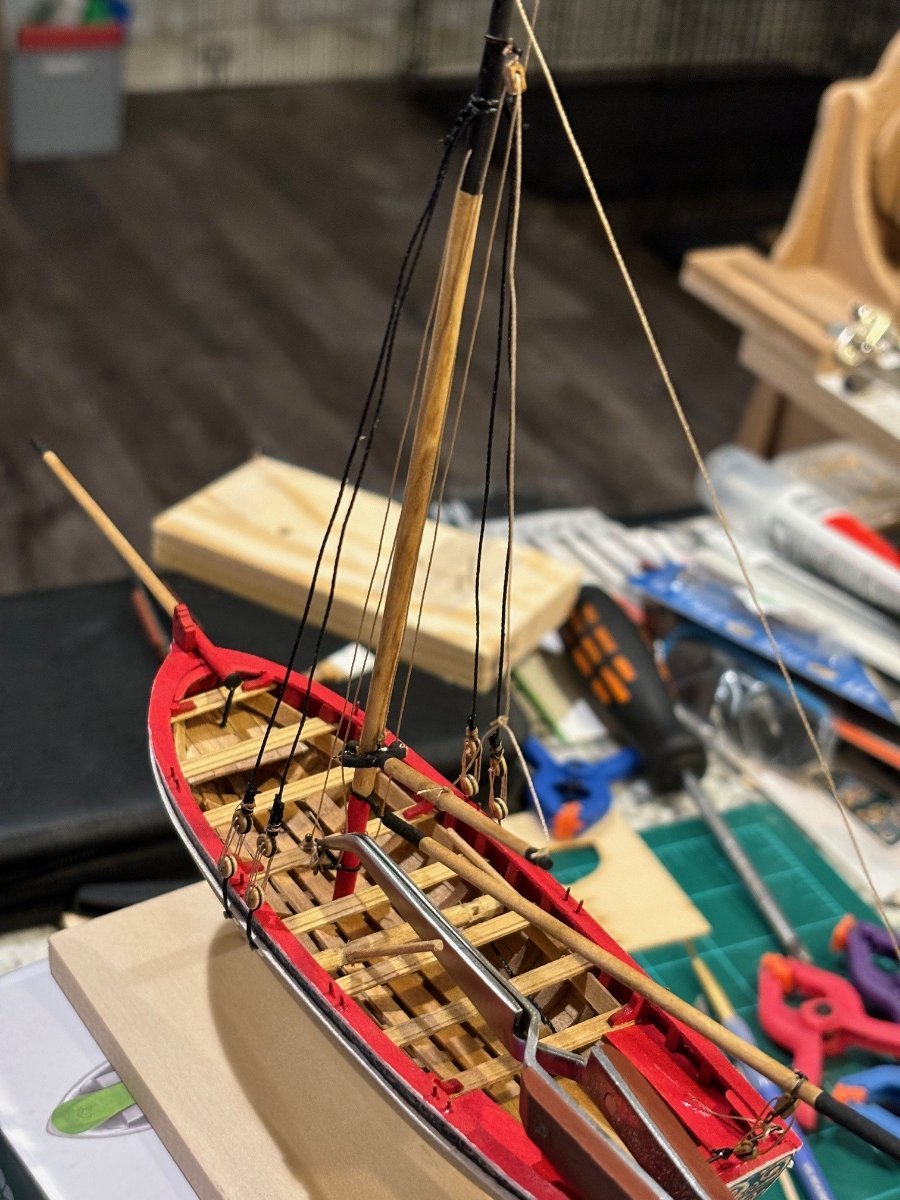
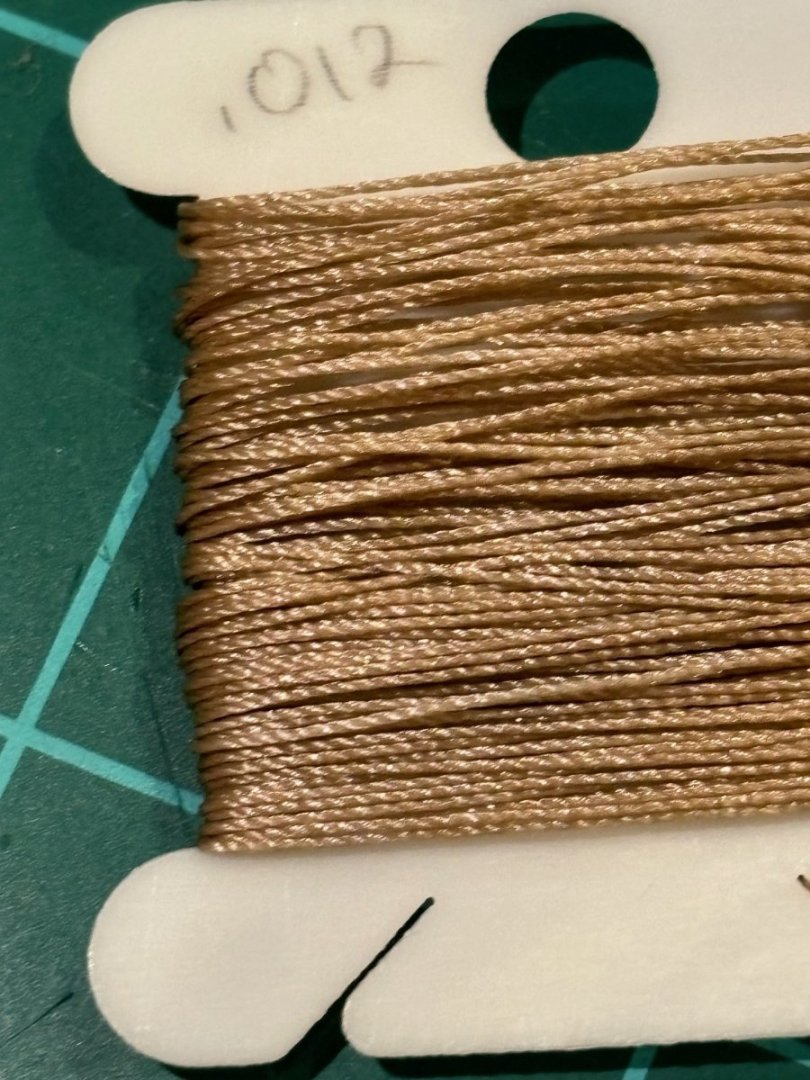
I was digging through my giant ship modeling tub and found some .012 tan rigging rope that I must have bought years ago from Model Shipways. After some debate, I decided to take a few steps back and removed all off the kit supplied tan string on the rigging and replaced it with the Model Shipways rope. Took a few hours to do, but I am very happy with the result. The model looks a lot better now. Only thing left to do is to remake the rope coils and add them back to the model. Then I can proceed forward with rigging the backstays and bowsprit. This photo below shows the difference of the kit supplied string and the Model Shipways rope.


- 50 replies
-
- 7
-
-
- 18th century longboat
- model shipways
- (and 1 more)
-
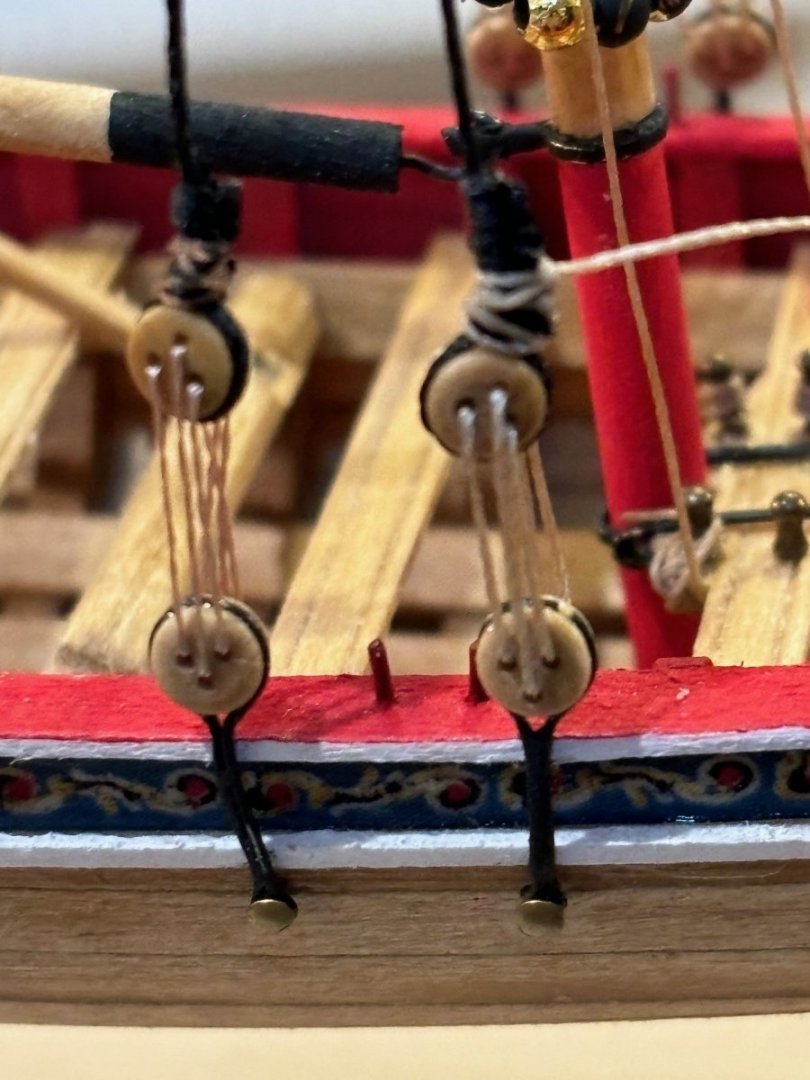
Finished rigging the starboard shroud today. All in all I am pleased with the result.


- 50 replies
-
- 6
-
-
- 18th century longboat
- model shipways
- (and 1 more)
-
Allen, No confusion on my part. I can see the difference. I have a rope walk as well from Model Shipways that I bought like 5 years ago. I will pull it out and use it for sure when I build My Occre Endurance kit that I have in my stash.
- 50 replies
-
- 3
-
-
- 18th century longboat
- model shipways
- (and 1 more)
-
The tan thread is from the kit. The black thread for the shrouds is from my stash of thread from Model Shipways. It is .028 thread, slightly bigger than what the instructions call for (.021); but it’s all I have. The black thread from the kit was scrapped due to the do-overs I had to do on the shrouds.
- 50 replies
-
- 1
-
-
- 18th century longboat
- model shipways
- (and 1 more)
-
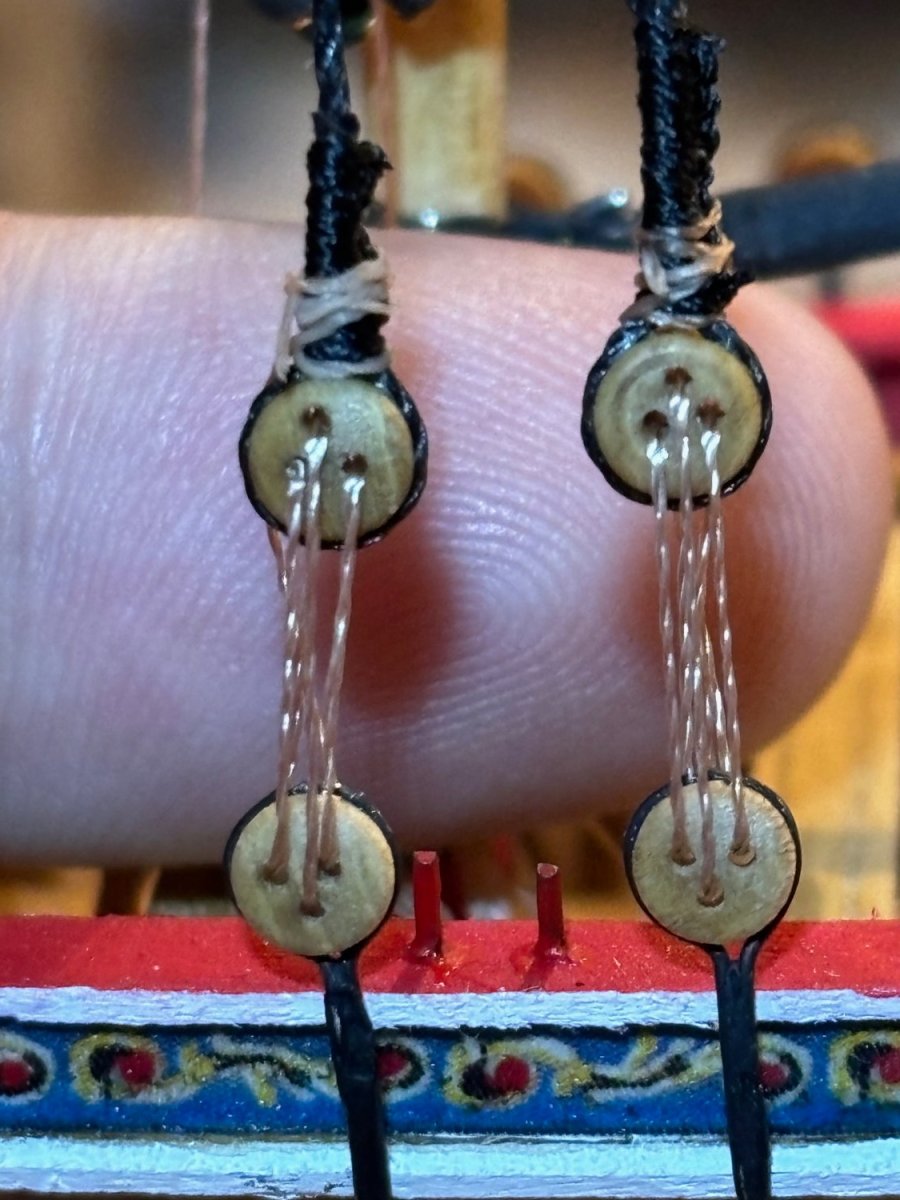
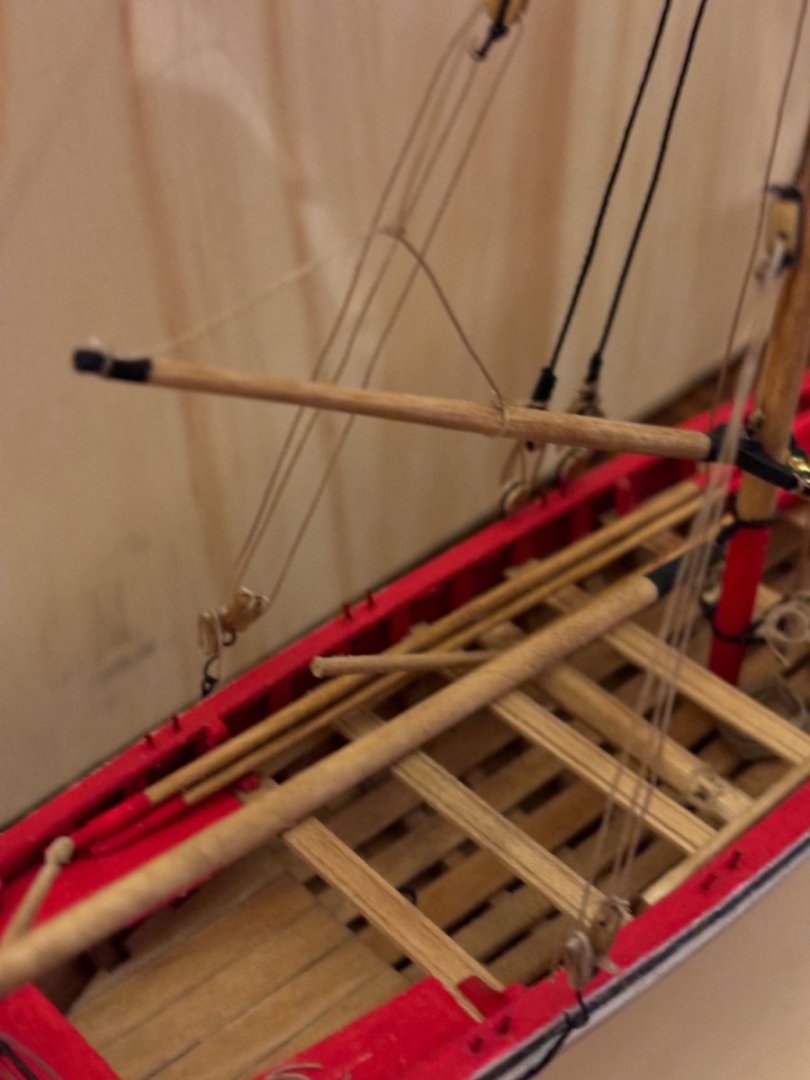
I got some work done on the longboat since my last update. Making and installing the mast, bowsprit, boom, and gaff was pretty straight forward. Rigging the boom and gaff wasn't too difficult either. But I have sort of struggled with the shrouds. I was finally able to complete port side of the shrouds after 4 attempts at it. The rigging of the deadeyes could have been done better, but I'm happy with it; especially since it was the first time I have done those and at this scale. Tomorrow I am going to start on the starboard side. Here's hoping that that side goes a little quicker to complete than the port side did.


- 50 replies
-
- 5
-
-
- 18th century longboat
- model shipways
- (and 1 more)
-
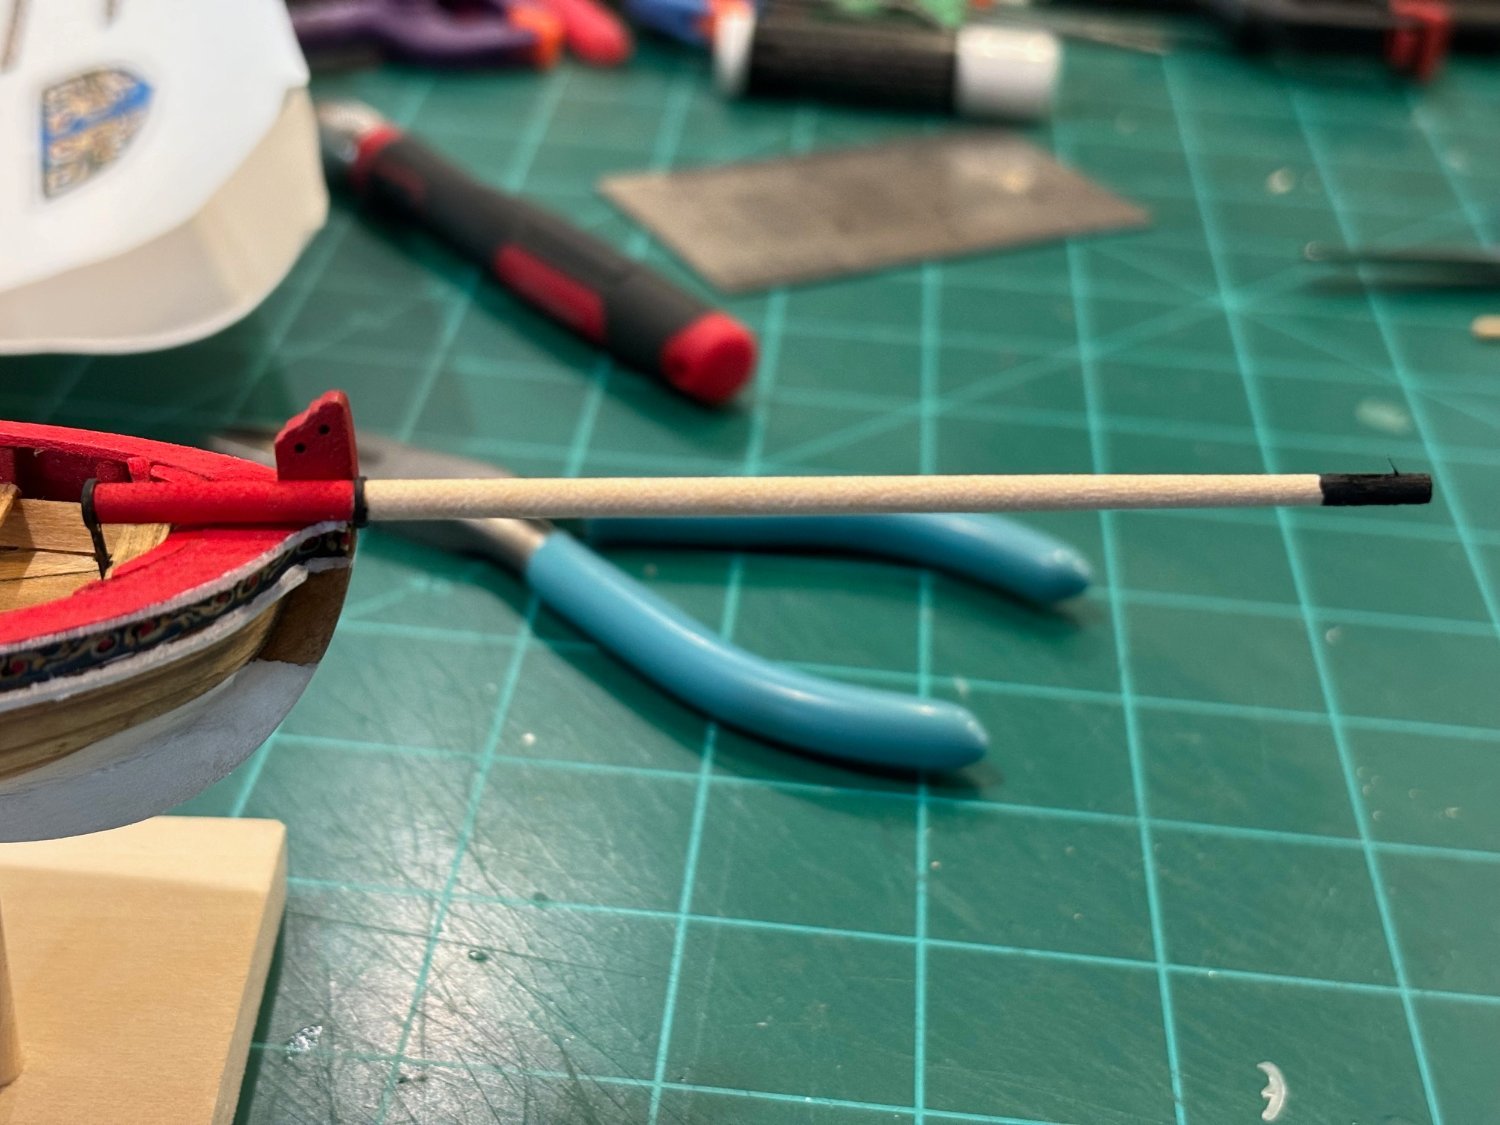
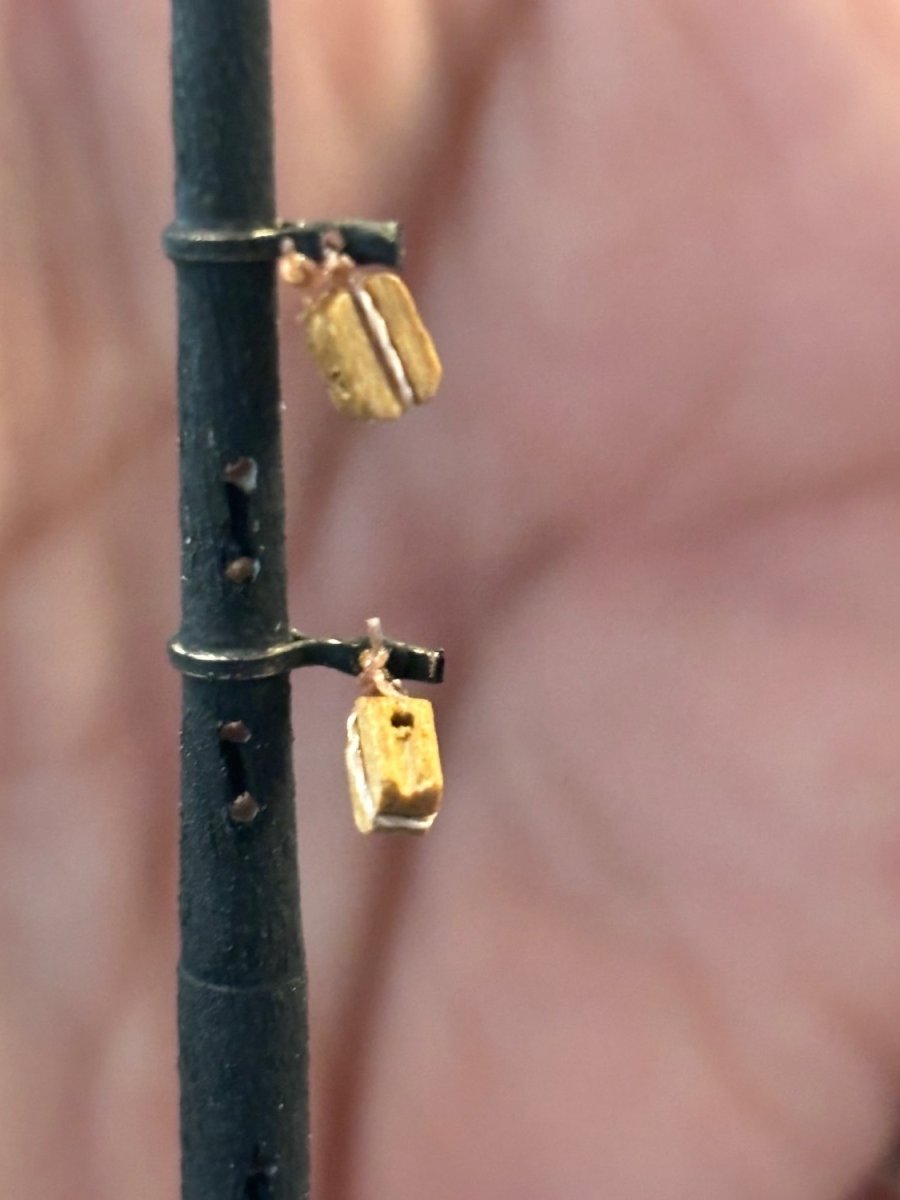
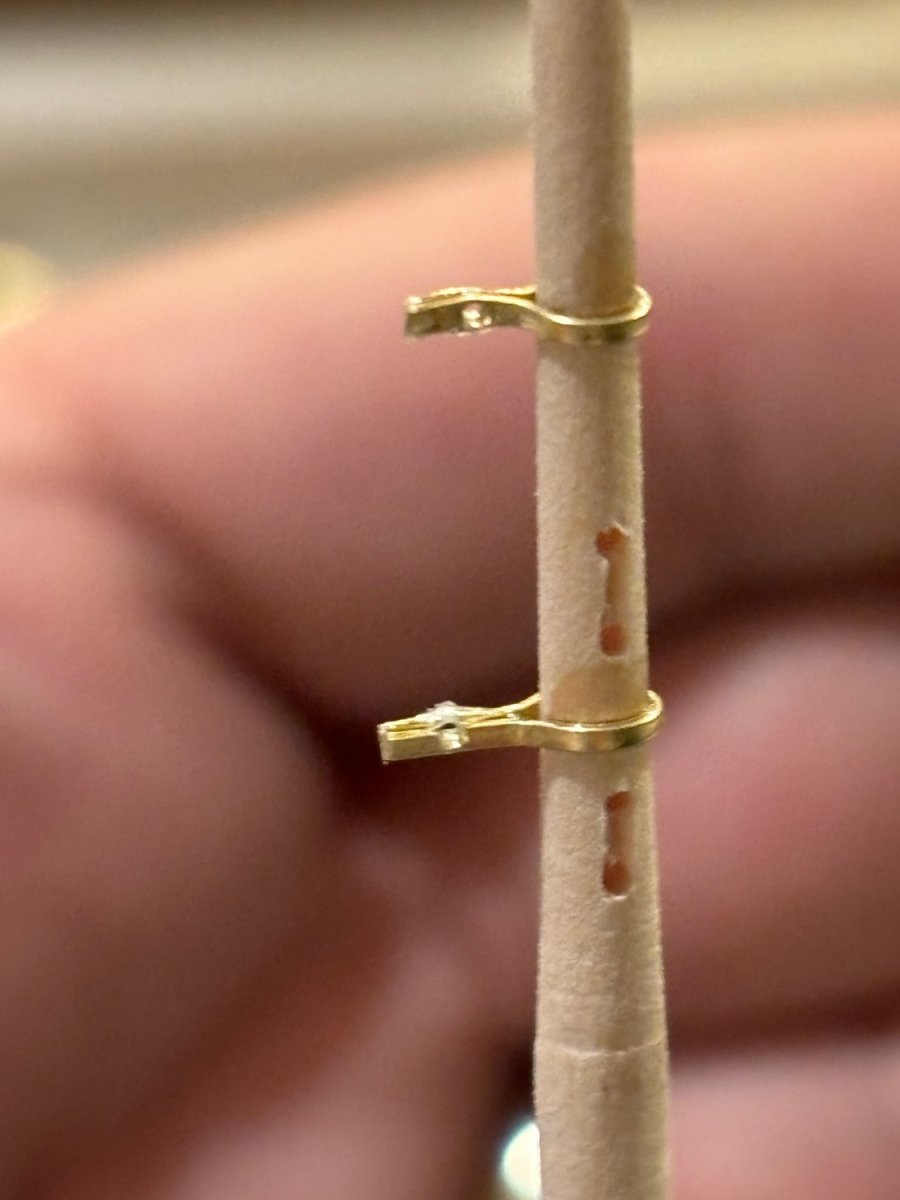
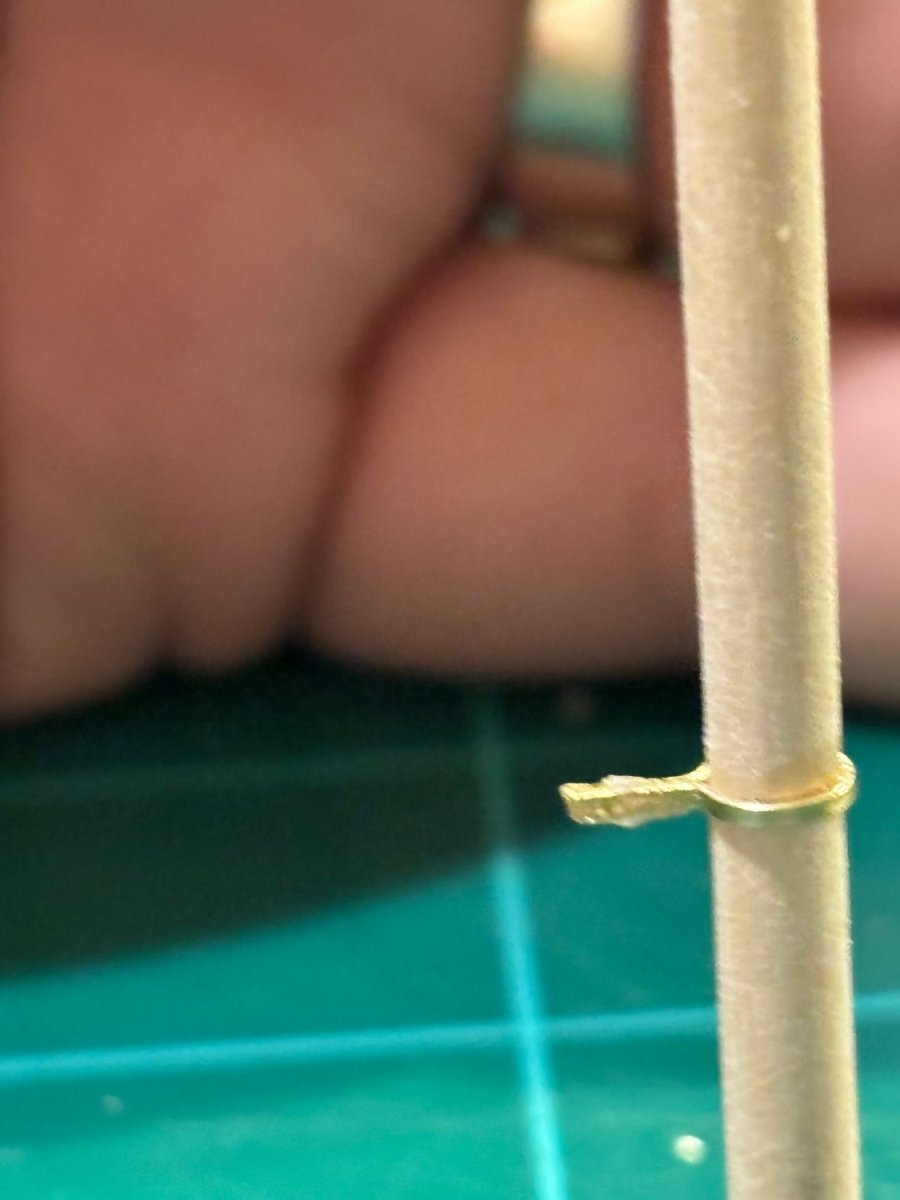
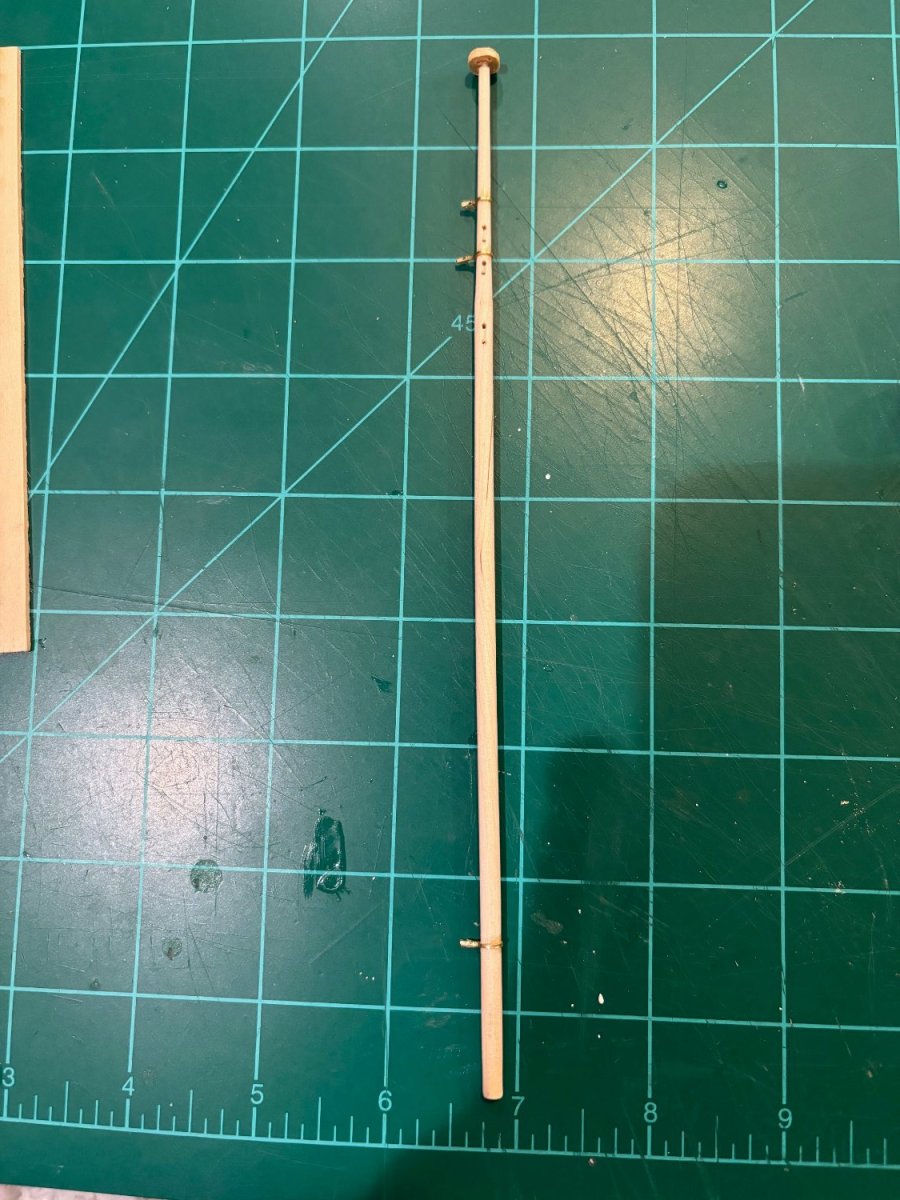
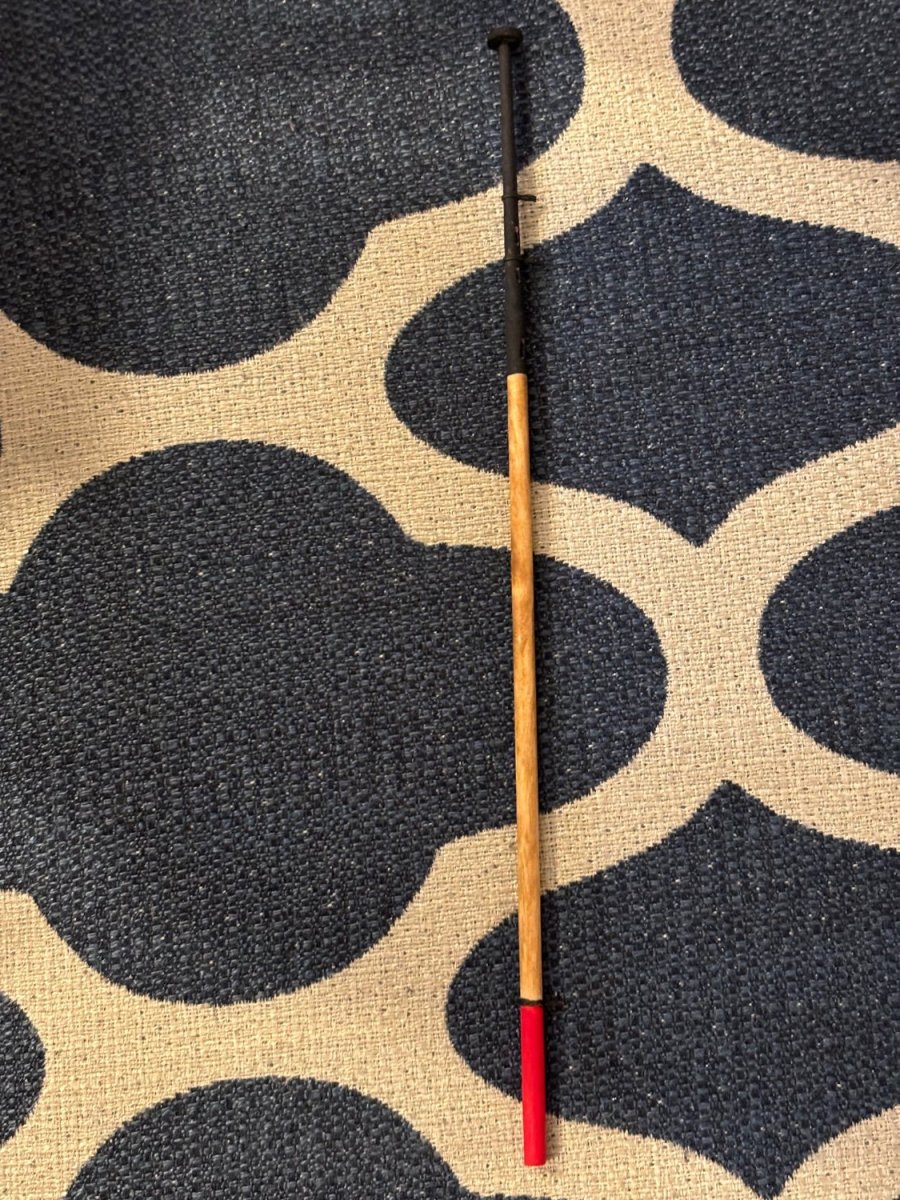
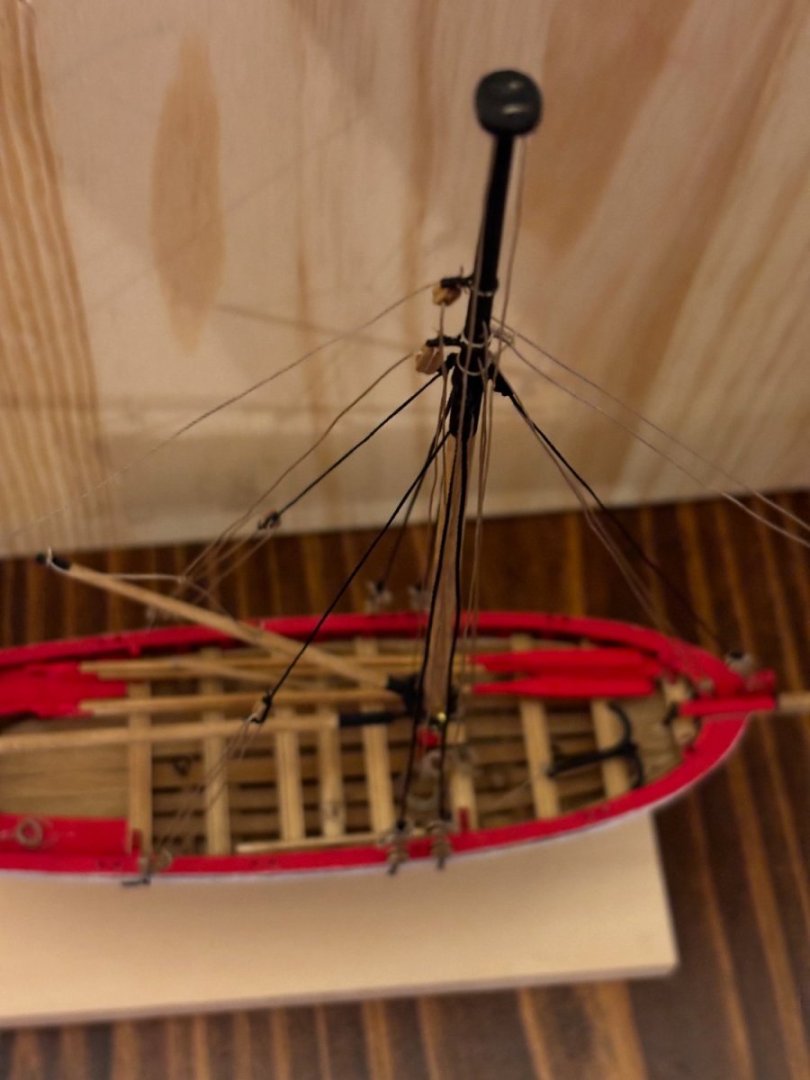
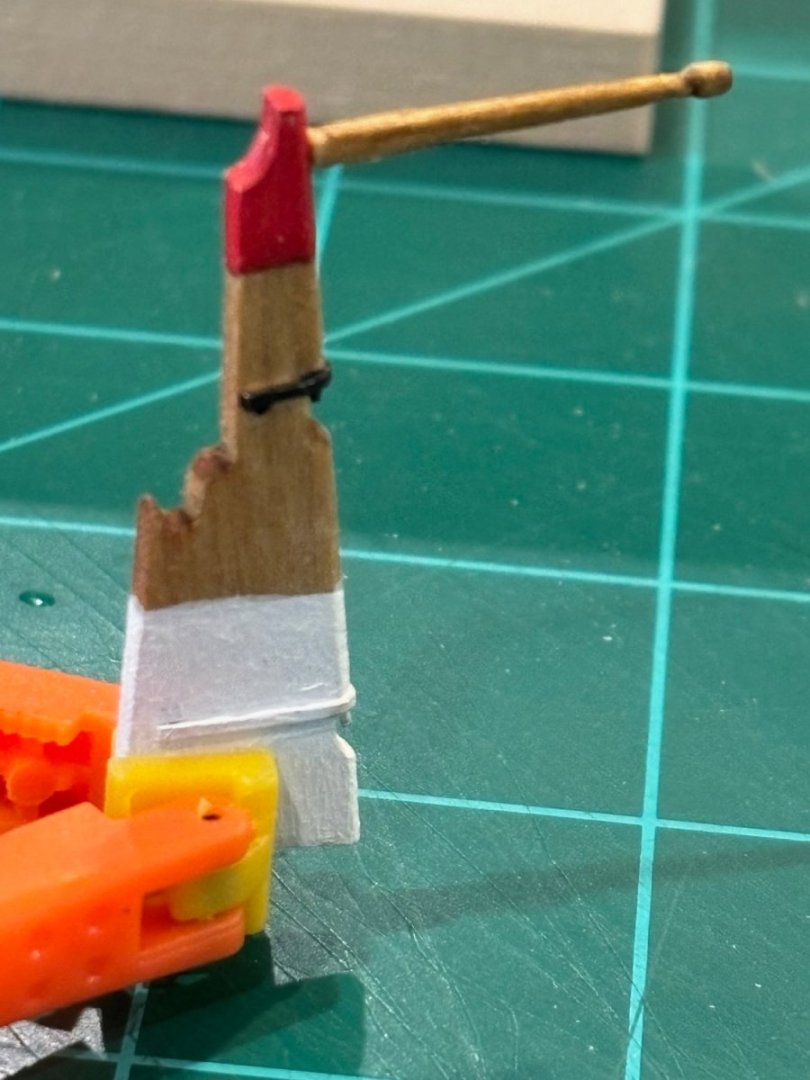
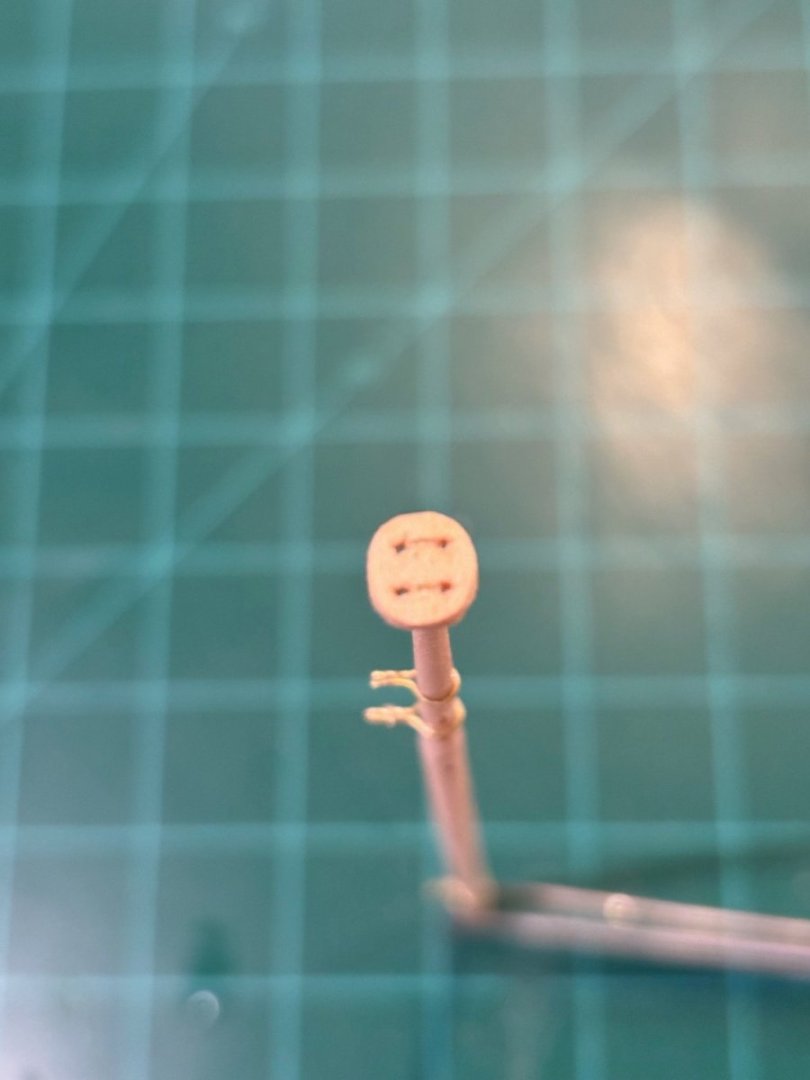
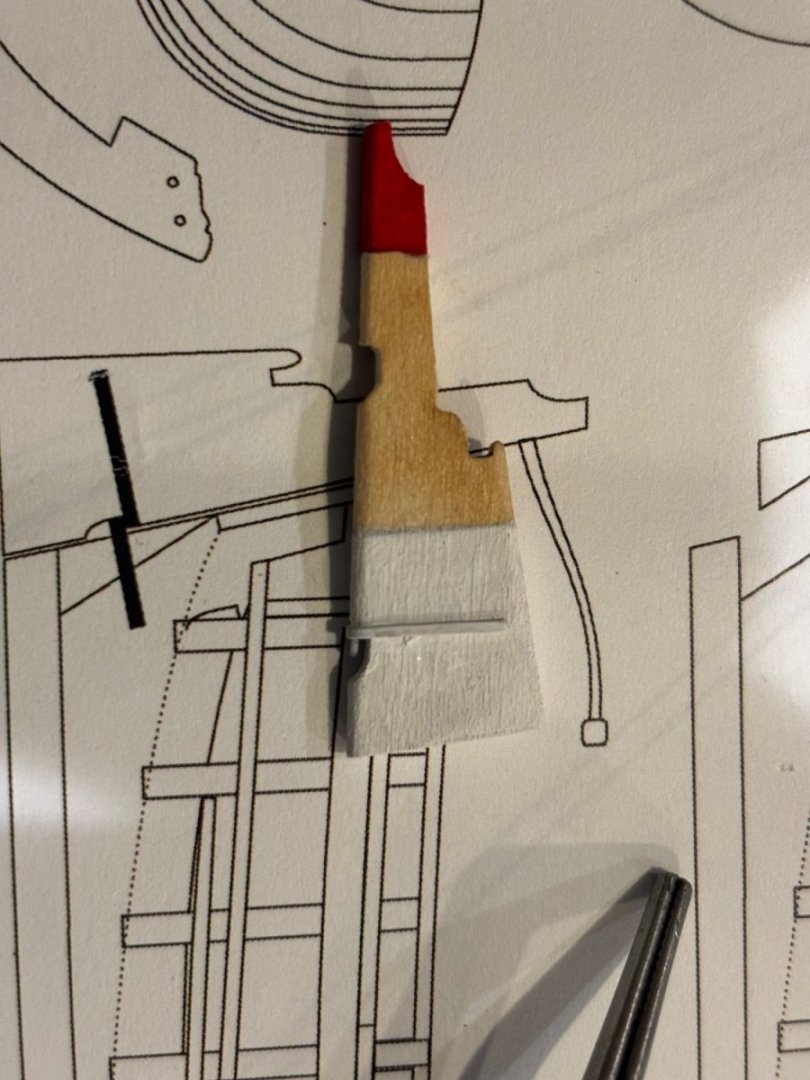
Over the last couple of days I was able to get the rudder finished up and installed on the longboat. Then I permanently attached the boat onto its base. The next day, I started the tedious task of tapering the mast. Using my drill just as Chuck suggests in the instructions made the task a little easier. The button on the top was a little nerve racking to make along with the iron work for the mast. Took a while, but it worked out in the end. After I got the button installed and the iron work onto the mast, I finished it according to the plans. Tomorrow I plan on adding the blocks to the mast and continuing on with installed the mast into the longboat.


- 50 replies
-
- 4
-
-
- 18th century longboat
- model shipways
- (and 1 more)
-
Thanks, I try my best. Handling these tiny parts can be very tricky
-
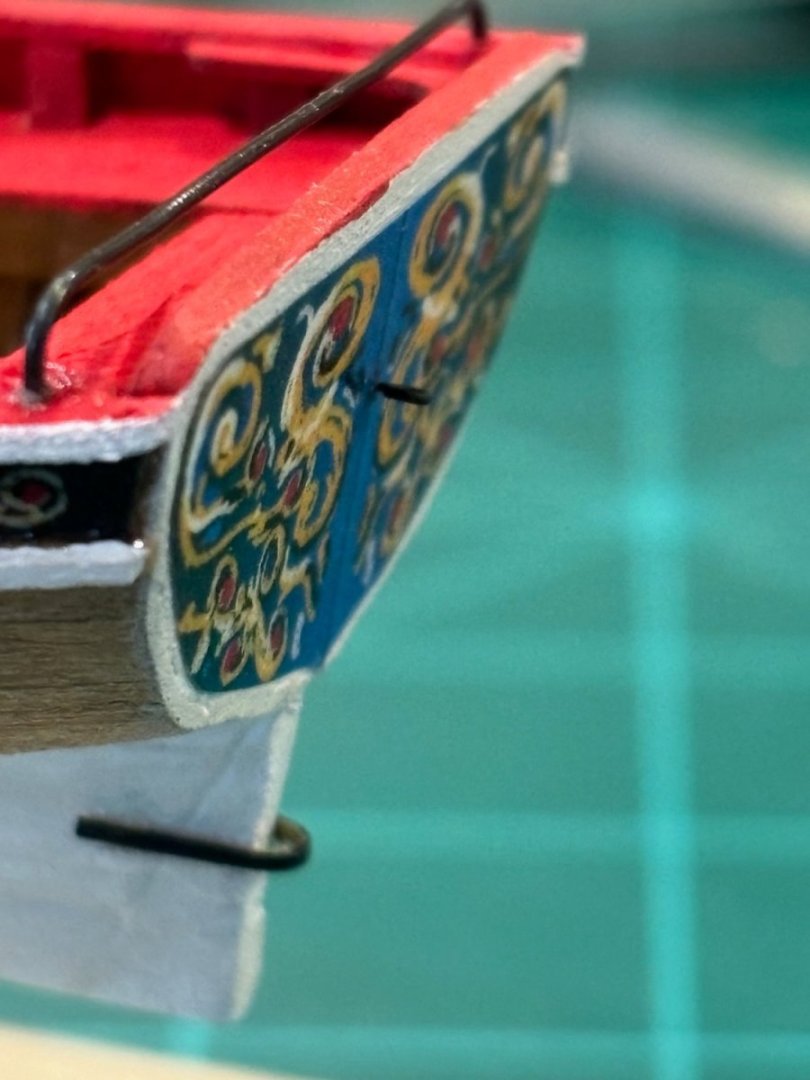
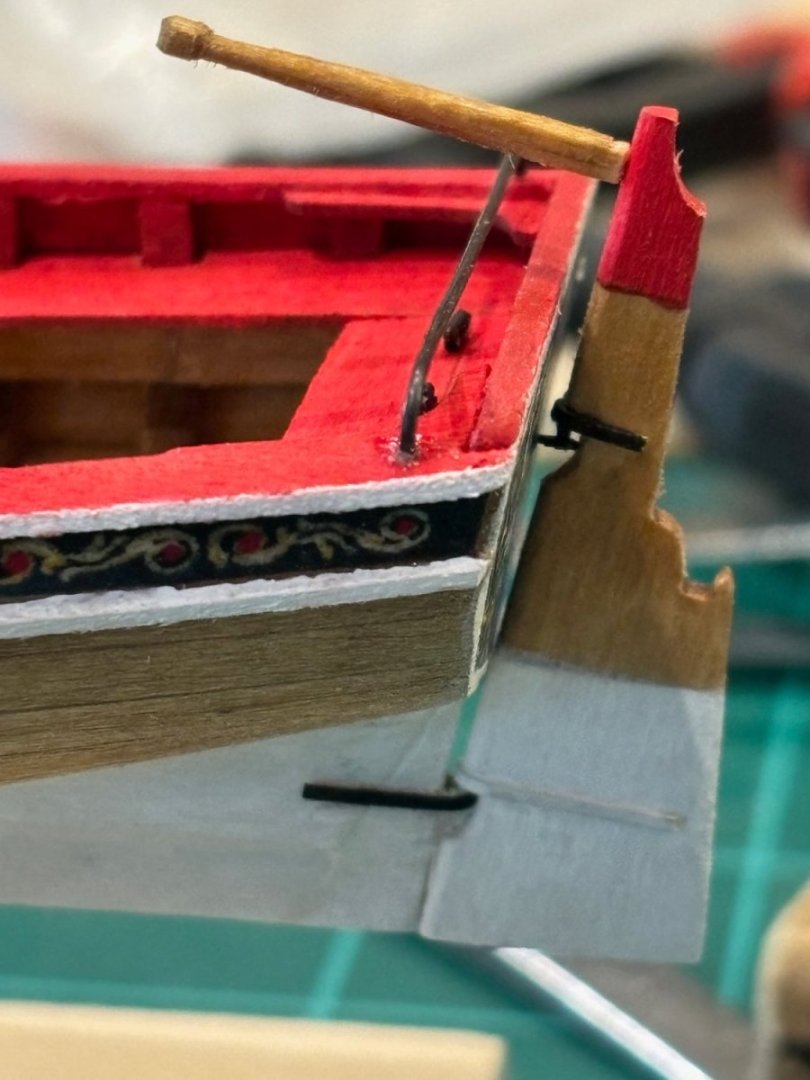
Got a little more work done on the longboat since my last post. Finished up the seats in the cockpit along with the locker. Also got all of the knees installed along with the windlass and handles. I also installed the oar holder pins and eye let rings for lifting the boat in and out of the water. After a little break, I began work on the rudder. I still have to get the top gudgeon installed and painted on the rudder, then I can install the pintles on the transom and stern post and hang the rudder. I also made the display base for the longboat. The boat is not yet permanently attached to the base, I will do that just before I install the masts and rig the boat.


- 50 replies
-
- 5
-
-
- 18th century longboat
- model shipways
- (and 1 more)
-
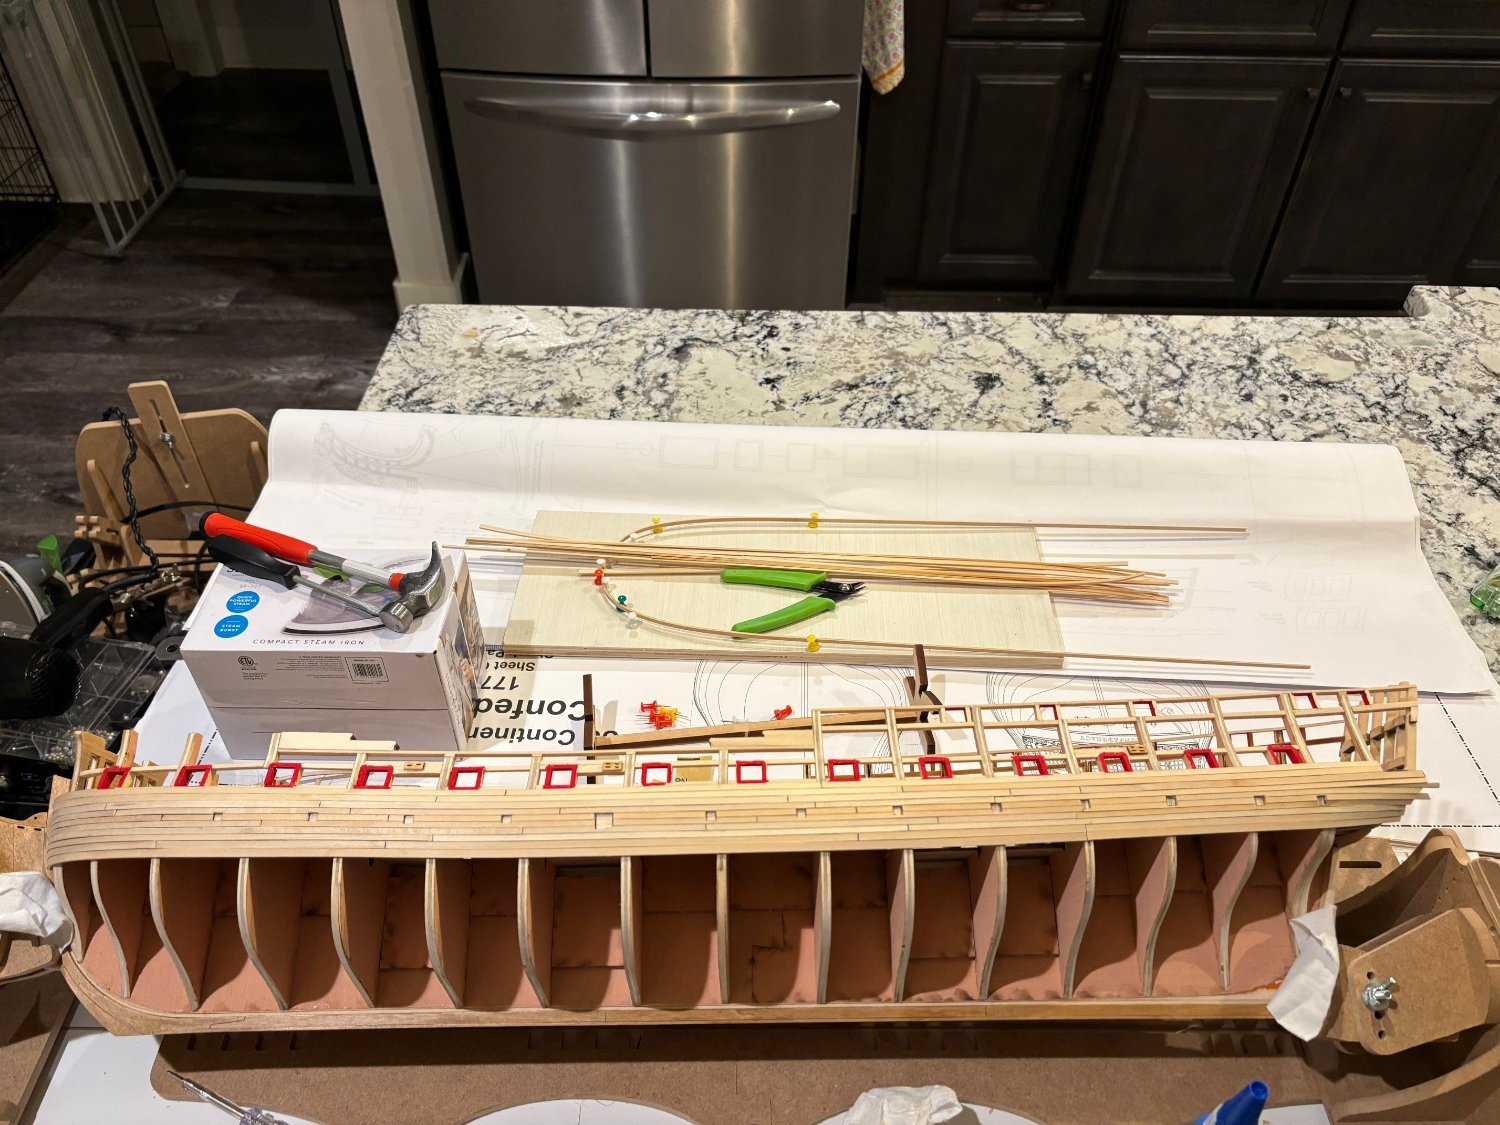
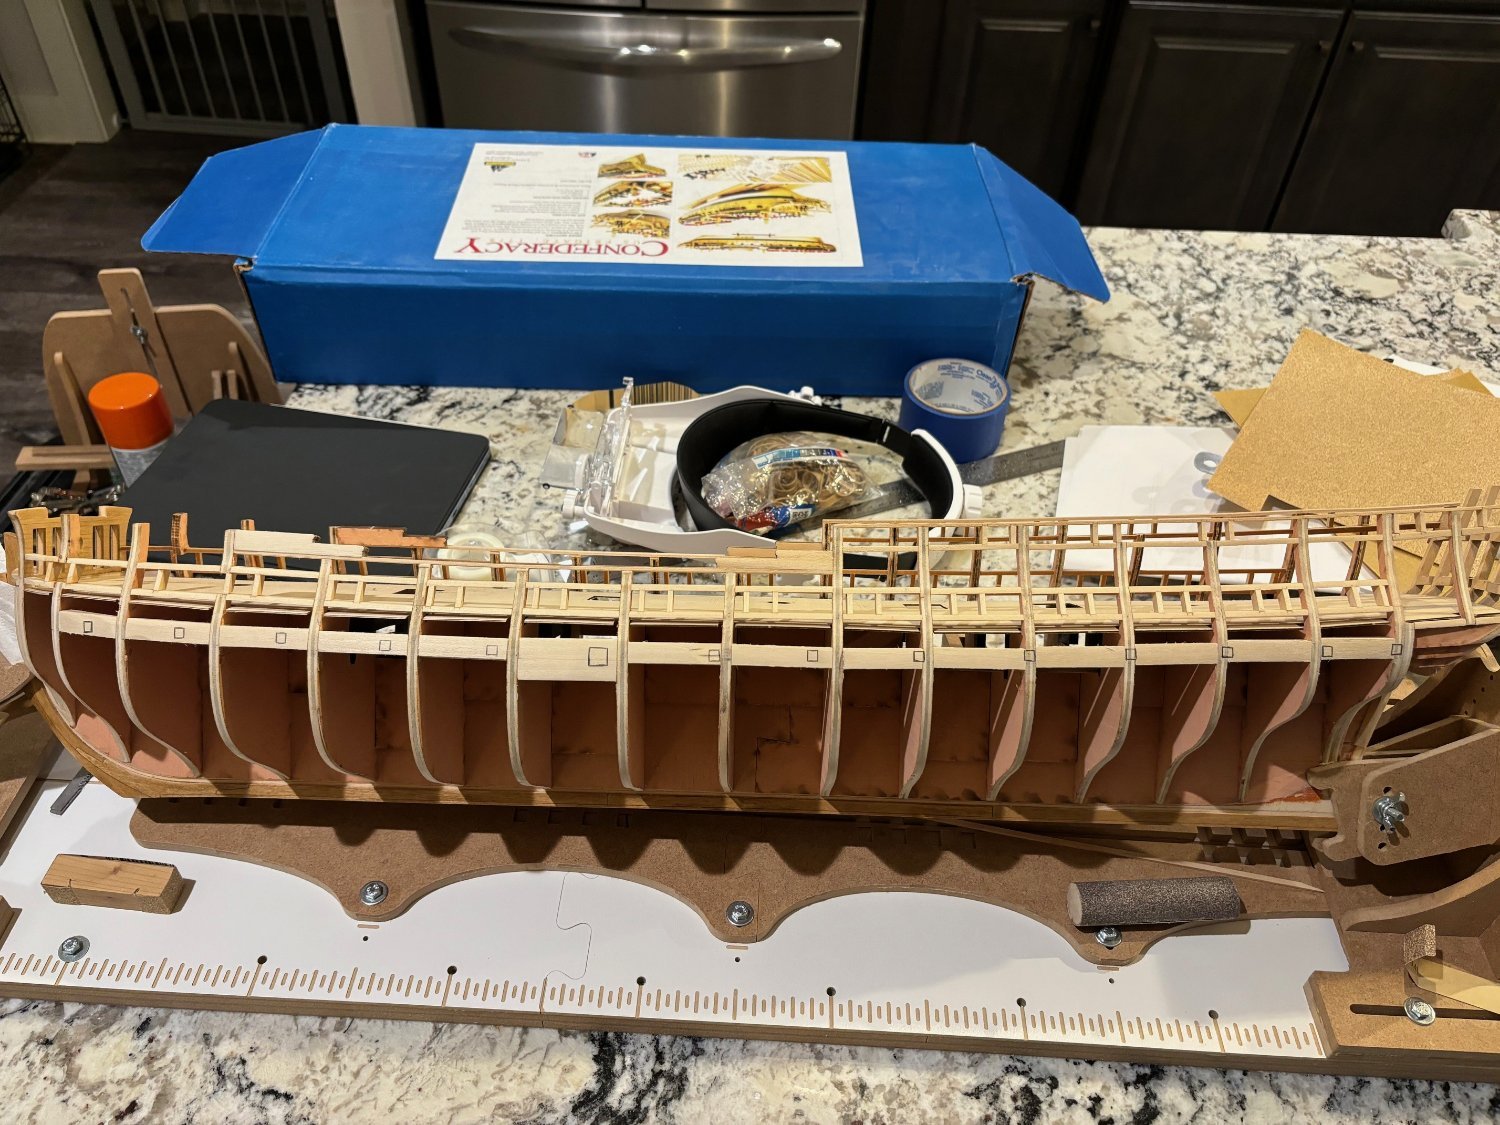
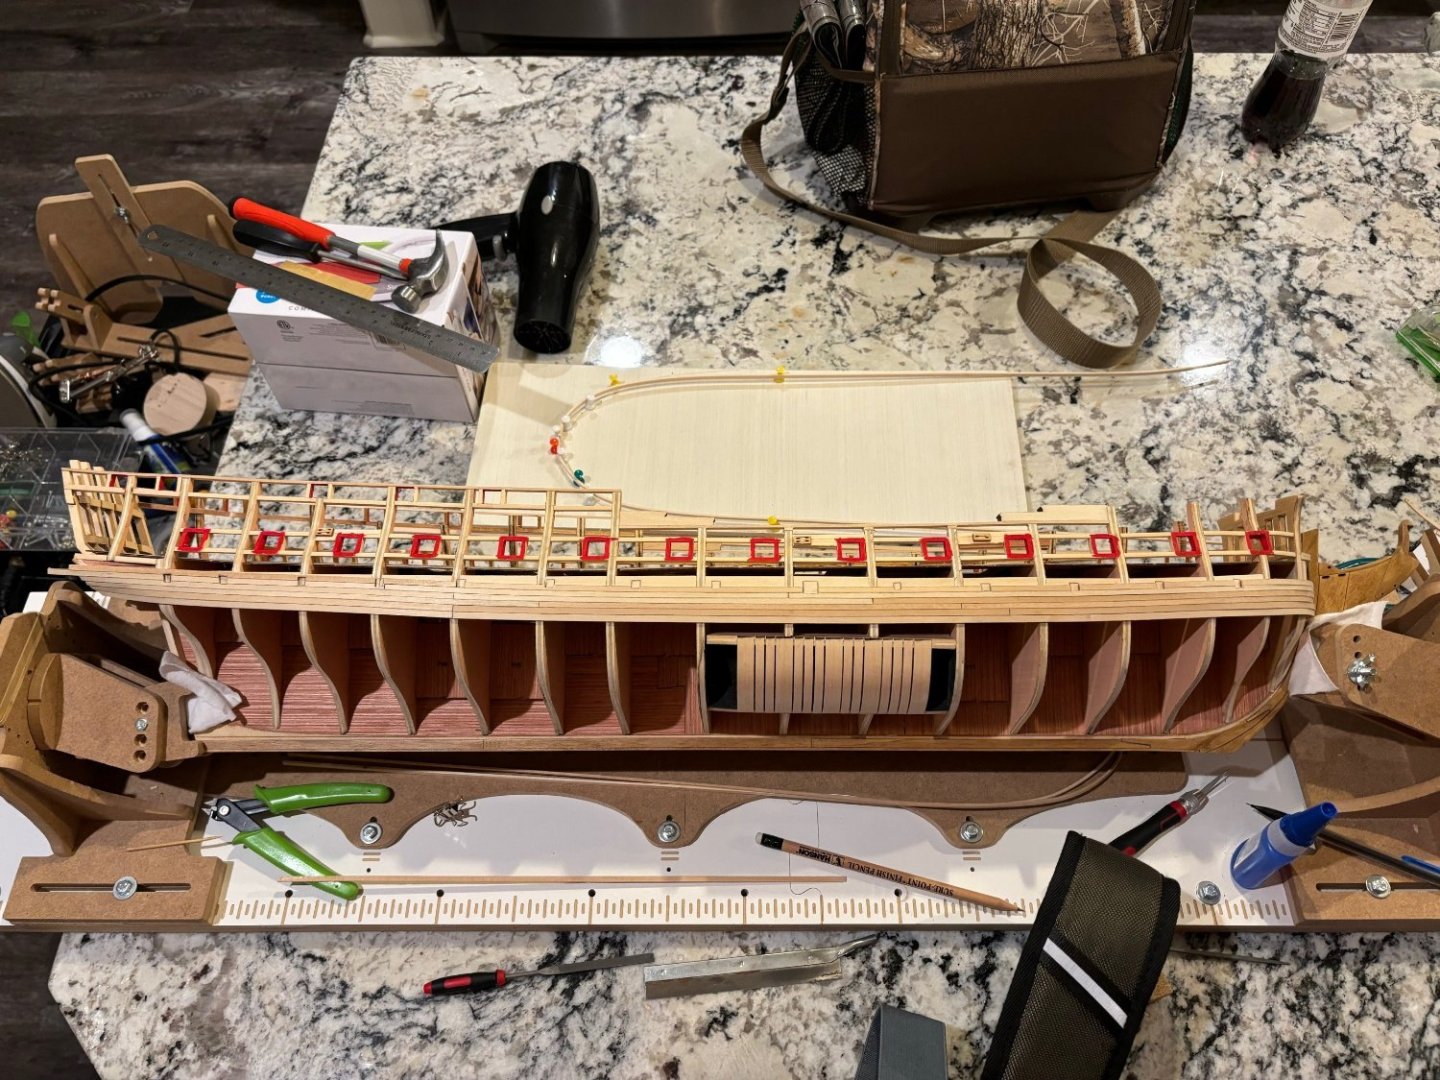
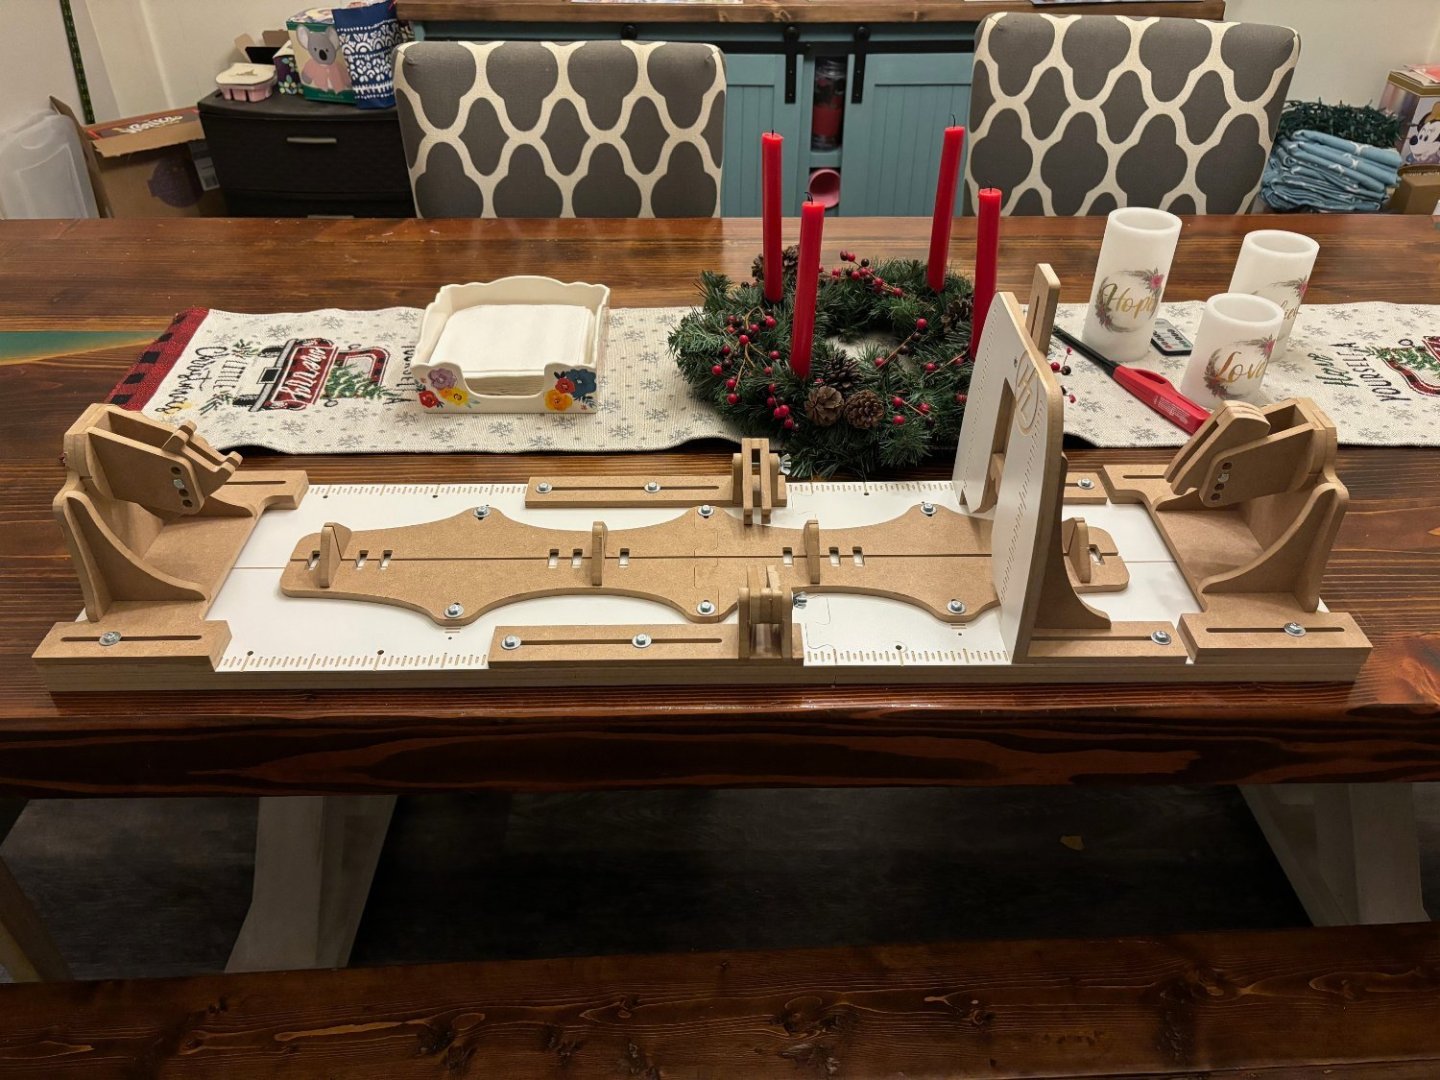
I haven't gotten any work done on Confederacy today, but I was able to get her dry dock built. The Professional Build Slip from Hobby Zone should help out greatly. I will get her transferred over to her new dock tomorrow sometime.
-
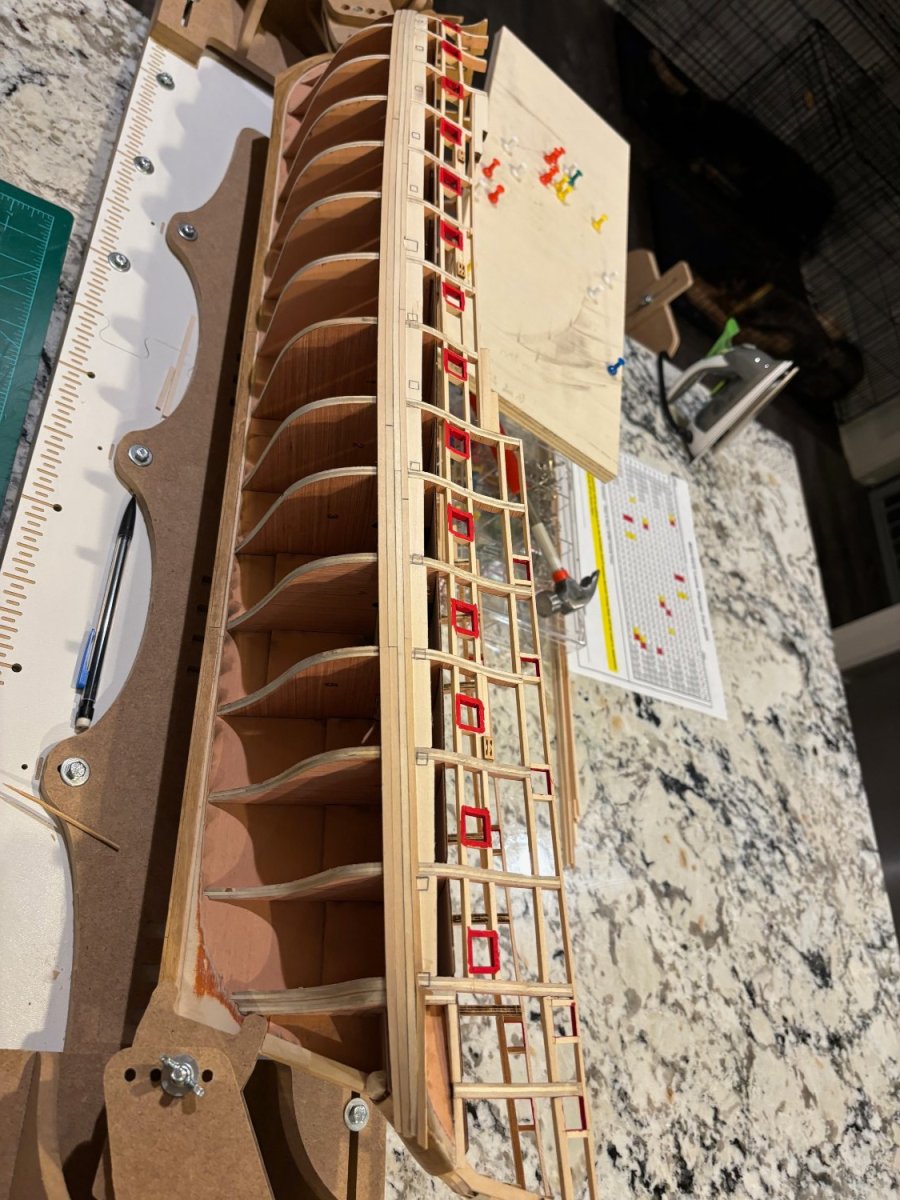
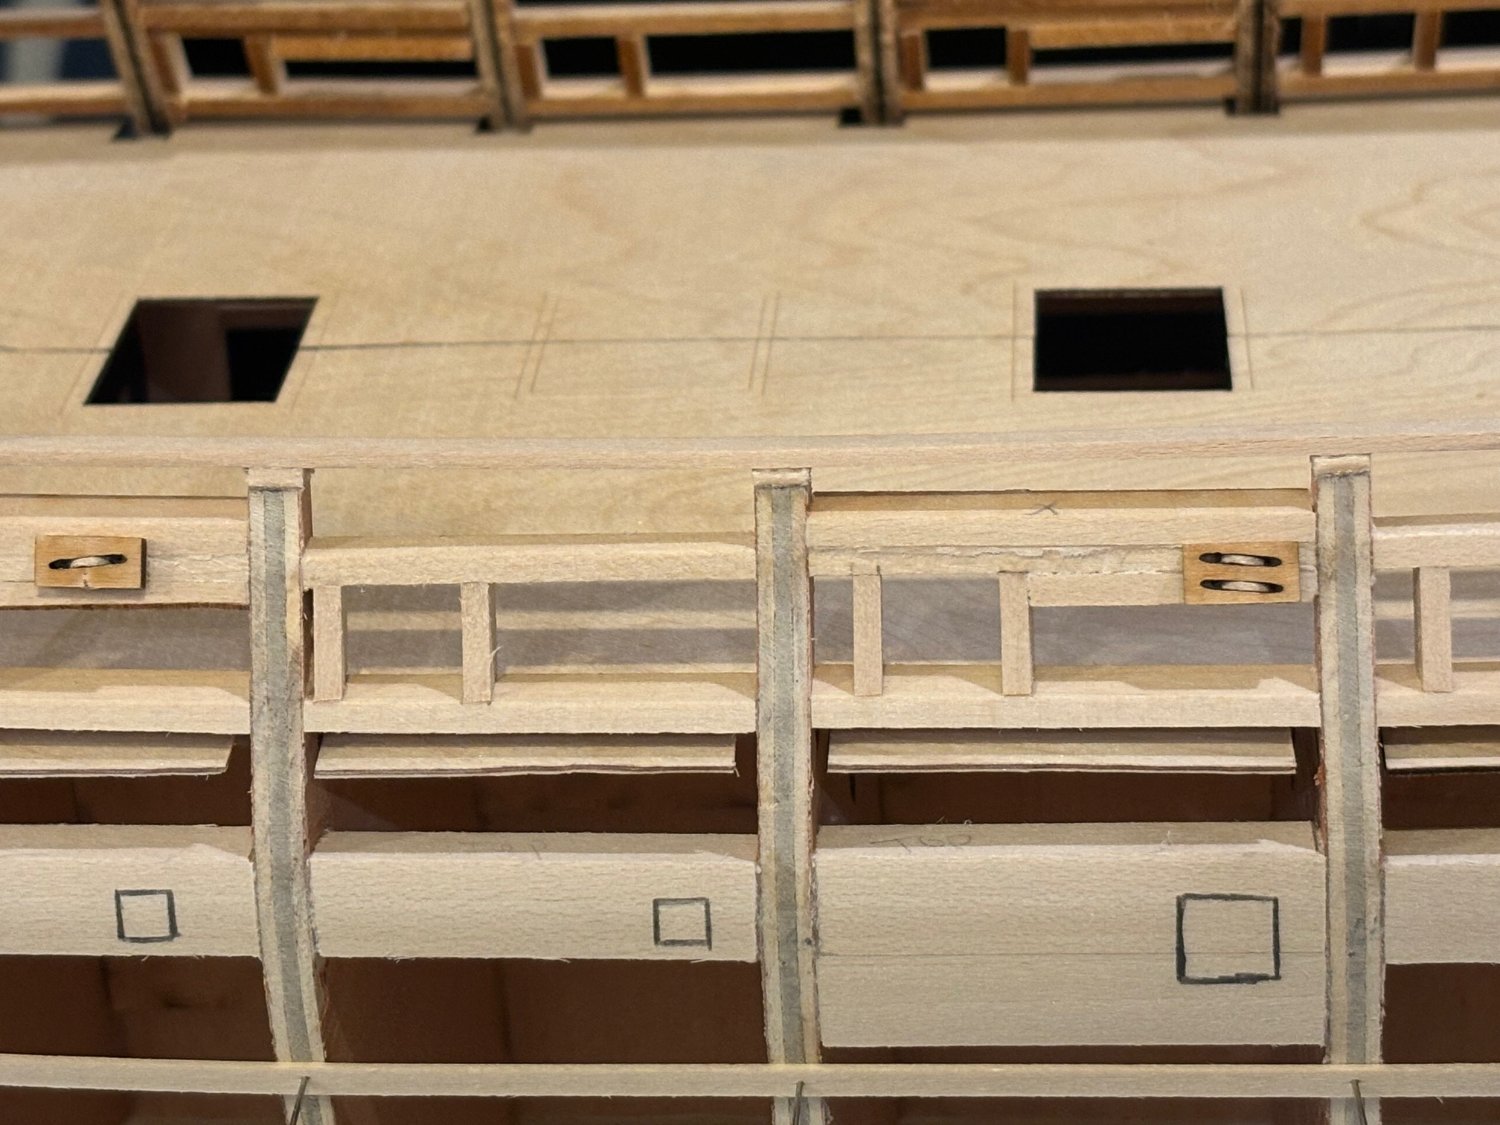
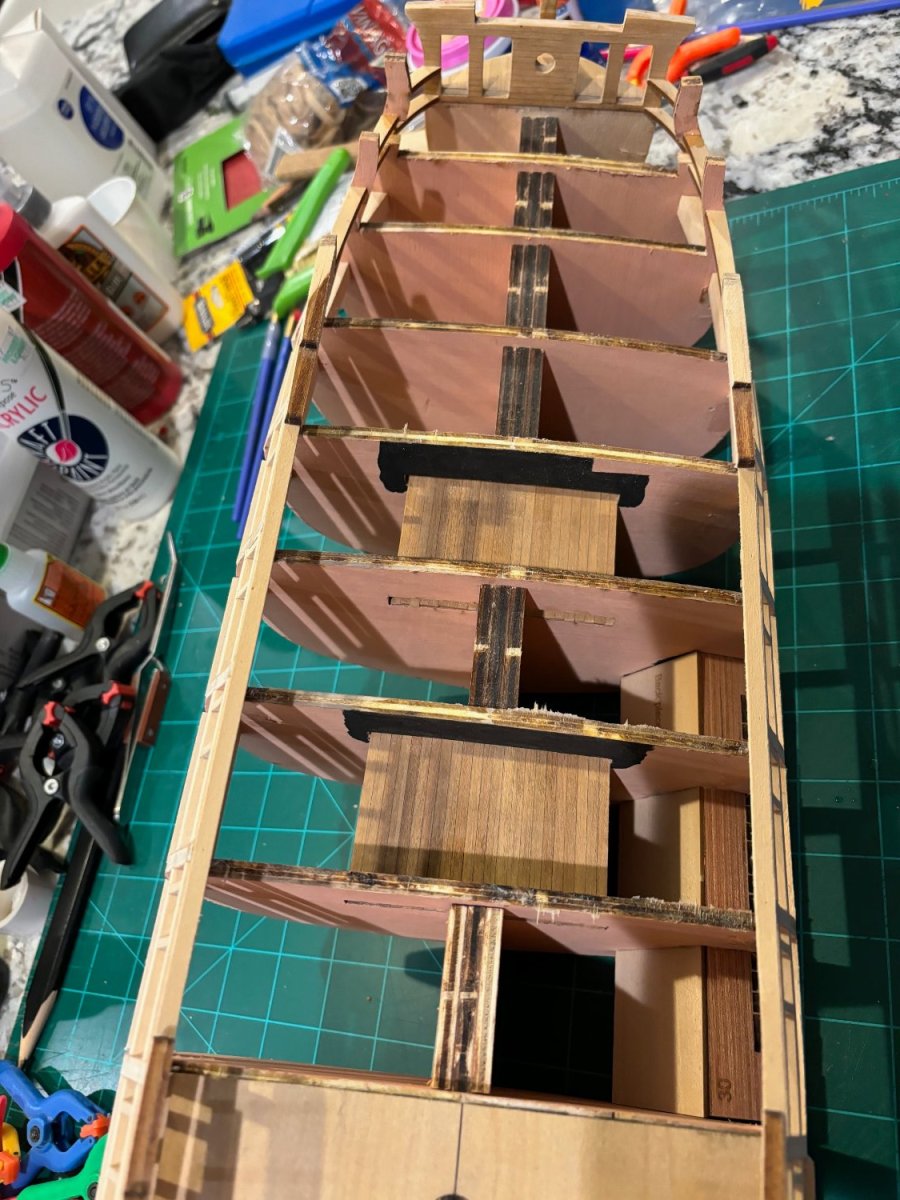
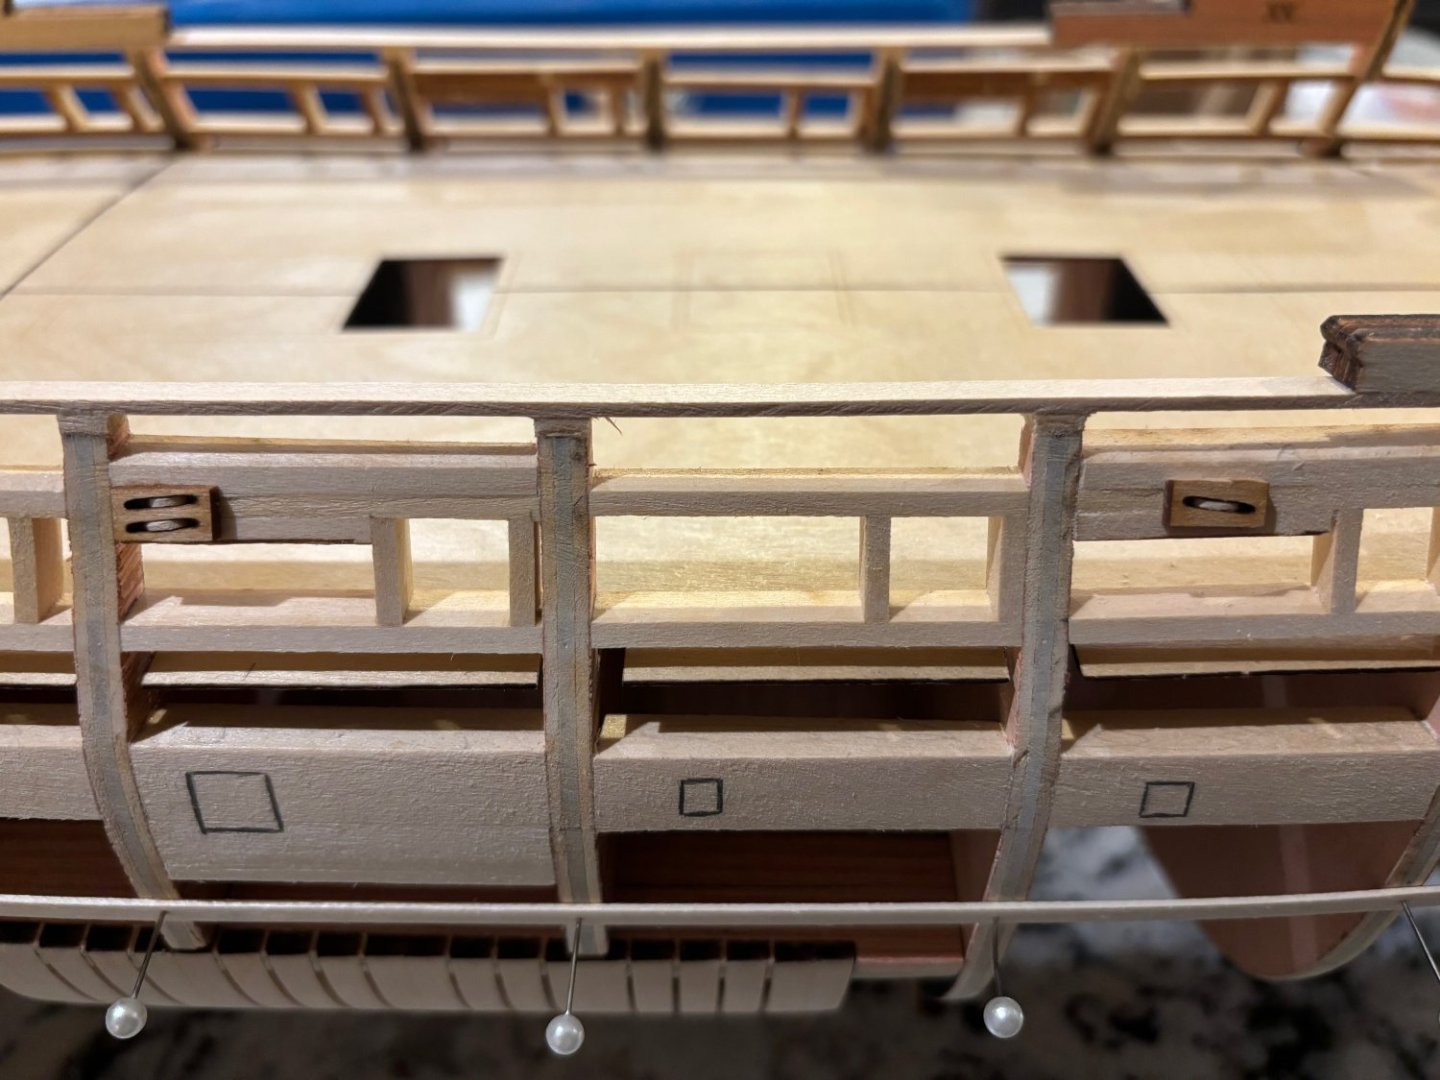
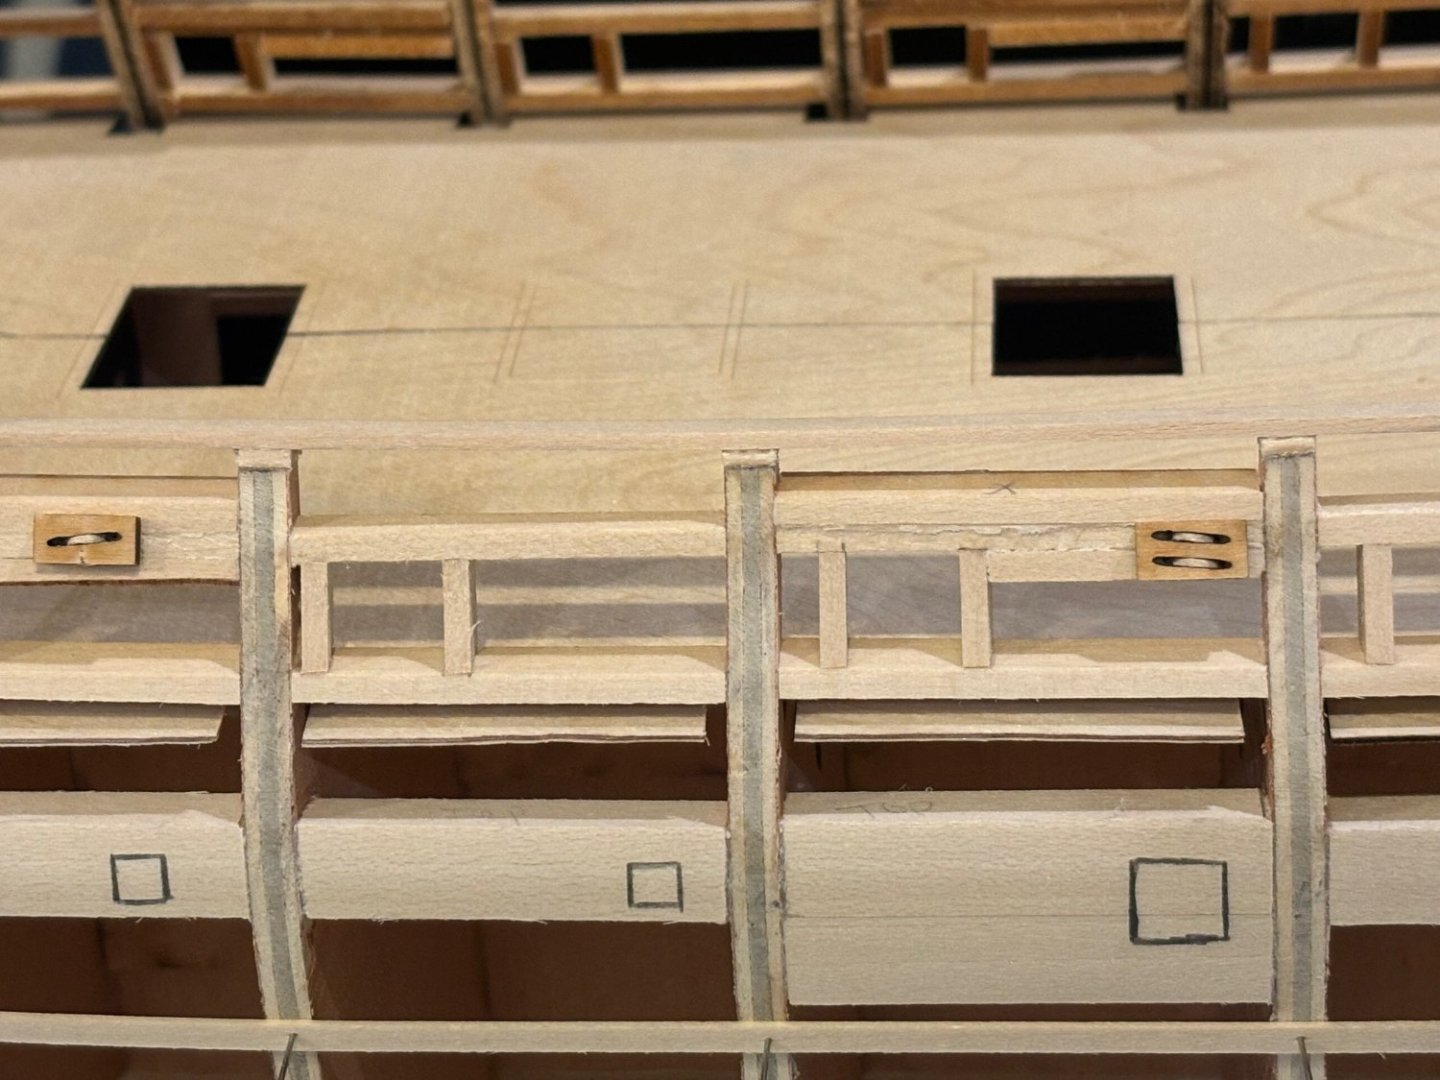
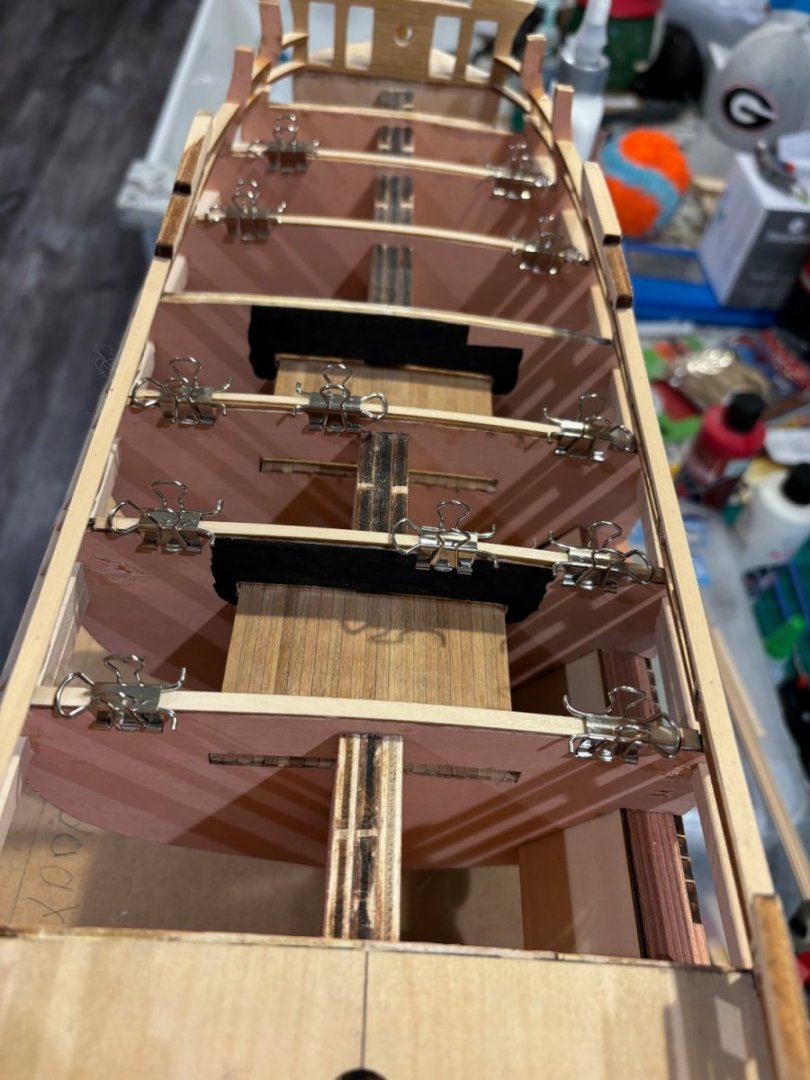
Got the forward part of the false deck removed and added some shims. I ended up having to add shims to 5 bulkheads. The last pic shows the false deck back in place. I haven't glued it down yet; but can already tell that shims is what it needed. Next up is to fix the sheer between hances. I sure am glad that the kit has extra pieces for the hances in it.


-
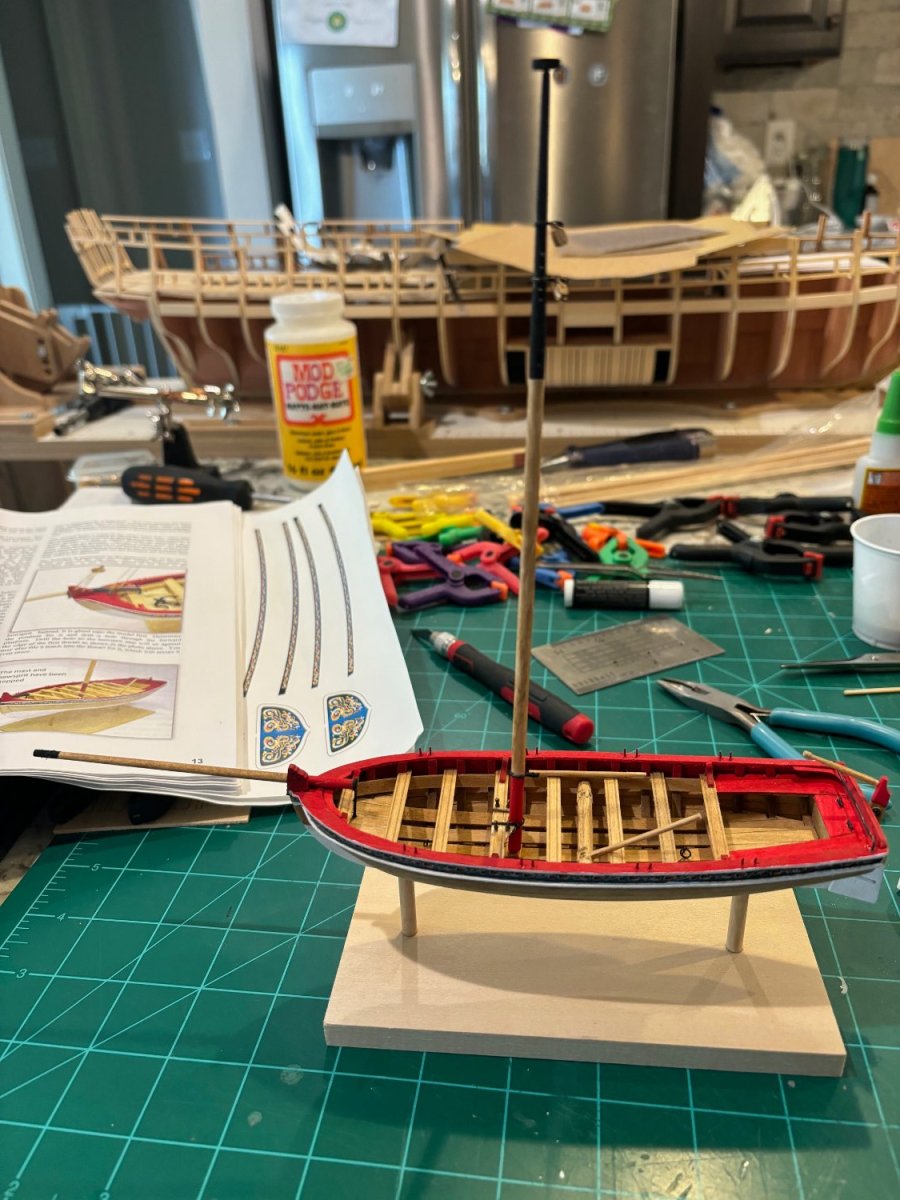
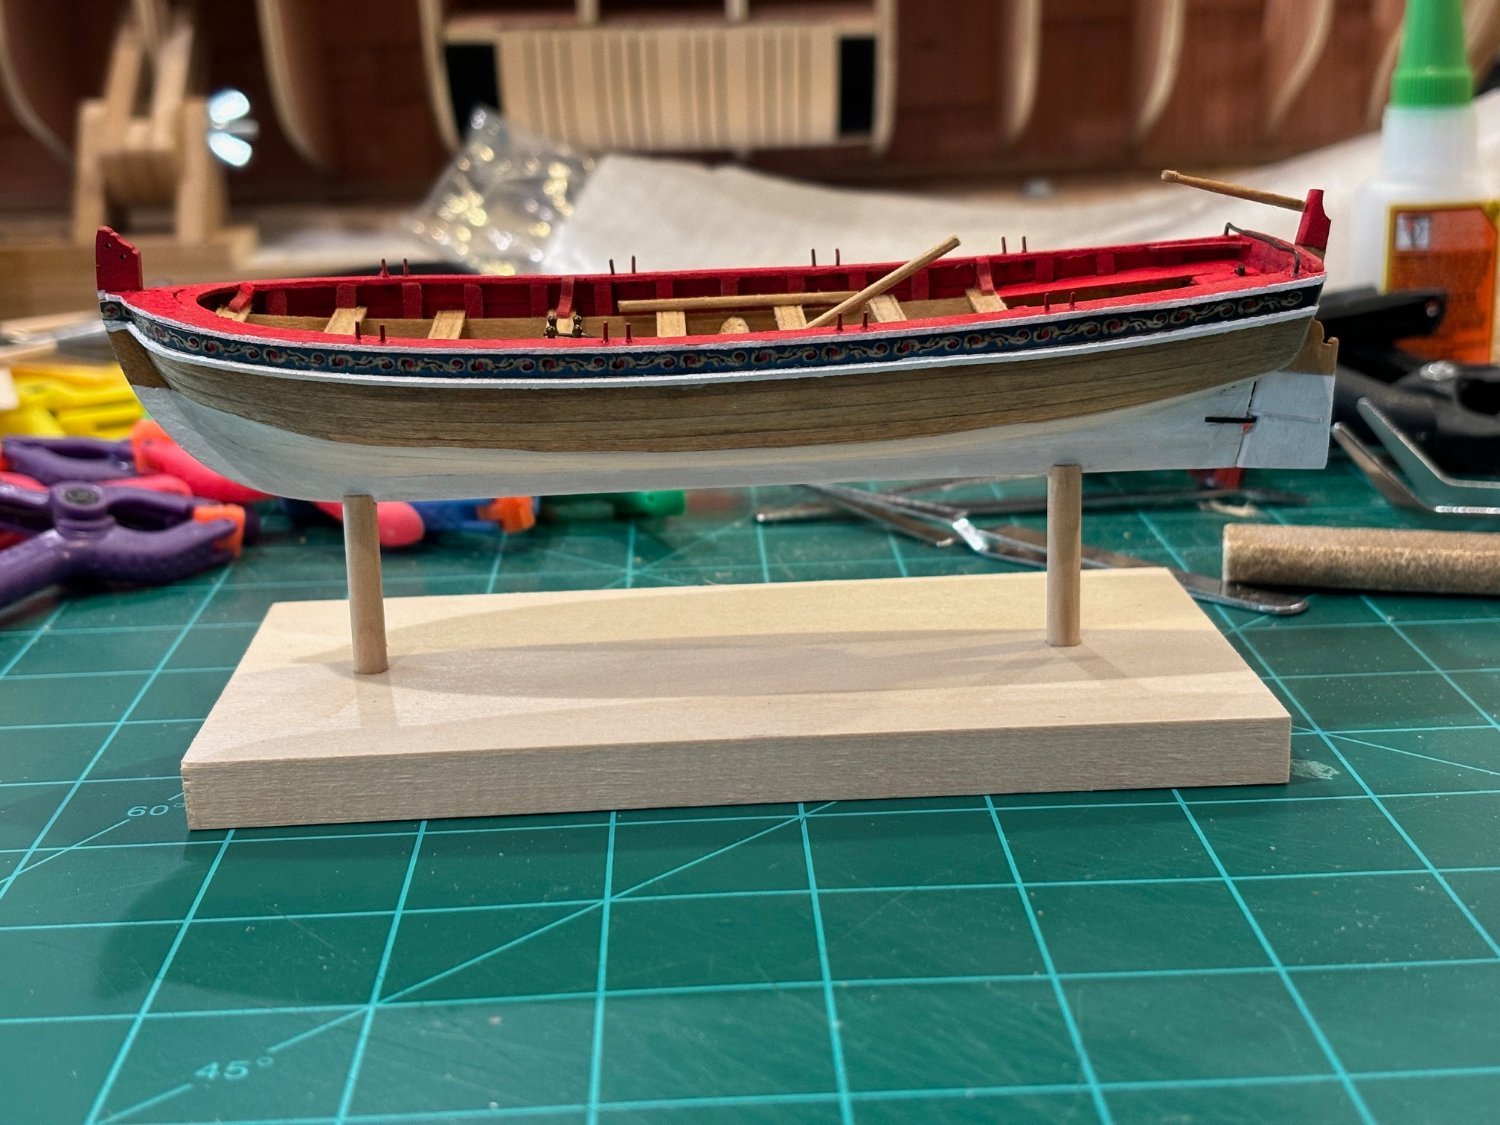
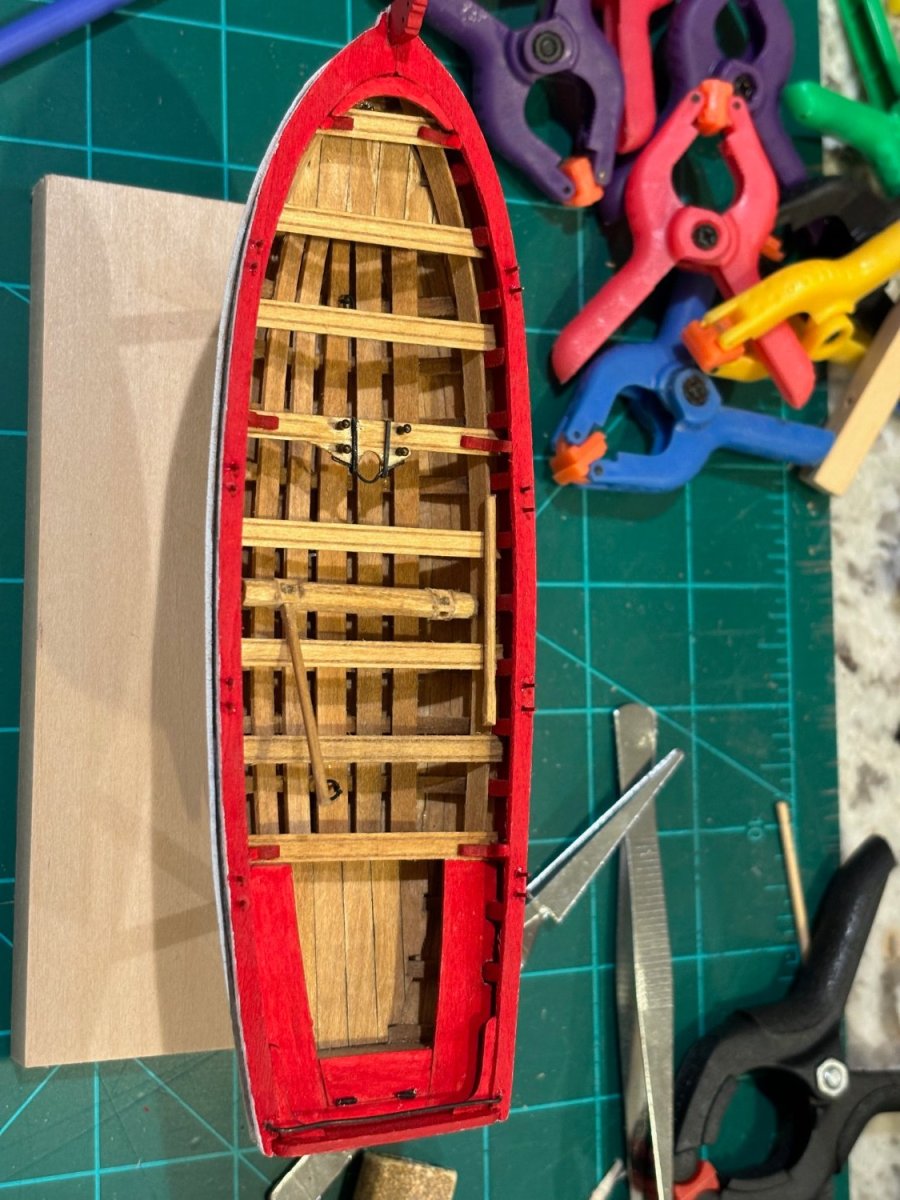
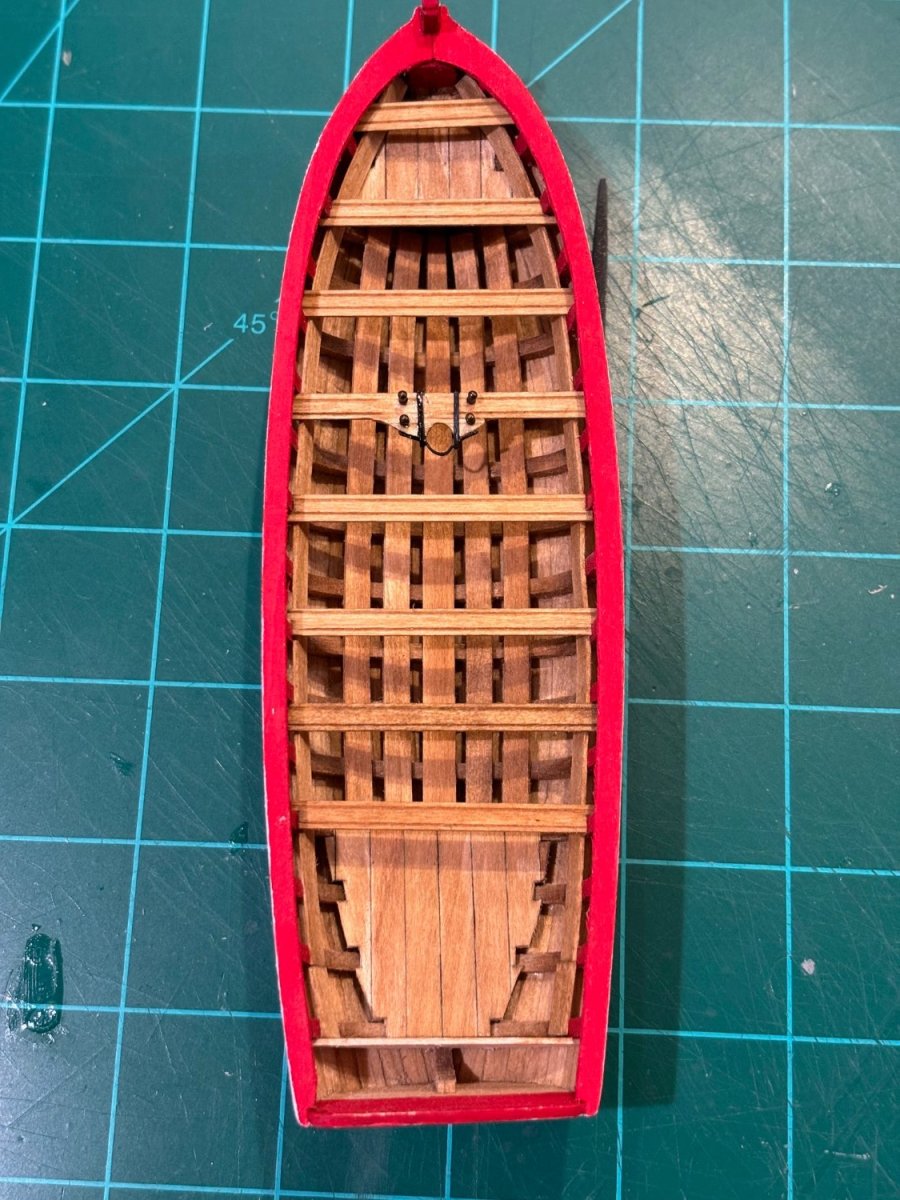
A little more work done today. Made and installed the thwarts and the front bulkhead piece for the locker at the back of the boat. Then I stained all of the interior parts with golden oak.

- 50 replies
-
- 5
-
-
- 18th century longboat
- model shipways
- (and 1 more)
-
My gap may be a little too large, the instructions only say to “Leave a consistent air space between each floor board.”
-
That was my thinking as well, just not something I’m looking forward to. I have the isopropyl and syringe out now. Hoping everything works out good