HOLIDAY DONATION DRIVE - SUPPORT MSW - DO YOUR PART TO KEEP THIS GREAT FORUM GOING! (Only 13 donations so far - C'mon guys!)
×


KennyH78
-
Posts
269 -
Joined
-
Last visited
Content Type
Profiles
Forums
Gallery
Events
Everything posted by KennyH78
-
 Sure am glad that I was able to get one of your rope walks earlier this month. I will be putting it to use soon along with your serving machine. It sucks that your supplier had to halt shipments to the USA. Hopefully, these things will work themselves out soon, but I doubt it.
 -
Chuck, I would also be interested in a puzzle of Winnie.
-
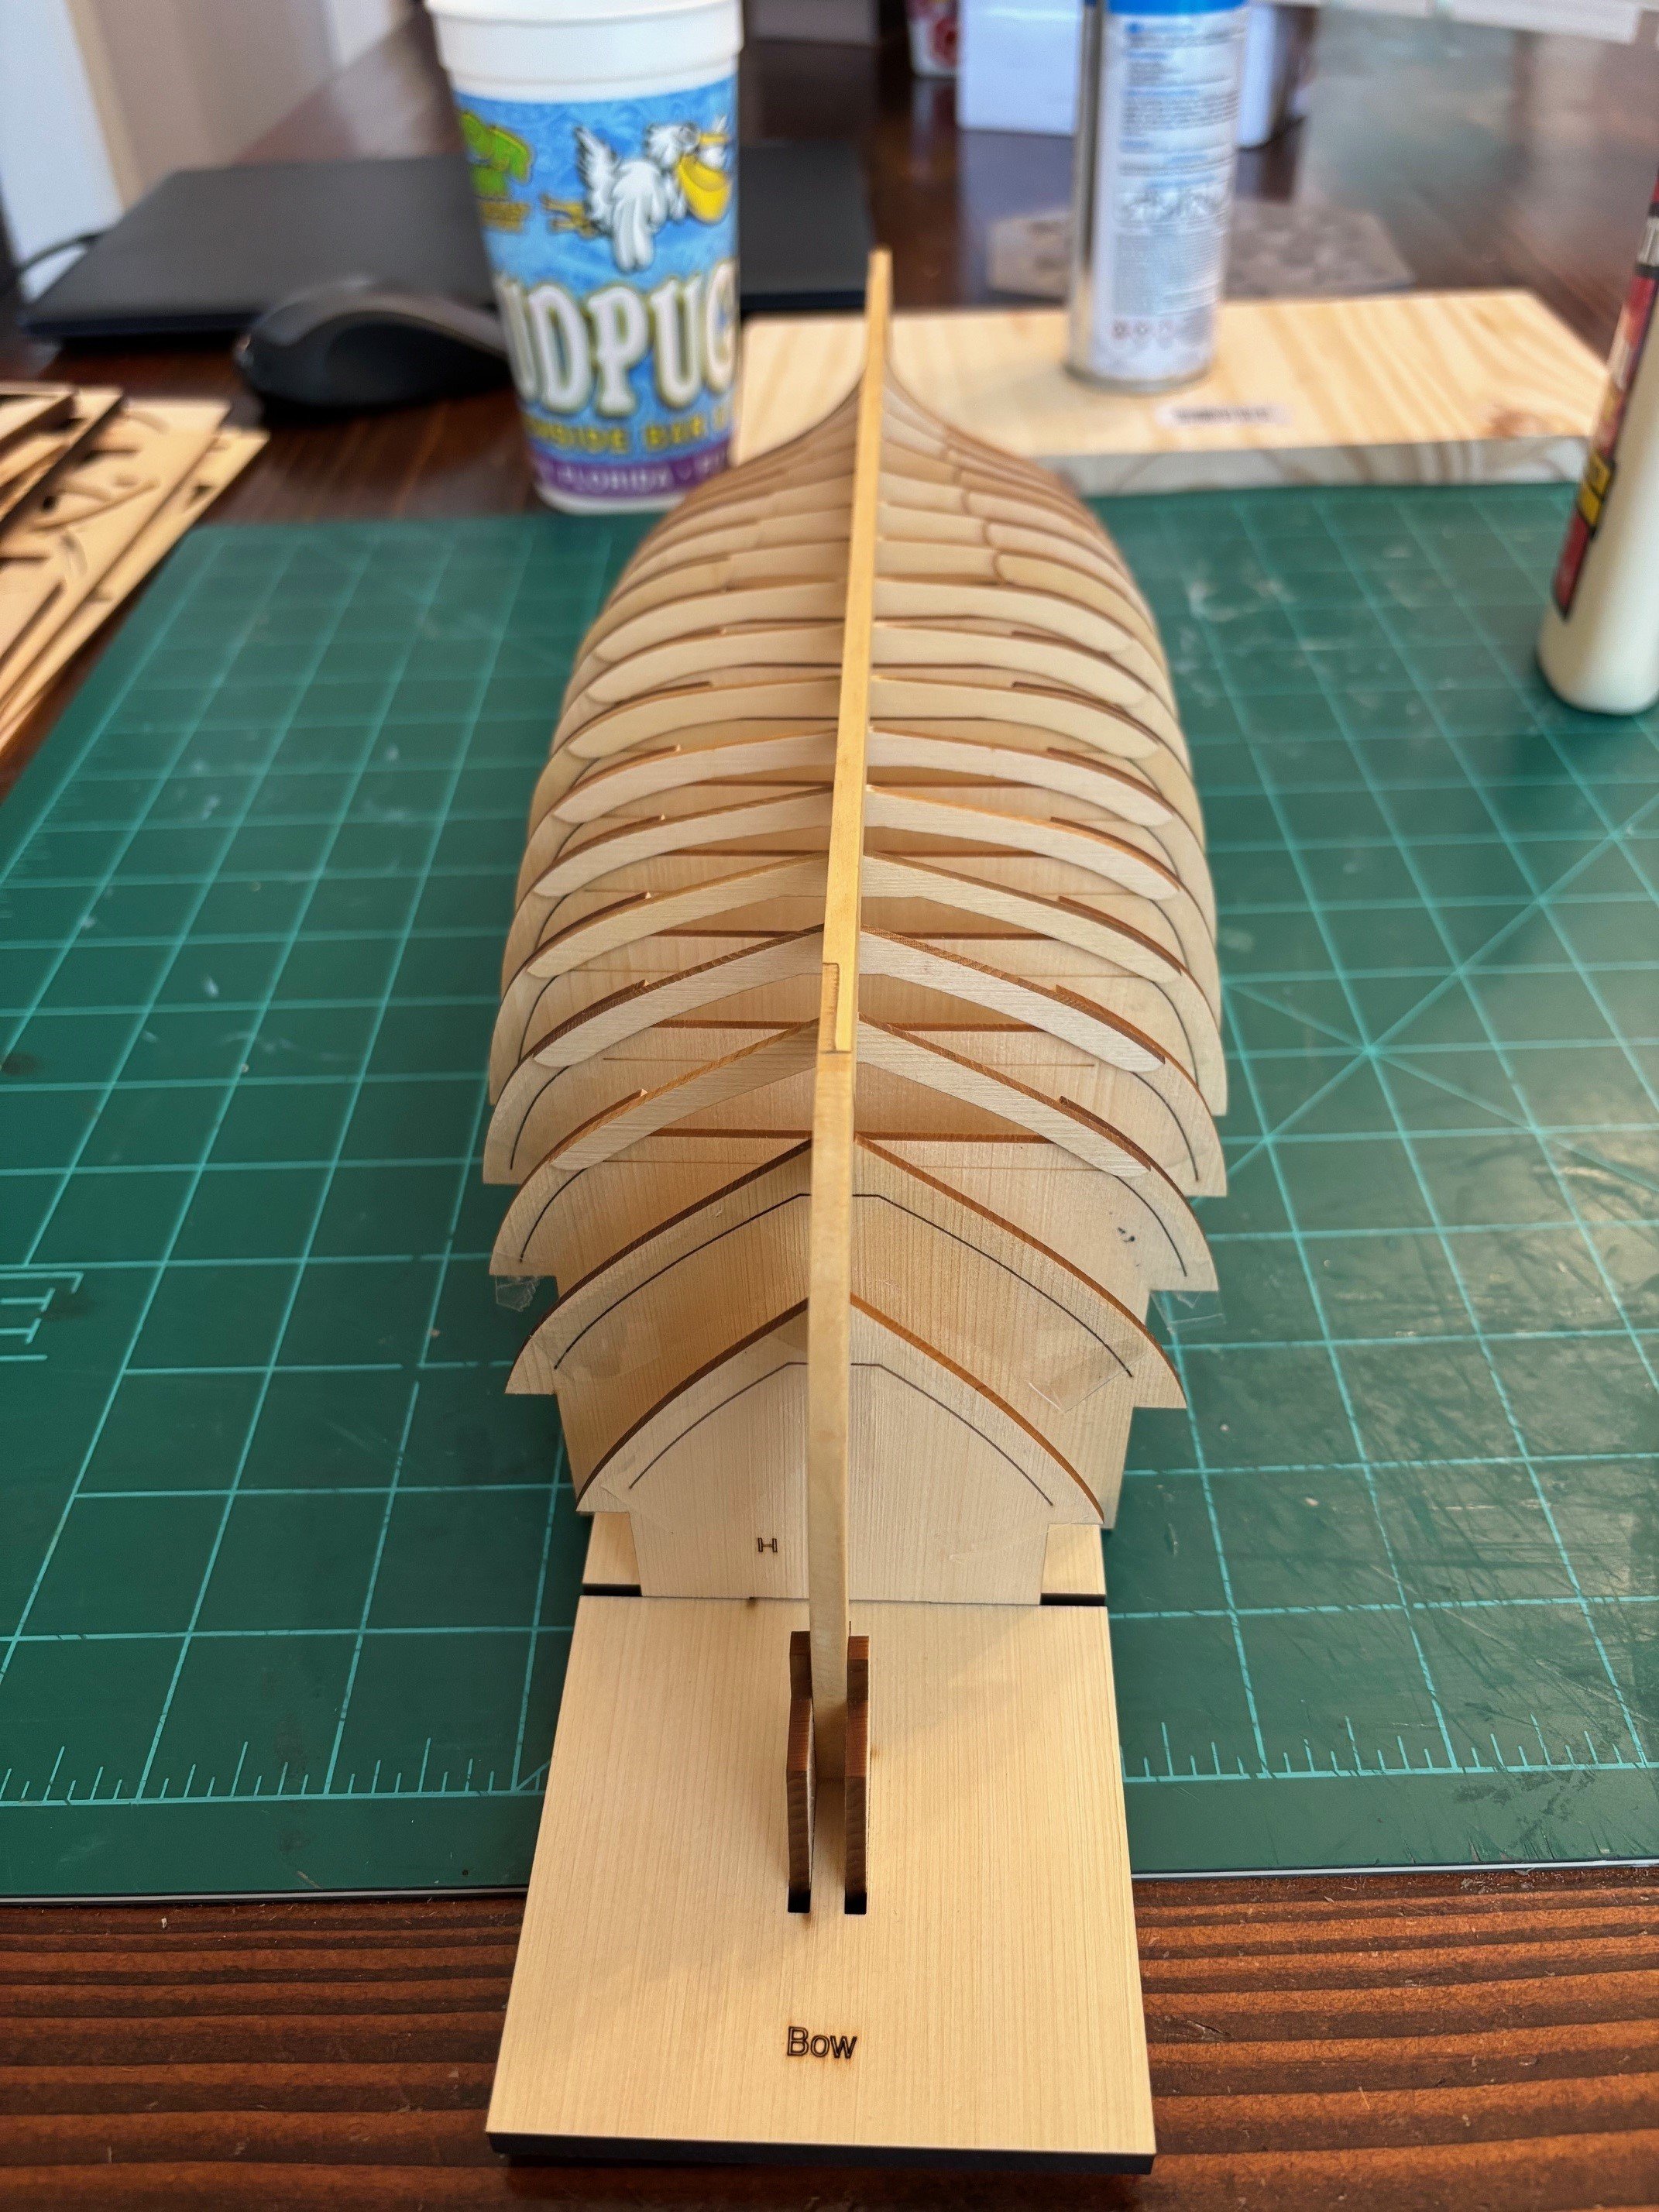
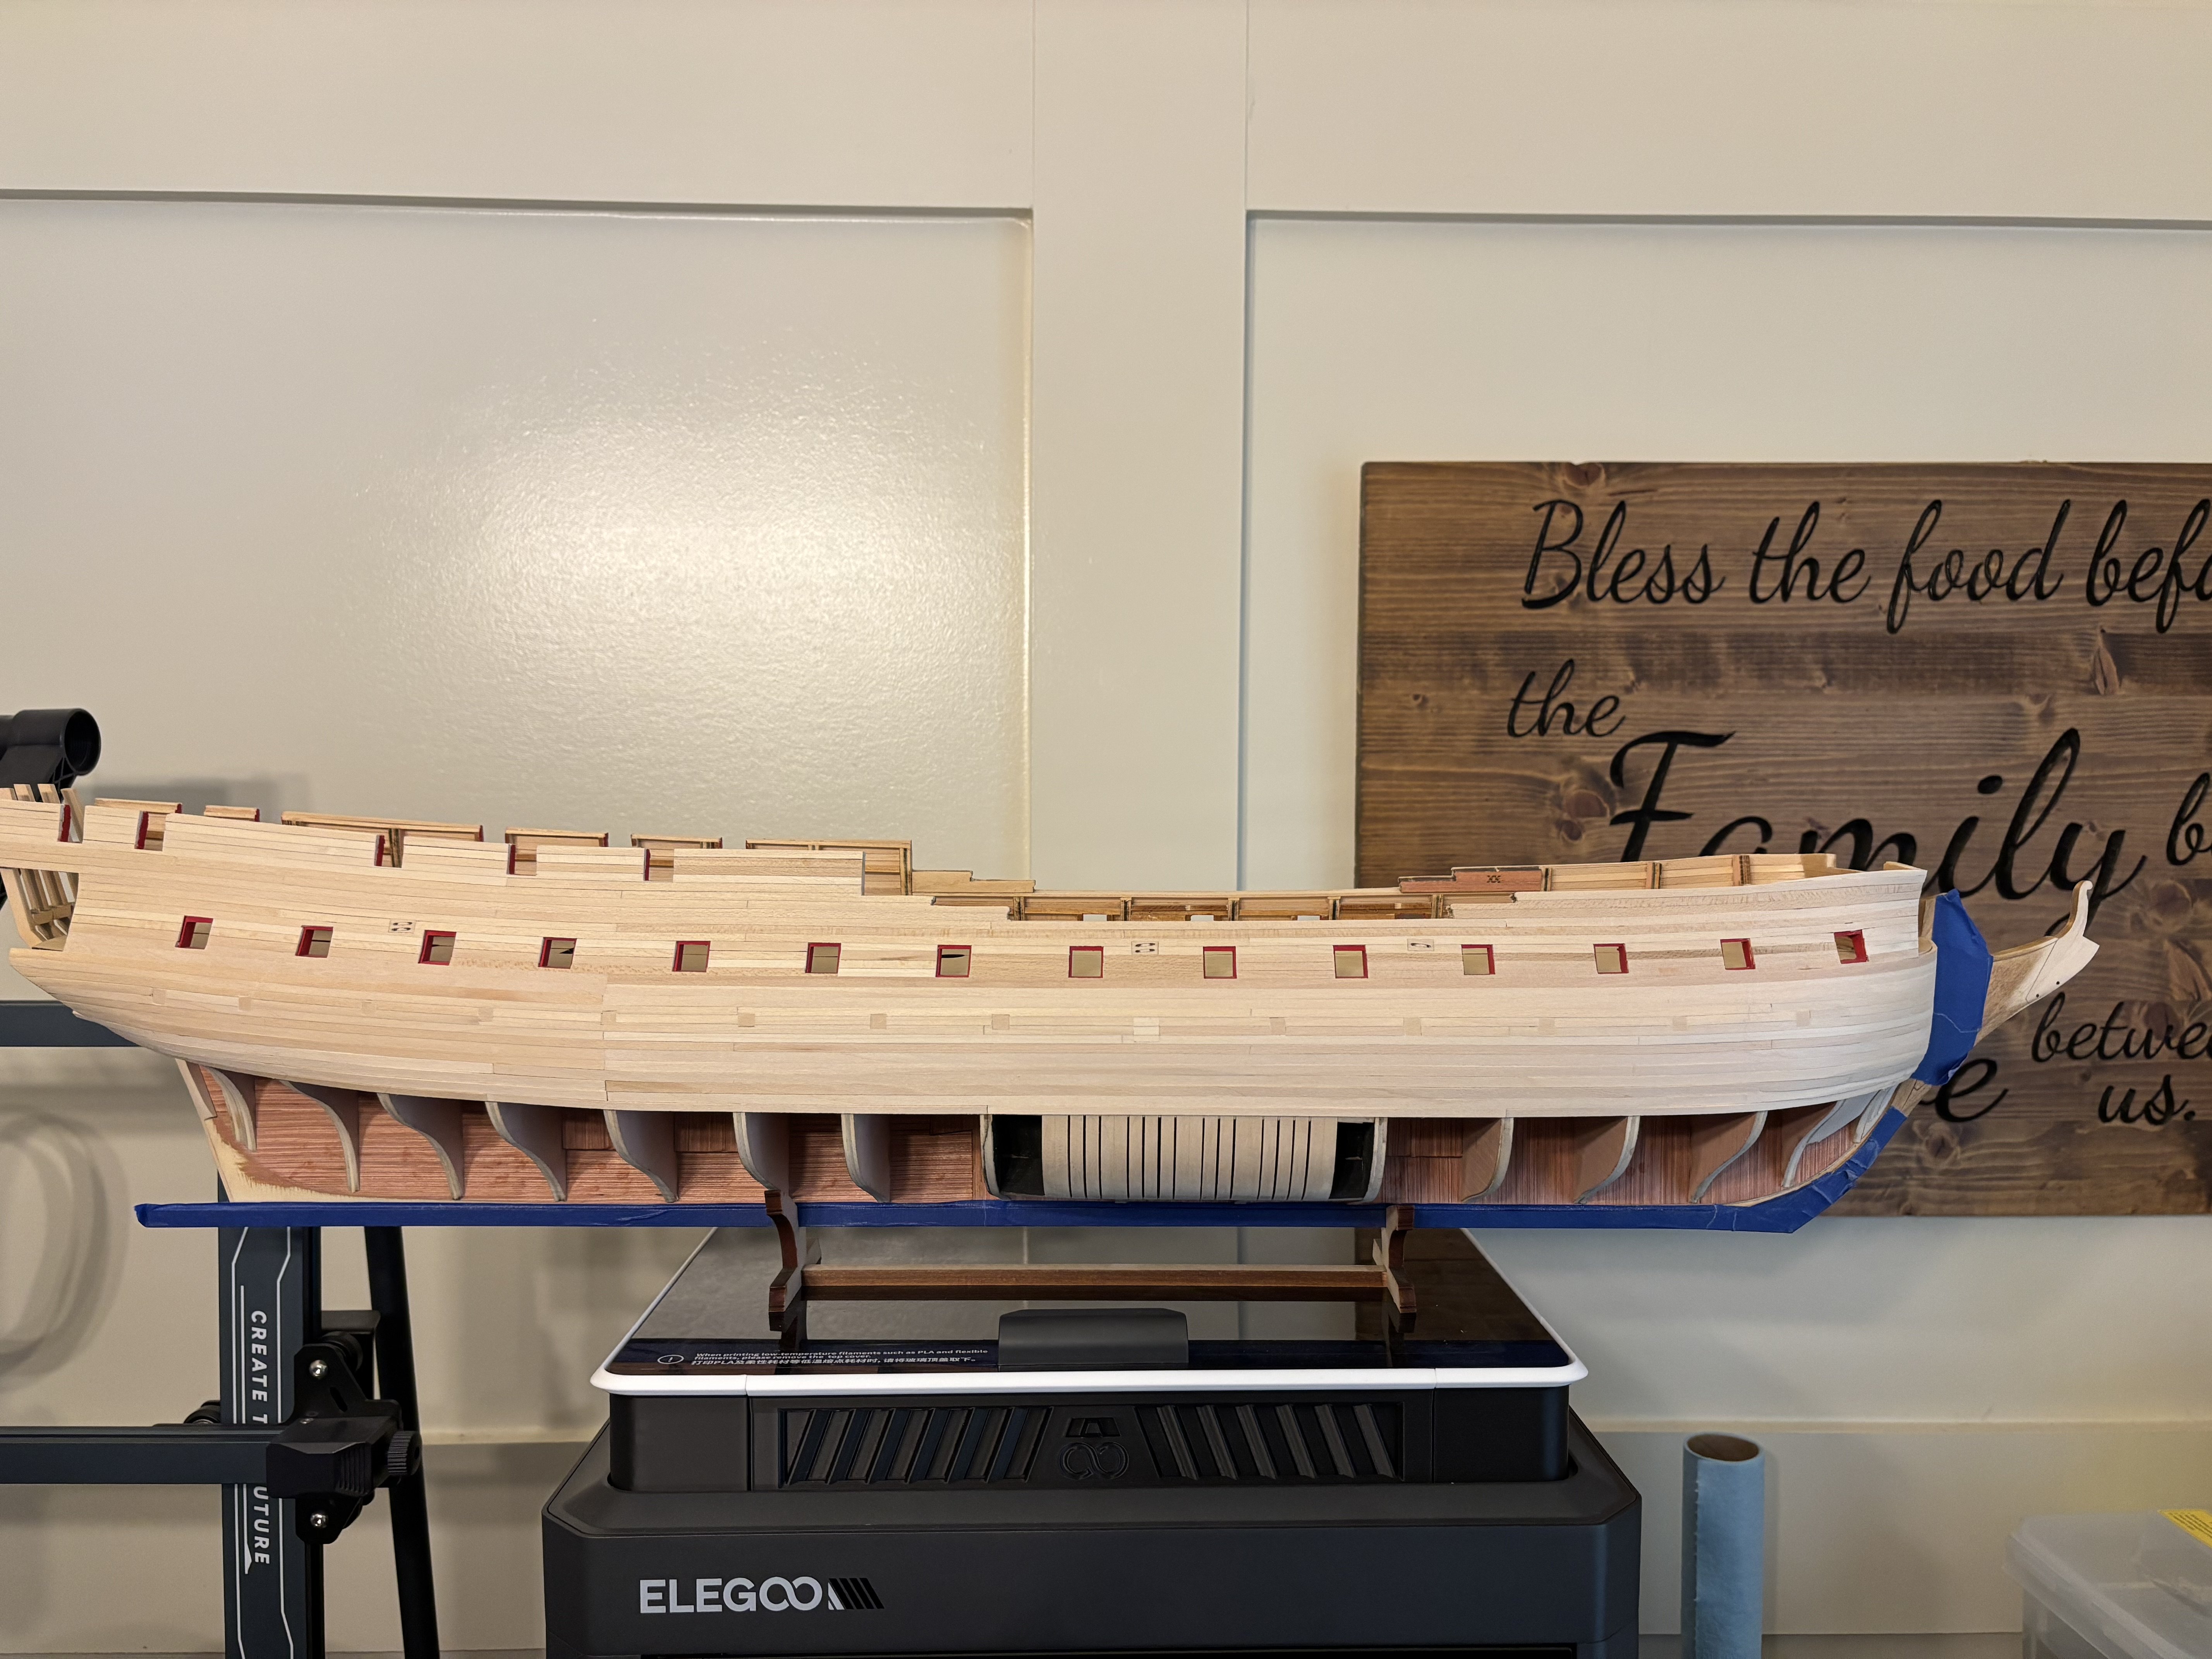
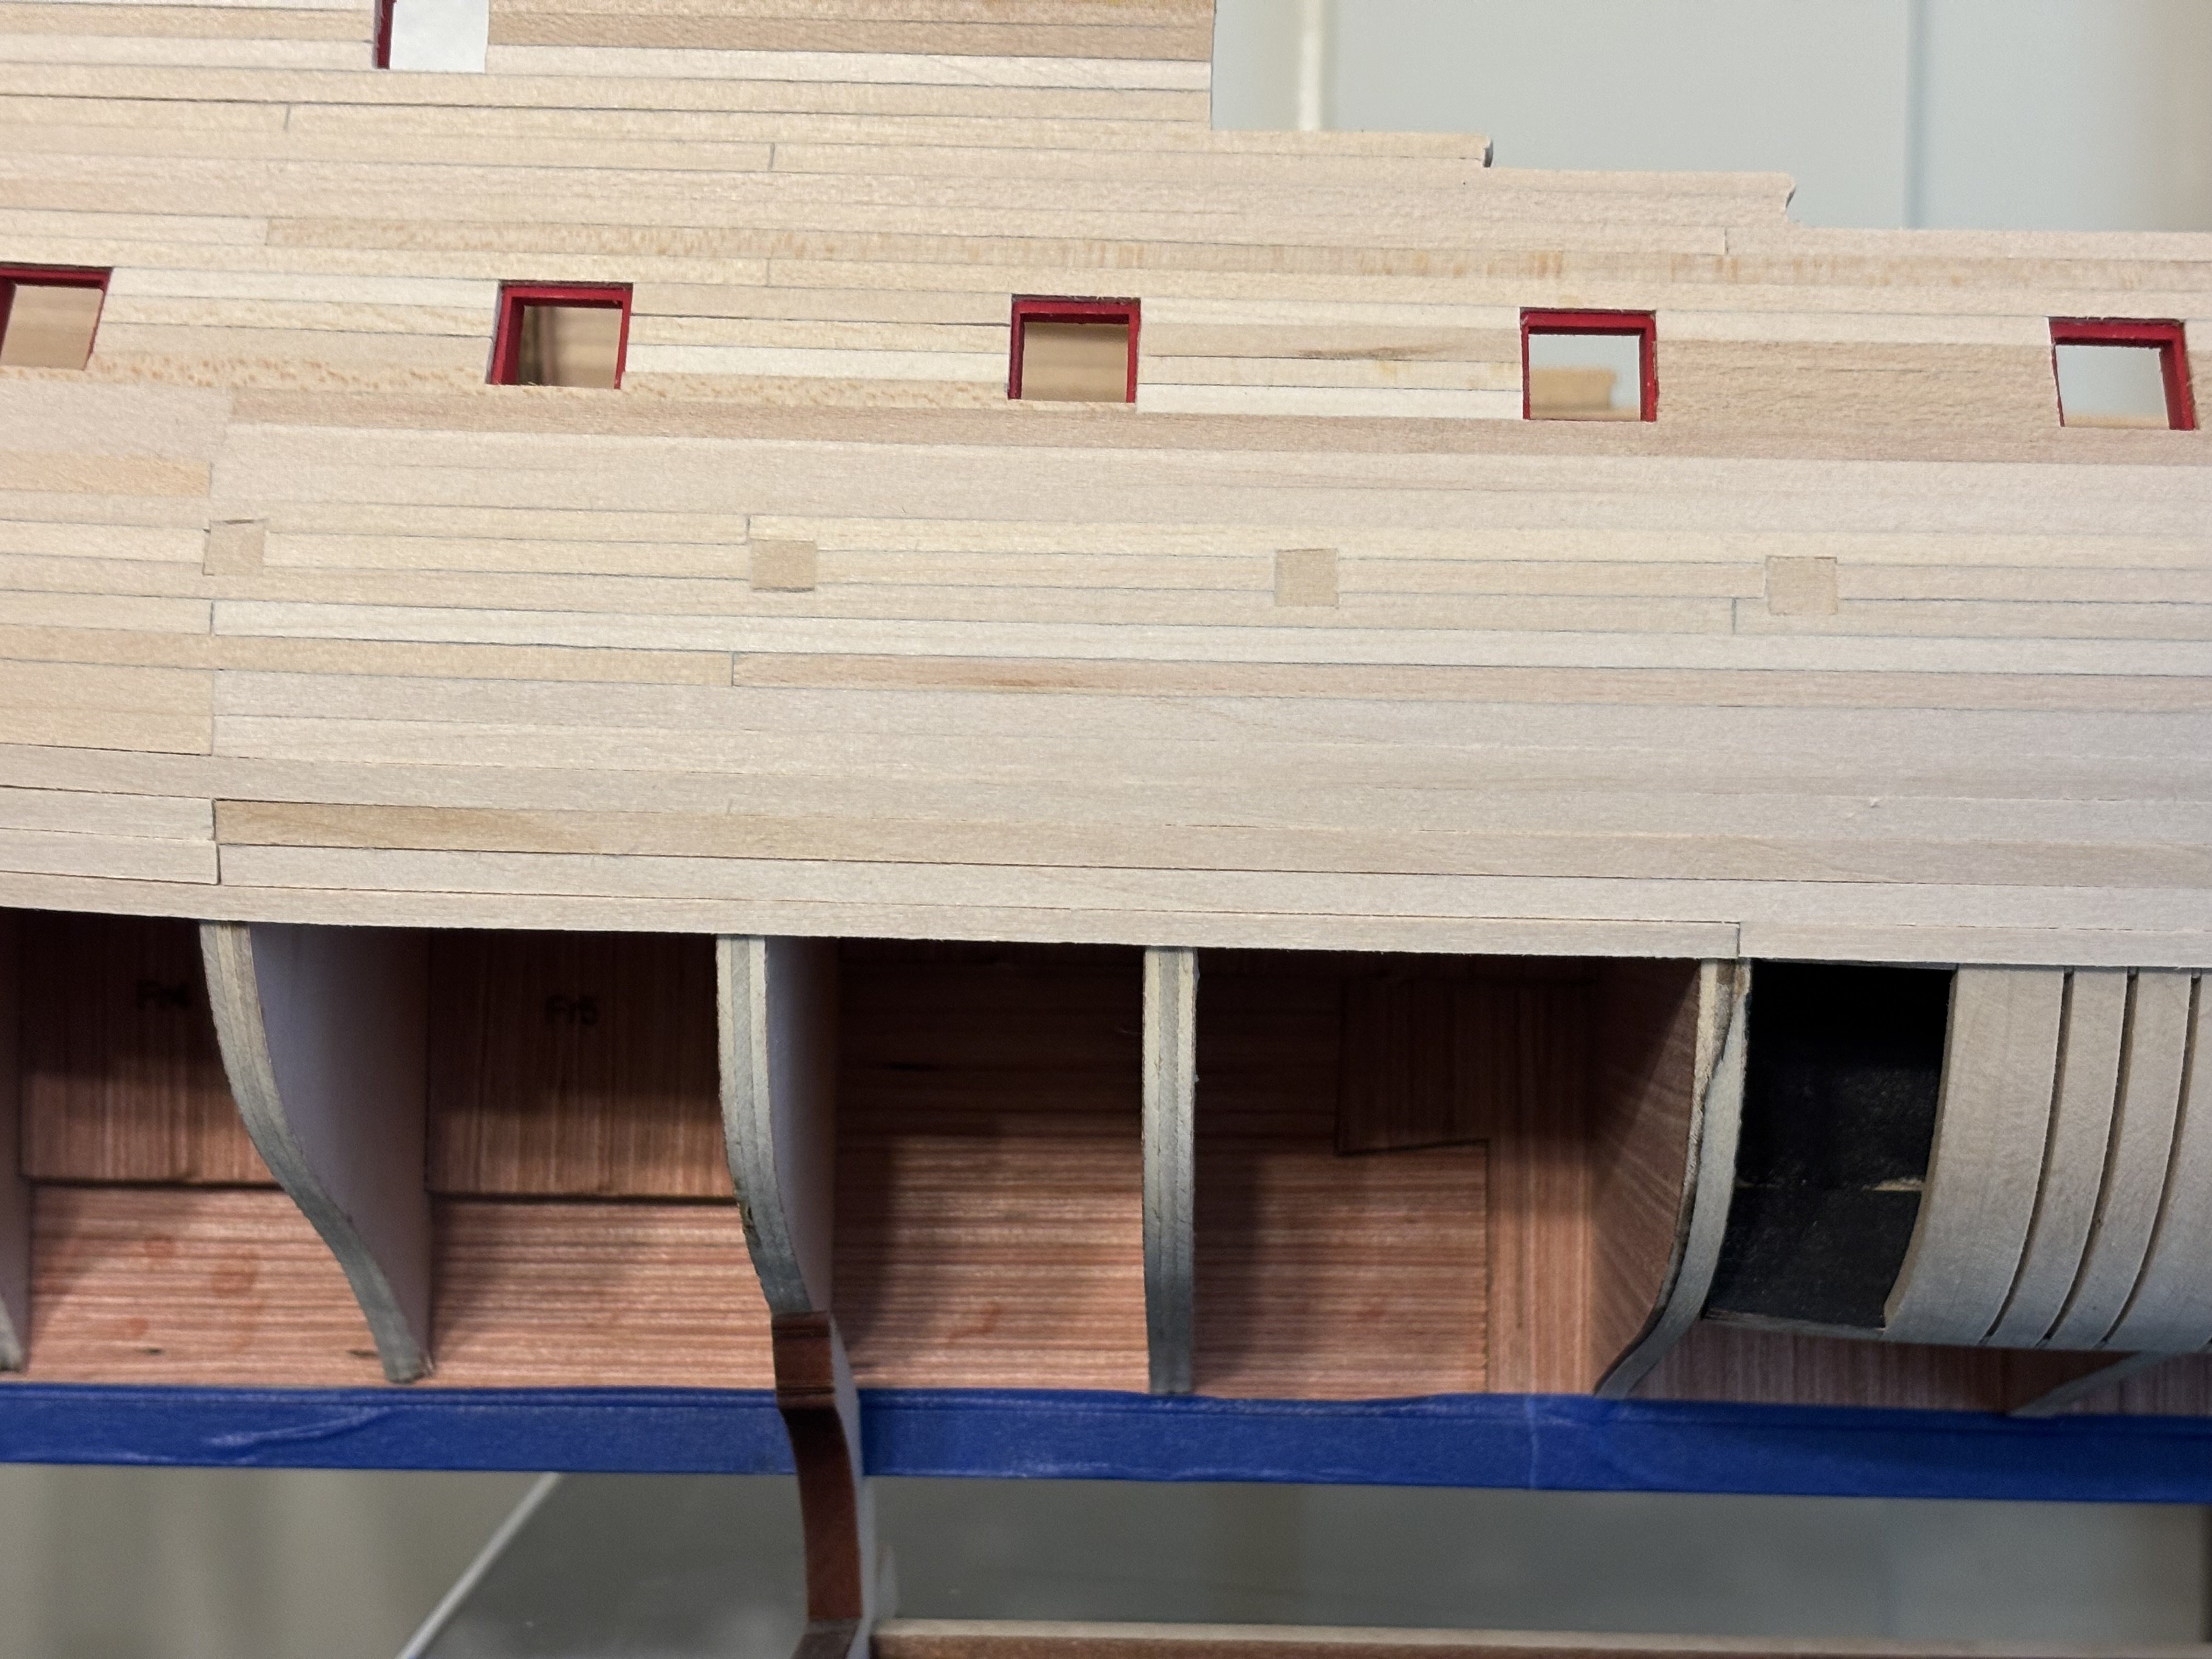
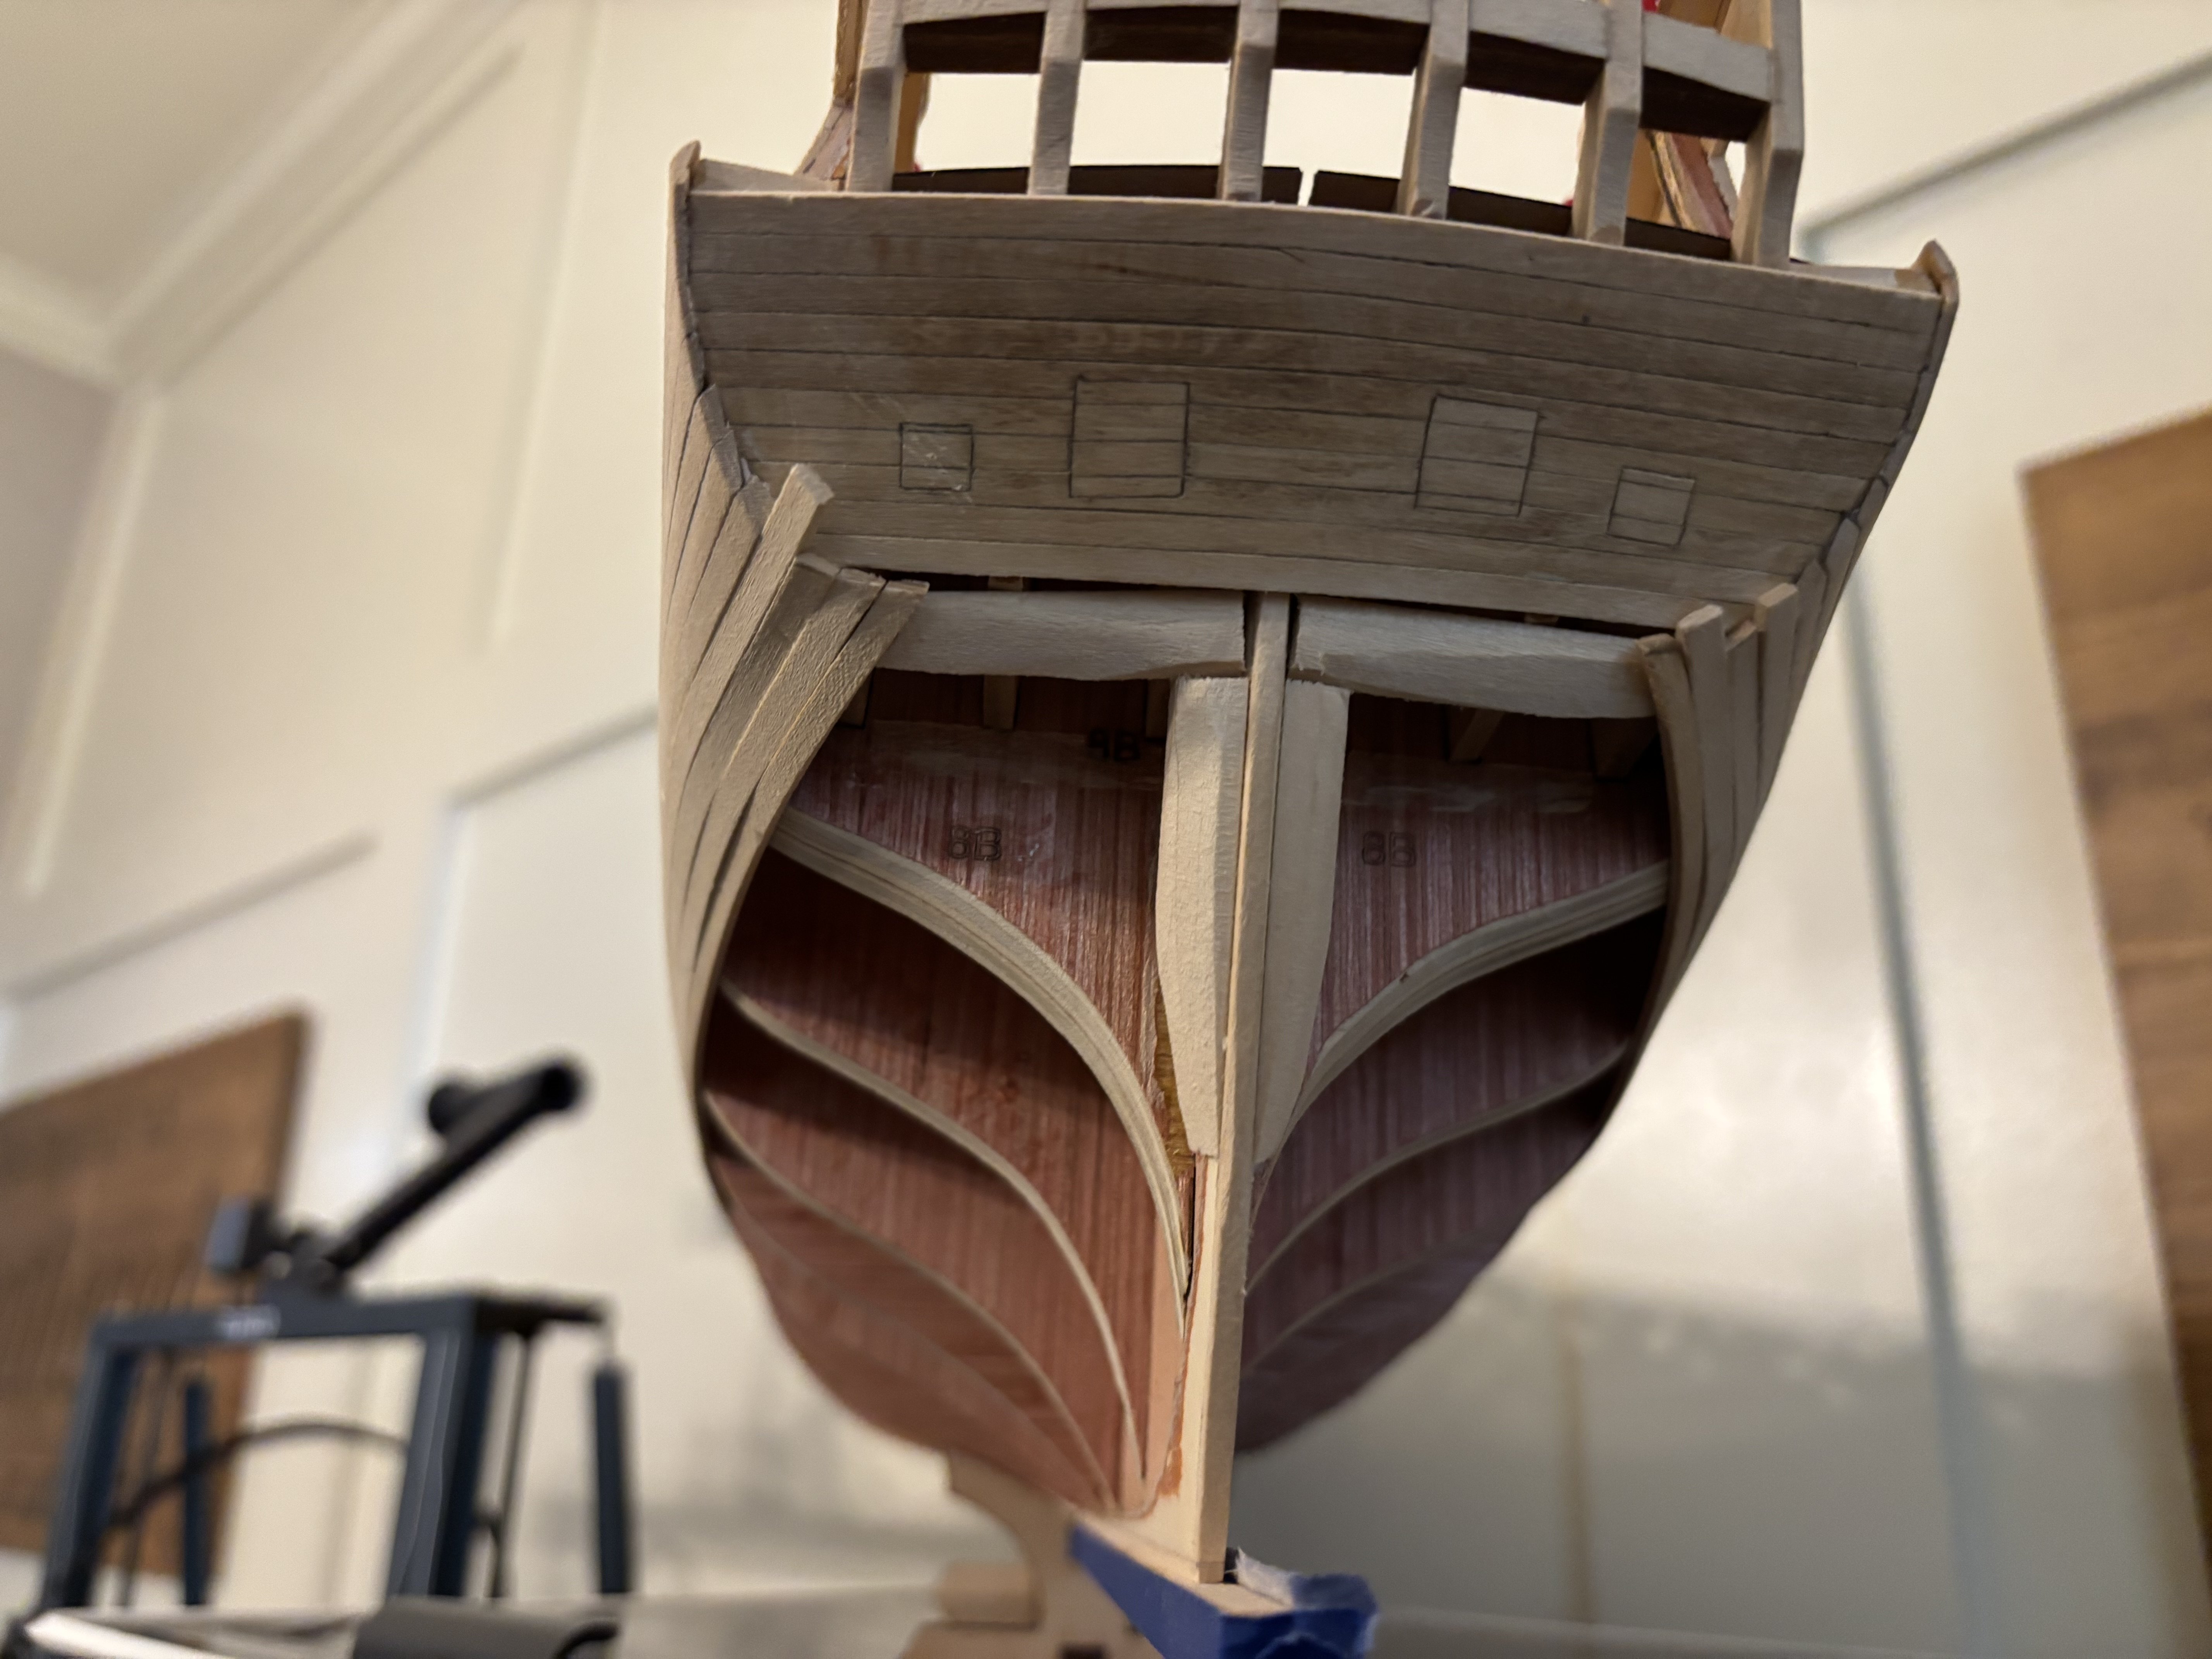
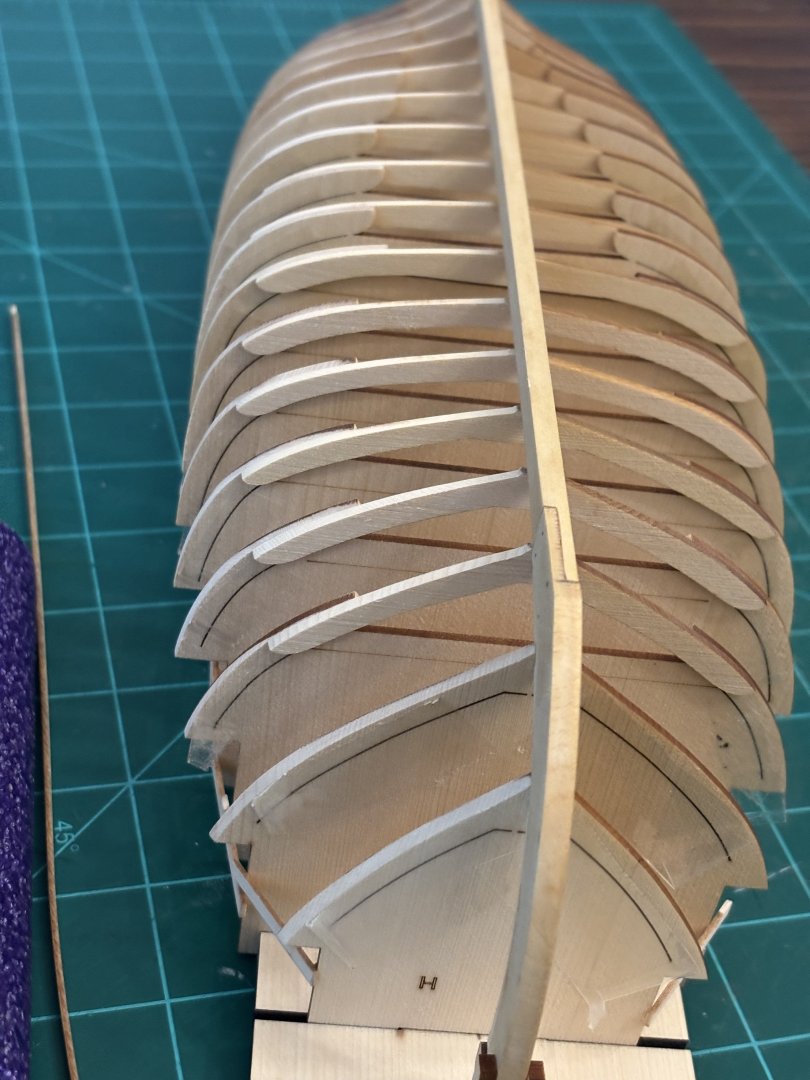
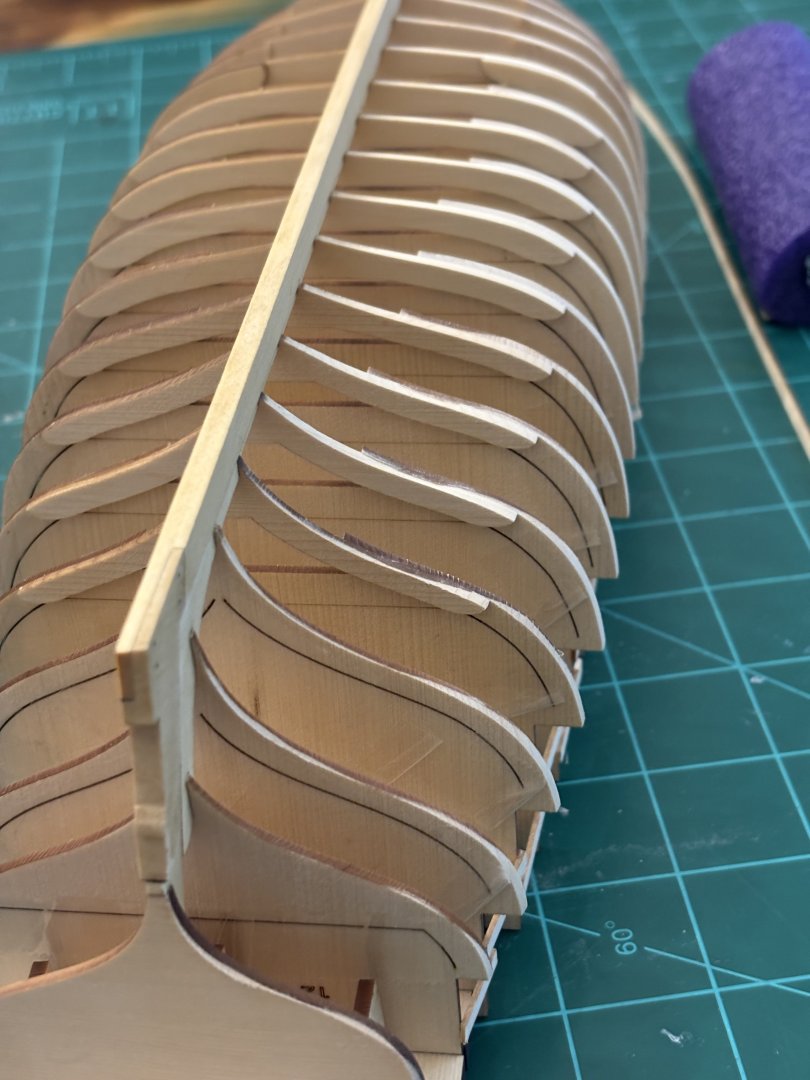
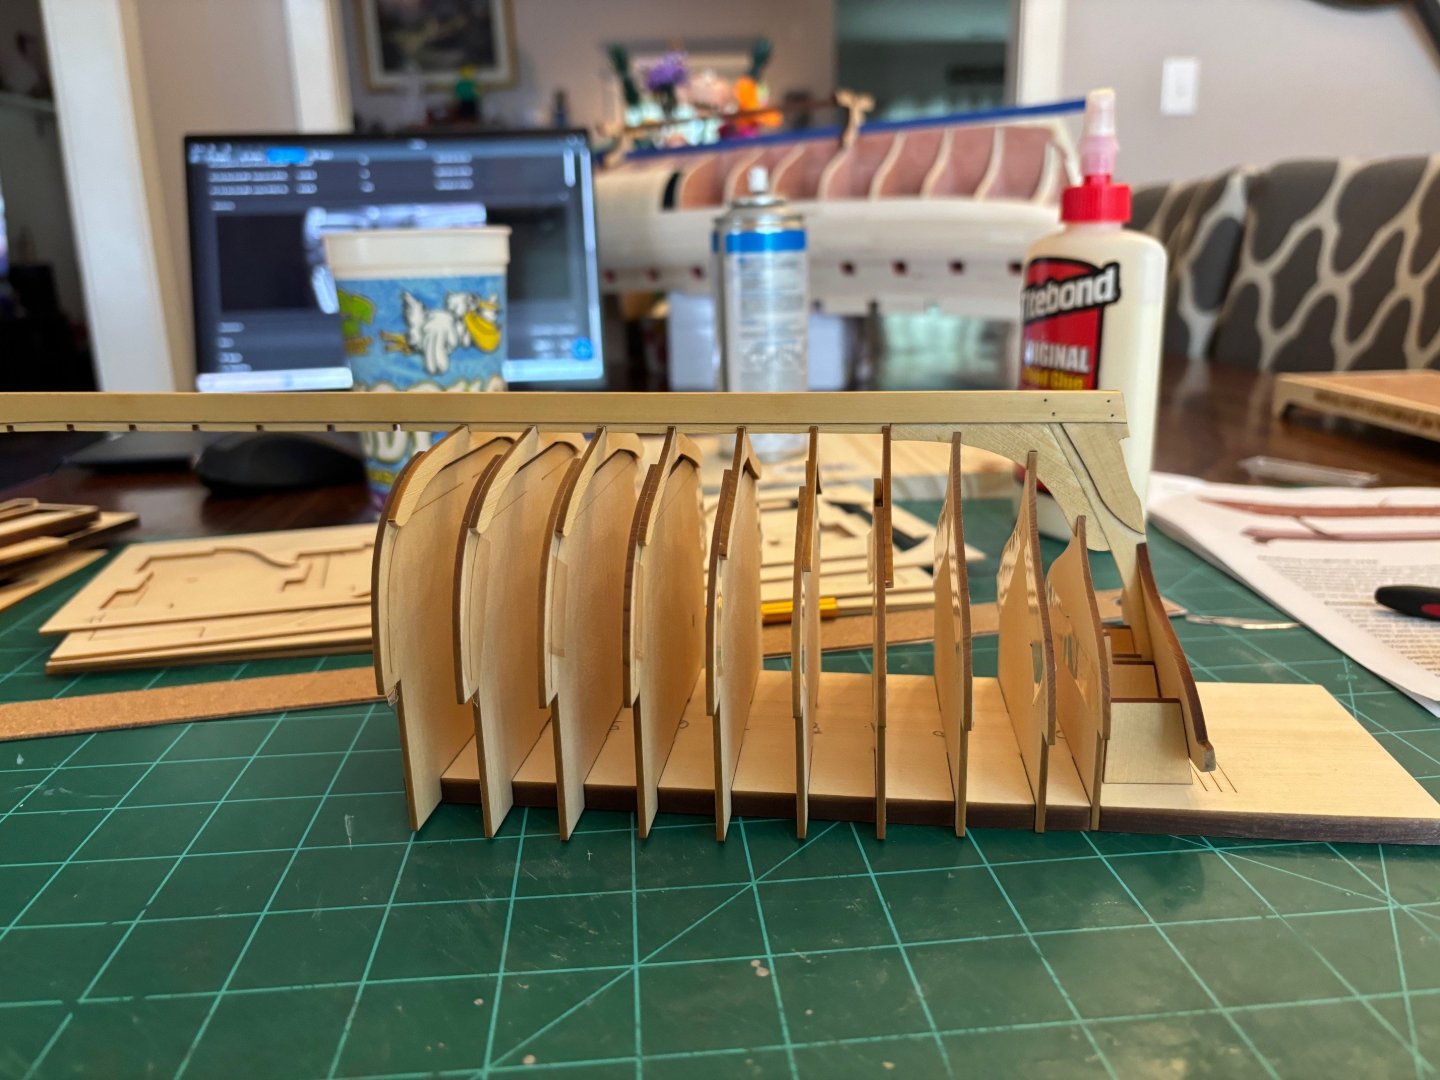
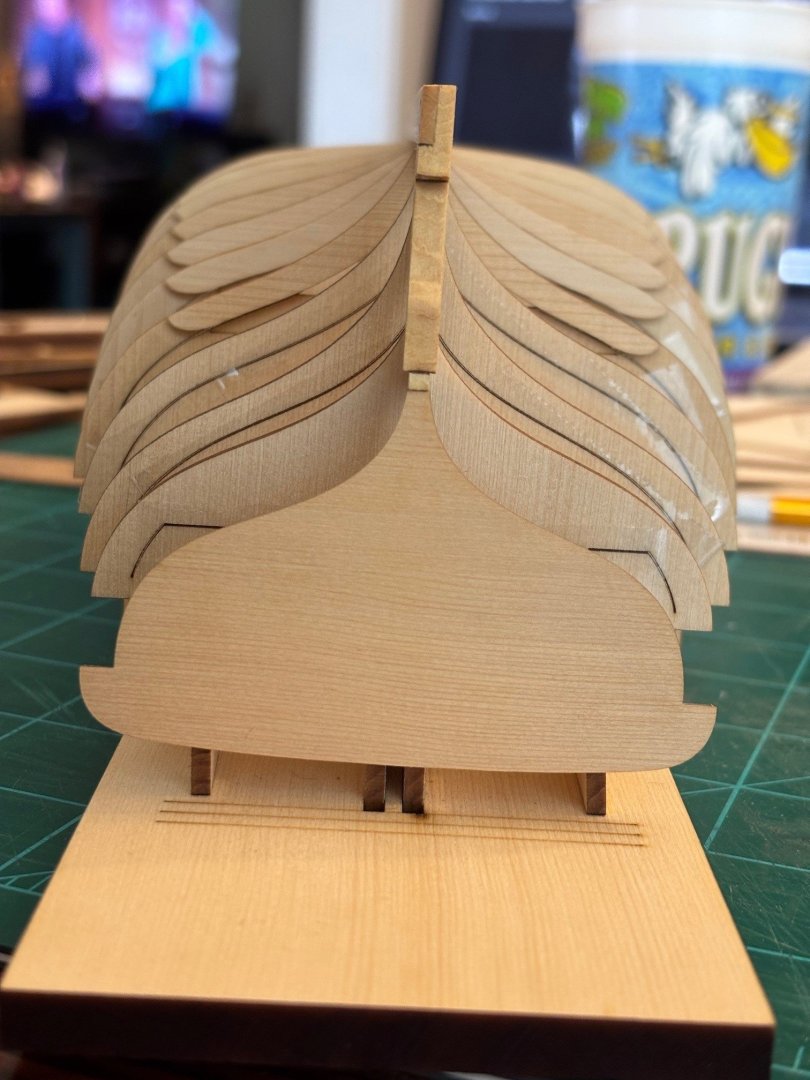
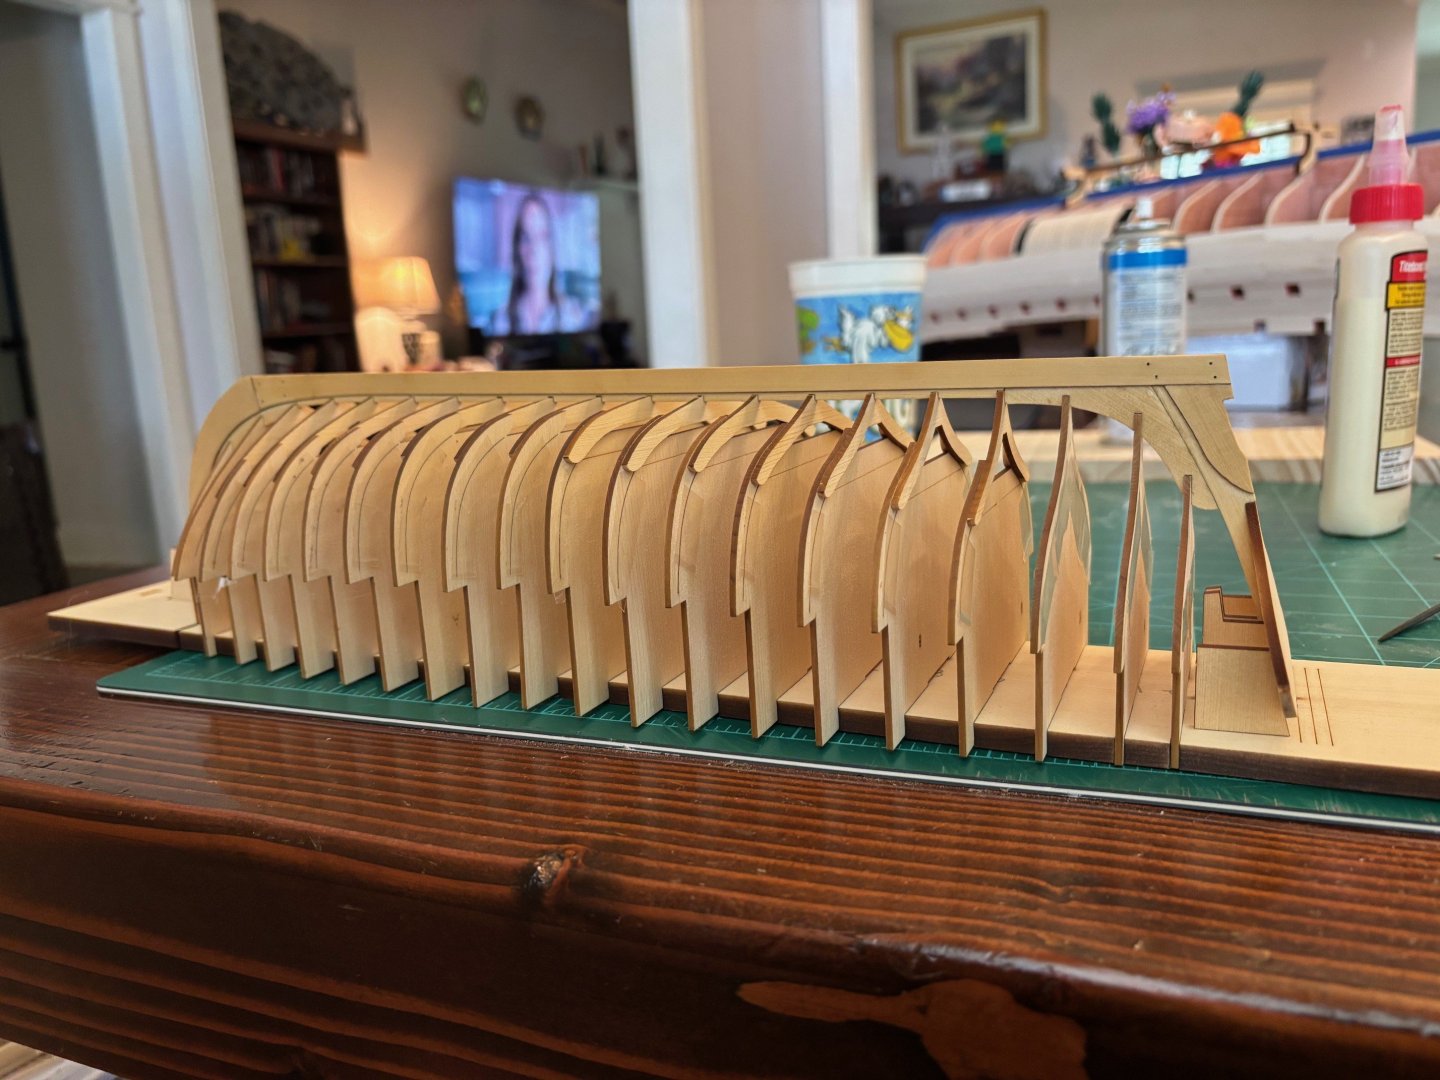
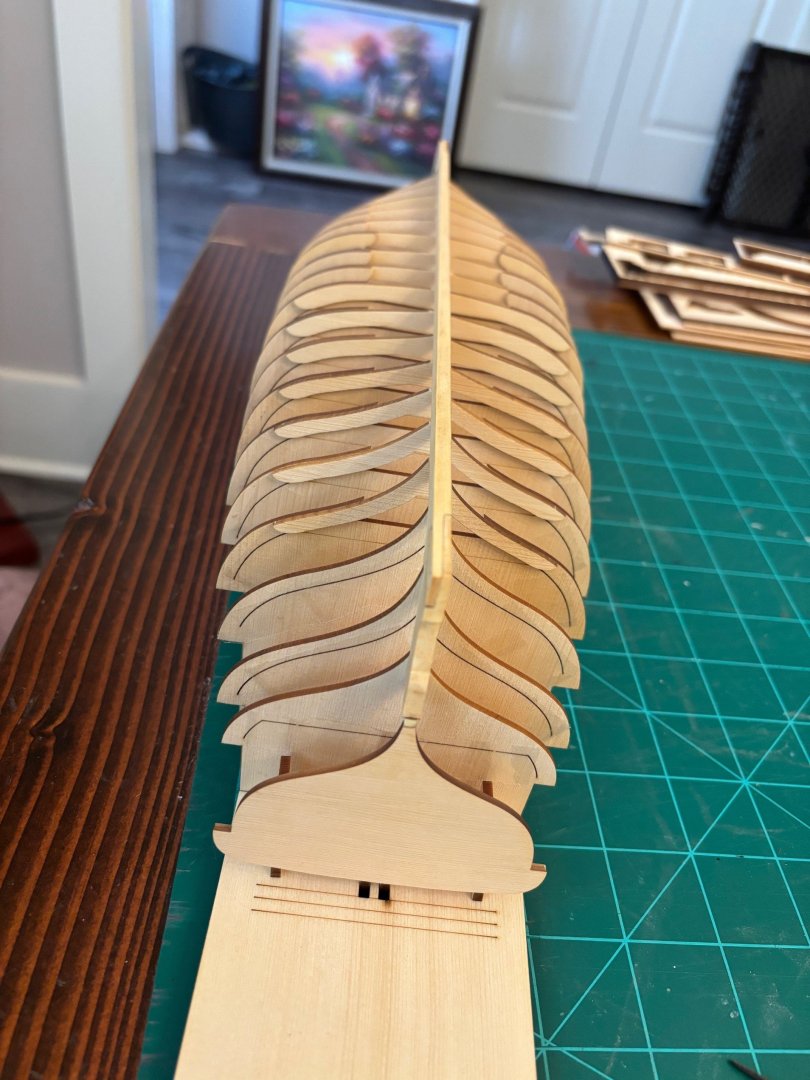
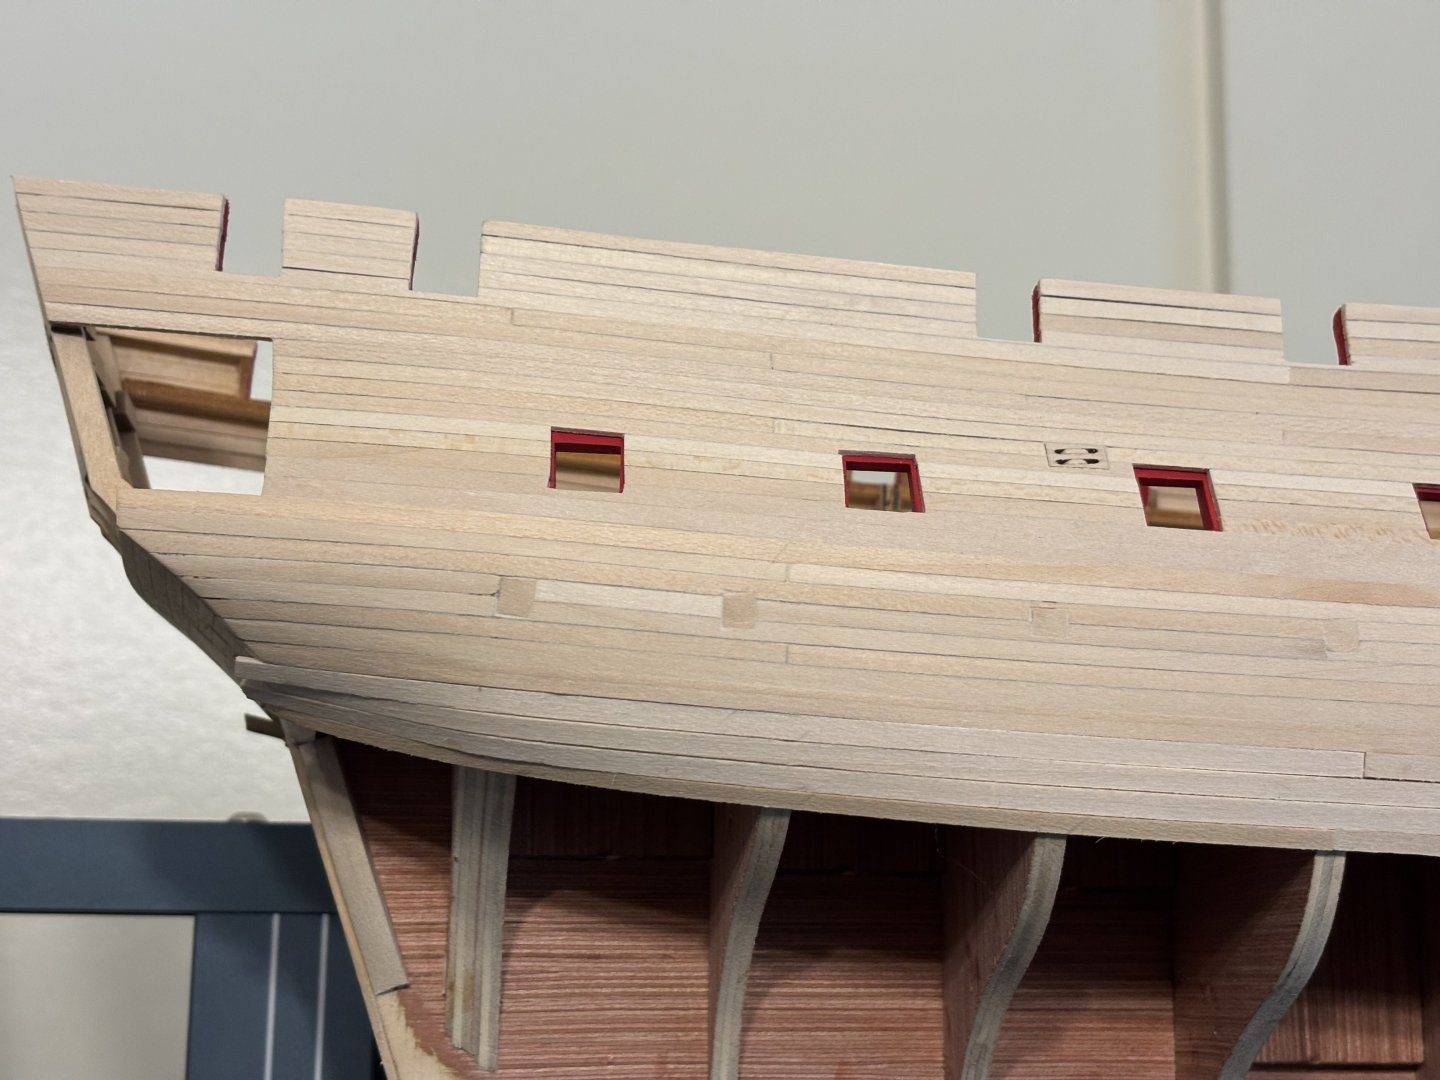
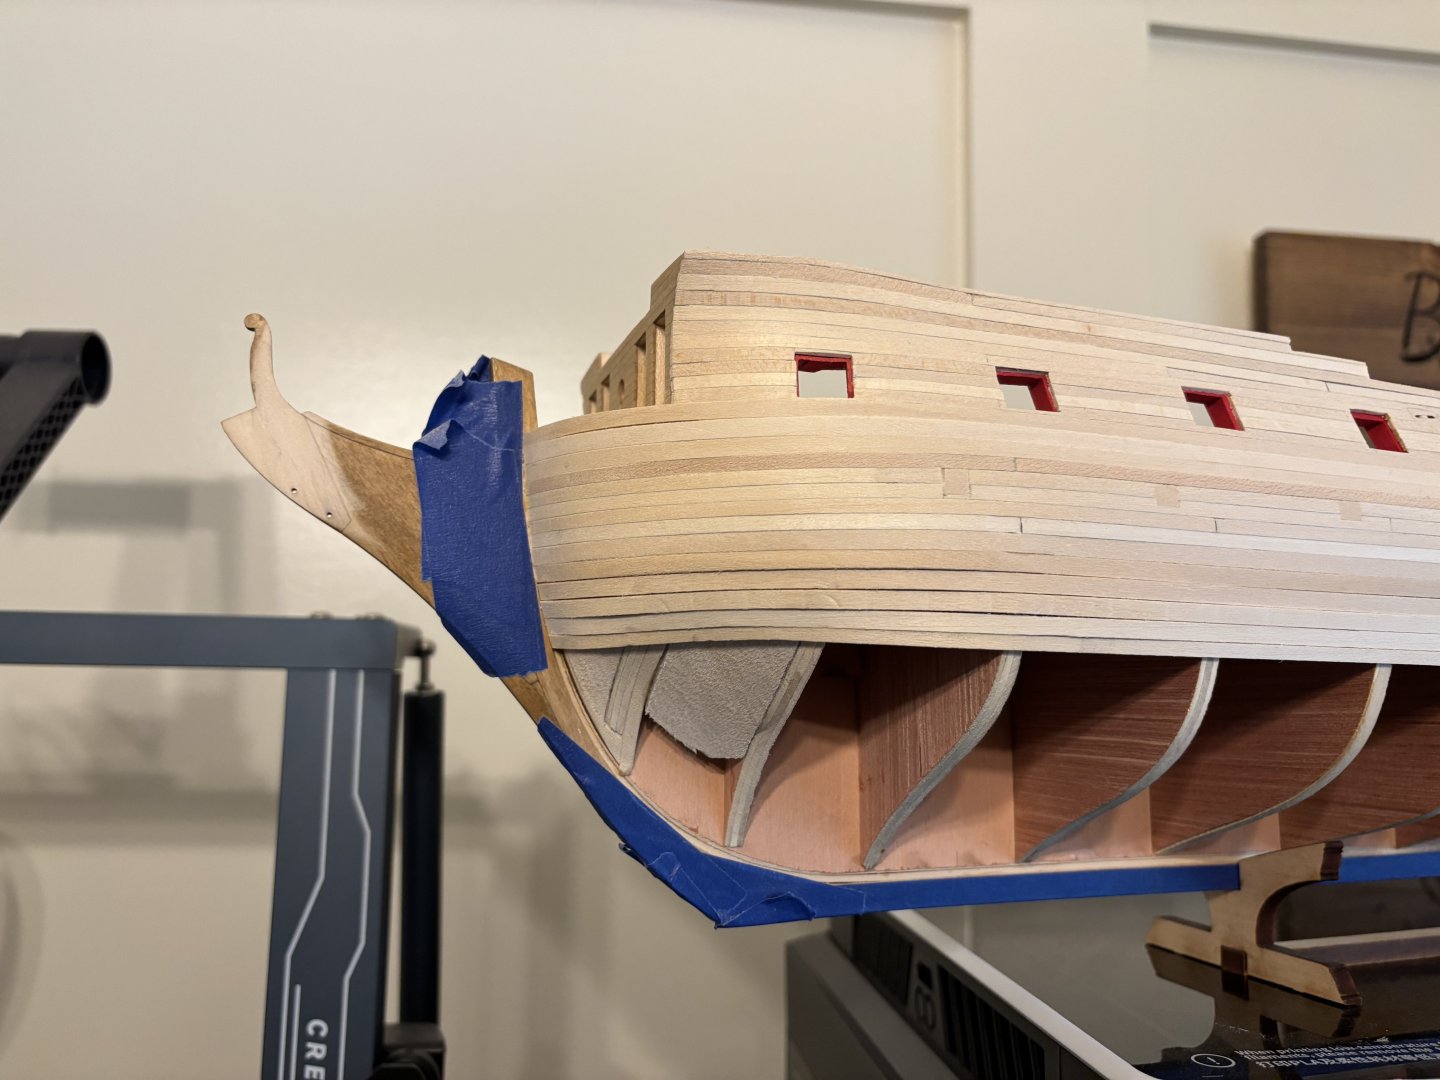
The process of fairing the hull is tedious and slow going. I am taking my time with it to ensure that it is done correctly. I am using 320 grit sandpaper and continually checking the frames with a batten.
-
Three reasons I bought this kit and started it back in 2018 1. It was designed by @Chuck 2. No rigging other than the guns 3. She is one of the 13 Continental Frigates built by the Continental Congress during the Revolutionary War.
-
Tony, thank you for the tips. I plan to line off the hull and take it very slow when planking the rest of it. I am hoping that filler and paint will not be needed, but I will use it if absolutely necessary. Ronald, it is Minwax Golden Oak 2108 that I used. I love the color and I think it came out great on the model. I used an old acid brush to apply it. That gave me more control as to where and how the stain flowed into the wood.
-
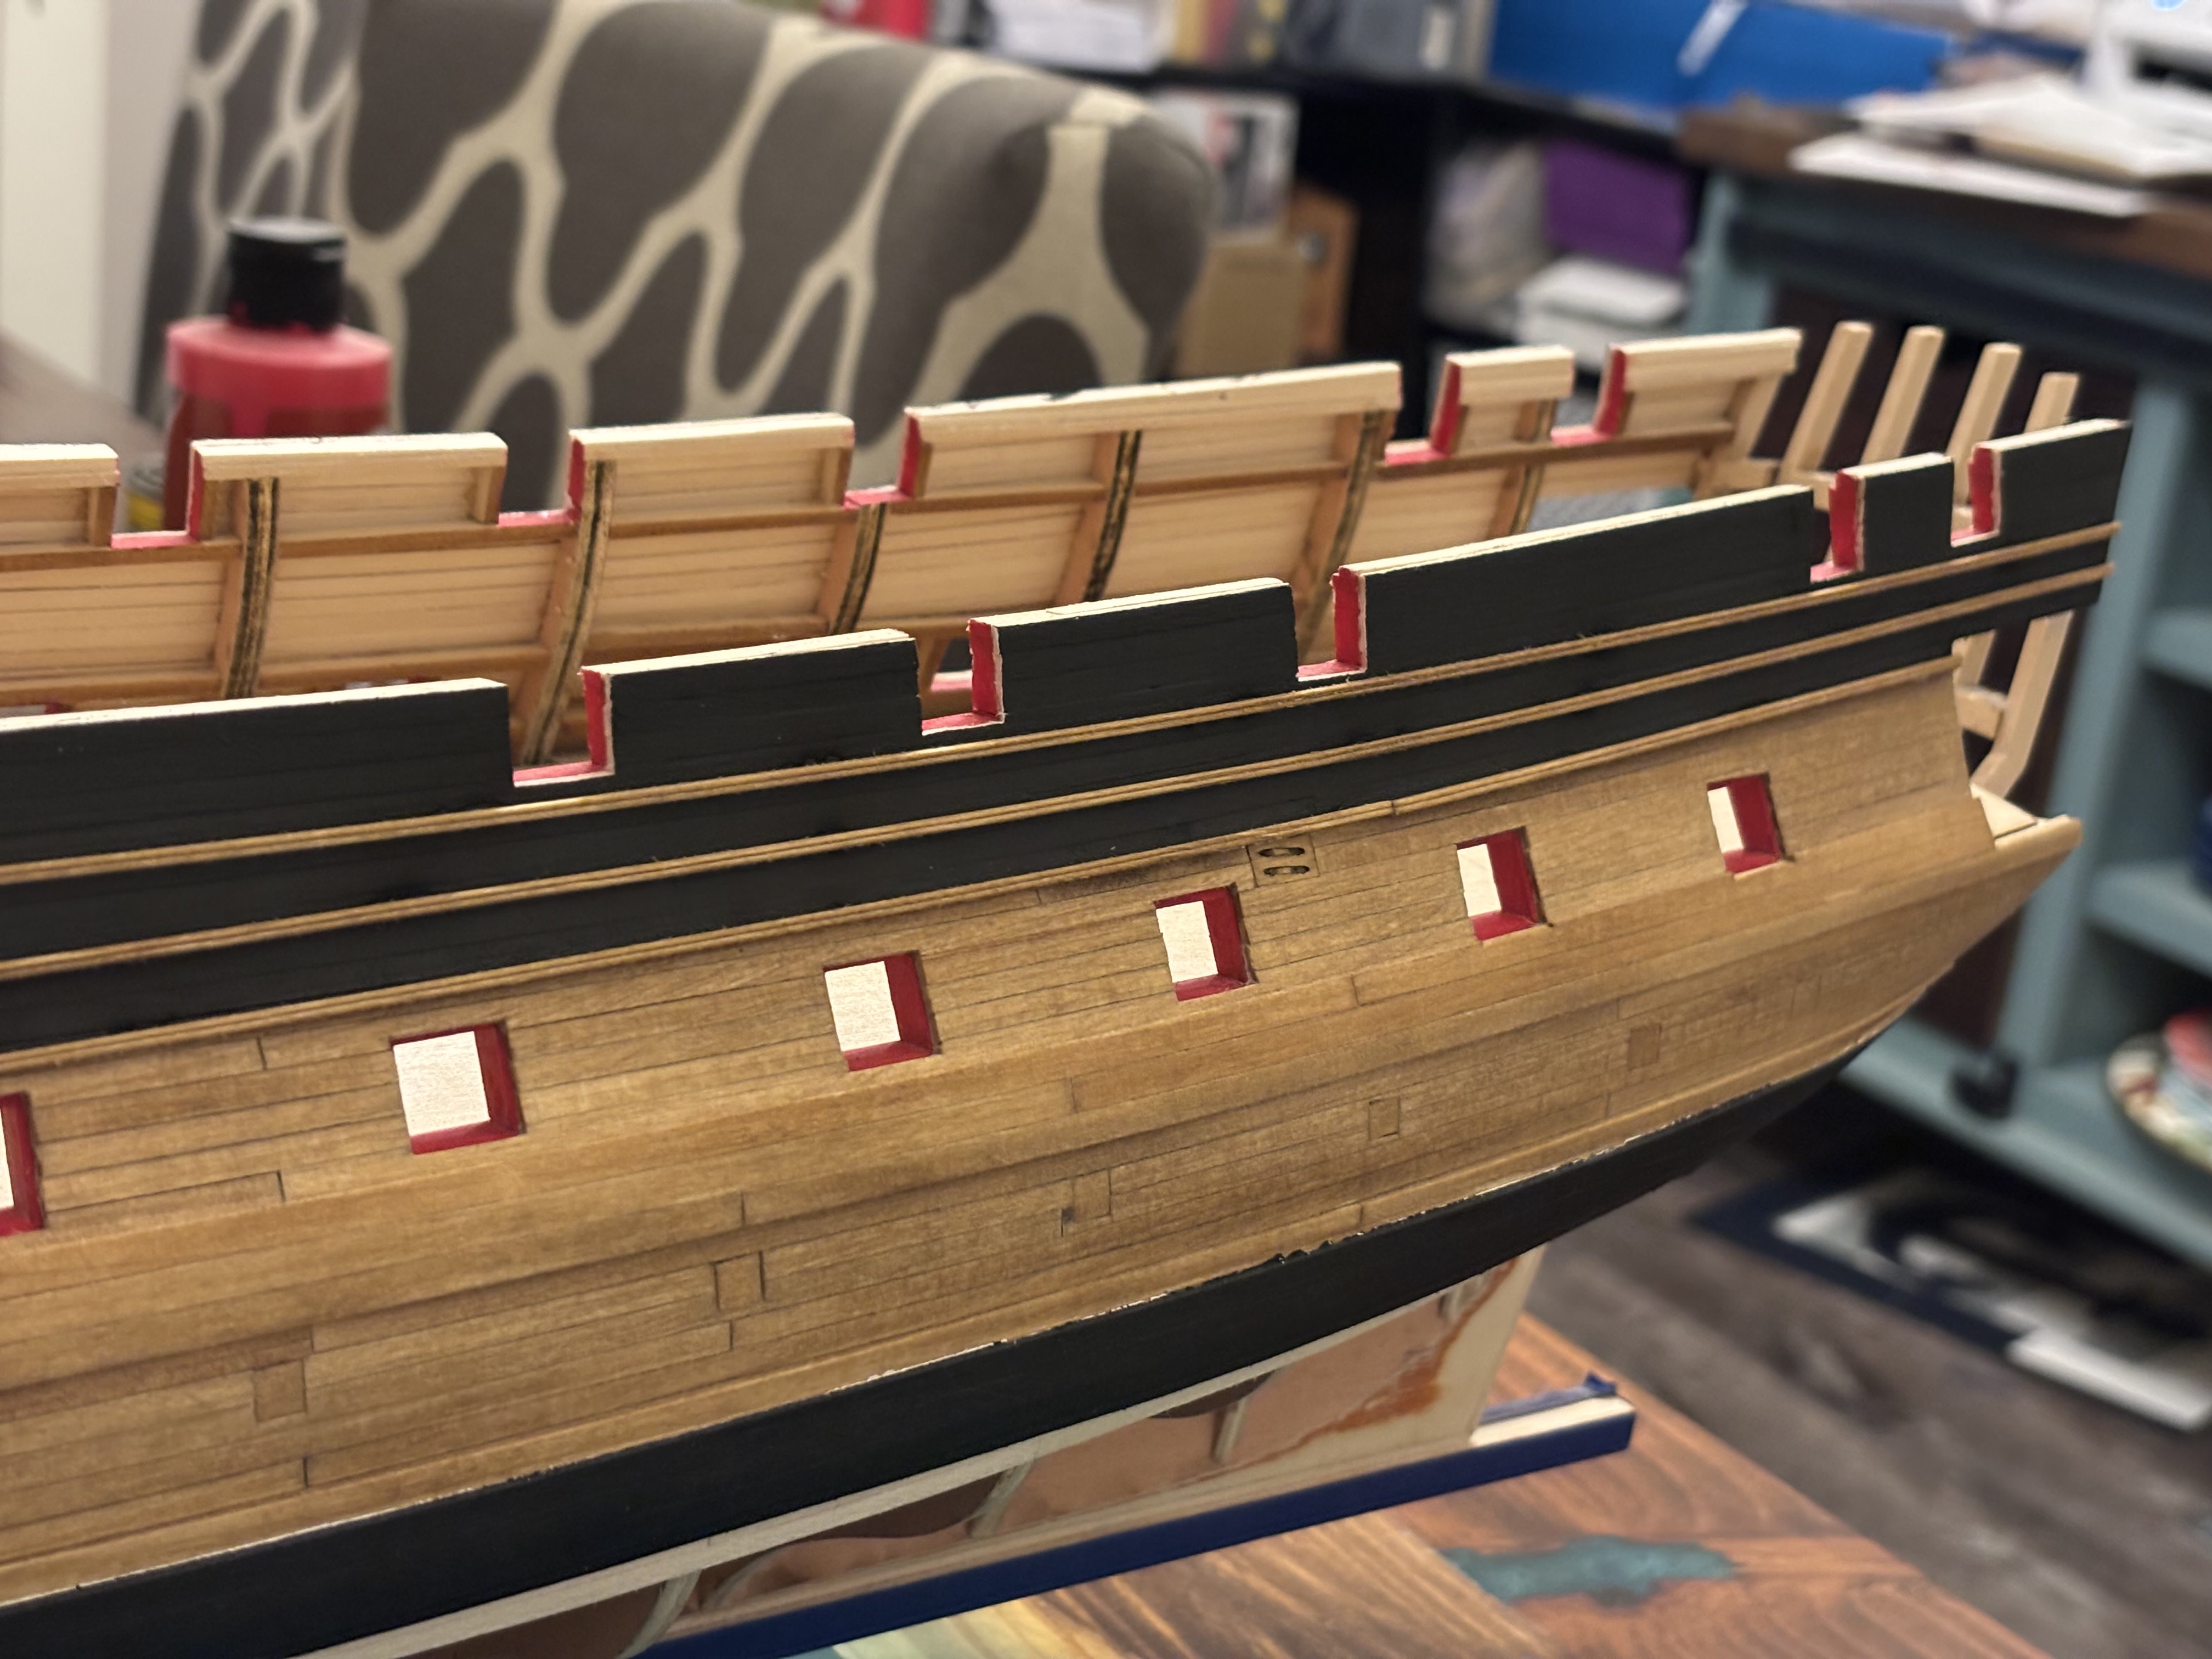
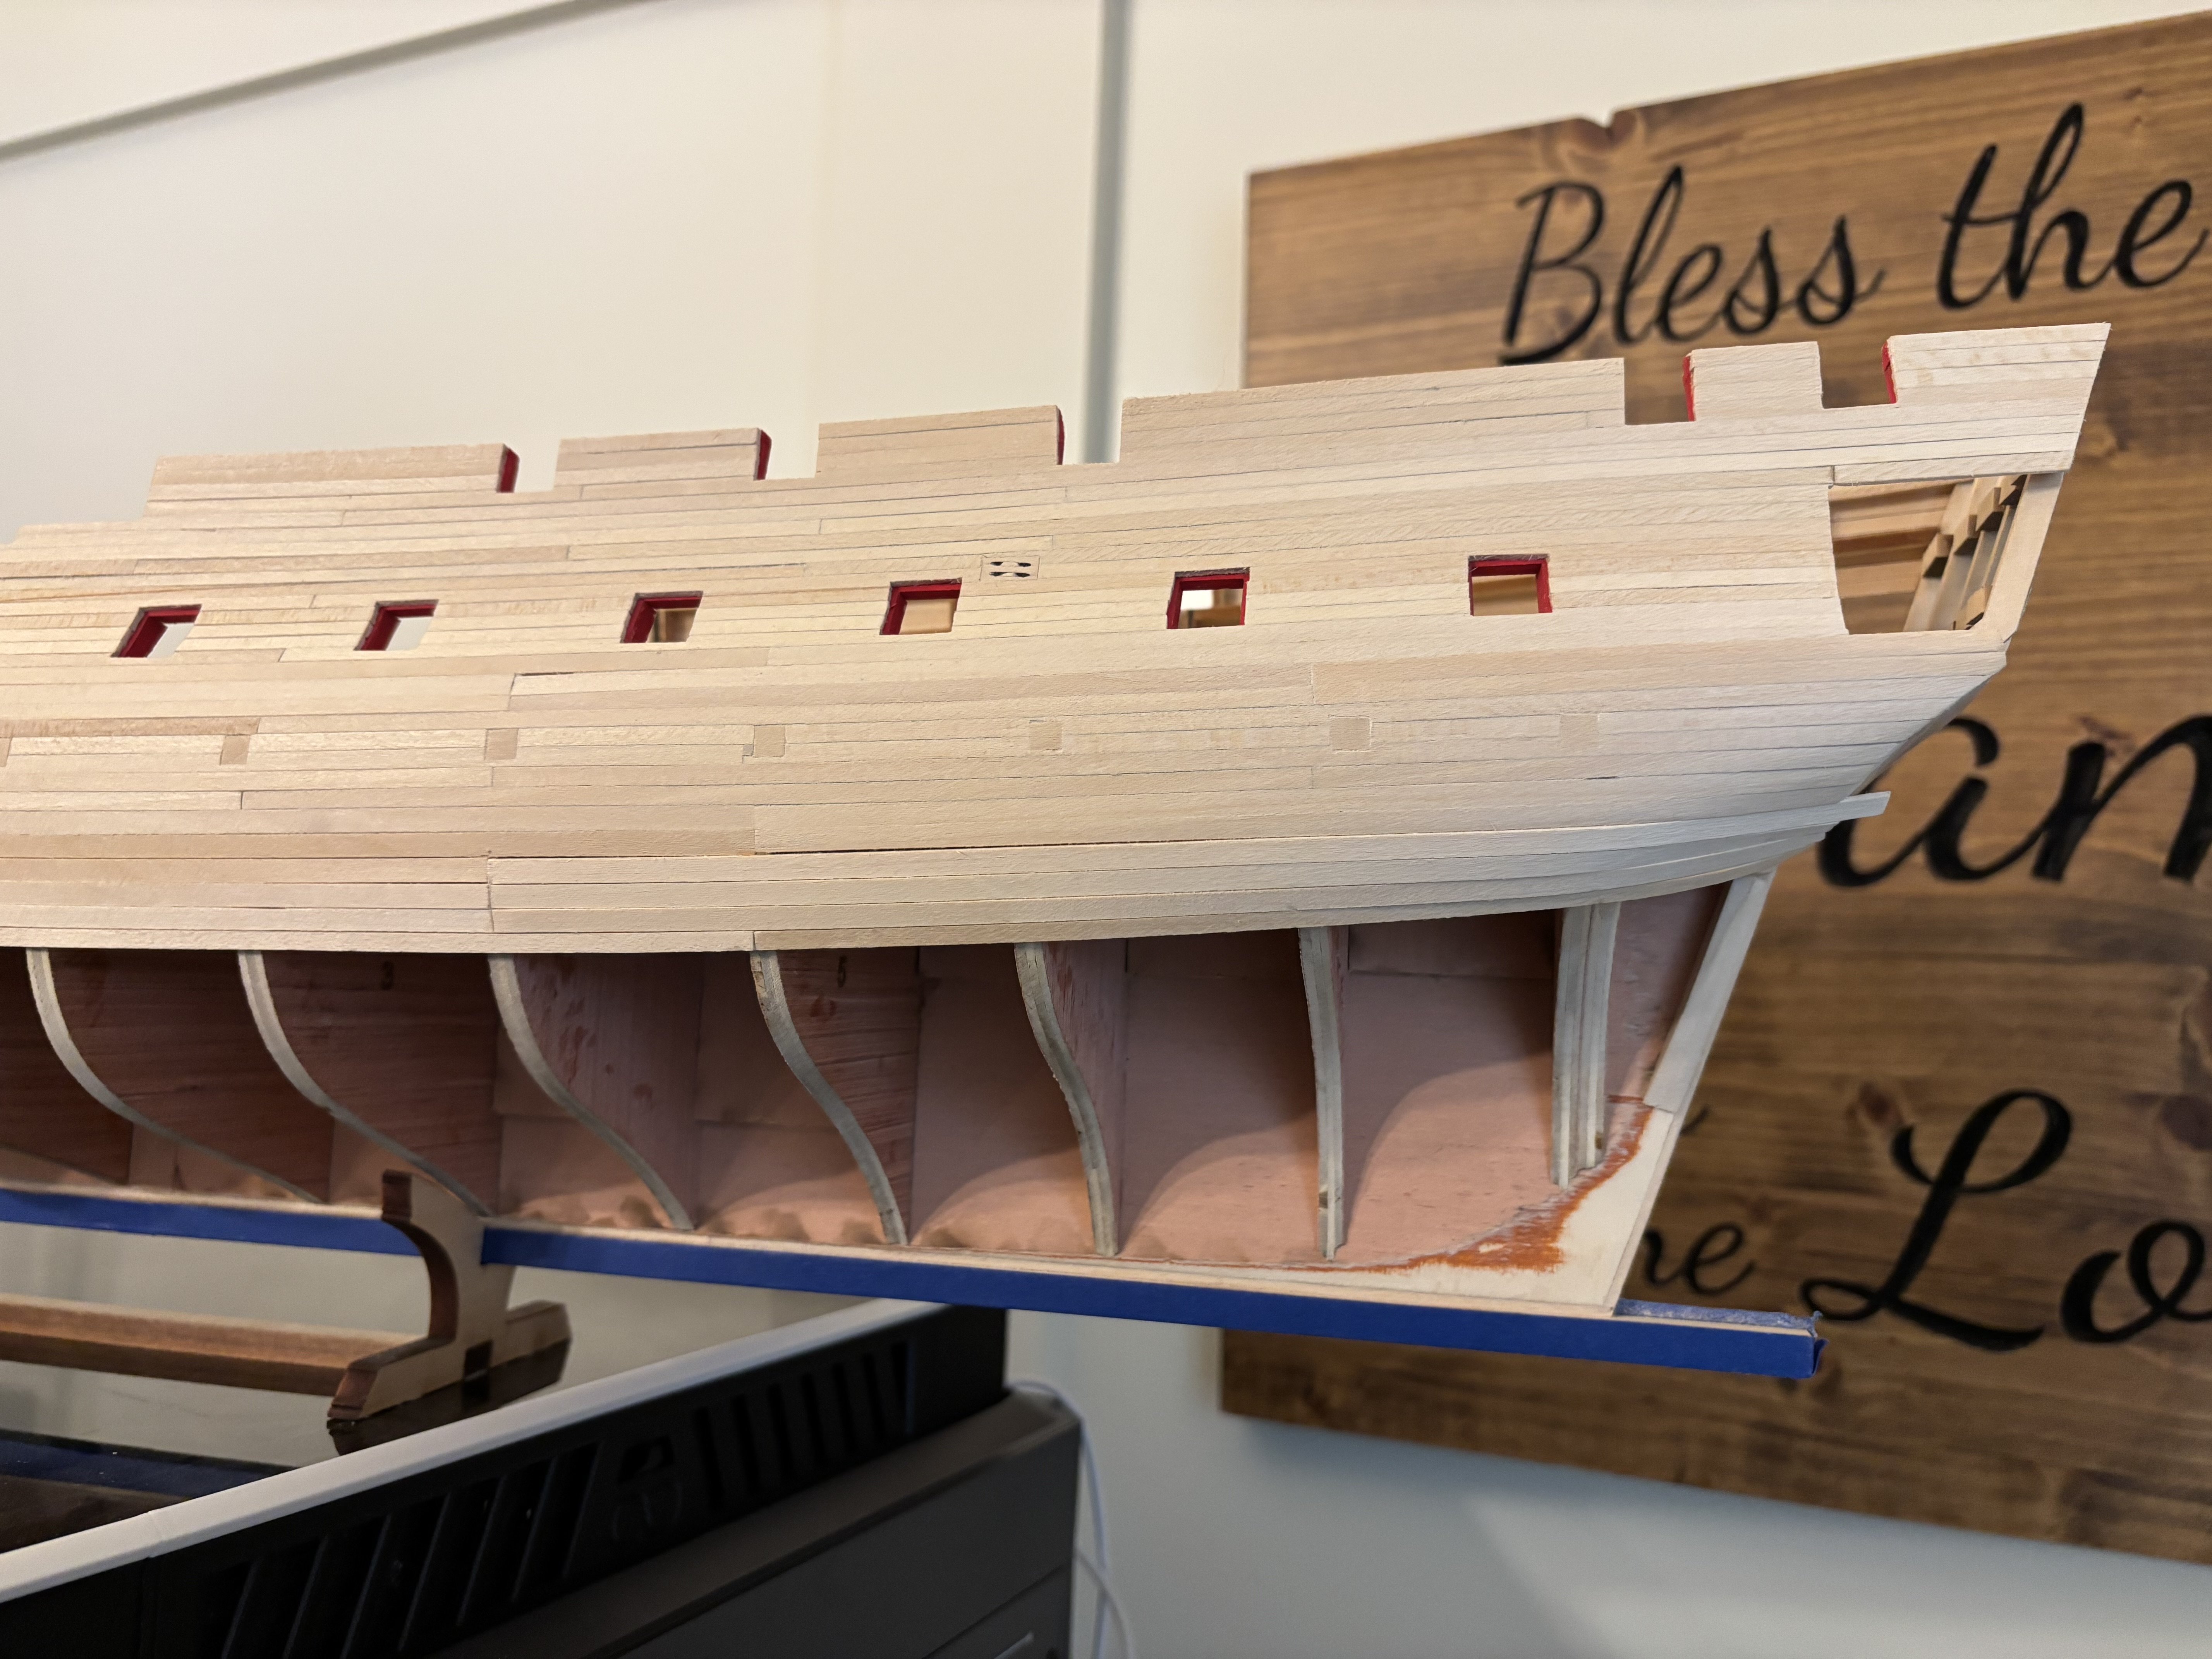
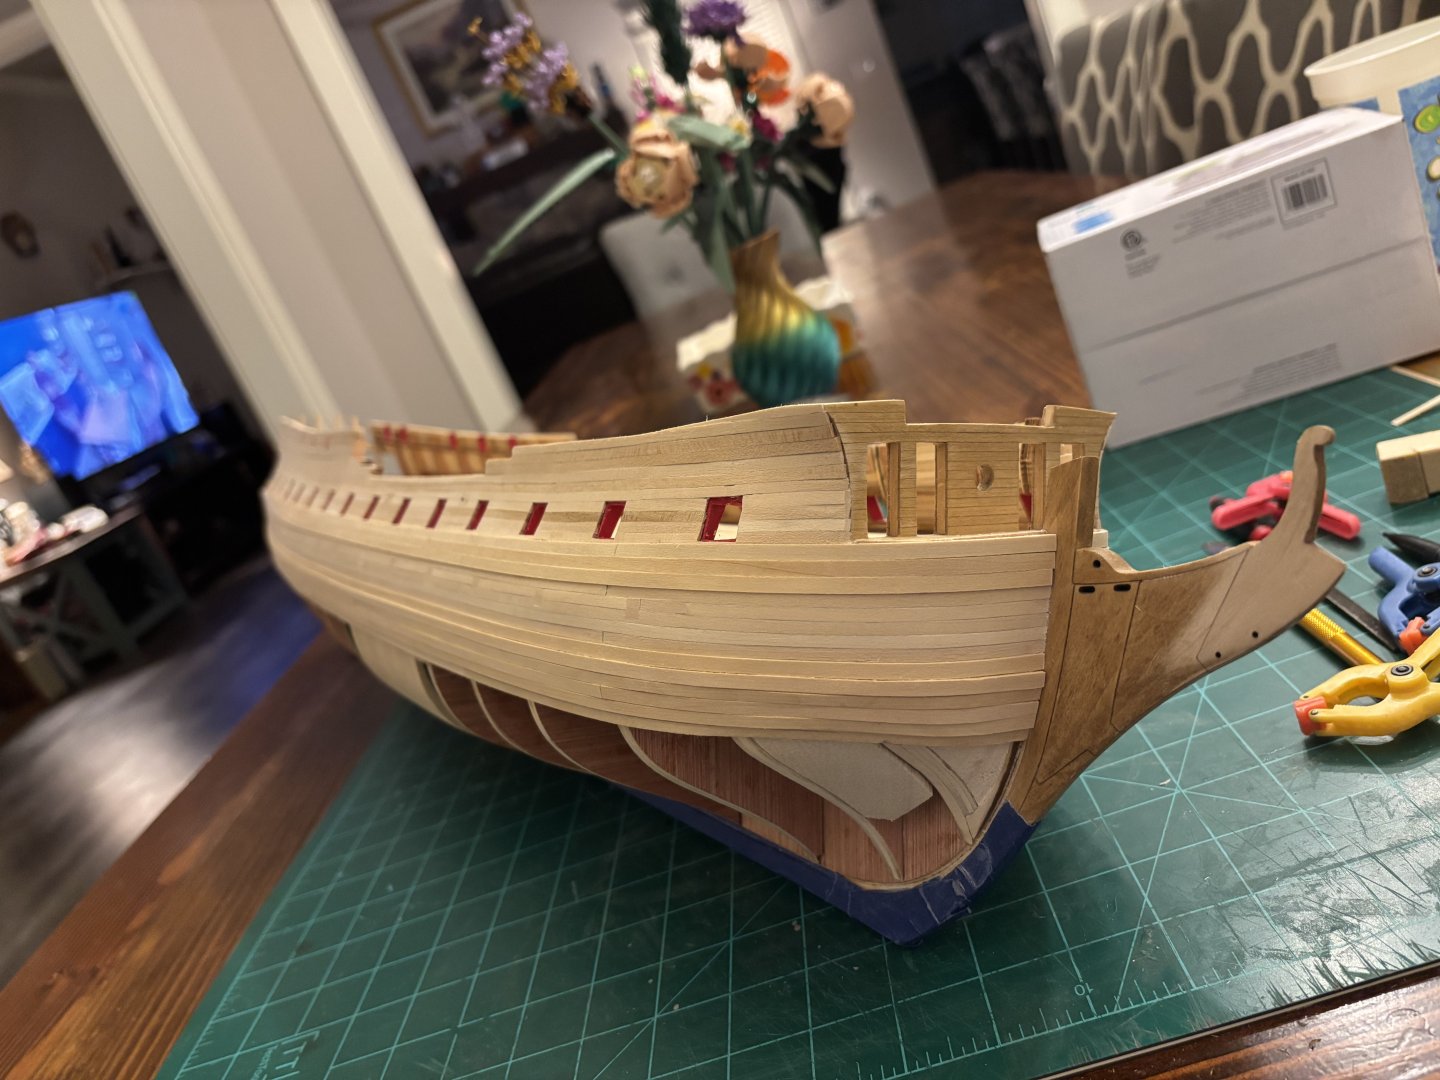
I got the second layer of planking sanded smooth and then I painted the wales black along with planking above the decorative molding. Then I applied golden oak stain to the rest of the planking above the wales. While that was drying, I scraped the molding pieces and then I stained them with golden oak. Once everything was dry, I glued the molding onto the model. Now I get to start planking the rest of hulls below the wales. I will not be treenailing the model since I think that it would take me over a year to drill all of the holes due to my carpal tunnel.


-
Chris, You are absolutely killing it on this small longboat, looks way better than mine. Keep it up and the boxwood on the model looks great!
- 38 replies
-
- 2
-

-

-
- 18th Century Longboat
- Model Shipways
- (and 1 more)
-
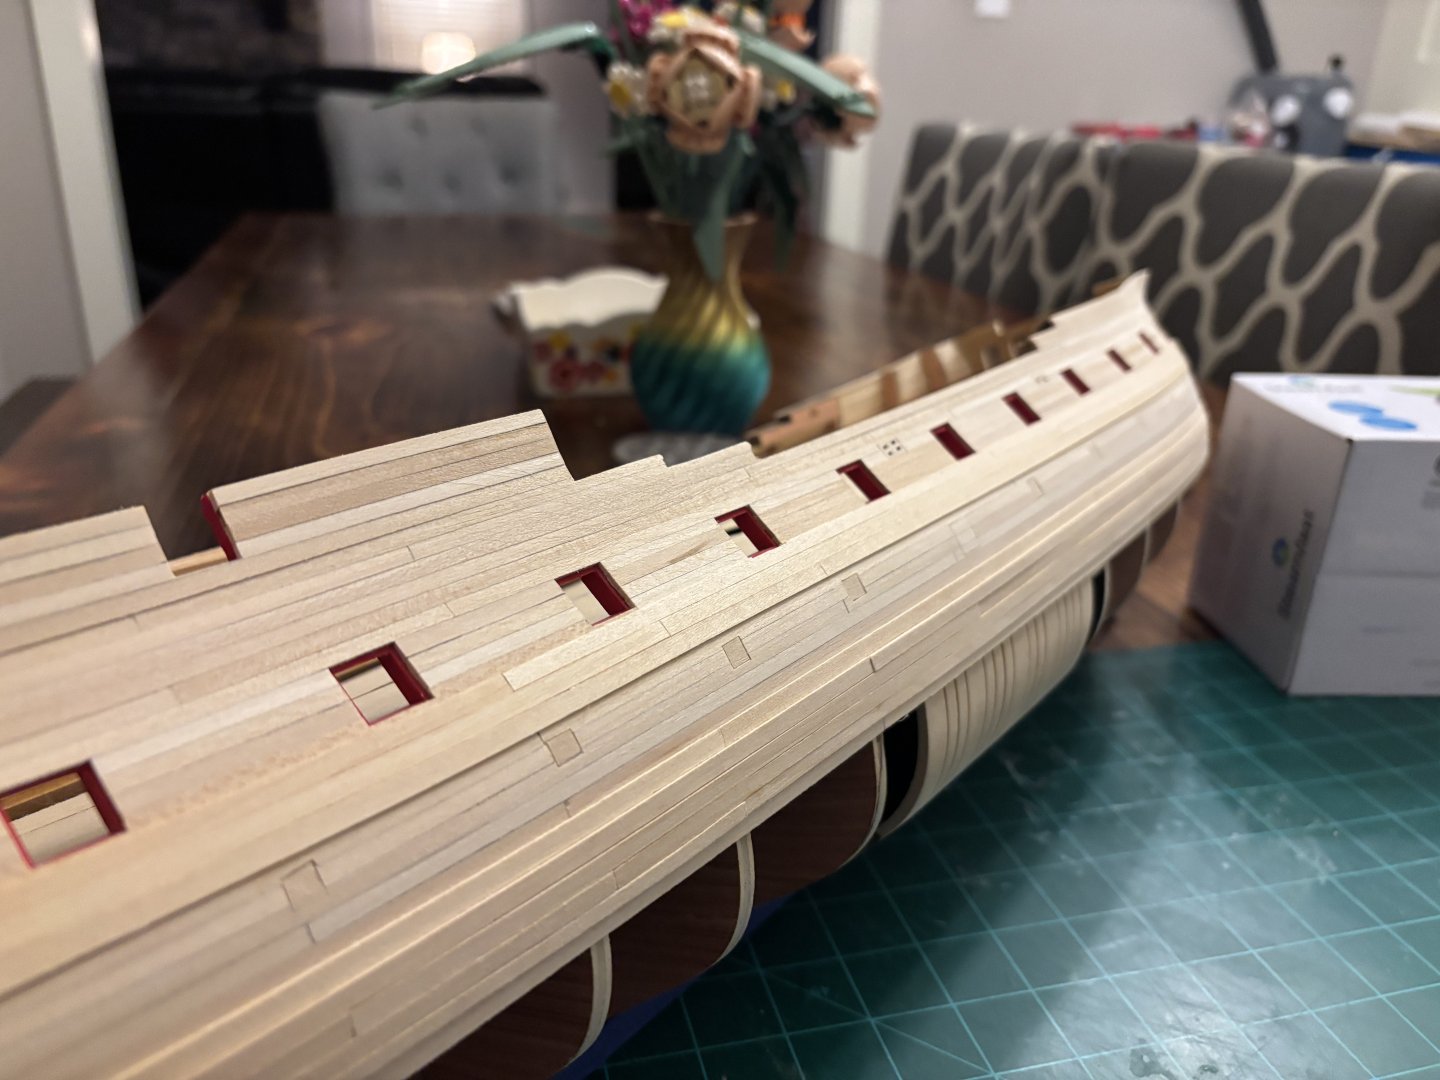
I have finished the second layer of planking on the wales, black strake and channel wales on the port side. No pictures yet, I will post some after I finish sanding it all smooth. That brings me to my question. As I am re-reading Chucks log on his Cheerful prototype build (post 196), I am wondering if I should sand the wales, black strake and channel wales to the same thickness as the surrounding planks at the bow. Chuck said that this was the true for most ships of that time and I am wondering if Confederacy was the same. What do you guys think? I am thinking that I will do the same on Confederacy, but would like some opinions from some of the more experienced members on here.
-
JJ, I have been a while since I have had a chance to read the forum. I finally caught up on your design of Portland and I have to say that you have thought of just about everything to make it easier to build. Keep up the great work! I can’t wait to see what you come up with next.
-
Just caught up with your prototype build of Portland. She looks fantastic and I am looking forward to seeing the planking going onto the model!
-
All of the second planking rows for the channel wales, black strake and wales have been installed on the starboard side. Tomorrow I hope to start on the port side. Once the port side done, then I will sand them all smooth before starting work on the molding strips.

-
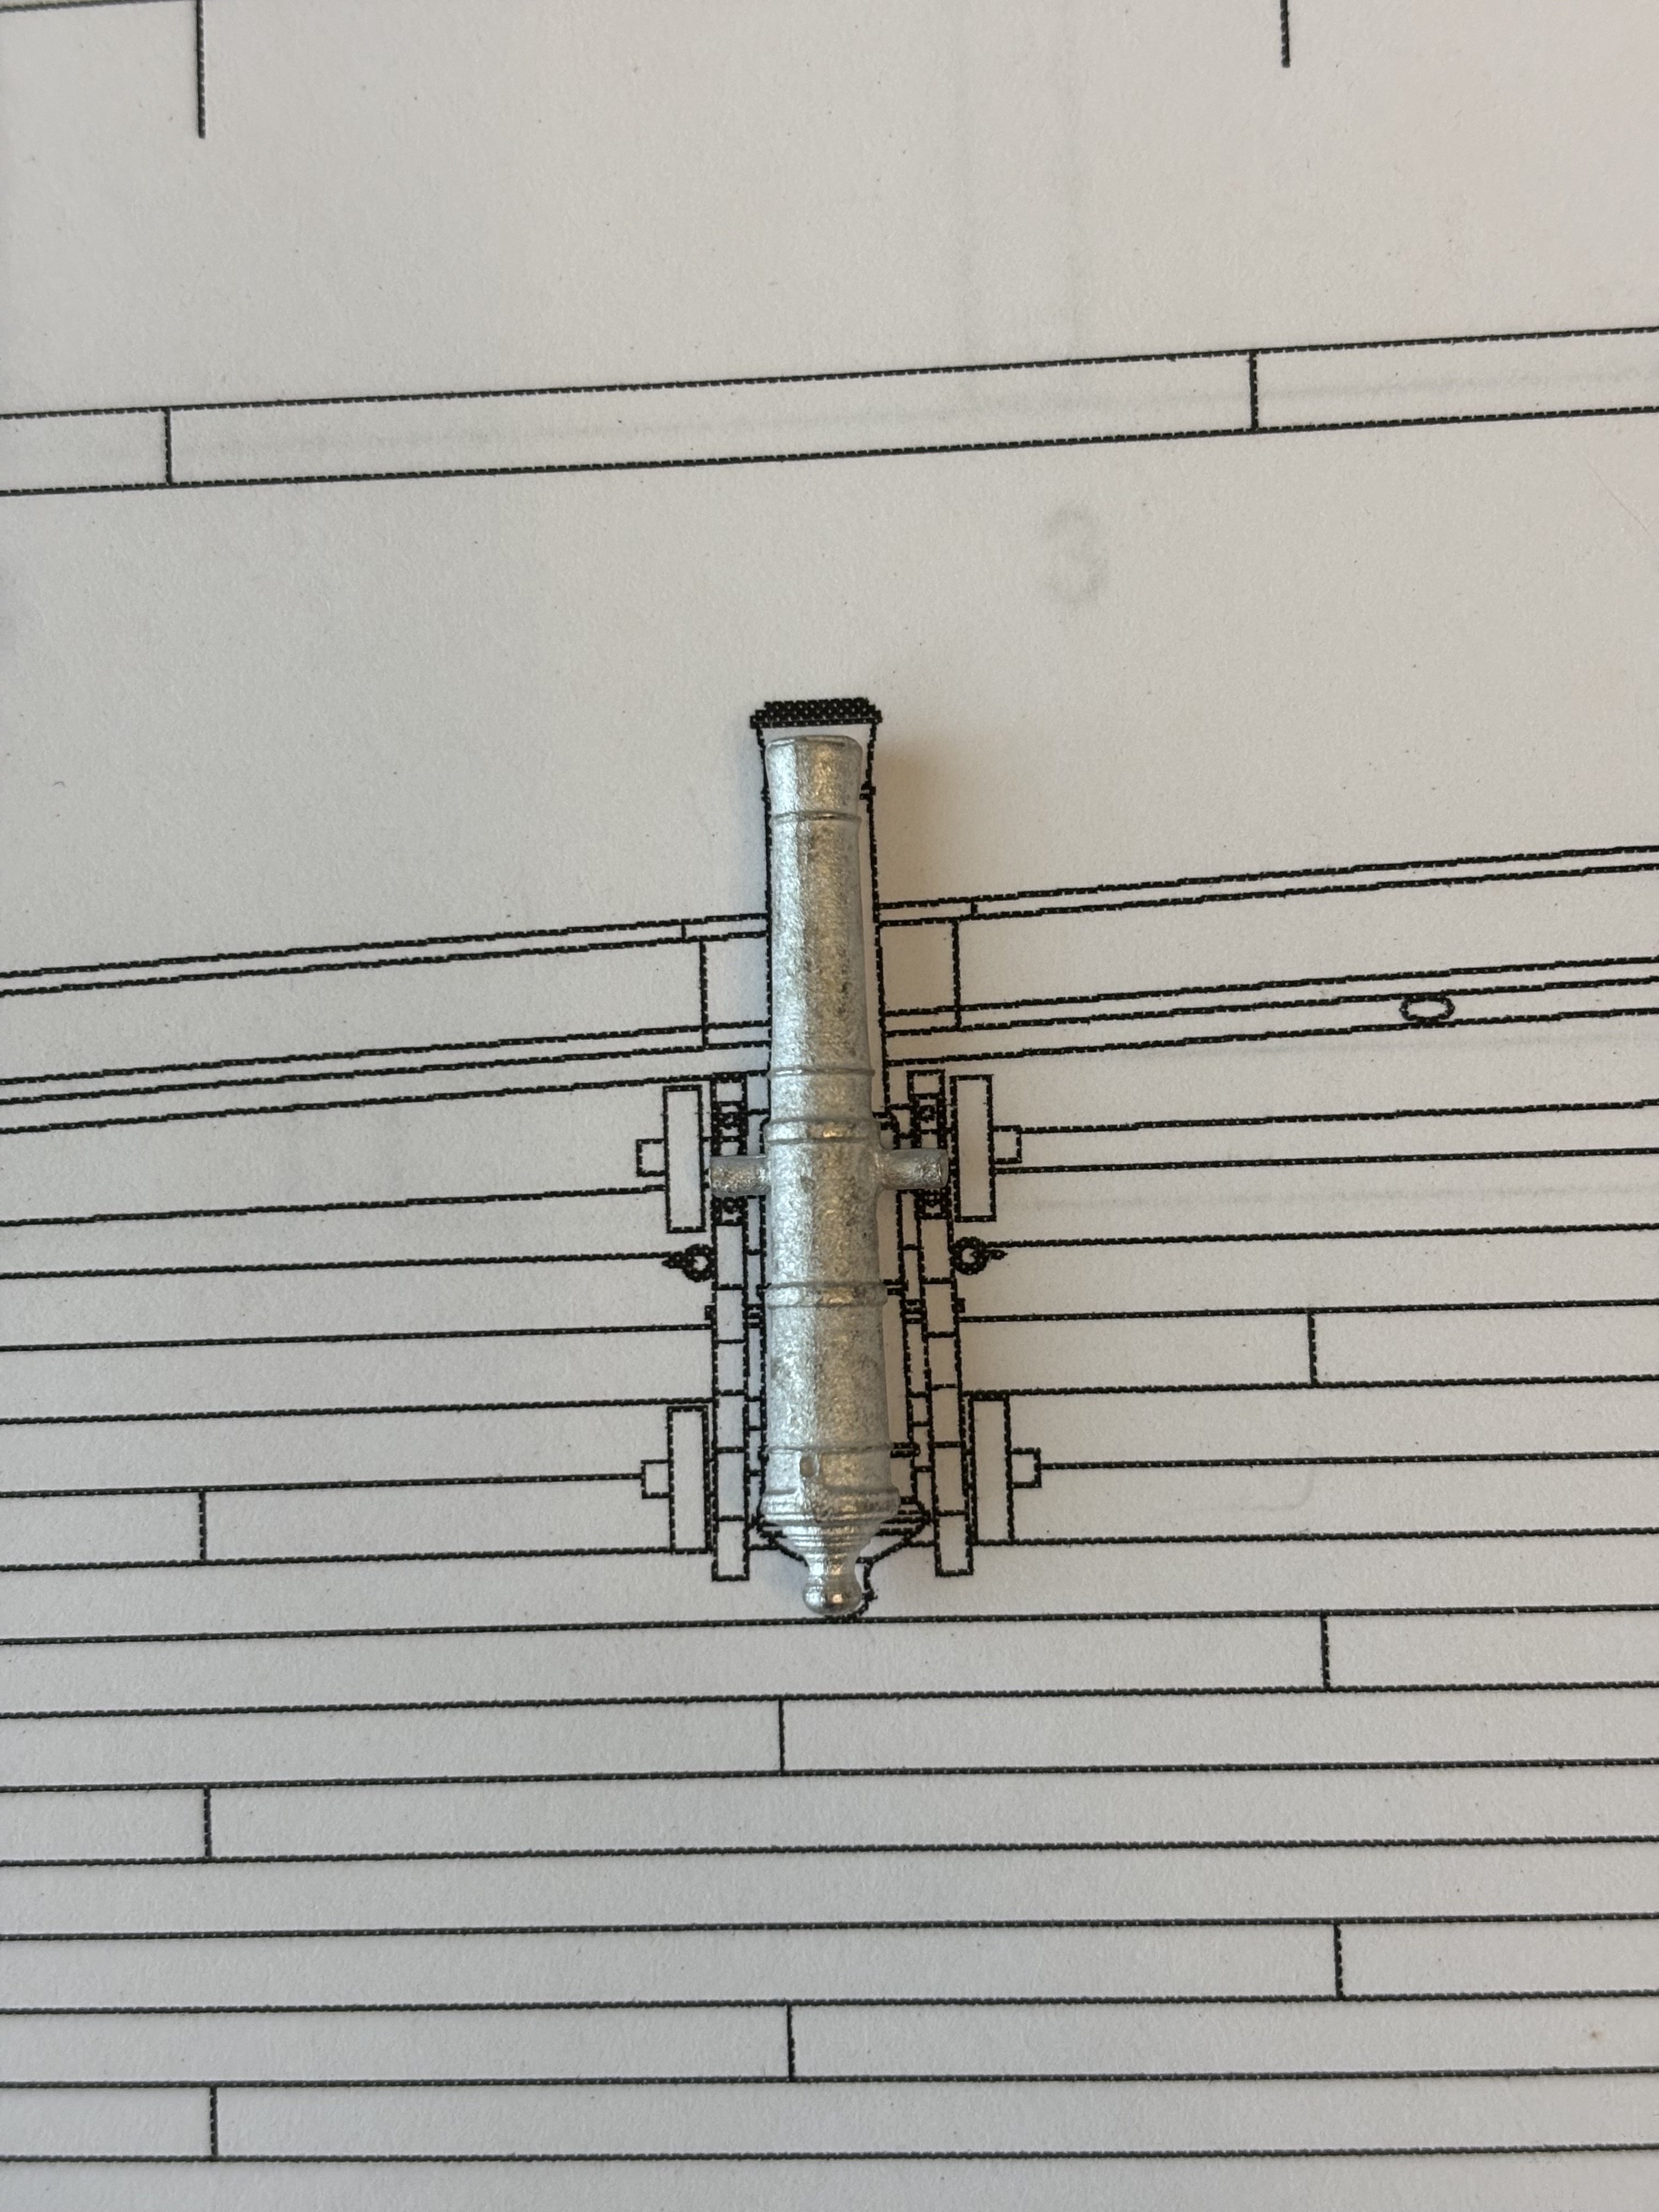
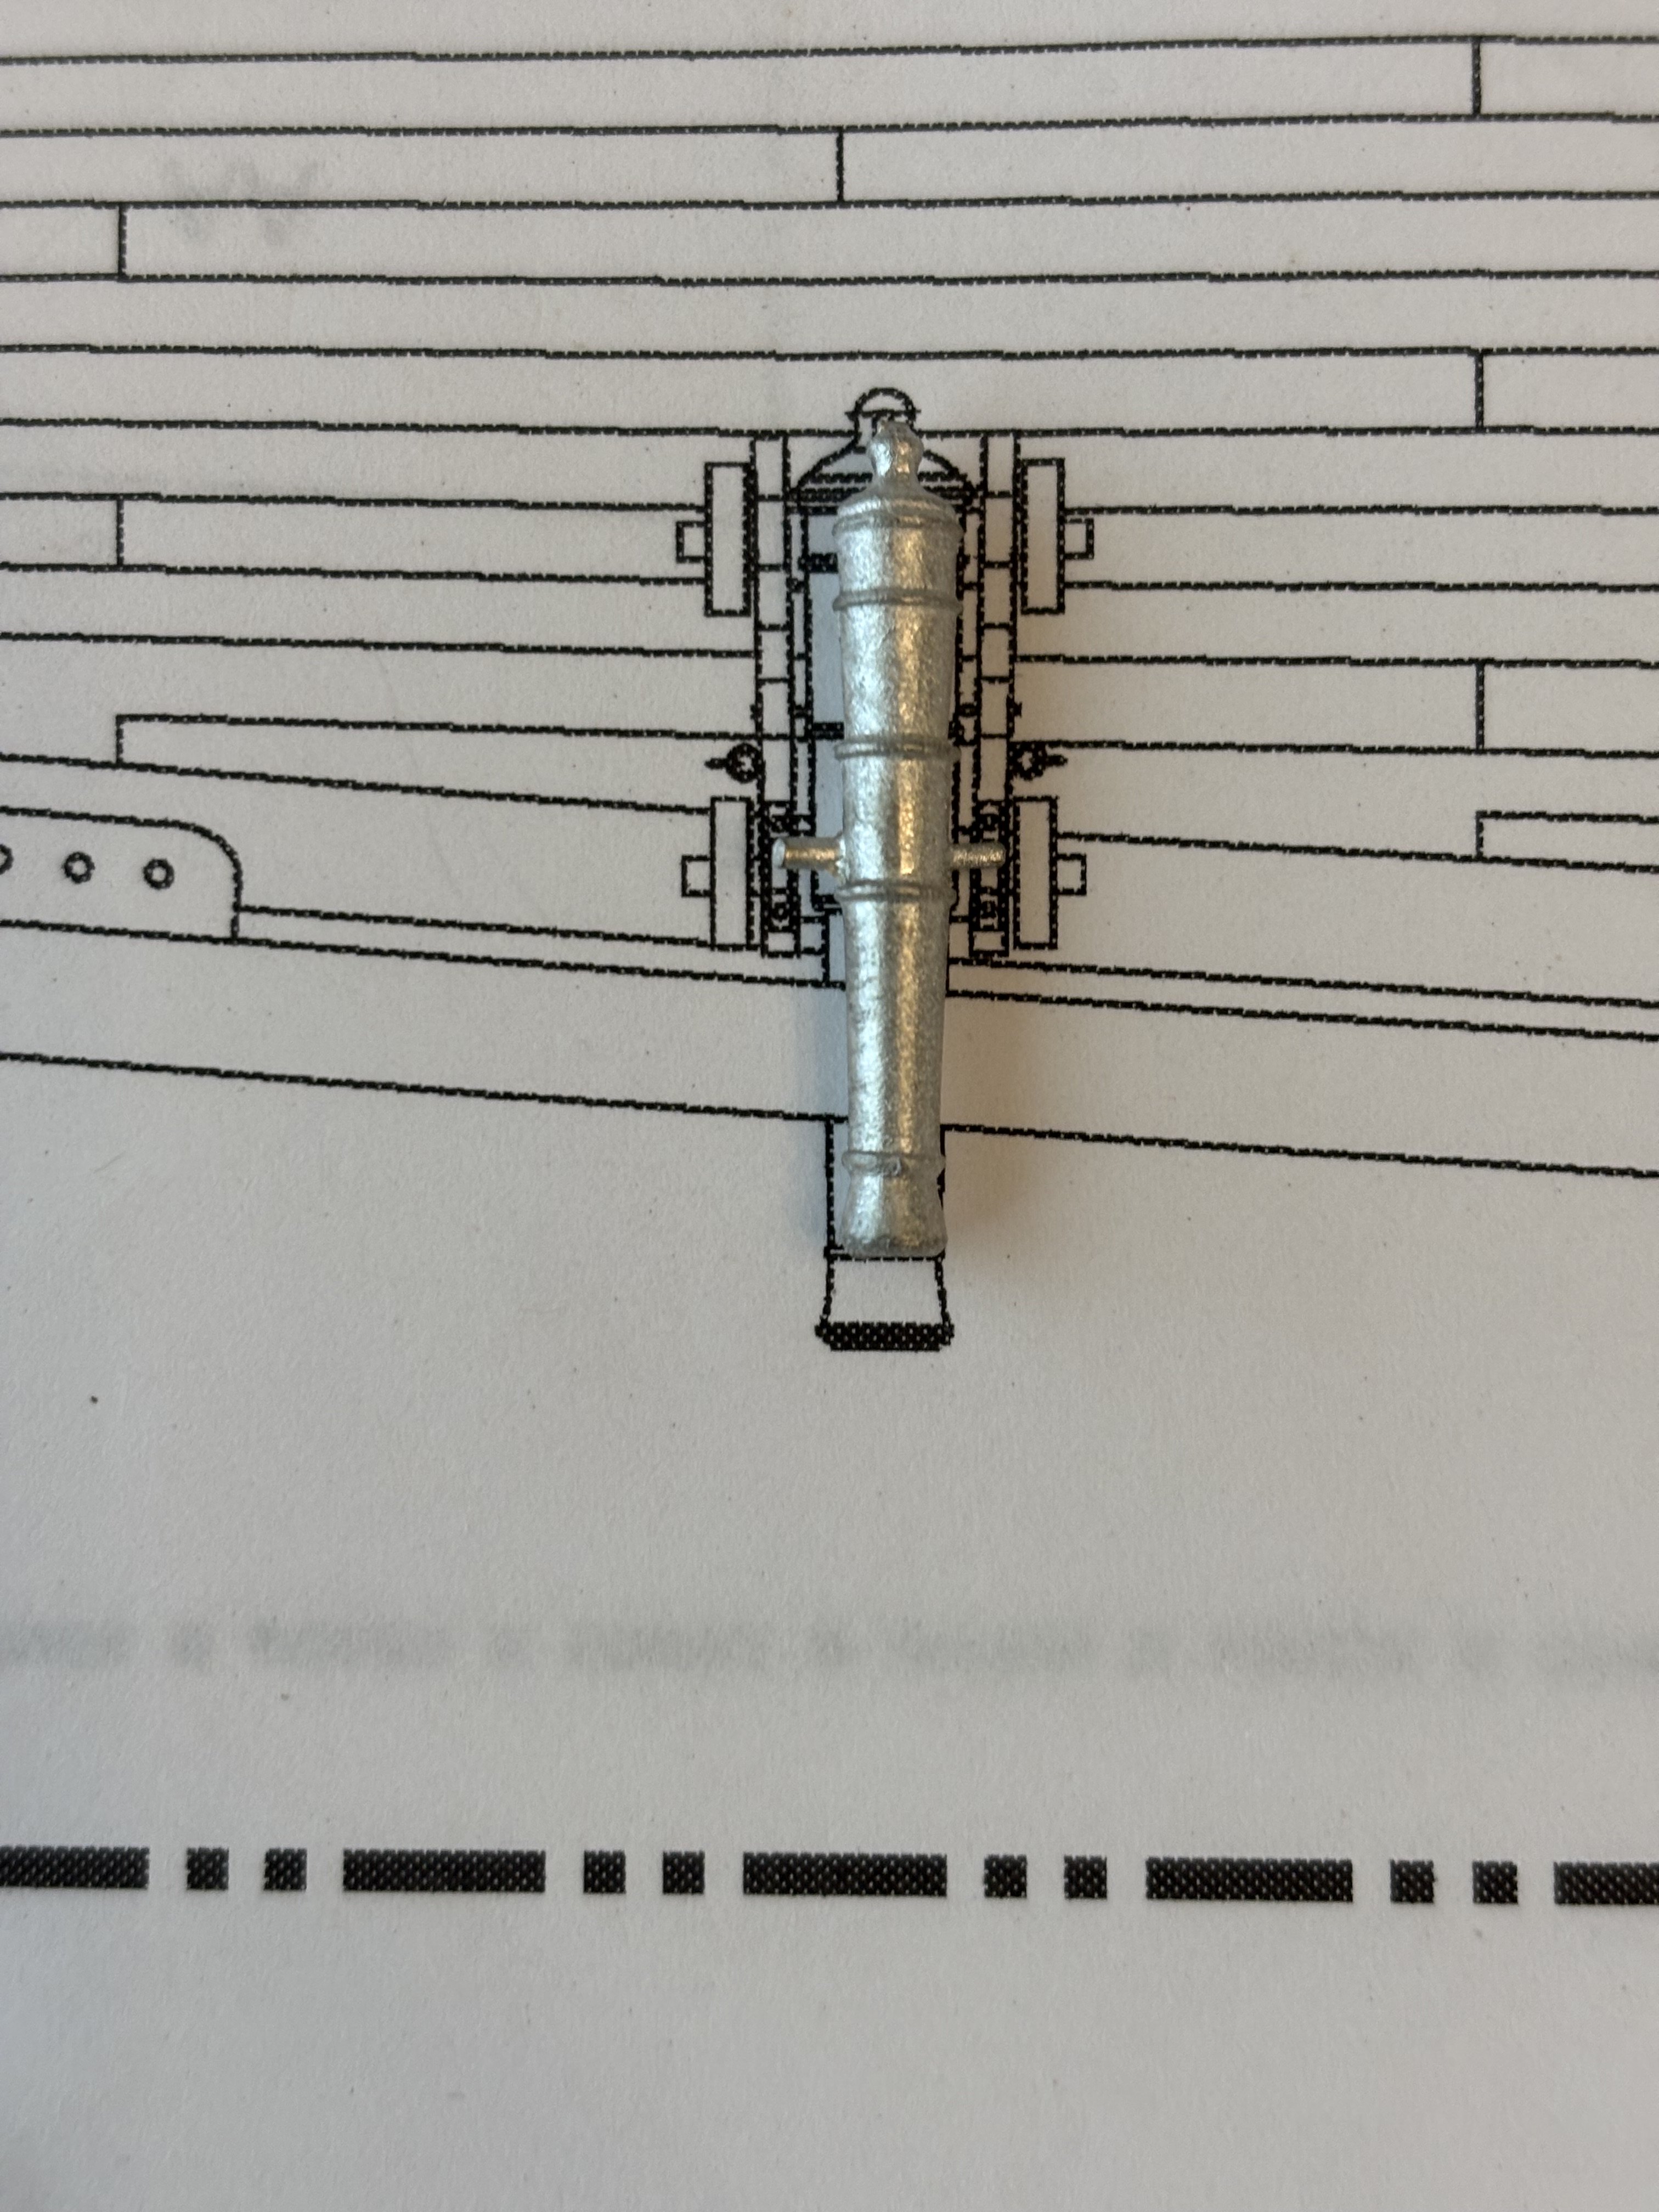
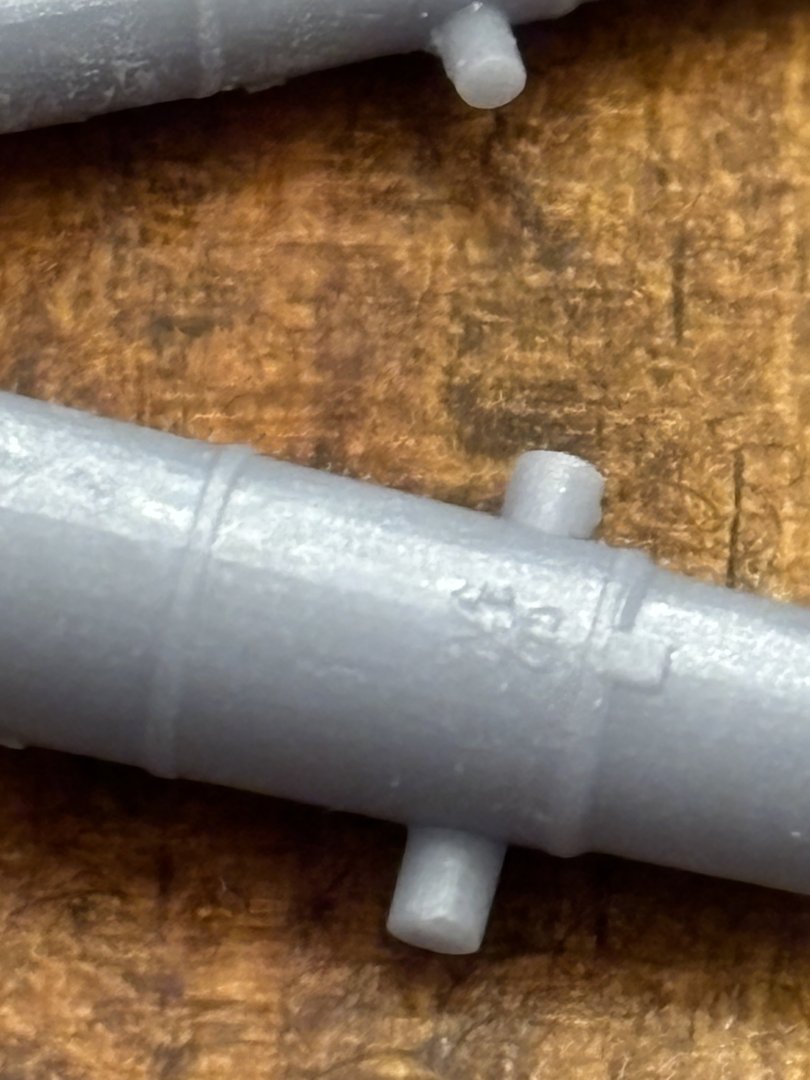
Thank you, Ross; but I cannot take credit for the files. I also have zero CAD experience, but I’m pretty good at finding 3D files on the internet to print on 1 of my 3 printers. The files I used for the cannons were downloaded from the NRG website and all the credit goes to Ron @thibaultron for the files. He also has a great how to article on how to get into 3d printing cannons in resin.
-
Thanks for tip @Chuck. I will definitely do that. I can already tell how fragile the hull is right now, so fairing will be slow going for sure.
-
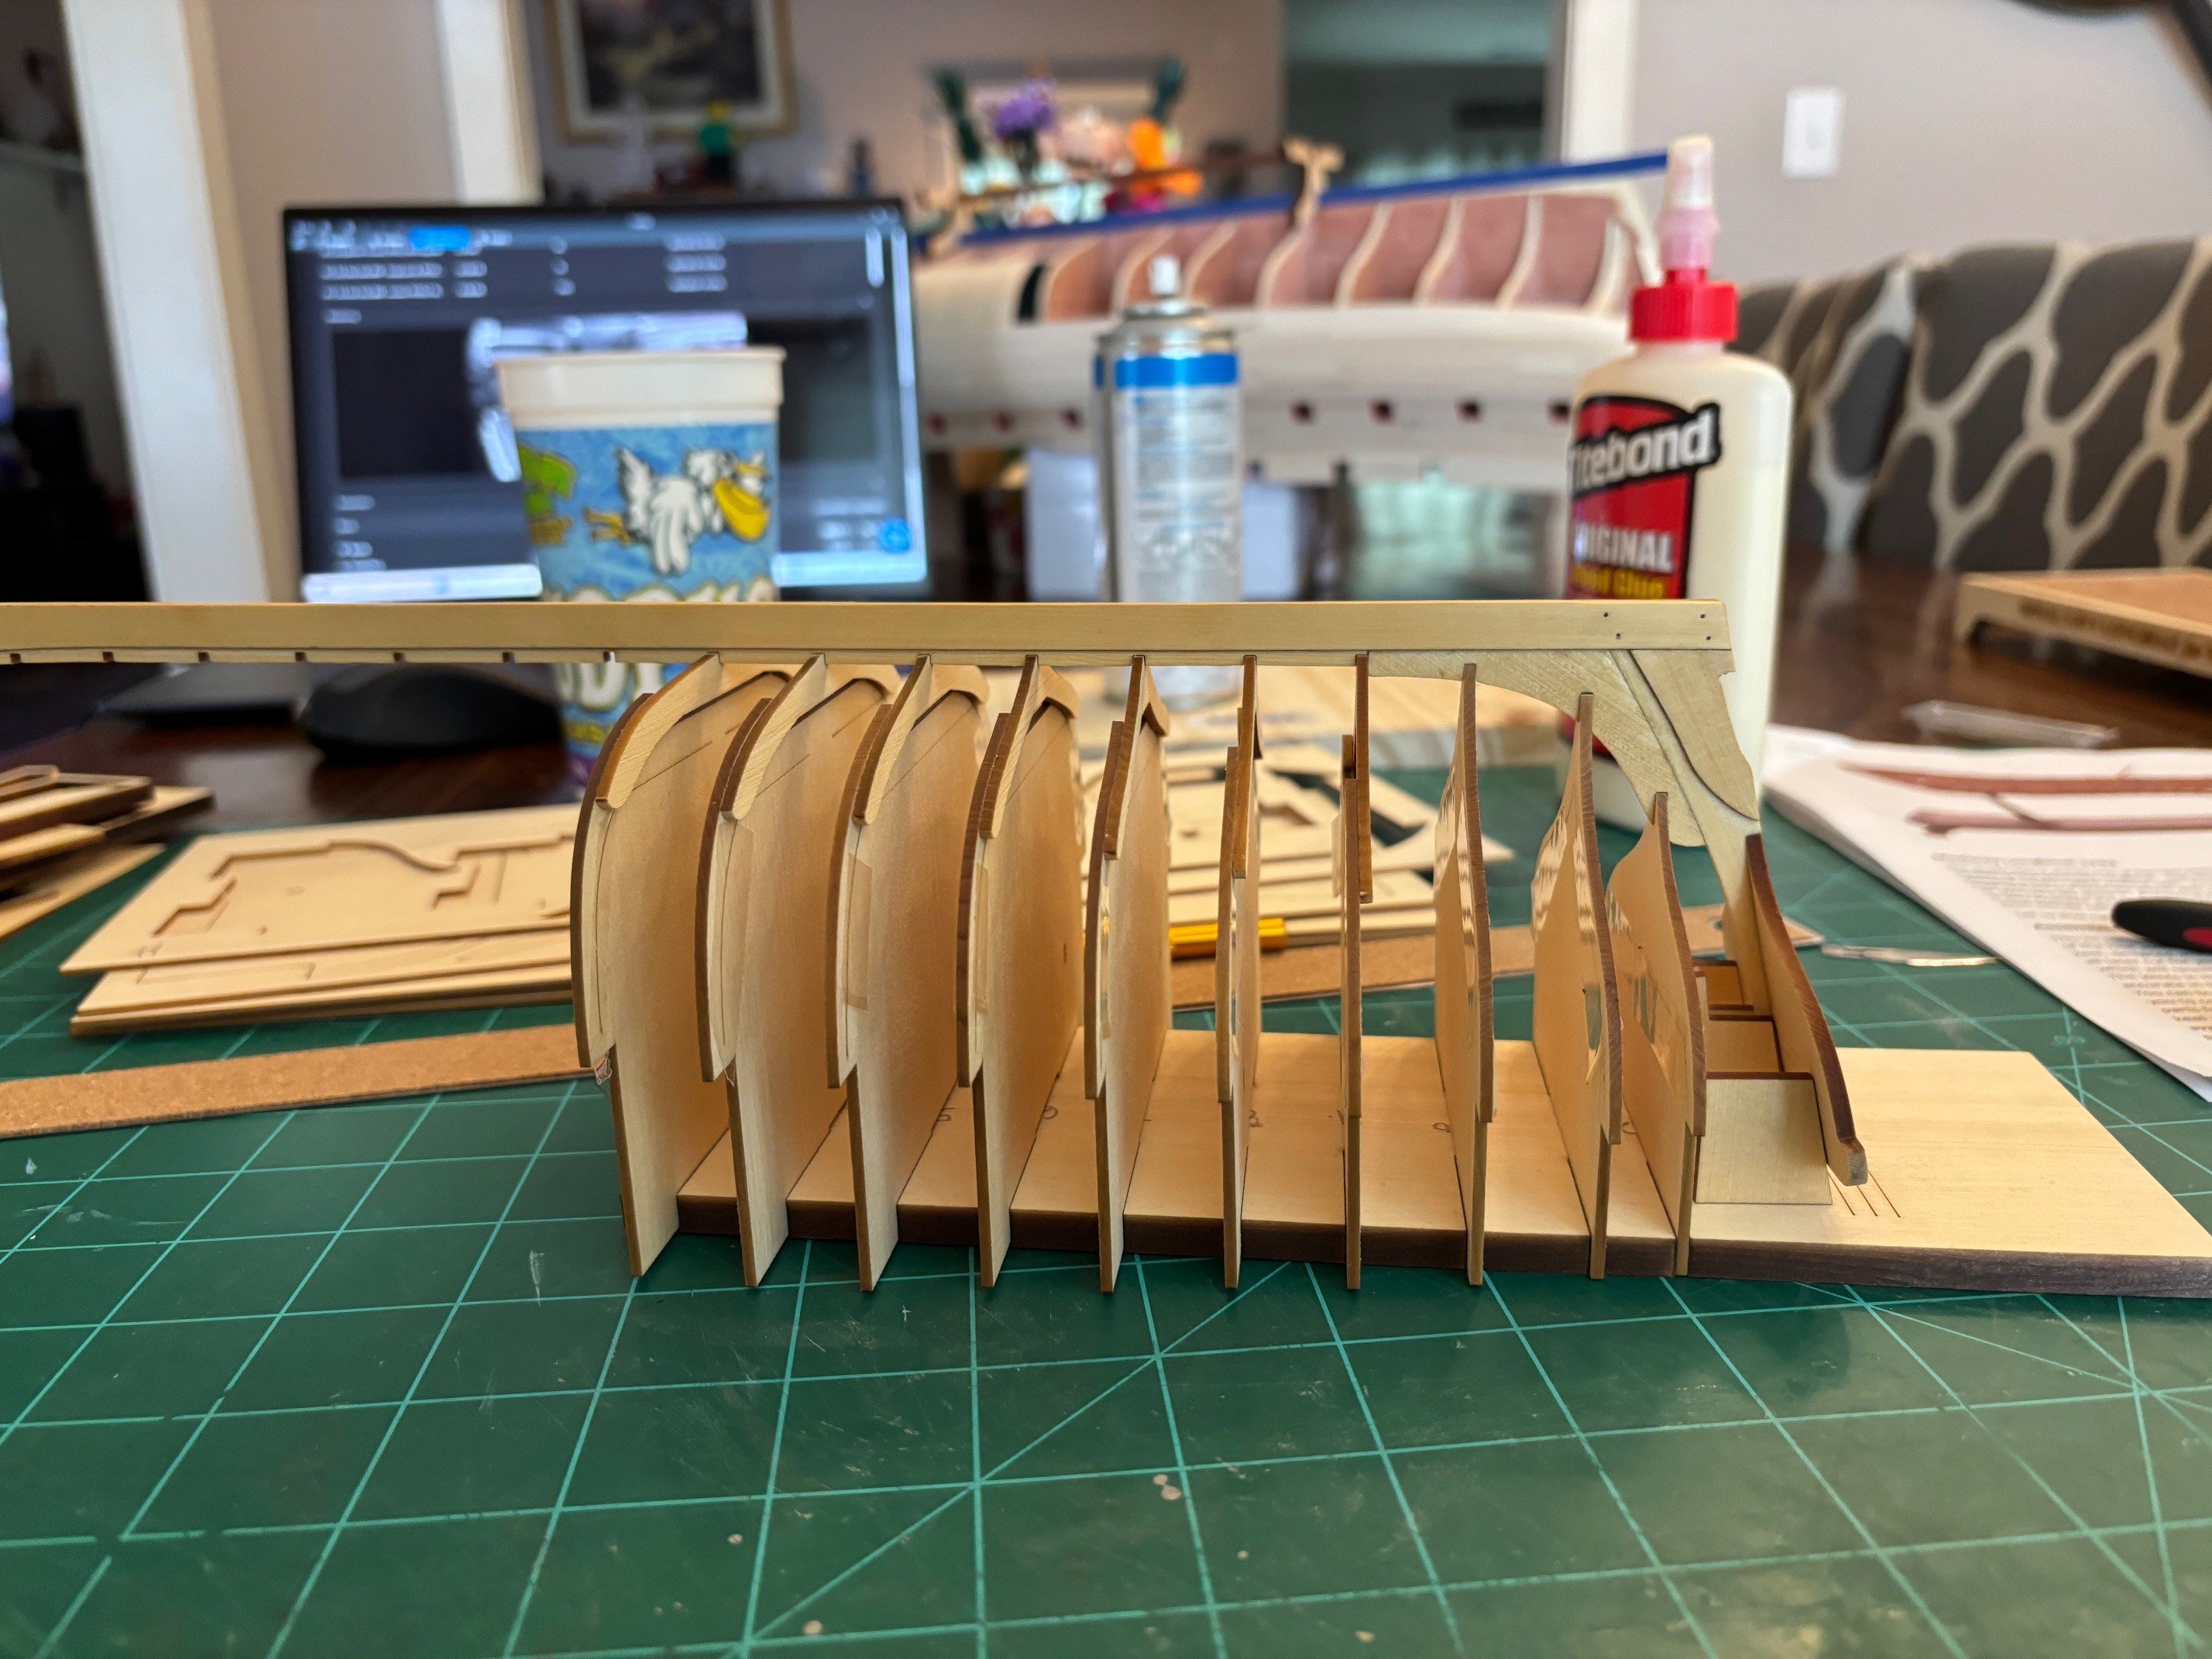
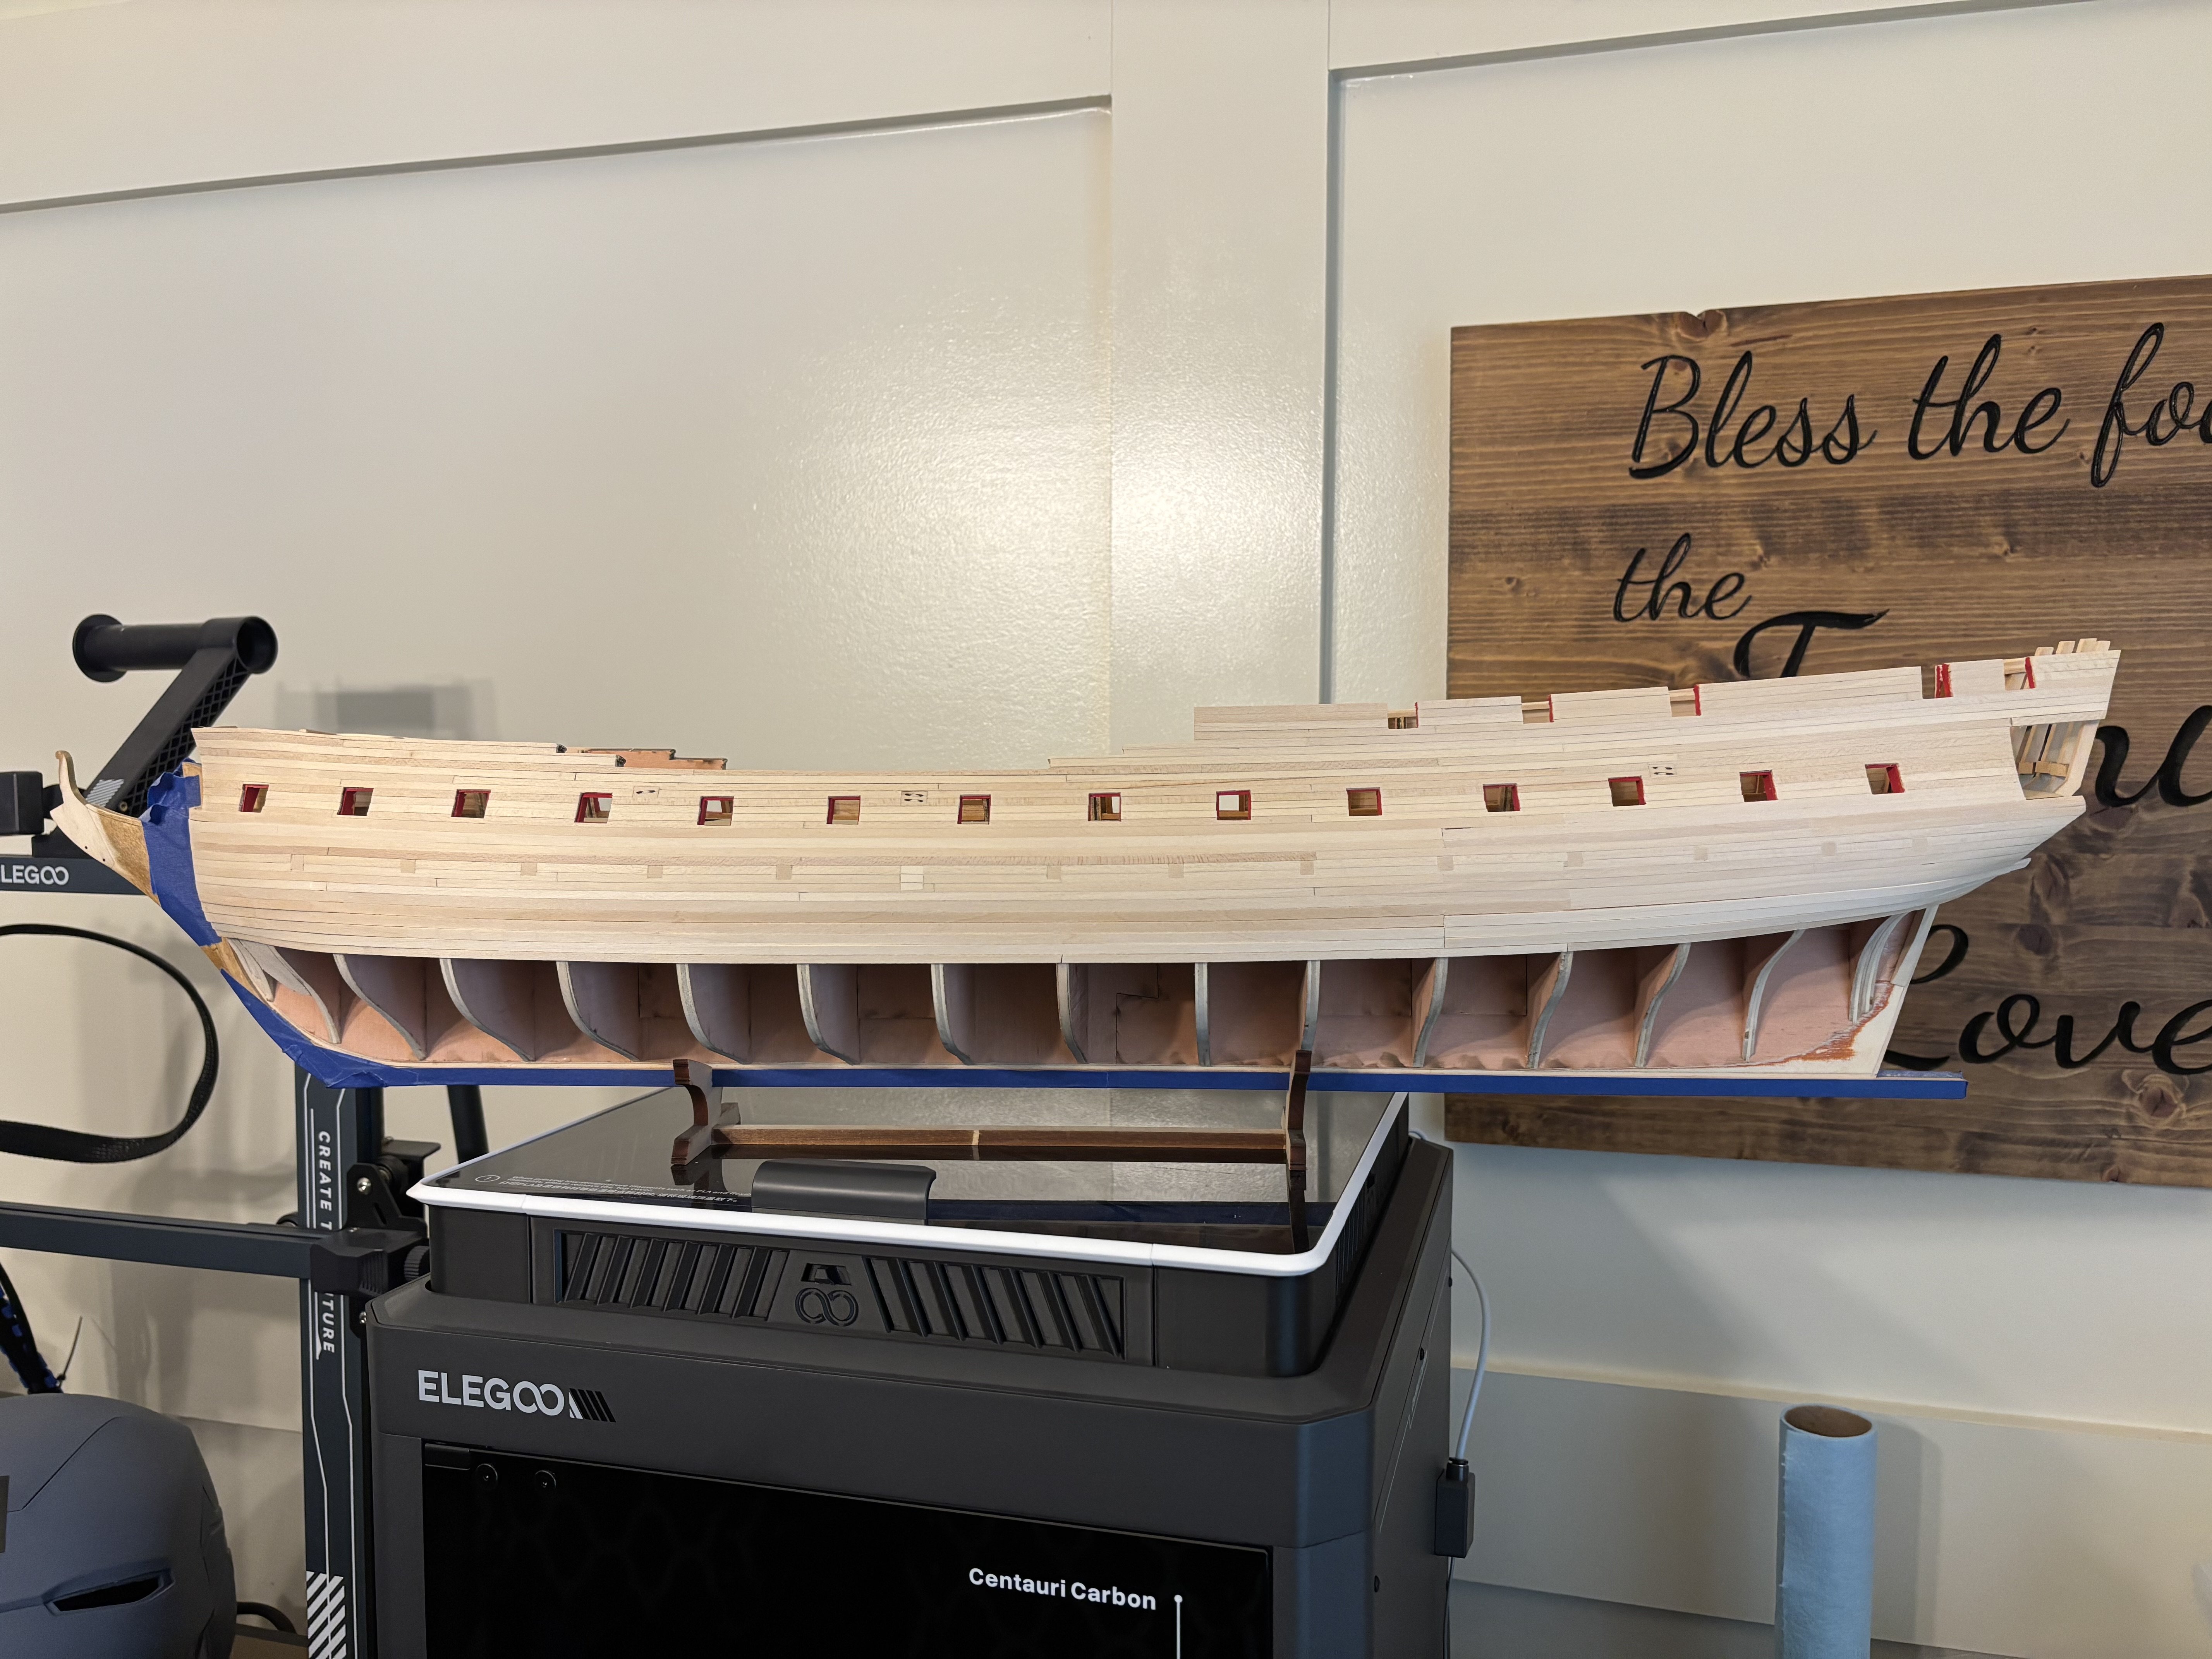
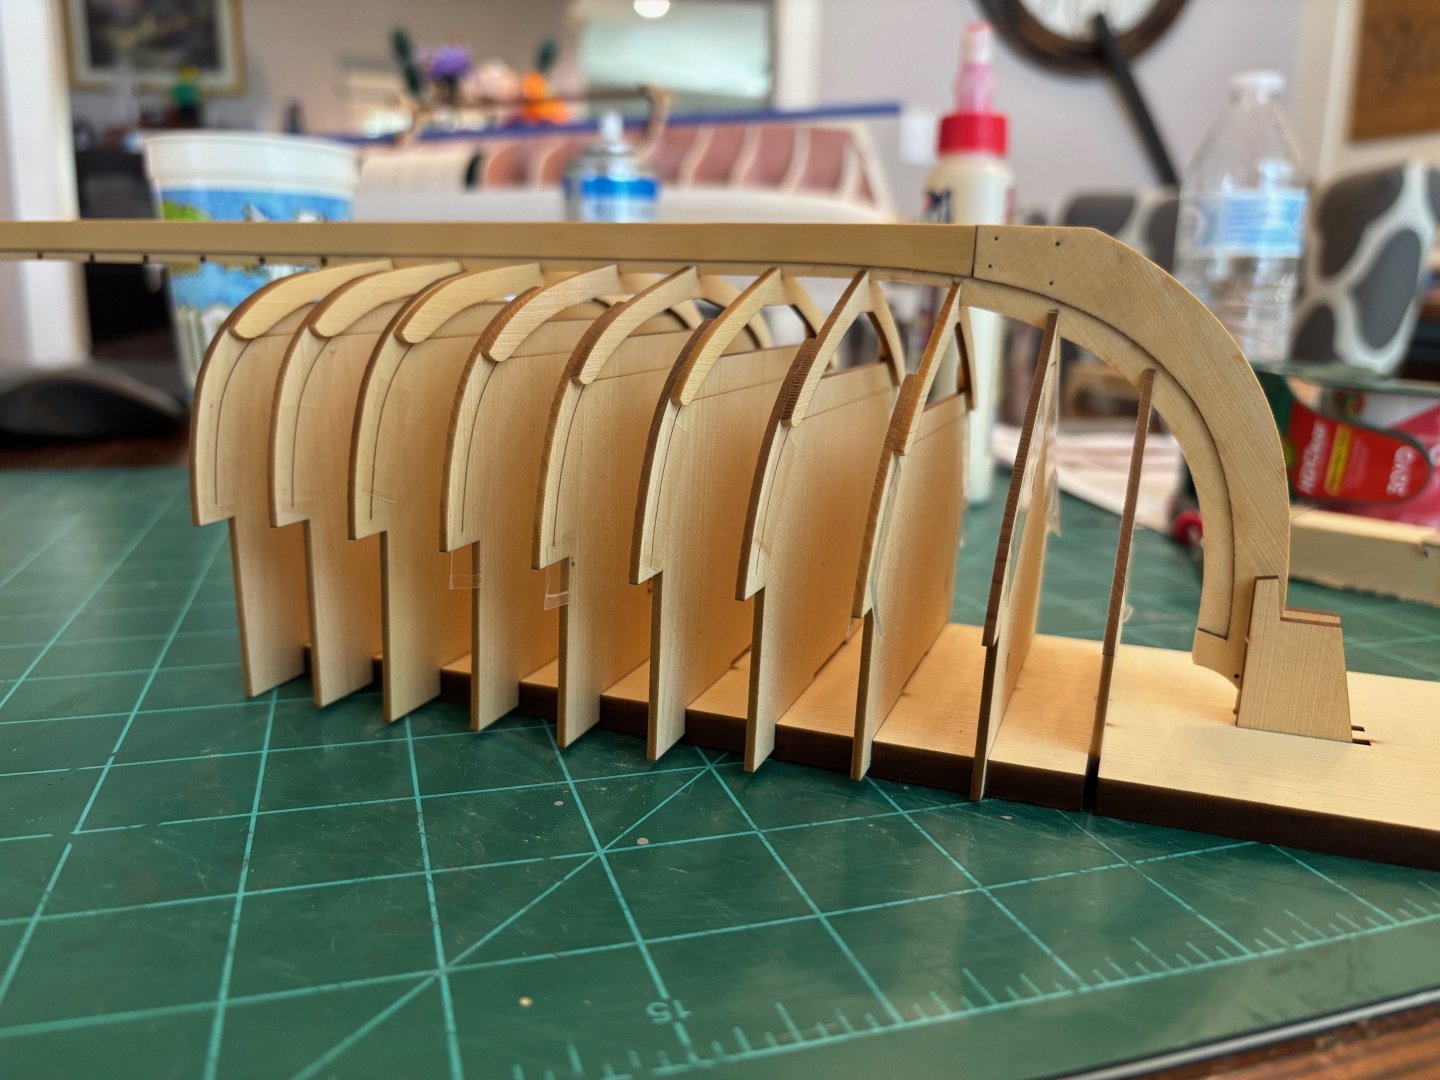
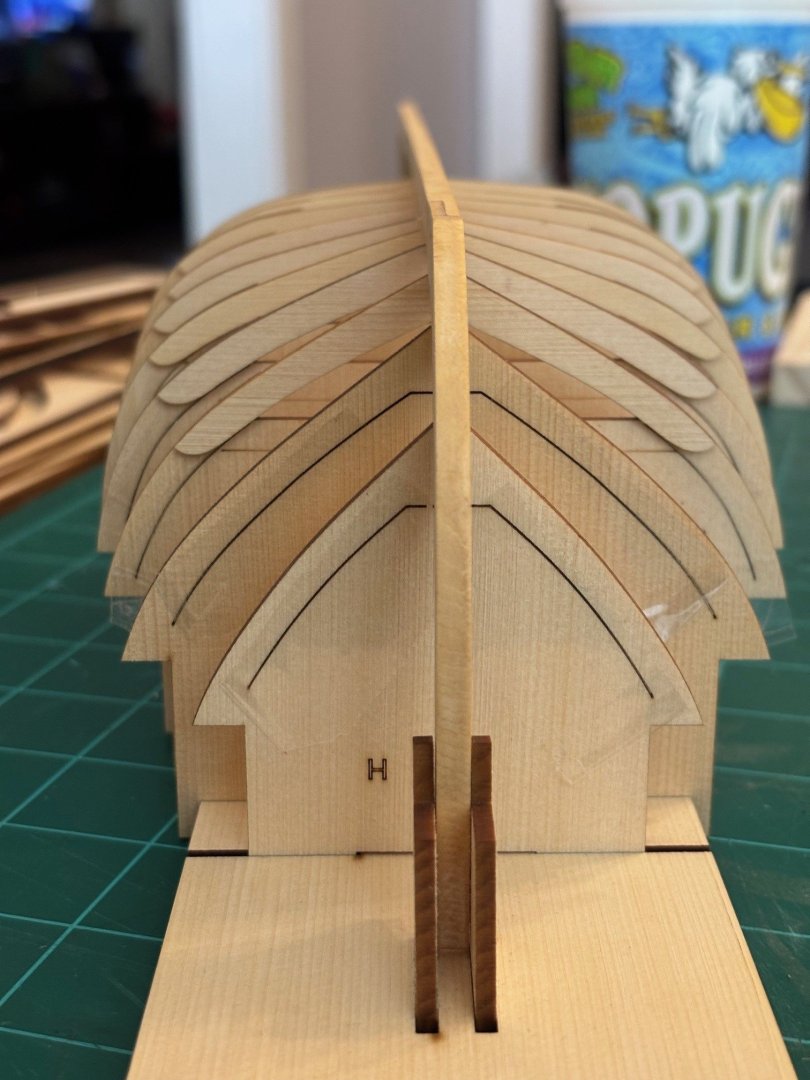
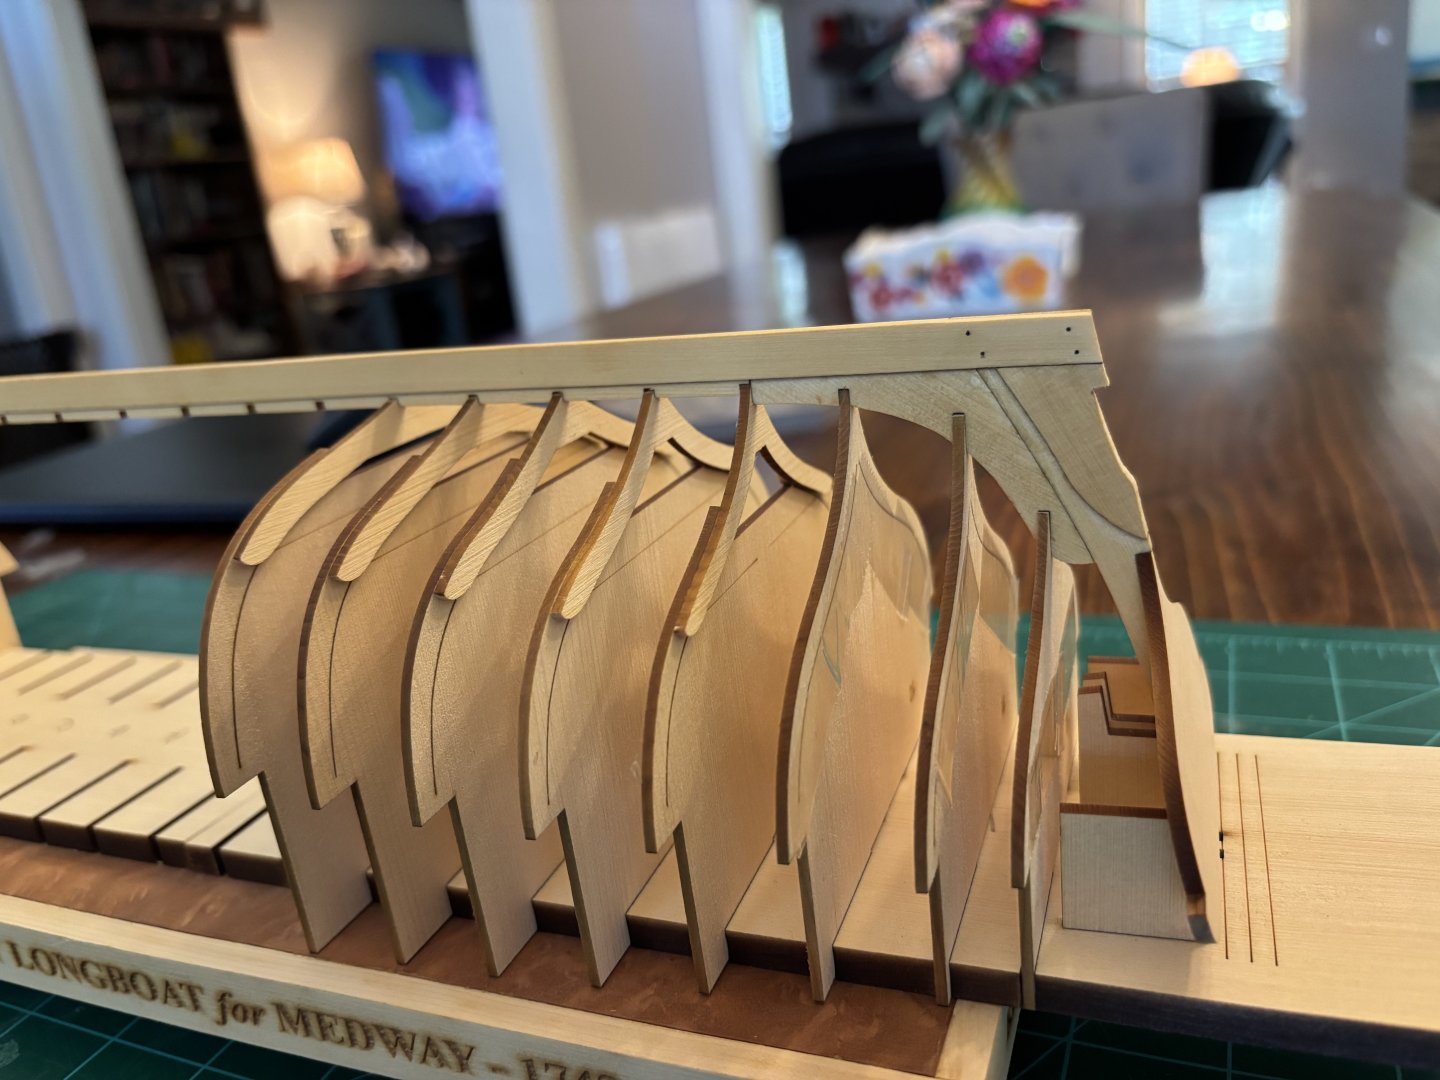
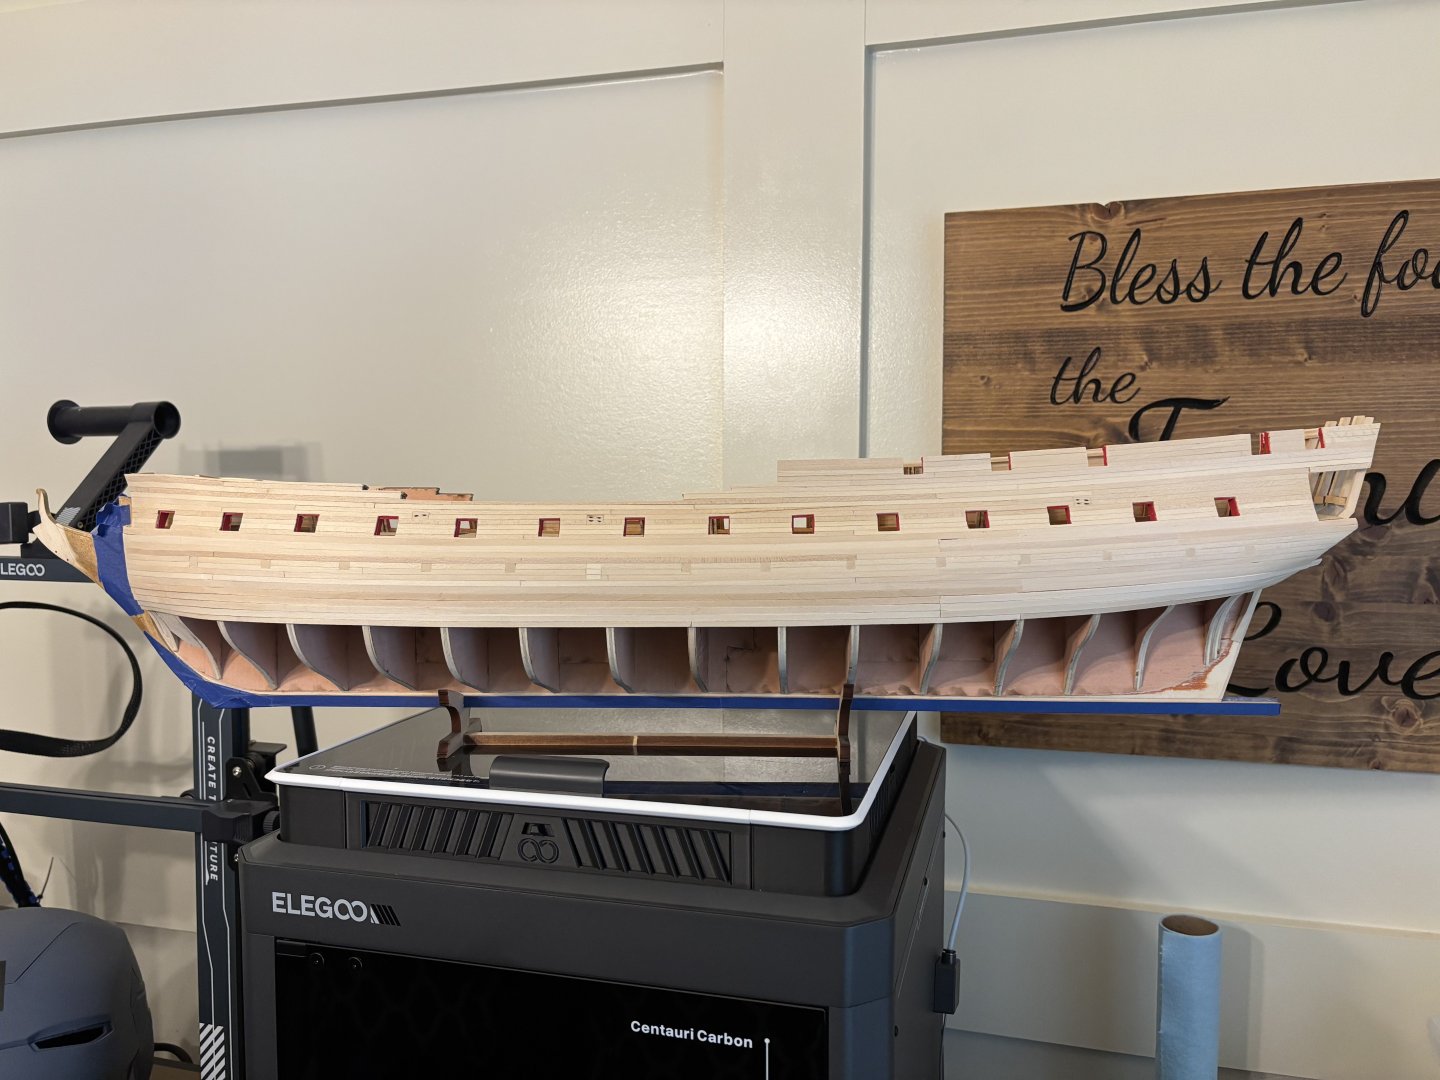
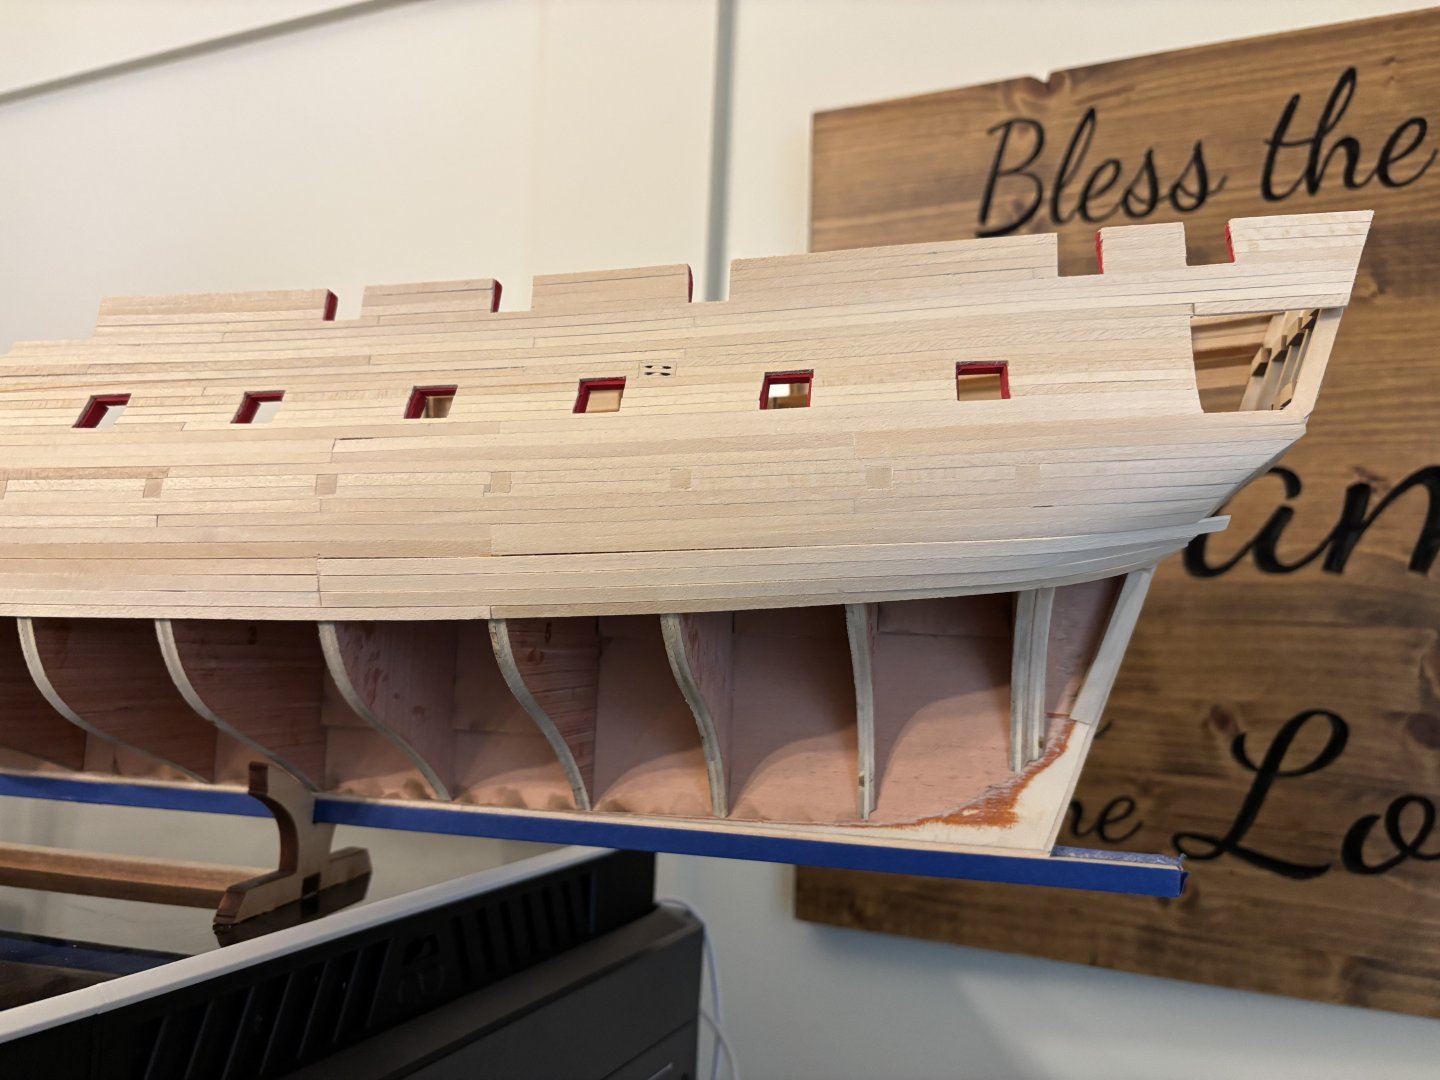
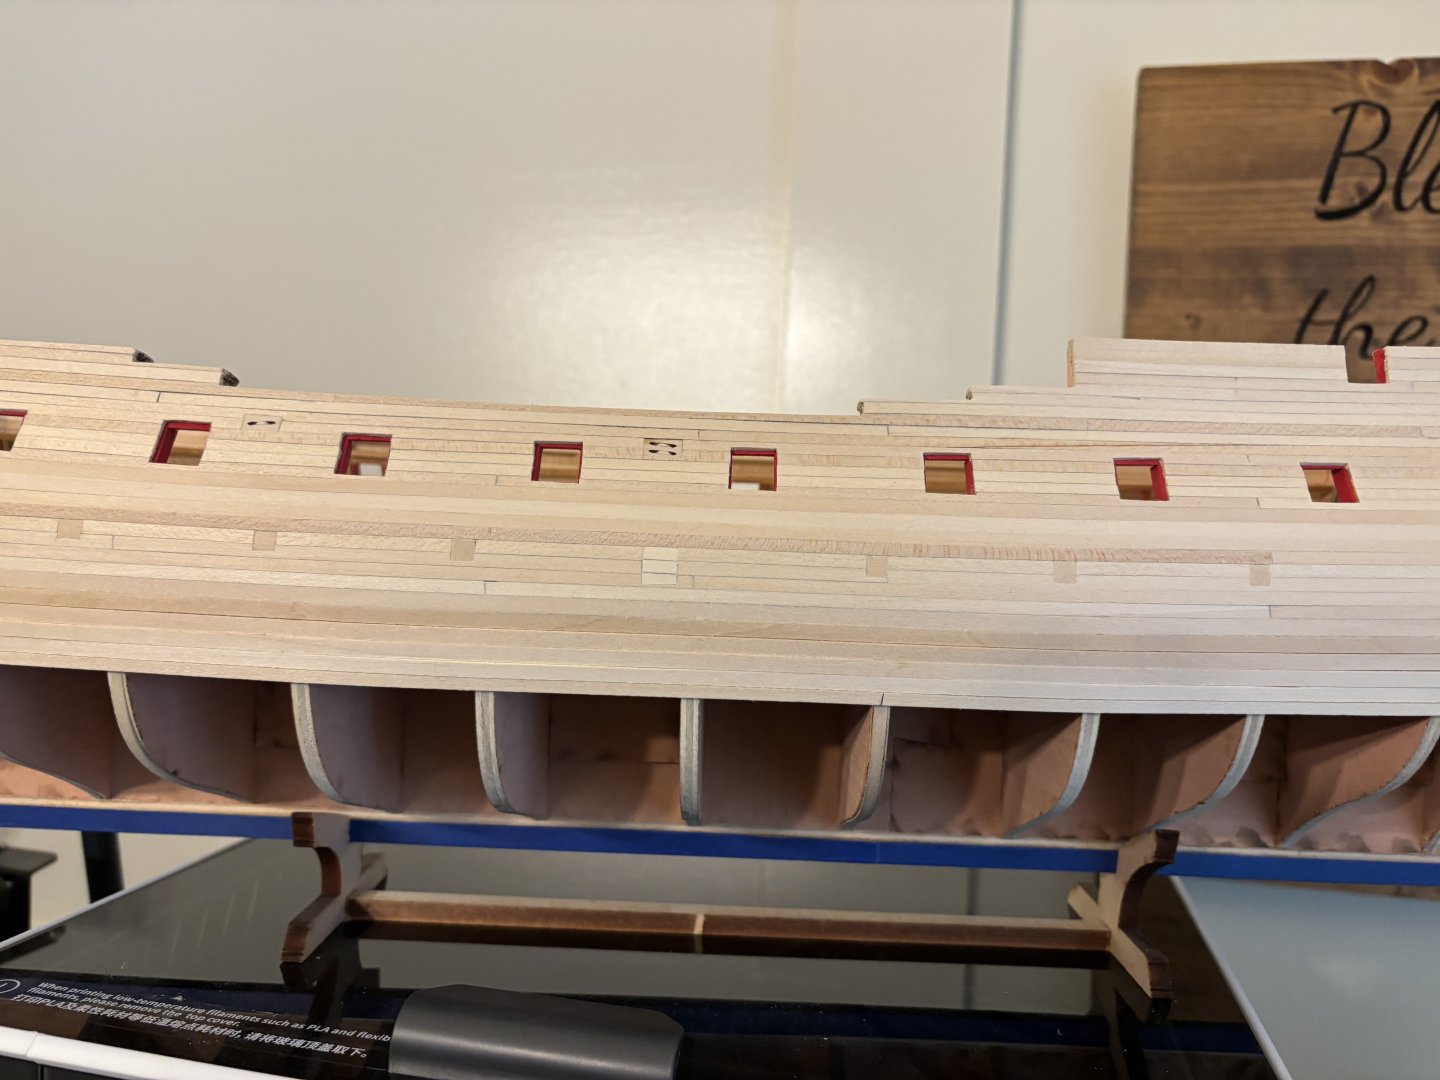
I have reached a milestone of sorts. All of the frames are glued to the keel assembly. The first four pictures show the frames dry fitted to the keel. One I was happy with the fit, I attached them permanently with some Titebond. The next step is to very carefully fair the hull with some 320 grit sandpaper.

-
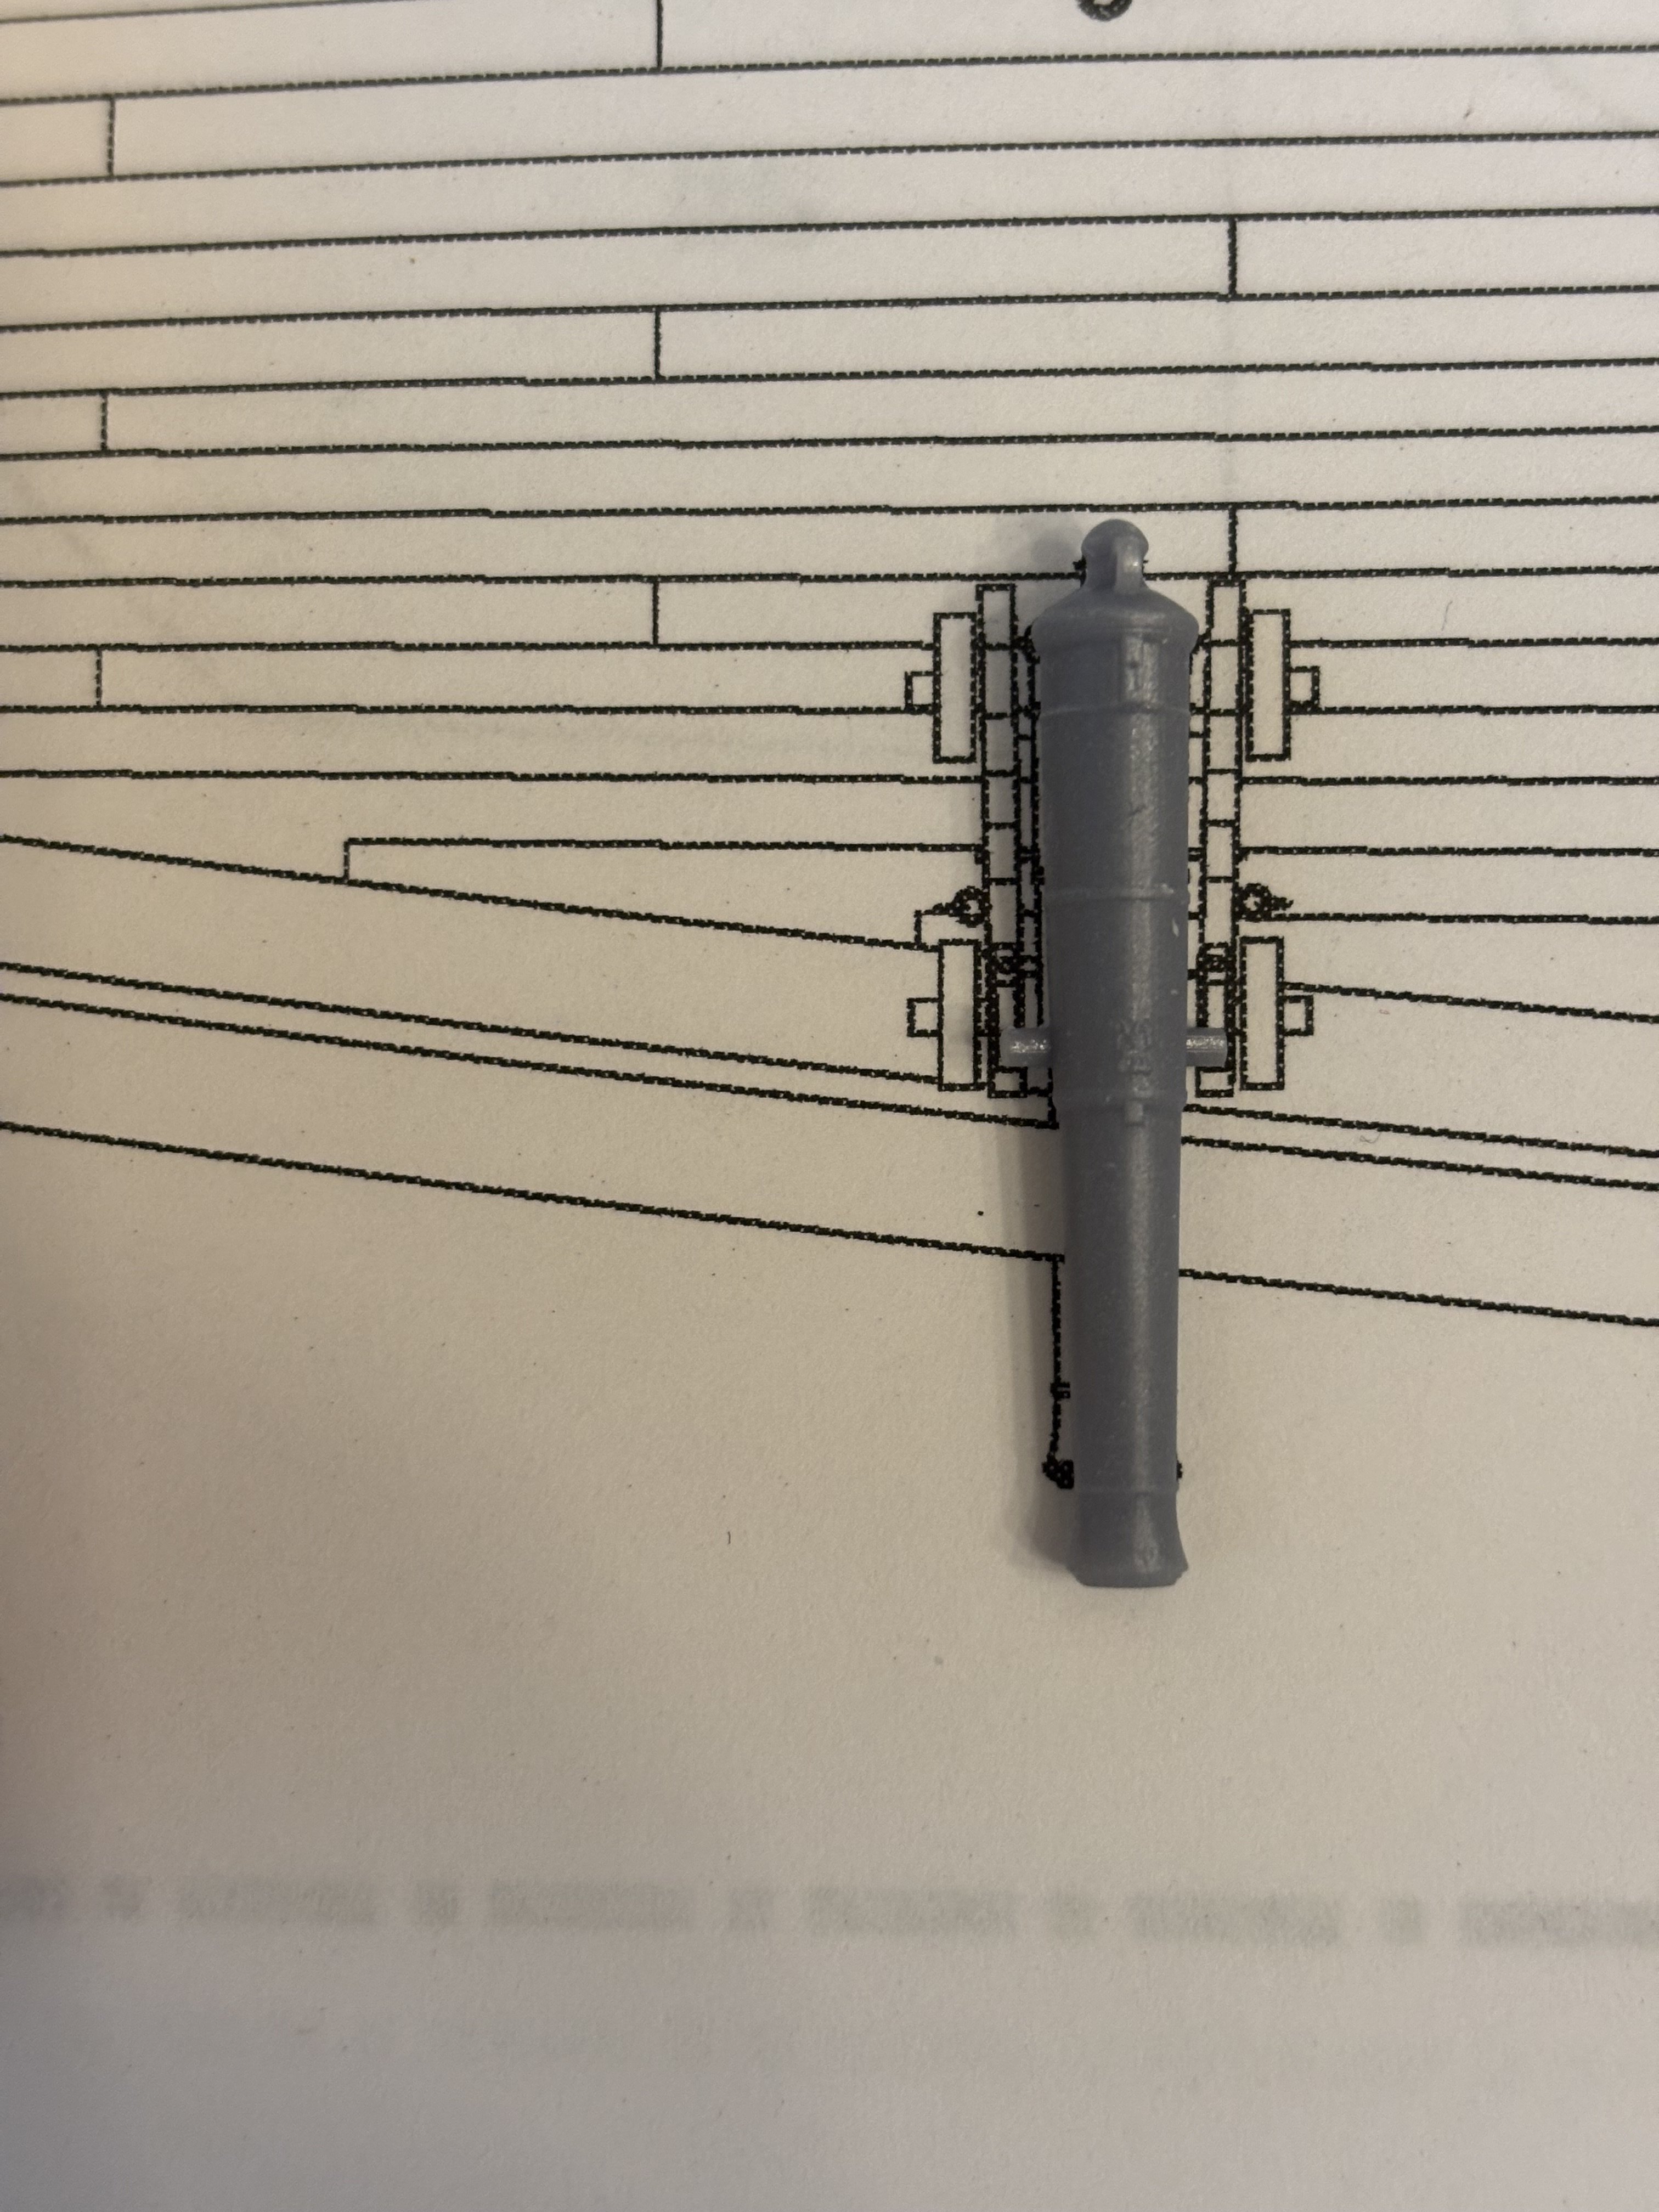
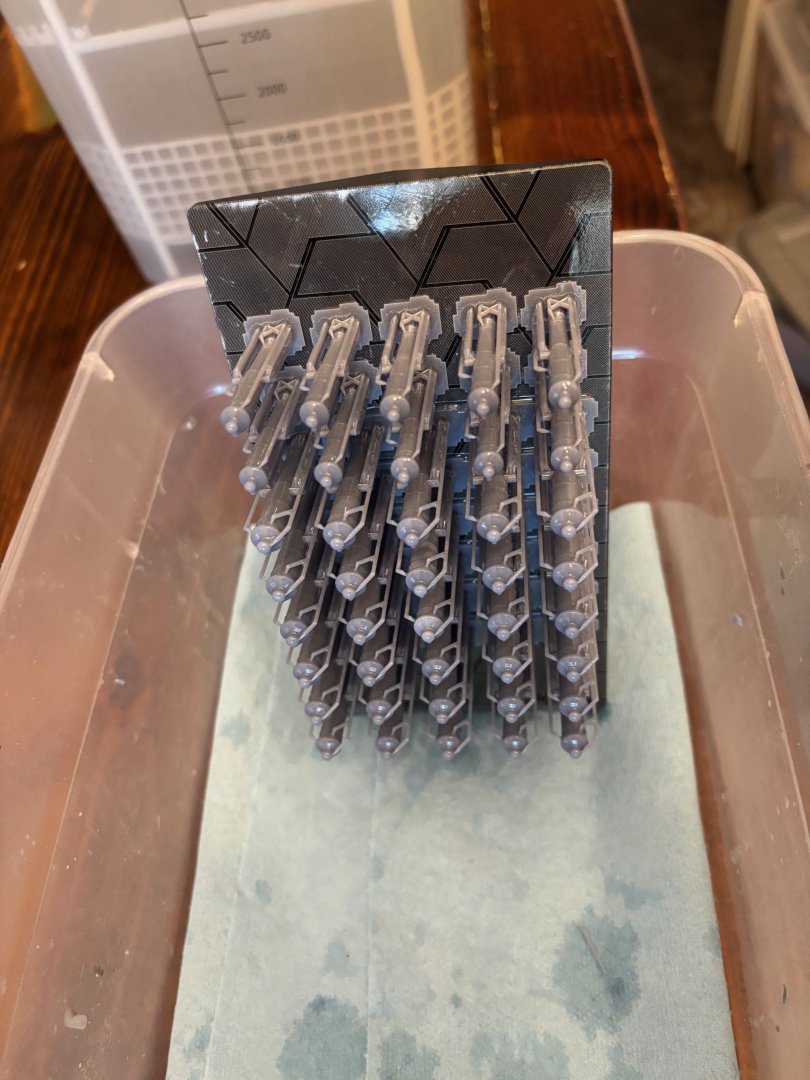
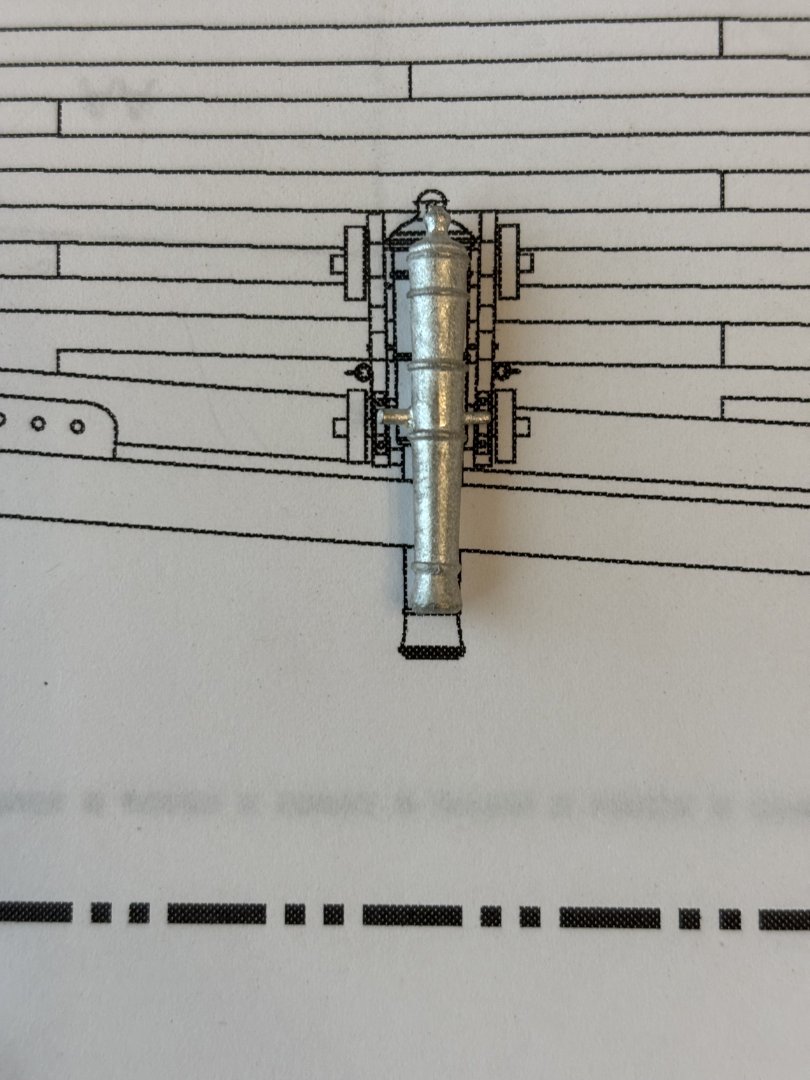
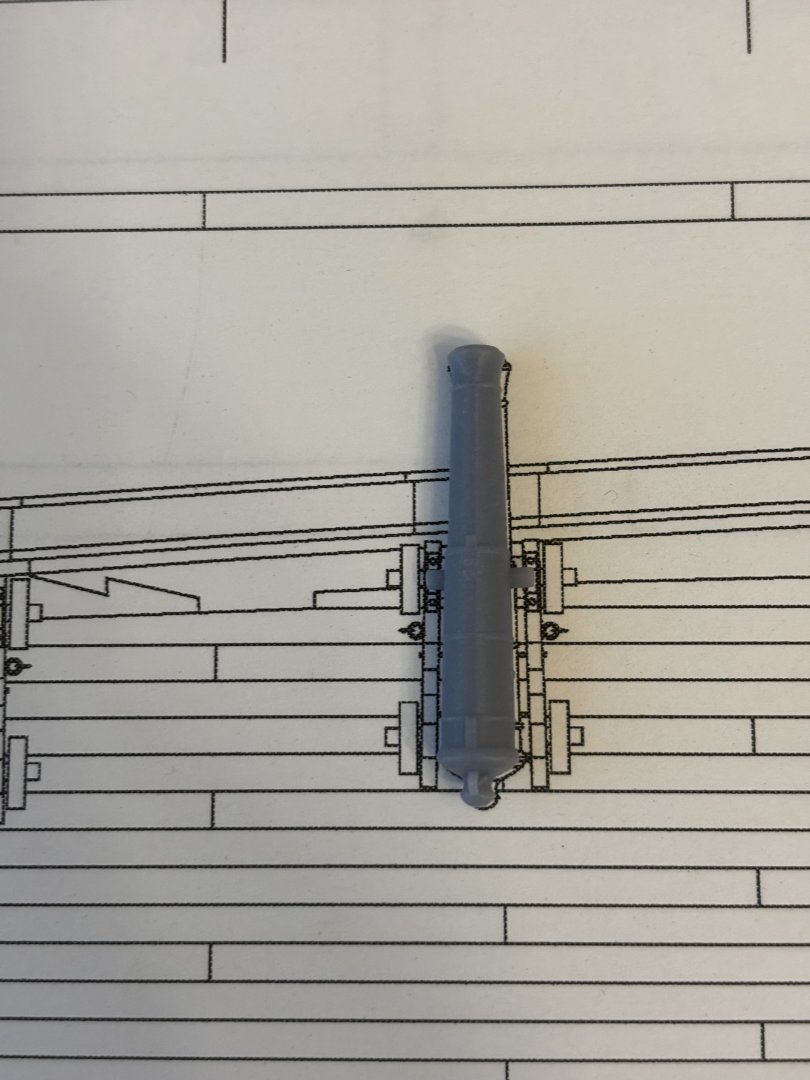
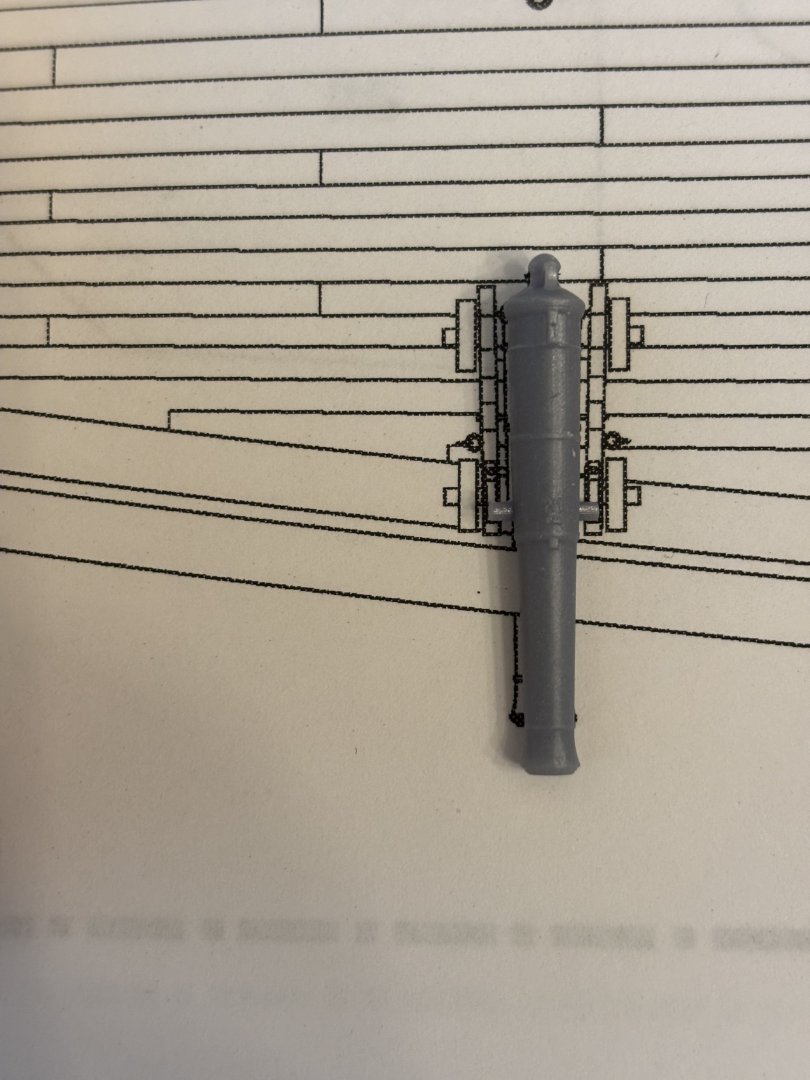
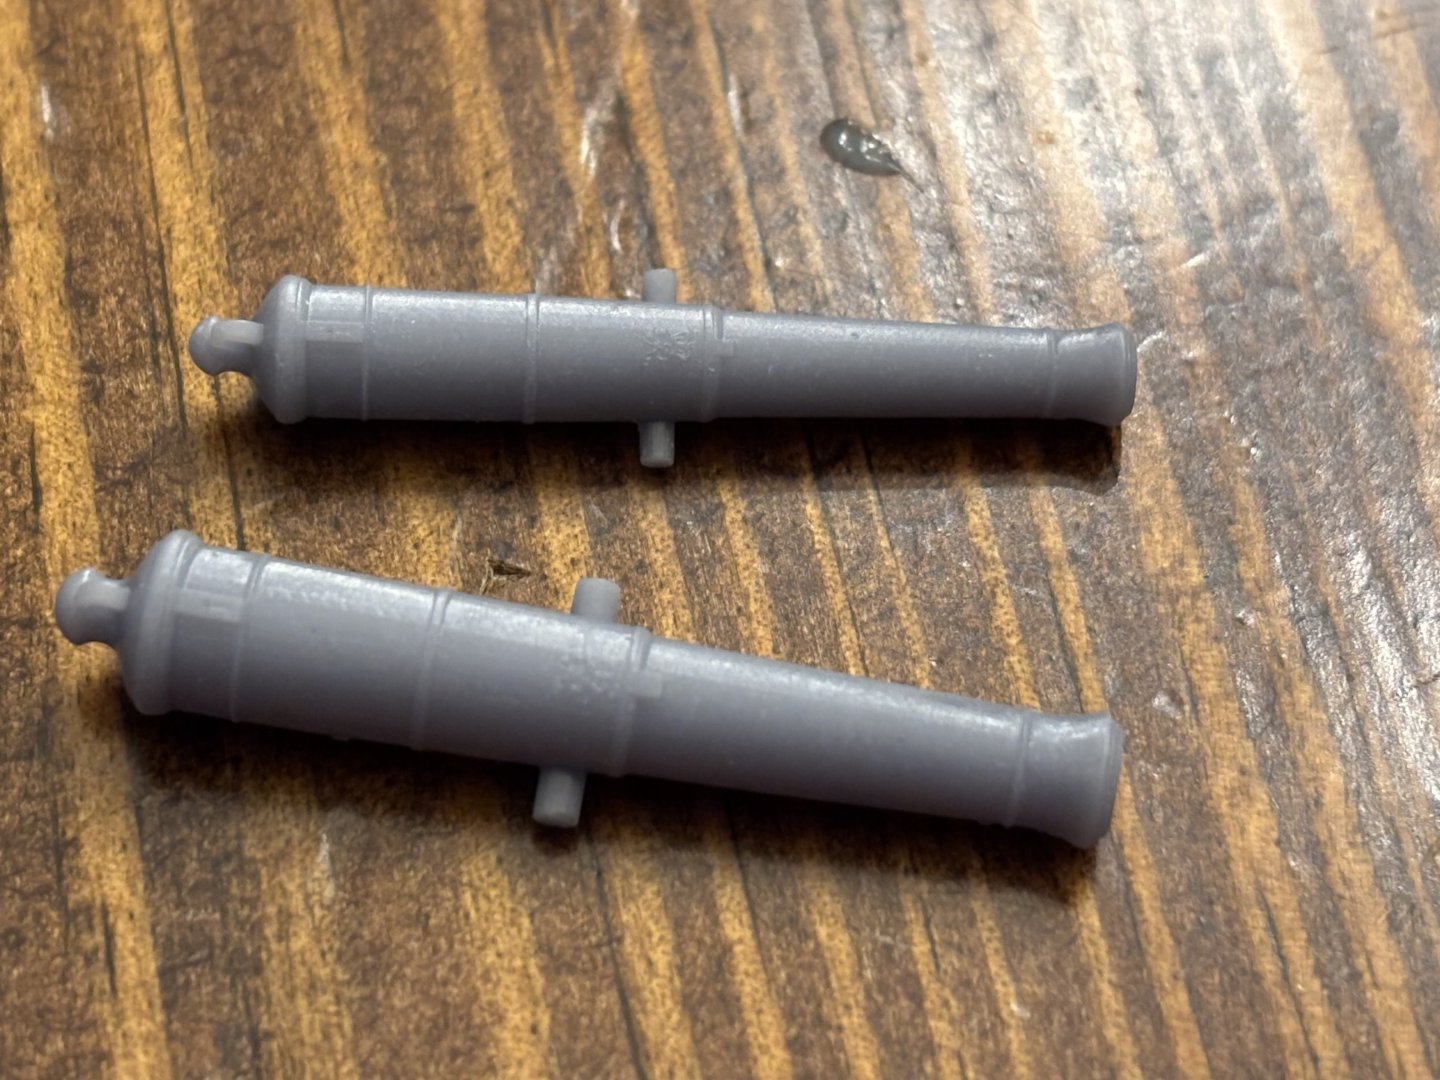
Not much progress to report. I am still formulating a plan on how to proceed with the second layer of planking on wales. I have, however 3D printed the final version of the cannons that I will be using on the model instead of the pewter cast ones provided by Model Shipways.
-
Thanks, sometimes you just have to take a step back for a couple of days and formulate a plan on how to fix it.
-
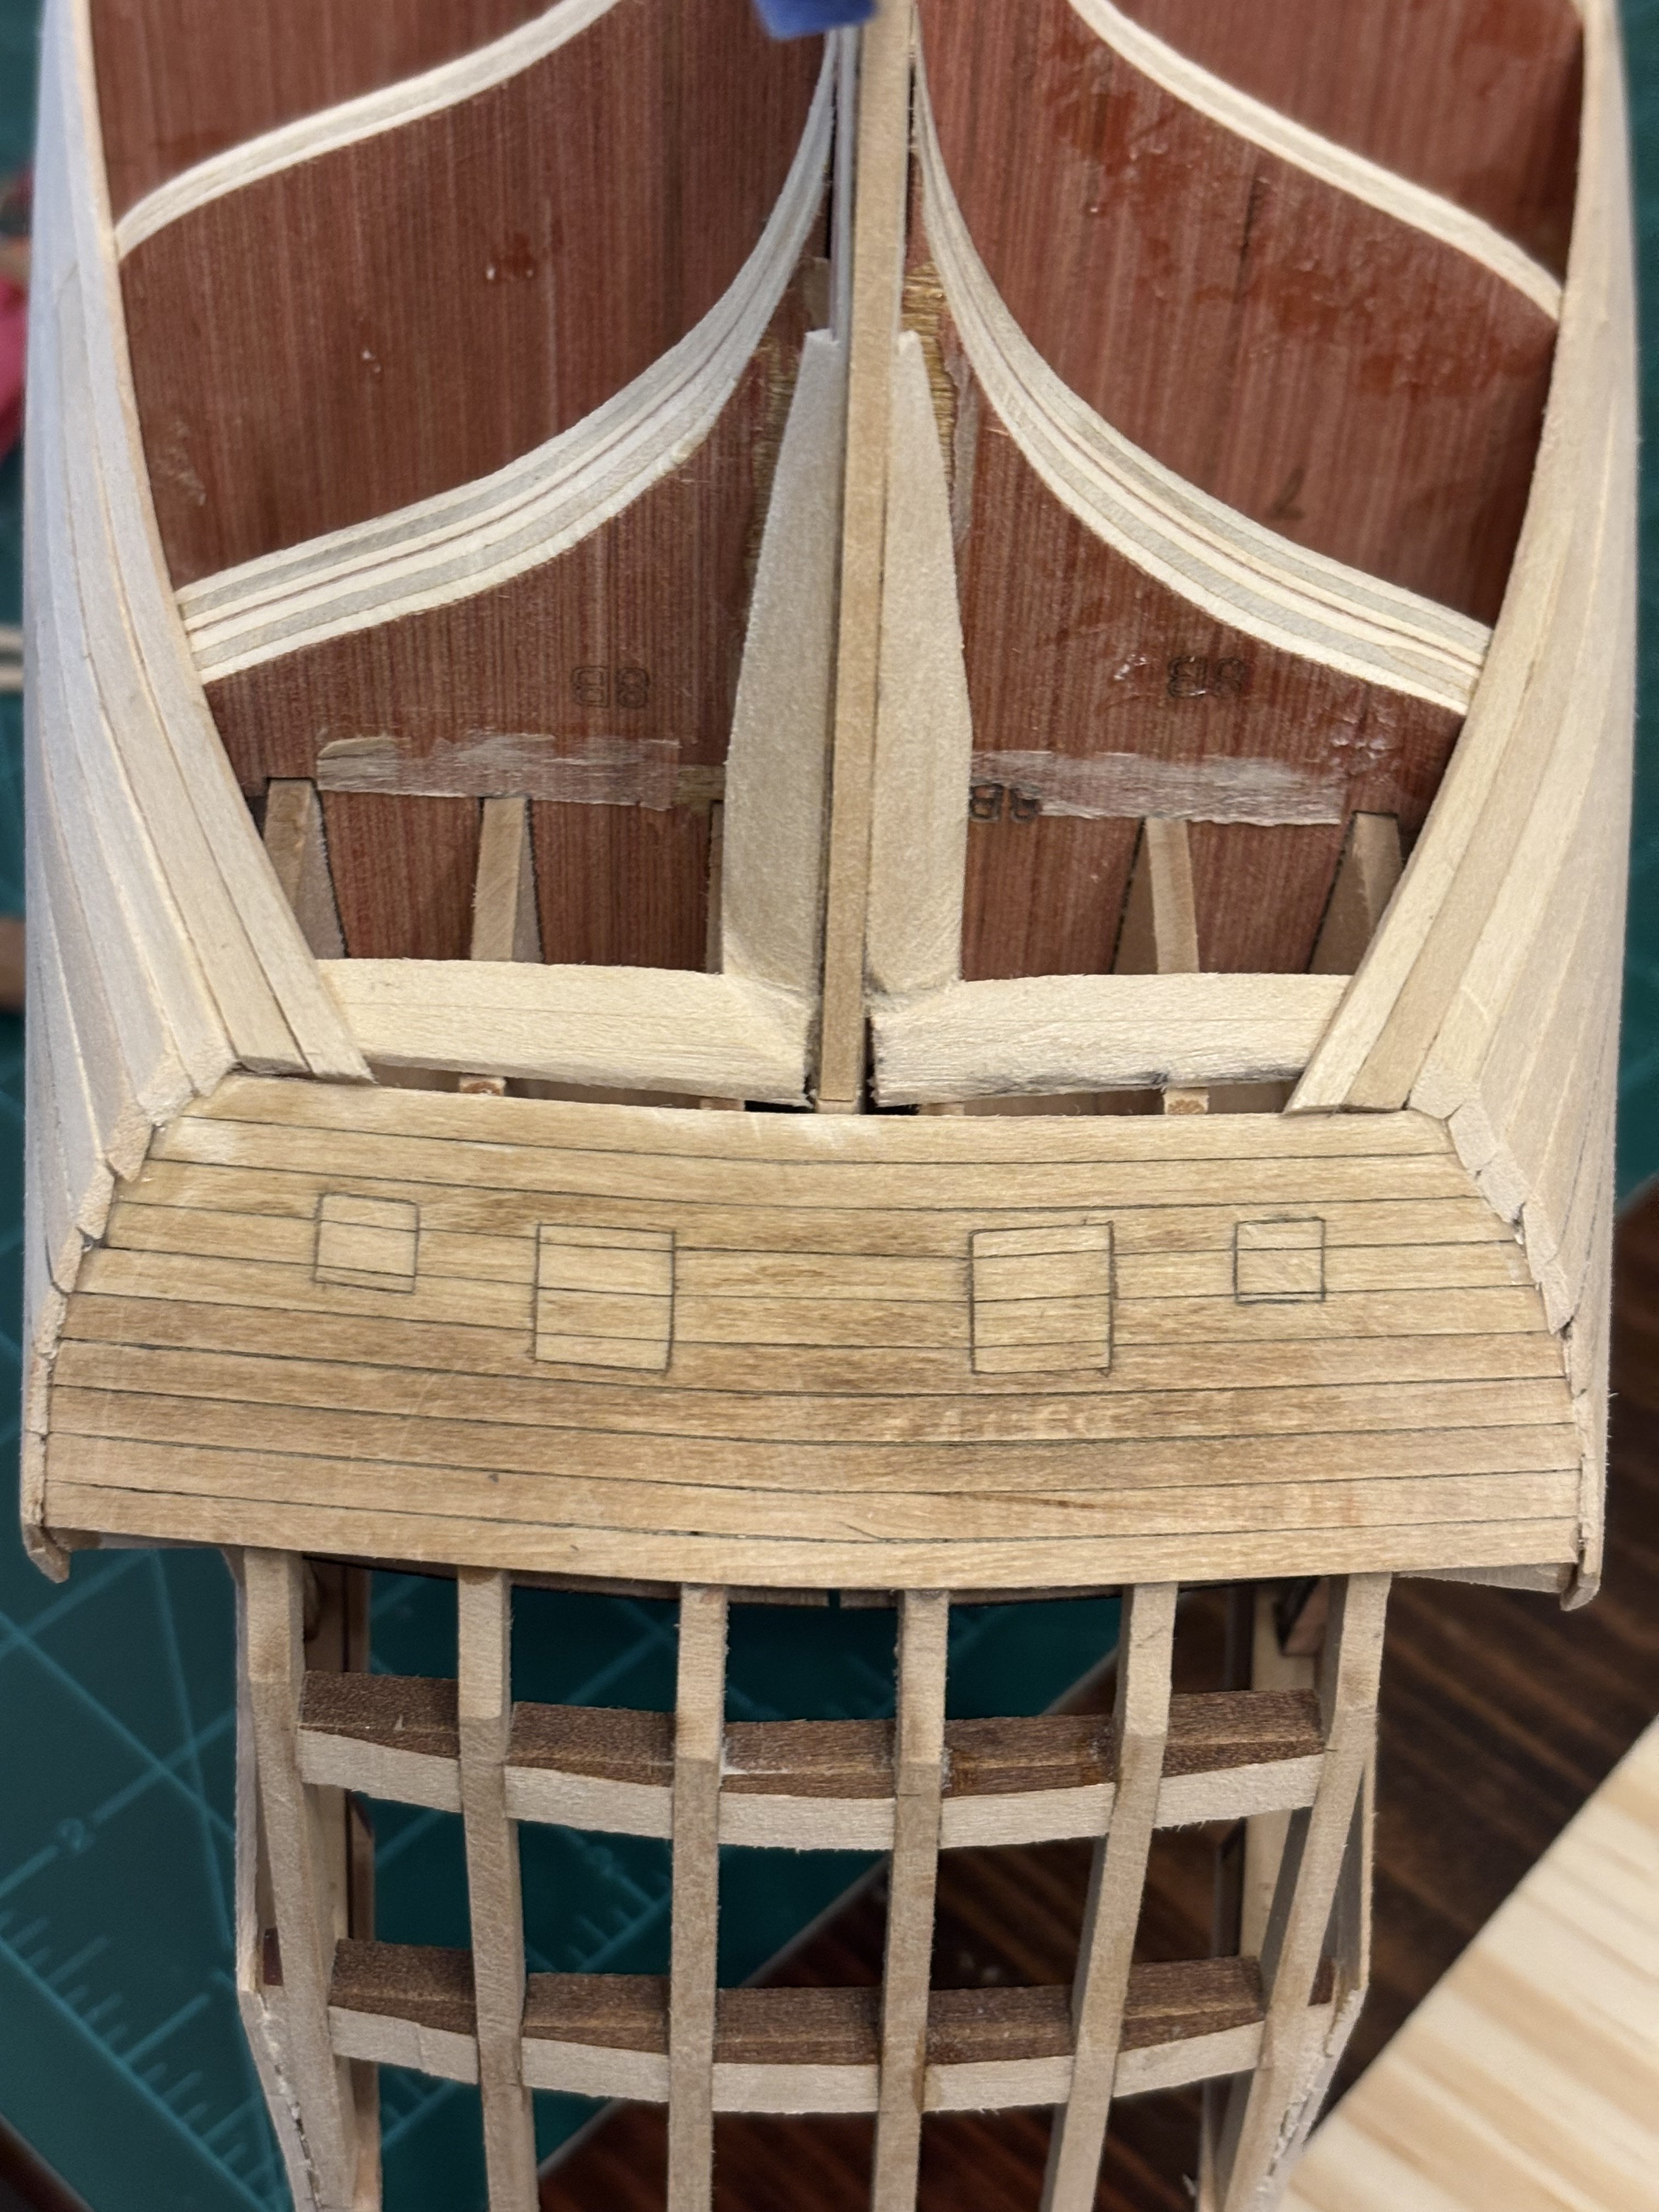
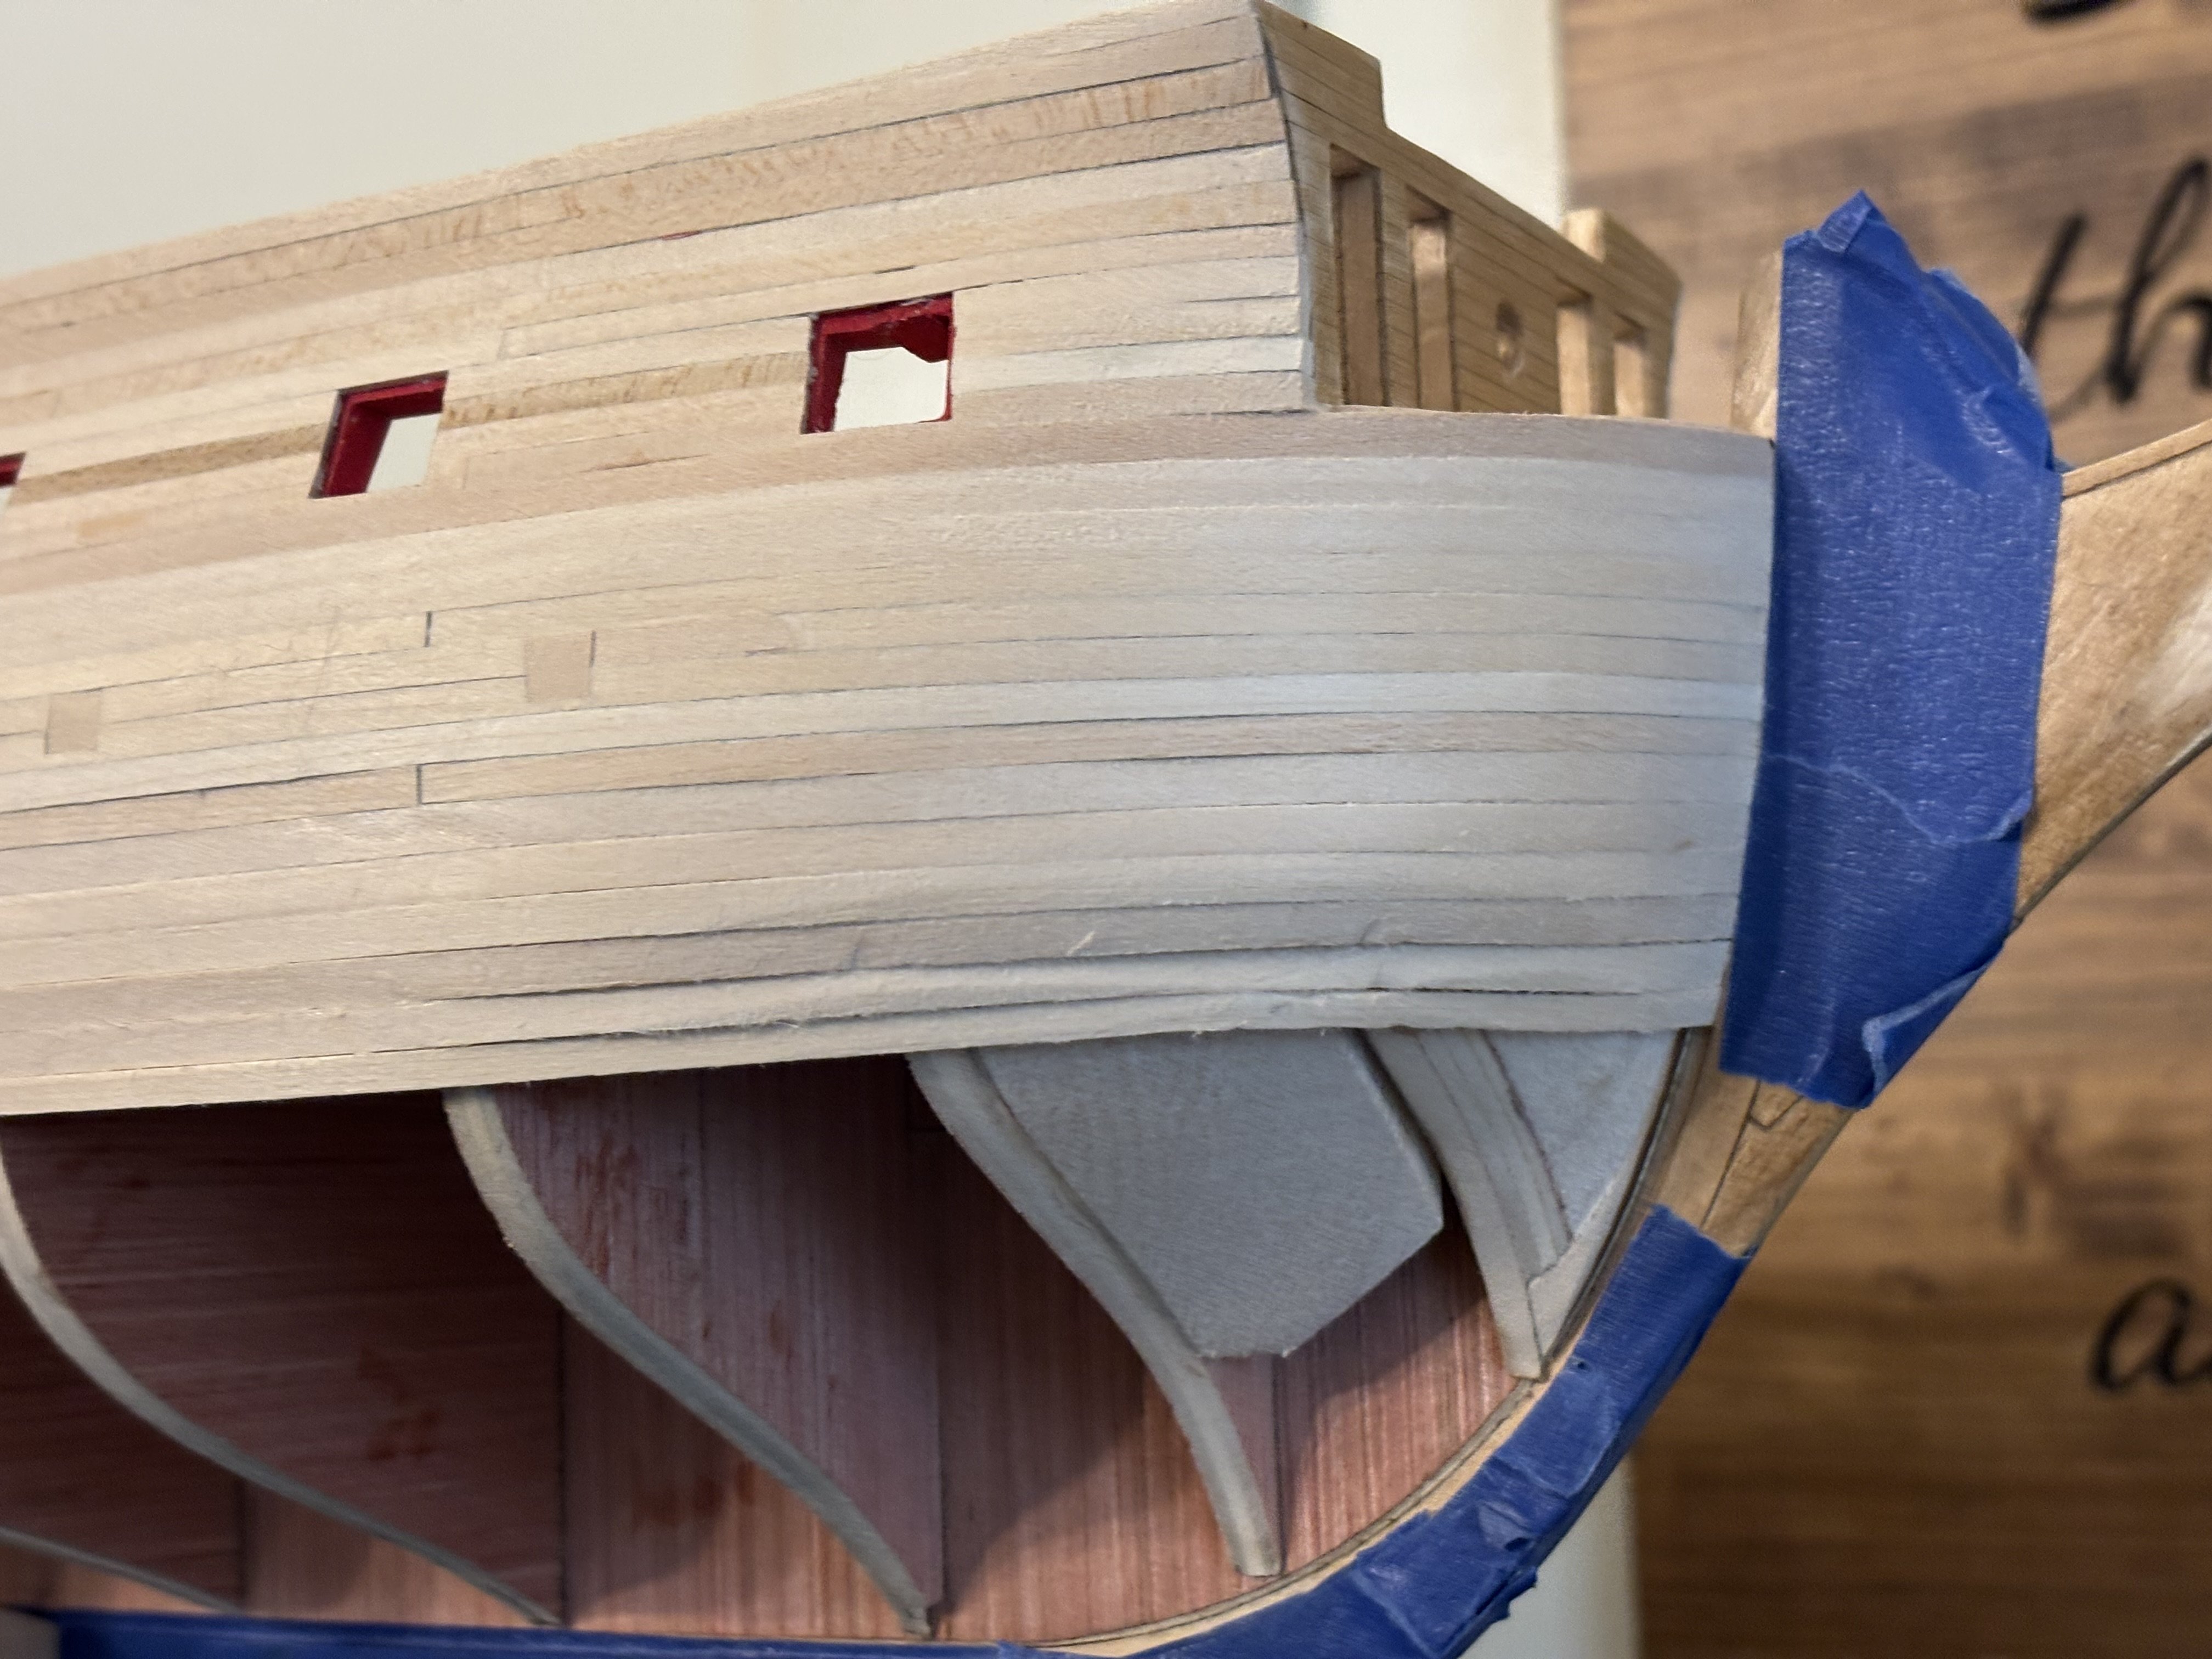
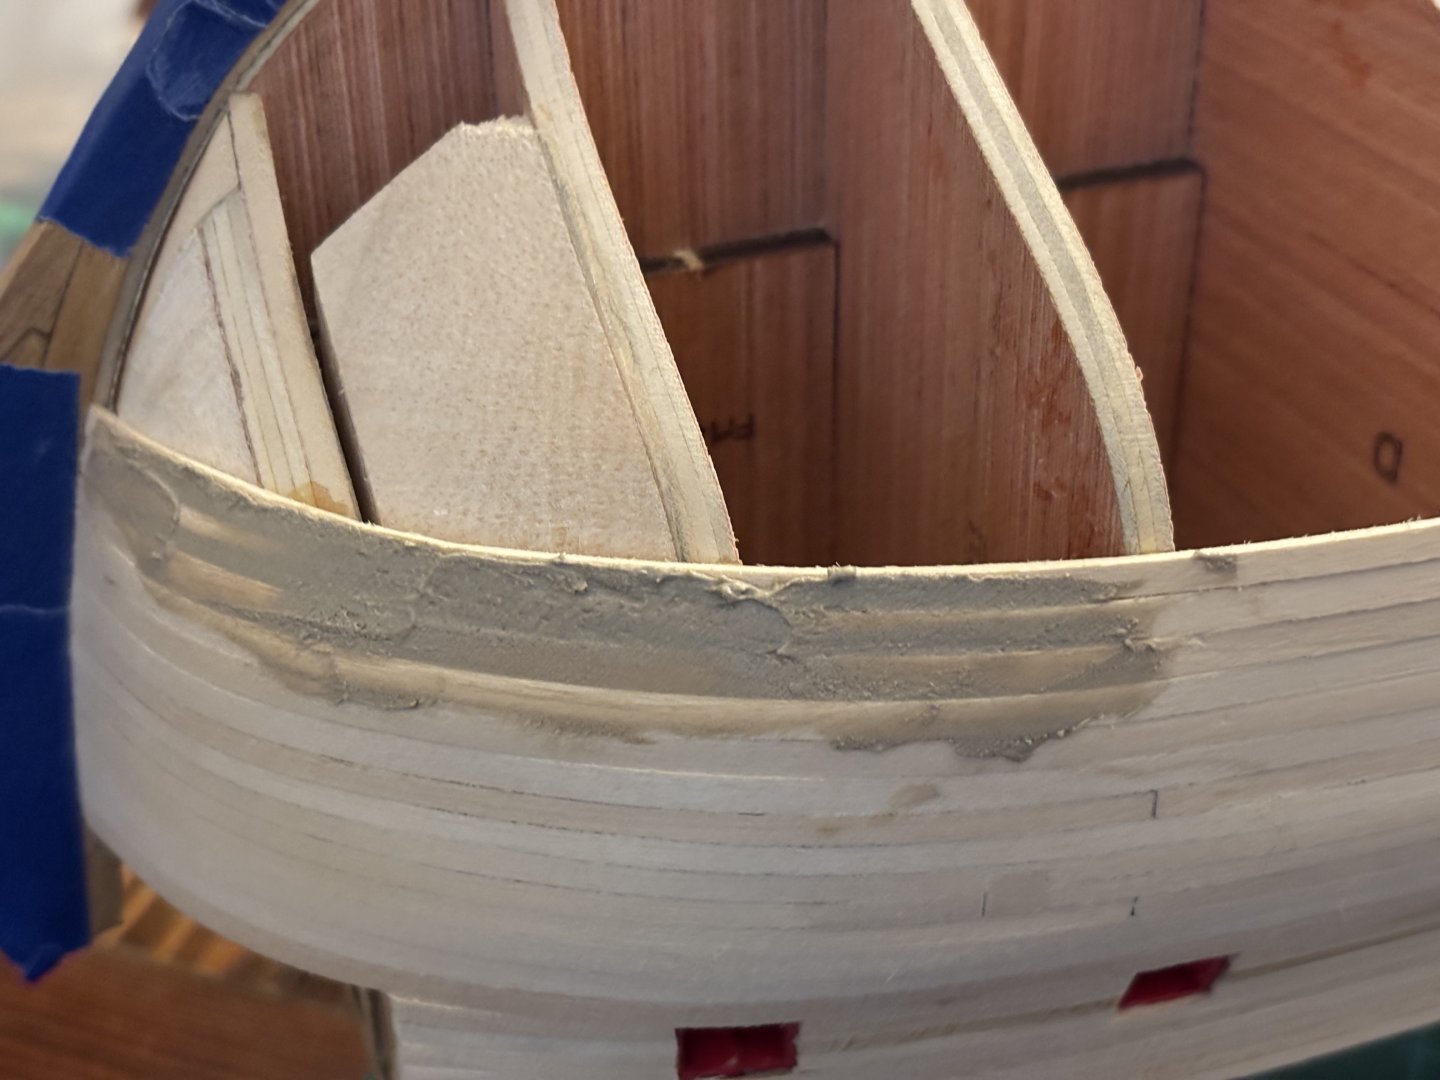
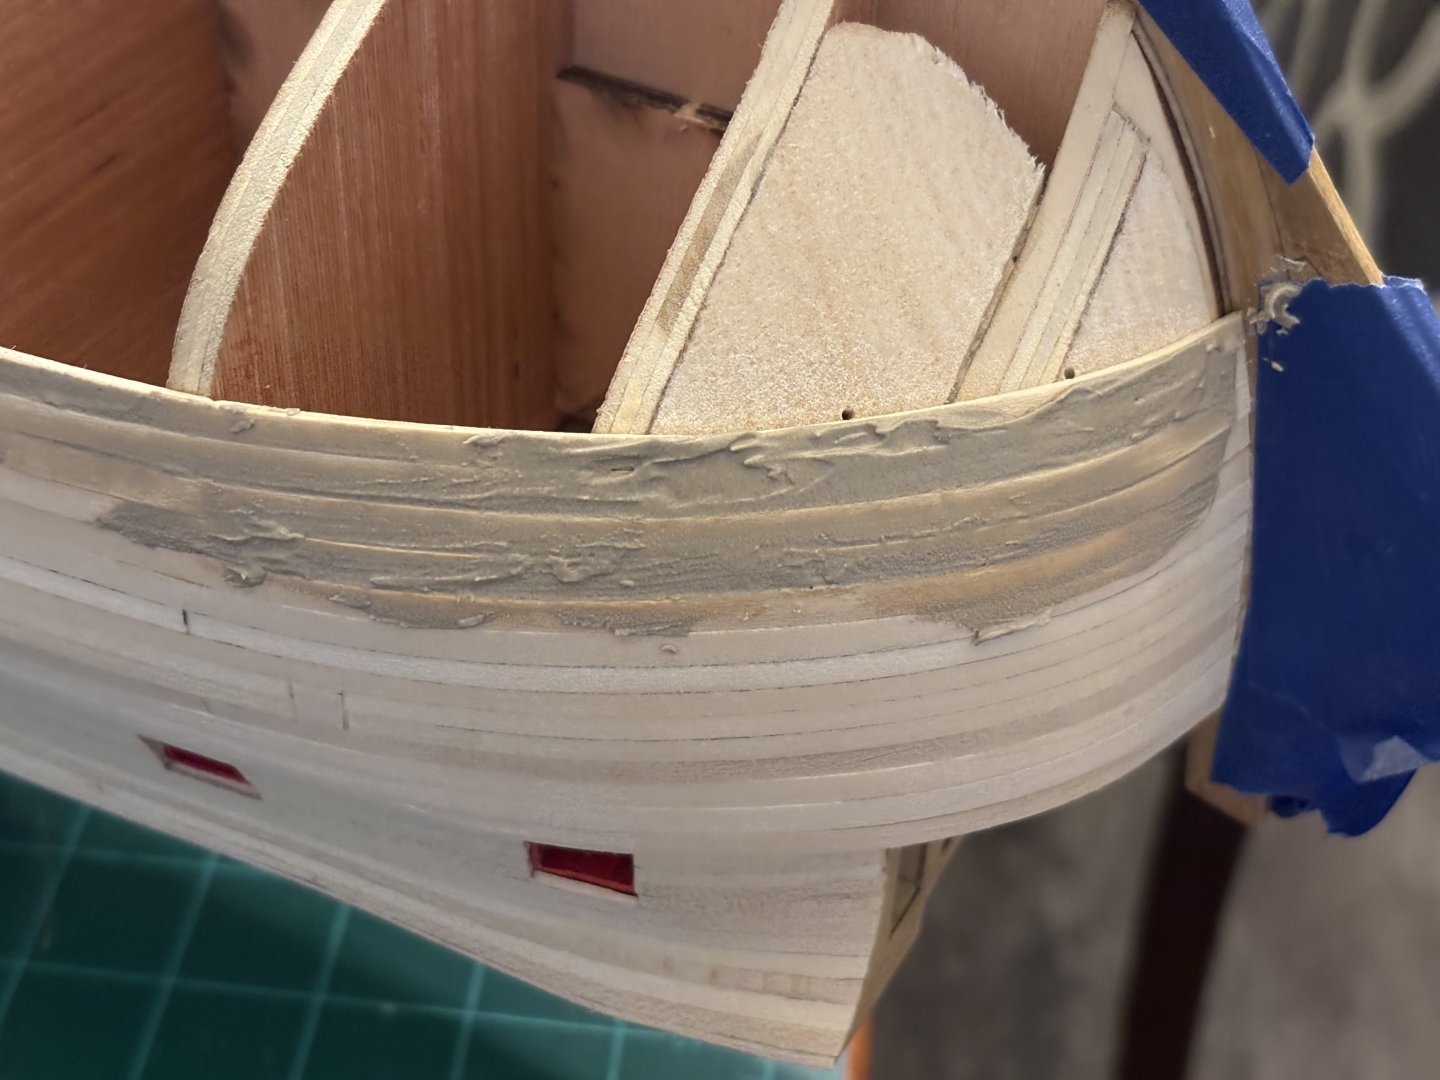
I think I got the filler pieces sorted out on the stern at the counter. It seems that I didn’t have them faired enough. I will get the ends of the planks cleaned up once the hull is completely planked. I also applied some wood filler on the first layer of the wales at the bow. Once the filler has dried, I’ll sand it smooth to get it ready to add the second layer of planks to the wales.

-
Started work on the frames today. The one piece frames pretty much self explanatory. The two piece frames aren’t that difficult either. Following Chuck’s monogram makes it all very easy. Nothing is glued in yet. Still have quite a few frames to assemble and fit. I’m taking my time with these, but I will get there.

-
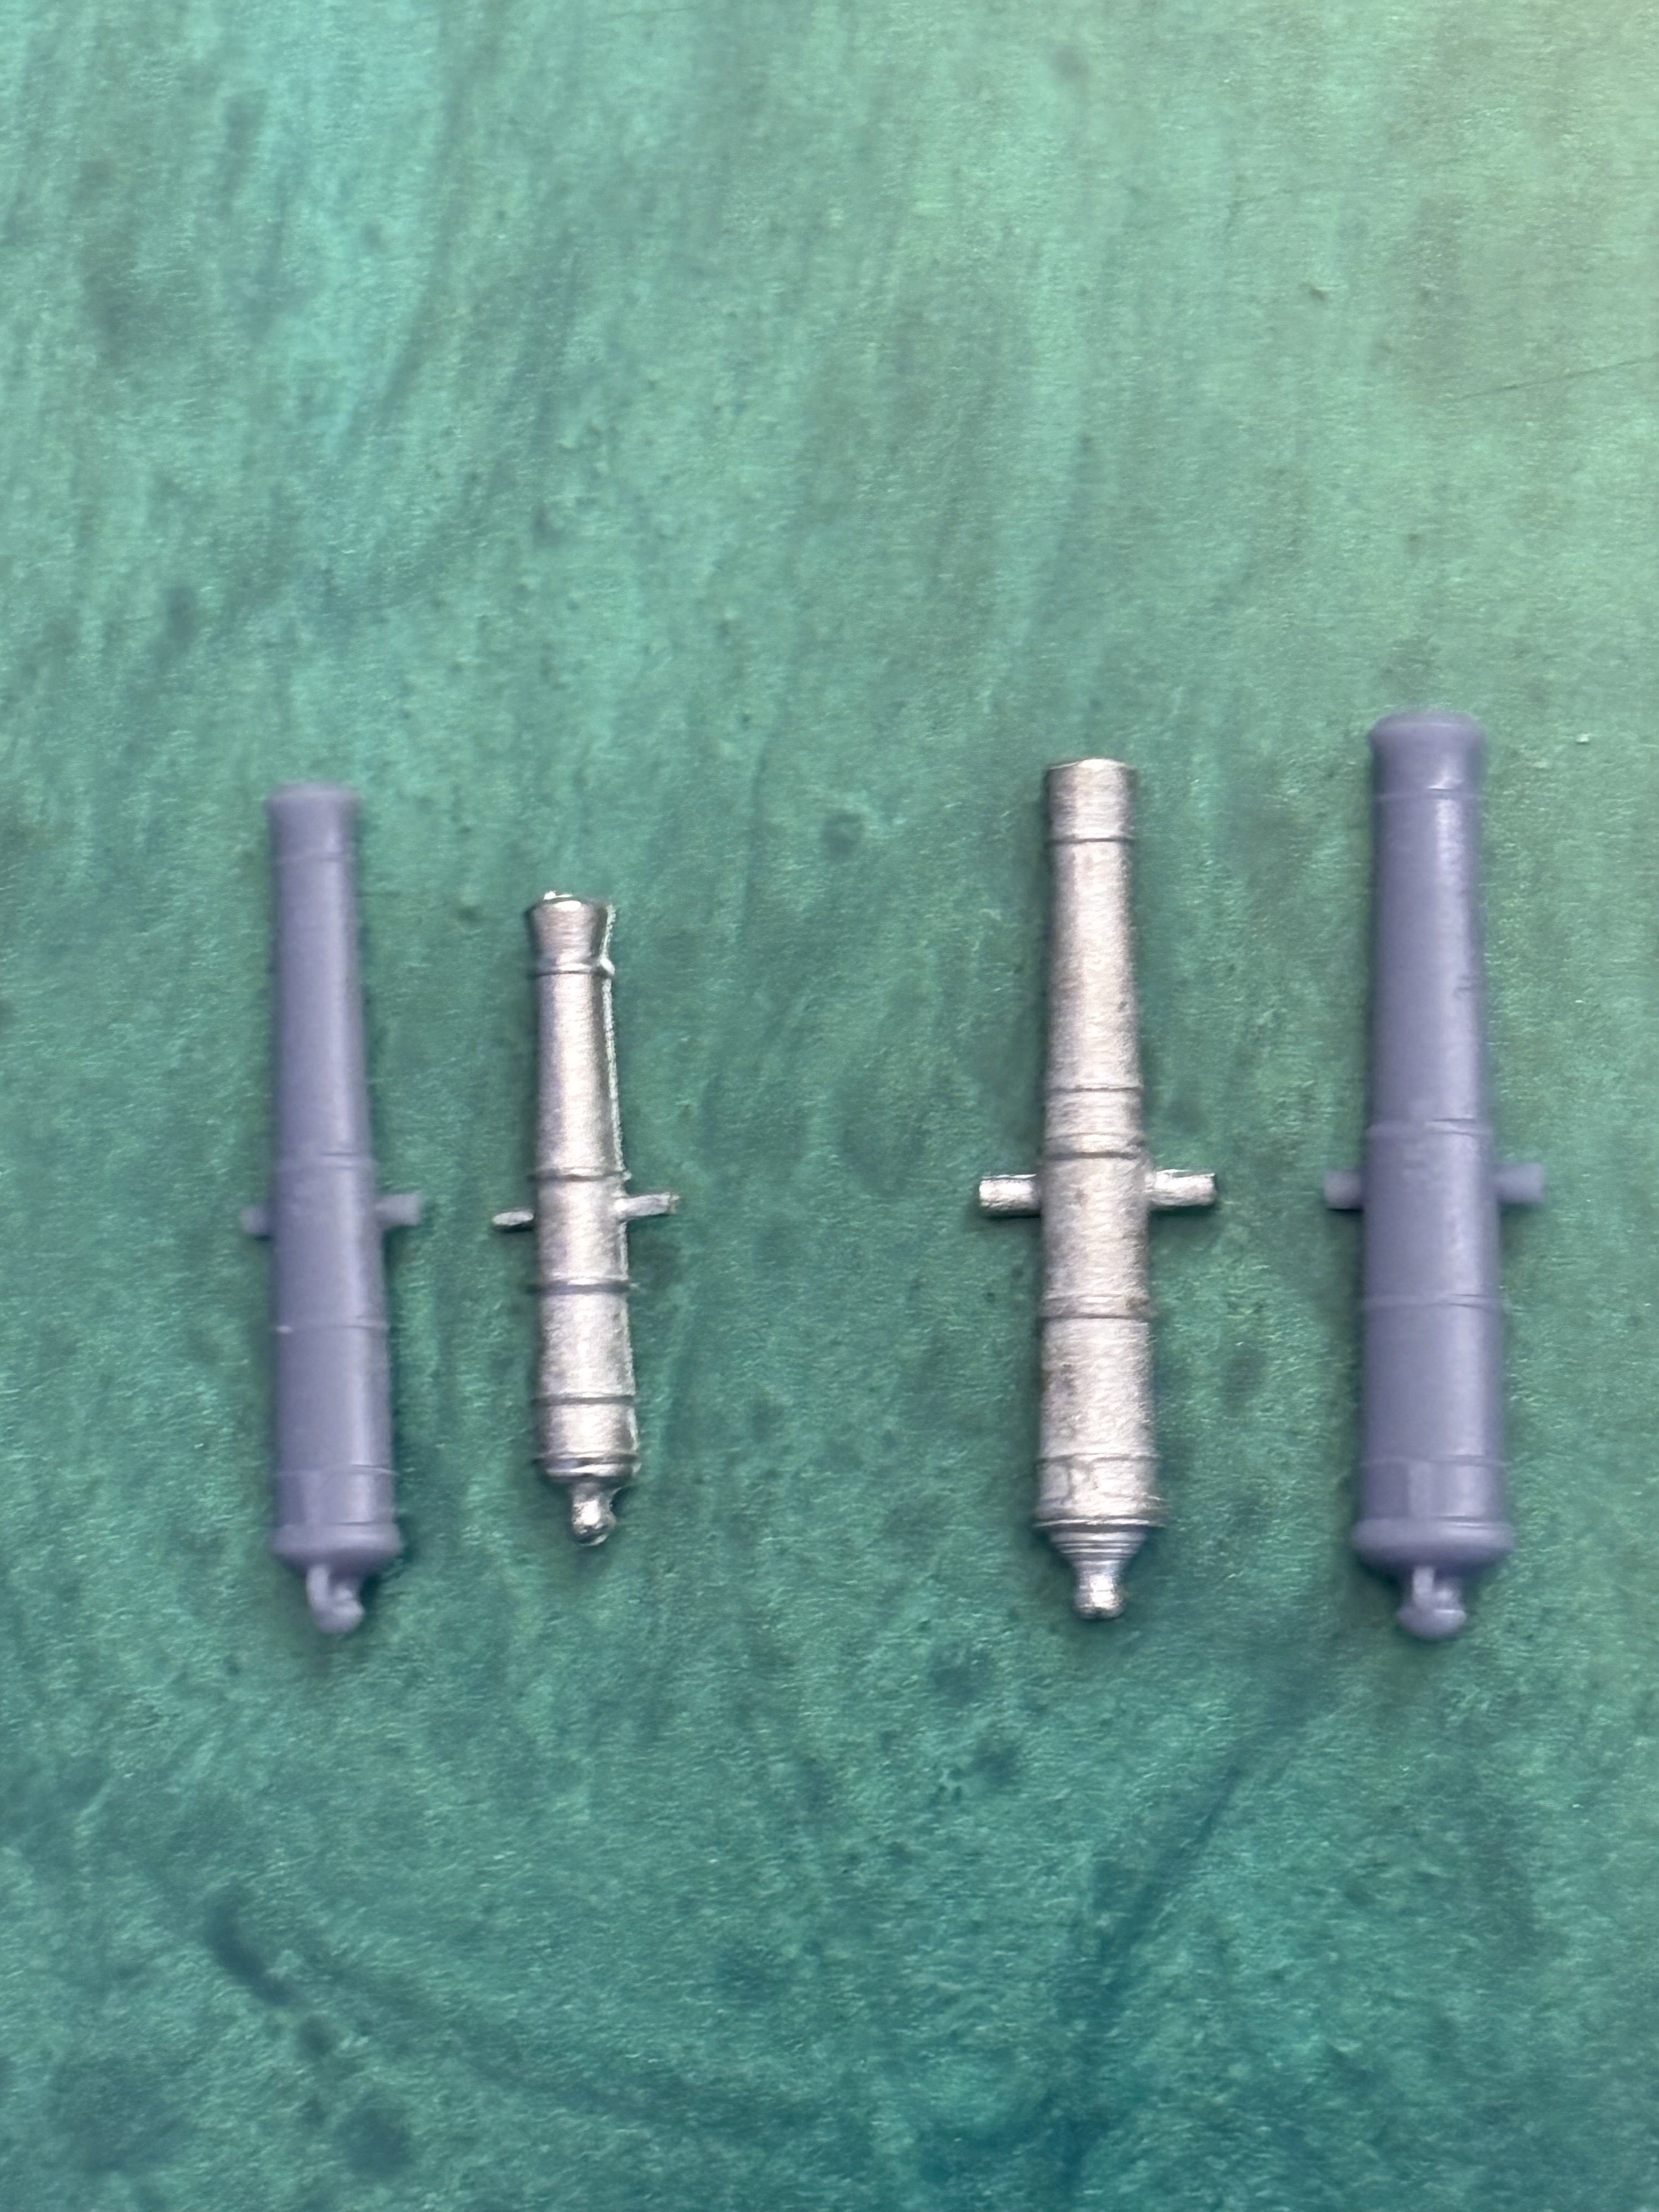
As I sit here trying to figure out the best way to tackle the problem I am having with the planks at the counter, I decided to take a small break and look at the cannons that were supplies with the kit. I never really liked them and had considered buying replacements from Chuck’s store. Then I ran across an article on the NRG website on 3D printing cannons. Well, I downloaded the files and the spreadsheet for scaling the cannons and sliced the files and printed some test cannon to see how they would come out. I think the 3D printed cannons will be the ones that I will use. They look better in my opinion and they are more to scale. I know that the 6 pounder cannons are a little longer that the plans, but I can live with that. 12 Pound cannon supplied with the kit 6 pound cannon supplied with the kit 3D printed 12 pounder 3D printed 6 pounder side by side comparison, 6 pounders on the left


-
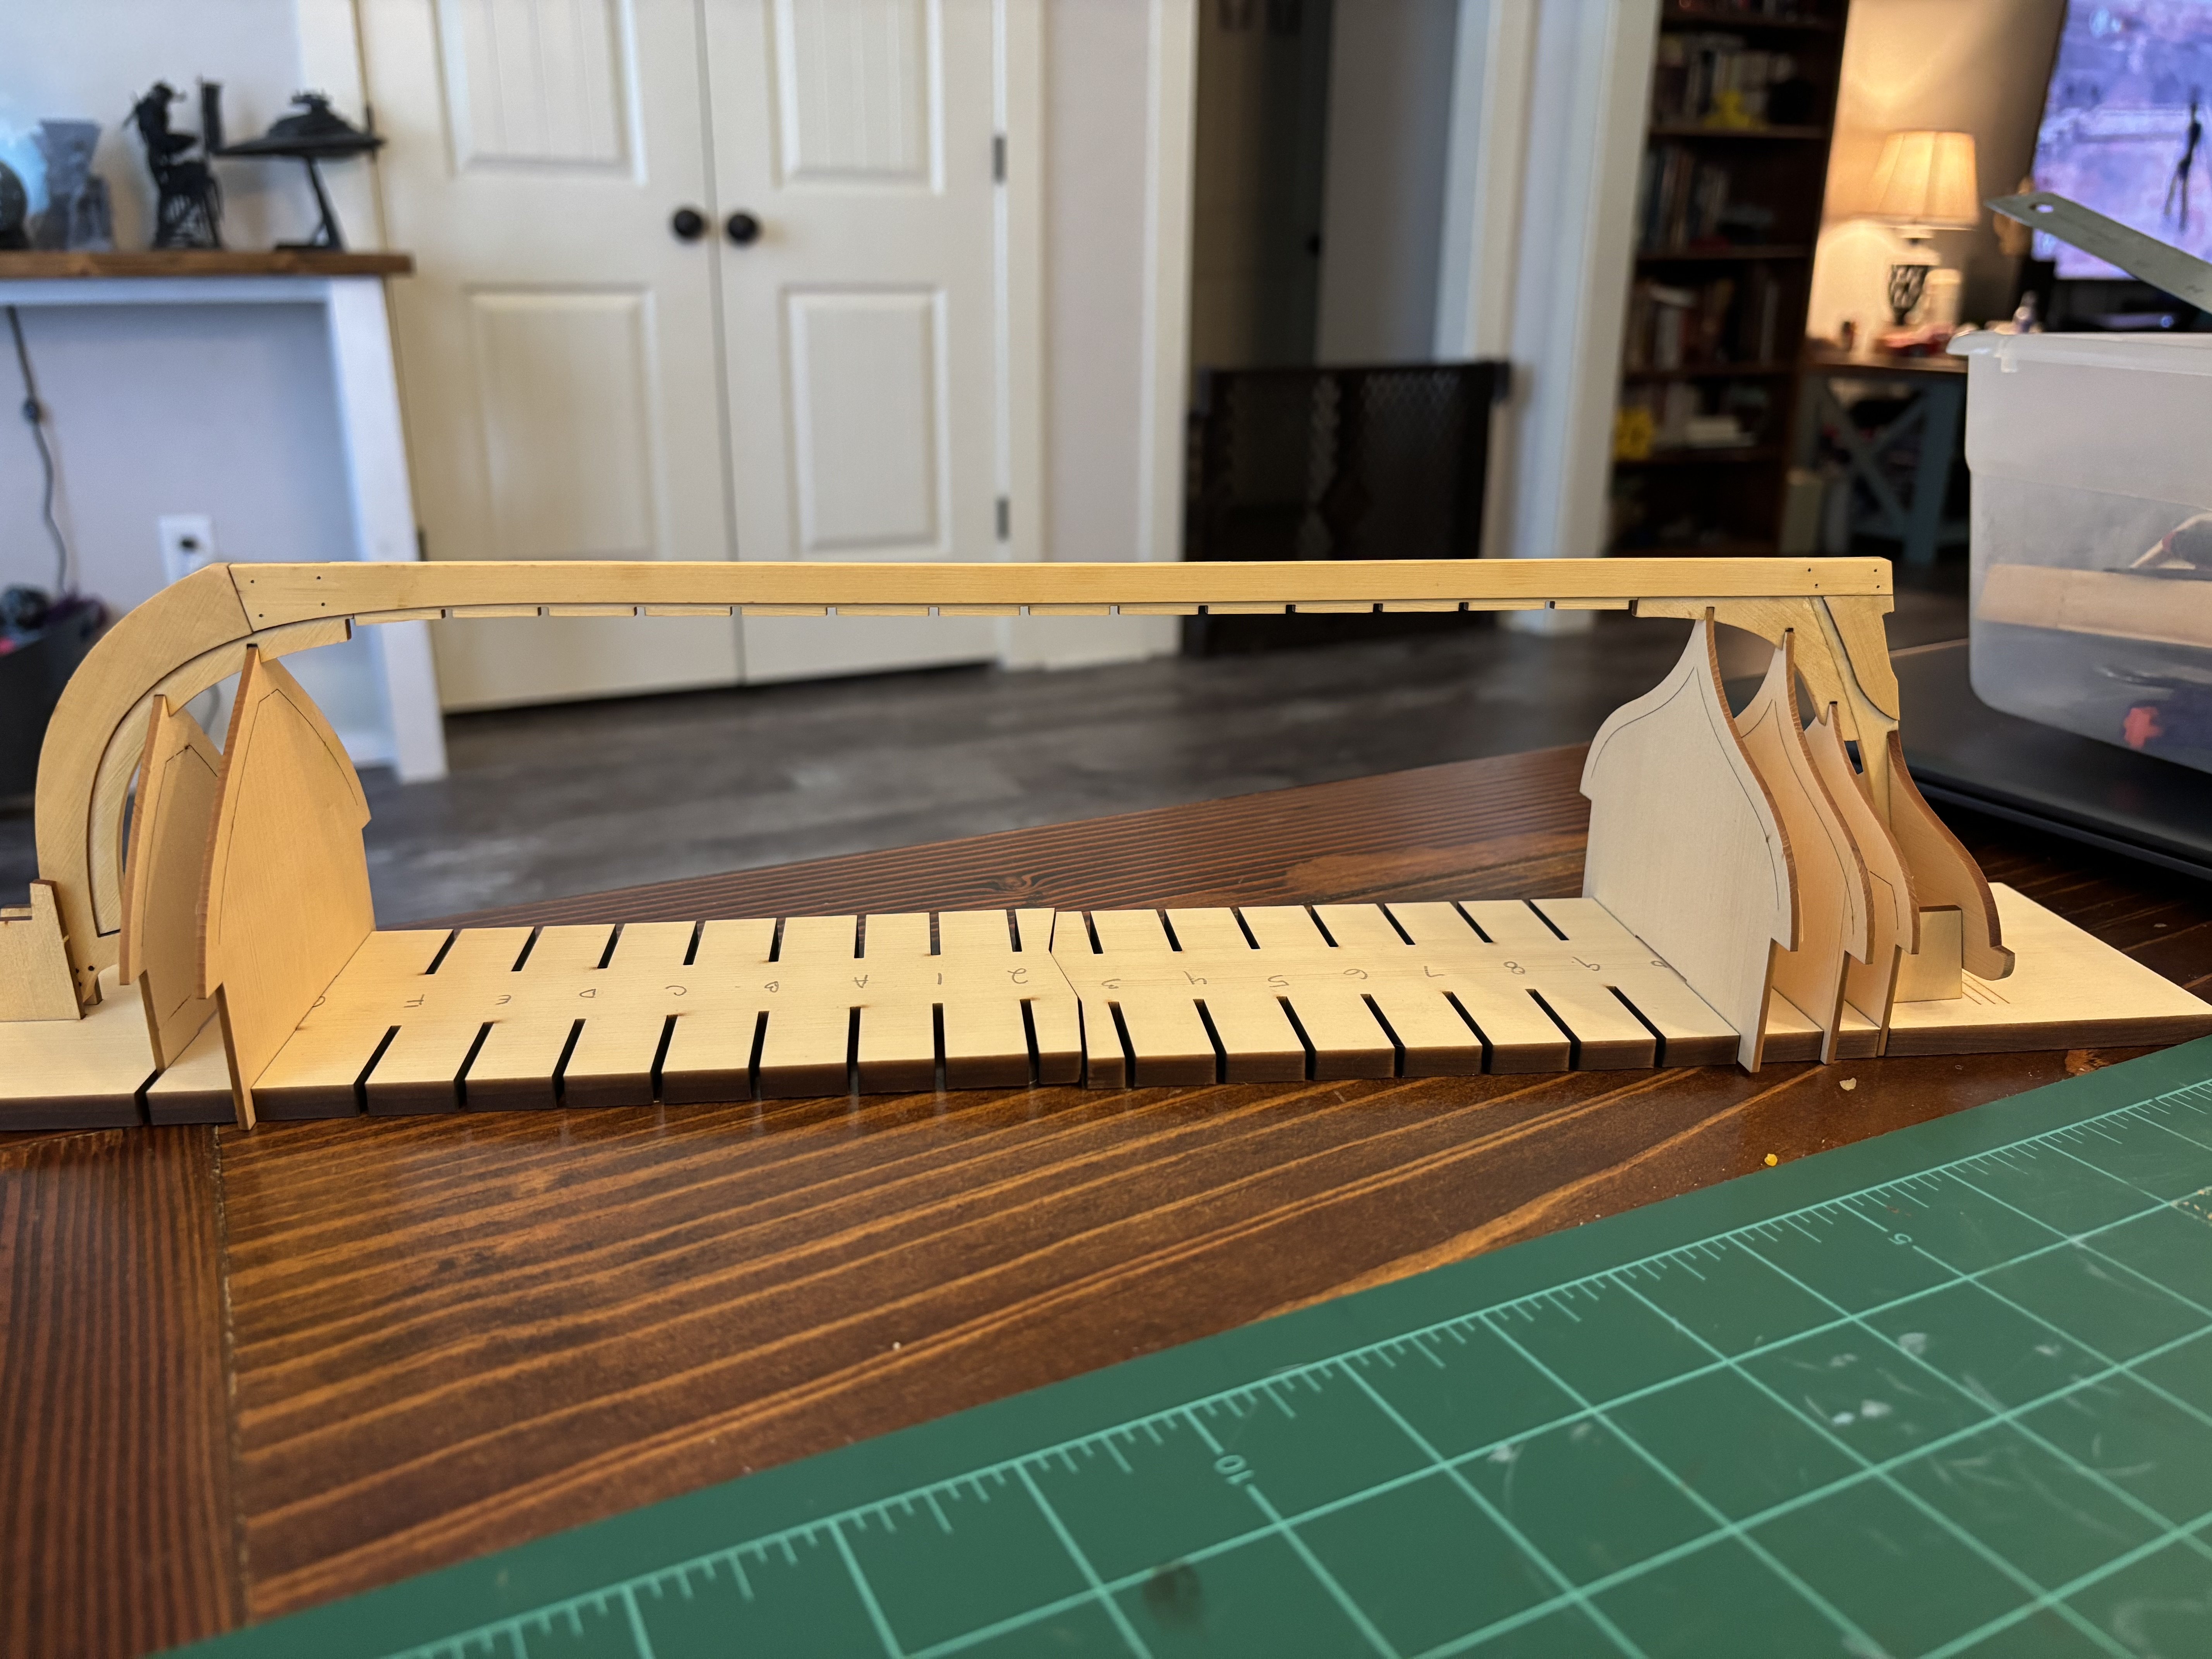
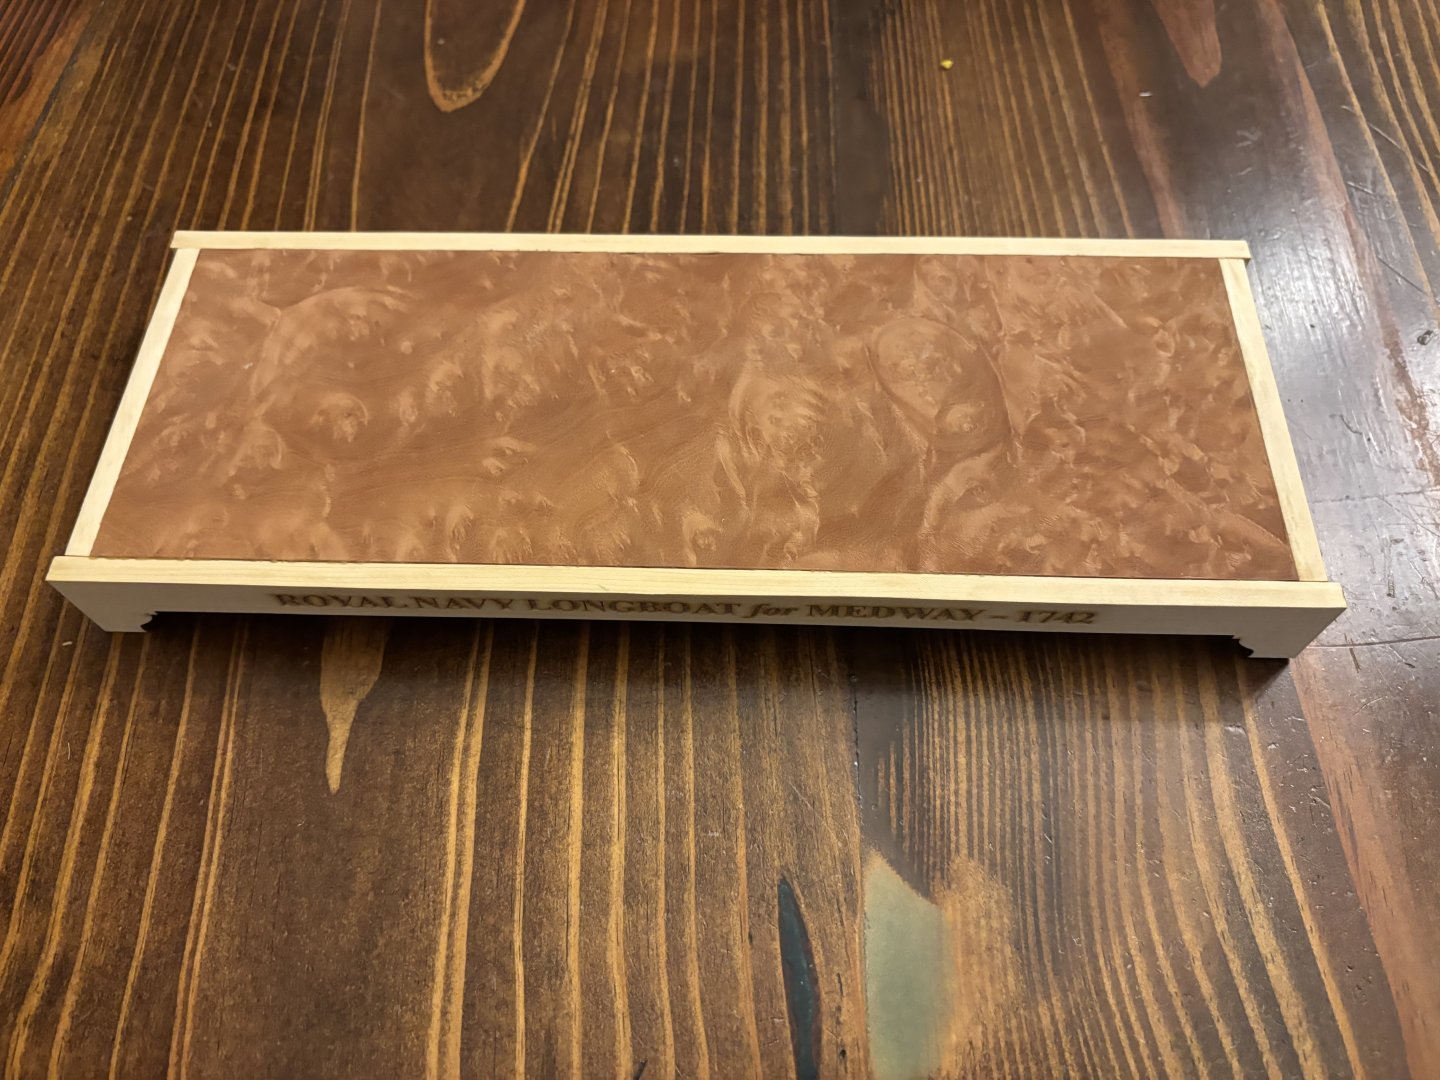
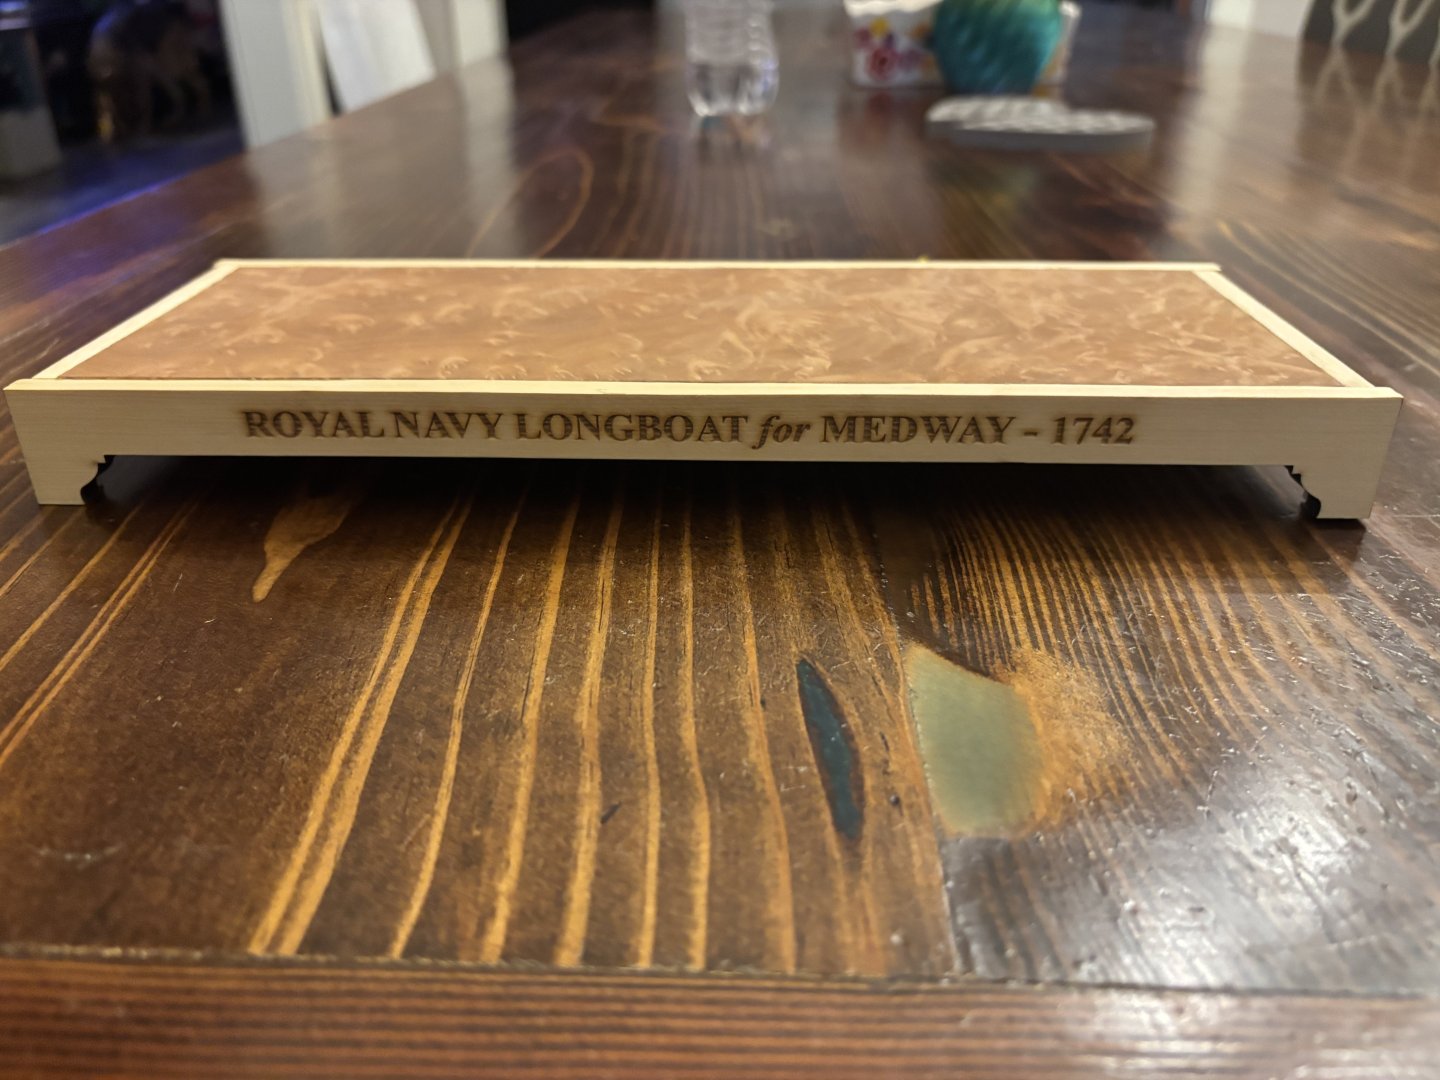
Got some more work done on the display base. All that is needed to do is to get the ends trimmed flush, sand it all smooth and apply some wipe on poly. I also got the bolts installed on the keel and glued the transom in place. Now it is time to start focusing on the frames.


-
Thanks for the tip, Ronald. I definitely go and check out those logs to see if I can get it all sorted out. Might even grab some balsa from the local Hobby Lobby and remove some planks and access the area to get the planks to run better.
-
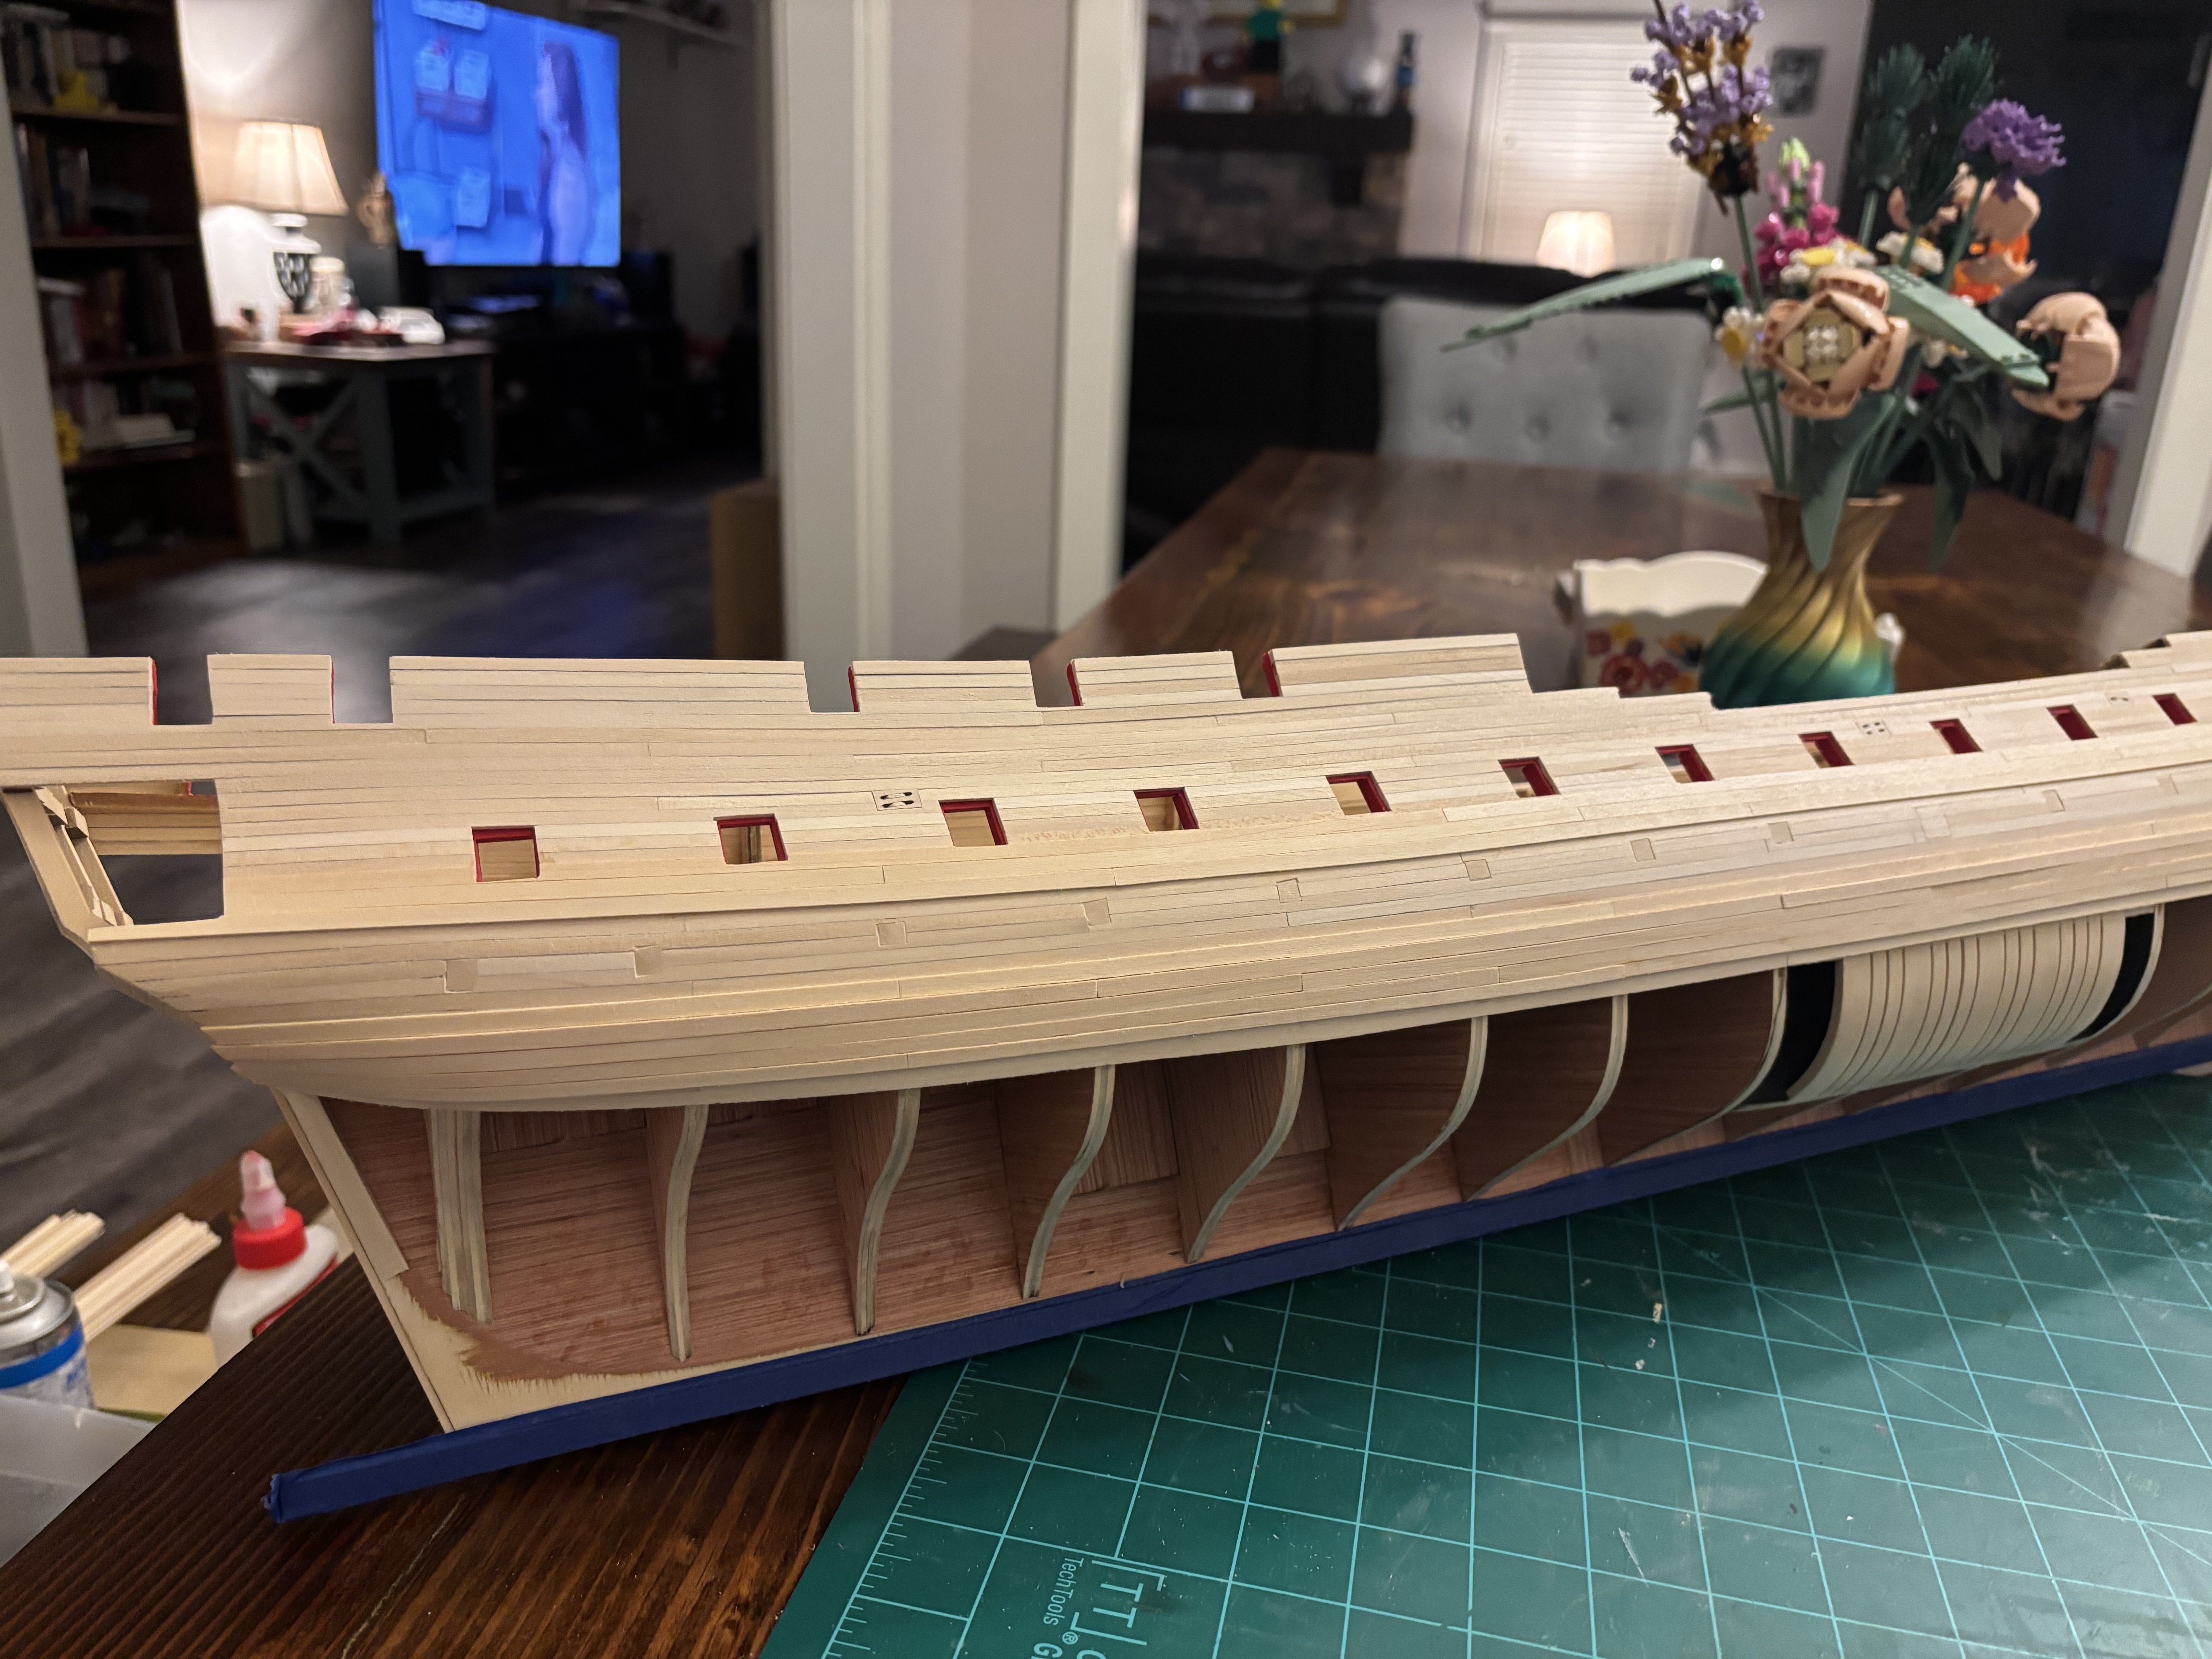
It has been a hectic year since my last post, or since any work has been accomplished on Confederacy for that matter. Life got in the way. Anyways, I was finally able to the first layer of the wales installed. Not the best looking planking job, but it will is going to be covered up by a second run. I think I will be painting the hull instead of staining it. That will help to hide some of my imperfections. I also plan to use some wood filler at the bow to help smooth out the planks there before adding the second run of the wales. The mid and aft section on each side came out pretty good and should only require some sanding to smooth things out. At the stern is where I am really unsure as to how to proceed. I am having a really hard time trying to figure out how to get the planks to bend enough so that they will tuck into the stern planks. I may just do the best I can and then add a trim piece to cover up any gaps. Not 100% on that yet, time will tell.


-
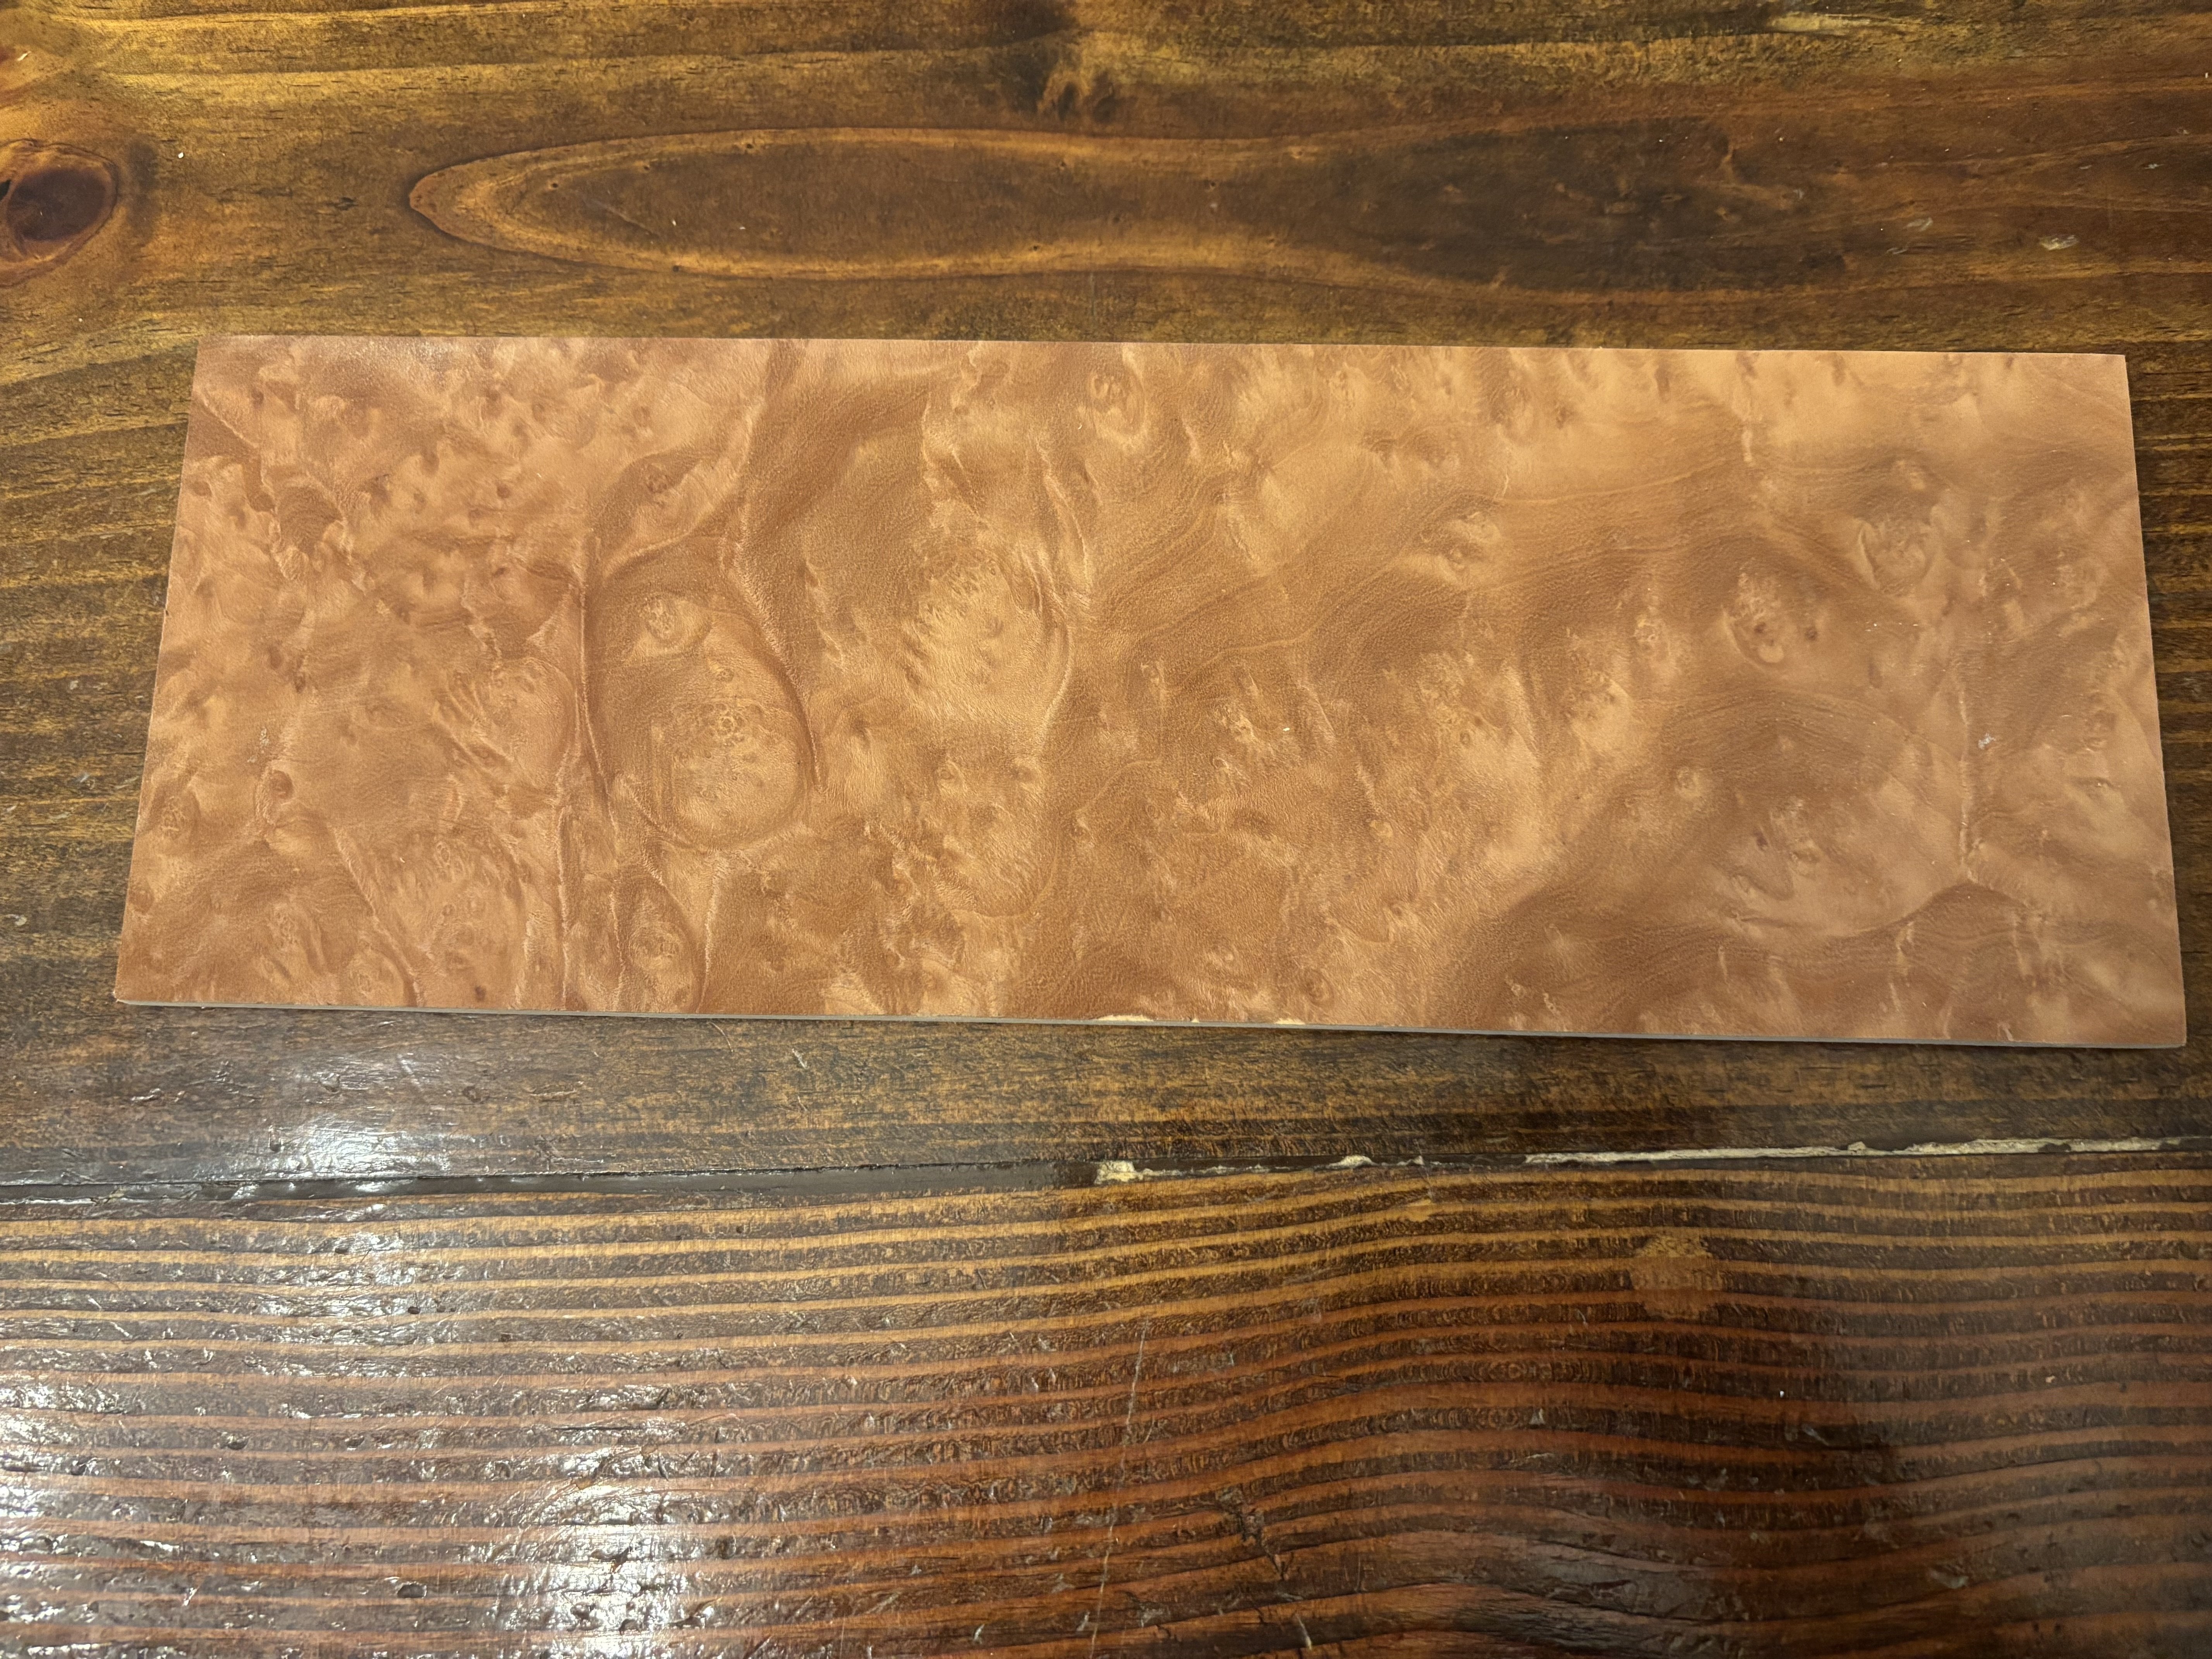
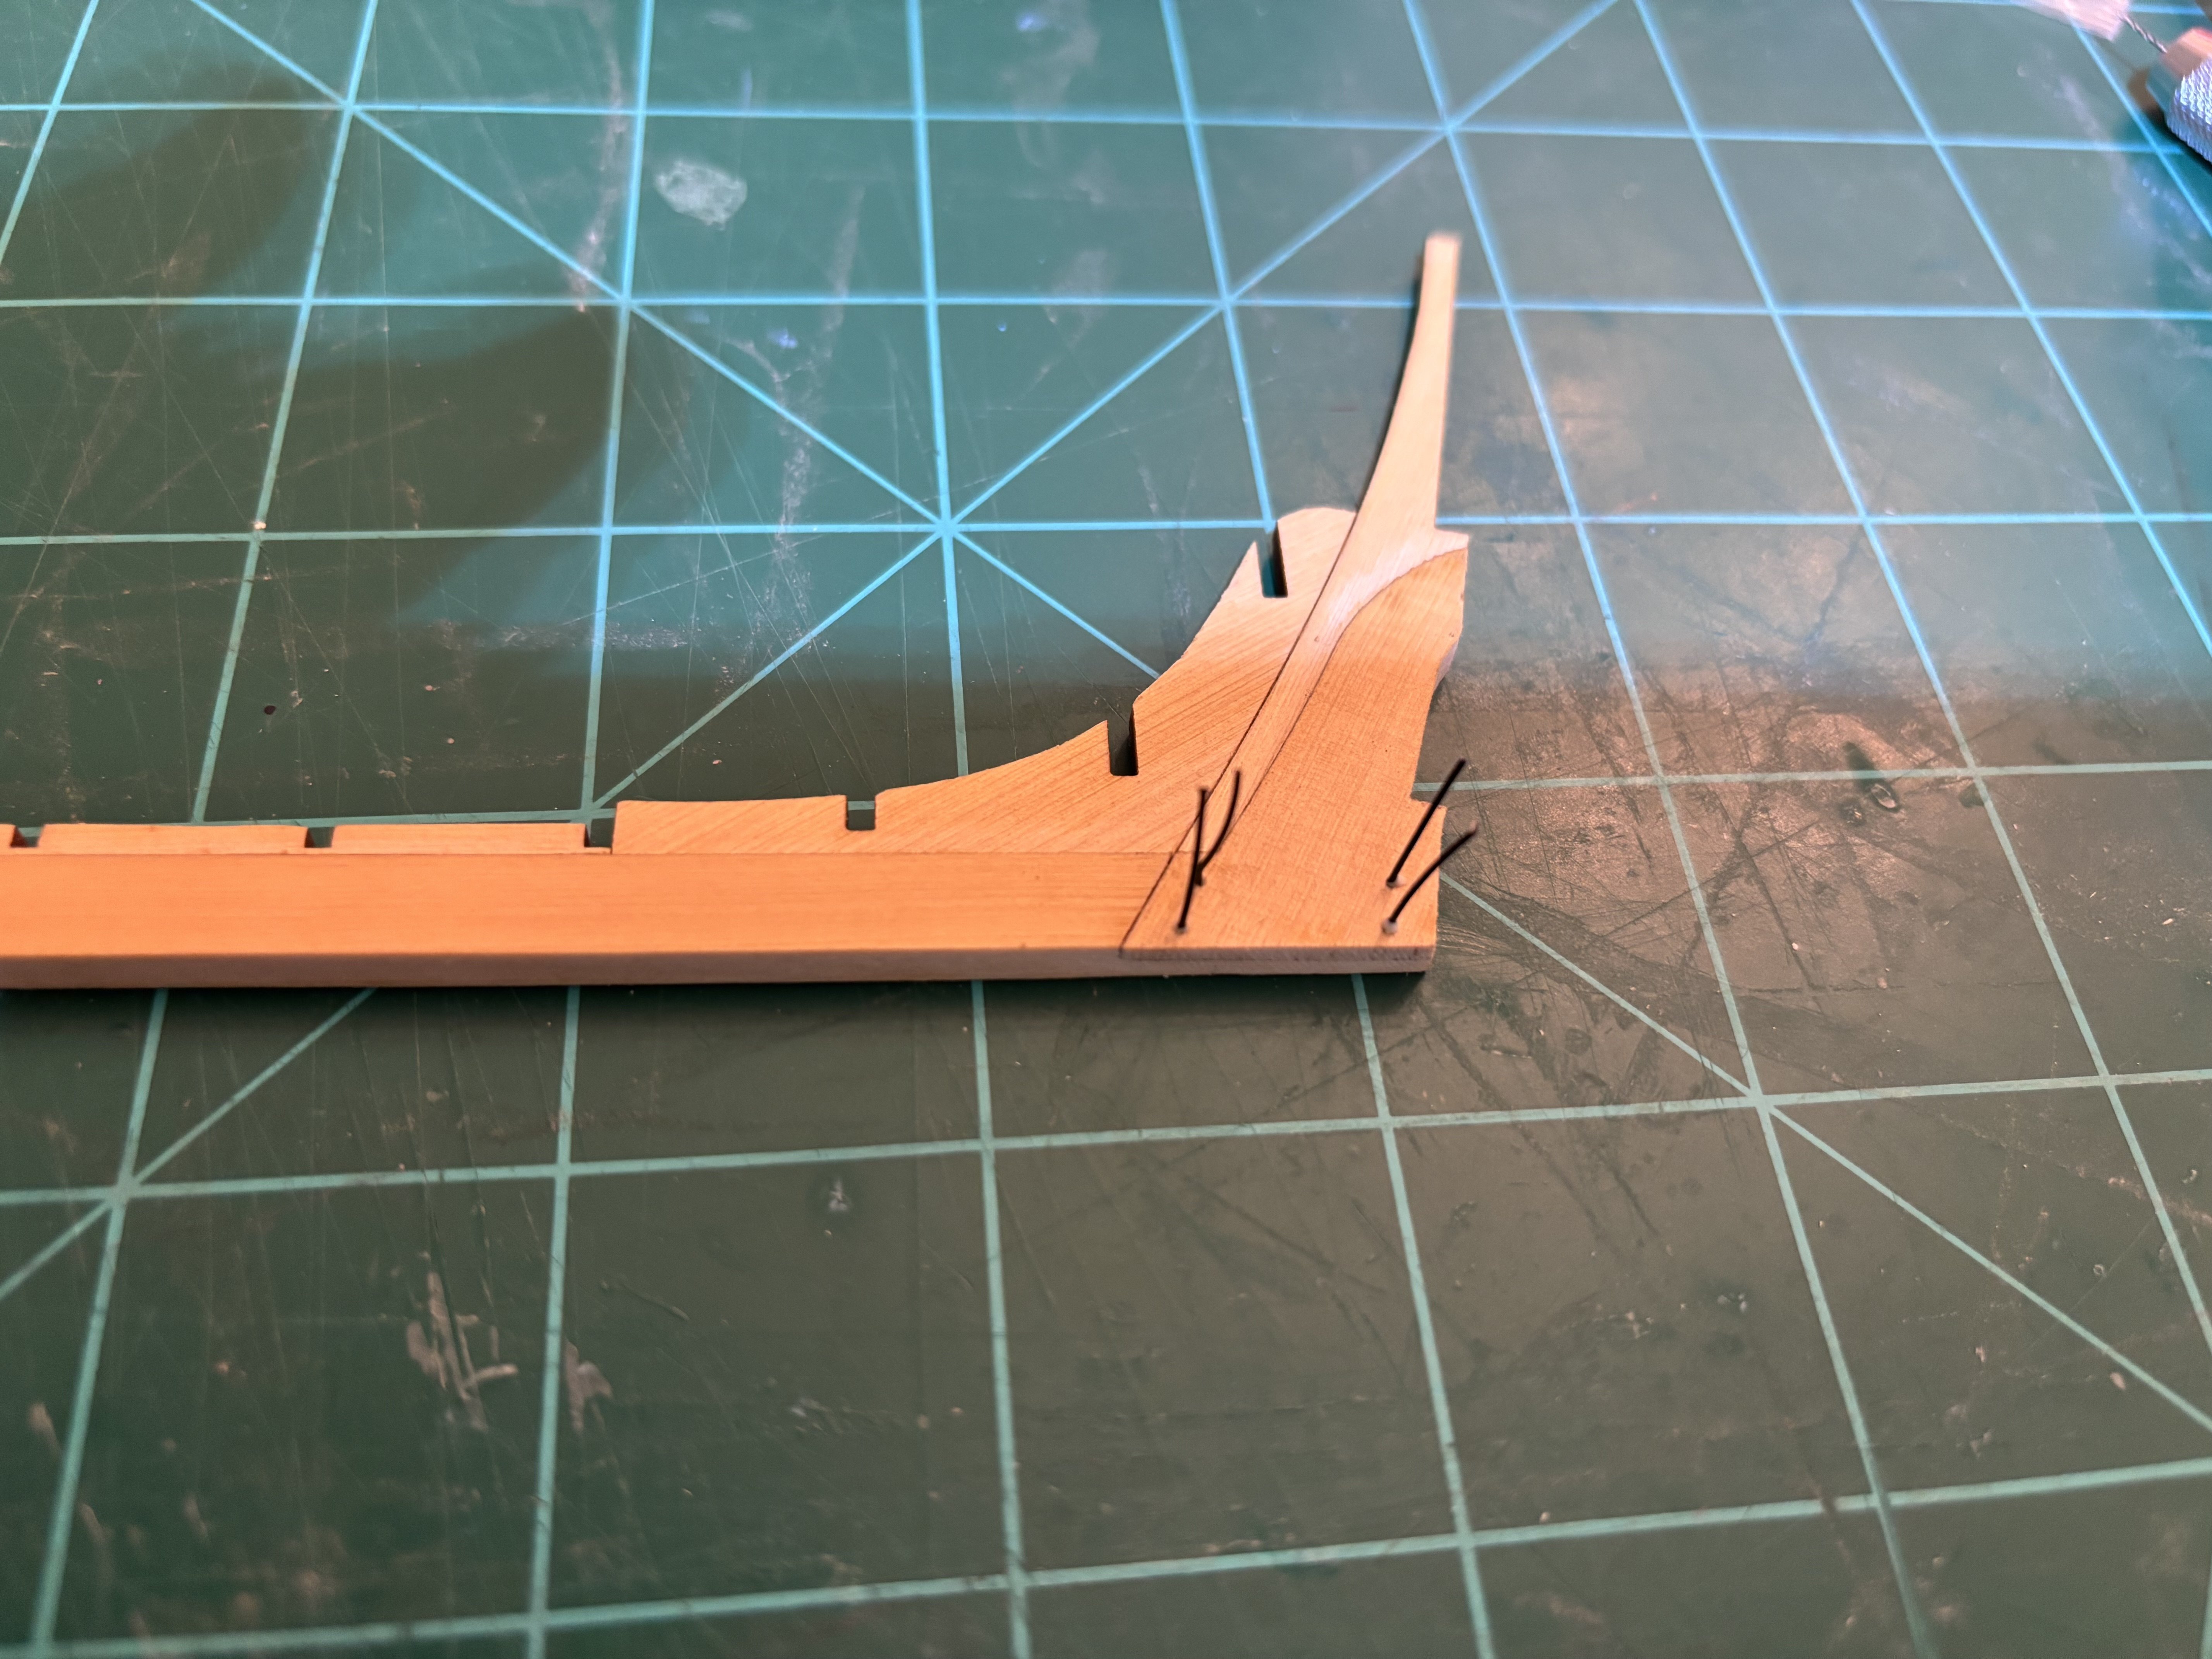
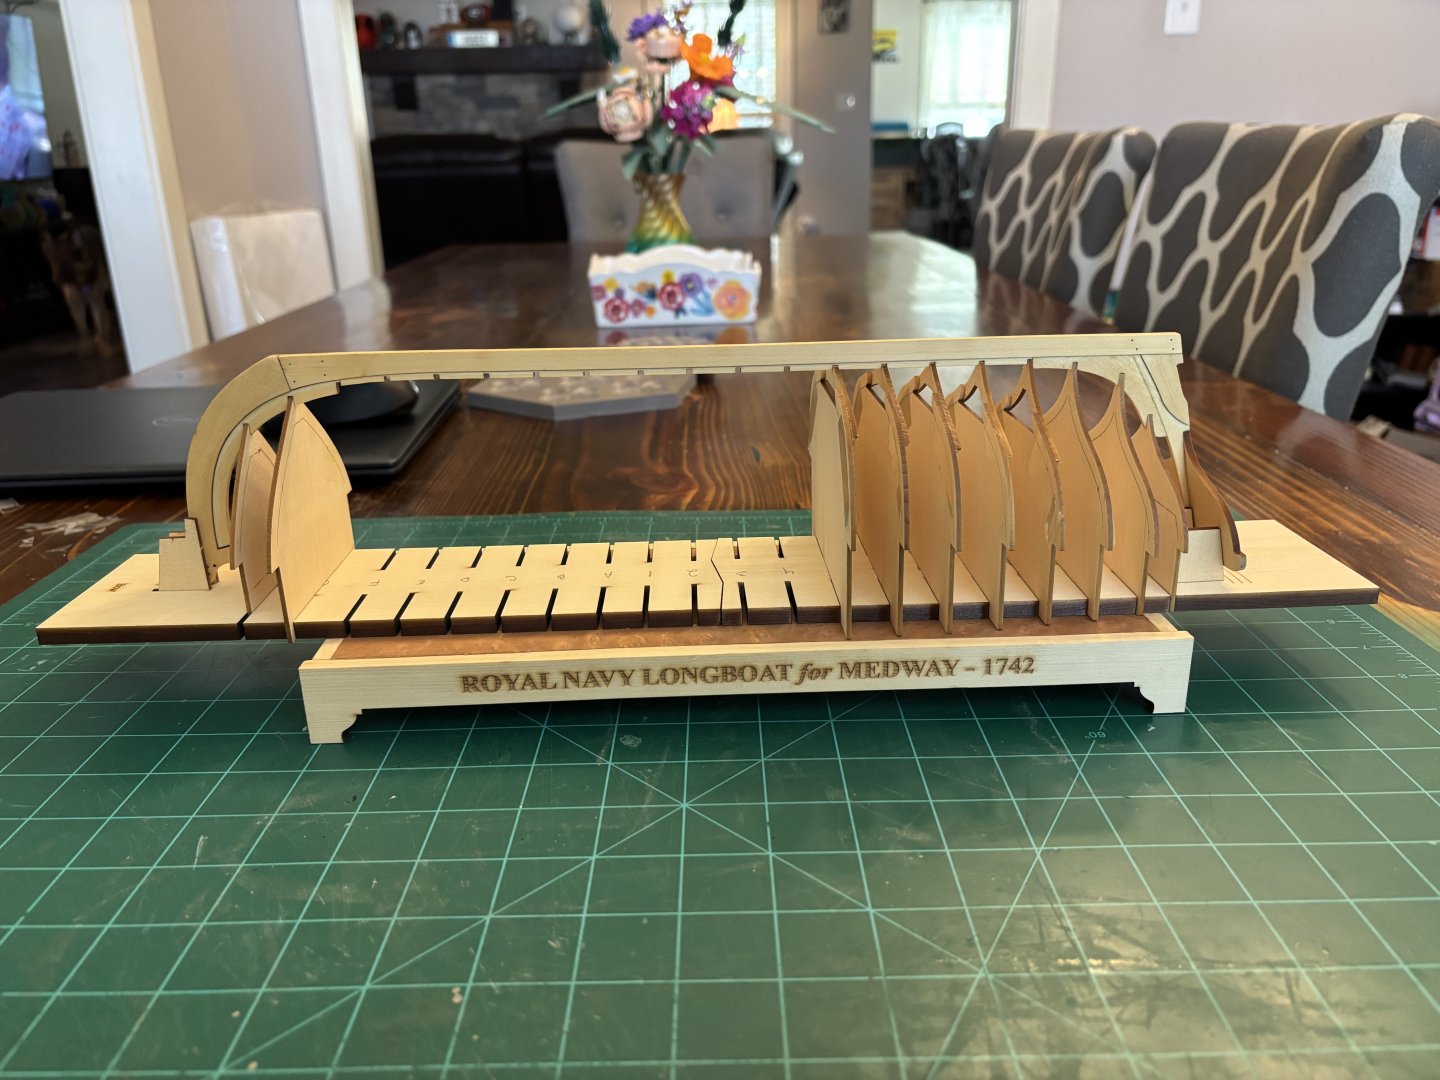
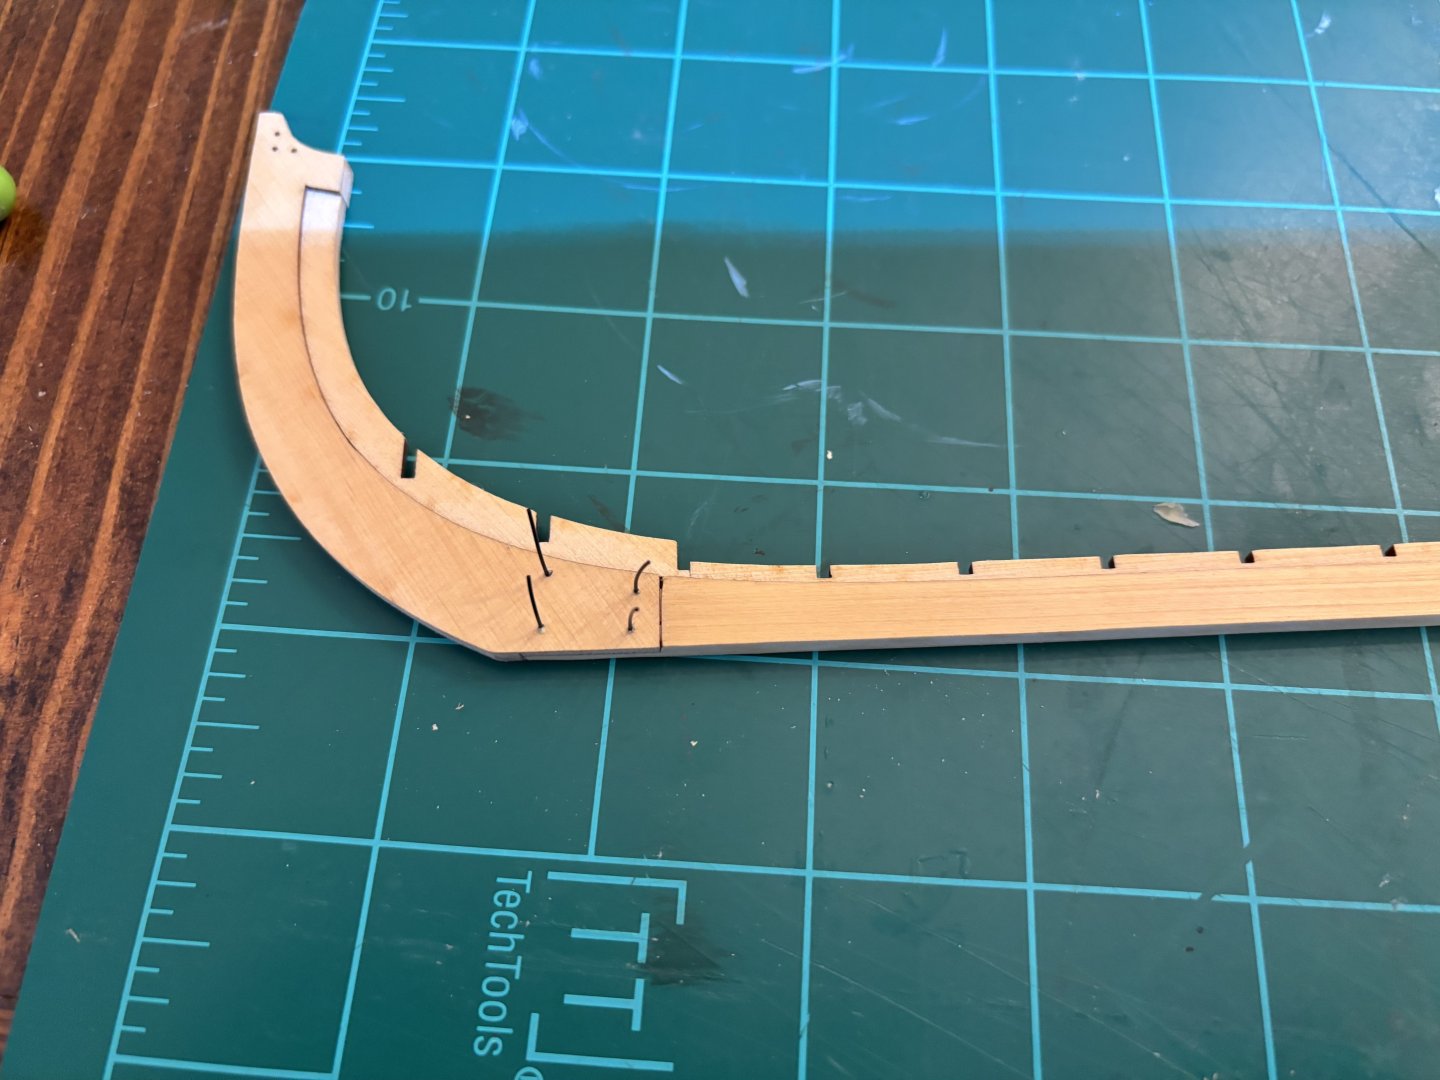
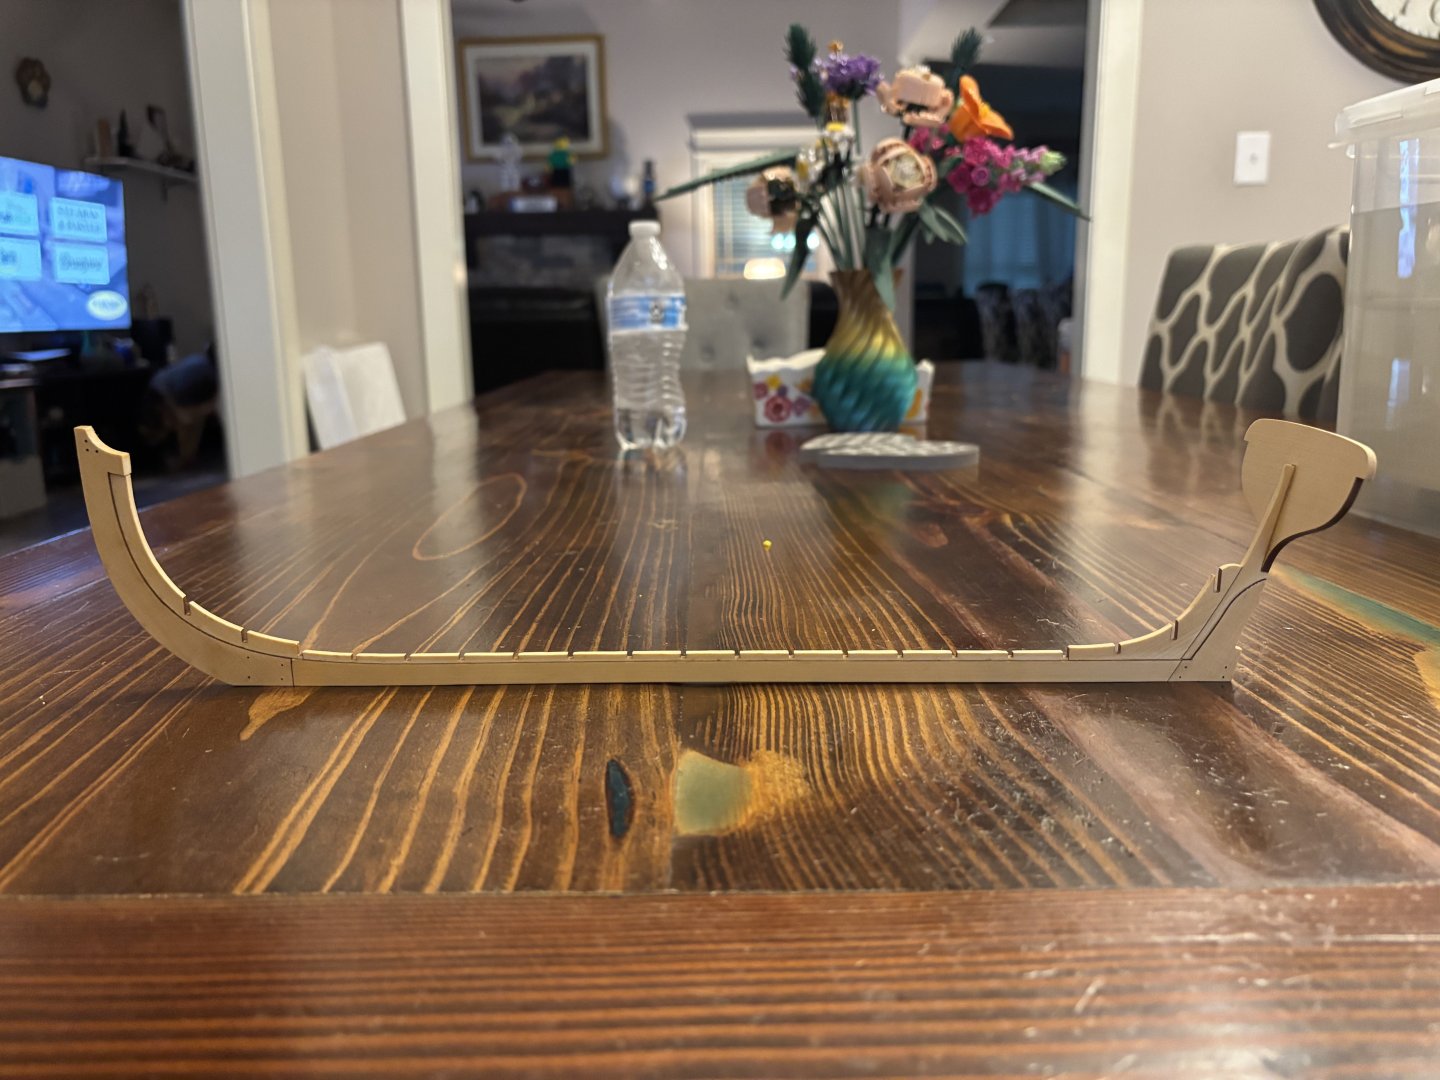
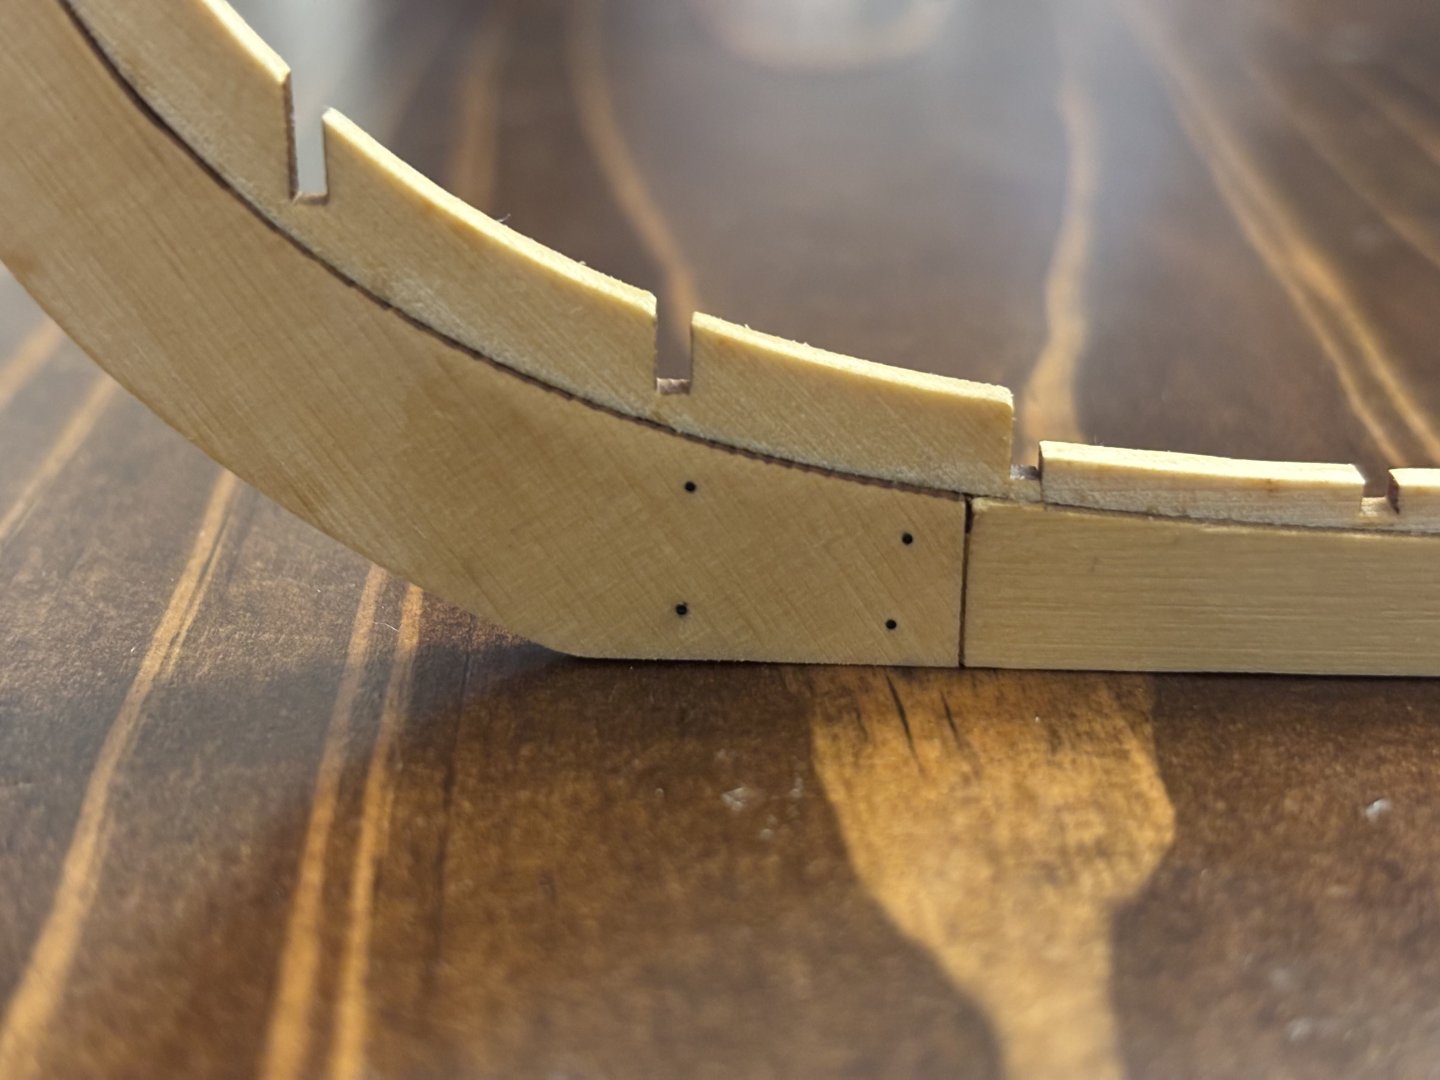
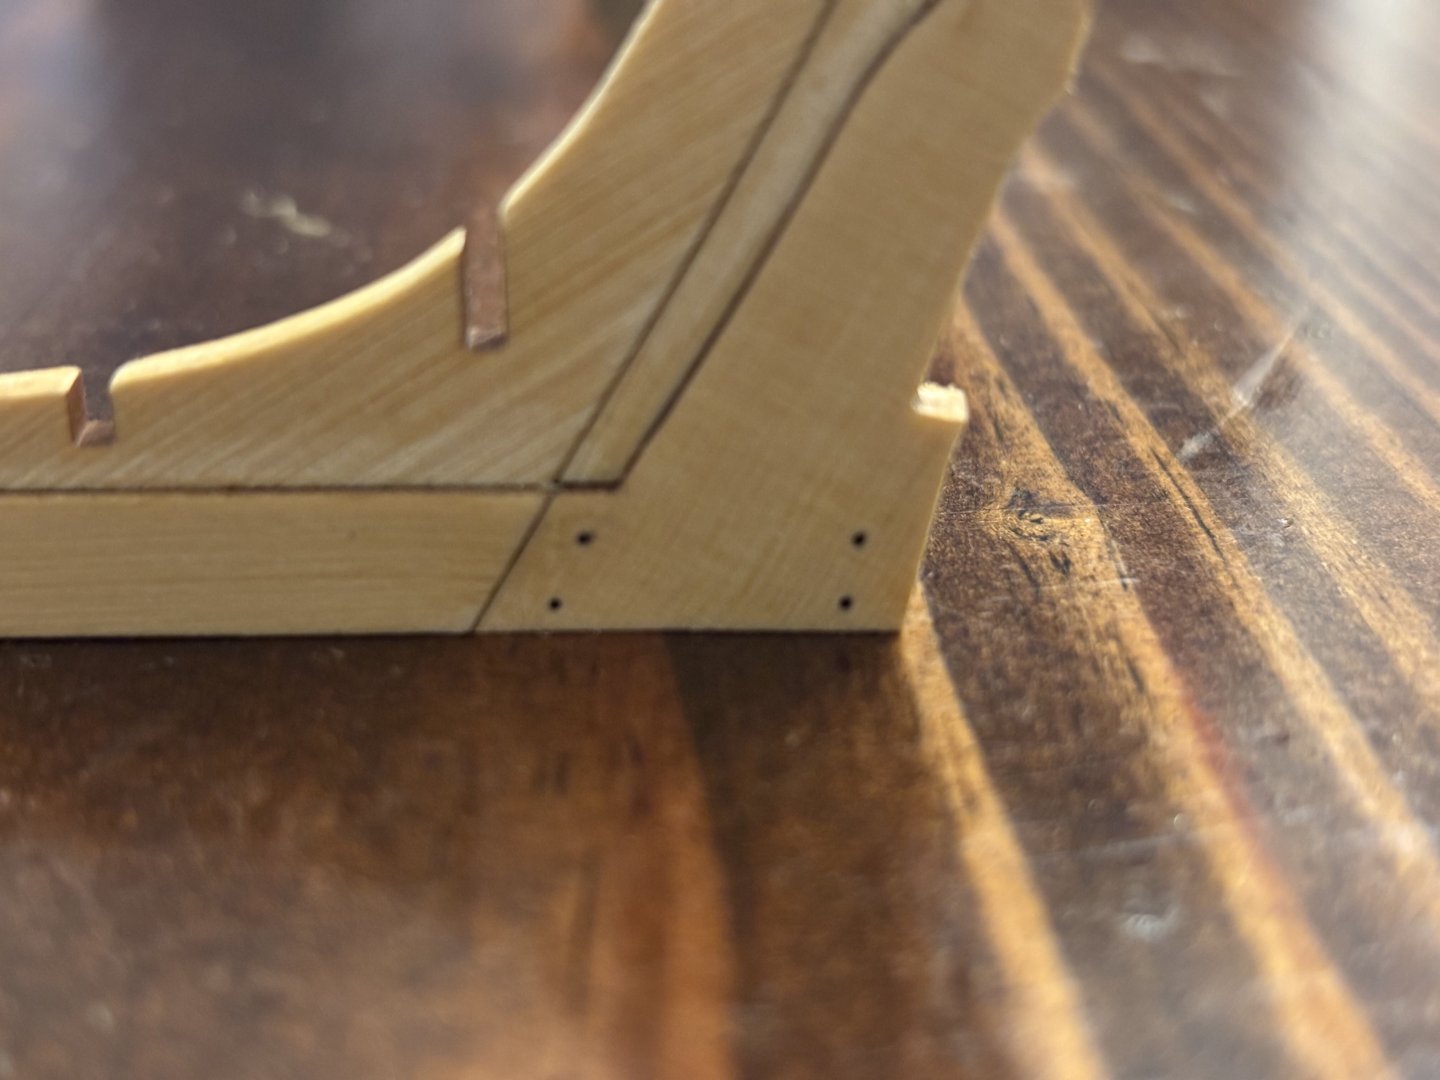
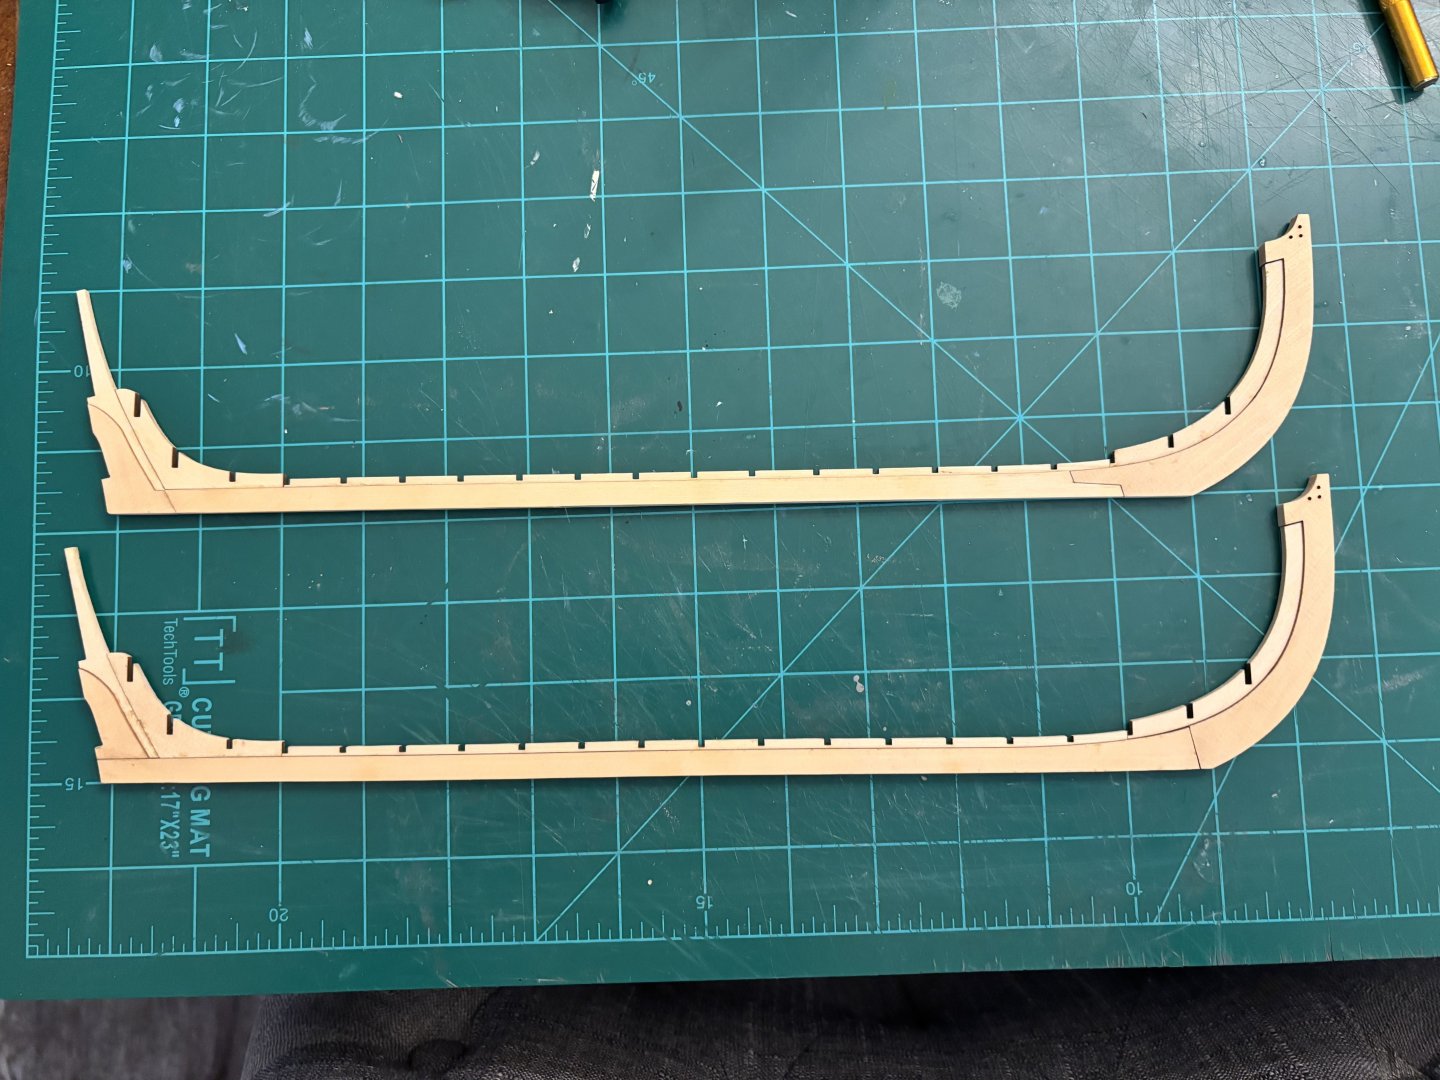
I have had this kit stashed in my closet for over a year and figured it was about time I got started on it. I only have the boat and the custom display base mini-kit. I was unable to procure the mast and rigging package. I may still try to build it with the mast and have it rigged out if I can find some info on how it is rigged. I have already built the Model Shipways longboat kit. I started out by glueing the veneers onto the 1/4” cherry piece for the base (I’ll post a pic of that on my next update). Then I built up both versions of the keel. I have still yet to decide which version I will use, but I leaning on using the more accurate version (the one that Chuck had you carve the joints). I’m going to put some wipe on poly on them both and then make my decision tomorrow.
-
Chuck, thanks for the update on that. If it doesn’t sell before I finish up my current project, I will probably continue the build. It is a fantastic model and I would love to build. Time is my biggest enemy though.