HOLIDAY DONATION DRIVE - SUPPORT MSW - DO YOUR PART TO KEEP THIS GREAT FORUM GOING! (Only 13 donations so far - C'mon guys!)
×


KennyH78
-
Posts
269 -
Joined
-
Last visited
Content Type
Profiles
Forums
Gallery
Events
Everything posted by KennyH78
-
 Chuck, I for one cannot blame you for raising your prices and I will continue to buy your products even if you raised your prices by 25%. You have the best looking ropes and blocks on the market.
 -
Kevin, I have agree with 100%. I own 2 FDM printers (both from Elegoo) and 1 resin printer (Anycubic Photon Mono 4 the I received for X-mas last year). There is a learning curve on these machines as well as the periodic recalibration of the print beds and other settings. But on the flip side, 3d printing can become an addictive hobby on its own, and they can be invaluable tools for model ship making.
-
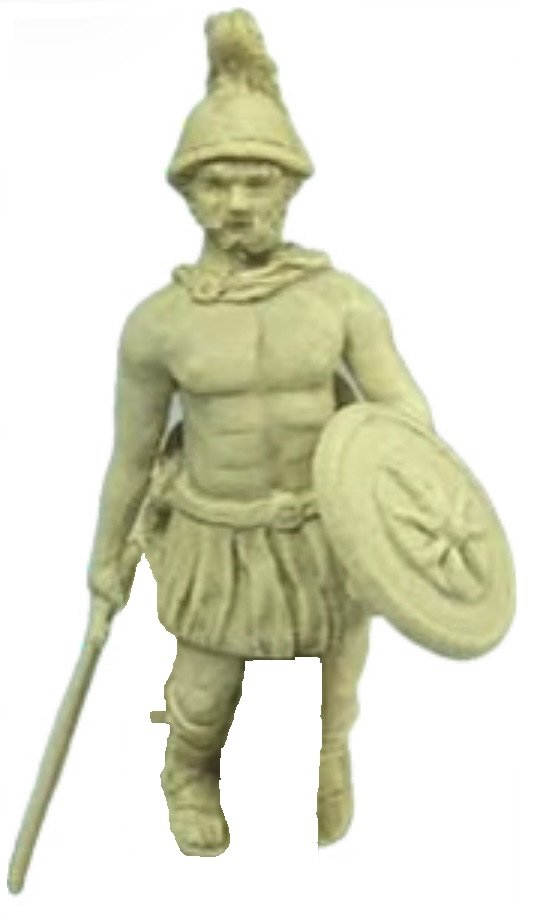
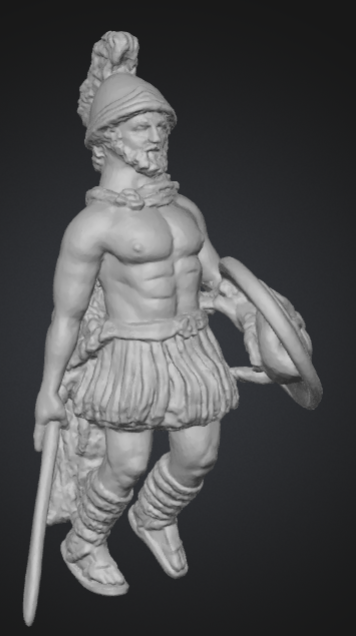
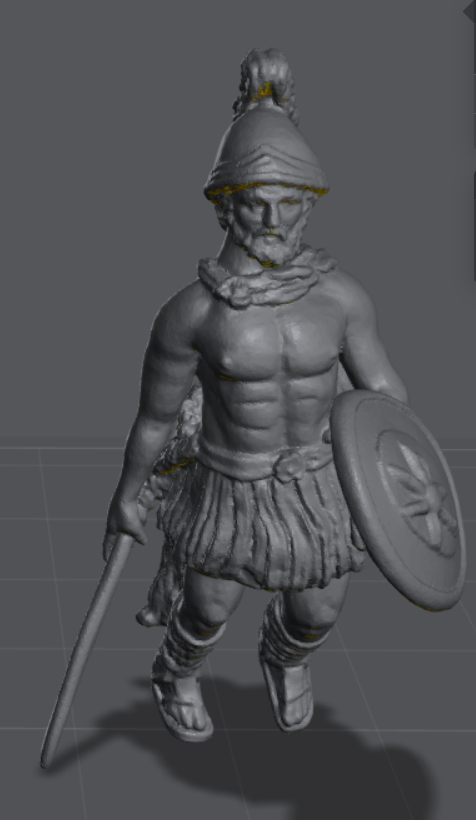
Switched gears and decided to try to tackle the figurehead for Confederacy. I'm pretty happy with how it turned out and will be attempting to print it soon. First I need to find some resin that is tan/wood colored. All I have at the moment is gray and black. I ended up using the picture of the figurehead from Chuck's tutorial on how to sculpt one using polymer clay (first pic). The second pic is what meshy 6 had generated and the third pic is of the model in LycheeSlicer.
-
Tally Ho by AntonyUK
KennyH78 replied to AntonyUK's topic in - Build logs for subjects built 1901 - Present Day
Anthony, she is coming along very nicely; a miniature Tally Ho.- 34 replies
-
- 2
-

-
- mixed materials construction
- Albert strange design
- (and 1 more)
-
Glen, the picture of the Endurance in the bottle is absolutely a work of art. I don't think that I would want to attempt it either because I would not be able to come anywhere near that level of craftsmanship. The artist/modeler did a fantastic job. Now, your model of the Queens Ann Revenge is equally a masterful work of art. I cannot wait to see what you come up with for the display base. On a side note, as per your recommendation, I did pick up the Amati Hannah kit to attempt a SIB build.
- 156 replies
-
- 7
-
-

-
- Queen Annes Revenge
- bottle
- (and 1 more)
-
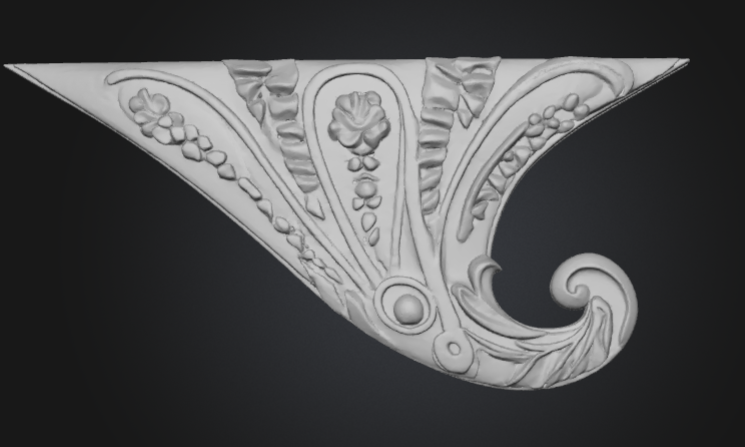
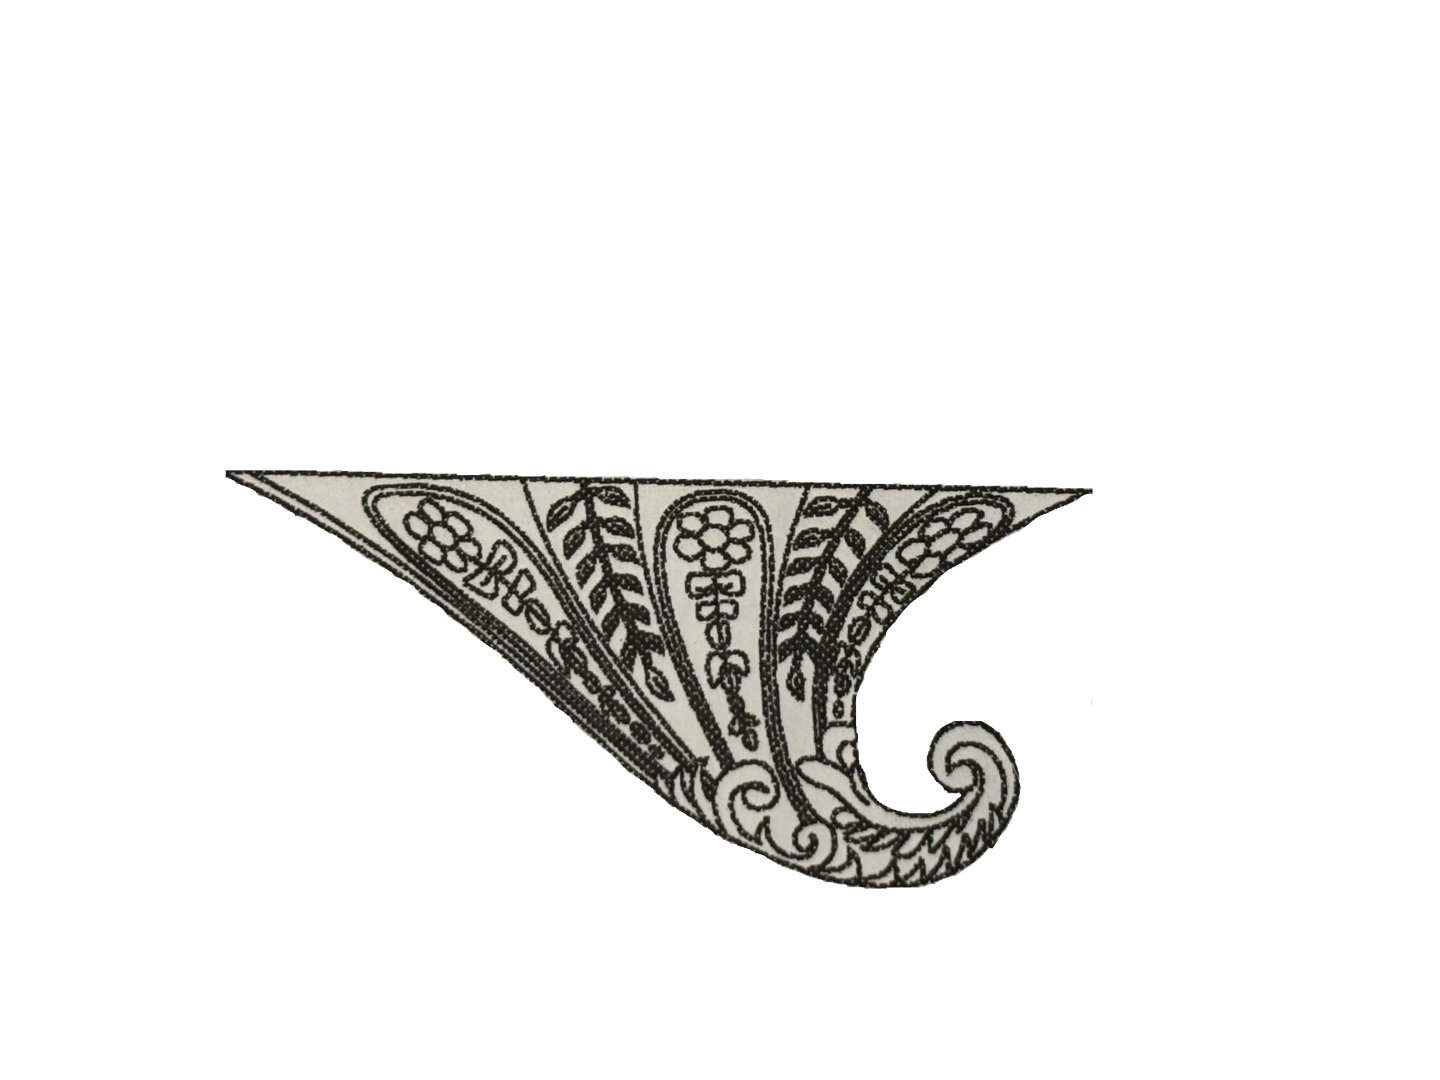
That makes a lot of sense now, guess I will have to try something different for those. I might try using sculpty clay to remake them. I will keep playing with meshy though for the rest of the stern carvings; maybe even the figure head.
-
Here is my first attempt at using meshy. I decided to start with the sash pieces that will go under the QGs. I took a picture of them from the plans and cleaned it up. Then inputted it into meshy and hit generate and this is what it came up with Not bad, but also not quite like the drawing. I need to figure out how to refine that. I will play with it some more for sure.
-
As Johnny has mentioned above, the movie "In the Heart of the Sea" is a must watch. The book by the same title, which also tells the story of the whaler Essex and the plight of the shipwrecked crew is a great read with more information than the movie. Another subject that may be of interest could be Shackelton's Endurance stuck in the Antarctic ice flows with the crew camped on the ice next to the ship, or maybe the longboat James Caird that Shackelton and 4 others sailed from Elephant Island to South Georgia Island, a journey of 1,300 km across stormy open ocean.
- 156 replies
-
- 2
-
-
- Queen Annes Revenge
- bottle
- (and 1 more)
-
Congrats on finishing the model! As I said before, she looks great and I can only hope to build one that looks half as good as yours.
- 205 replies
-
- 1
-
-
- Endurance
- Shackleton
- (and 2 more)
-
This is very interesting, thanks for posting the tutorial, @Chuck. I am going to see what I can come up with for the carvings on the Confederacy. I really hate the white metal parts and think that resin printed parts will be much better. I have already printed replacement cannon. I think the hardest part will be the figurehead, but I'm willing to give it a try.
-
Tom, she is a very fine model that you have completed. It was a pleasure to follow along with you on your journey. Your log will be a valuable resource for me to use when I finally get around to build this kit.
- 205 replies
-
- 1
-
-
- Endurance
- Shackleton
- (and 2 more)
-
JJ, the stern area with the QGs is progressing nicely. She is looking very lovely. It will be very hard to tell that there are 3d printed parts on this model when it is all said and done.
-
Wow, I can now let out a breath of relief for you! She looks great in the bottle. I just showed the admiral the last picture of her in the bottle and she asked “ How’d he get that in there?” Honestly, I’m still trying to figure that out myself, even after your detailed explanation.
- 156 replies
-
- 4
-
-
-
- Queen Annes Revenge
- bottle
- (and 1 more)
-
vaddoc, I find your explanations fascinating; but I must admit that I am somewhat of a nerd when it comes to computers and programs such as CAD. Your model of Tally Ho is going to be splendid. Maybe someday I will have the skill to draw her out in CAD and build her as well, time will tell. In the meantime, I will follow your design and build with great interest.
-
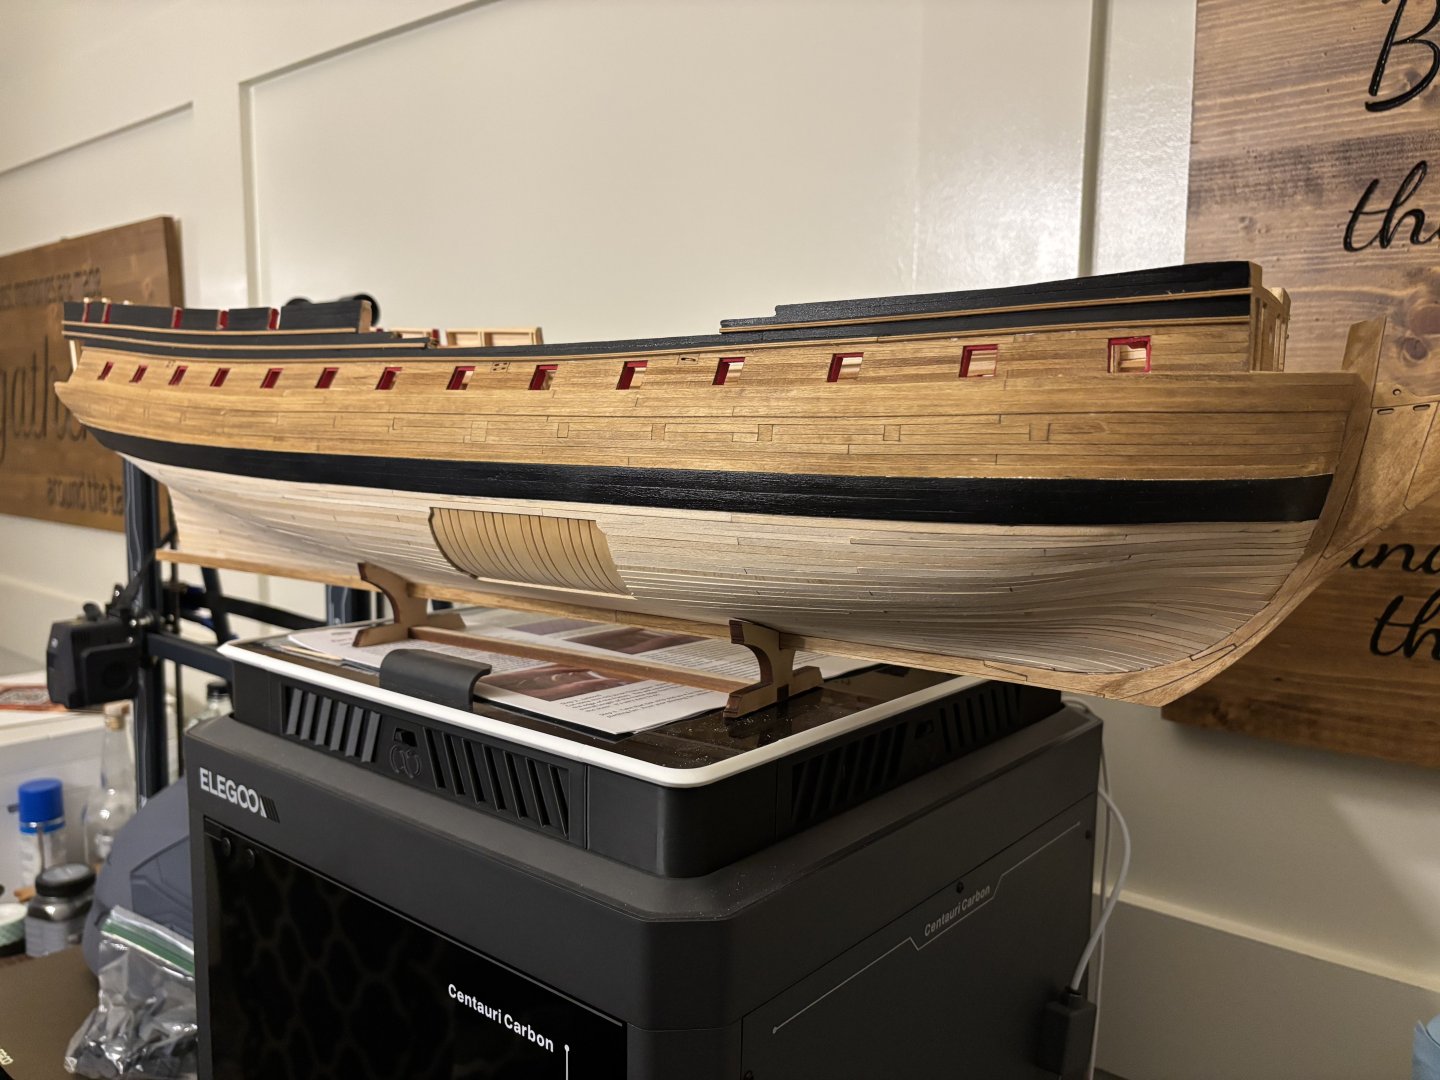
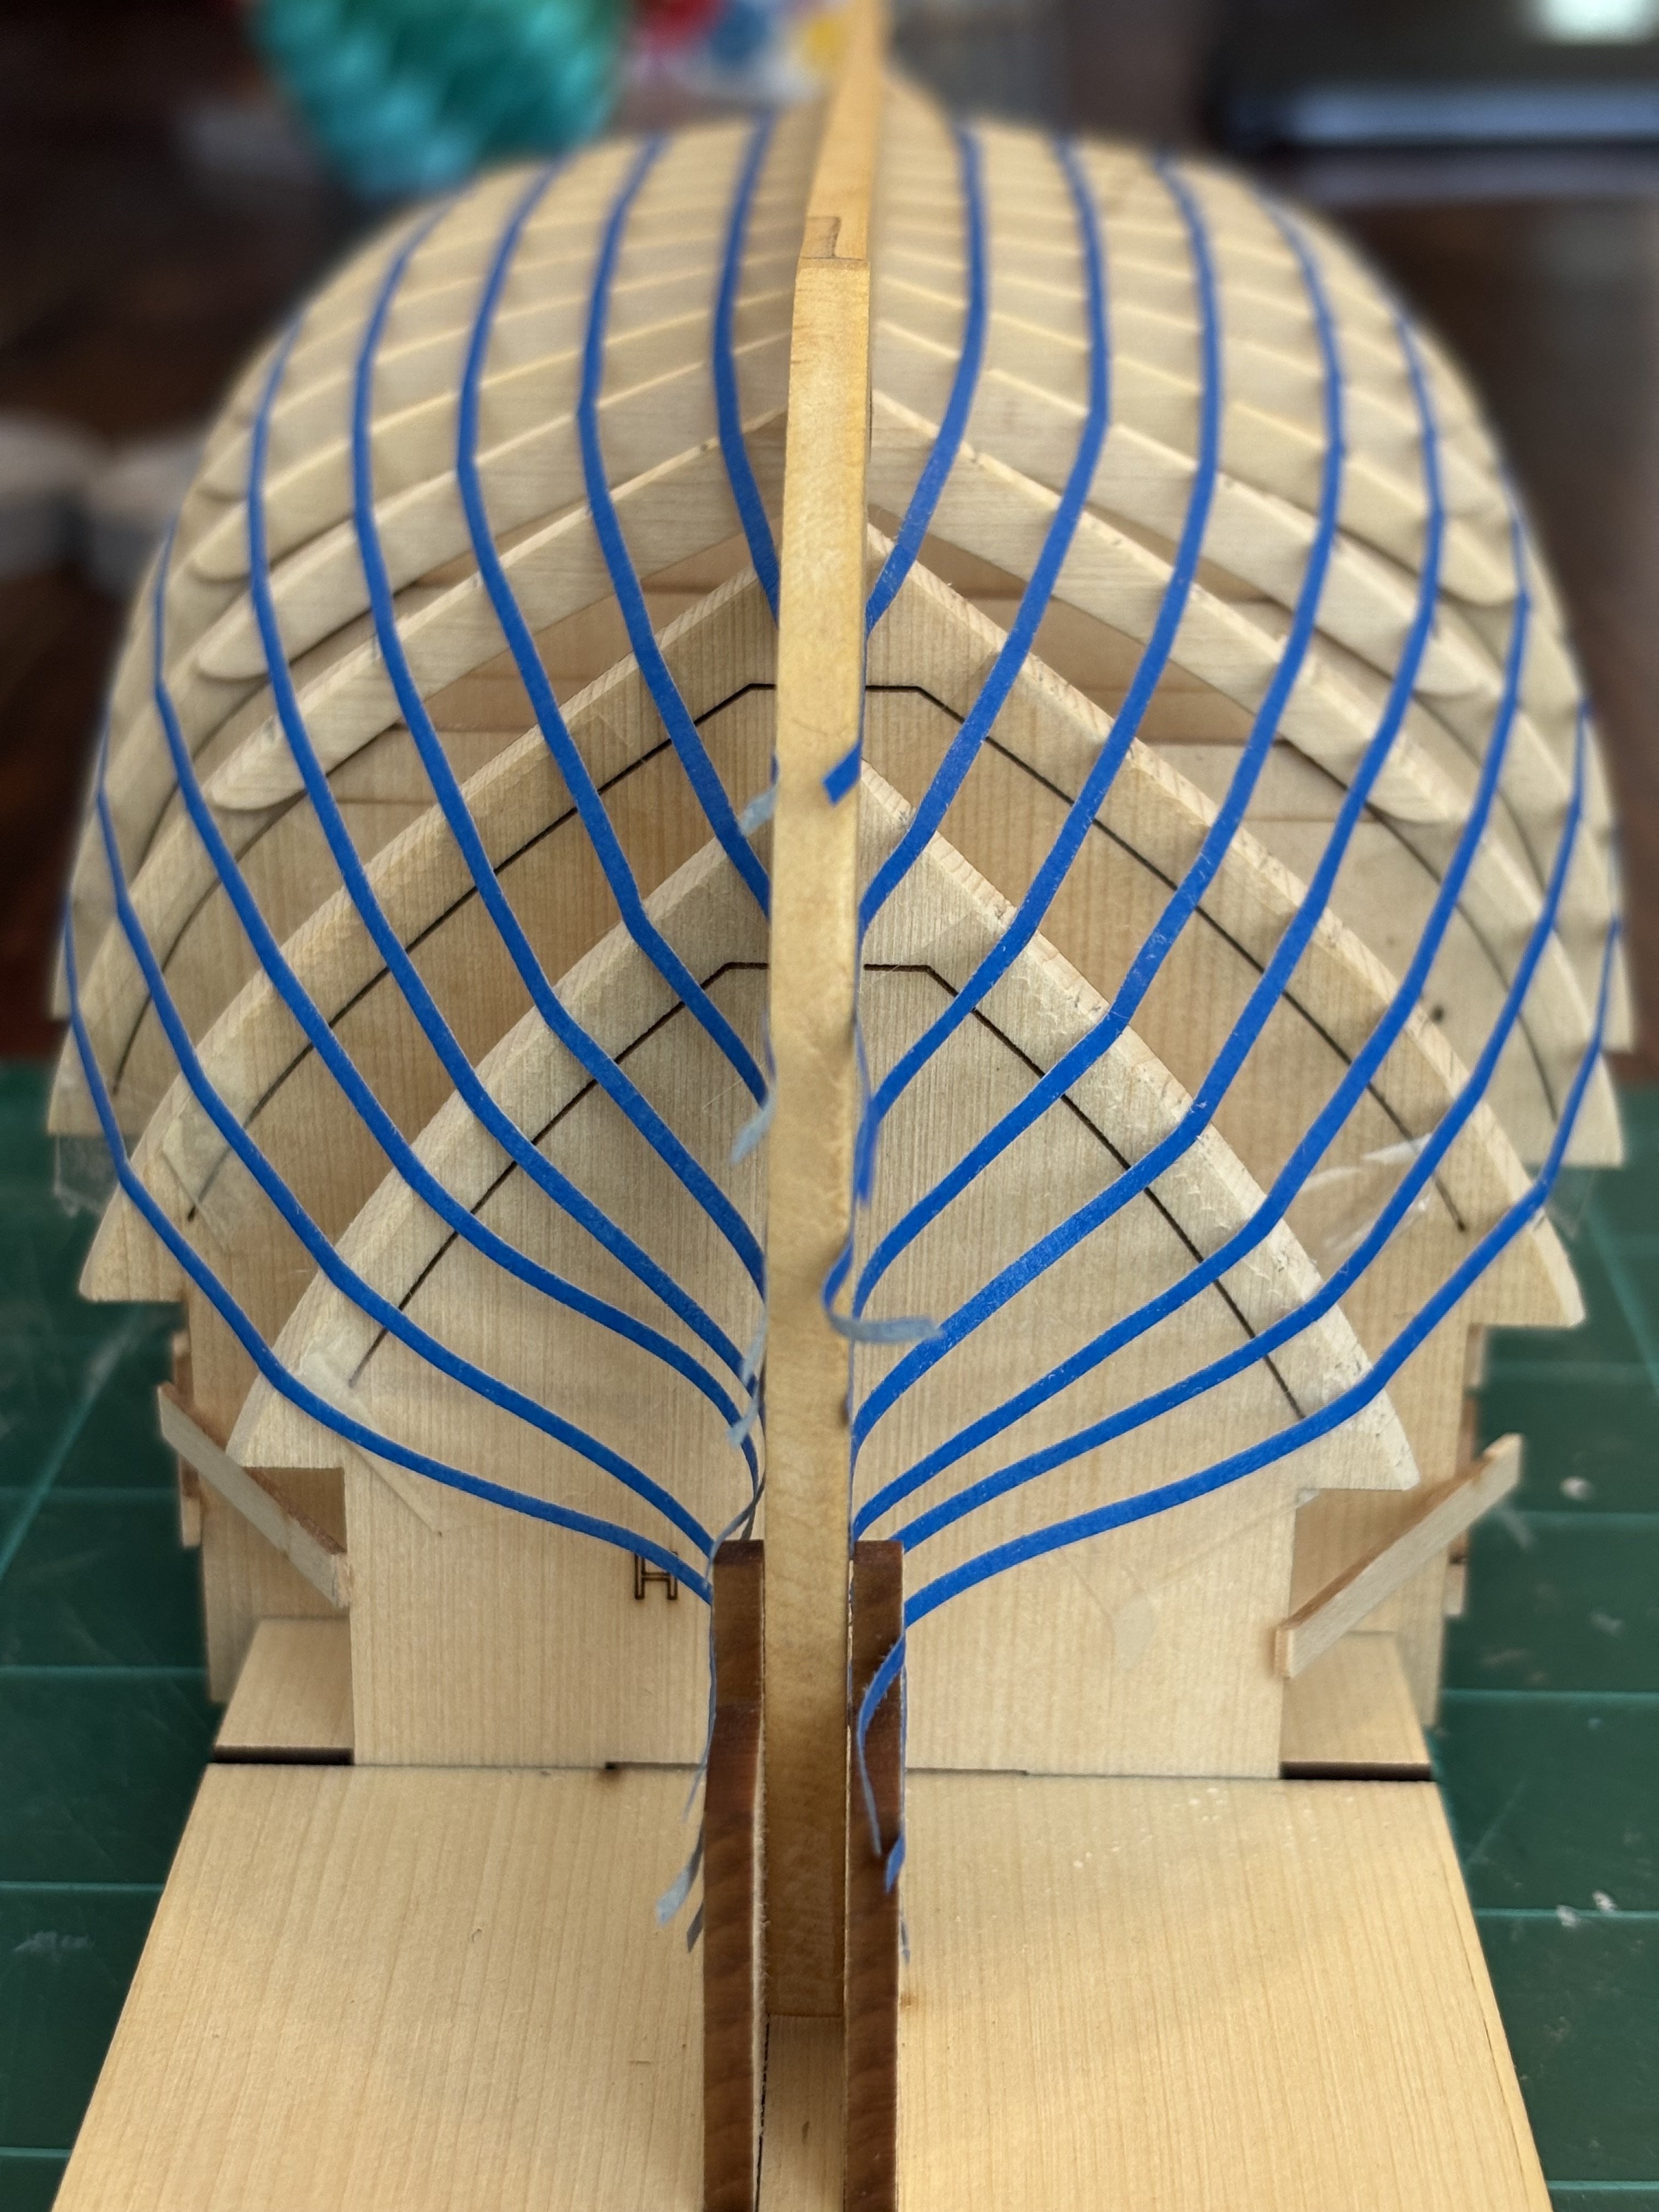
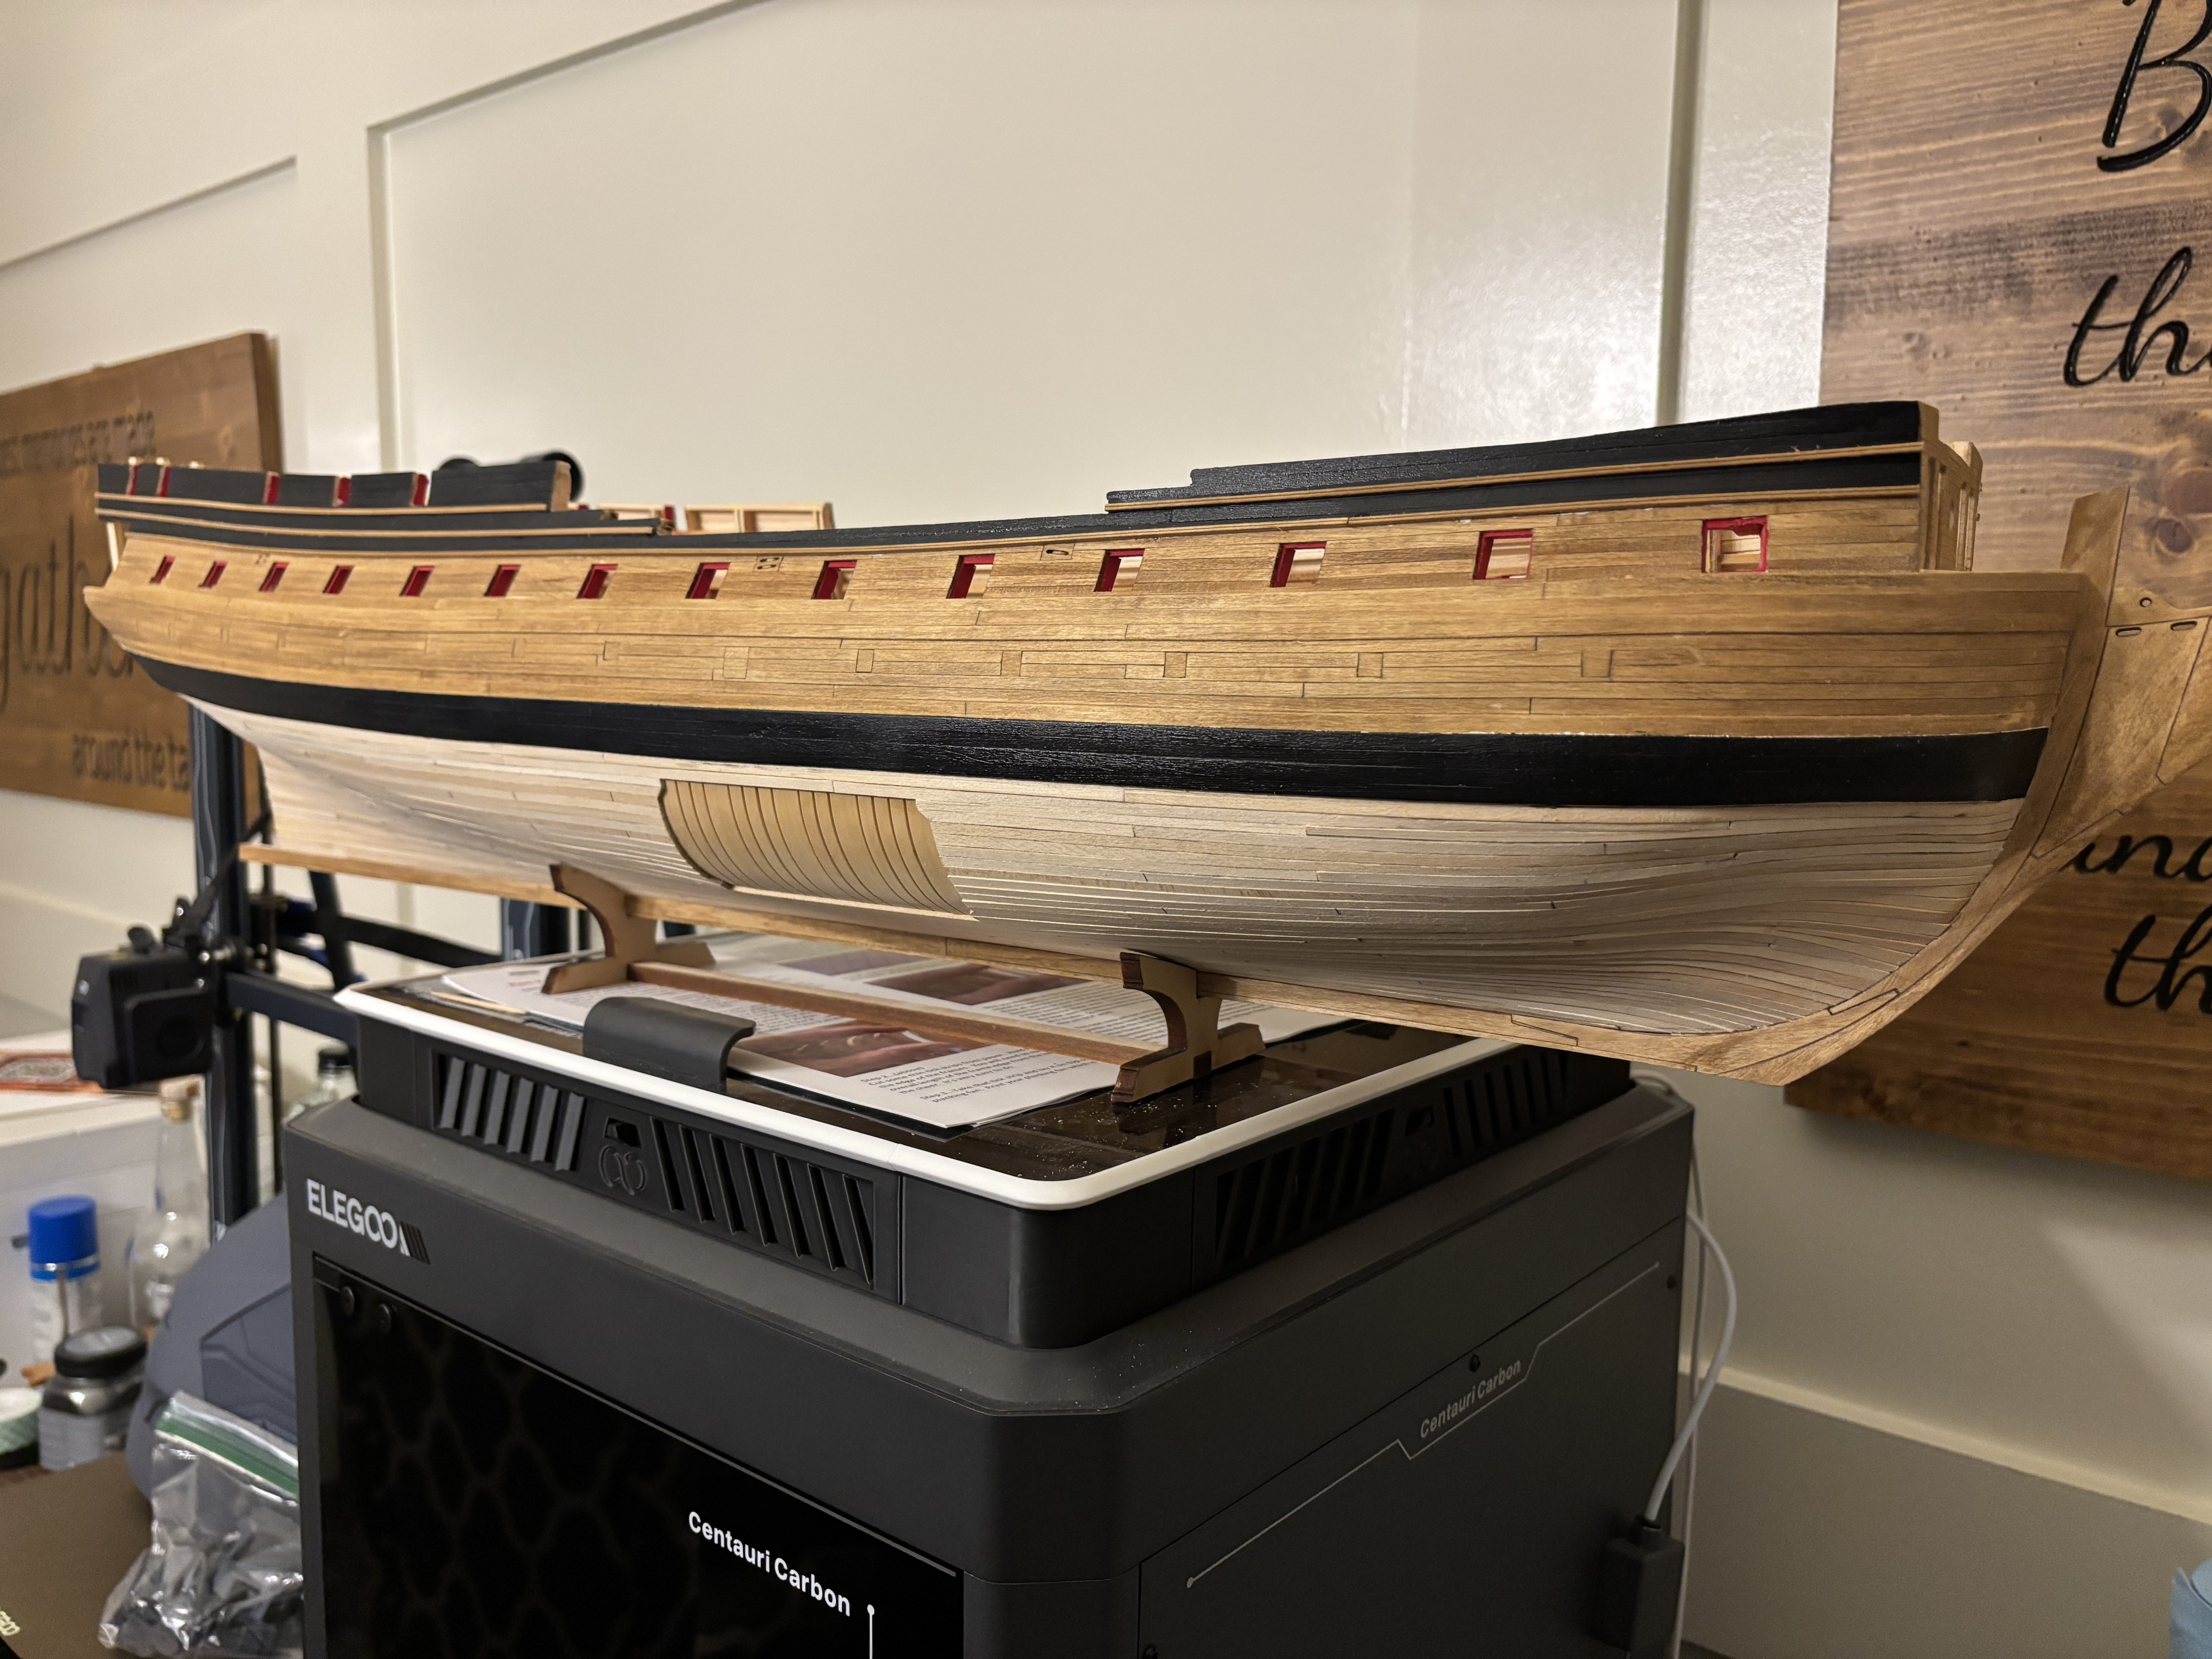
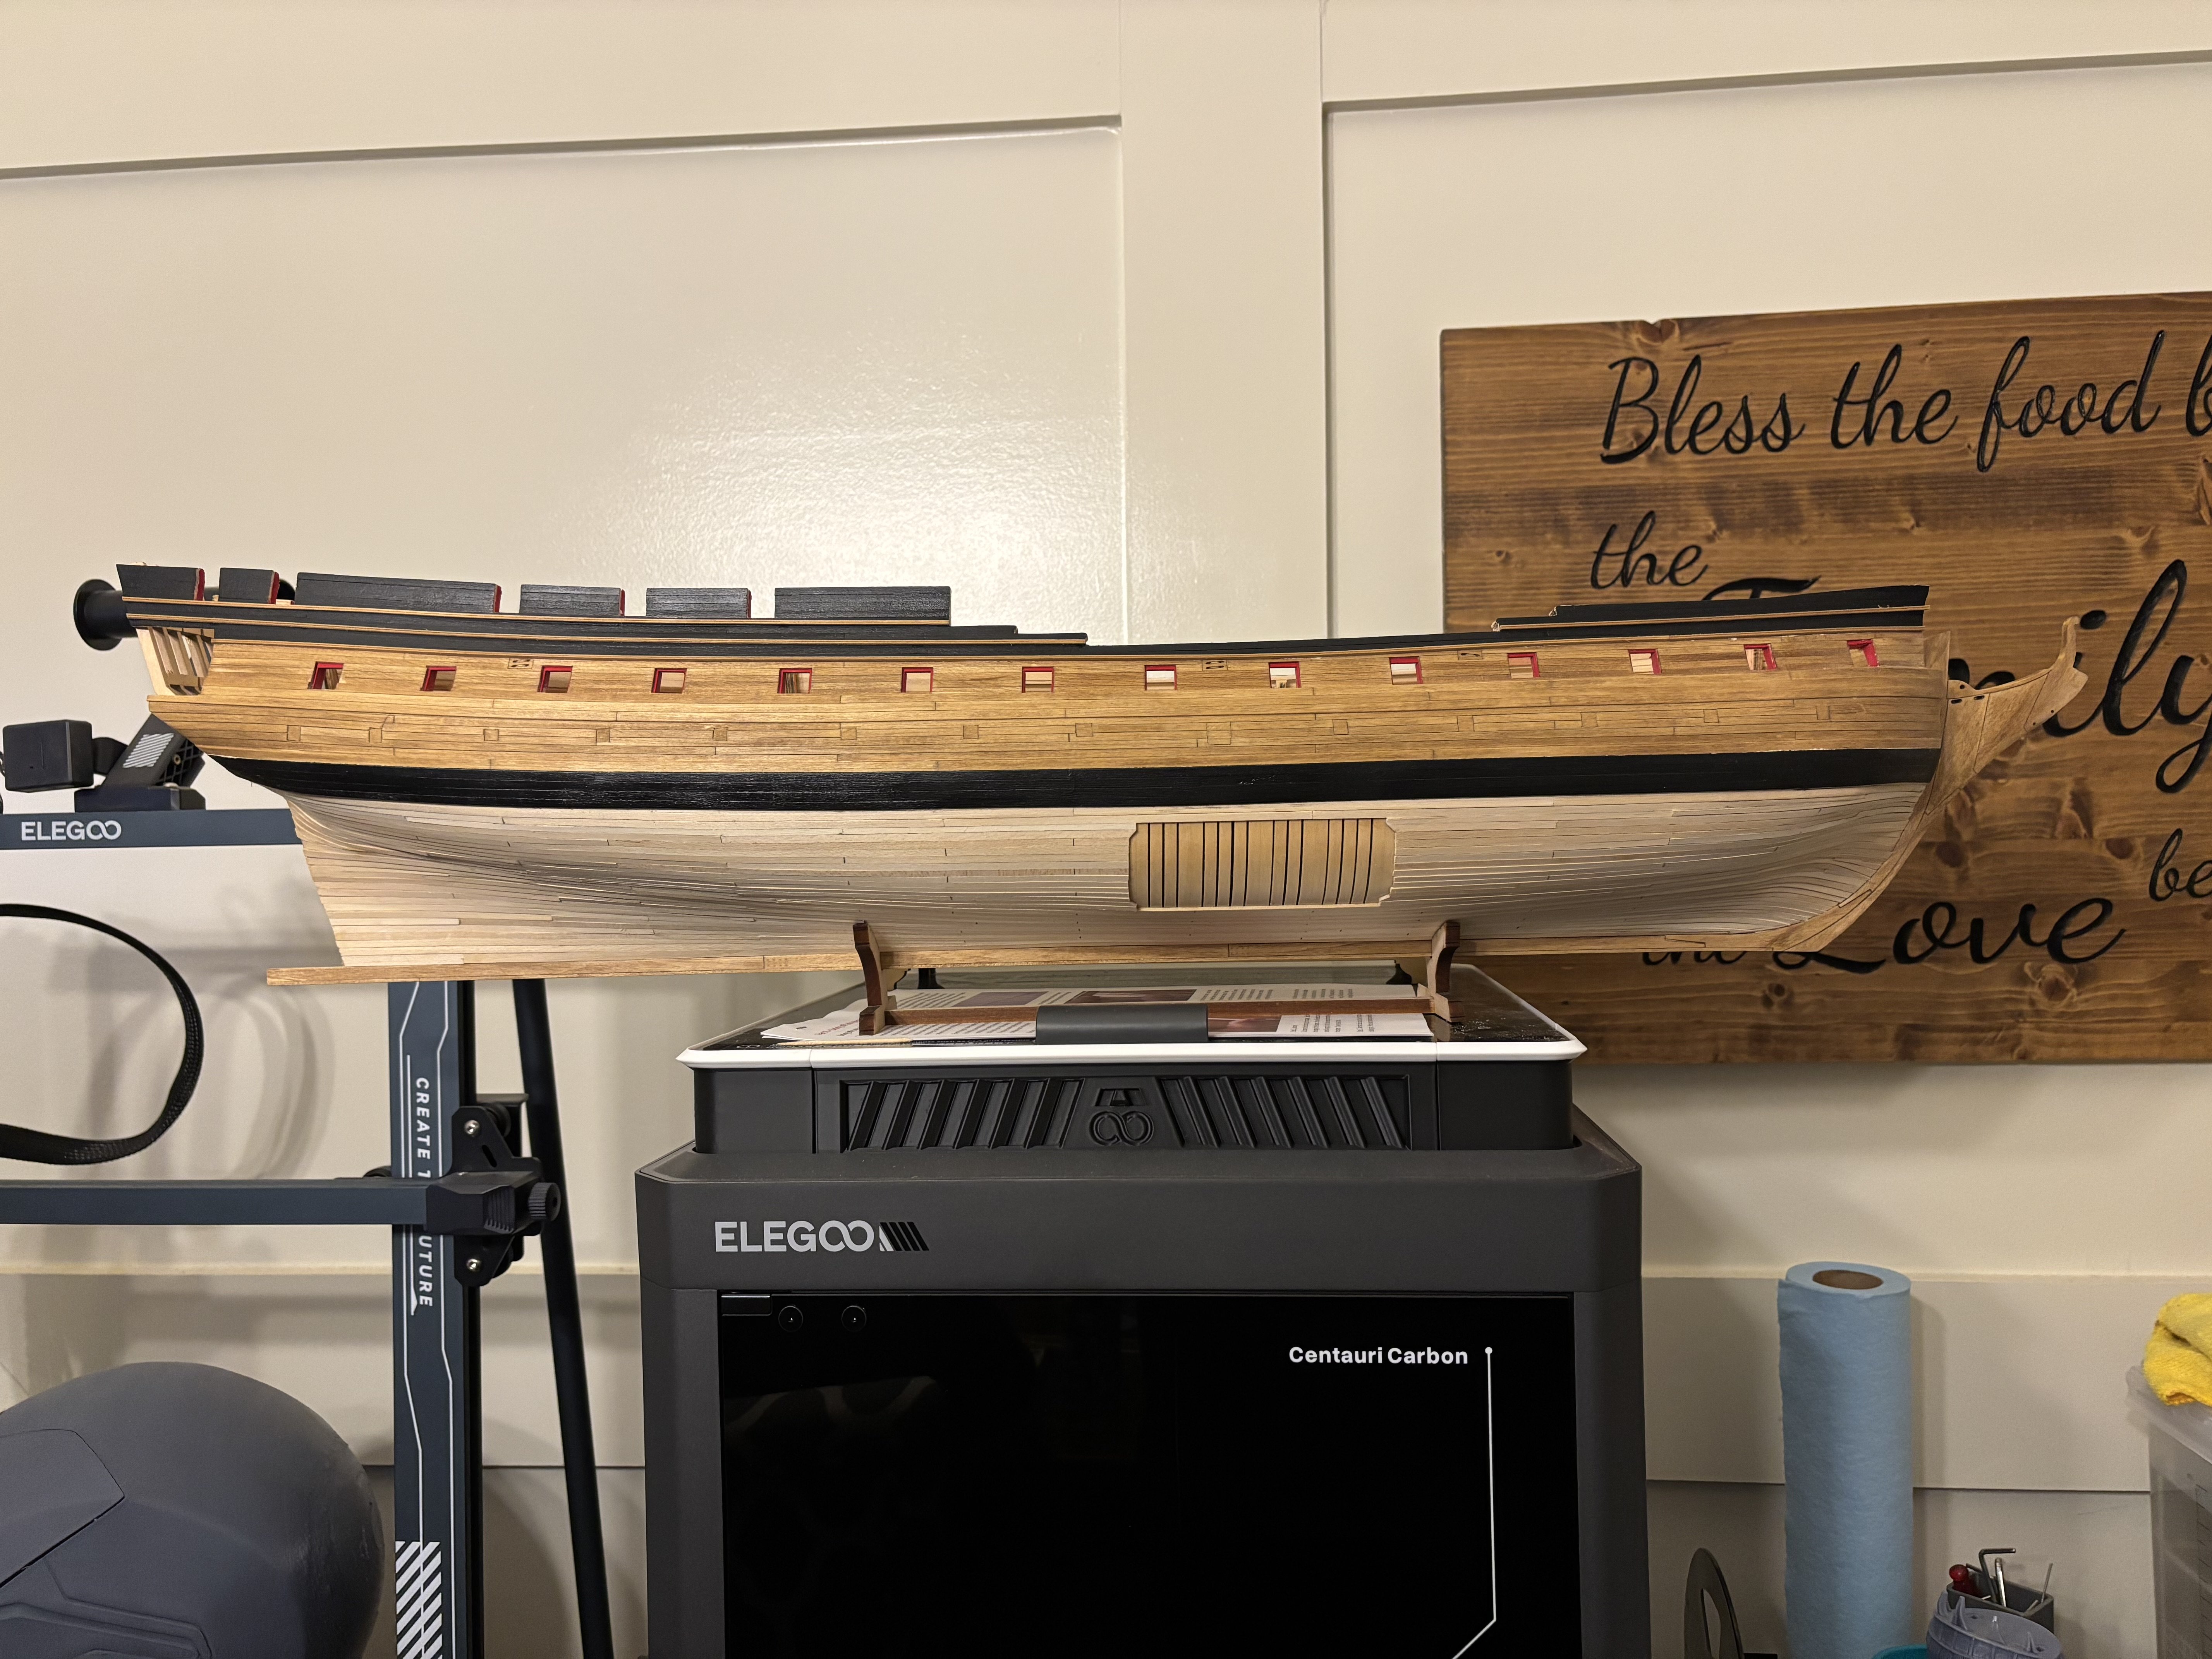
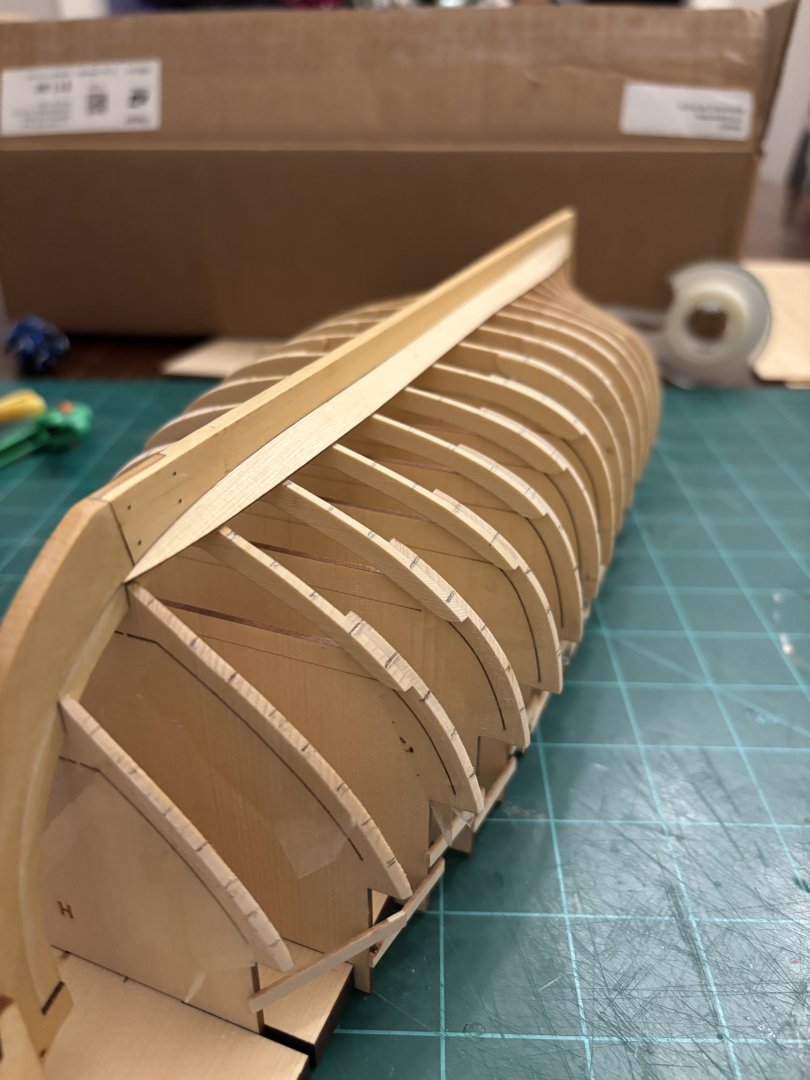
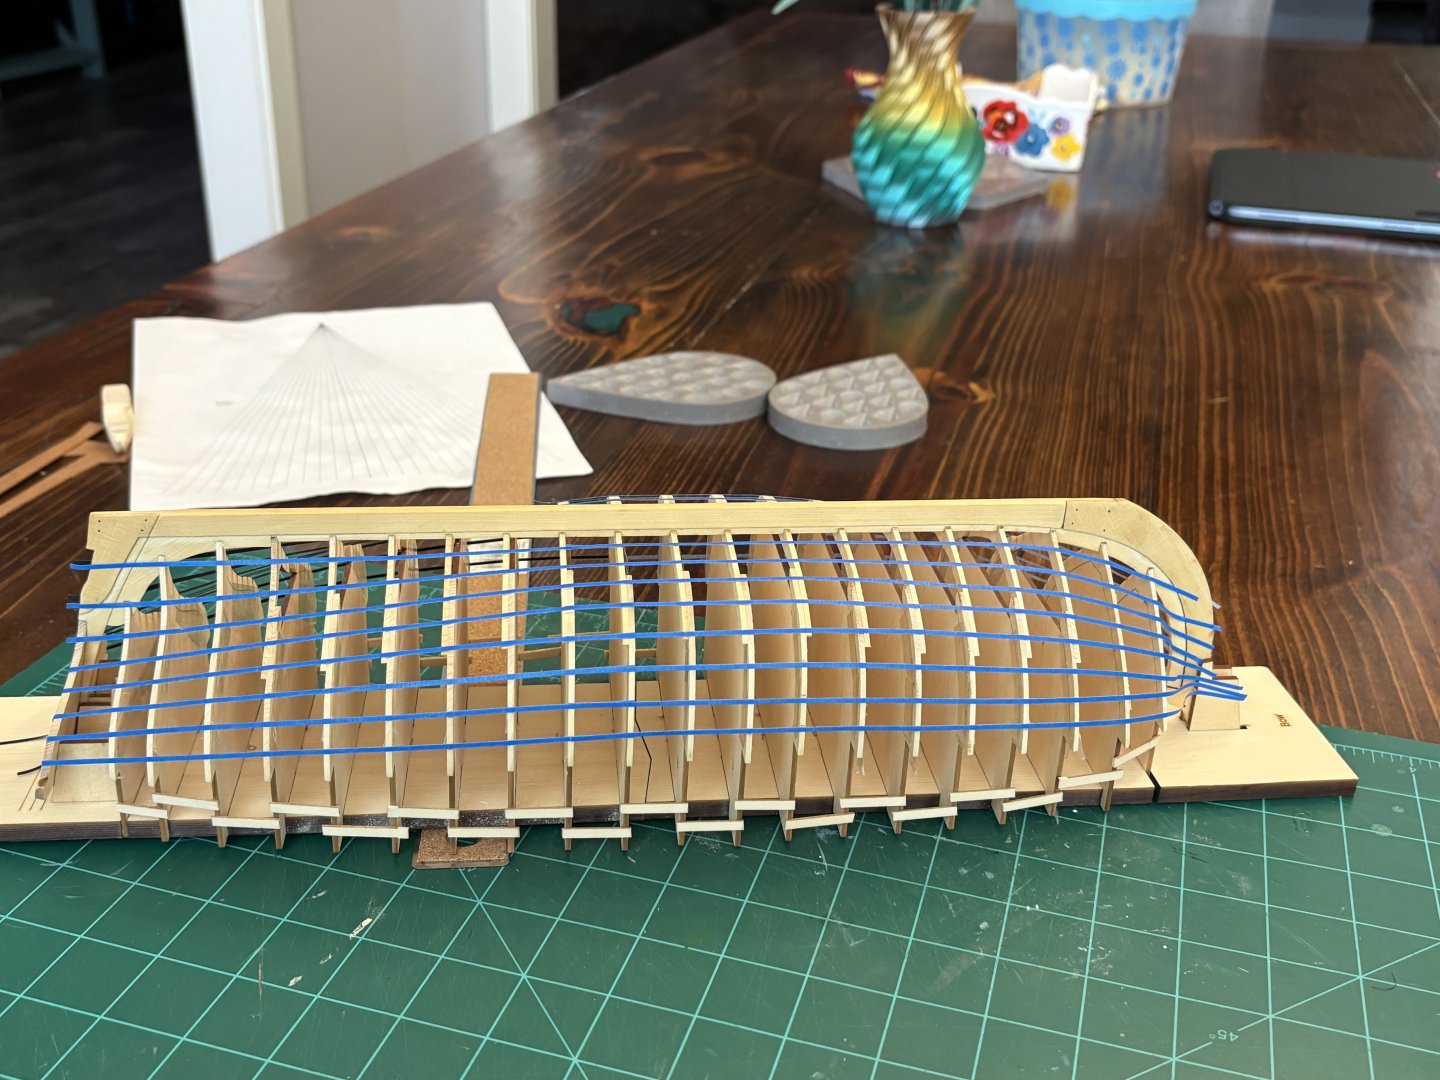
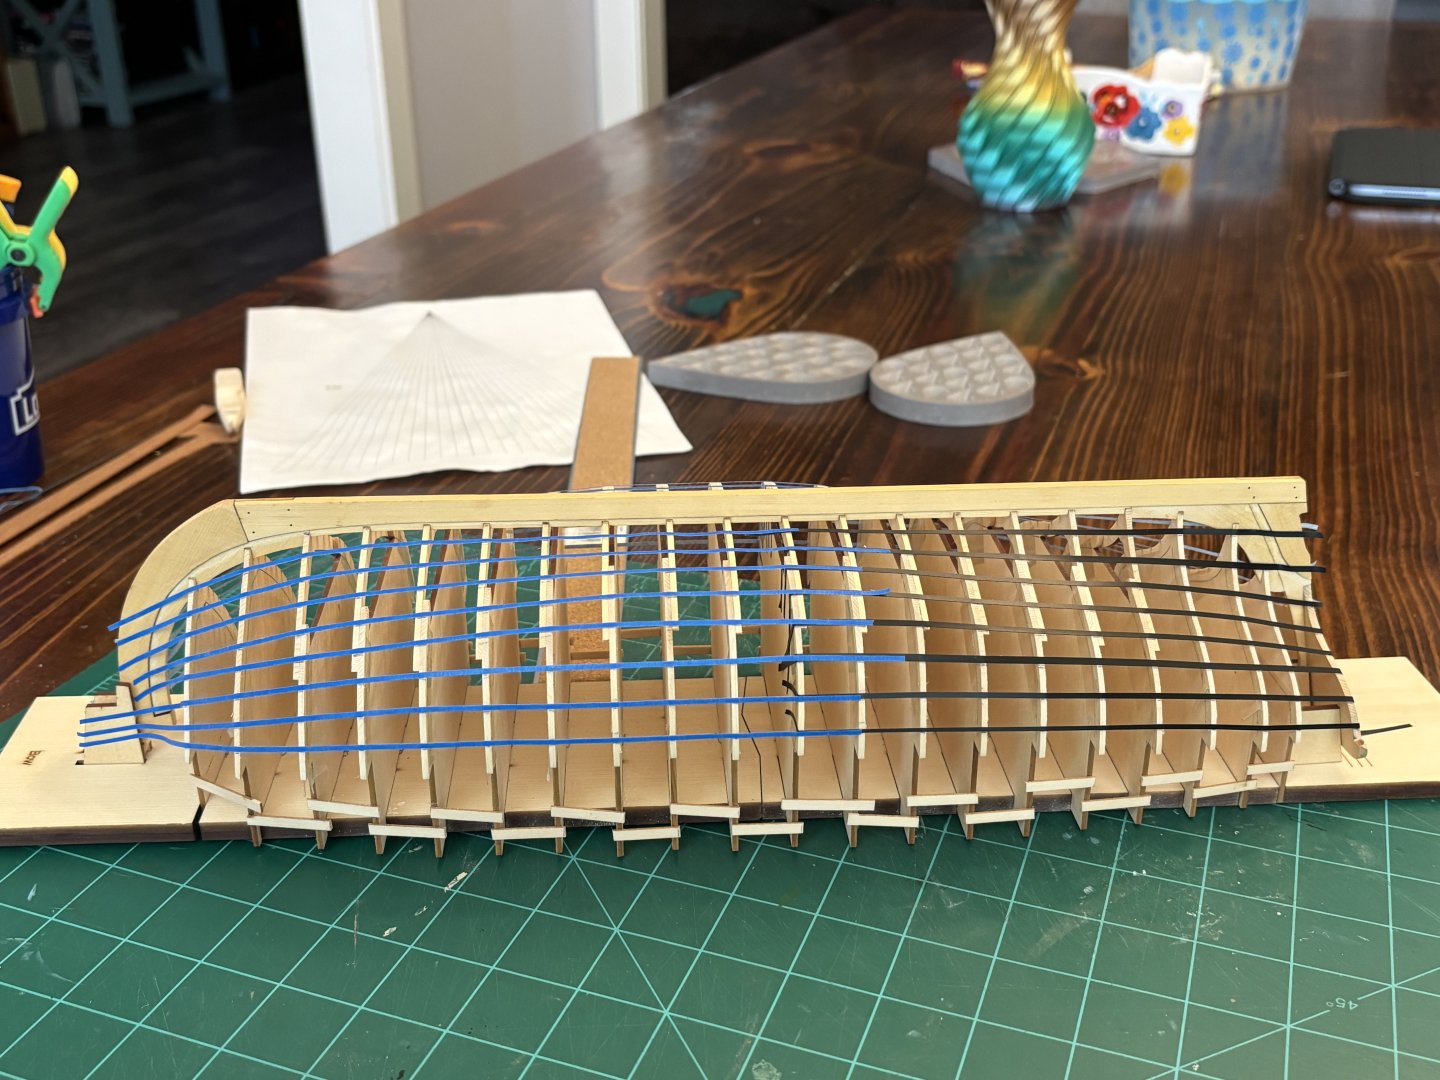
Progress has been slow in the shipyard, but I have been progressing with the planking. So far I have 3 strakes completed. I have been taking my time to get each plank bent and shaped to fit the hull and the other planks as tightly as I can. It’s not the best planking job, but I feel like I am improving with every plank and every strake and every build. Anyway, here is a teaser pic:

-
My hat is off to you Chuck. I don’t have the mind for designing the kits, although I would love to learn how to do some design work in TinkerCAD. But I do have a laser and 3 3D printers and know how to use them. All of my prints have been from files that I either downloaded for free or purchased. Basically, I don’t think that you are crazy. I think that it is awesome that you are sort of passing the torch as you wind down and get ready for retirement. Who knows, maybe I will be able to make the parts of your small kits for others that do not have a laser or 3D printer someday.
-
But the model looks great! Looking at your past builds, I am confident that you will be able to pull it off.
- 156 replies
-
- 3
-
-
-
- Queen Annes Revenge
- bottle
- (and 1 more)
-
Very glad to hear this news. I have the micro-mark table saw, but have been wanting to upgrade to the Byrnes saw for some time now.
-
Chris, the ensign looks great! It is a nice little detail that adds a little more realism to the model. Well done! I may have to try this technique at some point.
- 38 replies
-
- 3
-
-
-
- 18th Century Longboat
- Model Shipways
- (and 1 more)
-
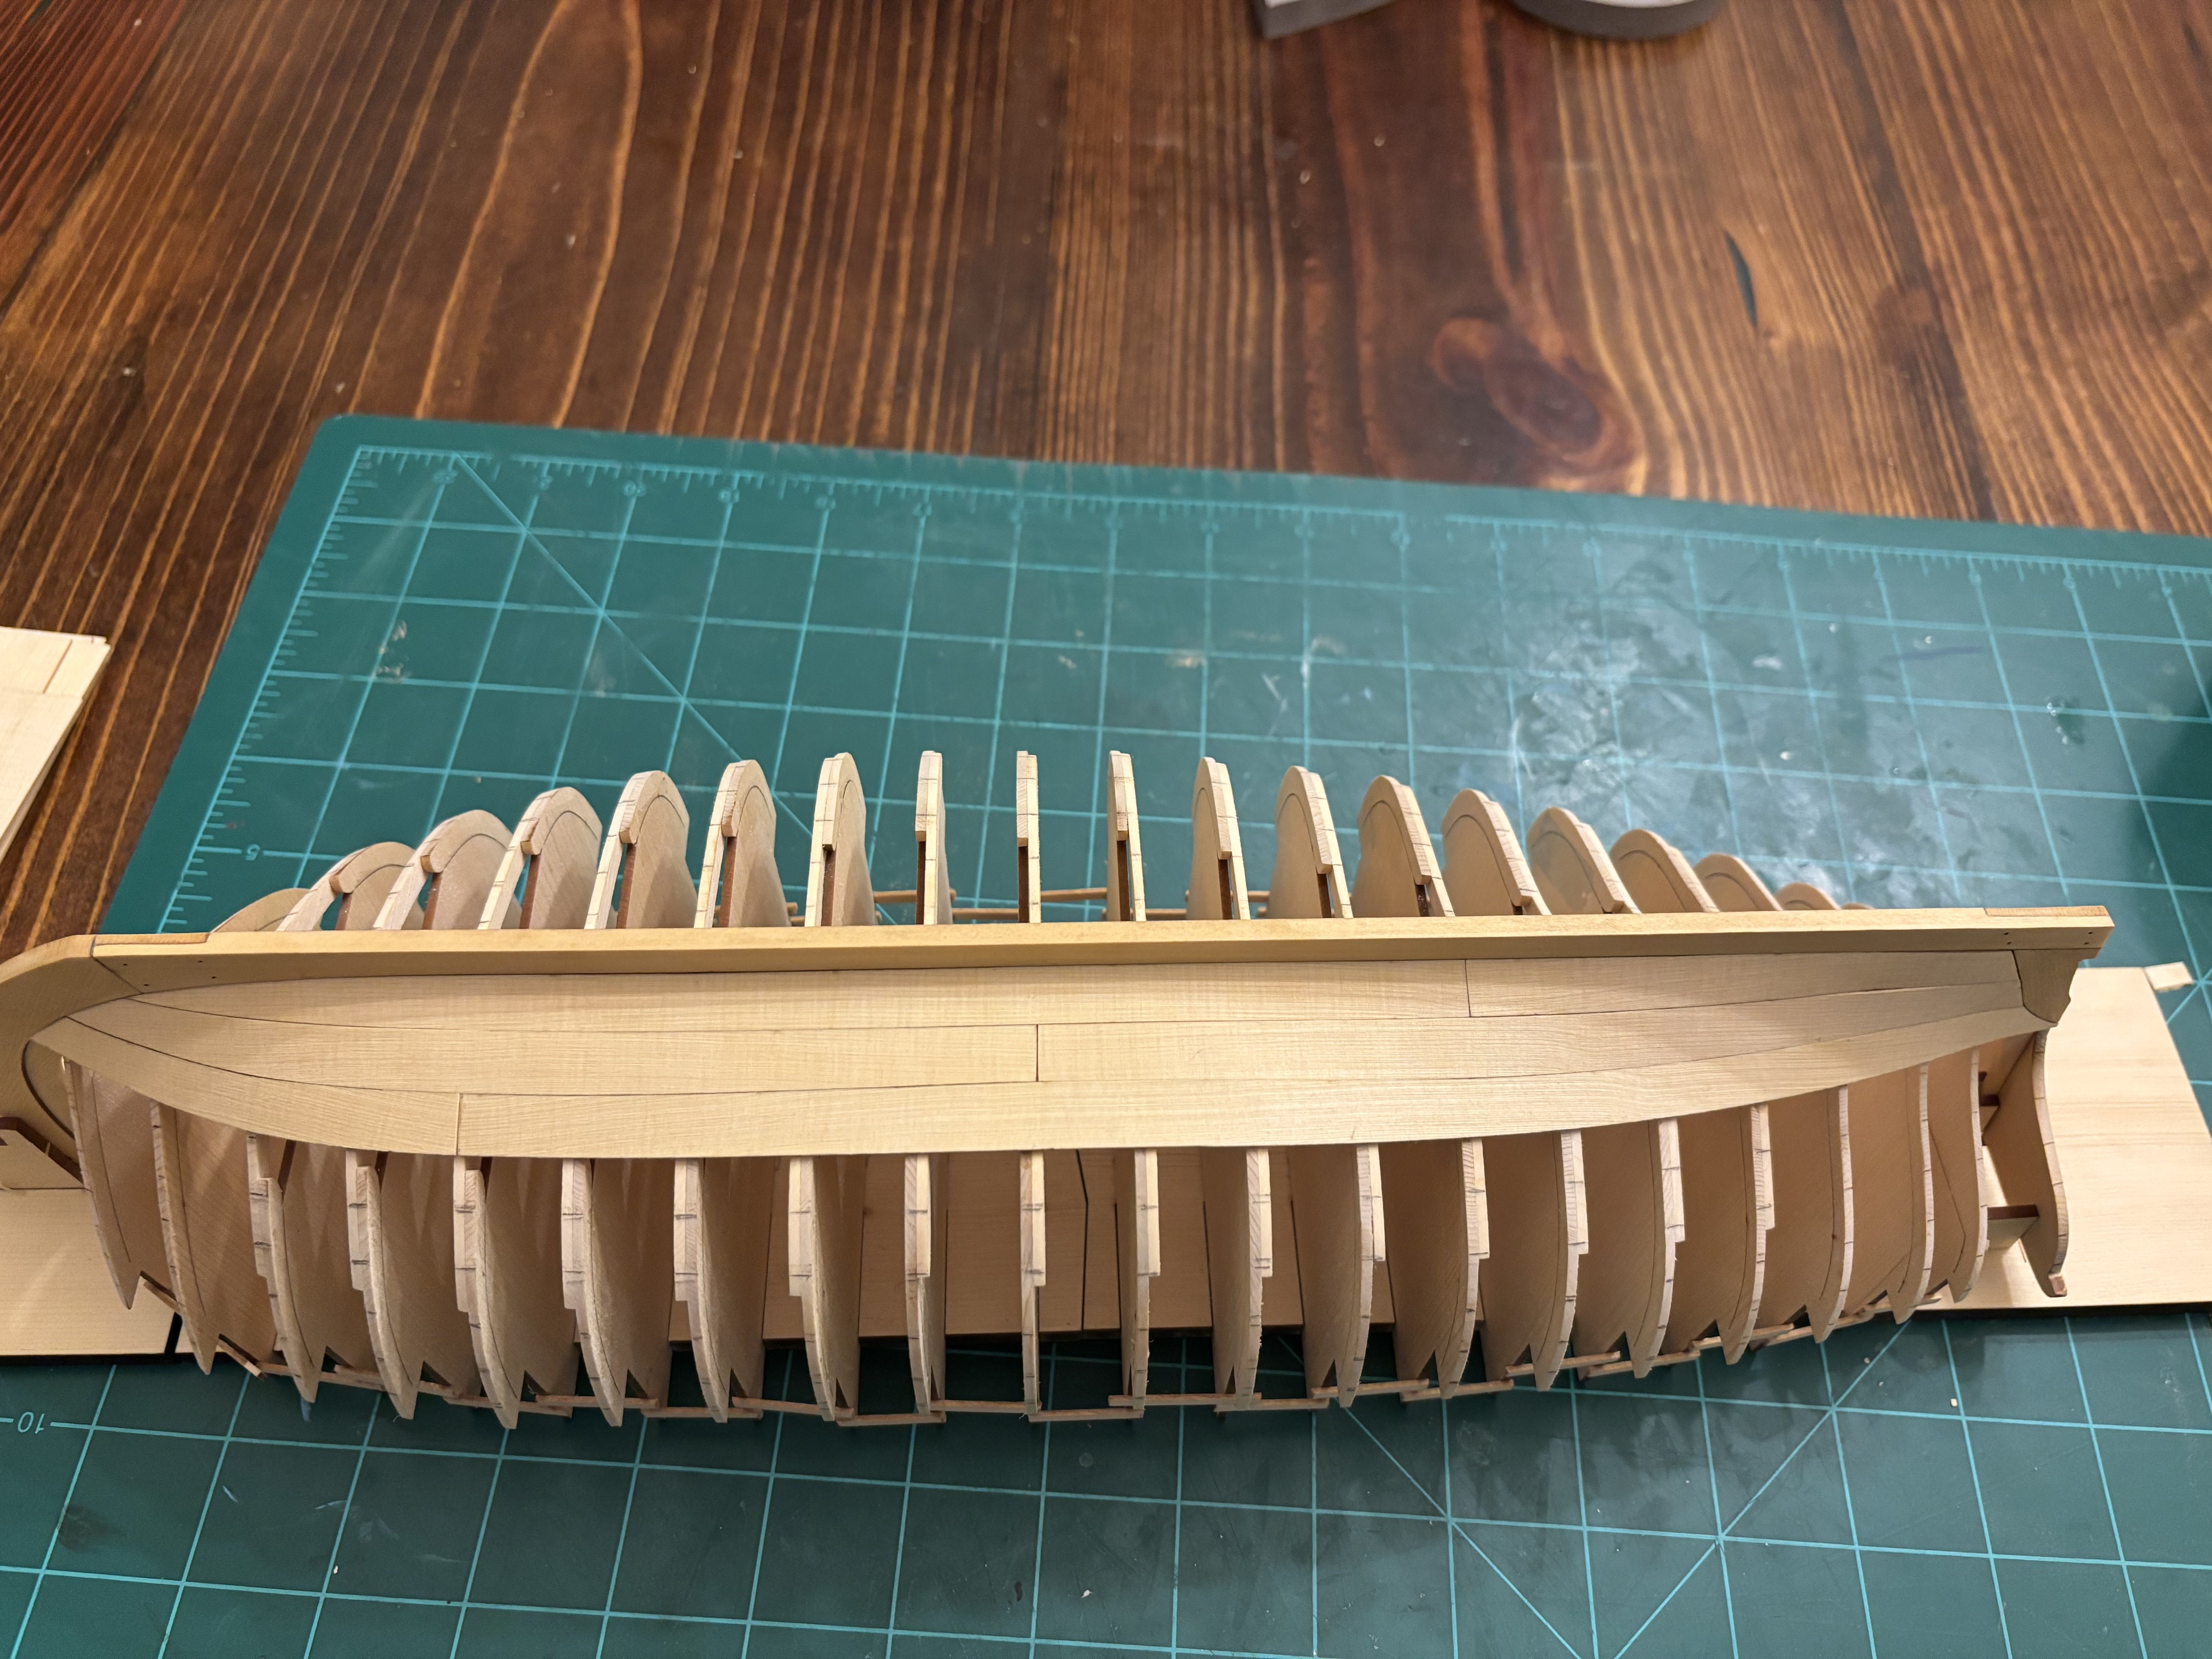
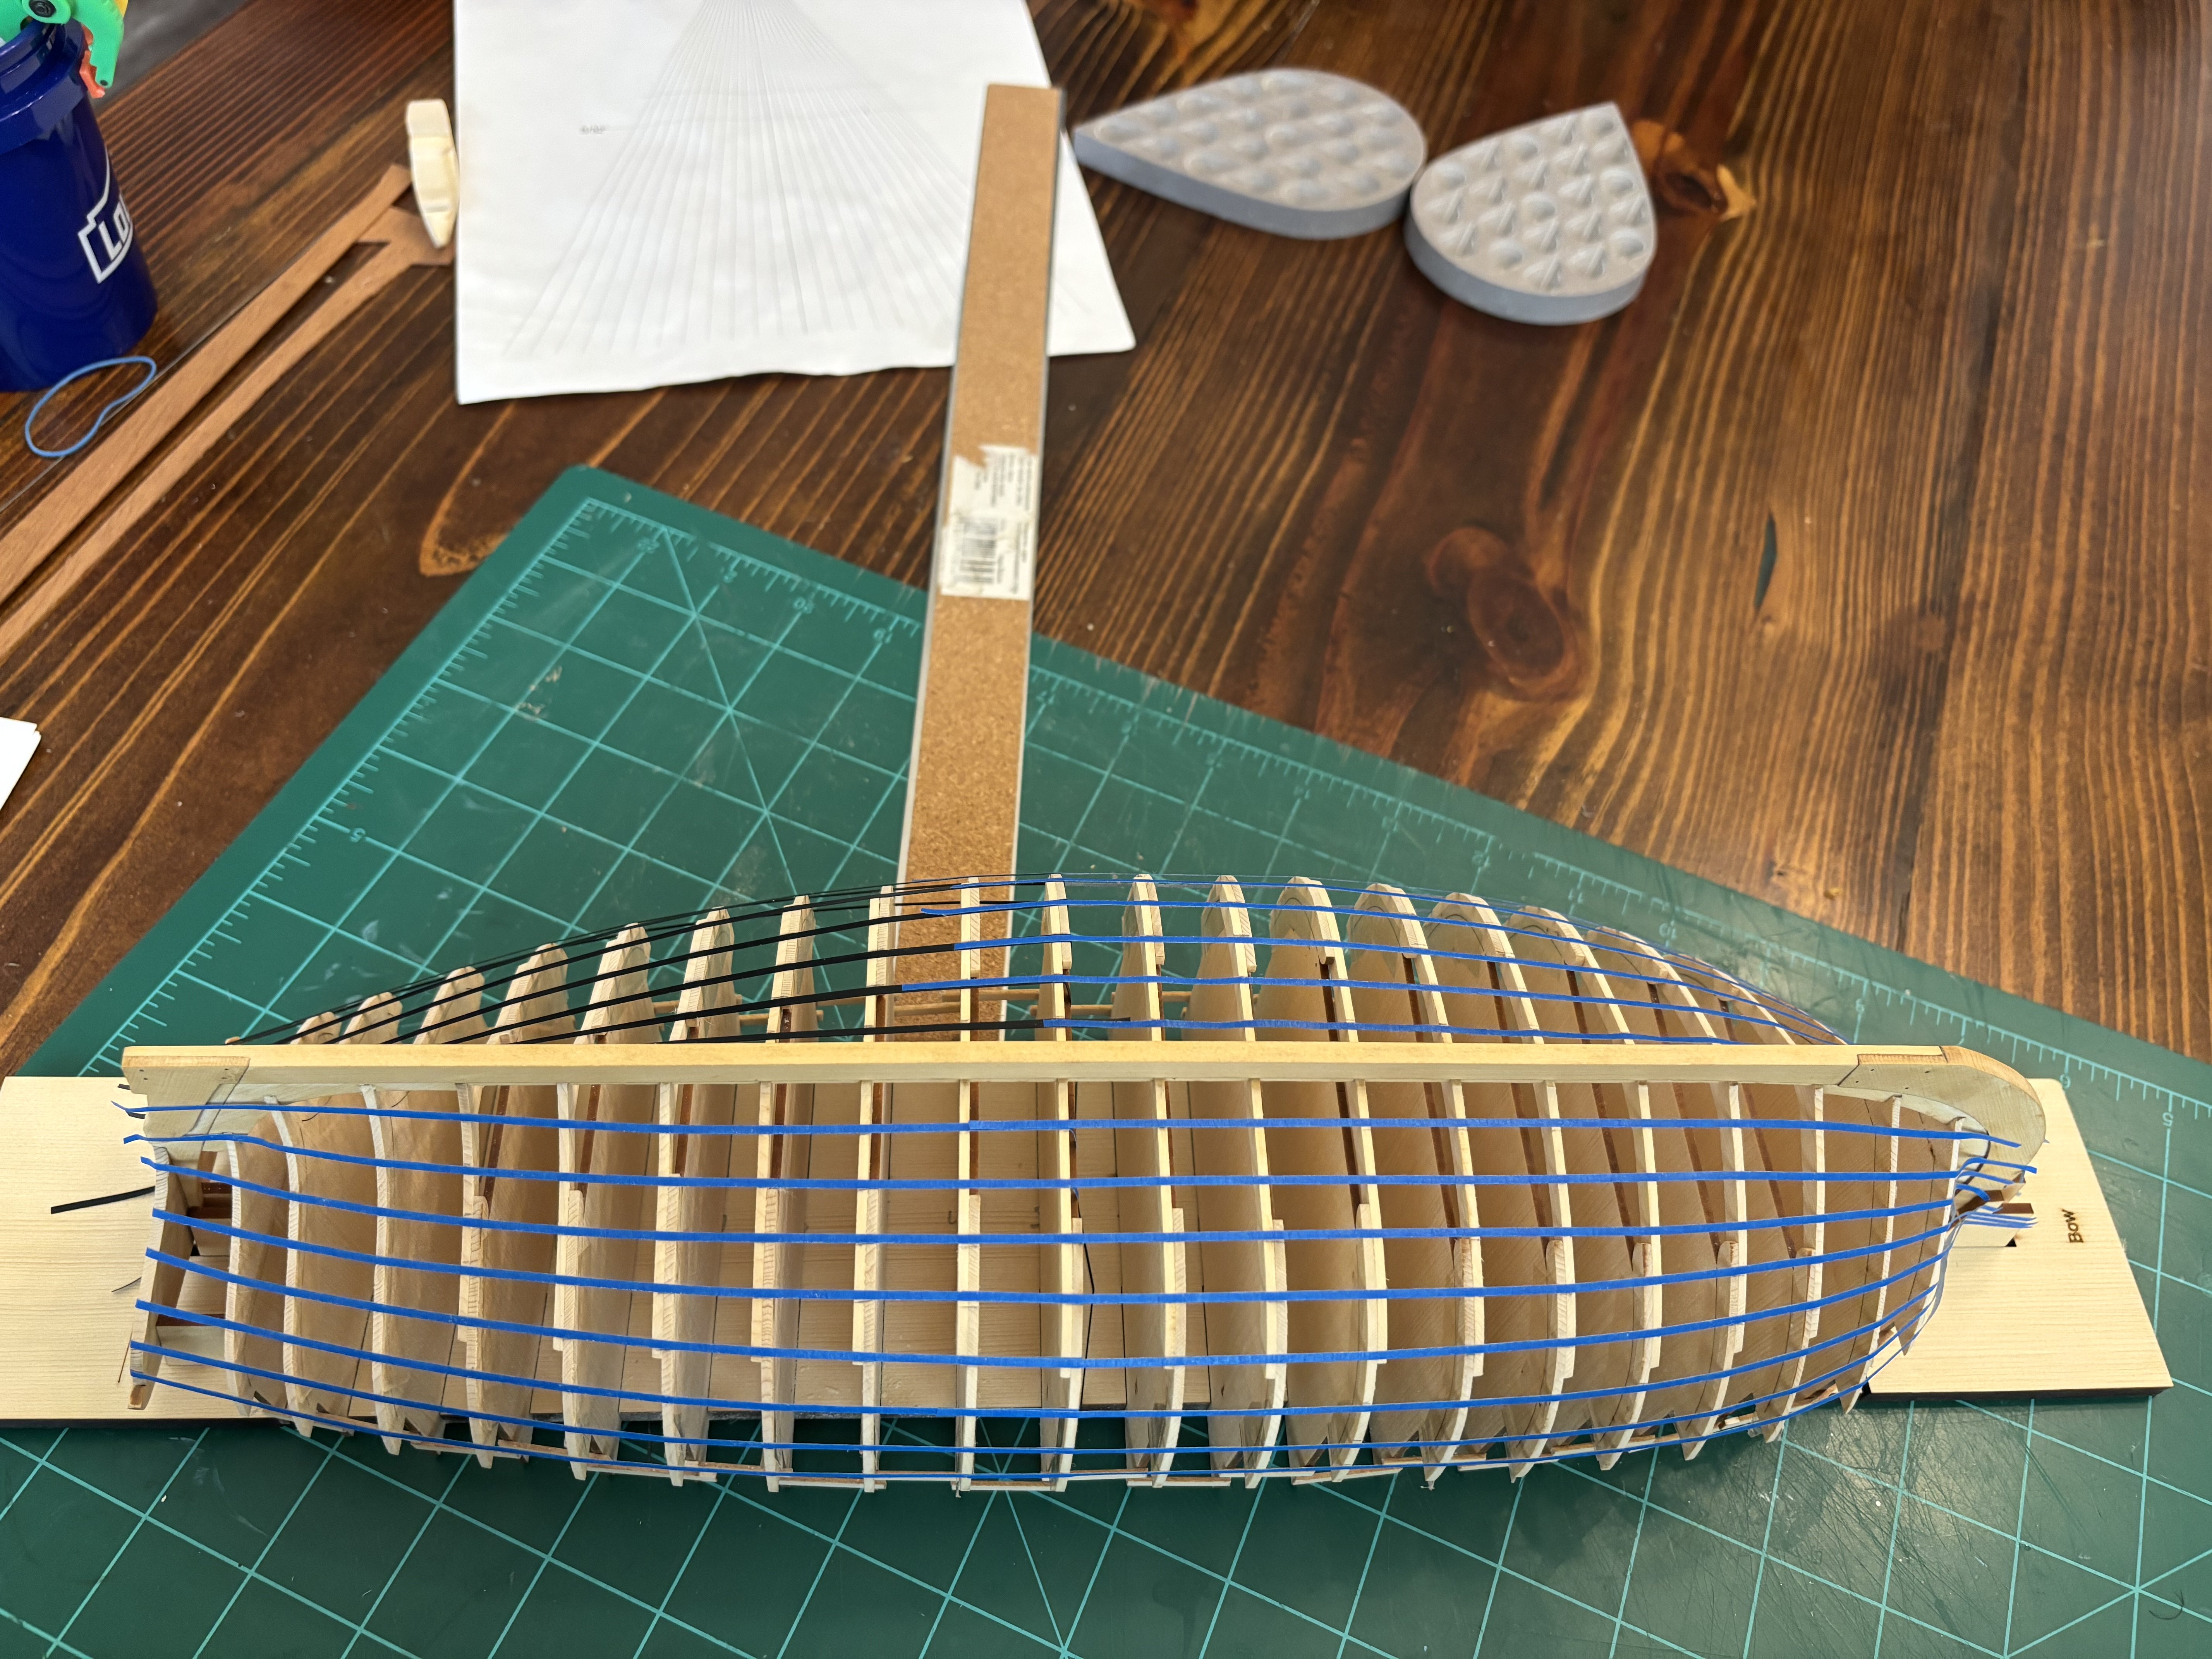
Found a little time to put in some work at the shipyard this evening. I was only able to get 1 strake completed, but I was taking my time to ensure that it was all done correctly and that everything fit tightly. Hopefully, I will have more time tomorrow to add some more strakes to the starboard side.

-
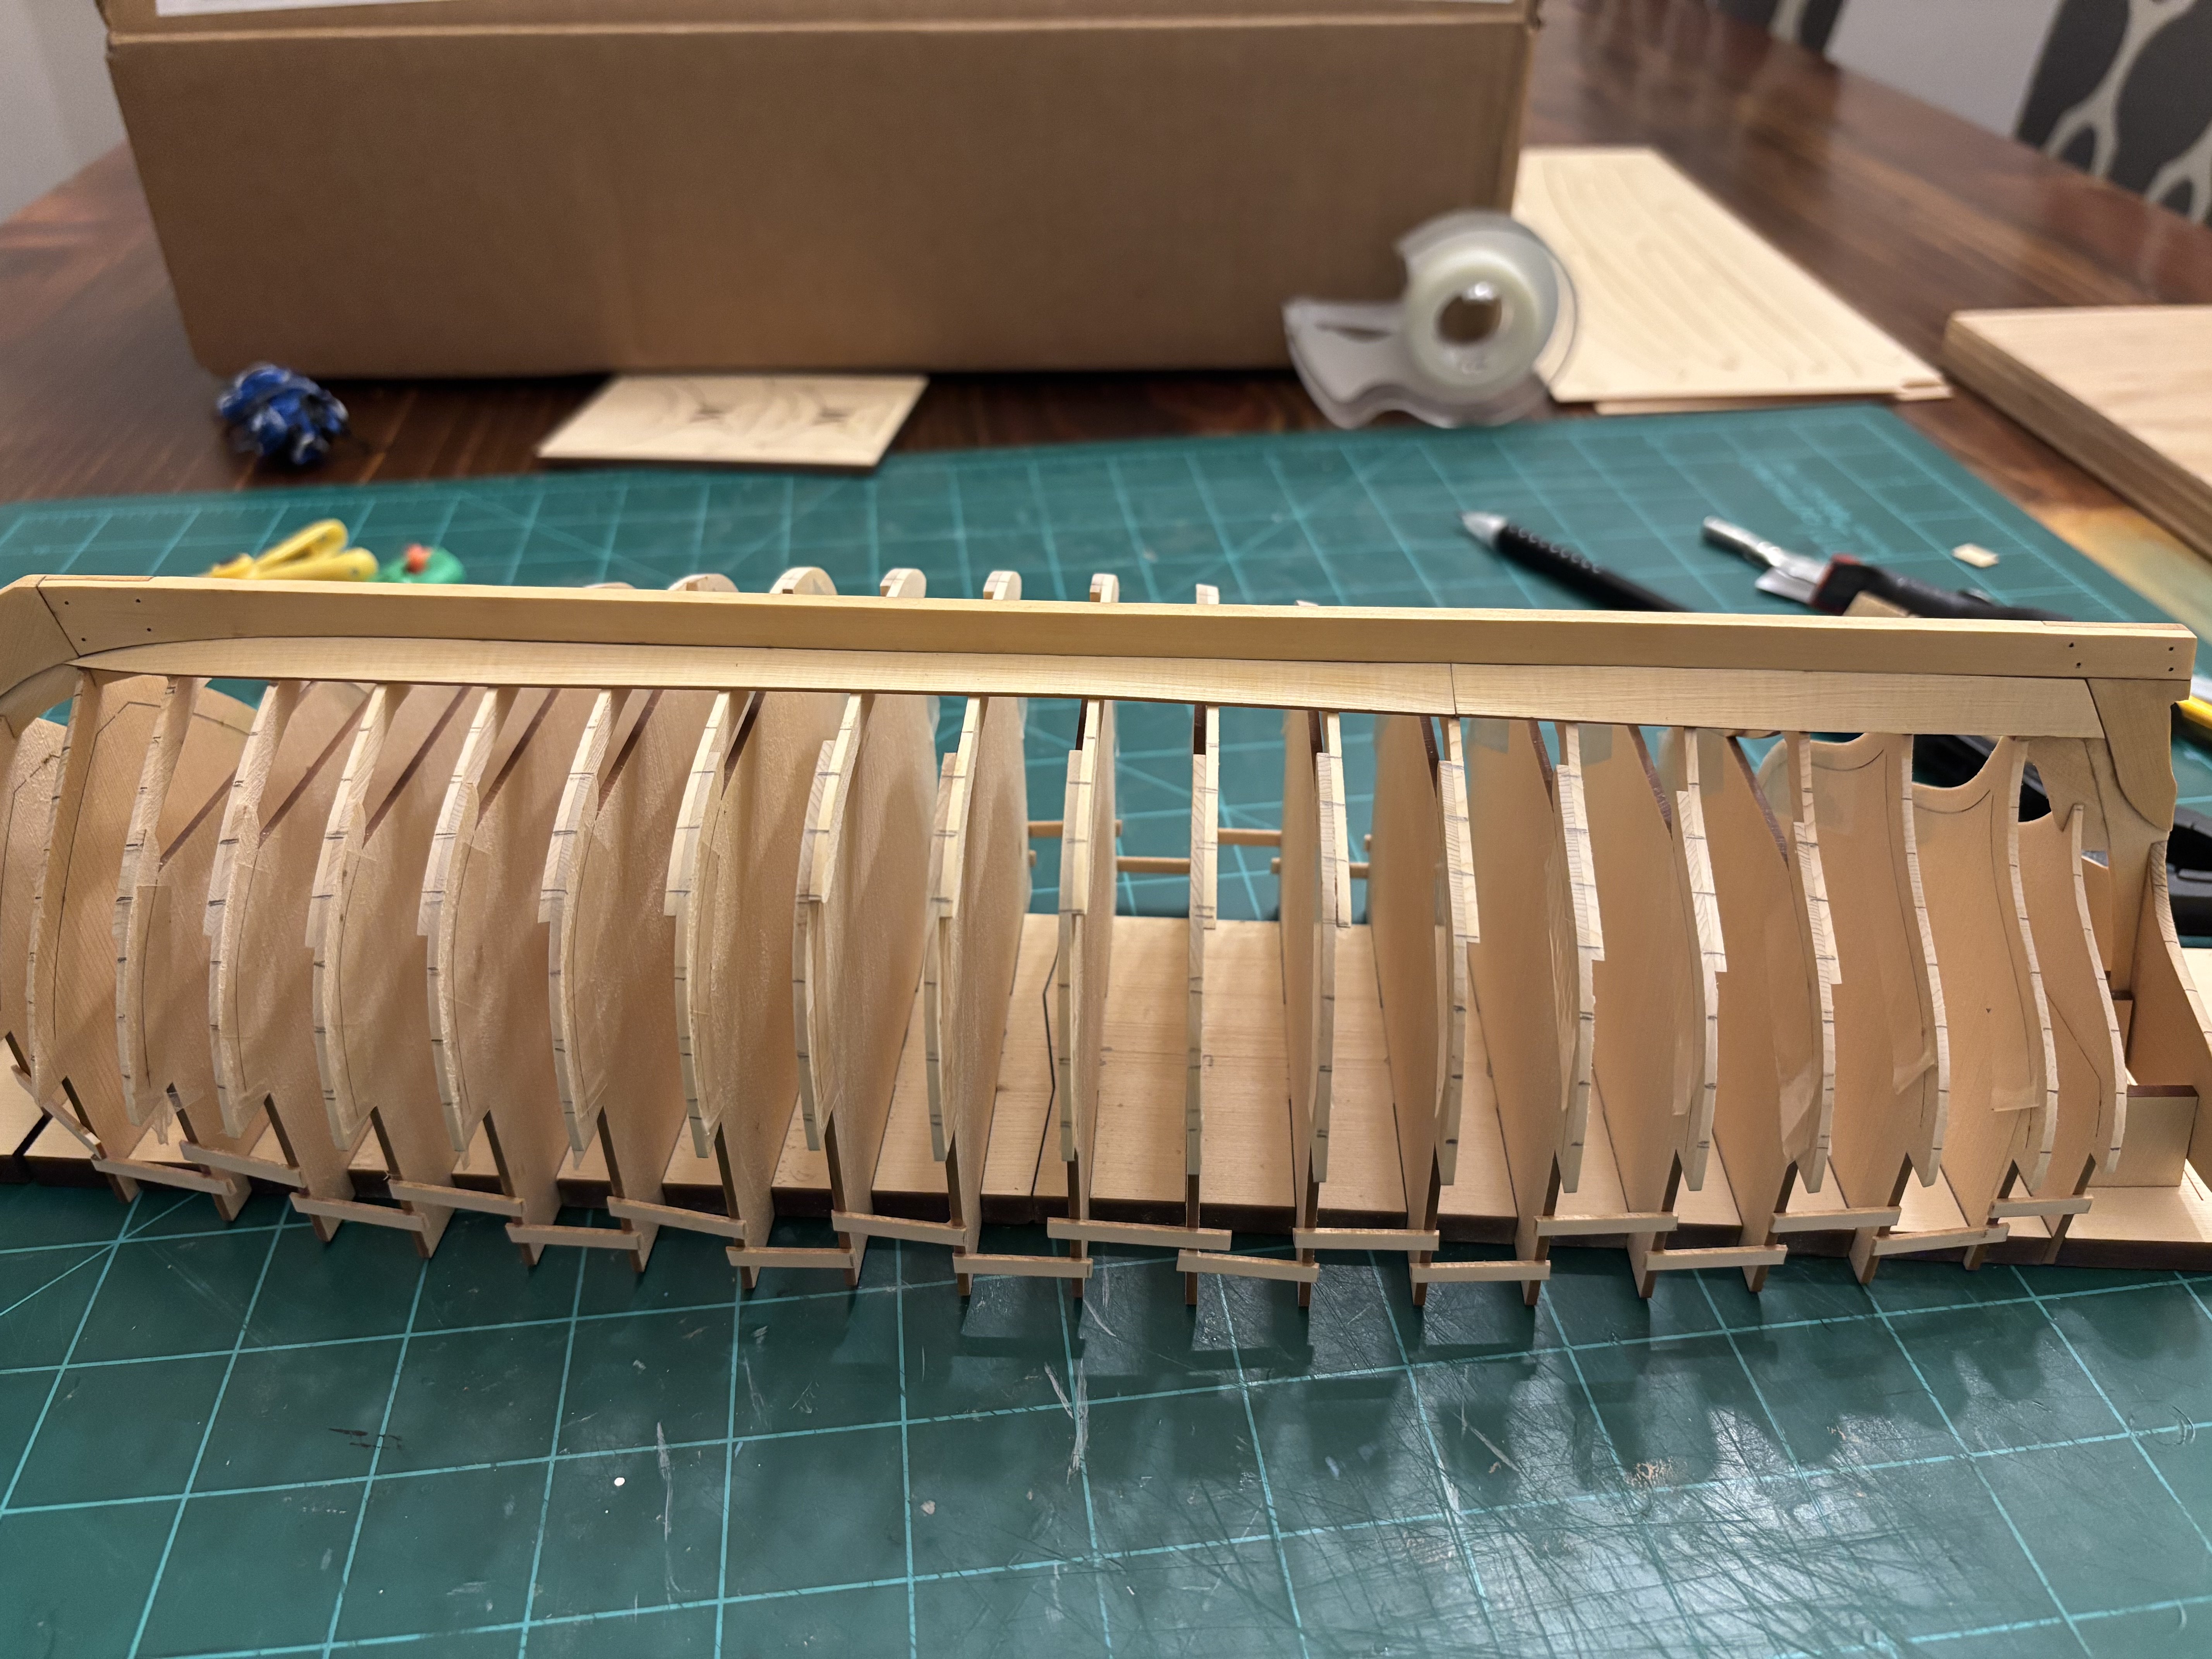
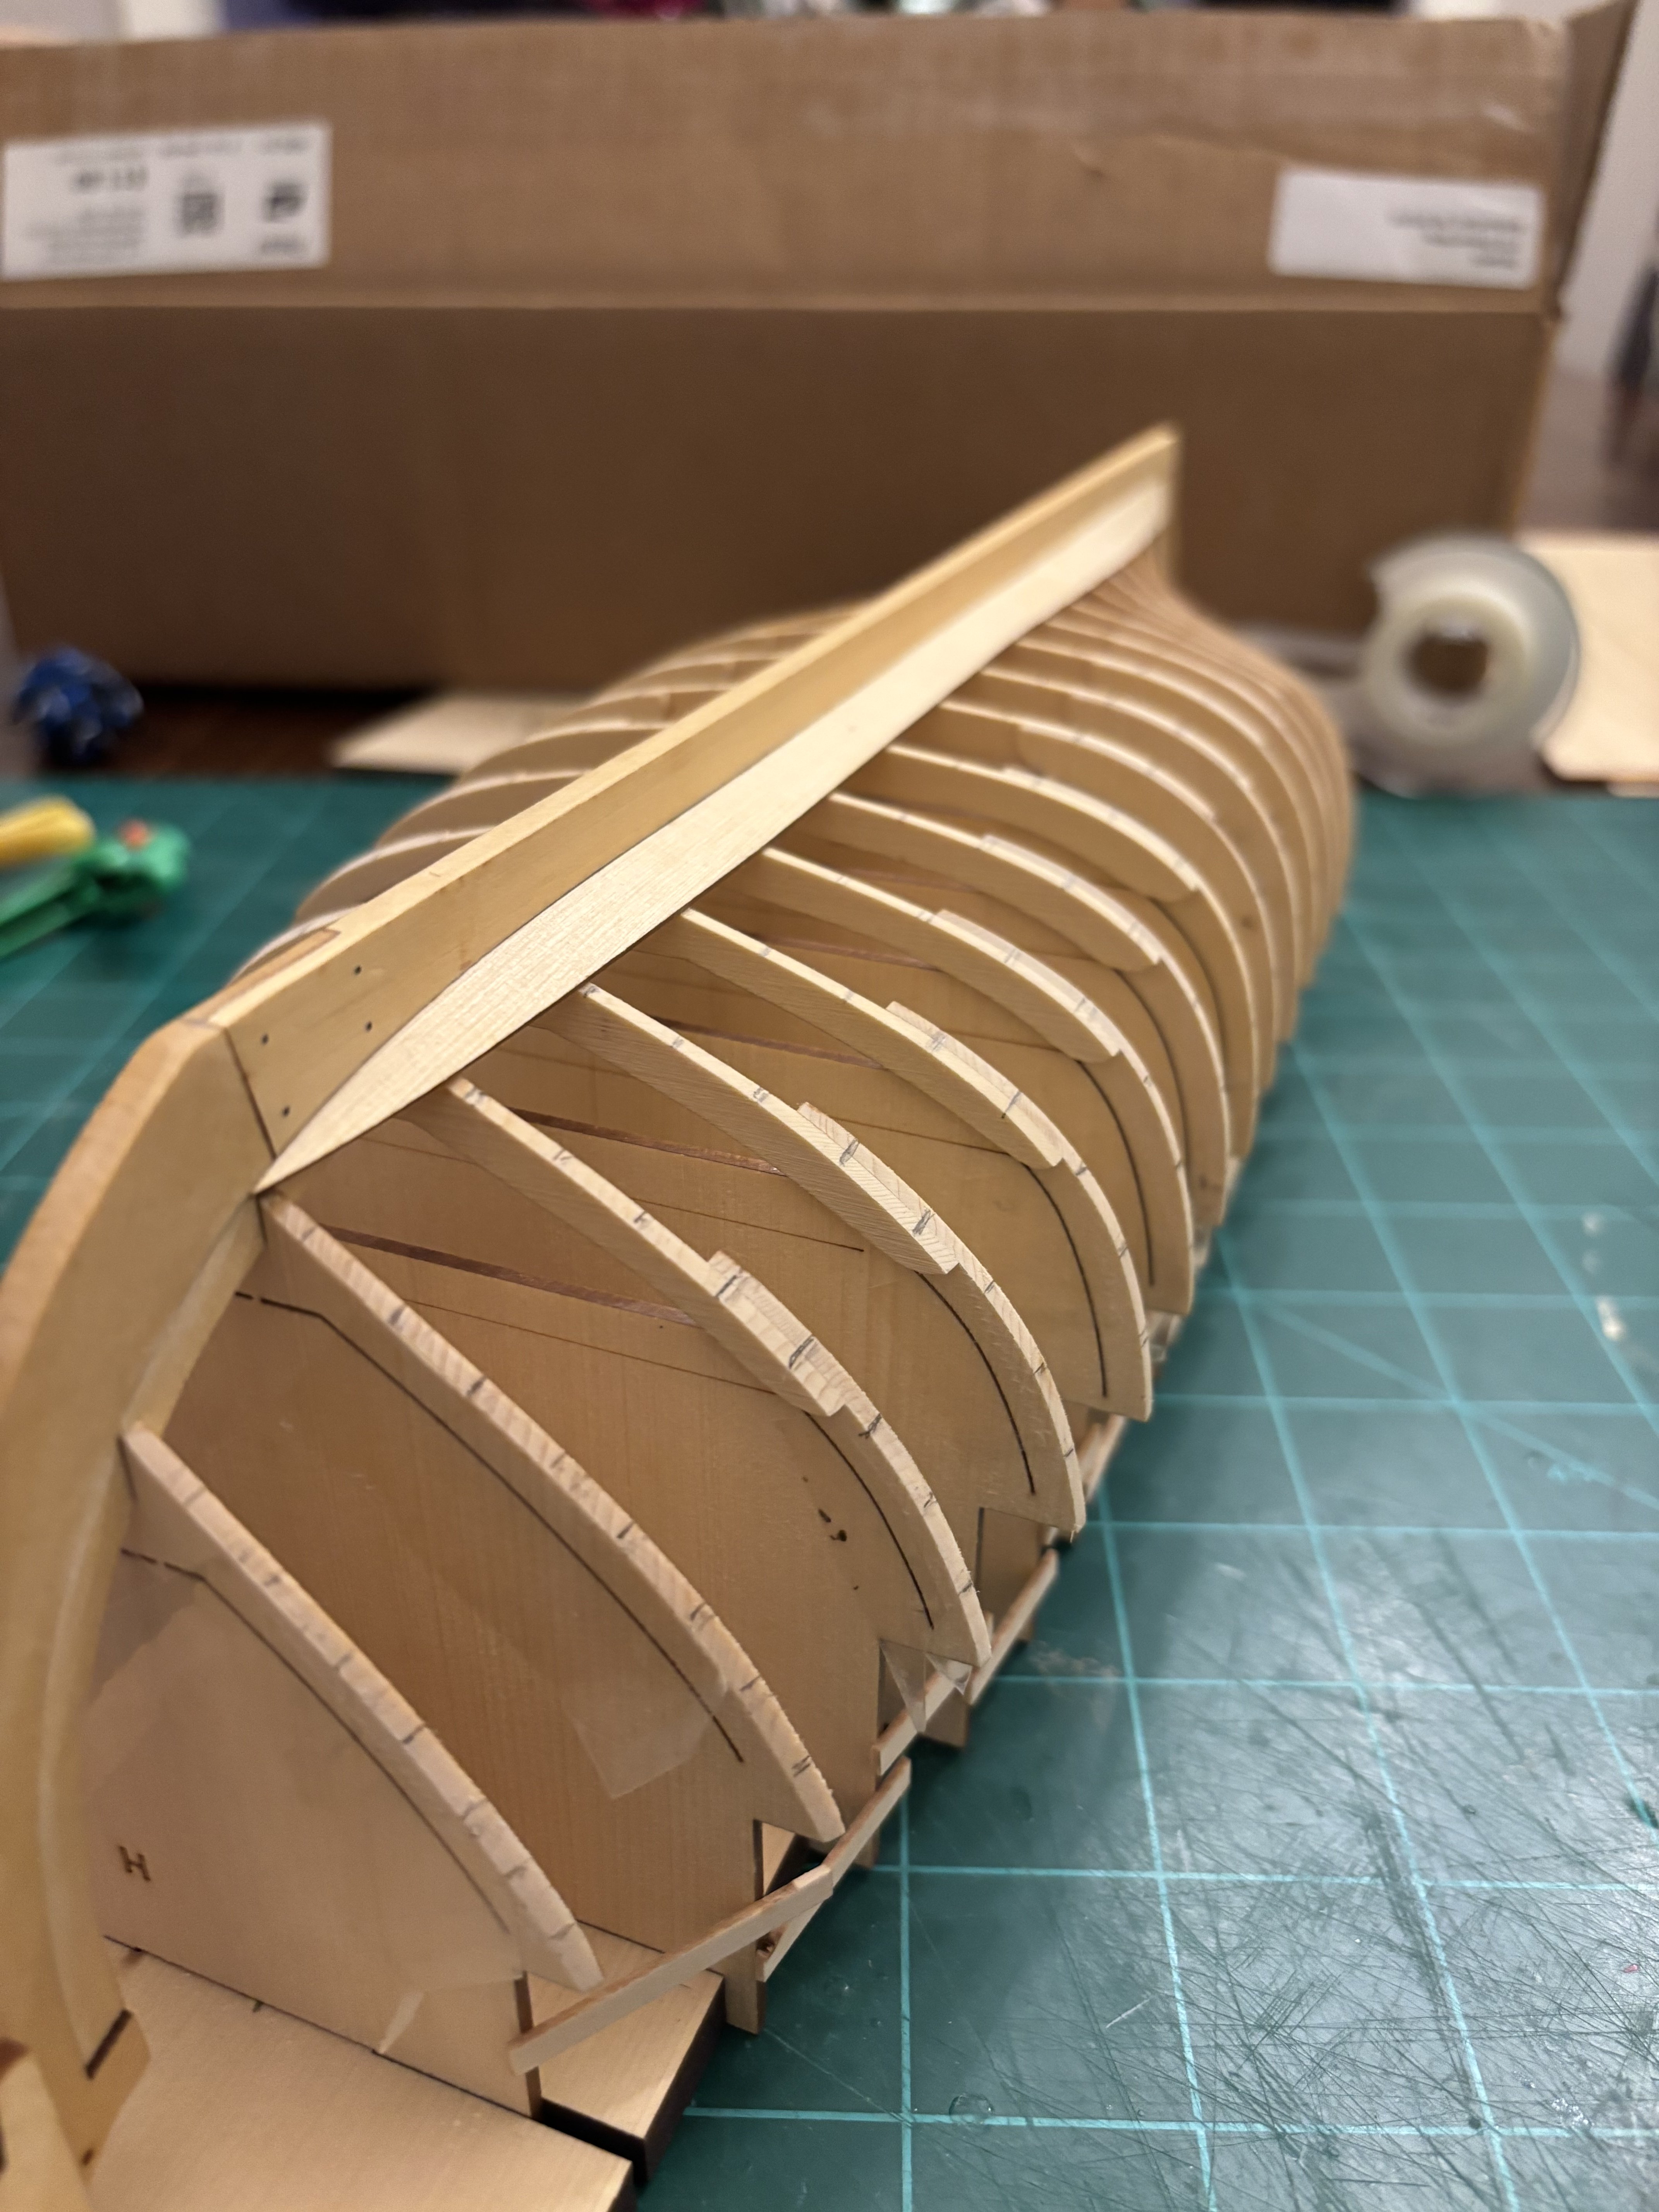
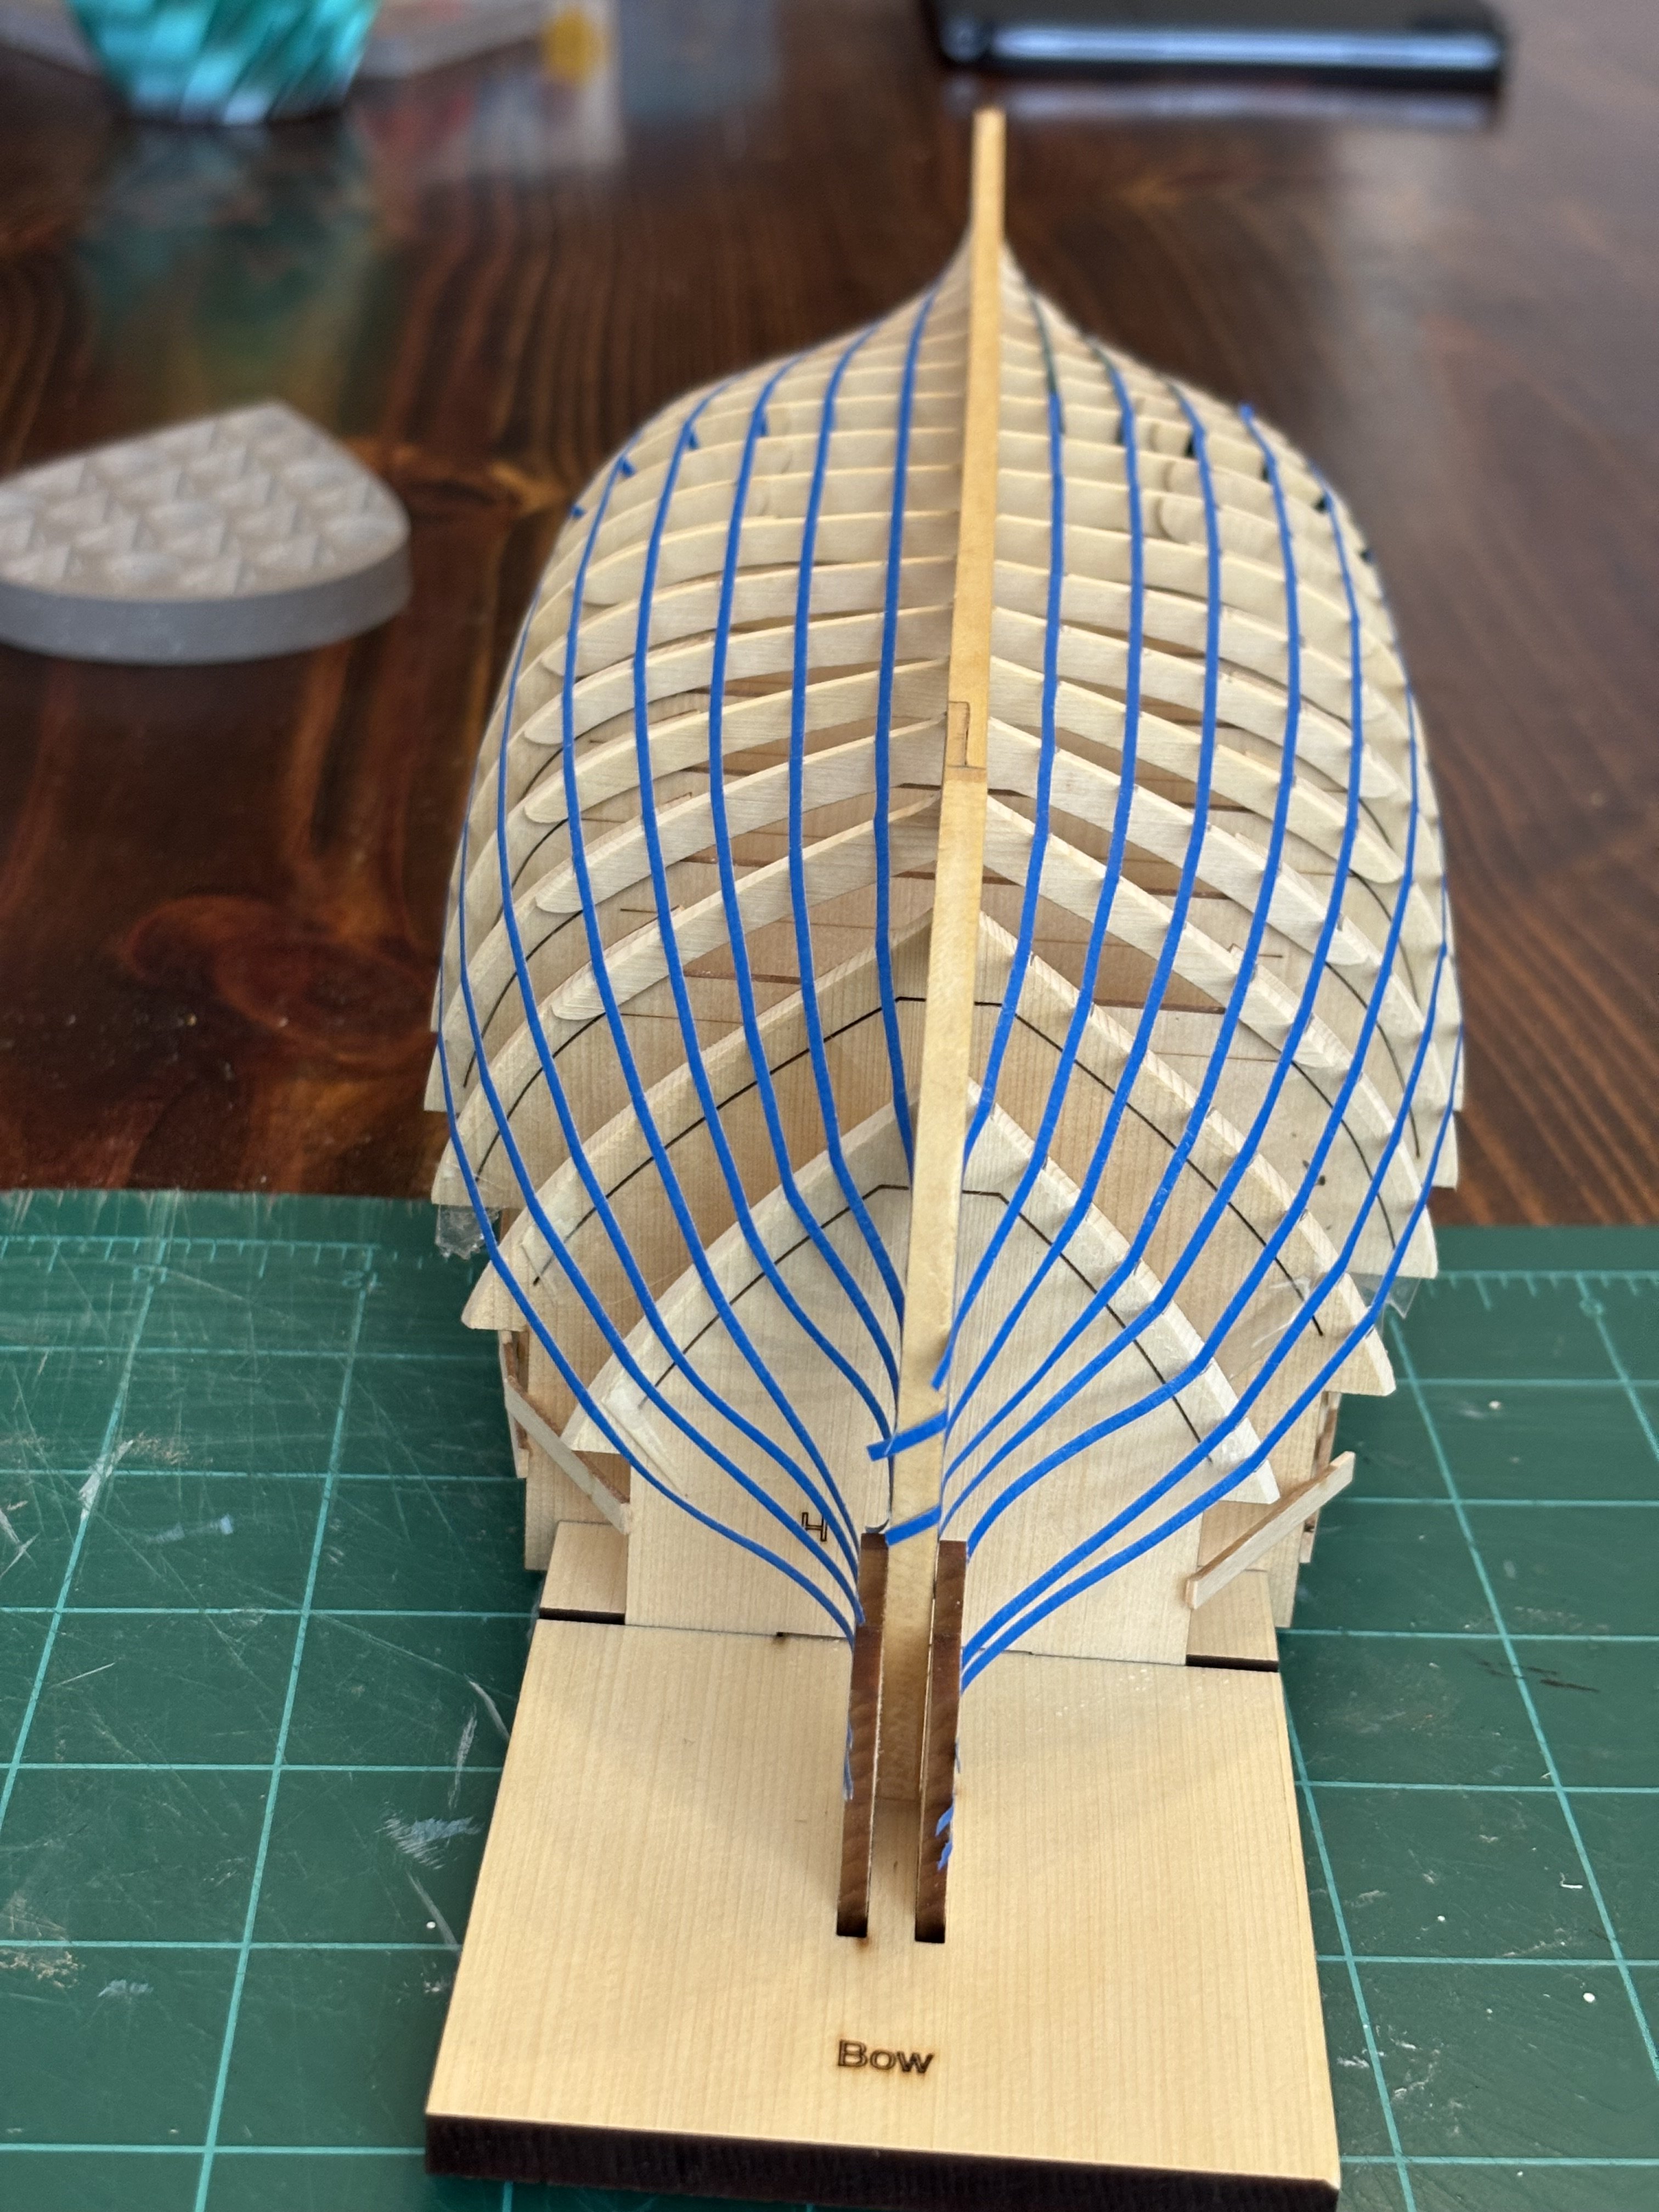
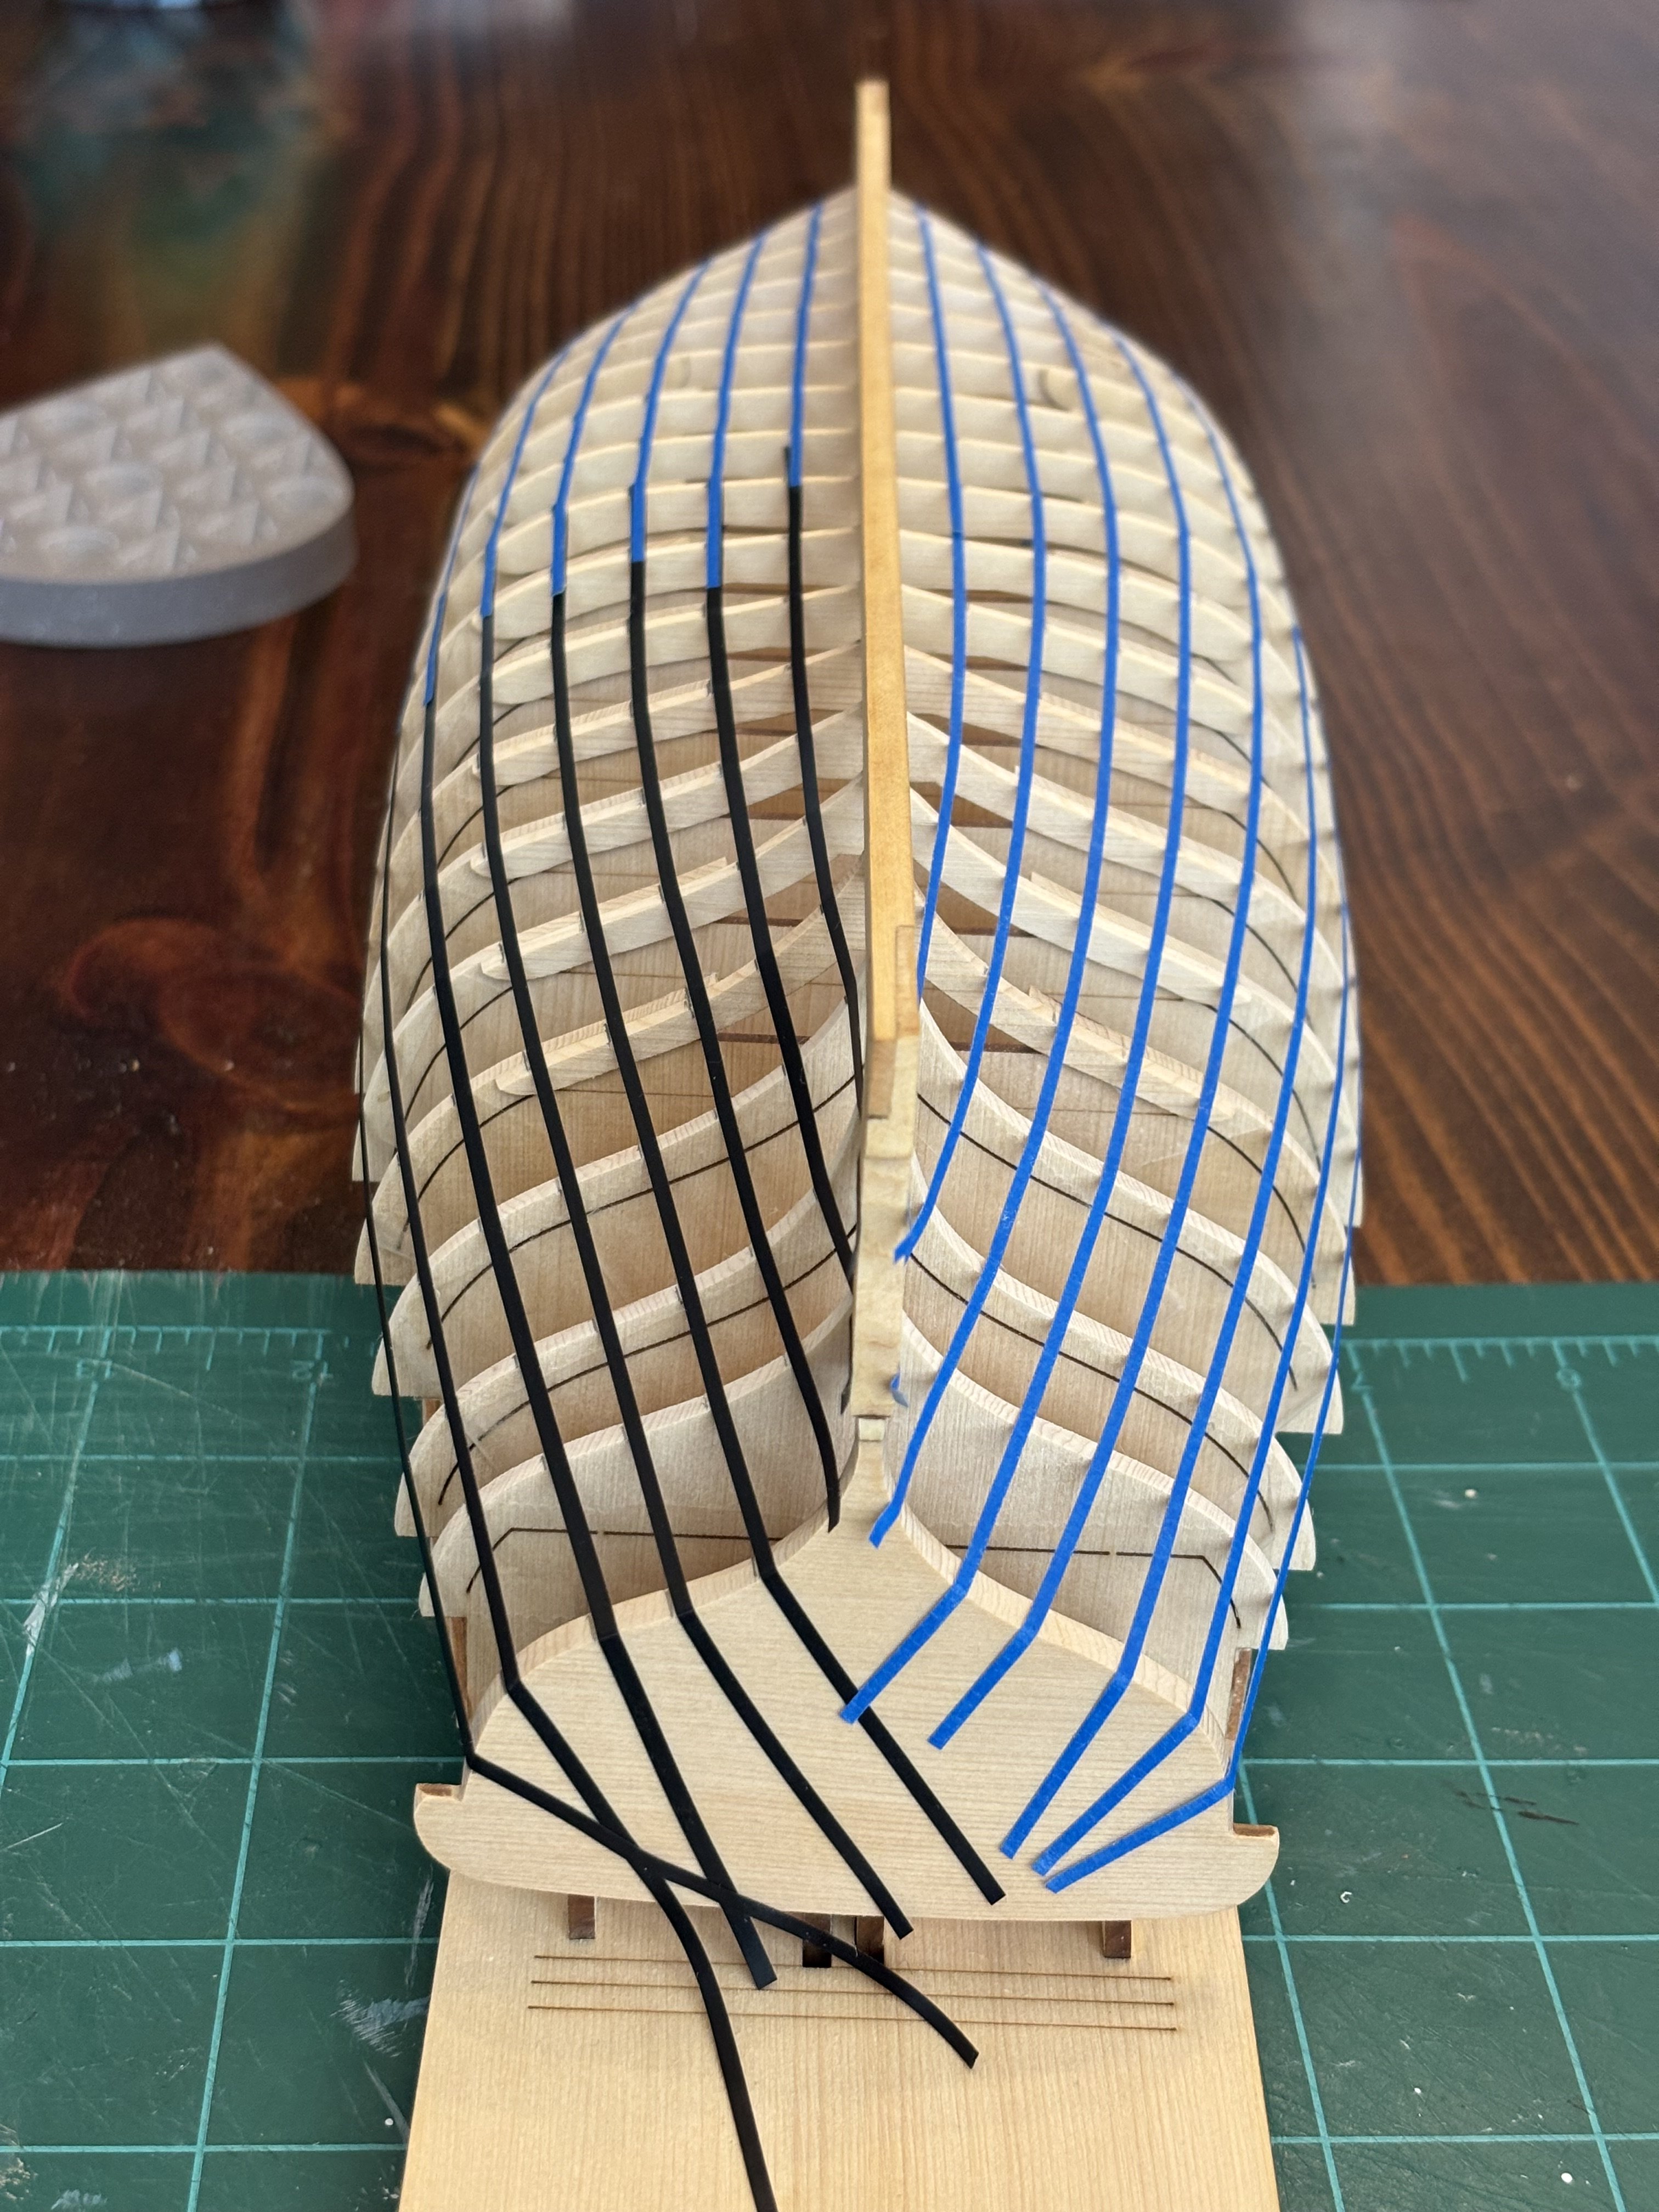
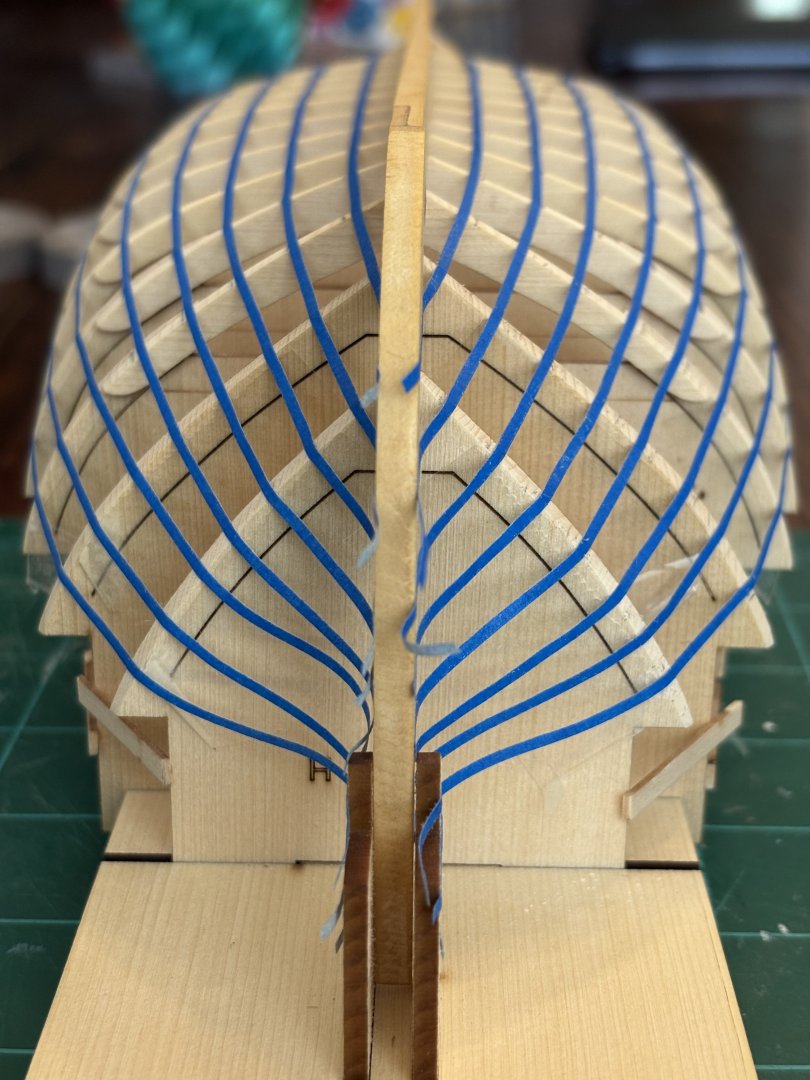
Now that I have completed the planking on my Confederacy, it was time to show the Medway longboat some modeling love. As Chuck has suggested in his monogram, I started the planking task by lining off the hull with thin strips of tape. This is where it currently sits. I think I will walk away for a little bit and come to give it a second look with a fresh set of eyes. Edit: looked at the bow again after typing this post and saw that the lines had to adjusted.


-
Can’t wait to print out and cut out all of the required parts and build this little model myself.
-
Finished up the starboard side planking tonight. Next up is the tedious task that everyone loves to do; sanding it all smooth. It’s not the best planking job, so no close up pictures; but I am happy with it and learned a lot from the whole experience.