


Cap'n Rat Fink
-
Posts
829 -
Joined
Content Type
Profiles
Forums
Gallery
Events
Posts posted by Cap'n Rat Fink
-
-
-
Very nice planking job done Tom!

-
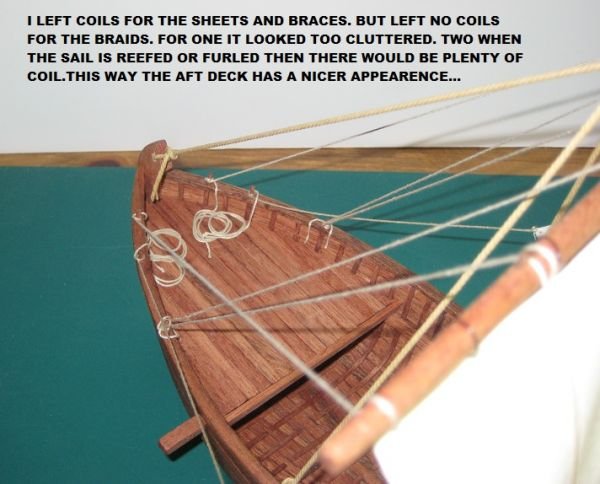
Thank You all for visiting my build log!!! More later!

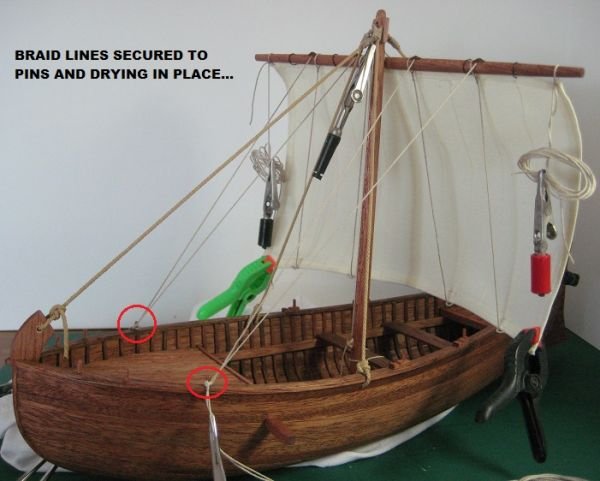
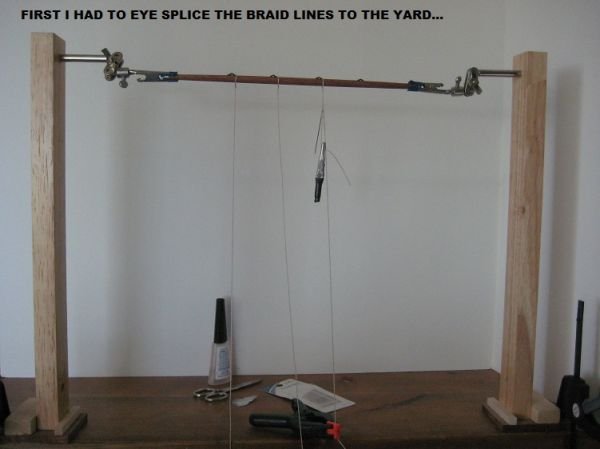
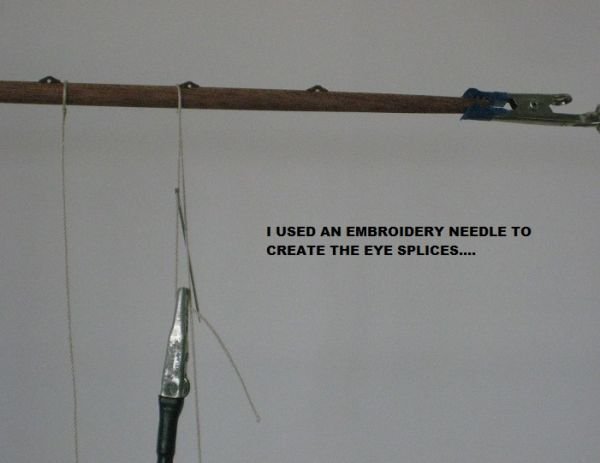
As the lines dry another style of braid riggin line is they would splice the two lines together and then haull them up. This variation as you see I'm using is two separate lines. I will use the other variation on my second boat...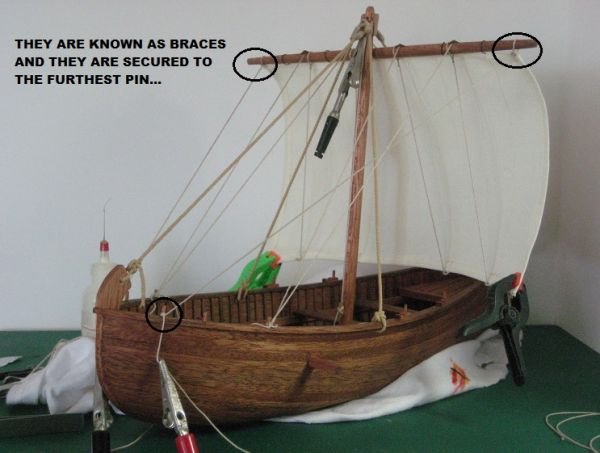
I love how Scott's Kit just POP's with the more detailed rigging on it...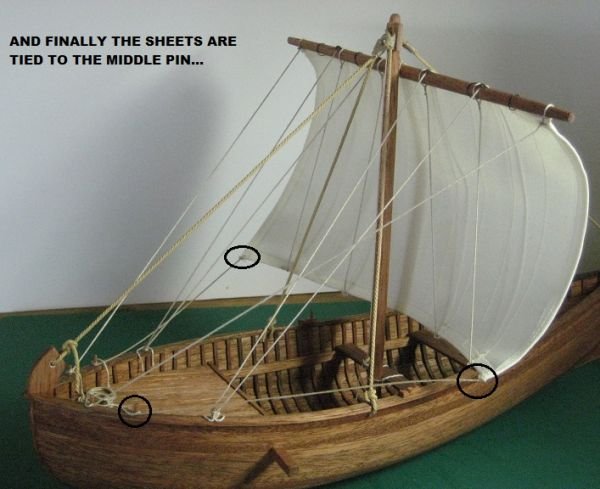

-
I really had a lot of fun researching this type of rigging style!!!


Again another portion of this style of rigging with different variations. I decided on a simple drilled hole through the hull to secure the shrouds. But some of the these boats would secure the shrouds either to the inwales and eyespliced or tied off, another was tied off on the thwart, yet another style was with deadeyes. the last one being if this new owner could afford such an upgrade.
-
This style of rigging had so many variations it just made the researching a whole lot of fun and very interesting. Speaking of researching my loved this boat so much with it's ancient style she has made a request of me to build a Viking Ship!
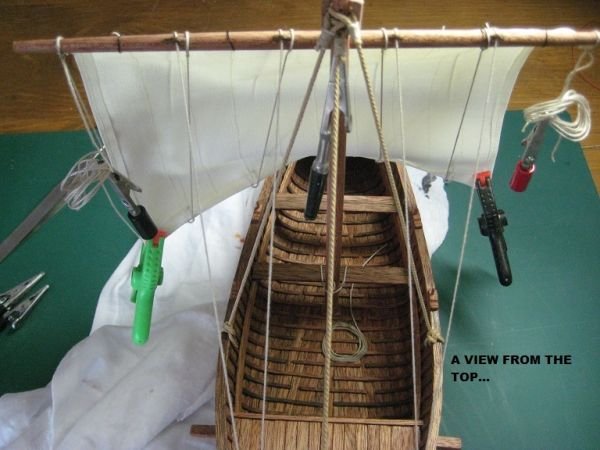
Here we go with more photos!
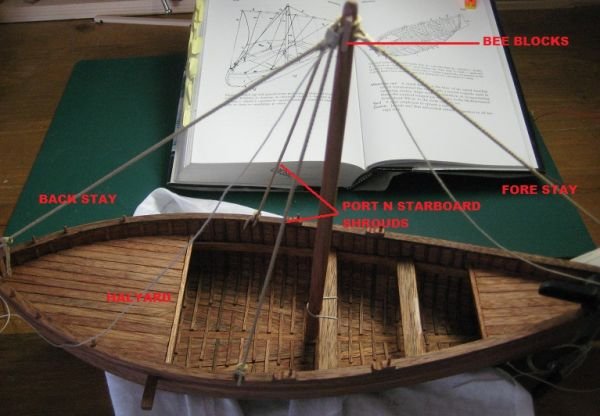
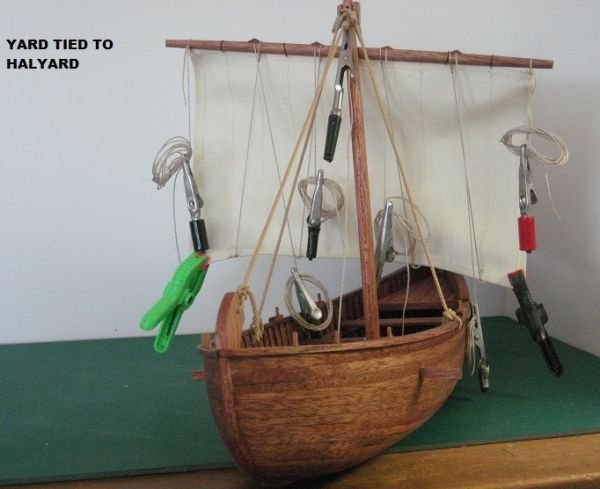
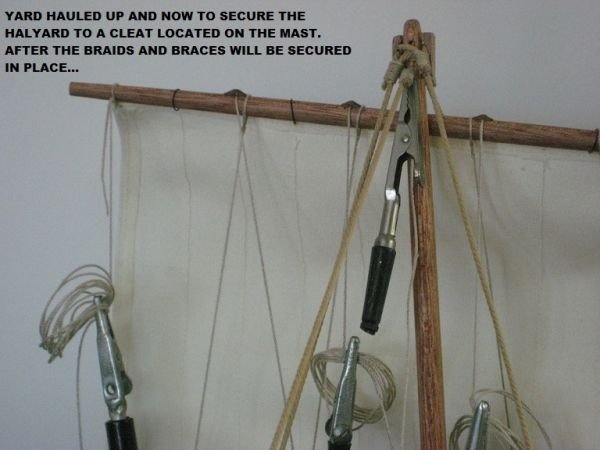
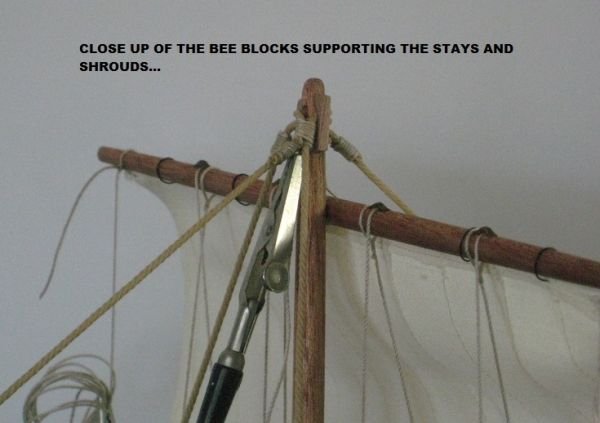
Braid rig boat come in many variations. I decided on one which will incorporate bee blocks at the top of the mast to support the stays and shrouds. I used a larger scale rope to give them a better look. At the tie off points these boats used half hitches or seized. I decided on half hitches. But I seized the lines at the bee blocks with other variations using eye splices....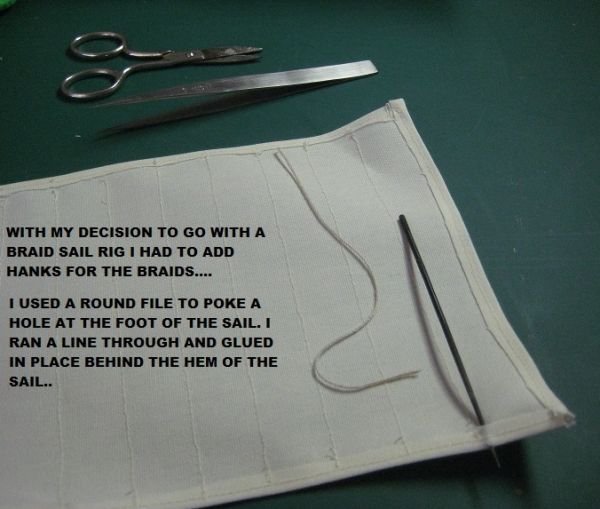
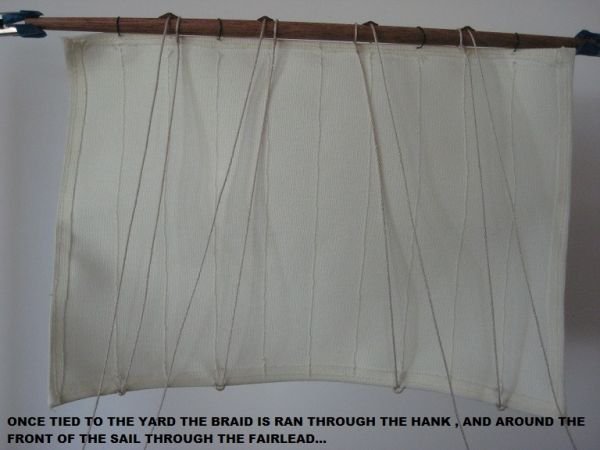
I think they are called hanks but not sure. These are needs because the braid style I decided on has me eyesplicing one end to the yard. Then the line will feed though the hank at the sheet then up and through the fairlead. Then finsihed off by being secured to a rigging pin on the gunwale....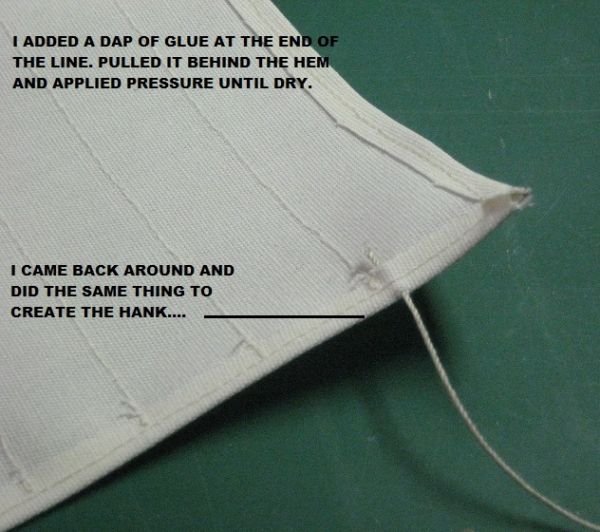


-
Hey Mark,
You think it would. Well when I placed the boat on the display stand I put backwards again. LOL!


Scott I gotta tell ya. I am just having a whole lot of fun with your kit here. The quality of the wood is just great!
Anja, John, and Bob THANK YOU ALL SO MUCH
-
John, Bob, and Joe,
Thanks Guys it sure does mena al ot to me!

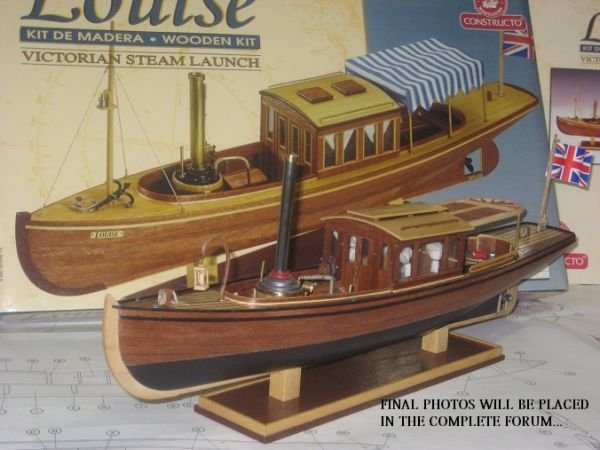
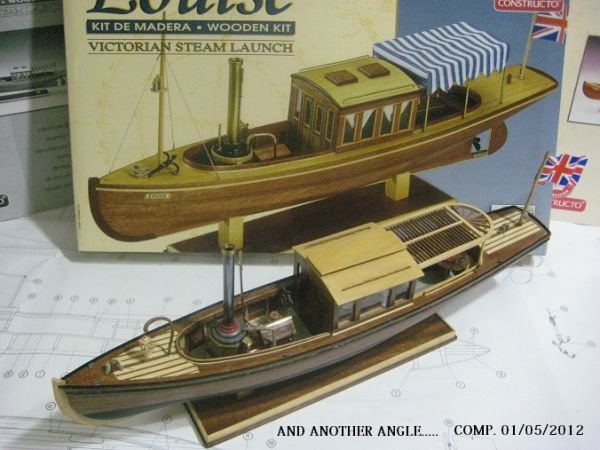
Here we go with the final photos


Final photos will be placed in the comp forum soon. Thank you all so much for stopping by.
-
Hello Meredith,
Your Launch looks great...I had a lot of fun with this MS kit.
-
Very nice looking hull Bob...
-
The rigging is just sweet John. Enjoy your visit buddy...
-
Hey Mark hows it going? Good to see you finally hitting the planking part. i love this part cause it really gets the juices flowing as you lay each plank. I hope you ain't too hot there, because we sure are....
-
THANK YOU FOR LOOKING IN ON MY BUILD THREAD MY FRIENDS....

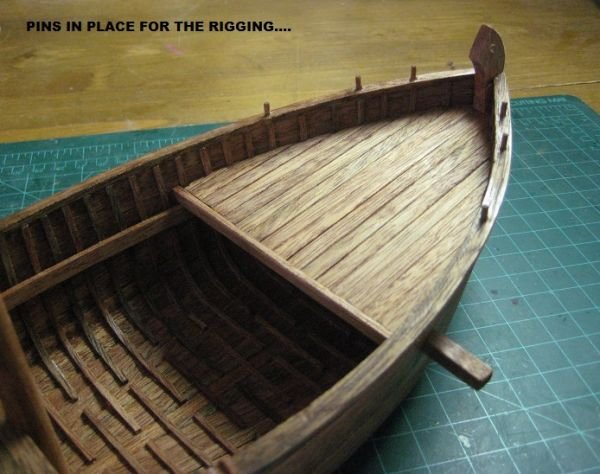
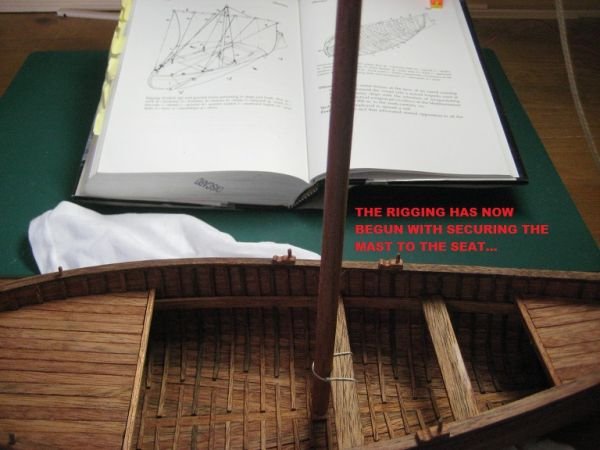
with six pins instead of 4 pins I have decided to do a more detail rigging of the braid rigging style they used in these boats at that time. What I have learned there are many variations of braided rigging. i just had to be careful of which one i would choose. I found some rigging style for a braid as old as 1500bc for these small boats. Which I could not use since this boat was around 40bc to 50ad....But i did find several rigging styles for this era. i will be rigging both of my models differently.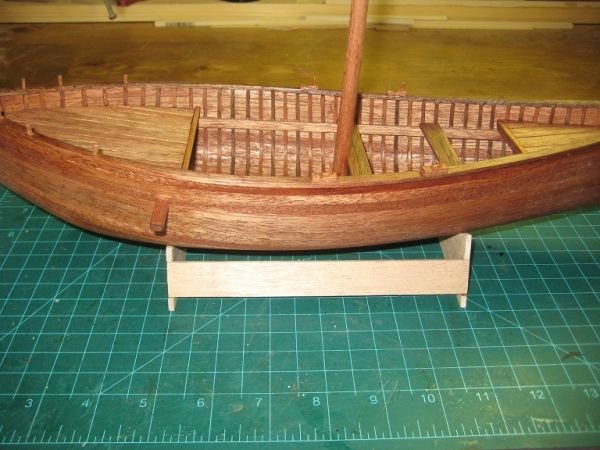
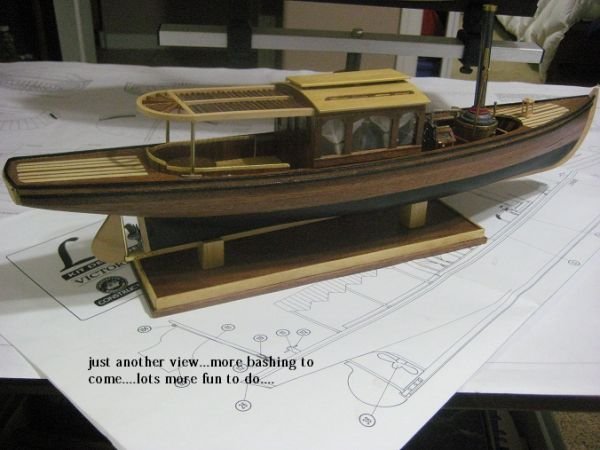
the new display stand.....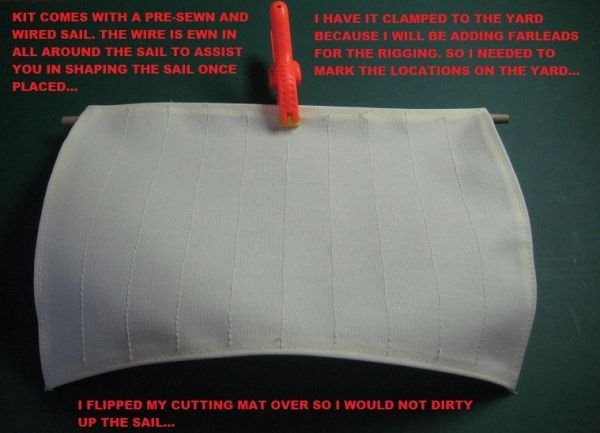
The more detailed rigging i will add required me to add fairleads for the braids...
so i had to aline the fairleads with the seams of the sail...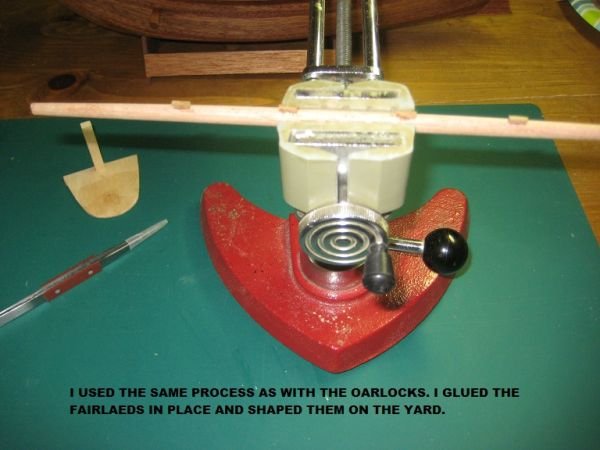
- Anja and avsjerome2003
-
 2
2
-
-
Thank you Frank! It's funny how i keep thinking the stern is the bow. I just keep laughing about it....

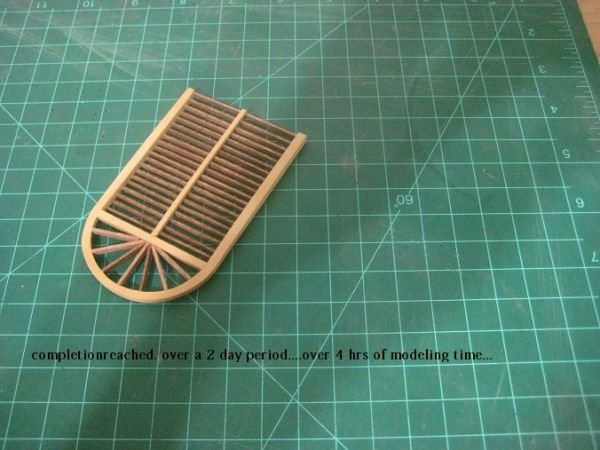
Time for another update. I did have a lot of fun building this little boat...
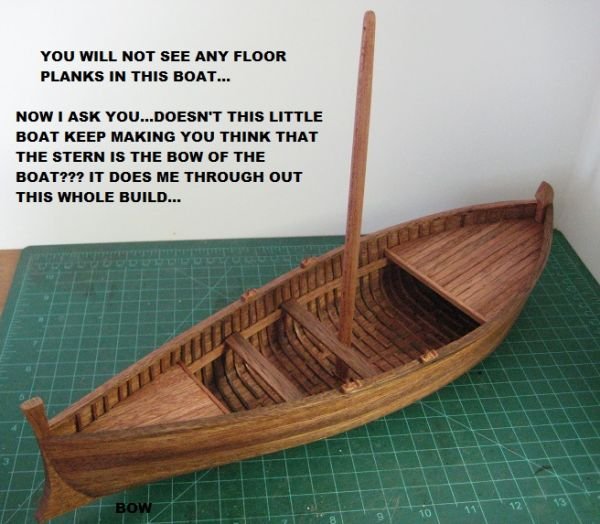
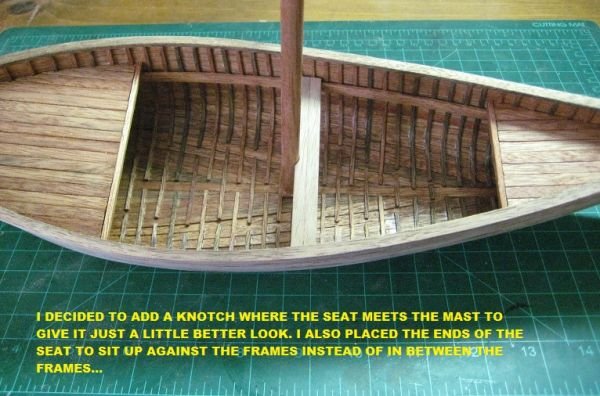
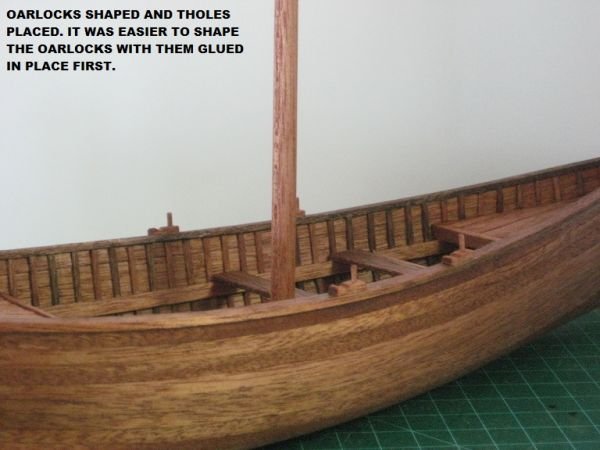
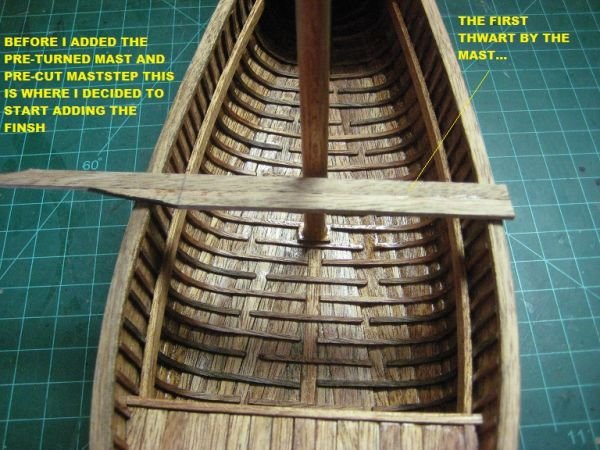
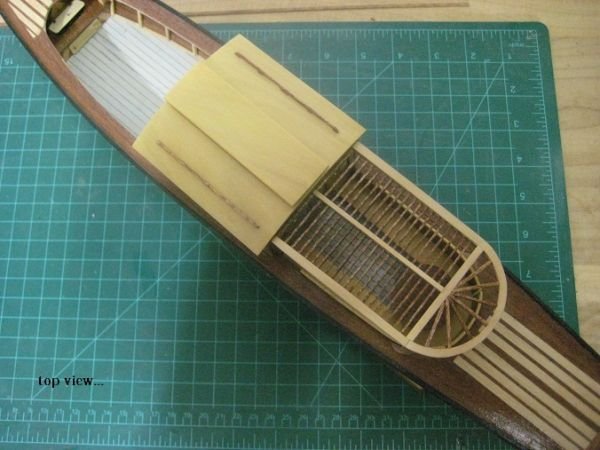
The reason for no floor planks is because the book only mentioned them at the end of the book. Which i thought very strange. If you ever read the book the author gets very detailed throughout the recovery process and what they discovered during the process. These ceiling planks as they are known by just were never mentioned. Per the book if there was any ceiling planks they would be few and placed most likely a little forward of amidships. I will add them to the second model...
Another tidbit...
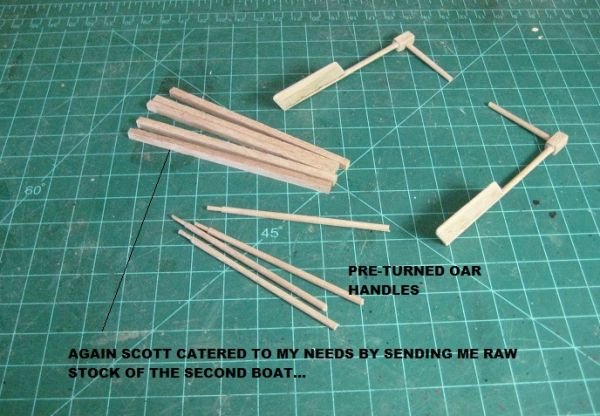
It was assumed the the buyer of the boat was well off enough to buy an old boat and rebuilt by the boatwright. But at that time inland of Galilee was so wood starve the boatwright had to use what ever wood he had on had. Thus the boat was constructed of 16 different woods. Plus the nails used were not long enough to be clenched so they were just hammered in. most likely because the new owner could not afford more iron for the longer nails need to clench. This is also why they figured the boatwright was a master craftsman because he built a very good seaworth boat with what he had on hand.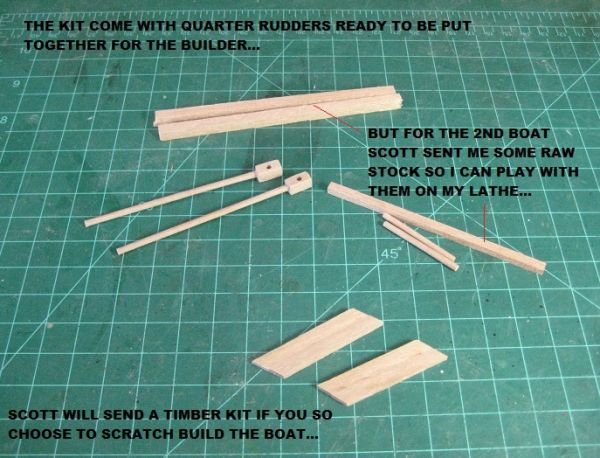
another tidbit....
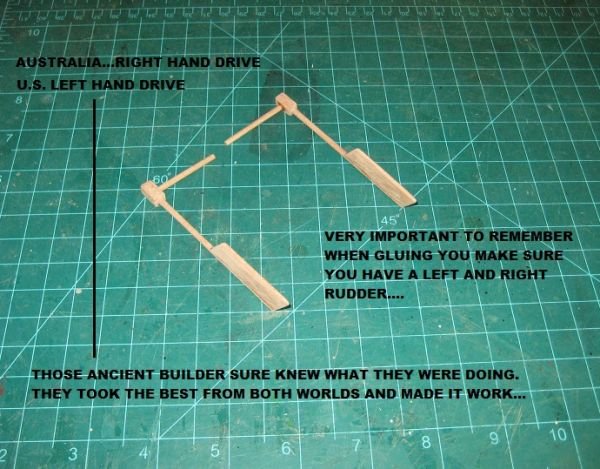
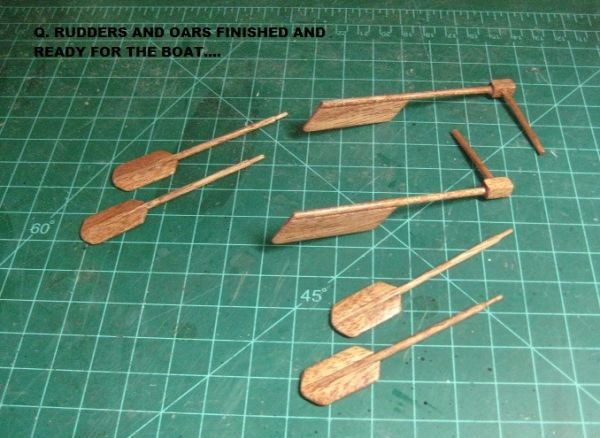
In Scott's beautiful boat model you have all seen at the beginning of my thread you see the quarter rudders. Mine on my model will have a small bit of rigging on them. The rigging for sure is to secure the rudders, but they were also used to help assist the steersman with the handling of the ruuders during rough seas...I found this out during my research oh sometime last year. Now you know how long it took me to get ready to build this boat...HAHA! man a little slow...- Anja, riverboat and avsjerome2003
-
3
-
-
Thanks for looking in.............
-
-
Hi Bob and thank You, But please don't change your mind there soooo many variations of steam Launches. Remeber we are modelers you are students but we are teachers too. And a teachers one duty is to inspire others. Plese do one I love your work.
Time to add a few more photos here

-
Hi John and Thank You.
I used Humbrol Metal Cote. You can see it on page 3 of the log. You brush it on then wait about 10 minute for it to dry. I usually wait 30 minute to an hour instead. But it does dry in 10. Once dry you take an old cotton cloth something an old t-shirt and then just rub it out, and there is your finish. It's neat little stuff
-
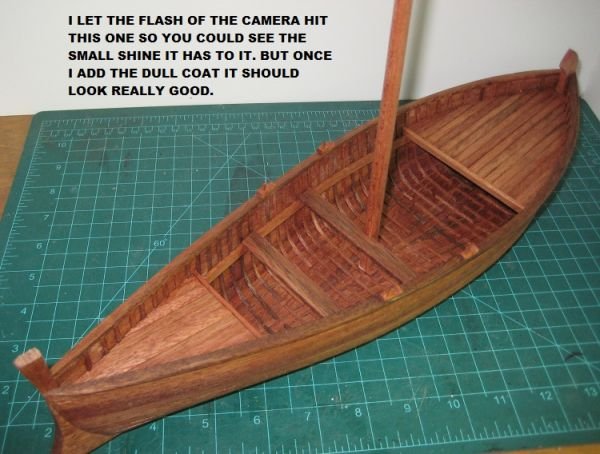
Thanks Anja,
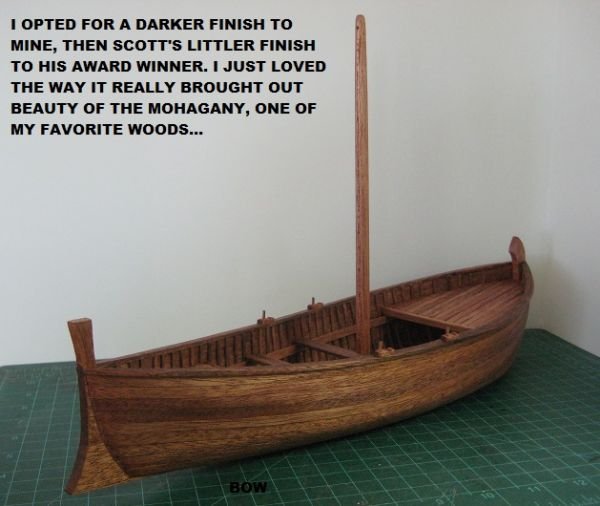
i used shellac straight out of the can to give it that darker color. i used dull coat to dame down the slight shine it gives it. The model is completed just working on the display case. This one is going to our church and the second one will be mine to display in our home.
As always thanks Scott.
Good for you John, just remember have 2 models going at once. Because you will need a brake from constructing the hull, it is a challenge but you will do it.
Thanks Bob your malabar is shaping up I see
Thank you Keith, you know I am still getting confused with the frontend of this boat too. LOL!
Thank You very much Wayne
-
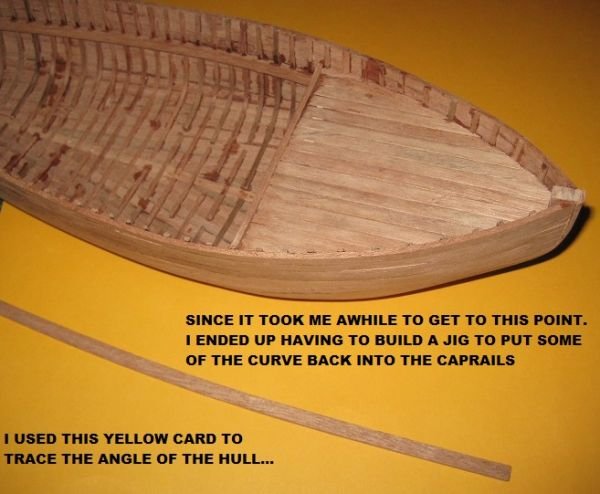
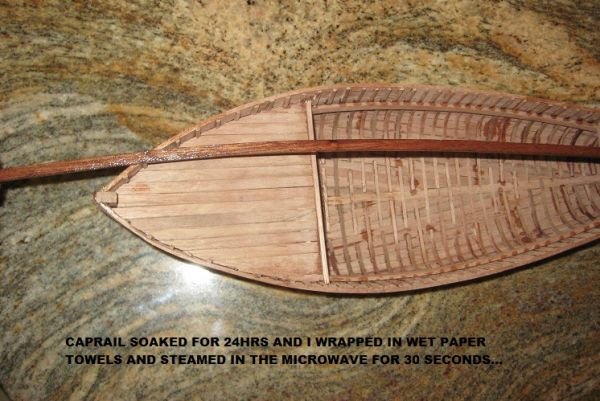
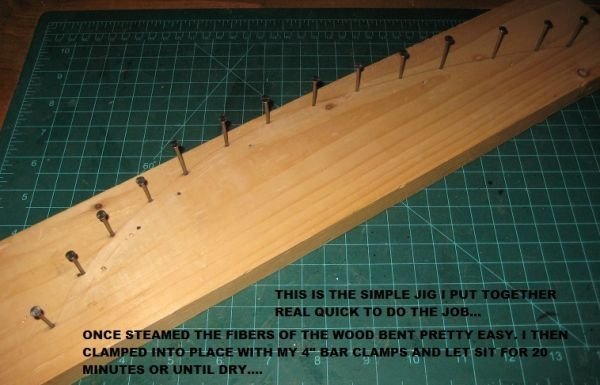
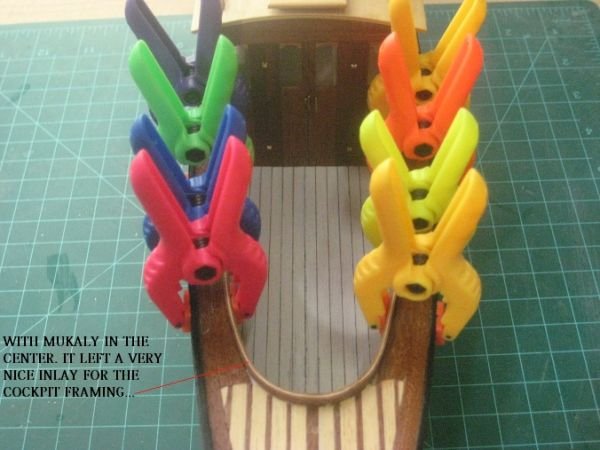
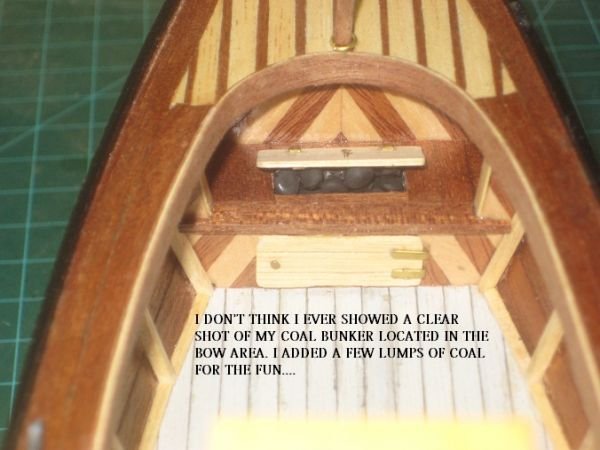
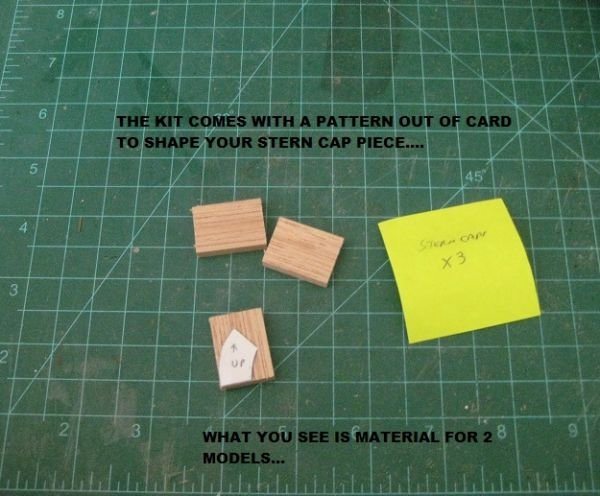
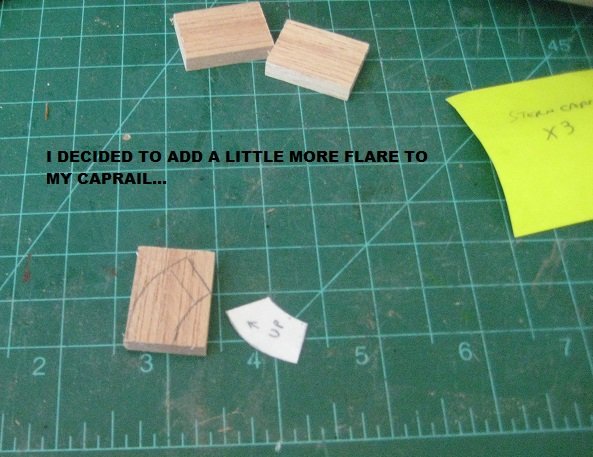
and a few more photos........questions and remarks are very much welcomed....

-
-
Well just about done with my vacation, busy checking emails and other things so i thought i would update my log here....
-


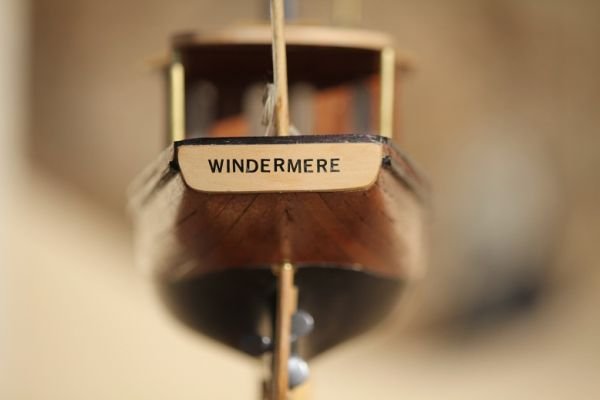
The Sea of Galilee Boat by Cap'n Rat Fink (mario) - FINISHED - 1/24 shell-method
in - Kit subjects built Up to and including 1500 AD
Posted
Hi John,
As for research i used info from ancient boats durning Ramses III era which is about 1500 bc, just a little toooooo old but i started from there and finally found more info around 100bc to 80ad. All was found in the www.
Anja, Bob, and Eddie,
Thank you ver much!