HOLIDAY DONATION DRIVE - SUPPORT MSW - DO YOUR PART TO KEEP THIS GREAT FORUM GOING! (Only 75 donations so far out of 49,000 members - C'mon guys!)
×


Mark Pearse
-
Posts
830 -
Joined
-
Last visited
Content Type
Profiles
Forums
Gallery
Events
Everything posted by Mark Pearse
-

Brass stock in small sections....?
Mark Pearse replied to Mark Pearse's topic in Metal Work, Soldering and Metal Fittings
what sort of saw blade is used for cutting brass? -
Hi John yes I did, & got some brass flat strips from them - at 6mm or 1/4 width. I can use a sanding block to reduce a small amount of that, to say 5 or 4mm width. As a follow-up, I did get some brass square C channel via eBay (3 x 1mm, 300 long) by Albion Alloys UK, the shipping hurt but I'll recover......
-
The strips I'm after are in the width range 2-6mm, & thickness range 0.5-1mm. It's very surprising, as you'd think these would be used a hell of a lot. I dug out every scrap I could find & in most cases I can make the scraps work: for jib tracks, chain plates etc. I was going to use some 3 x 1mm squared C channel as a mast track, but that's not available from K&S, I found a seller of Albion Alloys (UK), but the cost of shipping makes it v expensive. I'll try eBay I suppose,
-
Brass stock in small sections....?
Mark Pearse replied to Mark Pearse's topic in Metal Work, Soldering and Metal Fittings
Thank you all for the responses. K & S don't seem to have any rectangular strips (aka flat bar) narrower than 1/4". I believe I was looking at their store website. And thanks also for the guillotine suggestion, I hadn't realised that can work. I went right to the bottom of the scraps box & I can largely work with what I have in bits & pieces, except for the square C channel 3 x 1mm nom. I'll think about some alternatives, including eBay. -
I'm planning the metalwork & ....!!!! the smaller sizes of brass flat bar don't seem to be available. 6mm (1/4") width seems to be the minimum width - but a mere 5 years ago the range was much greater. It's kind of shocking. any suggestions?
-
Brass flat bar in sizes below 1/4" width seems to have vanished.... Does anyone have any recent experience of buying smaller sizes? 2-5mm widths, in thicknesses like 0.5, 1, 1.5, 2mm. any suggestions extremely welcome
-
that's great, well done indeed
-
Hi Vaddoc If there's a conflict in the information, the approach I take is to work out which aspect of the information to give priority to & which one to adjust. In the case of a conflict between the hull shape & the profile of the stem, I would likely prioritise the hull shape & allow the stem profile to adjust. (The stem profile will still be close, as unless there's an error the amount of adjustment should be minor). I encourage you to be decisive on this sort of choice....what would a boat builder do....? I would add that in some respects CAD is a double-edged sword. Its precision can make it look like the situation is worse than it really is. If we were still working with pencils, a lot of conflicts would be within the thickness of a line, or within the manual tolerances of draughting.
-
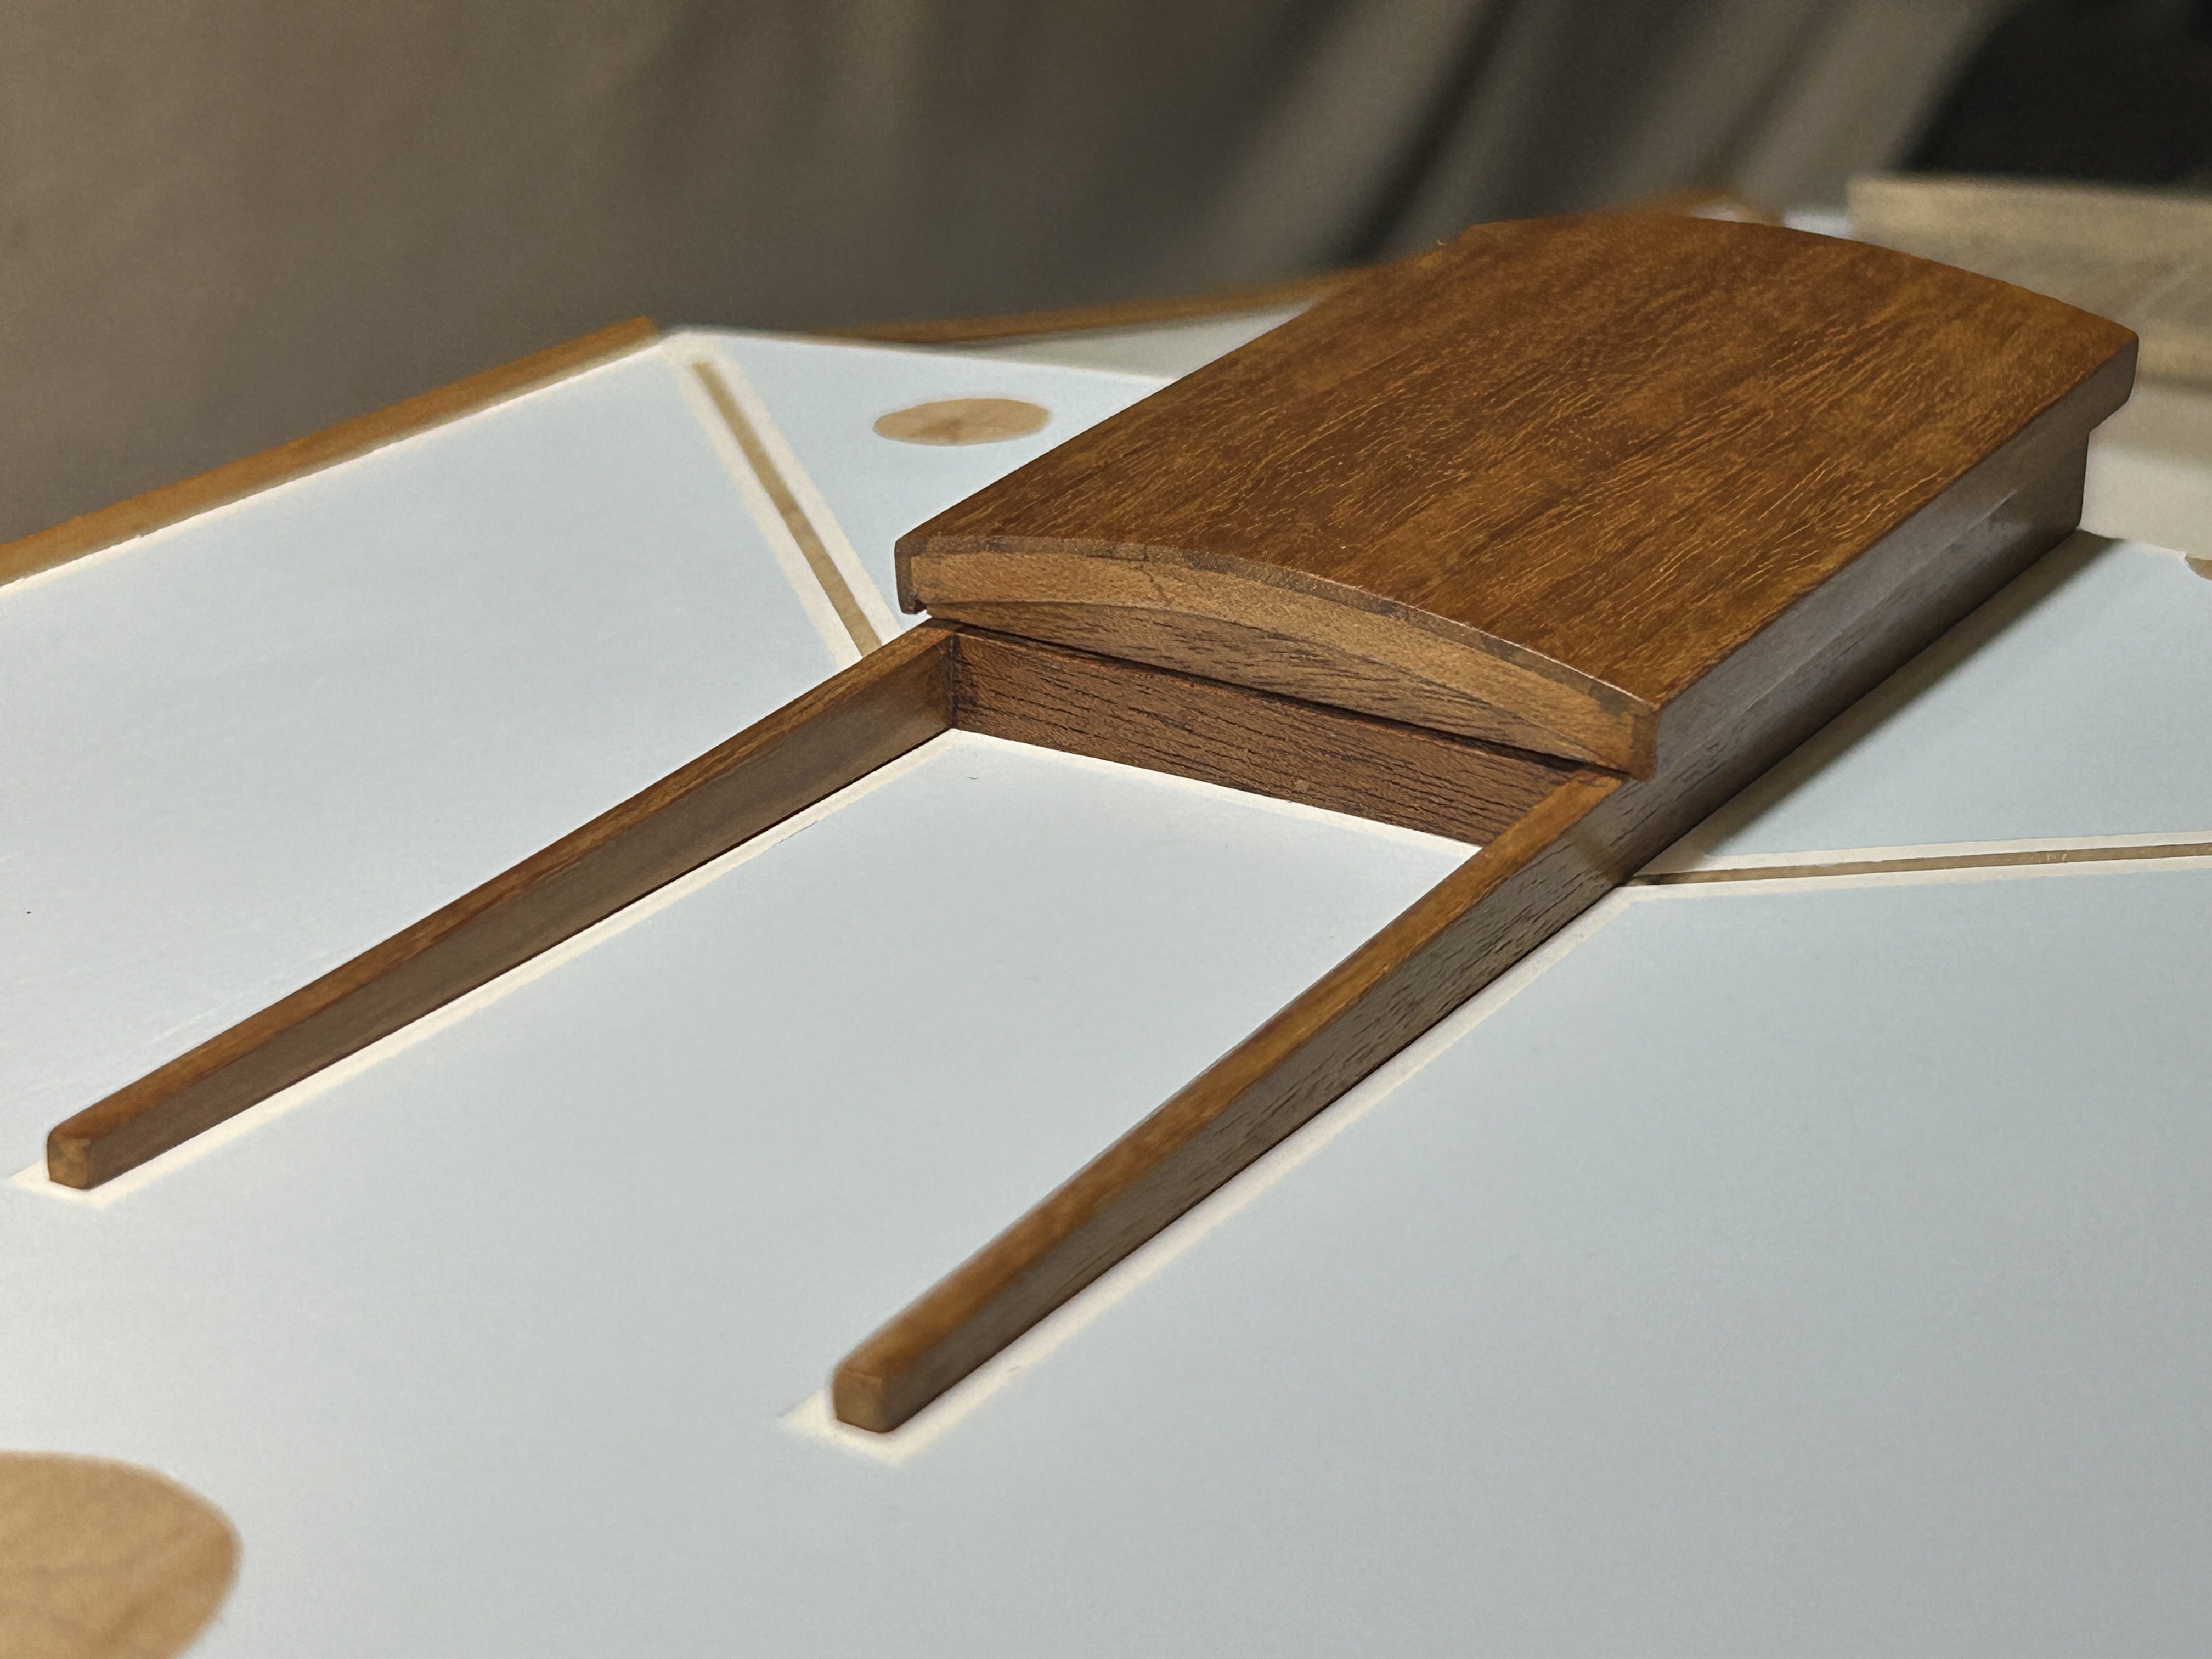
One detail that had been bothering me was the winches I purchased, for the running backstays & the mast halyards - nice but technically not very good. Steve from this forum (Bedford) kindly offered to assist & turned up some flanges perfectly to size, the difference is wonderful. They will be soldered together & tinned (thank you Welfack) the winches before: and after (now that's a winch): happy days....


-
Hi Patrick I'm curious - the leeboards are massive, & unless I'm missing something the plate behind that supports them isn't very large & is only at the top - so the leverage on the top part of the board & the mechanism, at times, must be huge. It just looks quite surprising that this amount of structure & support is enough.... Any reflections of yours on this would be interesting to hear. thanks,
-
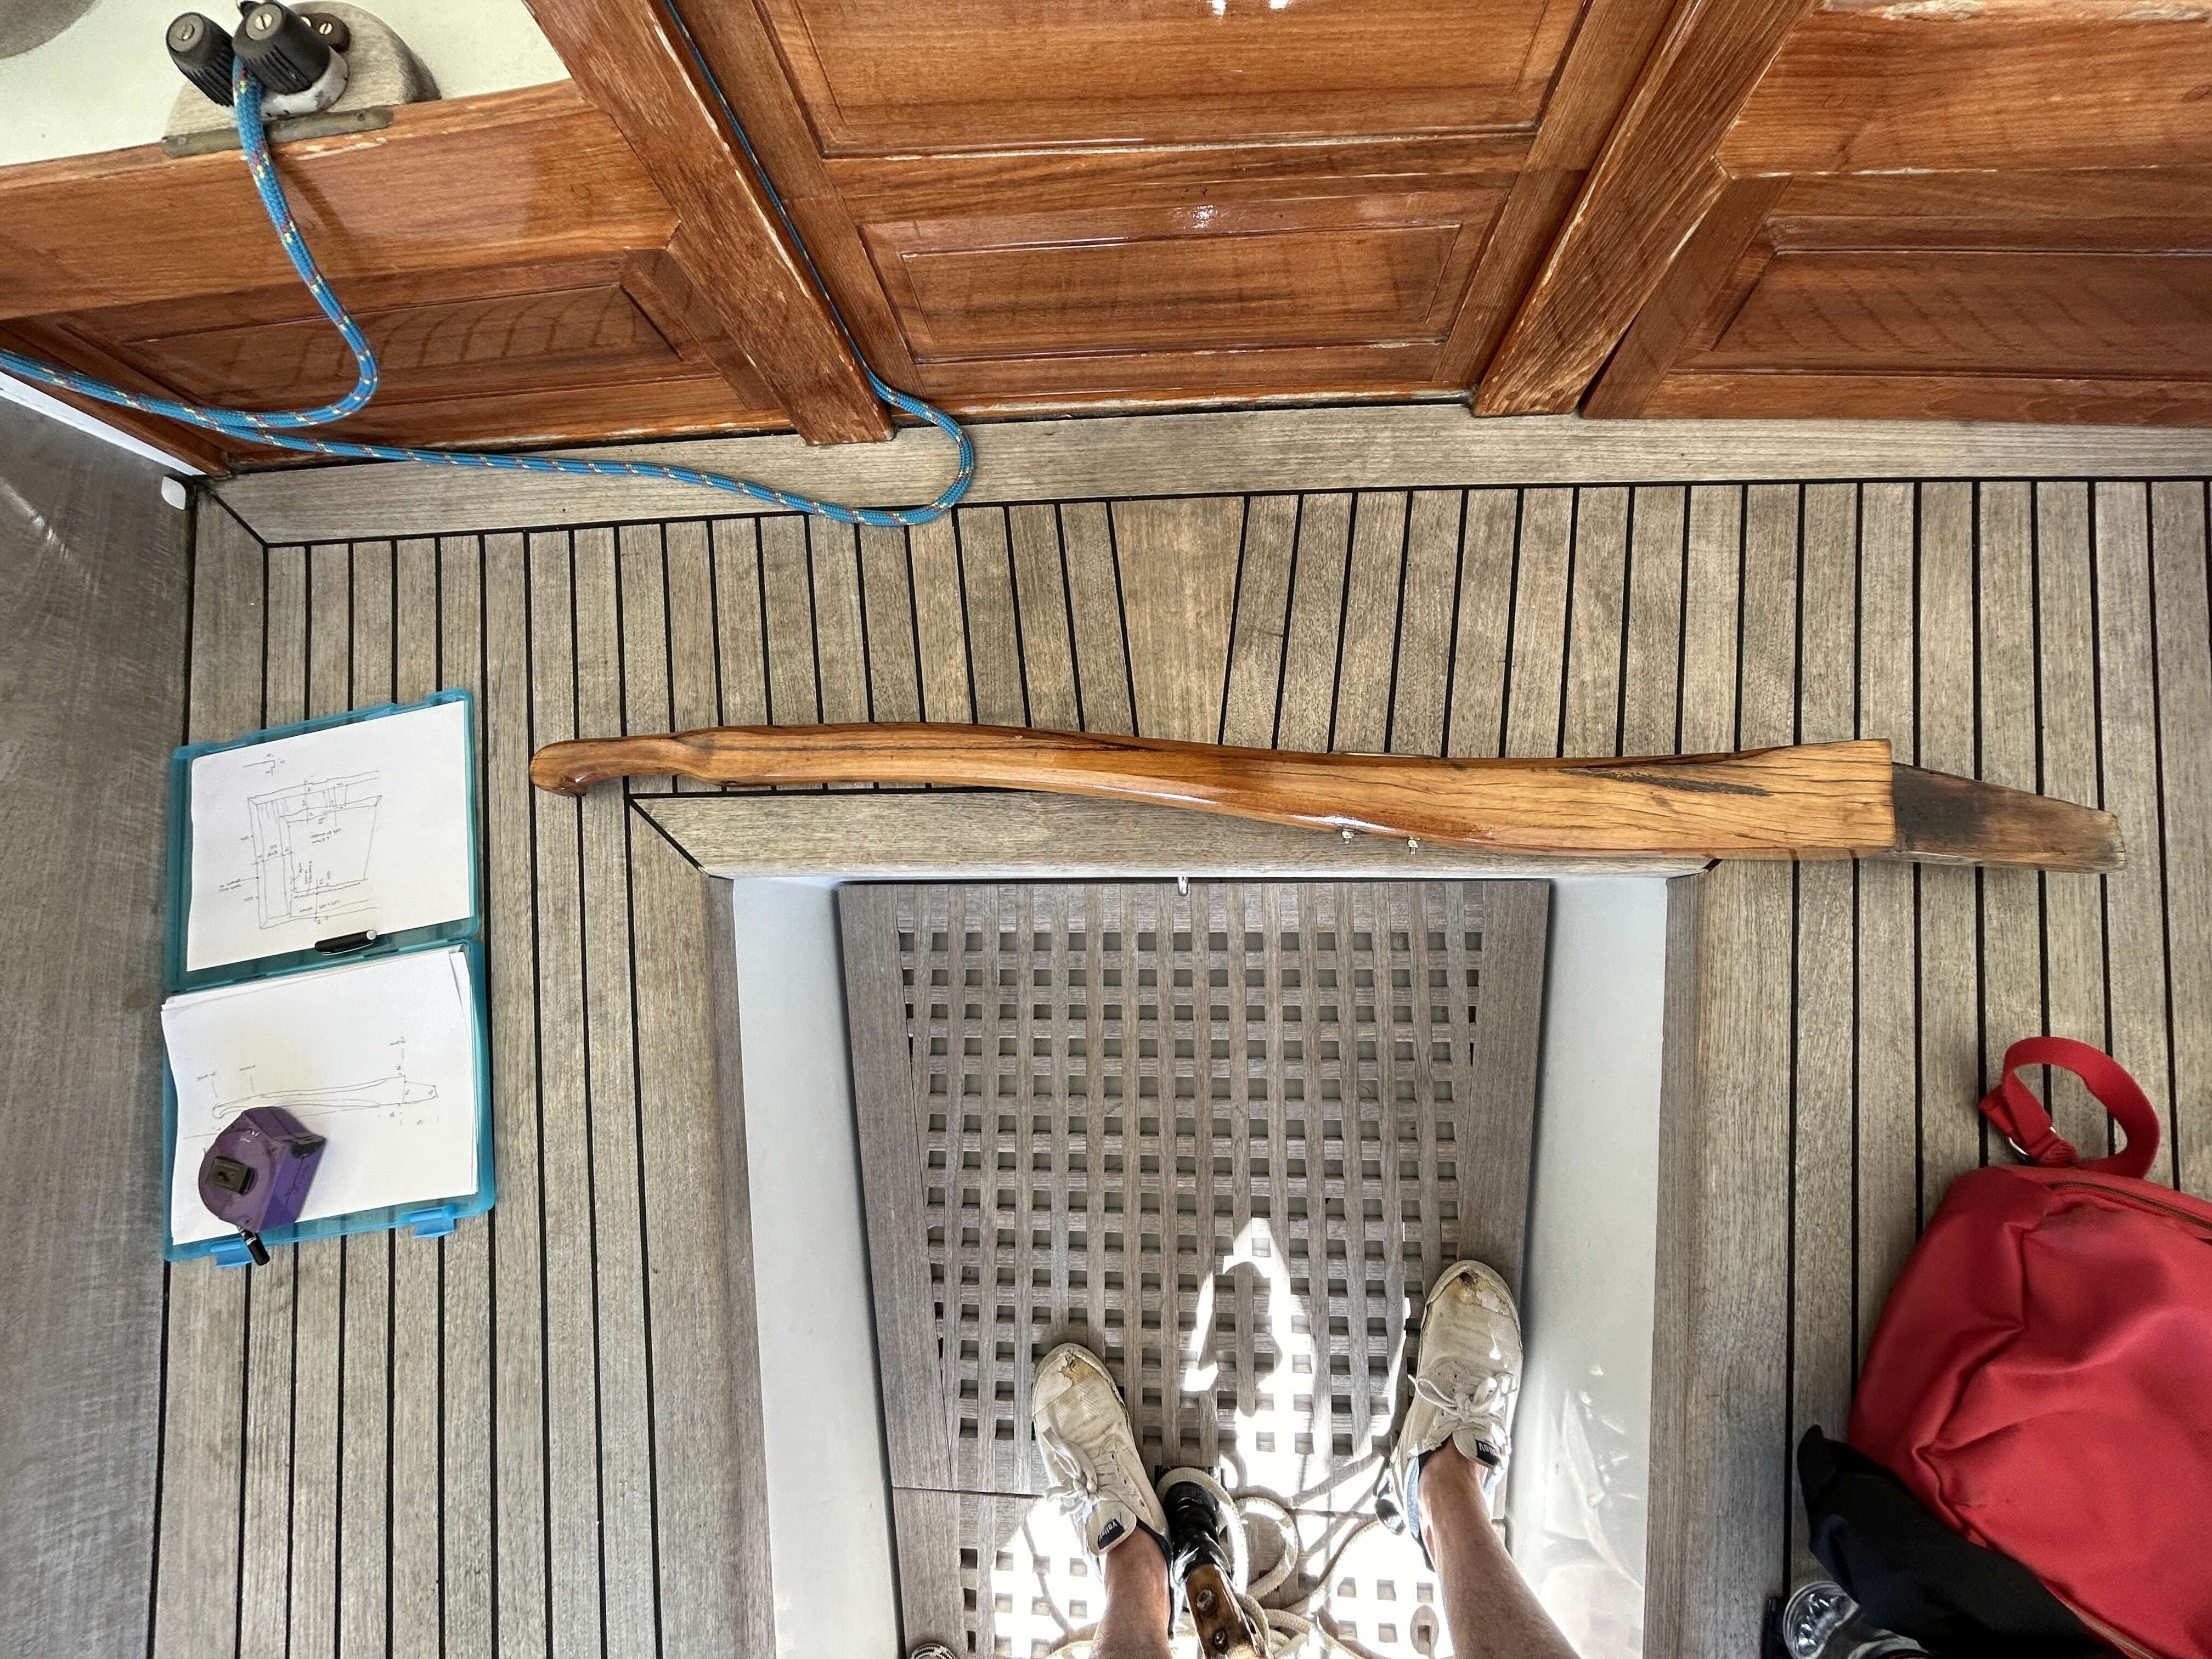
Some more details on the boil: The tiller is underway, & either finished or nearly there. Possibly another coat or two of shellac, the actual tiller is an aged piece of hardwood, so would be good to give it some of that character. The bowsprit & spinnaker pole are underway, here they are tapered & cut to length: I will do the pole, including end fittings primarily in timber. The actual pole is unfinished carbon fibre , so satin black, & the ends unfinished cast alloy of some sort. The basic details of the end fittings are roughed out, & since the photos the ends were treated with some CA glue to harden the timber & avoid splitting when cutting the beaks. To replicate carbon fibre, I rubbed the pole with black paint, with no undercoat. It's looking ok, so a gentle sand & another coat might do the trick. To help articulate the joint at the end fittings of the pole, I did a groove by rolling the pole under the blade of a craft knife, they have a nice straight long blade.


-
thank you both, & I also like that contrast between varnished timber & the weathered timber
-
Hi Steve, that would be fantastic - as a guide they will be around 9mm diameter, if that's not too small for your equipment, with a hole in the centre. I'll confirm later via a personal message.
-
Thanks all, & Welfack: a big thank you for this suggestion. I'll investigate & do some tests. I assume it needs to go onto metal as a base? (I purchased some small brass winches off the shelf, & on the smaller ones I'd like to add a base, as most contemporary winches have a base flange that is around 25-30mm thick - so my plan was to add a round disc to the bottom from 2 or 3mm thick acrylic).
-
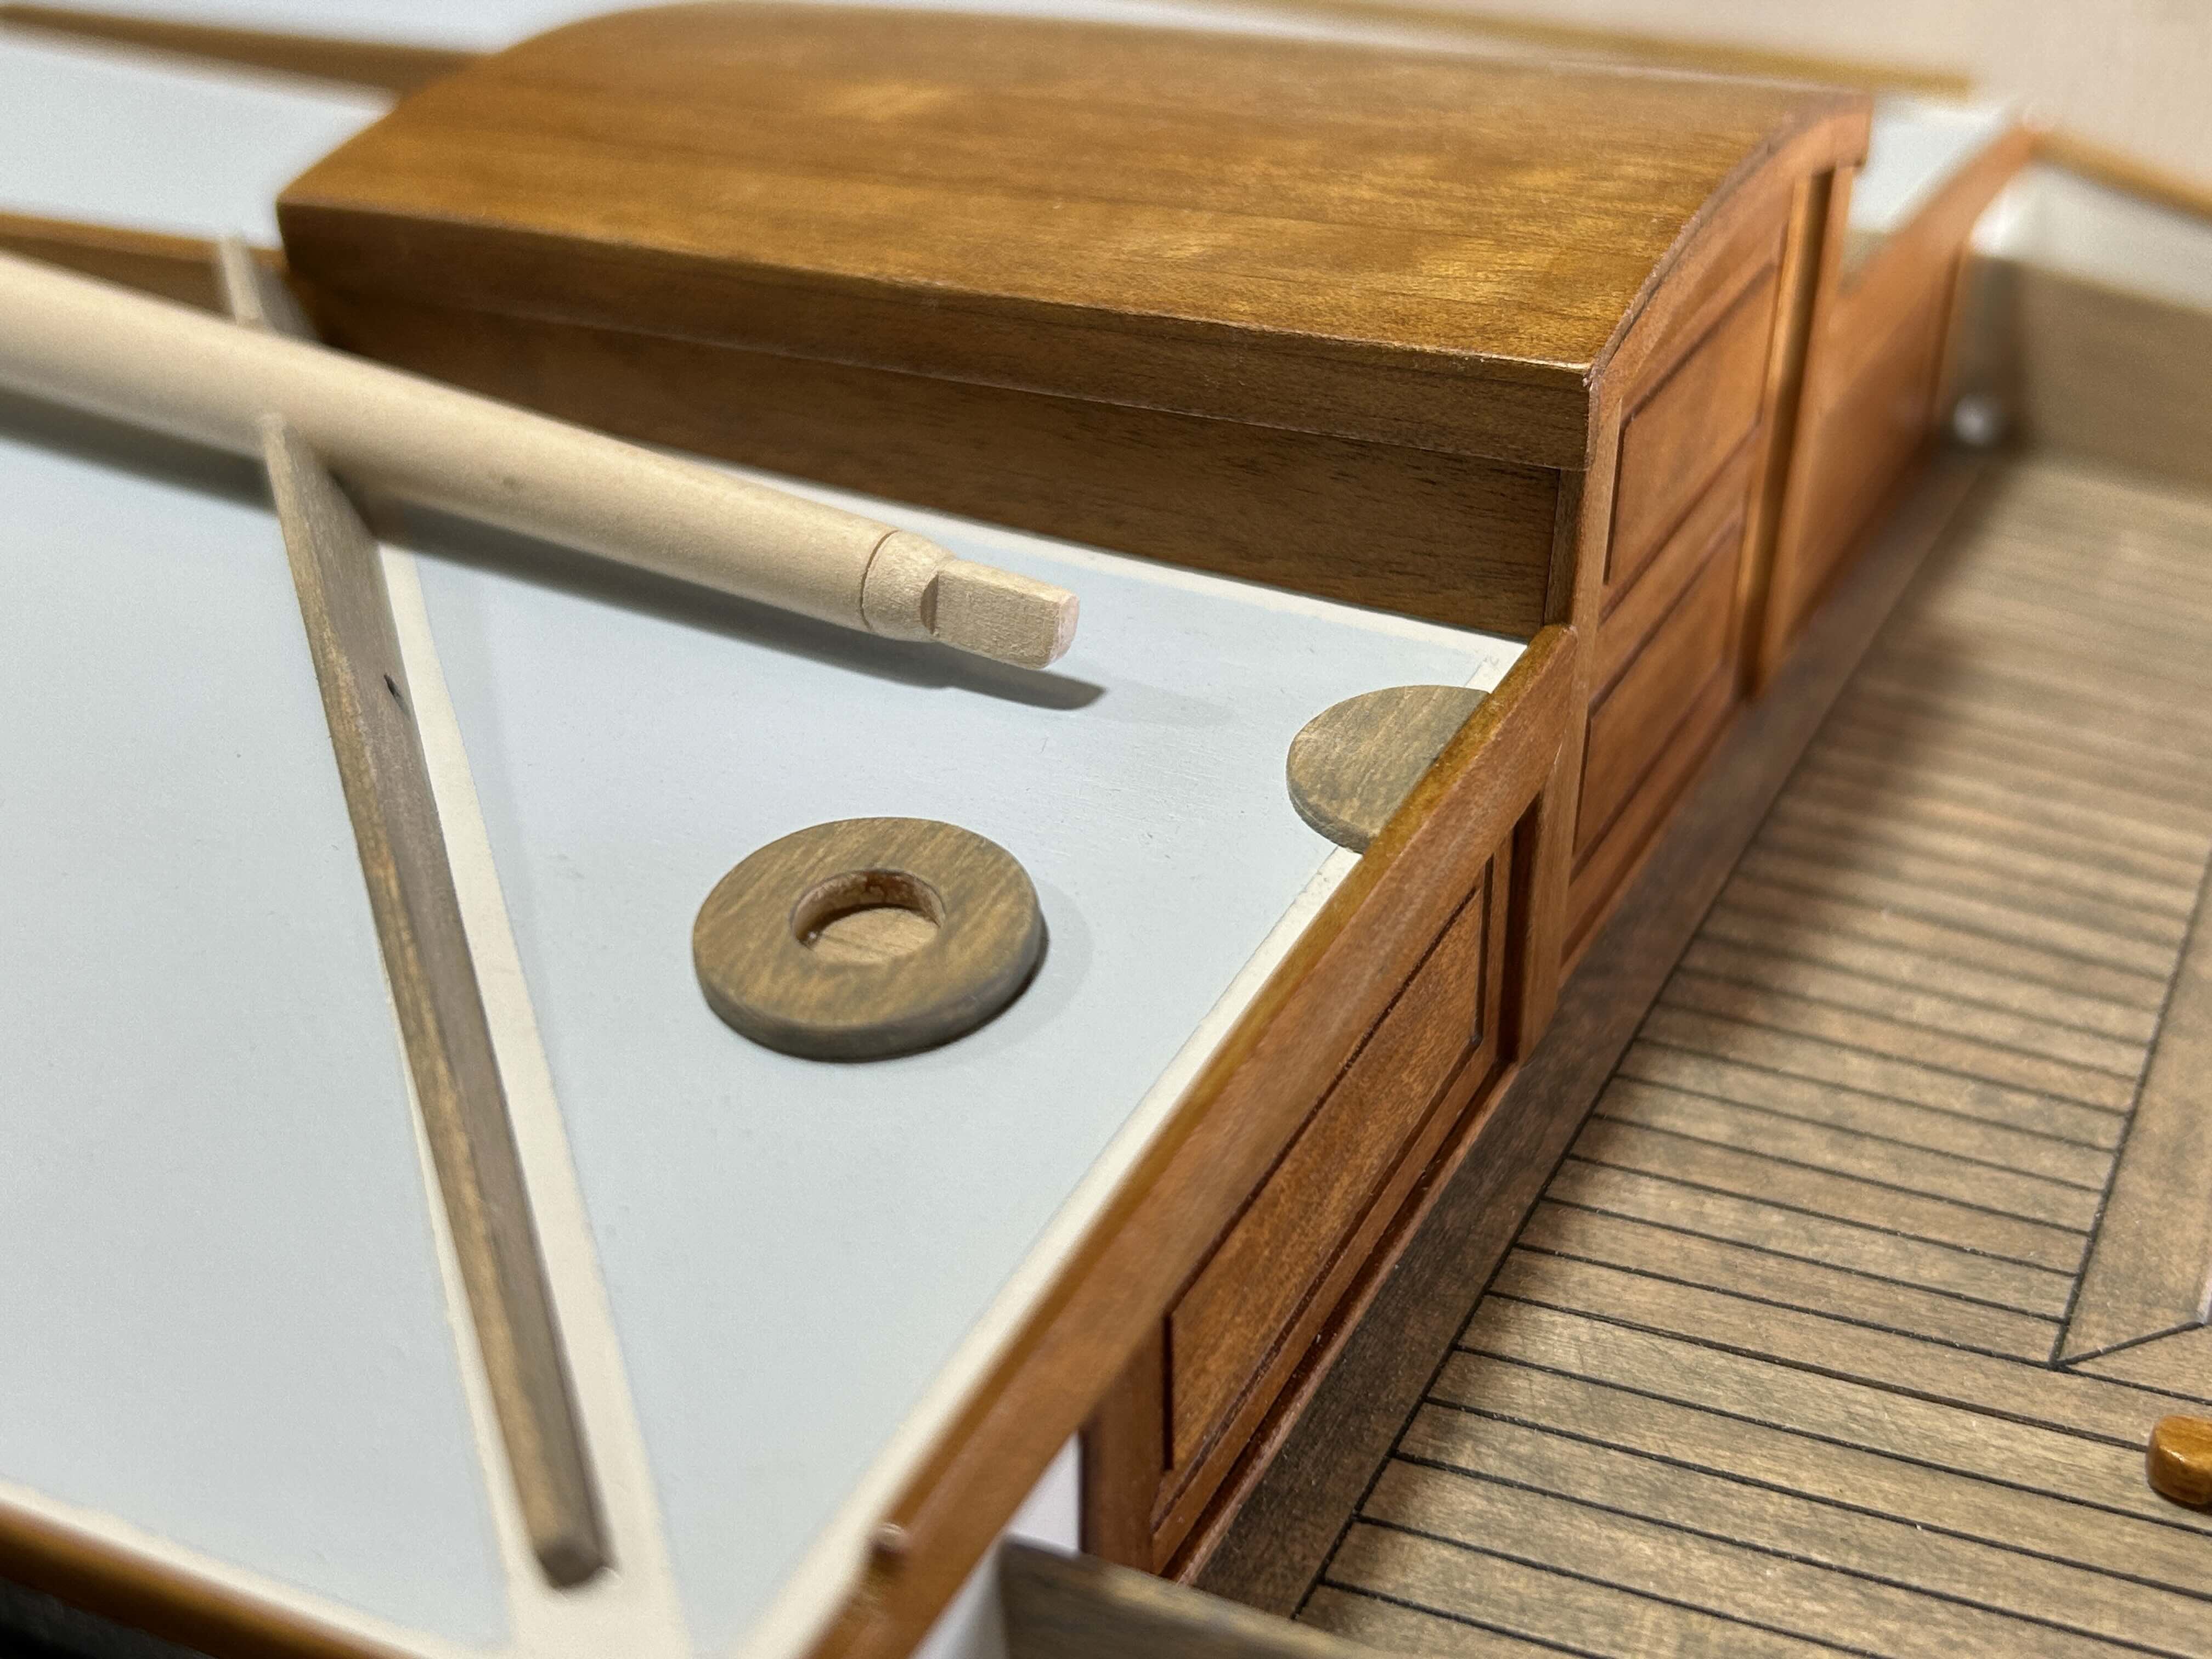
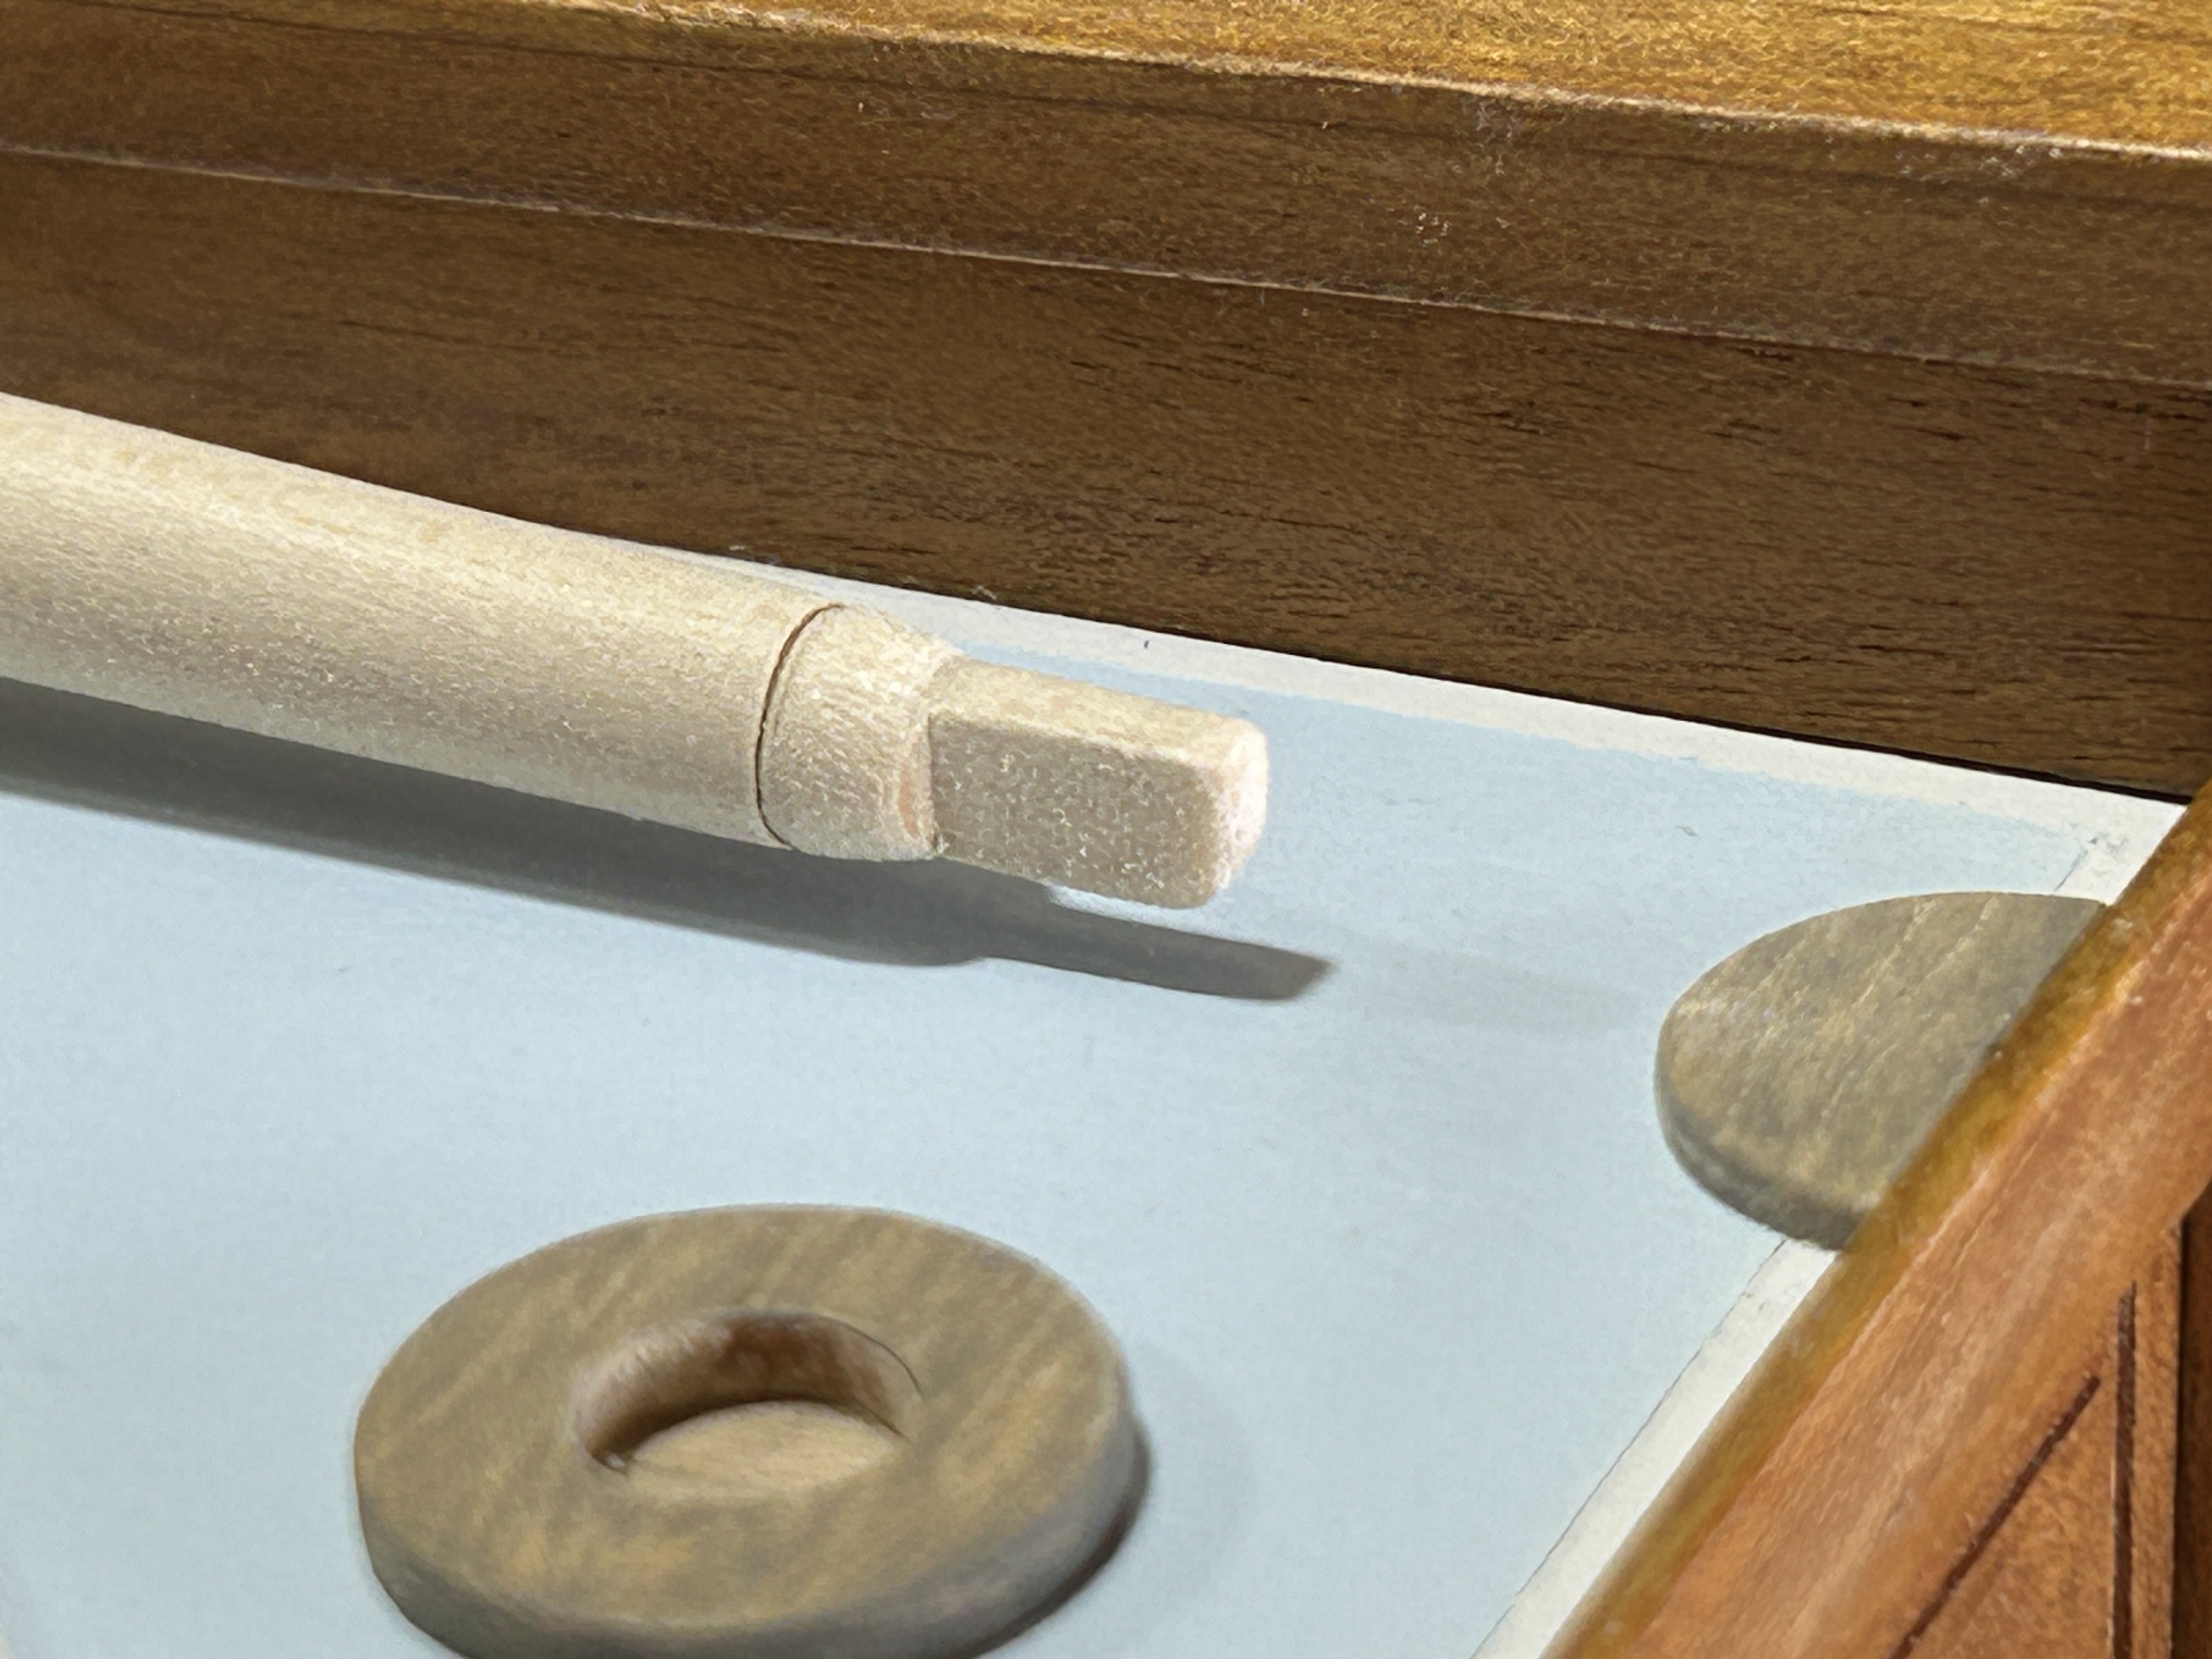
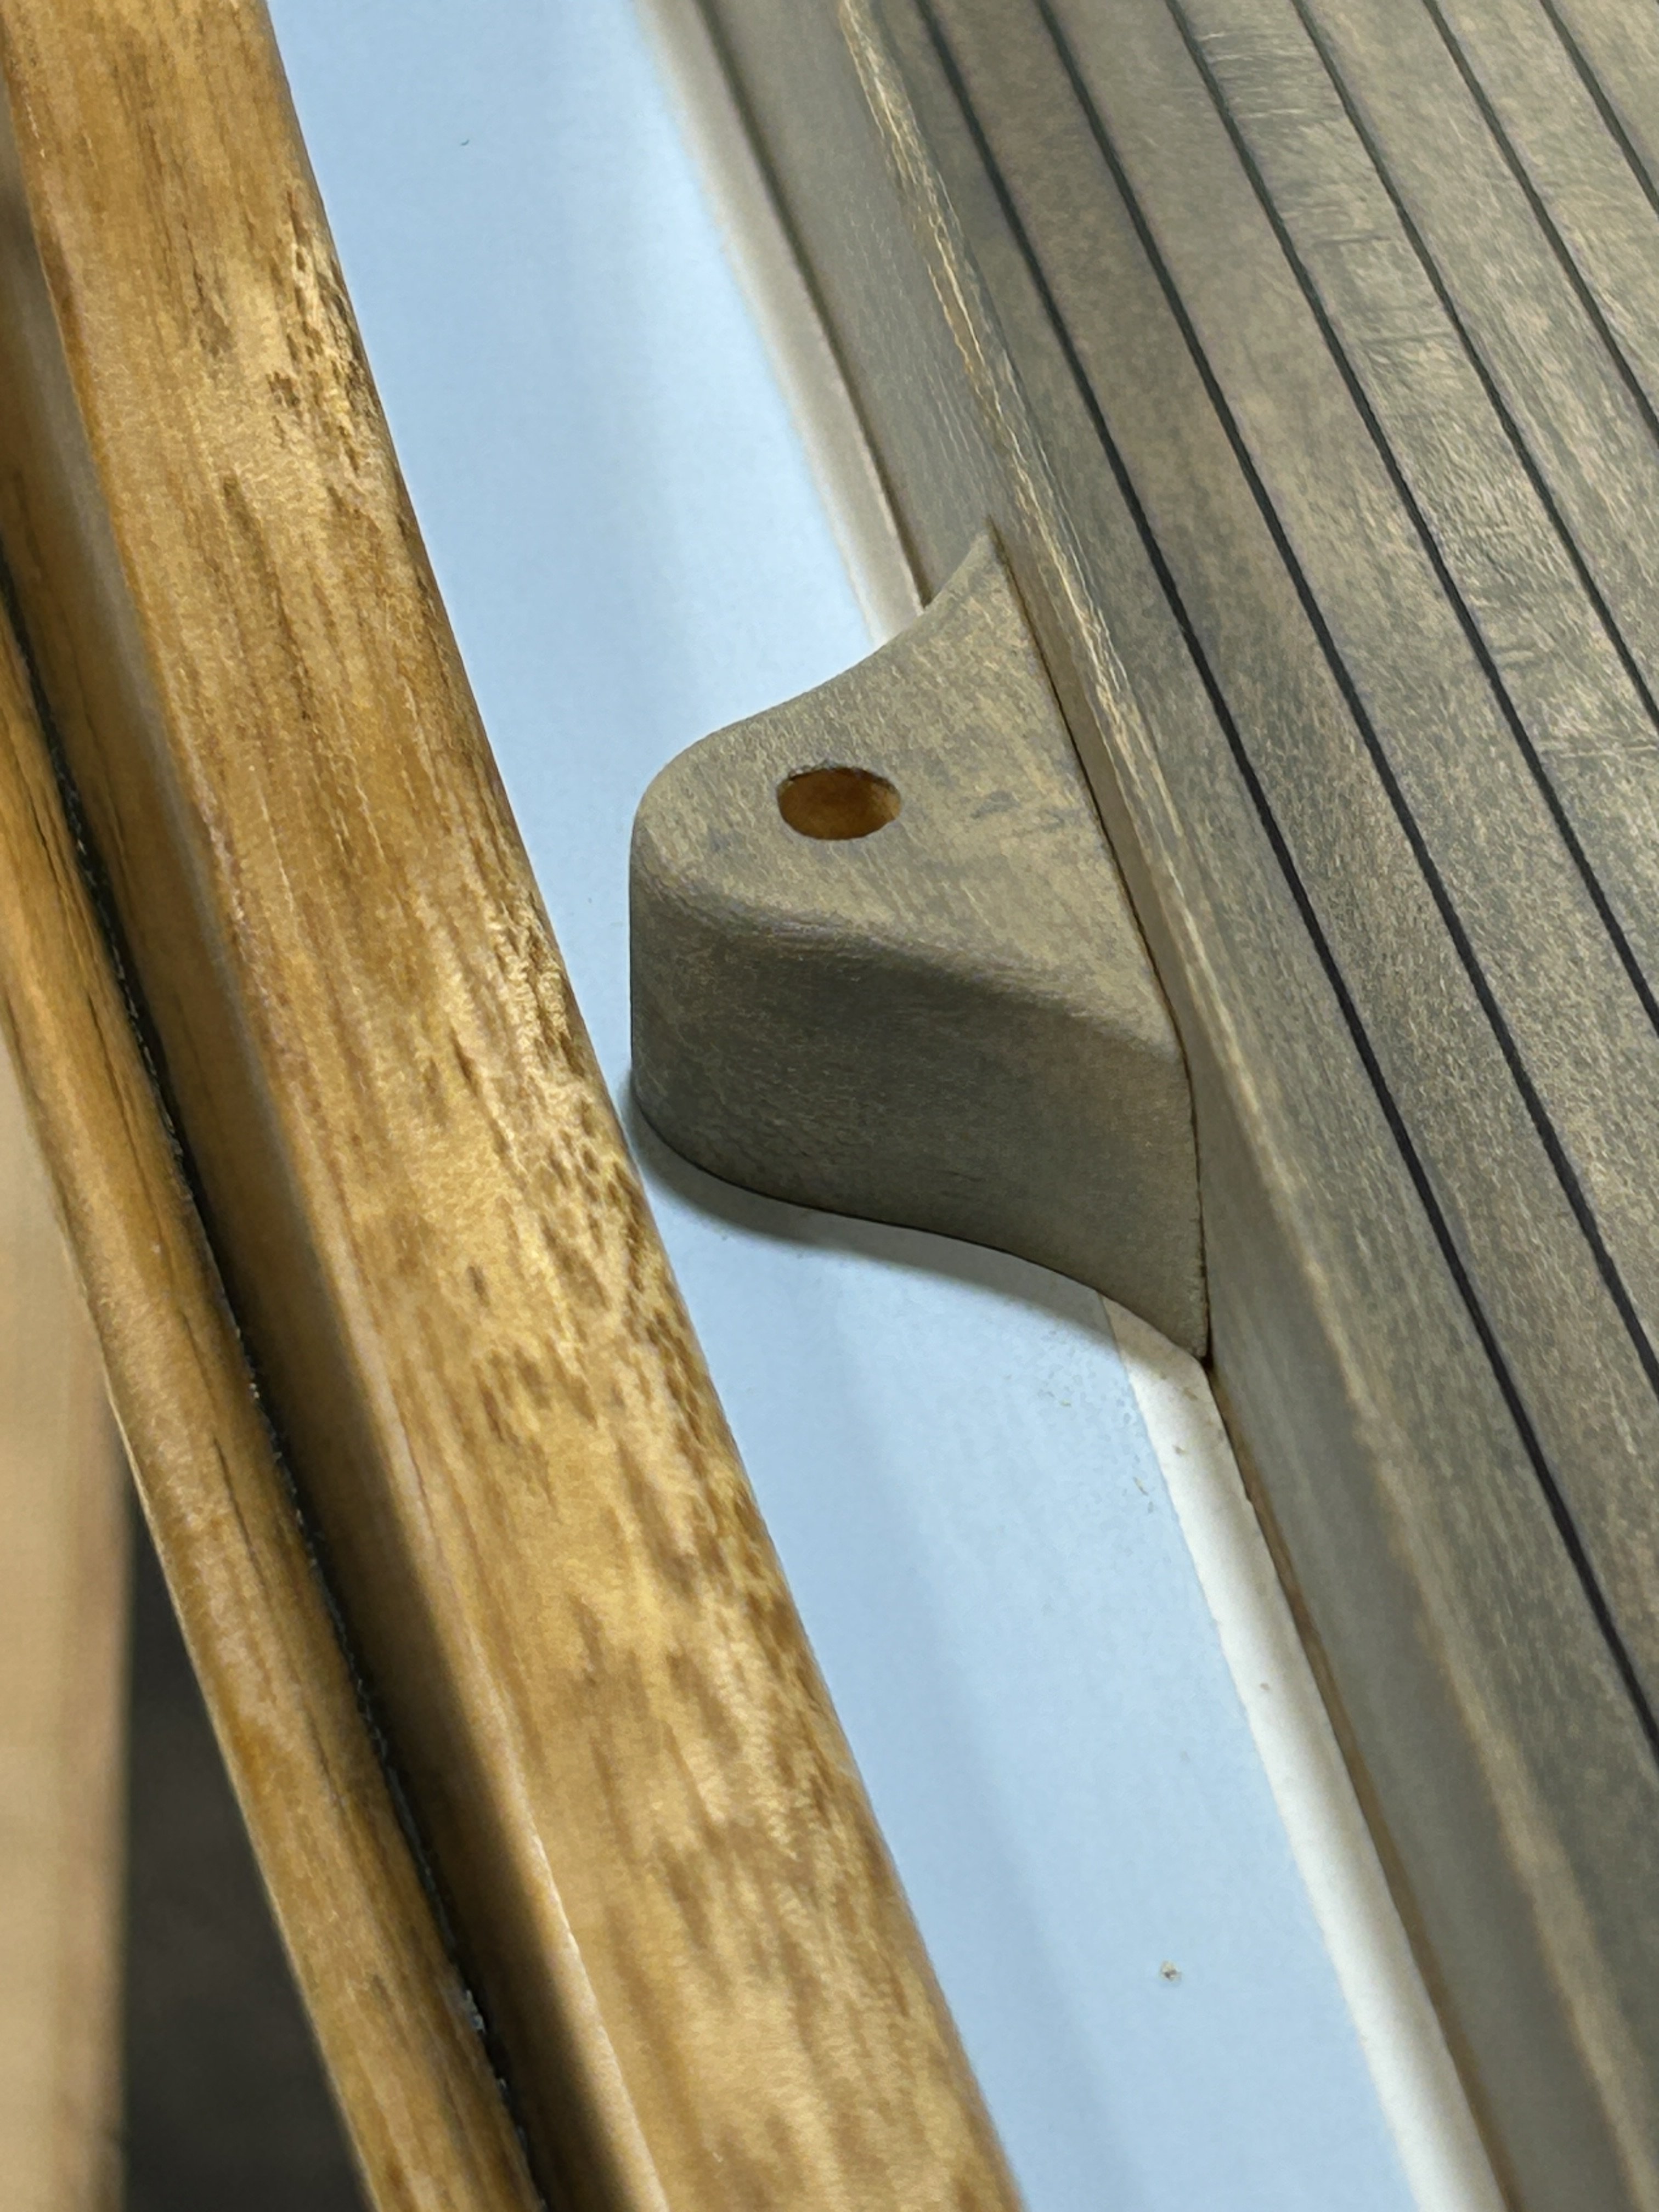
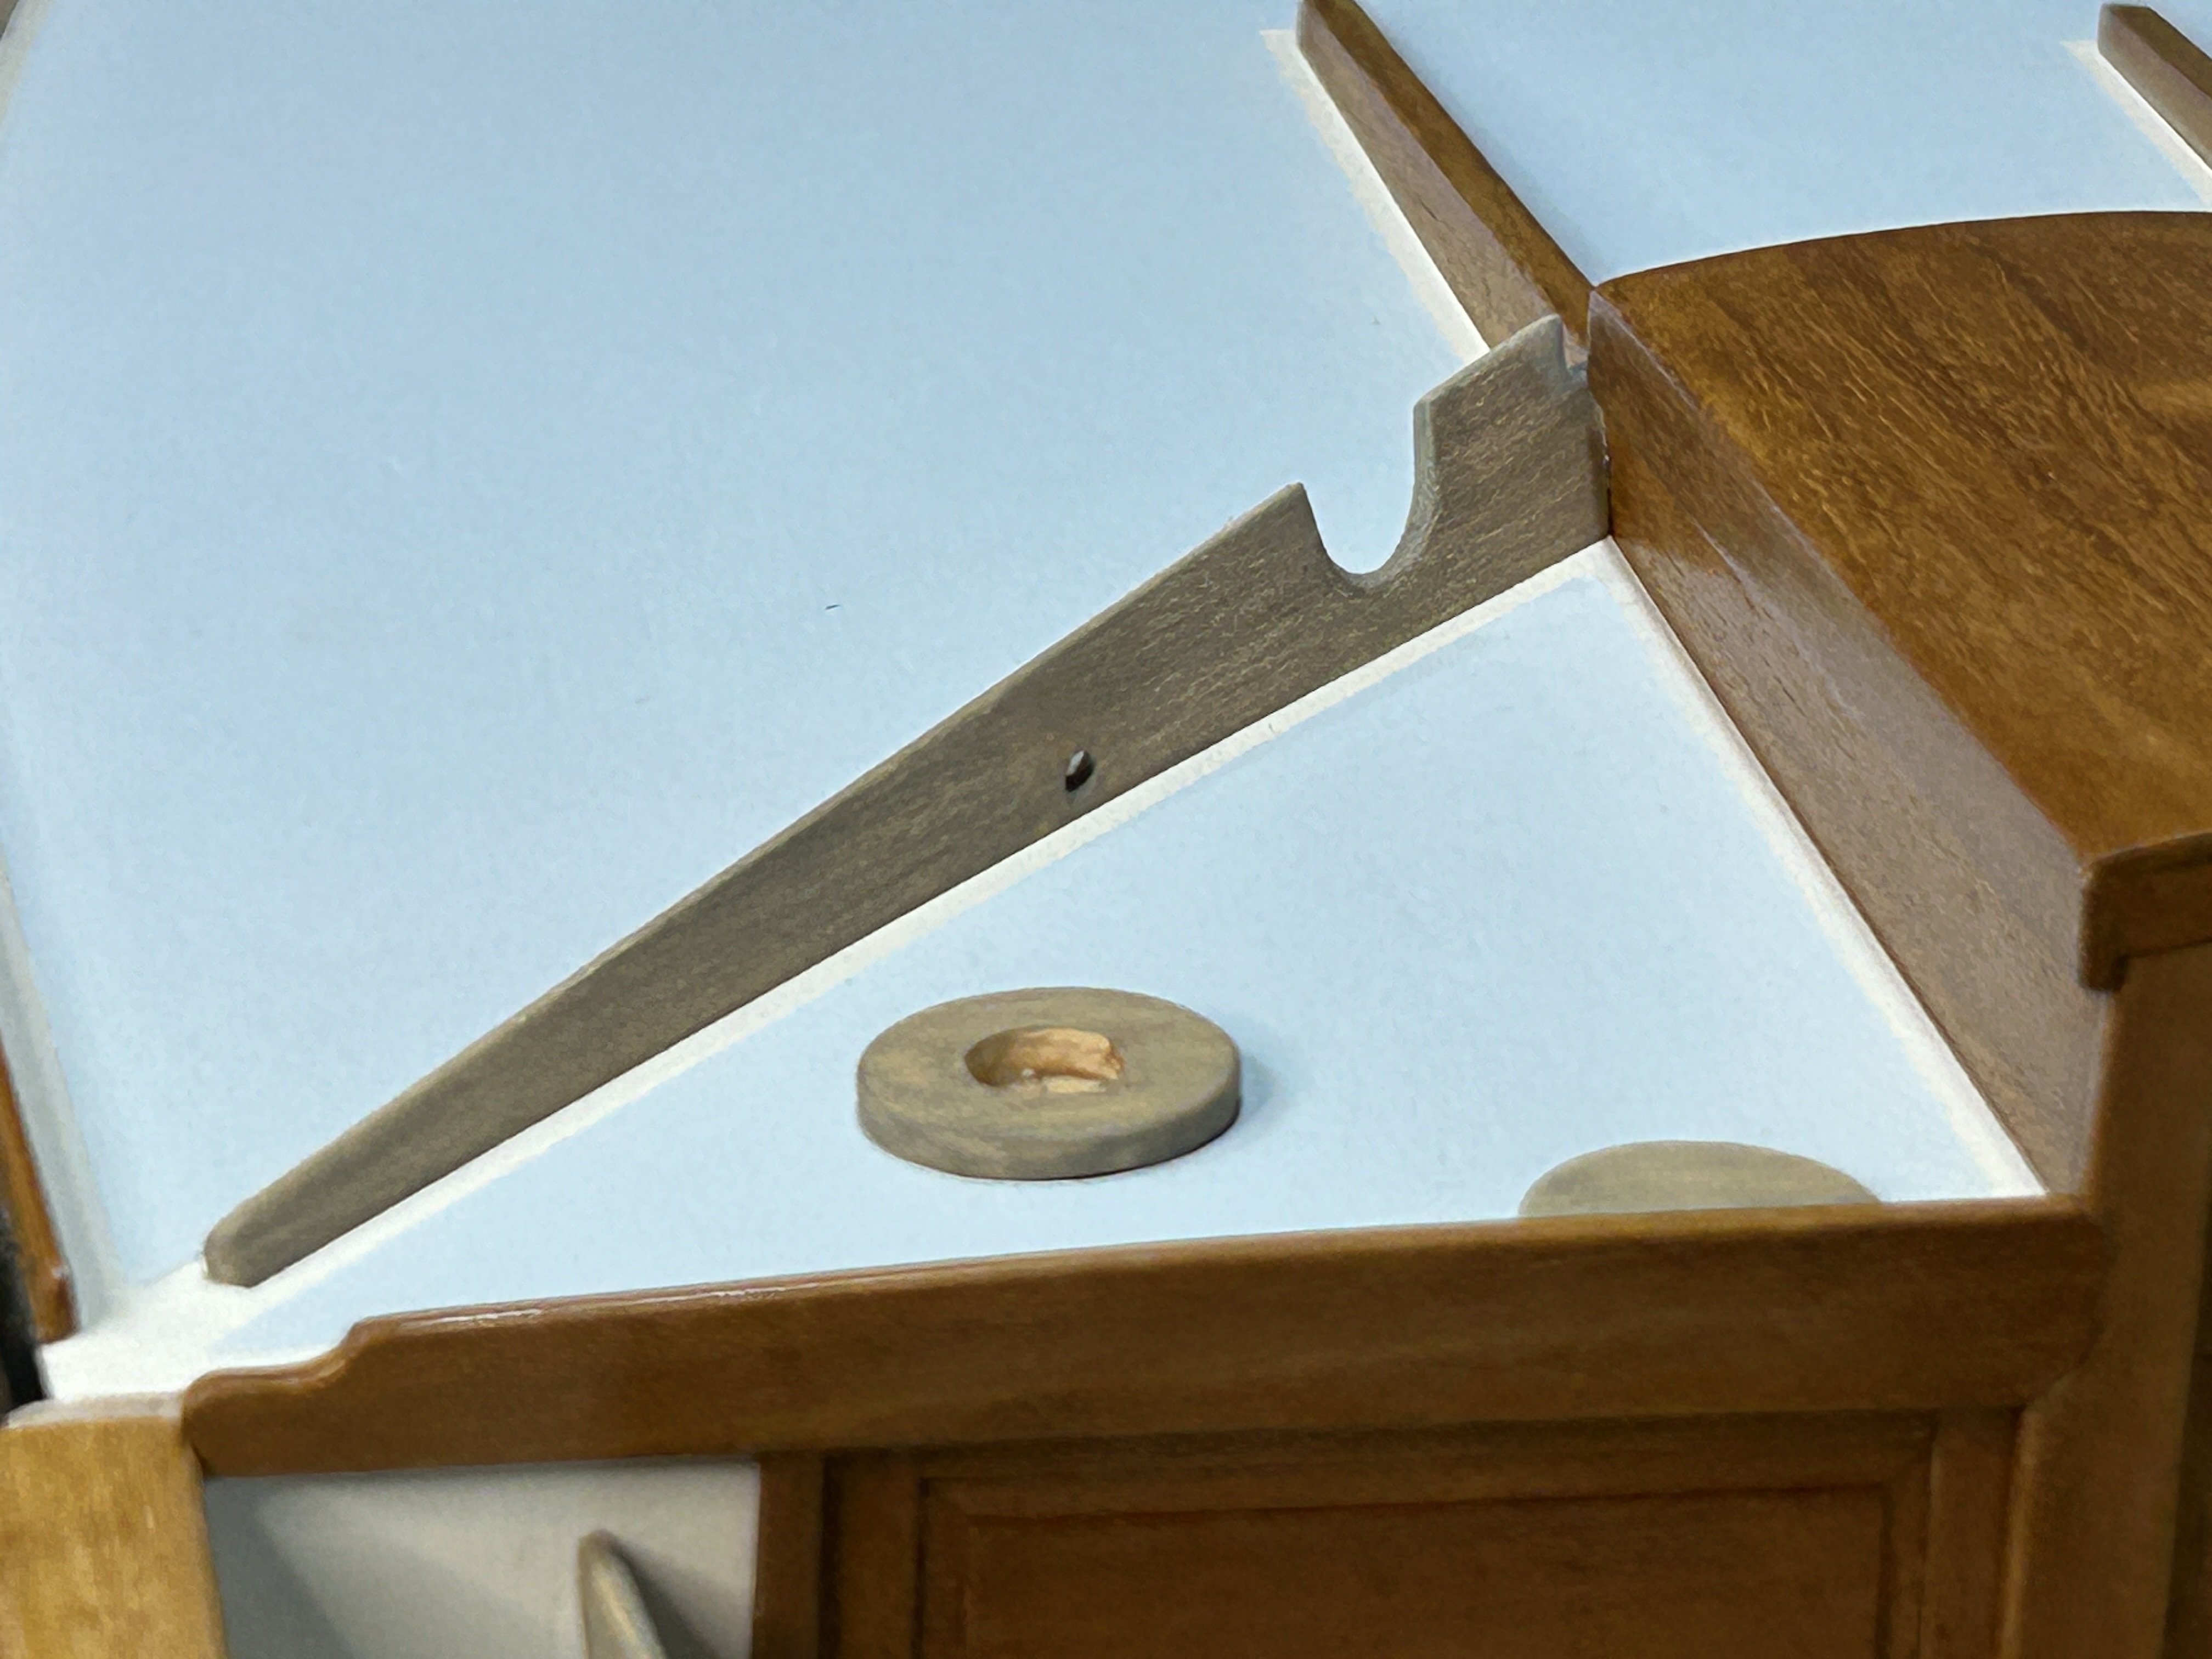
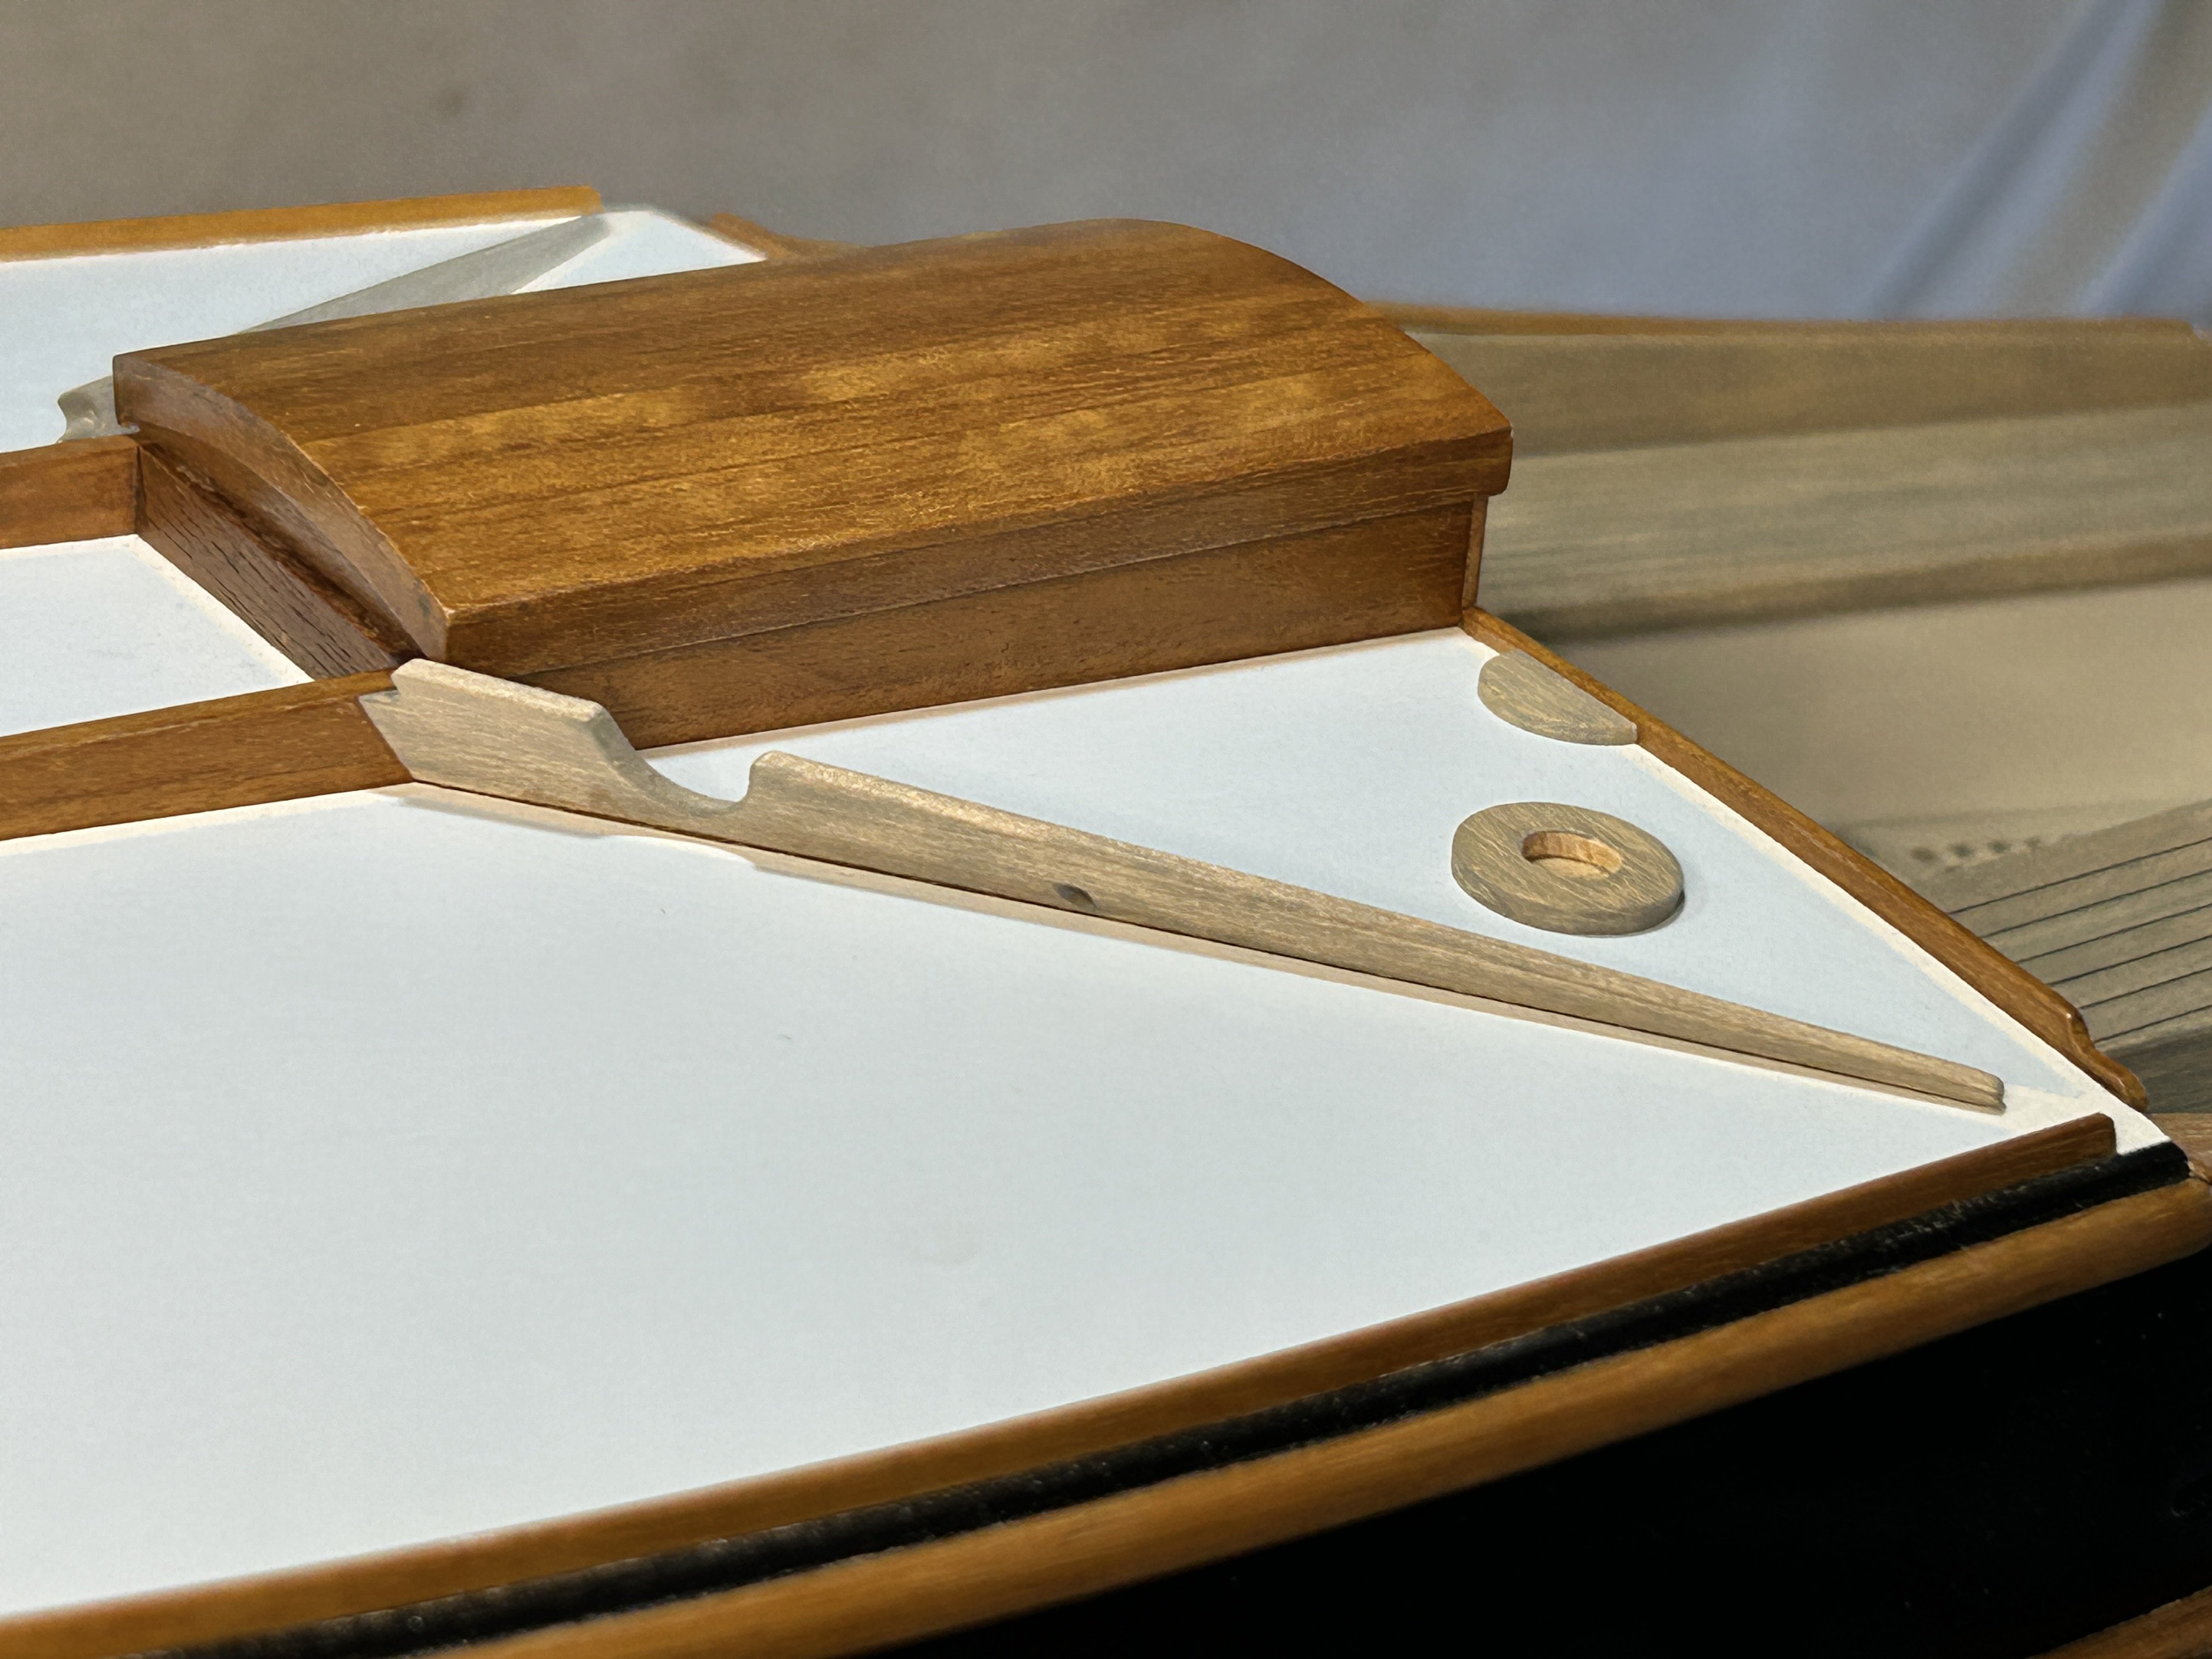
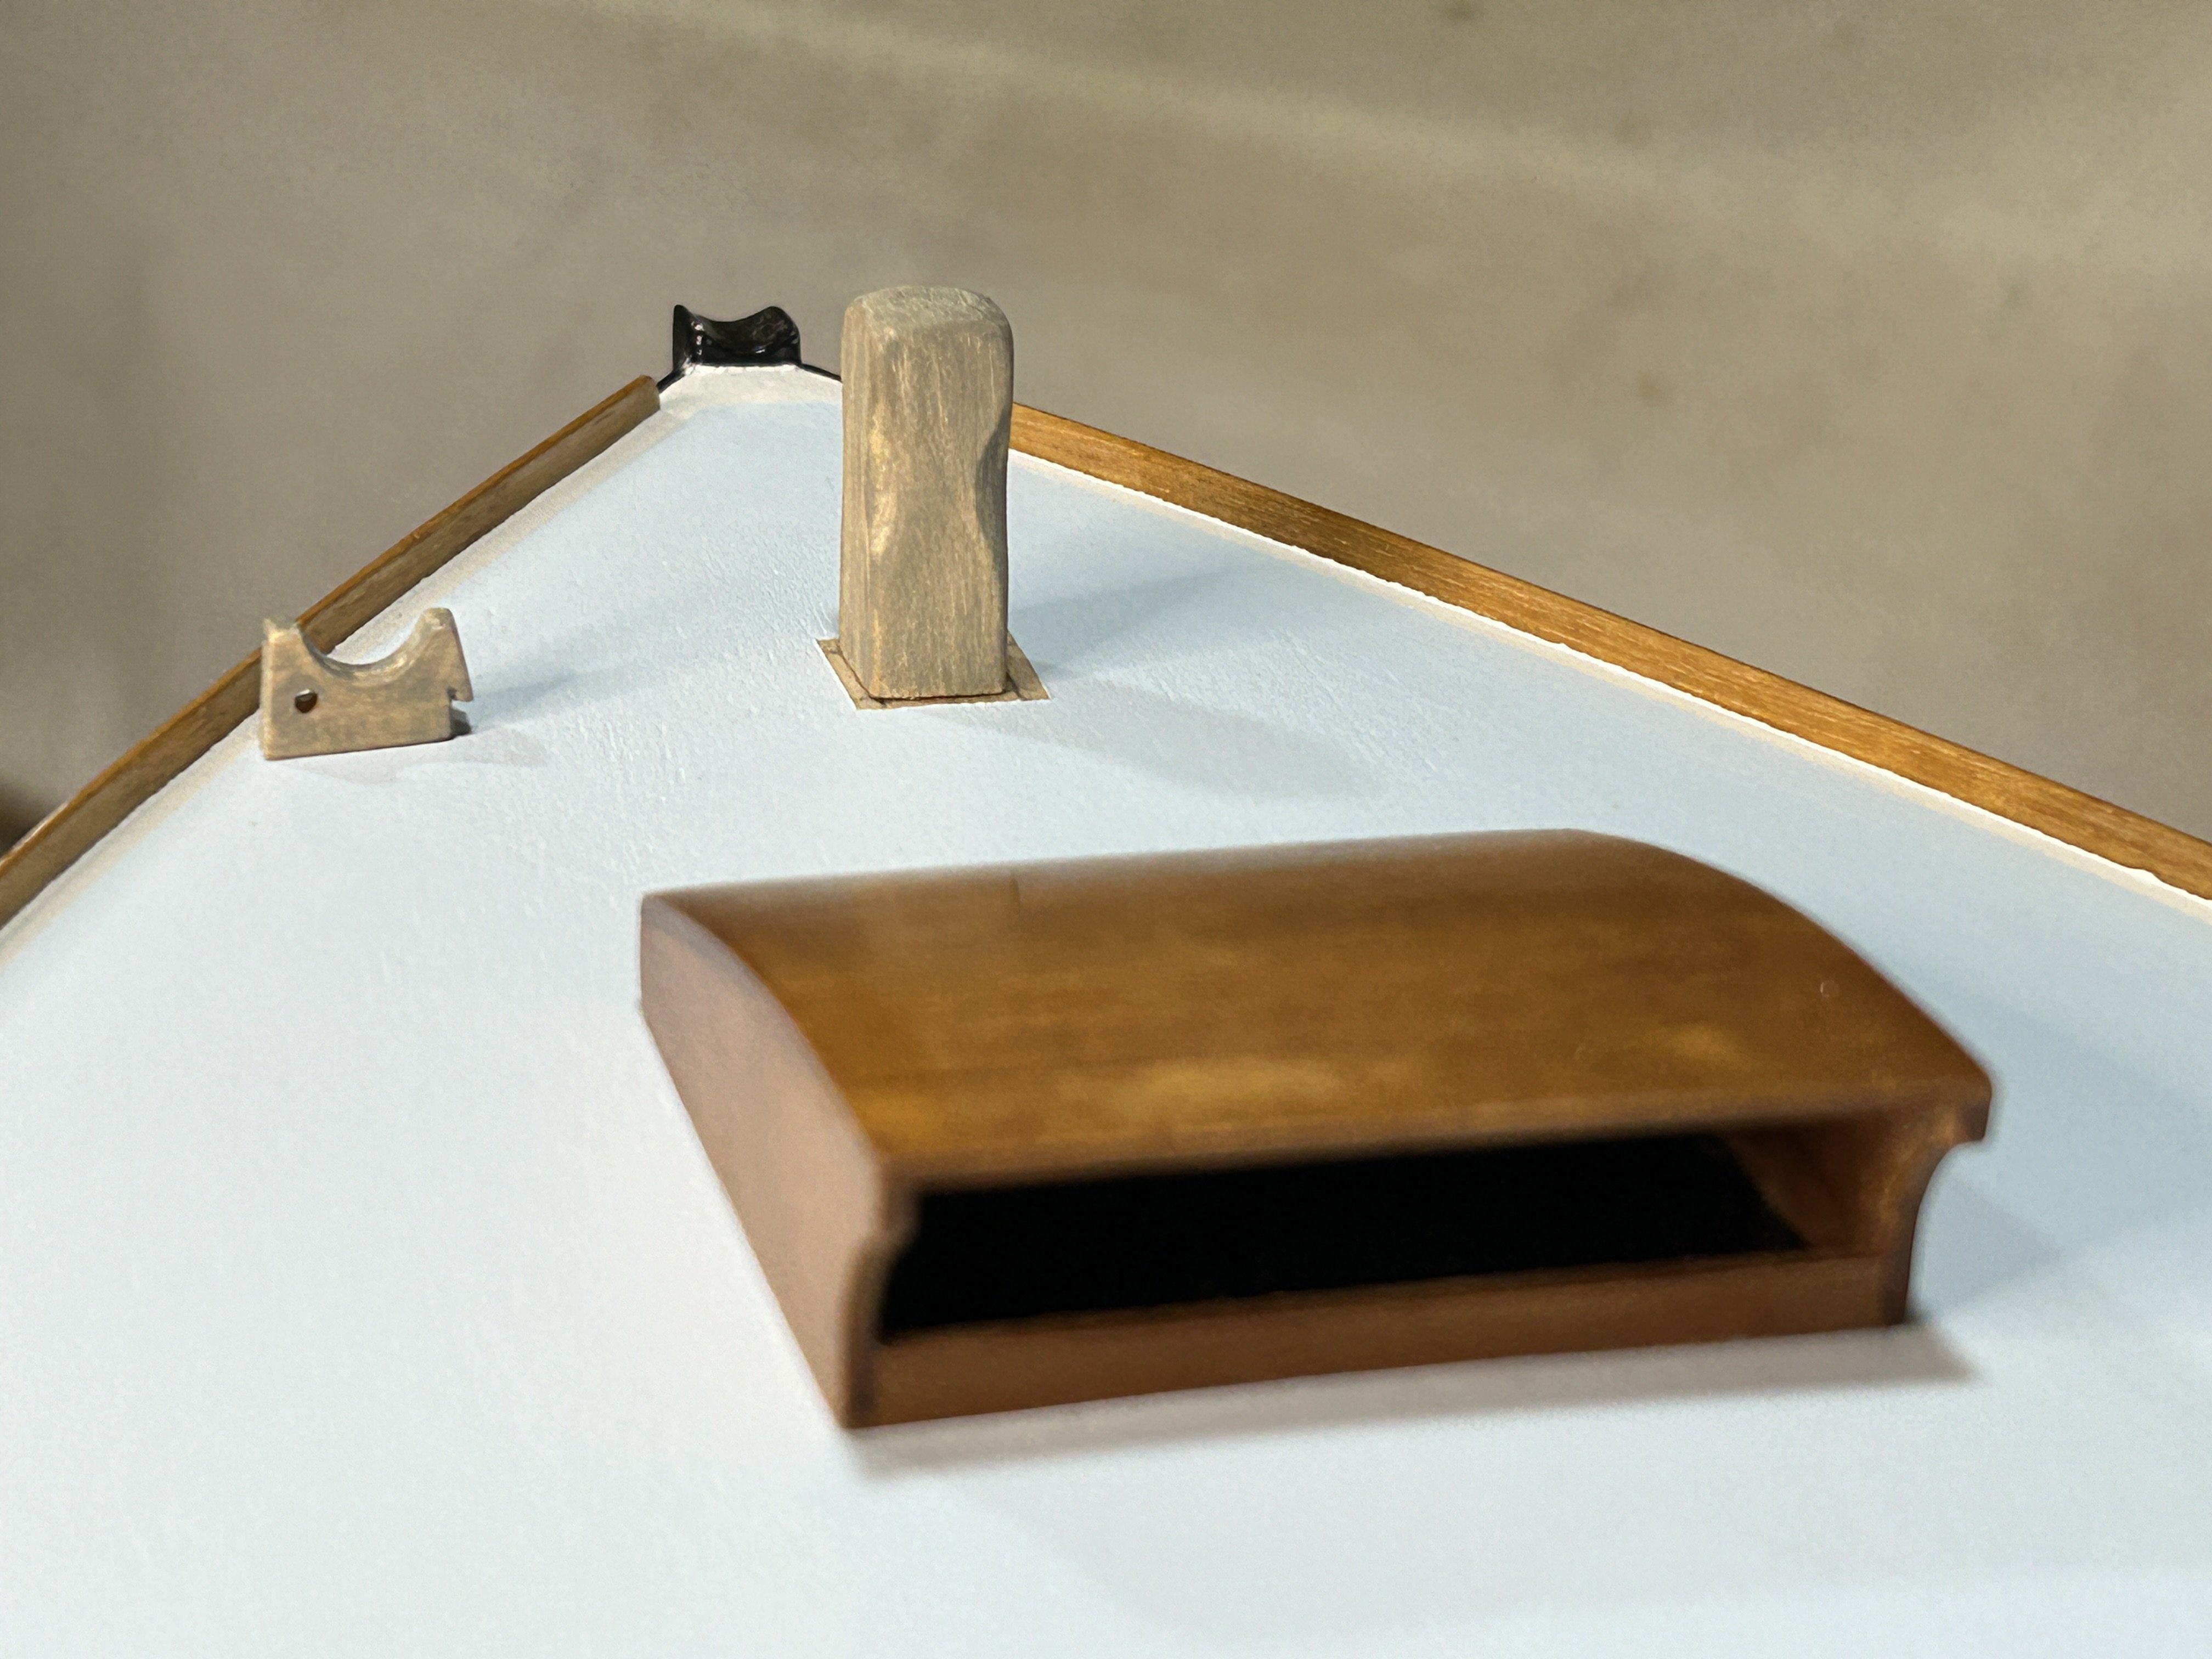
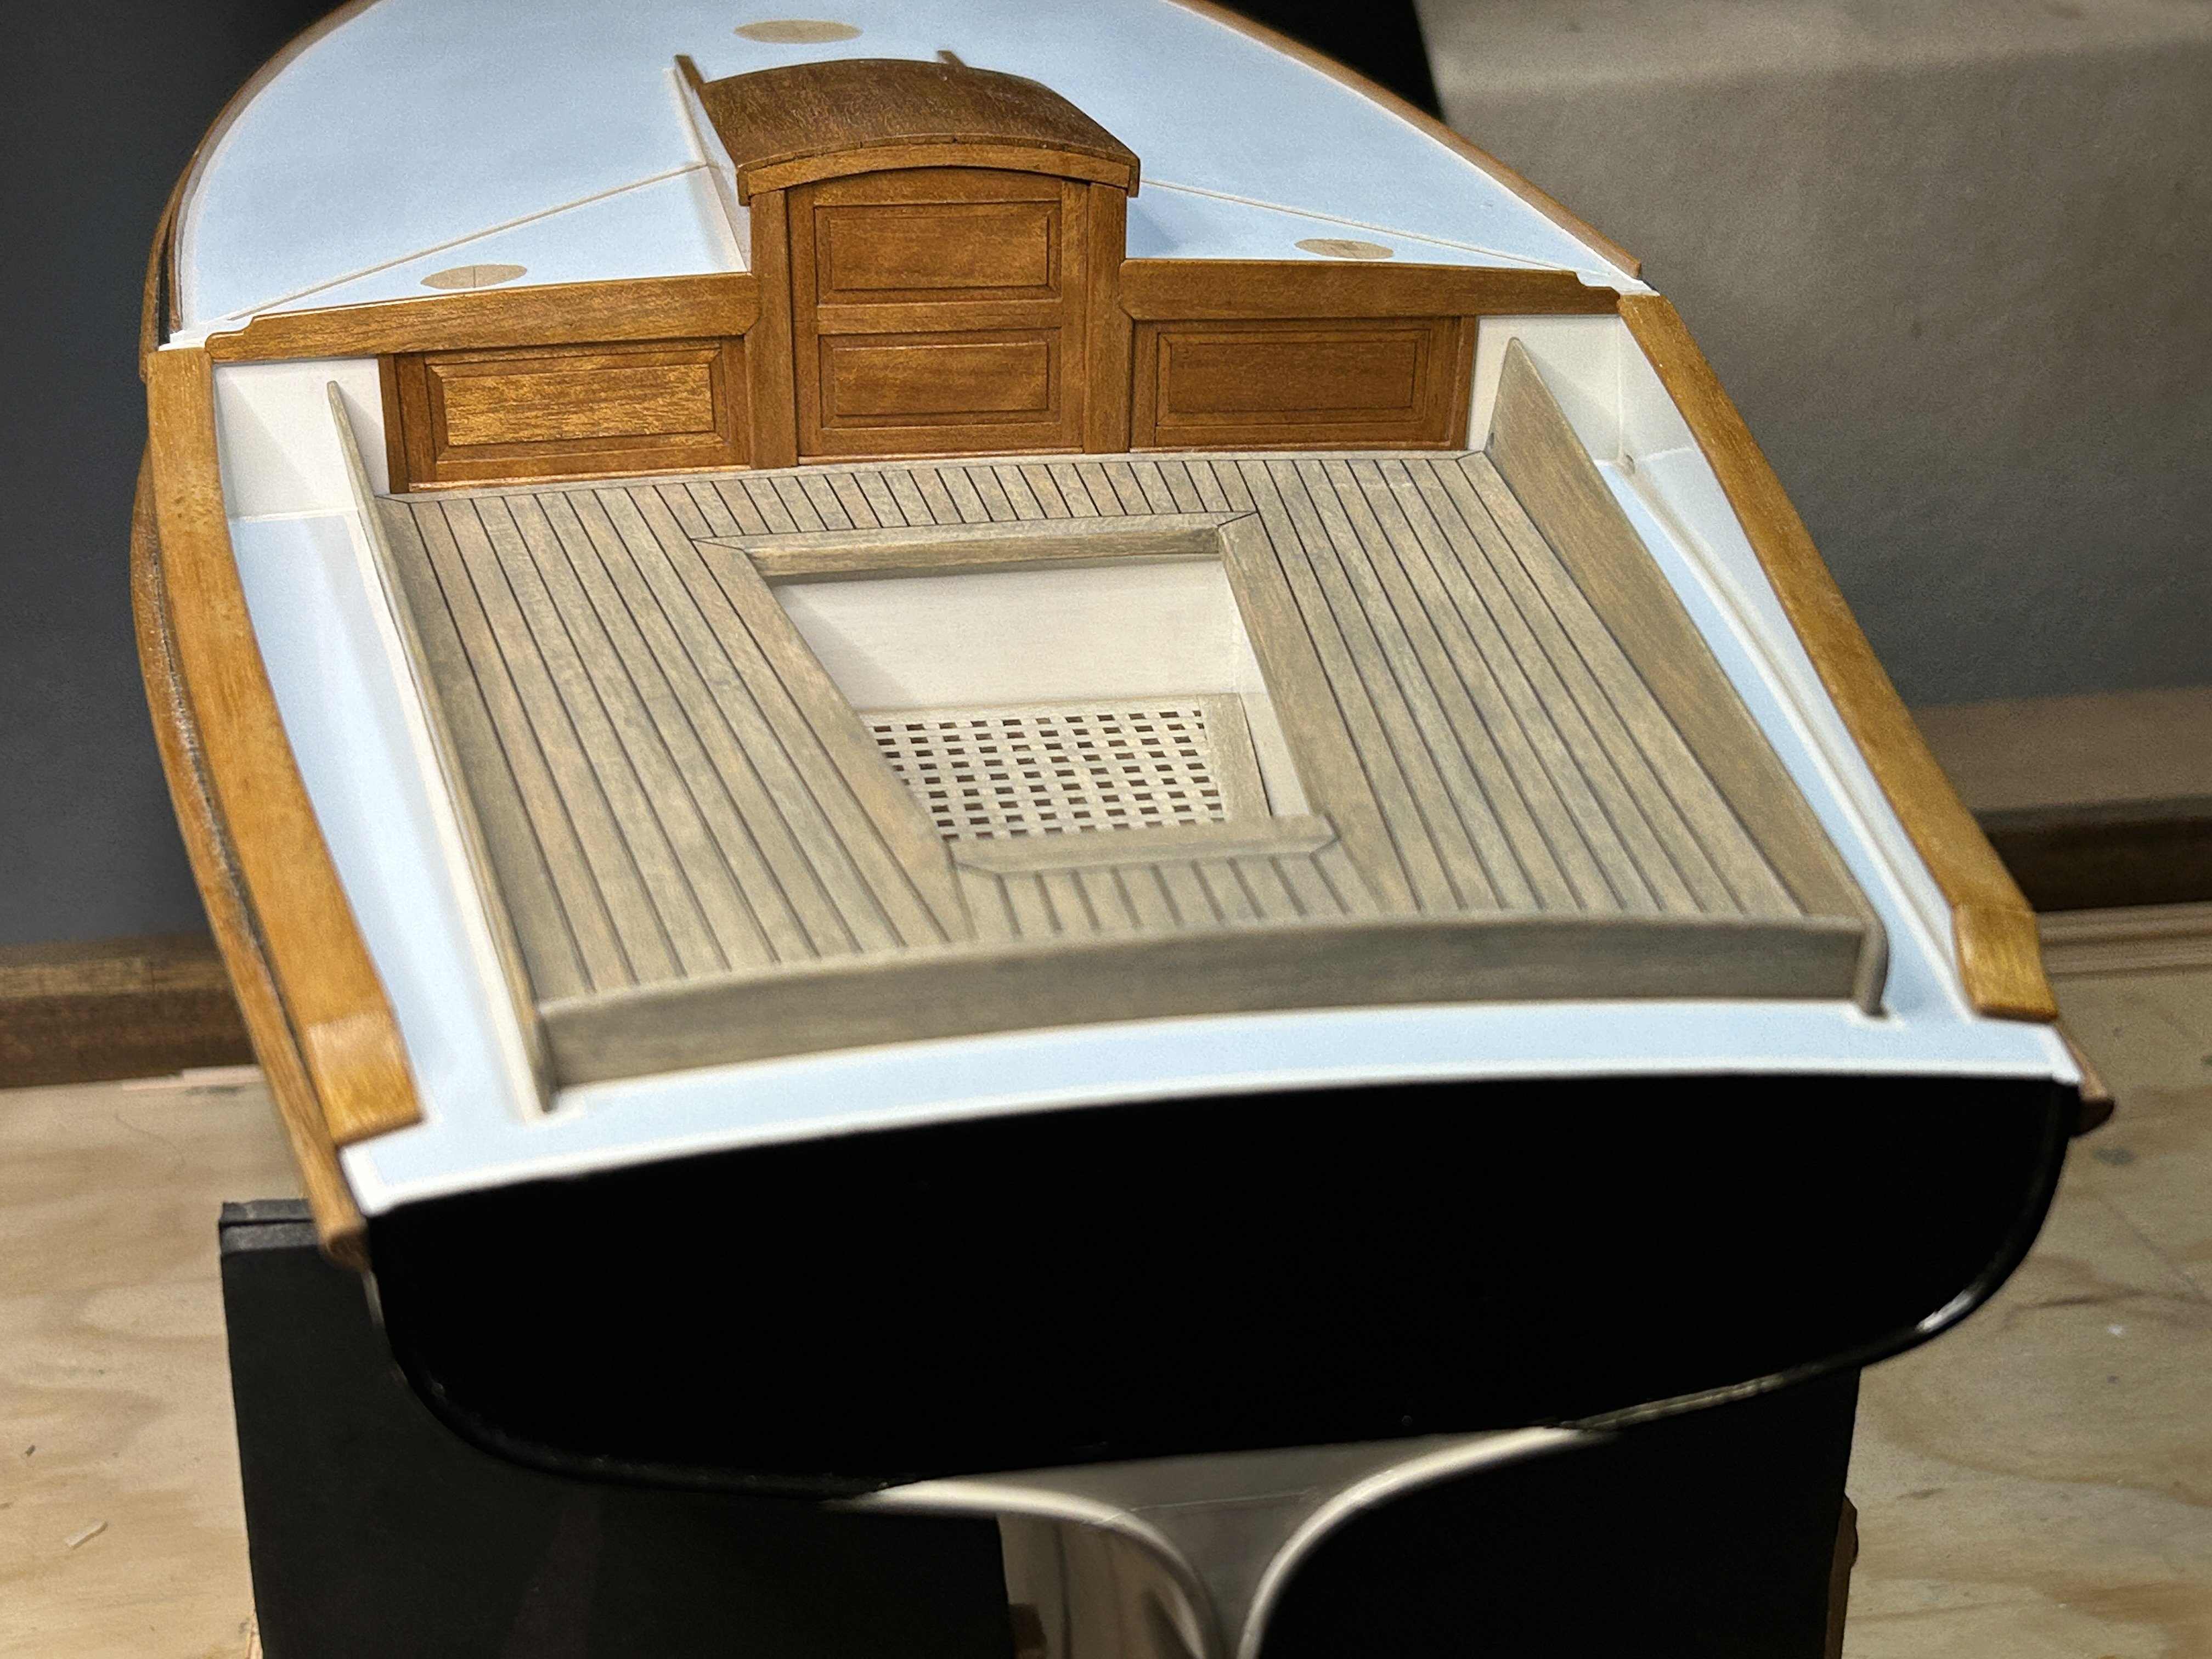
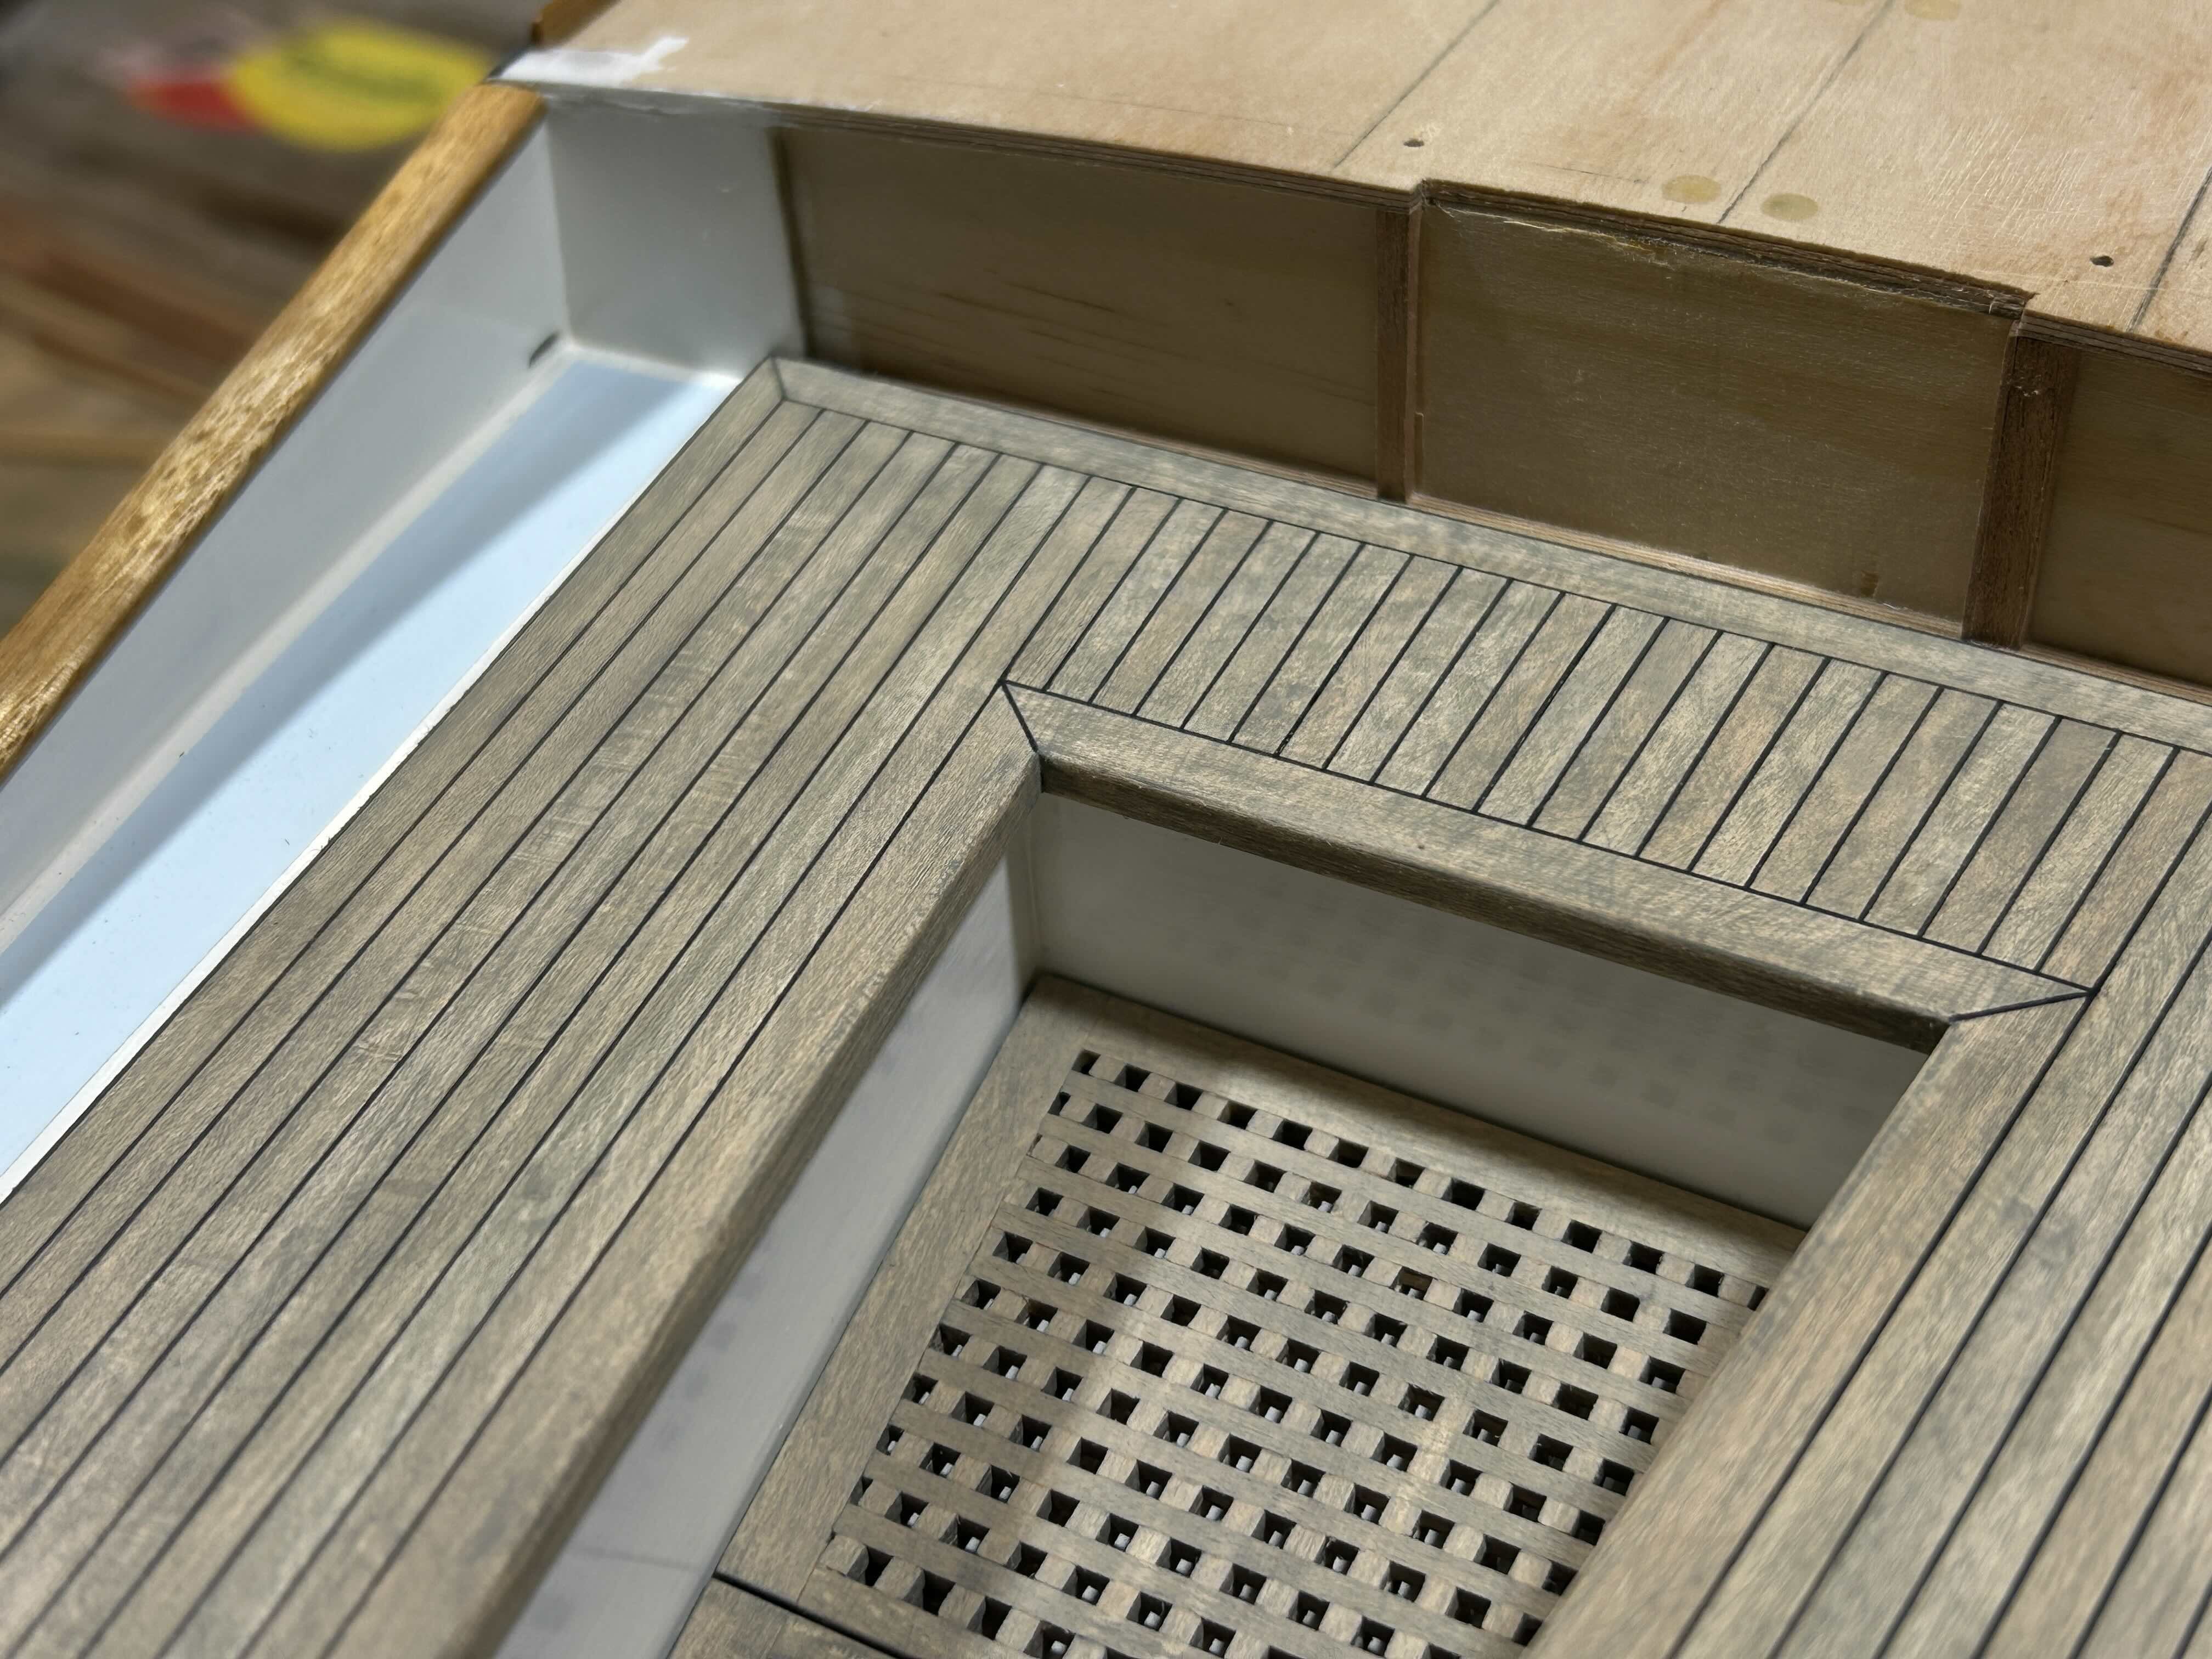
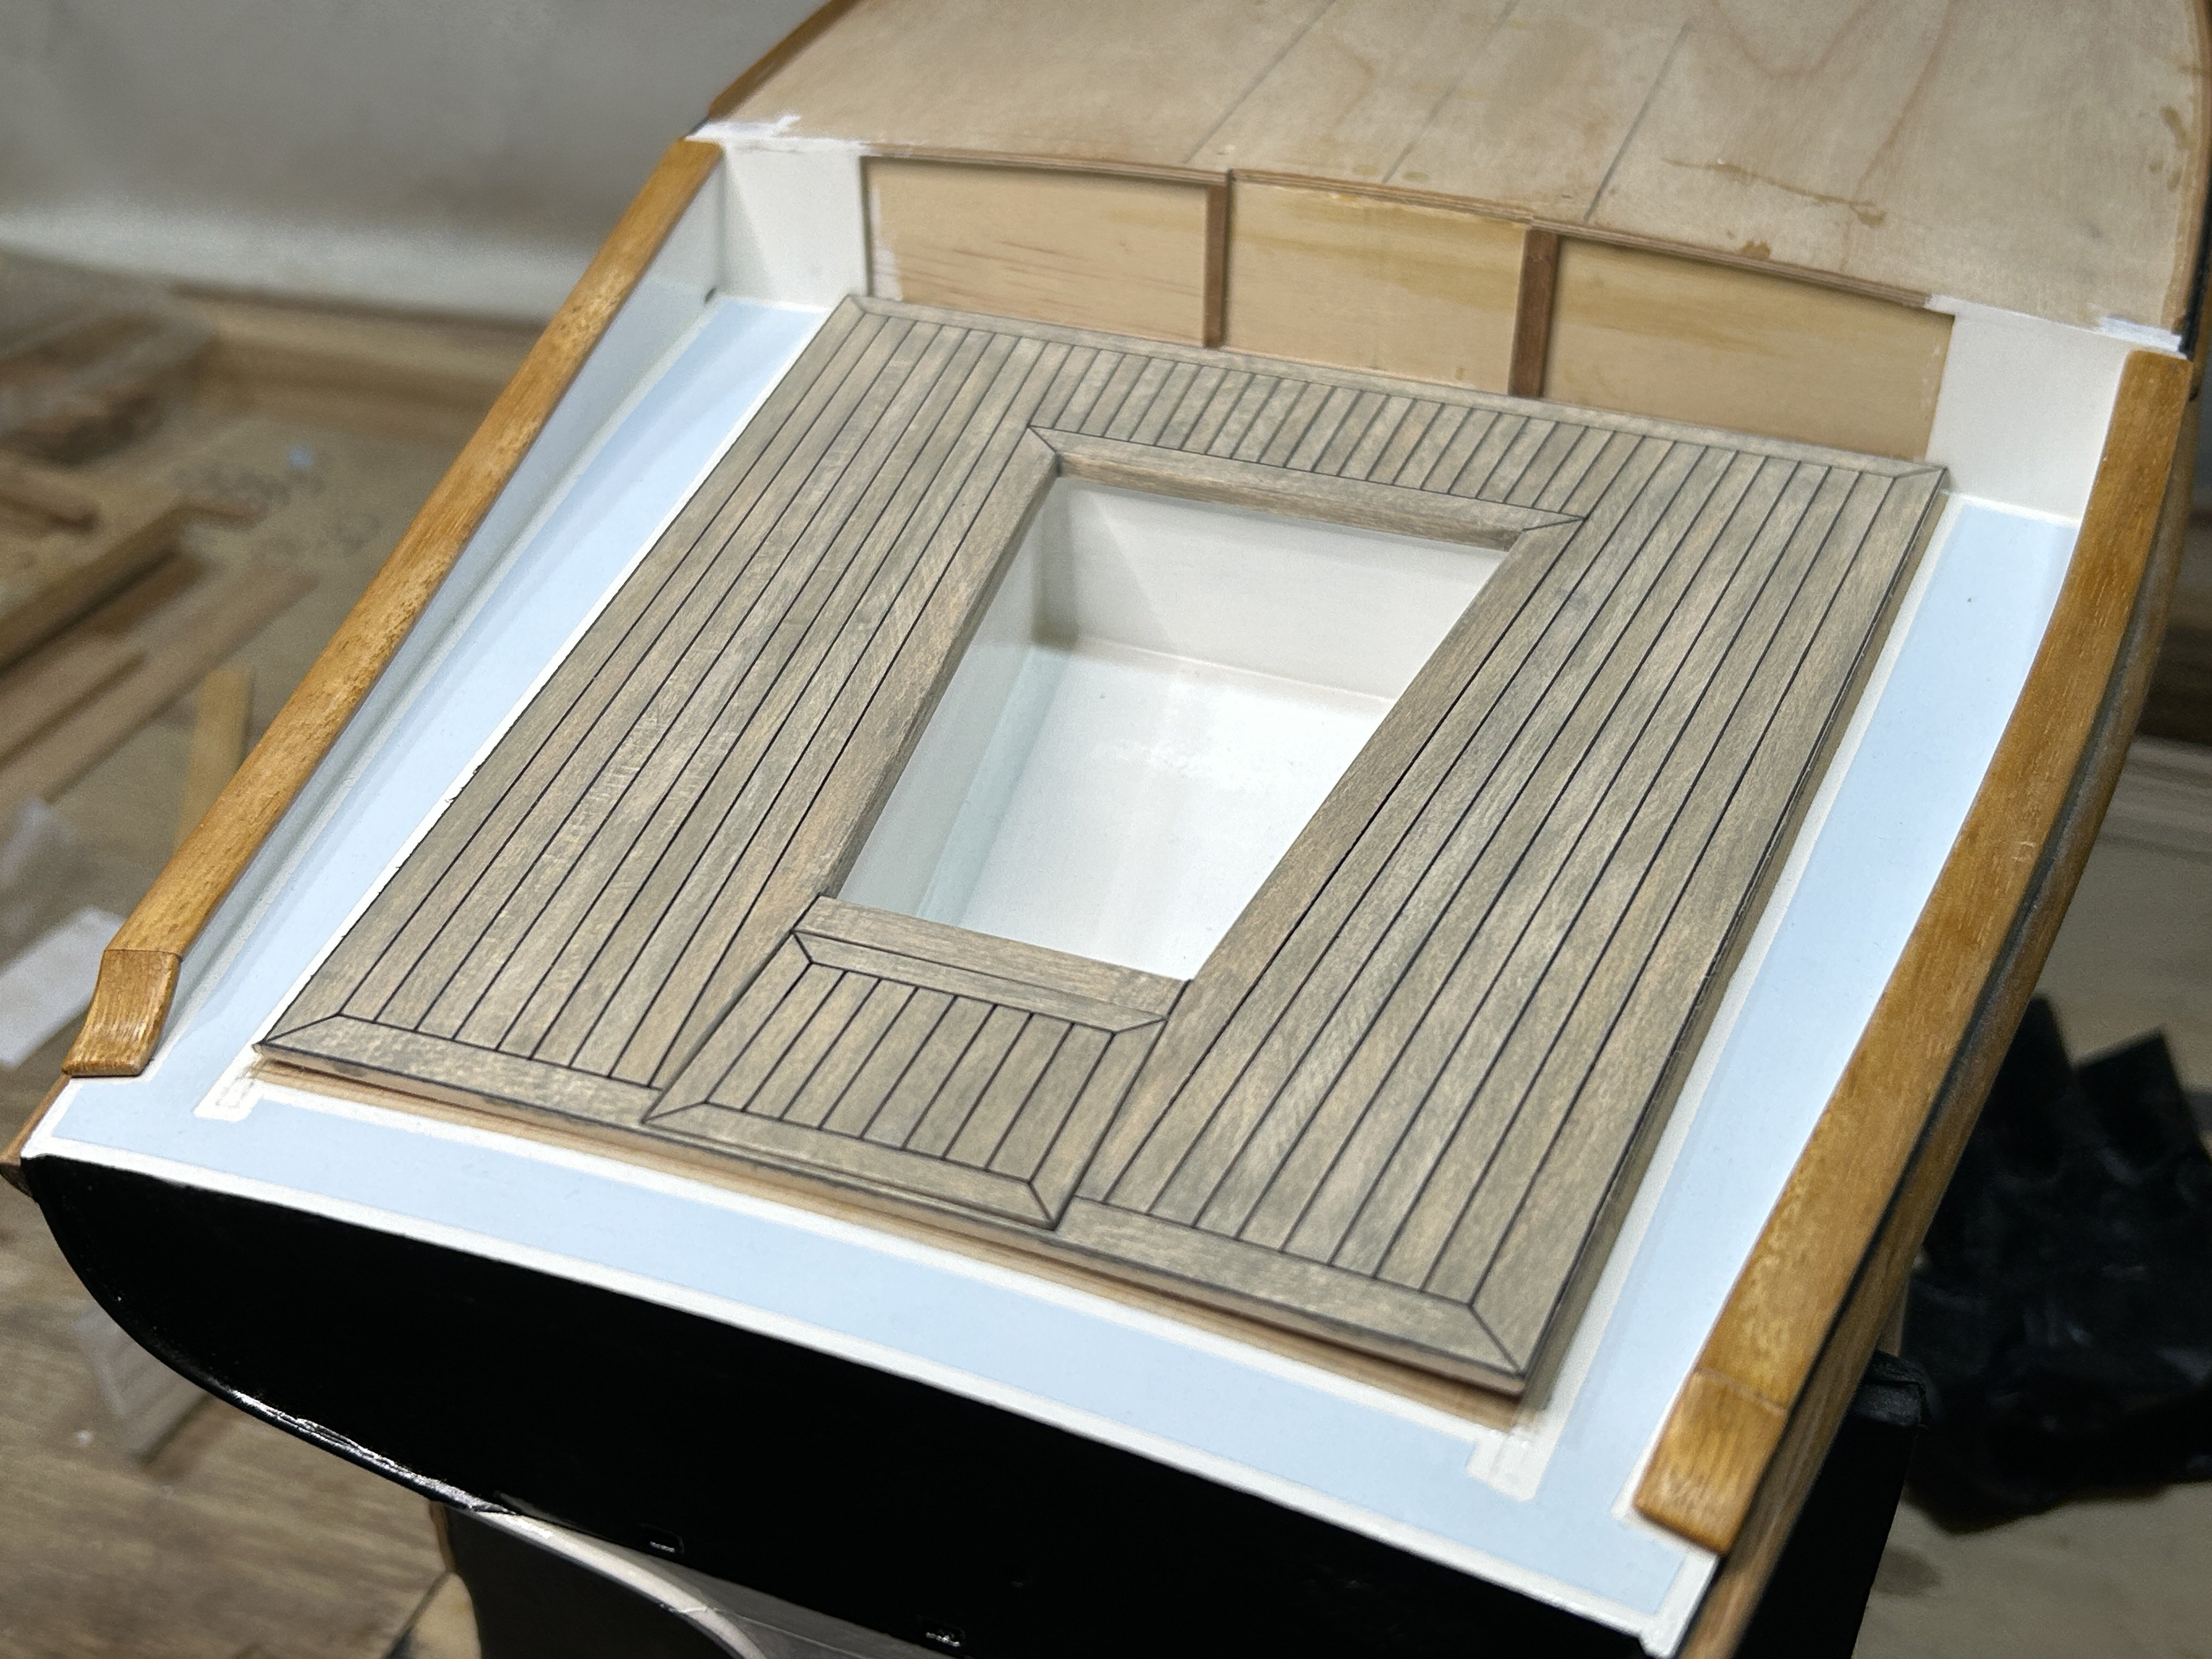
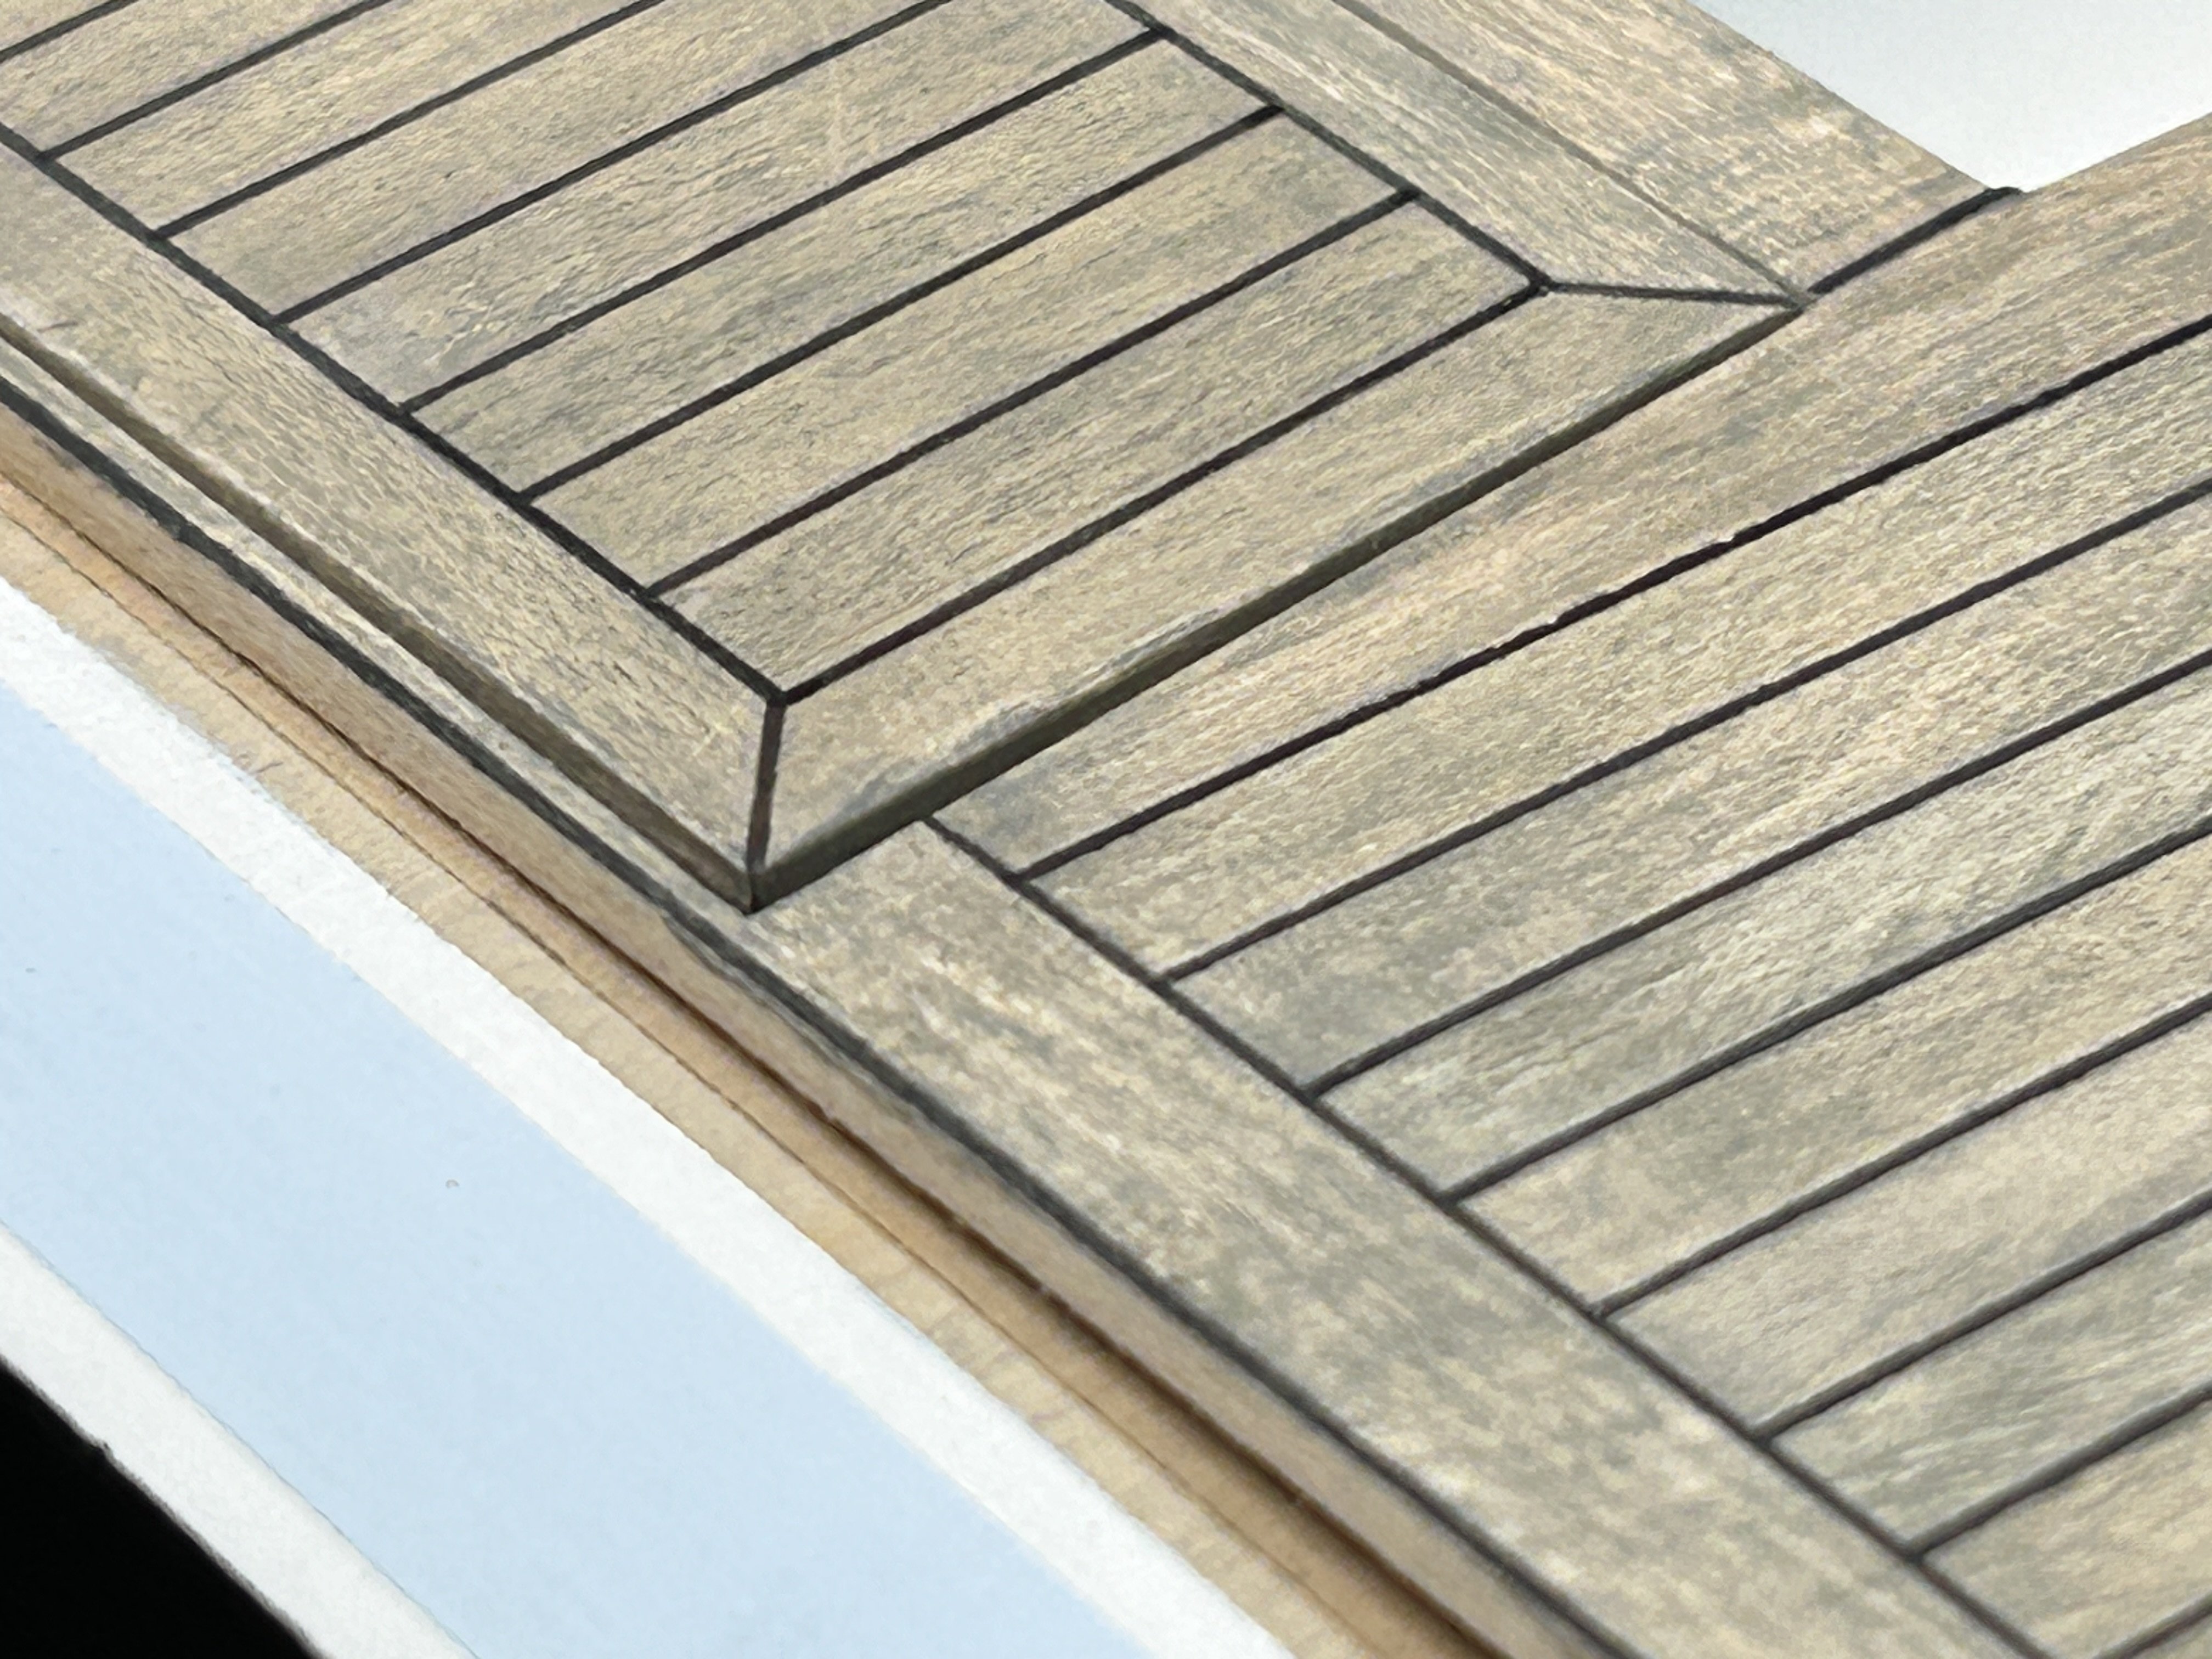
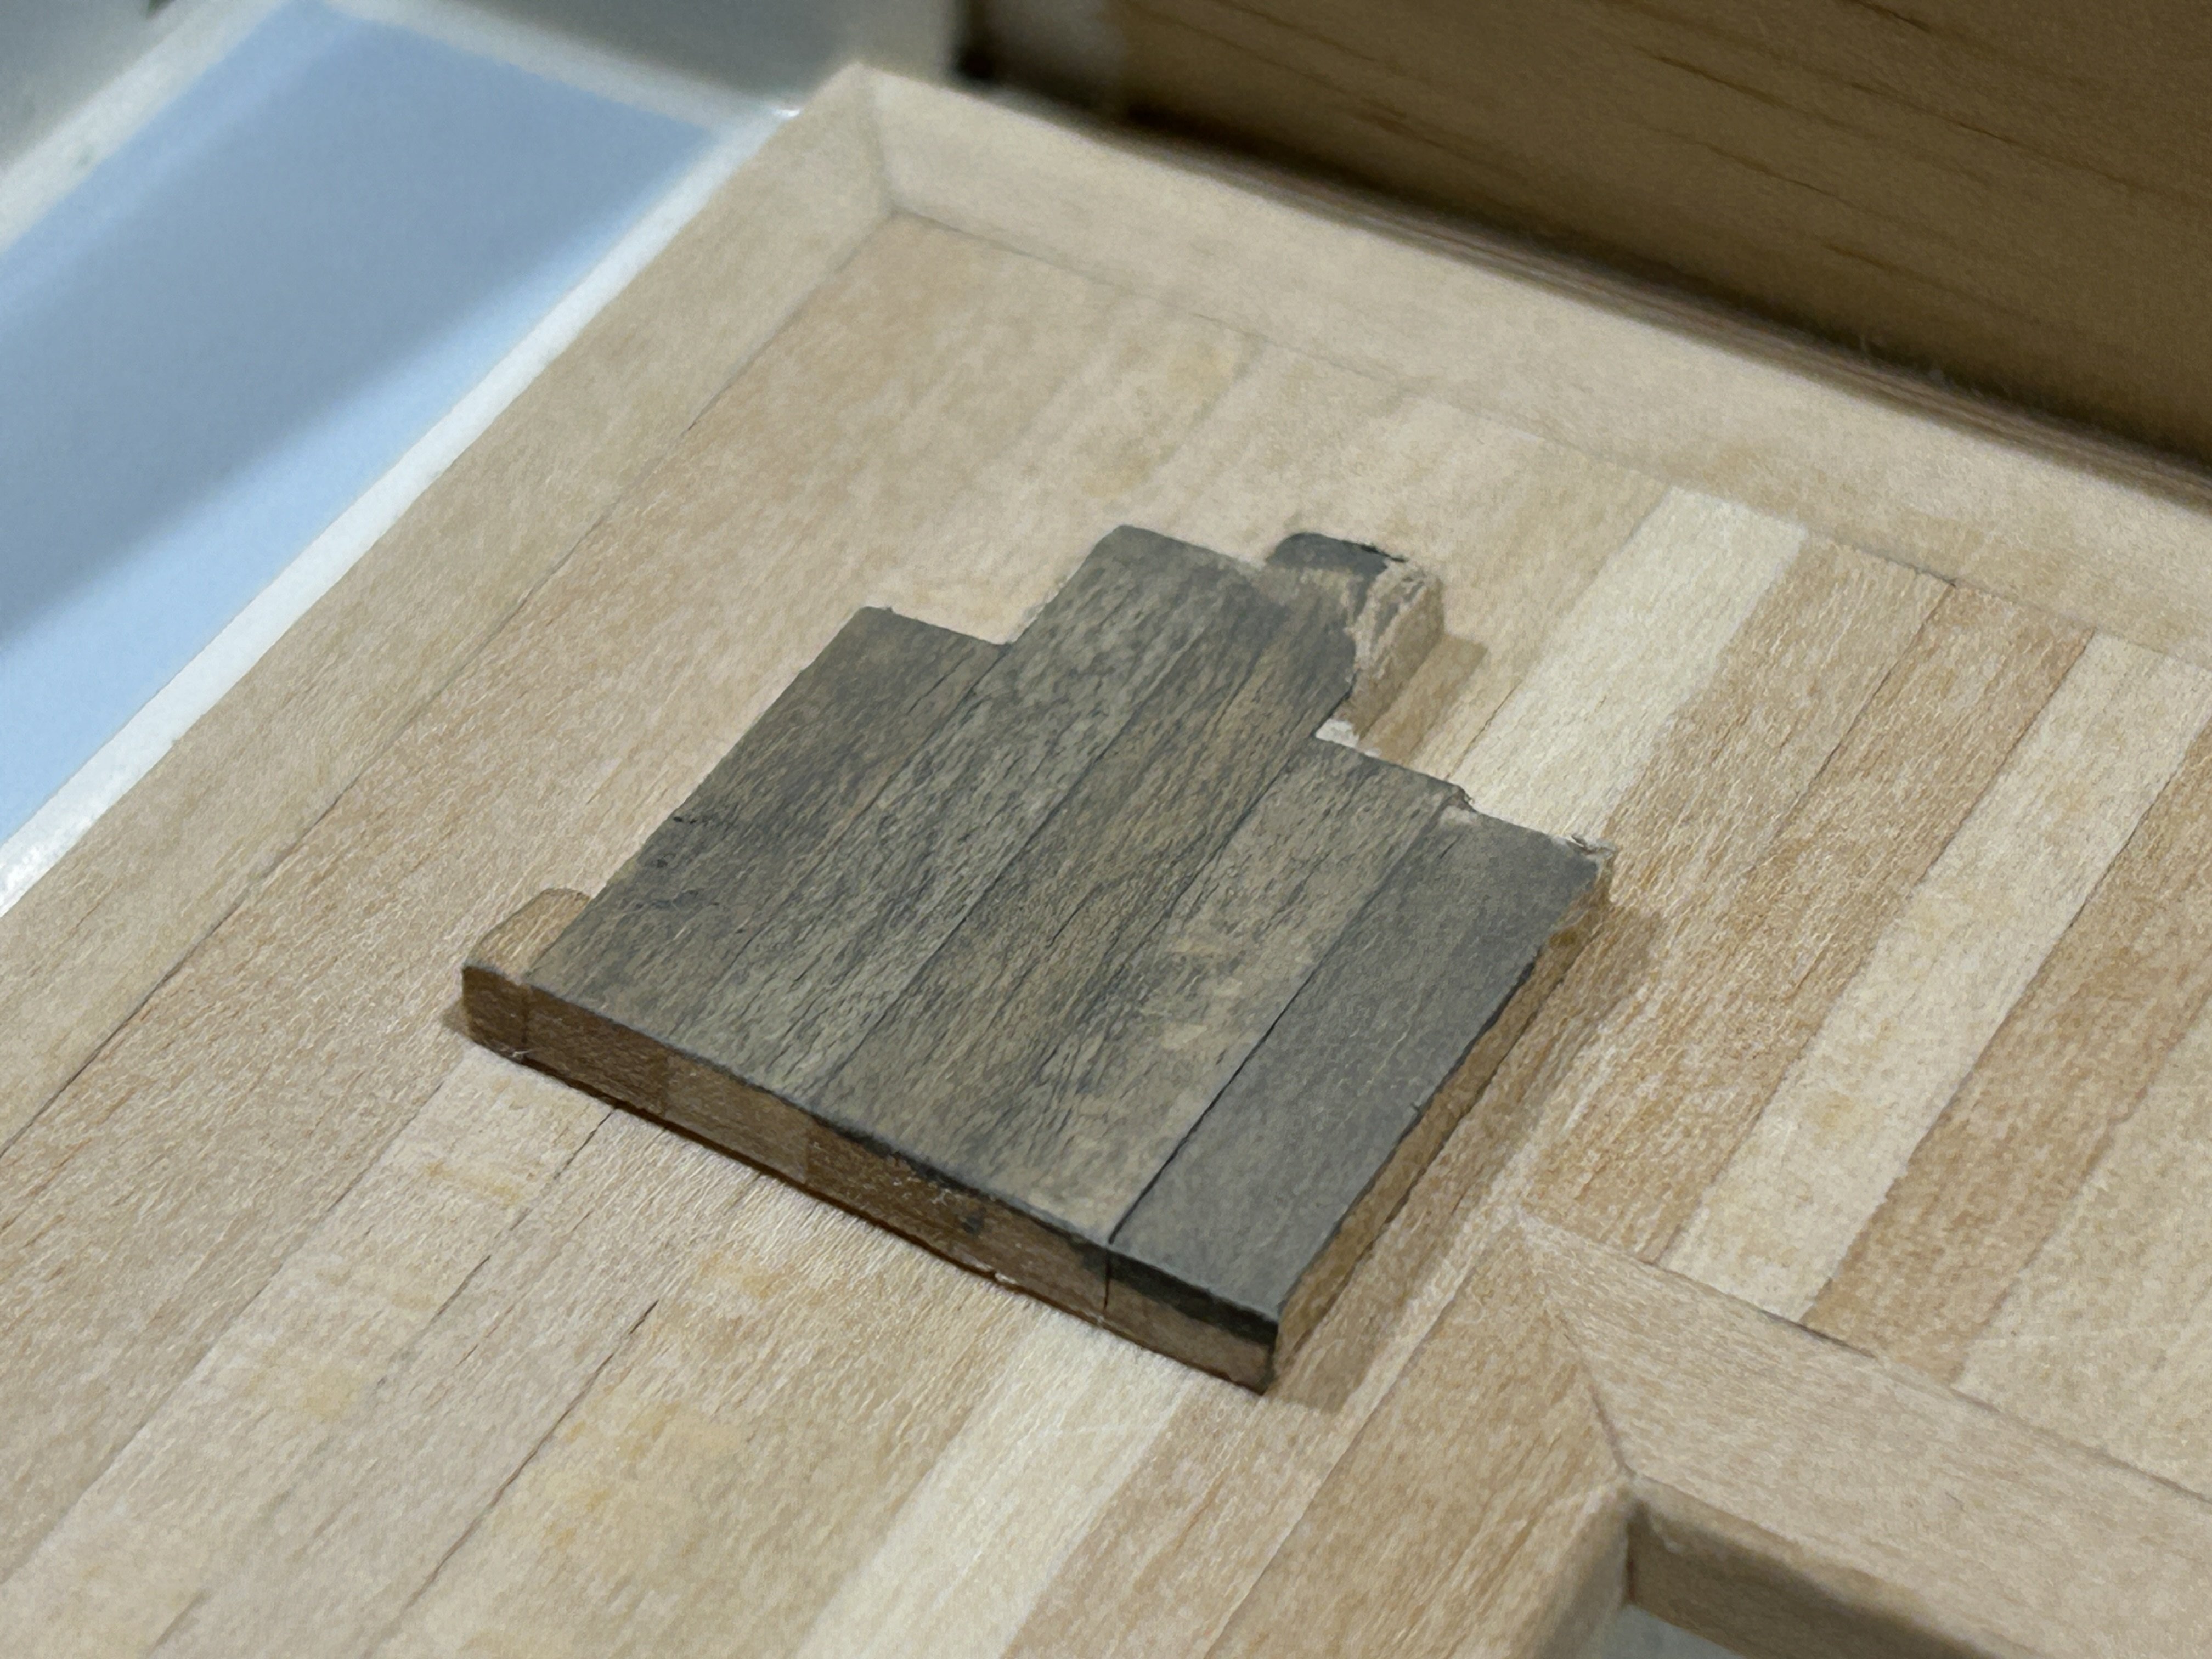
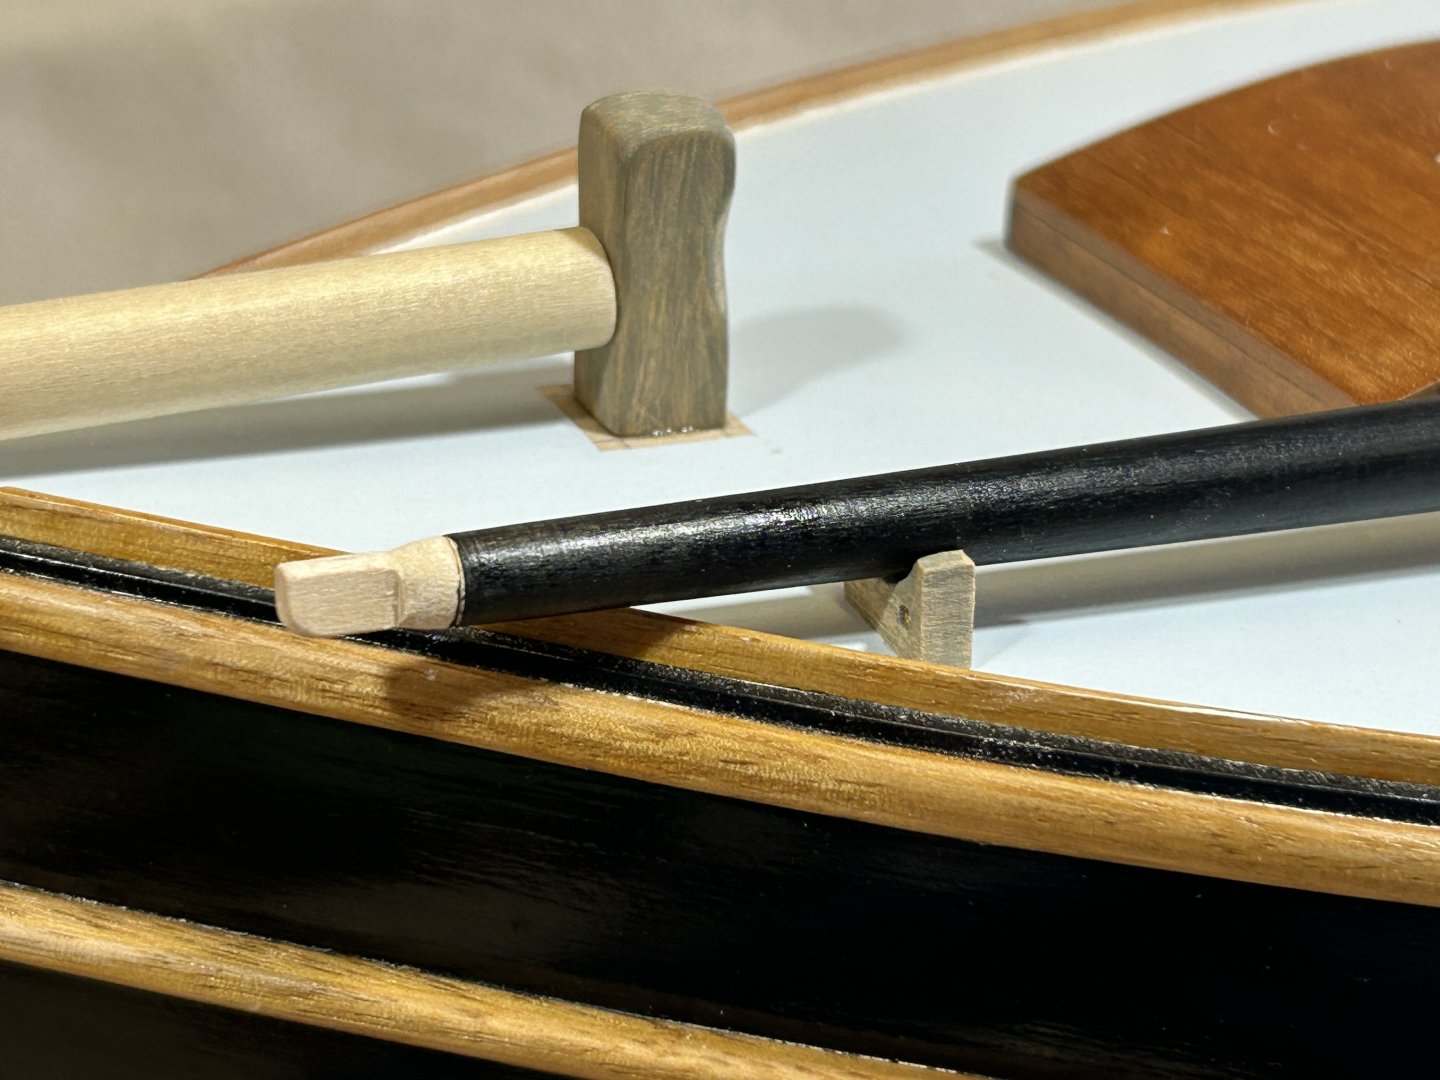
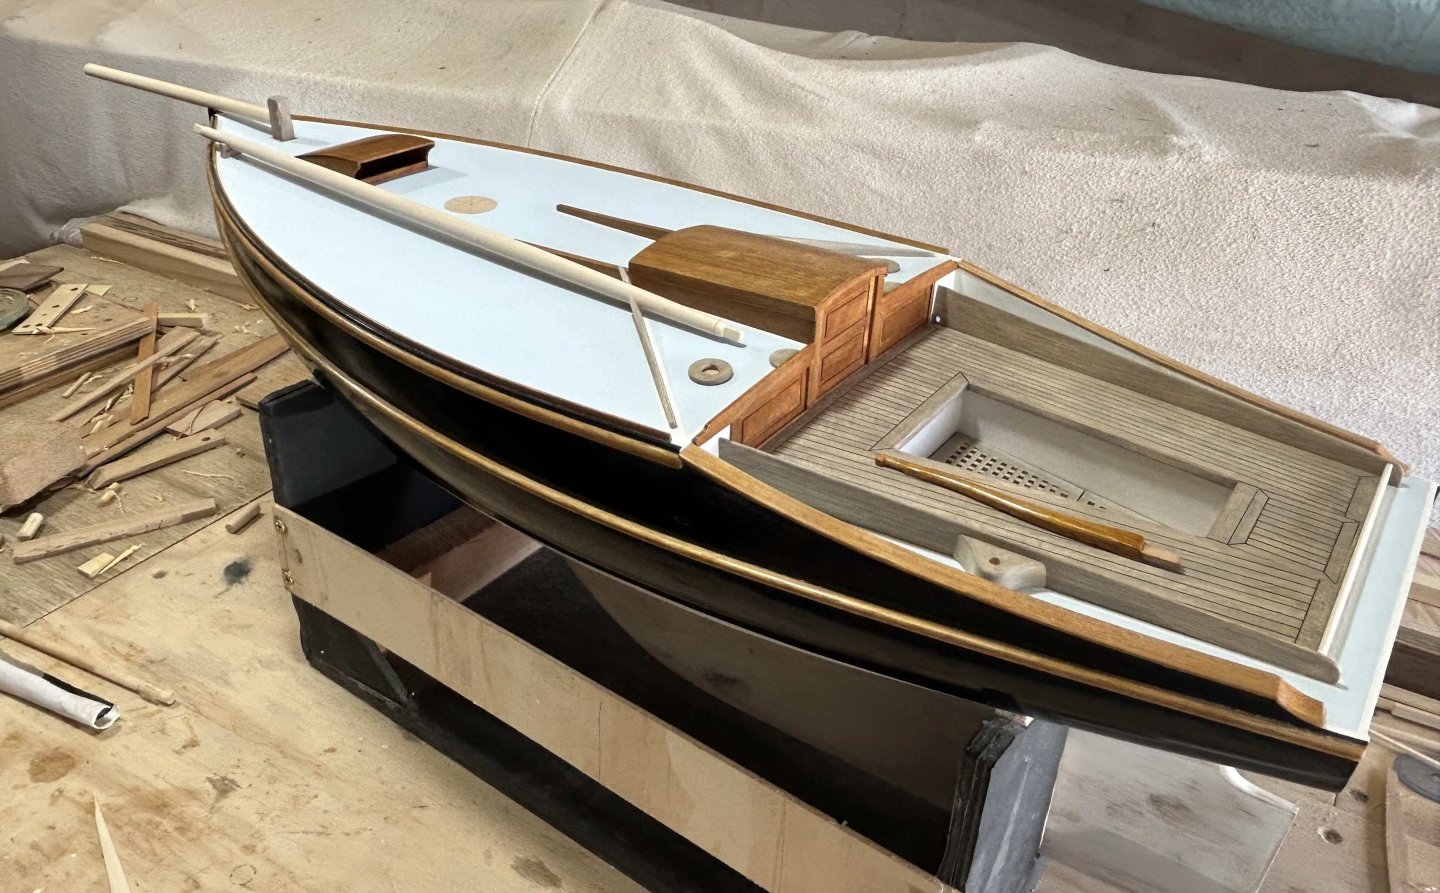
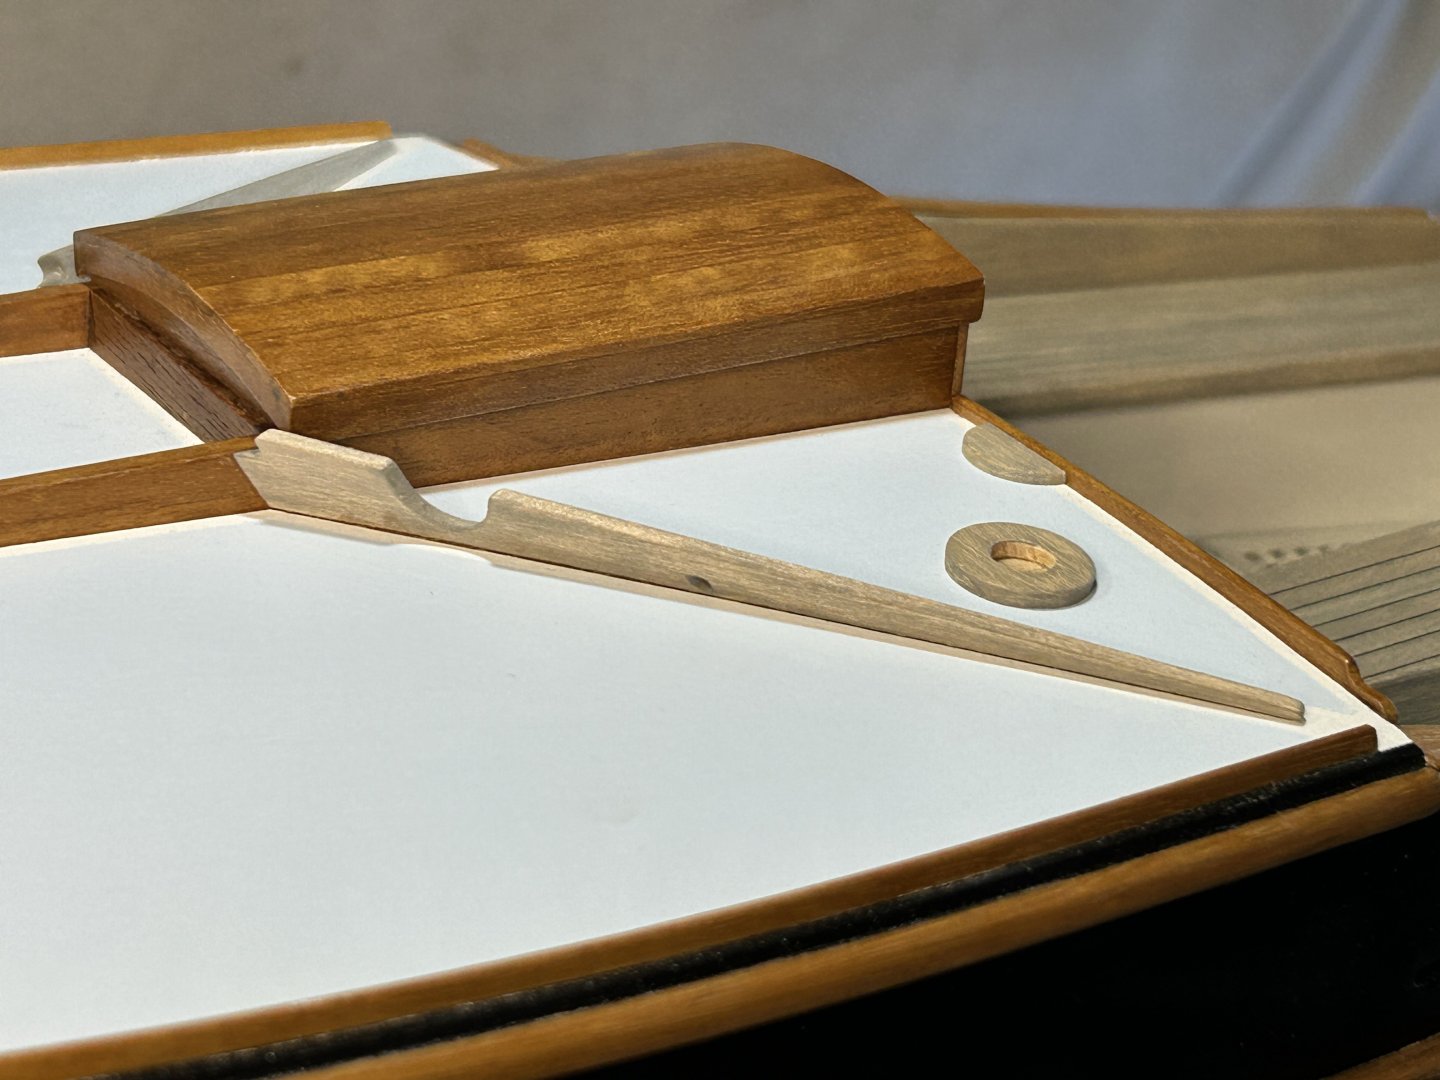
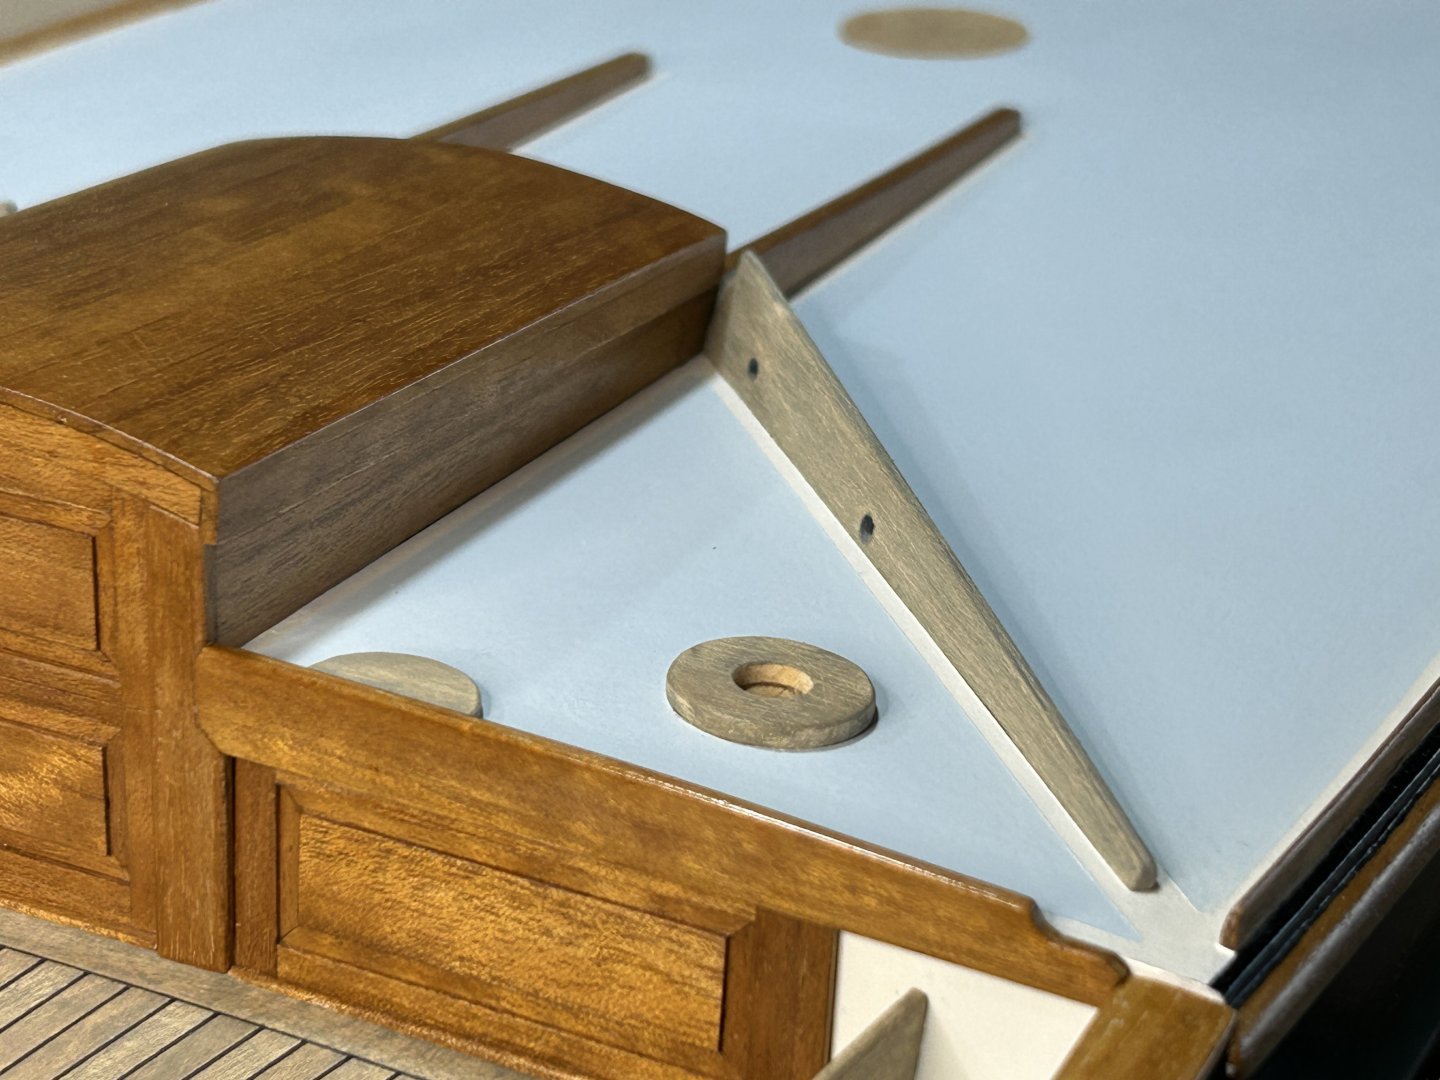
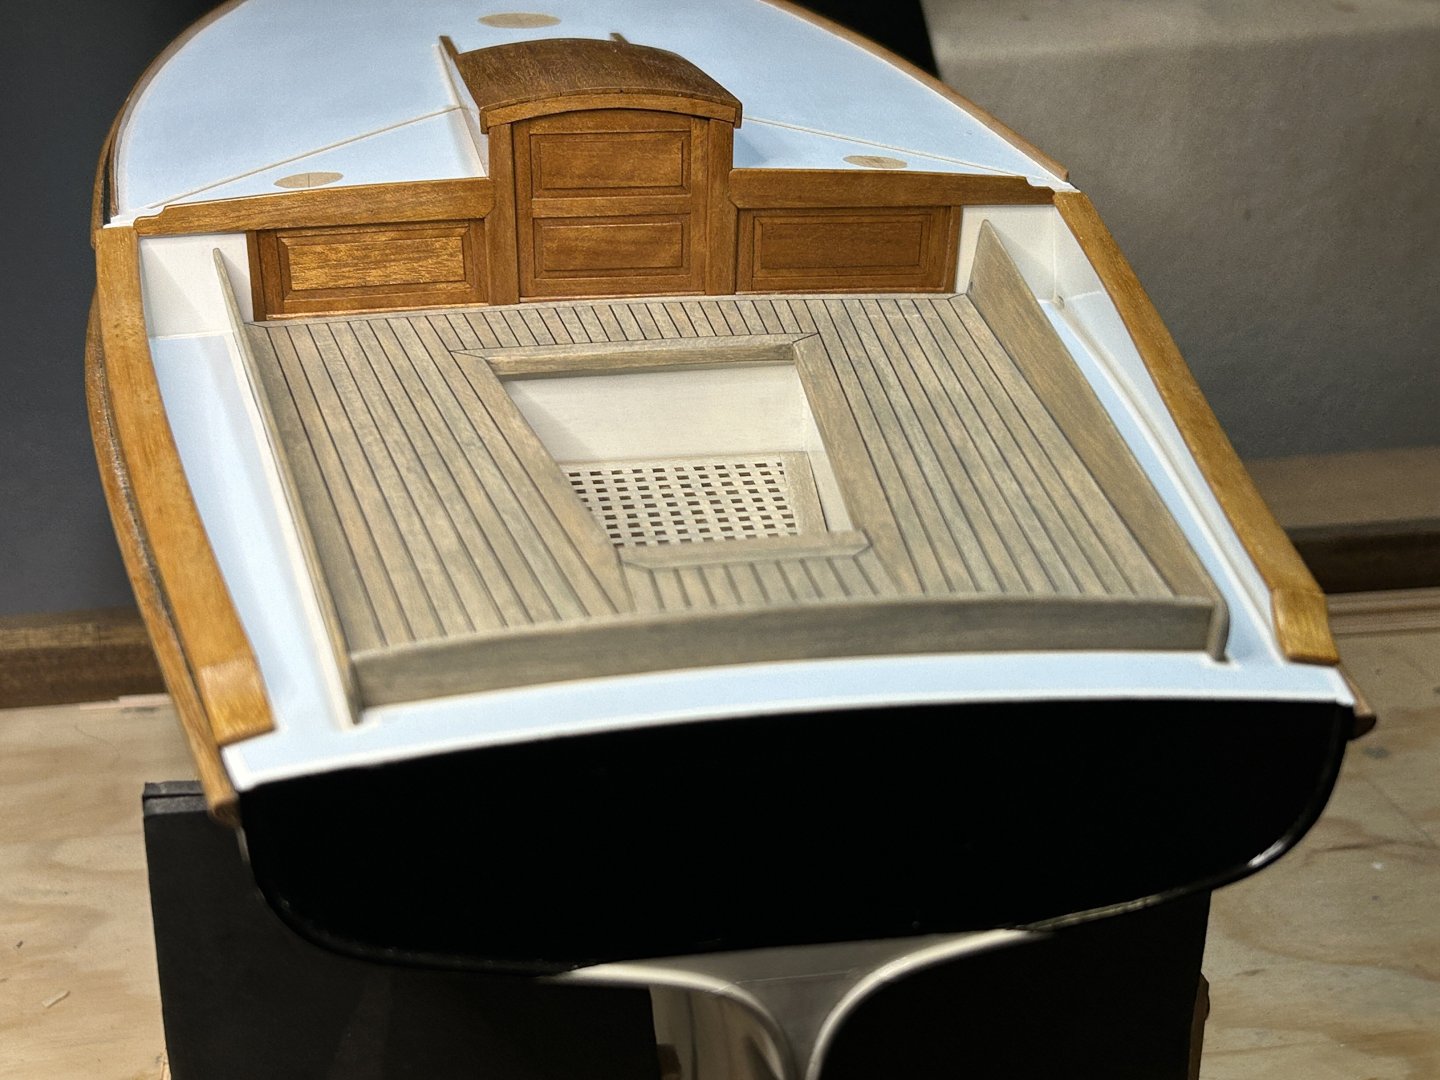
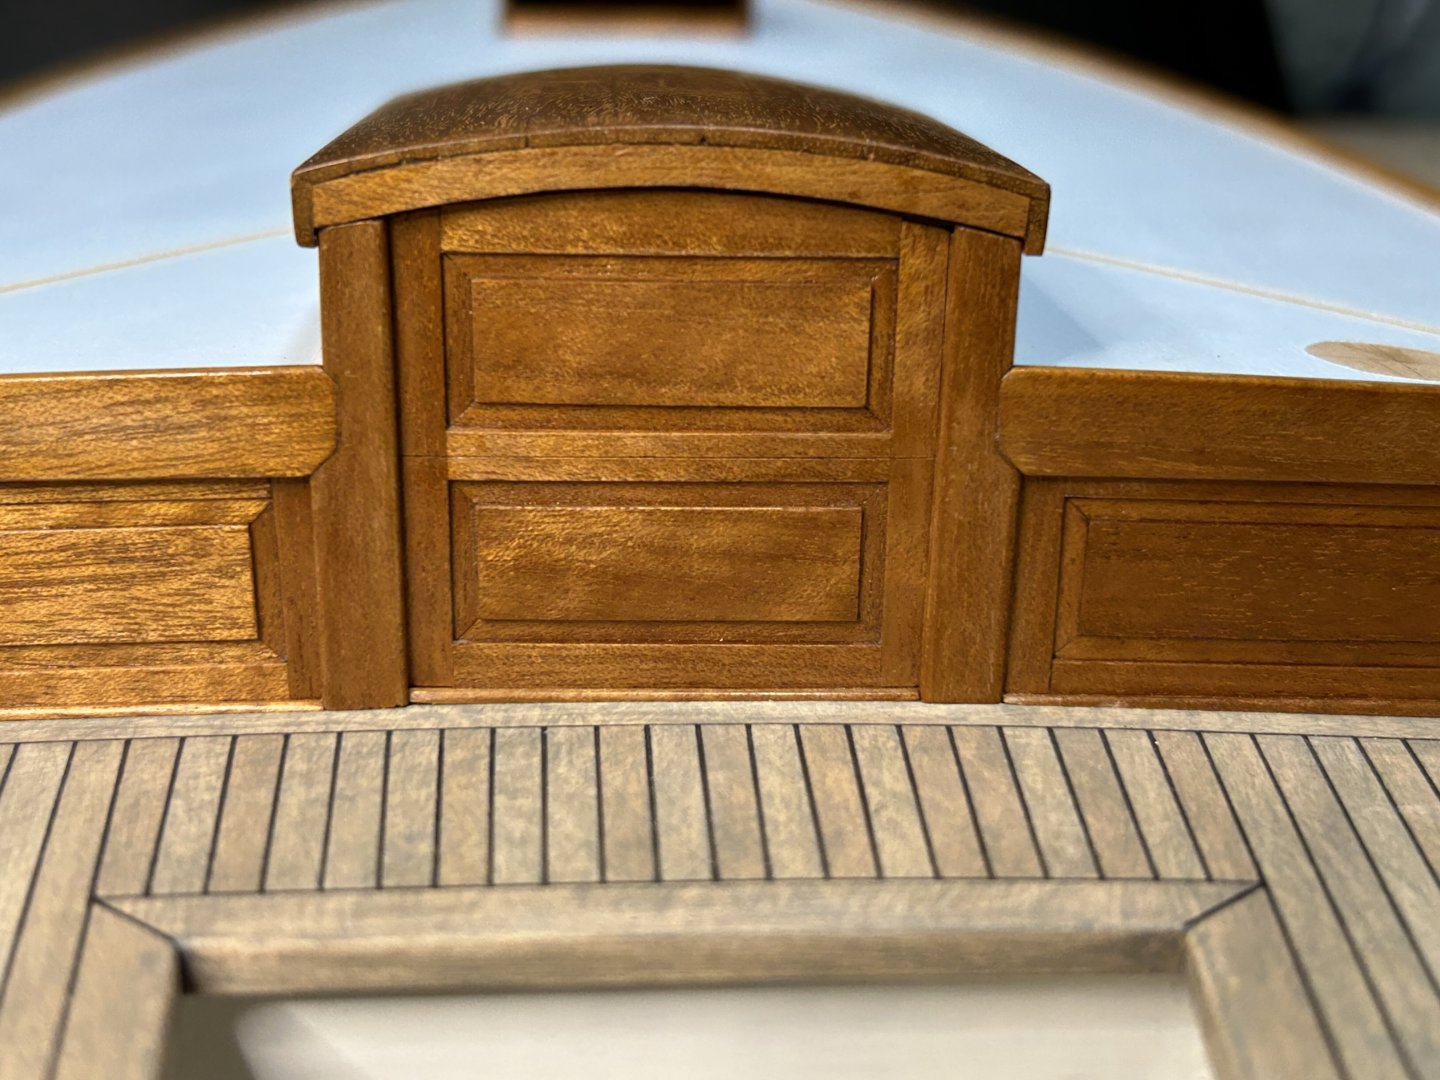
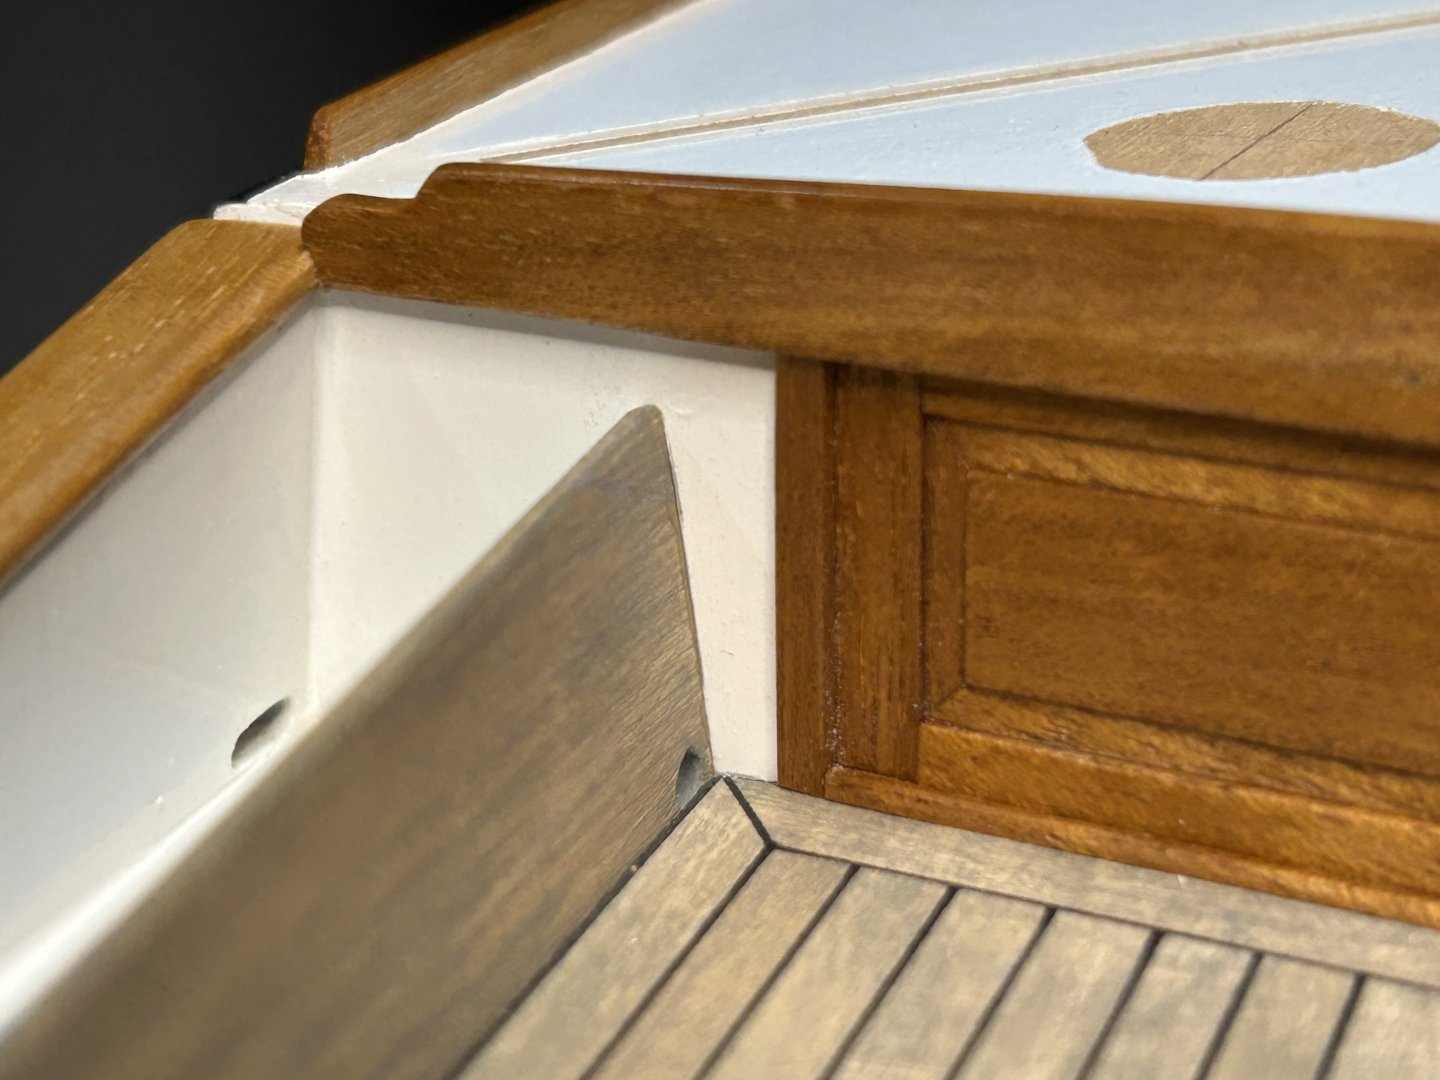
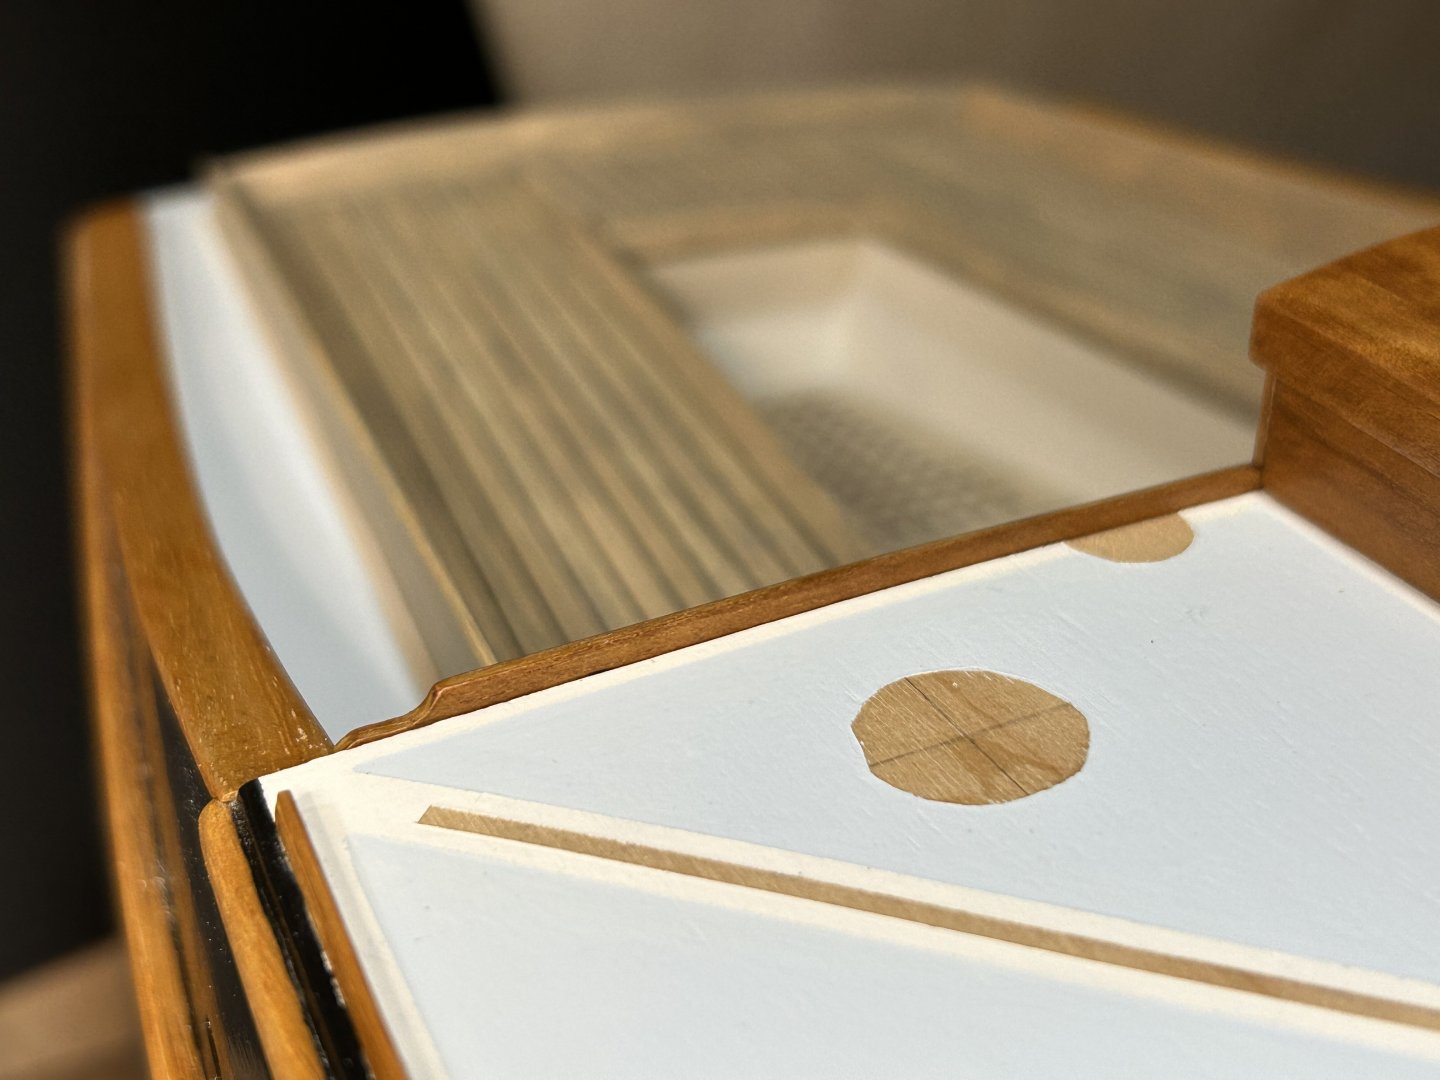
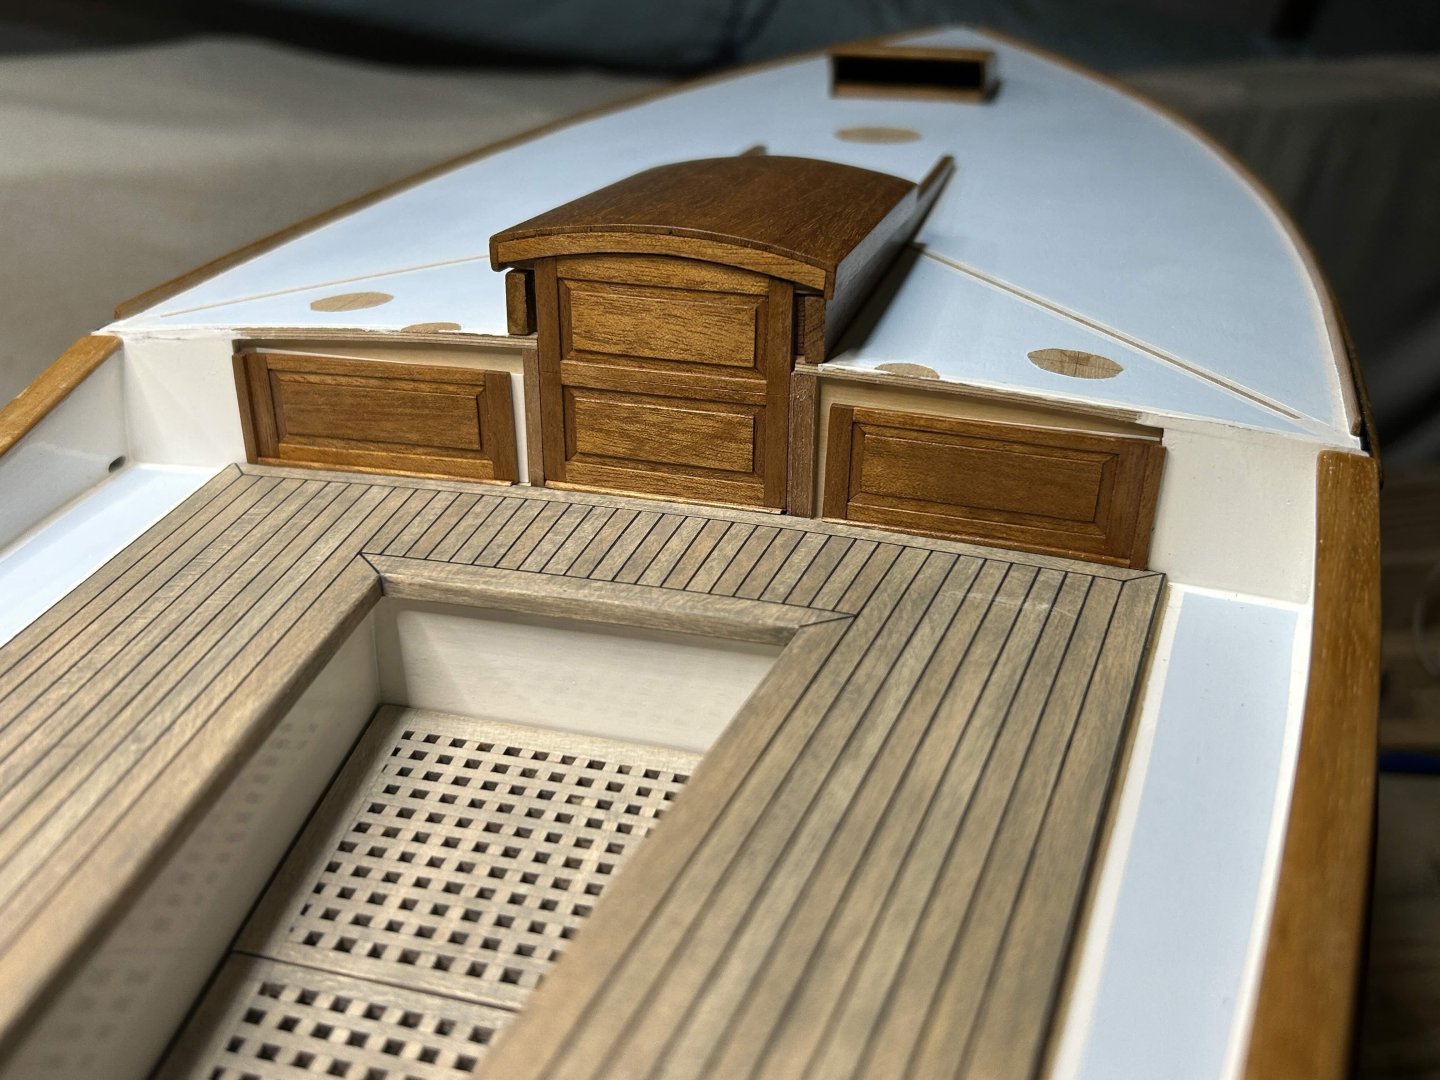
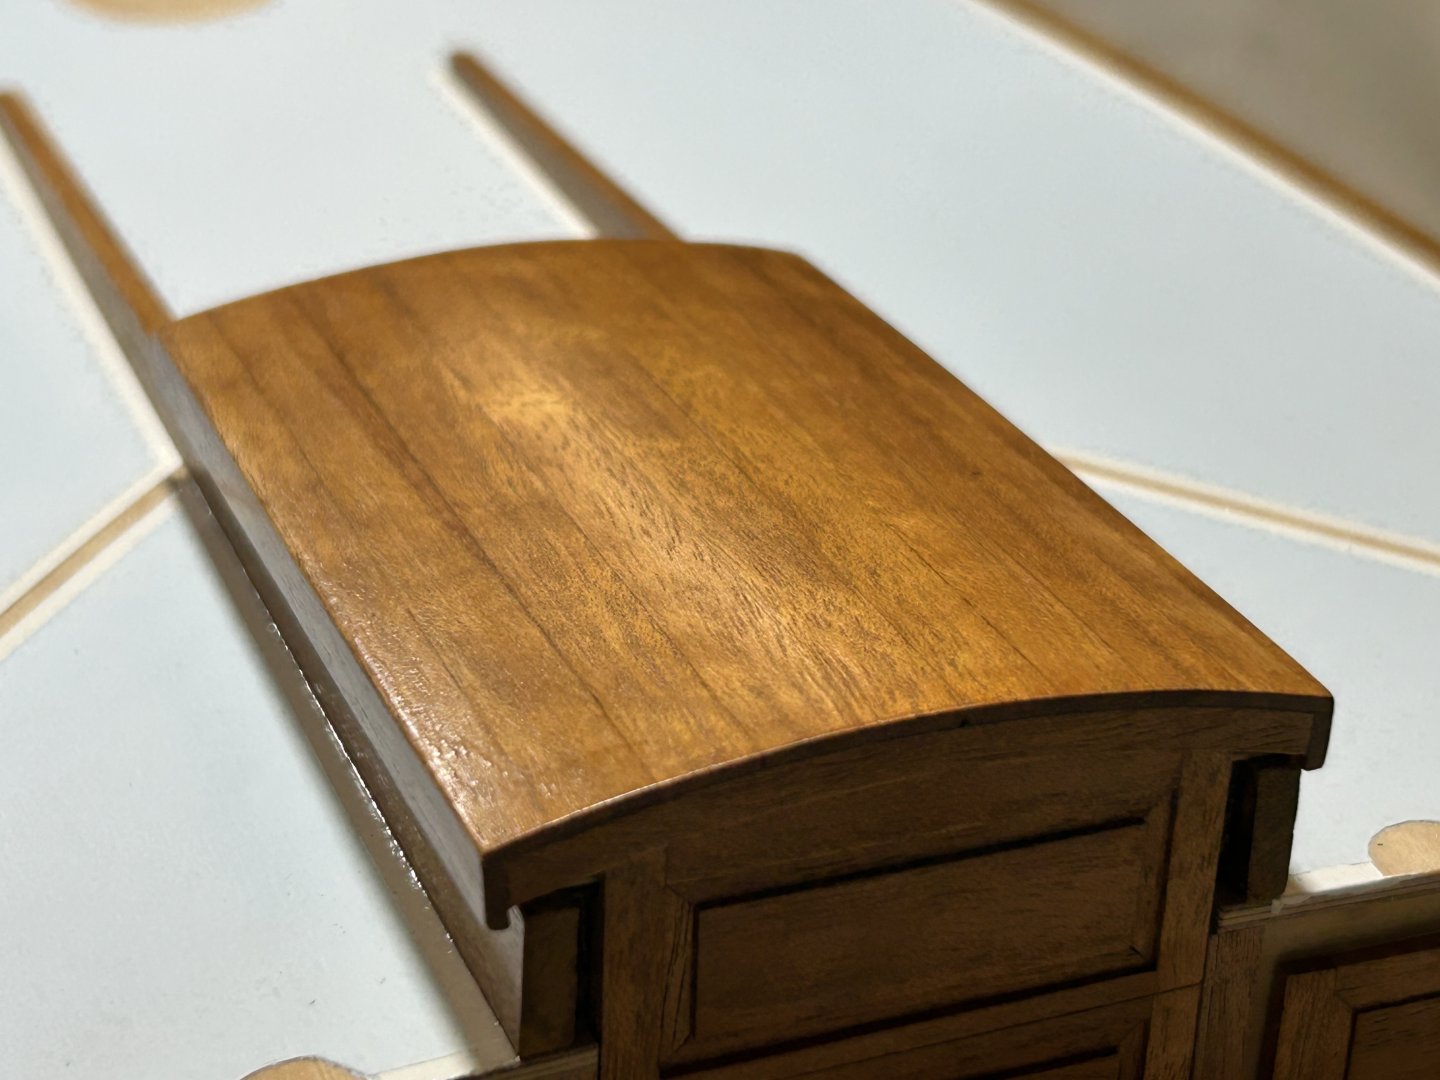
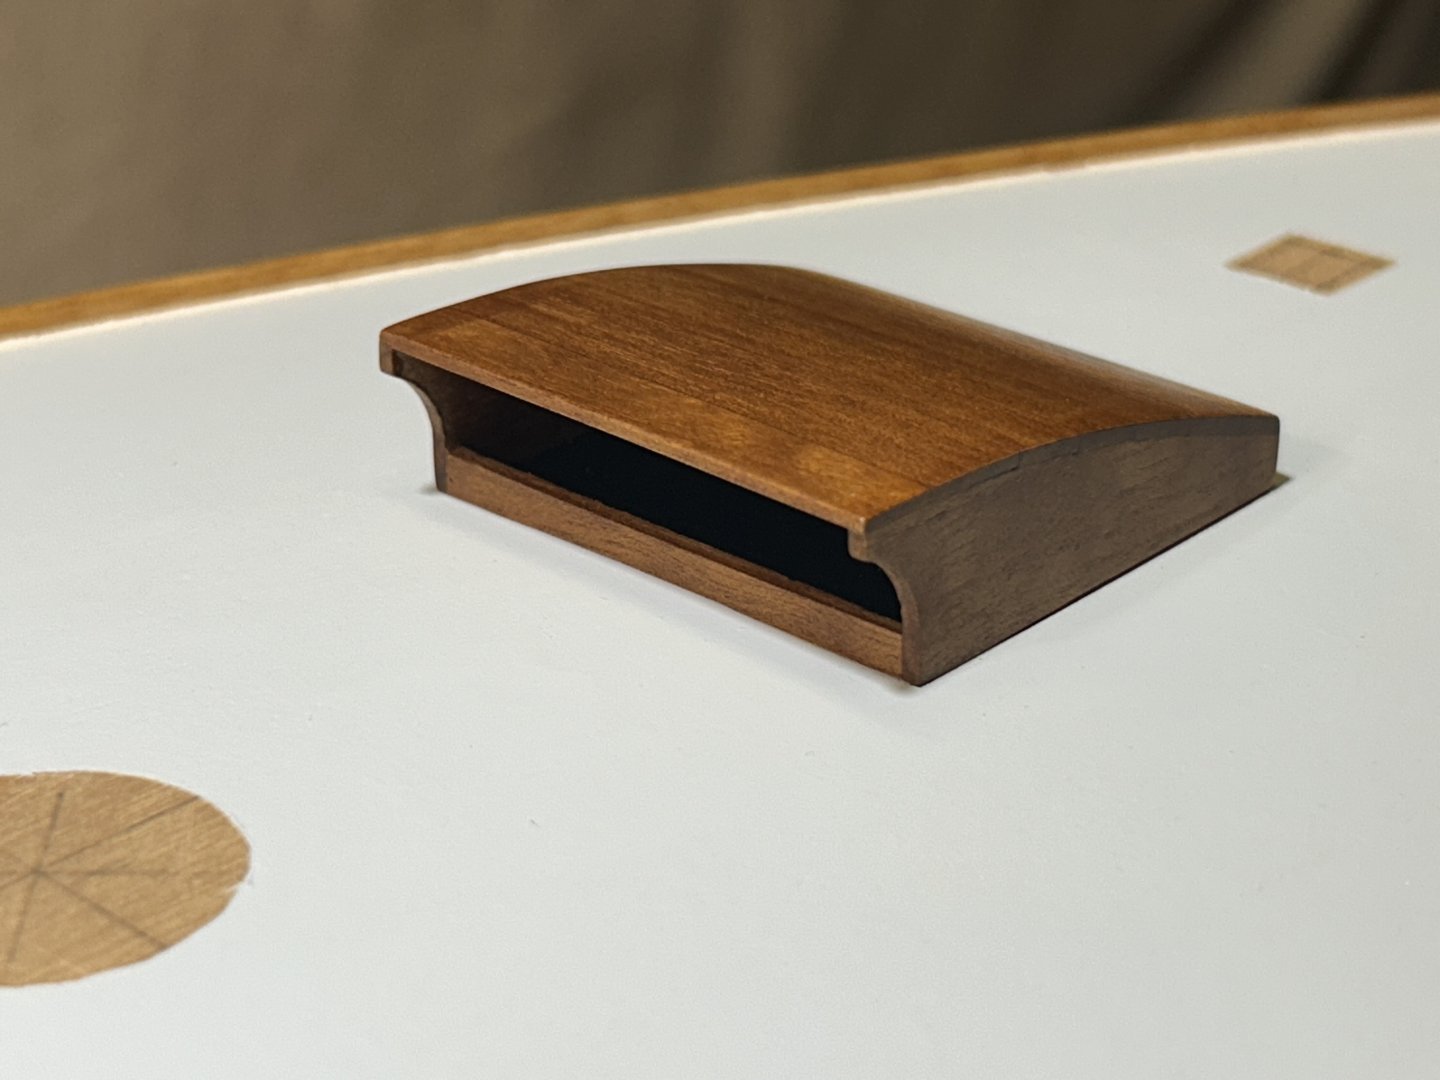
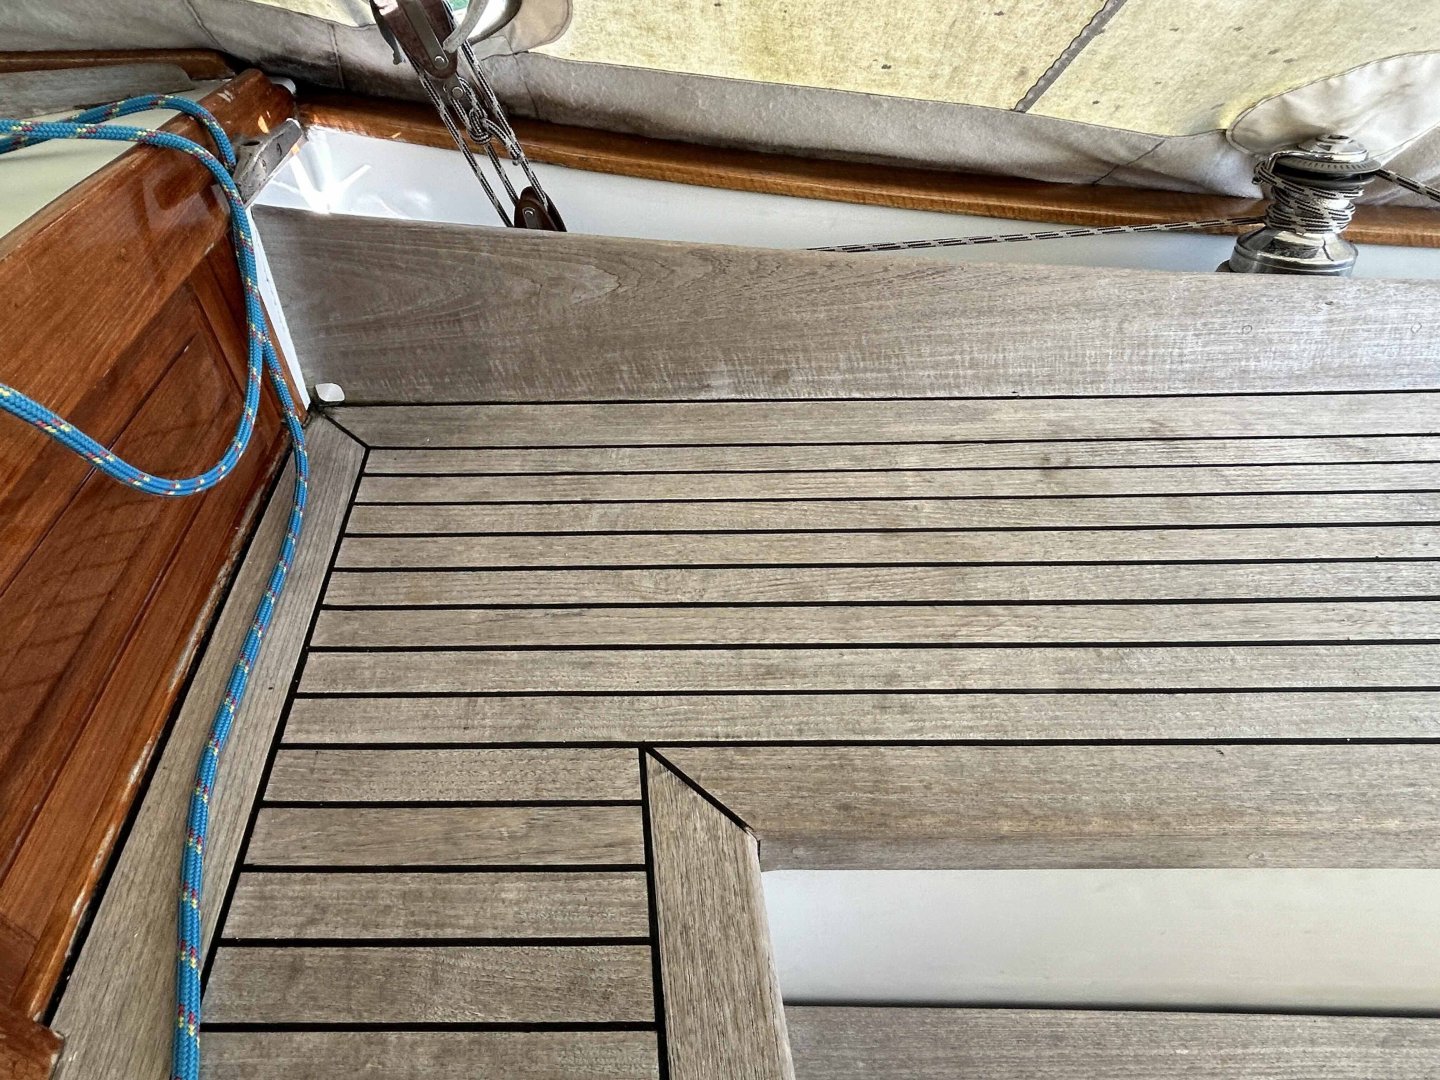
Thank you Steve & welcome Welfack, & hi to everyone - I've now almost completed the timber work, & apart from the spars just the tiller remains to be done now. Then I'll work on the spars & metalwork. This boat has stainless steel fittings, so I'll be painting the metalwork silver. This recent work includes deck & cockpit timber details, all unfinished (weathered) teak. The bases for the cockpit winches, which are used mainly for the running backstays. The deck cutwaters, deck winch bases & a small base for a cam cleat fitting - that are all alongside the main hatch. And the large cutaway on the port side cutwater is a support for the spinnaker pole. The Sampson post & the forwards support chock for the spinnaker pole. The sampson post isn't fixed down yet, there will be a mortise for the bowsprit, to be cut into the forward side face. And the port side cutwater. The small holes are for the lines that lead to the cam cleats: spinnaker topping lift one side & spinnaker pole kicker the other. I'm not sure what the 3rd one is, but will find out. They were tricky to drill due to the angles & the fact that regular drill bits down't work well at angles, especially if it's a small hand drill. What I did was: to initially drill the holes & then put CA glue on it all to harden the timber up, drill right through & CA to the hole...then when hard clean it all up. I also found that a 1mm wide strip of sandpaper was quite a useful way to sand inside the angled holes. thanks,


-
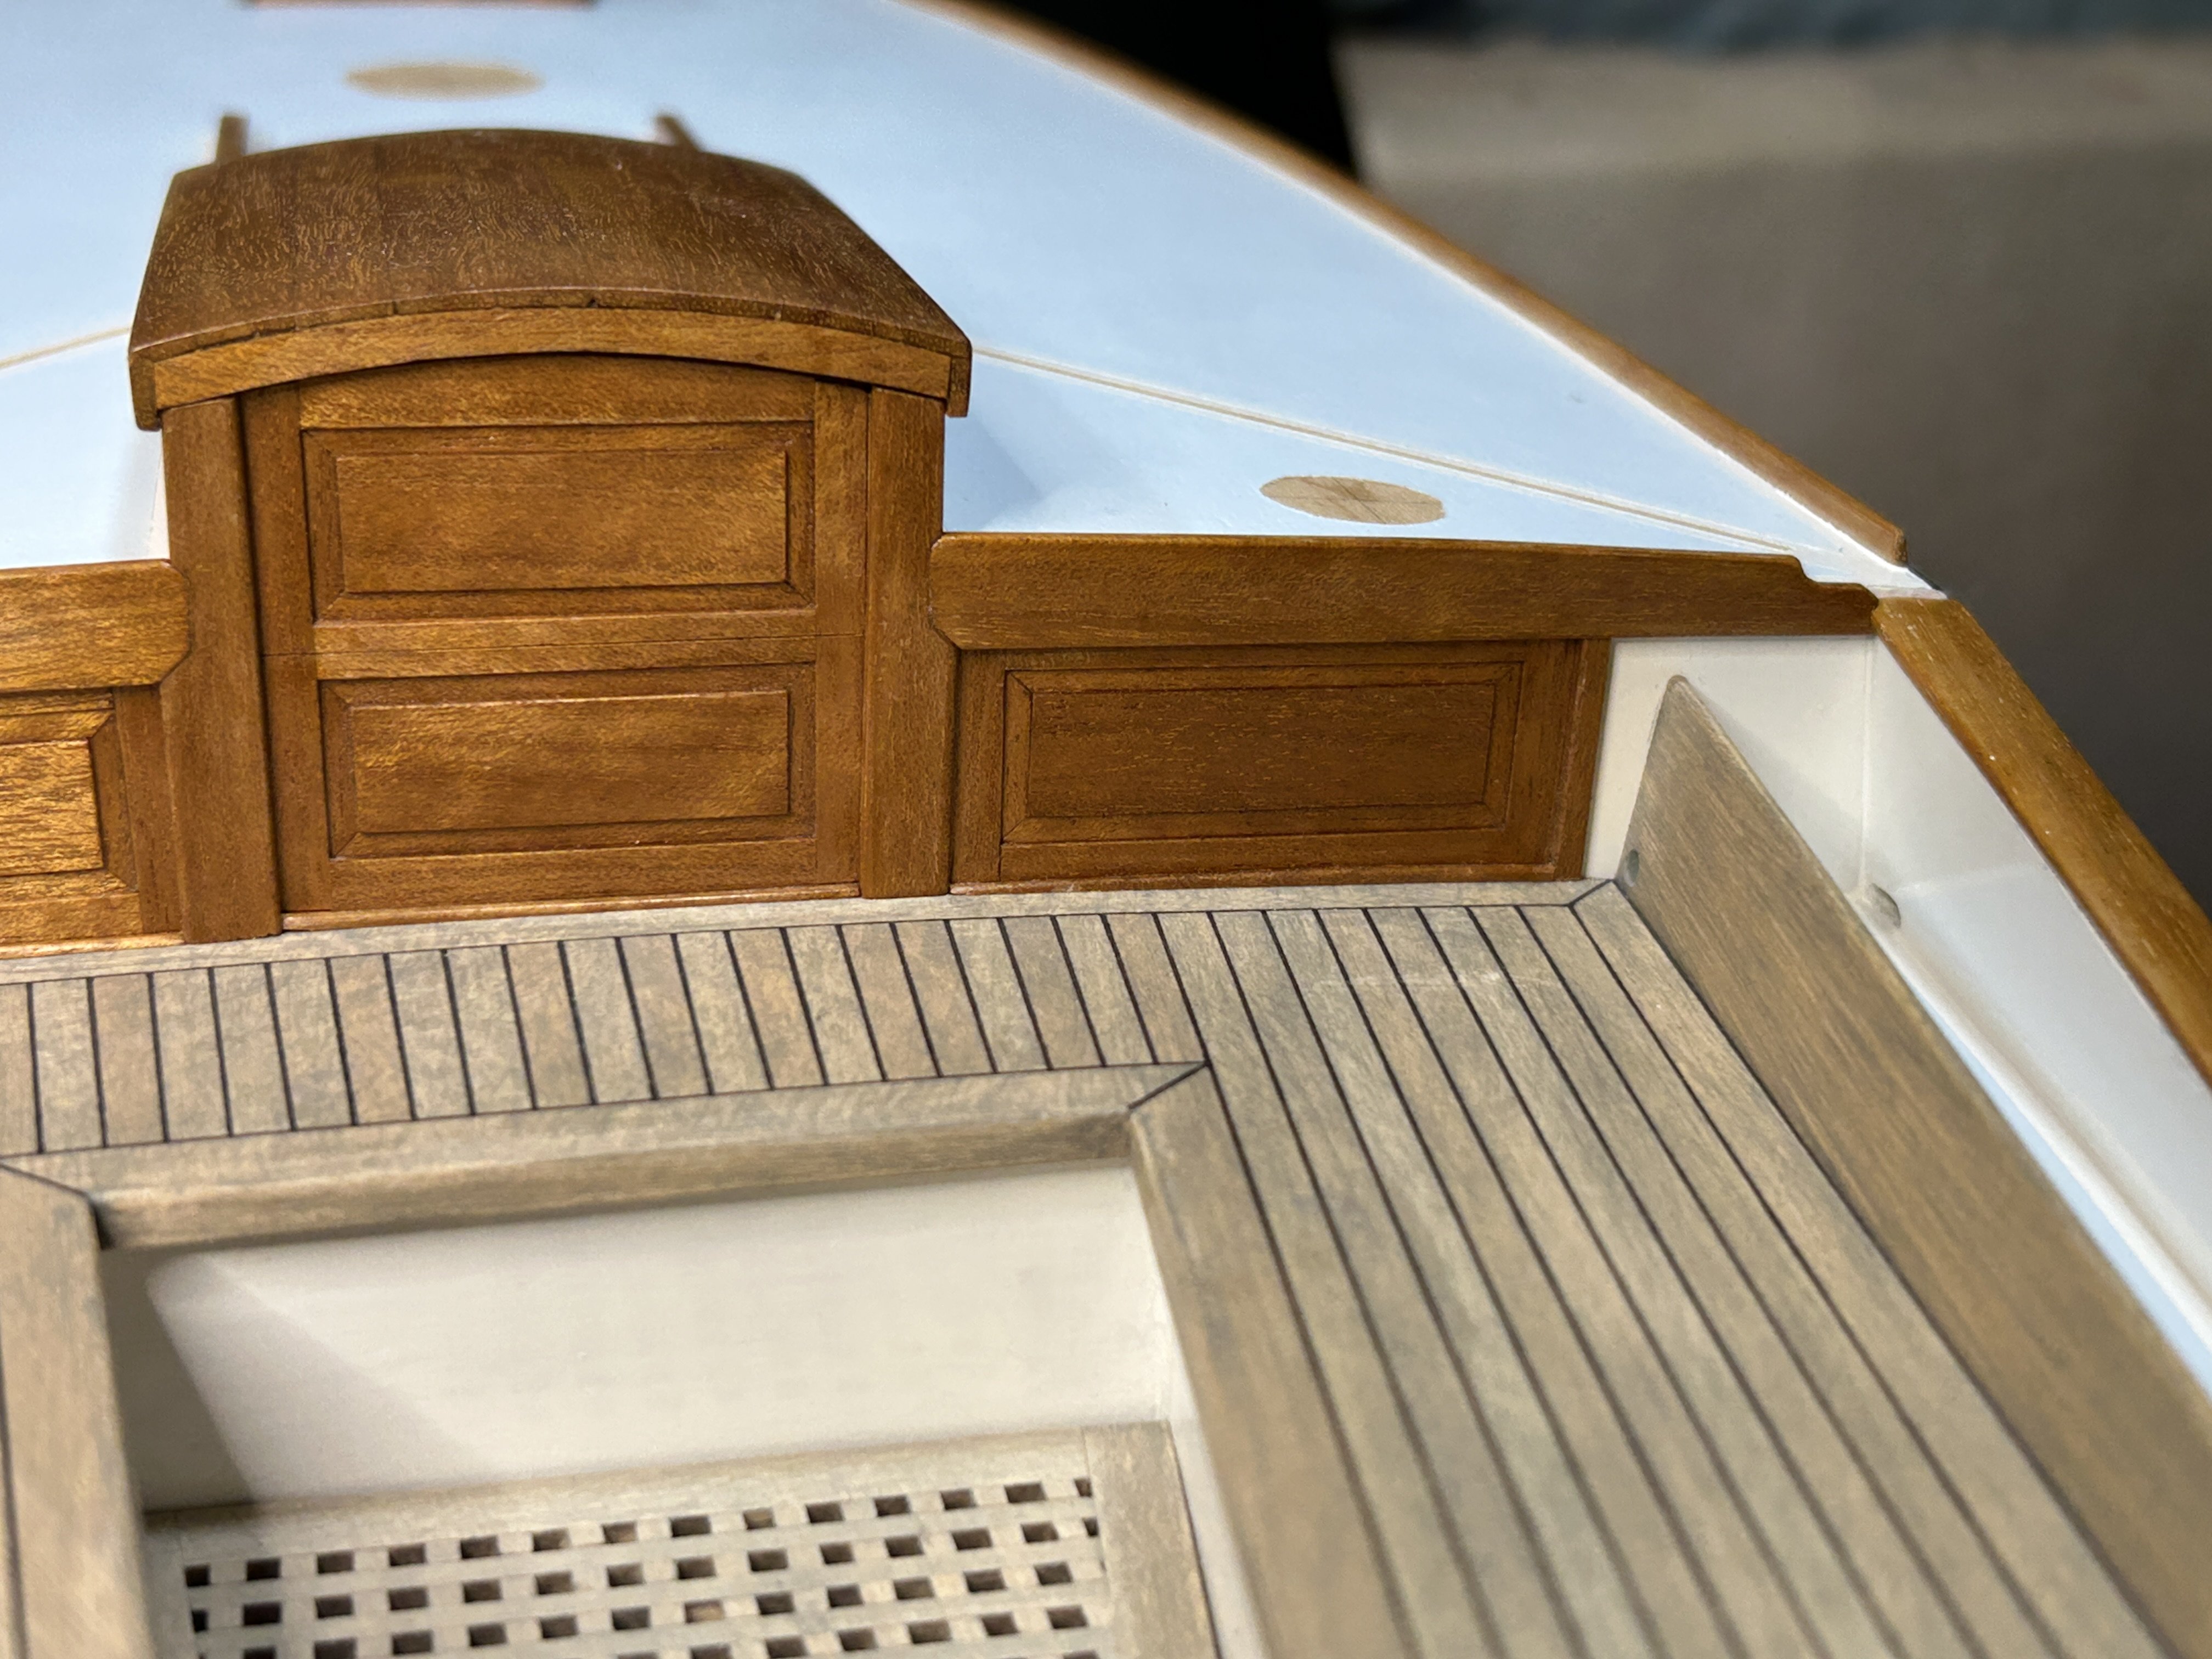
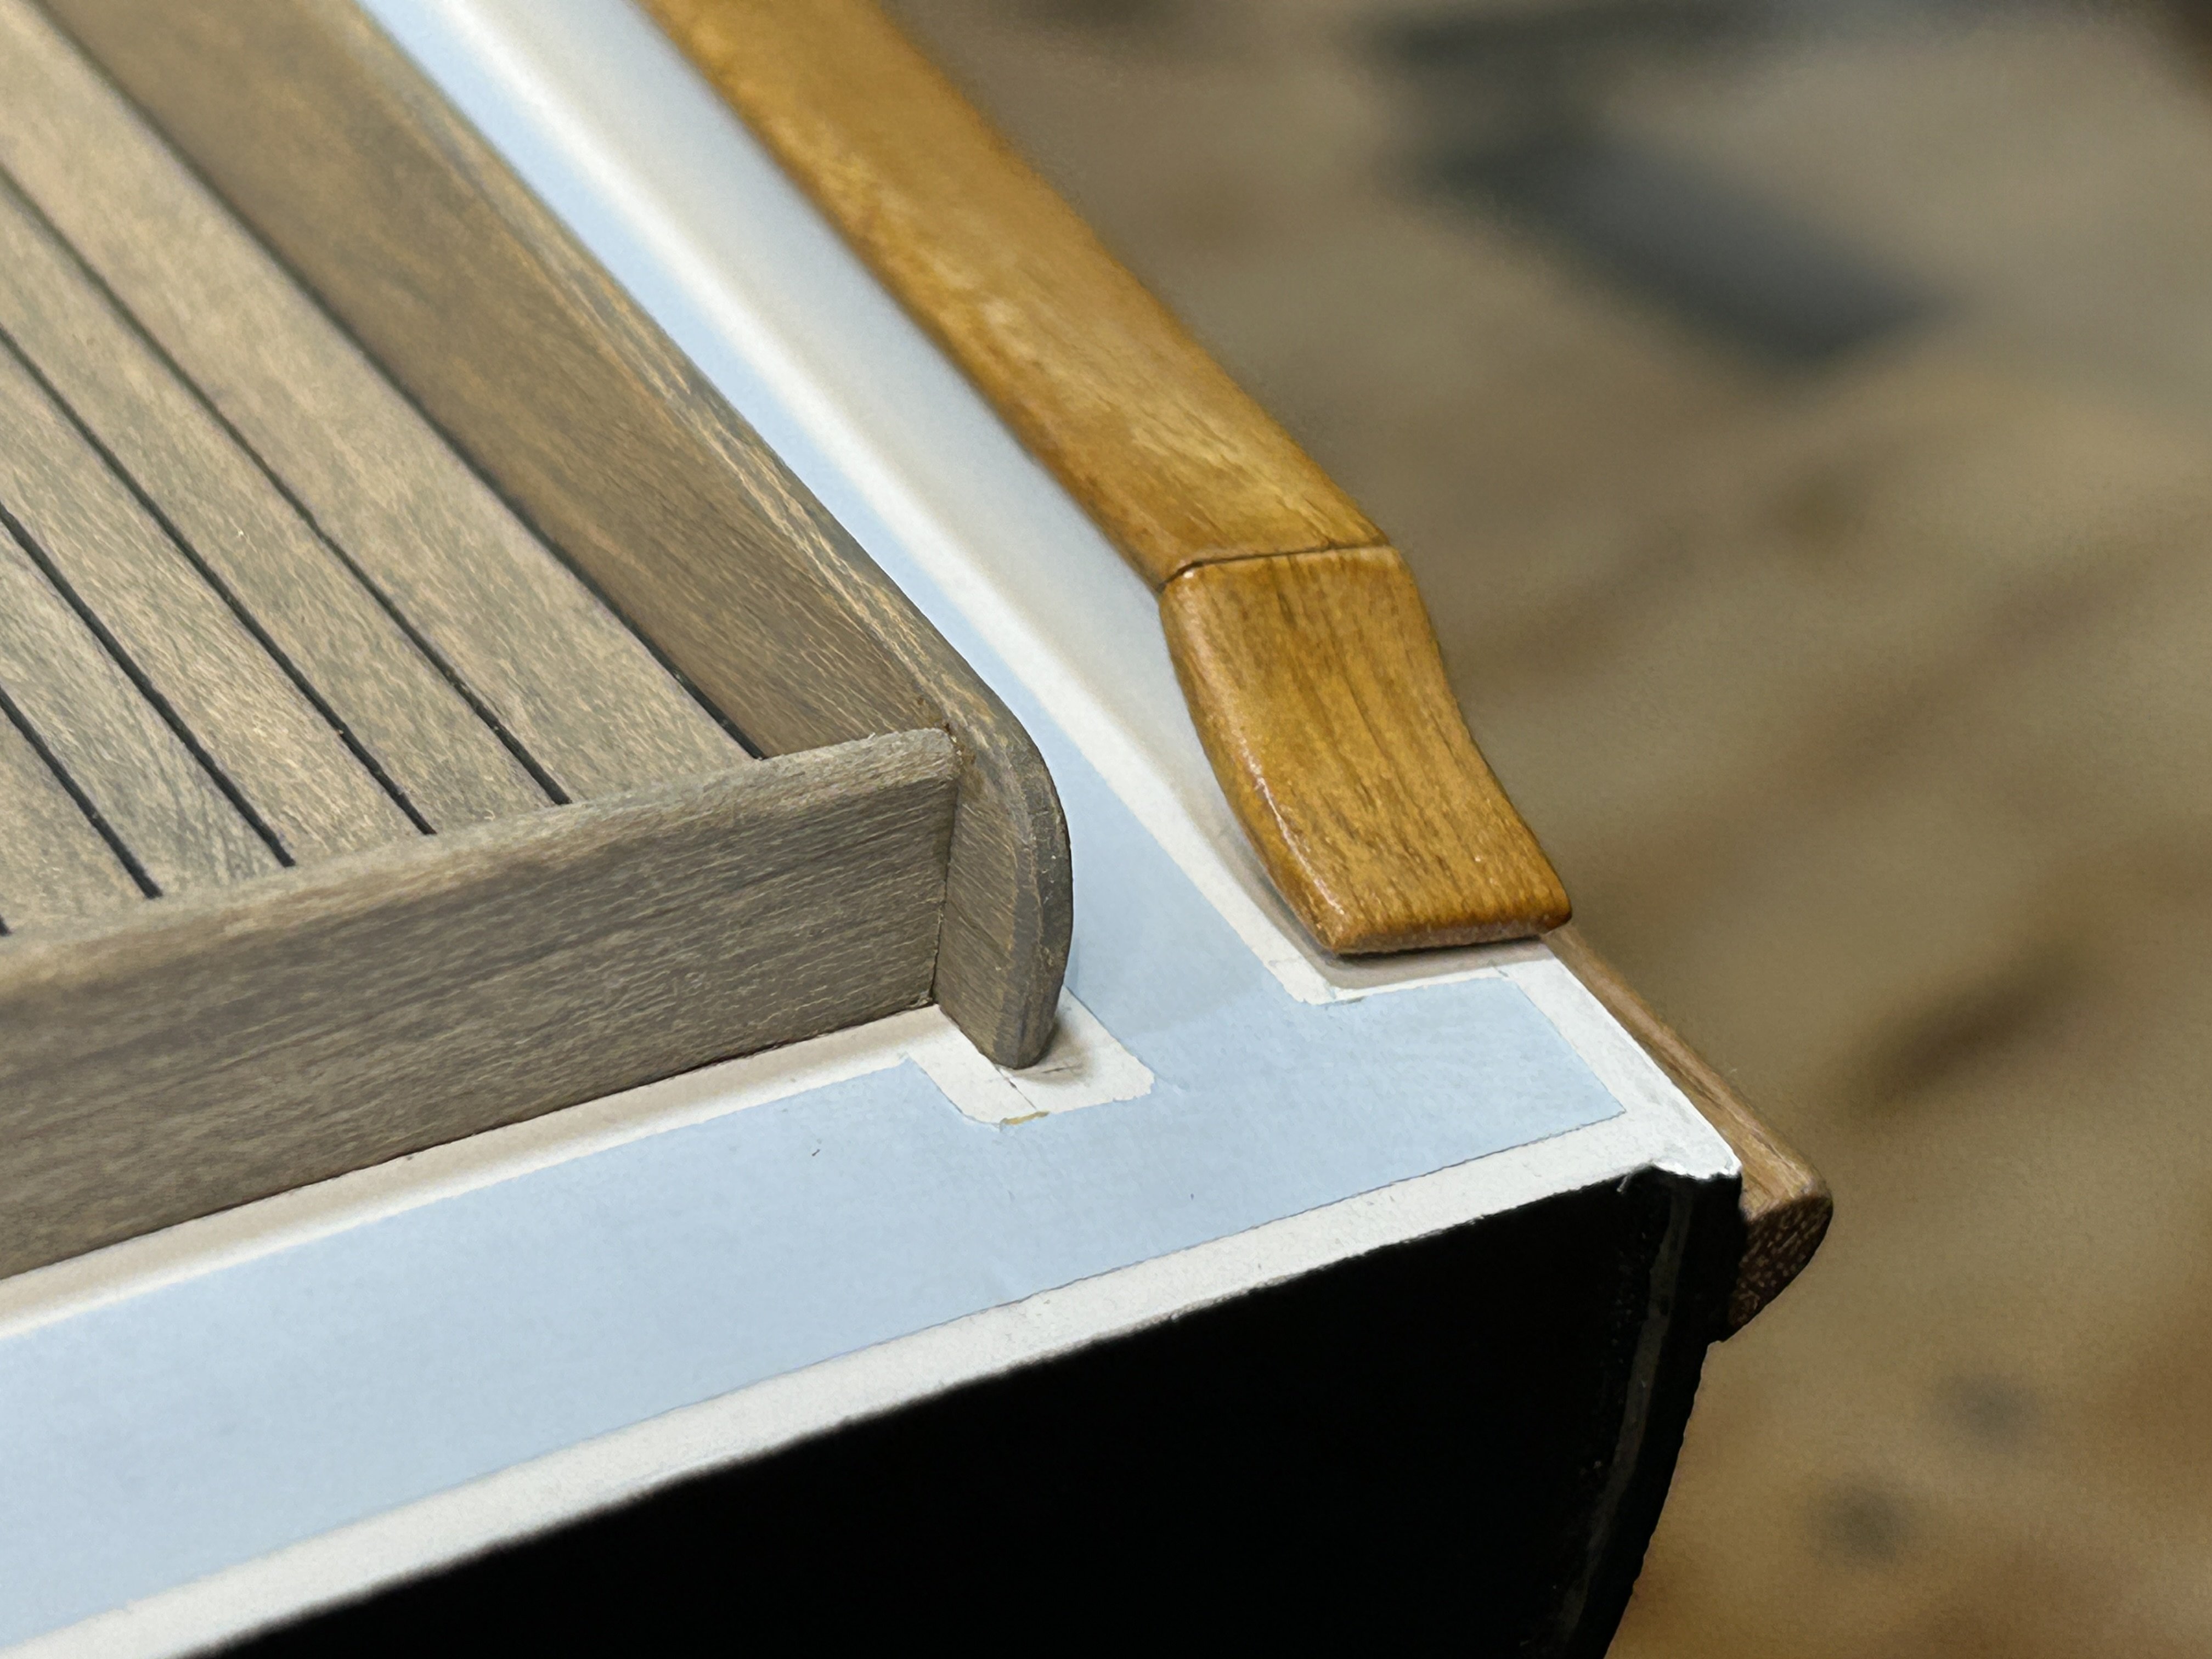
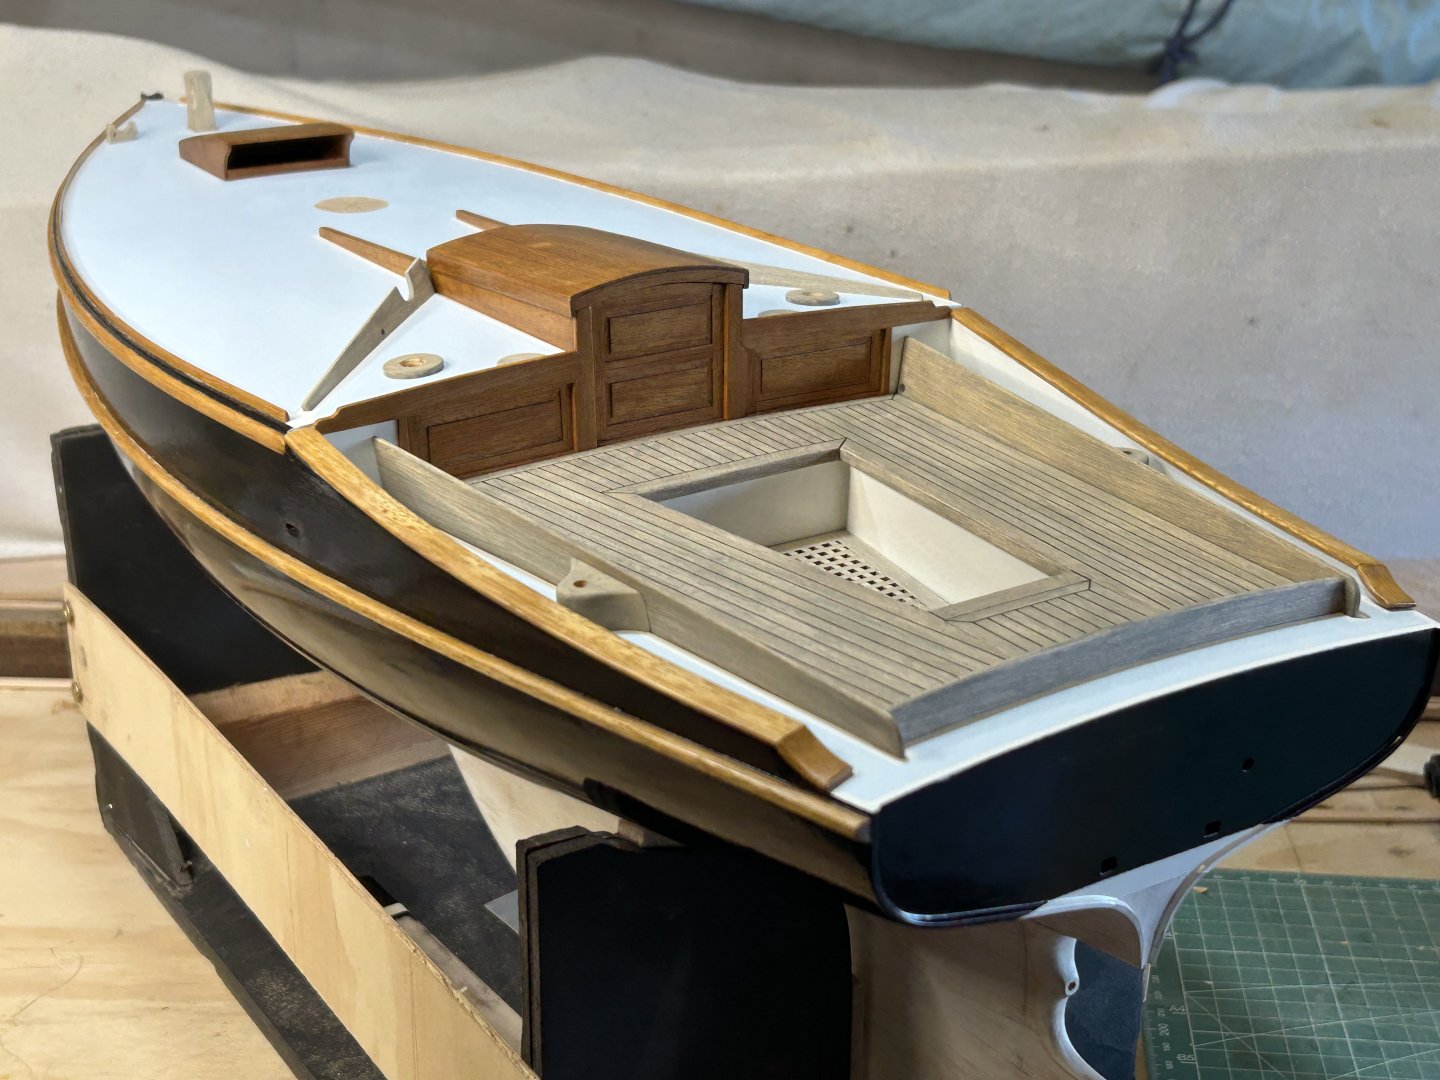
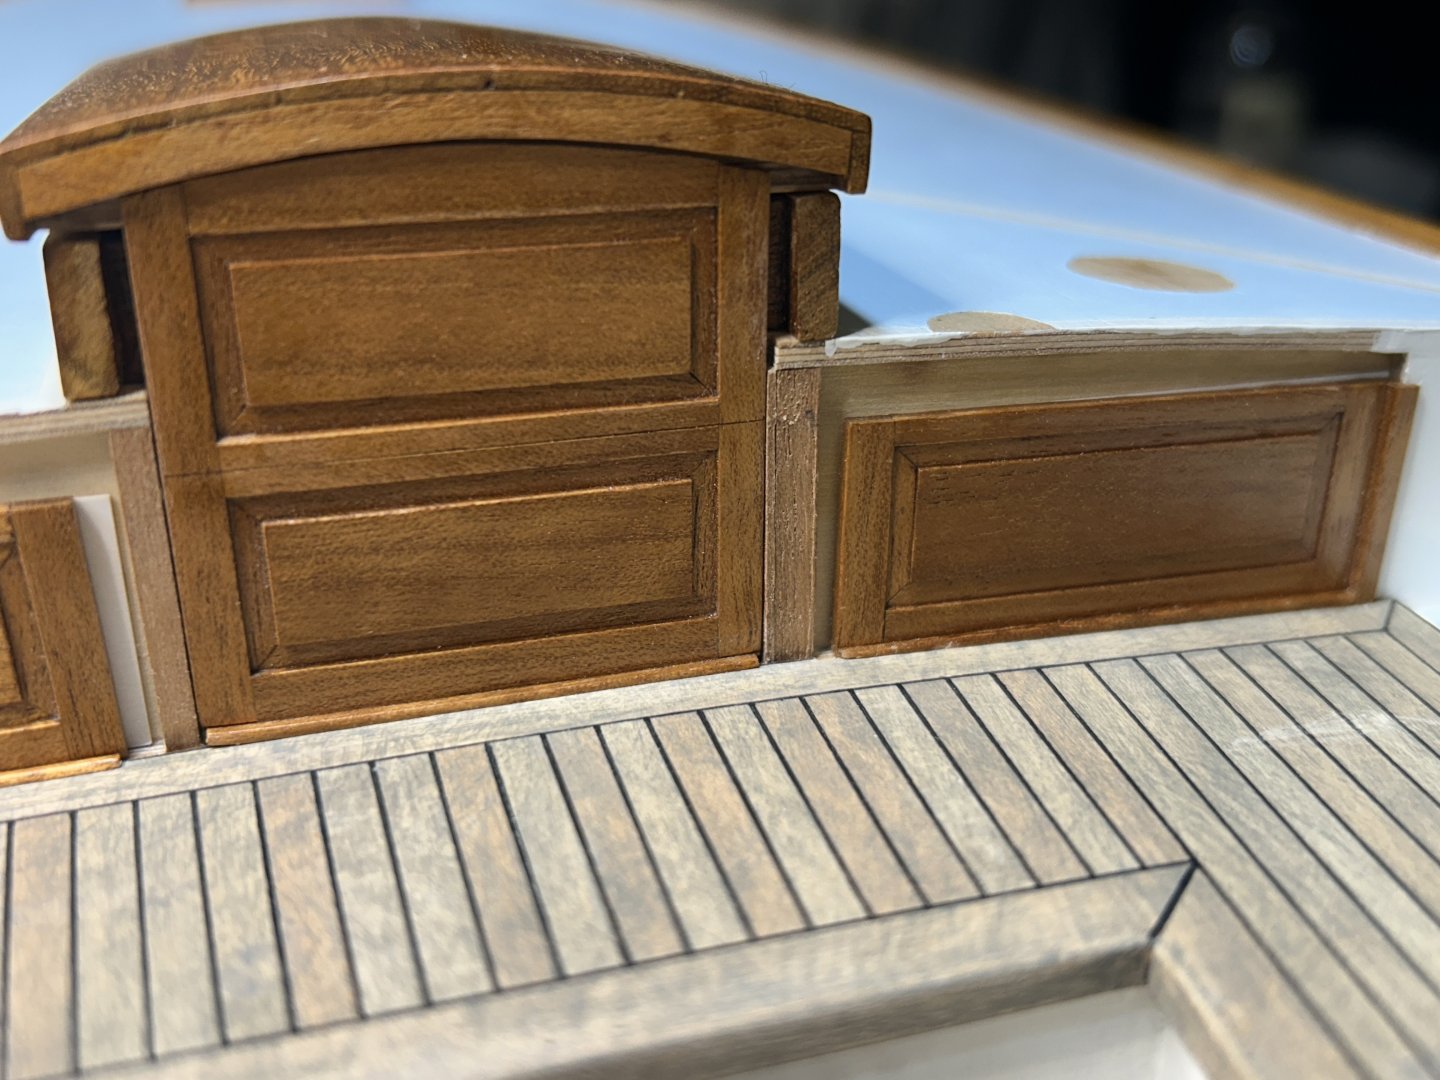
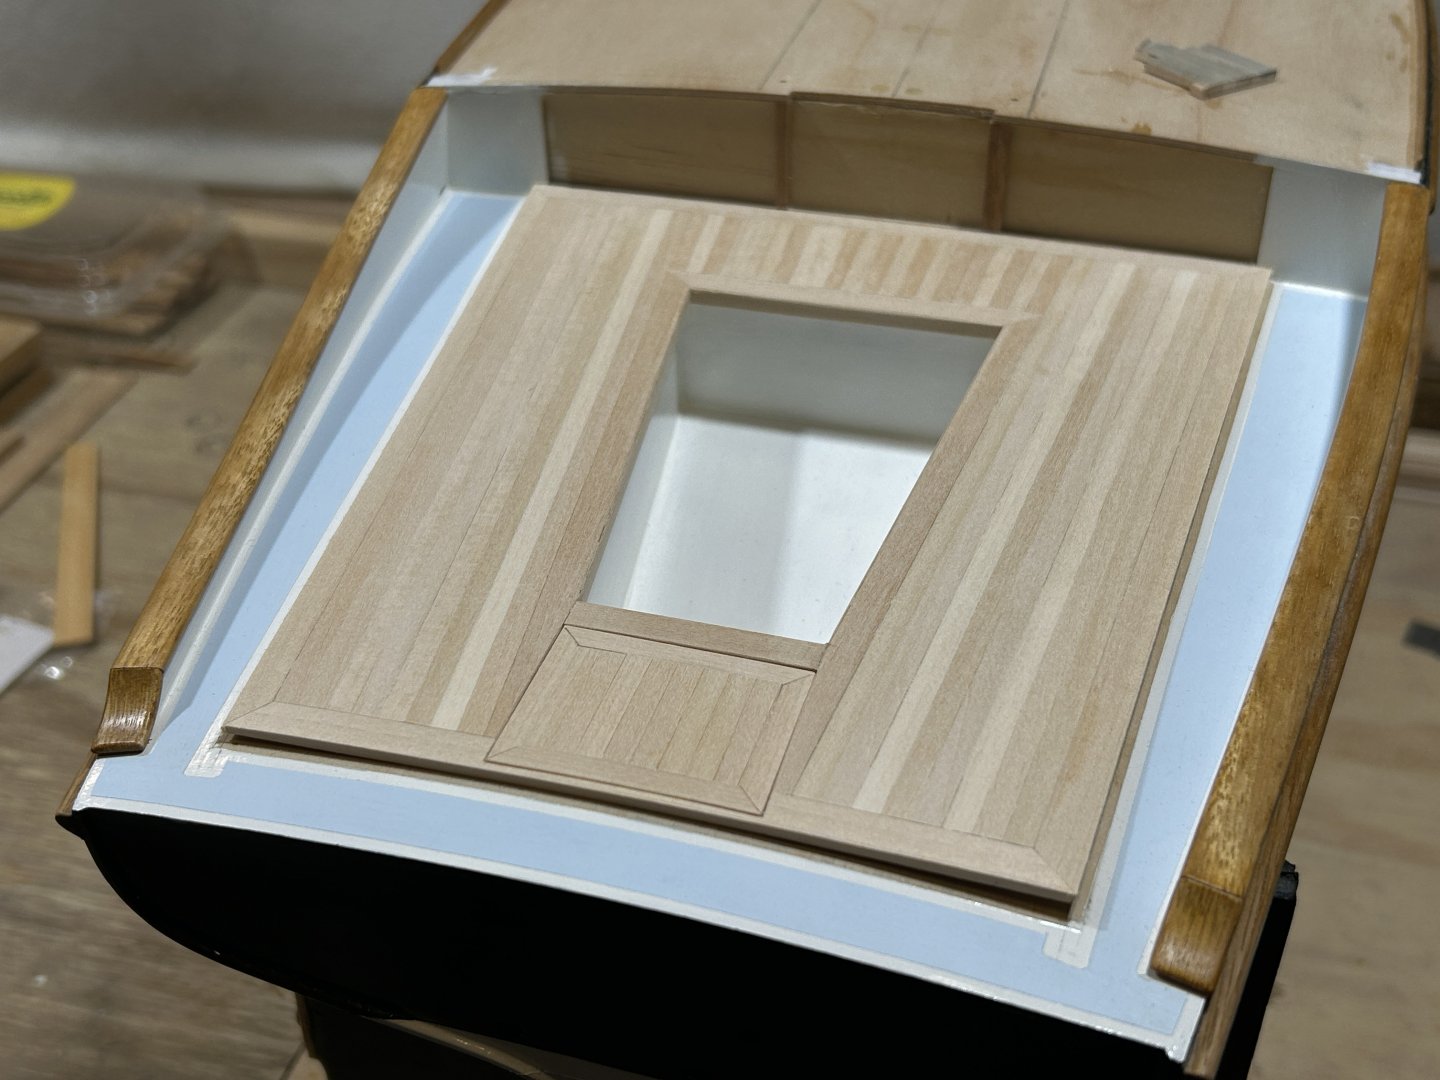
Thank you everyone, I'm now back from a Nordic trip in the northern hemisphere summer, & have now finished & assembled more of the details around the cockpit & face of the raised deck. The horizontal varnished trimming pieces both sides of the companionway, which insect with a vertical varnished piece each side; & the weathered teak cockpit seat backrests. Overall view: Detail, & I can see the pencil alignment mark needs to be removed: The junction of the strips was difficult to get, but happy with this: Detail, showing the drain openings & another pencil mark to be removed... Trimming piece, against the deck. thanks for looking in,


-
Since the last post, the cockpit sole was given the weathering treatment. The seat backrests are made but won't go on yet as they will restrict access for other pieces. A feature of these yachts is the varnished removable hatches either side of the companionway storm boards, & other varnished details. They are a really nice part of the cockpit area & of course will draw the eye to them on the model. So, with some hesitation I started fitting these pieces, after varnishing them (shellac, to a satin finish). The deck also got painted, matt blue with gloss white edges. On the photo below, cover strips & edge details are still to be added. This photo to show the finish, & the nice glow of the timber (Queensland Maple on the model, Teak on the yacht). And the fore hatch also:


-
Hi Vaddoc That's looking very good. The line of the planks looks lovely, a difficult thing to get right. Mess = busy
-
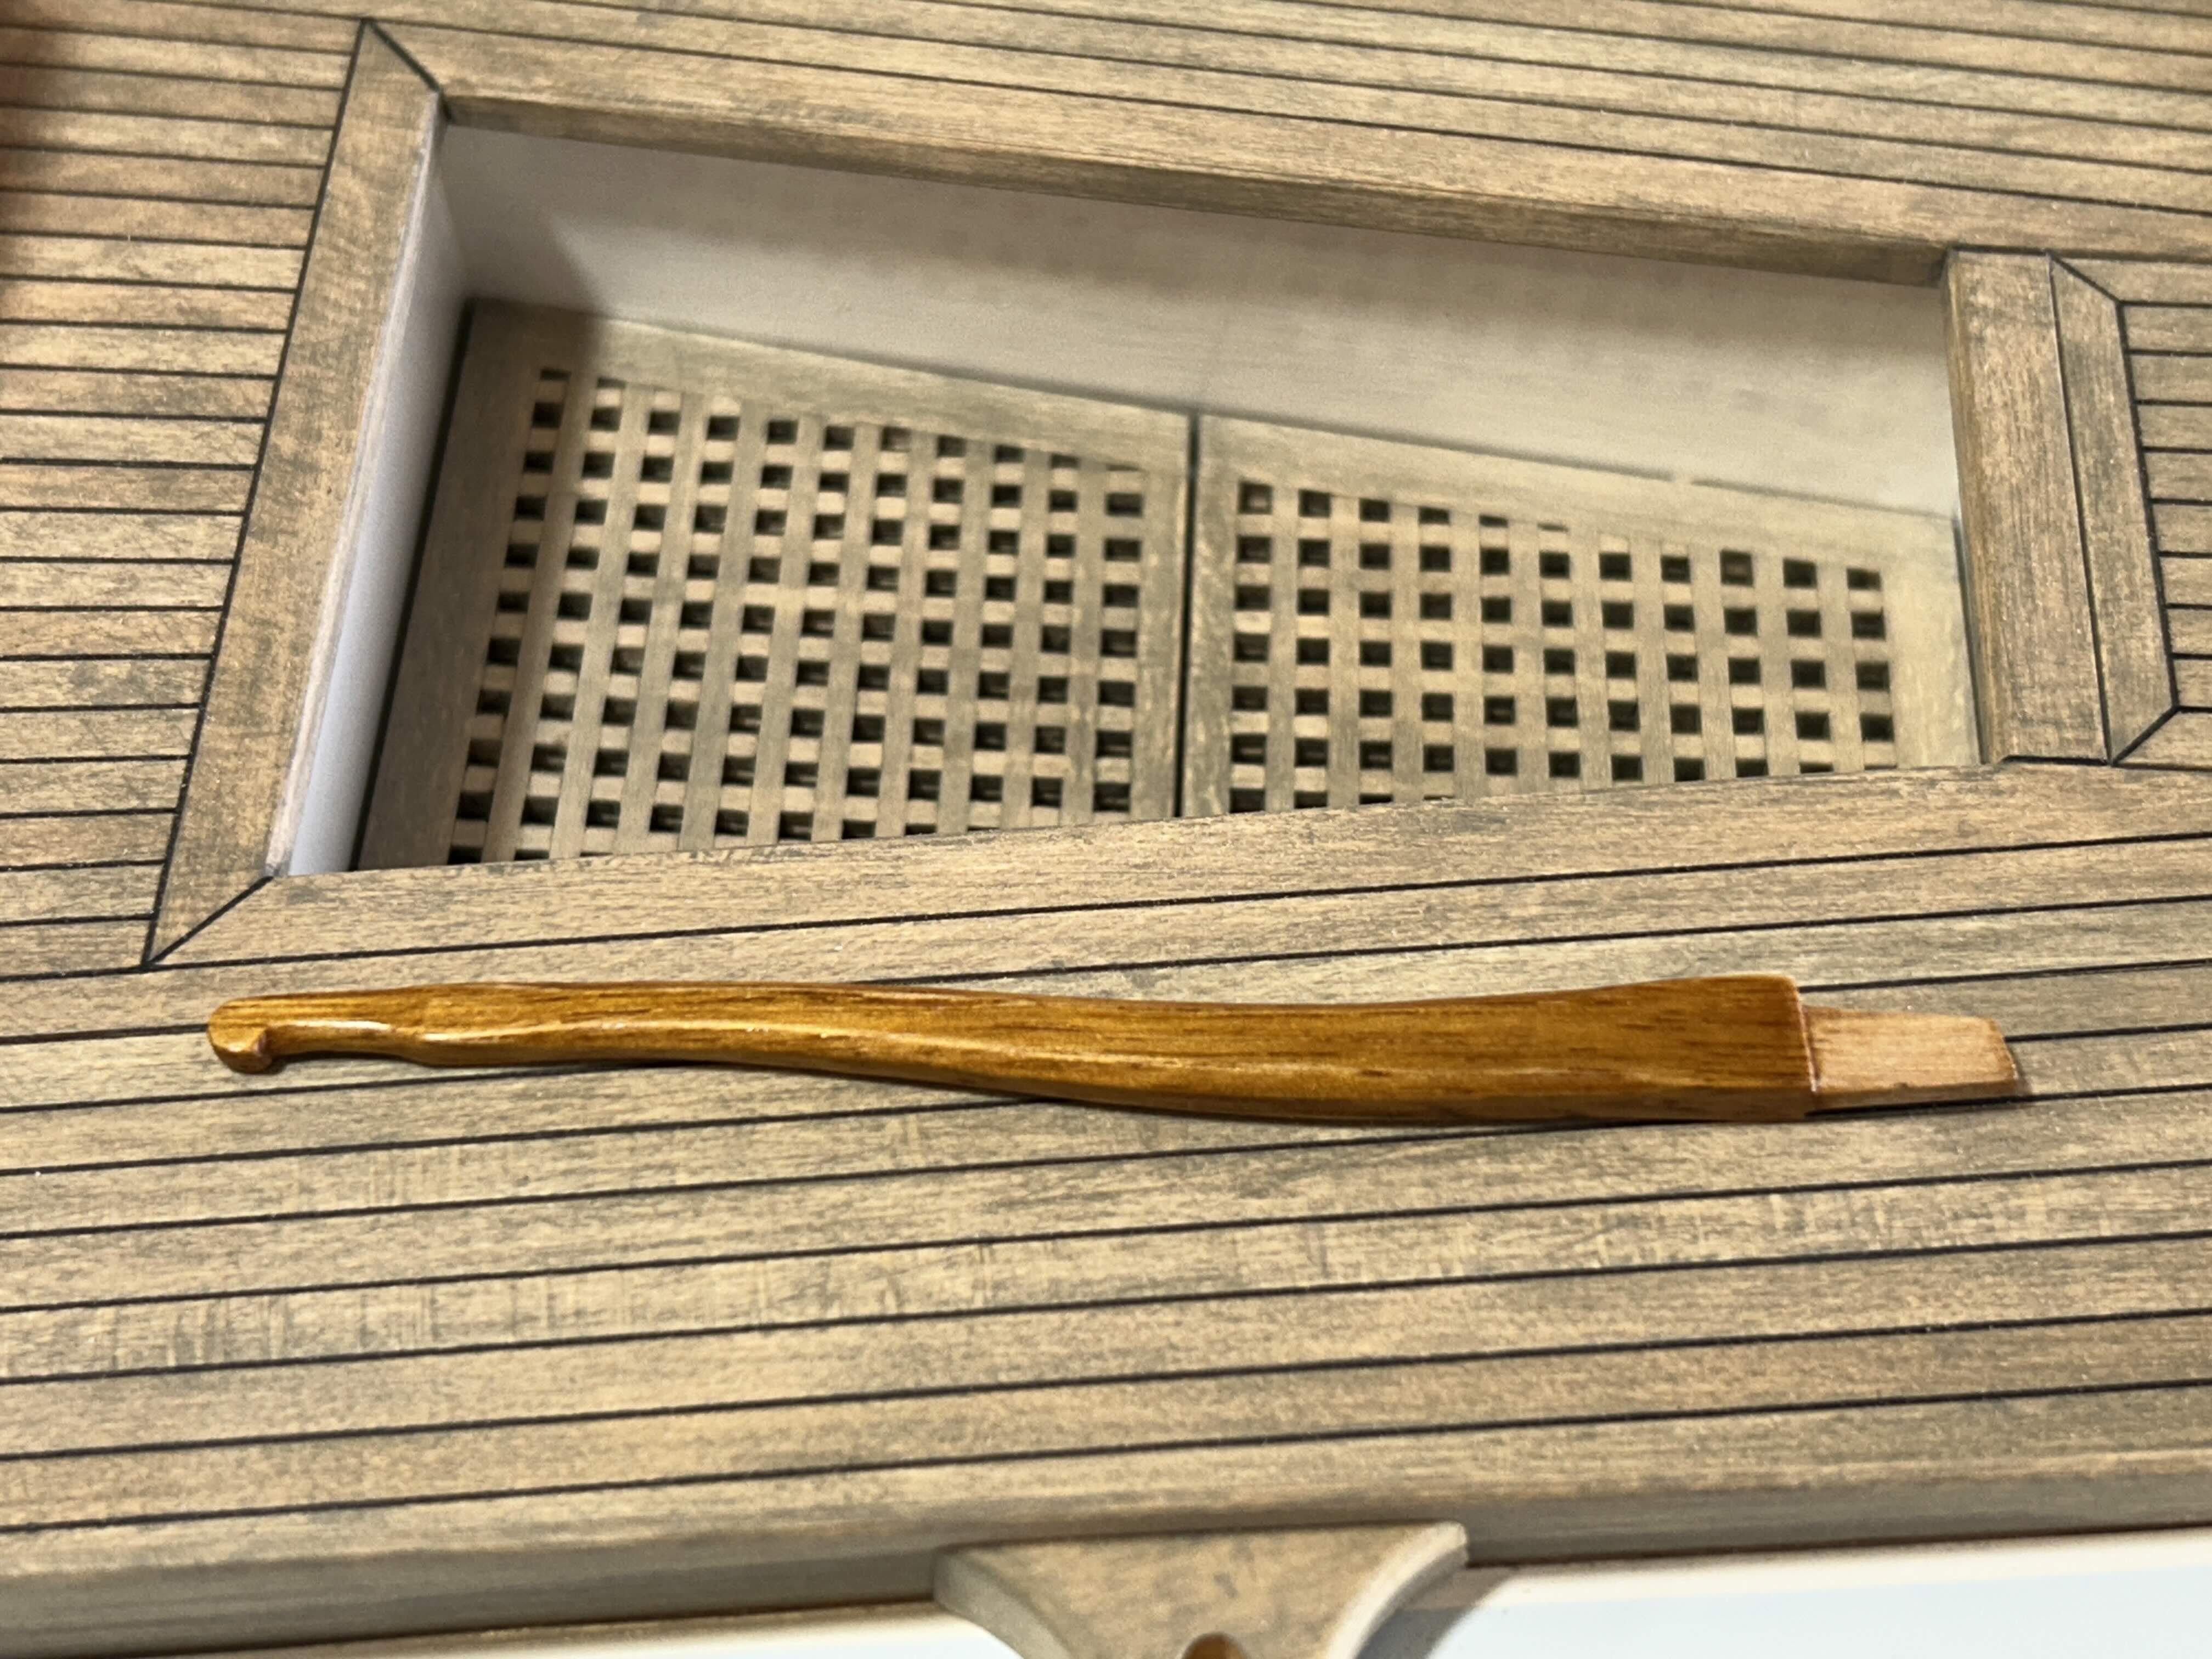
Yes, the adaptability of English is an enjoyable part of the language. There's some really nice colourful language in the book I'm currently reading: "The Shipping News", I'm not sure how close to you it's set. A v enjoyable book. And, the gratings did turn out better than I had hoped, not having done them before. Thanks,
-
Hi Trevor, thank you for the compliment; & you are going to have to explain this comment. Is "duckboards" the name of something else?
-
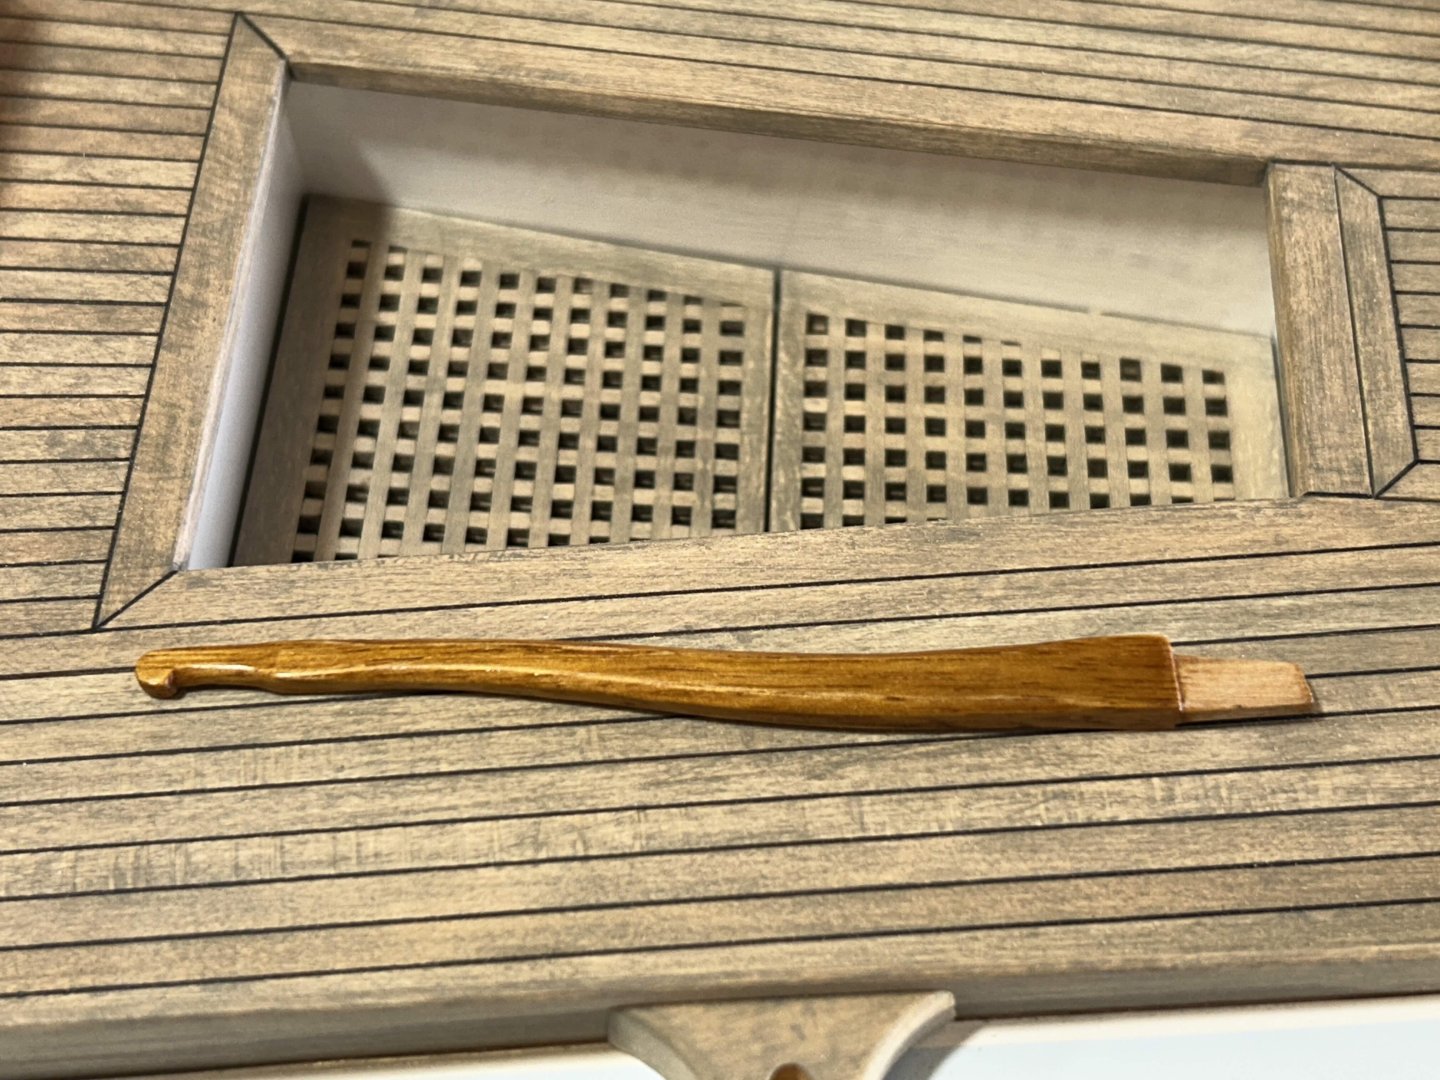
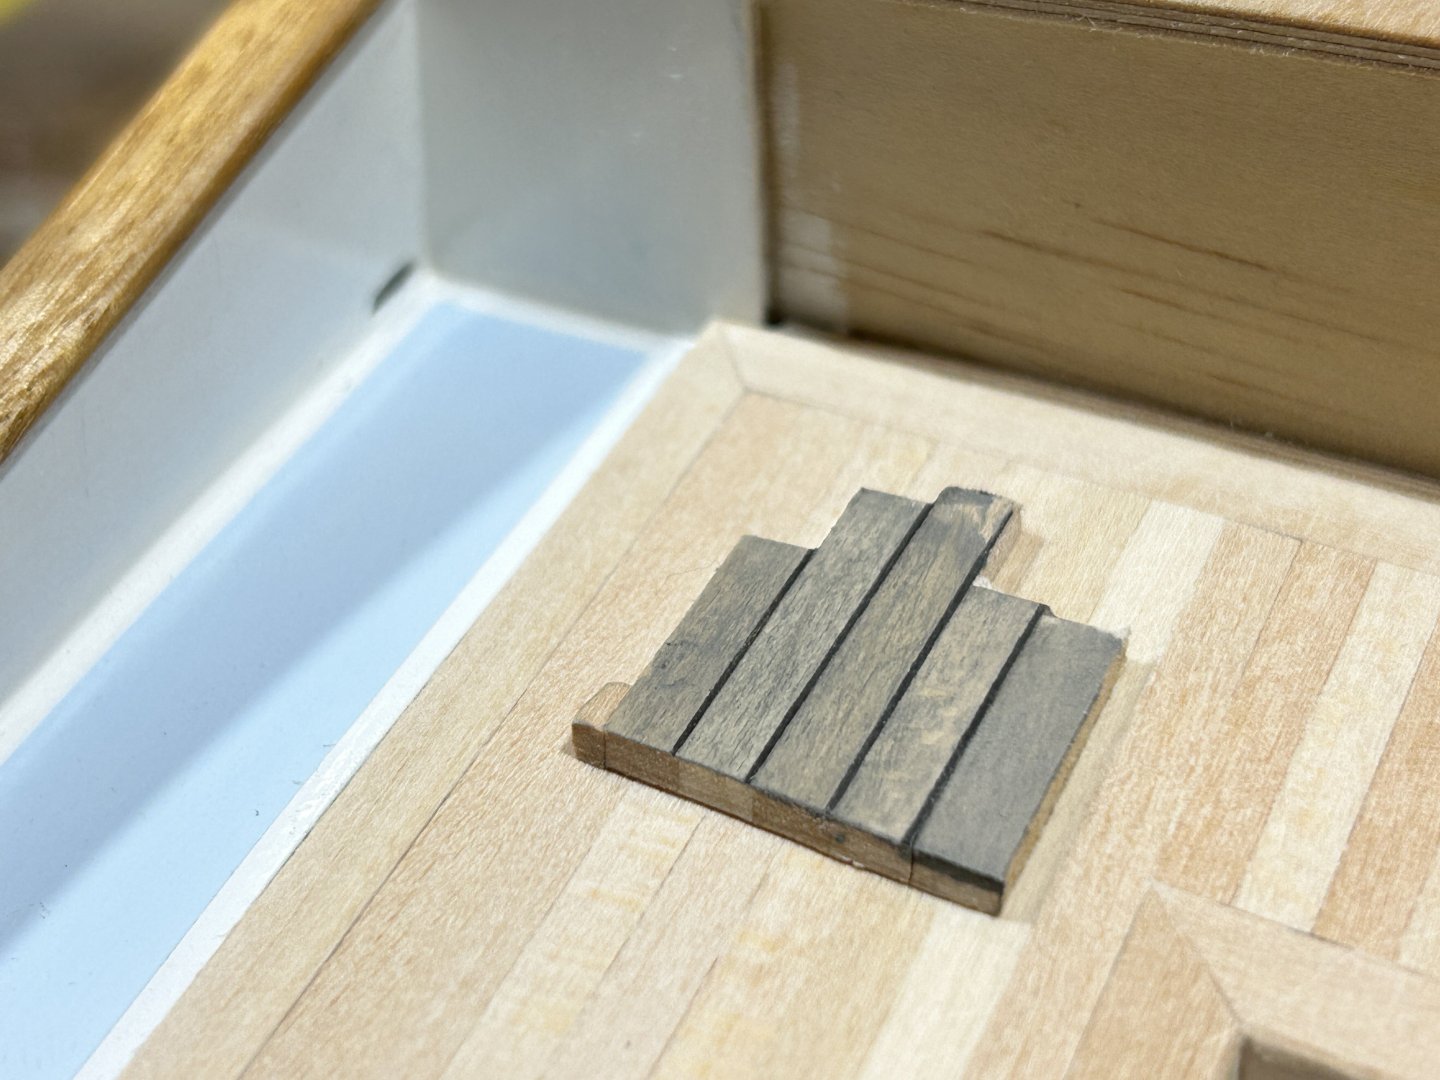
I worked on the cockpit footwell duckboarding over the weekend. I'd prefer to make it to an easier design, but this is what the boat has.... The frames were glued over cardboard templates: The thickness is 0.3mm over sized, if you compare the completed to the actual the difference is obvious, but the completed piece on the model looks reasonably to scale, so I'm ok with that. And parallel timber strips on the back, 2 x 2mm are slightly oversized, but should look to scale. Then the facing strips, with timber strips as temporary spacers: In the lengthwise dimension, the size of the timber strips wasn't naturally suited to the gap in the frames - so I adjusted the meeting frames to get even spacings in the boards. Here you can see the forwards panel completed to that stage & the after one has the meeting frame marked & about the be trimmed: And here with the small infill pieces of timber all in & completed....slow & painstaking but it's done now. Happy with the result as well. And in the boat. Next is to give it some weathering & also cut out for the mainsheet block, which is fixed off to the sole below the duckboards.


-
Later yesterday I wiped the dark grey paint onto the timber panel, the cockpit seating, to weather the timber. [On the paint, it was 3 shades of matt acrylic, Tamiya brand - some black, a fair bit of white & a fair bit of beige. It was dirty & still pretty dark.] The effect of the paint on the timber was a bit too strong, & gave it a bit of a wipe with a damp cloth but it didn't change much. The effect I wanted was understated rather than too much, & this was too much. I was concerned that I'd have to sand while lot off & start again. Anyway, tonight I gave it a delicate sand with 180 grit & it was looking somewhat better but uneven & there were patches (sorry no photos, fear doesn't make me think of taking photos). I suspect that some of the glue I'd used for laminating the timber - CA - had dripped or smeared or whatever on the timber & had changed the rate of paint absorption. So I diluted some of the paint & with a small brush dabbed here & there, plus some more careful detail sanding, & it was starting to look ok. It was time to do the caulking lines, & I'm really happy with the result. Once the backrests are done, I'll paint the whole lot with clear matt acrylic varnish, maybe 2 coats, then glue it all down. Or maybe varnish in parts, glue down the base & then the backrests.


-
Further progress on the cockpit area seating - the timber is weathered teak with caulked seams, a photo from the actual boat below, the boat covers are on, & the photo is the forwards side of the footwell. The weathering will be using paint, & then a black pen for the seams, so I will do the seat area first & the backrests of the seating after assembly. Doing the paint or the black lines would be much harder after full assembly. Here's the seats & lazarette hatch done, & ready for paint & the seams. nb: the timber panel isn't glued down, so the edges are currently not following the deck camber. This is another go at the paint, probably a little dark, but in this photo the grey is darker than the actual sample. Plus with the seams penned on below that. There's no doubt the black lines of the seams tends to make the great weathering gentler than without the black lines.


-
Hi John Yes, I agree with that - the tones of 5th from the right, & as pale as the 2nd from the right. If I could do those I'll be pretty happy. I find that you have to be careful selecting a colour from a small piece, that's to be used on a wide area - whether it's a room or a scale model.
-
Hi Dick That grating is a fine piece of work,