-
Posts
842 -
Joined
-
Last visited
Content Type
Profiles
Forums
Gallery
Events
Everything posted by Mark Pearse
-
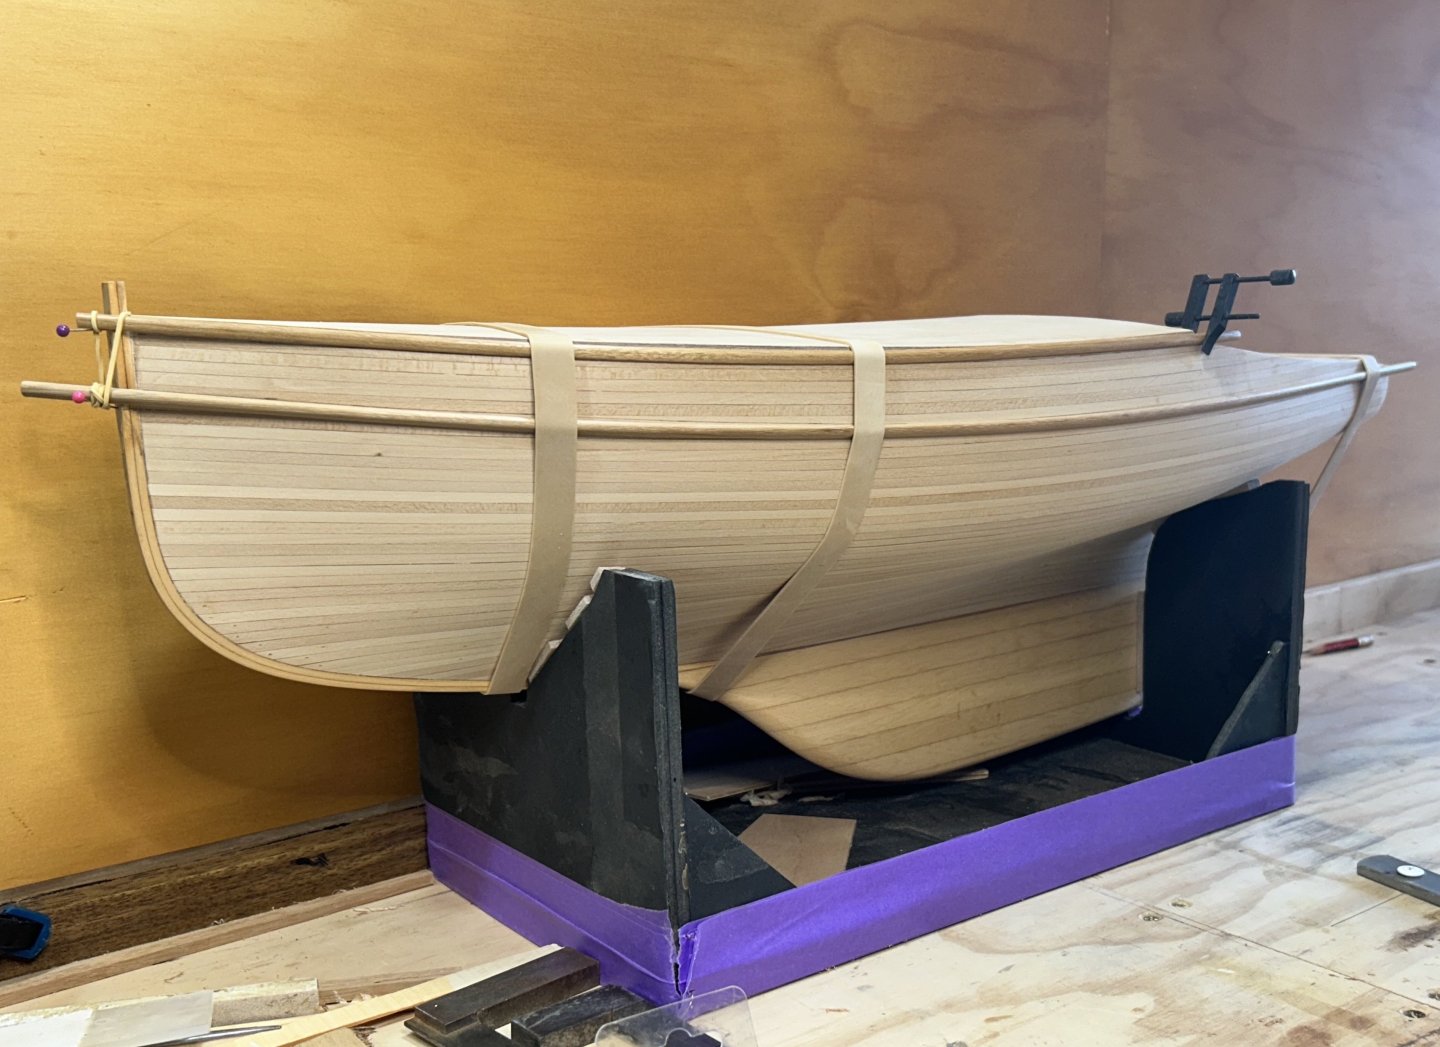
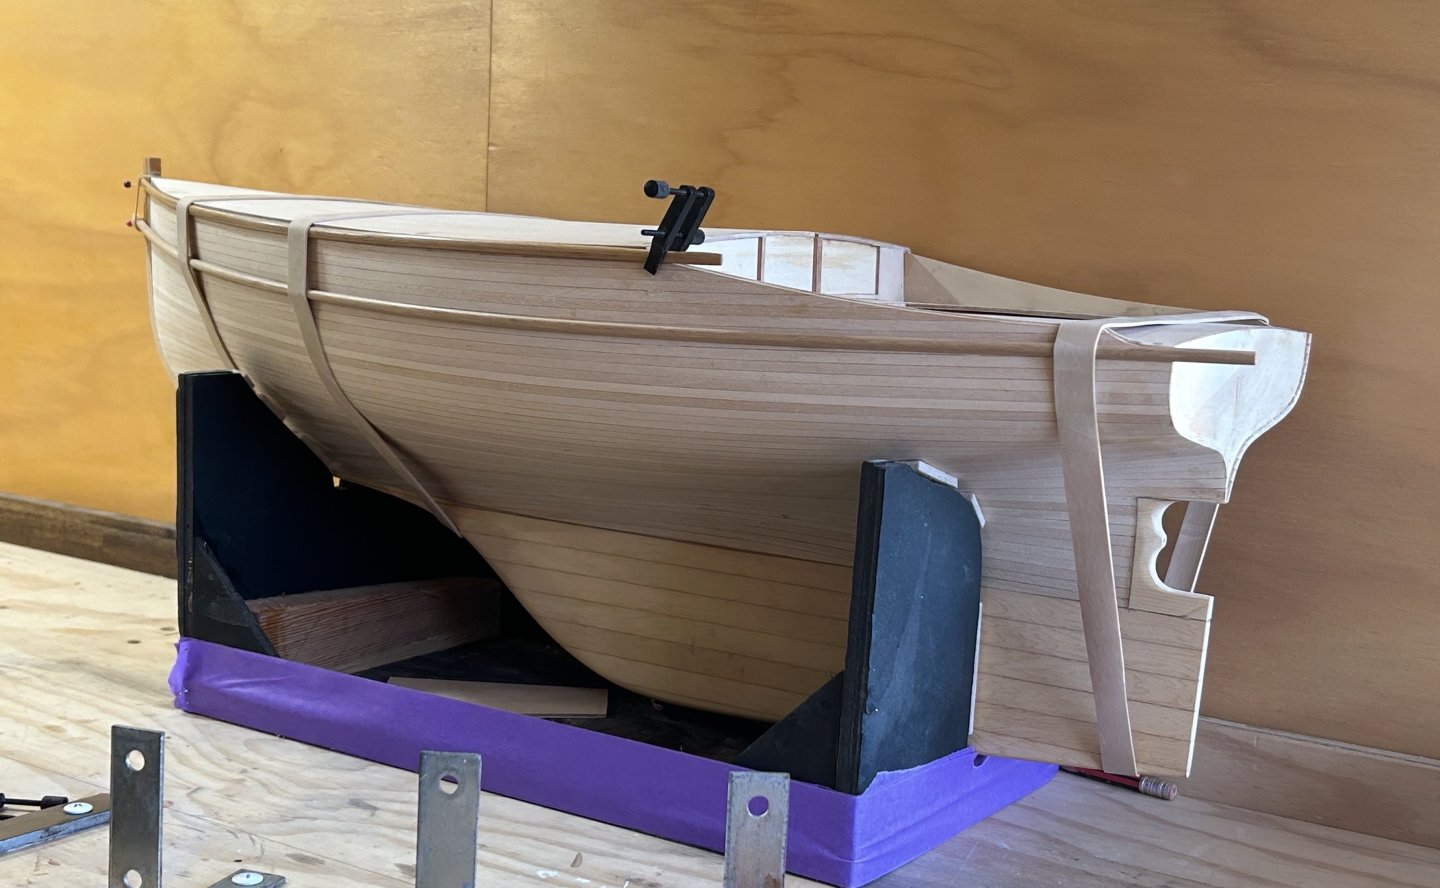
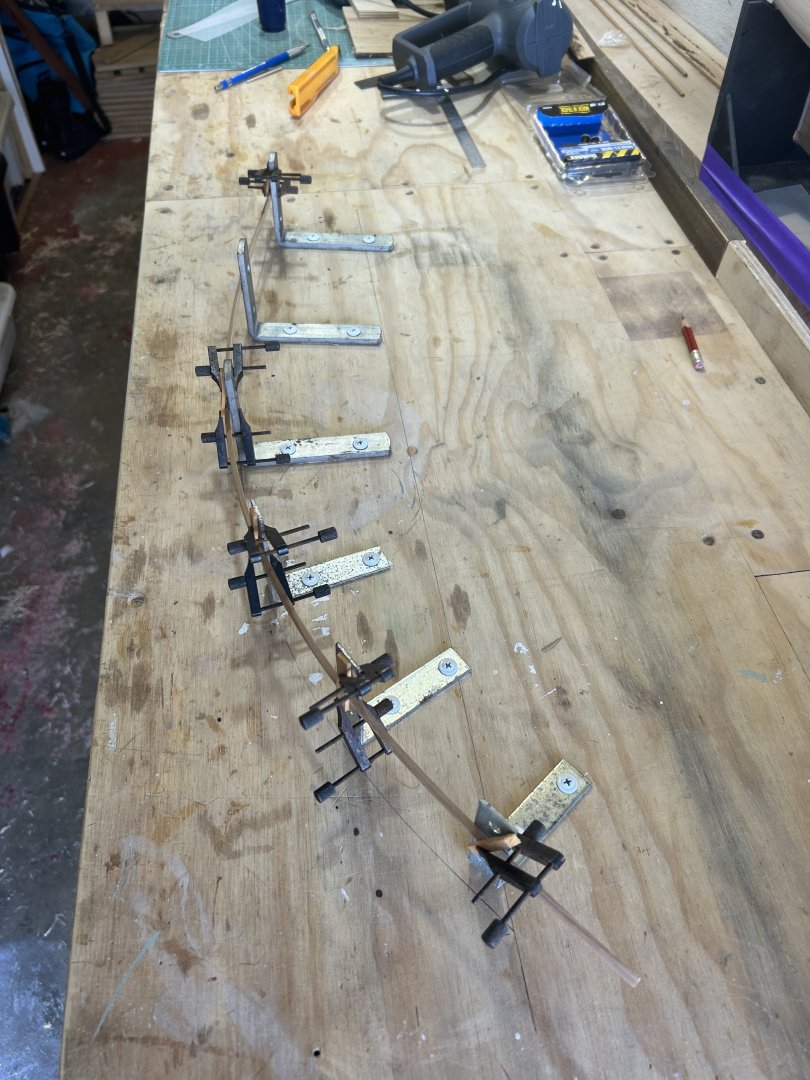
The current progress is towards painting the hull. Concurrent with the work below, I am working on some test panels for a hull paint - but just a little on my thinking: black shows gloss more than other colours, & as a gloss object at scale will look more real if the gloss level on the model is less than the actual...I'm going to be a bit fussy on that. The sponsons need a bit of assistance to make the curve of the hull shape, & fortunately Blackbutt respond to some heat reasonably well. My method was to scribe the hull shape on the bench, adding a bit more curve to the shape. Set up some angle brackets, clamp the middle one & heat sections (with a hot air gun) away from the middle & progressively clamp them. I suspect this isn't as good as actually making a small steam box & then clamping, partly because you haven't got much of an idea what effect the heat is having on the timber. Anyway, it worked well. I also gave one half of the gunwale the same treatment & then put them on the hull in a temporary way. That's partly so they have somewhere to stay while retaining the curve. Looks great. The last part of the sponson near the stern droops a bit, but that can be tweaked later. One aspect I'm not sure about, & would certainly welcome opinions: whether to paint the hull then glue the sponsons / gunwales, or glue them & then paint the hull. Painting is easier in the first case, getting the timber strips accurately positioned is easier in the second. I am leaning ever so slightly towards the latter. It would be good to get whatever opinions I can, from you all.... I'll also do a post on the in the paint section of this forum... thanks in advance,
-
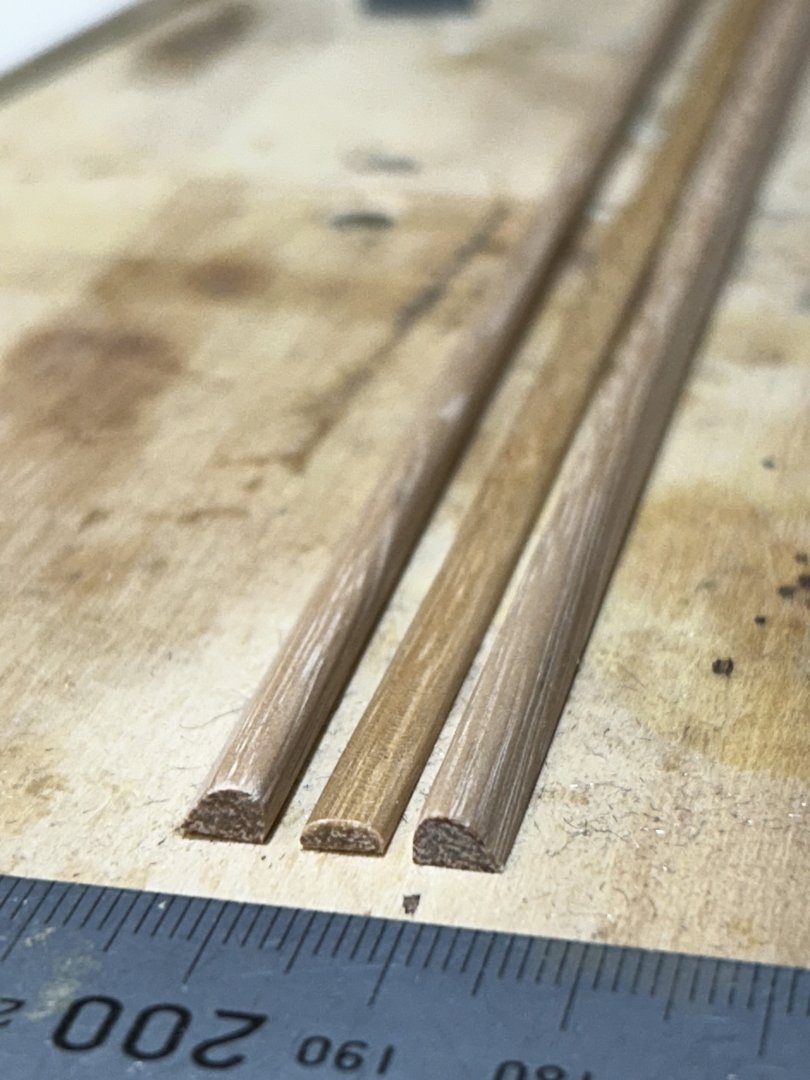
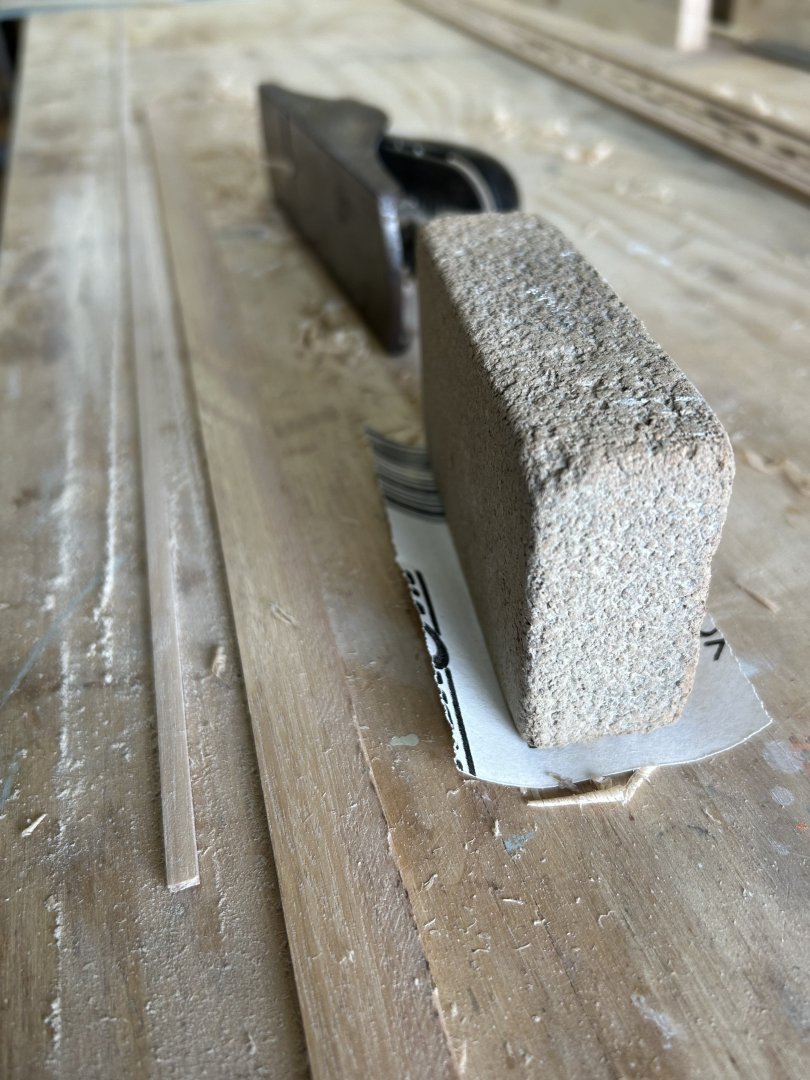
A little more.... The sponsons are now shaped. Below is the method I use for holding the strips while shaping, & my tools of choice; which works for 1:12 but techniques that work at this scale obviously might be an issue for much smaller scales. The back of the sanding block is 240 grit, & I have some finer (the softness of fingers helps sand curves), also some fine steel wool. Here's the strips: 2x 700mm lengths of sponson, 1x 1m of gunwale (a thin coat of shellac, hence the colour).
-
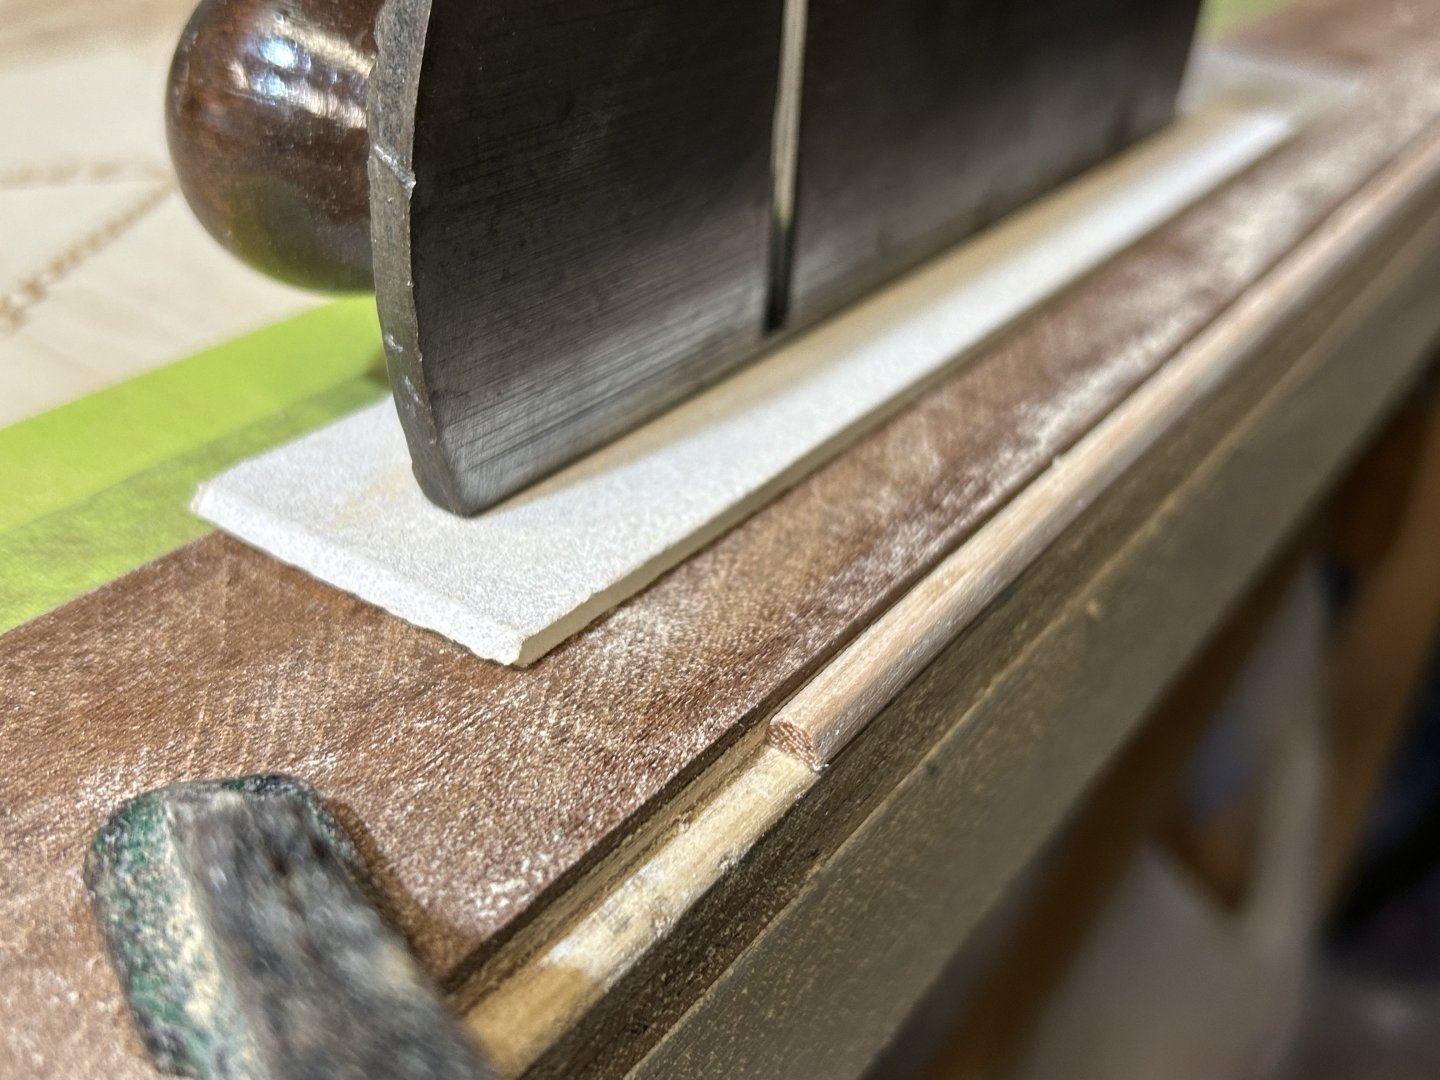
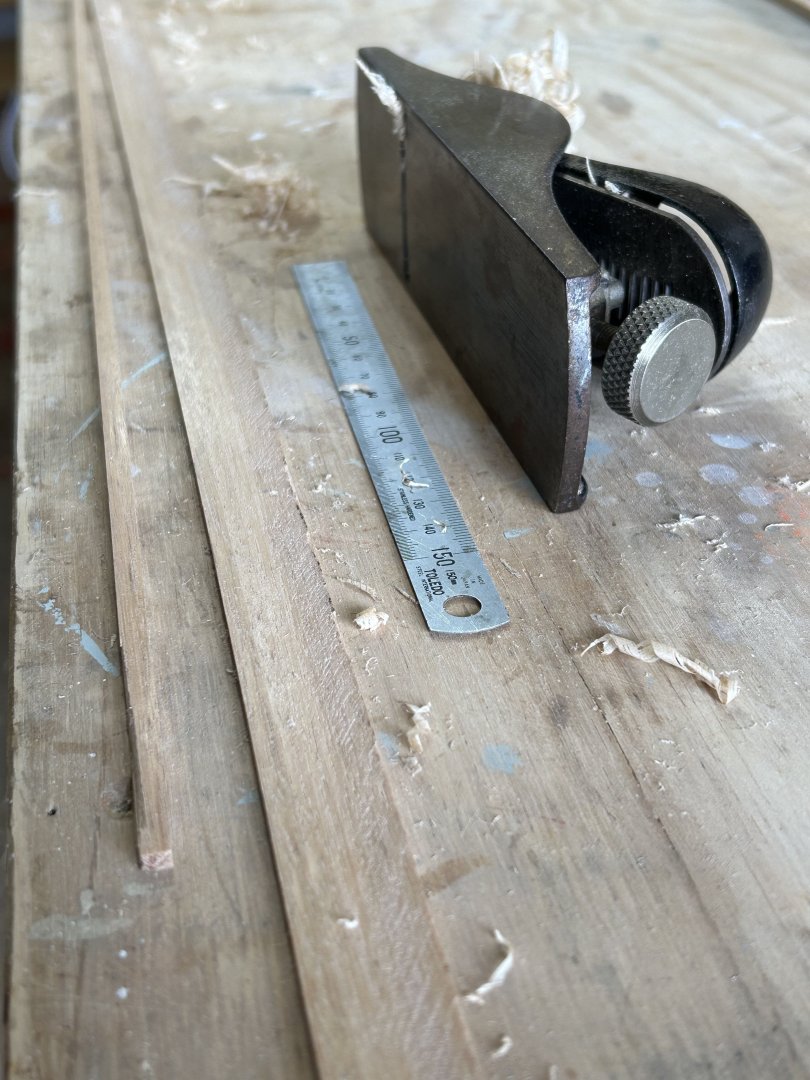
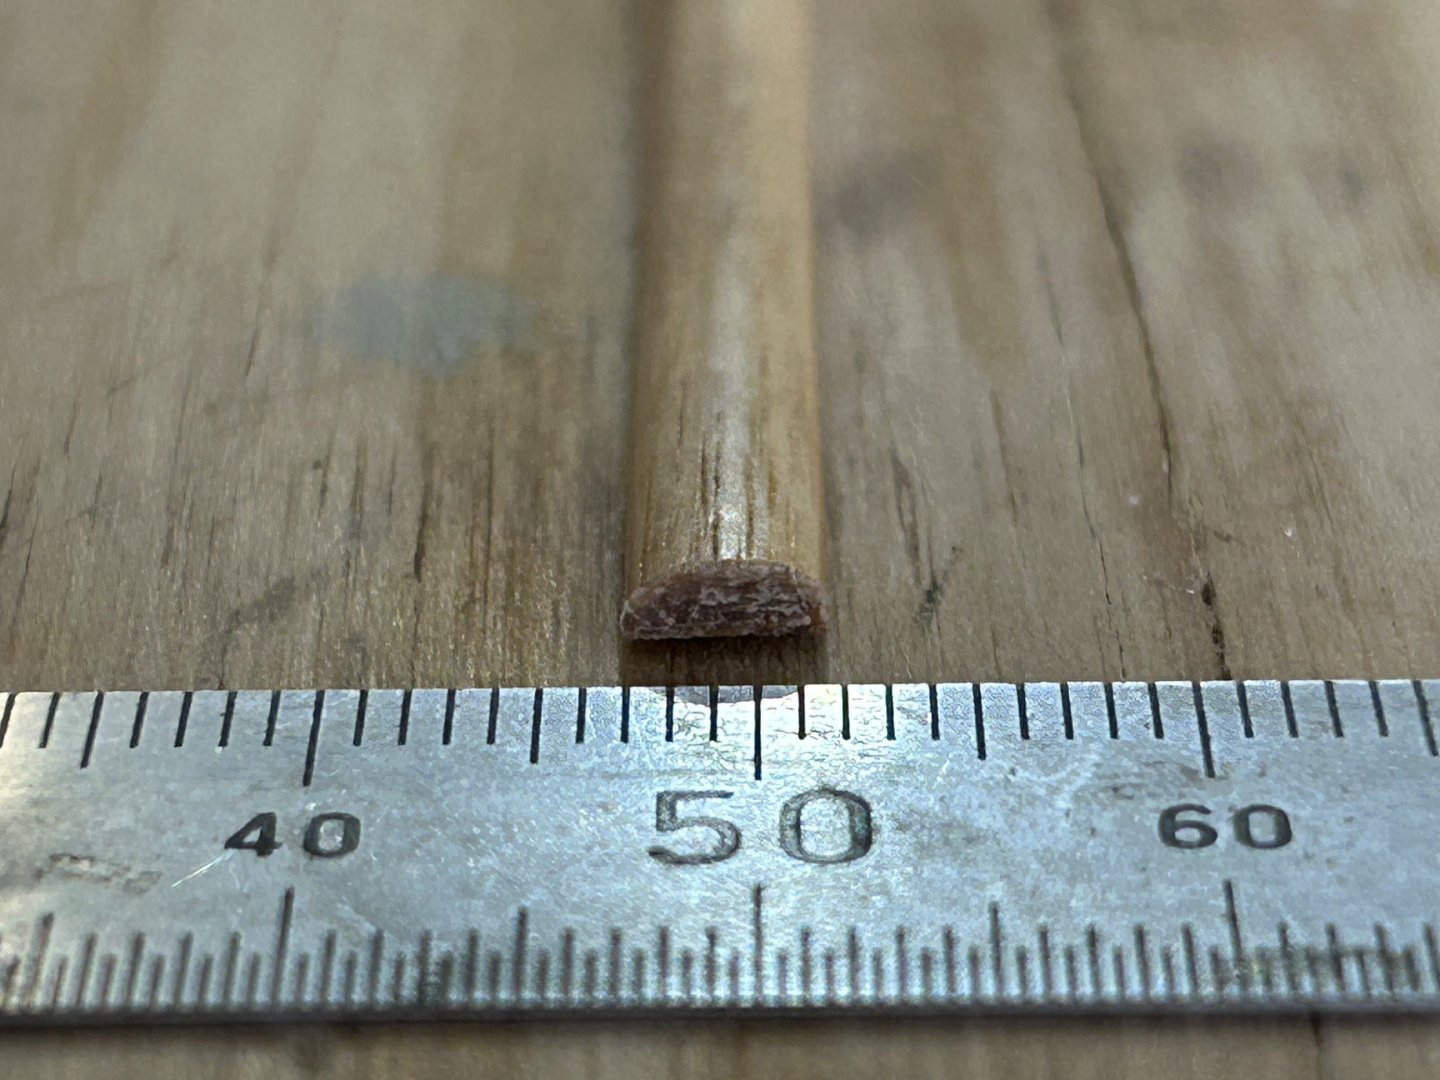
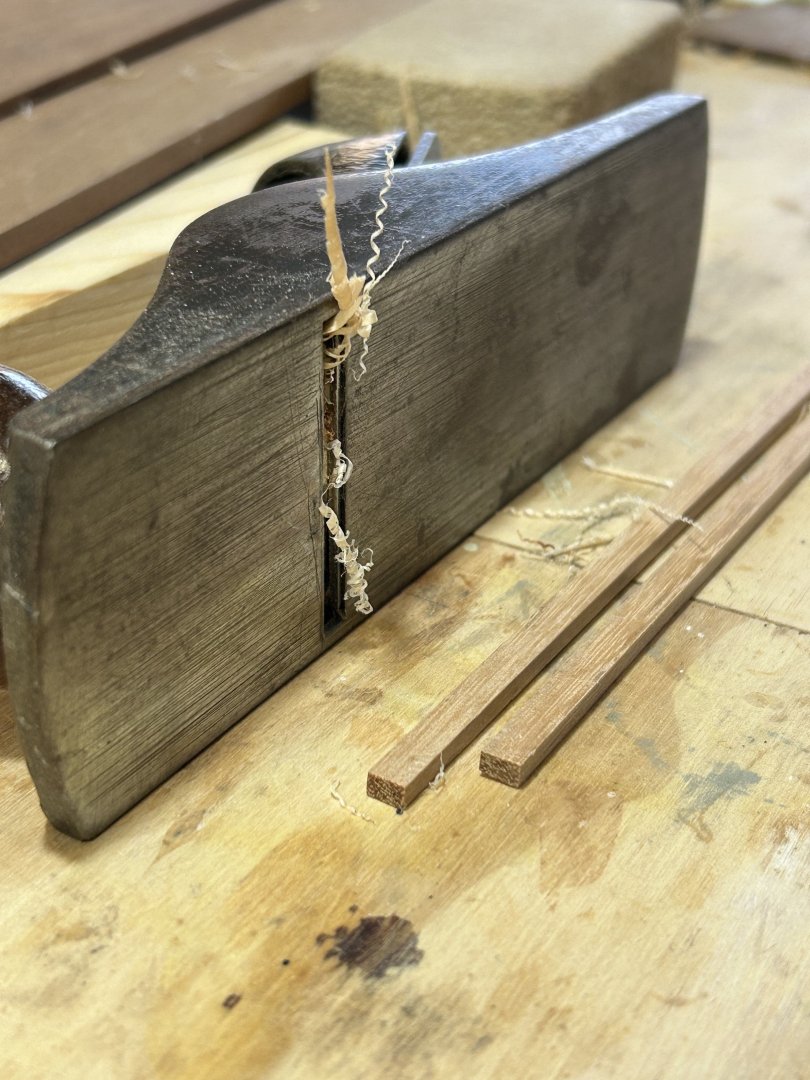
I decided the next major job is to paint the hull, & before that I have to make & position the gunwales & sponsons. In particular, the sponson line is important to the hull's appearance, & must be just right. It's mainly about the tapering gap above the sponson, between it & the gunwale. Hence the need to do both. The gunwale position will be a constant distance below the deck line but the sponson is tricky. My plan is to use brass pegs as dowels to fix the final position, put them aside & install after the hull is painted. On the actual yacht, the timberwork around the cockpit is teak, varnished or unfinished; & the hull timberwork is Spotted Gum - a tough hardwood that steam bends well. On the boat they have faded somewhat so I have used some Blackbutt that I have, a length of floorboard from a building site. I ripped some strips off on a table saw & then used a well sharpened plane to bring the timber sizes down further, & then to shape them. The strip on the left is a future gunwale, about 2.5 x 4mm. And shaped, finely sanded & one coat of shellac wiped on. I'll do some more coats later. Below are the future sponsons, about 4 x 5.5mm.
-
A beautiful model, & an especially interesting journey to follow ....
- 508 replies
-
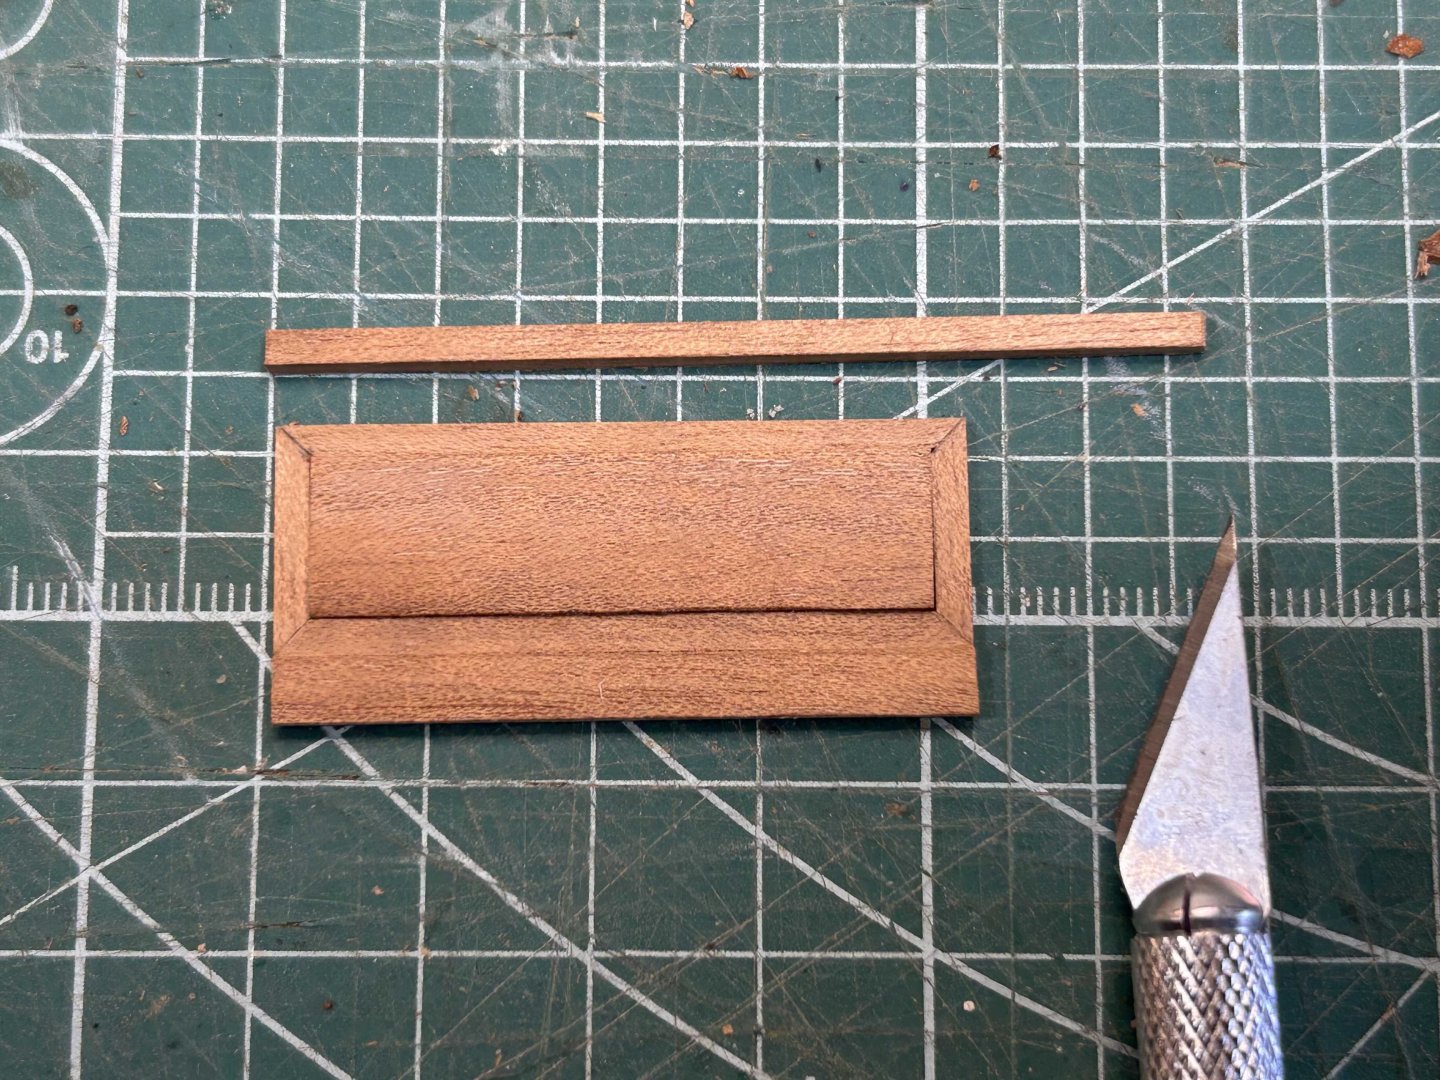
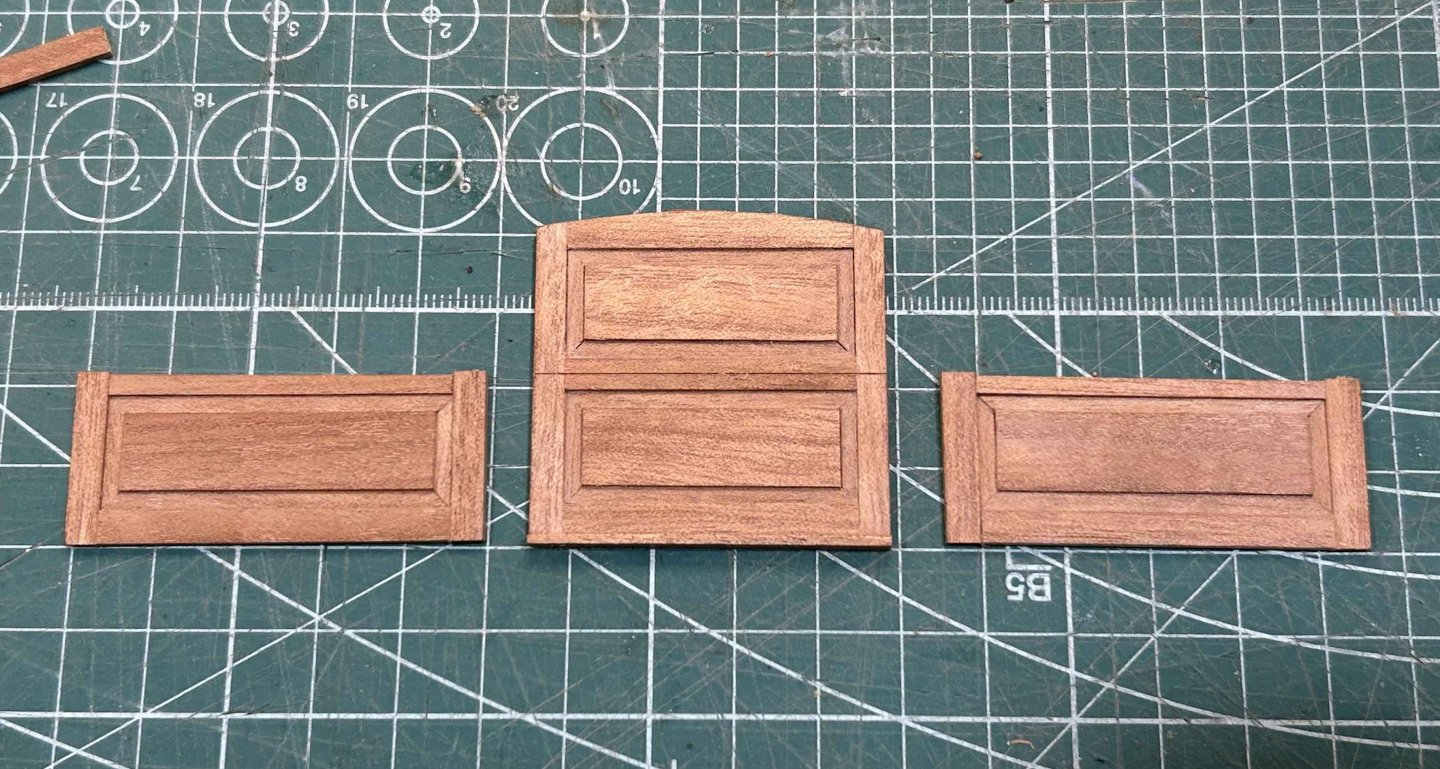
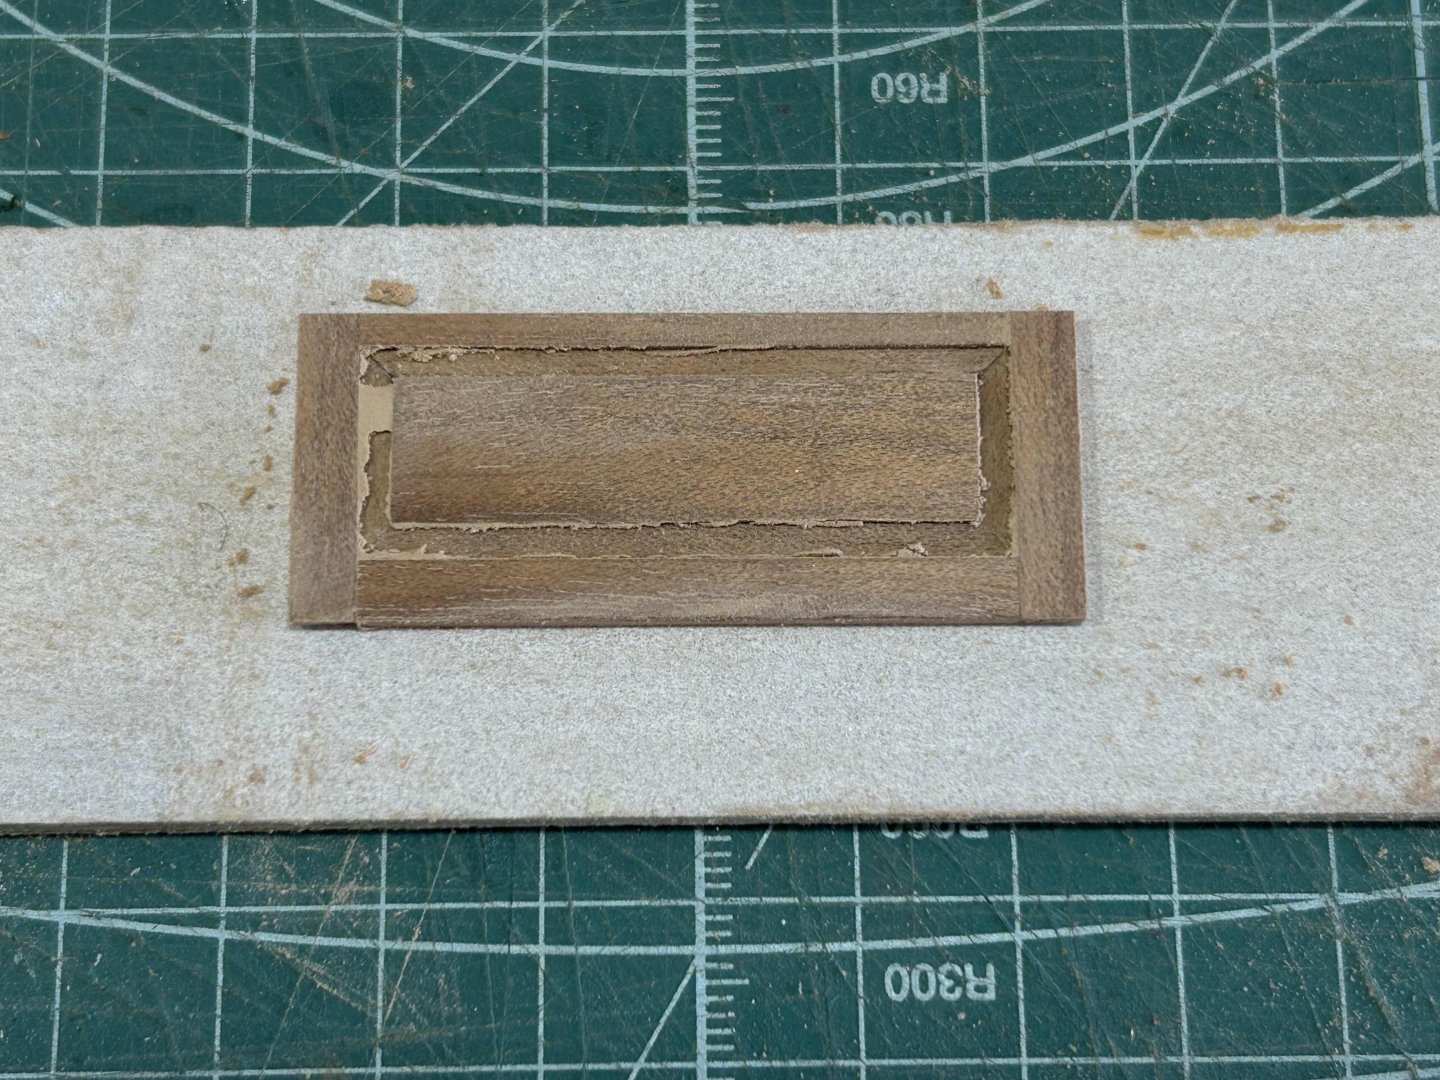
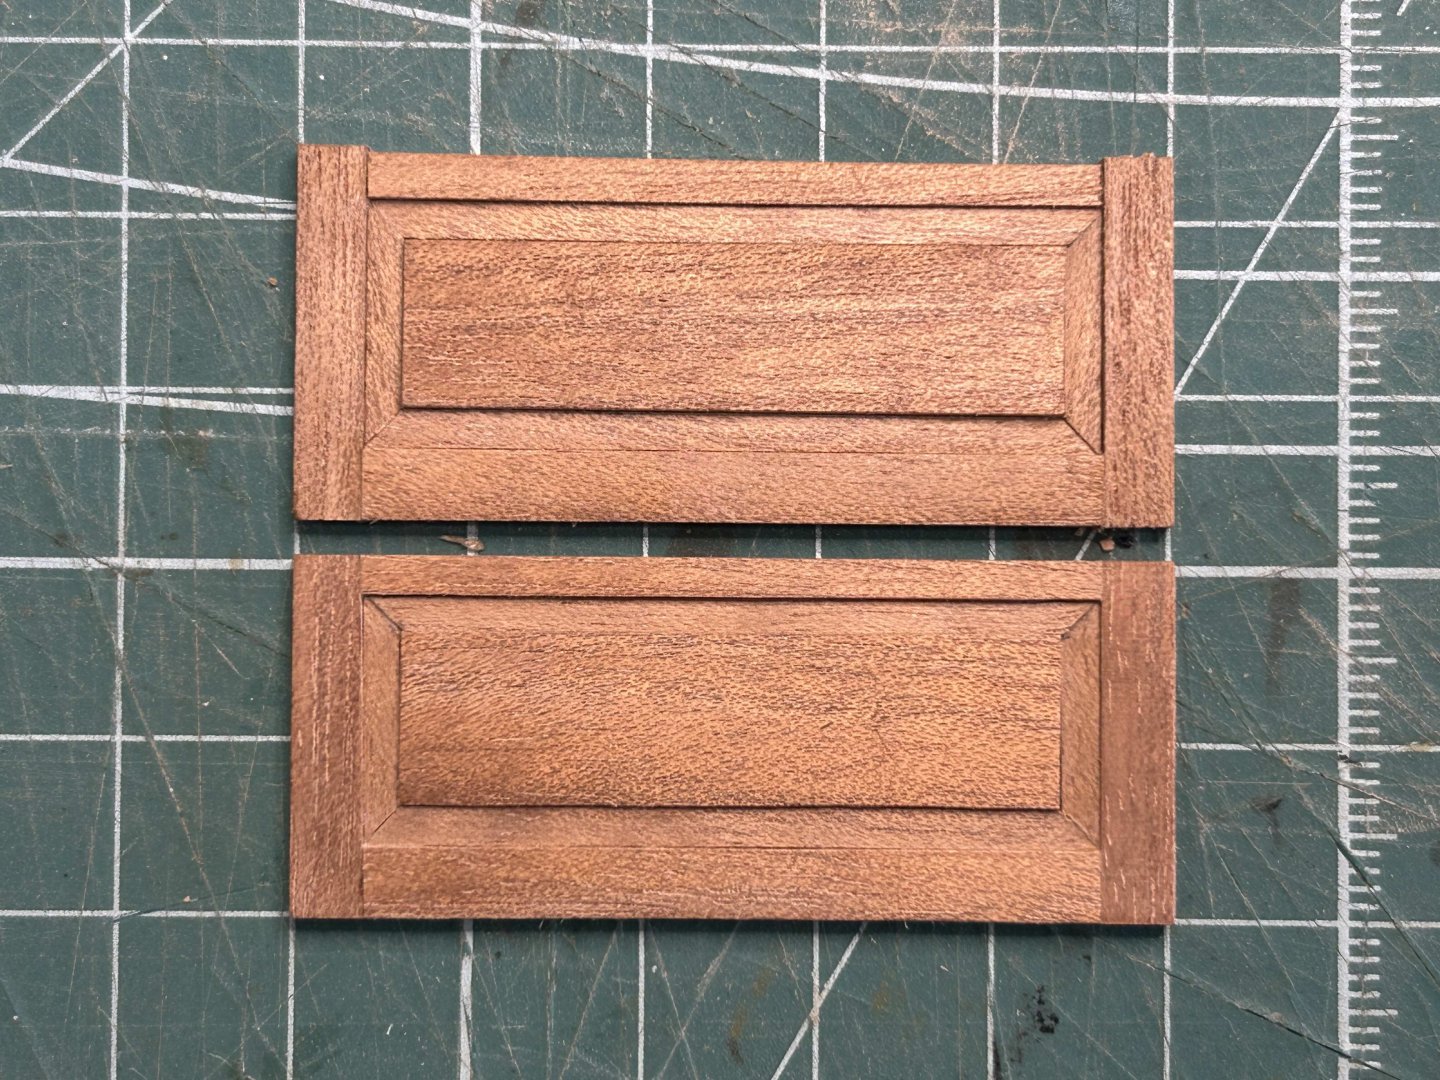
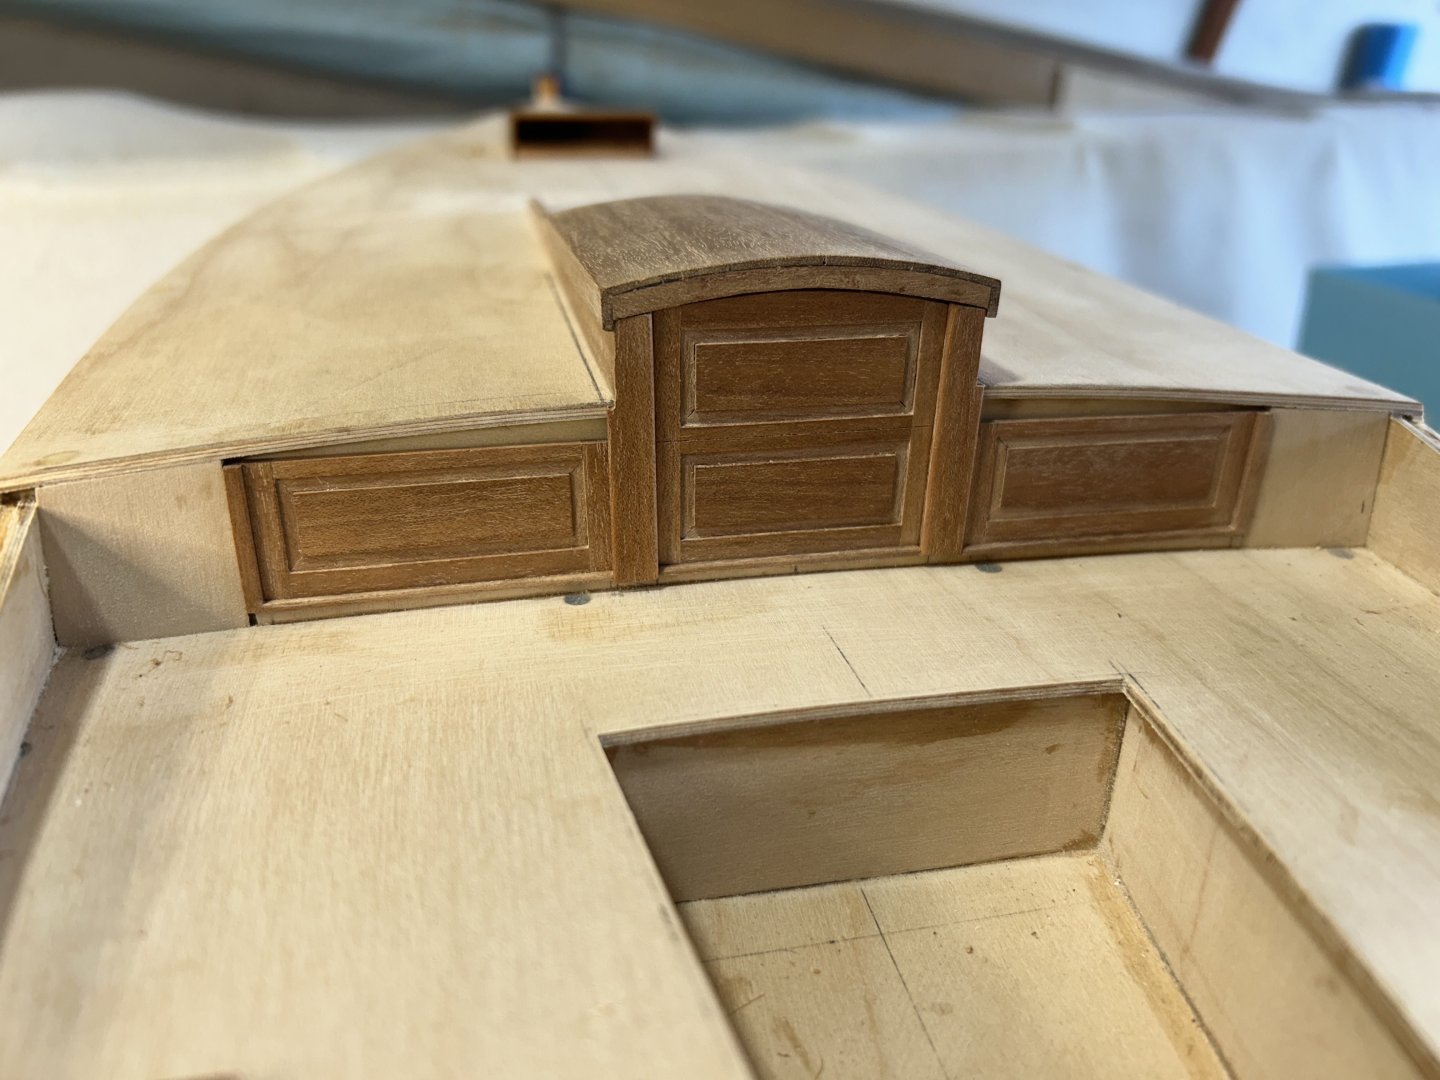
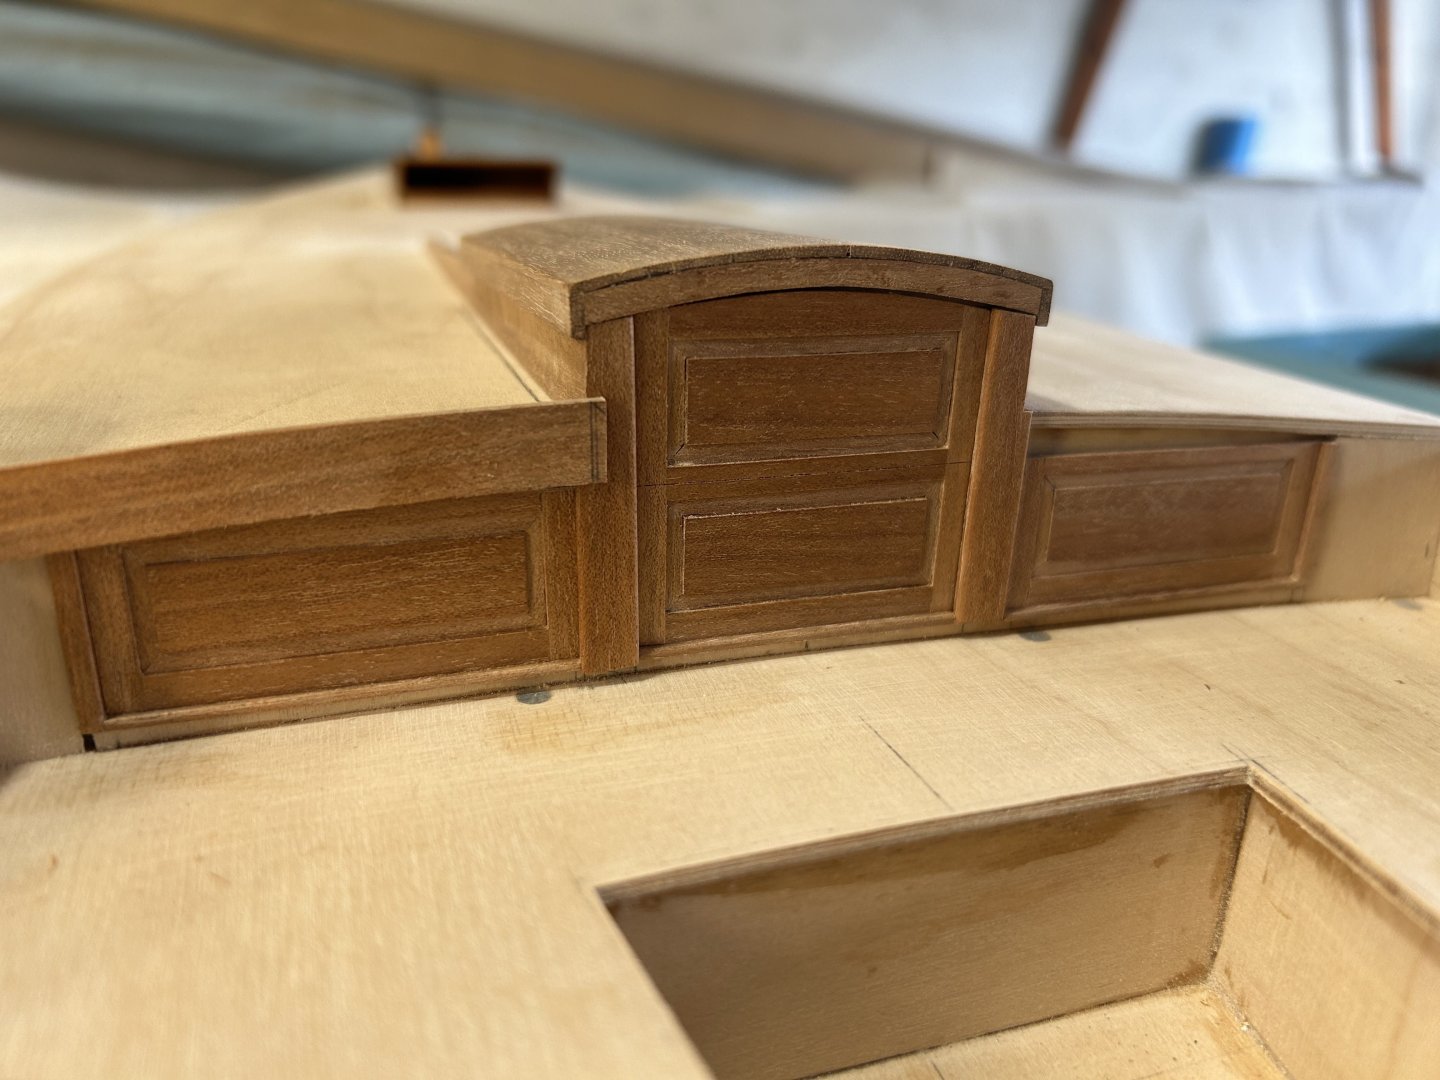
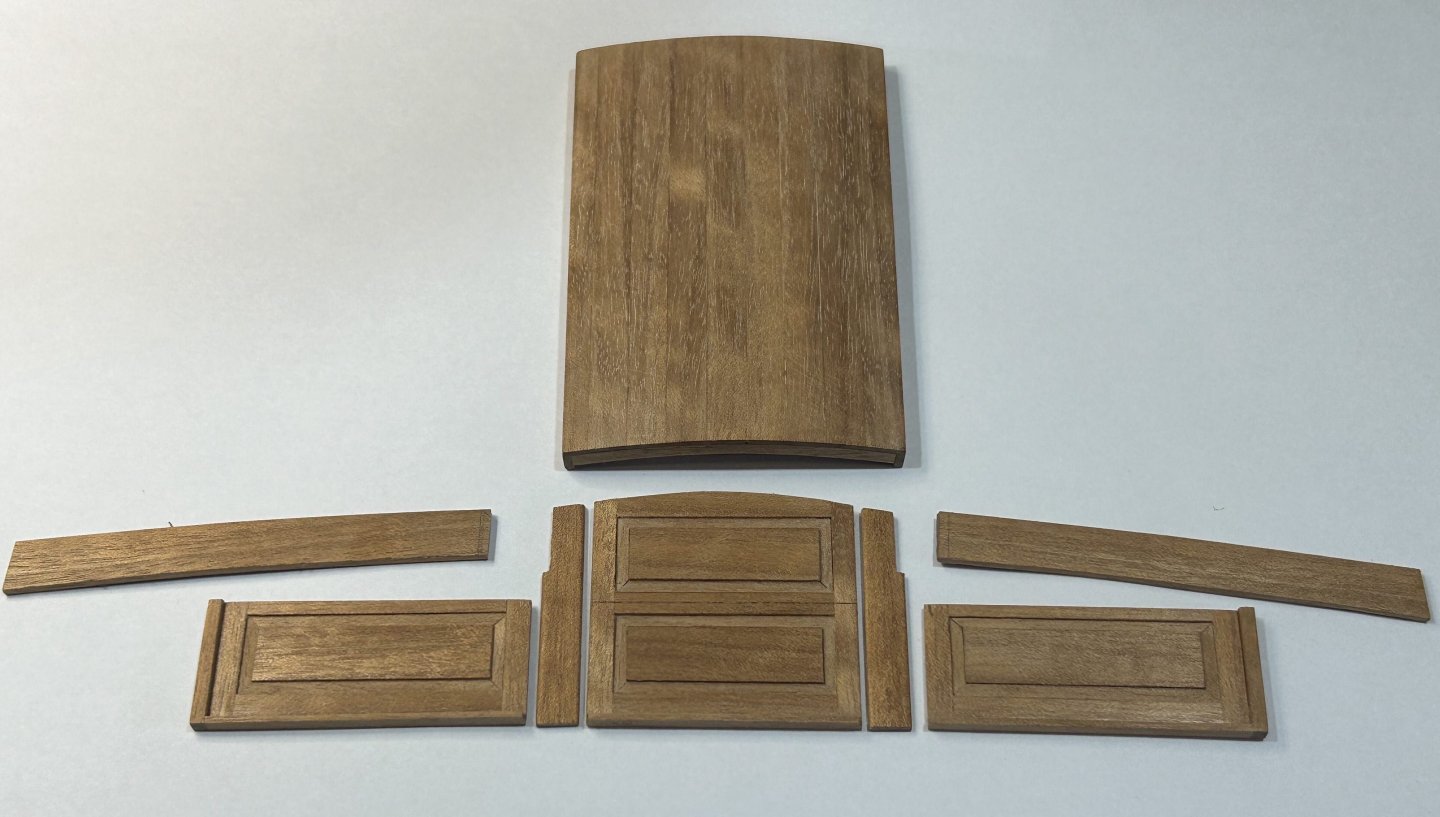
Thanks all, Druxey, when I was still drafting manually, I used 5H on plastic film. Nice sharp lines & no smudging. Some progress with the same area, the vertical face of the raised deck. Some further detail, in response to Rick's question. Everyone has their own method, & I have done it this way: The removable side panels that sit either side of the companionway hatch have a flat centre panel with a recessed surround frame, & then rails top bottom & sides, like a mini door. I didn't chamfer the surround frame strips, just recessed them. Nice sharp knife, careful measuring & careful gluing is my approach. Important is the opti-visor, being able to see is essential. Then sanding on paper glued to acrylic pieces. One sanded & one not...the effect of some careful sanding is nice to see. An important part of model making indeed. Dry fitted, with the separating frames that will be fixed to the side rails of the hatch. There will be curved members that trim the back edge of the raised deck. The bottom edge is slightly raised as the cockpit seating is laid teak, I've allowed 2mm for that. I've realised that this work can't go further until the hull is painted. So I'll put this aside for now, I'm changing tack & will make the toe rails, gunwales & sponsons. Then paint. bye for now,
-
Hi Jim Looking back to the early part of this log, the change has been incremental but significant; & I was also reminded of how this project must be a meaningful completion of work started by your mate George. As an aside, I am lucky enough to have visited Åland (also called Ahvenamaa), & had a happy day wandering around in the warm sunny summer weather. Keep up the great work.
-
Having the tackle suggests the position or angle of the steering piece was adjusted, have you come across any commentary on that?
- 508 replies
-
Hi Rick The panels have timber in 2 thicknesses, & using a sharp knife I cut strips from thicknesses timber to suit the pieces: centre panels & the rails in thicker (approx 2mm), the recessed pieces that surround the centre panels are about 1.25-1.5mm thick. Then just assembled & glued as I went. I made a small 45º angle tool, to get the corner mitres for the recessed strips fairly accurate. I have 2 more panels & will photograph some of the stages. I've been using a pencil, a regular pencil with timber etc. It's hard to keep them sharp enough to mark really accurately, so I'm thinking to go back to a 2mm granite clutch pencil with a rotating sharpener....getting a pin-sharp tip will be very helpful.
-
Thanks everyone for the interest. A short update: I have done some more on the varnished teak work of the raised deck. I have done a fair bit of preparation & pre cutting of timber. Here's the raised deck face with the storm boards done, no finish yet. There will be vertical frames either side of the boards, as per the 'actual' photo. The work light seems to be bleaching the colours also. And harking back to an earlier discussion, the CA glue stain in the forehatch really backed off over a few days. I gave it one coat of shellac to enjoy the thrill of a finish coat...The timber is the same colour on top & the vertical side, it just reacts strongly to the angle of the light.
-
It's a great pleasure to see the model coming together, & I really like the ageing you've done (to the boat...).
- 508 replies
-
Hi Steven This comment is possibly not relevant to this build, but might be useful - & it relates to Couta boats, & I recall you built one so at the very least it should be interesting. They still use the traditional setup for jib sheeting: sheets tied off to a horn cleat. They have one black & tackle sitting loose in the boat, hooks or strops on the ends. When tacking, the jib hand gets the sheet on manually at the horn cleat; then they use the block & tackle to get the sheet on hard, then take up the slack in the jib sheet on the horn cleat; remove the block & tackle & put away for the next tack. So they only need one tackle, not one each side of the boat. I checked Youtube, & this video shows it for about 2 seconds at 0:46
- 508 replies
-
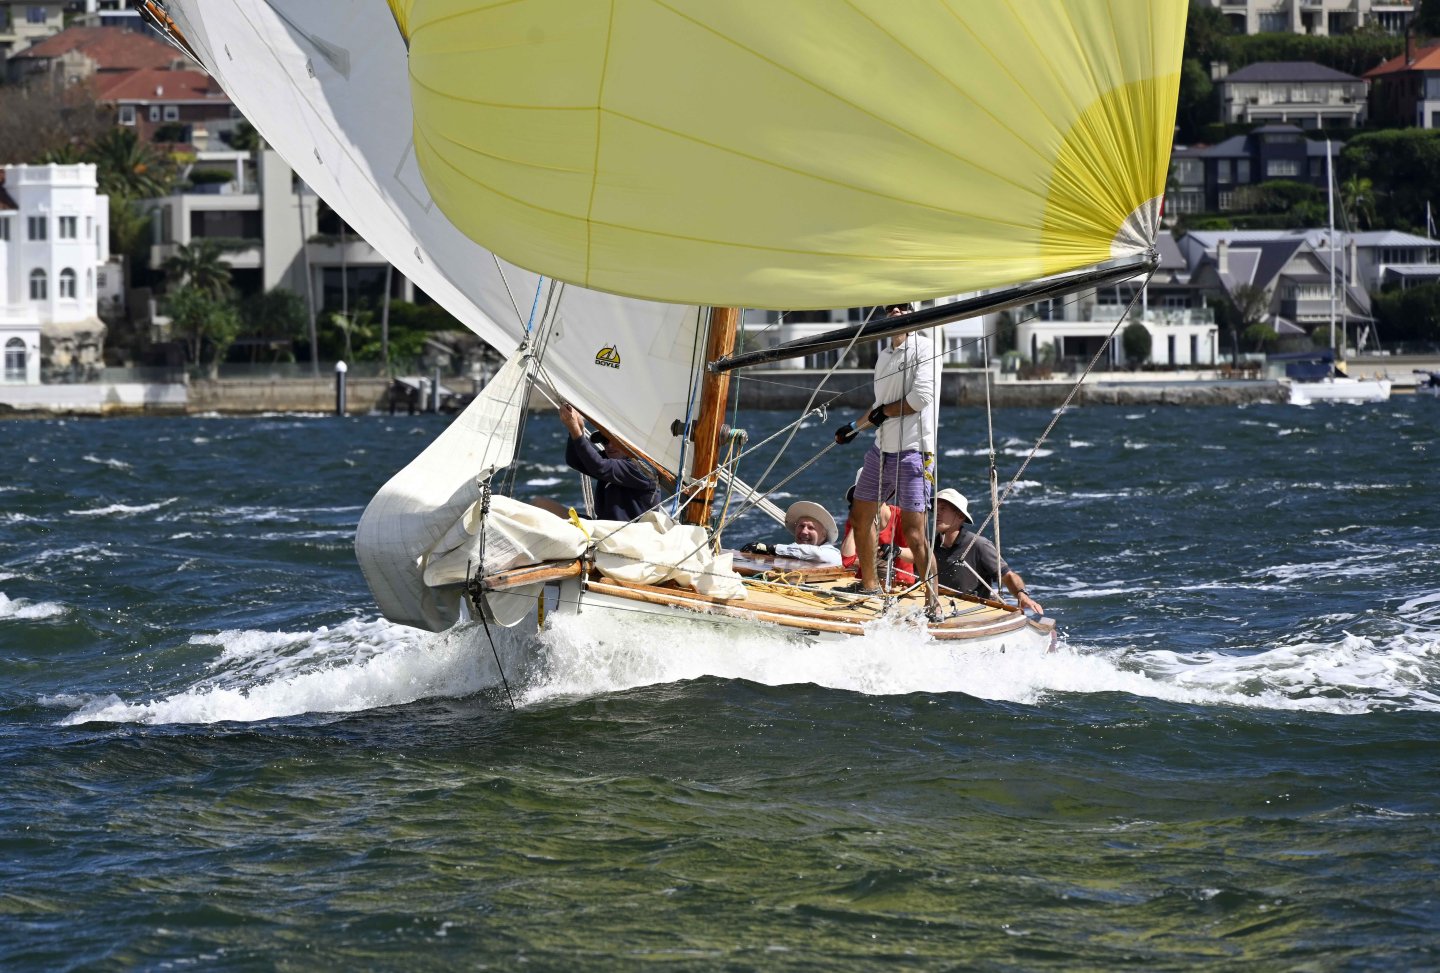
Hi Michael, We're almost related: one of my grandfathers was Belgian before emigrating - his name was Herbrand, a classic Flemish name I believe. Well spotted - Qld Maple is mainly used as a furniture timber. There aren't too many indigenous timbers that are suitable for furniture, & of the ones commonly used, it is a nice one. A gentle grain but lots of life in the way the light interacts with the grain. I'm not sure if you are referring to the photos of the actual yacht, or maybe the photo above from a previous build. In the actual yacht, they decided to do the cockpit & some boat details in unfinished teak. It feels really nice underfoot. The hatches are also teak, but varnished. "Bulky" is a completely fair description, they are very beamy for their length. There are many unkind things said about that, but not many people criticise their sailing qualities. I'm biased as I've always liked them & co-own one, below shows what happens when they are pushed: they sit down into the water & throw a lot of water, but don't bury the bow.
-
Hi Michael Qld Maple is a hardwood & is used for furniture & apparently it's good for musical instruments. It's not a tough or strong timber & is fairly light. I'm familiar with Mahogany & QM is not as hard, strong or as heavy as that - & as far as Ash & Beech go, I only know what we call Ash & Beech in Australia & they are probably unrelated to what you mean - I'm assuming you might be not from Oz. The weathered look you mentioned, I think is just the medieval standard of lighting I had on in the workshop (AKA the garage) when I took the photos. I agree that it's a really lovely timber, the photo below shows a hatch on a previous build, that has been finished with shellac. thanks for the interest
-
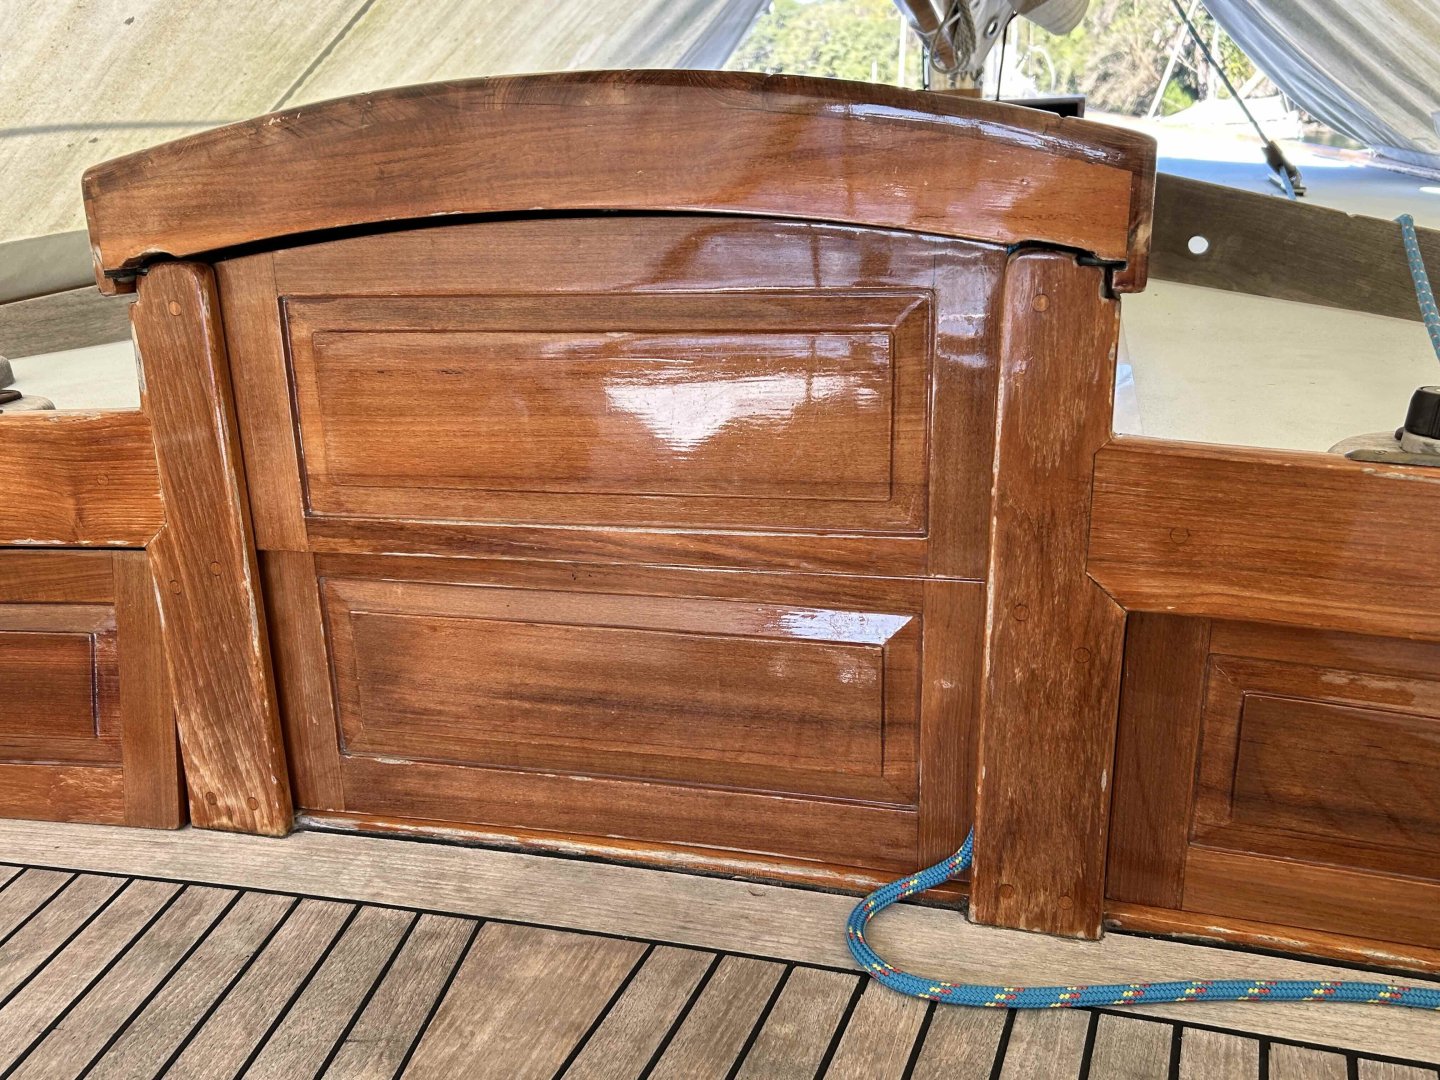
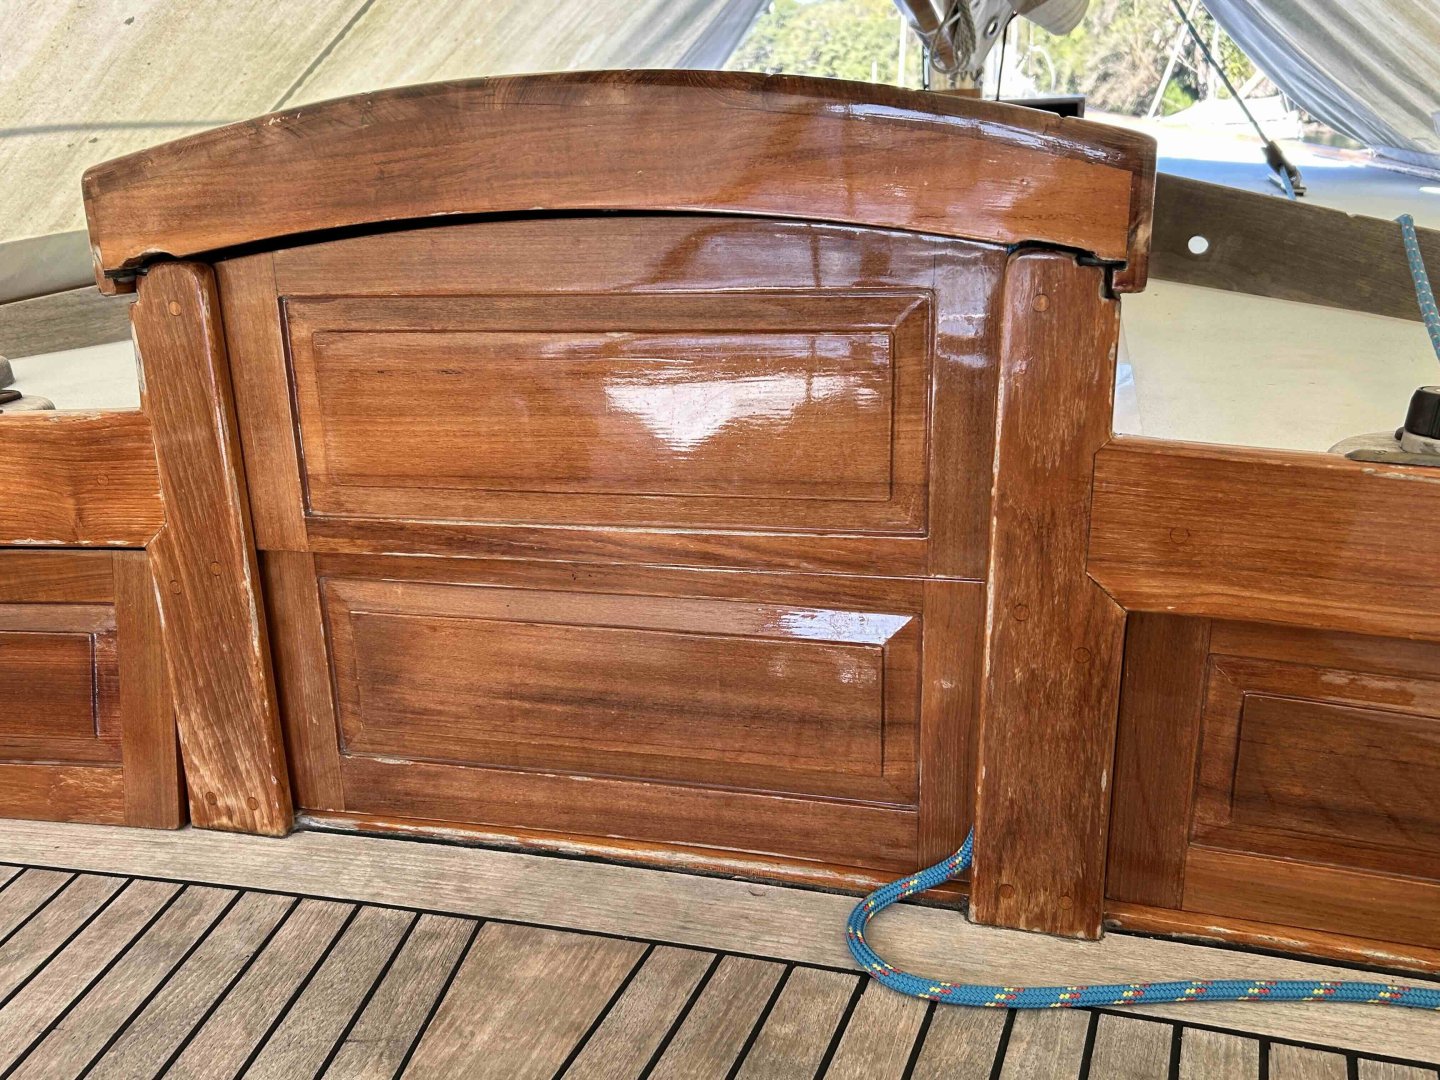
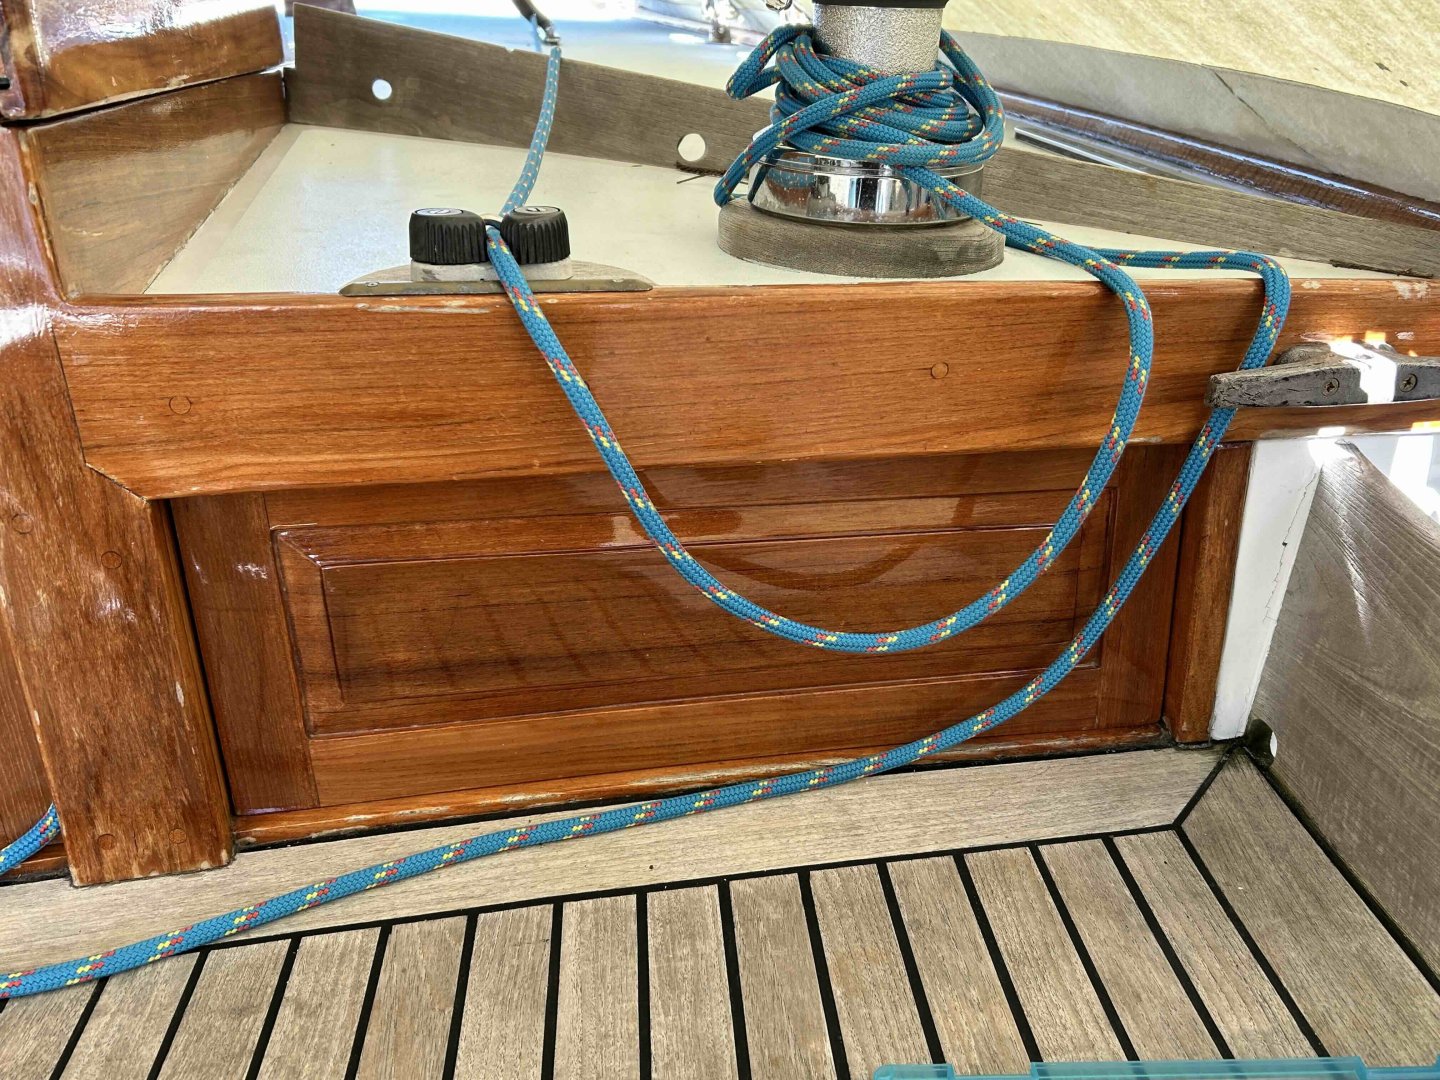
I've started on the visible timberwork, the decorative stuff that is either varnished or unfinished timber on this boat. It's not usual in Australia to have much unfinished timberwork, paint or varnish are the usual finishes & of course paint is more traditional for working style boats as it's cheaper & more durable. This yacht has work boat lineage in its design, but is a pleasure craft & there is certainly pleasure to be had in the highlights that varnishwork gives. Teak decks are not common, but for this boat there is some unfinished teak, which has of course weathered to a grey. For the timber that is varnished on the actual boat, I'll use shellac, several thin coats & finished off with steel wool to give a burnished look. To my eye, a brush-applied clear finish is out of scale, the build thickness looks heavy. Also, gloss levels have a scale effect: if the viewing distance of a model is 600mm, that's 7.2m at scale. At 7.2m from full gloss varnish, you can see gloss highlights, but not much - hence the burnished, slightly lower gloss level I propose. The hatches are vanished teak, & I am using Queensland Maple. The companionway hatch commenced; it integrates with timber wok on the face of the raised deck, see photo below of the actual. Various trimming pieces of timber still to be done. Regrading the weathered teak, I'm thinking of trialling the following: sand with a heavy grit sandpaper; rub some dark grey paint into the scratches & allow to dry; paint over with thin coats of white or pale grey paint. If anyone can give advice on weathering, I would appreciate any guidance or experience on this. And the forehatch. I haven't used CA glue a lot, but for the sake of time & used it on these hatches so I could get al of the timber strips on in one session. The seam first one from the top in particular, & it's not on the surface, seems to be what soaked into the timber. I'm not sure if it will become invisible when I apply the shellac finish. I will do a test & report back. In the second photo you can see the way light reacts with Qld Maple, it's beautiful when finished.
-
Hi Andy That framing is indeed beautiful. The photos raised an unrelated question for me, as I will need to try to show some timber weathered on my current build - the cockpit seats & some other timbers are unfinished teak, so greyed off. It might be just a trick of the lighting, but the photos appear to show the frames in a lovely greyed off state.......as opposed to the stringers. or perhaps you're building it outside in the elements, over 5 years....
- 174 replies
-
- Vigilance
- Sailing Trawler
-
(and 1 more)
Tagged with:
-
"but you said fleece" "stop whinging, it's gold, ain't it?"
- 508 replies
-
Hi Steven I agree, it is looking very good. An aside inspired by your post: I was admiring how clever rigging of the Drizza & Trozza lines are, in that drawing. There is a contemporary parallel, the high-end sailing world is moving back to a greater use of ropes in rigging: rope shackles instead of solid shackles, rope & eyelets instead of blocks, rope standing rigging instead of wire....using details similar to some of the techniques in this drawing.
- 508 replies
-
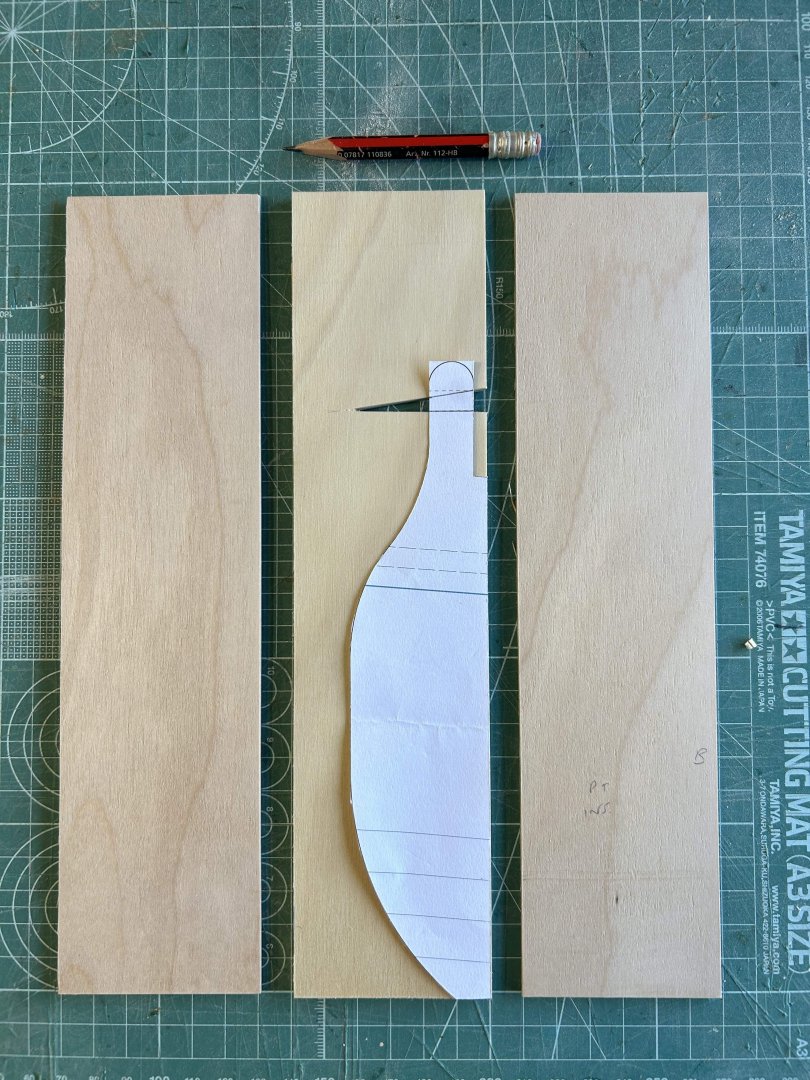
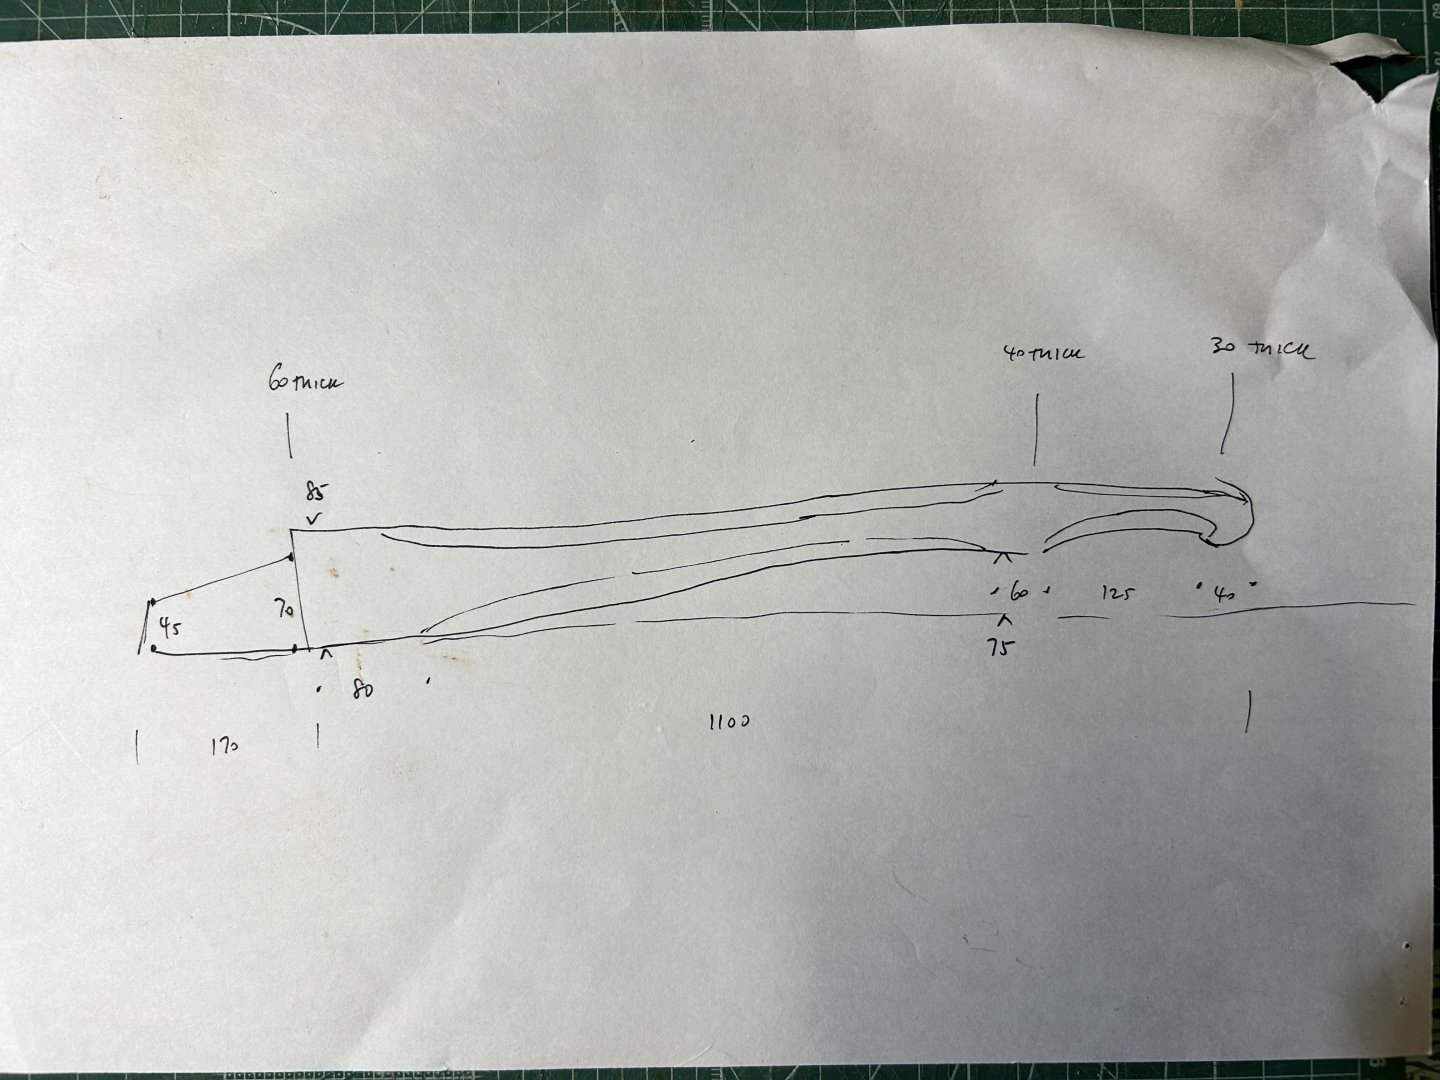
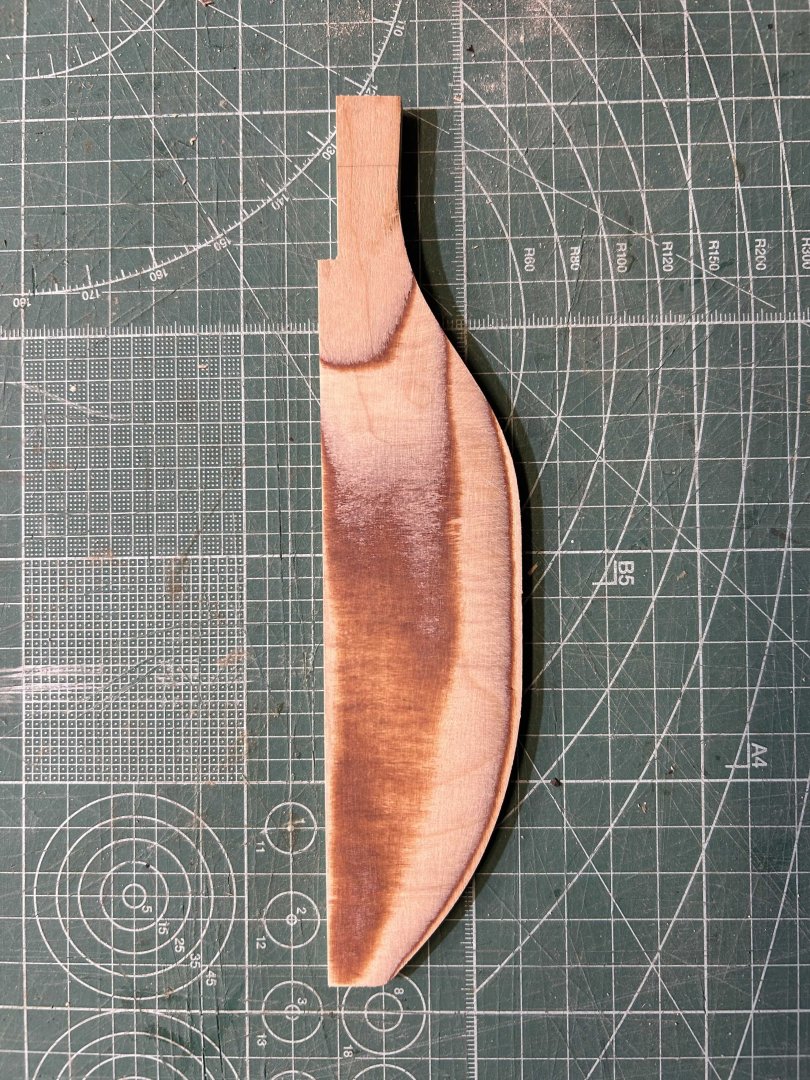
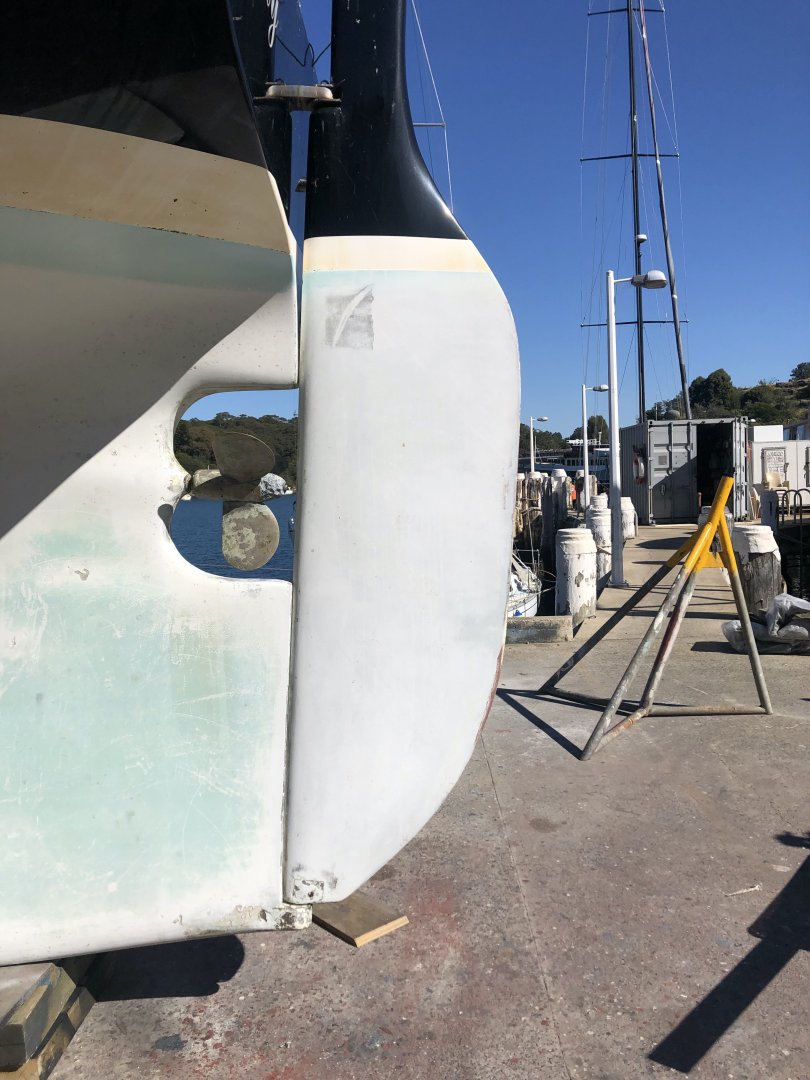
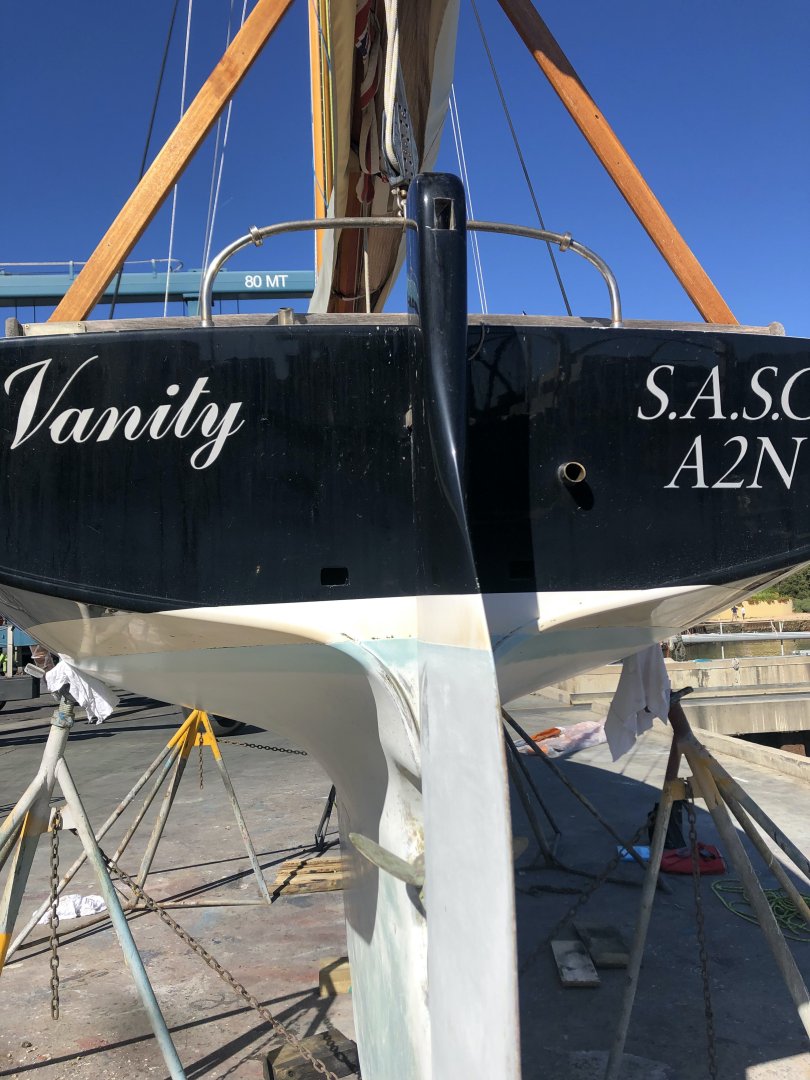
I've started on the rudder blade, & realised that plywood both suited the thicknesses of a sandwich approach, & also it would be very helpful to gauge accuracy of the shape - the easy visibility of the laminations is a great help with a subtle shape of changing thickness. The rudder has a few complexities: - they cleverly were able to make it very close & fair to the keel & also able to rotate a full 90º without hitting the transom (tiller is removable) - the cutout for the tiller - it has a very fine trailing edge This shows the delicate shape well: This shows the care with which they faired the rudder to the keel, the trailing edge of the keel is cupped & yet the rudder can rotate 90º...It must be that the pivot point is a bit more aft than you'd expect. It's only on anchor that you use anywhere near 90º, so it doesn't matter if the keel/rudder loses its fairness at that point. The construction will be a 3mm ply piece with a 2mm piece each side. 3mm as that's the thickness of the aperture for the tiller stock. Here's the 3 sheets, & the aperture is angled as shown. Here it is, glued up & with fairing underway. I clamped between 2 surfaces I was certain are flat, & used titebond for it's strength & simplicity of use. I am so glad I opted for plywood... And here's the tiller, when I get to it:
About us
Modelshipworld - Advancing Ship Modeling through Research
SSL Secured
Your security is important for us so this Website is SSL-Secured
NRG Mailing Address
Nautical Research Guild
237 South Lincoln Street
Westmont IL, 60559-1917
Model Ship World ® and the MSW logo are Registered Trademarks, and belong to the Nautical Research Guild (United States Patent and Trademark Office: No. 6,929,264 & No. 6,929,274, registered Dec. 20, 2022)
Helpful Links
About the NRG
If you enjoy building ship models that are historically accurate as well as beautiful, then The Nautical Research Guild (NRG) is just right for you.
The Guild is a non-profit educational organization whose mission is to “Advance Ship Modeling Through Research”. We provide support to our members in their efforts to raise the quality of their model ships.
The Nautical Research Guild has published our world-renowned quarterly magazine, The Nautical Research Journal, since 1955. The pages of the Journal are full of articles by accomplished ship modelers who show you how they create those exquisite details on their models, and by maritime historians who show you the correct details to build. The Journal is available in both print and digital editions. Go to the NRG web site (www.thenrg.org) to download a complimentary digital copy of the Journal. The NRG also publishes plan sets, books and compilations of back issues of the Journal and the former Ships in Scale and Model Ship Builder magazines.


