HOLIDAY DONATION DRIVE - SUPPORT MSW - DO YOUR PART TO KEEP THIS GREAT FORUM GOING! (Only 20 donations so far - C'mon guys!)
×


jonny.amy
-
Posts
346 -
Joined
-
Last visited
Content Type
Profiles
Forums
Gallery
Events
Everything posted by jonny.amy
-
 Ken, Yeah it was a bit of a bummer, but that was the final straw for me with that kit! It was my first (feable) effort in Ship Building, and I've only built better since then. Hopefully somebody buys it, if not, I'll finish her off as best I can and take her to an antique shop! I could get top dollar for her then!!! Haha
- 188 replies
-
- 1
-

-
- Sherbourne
- Caldercraft
- (and 2 more)
-
I'll be building up the gun carridages tonight, and I need adice in to the best way to rig them. Do I rig the outhaul tackle and blocks as well as the breech rope? Or do I keep it as simple as possible and rig just the breech rope? Does anybody have a picture of their Sherbourne gun's they can point me in the right direction with? Cheers Jonny
-
Morning All, Progress came to a halt this weekend with virtually nothing done, as I accidently dropped HMS President (my first build) whilst moving out of harms way, and as the stand hit the deck, it ripped off the stand, false keel and some of the lower hull! So I went in to recovery mode and took out my dremel to rasher off the remained of the lower hull to make her a water line model. I then built up some water with filler, and eventually painted it blue! I'll admit, I was a bit disheartened by this, and I've now chucked her on ebay for anyone to take away and finish off! I've very much fallen out of love with this model since I started it! So if anyone wants it, she's on ebay under the following link, if any of you UK builders fancy taking her on: http://www.ebay.co.uk/itm/Hms-President-Waterline-Ship-Model-/221800967749?pt=LH_DefaultDomain_3&hash=item33a45e2e45#ht_1003wt_968 Please note: President will come with a box of tricks that can be used to complete her! Now that I've fixed President to a stage where she can be sold, I can focus on Sherbourne again. Cheers, Jonny
- 188 replies
-
- 1
-
-
- Sherbourne
- Caldercraft
- (and 2 more)
-
That's exactly how I had intended to do the pumps. But I was thinking about chopping the handle in half, and replacing the curved end with a length of brass rod to give it more of the "rough and ready/fit for purpose look"! I'm under the impression from reading various books that the Revenue Cutters were fit for purpose and rarely decorated in great detail. Taking the M-in-L to the cinema now, but will be back in the Shipyard later on! Cheers Jonny
- 188 replies
-
- 2
-
-
- Sherbourne
- Caldercraft
- (and 2 more)
-
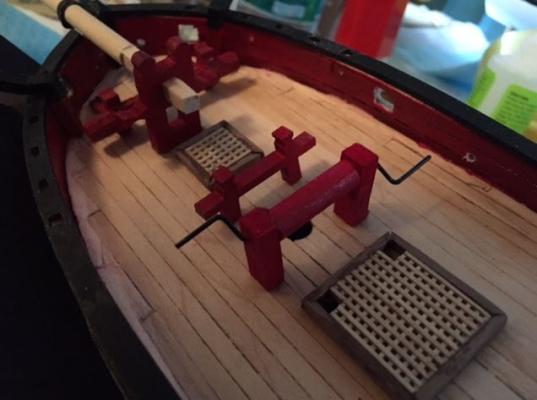
Hi All, Once again, thanks for the comments, yesterday, I had completely overlooked the fact the mast had a more prominent rake than other models I've built. All I managed to get done was the repositioning of the Jeer Roller due to the fact I was drafted in to "Operation Cupcakes" as chief pot wash, for the Mother in Law's birthday tomorrow. The Admiral will be decorating the cupcakes tonight, so fingers crossed I'll have a bit of peace and quiet to get back in to swing of things with the model, or I'll be back on pot wash duties?! Who knows? One thing I am considering is a complete rebuild of the Elm Tree Pumps, making the casings octagonal in shape from styrene strip, and modifying the handles to something less elegant like the ones on Badger or Pickle? Cheers Jonny
- 188 replies
-
- 4
-
-
- Sherbourne
- Caldercraft
- (and 2 more)
-
Progress is still progress Tony, no matter how fast or slow it is!
- 188 replies
-
- 1
-
-
- Sherbourne
- Caldercraft
- (and 2 more)
-
Already on it E, just glued them down. The mast sits in nicely now and has a more prominent rake! Thank you seasoned ship builders for the good advice one this one! It's getting late in the day now, so work in the shipyard might slow a bit! Cheers Jonny
- 188 replies
-
- 1
-
-
- Sherbourne
- Caldercraft
- (and 2 more)
-
Tony that's fine - I'll measure it off the plans later on. As for the Jeer Roller, that's come off with a bit of jigging and poking, but it came off without a hitch. Now just to drill a few holes, glue it in place and then fill the existing holes! Fun fun fun!
- 188 replies
-
- 1
-
-
- Sherbourne
- Caldercraft
- (and 2 more)
-
Ok so option 1 is the way forward.... Let's give that a bash then!
-
E - Yes I have dry fitted the mast.... it's a bit tight, but it fits. I was thinking about this earlier (dangerous, I know). Basically there is just under 1mm clearence, which is very tight. But the rake of the mast has not been compromised due to it. One thing I noticed it that 8mm dowel is bang on 8mm, but the mast step (in the keel) is not 8mm, more like 7.95mm as the mast did not fit in at all! After a bit of sanding it sits nicely in the seat! So, I have two options here, Option 1 - "unglue" (Rip off clean up and re-glue) the roller, and move aft by a few millimetres, or Option 2 -rasher a bit of the roller off with the dremel.... I prefer Option 2, just so I can wind the Admiral up with the noise it makes!! Haha By the way - Does any one know th exact angle of the mast rake? Cheers Jonny
- 188 replies
-
- 1
-
-
- Sherbourne
- Caldercraft
- (and 2 more)
-
Yeah it's still quite a long list Ken, probably another 40 to 60 hours, excluding the guns - they will be tricky as I've never riggined cannon's before, so it will be a learning curve! Cheers, Jonny
-
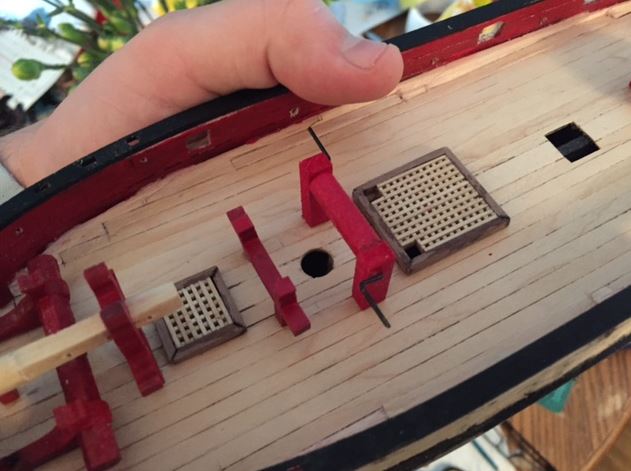
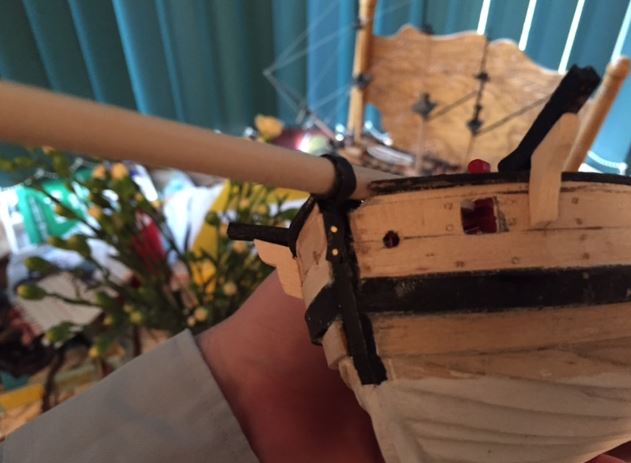
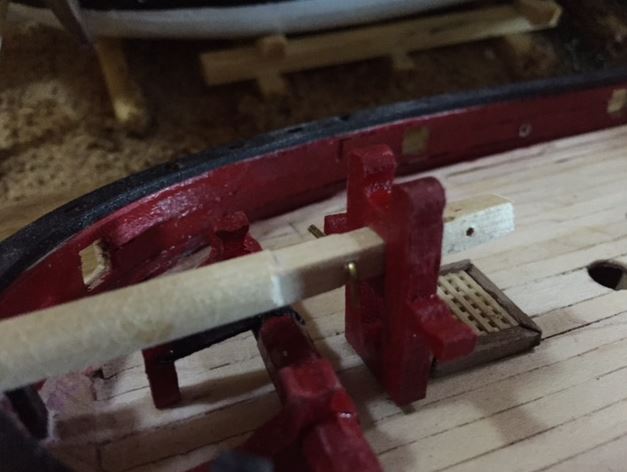
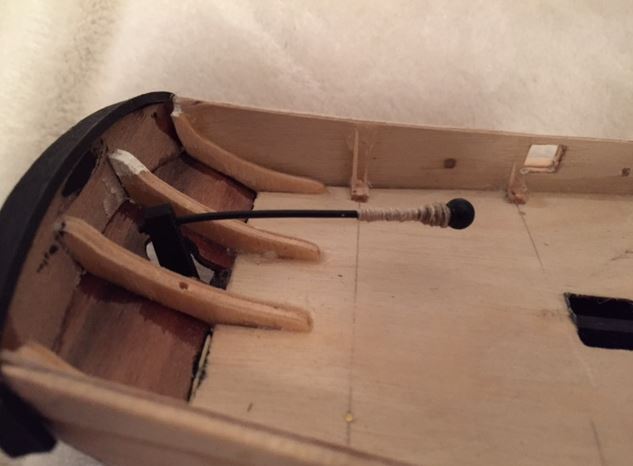
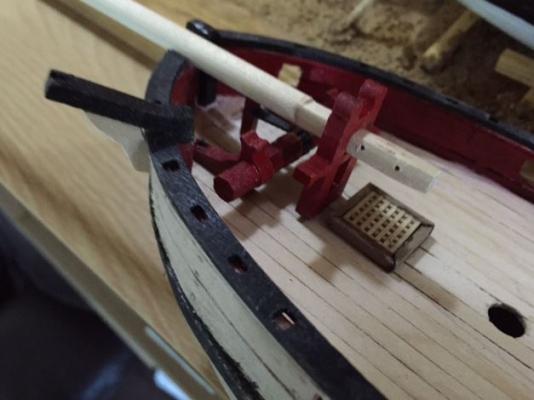
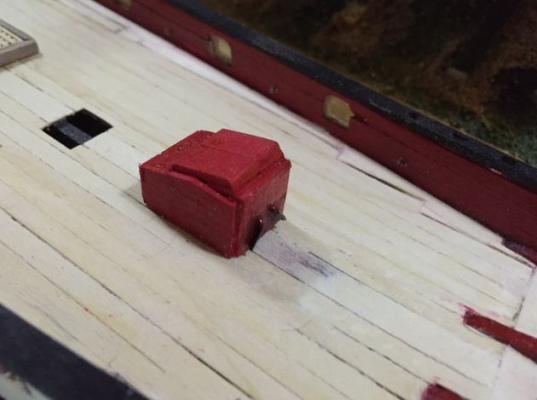
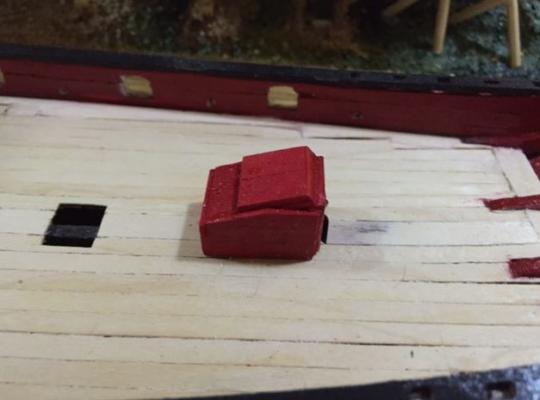
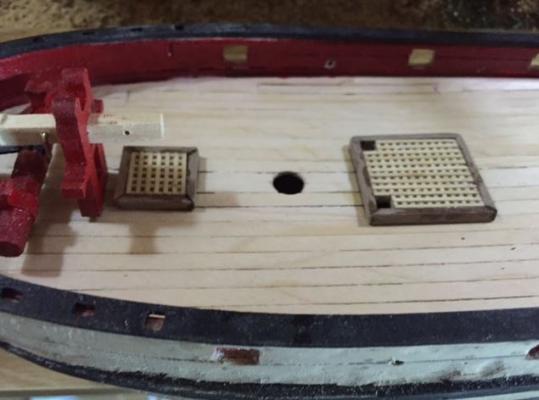
Hi Guys, Last night was abit hit and miss on the model, as the Admiral was doing online training fro her new job (and getting in a fluster), so that left me to do all the household stuff, like go food shopping, wash up, cook, and clean, and then help her out occasionally. So progress on the deck fittings was a bit slow. But I did build up a few important bits that have really made the model shine! So firstly, I decided to make the iron band seen on many pilot cutters that supports the bowsprit at the stem. This was made from black cartridge paper supplied with the kit. I wrapped it around the bowspit about 6 times, gluing it alternately at the 12 o'clock and 6 o'clock positions on the bowsprit. Next I cut another length of paper and wrapped that around gluing the two ends together to make a loop around the band. Twisting that through 90 degrees it was nailed on to the stem with two brass pins. My next endeavor was to build a Jeer Bitt or roller furler for the base of the mast. This has been done by some of the other guys on MSW (Tony with his Sherbourne - http://modelshipworld.com/index.php/topic/335-hmc-sherbourne-by-tkay11-–-caldercraft-–-scale-164-1763-a-novice’s-caldercraft-sherbourne/page-5), this was made out of some off cut 6mm DIA dowel from the bowsprit and two lengths of 4x6mm basswood strip, about 30mm in length. All I need to do now is band the ends of the roller with a strip of cartridge paper. All that remains on the deck fittings are: Swivel Gun Posts Seizing posts All Eyelets on deck All gun carridges All gun carrige fittings Fitting Guns. Fitting Channels Belaying Pin Racks Anchors Aft Deck Grating Tiller blocks and tackle Cheers Jonny


- 188 replies
-
- 4
-
-
- Sherbourne
- Caldercraft
- (and 2 more)
-
By the way, Jokita sent through the brass gun barrels for my build. I aslo tried the brass blackening gel, having soaked the brass in vinegar for 1 hour. It worked very well. The barrels were left to cure over night, but the blackened layer came off very easily, so I resorted to stripping them back to the brass and airbrushing the barrels balck. Cheers Jonny
- 188 replies
-
- 1
-
-
- Sherbourne
- Caldercraft
- (and 2 more)
-
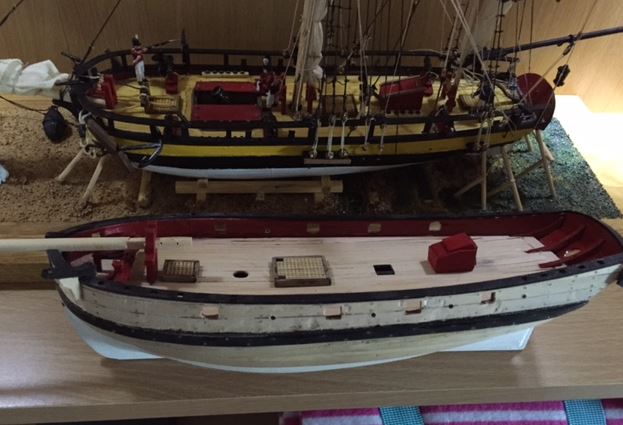
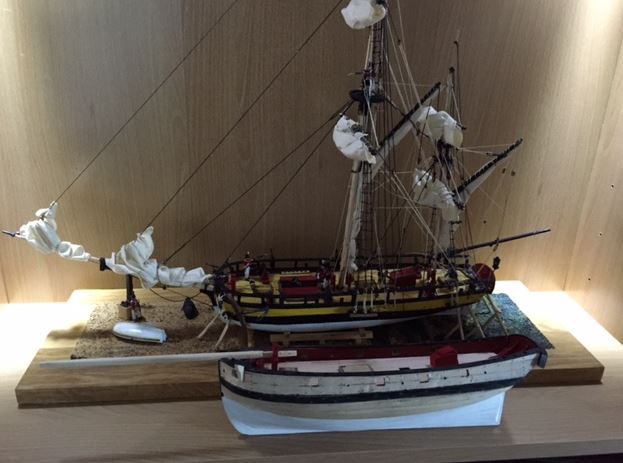
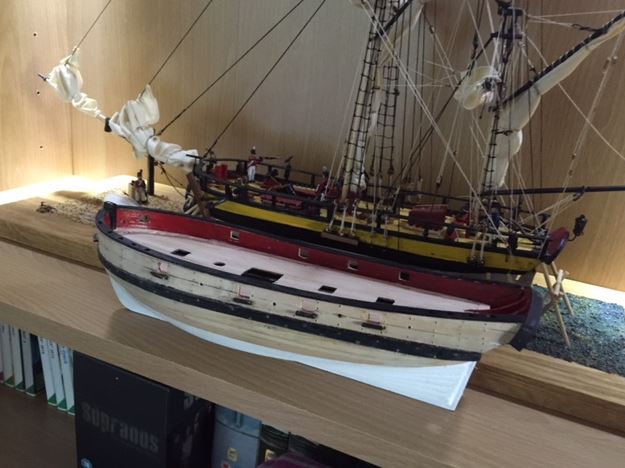
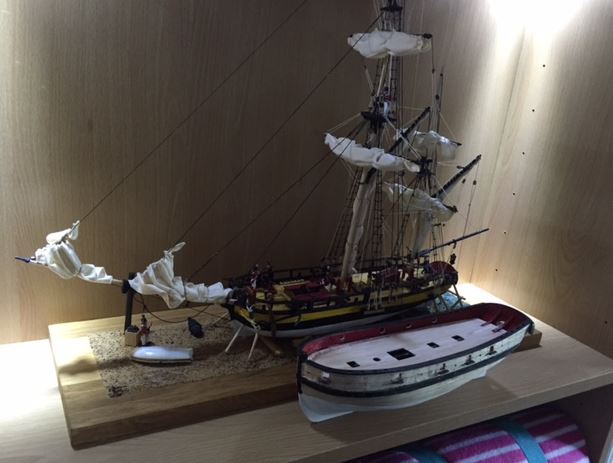
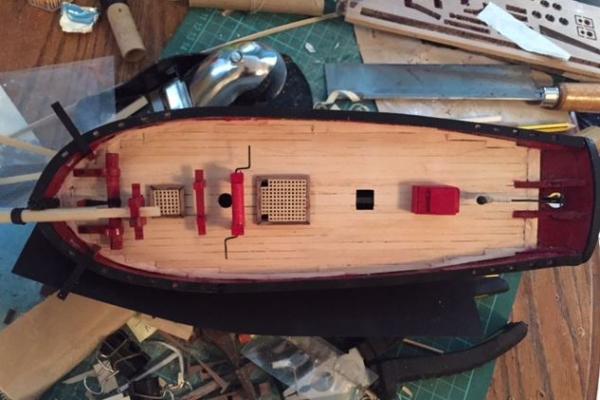
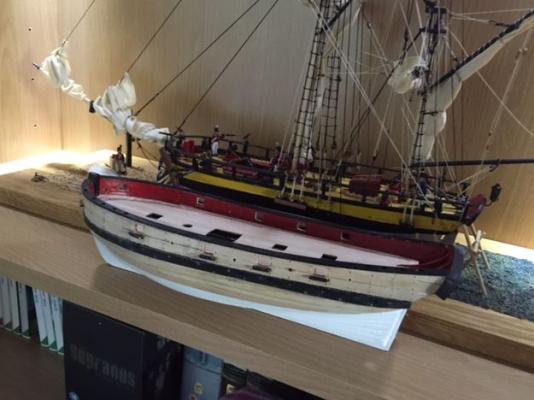
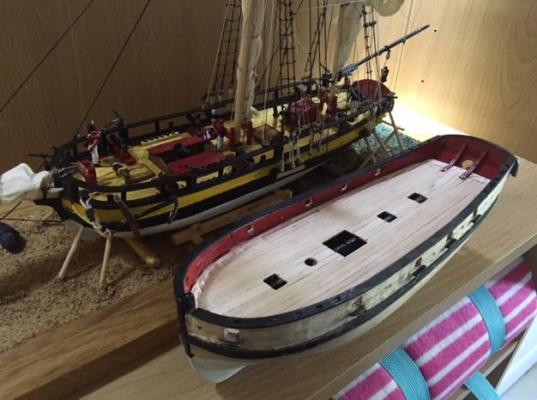
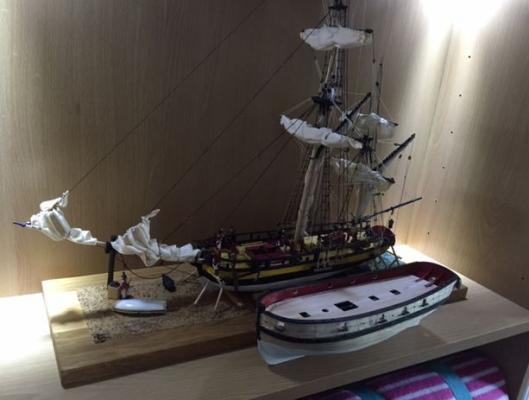
Photo Update of this weekends progress.... First of all, as mentioned in my previous post, I have built up the windless, bowsprit support, deck gratings and a companionway for the deck. I also started treenailing, but I am not happy with that at all, so I might remove the existing planks and replace them with new 6mm wide basswood strips. Either that or a strip some strips down to about 1mm think and lay them on top.... I'll make up my nide later on. Here are Sherbourne and Convulsion side by side. Sorry the photo's are a bit dark, the lighting in the display cabinet for Convulsion needs to be refined! My thoughts on the treenailing are that the nailing itself is not too bad, but the sanding of the basswood (with rough stuff then very smooth wet and dry) has left a less than desirable finish to the planks (as you can see in the second to last photo) and I think it brings the look of the ship down a lot, so I think I will have to re-do it to please my eye! Cheers Jonny .


- 188 replies
-
- 5
-
-
- Sherbourne
- Caldercraft
- (and 2 more)
-
Update on Sherbourne.... I'm absolutely bored stiff of tree nailing, having got 2/3rds along the length of the port side, so I've come off that, and built up the deck fittings and the catheads with basswood knees supporting them. I also decided not to add the aft most deck gratings, due to the fact that the real ship would have had a companion way of some form that wasn't covered by grating. I have built the windless as well, I firstly decided not to use the kit supplied windless, as it looked too small and the supplied kit windless wasn't the best of quality, but my scratch built attempt wasn't to scale, and looked too big, so I went back to plan A, which was tart up the existing windless and use that! Photos will come tomorrow! Cheers Jonny
- 188 replies
-
- 2
-
-
- Sherbourne
- Caldercraft
- (and 2 more)
-
I'm committed now! I've drilled my first lot of holes on the port side of the hull! I've got a few in there too!!! There's no turning back now!!!
- 188 replies
-
- 2
-
-
- Sherbourne
- Caldercraft
- (and 2 more)
-
Right it's decision time.... to tree nail the hull or not to tree nail the hull?????? Tree nails would be at 30mm on the carvel planks (one on top the other) and at 30mm on the clinker planks (just one at the "land" overlap)..... Please vote yes or no! Votes will be counted by 5pm tomorrow. Cheers Jonny
-
Ken, I'll try that tonight - the bottle says "To apply Abbey Blu Gel, use Abbey Grade 400 Steelwool (£4.99 for 1m) to prepare the area, apply Abbey Metal Degreasing Fluid to remove grease from the gun barrel (£9.00 per bottle) and once Abbey Blue Gel is applied dry off with Abbey Soft-Cloth (£5.95 for a pack of 2)", so I think I'll try the vinegar first before buying all those expensive products! Eamonn, beer promotions are always a bad idea! Haha when it comes to beer there is no stopping me! Haha I tried scraping the decking and that's worked quite nicely. The edge beams are still a bit uneven, but I'll just carry on scraping until I'm happy! Yeah I was on a roll the other night, I just found it very easy this time! Maybe I overcomplicated the decking (at least for me) when I built Convulsion?! I fitted the capping rails last night, and I have the Starboard side gunport sills to add on to the hull. After that it will be moving on to the guns if they ever arrive from Jokita/Caldercraft???? Cheers Jonny
- 188 replies
-
- 2
-
-
- Sherbourne
- Caldercraft
- (and 2 more)
-
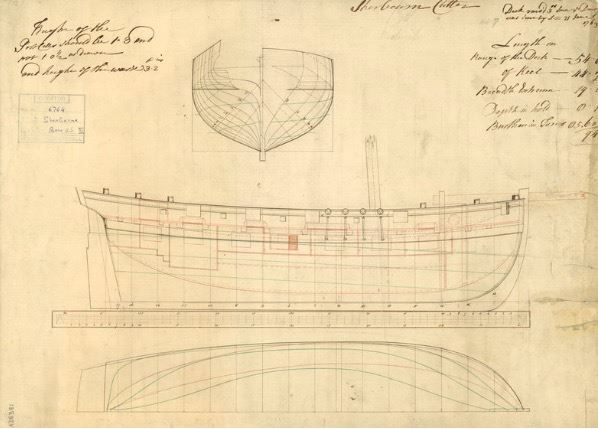
Hi guys, Just a quick photo update..... Firstly, I found the original shear line and profile drawings of Sherbourne on NMM website! I've decided to build a display case and line the back with the image! That's much later down the road, but I thought I'd share it with you know! The decking is done, as I said earlier, a bit of cleaning up and sanding is required now, but I can start thinking about deck fittings soon. I would have had it done last night, but the Admiral put a stop to all work fairly early last night, so I'll have to get on it tonight! Cheers Jonny


- 188 replies
-
- 2
-
-
- Sherbourne
- Caldercraft
- (and 2 more)
-
Thanks Ken, I'm pleased for the Admiral, and I know she's a bit anxious about the job, but I know she will be great at it! Hopefully they will send the brass barrels through as I's like to have a good stab at using the blackening gel (Abbey Blu Gel for gun barrels). I've tried with small bits of brass with mixed results... Whats the best "home remedy" for degreasing the brass? I'll dig out the logs later on, but for now, it's back to the grind at work! By the way, I started and finished the deck planking last night. The edge beams still require a fair bit of sanding to get them looking pretty, but I've got a nice little dremel so I'll get that bad boy on the job later on. Photo's will be posted later on! Cheers Jonny
-
Also..... I dropped the ball on the photo's last night! The Admiral got a new job (alongside managing the fleet and shipyard), so we spent the night eating Steak with a homemade Diane Sauce, and quoffing Champange! I'll grab some photo's tonight of the progress, and I'll also grab some of the cannons. Subsequently, the Test Cannon I built up is the best of the bunch, and that still required some cleaning up! Cheers Jonny
- 188 replies
-
- 2
-
-
- Sherbourne
- Caldercraft
- (and 2 more)
-
I'll be honest, when you pay top dollar for a kit like this, you expect to have some fittings that maybe require a bit of cleaning up, but a 1mm to 1.5mm lip either side of the gun where the casting was of poor quality, is unacceptable. The general quality of the kit is fantastic, and I've conveyed my praise to Caldercraft/Jokita, but I feel like the quality of the smaller kits might be compromised due to the fact that they sell more of them. As I have said in my previous build, the quality of th kit is ten-fold that of Mantura/Sergal, but I was abit disapointed by the metal castings. My first thoughts for fixing the guns were of filling and sanding, and then painting. But I'll be honest, I can't be bothered with that! I will never be happy with the outcome of them and it would spoil the model for me! I've been in contact with Jokita, and they will be sending replacement parts. I've asked for Brass barrels, but I'm happy with white metal! Cheers Jonny
- 188 replies
-
- 2
-
-
- Sherbourne
- Caldercraft
- (and 2 more)
-
Timmo, that was my first thought, but I wasn't sure if I had balls'ed up the build or if the kit was designed like that? Haha I will get some photo's tonight of the edge beams and deck beams. What was the cast quality of your cannons for Sherbourne like? Mine are terrible, and I'm seriously considering replacing them for the brass Caldercraft 4 pounders, but I'm concerned they would be too big?
-
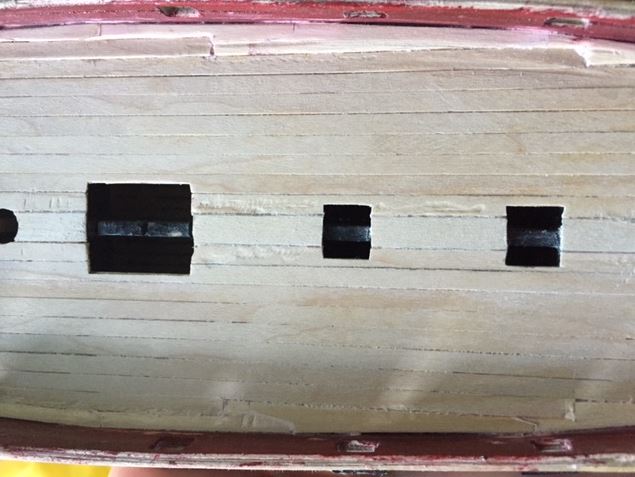
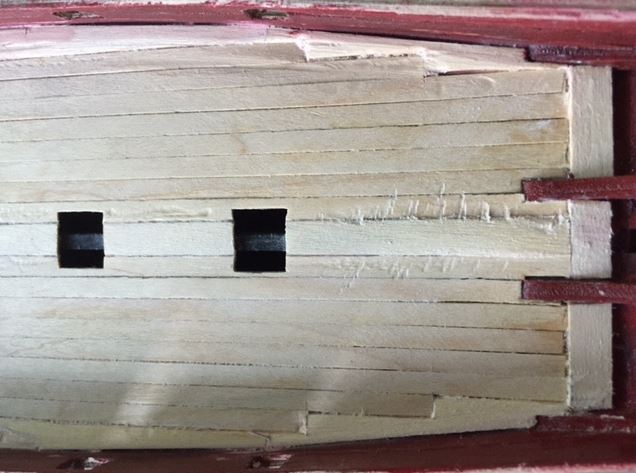
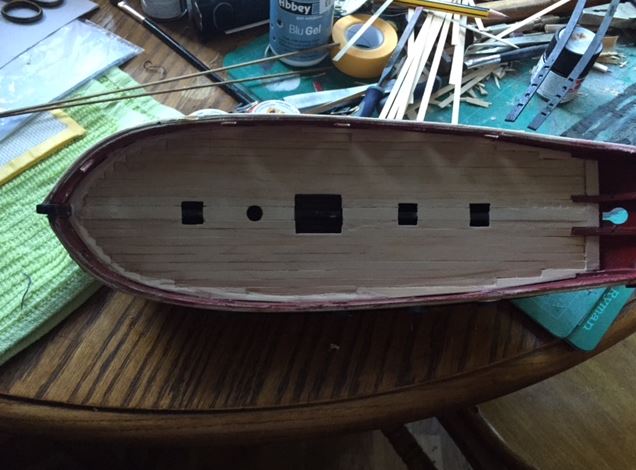
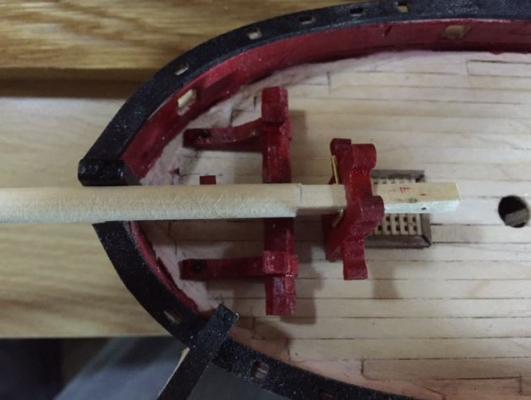
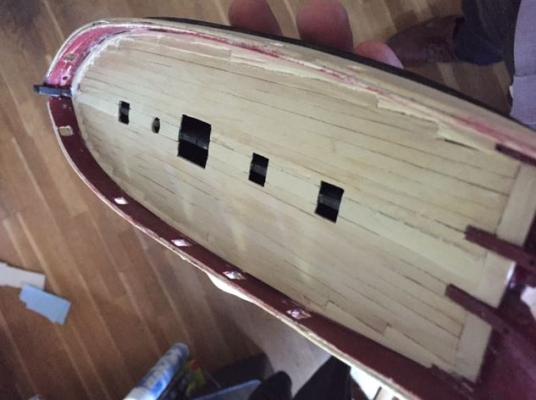
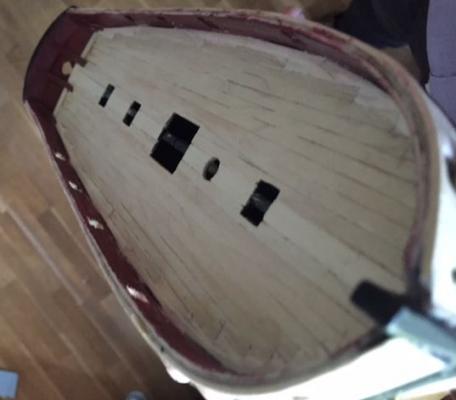
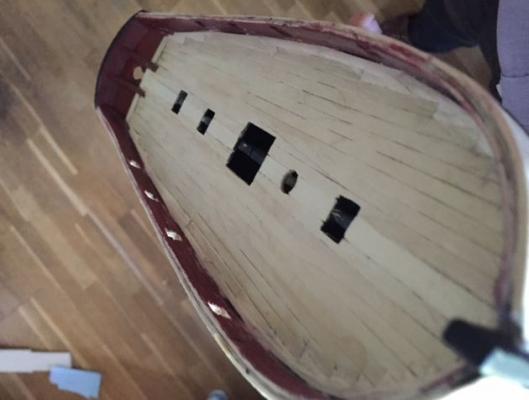
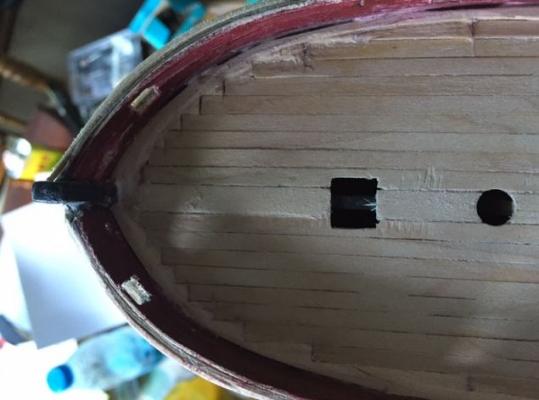
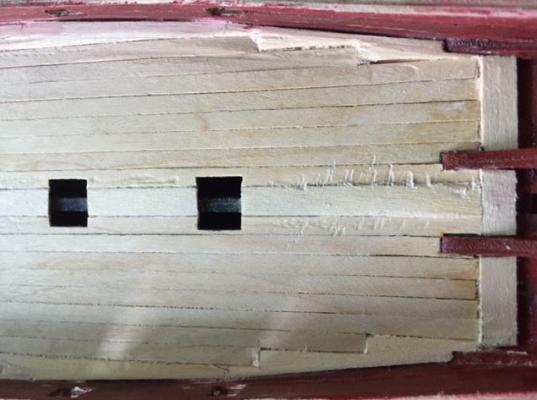
Morning All, This weekend was a bit disrupted by visiting family, so progress again was a bit slow. I have planked the bulwalks on the model and painted them a rustic mixture of red ochre and brillinat red to show a a bit of wear and tear on the ship. I also managed to get the edge beams, and center beam, for the deck planking down. I used some of the basswood strips for the edge and center beams, which will be sanded down to the thickness of the supplied deck planking. I intend to to drill small holes every 30 to 50mm in the edge beams to act as waterways. One thing I've noticed is that there is a small lip between the transom piece and the deck, about a 2mm lip, (as can be seen in the photo below) but enough to notice. Has anyone come across this? I've got my edge beams up to the edge of the false deck, so I guess I'll have to fill it with some trim? I will hopefully start deck planking tonight. I will be notching the edge beams to match the deck beams. Cheers Jonny

- 188 replies
-
- 3
-
-
- Sherbourne
- Caldercraft
- (and 2 more)
-
Jason, You've done a great job on HMS Snake so far! Your model has really inspired me to build the Snake, provided I get the go ahead from the Admiral! Keep up the good work!!! Cheers, Jonny
- 800 replies
-
- 1
-
-
- snake
- caldercraft
- (and 1 more)