HOLIDAY DONATION DRIVE - SUPPORT MSW - DO YOUR PART TO KEEP THIS GREAT FORUM GOING! (Only 20 donations so far - C'mon guys!)
×


jonny.amy
-
Posts
346 -
Joined
-
Last visited
Content Type
Profiles
Forums
Gallery
Events
Everything posted by jonny.amy
-
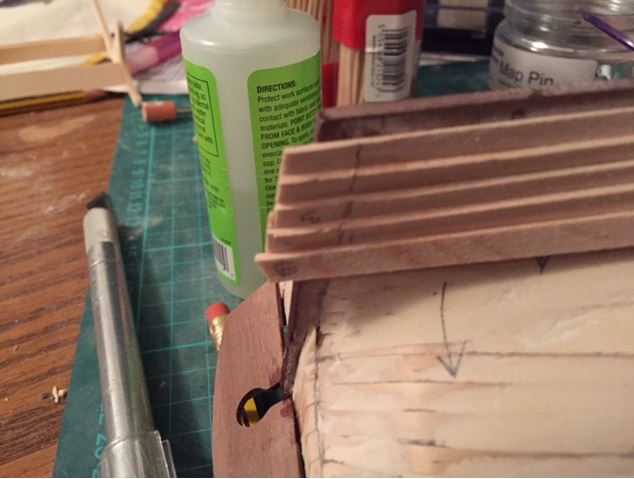
 Hi Guys, Just to say things at home have been a bit stressy over the last few days... The Admiral lost her Driving Licence, so we've spent the lastr two nights tearing the house up trying to find it... Lunkily I found it this morning in a pile of clean laundry whilst looking for underpants! Crisis averted, but it has meant that I have made absolutely no progress on the model. I have also recieved a phone call from the Lettings Agency to tell us they are happy for us to renew our tennancy agreement on the property after our tennancy is up! That means the percieved pressure is now off!!! Huge relief!!! I've got a day off tomorrow, so I'll be planking the bulwalks tonight/tomorrow and hopefully starting the deck planking and fittings soon! Cheers, Jonny
- 188 replies
-
- 2
-

-
- Sherbourne
- Caldercraft
- (and 2 more)
-
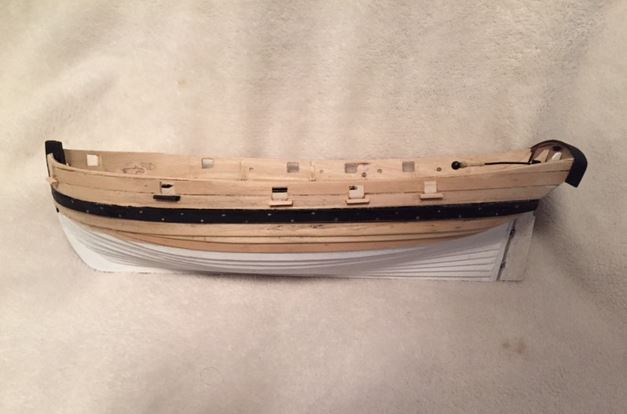
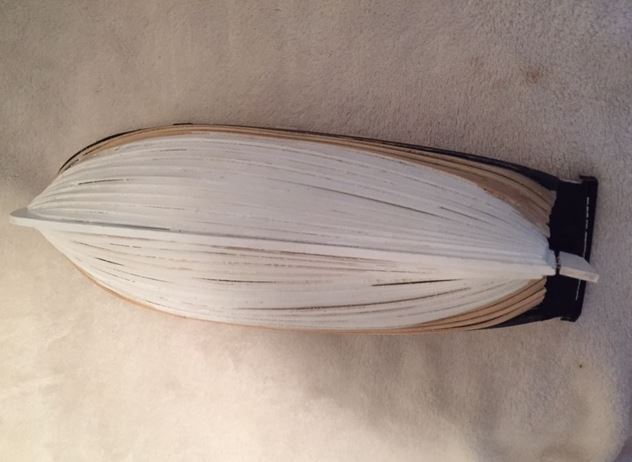
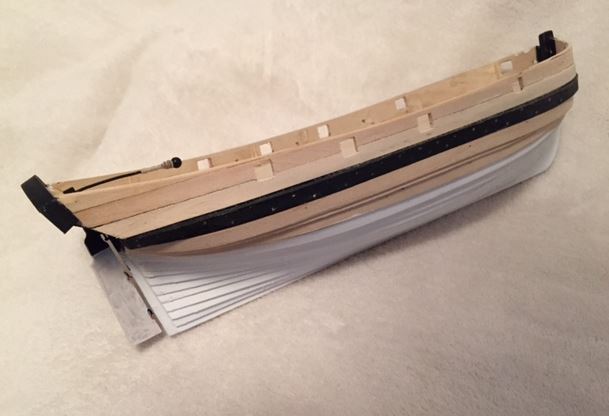
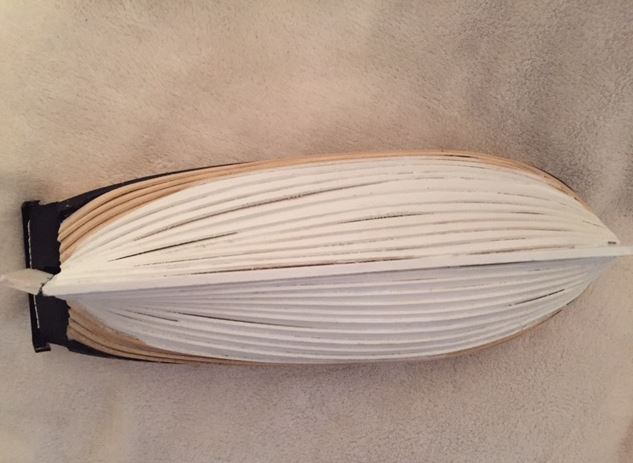
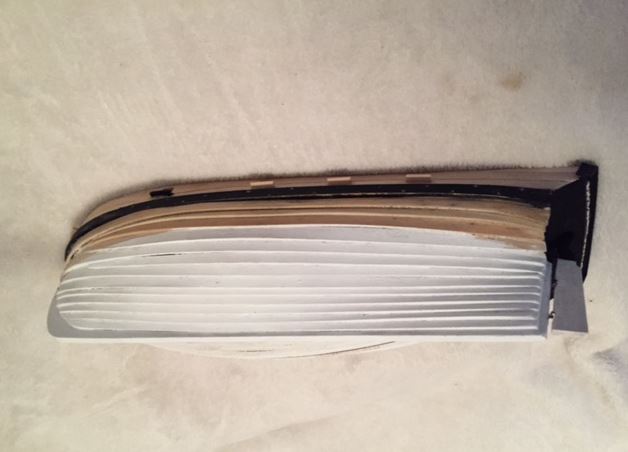
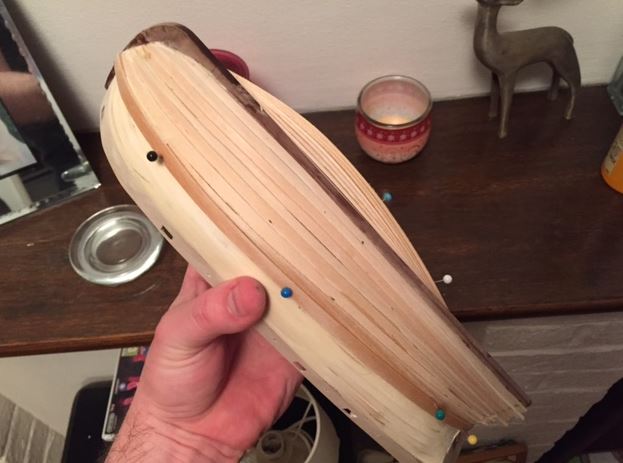
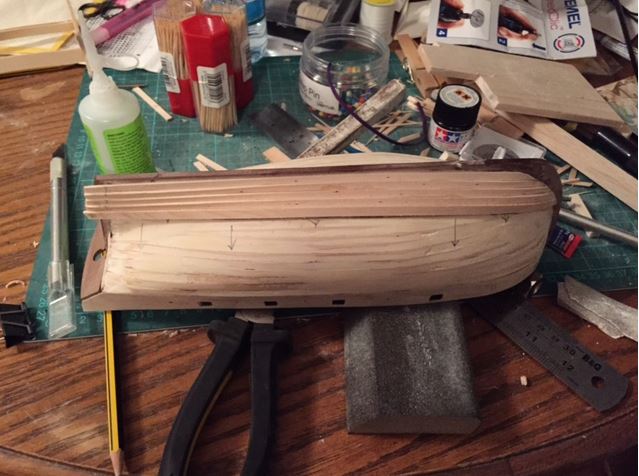
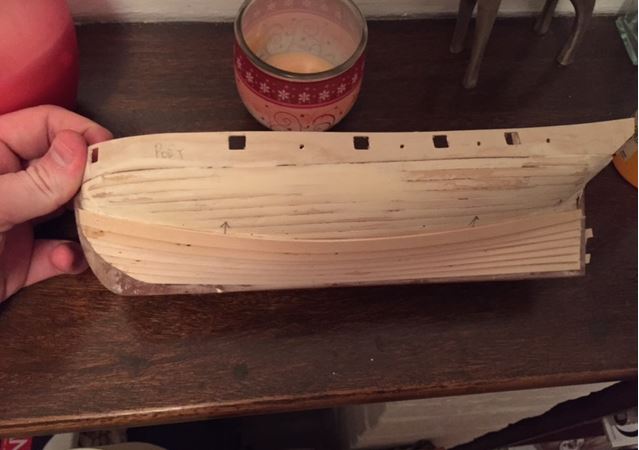
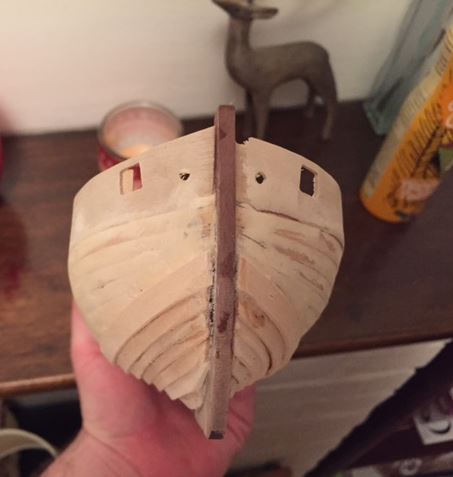
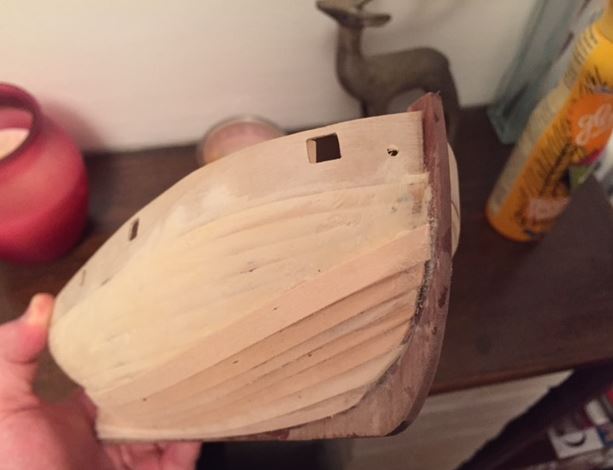
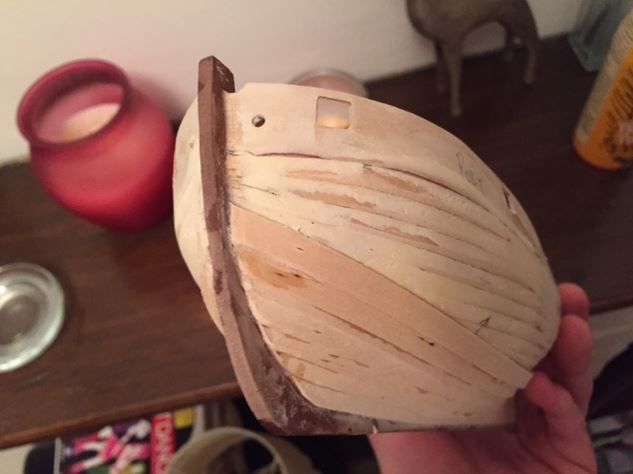
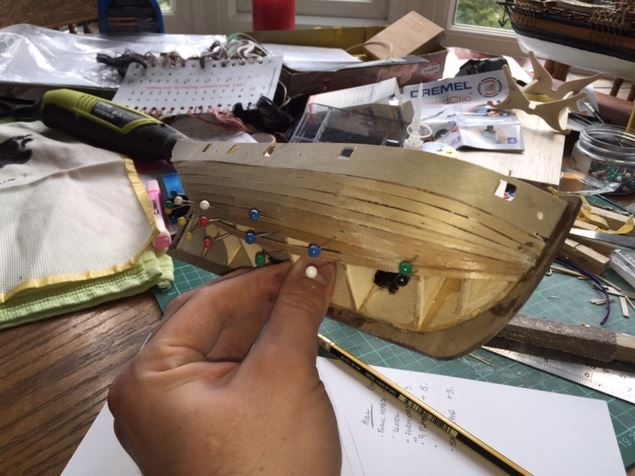
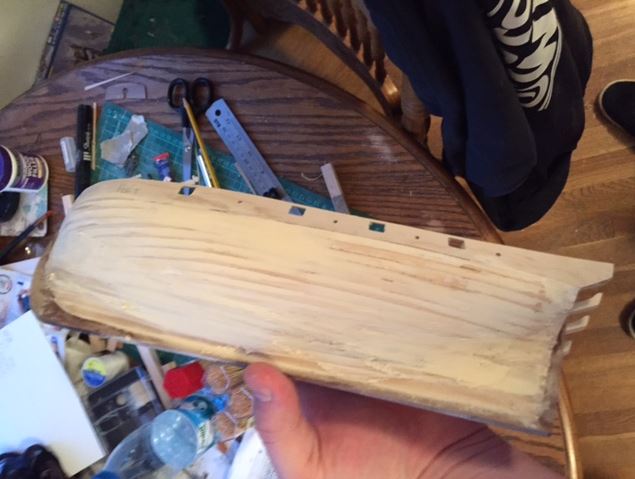
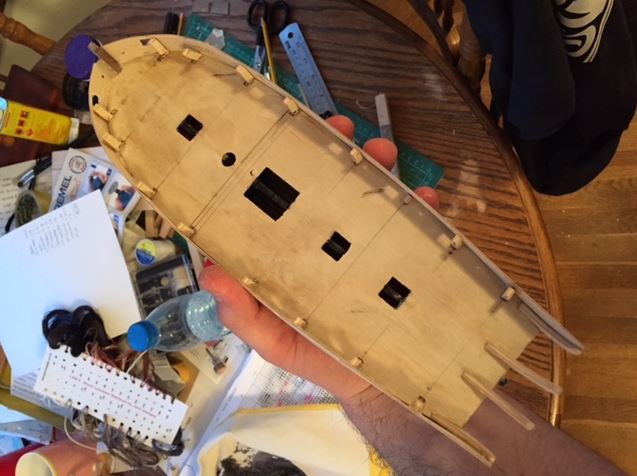
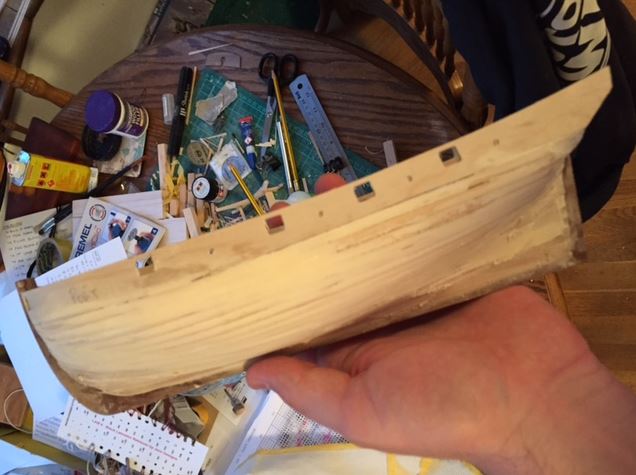
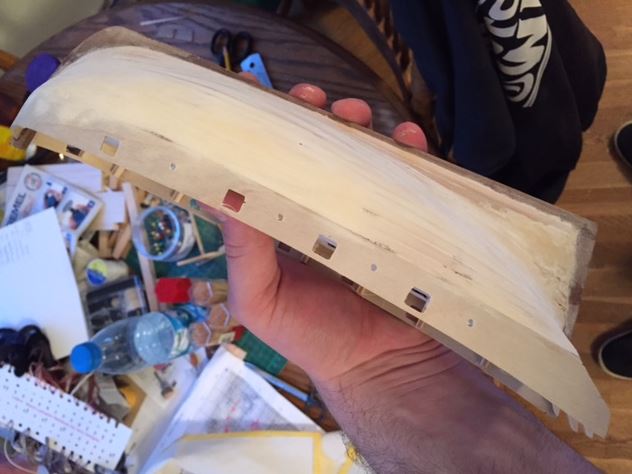
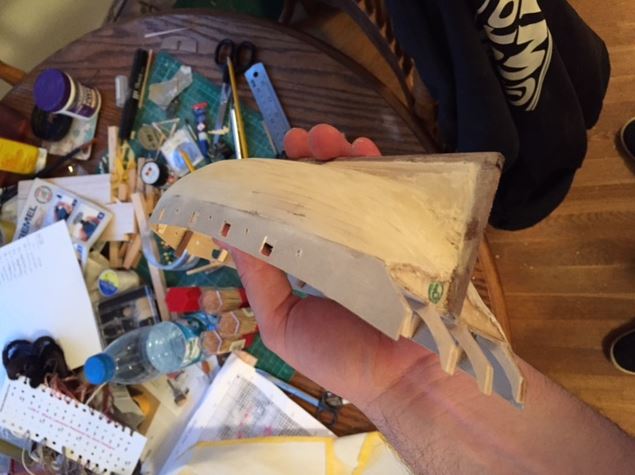
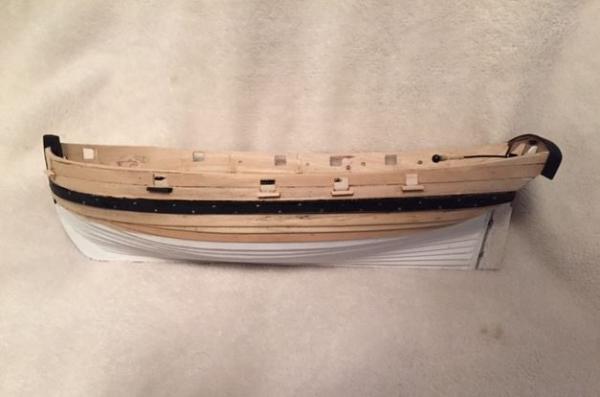
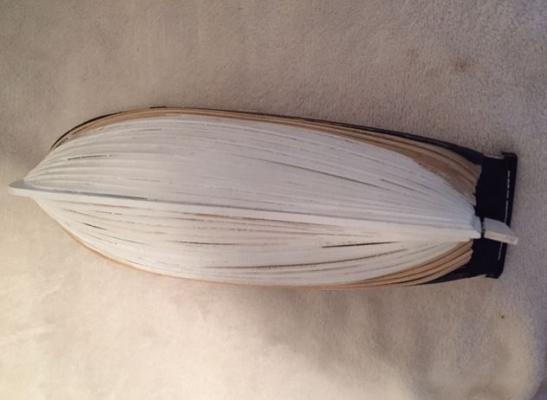
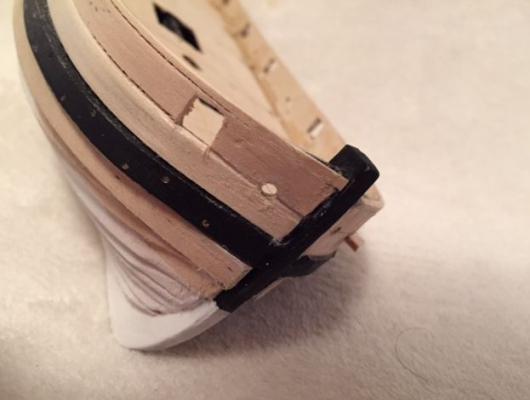
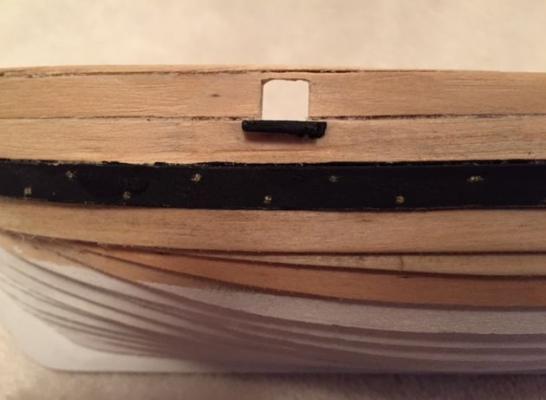
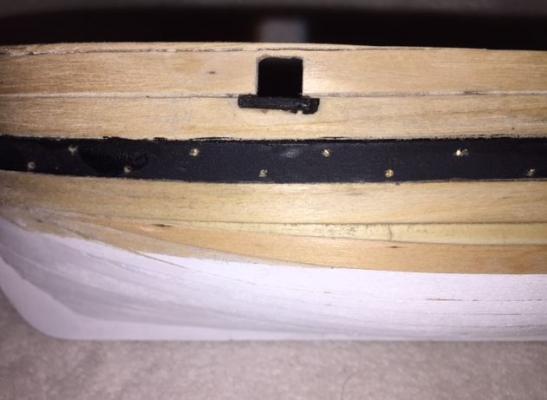
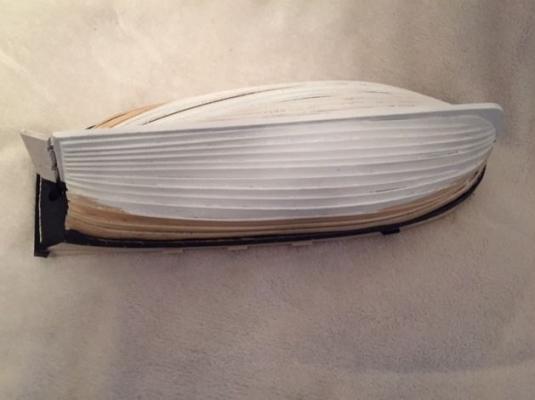
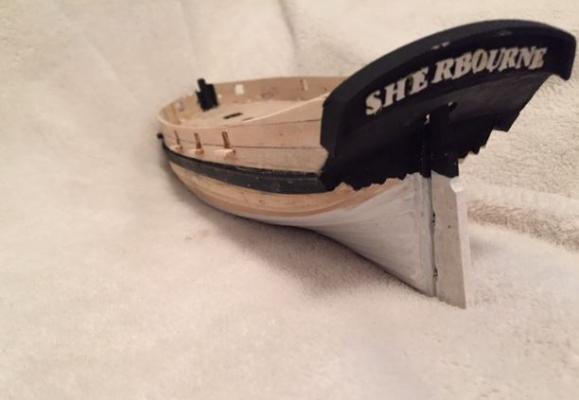
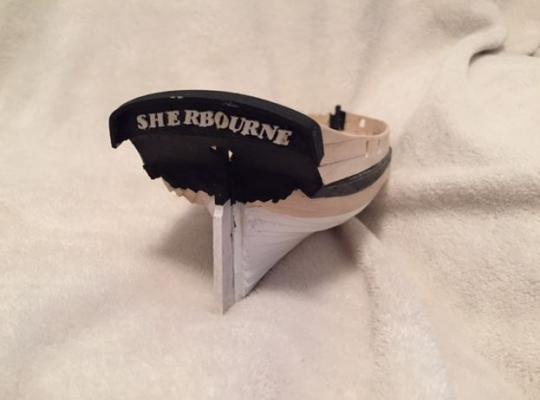
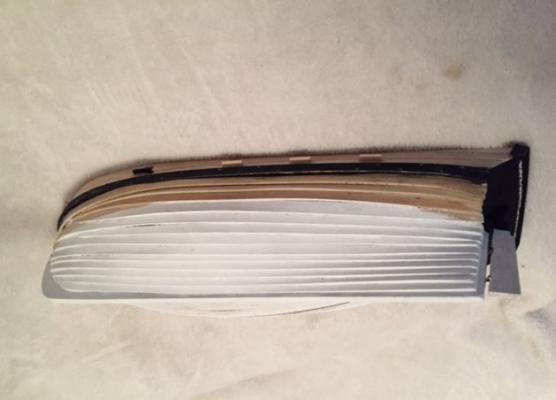
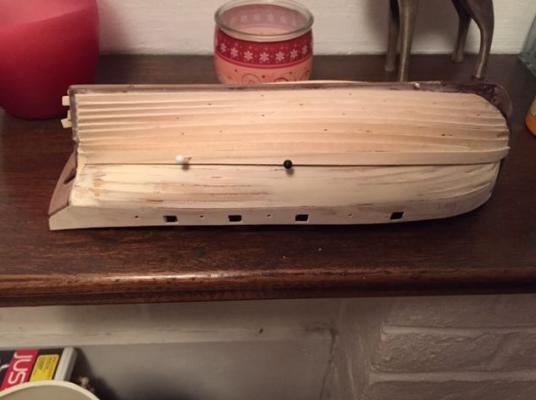
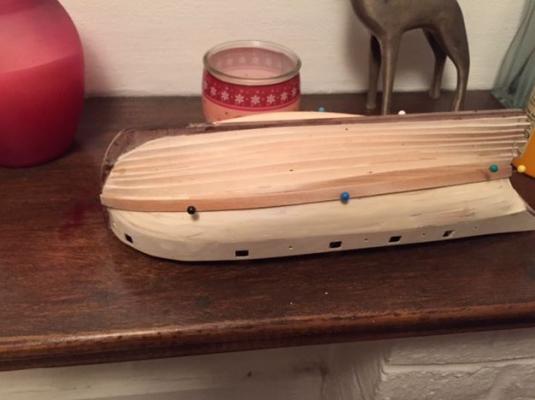
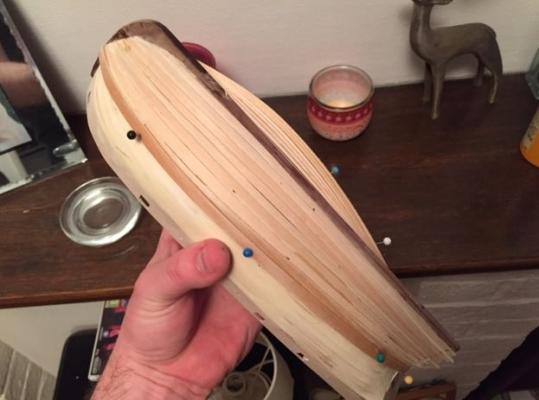
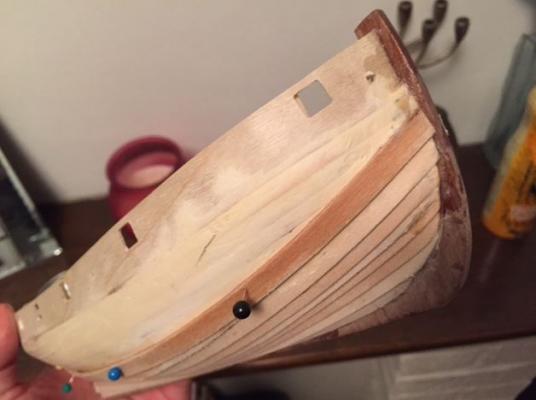
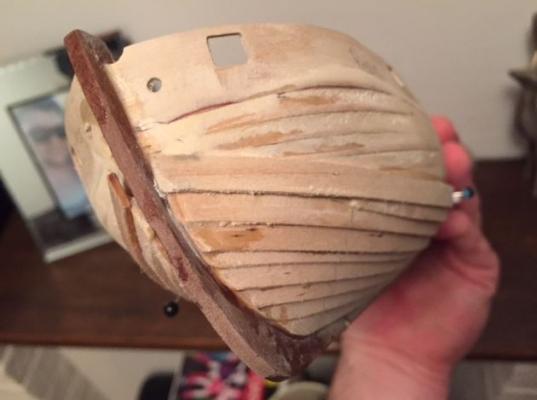
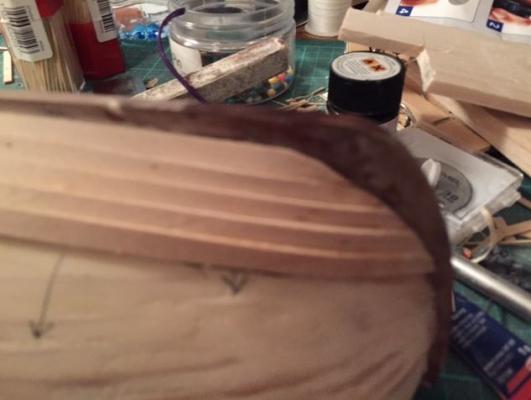
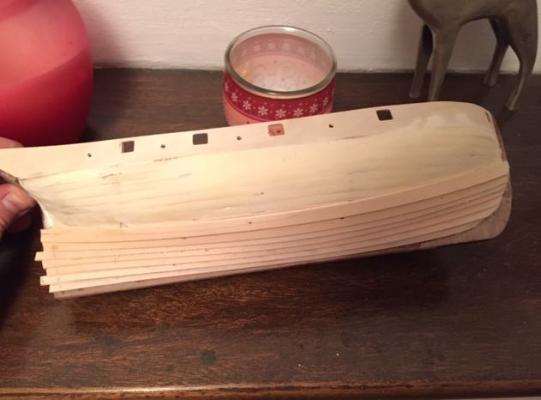
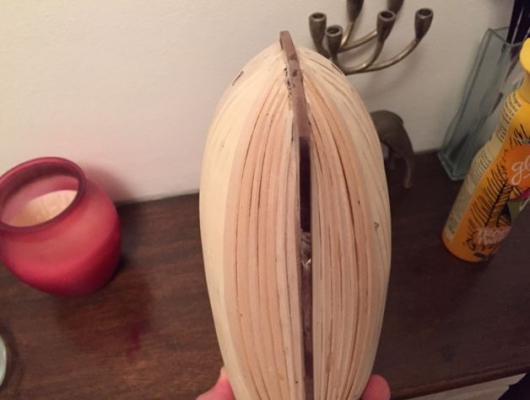
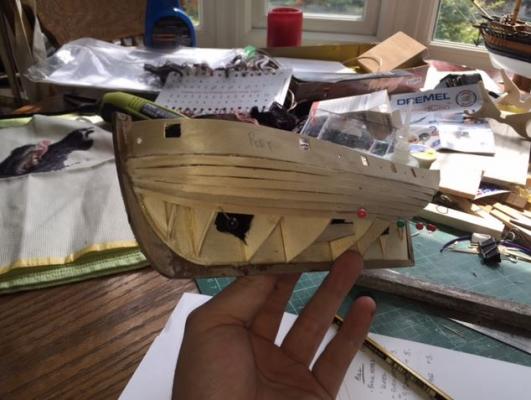
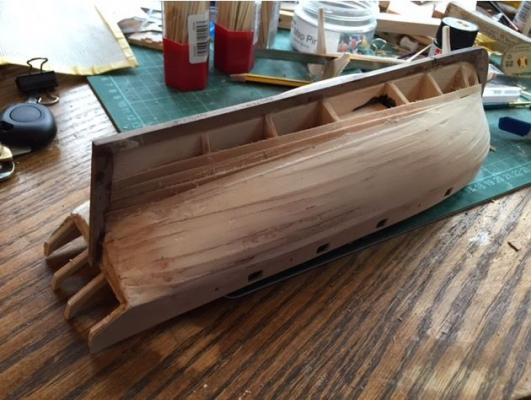
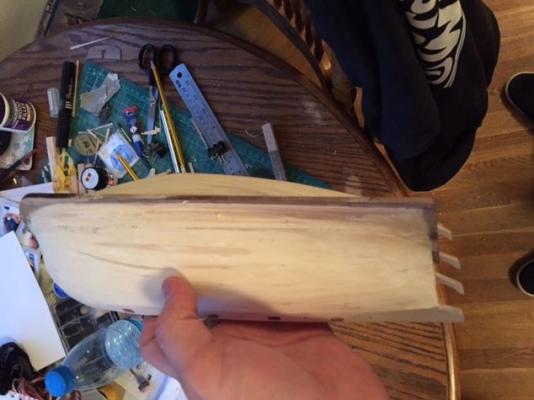
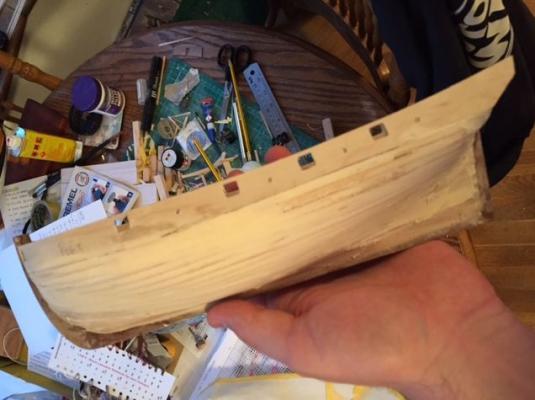
Hi All, The hull planking is now complete. The shape of the hull and lack of spilig further down the hull (in the early stages meant the transom was very difficult to work around, so the job I've done here has taken longer than I was expecting. But in general I am happy with the results. I will need to tart up the stern at some point, and I'm thinking of ways to that presently. Photo update on the hull planking.... I also built the rubber and tiller, and decided from the start that I would not use the kit supplied tiller as it looks awful! I have also "nailed" the wales down with brass rod. They look good, but with the occasional knock and repaint, some of them have been lost.... Next phase is to build up the bulwalks and cut all the rollocks through the basswood. Cheers Jonny


- 188 replies
-
- 3
-
-
- Sherbourne
- Caldercraft
- (and 2 more)
-
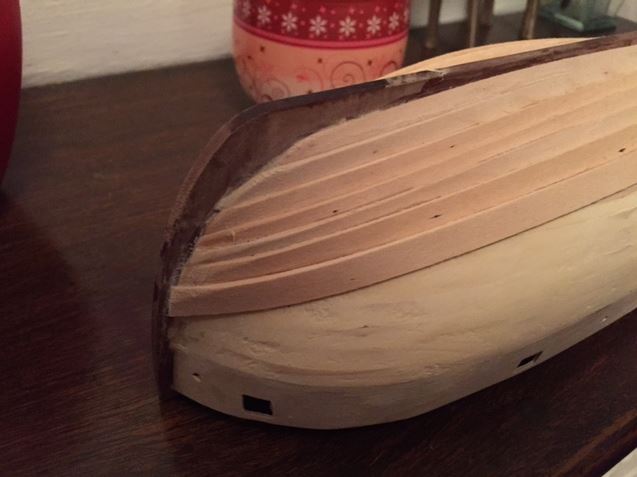
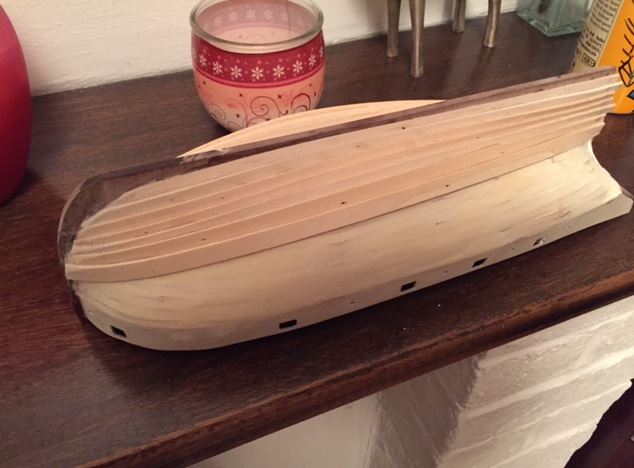
Oh! Jason I didn't know that! Well, I would have done that if I had known that! Haha I've planked the topsides, and finished the clinker planking. I'm in the process of clearing up the gun ports, so I'll post photos later on or maybe tomorrow. Cheers Jonny
- 188 replies
-
- 1
-
-
- Sherbourne
- Caldercraft
- (and 2 more)
-
I wouldn't dream of giving away one of my luscious cupcakes to the dog, let alone the Admiral! Haha I couldn't find a small enough tin of Stain in the right colour at the hardware store. The colour I wanted was only available in 1, 2, and 4 gallon buckets!! So painting the wales was really my only option! There's nothing wrong with baking, I love it, and brewing beer and (proper) cider!! My last batch of "gut rot" cider has an average alcohol content of 9.8% (11.2% proof US)!! It was good, but gave a serious hangover the next day!
- 188 replies
-
- 2
-
-
- Sherbourne
- Caldercraft
- (and 2 more)
-
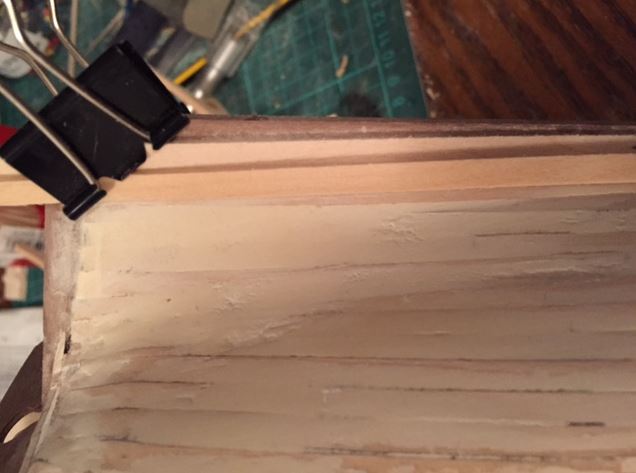
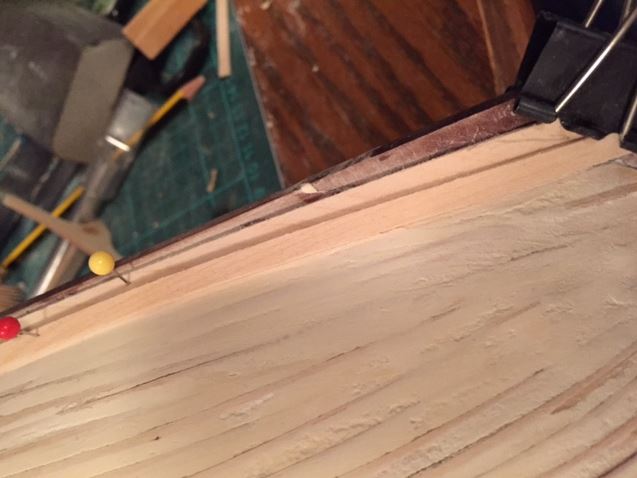
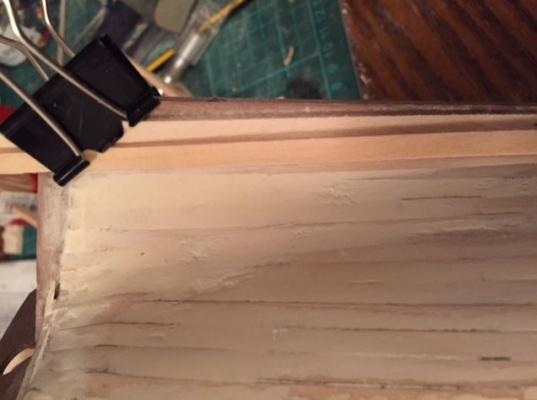
Hi All, Closing up the gap between the wales and the clinker planks today, and hopefully I'll be able to get the air gun out and spray the u/side white. Main focus for the day will be closing up the gap, and planking the topsides. Progress is slow today as we're looking after the Mother in Law's old fat and smelly Jack Russell, who rather ironically is called Tiny. She requires attention all the time, and has just spent the last 15 minutes asleep on my lap as I've tried to work on Sherbourne!! Cheers Jonny
- 188 replies
-
- 2
-
-
- Sherbourne
- Caldercraft
- (and 2 more)
-
Hi guys, I got the Wales on both sides last night and painted them black. Ebony Wales were not an option as the stuff I was looking at was far too expensive and had a lead time of 4 - 6 weeks as they had to come from the States. I was planning on ordering ebony strips from Stewart Macdonald (the guitar parts company), so it's been a compromise on price and looks for the more suitable option. I've bought some lengths of 1mm DIA brass rod to acts as bolts on the wales. I've got the port side bolted on, so I'm now off to do a bit manly cupcake baking! Cheers Jonny
- 188 replies
-
- 2
-
-
- Sherbourne
- Caldercraft
- (and 2 more)
-
Mike / Gundorph, Thanks for the kind workds and advice! I really should have bought AOTS before taking on this Clinker Planking venture!!! I'm leaving work today fairly early, so I'm hoping to get a fair bit done tonight. I got the planks for the wales soaking in water last night, and I'll get the bending iron out later on! When I get the wales in place, I can work out the shape of the last plank(s) to fill the gap. Does anyone have an idea of how to trim the width of a plank down a bit? I'd like to drop the carvel planking down to 4mm width strips rather then the 6mm used for clinker strips. Is there a special jig I can build to do this, or will something like a carpenters scribe do the job? Cheers Jonny
- 188 replies
-
- 2
-
-
- Sherbourne
- Caldercraft
- (and 2 more)
-
Kester, That is exactly the reponse I wanted! You Sir, get the gold star! So that means I have one plank left before taking on the wales! Woohoo!!! My next question is about fixings. I'm thinking about buying some brass rod (0.5 or 0.75mm DIA) to "copper nail" the planks. Is it possible to blanken the brass once they are in place? Will the blackening fluid corrode the basswod? Or am I better off using wood filler mixed with a black paint? Cheers, Jonny
- 188 replies
-
- 1
-
-
- Sherbourne
- Caldercraft
- (and 2 more)
-
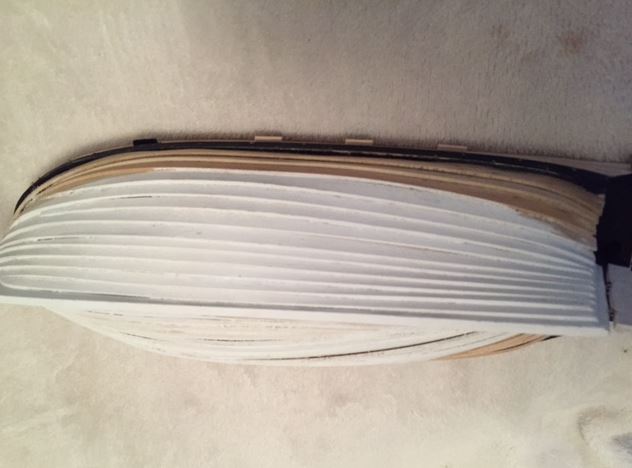
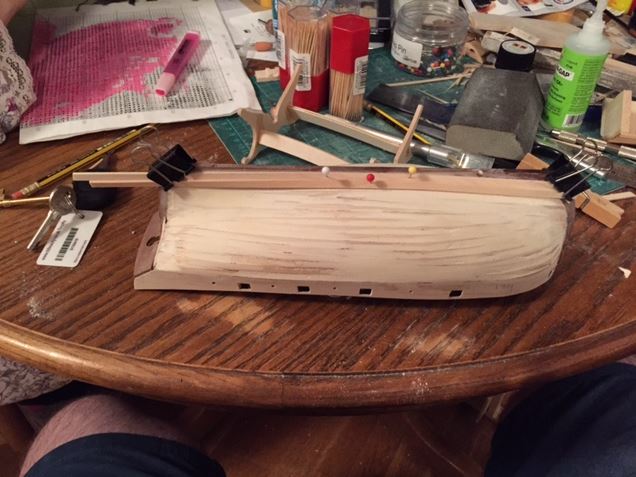
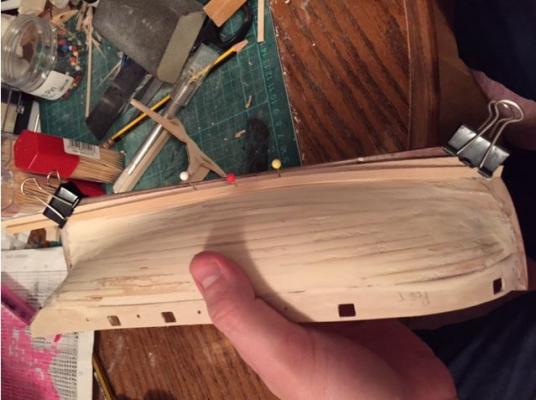
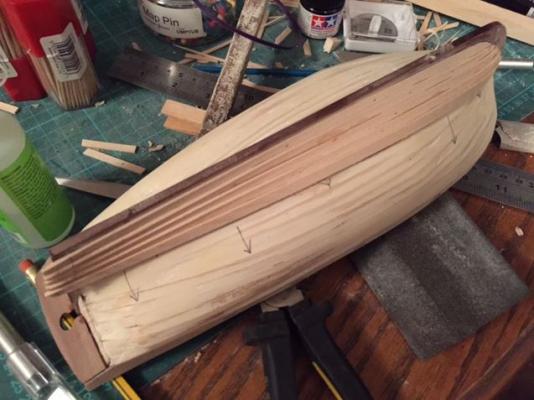
Clinker planking update.... Planks 8 & 9 (from Wednesday night) are on both sides. To reduce the curve of the planks around the waist, I placed a stealer along 2/3's of the length ship, which has pretty much bought the Bow and Stern ends of the planks in line with each other. My next step will be to build up the Wales and to clinker up to them. From that point onwards I am a bit hazy on whether I clinker or carvel the topsides. I will make this decision over the weekend, and I guess a bit of reading around will be required for that! Anyway, here are the photos.... Cheers, Jonny

- 188 replies
-
- 4
-
-
- Sherbourne
- Caldercraft
- (and 2 more)
-
Mike, Thanks for the kind words! I've never clinker planked a model boat before, so it's a steep learning curve for me! My method of doing 2 planks a night seems to be working well, but I had to spend my night doing other things last night! I see in your photo's that you clinkered up to the wale and then carvel planked the topsides. Am I correct in thinking that is the way to do it? Cheers Jonny
-
Another thought - Wales on a clinker planked ship..... Are they required? How do they fit on the ship in relation to the clinker planking? I'll be getting to that stage soon guys, so a quick responce would be greatful! Cheers Jonny
-
Hi All, I will post a photo update tomorrow. I got planks 8 & 9 on both sides last night, with plank 8 being a spiled plank. I'll hopefully get a few more on this evening before I have to go out. Cheers, Jonny
- 188 replies
-
- 1
-
-
- Sherbourne
- Caldercraft
- (and 2 more)
-
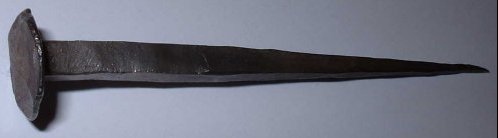
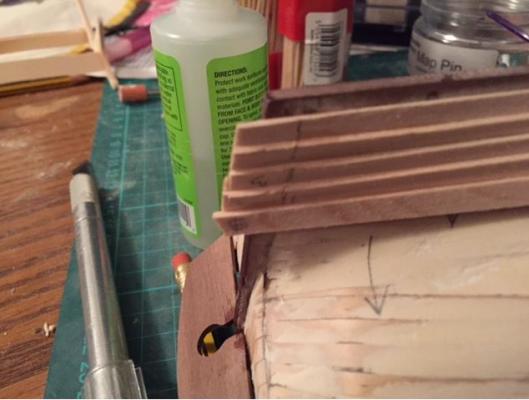
Morning All, I have a question on fixing's of the Clinker planks. Would the planks be pinned in place with tree nails, or would they use Iron or Copper nails to hold the planks down? If the planks are treenailed, are they nailed with one treenail, or more at the frame? The same question goes for the iron or copper nails. And last question, if I decided to use Iron or Copper what would be the best method and material to use? I'd like to show the head of the nail like shown below in the photo! Cheers Jonny
-
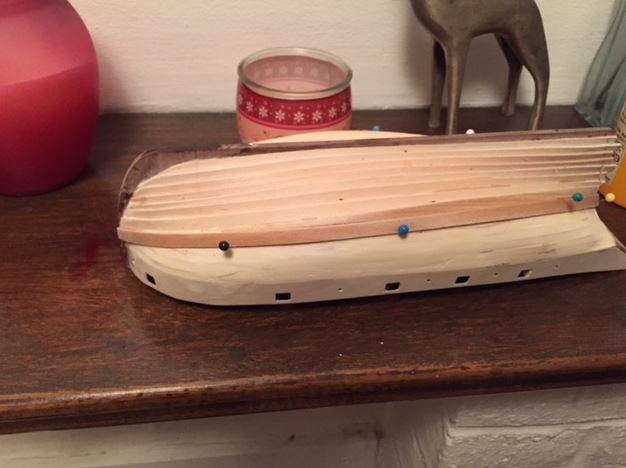
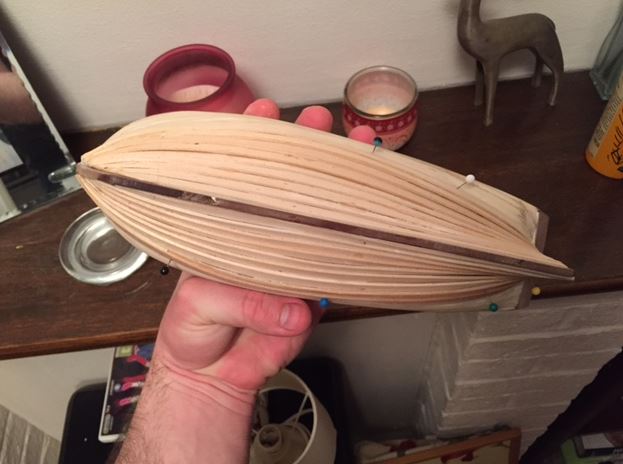
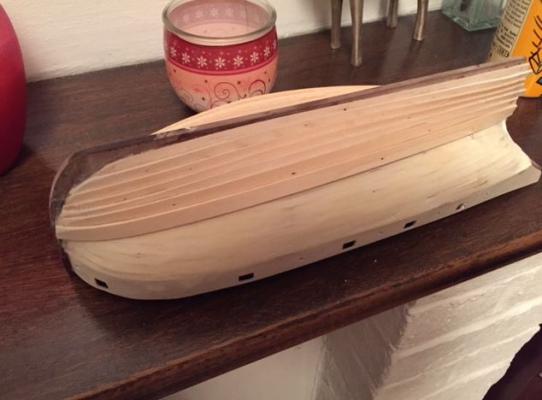
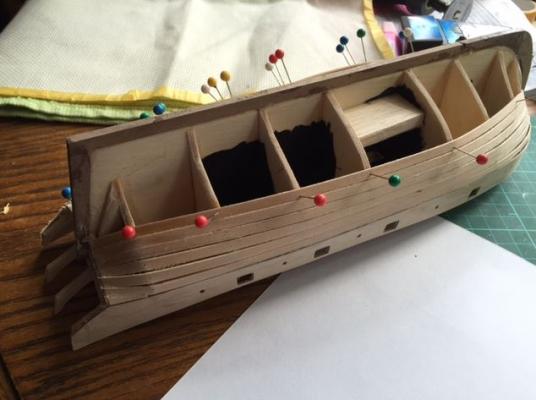
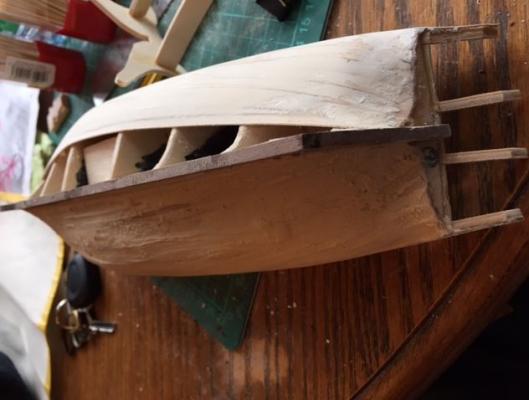
Morning All, Clinker Planking Update...... I recieved my basswood package yesterday, and realised (as stated above) I had bought far too much of the stuff for this model, so I have a surplus of basswood for the next few models I'll work on, if I can get the Admiral around the idea of another build! Might sratch something up? Who knows?! I also realised the stock I bought was 1mm wider than the original 5mm wide planks I started planking with, so I picked up the phone, spoke with my Grandfather (the ex boat builder) and discussed the implication of the of the wider planks. He told me it wouldn't be a problem and the boats he has built in the past have always had thinner planks towards the keel to accomodate the shape of the stern. Mini heart attack over! The next time I am ordering stock at work I'll have the sizes of the materials scribbled down somewhere for reference. So last night I evened up the planking on the starboard side of the model to match that on the side. I then soaked the lengths of basswood to make them pliable. I noticed that they take in the water very well, and become flexible enough for use in about 10 minutes. The wood that has been soaking for longer gets very springy, and doesn't hold its shape very well unless it is given a bit of persuasion! The following photo's show the progress I've made so far. My next step will be planking round the counter and evening up the planks so they are not so 'rounded' at the waist of the ship as can be seen in the 11th photo. I've attached a pdf of the two planks I need to cut to even up the 'dip' along the waist of the hull (fattest part). I'm assuming it will be a case of inventive spiling and maybe the use of a few stealers, but I couldn't fingue it out last night, and scrapped 2 planks by trying to make them fit! Clinker_011.pdf Any suggestions? Cheers for now. Jonny


- 188 replies
-
- 5
-
-
- Sherbourne
- Caldercraft
- (and 2 more)
-
Well I completely over estimated the number of Basswood planks I would need for this model! I ordered sixty 600mm lengths thinking I'd need that many. But I forgot the hull is under 300mm so I've got more than enough Basswood to build another 5 Sherbourne's!! Oh well! I've evened up the planking on the starboard side of the hull, and have got planks 6 and 7 on each side. They are following the lines of the hull nicely, but as I'm coming around the waist and the stern the planks will need some spiling to fit nicely. Overall it's looking pretty good so far! Cheers Jonny
- 188 replies
-
- 3
-
-
- Sherbourne
- Caldercraft
- (and 2 more)
-
David, I had the day off on Friday, and spent most of the last weekend working on Sherbourne! I've clocked about 32 to 40 hours in the last 4 days on the model!!! Doh!!!! Hahaha I don't know about that!!! Bu don't rush to finish your Ballahoo, enjoy it! I enjoy working on these models, and the Admiral can't pull me away from them!! Whilst I was building Convulsion I stayed up well past my bed time (to about 2.30am) just doing odds and sods on the model! I got in a fair bit of trouble for doing that!! Haha I just get so engrossed in it! I'd sell my soul to do this for a living! Cheers, Jonny
- 188 replies
-
- 2
-
-
- Sherbourne
- Caldercraft
- (and 2 more)
-
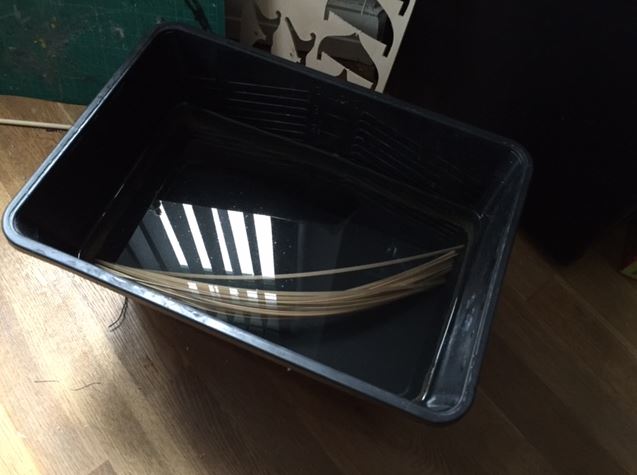
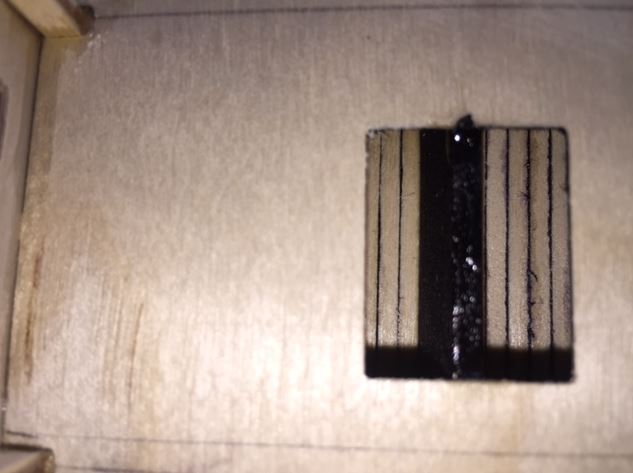
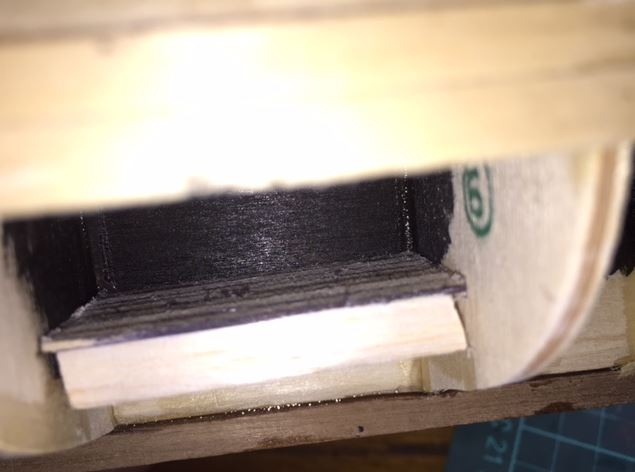
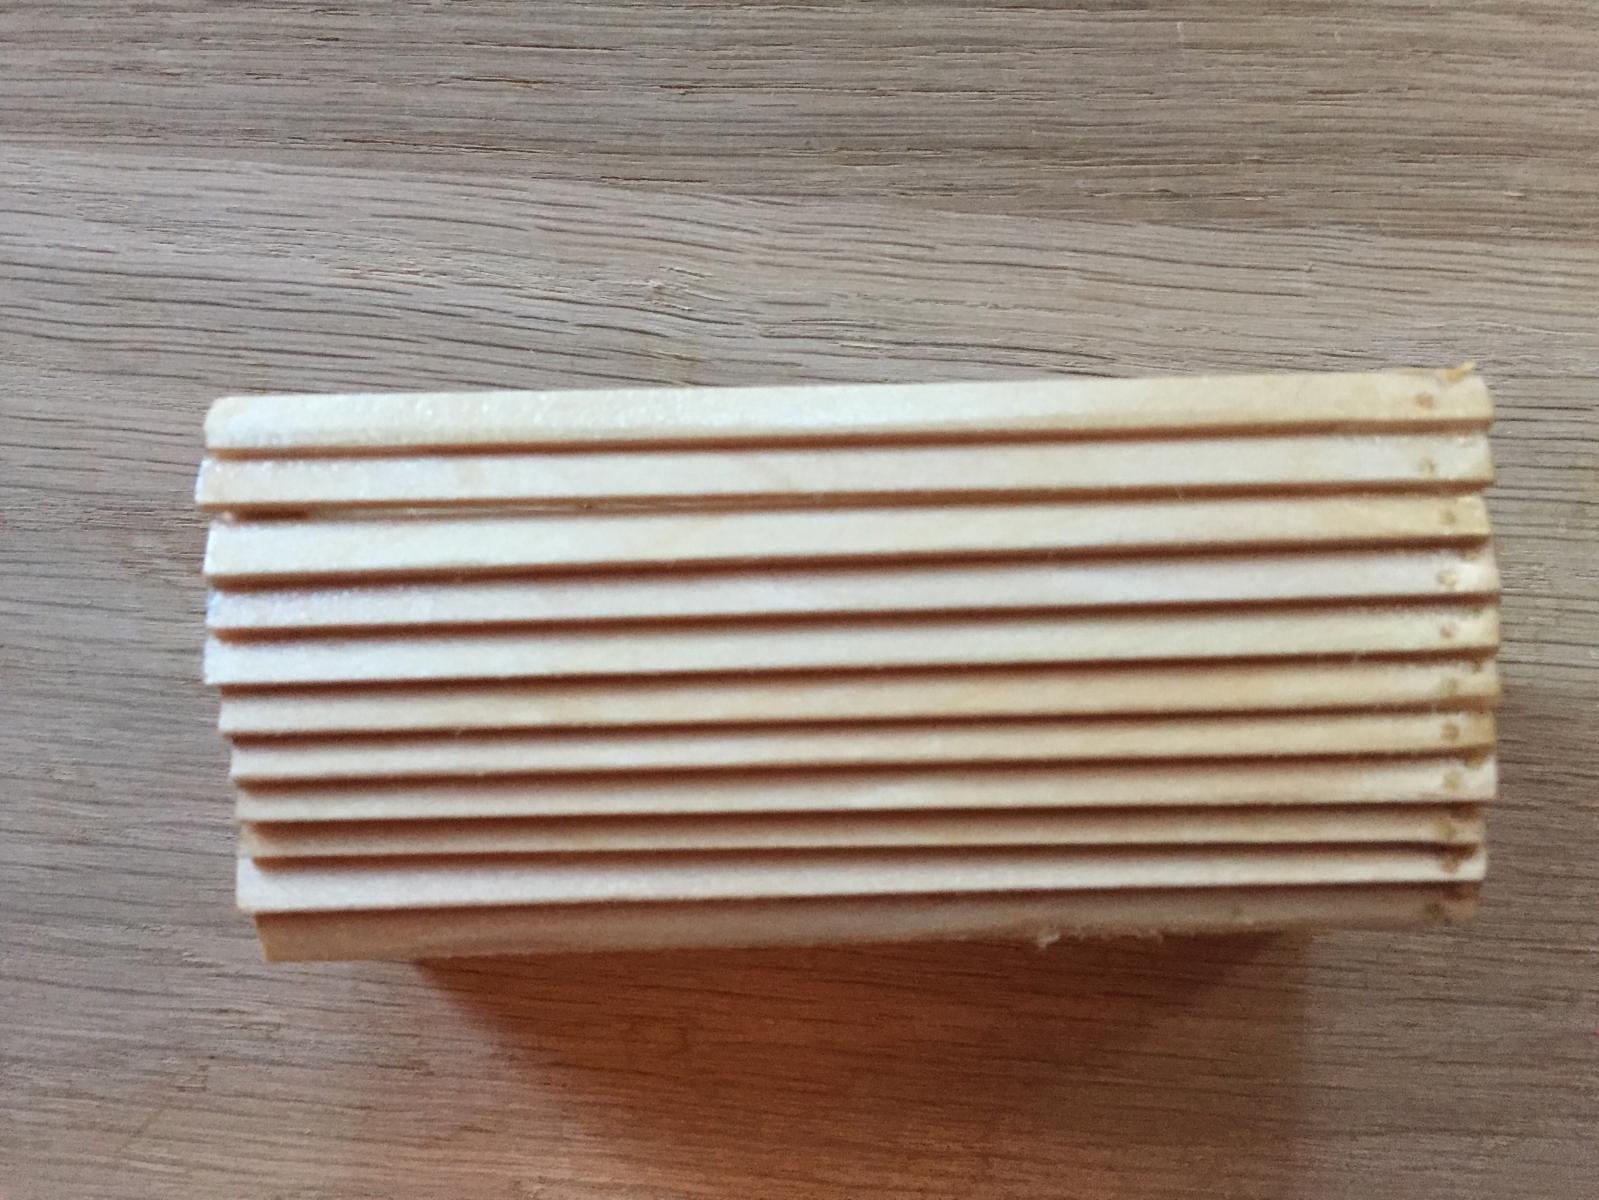
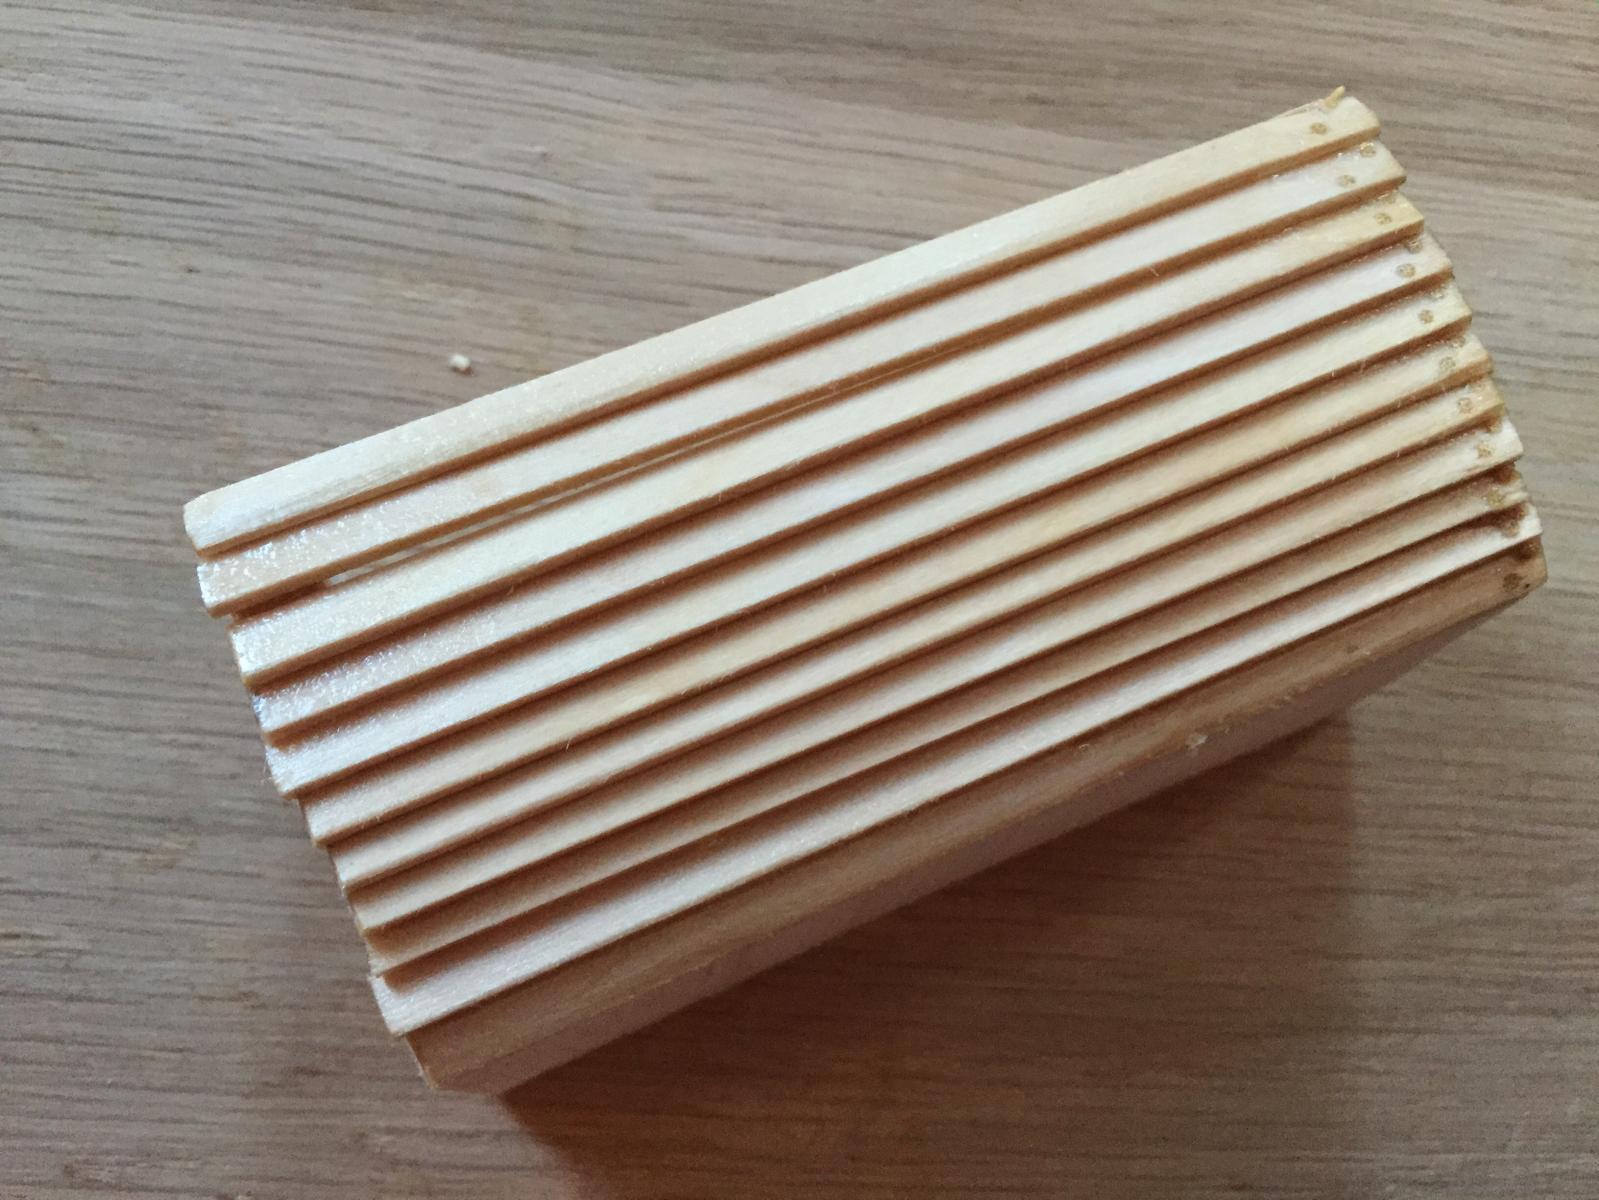
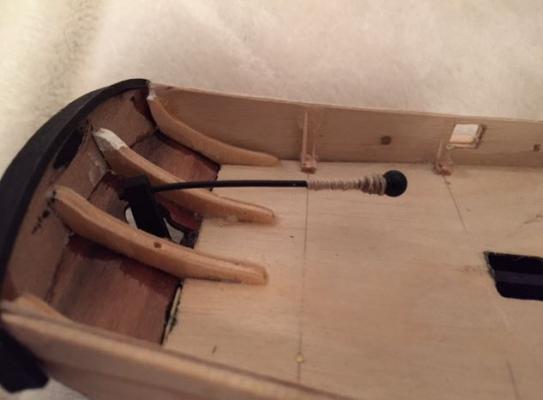
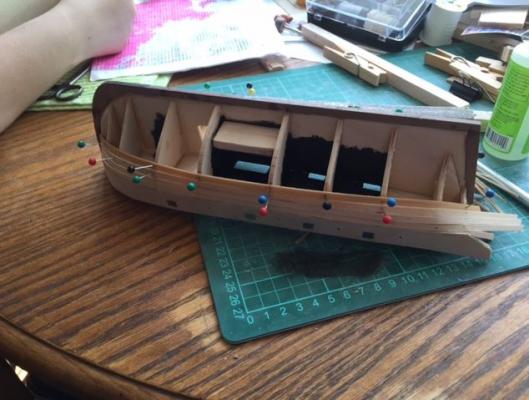
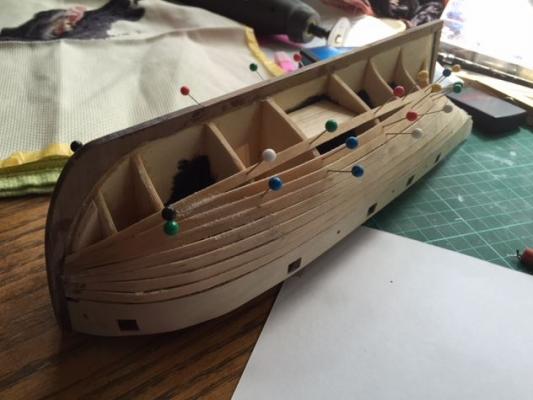
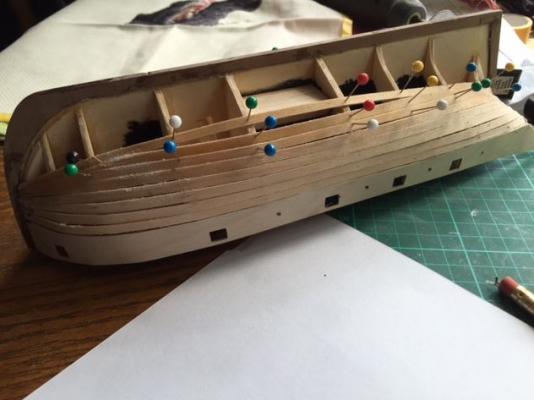
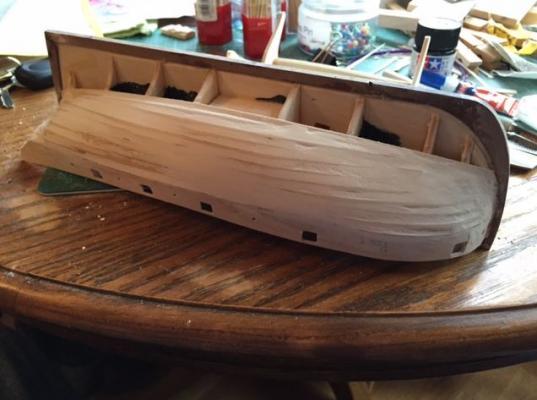
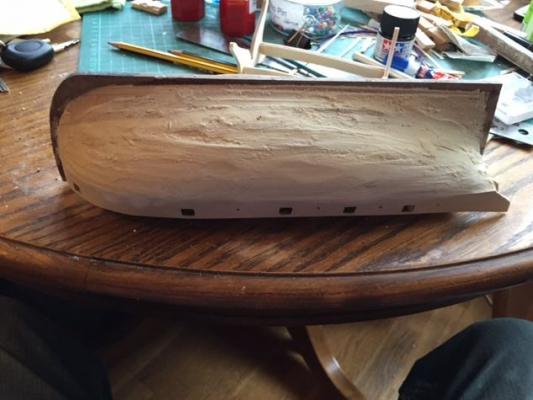
Retrospective Photo Update No. 2 First Layer of planking...... All of you who have build a Caldercraft kit before know that the first layer of planking is done with 1mm thick Lime planks. When I started building President (late 2013) I bought a big rectangular decorators bucket capable of holding 15 litres of paint/water (approx 4 Gallons), which I use in the early stages of my build as my plank soaking tub. The bucket is about 70mm shorter then the planks supplied with the kit, meaning a natural bend is forced in to the planks when submerged in the water. The planks are soaked for 24 hours (plus) until they are pliable. After this soak, I can bend them through 180 degrees and the planks won't split. The planks never leave the water until they are needed! It makes planking very easy. So I decided to paint the areas around the deck opening's matt black so the Plywood keel and bulkheads wouldn't show through after the build was complete. At this point Lucy (the Admiral) asked me "if this would be my last kit for a while"? To which I replied, "I don't know darling, I would like to build another kit...", pulling out my iPhone I show her Steve Priskie's build of HMS Snake on YouTube, telling her I'd like to a similar thing (basically meaning I want to build HMS Snake next)! At which point we discussed the pro's and con's of building another model, and also discussed the aspects of the model Steve Priskie had included in his HMS Snake build, such as Spar Deck/Hold under the false deck. To which Lucy suggested I do the same. I told her it was too much work to completely remodel the interior of Sherbourne, but it was possible to add false decking under the hatches to simulate the decking below. The following photo's show the false Spar deck. The support block was made from some rough cut Balsa block (10mm thick) cut to a 45x45mm square and split down the middle. The planks were some 4mm wide Basswood I found lying around, and the caulking was represented with the tried and tested (and sworn by) method of permentant marker on the edge of the plank. The next series of photo's show the planking of the hull. I've not been terribly neat with the first layer of planking because it will never be seen, and any gaps can filled with wood filler! First Layer done, it was time to scrape on a load of filler, wait for it to dry over night, get up, go to work, come home, take the bins out, wash dishes from previous night, cook dinner, eat, wash up, sand down the hull, go for a cigarette, wash the hull off with damp cloth, mock up clinker hull, sand down the hull, wash off again, sand down again to get nice and smooth, wash off, cigarette, put the washing on, watch a bit of tv, sand a bit more. After that I decided to try the clinker planking for real (by this time it's 10.30pm and I should be in bed), and cut the first 5 clinker planks (from the keel upwards) to the correct sizes and pinned them in place thinking I would leave it at that..... But my excitement got the better of me, and I glued the planks in planks. I'll post the Clinker Planking photo's tomorrow aft I've matched the planking on the Port side of the hull to Starboard. Cheers, Jonny


- 188 replies
-
- 5
-
-
- Sherbourne
- Caldercraft
- (and 2 more)
-
David, I was looking forward to the Group Build, but I wanted to ensure the model was safe if we have move house. To be honest, I'm doubting we will move house when the tennancy is up, but it's our Landlord decision - we live 40 minutes outside London by train, so if the Landlord has another tennant in mind who is willing to pay more then we are then he/she can ask us to leave. That is the situation I'd like to avoid, so fingers crossed that will not happen! Haha yeah I get in to the zone fairly quickly. I grab a drink (beer, cider, wine or coffee), put on some music (usually Rock and Classic Rock), and settle down to a few hours work. Although since my back operation, I've not been able to do stints on the model that are too long, my back starts cramping and I need to stretch it out and walk around. Cheers Jonny
- 188 replies
-
- 1
-
-
- Sherbourne
- Caldercraft
- (and 2 more)
-
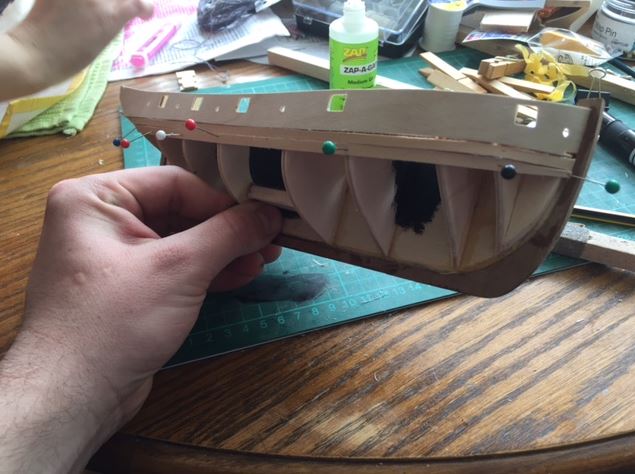
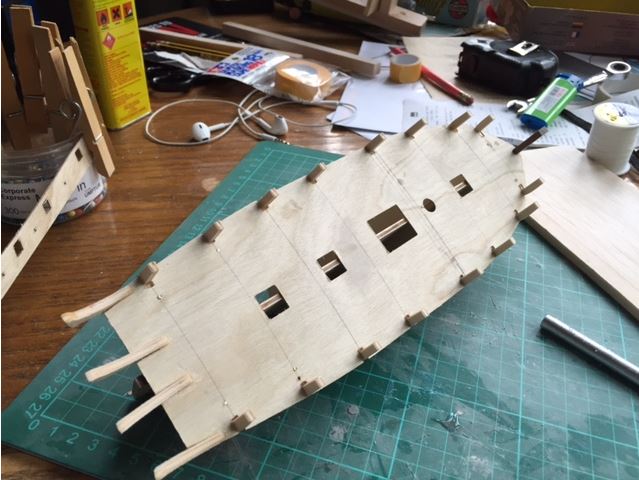
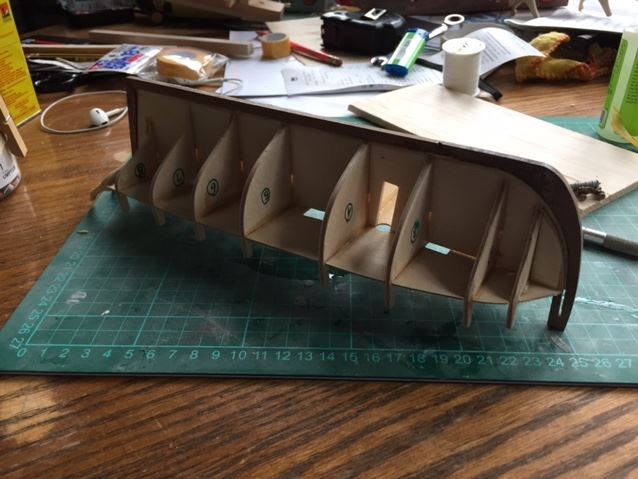
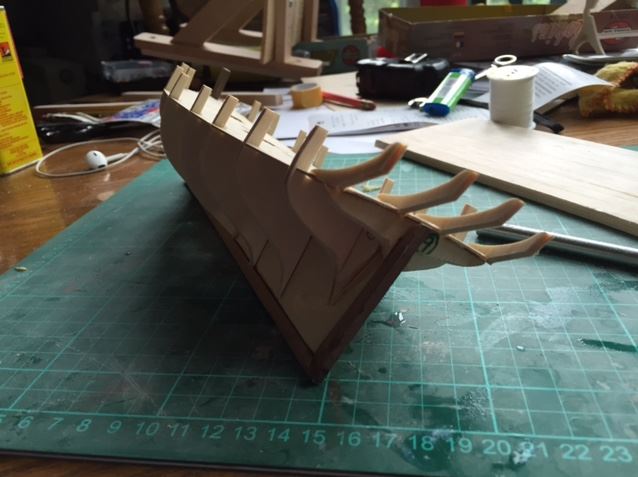
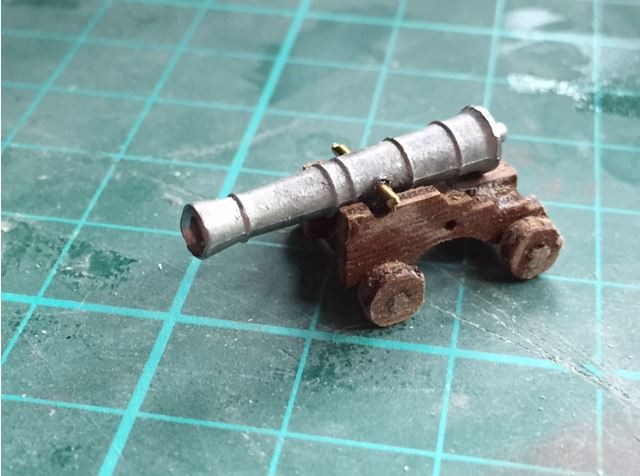
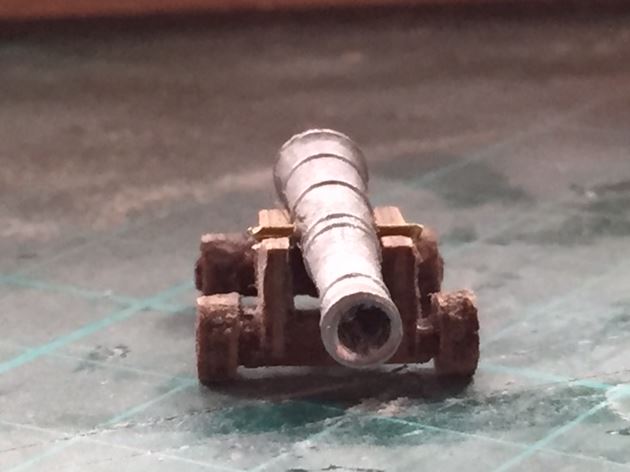
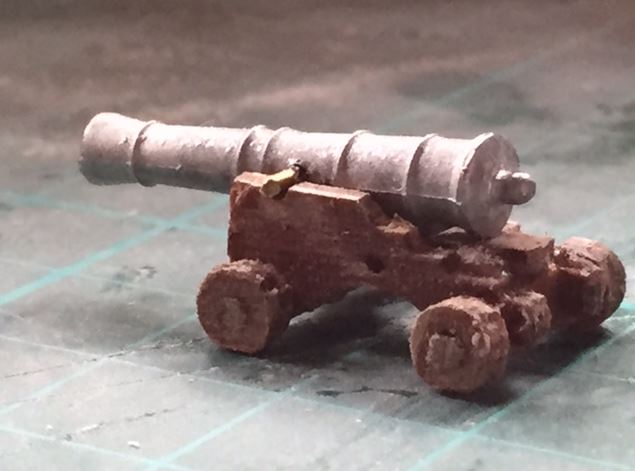
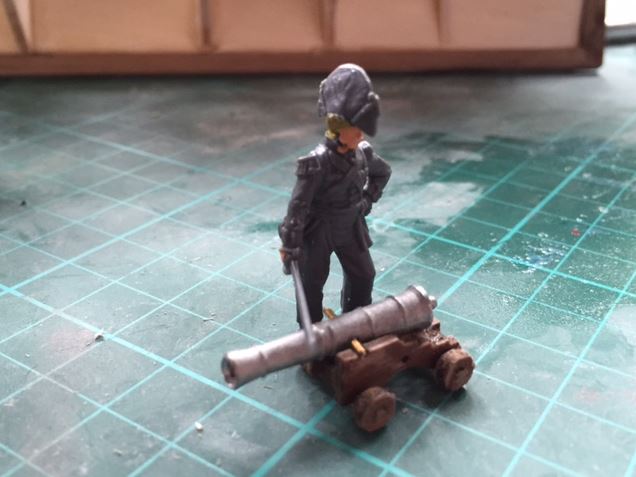
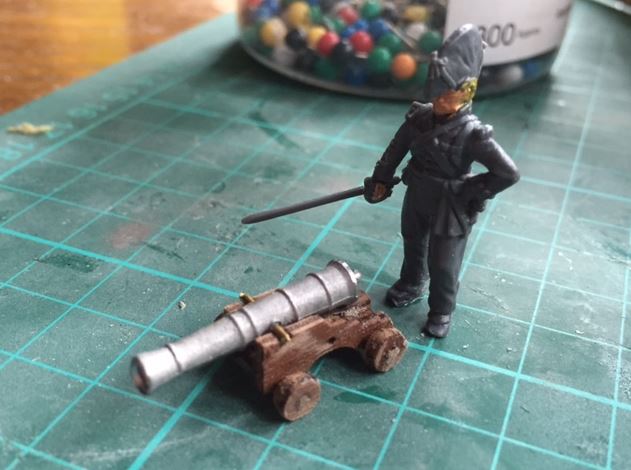
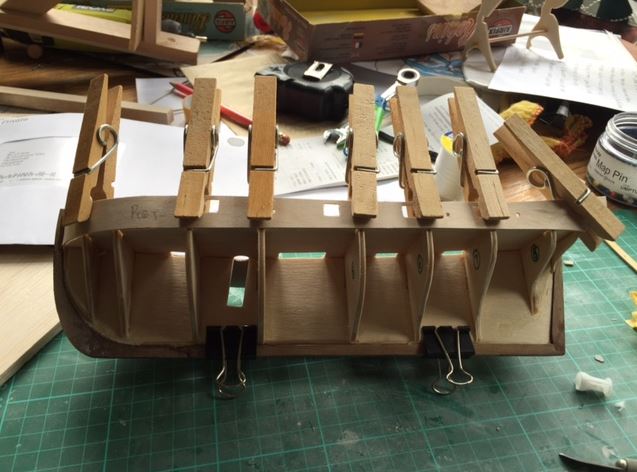
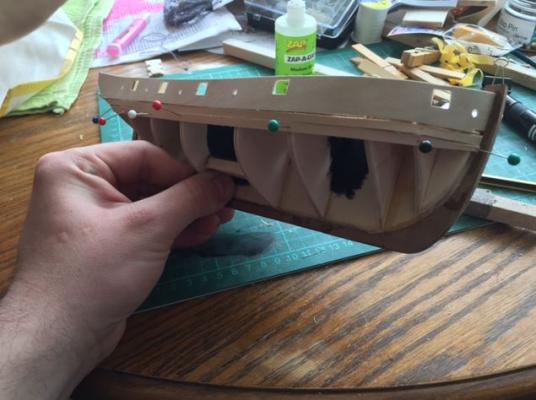
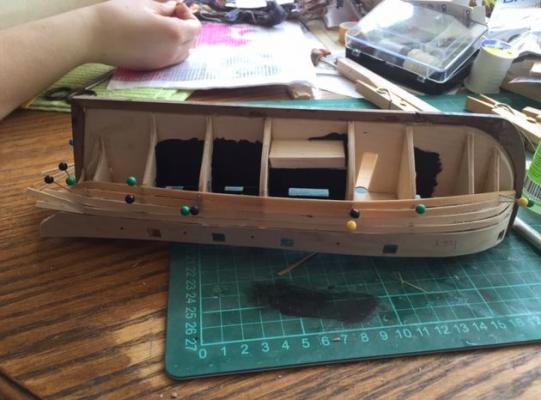
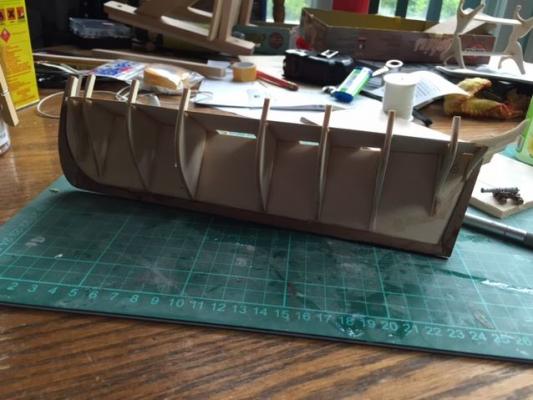
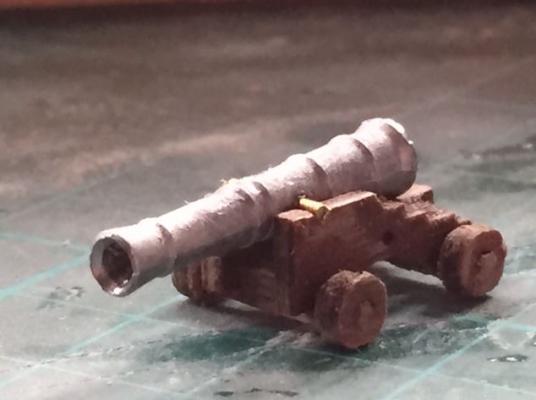
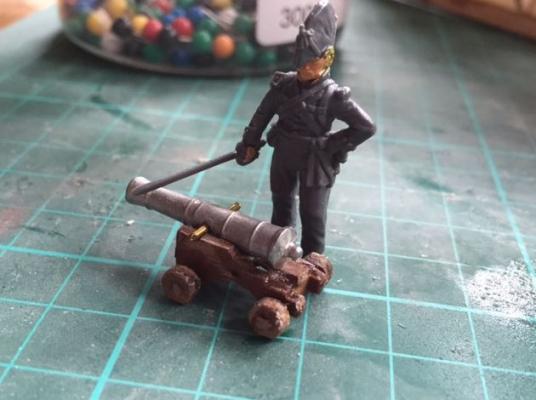
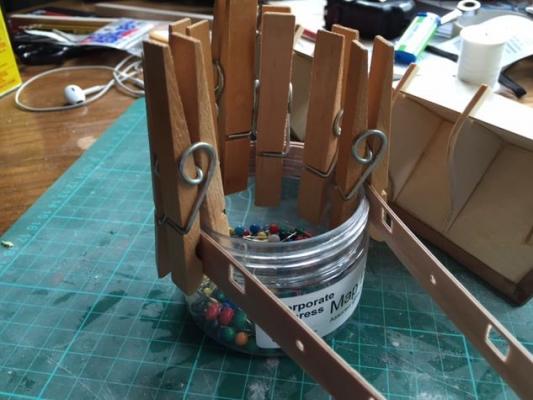
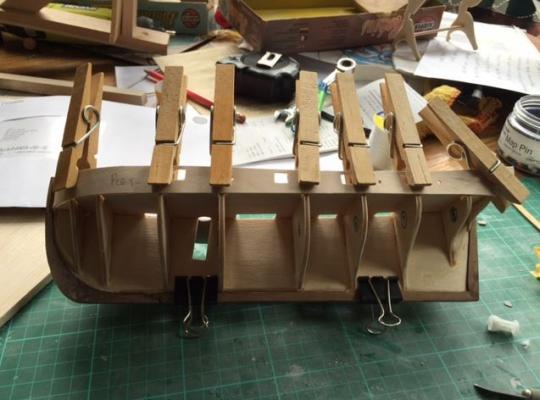
Retrospective Photo Update No. 1 I don't have many pictures of the keel assembly, or the bulkhead assembly, as it was done over a few weeks as "sneaky" little bits to work on whilst waiting to kick off the build. The photo's below show the false keel, bulkheads, false deck, and the plywood keel all assembled. Next I built up the Test Cannon for the gunport strip. This was much antisipated, but proved to be bit of an anticlimax, as most of white metal castings were of terrible quality, one cannon iscompletely disjointed with a 1.5mm overlap between cannon halves (a photo will come in due course). I will email Jokita in the week and ask for new set of guns to be sent through - preferably brass. I had an idea to drill out the centre of the gun to a depth of 10mm, which worked up to about the depth of 8mm before the gun got too hot to work with in my fingers. I think it looks better like this, but I'll look to replace the cannon barrels later on. I also noted how small the 3 or 4 pounder guns were, and can be seen in the photo's below. The scale figure is 25mm (without hat) and the barrel isn't even at waist height of an average sized man.... Must have been shorter back then?! With the cannon built, I soaked the gunport strip in water for 1 hour and bent the former around my pot of pins and pegged it down over night. Having left the formers overnight, I pulled them off the pin pot and lined them up with the cannon at the stern gunport. Pegging them in place, I dabbed them with CA glue on the bulkheads and left them to dry for an hour. The gun ports line up nicely in the bow and stern, and hopefully will be strong enough when I cut out the supporting bulkhead uprights. Round 2 of the Retrospective Photo Updates to come later!! Cheers Jonny


- 188 replies
-
- 5
-
-
- Sherbourne
- Caldercraft
- (and 2 more)
-
Kester, Thanks for the really useful information you have provided. I will keep the Topmast in the original orientation, especially as it is accurate for the period. I have made the decision to go down the Clinker route as it looks beautiful, and I've seen your build and I was very impressed with the aesthetics of the clinker hull. I started clinker planking on the starboard side of hull last night (5 planks in total) - gave it a go by pinning the planks down with a 1mm overlap. They've been tacked down with small spots of CA glue for now, so they will be easy to remove if necessary. It was a lot easier than I was expecting, but stealer's will be the next challenge. I spoke with my Grandfather last night (he was a boat builder for most of his life) and he gave me a few tips for planking the hull. I fitted the gunport strip with the test gun I built up from the kit, and everything seems to be straight and true, and fitting nicely. Which is huge sigh of relief! I also used my Dremel to cut the bulhead uprights, leaving about 0.5mm of plywood to support it. I'll break these off tonight when I get home from work! Cheers Jonny
- 188 replies
-
- 4
-
-
- Sherbourne
- Caldercraft
- (and 2 more)
-
Eamonn, I'll be using the kit supplied wood for the deck planking - purely to save a few pennies here and there. I built up a test gun for the aft most gun port (which I'll add photo's of later on), and theres plenty of room around the barrel for the 0.5mm increase of height for the deck. I'll be adding an edge beam/waterway out of the 2mm thick stuff, but it will be sanded to match the thickness of the deck planking. Haha I'd hope not, but having had the Caldercraft experience with Convulsion, I've learnt from the all the mistakes I made on her to "refine" this build process! Also getting in 'the zone' and spending a few coffee fueled hours working away really helps. For me, this is the easy part, the Kit Bashing bit is going to be a challenge, and has already proven to be!!! But more on that later! I'll post my photo's of progress later on, but for now it's back to designing Steelwork Connections for external platforms on a Oil and Gas Production module. Cheers Jonny
- 188 replies
-
- 3
-
-
- Sherbourne
- Caldercraft
- (and 2 more)
-
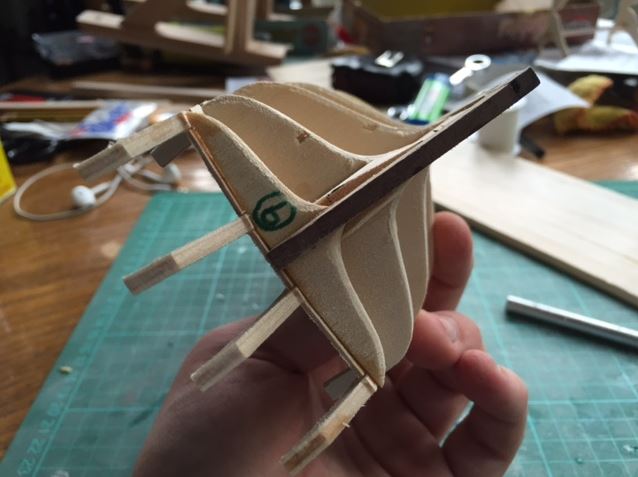
Ccoyle, your Sherbourne is beautiful! You've done a fantastic job there! I'm looking in to the topmost arrangement, and I'll make the decision when I get closer to the time. I've had a go at clinker planking on a quick frame I've knocked up tonight. It's going to make tree nailing a bit difficult, but I'm up for the challenge. Cheers guys, Jonny
- 188 replies
-
- 3
-
-
- Sherbourne
- Caldercraft
- (and 2 more)
-
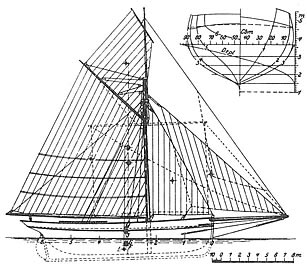
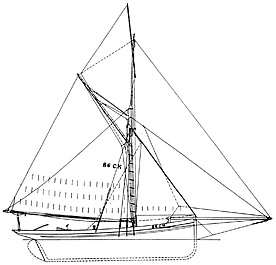
Tony, I have read, and I'm following yours, Gregor's, Dirk's, and Kester's build logs, and each build has it's own twist on Sherbourne which is very interesting. I won't be following George Bandureks book religiously, I'm using it as a spring board for kit bashing idea's!! Haha I hadn't considered what to do with the topmast, but having scanned through your topic, I'll consider changing it to match the contemporary models. Certainly look in to changing the direction of the Topmast - this is in fact in keeping with pilot cutters and smaller vessels of the period and later. From my quick internet search, these images popped up showing the forward facing top mast. The Fife rail is pretty much an additional rack of belaying pins for halyards, sheets and topping lifts. Looking at Pilot Cutters (circa 1890 onwards) the belaying pins are moved inboard from the cap rails to the Fife Rail to ensure a clear path around the deck, to centralise all halyards/sheets/lifts to the "mast base", and subsequently (from a structural mechanics point of view - by the way I'm Civil & Structural Design Engineer) send all of the loadings from the various ropes to the strongest part of the ship. It also means all sail handling is conducted from the mast, and the "roller winch" you build on your model would be used to assist in the manual handling of the sails/spars as well as pre-tensioning and aiding release of the ropes whilst loaded. So I'll build the Fife Rail and Roller on the model, but might have to be creative with the positioning of them as the deck will be quite busy! I'm miles off these sorts of decisions at the moment, so I need to focus on planking for now. Keep up to date whenever you can. Cheers Jonny
- 188 replies
-
- 4
-
-
- Sherbourne
- Caldercraft
- (and 2 more)
-
18th and early 19th Century cutter models
jonny.amy replied to tkay11's topic in Nautical/Naval History
Tony, Thanks for posting this on the forum, it will be a very helpful source of information for my build of Sherbourne. Once I have a spare moment I'll take an in depth look at the photo's and see what I can obtain from them. I'm fortunate enough to have an annual pass to Portsmouth Historic Dockyards, so I'll take some time to arrange a private viewing of any models of cutters they have in their vaults, and if I can get a private showing, I'll post a similar topic with my findings (if that's ok with you guys)?! Thanks for clearing a few details up for me already. Cheers Jonny- 42 replies
-
- 3
-
-
- Cutter
- 18th Century
- (and 4 more)