HOLIDAY DONATION DRIVE - SUPPORT MSW - DO YOUR PART TO KEEP THIS GREAT FORUM GOING! (Only 20 donations so far - C'mon guys!)
×


jonny.amy
-
Posts
346 -
Joined
-
Last visited
Content Type
Profiles
Forums
Gallery
Events
Everything posted by jonny.amy
-
 Haha yeah it's not the most riveting of watching, but it keeps her happy and I get the occasional cake out of it Thanks buddy, I was hoping for savage! It's an Englishism too! Cheers, Jonny
- 188 replies
-
- 1
-

-
- Sherbourne
- Caldercraft
- (and 2 more)
-
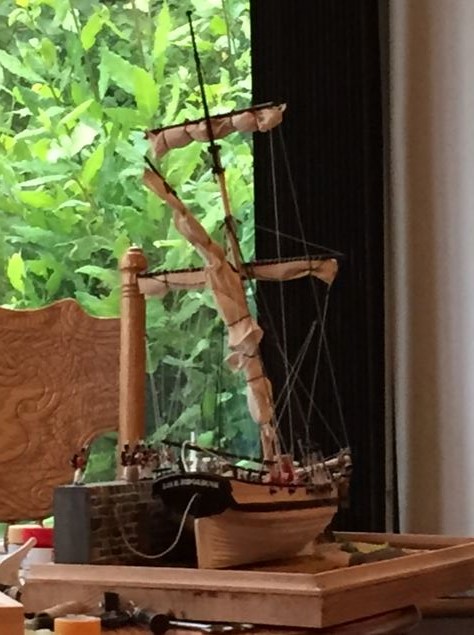
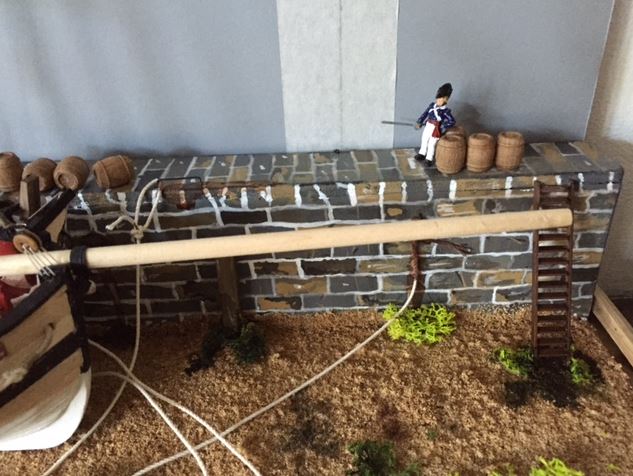
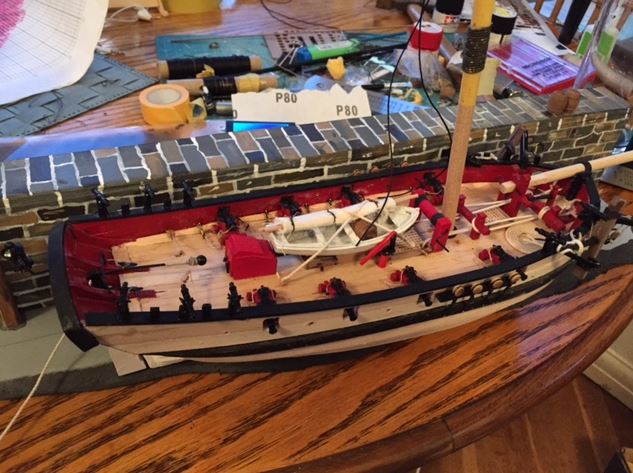
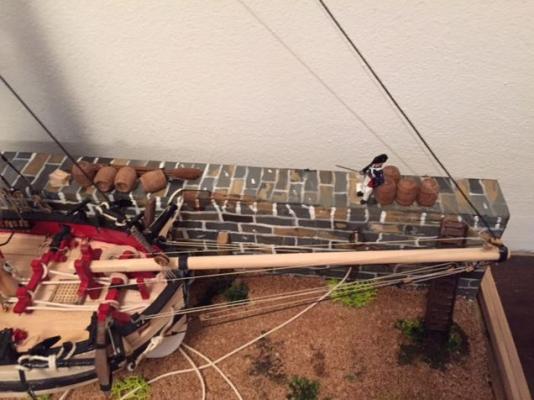
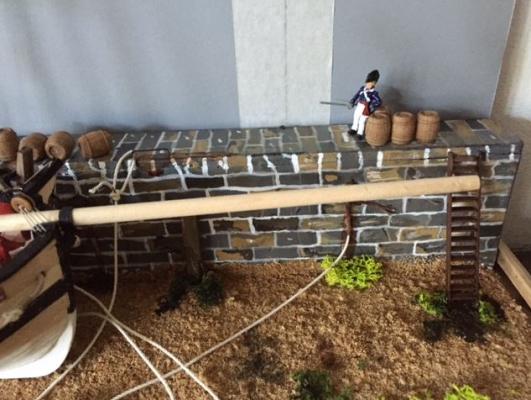
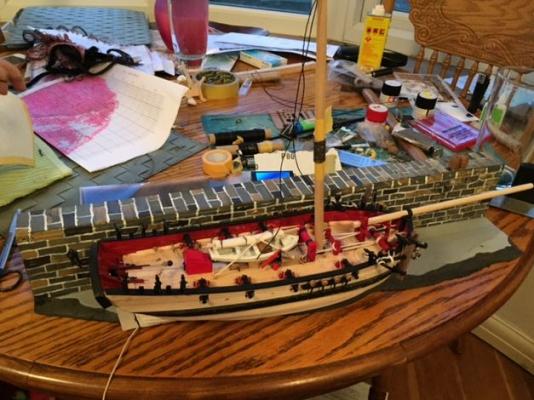
Cheers Eamonn, I was going for deadly!! Haha, last night was the start of Great British Bake Off (Lucy's favourite program), so I had to down tools rather prematurely last night because I "would make too much noise" if I continued on the model. So I just managed to paint the Marines on the Quayside and get them glued down in place before the start of the TV program. Here is a photo of what I could see from the sofa last night! I agree, from that view, she does look deadly! Cheers, Jonny

- 188 replies
-
- 3
-
-
- Sherbourne
- Caldercraft
- (and 2 more)
-
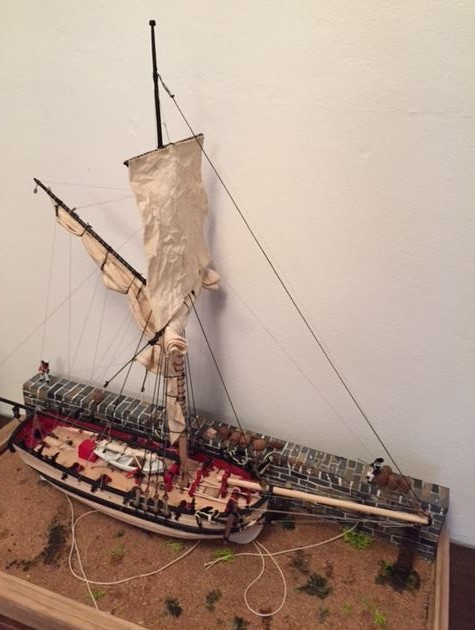
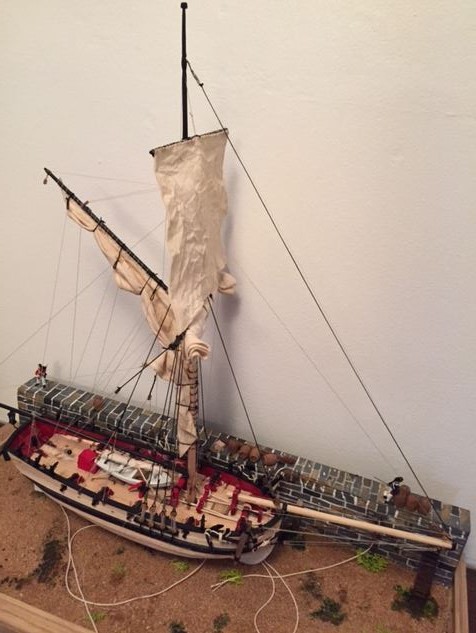
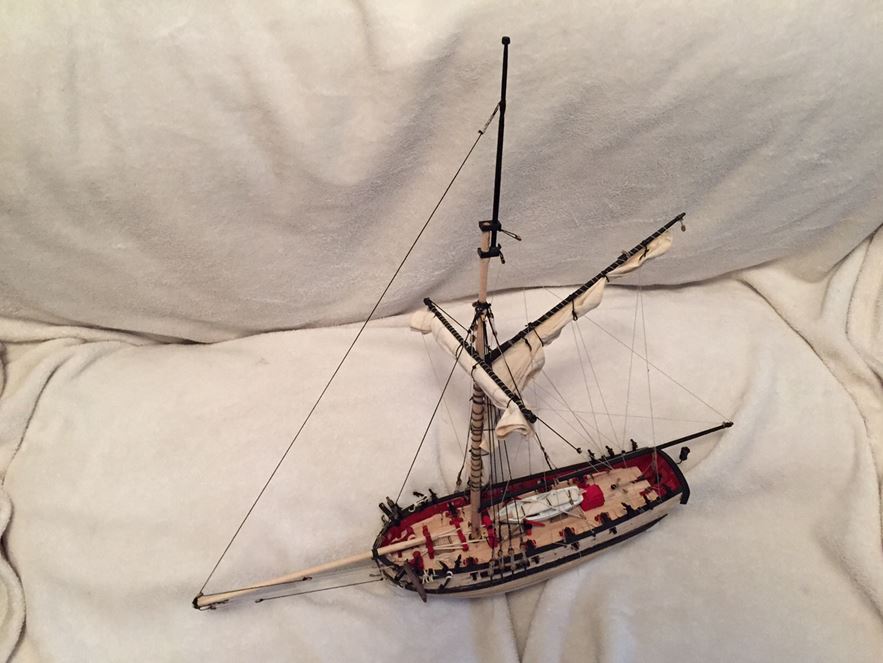
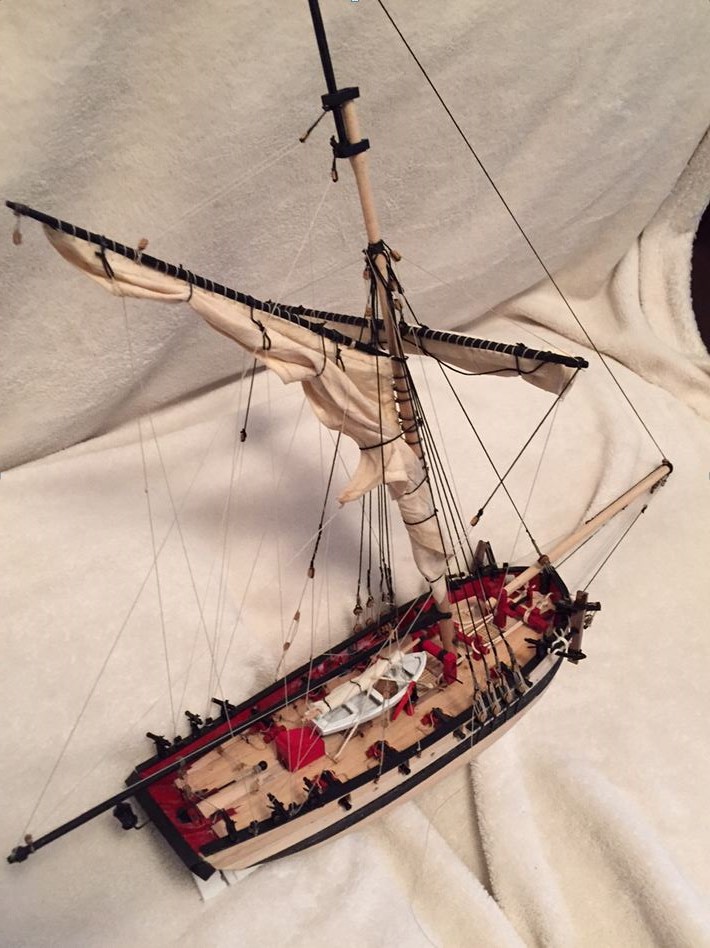
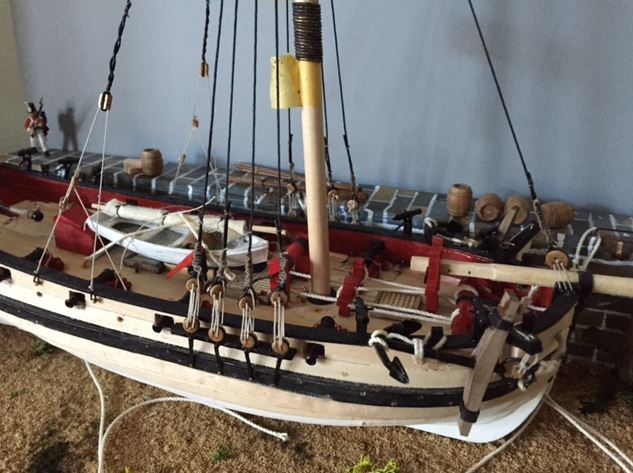
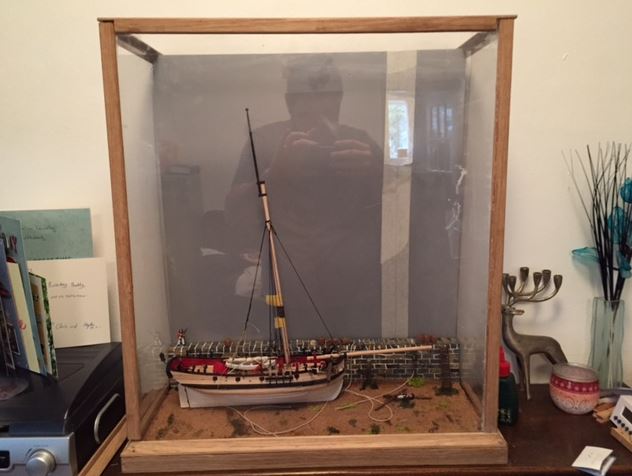
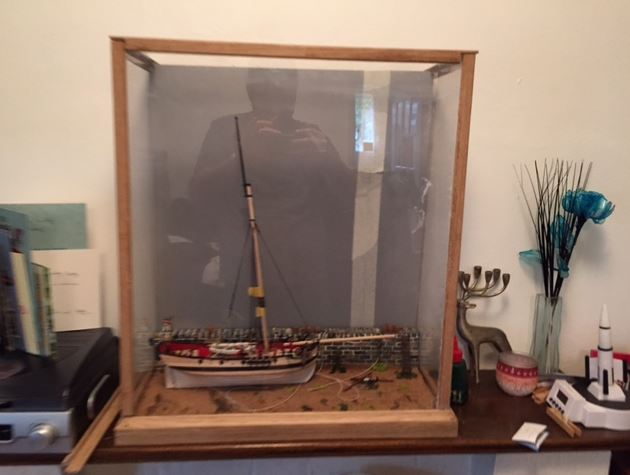
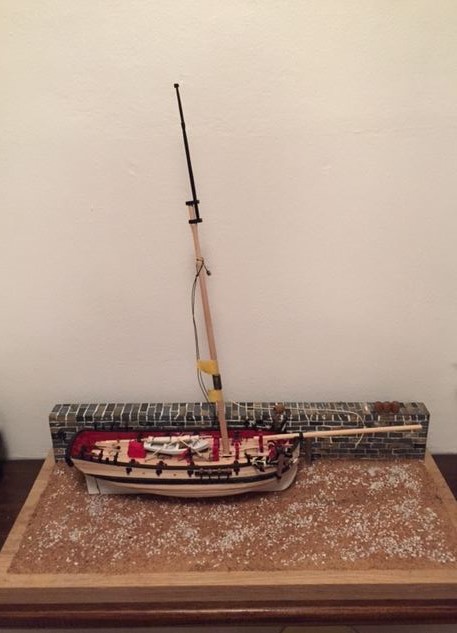
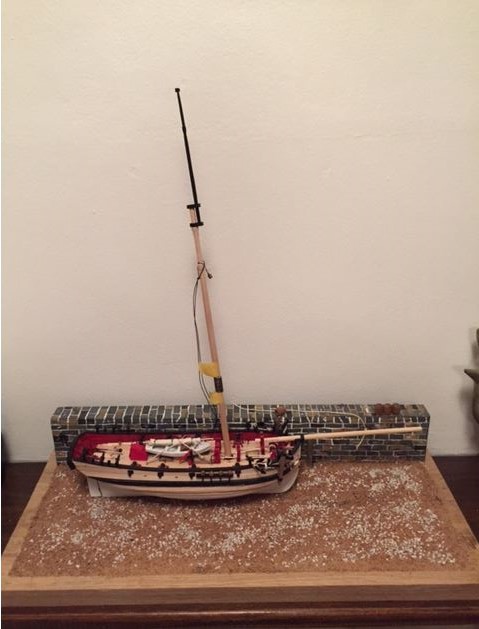
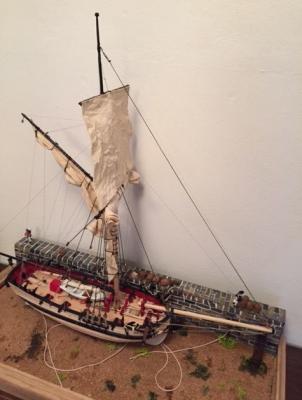
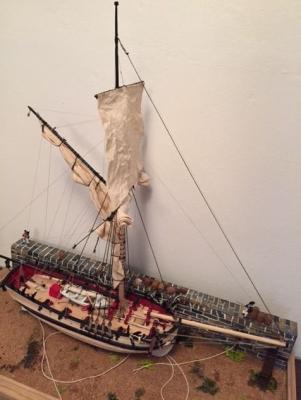
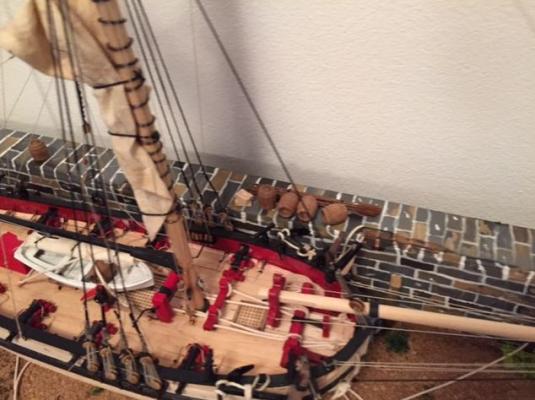
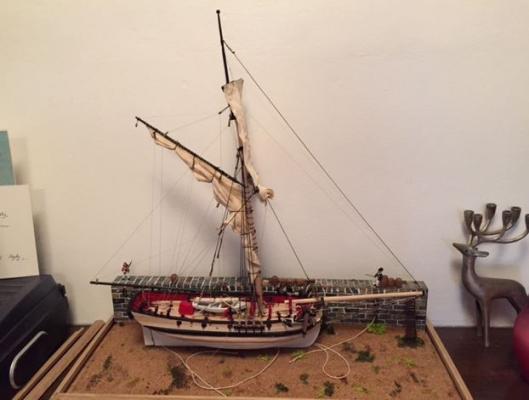
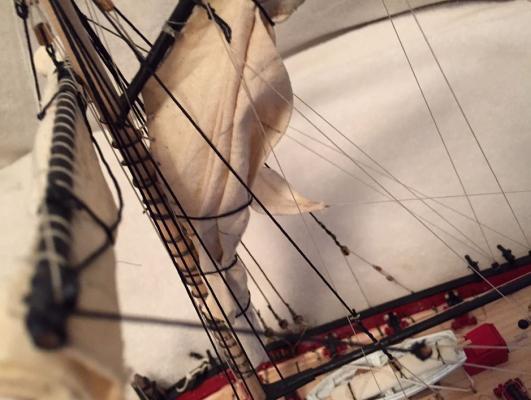
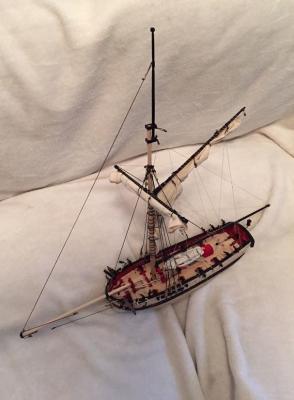
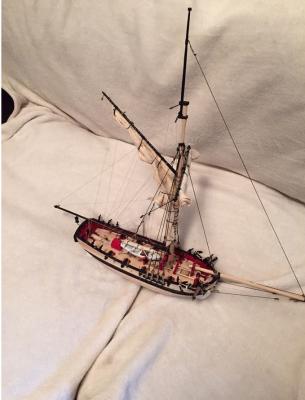
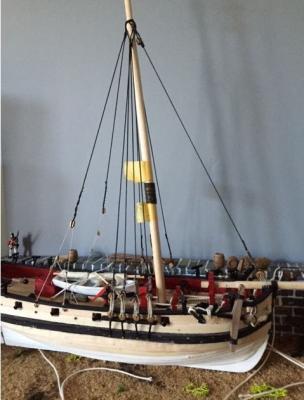
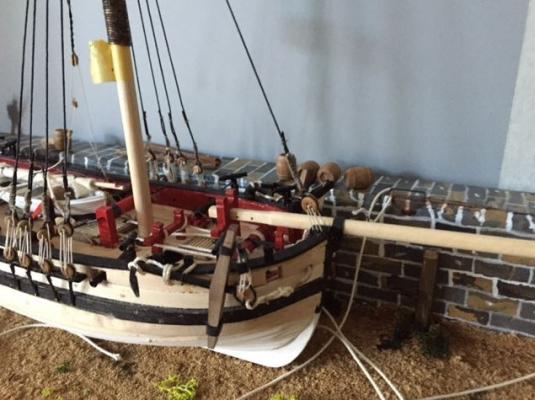
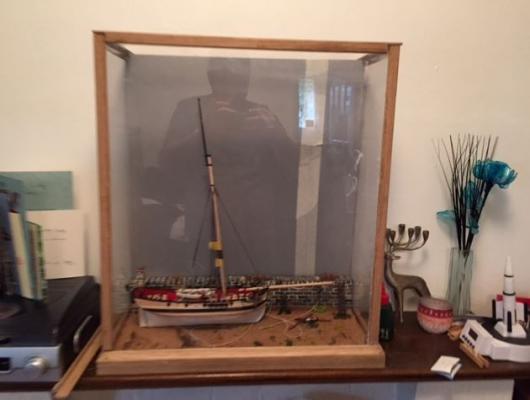
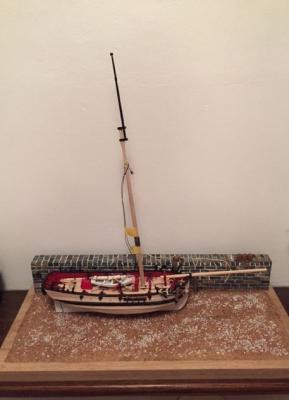
Photo Update time... Sherbourne is moving on very quickly currently, and the final touches are being applied before the model is completed, but that will more than likely be in the next two weeks. I will reef the topsail tonight, but with the Admiral being sent home from work with flu-like symptoms, I may be on duty in the sickbay. Here's a few photo's on Sherbourne flying her Topsail up against the harbour wall. Note in the first photo you can see a hazy patch on the display case, this where the CA Glue has run and I've tried (and failed) to clear it up. I will use my day off on Friday to clear this up, after my trip to the Physiotherapy Department at the hospital. Cheers, Jonny


- 188 replies
-
- 9
-
-
- Sherbourne
- Caldercraft
- (and 2 more)
-
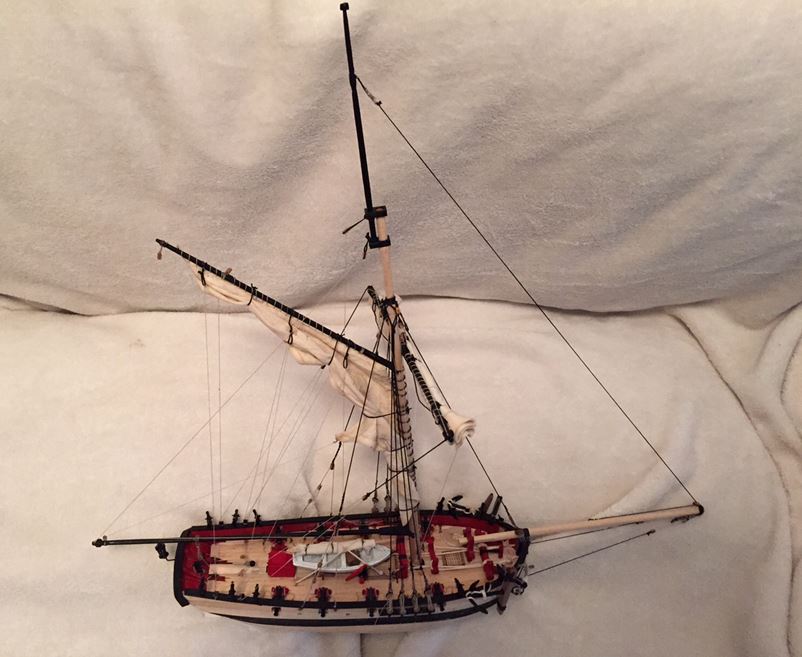
Hi Chaps, I have another update for later on today! I managed to get the Topsail on to the yard last night, and I also got it on to the model. The next phase for the topsail is to rig the reef lines, but I'll have to dig out some spare blocks from my President stash to finish her off! I'll post photos later on! Cheers Jonny
- 188 replies
-
- 2
-
-
- Sherbourne
- Caldercraft
- (and 2 more)
-
Ken, I've looked at Novus and I'll more than likely go down that route, but I was hoping not to scrape any material off. What I didn't realise when I used the Solvent Cleaner is that with CA glues it just thins it, makes it pliable again and you have to scrape it off with a blade. I might give it another go tonight, but worst case scenario is to scrape it away, wet and dry the plexiglass, and then polish the plexiglass. Cheers Jonny
- 188 replies
-
- 1
-
-
- Sherbourne
- Caldercraft
- (and 2 more)
-
I'll get the Topsail in place tonight and grab some photo's of her up against the quay wall. Cheers for the kind words E! My question is a perplexing one now... How do I clean up and remove CA glue from plastic? I've used Plexiglass on the Display Cabinet, and I managed to get a few runs of the CA glue and "Plastic Weld" glue on the glazing. Do any of you know any methods of removing CA from plastics? I've tried using an industrial strength glue remover, but it's let a rather cloudy finish to the Plexiglass! I'm not sure what to do now, as I'm reluctant to break out the panel and replace it, or scrape the material to clear it away... Cheers Jonny
- 188 replies
-
- 1
-
-
- Sherbourne
- Caldercraft
- (and 2 more)
-
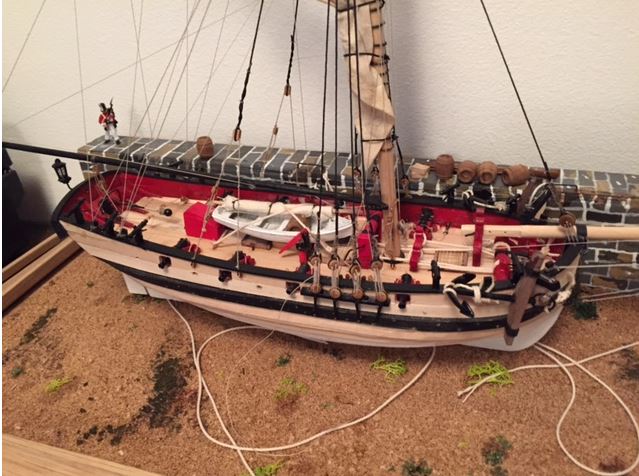
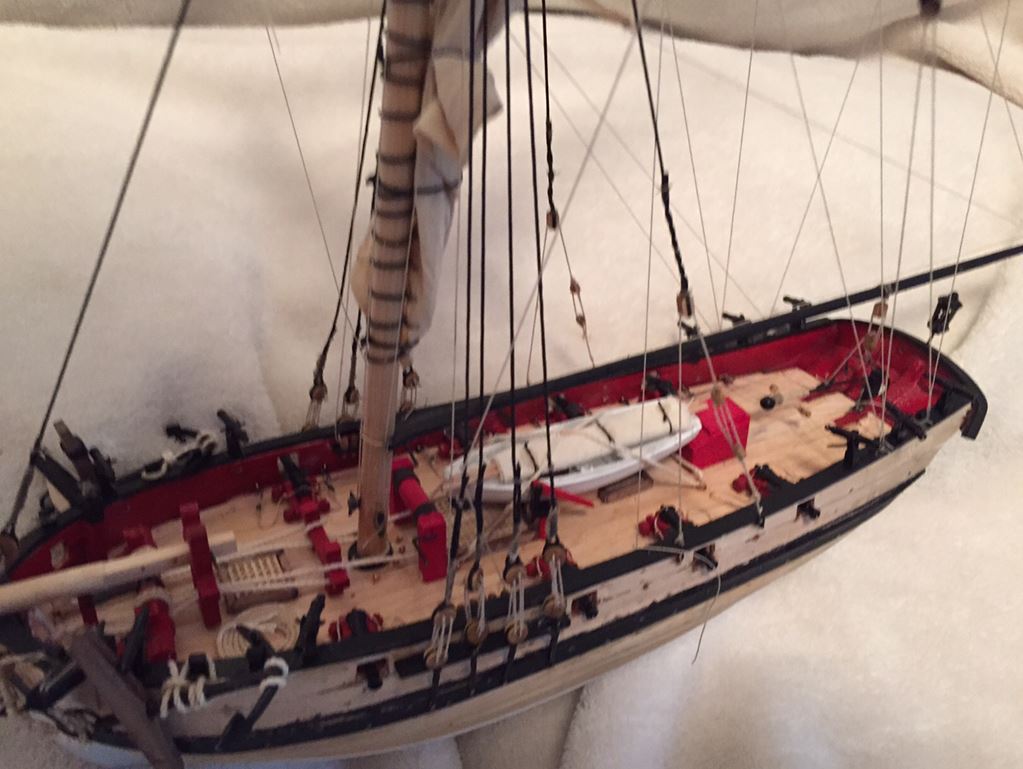
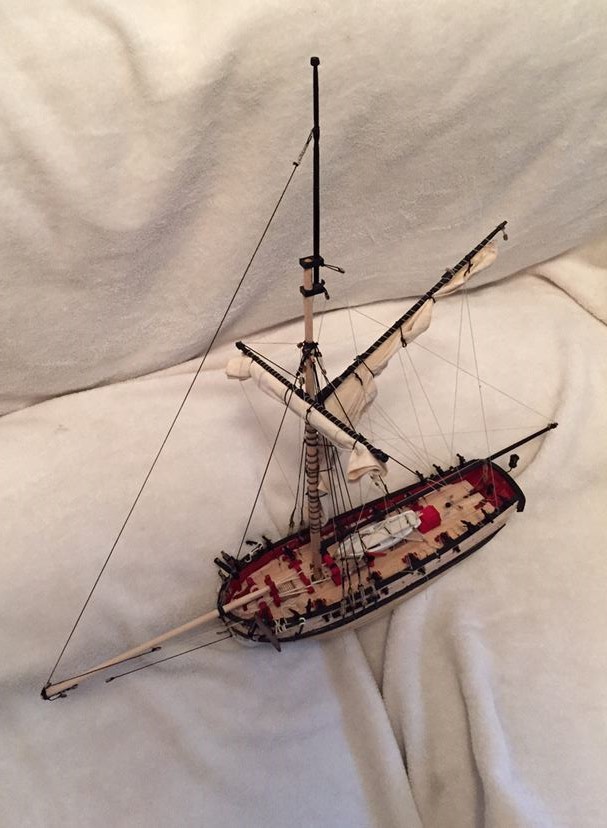
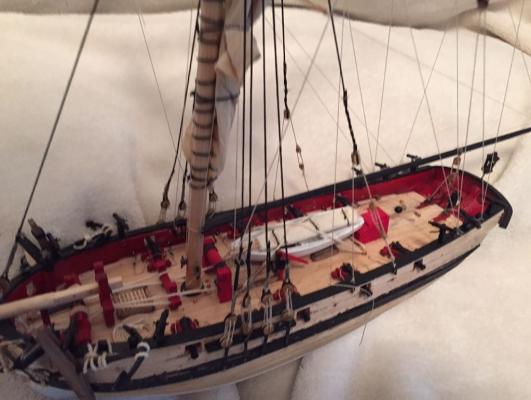
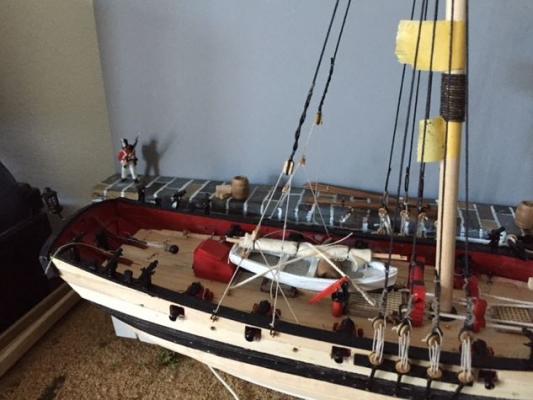
Hi Guys, I've managed to get some time now to update you all on Sherbourne. This weekend saw a hive of activity on Sherbourne, with mostly all but the ratlines complete. There are still a few odds and sods to get on with, and I need to stitch the topsail to the yard, and rig the reef lines and blocks. One thing I've noticed is that there are no stays on the Topmast and no shrouds to the topsail yard, I assume that the Topsail is the main driving sail so it rarely reefed in or furled. And my other assumption in the furling/reefing process is that the yard would be dropped to the Forecourse yard and reefed from there. Am I correct in assuming so? Any way, here are some photo's of Sherbourne so far... That's all for now folks! Cheers Jonny


- 188 replies
-
- 5
-
-
- Sherbourne
- Caldercraft
- (and 2 more)
-
Morning All, A big update will come later on, with a significant change in appearances for Sherbourne in the last 48 hours! I will hopefully post the update later on today, but I have to get a rejected drawing reissued and translated in to Russian before I can think about posting the update! Cheers Jonny
- 188 replies
-
- 2
-
-
- Sherbourne
- Caldercraft
- (and 2 more)
-
Afternoon Everyone, Yesterday's "uninterrupted day of ship building" was more of an uninterrupted day of house work that included washing clothes, mopping the floors, tidying the bedroom, tidying the lounge, cleaning the kitchen, occasional cigarette break, and then washing the dishes. Starting at 7am and finishing around 5pm, I had no time to build the model. Next on my list of chores today, is hang out the washing and tidy up my build area (the dining room table) before I can build any further. Oh and the best news of it all is that the model must be finished, or near completion in 3 weeks, so I've got full attention on the puppy!! I'm a little bit worried now!! I'll keep you posted on all developments with Sherbourne in the next 3 weeks. Cheers, Jonny
- 188 replies
-
- 3
-
-
- Sherbourne
- Caldercraft
- (and 2 more)
-
Hi Chaps, Again, progress was a bit slow last night. I finally got round to painting the Forecourse Yard and adding the outhaul to the spanker boom. I also made the Staysail and the Forecourse using the curtain lining I found at the Haberdashery whilst building Convulsion. I'll draw on the sail patches, and stain these with a weak solution of tea, and leave them to dry overnight. We have a team coming in tomorrow to fix the boundary fences on the property tomorrow and the Landlord has requested that one of us is present in the house the whole time, so I've got the pleasure of a full uninterrupted day in the Shipyard tomorrow! I plan to get the ratlines started this weekend and maybe if the process smoothly, I might get some other bits of rigging done. Cheers Jonny
- 188 replies
-
- 2
-
-
- Sherbourne
- Caldercraft
- (and 2 more)
-
I think these are paintings of HMS Victory of 1737. https://en.wikipedia.org/wiki/HMS_Victory_(1737) If you look closely at the bottom image, the Mizzen mast shows a Driver-boom (large triangular sail) as apposed to the more modern style of gaff rigged working sail with a Spanker/Gaff boom above and the Driver-boom below. As far as I am aware, the plain yellow ochre paint scheme was standard of the Royal Navy unitl the 1770's/1780's due to the fact the paint/decoration of a ship came out of the Captain/Commanders pocket (or through the ships funding - Purser) and was issued as an expense to the Admiralty. The colours Red Ochre, Yellow Ochre, and Black were usually the cheapest and most readily available colours for a Captain to obtain. Again, the HMS Victory of 1737 had the exposed balconies at the Stern, but the Thomas Slade designed Victory (built as the seventh HMS Victory of the Admiralty Fleet) launched in 1765 (almost 21 years after the sixth Victory sank in the English Channel) was designed with completely enclosed Stern Galleries due to an alteration to standard design practices made by the Admiralty to make the stern galleries (usually the weakest part of the ship) as strong as possible during an engagement. In theory, the glasing at the stern was removed during action as to minimise damage to crew in the event of a **** entering the Stern Gallery, but the design of the enclosed galleries meant that the stern facia acted as a solid bulkhead, strengthening the stern of the ship. Cheers Jonny
-
Hi All, There's been little progress to speak of in the last few days, apart from making the mainsail (same fashion as the sails on Convulsion) and stitching that on to the drivergaff. The one thing I have done though is add the reef lines to the sails, so it can be furled properly. I need to add a bolt rope and block to the end of the boom to act as the clew and outhaul. This would mean the sail is rigged correctly. I probably will not bother with rigging a Cunningham or downhaul, just the outhaul and reef lines as they are more than likely to be seen on a ship of this period. See the PDF for a quick sketch... Reef Line Sketch.pdf Cheers Jonny
- 188 replies
-
- 2
-
-
- Sherbourne
- Caldercraft
- (and 2 more)
-
Thanks Chuck, I had just got to checking the parts list online. I will hopefully be pacing the order soon. Jonny
- 162 replies
-
- 2
-
-
- 18th century longboat
- model shipways
- (and 1 more)
-
I have been told by my girlfriend (the Admiral) that I am not to start the kit until I have finished Sherbourne, and we have let our new addition (a Cocker Spaniel puppy)settle in to the house for at least a month. So I won't require the blocks straight away, but I will definitely replace them. I will look at the parts list and the parts required tonight, and get back to you soon. Before I go ordering anything, I just want to clarify that you can ship to the UK? Cheers Jonny
-
Hi Chuck, My girlfriend bought me this kit for my birthday recently, and I've had a look through all the parts in the box, and generally I am happy with the contents, apart from the rigging blocks. I like the rounded blocks used on your prototype, and I assume due to production costs they changed for the standard rigging blocks used in most kits. I'd like to replace these. I'd like to know how many blocks I would need to buy, and if I can buy the rigging blocks from your website? Thanks, Jonny
-
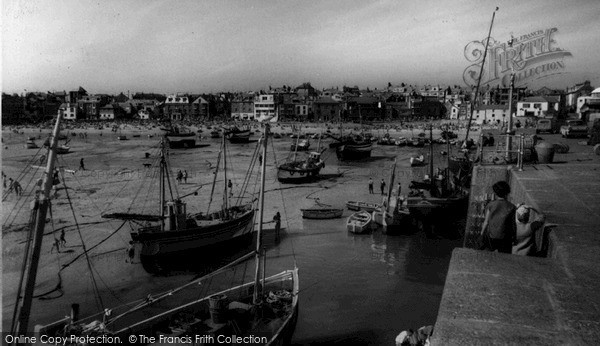
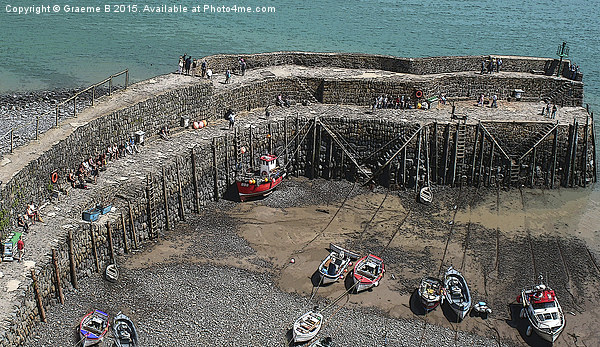
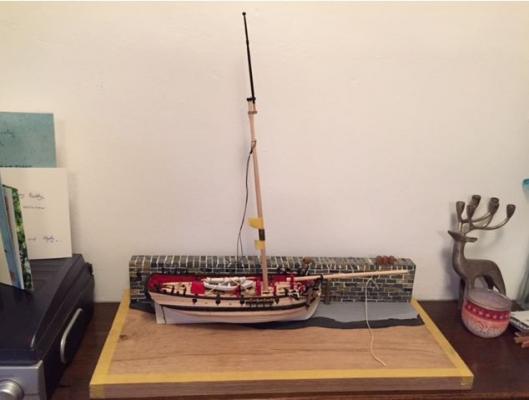
Brian, The intention is to have the model dried out against the wall in a tidal harbour, for example St Ives, Cornwall, or Gorey in Jersey. I had thought about using the water gel stuff, but have had less than decent outcomes from using it. The last attempt I made using the stuff, it cracked and split so badly that there was not fixing it. The photos below are the sort of look I'm heading for..... Cheers Jonny
- 188 replies
-
- 2
-
-
- Sherbourne
- Caldercraft
- (and 2 more)
-
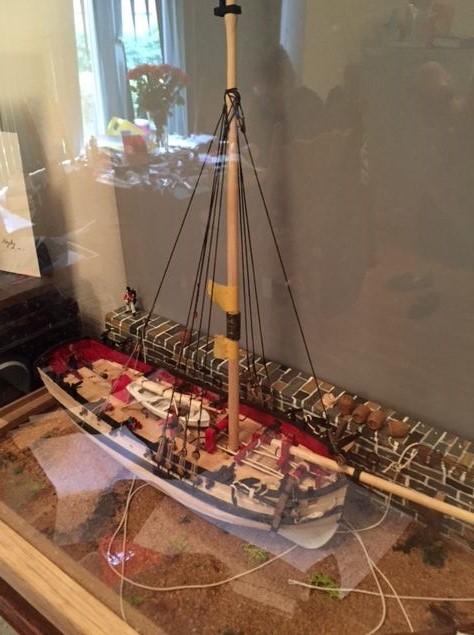
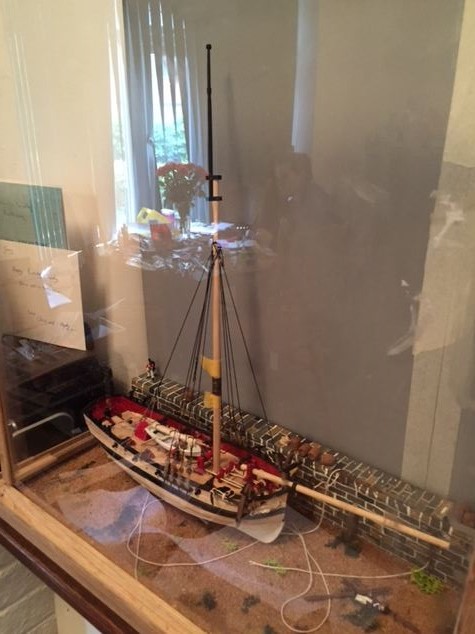
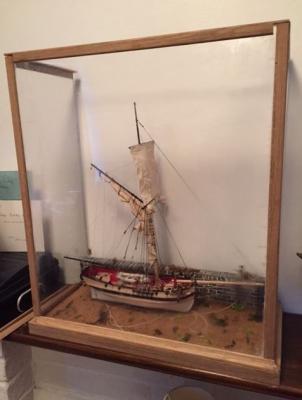
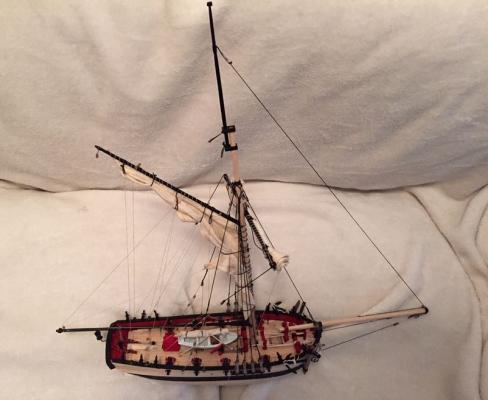
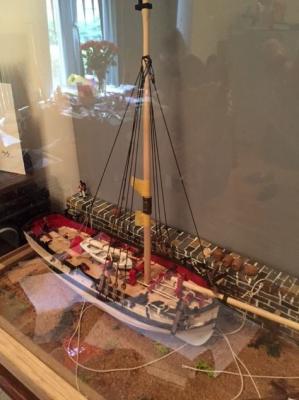
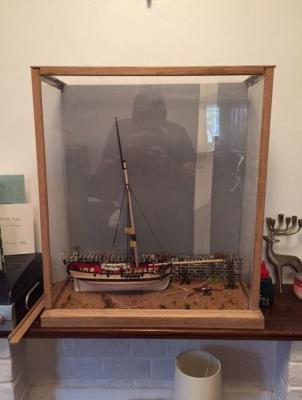
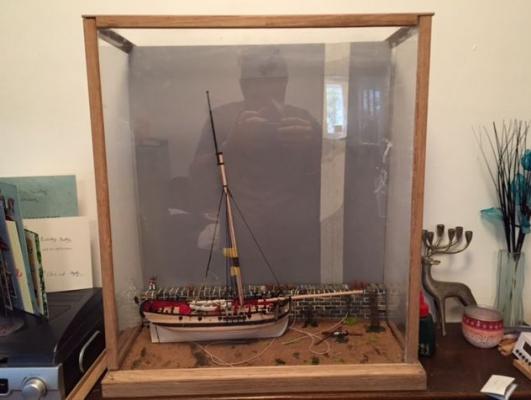
Morning Chaps, This weekend was rather busy in the Shipyard, with the rigging of the standing rigging and construction of the display cabinet! So it is photo-update time on Sherbourne before a "Pupdate"! Standing Rigging Photos.... Display Case Photos... There is still a lot to do in regards to the rigging and the display case. I need to find a way of removing a few superglue stains from the Plexiglass and I need to trim a few corners down for the brass corner pieces to go over the top of them. I could also use my Dremel to neaten up the back of the case, but I can only do this one the model and backboard are in place. PRESS RELEASE..... Time for a Pupdate!!! I'd like to introduce Lily to you all as the new Shipyard Surveyor and Master Shipwright. She will be taking on this role from 21st August 2015. The Admiral has ordered all Ship Building to cease from 21st August for one month to get the new team member used to her new surroundings! Sherbourne is to be near to completion by this point. As you can see, she will need a good wash before she starts Surveying! Cheers Jonny


- 188 replies
-
- 6
-
-
- Sherbourne
- Caldercraft
- (and 2 more)
-
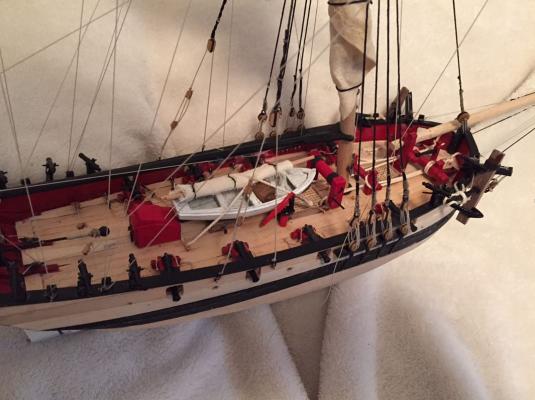
Antony, 50 gold stars for you! Thanks for answering my question on the bollards! I have the kit supplied cannons left over so I was hoping to find a use for them. Thanks for the kind words! I have made serious headway on Sherbourne this weekend, having run all the Shrouds, Running Backstays, and Forestay. I also build up the main sail that will be lashed on to the gaffboom and brass rings around the mast. I still have to build the yards and rig the bow sprit, but the lower mast is almost there! Cheers Jonny
- 188 replies
-
- 3
-
-
- Sherbourne
- Caldercraft
- (and 2 more)
-
Martin, Your build looks great so far! Very neat! I thought I would comment on here as I am of Jersey decent. My father was born on the Island, and lived in Trinity, and St. John, before moving to the mainland at 16 to take on a sailmaking apprenticeship. I was recently on the Island, and wondered who made the models in the Maritime Museum (I know some are antiques)? My grandfather made all of the sail/rope displays and a few of the boatbuilding/boat displays that are there, and he couldn't remember who the models came from. Cheers Jonny
-
Hi Chaps, If I get some time today, I will post a few photo's of my progress from last night. I'm out for a curry tonight with the lads from work, so I'll be back on Sherbourne tomorrow! Cheers Jonny
- 188 replies
-
- 3
-
-
- Sherbourne
- Caldercraft
- (and 2 more)
-
That's the plan for this evening! Those will be the final touches for the model, but I will build them on to the display now so that once the rigging is started (and eventually finished) I will be able to finish the model off with bow/stern lines and springs. I'll take more photos tonight of the rope work tonight. As for bollards, I'm not sure if they were used in this period of history, so I'm going to cheat and use brass rod to make a series of bars sunk in to the stonework as tie down points. Cheers Jonny
- 188 replies
-
- 3
-
-
- Sherbourne
- Caldercraft
- (and 2 more)
-
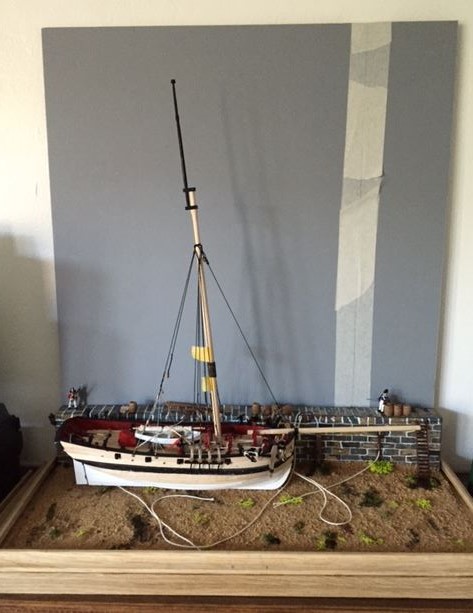
Hi Chaps, I went to the DIY Store last night and found a great piece of oak with minimal knots and splits in it, and at 25mm had a nice weight to it (4.8 Kilos)... At £21.00 for a 900mm x 300mm length, I thought it was too good of an opportunity to pass up! So I rashered that down to 540mm and 260mm wide (to fit on the mantelpiece) and tidied it up with a plane, rasp and a bit of sand paper. I glued the backdrop down to the board and coated it with some PVA glue and large stone chippings I bought from the model shop. I used the remainder of the railway ballast from Convulsion to layer on top of the board. I'll head to the model shop tonight and pick up some fine sand material and moss/seaweed for the board. I have the day off on Friday, so I will head over to the DIY Store and pick up some Perspex for the display case. I need to make four sides of Perspex and can use fibre board for the back panel. Cheers, Jonny


- 188 replies
-
- 6
-
-
- Sherbourne
- Caldercraft
- (and 2 more)
-
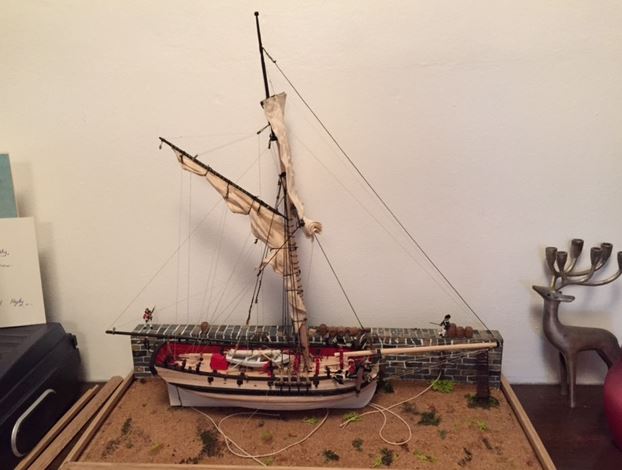
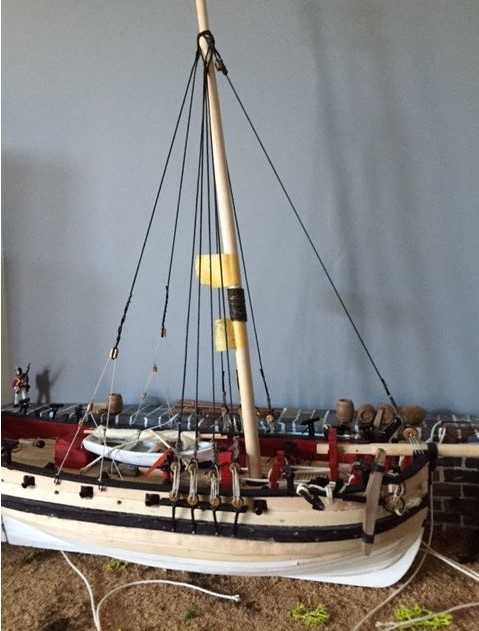
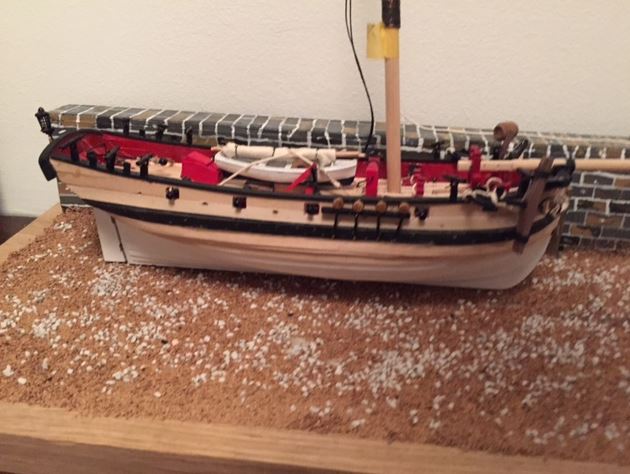
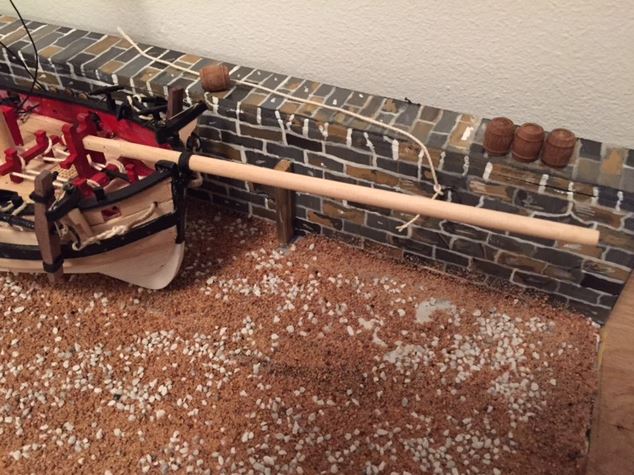
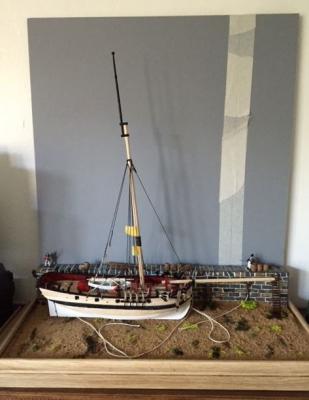
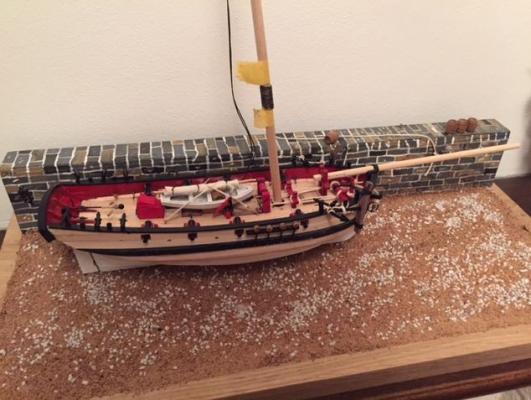
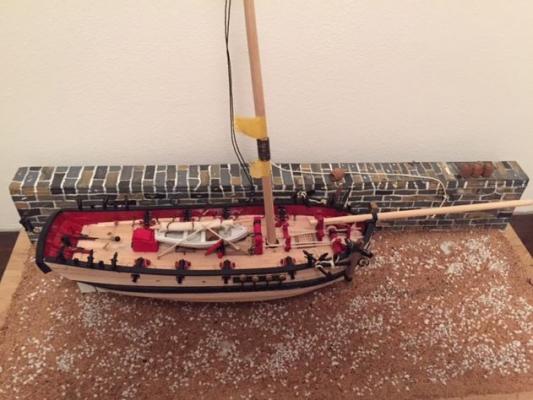
Hello Chaps, Just a quick update on Sherbourne and the Display backdrop.... Painting of brickwork is complete, not the tidiest job, but I have a cunning plan to tidy up the grout lines! I need to find Tipex/White Out pen and trace round every line to add a bit more definition to it. I'll head to the hobby shop over the weekend and buy some mossy plants for seaweed and gravel/sand ballast for the beach below. I've used the foam board to add a gradient to the base, and in doing this the Hard/Stone wall sits about 15mm above the top of bulwarks on Sherbourne, so gives the impression of the Cutter being maintained at low tide in a deep port. I need to head out to the DIY Store tonight or tomorrow night to buy the base board for the Model,I need to find something 540mm in length and 240mm wide, but I'd rather not pay over the odds for it! Cheers Jonny

- 188 replies
-
- 7
-
-
- Sherbourne
- Caldercraft
- (and 2 more)
-
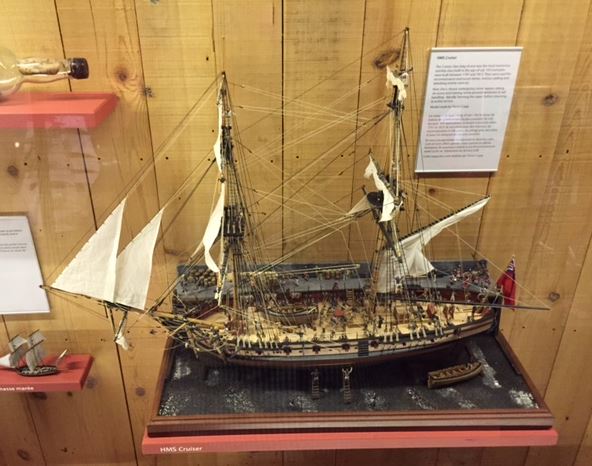
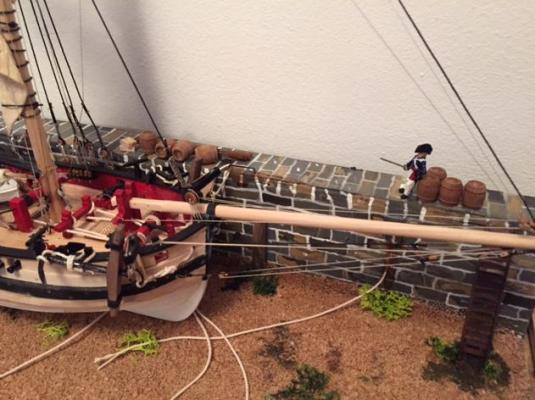
Hello Chaps, I hope you all had a great weekend? I decided on a theme for my Sherbourne display case. I liked my display idea for Convulsion, with the ship beached and the crew members scurrying around doing various jobs, so I made the decision to a similar thing with Sherbourne. But this time I will be doing something a little different to Convulsion. I have made a Stone Harbour Wall from foam board, and started painting the block work on to the board. I got the idea from a display of HMS Cruiser I saw at Jersey Maritime Museum whilst I was out there a few weeks back. The description of the model was highlighting that it was a scratch build at scale 1:64, but it looked a lot like the Cruiser Model produced by Jokita/Caldercraft.... Any way, the display shows Cruiser against the Hard, undertaking minor repairs and taking on fresh provisions. I will do a similar thing with Sherbourne, but might show carpenters making a new spar, and the kit supplied cannon barrels will more than likely be stacked on the Hard with a few barrels and crates. I'll also build up a few Marines with a Marine Captain to look official on the Hard. I'll take some photo's of the display once I've finished the painting. Cheers Jonny

- 188 replies
-
- 2
-
-
- Sherbourne
- Caldercraft
- (and 2 more)
-
Cheers Ken! Yeah that was a complete surprise! I said I wanted to do a Plank on Frame build and she researched it all herself and that's what she found me. Gold Star to Lucy! Oh yeah the chocolate orange is my favourite! I love putting them in the freezer and breaking them up in to little bits. Cheers Jonny
- 188 replies
-
- 2
-
-
- Sherbourne
- Caldercraft
- (and 2 more)