


usedtosail
-
Posts
2,377 -
Joined
-
Last visited
Content Type
Profiles
Forums
Gallery
Events
Posts posted by usedtosail
-
-
Thanks Mike and Pete. I appreciate the comments.
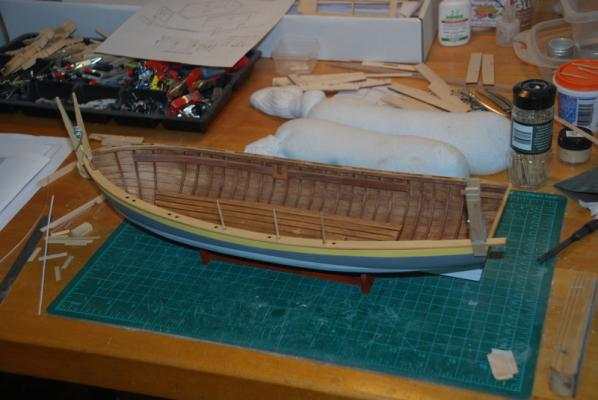
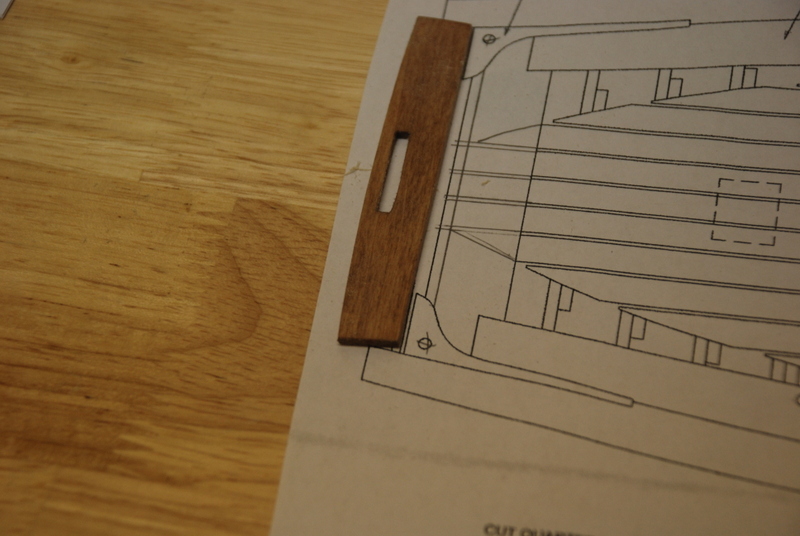
I am a little disappointed with some of the laser cut pieces that Model Expo supplied with this kit. I have found a number of pieces that were either just too small or just big enough to fit before any sanding. I would rather they made the pieces slightly oversize so that they could be sanded to fit. Here is the latest piece I had trouble with, the back rest. At first I was going to eliminate it as others have done, but I think it looks good, so I want to include it. As you can see in this picture, the supplied piece is smaller than the plans:

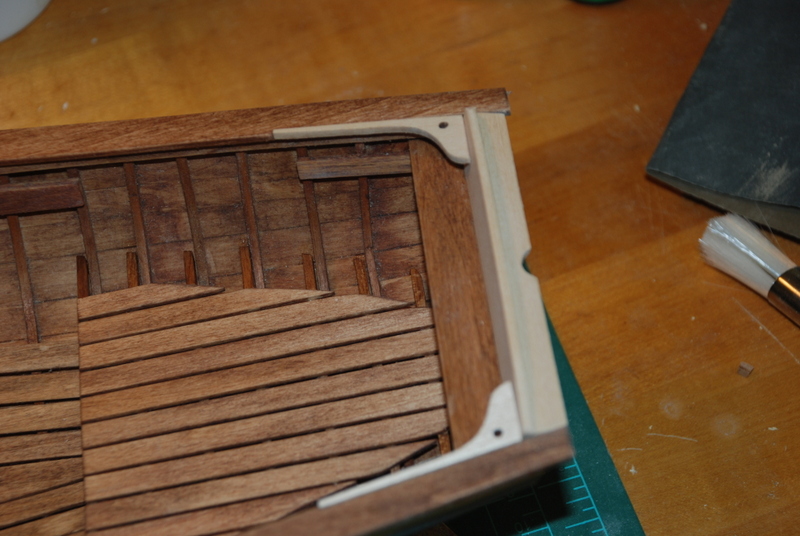
So, I remade the back rest from one of the thwarts that I had to remake because it was too small. I added more to the sides and sanded it to fit. I did not add the cut out in the new back rest. The quarter knees were also too short and since there is a notch in the gunwales for them, I could not just install them further back. So, I made the stern gunwale wider which moved the back rest more forward so the quarter knees would fit after sanding them to the angle of the back rest. Here is how these pieces all came out. They are just dry fit as I still have to stain them. You can see that even the width of the quarter knees is too small where they fit in the notches, so I am going to have to sand the gunwales down at those spots. I would rather have the quarter knees too wide and sand them to fit the gunwales. It is not like we are talking about a lot of excess wood here, just a few millimeters on each piece that would made a big difference.

-
Have a great day on your Birthday, Mike. I love the color of that guitar, too.
-
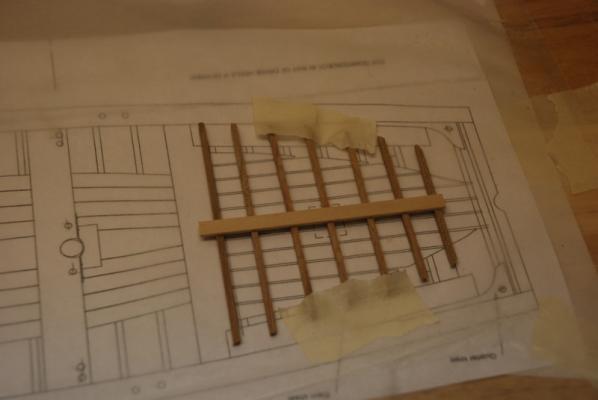
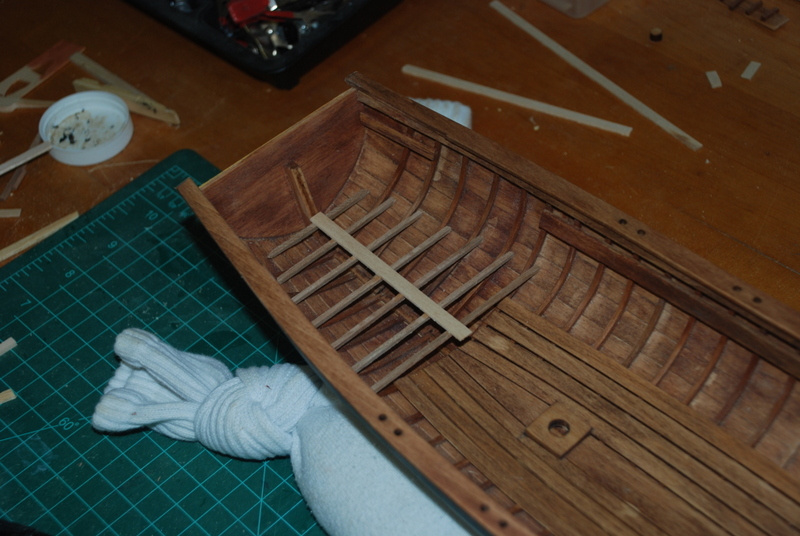
Here's the story with the quarter deck. My first attempt was to make the quarter deck on the plans, then fit it into the hull. I left the frames long so I could cut them down to fit.

This actually worked fine as I was able to trim the frames back a little at a time and get the deck to fit into the hull. I had to trim off the stern frame and some of the planking to get it to fit far enough into the hull, but that was not a problem and I just glued a new frame to the back when the fitting was complete. What I didn't like was that the quarter deck frames did not sit flush to the hull frames, so the deck was just sort of floating in the hull. This didn't seem right to me, so I decided to remake it. I used alcohol to loosen the glue and was able to salvage all of the planks and most of the frames.
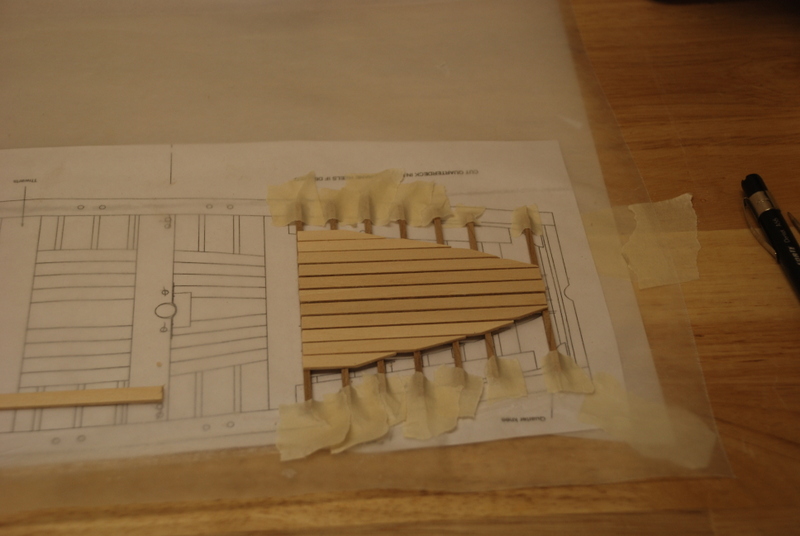
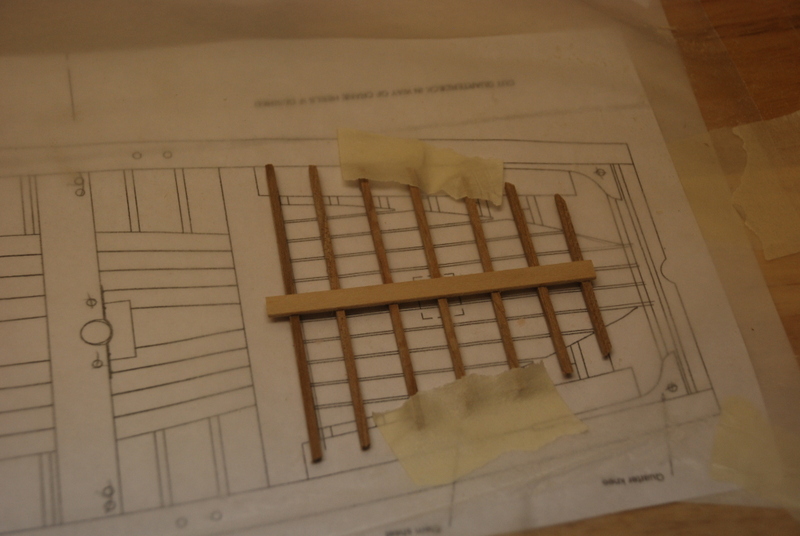
This time I fit each frame into the hull before the planks went on, making sure they were flush up against a hull frame and the planks would make contact with all the frames. When they were all in position, I glued the center plank to the frames and readjusted the frames back up against the hull frames before the glue set up.

I let this dry a few minutes, then carefully took it out and transferred it to the plans.
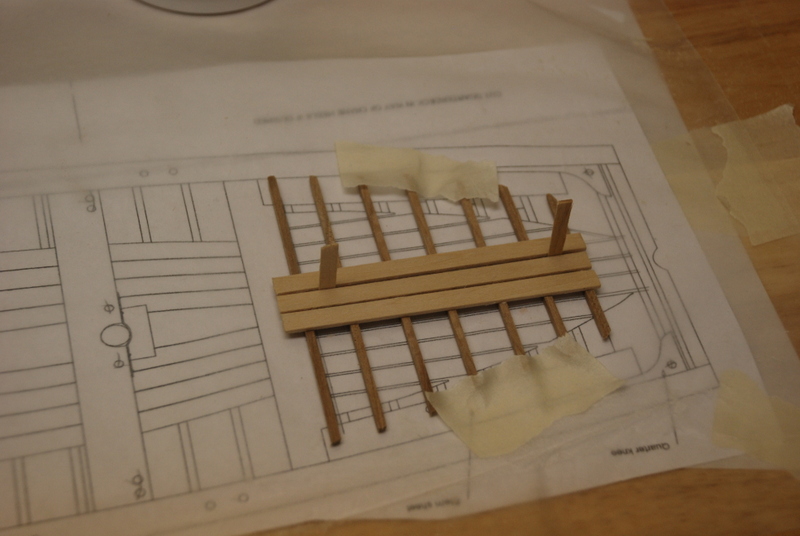
I then glued the rest of the planks onto these frames, using thin strips of wood to keep the distance between the planks more consistent, which is something I didn't do on the first attempt and it showed.
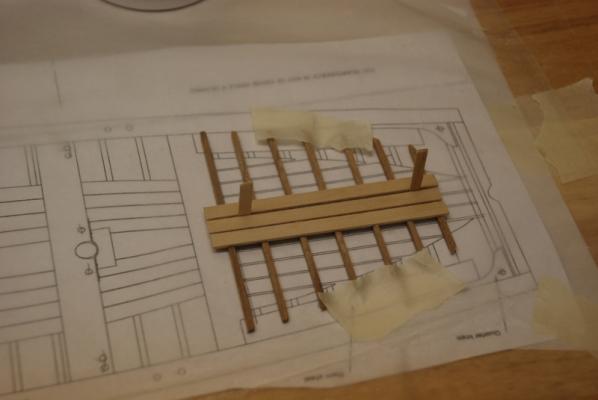
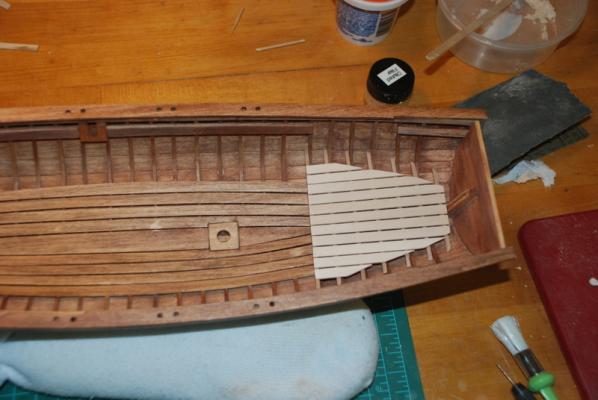
When this dried, I trimmed the excess off some of the planks and test fit it back into the hull. I was much happier with this version. Now it just needs to be sanded and stained, and it will be ready to be installed.
- pete48 and CaptainSteve
-
 2
2
-
Here's the progress over the last week. I glued the gunwales to the hull, using clamps made from wood strips wrapped in masking tape where they contacted the gunwales and rubber bands. These worked pretty well, but there were a few spots where the gunwales did not bend enough to make contact with the hull. I added balsa wood blocks under the rubber bands to give the clamps more pressure and this helped pull the gunwales down to the hull.

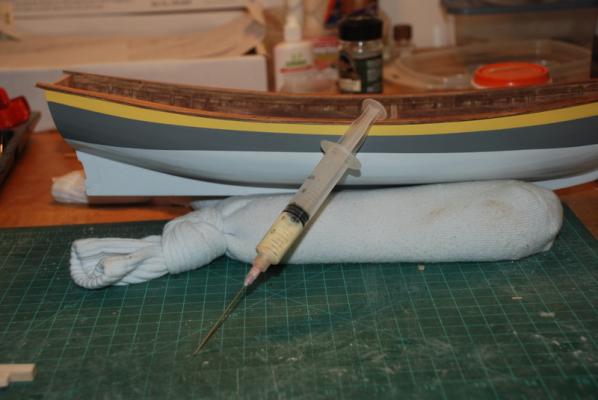
The next day I removed the clamps and addressed the couple of areas that were not in contact. I used the glue injector shown in the next picture to inject glue under the gunwale in the spots that didn't make contact, then re-clamped these areas. The injector is just a large syringe I got in a kit to fill ink jet printer cartridges and it works great with wood glue. The tip will plug up right at the end, but a piece of wire in the nozzle clears it right up. This step brought the gunwales into place.
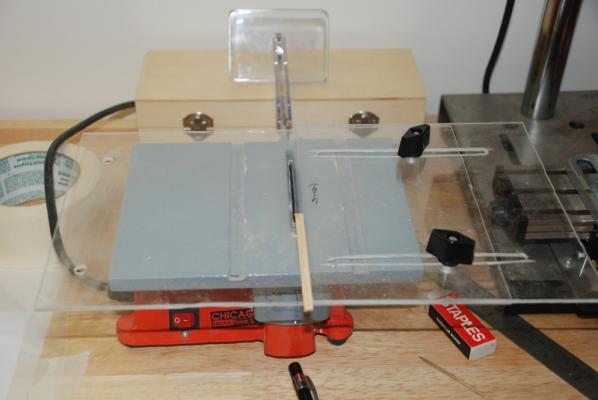
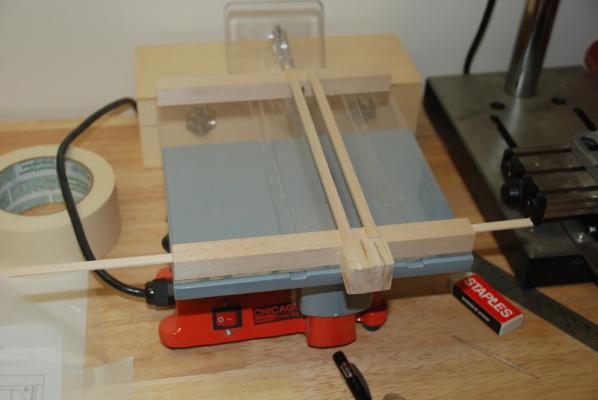
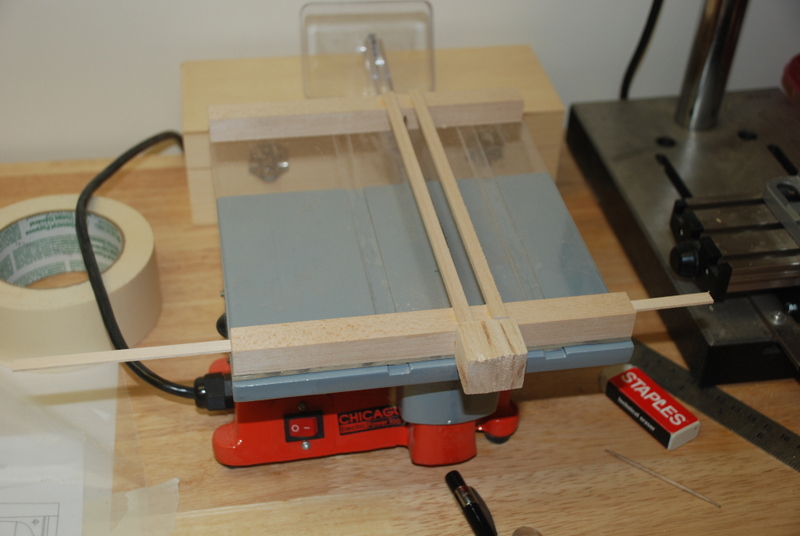
I made up the strip of wood to fit between the two gunwales at the stern, using some basswood sheet. I cut it using my cheap table saw from Harbor Freight. This saw is nothing like the Jim Byrnes saw, which I hope to have someday, but for now it works fine with this sort of job. This saw is very under powered, so you have to use it appropriately, but with care it works OK on soft woods like basswood. I bought a slitting blade for it on eBay, which make nice thin cuts. I also made the Plexiglas fence shown in the picture, since the cheap saw came with no fence. It acts as a zero clearance insert, and makes the saw usable. The second picture shows a sled I also made for this table saw, which comes in handy for cutting longer pieces.
The next post will discuss how I made (and remade) the quarter deck.
-
-
Ed, that is beautiful work as always. I really enjoy following your builds, and have learned a great deal.
I have a mundane question however, which I hope you don't mind. What kind of board do you use under the frames when you are gluing them up? I am looking for something that will hold pins like that but be easy to insert them into, if there is such a thing. Bulletin board material (cork?) would be too soft, I think.
Thanks very much.
-
-
-
Thanks Mike, Pete, and QA. Sorry to hear you can't get this kit in the UK. I have found that Model Expo kits are very nice to build. Is it a problem with shipping overseas?
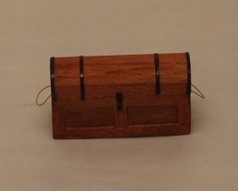
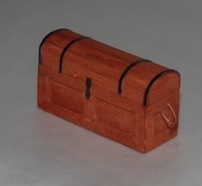
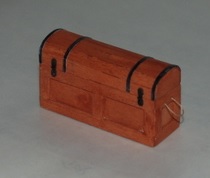
Here is the completed toolkit. It doesn't open like others have done, so it doesn't have miniature tools inside. I wanted to make the outside a little more detailed than the kit version, so I added a latch and hinges, and some iron bands. I finished it with very watered down Burnt Siena paint, so it was almost like a stain, and was very happy with how it came out.
Here are the gunwales being glued together. I shaped the areas around the stem and decided to glue the two sides together off the model as the instructions say to, with the little scrap piece for support. These now need to be stained, then glued to the hull.
-
It is just a regular soldering iron with a much larger "tip". In fact, when mine crapped out, I removed the tip and screwed it into a regular soldering iron, and it has been working great ever since.
-
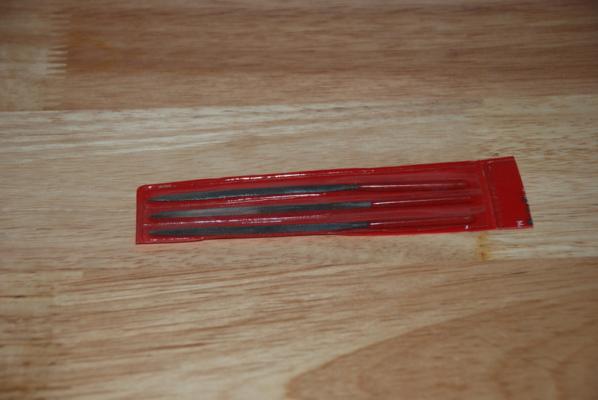
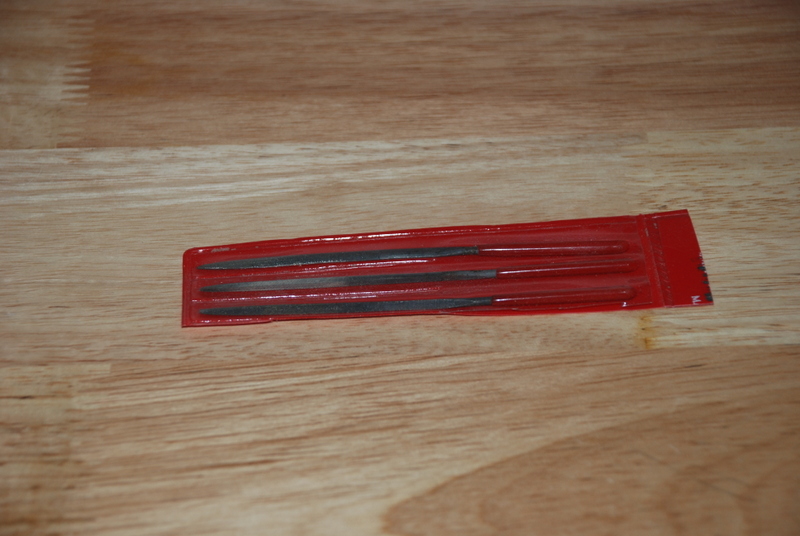
When I first started I bought one of the Deluxe Tool sets from Model Expo. I found pretty much everything in the set useful and I still use most of it today. The best items, though, are these tiny files that came in the set. I used them all the time:
I find a good set of tweezers especially useful, too. I actually have about three different styles that I use, but the curved ones seem to work best. I have two - one that I use for gluing and one that I keep clean for rigging.
I hope this helps.
-
I agree with Mick. Those posts look super.
-
Yes, the first picture is two blocks stropped together. Since they are on the mast cap, one of the two is for the yard lifts and the other could be for the sheet or tack of the sail above.
The second picture is a sheave in the mast, like what was one the cat heads. I believe this was used for raising and lowering the topmast. This can be simulated with two holes and a slot, which is how I would do so you don't weaken the mast too much.
Hope this helps and someone please correct me if I am wrong.
-
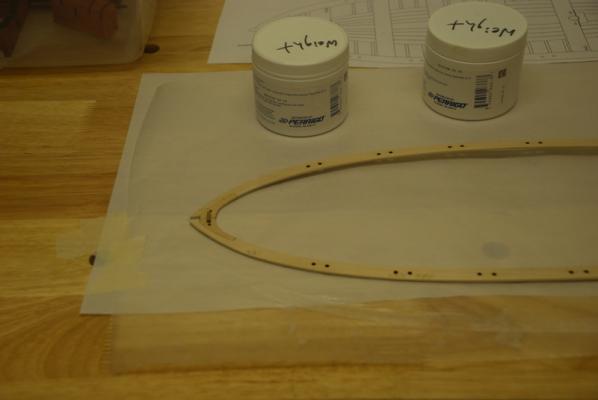
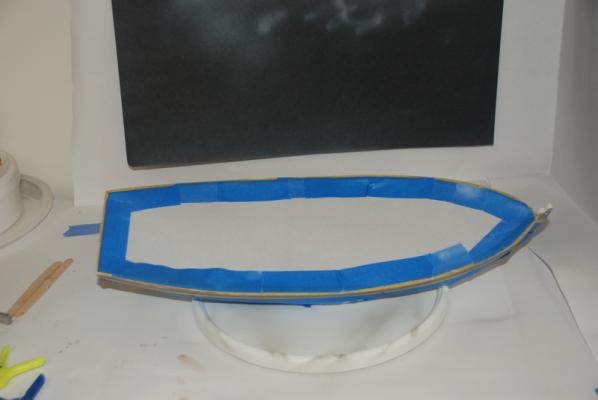
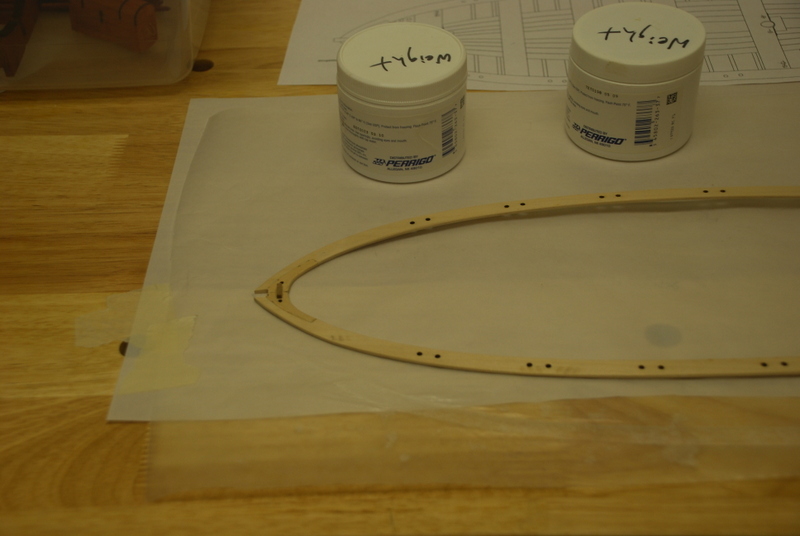
I started working on the rails tonight. I had previously drawn the outline of the gunwales on a piece of paper, so I expanded those out to the edge of the rail on both sides to use as a guide for shaping the rail pieces. I taped this down to the workbench, then taped a sheet of wax paper on top. I soaked the port rail for a while, then placed it on the template and bent it laterally to shape. I used clamps to bend it against and also to hold it flat to the workbench:

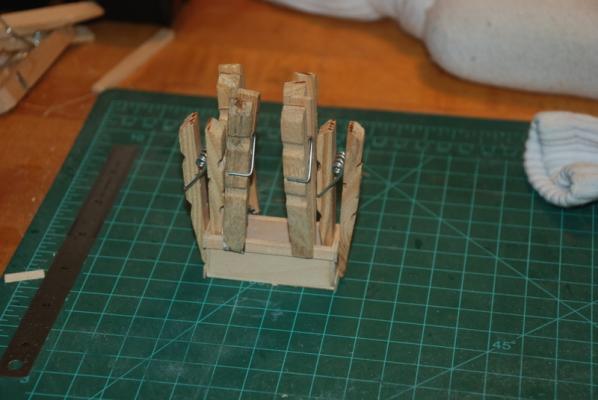
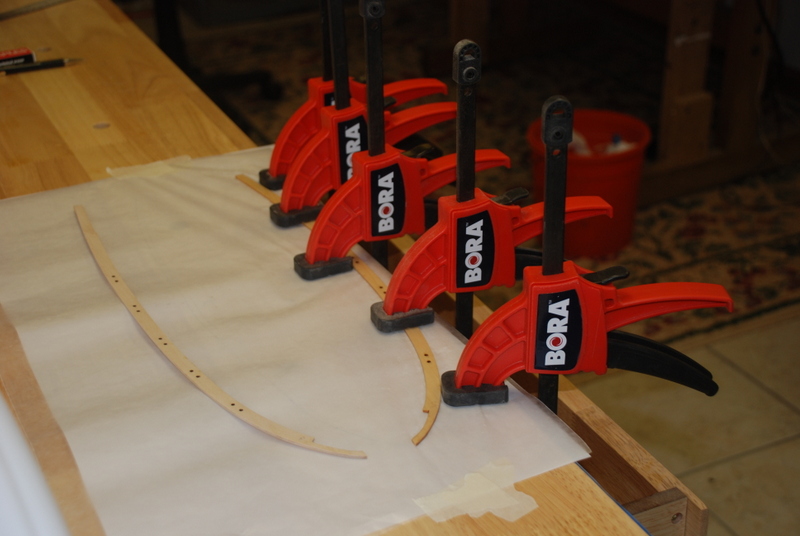
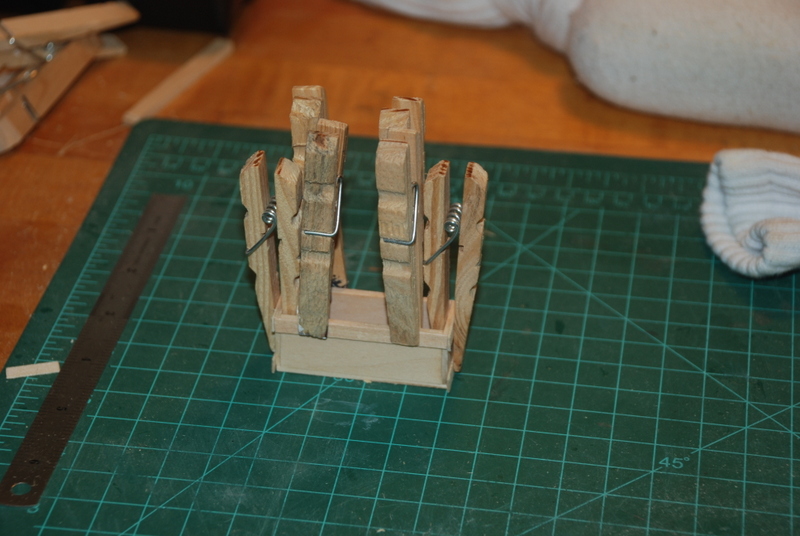
I then added the spacers along the gunwales to give the rail pieces more gluing surfaces, After I added them all, I thought about another way to shape the rails, using the hull itself. I soaked the starboard side rail piece then put it on the hull, using toothpicks to hold the center out to the edge. I used clothes pins as clamps on the bow and stern, after bending these ends to the gunwale. I checked the shape along the gunwale and the rail had a good overhang on both sides, so I left it in place to dry. I also pushed the center down to the hull edge, so I am getting the vertical bend as well as the lateral bend this way:
I may end up building the rails on the hull instead of as one piece off the hull. I will have to see how the port side comes out.
-
-
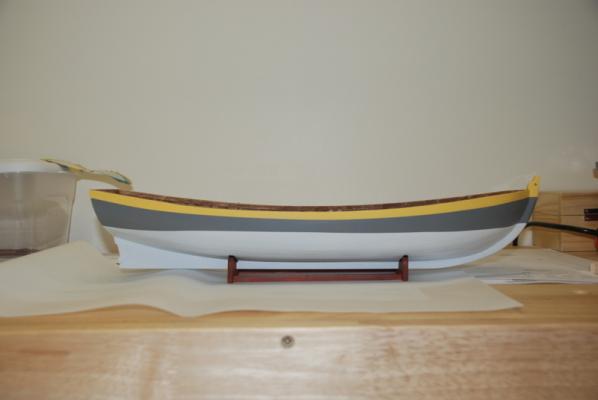
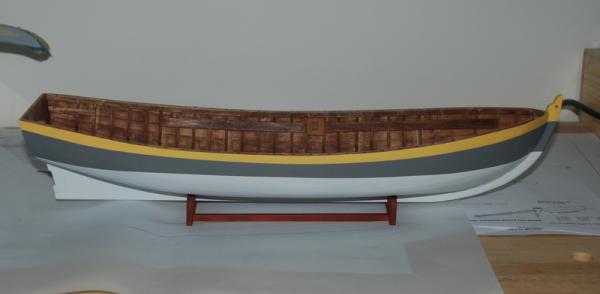
As promised, here is the completed painting of the exterior.
I made up the latch and hinges for the toolbox and blackened them last night, I should have pictures of the completed toolbox later this week.
Next to tackle are the rails. It looks like I will be able to use the kit supplied rails, even though my hull is a little wider in the middle (much like me). I think I can wet and bend them to the correct shape using a spacer in the middle to get the width I need.
-
Yes, Dunolde, There was a lot of material to remove. I did get a bit carried away however, and had to add some back with wood filler, mostly in the area under the last two gunports. I am still not sure how I did that, except that I didn't use heavier stock for the templates. I do remember being uncertain where the templates aligned at the deck level. I believe I had them too high. Good luck with this step, I am sure you will do fine. Just take it slowly and keep checking the fit.
-
That coaming is just perfect. Nice job.
-
Henry, that stern is outstanding.
-
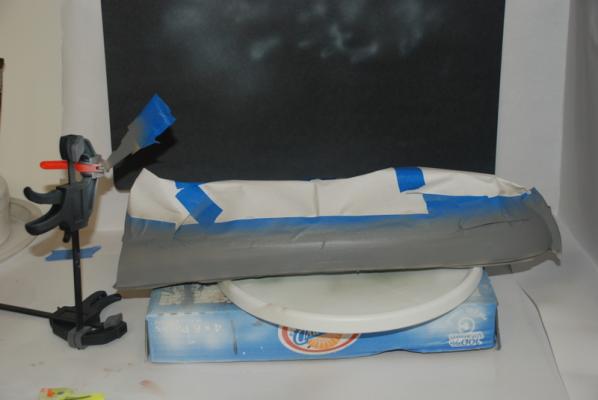
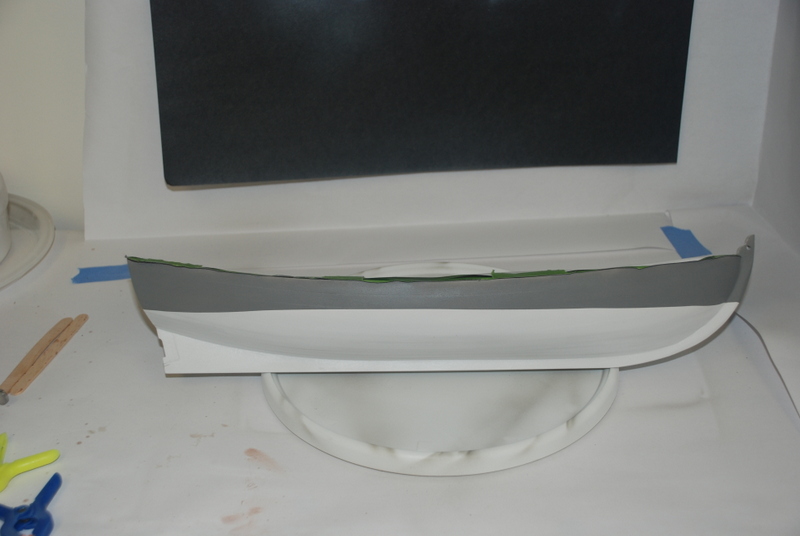
Here is the hull so far, with the off white and grey colors:
I re-masked the whole hull for the yellow stripe, being a lot more careful at the top edge, as the yellow needs to get right up to the edge:

I first sprayed yellow straight, but ended up toning it down with some white so it was a paler yellow. I sprayed the last coat last night so I should have some pictures of the whole painted hull soon.
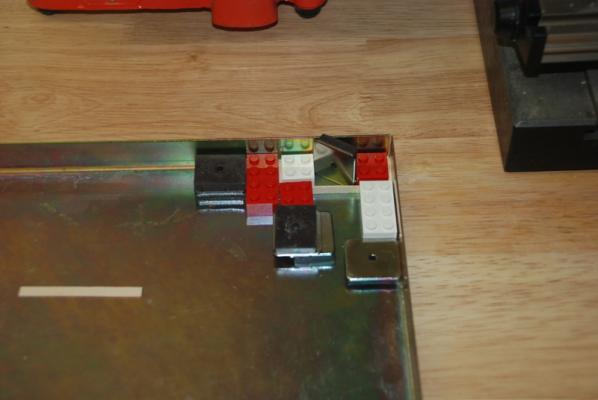
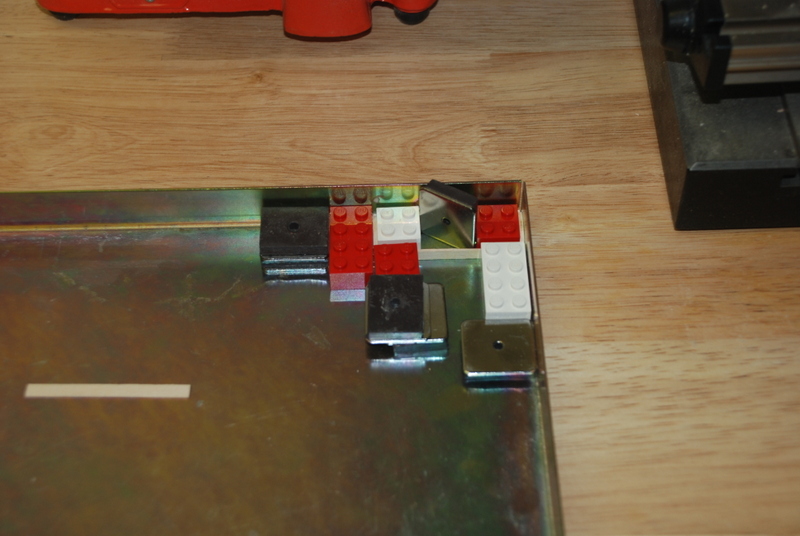
I started making the lid for the toolbox by gluing two planks to the two end pieces, after sanding the end pieces smaller so the lid will fit flush on the box. I have had this magnetic jig for a while and it worked OK but not great. When I added the Legos pieces to use as small squares, it really made this much more useful:
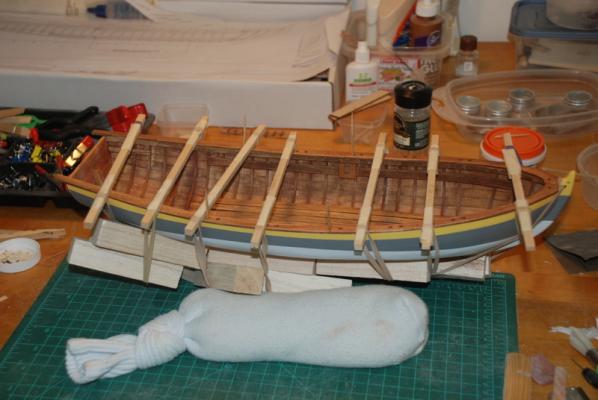
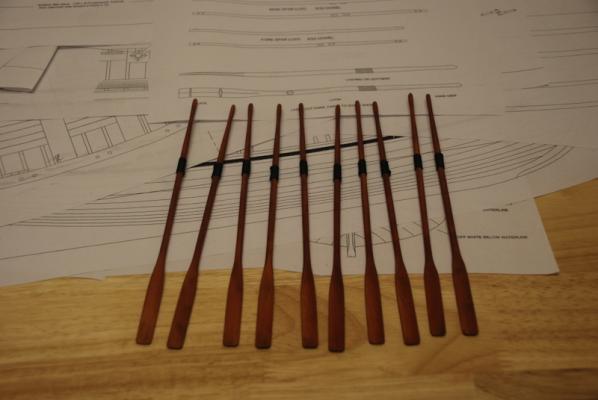
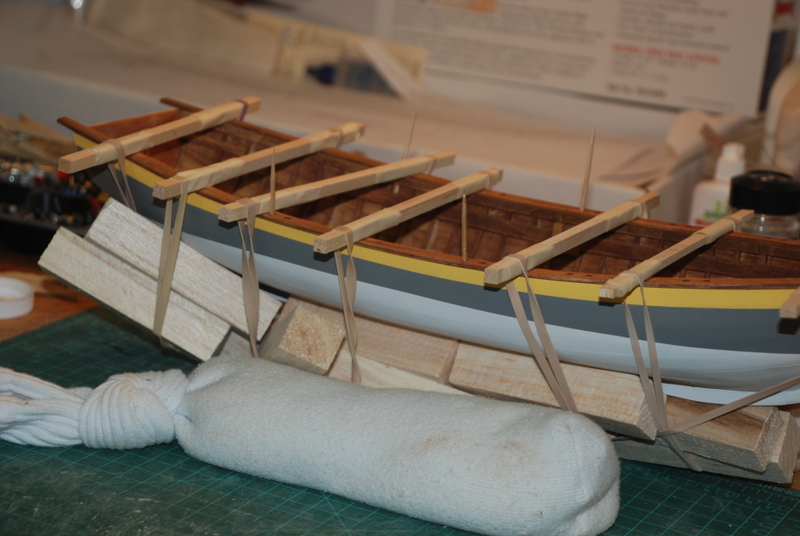
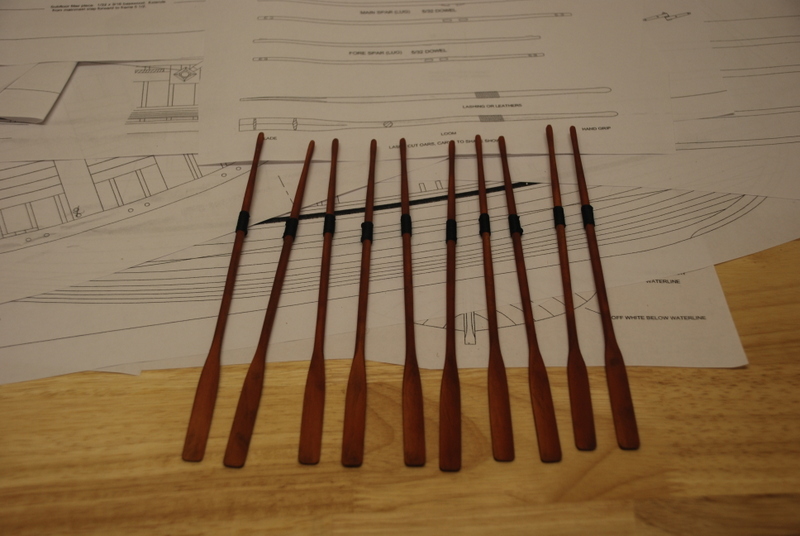
Finally, I stained the oars, but did not like the finish, so I ended up spraying them with some burnt sienna paint, which I liked a lot better. I also added the lashings to them, which I painted with a very diluted solution of white glue and water to fix them in place. I am very pleased with the results:
-
-
Jaager, that is exactly how I marked the water line on the Bounty Launch. The only trick was keeping out of the way of the laser while applying the masking tape.
-
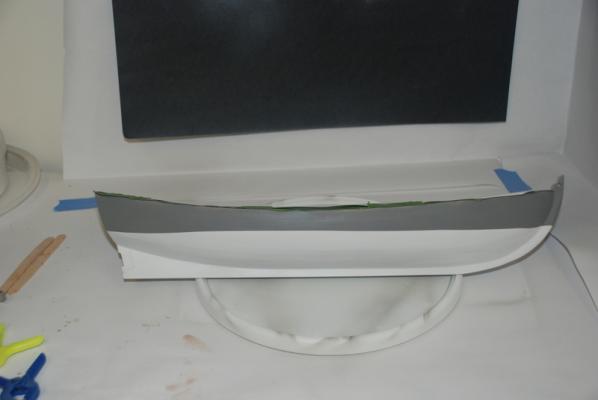
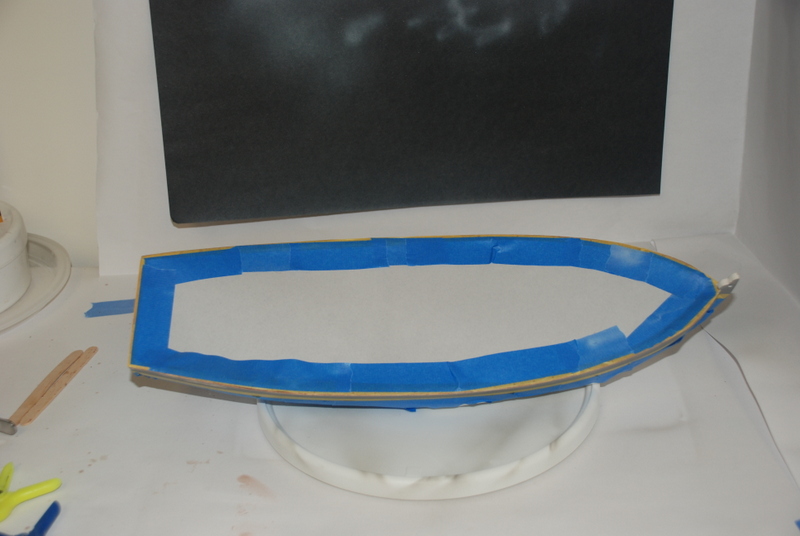
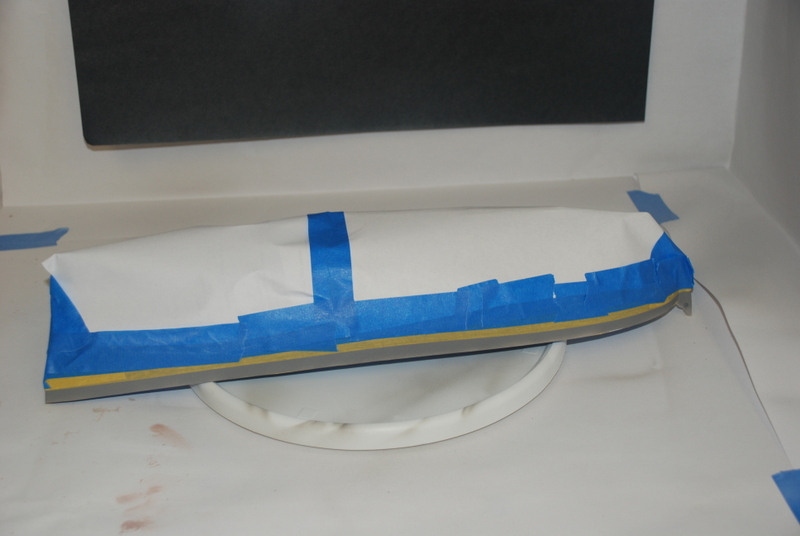
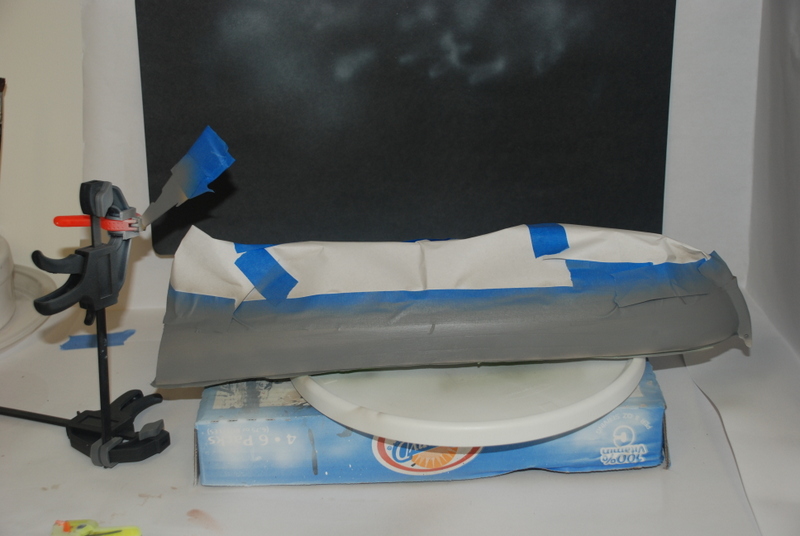
I marked the waterline on the hull but forgot to take any pictures. I used a laser level on a tripod, with the hull in the cradle, to project the waterline onto the hull, then instead of marking the line with a pencil, I placed long strips of masking tape along the laser line. I did it this way because I didn't want any pencil marks showing up on the white portion of the hull. I also masked off the rudder at the same level so the waterline will continue from the hull to the rudder.
I masked off the rest of the hull and rudder with masking tape and paper, and sprayed three coats of grey paint above the waterline:
Between coats, I started putting the tool box together. Here I am adding some of the trim pieces. I mitered the joints between the trim pieces at the corners.
I am going to try making the lid for the toolbox from the two side pieces that came with the kit, but instead of using the solid pieces for the rest of the lid, I am going to use wood strips to plank the lid.
-
Henry, I am glad that you are back to shipshape. I know the feeling as you watch your model fall. The other night I was holding the hull to line up some masking tape and the next thing I know it is bouncing off the work bench. No damage except to my heart, luckily.


Santisima Trinidad by GTM - OcCre - 1:90 - Kit Bashed
in - Kit build logs for subjects built from 1751 - 1800
Posted
Wow, they actually open and close. That is impressive.