Moonbug
-
Posts
1,028 -
Joined
-
Last visited
Content Type
Profiles
Forums
Gallery
Events
Everything posted by Moonbug
-
 Lovely work Werner! One of my favorite models - so much so I’ll be building it again soon. I appreciate your unique take on it.
 -
Thanks DA, I appreciate it! And thanks for looking in on the build.
-
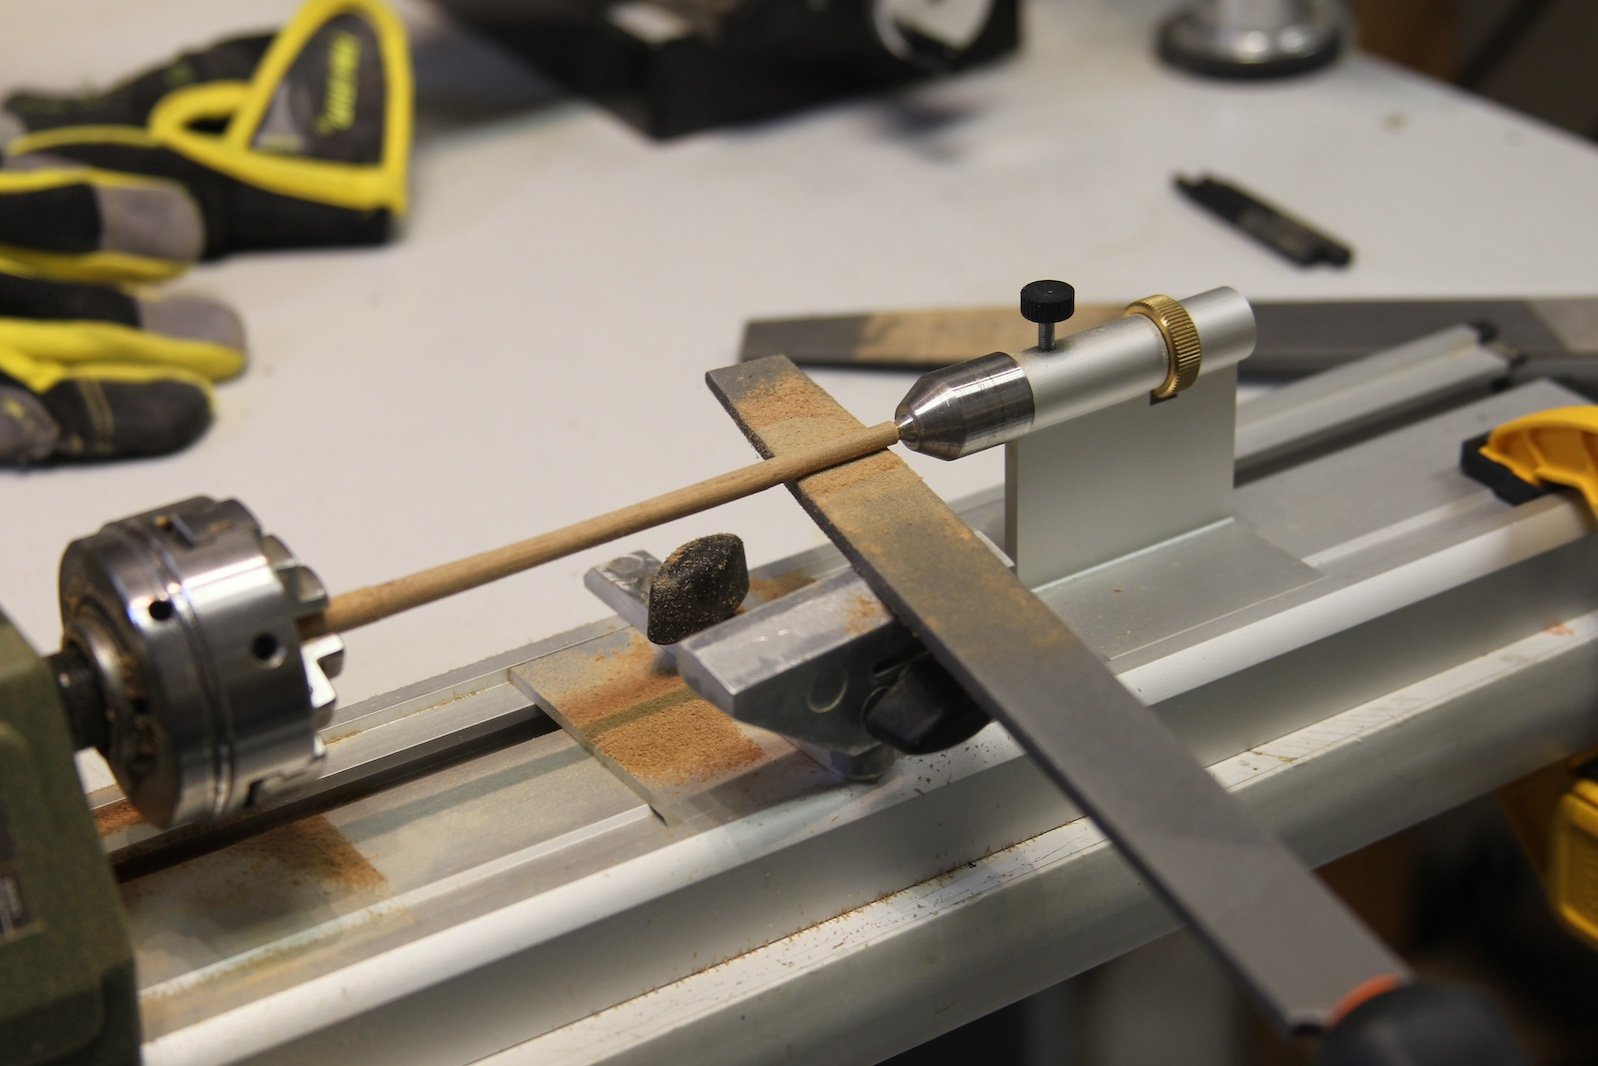
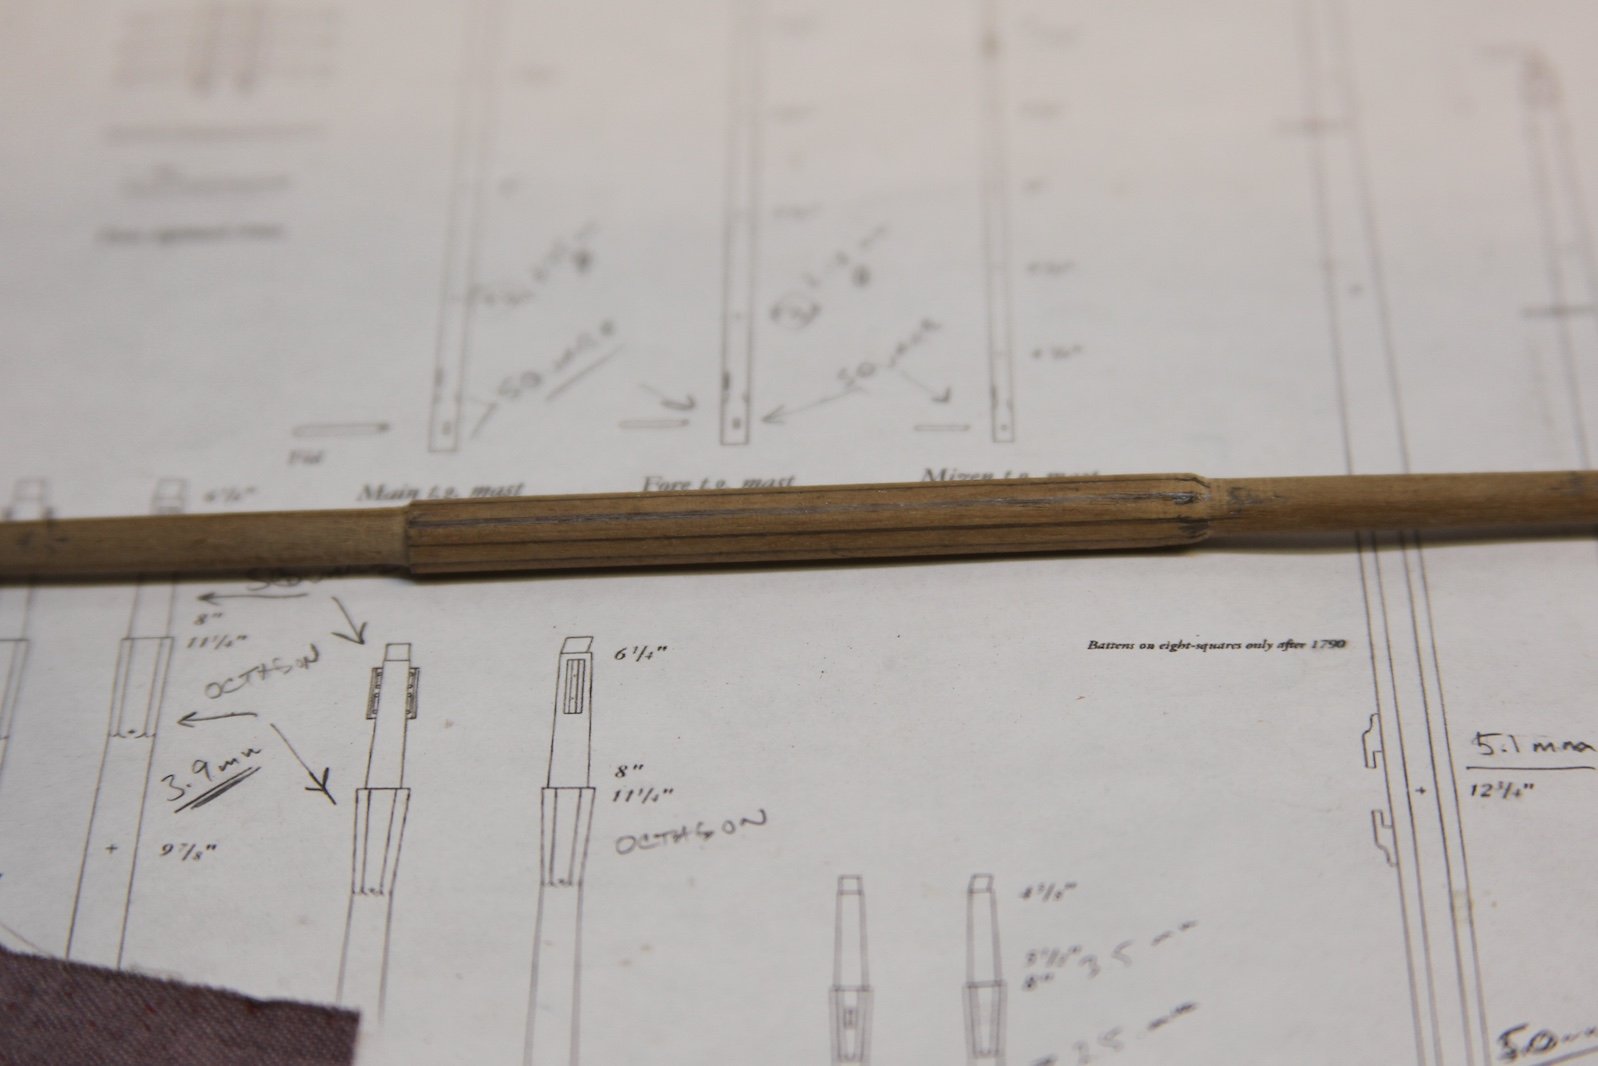
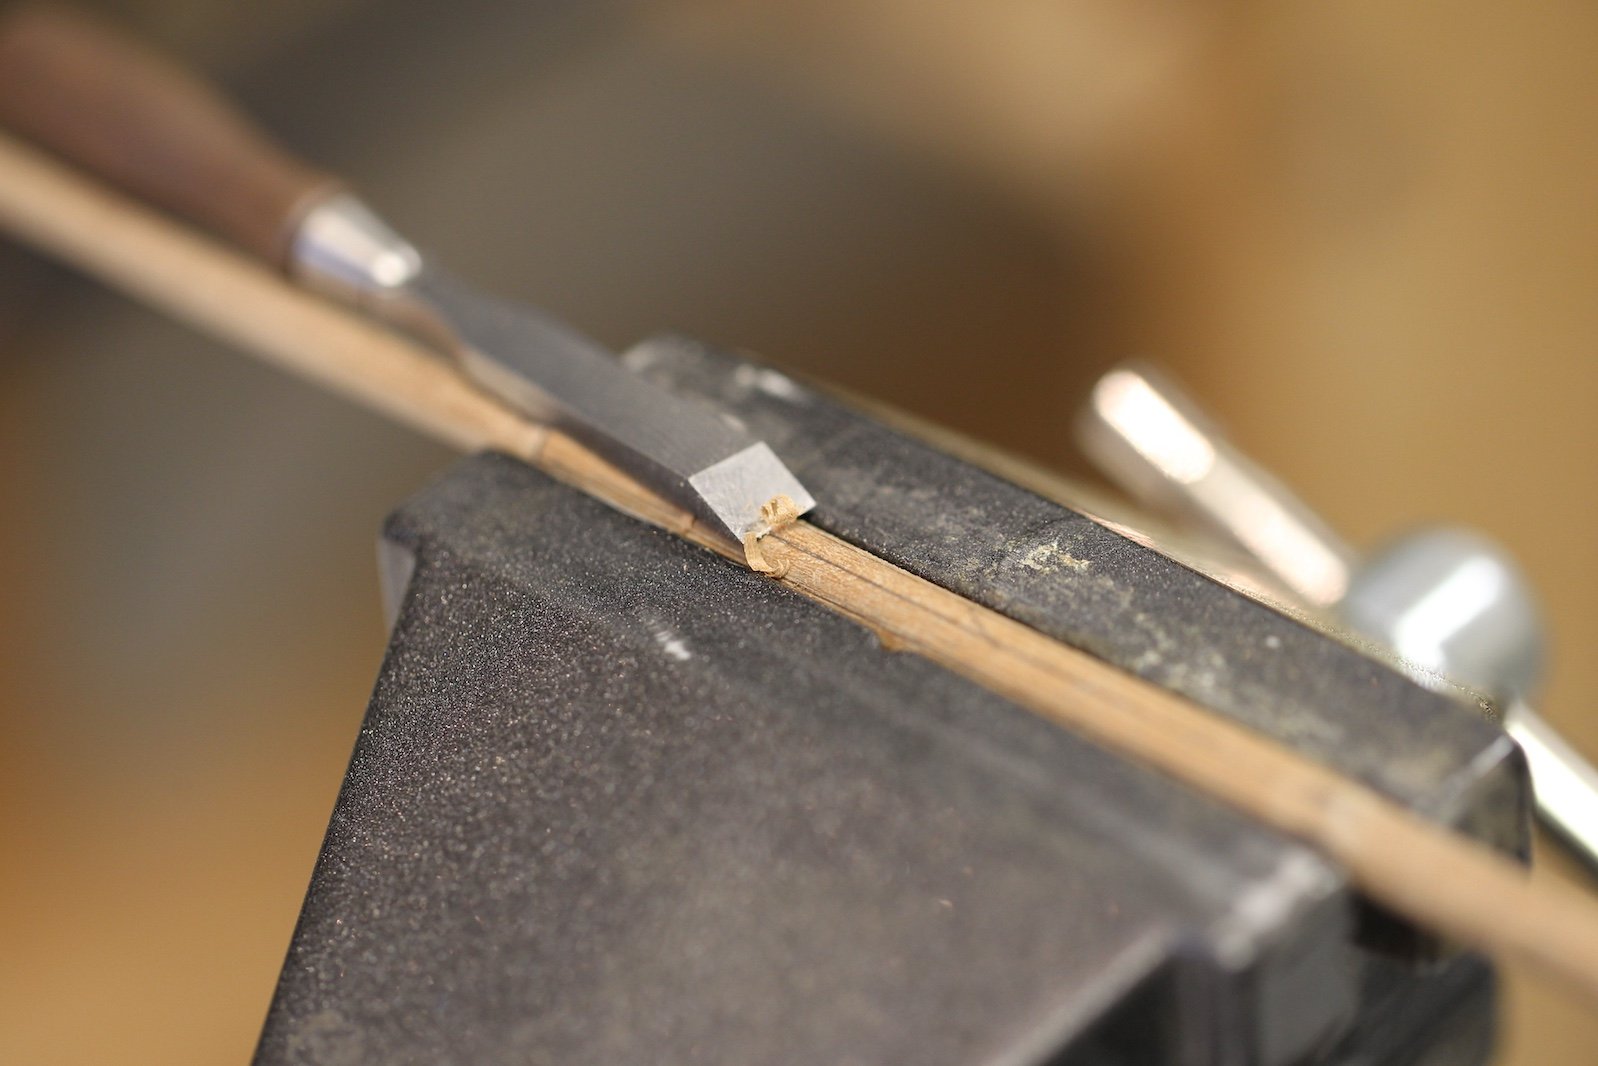
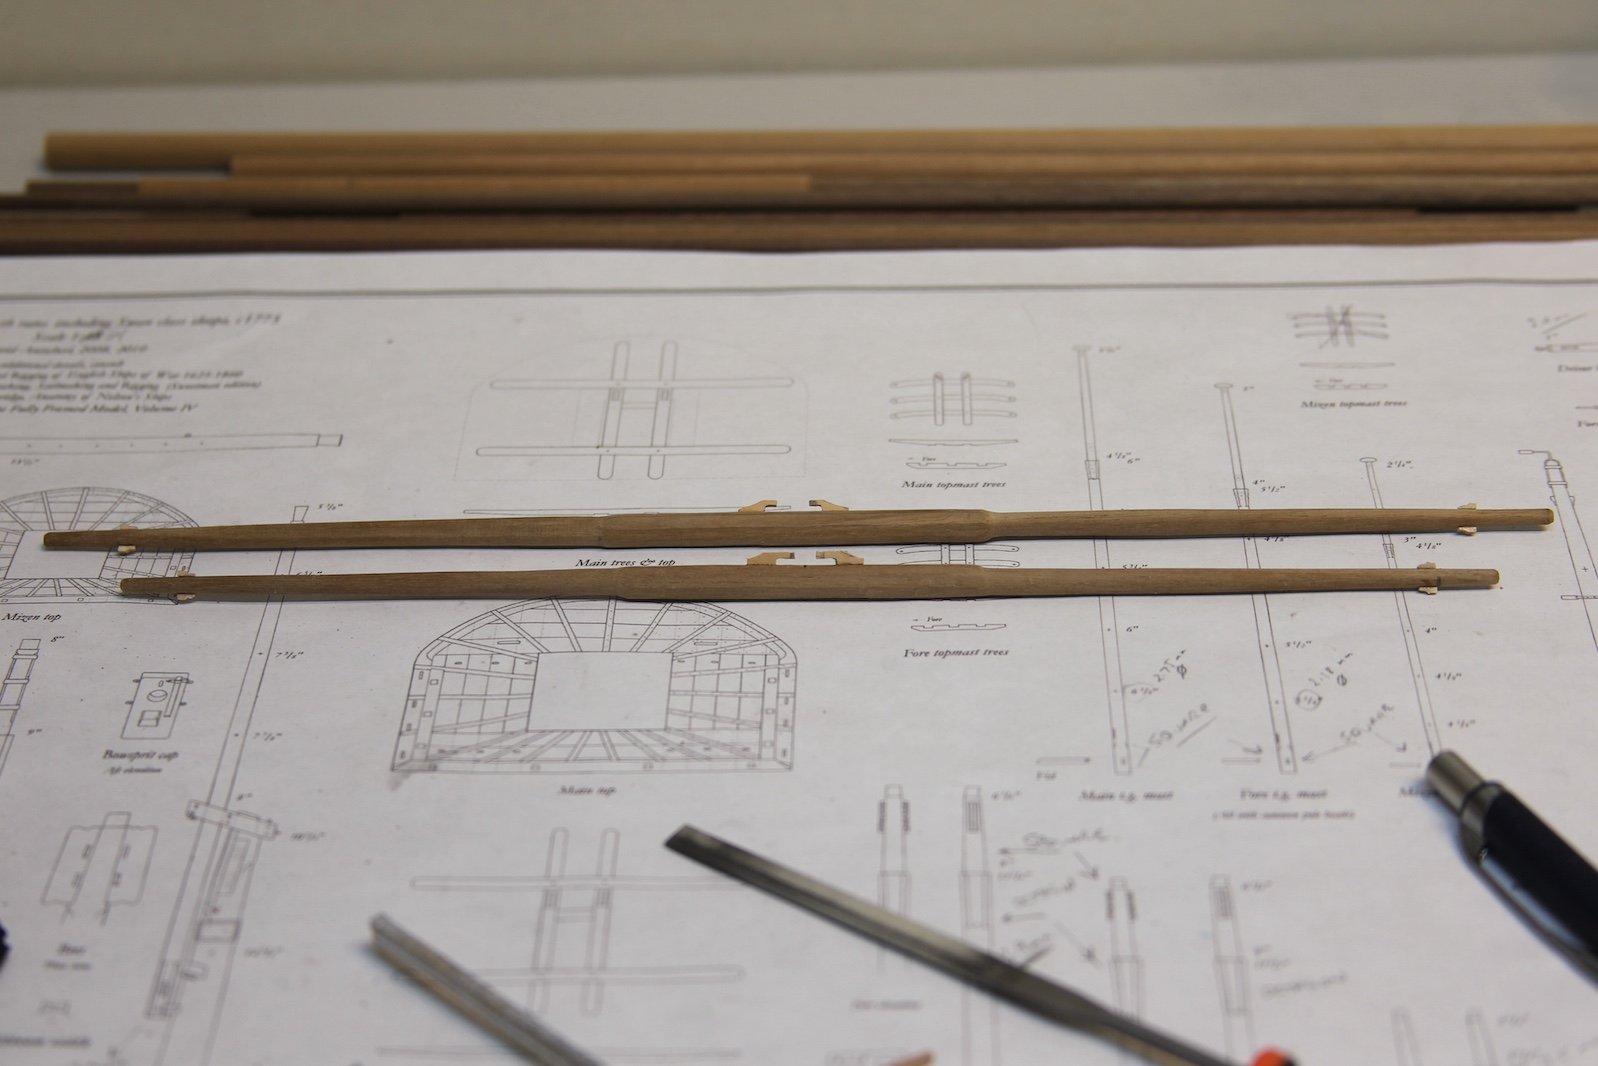
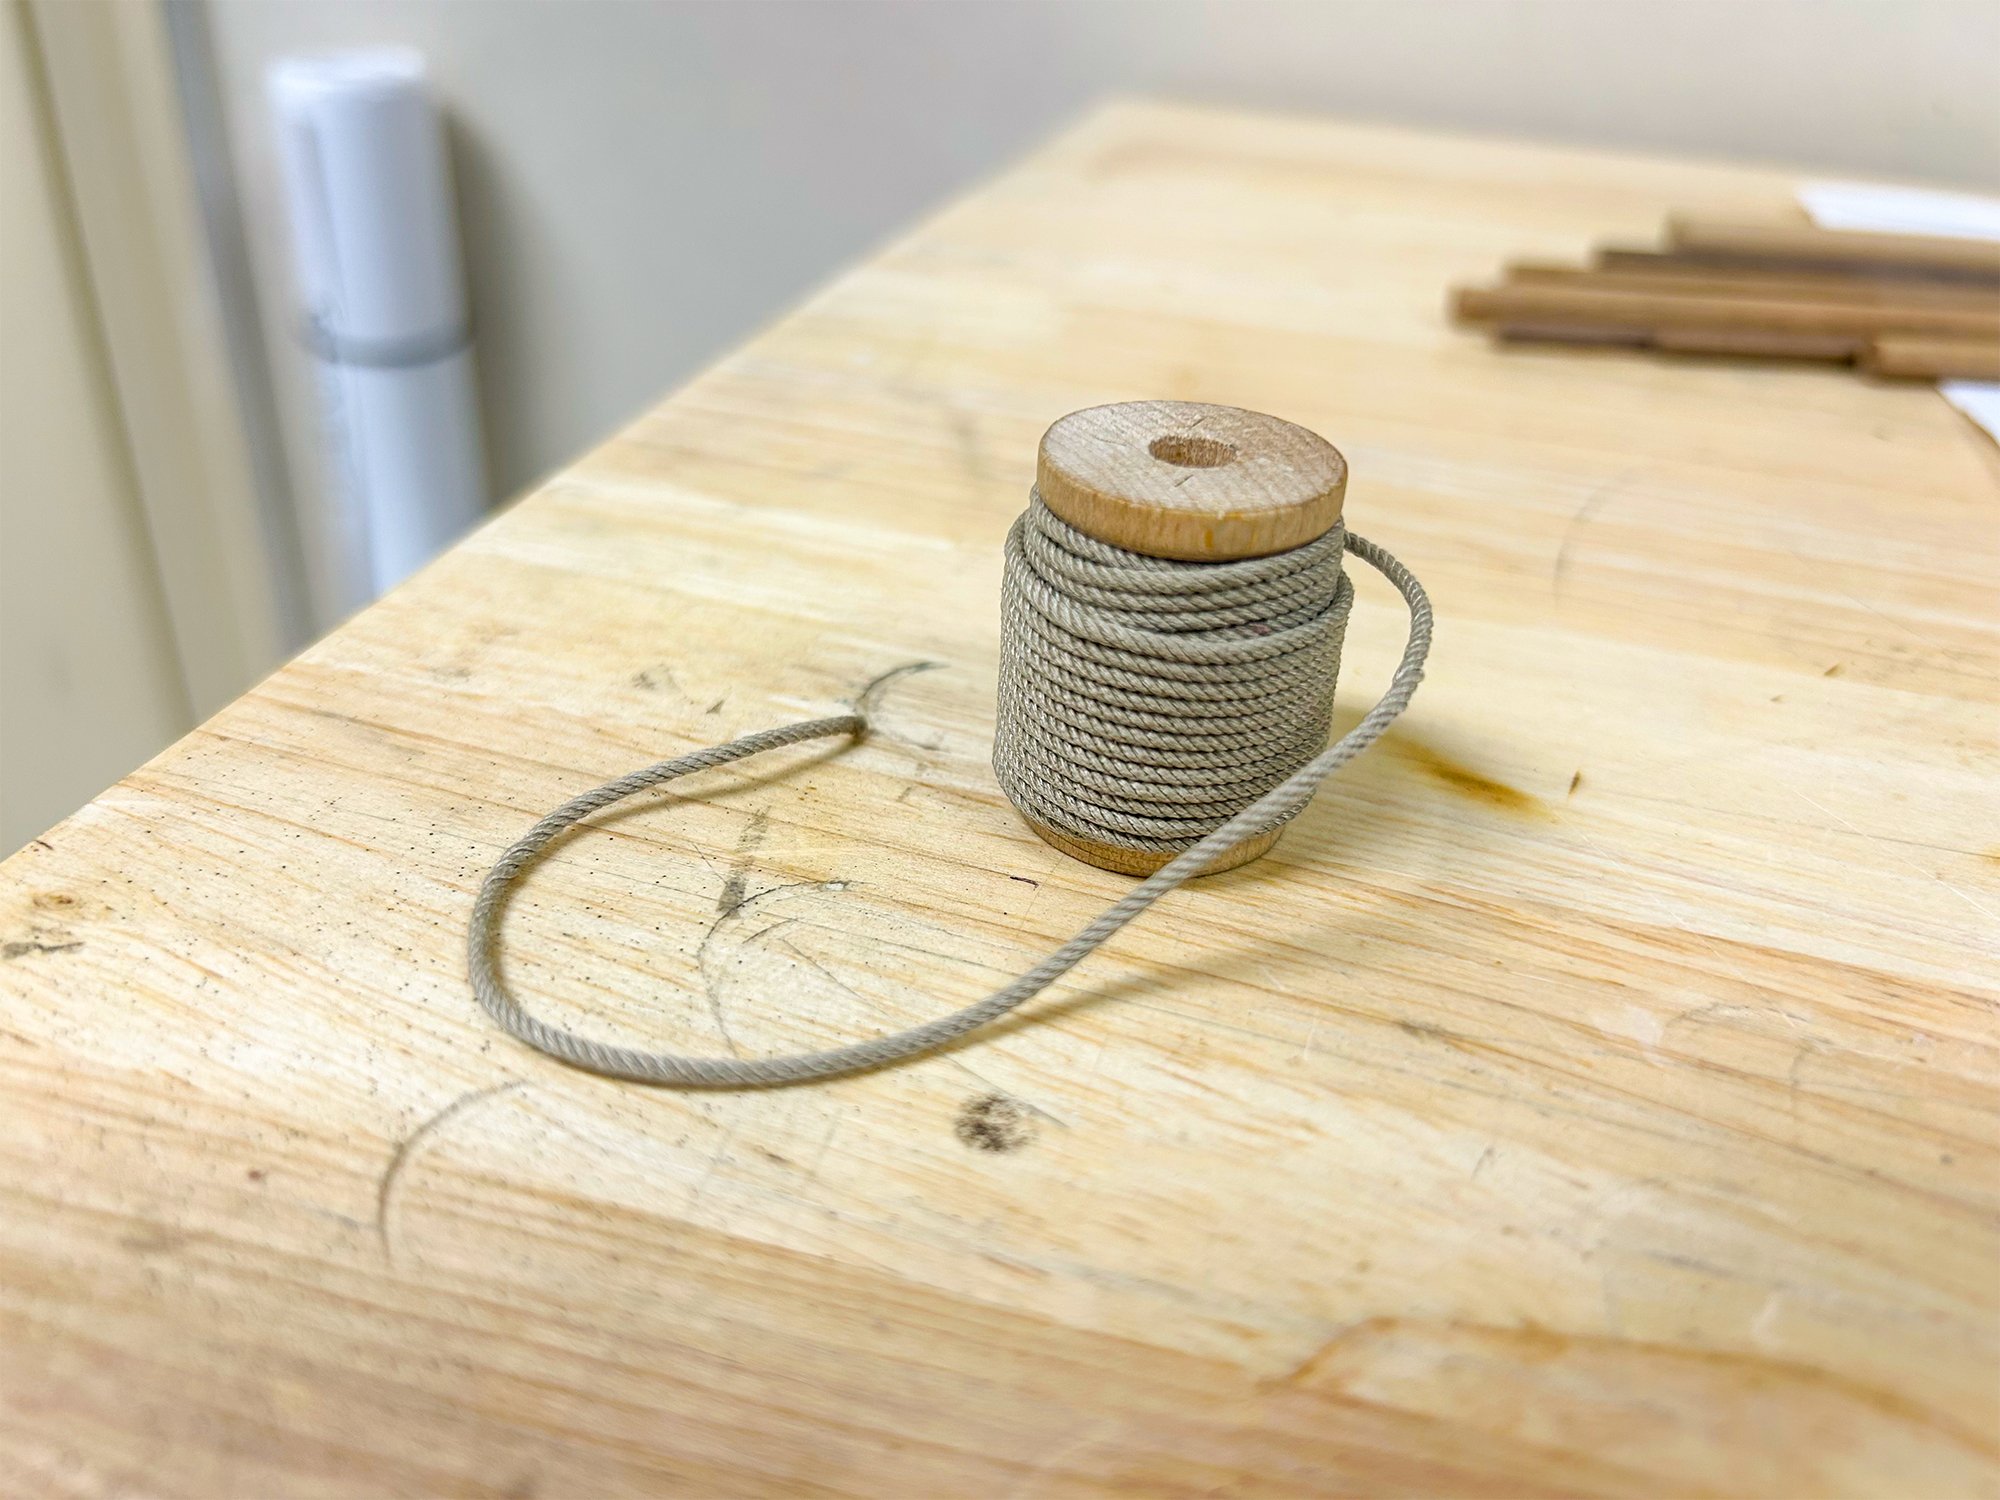
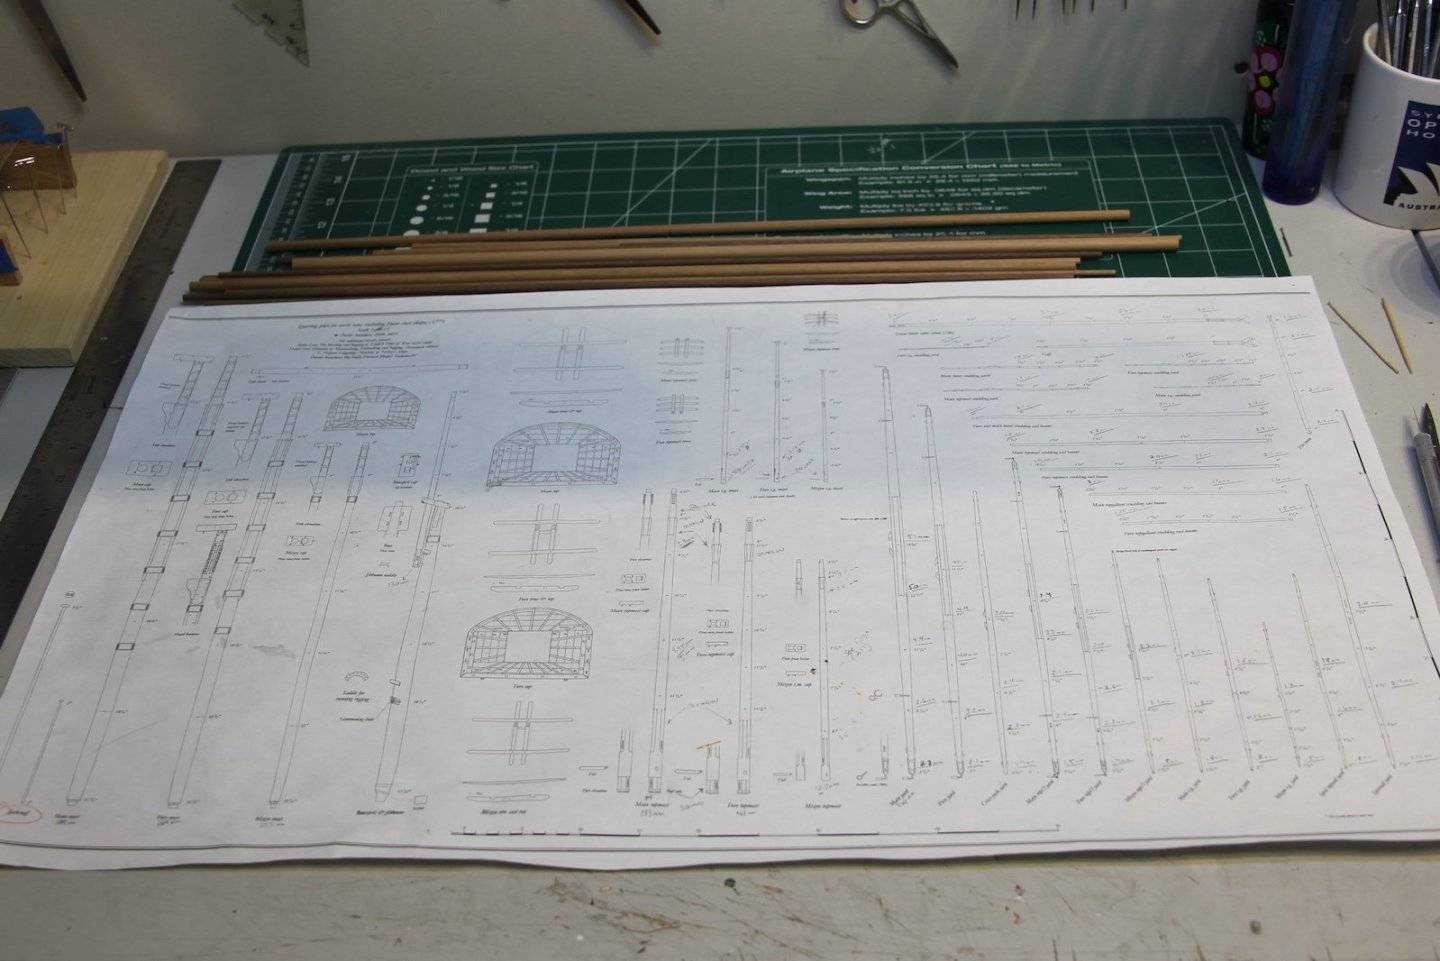
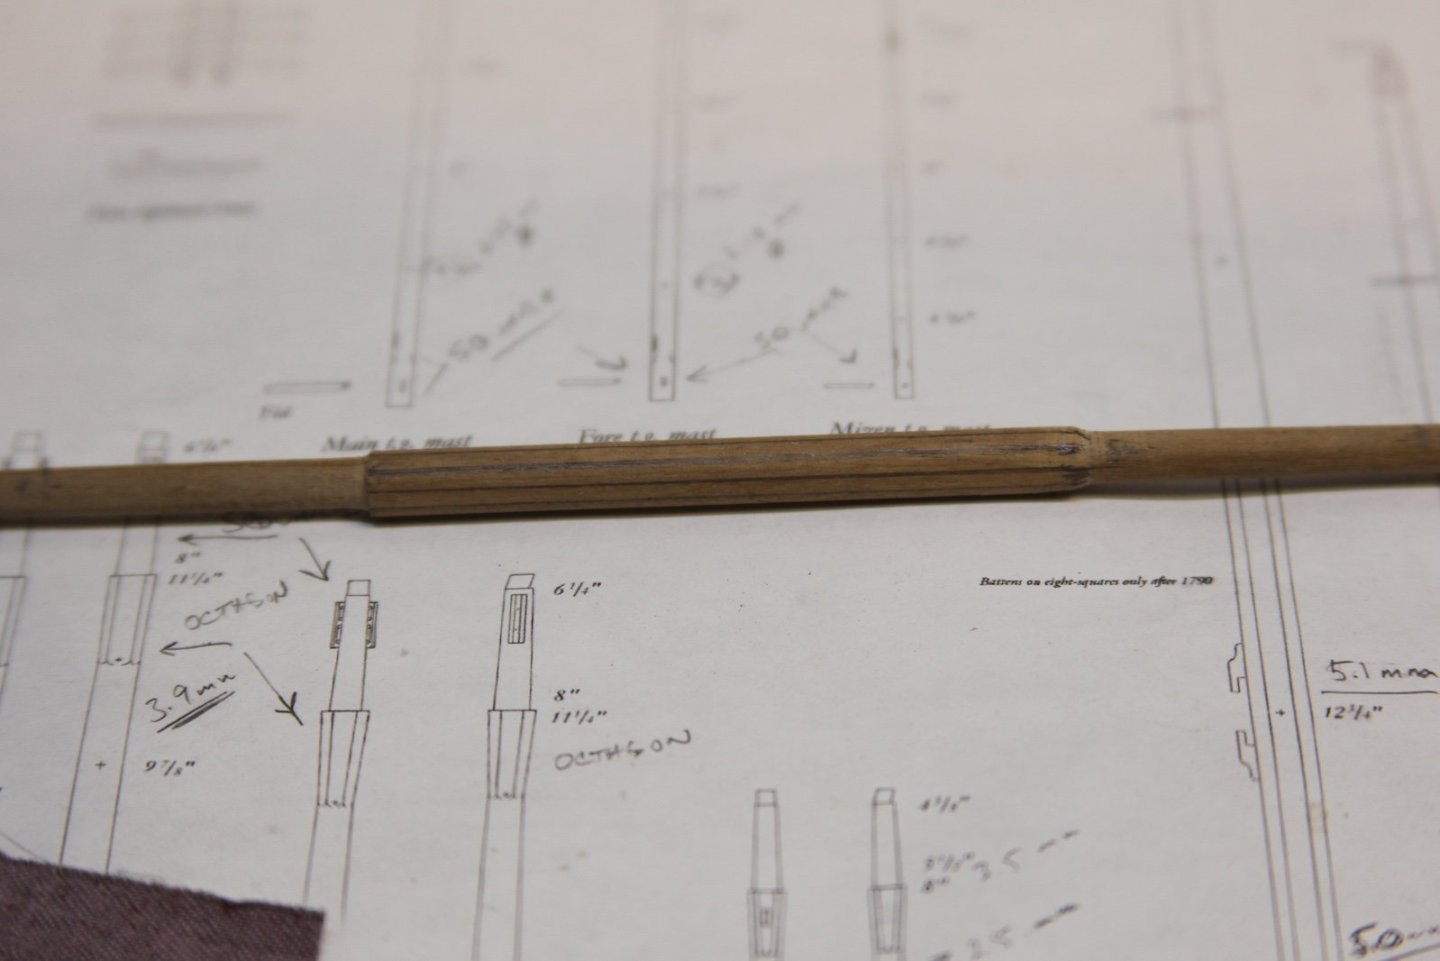
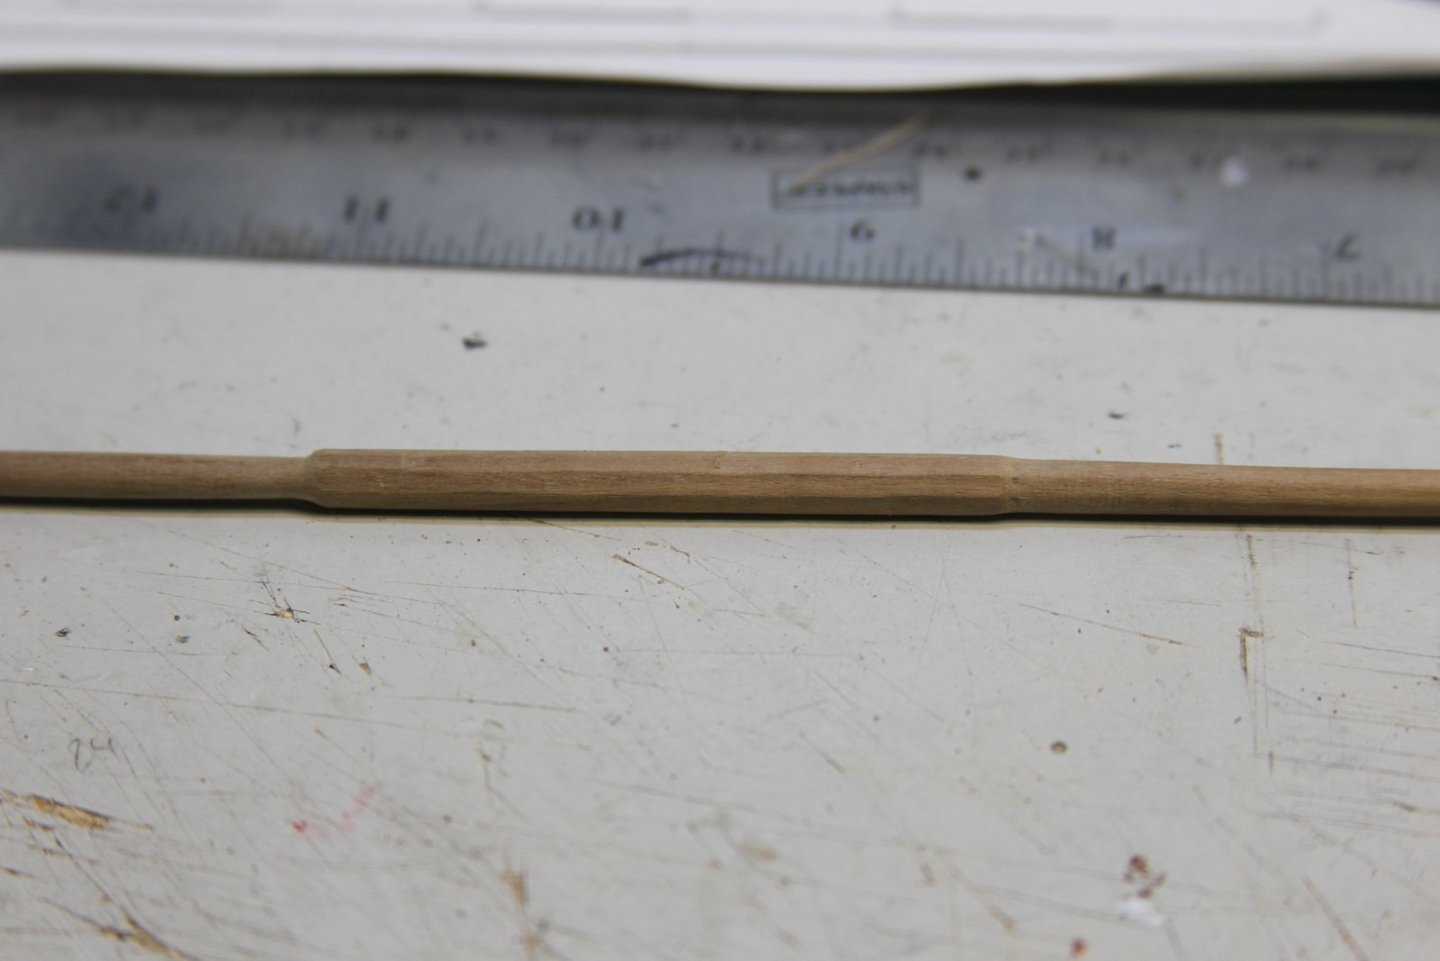
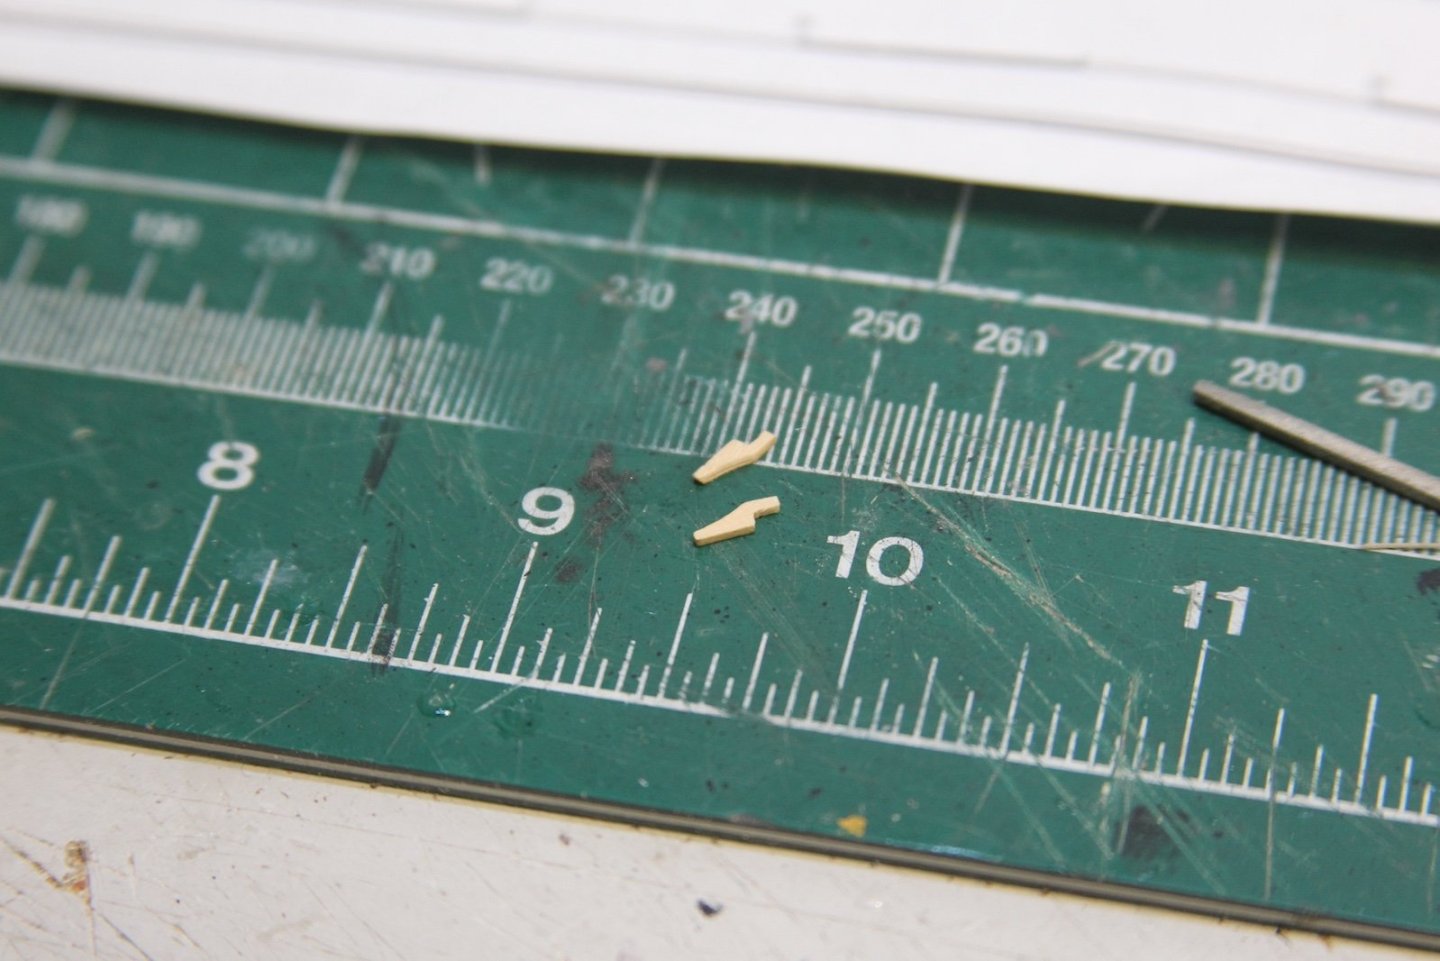
Yards and yards of yards. There are likely to be some sporadic posts while I work on building out the yards. My intention is to build / shape the yards, paint them, then fit them out before I start the running rigging. I'll go over creating the main yard, but probably not likely to illustrate much with the others unless there are some specific deviations. First, I laid out my Swan yard illustration from The Fully Framed Model. Those who are familiar know that TFFM is scaled to 1:48, so i took the layout to my local print shop and had it scaled down to 1:64 so I could directly correlate the yards to the layout. Then, I went through and adjusted all the numbers from their real-time inch measurements to the scaled millimeters at 1:64. Ideally, the yards are much easier (and better) to make from square stock - but I'll be using the dowels I have on hand because most of my extra square stock is of much softer wood (I don't have a supply of boxwood). To accomplish this, I start with a dowel at least 2mm larger in diameter than what I need for the yard, measure out the necessary diameters at the different lengths of the yard, then start by filing off the yard to get close. Then I'll follow up with a couple varying degrees of sandpaper to get it smooth and down to the proper exact diameter. To get the octagonal section correct, I started by marking out lines in fourths, then eighths in equal measure. The yard is locked into the vice, then the first pass is made with my snazzy veritas miniature chisel - thanks to @giampieroricci for the recommendation. I then lightly cover them with my miniature plane to try and get them as even as possible at this scale. The center and end cleats are all shaped from scrap boxwood. Here are the main and fore yards, but I'll wait until all of them are made before I paint them all black.


- 419 replies
-
- 7
-

-
- Victory Models
- Pegasus
- (and 2 more)
-
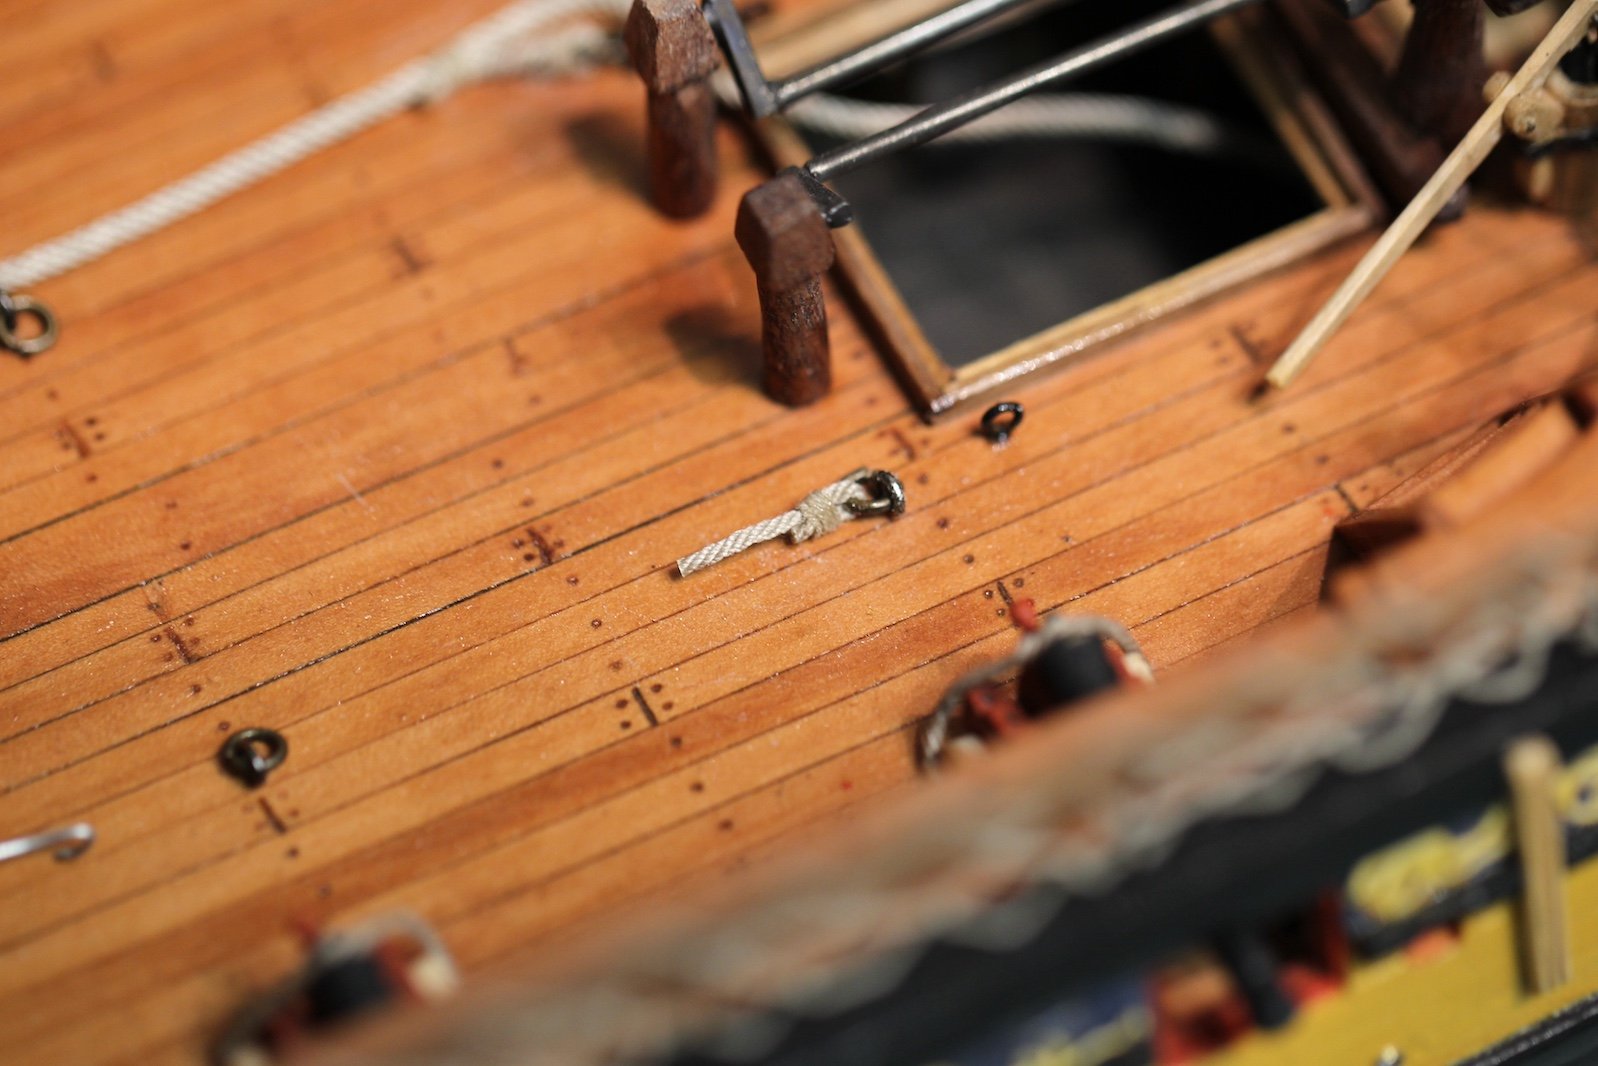
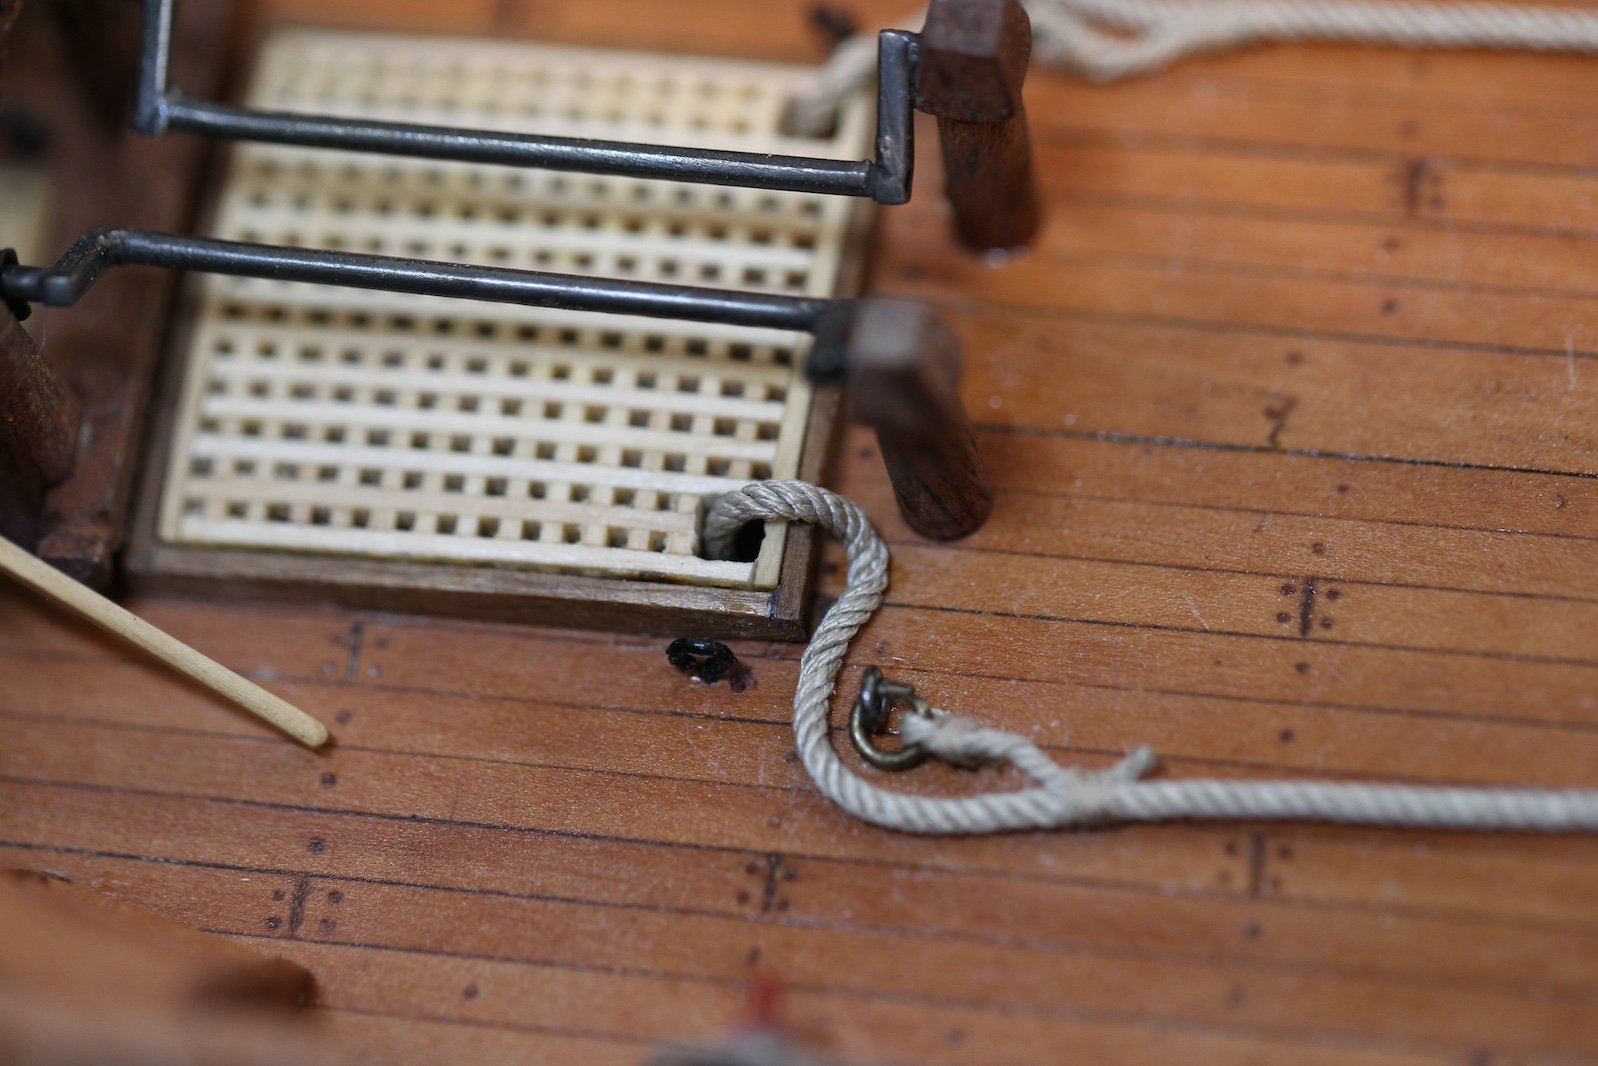
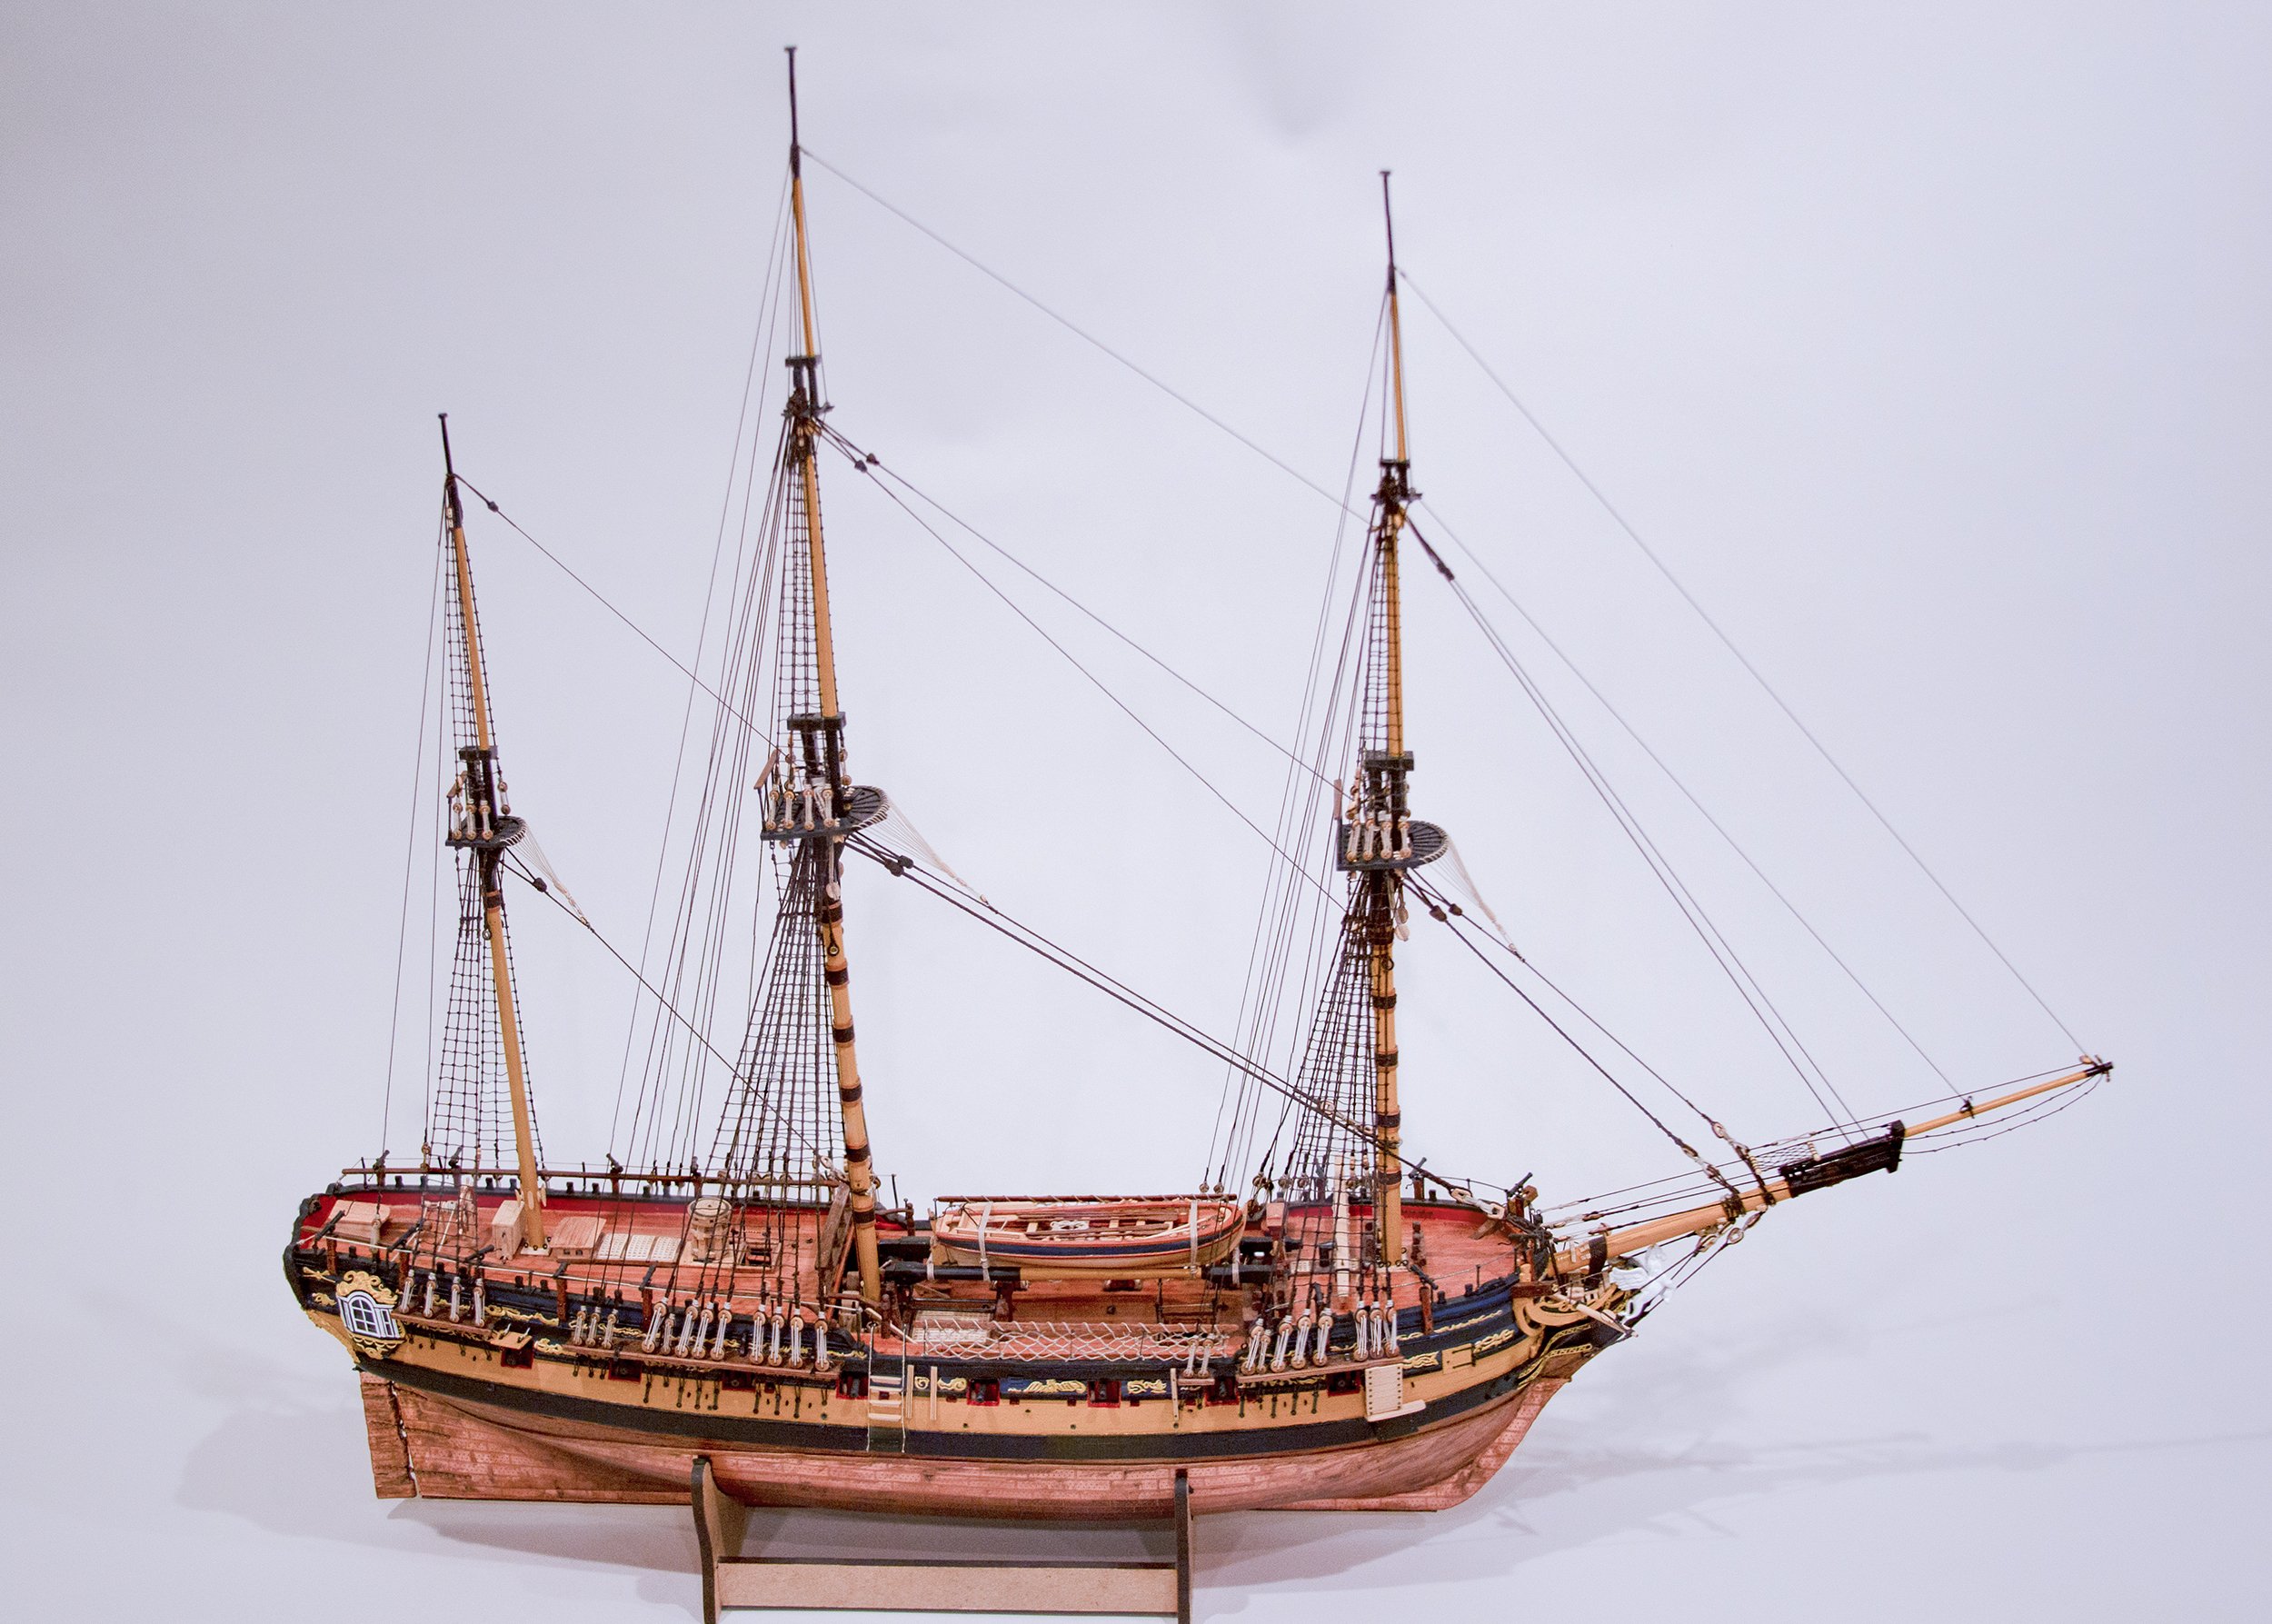
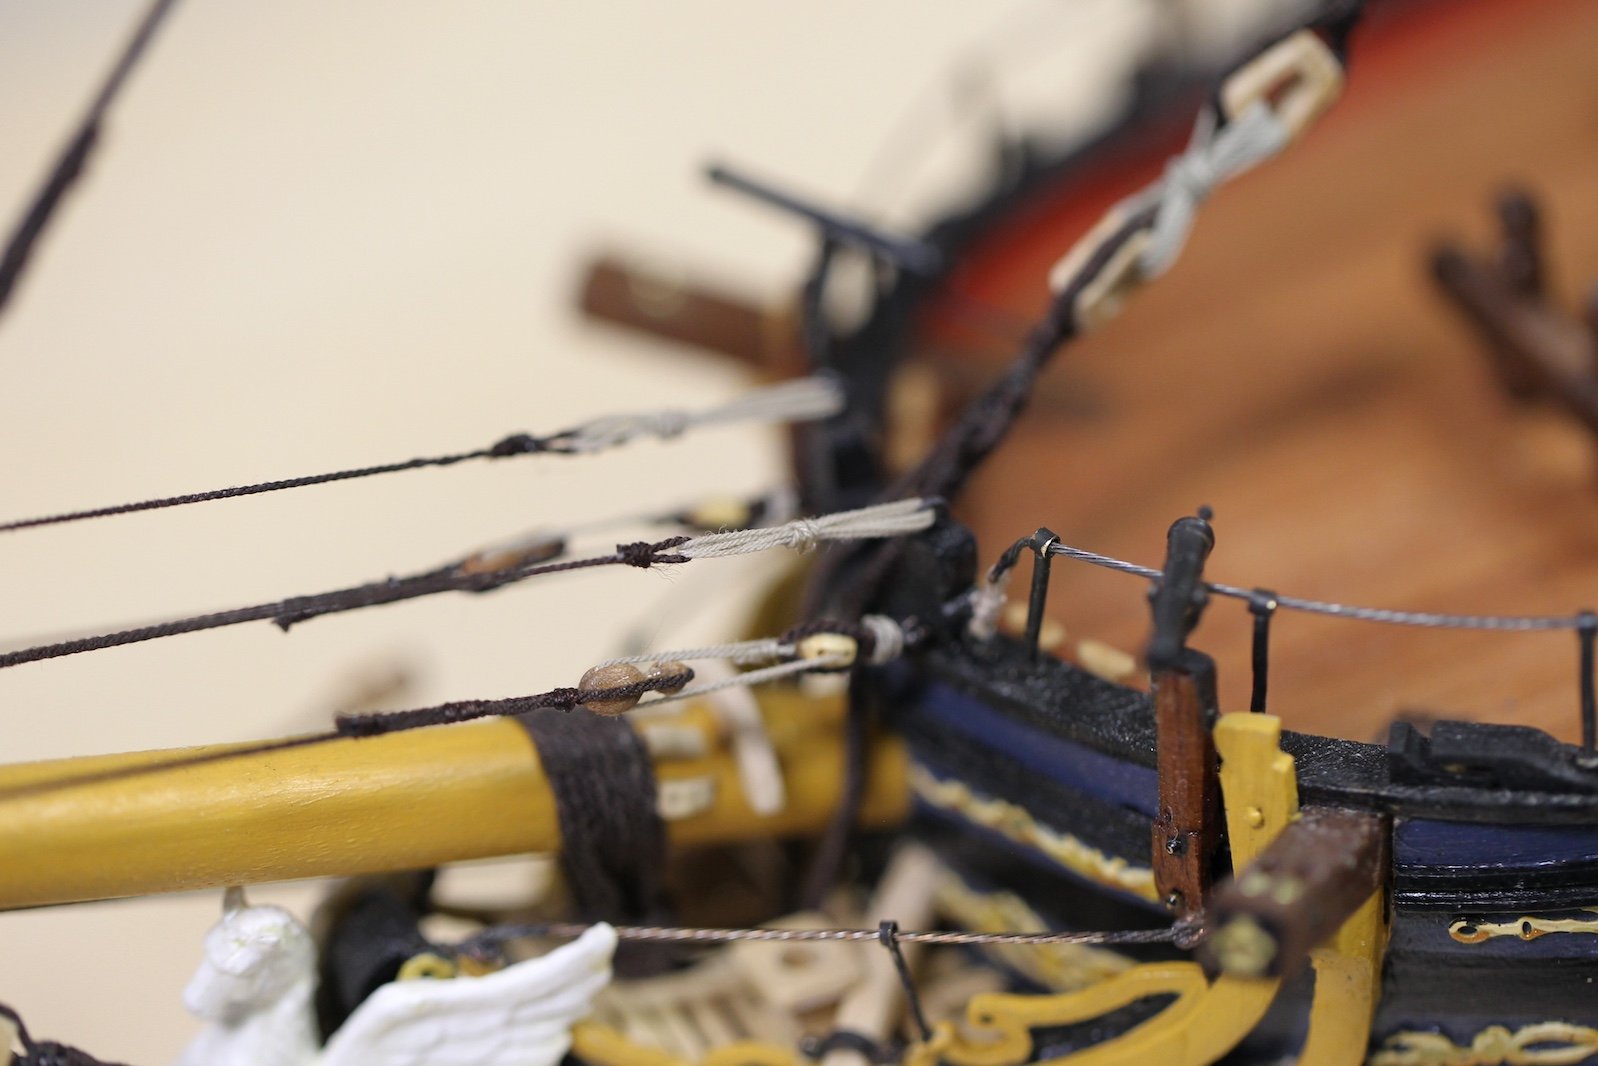
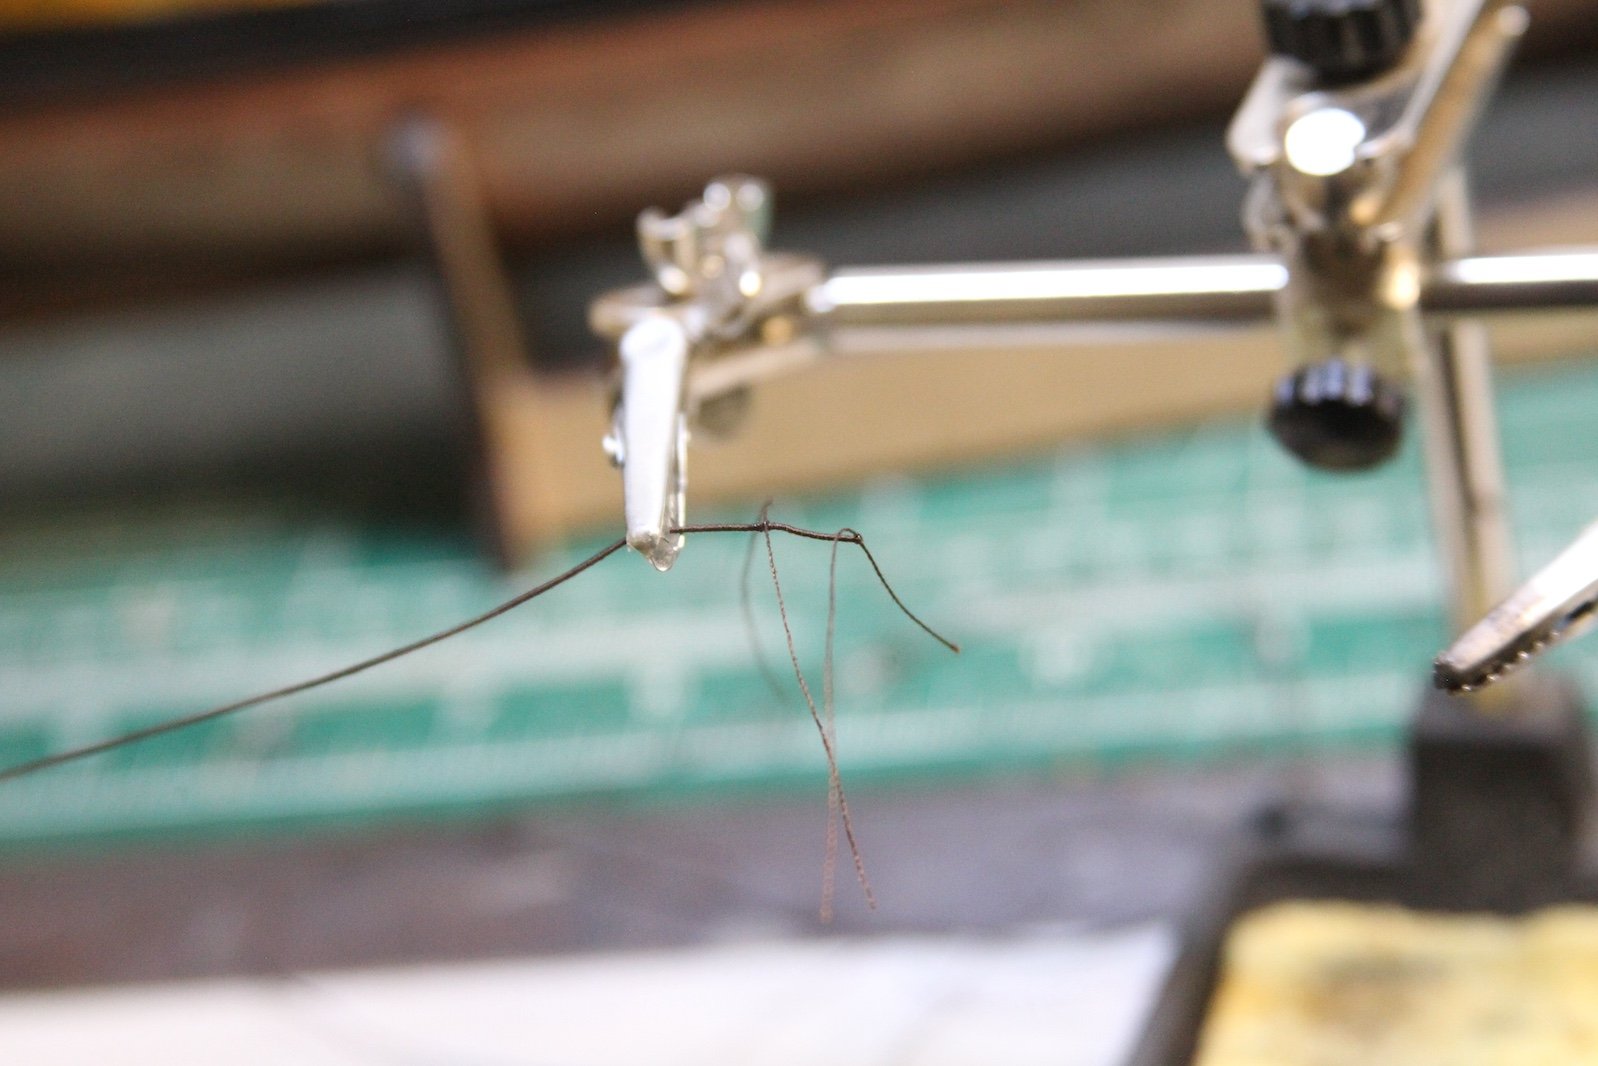
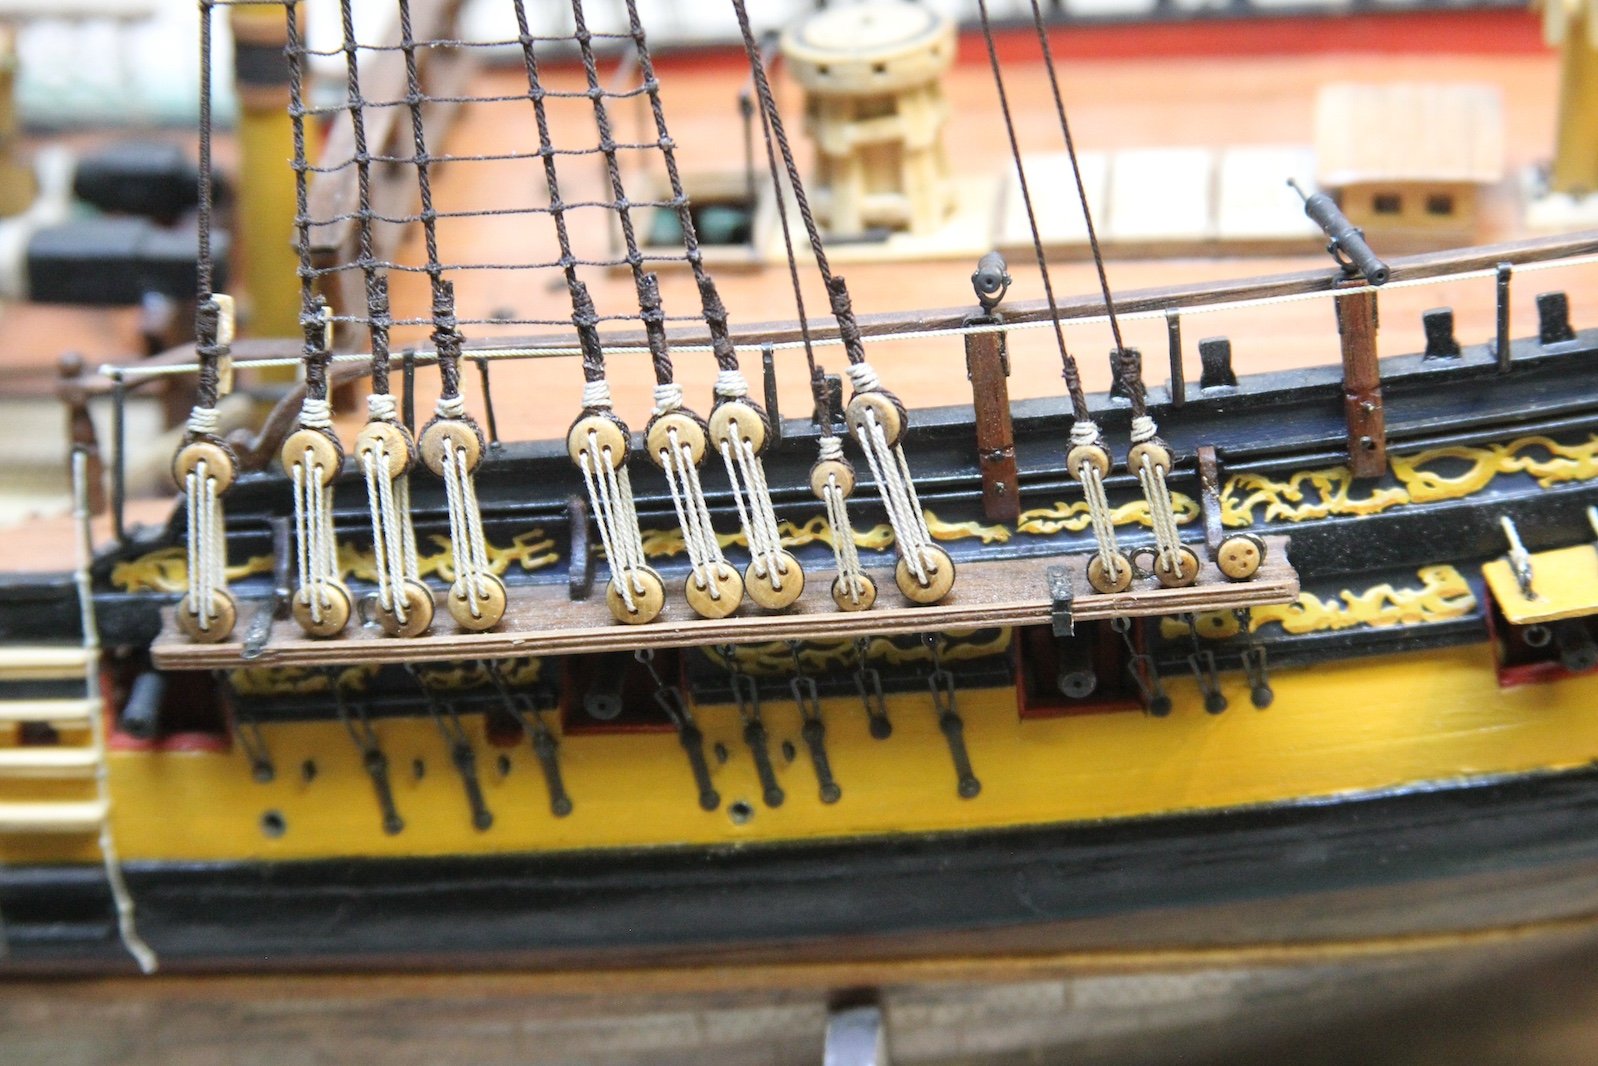
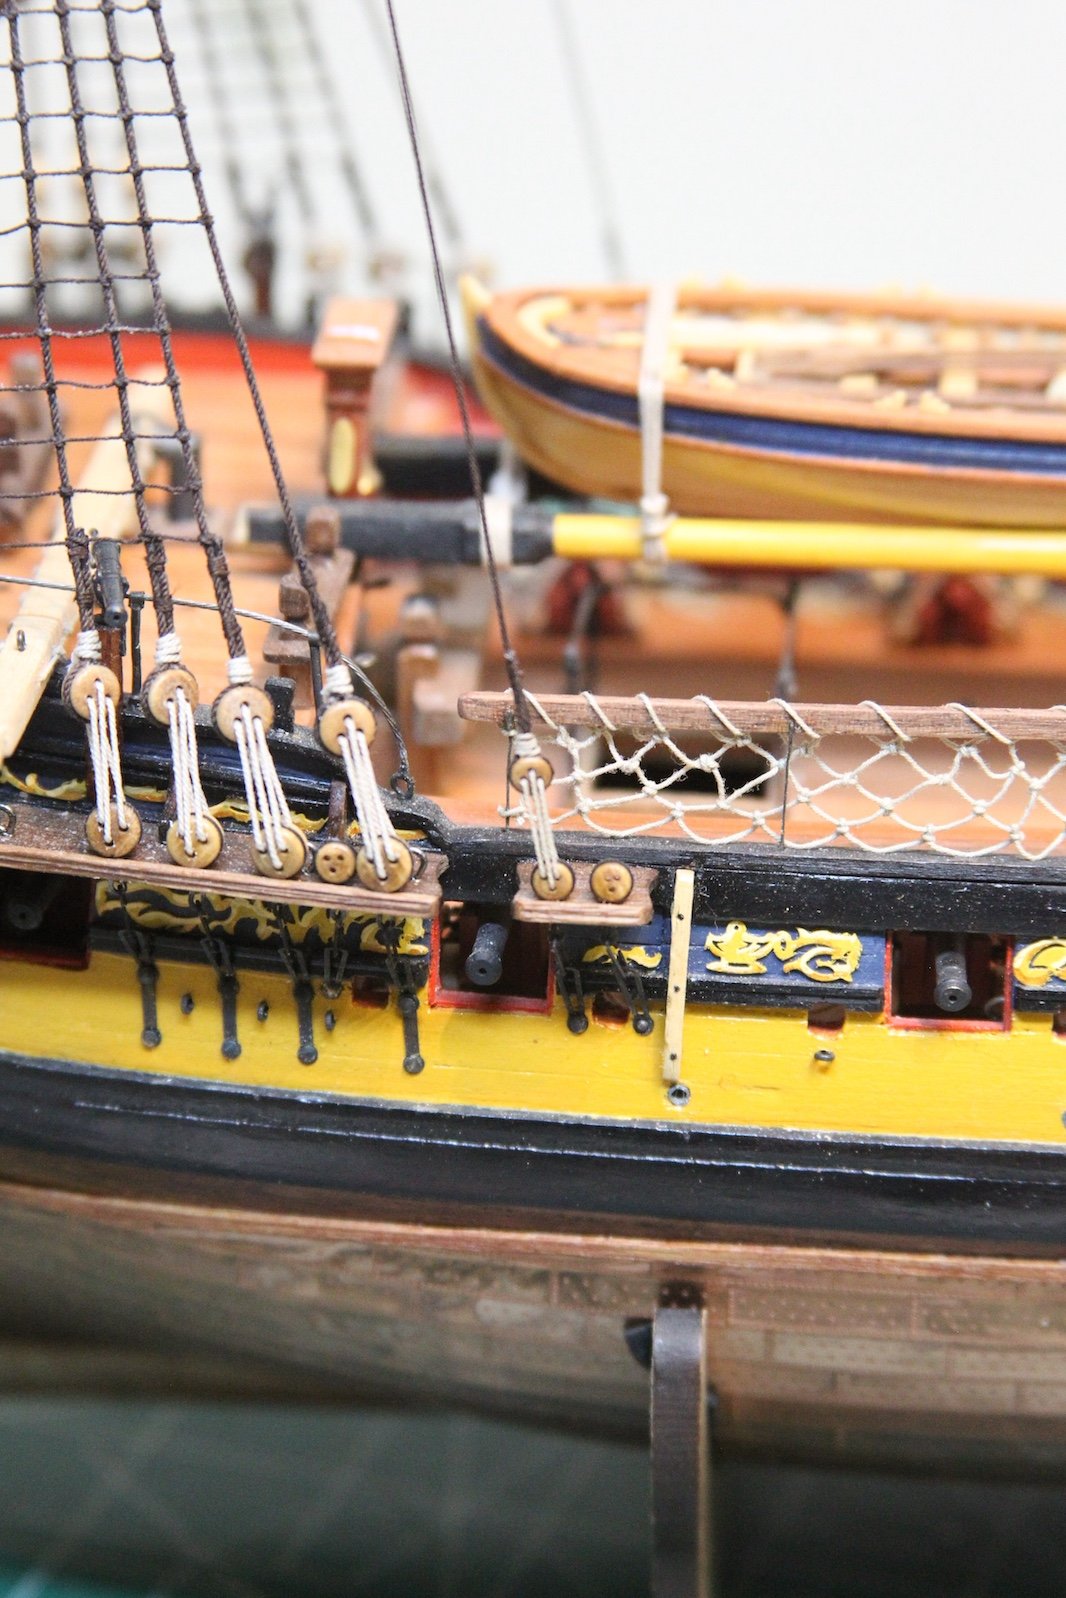
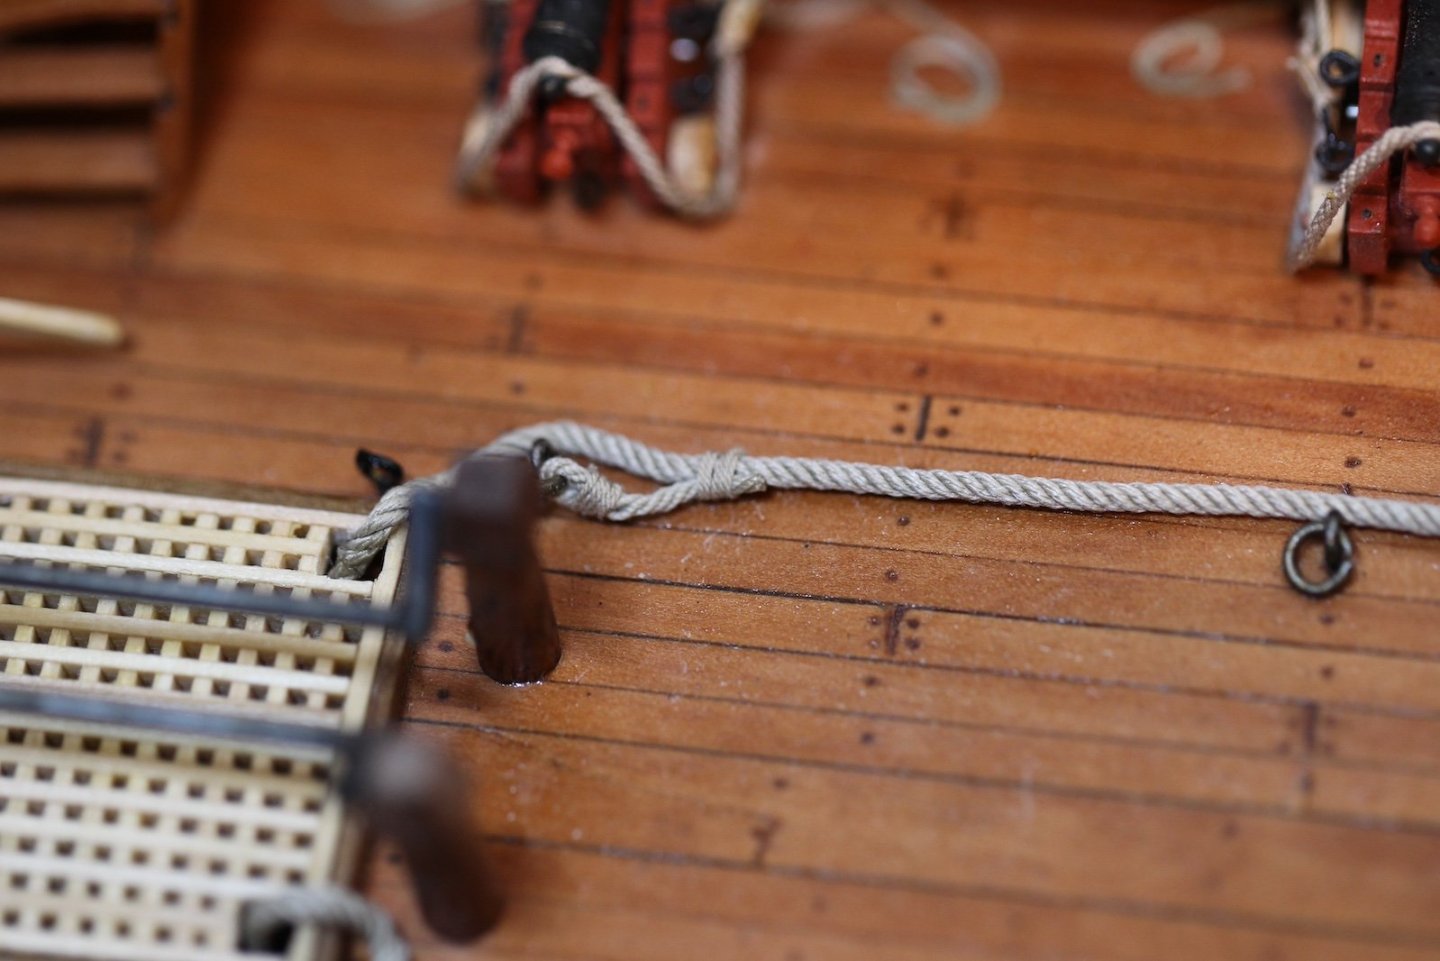
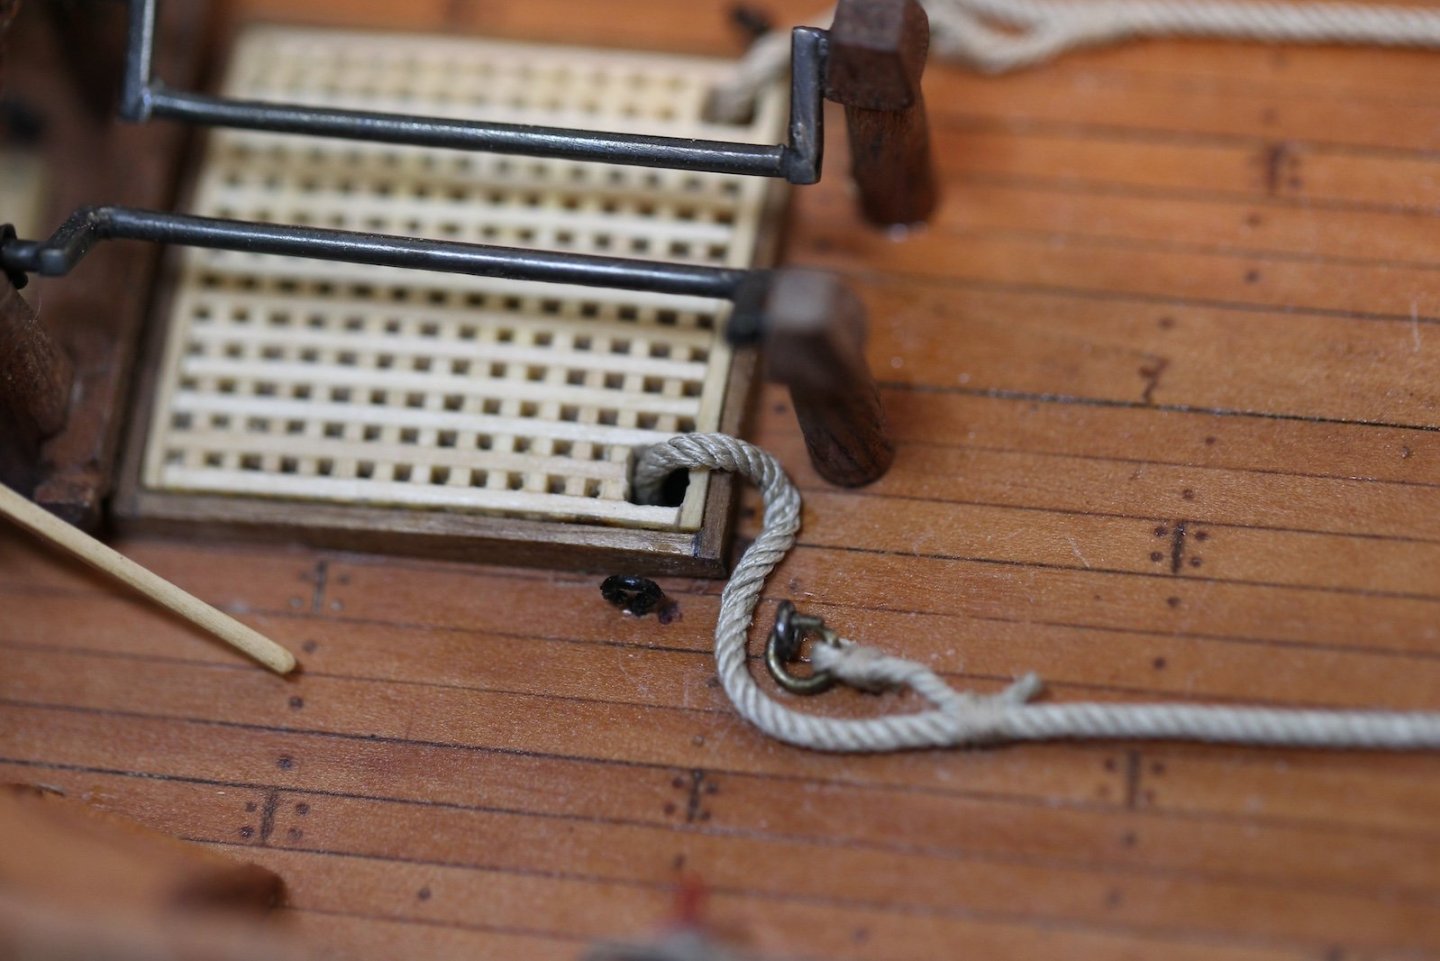
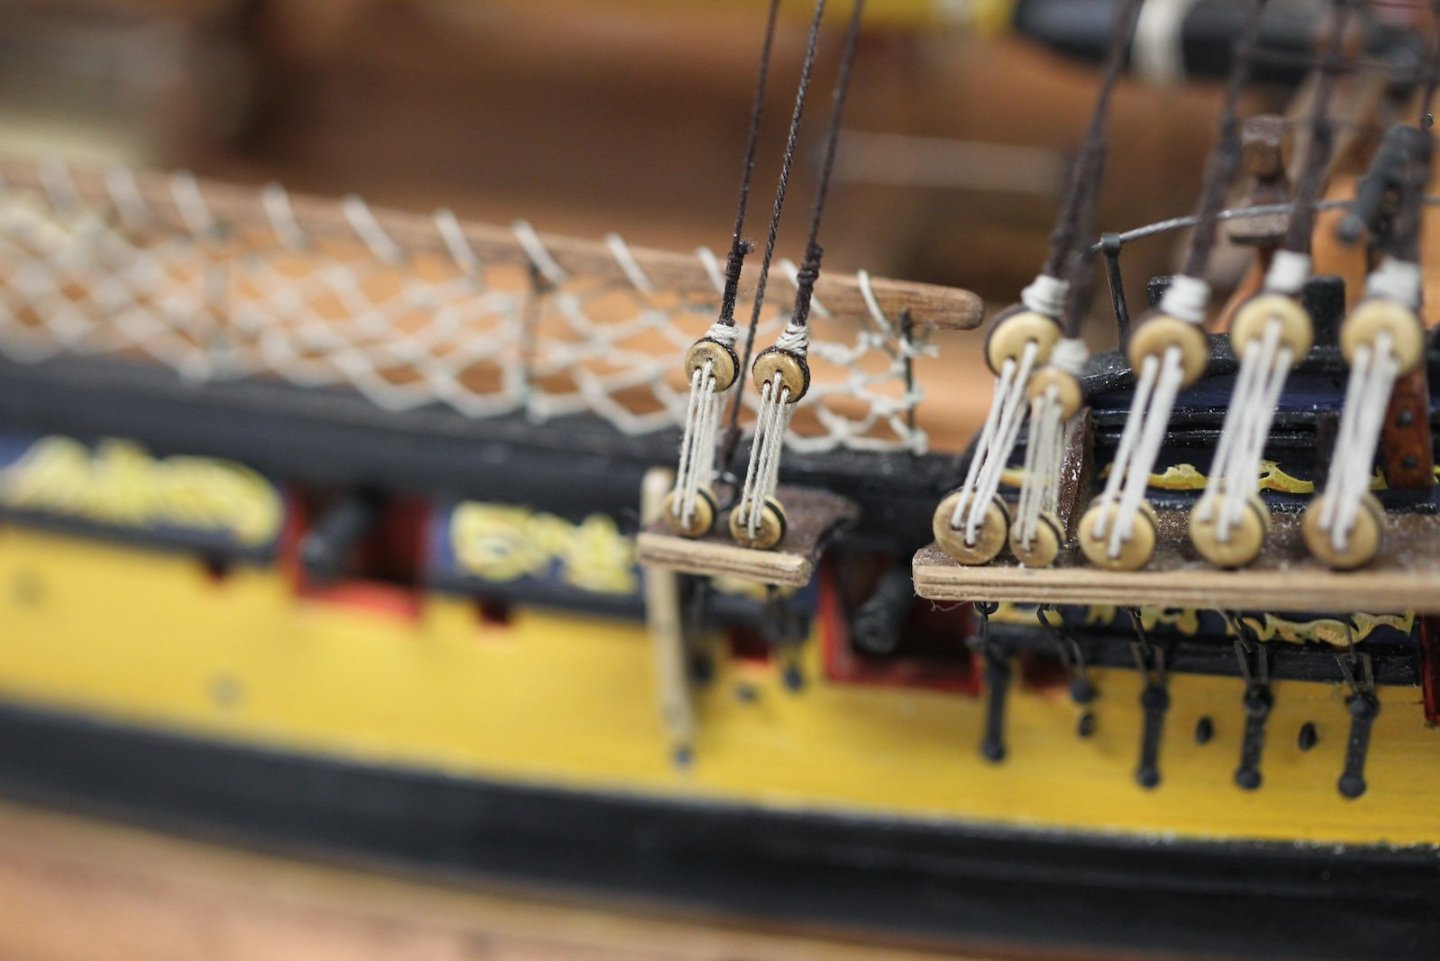
Before moving on to the running rigging and several days of Yard Construction - one of the details I've really wanted to add to my version of the Peg is the anchor cable along the main deck. Surprisingly, it has been somewhat difficult to find really detailed reference material for this bit. So, a special thanks to @Blue Ensign for reaching back into his archives of photos and research for providing some guidance. I'm also following information located in Darcy Lever's The Young Sea Officer's Sheet Anchor - section 109. It's important to note (as BE rightly remind me), having the anchor cable run along the deck and wrapped around the riding bitts is incongruent with having the anchors mounted on the catheads, as the cable would only be along the deck when the anchors are in use. The anchor cable itself is the largest line on the ship at a whopping 13" circumference - translating to 1.65mm in diameter at 1:64 scale. As a side note - this size rope is quite challenging to spin on a rope walk. First - it takes 12 total strands of Gutermann size #30 thread; four sets of three strands each. Winding this amount of thread creates a huge amount of tension and one has to be very careful not to over twist and break the thread - which of course I did my first attempt. Essentially the hawser runs from the hawse holes through the deck and along the hatches before descending into the aft hatch near the water pumps. The good news is that my launch and extra topmasts were not permanently secured and could be removed for this process. The cable is secured to ring bolts using a smaller line wrapped / seized to the larger anchor cable. First, I'm using .75mm rope for the smaller line to secure the cable to the ring bolts via eyes all wrapped with .10mm line. I fed the cable through the hawse holes with a small wire, ran it along the deck and wrapped it on the riding bitts as illustrated in the Sheet Anchor. Another note here - I've seen a couple of options for how the cable is run down into the aft hatch. The one that makes the most sense is having the hatch split so that part of it is removed when the anchor cable is in play. However - I am trying to avoid being able to see down into the lower deck where there is essentially nothing happening. So I went with option two - which is having small square areas cut out of the hatch to facilitate the cable. It took a little bit of shaping and pva to get the rope to "lay" on the deck and run through the hatch in a way that pleased the eye, but overall I'm quite happy with the turnout and glad to have added this touch.


- 419 replies
-
- 13
-
-
- Victory Models
- Pegasus
- (and 2 more)
-
Chairs! Let’s see your chairs.
Moonbug replied to Desertanimal's topic in Modeling tools and Workshop Equipment
Hehe, thanks Gary - yeah I definitely dig the "Vyper". I mean, let's be honest - it's expensive has H#ll - but really well constructed and the wheels are super smooth. Would be a great contestant for any sort of "office chair races." It also adjusts up and down quite cleanly for switching work surfaces - a must for me as I'm not the tallest fella in the room. The padding on both the seat and the backrest are very good, and as you can tell by looking the entire thing is VERY sturdy. However - not having armrests is a bit of a sacrifice for me. It makes it so you can reverse the chair and lean forward against the backrest 'cowboy style' - but a tradeoff to be sure. Sort of unrelated to the topic - but it also doubles as a shop chair when I'm working in the garage on my baby...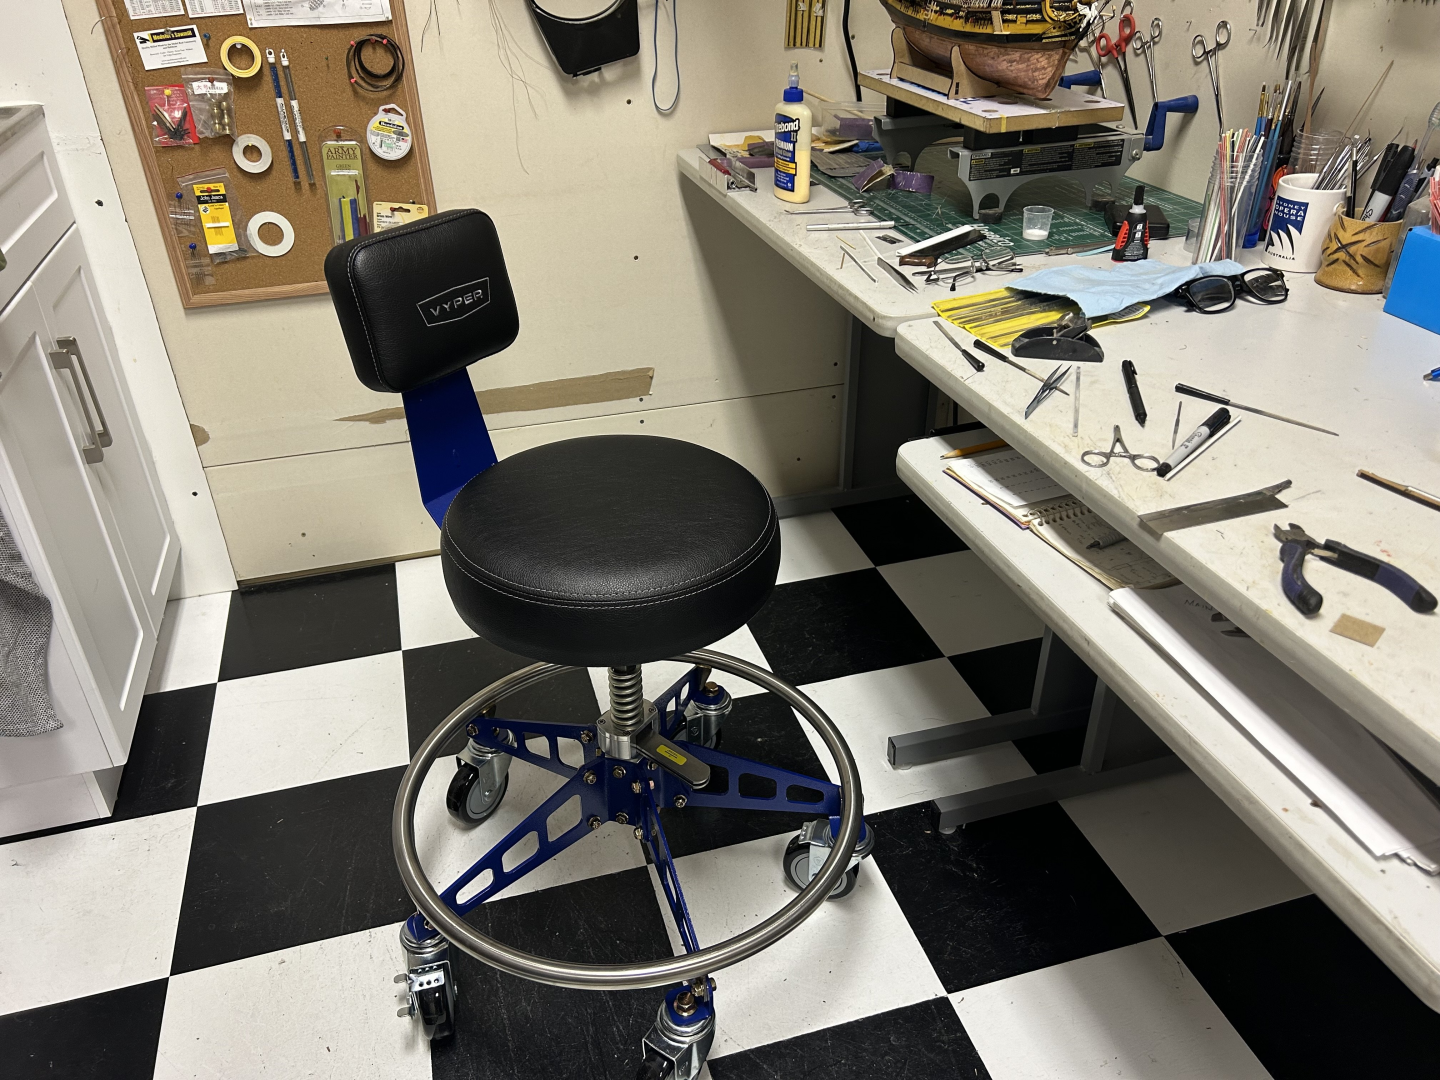

- 27 replies
-
- 12
-
-

-
Thanks so much Dave, really appreciate it. Looking forward to seeing the progress on your Rattlesnake.
-
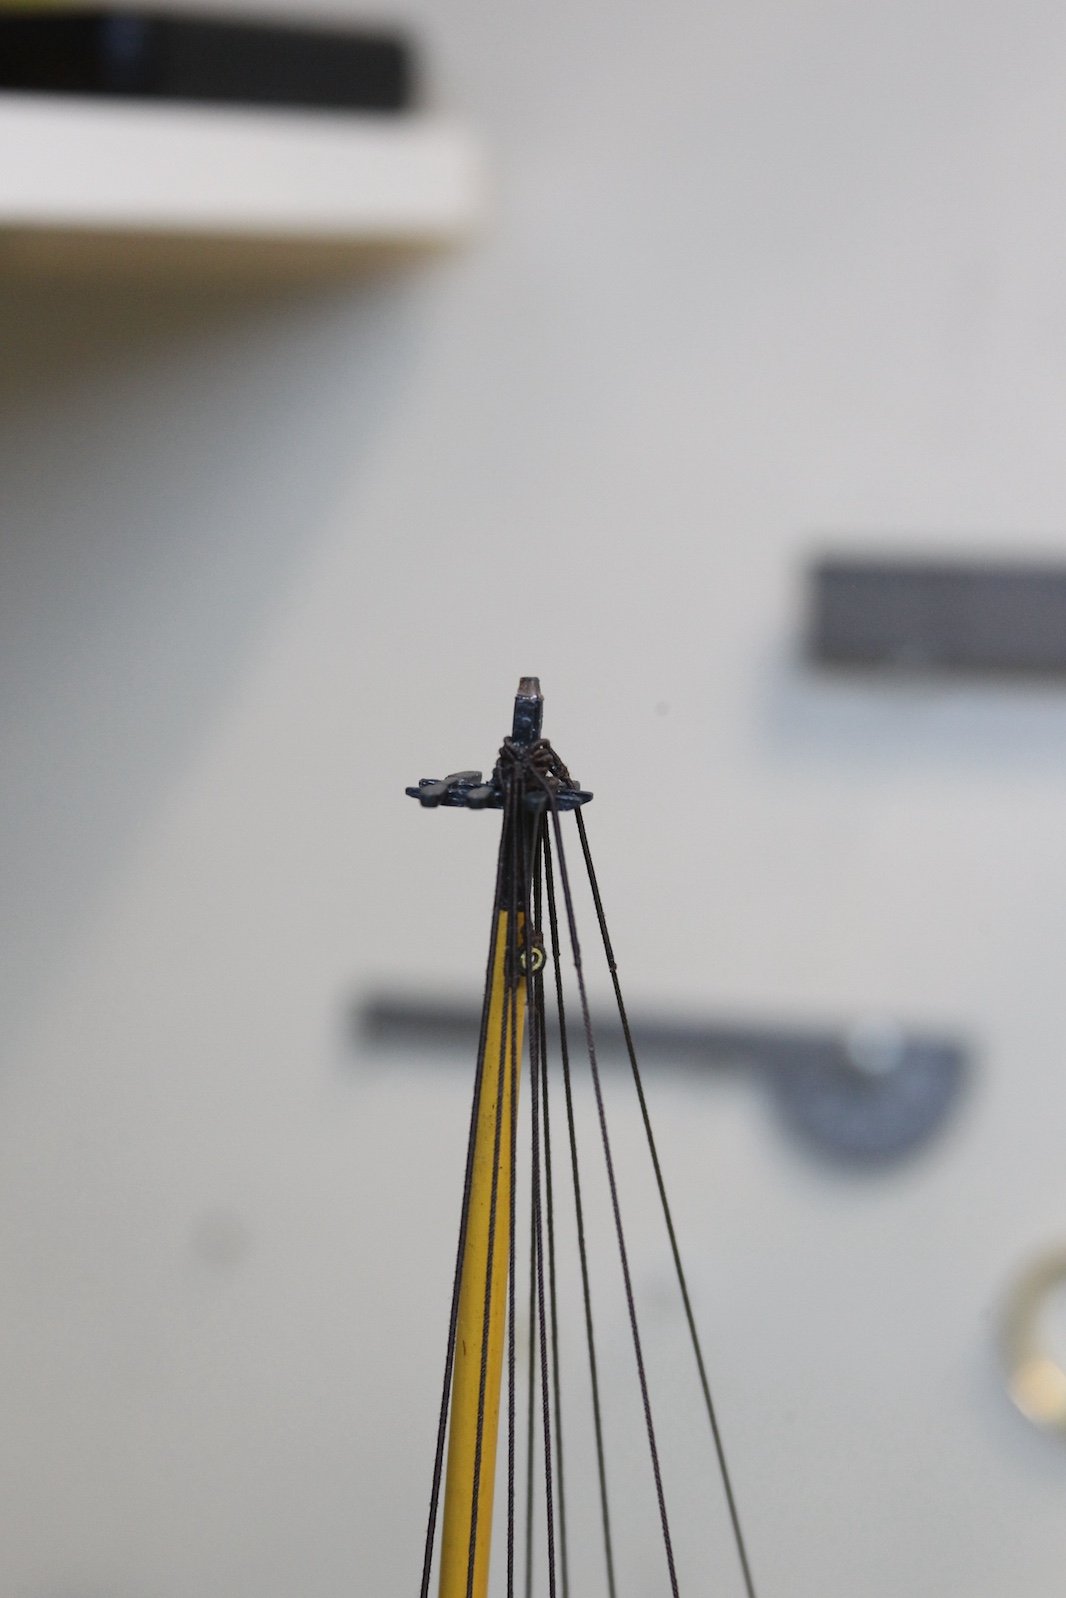
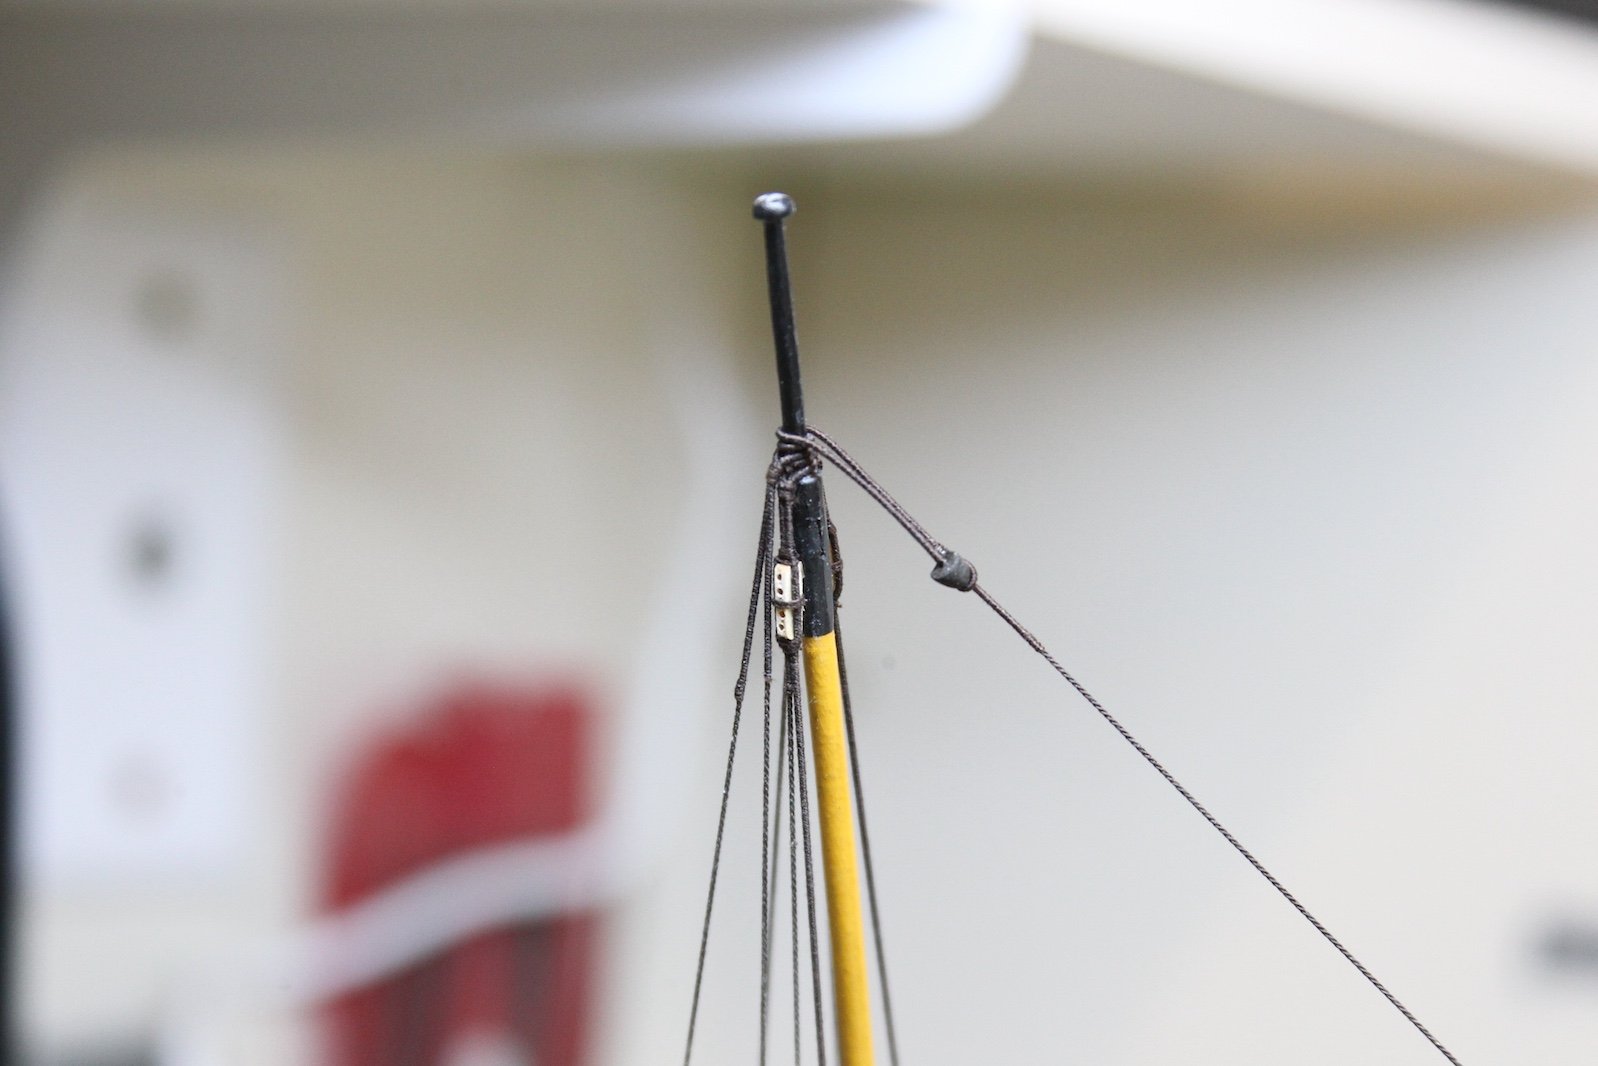
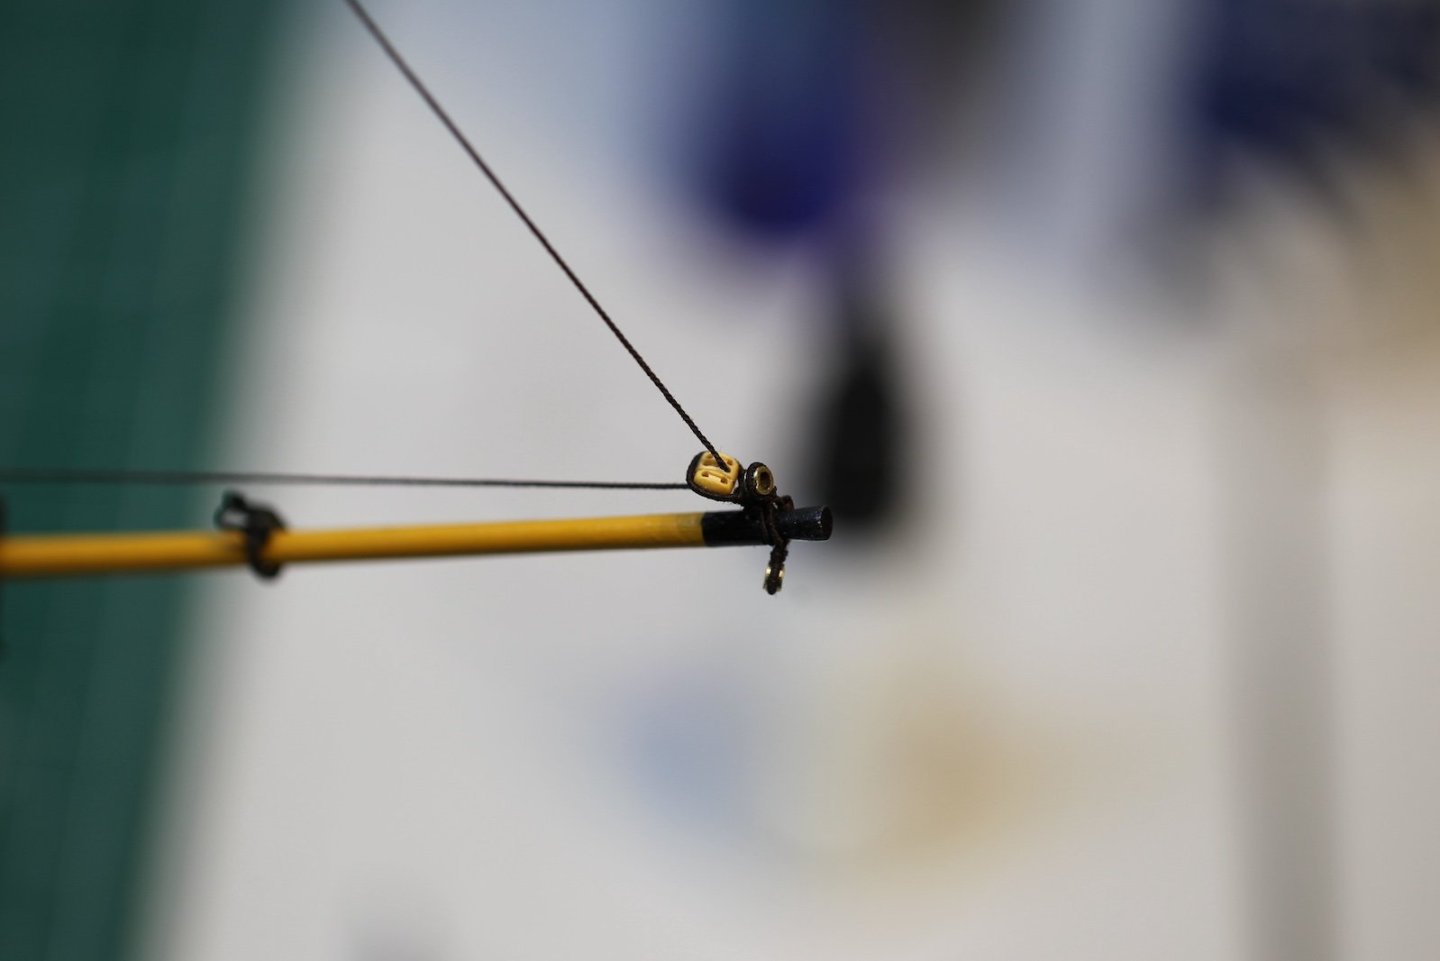
The Jib Stay is a very straightforward bit and represents the last of the standing rigging. The stay starts on the traveller and is seized to the ring between the starboard side of the shackle and the hook. It then passes through the upper sheave on the starboard side cheek block on the the topmast head. There are a few options as to where the jib stay finishes depending one what works best and is an unimpeded fall of the line. Most rigs have it tied above one of the deadeyes, while others have it hooked to the shelf. I chose an eye ring that’s not being used as it ensured the aforementioned free fall of the line from the upper mast head. And with that - the standing rigging is complete!


- 419 replies
-
- 14
-
-
-
- Victory Models
- Pegasus
- (and 2 more)
-
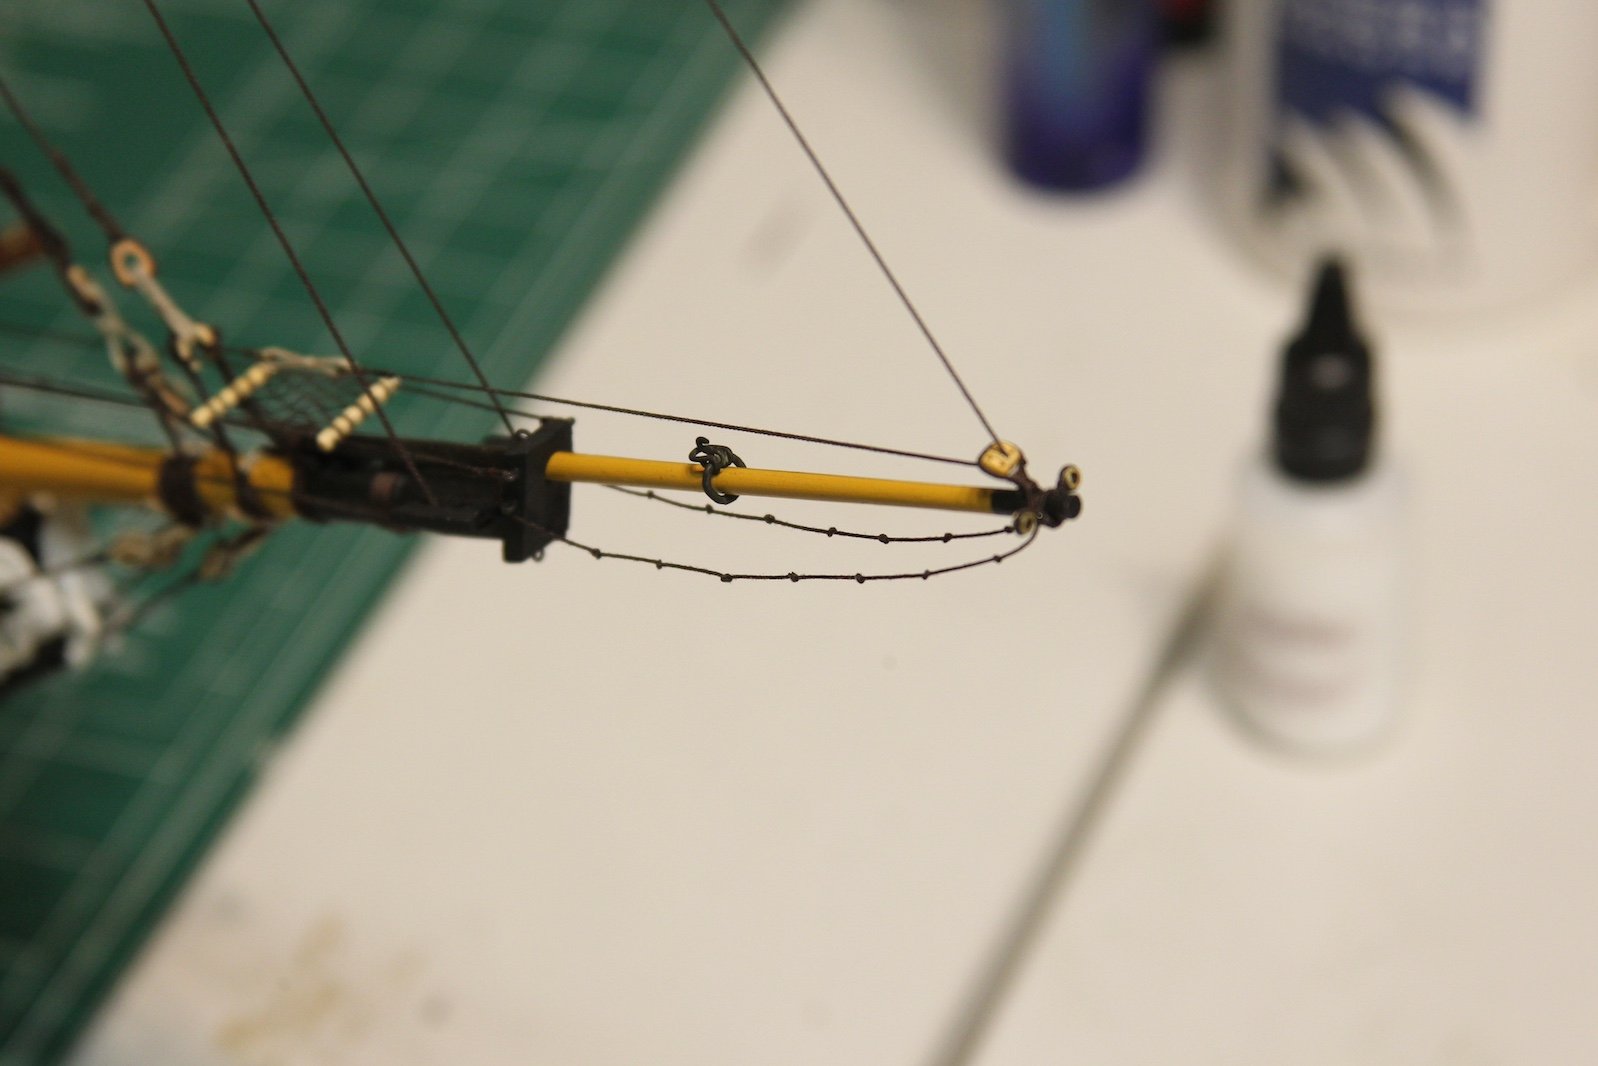
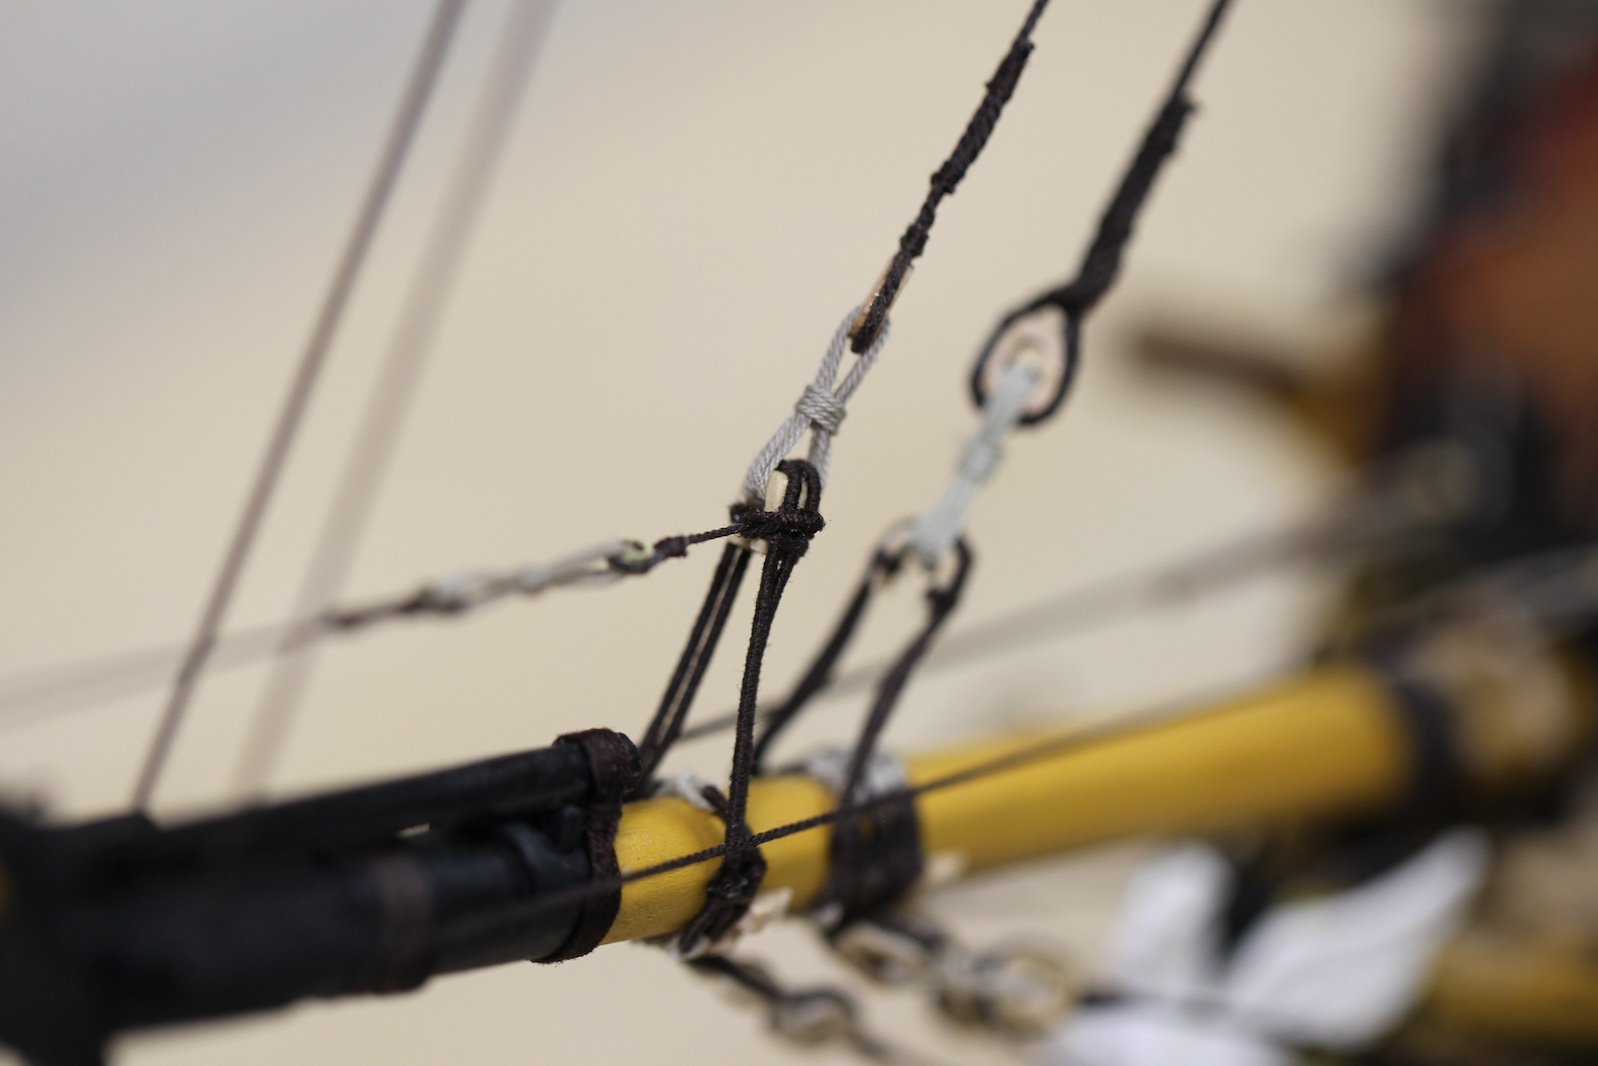
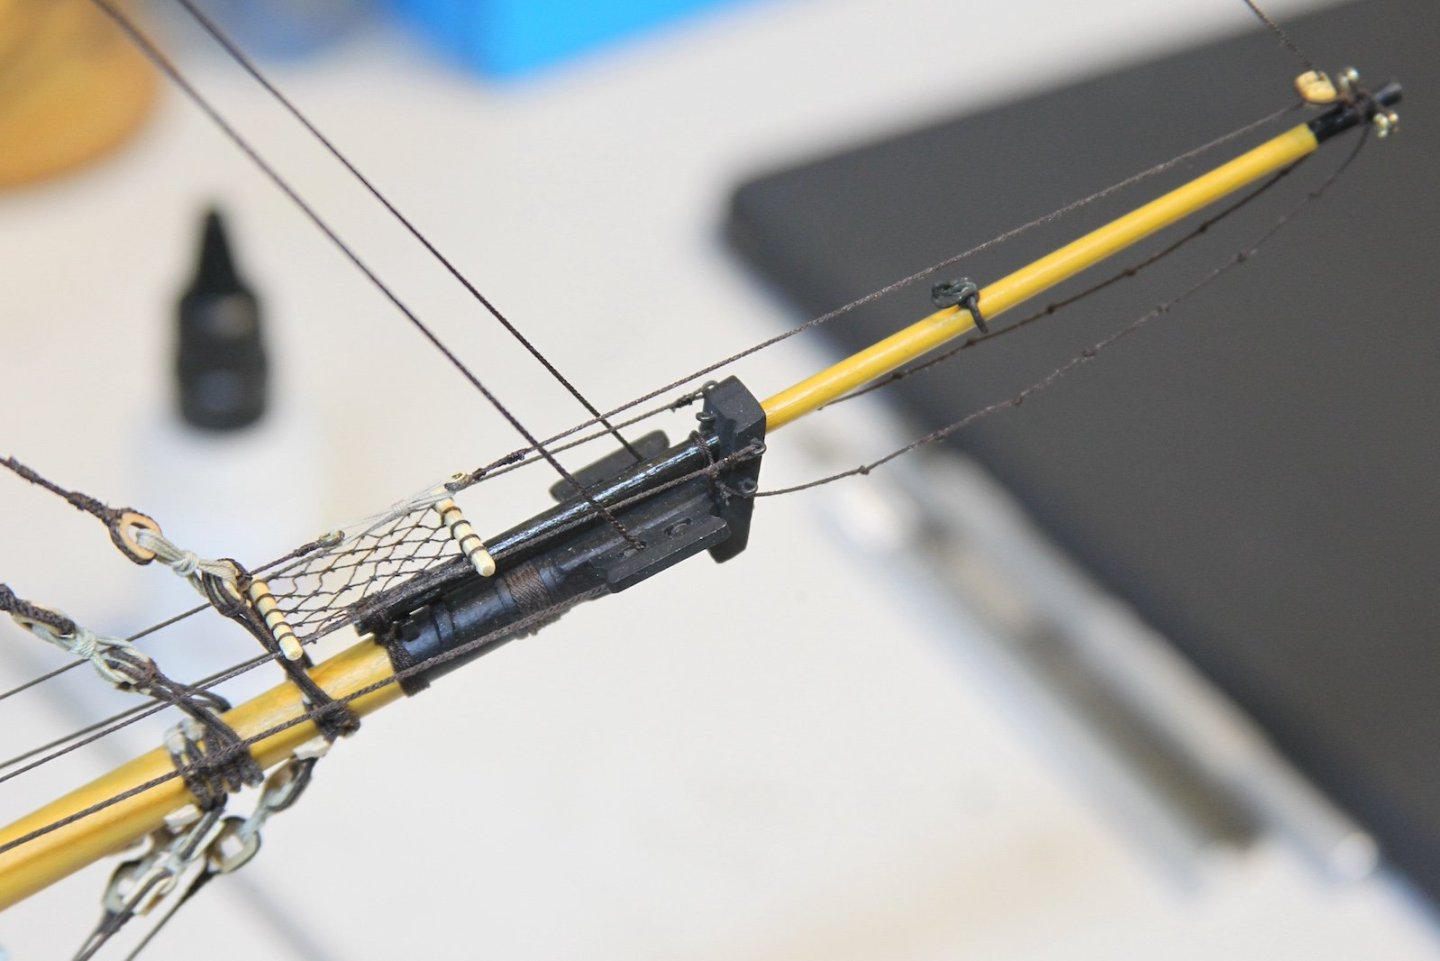
Short update - but the other thing I accomplished today were the jib boom horses. Nothing particularly complicated about them - they go over the end of the jib boom with and eye and loop, then have knots every 2' which translates to about 9.5mm at 1:64. I went with 10mm because it's easier. The aft end of the horses loops over the jib boom behind the cap and seizes to itself. I then use a liberal amount of diluted PVA to get the to hang and hold their form.

- 419 replies
-
- 9
-
-
- Victory Models
- Pegasus
- (and 2 more)
-
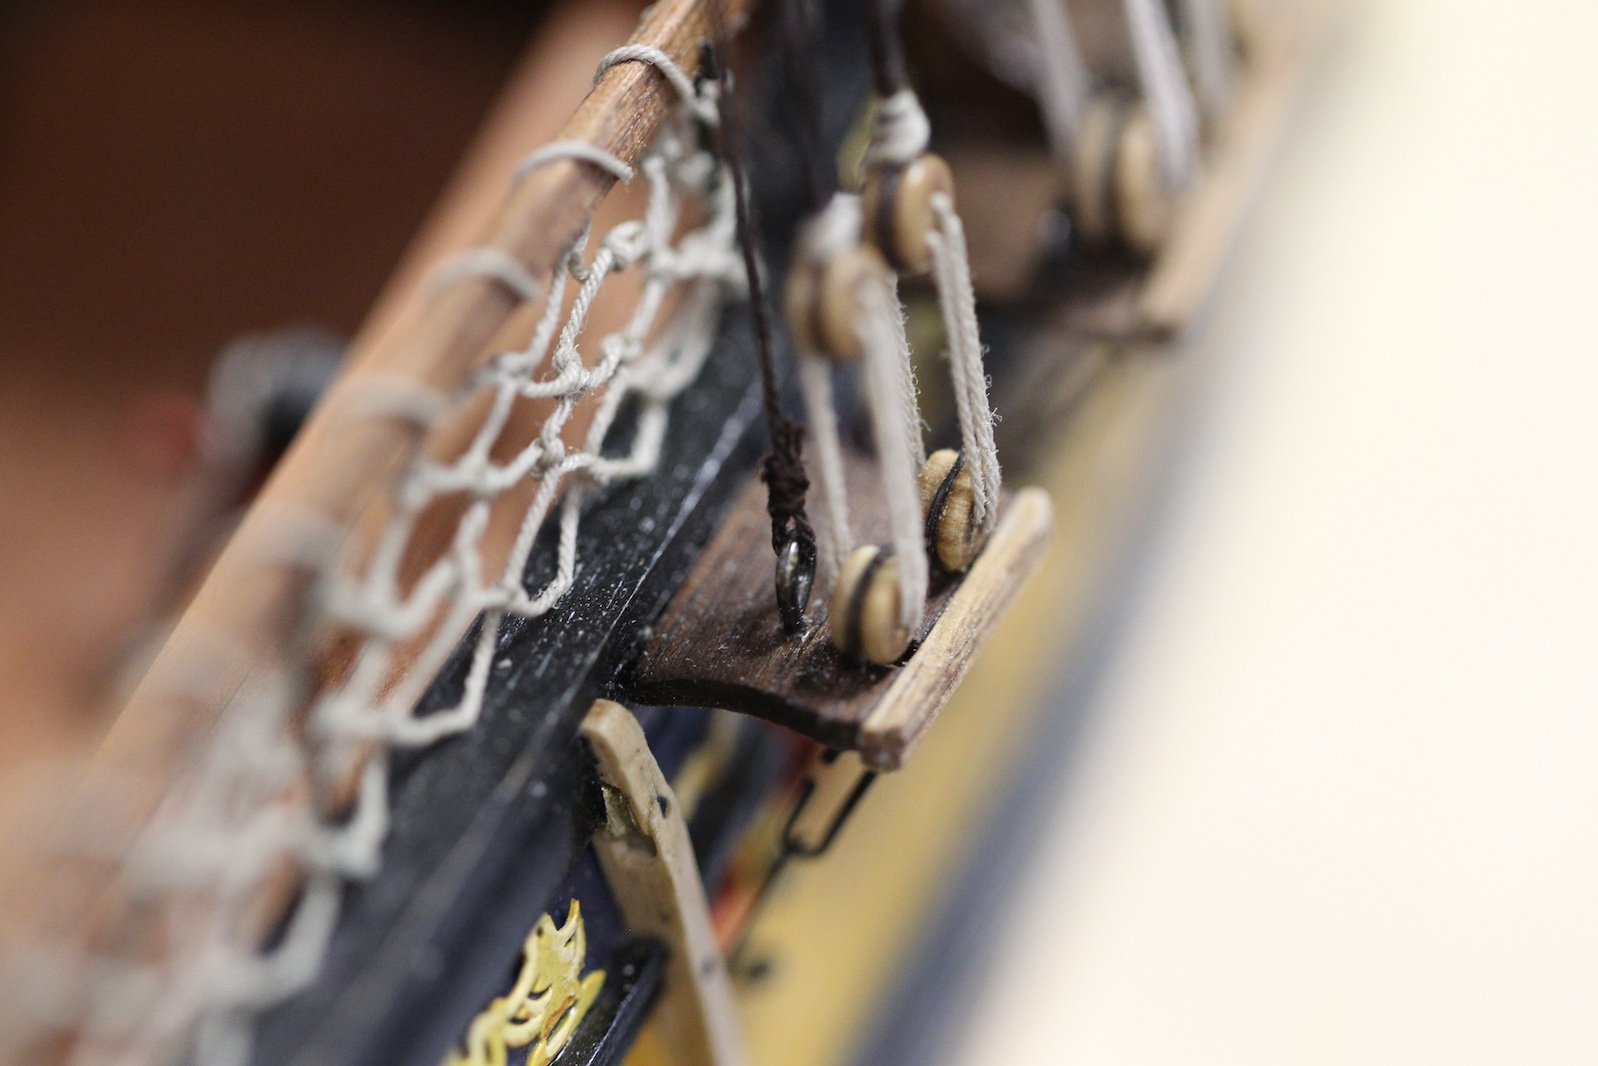
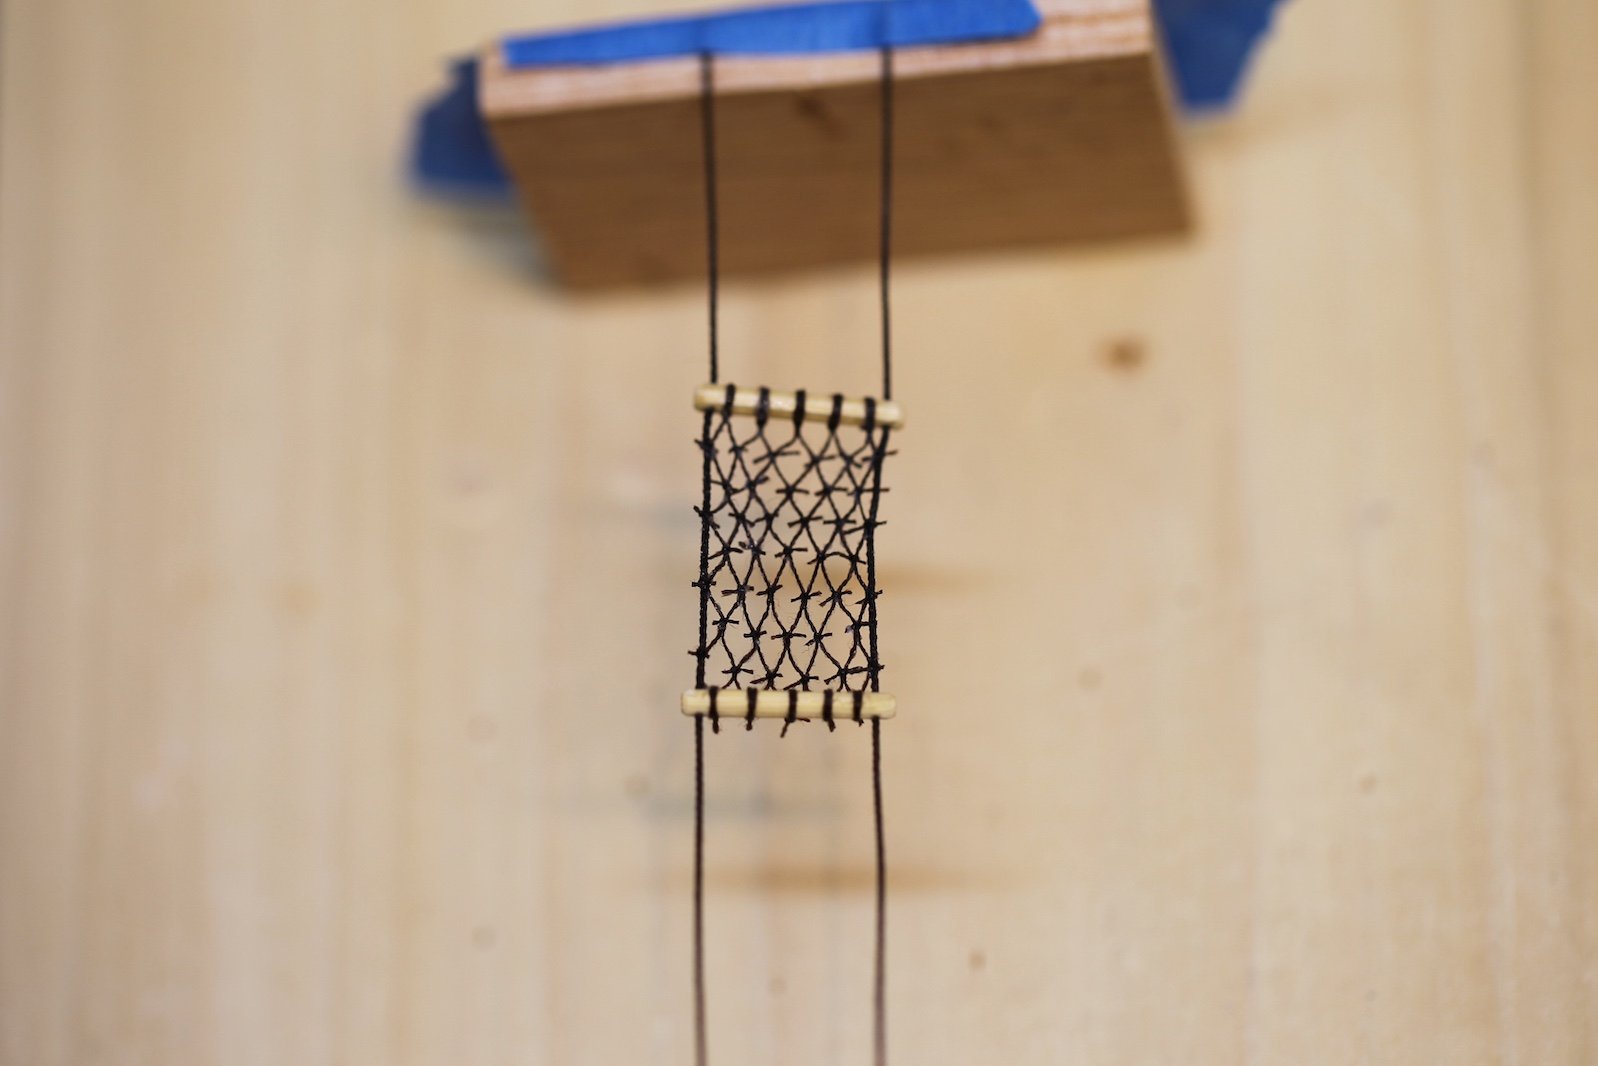
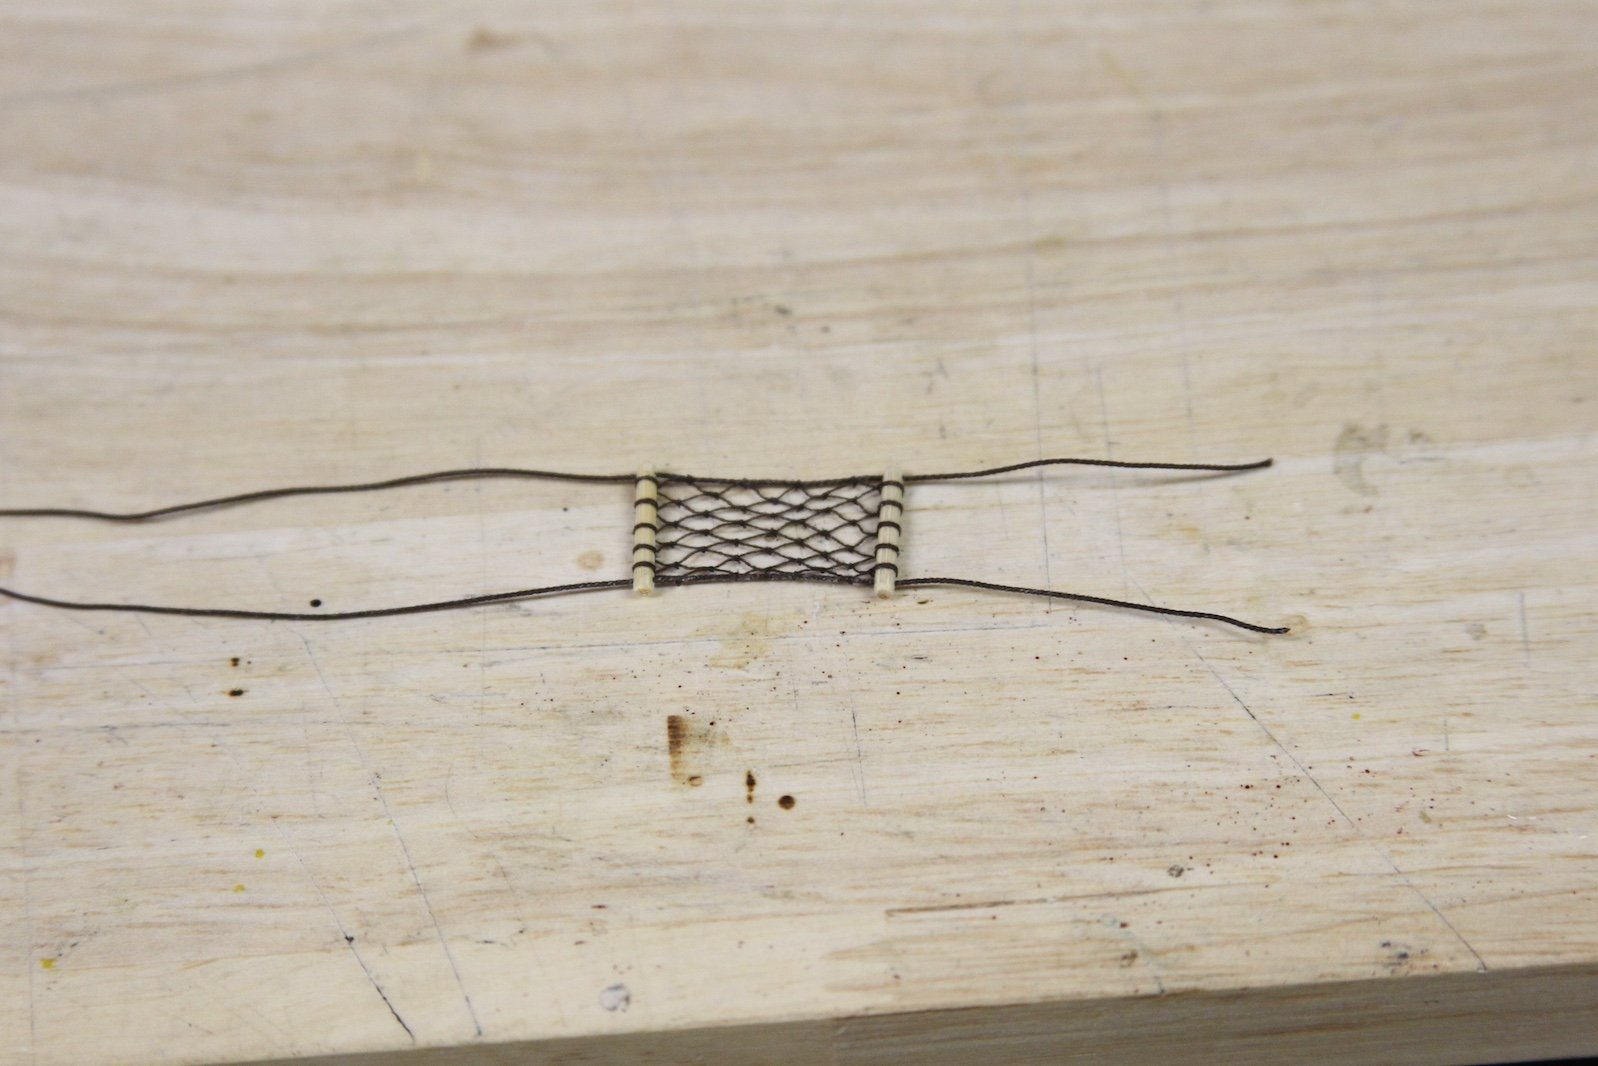
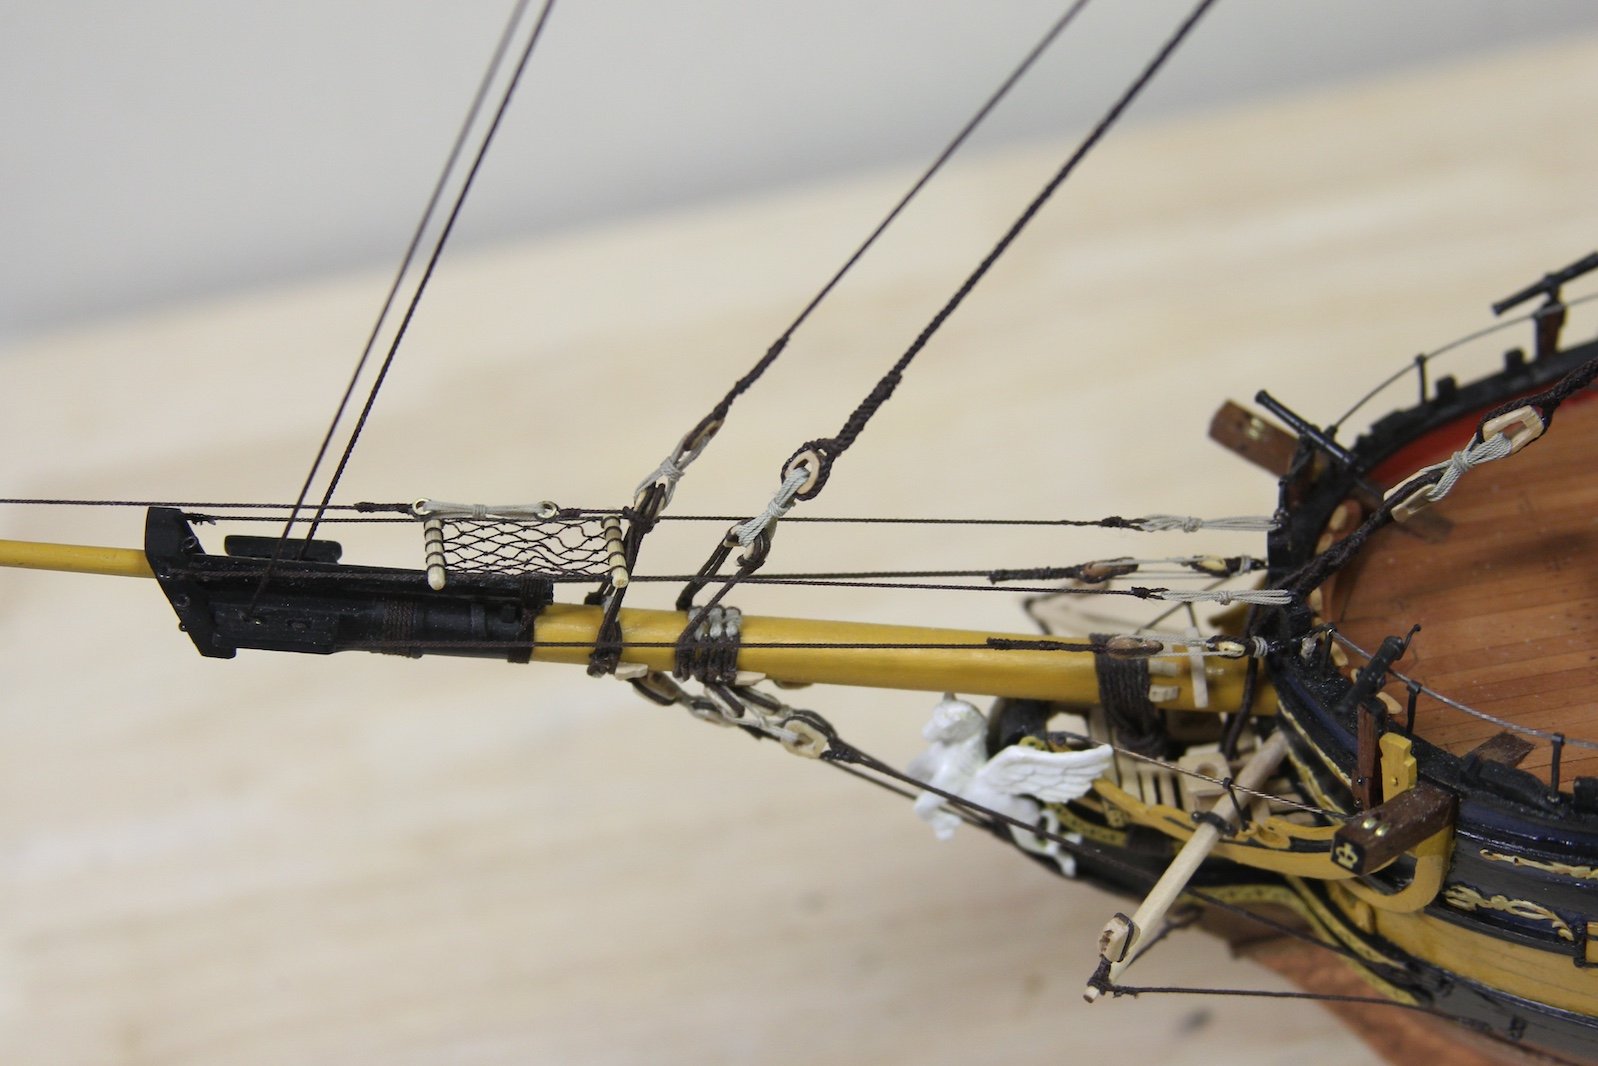
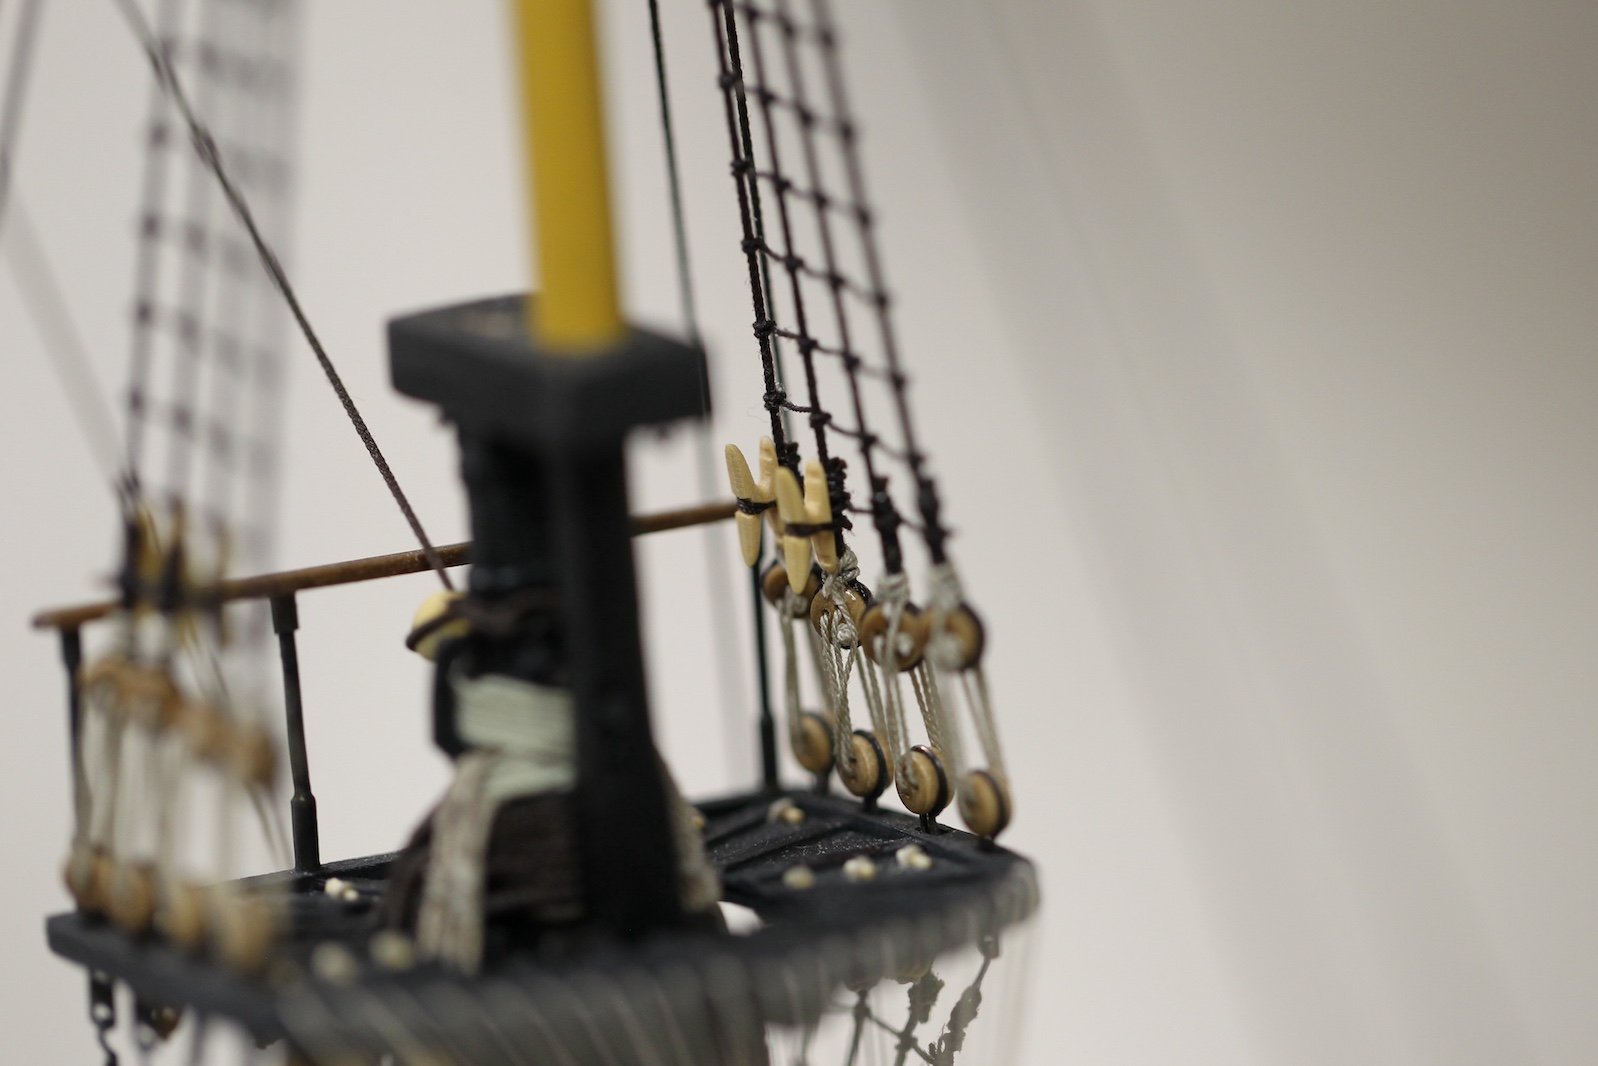
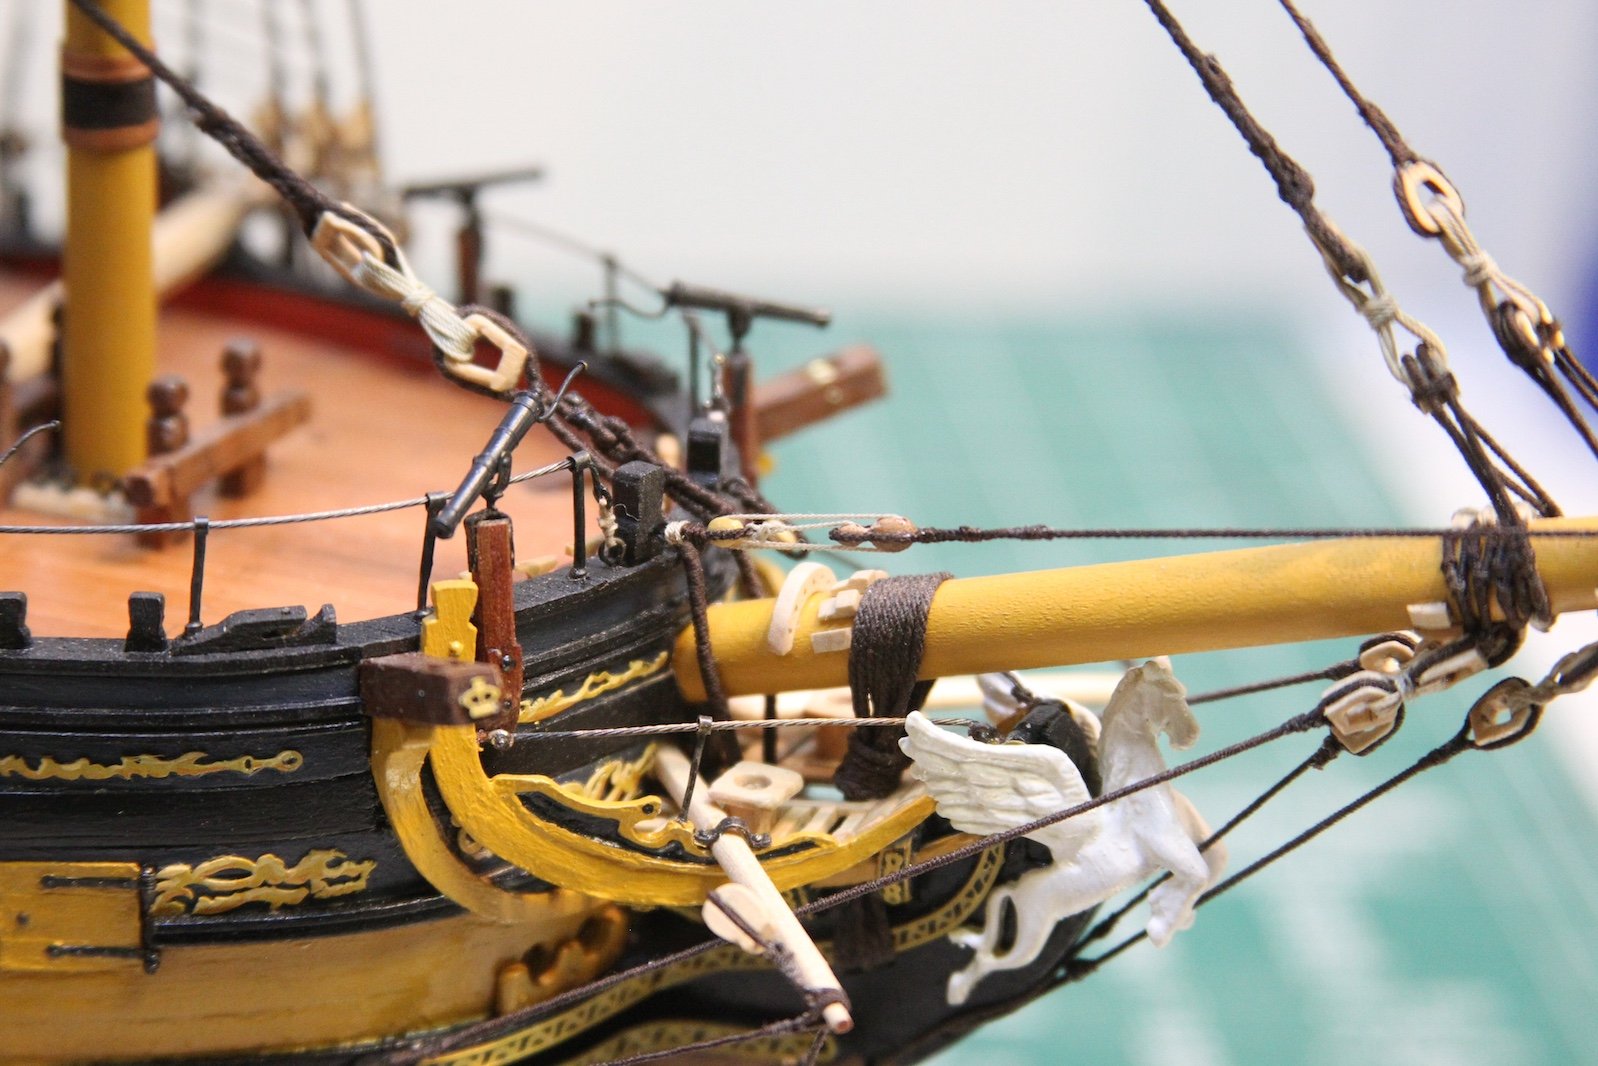
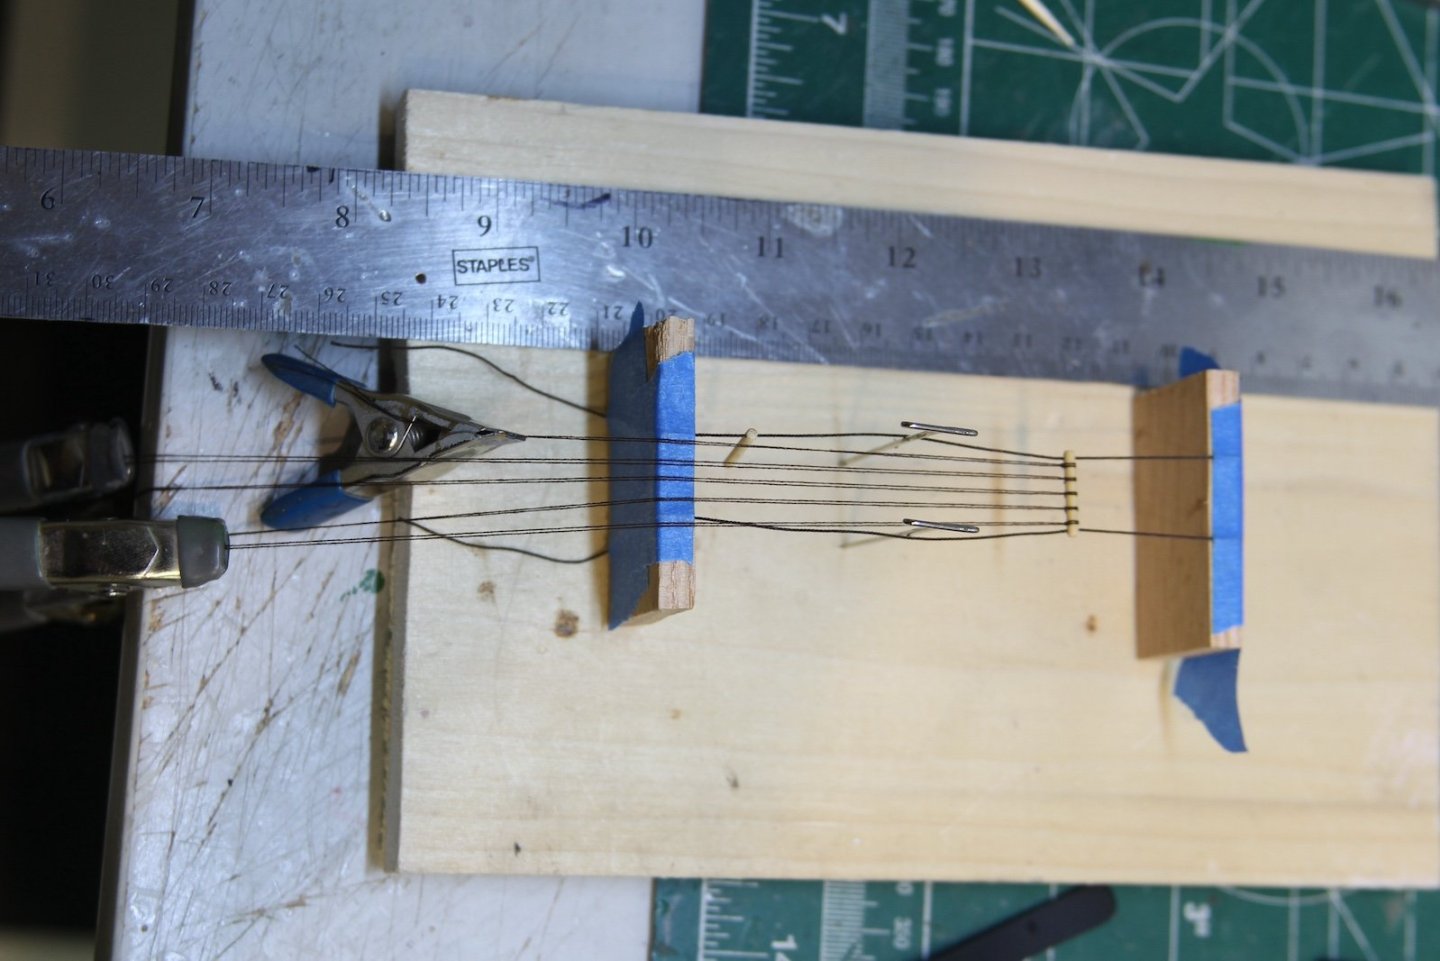
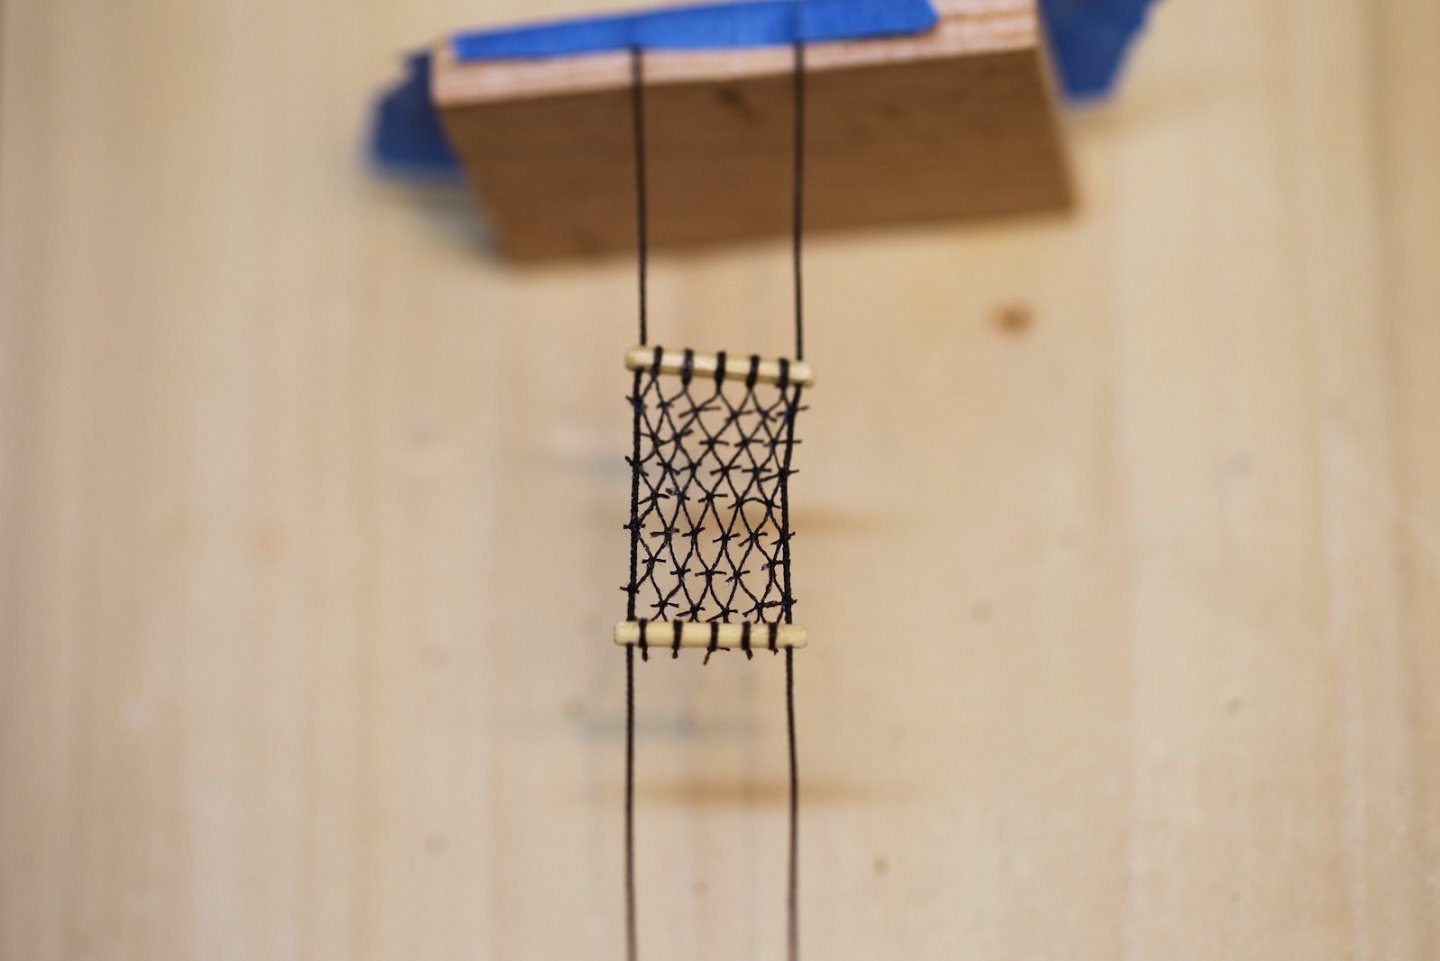
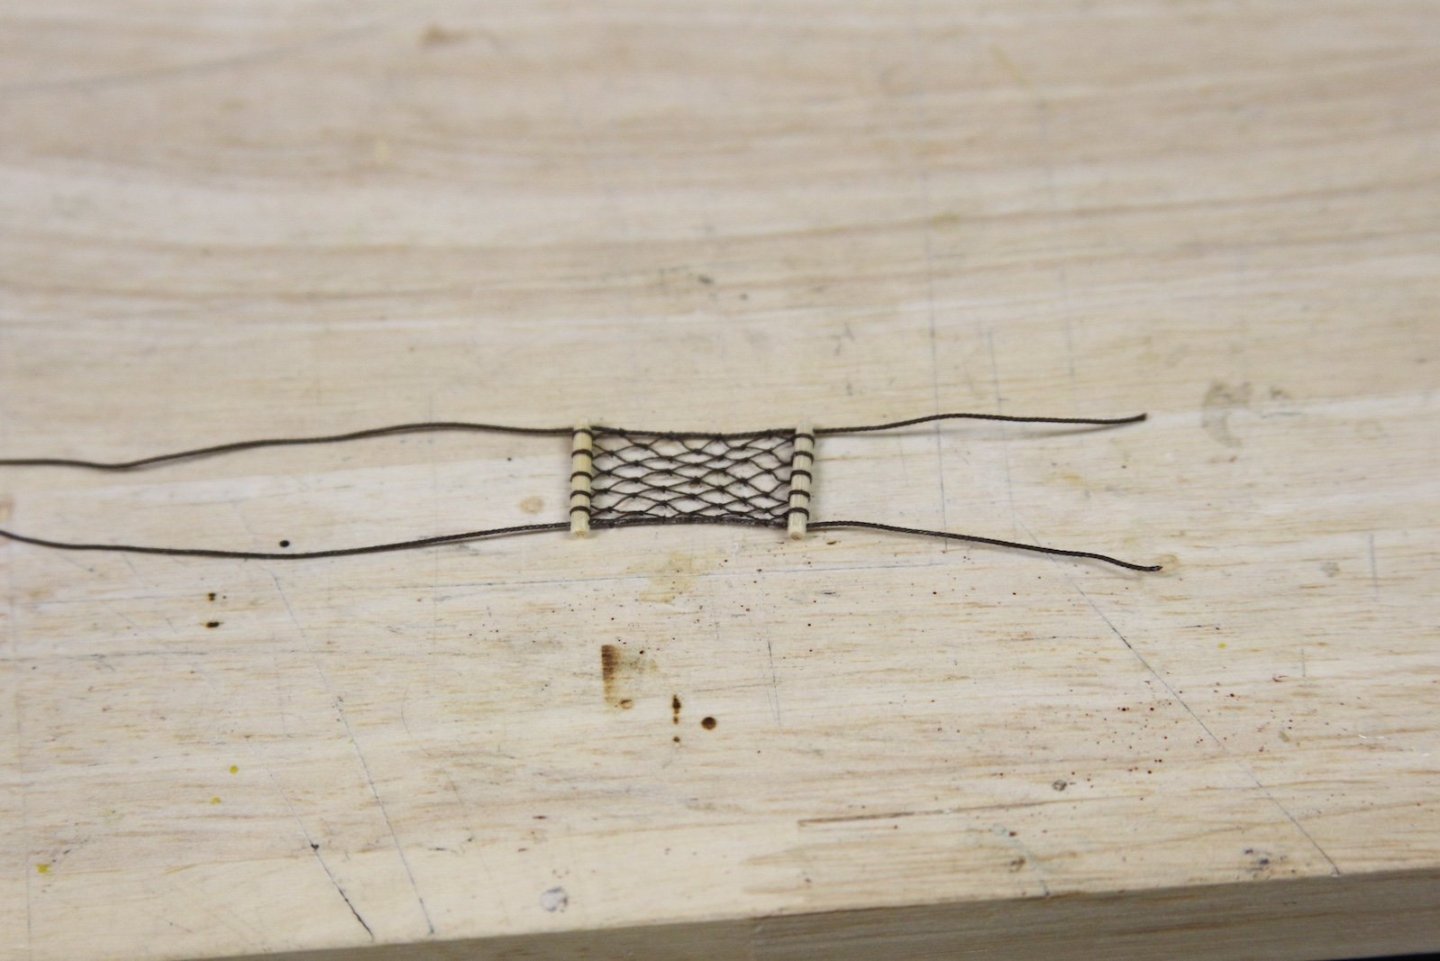
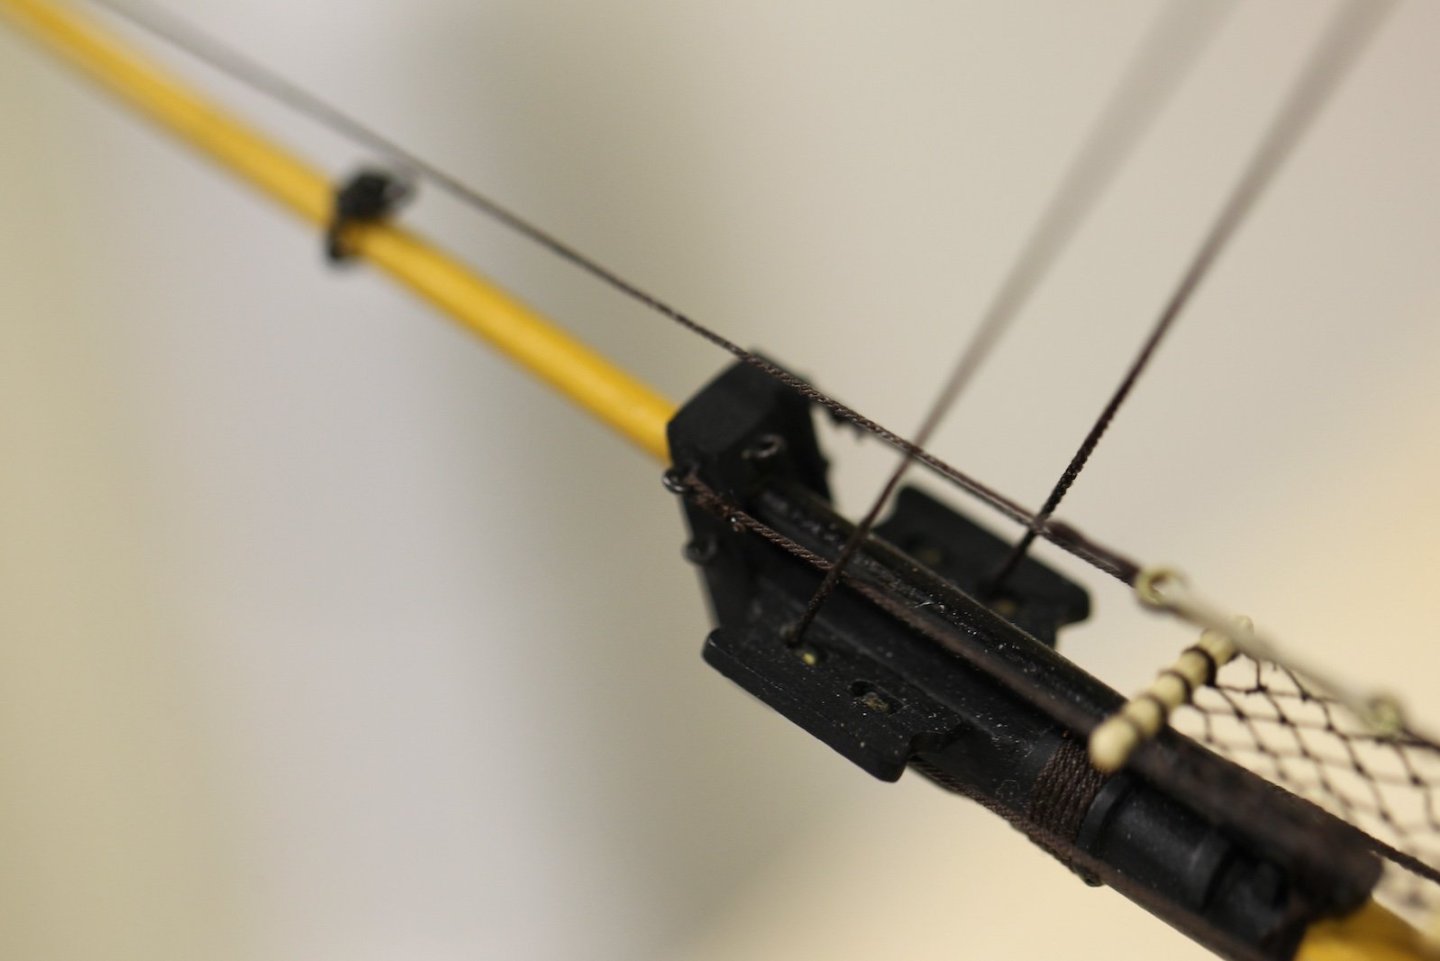
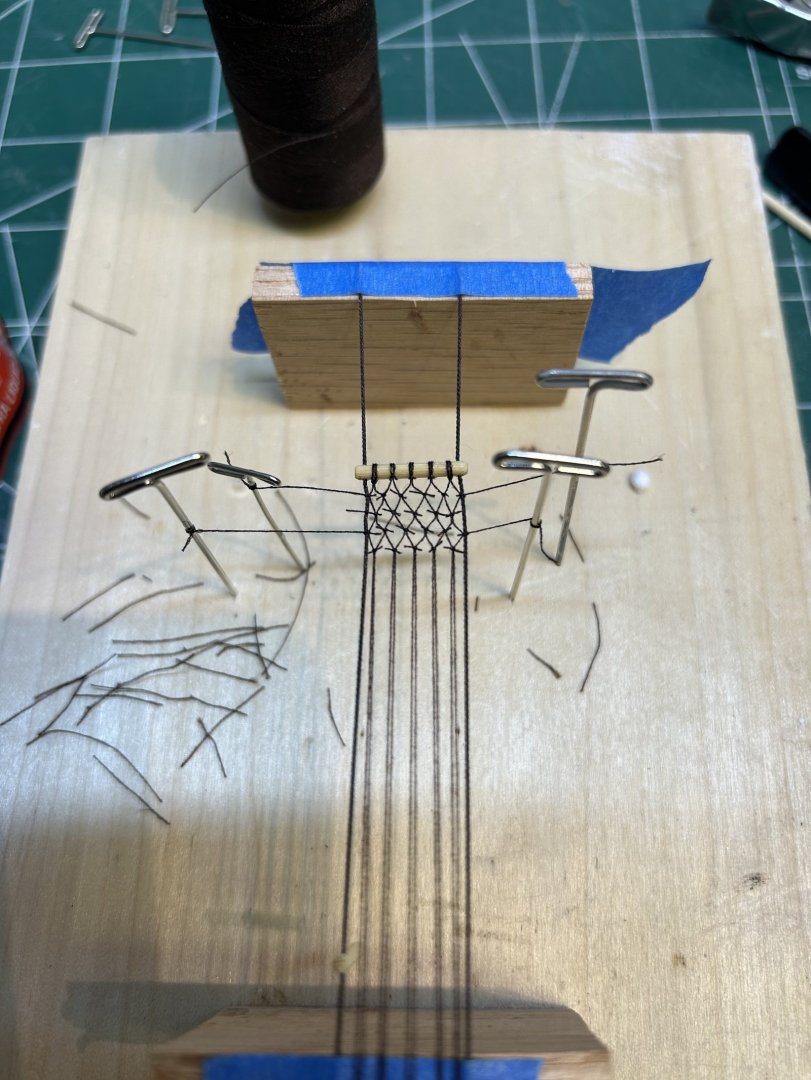
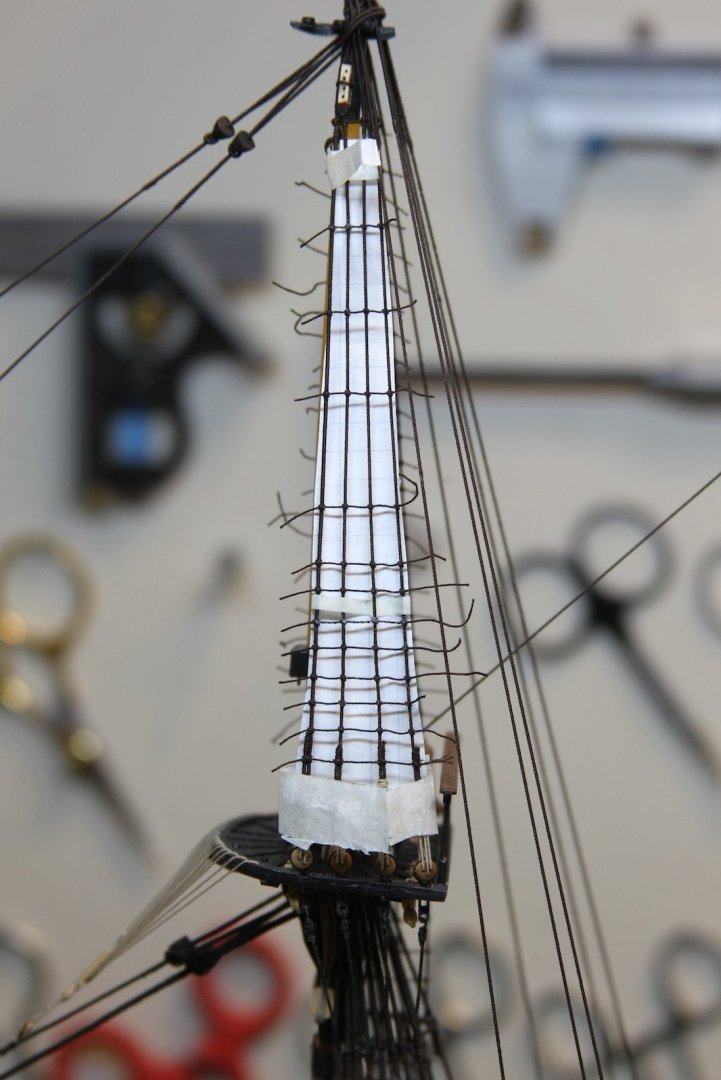
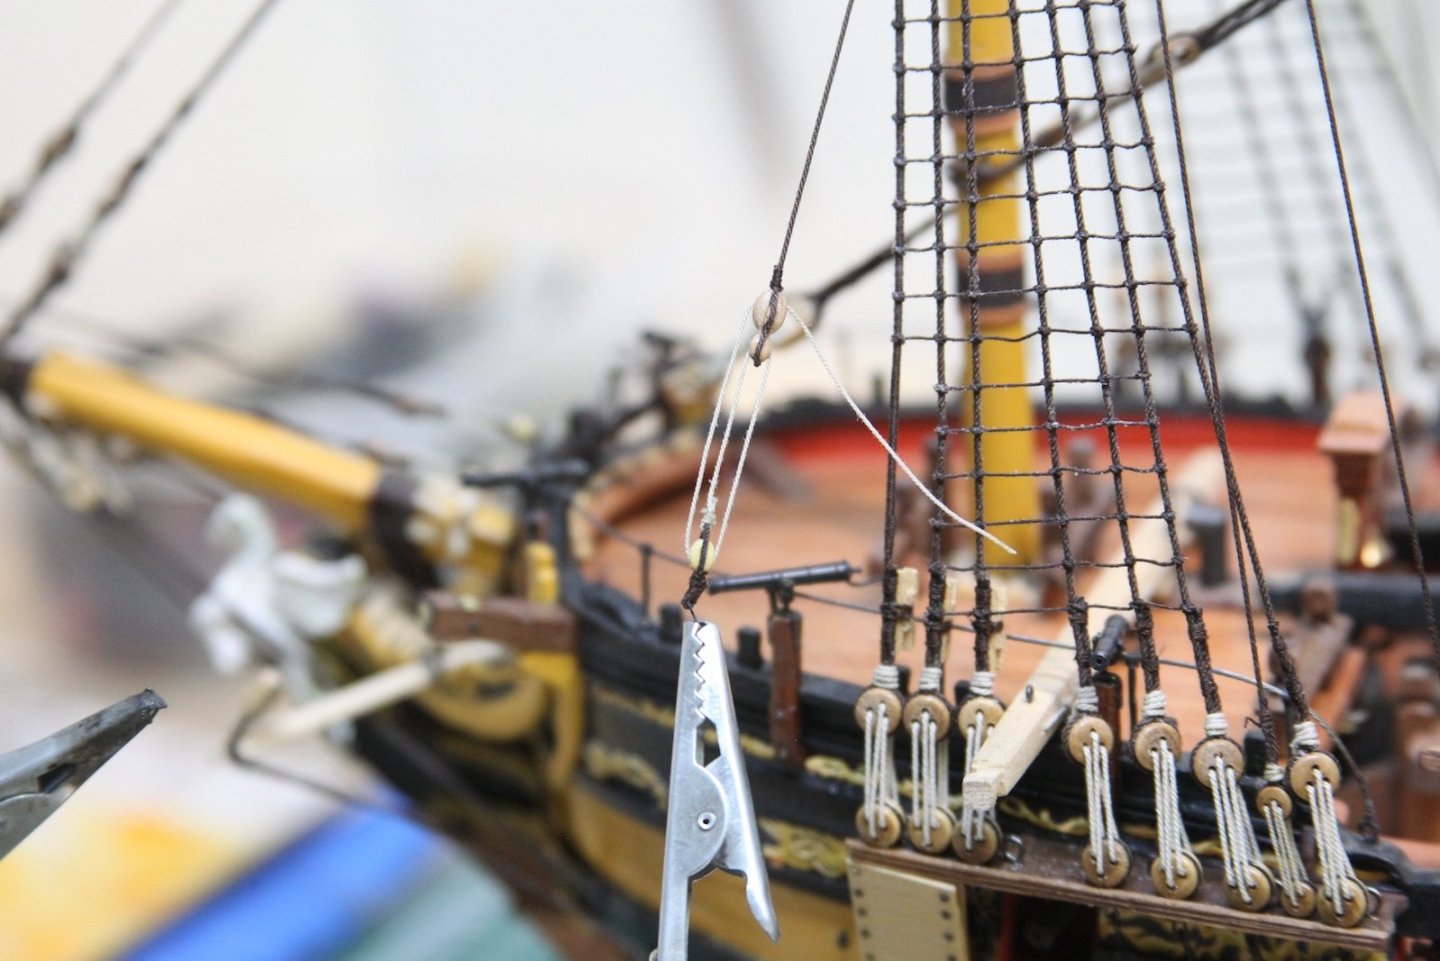
Thanks a lot Bob, really appreciate it. This little jib boom net is another often overlooked piece that is quite delicate and complicated - particularly at a 1:64 scale. I honestly looked around for bits throughout the shipyard and the house that would allow me to 'fake it' - but coming up empty handed, I went ahead an made the netting myself. It turned out to be quite fun - which I'm sure makes me a little nutty. The net is made of two spreaders with horses run through them and the netting secured between the spreaders. While the horses run from the bowsprit cap back to the knightheads along the fore rail, the netting itself (at 1:64) is only 10mm wide by 20mm long. I used trimmed down bamboo tooth picks for the spreaders and run .30 mm line through them. Then I connected them to a simple jig that elevates everything and gives me a bit of room with which to tie the netting. Five pairs of my smallest line (150 Gutermann thread) are secured to one of the spreaders. I differed from the FFM guidance here by only connecting one spreader to start. I used pins to prevent the horses from bending in our out - each set of knots tied to the horses is secured to the pins to keep them in place. I only tied each intersection in a half knot (anything else is too bulky) and then touched the half know with the tiniest bit of CA delivered with the pointy end of a straight pin. I try not to use CA on knots since it discolors everything, but right now you're looking at the bottom of the netting and the half knots will not be visible from above. This CA also has the added benefit of stiffening the lines for cutting later - which ended up being the most difficult part of the entire endeavor. I worked my way down the netting toward my 20mm target changing where I start the knots depending on the row. On rows that attach to the horses I started on the ends to secure them to the pins and keep everything even, on the other rows I started in the middle to avoid tugging at the ends. Once I reached my target length, I secured the lines to the other spreader with a modified version of a half hitch. I'm not sure I could explain the knot again adequately, but it worked. Once again, tiny spots of CA secured them on the bottom of the netting. After the netting was tied, I washed all the knots liberally with diluted PVA and let it dry overnight. The ends of the knots were cut with a brand new scalpel blade. This is vital - as the very sharpest instrument on hand was the only thing that would work adequately. The net is secured to the bow with the fore end seized to the upper eye bolts on the bowsprit cap while the aft end is secured to the knightheads via a .10mm lanyard. I know that one little gap looks funky - but that's the angle of the photo. It actually looks pretty normal with the naked eye.


- 419 replies
-
- 11
-
-
-
- Victory Models
- Pegasus
- (and 2 more)
-
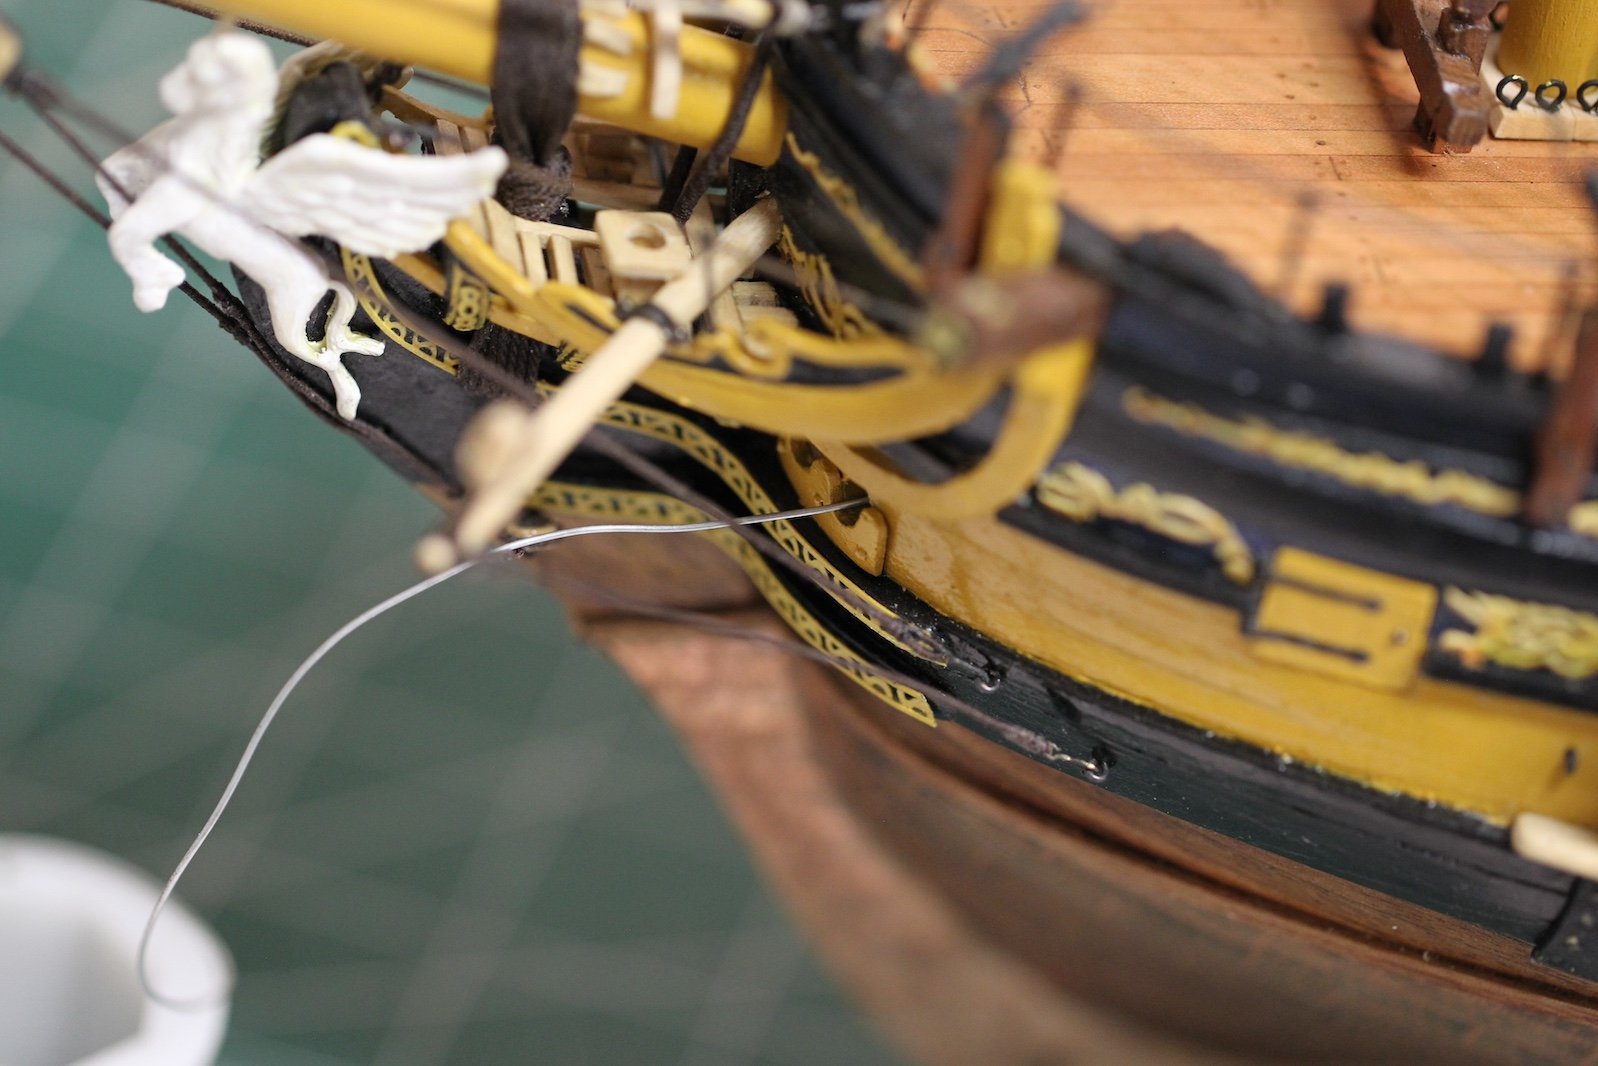
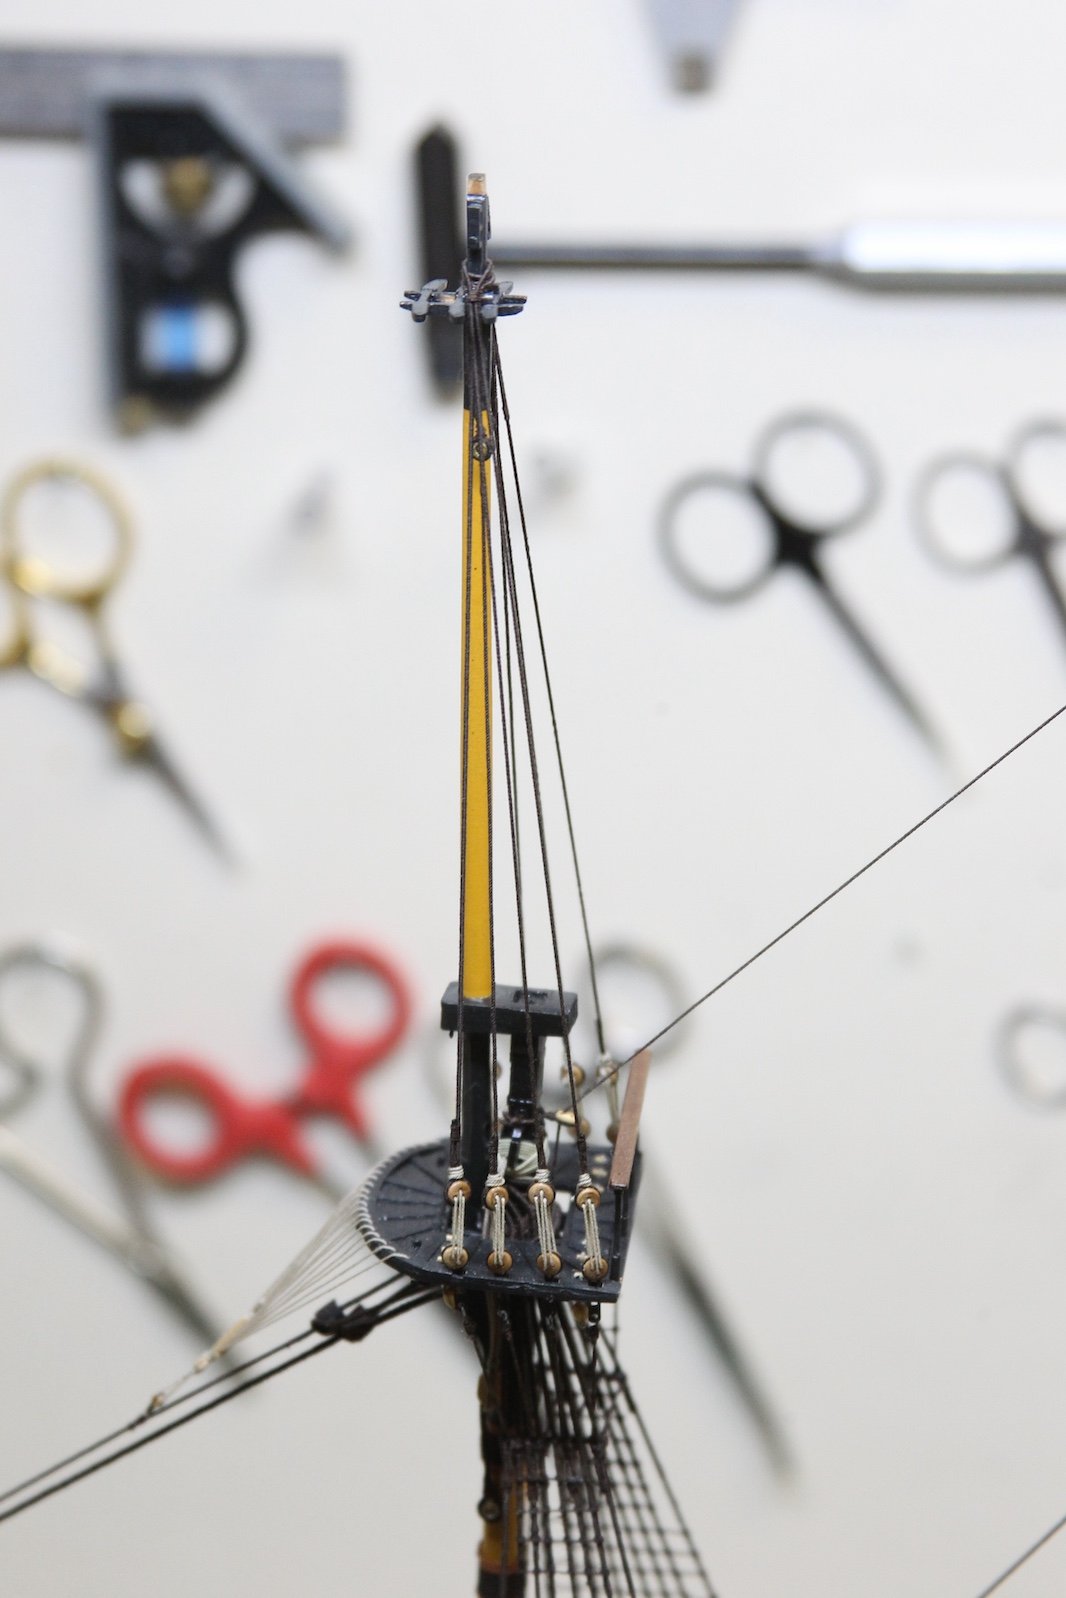
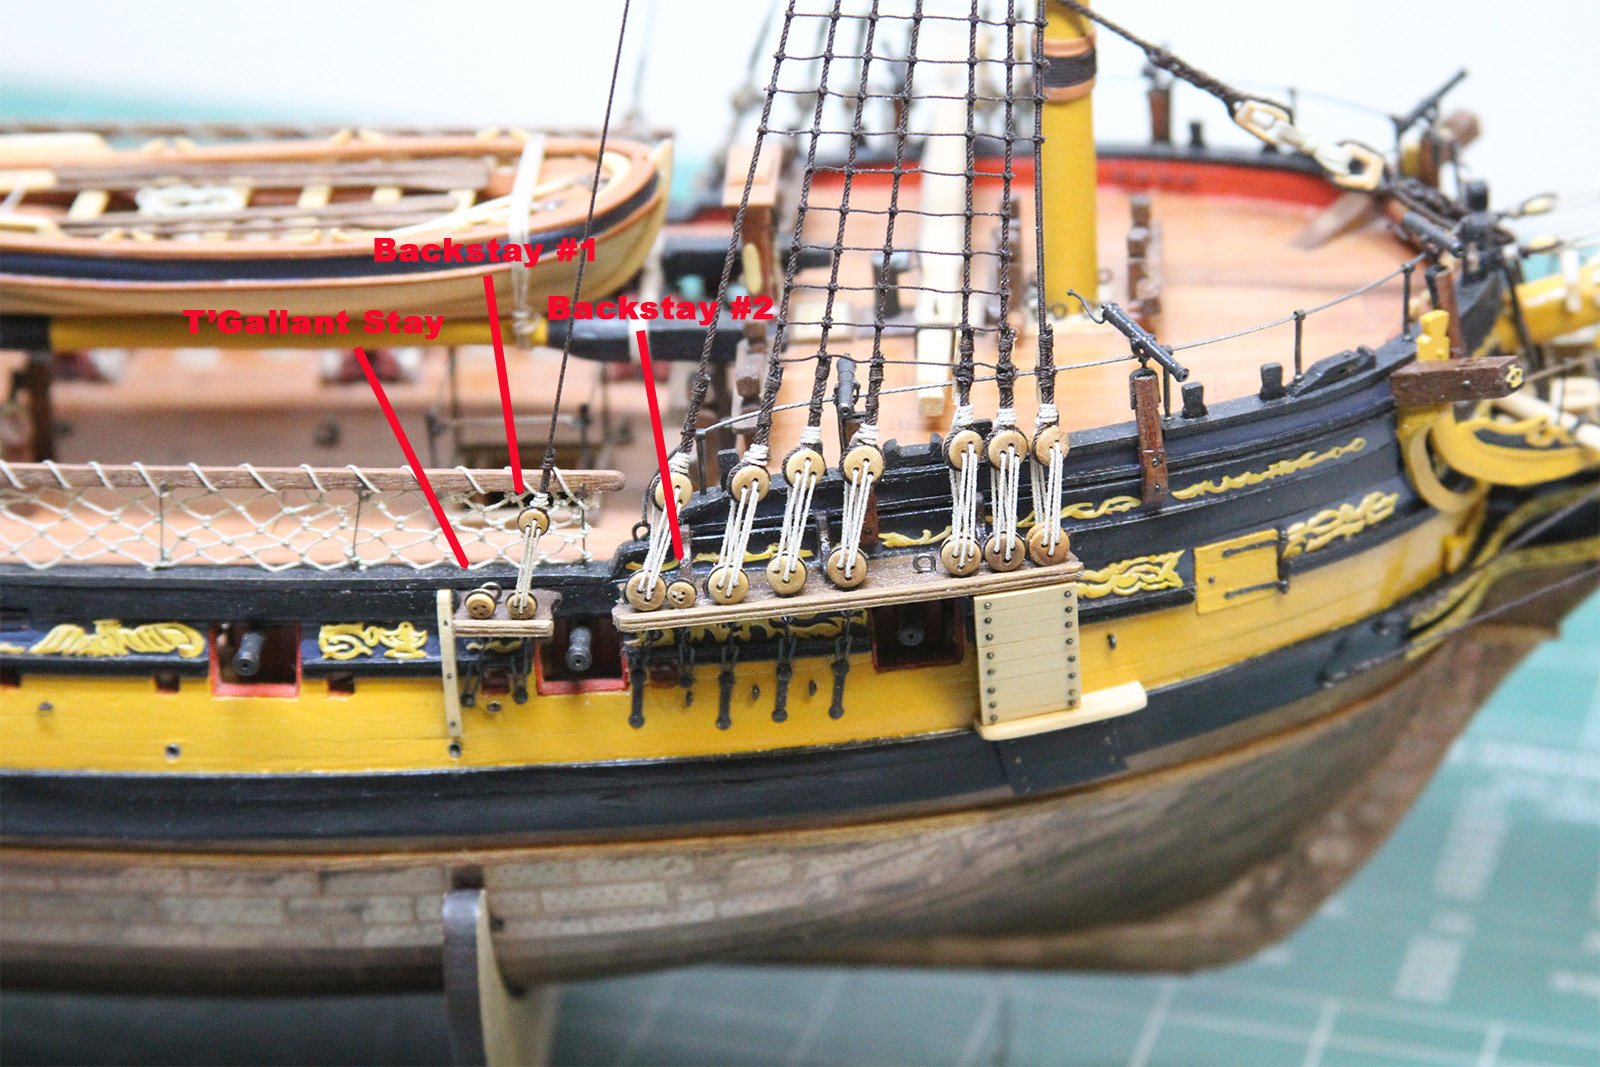
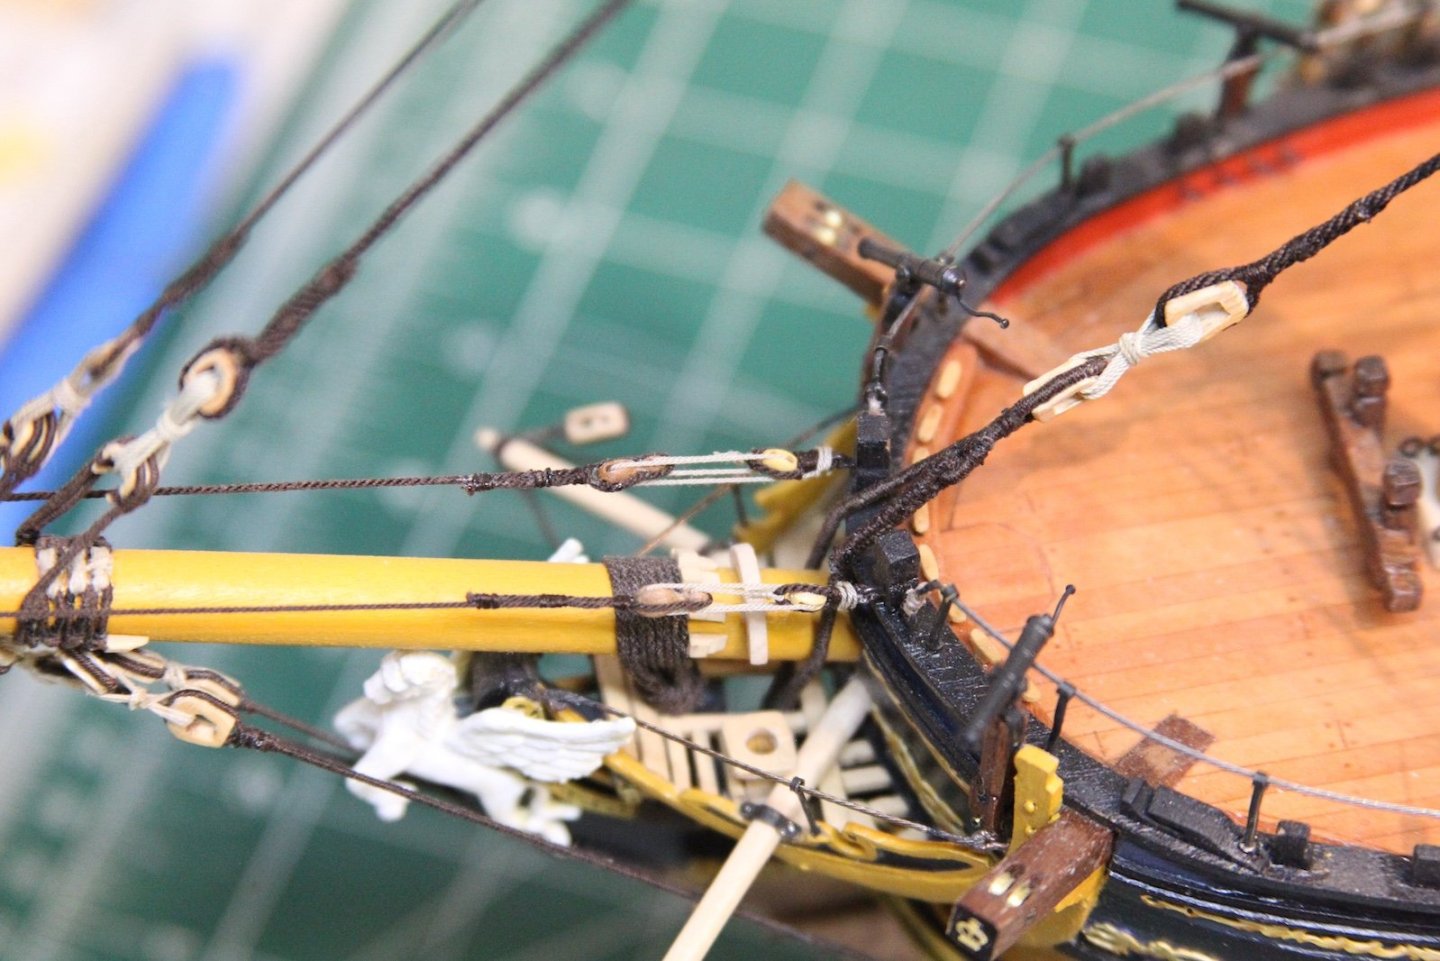
The fore t'gallant stay runs from the top of the fore t'gallant mast down to the bowsprit and then seizes to the open heart of the fore preventer stay. A little bit unique, but quite interesting. Now, here's where I've deviated from the plans again. The FFM and others show two sets of thimbles around the end of the bowsprit- a pair together for the spritsail yard lifts, and three together for the t'gallant stay and the t'gallant bowlines. However, there is some evidence that a treble block was used instead of three thimbles. This is an option I first discovered from Dan Vadas as part of his Vulture build, and I really liked the look of it. Five thimbles on the bowsprit looks much too busy to me - so I went with the block / thimble combination. The rest of the fore t'gallant stay is pretty straightforward; looped around the top and then runs through the treble block. As mentioned, the end of the line is seized to the open collar of the foremast preventer stay with a lanyard.


- 419 replies
-
- 8
-
-
-
- Victory Models
- Pegasus
- (and 2 more)
-
Hey Phil, thanks - that’s exactly right. Corny as it is - I imagine myself as the Capt’n, sorting out how I want her title run. I think it would have been amazing to compare the setups between different captains - based on their personalities and purposes.
- 419 replies
-
- 3
-
-
- Victory Models
- Pegasus
- (and 2 more)
-
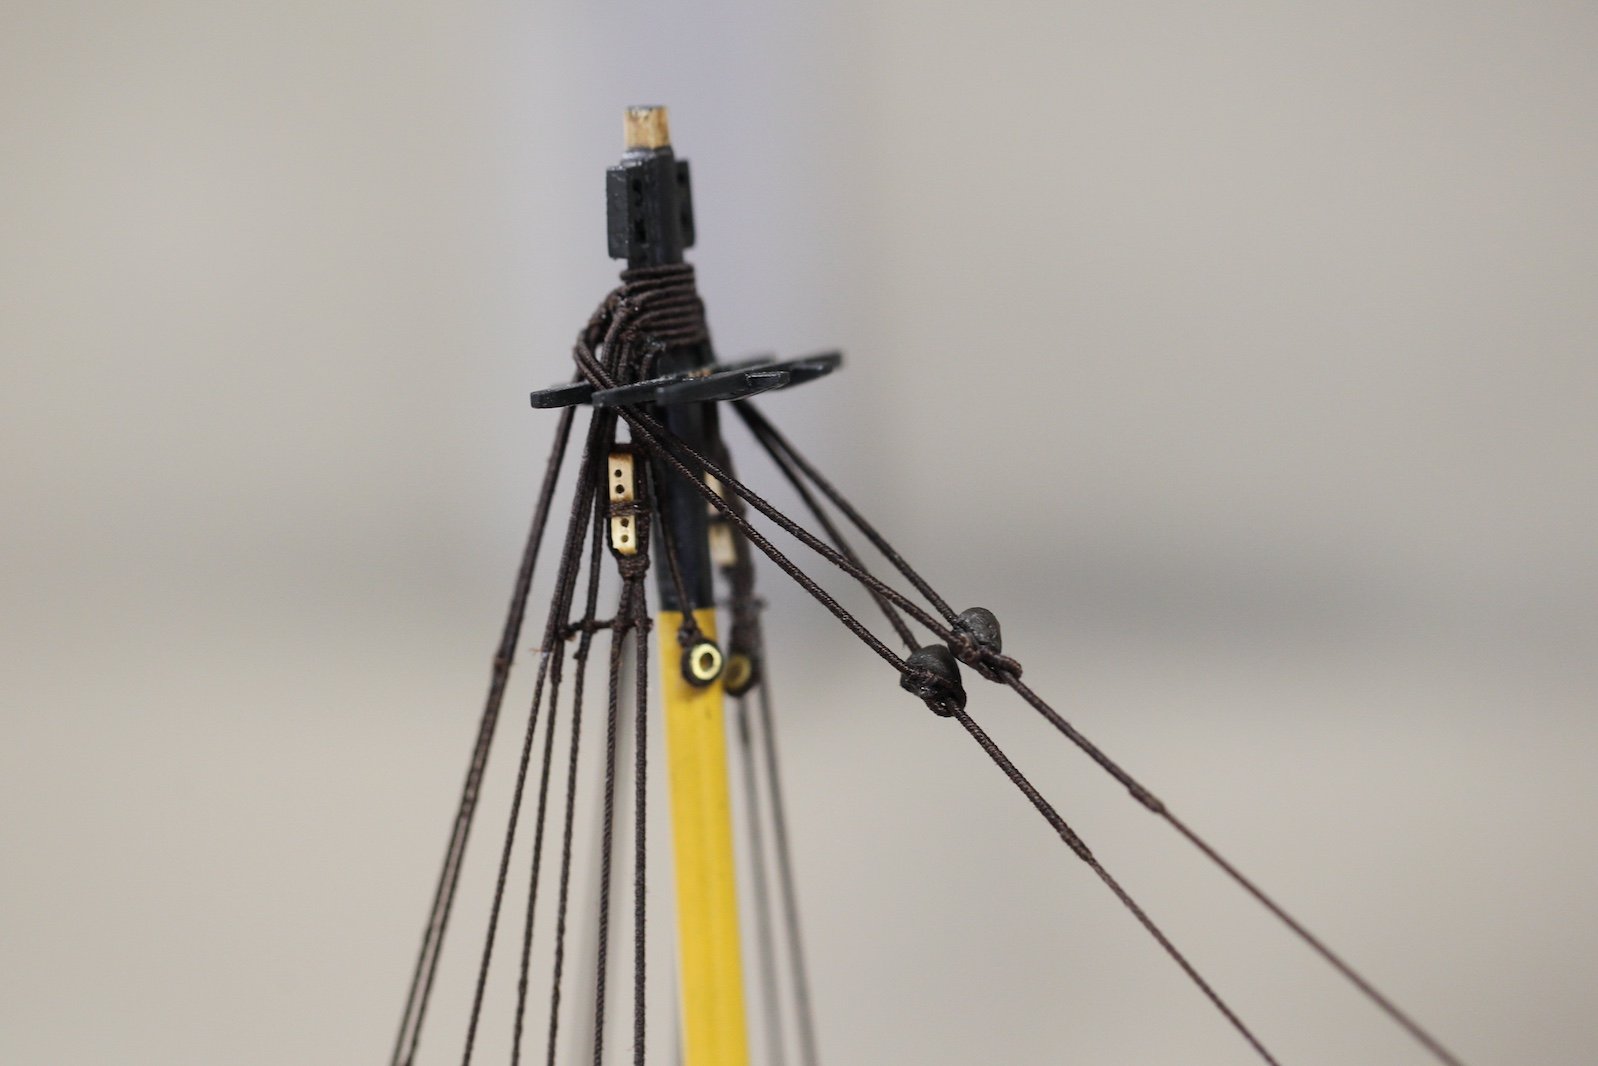
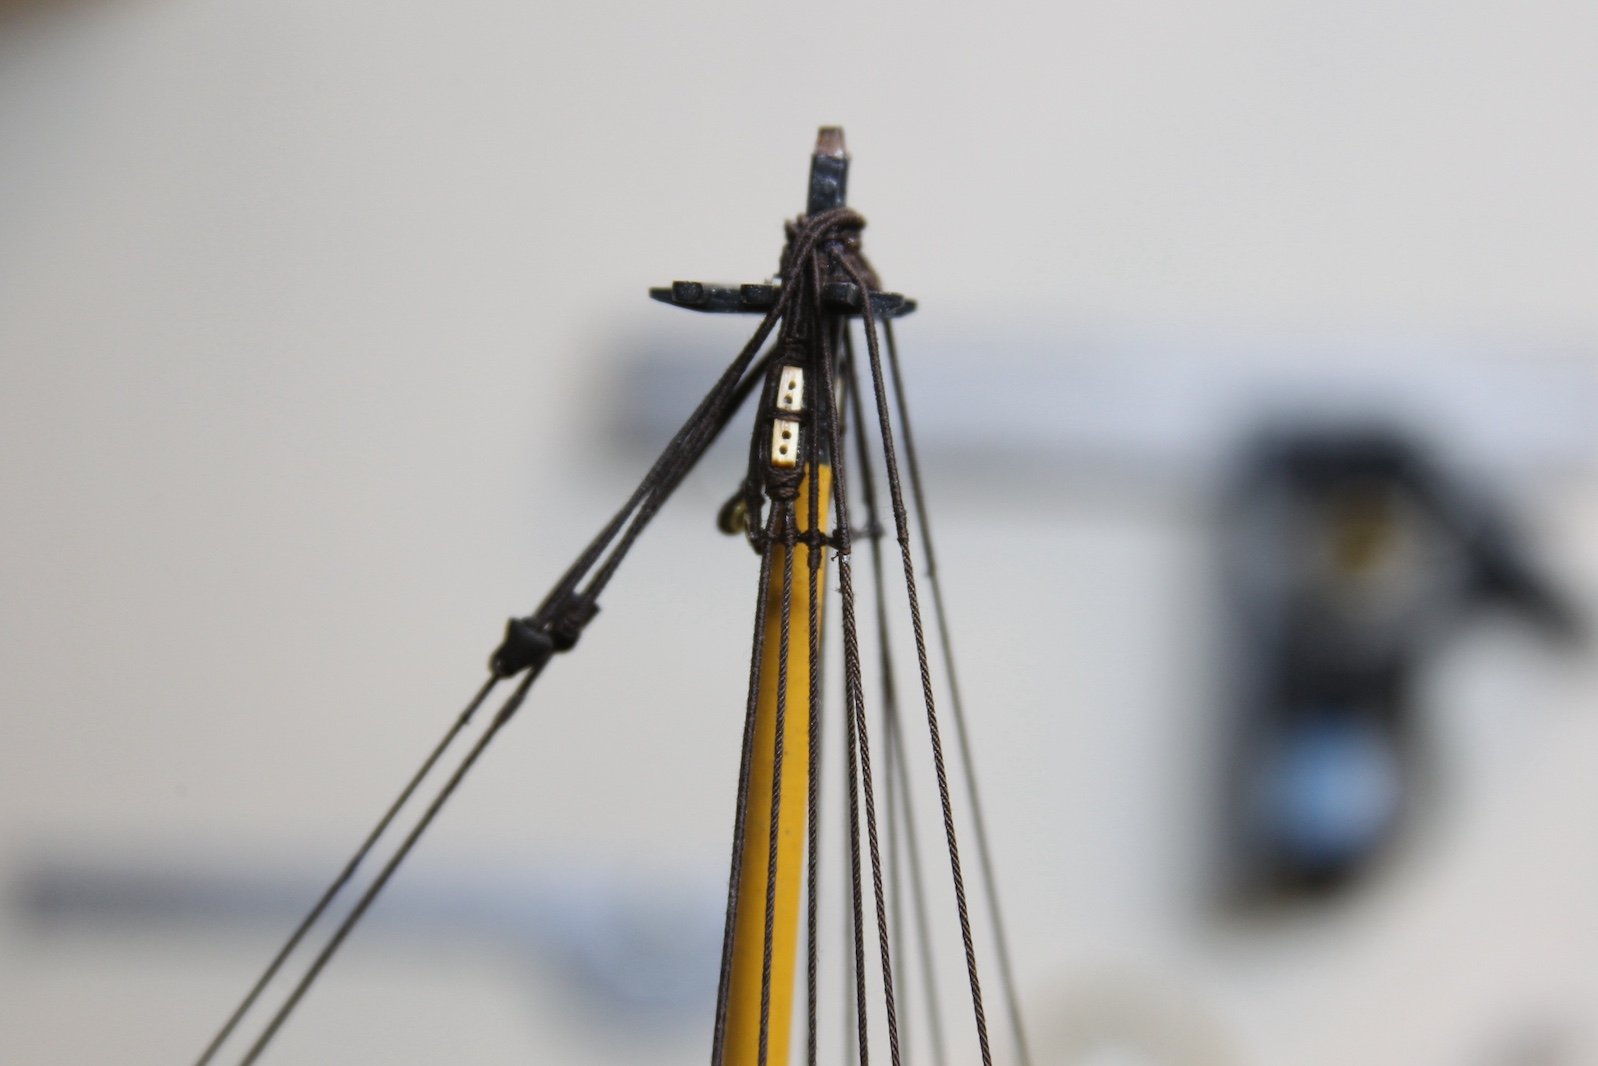
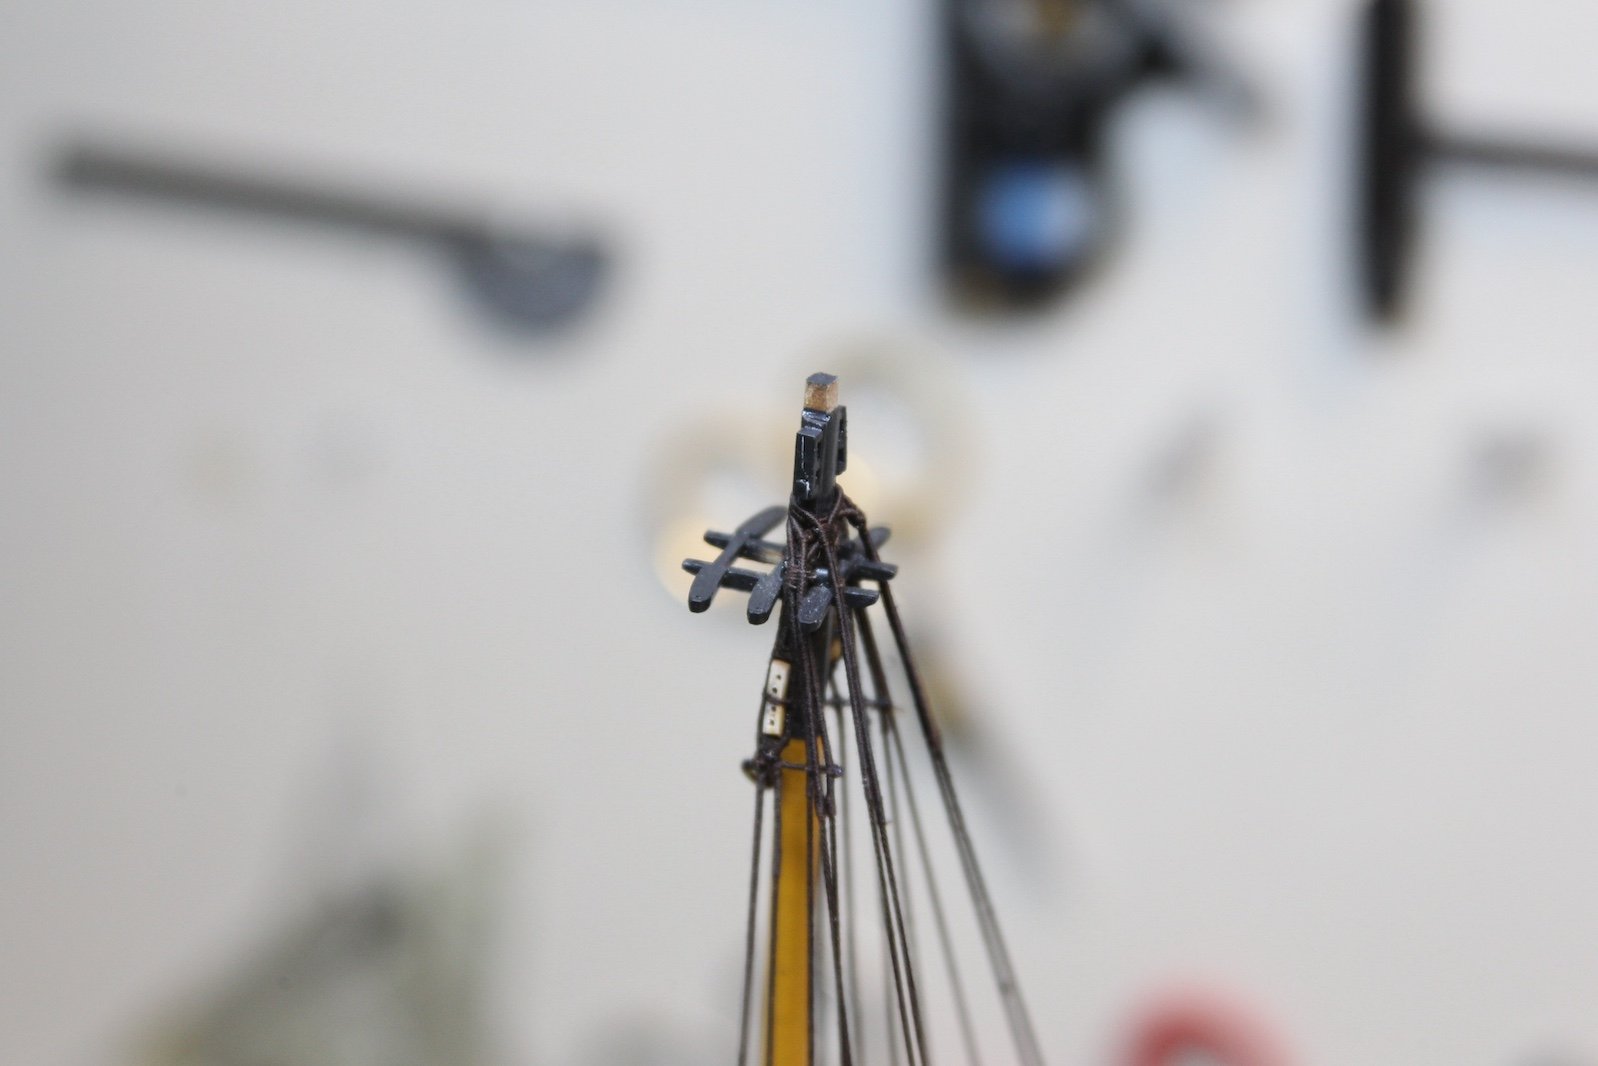
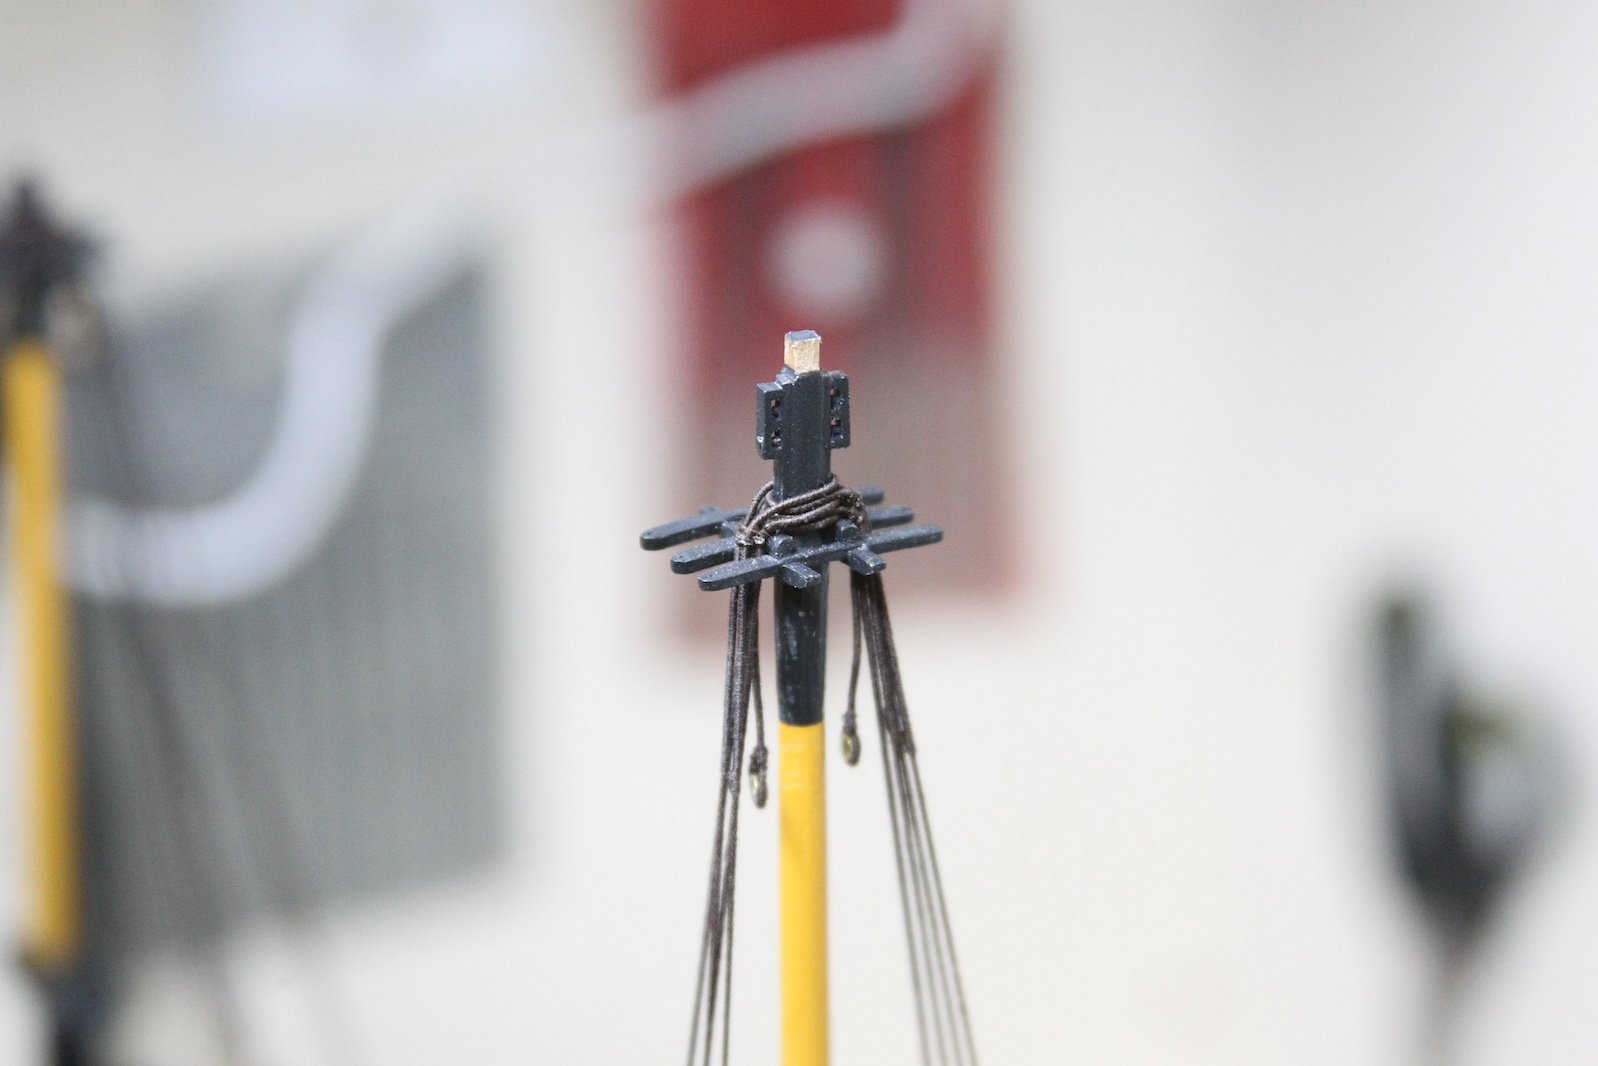
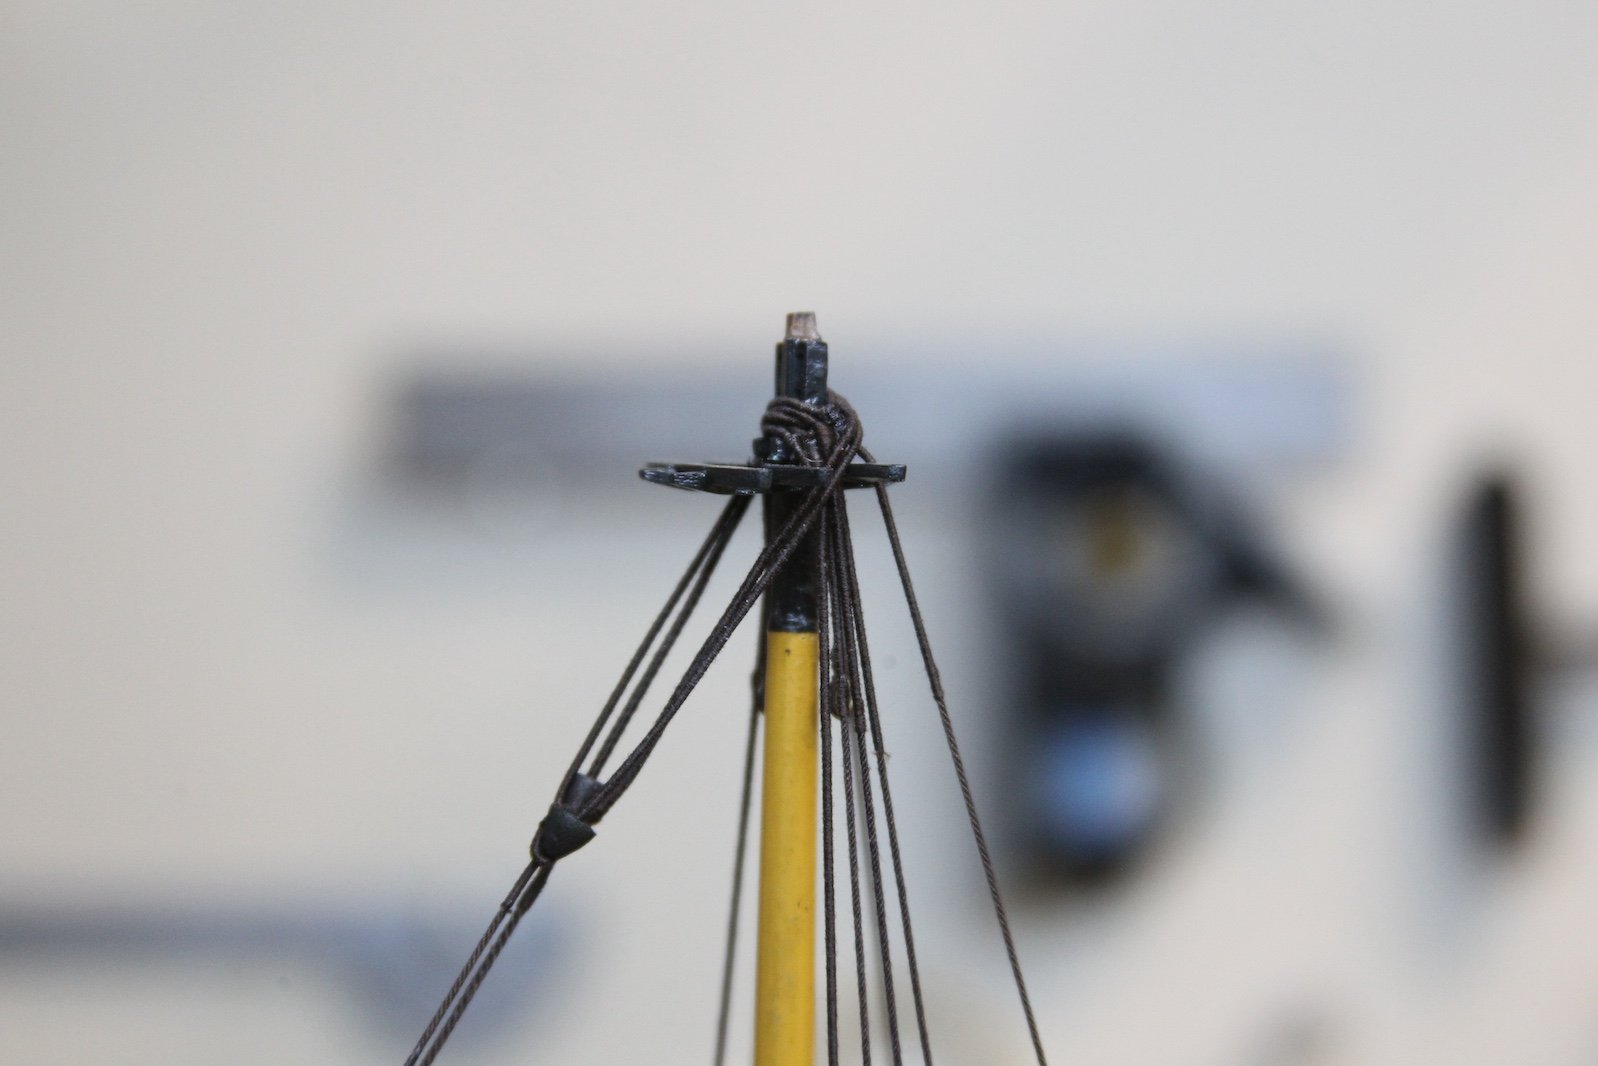
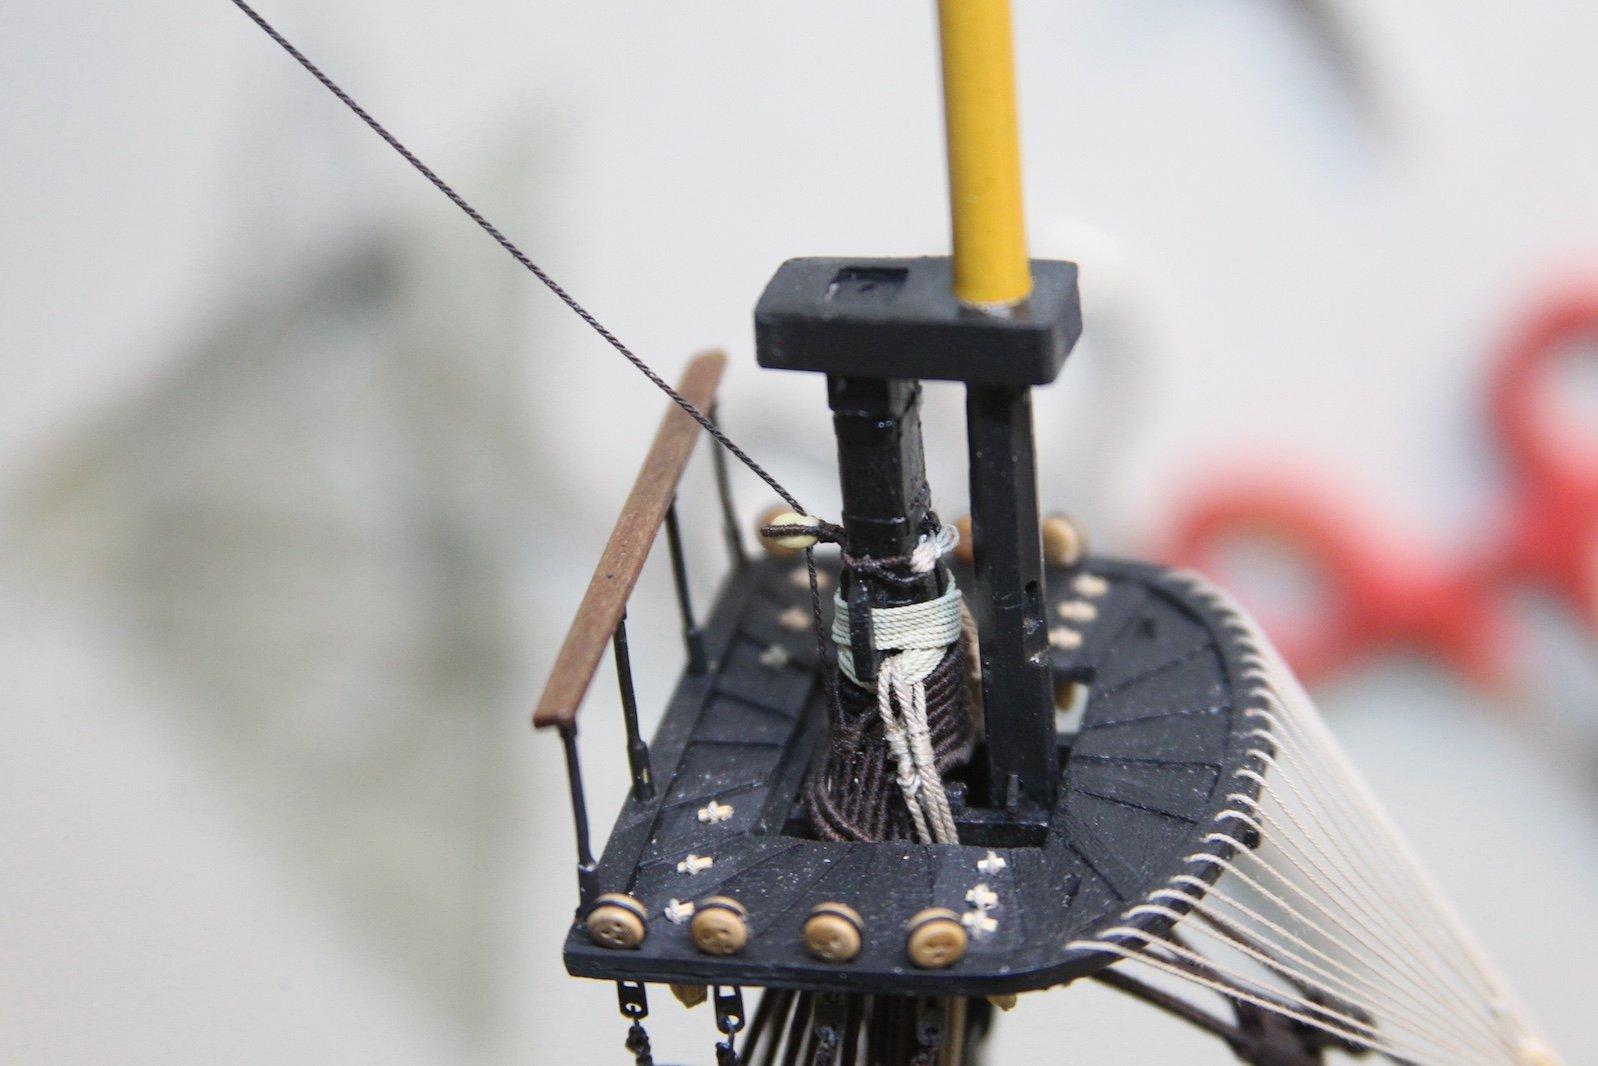
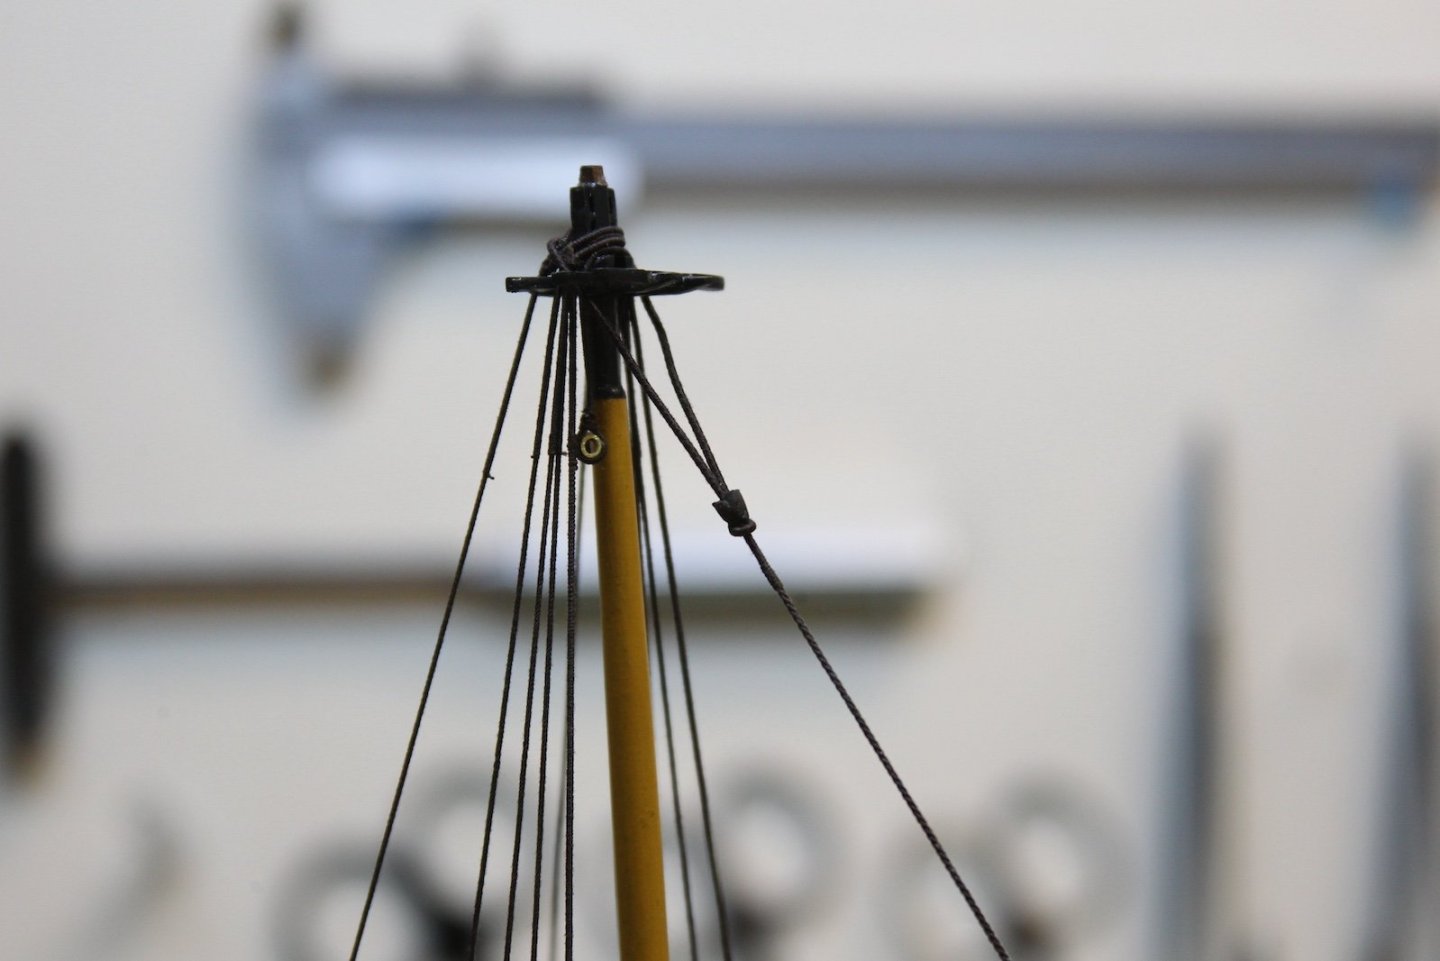
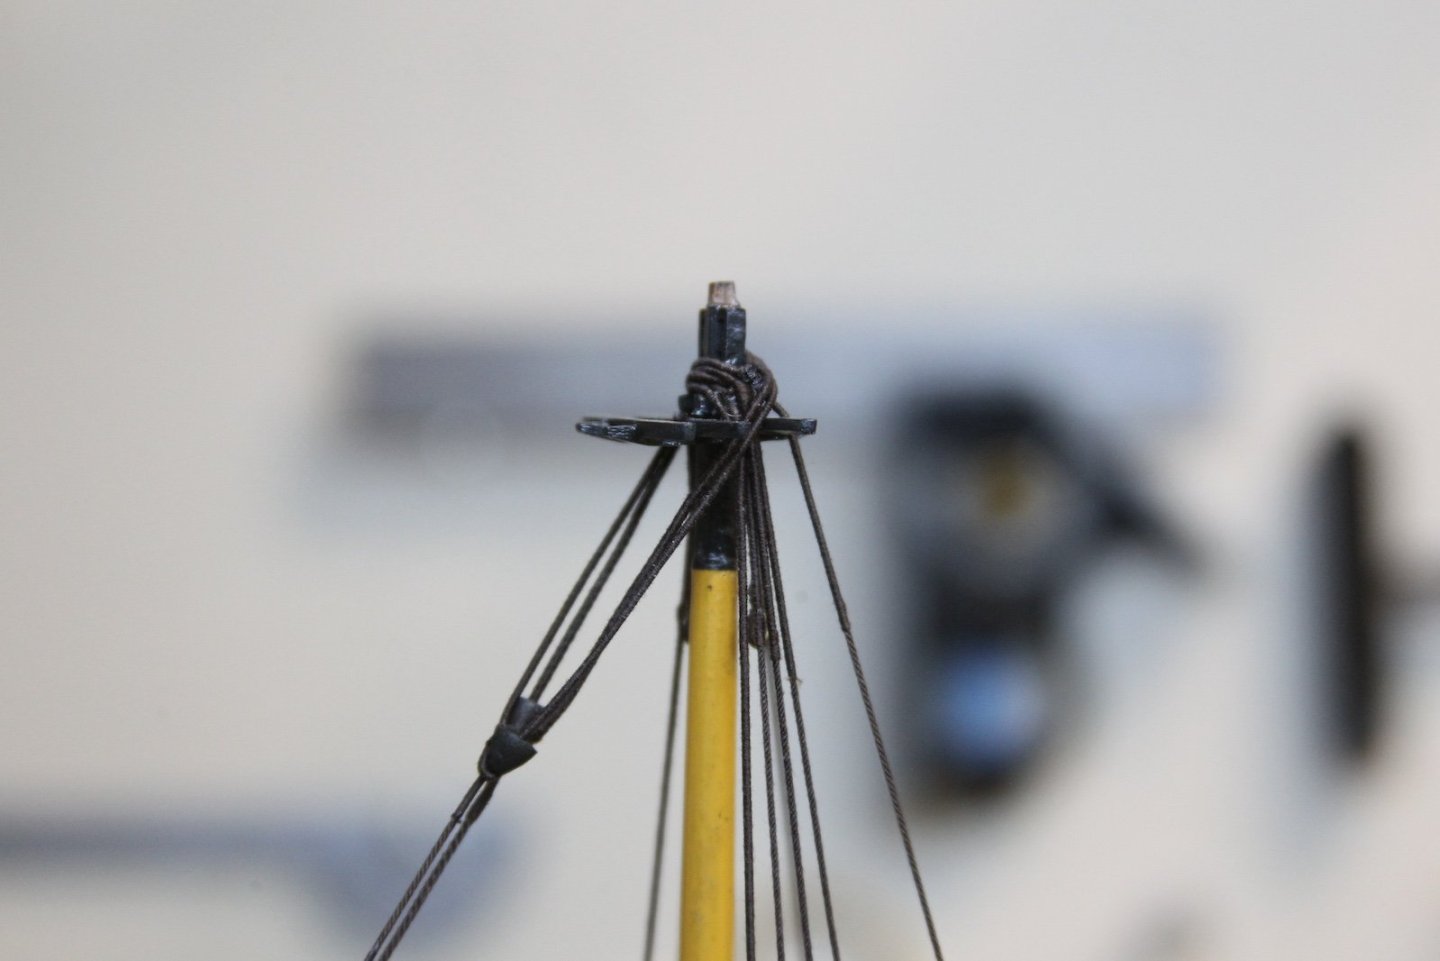
As it turns out - there are a number of complications and some competing information when it comes to the main t'gallant stay. First, although the text in chapter 17 is correct on the FFM - the schematic illustrations (and my computer generated images) show the stay running through a block attached to the fore masthead. However, all of my other resources show the block seized to the upper masthead. I chose to go with the latter, not only because of the preponderance of the evidence, but it also looks more even and consistent. The next bit of conflicting information has to do with how the bottom end of the say is rigged. FFM has the line knotted to the strop of the upper preventer stay block. However (and this is actually pointed out in FFM's chapter), this only works if the line runs through the block at the main masthead. A line coming from the UPPER masthead (as I'm going to have it) to the upper preventer stay block is fouled by the mast cap. The way around this - is the 'alternative' version of rigging laid out in the FFM. This version has the t'gallant stay running through a 9" block at the upper mast head (as mentioned above), then down to a thimble in an eye. That thimble is then attached to a second thimble (via a lanyard) that is part of a span that instead straddles the upper preventer stay block instead of attaching to it. This is the method I'm using. First, I created the span using a served .30mm line with a thimble. I quickly discovered, that even with this span / thimble - the line running from the block above it will still foul on the mast cap. So I carefully shaved off a little of the cap and repainted it. The upper 9" (3.5mm) block is attached - but instead of stropping it around the masthead - I'm flat out of room - I stropped it just below the cross trees at the hounds. Finally, the two thimbles are lashed together with a lanyard and a fap and tied off. An overall look - I definitely think it makes more sense for this line to run from the upper masthead rather than the lower.


- 419 replies
-
- 11
-
-
-
- Victory Models
- Pegasus
- (and 2 more)
-
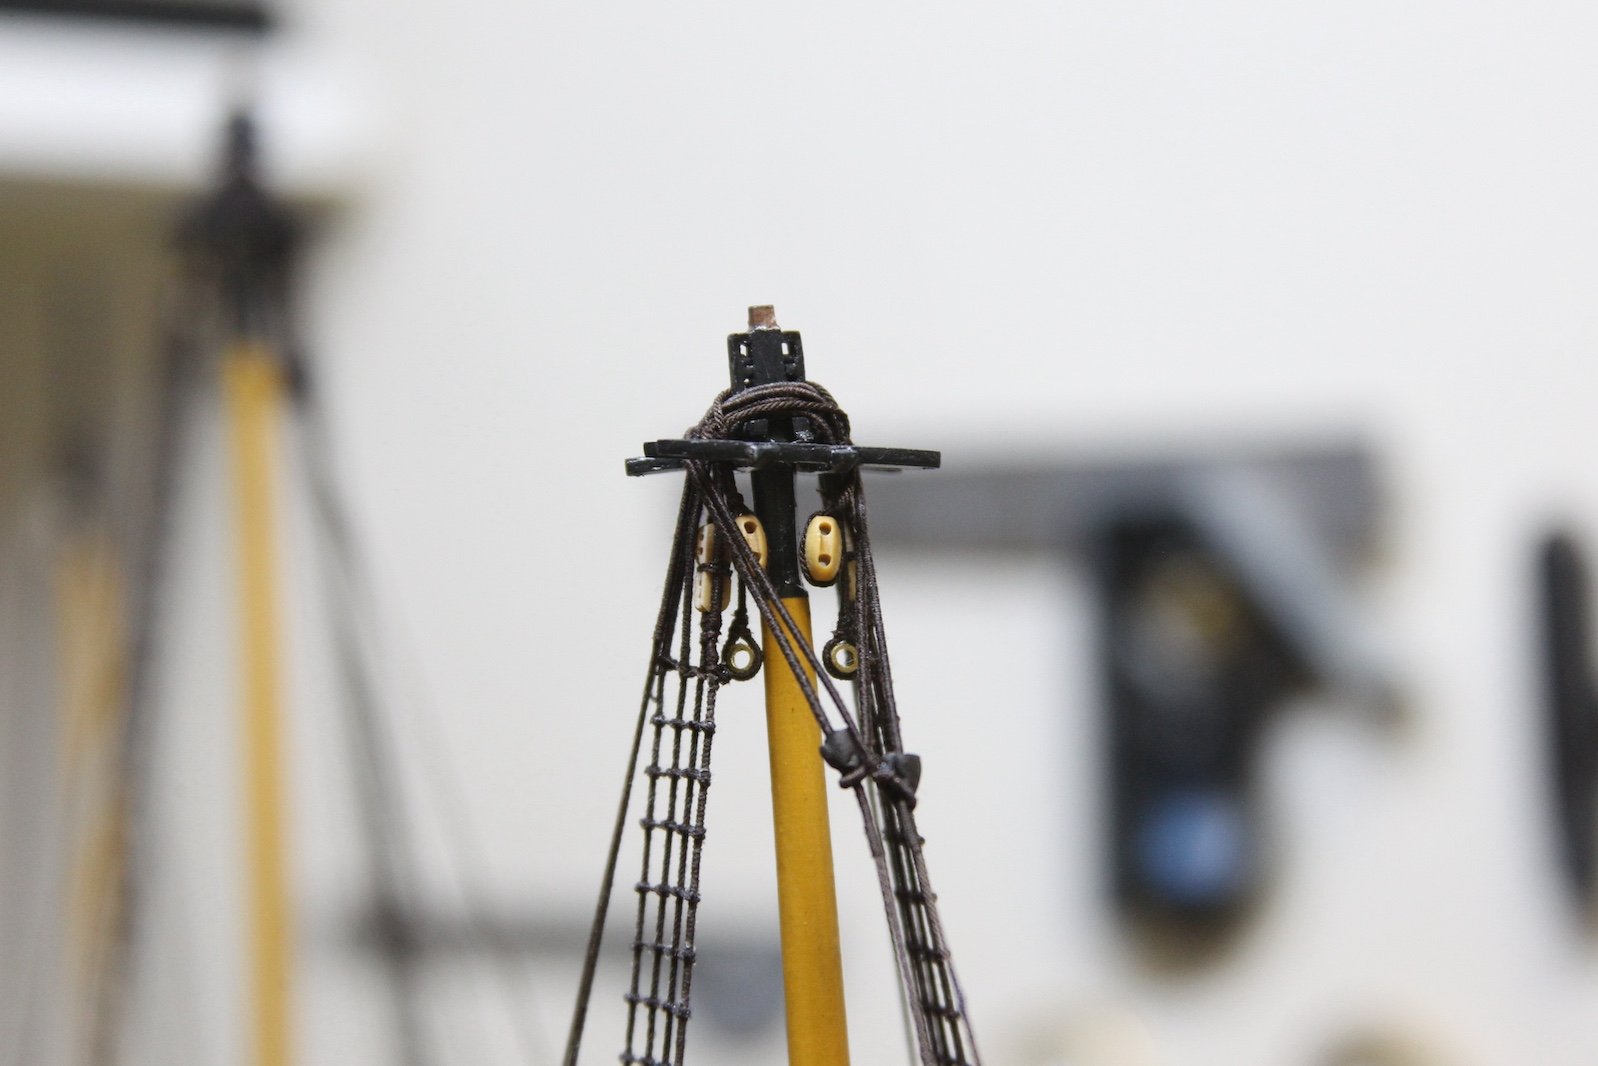
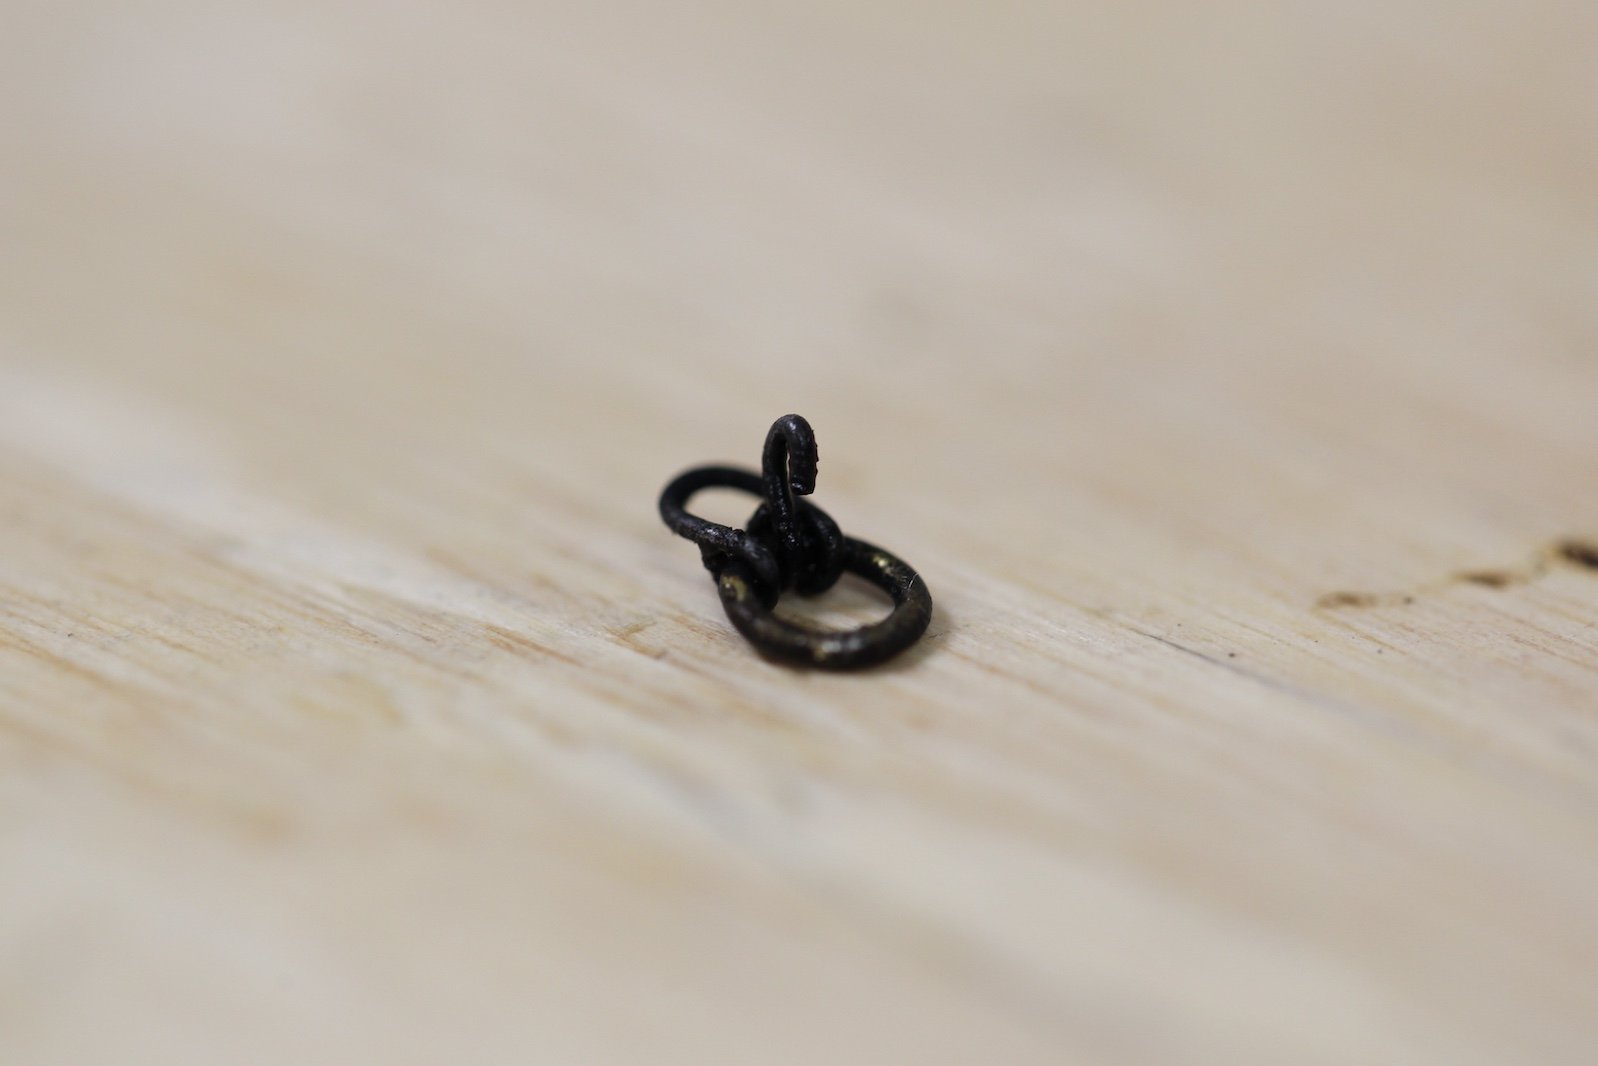
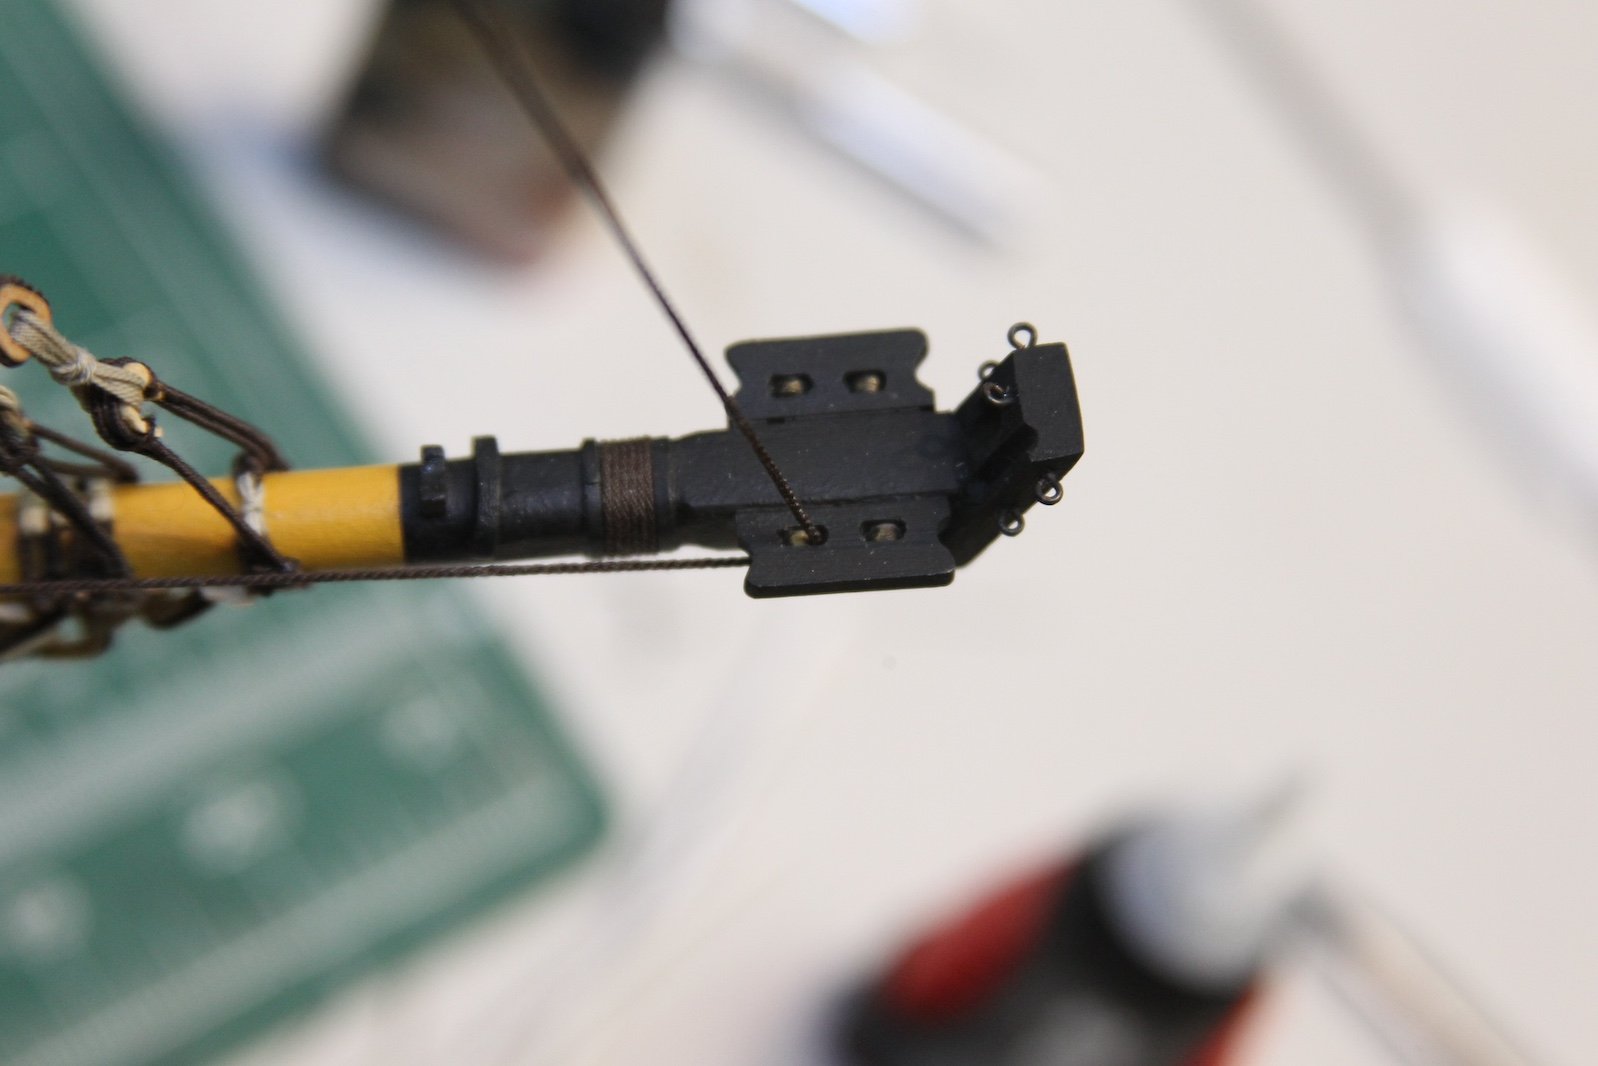
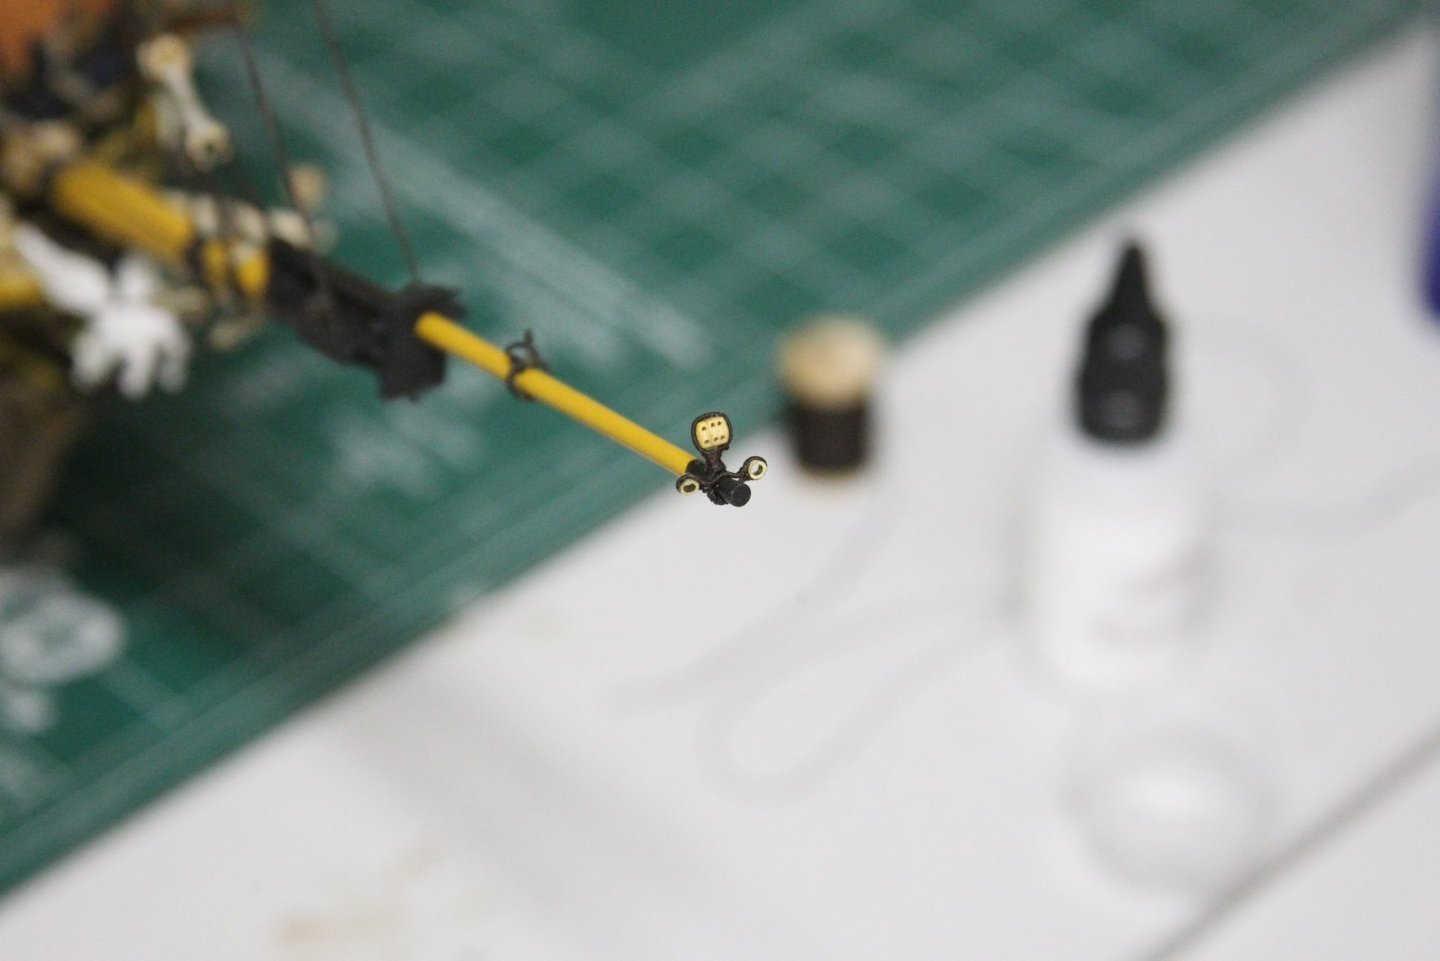
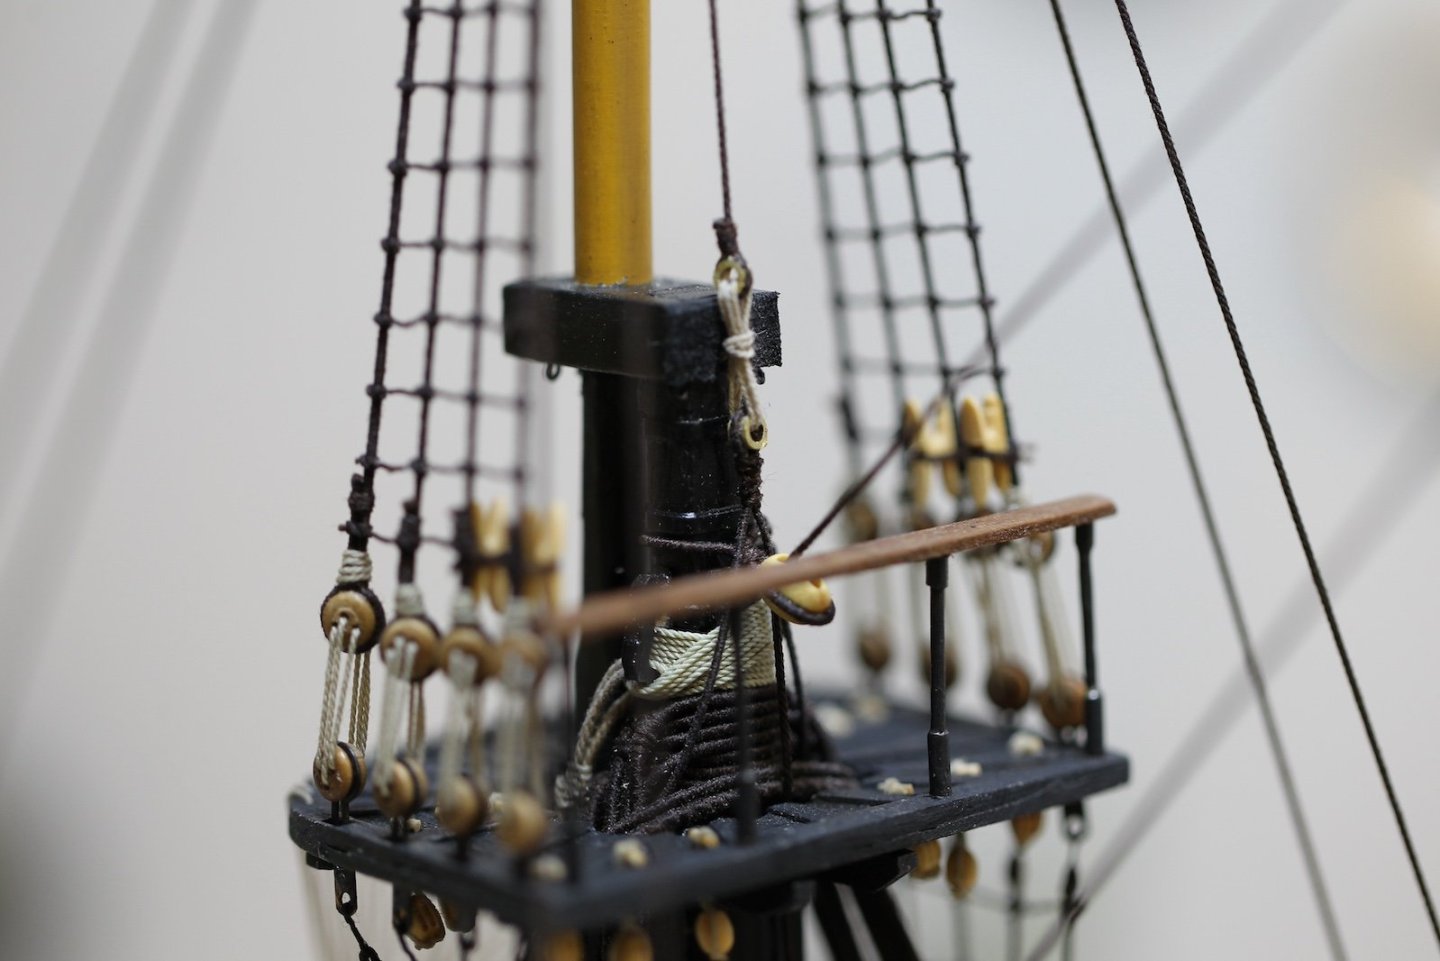
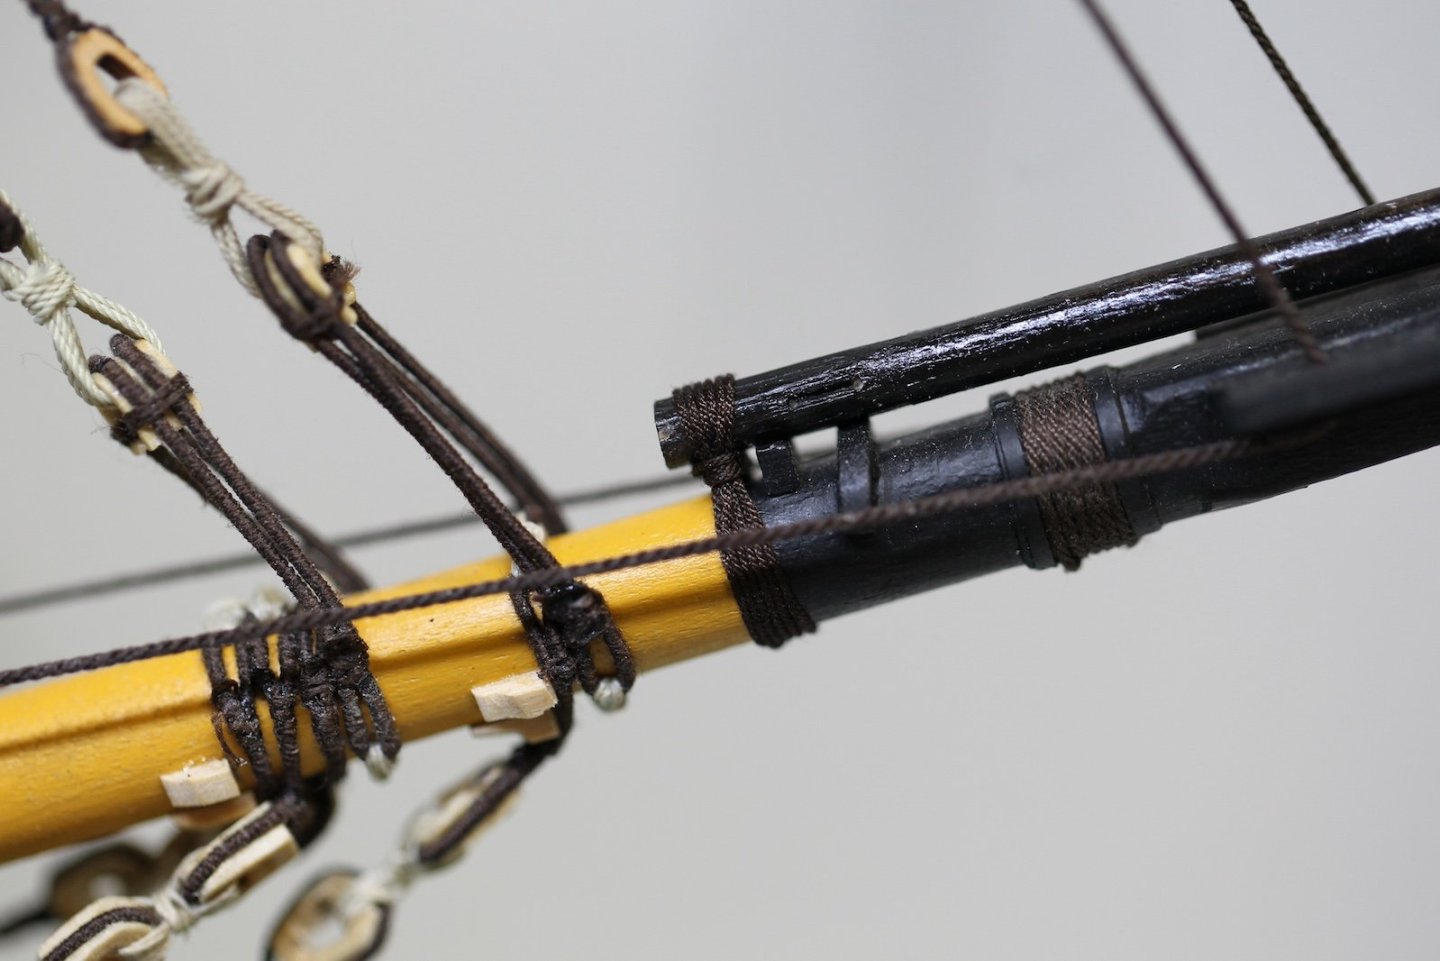
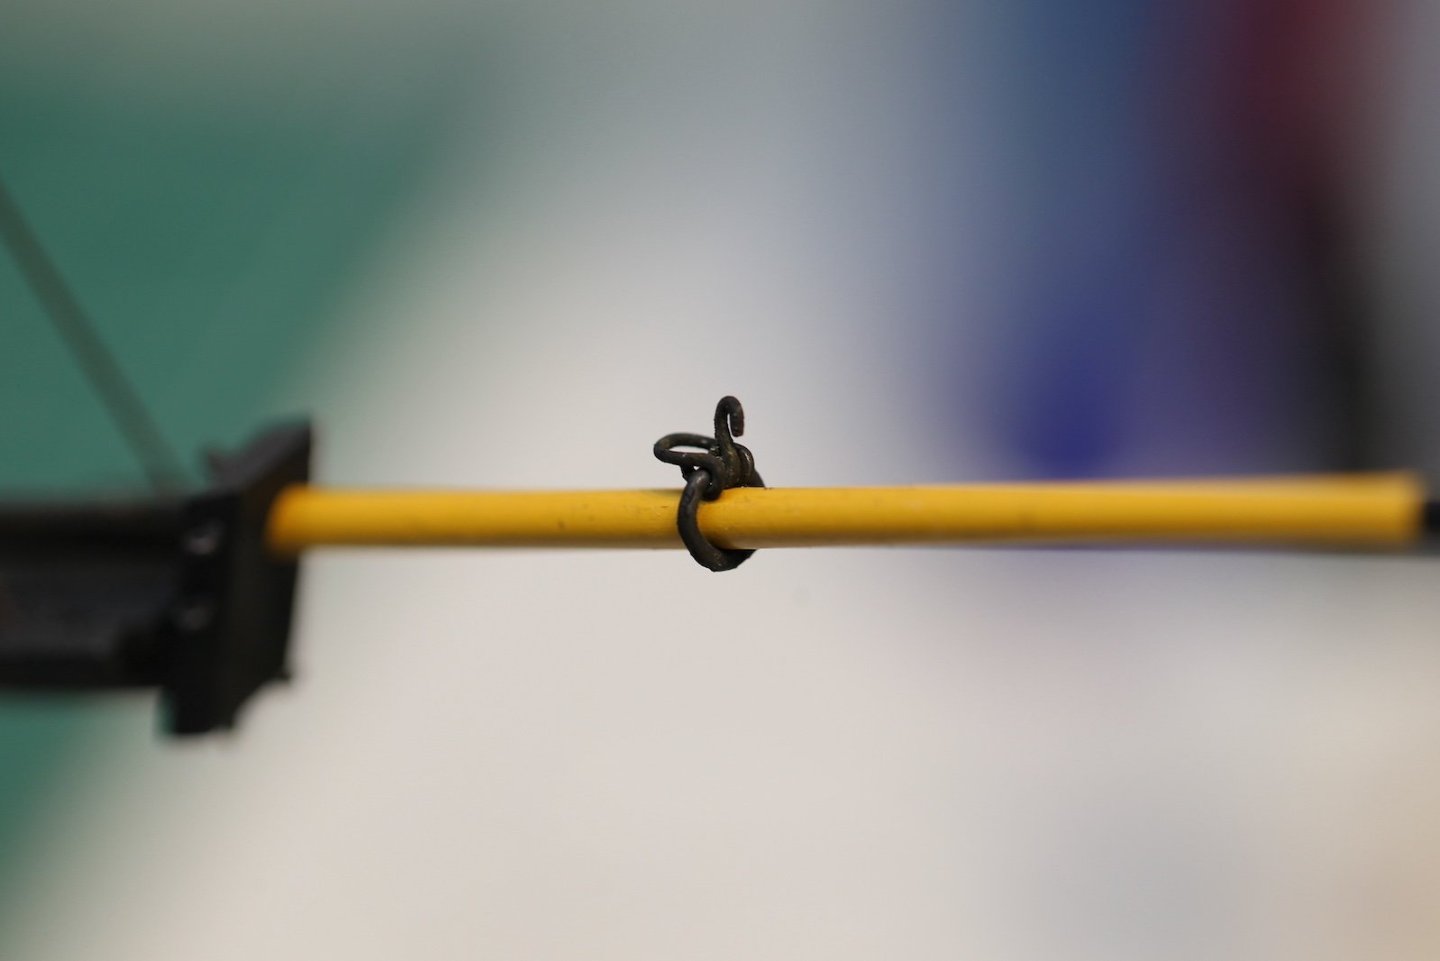
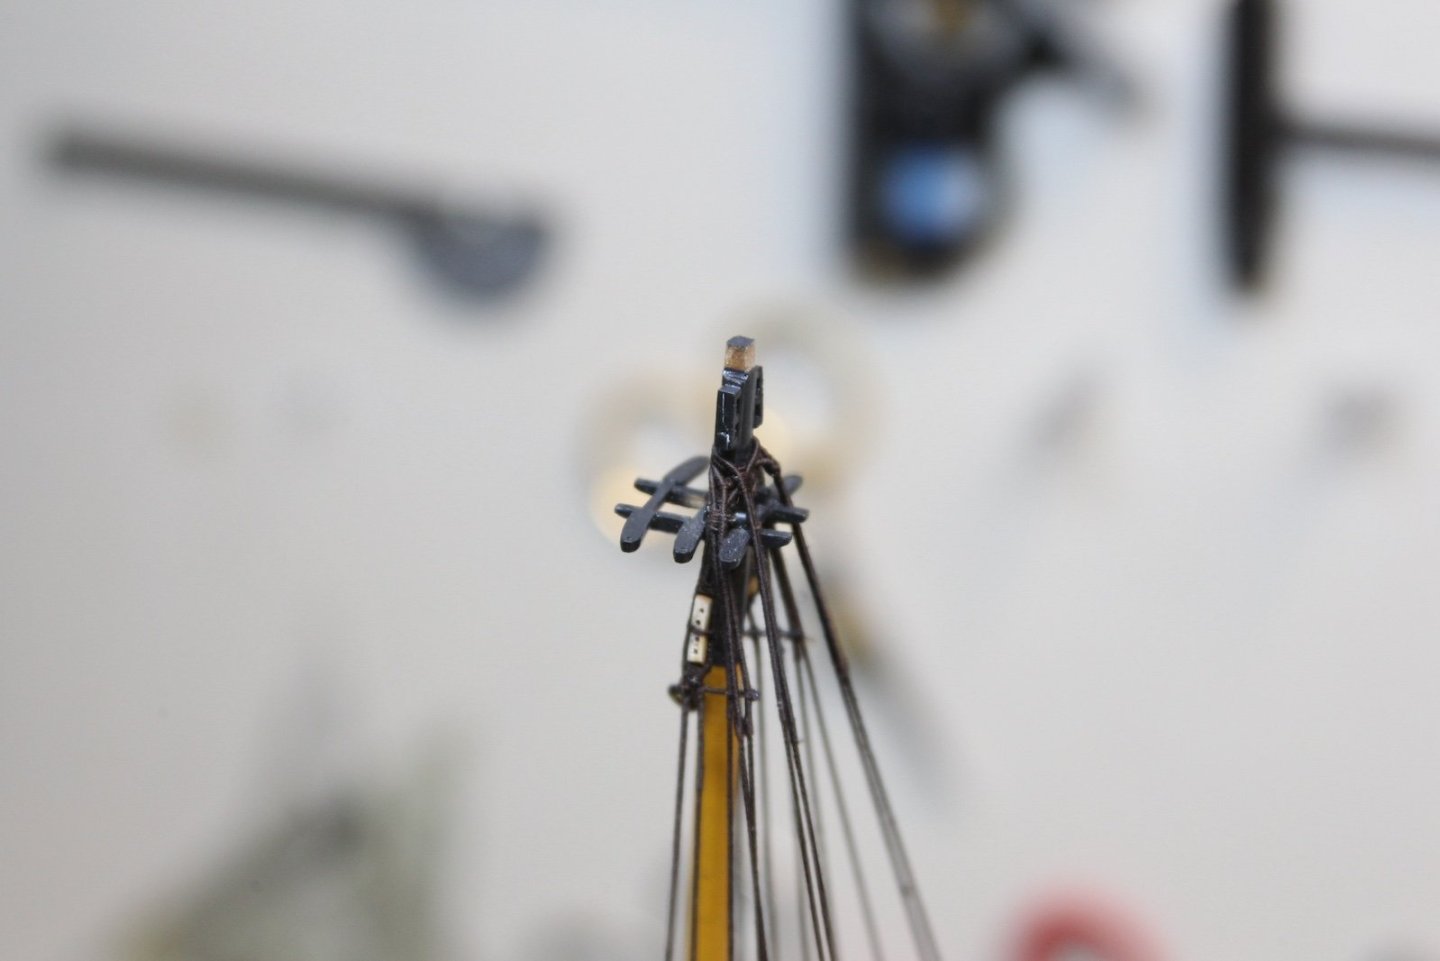
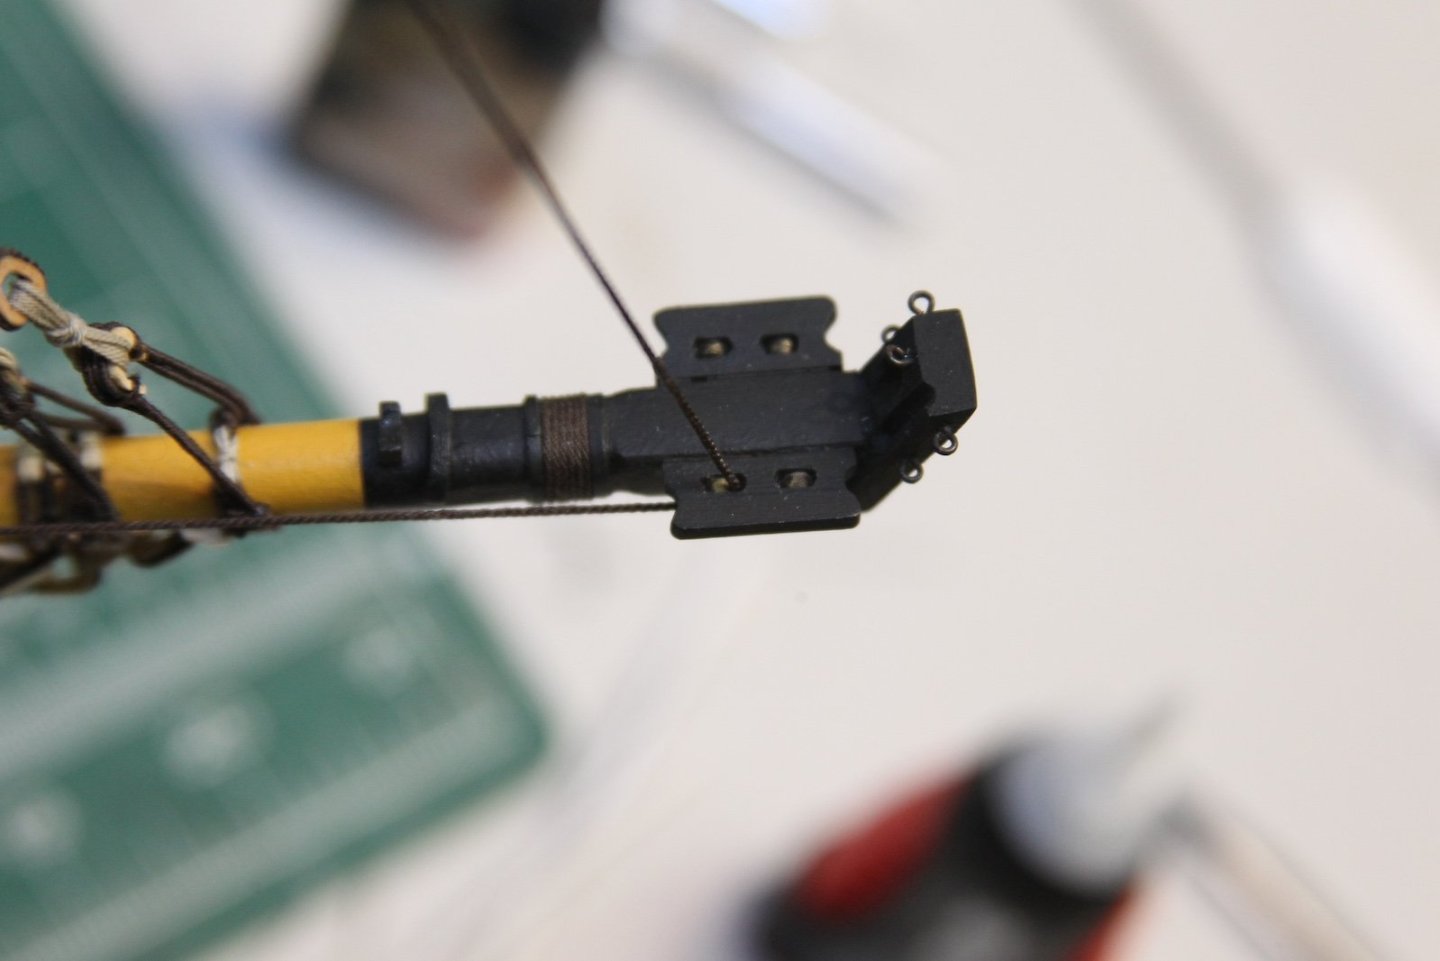
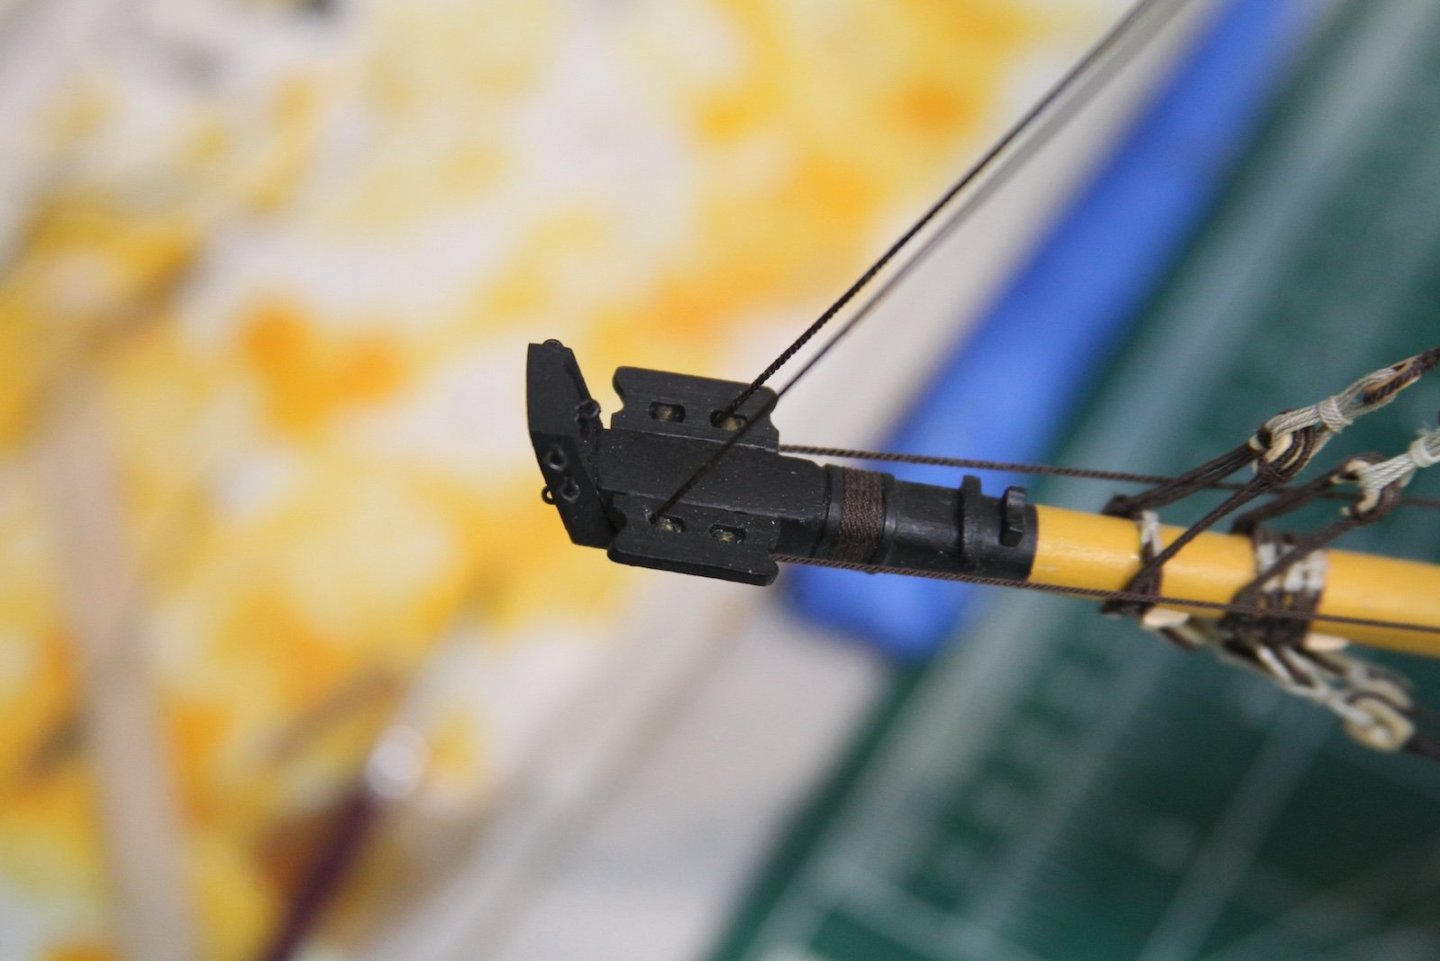
Getting ready for the T'Gallant rigging takes a couple preemptive steps. As the FFM points out - getting the upper jeer tyes done before mounting the T'gallant masts is quite a bit easier than waiting until later. Even though these area simpler bit of rigging than the lower versions, I still found the quite tricky as I am running out of room on the upper mast heads. Were I to do it again - I would allow for more room on the upper heads above the cross trees and tressle trees than the measurements suggest. The blocks for both fore and main are listed as 14" or 5.5mm. While I probably could have waited a bit longer to mount the jib boom, I decided to do it now so I can start to wrap up the standing rigging. Mounting the boom requires wrapping the crupper - a 2" line - I used .25mm with six wraps and secured very similar to the gammoning. While Lees has this wrapping forward of the saddle, I stuck with the FFM which shows it aft. Before any rigging can be added to the end of the jib boom, I first need to sort out the jib boom traveller. This is a specific piece of iron work that has a ring that holds the jib outhaul and the running end of the jib stay. It also has a hook that holds the tack of the jib. Both of these are attached to a larger ring that runs along the jib boom. I shaped all these with two different gauges of wire and silver solder. Finally, the entire piece is blackened and run over the end of the jib boom. Important note: I realized later when I rigged the jib stay and the jib traveler overhaul, that I made this piece with the loop on the wrong side of the hook. The loop needs to be fore of the hook to effectively rig the overhaul through the sheeve in the end of the jib boom.

- 419 replies
-
- 9
-
-
- Victory Models
- Pegasus
- (and 2 more)
-
Several hours of work, and very few photos can only mean one thing - ratlines. Finished up the rest of them. No mystery here - same as the lowers, with a piece of 5mm graph paper serving as a template and spacing them out then filling in the gaps. Ratlines are tied off with half hitches, then diluted glue on all the knots. I give it a good overnight drying before I go through and clip off all the ends with a scalpel. I also added the upper shroud cleats.

- 419 replies
-
- 7
-
-
- Victory Models
- Pegasus
- (and 2 more)
-
Thanks so much Bob - appreciate the support. I’m confident your Peg is going to be great; you’ve definitely got the skills to make it so.
- 419 replies
-
- 2
-

-
-
- Victory Models
- Pegasus
- (and 2 more)
-
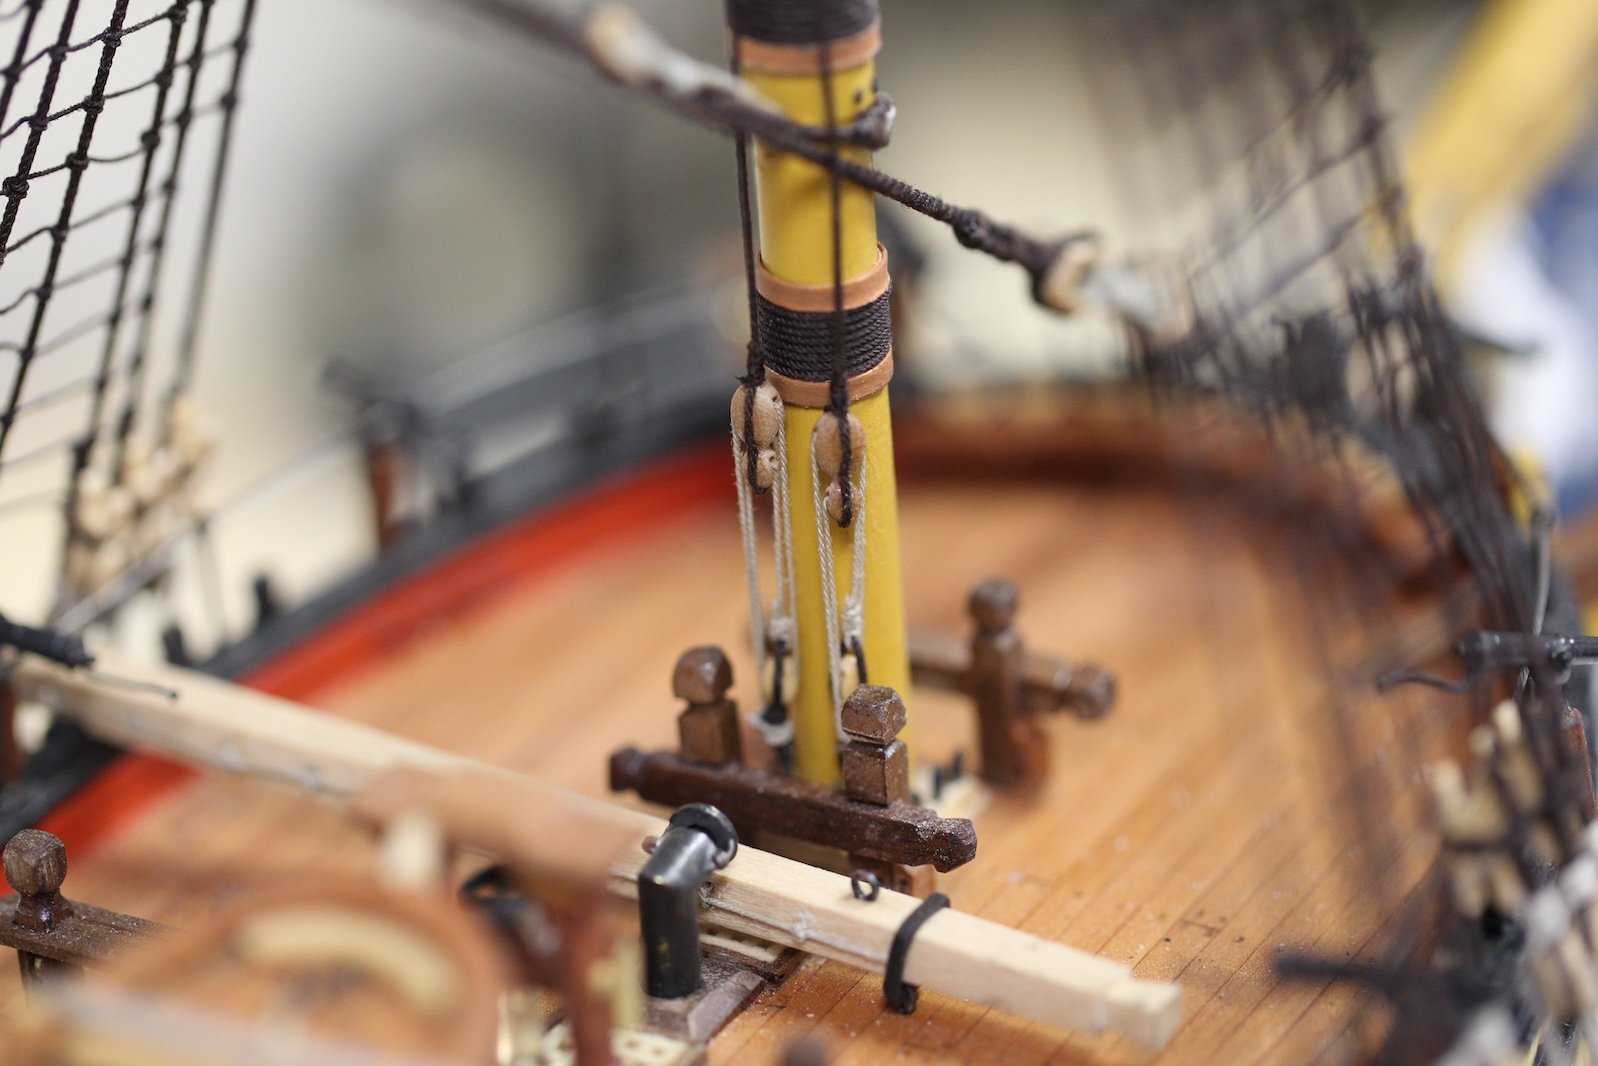
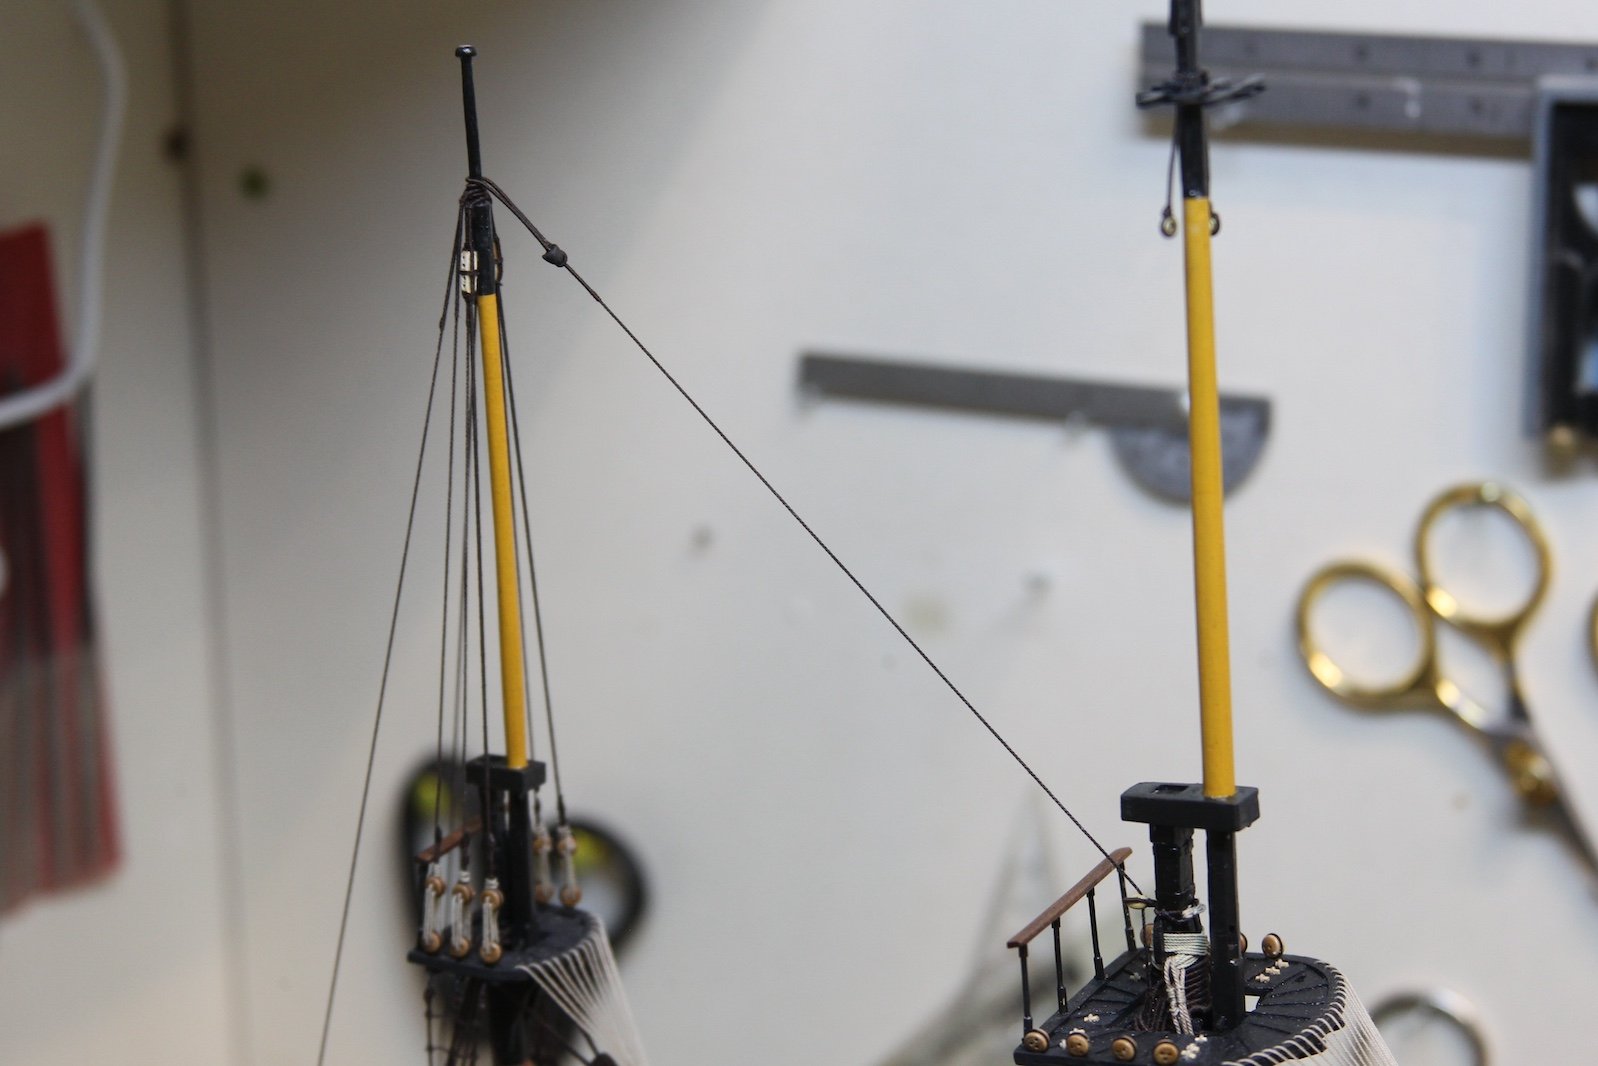
The main topmast stay and main topmast preventer stay obviously follow the same pattern as the foremast - though they are reversed in their placement. Meaning, the preventer stay is laid over the masthead first, then the main topmast stay. The preventer is a 4" line - .50mm at scale - served to just past the mouse as with the others. The line feeds through an 11" (4.5mm) block that is lashed to the foremast just below the hounds and above the catharpins. The block is stropped with a fully served .38mm line. I used the FFM's version of this strop - an eye on one end, wrapping around the block, then the free end looping around the mast, through the eye, and tied off against itself. The bottom tackle of the preventer (as well as the main topmast stay) is made up of a violin block at it's top and a single block attached to a hook that is secured to one of the eyebolts in the deck at the base of the foremast. The preventer is secured to the port side foremost eyebolt. This was a tricky bit to get measured properly. My process was to first secure the single block to the hook then measure it's length to find a reference point on the mast. Then, I laid the violin block against the stay pulling it down the mast until I found a reasonable distance between the blocks for the lanyard. In this case, it was about 7mm. Then, I unhooked the hook and added the lanyard using .30mm line without securing one end of the line. Finally, I re-hooked the bottom block into place, tightened the lanyard and stay, and secured the lanyard to the bottom end of the tackle. This process is repeated for the main topmast stay with the line being 5.5" - .70mm at scale - and using an 14" inch (5.5mm) block that is stropped and lashed to the masthead above the stays and jeer tie lashings. The bottom tackle is the same and hooked to the starboard side eyebolt at the front of the foremast. Starting to look like a rigged ship!


- 419 replies
-
- 12
-
-
-
- Victory Models
- Pegasus
- (and 2 more)
-
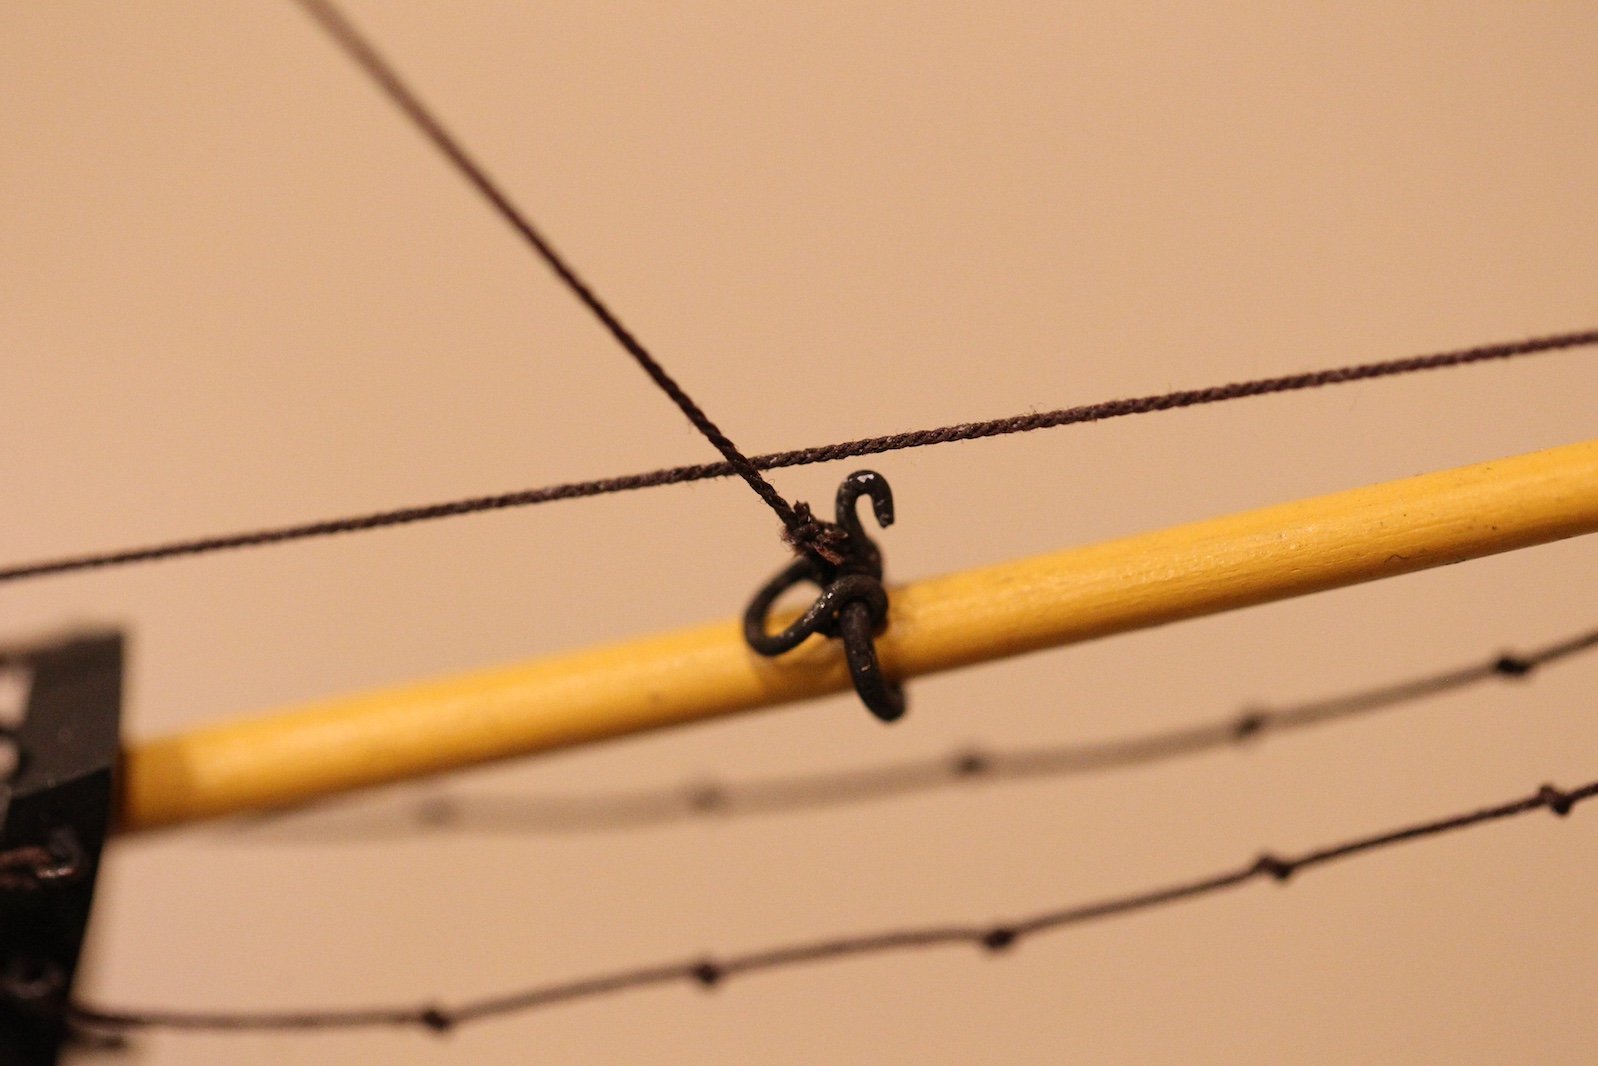
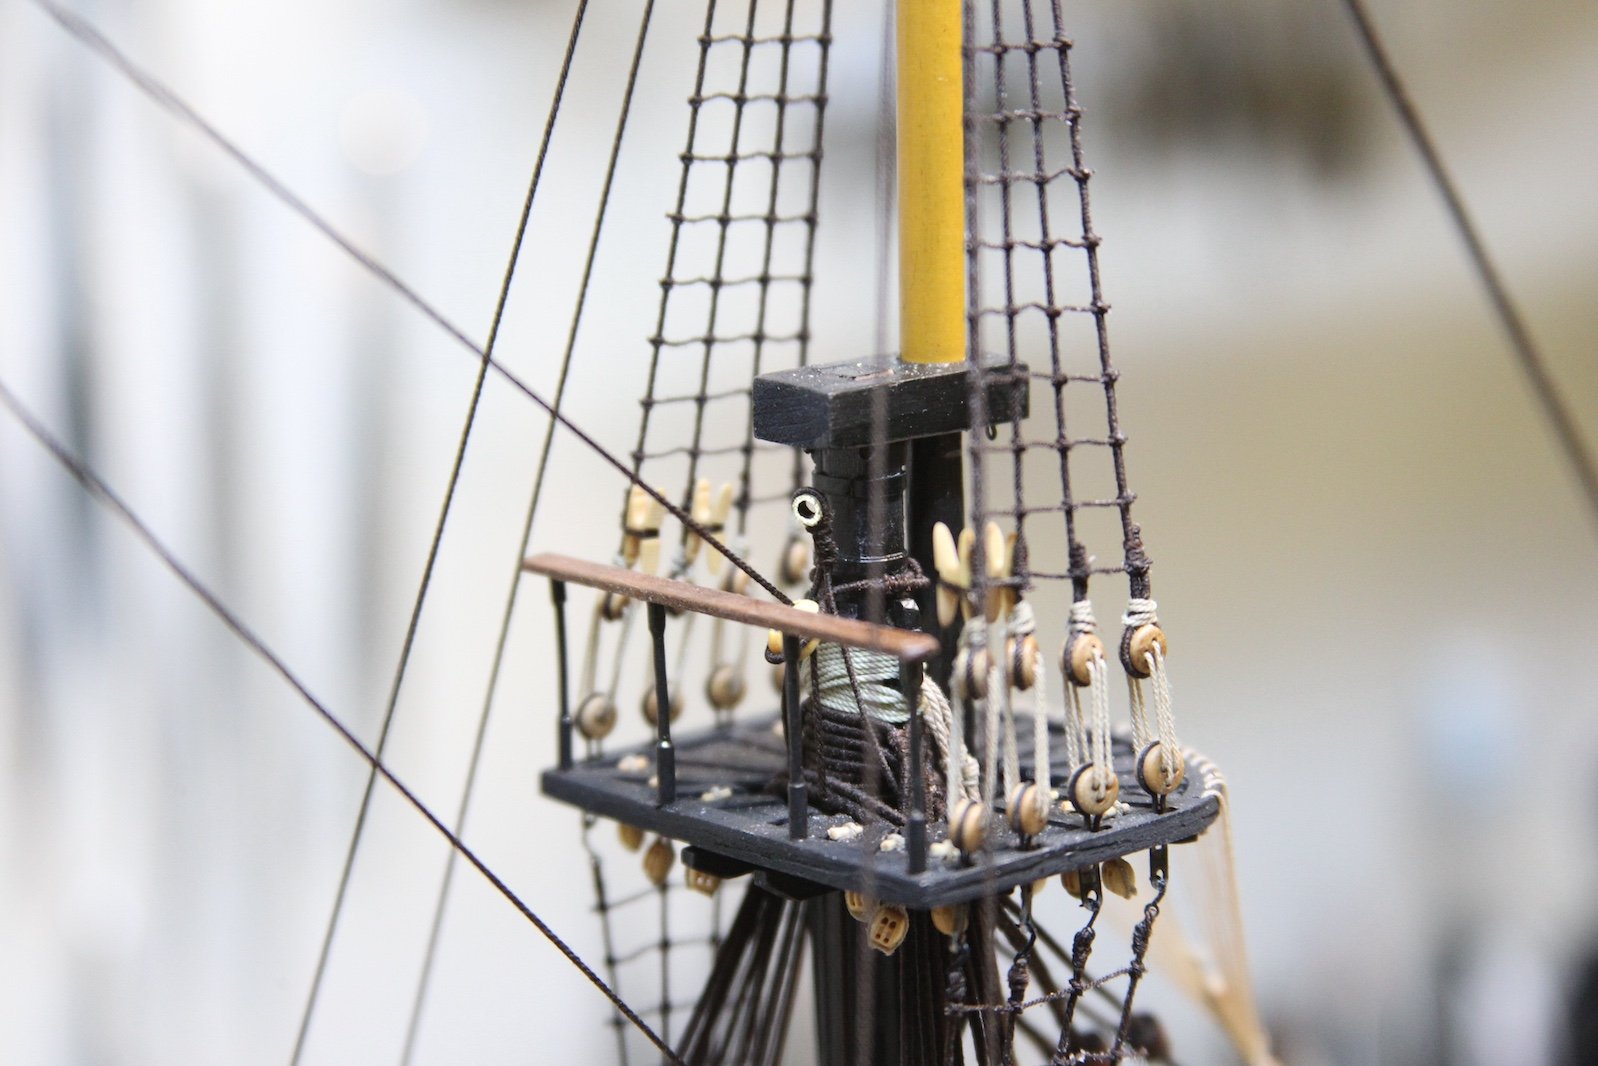
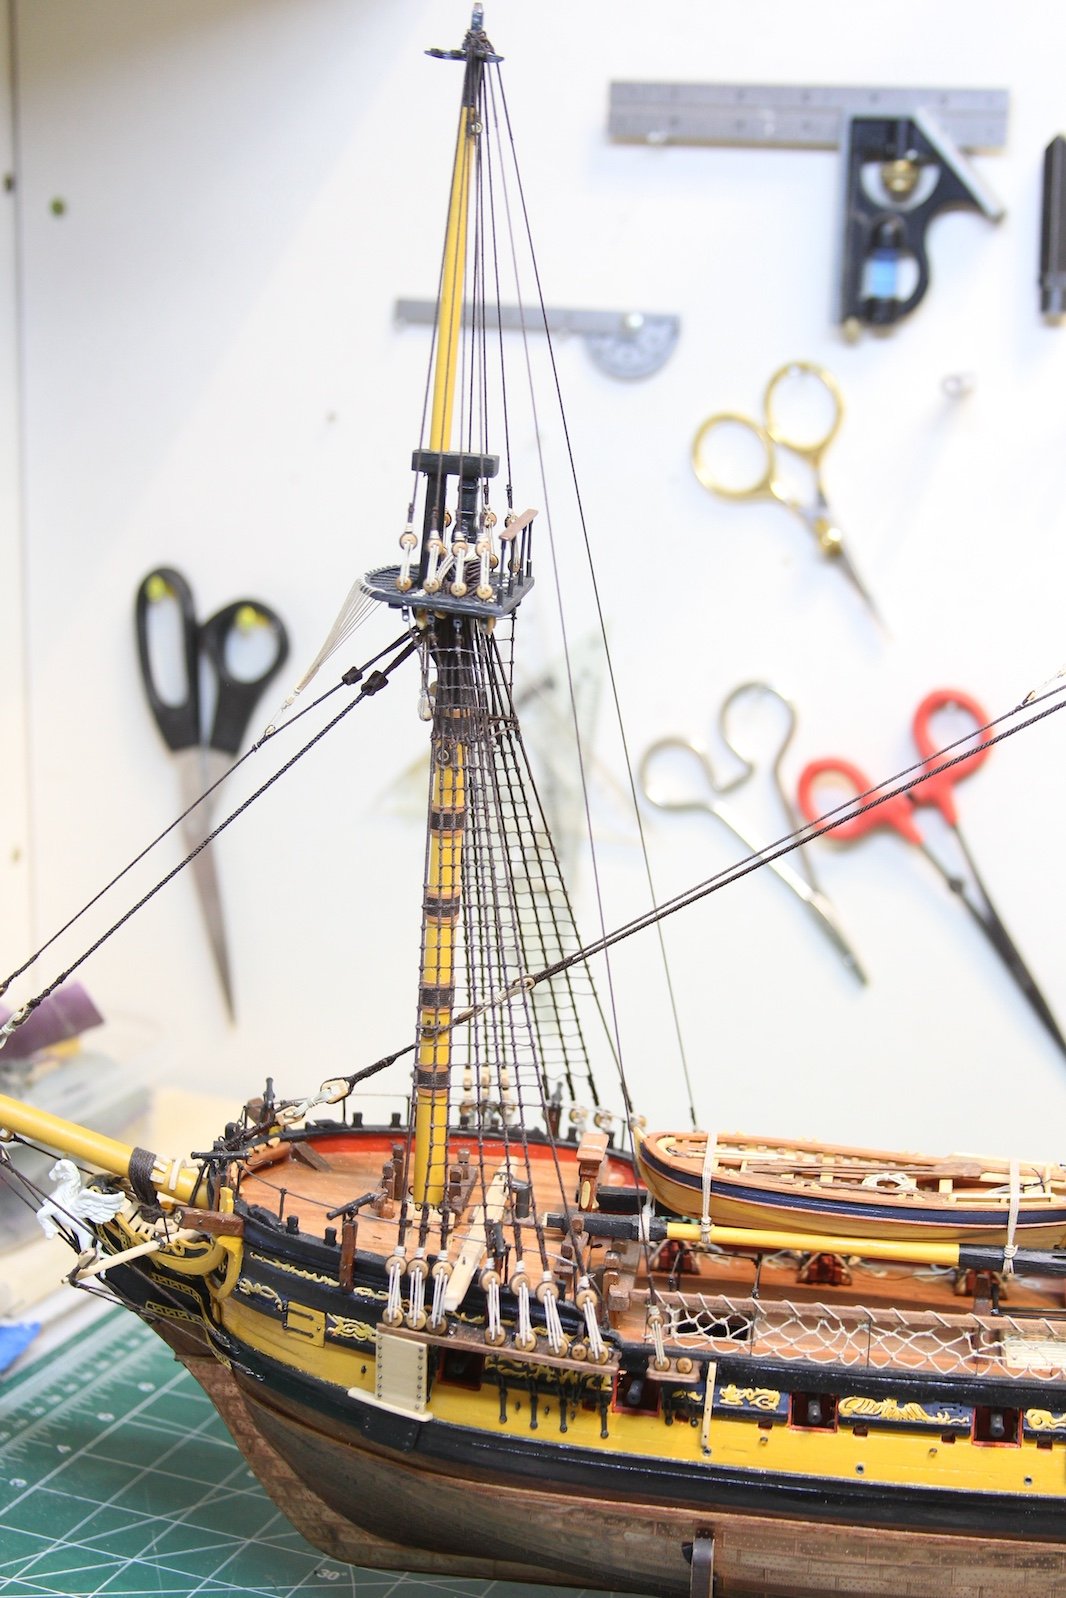
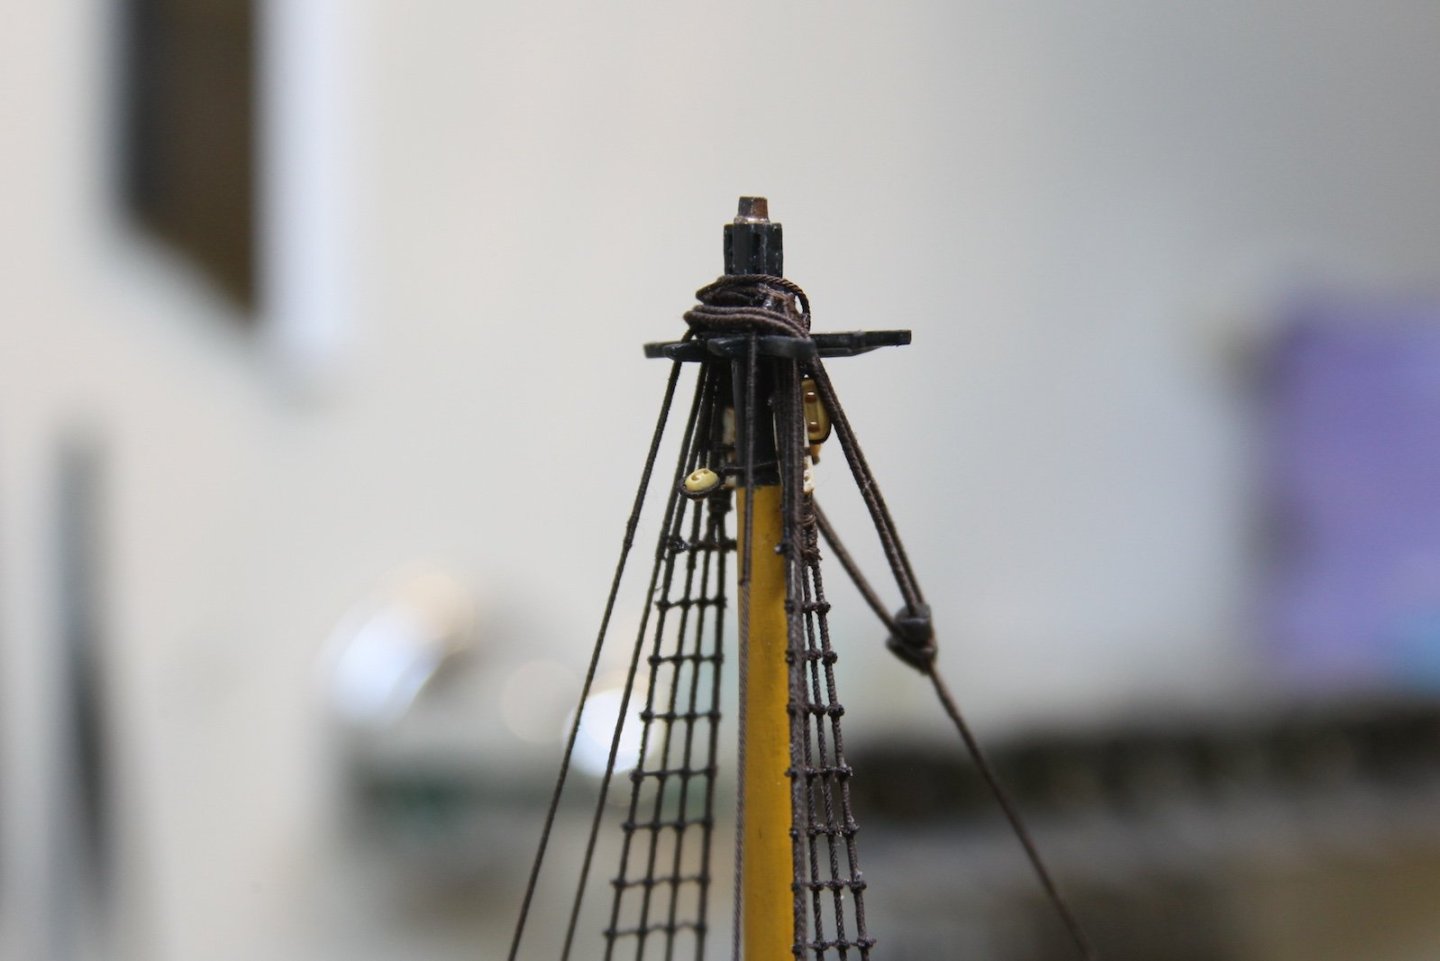
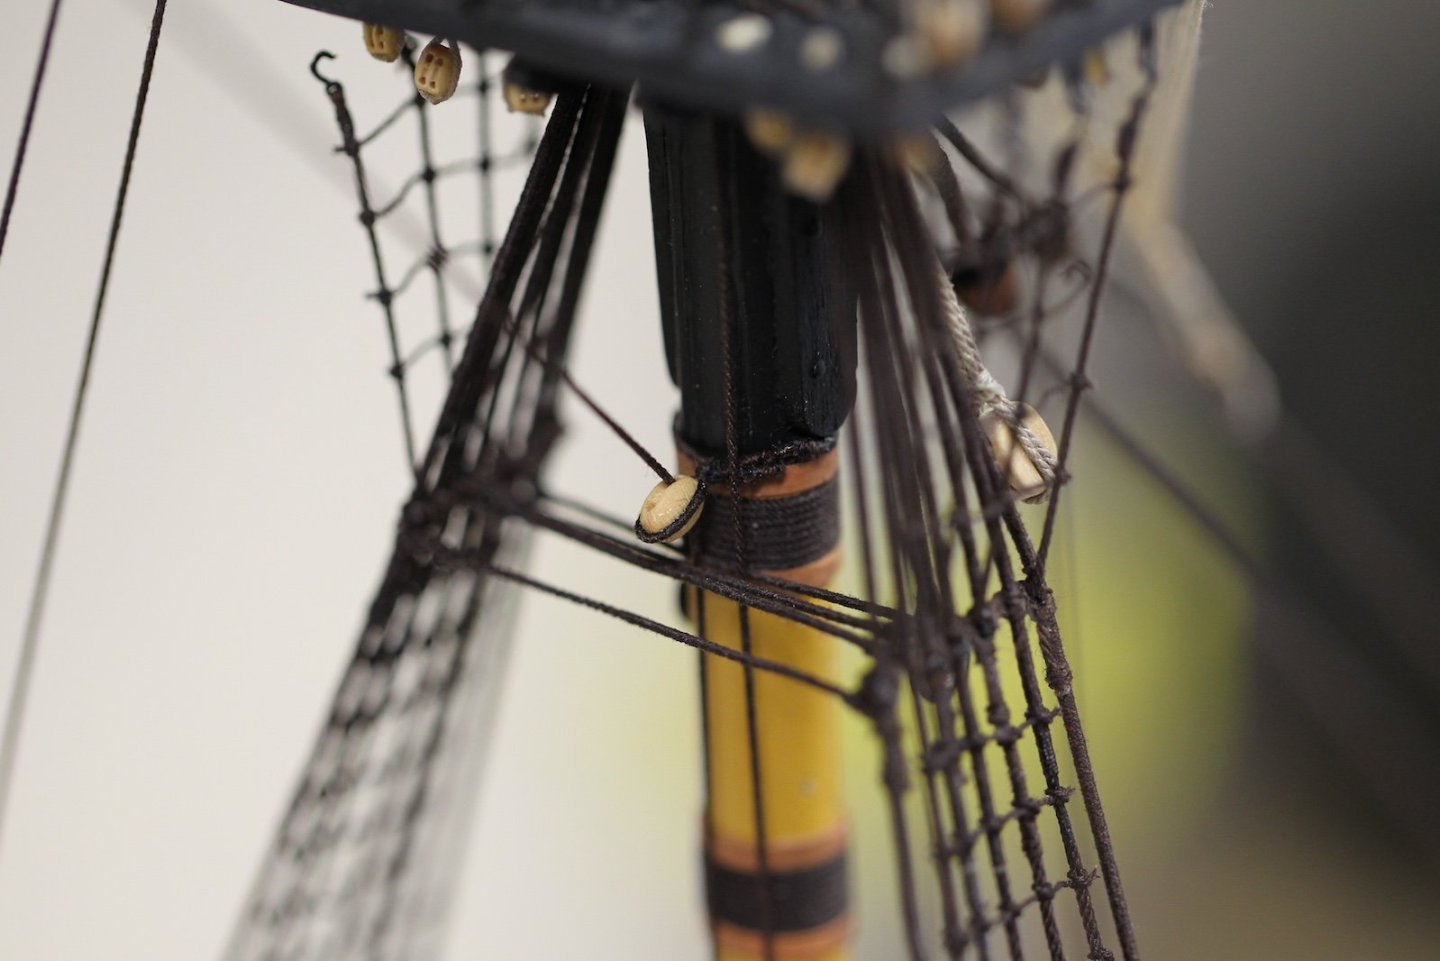
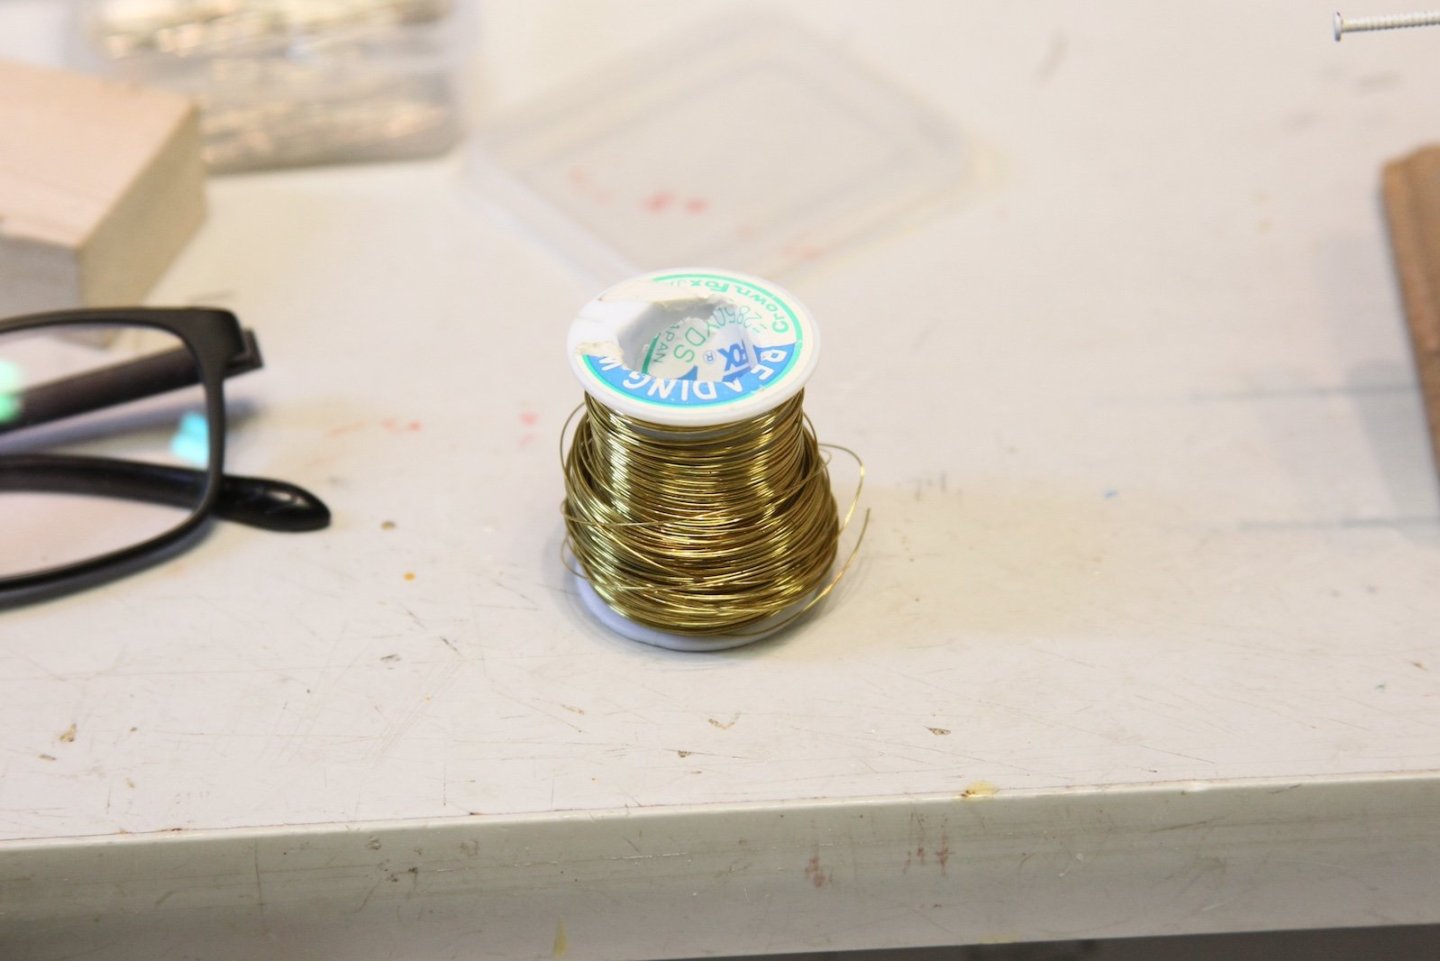
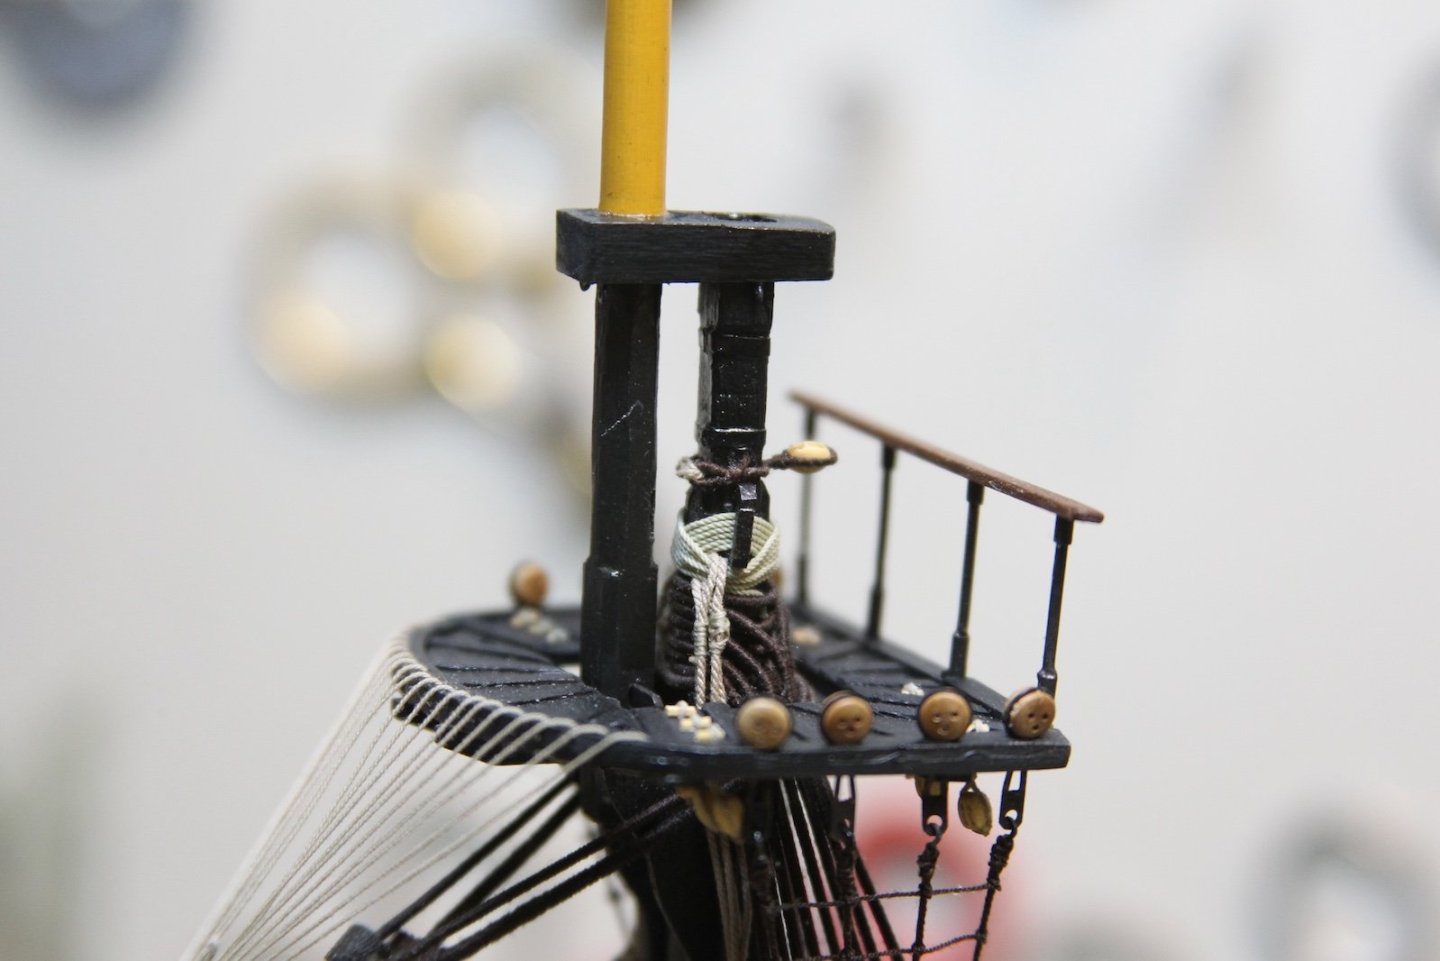
If we recall, I used served sewing pins for the futtock staves on the lower masts, providing something a bit more firm than just a served line. The futtock staves on the upper masts are smaller in circumference however, so instead of pins I opted for #28 beading wire - which worked quite well. I did have to put a very, very thin coat of tacky fabric glue on the wire before I served it however to get the thread to stay put instead of just having the wire rotate with the thread doing it's job. Next step was measuring the length of the stave for the given mast - which ended up being 7mm for the main and 5mm for the fore mast. This small size was quite tricky to work with - so I coiled a knot on each end first, then attached it to the shrouds. As a note - I touched each end of the stave where it was cut with a black sharpie to cover the exposed wire. The staves were attached just far enough below the sister blocks to allow for the two foremost shrouds to be pulled apart a bit and all four shrouds to be evenly separated as they have a tendency to overlap where they come together in the limited space below the heads.


- 419 replies
-
- 9
-
-
- Victory Models
- Pegasus
- (and 2 more)
-
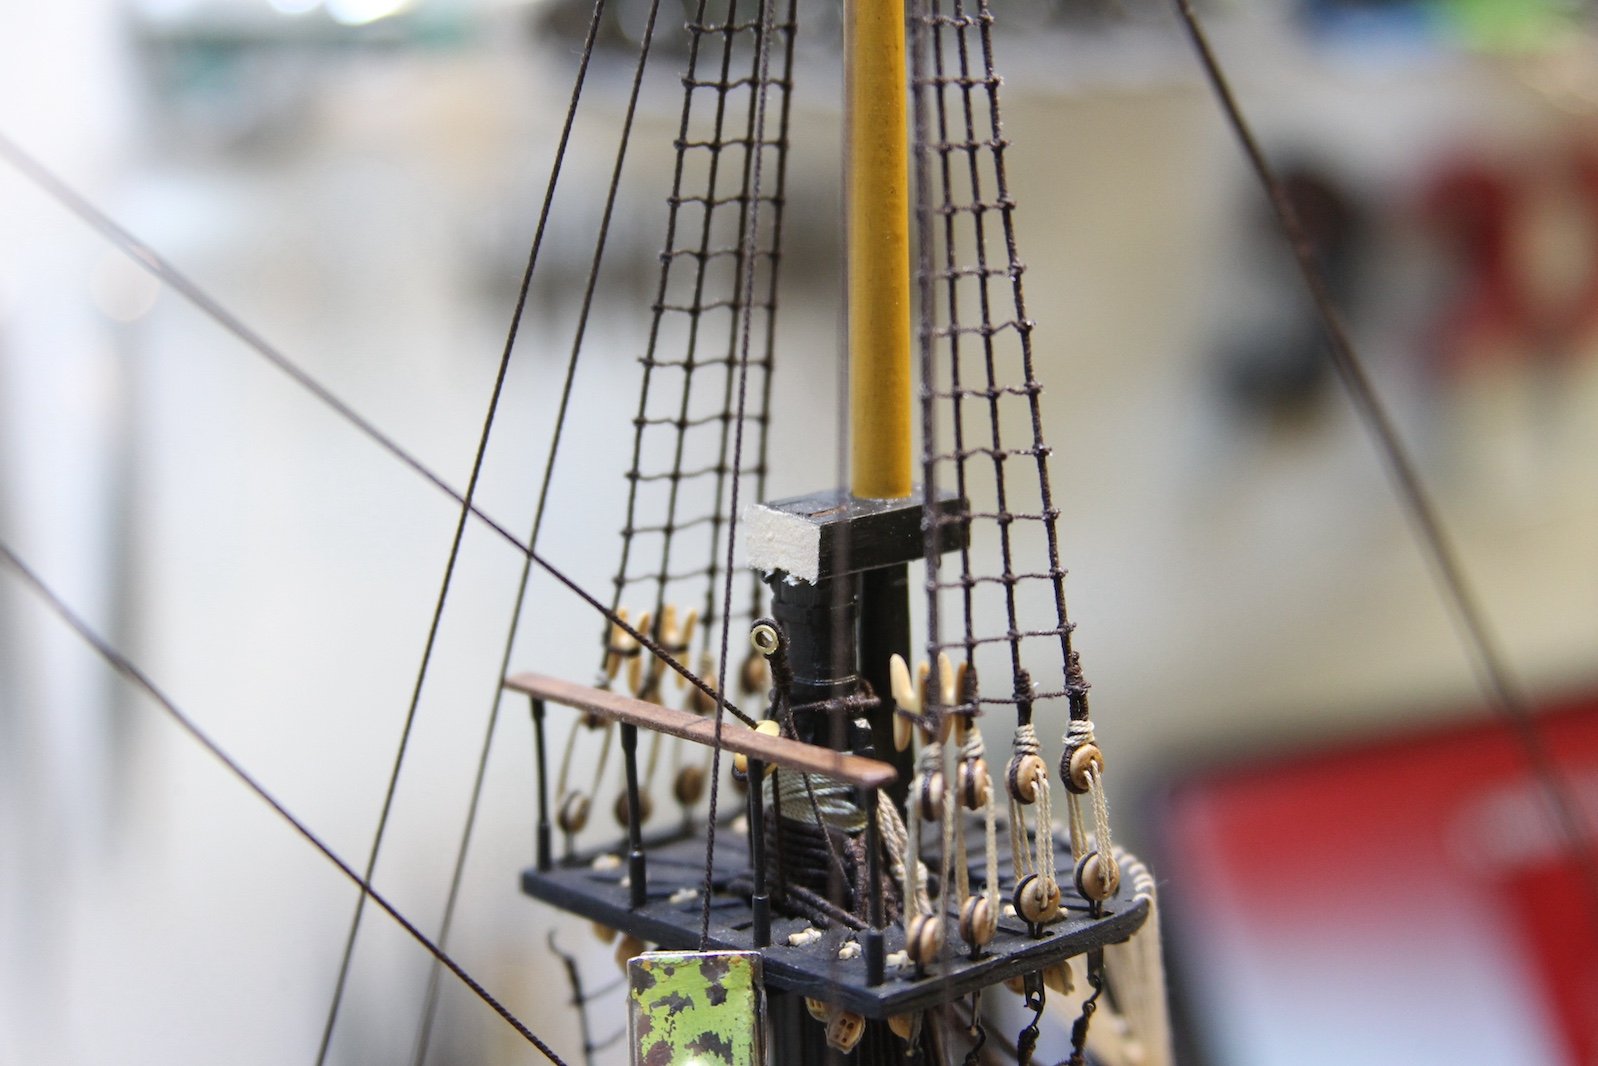
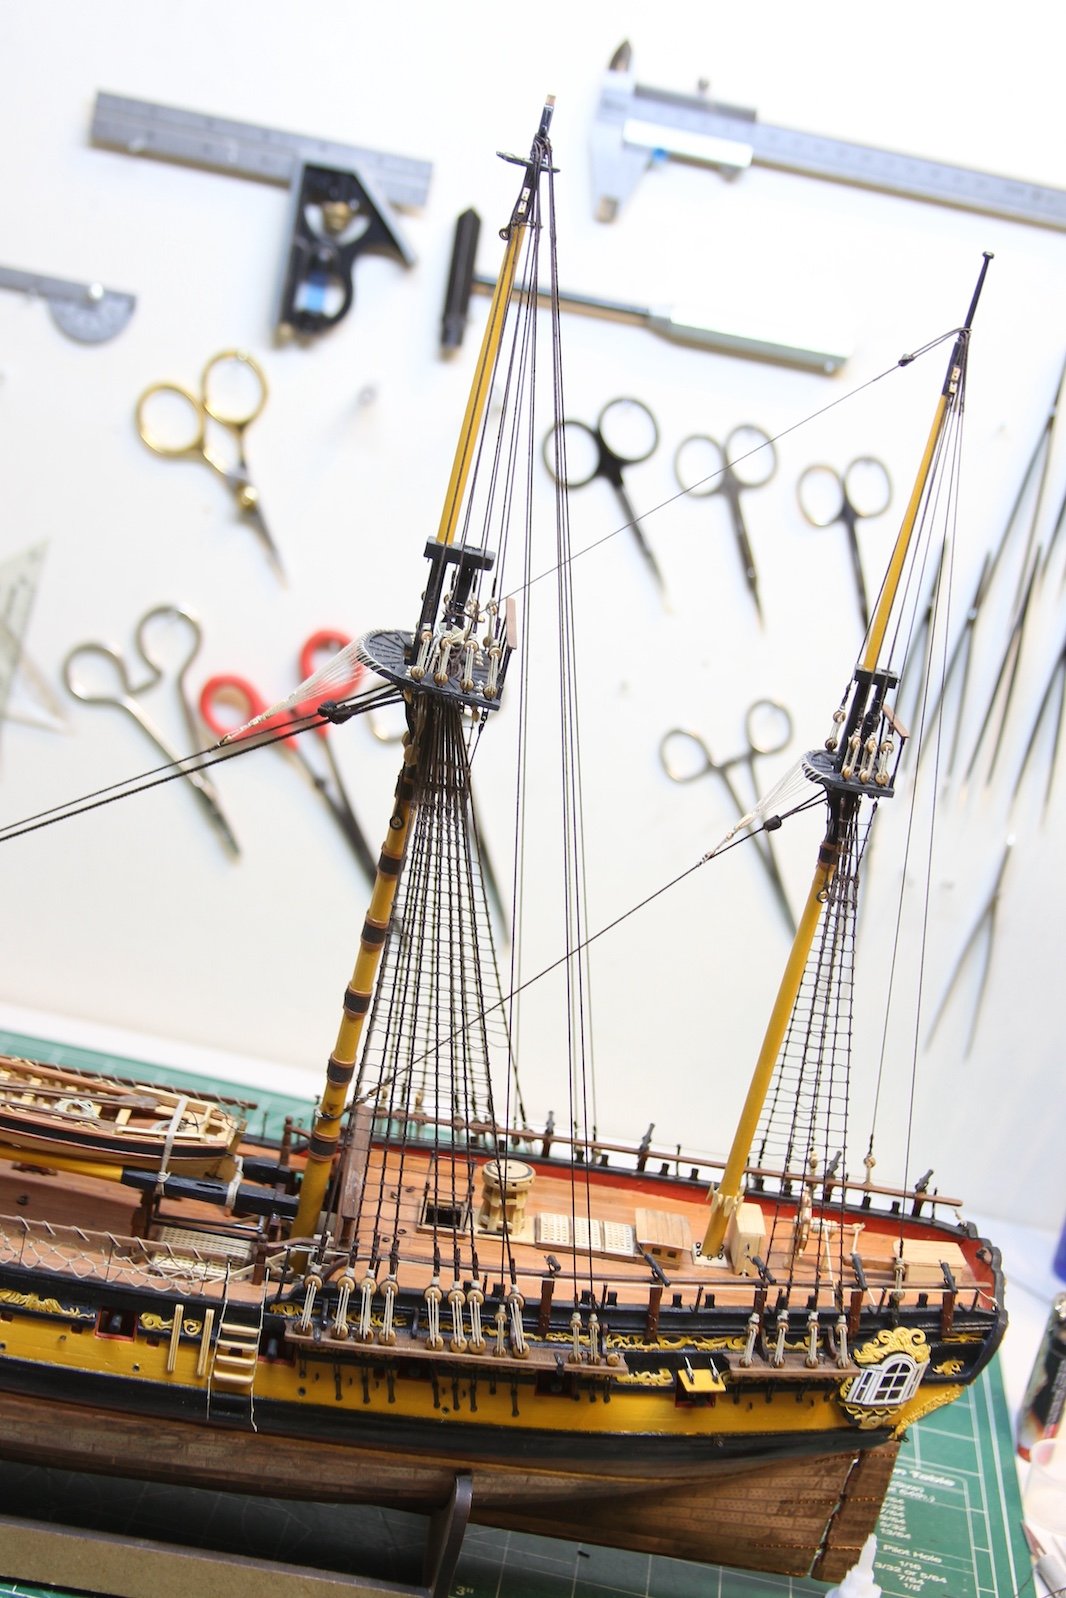
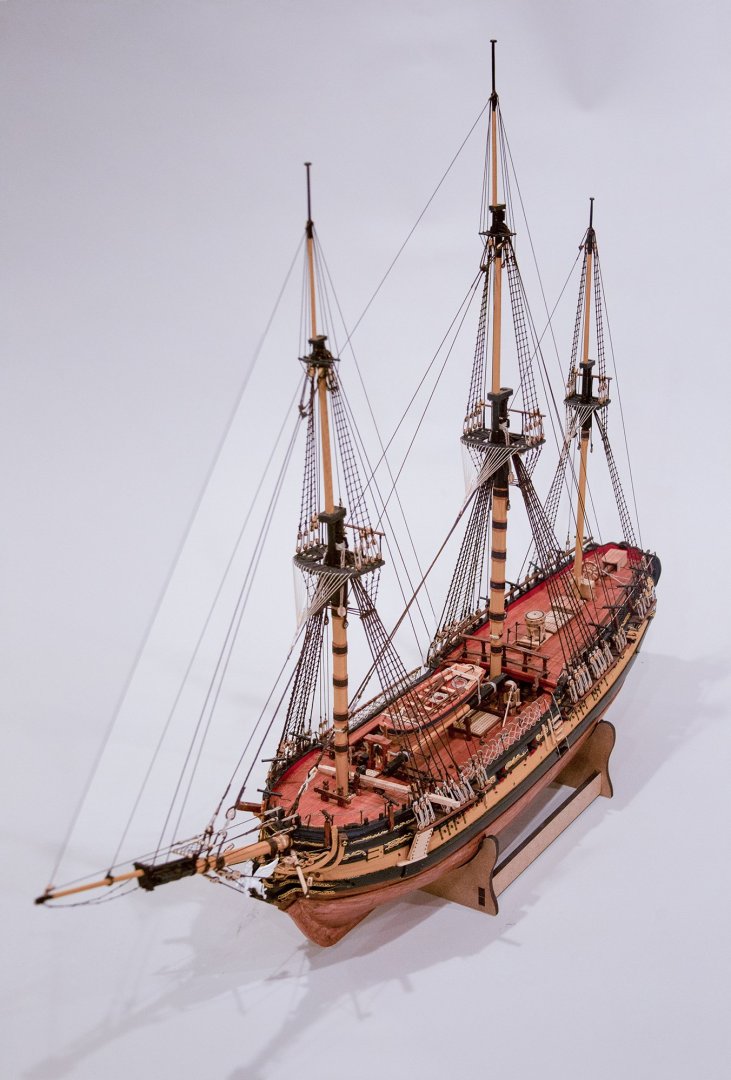
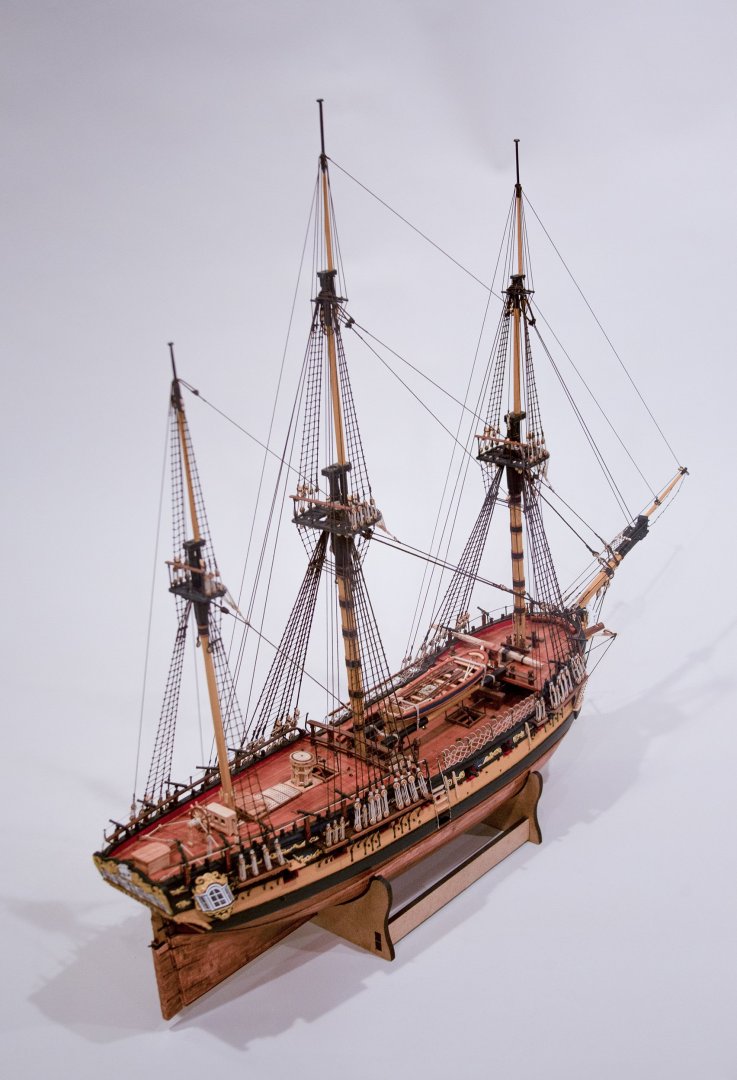
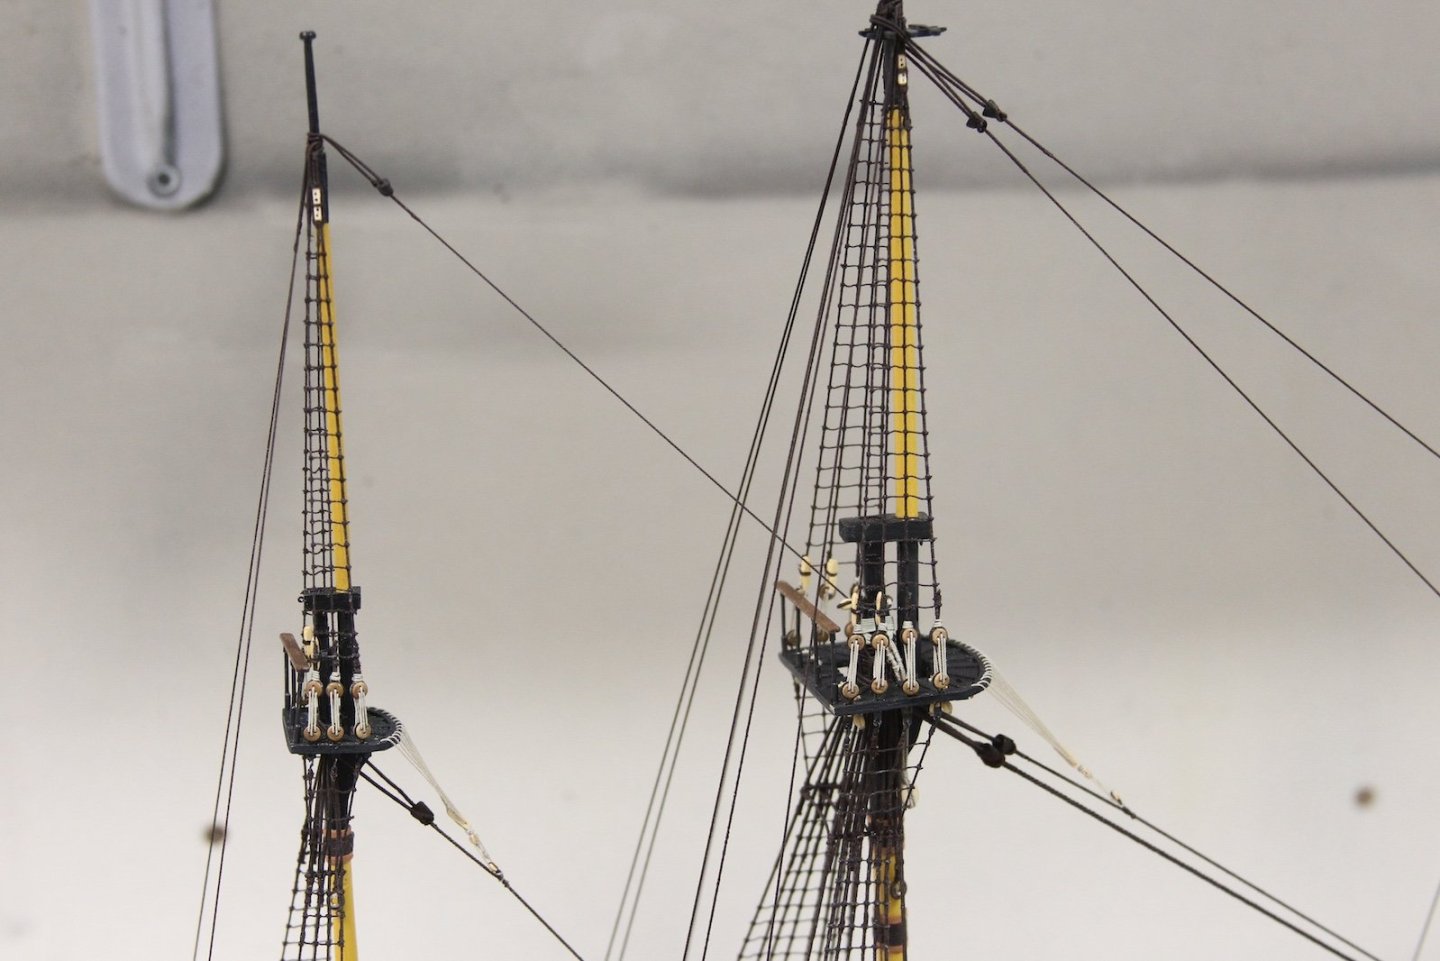
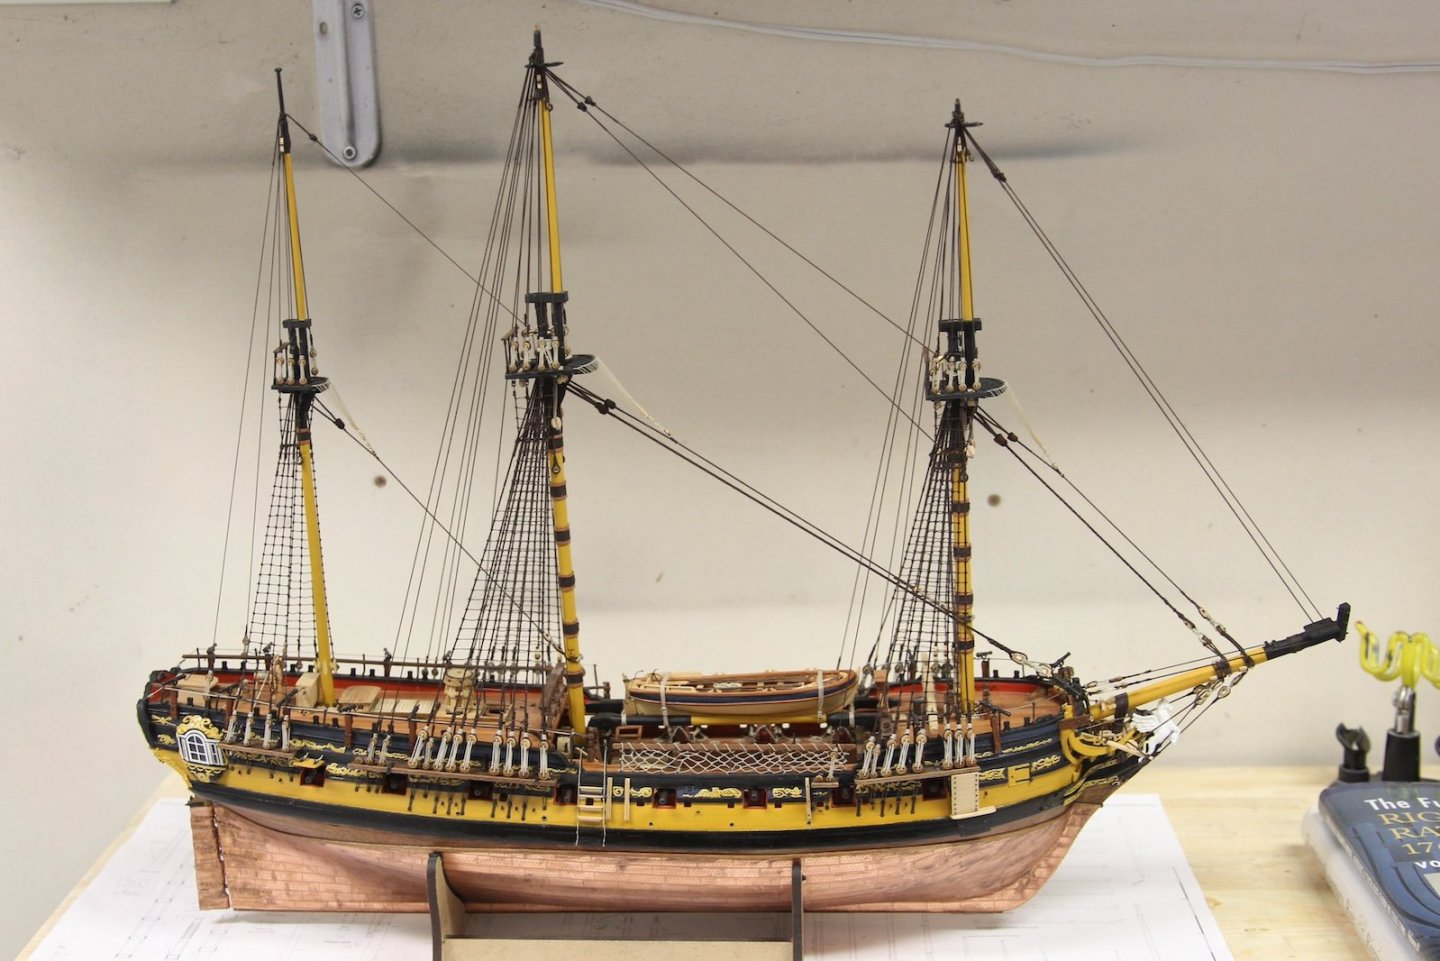
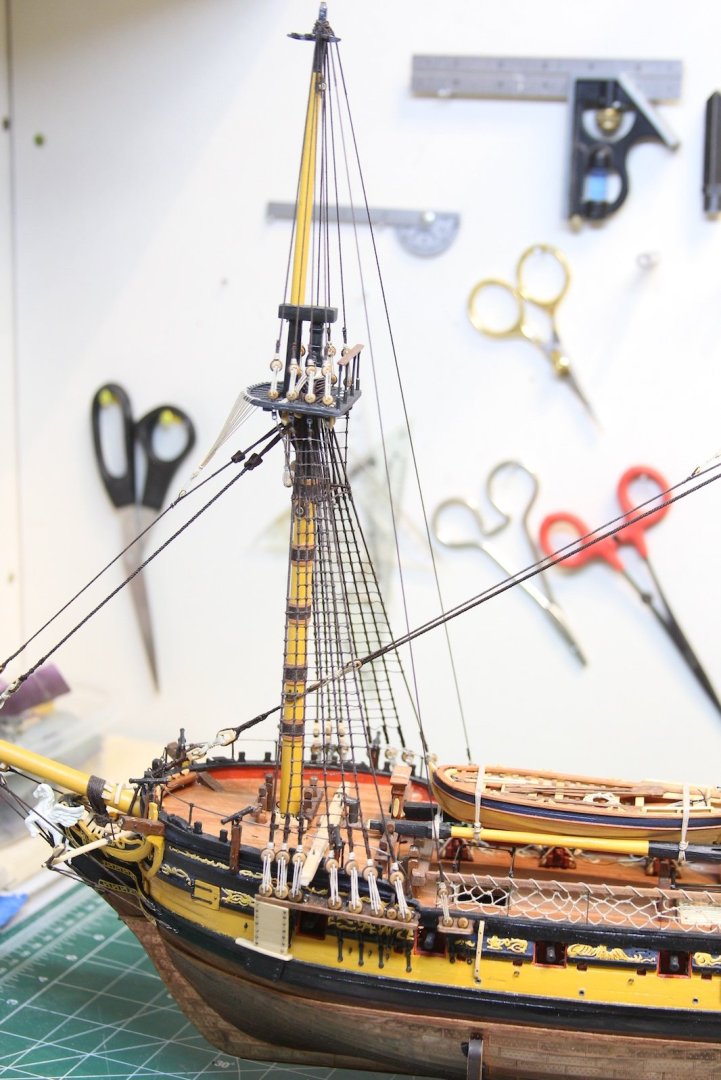
As I illustrated above - Added the additional stays to the upper main and fore masts. It definitely adds to the complexity and bulk on the mastheads, but still looks good to me. And more importantly, I've utilized those extraneous deadeyes. I guess we can just rest assured that this would be the most stable 14-gun sloop in the Navy!

- 419 replies
-
- 5
-
-
- Victory Models
- Pegasus
- (and 2 more)
-
Finally finished up the Main upper shrouds today. Nothing special about them - served just past the hounds and hooked to the deadeyes. Here is a tip however - that I figured out way too late. As in, after replacing / repairing three futtock shroud hooks that had snapped off from the tension of the lanyards, etc. I shoved a toothpick into the chain to relieve the tension on the hook while rigging - then eased / twisted the toothpick out after the rigging was tied off.

- 419 replies
-
- 10
-
-
- Victory Models
- Pegasus
- (and 2 more)
-
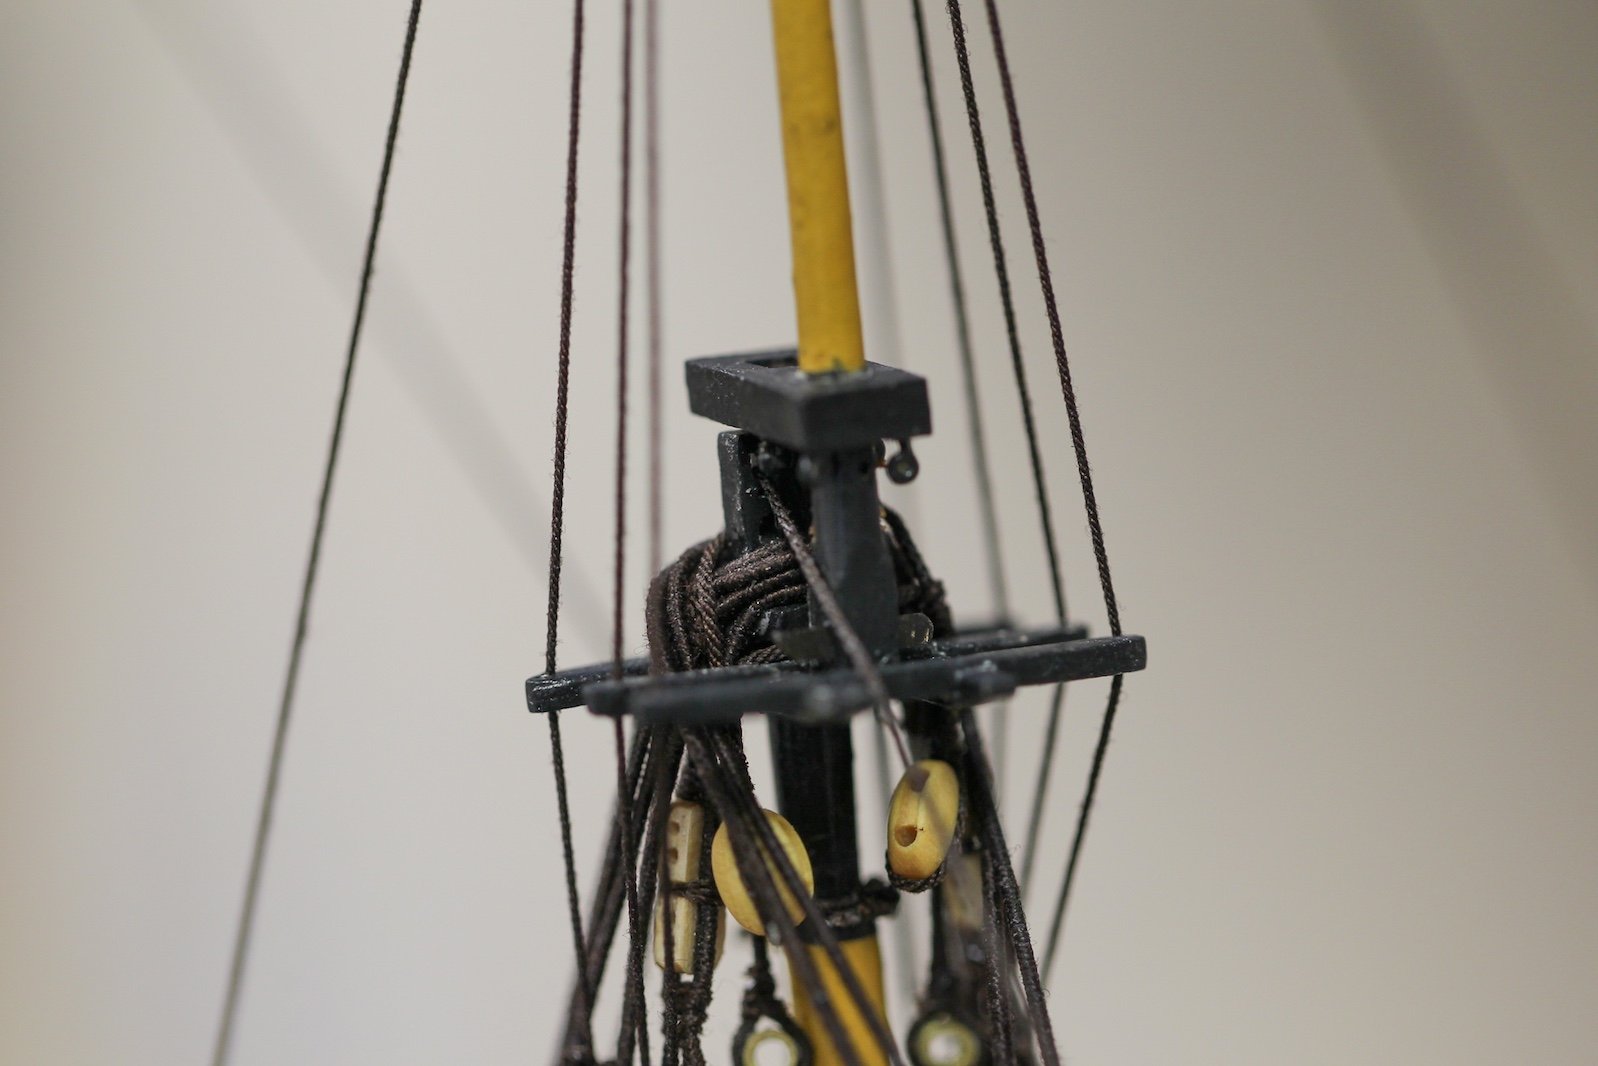
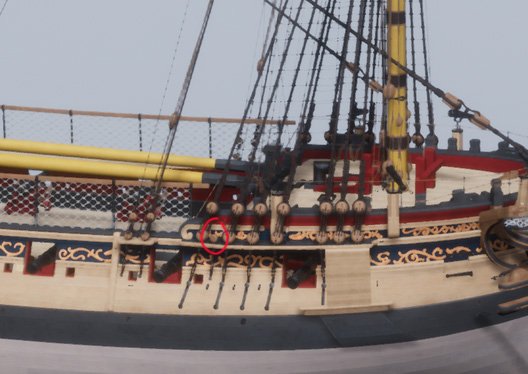
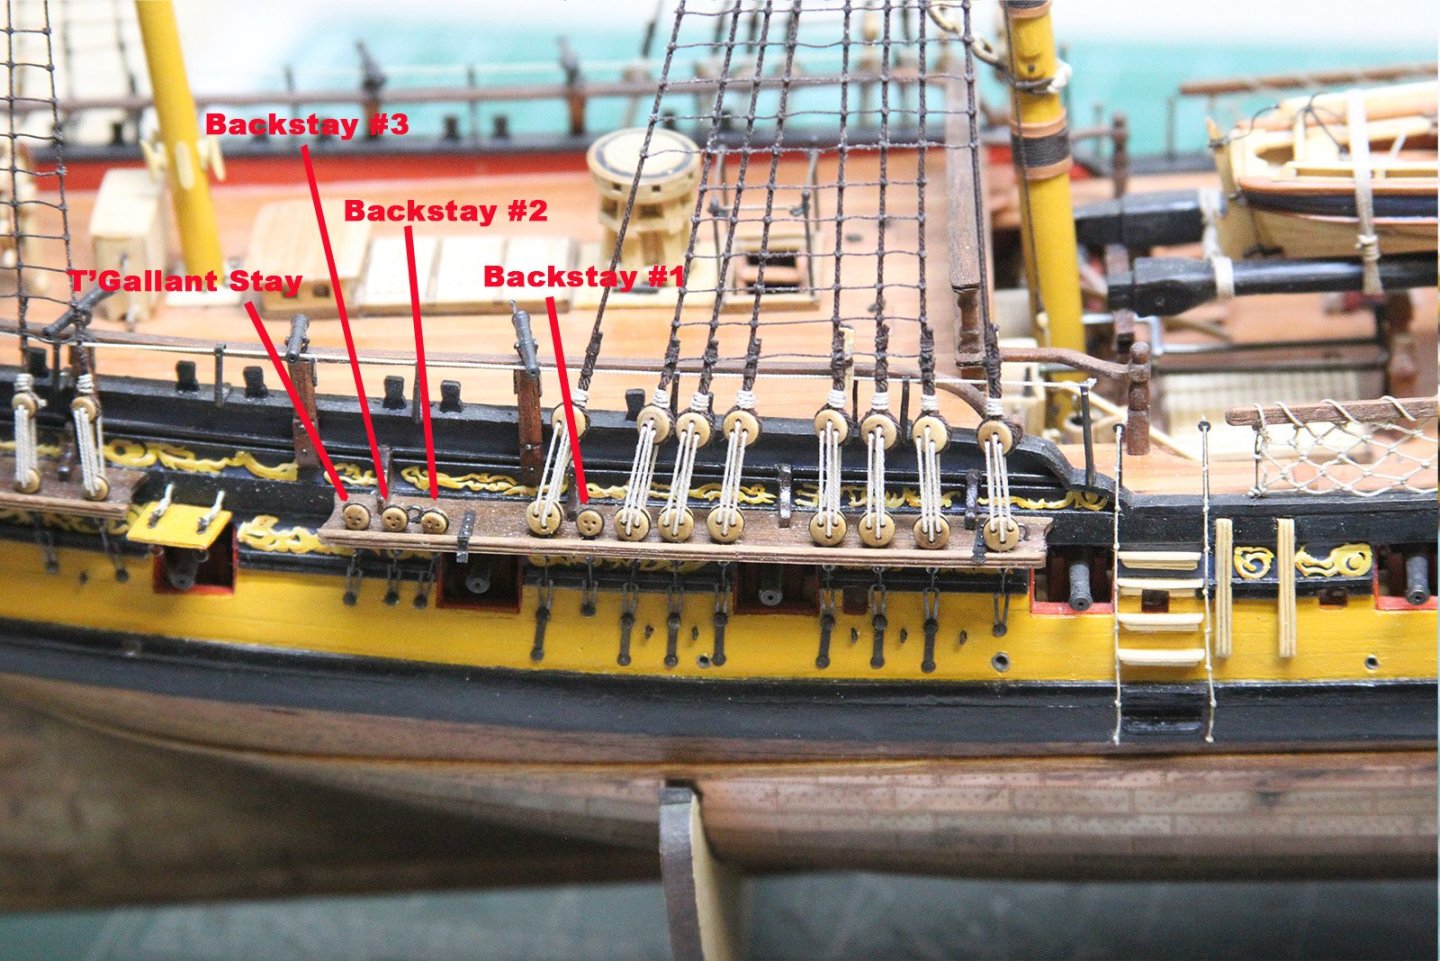
Deadeyes - Backstays - and Shifting Backstays.... As continue to work on the shrouds and stays, I've noticed some conflicting information regarding the number of deadeyes and their corresponding stays. This is certainly something of which to be wary when you're working off a few different plans - i.e., a kit build but also guided by Steel, The Fully Framed Model, and sometimes Lees. TFFM has the fewest stays - and Chris Watton's plans for the Peg have the most. TFFM specifically mentions the Swan class only having single stays off the masts, and Steel specifically mentions three pairs for ships of 74 guns or larger, two pairs for 74 to 20 guns, and a single pair for 18 guns and smaller. However Chris' plans show multiple stays off the main and fore. Chris' plans also show Royal Stays and a shifting back stay off both main and foremasts - which are not shown in other guidelines. As a result - if I continue to progress using primarily TFFM - I'll end up with some unused deadeyes. In fact - even on the final images of TFFM's Swan - there are unused deadeyes - which I've also seen on Dan's Vulture as well as BE's Peg. Here's the thing - I know my personality; I'm the guy who has all his stuff positioned specifically on his desk. So having unused deadeyes is going to drive me crazy. As such - I'll be diverting from TFFM and Steele and including enough additional stays to use the deadeyes. So - I'll have two back stays and one t'gallant stay on the fore, three backstays and a t'gallant on the main - and I'll forego Royals (Lees says they weren't introduced until after 1810) and shifting backstays - because I'm running out of room on the top masts. So here's what I'll have:

- 419 replies
-
- 9
-
-
- Victory Models
- Pegasus
- (and 2 more)
-
Moving onto the foremast - don't ask why I am doing the foremast ahead of the main. There's no real logical explanation, except I mis-measured the length of the shrouds needed for the main and they were a bit too short - however, just the right size for the fore mast. So I went with the foremast next. Shrouds are the same - no mystery here; the foremost served it's length and the others served a few feet down from the heads to the hounds. The aftmost line being the backstay and attaching to the smaller deadeye aft of the others. One thing worth noting as I rigged these upper shrouds. The plastic hooks I'm using at the futtocks were NOT very strong - and on more than one occasion tightening the deadeye lanyards caused these plastic hooks to separate from the deadeye chains. A bit of a pain. Had I to do this again, I'd forego the plastic hooks and manufacture my own out of stiff wire or a suitable substitute. As it stood I needed to provide tension on the deadeye lanyards very carefully alternating from port to starboard until all was even and consistent. The fore stay and preventer stay are similar to other stays as well. The Stay is 5" (.65mm) and the Preventer is 4" (.50mm) and they both extend down to the sheaves in the bee blocks. Worth noting - the preventer stay is wrapped above the stay on the mast head. Down at the bee blocks, the stay goes through the aft starboard sheave and ends fitted with a violin block that has a lanyard connecting to a 7" single block stropped to an eyebolt in the knighthead. The preventer stay takes the same route, except through the foremost sheave on the port side of the bee blocks. It ends the same with the violin block and lanyard attached to the single block and knighthead.


- 419 replies
-
- 14
-
-
- Victory Models
- Pegasus
- (and 2 more)
-
The mizzen topmast stay represented another decision point. Based on both Steel and The Fully Framed Model there were a couple of different options regarding how this stay was rigged to the mainmast. Steel has the stay extending to a thimble below the topmast and reeved through a couple of thimbles lashed around the main mast just below the catharpins and rigged together by a lanyard. This is also displayed in TFFM's illustrations. However, another option showed in Dan Vadas' Vulture and described as an alternative in TFFM has the stay extending through the block at/above the topmast then feeding down the length of the main mast to a pair of blocks connected by a lanyard and hooked into an eyebolt at the base of the mast. This is the method I'm opting to use as it is a cleaner look to me. Either way, the mizzen stay is 3" (.38mm at scale) and I used .15mm for the lanyard. Block first - the typical arrangement with a served line lashed to the mainmast. I knew this was going to be a very tight area to rig at the base of the mainmast with the water pumps and half a dozen other things populating the area. My plan was to seize the hook to the bottom block, seize the block to the end of the stay, attach a loose lanyard, hook the line, then tighten the lanyard. This plan was moderately successful, but still took a combination of my dental loops, my longest narrowest tweezers, and an abundance of patience to accomplish. The bottom hook is attached to the aftmost eyebolt on the starboard side. A look at the final arrangement - apologies for the slightly out of focus shot of the lower block rigging, but it was a little challenging getting a lens to pick up what I needed.


- 419 replies
-
- 8
-
-
- Victory Models
- Pegasus
- (and 2 more)
-
Thanks Mugje - I doubt I’ll mount them permanently, but it’ll be fun to see them aboard when she’s fully rigged.
- 419 replies
-
- 3
-
-
- Victory Models
- Pegasus
- (and 2 more)