Moonbug
-
Posts
1,028 -
Joined
-
Last visited
Content Type
Profiles
Forums
Gallery
Events
Everything posted by Moonbug
-
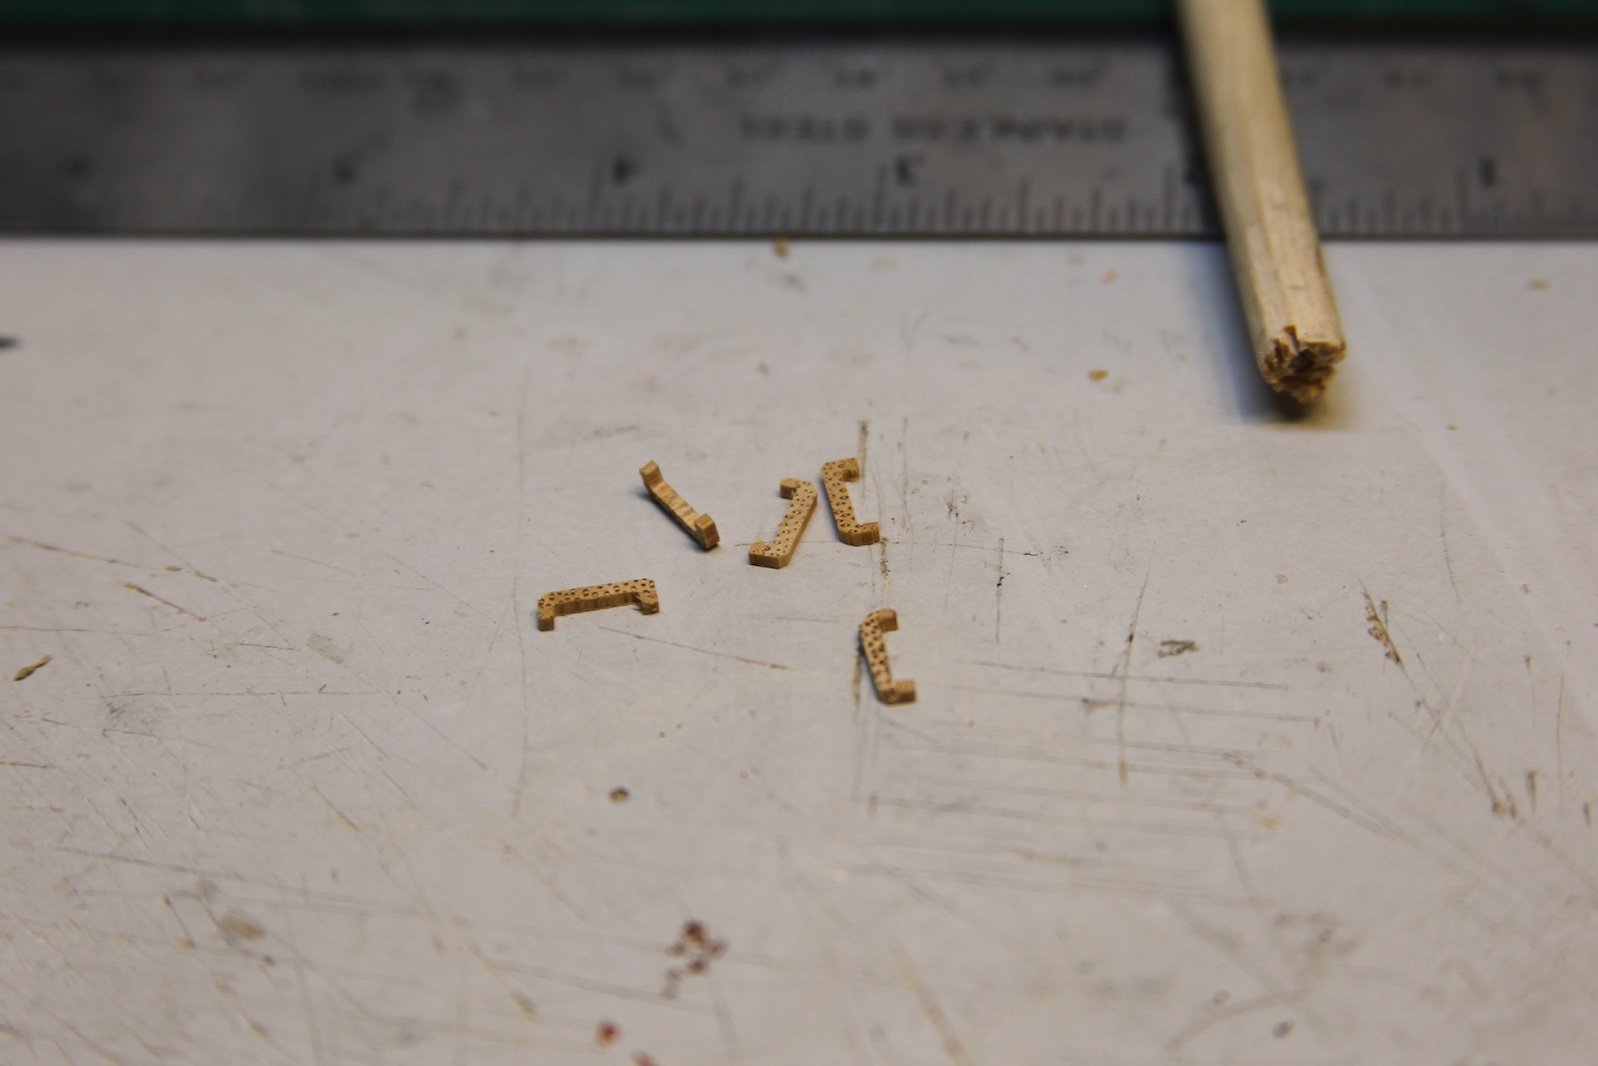
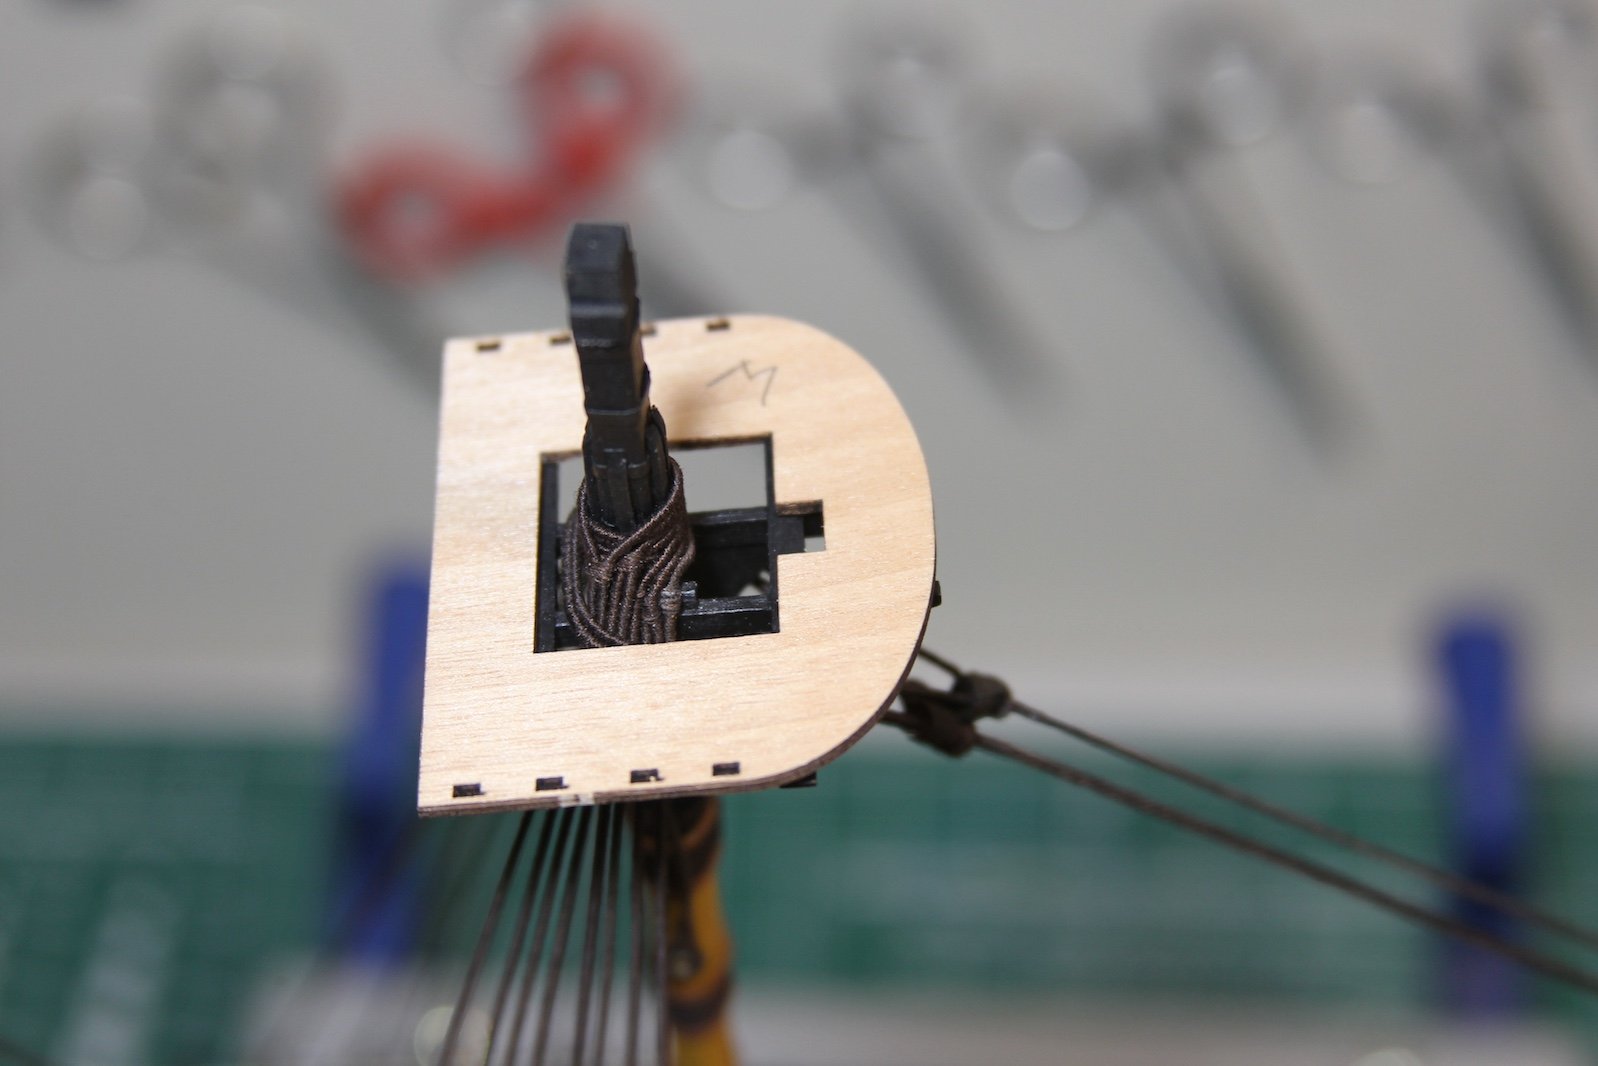
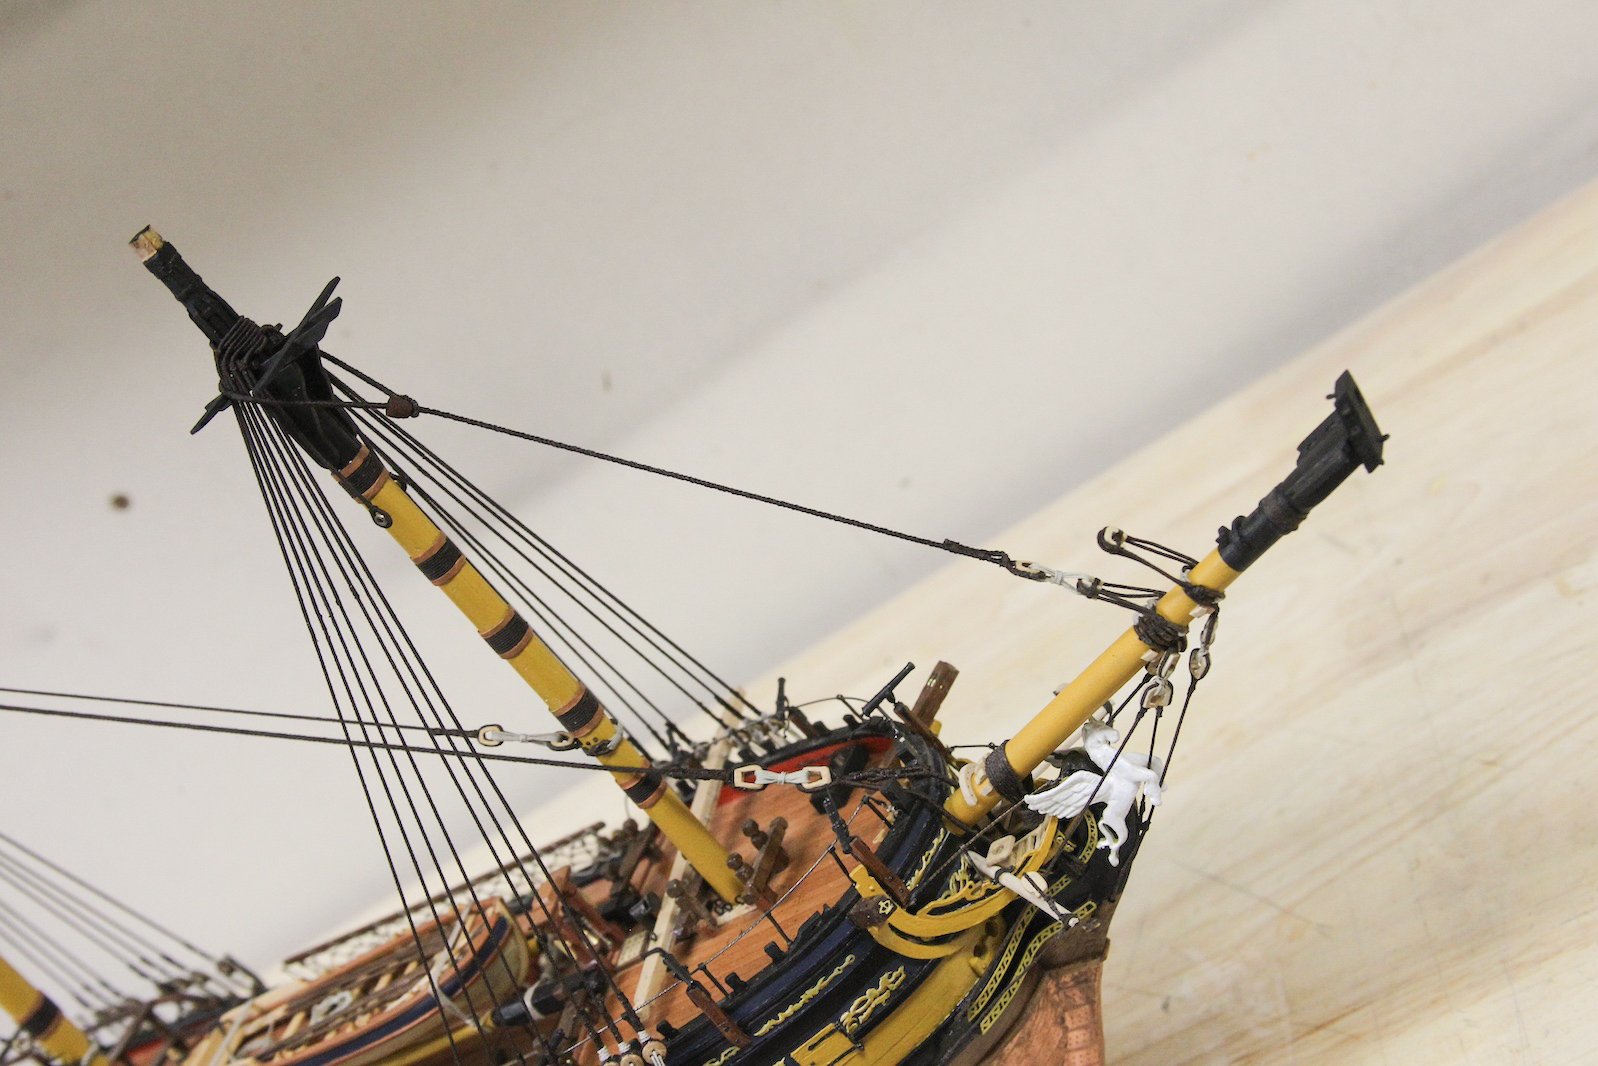
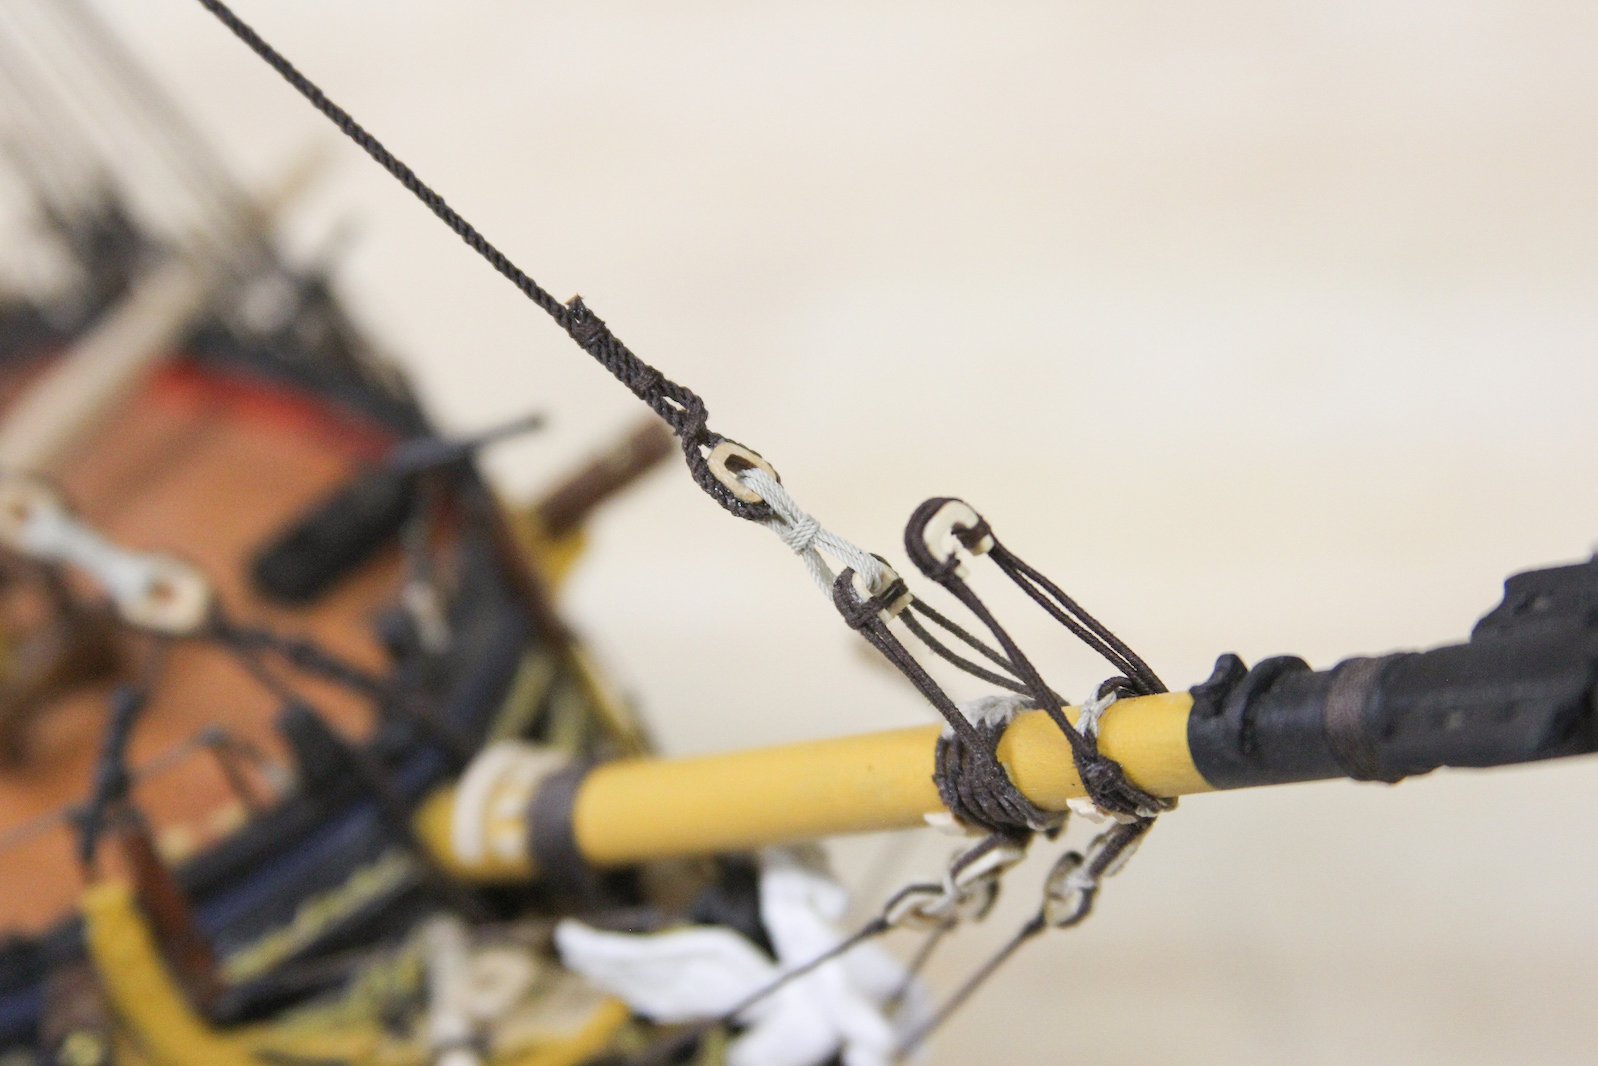
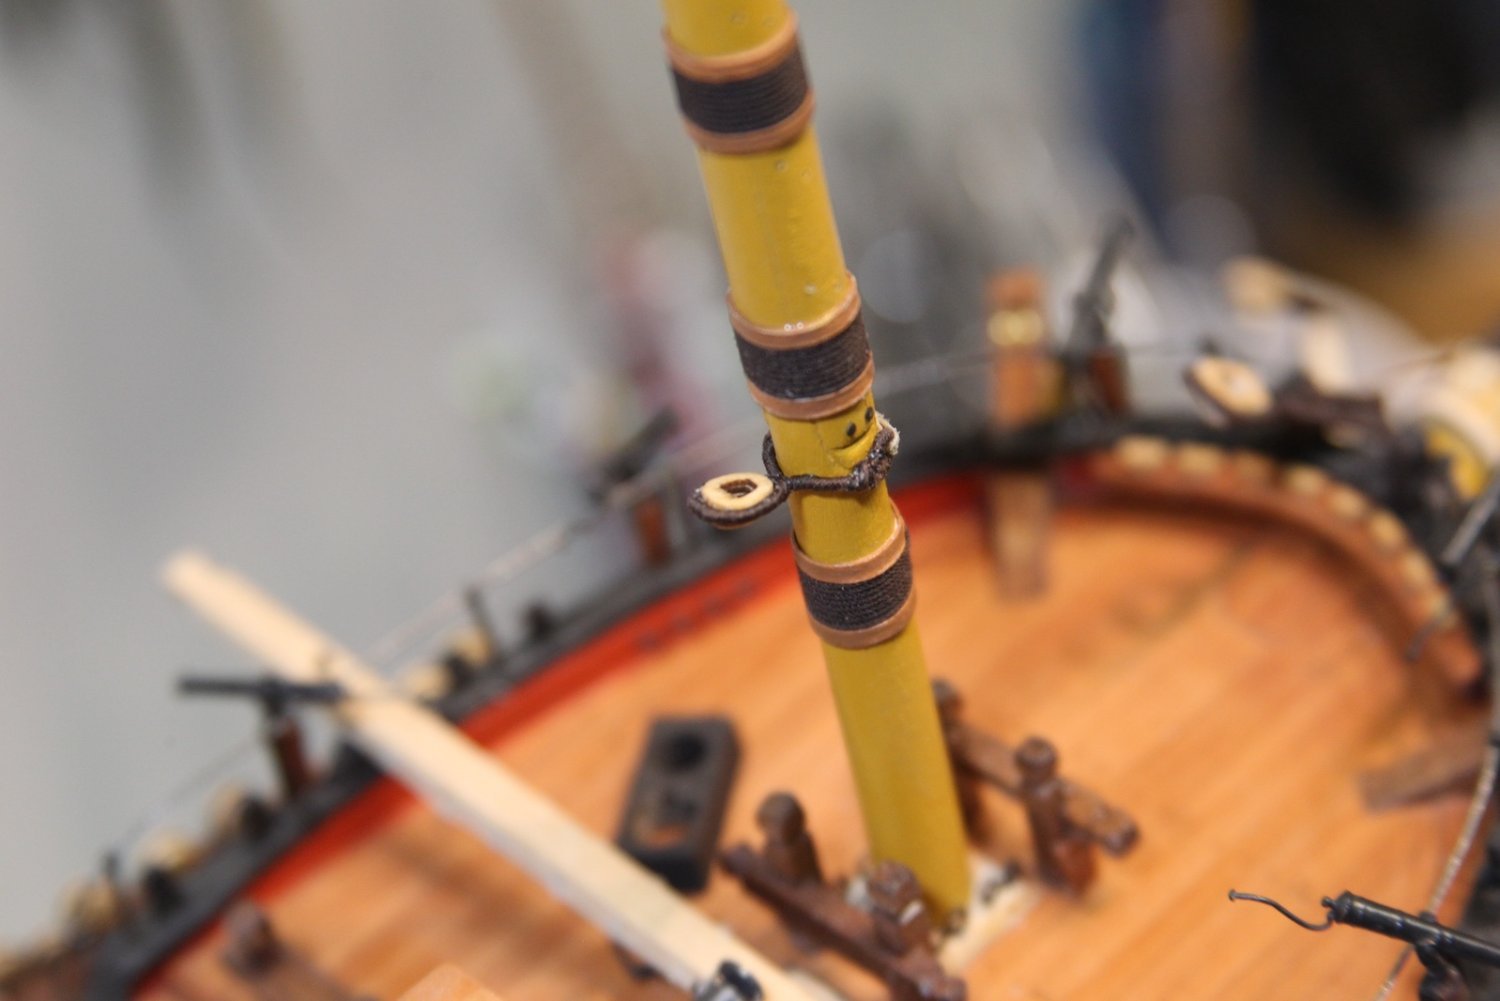
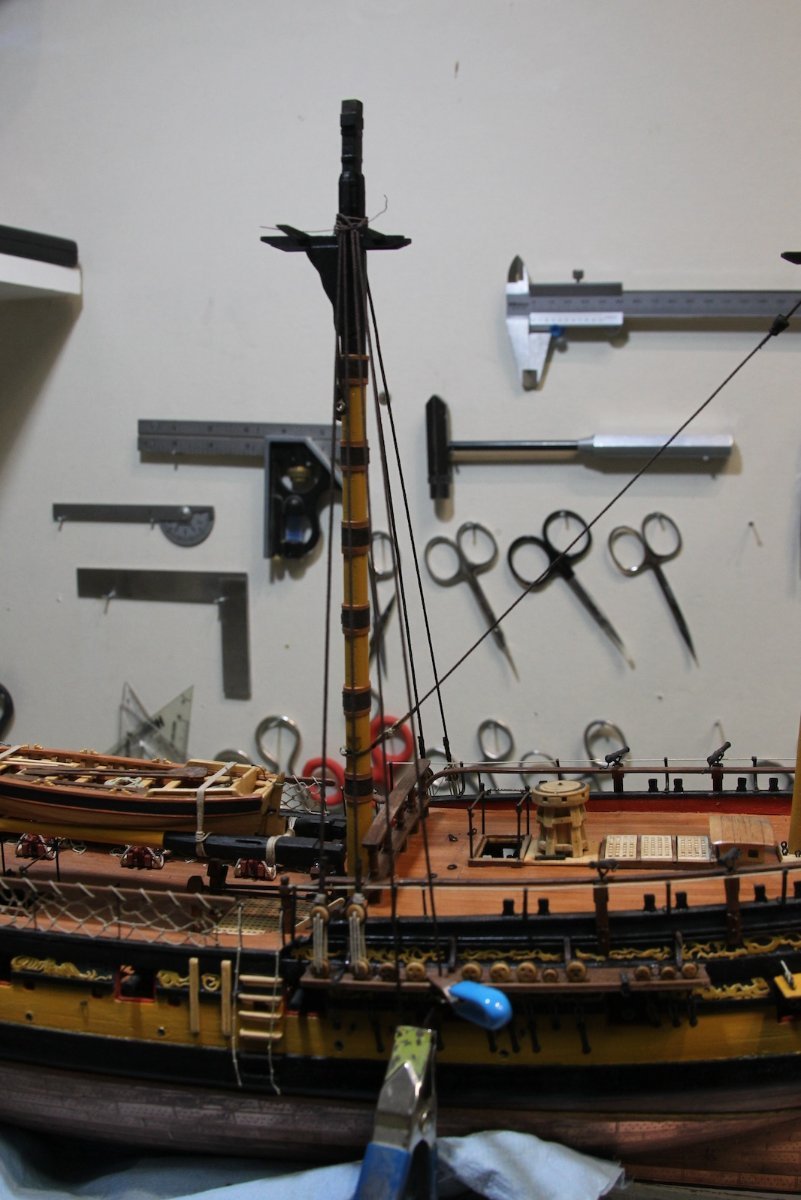
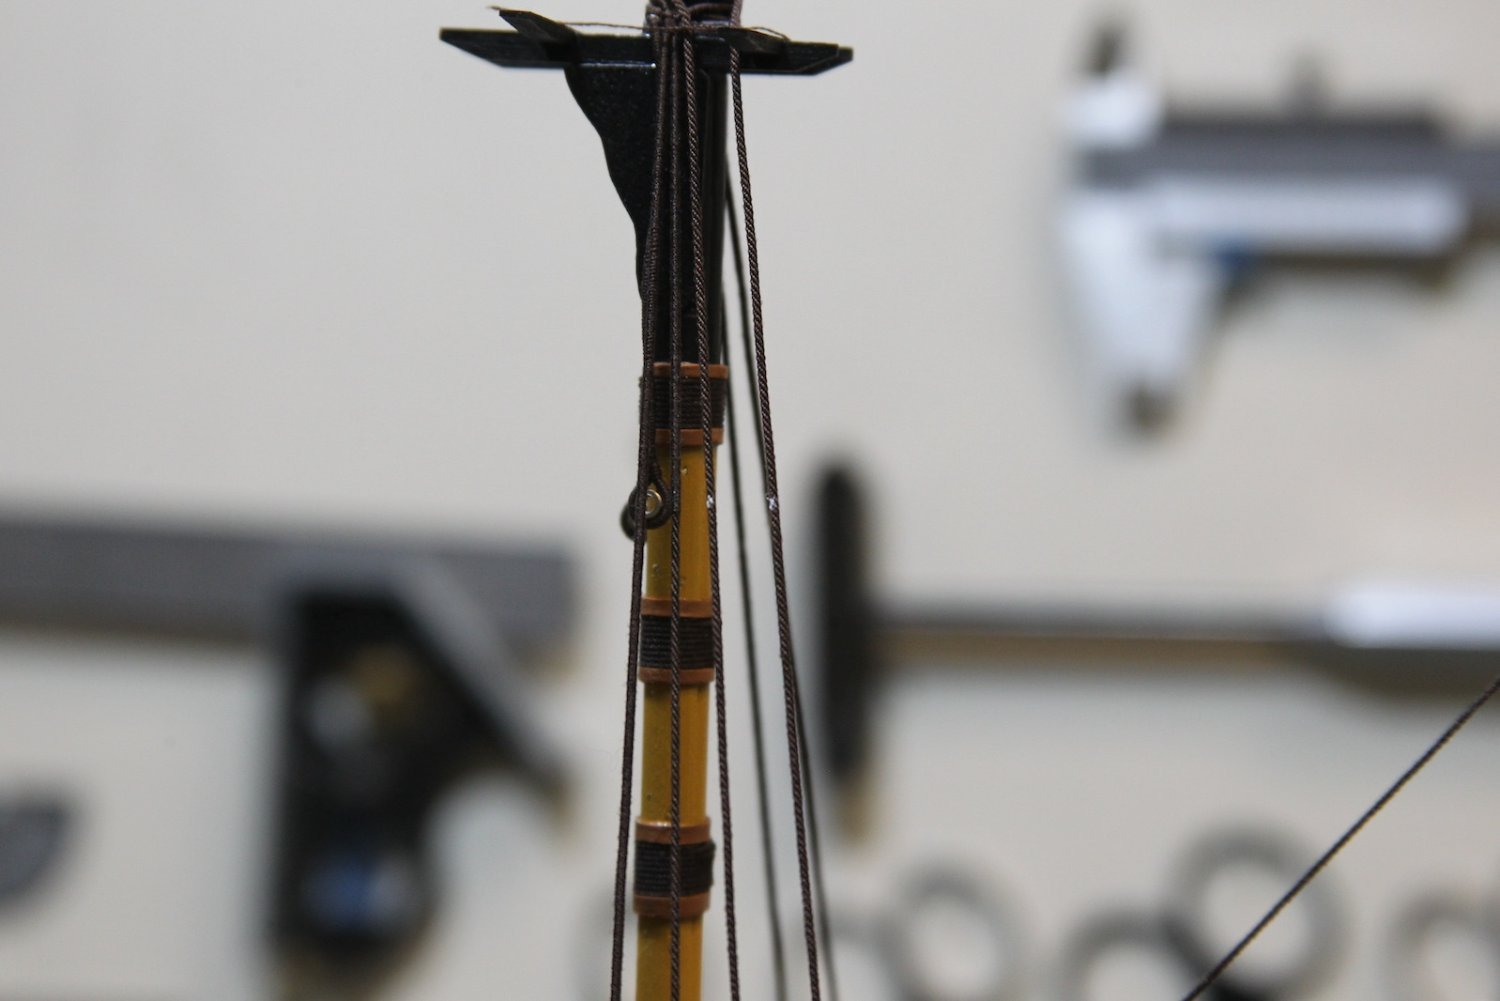
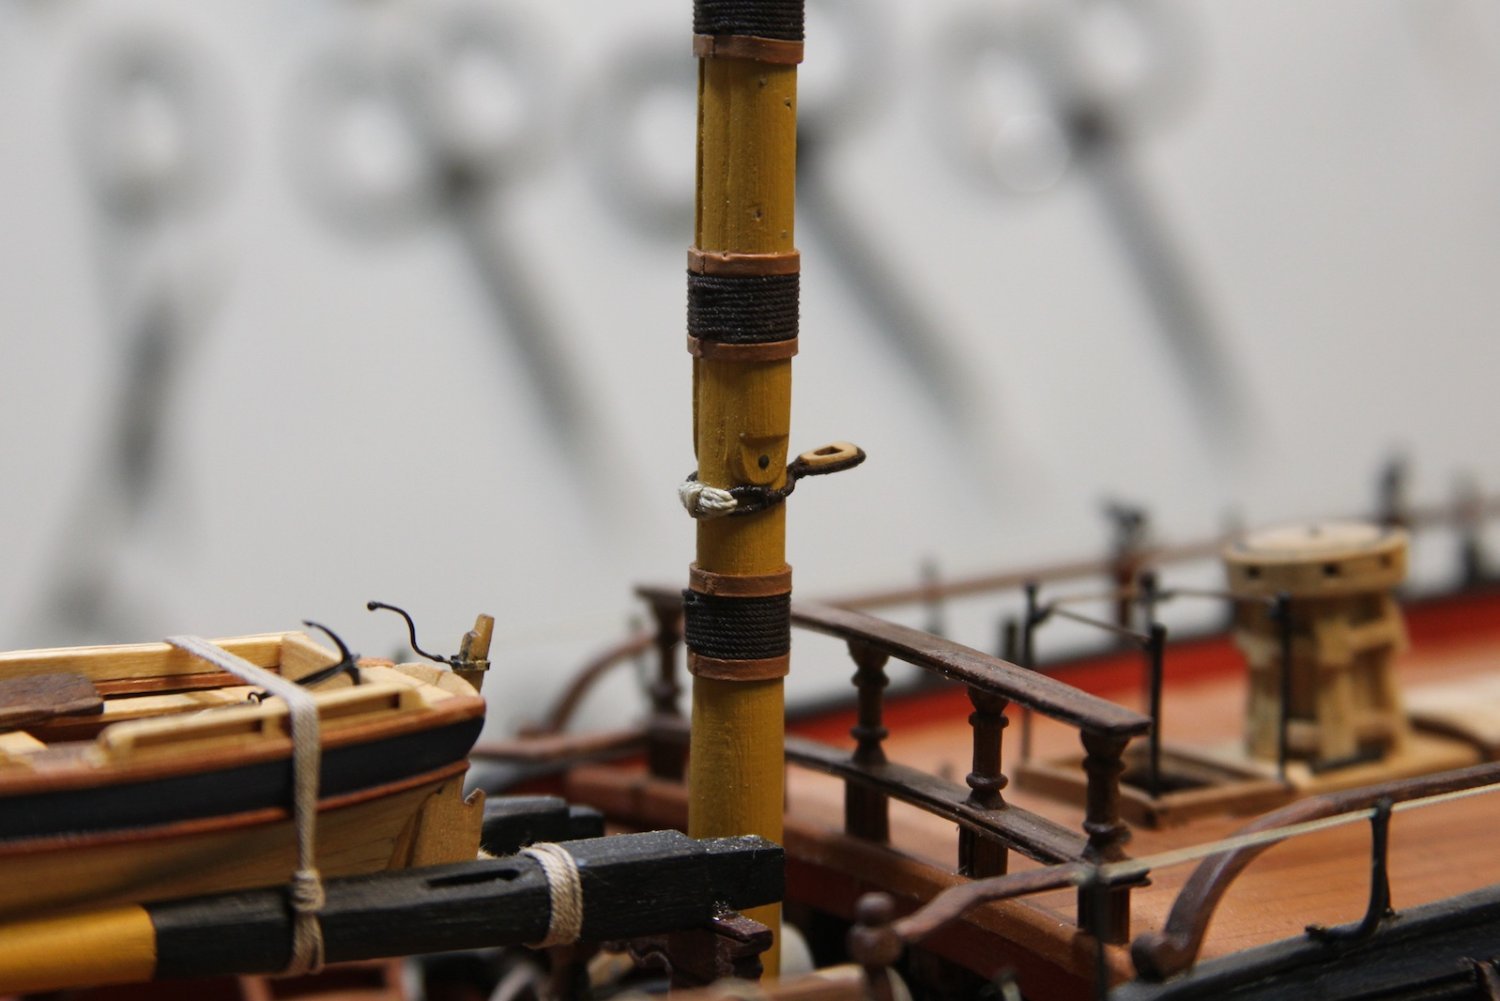
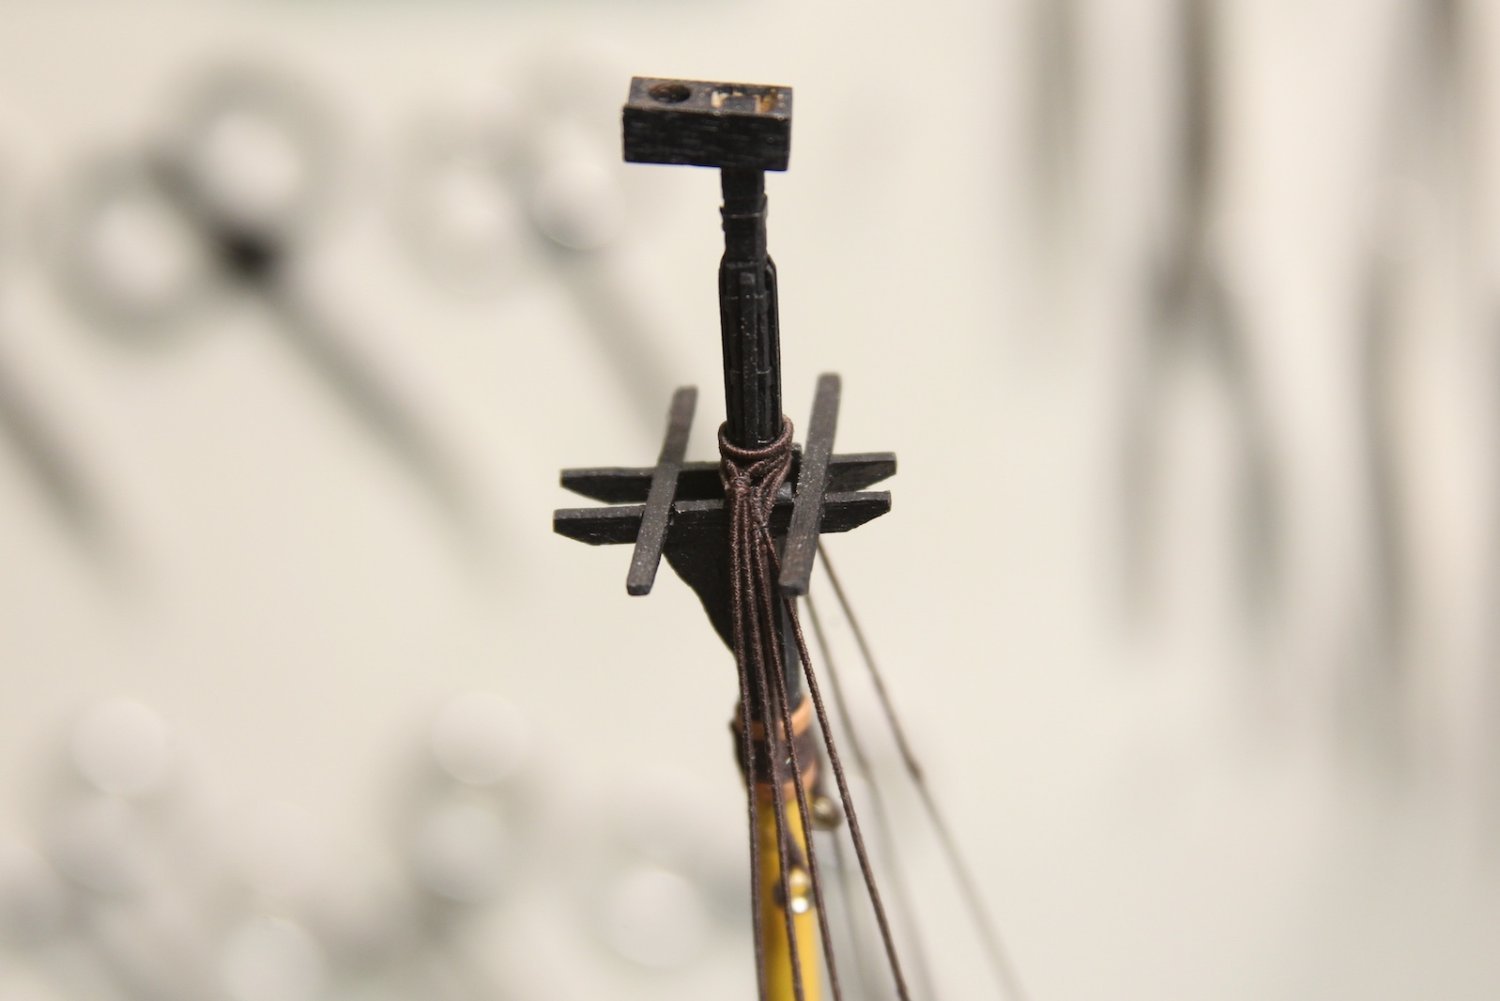
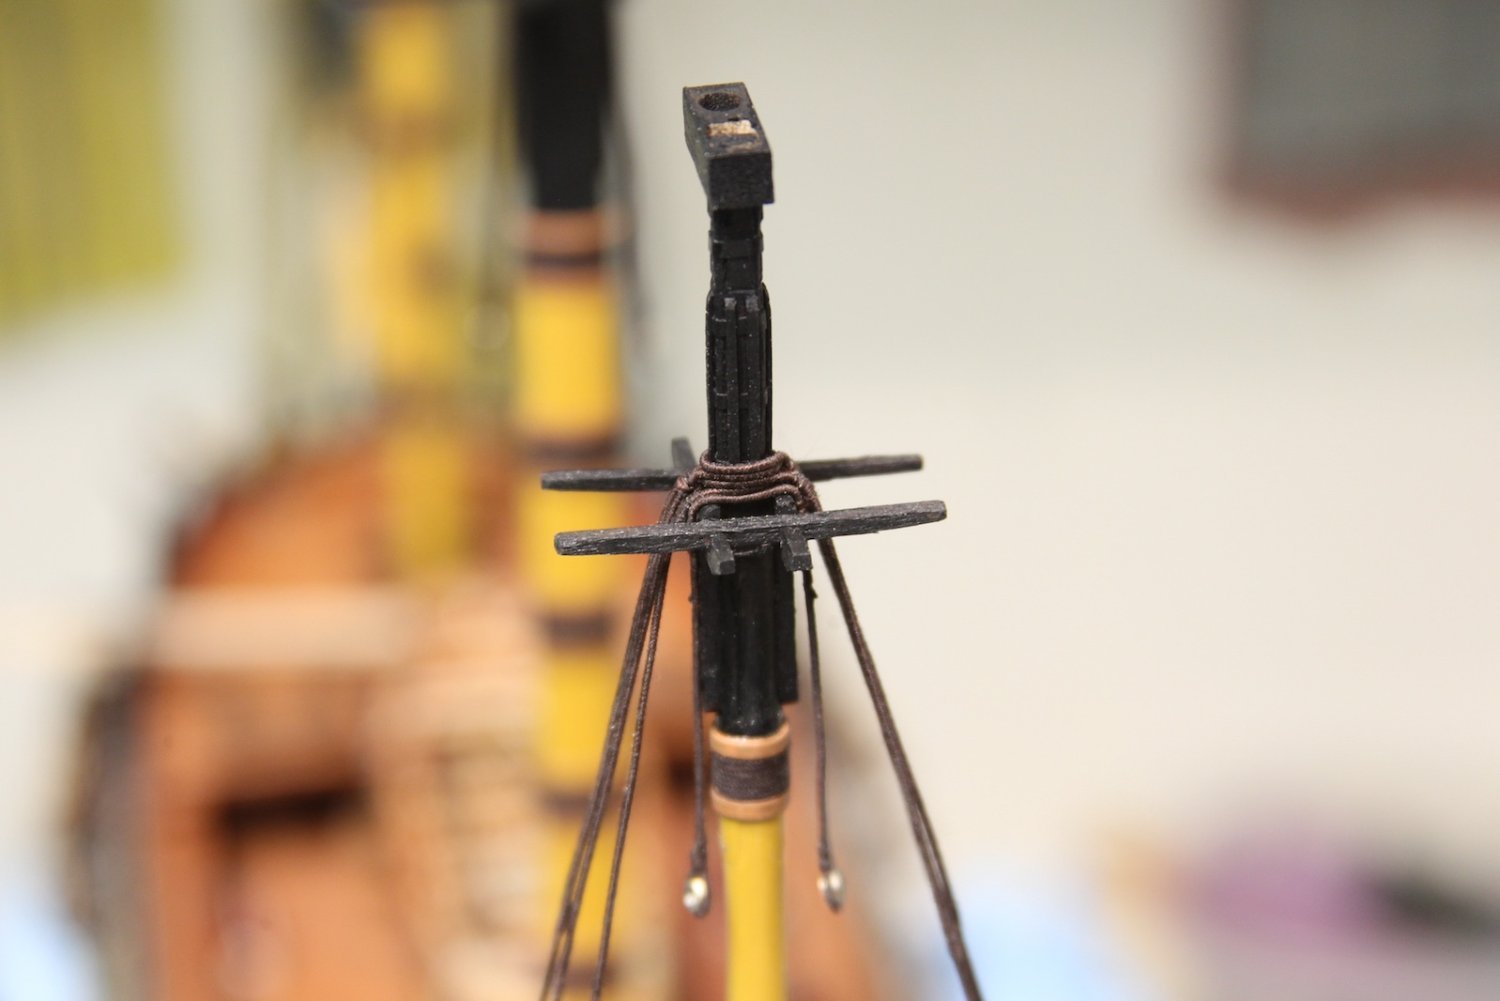
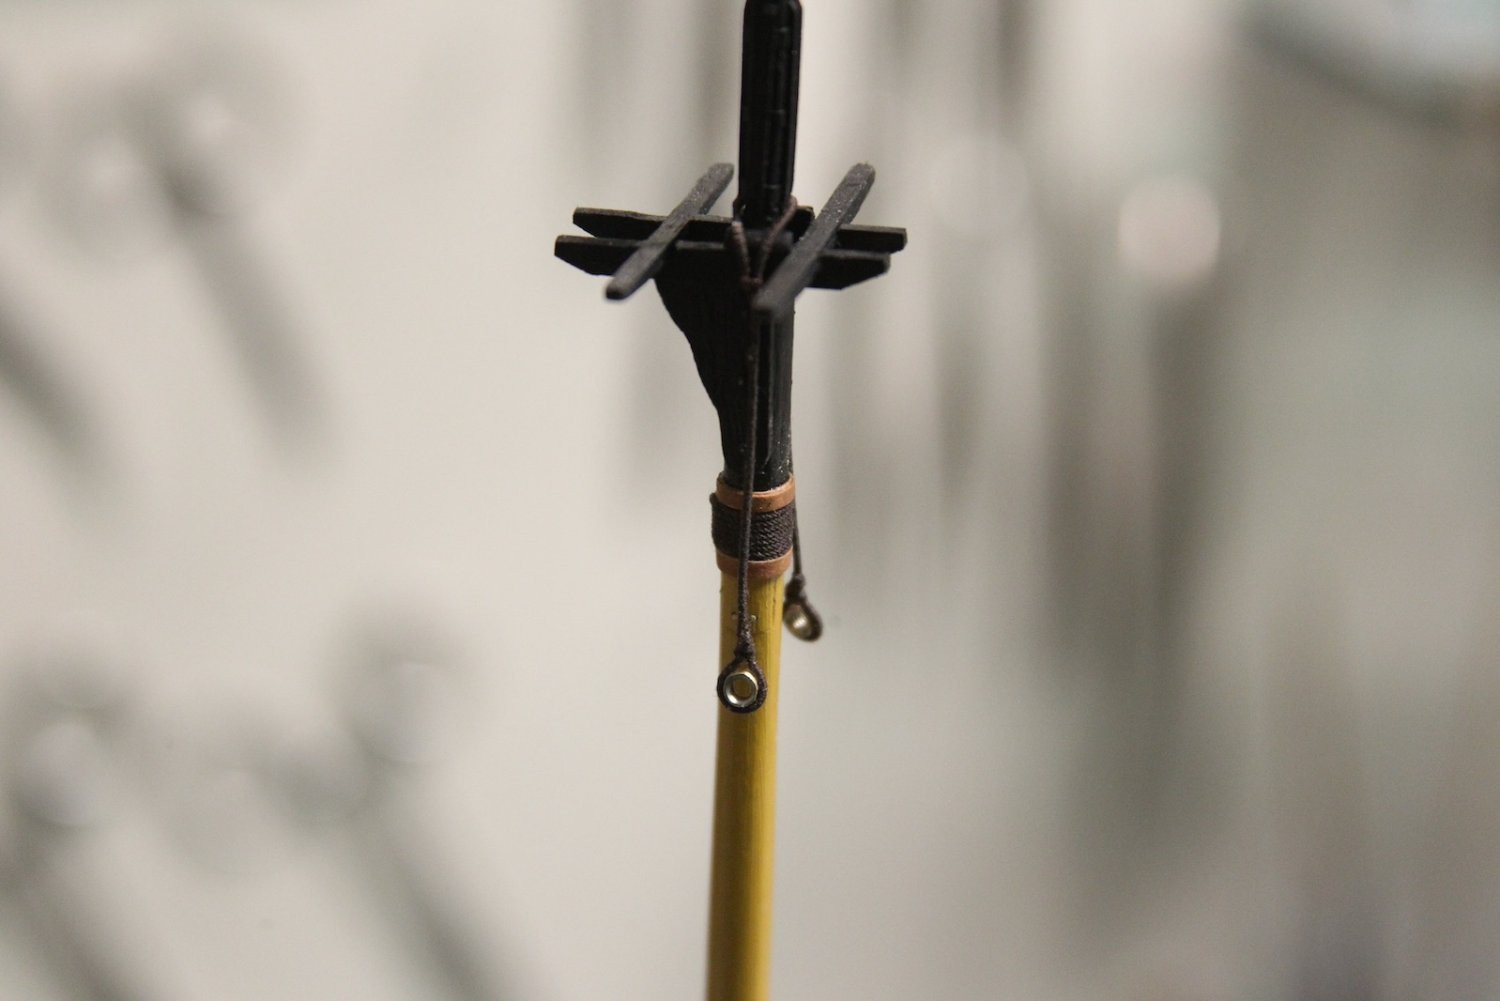
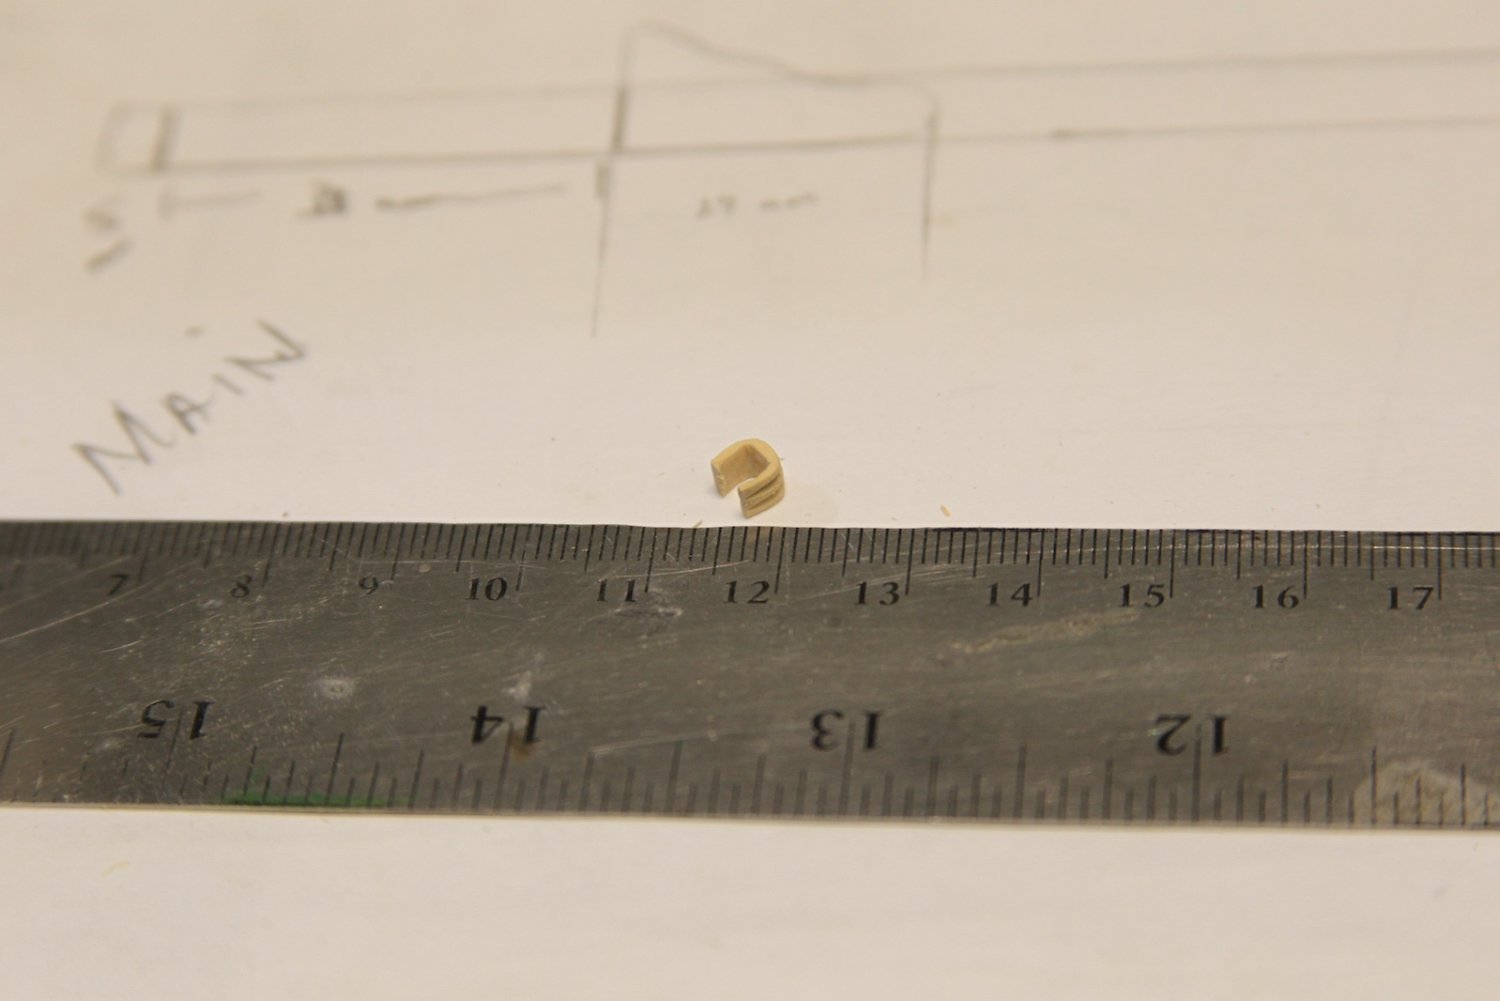
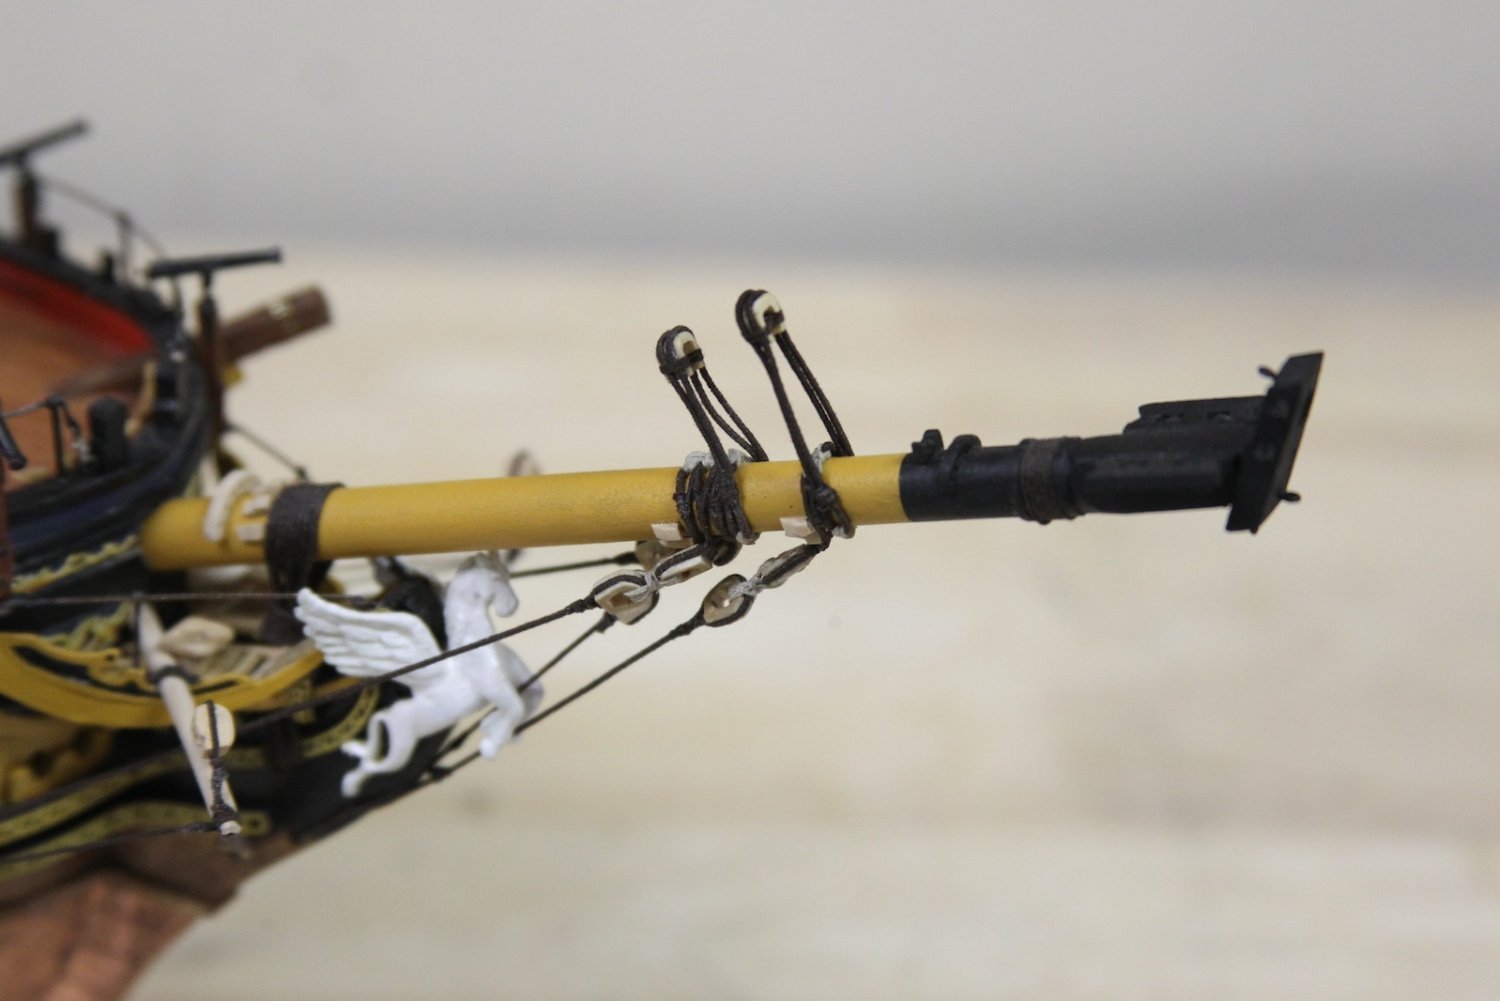
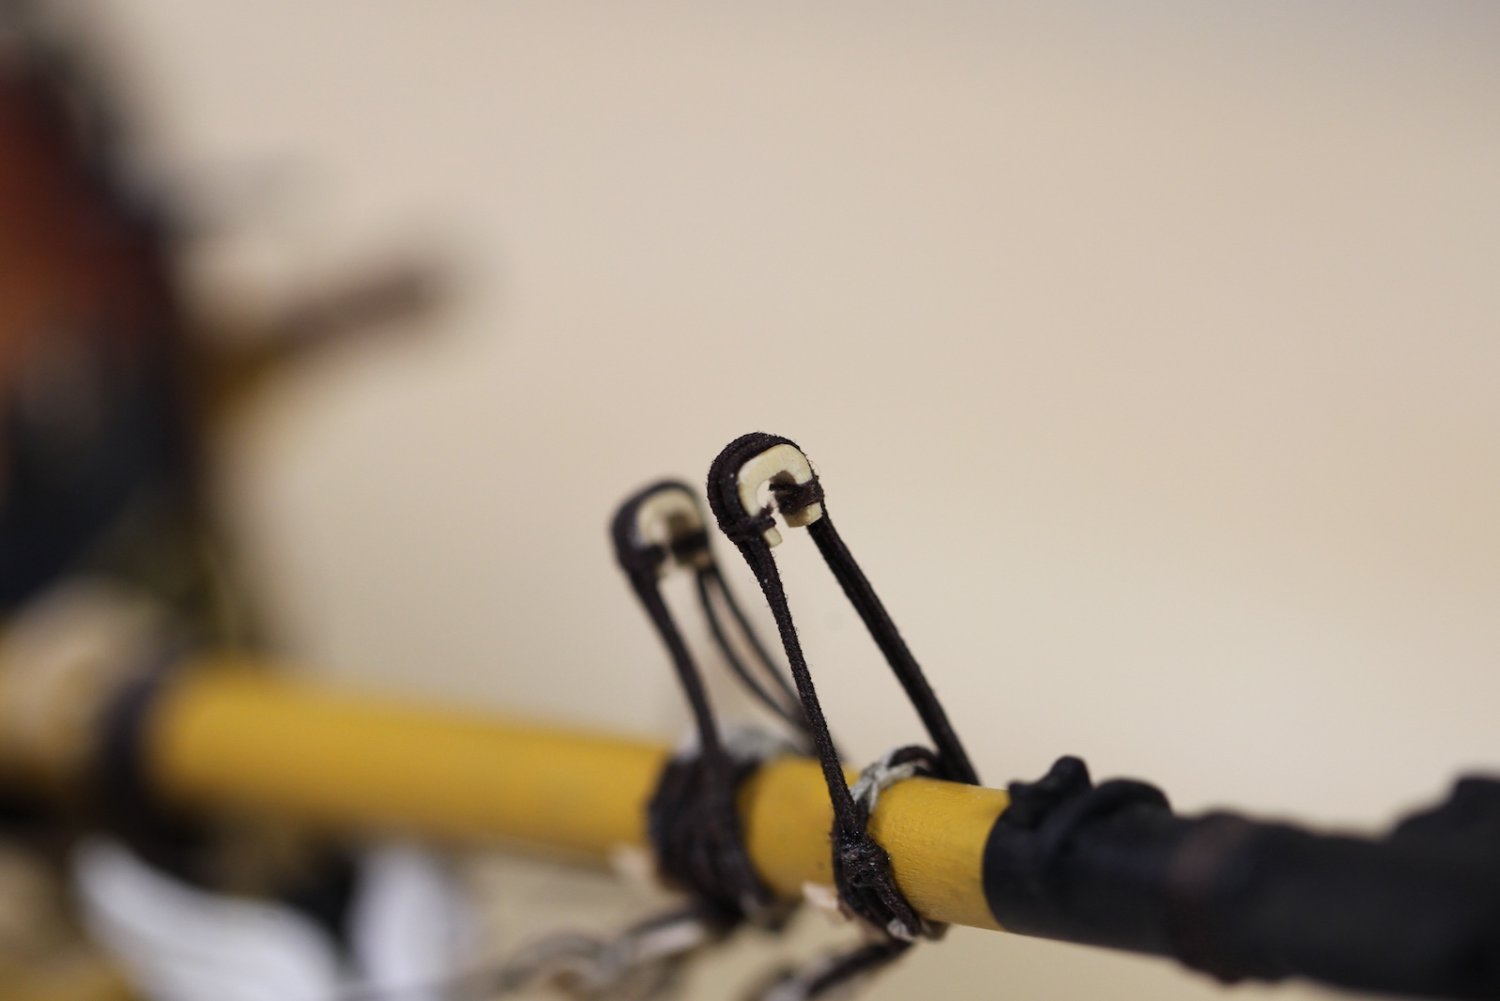
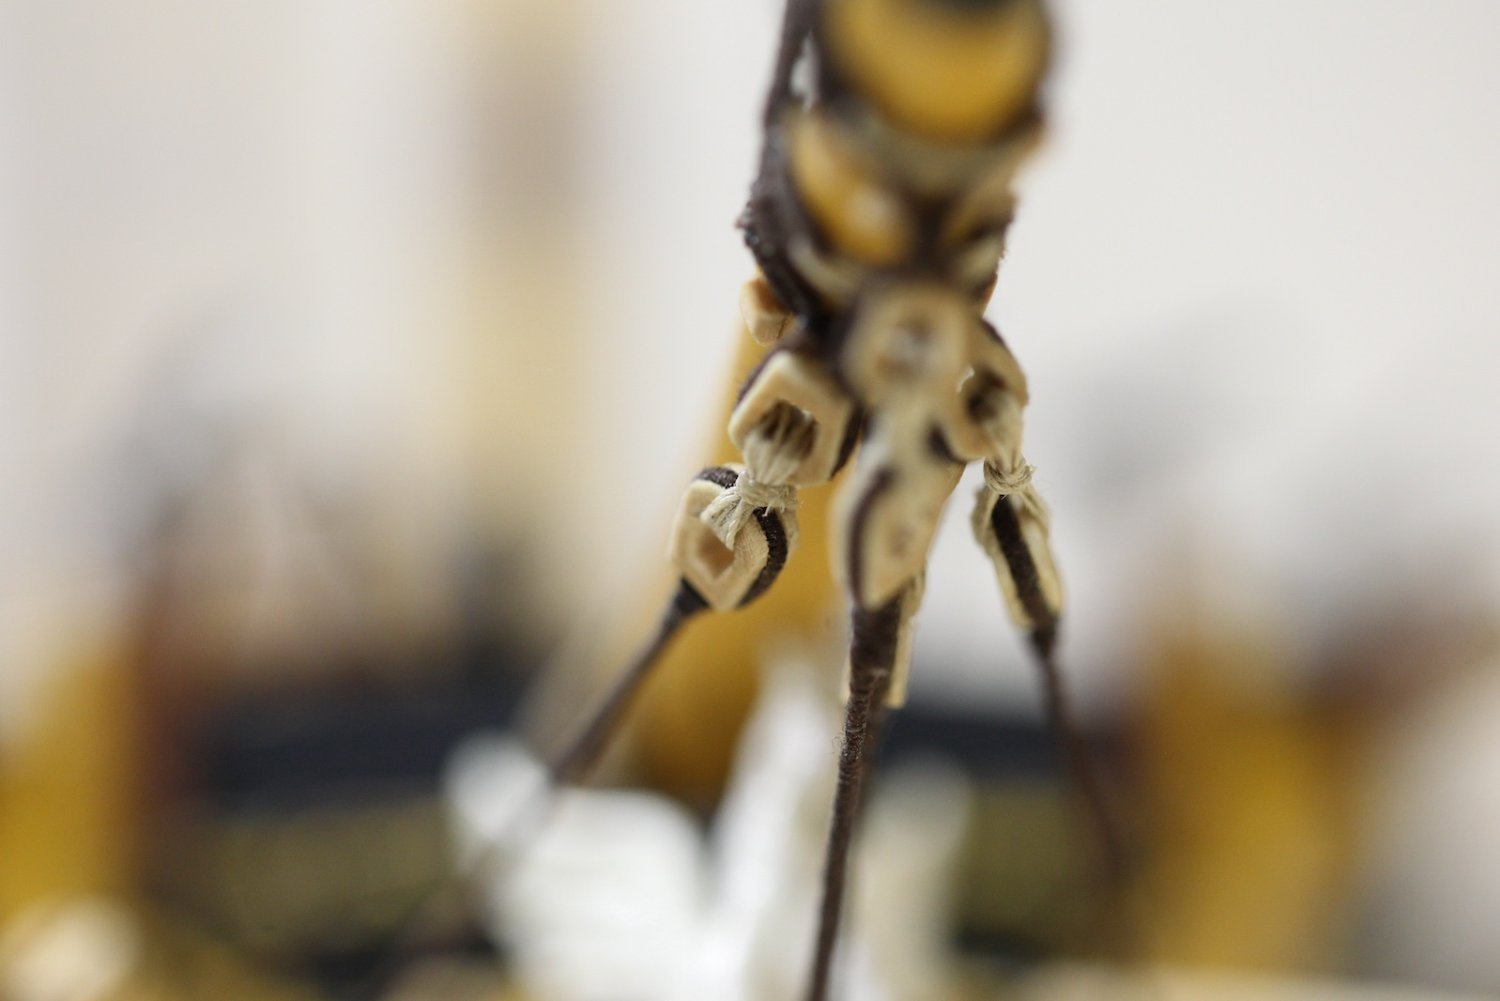
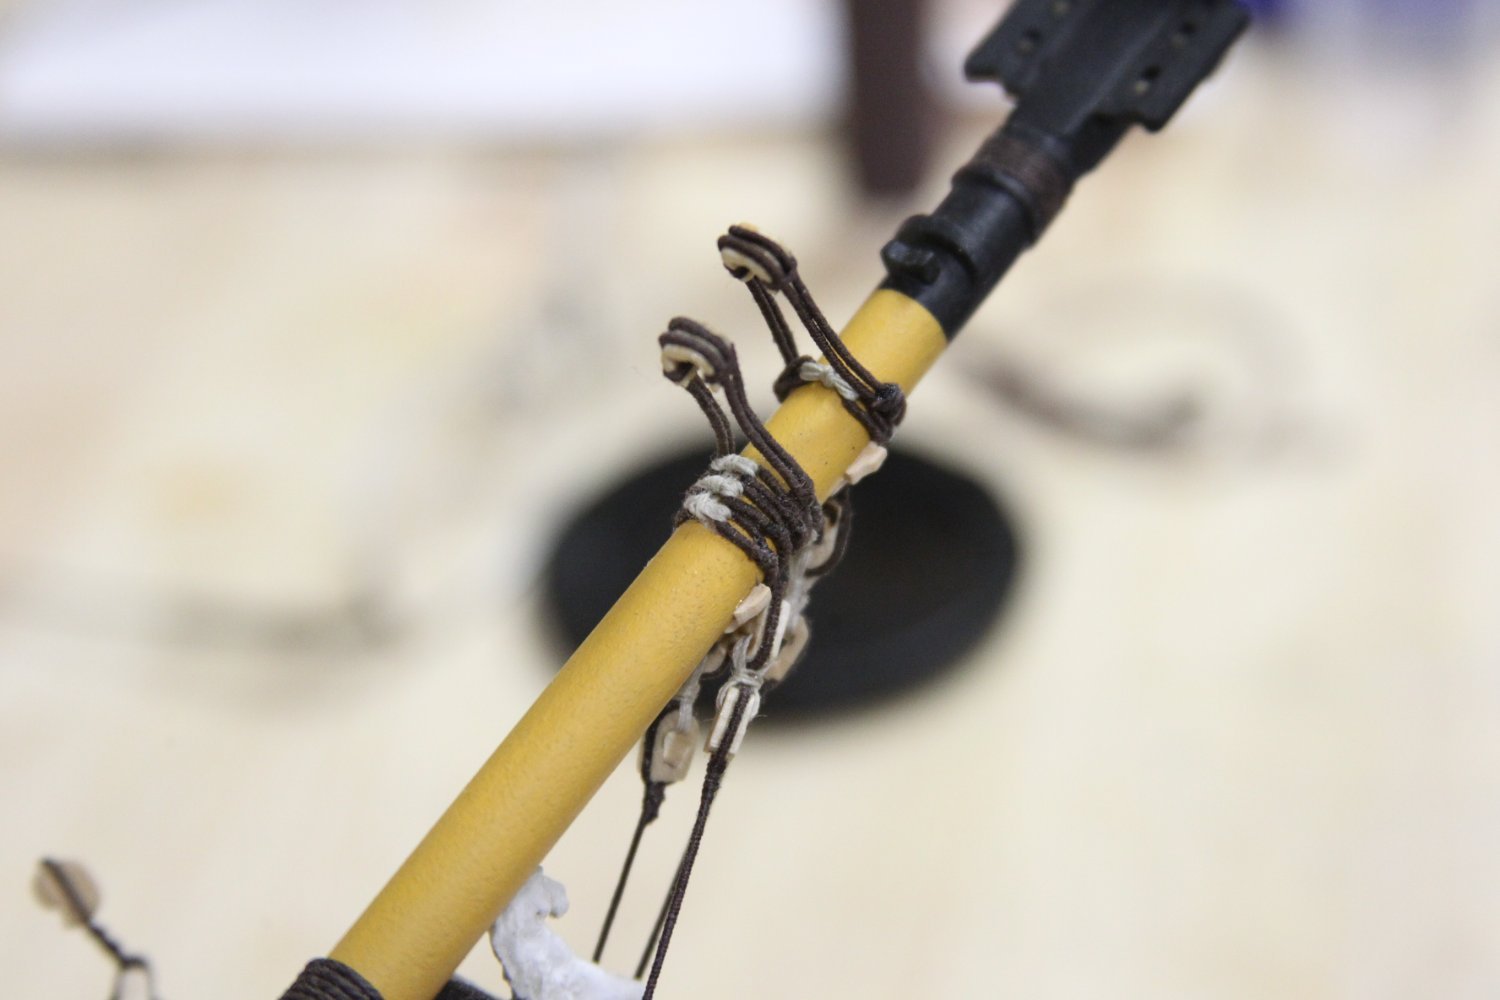
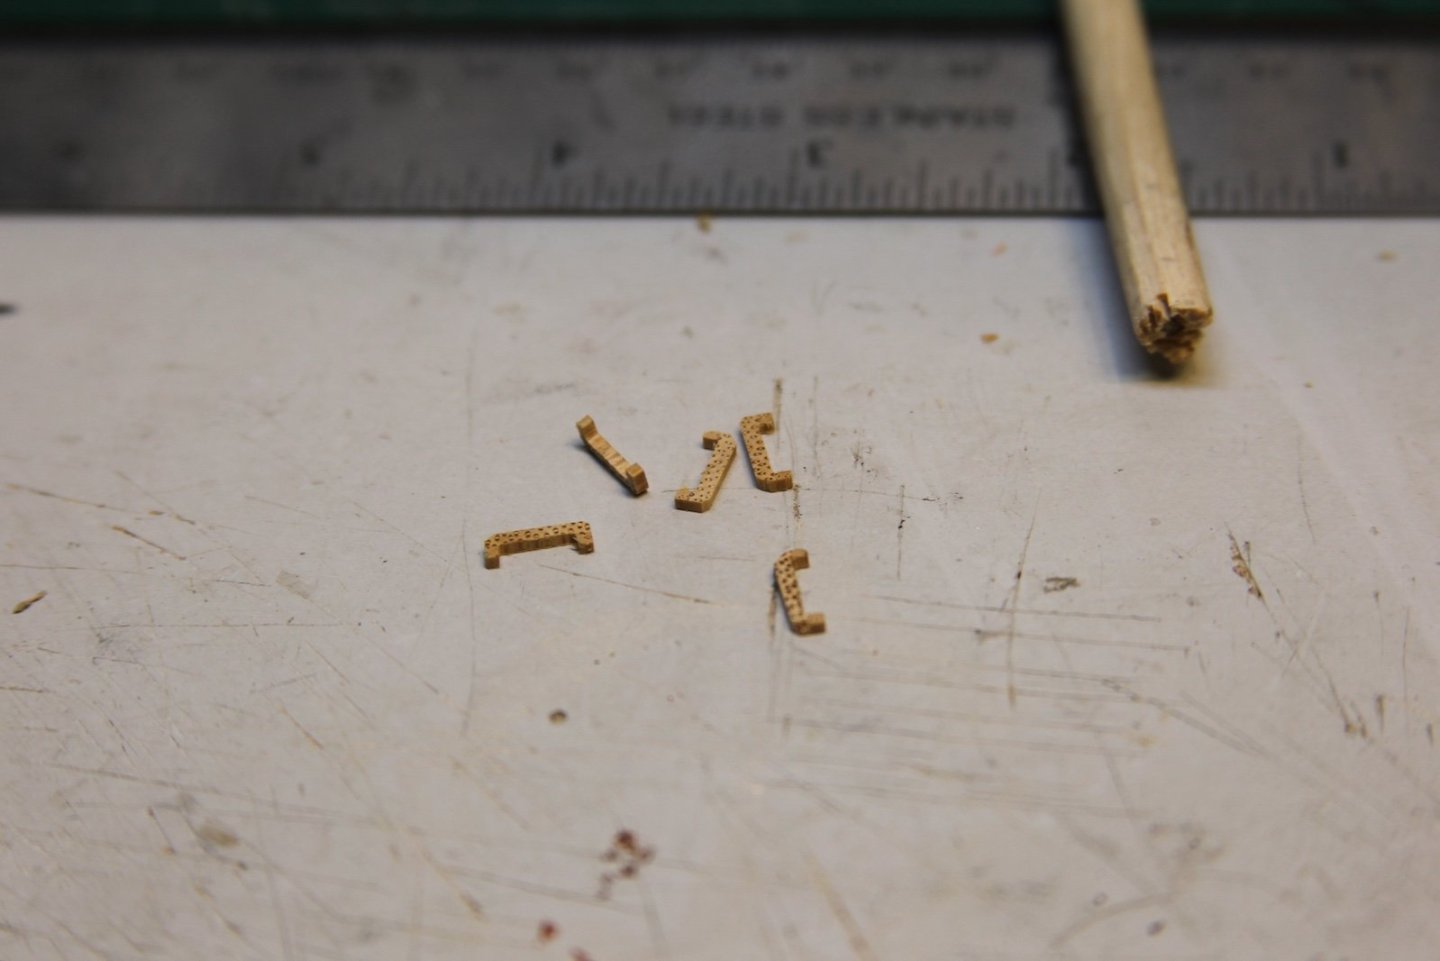
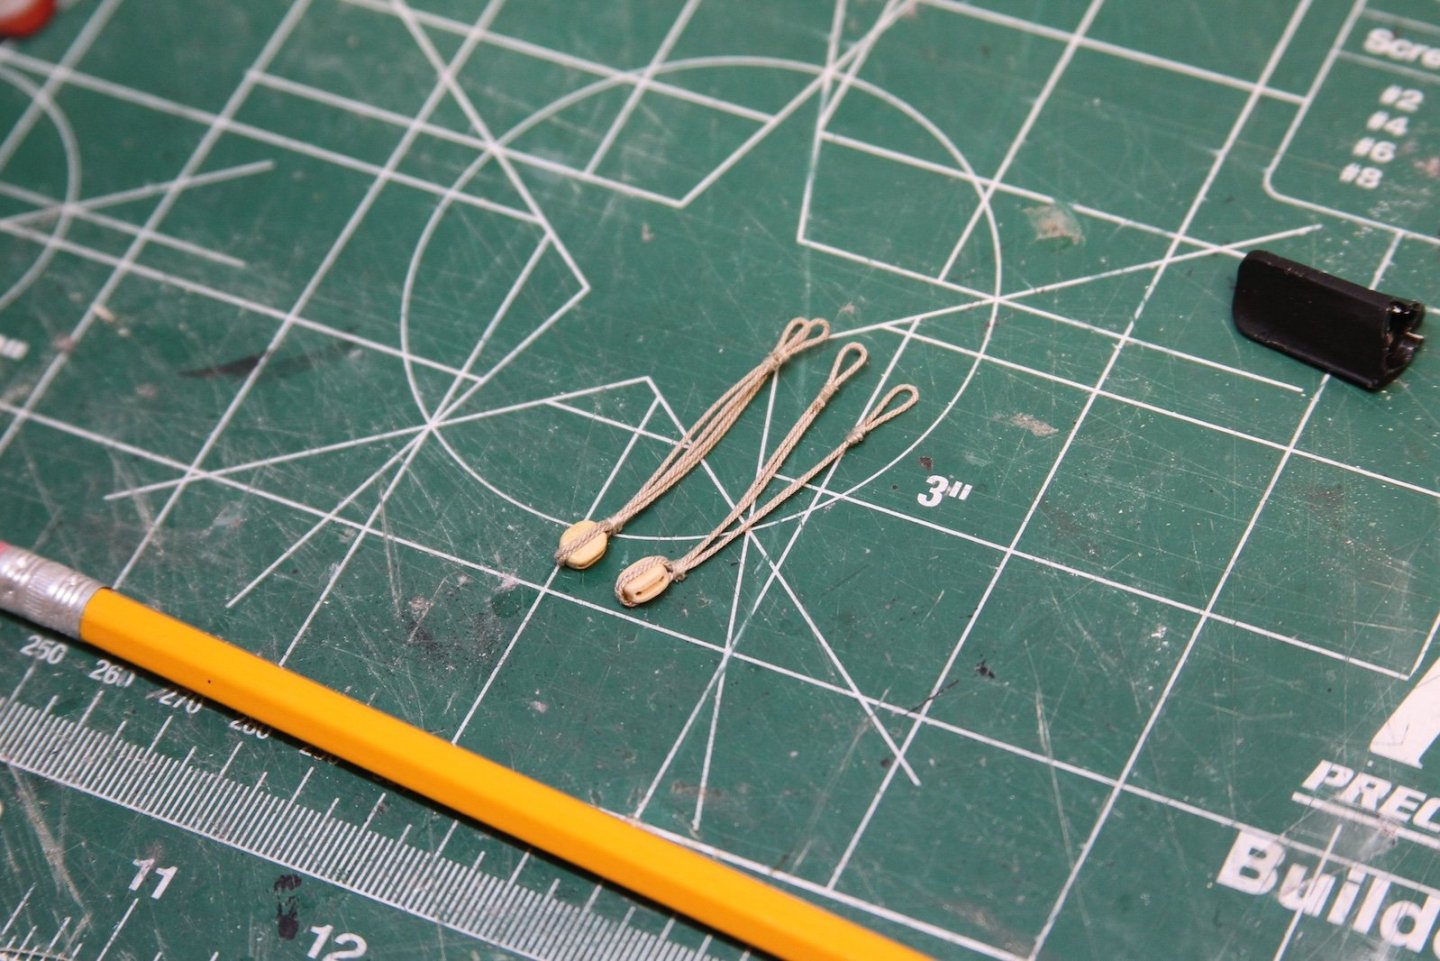
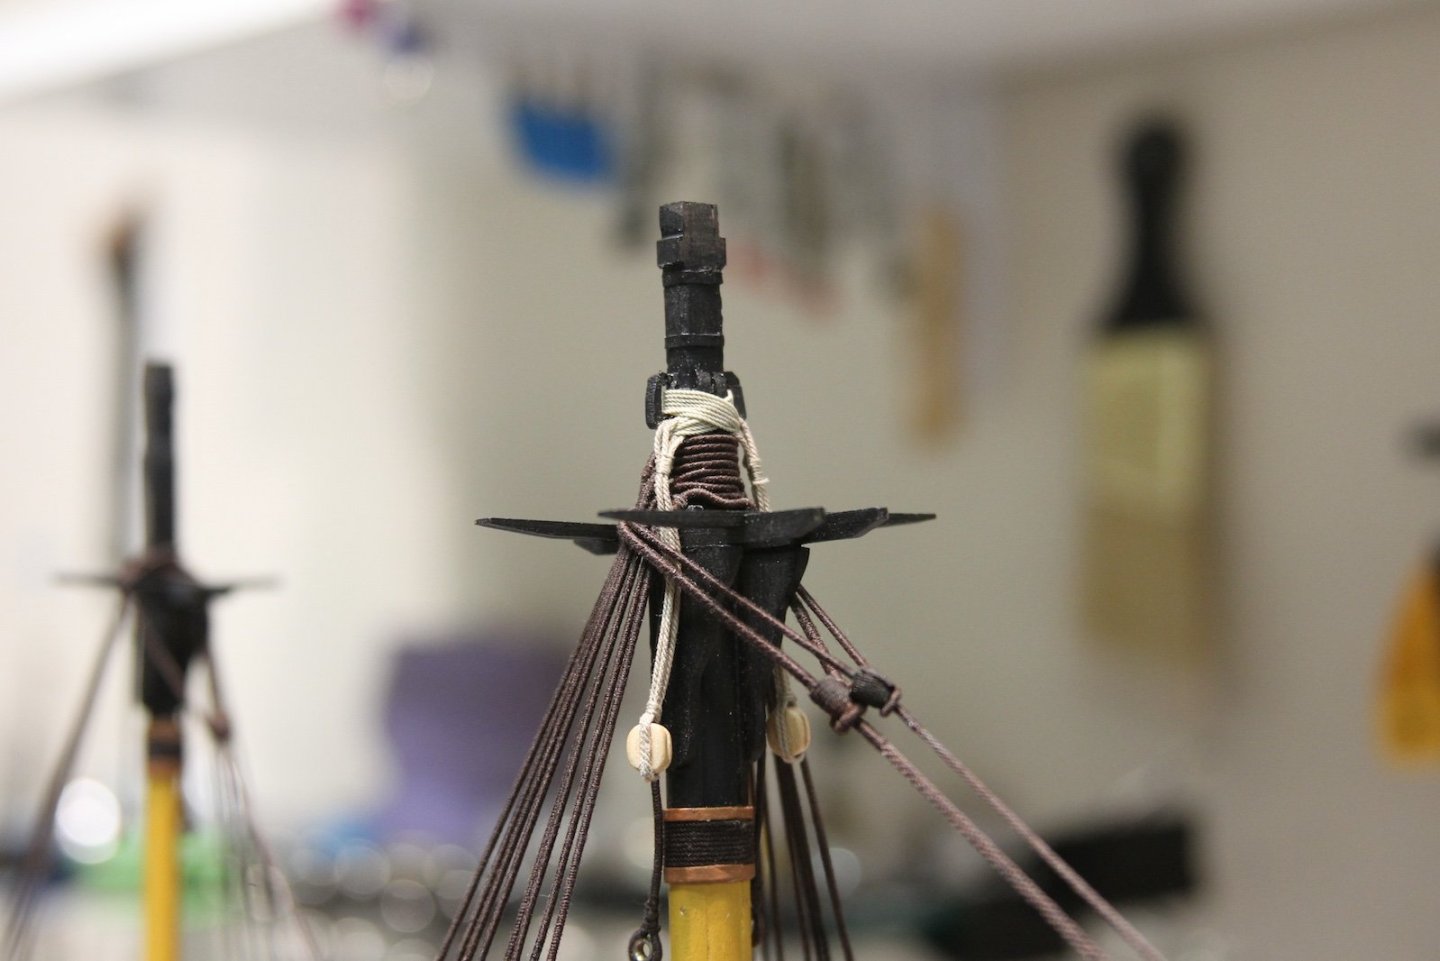
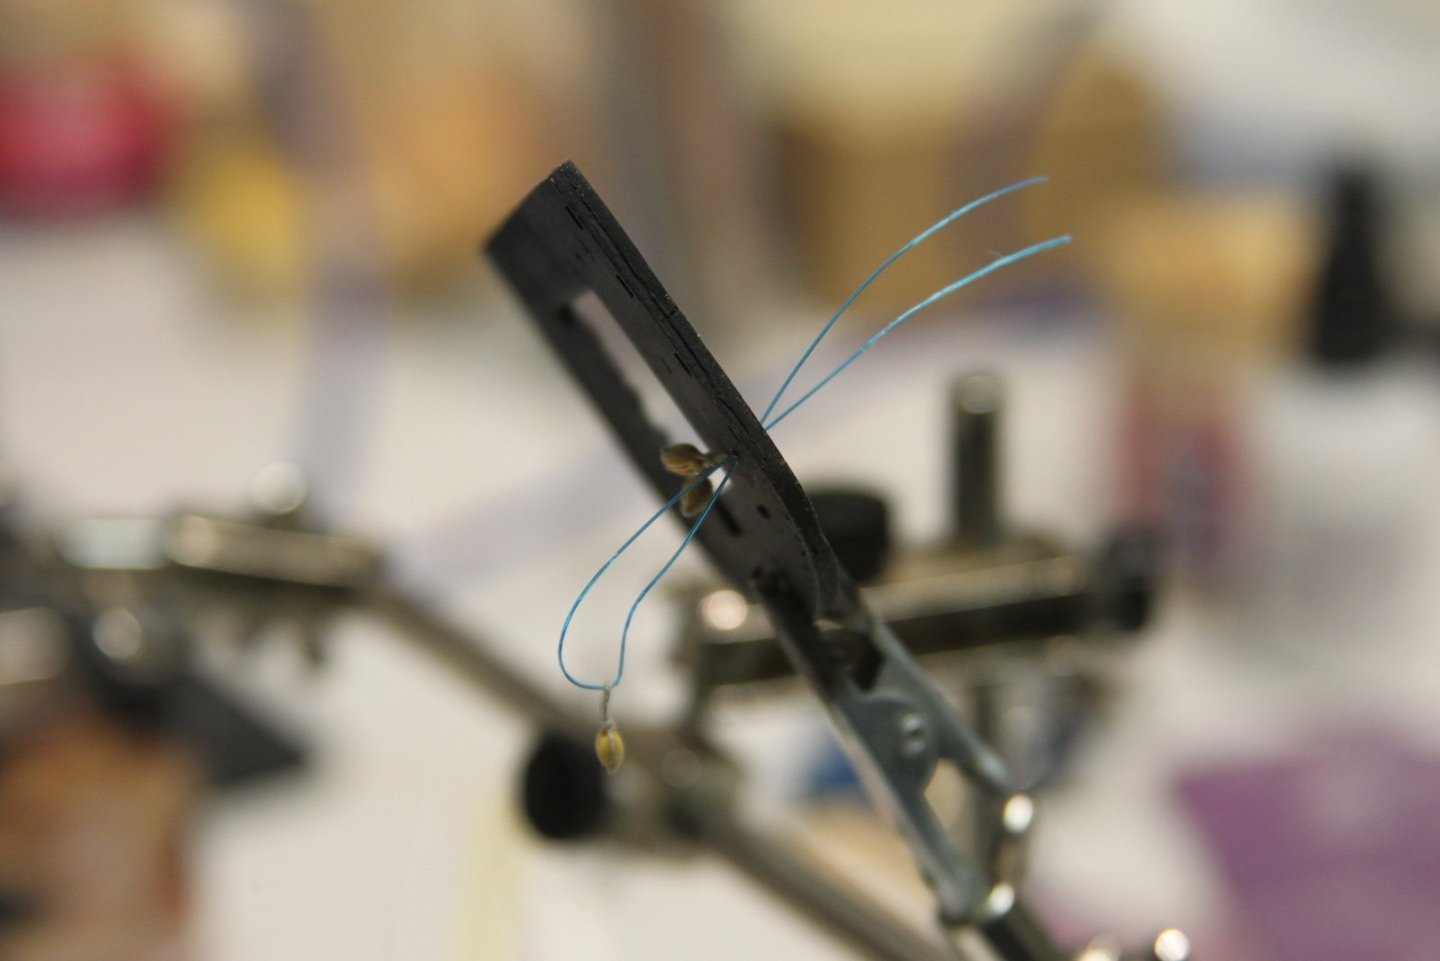
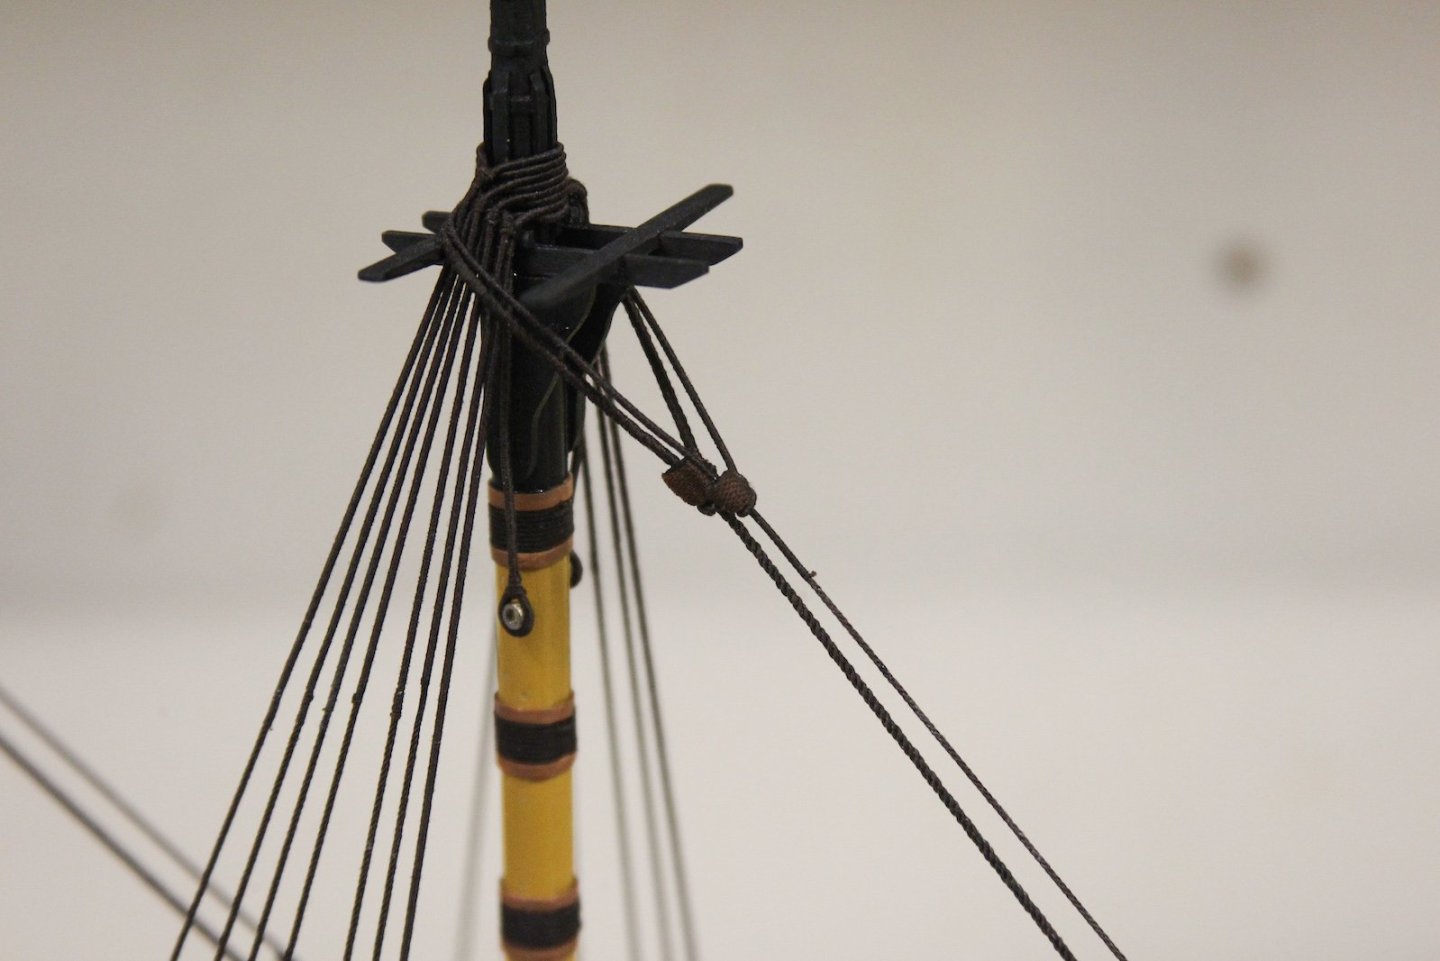
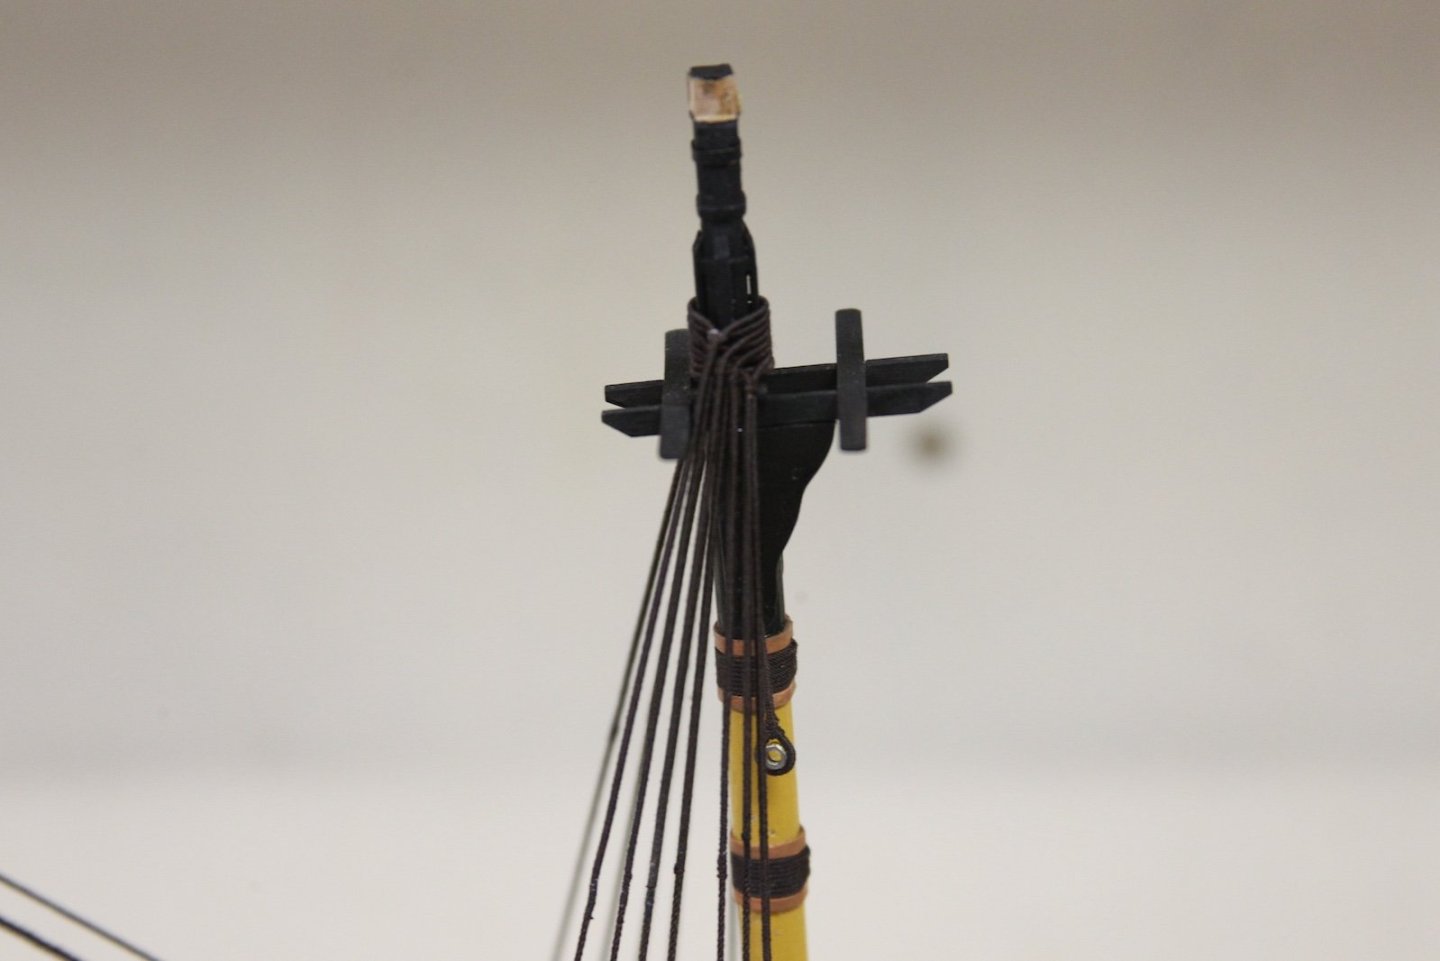
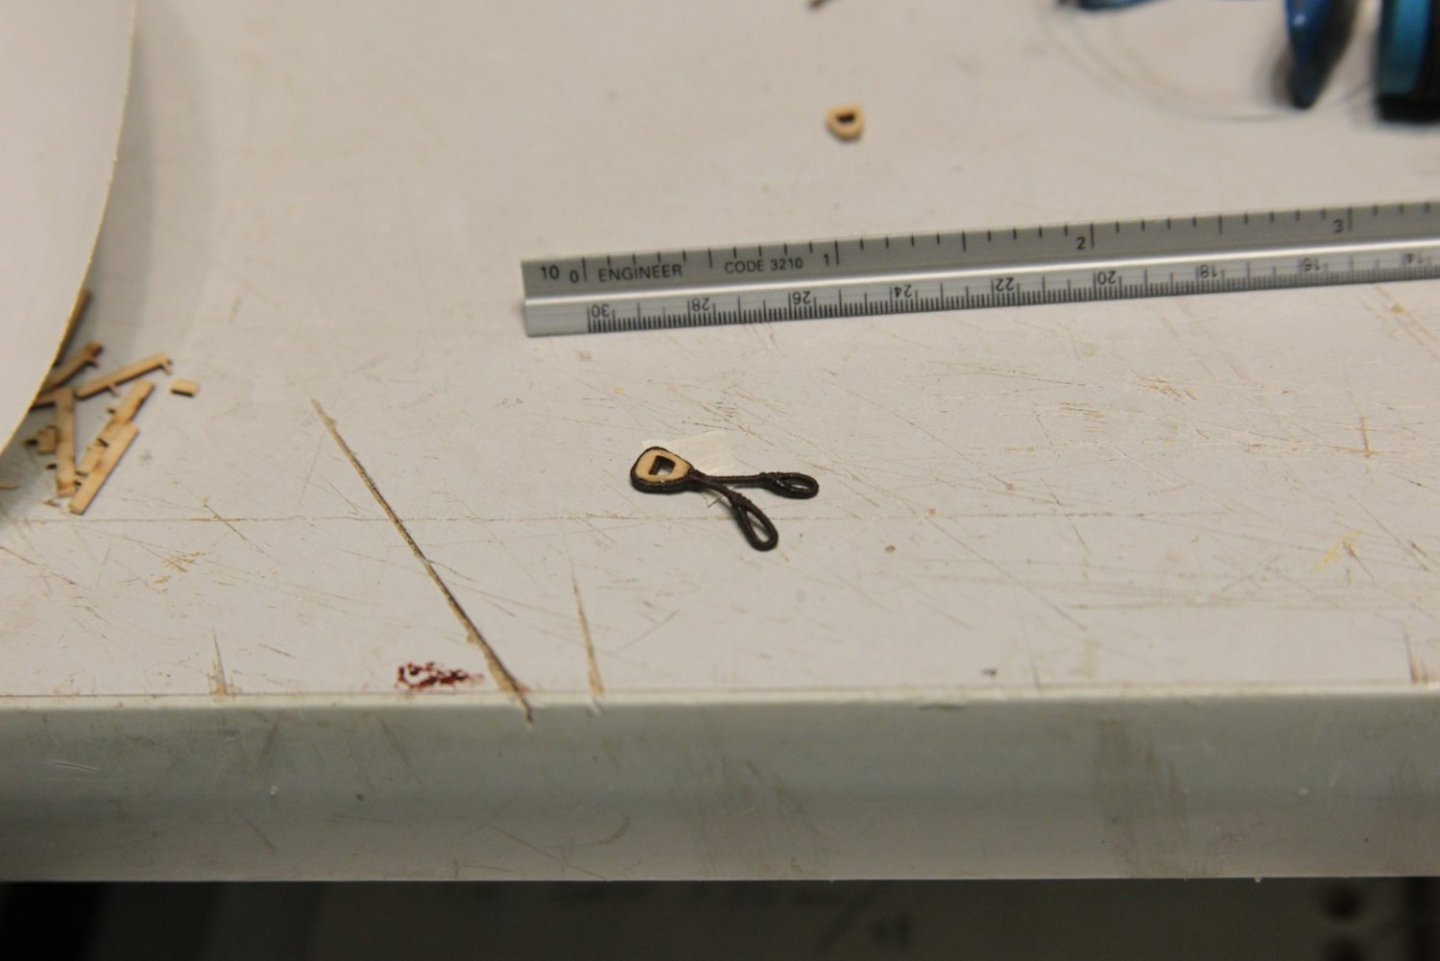
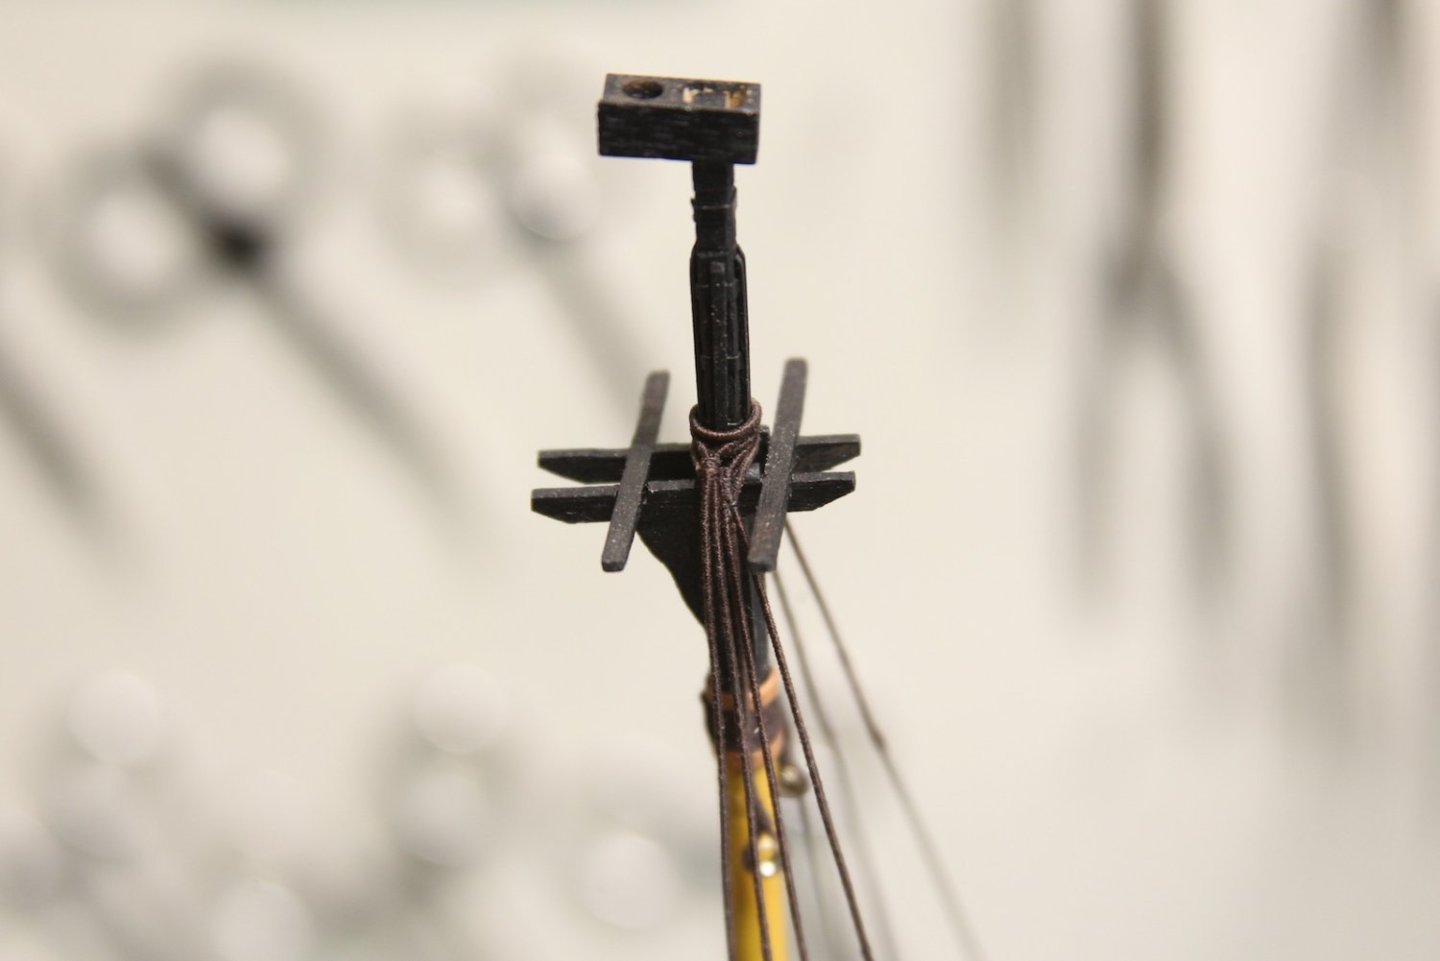
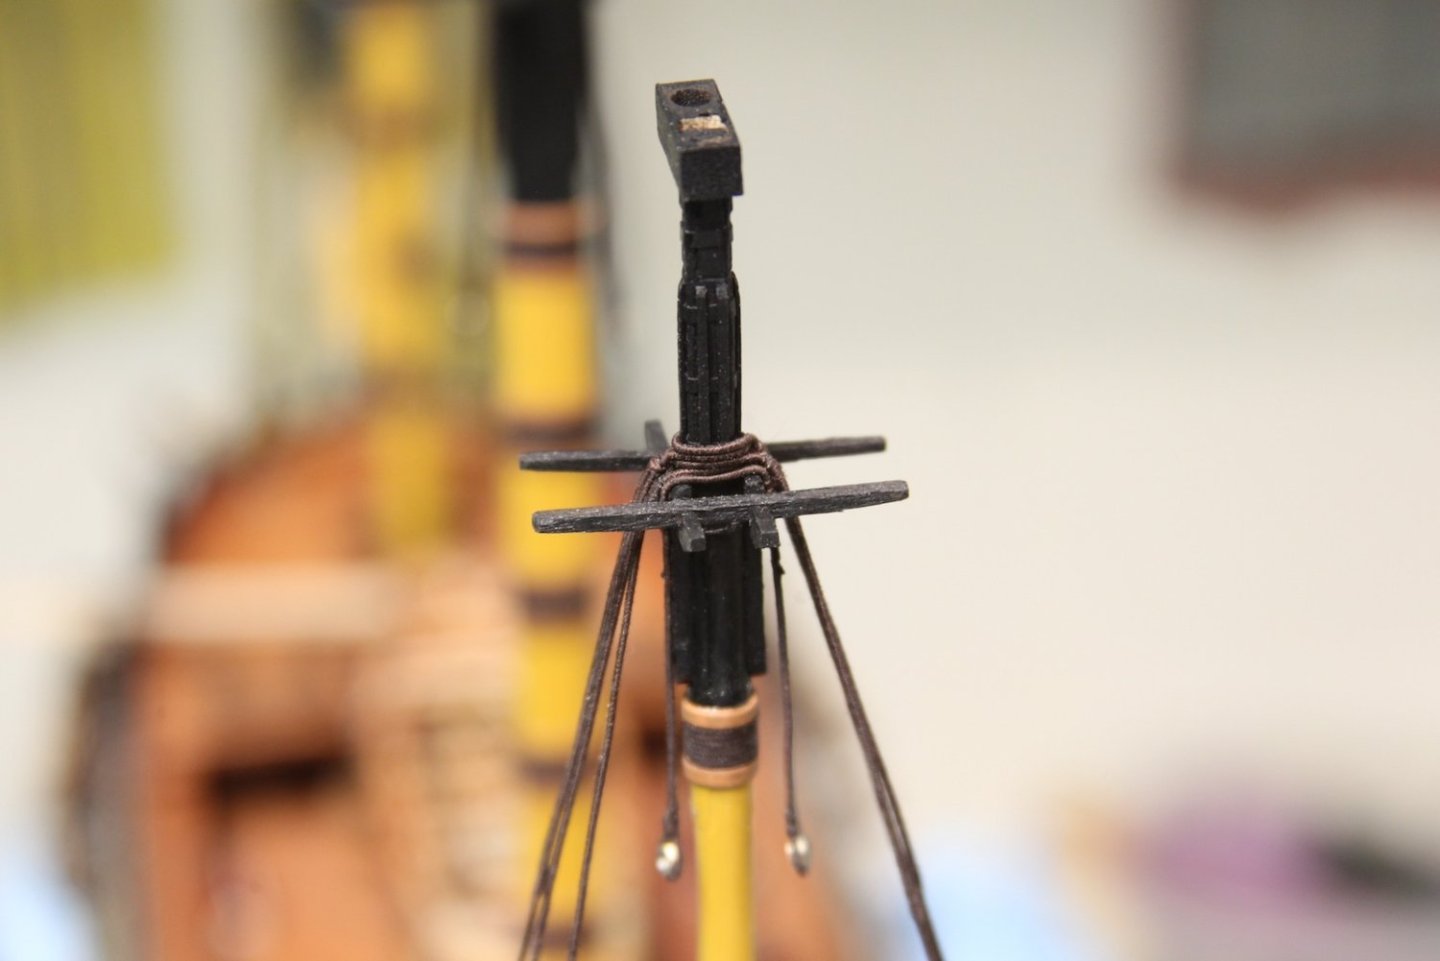
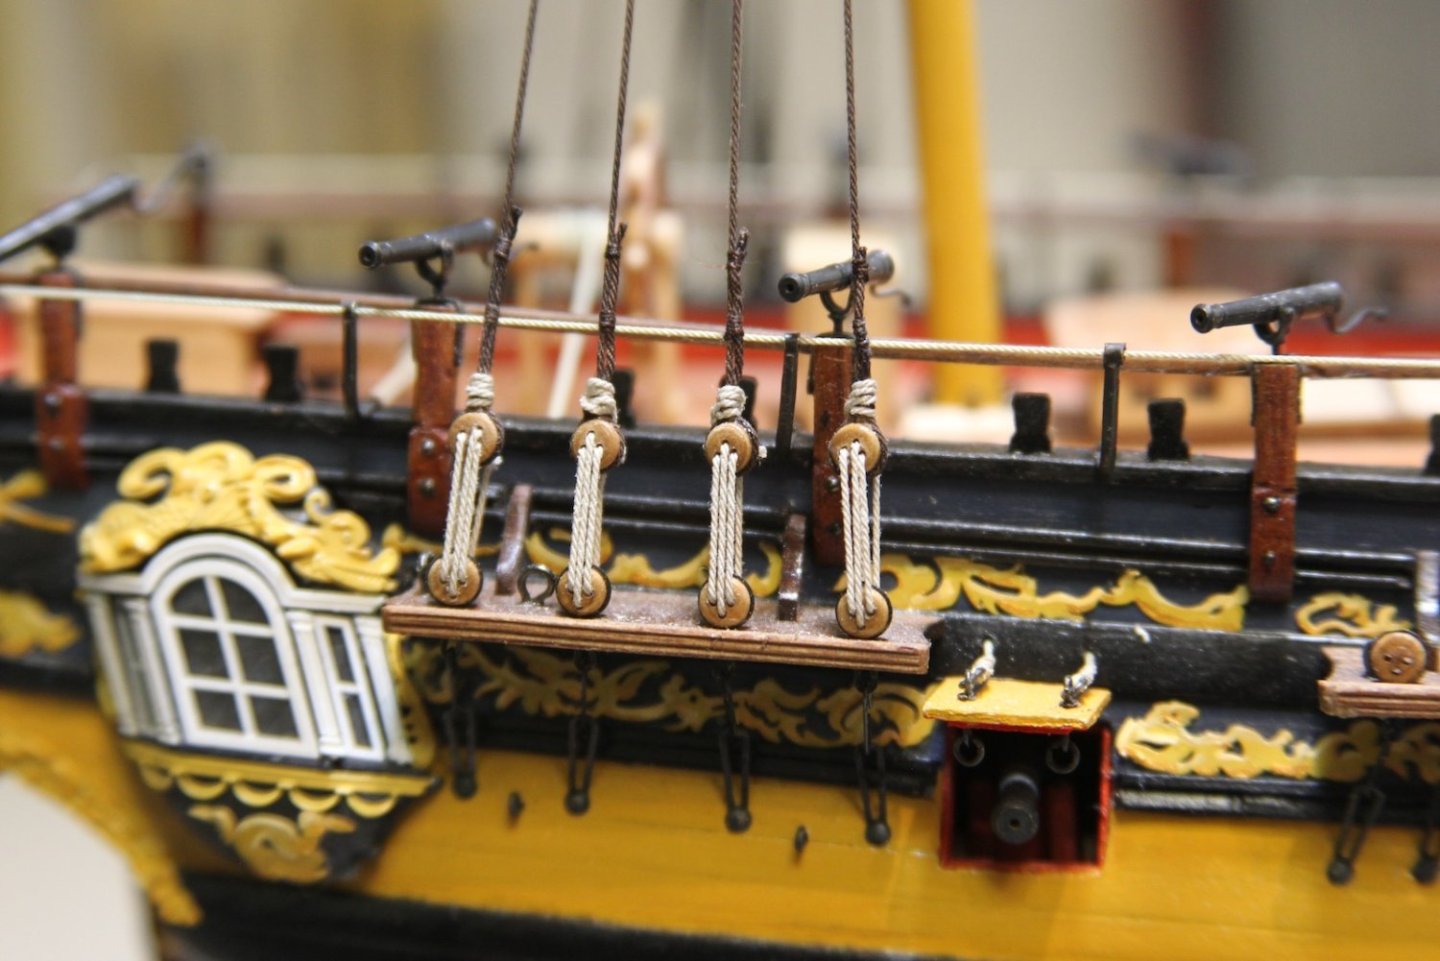
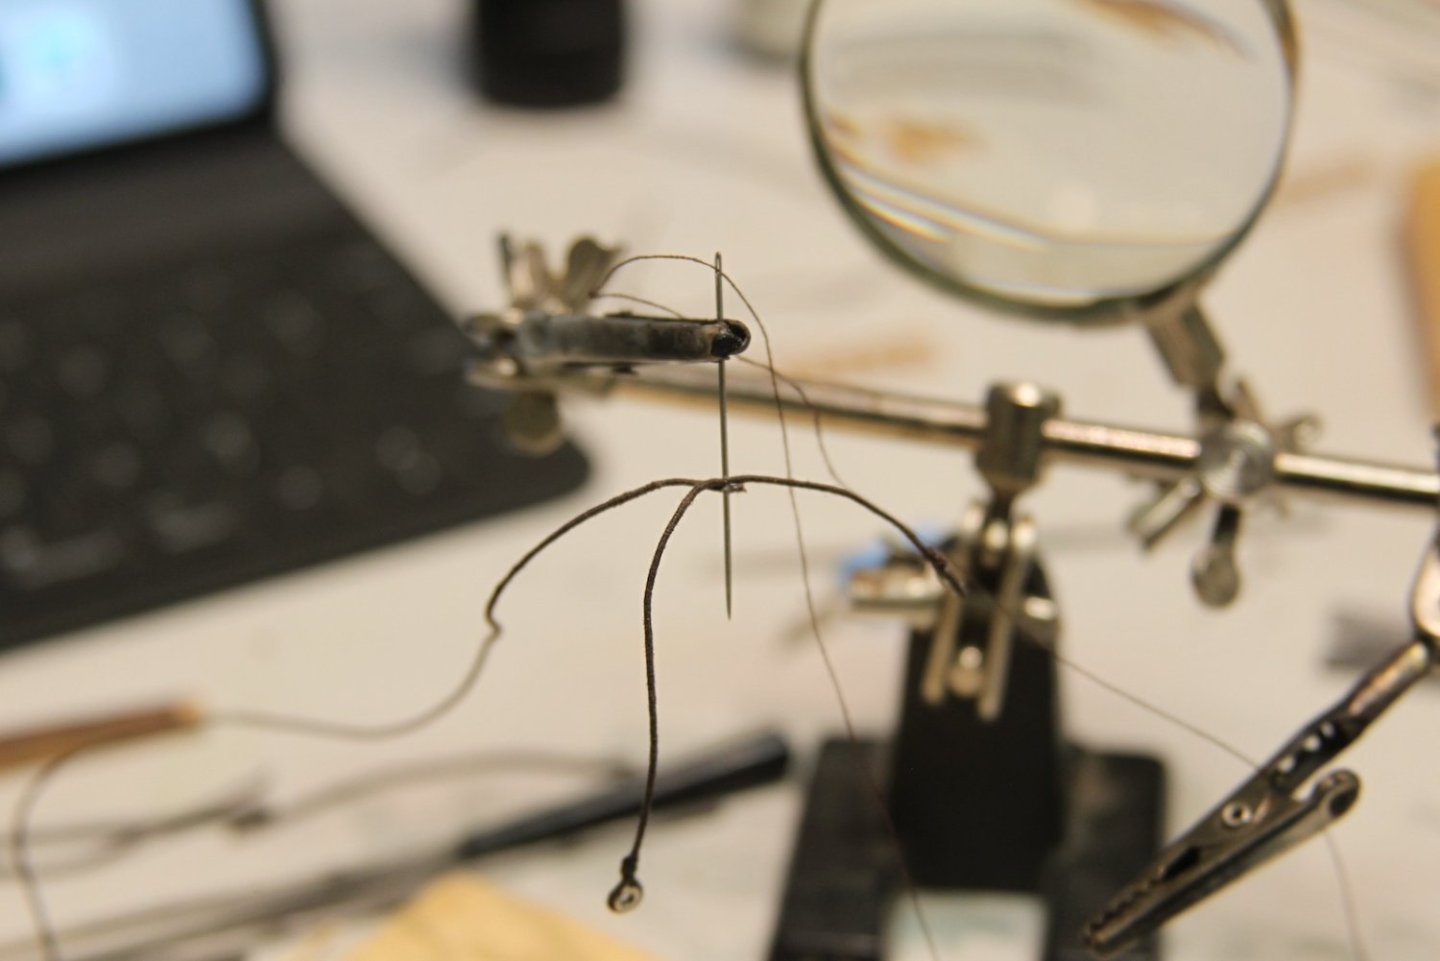
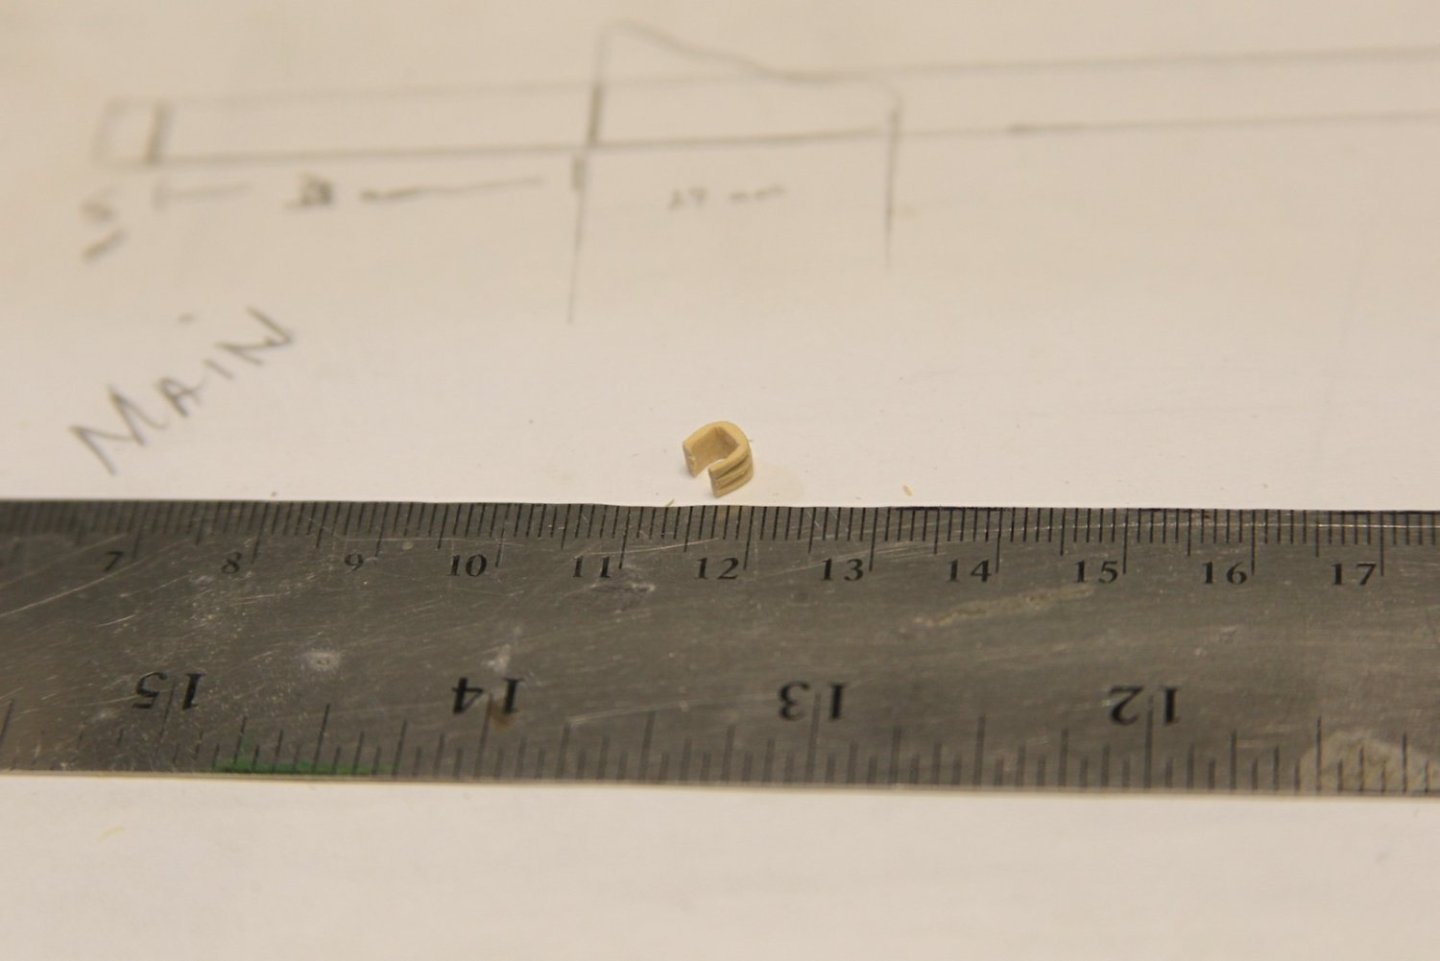
 This is one of those infamous posts we've all had multiple times - defined as "a short post but a lot of work." I wanted to rig the jeer tyes prior to fitting the mast heads, as it just seems like it'd be easier to get these buggers at least somewhat correct without the masthead in the way. The jeers are the tackles for hoisting and lowering the lower yards and are comprised of 20" single blocks (about 8mm) double stropped with 7" (.88mm) line and lashed to the masthead with seven wraps of 3" (.38mm) line through two closed cleats. My .85mm line looked a little bulky around the block, so I used .75mm instead which I liked better visually. The cleats took me two iterations. The first is boxwood, and I tried to give them some nice shape and a little finesse with some sanding and they just ended up looking like they were cut out of wood by a third grader with a dull pair of scissors. So I tried again with some dense scraps of an unknown wood that used to be a pen case, and I simplified them to just rectangular closed cleats. Helpful that they'll eventually be painted black. Notice that I made an extra knowing at least one would either break or go sailing across the room. The double strop is made from a 90mm length of line turned into a closed loop by securing the ends together, then folded around the block creating a 45 mm long strop. I closed the loop by feeding a needle and mara 100 thread through the two ends and seizing it at the base of the eye. An eye is seized at the other end, then both strops are looped over the block and seized once again. The jeers are lashed to the mast through the cleats and the eyes with the aforementioned .40mm rope, while being careful to lay the rope as cleanly as possible around the masthead. It's not shown here, but I used a small clamp attached to the block to give it a little weight and tension while feeding the line through the cleats. The strops should hang down just long enough that the yard will sit at the level of the futtock shrouds when they are rigged later.
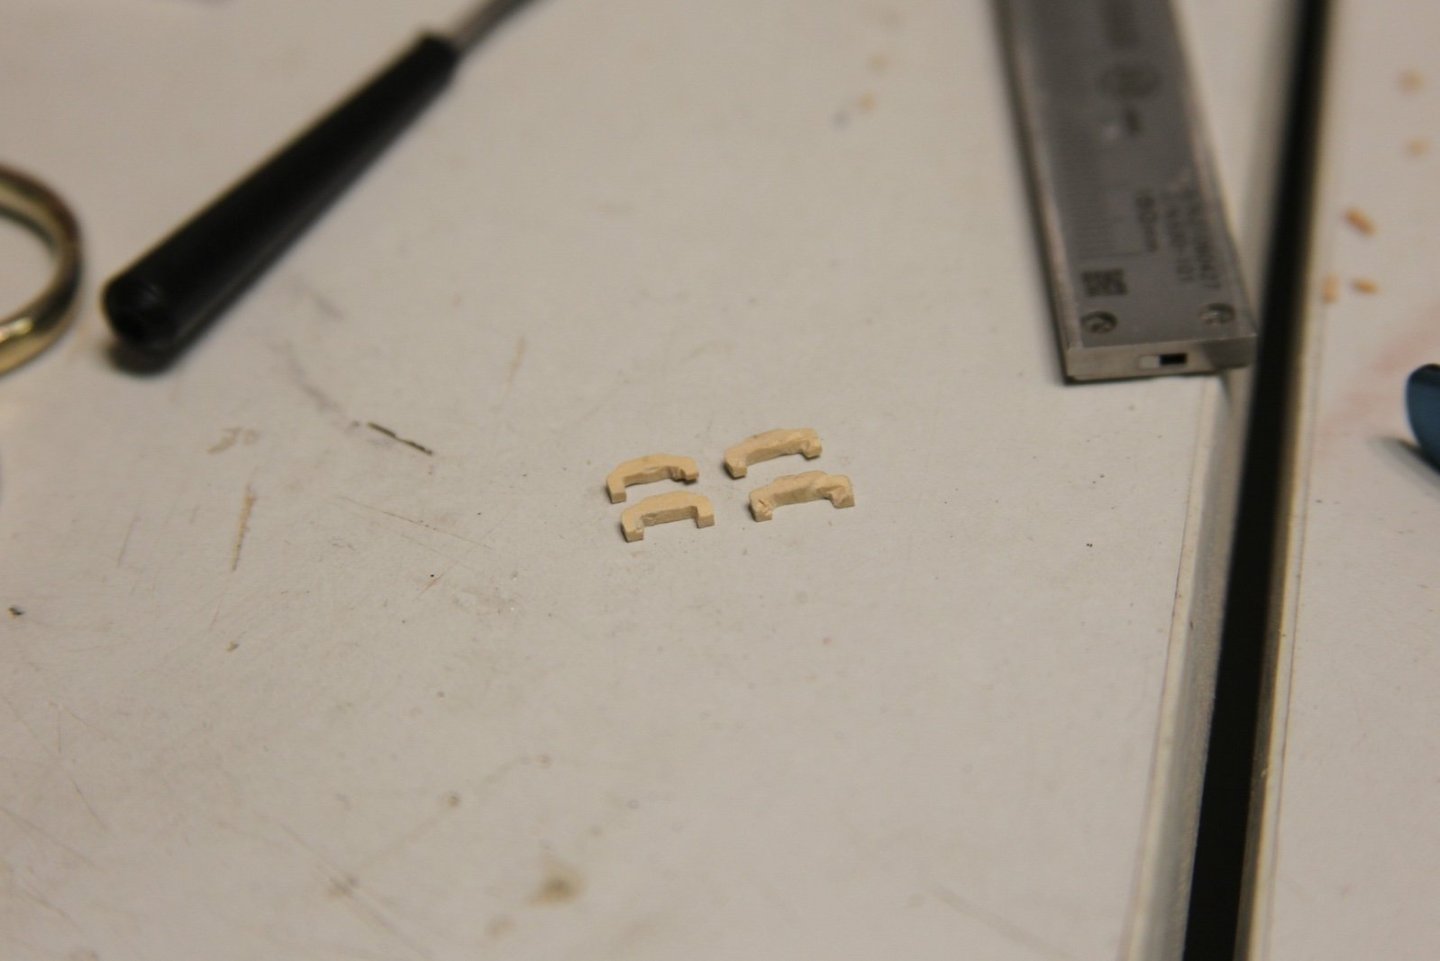

- 419 replies
-
- 6
-

-
- Victory Models
- Pegasus
- (and 2 more)
-
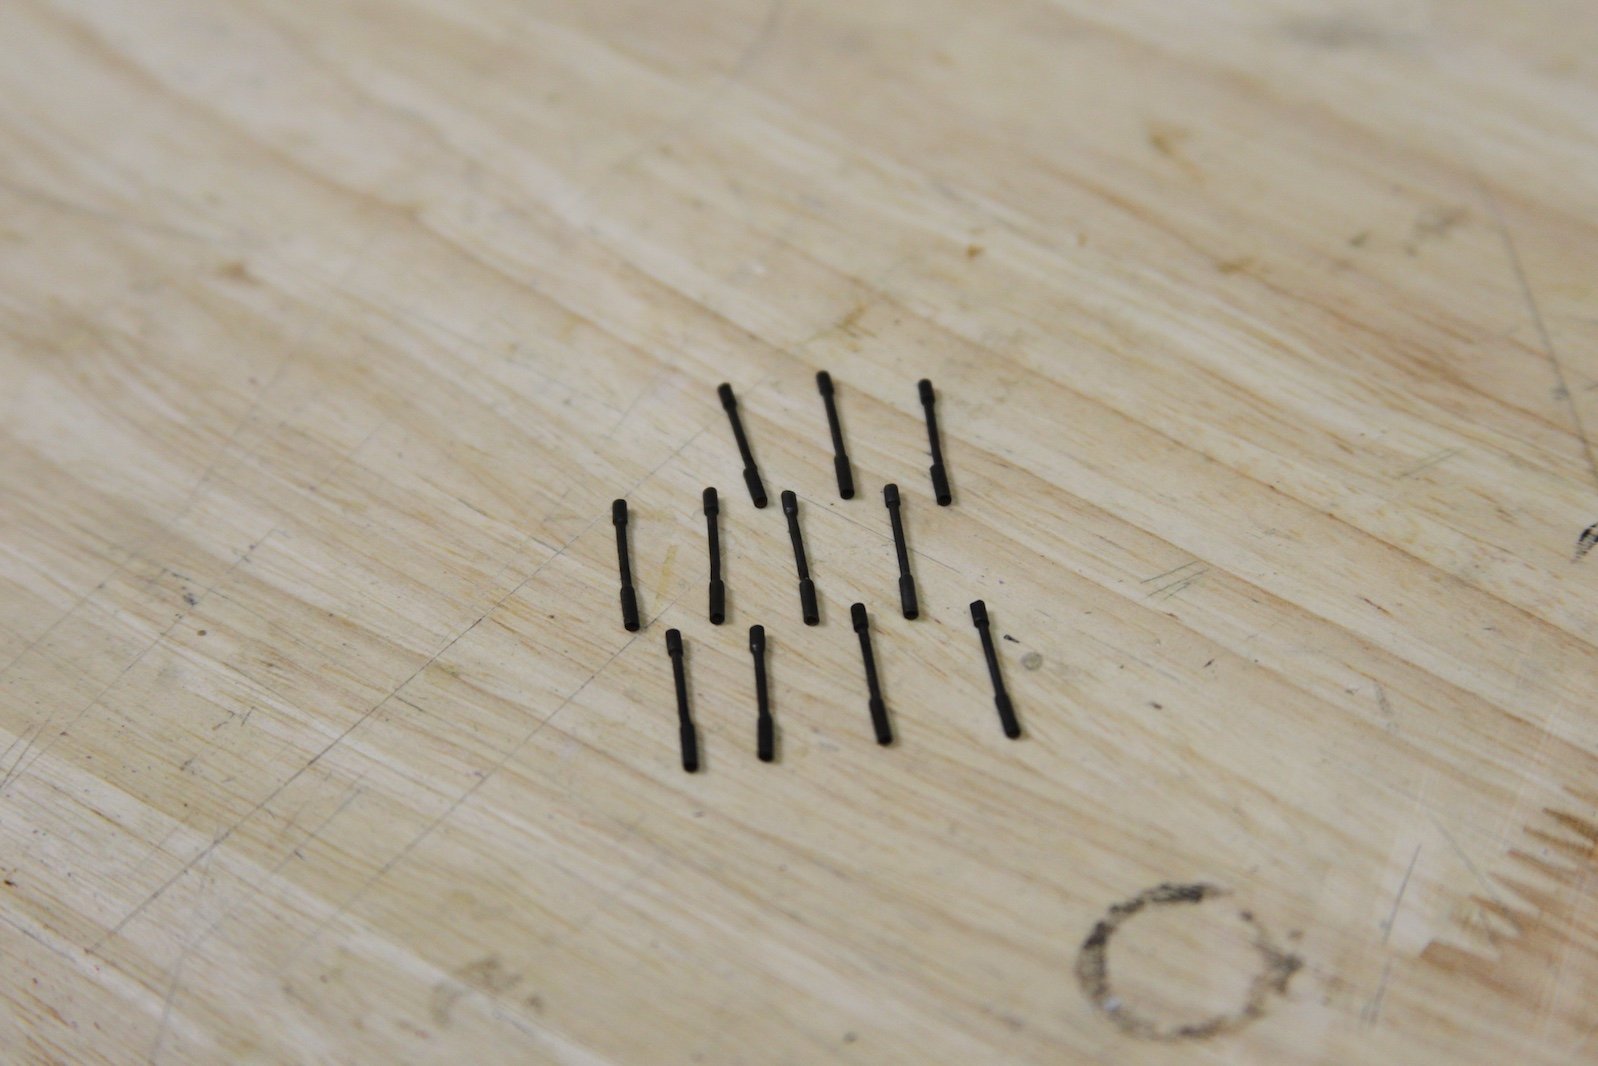
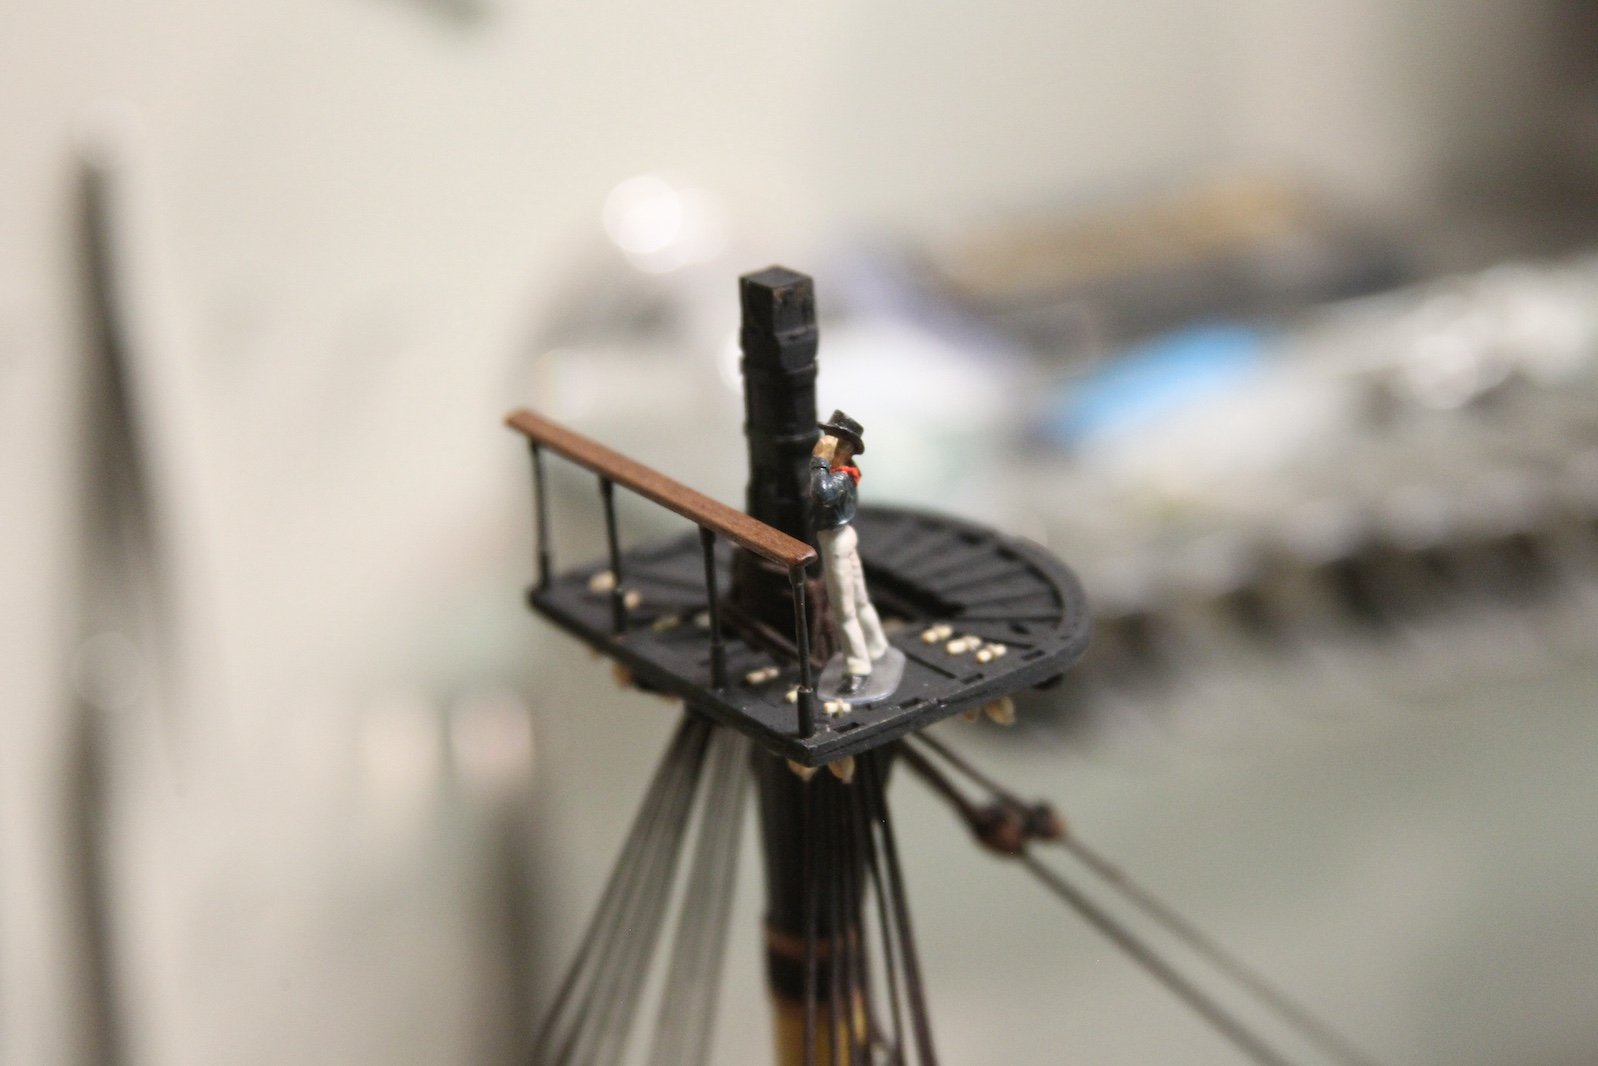
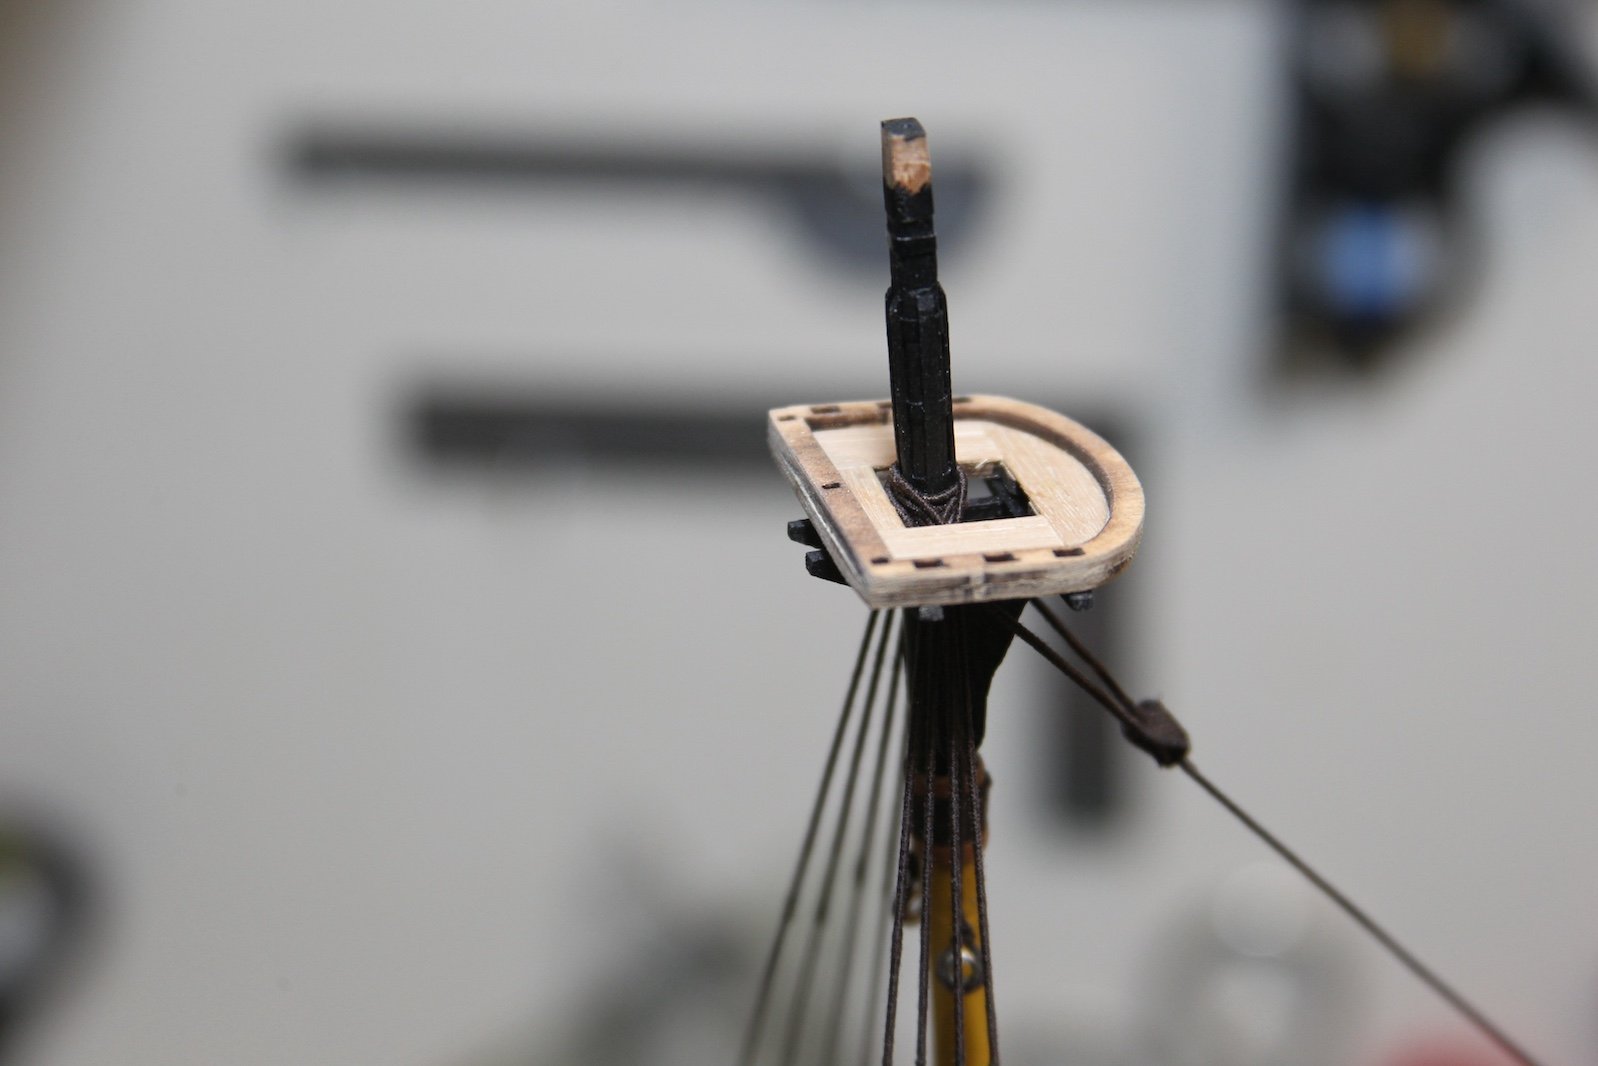
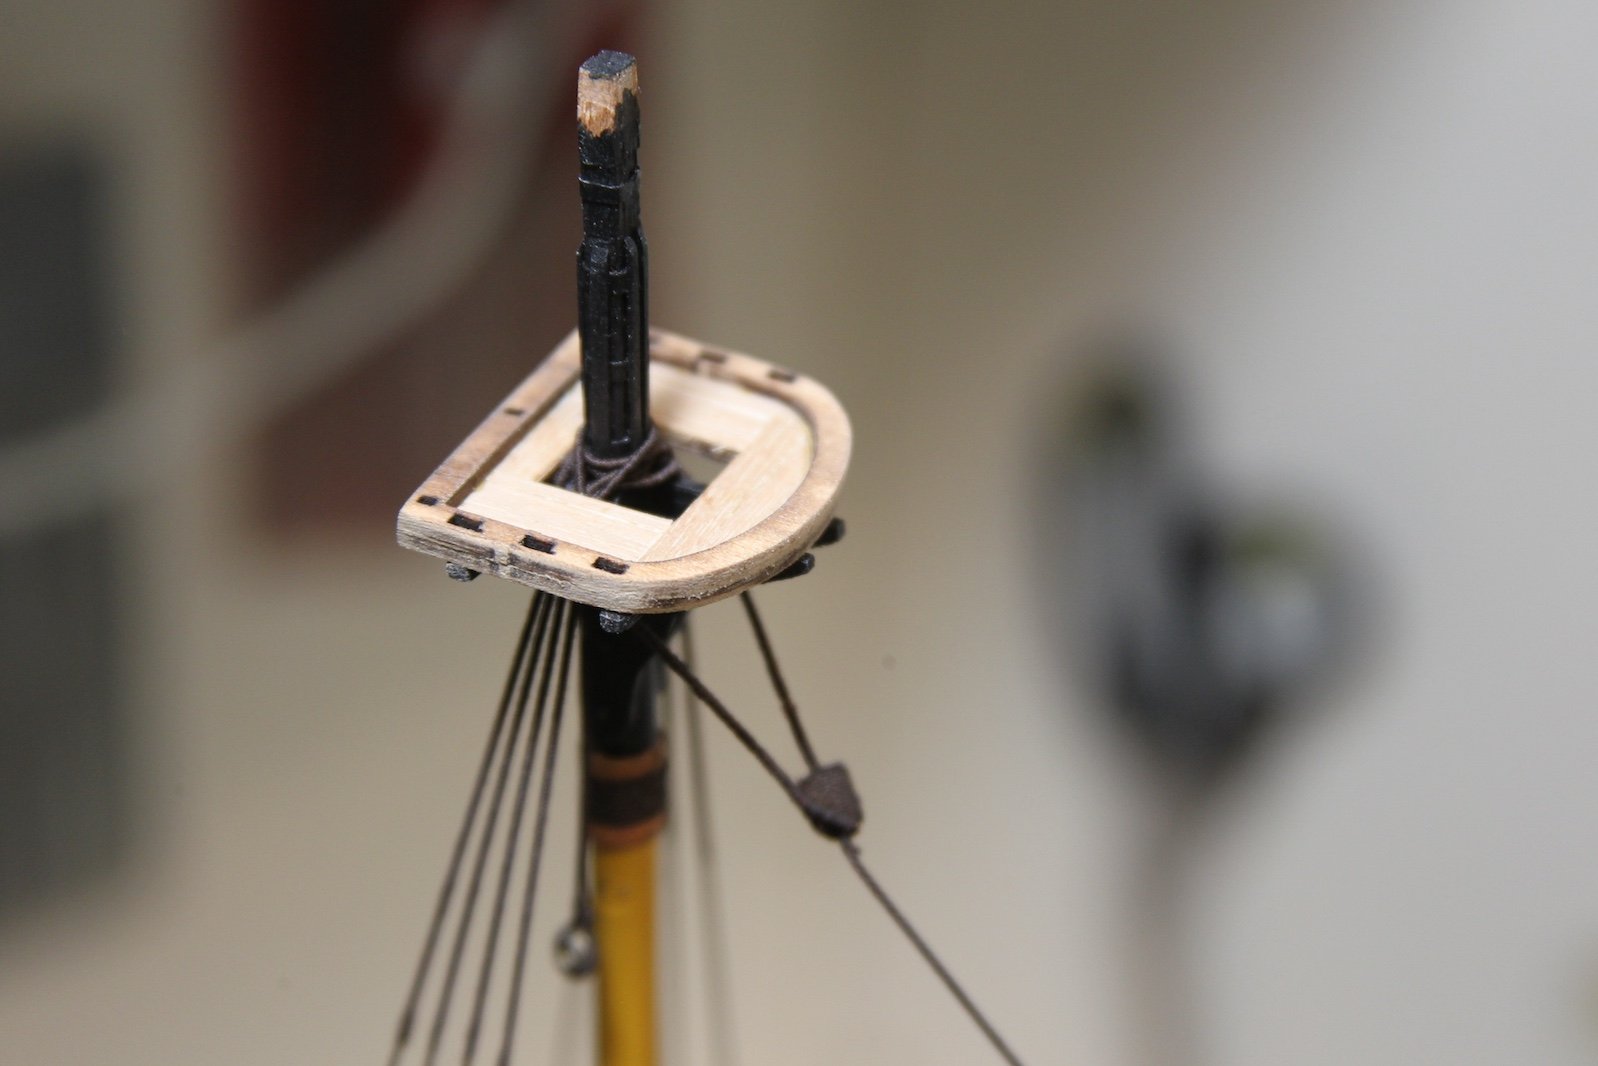
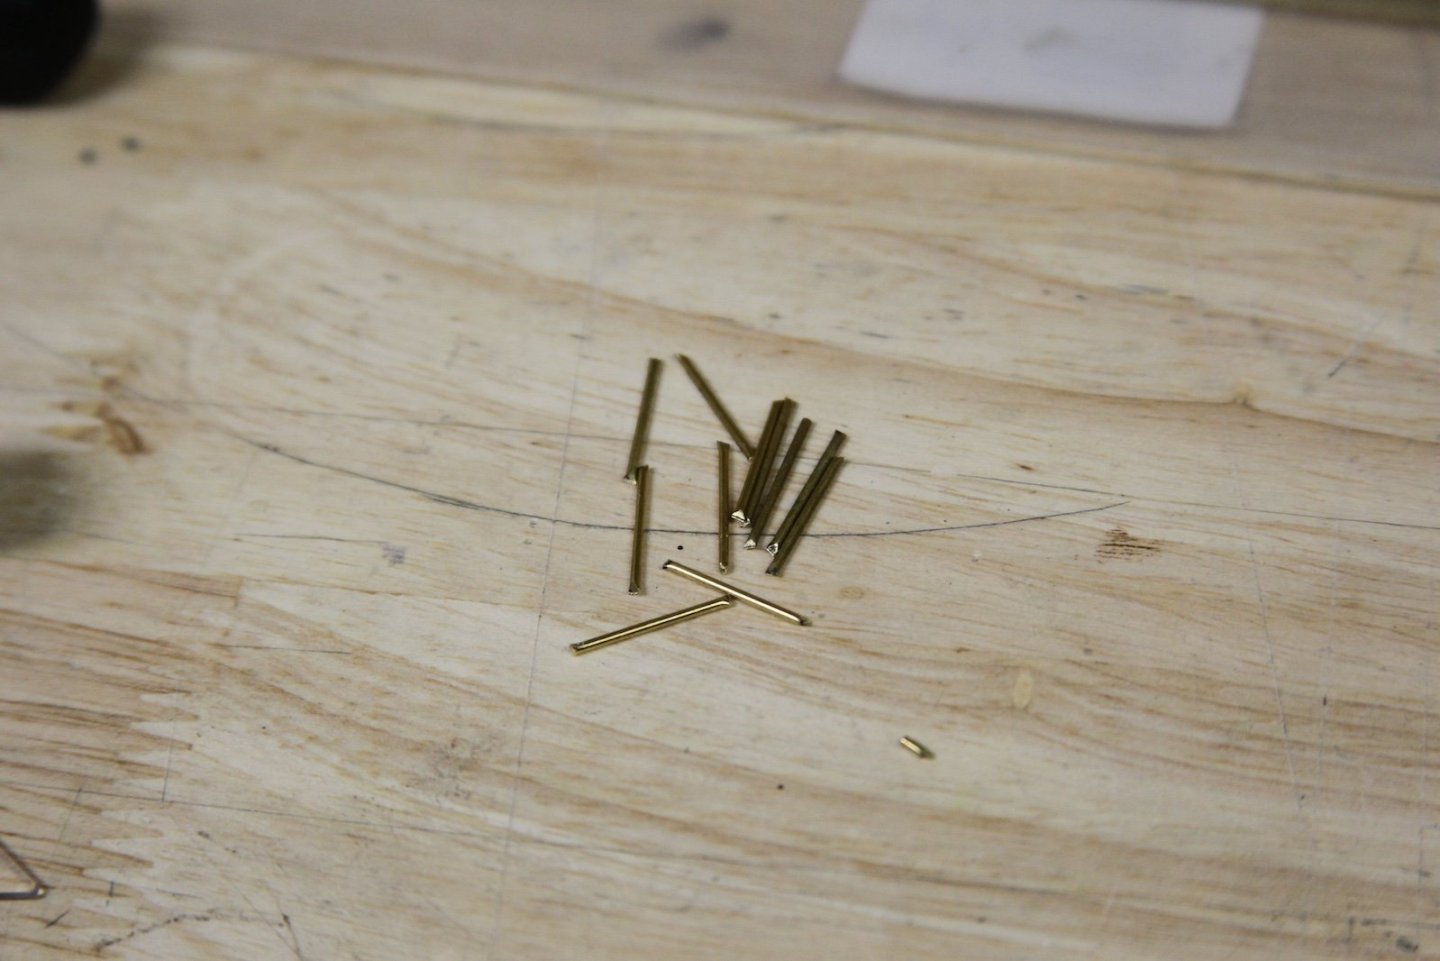
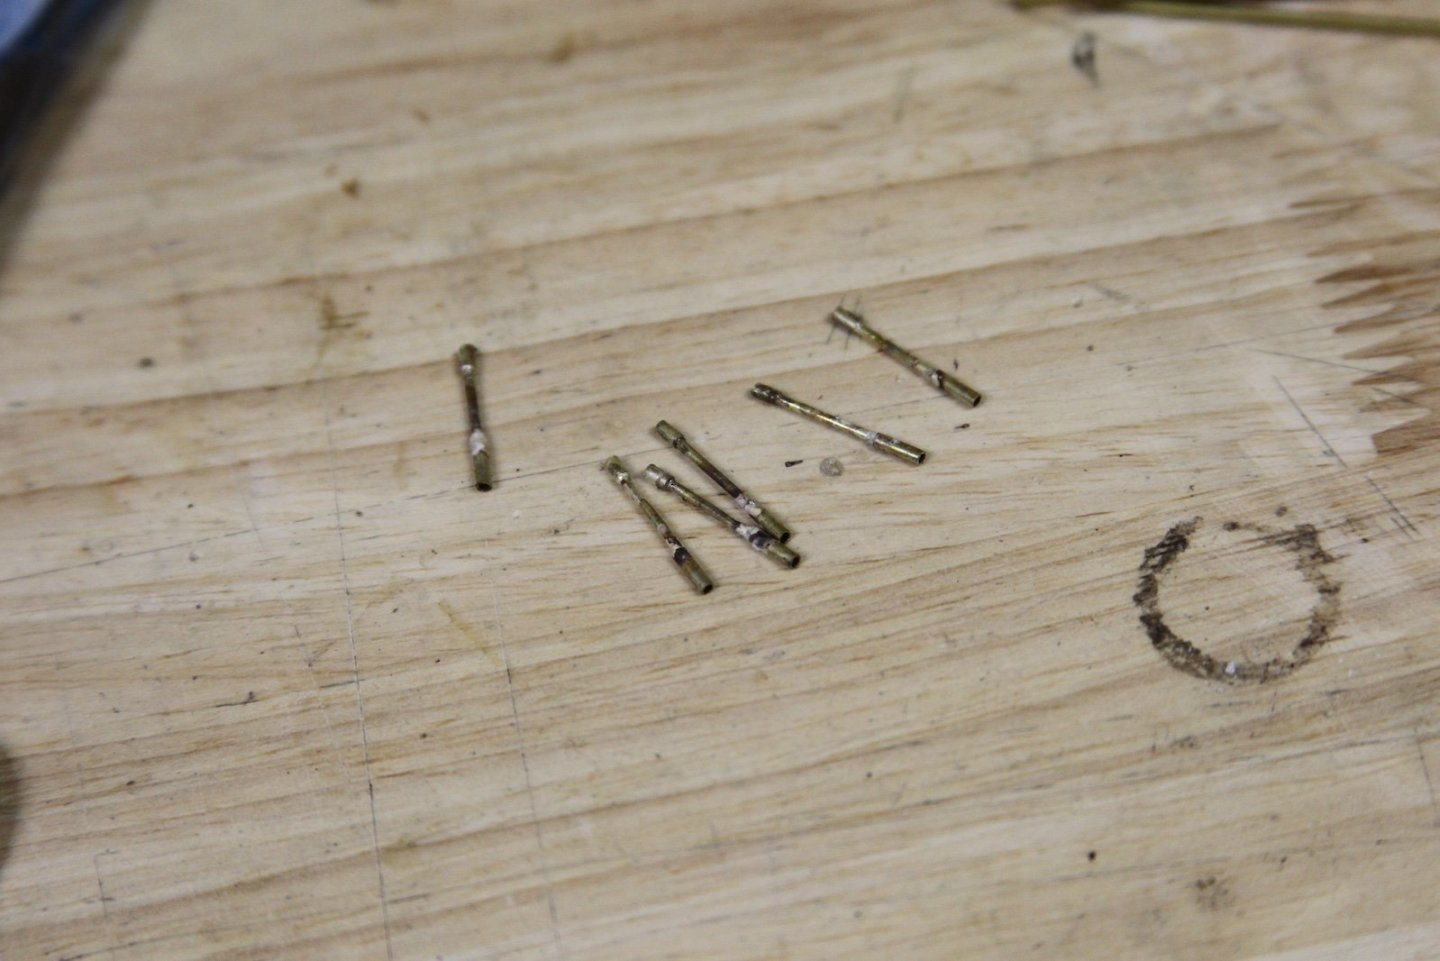
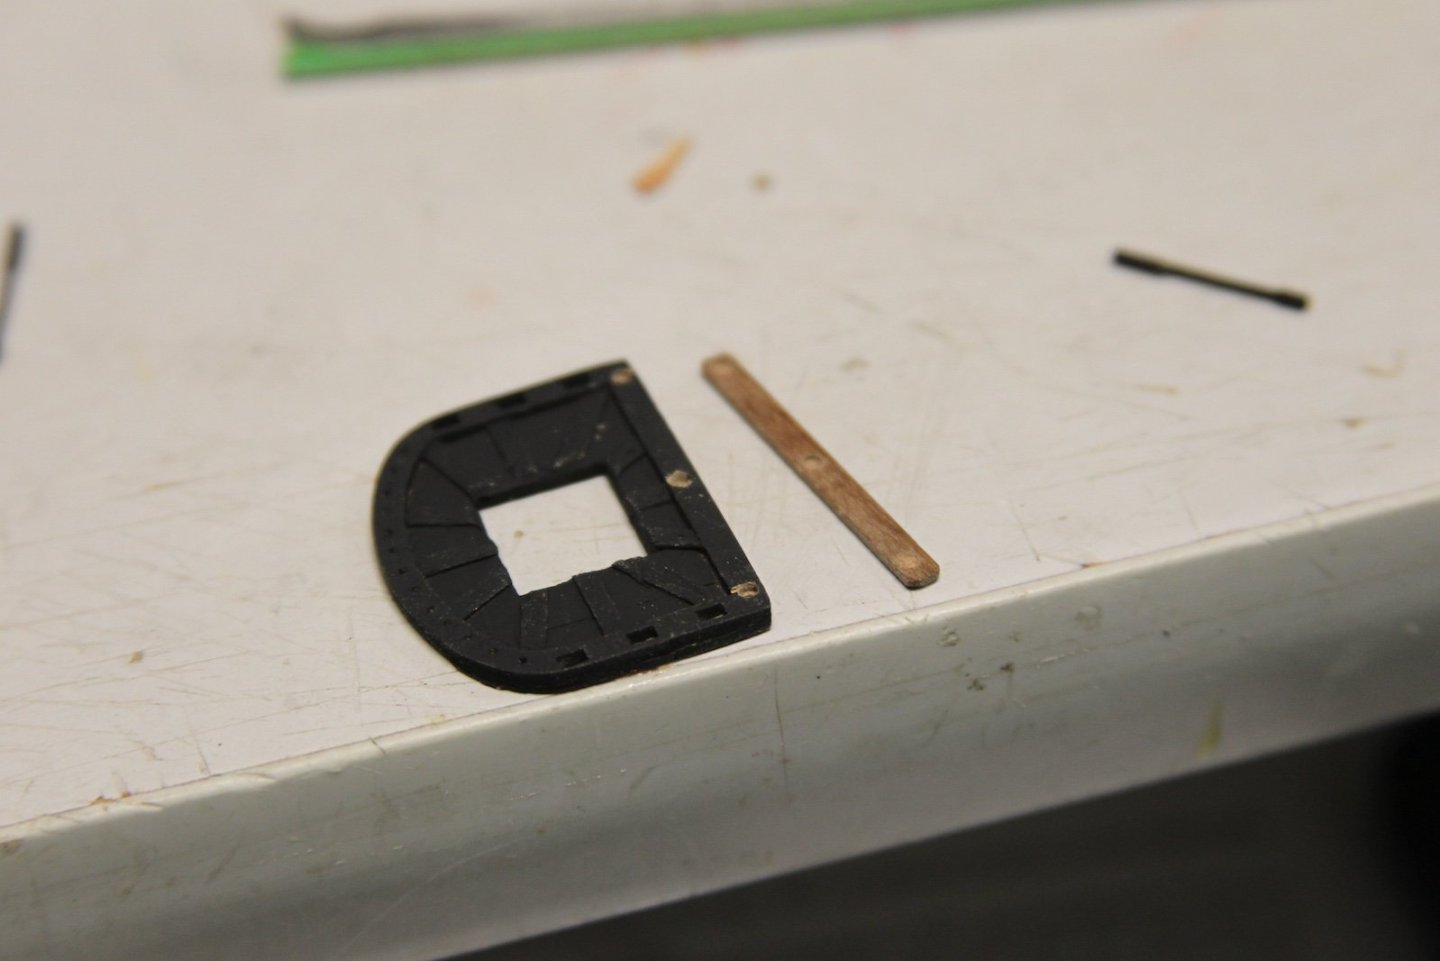
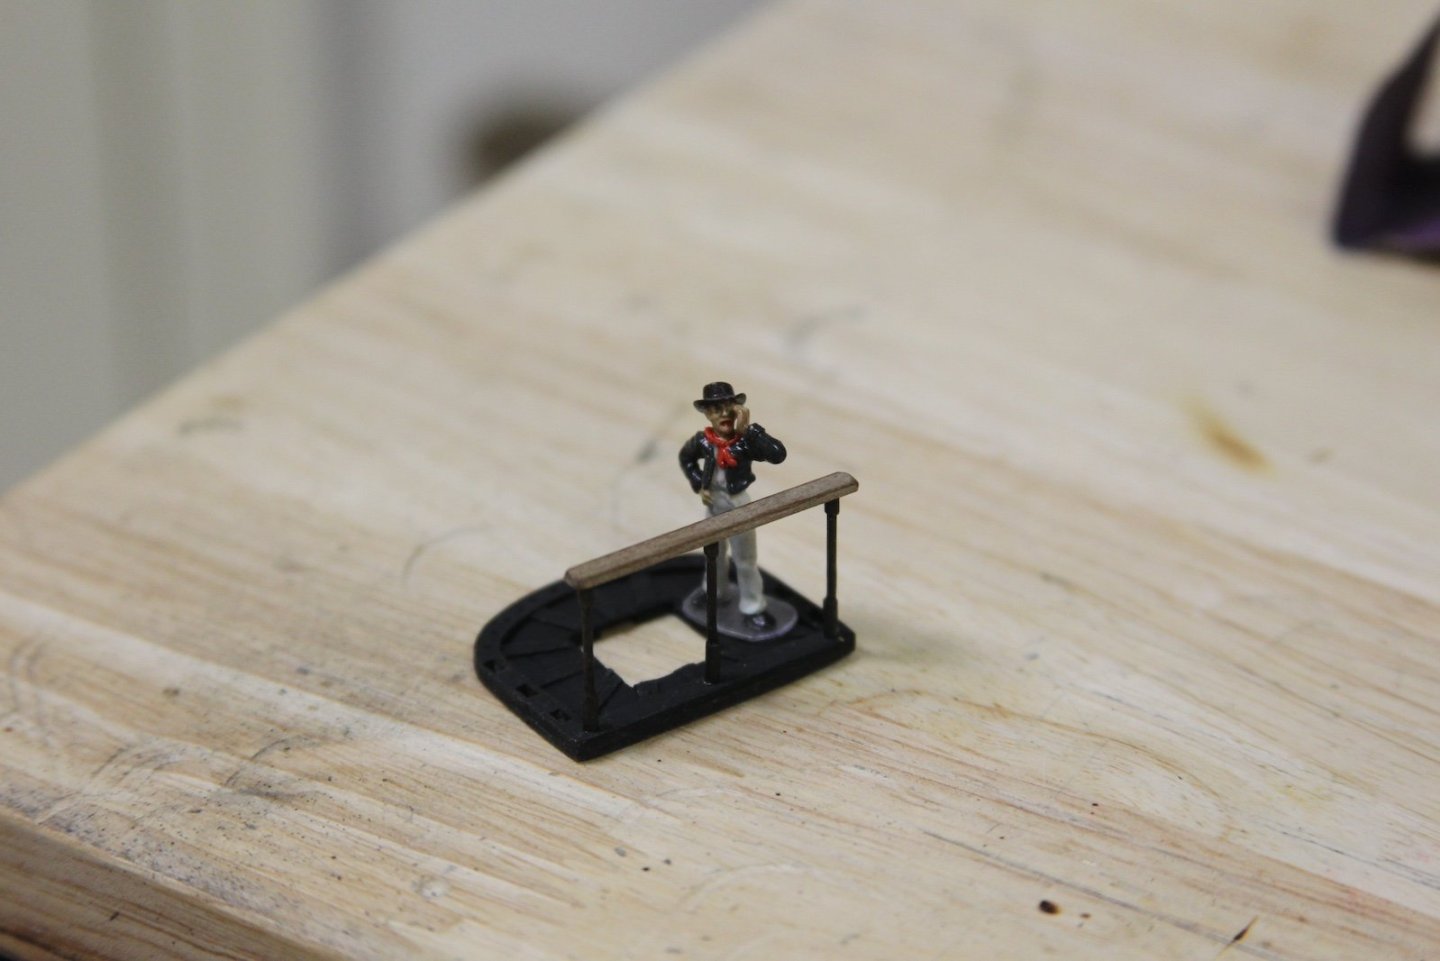
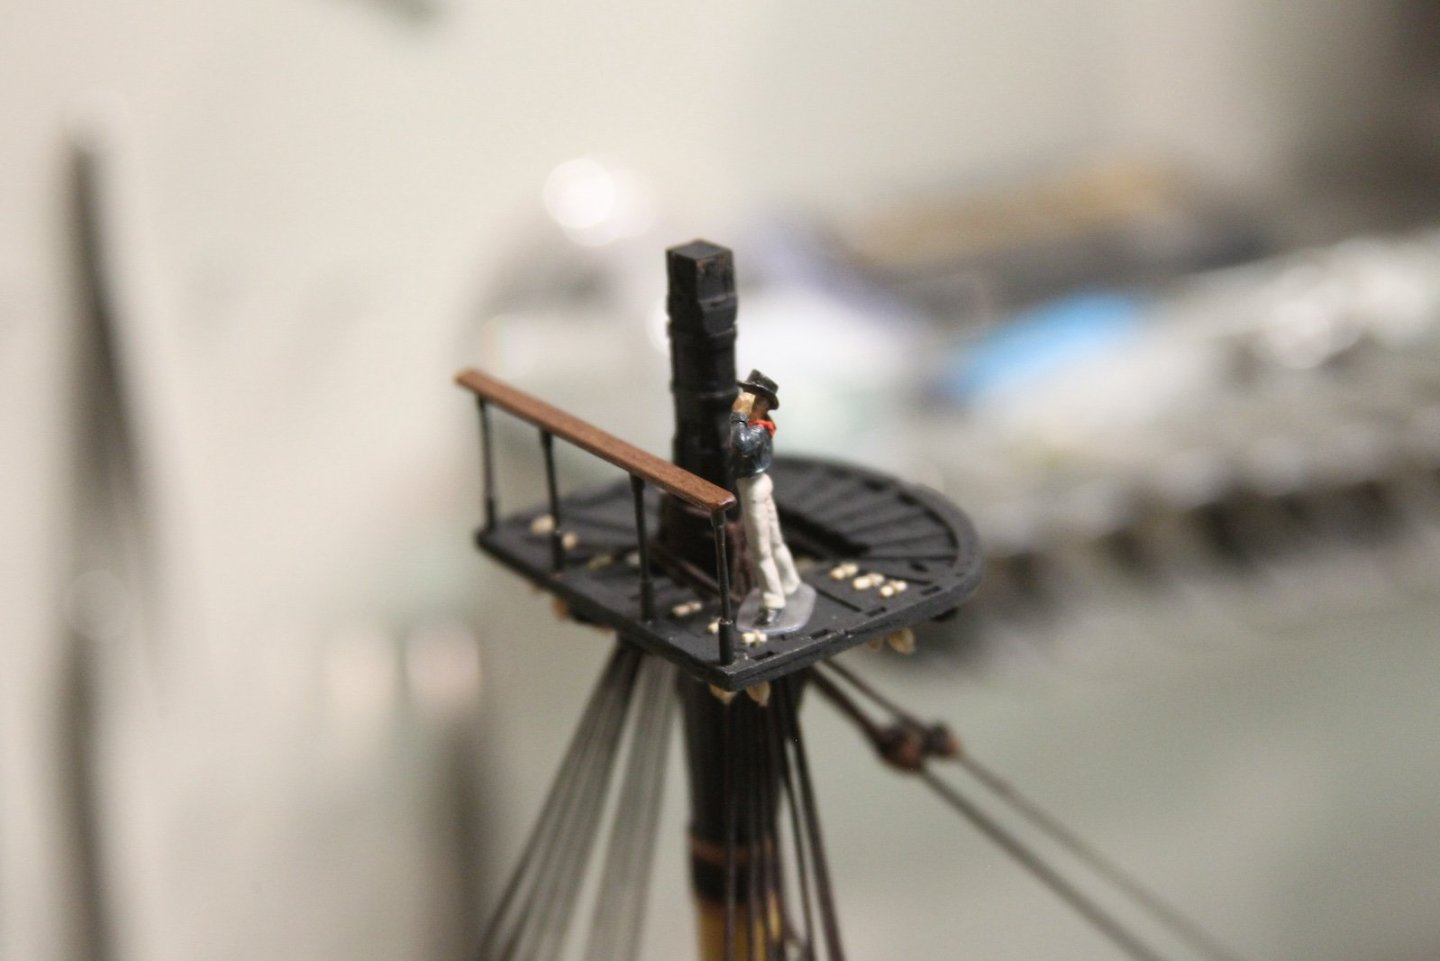
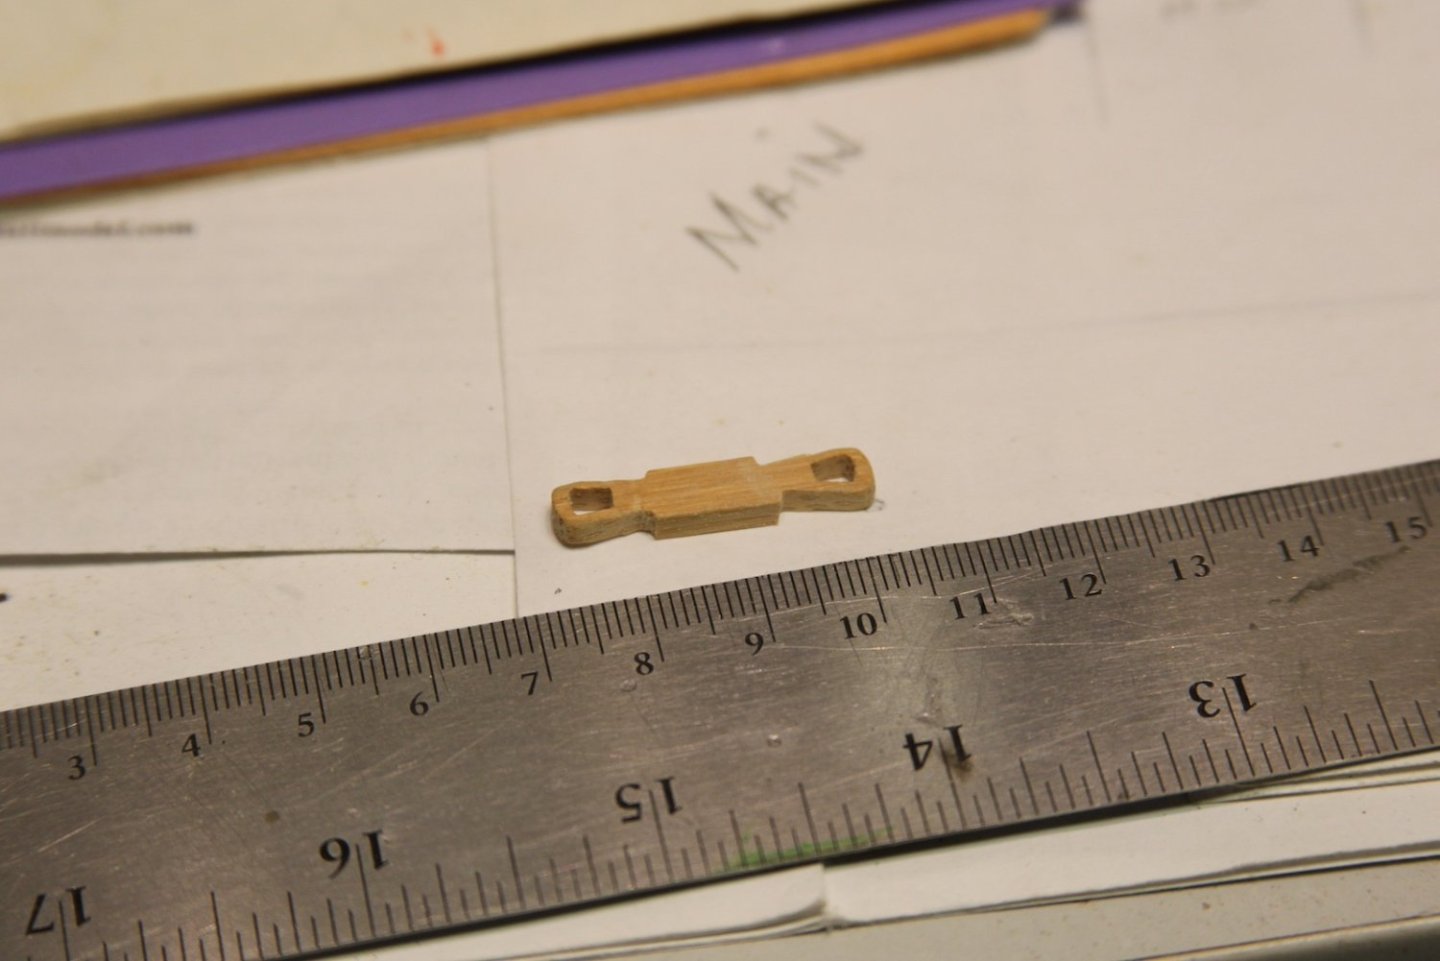
I wanted the stanchions and railings for the mast tops to match the main part of the ship, so I used brass tubing and walnut again. The stanchions are three parts - the main post is a 1mm brass tube cut to 15mm with each end sanded to a point to facilitate my later placement and soldering. The bottom of the stanchion is 2mm tubing cut to 5mm and the top is 2mm tubing cut to 3mm (missed taking a shot of these). The bottoms and tops are slid over the top of the pointy ends of the middle and silver soldered into place. The stanchions are sanded and blackened - my blackening process is laid out here in post #175. I bored out spaces in the mast tops and the railings to fit the stanchions then assembled them. The first mate let's me know that the sizing and scaling are pretty close to what I'm looking for.

- 419 replies
-
- 7
-
-
- Victory Models
- Pegasus
- (and 2 more)
-
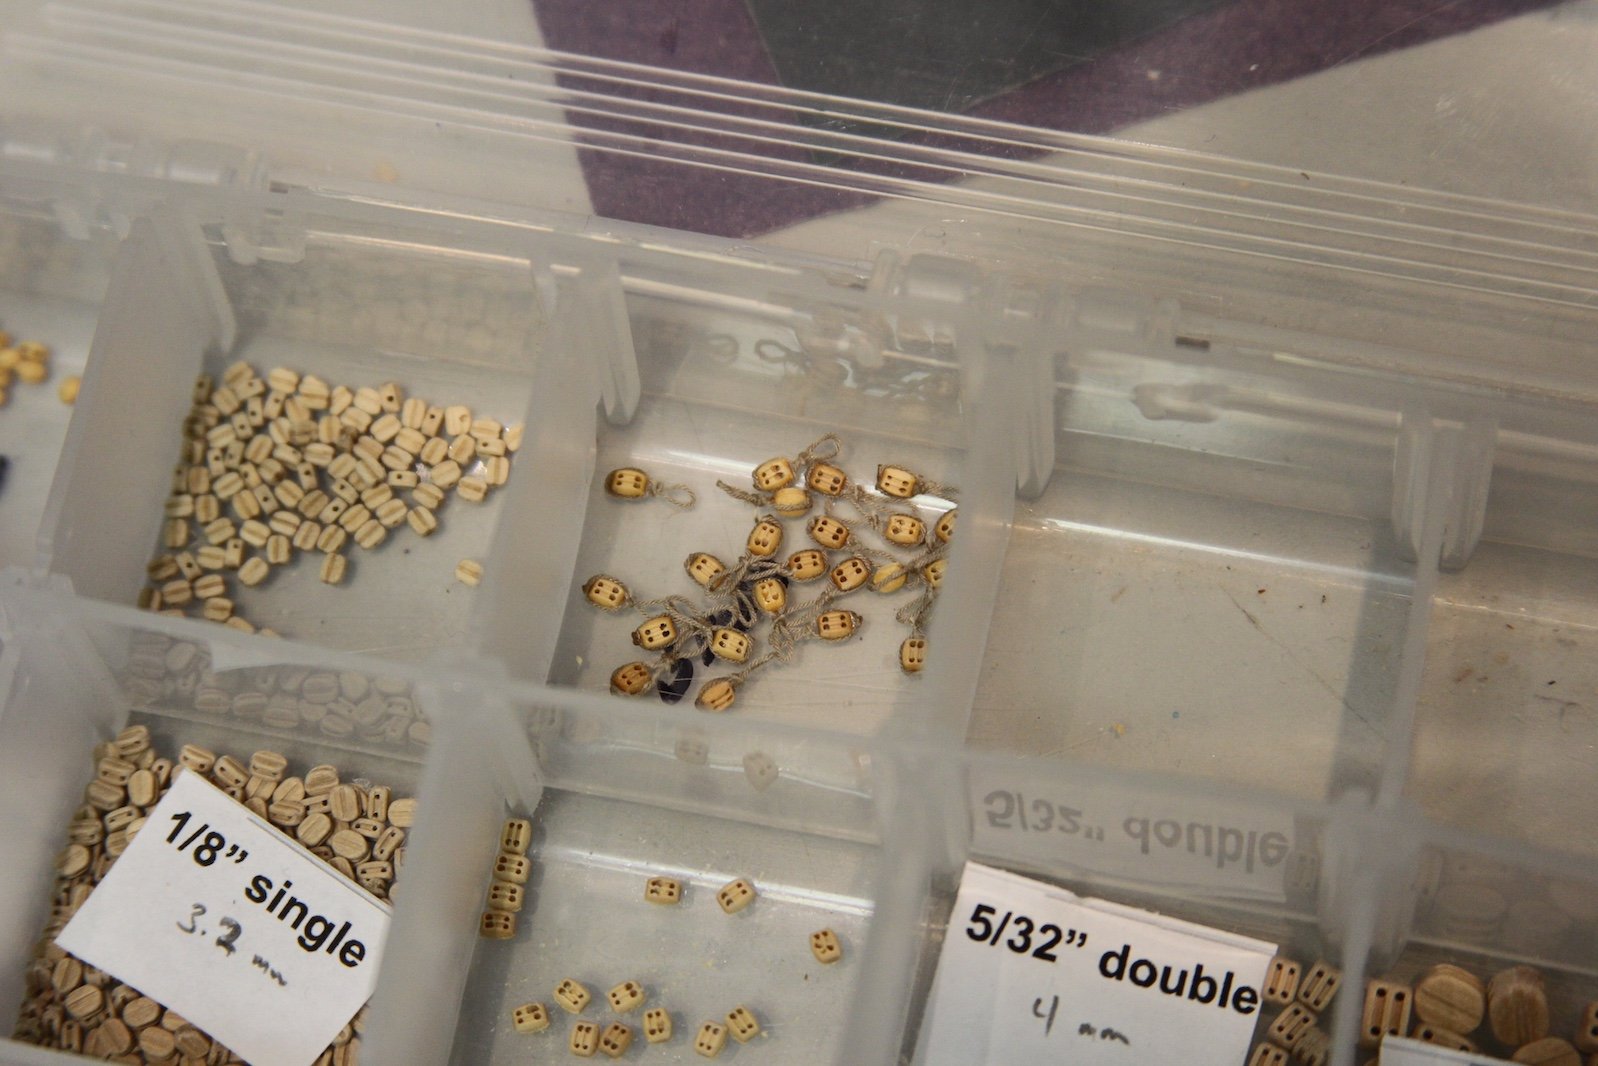
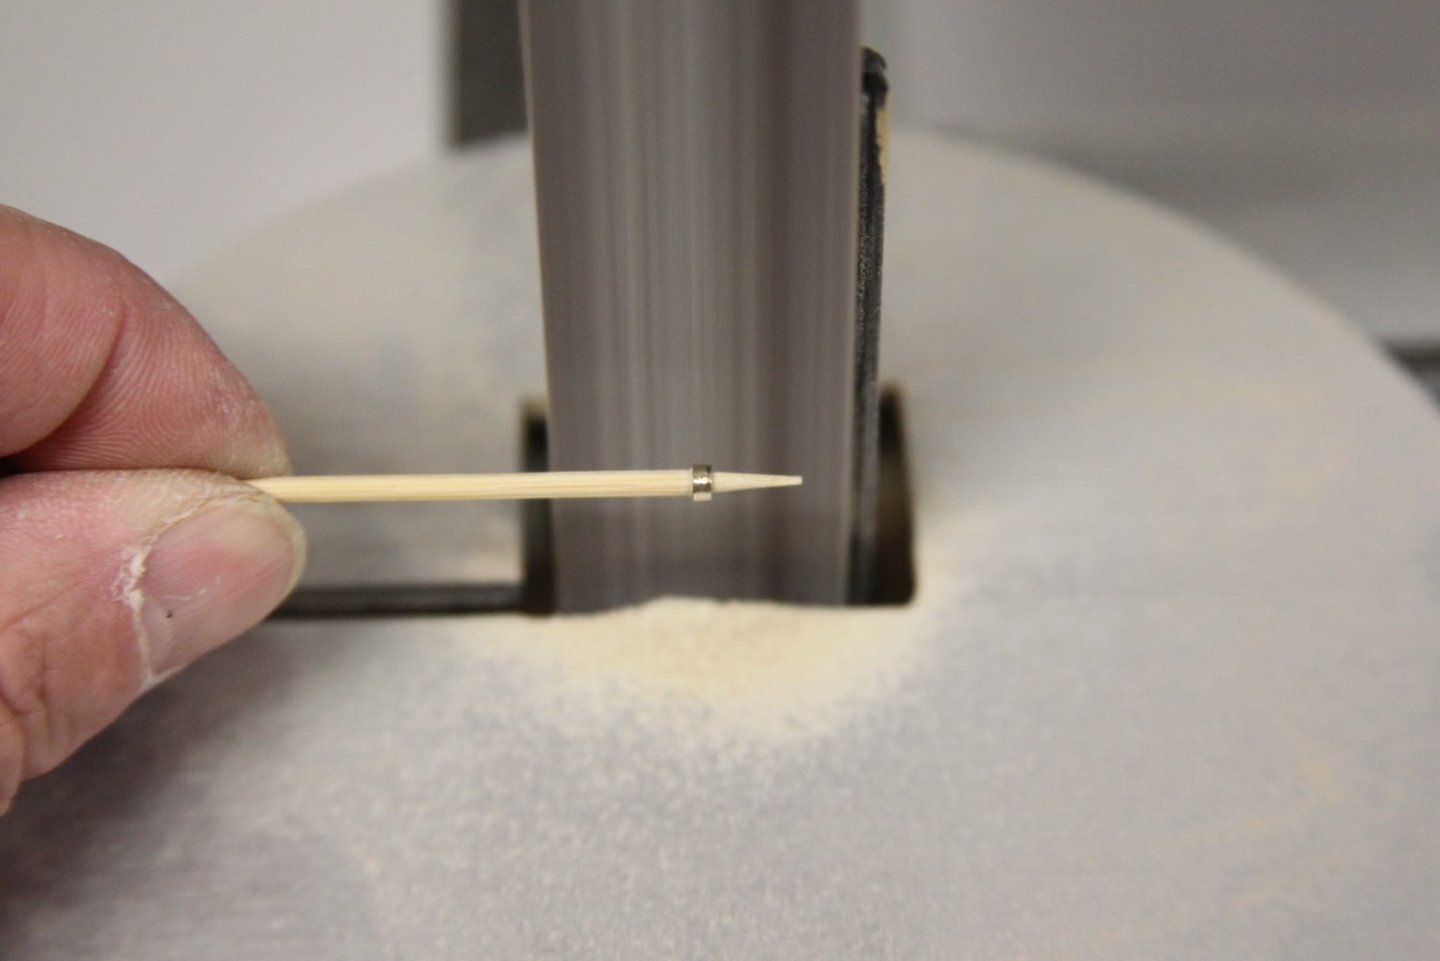
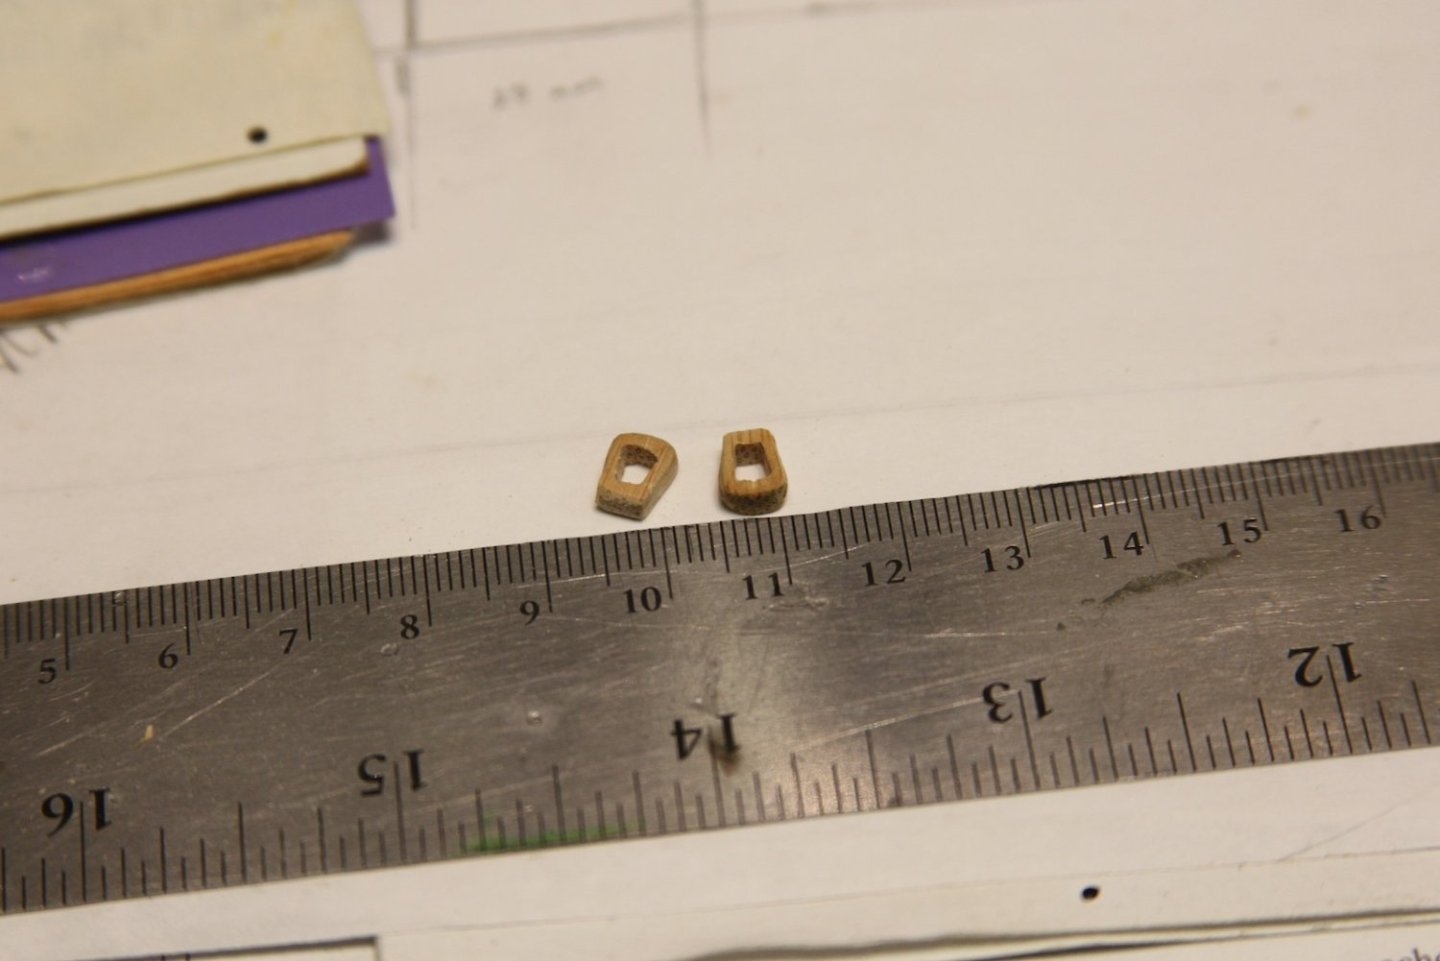
The next step for the mast tops is to mount the blocks beneath the tops. As with several of the fittings, there are a number of variations to the blocks mounted beneath the mast tops. As is my default for most of the build, I'm predominantly following the TFFM. First - I've committed myself to pegging the strops of the blocks rather than taking the easy way out and using eye bolts. Truth be told, it would probably be little noticed if at all, but pegging the strops through the mast top adds one of those little nods of accuracy that die-hards may take note of. Now, that said - because these blocks are hardly visible after the running rigging is added - I am not above "cheating" a little bit with the stropping of the blocks by simulating the seizing with overhand knots and using a tiny touch of CA to secure the bottom of the strop to the block. I start by tying off the strop at the top creating the eye that'll attach to the mast top, then I'll secure the block to it. Admittedly, I didn't do an awesome job of consistency with the size of the eye - probably should have found a proper size dowel to get more consistency and keep the 'seizing' from slipping. I stropped all 24 blocks - all the same size at 3mm. In truth, the inner blocks were a bit smaller than the outer - but not a noticeable size difference to me when mounted under the mast tops. Another little short cut that's hopefully not noticeable to anyone else once rigged. What is noticeable, is that I pre-drilled the top block holes a little wider to ease the rigging later. The pegs are quite tiny and fiddly. I sanded down a bamboo toothpick to the smallest diameter I could get before it just fell apart - it ended up being just under 1mm. Then I cut off 1.5mm of the end with a razor blade to create the peg. I use fishing line to feed through the hole and pick up the loop in the block and pull it back through the mast top then add a dab of just slightly diluted pva to hold it in place. Once all 12 per mast top are done I needed to touch up the paint a bit, then I test fitted then on the ship to make sure the cross and trestle trees didn't run the risk of fouling the blocks, etc.


- 419 replies
-
- 4
-
-
- Victory Models
- Pegasus
- (and 2 more)
-
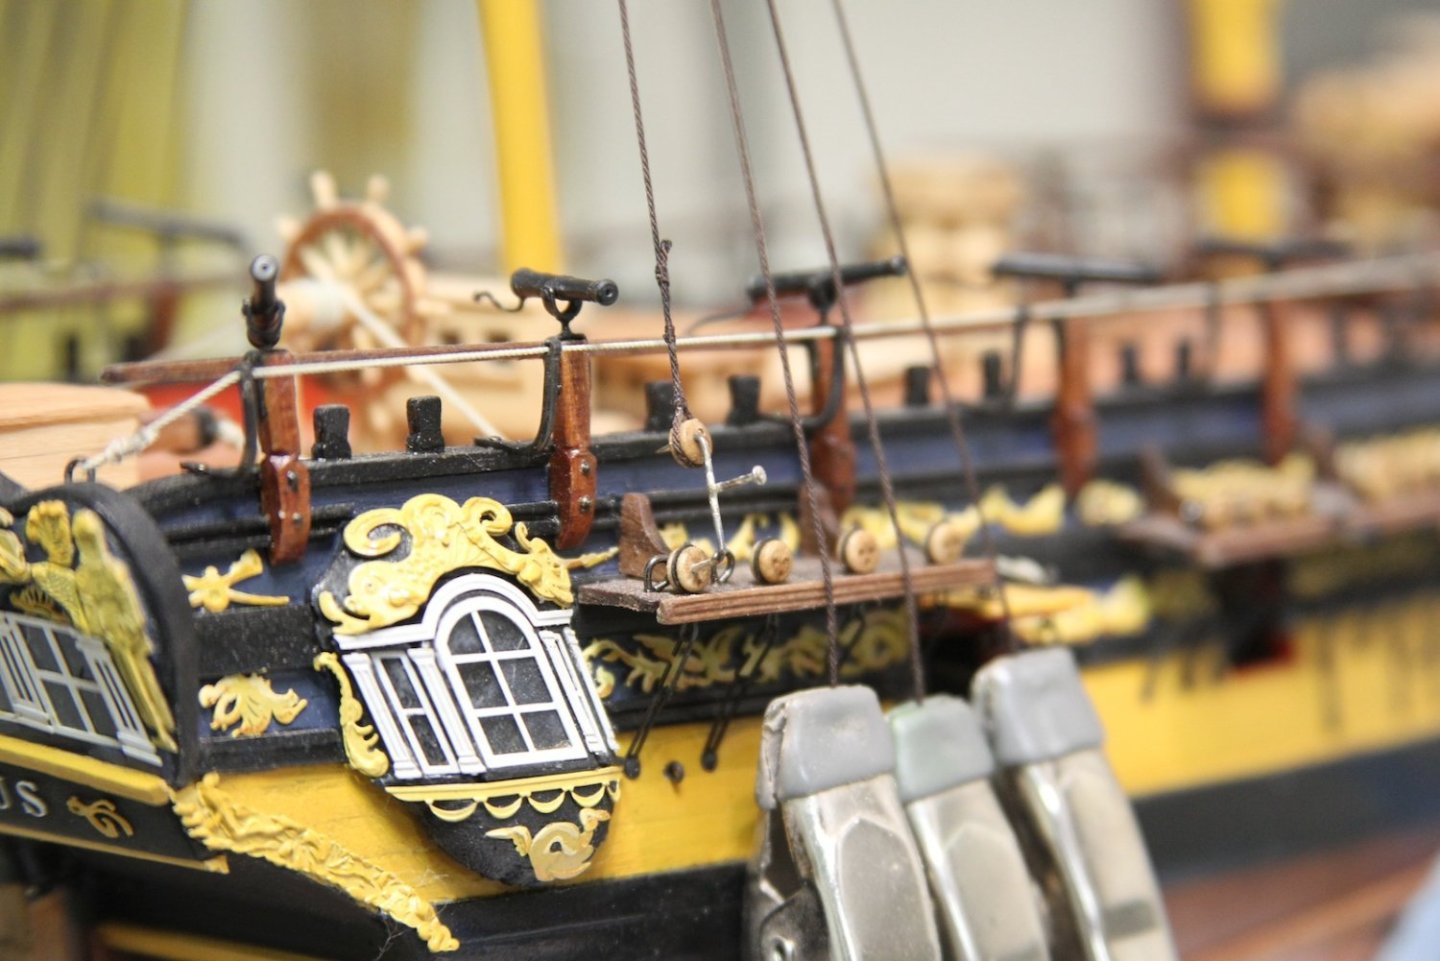
Nice work Christian - good to see another Peggy getting top notch treatment. I dig the approach to the transom and quarter badges!
-
Thanks for the nice words Bob - and thanks for following along! I’m looking forward to when you pull your Peg back out.
- 419 replies
-
- 1
-
-
- Victory Models
- Pegasus
- (and 2 more)
-
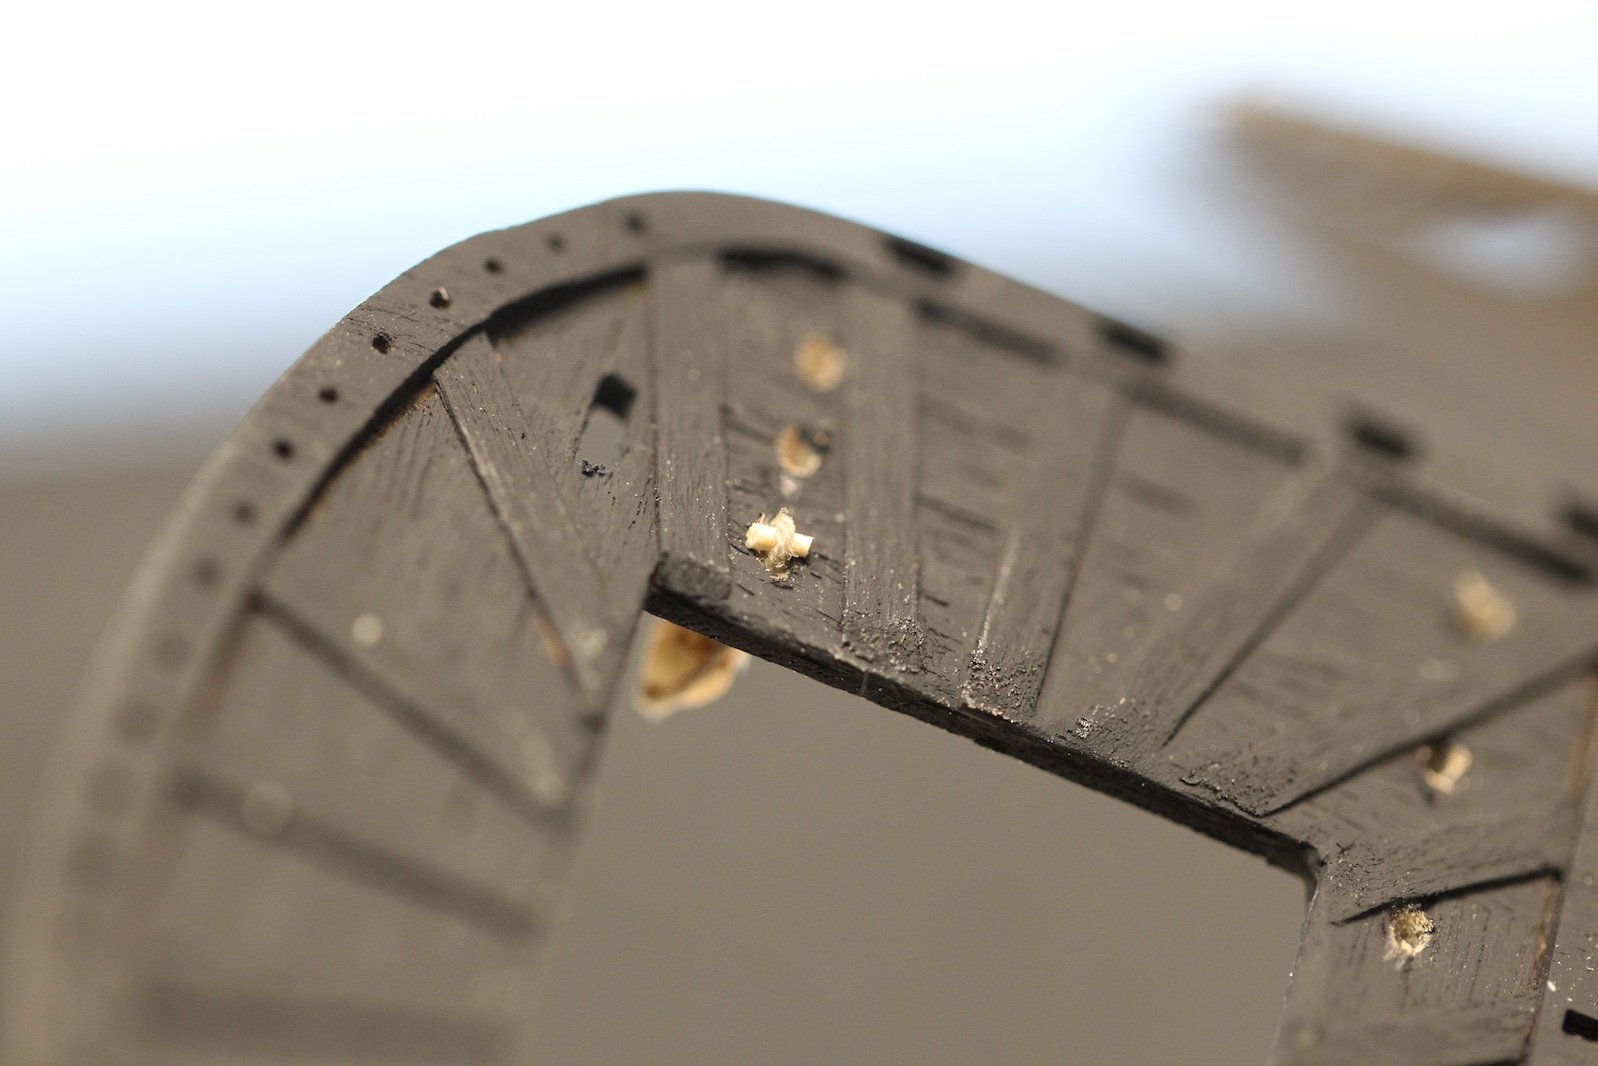
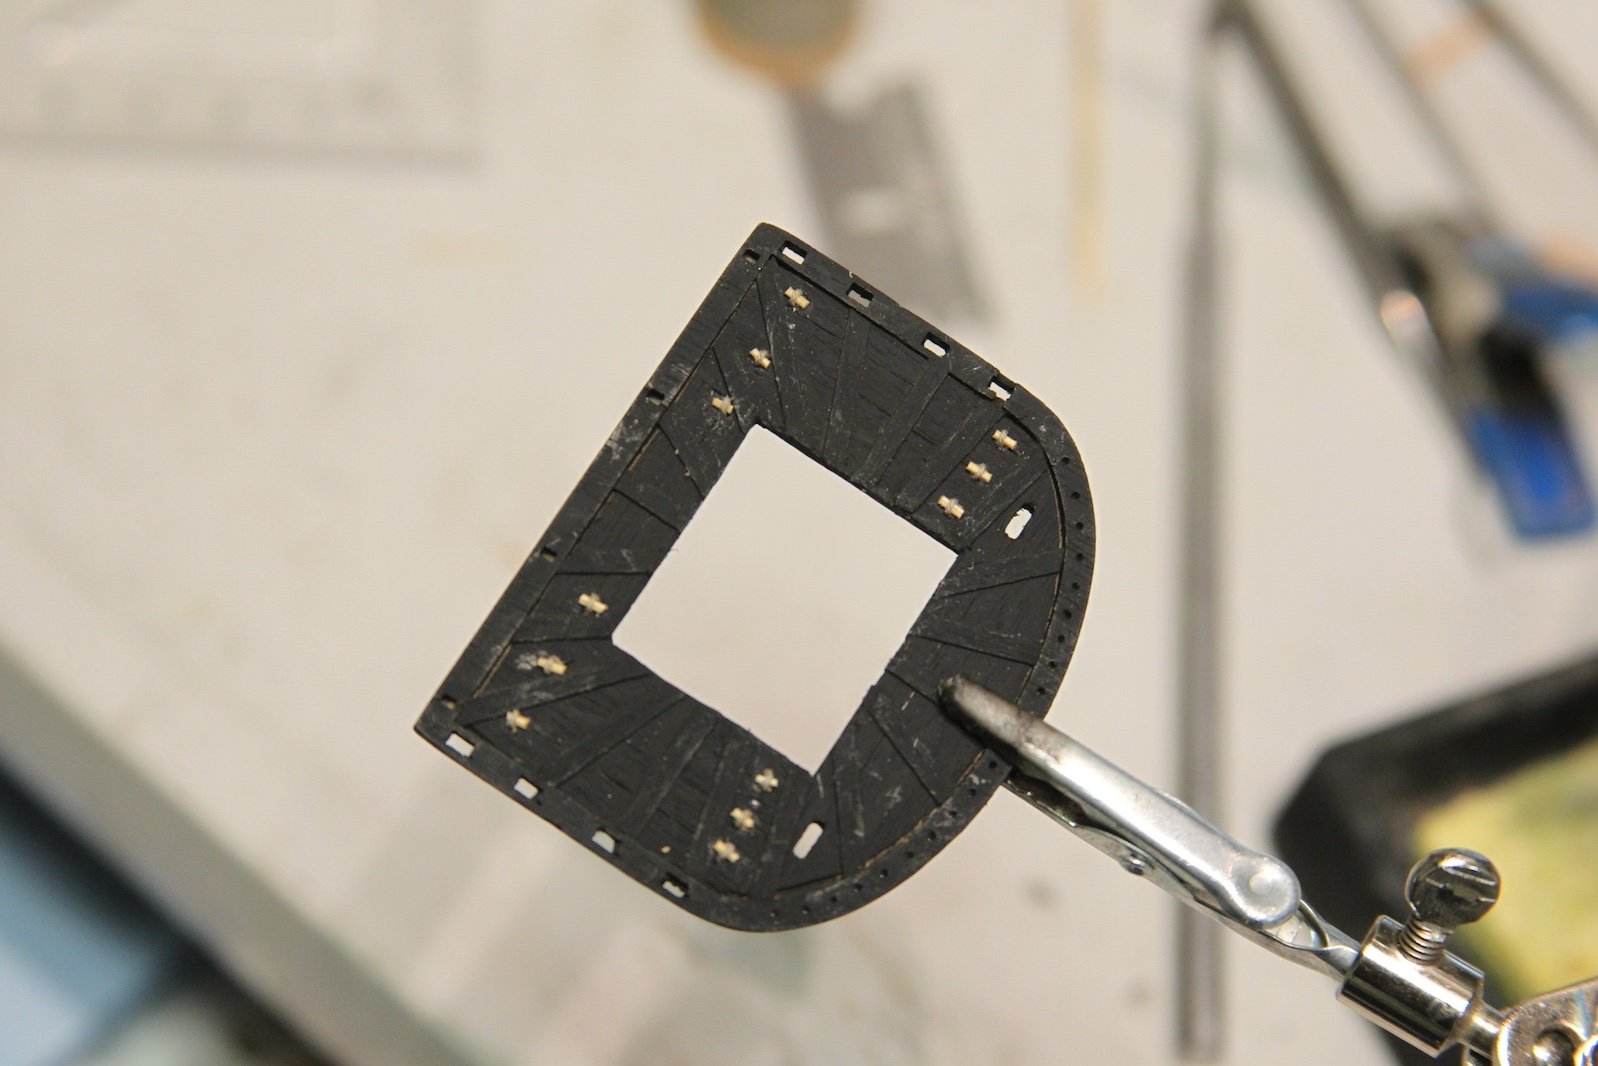
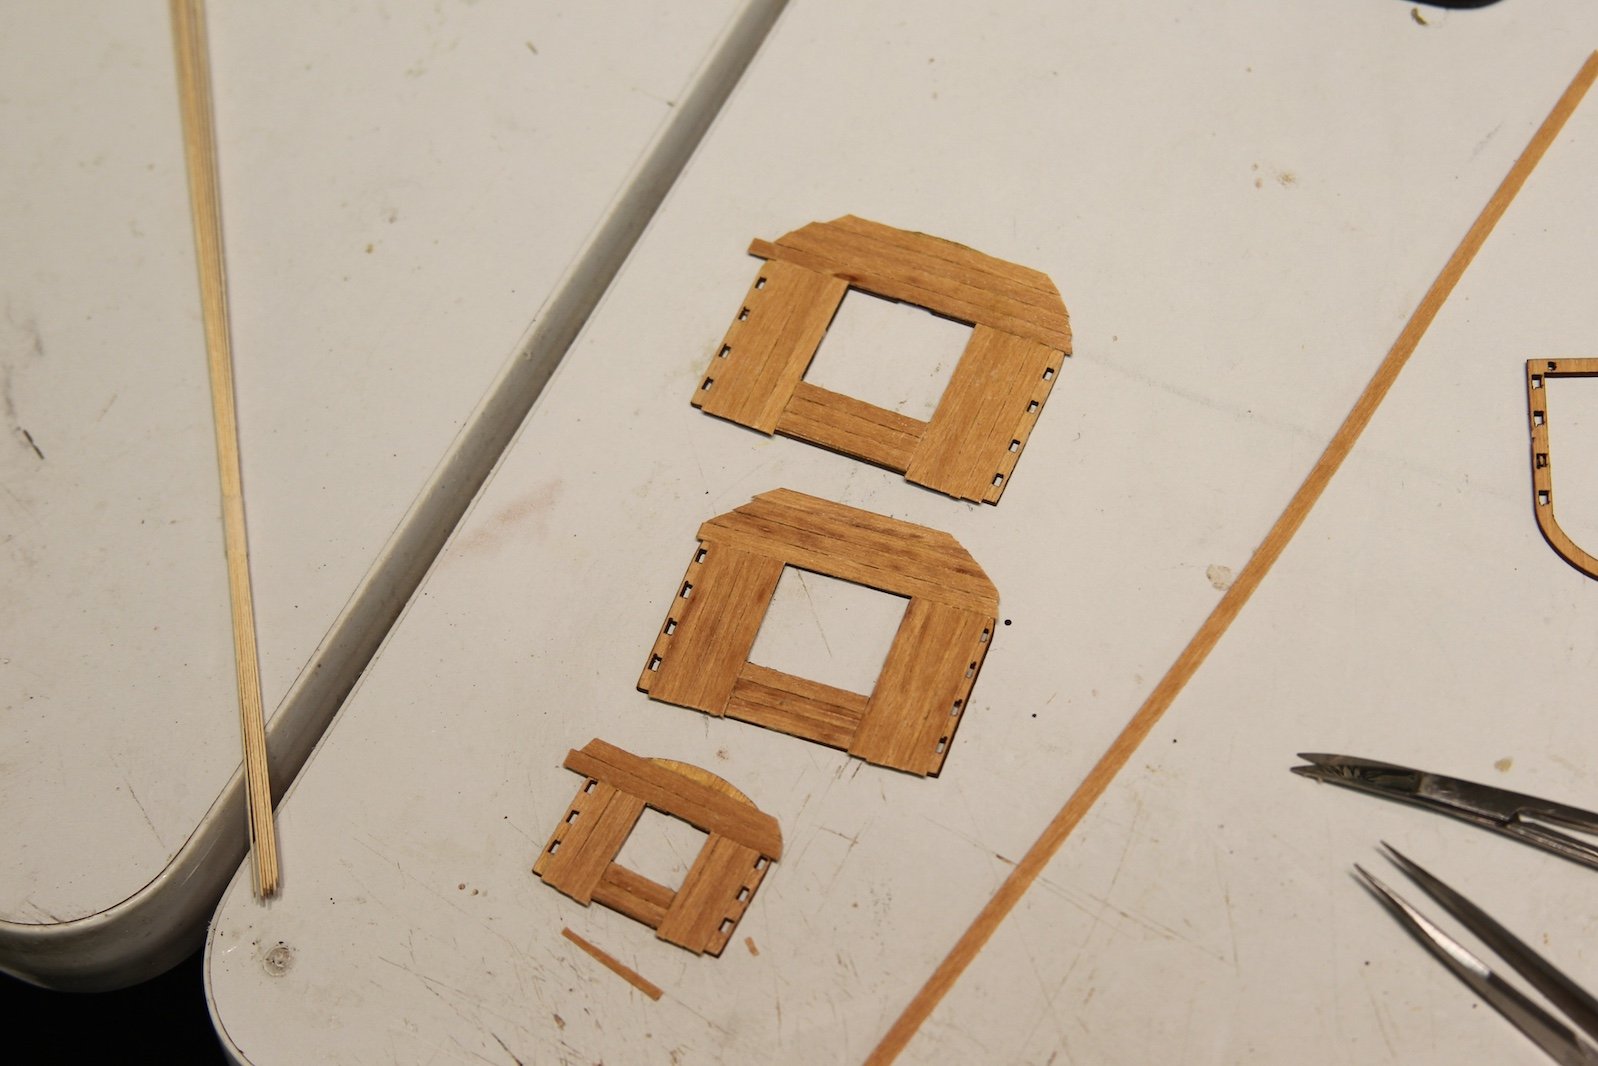
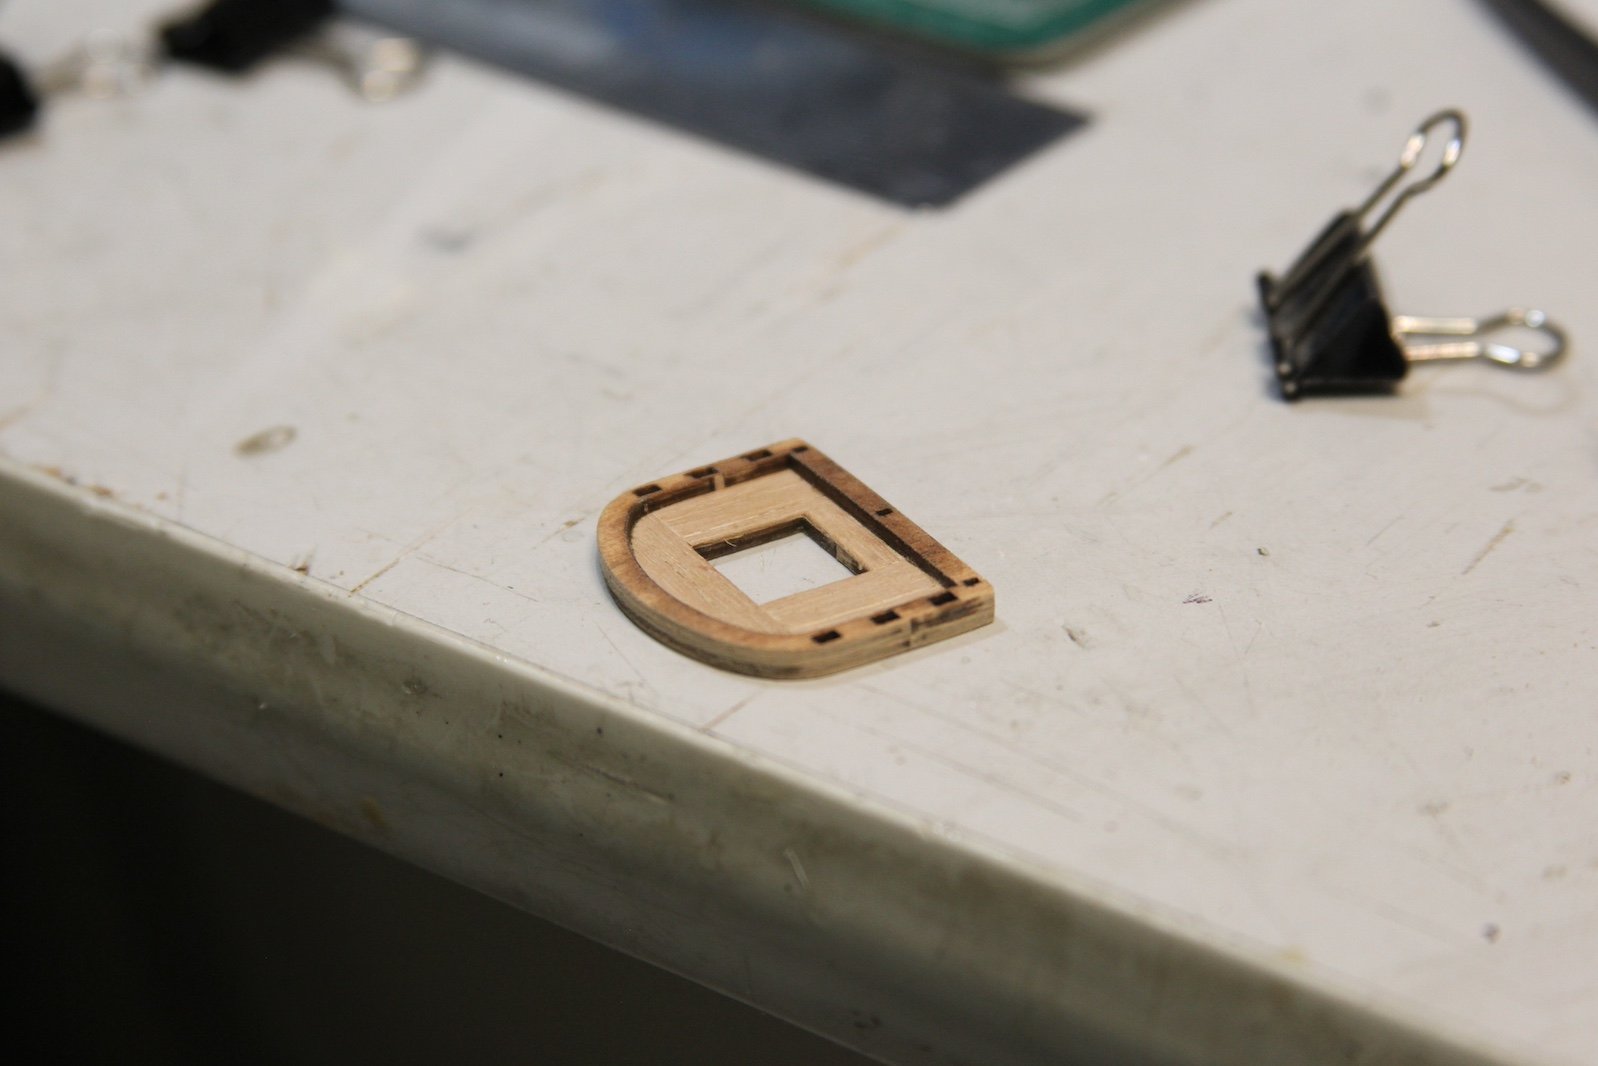
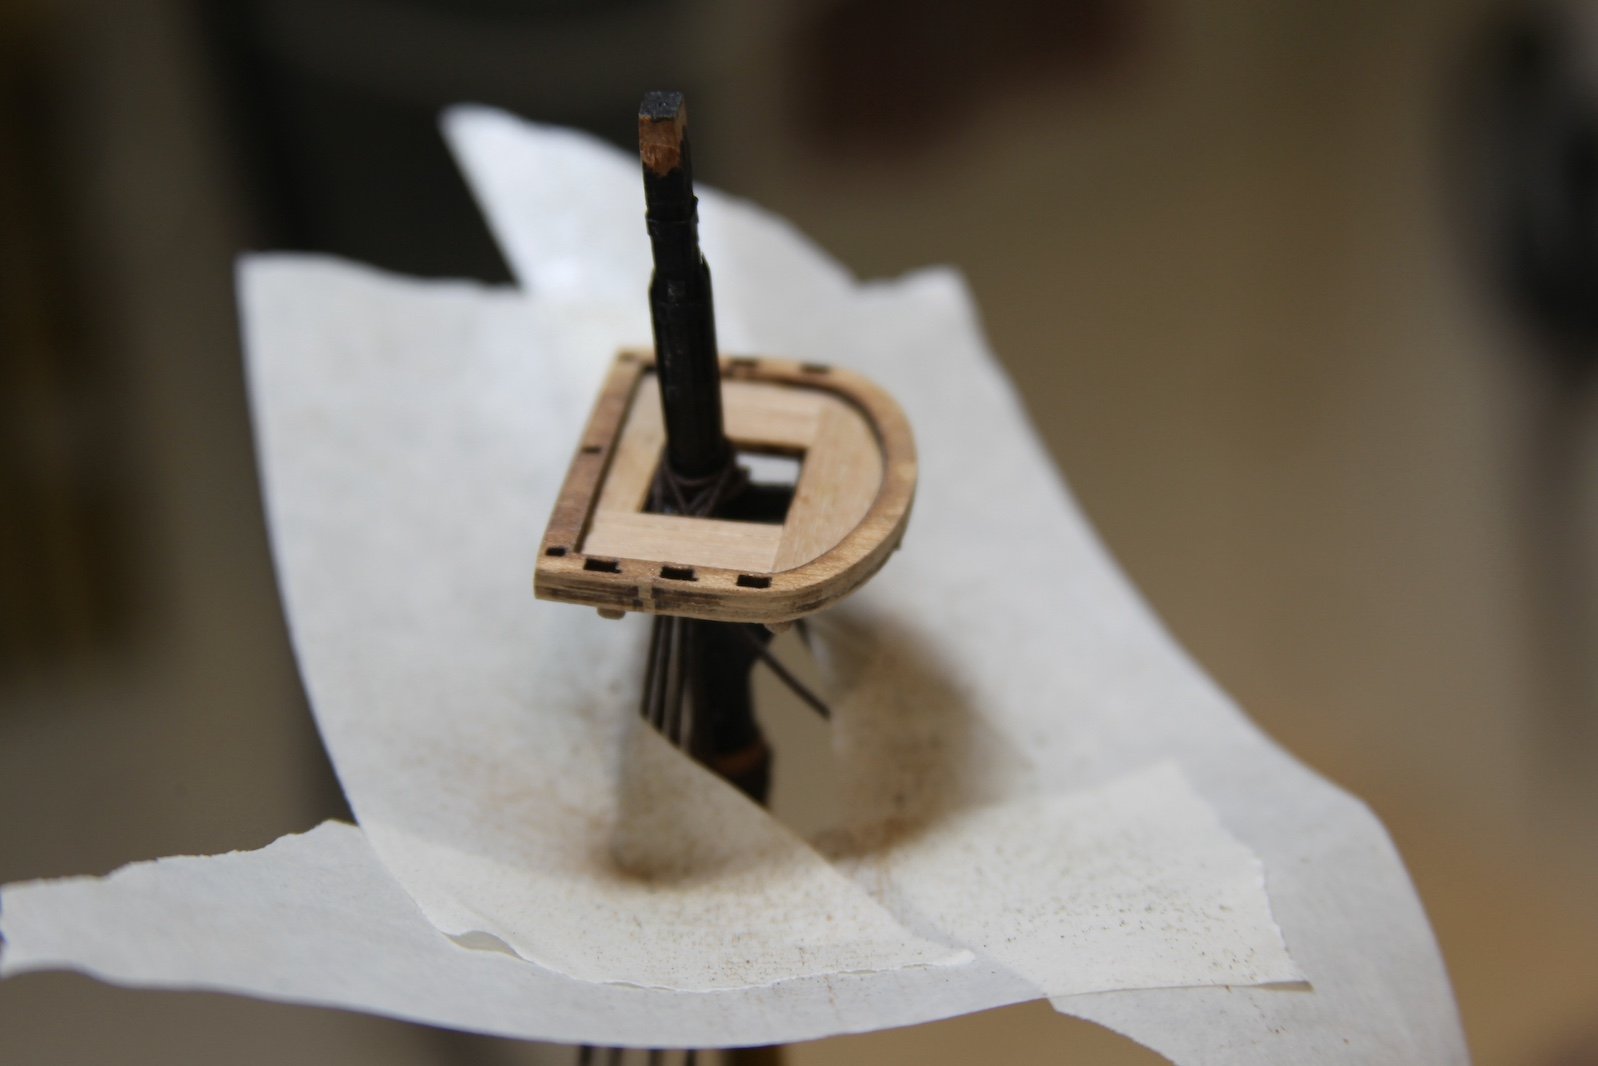
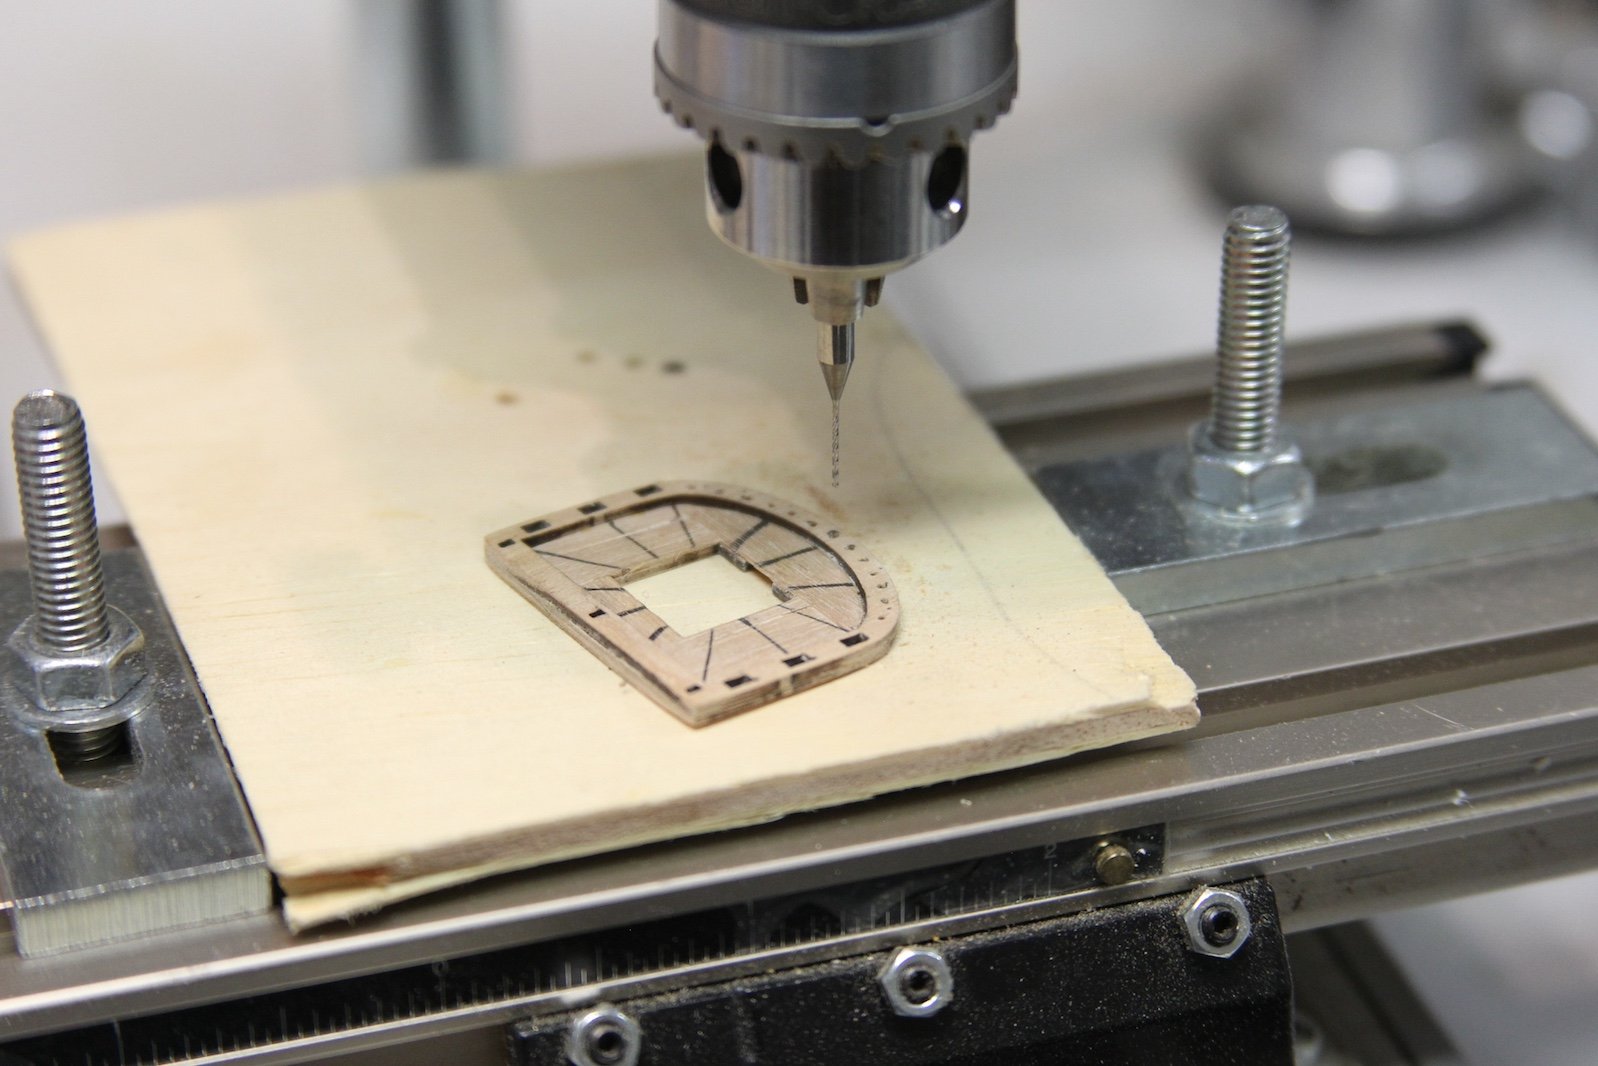
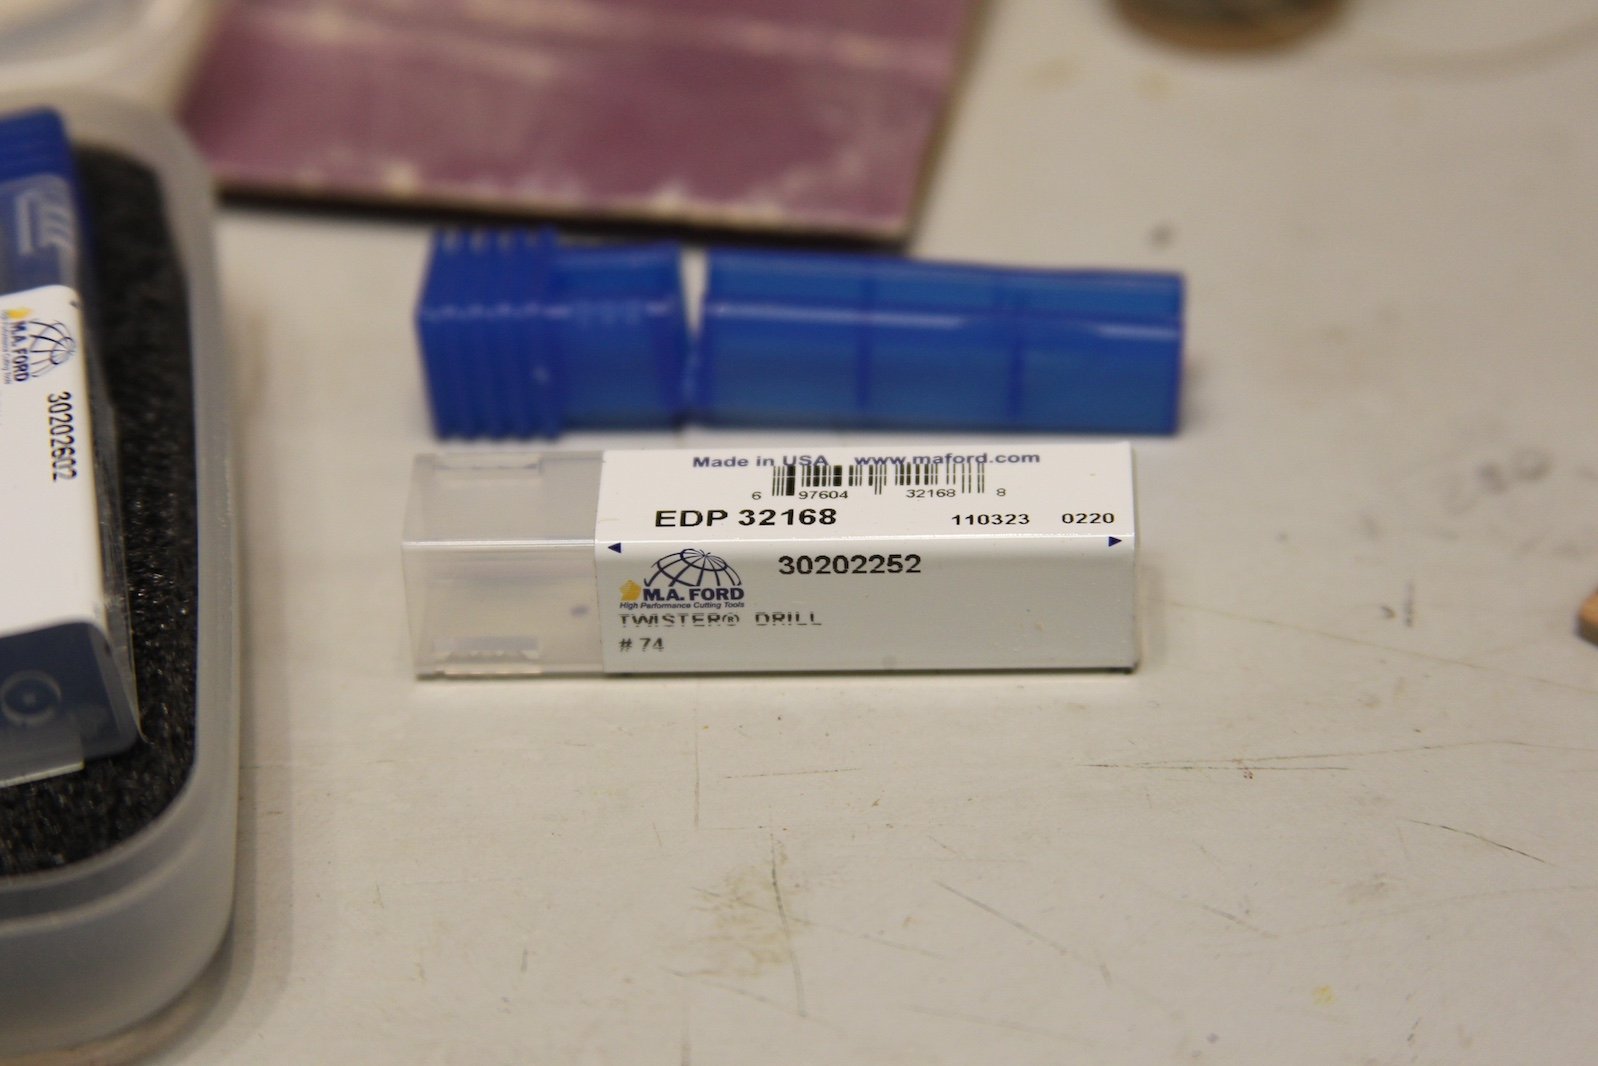
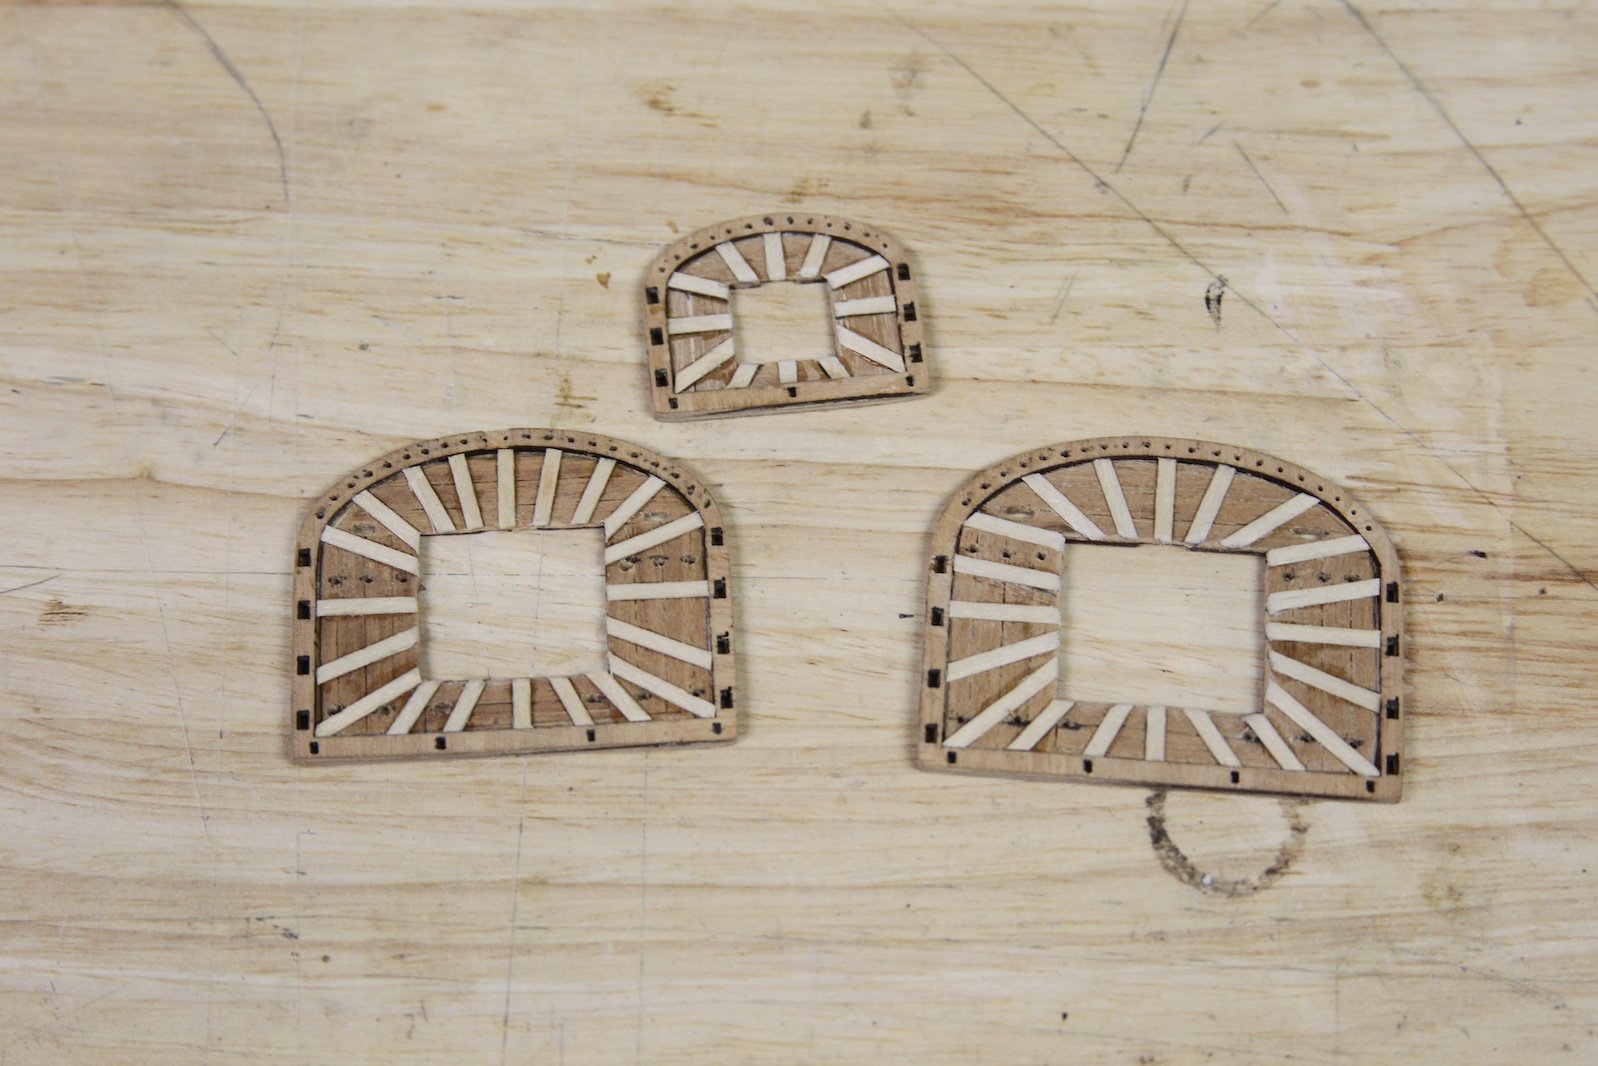
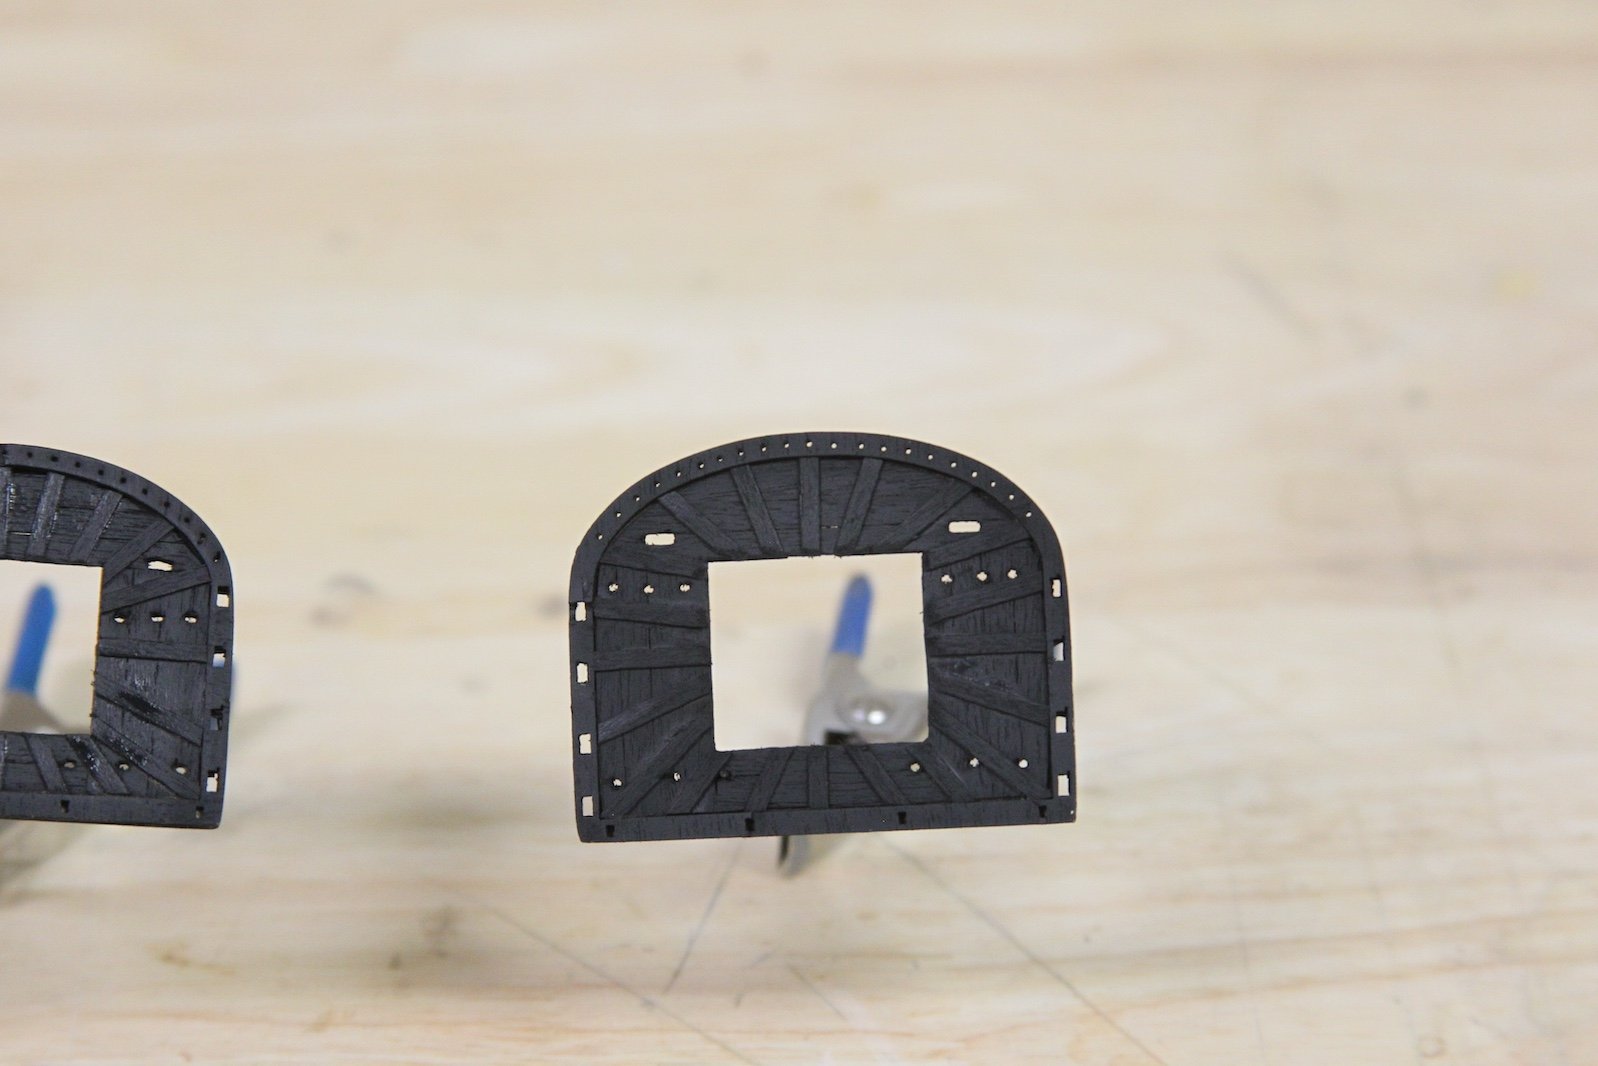
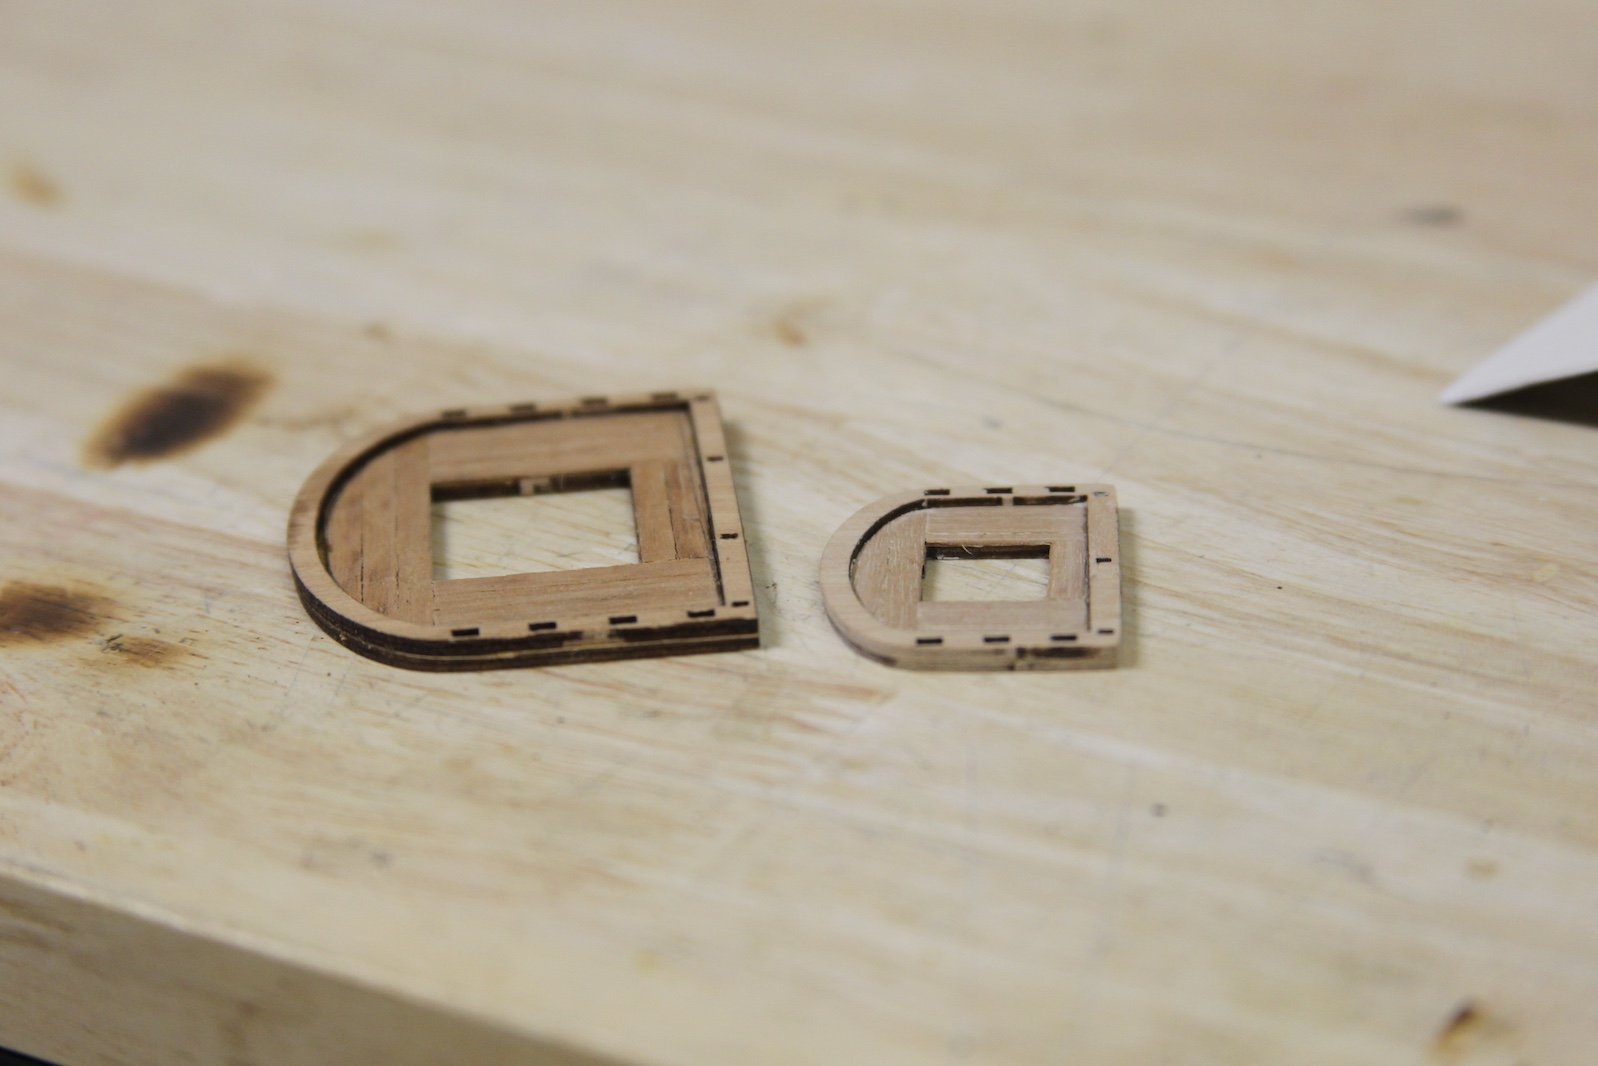
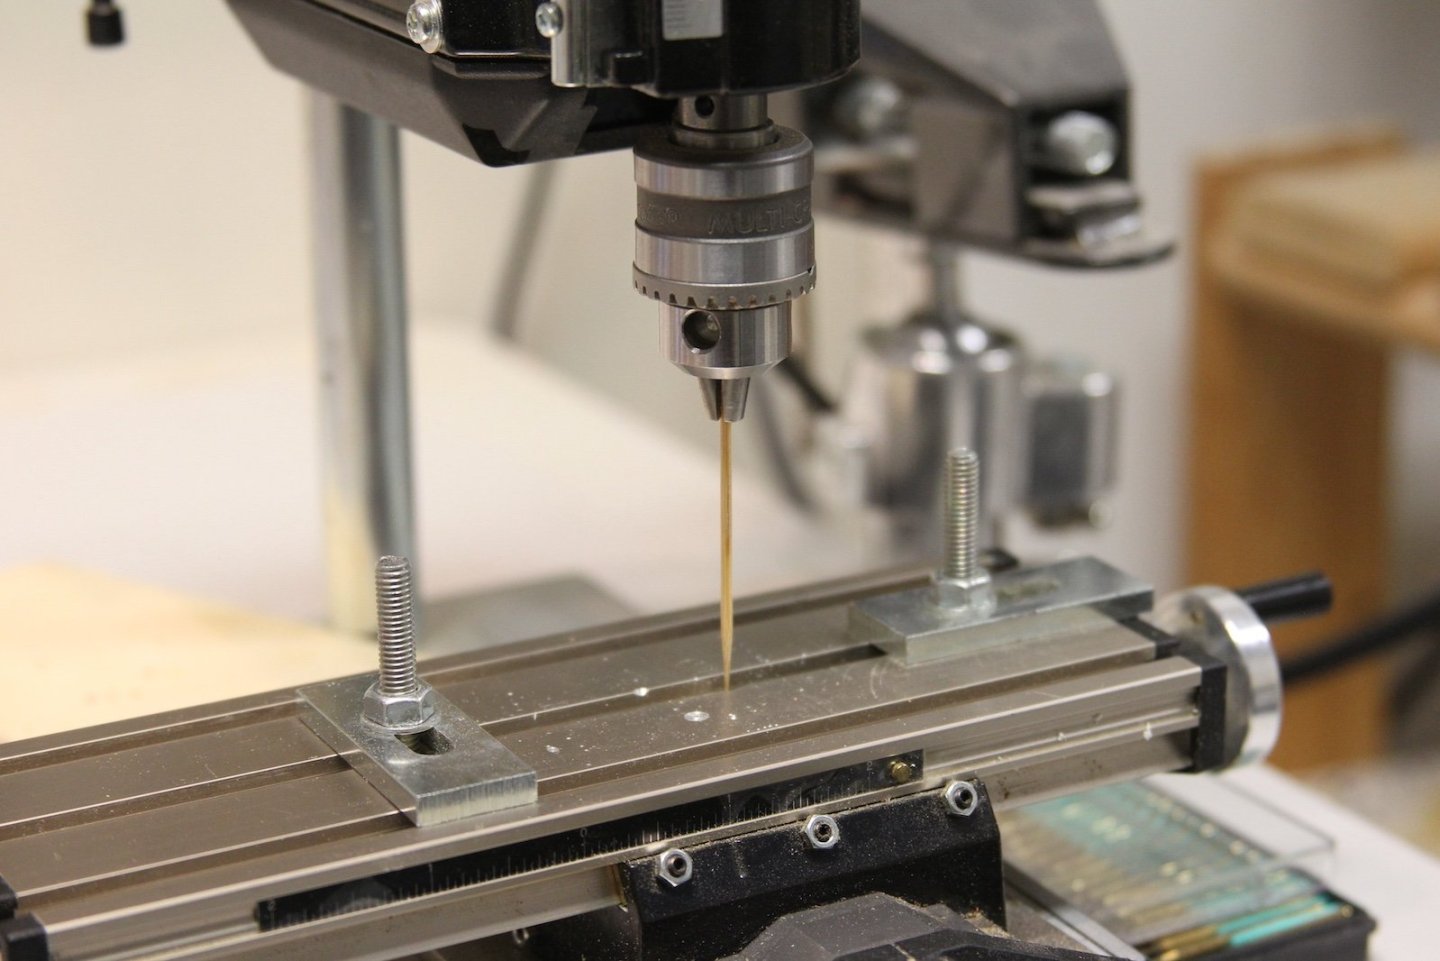
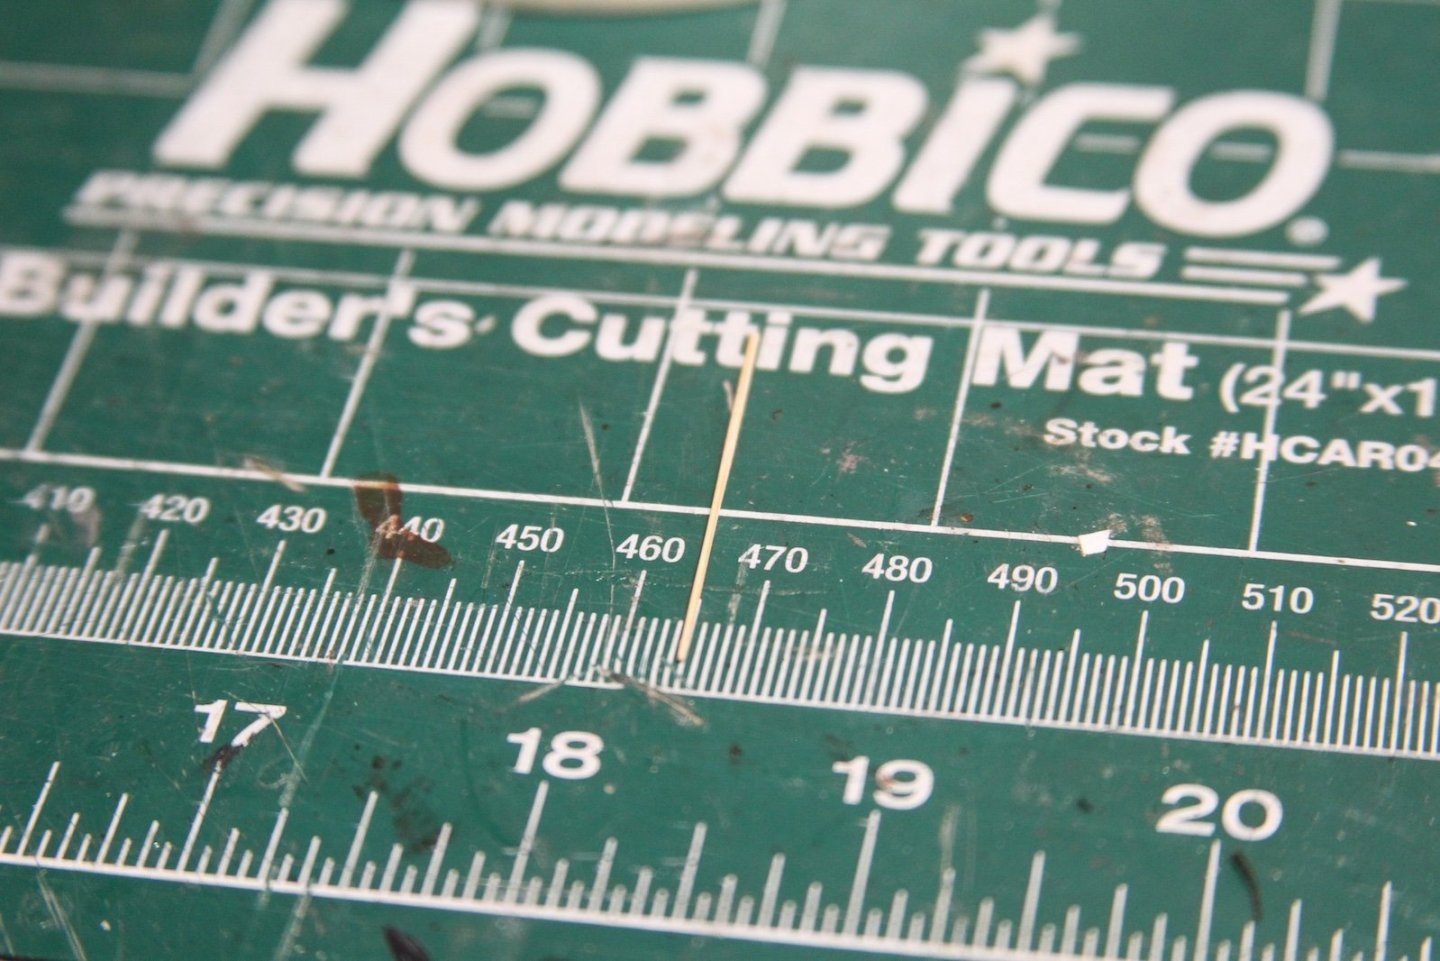
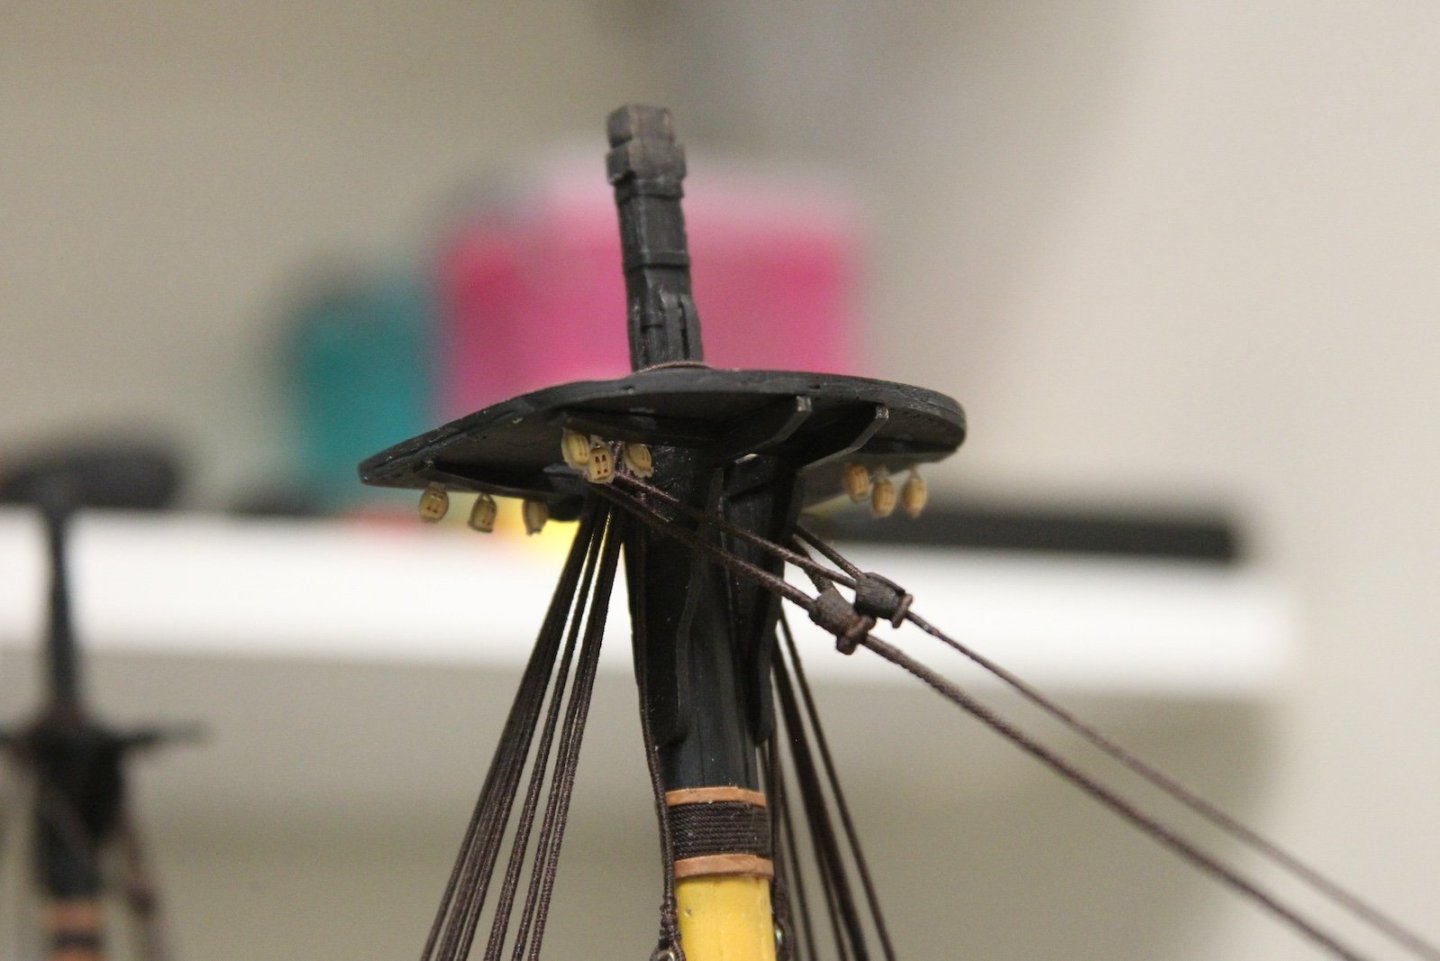
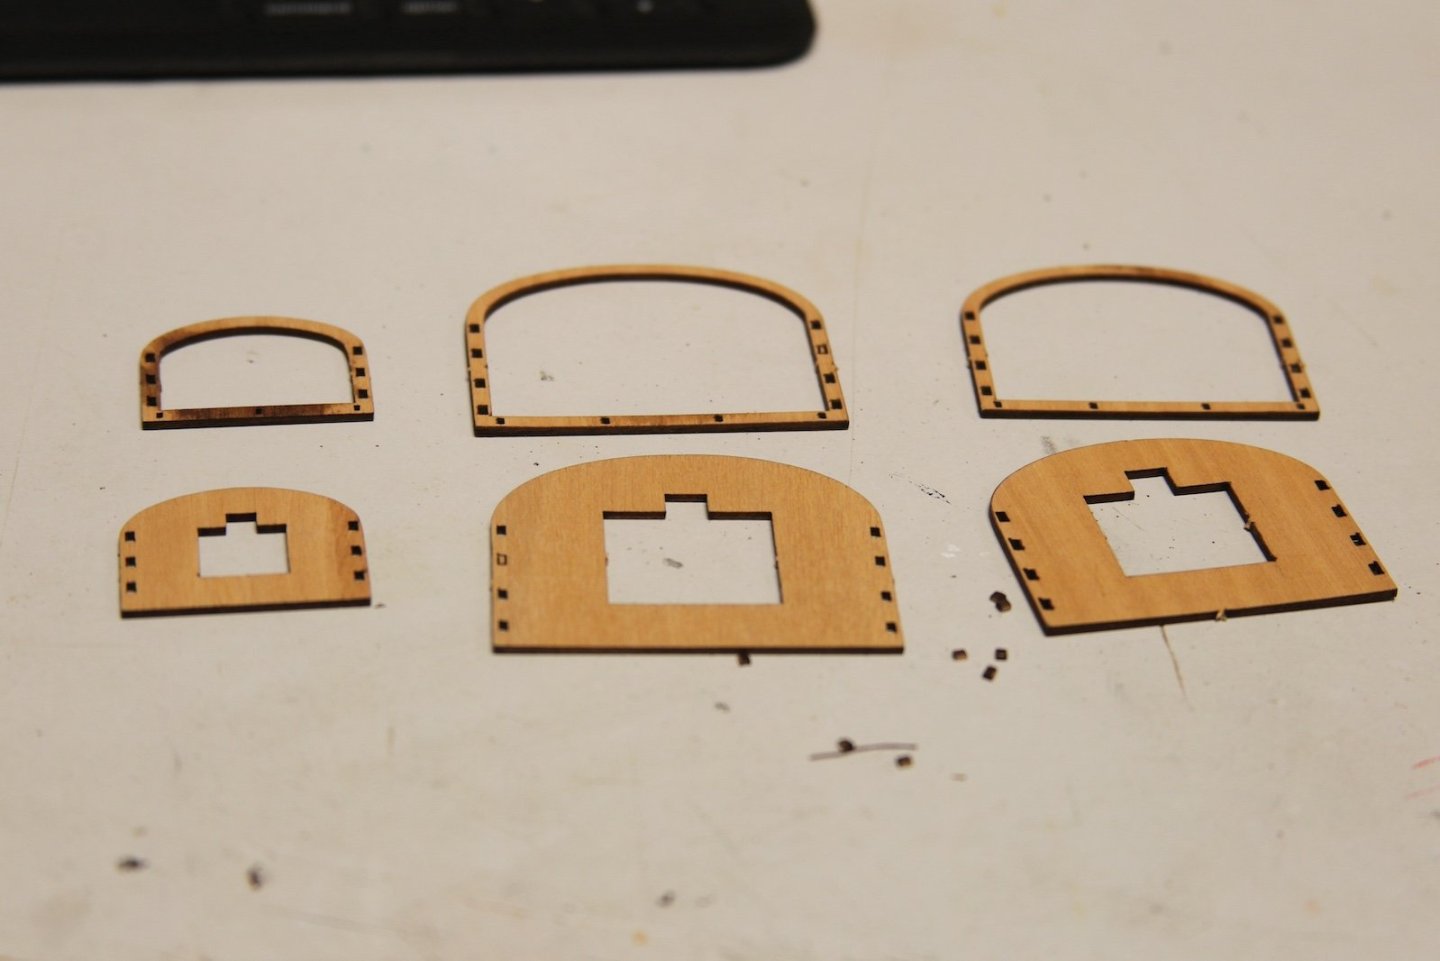
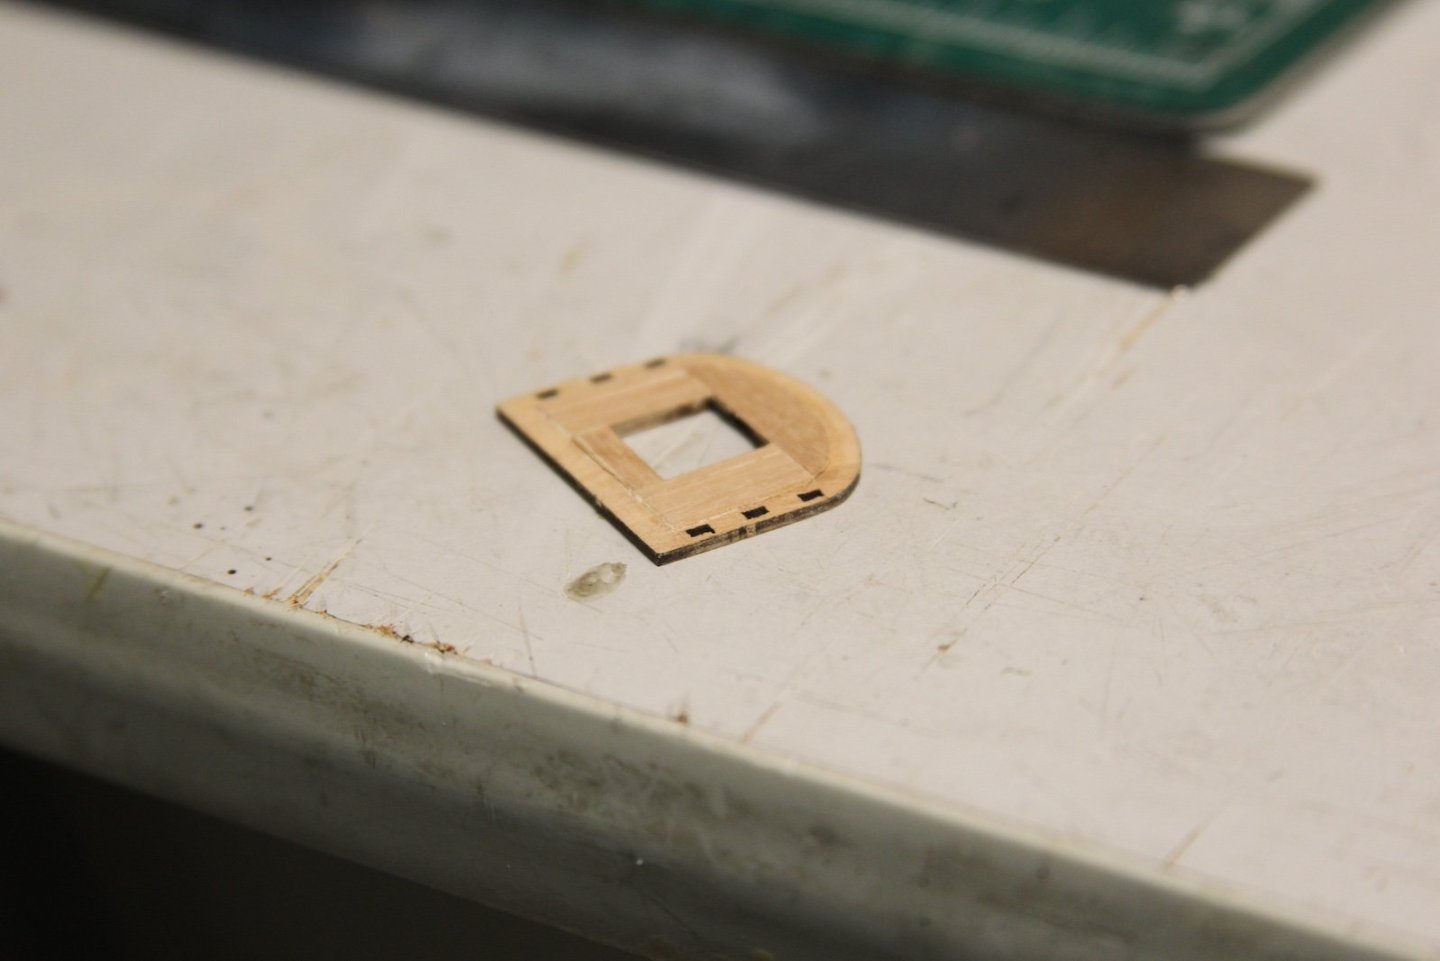
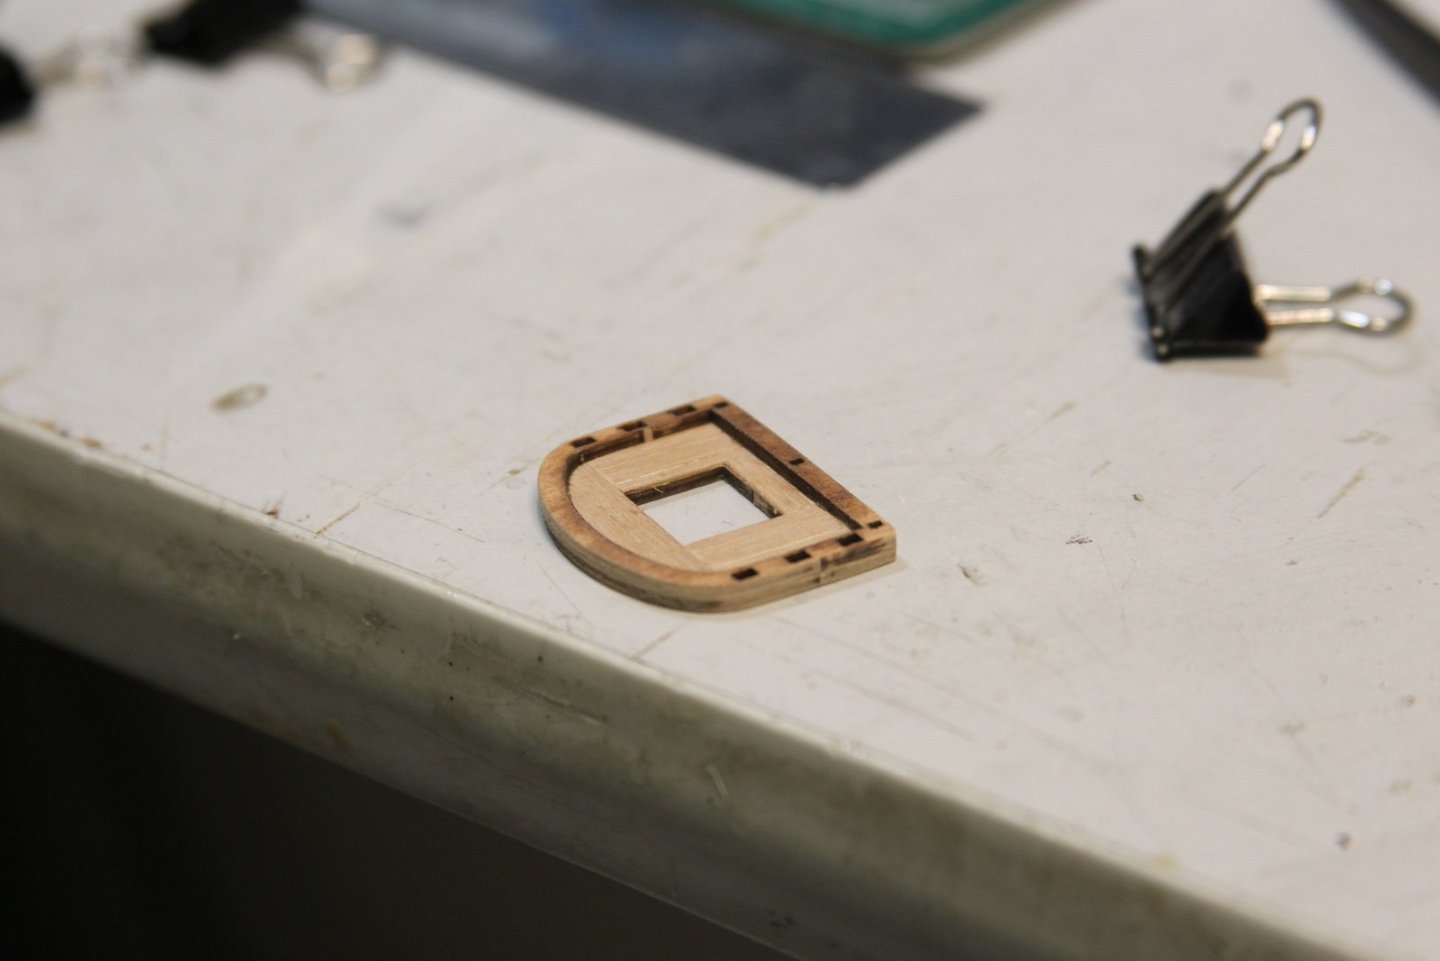
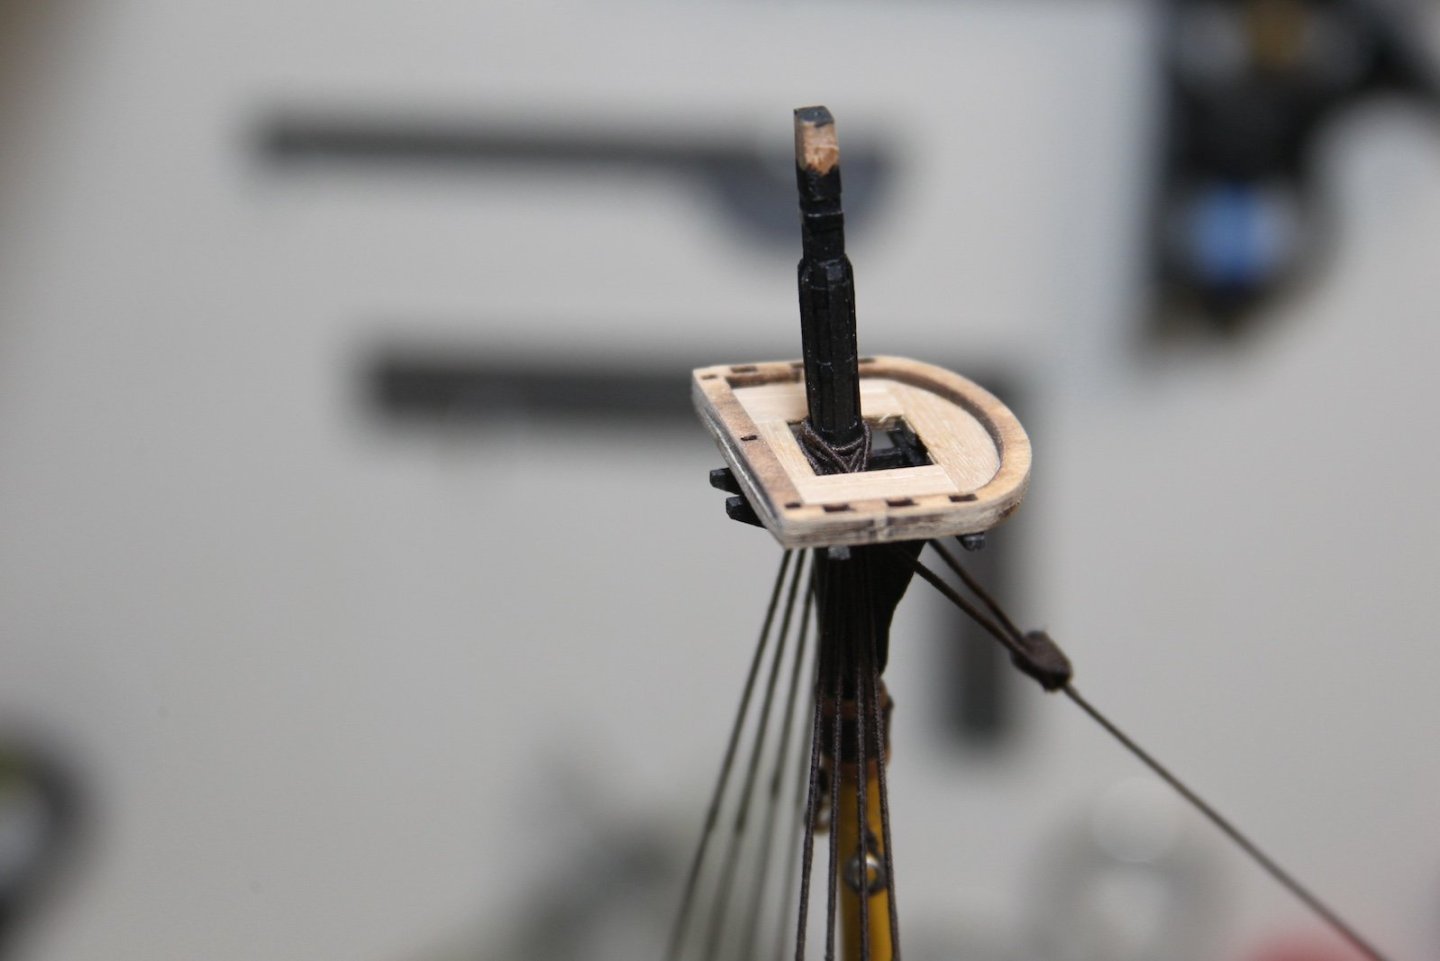
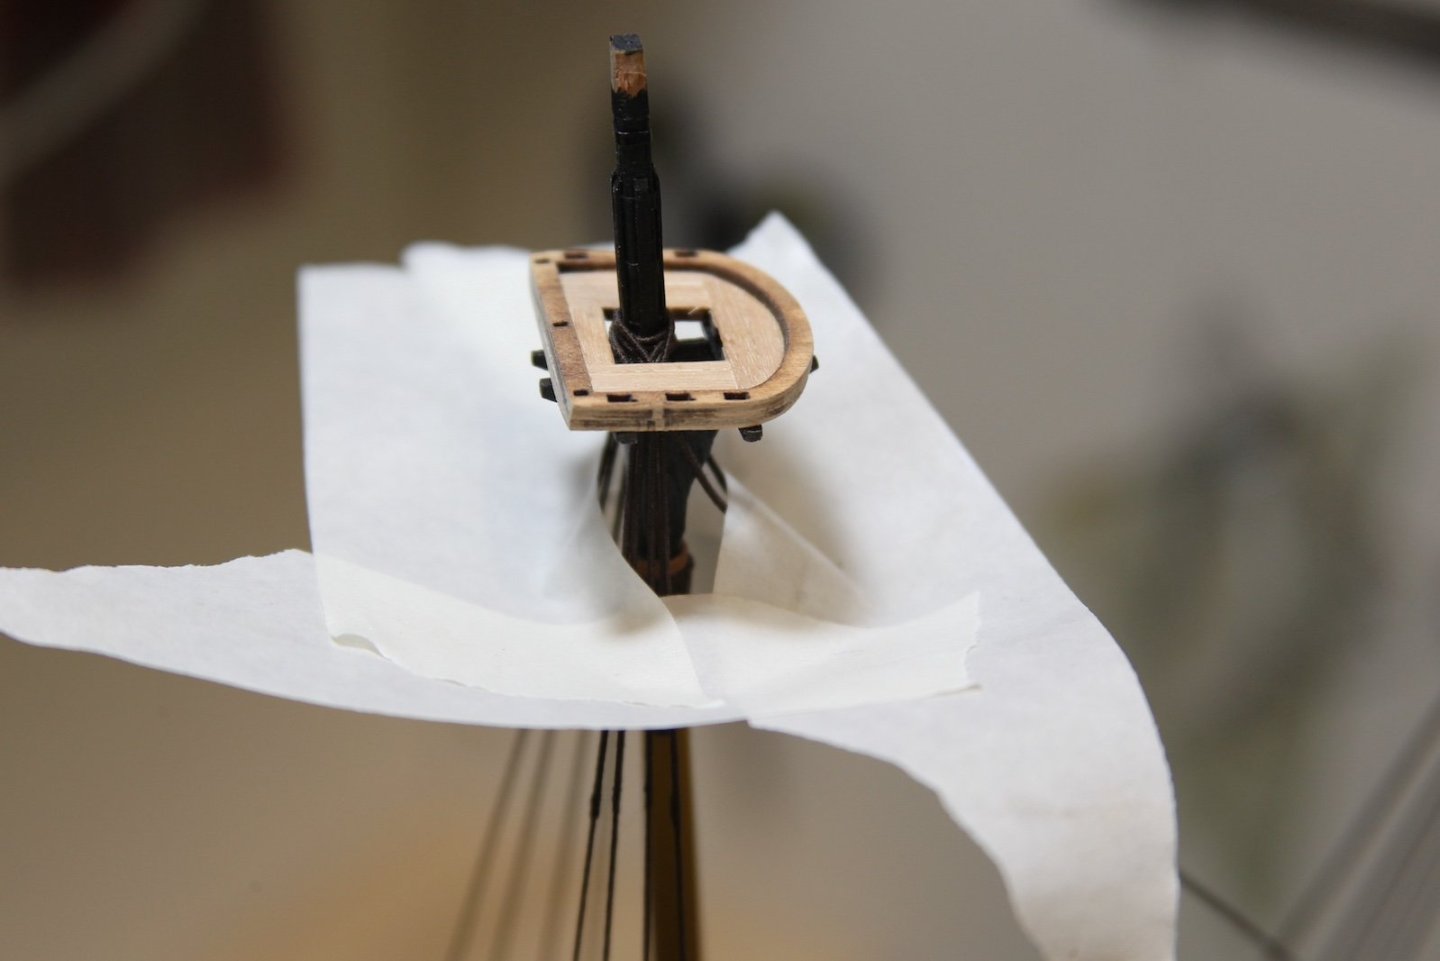
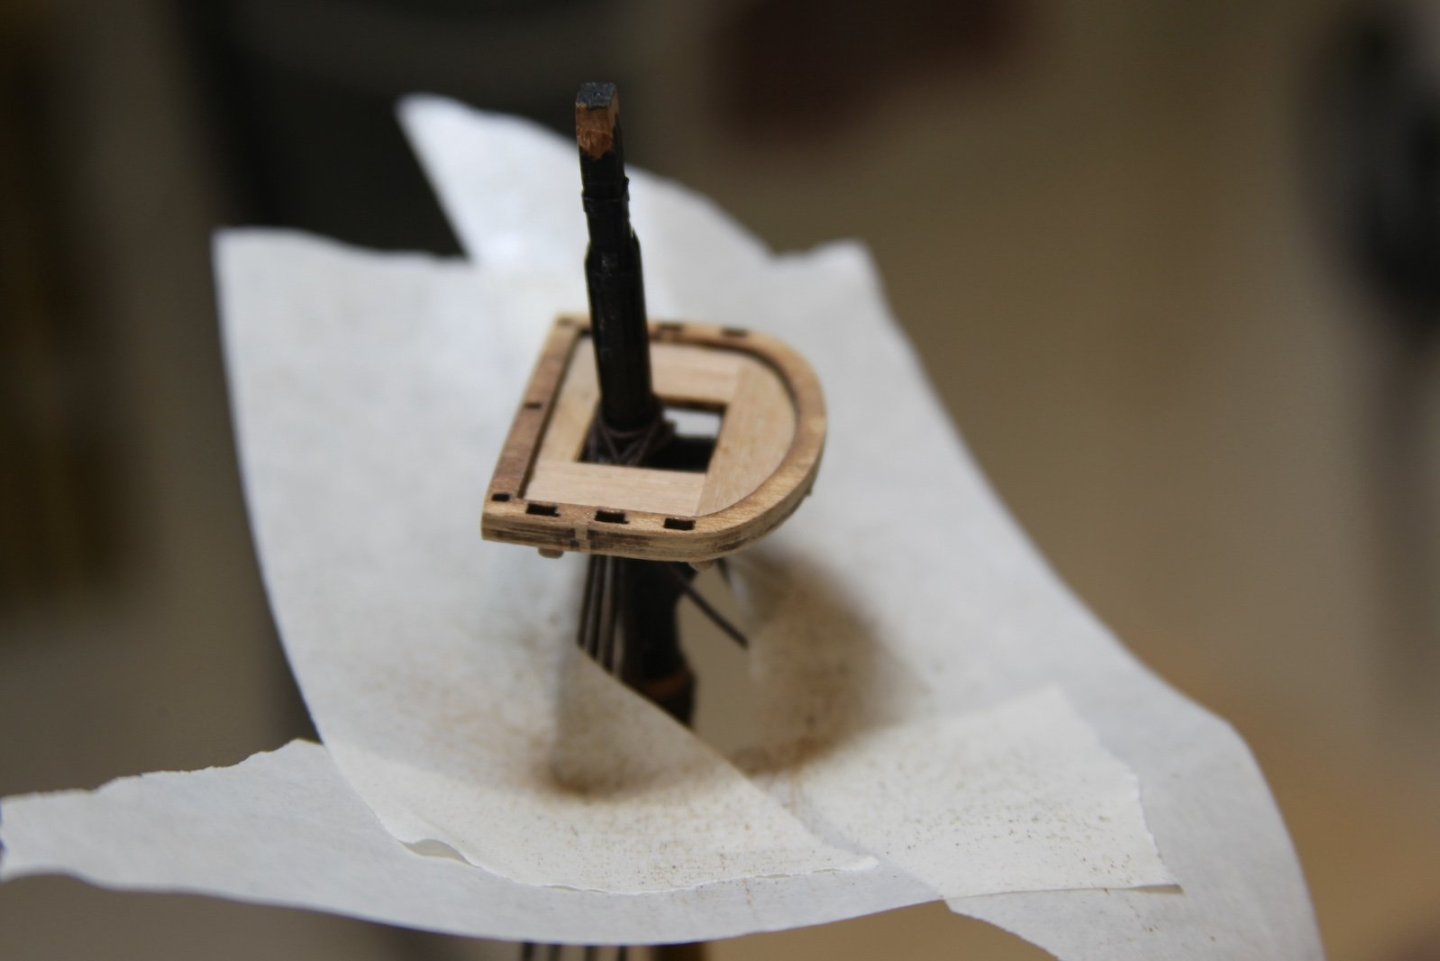
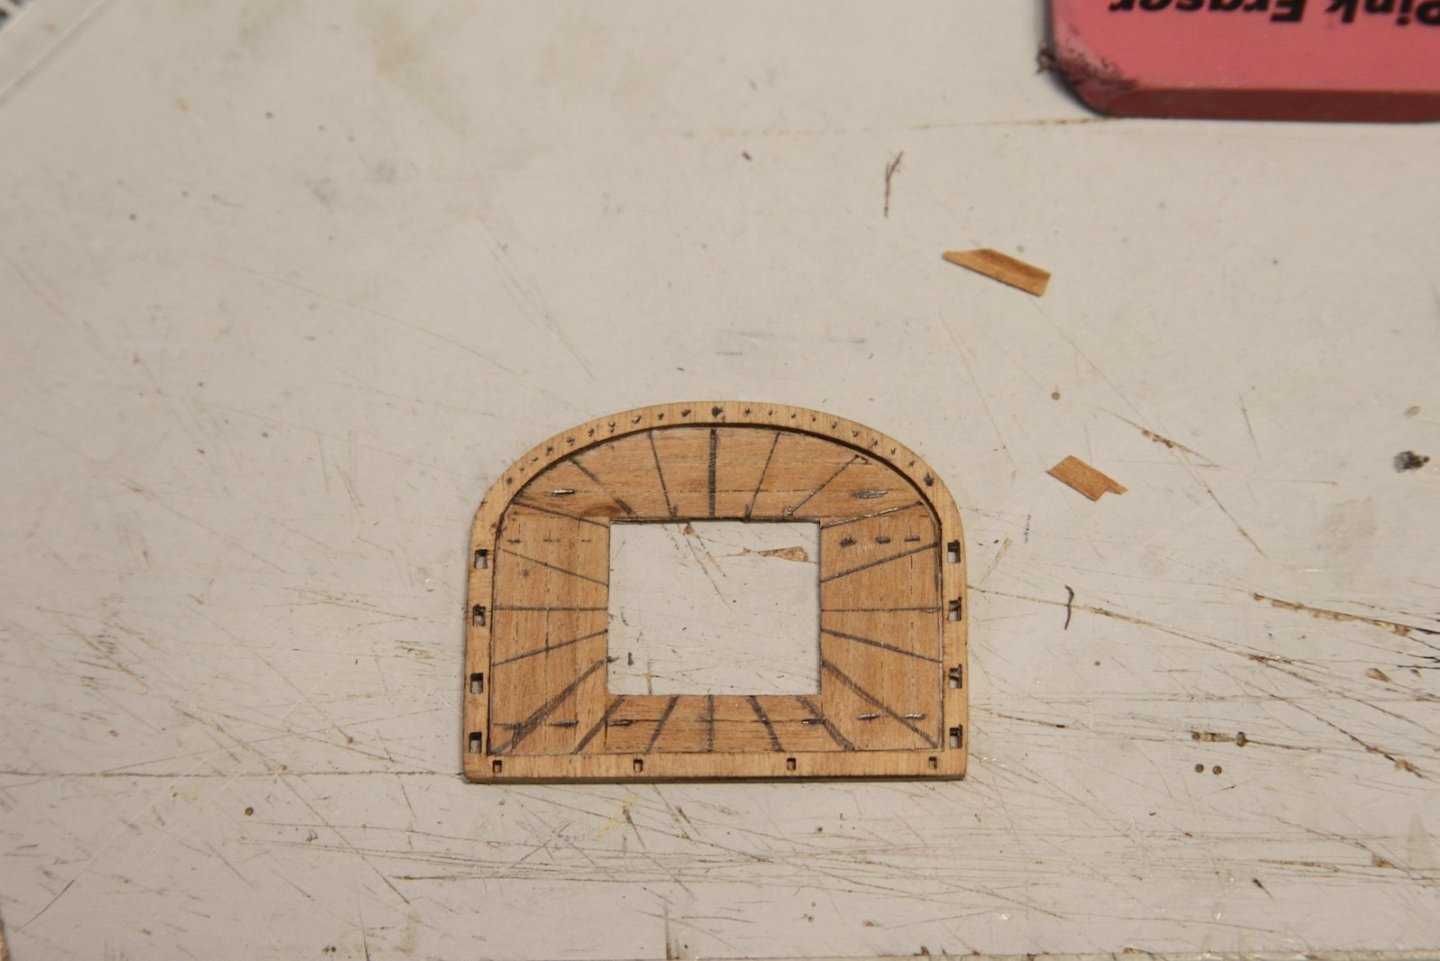
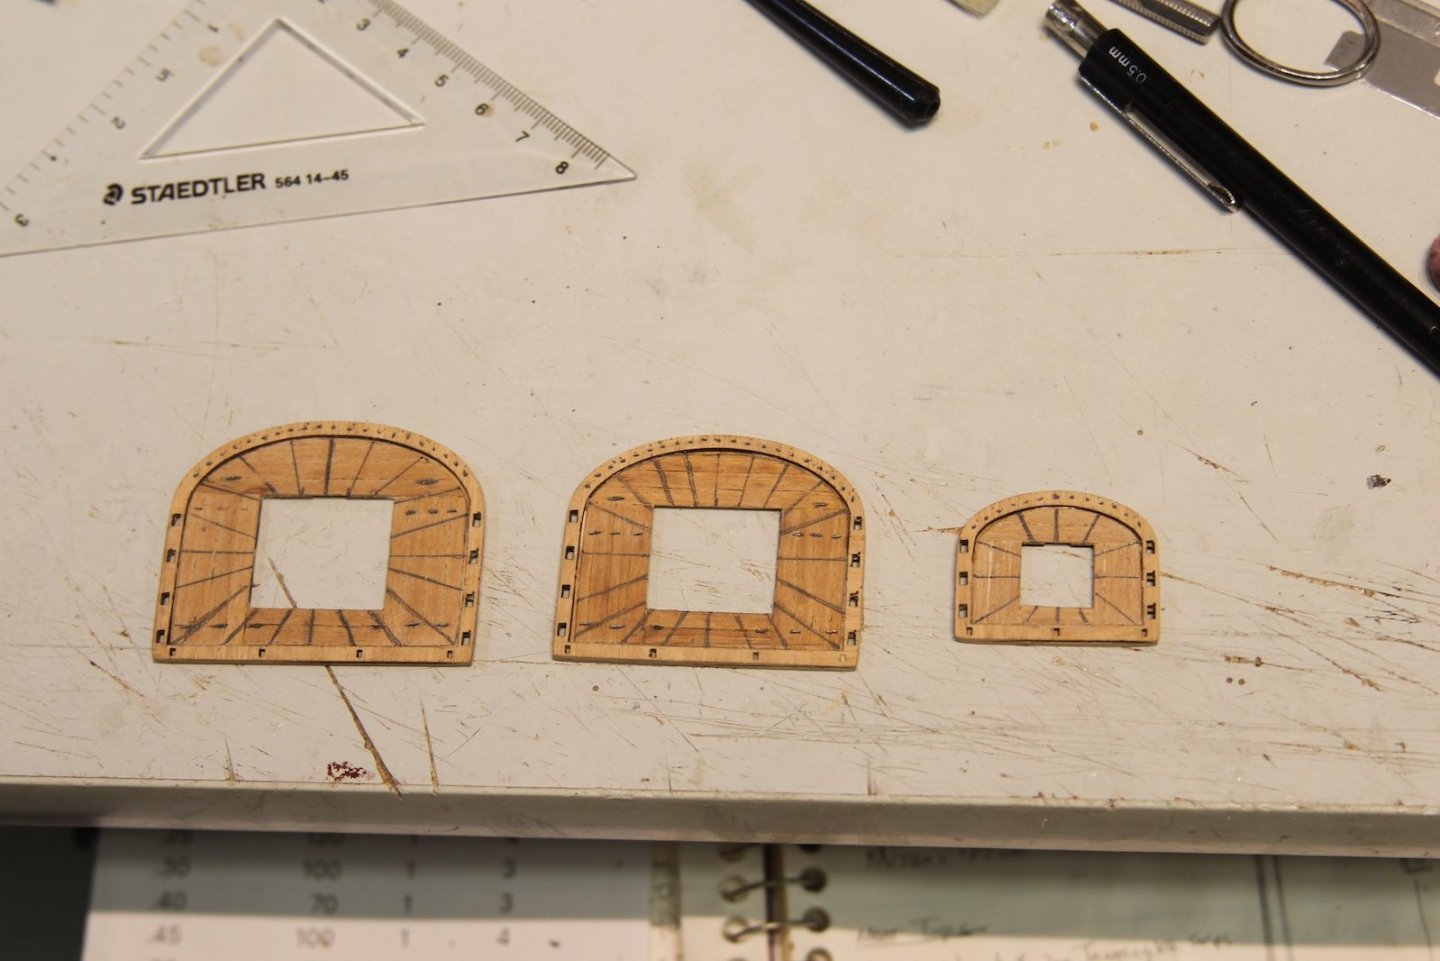
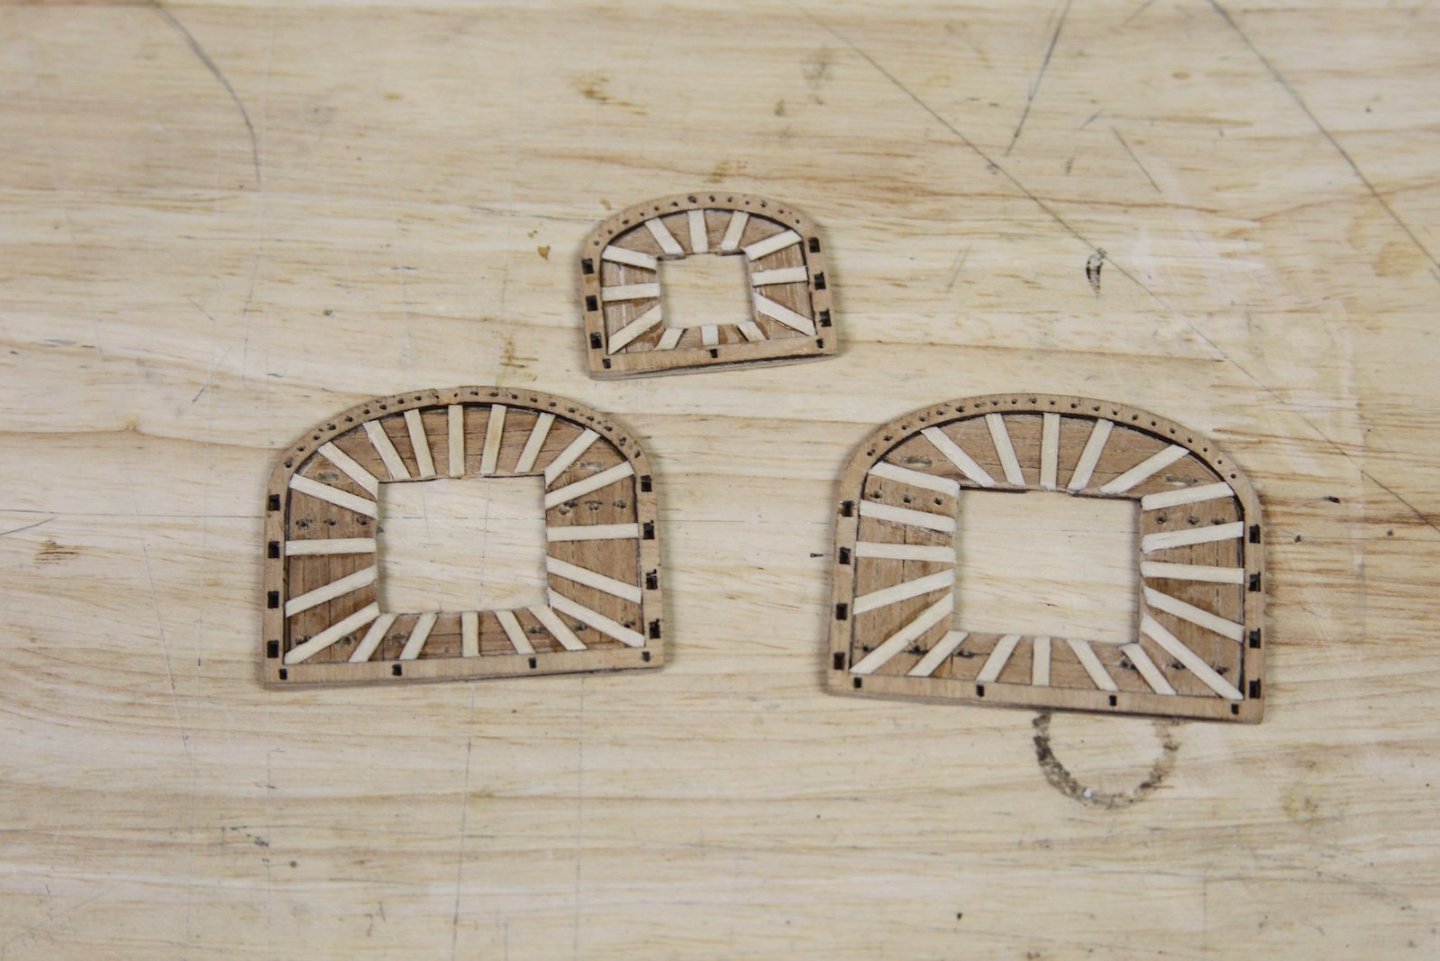
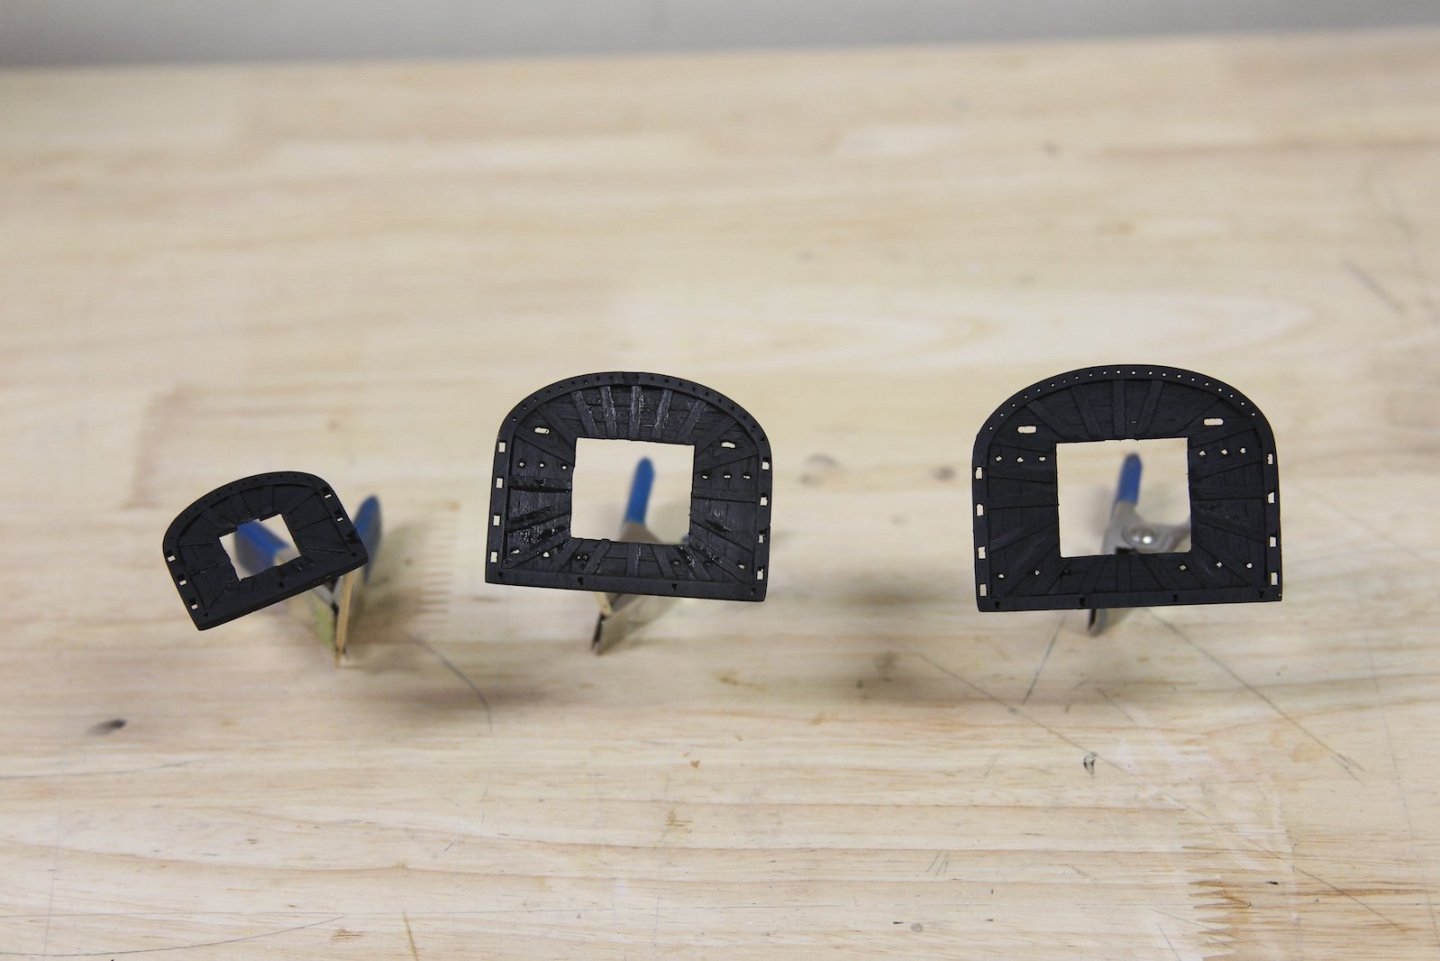
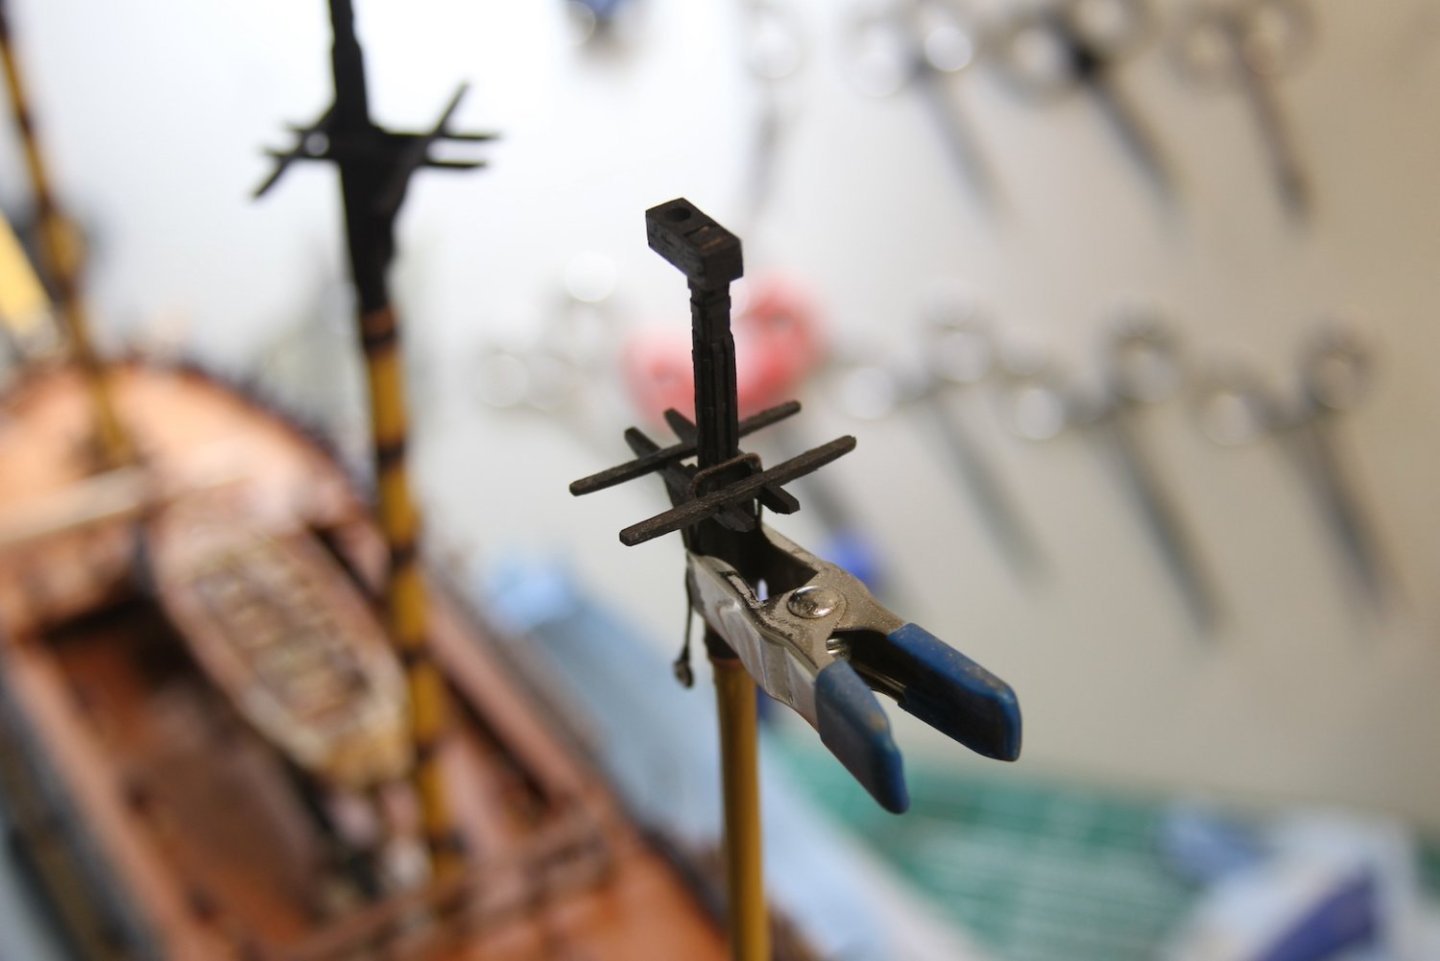
Since the mast tops are painted black throughout, I've decided to stick with the kit parts and modify them as needed rather than scratch build them. They're well crafted, so hopefully won't require too much work. I can tell at first glance that they'll be too thick once put together, and the mizzen mast top is a bit under scale, but I think I can still make it work. I also looked into the little "notch" built into the prefab mast tops. There seems to be some controversy when they went from a square hole to including the notch - but I'm going with a square for a more aesthetic reason - I just don't like the way it lines up with my cross trees. Step one is planking the mast tops. I'm using some leftover .6 x 3mm Tang that was intended for the deck planking. I've covered over the notch, did some light sanding, then cut out room around the perimeter for the rim. You can already tell it's going to be too thick. You can also see the undersized mizzen mast top when it's tested fitted. Rather than build a slightly larger mizzen mast top, I've decided to sand down the cross trees and trestle trees. I have to do this on the mast and I don't want to have to clean too much, so I made a little masking tape "bib" for the mast to wear while I do the work. This first photo shows the difference between the thickness of the two mast tops after the mizzen has been sanded down on both sides. I measured and laid out the locations of the small timbers as well as the holes for the blocks and the crow's feet. There are some different accounts of the number of crow's feet depending on which publication you go with. While I took these into account, I ultimately went my own path here and decided on a number of holes based on visuals and measurements. I decided that using .10mm line and drilling the smallest hole that would accommodate that line meant spacing each hole about 2.5mm apart. Given that spacing - I ended up with 13 mizzen holes and 21 holes for both the main and foremasts. The crow's feet holes were started by a small punch with a dental pick, then drilled out. I have a lovely set of MA Ford twisted drill bits that I love - and give me very clean holes at very small diameters. The #74 bit is about .5 mm, which gives me a smooth feed of the line. Crow's feet holes are drilled and timbers are added before I drill out the holes where the blocks will be mounted. Finally, they're all painted - I use an airbrush with Vallejo's "Nato Black" matching the other black parts of the ship. Up next - I'll rig the blocks before and dig into how the top masts are rigged, specifically the t'gallant stays, before mounting the mast tops.


- 419 replies
-
- 9
-
-
- Victory Models
- Pegasus
- (and 2 more)
-
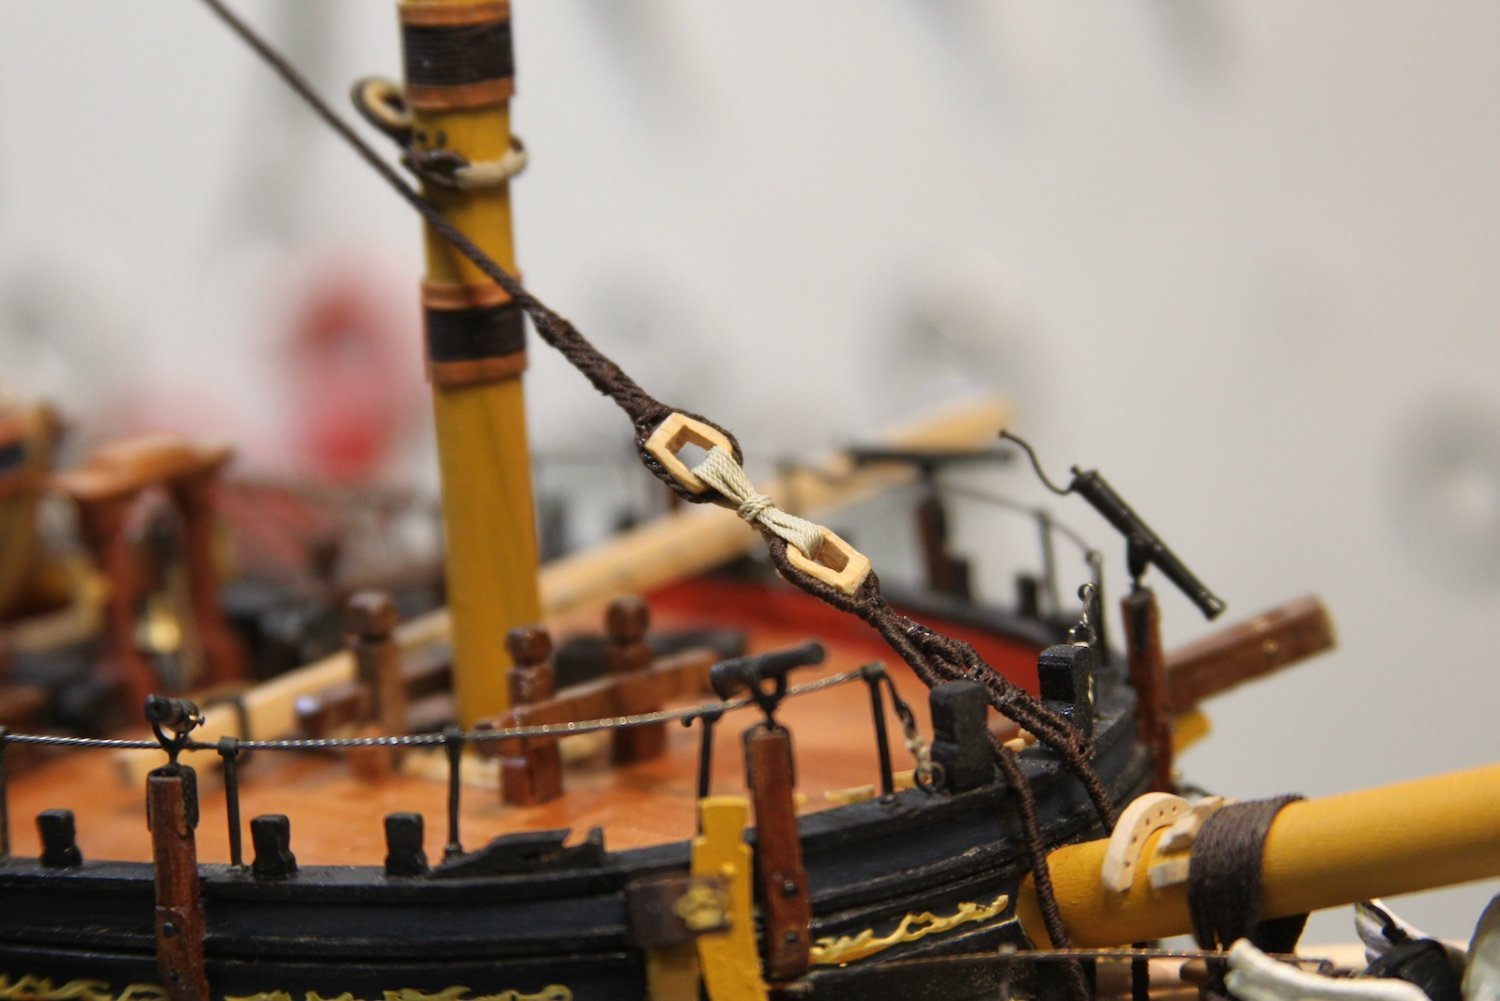
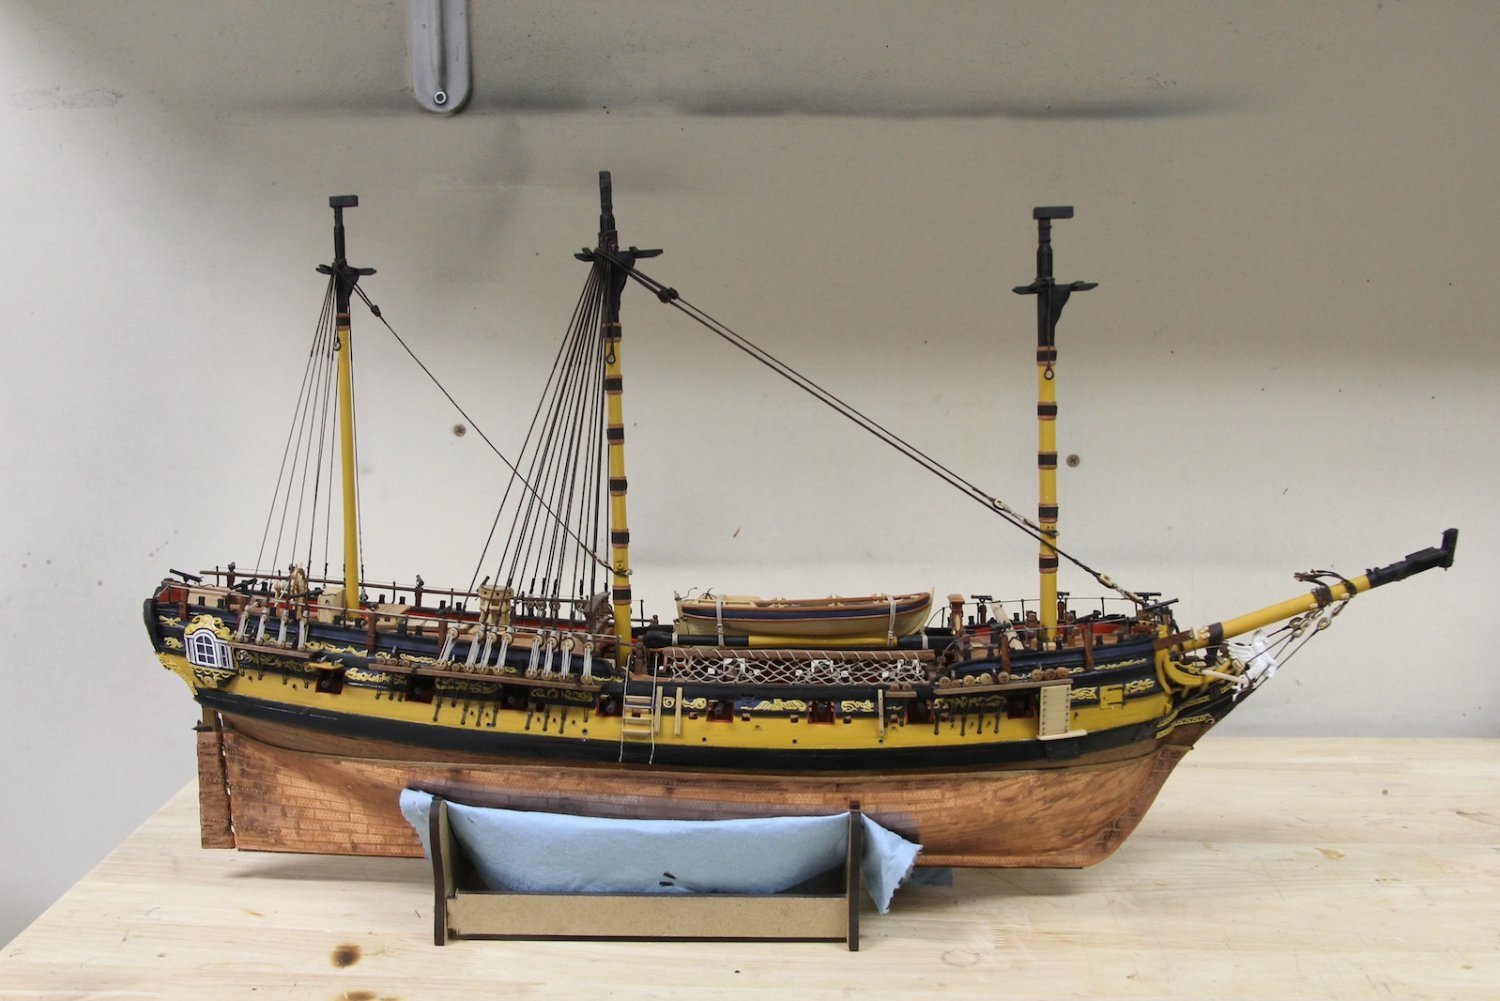
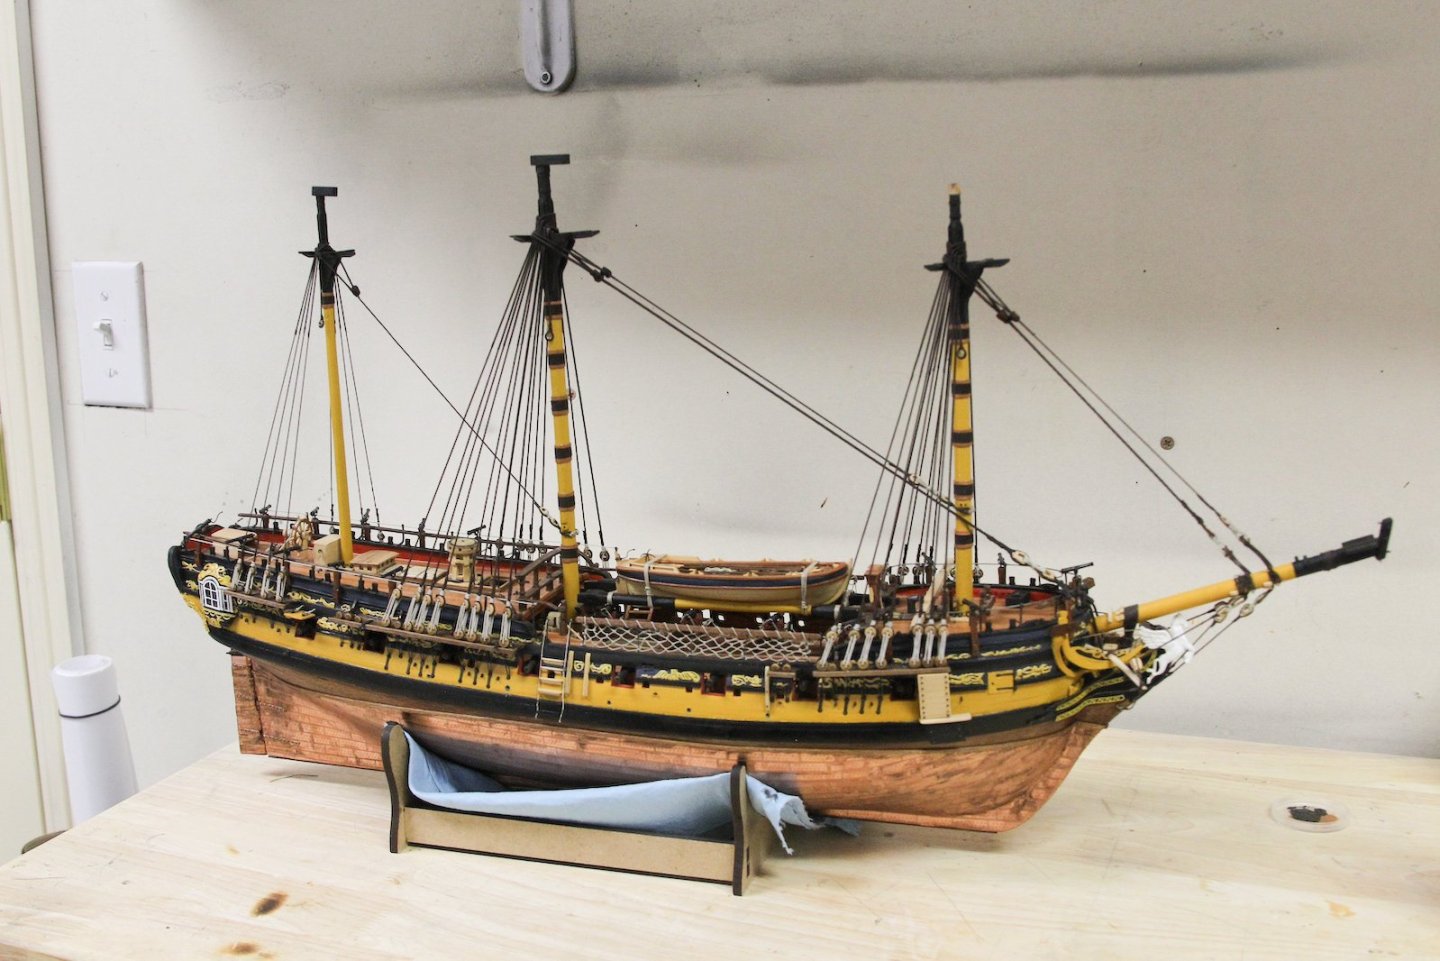
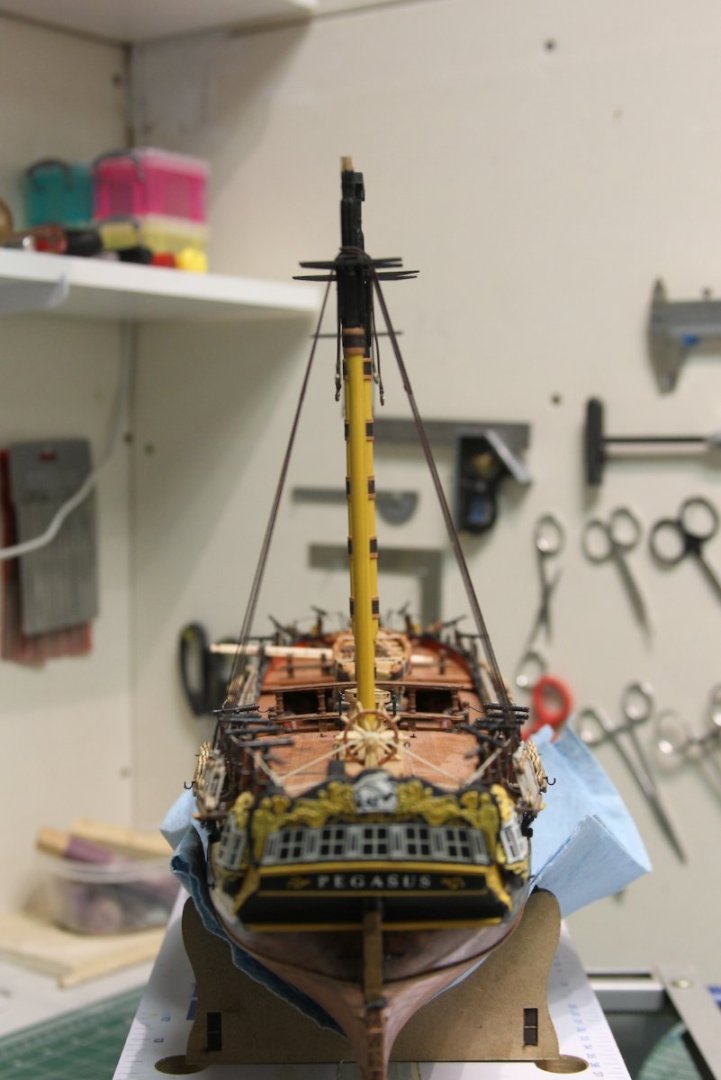
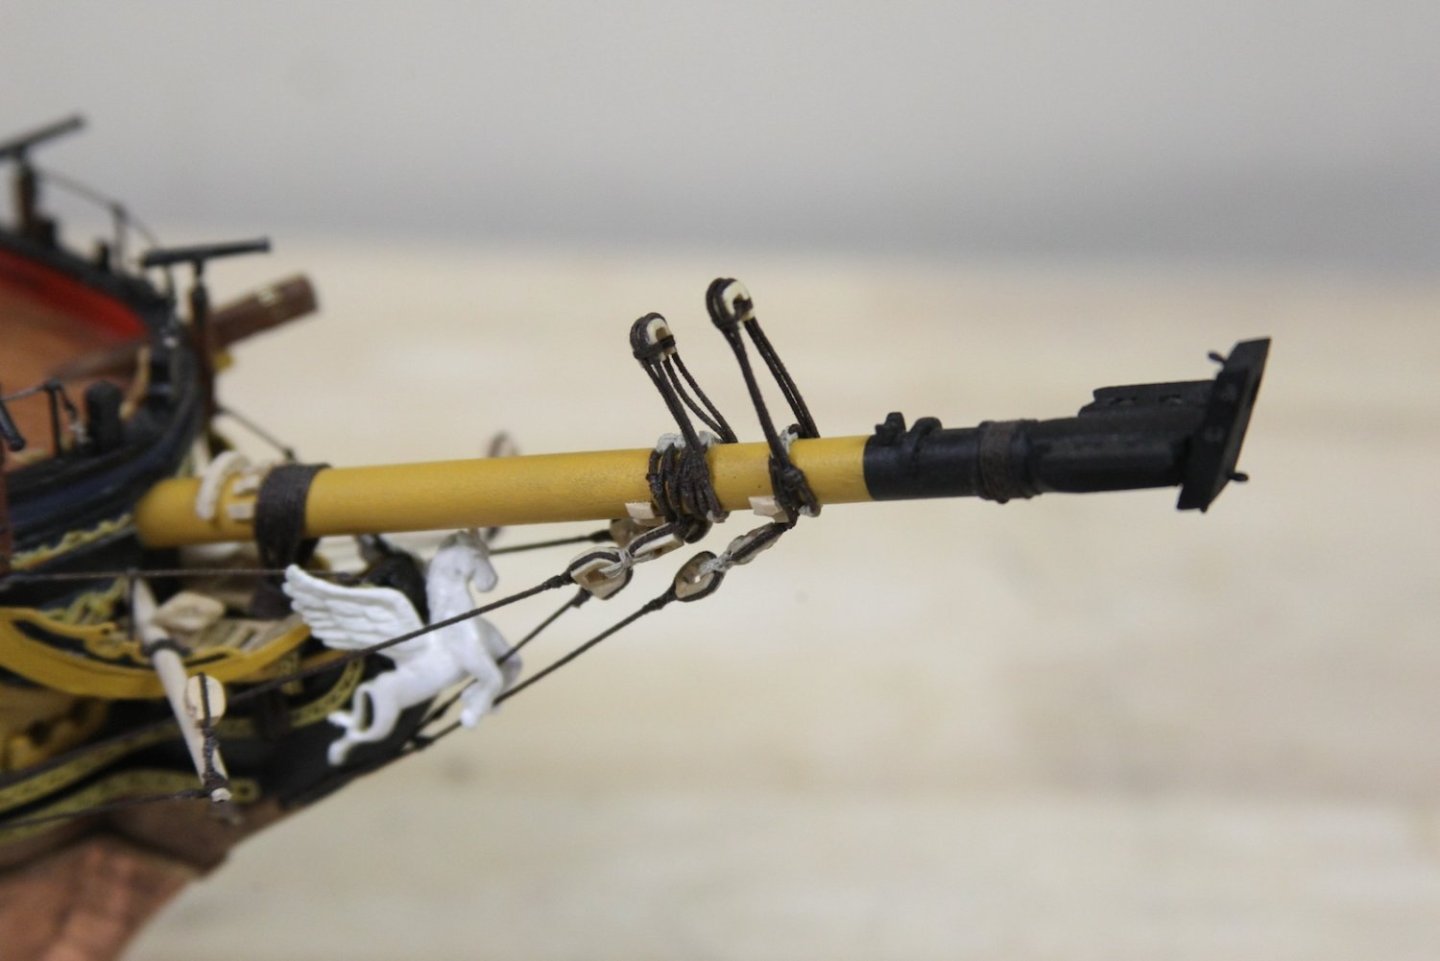
Fore Stay and foremost preventer stay were next on the list. Pretty much a carbon copy of the main and her preventer stay except the rope sizes are a bit different and of course they secure to the open hearts on the bowsprit. Fore stay is listed as 9.5" circular which becomes 1.2 mm at scale with a closed heart just over 5mm. Once again I'm using the fine lasercut hearts from Syren. I'm using .45mm line for the lanyard, same as the main stay. The preventer stay is listed at 6" circular which comes out to .76mm at 1:64, I'll be using .75 since that's what I've made and if anyone can tell the difference of .01mm they've got Superman eyes. The close heart is slightly smaller as well at just over 4mm as is the lanyard - I'm using .30 mm rope. Here's where she's at with just under 700 hrs of labor. Granted, I'm not always super great at keeping track of time, so that's a best guess. Up next I'll start working on the Mast Tops as well as the Topmasts. Oh - pay no attention to the caps - they're just a placeholder.


- 419 replies
-
- 9
-
-

-
- Victory Models
- Pegasus
- (and 2 more)
-
Lovely, lovely work BE! It's been a pleasure watching the progression of your builds over the years. I'm curious - you mentioned sprucing up the Norse Love - what's your cleaning method? I too prefer some of my ships to be 'exposed' instead of in cases. I use a combination of gentle air and a soft, wide paint brush. What about you?
- 648 replies
-
- 3
-

-
-
- Indefatigable
- Vanguard Models
- (and 1 more)
-
Thanks Jason, much appreciated. I almost always start with an everywhere search here on the forum - so I plugged in "Swifter" to get info on the sequence, etc. Then, I mostly look for @allanyed's name; since he always gives great reference material. 🙂 In this case, he pointed toward the very often referenced - Lee's The e Masting & Rigging of English Ships of War - on the order of dressing. Sometimes I'll cross reference the info with David Steel's books or Marquardt's Eighteenth-Century Rigs & Rigging if any information differs.
- 419 replies
-
- 3
-
-
- Victory Models
- Pegasus
- (and 2 more)
-
It took a few days to wrap up the foremast shrouds. Same process as the others of course with a 7" circular line which is .88 mm at scale (.85 mm line for me). Like the main, the foremost shroud is served its entire length. The biggest difference between the fore shrouds and others is that there are 7 shrouds representing an uneven number. As a result, there are three pairs of shrouds and a single shroud with an eye splice called the swifter. According to Lees, the swifter is the aft-most line and the last one looped over the masthead.
- 419 replies
-
- 14
-
-
- Victory Models
- Pegasus
- (and 2 more)
-
Thanks @brunnels - much appreciated. While I make reference to David Steel, Lees, and Greg Herbert - I always try to make sure there is credit where credit is do - I frequently refer to Dan Vadas' build of the Vulture which is one of the best examples of pure craftsmanship and accuracy. I also constantly hop back to @Blue Ensign's Pegasus build for accuracy as well - but BE also did such a fantastic job of translating Steel, Lees, and Greg's references in what 1/64 scale should be it saves me loads of time flipping through pages and doing math.
- 419 replies
-
- 6
-
-
-
- Victory Models
- Pegasus
- (and 2 more)
-
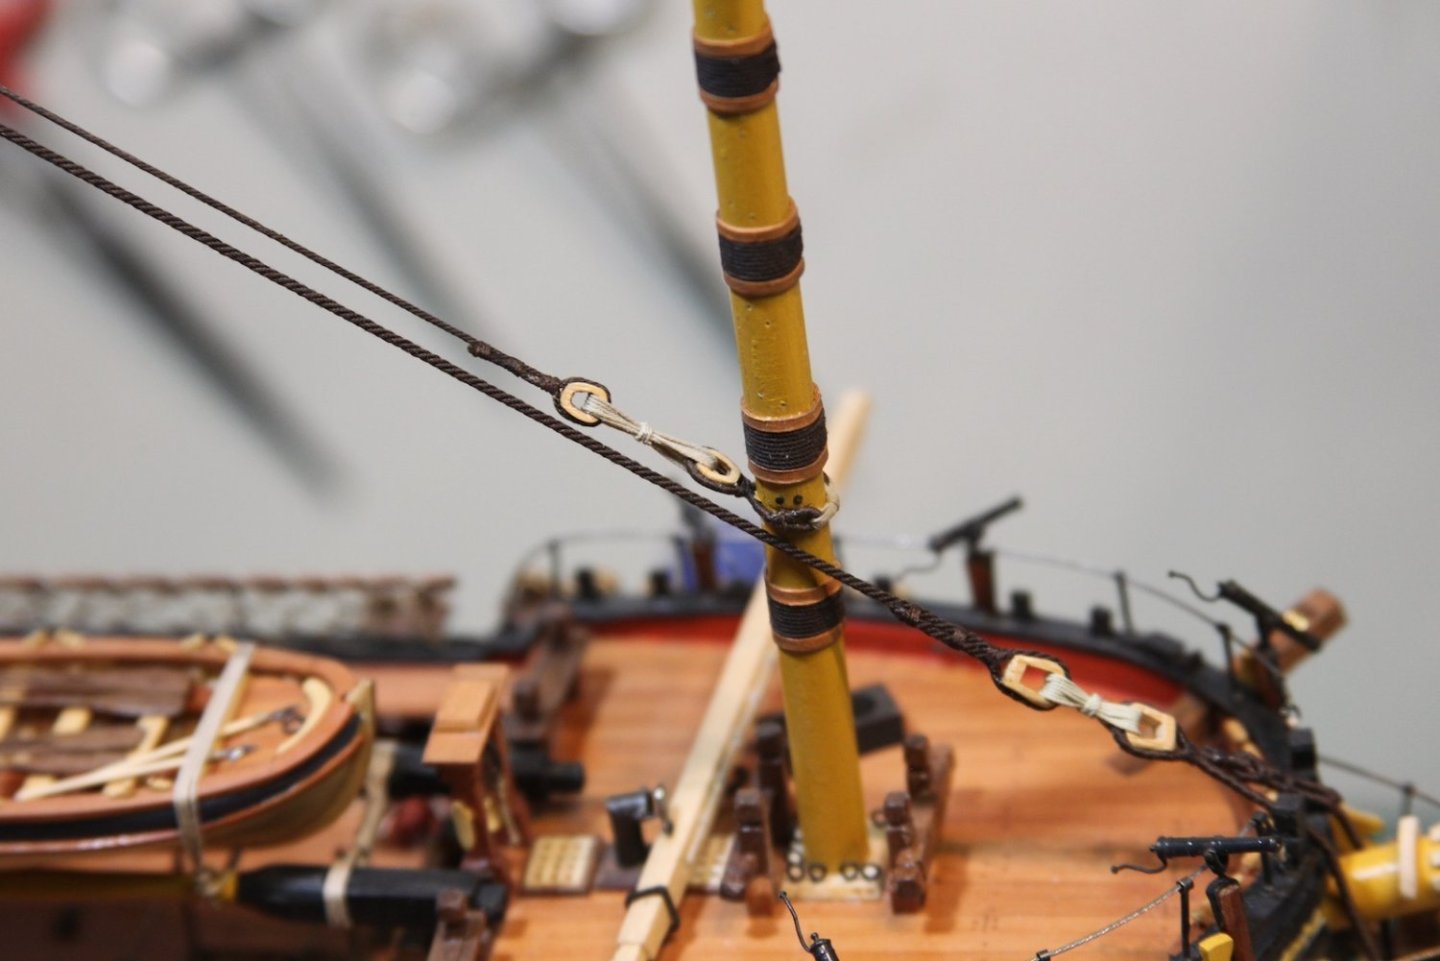
NOTE HERE: A potential error here as I decided to put the preventer ABOVE the main stay. This effects whether the euphroe and crow's feet attach to the preventer or main, and subsequently how the fore yard braces are rigged. Next up are the main and preventer stays as they're obviously much easier to add at this stage prior to the foremast shrouds. As the largest line on the ship, the mainstay runs at 10" circular translating to 1.26mm at 1/64, or in my case 1.25 - which I had to take the time to spin since I didn't have that size immediately available. For those of you using the magical Syren rope rocket, I achieved 1.25 mm by spinning four lines of Gutermann Mara 15 thread. After doing a little search and noodling, I found some evidence of the preventer stay being below the main, while most had it above. I went slightly above for a selfish reason - I was able to lash the preventer stay collar right up against the bottom of the cheeks rather than adding a couple of cleats to keep it in place. The closed heart on the preventer stay collar is a 5.5 mm heart from Syren - a smidge larger than it should be, but they're so easy to assemble, sand, file, and deal with it's well worth it. The mouse is put together the same as the Mizzen both for the main and preventer. Both should be three times the diameter of the stay and both of mine came out larger than they should be, but about as small as I could get them and still be able to work with them. The heart on the mainstay is a twin to the one I made in an earlier post on the bowsprit collar - 5.95mm (6 really) boxwood and the whole thing is lashed with .45mm diameter (3.5" circular per Steel) tan rope at the lanyard. The preventer stay mirrors the main with smaller dimensions - the stay itself is 7" (.88mm diameter) mirroring the main shrouds. I measured the mouse as best I could but ended up just 'eyeballing' it to get it a bit smaller than the main mouse and still look right. The twin closed 5.5 mm heart is lashed with .30 mm rope. After some measuring, remeasuring, and adjusting the heart placement a couple of times, I still ended up with a bit longer lanyard than I'd like, but acceptable to me. An overall look at the rigging thus far before moving on to the foremast shrouds.


- 419 replies
-
- 16
-
-
-
- Victory Models
- Pegasus
- (and 2 more)
-
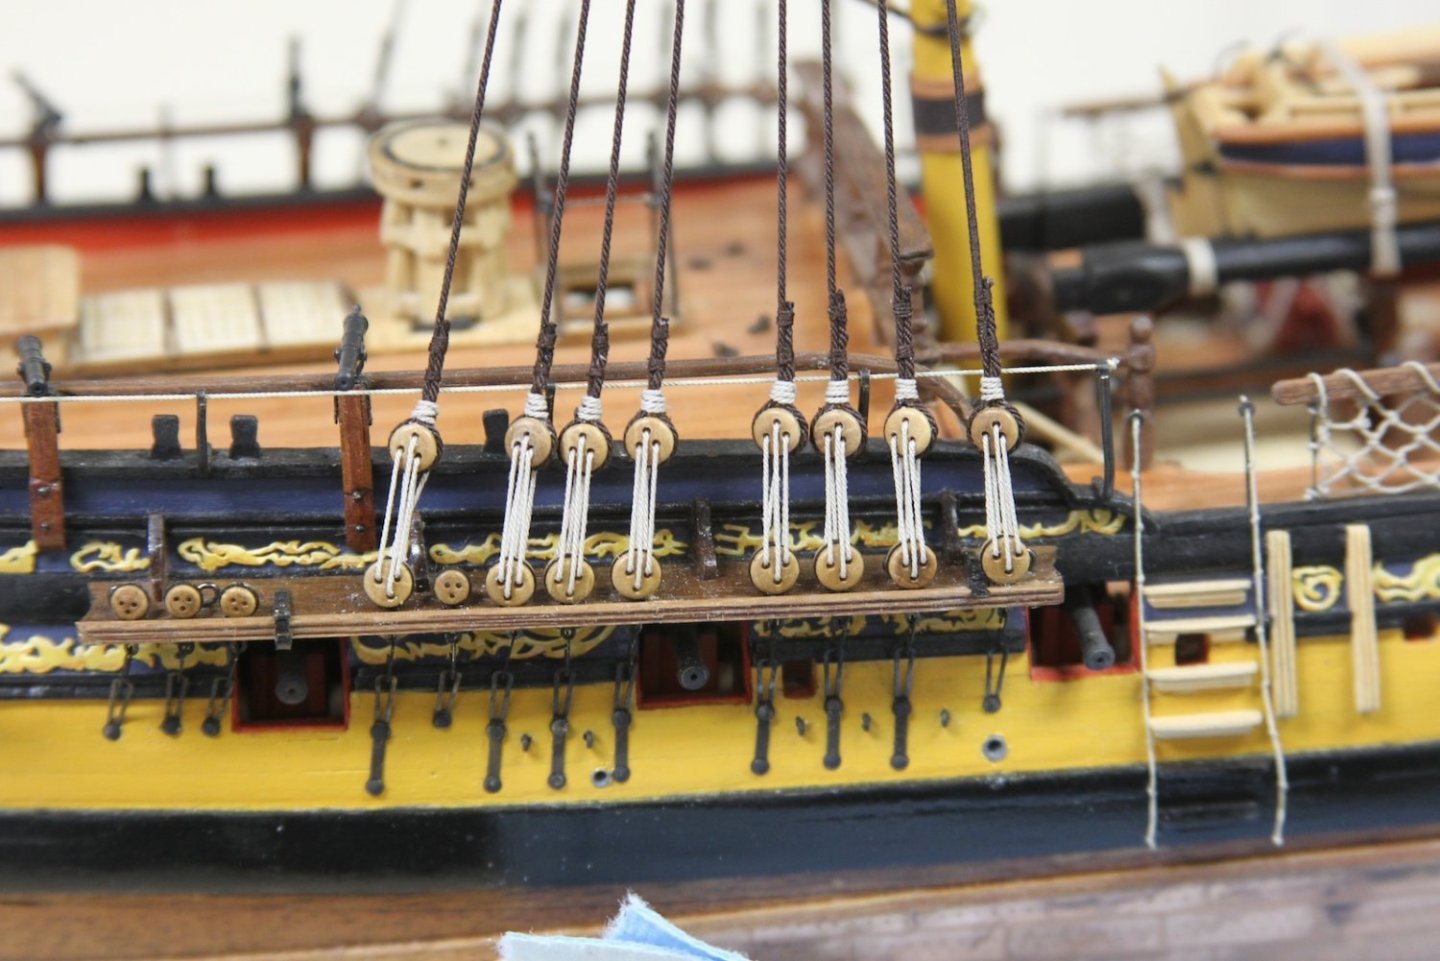
The Main shrouds are basically thee same as the Mizzens. There are two key differences however. First, the size of the line. The main shrouds (according the Steel) are 7" circular, which translate to scale as .88 mm diameter, my rope is .85 which of course is an inconsequential visual difference. The second difference is that the foremost shroud for the mainmast (as well as the foremast) is served for its entire length while the remaining shrouds are served for the first 8' scale feet. Another interesting deviation between the kit schematics and TFFM is a difference in the number of shrouds - the kit shows 8 and the TFFM shows 9 - four pairs and a 'swifter' with a spliced eye over the masthead. I'm sticking with the 8 four a couple of reasons - A) it's easier to do four pairs than adding a swifter and B ) - probably more importantly - I didn't look this far ahead when I was adding the deadeyes and only added eight. No way I'm going to back and redoing all that work for one more shroud... Otherwise the main shroud process is a repeat of the mizzen; measuring the shroud, serving the line, looping and seizing the shrouds at the masthead, then attaching the deadeyes using my handy (slightly larger than the mizzen) spacer. This time however, I measured each shroud around the mainmast and marked the distance of where I'd need to serve with a touch of white paint. The total length needed to serve is slightly different for each shroud as they each angle a bit different as they move from for to aft. Overall, a slow process which took three days to complete for the mainmast.


- 419 replies
-
- 8
-
-
- Victory Models
- Pegasus
- (and 2 more)
-
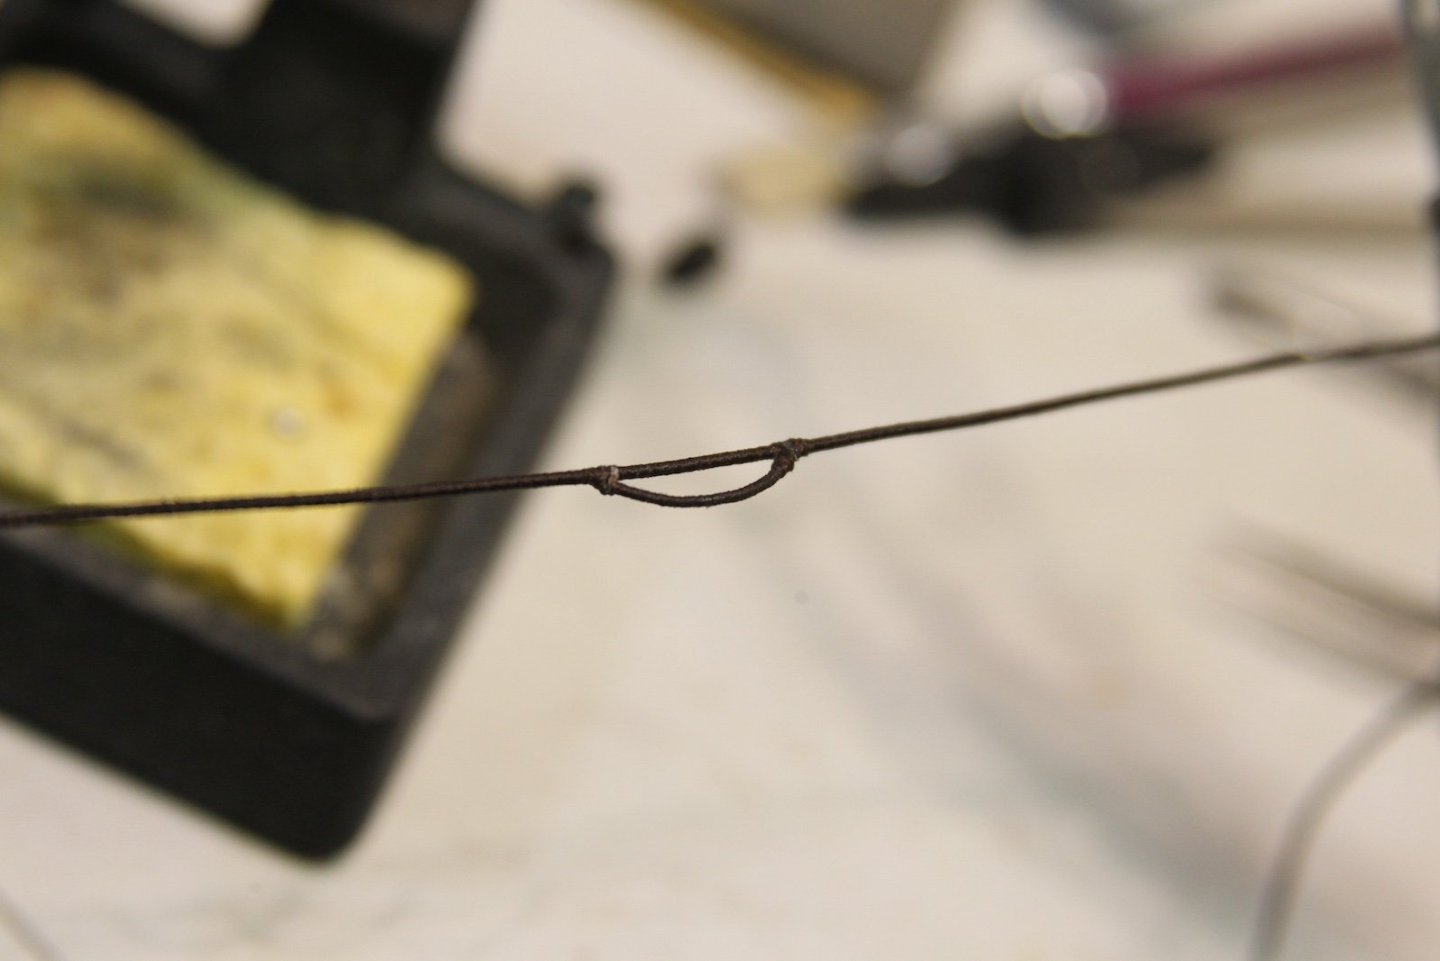
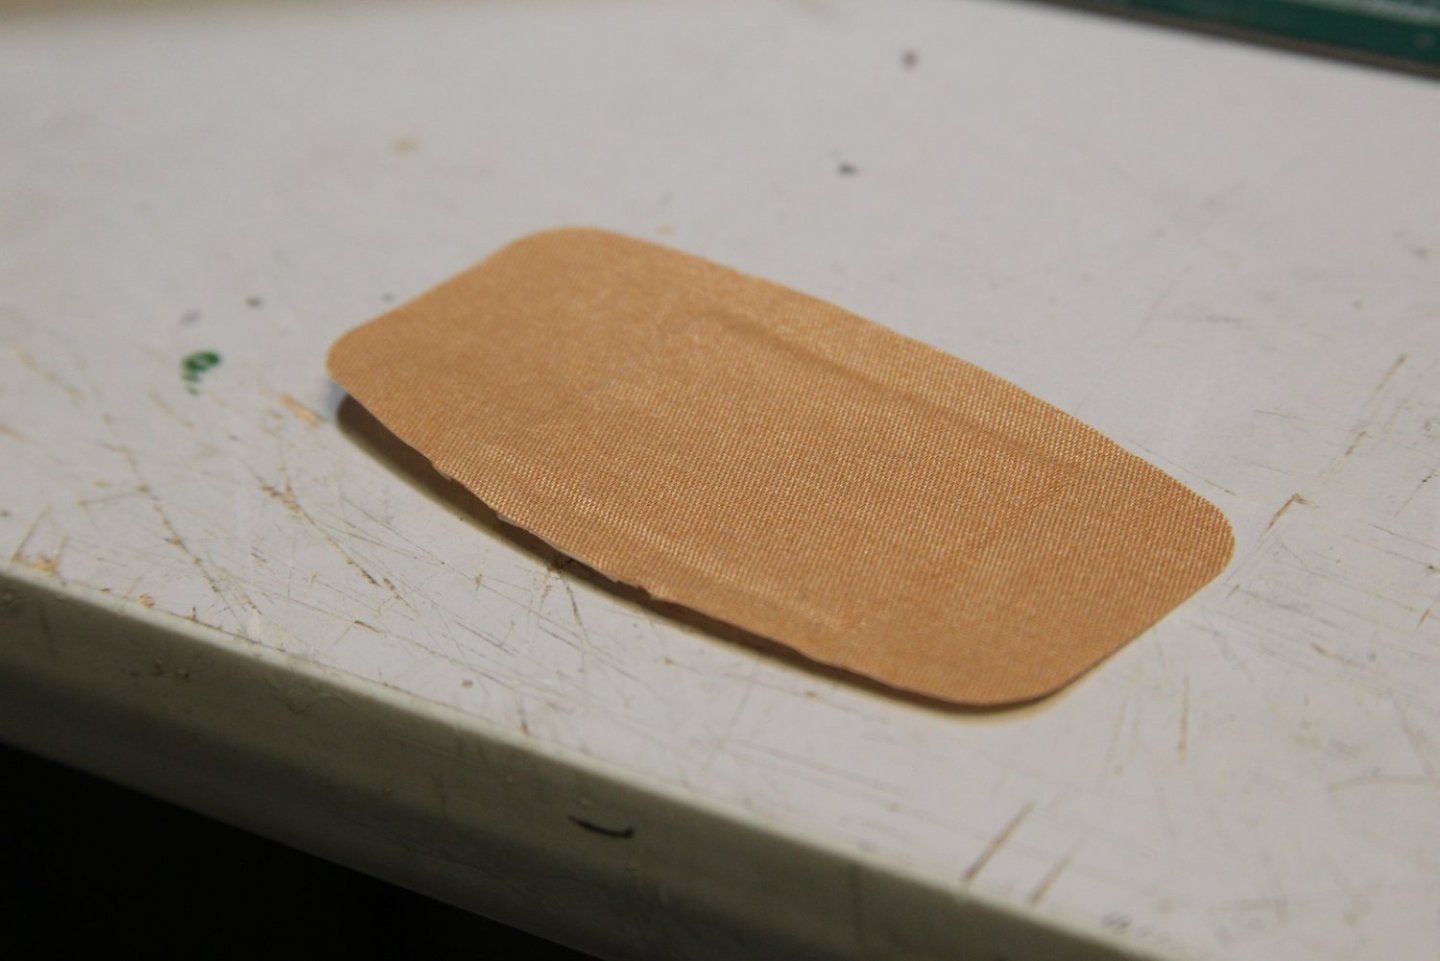
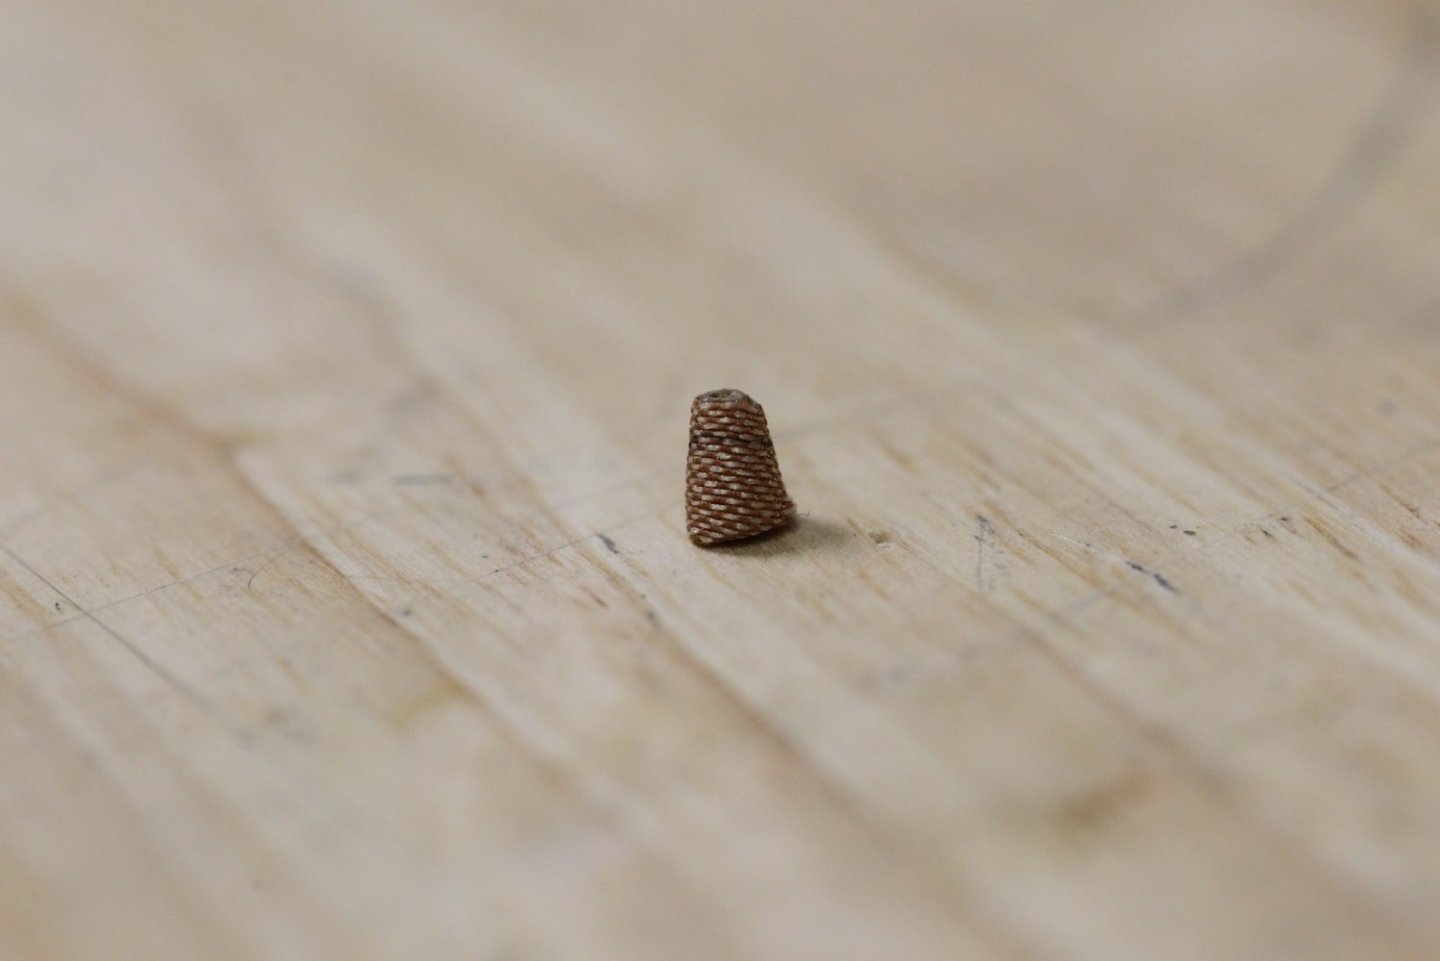
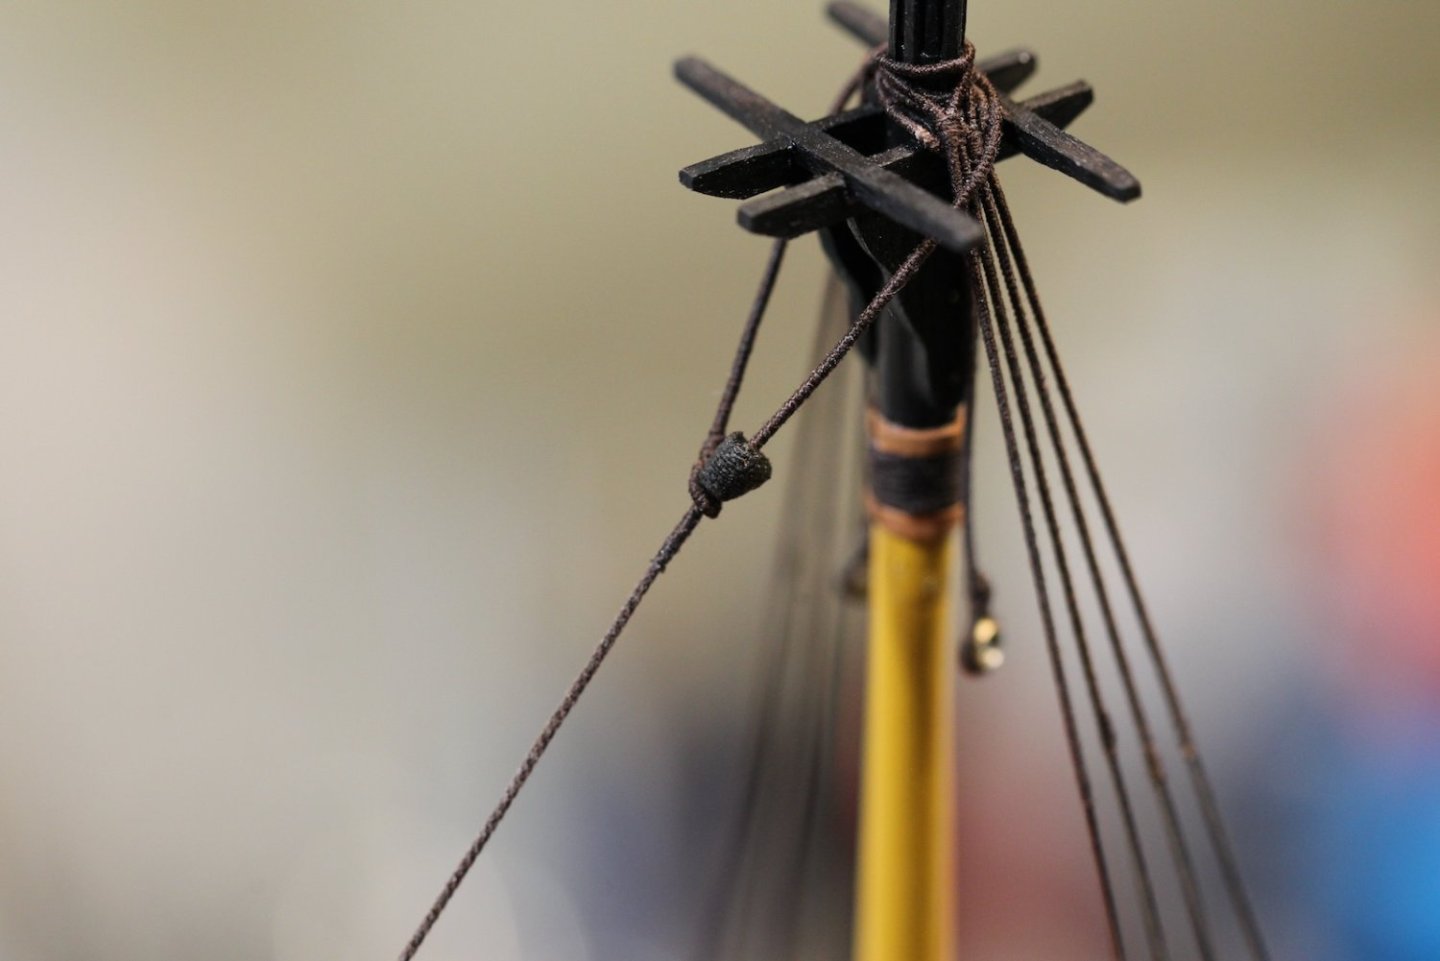
Next up is the Mizzen stay as getting this rigged prior to the mainmast shrouds ensures that I have proper access - particularly to the collars which I find to be a little fiddly anyway. Starting with said collar - the Mizzen stay is 5.5" circular, so I'm .60mm served with Mara 120 for the collar and .75mm for the Mizzen stay itself. The collar is pretty straightforward and is seized the same as the bowsprit collars on previous posts. The hearts are closed and for these I'm going with Chuck's Syren product - easy to put together and work with - including filing an indentation around the edge within which the strop will fit. The lashing is .15mm for mostly aesthetic reasons - it's the smallest rope that I have that still retains some "visual to the naked eye" detail. The stay itself has a mouse near the masthead so creates a bit of a challenge in terms of planning and execution. The top portion is served to just below the mouse with an eye into which the rest of the stay are inserted. To get the serving correct, I started by looping the end of the stay then feeding my serving line (mara 120) into the stay via sewing needled. The eye was 'hand served' then I was able to load the entire thing into my serving machine to do the rest of the portion that needed it. The mouse is a sanded dowel that is drilled out with a hole just big enough to accommodate the served line. I don't have an exact diameter of the bit that I used because I started with "very small" and then gradually increased bits until the serving line barely snugged its way through. I've seen quite a few different ways to simulate the 'woven' texture of the mouse. My option was this bandage. My Admiral happens to be allergic to latex and cannot use just any type of bandage, so we have a few different versions of fabric bandages. This particular one had the look and feel of weaving at the correct scale. The added bonus is that it has adhesive - though I did had a dab of CA to ensure it does not come loose. The mouse is listed as three times the diameter of the stay, but the bandage added a little bulk - so I did have to scale the mouse down a tad as the original effort was a little big for my taste. Ultimately I just 'eye-balled' it until it looked right to me. The mouse is then painted first black, then brown to try and match the color of the stay. Finally, the lower end of the stay is seized to a twin closed heart to the collar and lashed. One note in the second picture below - although the lashing behind the mast looks much lighter - that's a trick of the camera where my overhead light was shining - all the lashings are the same color.


- 419 replies
-
- 14
-
-
- Victory Models
- Pegasus
- (and 2 more)
-
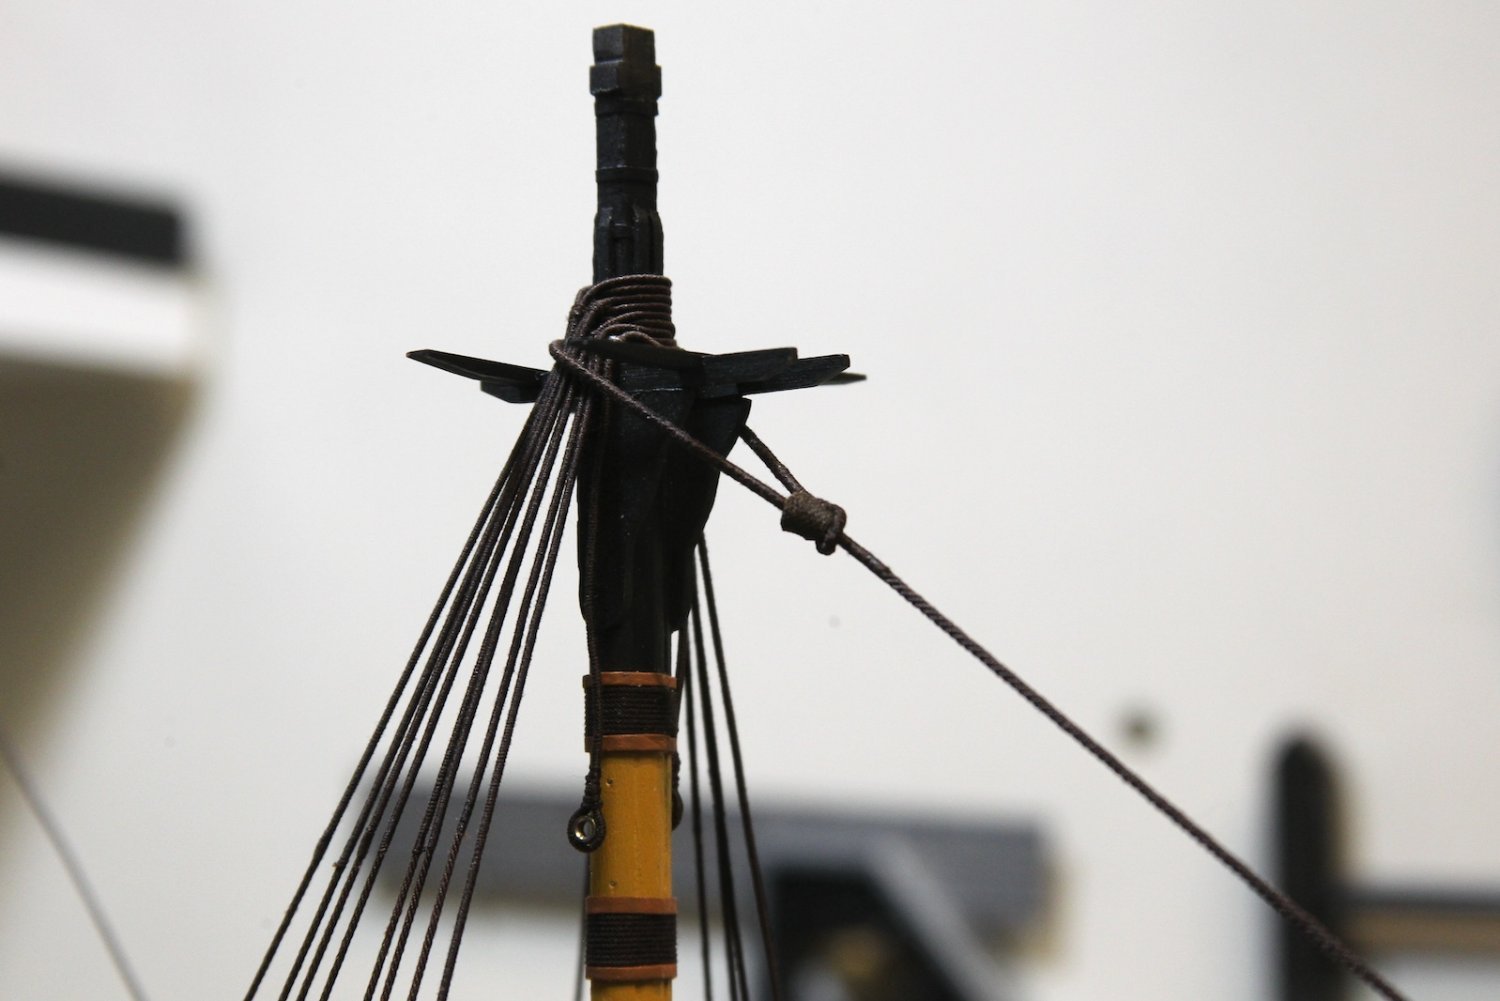
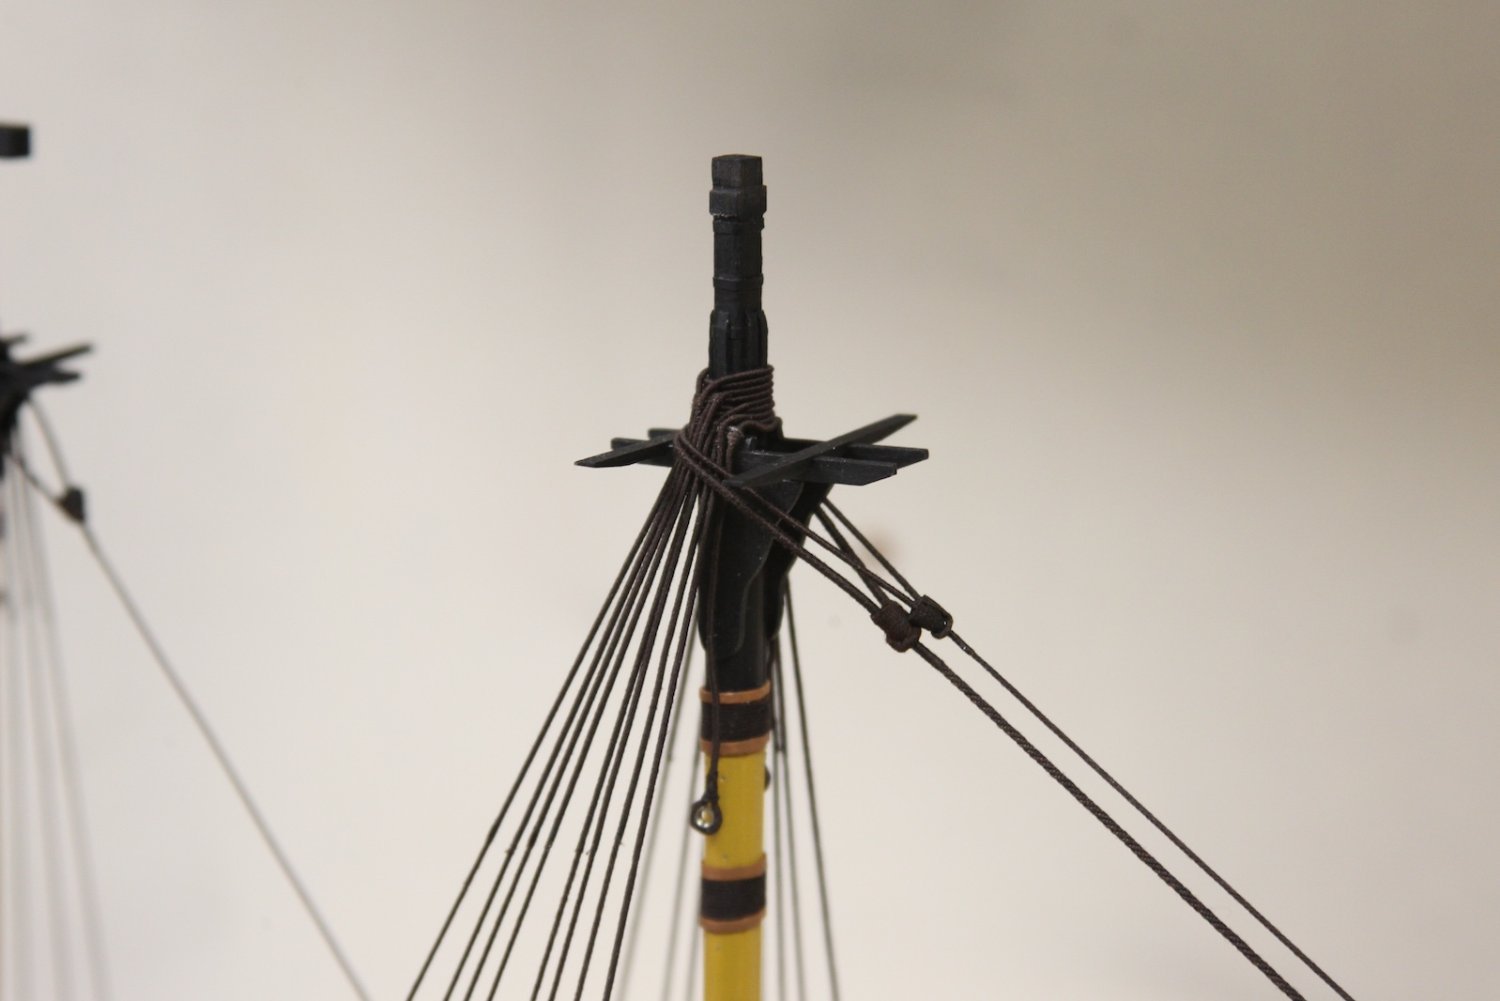
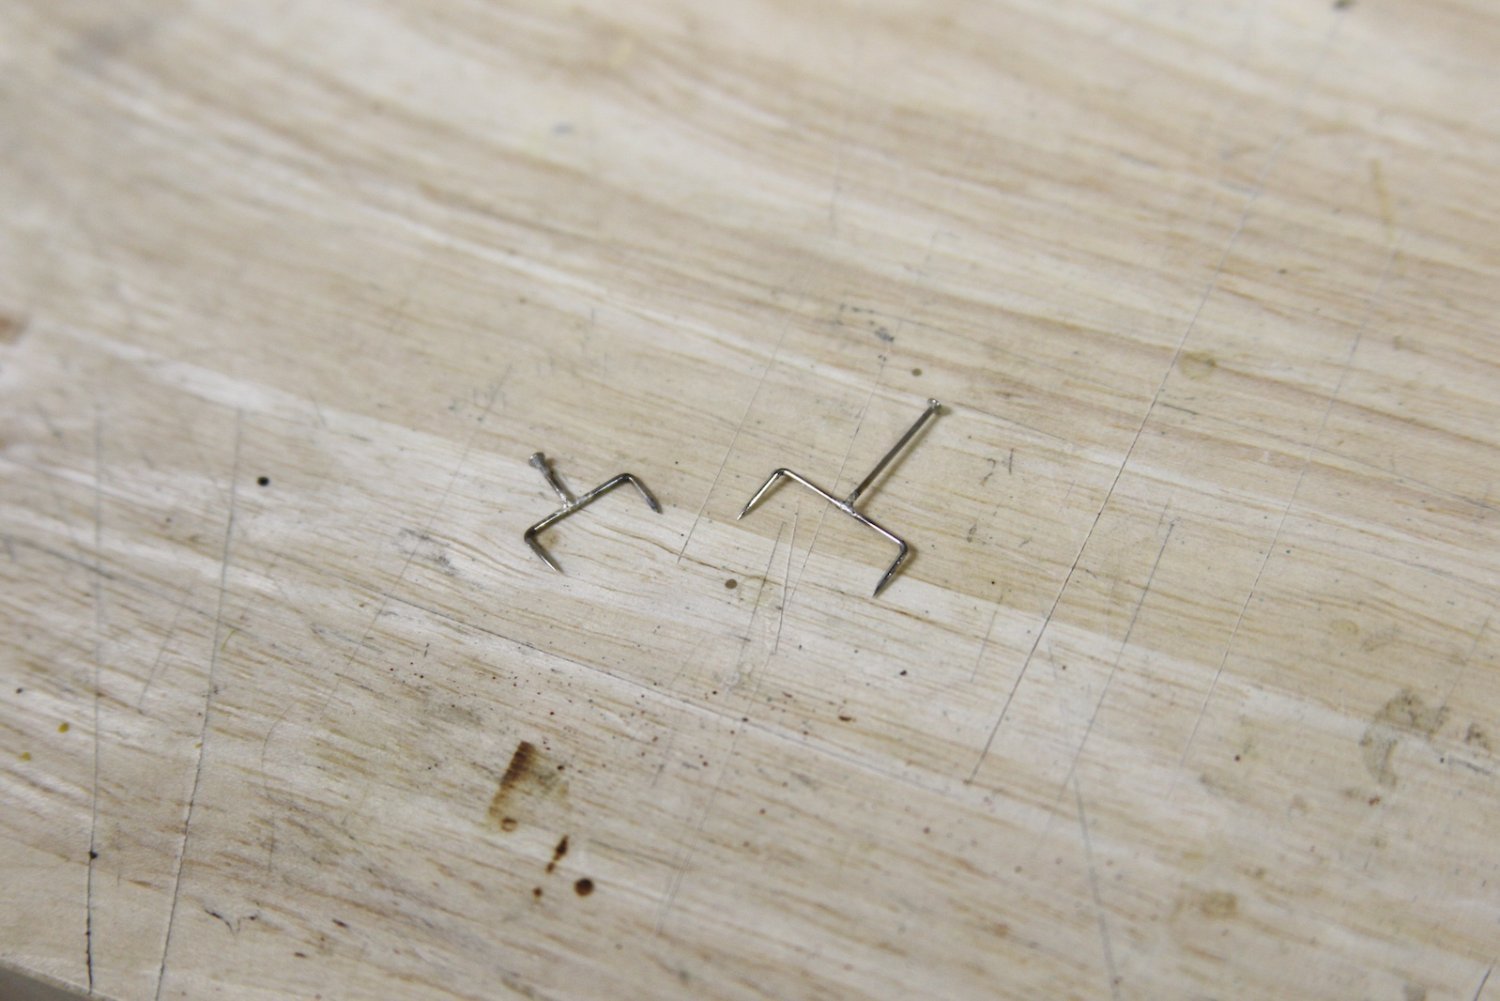
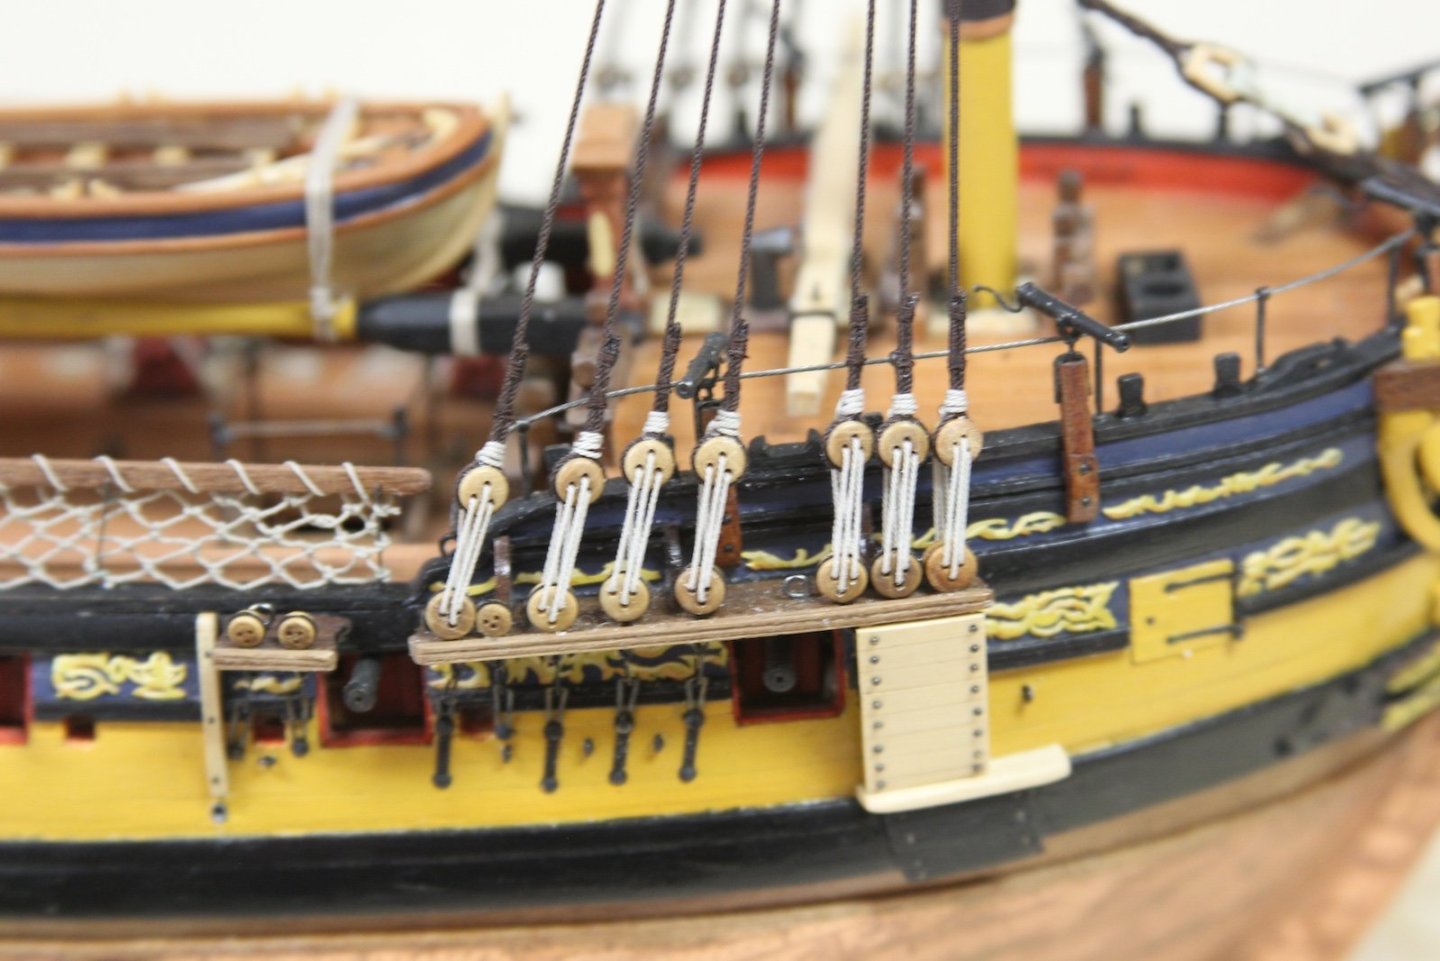
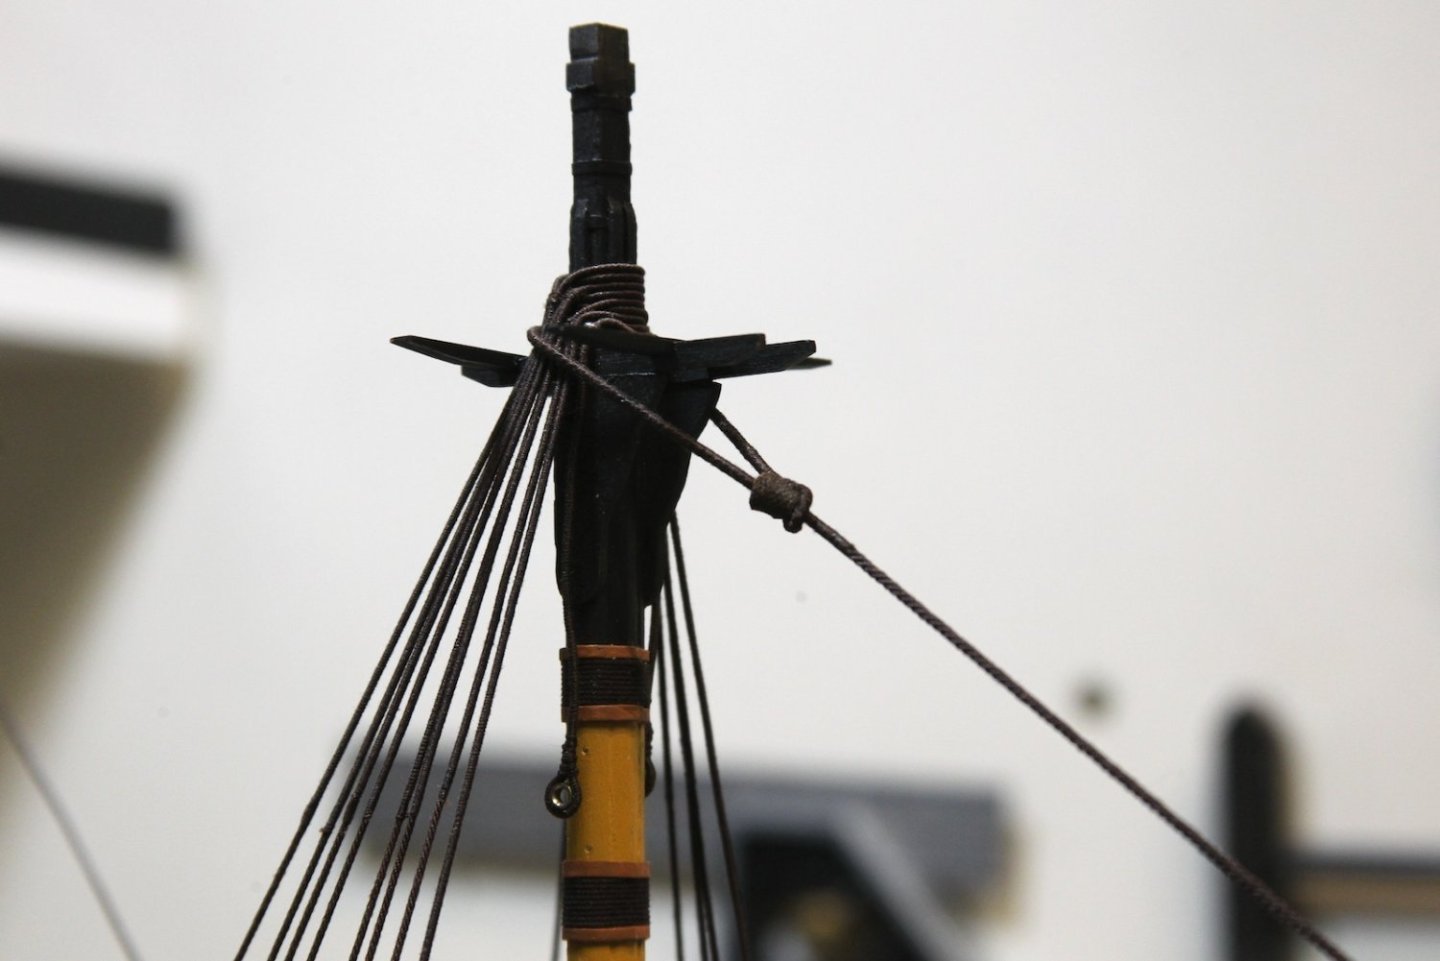
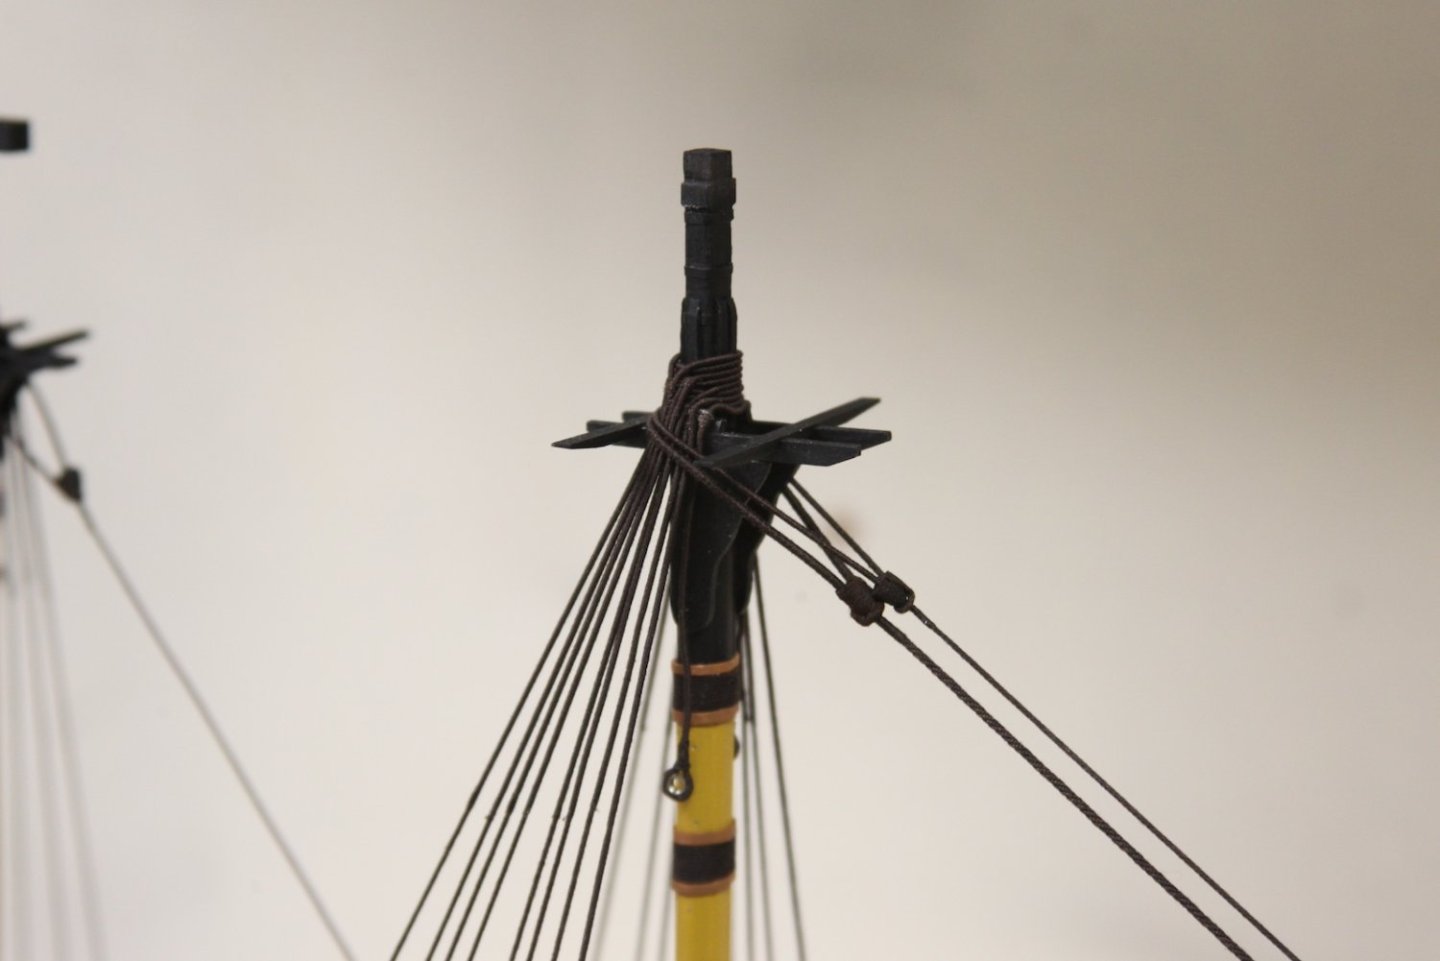
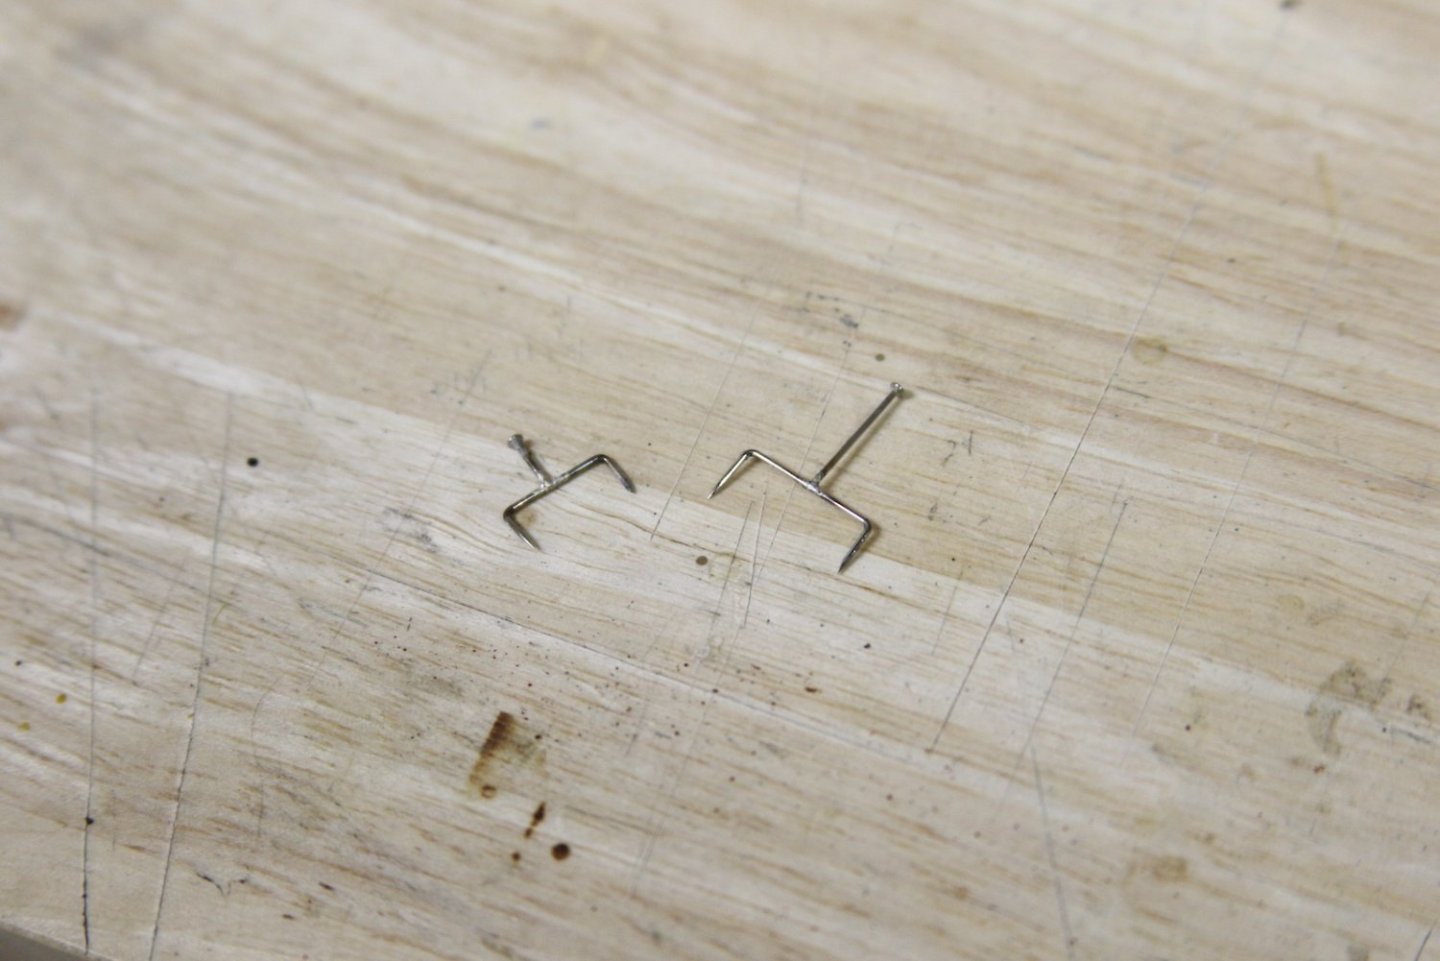
First, a shot of all three of the burton Pendants. Quick photography note - this image is actually three different shots "stacked" to clear up the difference in focal length and focus between shooting each mast. A neat trick that's easy to "google" on the internet for those of you who use Photoshop. On to stepping up the masts starting with the Mizen shrouds. The shrouds are 4.5" circular (.57mm diameter at scale) and are served for the first six feet (about 2" at scale). First, I measured my line and marked where they'd be served, then I used a .60mm line served with Mara 120 and did all the serving in advance. The shrouds are wrapped around the masthead and seized on top of the burton pendants in pairs alternating between port and starboard. There are obviously many techniques shown throughout this forum when it comes to how to handle deadeyes and lanyards. I created this spacing jig using straight pins. I measured and cut two different sizes for the two different sized deadeyes and silver soldered them with a little handle. Using the spacer I measured the bottom of the shroud and kept it place with a touch of CA before seizing it. The lanyards are 2.5" circular which works out to .30mm diameter line. I did have to slightly bore out the holes of my smaller deadeyes to accept the lanyard. My personal process is to feed the lanyard through the deadeye, tie off the knot from the initial feed and leave the other end loose until I can tighten the lanyard to the proper tension / distance and lash it off to the shroud. Then I go back and seize the top end of the shroud.


- 419 replies
-
- 9
-
-
- Victory Models
- Pegasus
- (and 2 more)
-
Lovely, lovely work BE. I only see one - rather significant - problem. You are inciting within me the desire for another of Chris' great looking kits - and my Admiral will surely disapprove as we just started shelling out for our 3rd daughter through University.
- 648 replies
-
- 5
-
-
- Indefatigable
- Vanguard Models
- (and 1 more)
-
Beautiful work as always Giampiero. A couple posts ago regarding working on the headwords there are a couple small chisels in the picture - can you tell me what brand those are?
-
Good to see you back at it Richard - I admire your persistence.
-
Very nicely done. Also - I'm very in touch with the "...at all times am aware of where my hands are" concept - especially as I lose some dexterity with age.
- 562 replies
-
- 2
-
-
- vanguard models
- alert
- (and 2 more)
-
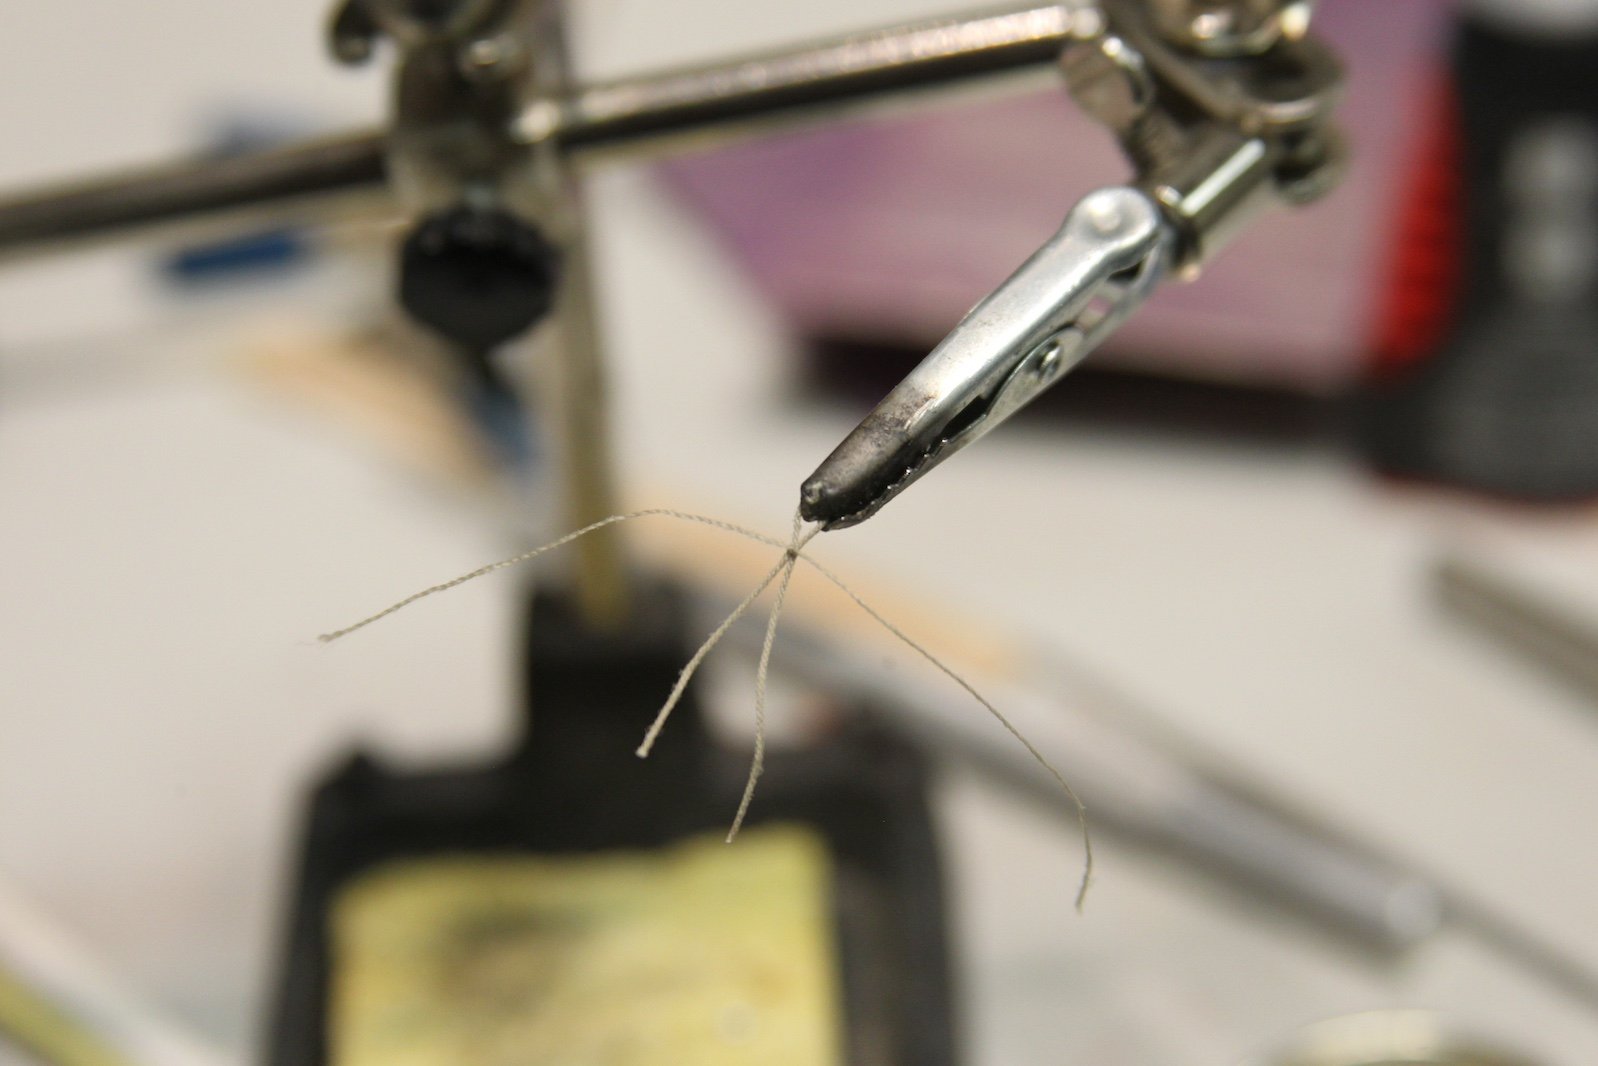
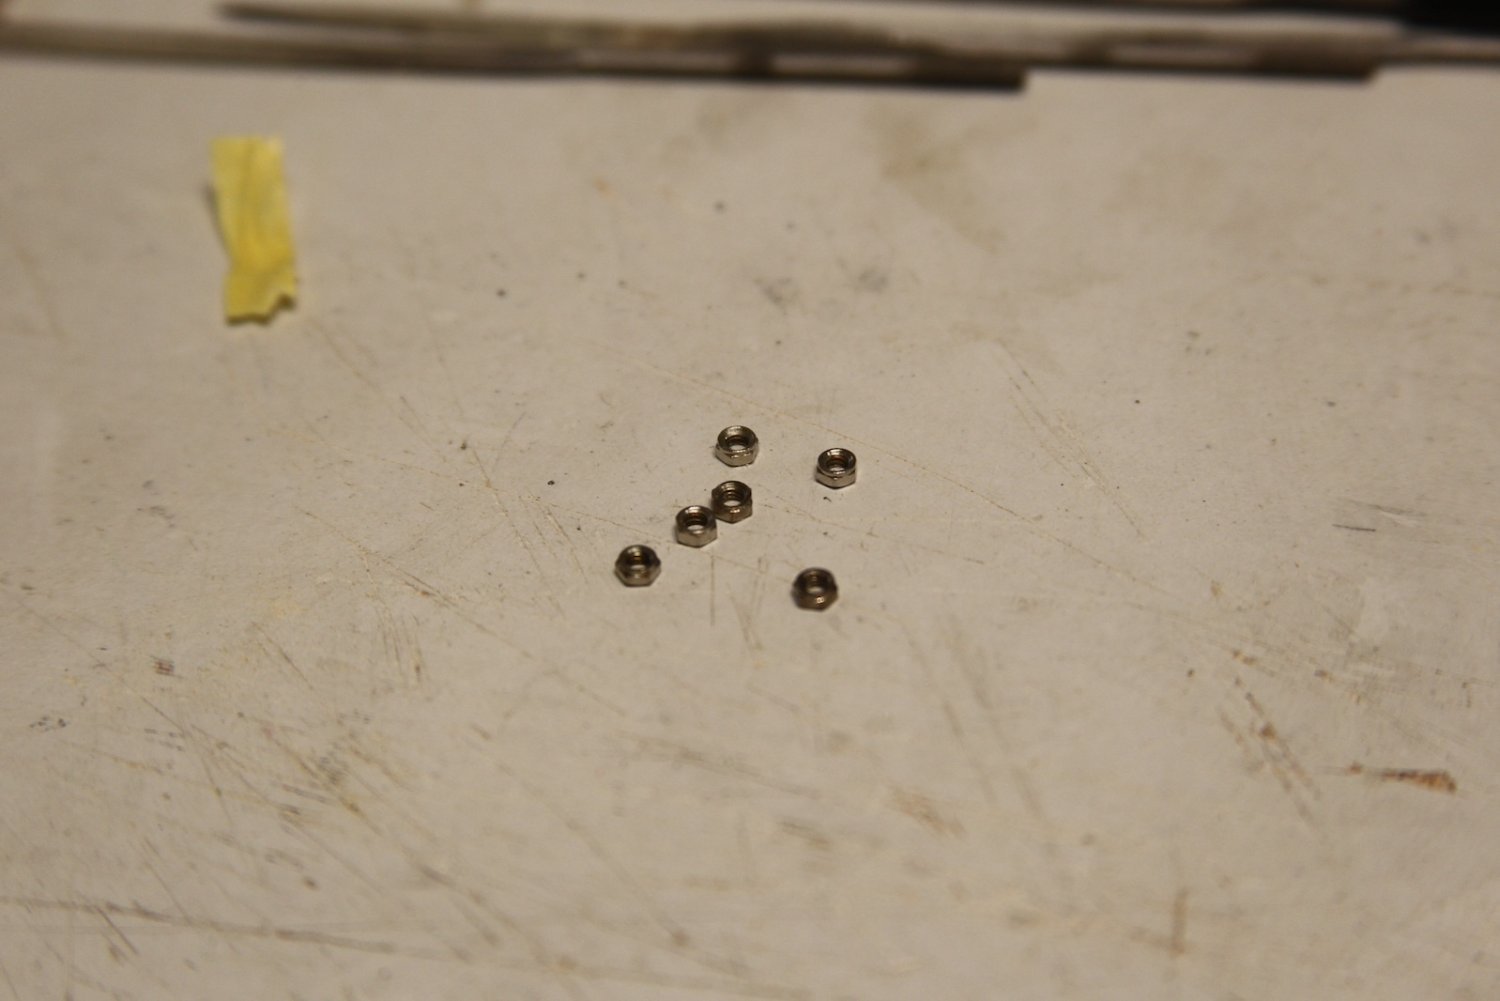
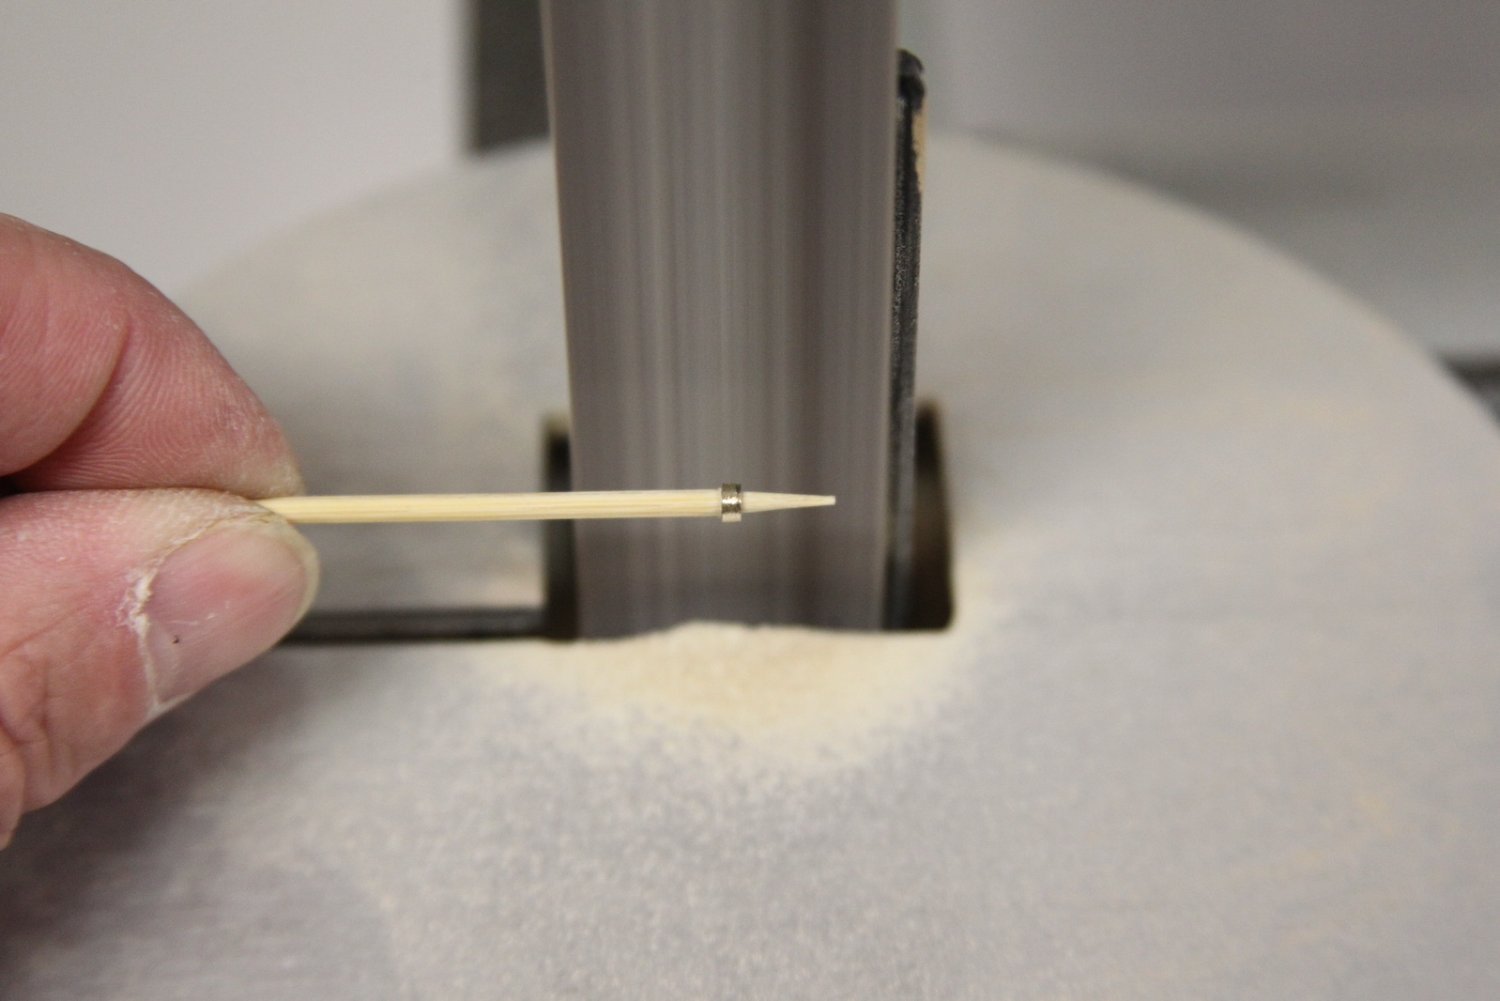
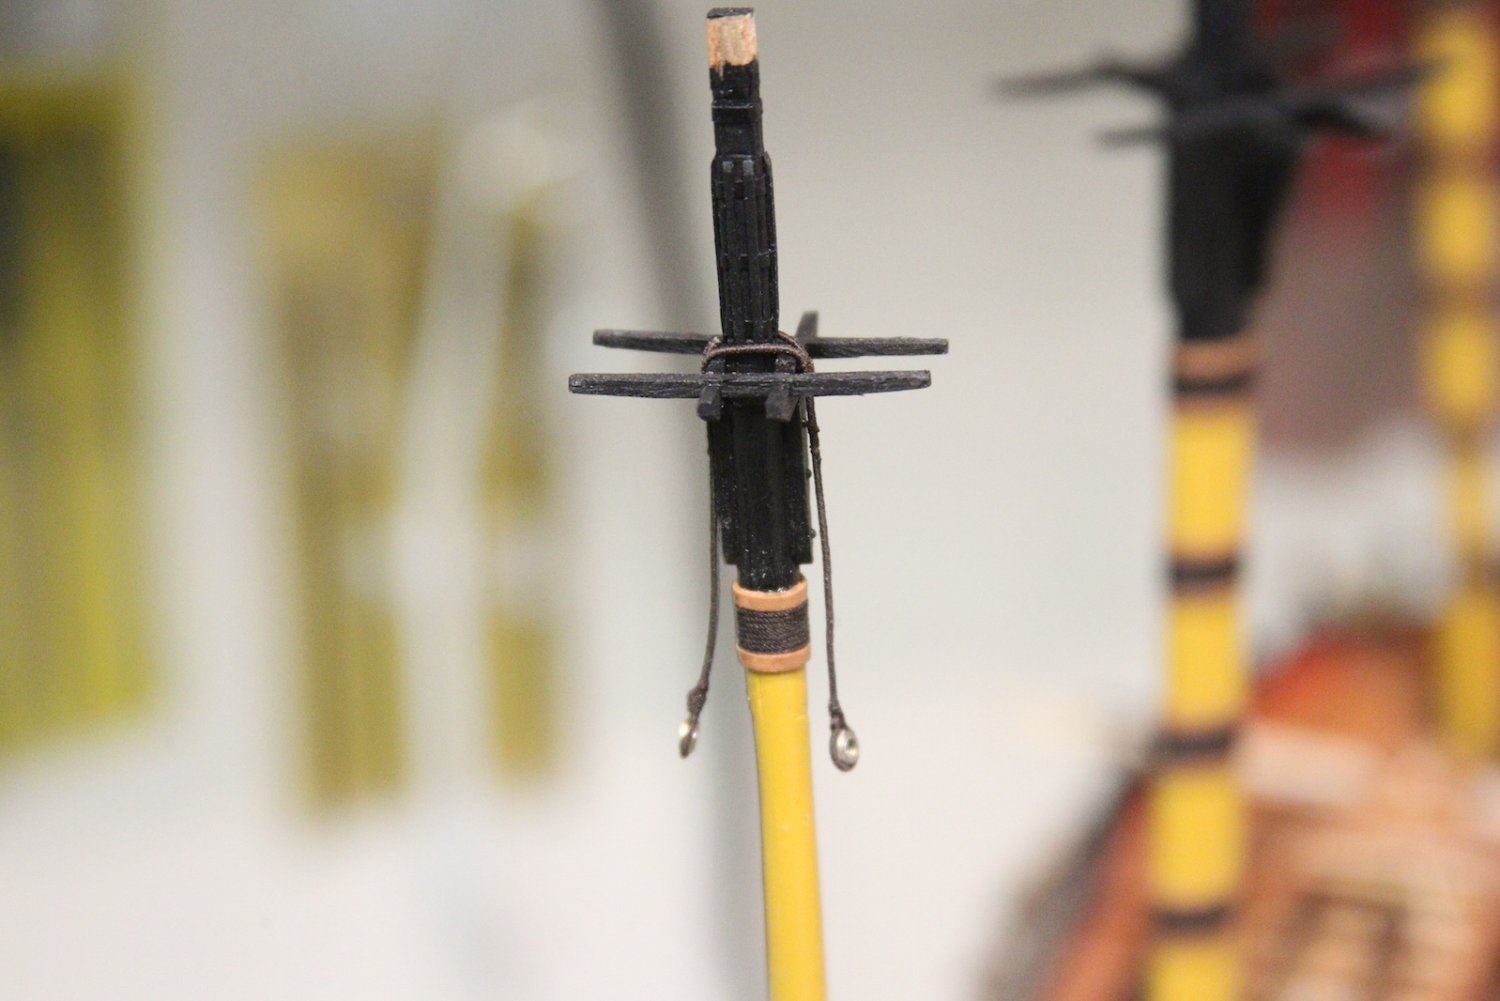
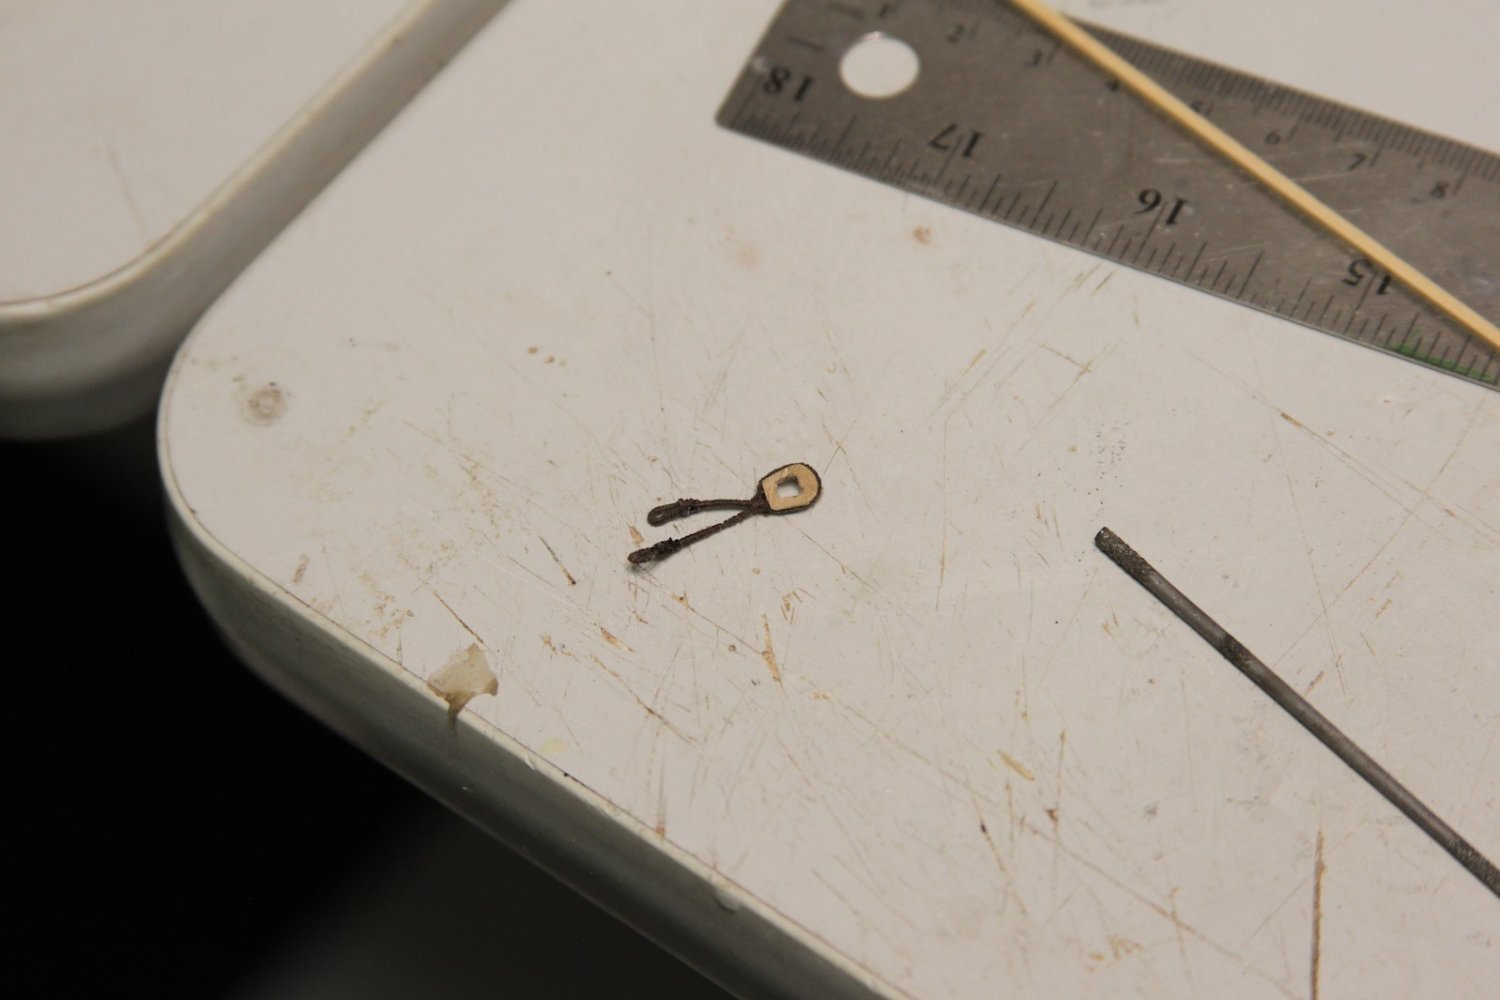
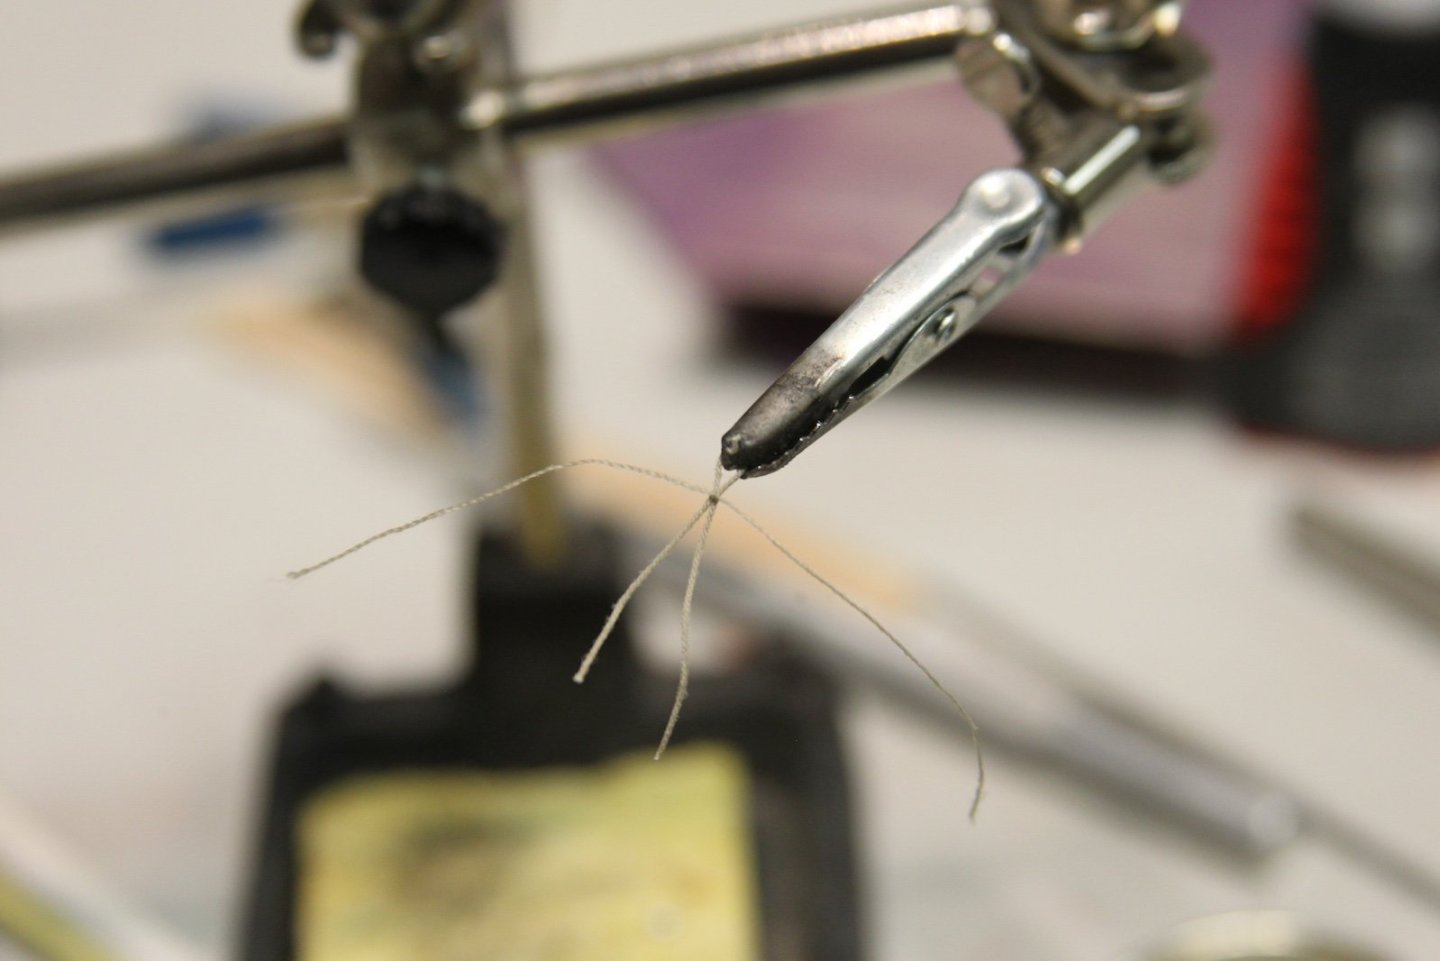
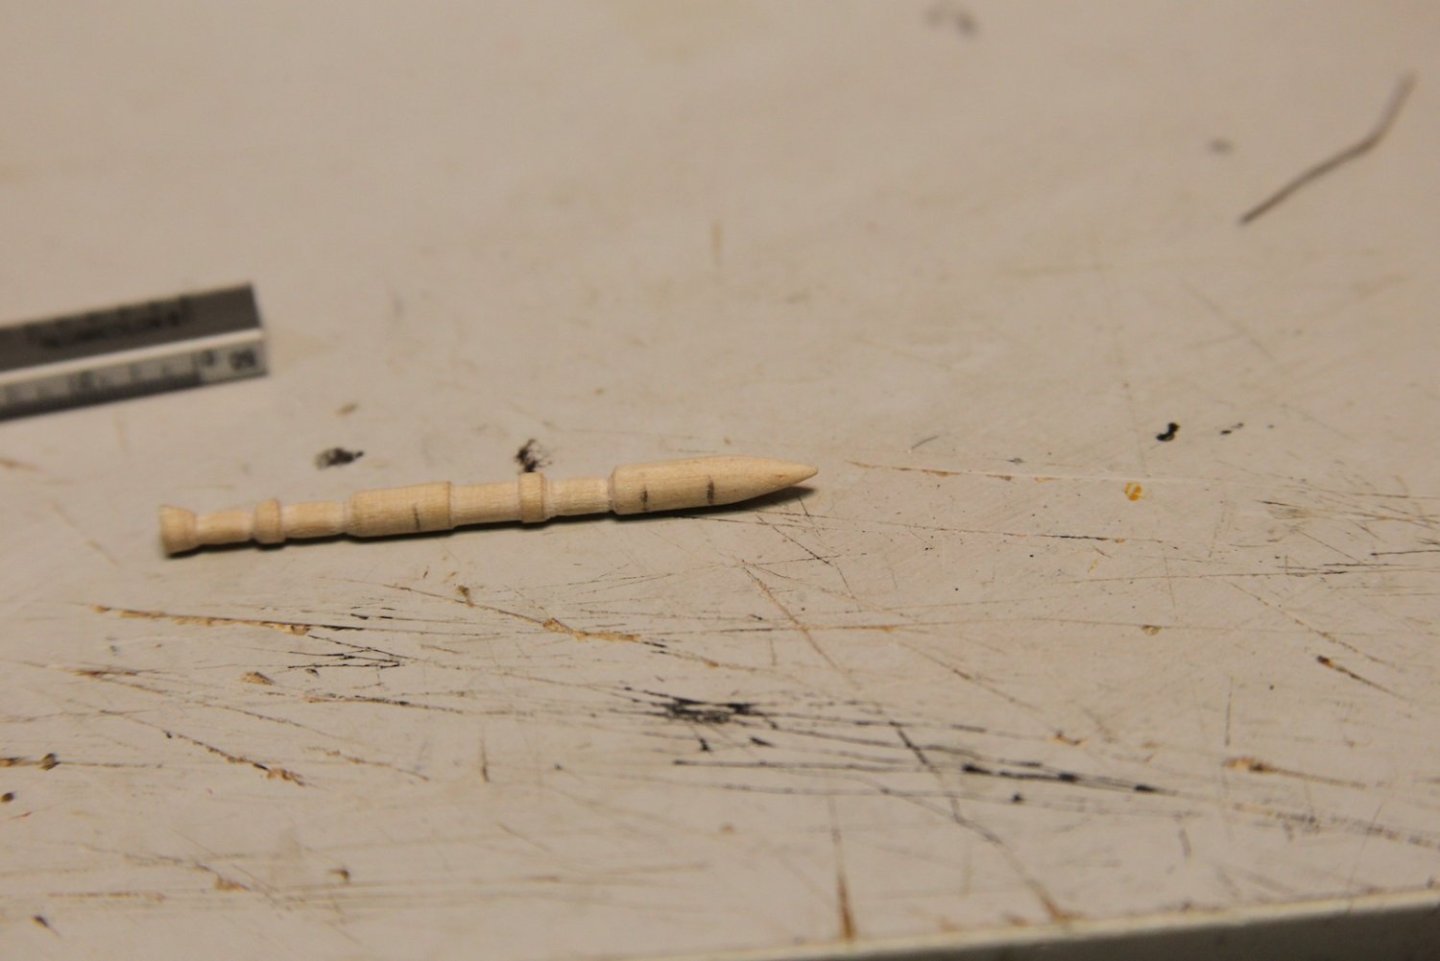
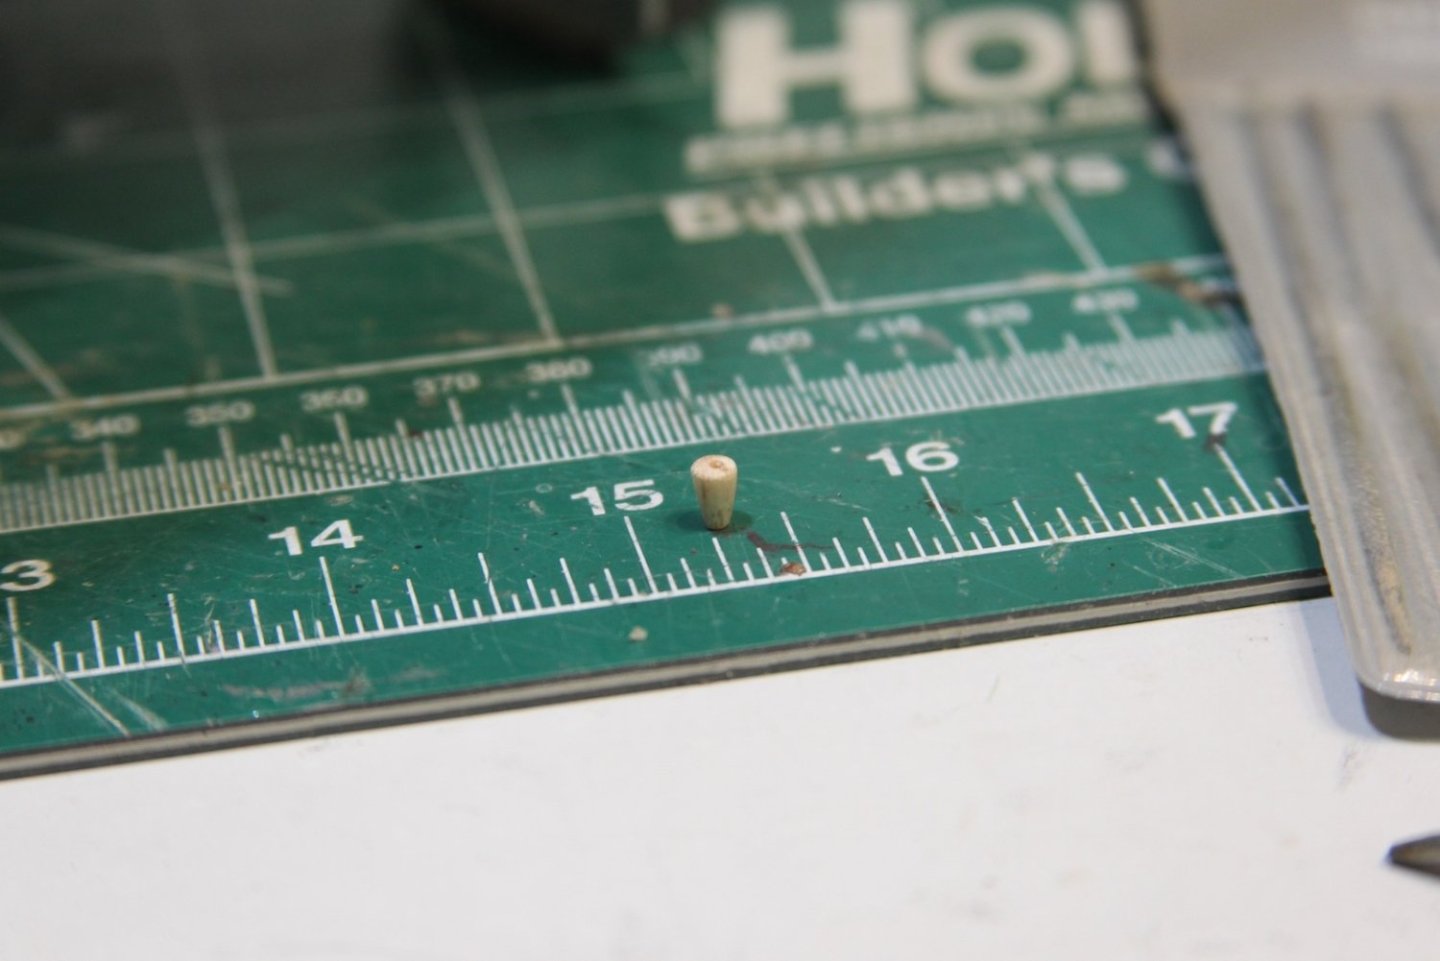
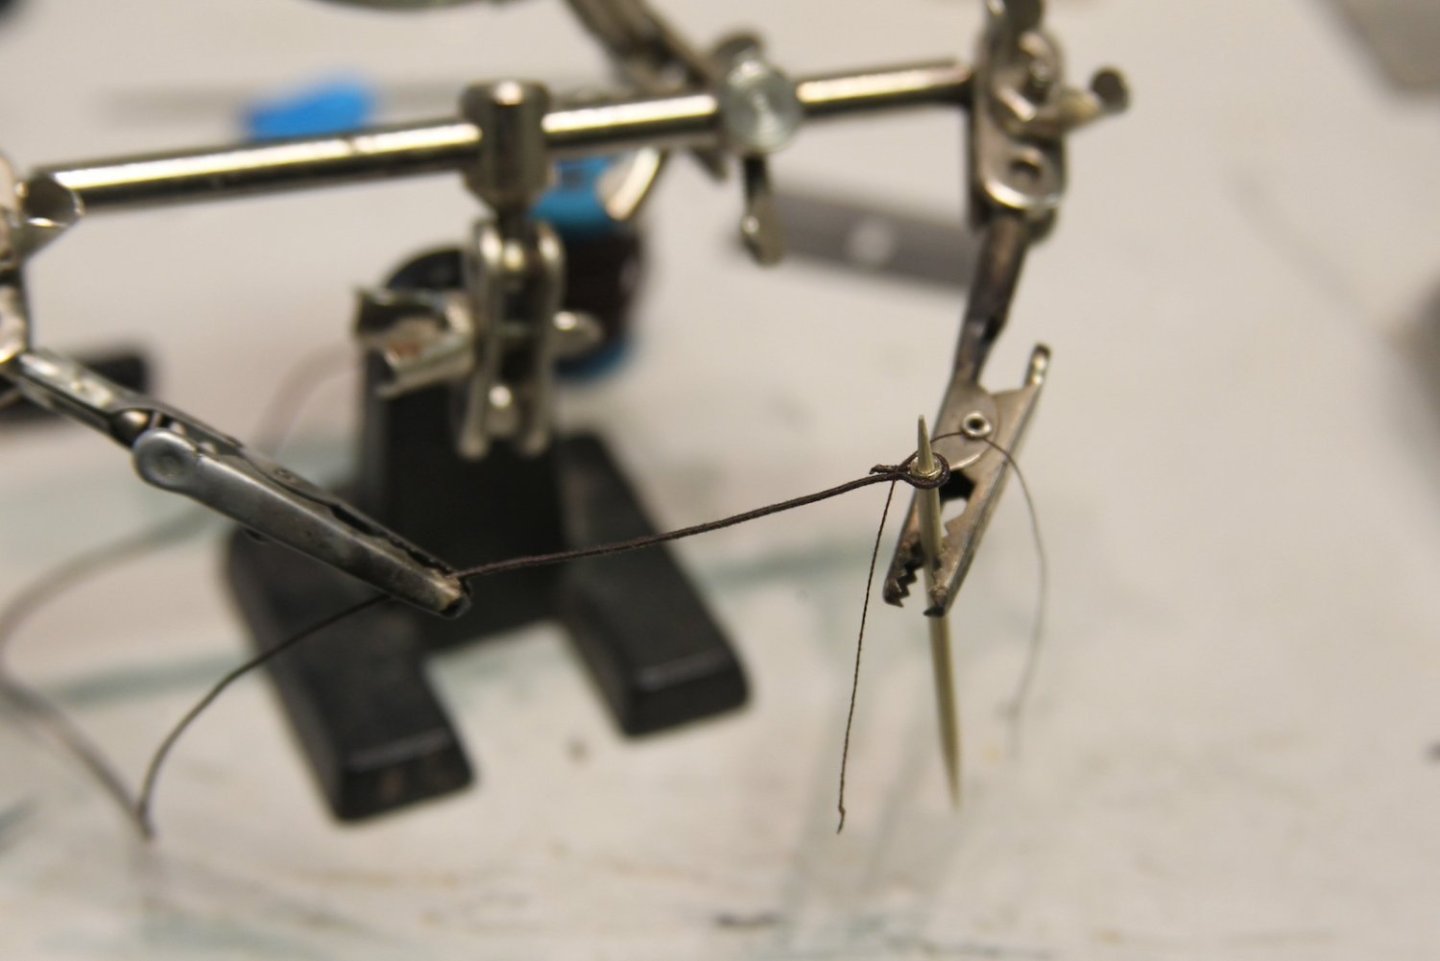
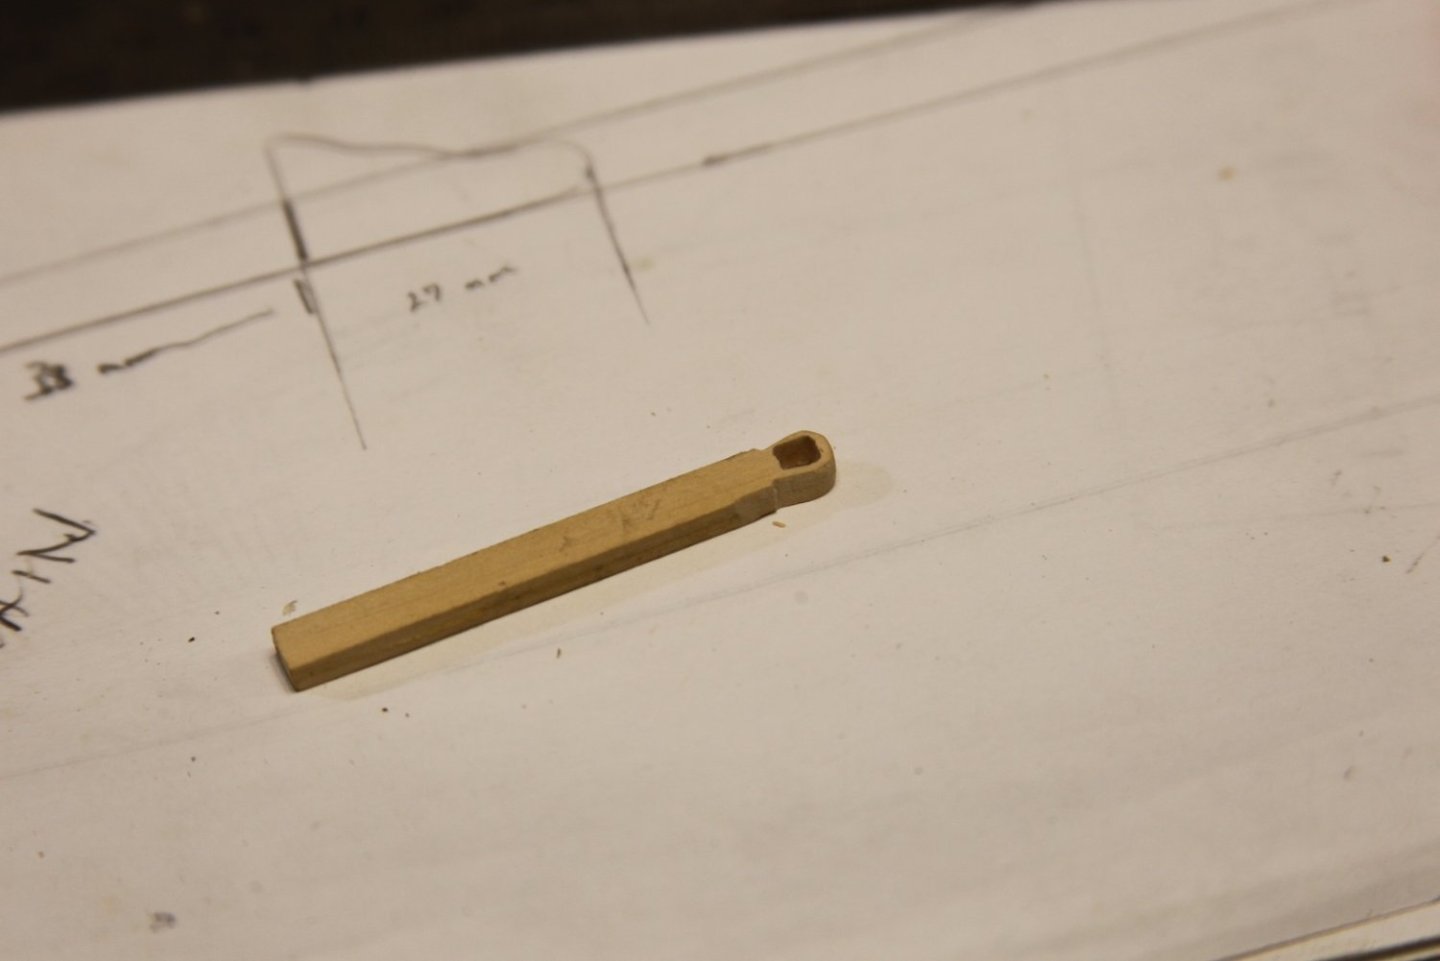
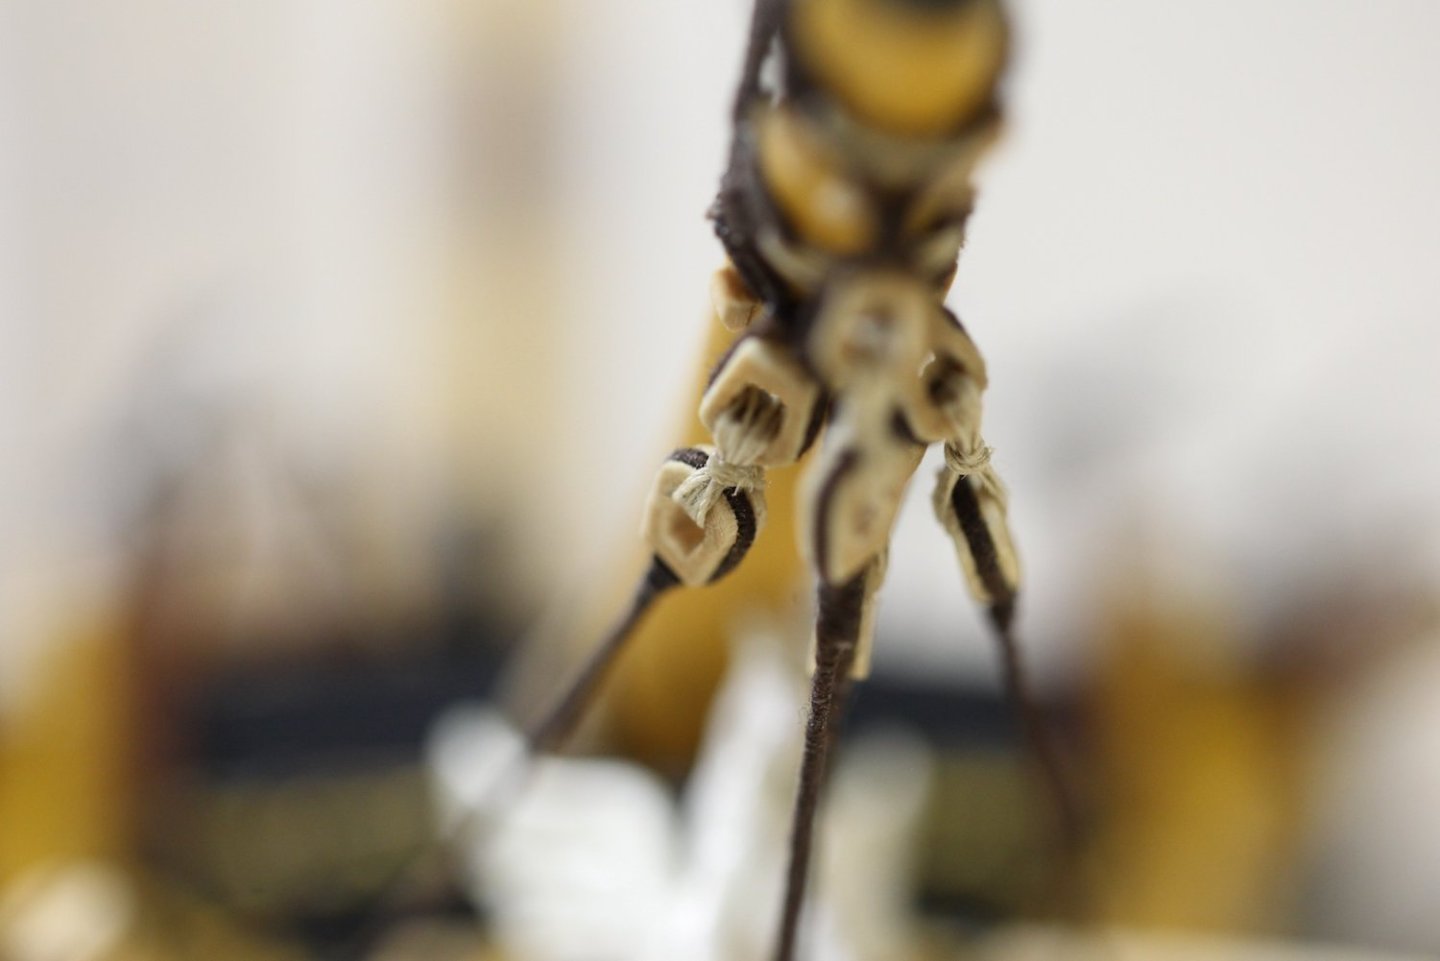
Well this little burton pendant ended up being a little bugger. First I wandered around searching through my little drawers and containers to find something that might work for the thimbles at the end of the pendants. What I ended up deciding upon were these little nuts left over from some model or another. They were an adequate diameter and just needed to be rounded off by slipping them over a toothpick and barely rubbing them against the belt sander. The darn little splice at the center where the pendants slip over the mast head ended up being much more fiddly than I expected. The thimble is lashed first - sticking with my toothpick to keep everything in place. For the mizzen (this pendant) I used .5mm served with Mara 120 and slipped a needle through it (which took several tries) to start the splice. I then wrapped additional 120 thread over to finish it off. It actually took me a few tries to get the length of the splice correct, and the 'bottom' of the splice is a little messy as I had to use a dab of CA glue - but I've masked it by laying the ugly portion against the mast. The final product looks pretty good to me. The other two pendants for the fore and main are the same process but with slightly larger line. I'll be using a .75mm line served with Mara 70 thread to create a 1mm pendant.


- 419 replies
-
- 11
-
-
- Victory Models
- Pegasus
- (and 2 more)
-
Snazzy idea for a little deadeye jig!
-
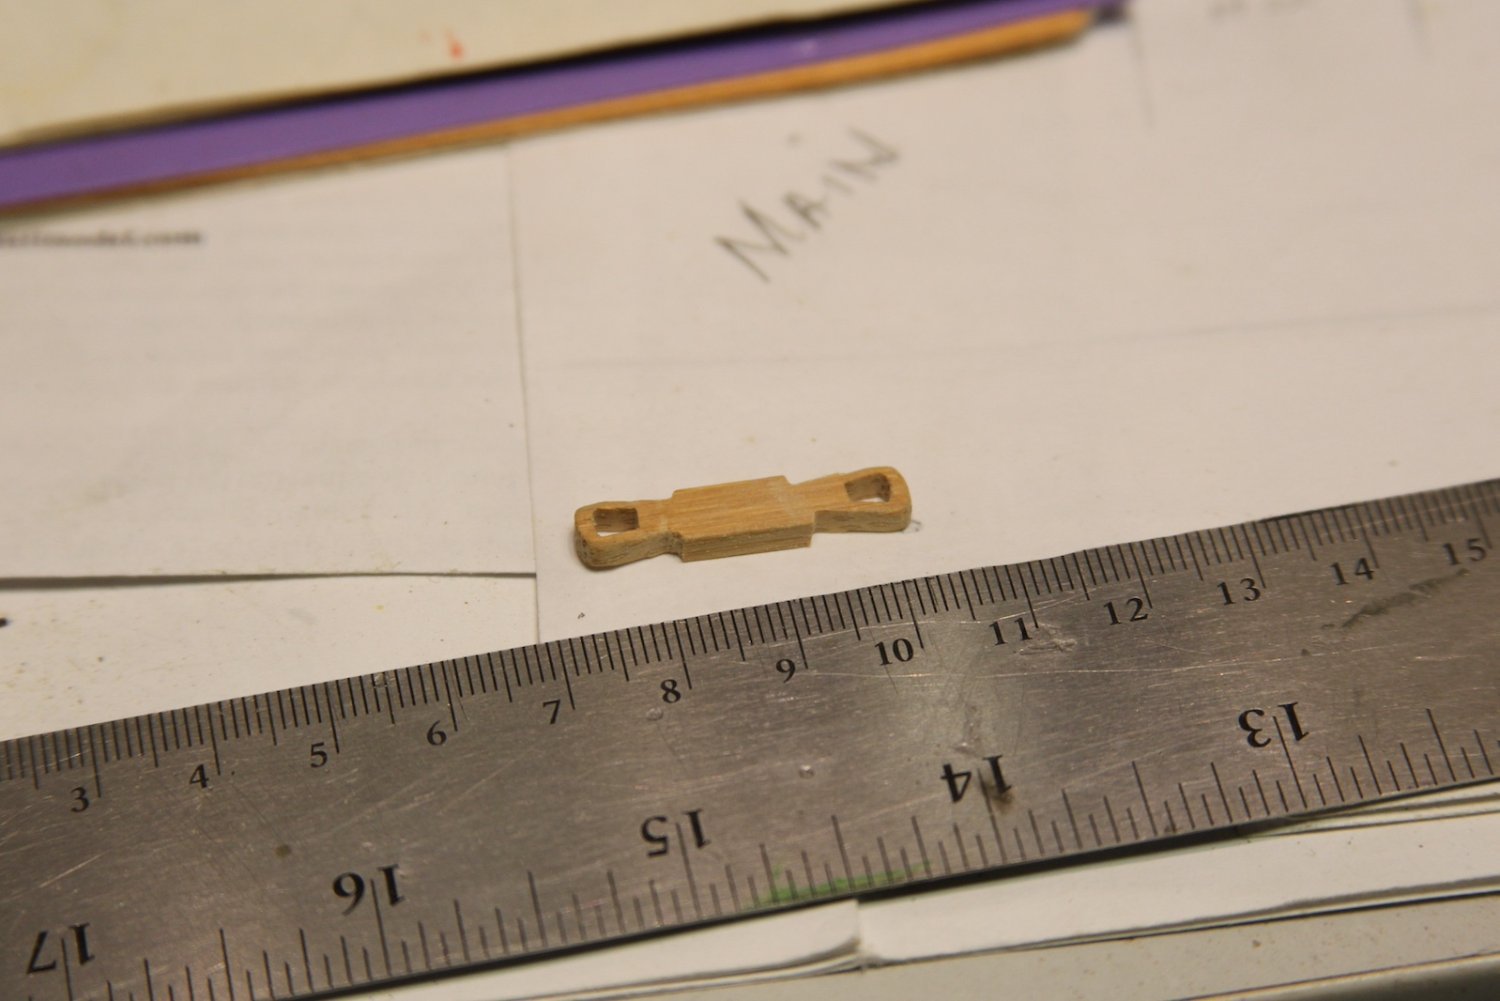
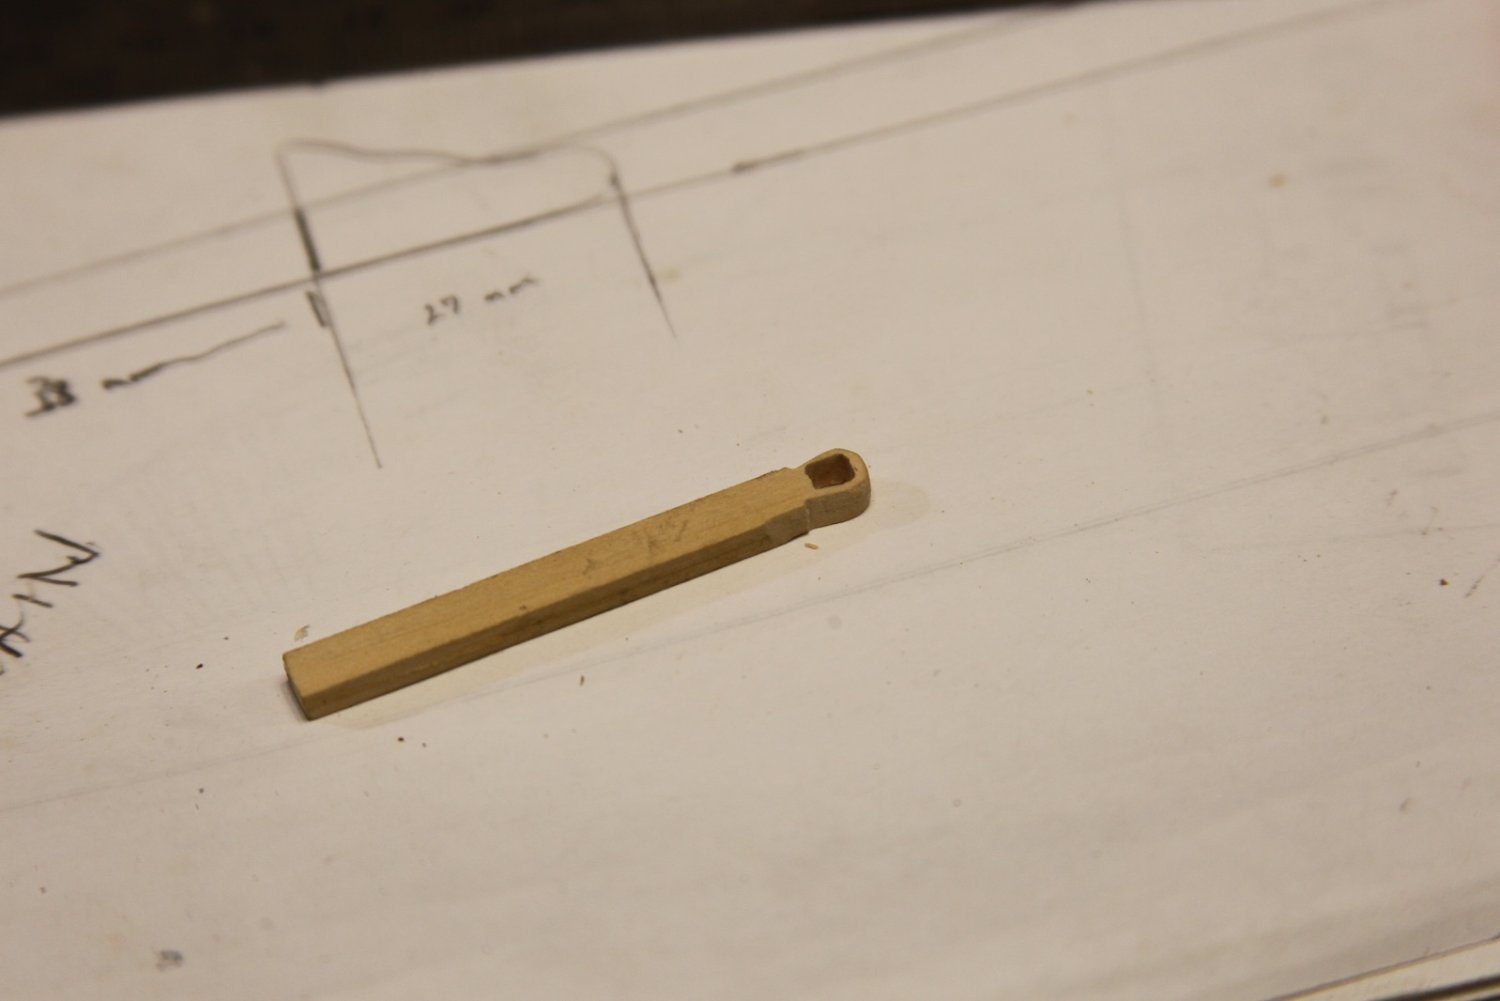
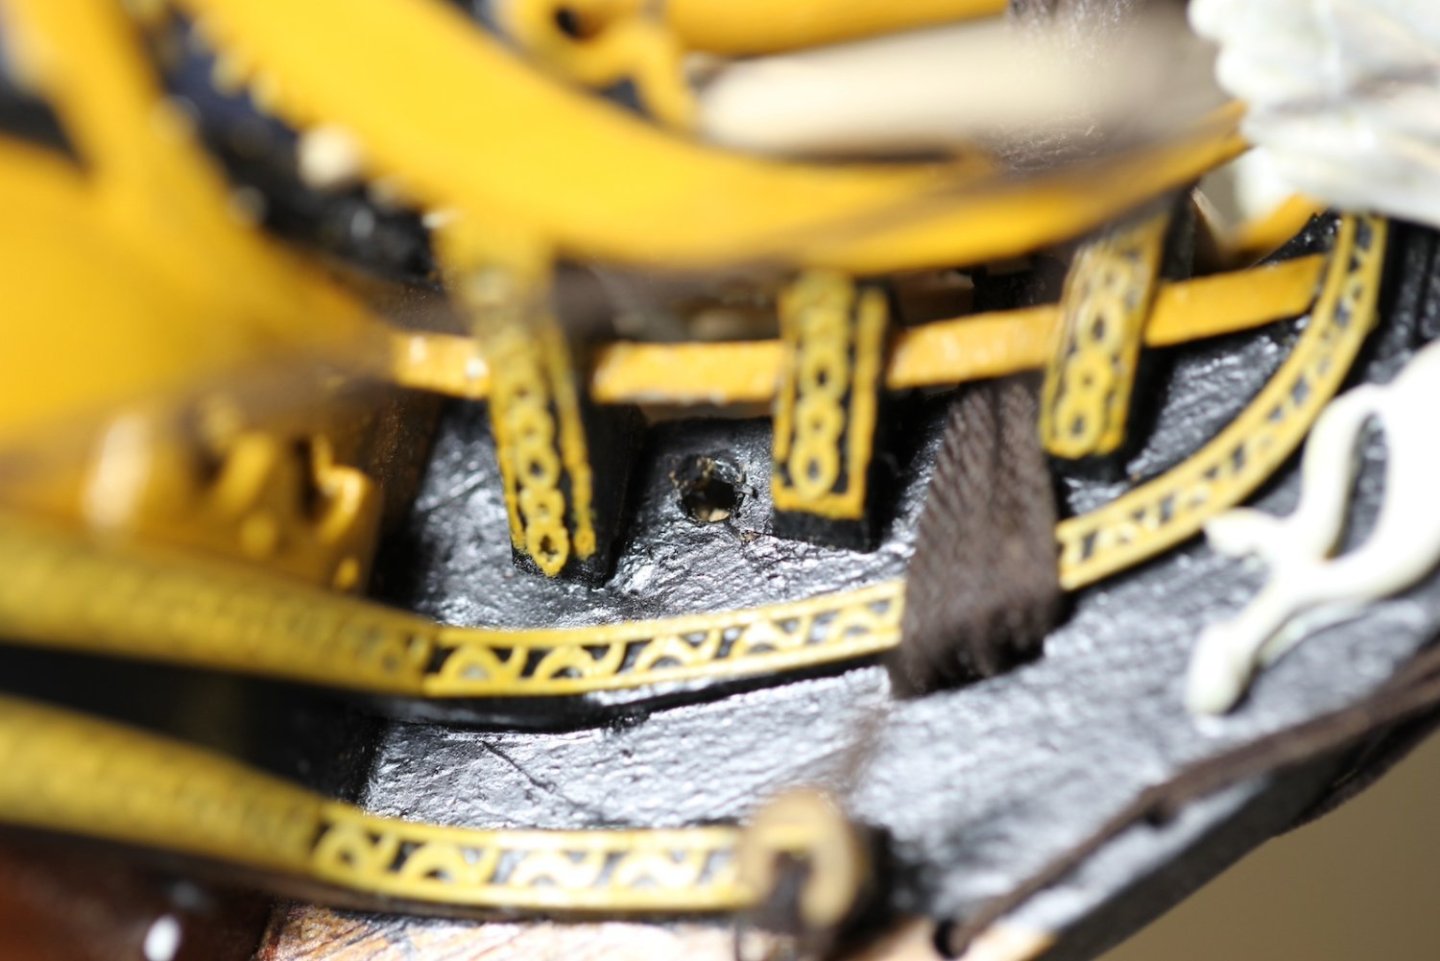
I had several work meetings this morning which required little participation on my behalf. As a result, I mostly just mulled over the Mainstay collar until I gave up on work and trotted into the shipyard. This largest of the bowsprit collars requires a thicker rope than the others (8" of served cable according to Steel) so I used a 1mm rope and served it with Gutermann mara 70. I had several feet of 1mm rope that I made that hadn't turned out quite as tight as I wanted and looked a bit funky, so I kept it around to use as the base for served lines. The main stay collar is a bit more complicated than the others as well. It has a spliced eye on one side, then it's lashed to a closed heart, then it pass through the knee of the head, then another spliced eye is looped through the first one. Pretty easy to turn the whole thing into a big lumpy mess if one isn't careful. Starting with the heart - 15" according to Steel which translates to 5.95mm at 1/64; we'll call it 6mm. I actually made this heart (and it's compliment from the main stay) from some hardwood I had lying around that was part of a pen case. It's not quite as hard as boxwood but hard enough and has a little bit more color to it. I shaped two ends of a 6mm wide strip then drilled and shaped the holes before cutting them off and rounding off the hard edges and adding a groove for the line. The rest of the process isn't really documented per se, but I do have to point out an oversight. I didn't look far enough ahead (or at least missed this need) so I ended up having to drill the hole in the knee of the head now, as opposed to before I constructed the bits and finishings of the bow. Little bit of a pain the rear, and yes I did go back and touch up the spot where I scuffed the yellow paint. The last photo shows the finished collar with everything attached, lashed, and seized.

- 419 replies
-
- 11
-
-
-
- Victory Models
- Pegasus
- (and 2 more)
-
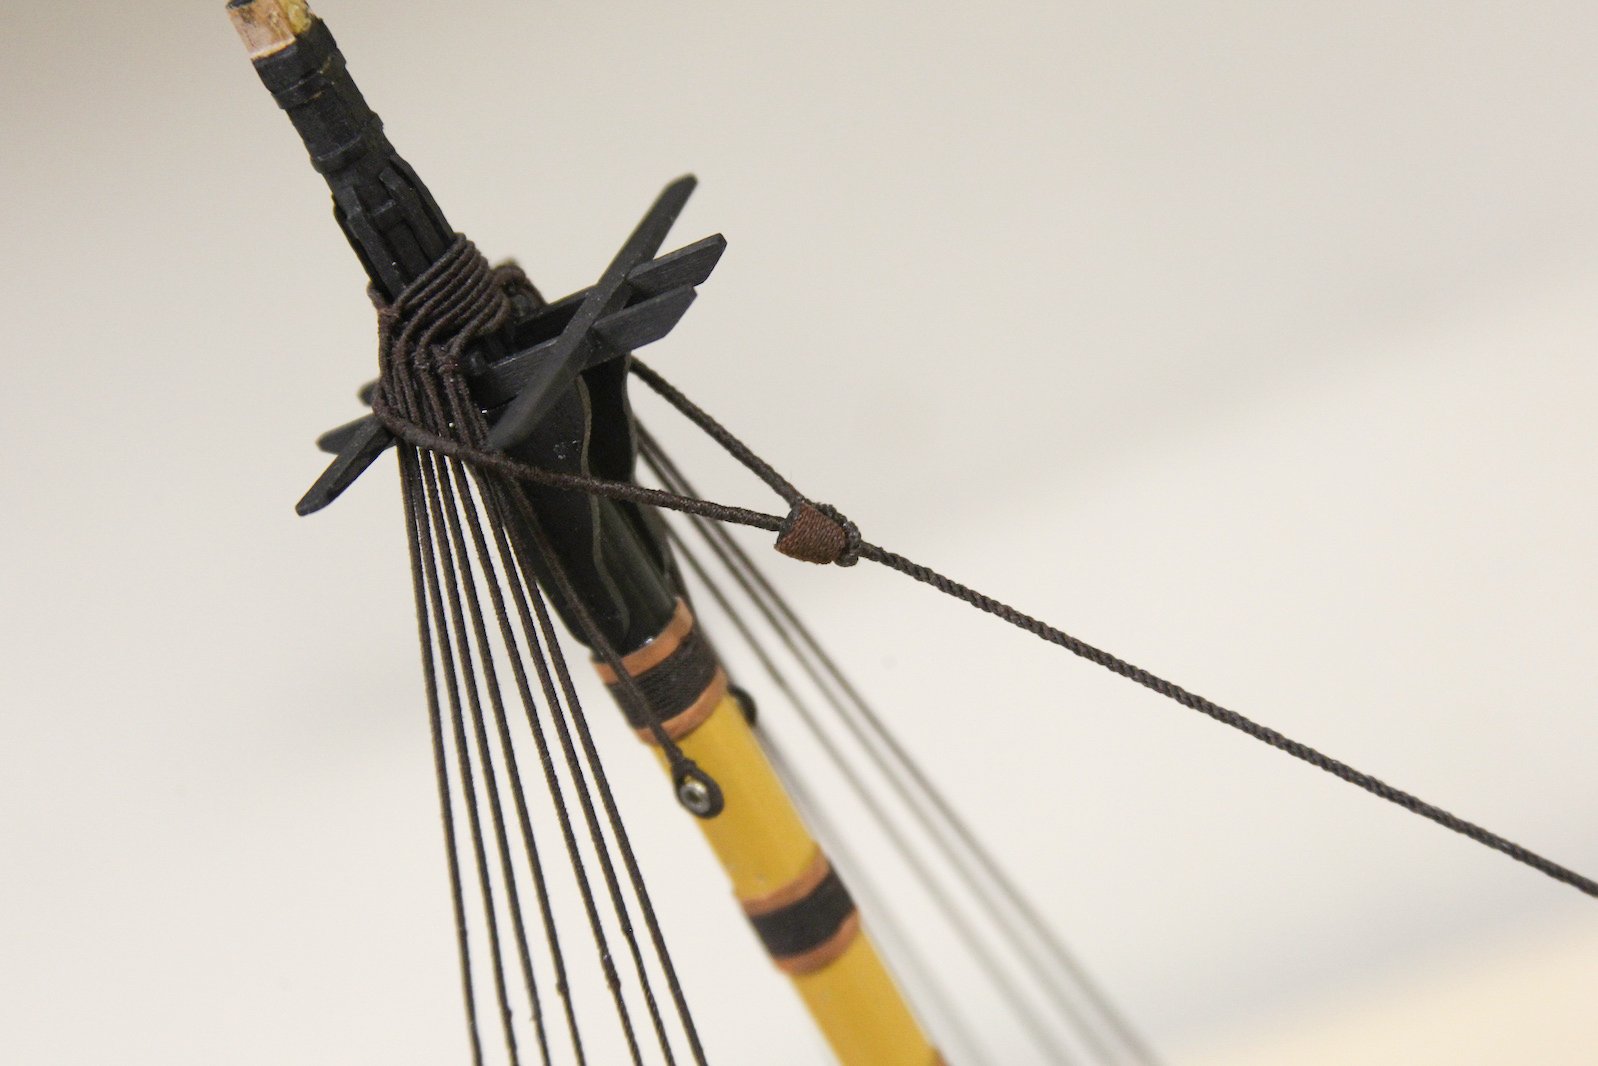
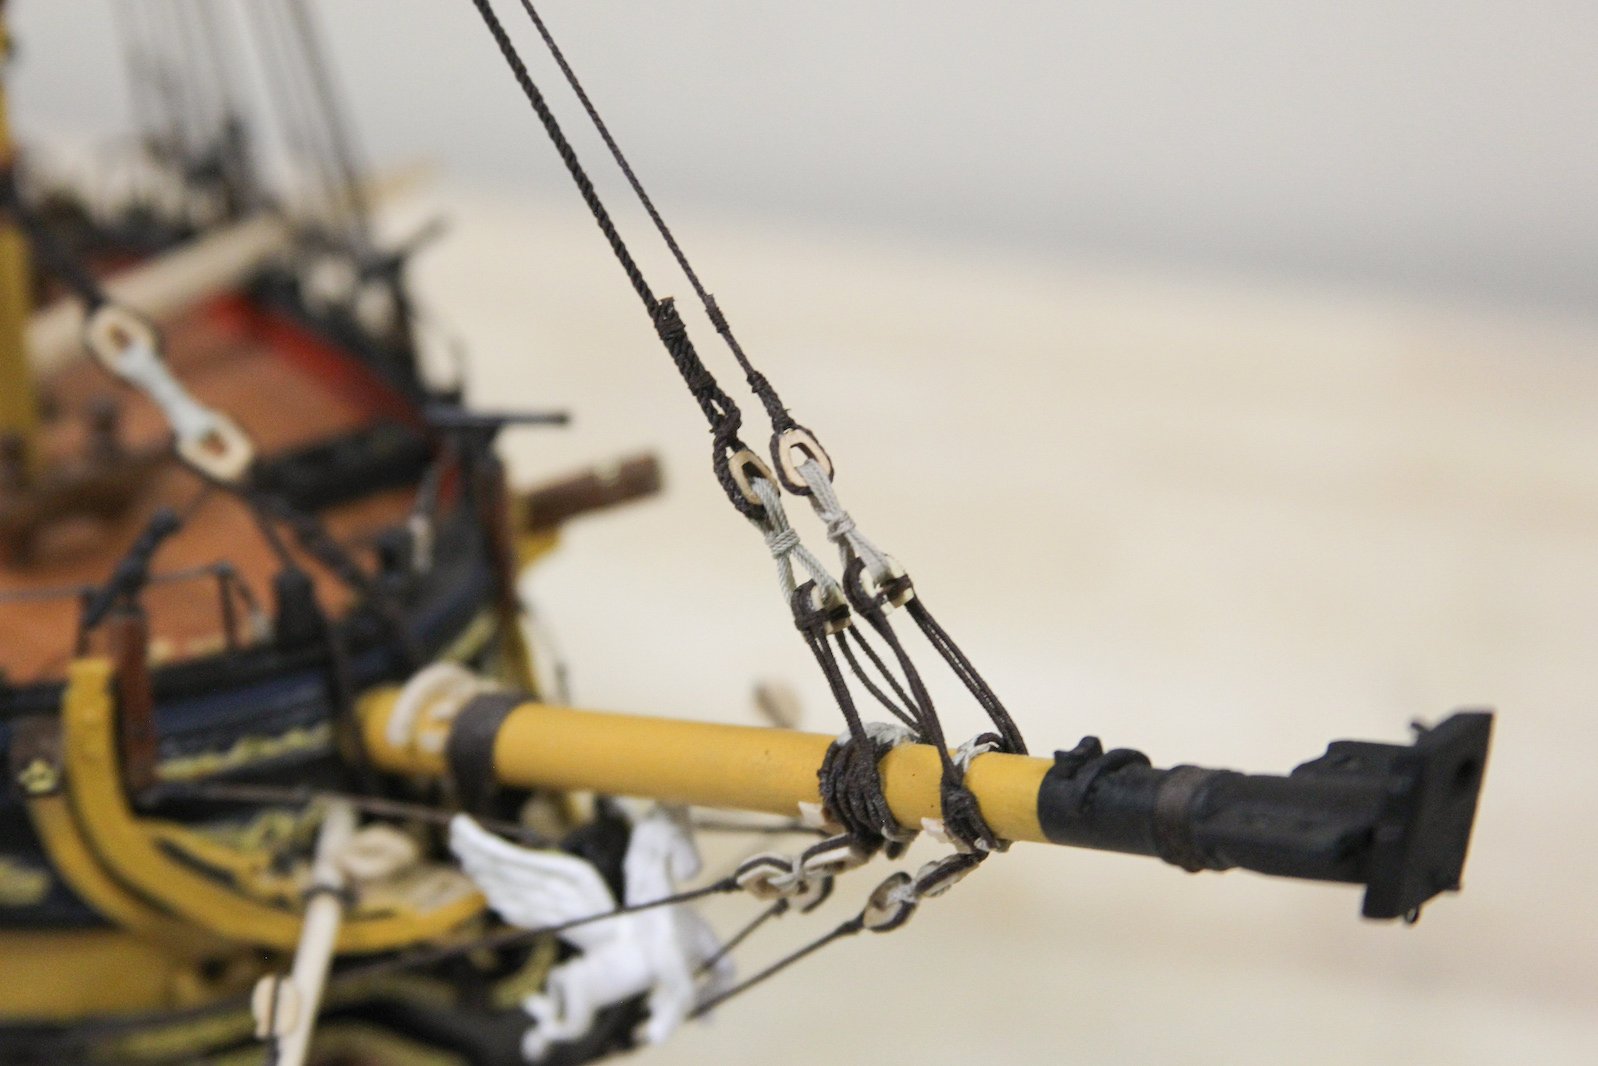
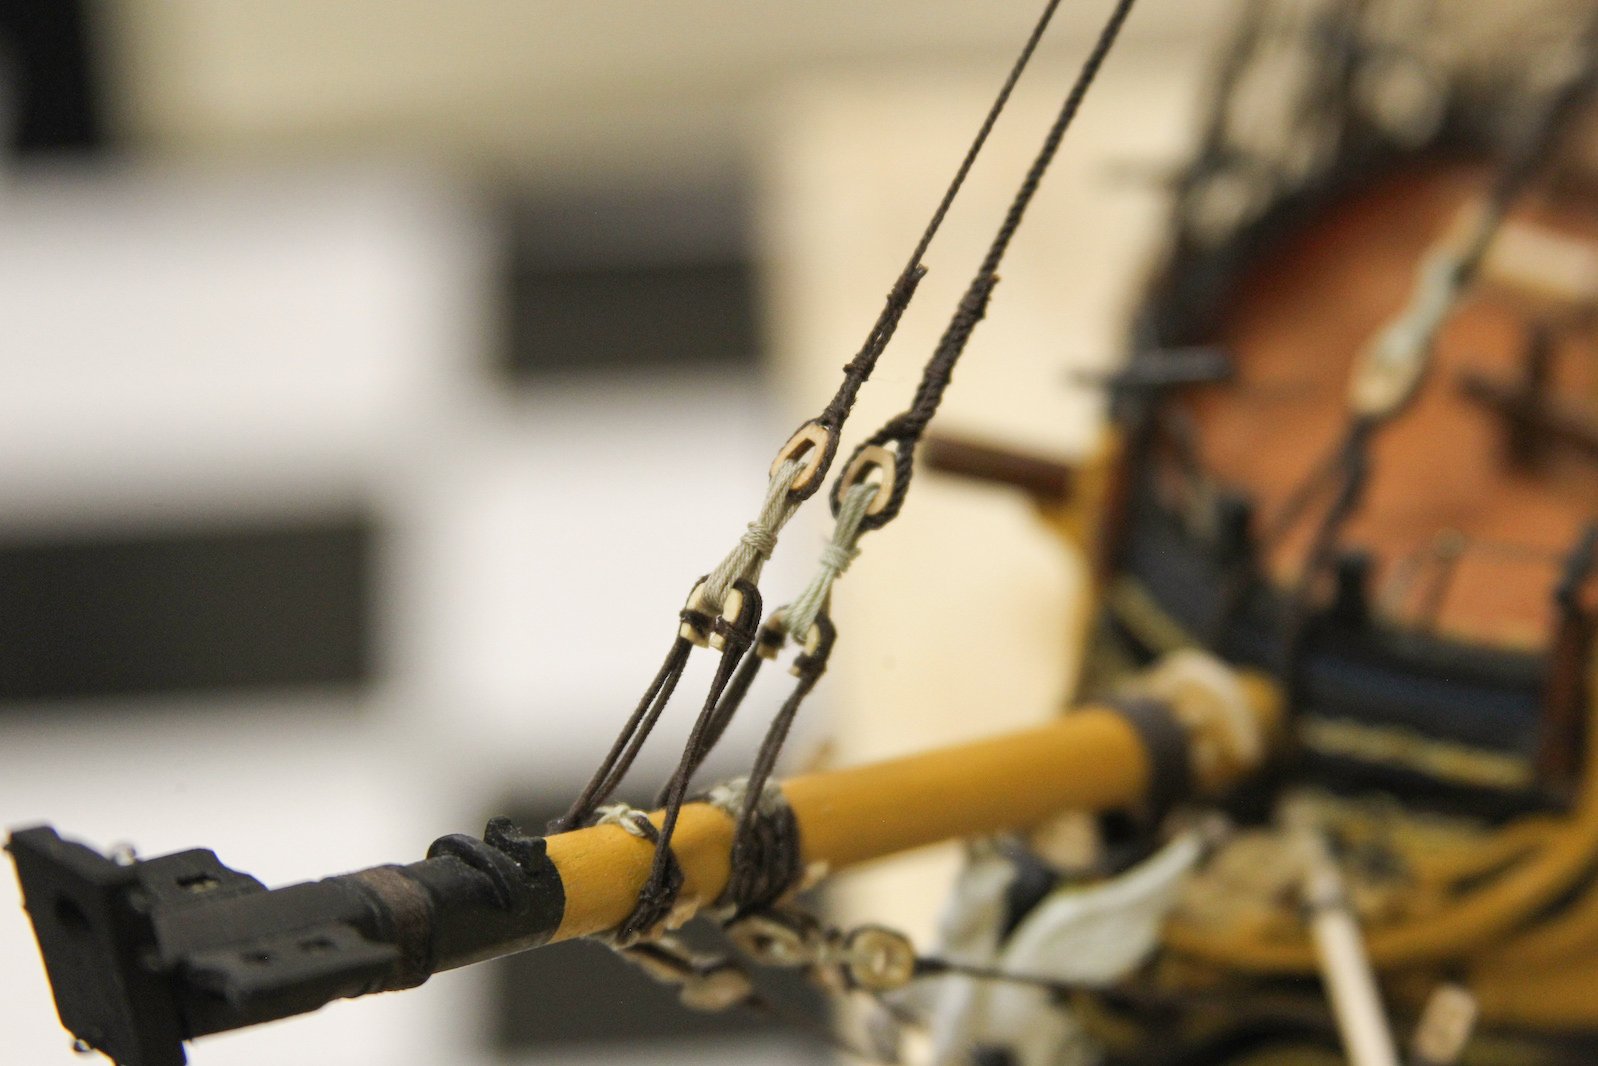
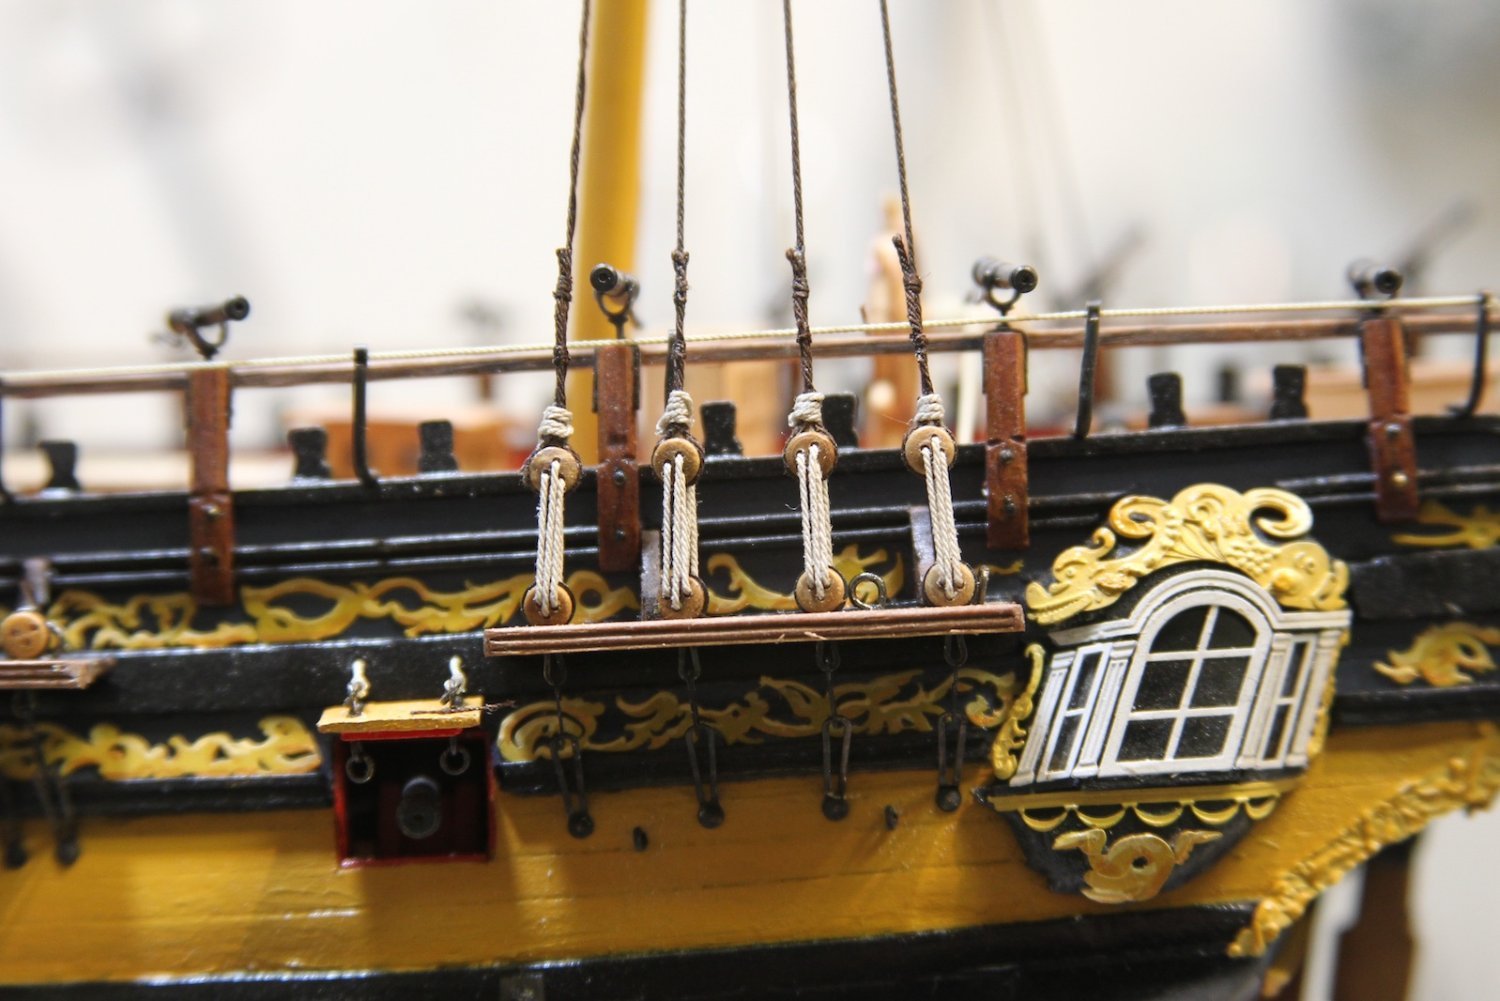
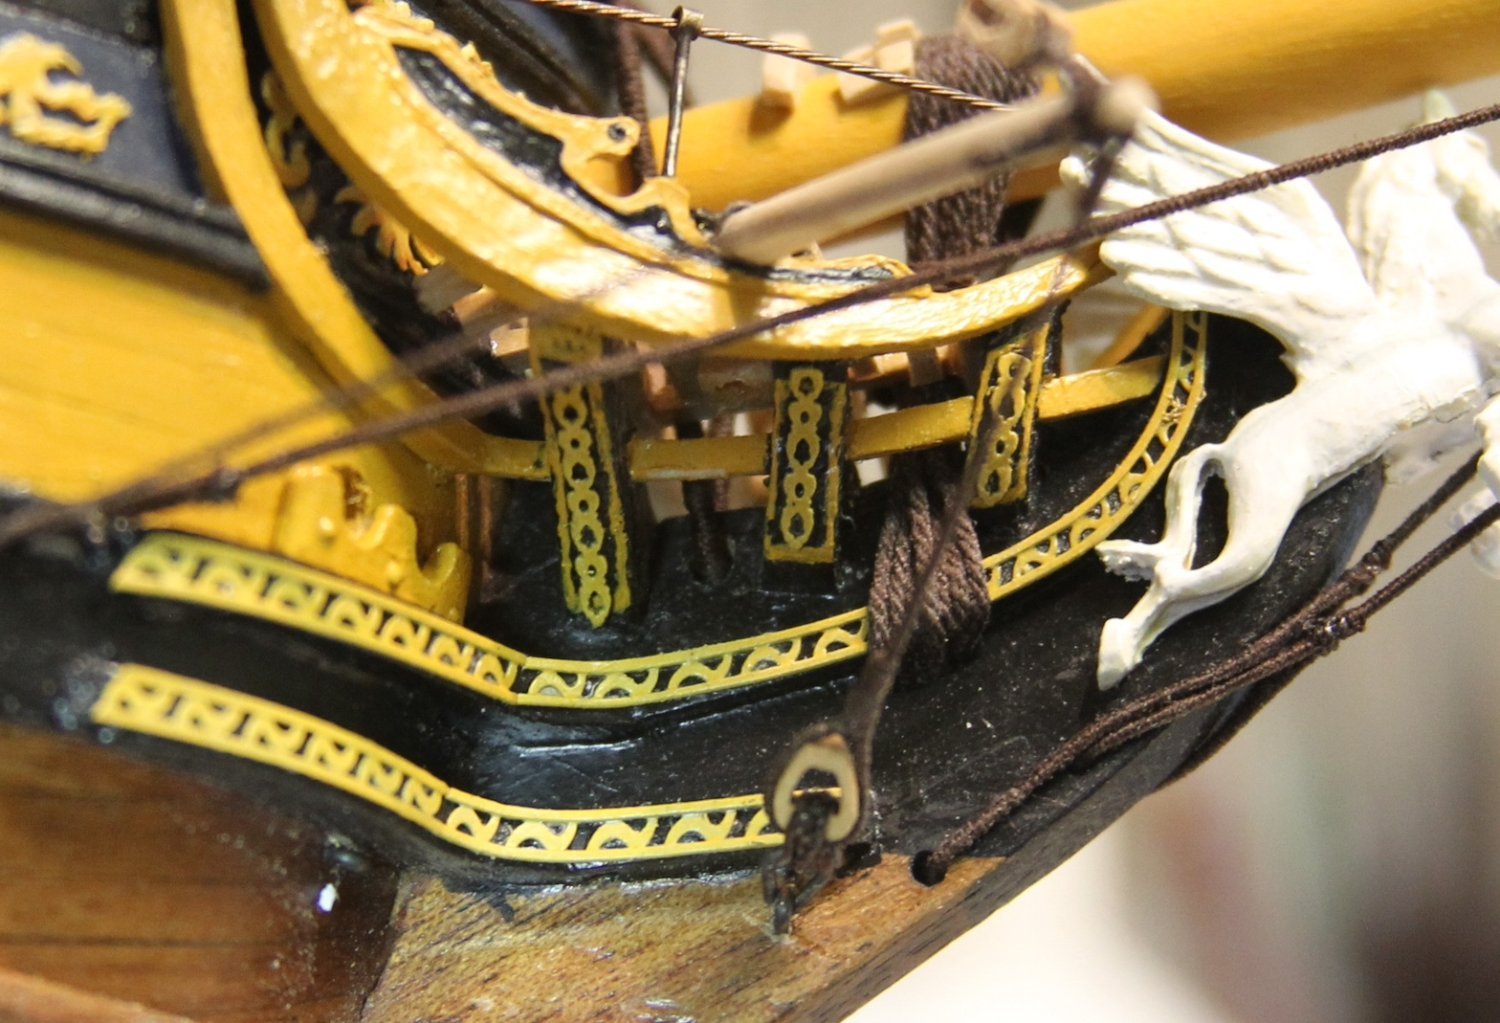
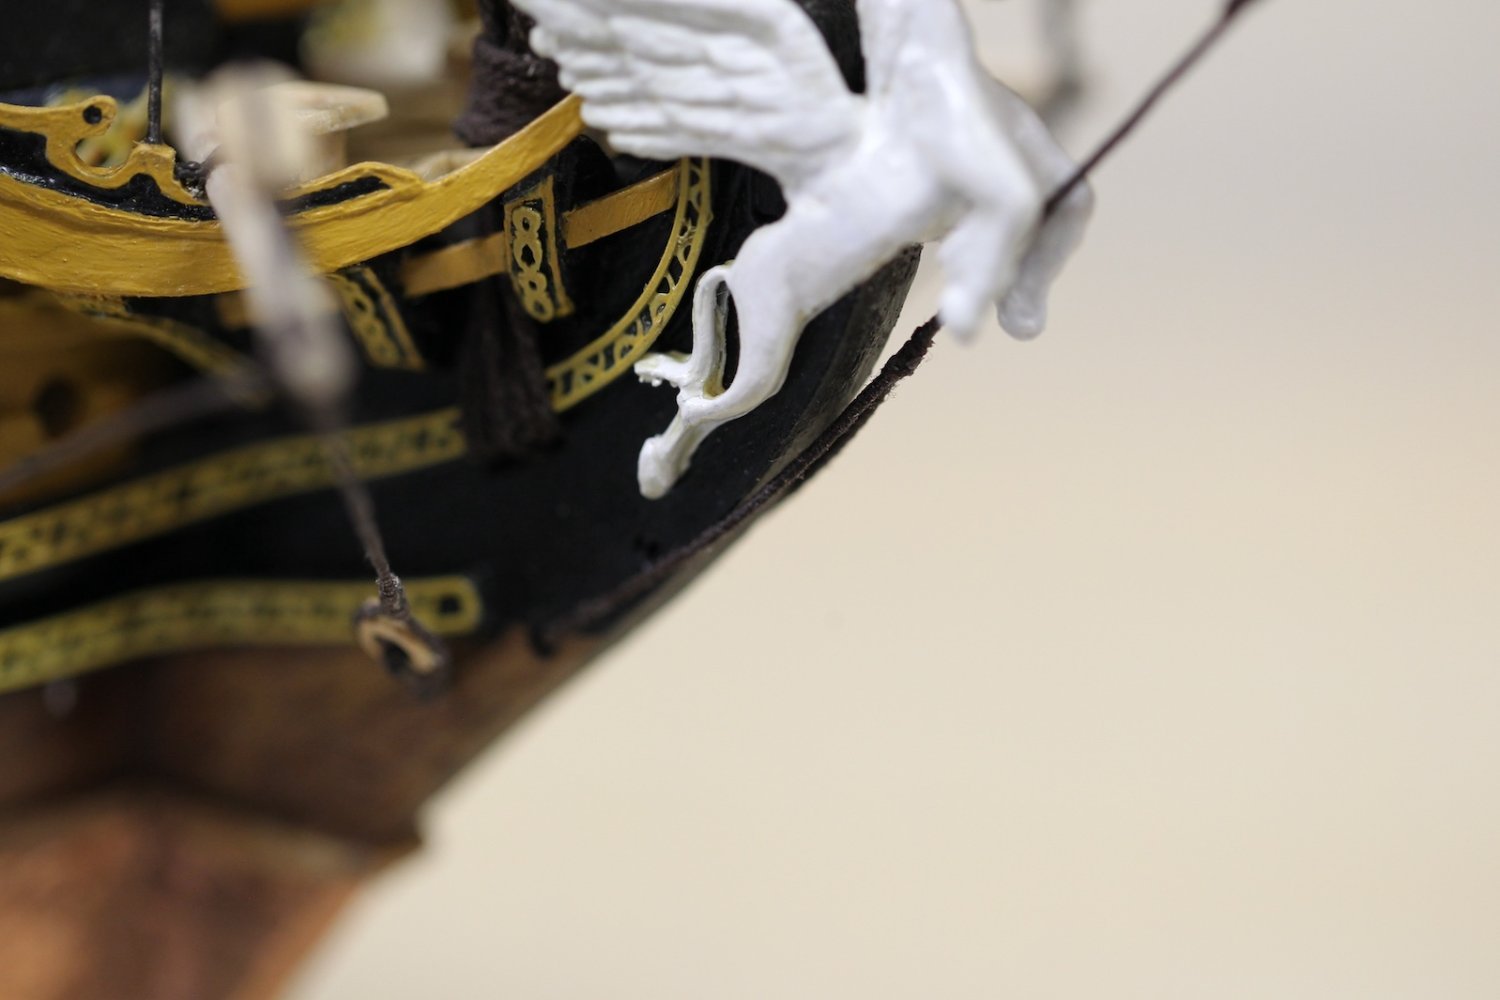
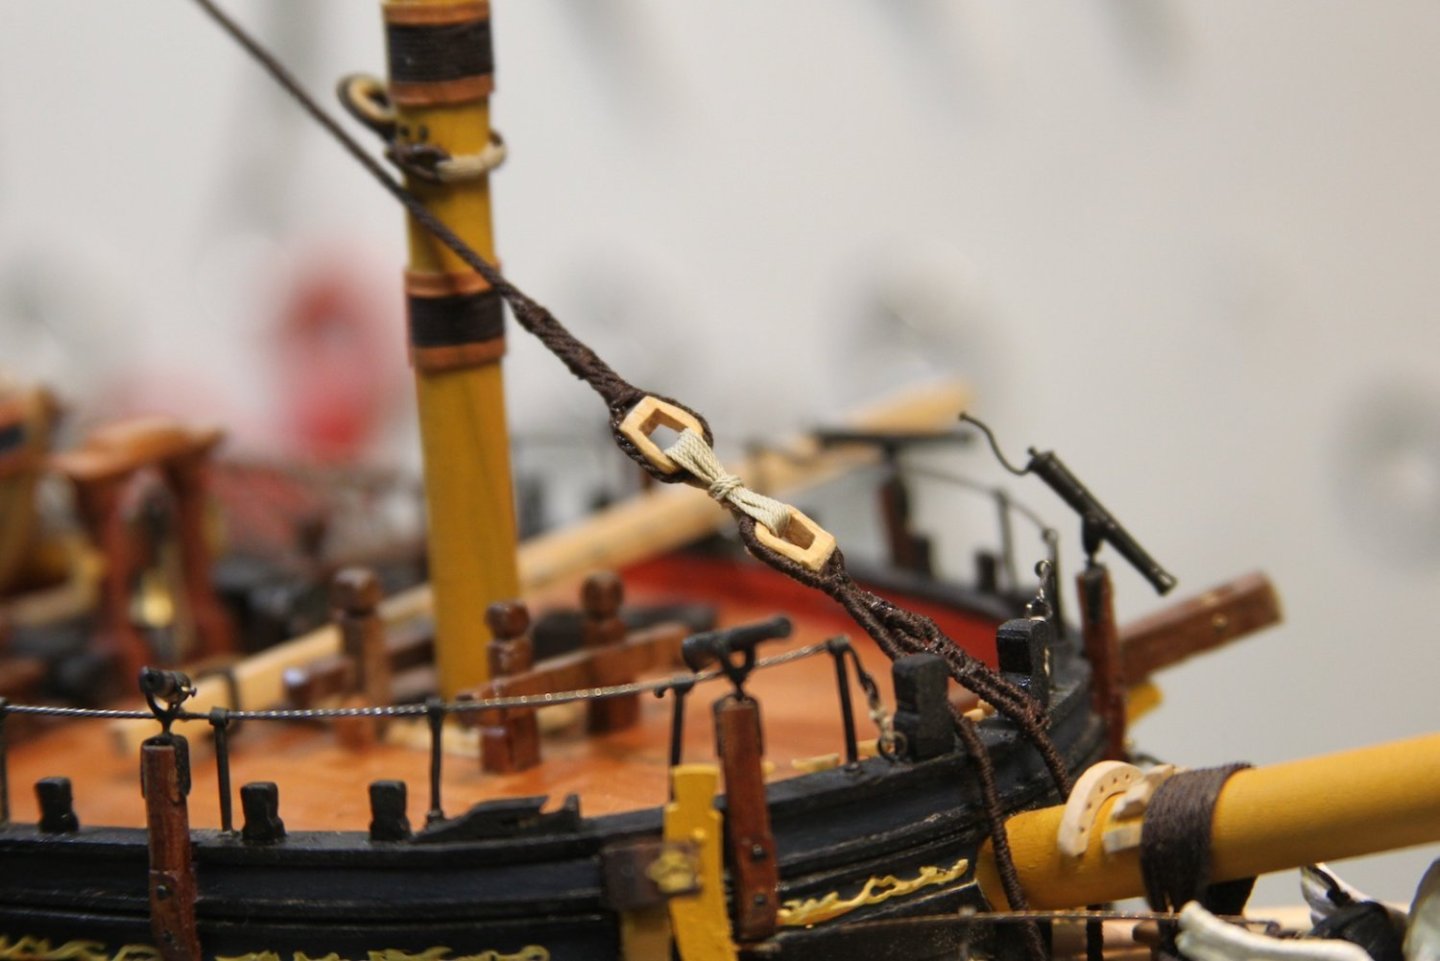
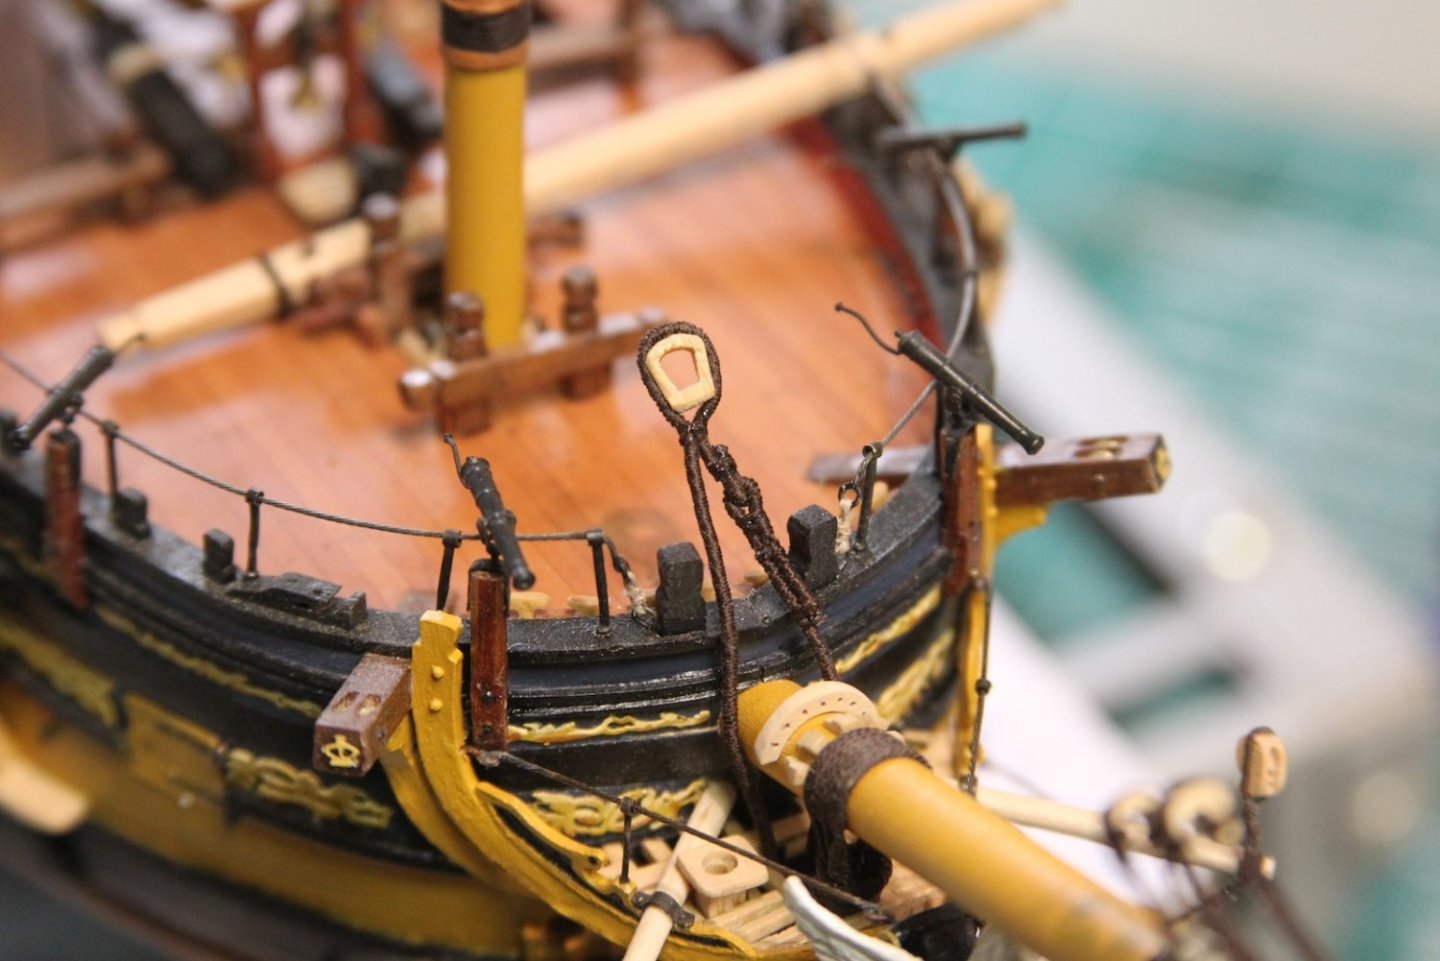
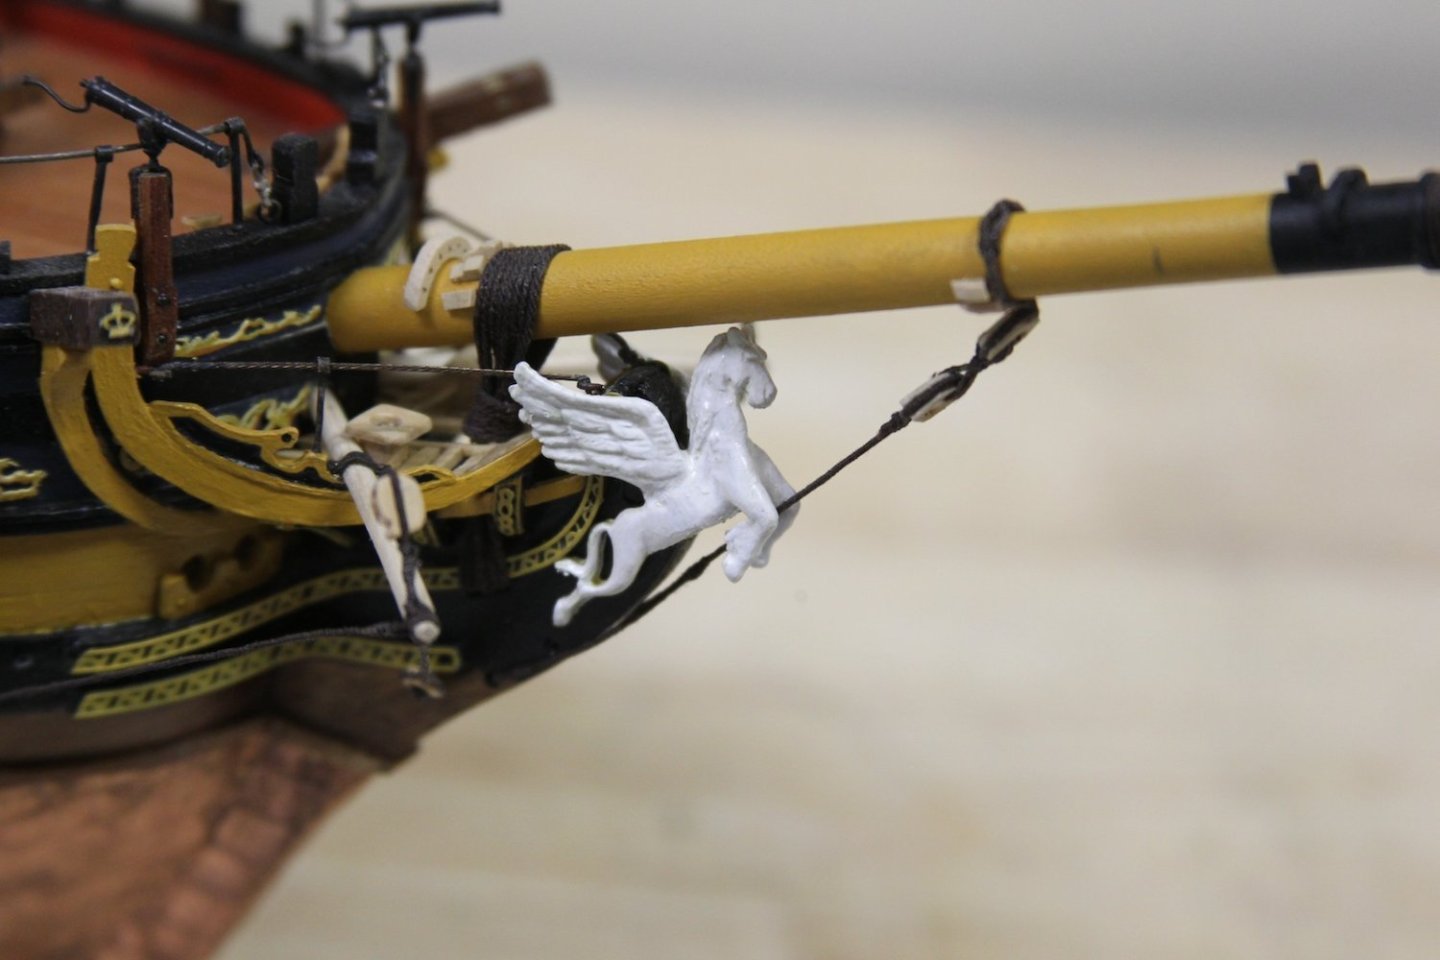
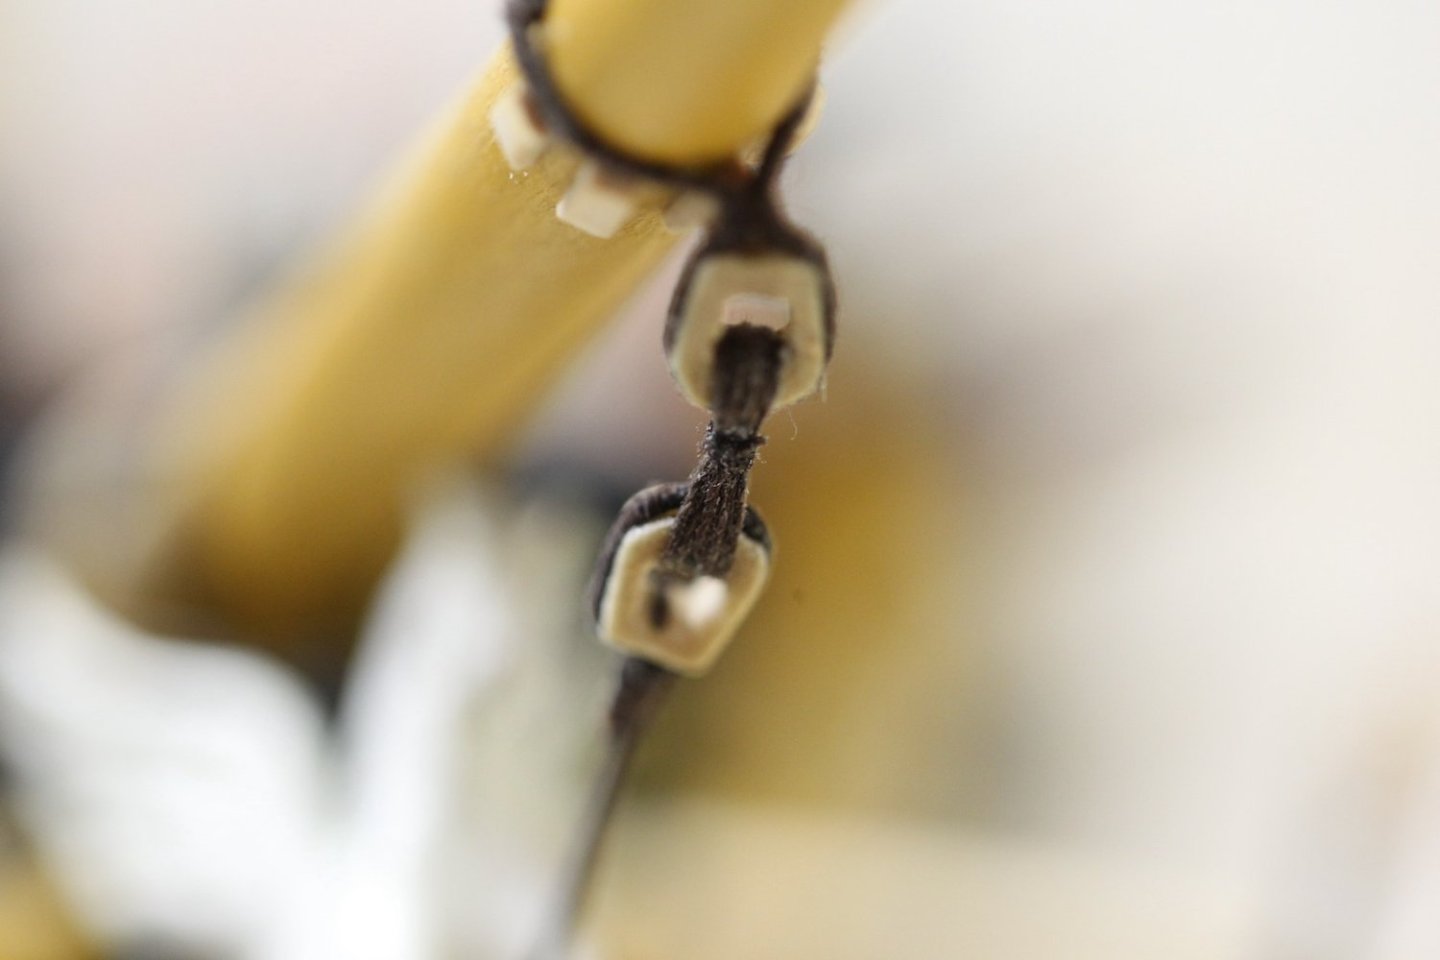
More work on the bowsprit standing rigging. First I went back and swapped out the dark rope with tan on the heart lashes; much happier with the look. The large open hearts for the double strop Forestay are cut from a strip of boxwood. Rounded the end, drilled a hole, sanded it square, and added grooves for the strops before cutting it off. I won't go through every collar, etc since it's pretty well documented in several places (and I also forgot to take very many photos of the process), but here are a few photos of the bobstay collars, bobstays, bowsprit shrouds, and associated hearts and lashes. All of these are following Steel (and Lees) via Danny Vadas' wonderful build log of the Vulture that I have referenced many times. The hearts are all made as shown in the previous post, the lines are all .50 mm served with Mara 120 thread and lashed with .10mm tan.


- 419 replies
-
- 7
-
-
- Victory Models
- Pegasus
- (and 2 more)
-
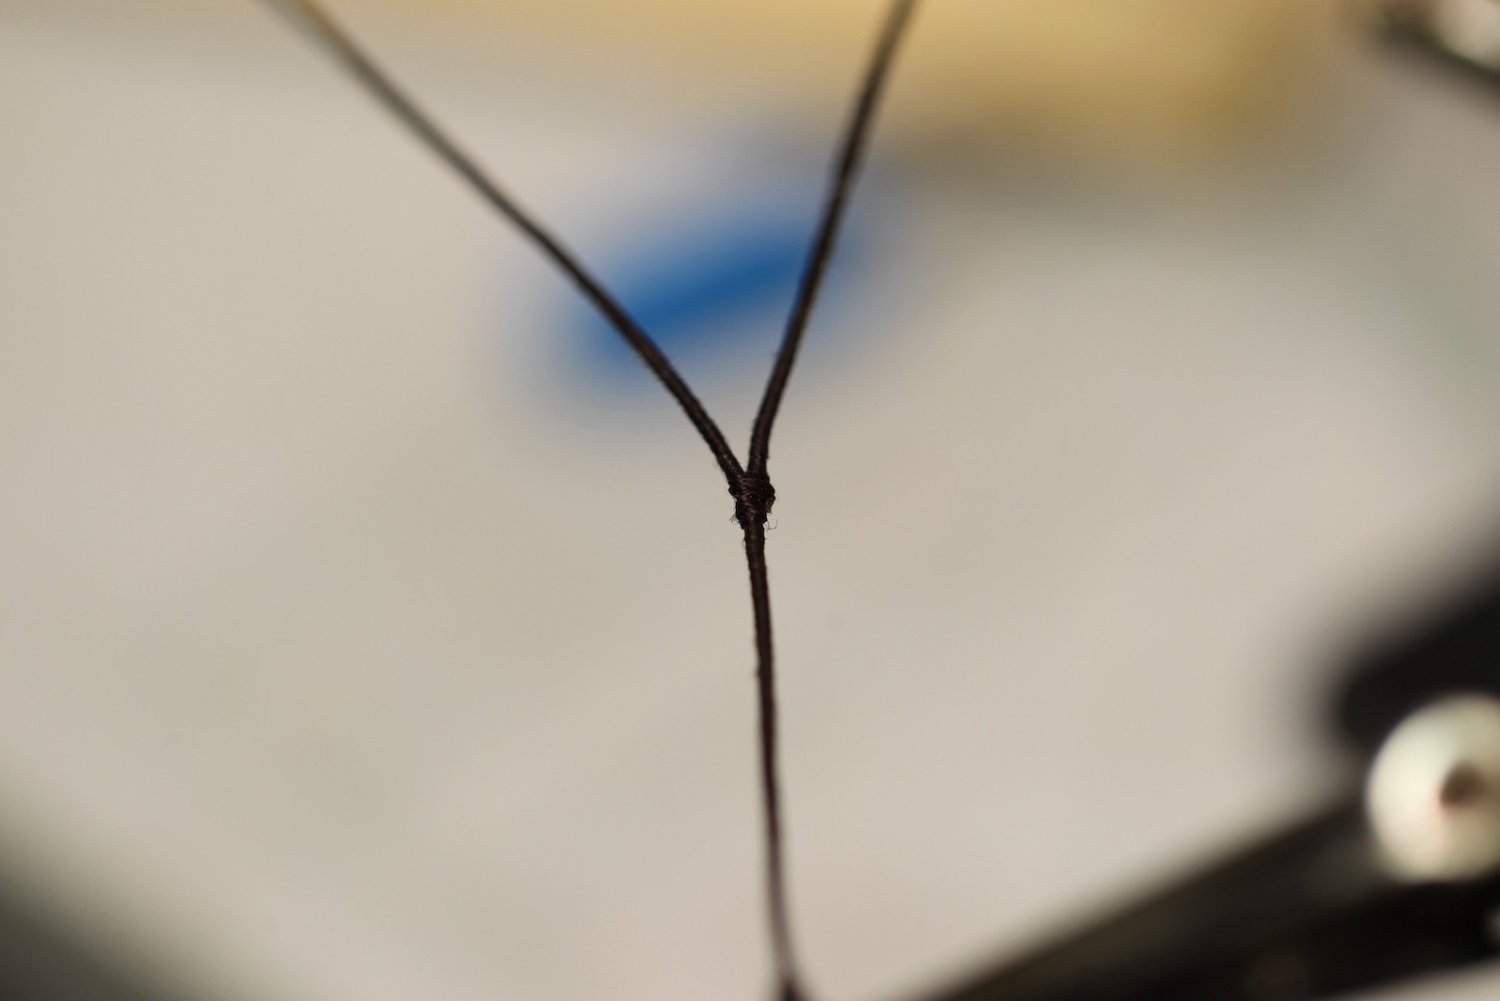
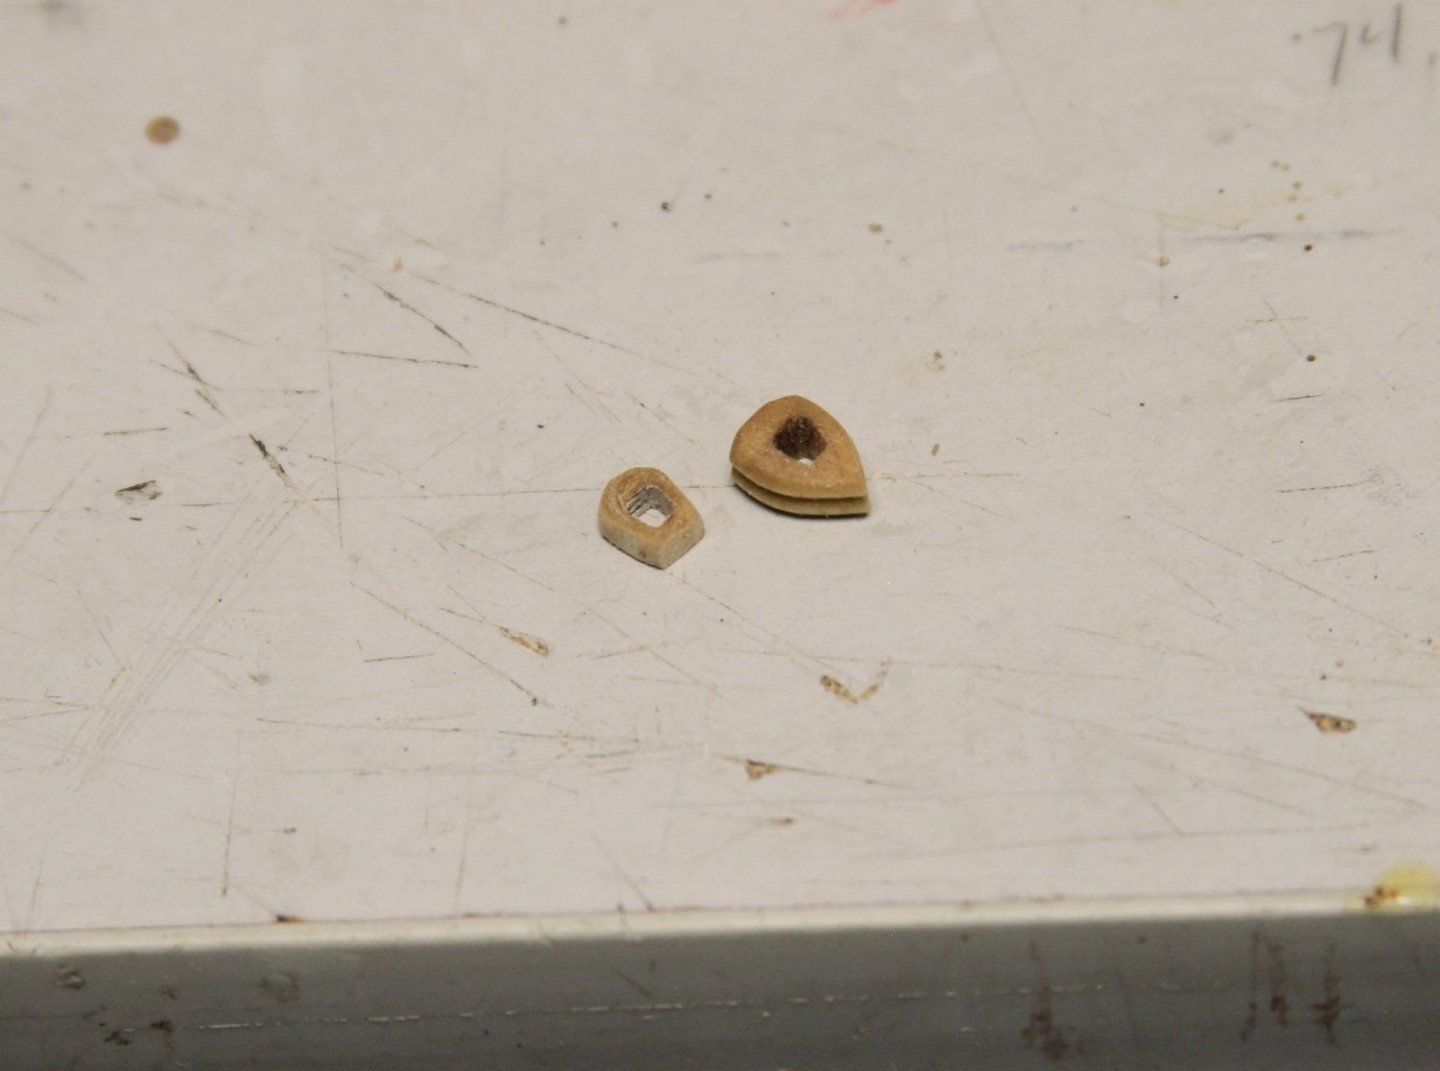
Relatively small update with a fair amount of work. Starting the standing rigging at the bow with the inner bobstay and collar. I had some closed hearts but they were neither the shape or size that I wanted so I modified them rather than start from scratch with new ones. Although Steel mentions closed hearts being used and other documentation such as Lees mentions deadeyes used on the bobstays and bowsprit shrouds, I'm opting for closed hearts as that is what is laid out in the TFFM and I'm trying to err toward Steel and the TTFM as much as feasible. I'm using .45mm rope served with the Gutermann Mara 120 . After a couple of efforts, I haven't done as nice of a job as some at the splices where the served rope meets and is wound together, but I'm quickly learning that each year that goes by seems to cost my little sausage fingers some dexterity. The other notable thing here is that I've lashed the hearts together with dark rope as shown in my TFFM reference illustrations. However - nearly every other reference I've seen shows them lashed together with non-tarred tan. I'm not sure I'm digging the dark - so I'll likely go through and change them out and do the rest in tan. Greg, @dvm27 any insight here?


- 419 replies
-
- 11
-
-
- Victory Models
- Pegasus
- (and 2 more)
-
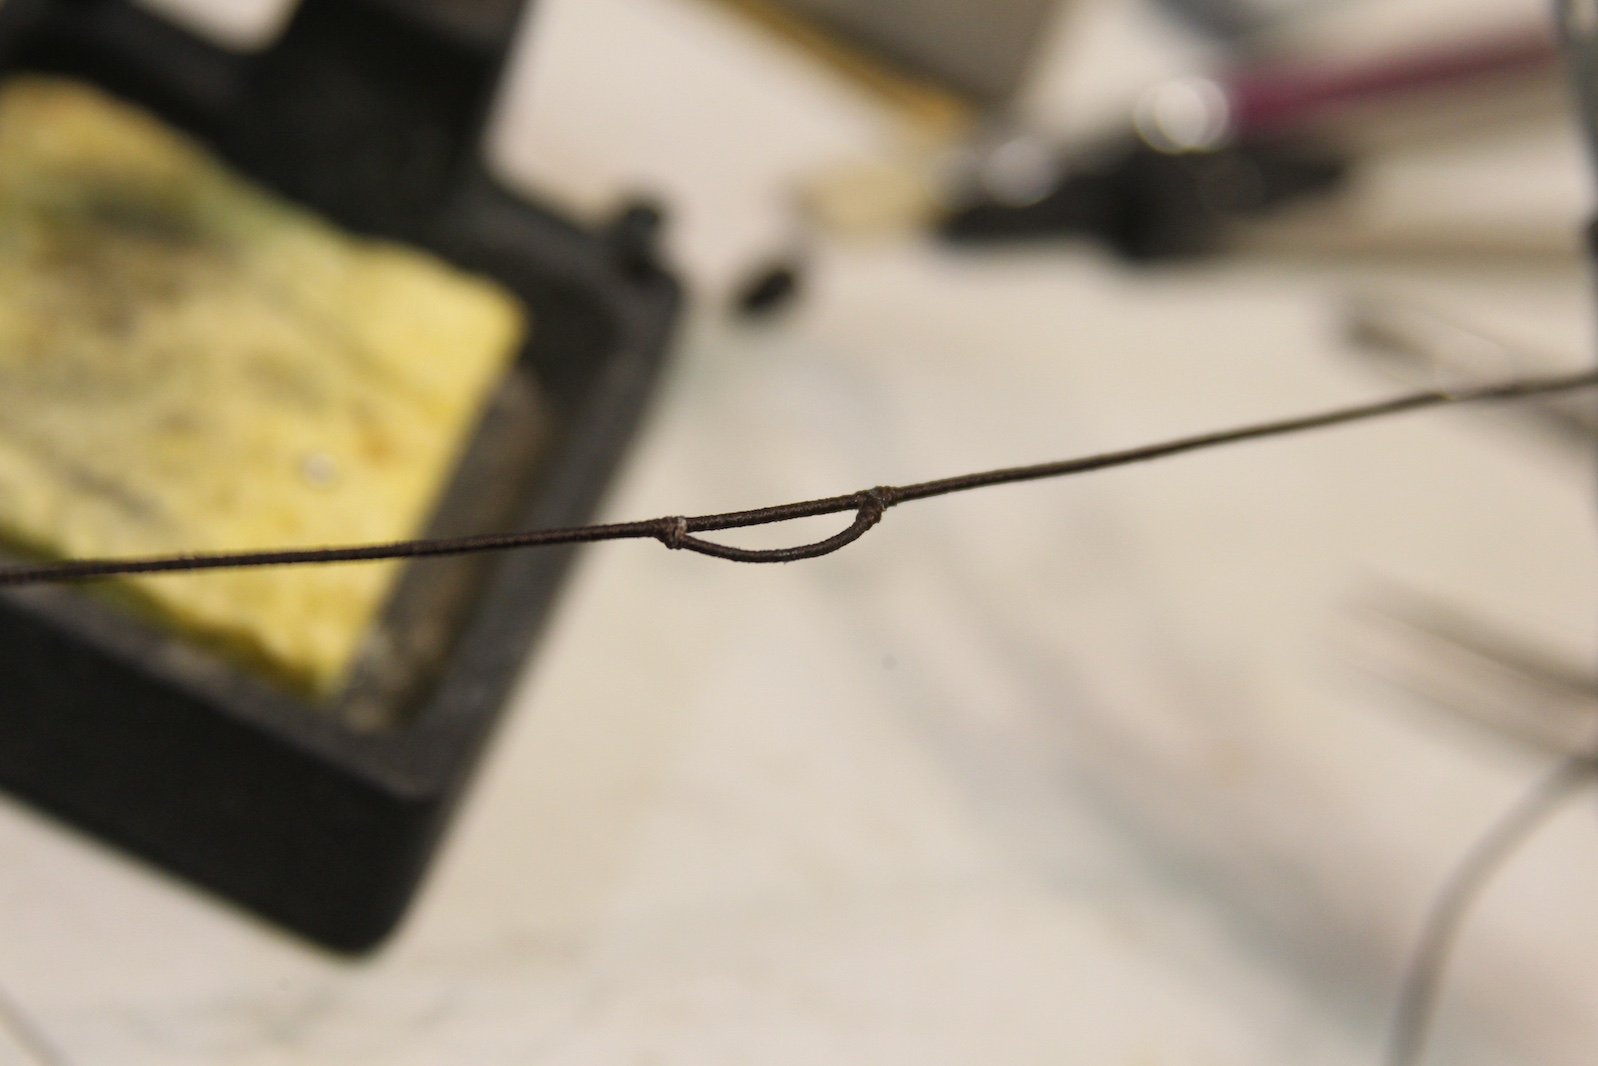
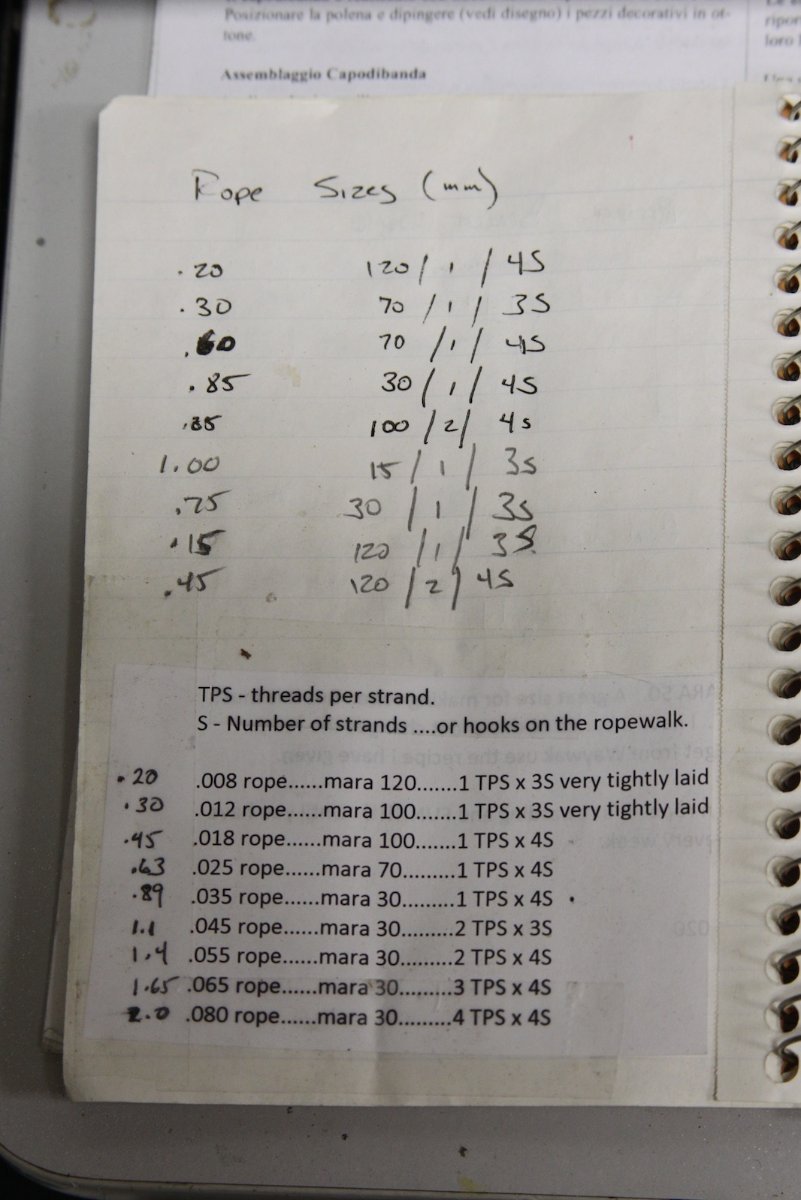
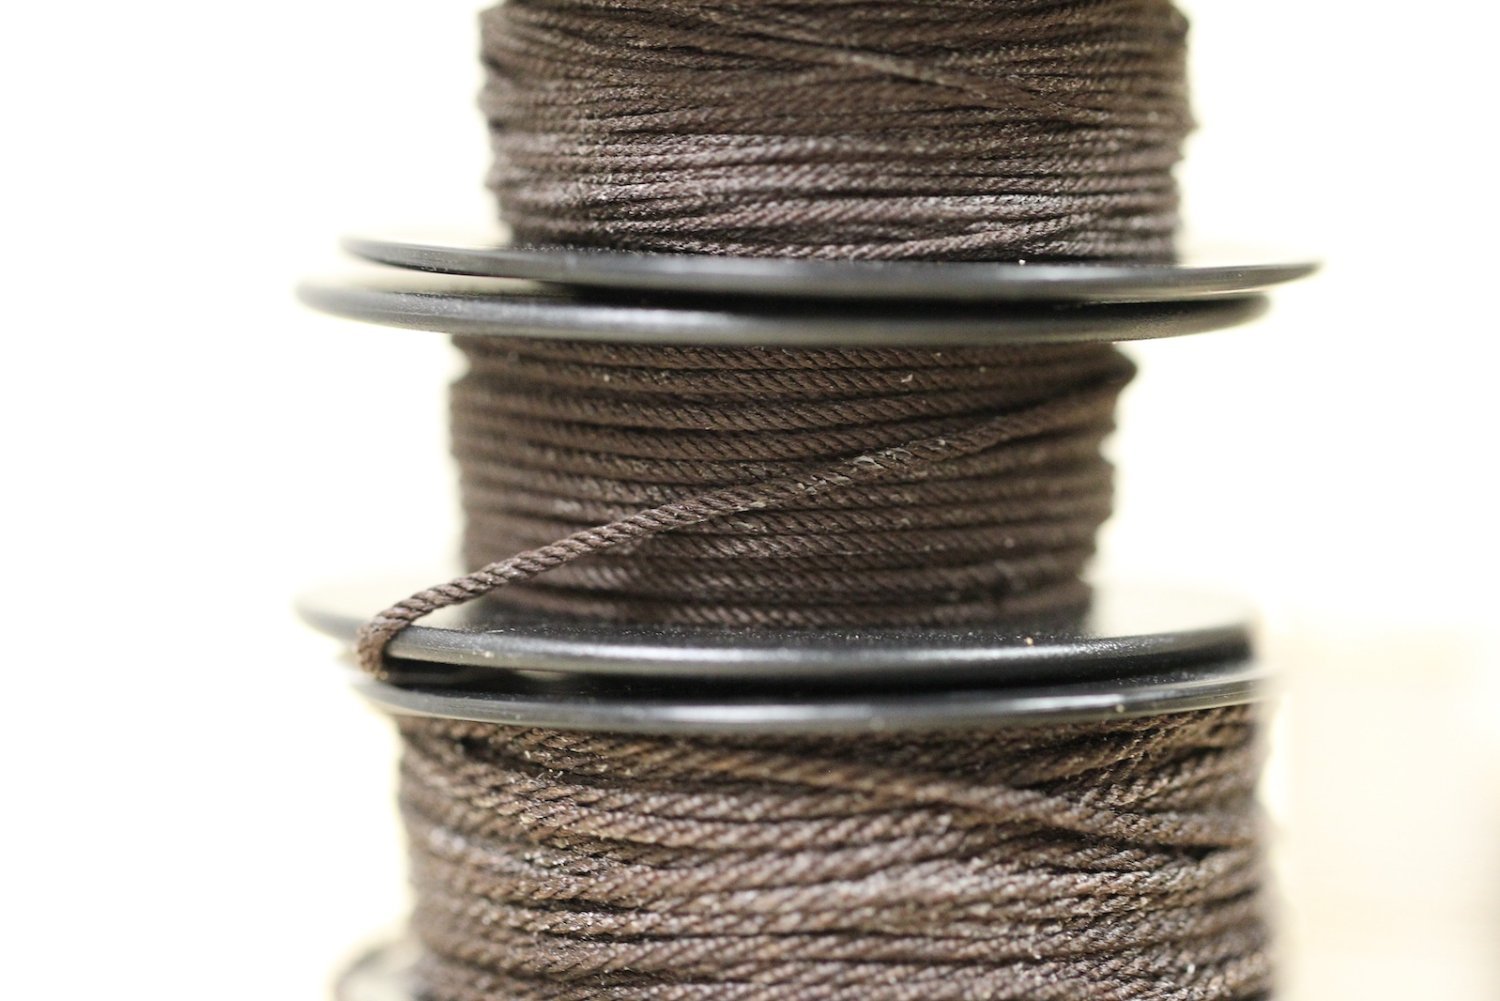
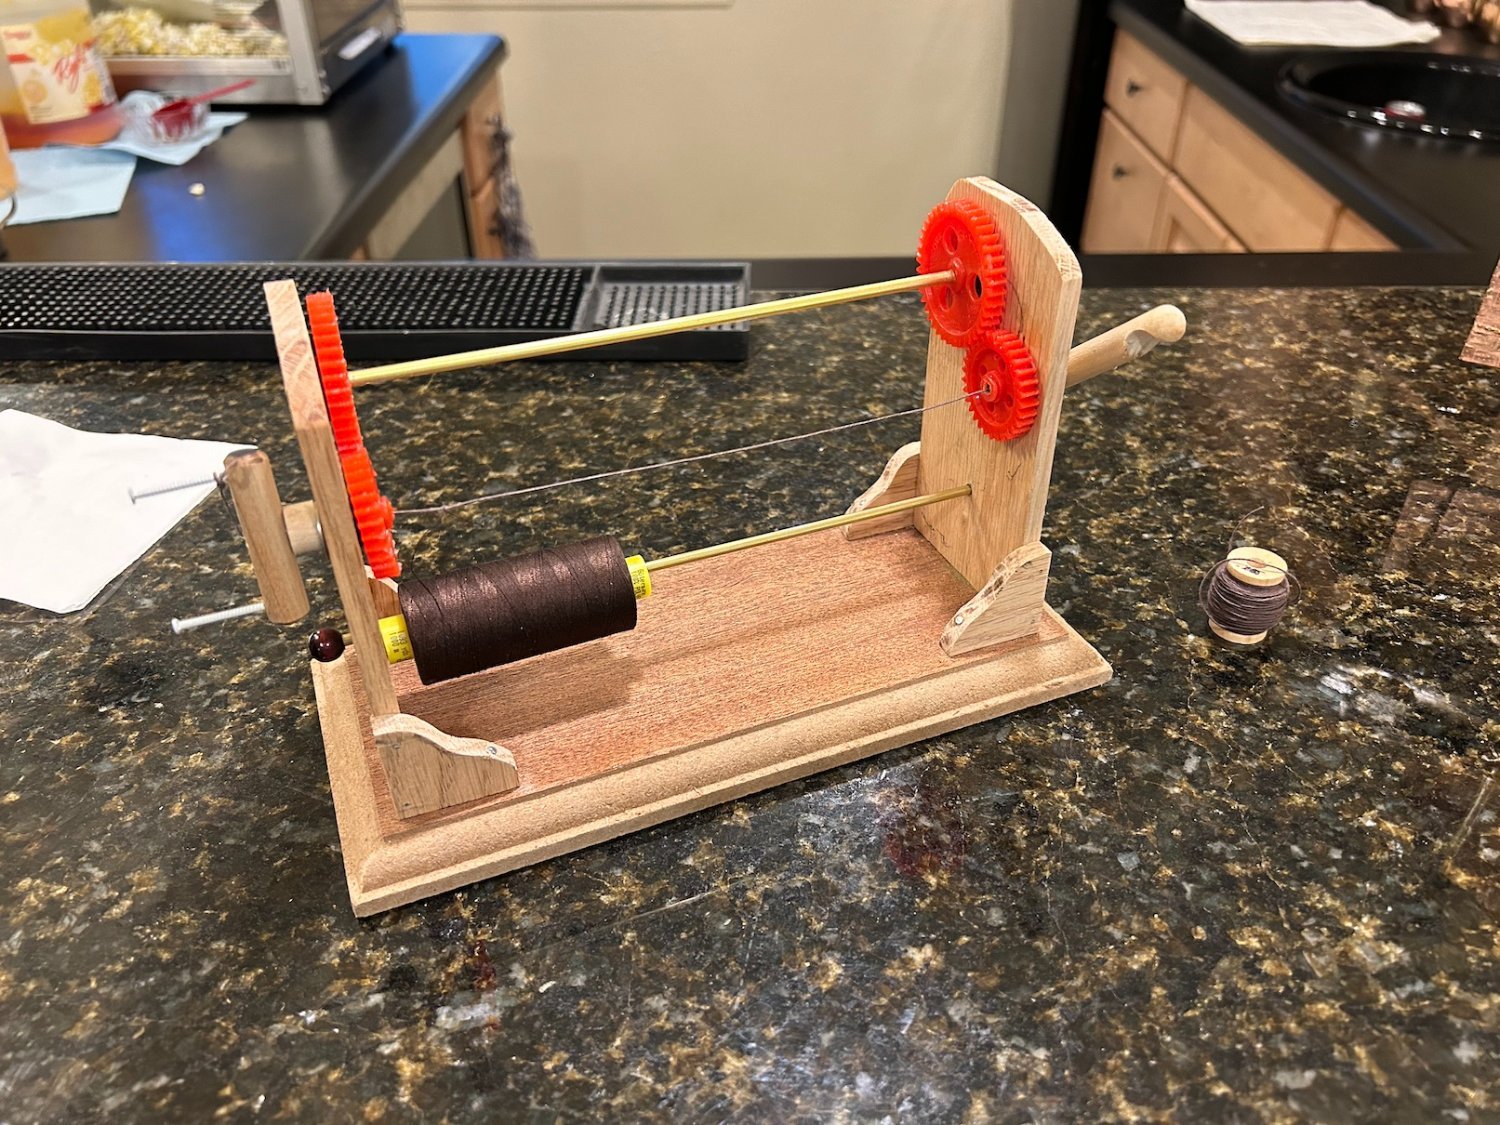
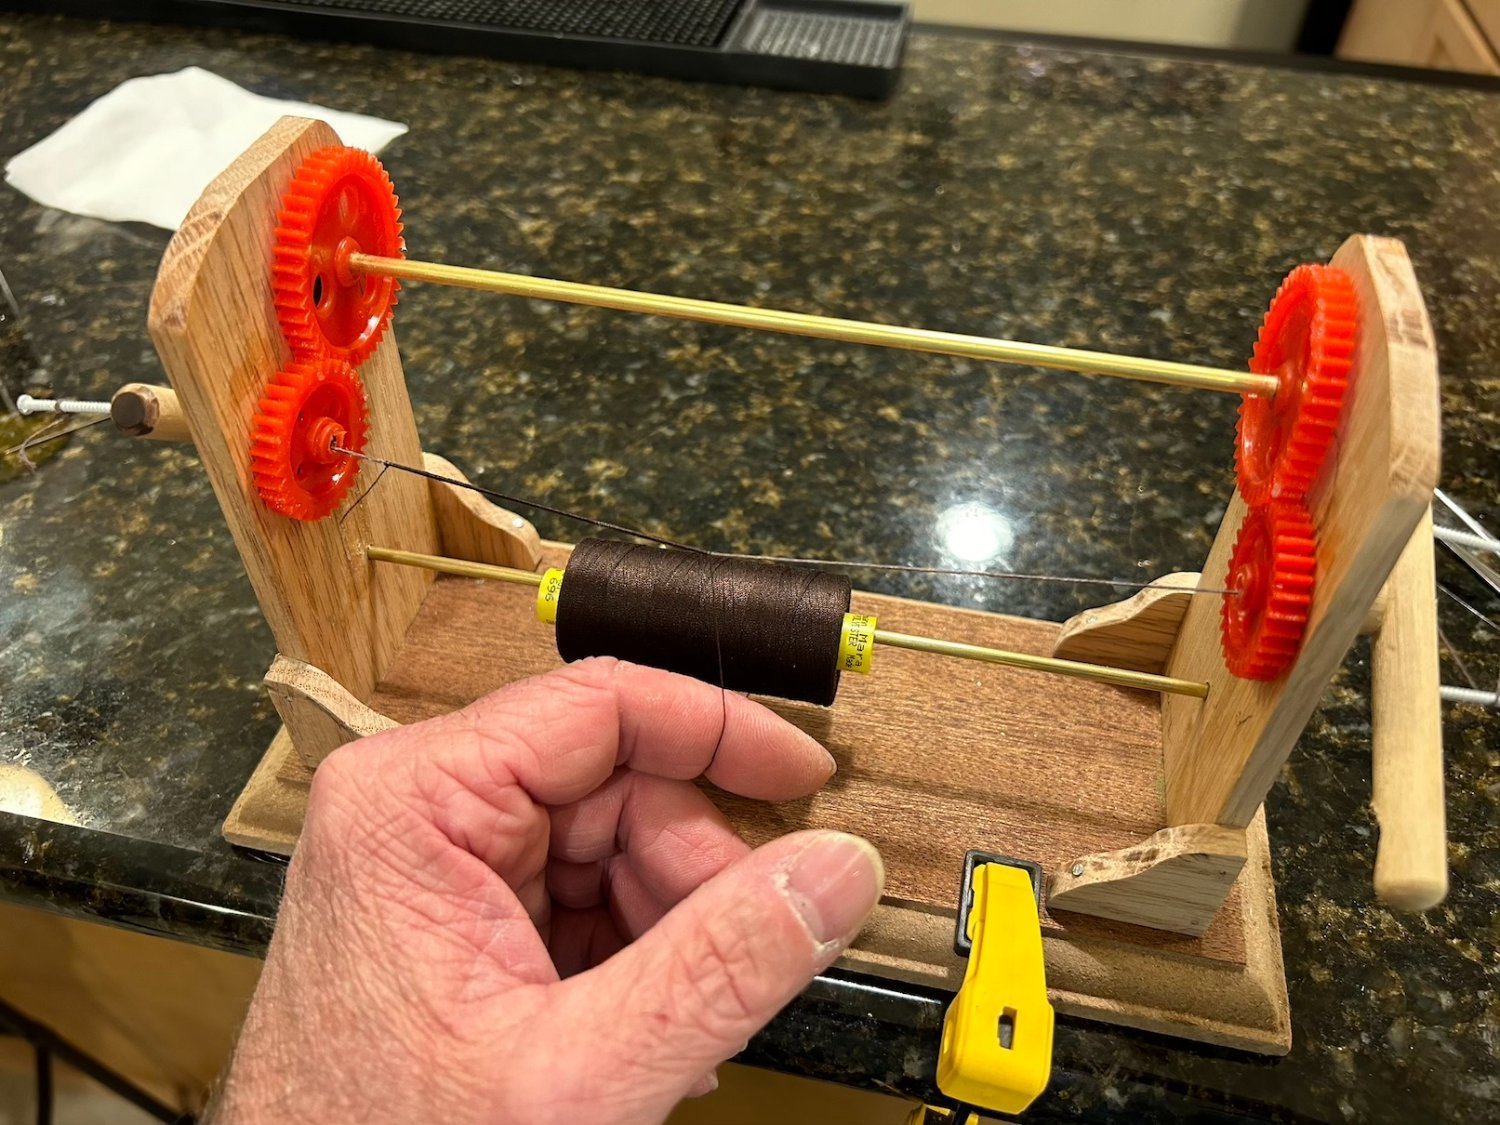
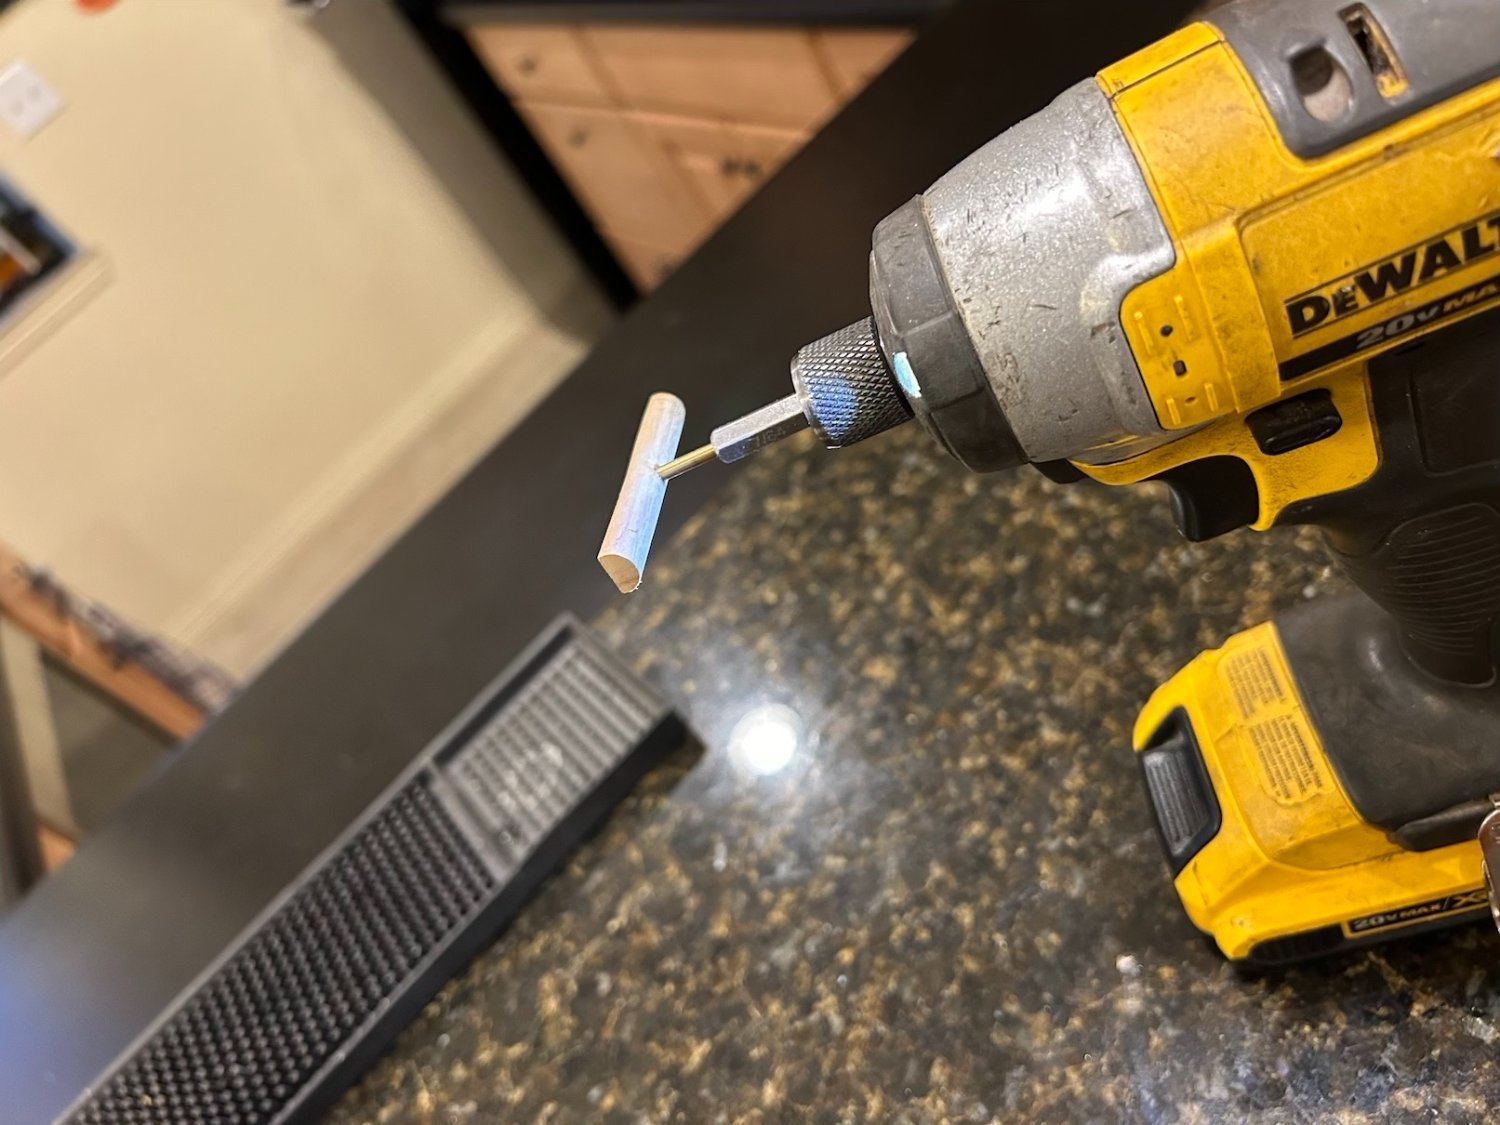
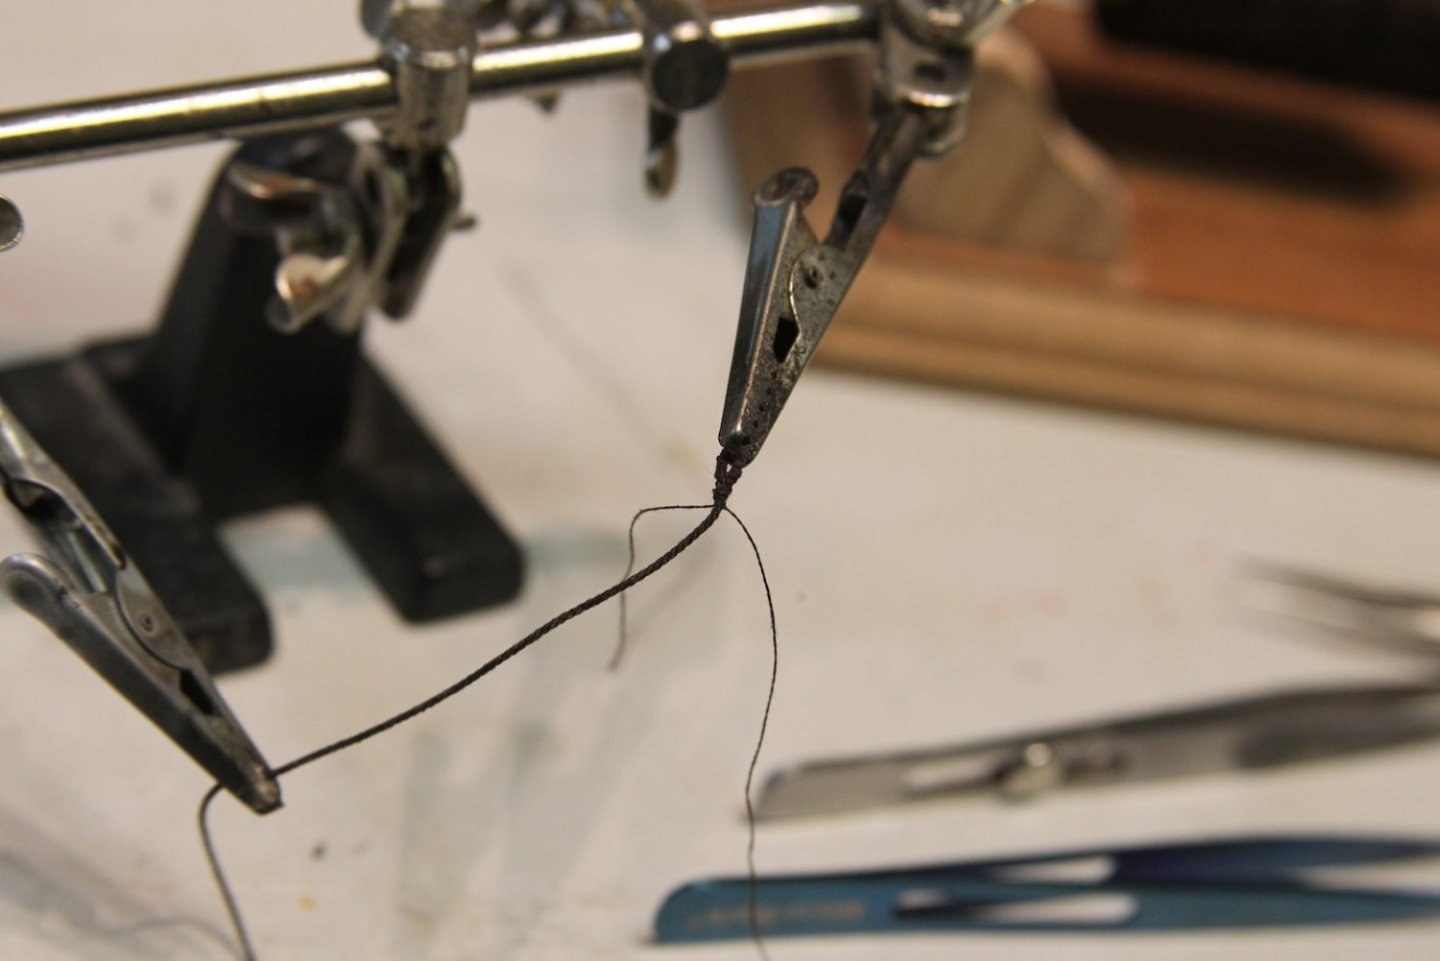
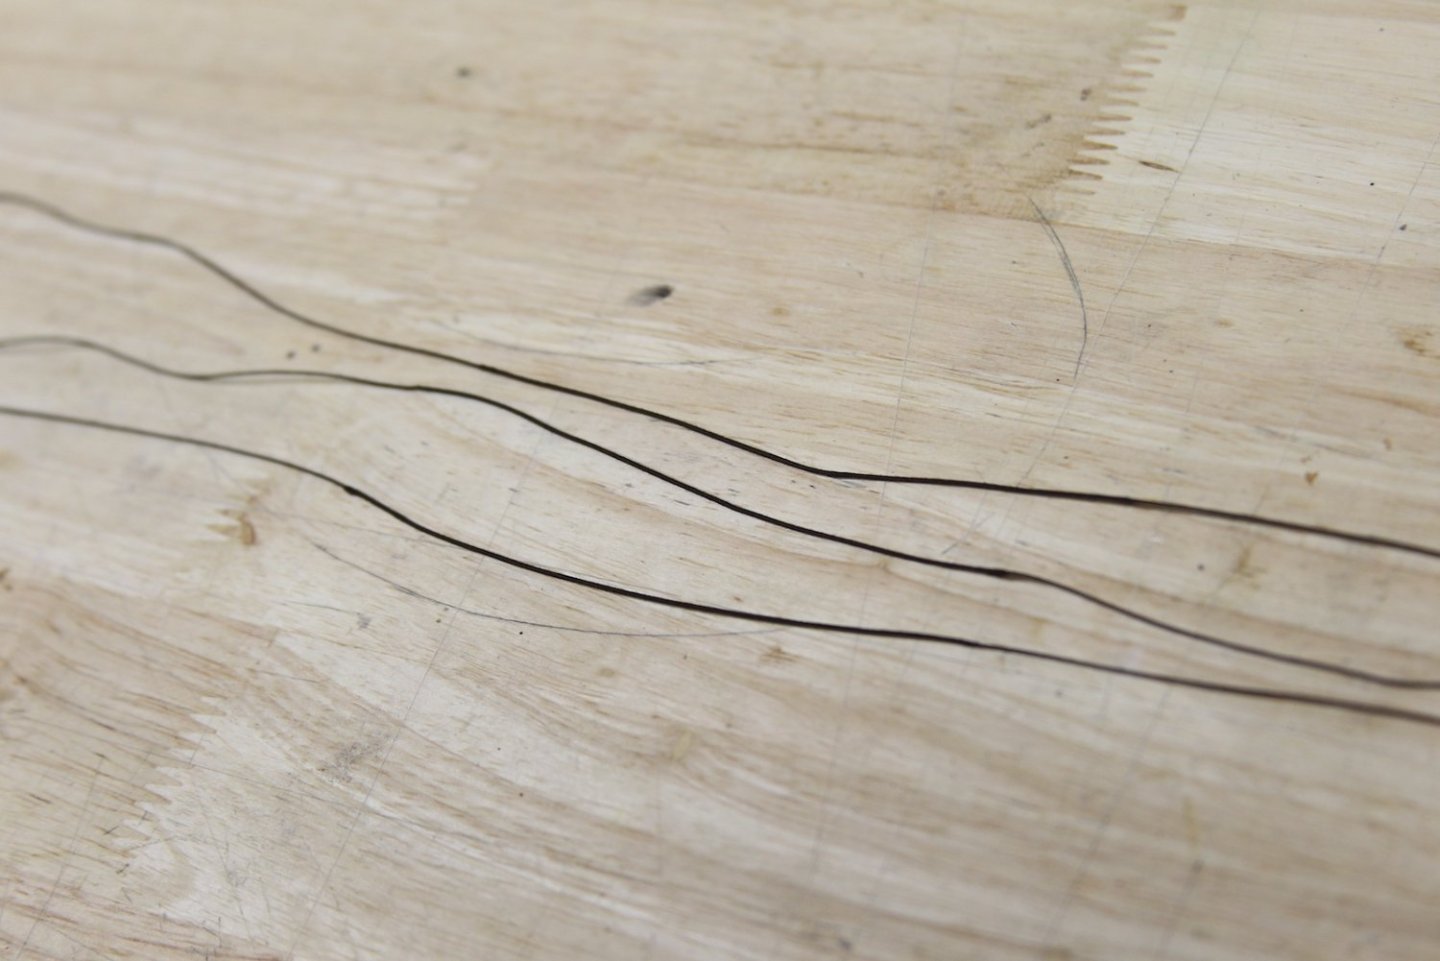
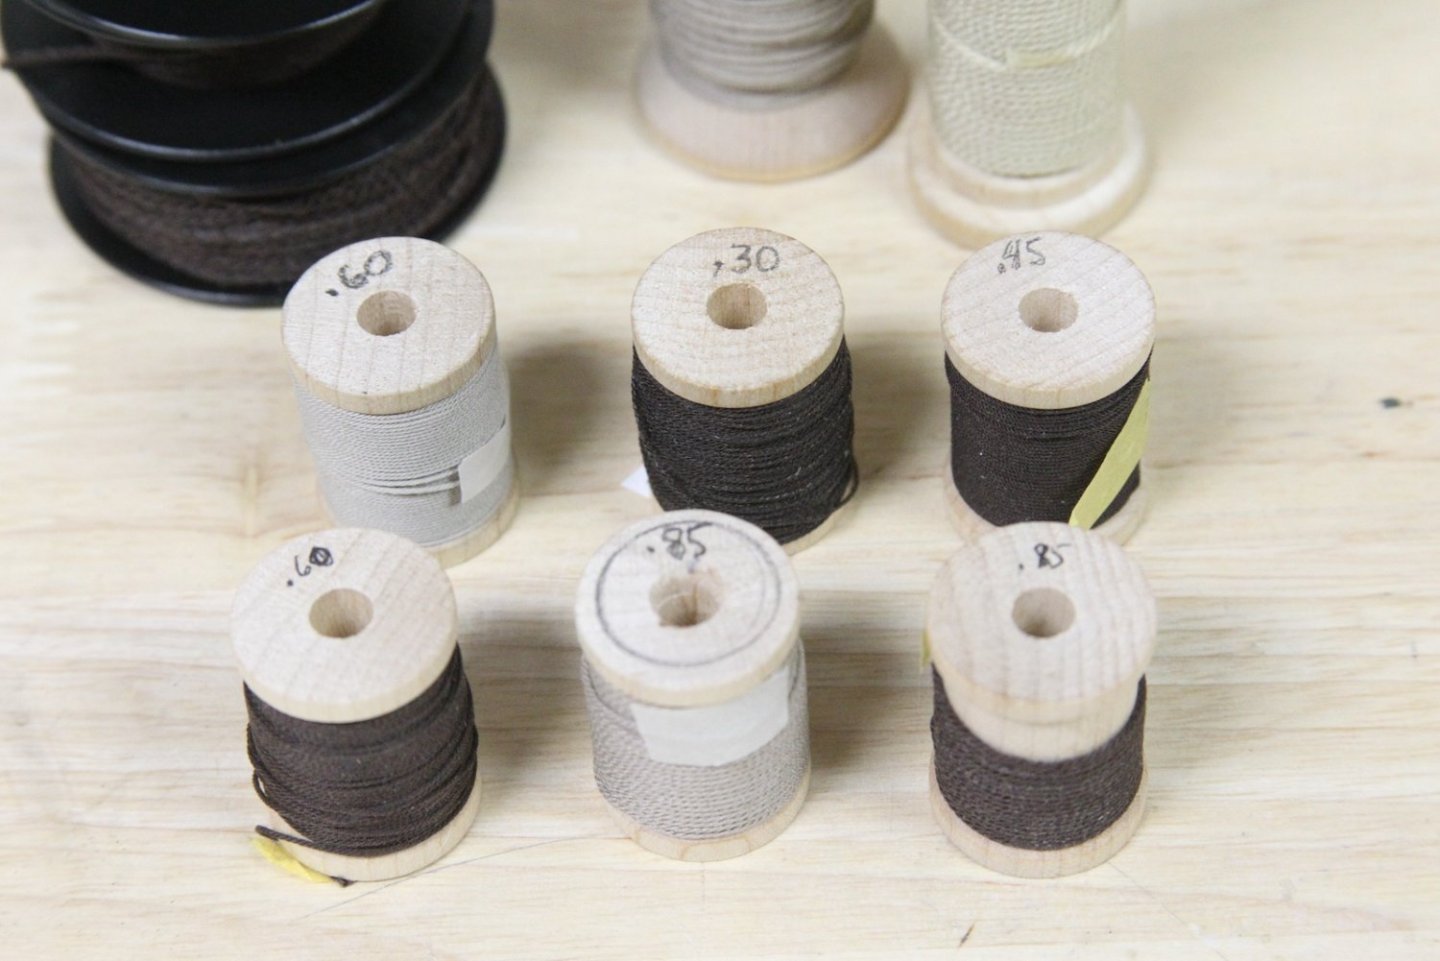
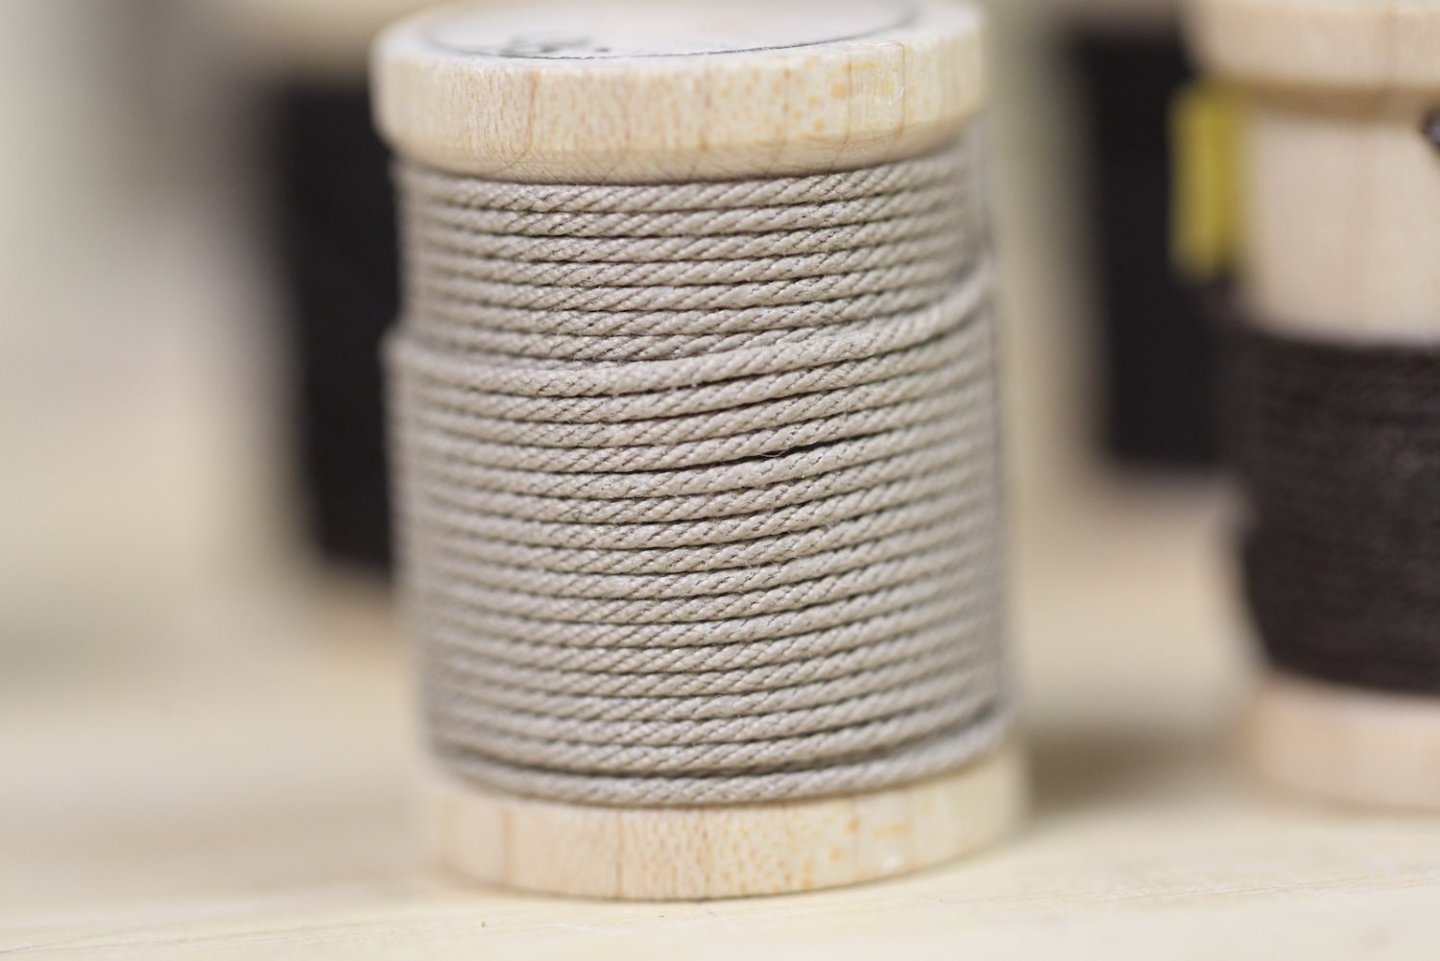
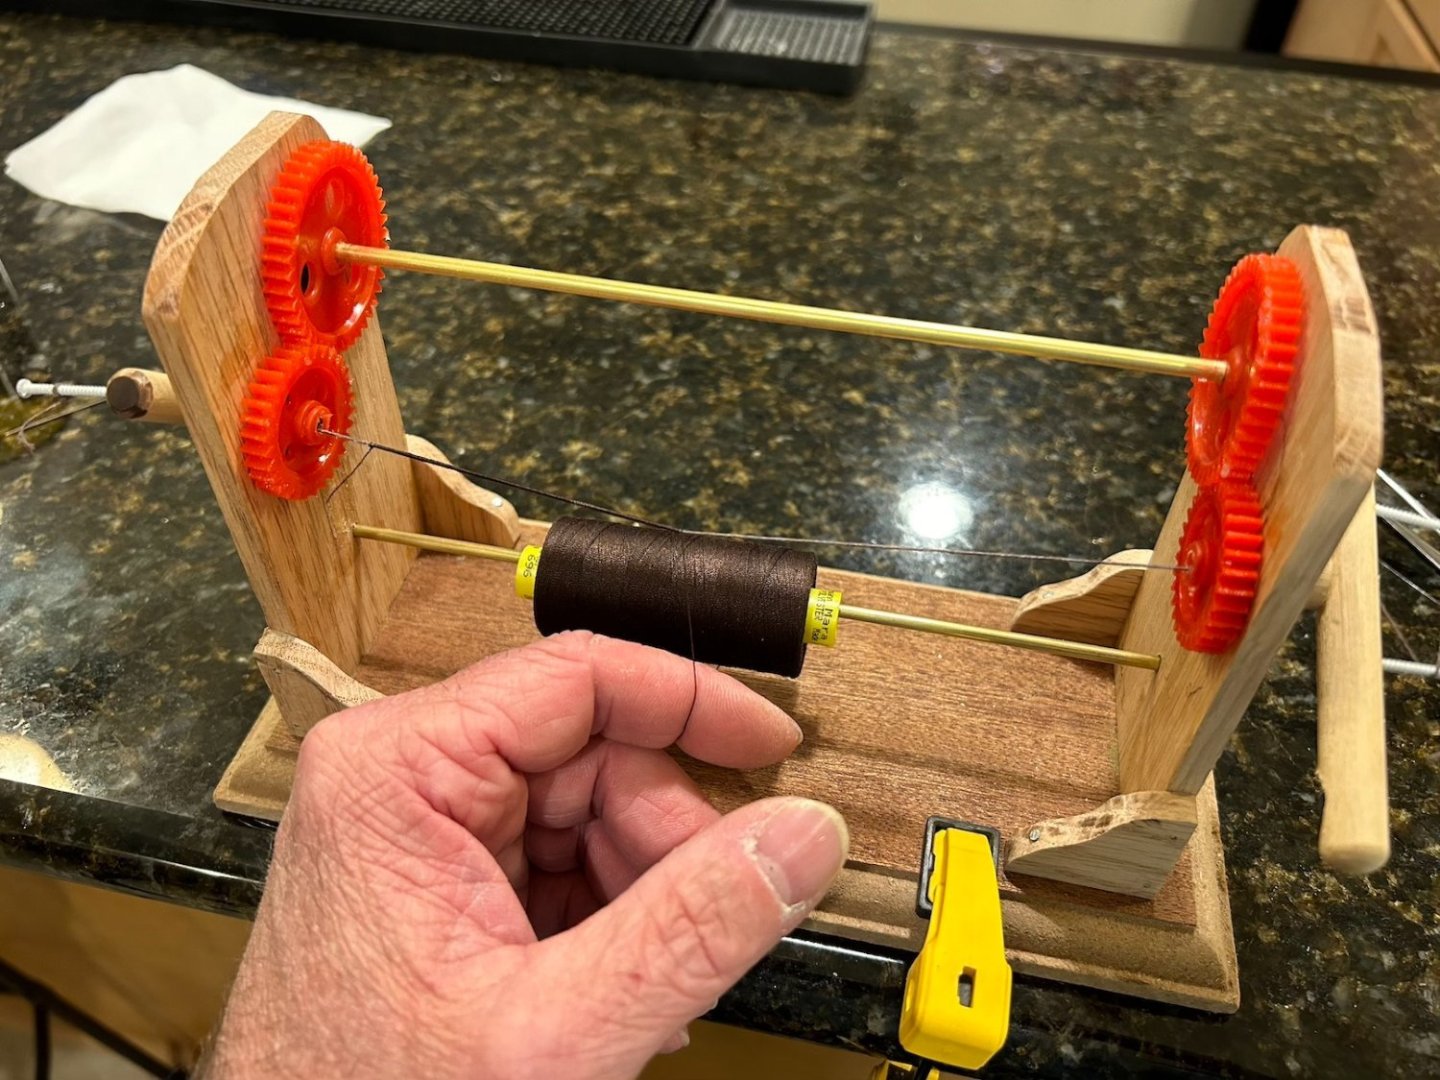
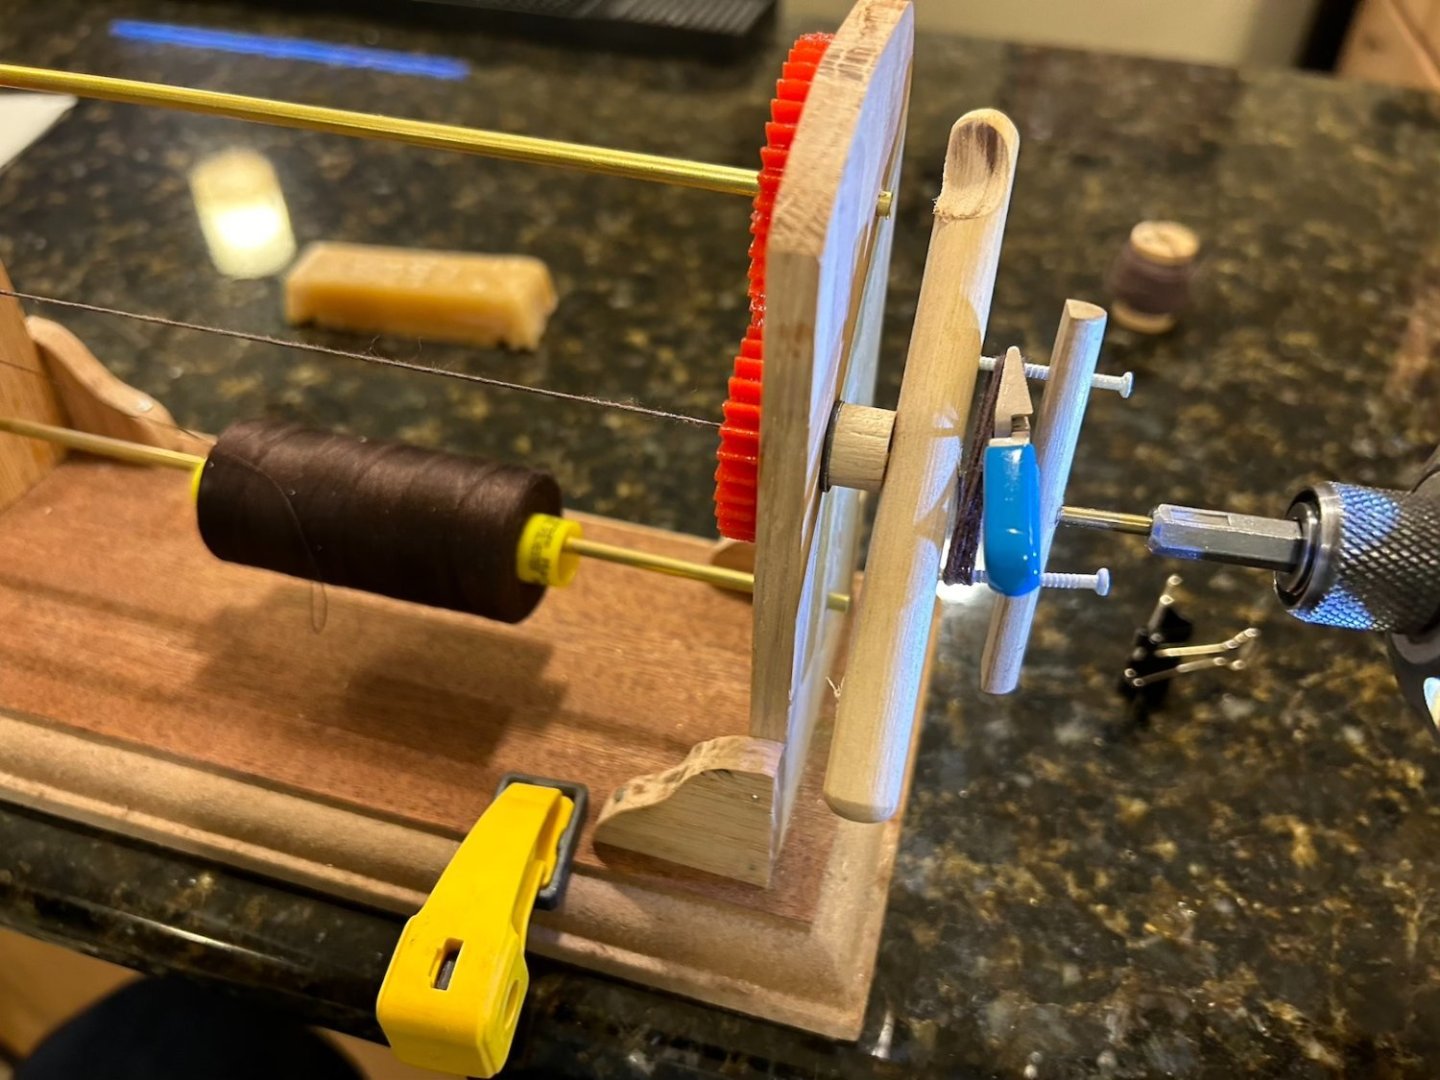
While working on the lower masts, I've also been doing some "rope work" to prepare for the standing rigging. As I've mentioned in several previous posts, I'm using @Chuck's Syren Rope Rocket which works great. I use Gutermann brand Mara thread in 120, 70, and 30 weights and combine those options in dark brown and tan to create what I need. The chart below lays out combinations that create the sizes I need. The left number is the weight, the middle number is the number of threads per line, and the right figure is the number of lines per rope. I premade a variety of different sizes and shades, but mostly the dark rope for standing rigging for now. I did a little bit of serving of some rope to get ready the standing rigging for the bowsprit. I made my own hand spun serving machine based on examples I've seen. The rope slides through the gears with a spool mounted on the bottom. Turning the handle (while steadying) the bottom thread seizes the rope about 6 to 7 inches at a time. After much turning, I decided my shoulder was a little sore (I've had a some work done on it since I got a little broken in Afghanistan a few years ago), so I created this little drill bit tool to turn the handle for me. Worked pretty well - not to fast, but steady. Takes about a minute to get a 6 inch served rope.


- 419 replies
-
- 16
-
-
- Victory Models
- Pegasus
- (and 2 more)