Moonbug
-
Posts
1,028 -
Joined
-
Last visited
Content Type
Profiles
Forums
Gallery
Events
Everything posted by Moonbug
-
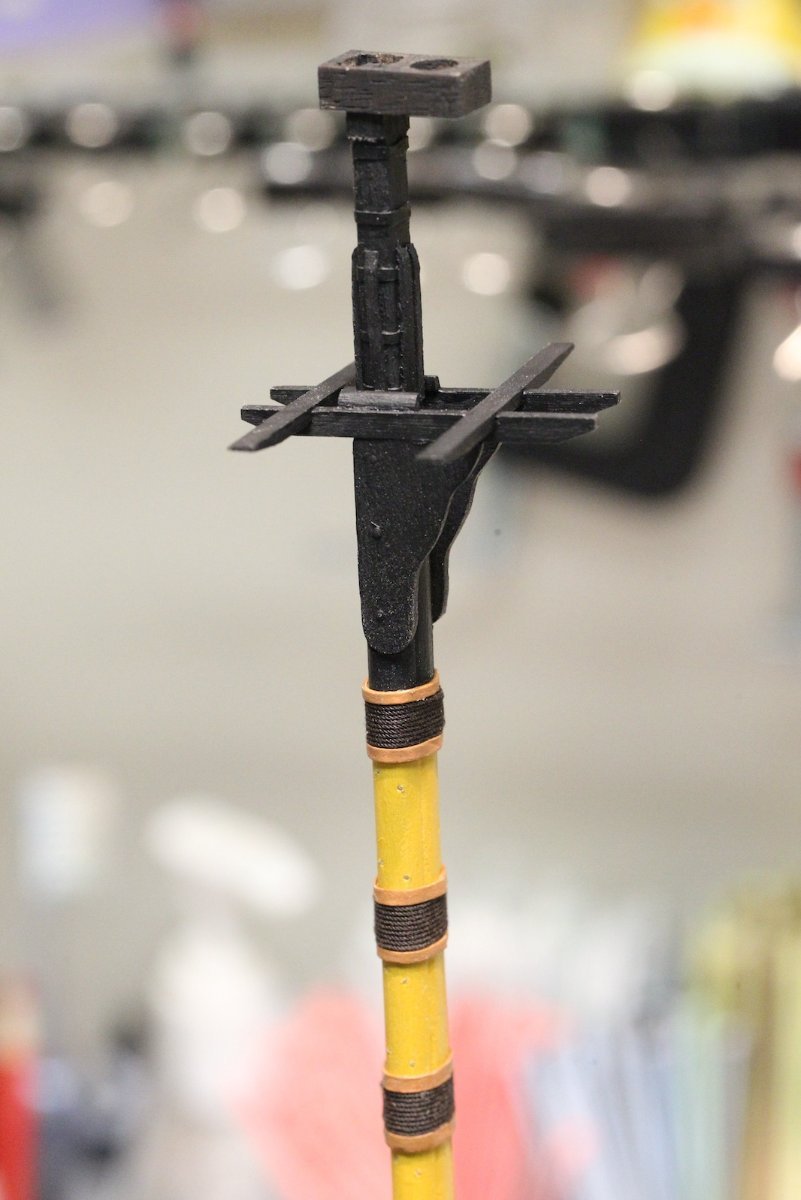
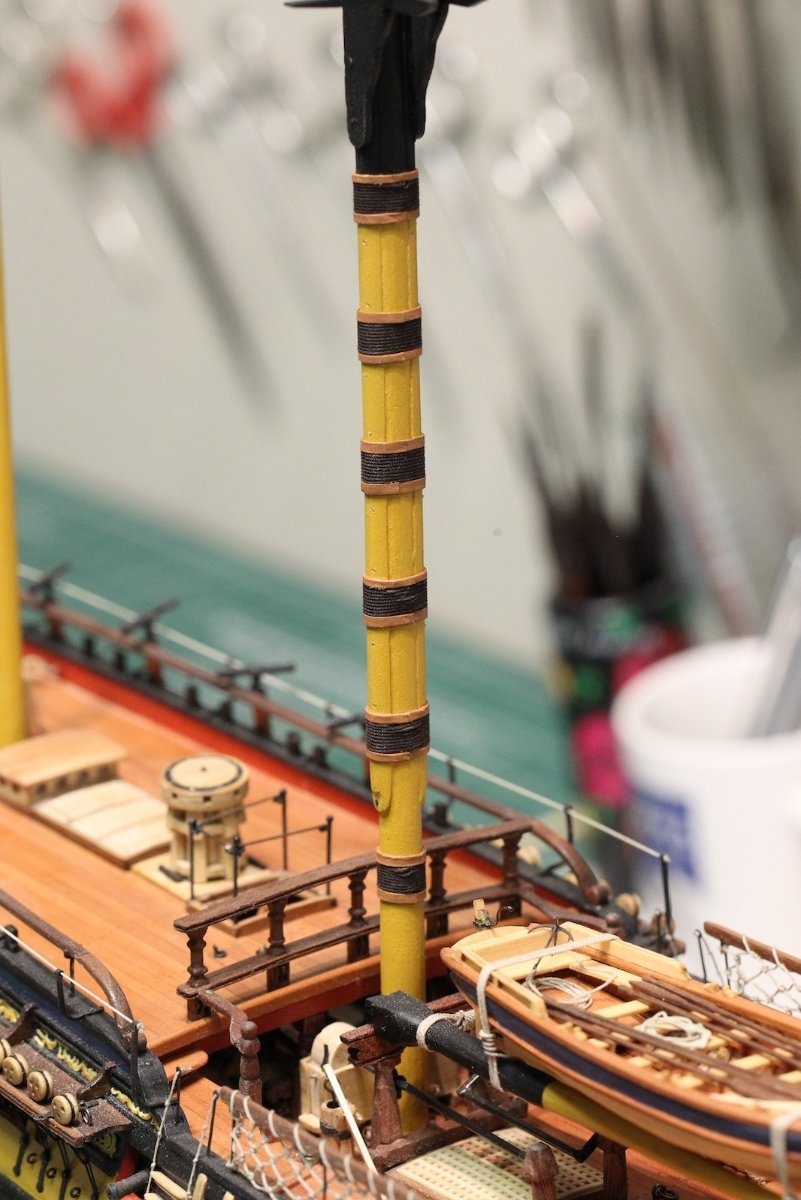
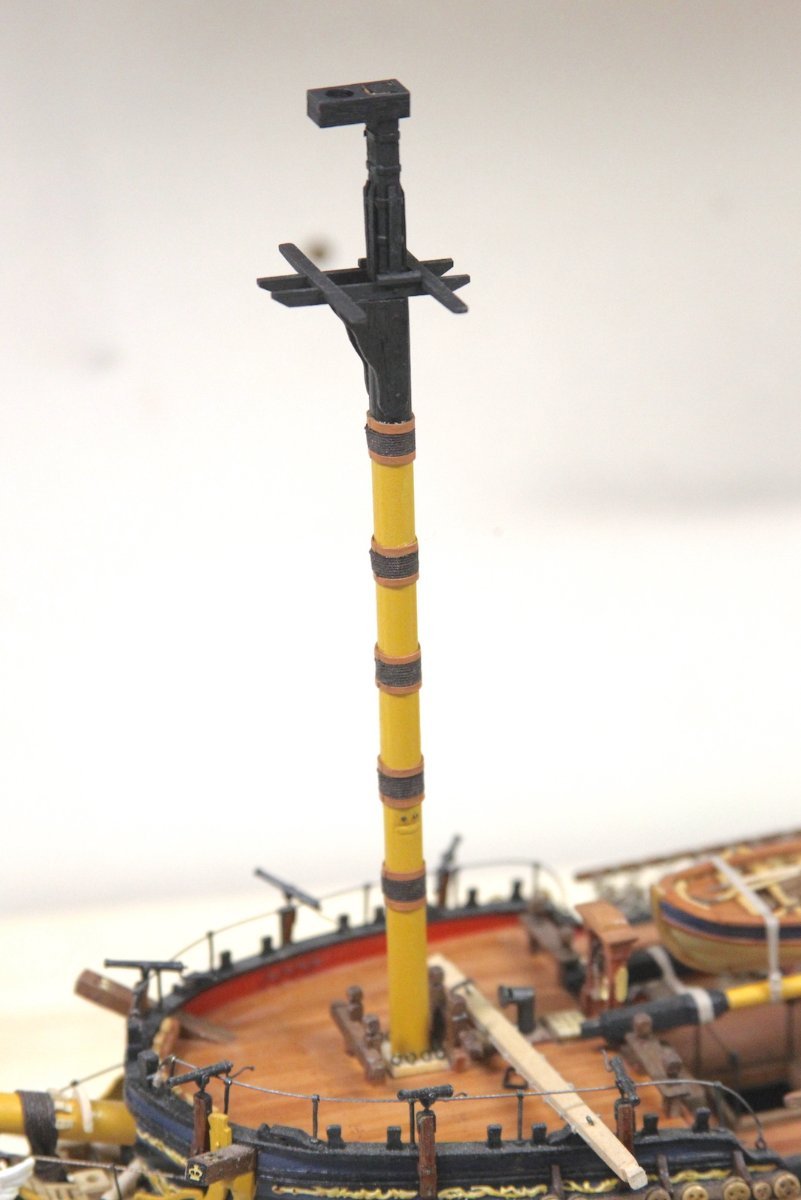
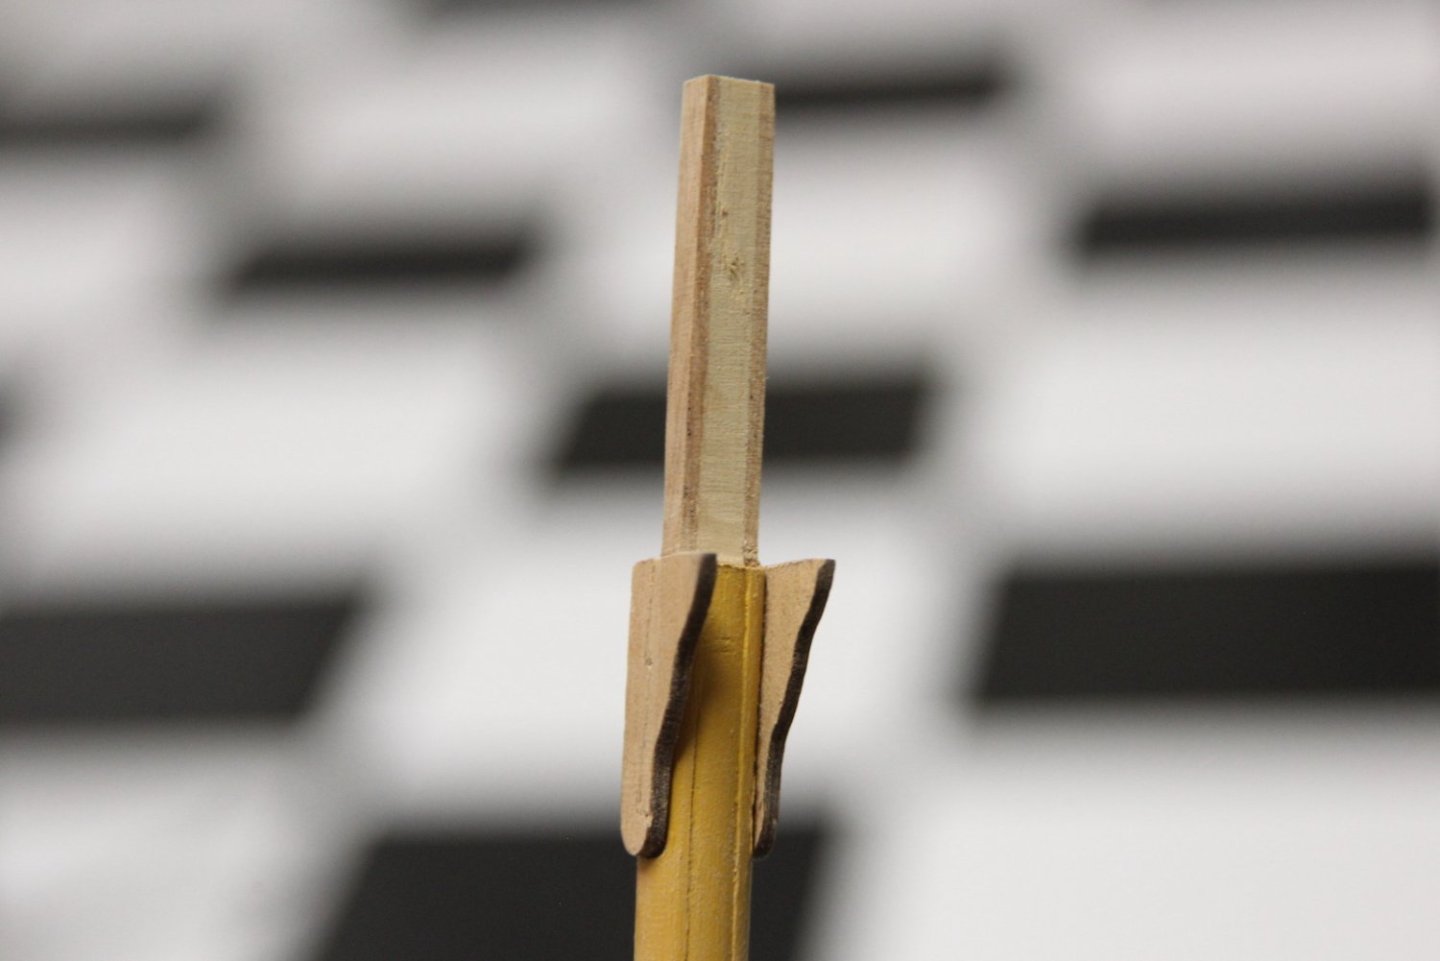
 Prior to staring the Main mast I went back and added a detail to the foremast that I'd forgotten - the pinning along the cheeks. It's an easy addition, though obviously takes a bit of time. This is also the reason I always save the ends of pins/nails that I clip off. This way I can sharpen an end, sand the backside, then poke them in where needed (after pre-drilling of course). There isn't too much detail to go into for the Main, as it is almost identical to the Foremast. I scaled it out the same as the rest; I did however make the cheeks a little more pronounced as I said I would and am happy with results. The good news - it's also not so different as so stand out greatly when you see all the masts set in place.
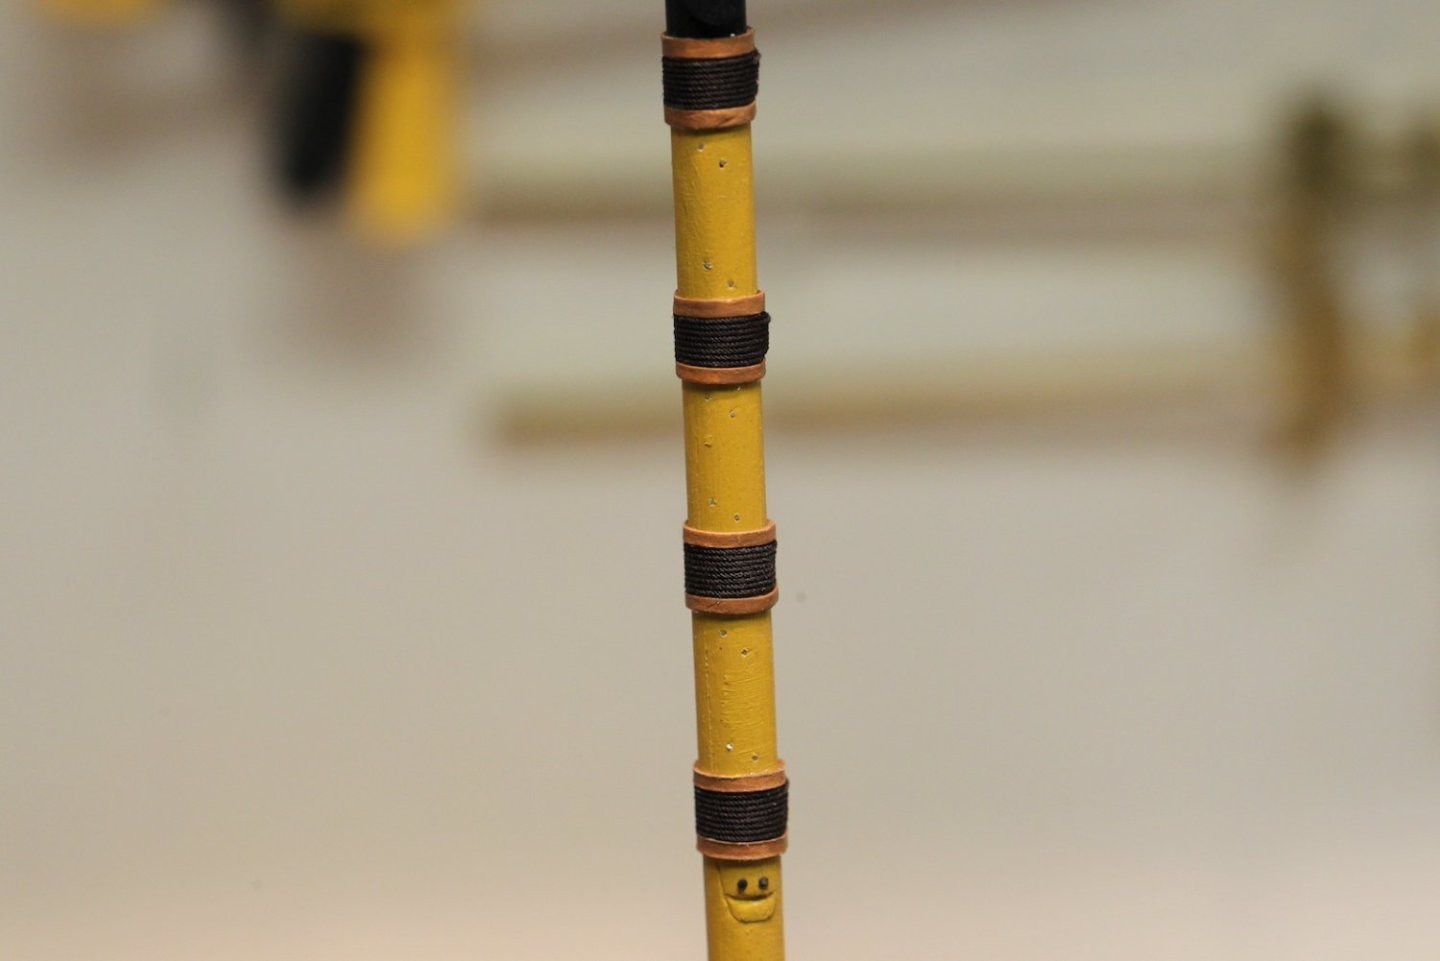


- 419 replies
-
- 14
-

-
- Victory Models
- Pegasus
- (and 2 more)
-
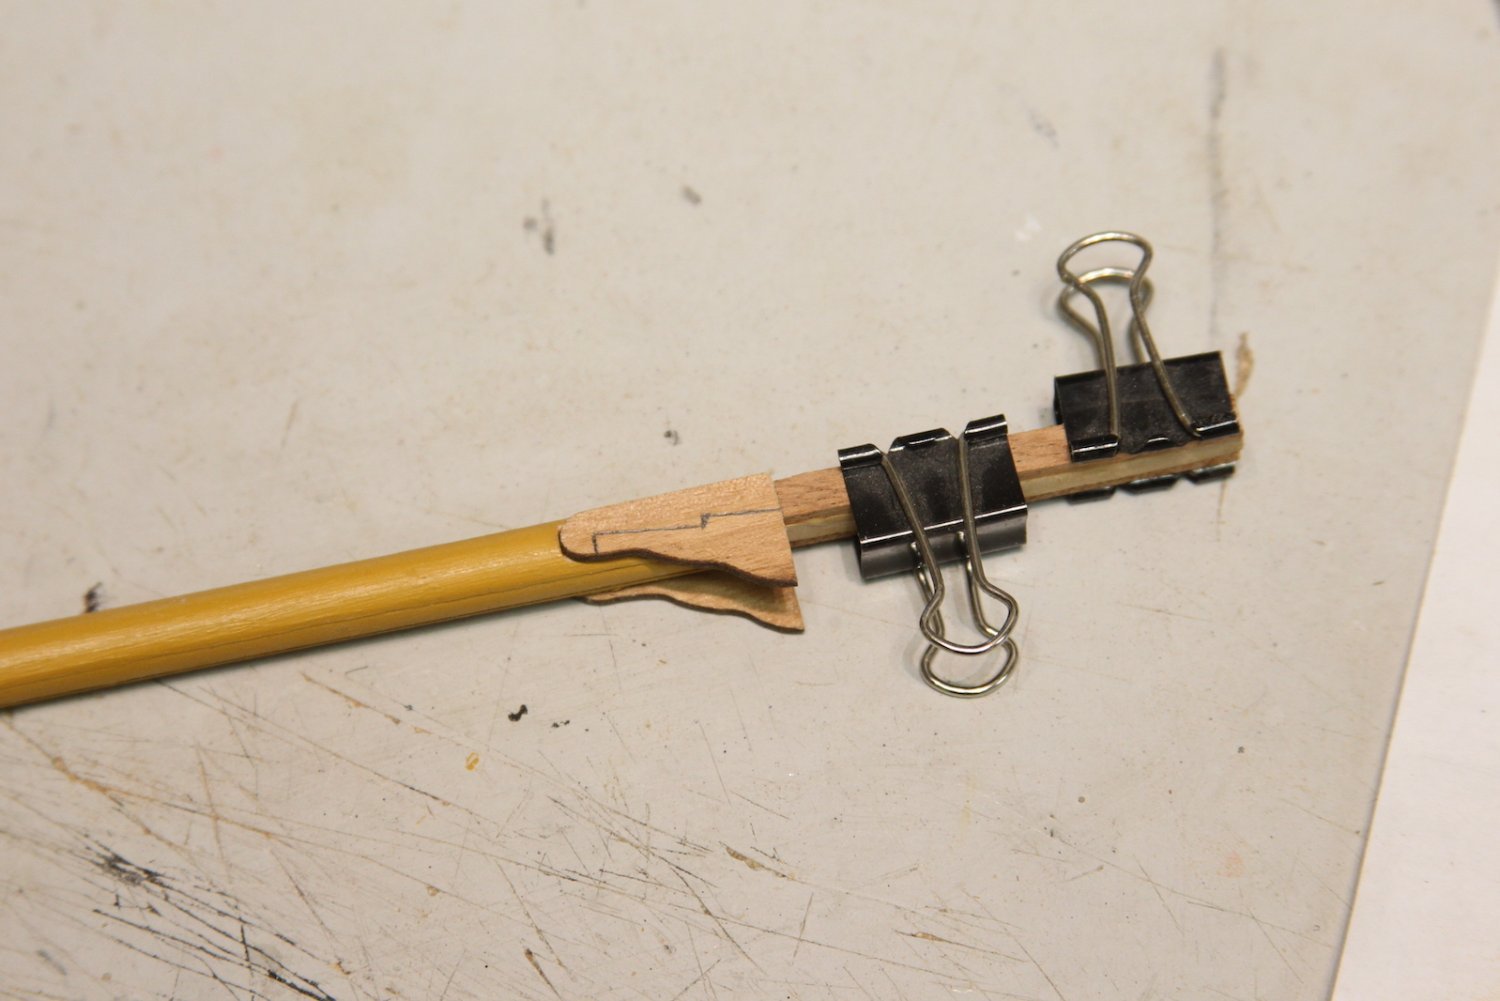
Thanks so much Pete, appreciate it. I'm glad she is as well; much easier to cope with our own tribulations than those of our children. Foremast today - pretty much the same process as the Mizzen of course, except the cheeks are a bit longer. Granted, the cheeks here are not quite as pronounced as they probably should be according to the TFFM, but I'm still ok with them. I'll likely make them more pronounced for the main, while still trying to maintain some consistency. The only other thing worth nothing here is that with these bibs I've etched out and scored the pattern in which they would have been put together rather than one solid piece. Once again the woolding loops are manila folder strips wrapped twice around the mast. I also didn't mention with the mizzen that I tacked in some nails to give it a nice authenticity detail.


- 419 replies
-
- 12
-
-
- Victory Models
- Pegasus
- (and 2 more)
-
Nicely done. I agree that these are a really nice (and visible) touch and are often overlooked.
- 648 replies
-
- 3
-
-

-
- Indefatigable
- Vanguard Models
- (and 1 more)
-
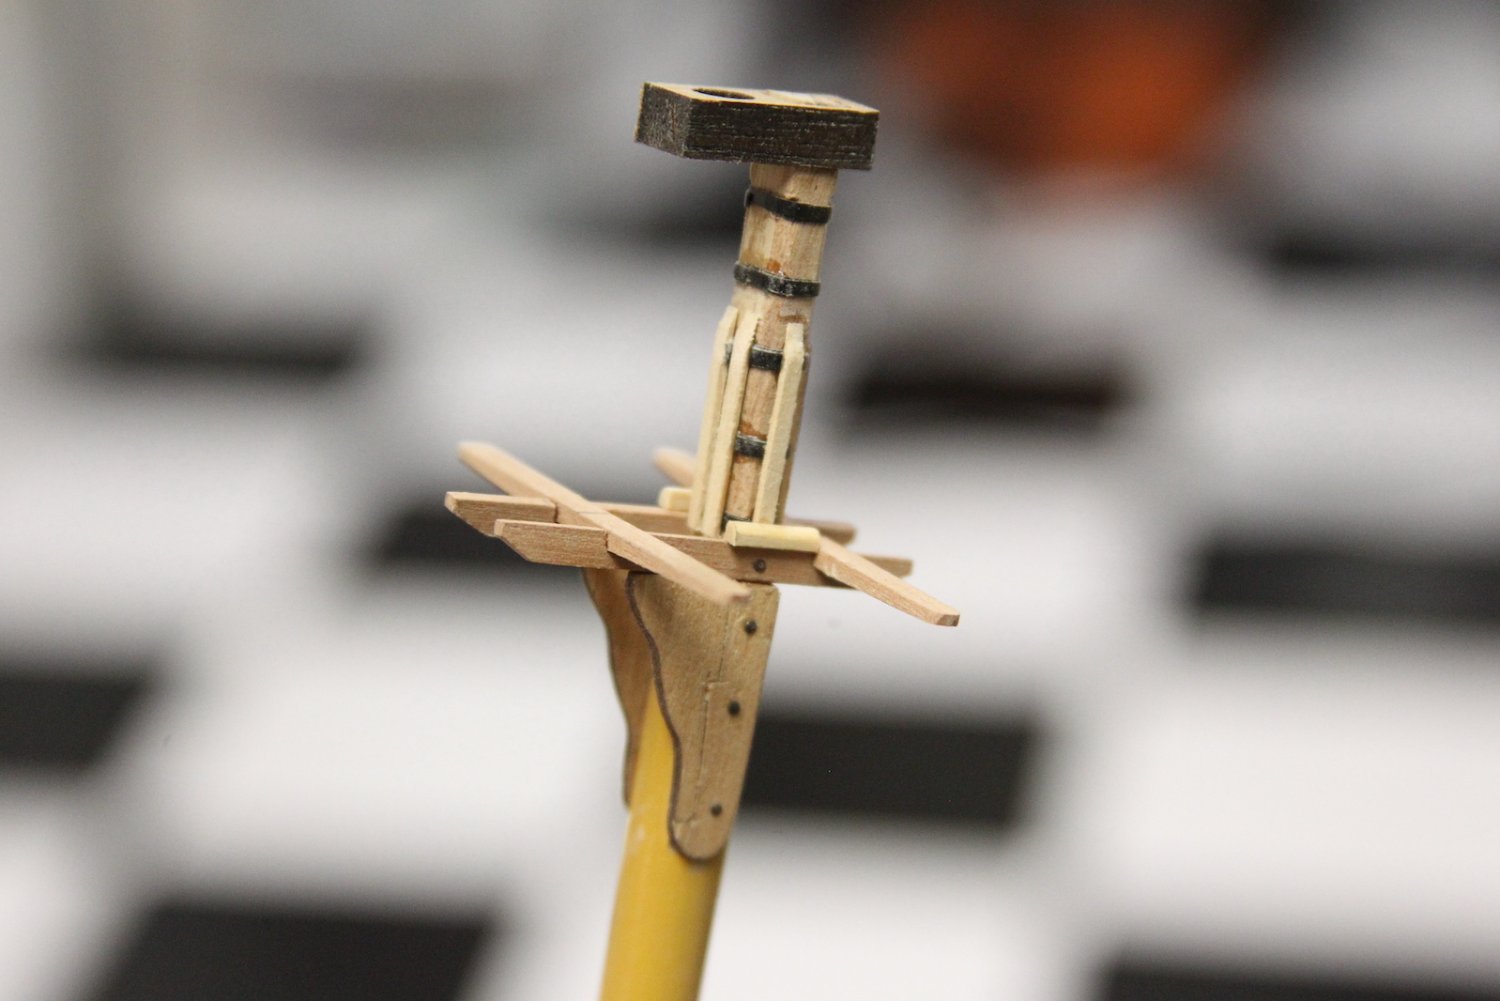
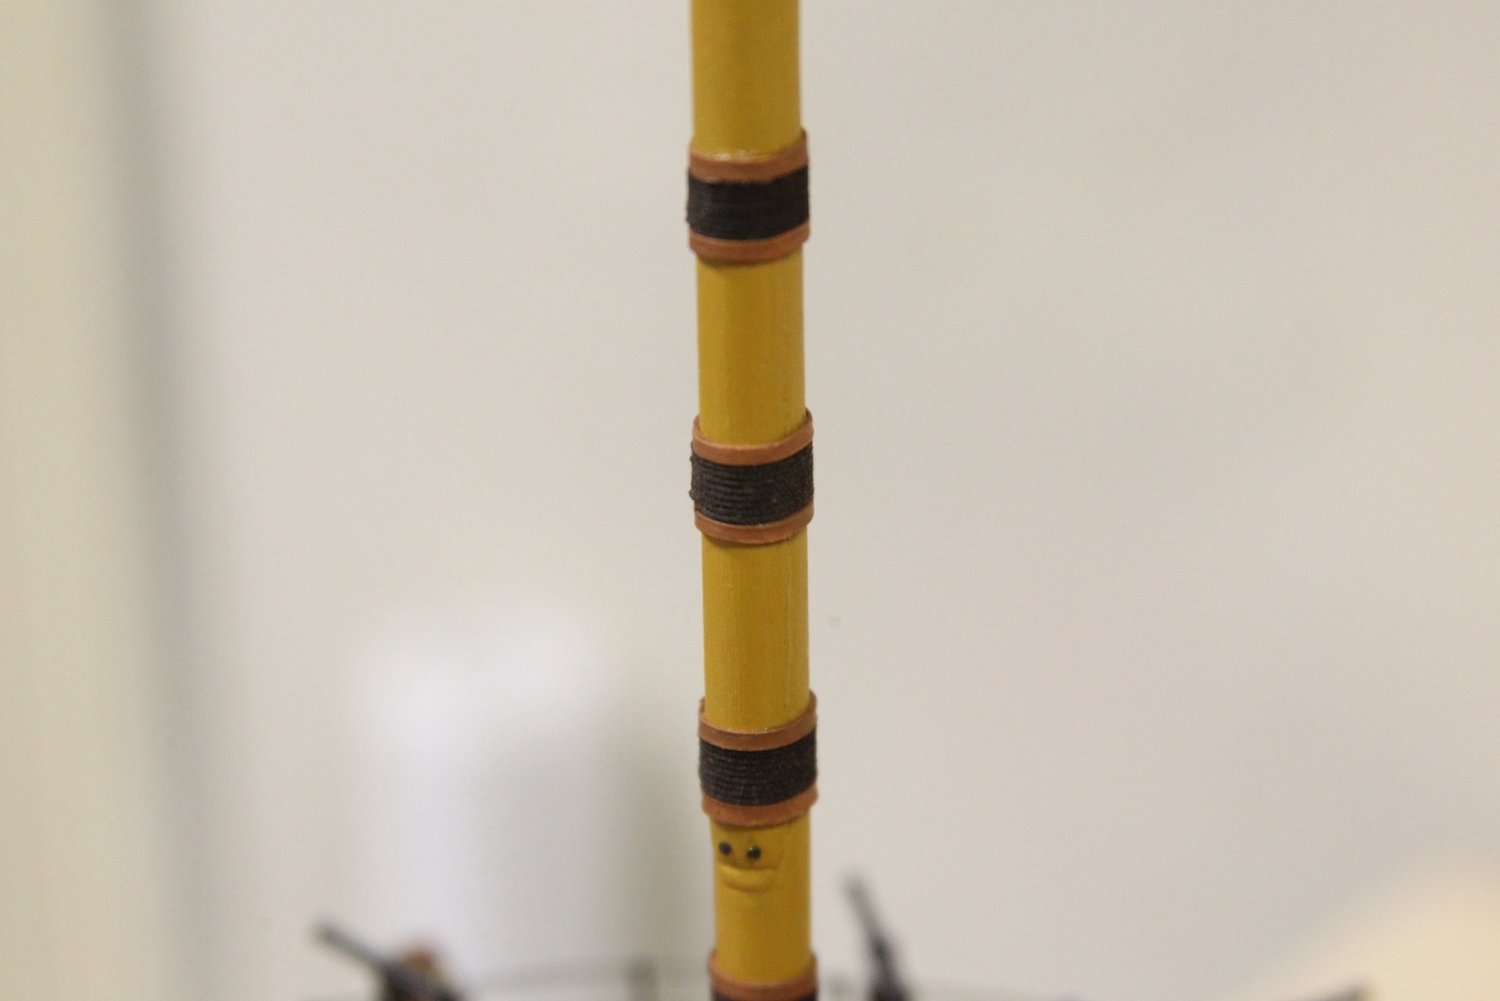
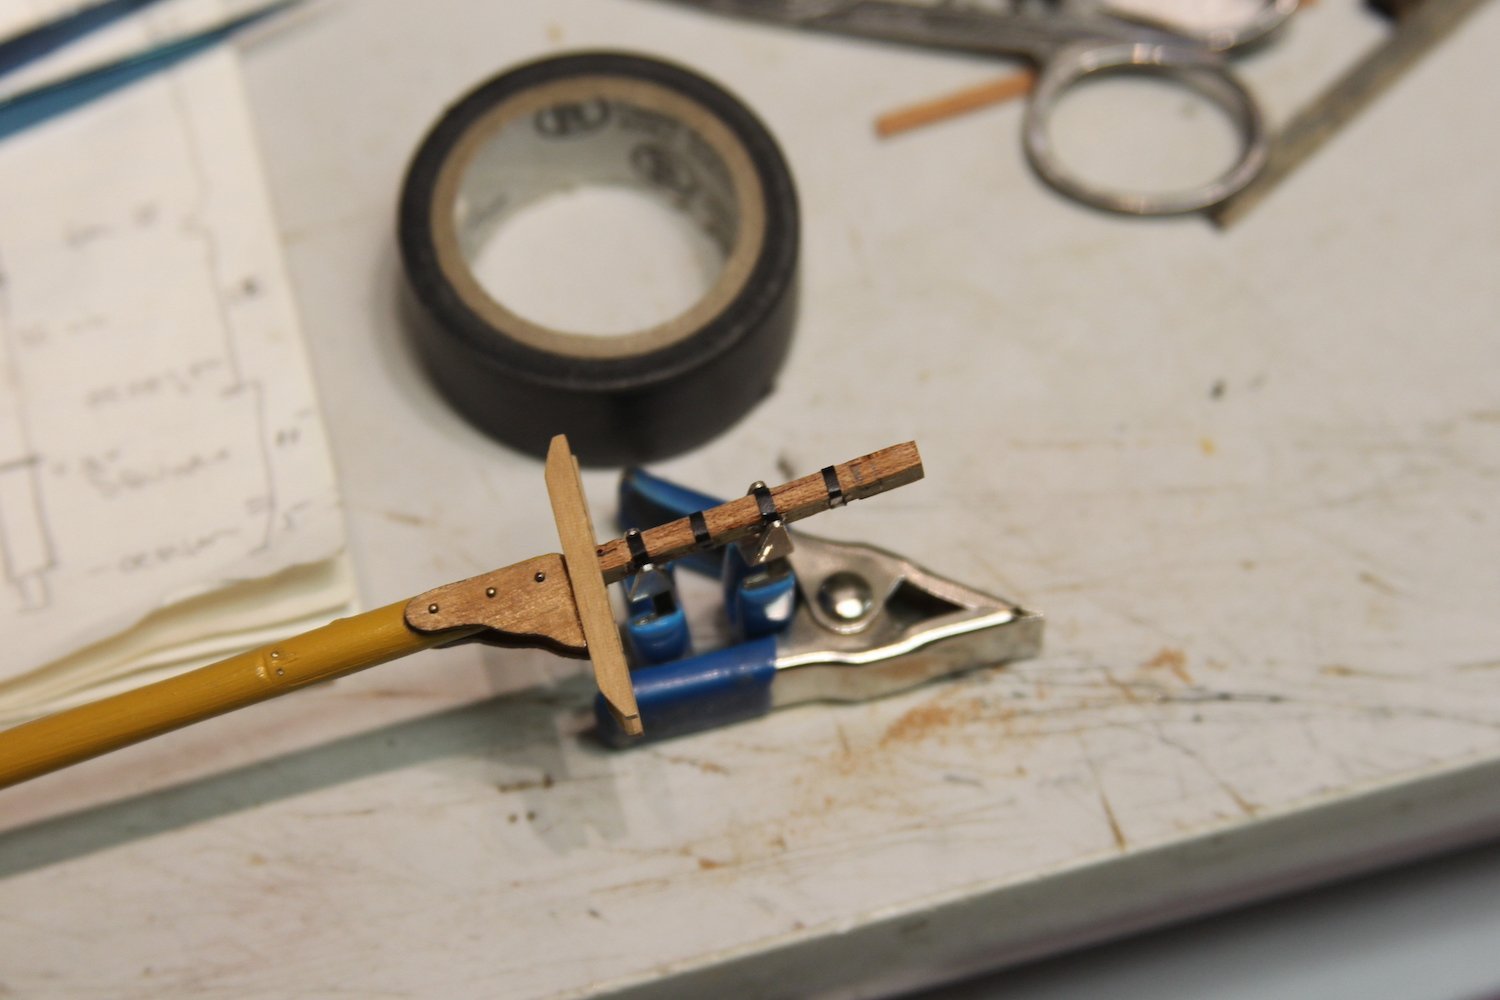
Got to work on the MIzzen mast. Although I know that the masts are all measured by the Main (and thanks again to BE and others for doing the math for the rest of us from Steel's work), I wanted to start with the Mizzen because it's a bit easier and I want to get my feet wet again. I started with the measurements and diagrams in the previous post and lathed out the mizzen then added the cheeks and the bibs. After adding the two 'filler' sides to the masthead above the bibs, I used sliced electricians tape to simulate the iron hoops that hold the masthead pieces together. Then I added slim strips as the vertically placed battens. Cross trees and trestle trees are added then I simulated the hoops for the wooldings by using a manilla folder cut into a strip then painted. The woolding itself is my homemade rope using the famous Syren Rope Rocket. This particular rope is .045mm made from 4 doubled up strands of 120 mara thread. Going to have to even out that tiny lump there that I didn't notice until the macro shot... Also, they're difficult to see here, but the bolsters are added by rounding one edge of a small square strip and mounting them on each side where the shrouds will extend down to the deadeyes.


- 419 replies
-
- 12
-
-
- Victory Models
- Pegasus
- (and 2 more)
-
I appreciate everyone's warm thoughts. The last couple of days was mostly research and digging up my past references. Feeling quite a bit 'out of the loop' in many ways, but decided to jump right back in with some mast measurements and planning.

- 419 replies
-
- 11
-
-
- Victory Models
- Pegasus
- (and 2 more)
-
Hello everyone. I realize it's been quite some time. I appreciate folks looking into the build as well as those who've reached out. By way of short explanation - I'm doing well. Sometimes (especially when you have four grown children) life simply gets in the way of one's hobbies. I won't go into detail of course; but my oldest daughter (now 25 yrs old) survived a serious sexual assault nearly two years ago since I last posted. Needless to say, it sent our family on a much different trajectory than any of us anticipated leaving things like hobbies much less of a priority than taking care of one another. She has overcome much and is well now. After many months of walking by my shipyard as it collected dust, I'm once again feeling the pull to work in there again; so soon I'll have some more Peg updates. Thanks again - and I'm enjoying catching up on some of the cool projects that have happened during my absence.
- 419 replies
-
- 9
-

-
-
- Victory Models
- Pegasus
- (and 2 more)
-
Hey B.E. - I totally understand where you're coming from in terms of whether to include the binnacle. Your dedication to representing a contemporary model version is a cool avenue to take. That said - I do love m'self a good binnacle, and yours is quite nice.
- 857 replies
-
- 6
-
-
- Sphinx
- Vanguard Models
- (and 1 more)
-
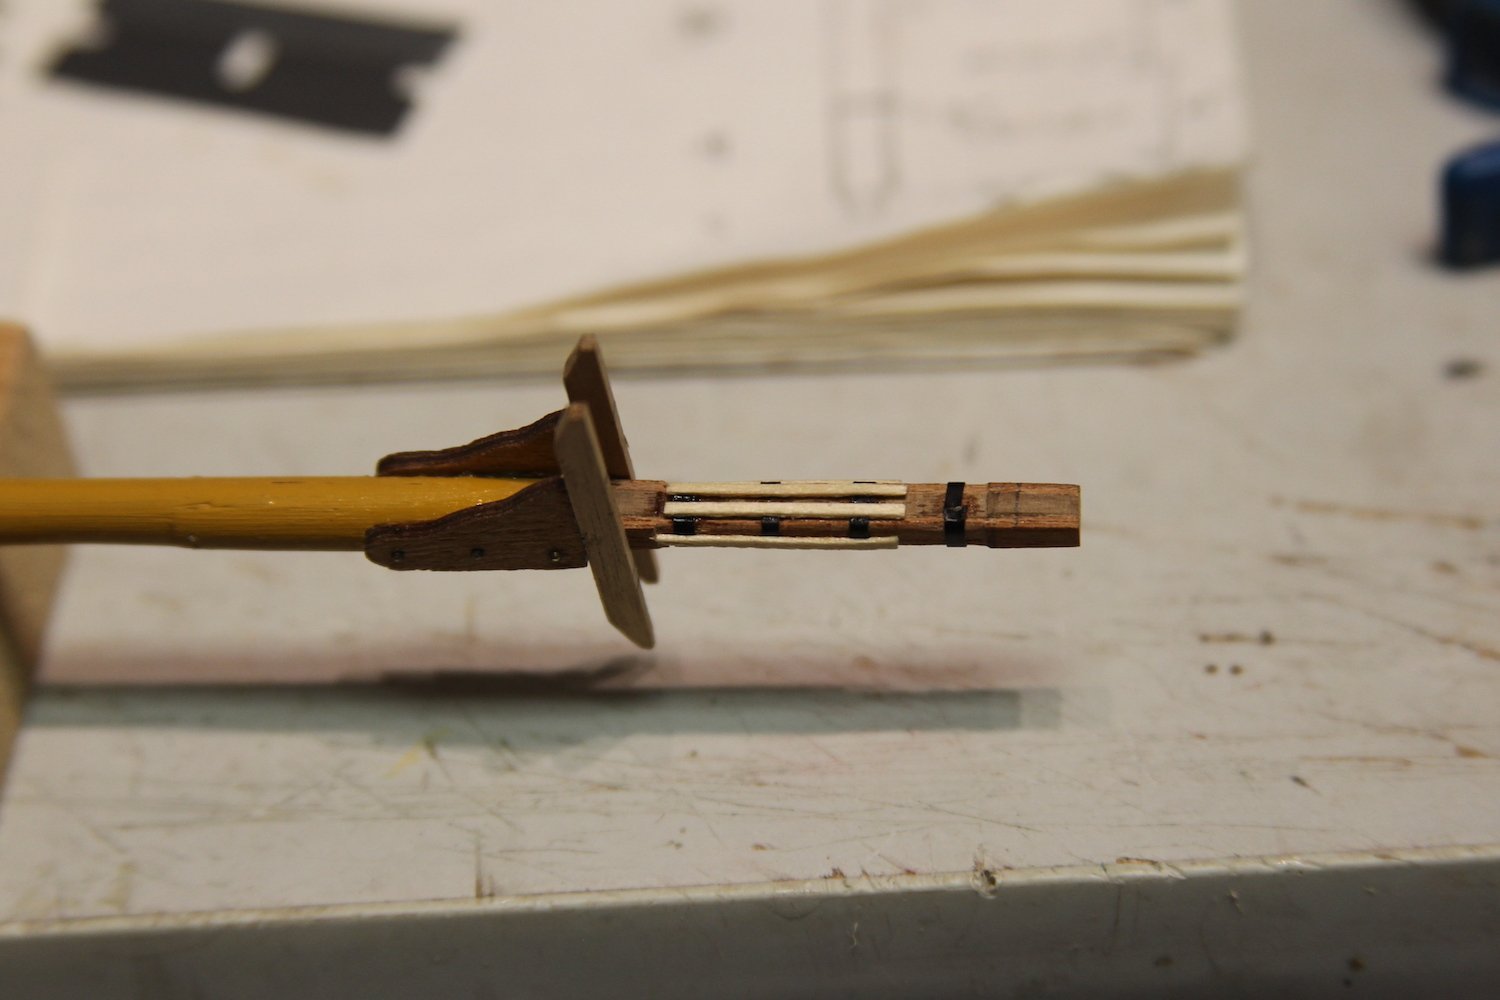
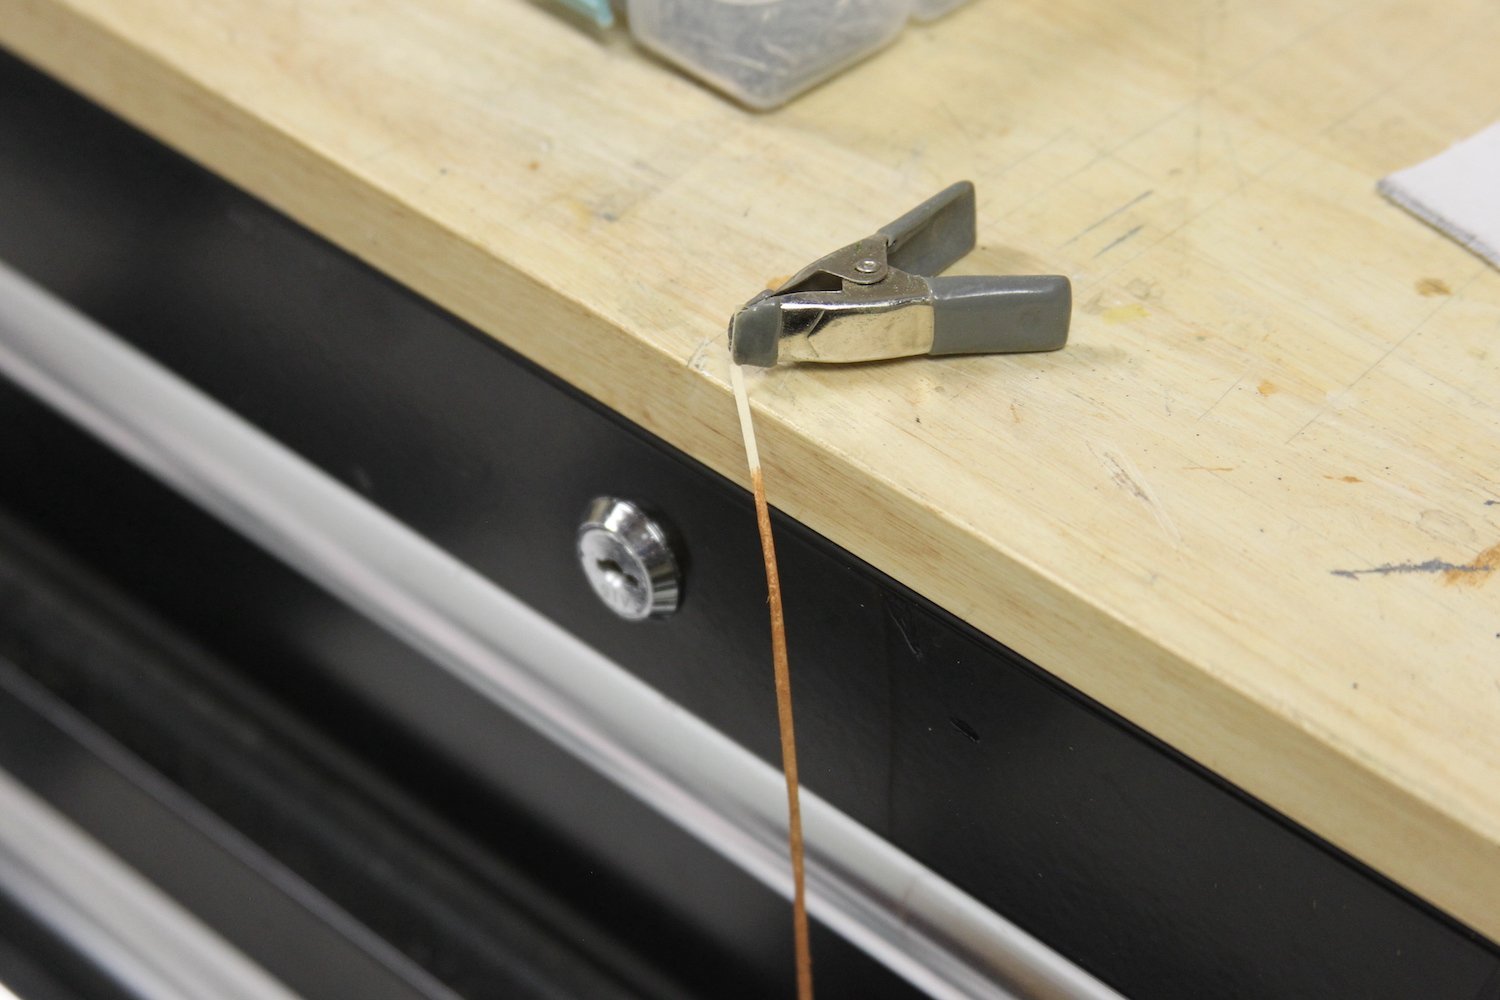
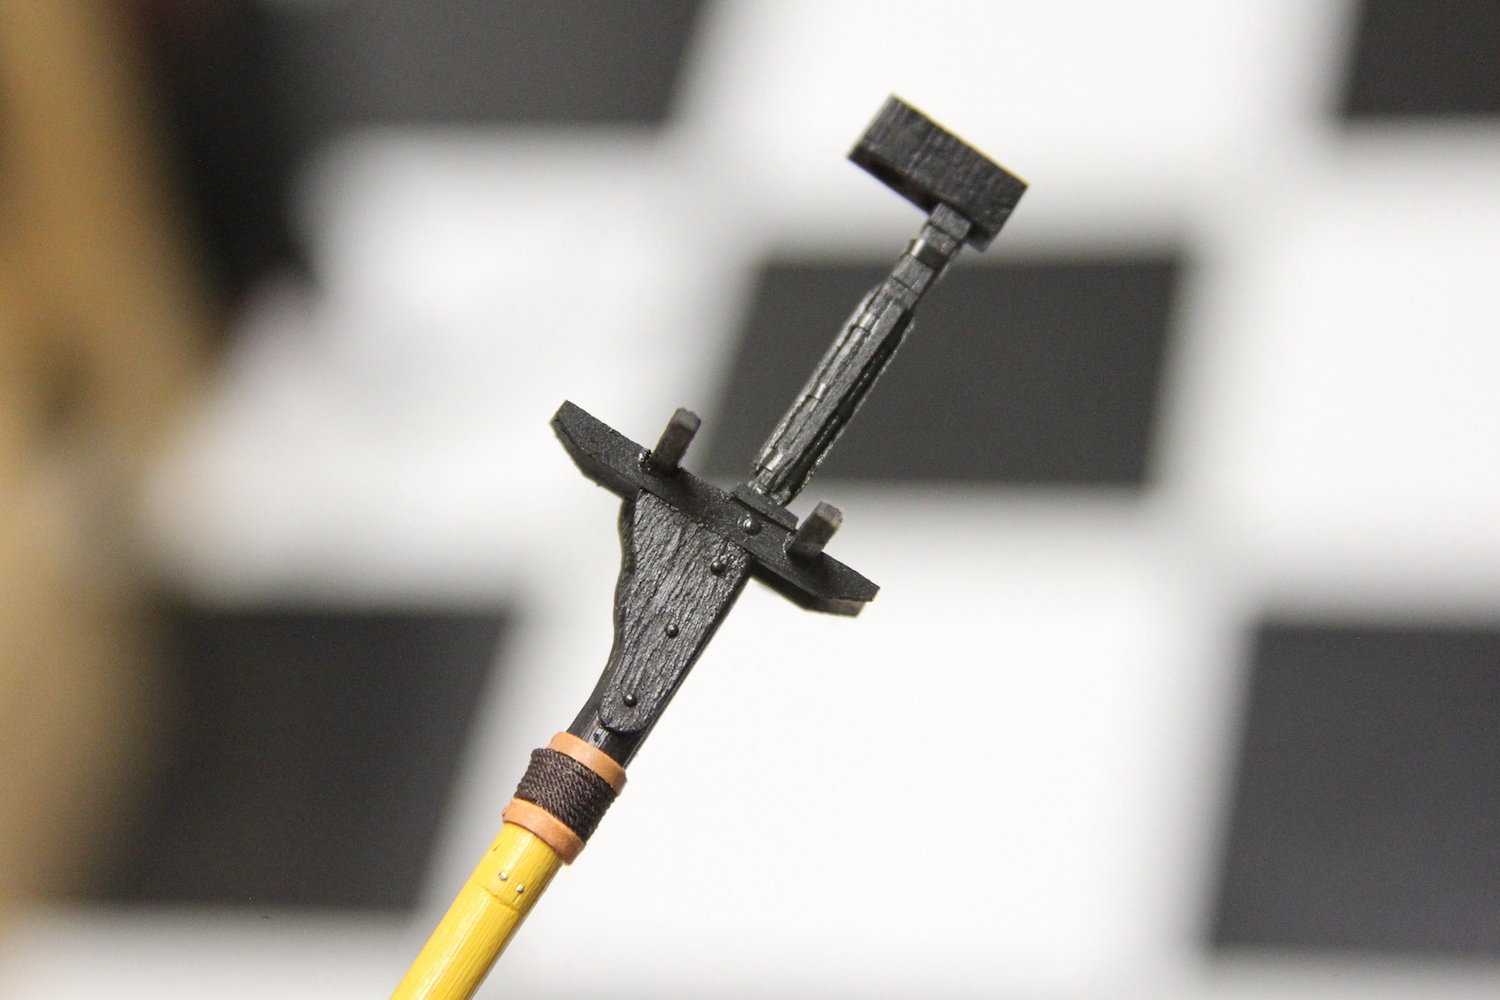
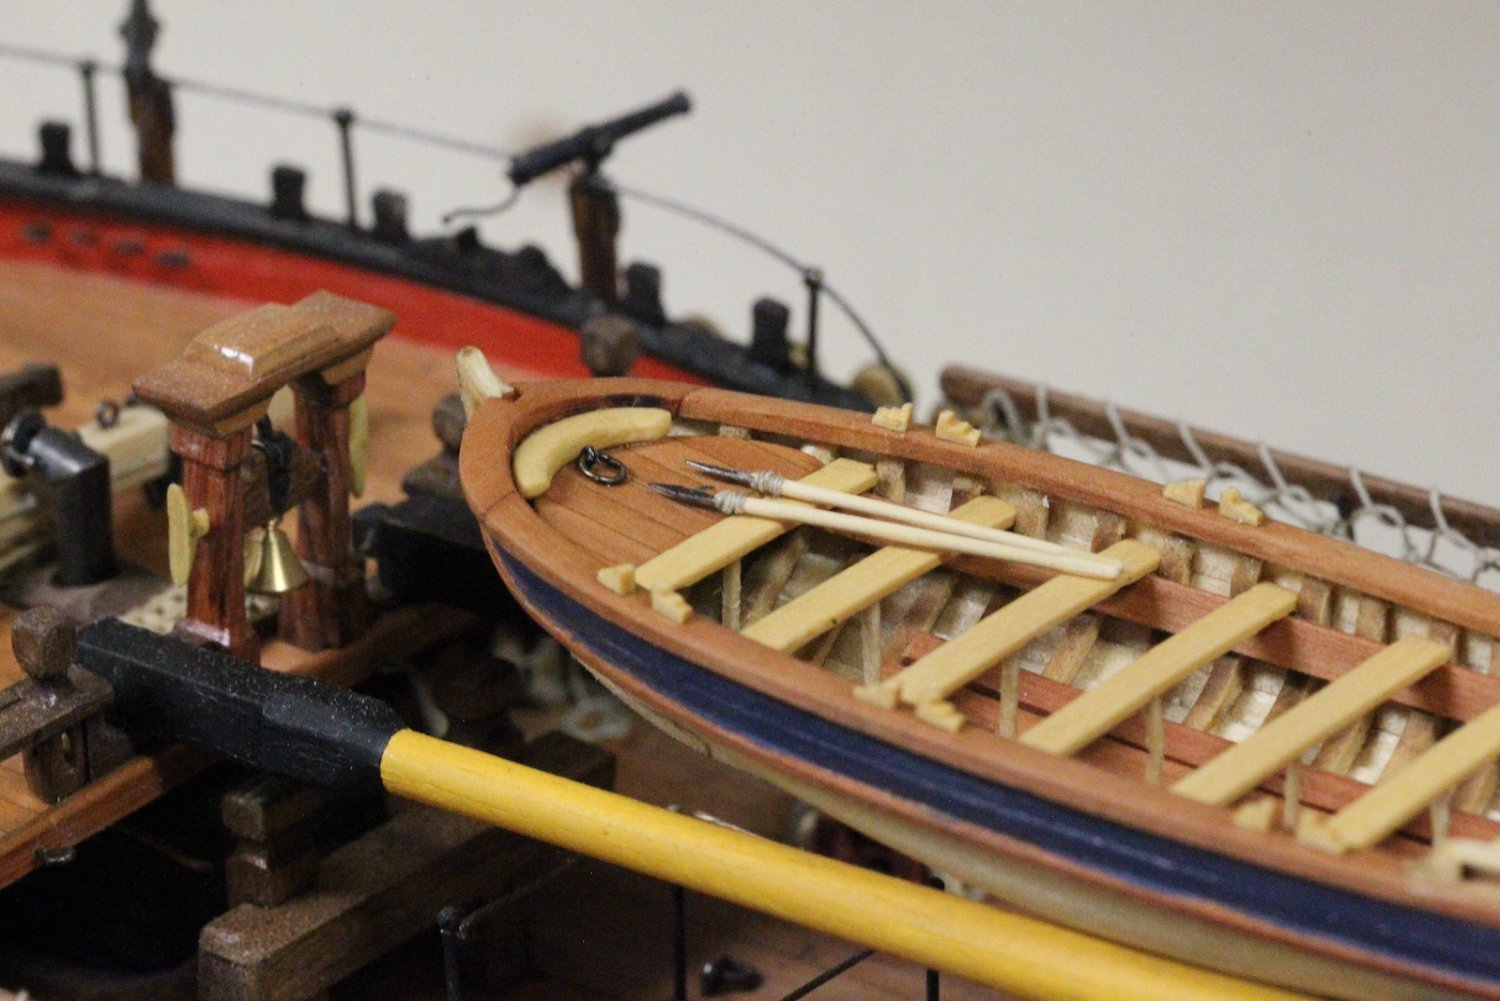
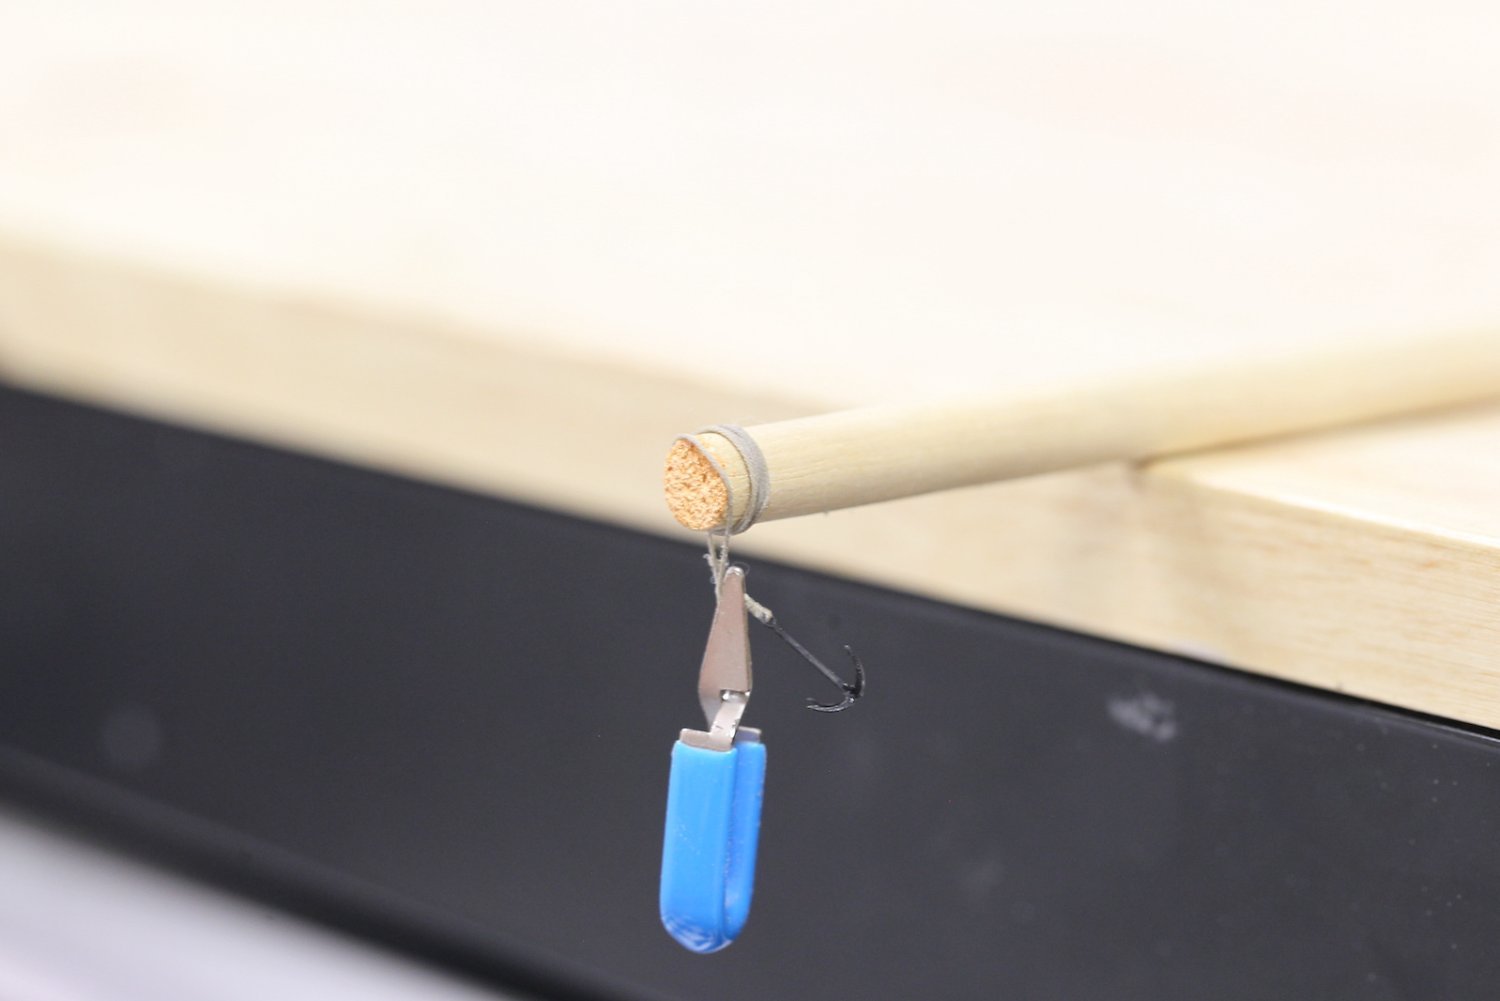
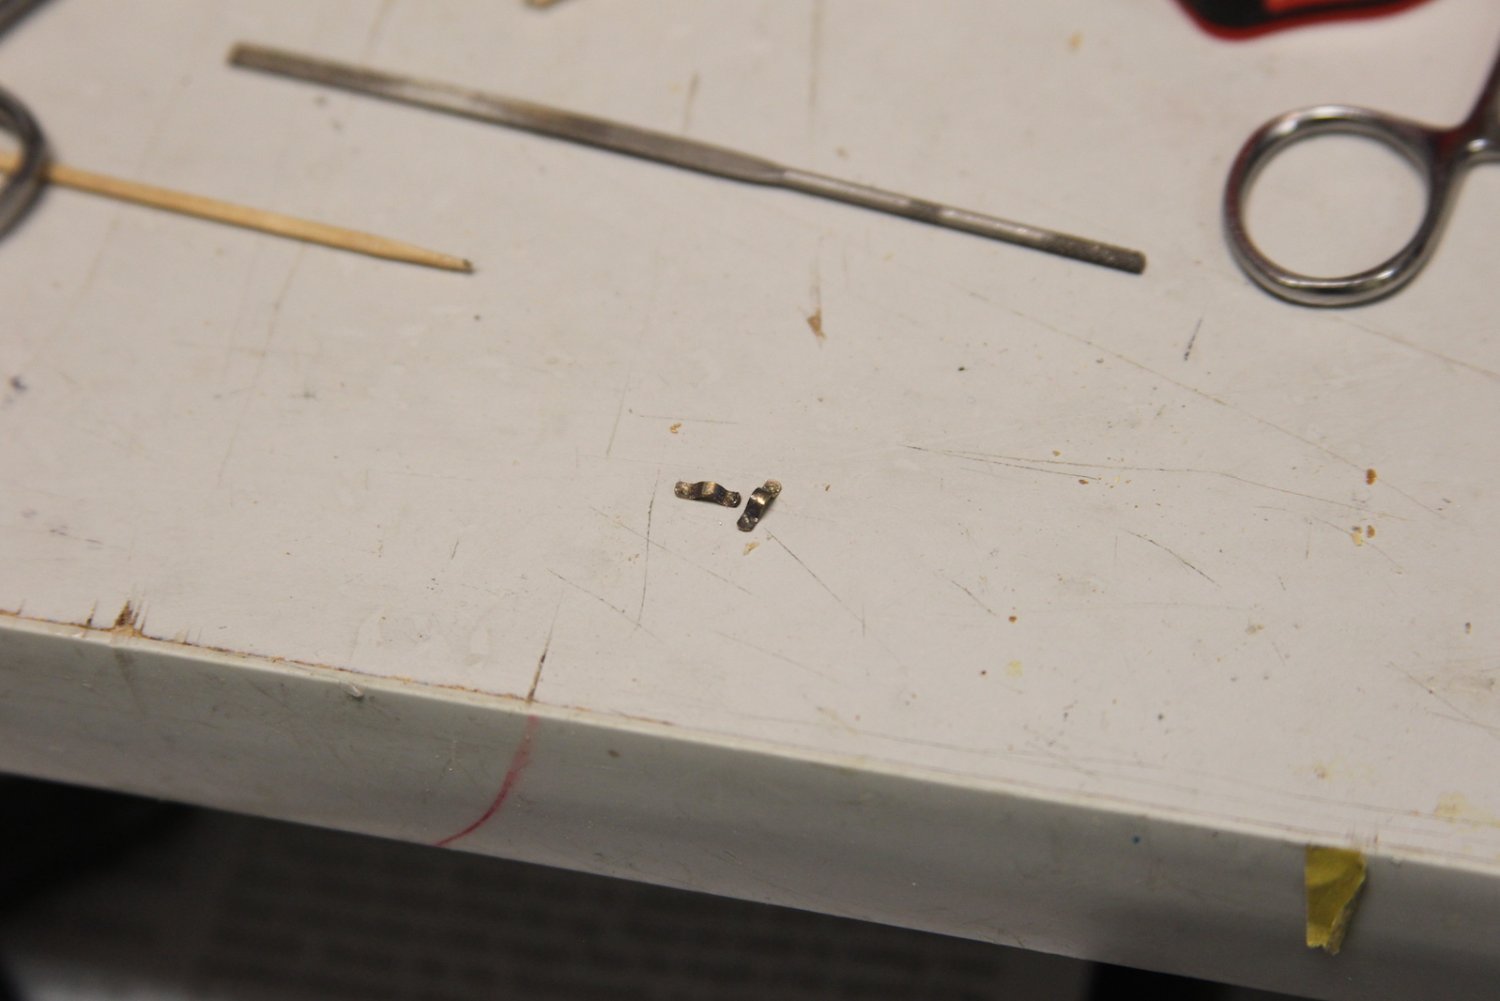
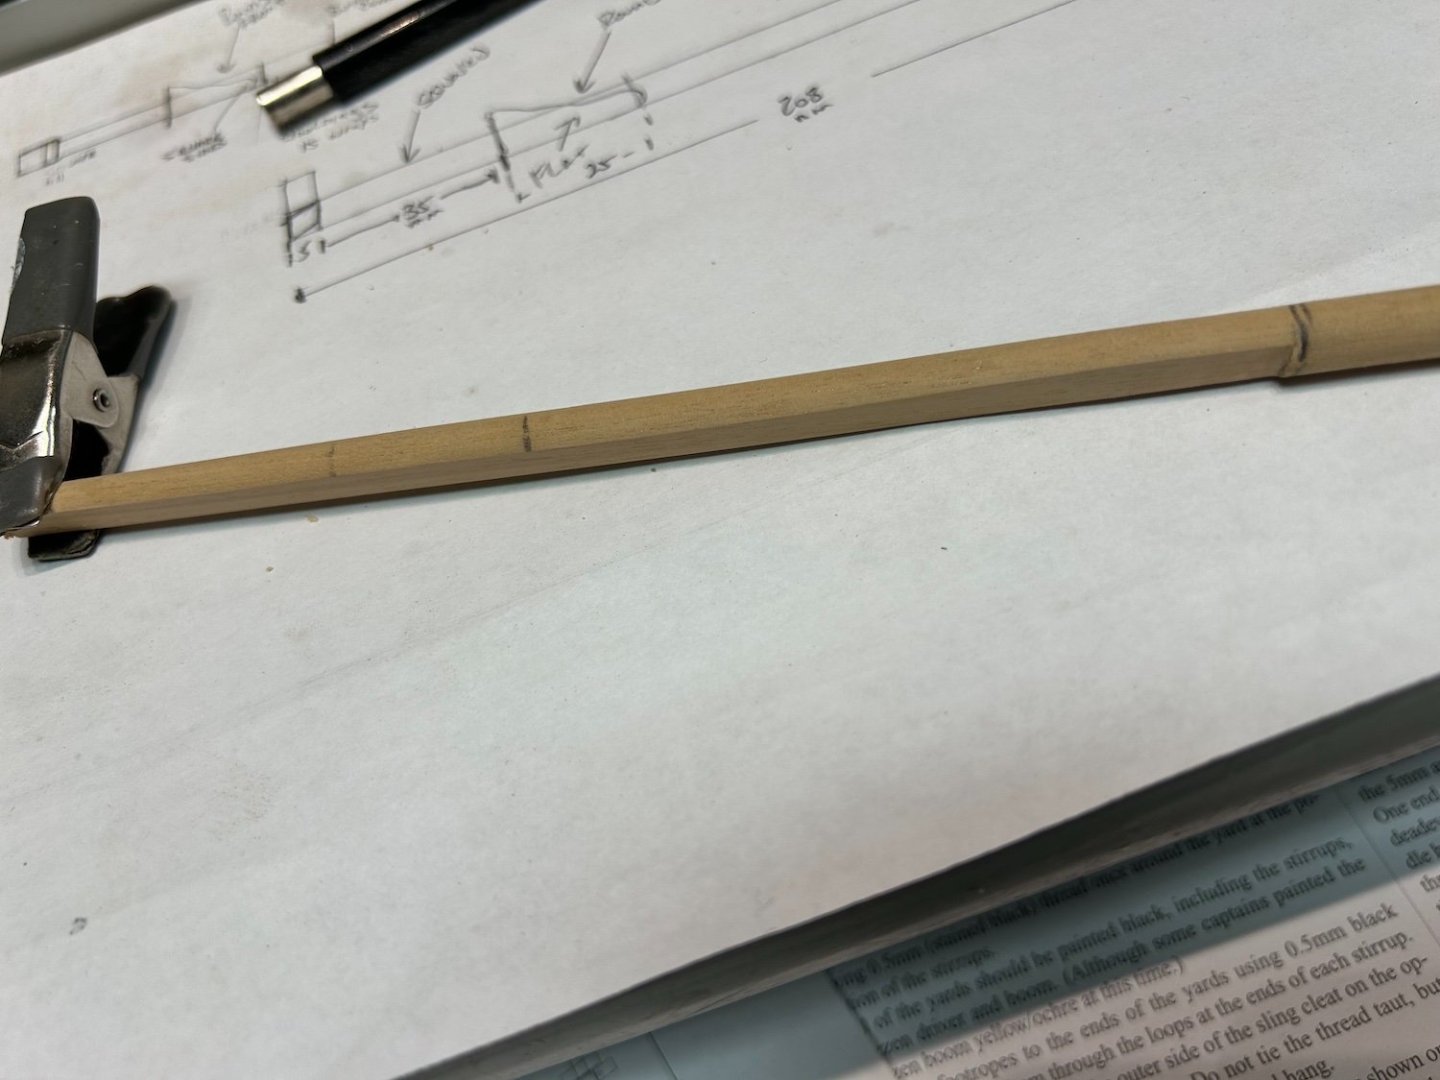
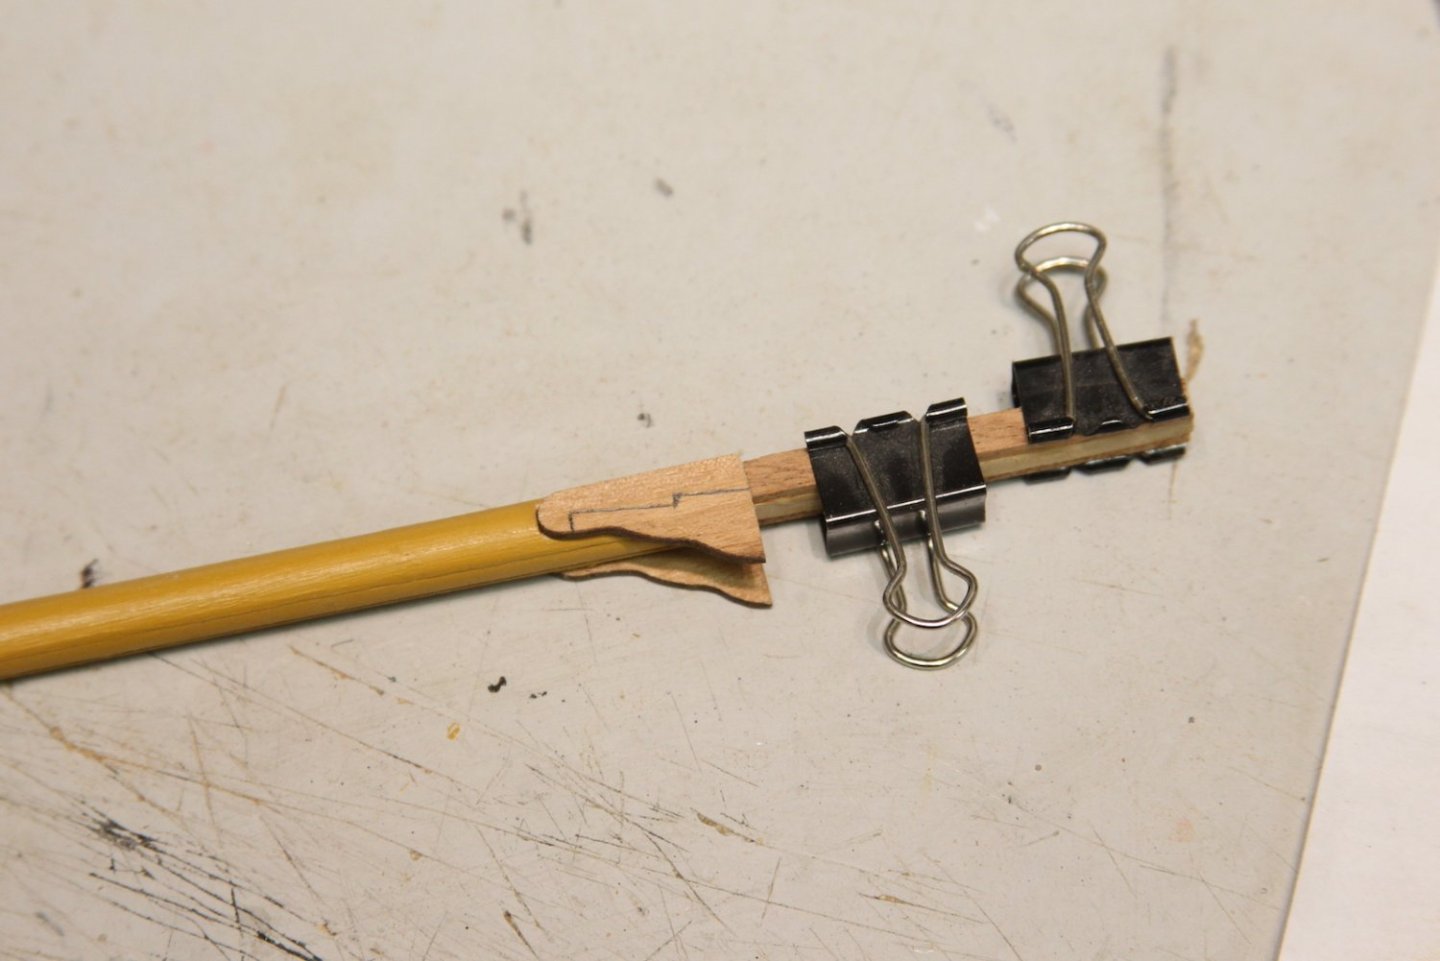
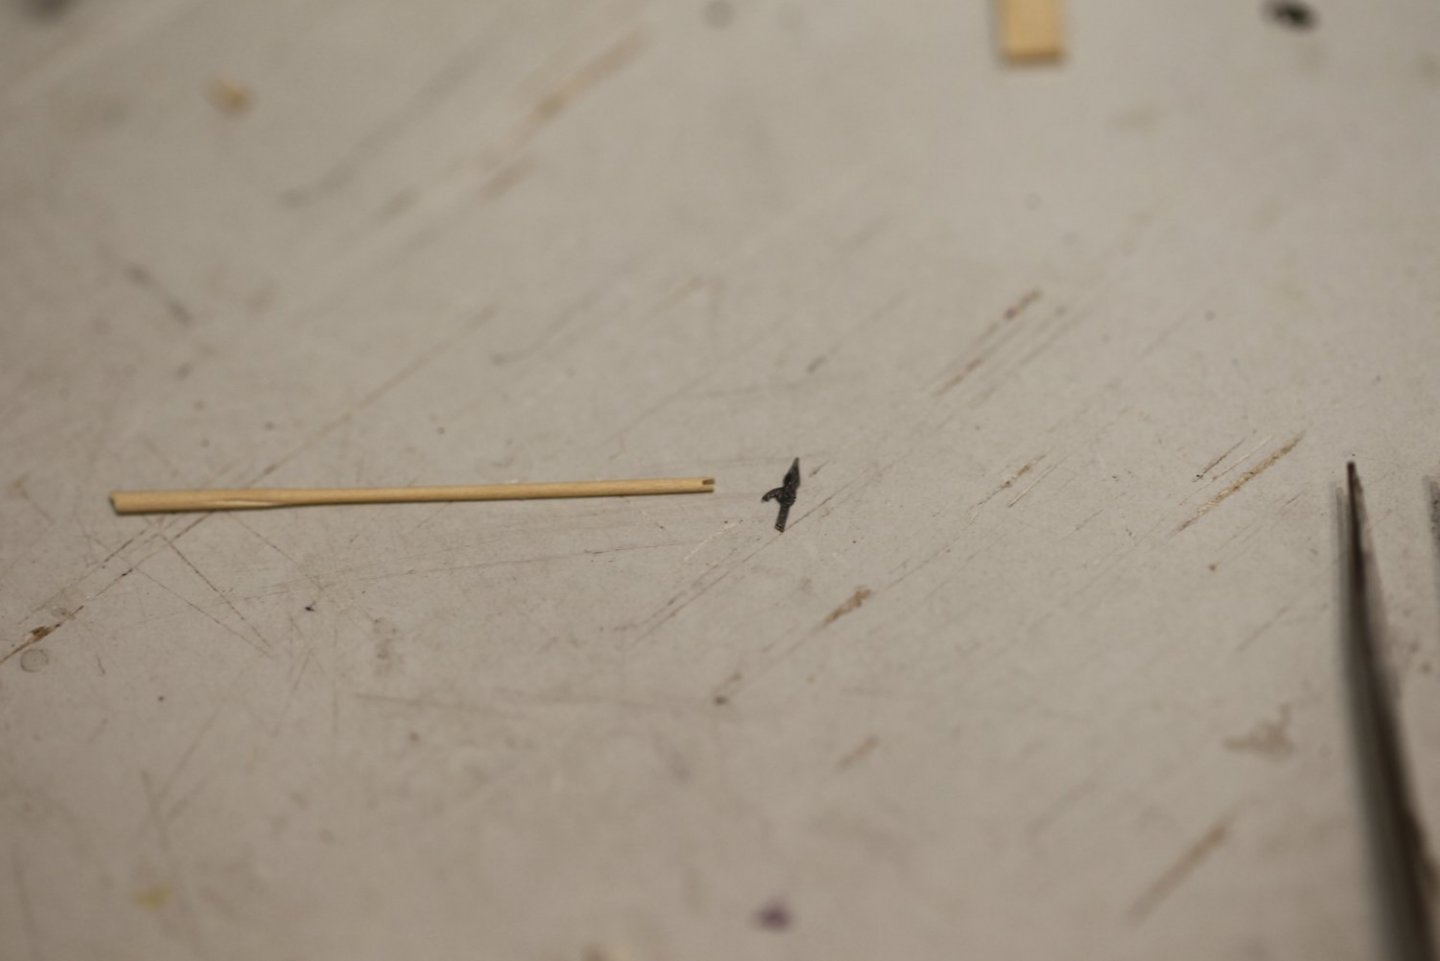
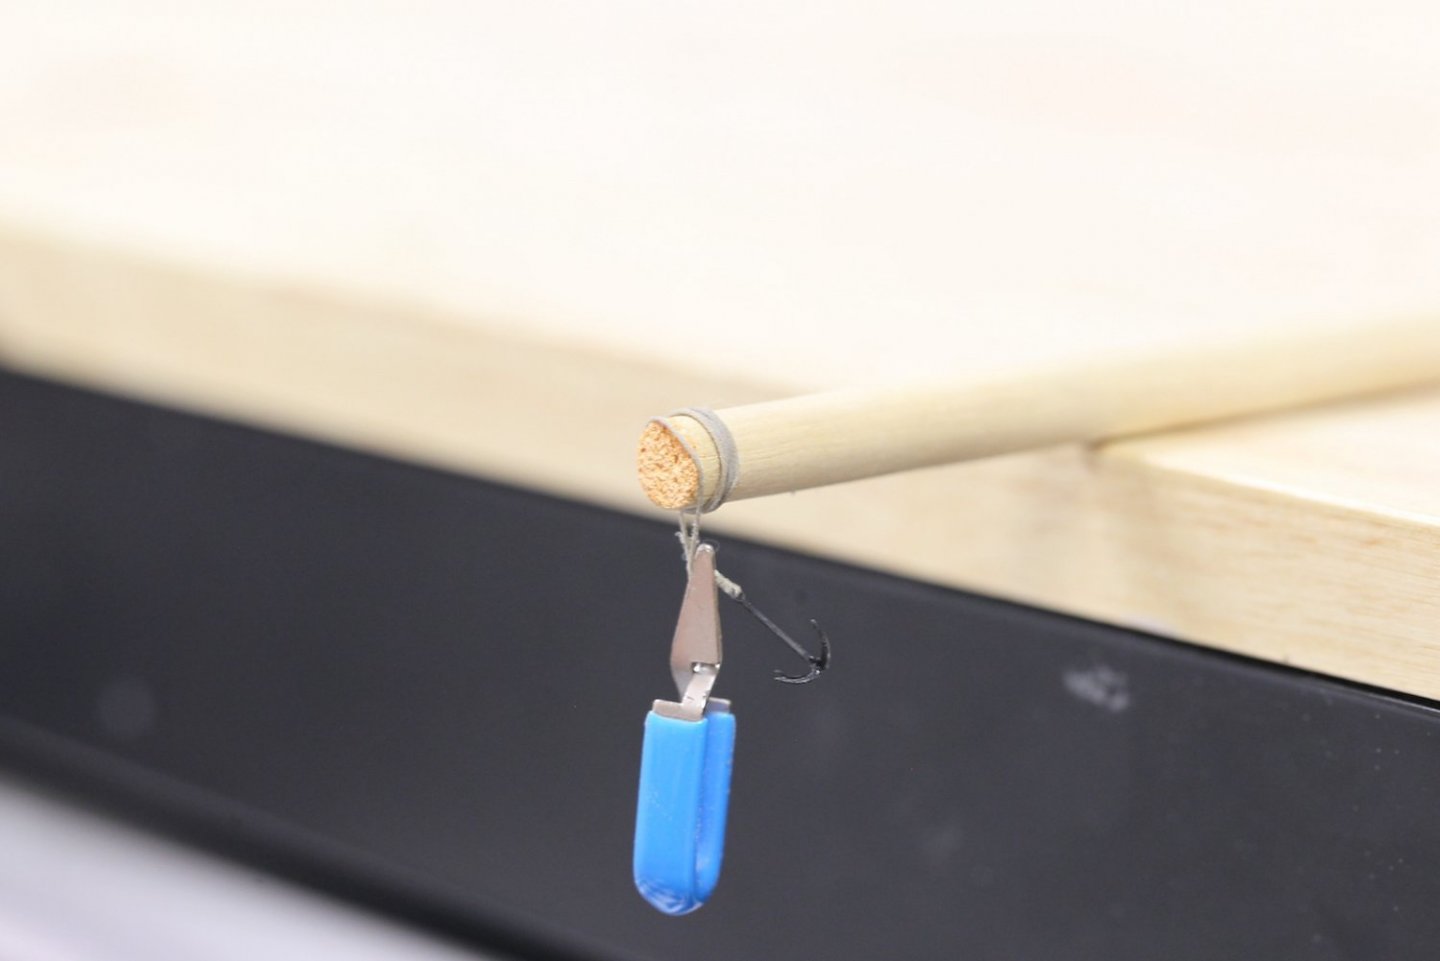
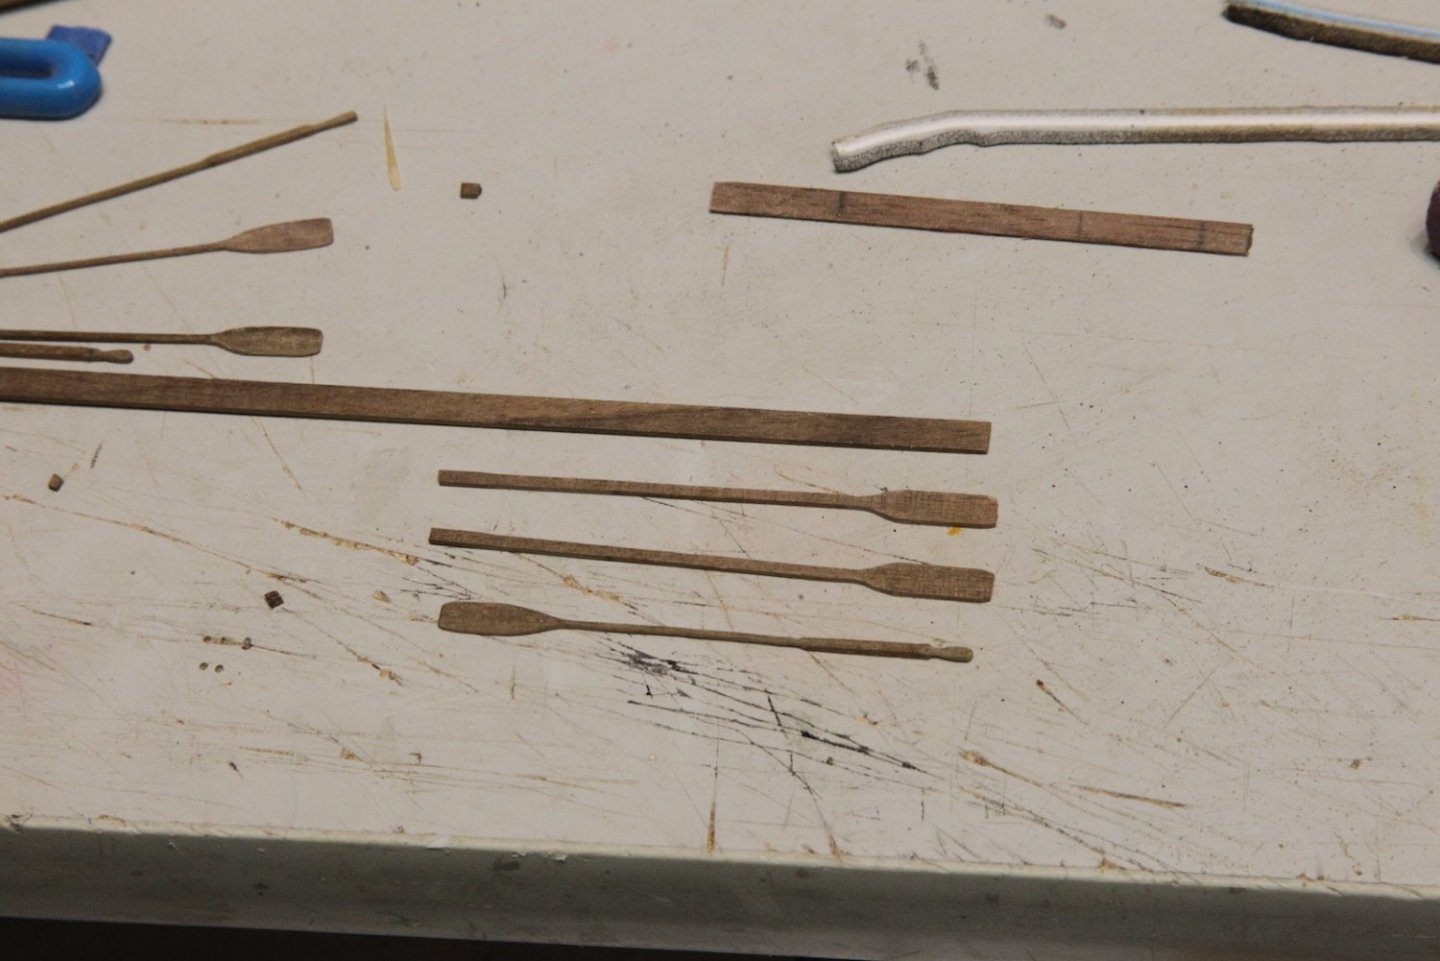
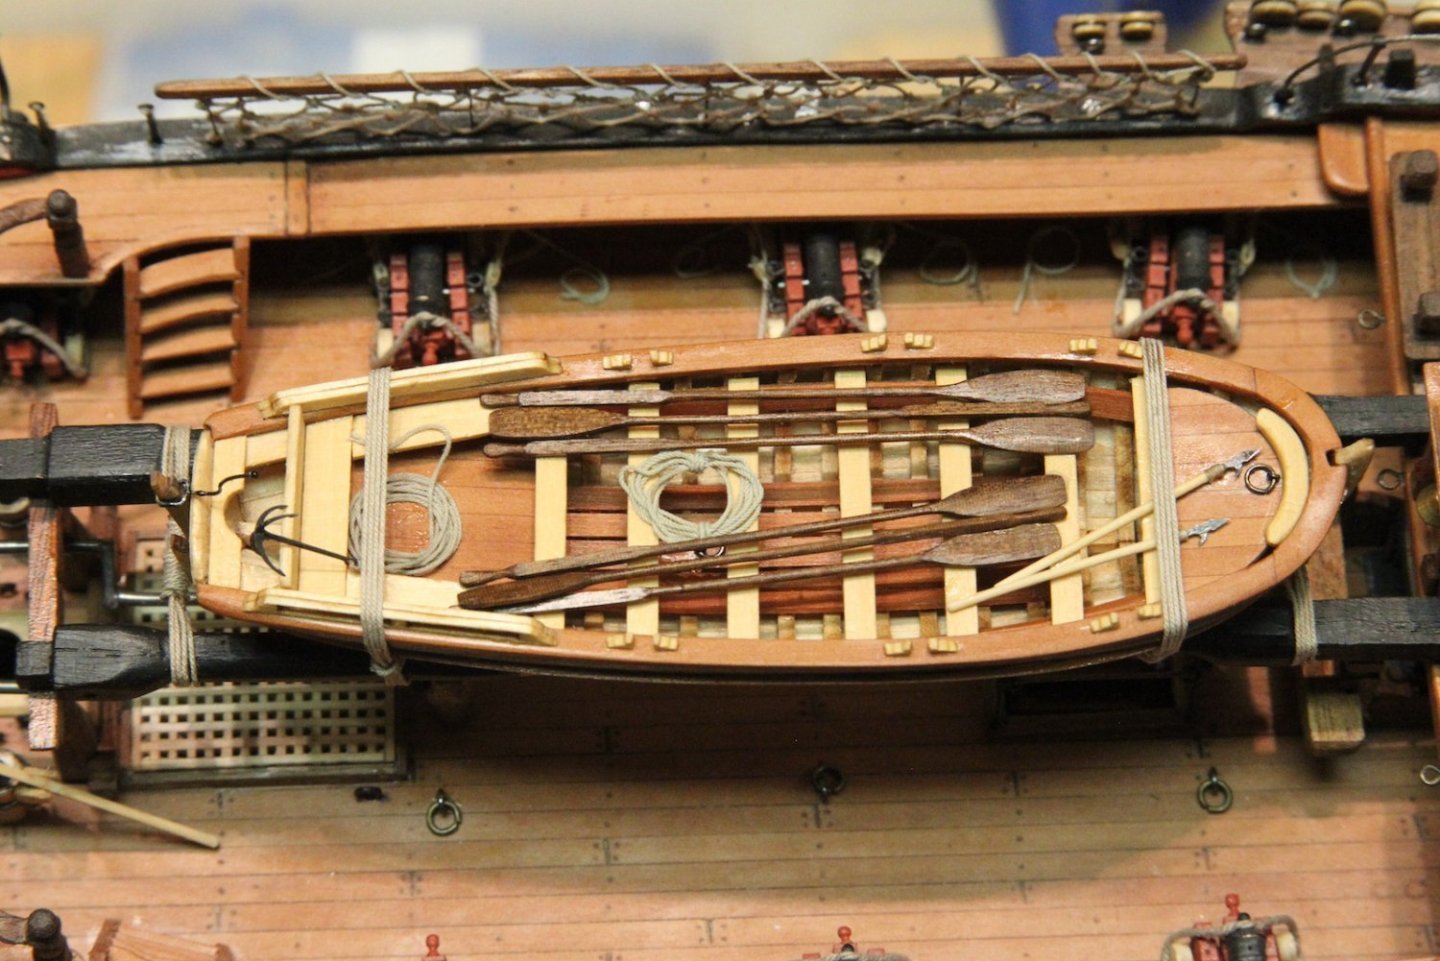
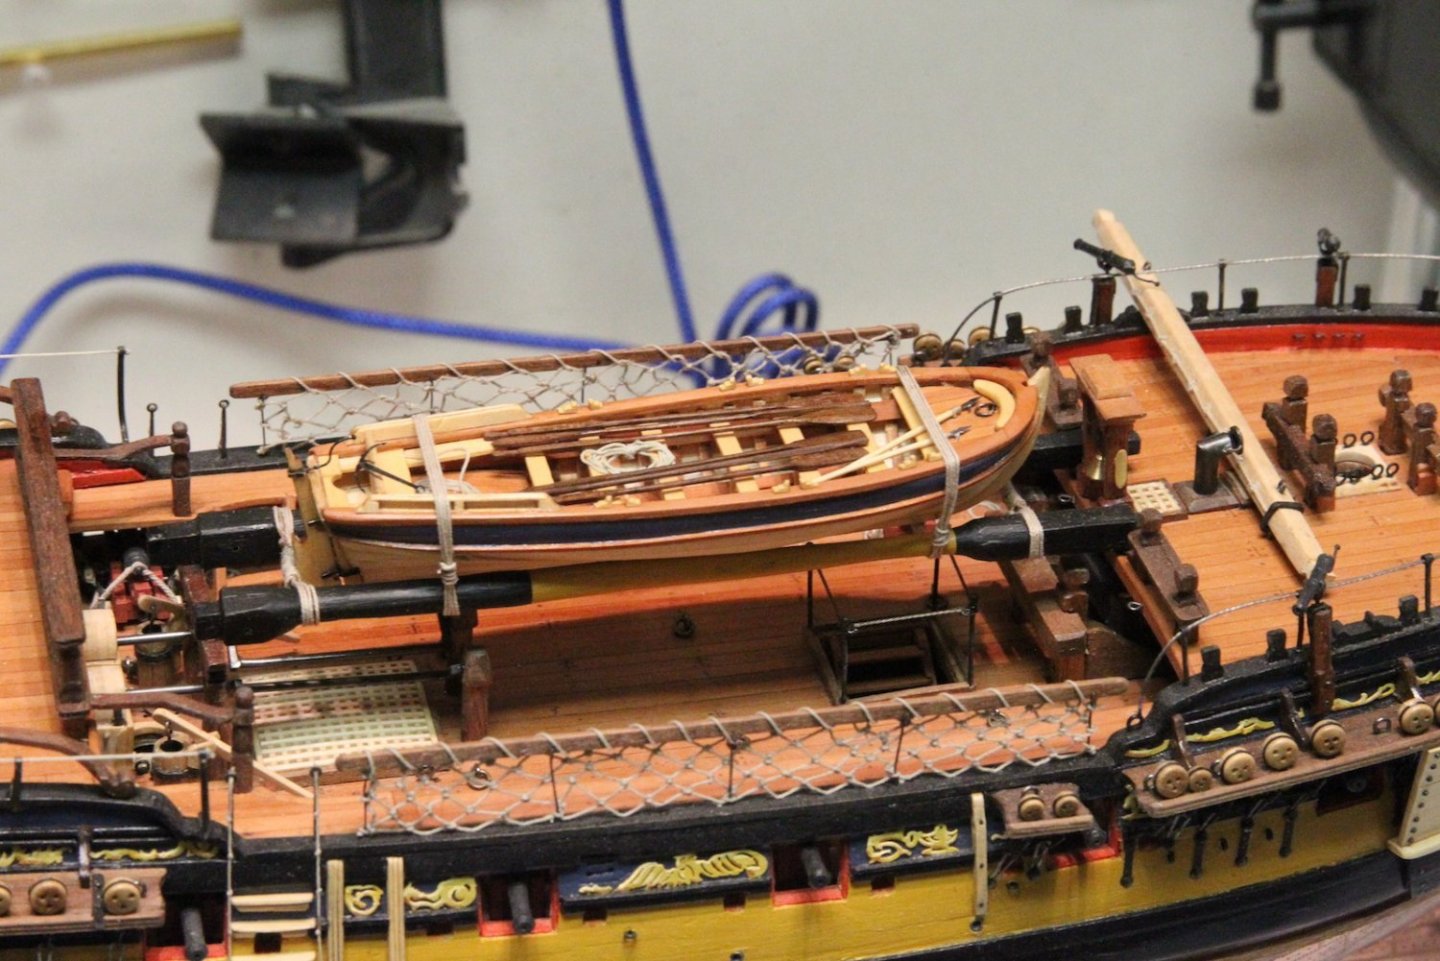
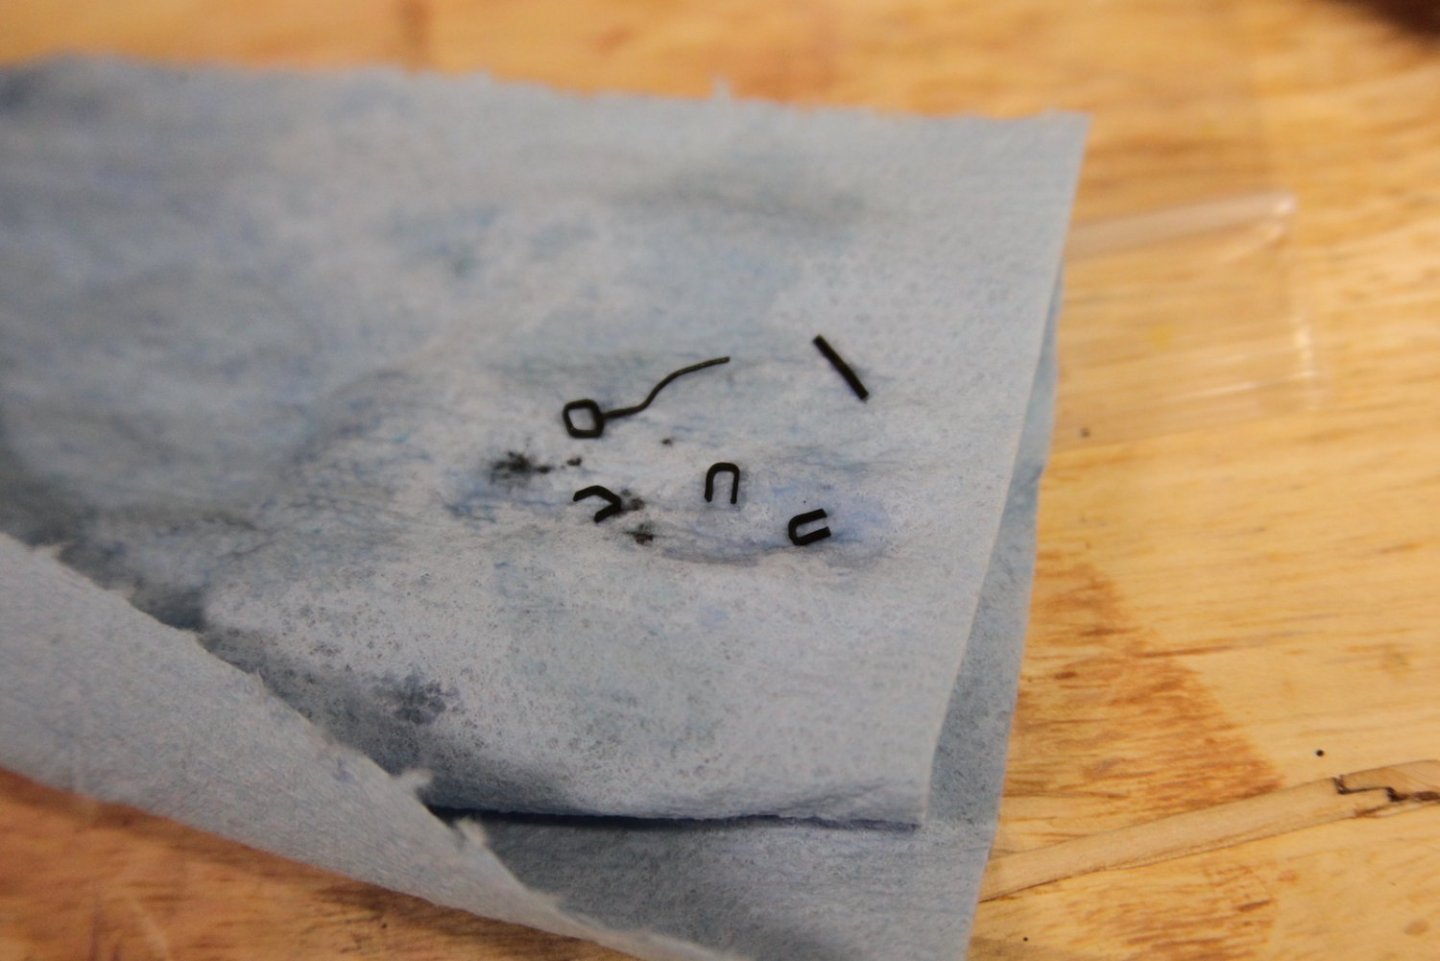
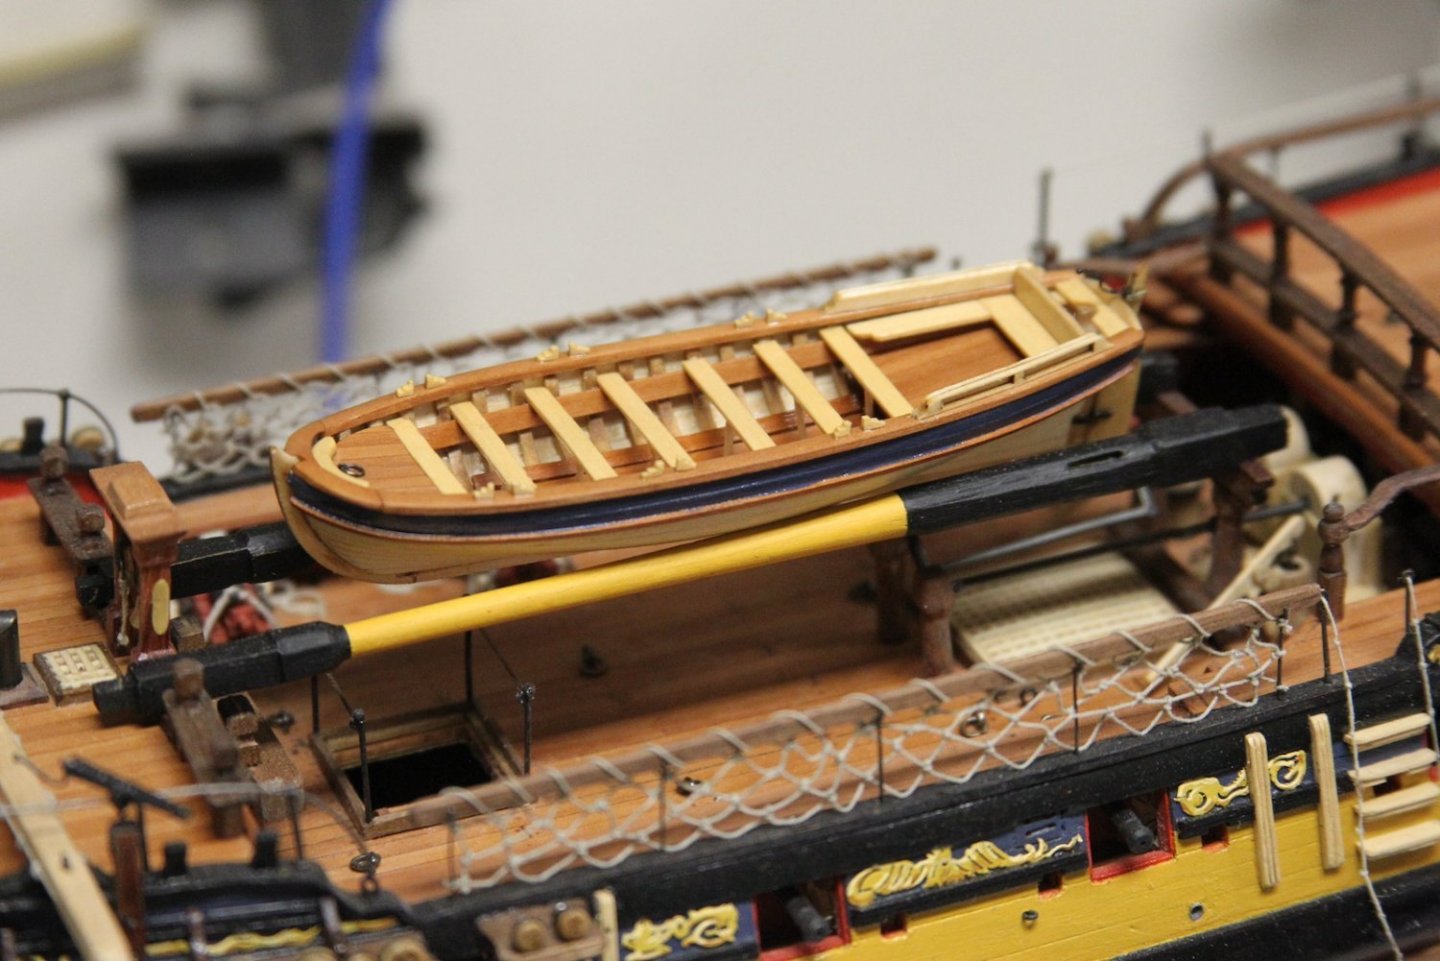
Thanks @BobG, much appreciated. I've been working pretty hard on my golf game. Truth be told - I was pretty darn good back in the day toward the end of my Air Force days, but then I got broken a bit in Afghanistan and my swing has changed as a result. Trying to make the adjustments for that - as well as just getting older. Continuing work on the launch, I used the photo-etched harpoon tips and blackened them. To create the harpoon itself, I sanded a dowel down to approximate diameter, then cut a notch into the end to hold the head. Then I wrapped it in place. This is based on both my ship research and my anthropology research for the time period. These photos are a bit deceiving, but those 1/64 scale folks know just how small these buggers are. I used a jeweler's saw with the smallest blade I had to very gently stroke back and forth and create the notch. The grappling hook is pretty straightforward, the photo-etched pieces glued, blackened and then attached to a coiled rope dabbed with some diluted white glue to hold it in place. The oars at this scale a BUGGER. I started with a 5/32 x 1/32 piece of walnut. I used walnut instead of boxwood because once again I am paying very particular attention to my color schemes, and I want the oars to stand out from the launch, yet blend with the other walnut deck fittings. Anyway, I mark off the length of the paddle, and rounded and squared off portions of the oar. Then I trim/sand the handle square, only to finally round out the portions in the middle. Lastly, I thinned down and shaped the paddle ends. I think I ended up doing about ten of these - at least a few of which broke - to end up with the six that I wanted. This is a very slow, gentle, and tedious process of sanding. I'd guess that I probably devoted about an hour to each oar. My 'mounting' technique is a combination of organization and haphazard-ness. In other words, I don't like an OVERLY organized or militant look to things, because it feels unnatural. Yet, I don't want it to appear as though the crew is completely void of discipline. So the spare top masts are strapped down, the launch secured, and the oars and bits and pieces stowed. I threw in an extra coil of rope for good measure.

- 419 replies
-
- 18
-
-

-
- Victory Models
- Pegasus
- (and 2 more)
-
Rounding off axles is always a pain - but for char on wheels, I’ve found that sliding them onto a toothpick until they “lock” in place, then rolling them very gently along a flat piece is sandpaper let’s you sand a minuscule amount at a time without altering their shape.
- 505 replies
-
- 7
-
-
-
- vanguard models
- Sphinx
- (and 1 more)
-
As a note of perspective - I’m probably upward of $1,000 all-in on the Peg by upgrading timber and parts that it sounds like are being included with the Indy. My guess is that most of the “serious” builders end up spending this much regardless - so one might even consider it to ultimately be a cost savings.
-
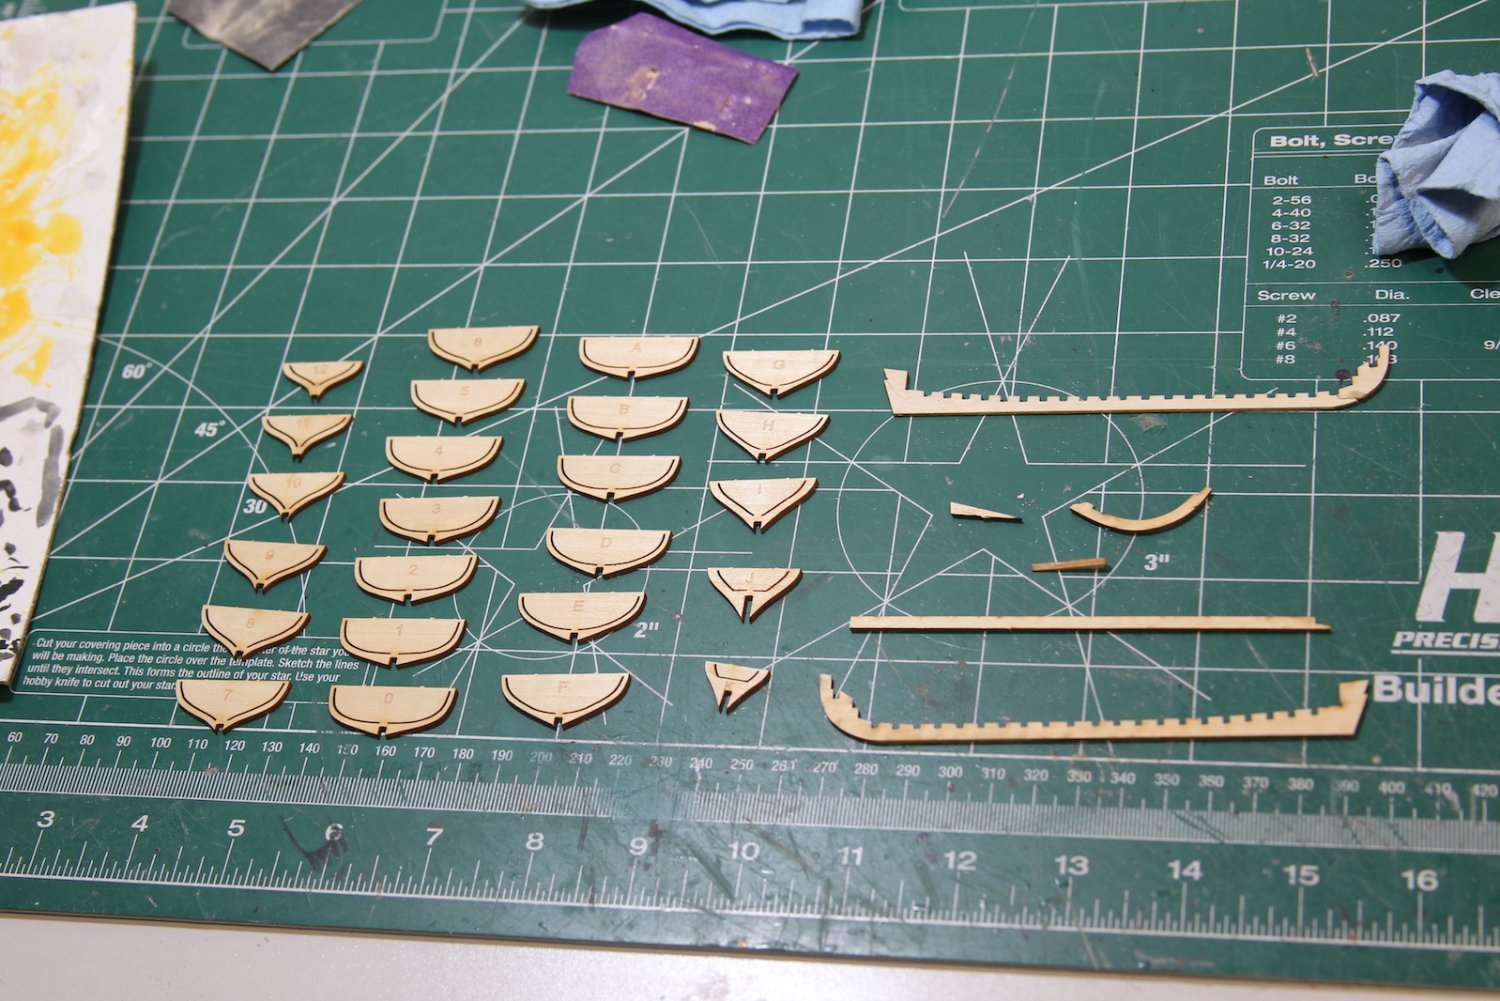
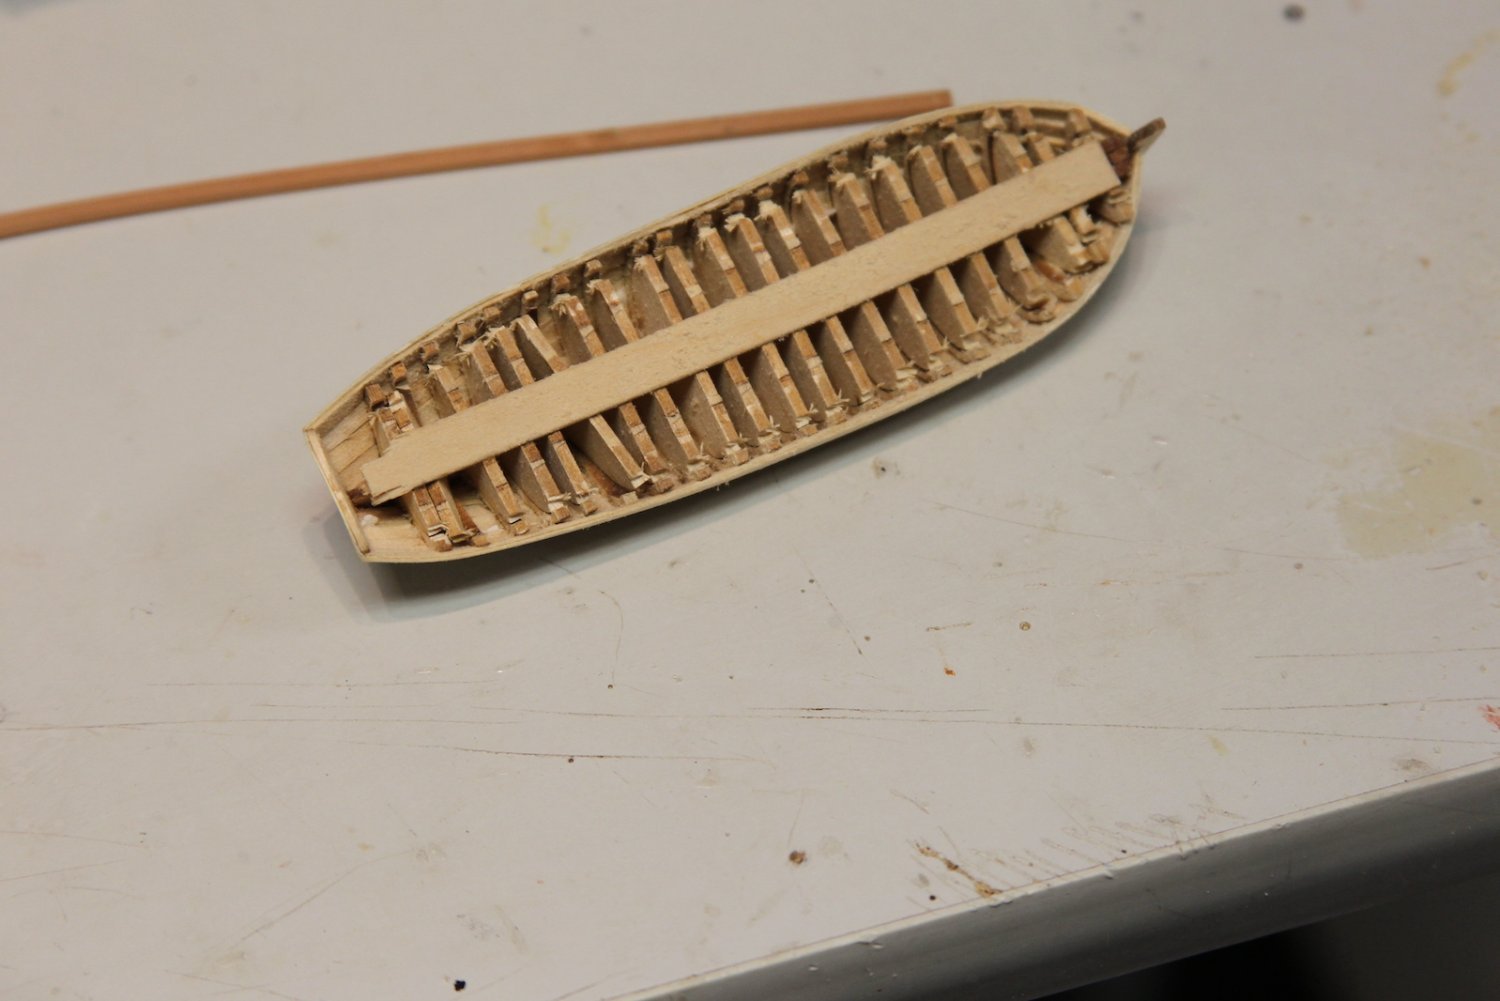
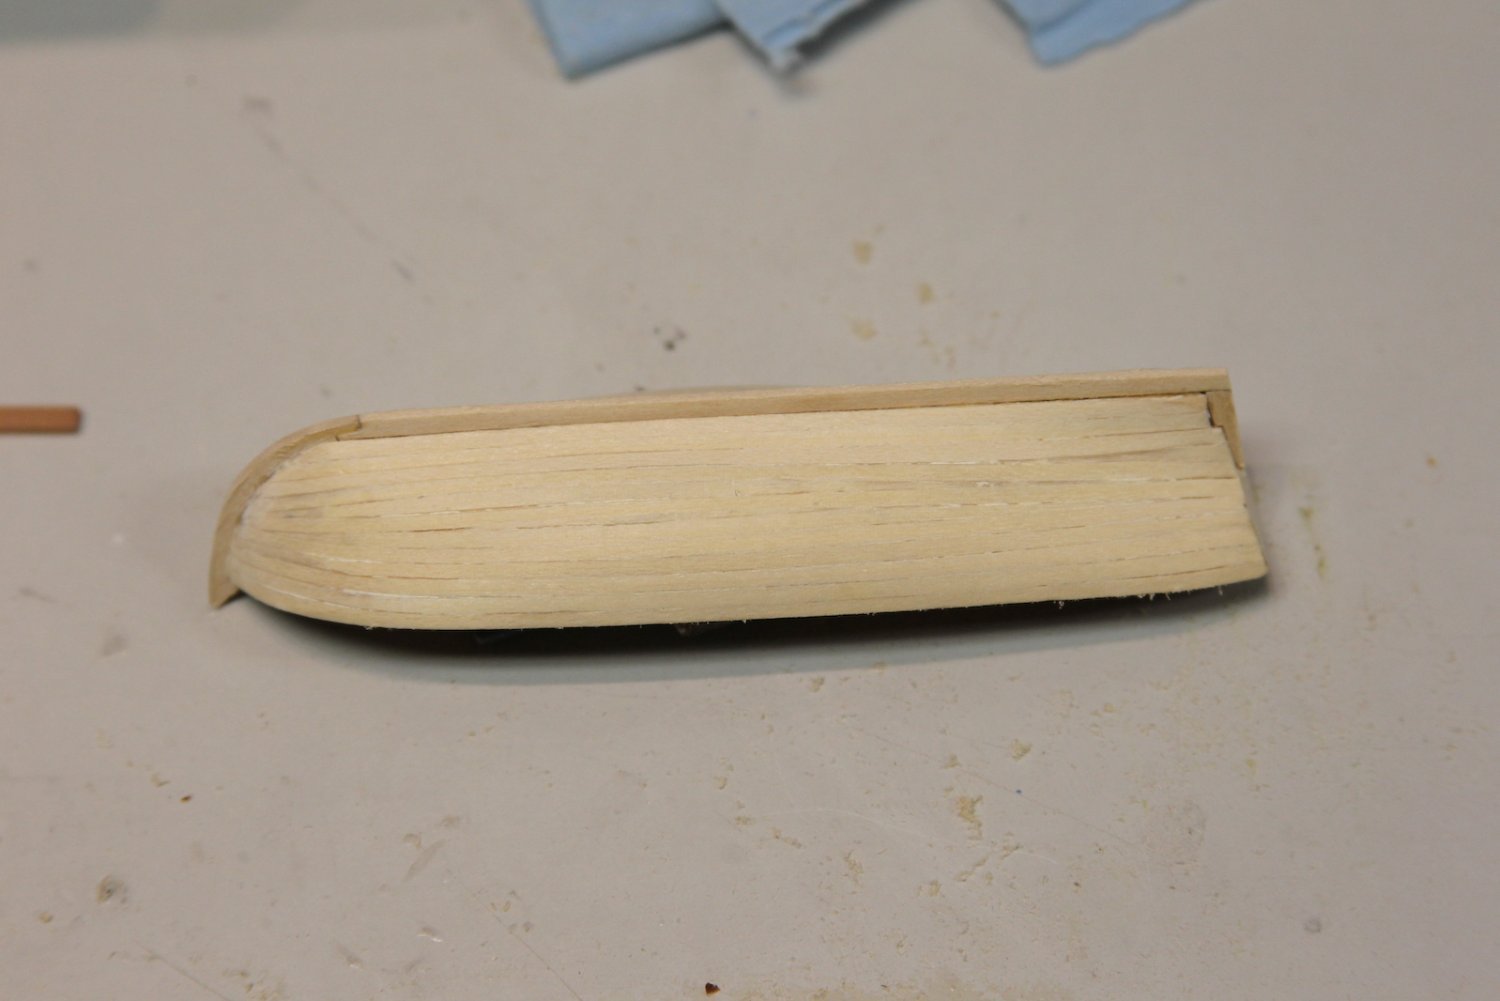
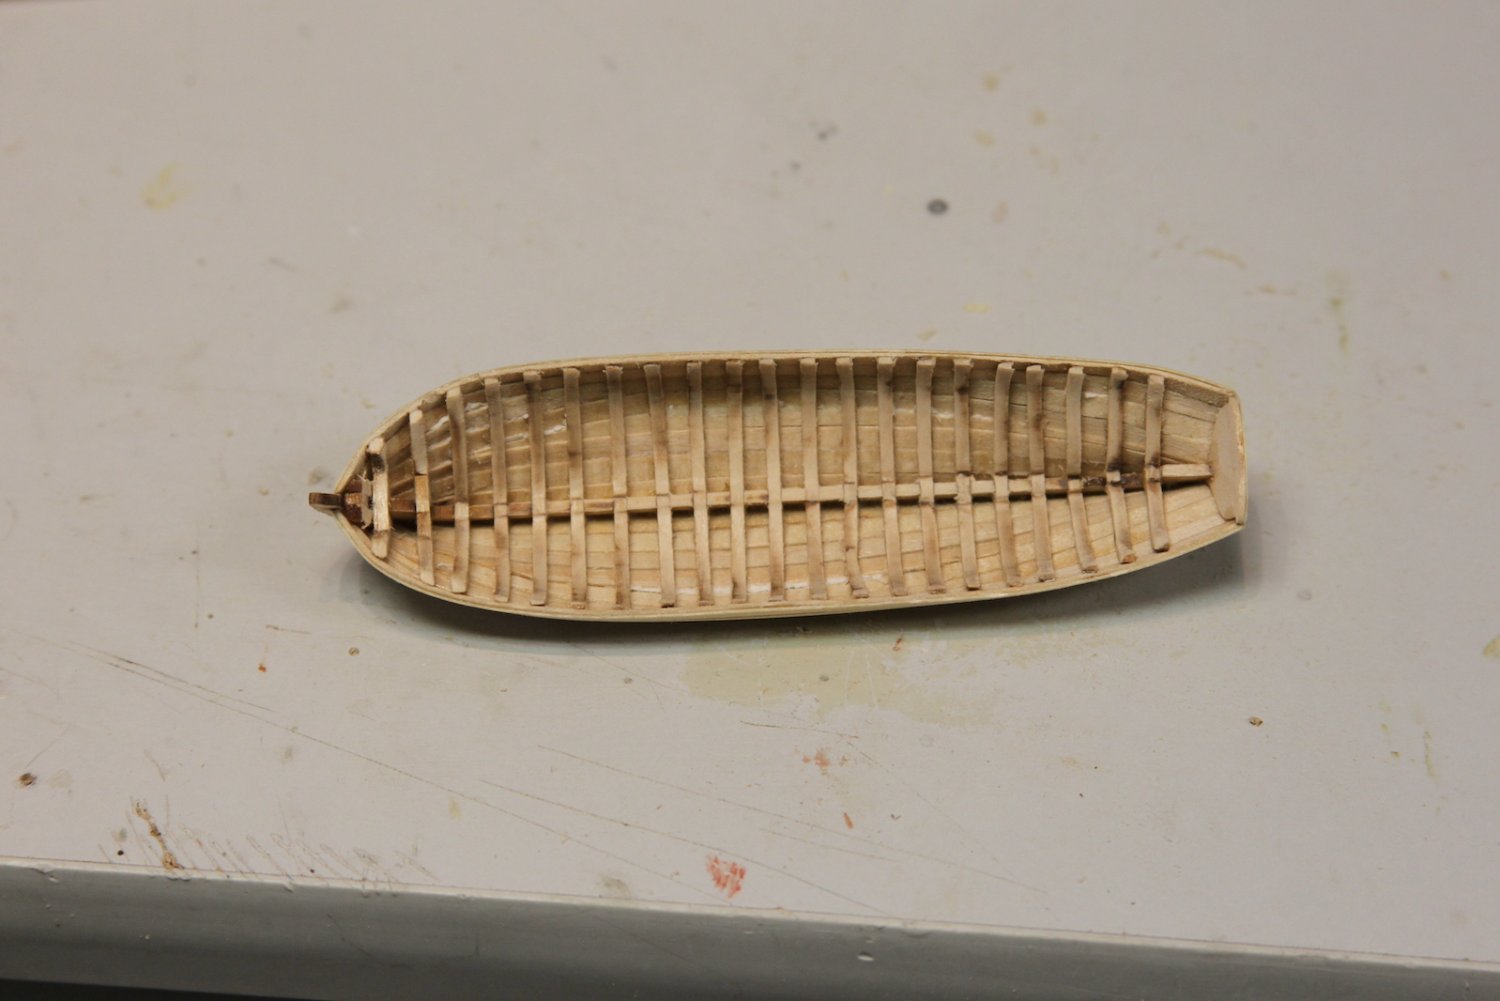
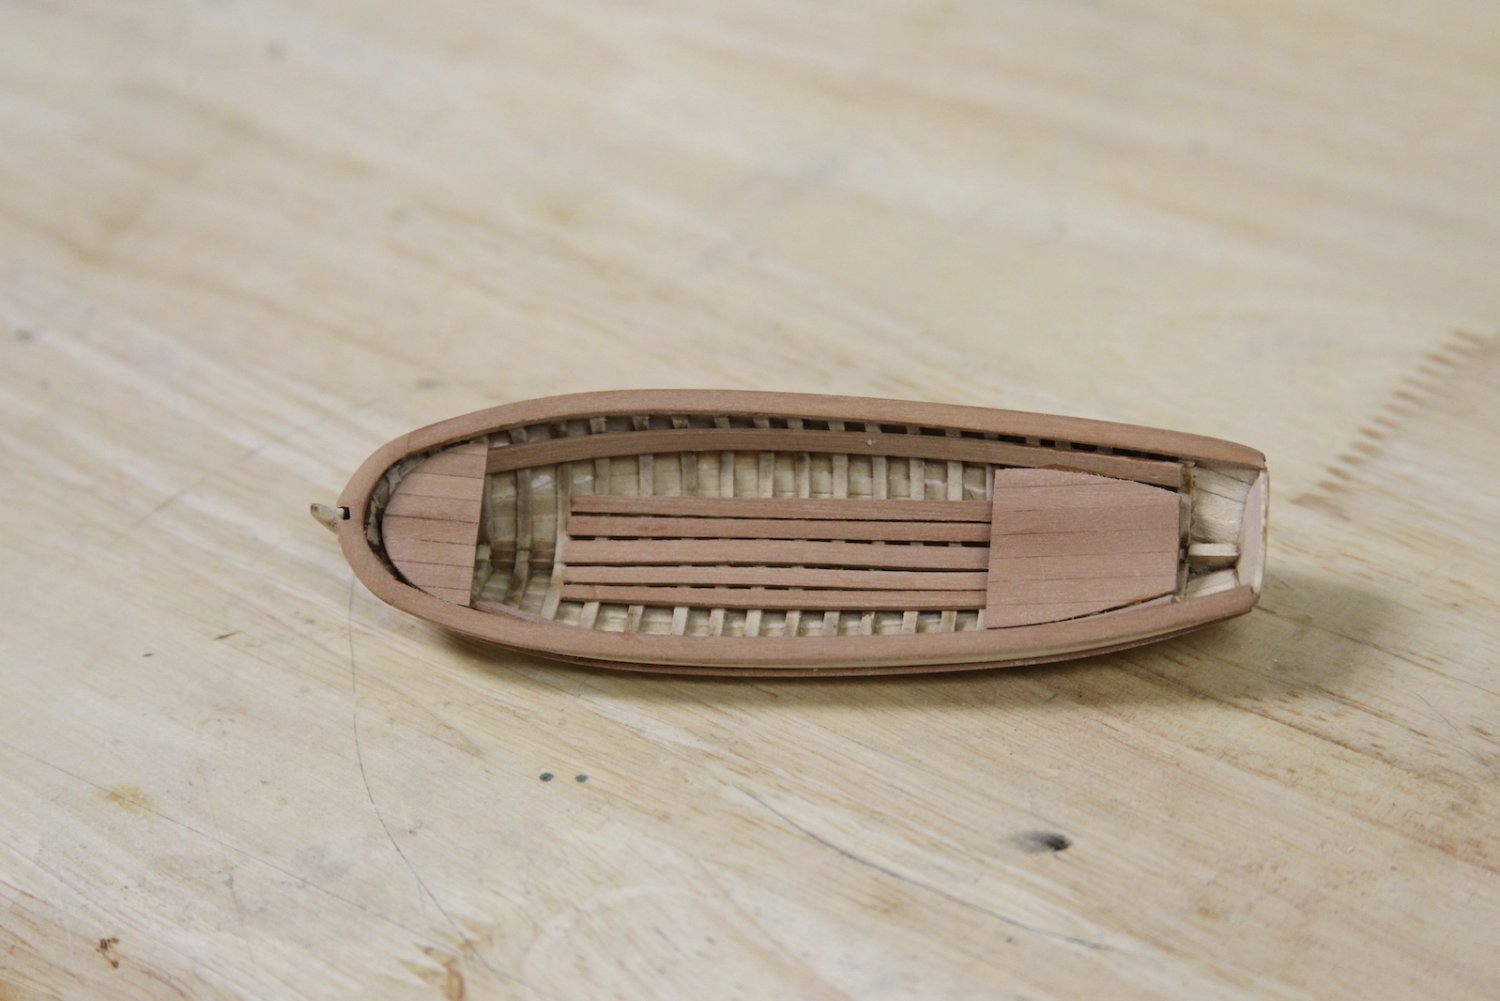
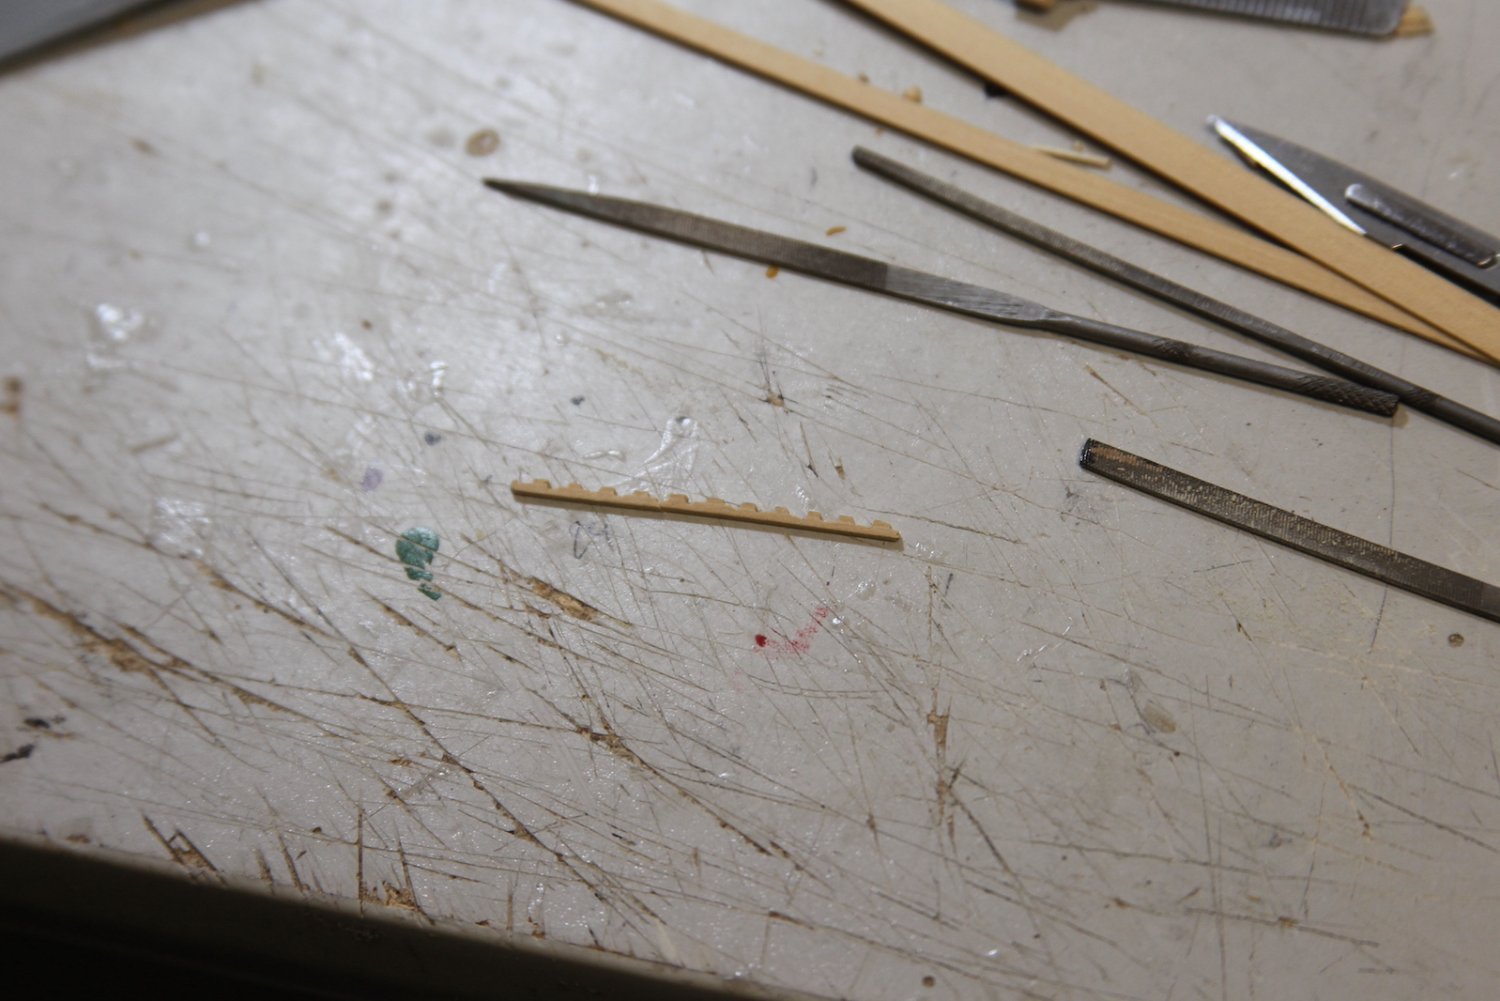
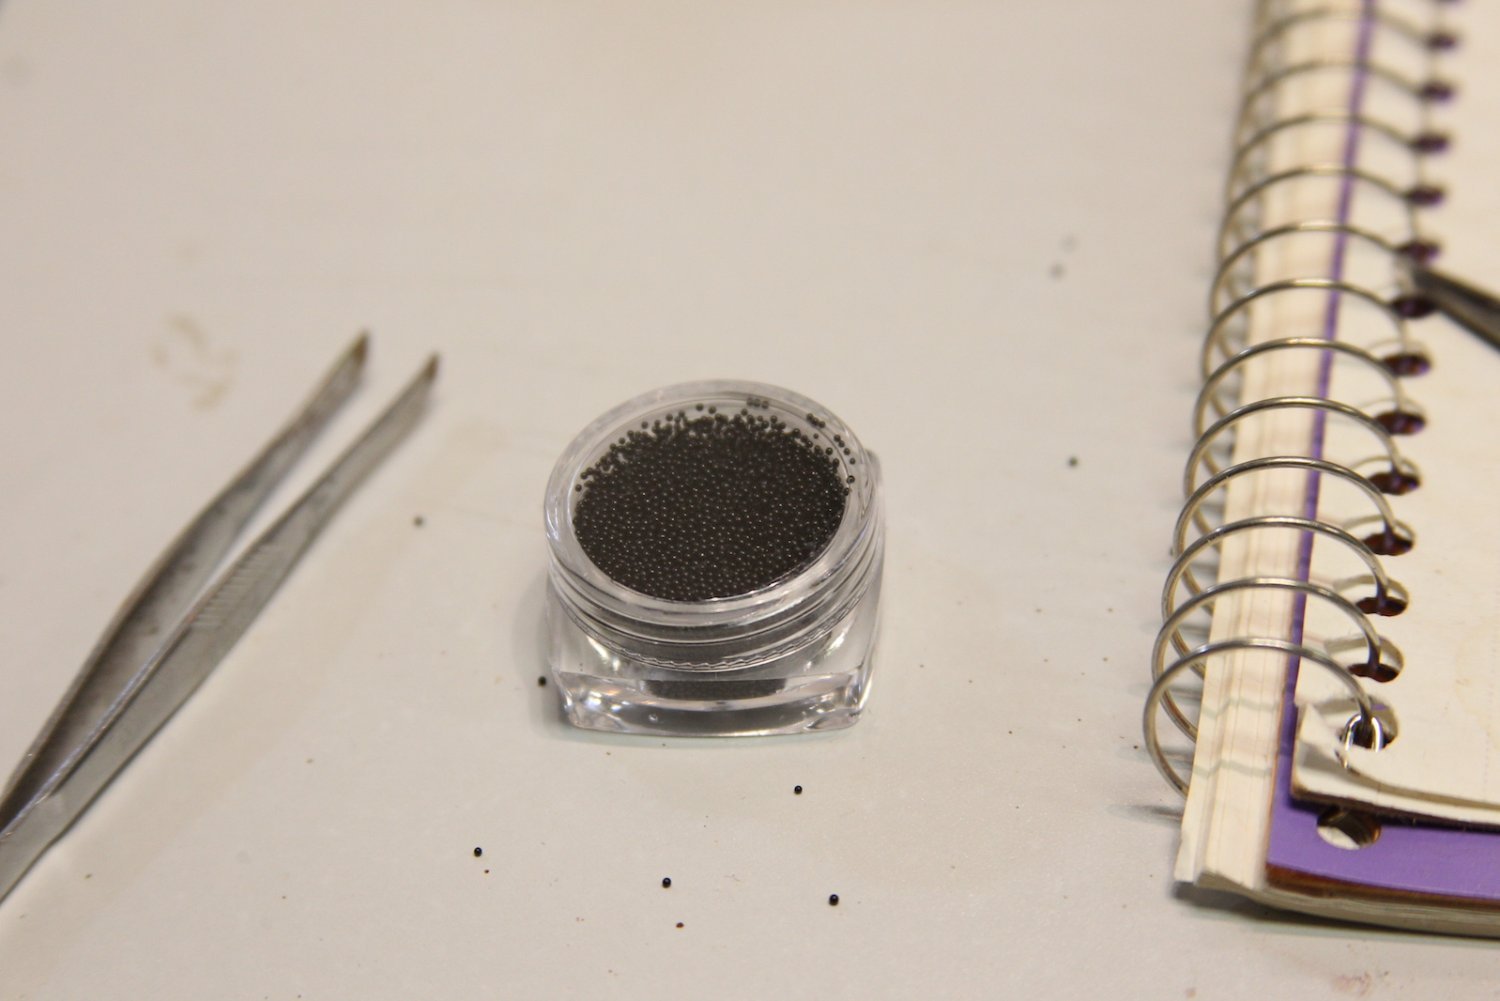
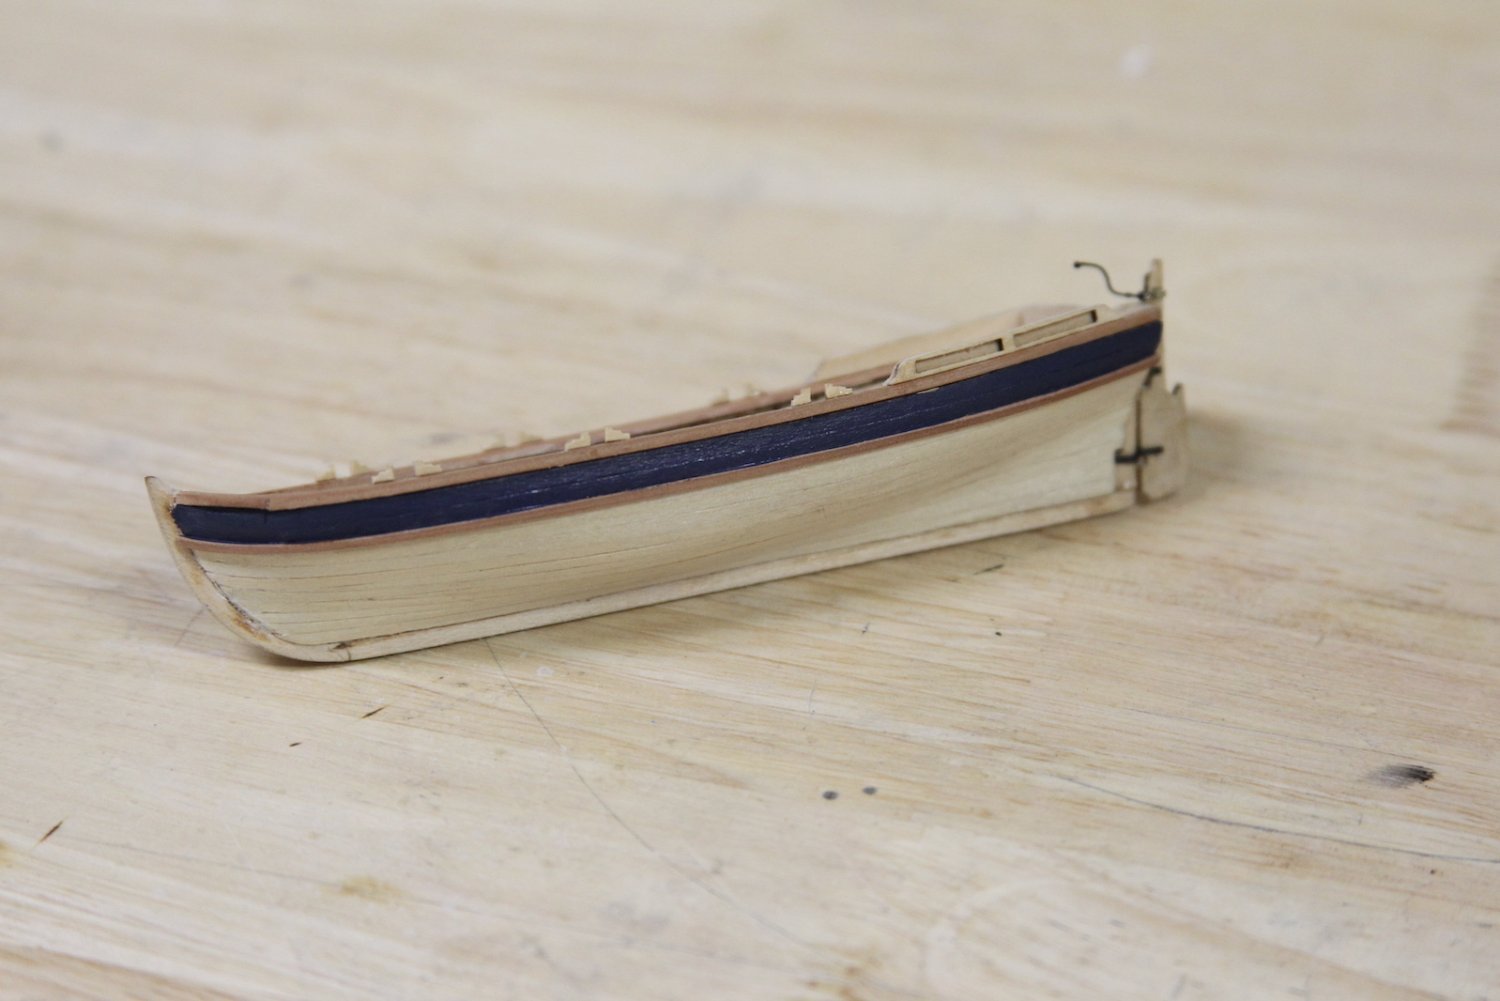
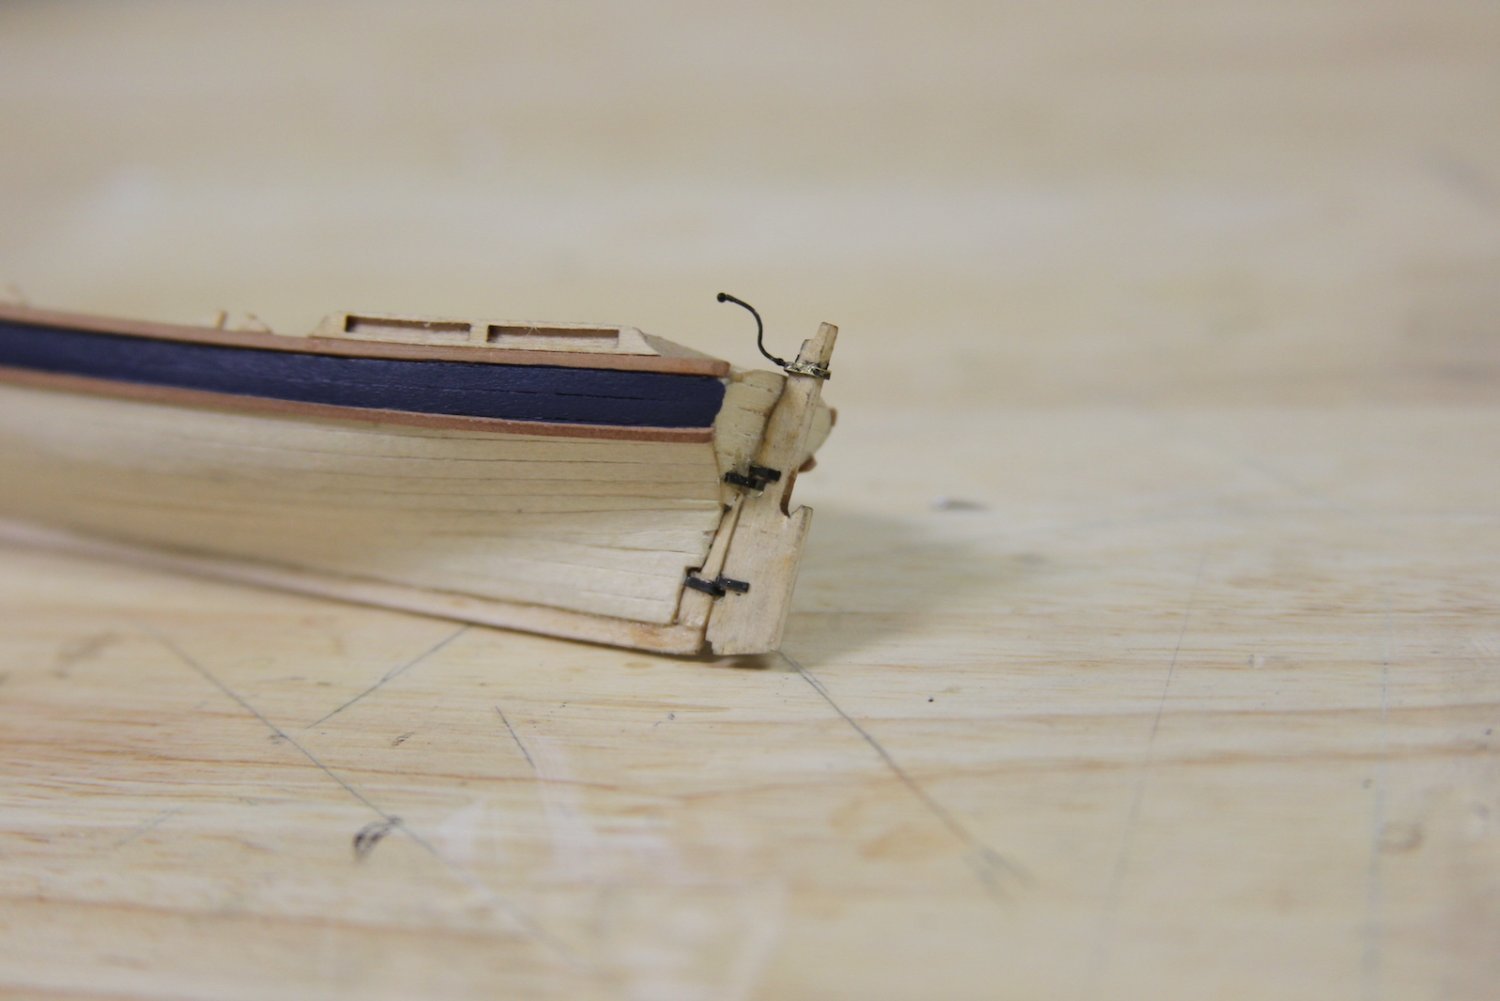
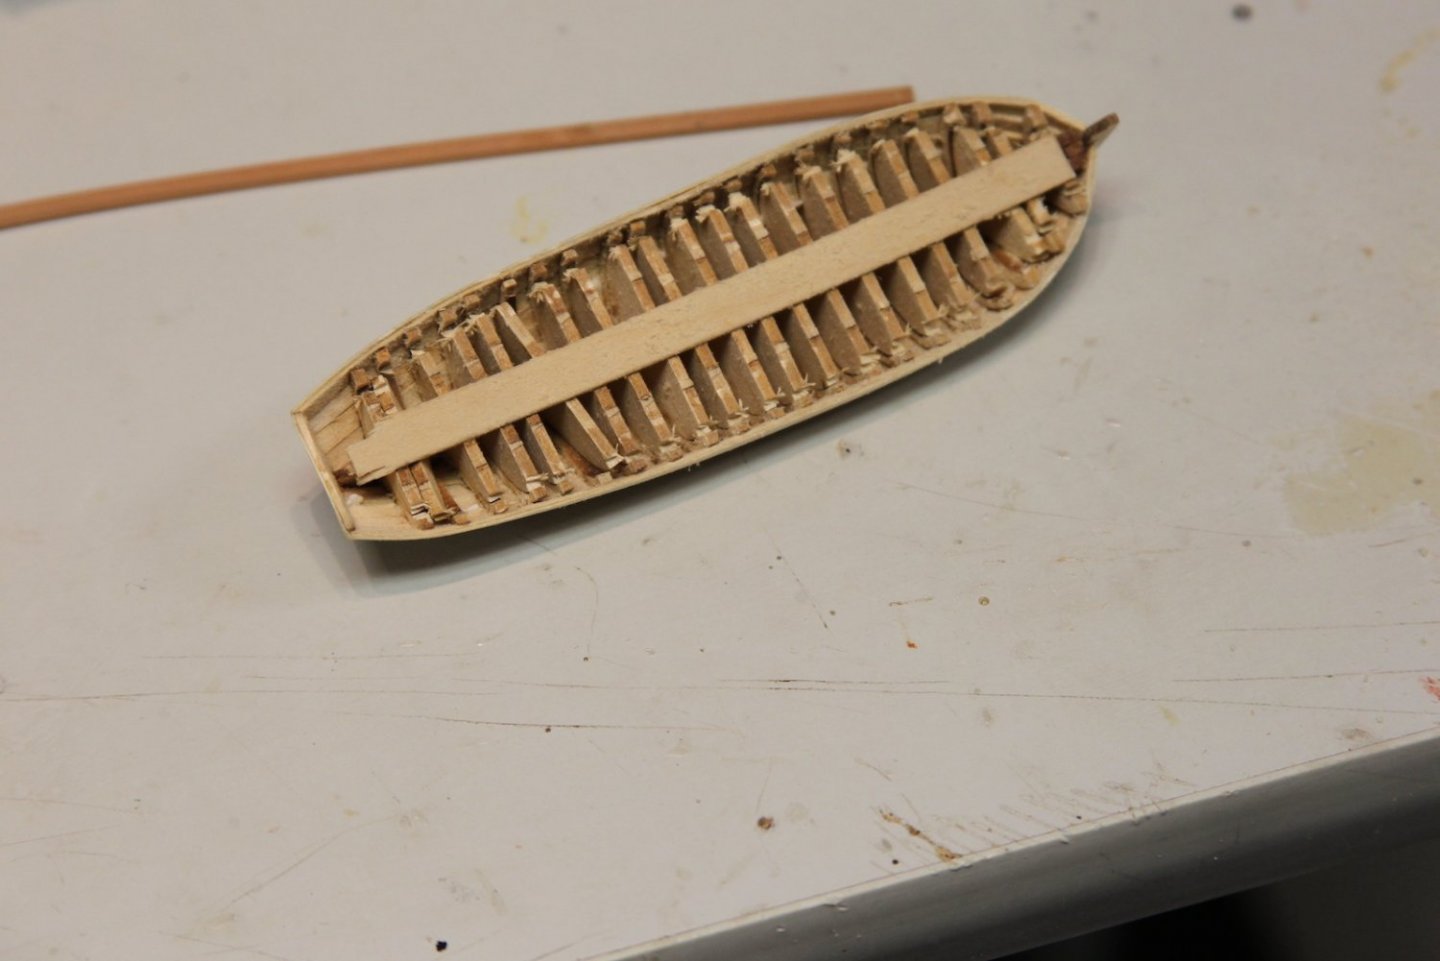
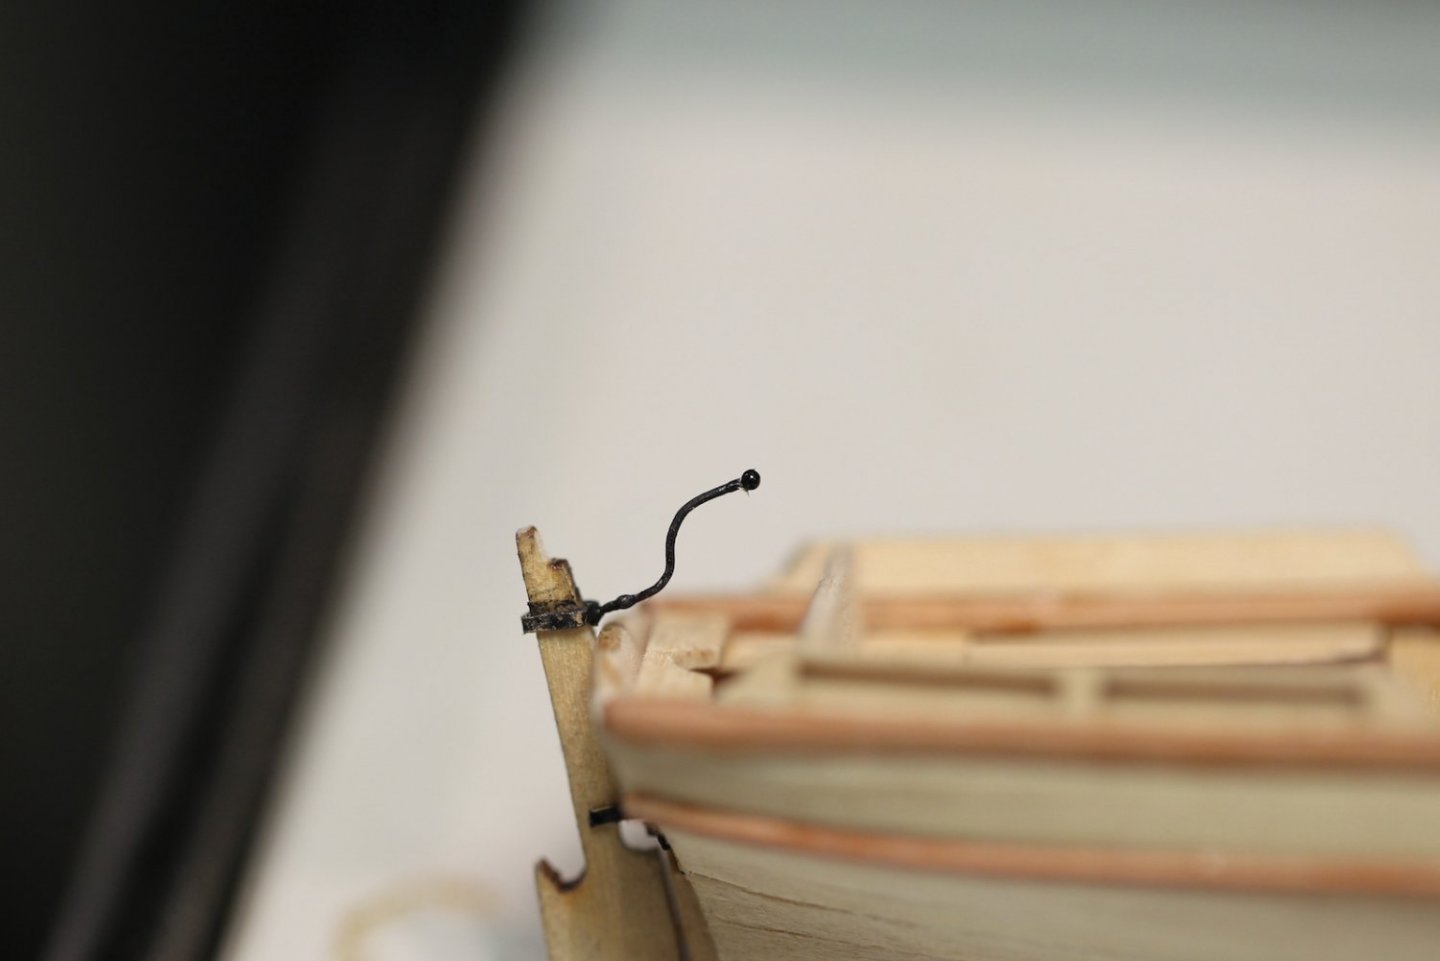
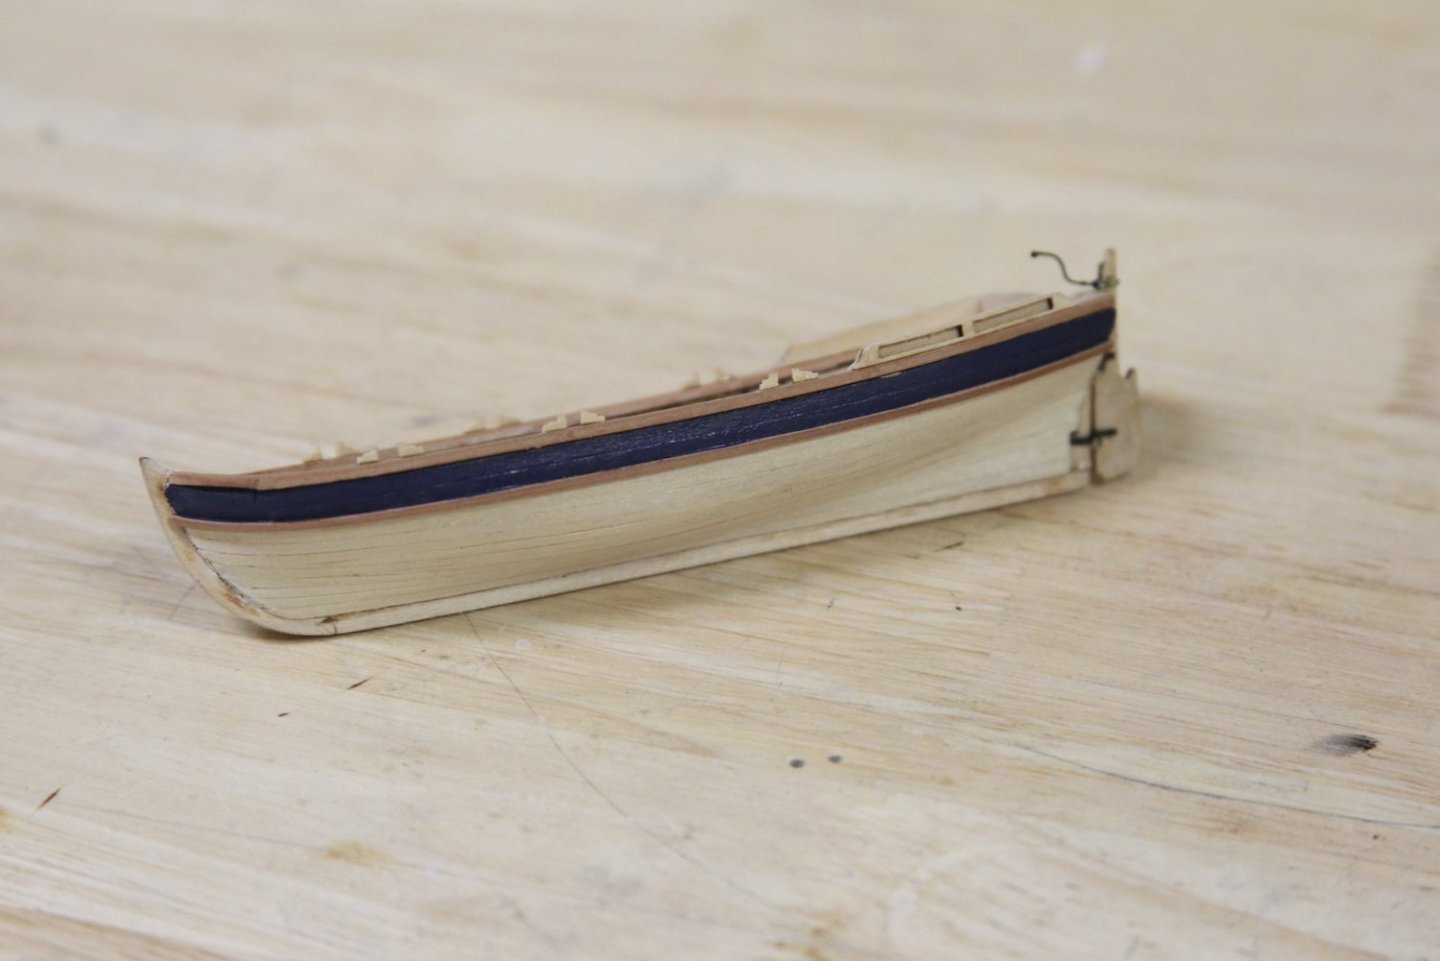
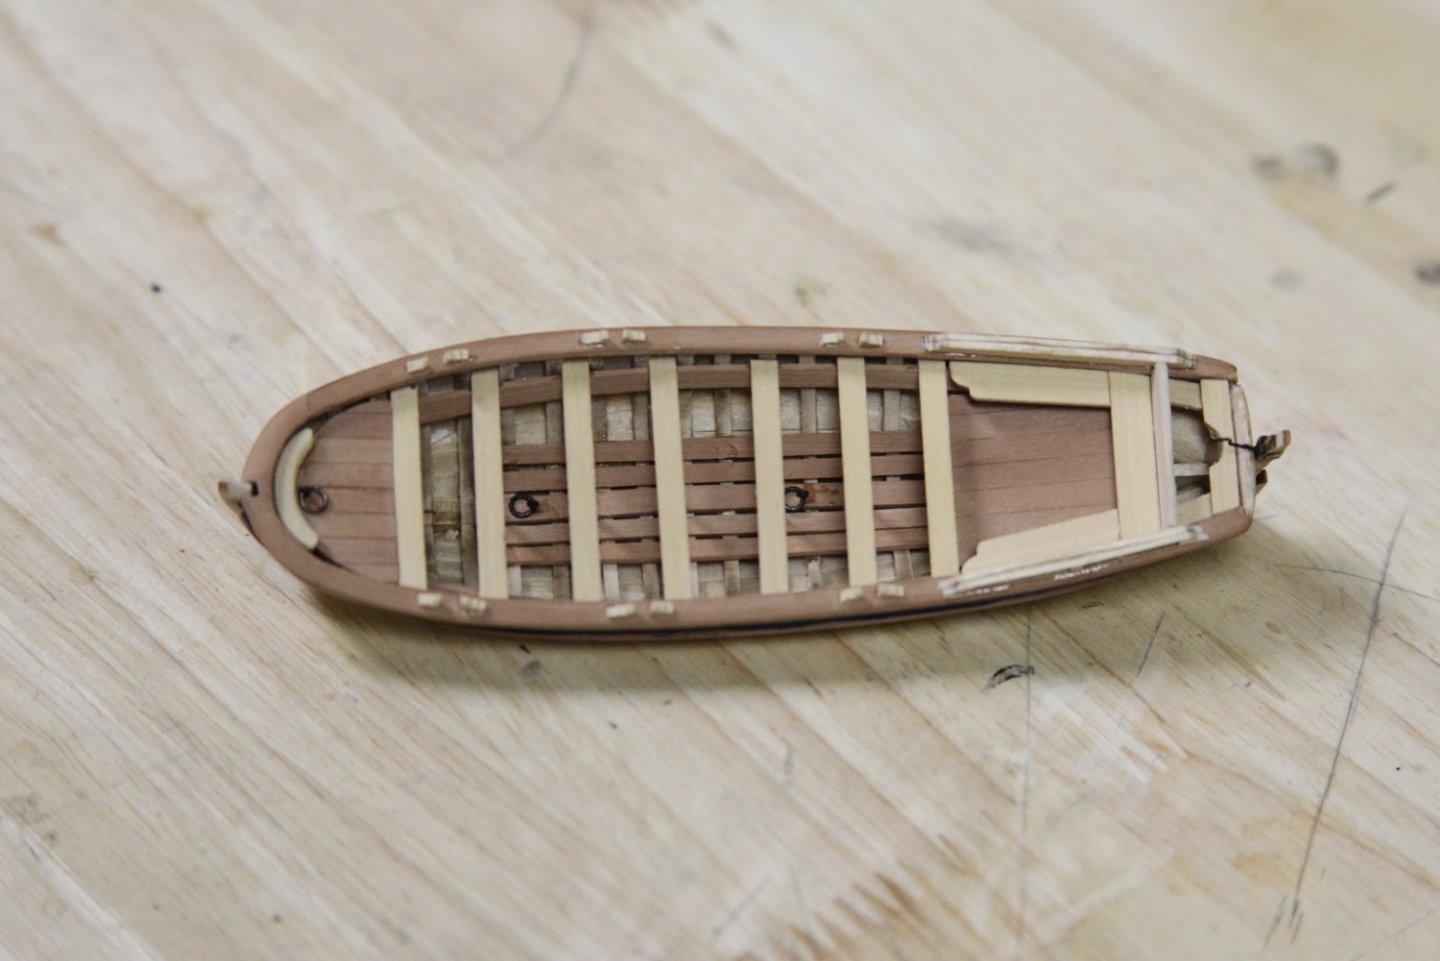
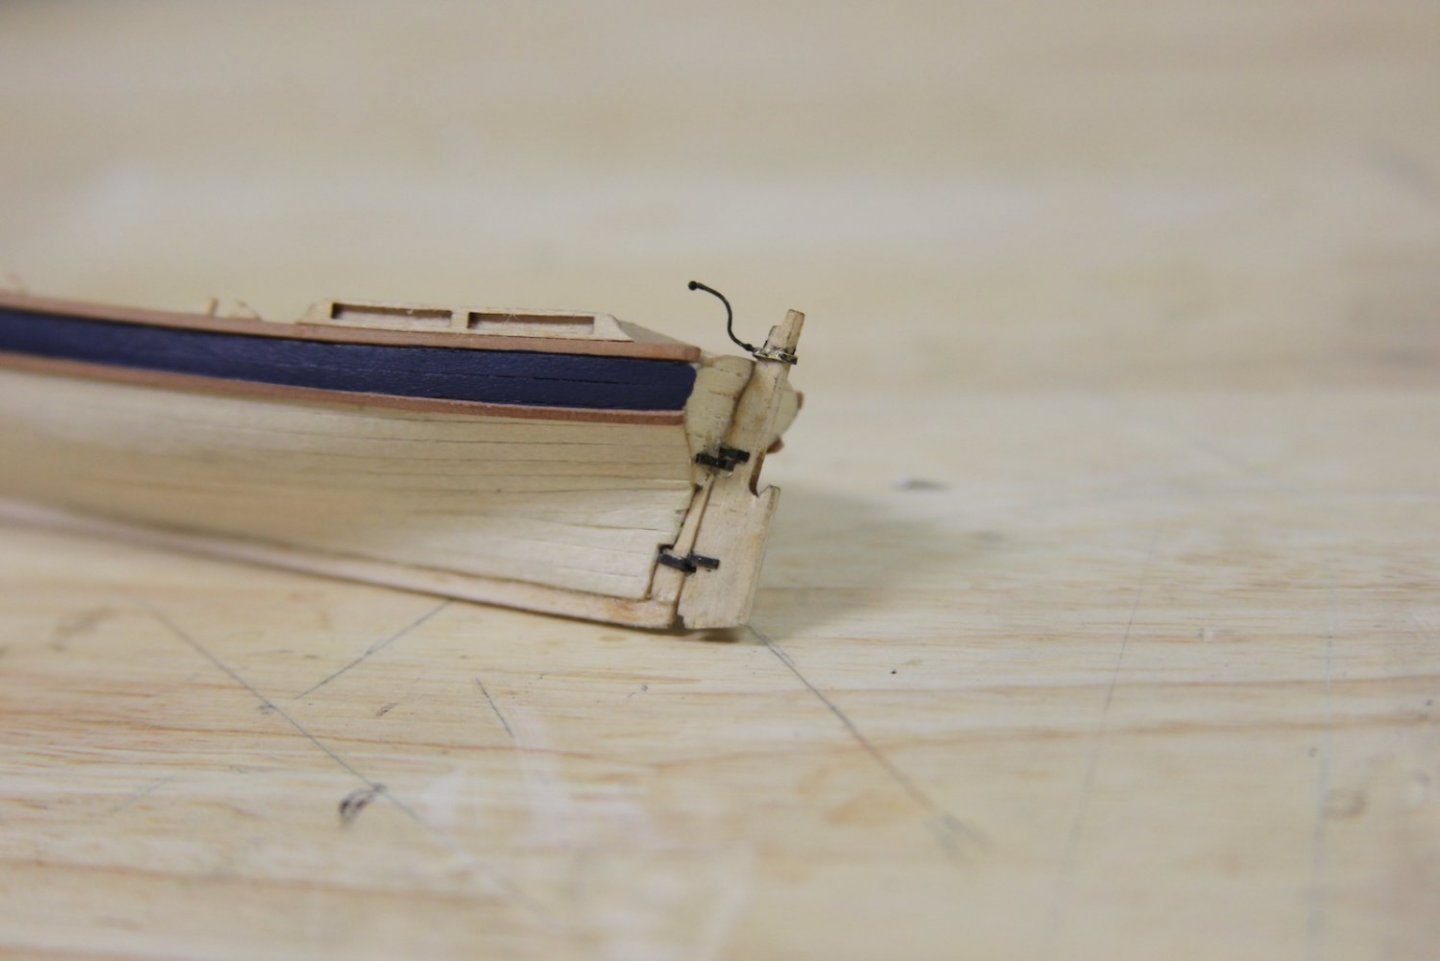
Guess it's been a while. I have been keeping up with other builds, even if I haven't been posting here. And... not posting doesn't necessarily mean not working in the shipyard - albeit, not nearly at the pace I was working throughout the winter. Warming up here in Colorado means getting out to golf a bit more when I'd otherwise be in the hobby room. At any rate - I've been toiling away at the launch and what kind of vessel I wanted above the waist. The truth is, I've always been partial to a pinnacle; and I think the sleek lines match the elegance for which the swan class is known. For my pinnacle, I borrowed the bones from the Confederacy Pinnacle, then went scratch from there. The keel was pretty easy to duplicate - but the bulkheads not so much without a laser cutter or some kind - so I just outright stole the ones from the Confed kit. I'll worry about that Pinnacle when the time comes - but I do have my eye on Chris Watton's pre-cut kits - so I'll definitely be at least trying out that route. A couple of things I did a little differently as I built upon the keel and bulwarks - I glued a strip to the top of the pieces that'll later be removed. This adds LOTS of stability to the boat as you plank it. Otherwise, the much smaller pieces tended to wiggle around and get out of place - and yes, that crooked one was fixed first. Second - I actually double planked this little bad boy. The thin, narrow planks are really tough to get flush as you taper and shape them. Double planking gives me the opportunity to fill in some gaps with filler, sand smooth, then get the second layer of even narrower, and thinner planks really nice. After the insides are removed to reveal the frame and sanded even, I filled in some of the parts such as the seats supports, floor boards, gunwales, and planking with Swiss Pear to create a nice contrast and also match parts of the Peg herself. This is a technique I used on Augie's Confederacy and really liked. The seating, and oar locks are all boxwood. The oar locks were shaped with a needle file in one strip, then cut off before being glued to the boat. The rudder parts are brass shaped and blackened. Interesting note - the little round 'handle' on the tiller is a tiny bead that's called 'caviar beads'. Apparently they're used as decorations on women's fingernails. They were the smallest bead I could find on Amazon a while ago. Finally painted the sides the same color blue as the sides of the Peg. I've still got the oars and other things that will go inside the pinnacle, but here's what she looks like with a coat of Tung oil and sitting in her spot on the spare topmasts.


- 419 replies
-
- 12
-
-
- Victory Models
- Pegasus
- (and 2 more)
-
Nice work getting such a tight fit with those railings and support knees BE. And if you find a good nozzle cleaner, please let me know. I cringe at the amount of dust and build up every time I take a macro shot these days.
- 857 replies
-
- 4
-
-
- Sphinx
- Vanguard Models
- (and 1 more)
-
Welcome, from a fellow Coloradan a bit north. Clamps, sanding tools, and tweezers mostly. You’ll also likely find yourself making as many tools and jigs as you purchase.
-
Thanks Cisco, much appreciated. Greg Herbert now sells a series of downloadable computer generated photos from The Fully Framed Model Swan series that have been really helpful.
- 419 replies
-
- 4
-
-
- Victory Models
- Pegasus
- (and 2 more)
-
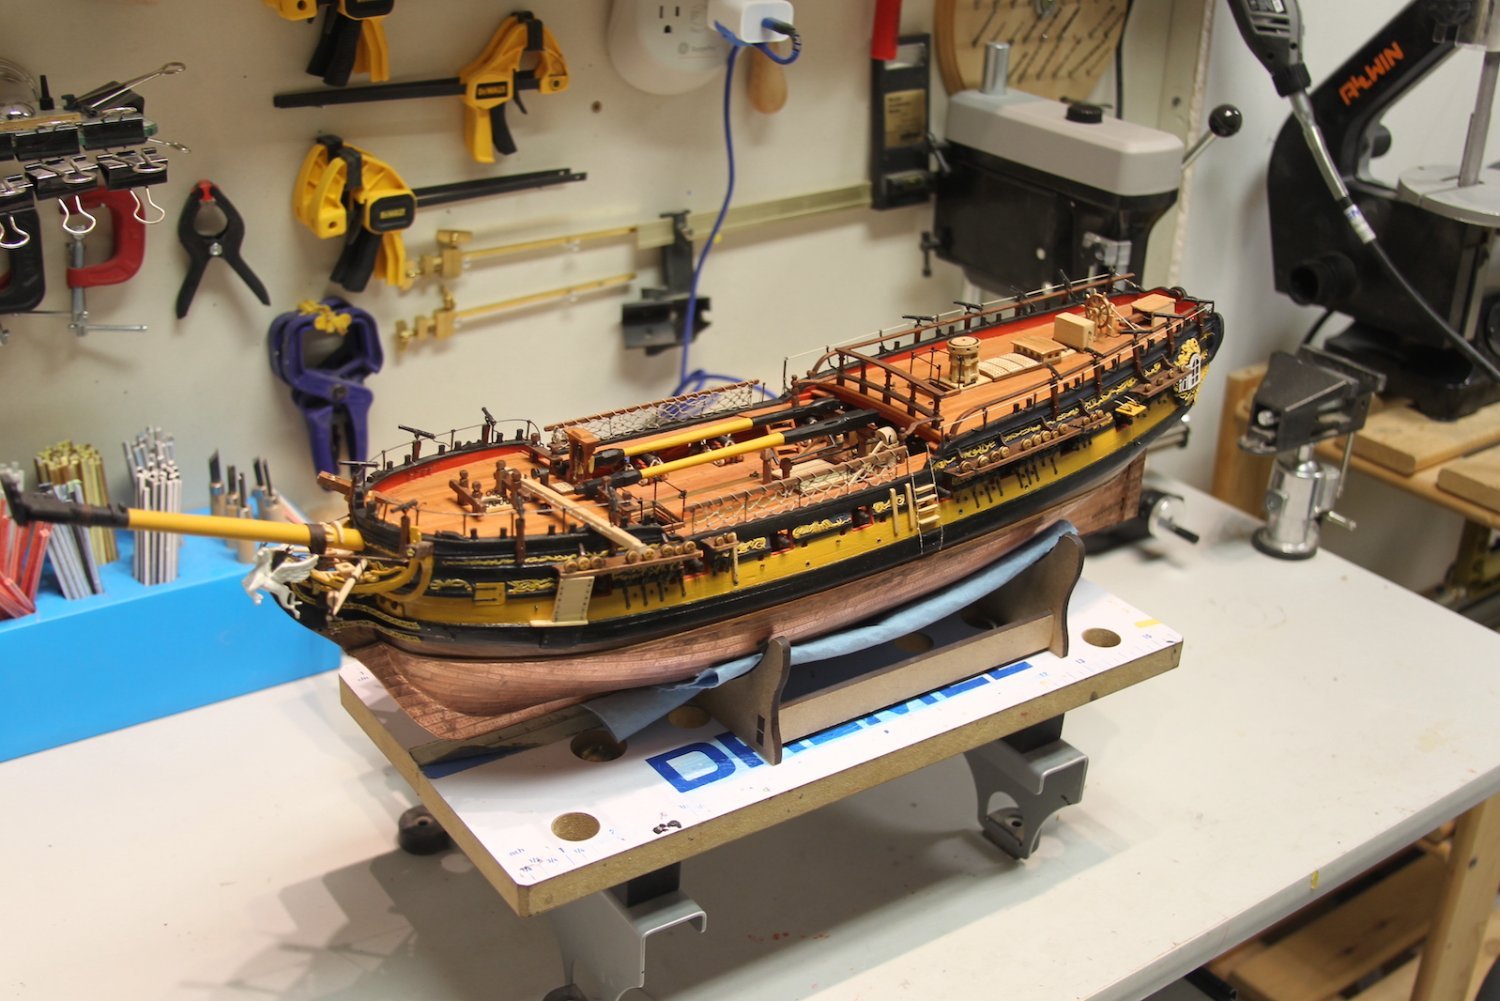
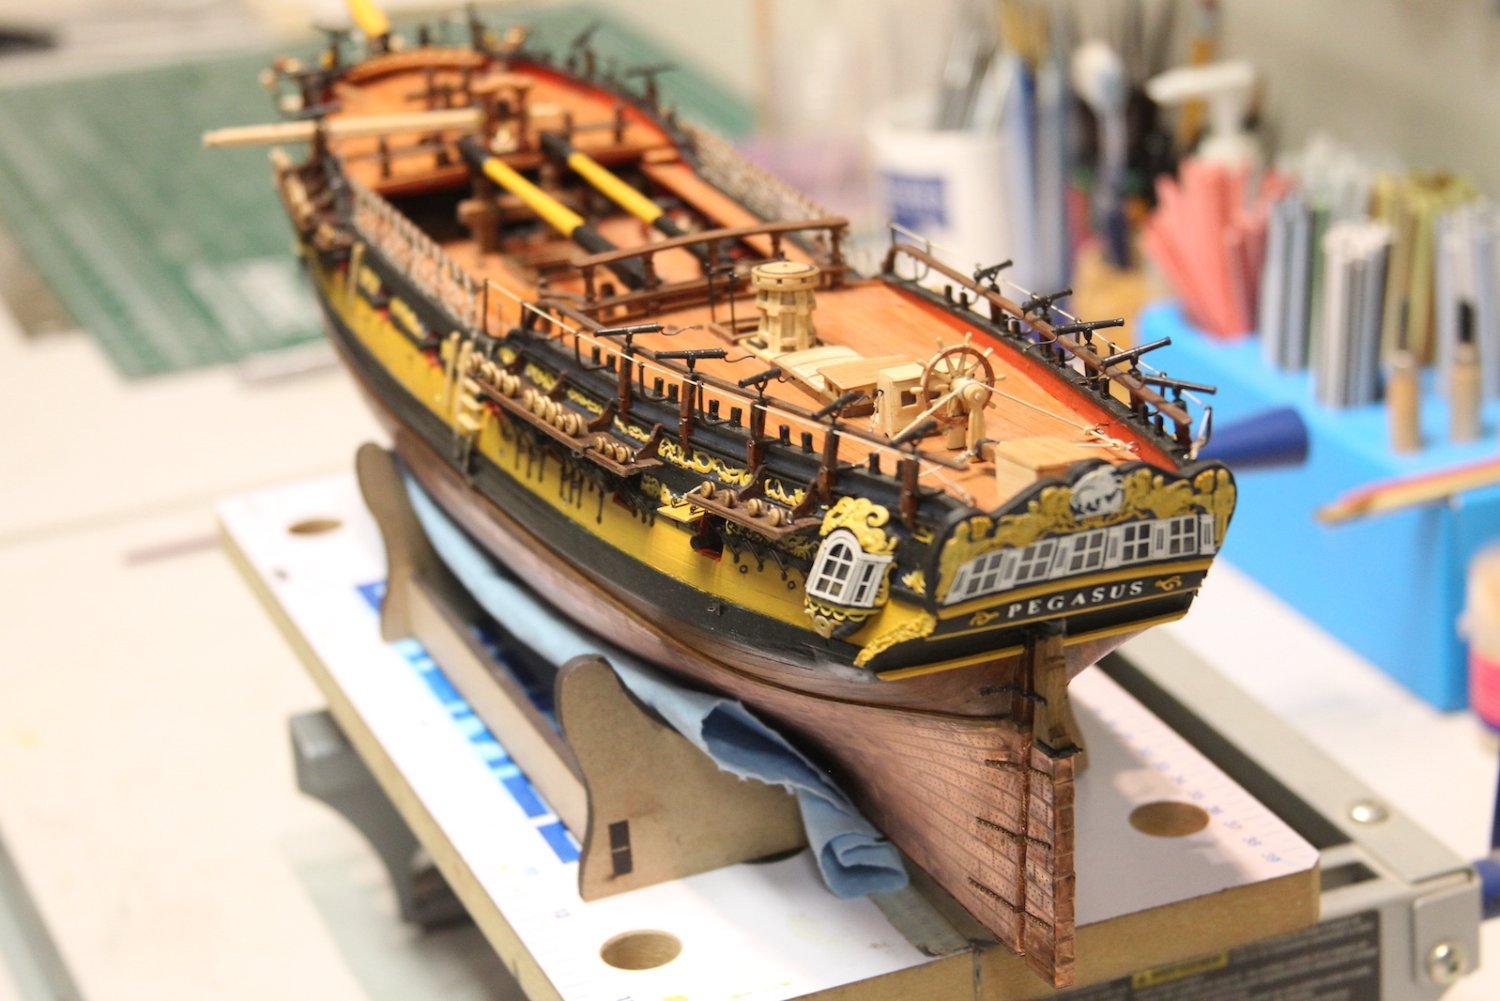
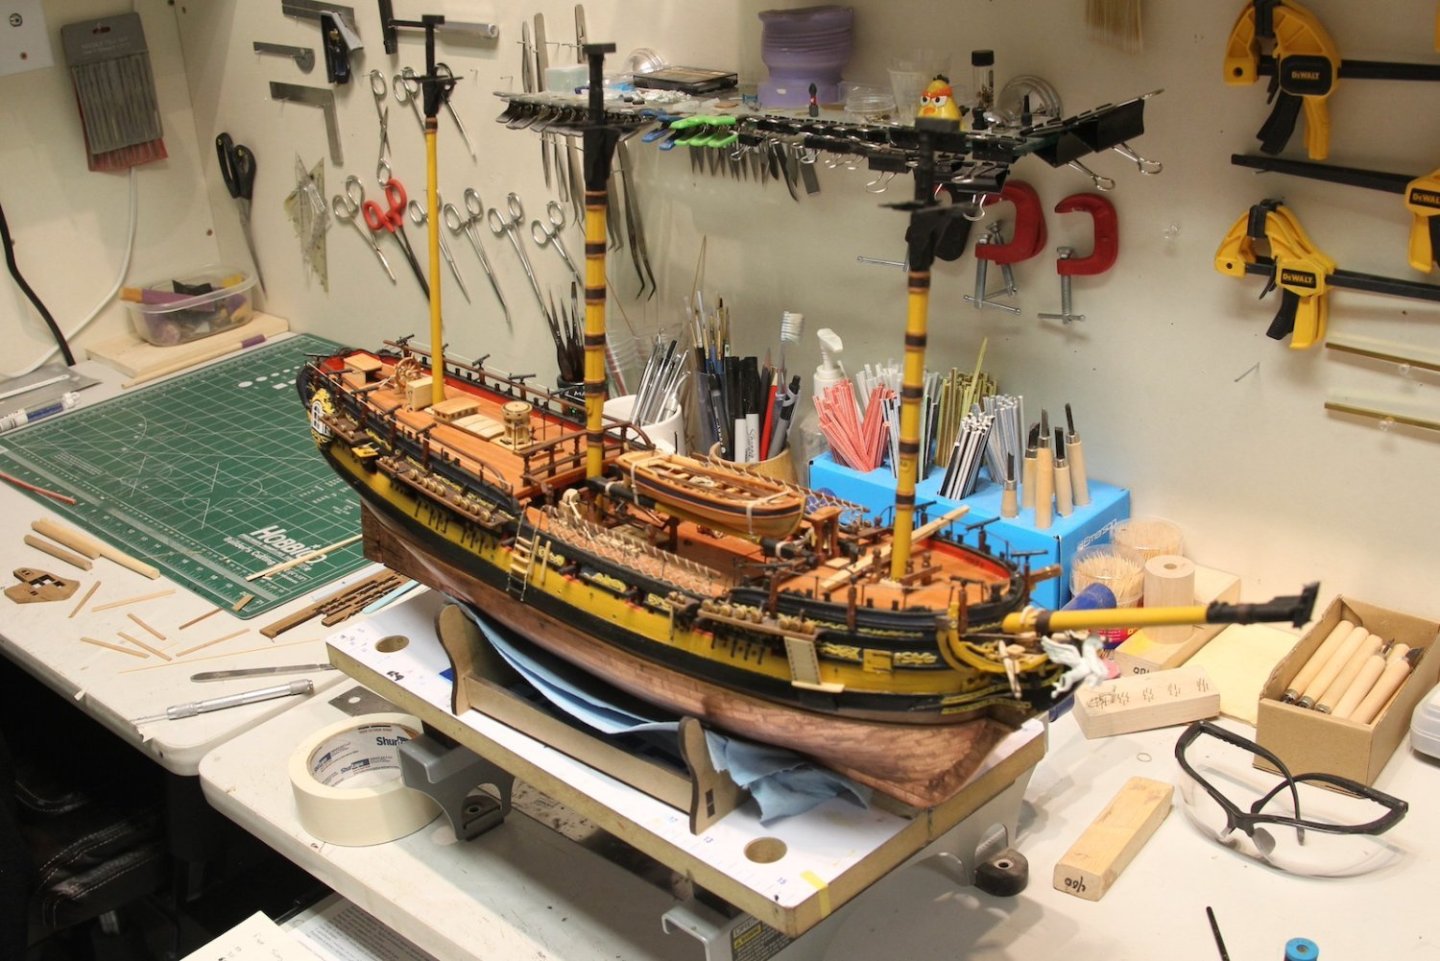
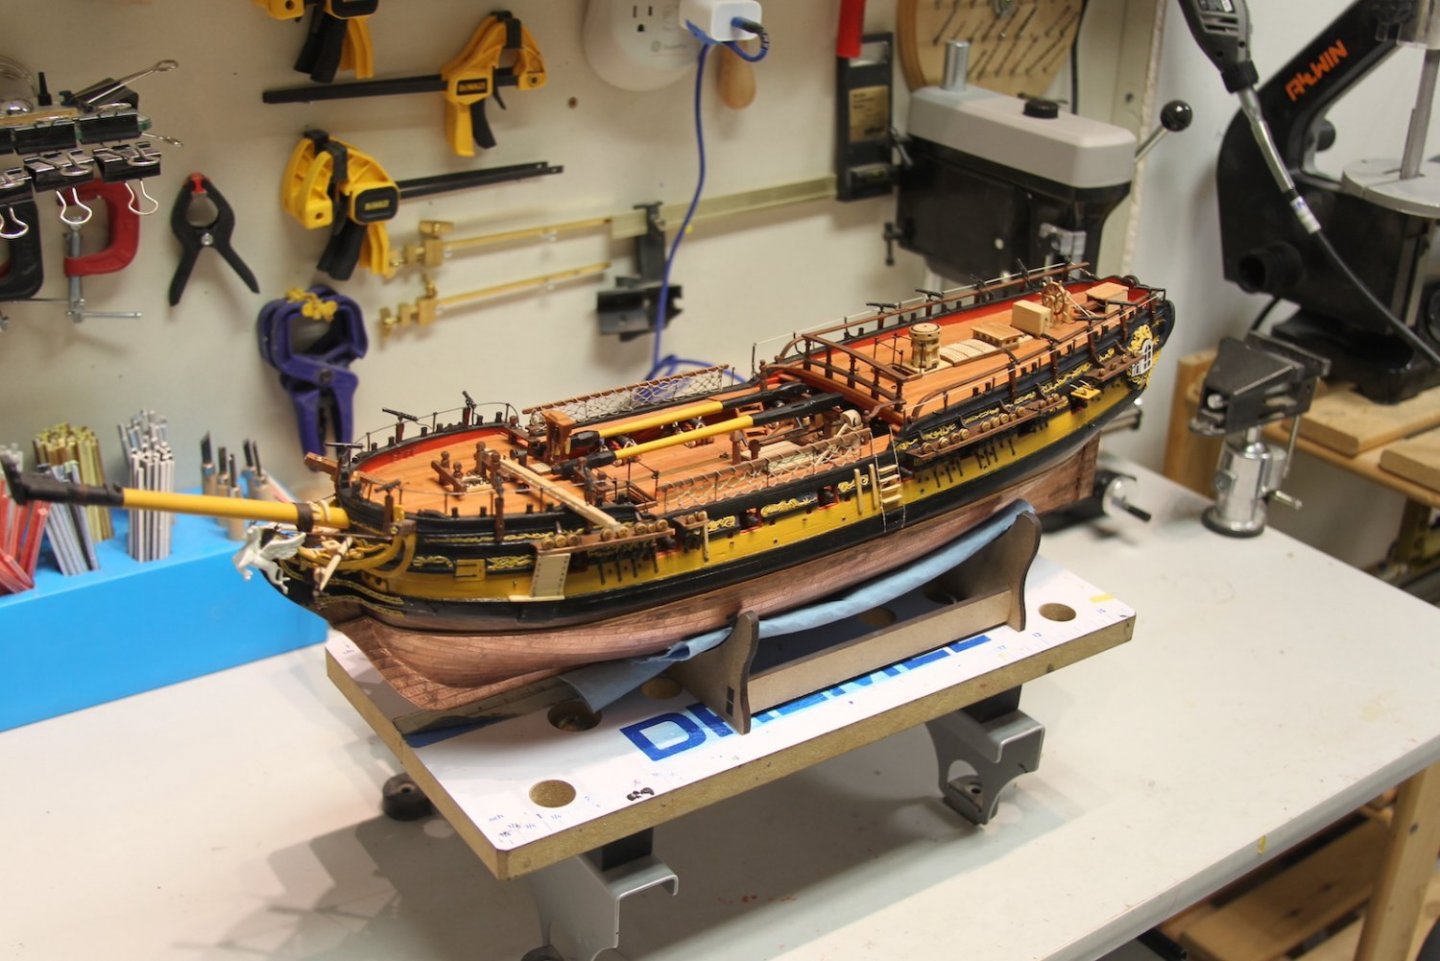
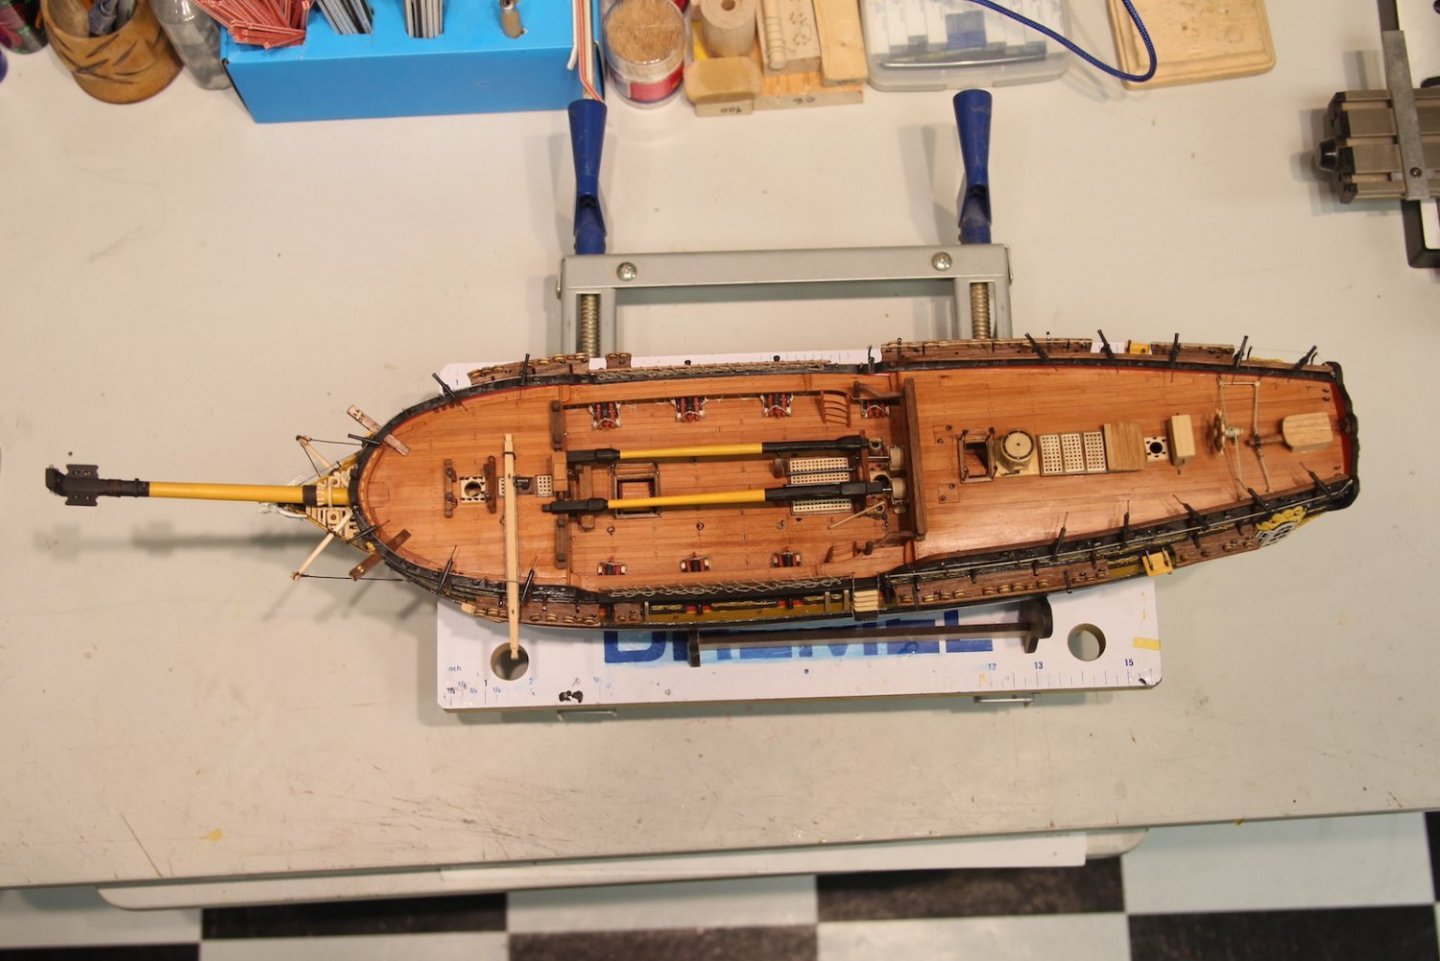
After I put the spare masts in place, I thought it was a good time to add the 1/2 pounders where they belong. This also represented what I thought to be a good opportunity for some general photos of the progress thus far. I'm just under 600 hours.


- 419 replies
-
- 14
-
-
-
- Victory Models
- Pegasus
- (and 2 more)
-
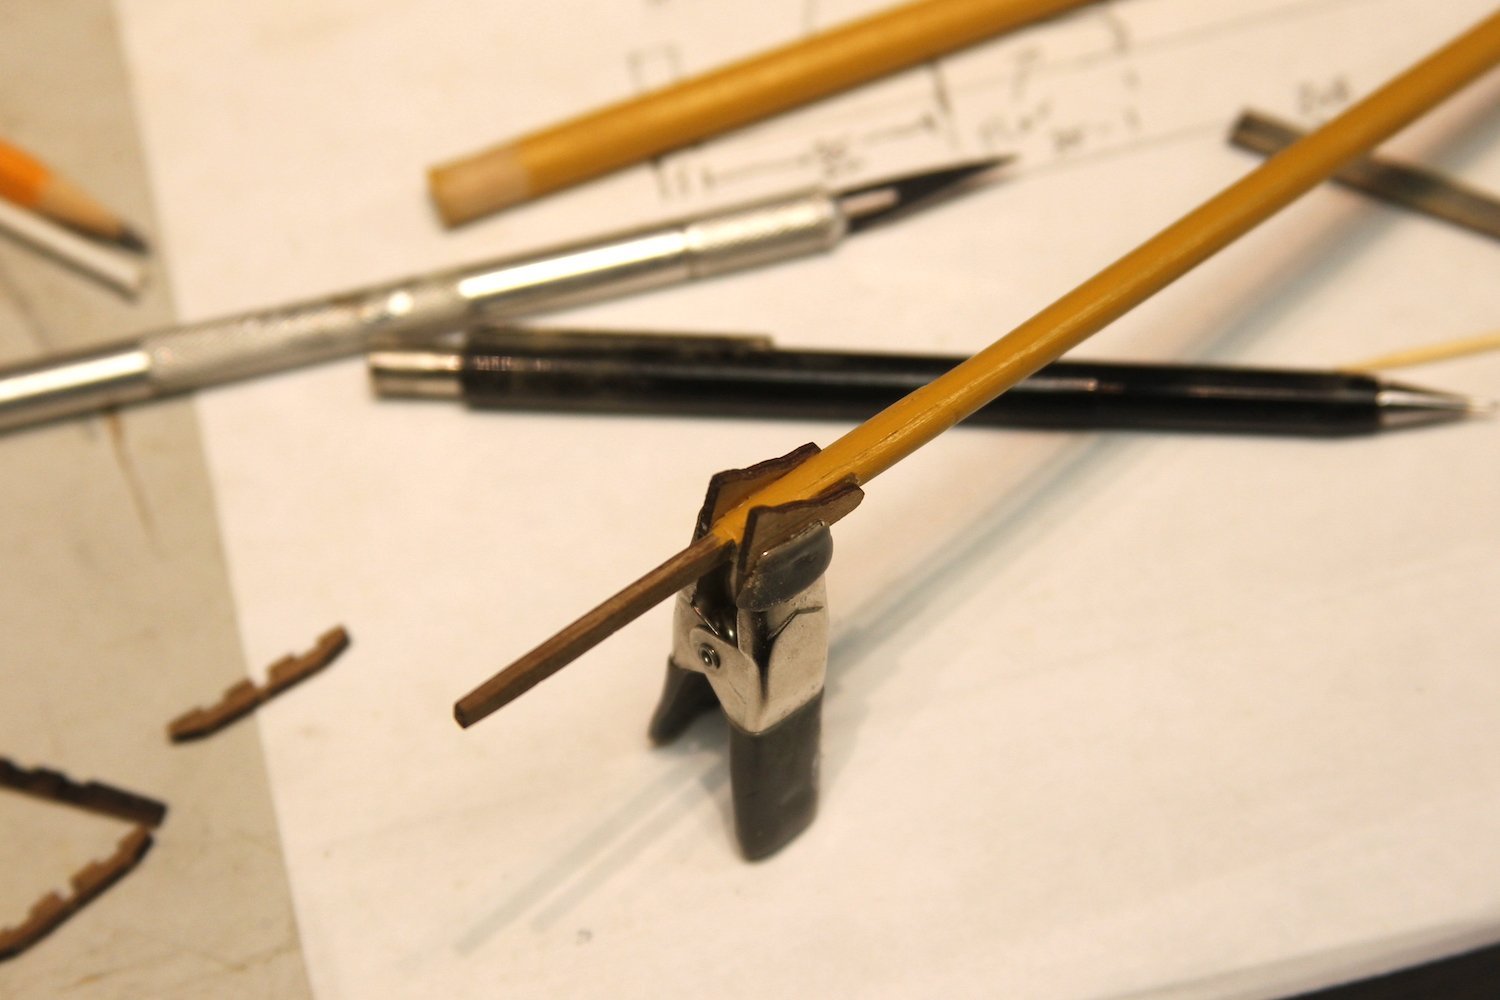
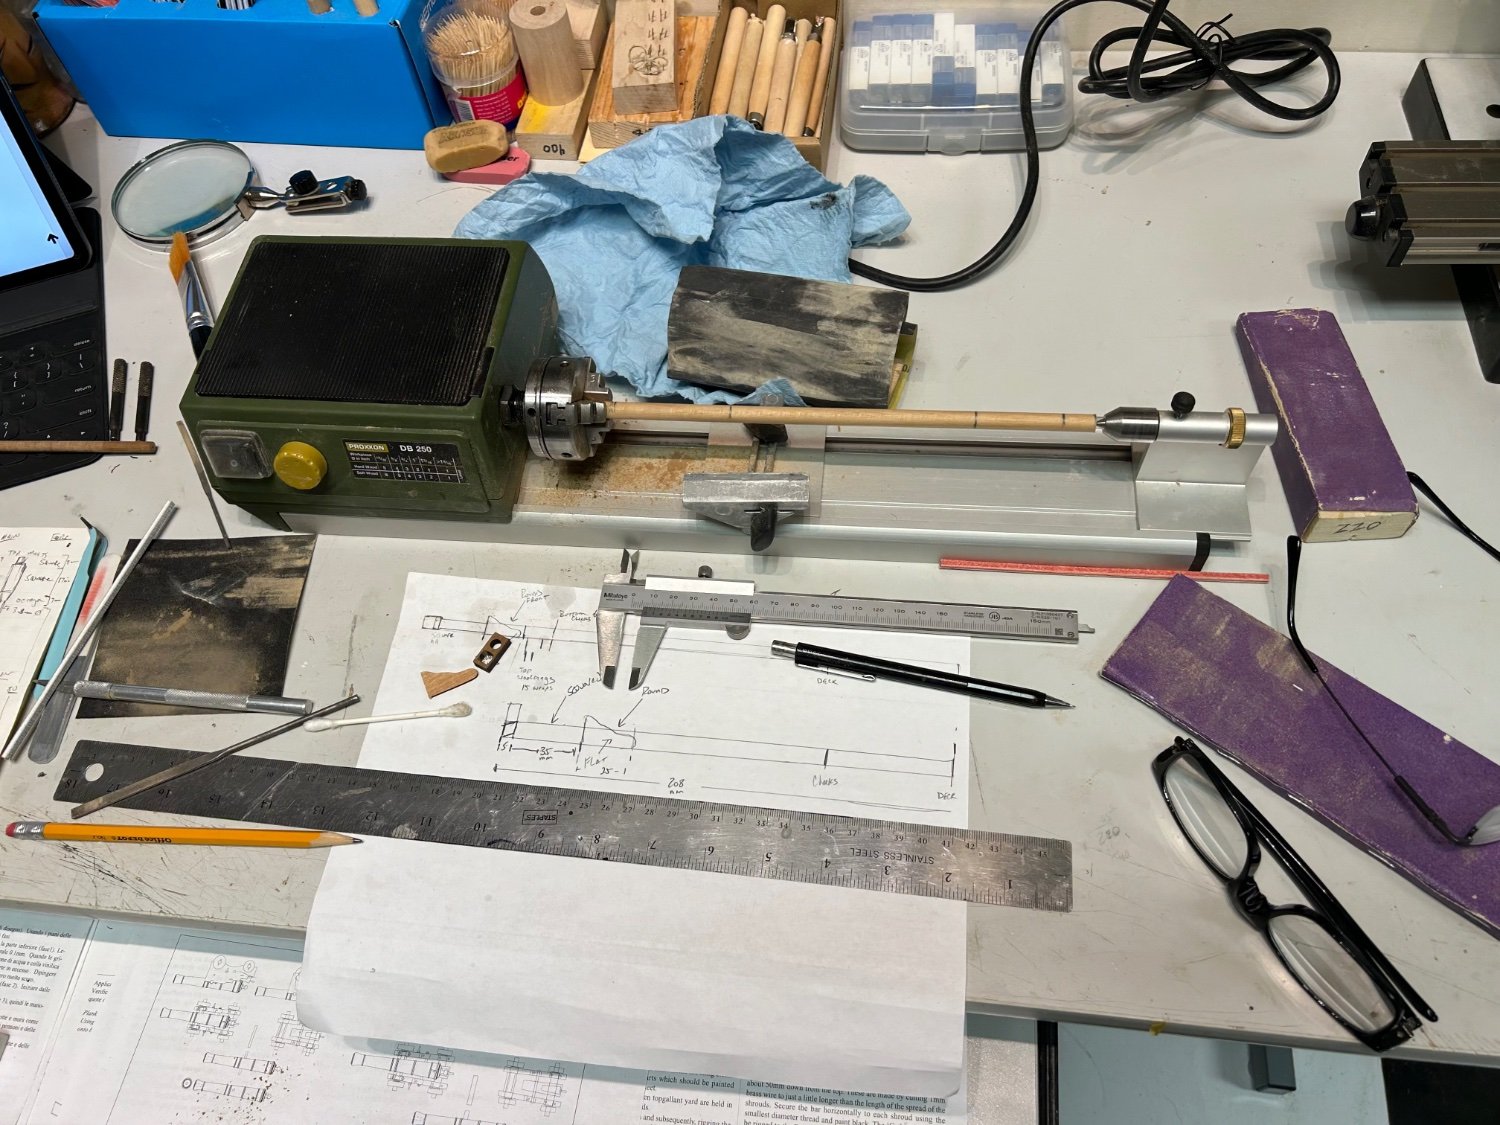
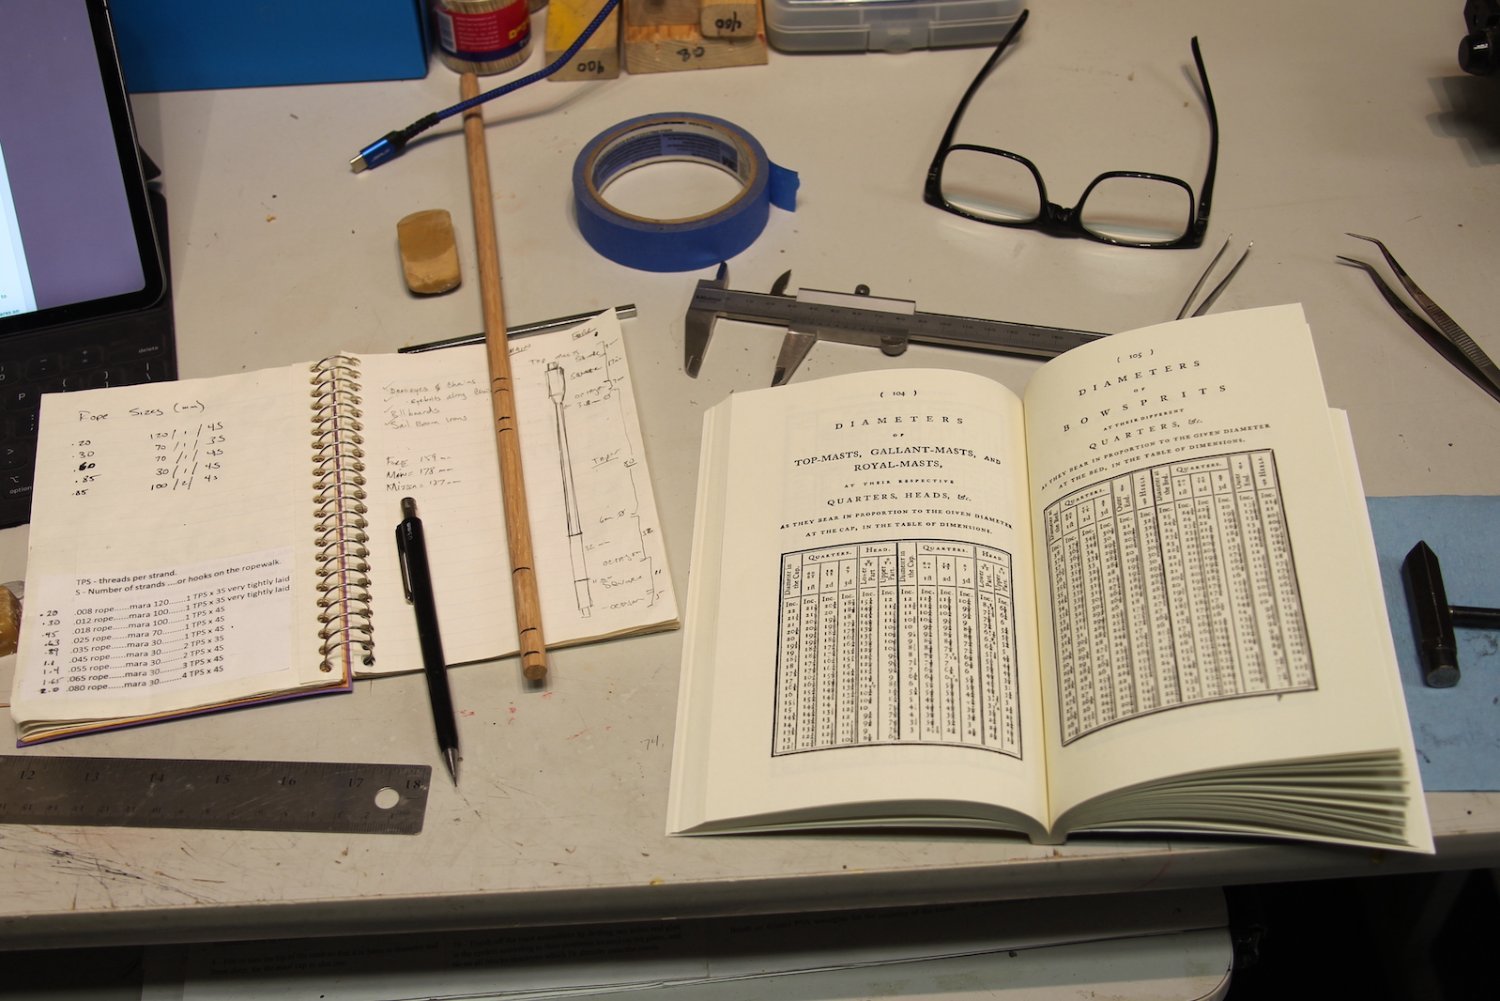
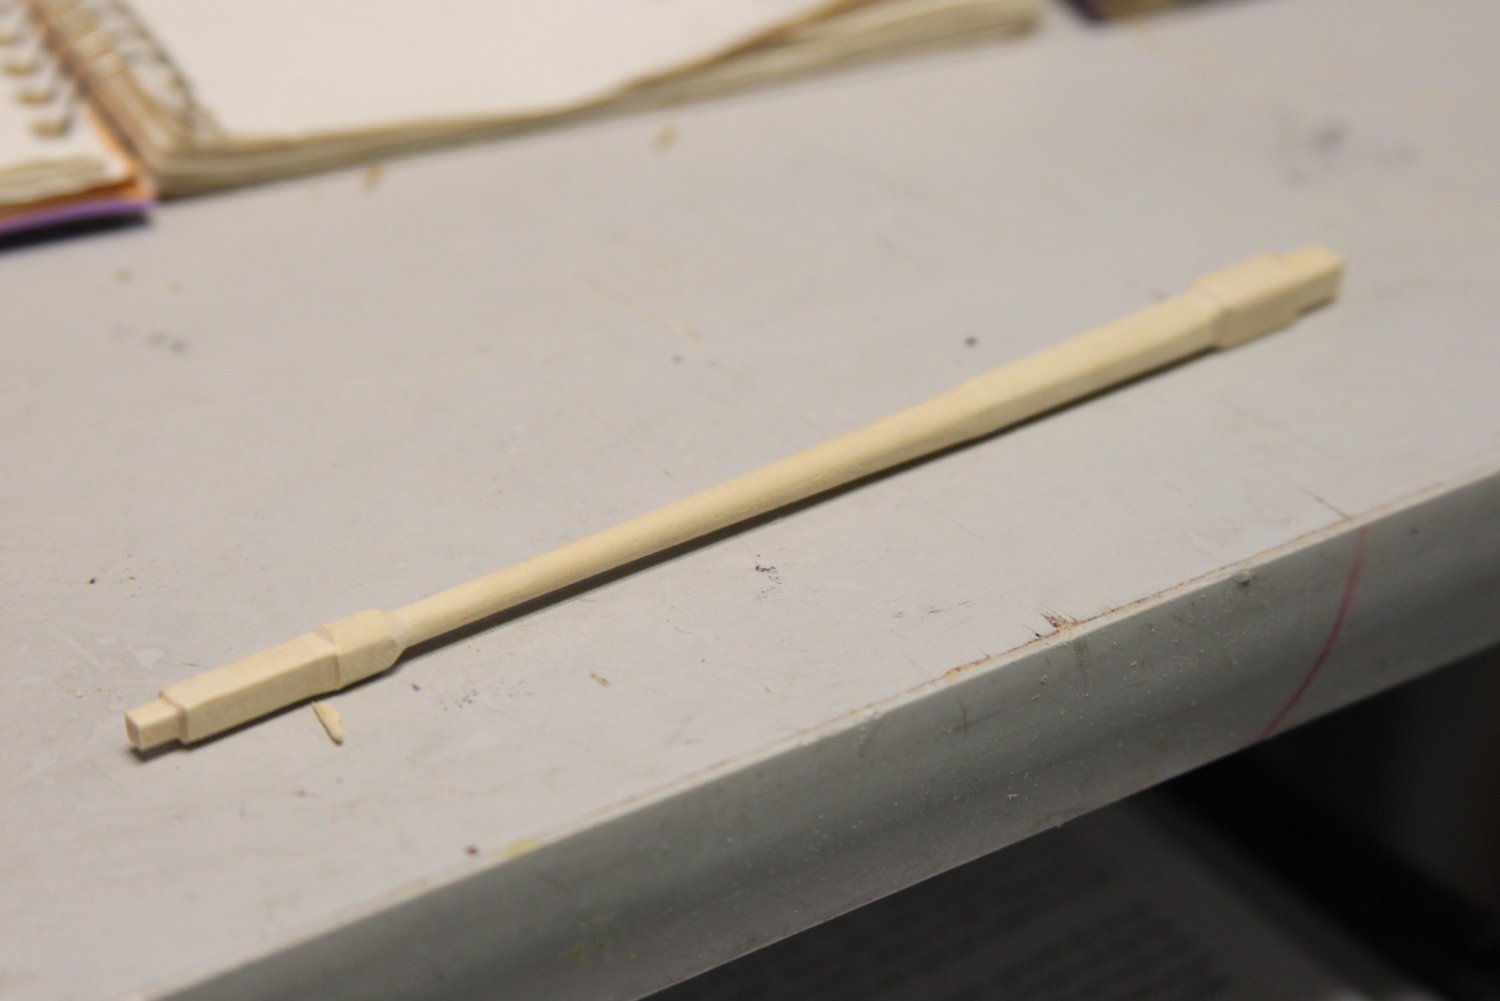
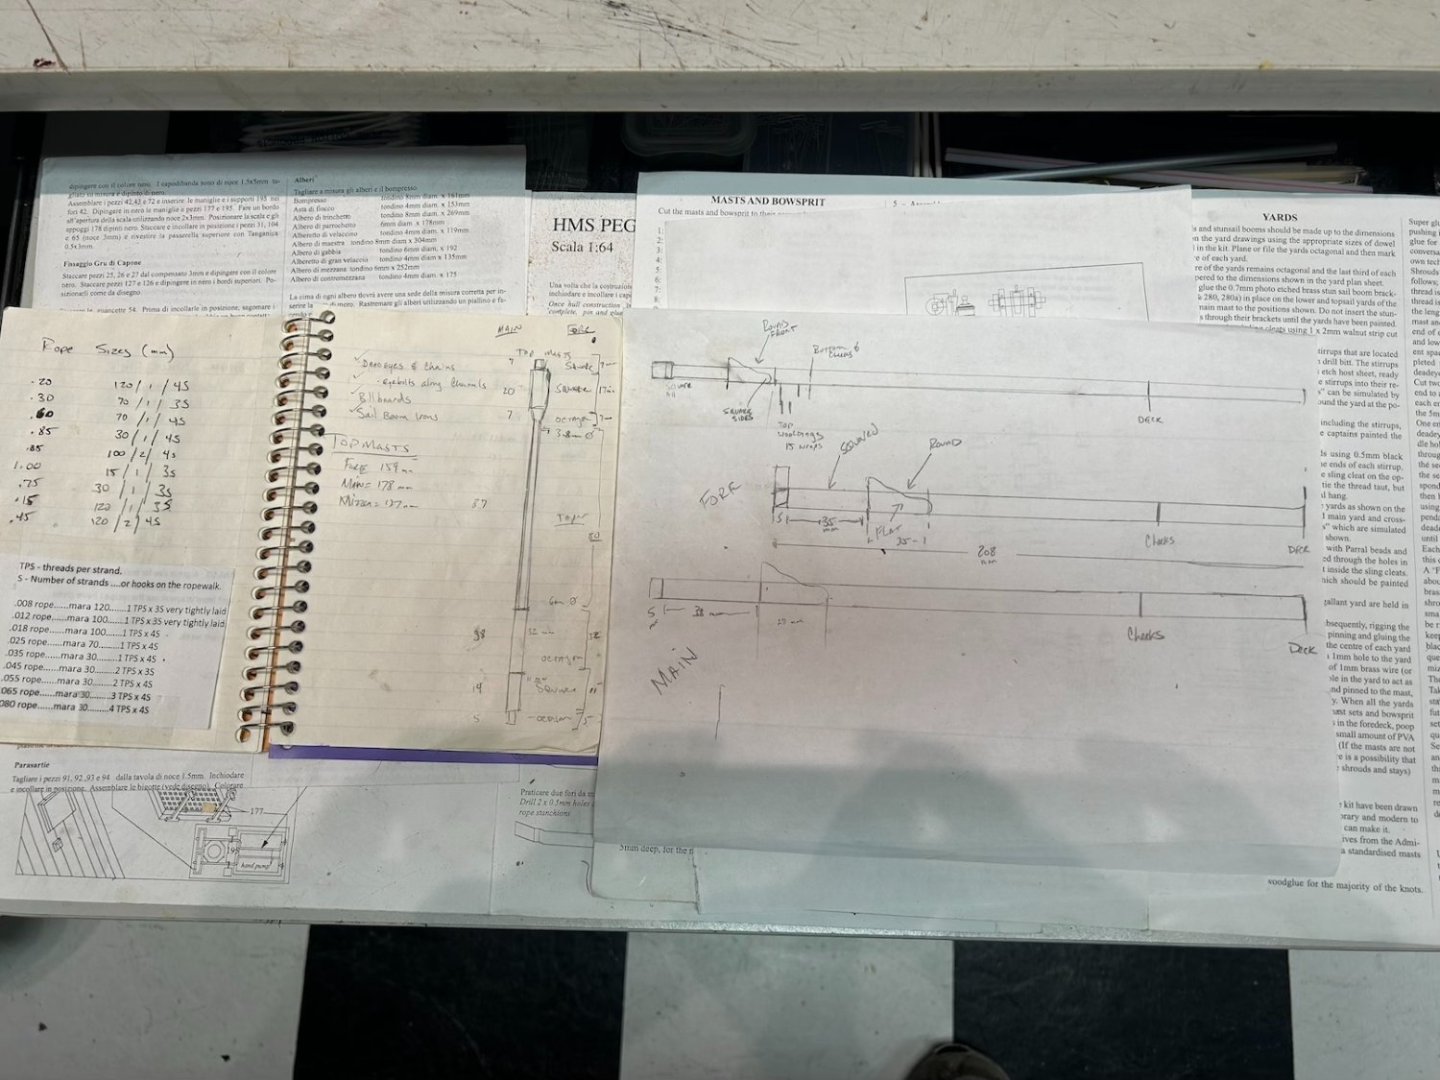
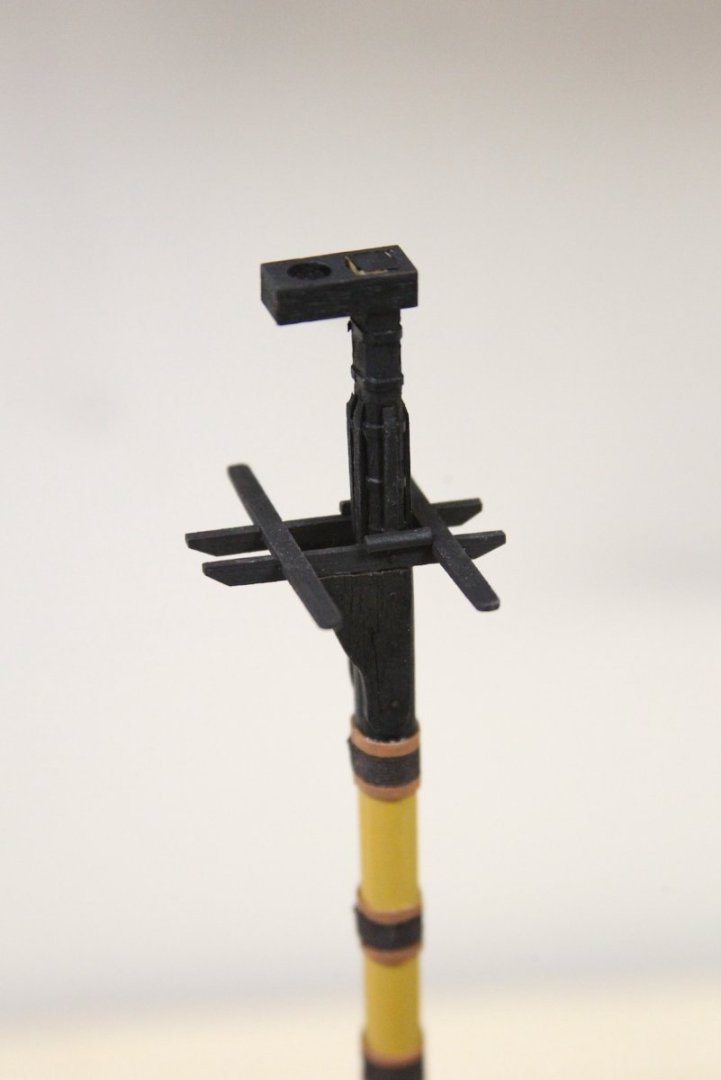
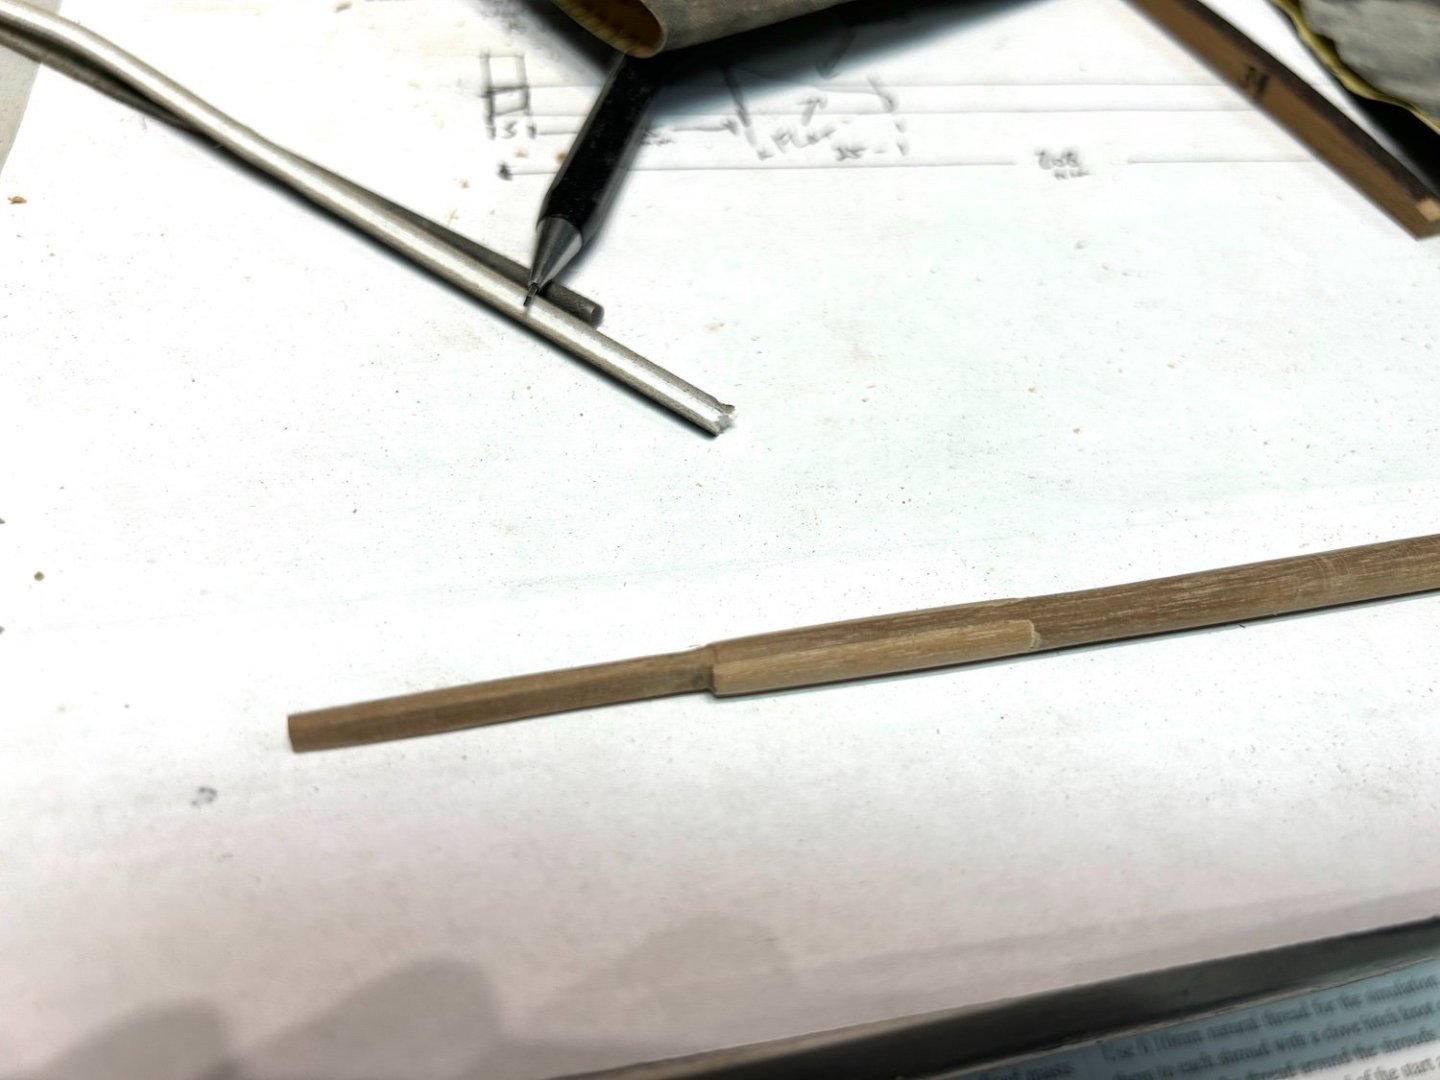
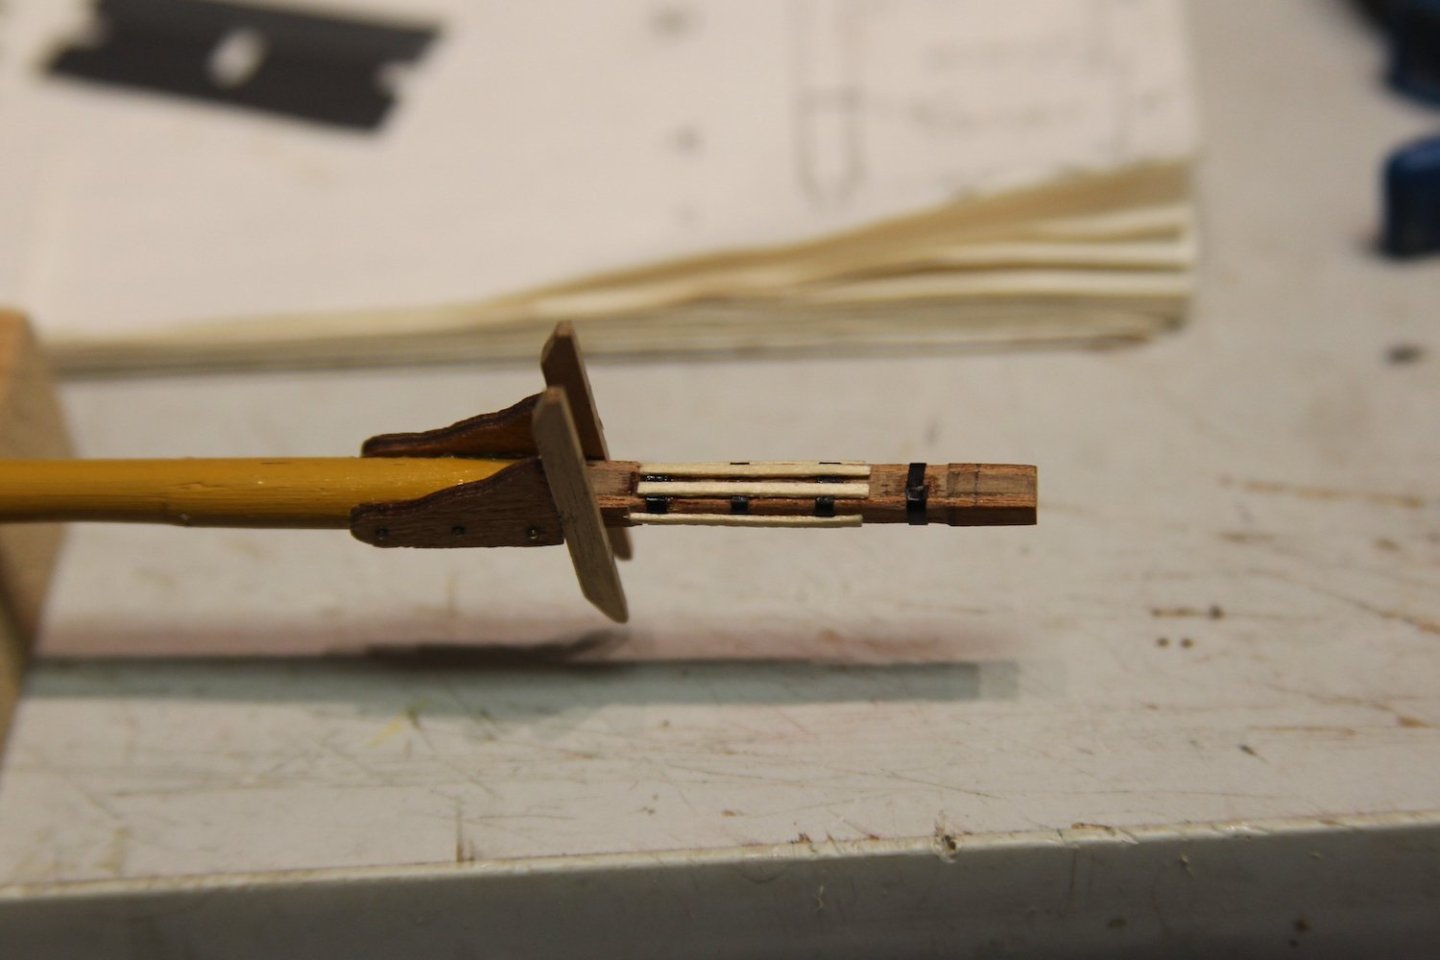
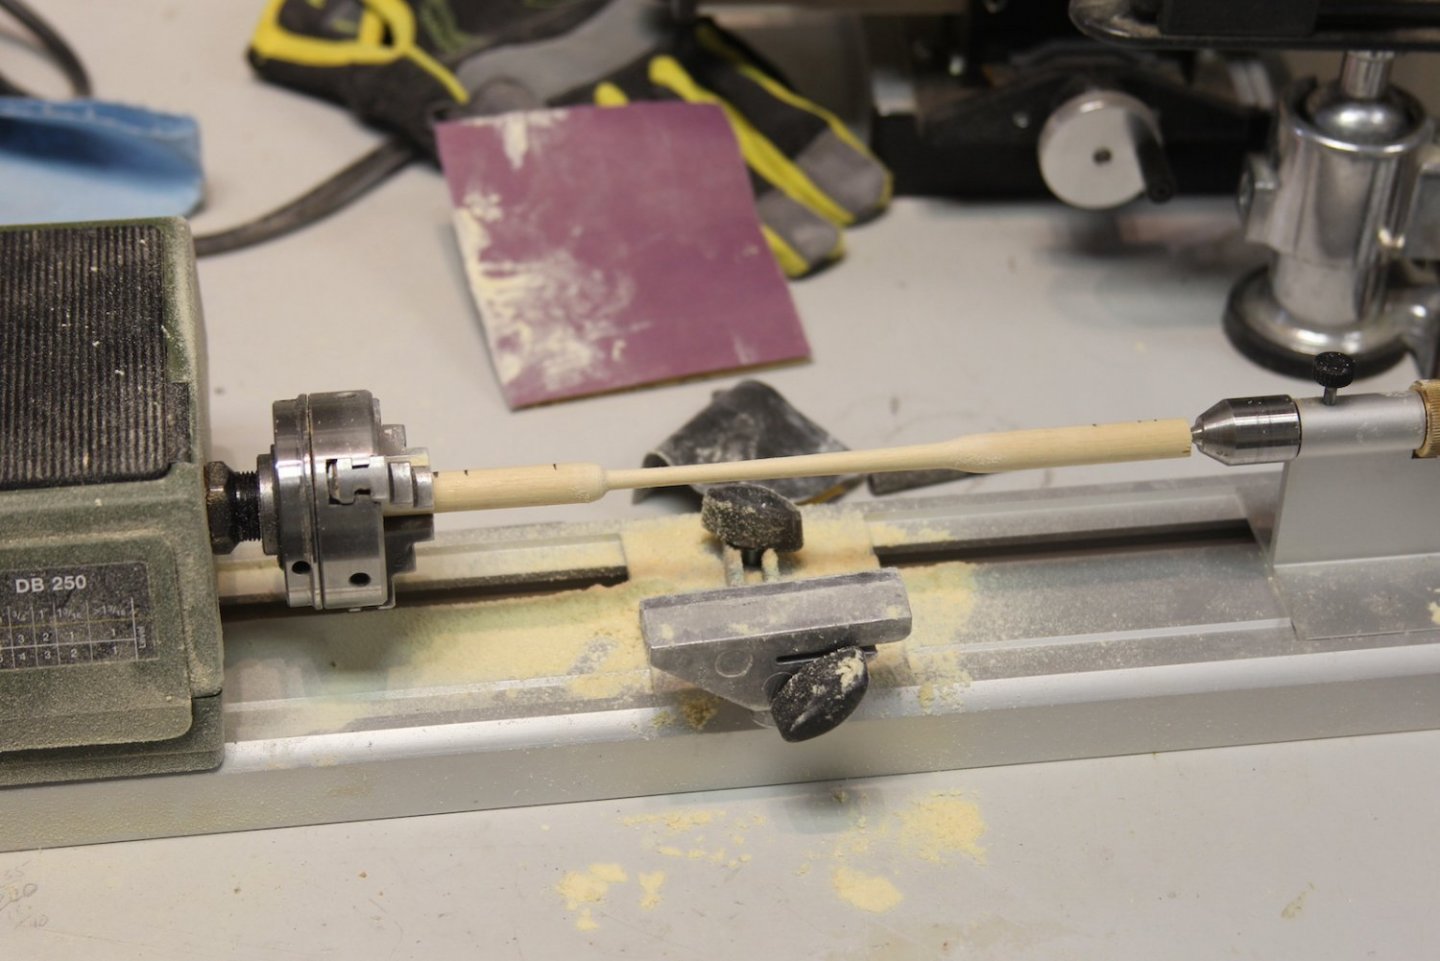
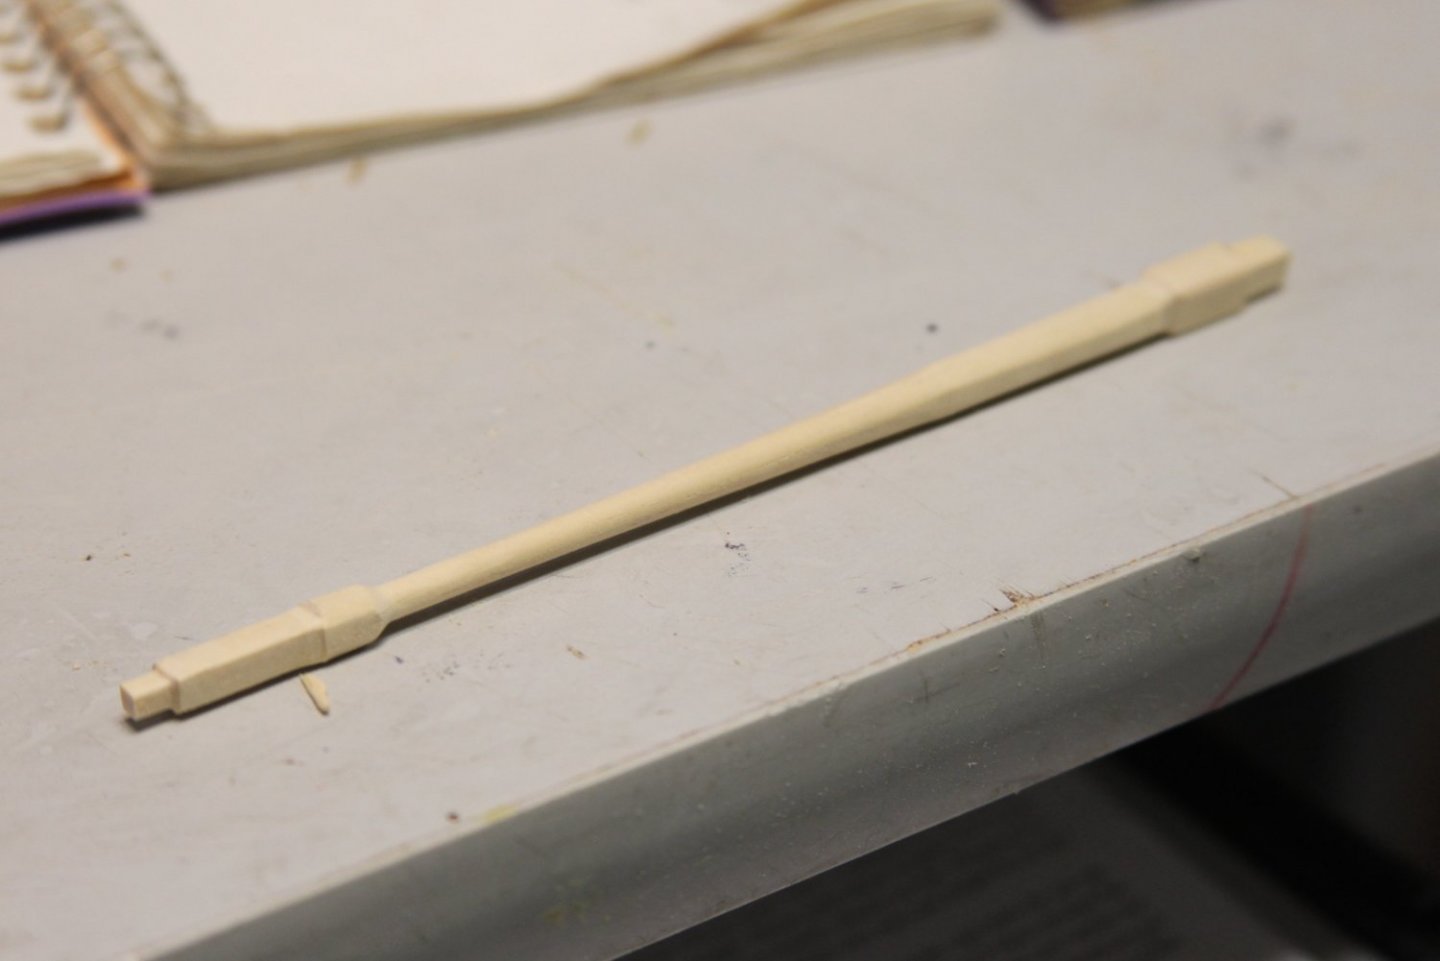
The nice thing about doing two extra top masts that mount on the deck and hold the ship's launch is that it gives one an opportunity to try a couple different methods to get the masts correct - or at least close to it. I used two different types of wood for the fore top mast and the main top mast respectively, and the first one turned out with much to be desired. It was an extra dowel I had lying around and I'm not even sure what kind of what it is - but it was too dense, very difficult to shape properly. The second was a basswood dowel which turned out much better. Which gives me a plan for the "real" masts that will come later. As others have pointed out, the kit plans for the top masts leave out some detail, so I did some research with Steele's books and drew out my plan for the top masts. The good news is - @Blue Ensign graciously did all the math in his Pegasus build log here - so I didn't have to spend as much time interpreting Steele's archaic verbiage, just some double checks. Unlike BE however, I am more comfortable starting with a round dowel a bit larger than the target, tapering it where necessary, then squaring off the ends. Really just a matter of preference and taste I think. Perhaps I'll start with the square when I do the Main and Fore masts as the round dowels I have may not be large enough in diameter to start with. Either way, with these I transferred the newly calculated lengths etc to the dowel, then start creating sawdust. I did keep my fore top mast that was pretty rough looking as the paint and the fact that it'll be under a launch will hide many of the flaws. Just don't zoom in too closely on the photos. 😛 Here are the two spare masts in place on the gallows.


- 419 replies
-
- 11
-
-
-
- Victory Models
- Pegasus
- (and 2 more)
-
Welcome - glad to see you around our forum. I've enjoyed five of your kits - four ships and a stagecoach.
-
Nice work. I think each additional bit that you add to the transom and that area shows off how well your hard work and attention on the letters has paid off.
-
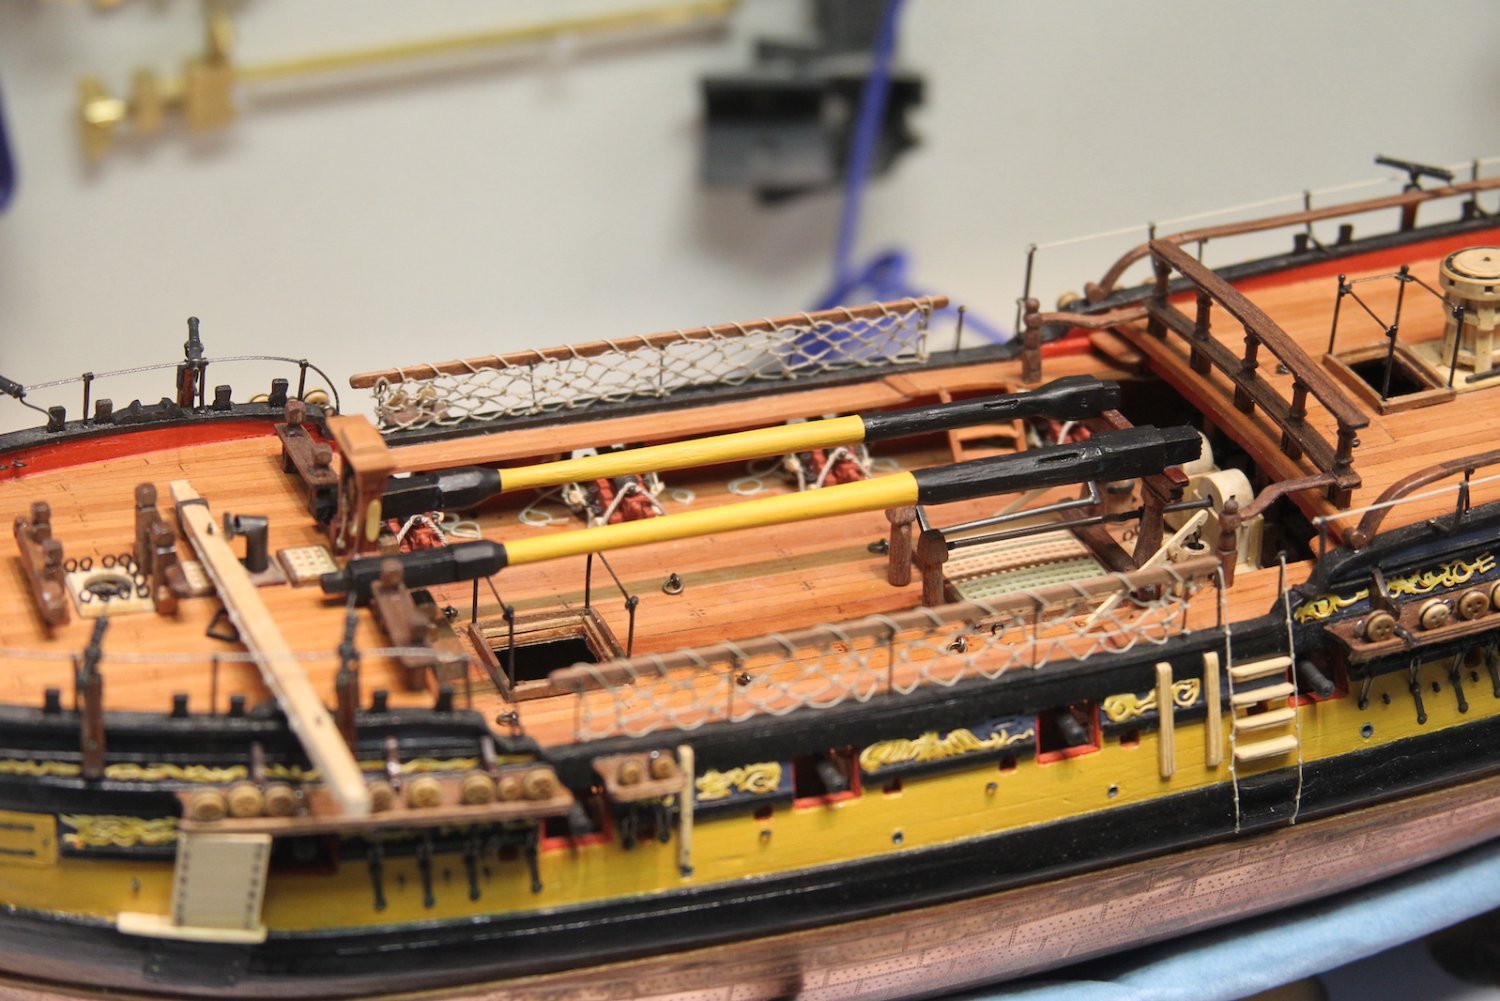
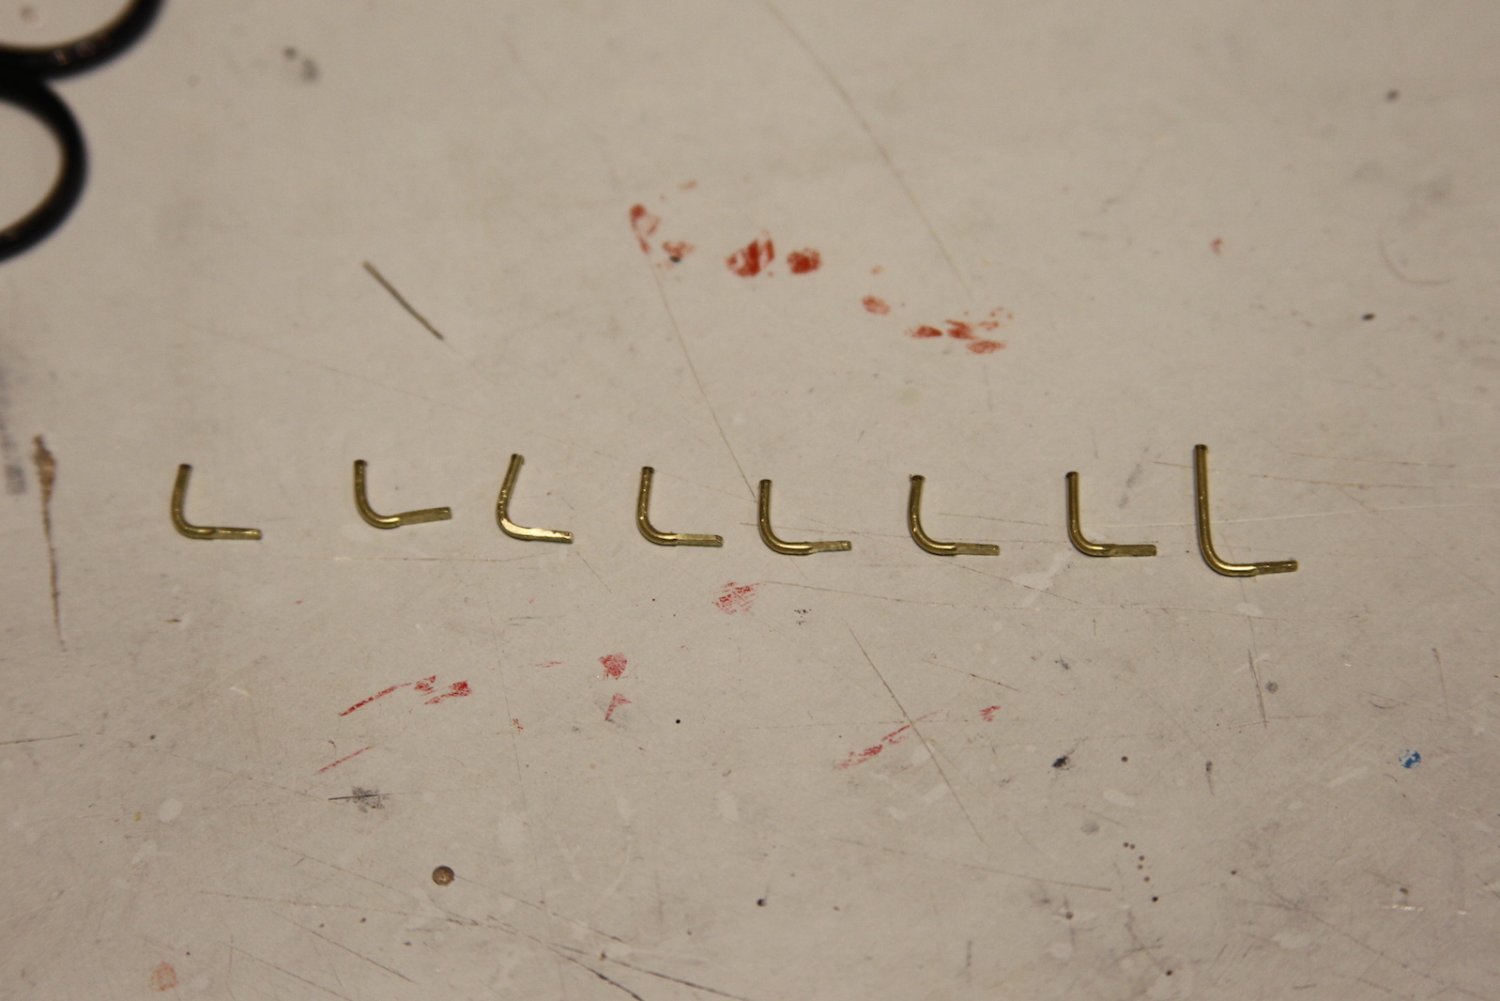
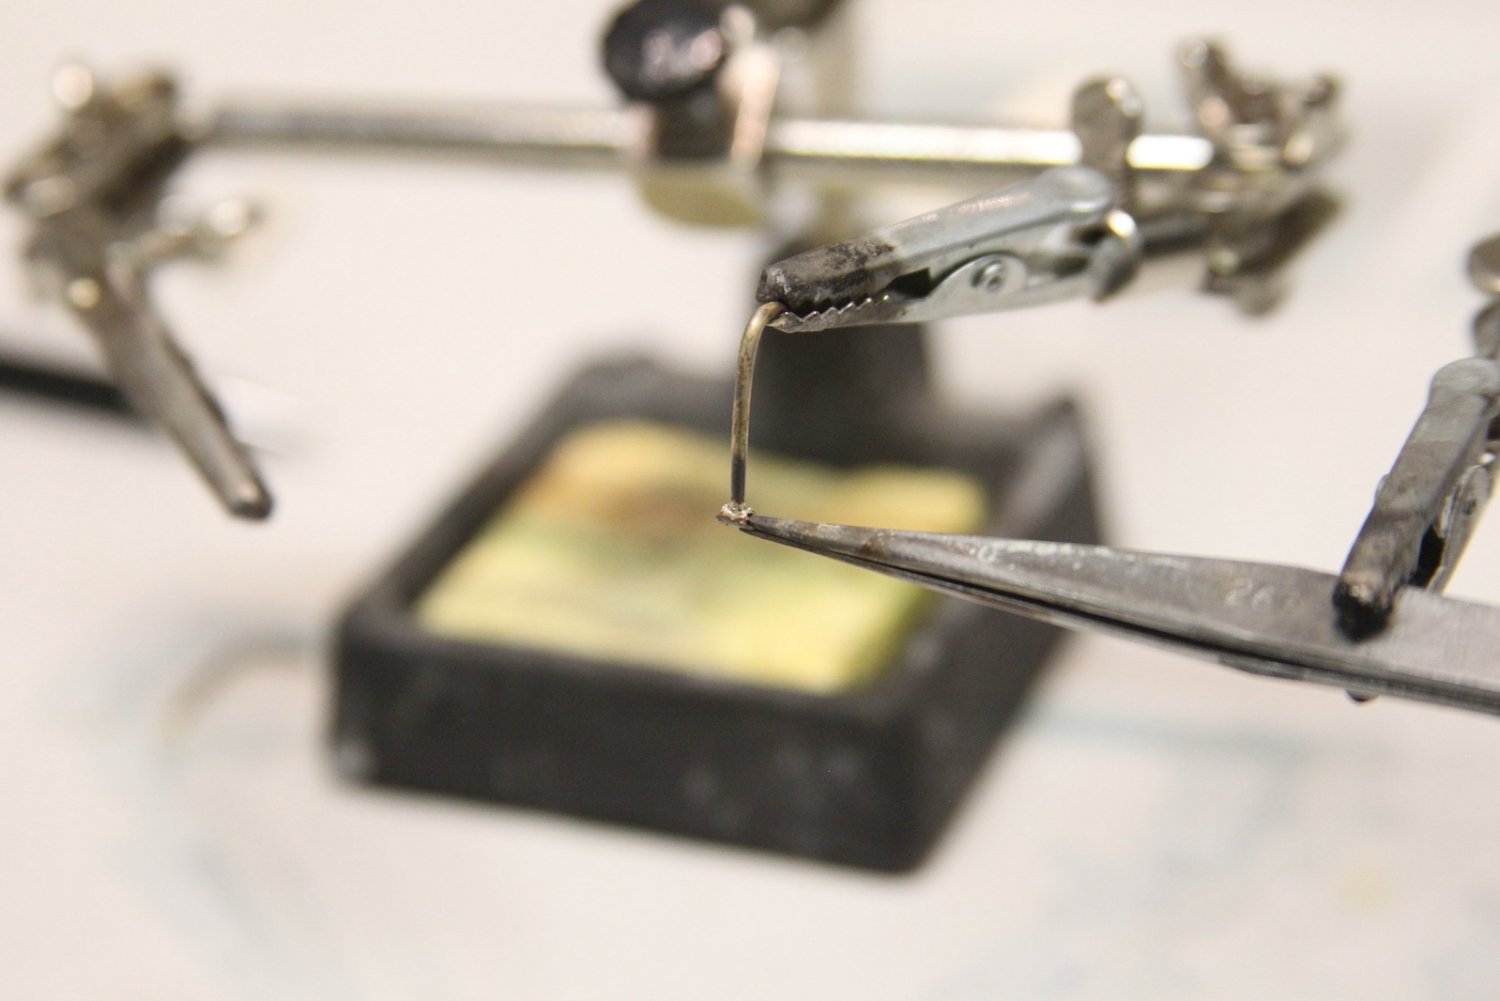
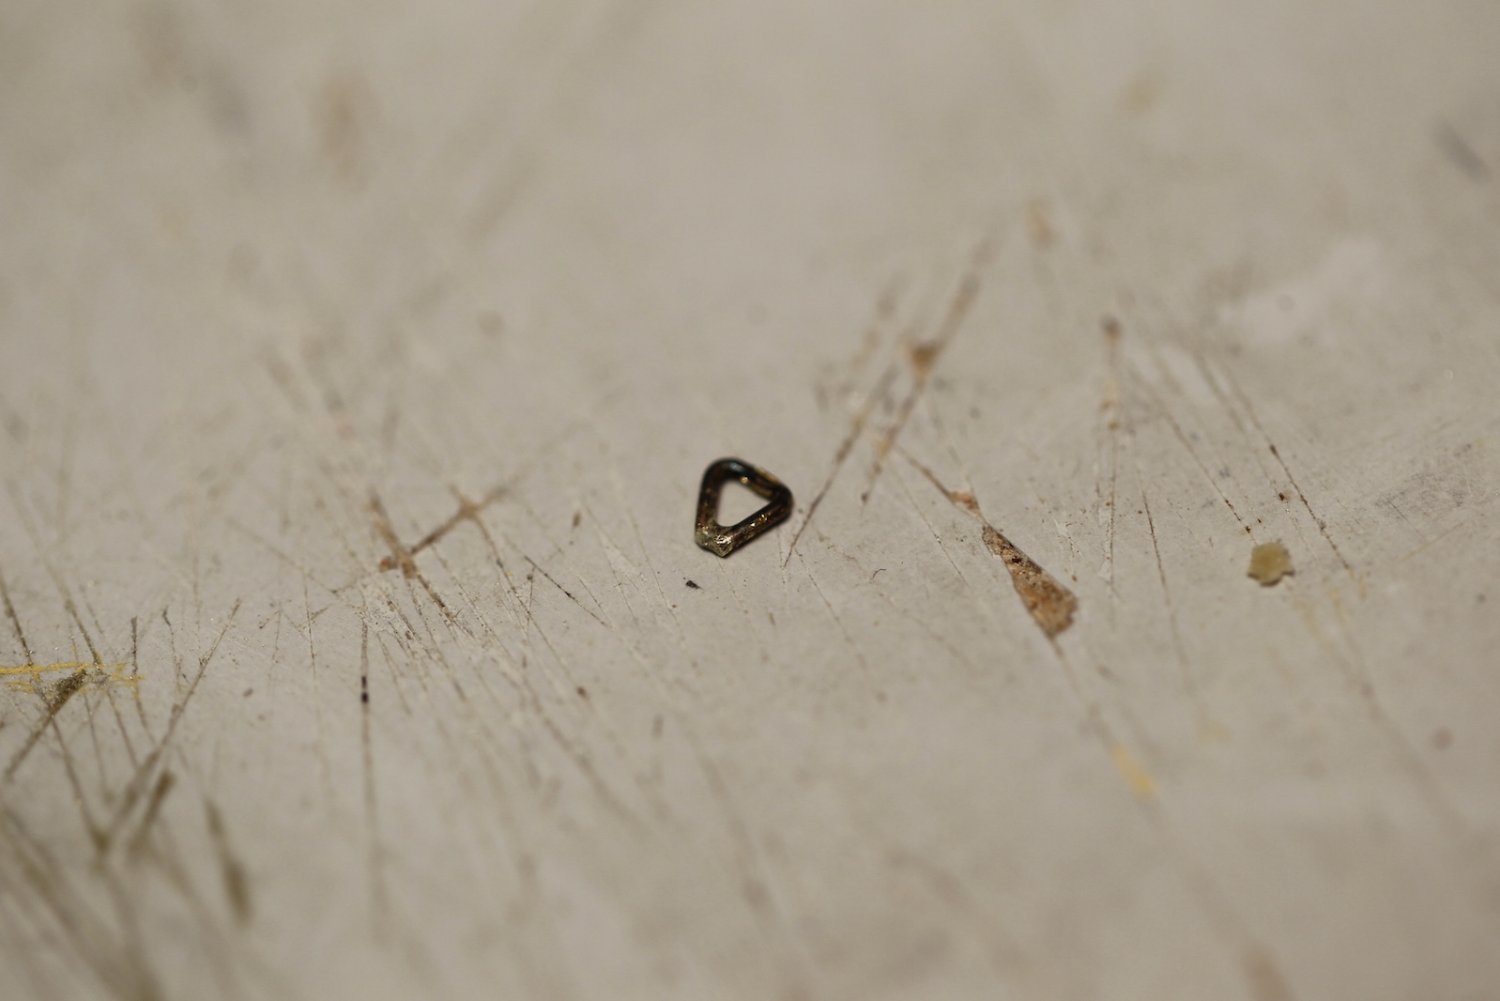
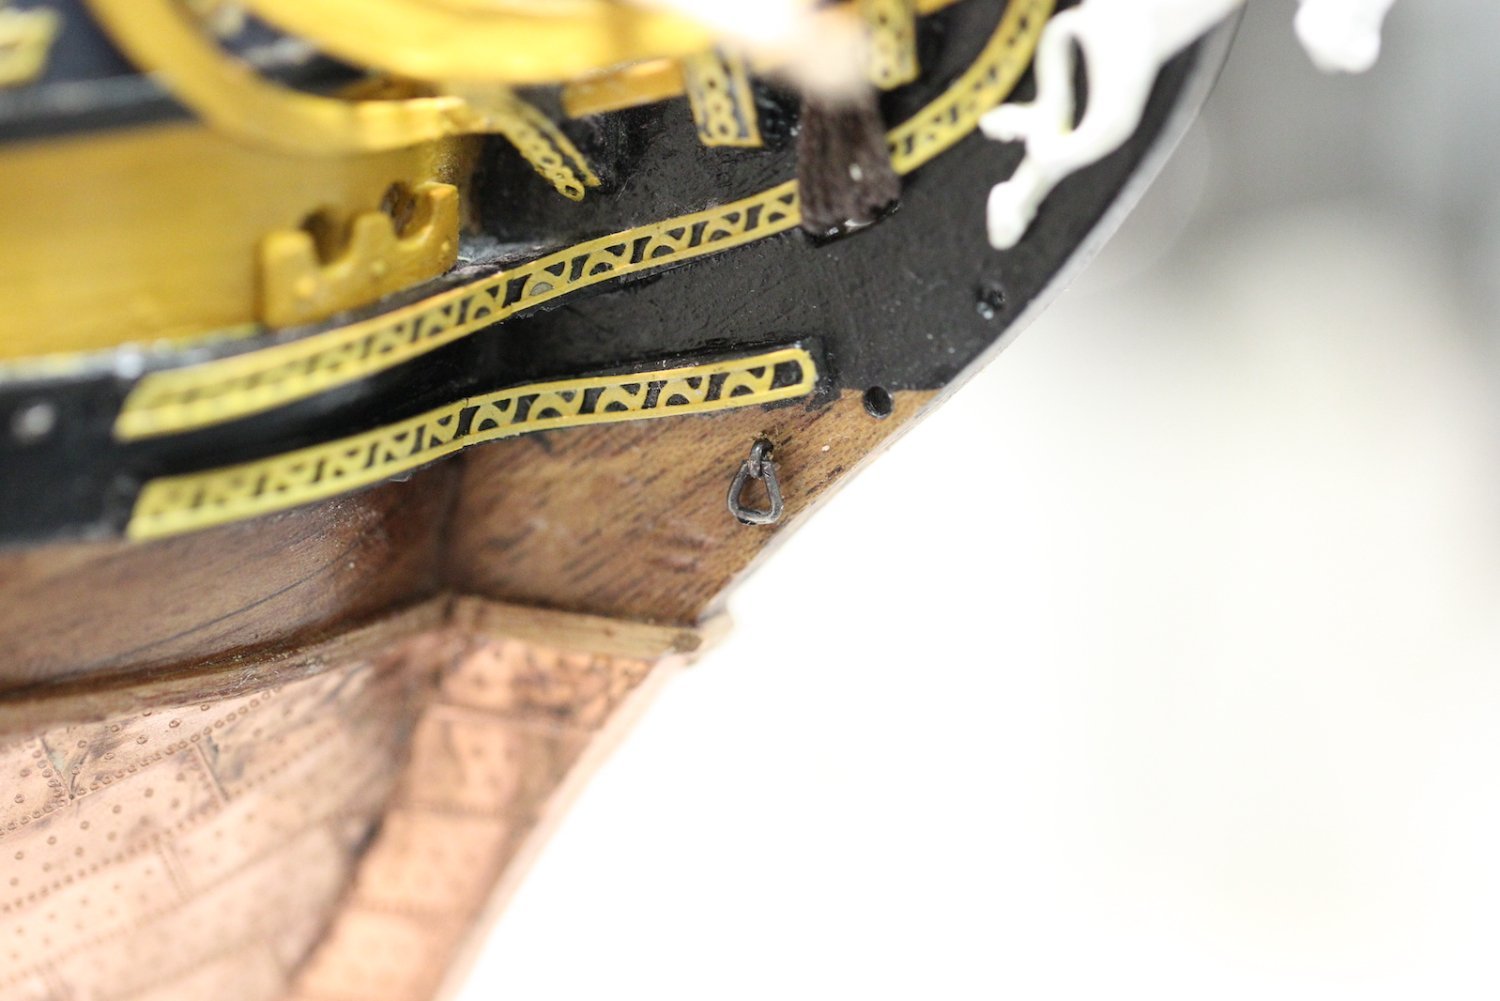
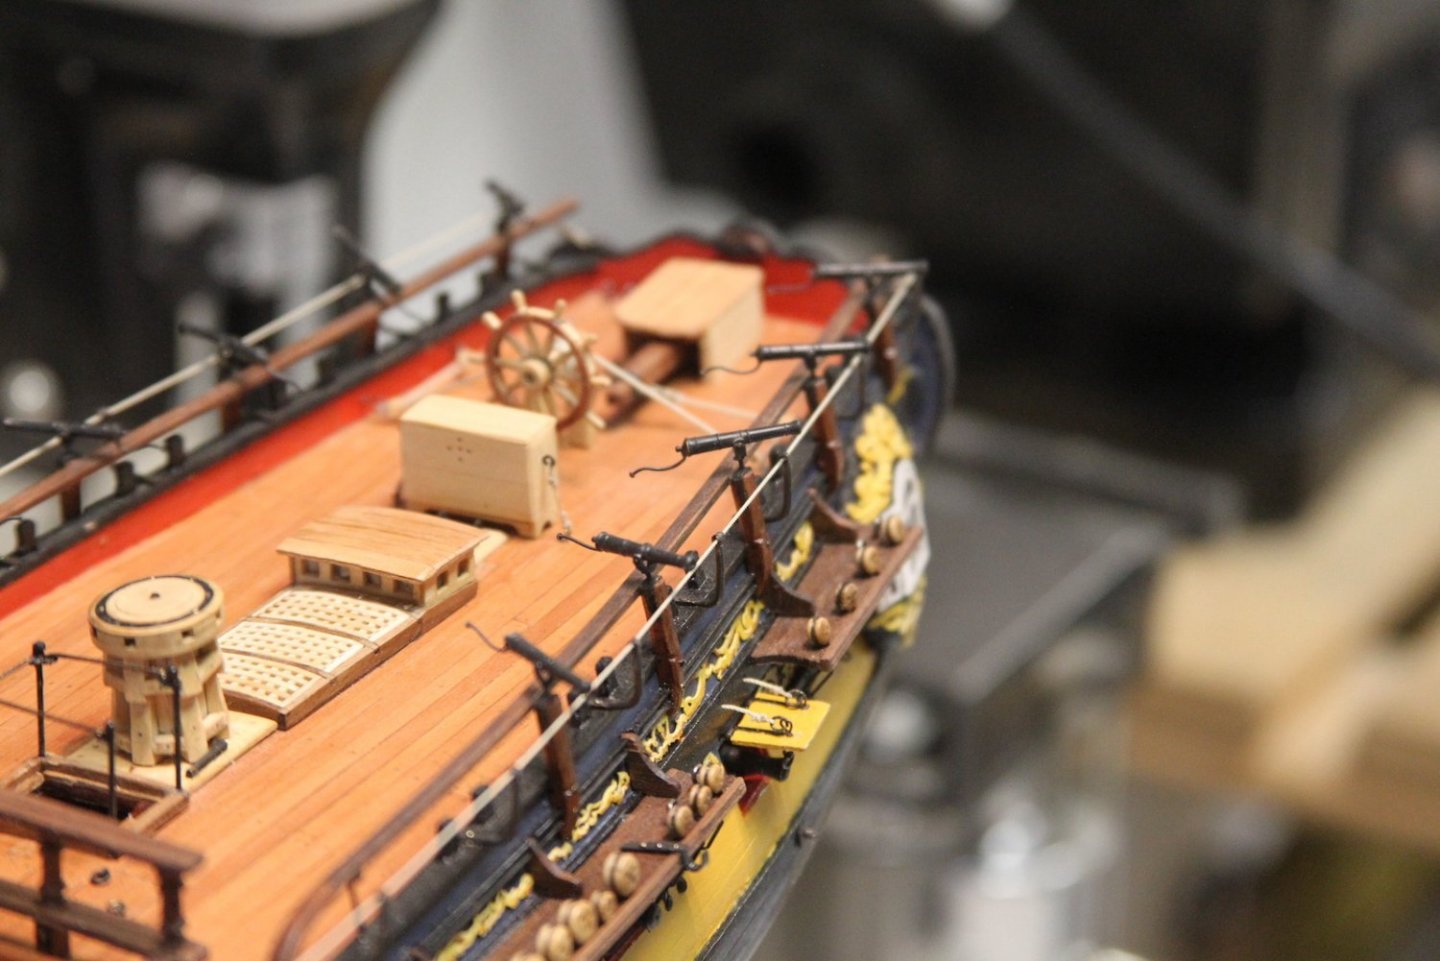
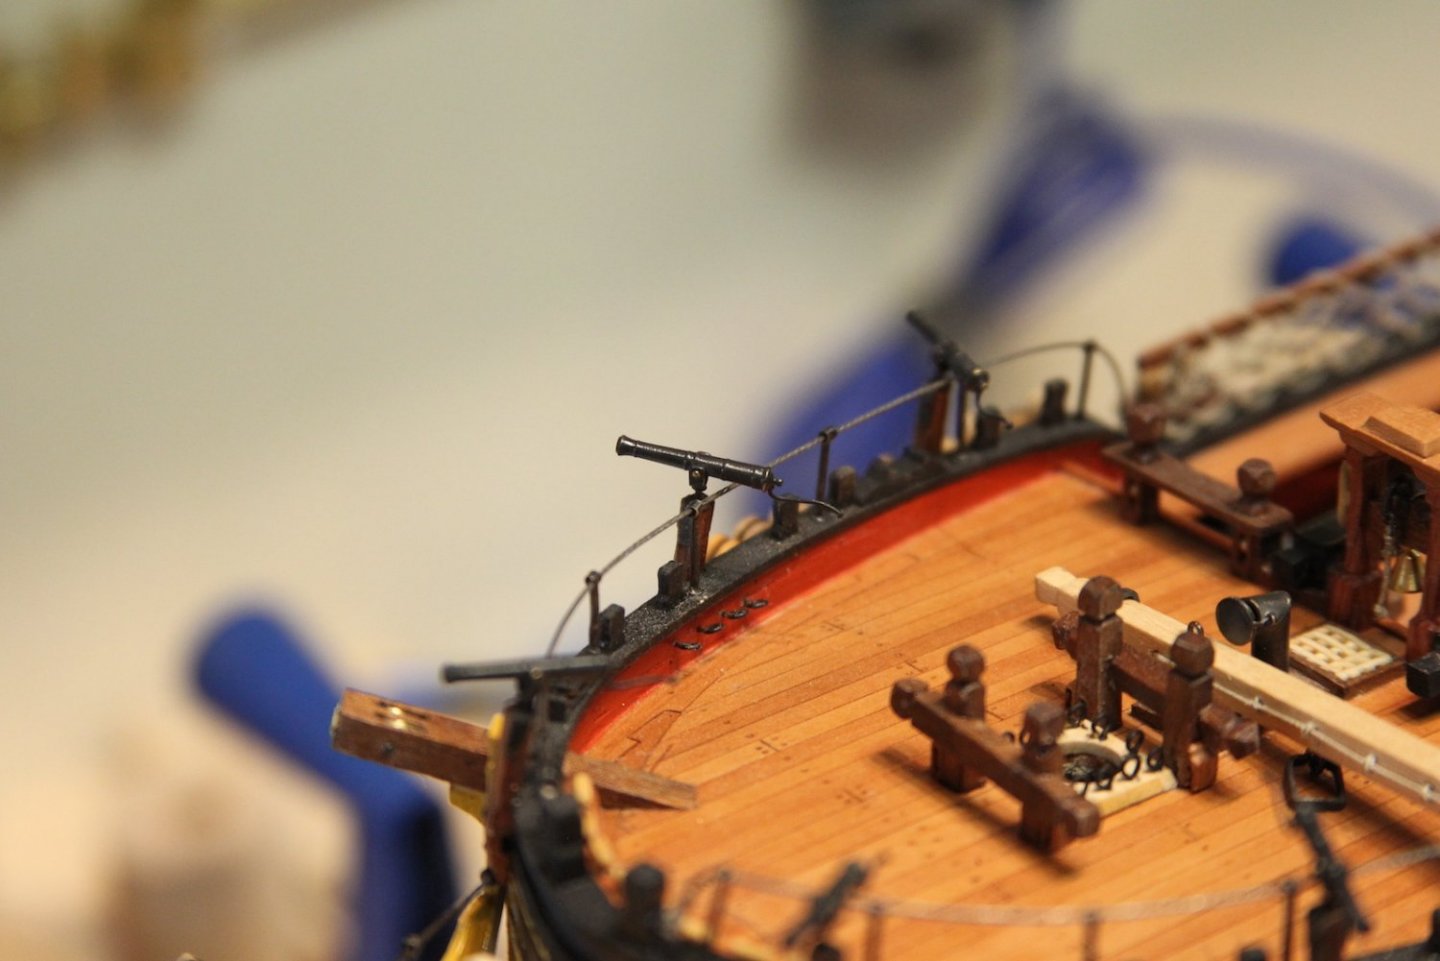
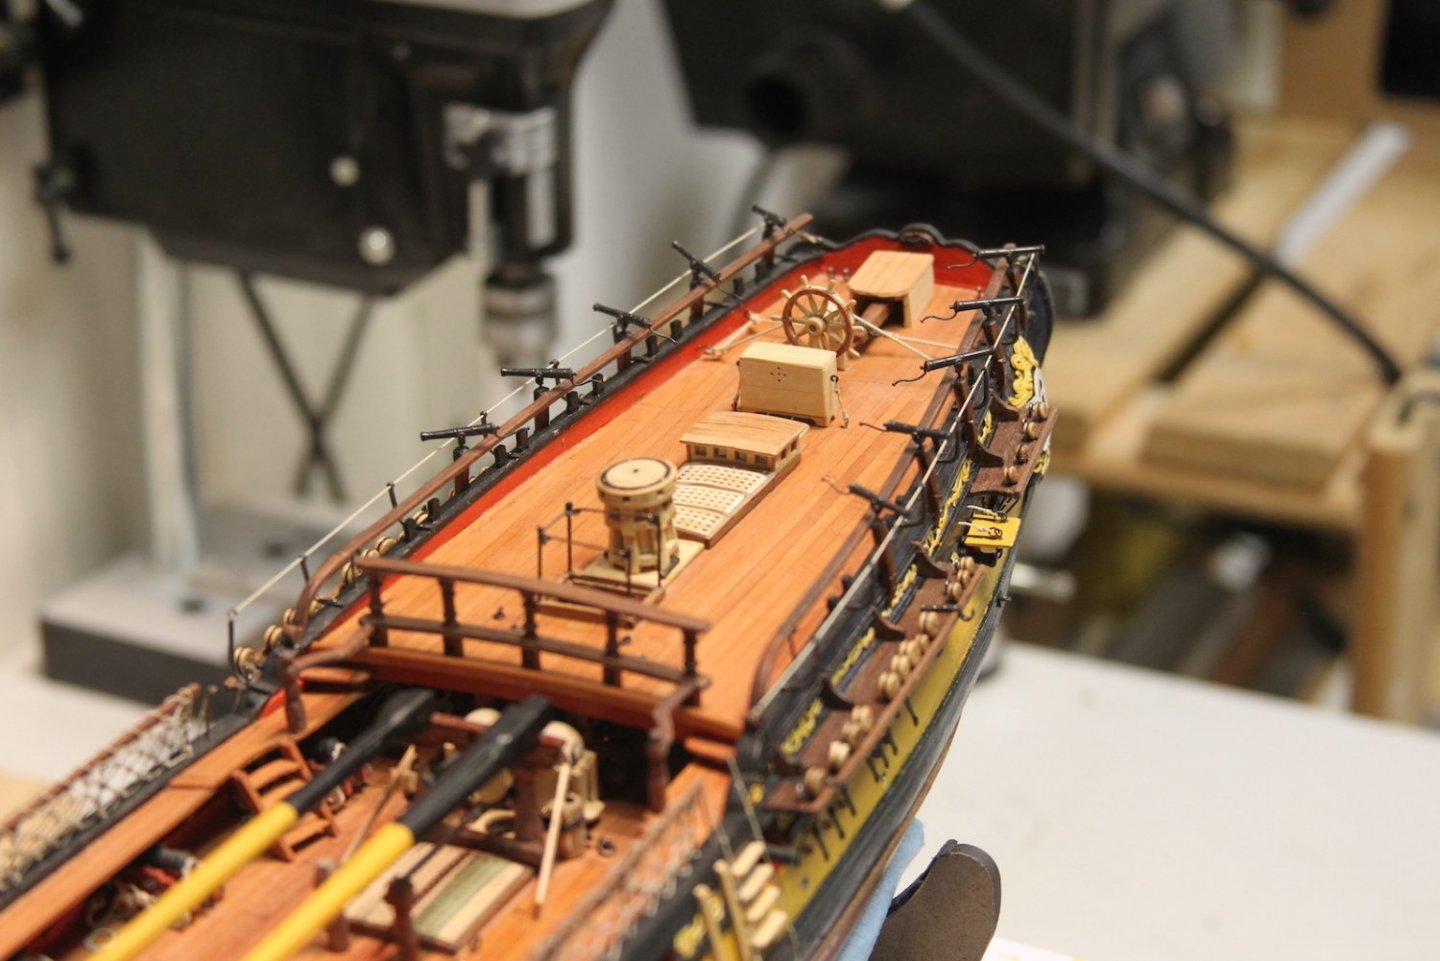
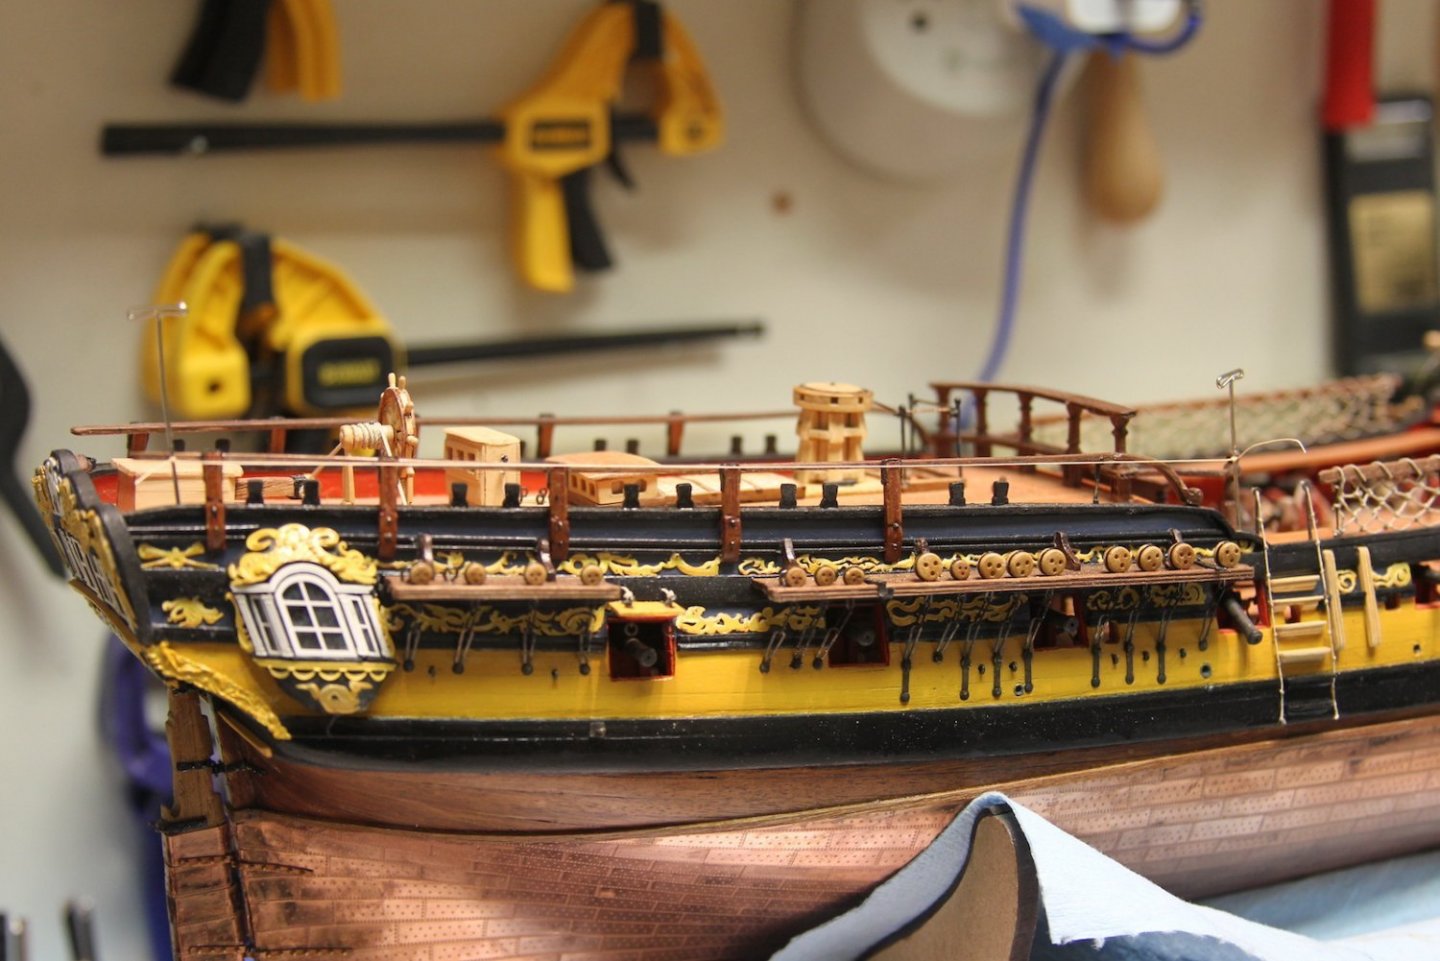
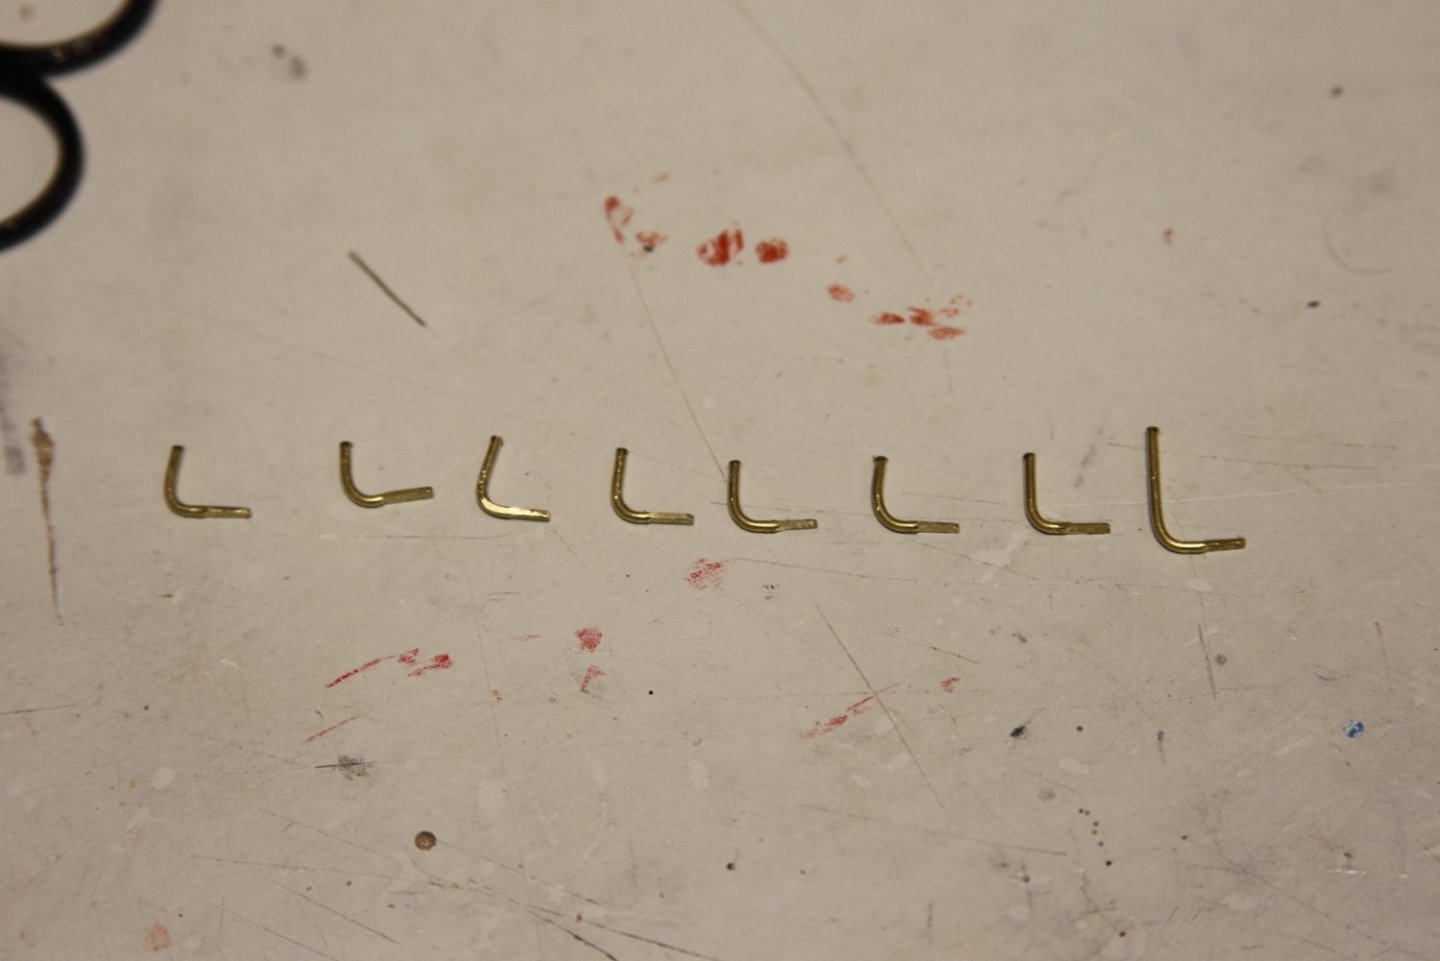
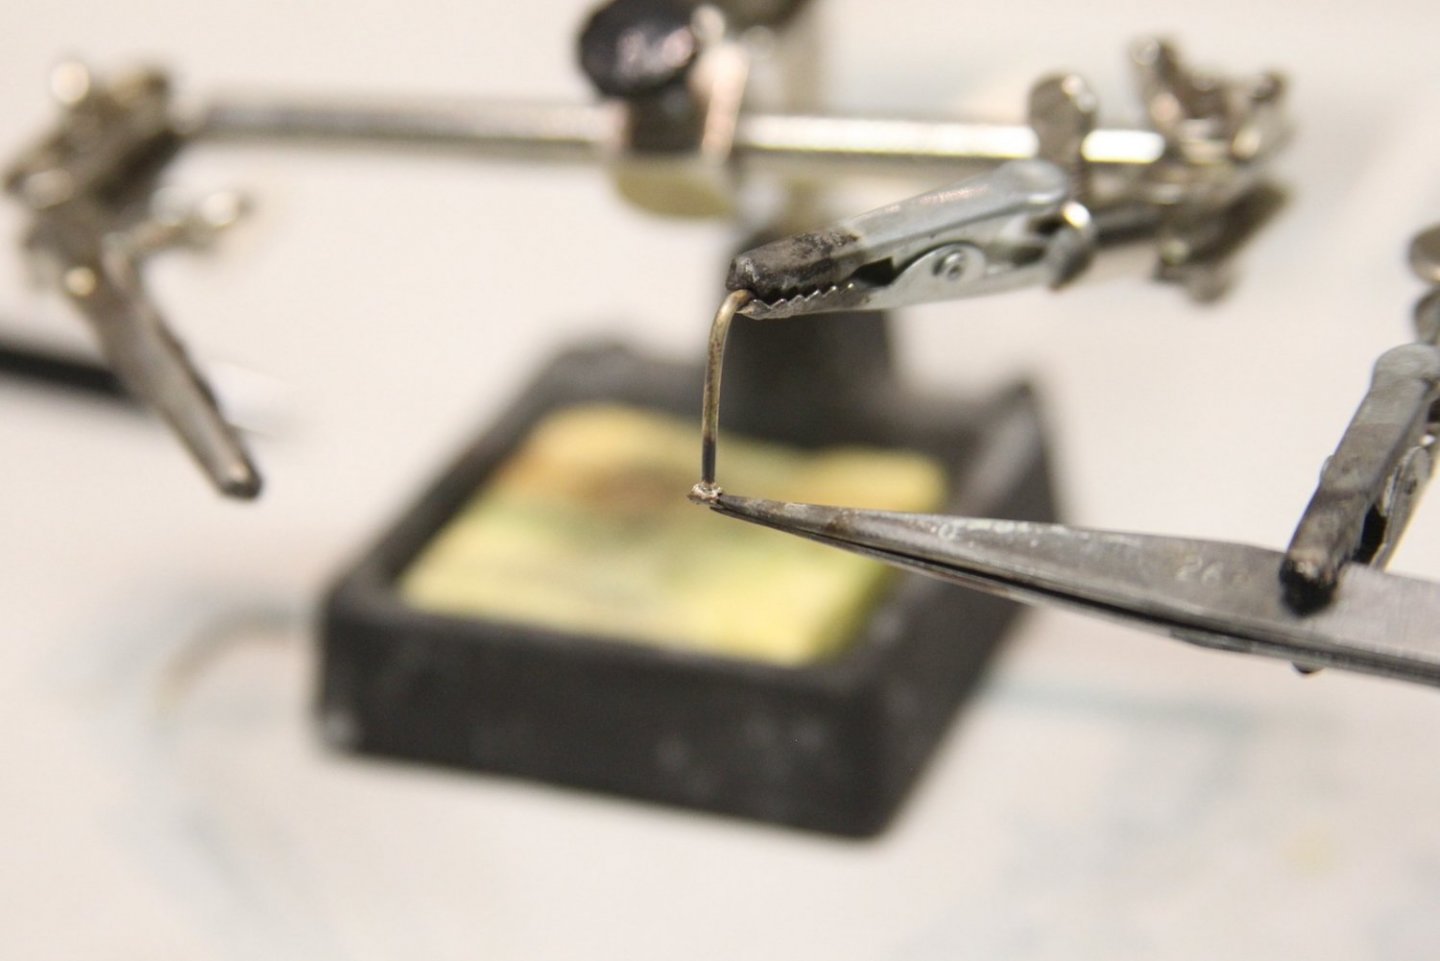
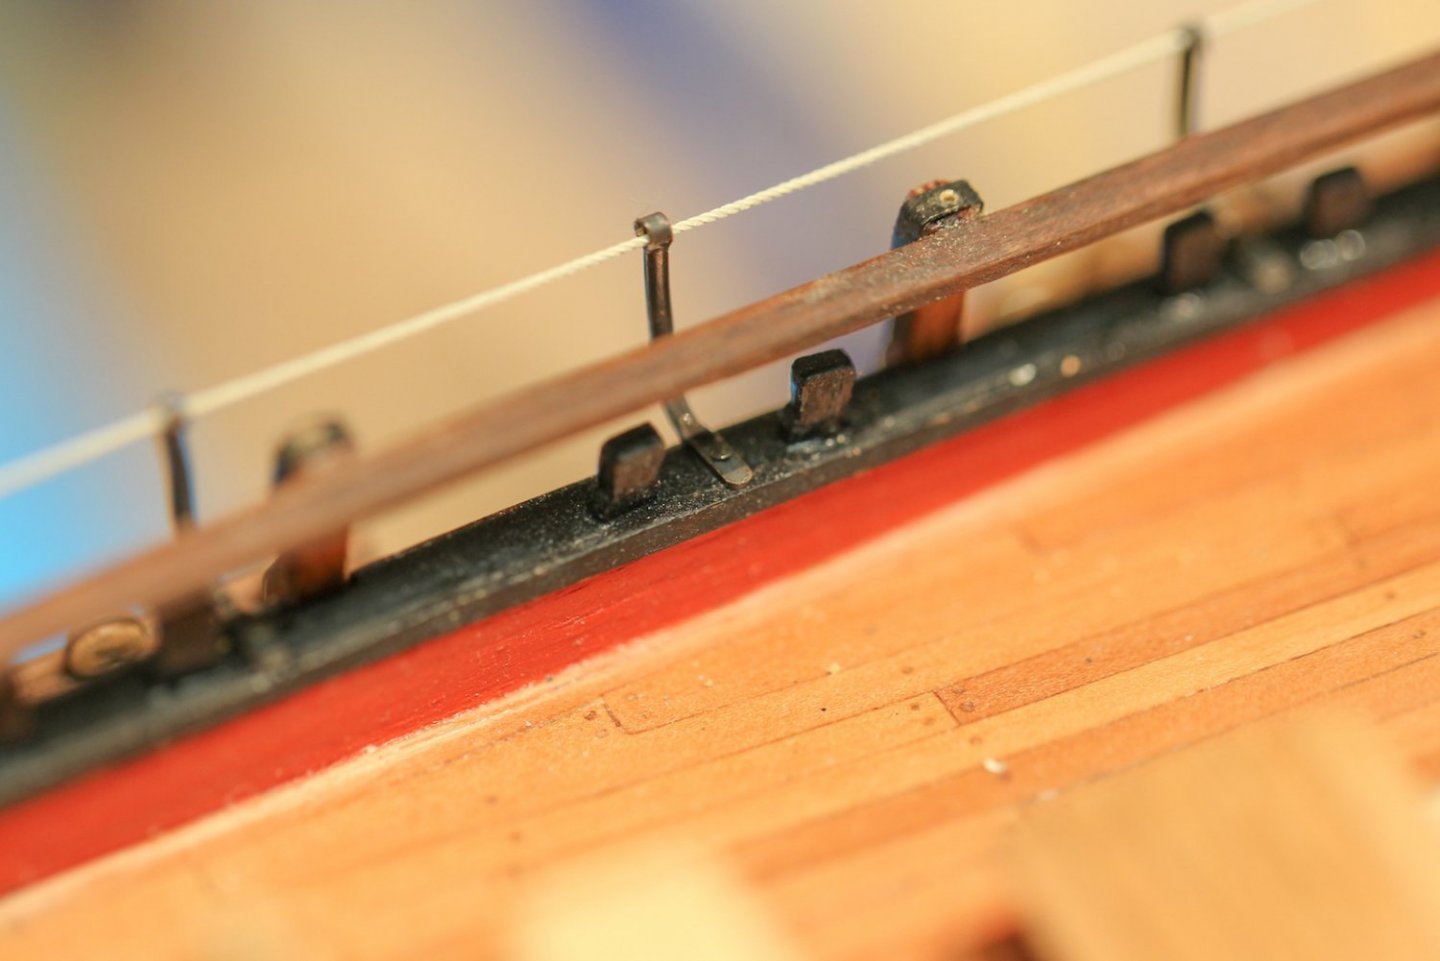
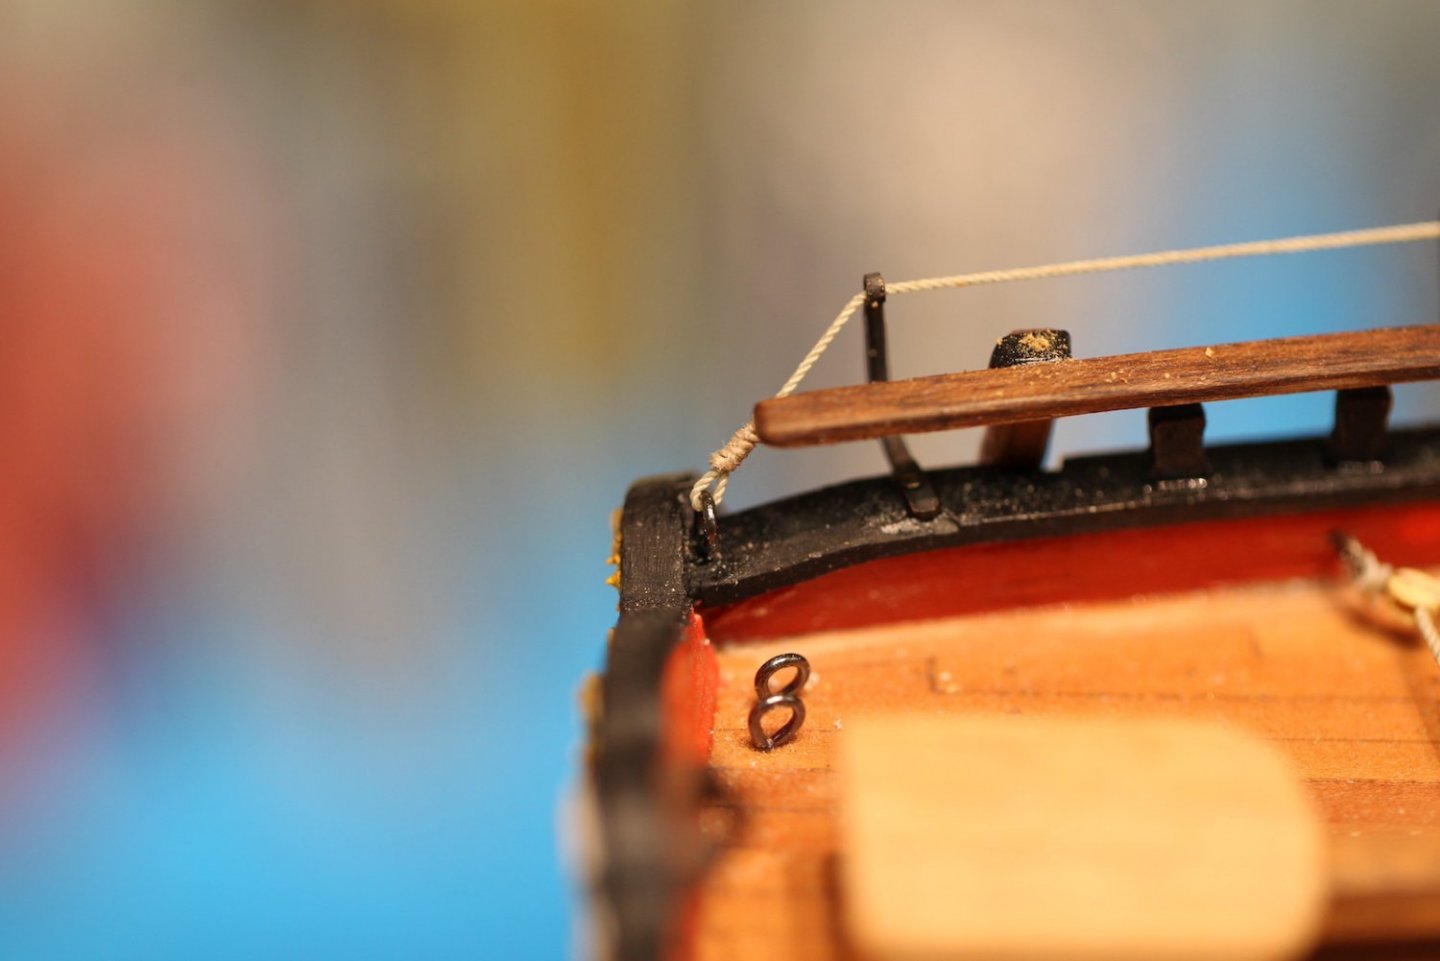
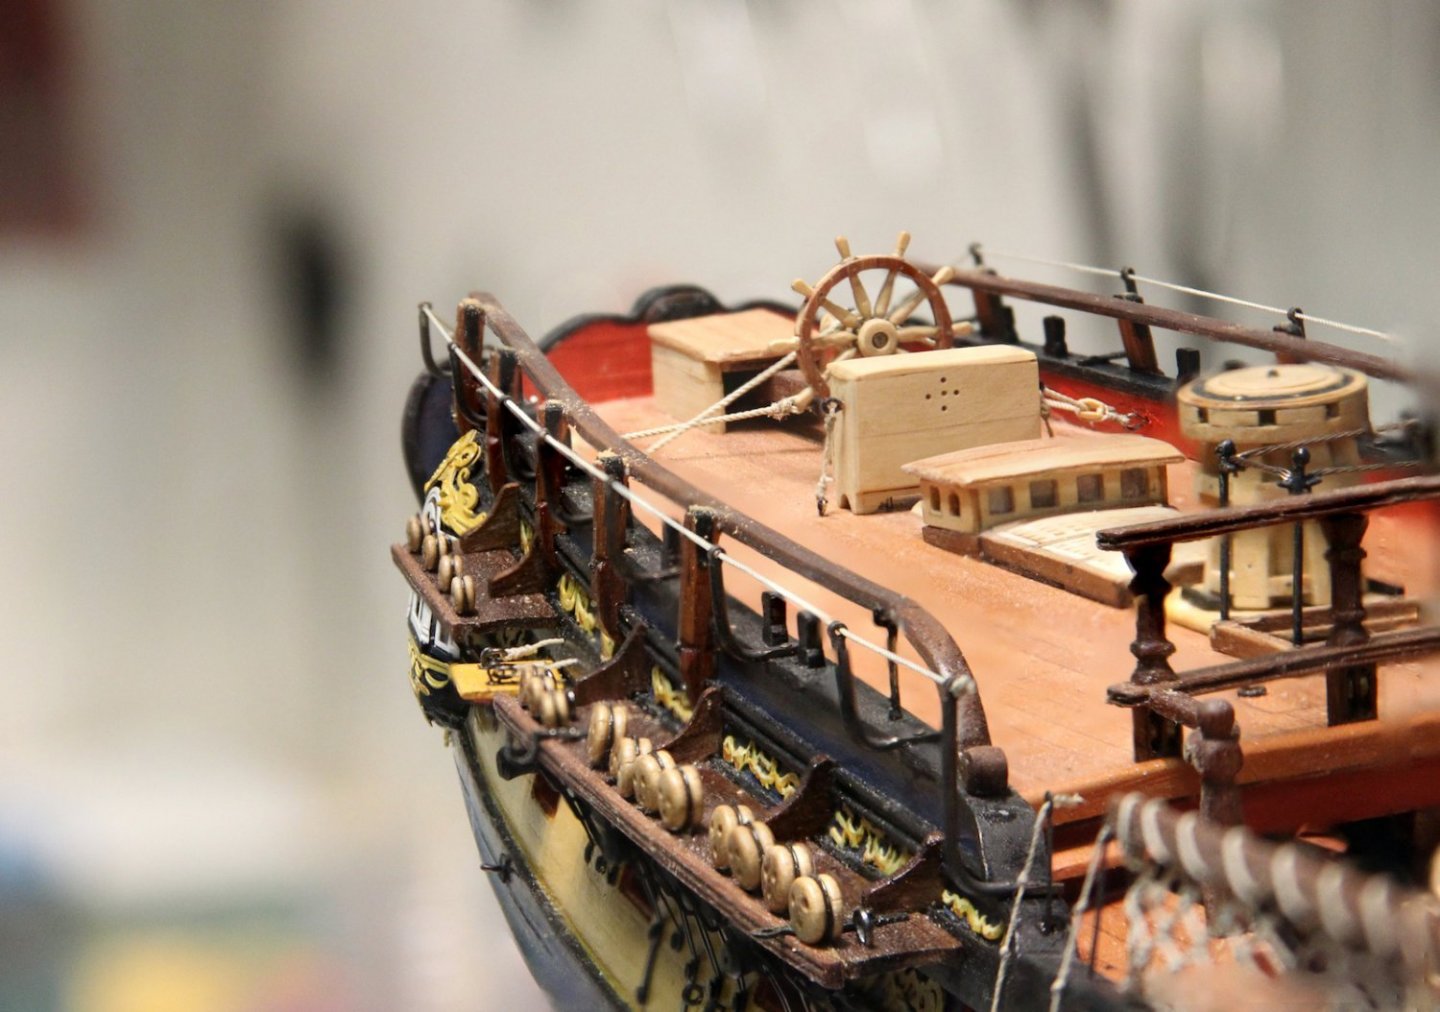
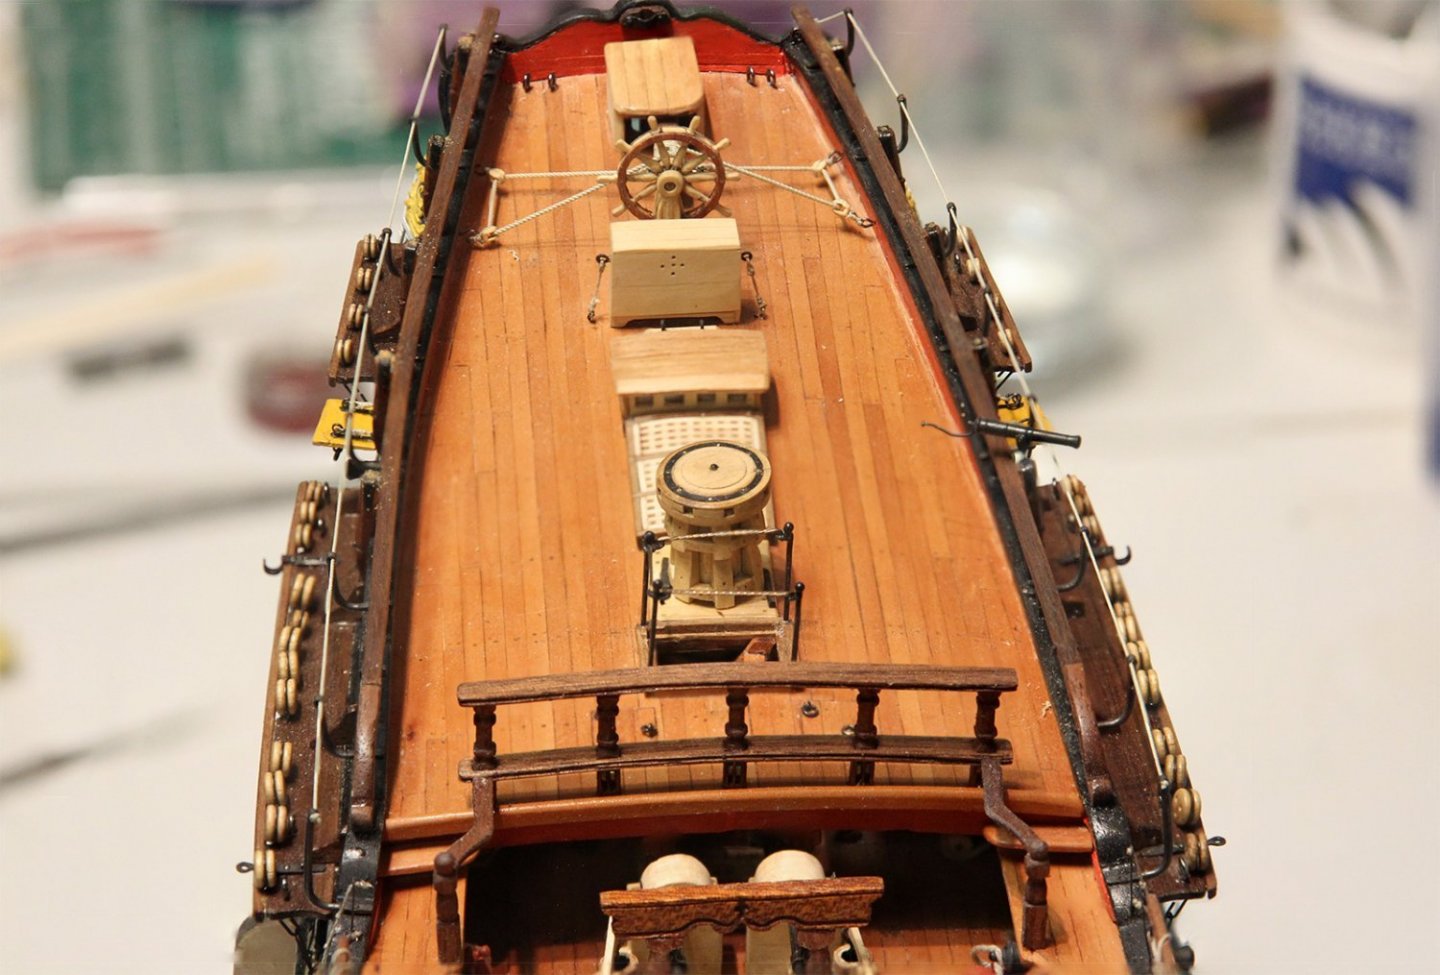
The subject of hammock cranes is another that seems to lend itself to quite a bit of variation depending on country, era, type of ship, etc. There's a good topic that dates all the way back to the relaunch of the MSW site here: https://modelshipworld.com/topic/716-hammocks-cranes-and-covers/ For my hammock cranes, I've once again decided to go with the Swan Class examples illustrated in the TFFM where the cranes are along the length of the quarterdeck parallel to the rail. I started by cutting and bending lengths of 1mm diameter brass rod then flattening one end. My method of flattening is putting the end in the flat part of needle nosed pliers (the smooth area NOT the ridged area) then laying the pliers against an anvil and give it a couple of good whacks. The flattened bit does need to be shaped a bit afterward so that they're all consistent width. I stuck a couple of pins in either end of the rail and ran a thread so I could measure the necessary heights of the stanchions as they ran alongside the railing. It's important to ensure that the height of the hammock cranes falls short of the 1/2 pound guns - also figuring in the loops that are to be soldered to the top that facilitates the line. Stanchions are cut to height and a small bit of a 2mm brass tube is soldered to the top - same method as other railing stanchions on the ship. Everything is blackened and mounted. A couple notes - I kept all the railings in height order as I blackened them, which was a bit tricky. But I didn't want to mix them up after I'd measured them all. I mounted them with a 'bolt' through the center of the flattened area. Technically, I should have used two bolts, but at this scale that was too much to ask. The fore end is knotted at the stanchion. Technically (again) this should have been pulled down and mounted on a ring bolt at the railing, but my wood railing is a bit too far forward for that and it looked terrible, so I compromised. The aft end is seized at a ring bolt. Overall I'm pretty pleased with this arrangement. You can see in the broad photos I've mounted one of the 1/2 pounders to make sure nothing would get fouled with this layout.

- 419 replies
-
- 15
-
-
-
- Victory Models
- Pegasus
- (and 2 more)
-
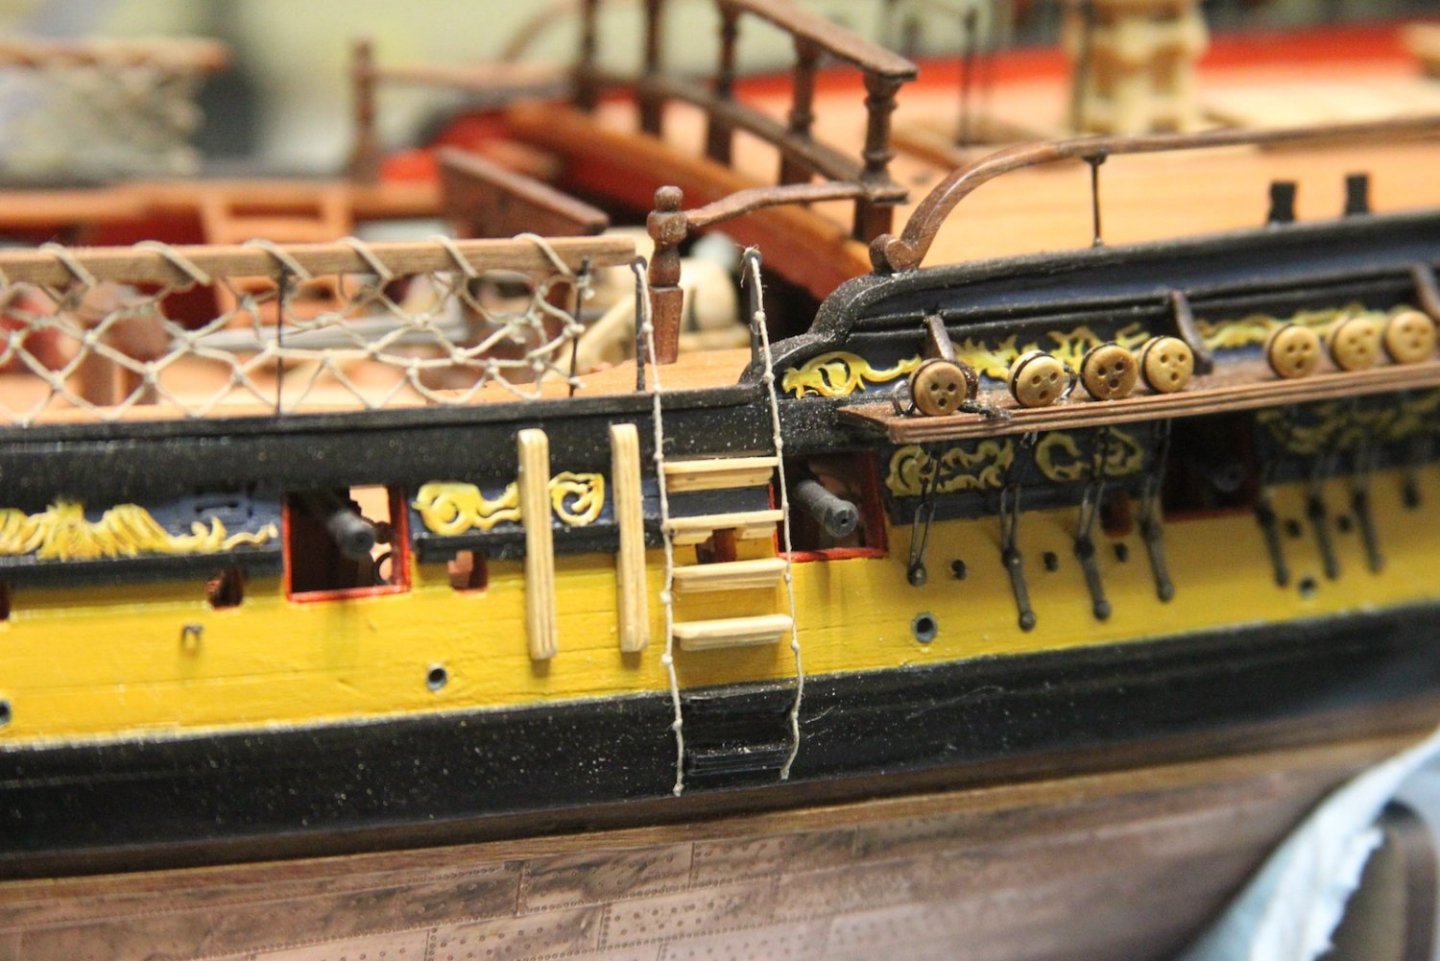
I took a couple of hours to knock out the entry ropes. Seems simple enough, but of course trying to get the knots equal distance apart is always a little bit of a challenge, especially with .20 mm line. The stanchions are the circle top laser cut fellas that came with the kit and that I'd replaced in other areas.
- 419 replies
-
- 7
-
-
- Victory Models
- Pegasus
- (and 2 more)
-
Welcome Todd - both Colorado and the military are well represented here! Glad you could join us, good luck on your build. Don’t hesitate to reach out for anything.
-
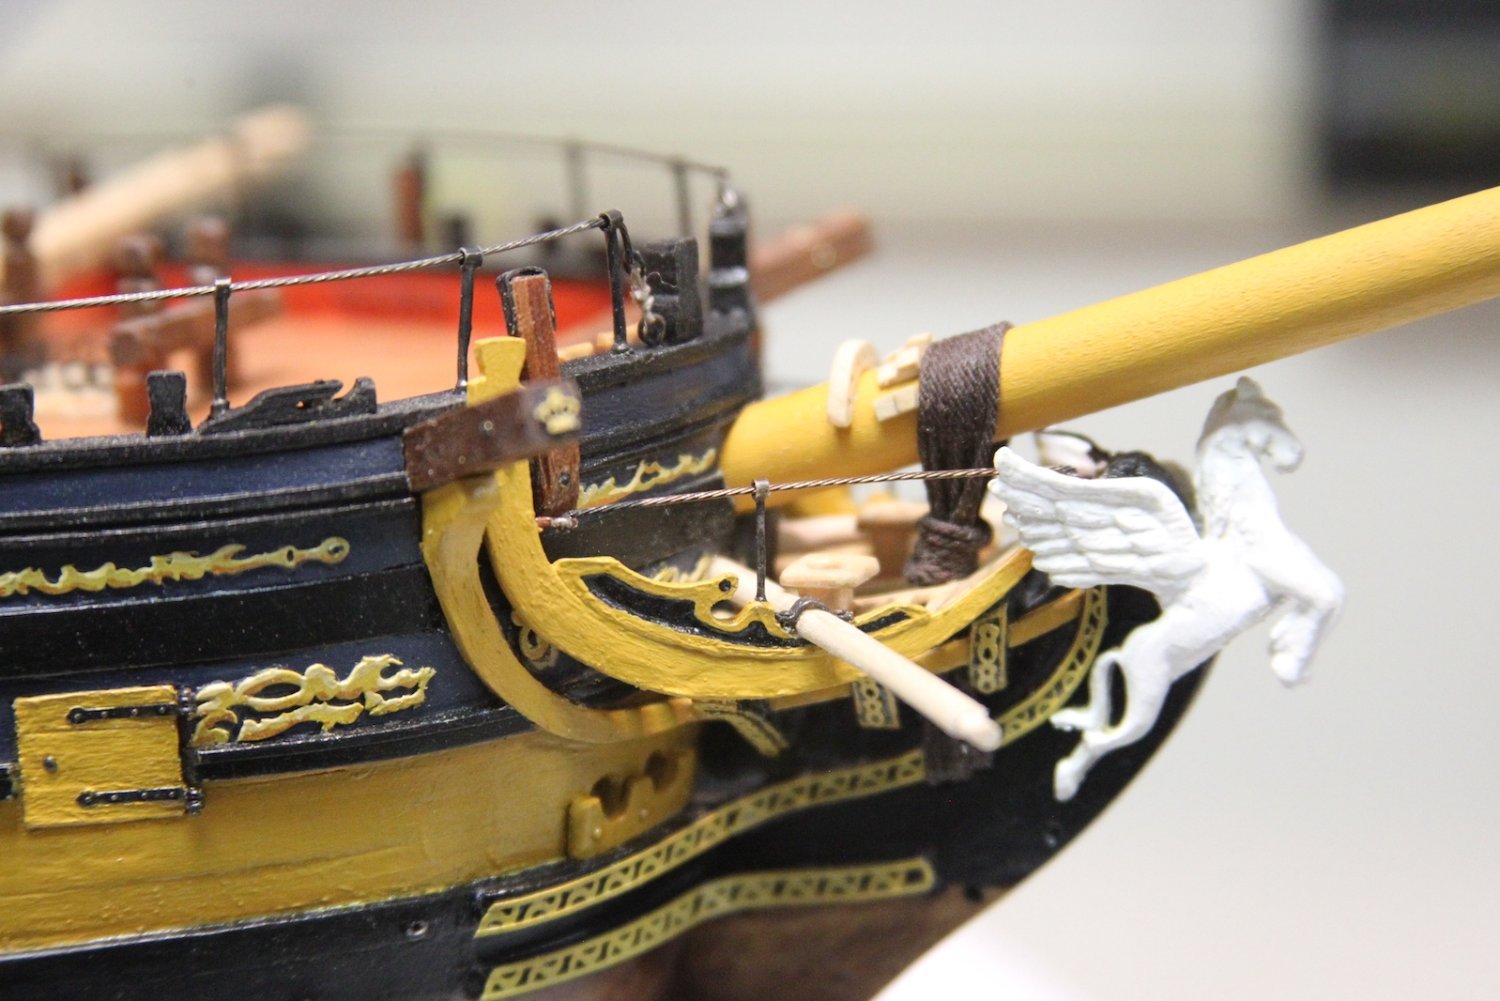
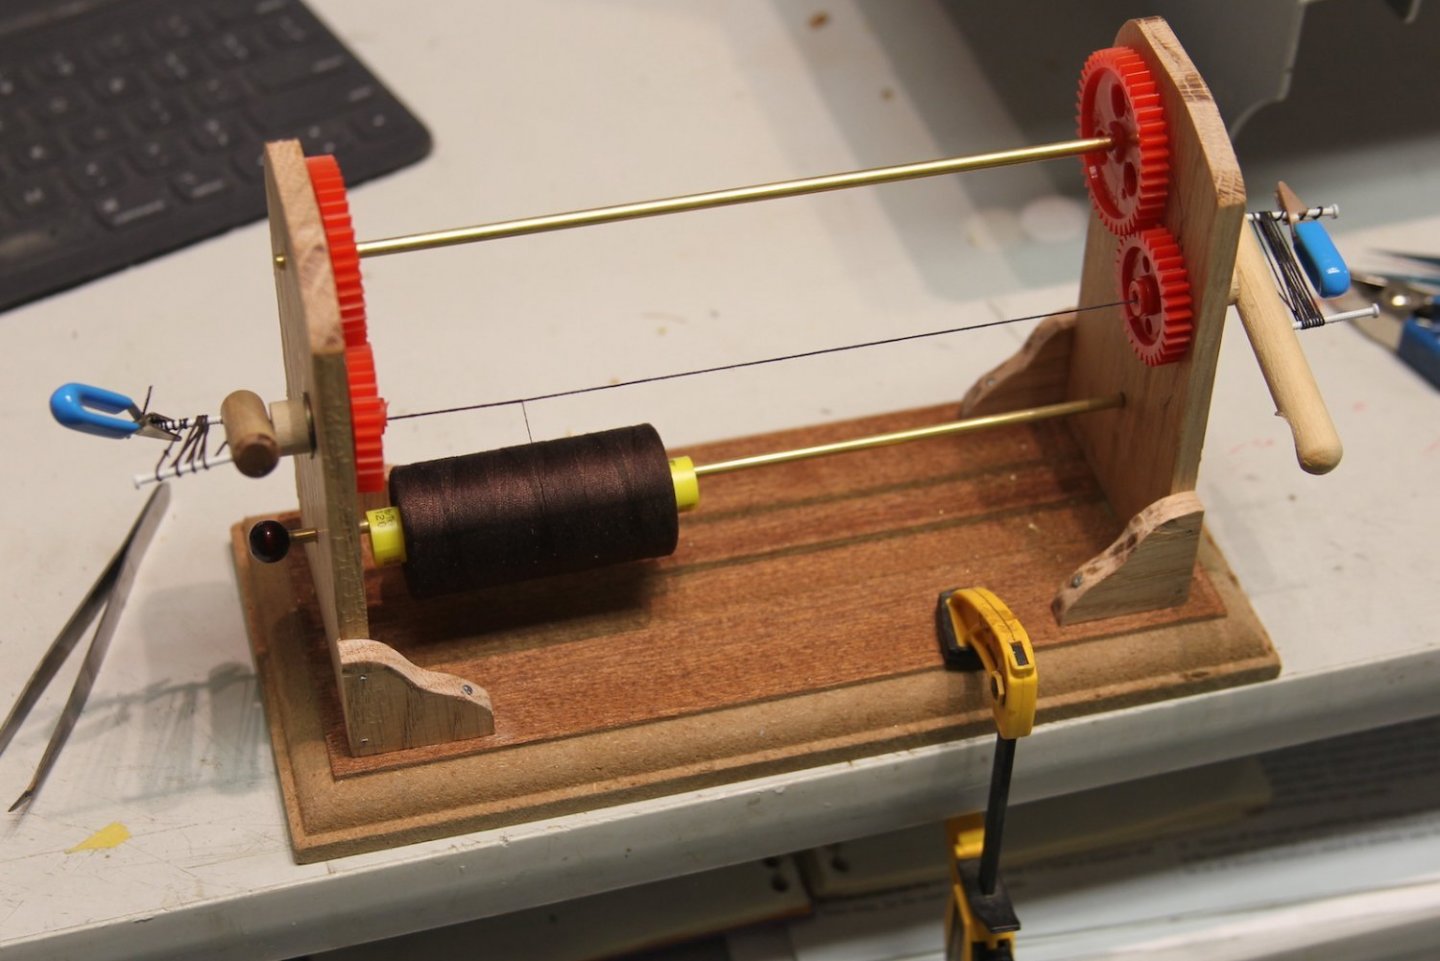
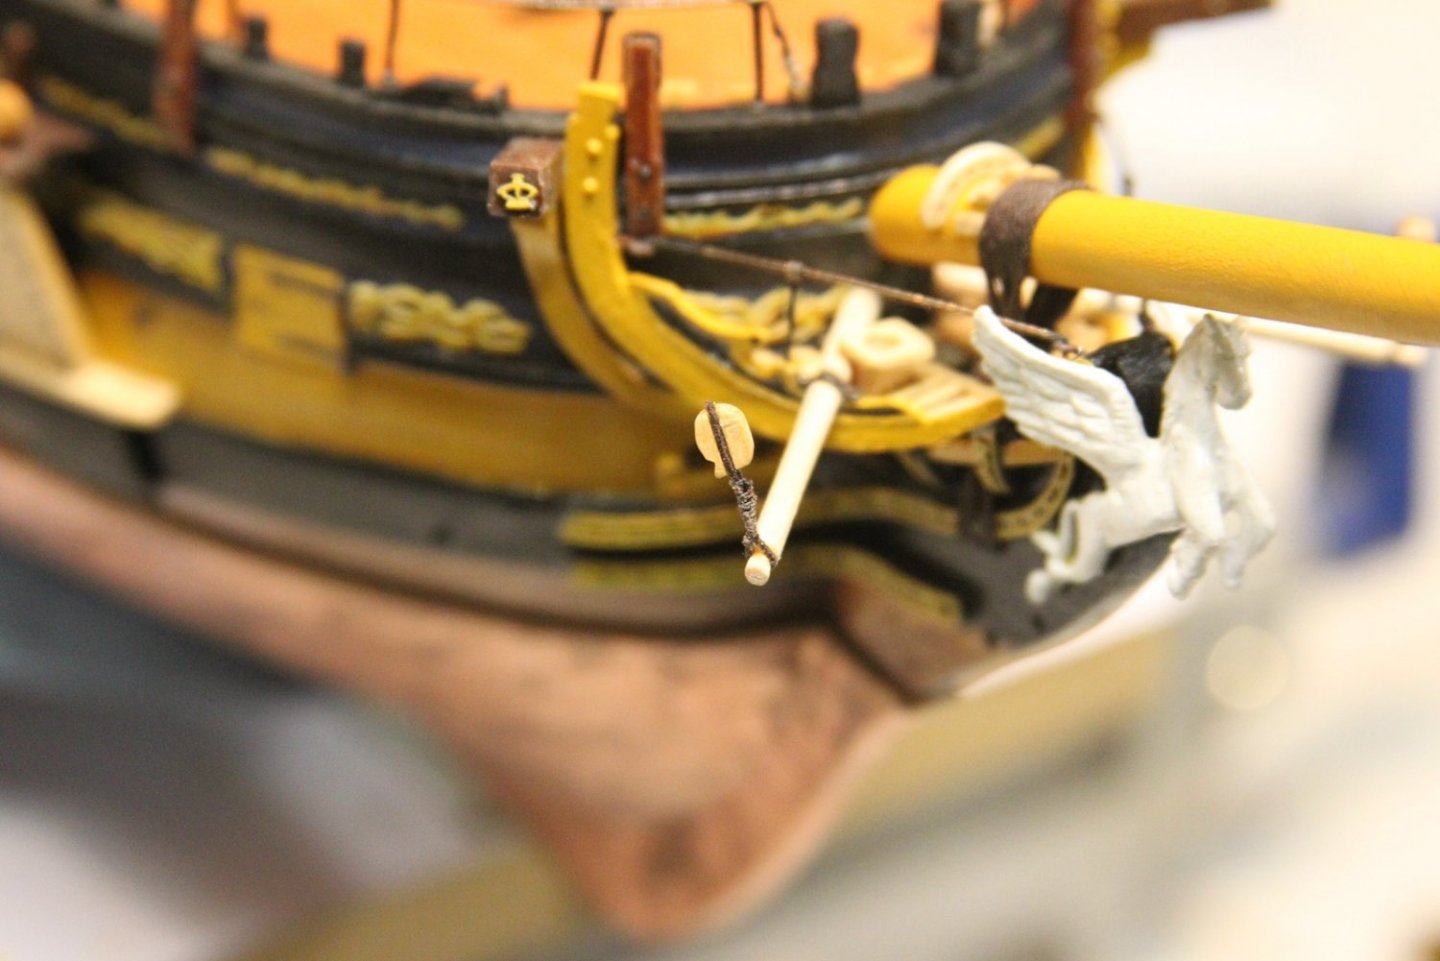
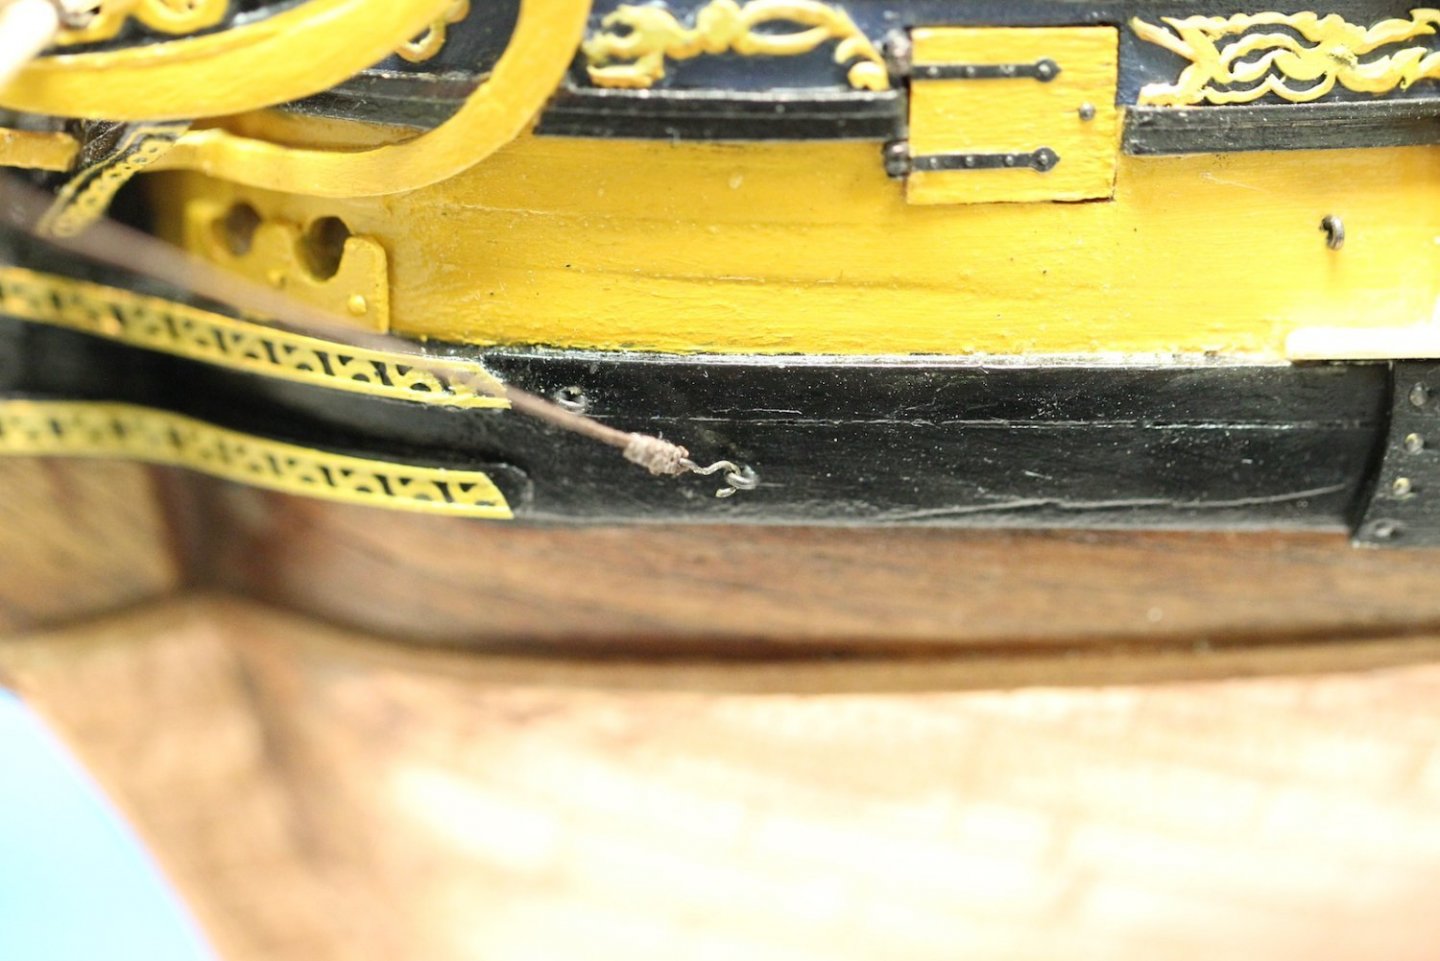
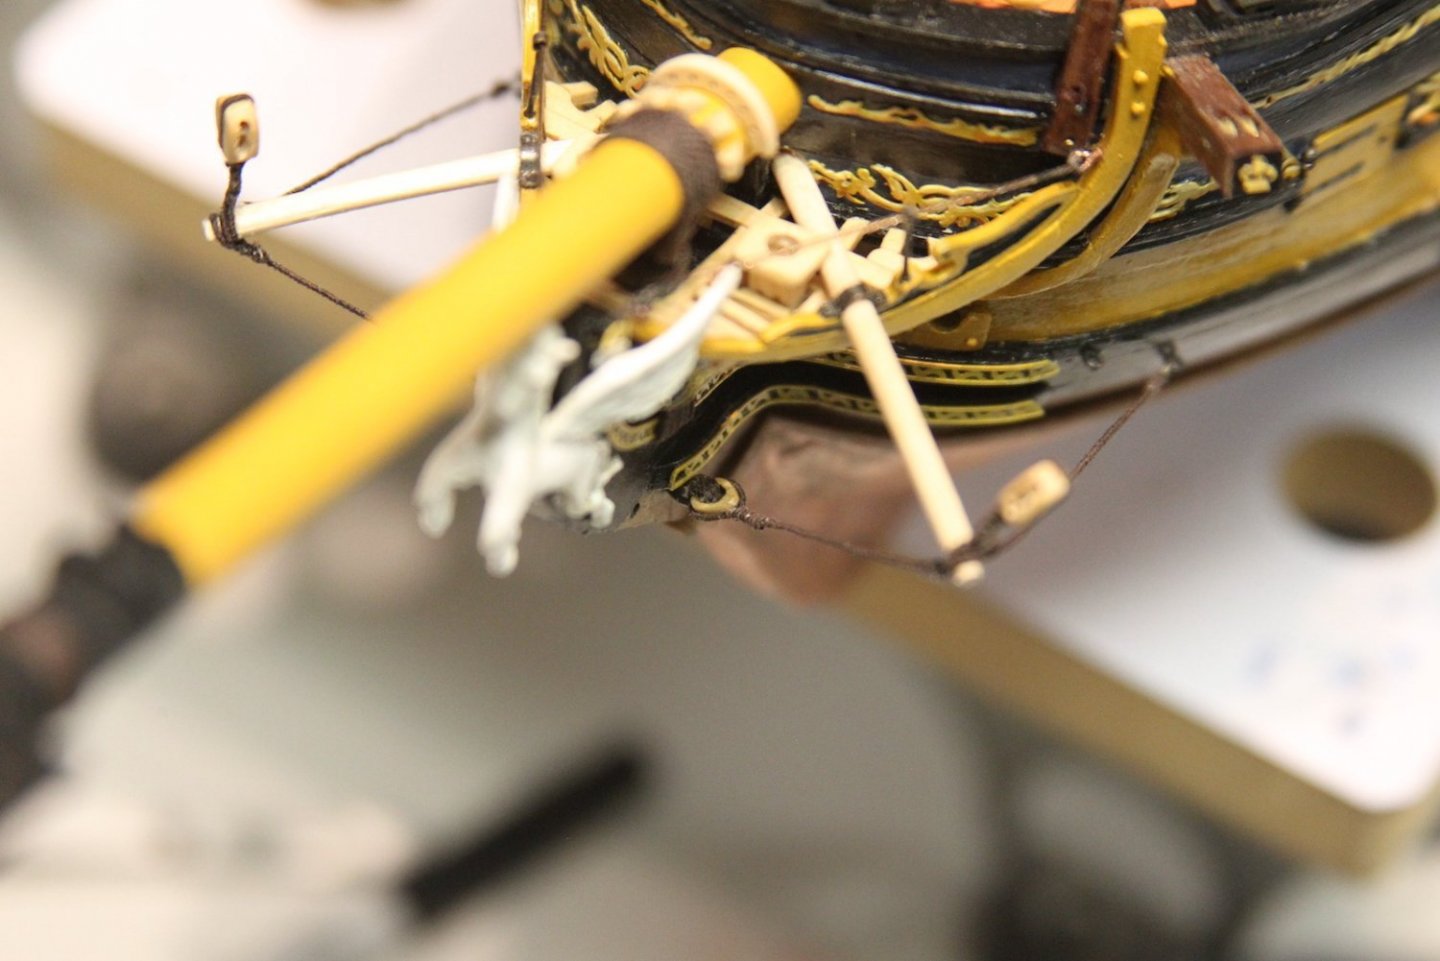
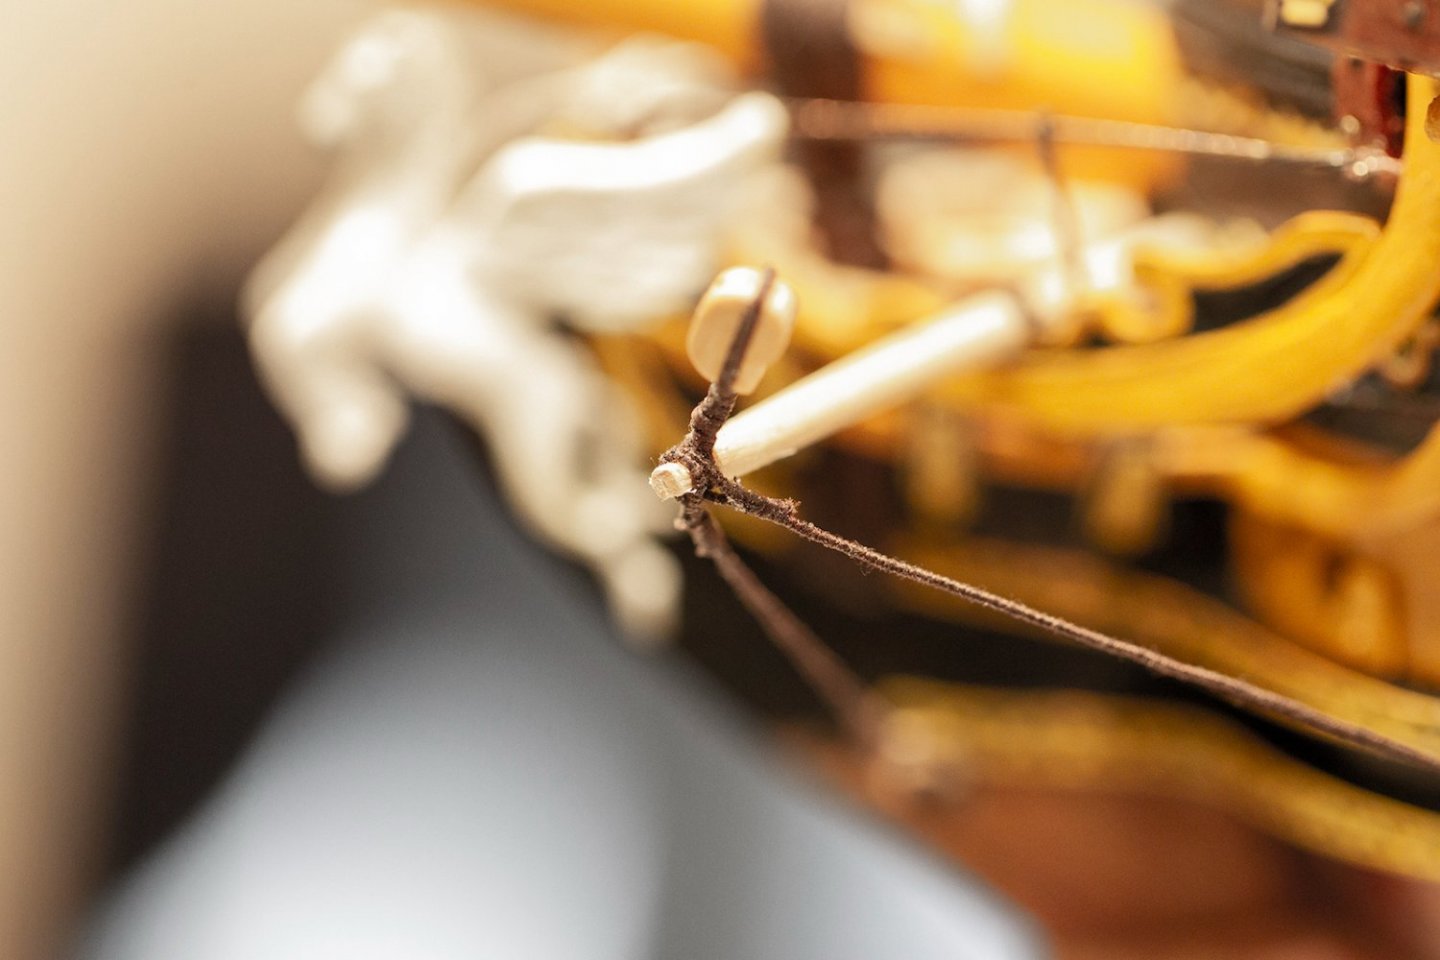
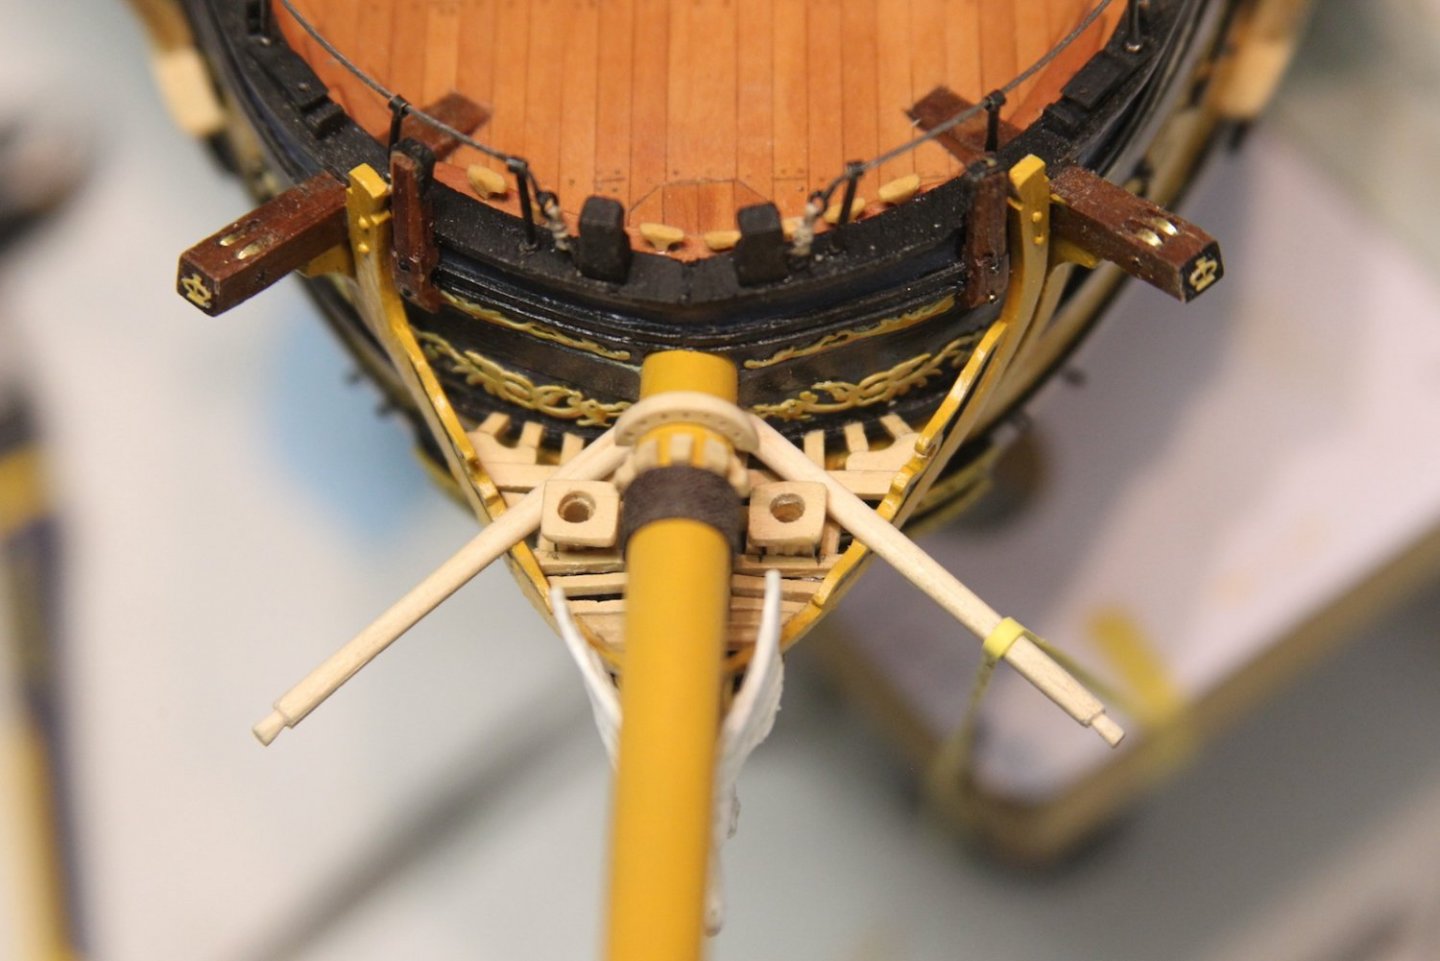
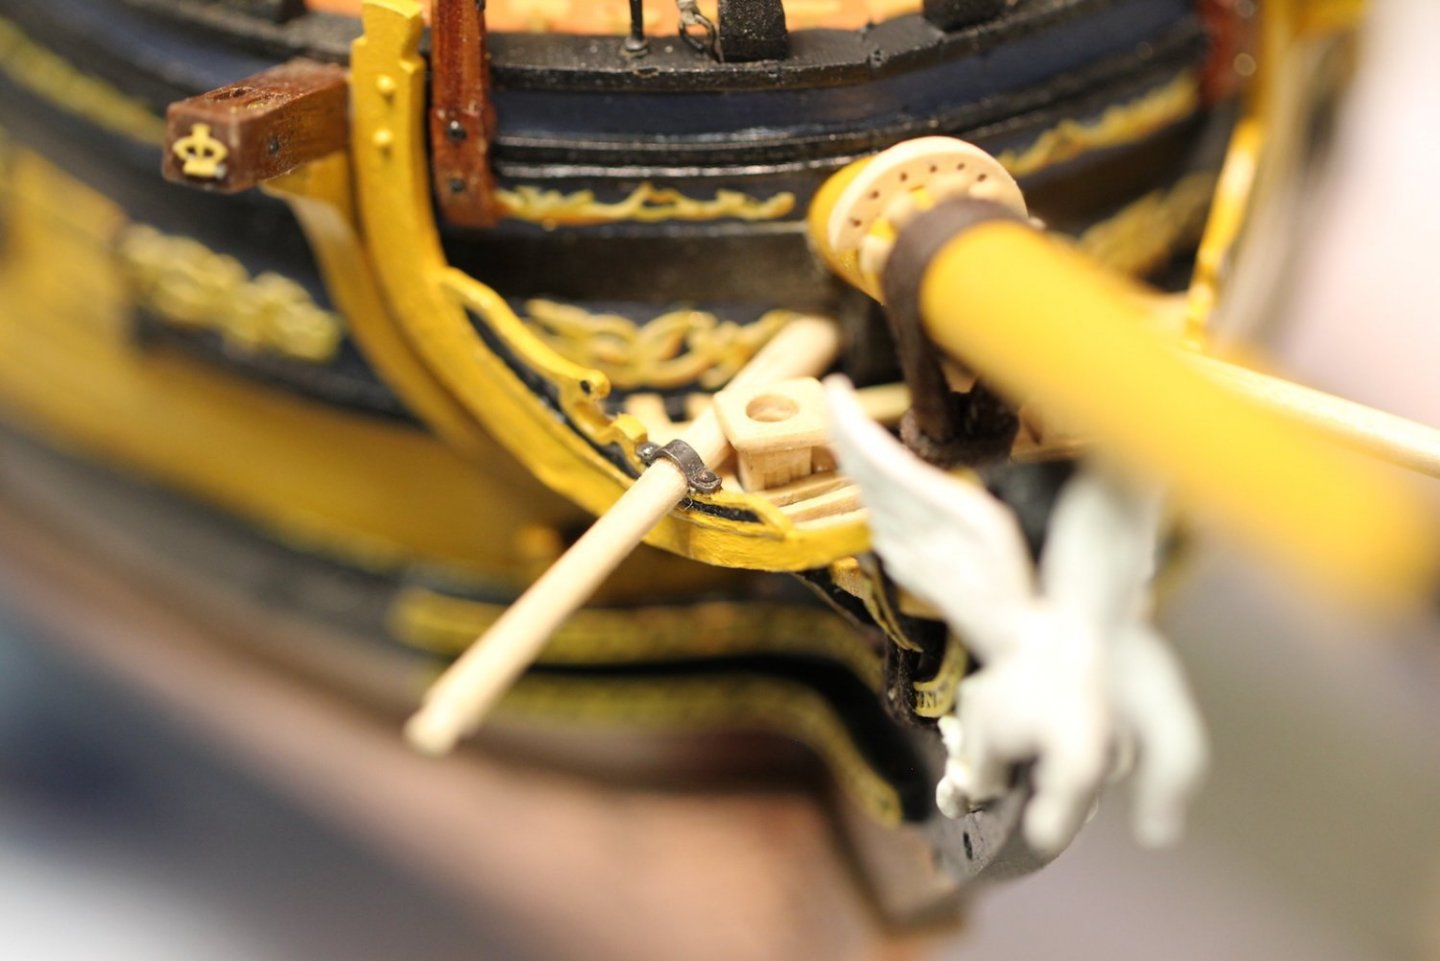
Rigging the boomkins is my first little foray into rigging the Peg. As I mentioned in the gammoning post I'm making my own rope/line for this project, and as such I've put together my own line server. Basically I just looked at a few of the ones being used by our members and replicated them as well as I could. It really only cost me some scrap wood, a couple brass rods and $3 or $4 for a set of plastic gears. Works pretty well! Most likely not as great as Chuck's "Serve-O-Matic" or some of the others, but gets the job done for me. Based on scale, I took a .30 line and served it with 120 gauge Guterman thread for the strops and the boomkin shrouds. The fore tack block is one of my larger (6 mm) boxwood single blocks sanded down to create the shoulder block look and the served line for the strop. This is looped over the boomkin first, then the aft shroud is up with a pretty simple hook into the eyebolt set up. The fore shroud is a bit more complicated with a triangular eye bolt strapped to a heart and lanyard. The eye bolt is a bit of wire angled into the triangle with the end soldered then attached to a standard eye bolt. I don't remember where I got these laser cut hearts, but after a little sanding they worked out well. Strapping the heart to the triangle without it looking like a just a big lump was a bugger though. For the second one, it made much more sense to do that part first, then loop the other end over the boomkin and finish the shroud.


- 419 replies
-
- 11
-
-
- Victory Models
- Pegasus
- (and 2 more)
-
Very nicely done BE - and certainly well worth it.
- 857 replies
-
- 2
-
-
-
- Sphinx
- Vanguard Models
- (and 1 more)
-
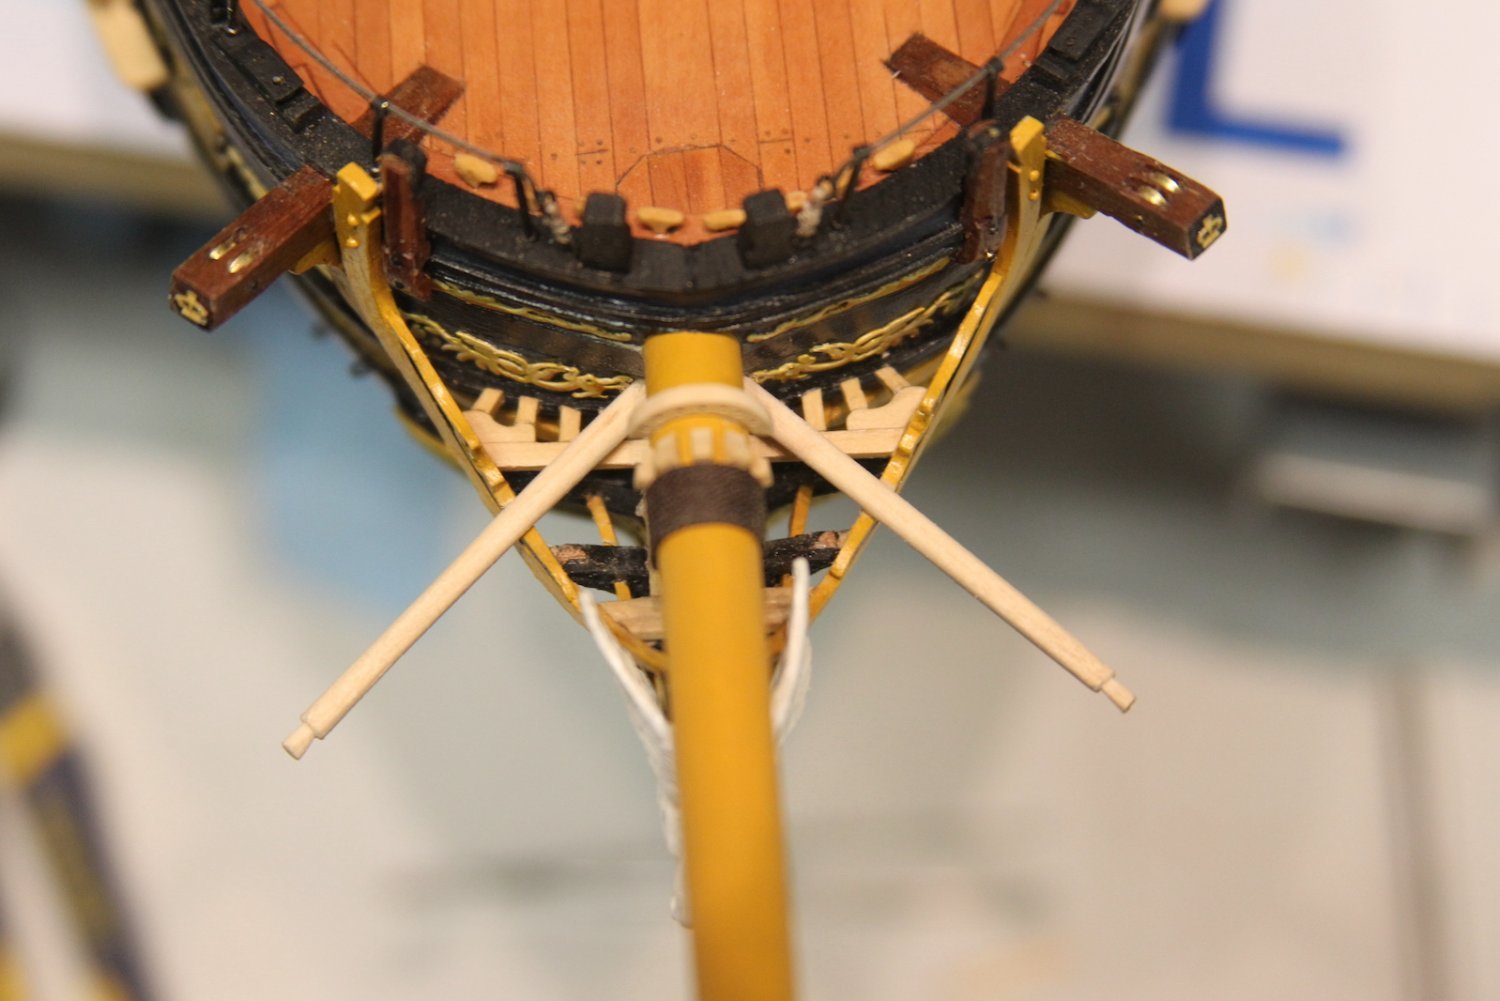
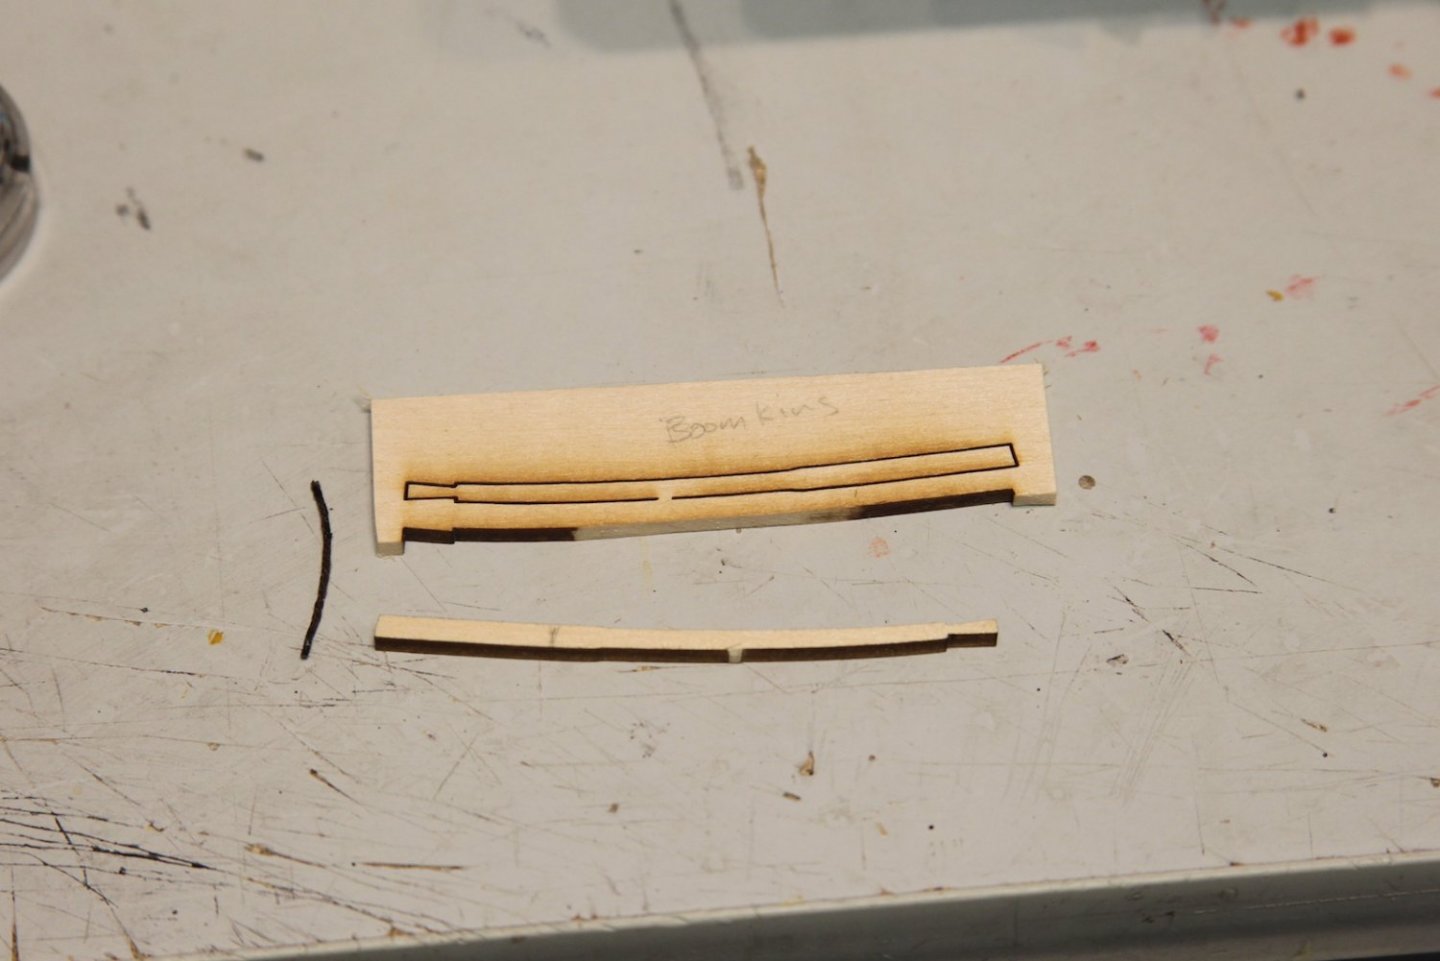
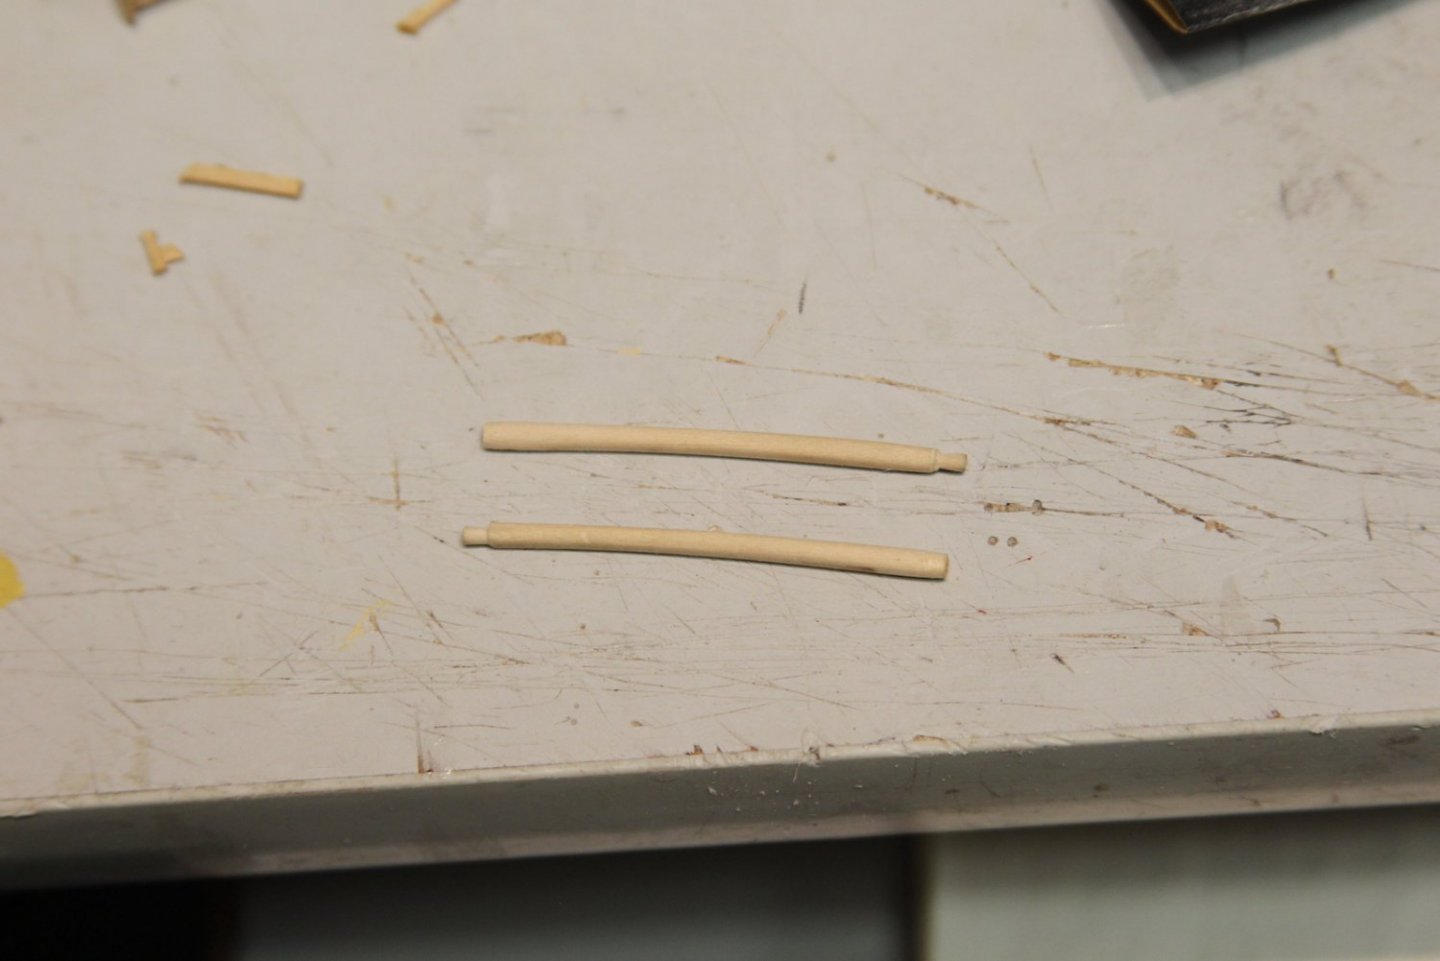
The other task accomplished this weekend (while watching many hours of the Masters) was the boomkins. Although they are pretty straighforward, the slight curve does provide one complication. However - as many of you know - one of the benefits of having done a handful of builds is having a stash of extra bits and pieces that one refuses to get rid of - because why would you? Add to that - one of the benefits of having one or two of Chuck's kits particular is that he's not shy about providing extra parts. So my boomkins were adapted from the parts I have leftover from the Confederacy; which lucky for me is also a 1/64 build. Although the Peg's boomkin dimensions are different, this did save some work. I did however have to make up that extra work when I discovered that my seats of ease were just slightly off - about a half millimeter to be exact. The boomkins run right along side the sides, so although I did measure for this - being off by even the slightest is no bueno. Moving the seats of ease meant readjusting all the ledges. A little bit tedious, but necessary. Capsquares are cut from brass and shaped by curving them over a pin file handle. They're then drilled & blackened, then mounts the boomkins to the head. Next step for the bow was the berthing rail. I followed the same procedure here as the foc'sle by soldering a brass tube to a pin head, filling it down and running the same cabled wire through it. I still dig how this 'railing' looks as compared to using a line or a straight metal rod. However, I think this will preclude me from adding netting to the bow because I think that will look funky. I may change my mind after mulling it over as the netting can be added at any time. A word on drilling out the capsquares and other brass / metal parts. I was having great difficulty doing this so reached out to this forum for advice. Since then - I have had much more success by taking the following steps: First, I ordered a very good (and expensive as heck) set of mini drill bits from McMaster-Carr. Pre-drilling, I anneal the brass first with a small torch and tap out a dent with a small, pointed metal punch. This gives the drill bit something to grab on to and prevents it from sliding all around and ultimately snapping off. Finally, I make sure my piece to be drilled is secure in my drill press with a piece of wood or something underneath it and lower my drill press very, very slowly as I drill out the hole.


- 419 replies
-
- 12
-
-
- Victory Models
- Pegasus
- (and 2 more)
-
This is true of a few Artesania kits - but the good news is, there are a handful of Swift builds here on the forum. In fact, these days I often only use the instructions as a guideline, and much of my builds are put together using a combination of build logs from here, and research. Good luck on the Swift - I always enjoyed that kit. So much in fact, I've built it twice.
- 8 replies
-
- 3
-
-
- first build
- Artesania Latina
- (and 1 more)