


schiffebastler
-
Posts
322 -
Joined
-
Last visited
Content Type
Profiles
Forums
Gallery
Events
Posts posted by schiffebastler
-
-
Very accurate and nice planking! Looks good
Regards, Joachim
-
Thank you very much for your interest! And of course I will keep the pictures coming.
Regards, Joachim
-
Hi Peter,
really interessting this picture... For the moment, I have no right idea, but I just send a mail to somebody who lived and worked on the Amerigo for one year.
Regards, Joachim
-
Your mast looks really good. I follow this with great interesst, my own masts have to be done in some weeks...
Regards, Joachim
-
Hi Jim,
just found your build log for the Robert-E-Lee. It looks really amazing, very accurate and nice build!
Years ago, I build the same kit and it is always great to see again this ship. If you are interested, here you can see a few pictures of my own one:
http://www.segelschiffsmodellbau.com/t1307f99-Robert-E-Lee.html
Will follow your thread.
Regards, Joachim
-
-
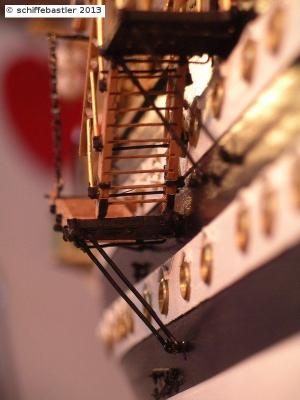
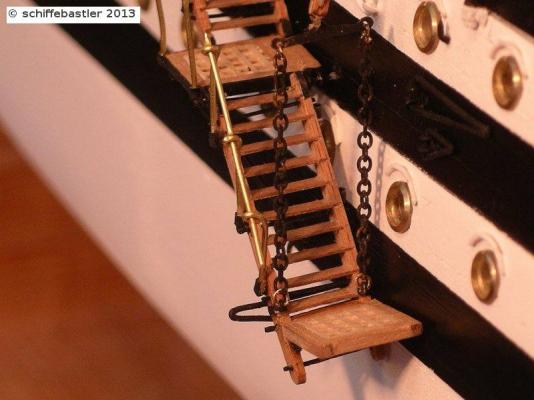
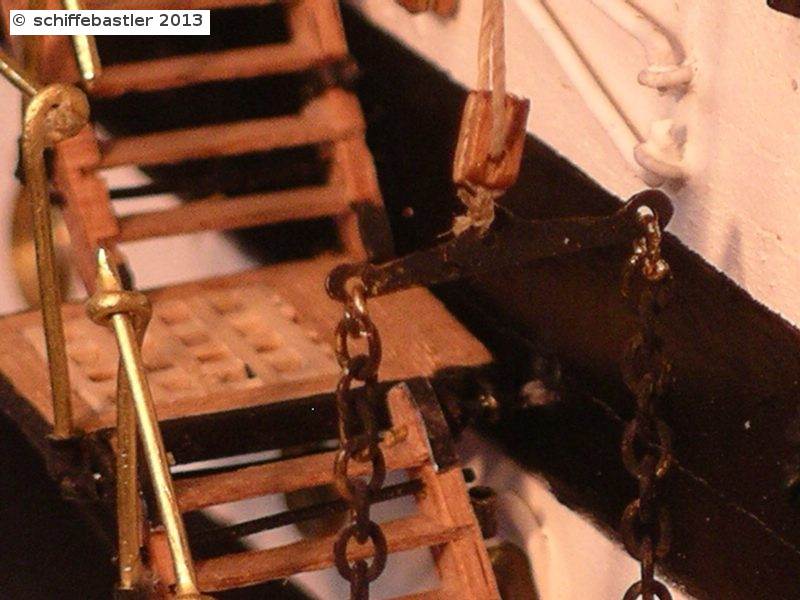
... the last shown is a crane outrigger for each sea ladder.
With these outriggers the lower ladder is feered. For this purpose, there is used a block and a tackle at which the gallow with the chains is fixed.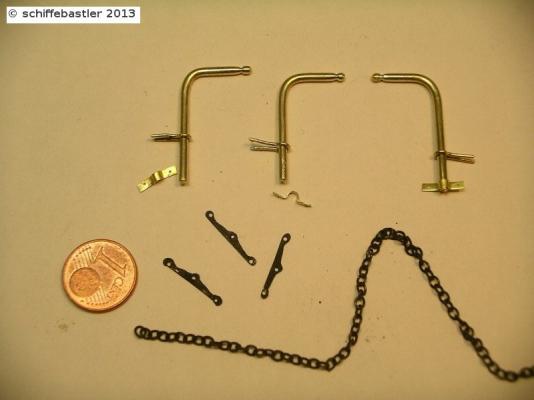


On the journey, the either only the chains or the gallow and the chains are taken out (I have seen both on pictures).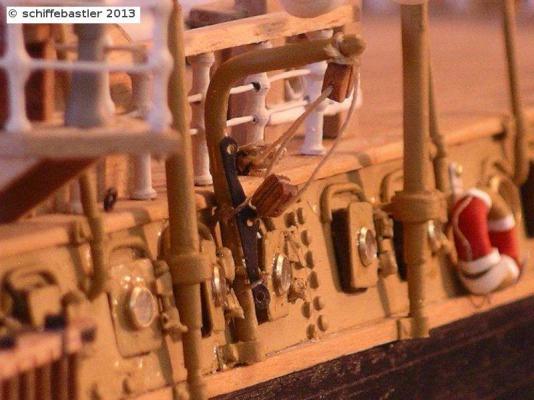
Ok, now I am ready! Thanks for your patience!
Regards, Joachim -
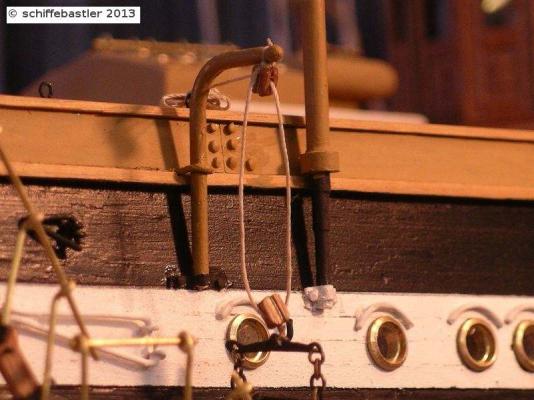
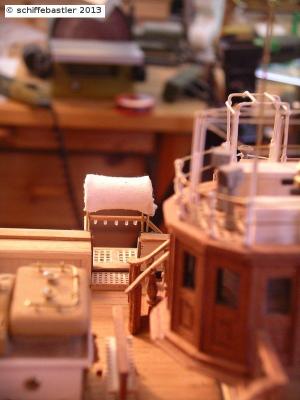
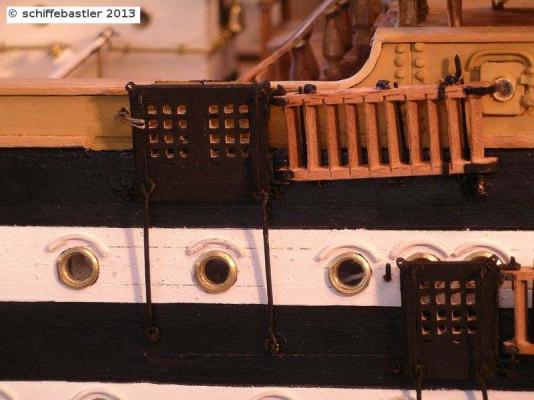
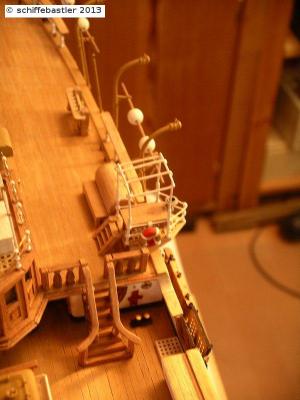
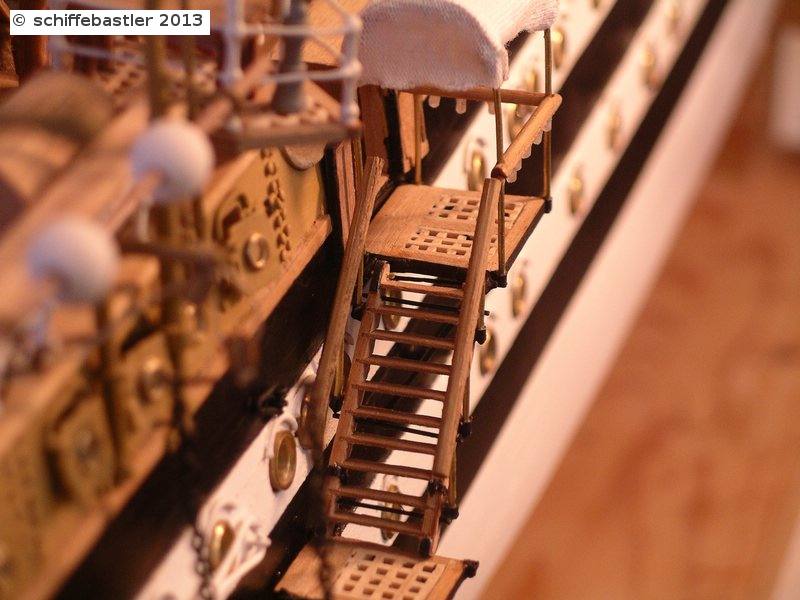
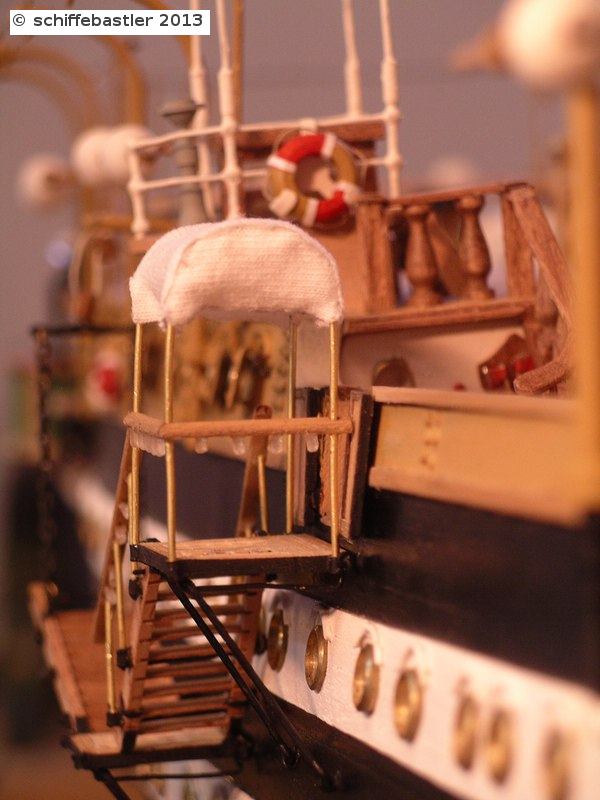
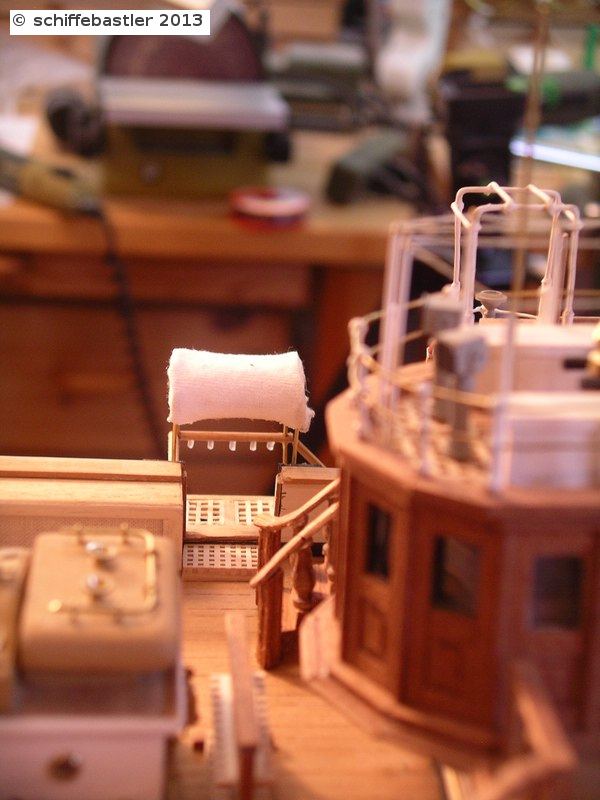
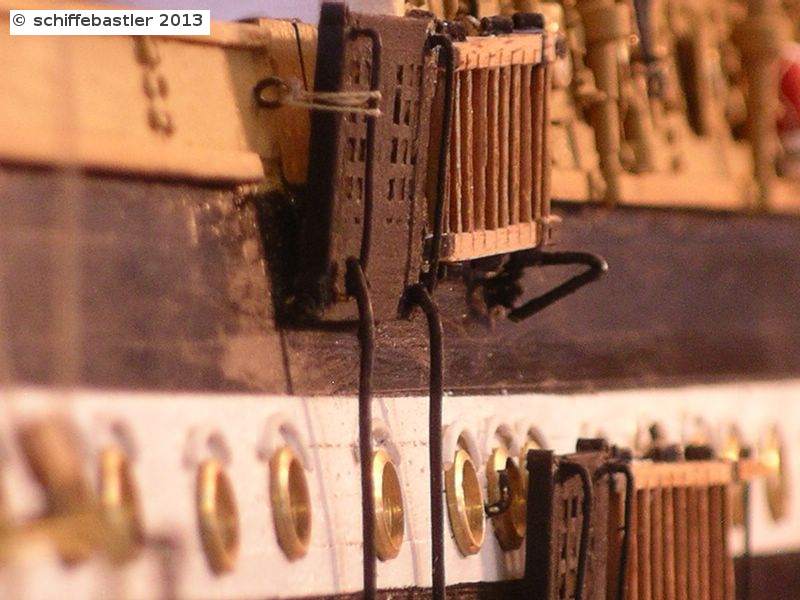
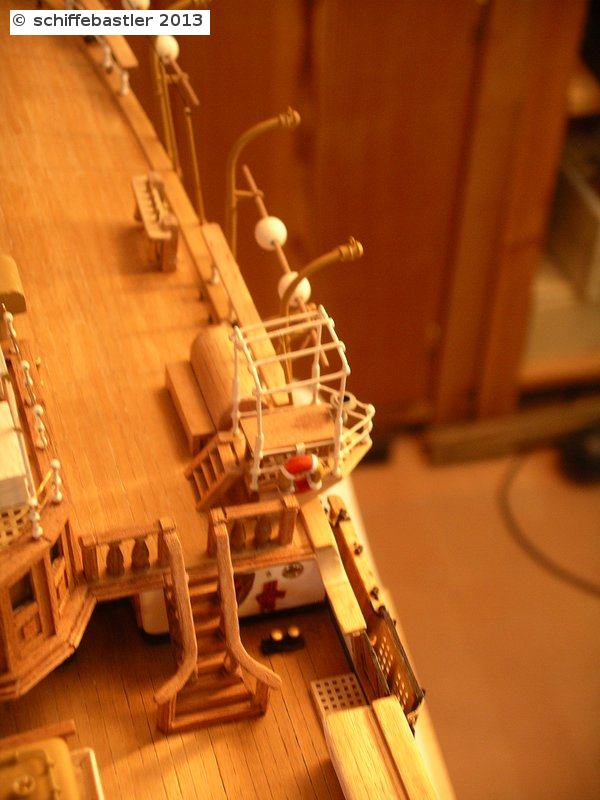
... now you can see the third sea ladder, which is displayed for official greetings.
In this case, the two sea ladder segments are pulled down, but the lower ladder is not used. This ladder is pulled up with the gallow and put on an outrigger. What is not shown at the model, there has to be put an additional gangway onto the second podium square to the other ladders. This is put at the other side on the pier.
For this show purpose there are used stanchions with wooden handrails. Above the last podium there is put a small canopy. If you are looking closely, you can see small lamps below the handrails. These lamps are build of acrylic glass with a diamater of 1 mm and length of 1.5mm.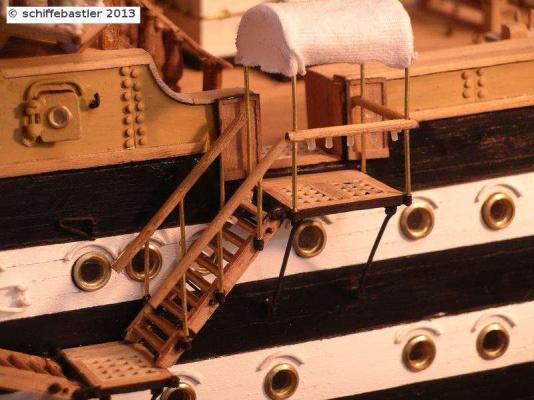


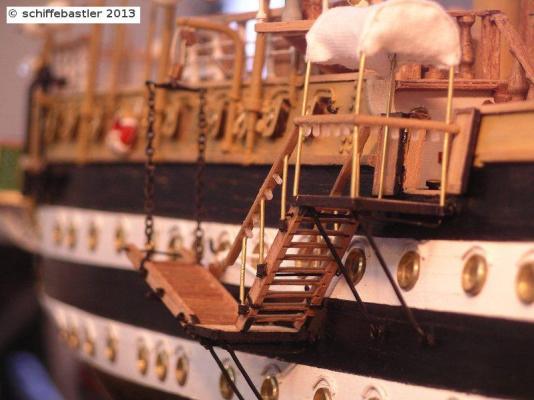
... and again one
-
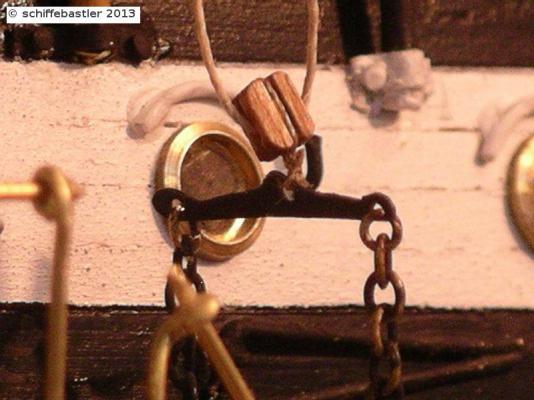
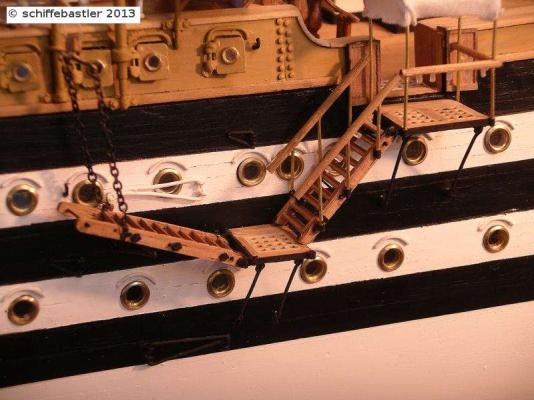
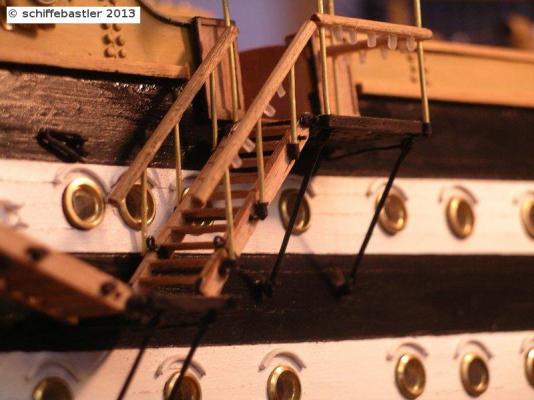
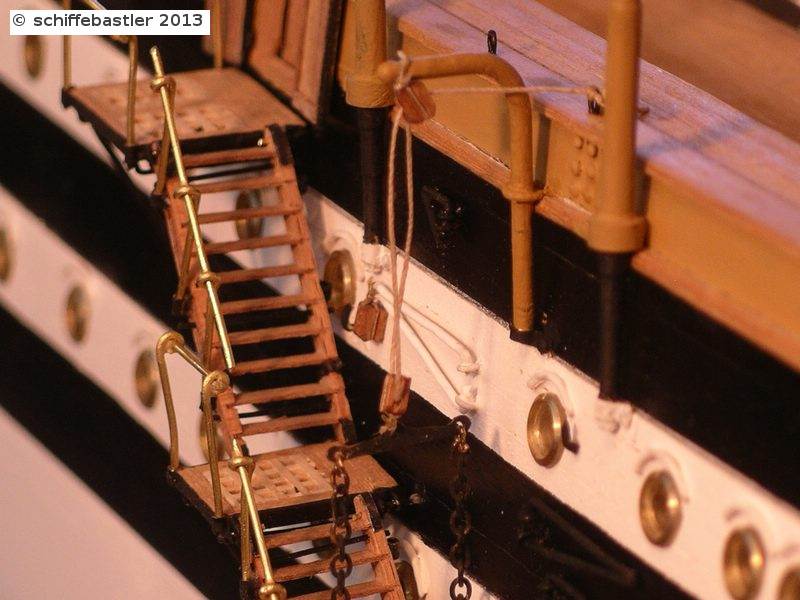
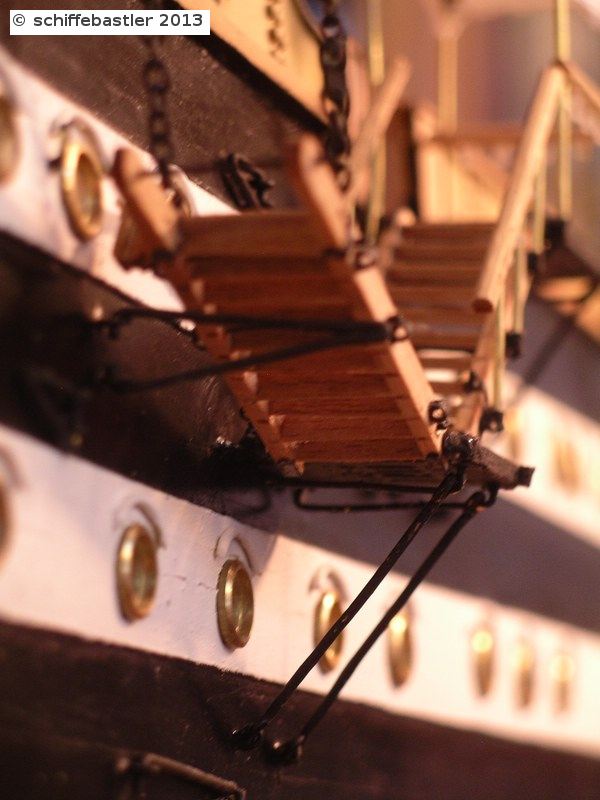
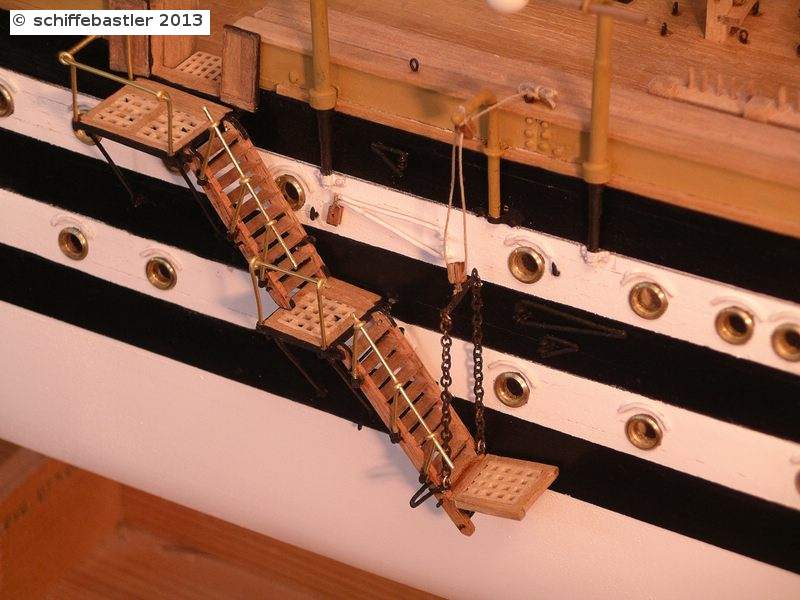
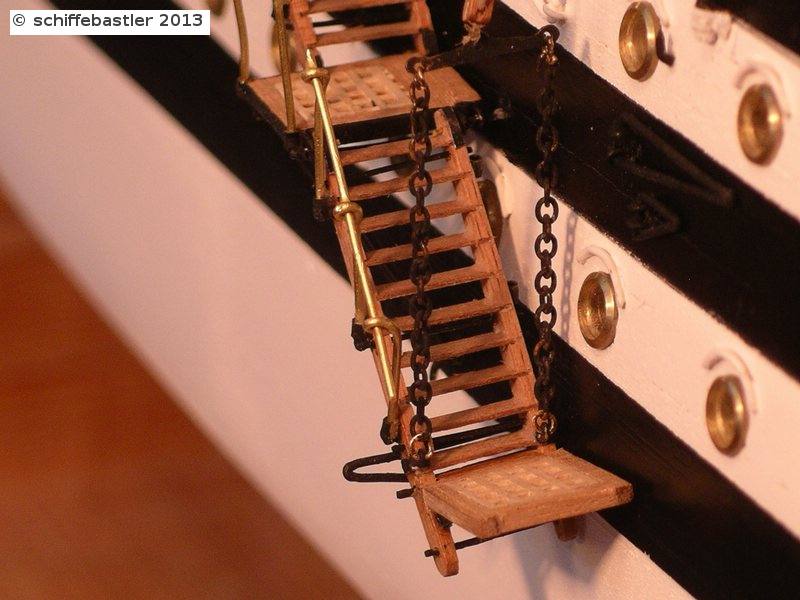
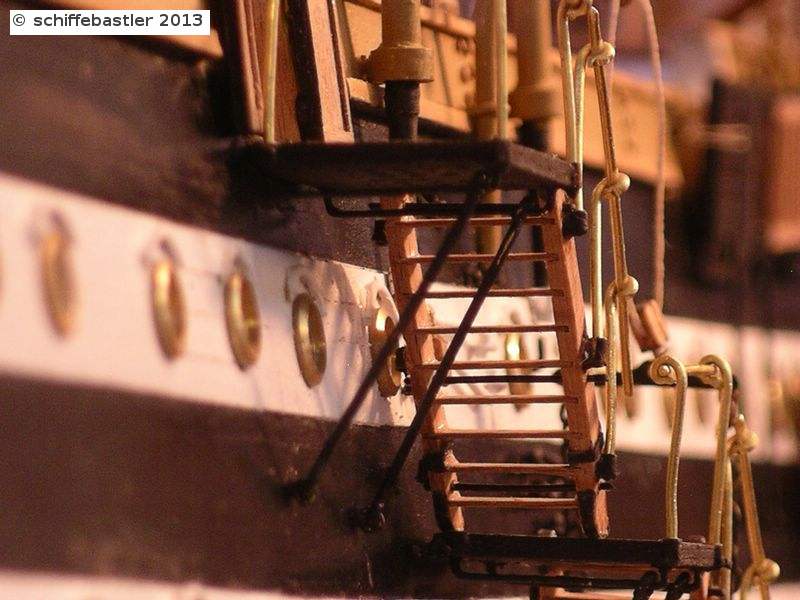
... now I will show you a totally opened sea ladder, which is ready for boarding small boats.
As you can see, both podests with their ladders are moved down. The ladder of the lower segment hangs on a gallow with chains. With this the lower ladder is beeing hold in position or feered. On the second picture, behind the gallow, you can see an outrigger (white colour) where later a rope is put through. With this outrigger the movement of the sea ladder is done.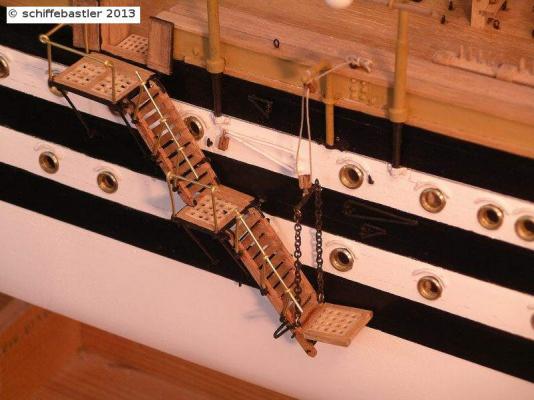
At the end of the lower ladder can be fixed an additional smaller podest.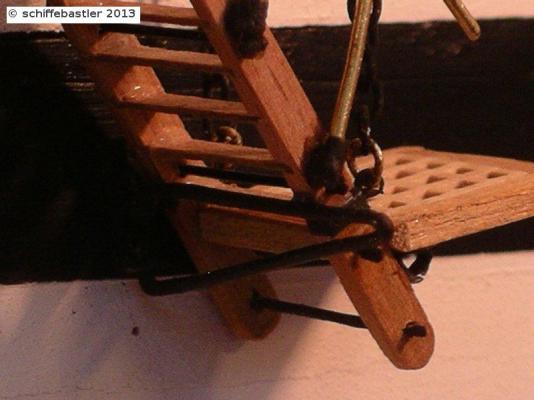
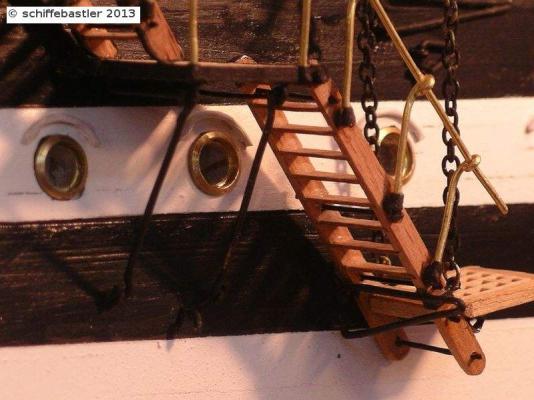
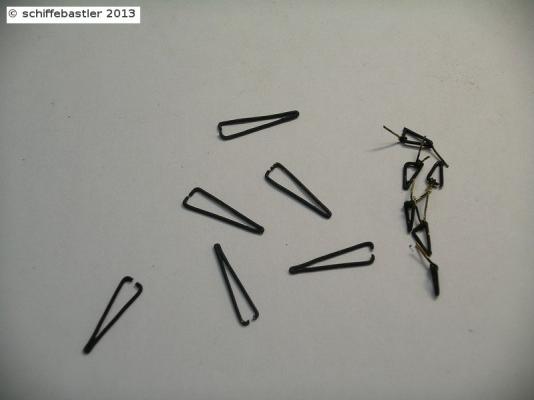
For this purpose of use, there are use very simple stanchions made of brass. These are put into the existing holders.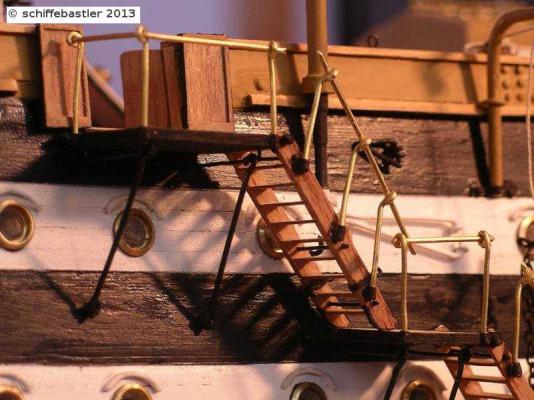

The pillars below the podiums are moved to the outside and shore the podiums. Below the additional podium there is moved also an outrigger.
- popeye the sailor, slagoon, Gimo and 1 other
-
 4
4
-
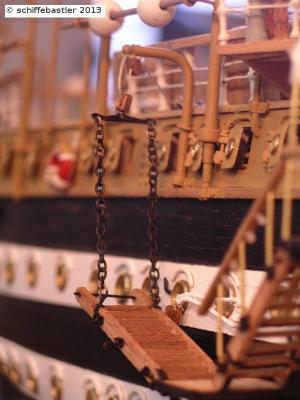
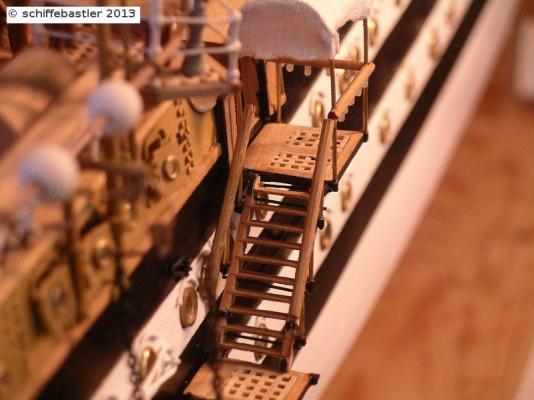
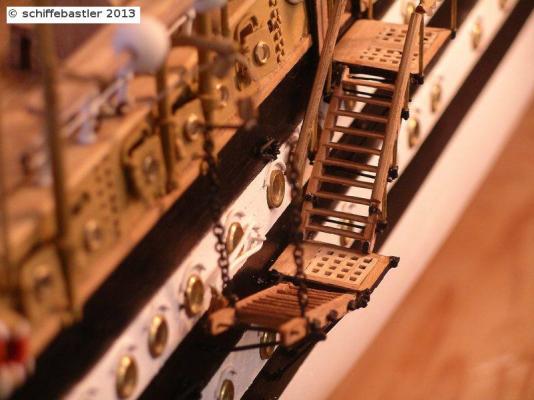
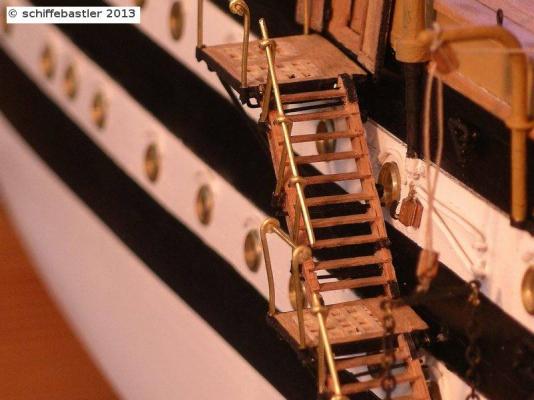
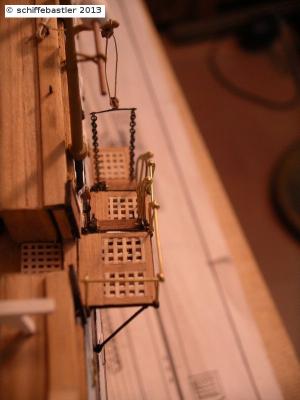
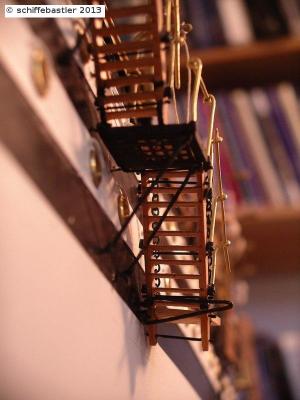
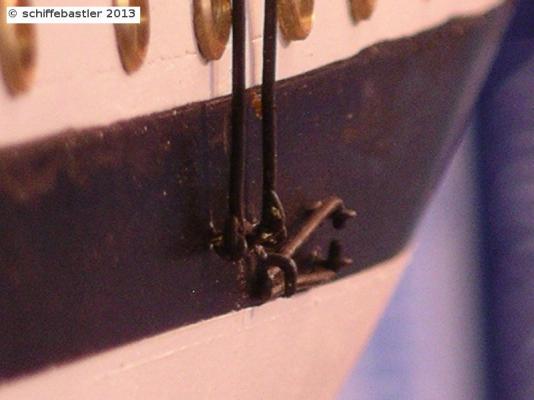
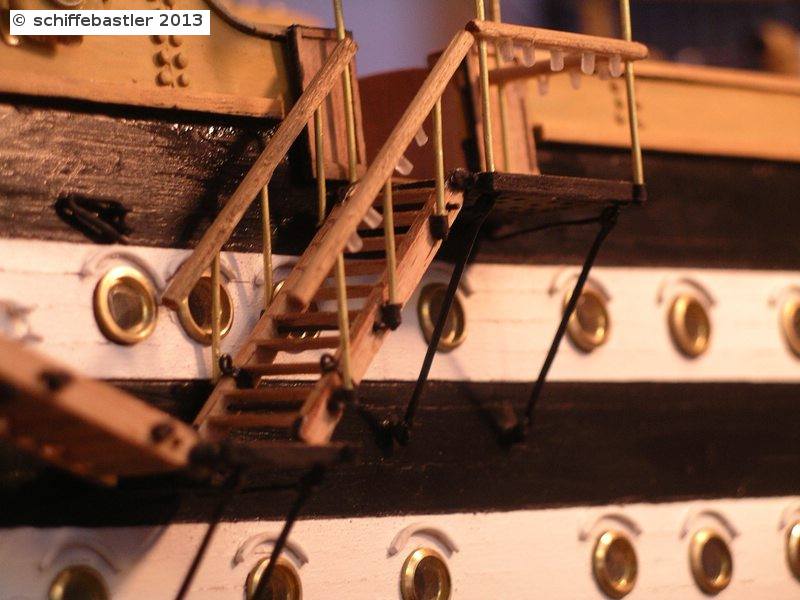
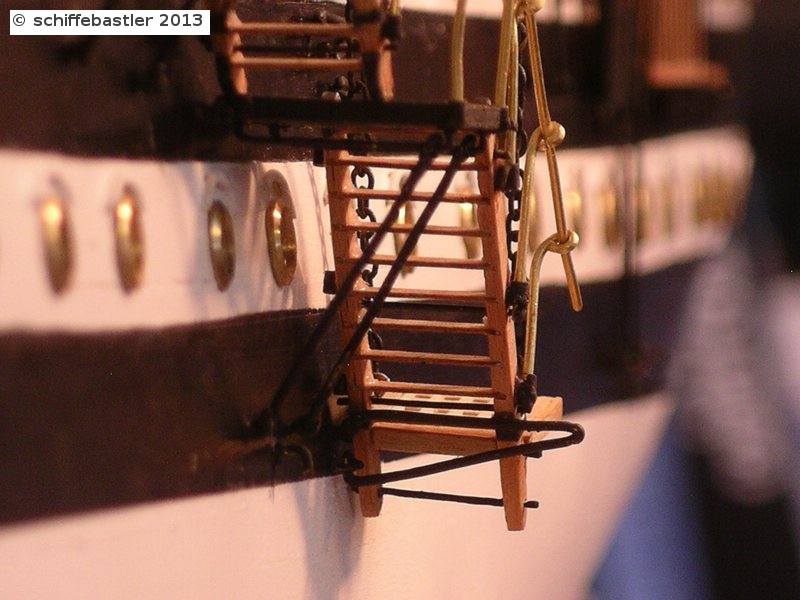
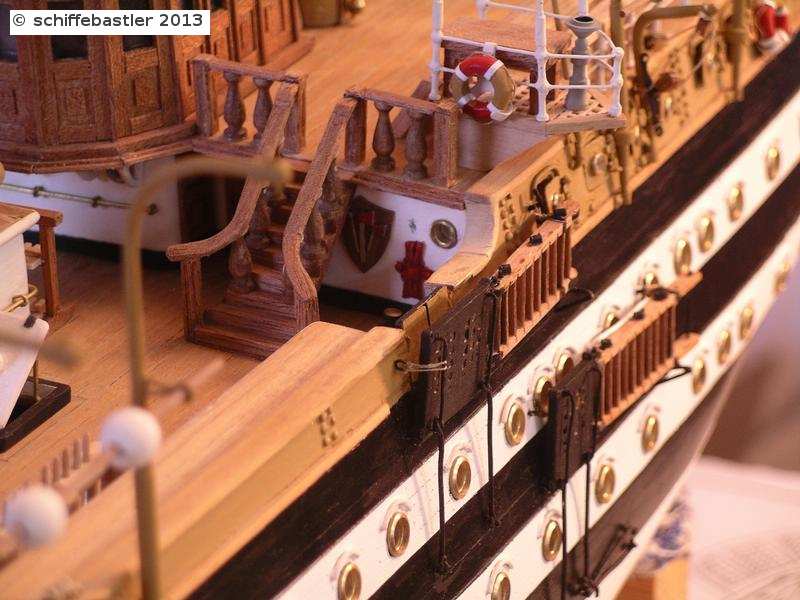
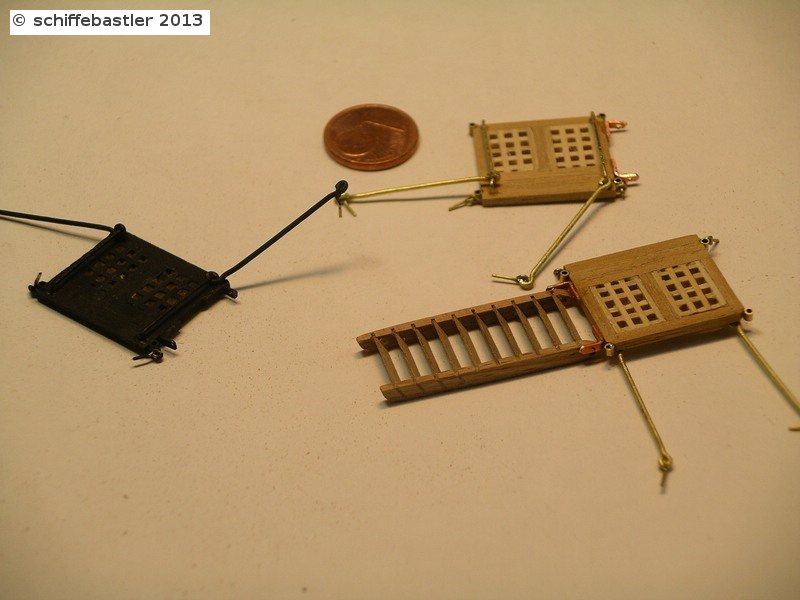
... the first shown sea ladder will be in running version, fixed at the hull.
As you can see, each sea ladder consists of two segments, each of them with a podium and a ladder.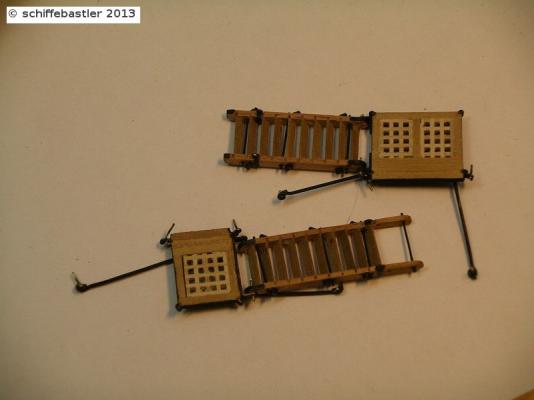
Each podium can be foldet up to the hull. The movement is supported by outriggers with which the elements are veered. Each ladder lays on outriggers with their tail. All outriggers can swing.
The podiums and ladders are lashed or fixed with metal fittings (I found both versions on pictures).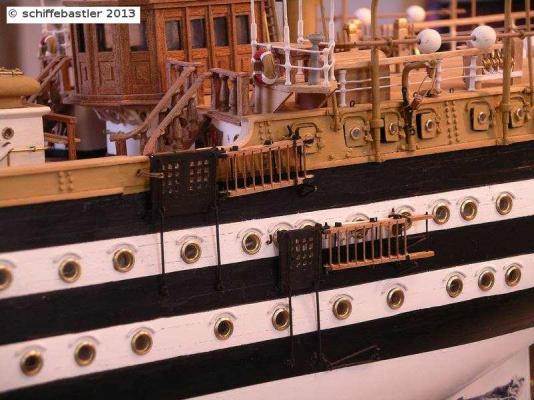

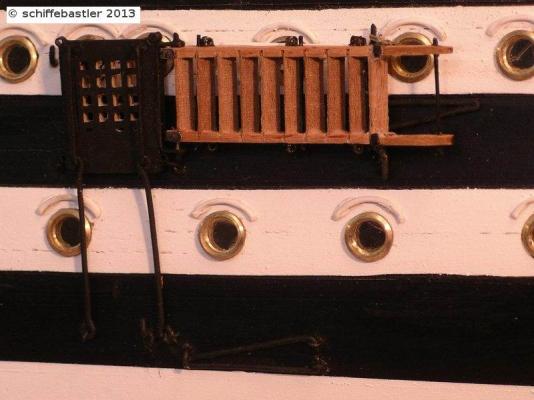
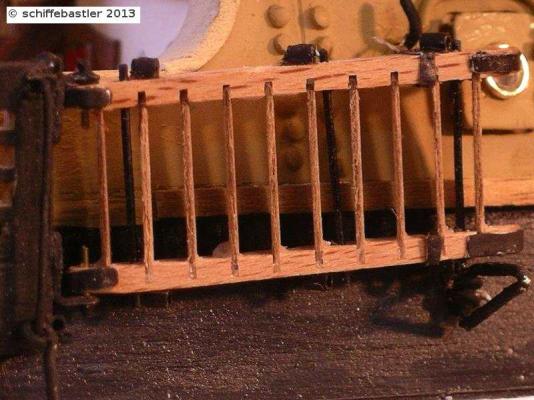
All outriggers, which are not necessary in that moment can be moved to the hull and fixed.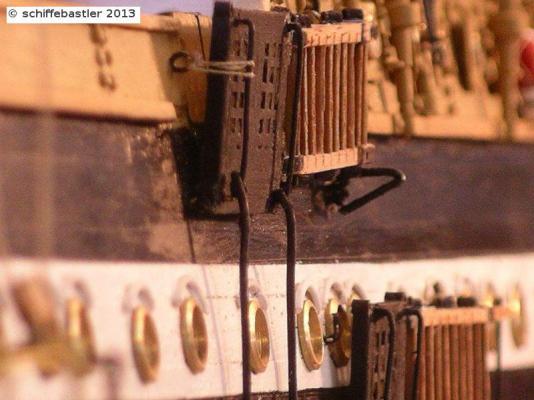
and again some pictures...
will be continued ...
-
Thank you Al !
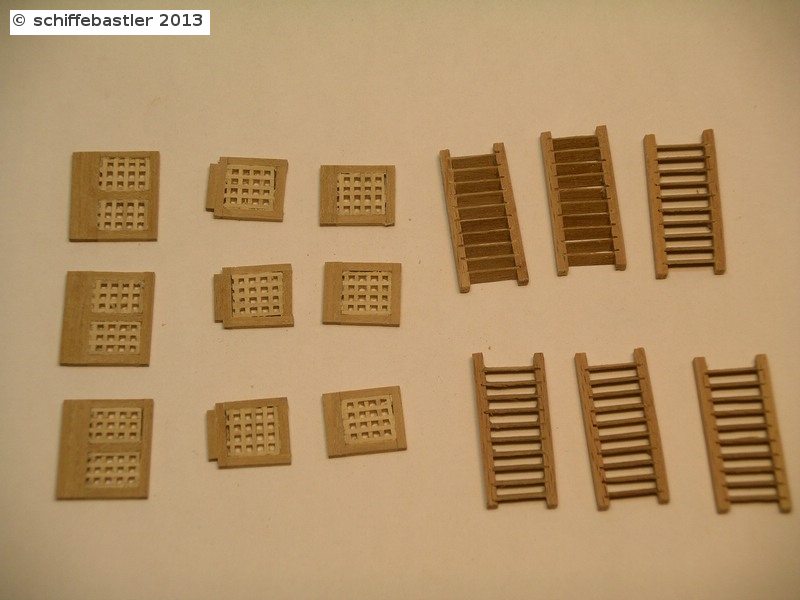
Today I would like to show you the sea ladder (hope, this is the right name...). Due to many details and different types, this will give multiple postings.
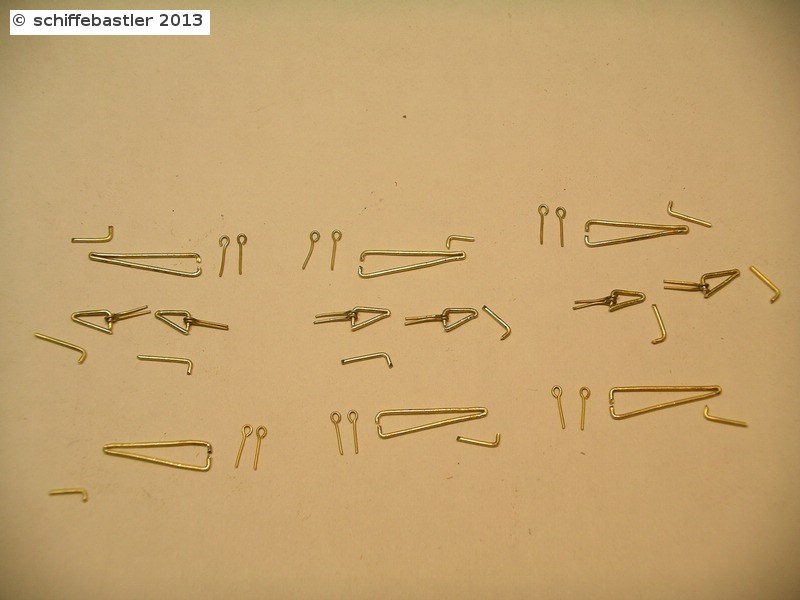
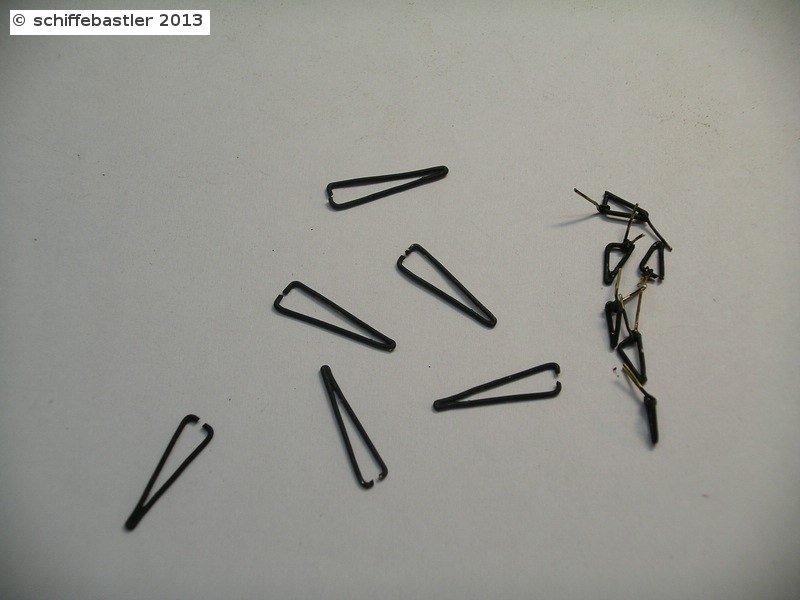
I will start with a short overview with most of the important parts.
The Amerigo consists of three sea ladders. Each of them consists of two segments and each of them consits of a podium and a ladder. The sea ladder segments are fixed outside of the hull of the ship.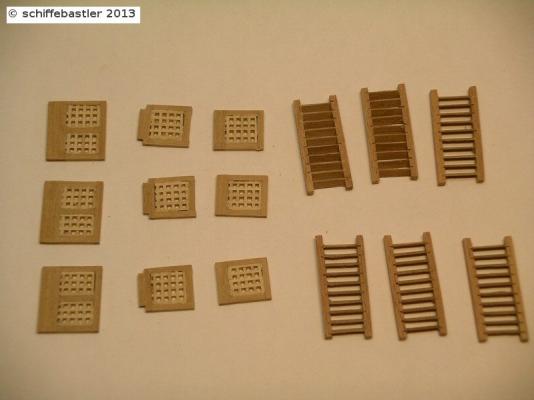
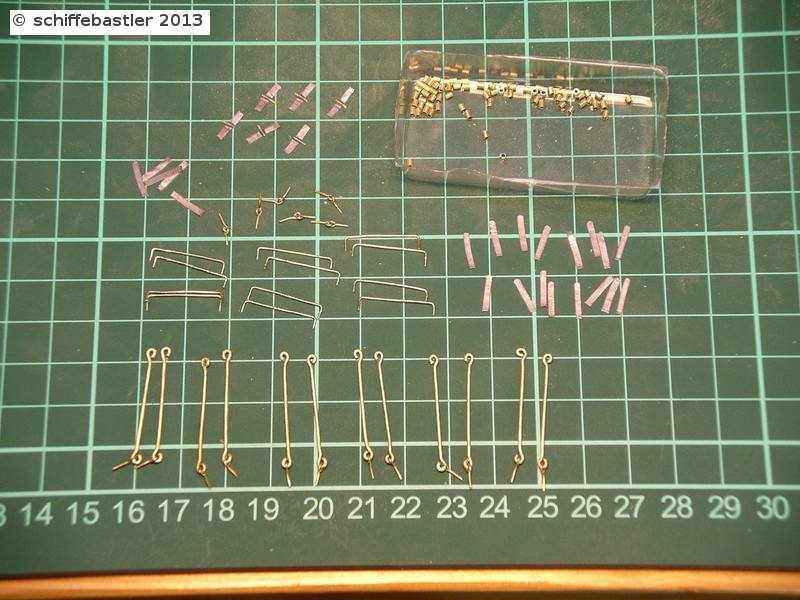
At the podiums and the ladders are fixed some holders where the stanchions are pluged in. These holders I have build with small pipes, inside 0.8mm and length 1.5mm.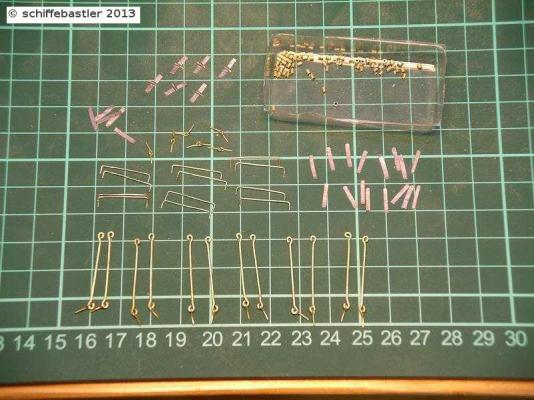
In order to enable the folding and fixing of the podiums there are some rods below the podiums where some stanchions are are fixed in a flexible way. The ladders are fixed at the podiums an can be moved.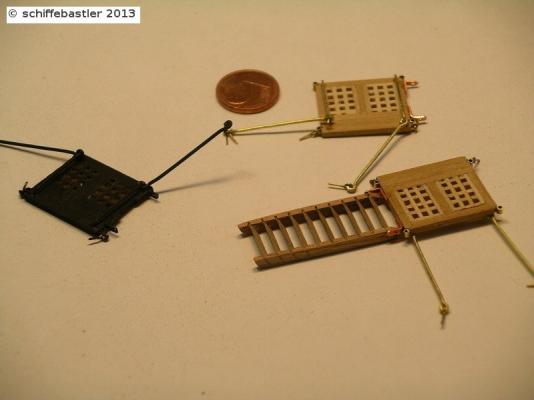
The ladders have some metal strengthenings along the stringbords ant metal pipes inbetween.
In order to fix the sea ladders or to shore them, there are needed a few holders and pillars.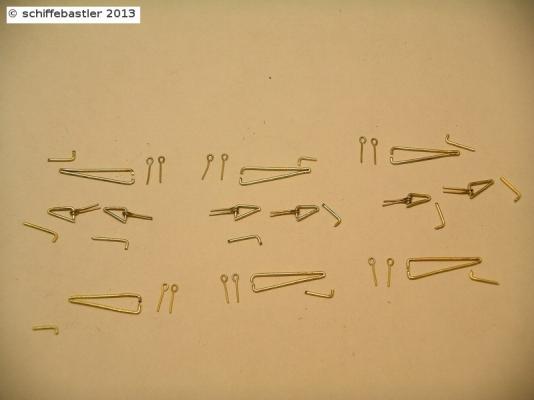
... will be continued ...
-
It is always a pleasure, to see such beautiful pictures ! And if you post them twice, it's twice the pleasure!
Regards, Joachim
-
Hi Michael,
you have done a really great work with the stern! And it is not a compromise, it is your model, you have desinged it without the red colour and it is a wonderful model as it is - it does not need at all the red colour!
Regards, Joachim
-
This is an amazing build of a wunderful ship! I looked through the build log with great interest, becourse I own the same kit and will build it some day...
I will follow your impressive build log with high interest.
Regards, Joachim
- Red and avsjerome2003
-
2
-
Such beautiful small things are increasing the value of the model and absolutely worth to be build! Well done.
Regards, Joachim
-
Hello Gimo,
I have just looked through the build logs and detected your wunderful model! It is a really outstanding work, congratulations!
This model is very interesting for me, becourse I own the kit from Corel, where your plan is from. Your work will be a great support for me!
I will follow your build with great interest.
Regards, Joachim
-
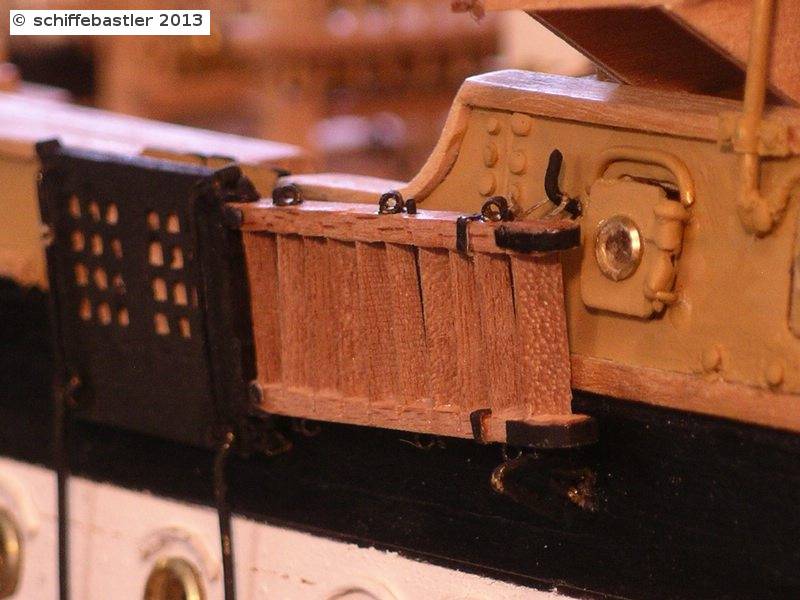
Bevor I will start with the gangways, I had again a look to the doors of the bulwark. On the picture you can see, the existing one based on the kit. But I don't like them and they are absolutely not corresponding with the original ones.
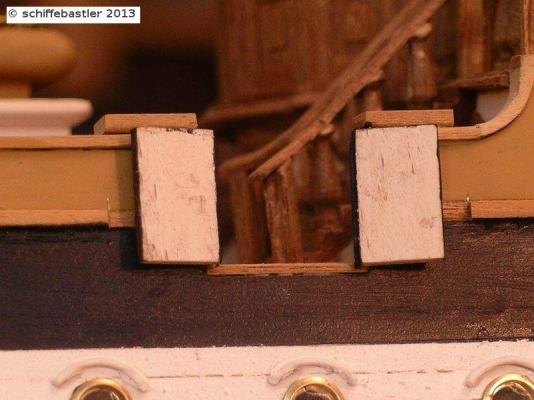
So, I teared them off. Then I build new ones with a ledge arround, added some hinges and metal composite, and of course the exterior side was painted.
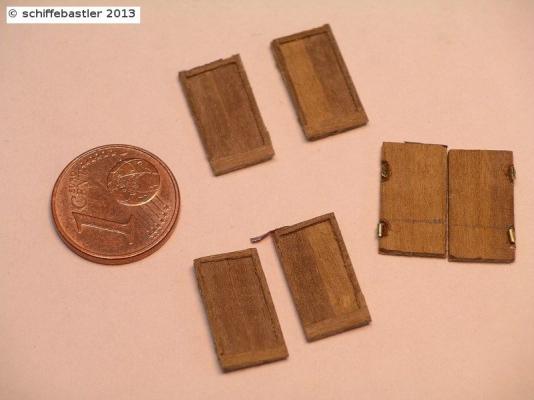
The Amerigo has three doors, one at the starboard side and two at the other side. Although I intend to show the model with fully sails, I like to show at least one of the gangways in extended version, another partly extended and the other in 'closed' version. Becourse of this, the back door at the larboard side will be closed.

And now I continue, analysing the pictures of the Amerigo, in order to understand the operation of the gangways, which will follow after being ready.
Regards, Joachim
- edmay and popeye the sailor
-
2
-
You have done a great job, Lars Peter, the main mast looks beautiful! And I see, it will not be easy to build the rigg.
Regards, Joachim
-
Thank you all for your kind comments!
The next step will be, to produce the gangways. Actually, I am analysing the pictures of the ship and I try to understand fully their operation, in order to produce more realistic gangways and a few more details than the kit itself offers. We will see...
Regards, Joachim
-
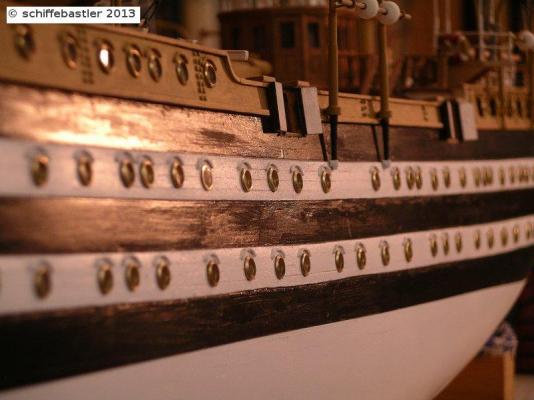
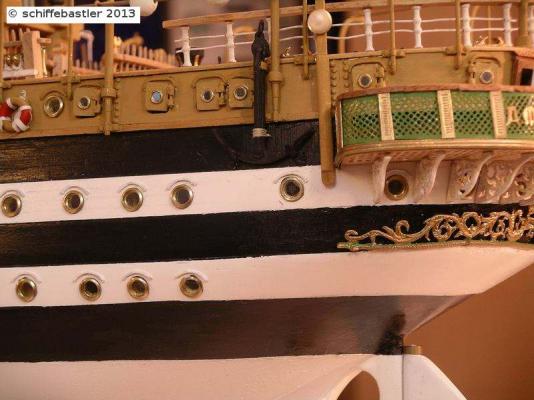
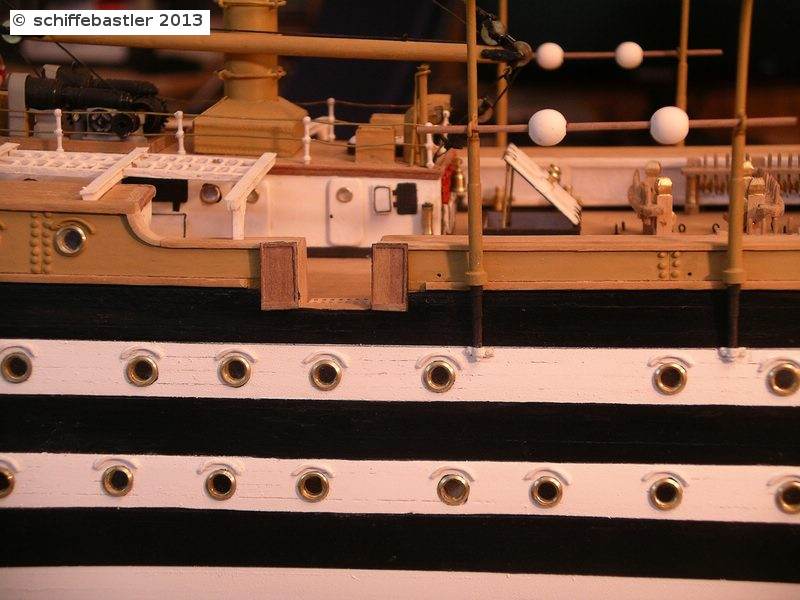
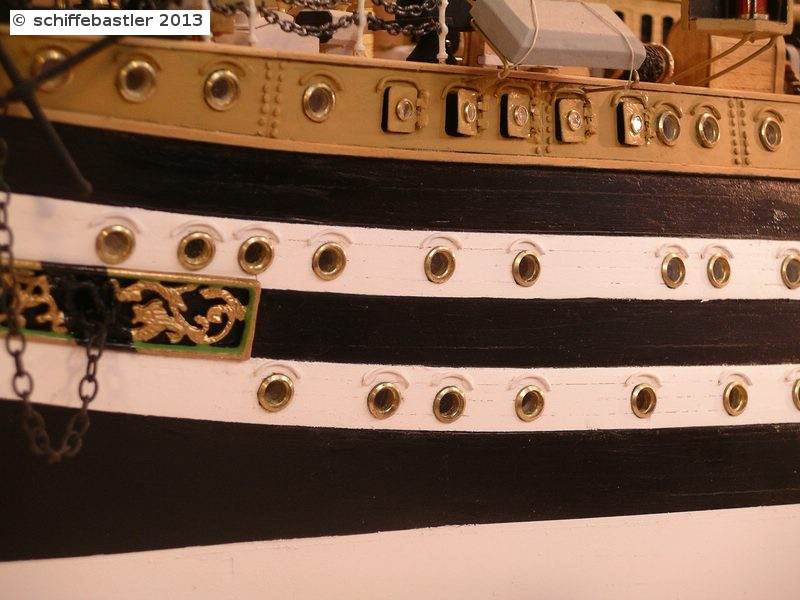
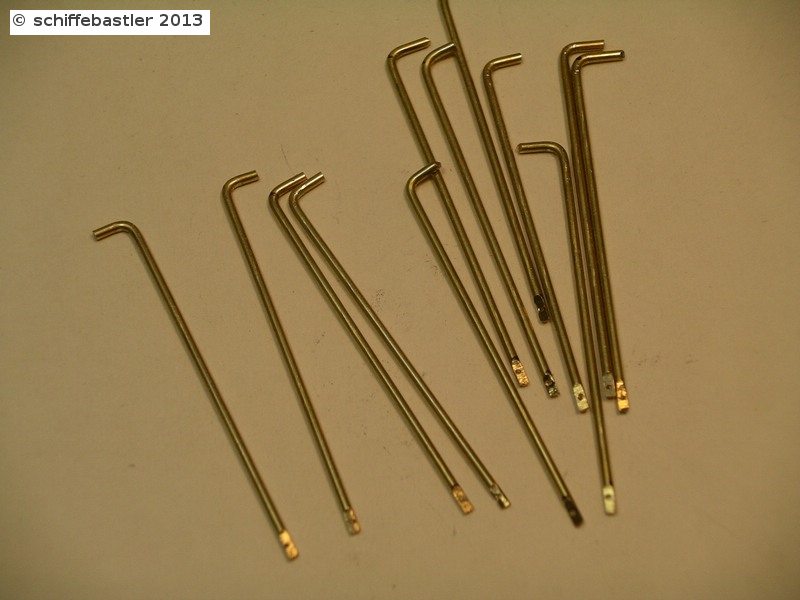
Hello,
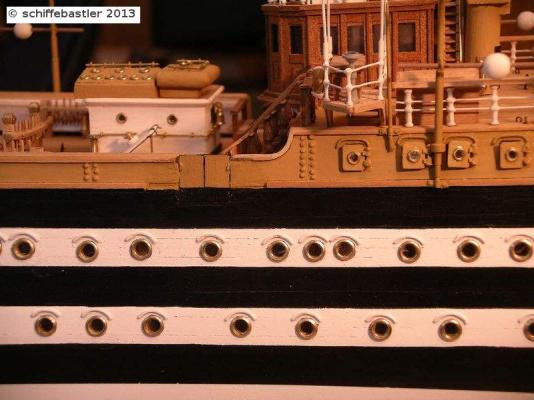
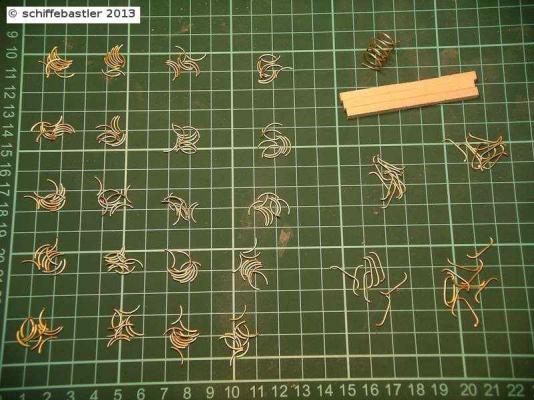
the next step is, to add raindeflector to alle windows and portholes (... and there are a lot ...).
These 'eyelashes' are a specific characteristic of the Amerigo.
I produced them from 0.8mm wire which I turned around a spar and a timber. Then cutting the pieces, sticking on the model and painting in the appropriate colour.

Regards, Joachim
-
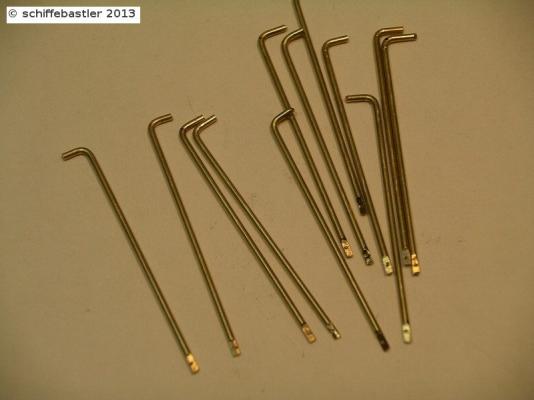
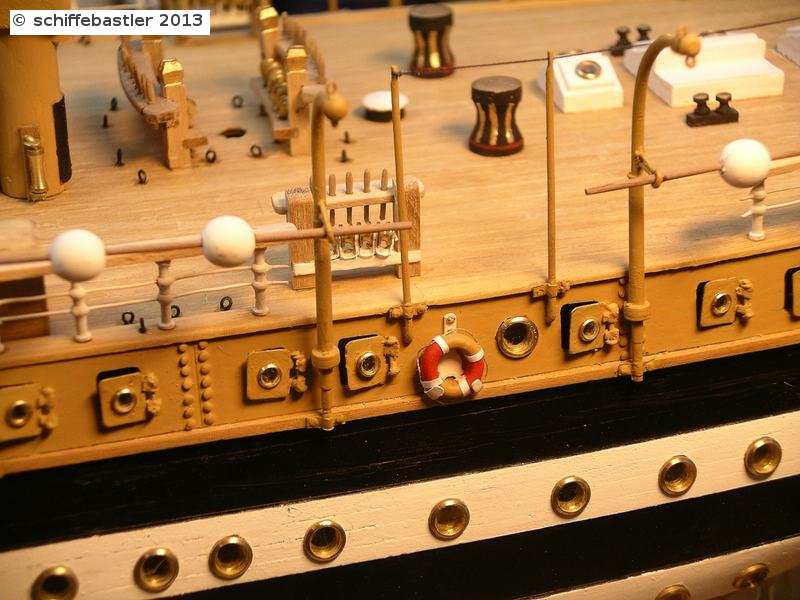
Thank you Frank!
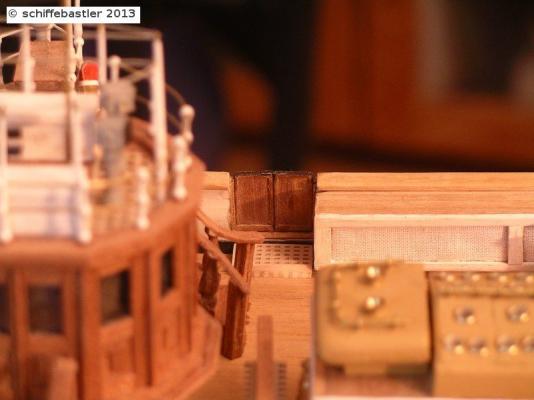
The next are the rods for the awning at the tail of the ship.
On the top of the rods I drilled small holes. The rods are connected with ropes where the awning can be put on.
The rods are fixed outside the ship with metal stripes.
So far today

Regards Joachim
-
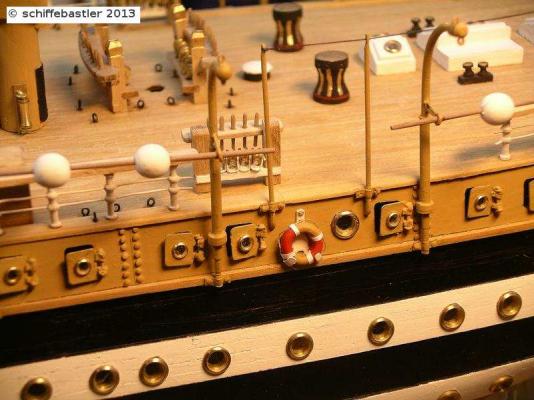
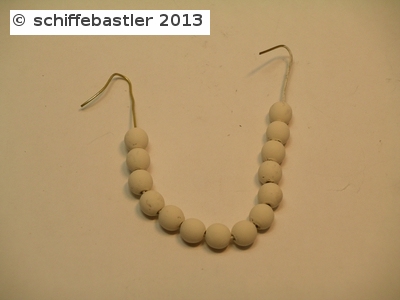
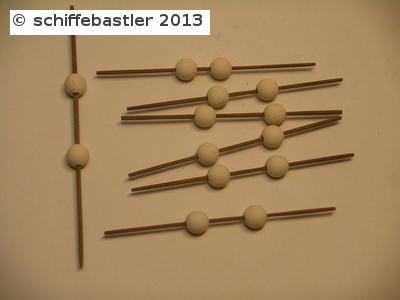
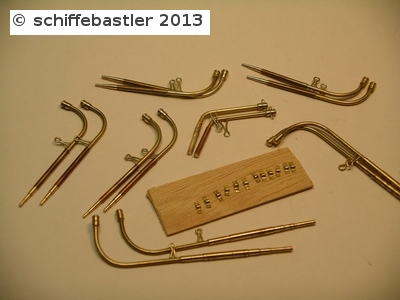
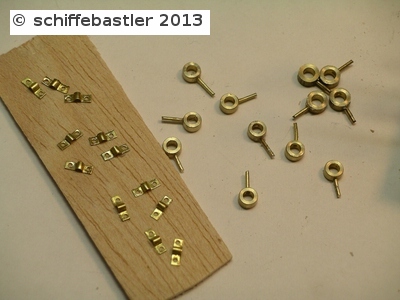
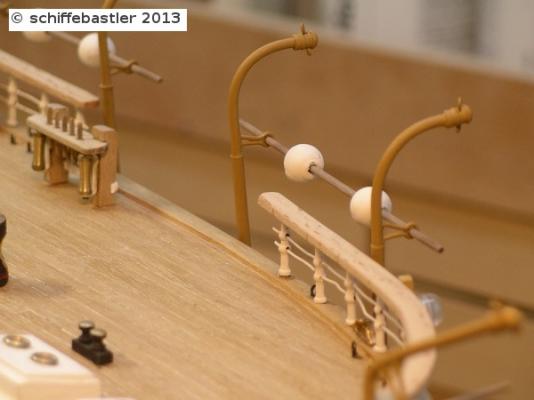
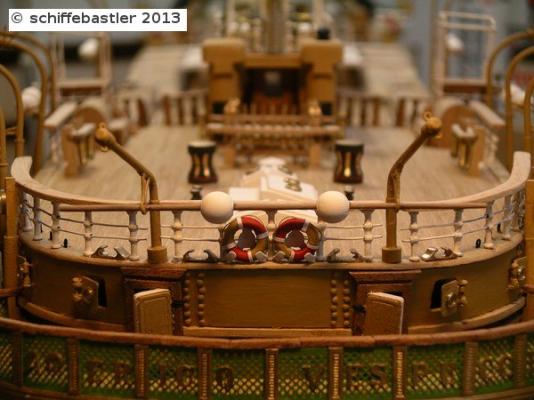
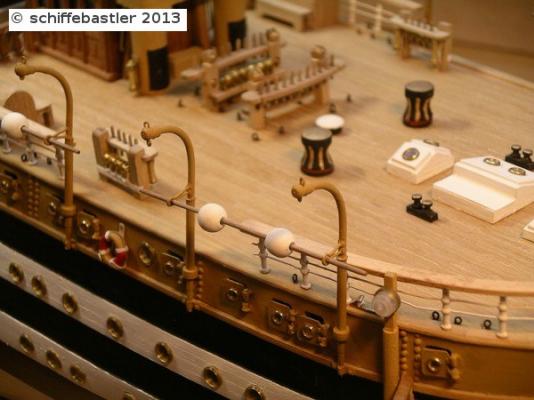
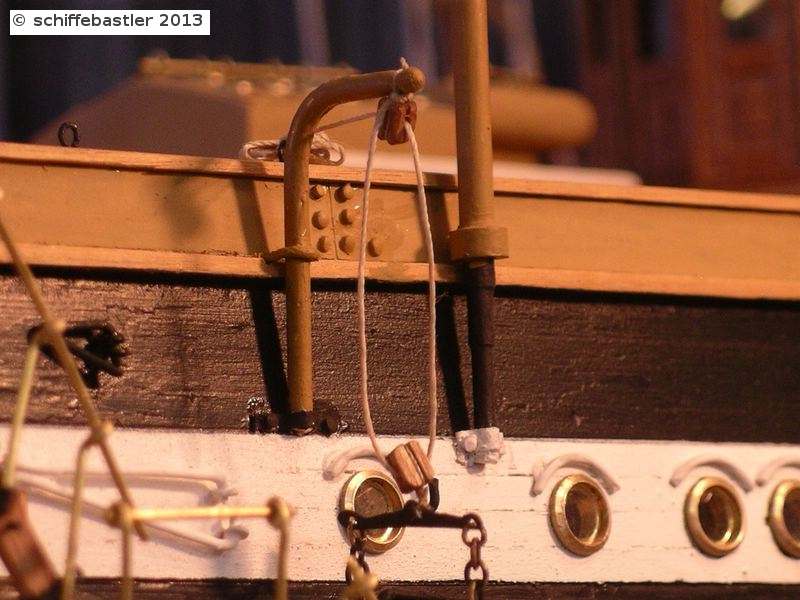
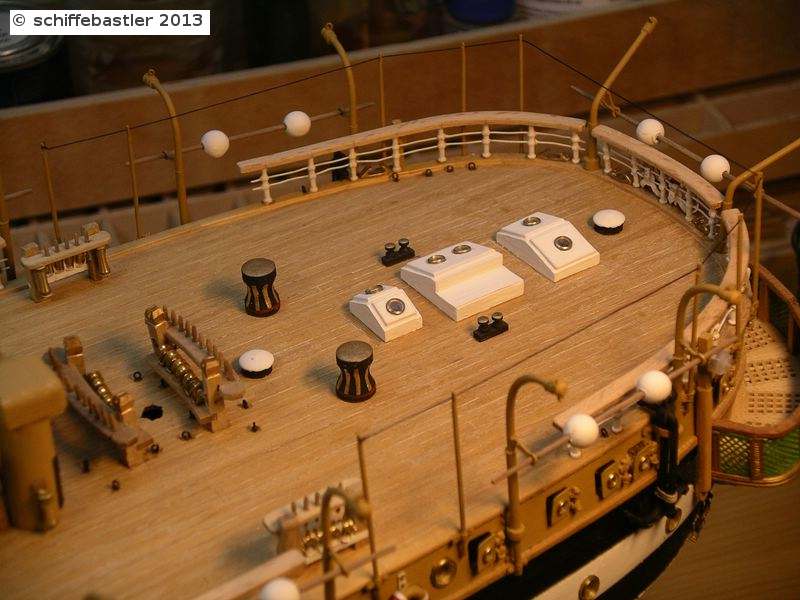
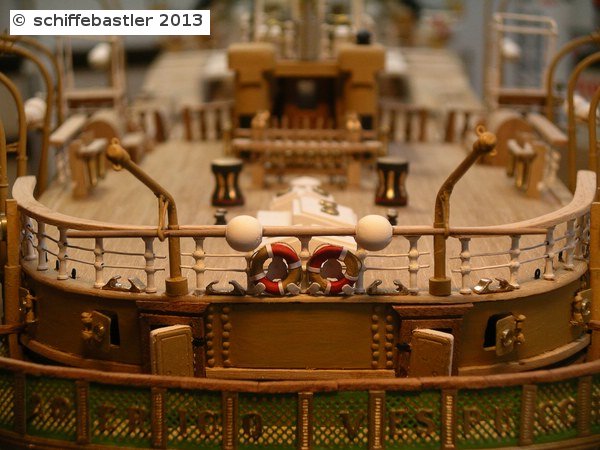
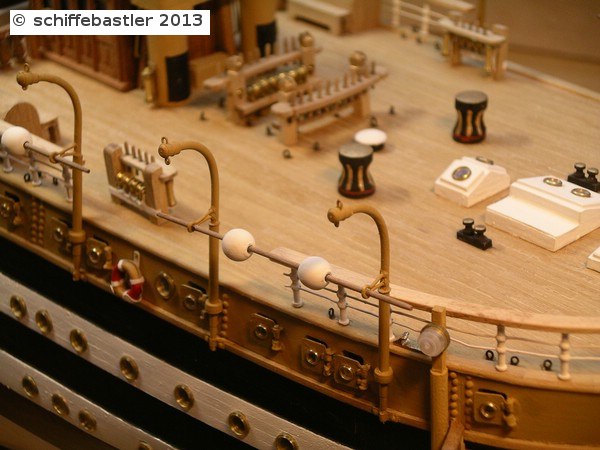
Now, I would like to show the building of the davits (hope, this is the right english word??), they hold the small boats.
First a few small balls which have to be placed on wooden bars where the boats are leaning on.
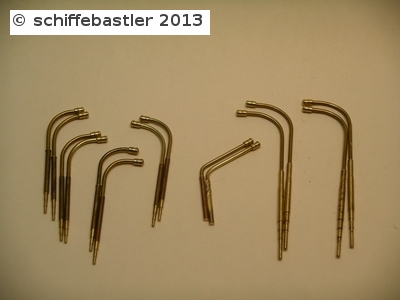
The davits are made of brass, which has to be turned.
Into some holes which I drilled into the davits, I put the small holders for the bars. Then a ring is fixed onto the bottom of the davits; it fixes the davits at the ship - within the ring there is installed a metal stick. The bottom of the davits are fixed on the ship also with metal stripes.
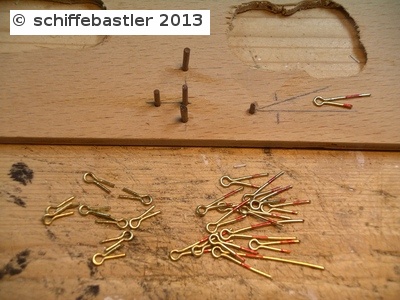
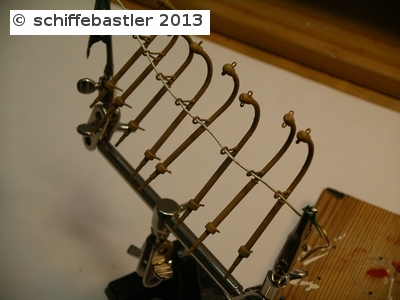
The rigging of the davits and the placement of the boats will be done after rigging the whole ship, becourse otherwise it will hindering the rigging of the ship.
And sorry for my bad english, but I hope, you can understand the content anyway - at least together with the pictures...otherwise, please don't hesitate to ask me...
Regards, Joachim
-
Thank you very much Lars Peter! But as I wrote in your log, your model is excellent!
More and more I use as basis for the detail the real pictures of the ship.
Here is a very interesting link, maybe it still can also help you a bit:
http://www.congedativespucci.it/galleria/1999-index.html
Regards, Joachim
-
Hello,
I just looked through the forum and found your beautiful model. It looks great!
Actually I am building the same model, based on the same kit. It seems that your kit is younger than mine, some parts obviously have changed a bit.
Will follow your log with interest.
Regards Joachim


Reale de France by Bender - FINISHED - Corel - Scale 1:75
in - Kit build logs for subjects built from 1501 - 1750
Posted
Al, I like this, looks fine!
Regards, Joachim