HOLIDAY DONATION DRIVE - SUPPORT MSW - DO YOUR PART TO KEEP THIS GREAT FORUM GOING! (Only 24 donations so far out of 49,000 members - C'mon guys!)
×

kirill4
-
Posts
907 -
Joined
-
Last visited
Content Type
Profiles
Forums
Gallery
Events
Everything posted by kirill4
-
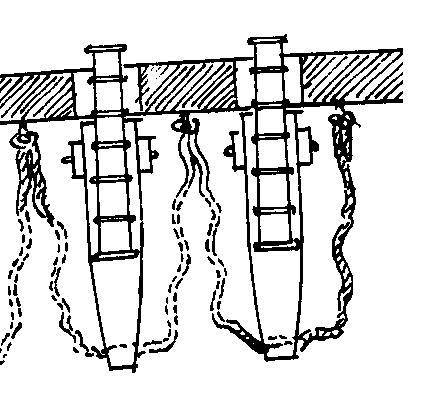
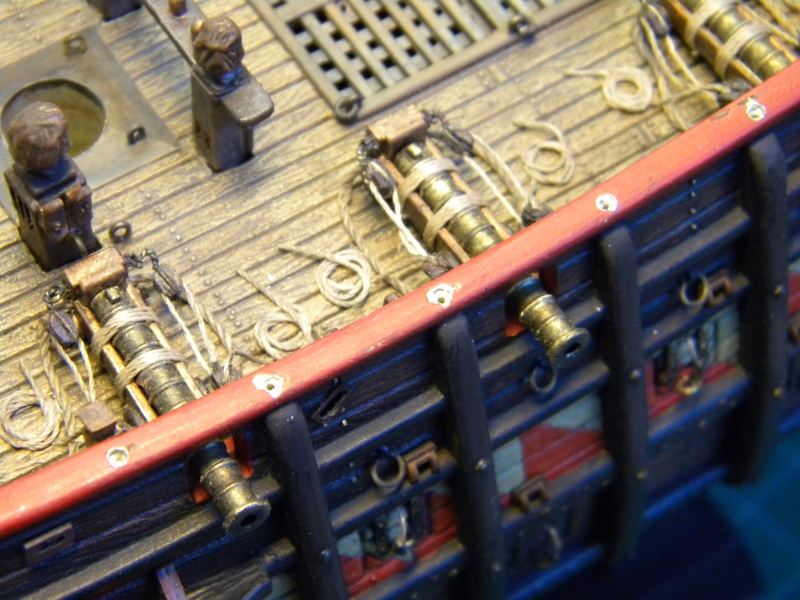
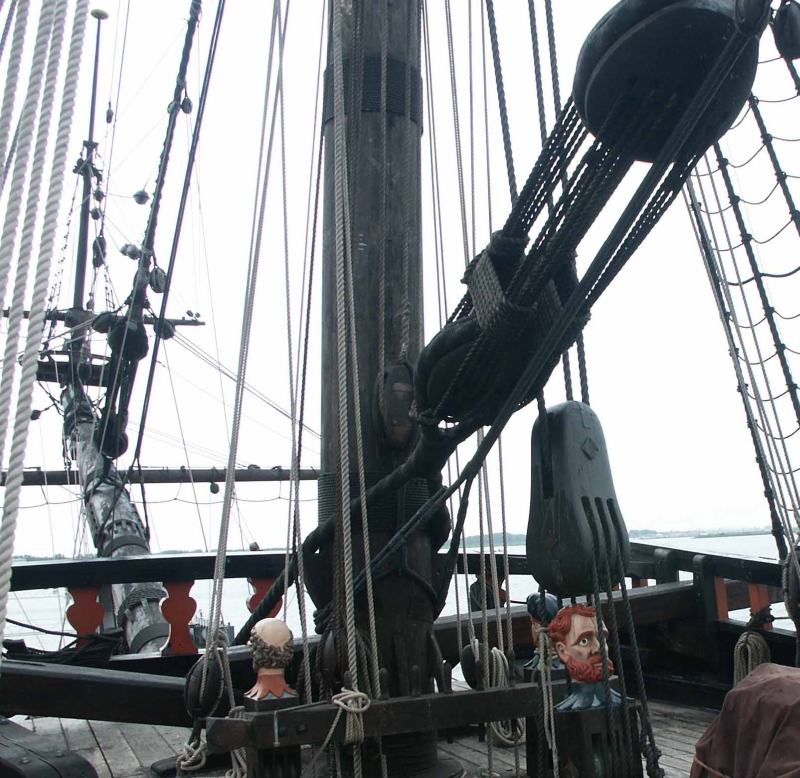
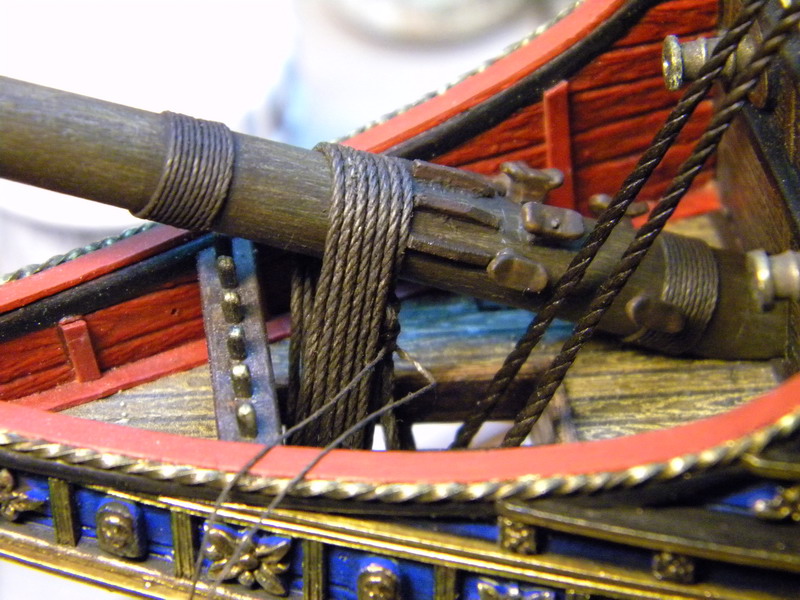
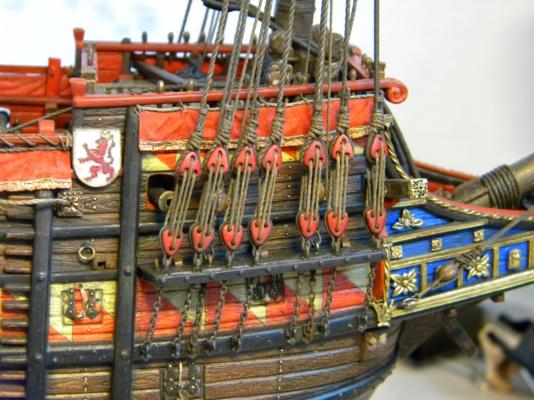
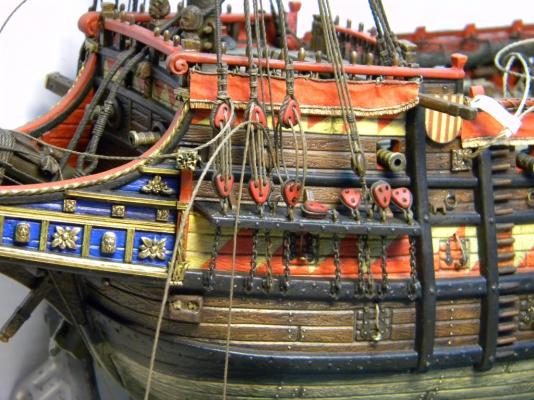
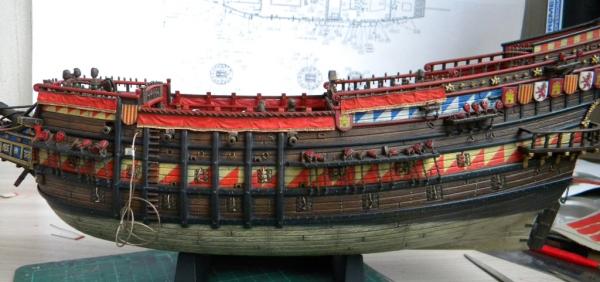
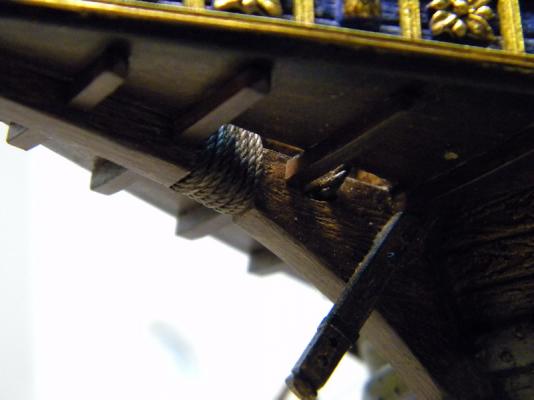
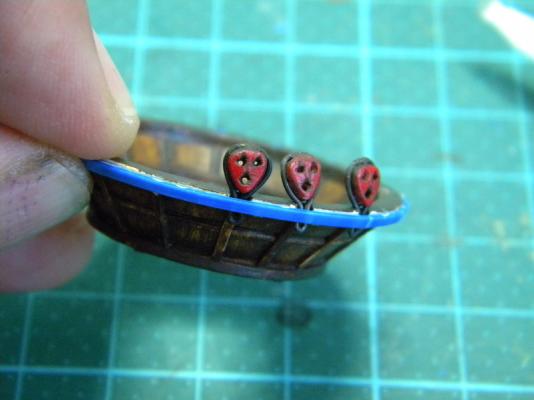
 Hi, Matti I liked this fotoes You made -where model placed in front of trees...and color schema used for painting...really perfect ! artistic!!! qstn abt guns - looks strange for me arrangements of breeching(too thin and short) and coil ?...or they are installed temporary? or there is some specific for this vessel? All the best! Kirill
 -
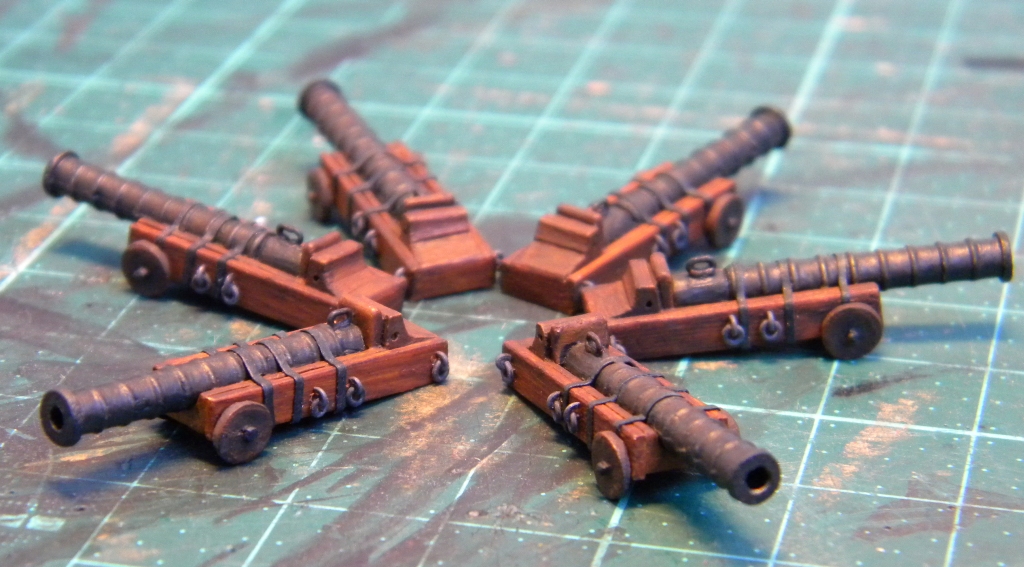
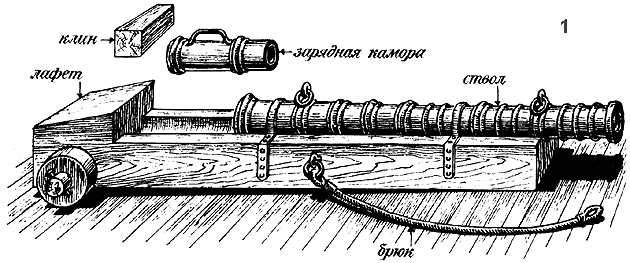
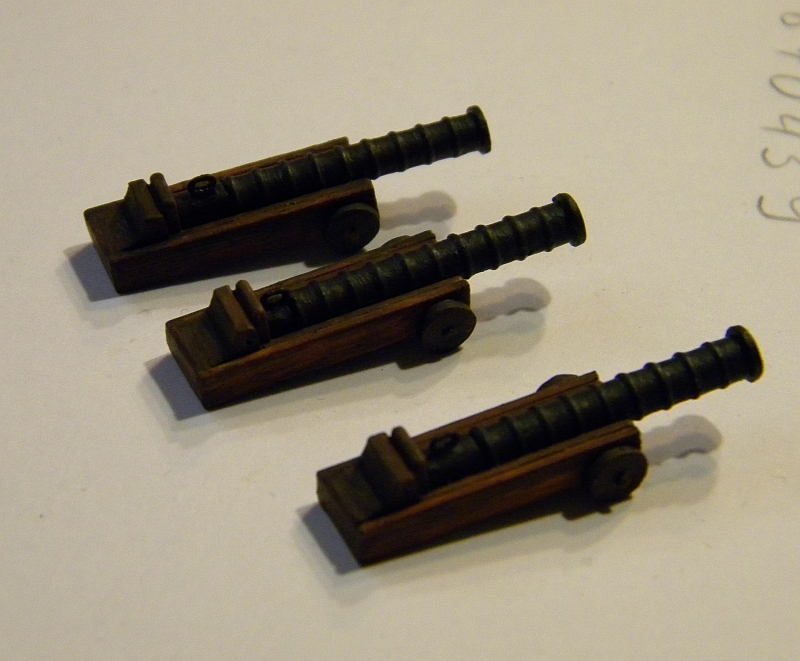
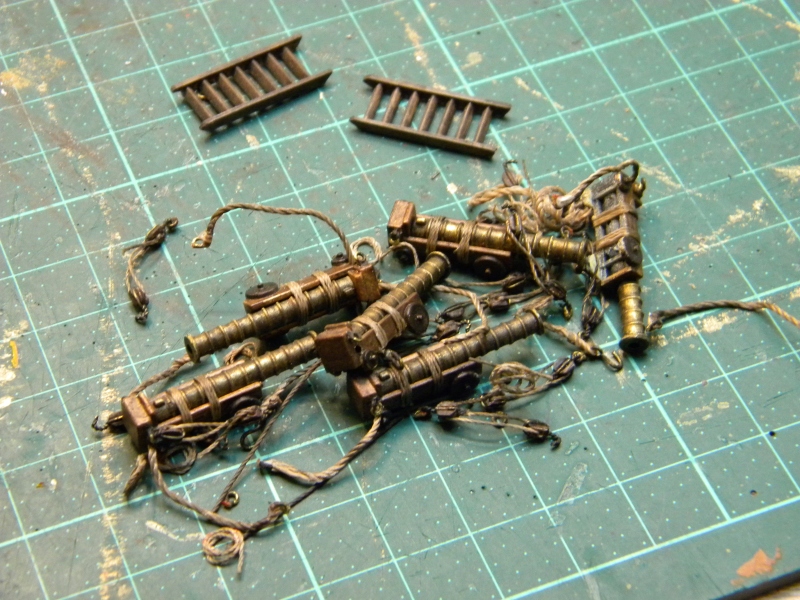
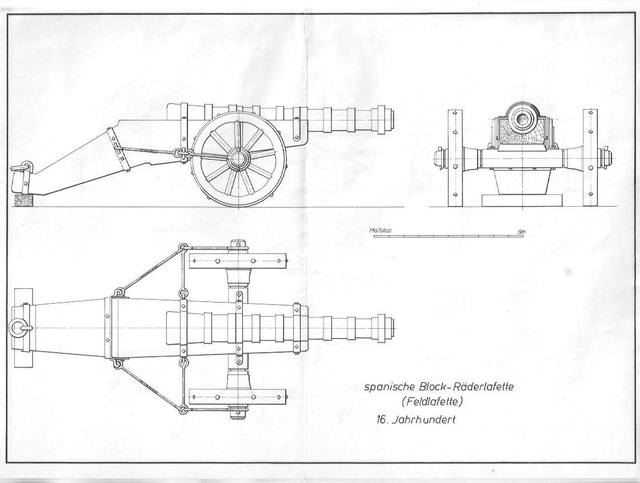
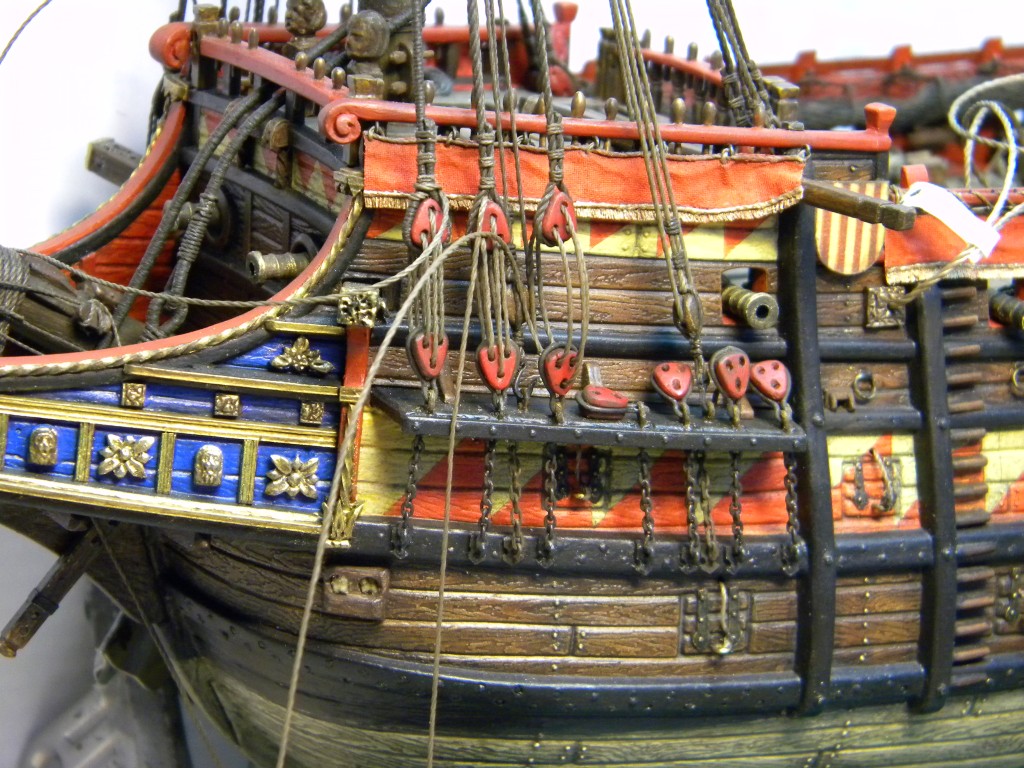
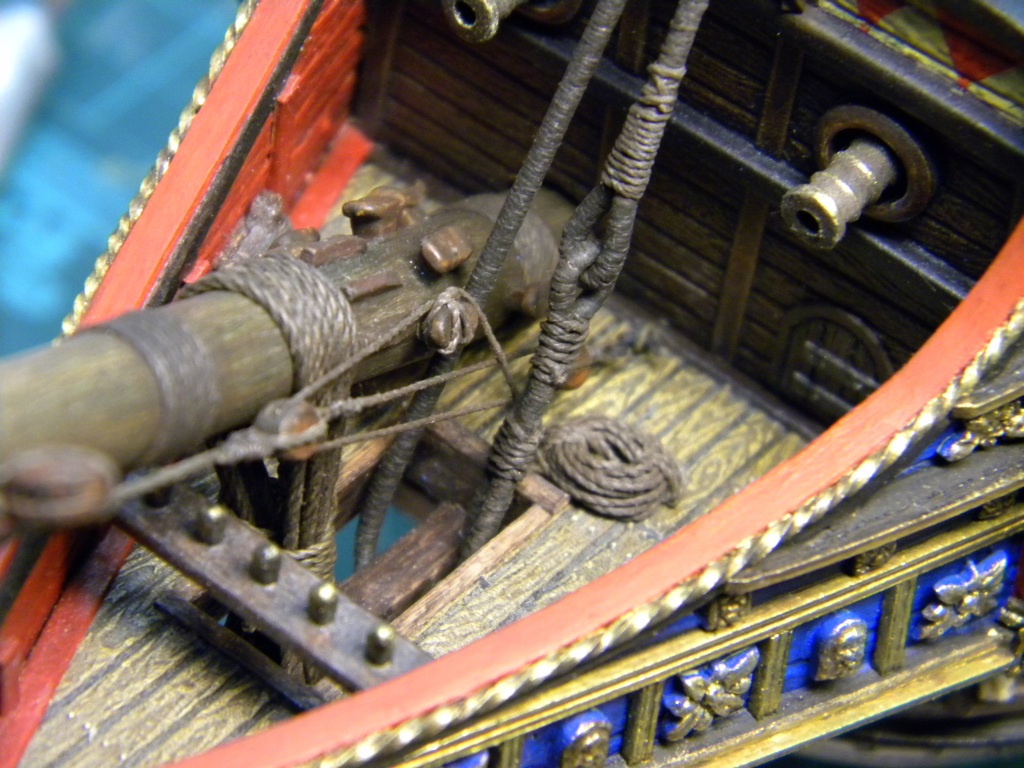
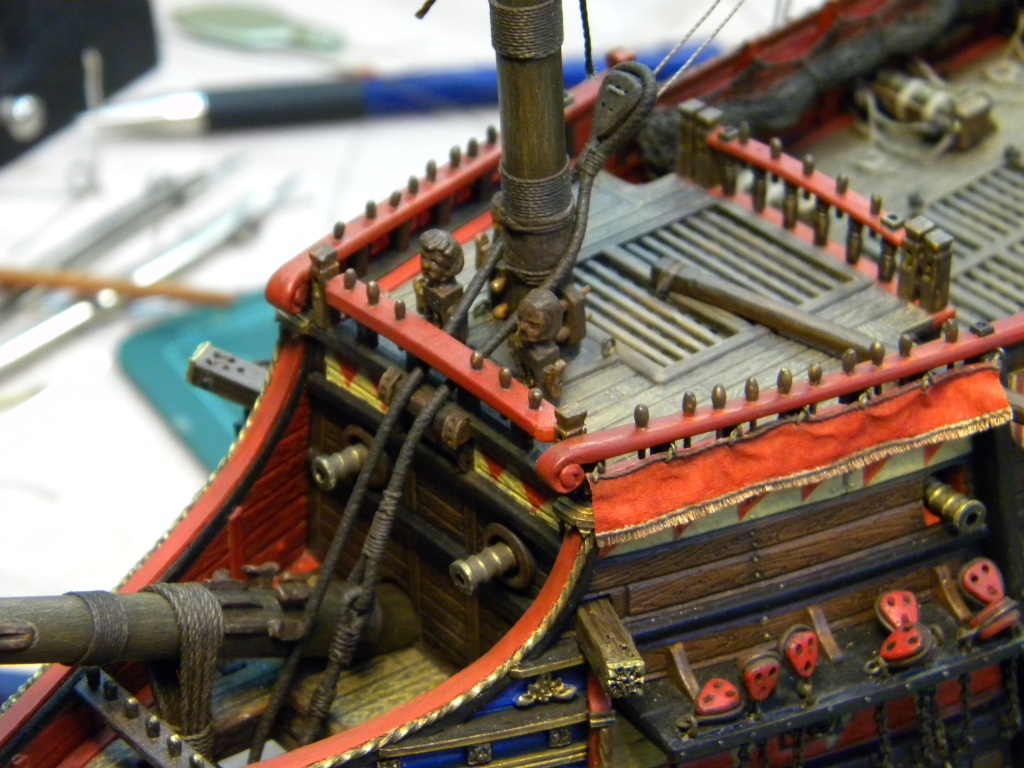
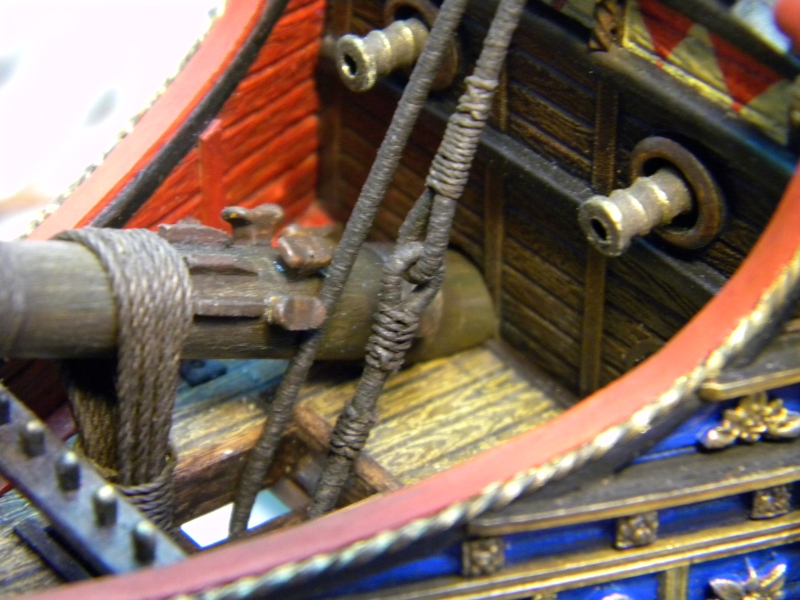
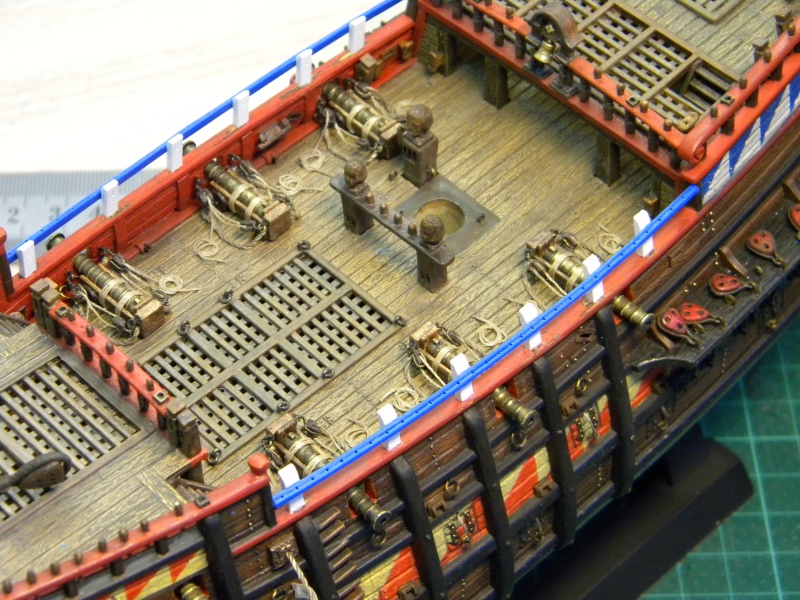
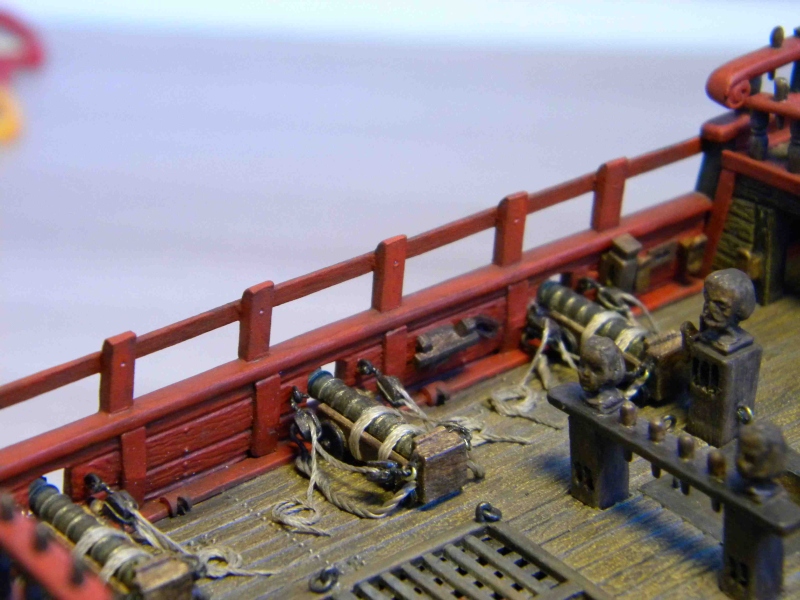
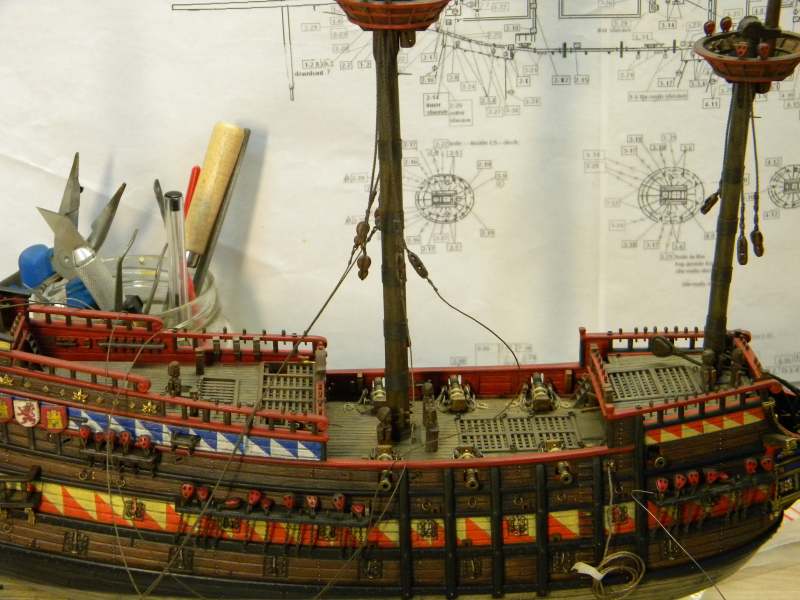
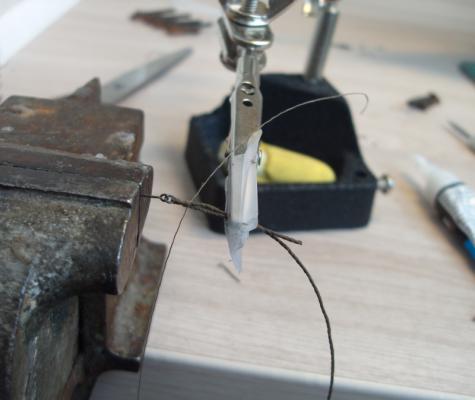
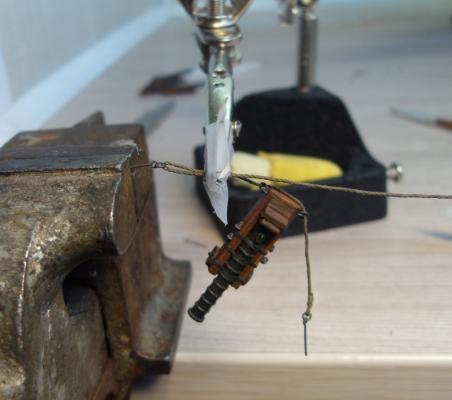
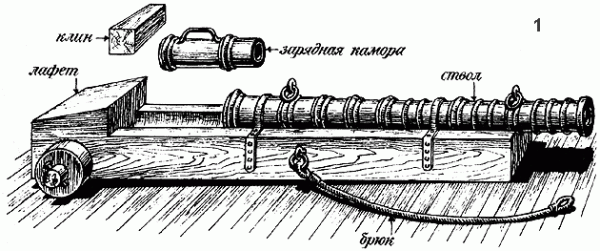
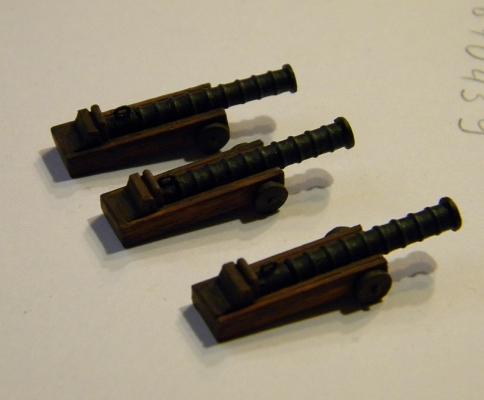
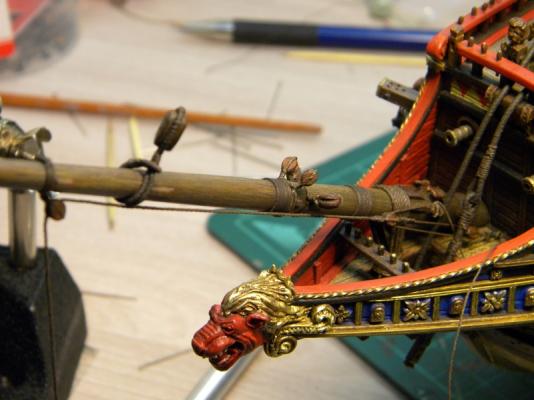
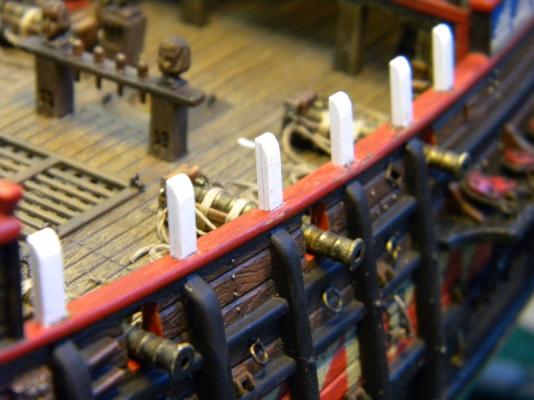
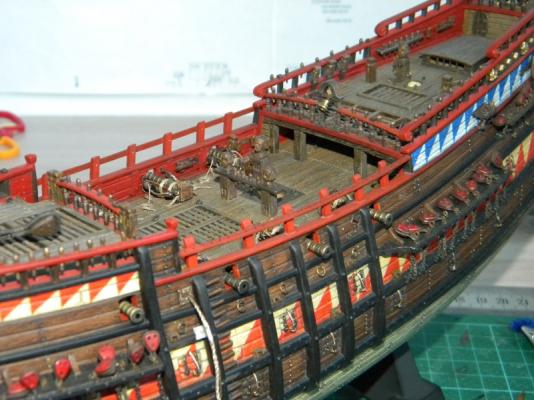
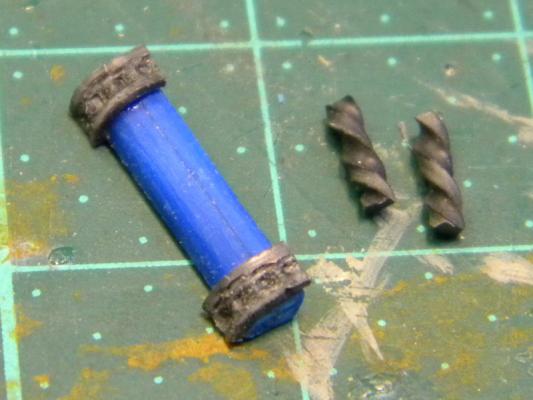
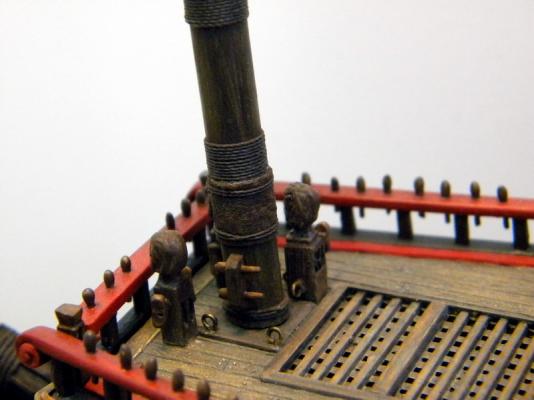
than there was a problem with guns...actually spanish galleon should have two wheel gun-carriage, kit version was 4 wheel, and I tried to modify it for two wheels carriage...let say I did it formal only due to wrong position of kit guns frame which positioned too low, and full size modification was not available ...so I did what I did , and removed previously installed gun tackles ...I don't know what kind of arrangements of this tackles need to be done for breech-loader guns and I left breeching only Mary Roze armament pozition - just for example as it was very near to galleon age


- 228 replies
-
- 5
-

-
- spanish galleon
- lee
- (and 1 more)
-
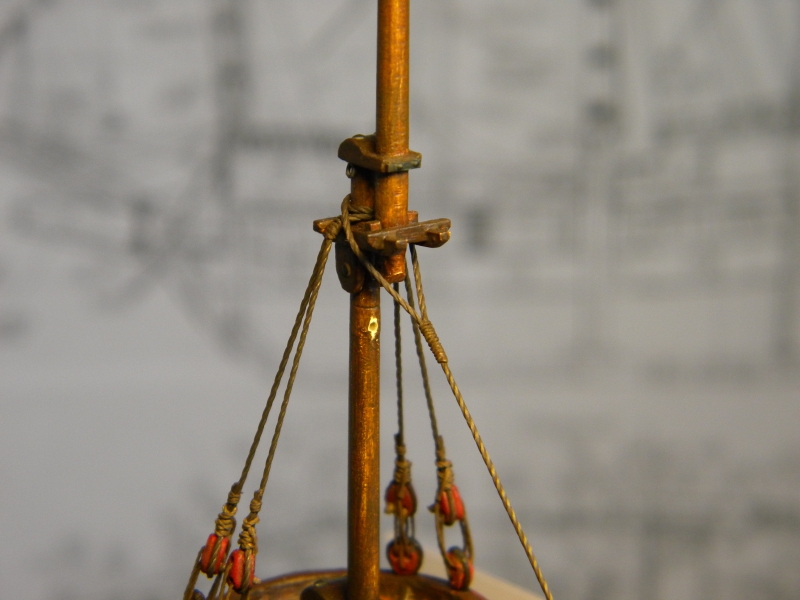
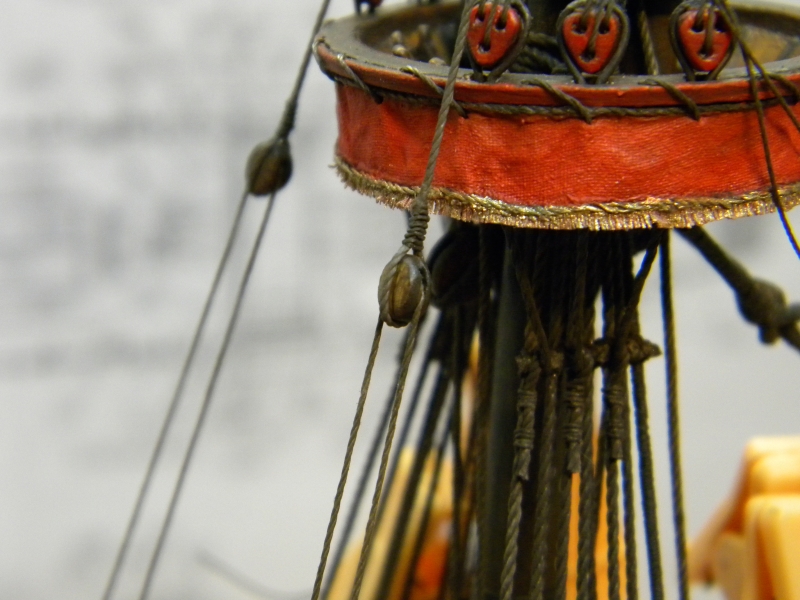
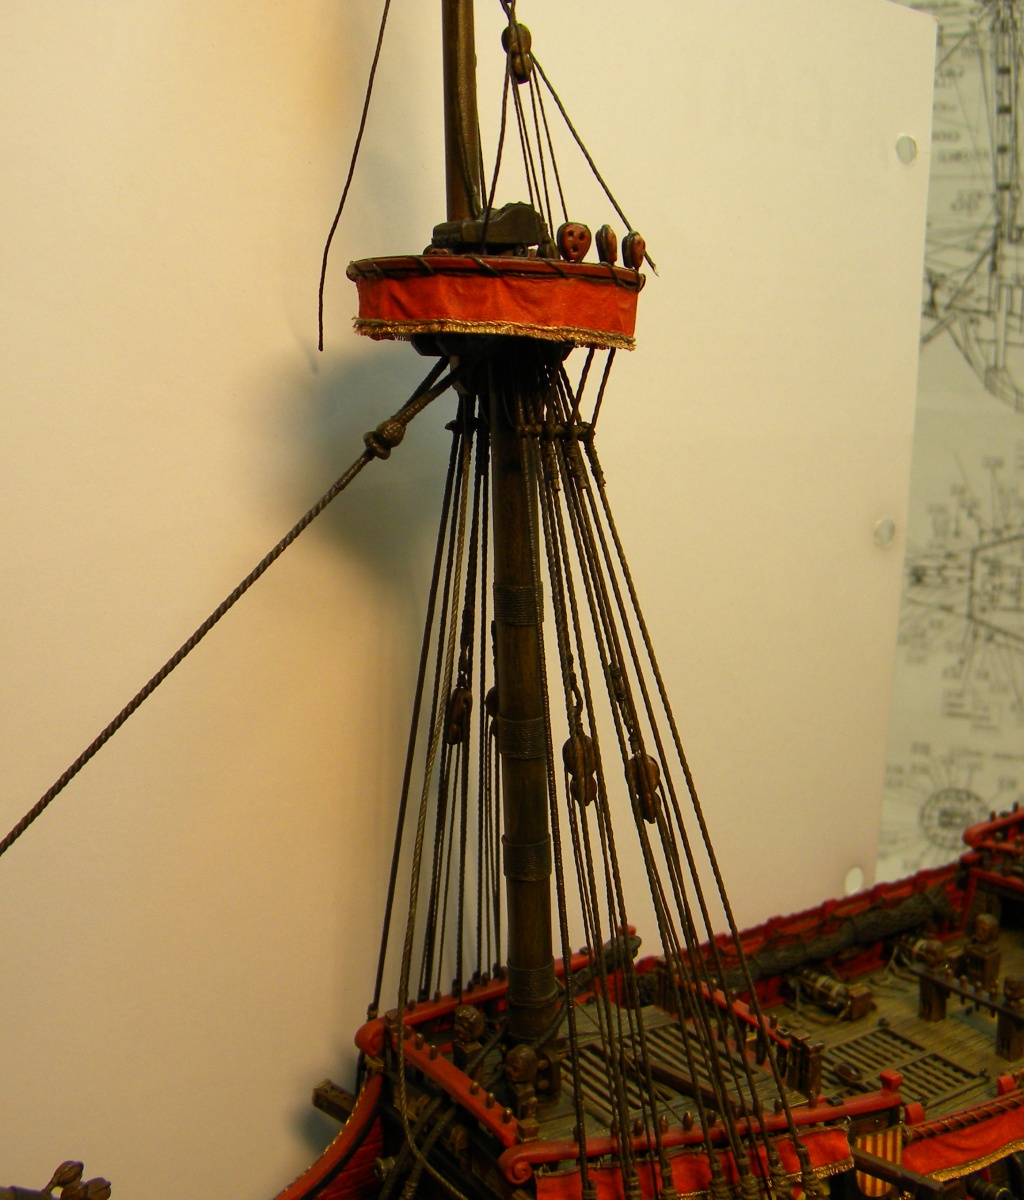
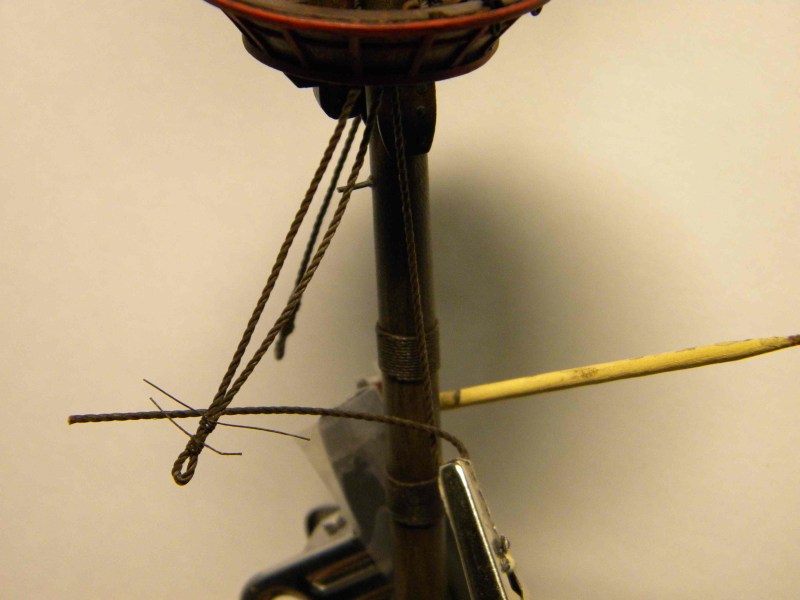
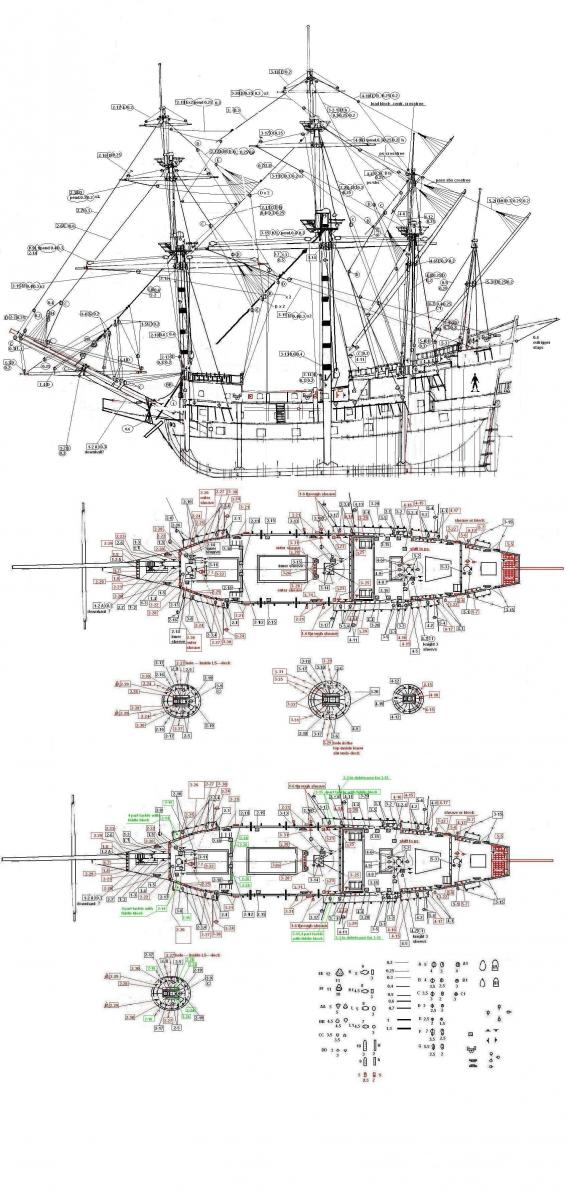
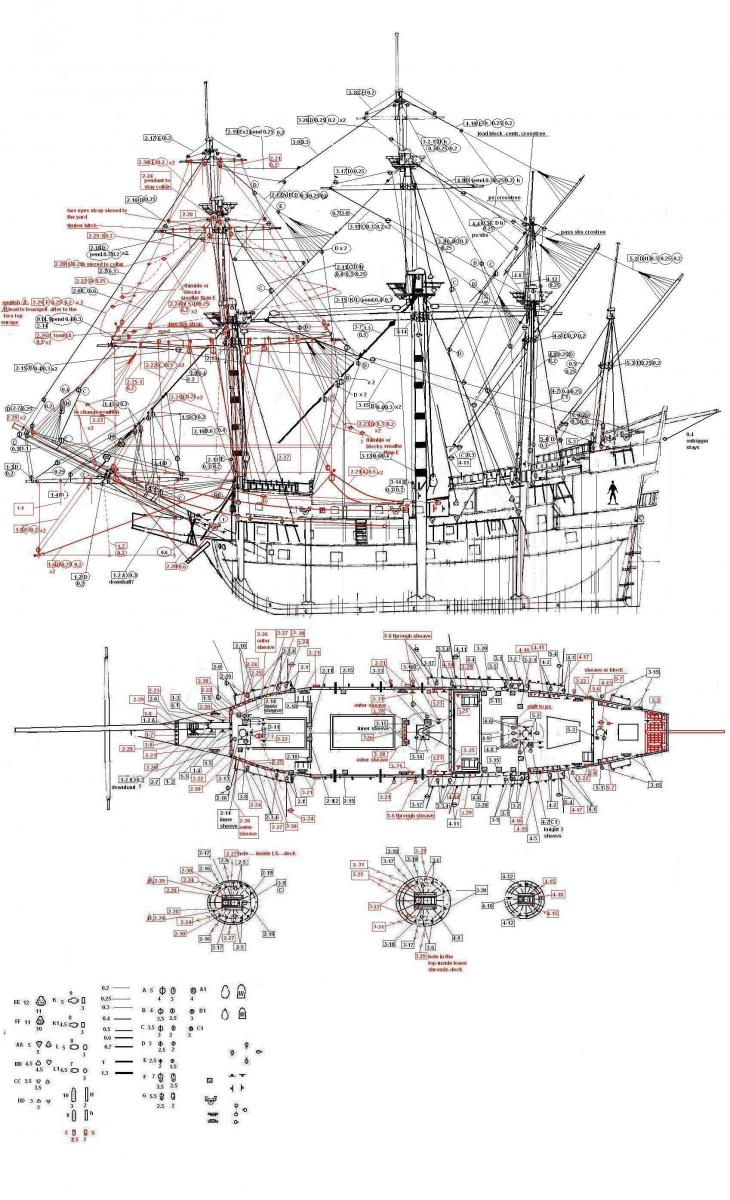
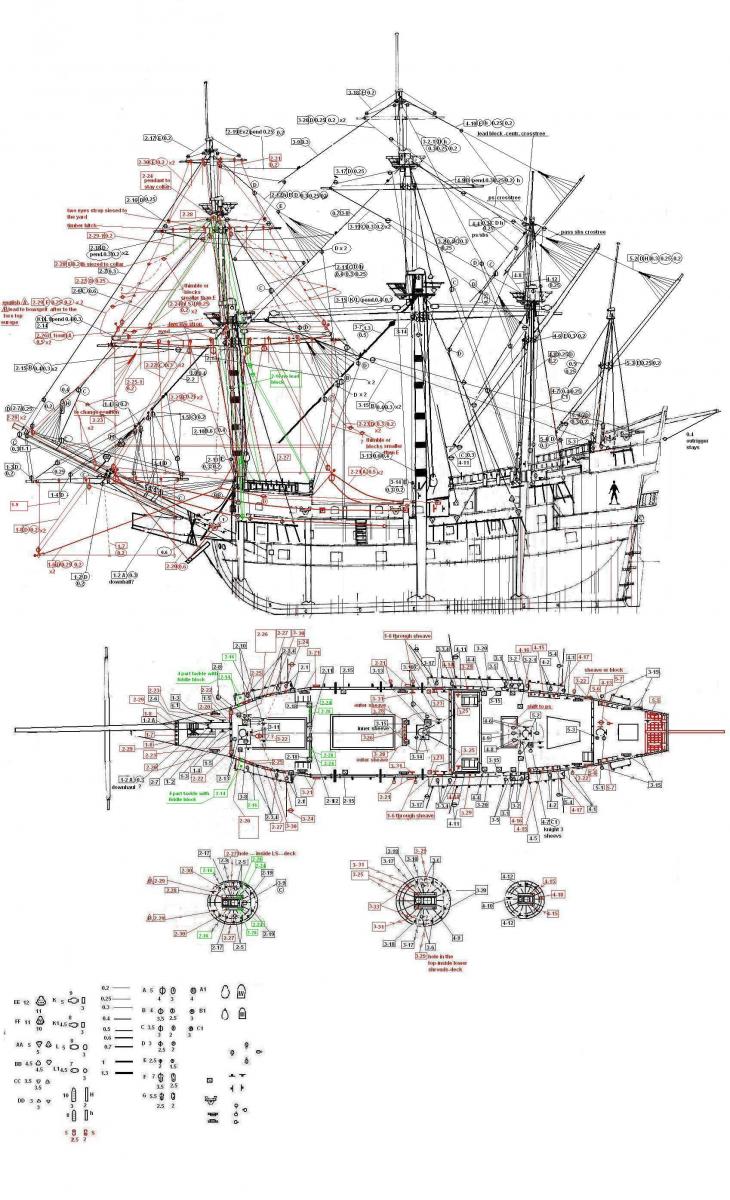
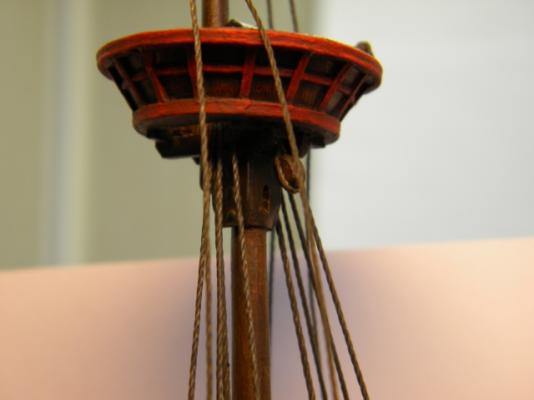
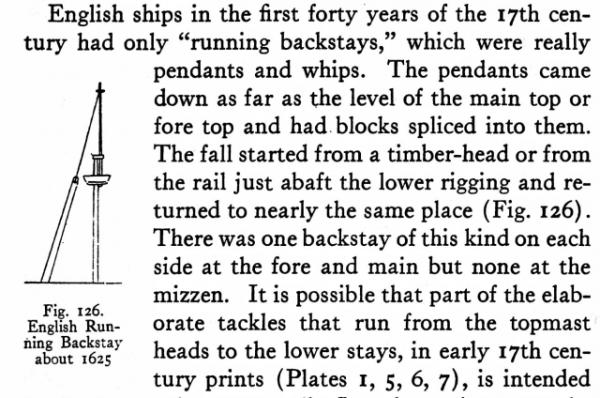
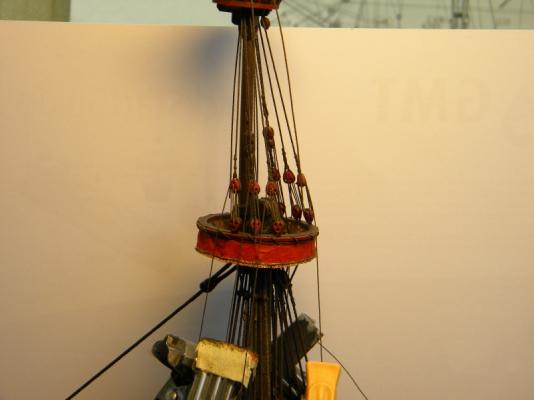
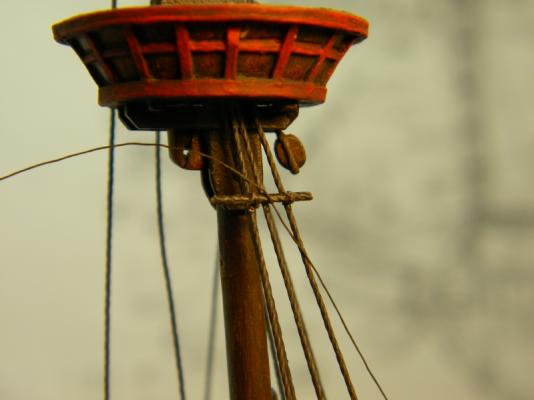
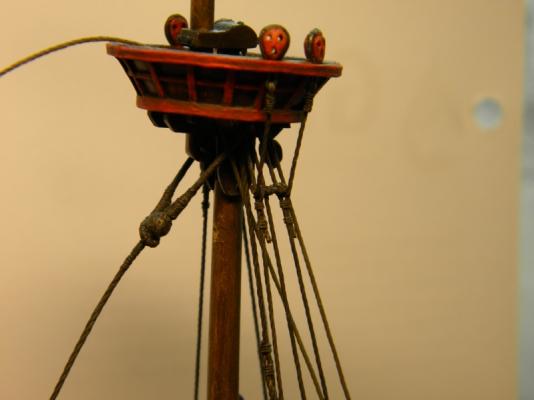
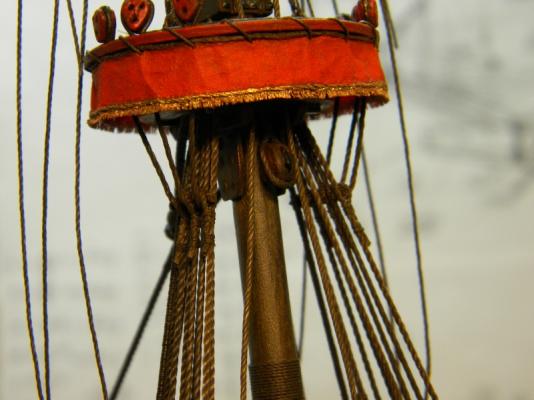
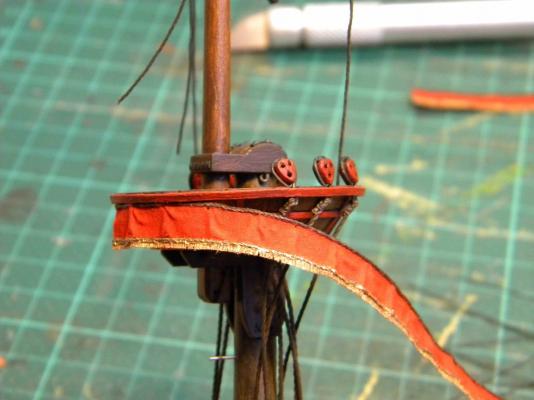
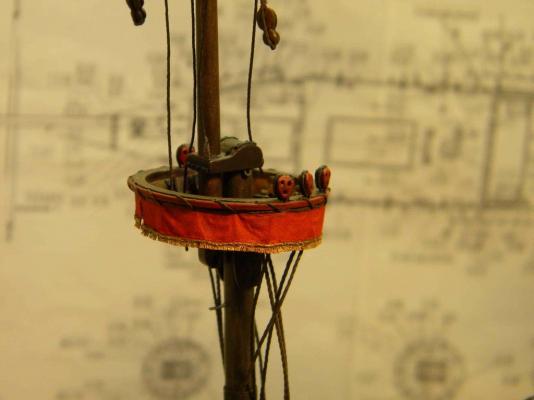
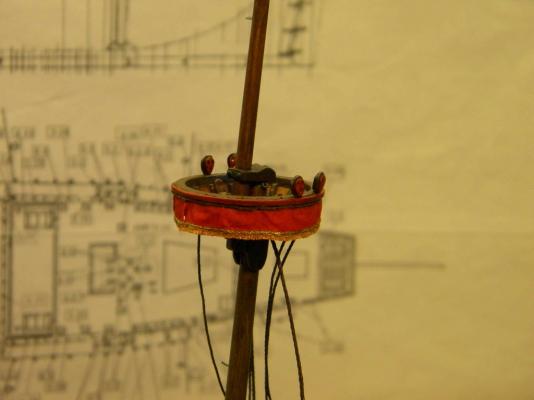
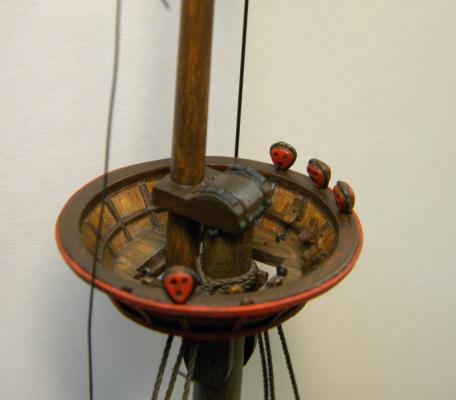
Hi all, after completion foremast , I continue with fore topmast and topgallant shrouds and their futtock shrouds,and installed running backstays, as soon as it was done ,I started installation of fore topmast and topgallant stay


- 228 replies
-
- 3
-
-
- spanish galleon
- lee
- (and 1 more)
-
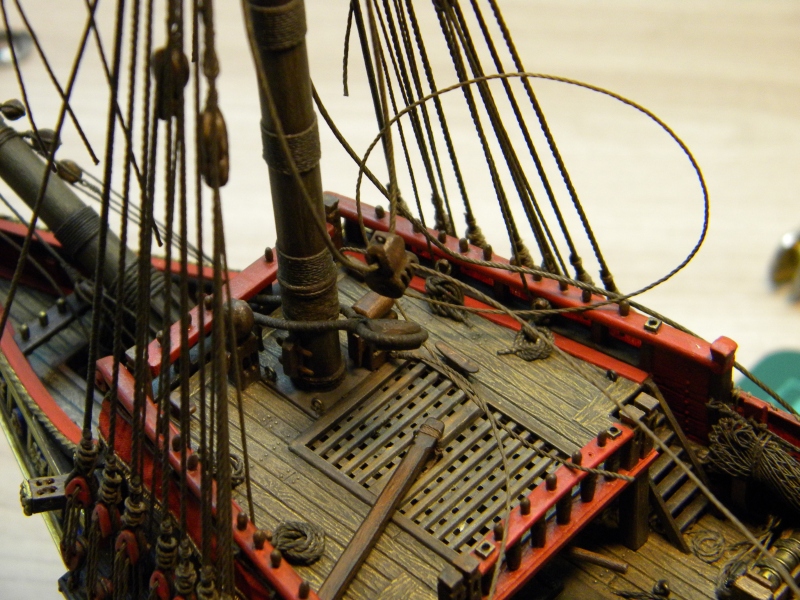
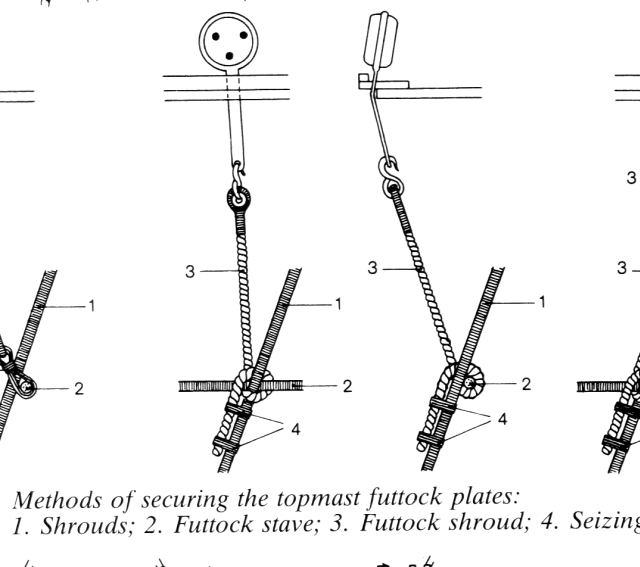
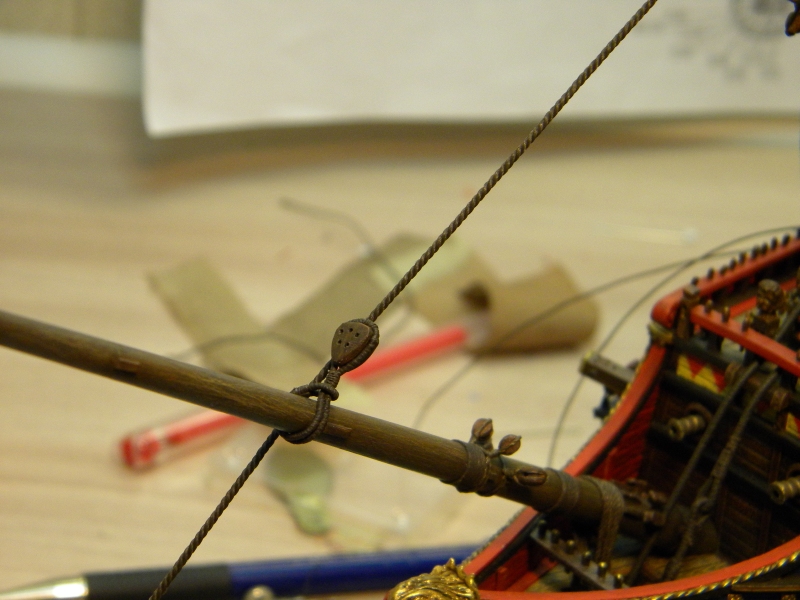
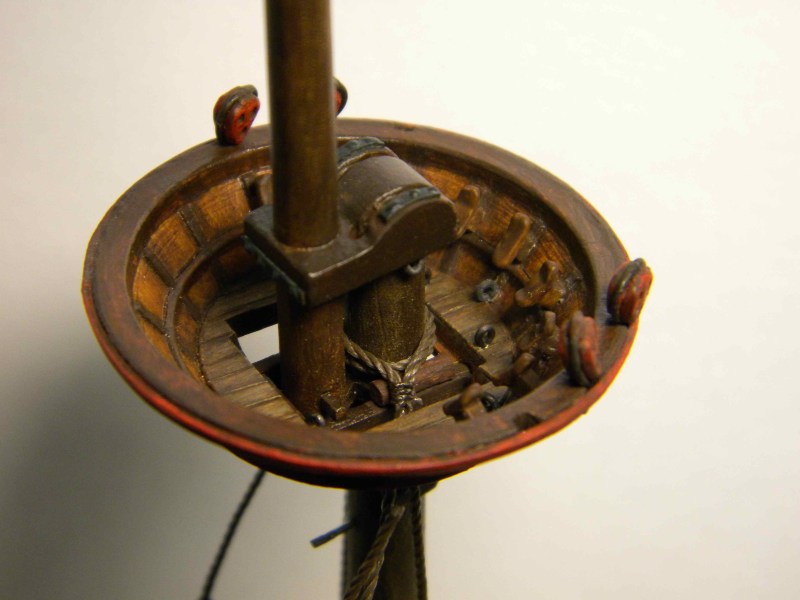
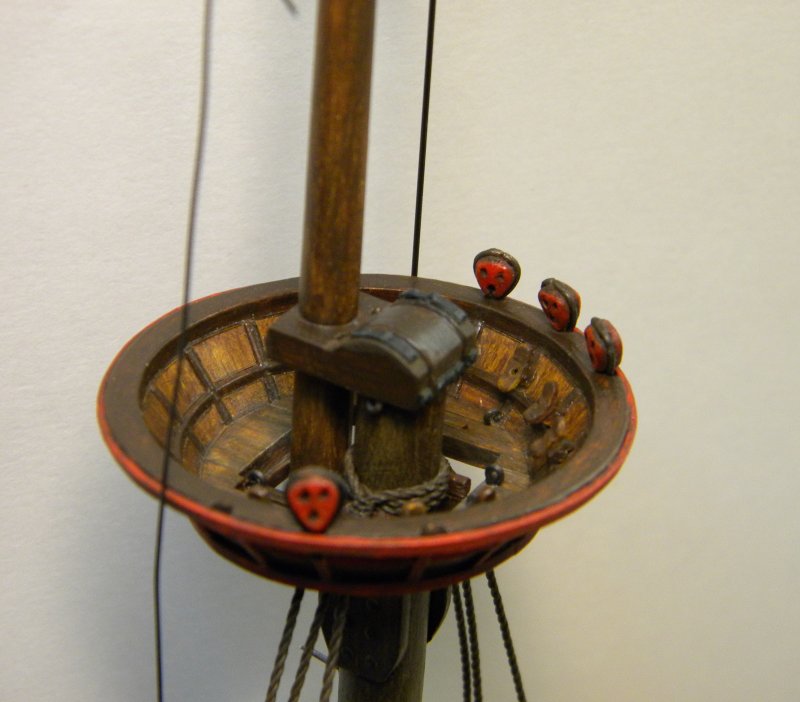
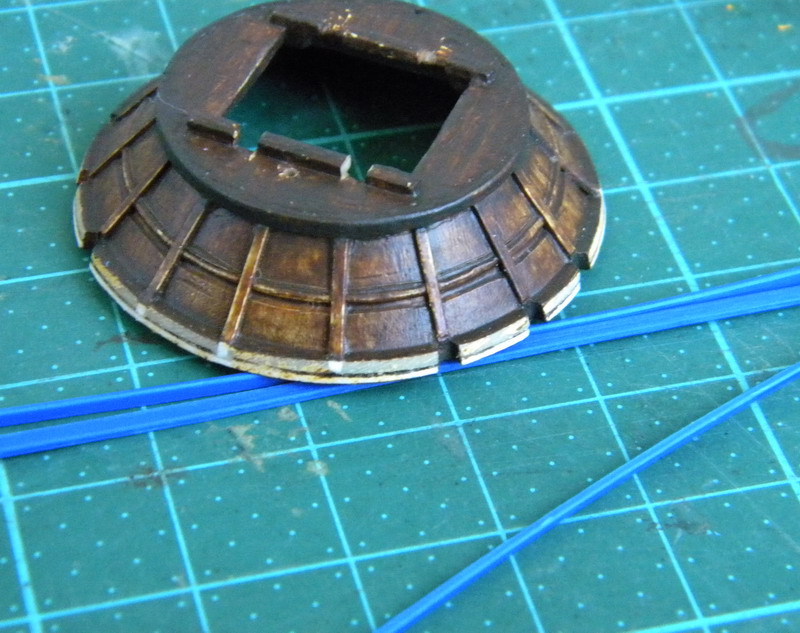
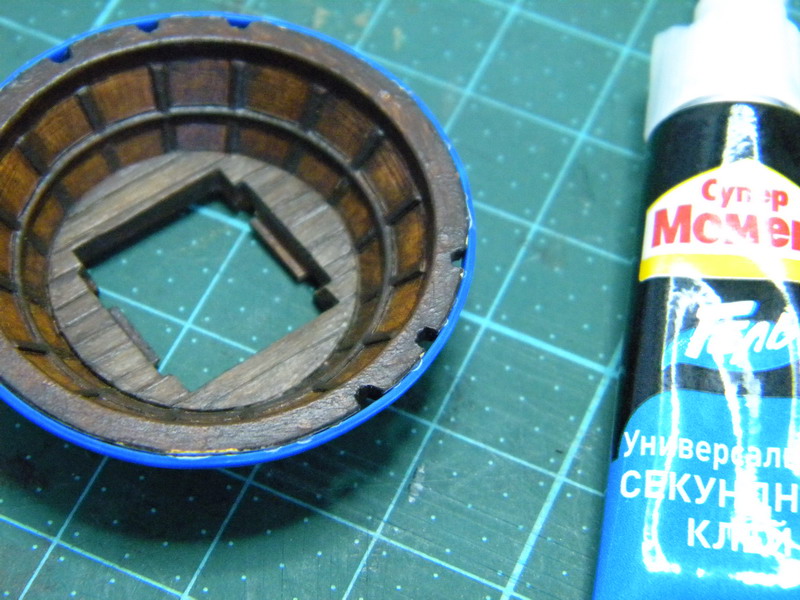
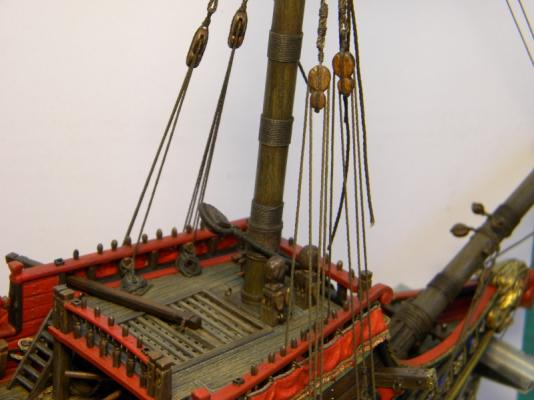
Ok futtock shrouds and catharpin next step ... catharpins on my models will not be installed , I found that it is not "mandatory" for galleon age ....the rest I tried to do as it is discribed in" The rigging of ships. In the days of the Spritsail topmast 1600-1720 - Anderson" than I installed lower yard ties and halliards,ties clued to cap and tightened by halliards , lower yard will be installed later on together with fore sail


- 228 replies
-
- 3
-
-
- spanish galleon
- lee
- (and 1 more)
-
HALF MOON by jct - FINISHED - Corel
kirill4 replied to jct's topic in - Kit build logs for subjects built from 1501 - 1750
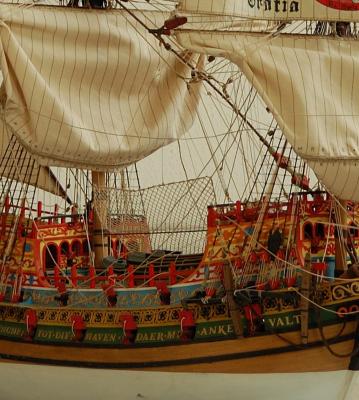
Hi J, Nice job, really looks nice! As I understood - lions used as the figurehead- just good simbol of POWER! as far as I can see on many galleons contemporary drwngs - lions very often used ...I think it is the simplest explanation ...and not only galleon age but later on, this variations of lions were in use may be more often on navy vessel? Abt red ship side I'm not so sure if it is ness-ry to use this color on HM ,if she is not navy vessel(trade vessels -brown or dark wood or natural wood color),and need to be colored red in case of "Yes" red color- I think mostly matter of fashion for navy than need to have it for some practice purposes But if You painted it red -it will not be mistake because in this time merchant vessels easily became navy and most of the time they have same armament... Actually it should not be really red color, need to be more close to red ochre - blood red there is good Rolf Hoeckel book "Modellbau von Schiffen des 16 und 17 Jahrhunderts" where he told abt painting/color... there is HM replica - red color but on this picture of merchant dutch vessel - no red color and no figurehead ....I think in both cases You will be right, which color scheme You will choose (sorry my English) All the best! Kirill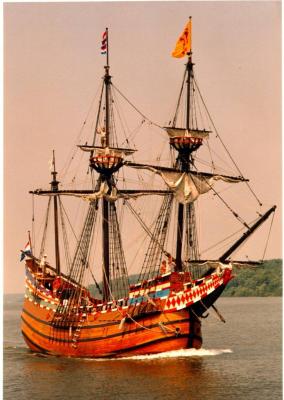
-
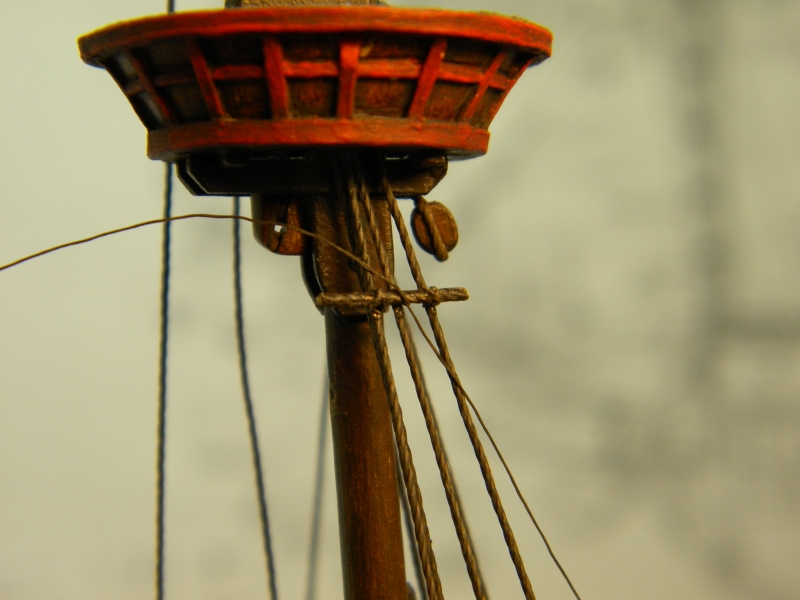
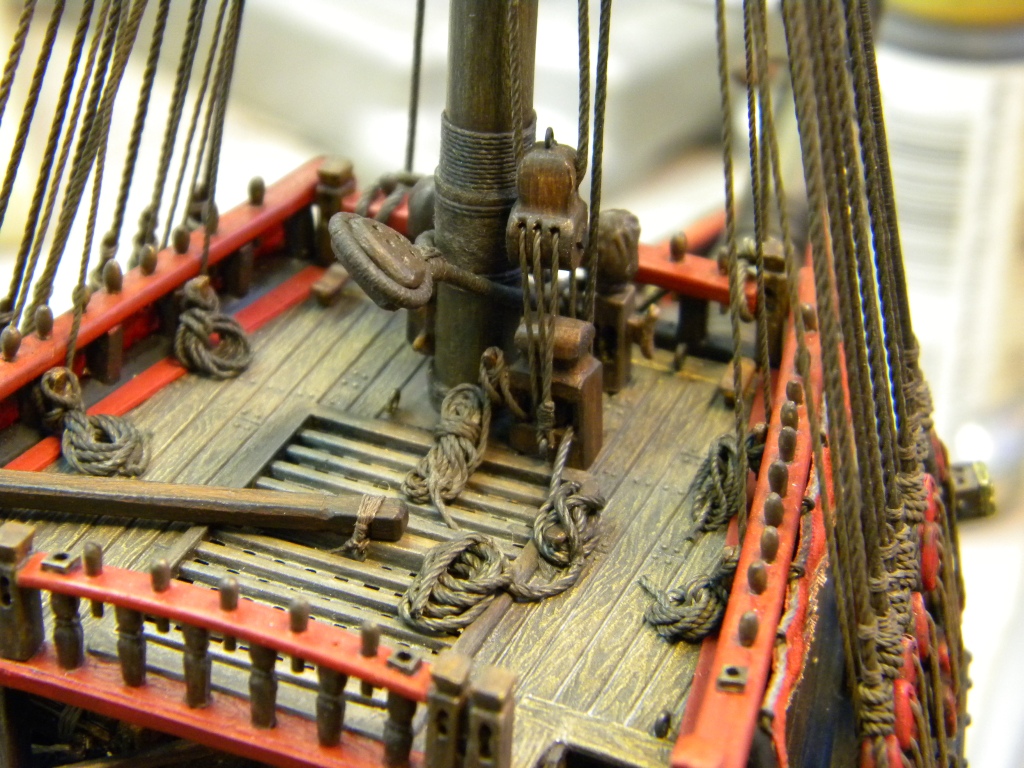
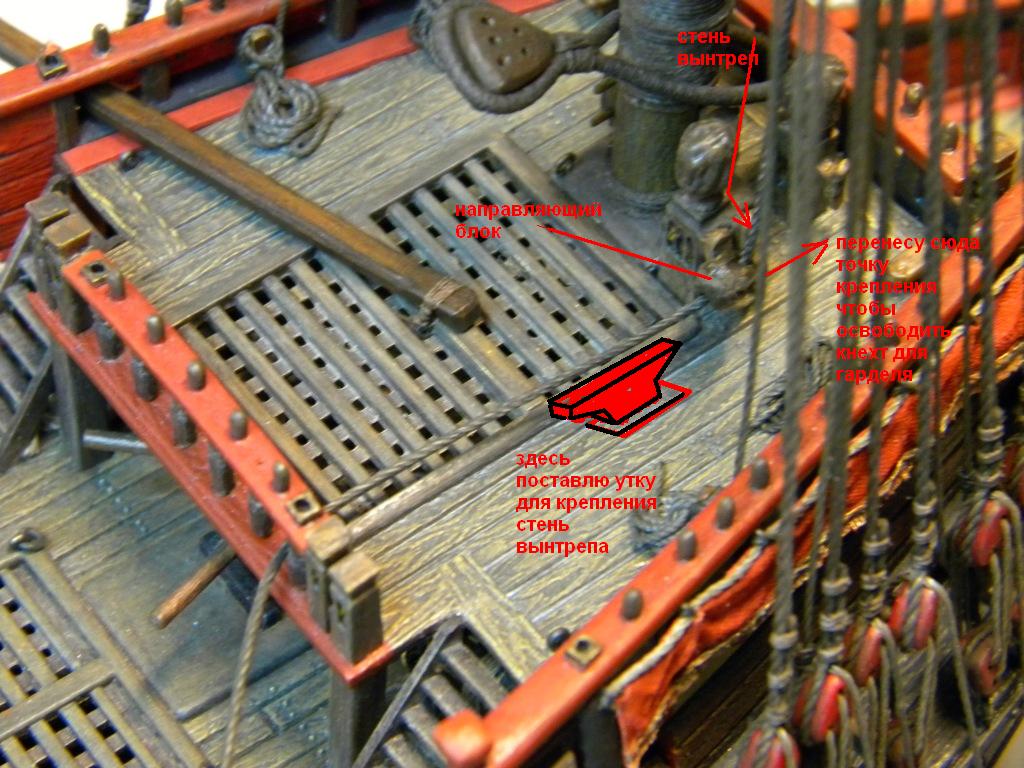
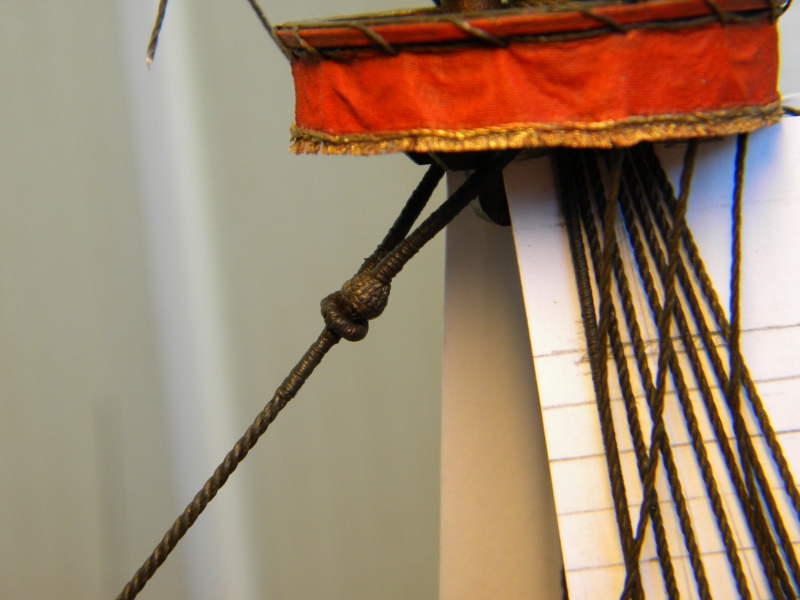
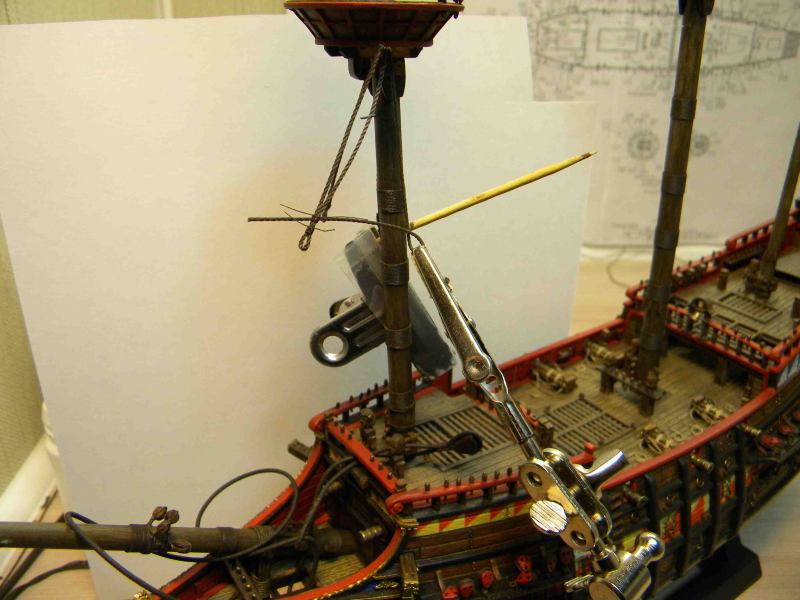
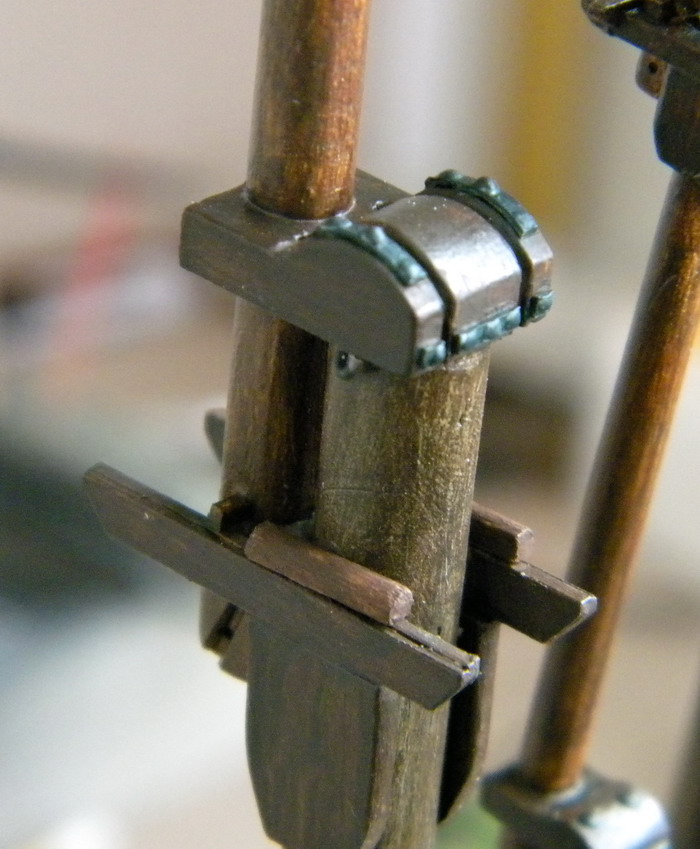
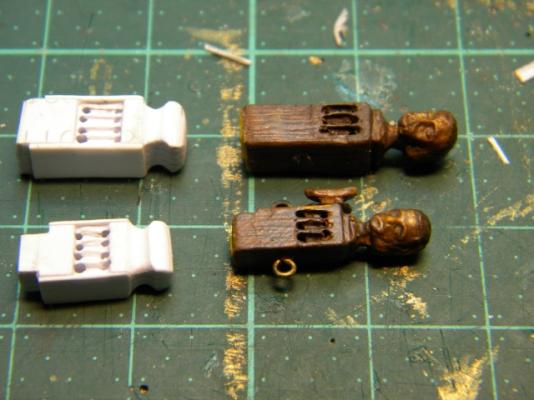
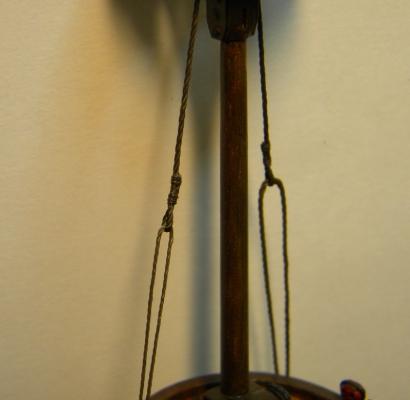
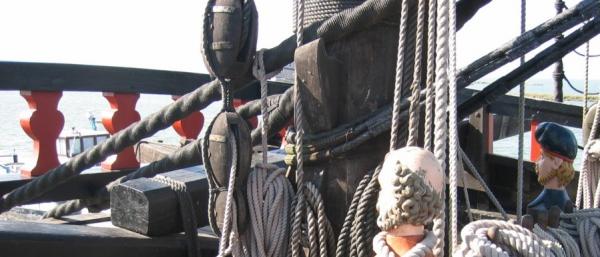
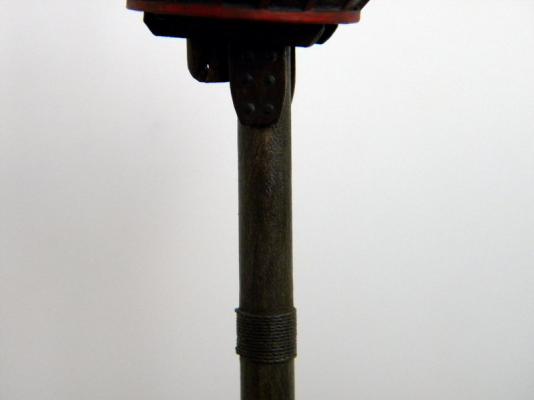
next stage for me was the fore mast top rope installation...actually it is not necessary to have it in normal sailing condition...but I wanted to have it just for fun During top rope installation I've found that I need to replace mast bitt - this part from the kit was wrong construction and couldn't adopt my top rope...so I fabricated new one from telefon plastic cards... than there was questn how and where to secure running end of this rope...I didn't find better solution but only to install additional cleat...it is funny, but I don't know how it should be arranged on galleon...I didn't find this arrangement on modern galleon sailing replica From the books I only understood that mast bitt should have 4-th sheeve fo this rope


- 228 replies
-
- 4
-
-
- spanish galleon
- lee
- (and 1 more)
-
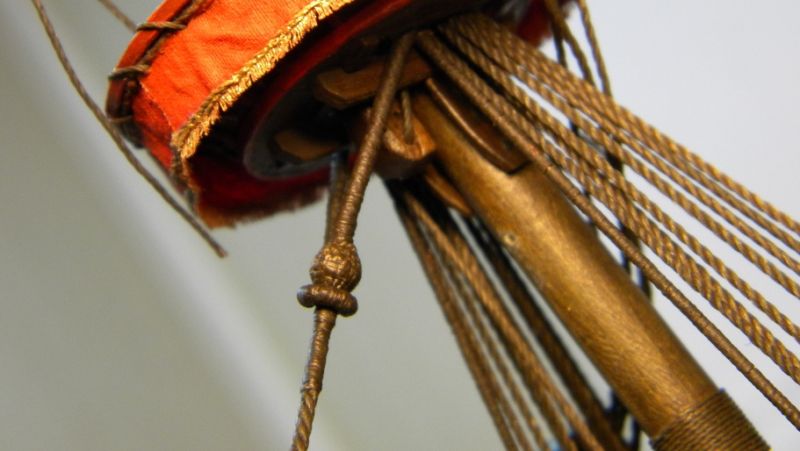
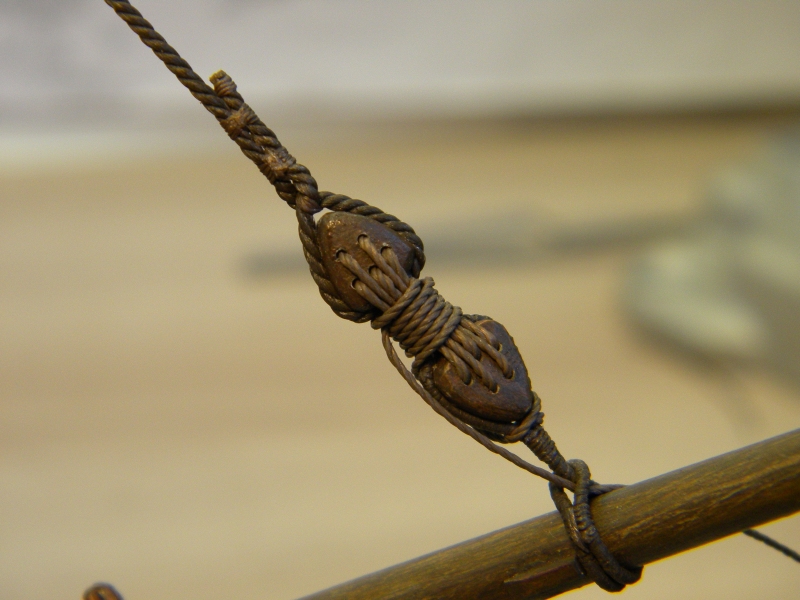
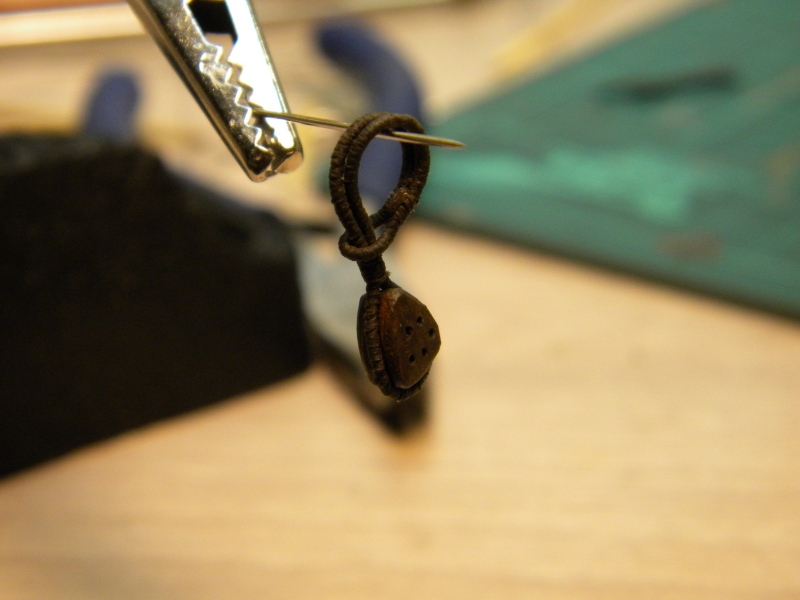
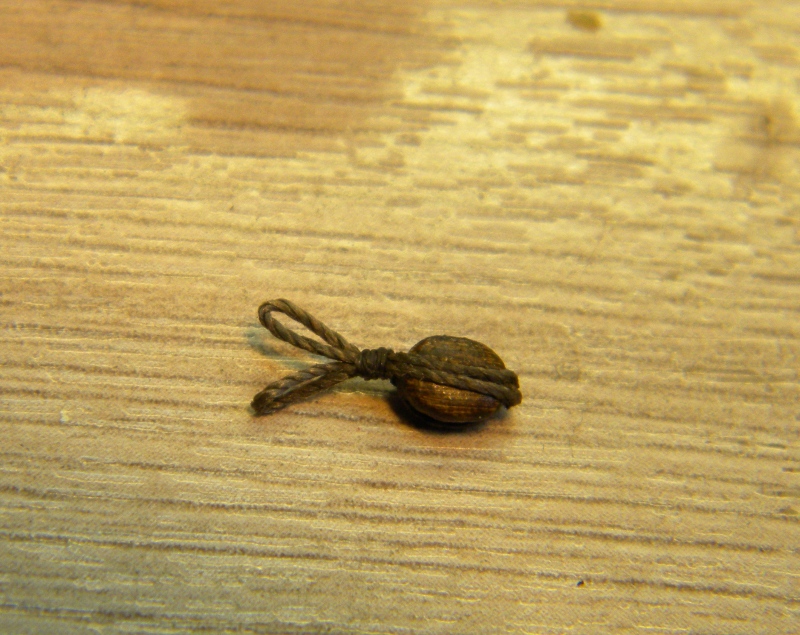
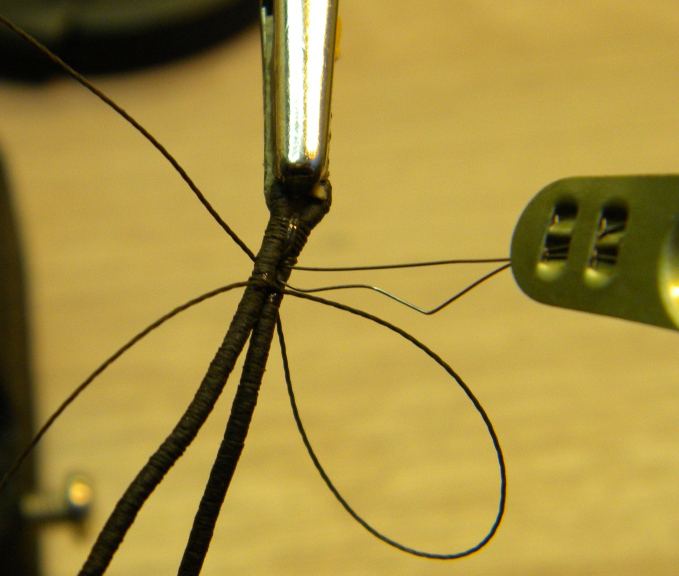
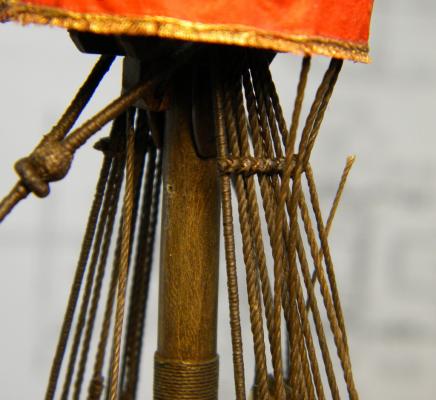
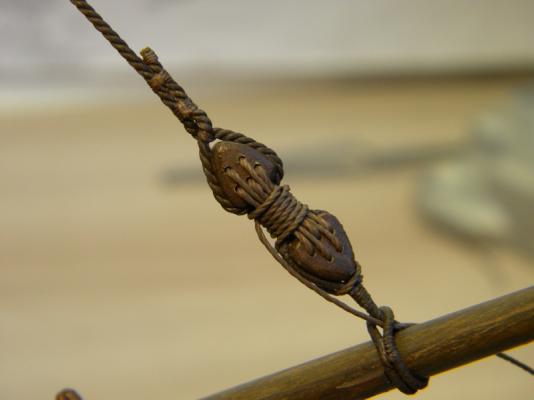
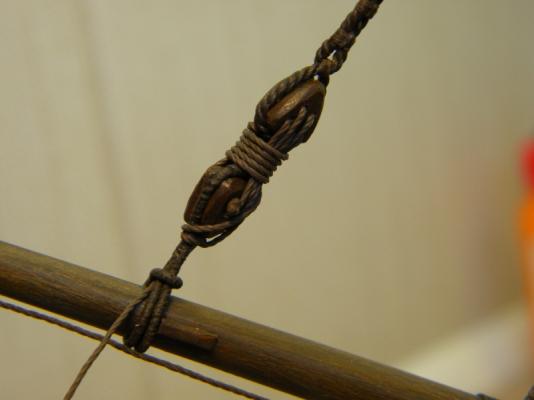
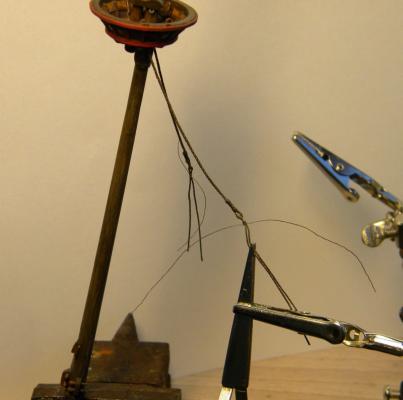
Next stage for me was just continue to attach shrouds without laniards and when all set was installed left them like this for a moment, than I fabricate fore stay with loop and mouse and install it and adjust nessry lenght ...and after that only it was possible to remove carton and install and adjust laniards...adjusting laniards tighteness took me couple of days due to plastic masts very sensitive and load need to be distributed very smooth As soon as it was done I secured them with drop of CA gel oposite and than made free end of laniard turn around and secured...details of location knob and passing those laniard ends well discribed in "The rigging of ships. In the days of the Spritsail topmast 1600-1720 - Anderson" Mouse I've made from piece of liquid steel ,forming a ball shape(not pear shape like on modern vessel) and imitated stitch by knife + painted later on Shrouds top Loops not served ///as I understood in this time they shouldn't be(continent)


- 228 replies
-
- 6
-
-
- spanish galleon
- lee
- (and 1 more)
-
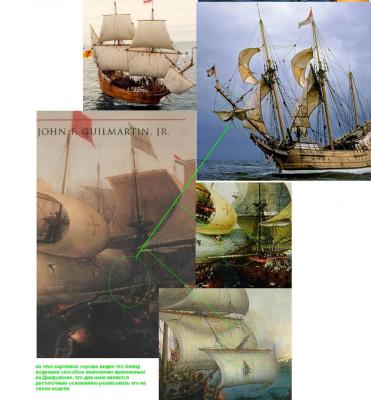
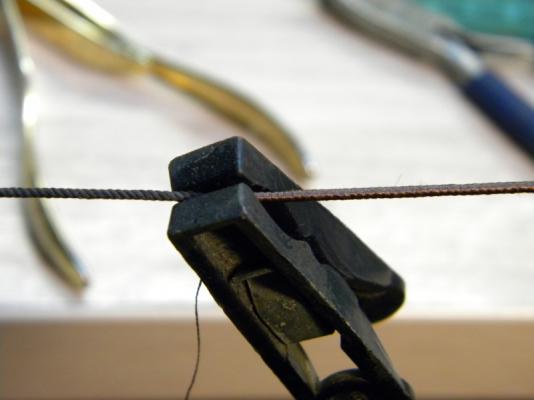
Hi Matti, Clear, thanks, making my "galleon rigging report" I was thinking in parallel how to make this "the squared holes" ...I mean ,how would I do that...take some steel rectangular cone end rod , heat it up till yellow color and to burn preliminary drilled hole inserting this rod and than sand paper...but this is just my fantasy How You did it in reality?
-
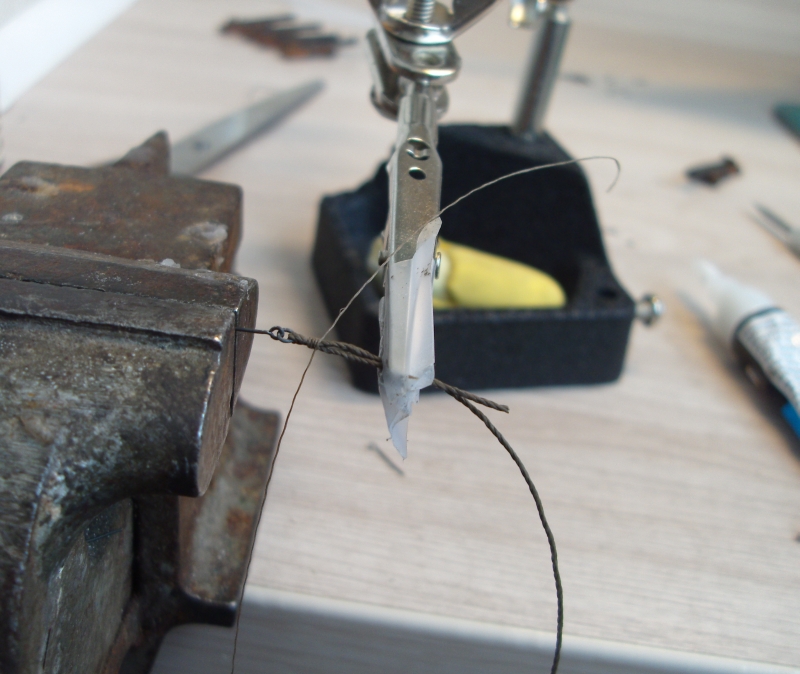
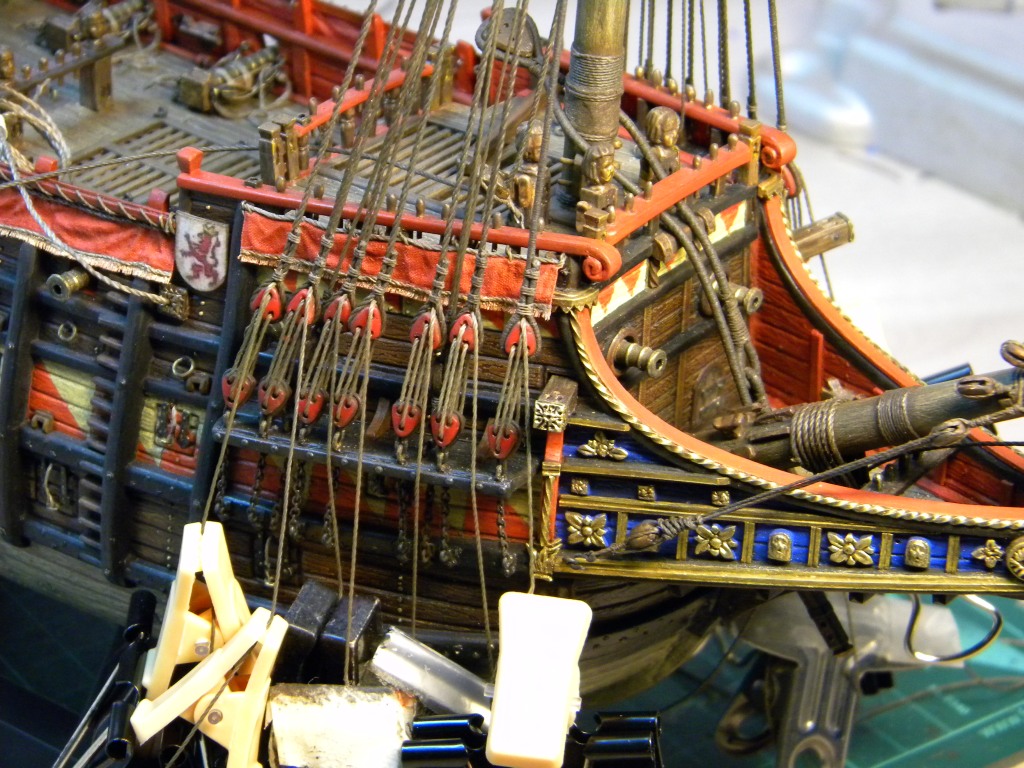
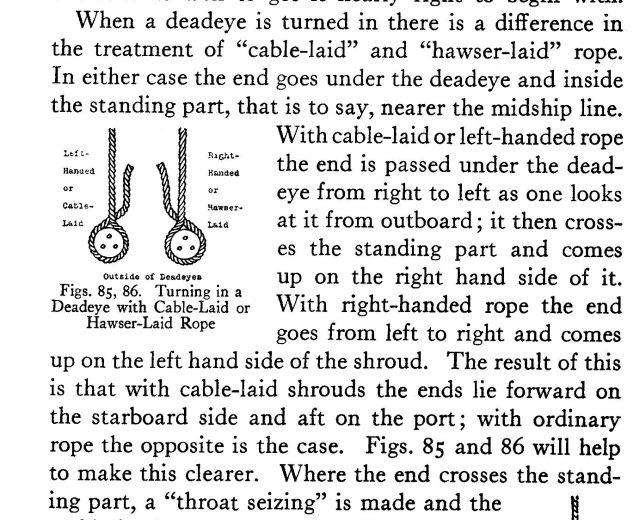
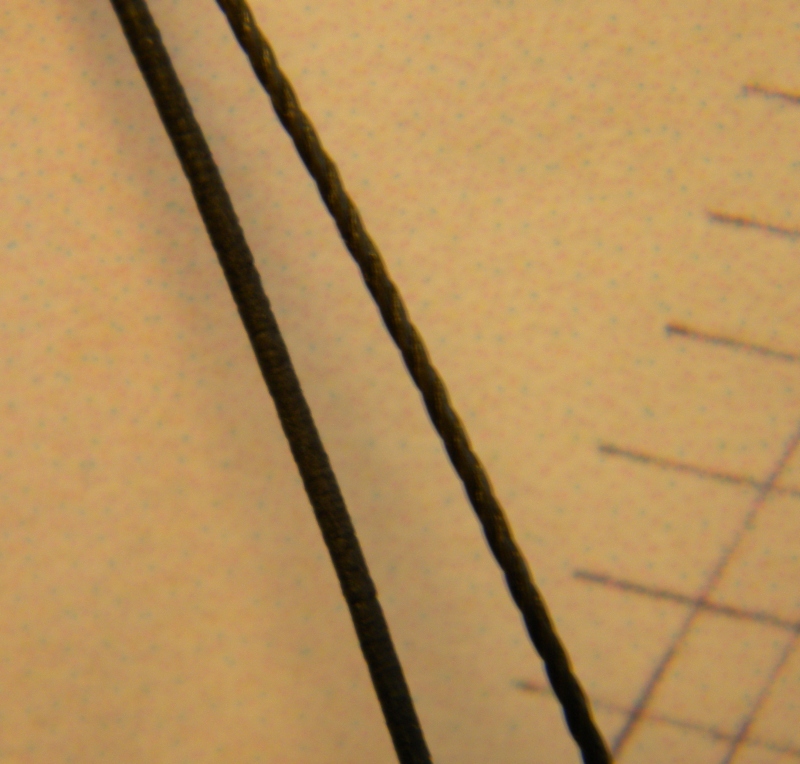
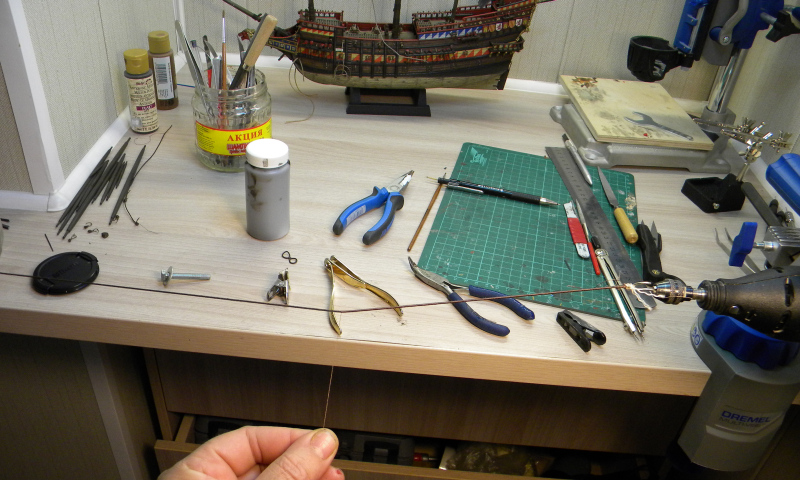
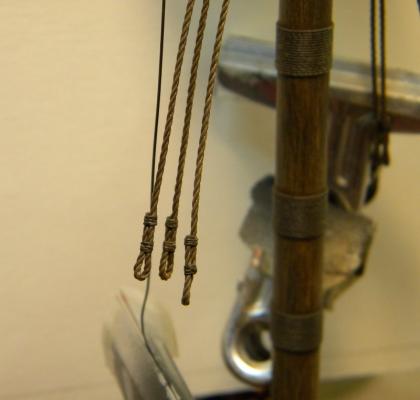
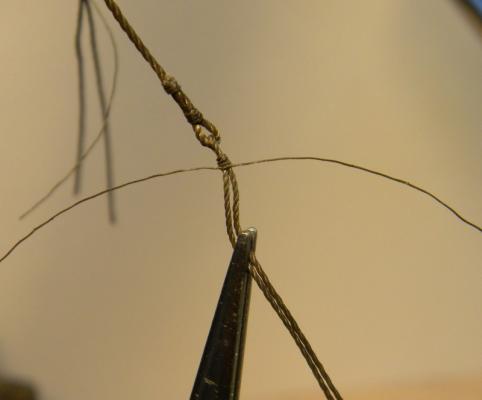
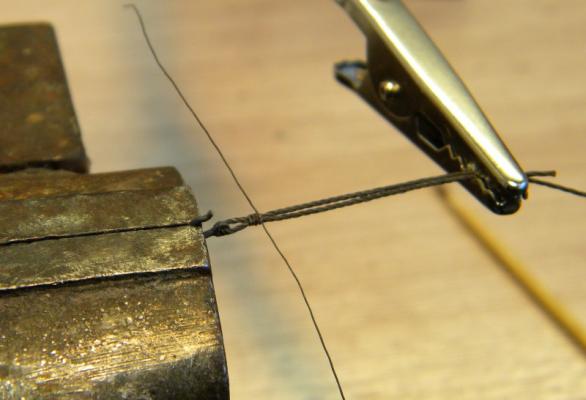
Next stage was fore shrouds installation...as soon as it is my first model where I wanted to make more or less full style rigging,I men as much complicate as I can do...I was a little bit afraid to start... One of the unsolved problem which is still remains - I use not proper ropes for rigging but ordinary polyester threads...and appearance is not as it should be when You make Your own ropes...but OK...next model I will do with correct threads,just need to fabricate simplest rope makeing mashine Thread which I used for shroud - hawser laid ,as said -ordinary rope...and same I saw was used on Duyfken replica Above deadeye I didn't make end crossed standing part and didn't make "throat seizing" but just seized end rope to its standing part when rope went around deadeye -finaly have rope end lie forward on sbs and aft on ps ...classical arrangment on modern ship will looks different Thread which I used was preliminary painted by acrylic paint (mix of brown+black+ochre light+raw umber+matt acrylic varnish) - proportion free, just maid it close to dark brown for standing rigging and brown -raw umber- yellow- for running rigging Before start making shrouds I made hard carton pattern where marked pozition of the shrouds+position of upper deadeye+ratline position upper deadeye secured with wire wich I purchased in some shop for sewing hobby and a drop of cyanoacrylate adhesive gel ... The rest of procedure was much easy that I supposed -make shroud goes round of upper deadeye,adjust position ,make it tight as much as possible and hold by clip + secure end of the rope with couple of seizing... forward shroud I made serviced I guess this "technology" is very well known and isn't so interesting... ratlines will be installed at the final stage of the rigging...


- 228 replies
-
- 5
-
-
- spanish galleon
- lee
- (and 1 more)
-
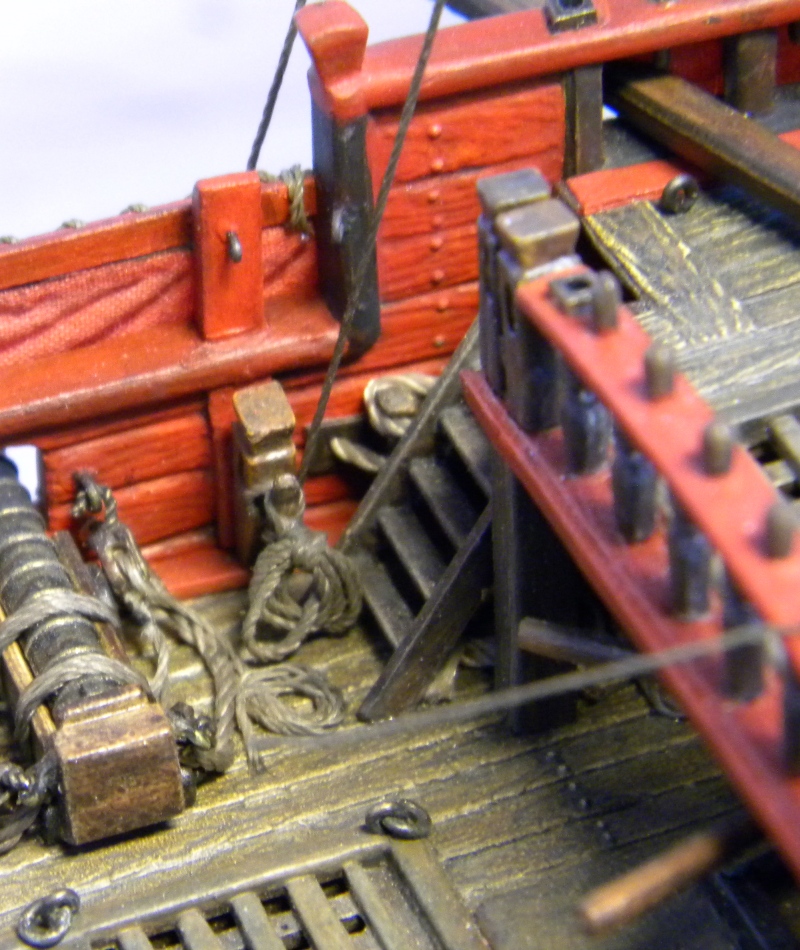
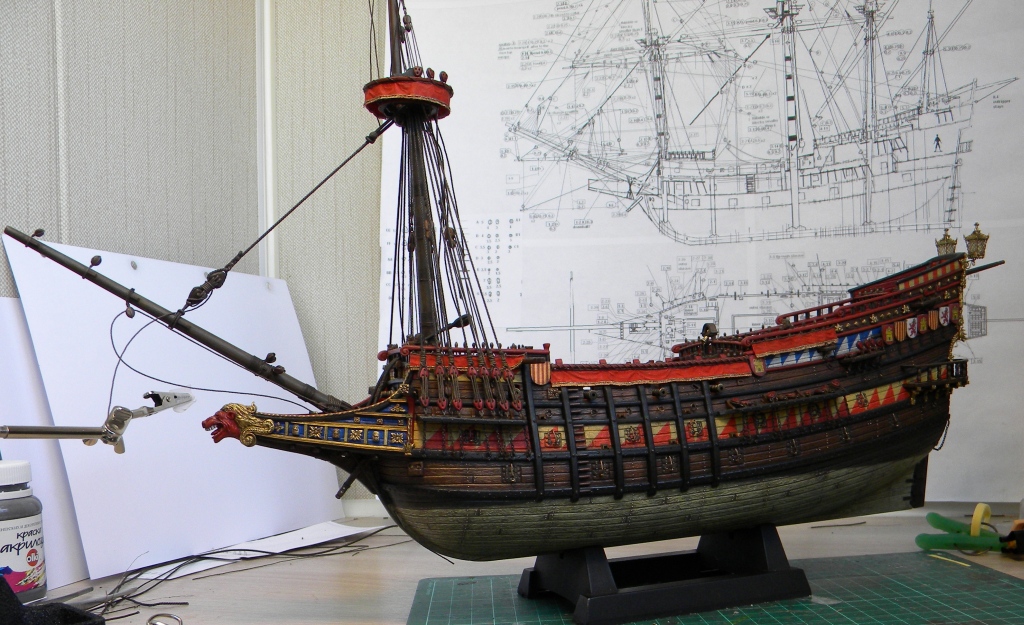
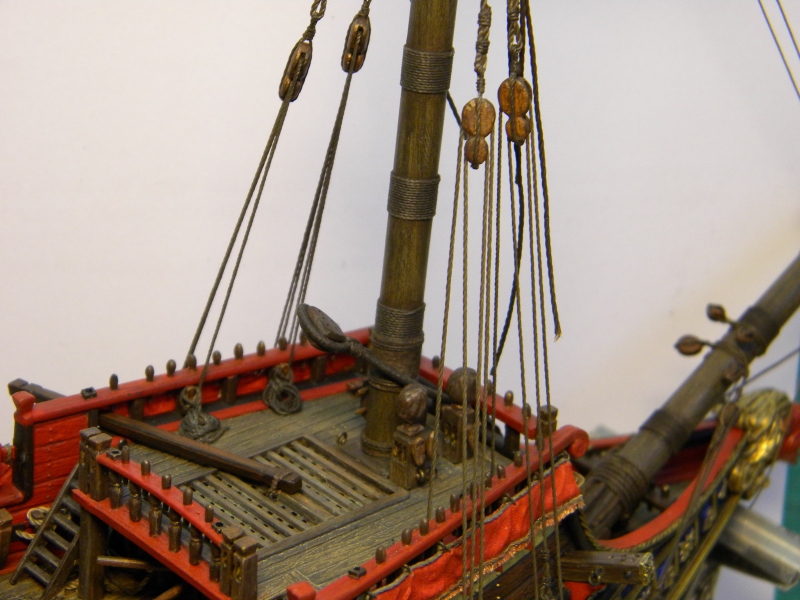
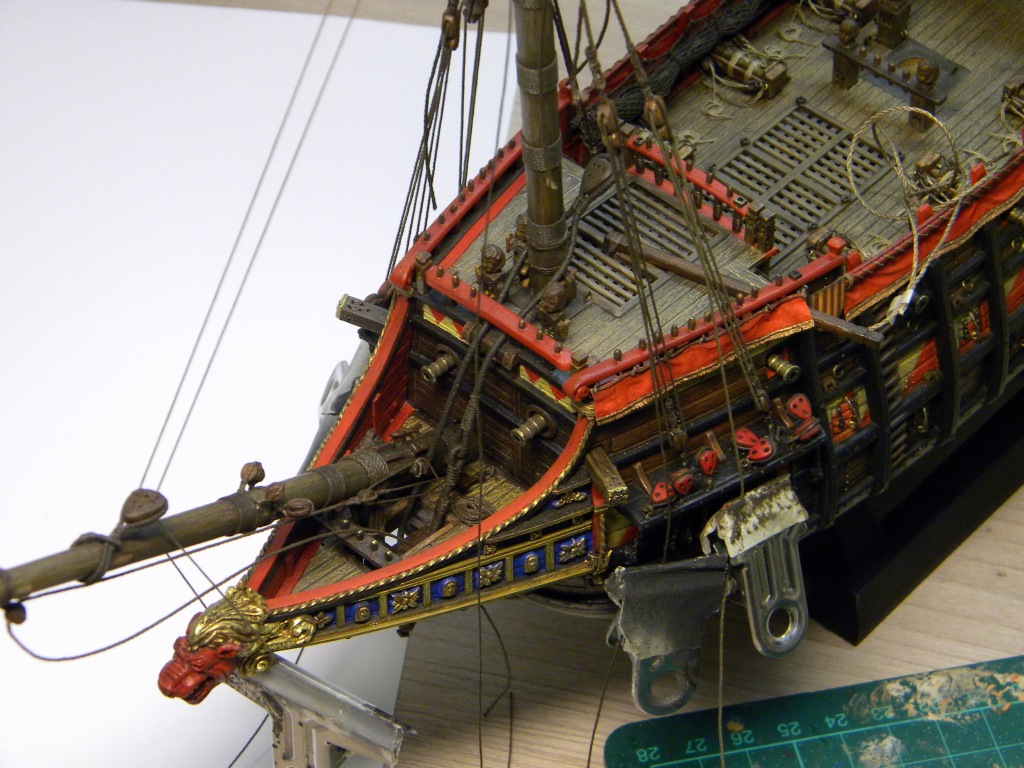
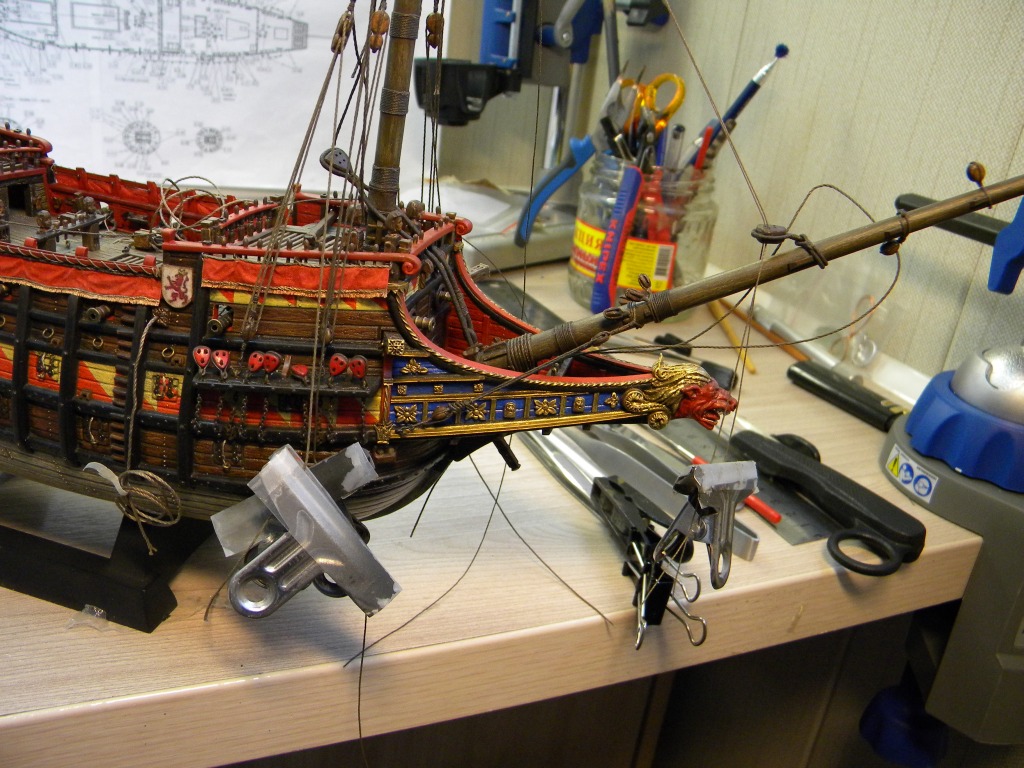
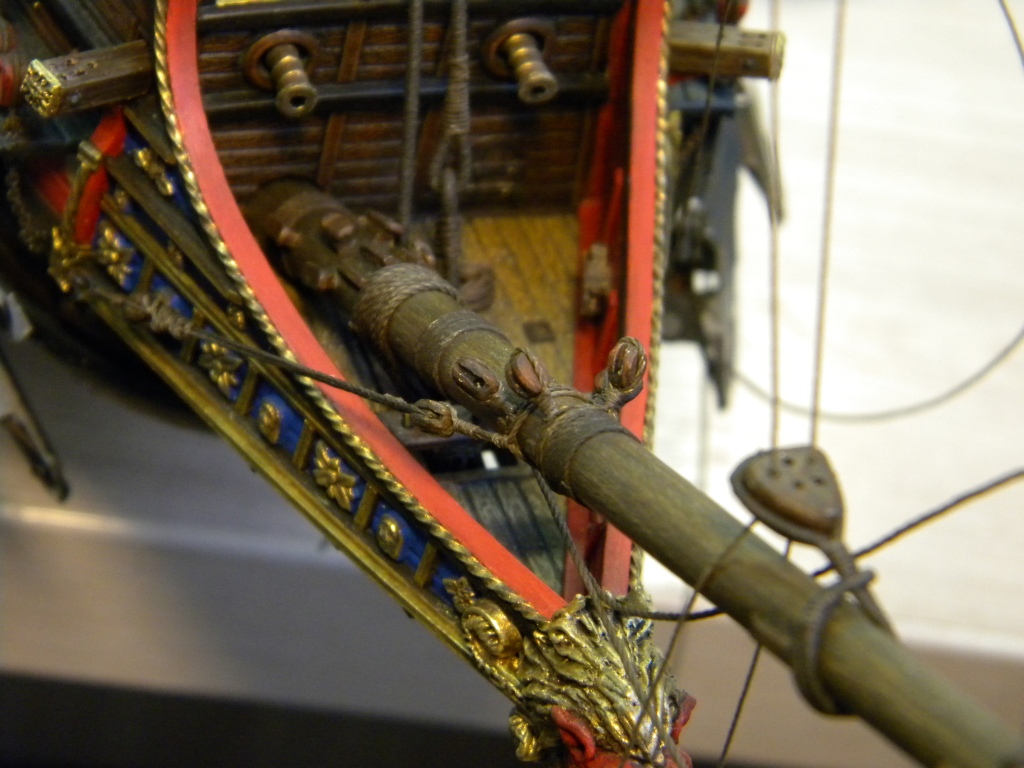
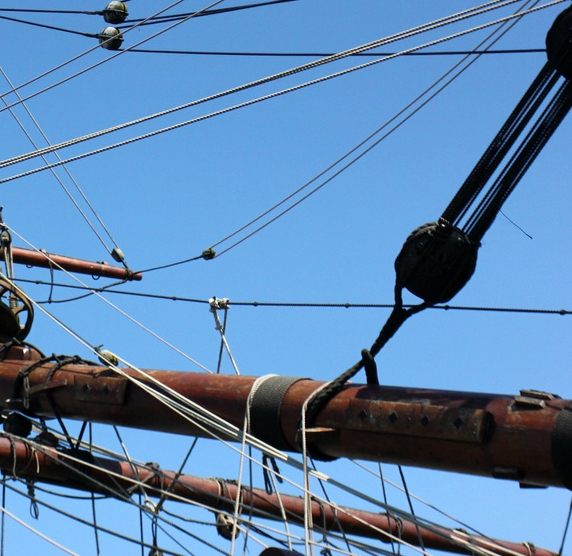
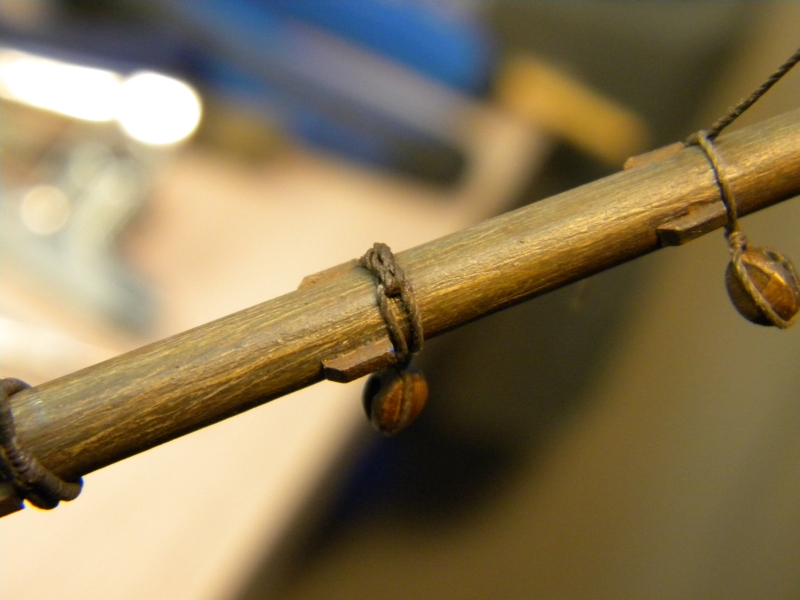
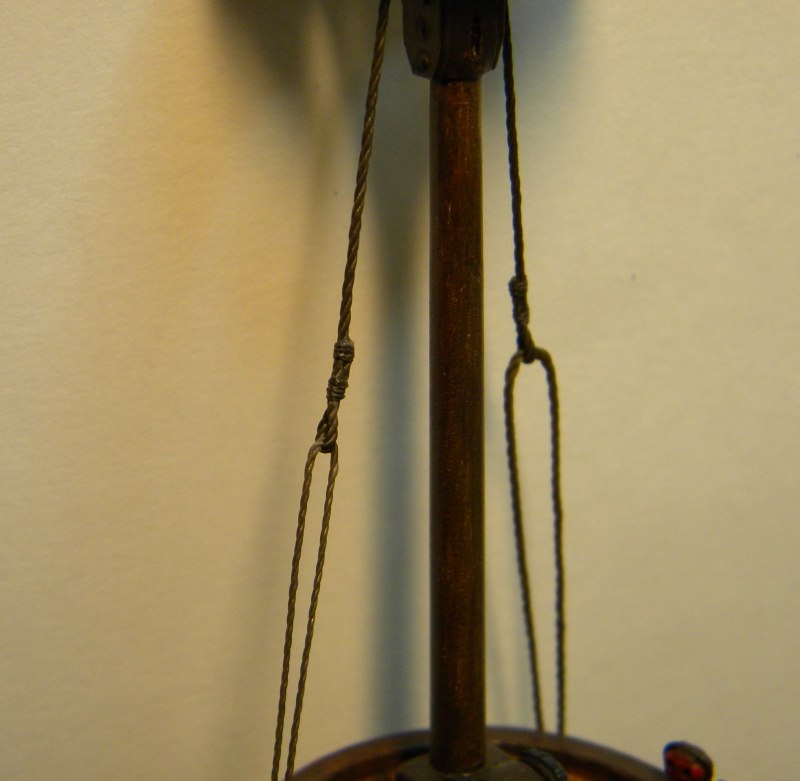
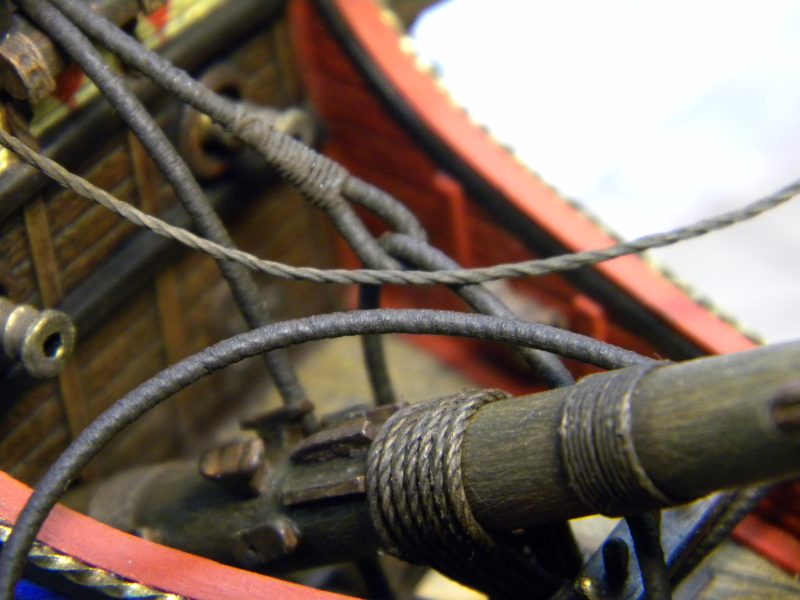
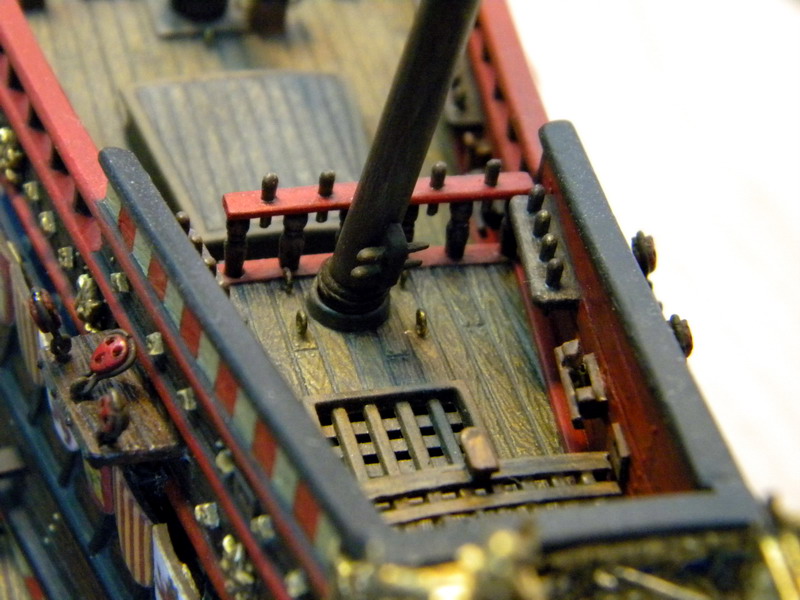
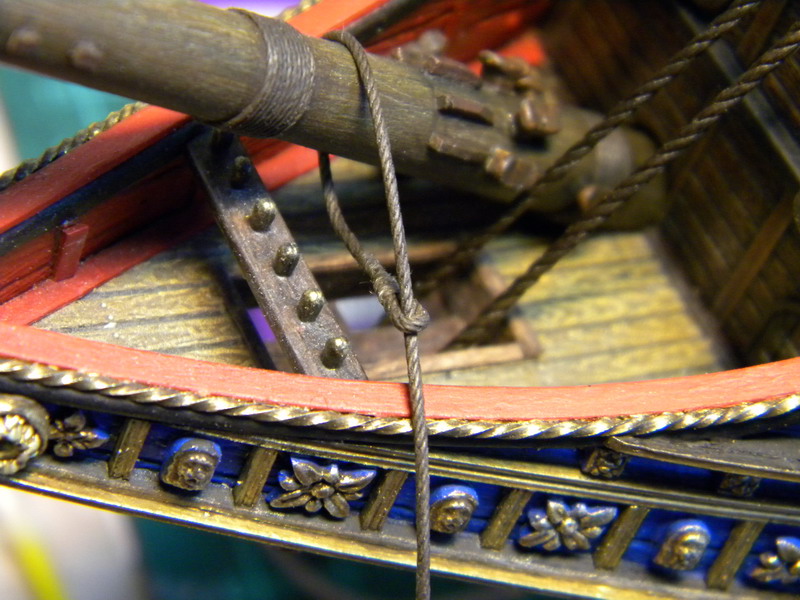
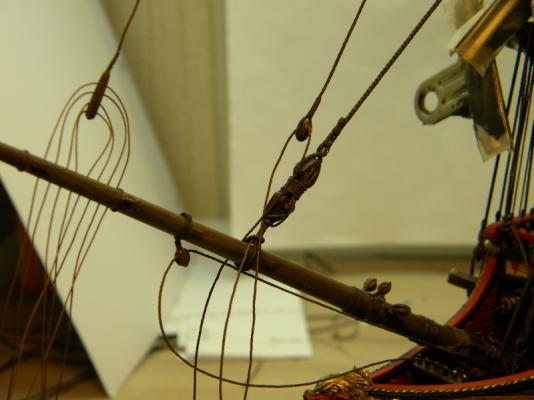
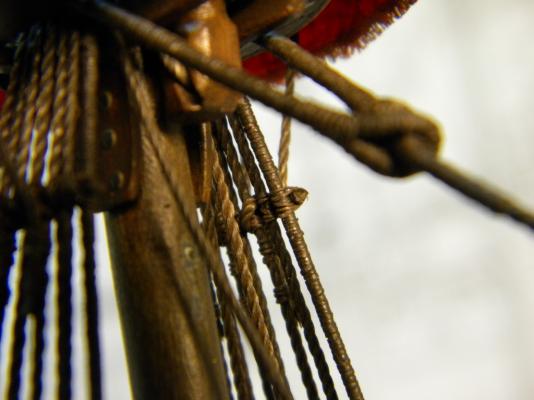
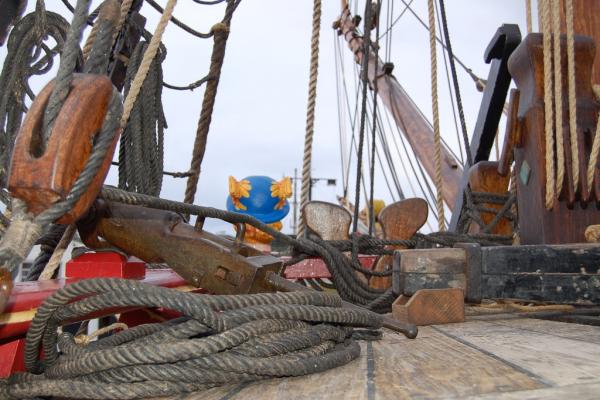
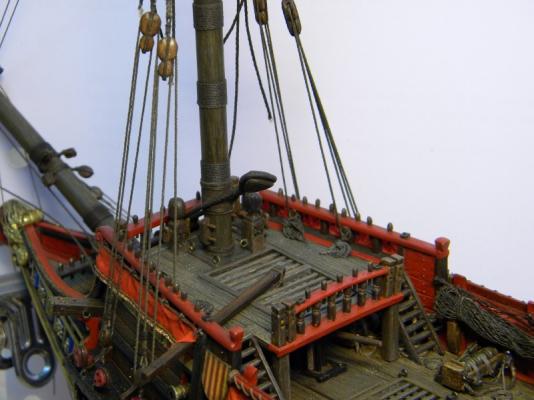
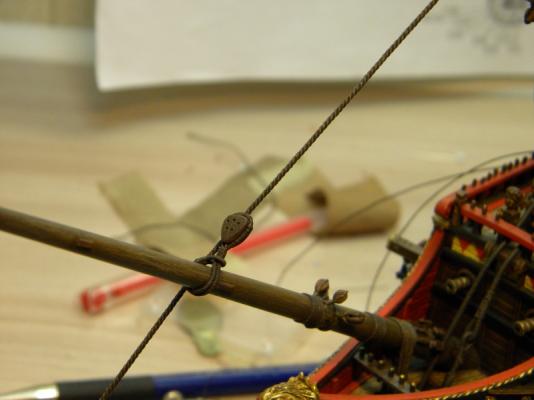
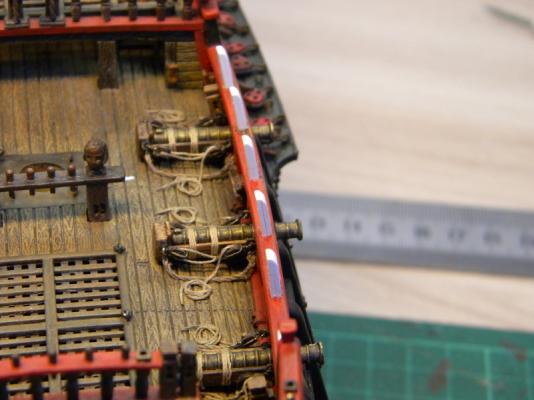
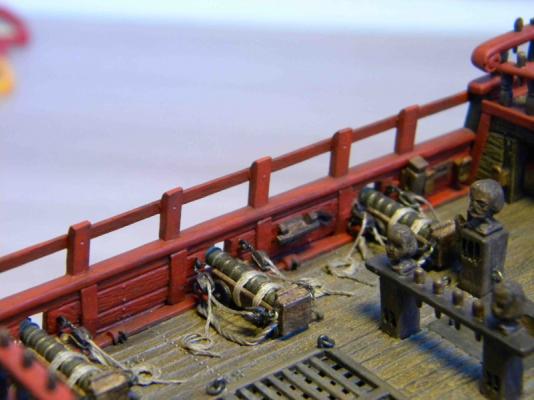
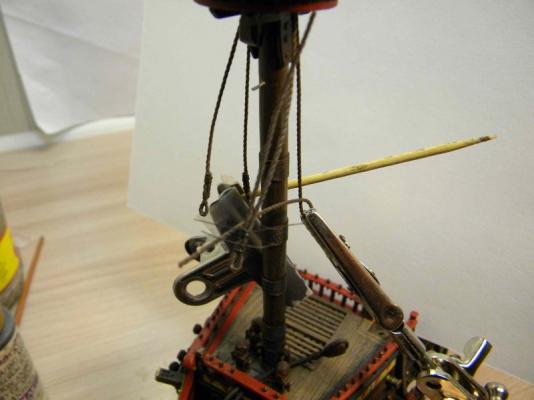
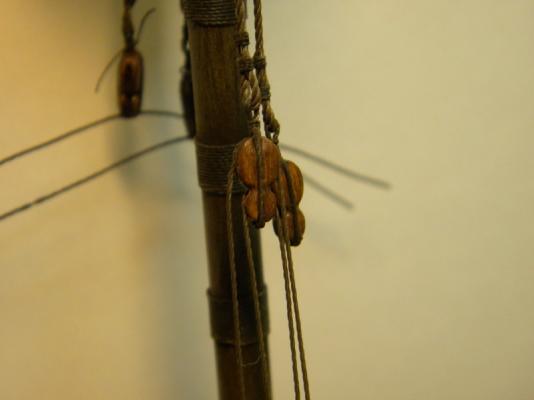
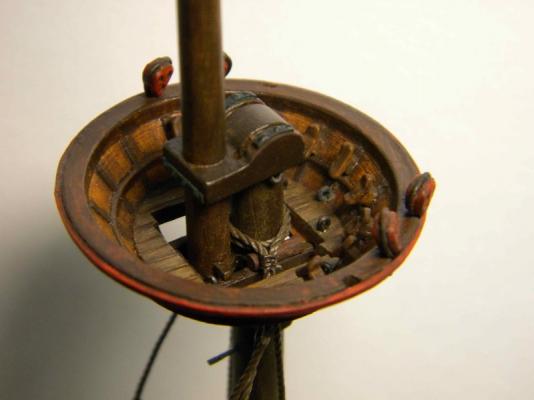
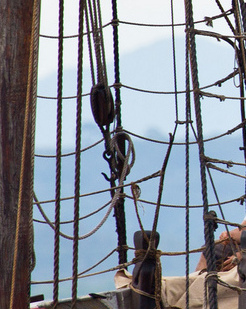
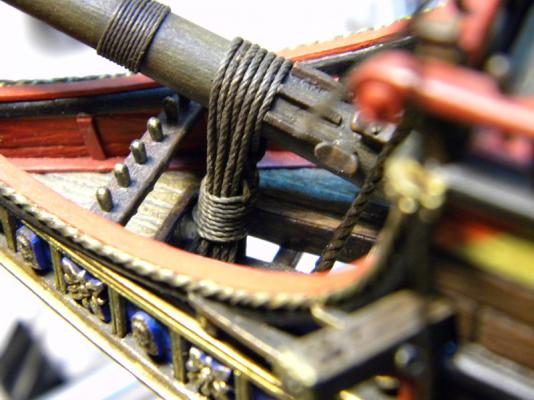
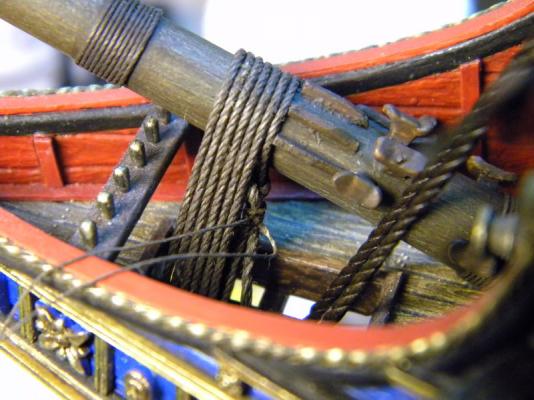
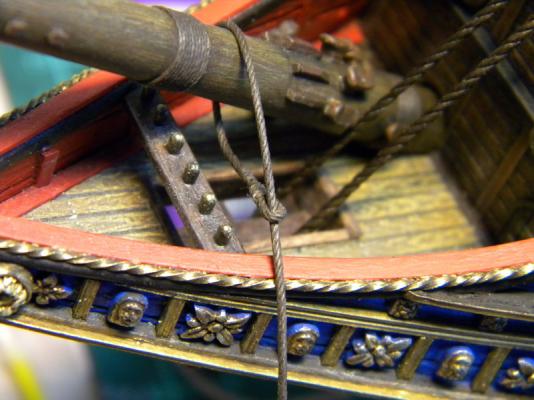
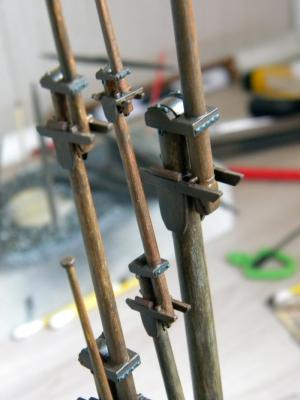
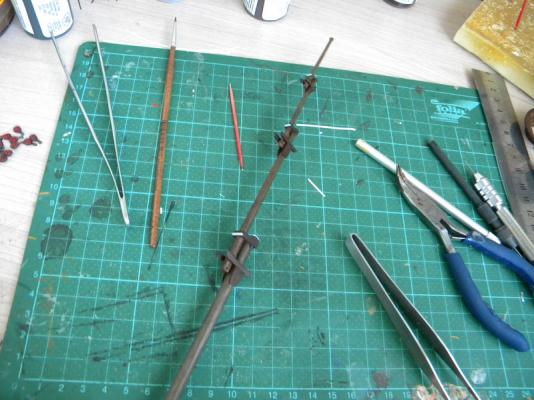
As soon as I solved this problem with bowsprit fixing I went to the mast tackles and made them tight + added imitation of ropes coils

- 228 replies
-
- 4
-
-
- spanish galleon
- lee
- (and 1 more)
-
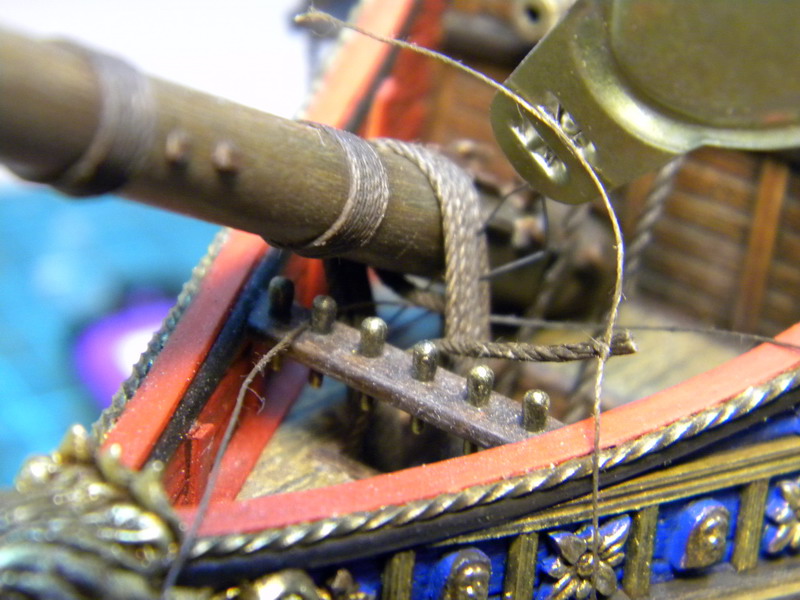
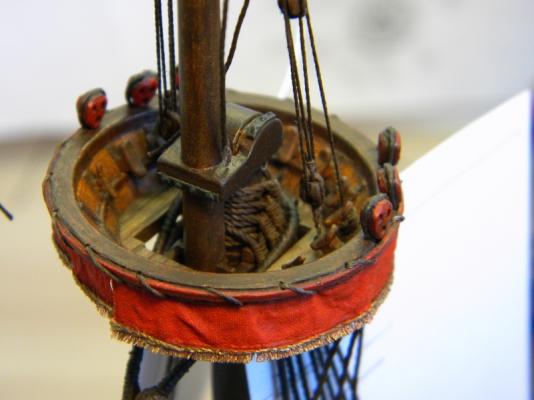
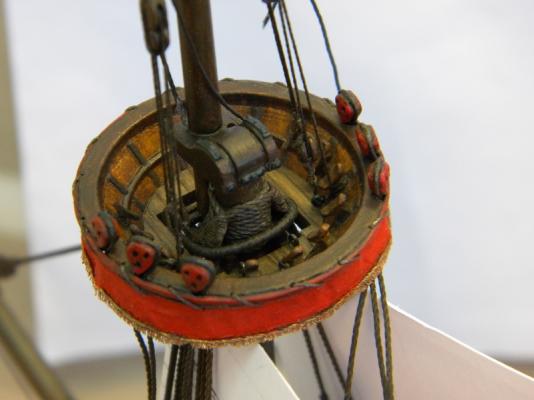
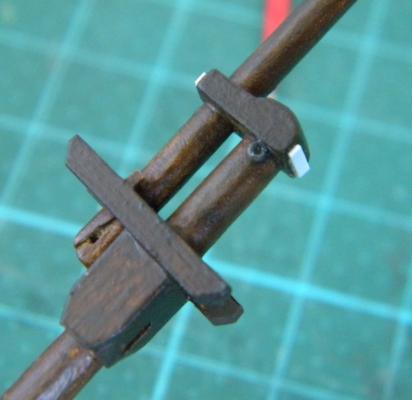
Hi Matti, I like very much Your style ! and I like galleon as well ,and allways with great interest watch how people work with wood ... Regarding capstan You made - nice job! But I have question...those bars ...the side goes to the capstan head...they need to be rectangular and round all the rest...difficult to see on foto... Did You make them rectangular or left rounded? Thanks Kirill
-
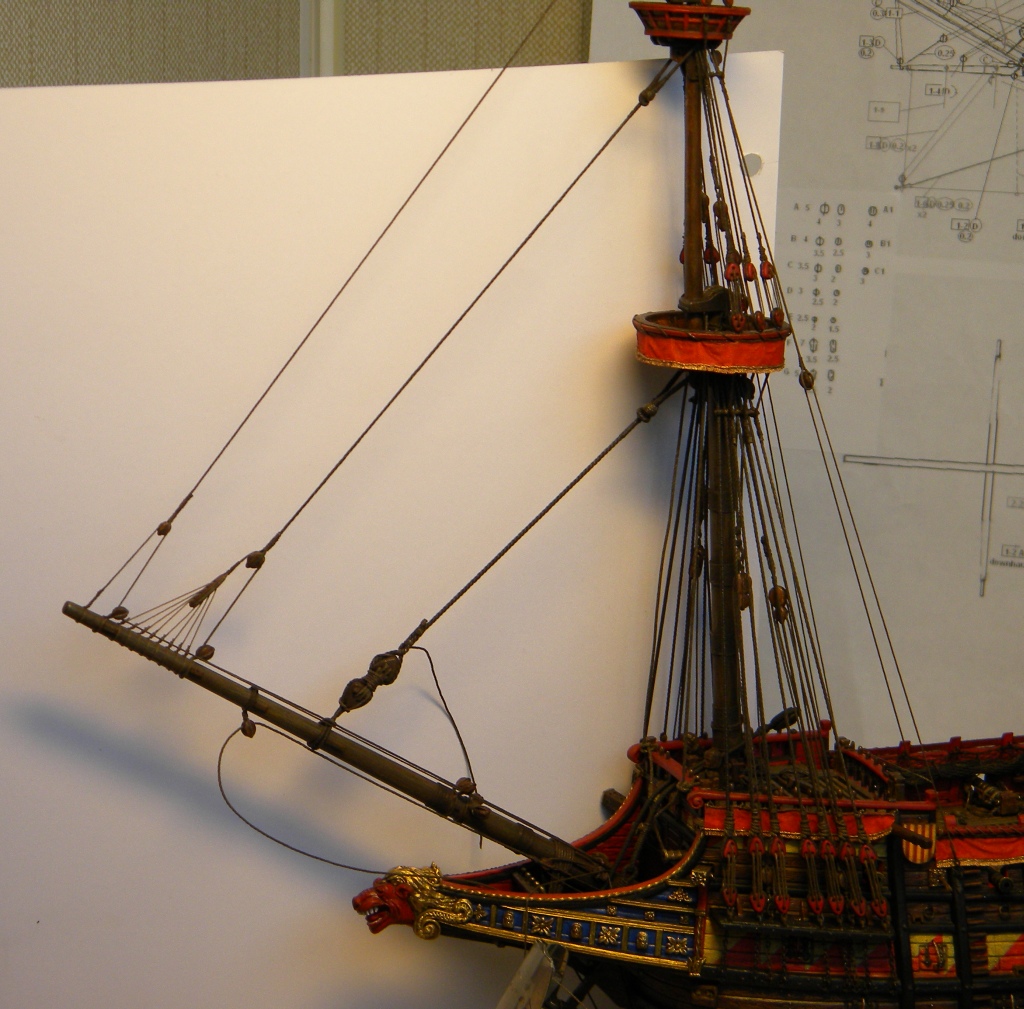
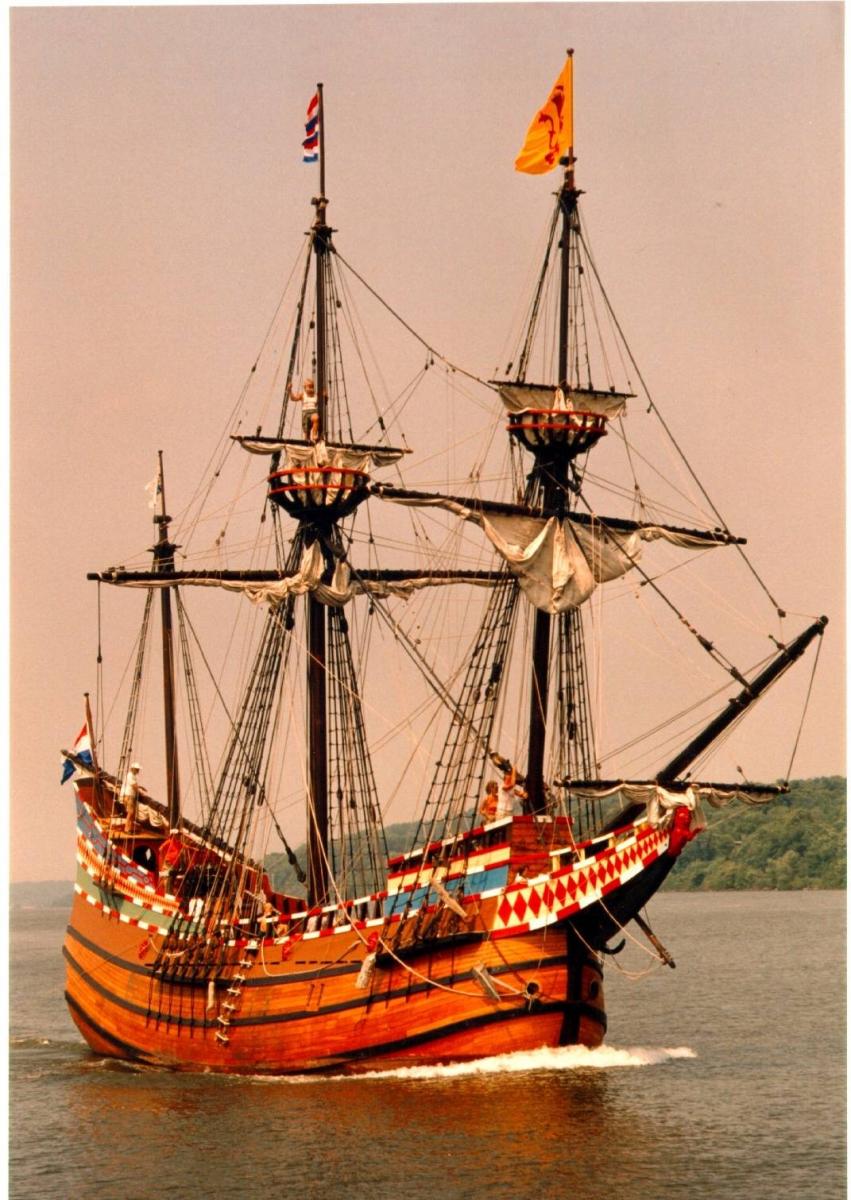
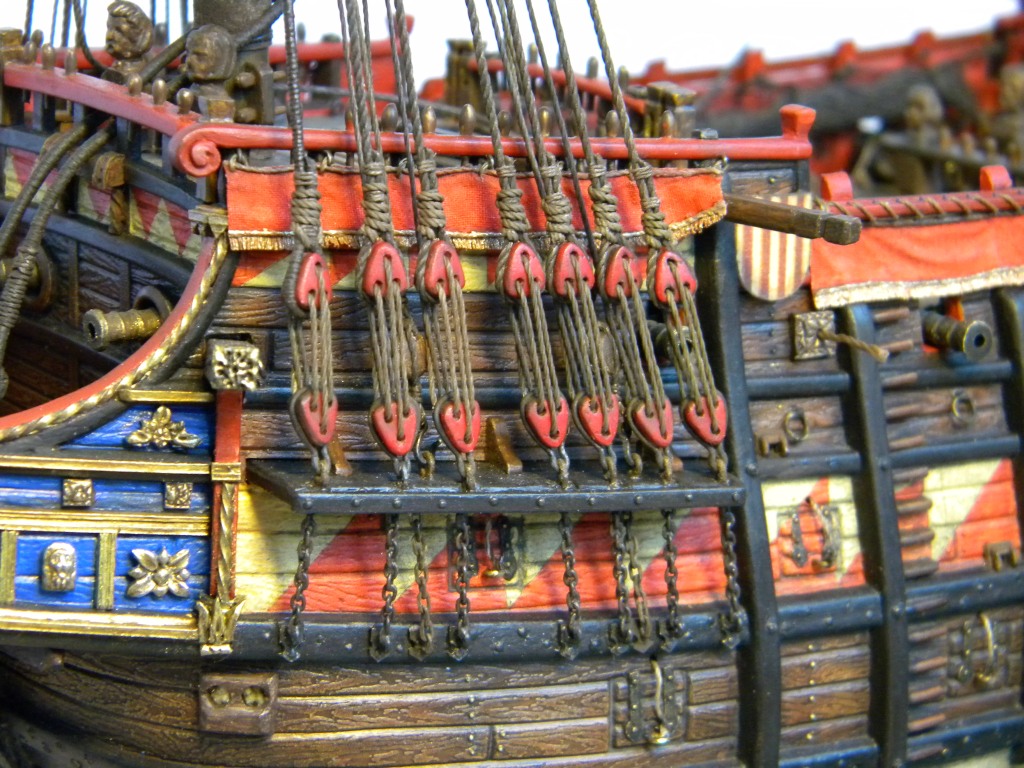
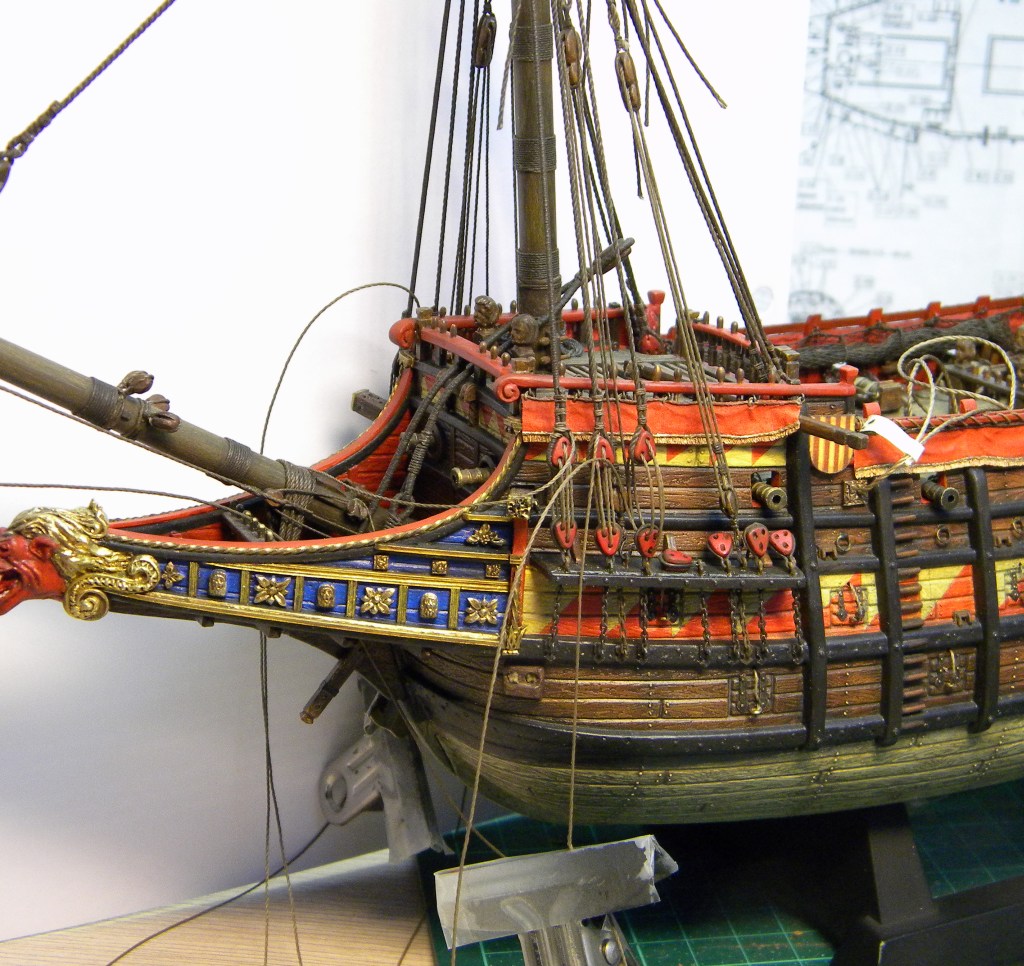
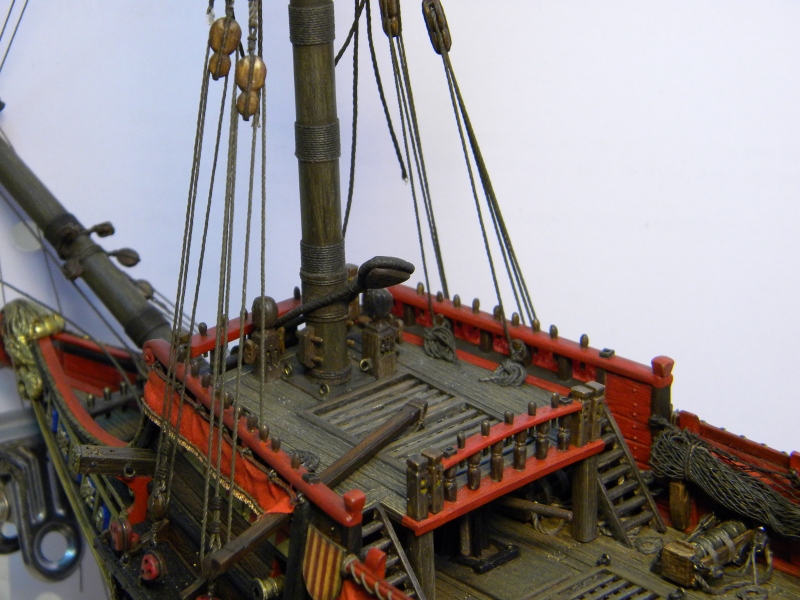
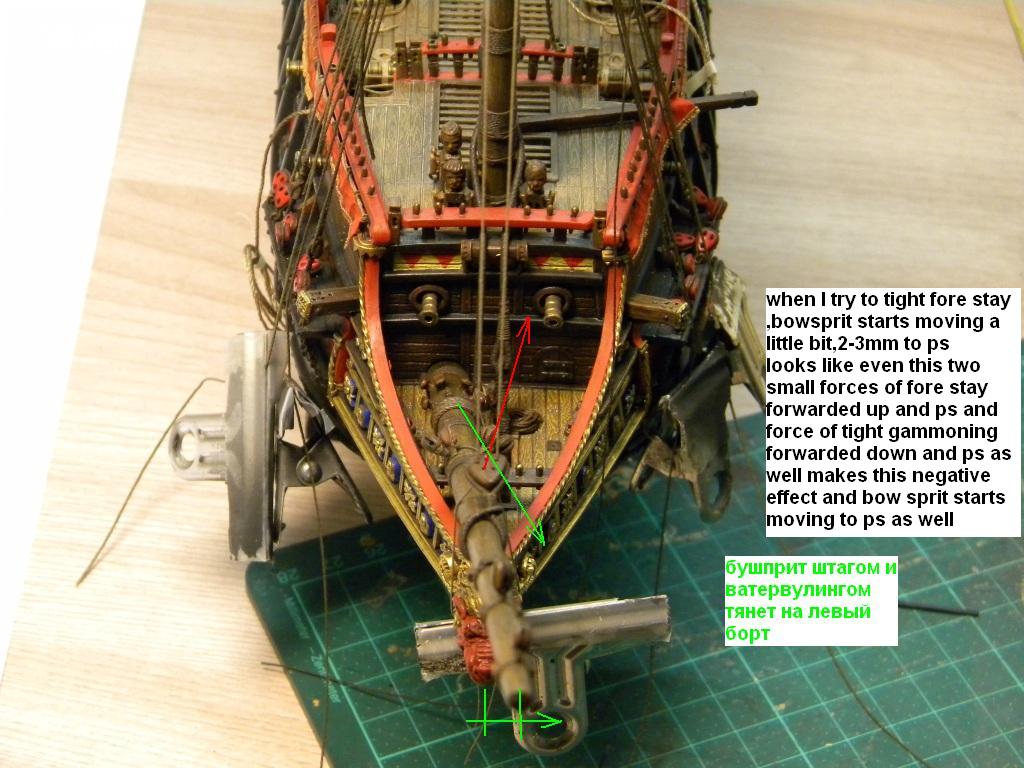
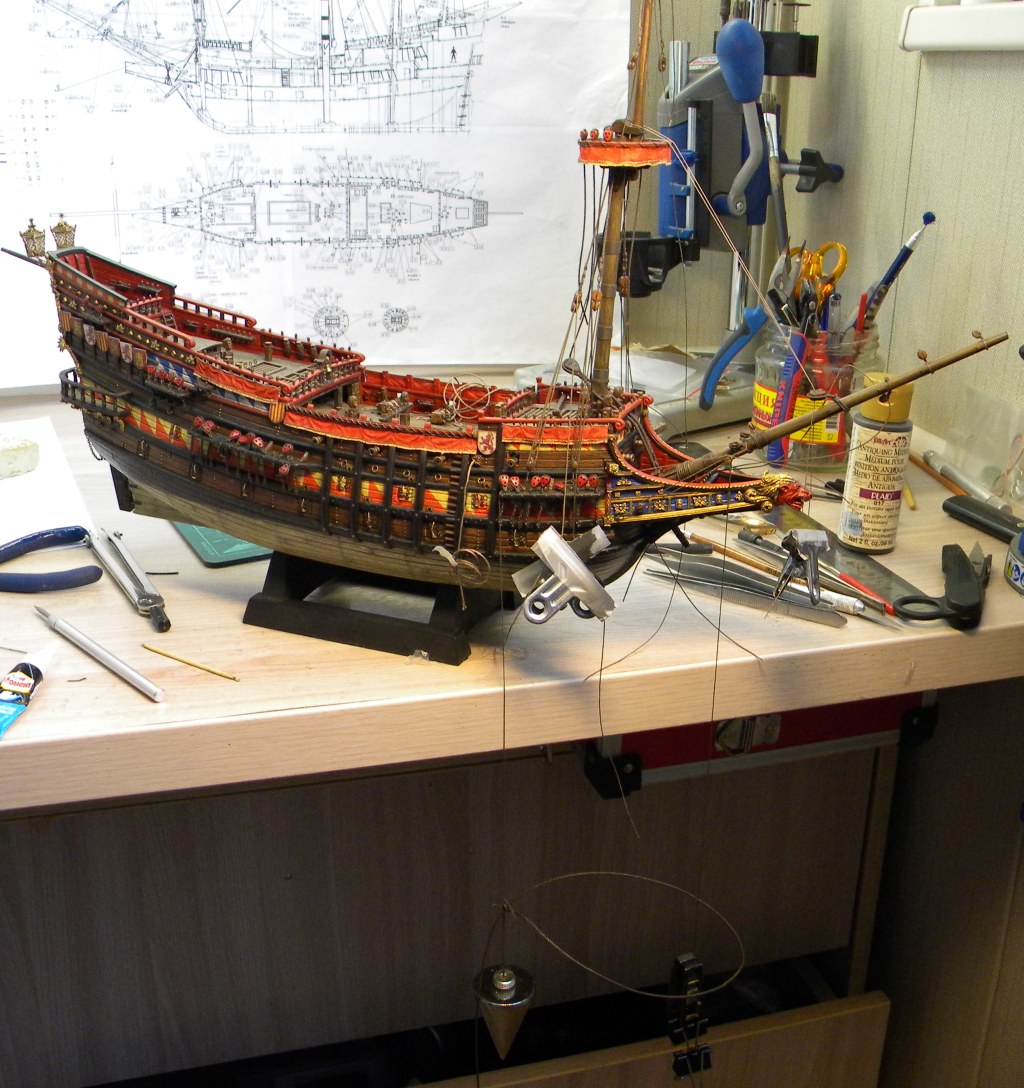
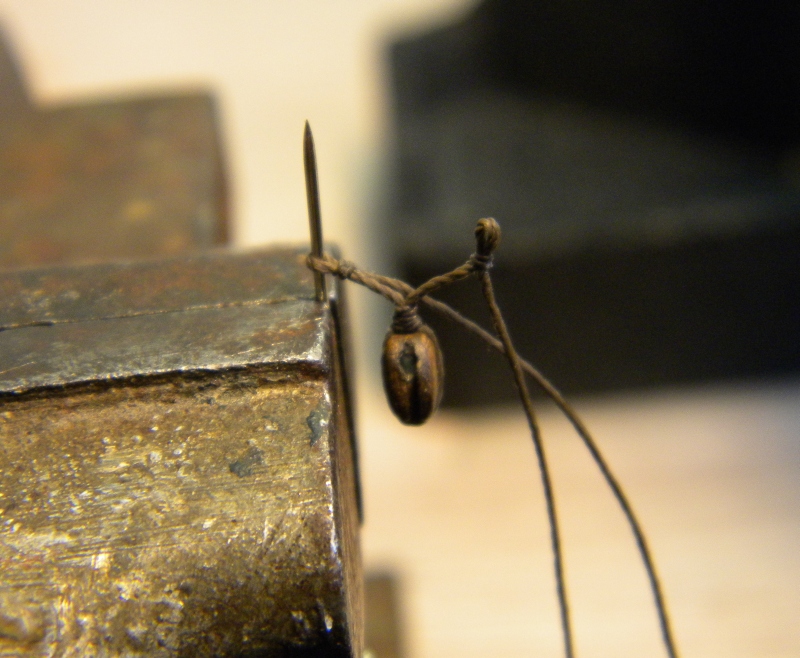
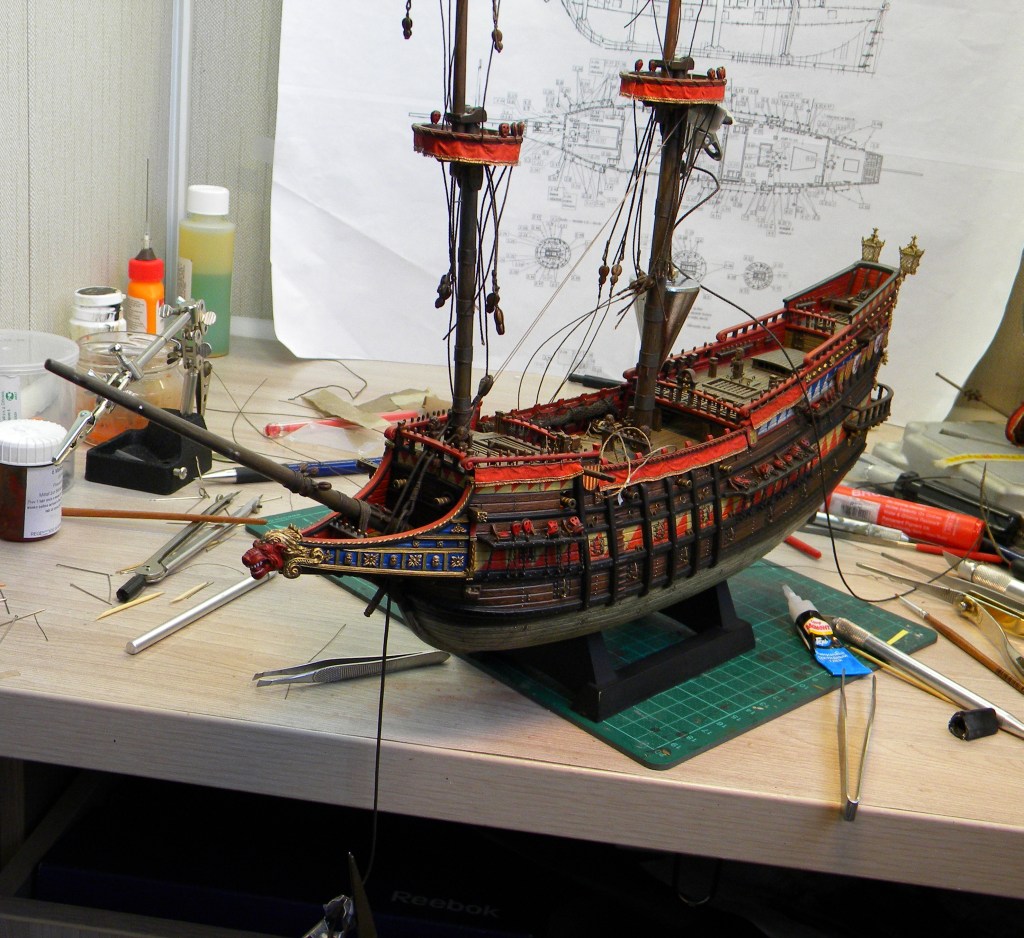
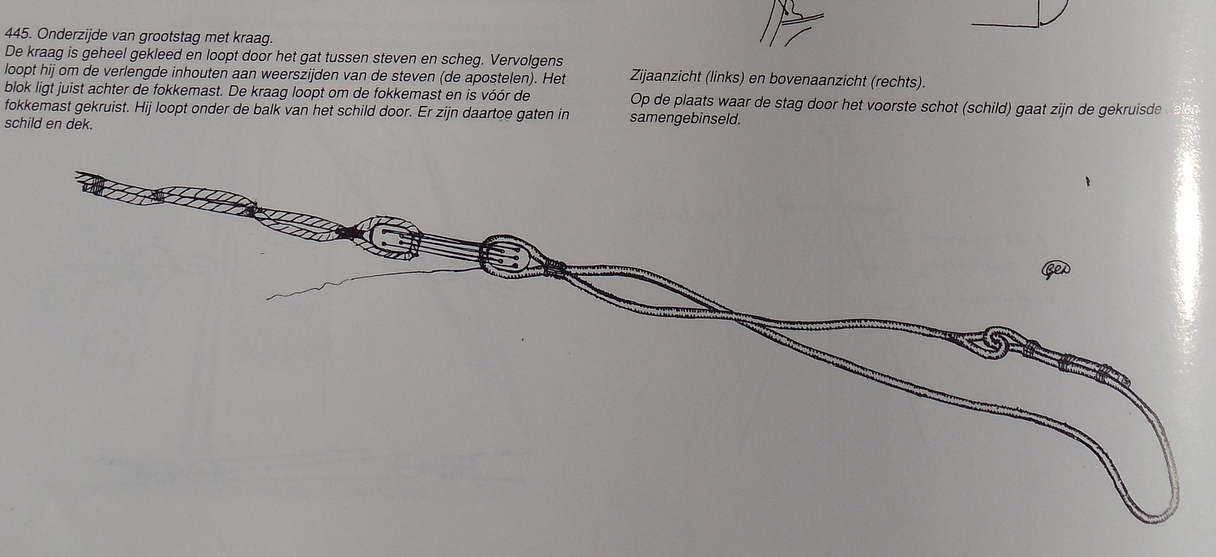
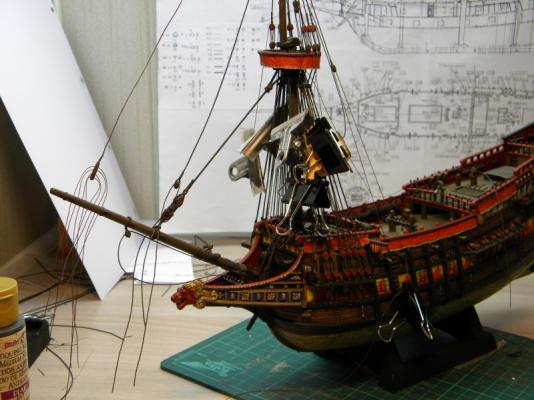
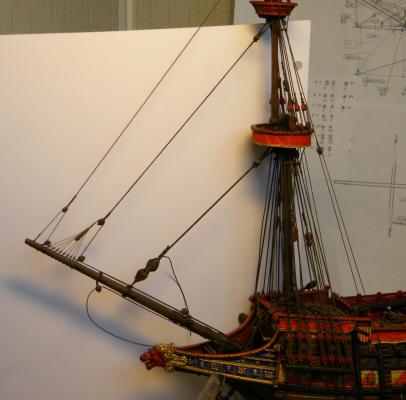
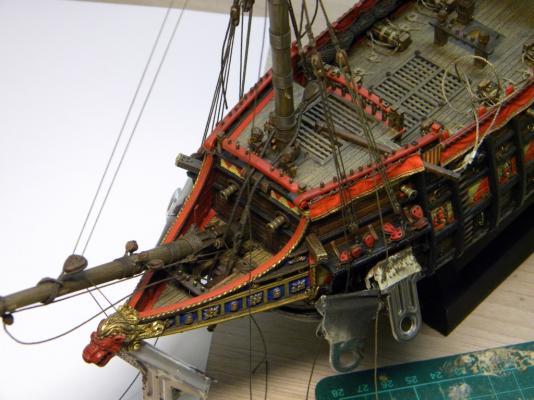
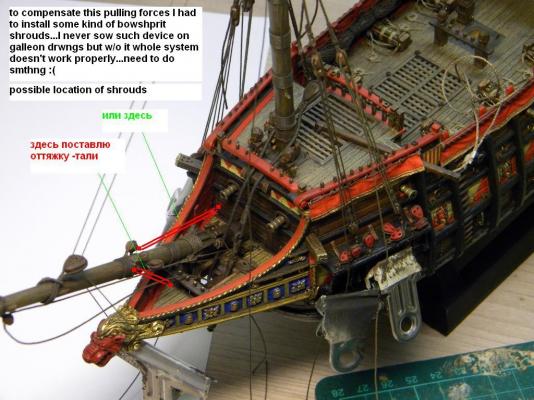
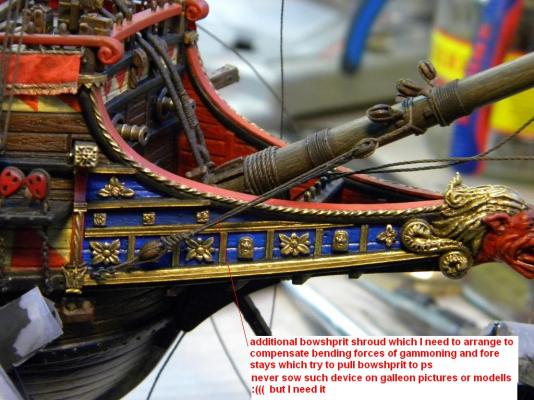
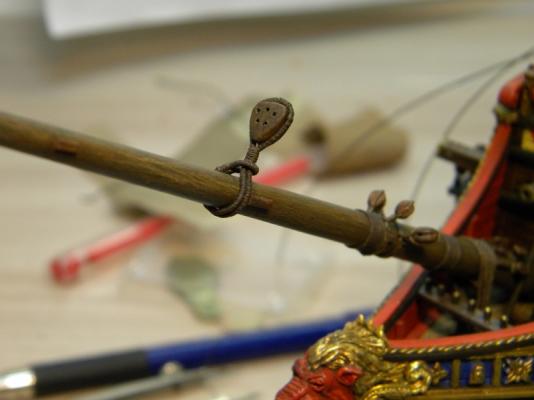
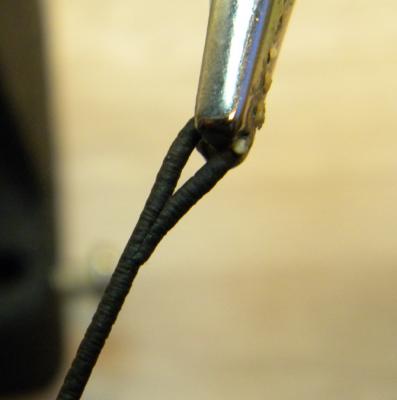
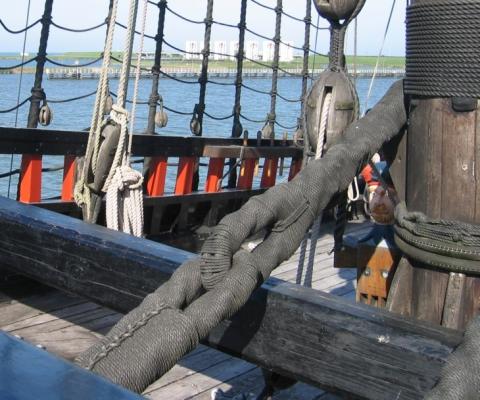
Good day everyone, continue with assembling report after completion fore stay lower collar I've try to imitate fore stay load on bowsprit and met with serious problem...see...bowsprit starts moving to ps as soon as I loaded fore stay...look at the picture You can see at least two forces which are forwarded in the same direction of ps and try to pull bowsprit to the same way...it happened due to on galleons bowsprit stays a little bit right from center line and under the angle to the center line ...so finally there is strange picture exists with this effect of bending/pulling bowshprit to the ps , In this period of galleon,at least ,as I understood ,there must be no bobstays ,no bowsprit srouds,no other rigging which keep bowsprit in position exept gammoning...I did only gammoning as it should be///and have this problemm ...on normal vessel ,when bowshprit locates along center line of the vessel ,static forces distributed in other way and such effect I think ,not exists... but even than you see that on the vessel of later period , bowshprit shrouds and bobstays are in use ...and must not be installed on galleon model Finaly I decided to install b-shroud only sbs , just to hold bowsprit in position when all fore stays will be tight Anybody met such problem during building your own vessel of the same period-like Half Moon or similar? and what You did to solve this problem?


- 228 replies
-
- 1
-
-
- spanish galleon
- lee
- (and 1 more)
-
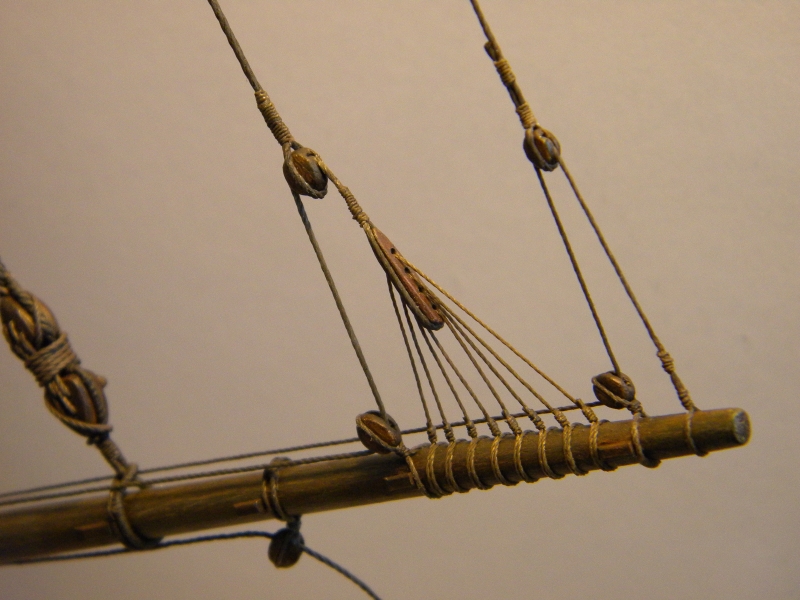
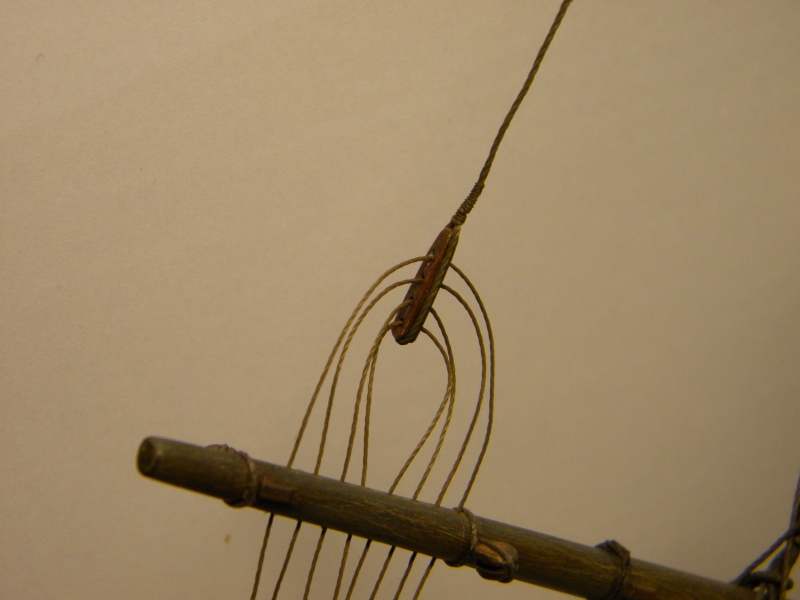
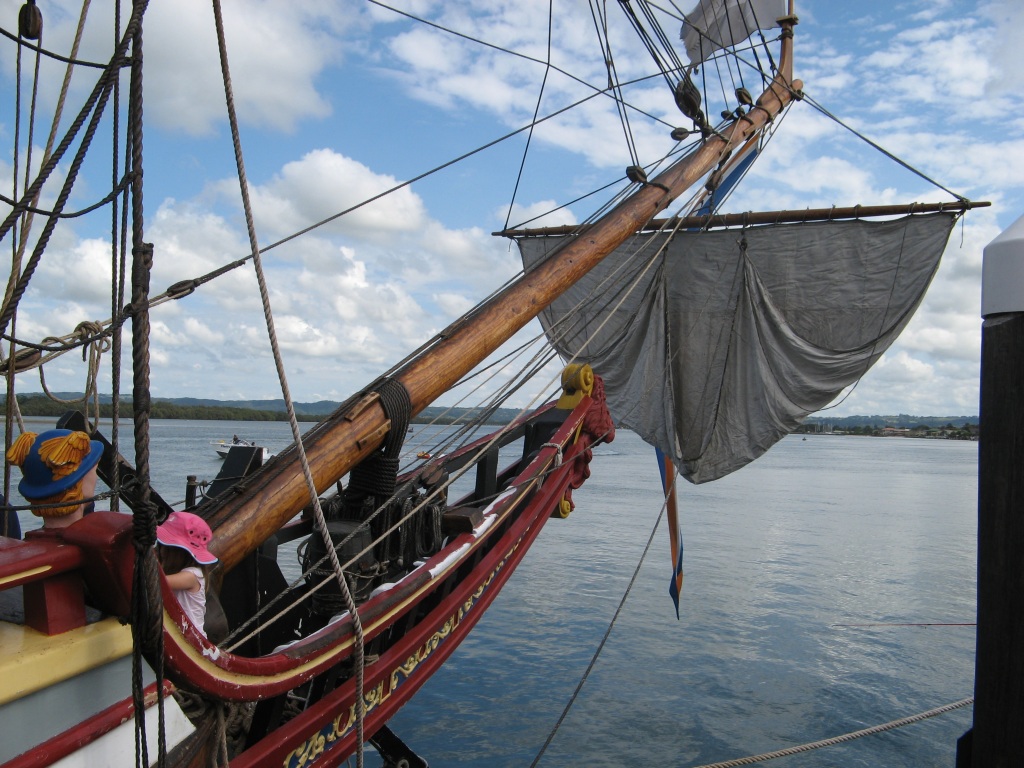
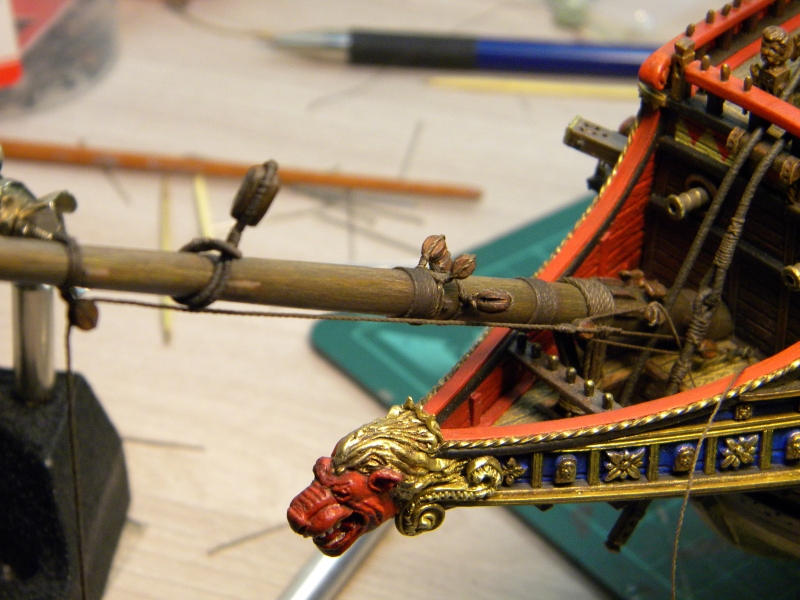
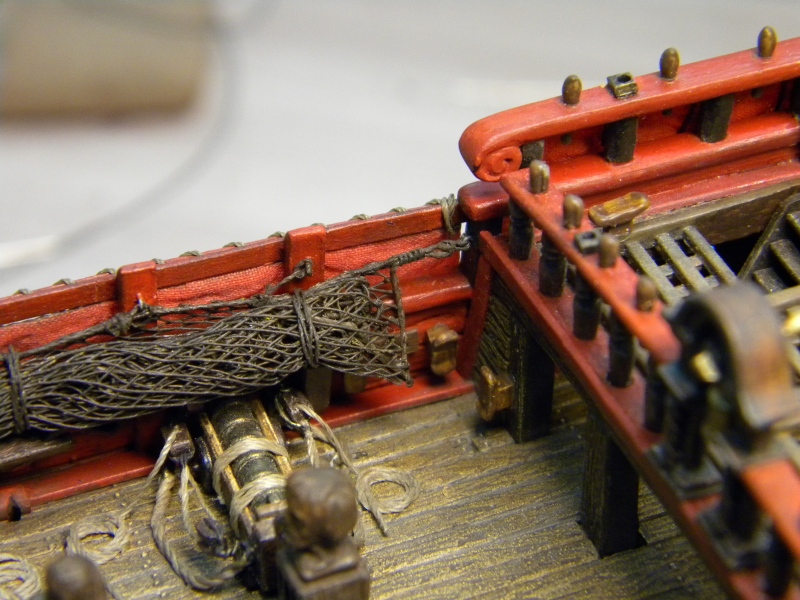
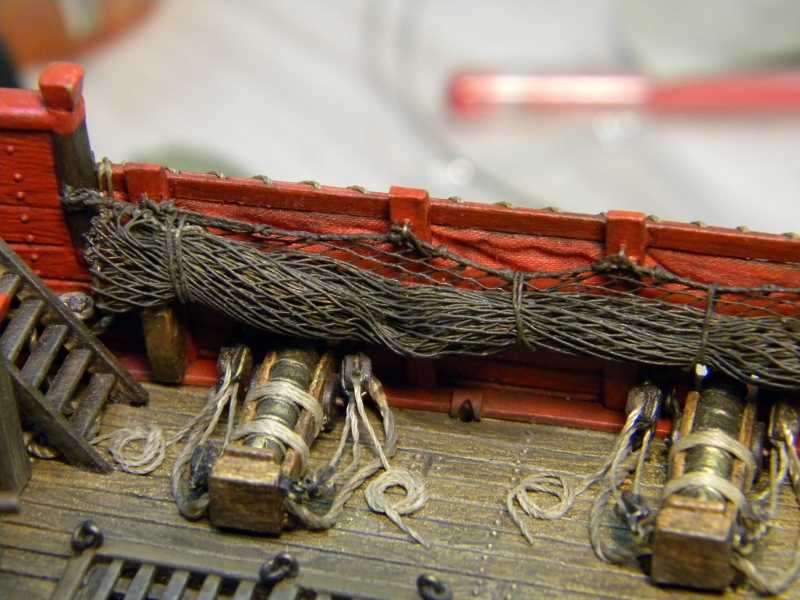
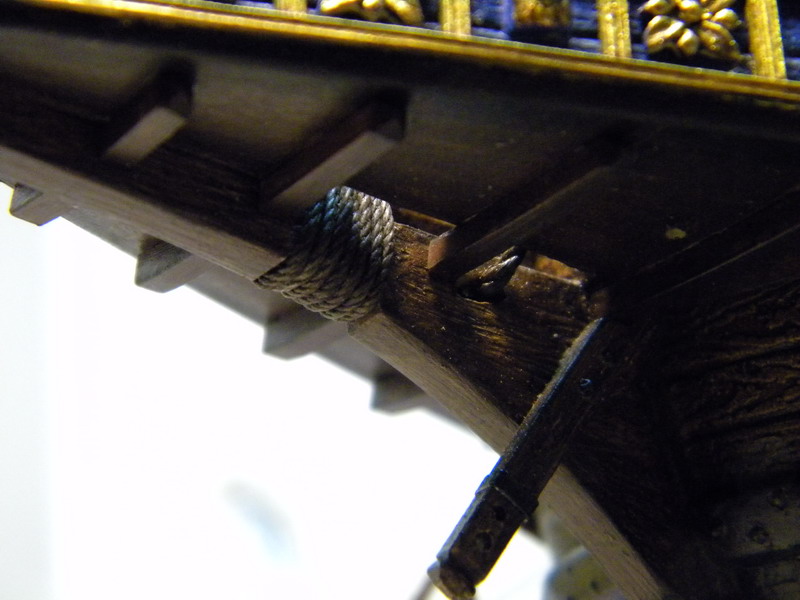
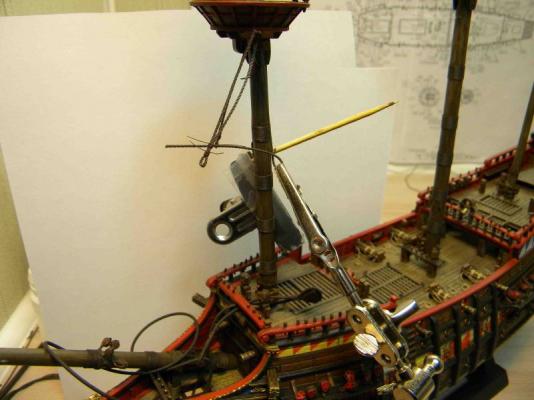
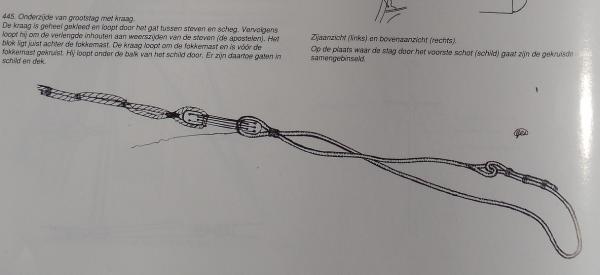
Dear friends, continue posting fotoes of previous months... after boarding net installation I began to arrange / to fit bowsprit blocks...fore stay lower deadeye I decided to secure to bowsprit in some special way ,not by means of spliced collar and round seizing- try to imitate what I saw on Batavia replica...need smthg looks unusual ... And one more strange thing I did,and I guess most of the people building sailing vesells models may not agree with it... I decided don't use sling or any kind of parrel to secure/hold spritsail yard to the bowsprit, but use tie and halliards only, means, thick rope attached to bowshprit - goes through single block suspended to bowsprit- and than ended with halliard tackle near gammoning... at least some kind of such arrangement mentioned in Anderson book, page 212 and what I could recognize as such arrangement looking at contemporary pictures Same and really working arrangement we can see on very accurate Duyfken replica I think such kind of arrangement could exist till begining of the 17 century(end of galleon age) and later on, sling or parrel need to be installed and halliard arranged in different way


- 228 replies
-
- 2
-
-
- spanish galleon
- lee
- (and 1 more)
-
Thank You Very Much Daniel, I listen to Your wonderful building stories (first on german forum for Sailing Ship Modeling) long time and still not get tired Thank You,cheers!
-
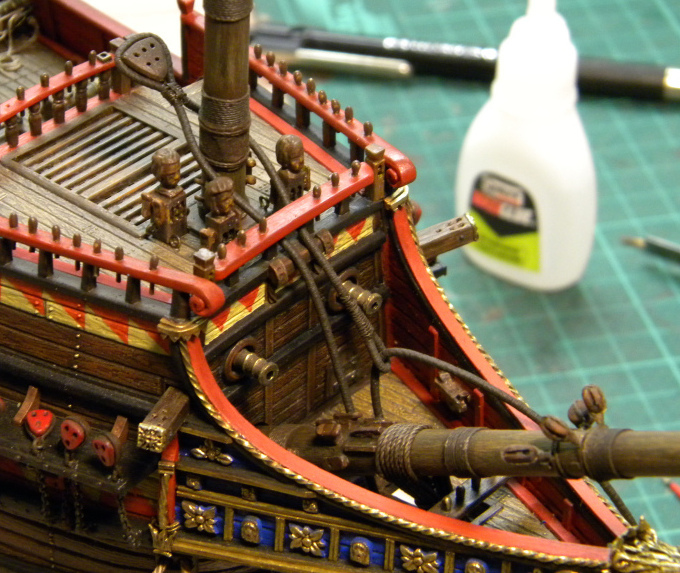
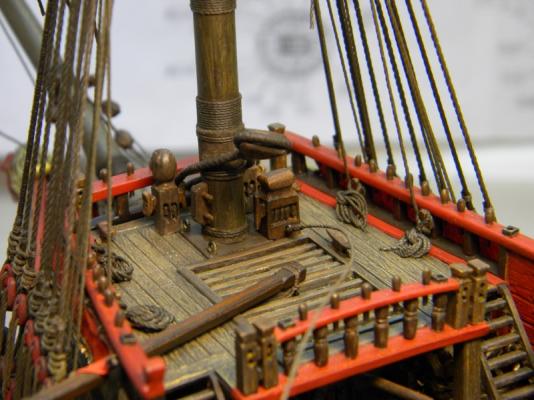
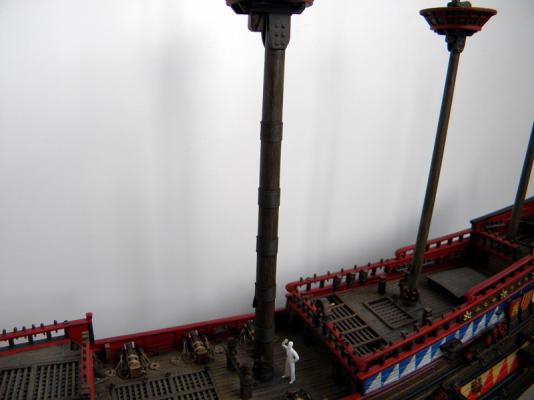
16 february 2014 , 19:57 It was famous day for me- I clued fore mast - no possible to dismantle anymore and fixed main stay lower collar ...and installed fish davit beam


- 228 replies
-
- 6
-
-
- spanish galleon
- lee
- (and 1 more)
-
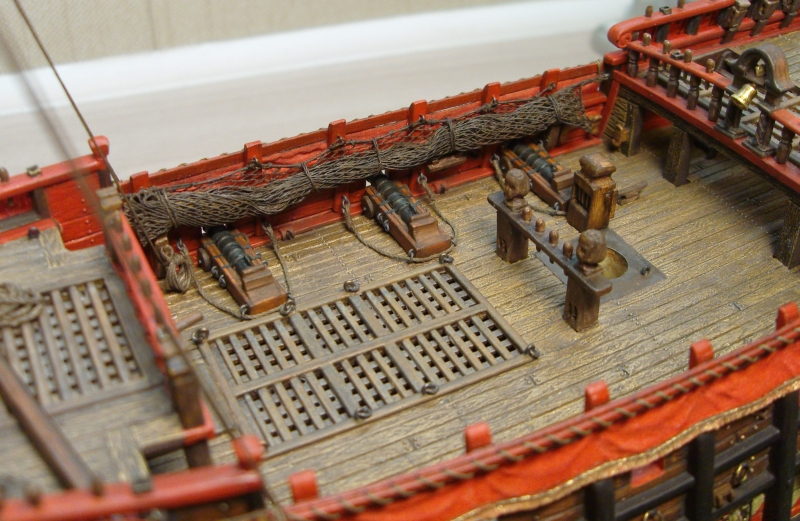
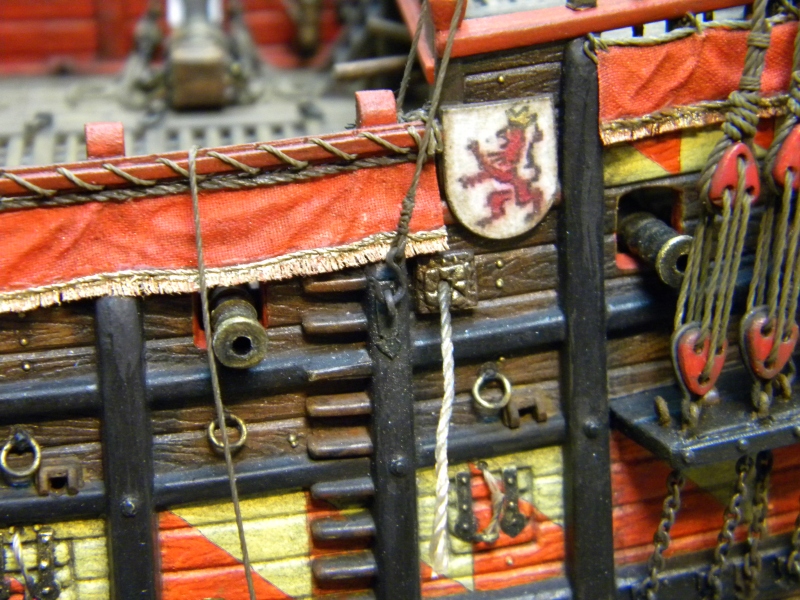
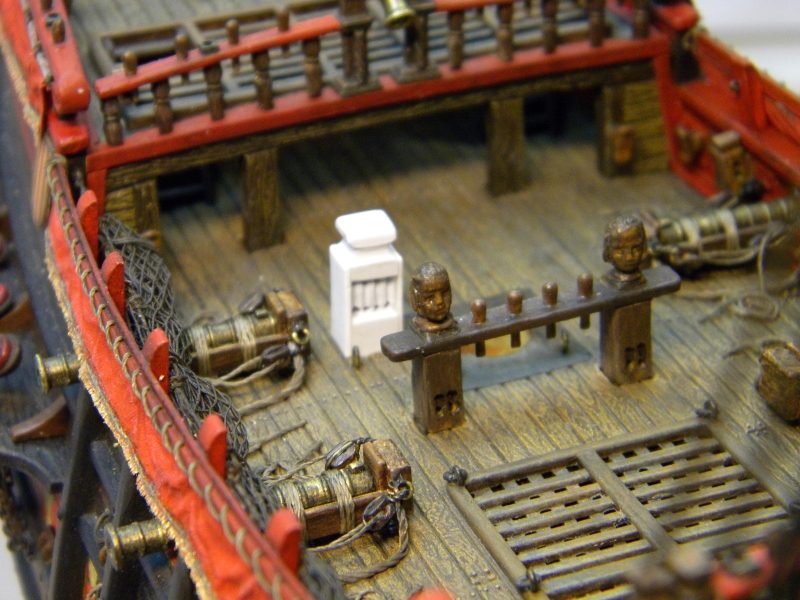
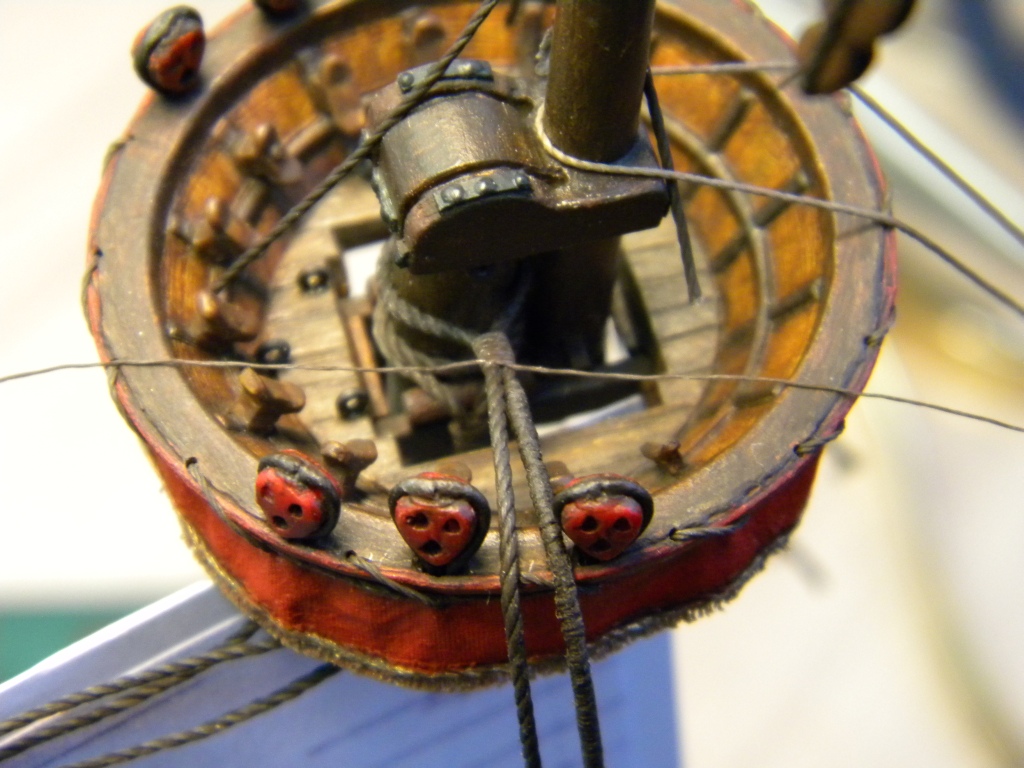
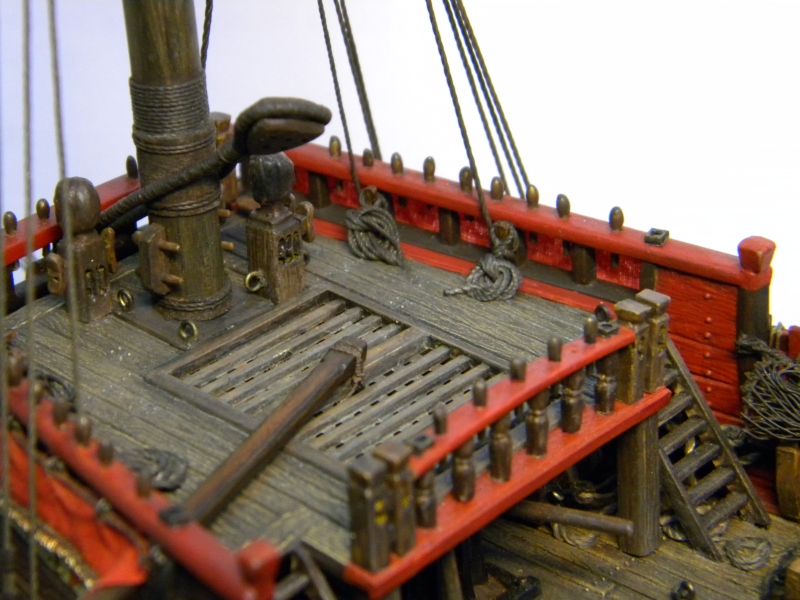
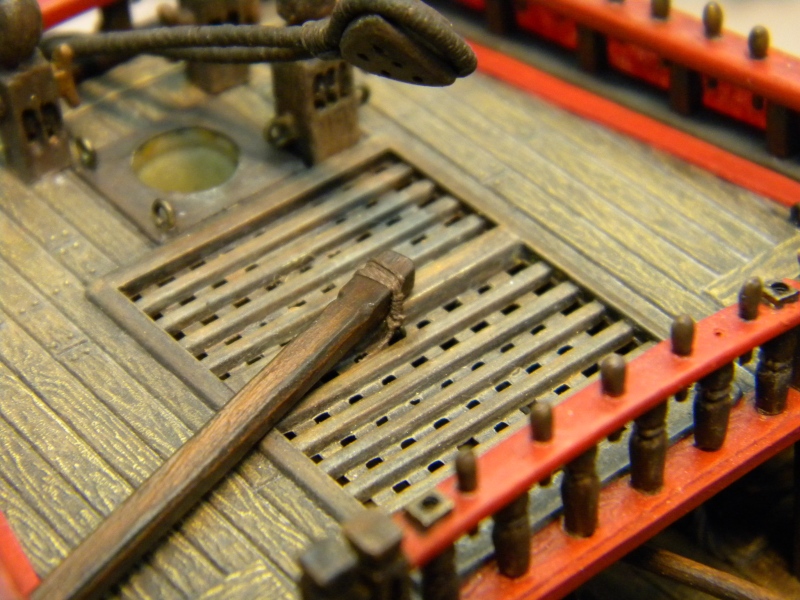
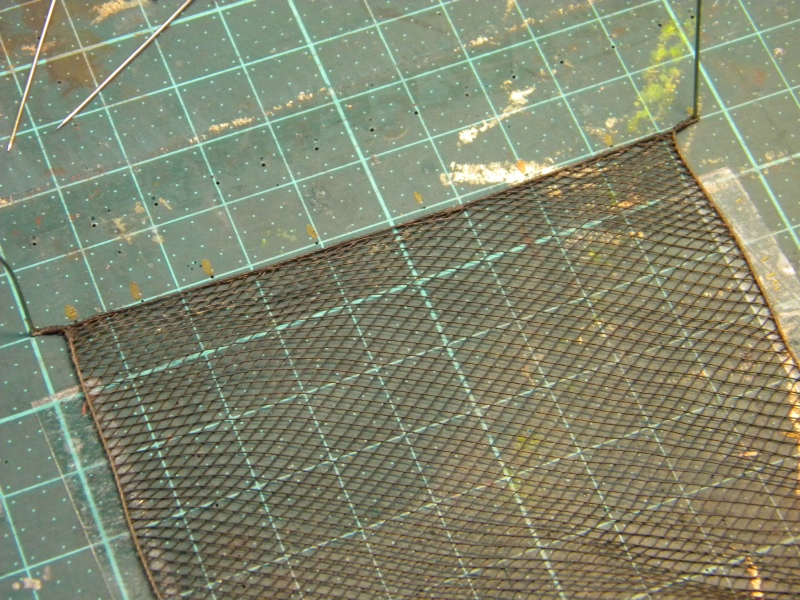
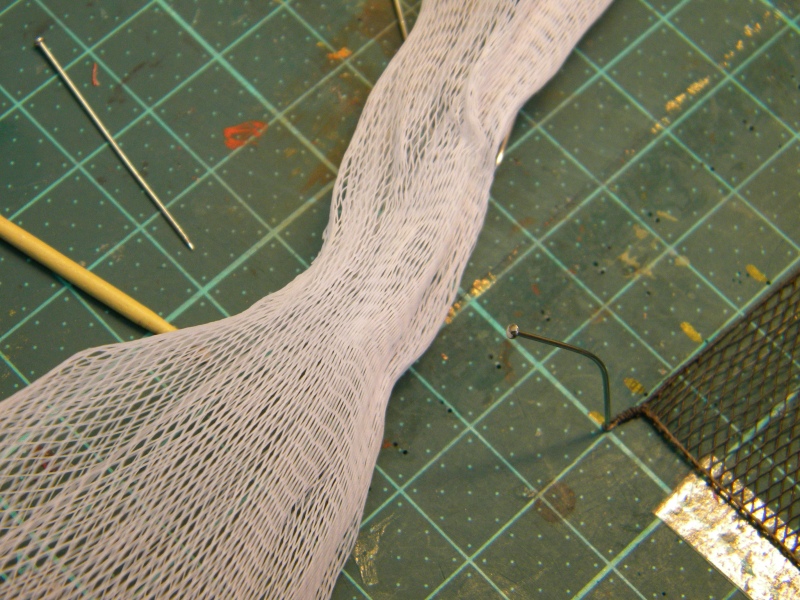
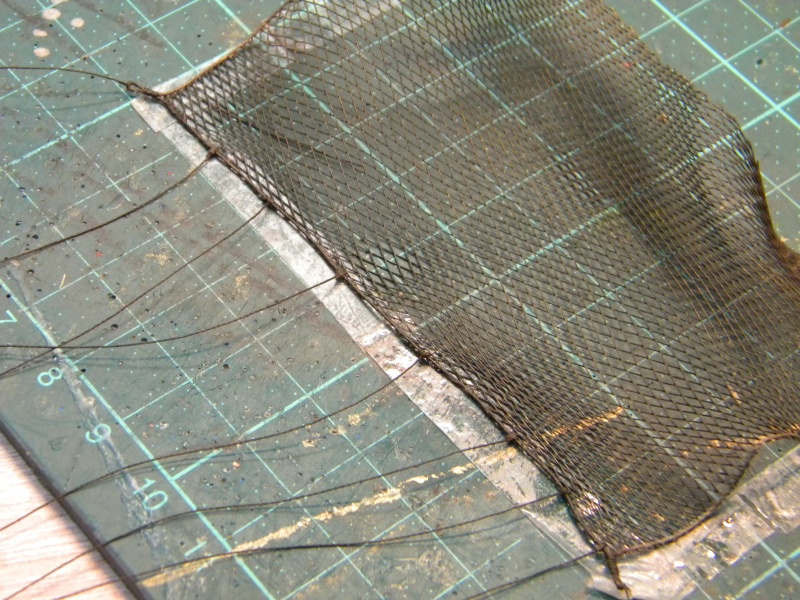
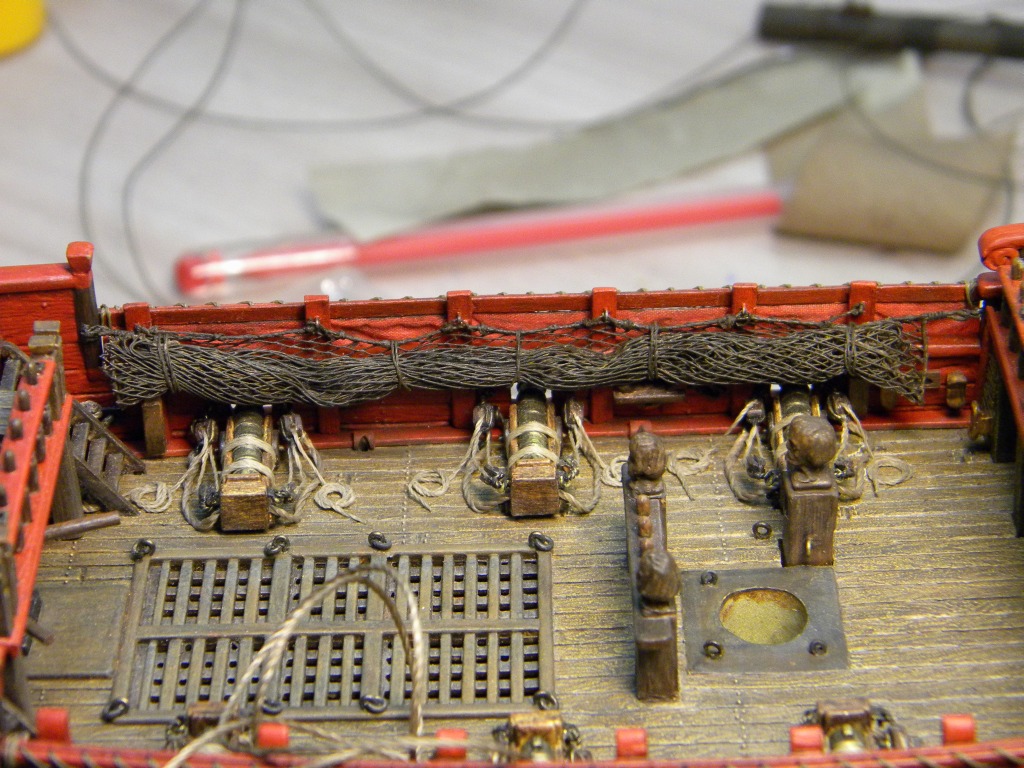
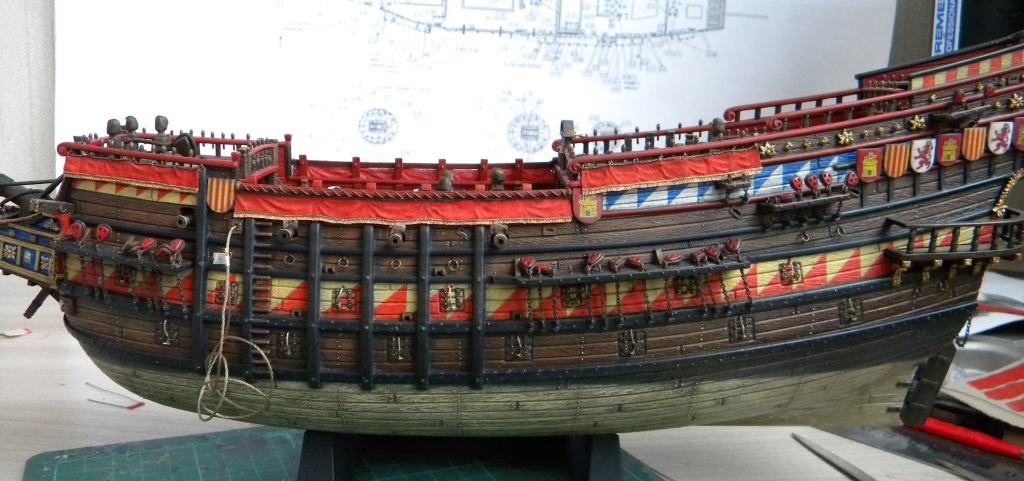
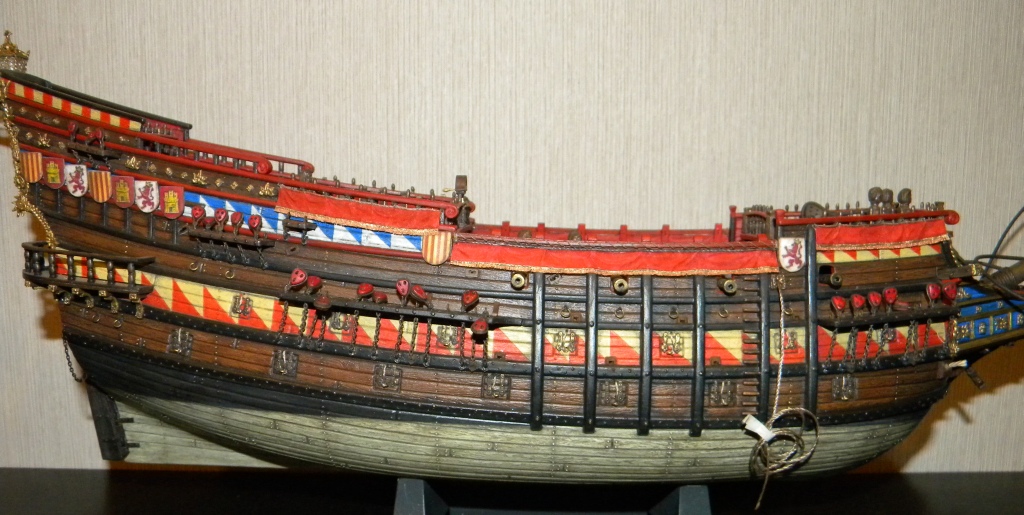
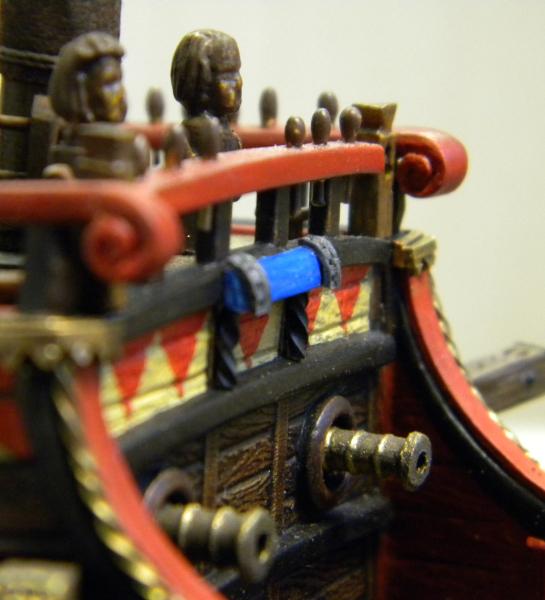
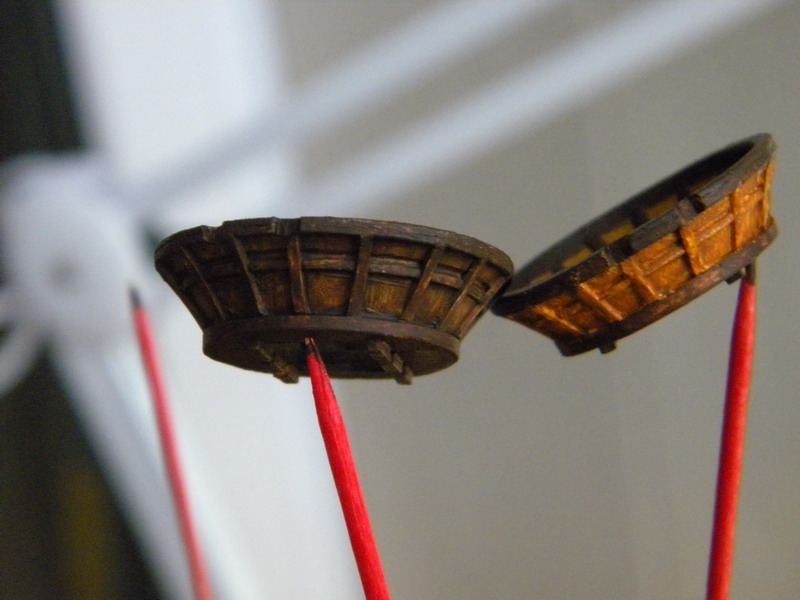
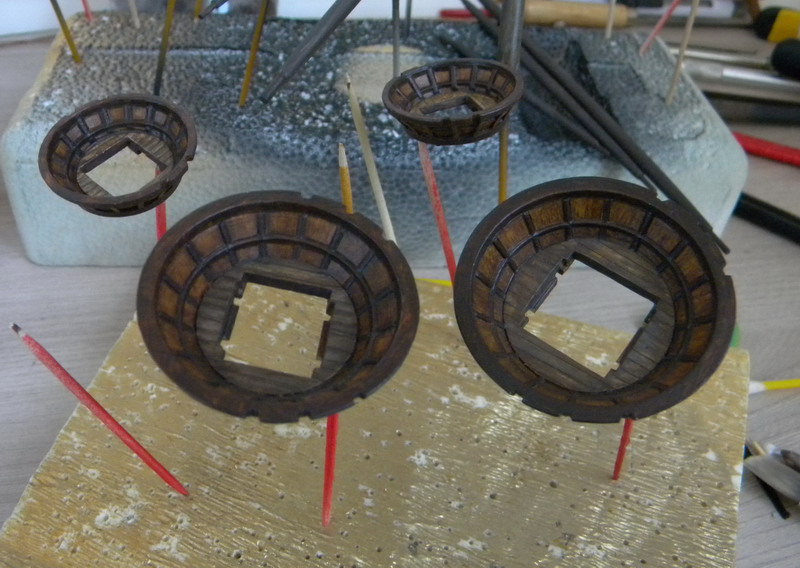
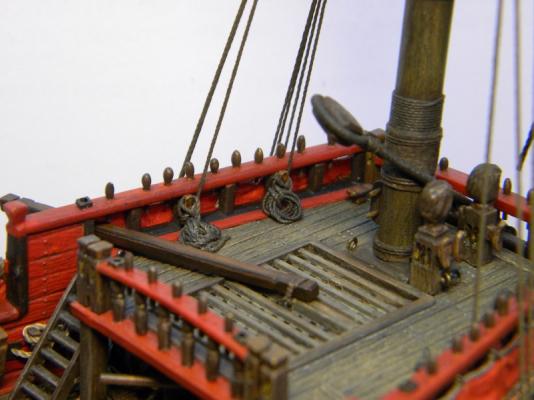
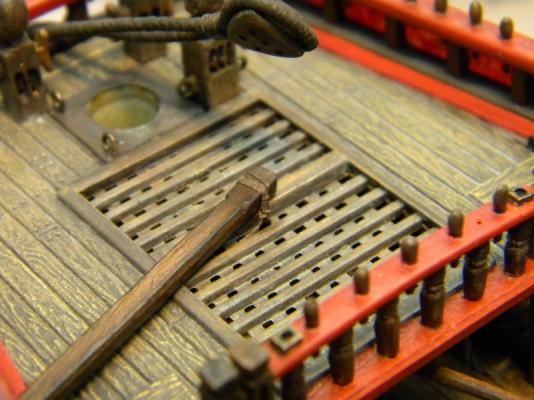
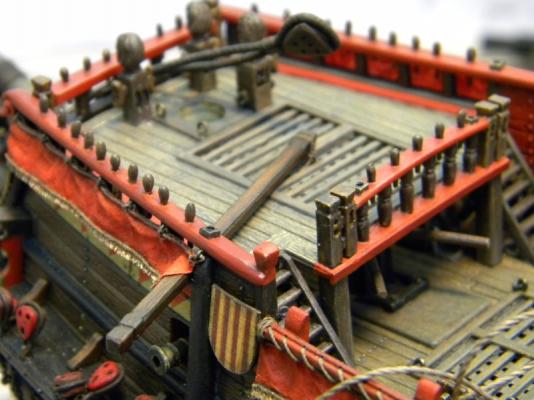
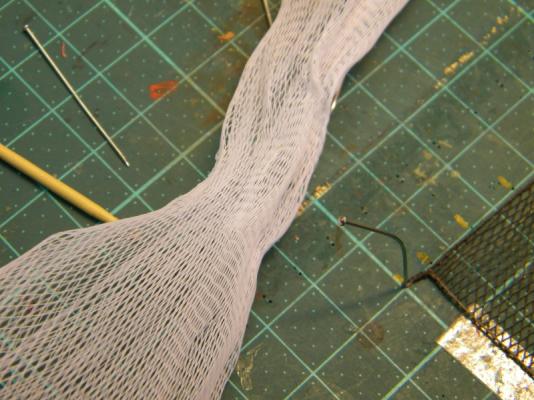
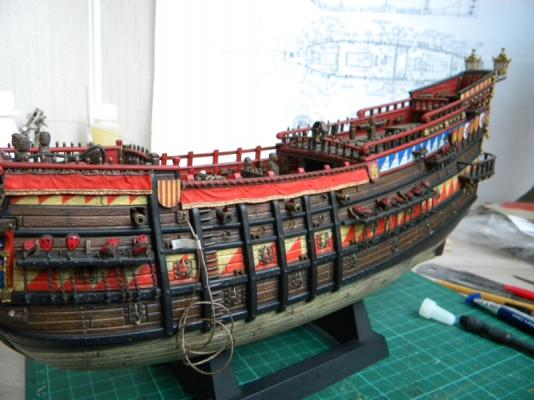
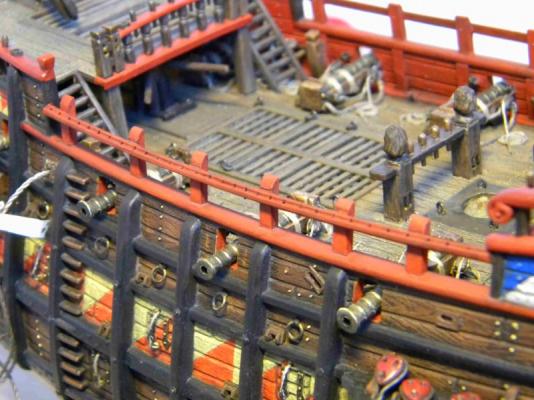
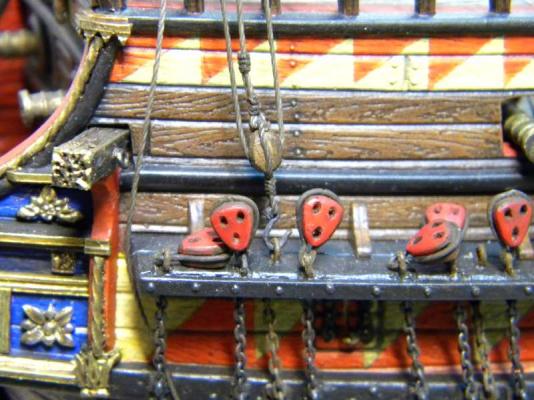
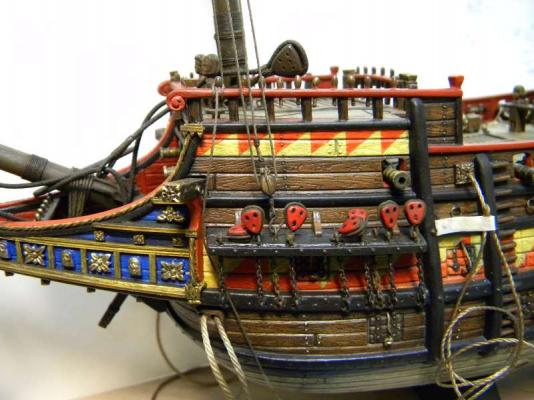
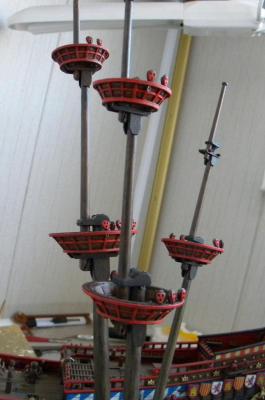
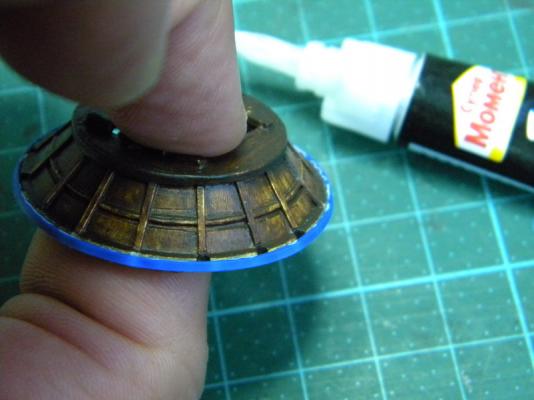
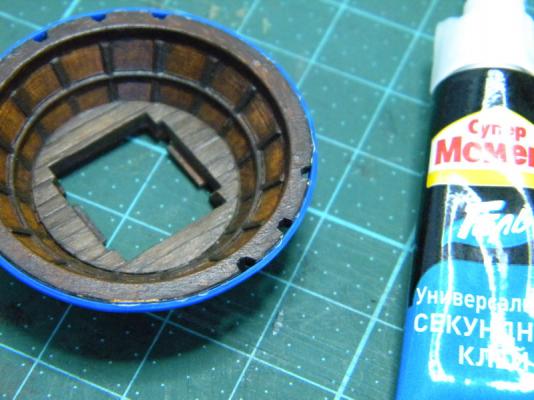
next idea was, that my galleon needs antiboarding net as well...again,on many pictures of galleon we can see that there was no free access to the main deck...often it was closed by some kind of ?gratings?...to fabricate grating -this task was too difficult for me?and I decided ta make imitation of antiboarding net,which also was in use in this period I've made it frm garlic pakaging neilon net of couse it was not best material,but suitable and fast founded same arrangements with this net I saw on this model of flemish galleon(read spanish on that period -look at the flags) and carvel museum model


- 228 replies
-
- 4
-
-
- spanish galleon
- lee
- (and 1 more)
-
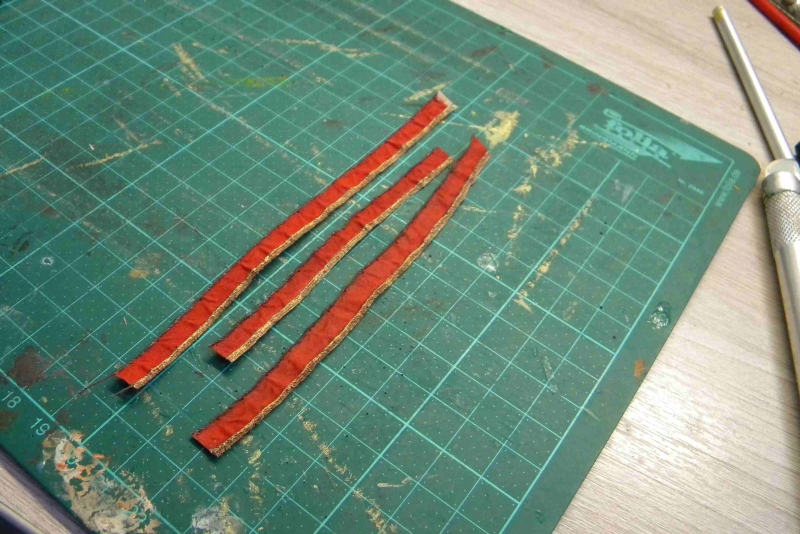
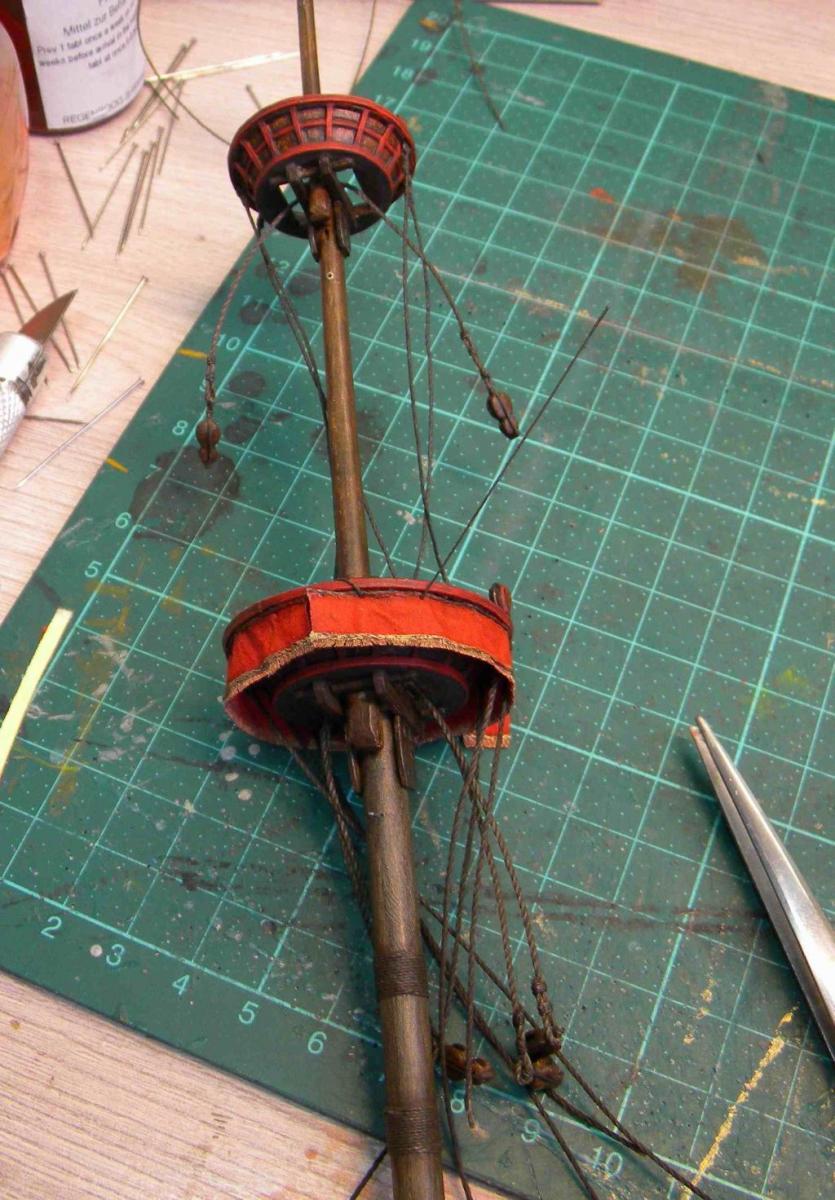
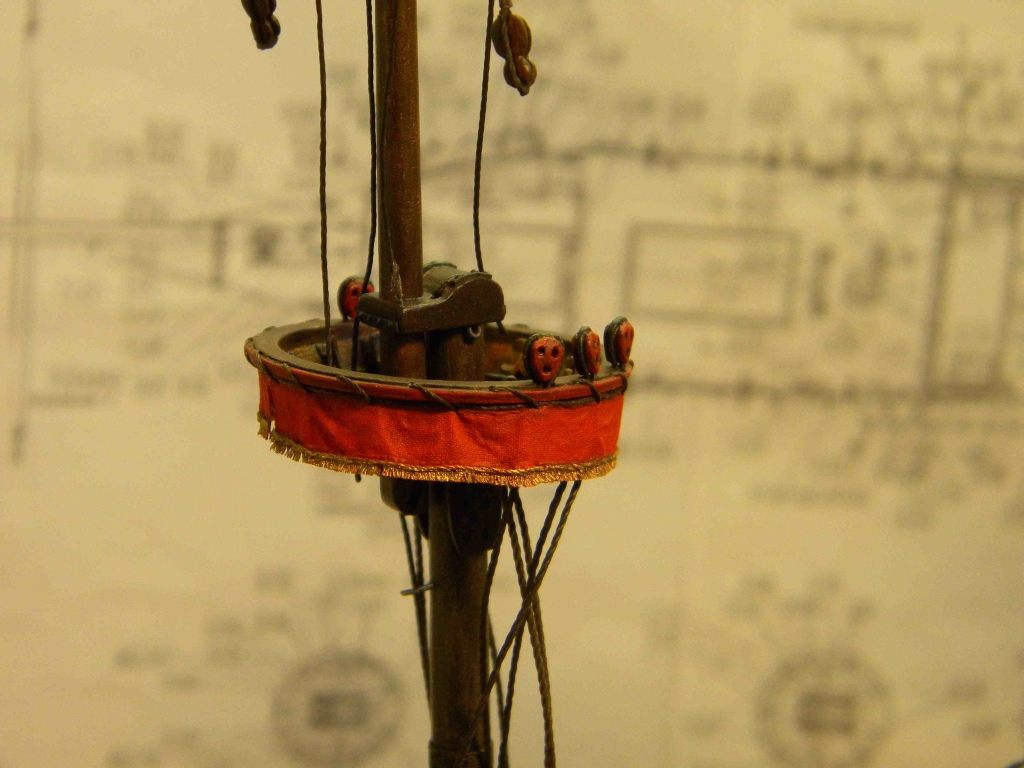
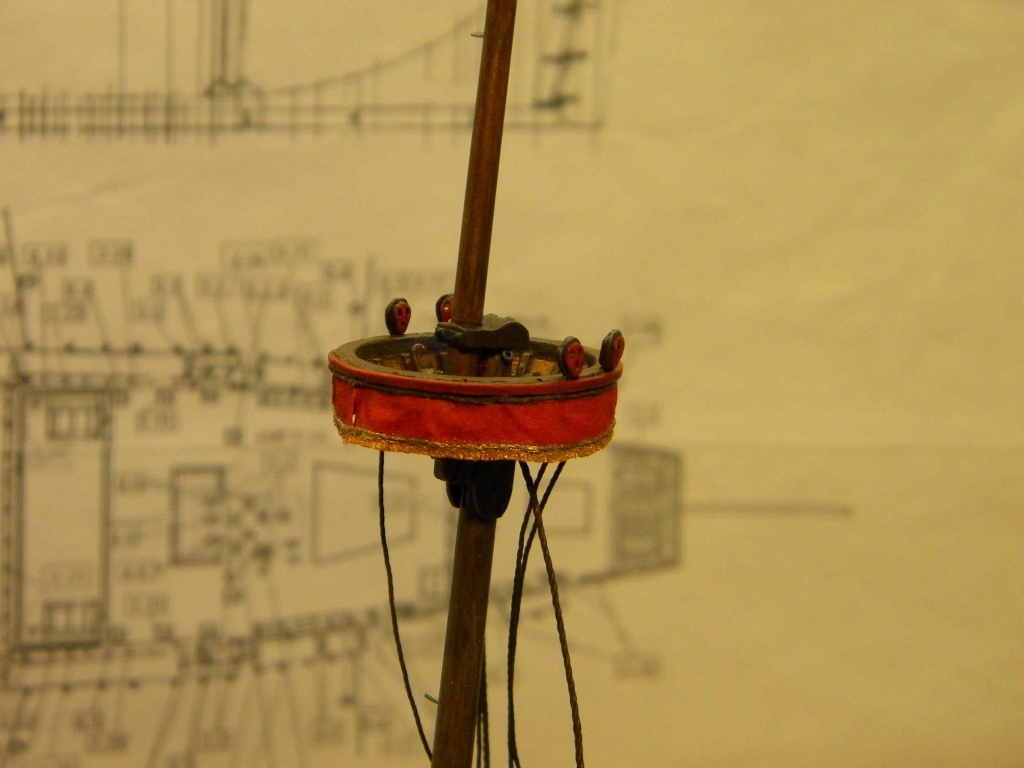
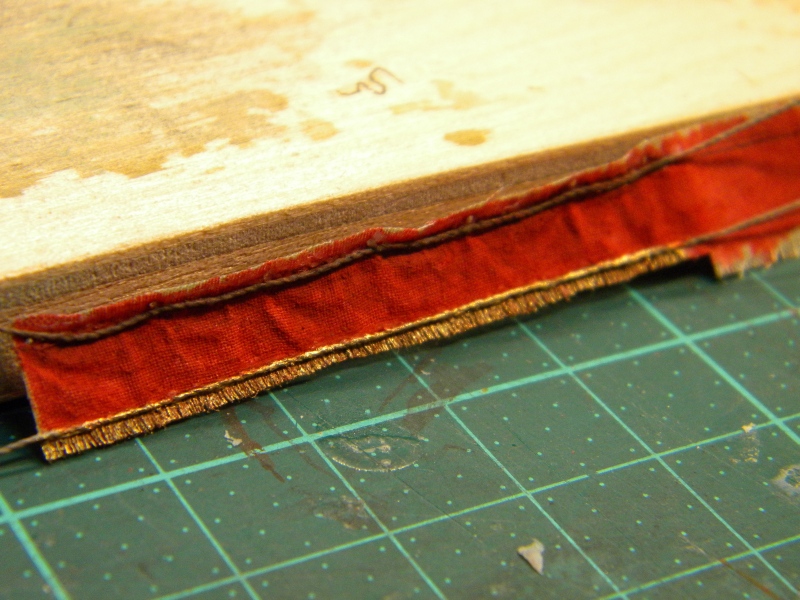
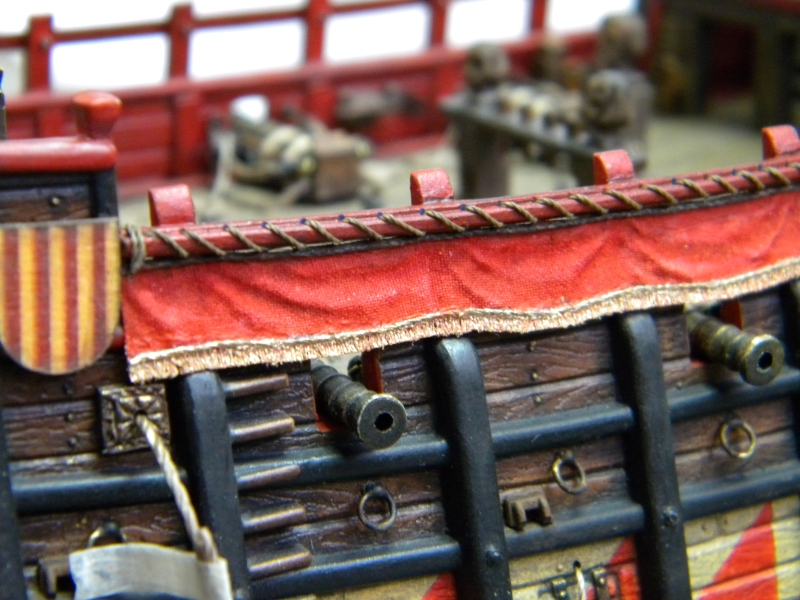
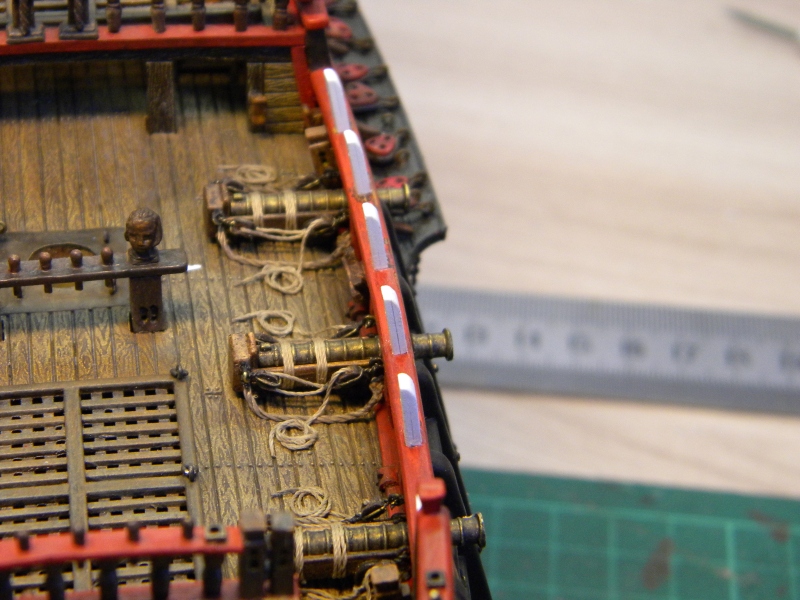
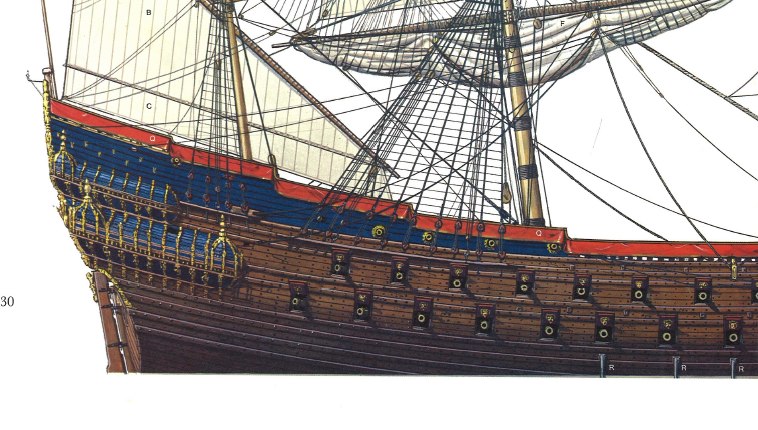
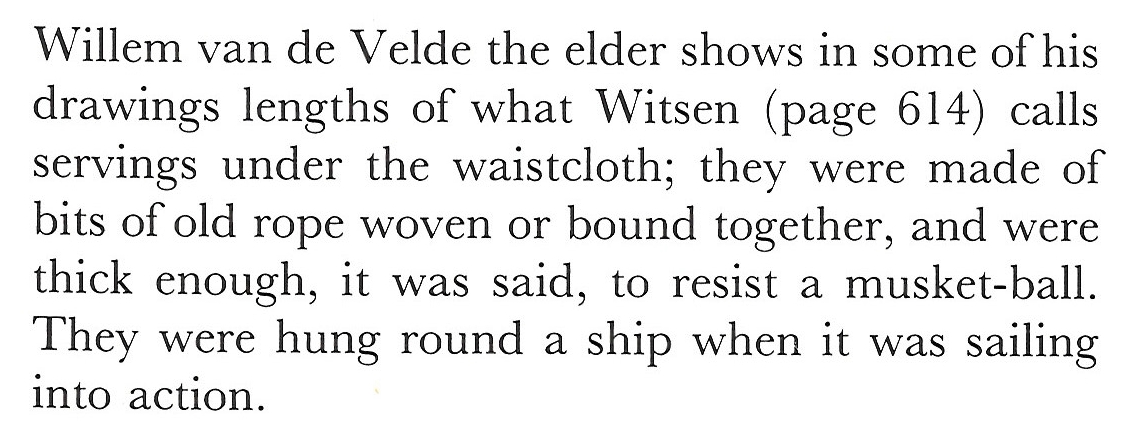
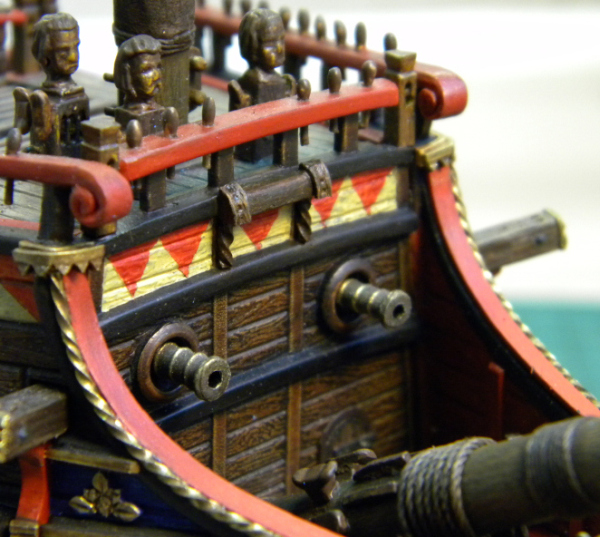
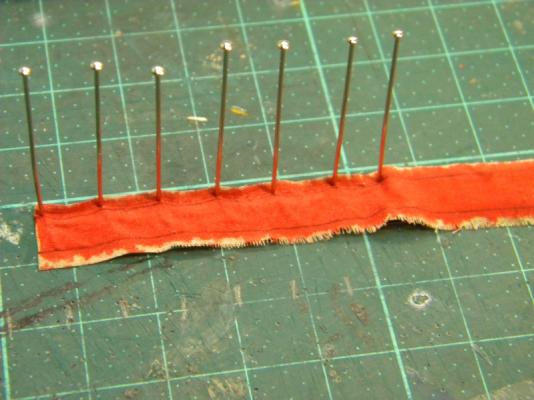
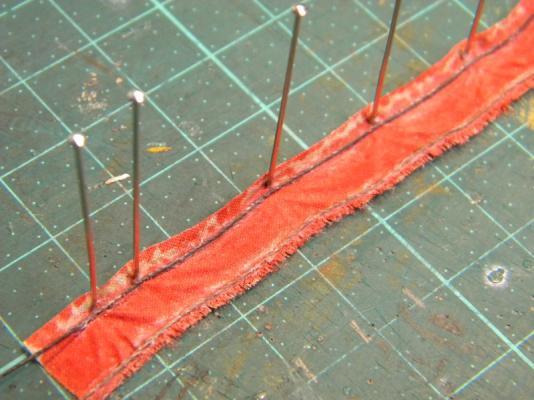
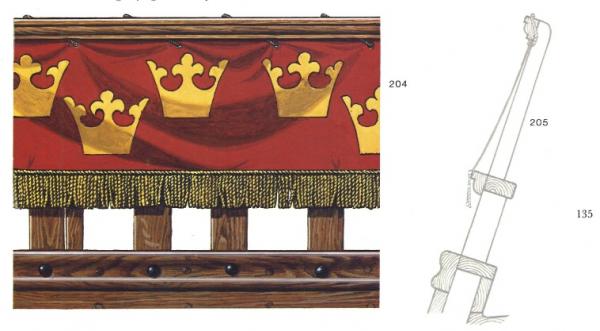
waistcloth ,in fact, I made frm preliminary painted percale soaked in white wooden clue mixed with water, to form folds, fabric need to remains wet... fringe I made by unraveling lower part of waistcloth fascia


- 228 replies
-
- 4
-
-

-
- spanish galleon
- lee
- (and 1 more)
-
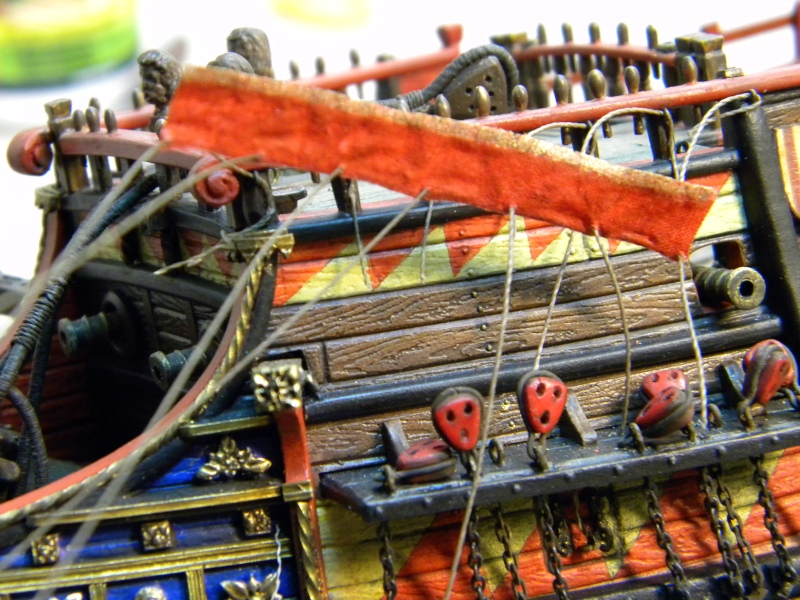
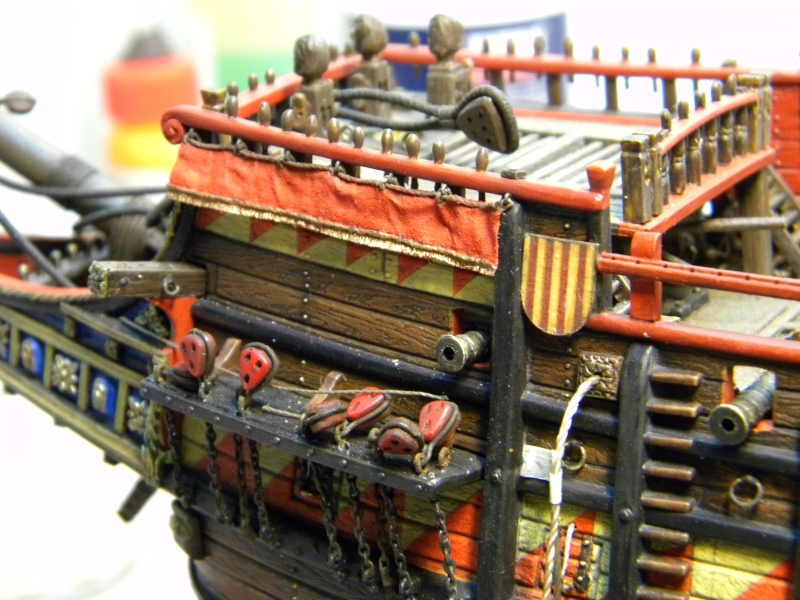
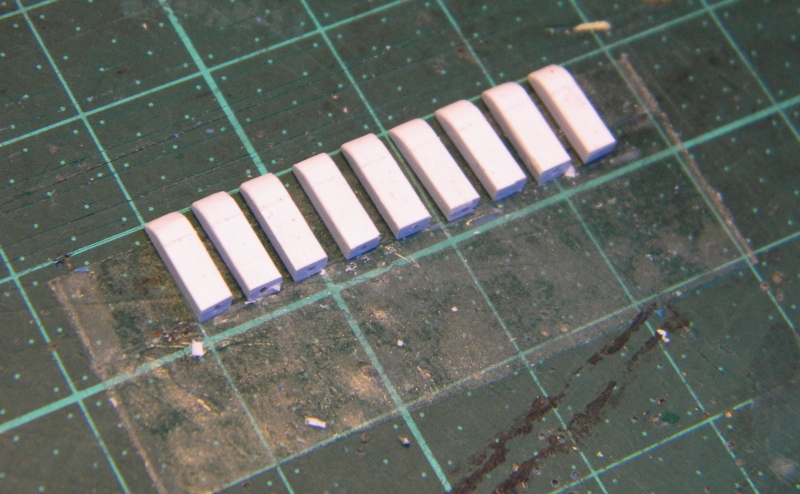
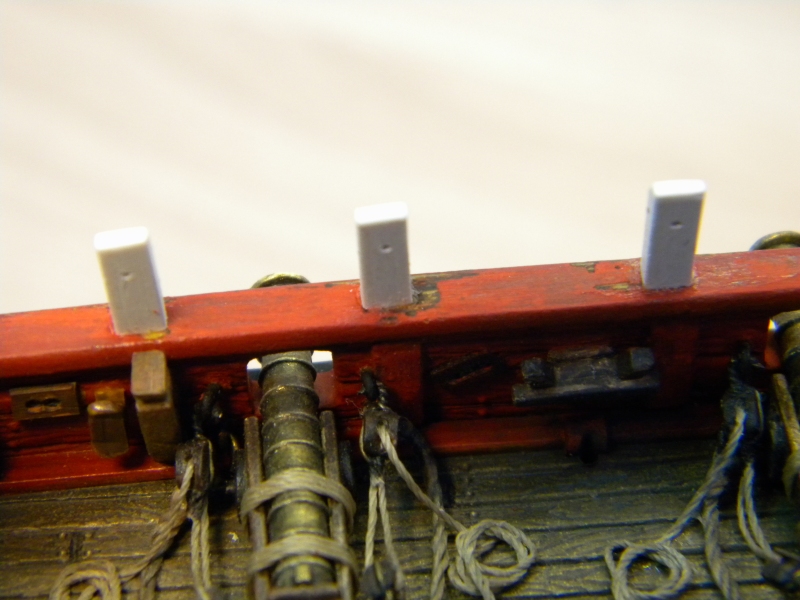
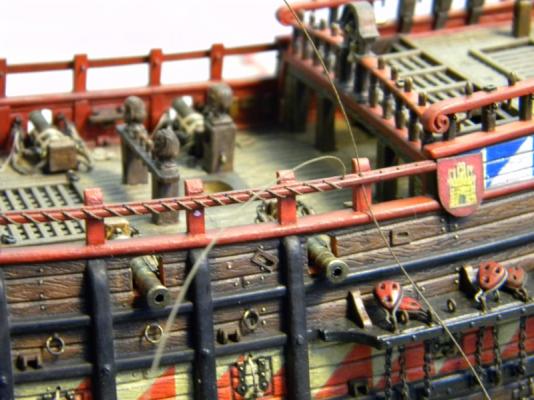
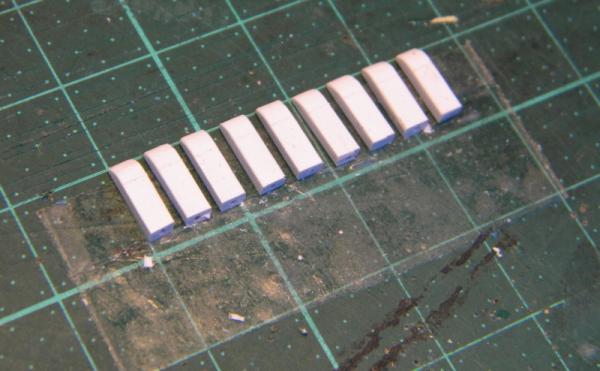
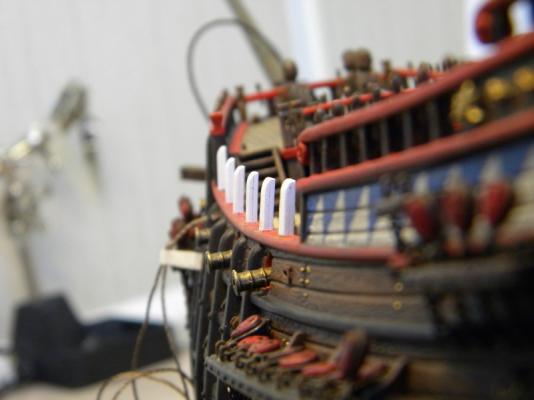
but for waistcloth installation it was ness-ry to make some modification-to arrange kind of railings


- 228 replies
-
- 5
-
-
- spanish galleon
- lee
- (and 1 more)
-
later on I had crazy idea that my galleon need waistcloth...I see this elements very often on contemporary galleon pictures...so I try to fabricate them


- 228 replies
-
- 2
-
-
- spanish galleon
- lee
- (and 1 more)
-
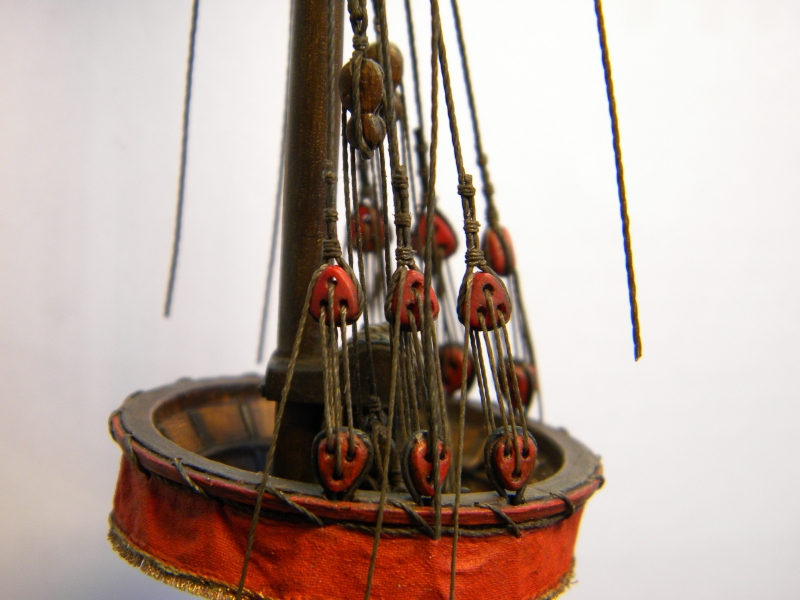
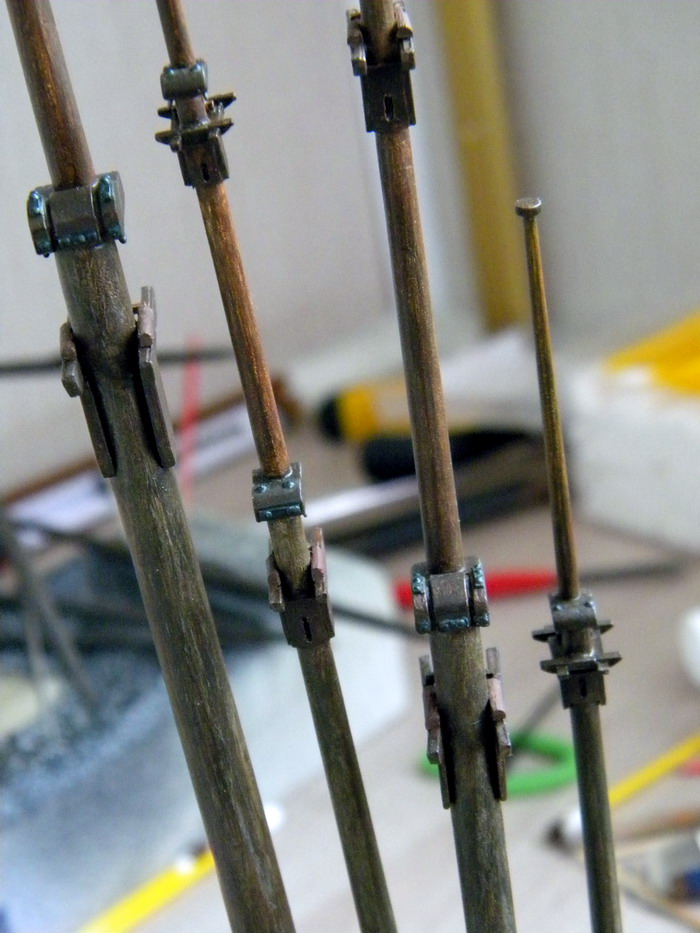
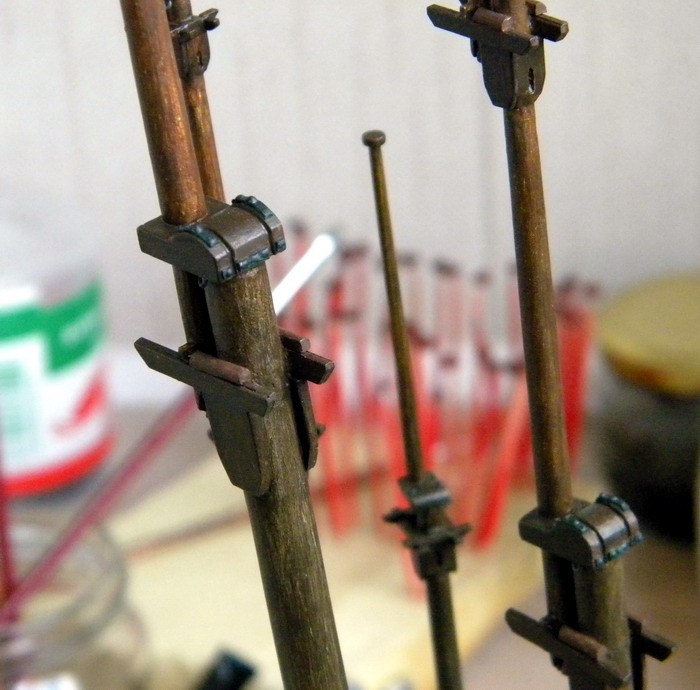
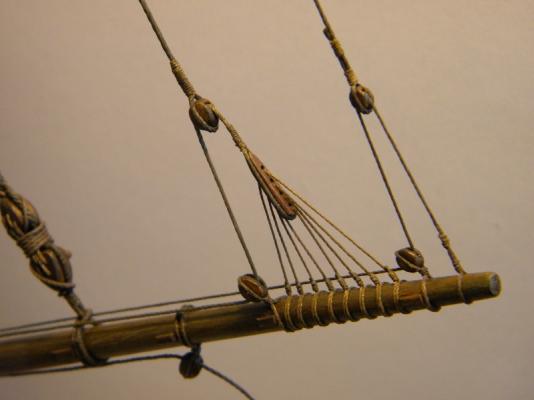
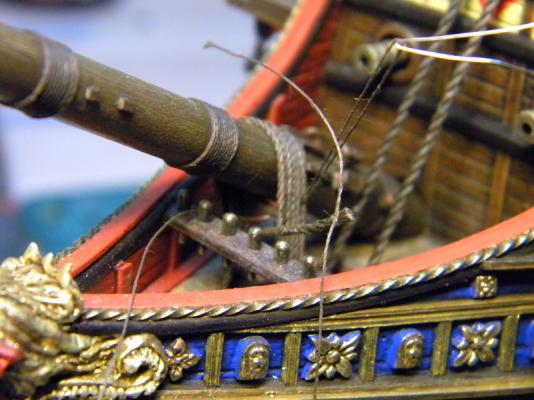
than I installed fore mast tackles pendants and arrange tackles and installed pendants on the rest of the masts


- 228 replies
-
- 5
-
-
- spanish galleon
- lee
- (and 1 more)
-
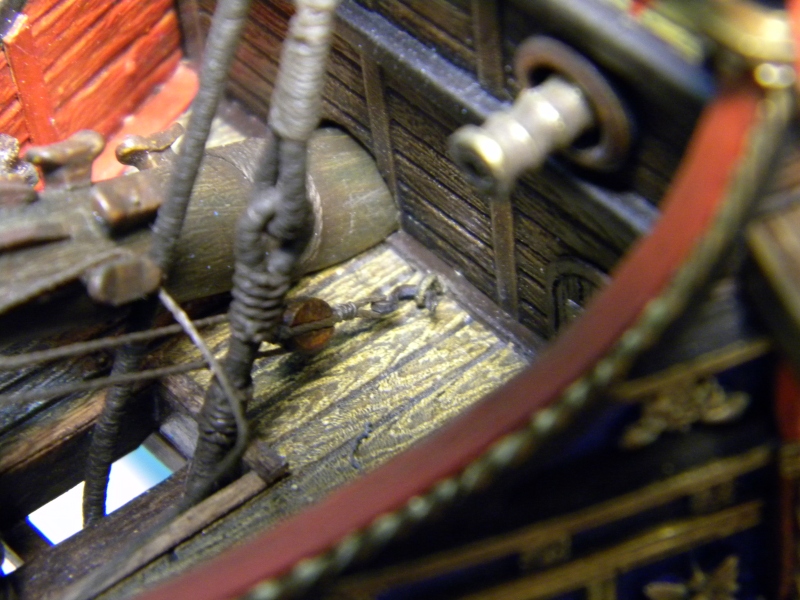
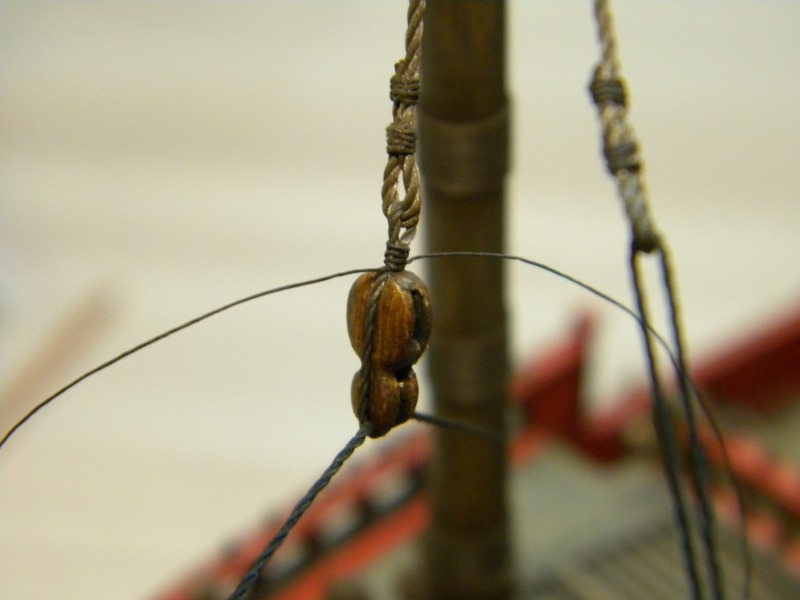
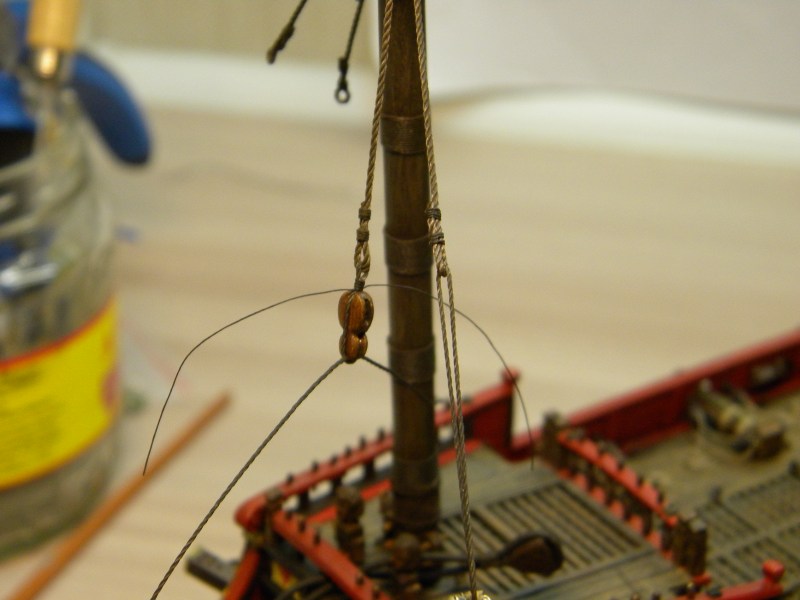
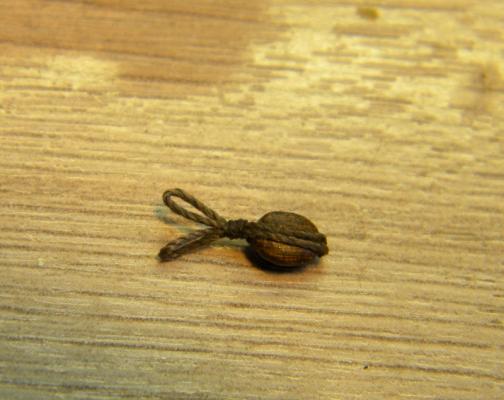
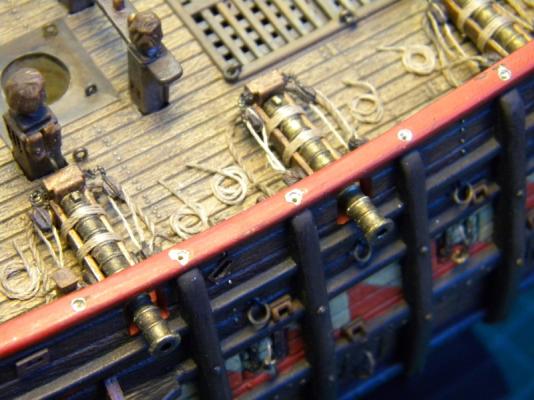
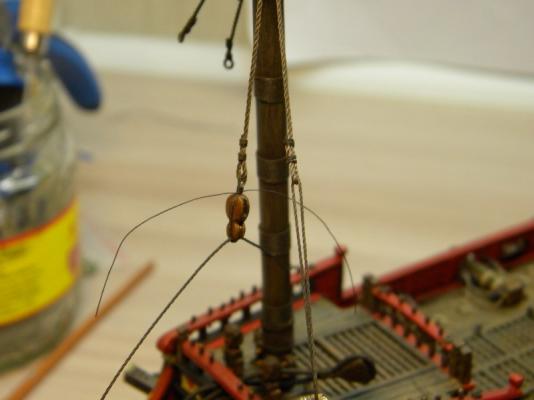
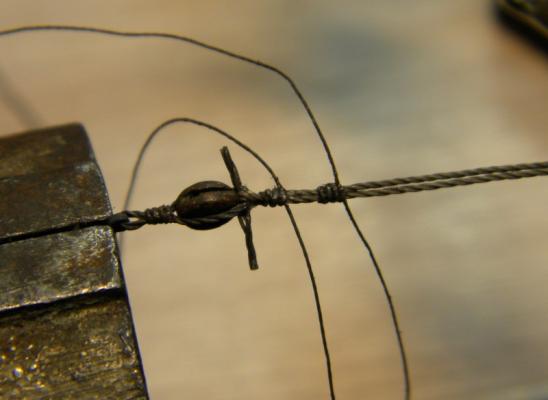
when sets of the blocks were ready, I've made supporter for main stay lower collar...I don't know if this device exists on full size vessel,but on my model without this device stay collar rests right on the edge, so I decided to install it than I prepaired(serving) lower mainn stay collar...to connect both ends I did arrangements which looks like this part made on Batavia replika or De_Zeven_Provincien drwngs. Model ,at least in such way how I understood it Final adjustment and Connection those two ends I did after installation masthead tackles


- 228 replies
-
- 2
-
-
- spanish galleon
- lee
- (and 1 more)
-
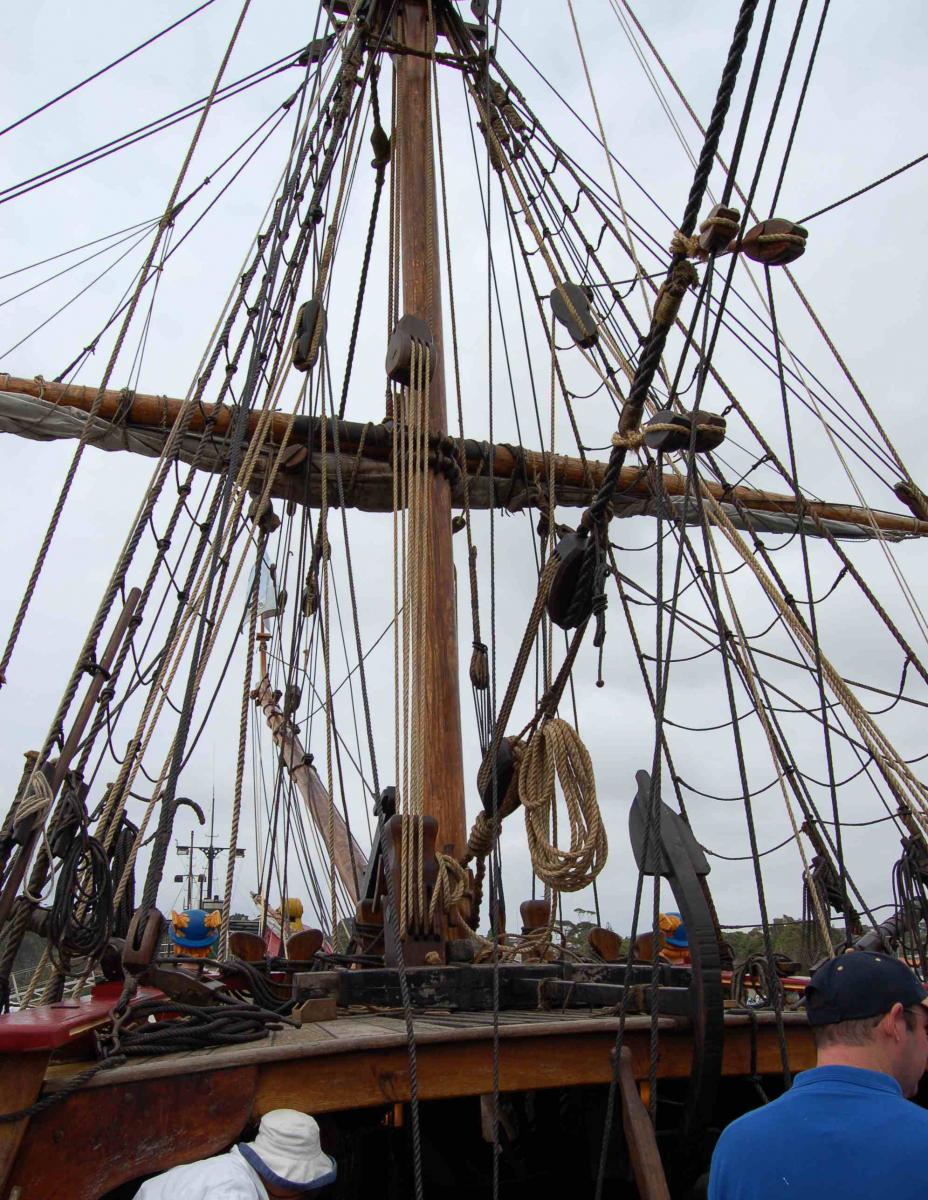
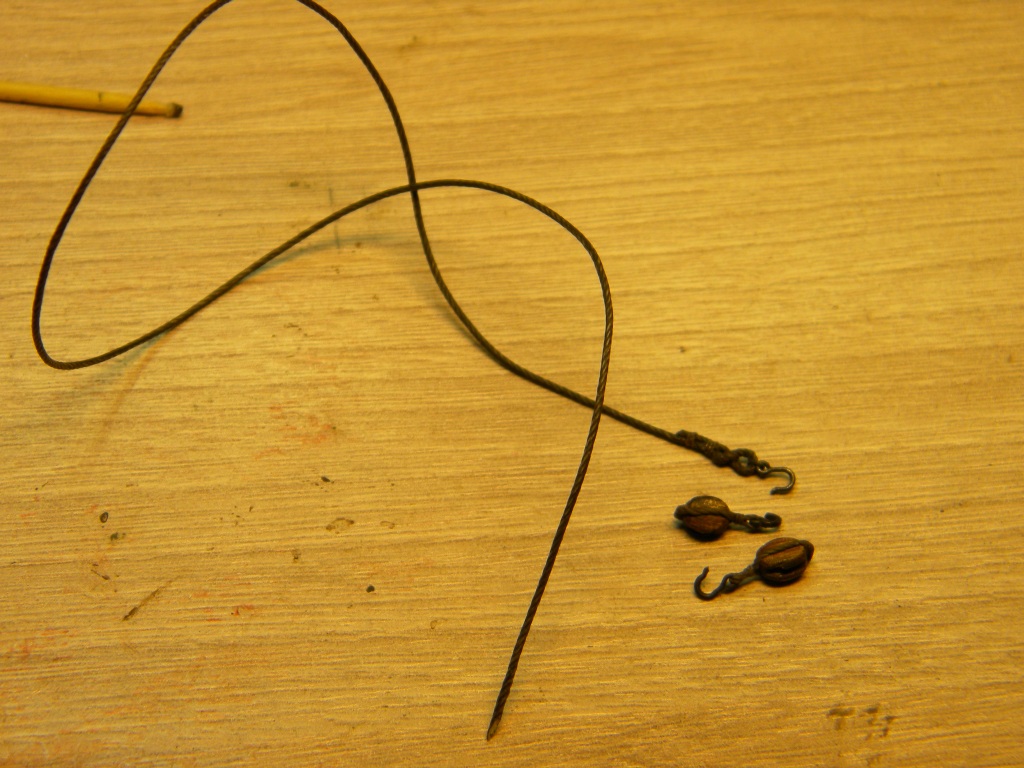
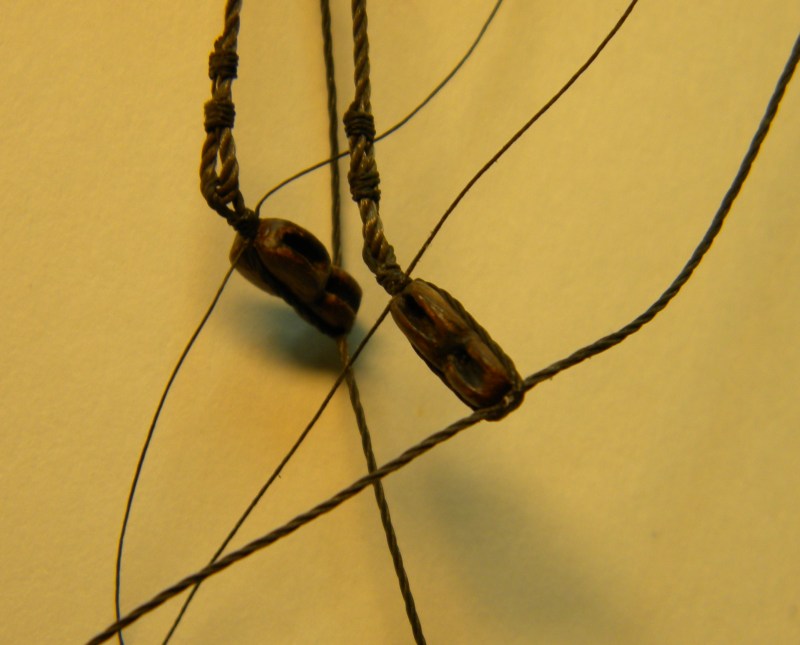
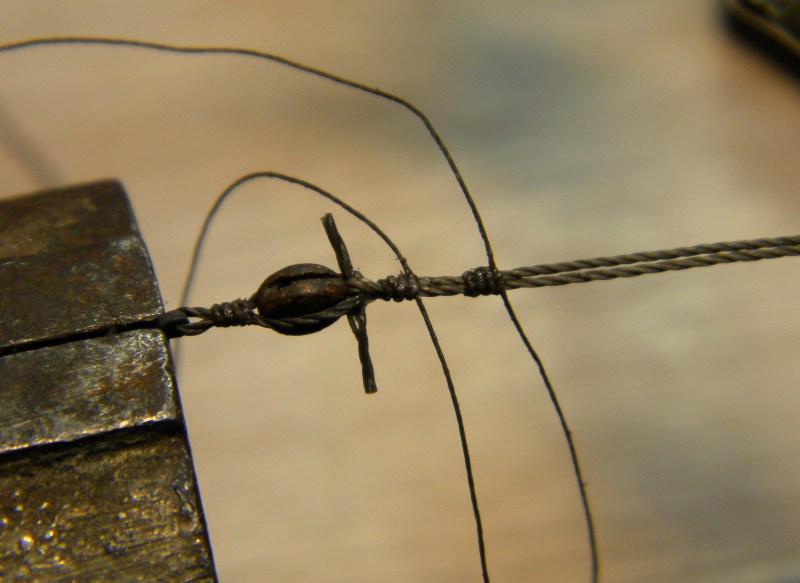
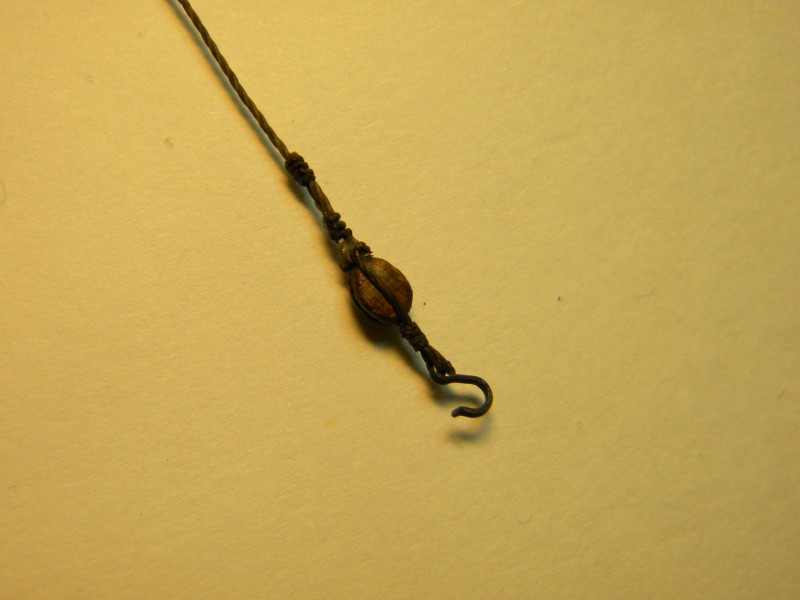
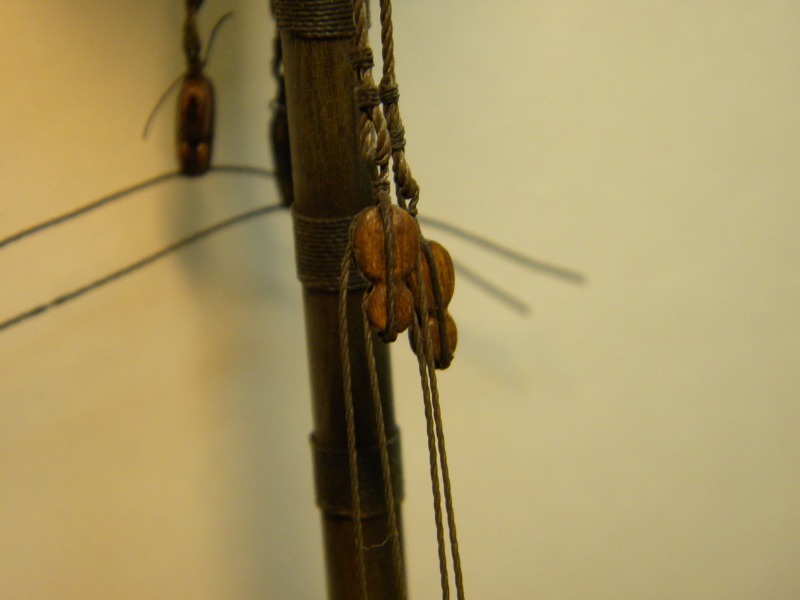
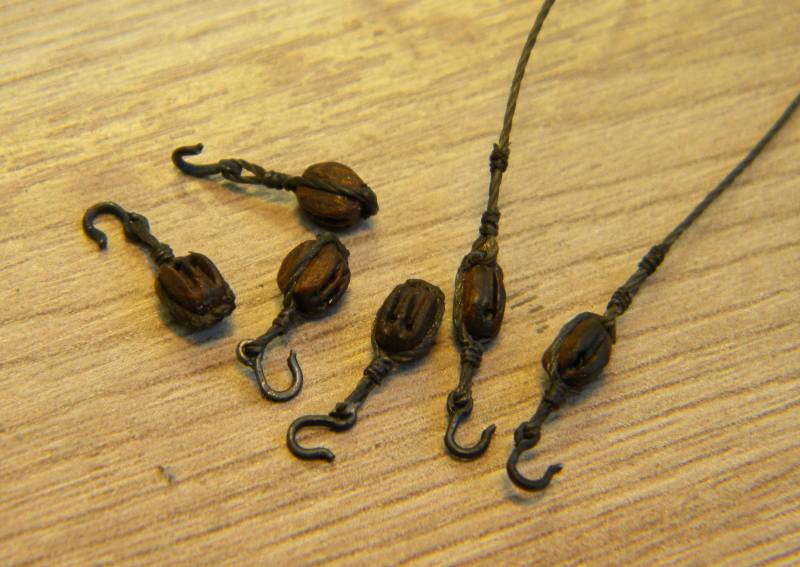
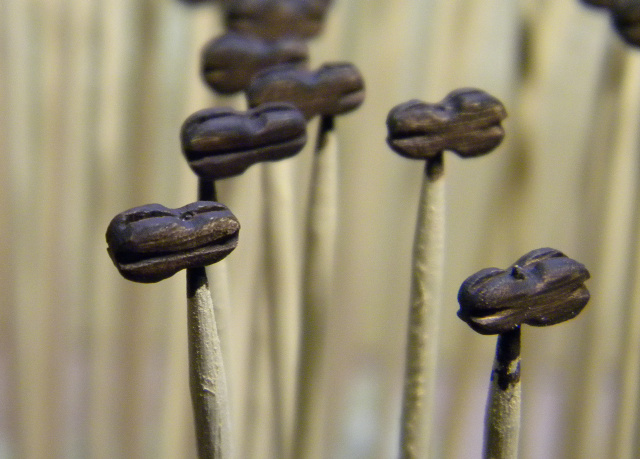
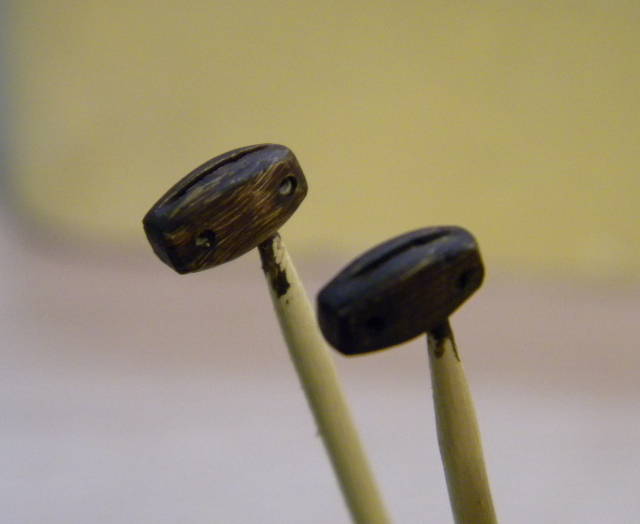
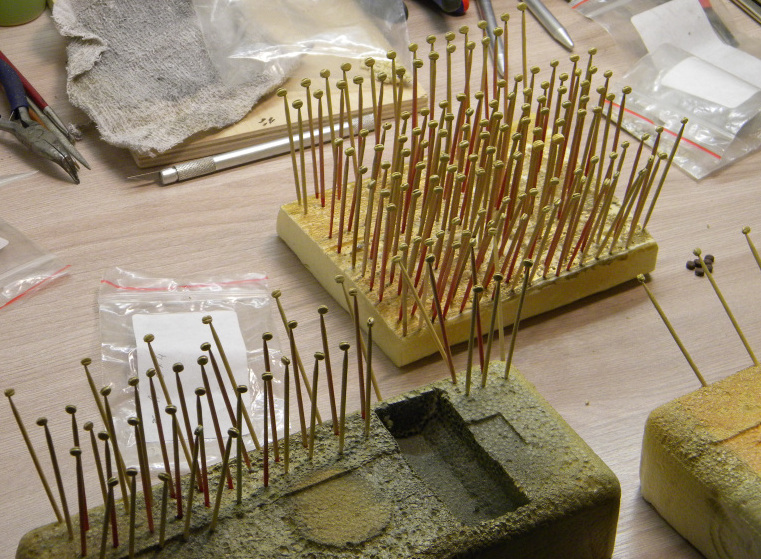
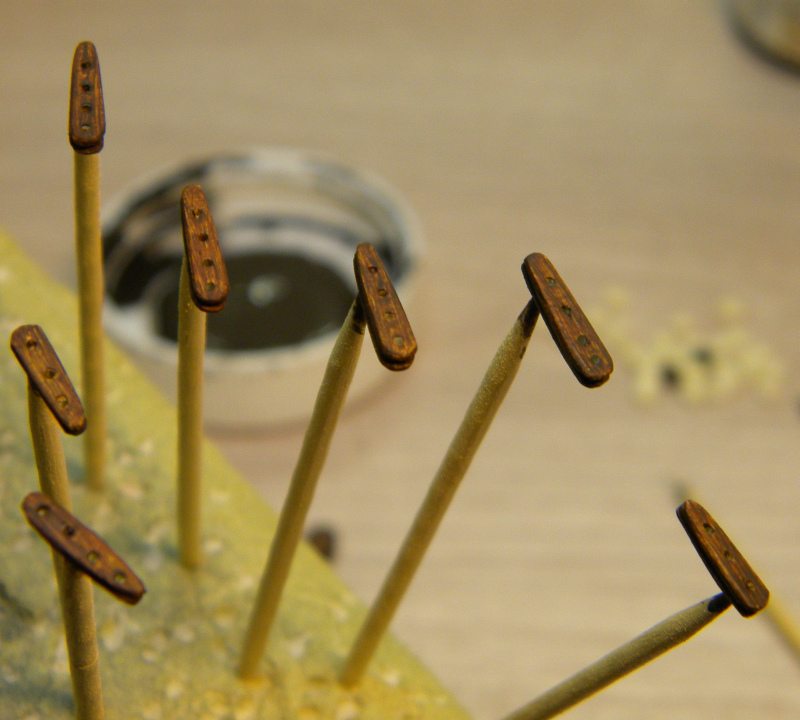
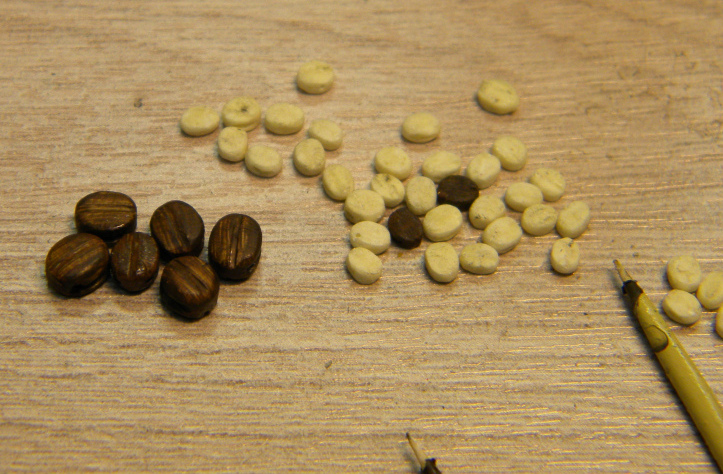
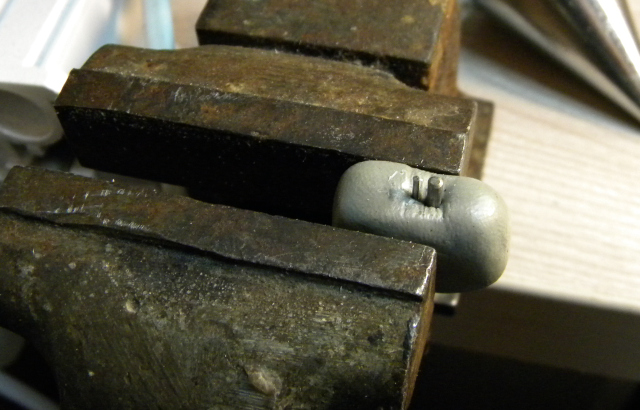
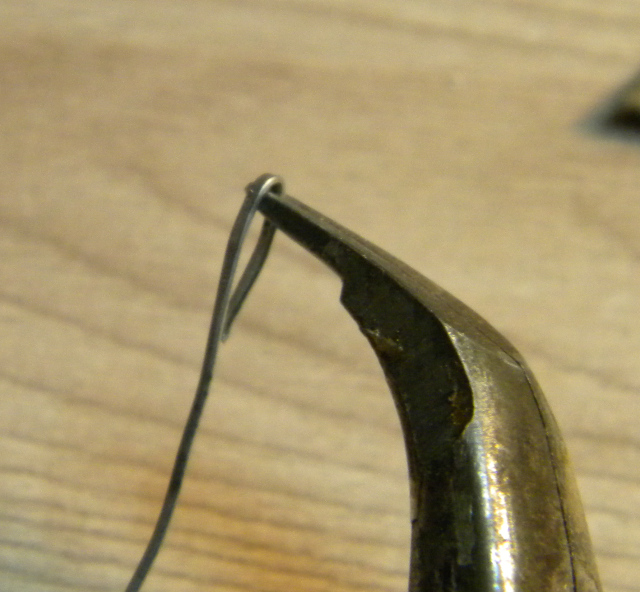
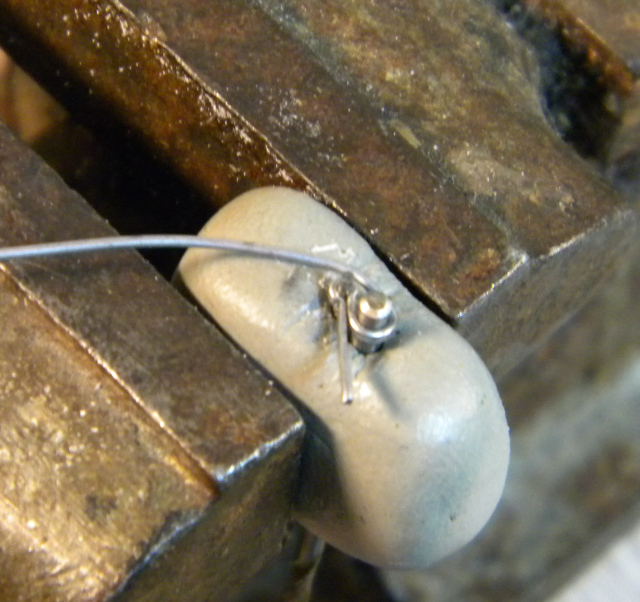
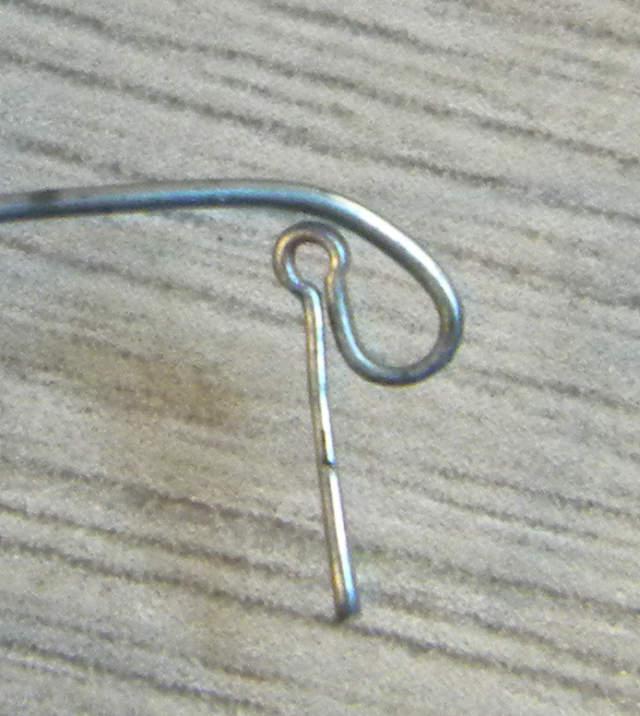
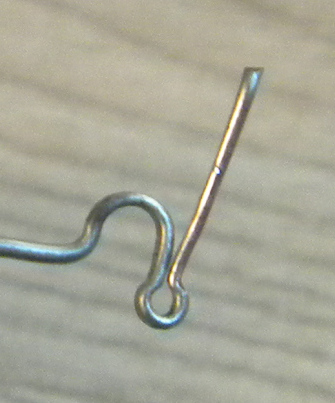
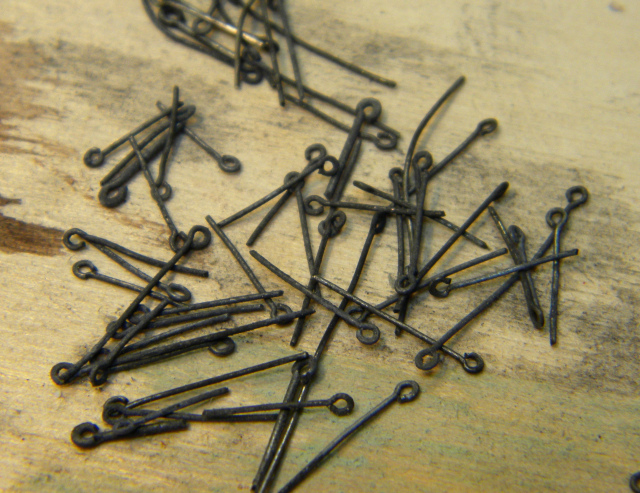
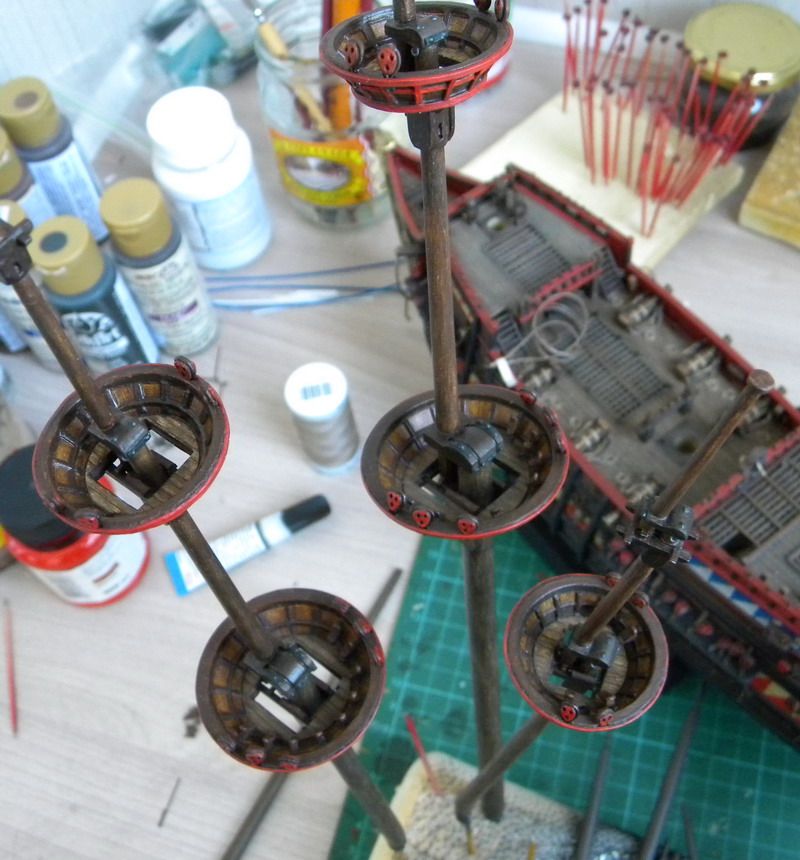
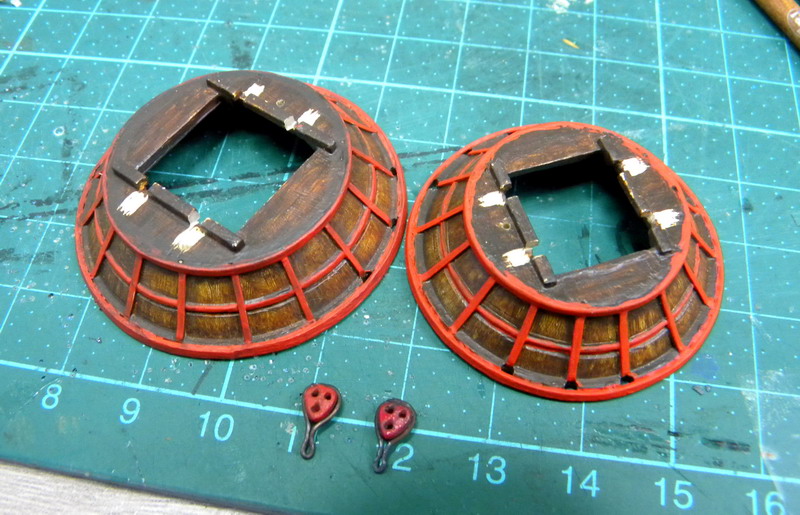
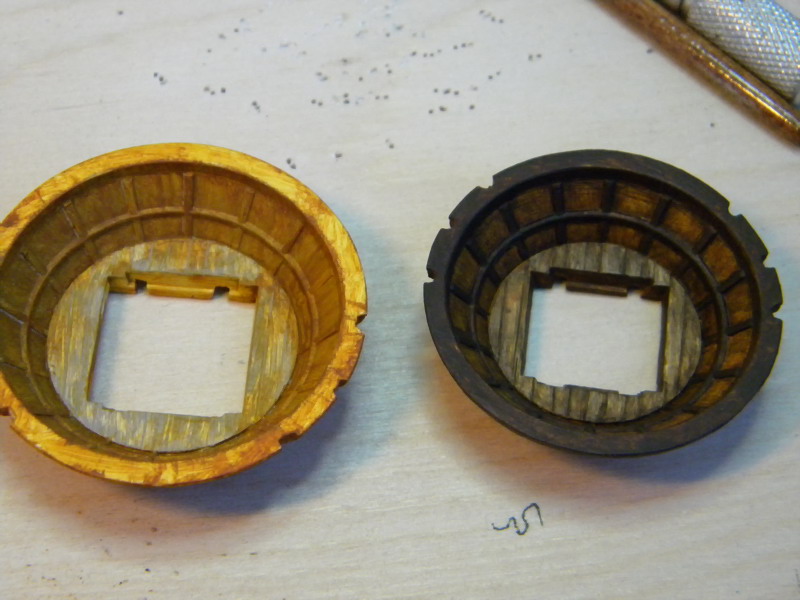
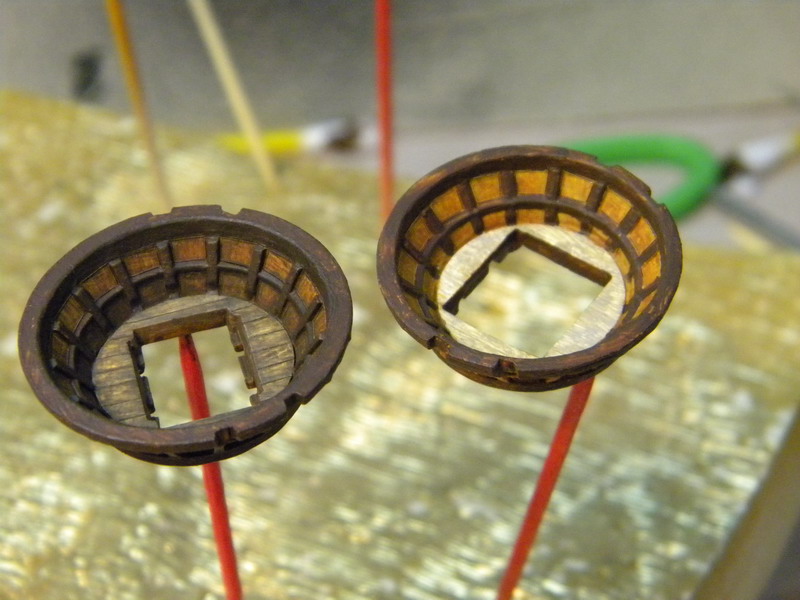
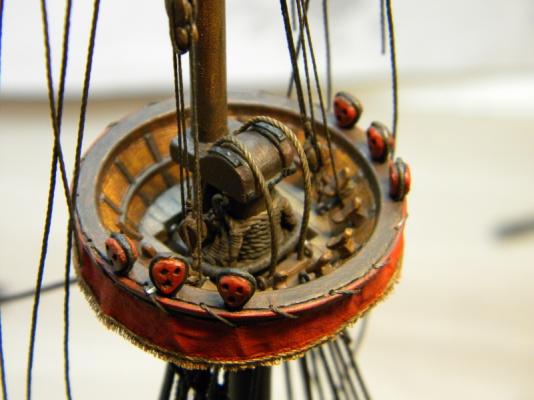
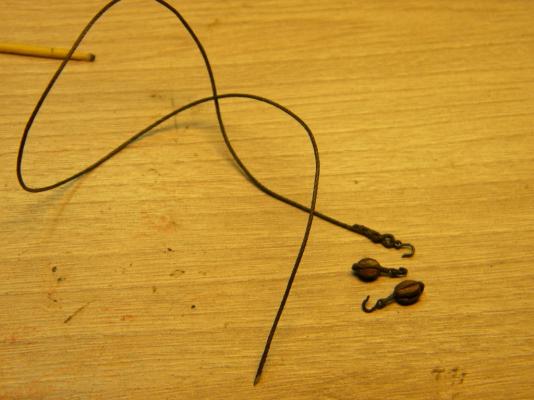
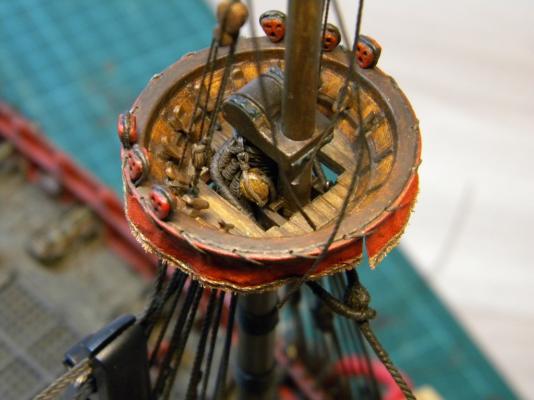
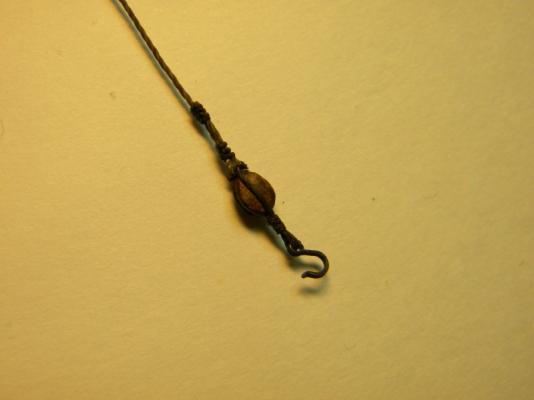
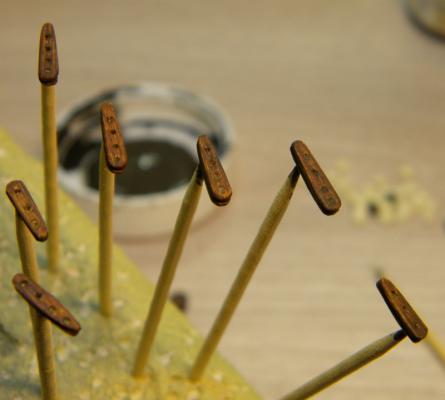
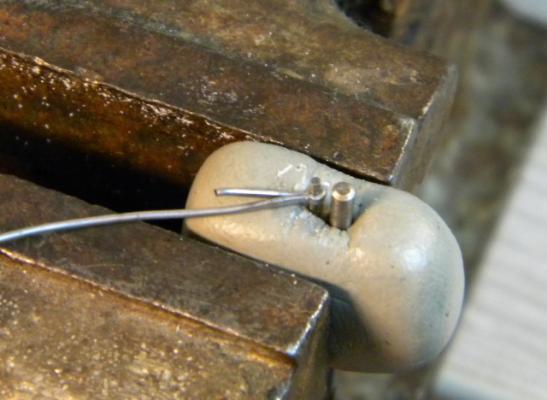
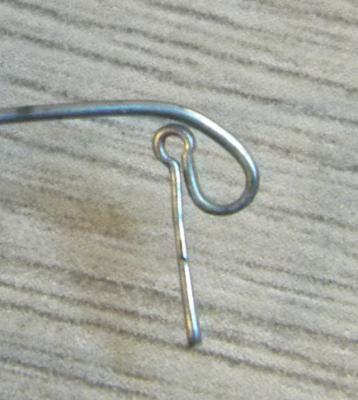
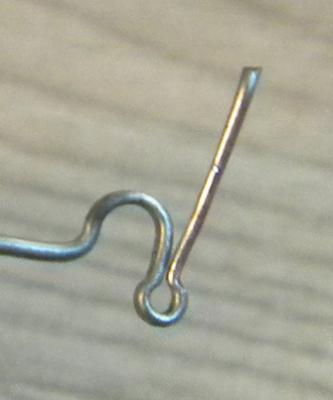
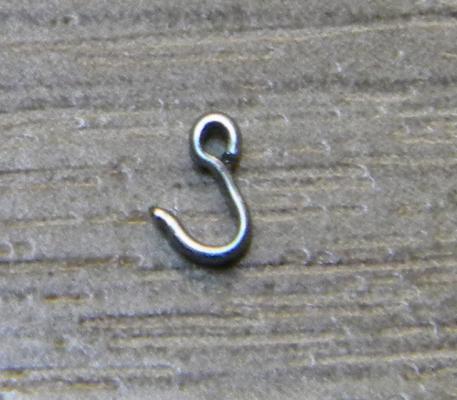
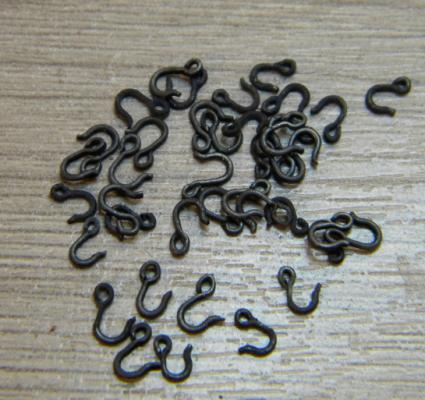
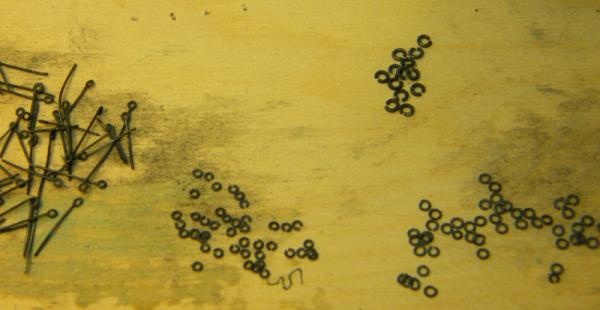
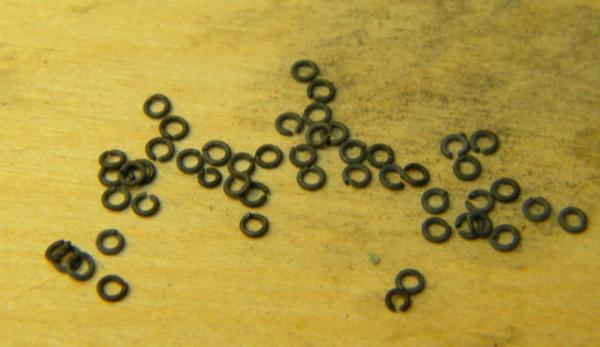
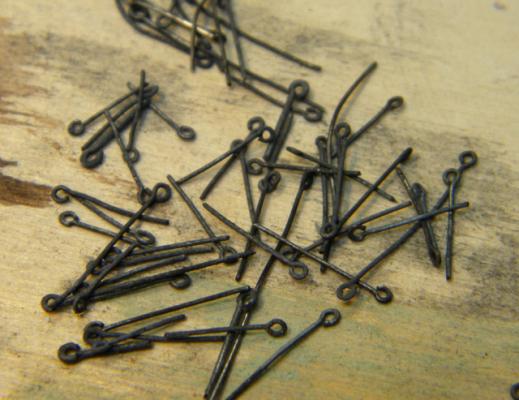
this is the recent part of building... all jobs were done during last couple of months made some preparation for fore mast and bowsprit rigging + painted all ness-ry bloks and made some ring bolts and hooks ,as sample - Duyfken replica


- 228 replies
-
- 6
-
-
- spanish galleon
- lee
- (and 1 more)
-
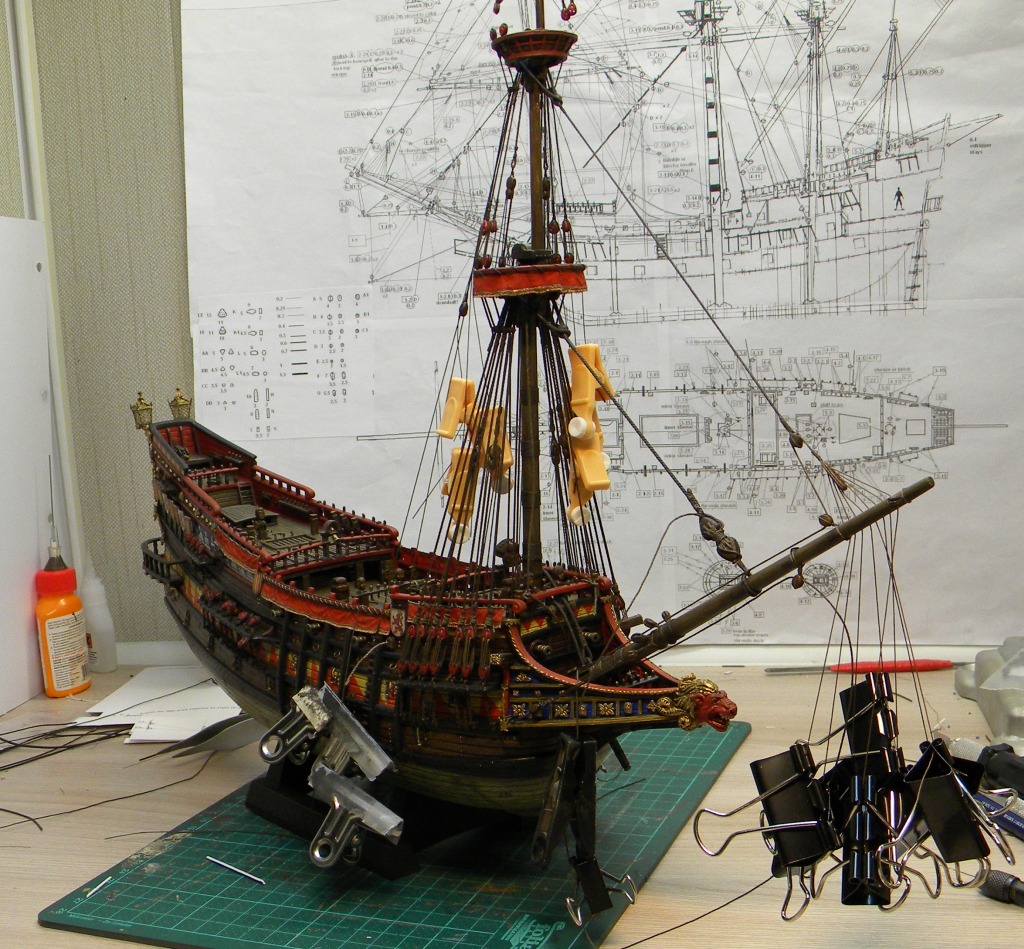
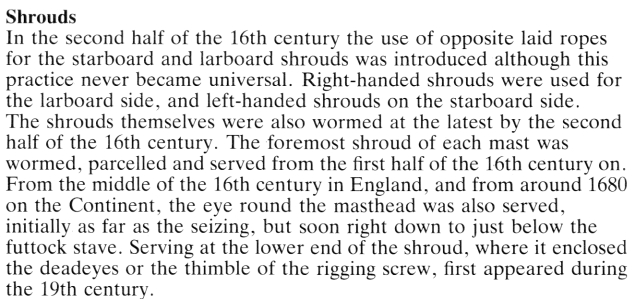
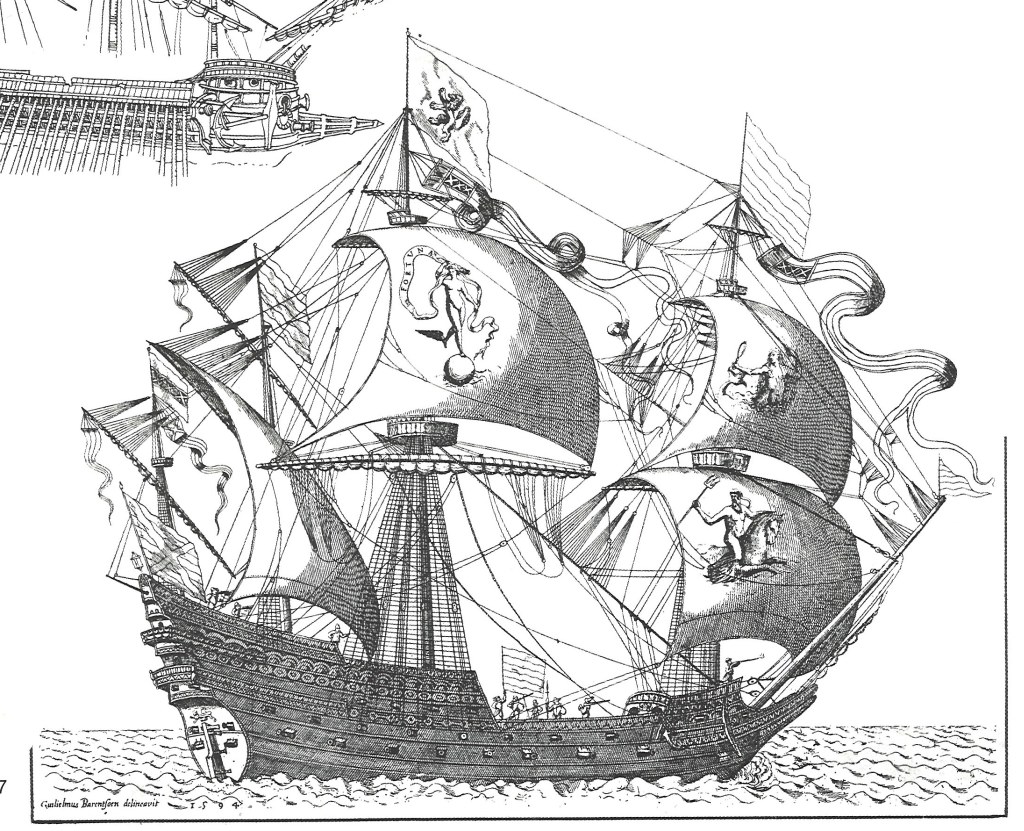
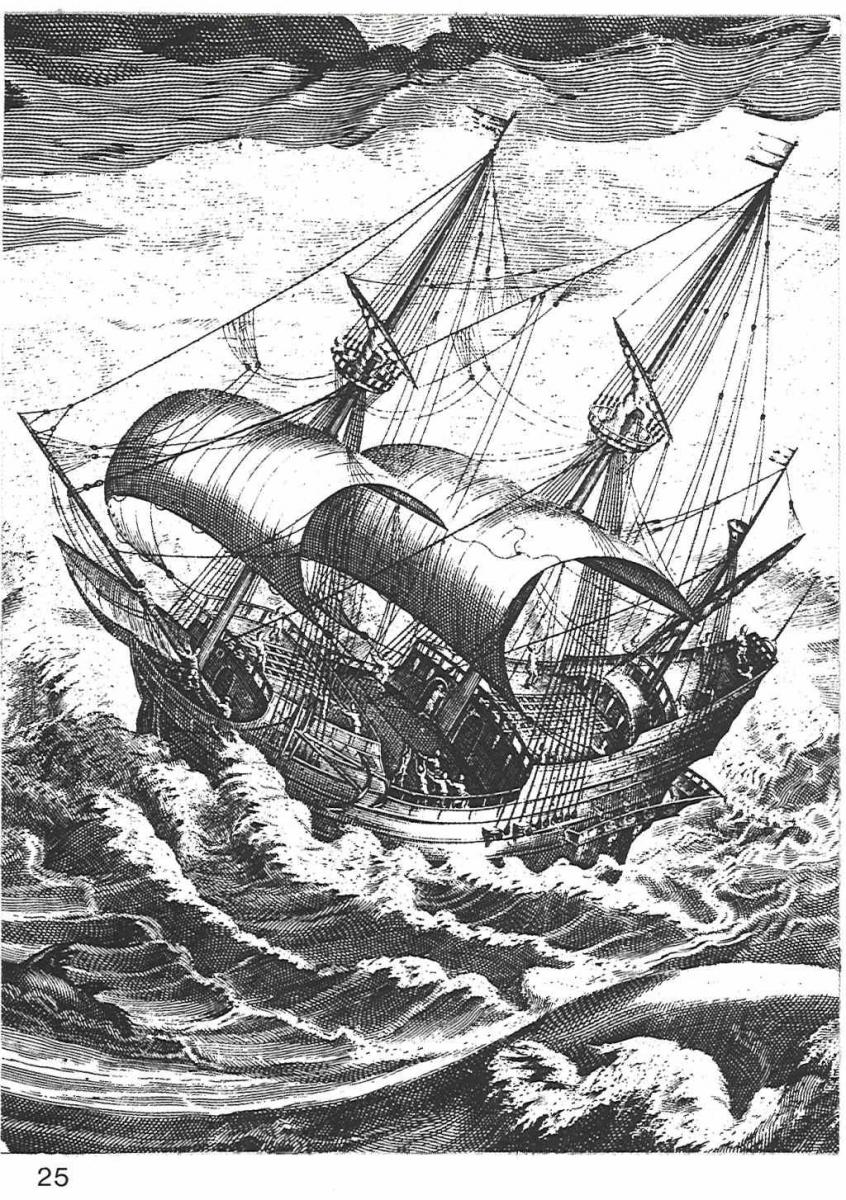
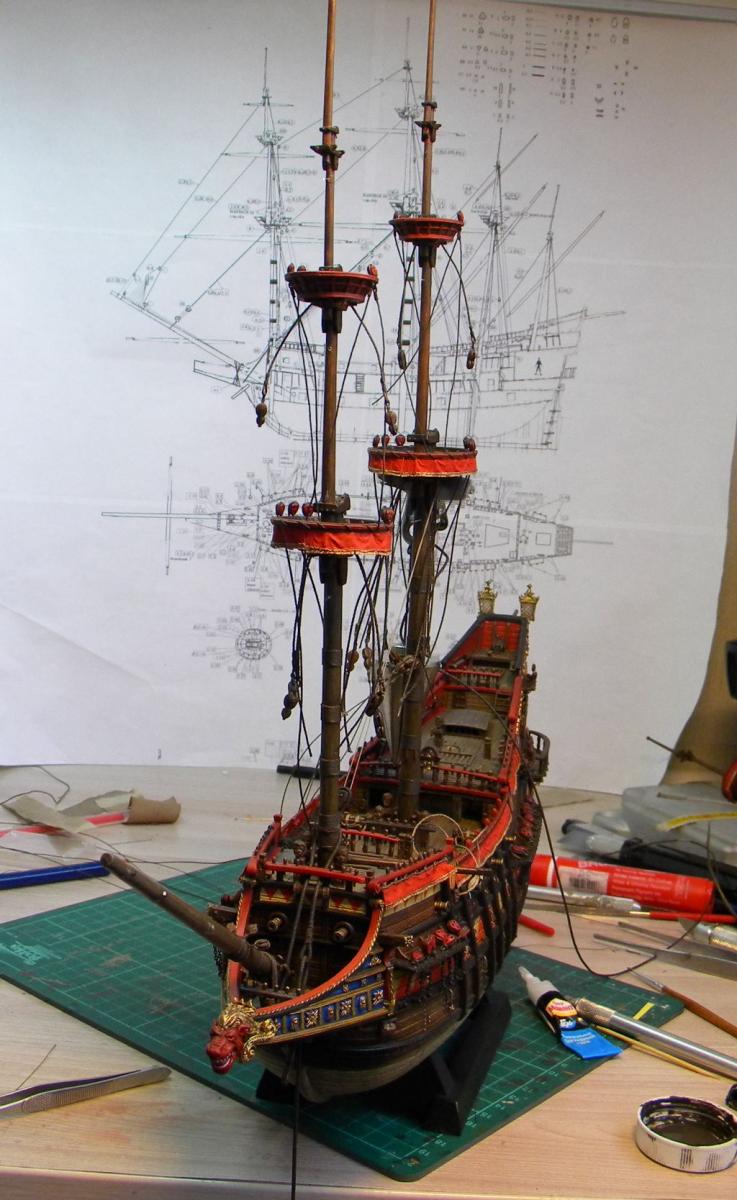
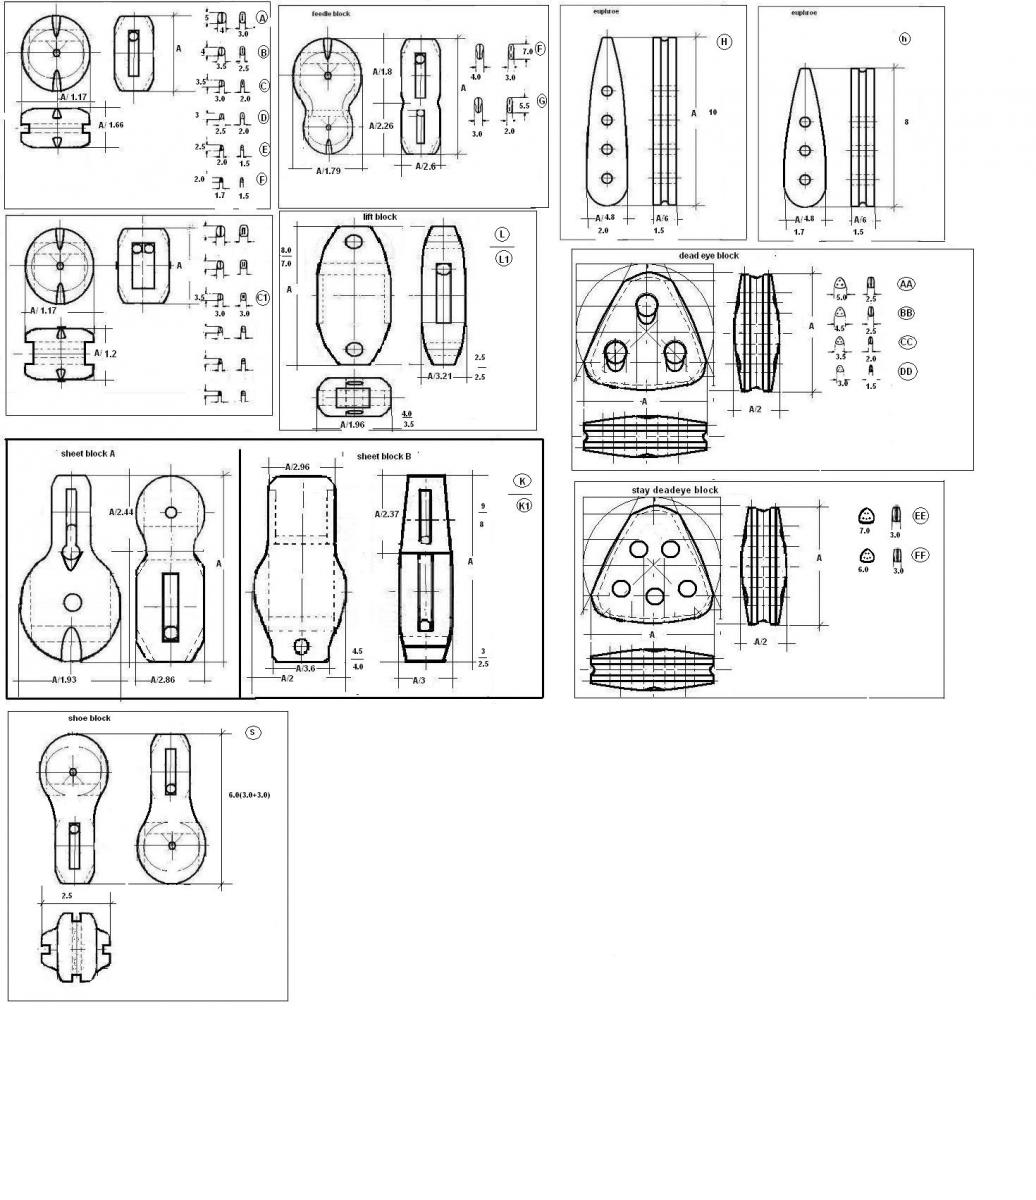
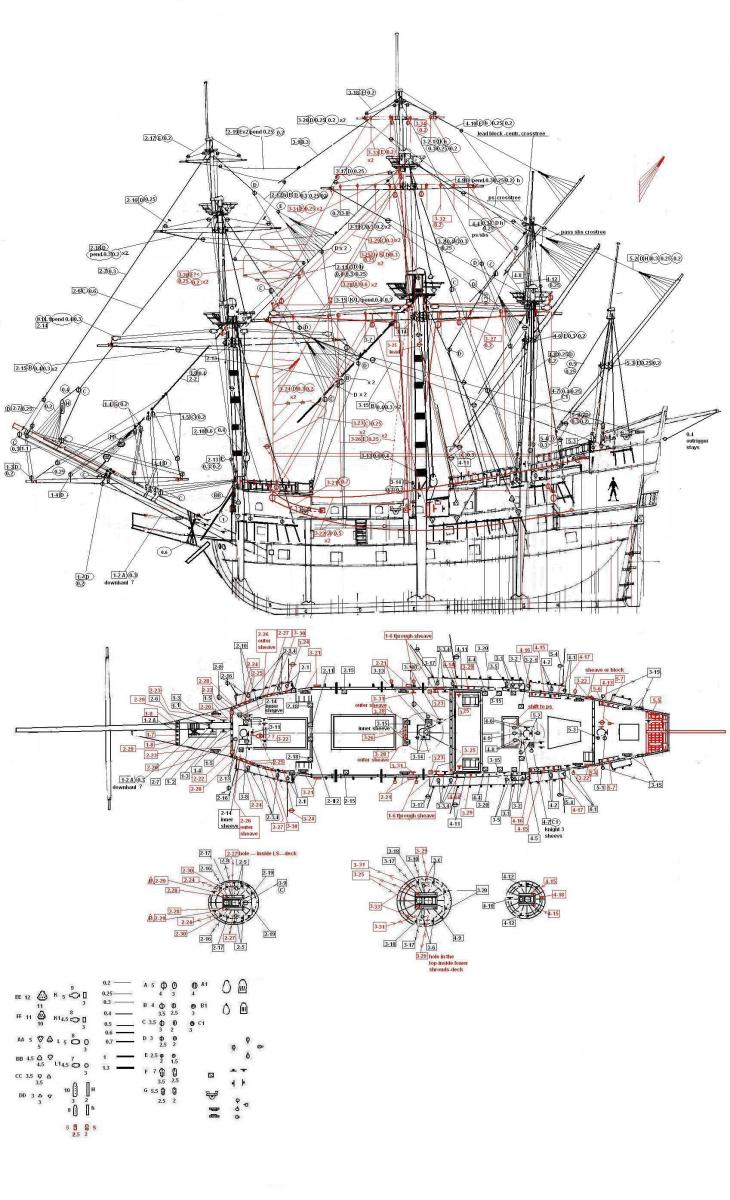
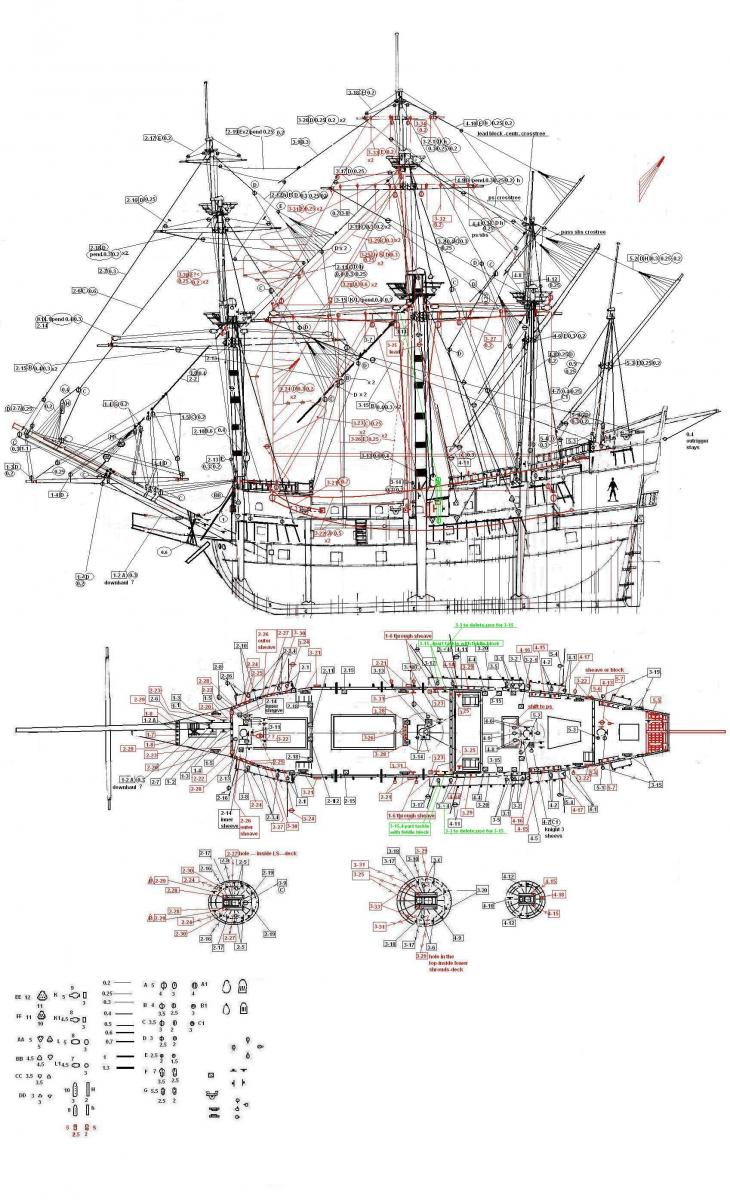
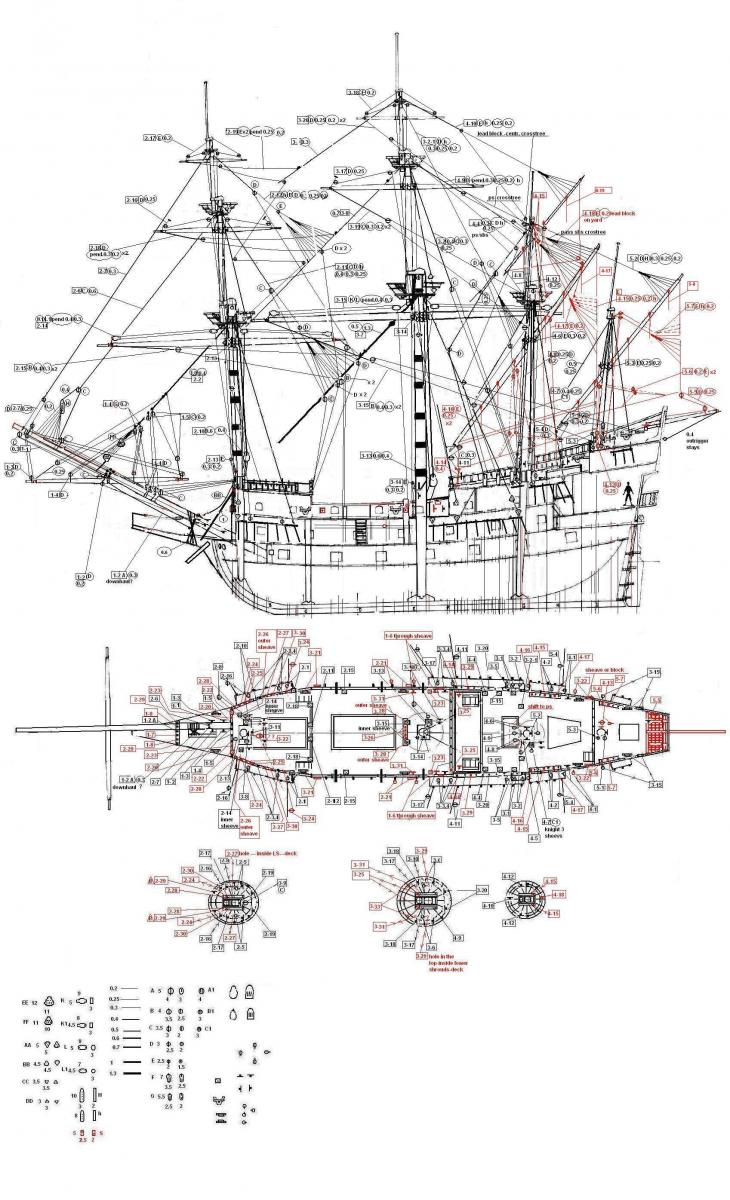
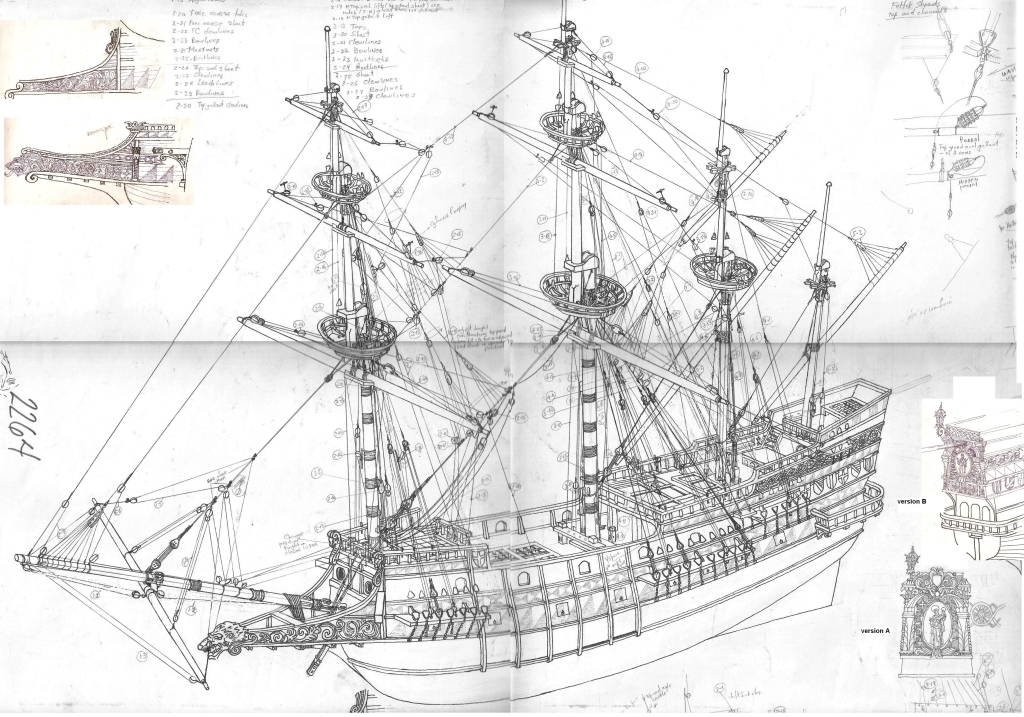
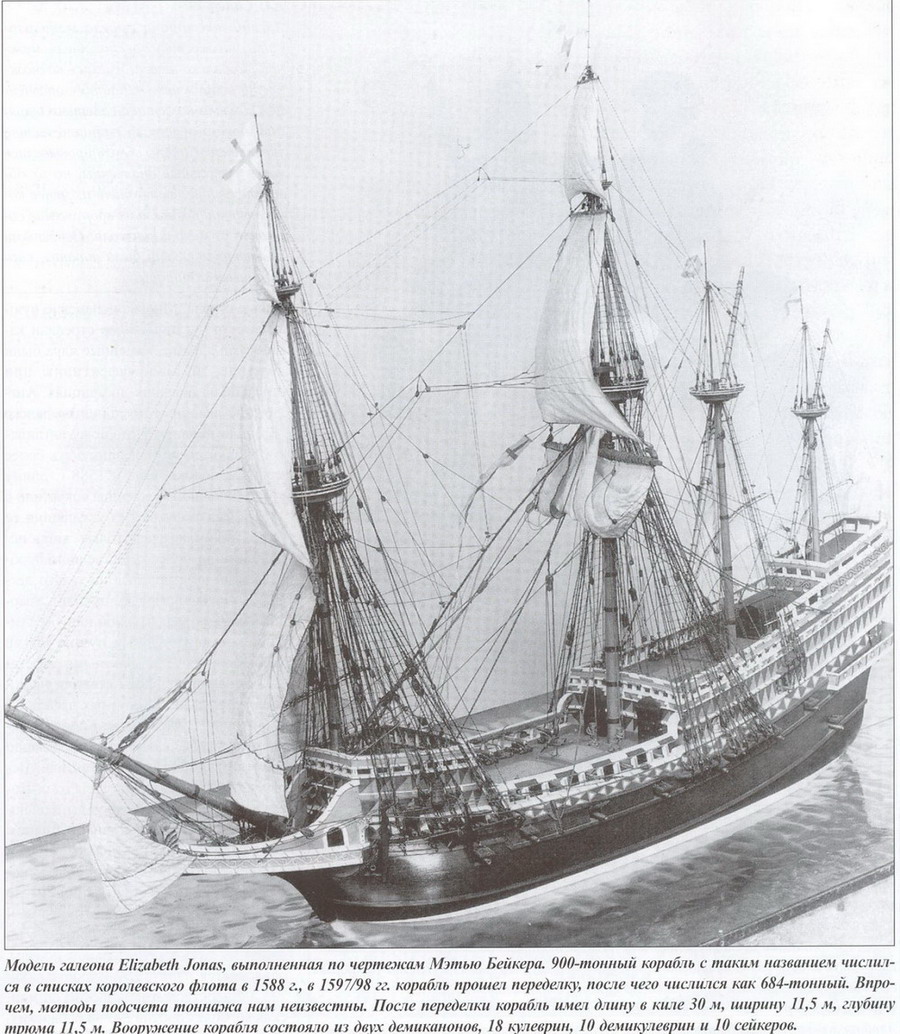
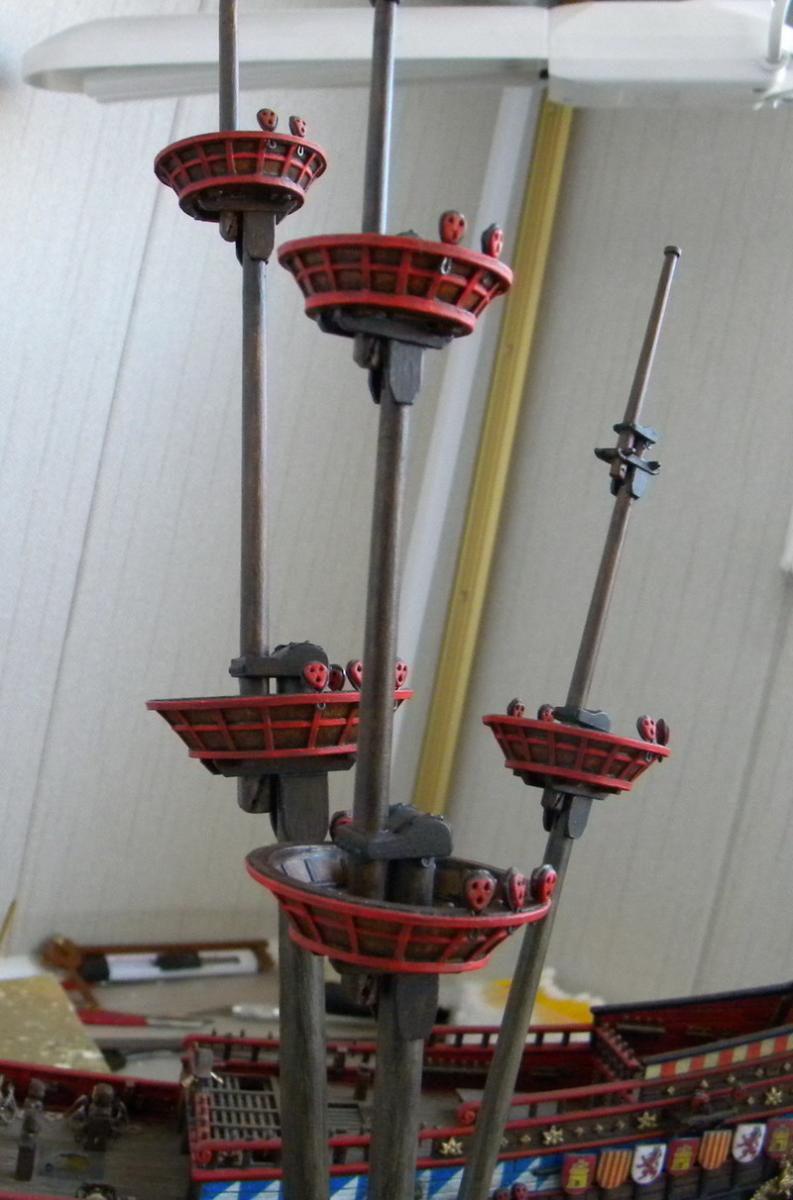
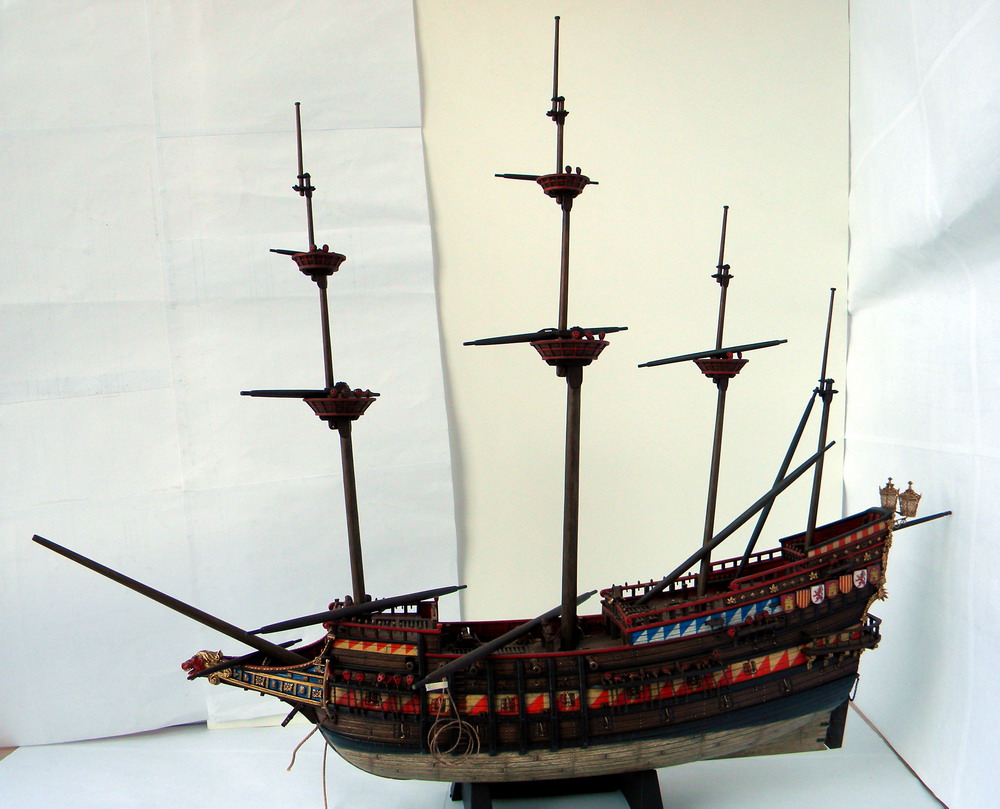
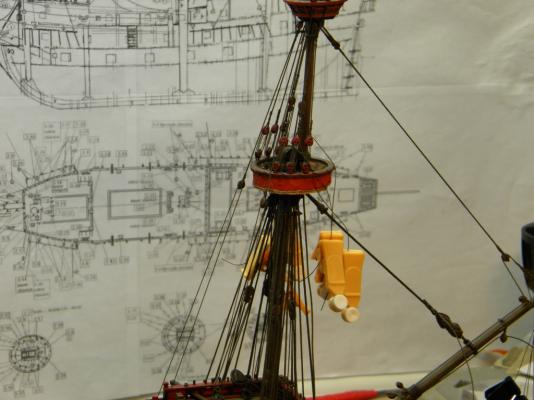
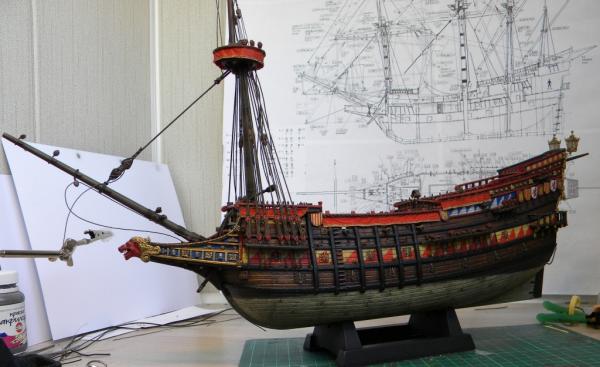
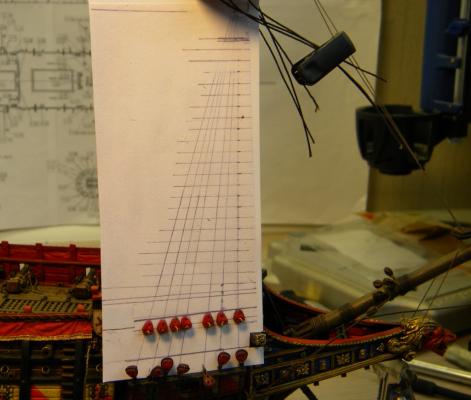
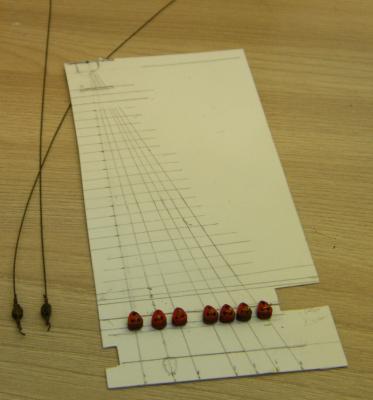
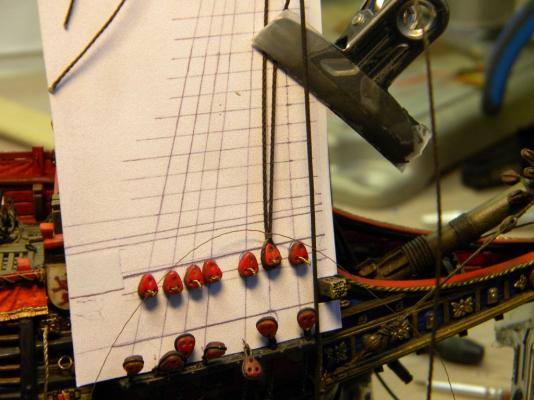
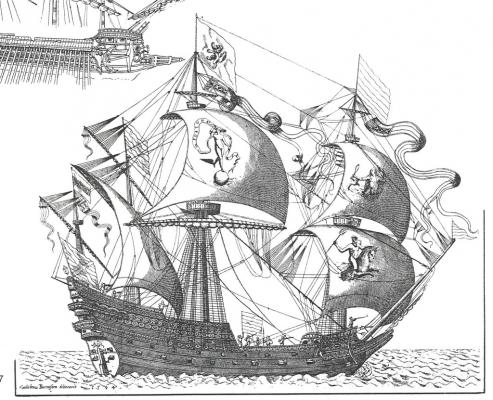
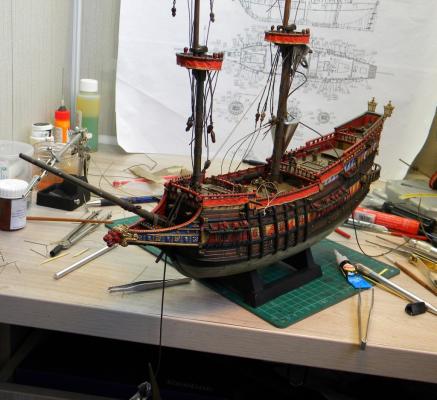
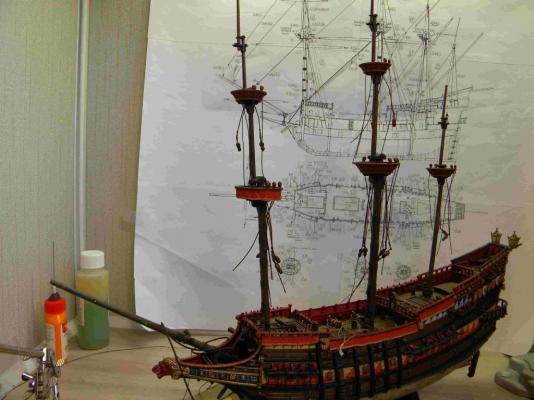
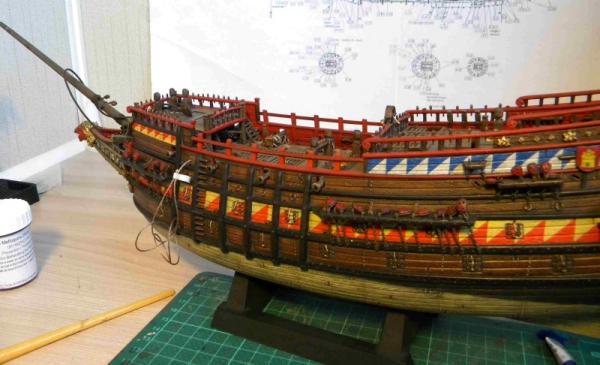
This is my own version of spanish galleon 1588 rigging...try to make it based on information frm The rigging of ships. In the days of the Spritsail topmast 1600-1720 - Anderson and Peter Kirsch "The Galleon the great ships of the armada era" galleon rigging drwng How accurate it happened I don't know...but I try to do best of mine
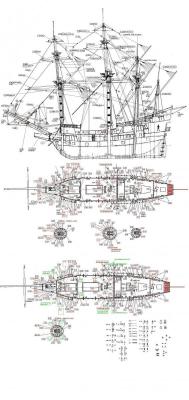


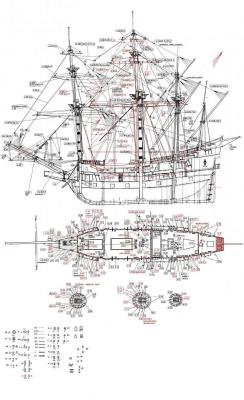
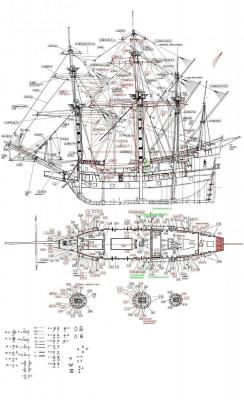
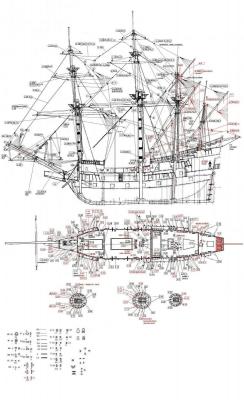

- 228 replies
-
- 6
-
-
- spanish galleon
- lee
- (and 1 more)
-
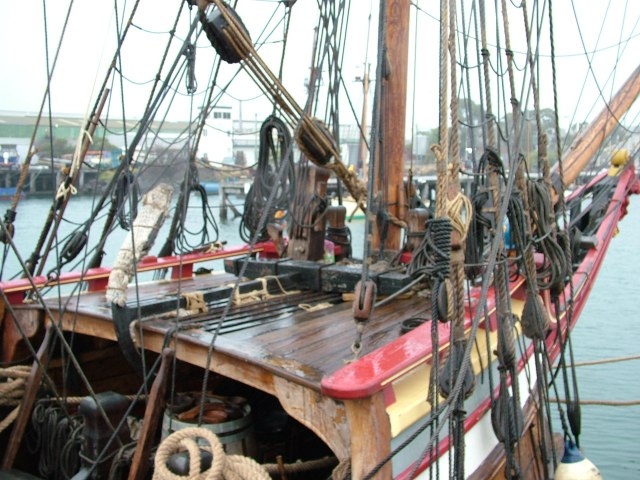
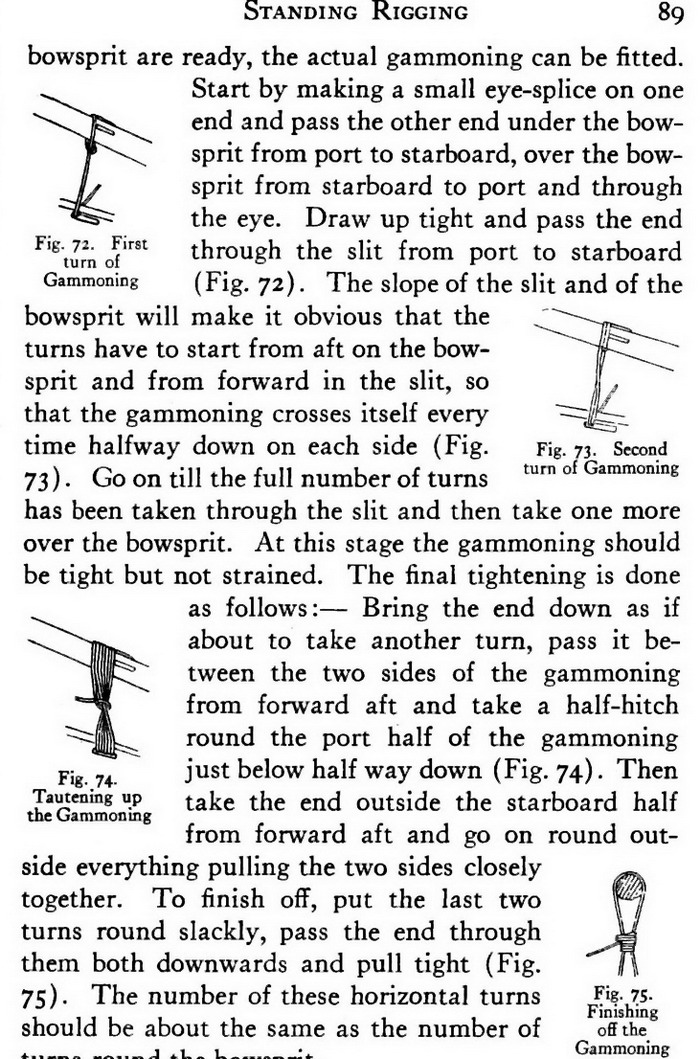
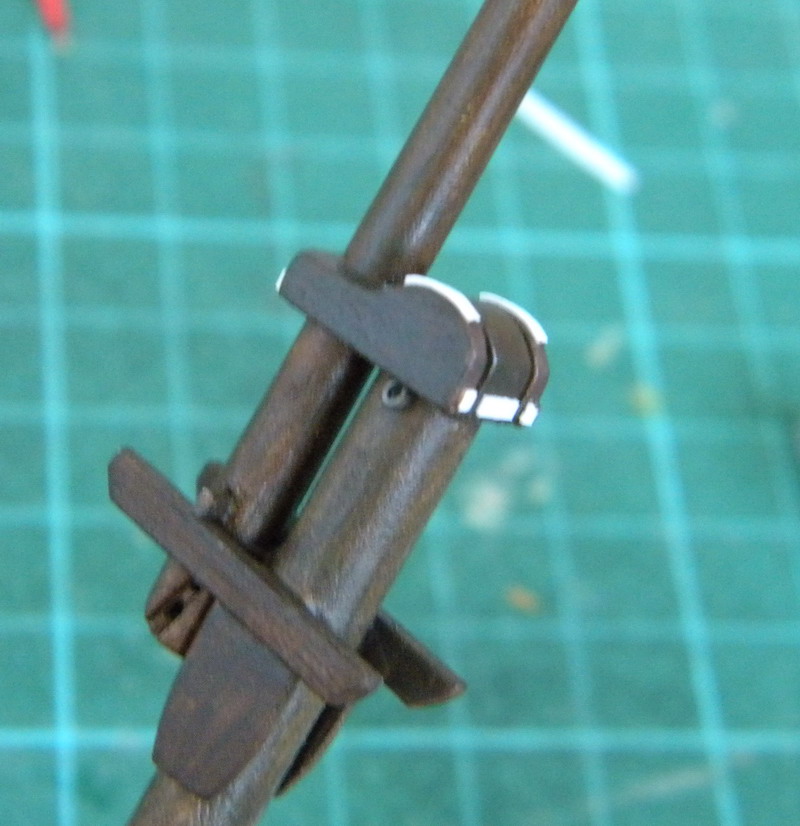
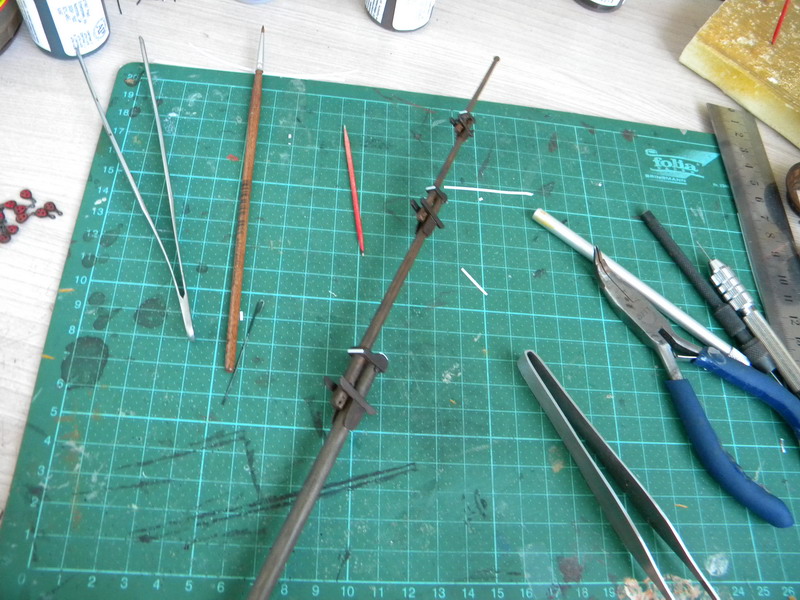
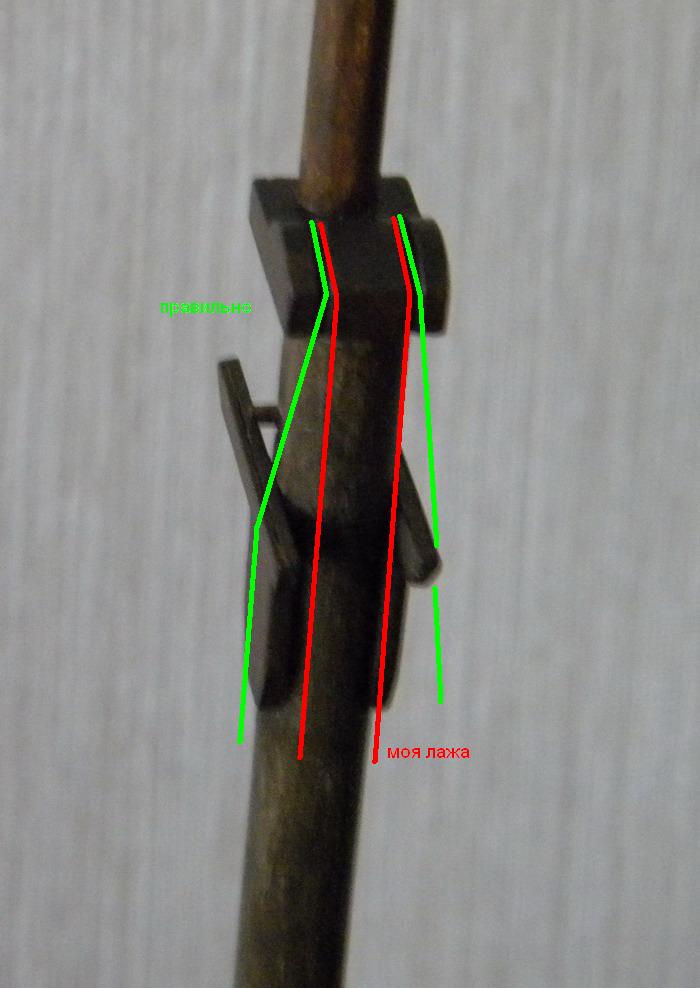
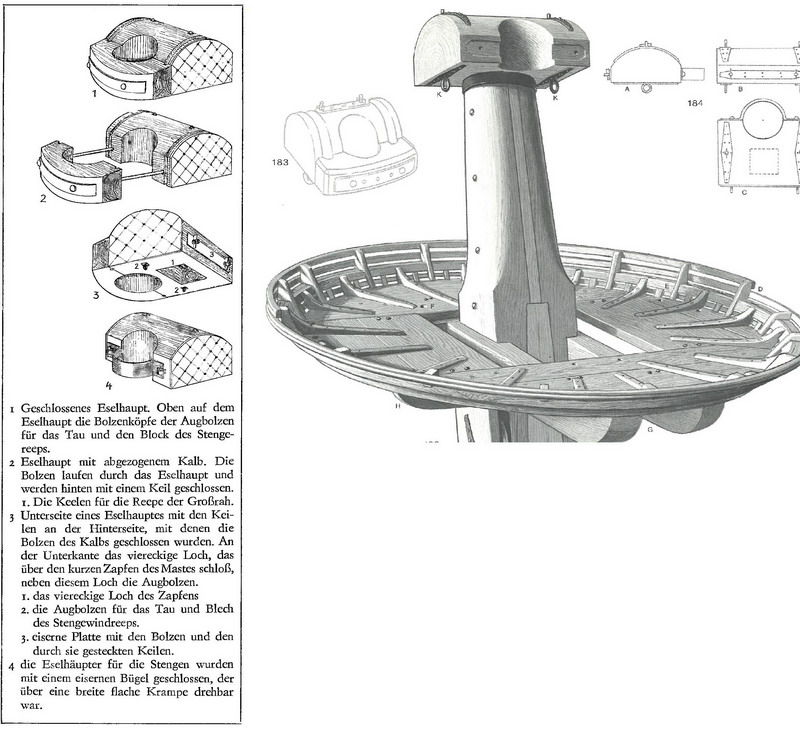
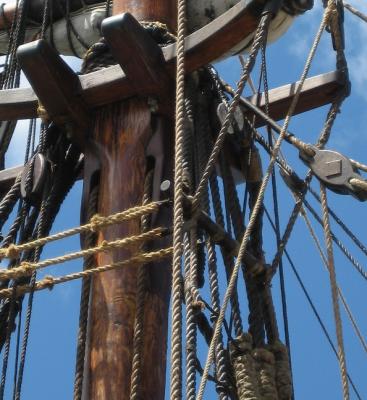
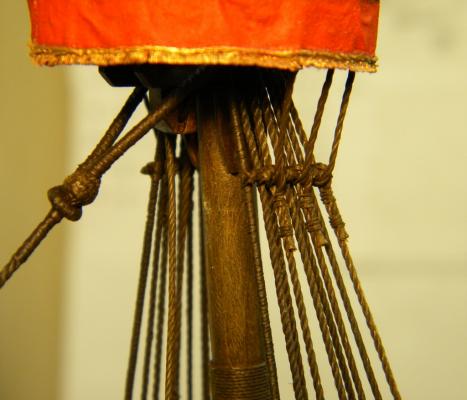
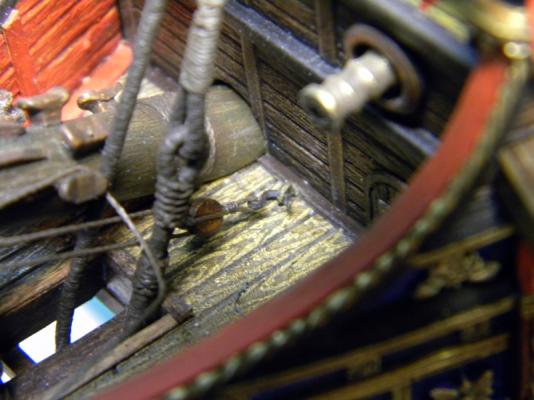
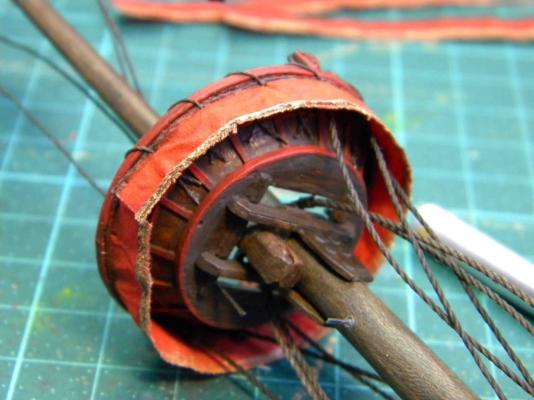
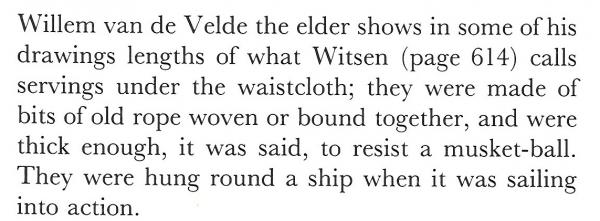
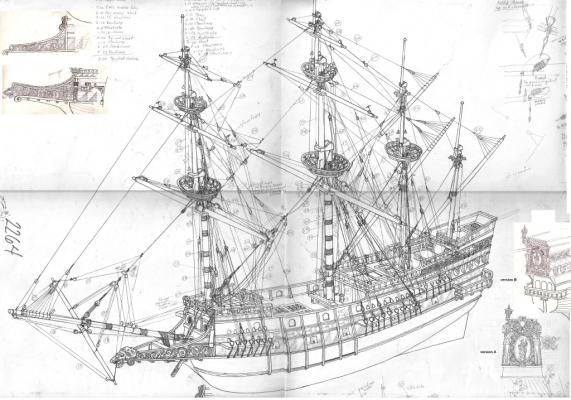
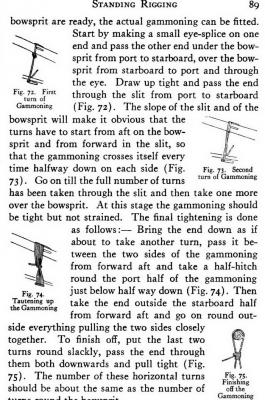
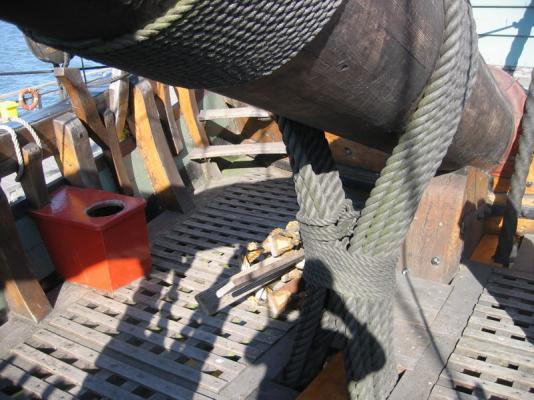
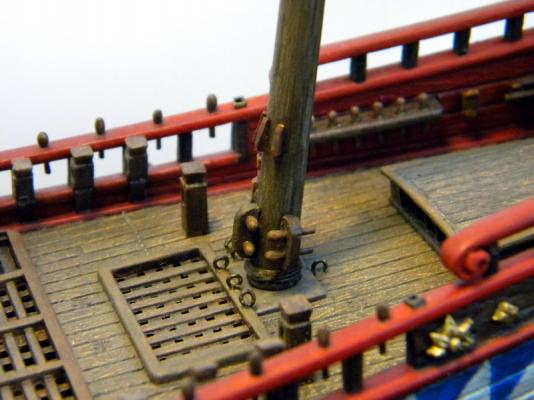
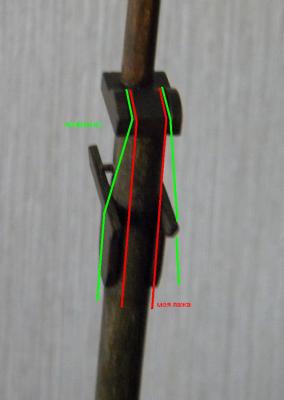
continue with masting There was some problem with gammoning arrangement for me...as it should be according to Anderson...when I started making loops I lost control of this process and finaly rejected this idea...so I try to imitate how it looks like on Batavia replica


- 228 replies
-
- 8
-
-
- spanish galleon
- lee
- (and 1 more)
-
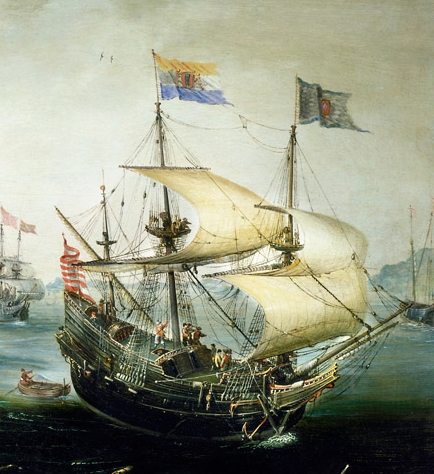
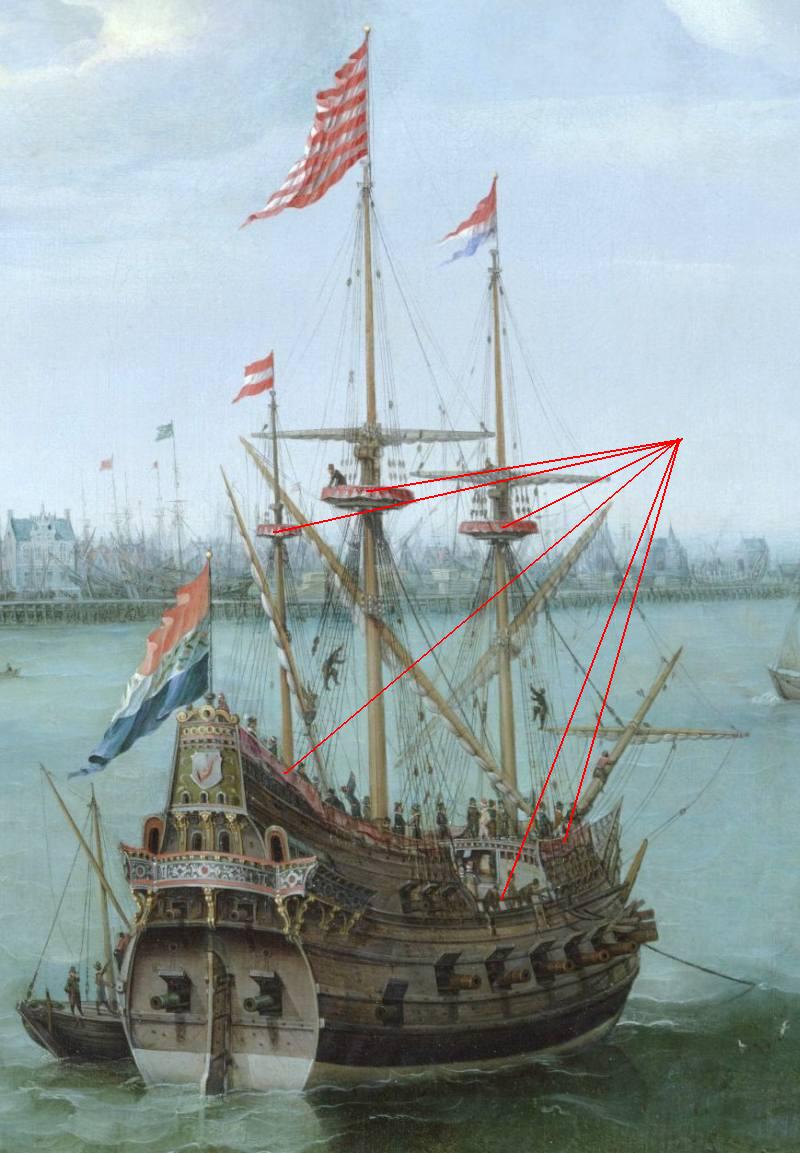
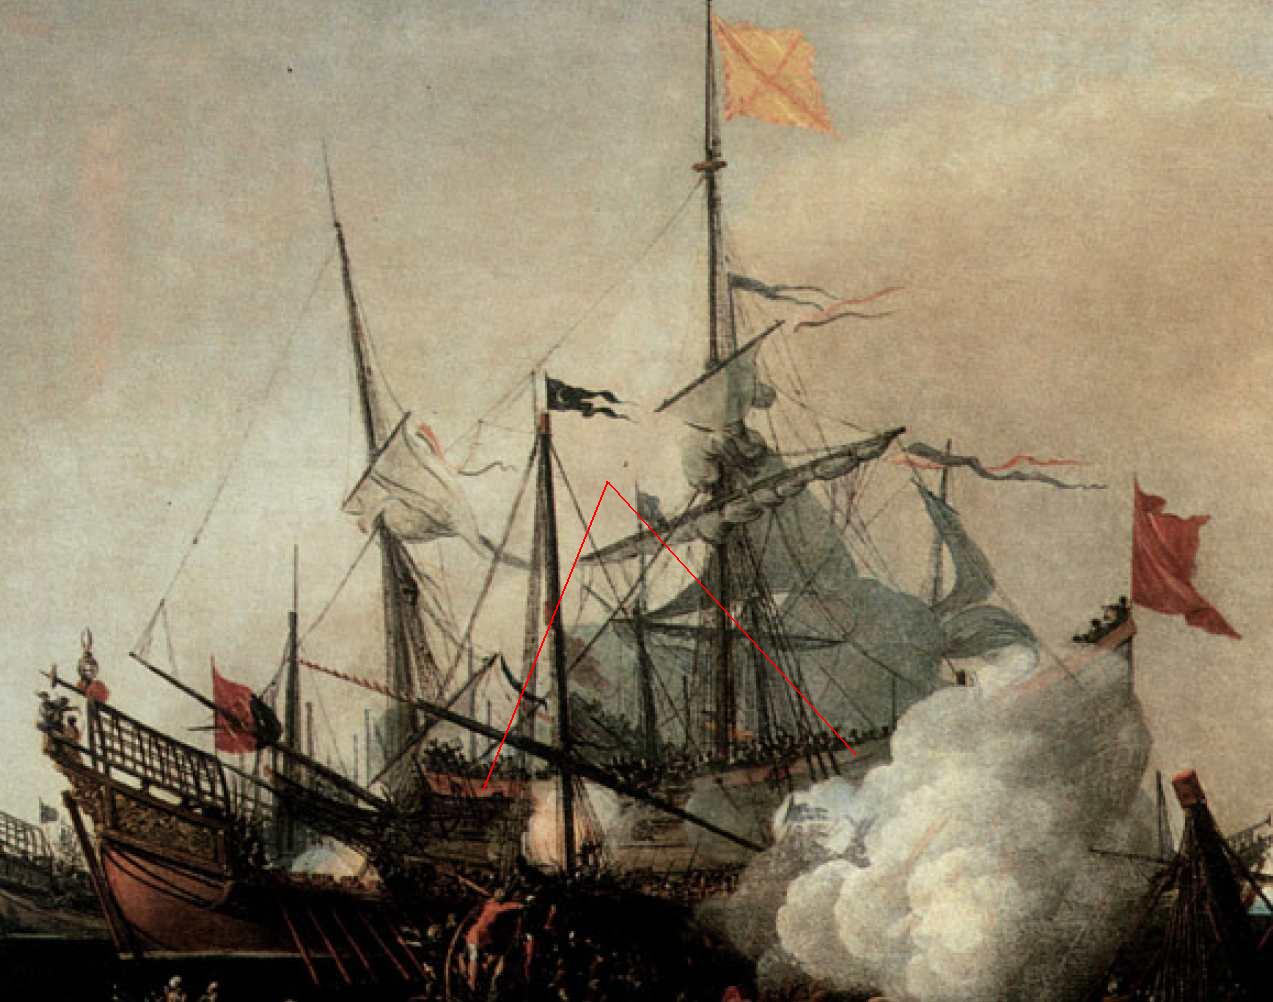
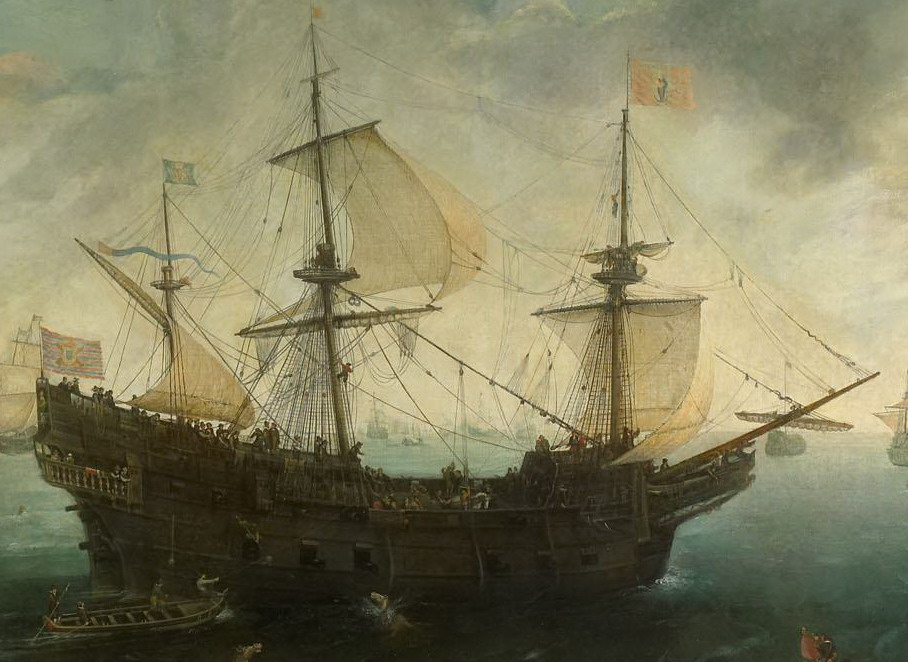
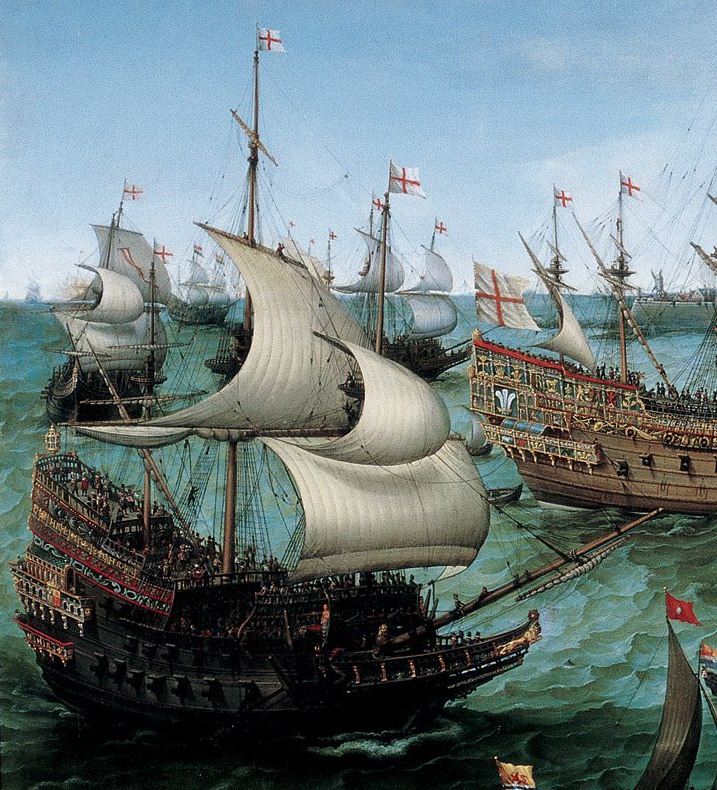
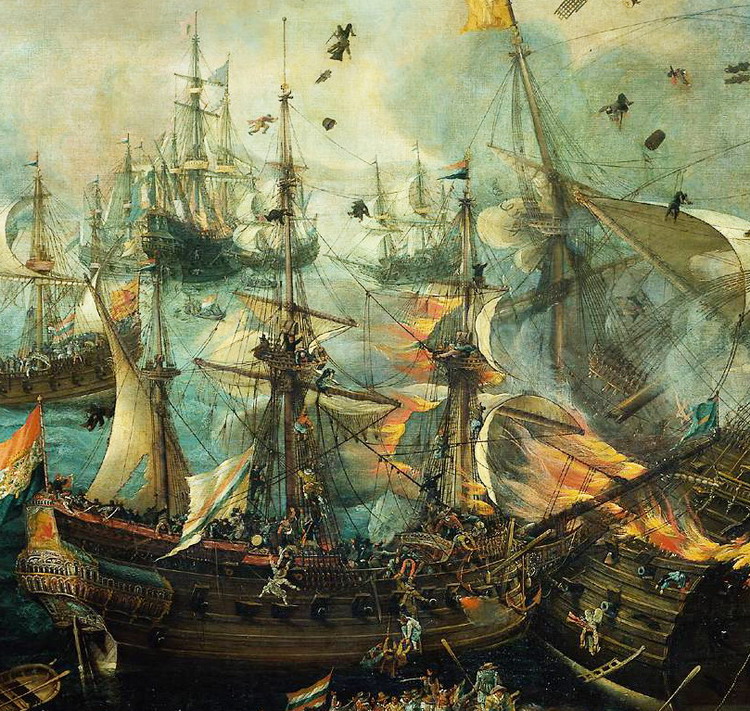
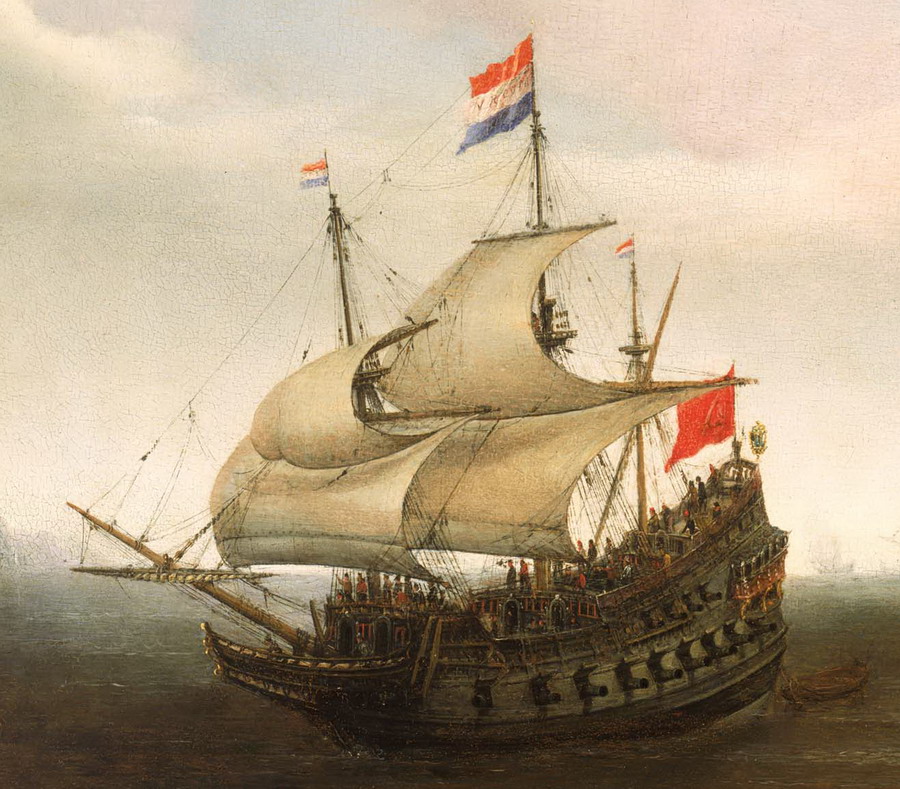
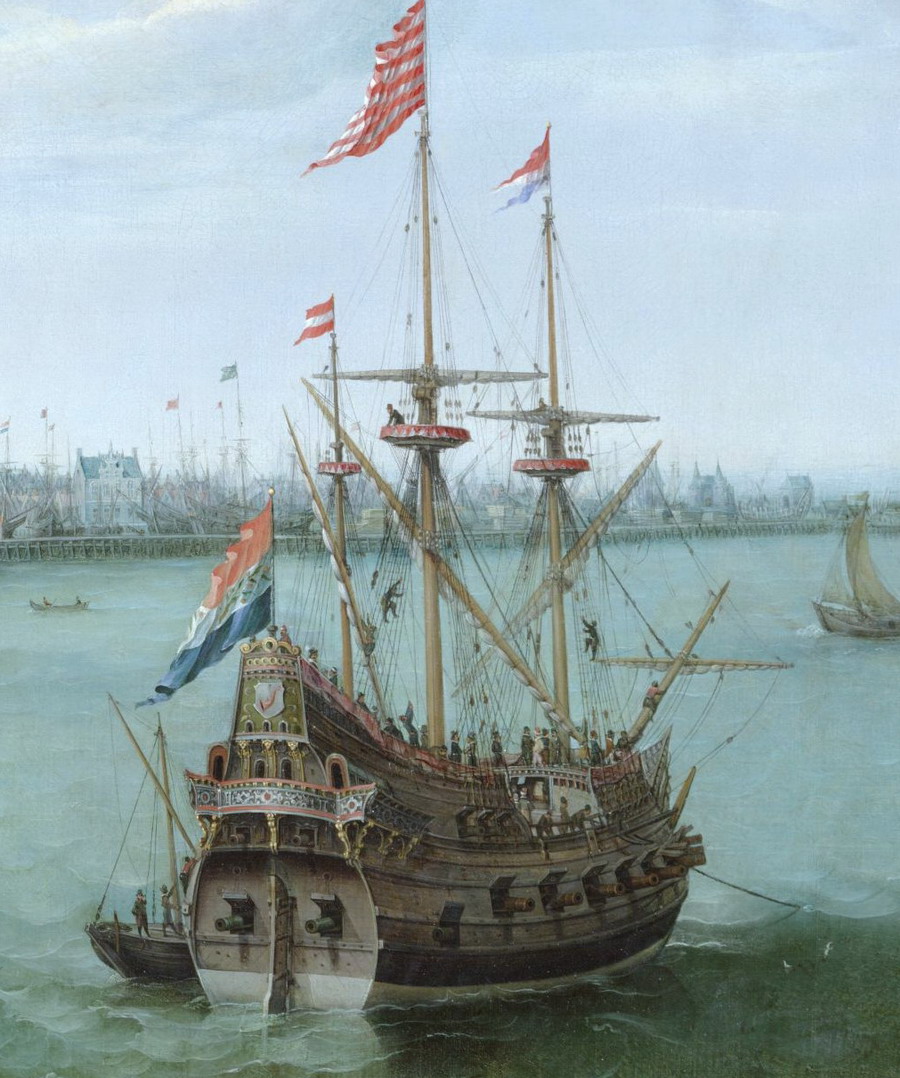
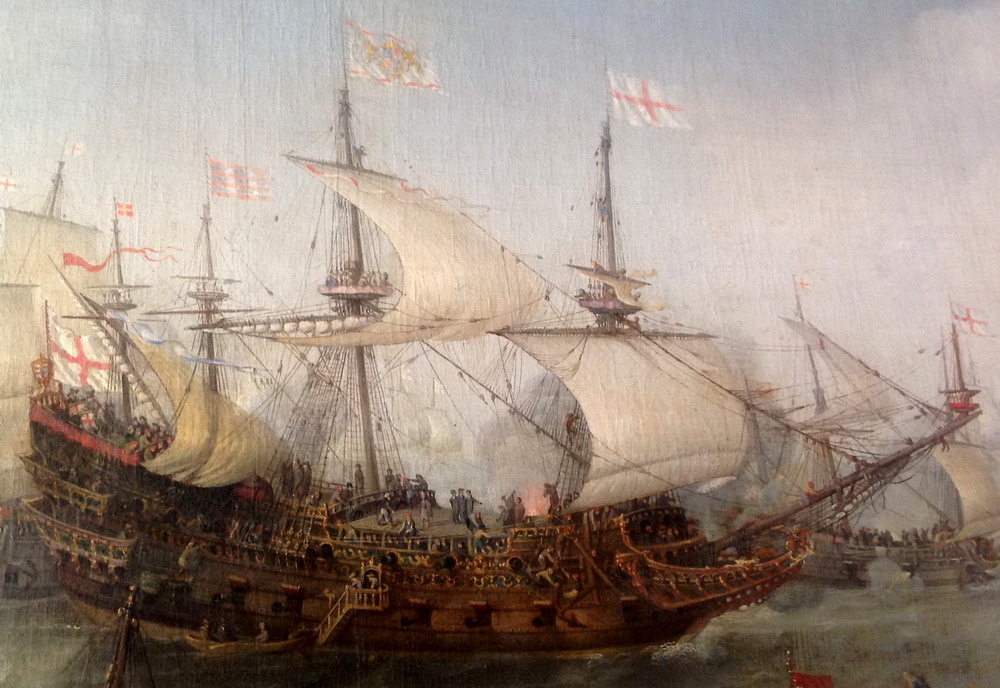
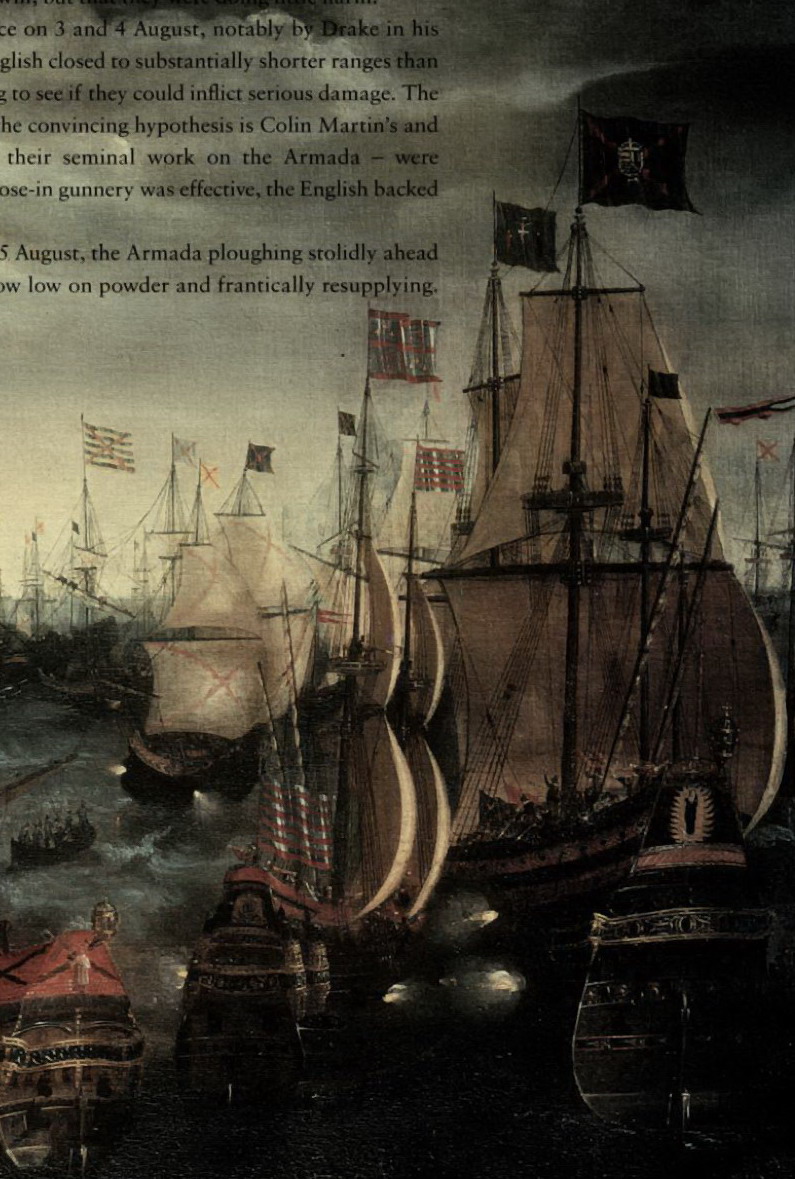
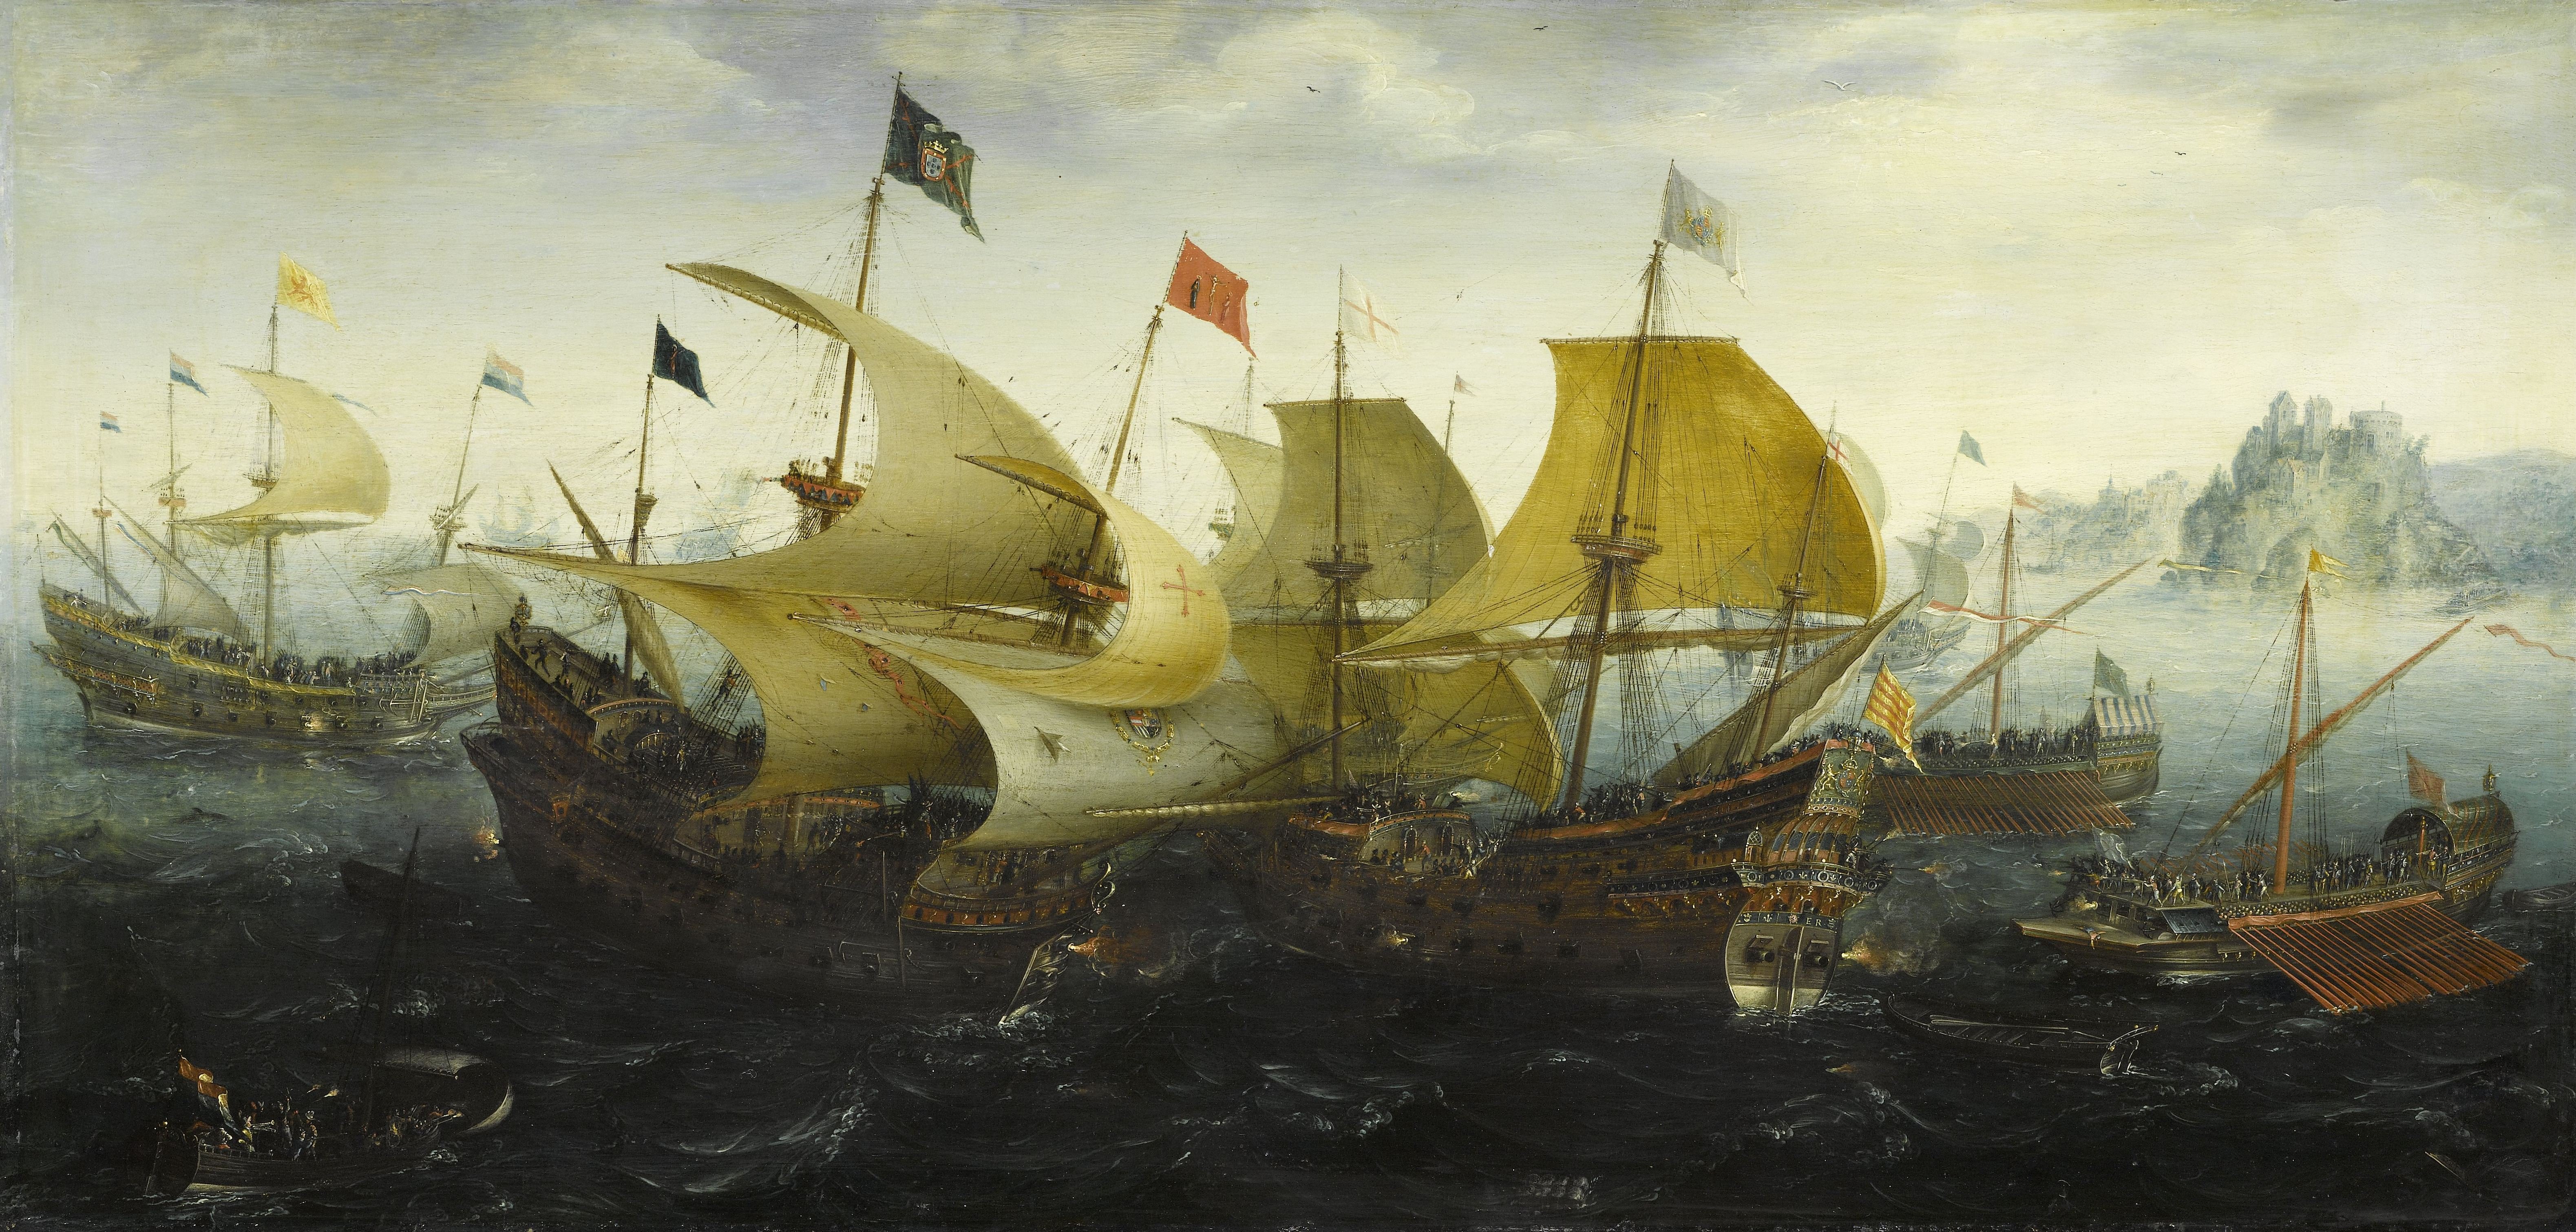
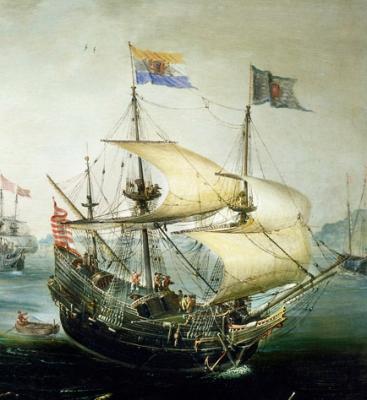
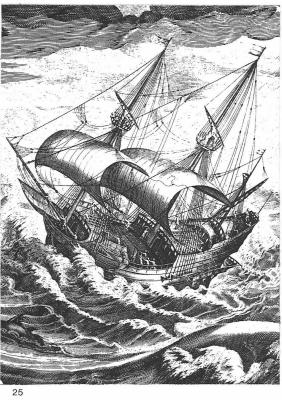
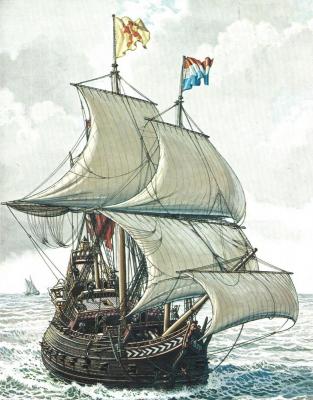
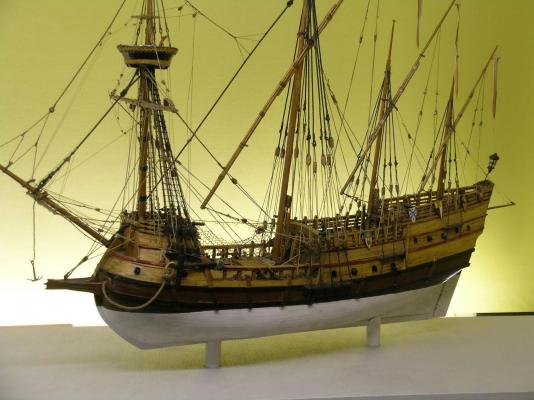
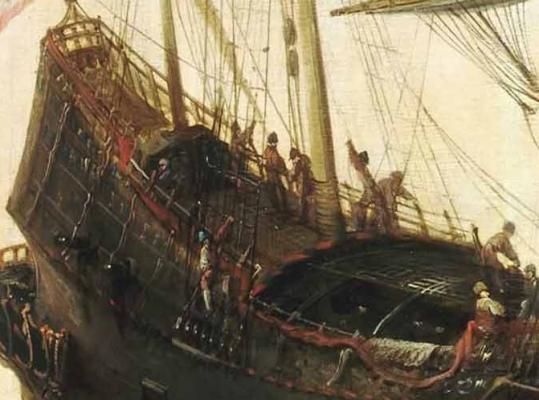
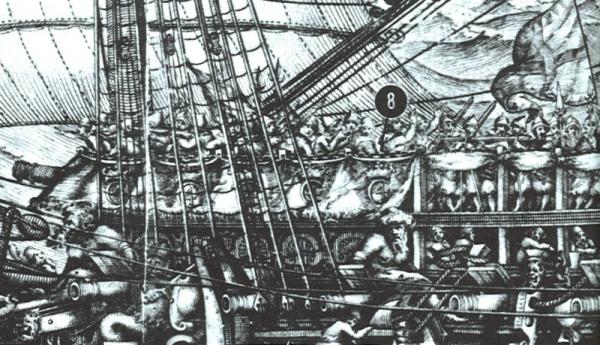
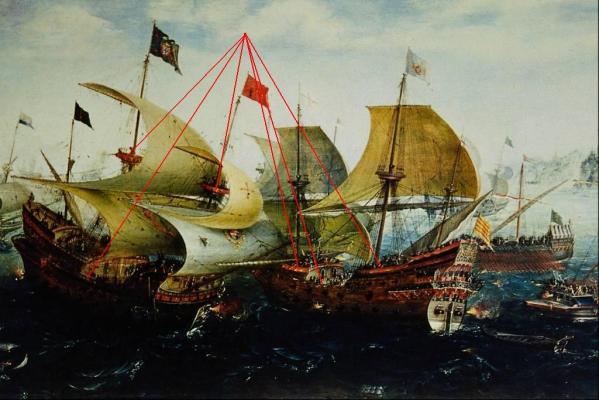
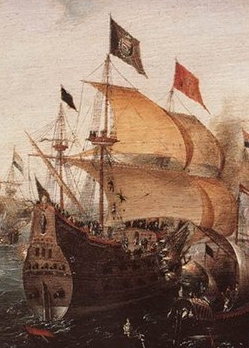
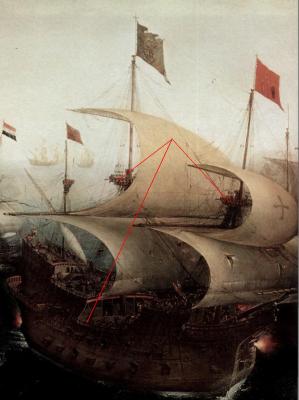
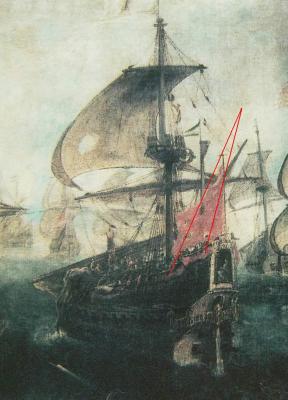
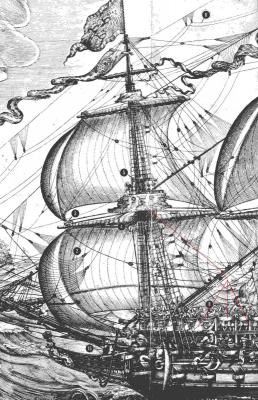
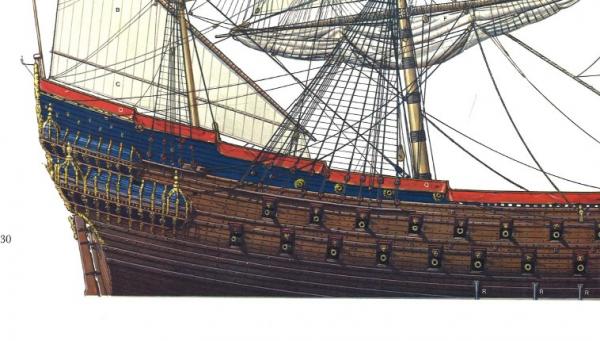
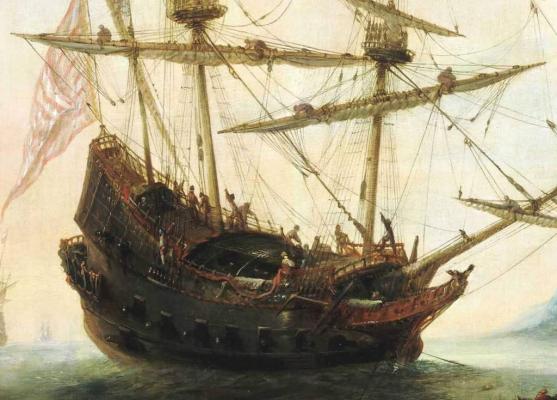
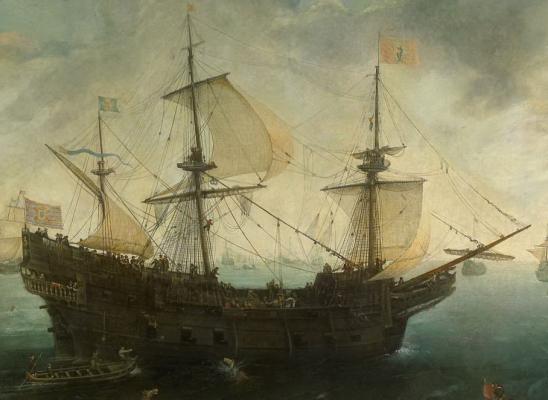
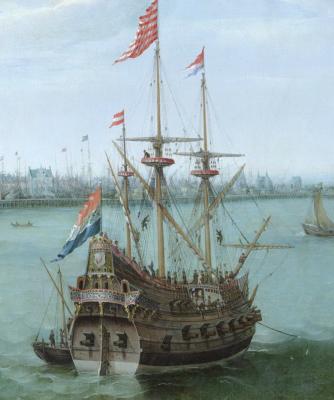
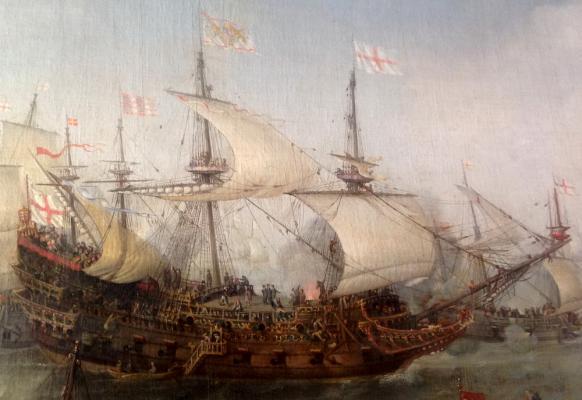
continue with masting...there are some various artists contemporary galleons pictures wihich I reffer as samples for my models... ps "name"s of those pctrs are wrong,don't look on it...found that for me was very difficult to find old pictures of spanish galleon which painted by spanish artists...most of spanish galleon pictures made by duch artist...and often looks like dutch galleon


- 228 replies
-
- 6
-
-
- spanish galleon
- lee
- (and 1 more)