robipod
-
Posts
202 -
Joined
-
Last visited
Content Type
Profiles
Forums
Gallery
Events
Everything posted by robipod
-
 Been working away in galleries this week. Decided to do some modifications. Tight fit.
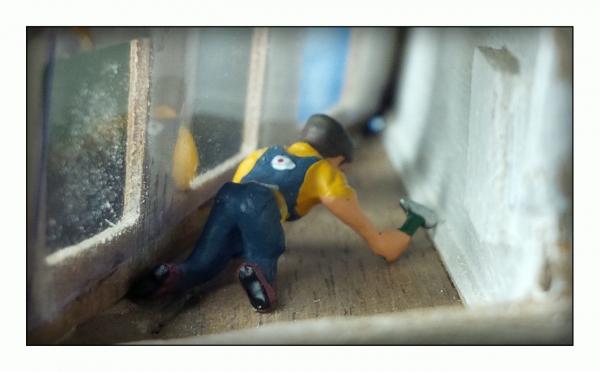
- 295 replies
-
- 11
-

-
- victory
- caldercraft
- (and 1 more)
-
Thanks Lawrence. Have been trying to catch up! Was really busy all last year and couldn't muster the enthusiasm to get past the upper gun deck. Will keep on going! I find it very relaxing this year. Probably be a useful of last year's non shipyard activity.
-
Nick just noticed that you put the revised yellow on her. Looks great. Strangely when I was there my camera lens and film pulled a colour very similar to the "new" colours. It is weird when I look at the photos now. I always saturated the yellow as I thought is was wrong shade. Looks so good. I magnify every picture you post so as i can figure out what to do! Keep going and and keep posting! Rob
- 84 replies
-
- 1
-
-
- finished
- caldercraft
- (and 1 more)
-
Ian If I take all my gunport linings out will you come over and replace mine. The linings look great! I was fortunate to have a coffee with Ian and he brought a piece of the padauk with him. He's right on how nice a wood it is. So smooth and he was able to cut perfectly. The wood is way better suited than the material supplied in the kit. Go get some if you can. Isn't it great to see Ian experimenting even with the wood! Big compliment to you Ian. Thank you for your ideas and sharing them!
- 191 replies
-
- 2
-
-
- victory
- caldercraft
- (and 1 more)
-
Quarterdeck brushed with three coats of "varathane diamond wood finish satin water based crystal clear" The colour seems to change depending on how the outside light from the window bounces off the deck. Check the colour change from the yellow reflection of the foremast on the deck.
- 295 replies
-
- 6
-
-
- victory
- caldercraft
- (and 1 more)
-
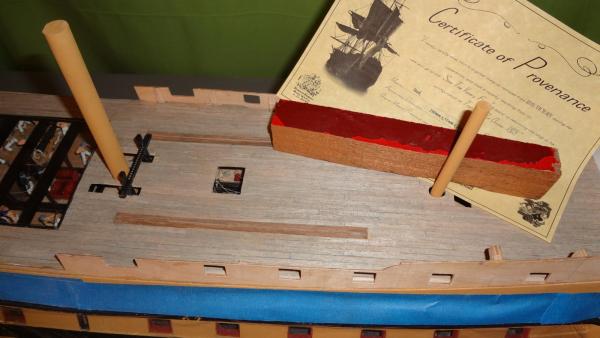
Here are the final embedded pieces, plus Certificate ( ). The quarterdeck has been weathered with ferrous sulphate in water. Will seal the deck with clear satin water based varathane tomorrow. Want to let the deck completely dry before sealing. Not sure that I can ever do anything with the piece from 1815 refit that I've placed on deck. It will just have to sit with the other piece in the final case.
- 295 replies
-
- 3
-
-
- victory
- caldercraft
- (and 1 more)
-
I tried to put in a new email so I could start receiving notices again . It failed. After intervention by Jim he got my original credentials working a few hours later. Lost a couple posts in the process.. Will post some stuff later this weekend to catch up. My thanks to him for getting me going again. BTW I could not get a verification email to a Microsoft account I've had for years. I should have left the email alone lol.
-
Port racing stripe installed on quarterdeck. The wood colour changed when I sanded it down. You can see the difference with the starboard pieces not yet installed. Hmmm... Wonder why it changed. Oops it changed because I sanded it down. Wonder how I can get that starboard colour back.


- 295 replies
-
- 5
-
-
- victory
- caldercraft
- (and 1 more)
-
I'm off to the fish store to look. Great idea Telp. Wait, where does one find live fish? Your idea also made me think of a case for the ship. Maybe a fish tank might work. With no water and fish Have to look up a place here in Calgary. hmmm
-
All good. Thanks Ian.
-
Thanks for feed back Nick and Graham. Yes, I've now decided to go for it. Will see how it turns out.
- 295 replies
-
- 1
-
-
- victory
- caldercraft
- (and 1 more)
-
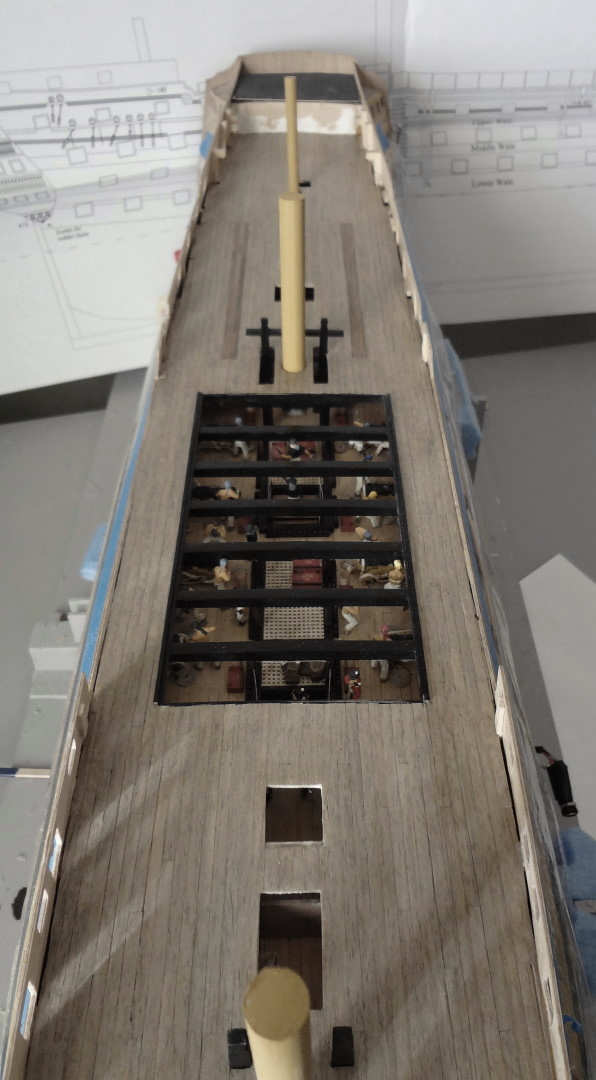
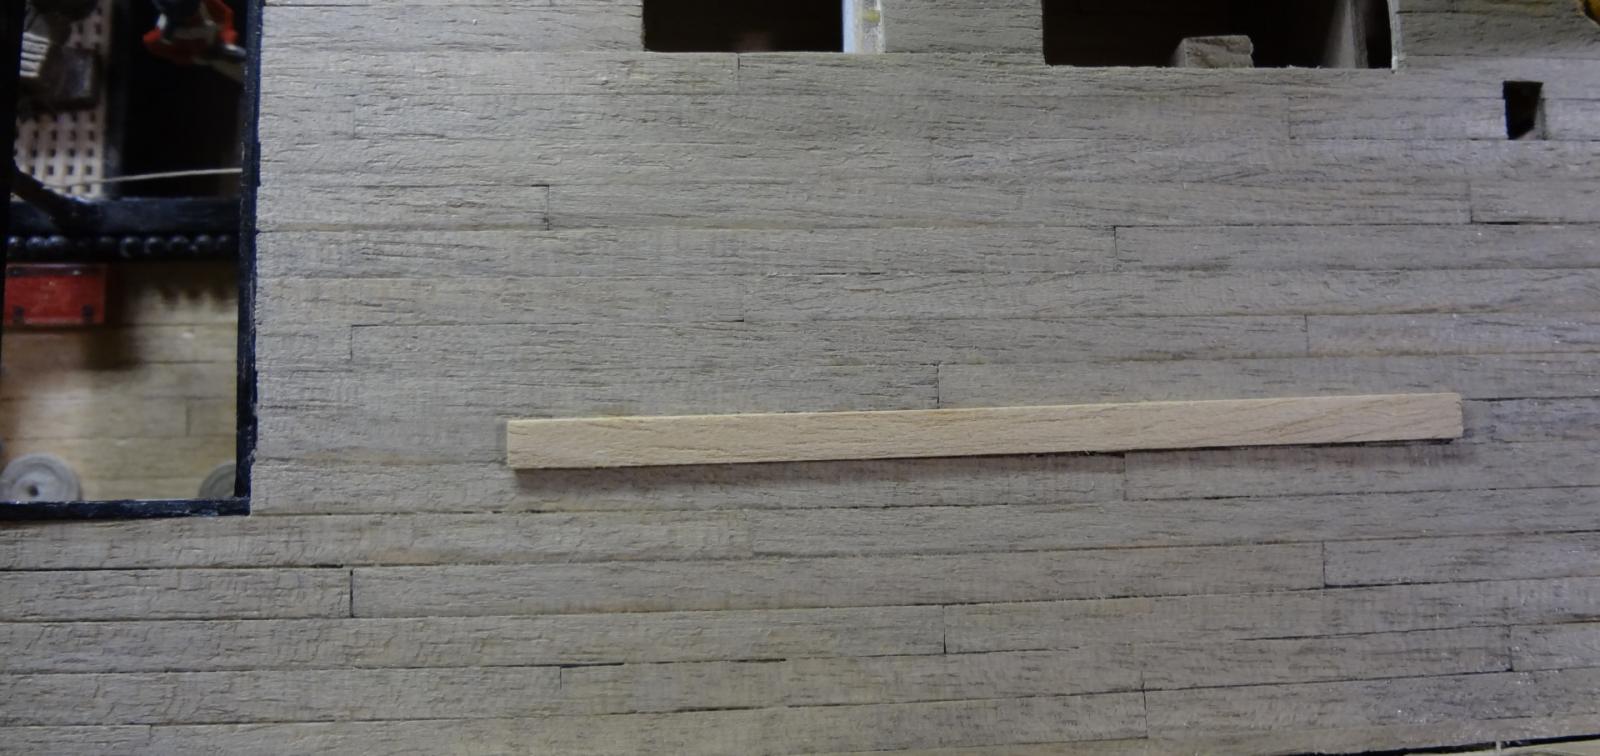
I'm thinking of doing something a bit weird. Kinda weird. LOL... Okay here it is. If you've read my build you might remember that I've got some authentic wood from HMS Victory. Yes, all legal... My plan has been to do the beakhead deck with wood strips I have cut from the block of the Victory. Now that I am doing the final deck I am seriously considering putting two racing stripes down the deck as in the photo. (not lined up properly) No, not racing stripes but two (actually four but looks like two) strips of the real Victory right into the quarterdeck. Do you think I'm nuts???? I am not leaving the deck the natural colour and will be giving it an ever so light brushing to give it a greyed look similar to the one I did on the very first deck. Was that the lower gun deck... It's been so long. LOL... It will contrast. Can I pull it off? It should make for a conversation piece. Will it look way too weird? Am 90% there to put them in just explaining this. It will really be unique... LOL..
- 295 replies
-
- 3
-
-
- victory
- caldercraft
- (and 1 more)
-
Are any of you getting emails that someone has posted comments? I'm not getting any notification by email of any topics that I'm following. I used to get them all the time.
-
Looking really nice Kevin. How long do you anticipate it will take to rig the ship? And I've got another question of you. Do you sit or stand doing the rigging? Just curious as I notice I've been standing more now that I've put the quarterdeck down.
- 1,319 replies
-
- 3
-
-
- caldercraft
- Victory
- (and 1 more)
-
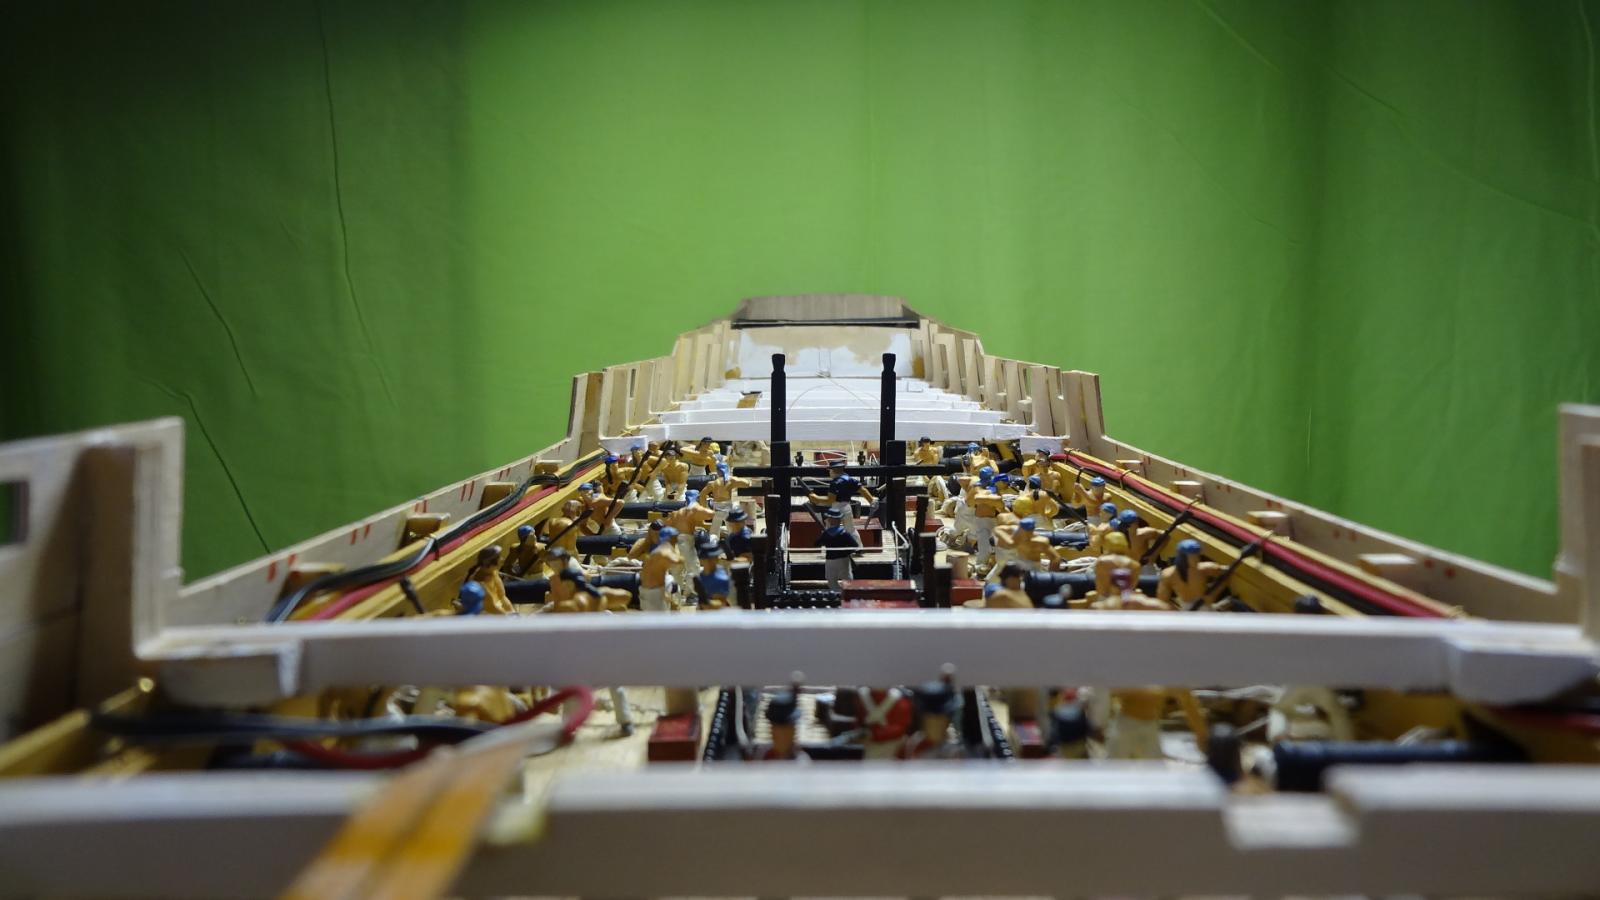
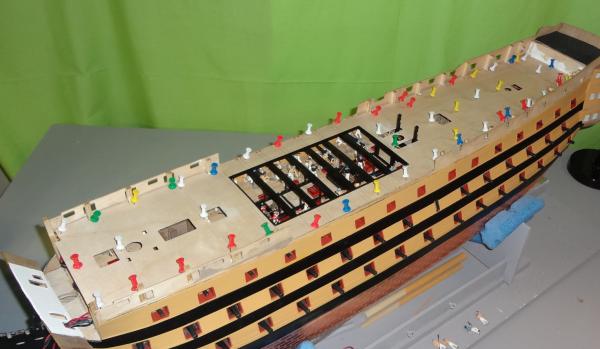
Done. Did the stealer/spacer. Nobody but me and the rest of you here will know. It is barely distinguishable. I'll put some stuff on deck to really take the eye away from it. Like a platoon of marines... LOL... all standing in line on top of it... (I have no idea how many in a platoon btw)

- 295 replies
-
- 3
-
-
- victory
- caldercraft
- (and 1 more)
-
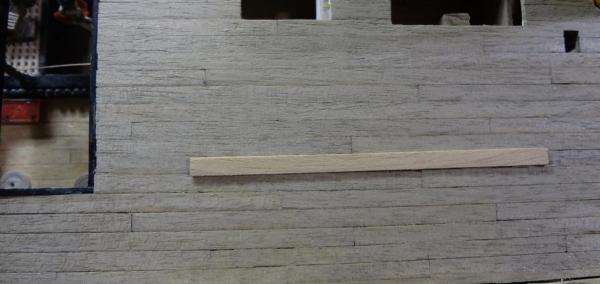
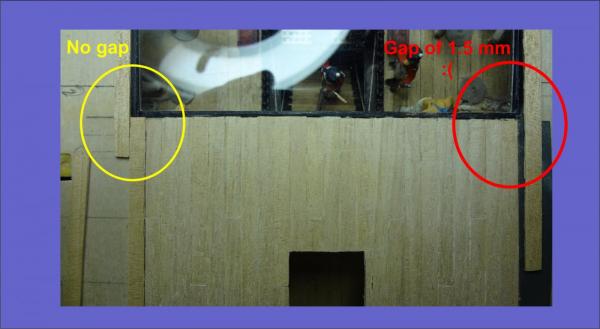
Thanks Ian, but I read a lot too. Others give me the ideas. Here is the challenge I was talking about when we had coffee. Sighhh... LOL Am out 01.5 mm. Oh darn... Am pretty sure it has to do with some of the inconsistency of the width of the 1x4. Well, it couldn't be my measurements... LOL..
- 295 replies
-
- 2
-
-
- victory
- caldercraft
- (and 1 more)
-
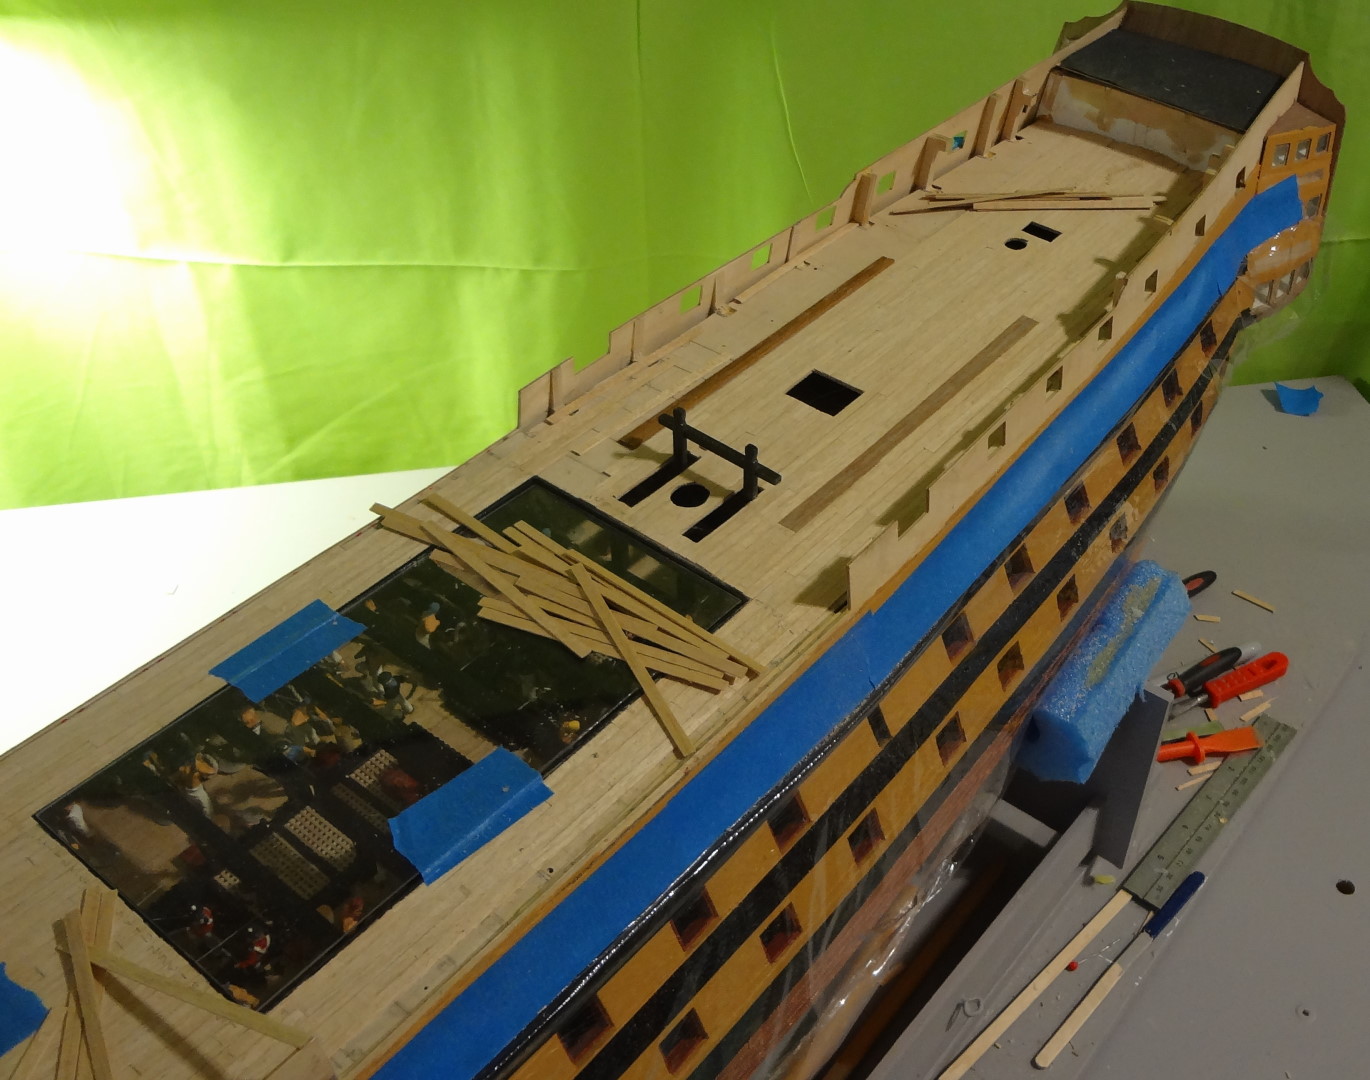
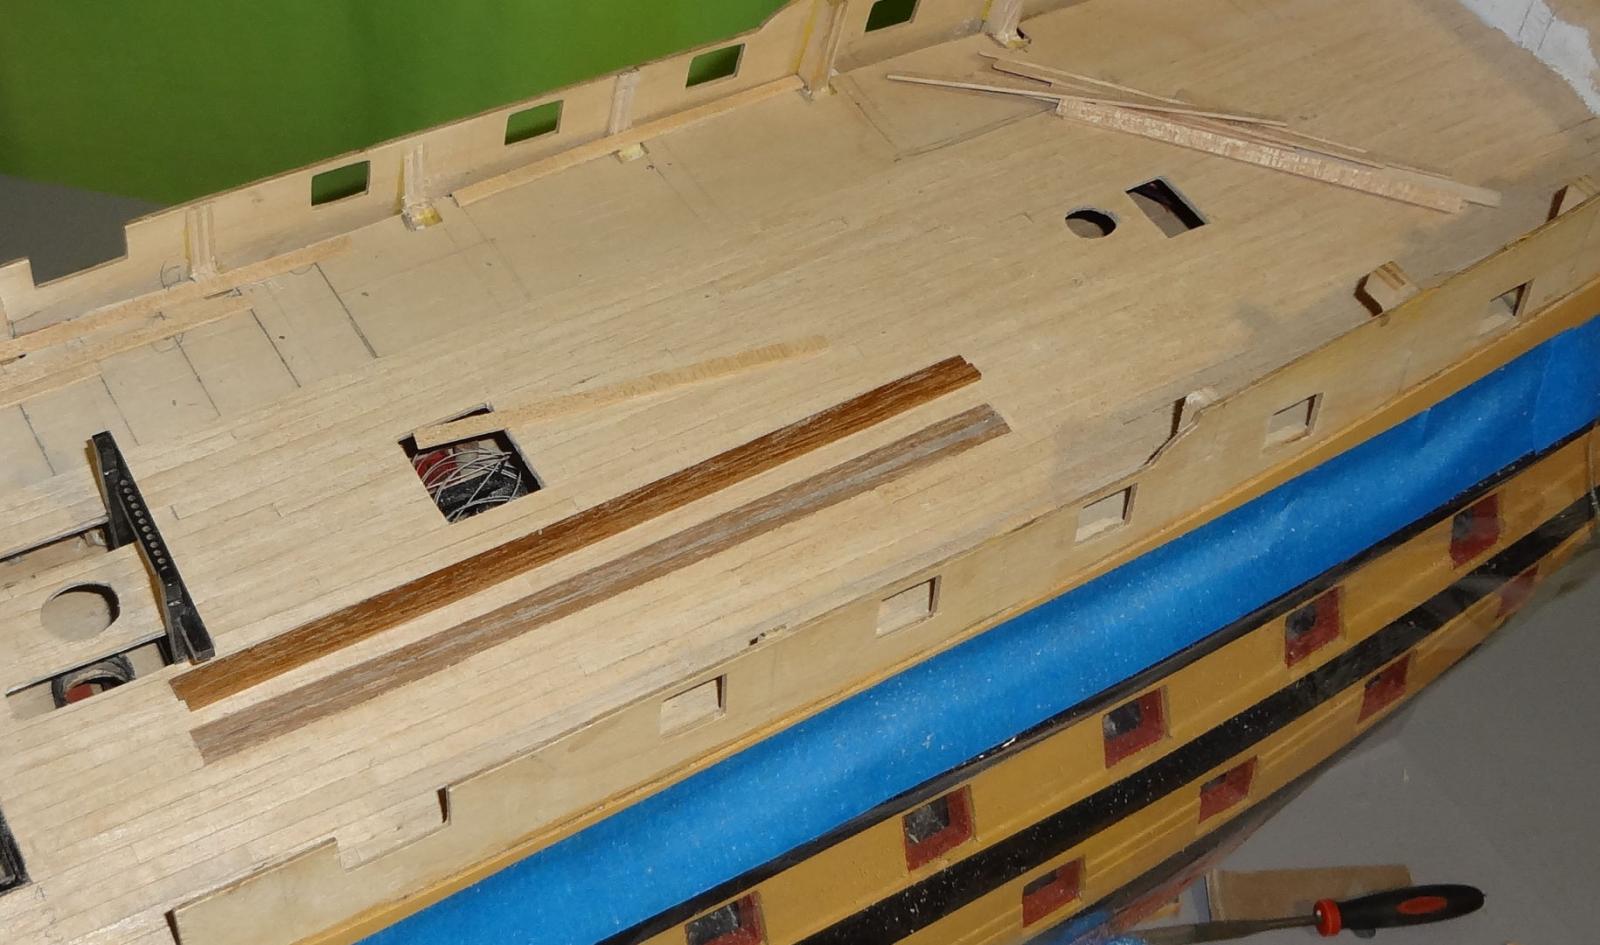
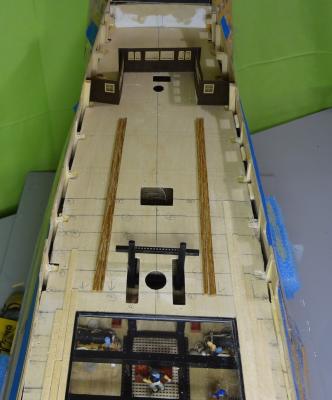
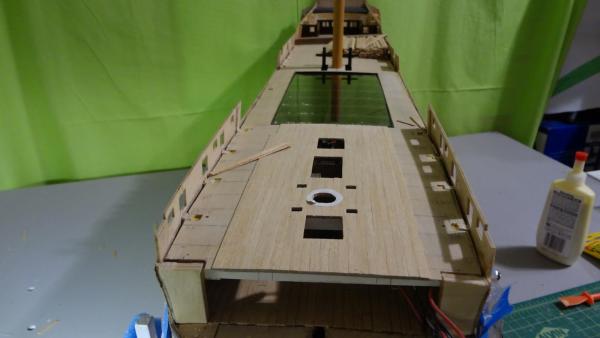
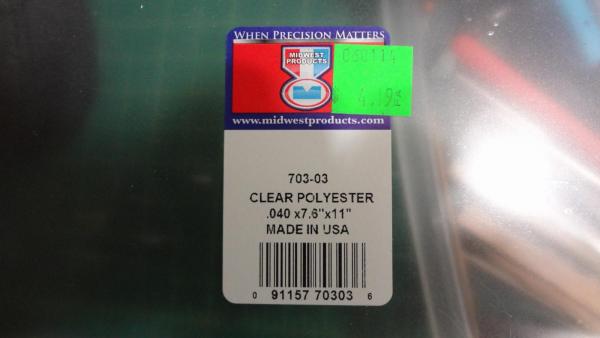
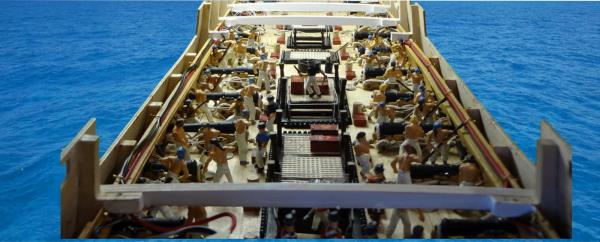
Started to plank the quarterdeck. Have an idea for protection of the skid beam assembly and interior. Purchased a sheet of clear polyester. It is the exact length of the assembly so only one cut by scissors. Laid the clear plastic on top of the skid beams for the foreseeable future. Here is the product and what it looks like in position. Was considering cutting 1 x 3 slots in the quarterdeck and filing with the polyester to 'see more of the upper gun deck' but shelved the idea.

- 295 replies
-
- 3
-
-
- victory
- caldercraft
- (and 1 more)
-
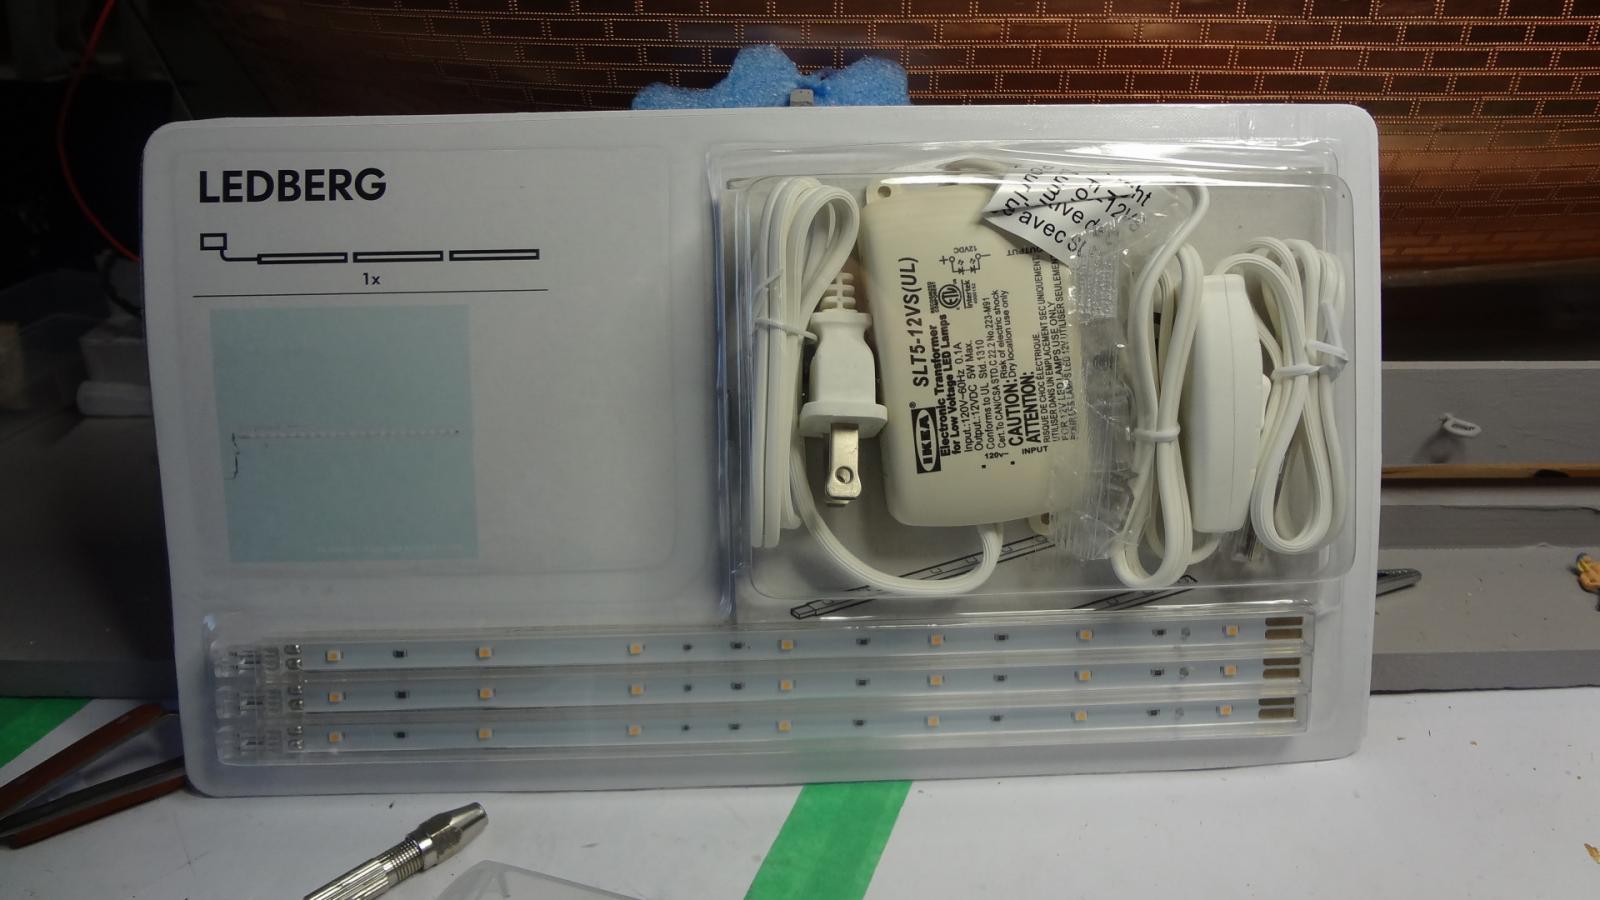
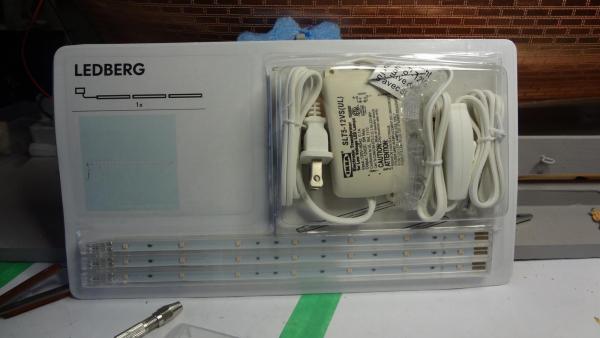
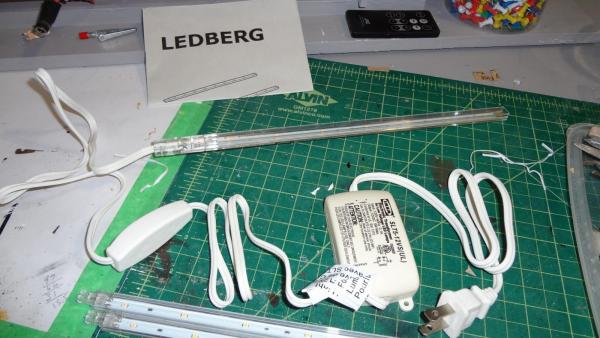
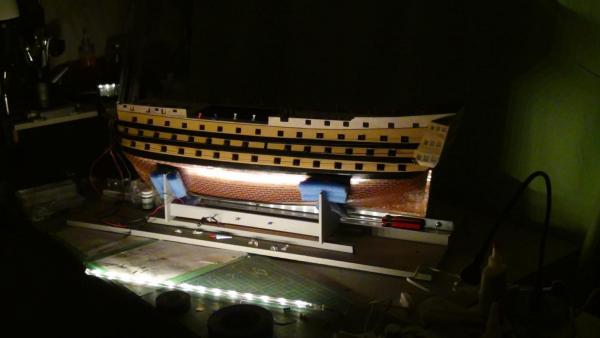
While looking for some back lighting for my TV I found this gem at IKEA. These LED lights are inexpensive and appear to make great accent lighting for the ship. Just a thought for everyone. There are three sets of LEDs.Each easily attached so you can have one to three sets. Not the best of pictures. The light burning on the hull does not show up when one uses eyes... and there are two sets of LED in the picture. Placing one string in front and the other behind might be very effective. Over to you!
- 295 replies
-
- 1
-
-
- victory
- caldercraft
- (and 1 more)
-
Heading to the first planking! Now the fun begins. Lol Looking sweet there Robert. I've found that the more I prepare for various stages the better off I'll be in the long run. Something I was thinking about last night was how important the purchase of the micrometer is for the build (autocorrect on this tablet is not recognizing "build"). I truly believe it is a "must" item. Keep going! Have fun! Planking seems to take forever same as building cannons on upper gun deck. Lol
- 527 replies
-
- 1
-
-
- caldercraft
- victory
- (and 1 more)
-
Ian... one needs a big strong magnifying glass and small paint brushes... LOL..Thanks for compliment.
- 295 replies
-
- 1
-
-
- victory
- caldercraft
- (and 1 more)
-
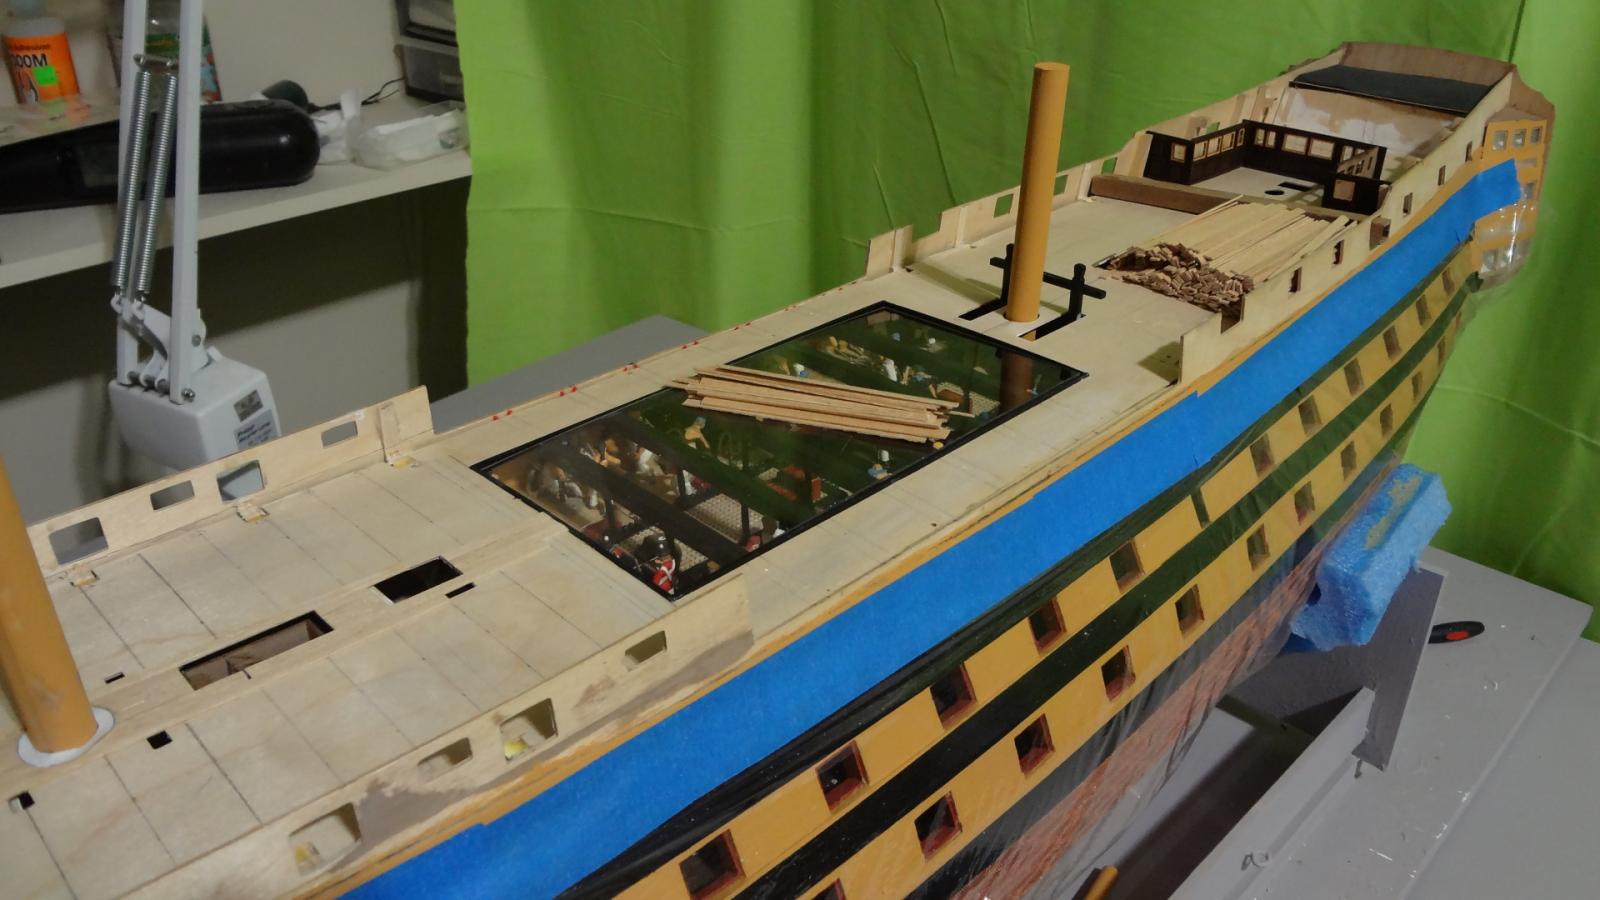
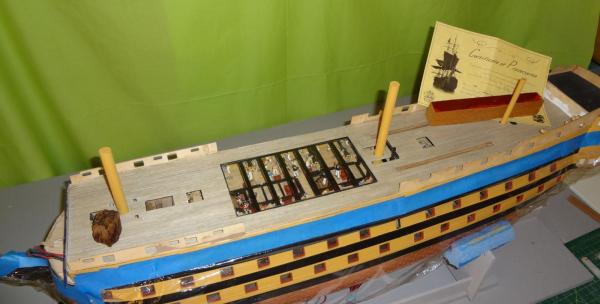
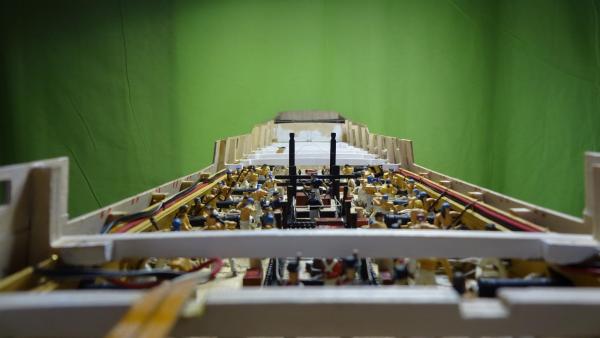
Quarter deck on! Not according to instructions. Pre-glued the skid beam assembly to ply sheet. Mounted the bitt pins. Then glued the deck into place. I could not have done the sailors etc. if I had followed the instructions. Would have taken them all out. [ ] . It was relatively easy to do it this way. Did measure, remeasure and remeasure and fitted it multiple times.. Am happy it worked! Going to let it dry for 24 hours. Going snowboarding!...
- 295 replies
-
- 4
-
-
- victory
- caldercraft
- (and 1 more)
-
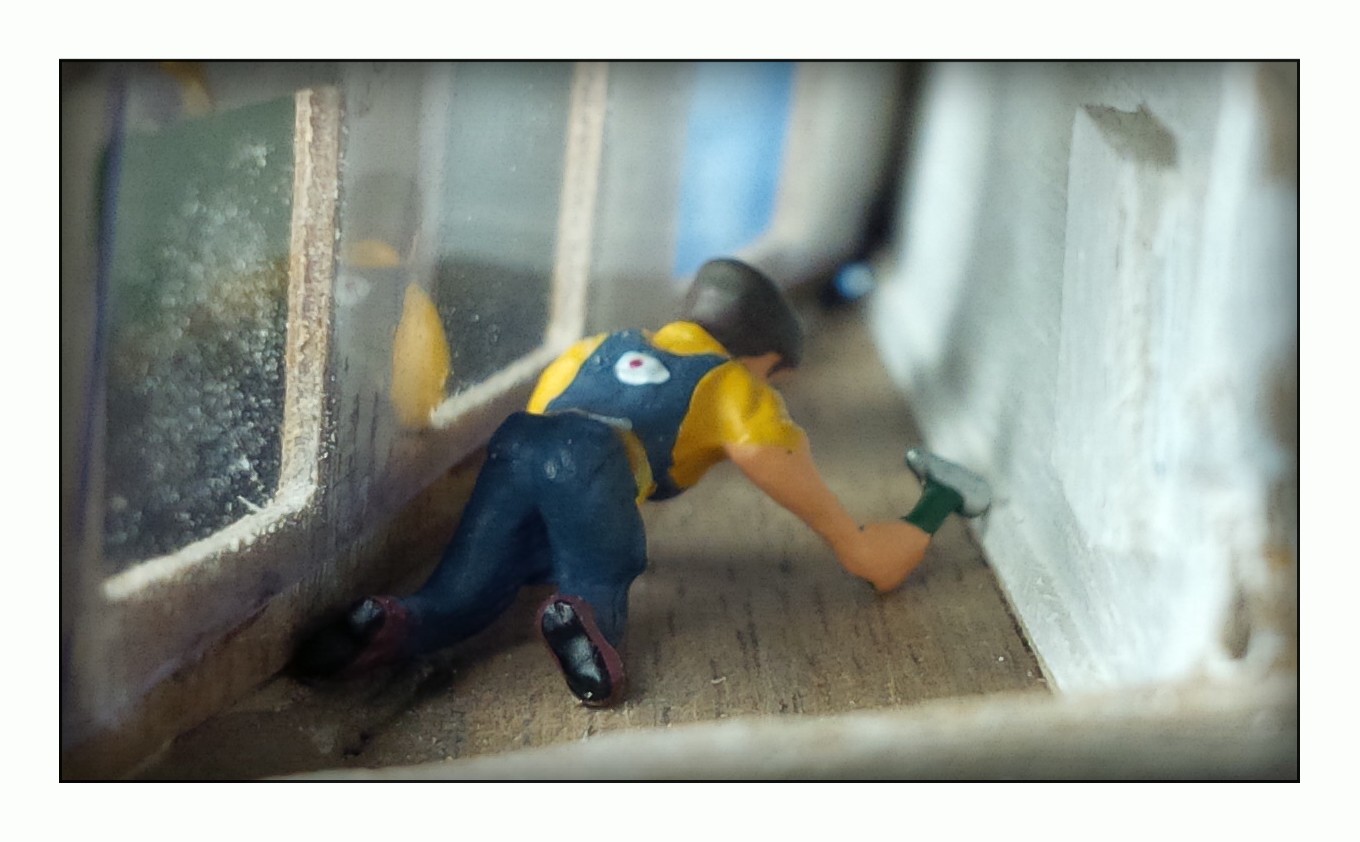
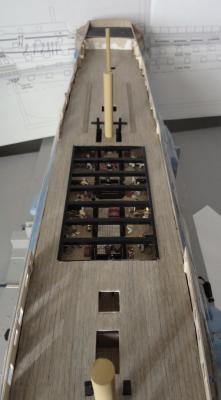
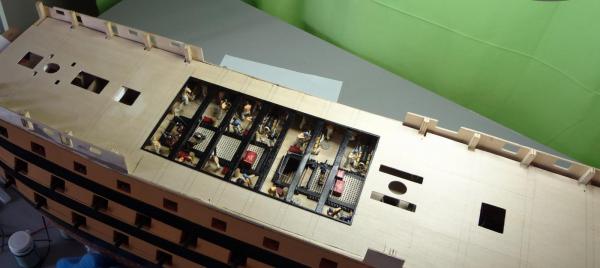
sailors done until I get the waist ladders installed. Am ready to install the quarterdeck. Final check today before installation.
- 295 replies
-
- 4
-
-
- victory
- caldercraft
- (and 1 more)
-
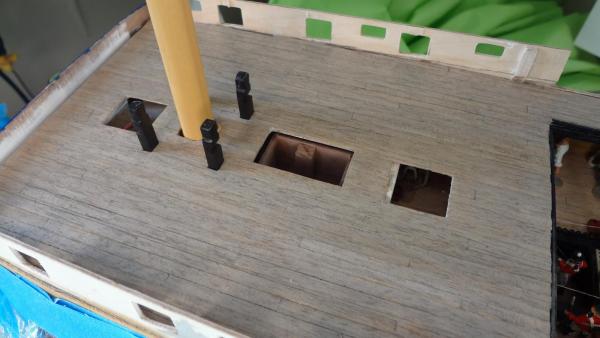
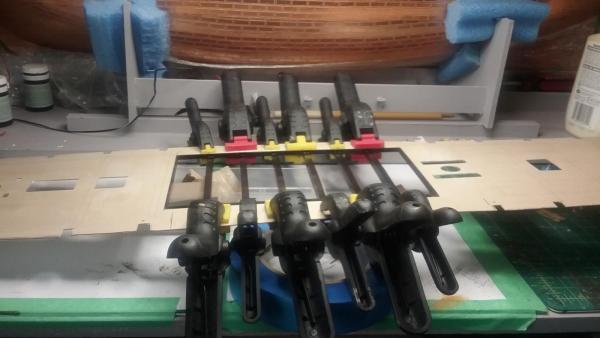
Skid beam assembly I've been messing around with the beams. Have assembled and been fitting etc. Instructions suggest fitting assembly after quarter deck partially glued. Has anyone attached the assembly to the quarter deck before glueing the deck in place? It seems to me that I can mount to the quarter deck before I put the decheck down. I may not be explaining this properly lol.. is there something I'm missing in completing the assembly? I think it can be installed directly to the deck pattern and then the whole unit installed. It will be easier to do the stanchions too. Thoughts?
-
Ian. Hull looks great, Already used the orange spatula a few times. Comes in handy that size. Keep up the awesome build
- 191 replies
-
- 3
-
-
- victory
- caldercraft
- (and 1 more)