HOLIDAY DONATION DRIVE - SUPPORT MSW - DO YOUR PART TO KEEP THIS GREAT FORUM GOING! (Only 20 donations so far - C'mon guys!)
×
Andre
-
Posts
152 -
Joined
-
Last visited
Content Type
Profiles
Forums
Gallery
Events
Everything posted by Andre
-
 Fantastic work!! I admire your skills and your attention to details, even to those details that are probably not visible anymore later..
 -
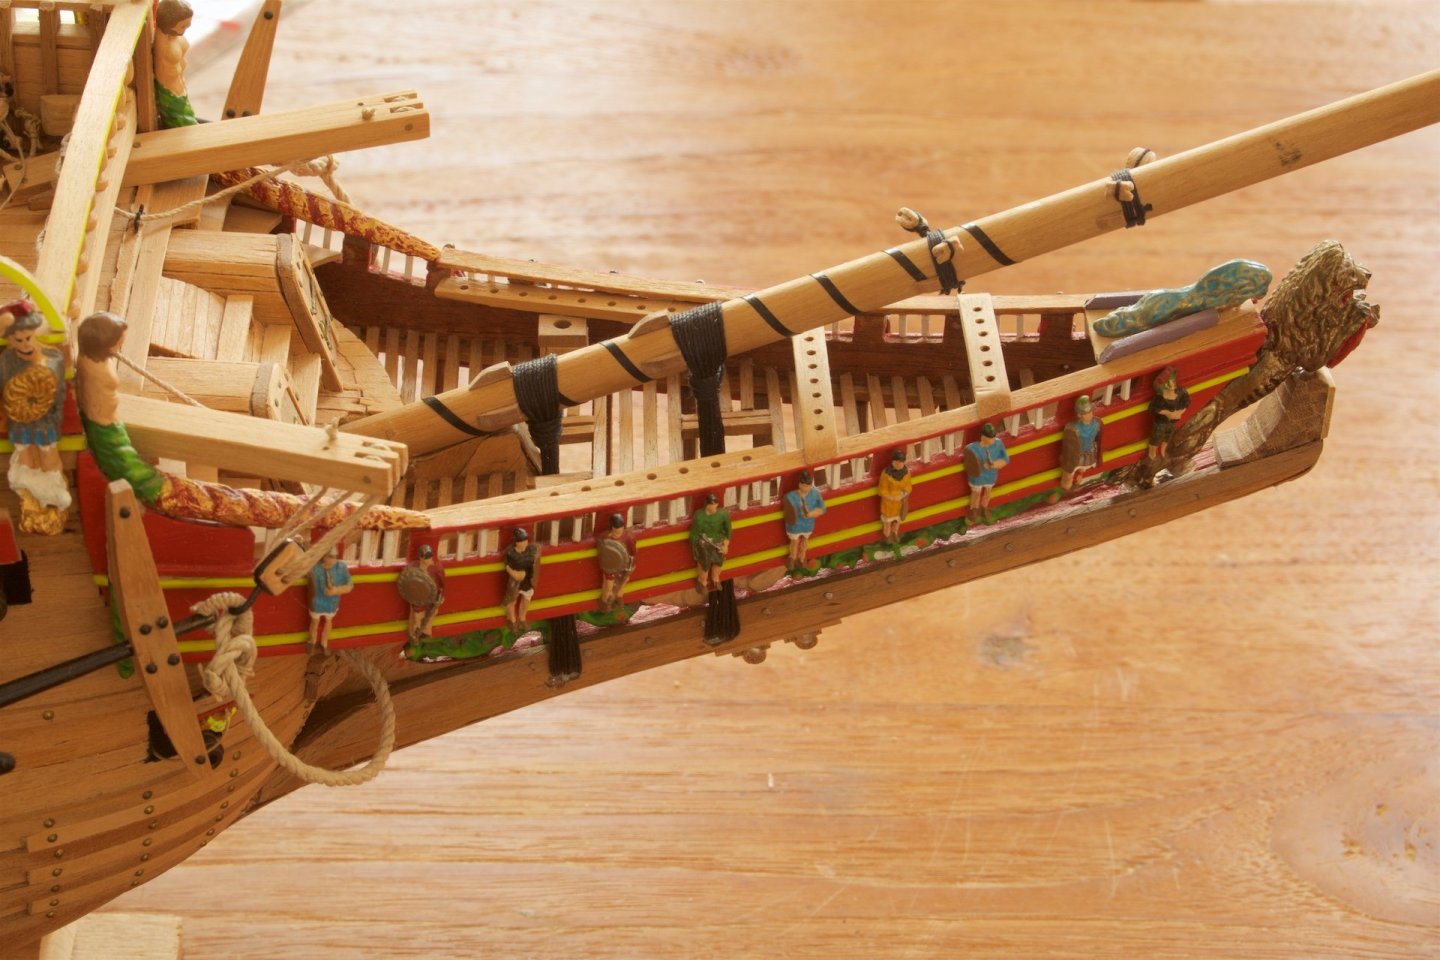
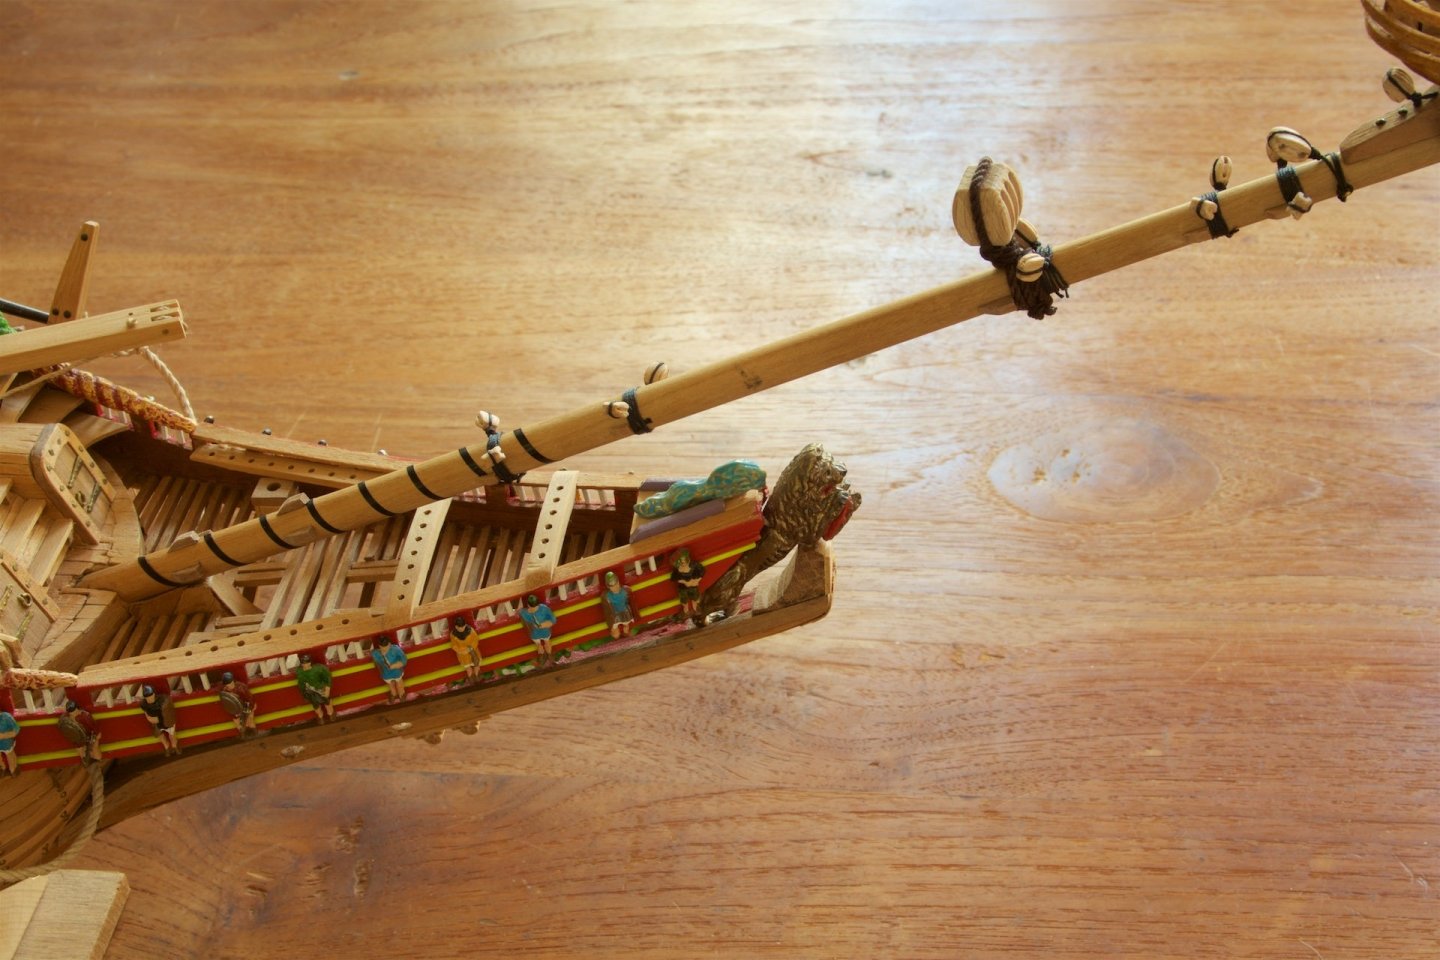
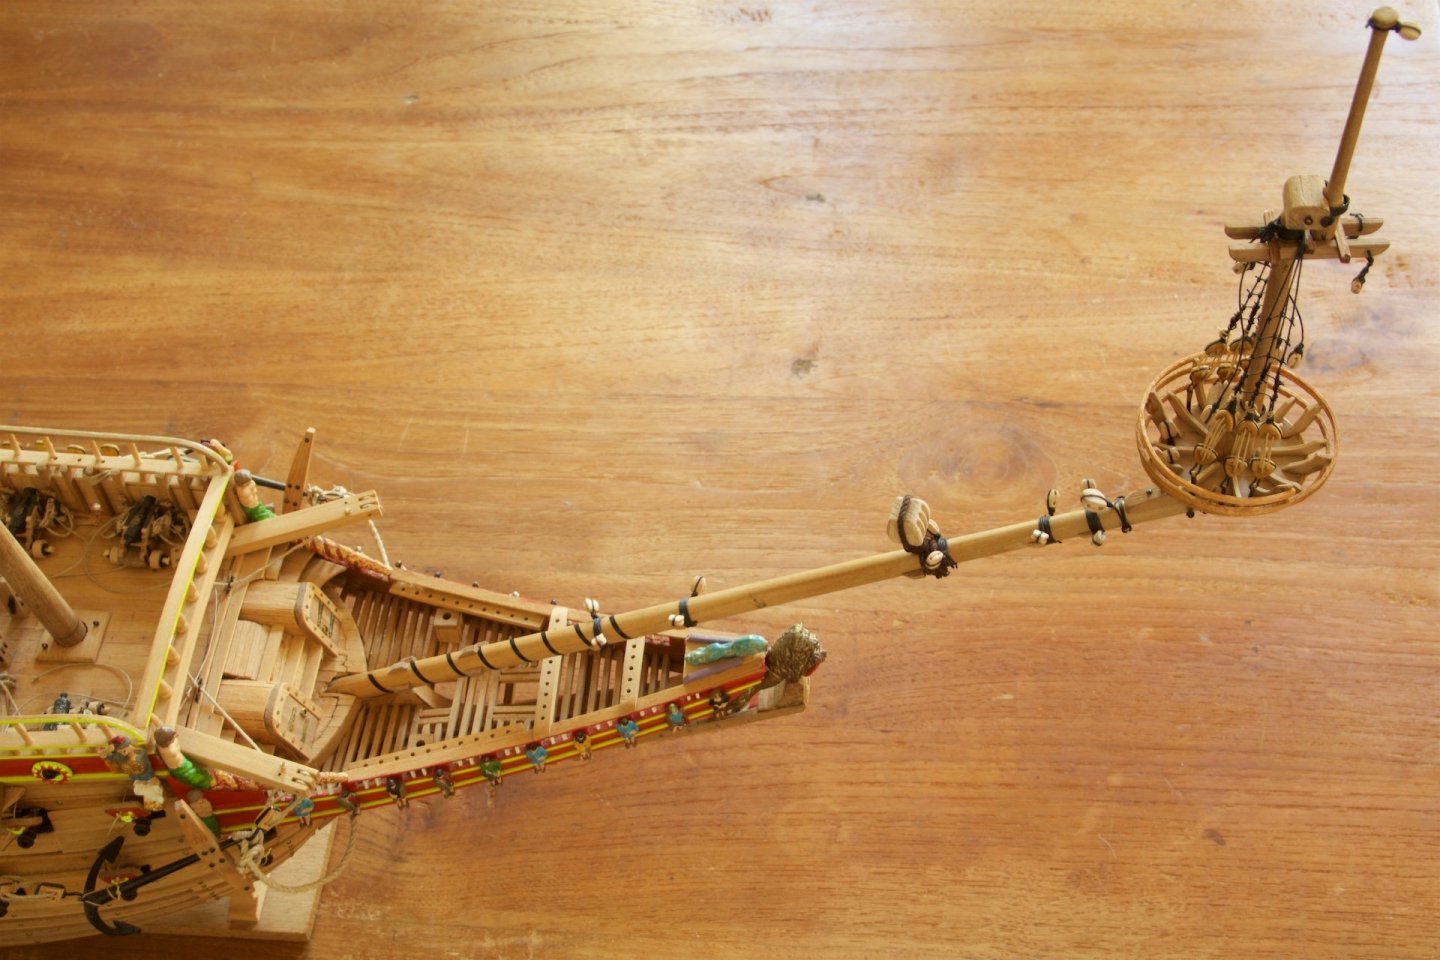
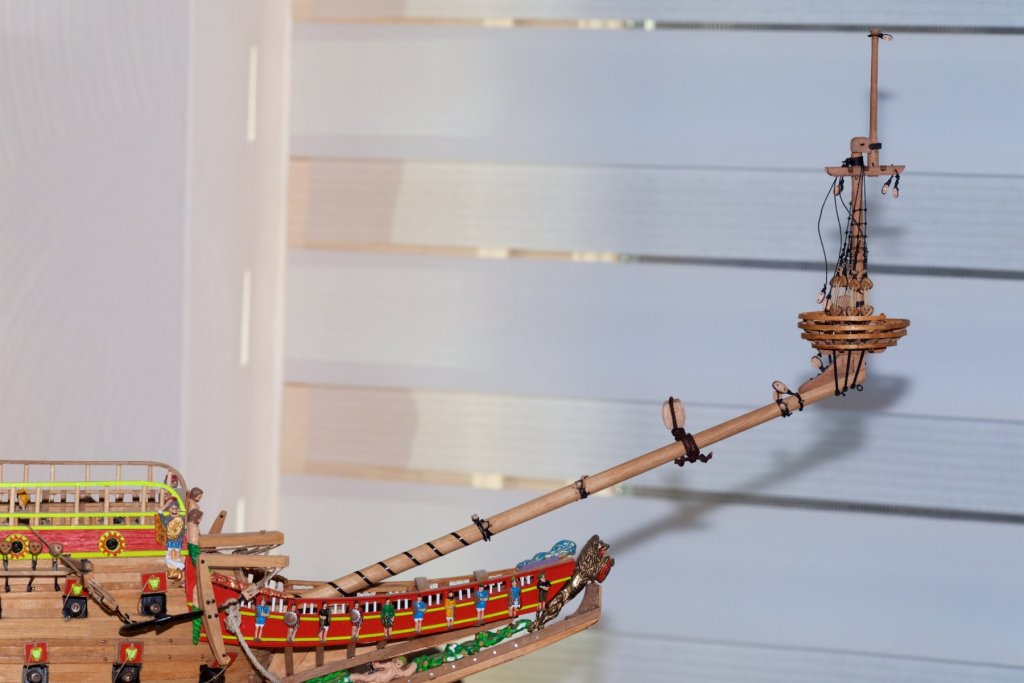
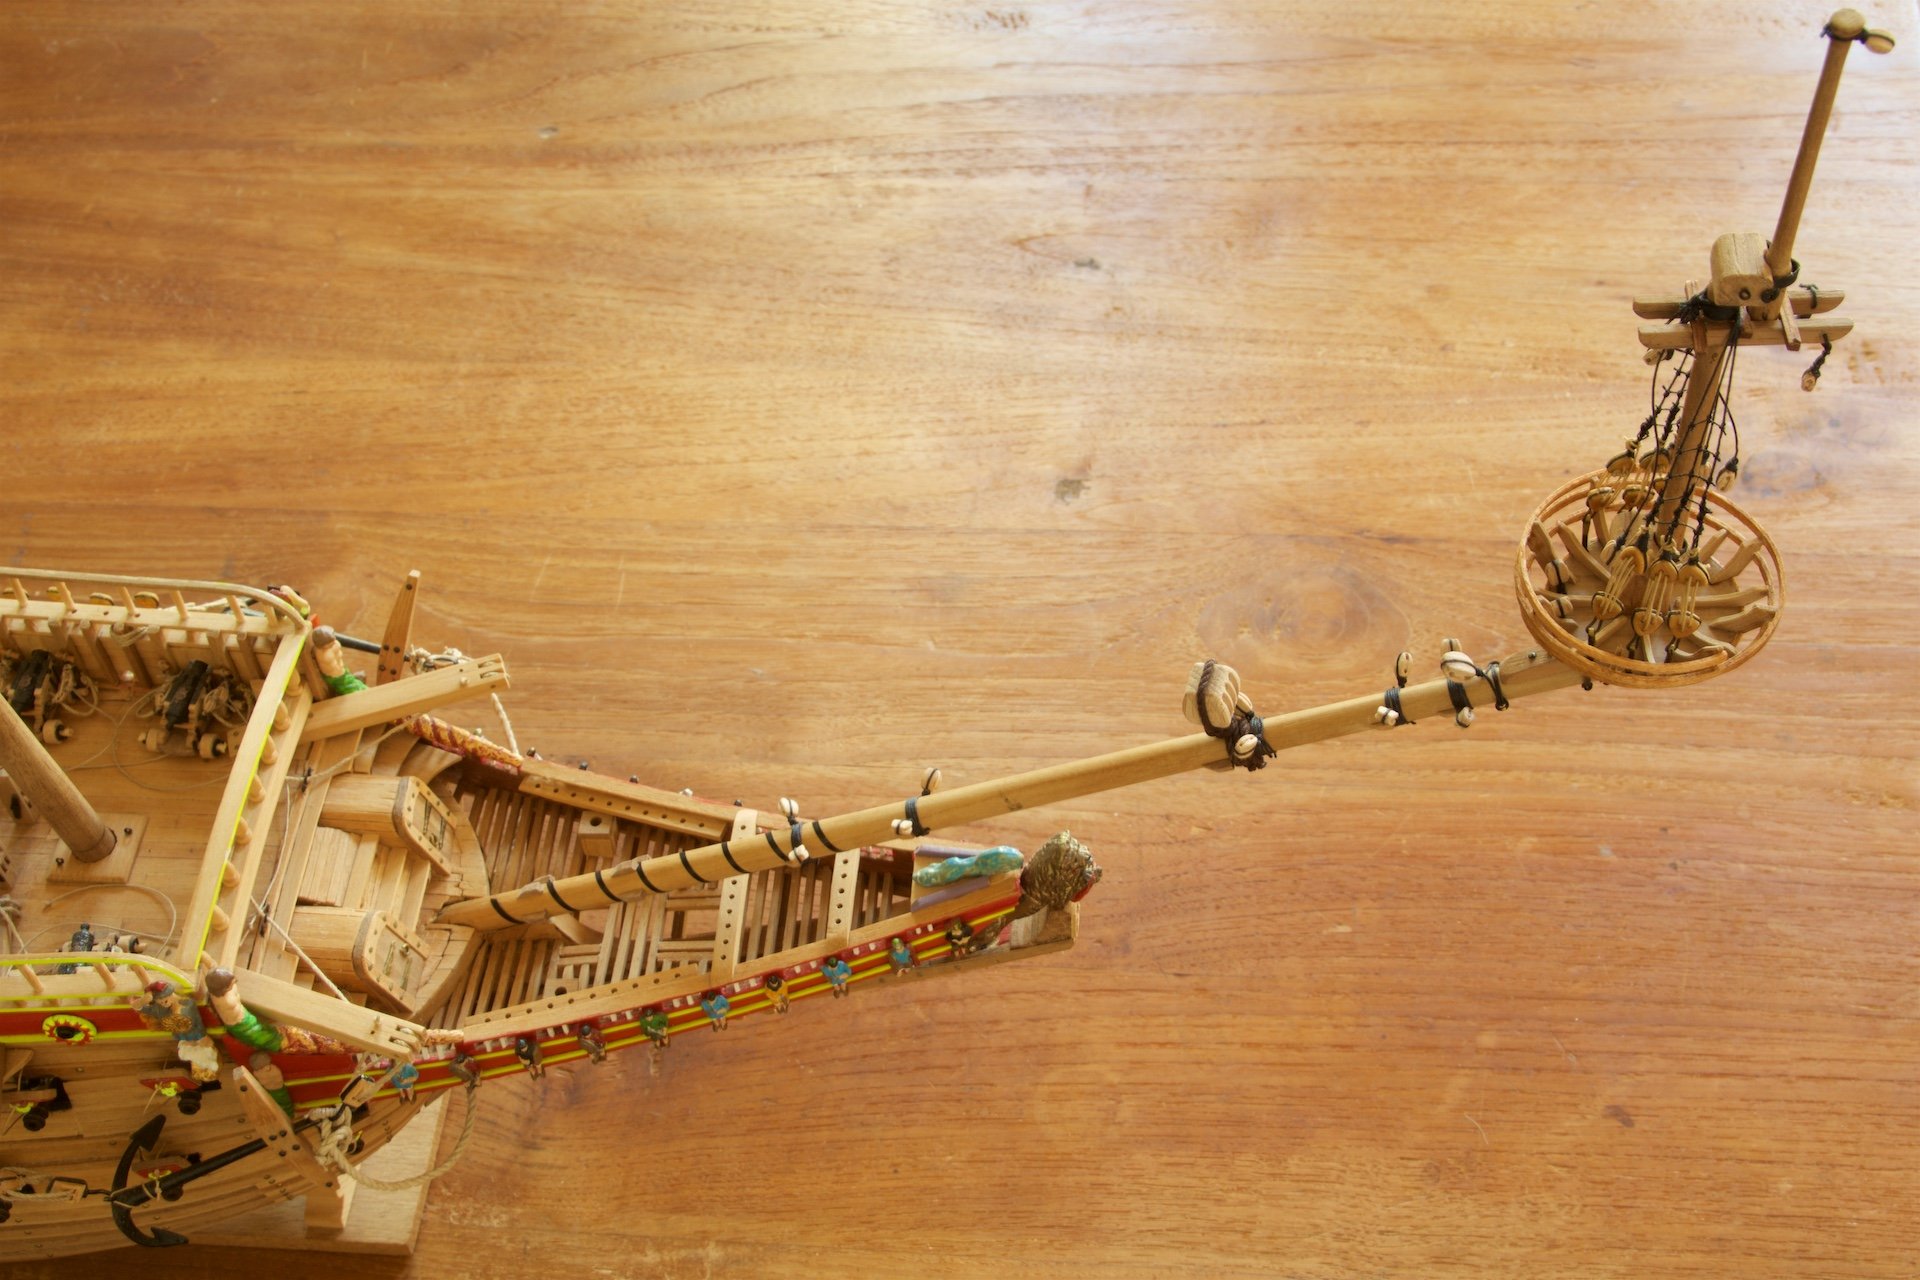
I have installed the bowsprit in place, and added the two wooldings. I hope to have counted correctly for the number of blocks attached to the bowsprit... I used 0.8 mm thickness of rope for the wooldings.
-
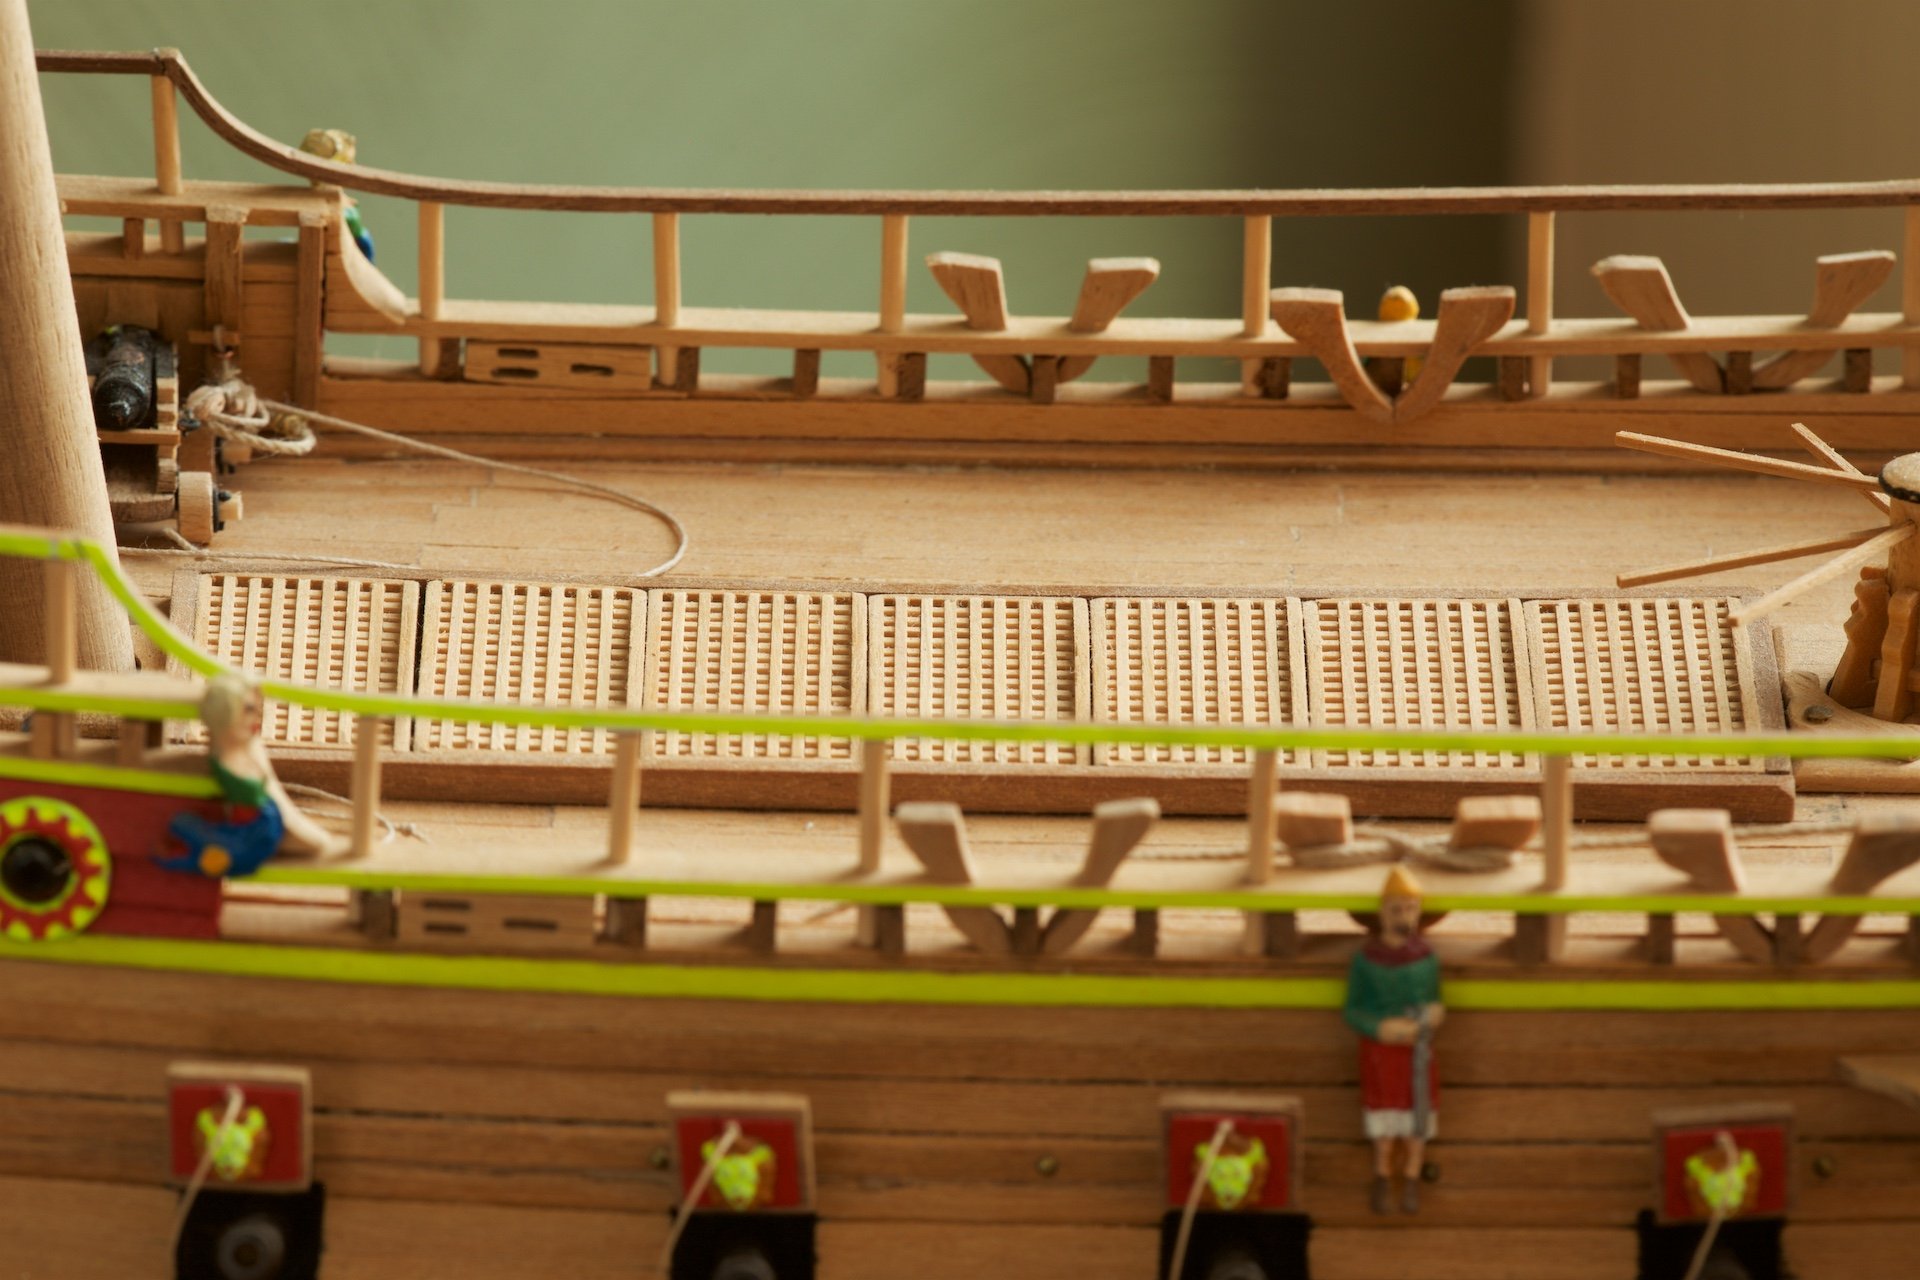
Attached some blocks on the decks. This prior to installing masts and rigging, because now I still have easy access.


-
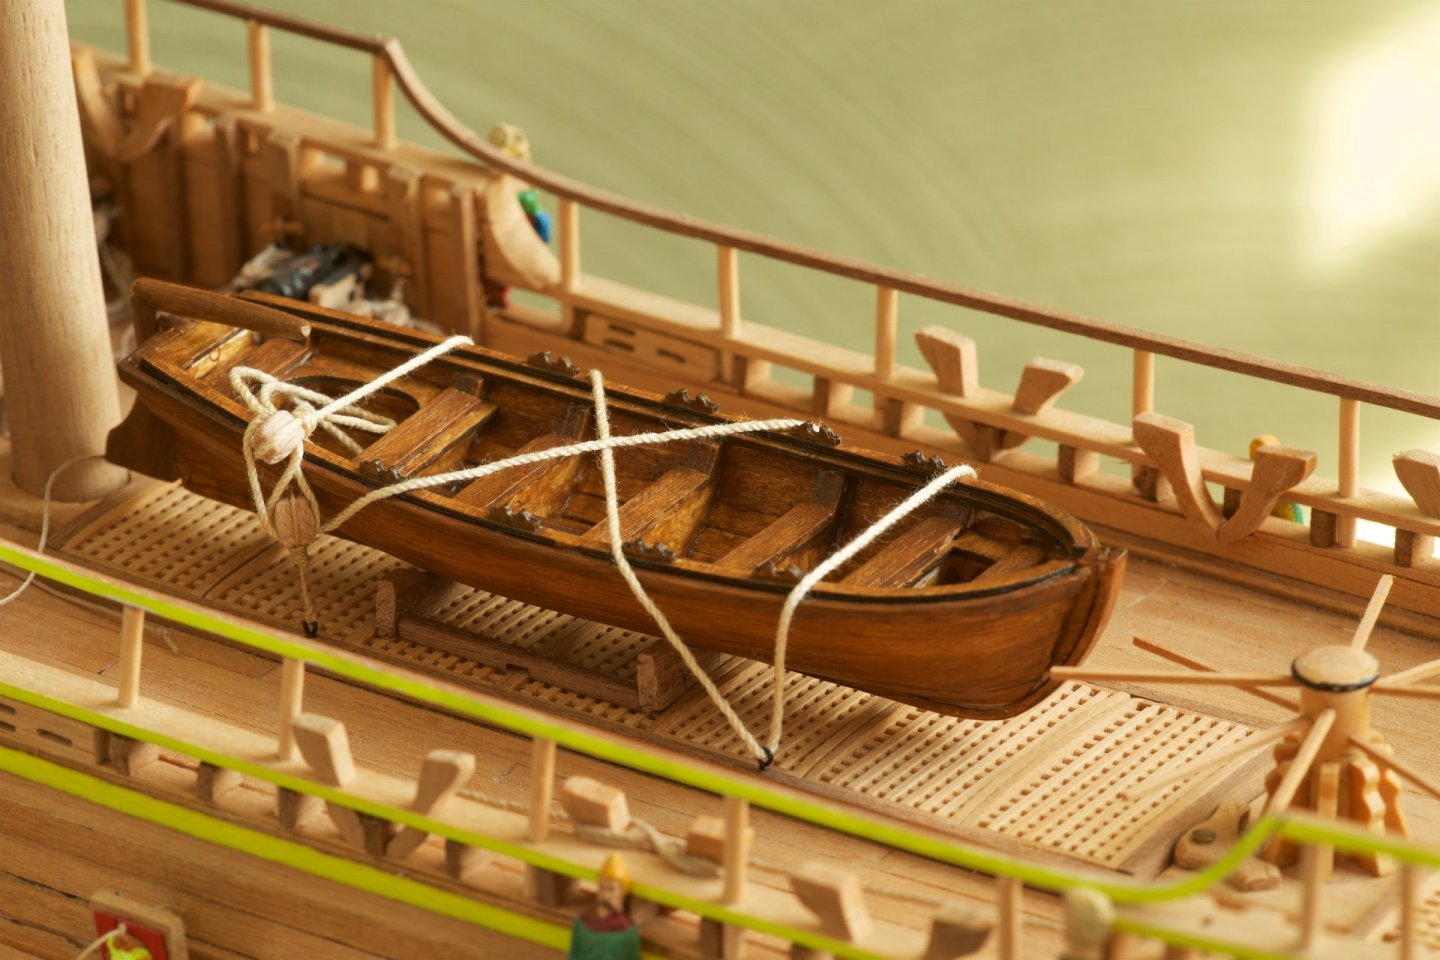
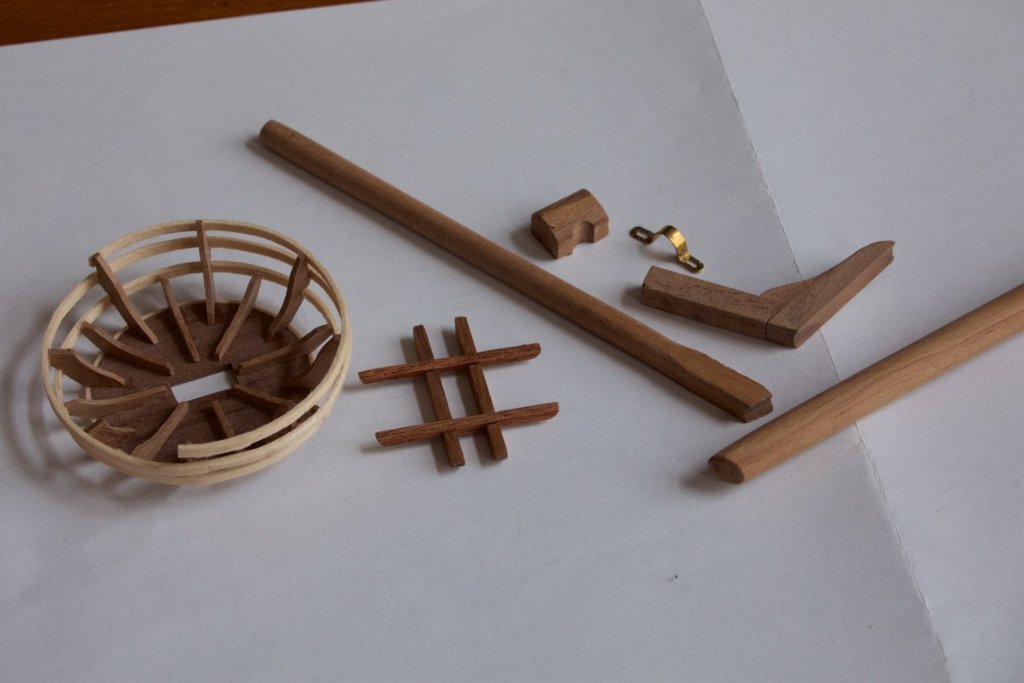
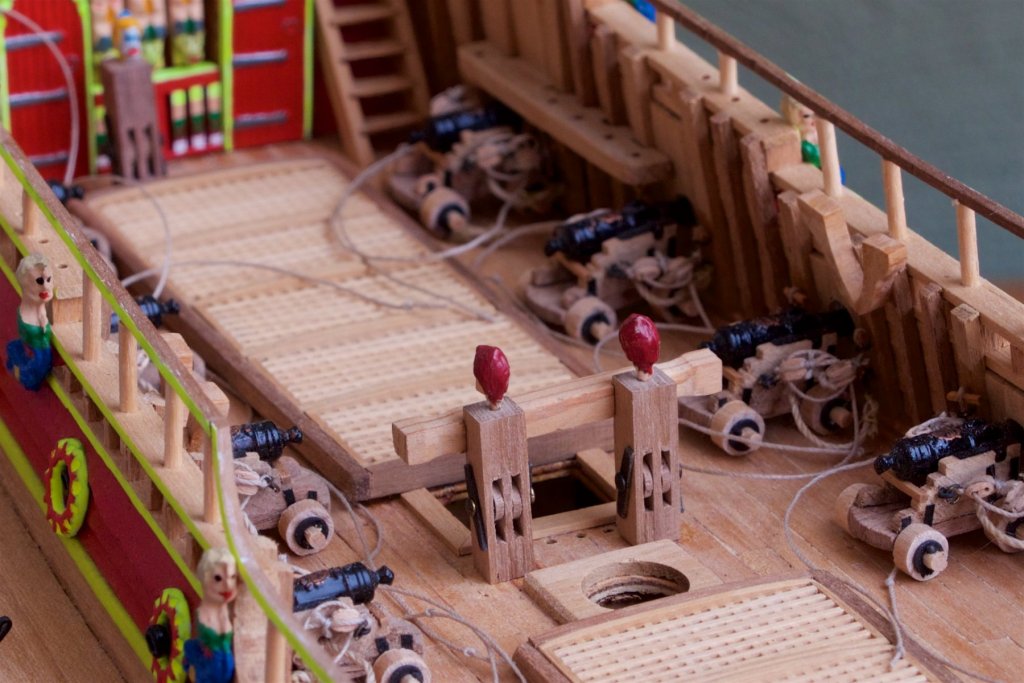
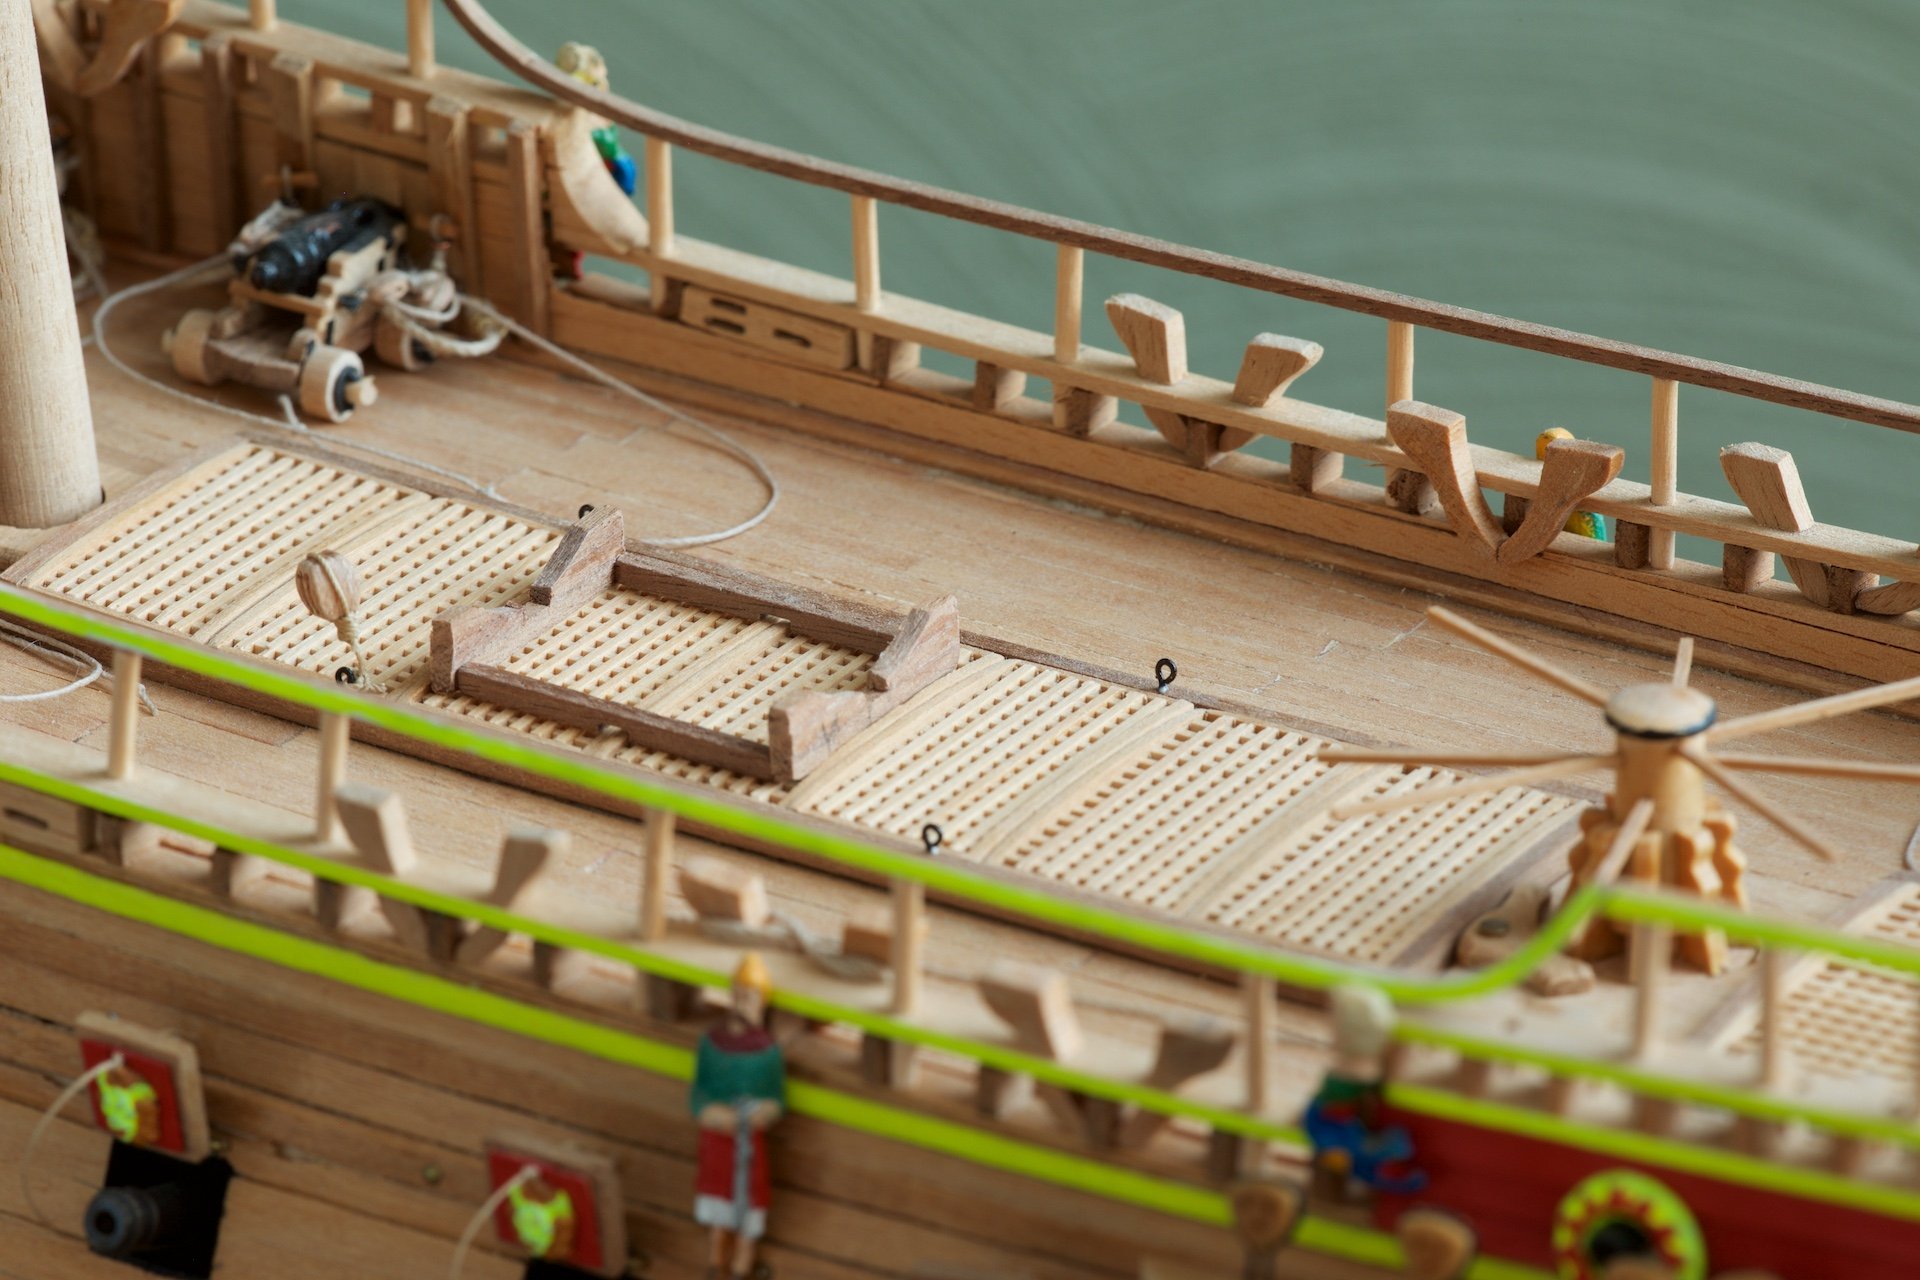
Installing the rowboat on deck. Because the bottom of the boat is not flat, I had to make a small stand for it. Then installing on deck with rope. First I had attached the block to the ring with rope (picture 3), but the rope was too long, so I decied to install the block with a hook (picture 4). When installing the anchors, I had made this block with hook, so I used this one, although it is larger than the other block. In principle, a block with hook seems more logical, because when the rowboat is used, the rope with hook-block can be easily removed.


-
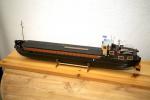
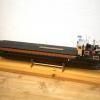
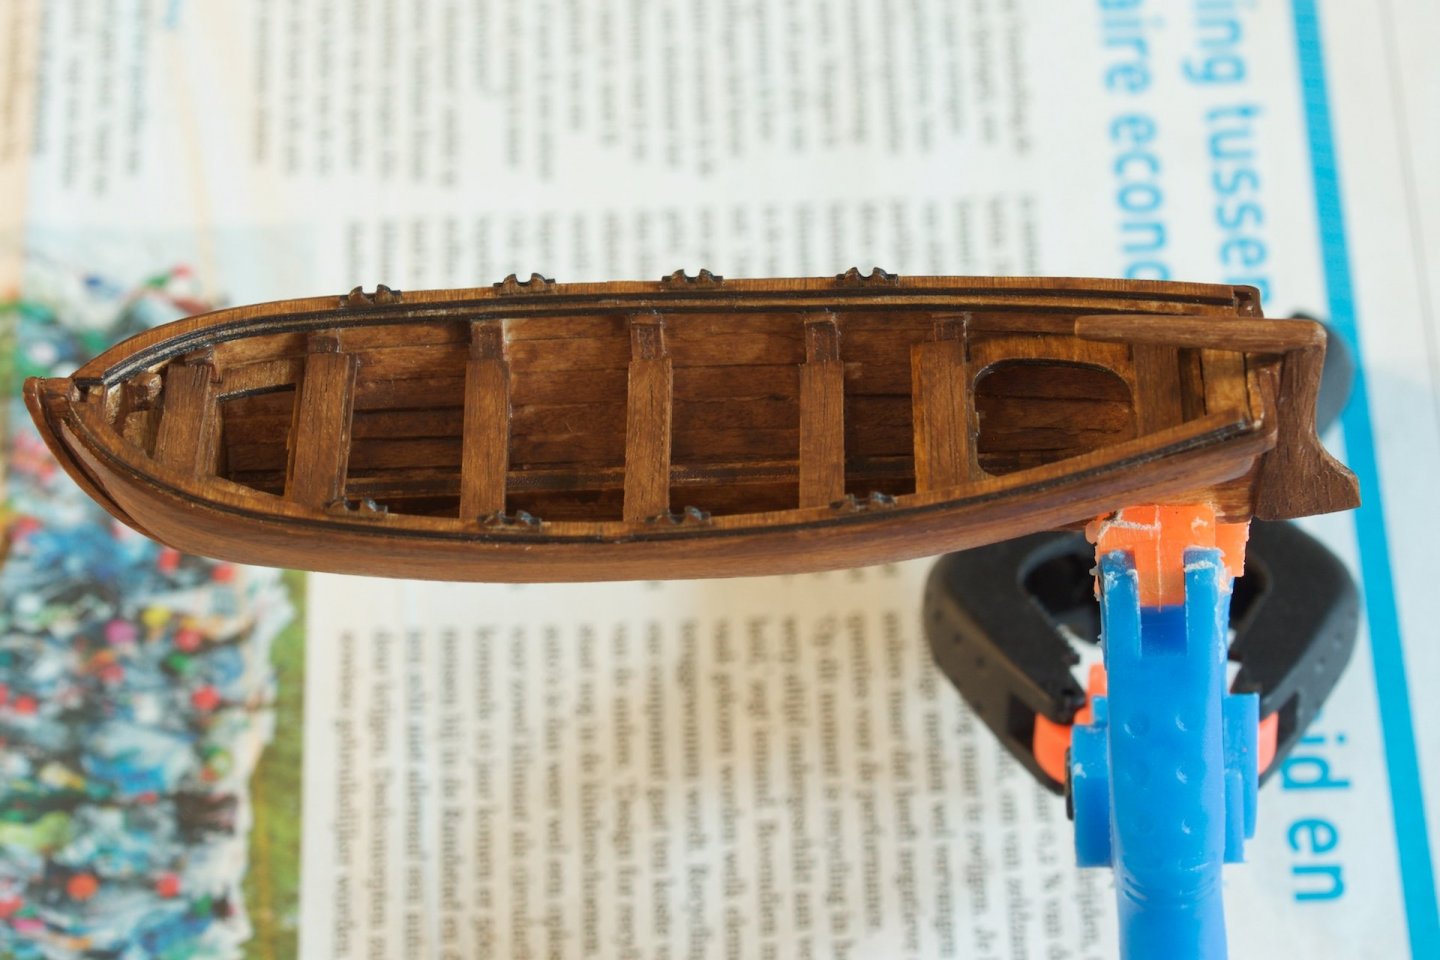
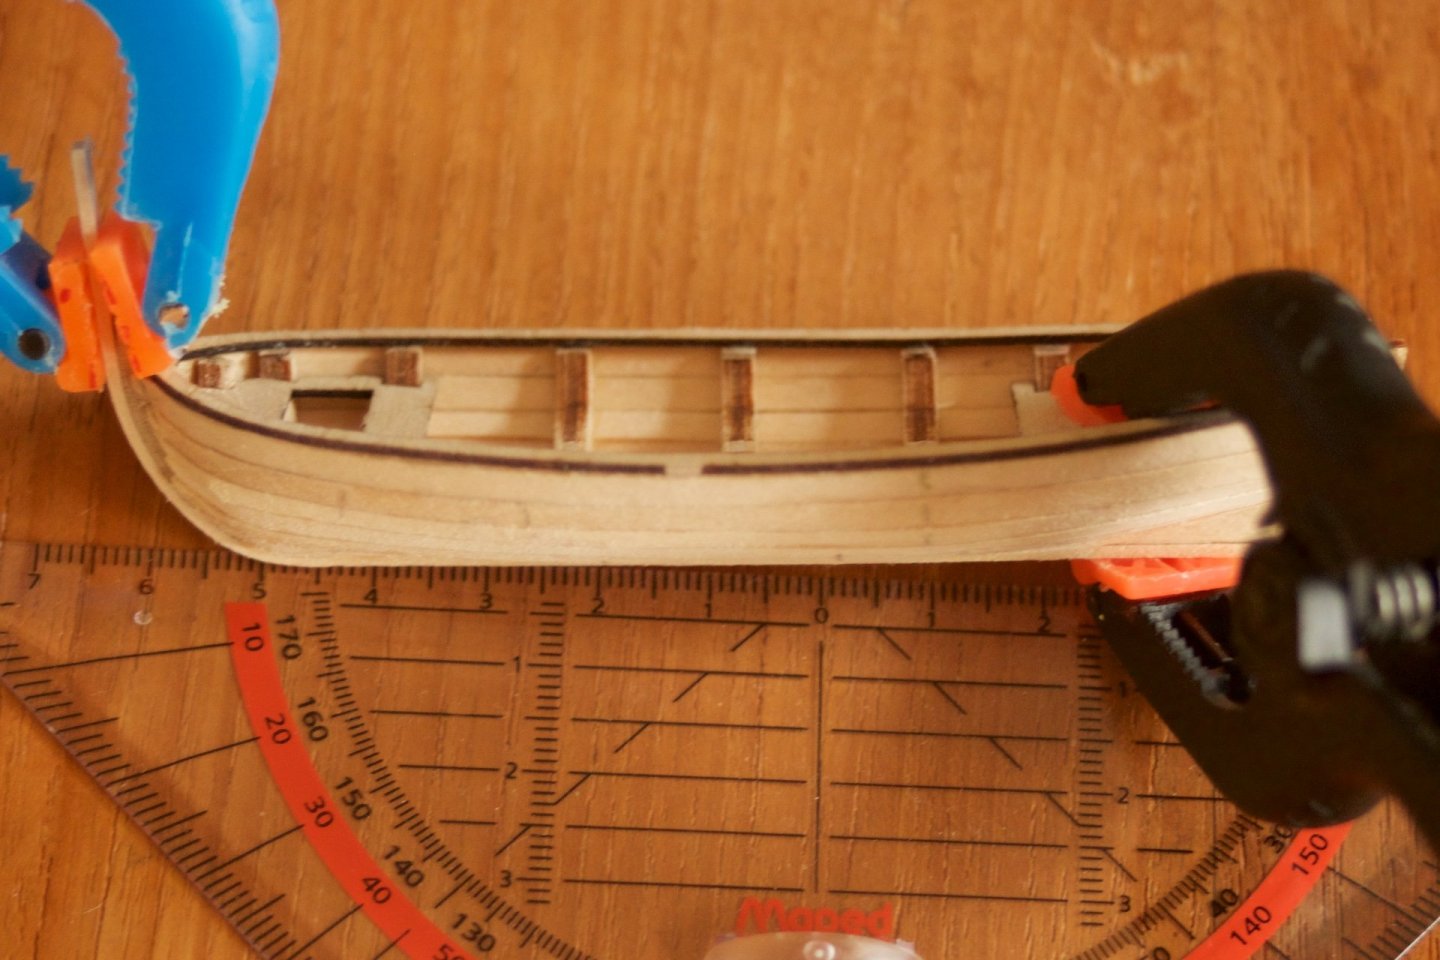
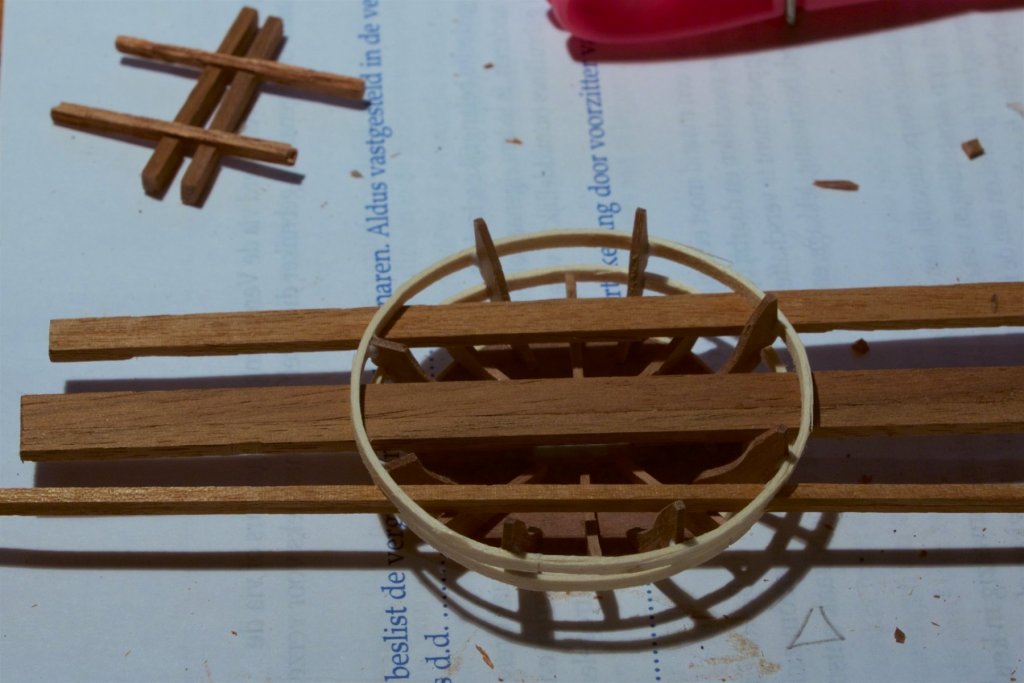
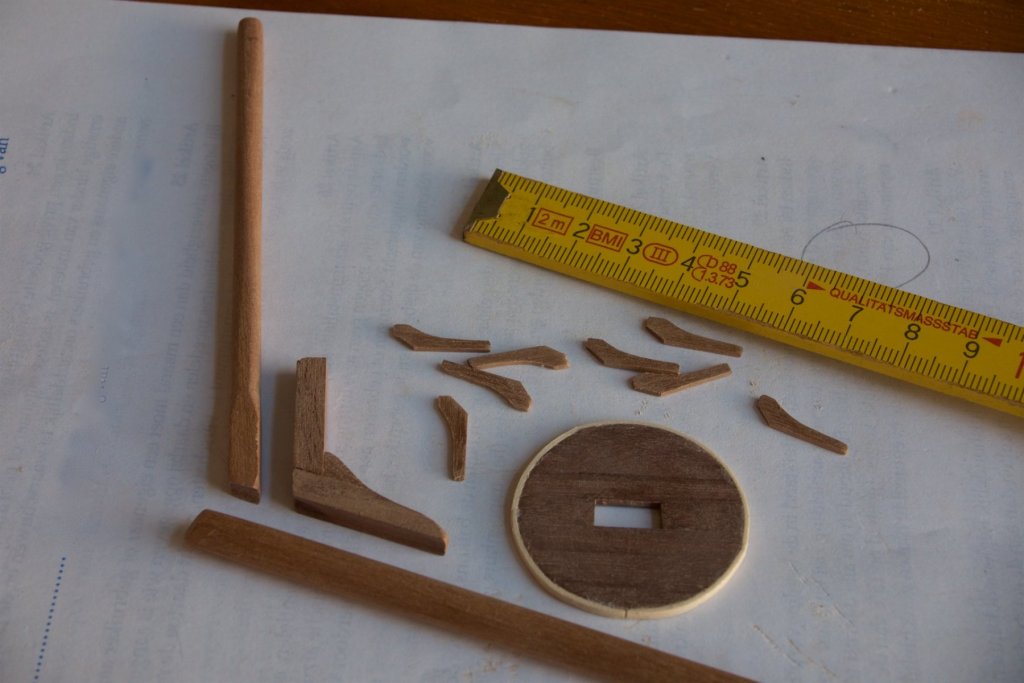
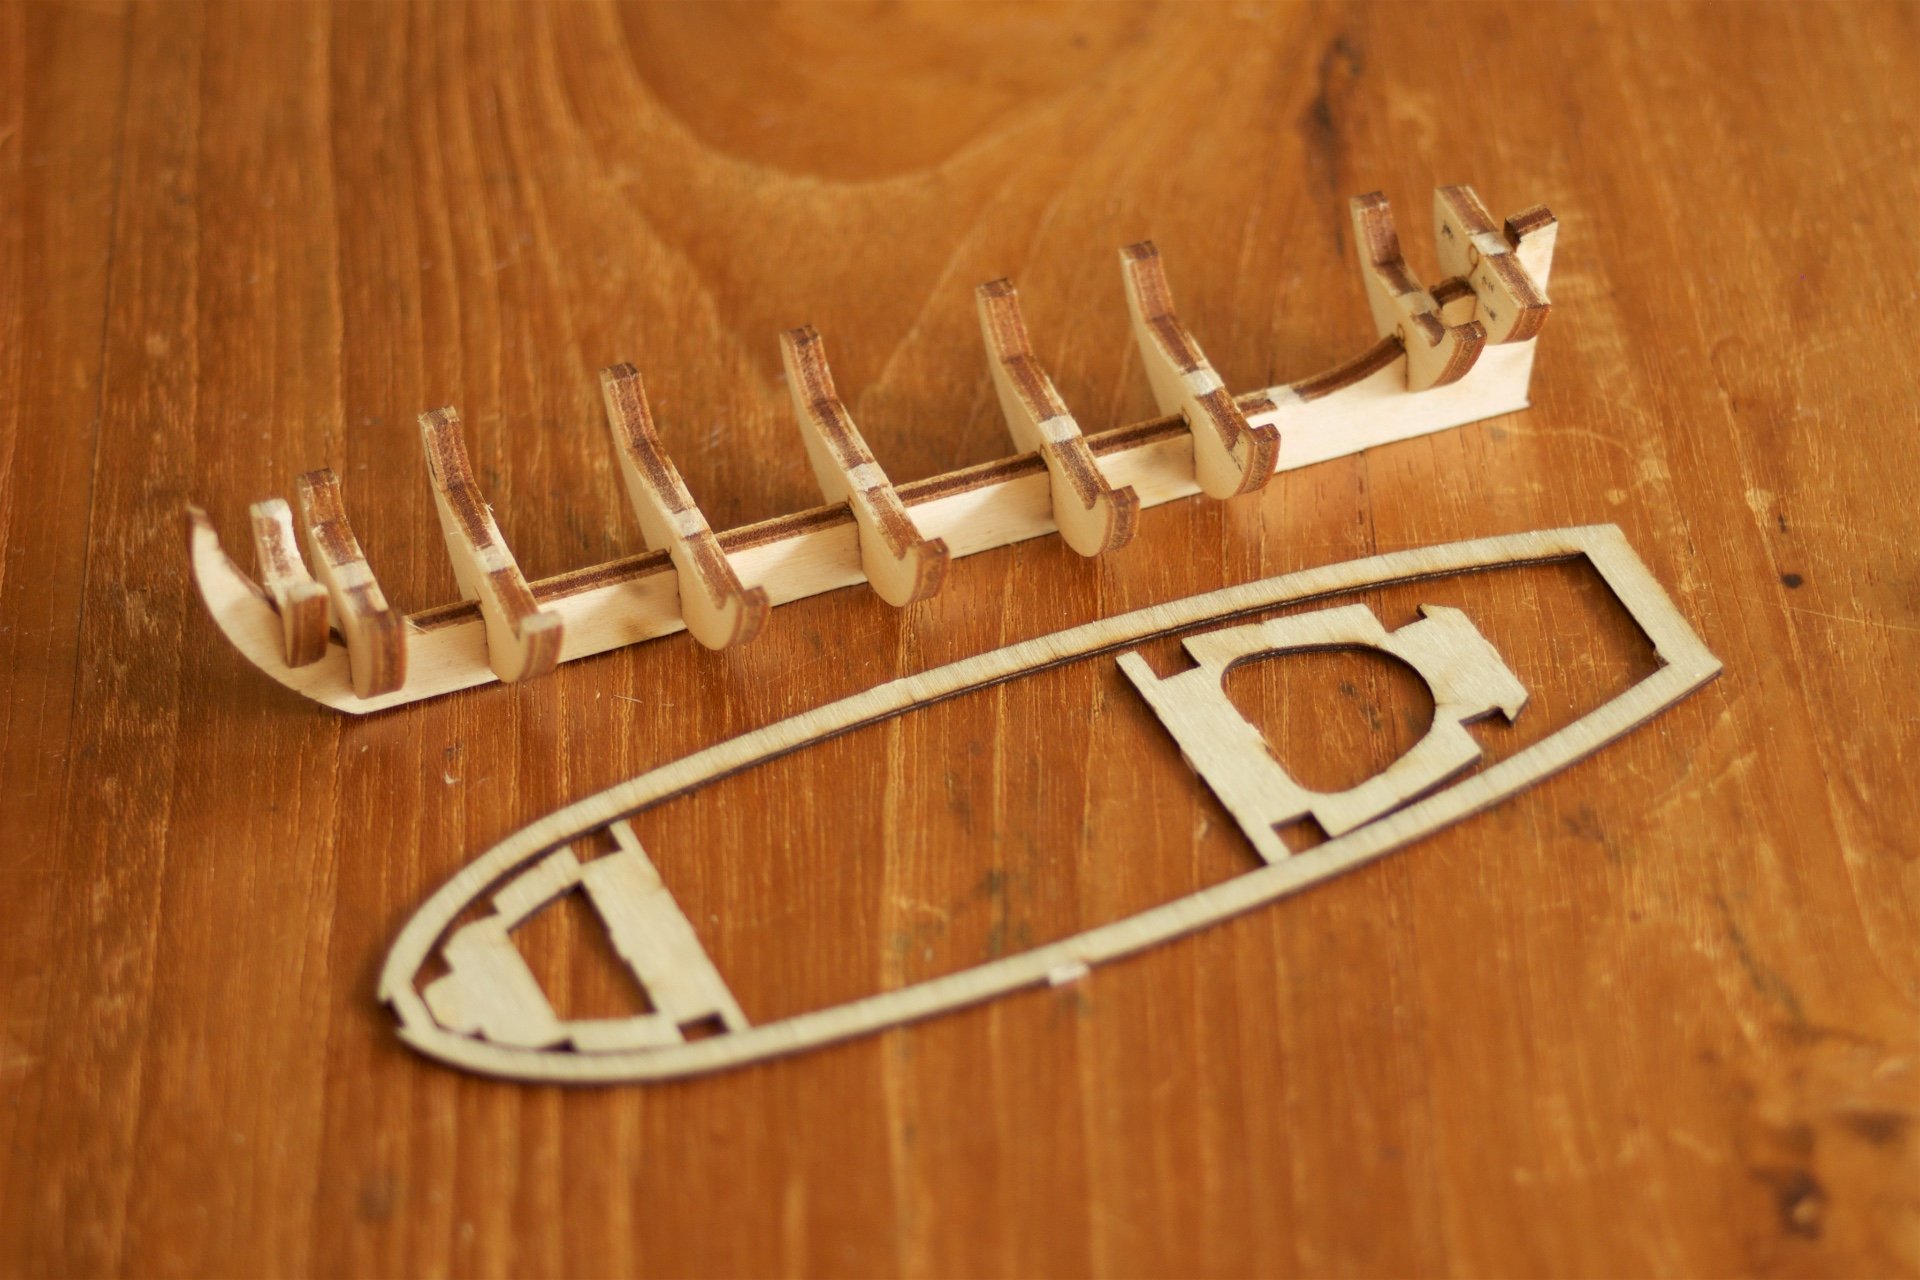
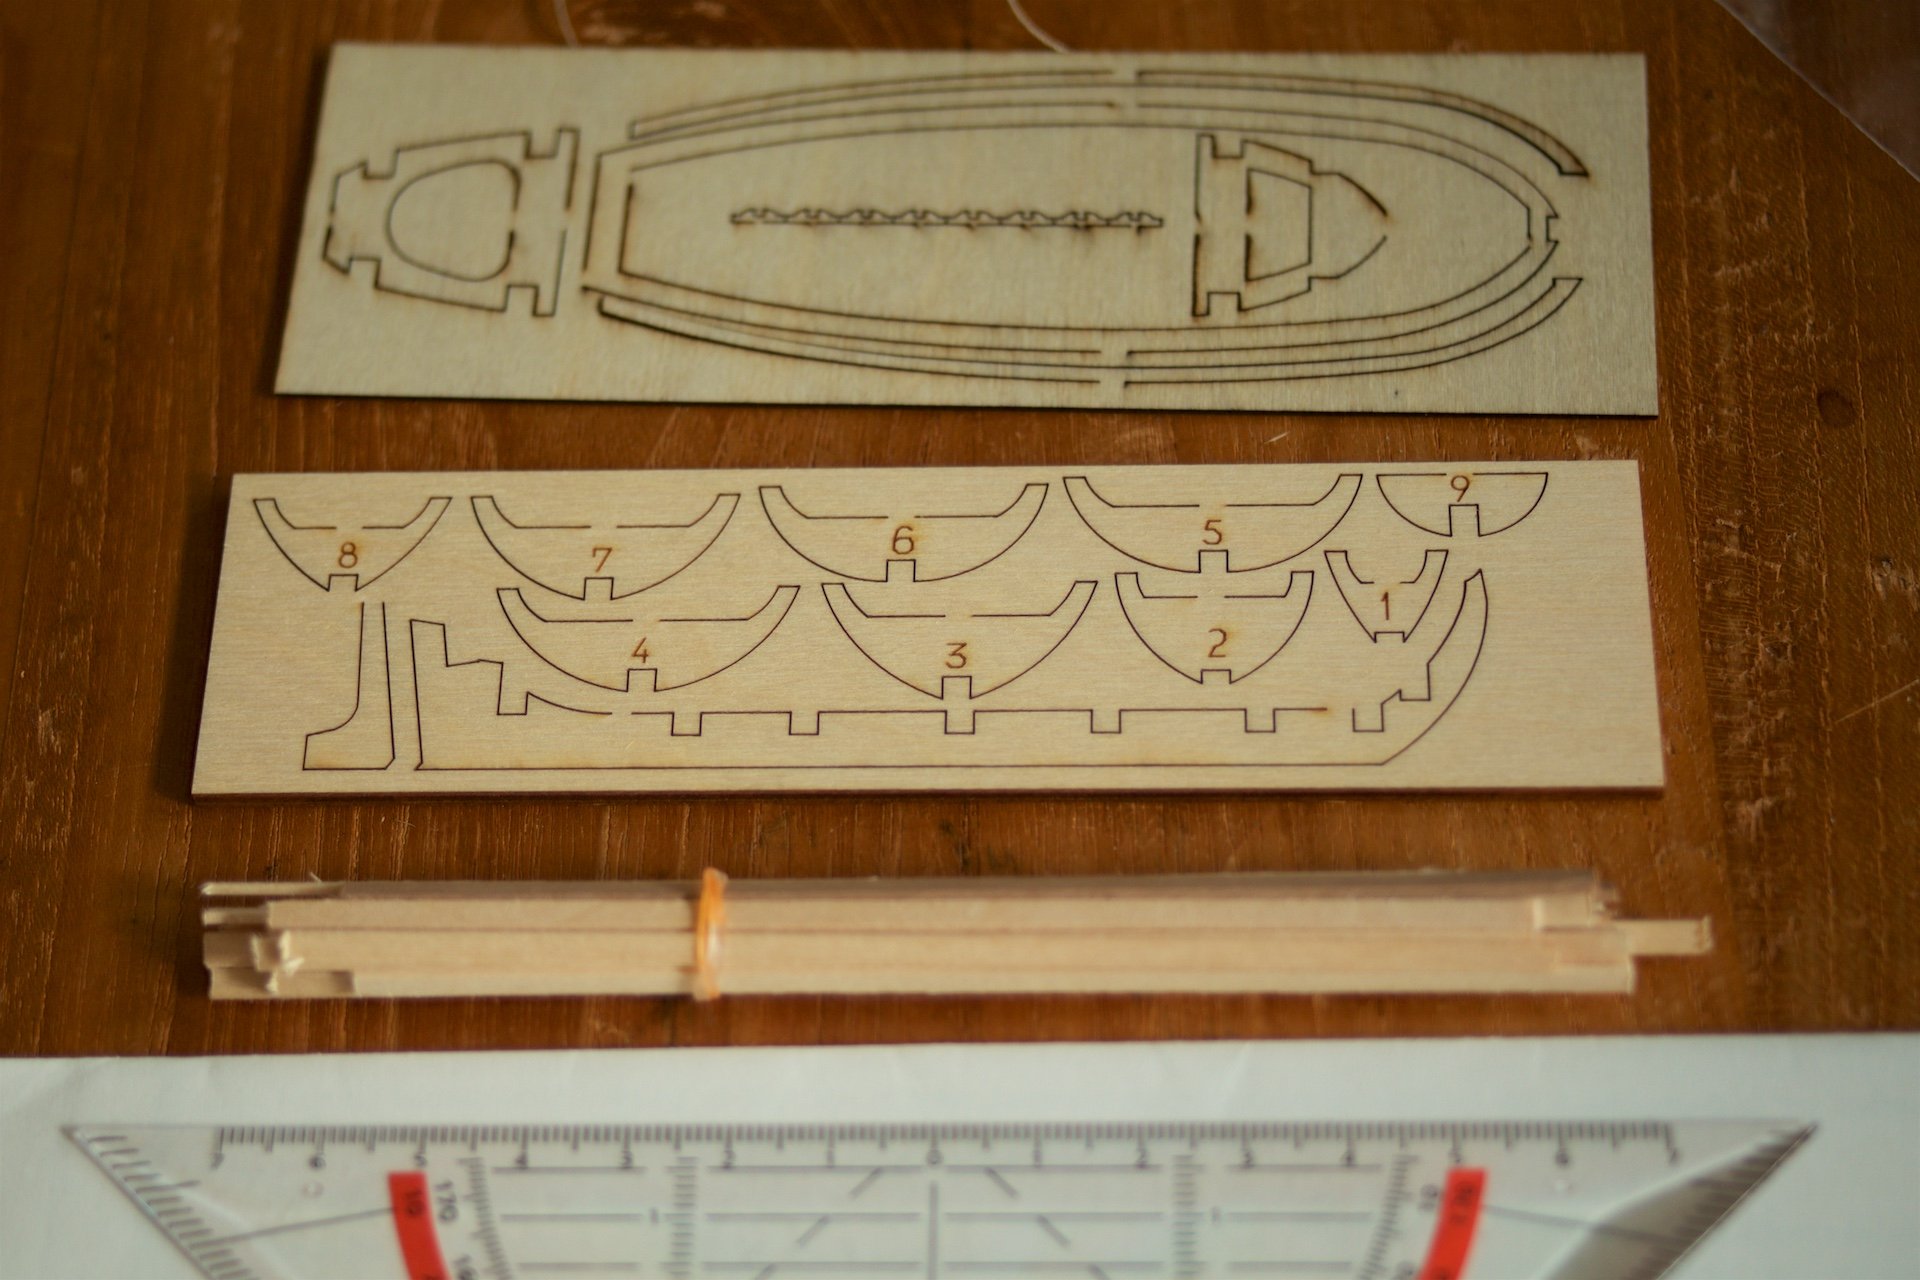
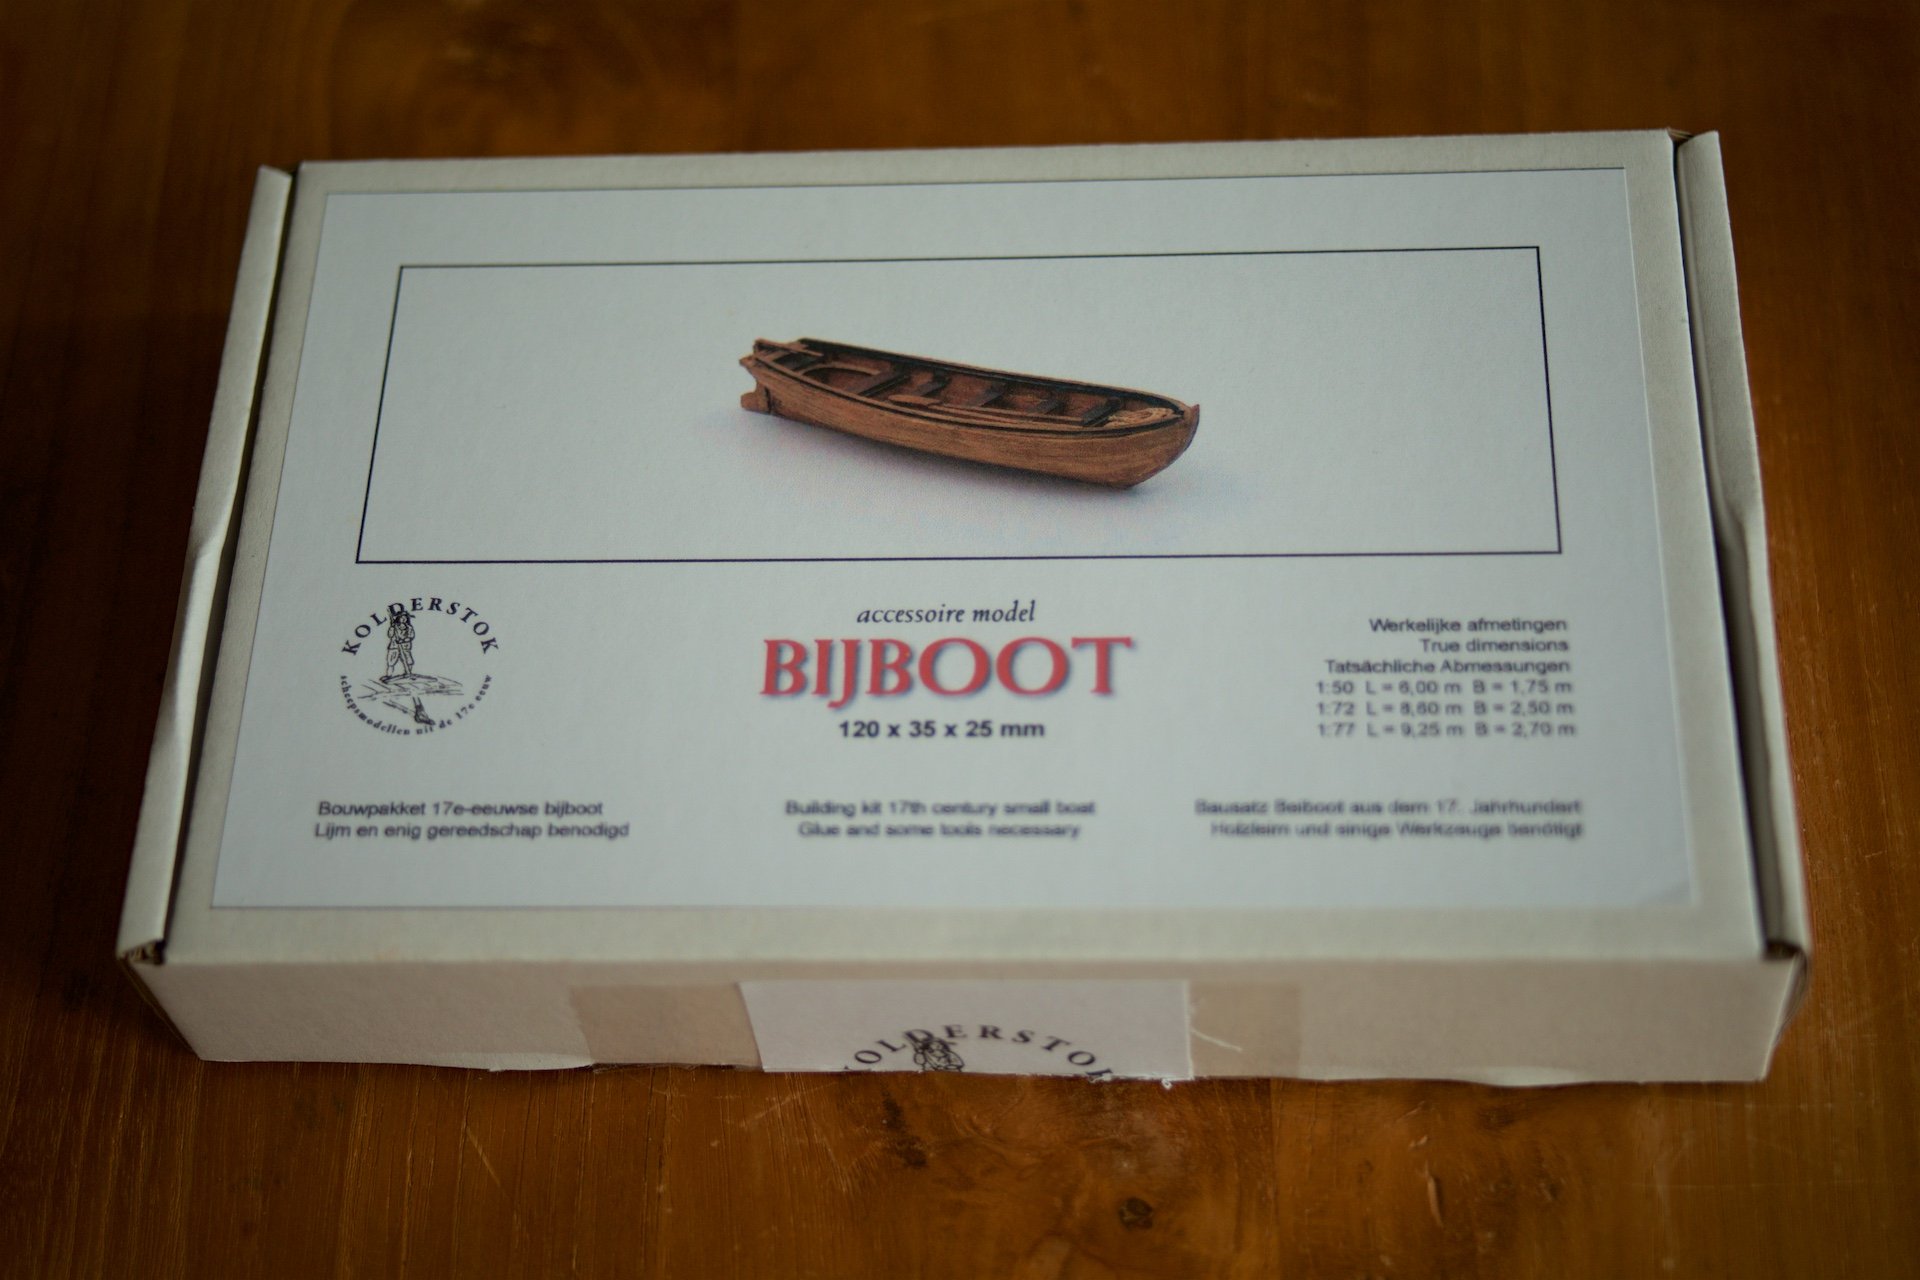
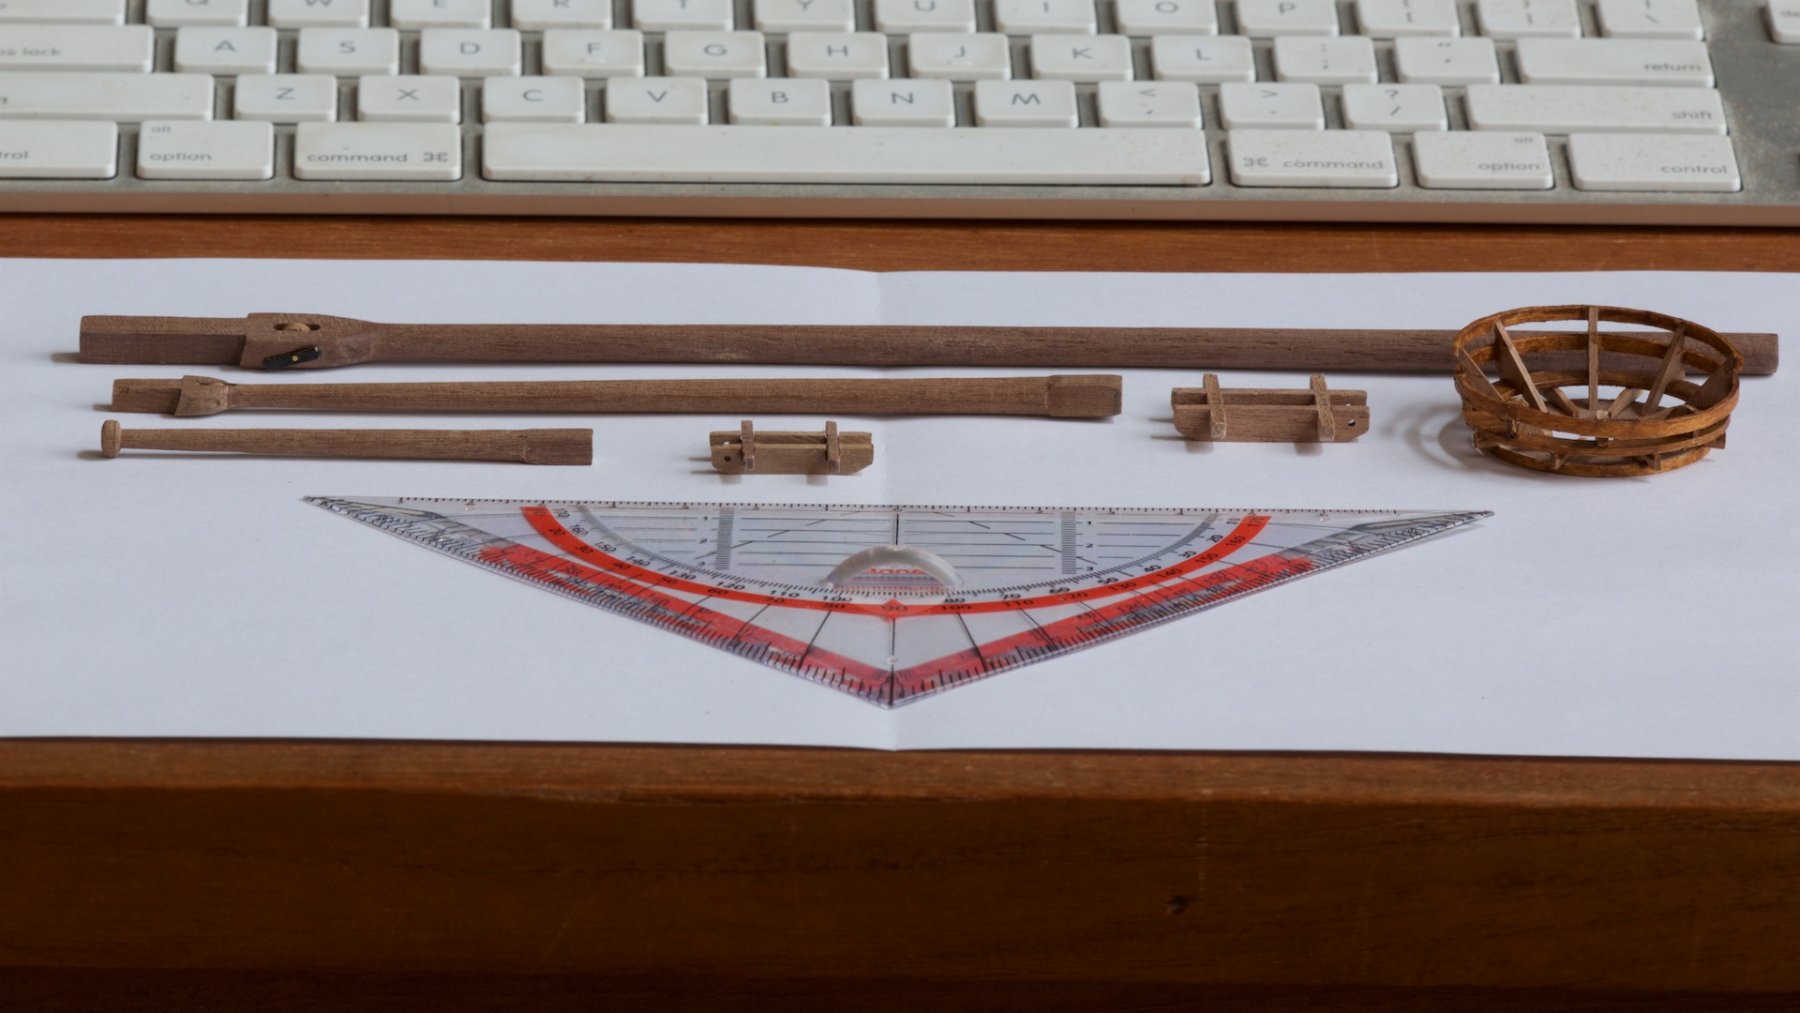
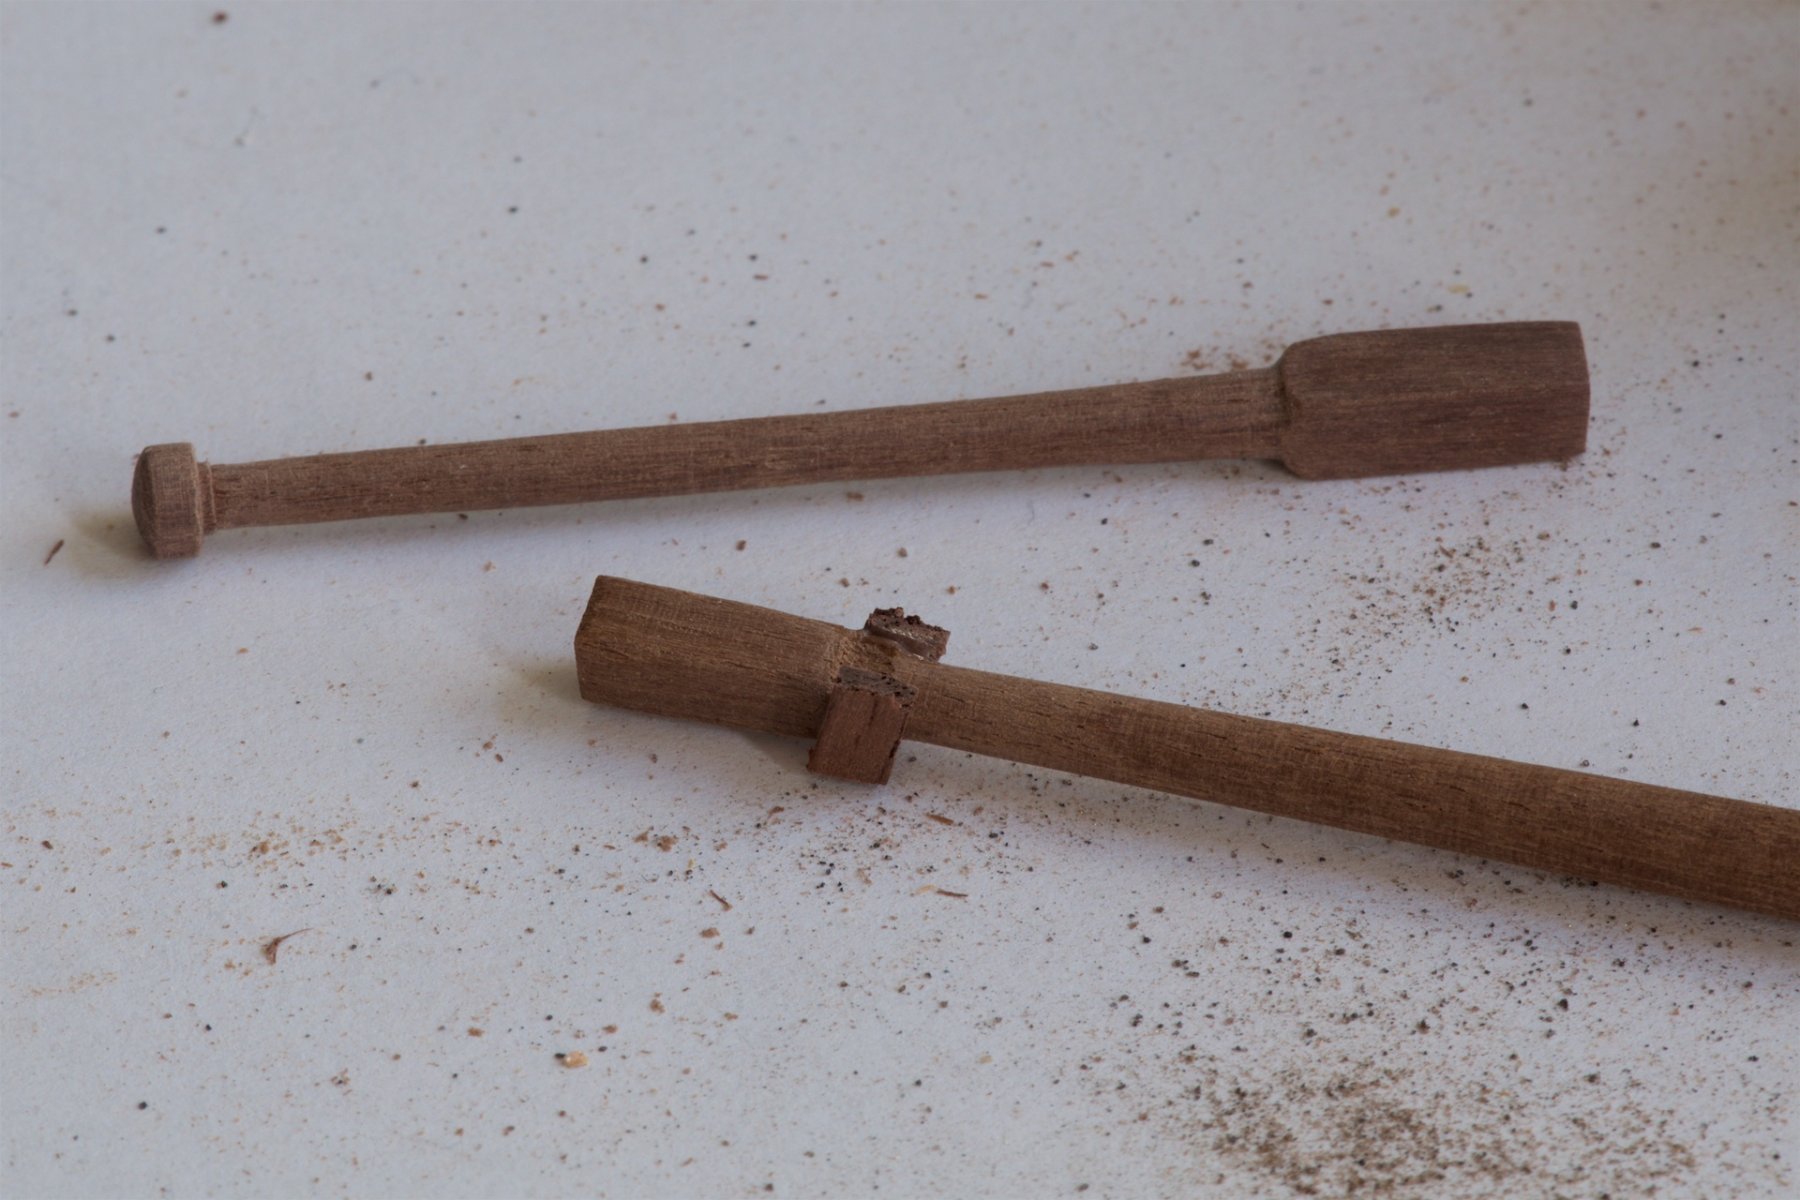
The hull of the sip is now more or less finished, so next will be the rigging, which will be mostly with ropes.. Before switching to that, I could make an additional item from wood: the rowboat. I first had the idea to do the design myself, based on pictures, but during the Lelystad exhibition (my previous update), I purchased a small model for it. It is 12 cm in length. At scale 1:75, this translates into 9 meters. This perhaps a bit too long, but it just fits on deck. Below some photos of the build. The wood in the kit is mainly simple white wood, and I replaced some of it by nutwood. The use of white wood means that some staining is prescribed, also in the description of the kit. I did the staining, but it is now perhaps a bit too dark compared to my unstained Wasa...


-
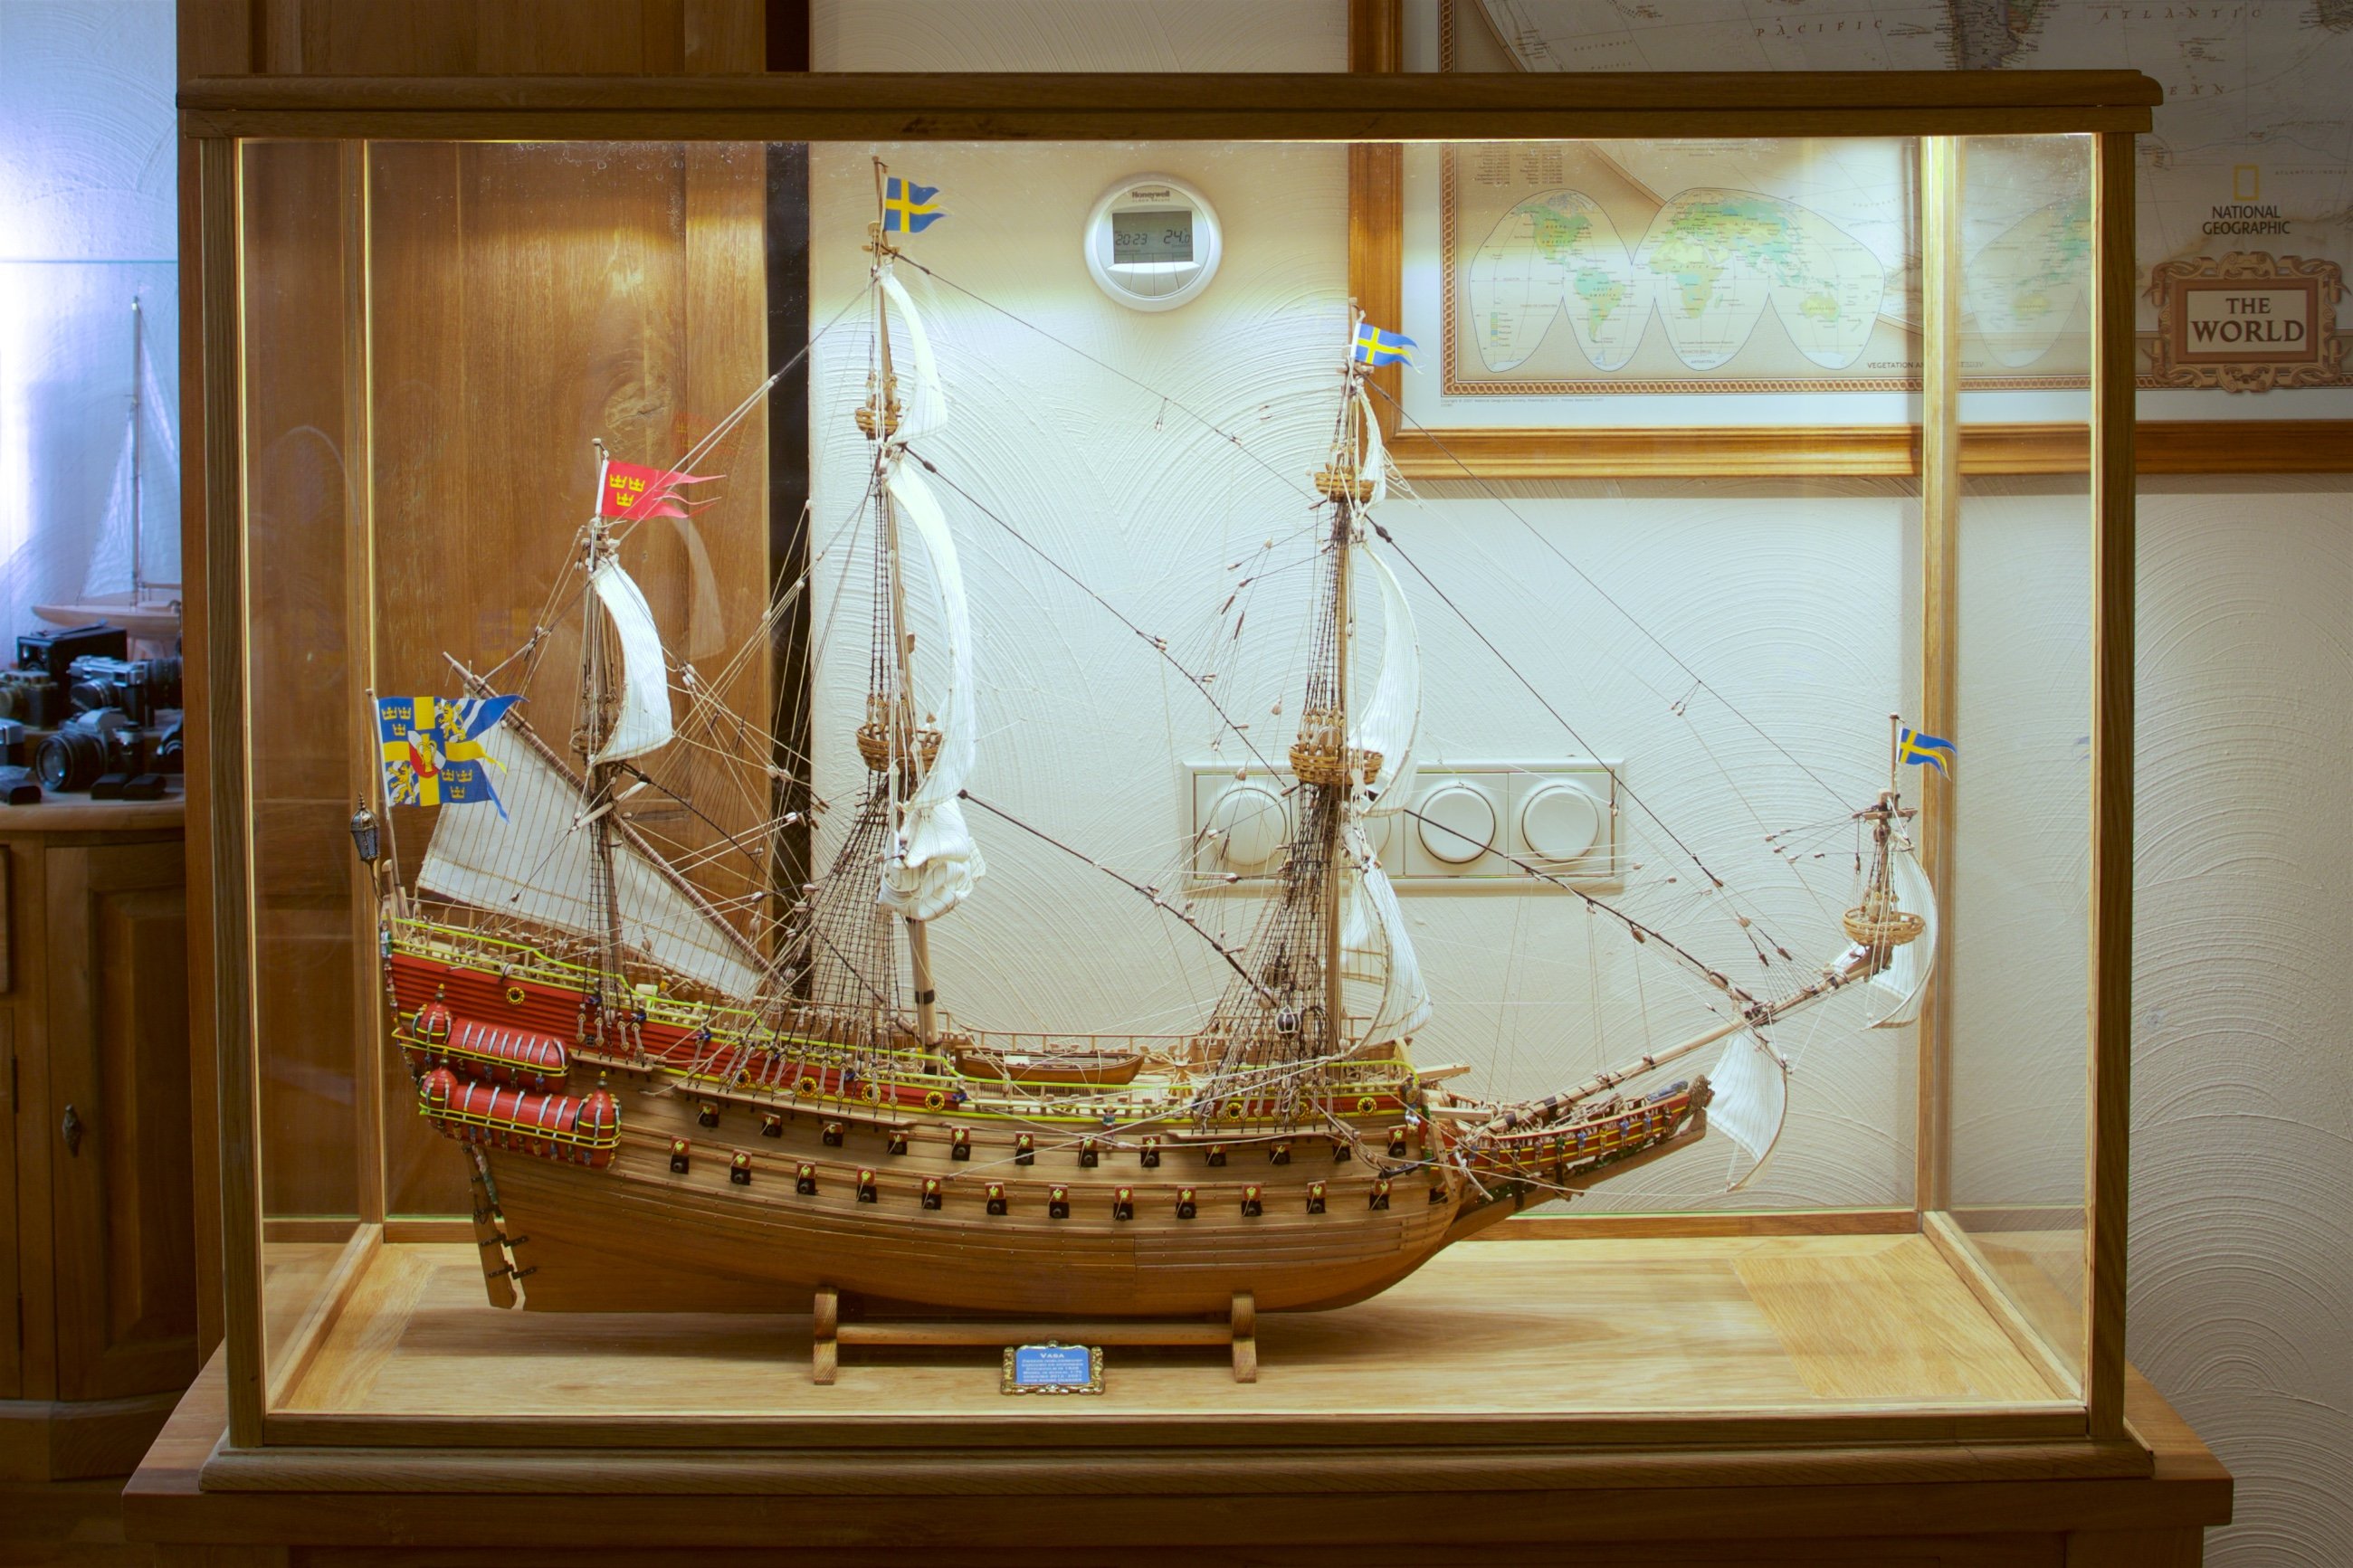
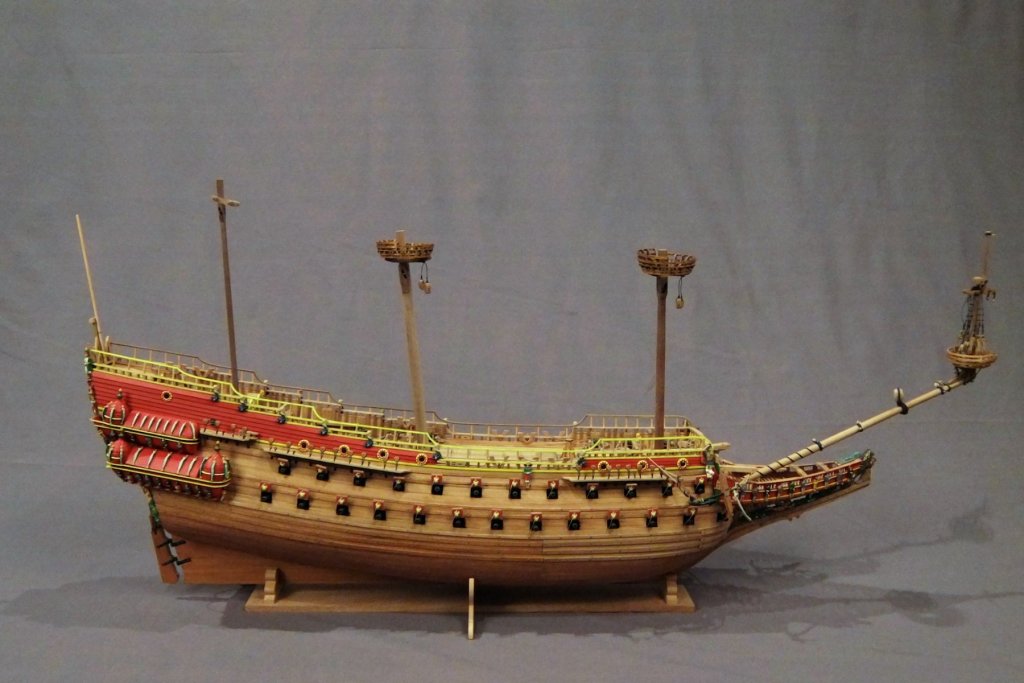
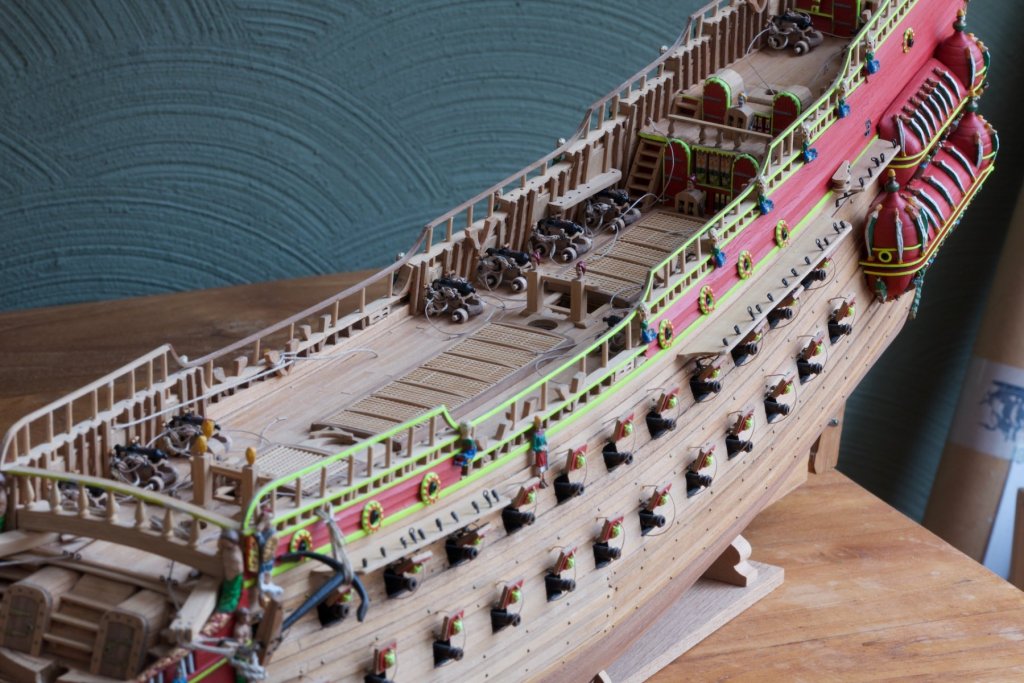
During a meeting (Lelystad, The Netherlands) of model makers of historic wooden ships: a photo opportunity with good lighting. The current state of my model. The masts are not fixed yet, and the fore mast and mizzen mast are not in exactly correct angle...
-
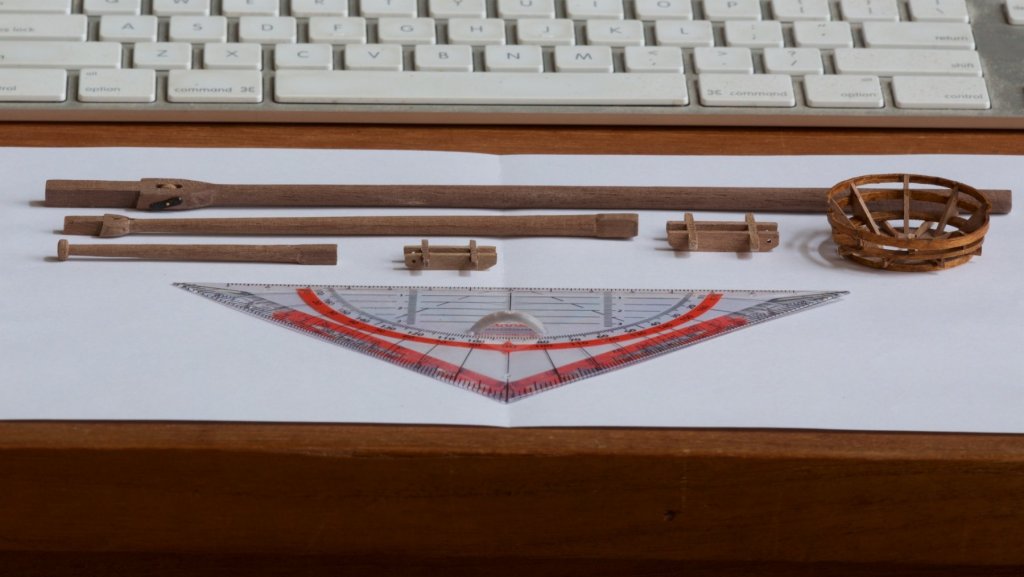
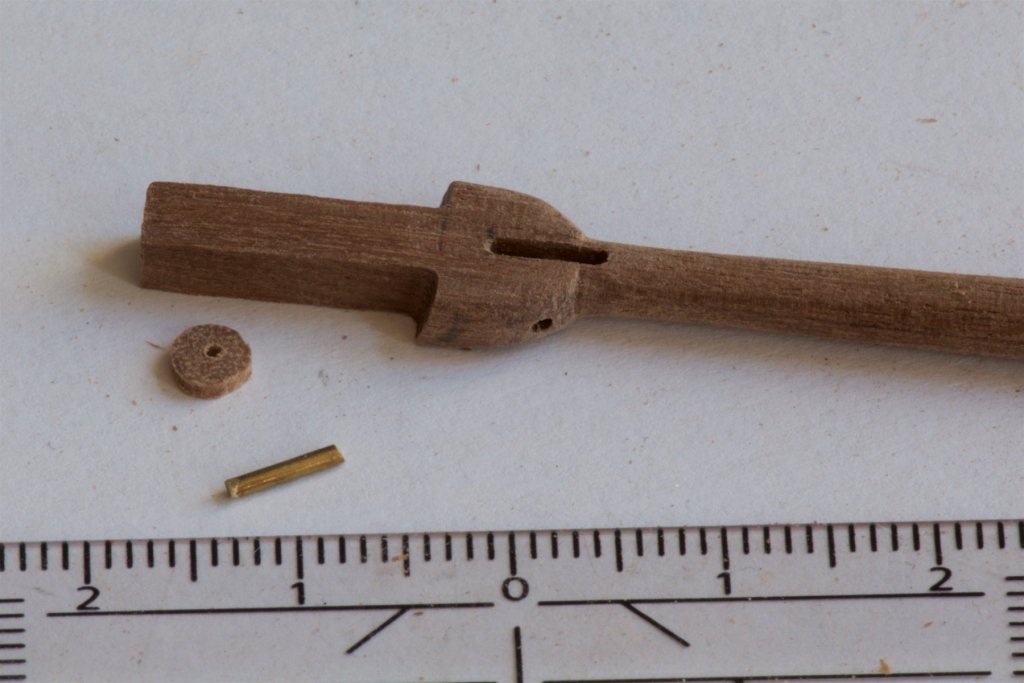
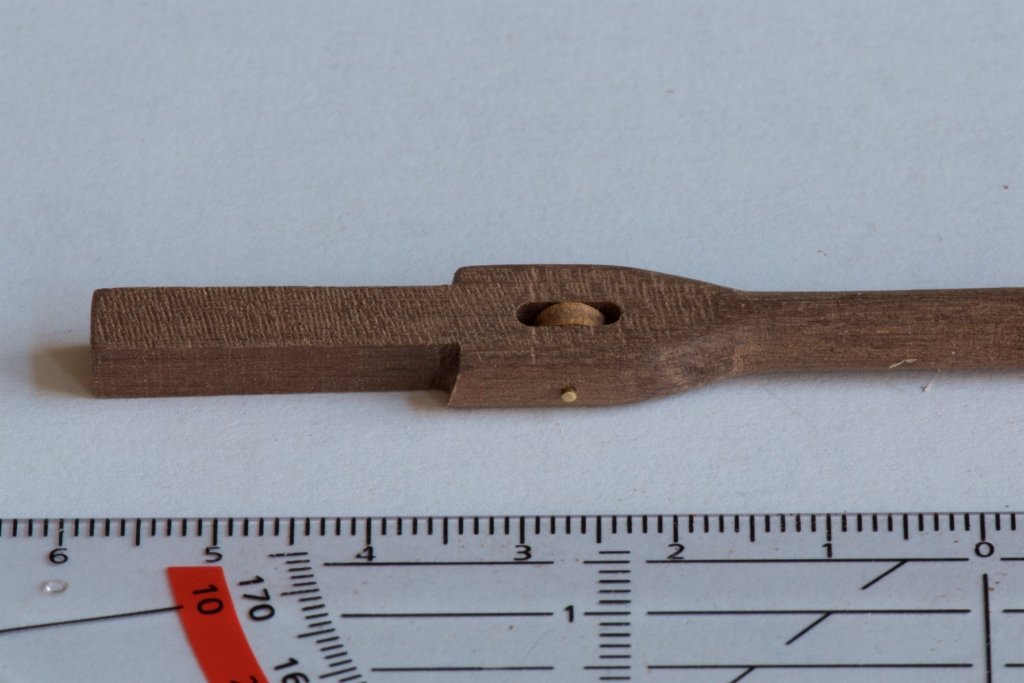
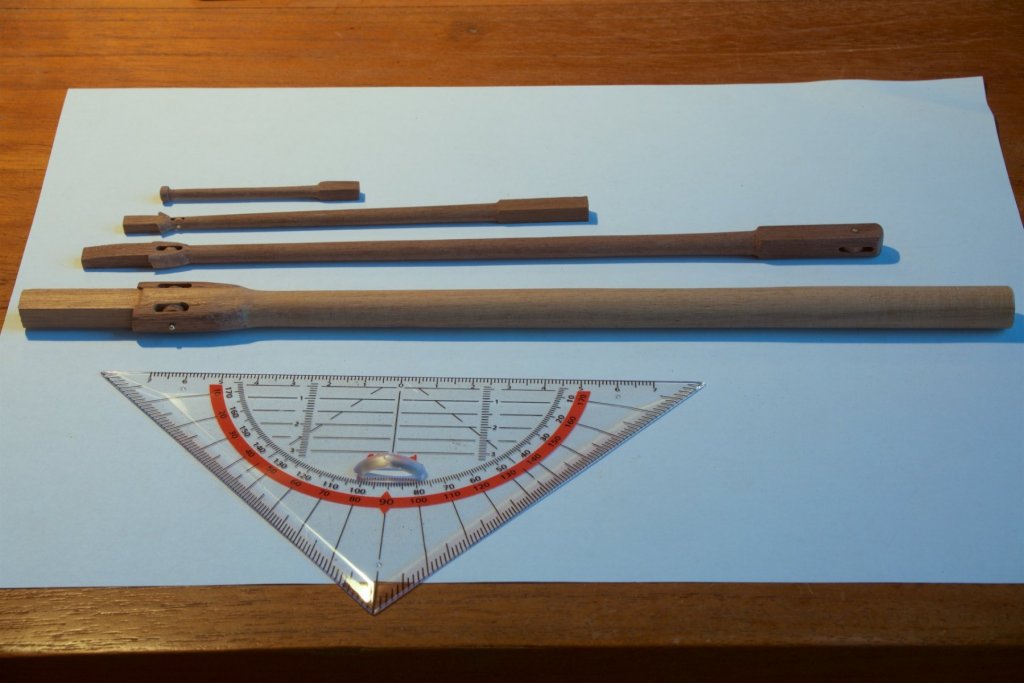
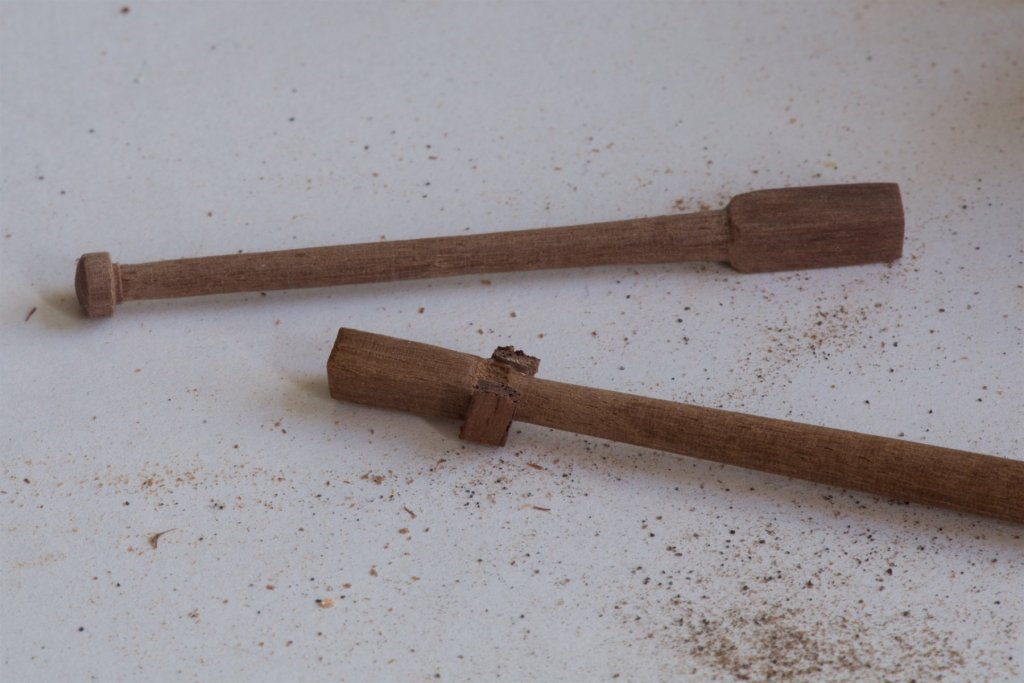
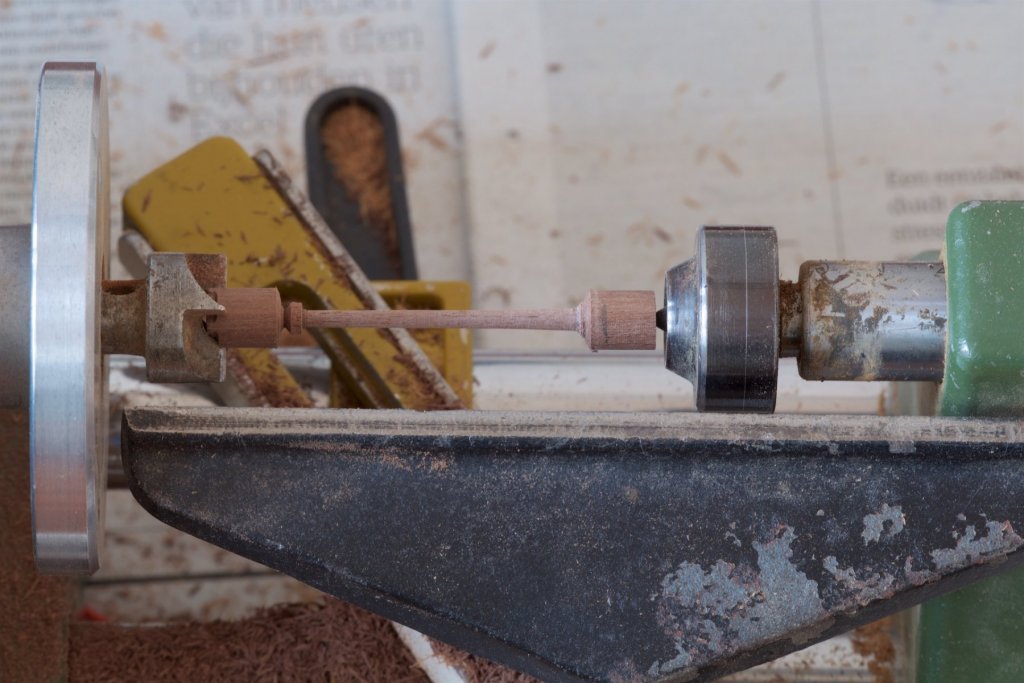
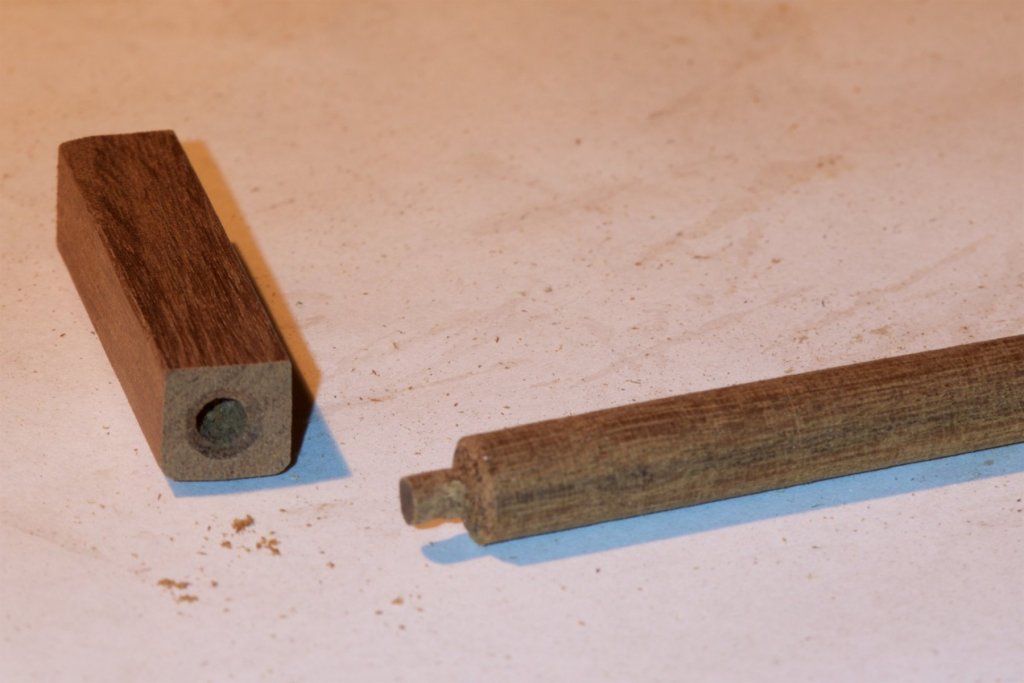
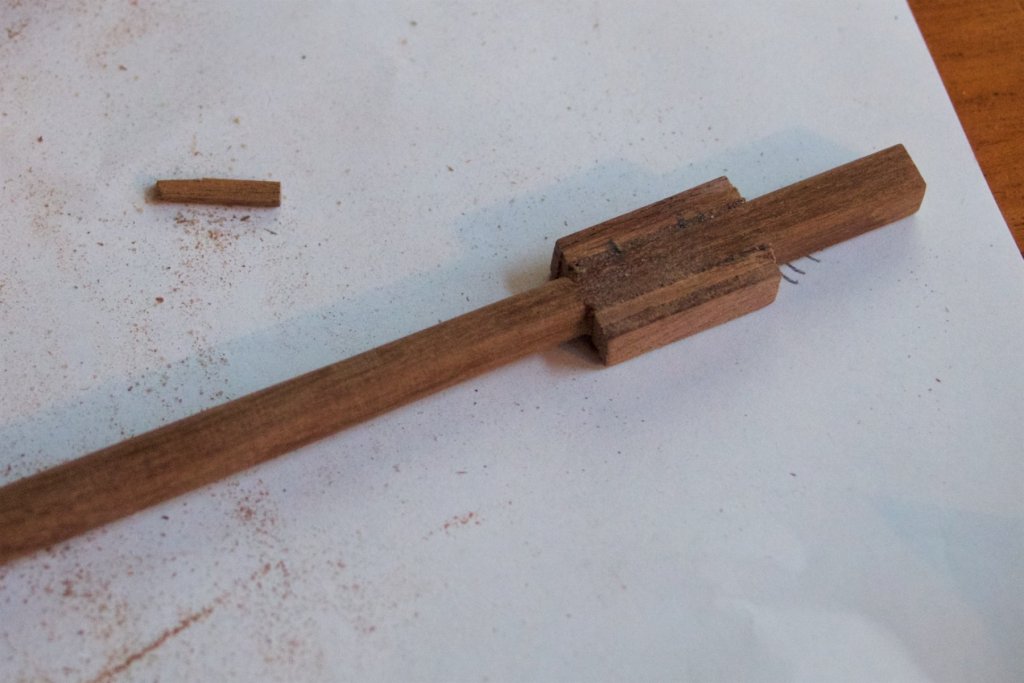
Continued with the bizzen mast. Because the diameter of the mast parts of the bizzen mast are smaller, I figured that I could use the lathe to make them from thicker wood and then leave out the part where the mast has a wider part: the parts where the platforms rest upon. This way the mast parts are one peice of wood. I am happy with the result.

-
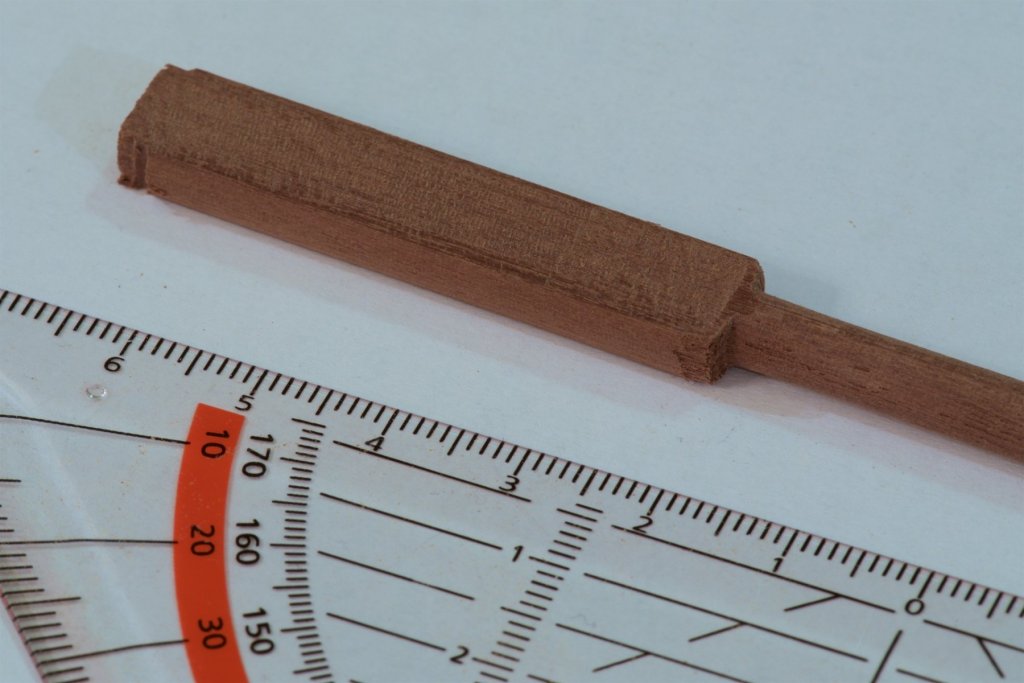
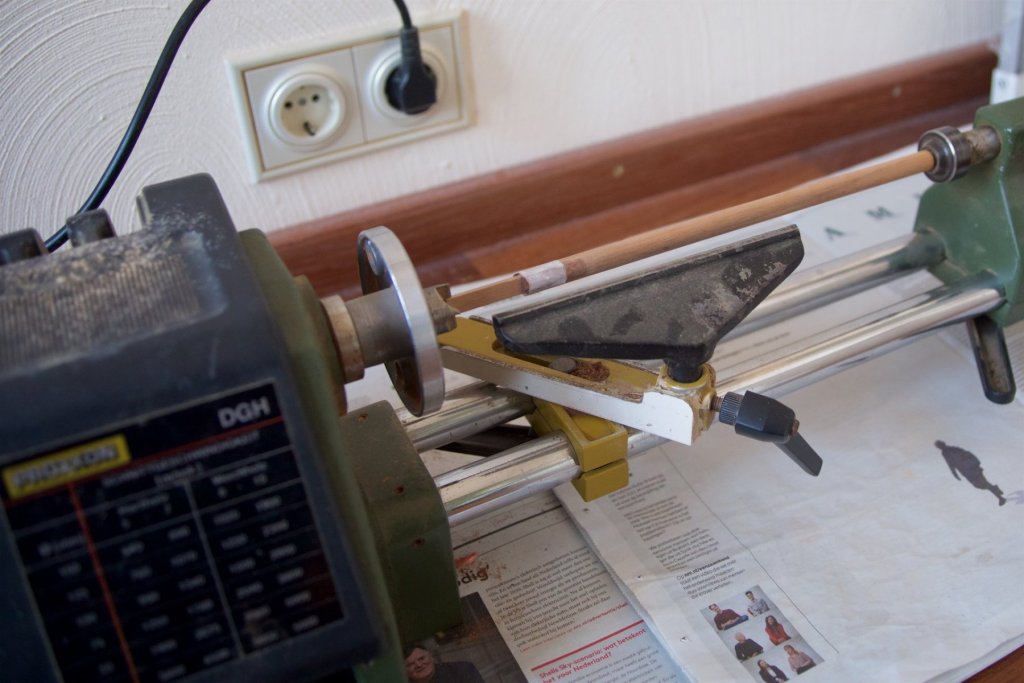
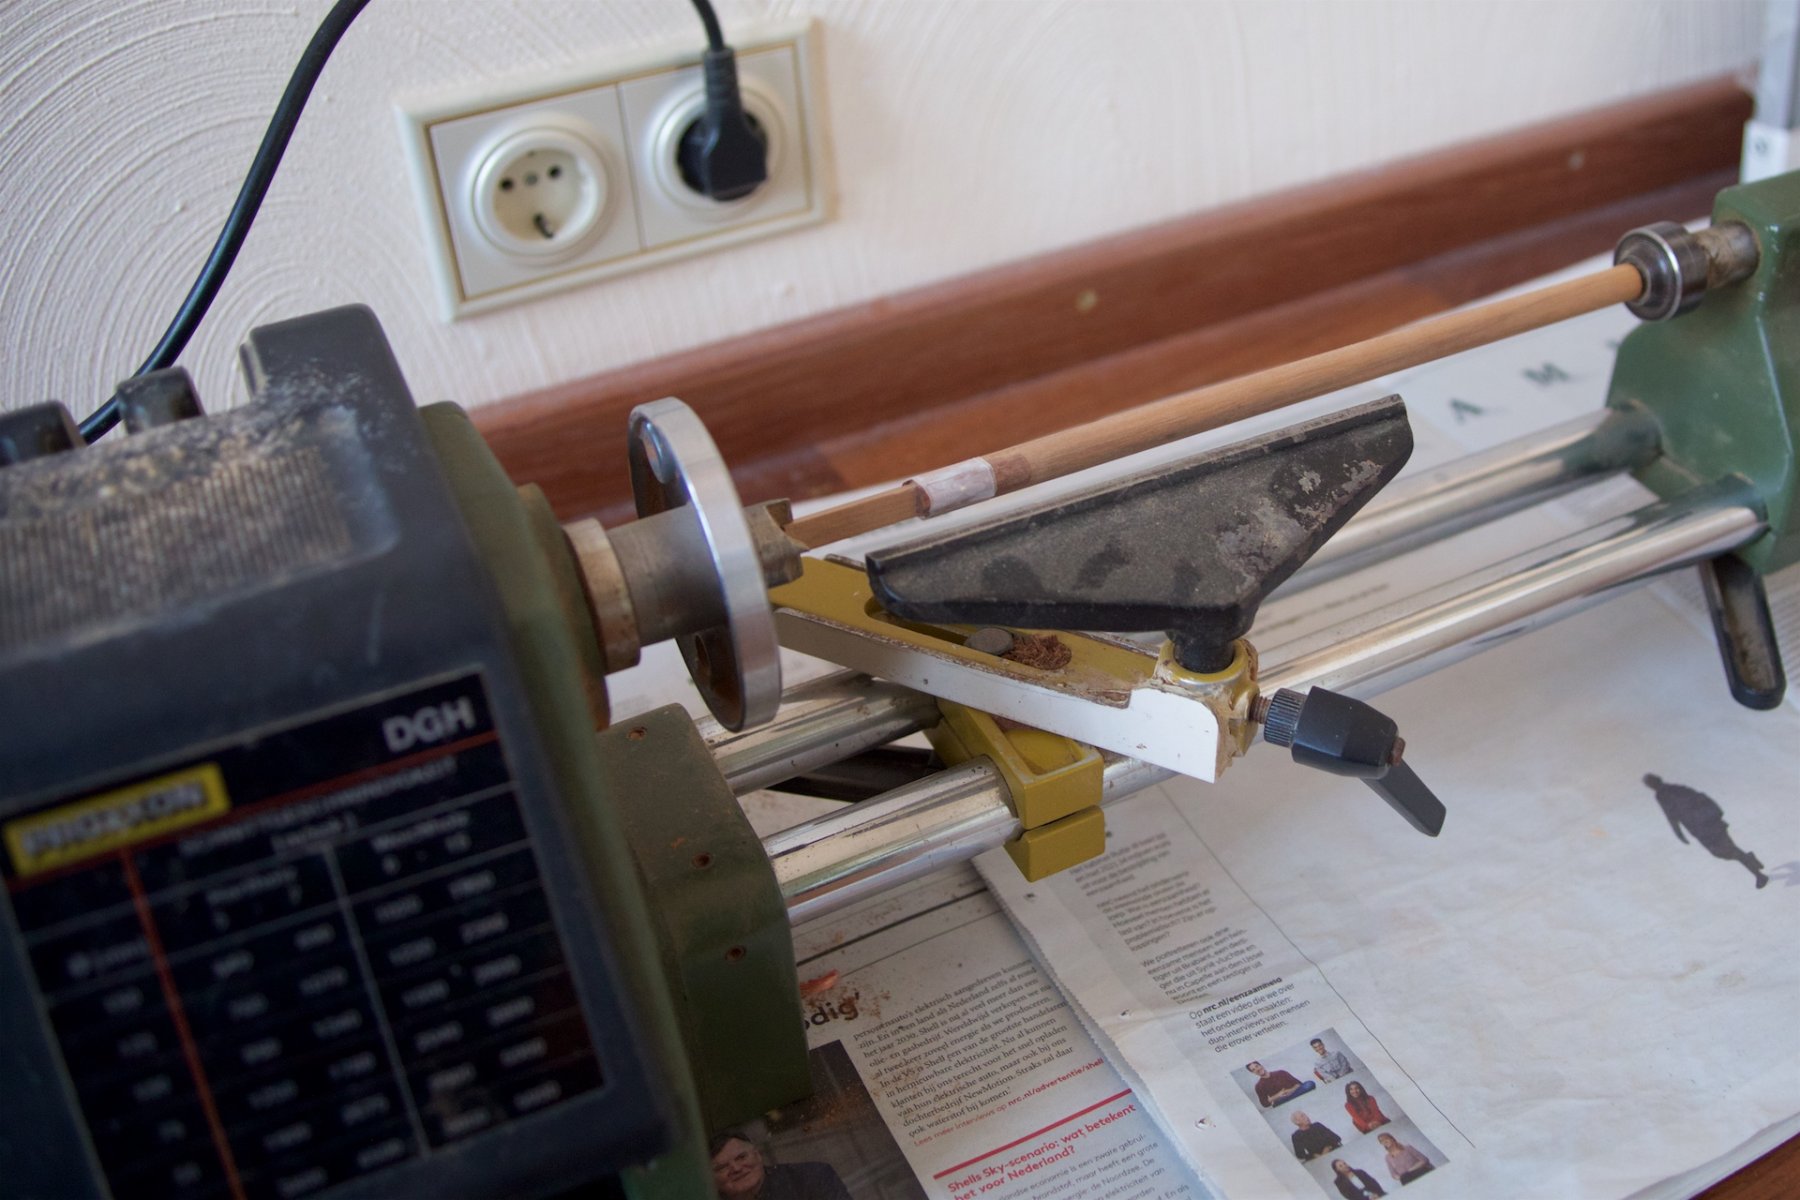
I made meanwhile the mast parts of the main mast. I used another lathe for the woodturning now. Mostly, because the lower section of the main mast is too large to fit into the mini-lathe. But having used the bigger one, I now prefer this bigger one, because it is more stable. So, I also made the top section of the main mast using the big lathe, from wood that had diameter of 10 mm, whereas the diameter of the finished part is only 5 mm at its widest (the top). As the main mast is at an angle of about 7%-8%, I made the supporting sections also at a same (counter) angle, so that the platforms will be approximately straight in level.
-
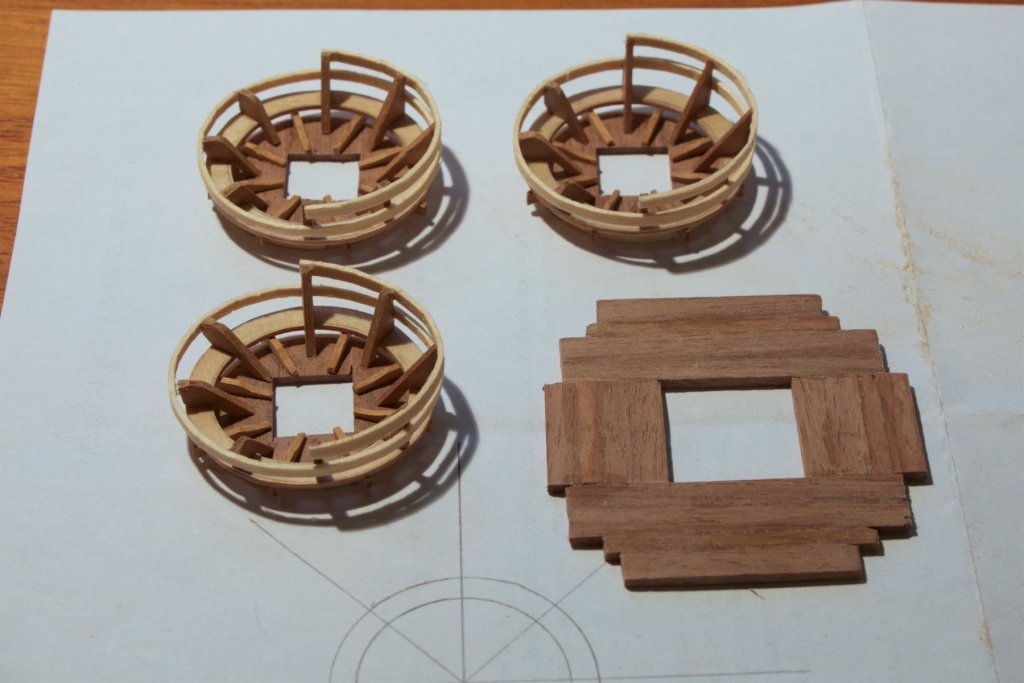
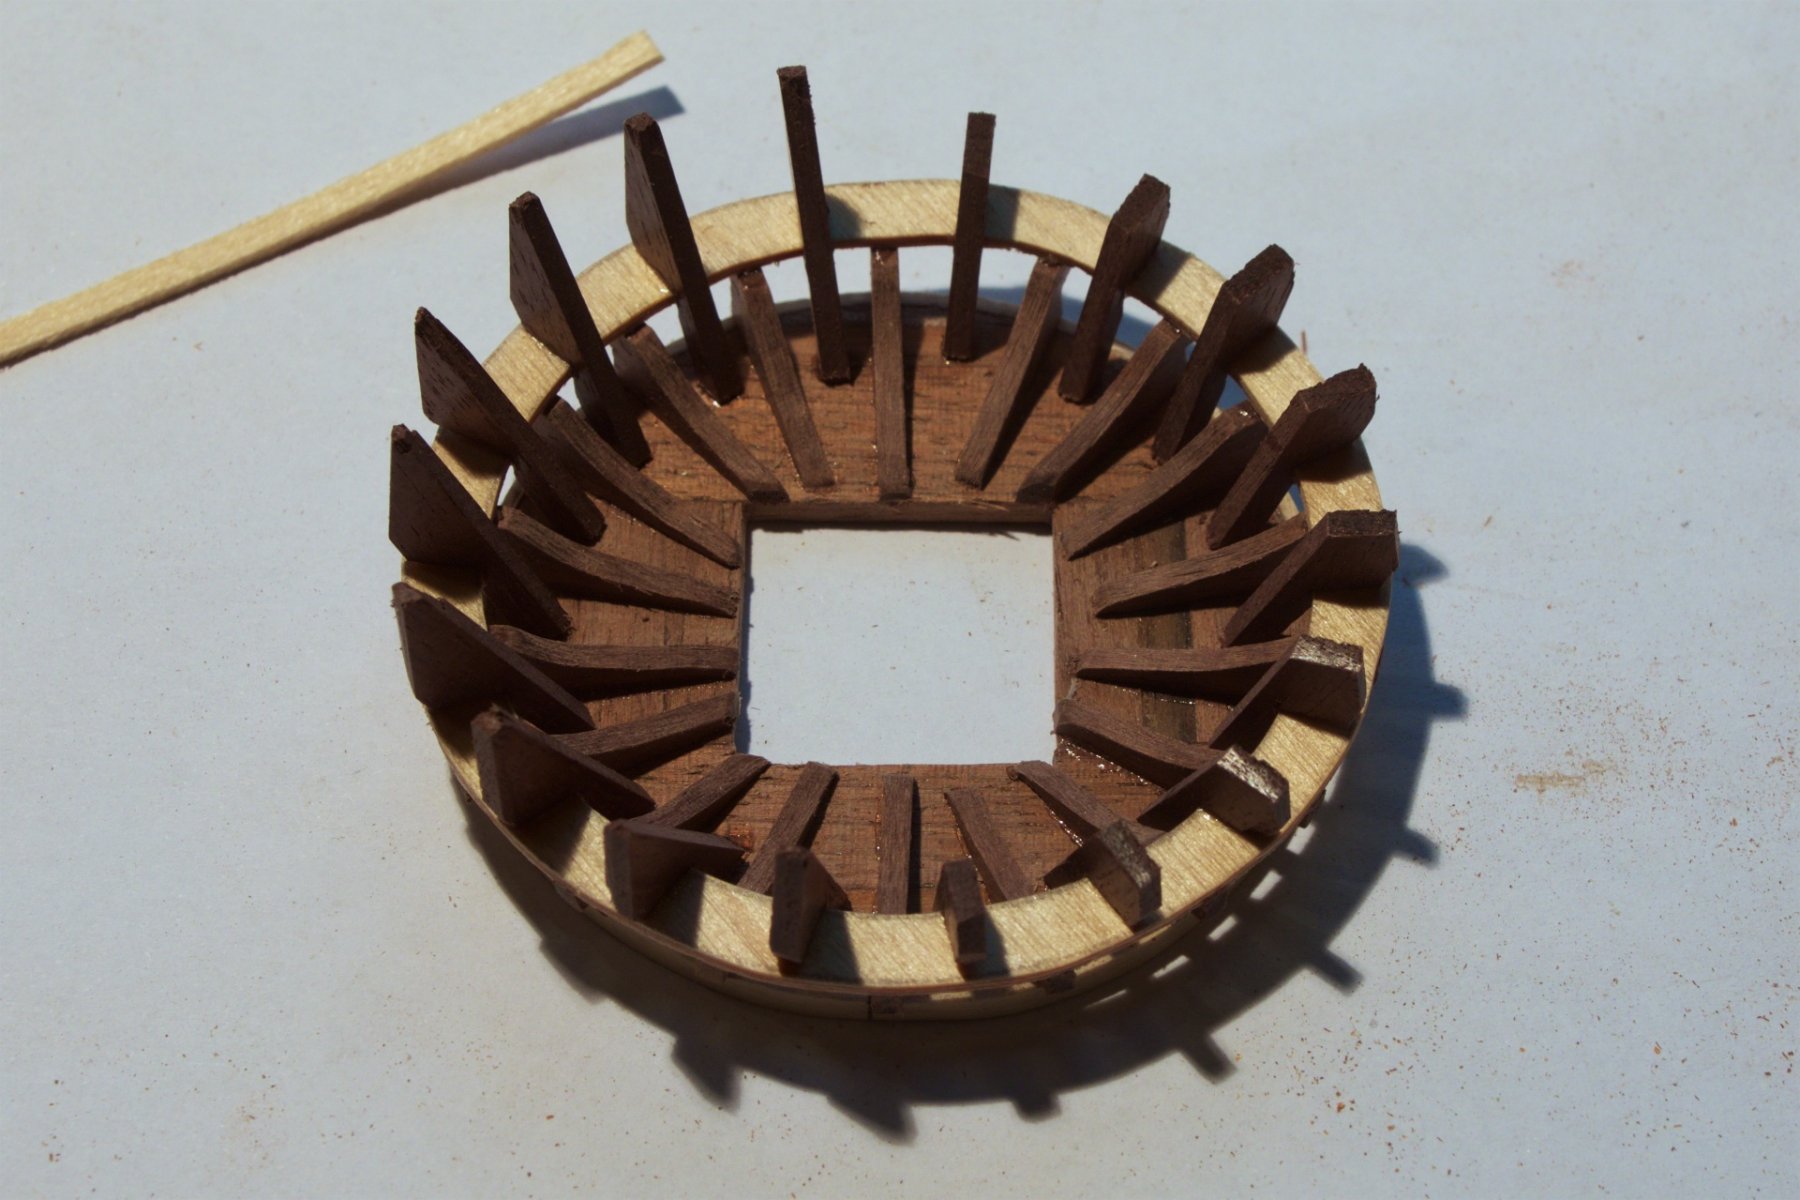
Meanwhile also made the second large platform (on right side in photo). After making this one, I noticed that I have made it slightly different from the first platform (on left side): the spacing between the bended wooden around the outside is now 2 mm instead of 3 mm. I actually like the 2 mm better.. I will leave them like this. The wooden 'discs' and the bended wood were very white in color, so I applied wood stain on them to make these parts darker. It was with 'dark oak' wood stain'. There remains some color difference with thr note wood other parts, but this is ok for me.

-
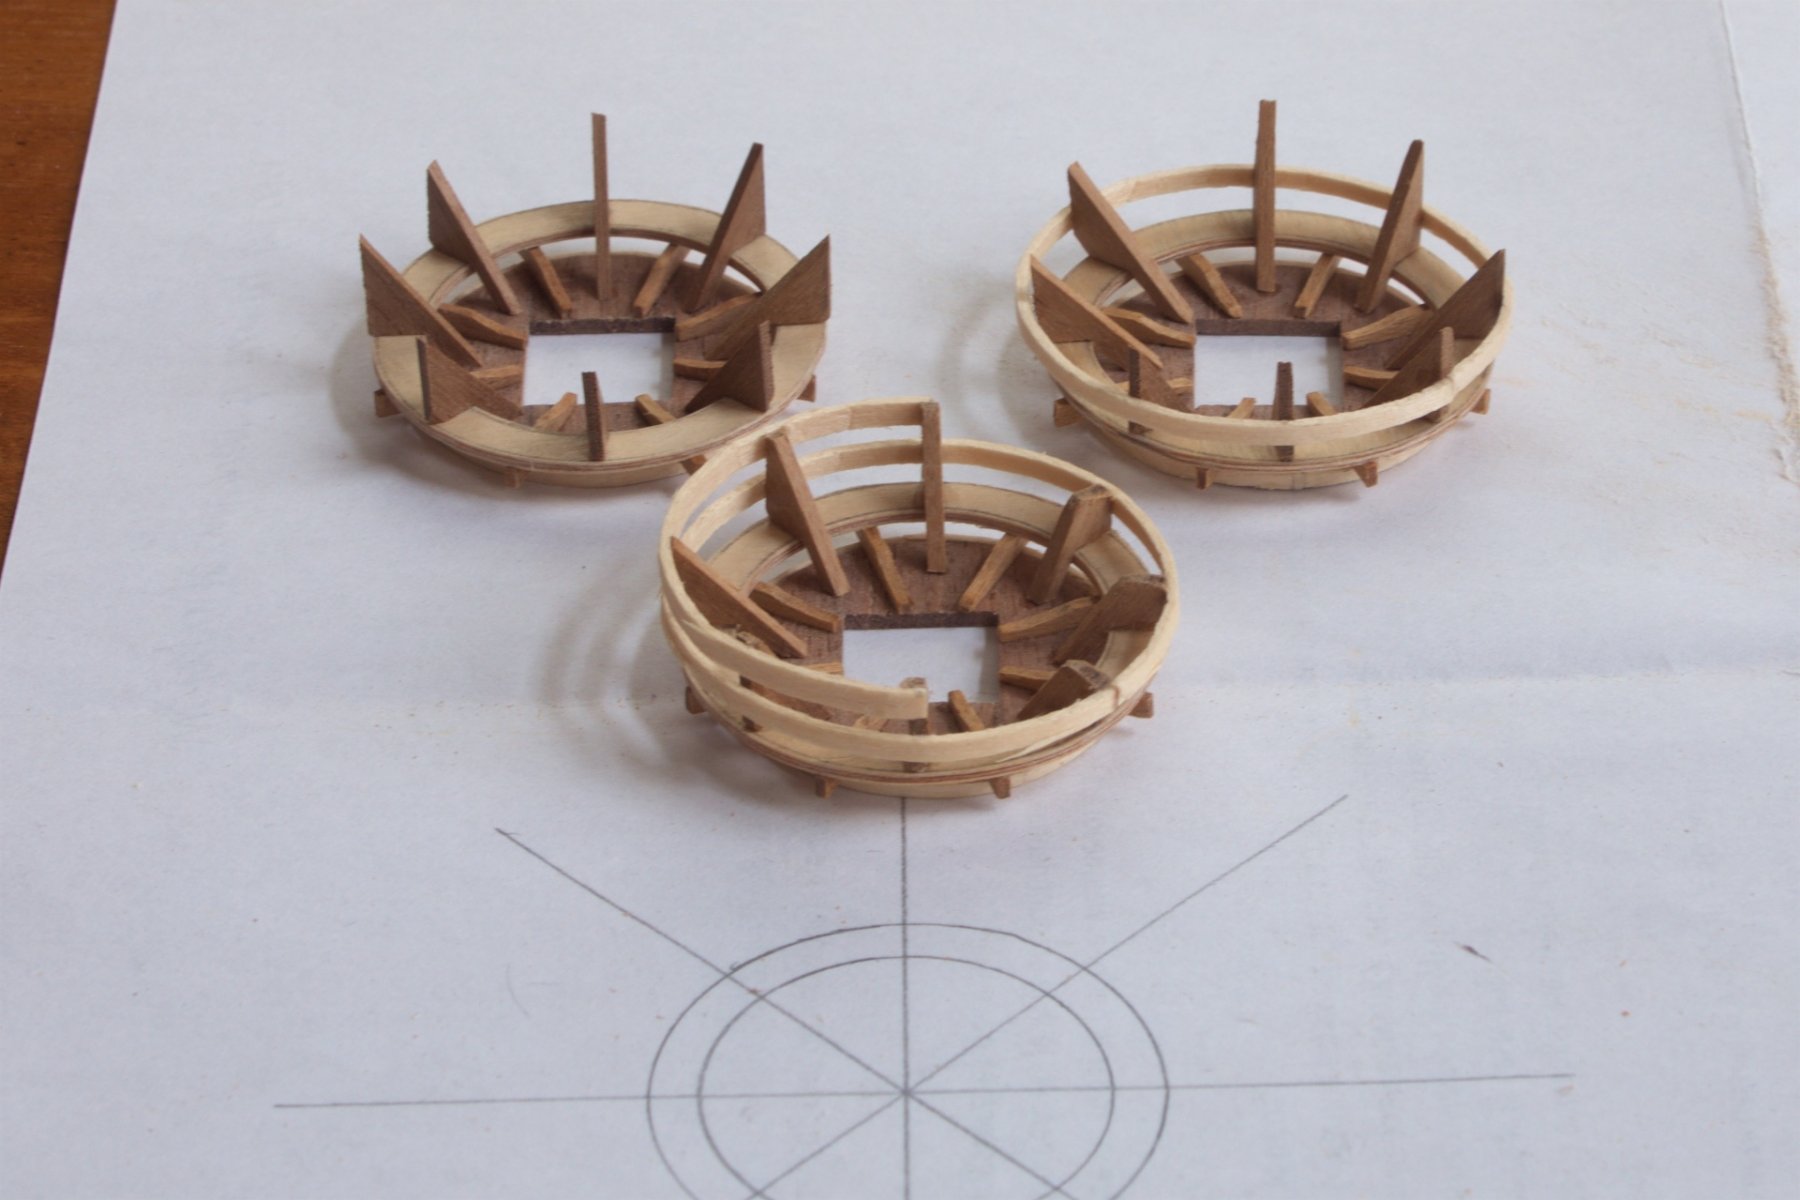
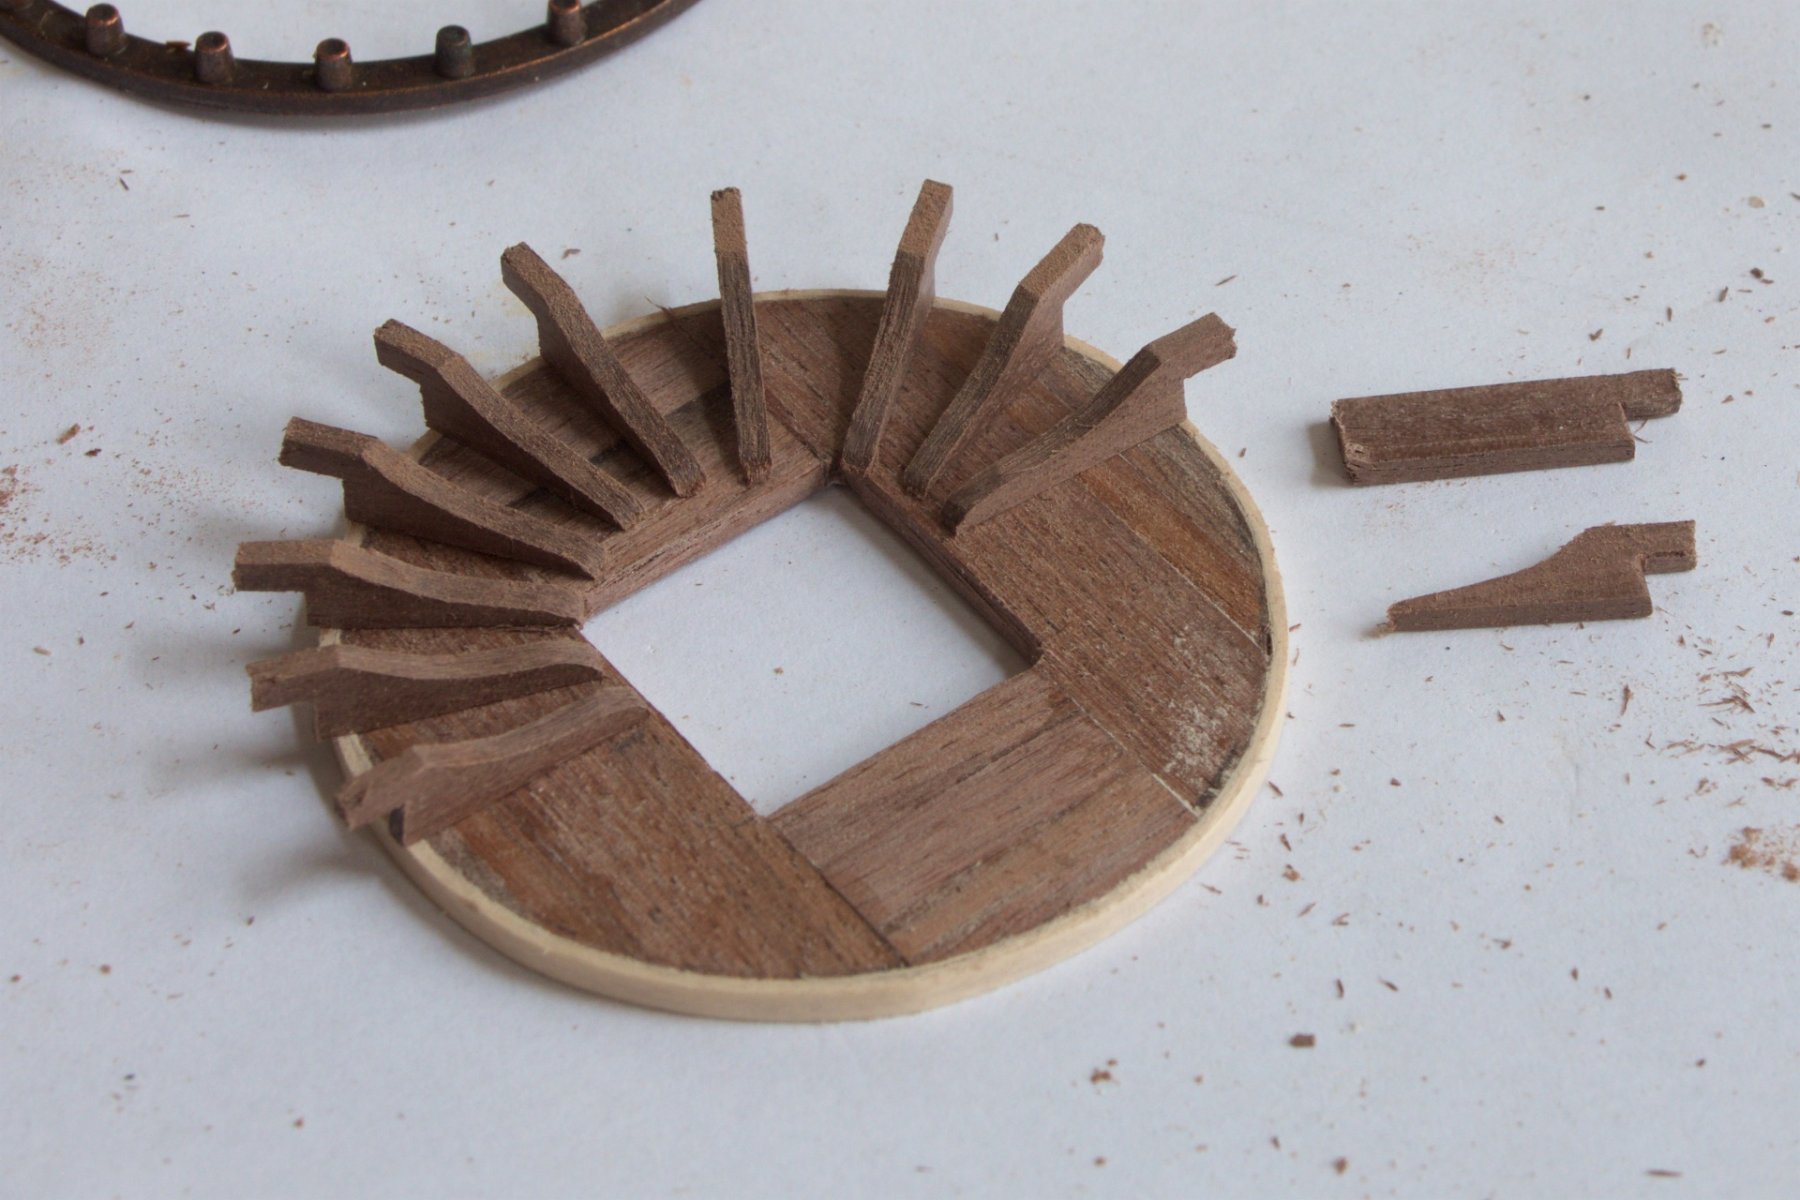
Made the three smaller platforms for all the three masts. I used the Corel metal ring as size guidance. I made these similar like the bigger platform of the fore mast, so slightly different from the platform that I had built earlier for the bowsprit. The difference is the wooden ring through which the deadeye attachments will go. Also now the opening in the center is bigger, as there will be many ropes need to go through these openings. Only one big platform to do: the one for the main mast.


-
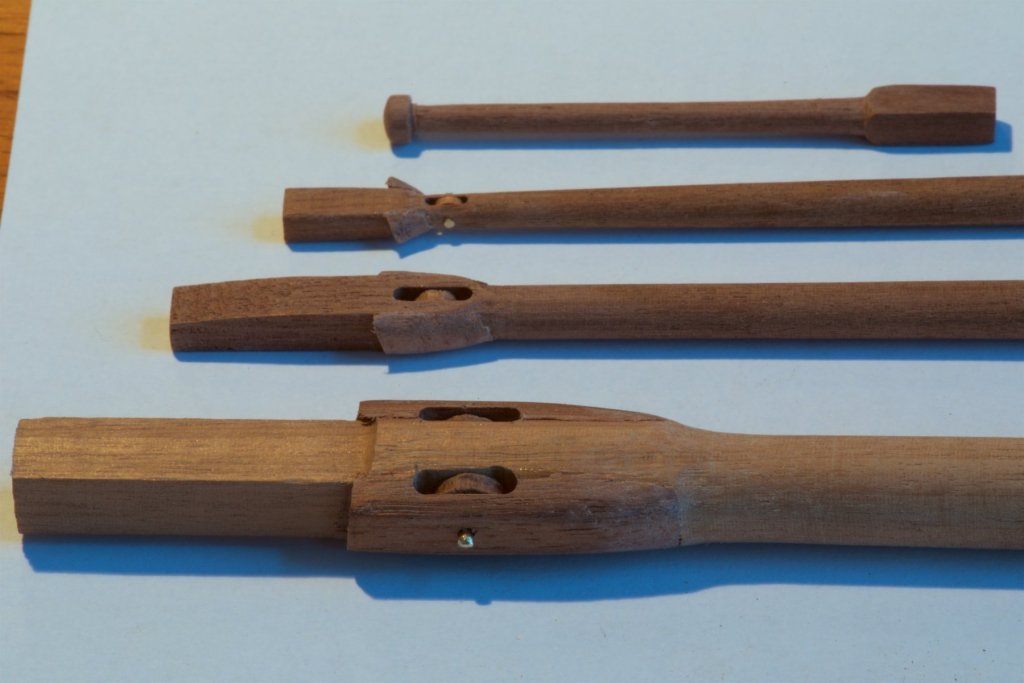
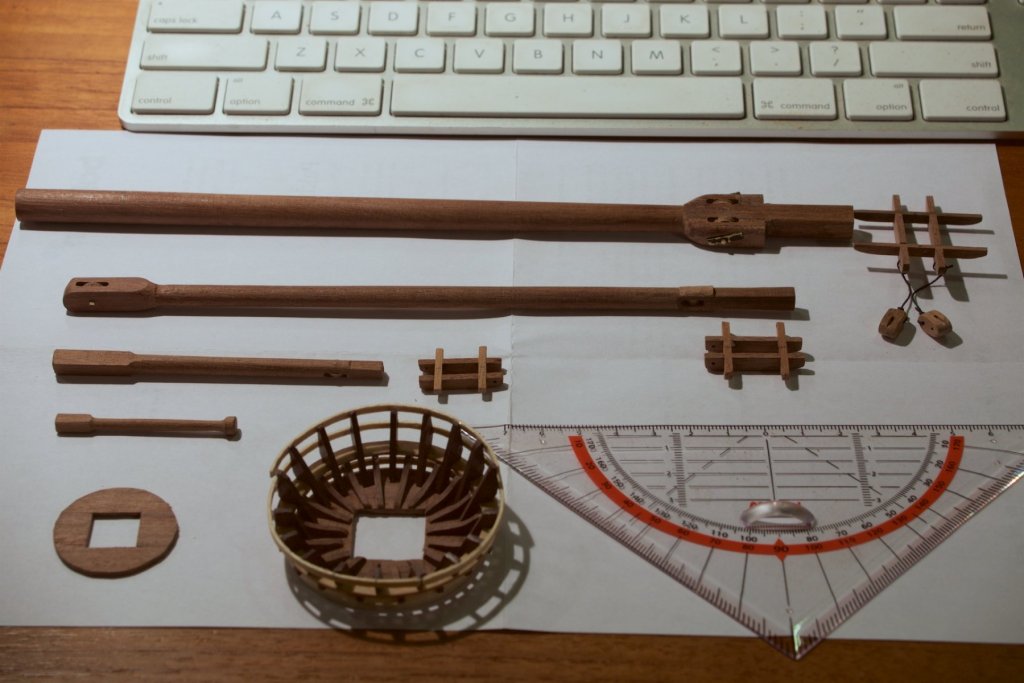
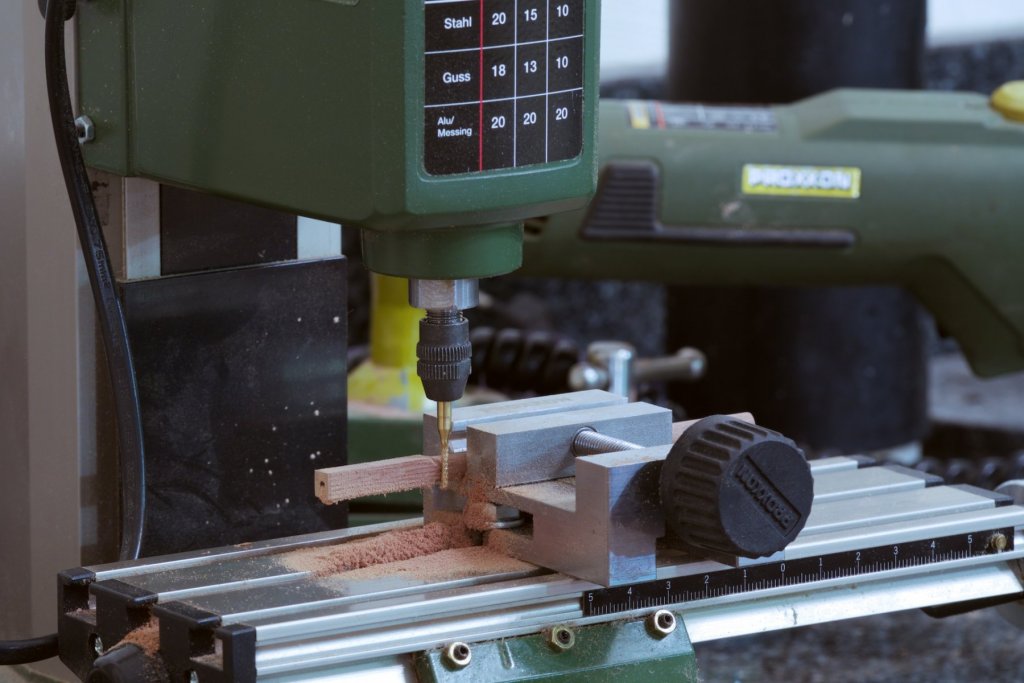
Continuing with the foremast. Made the other three components of the mast: topmast, topgallant mast and the flag mast on top. The topmast has such a big diameter at the bottom, that I made it from two parts. Very happy now with my milling machine. Ideal to make the square parts at the top and bottom of each part.
-
Hi Frank, Thank you for your compliments! I have the Proxxon lathe already some time. I had bought is used, and as a result it is probably not complete with all accesories. At first uses, I had difficulty to have the wood fixed thightly in place, but that was with very thin wood (I think that this was with the flagpole at the stern of Wasa). So, at first I thought that it was too light/weak, but now working with somewhat larger diameters and stronger wood, it works well. At present, I have only one chisel, but I have ordered more. It took me some trying to figure out how to use the combination, but it works well enough for me now. I assume that with new/more chisels, it will be much easier for me. Andre
-
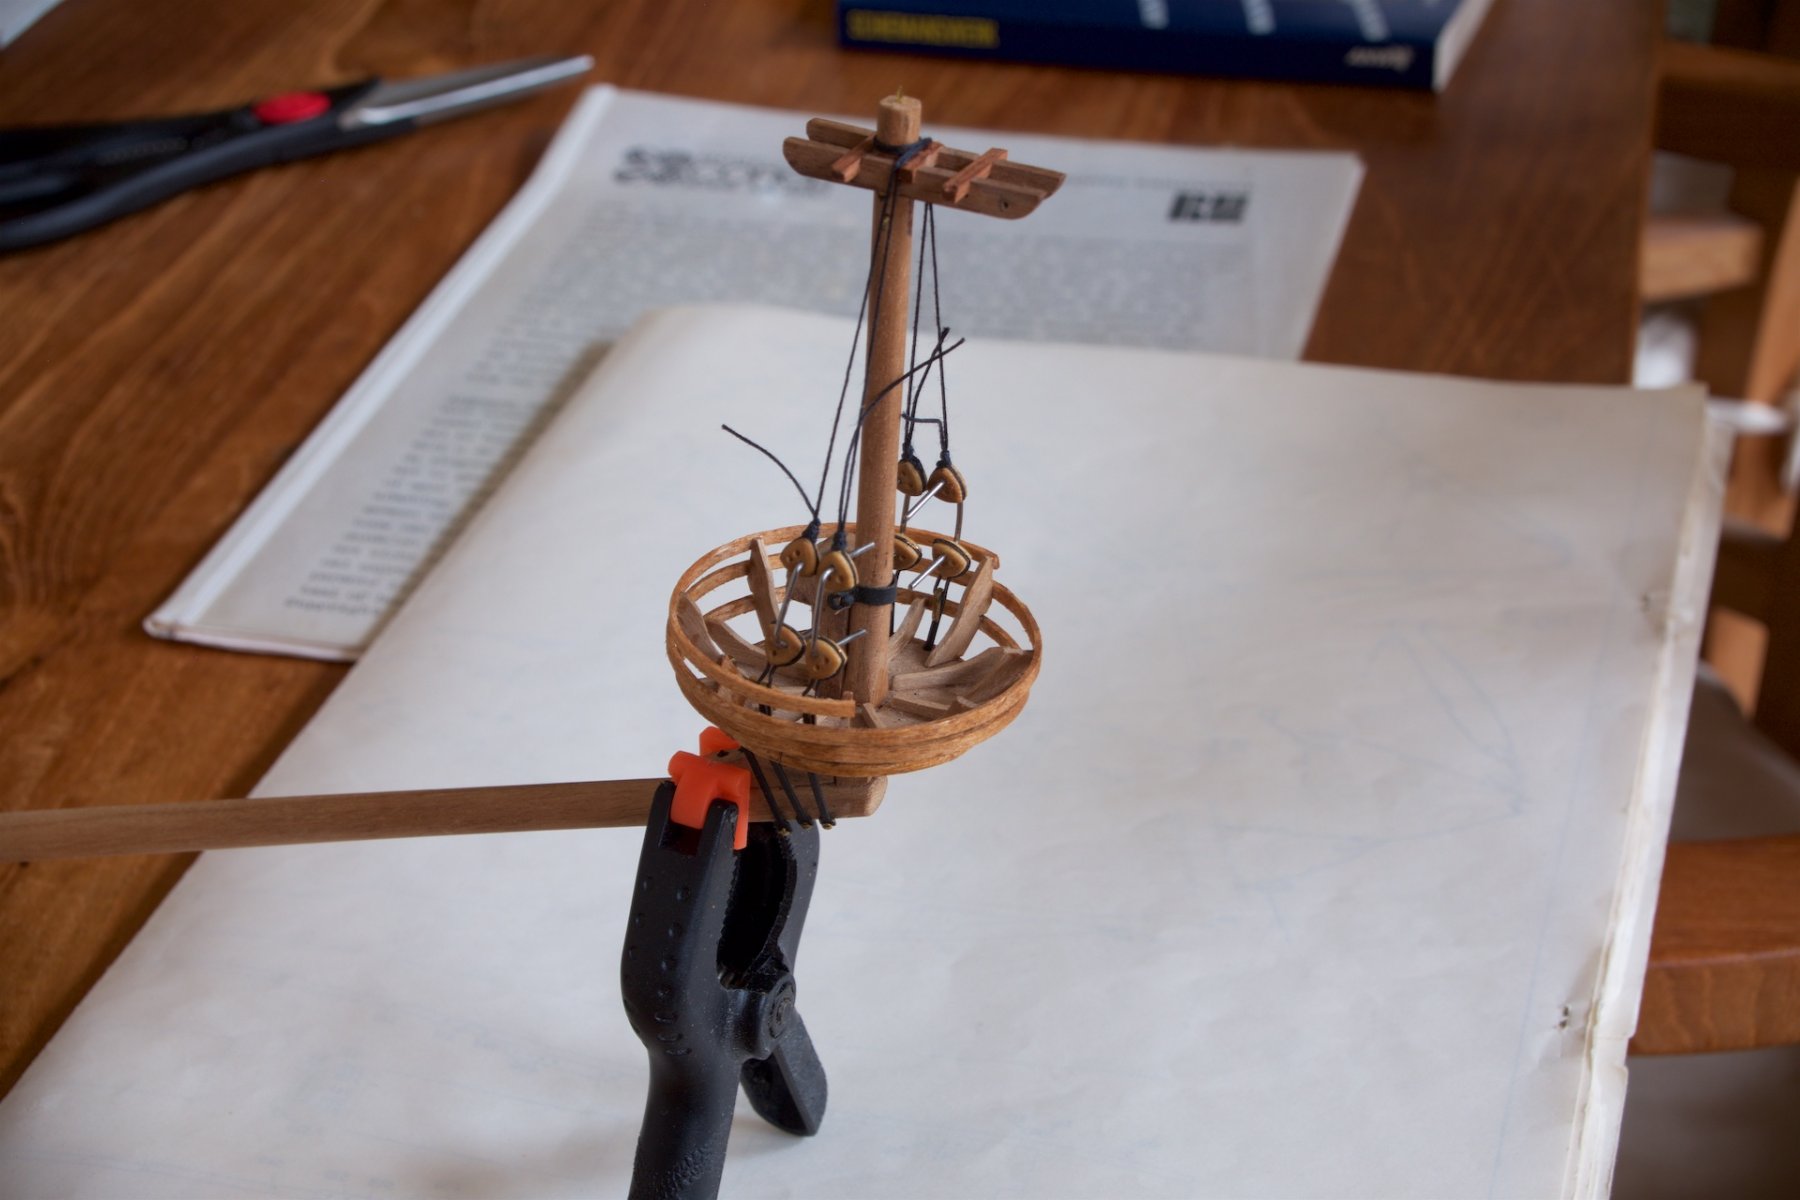
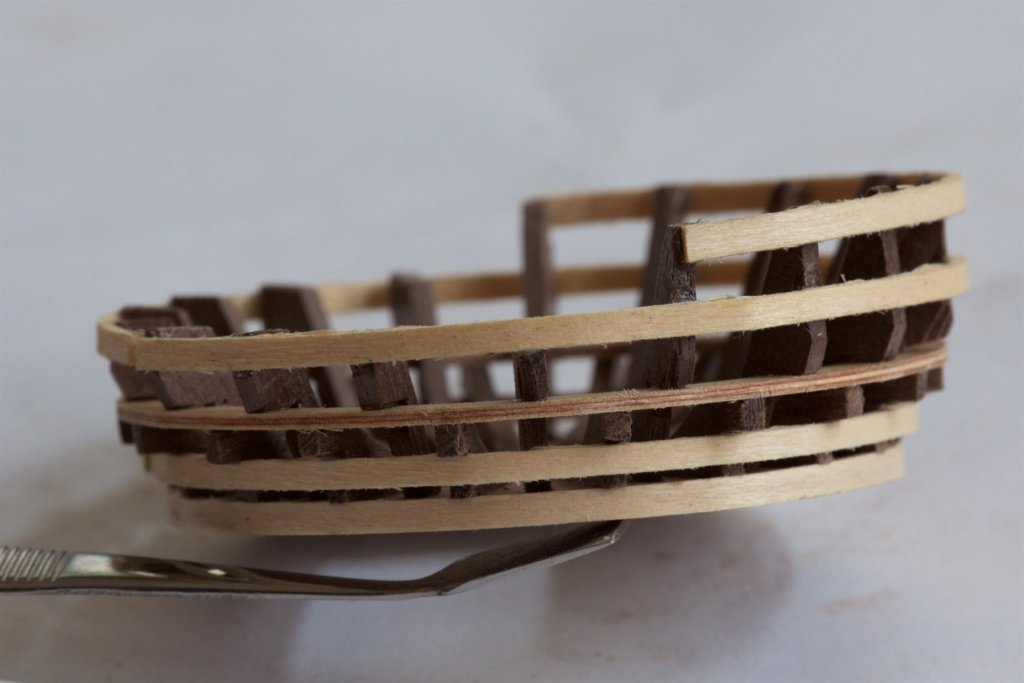
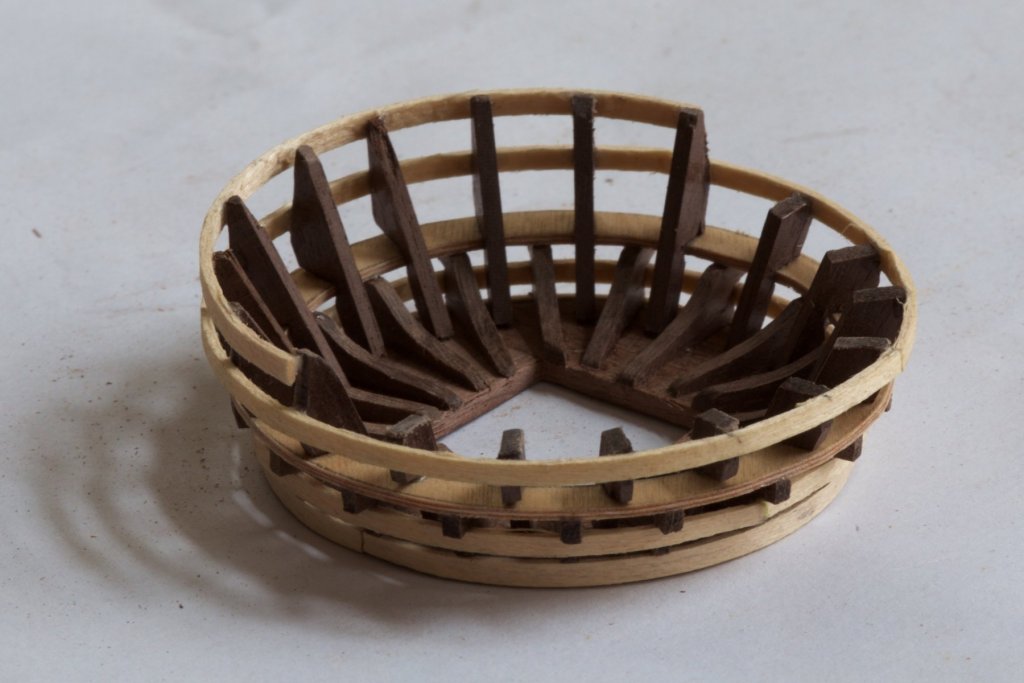
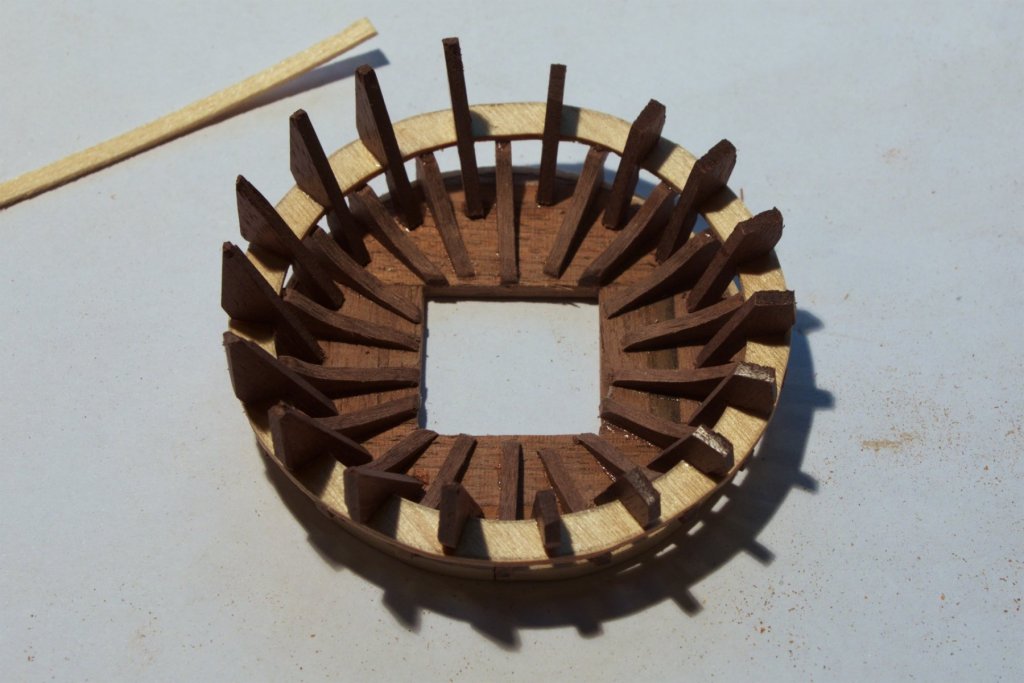
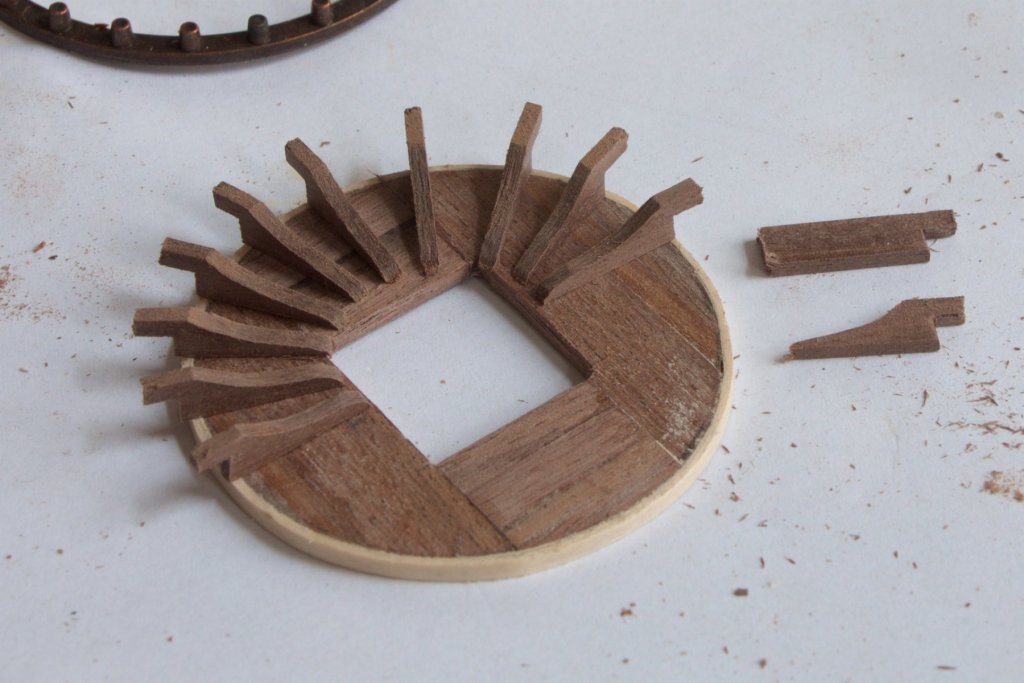
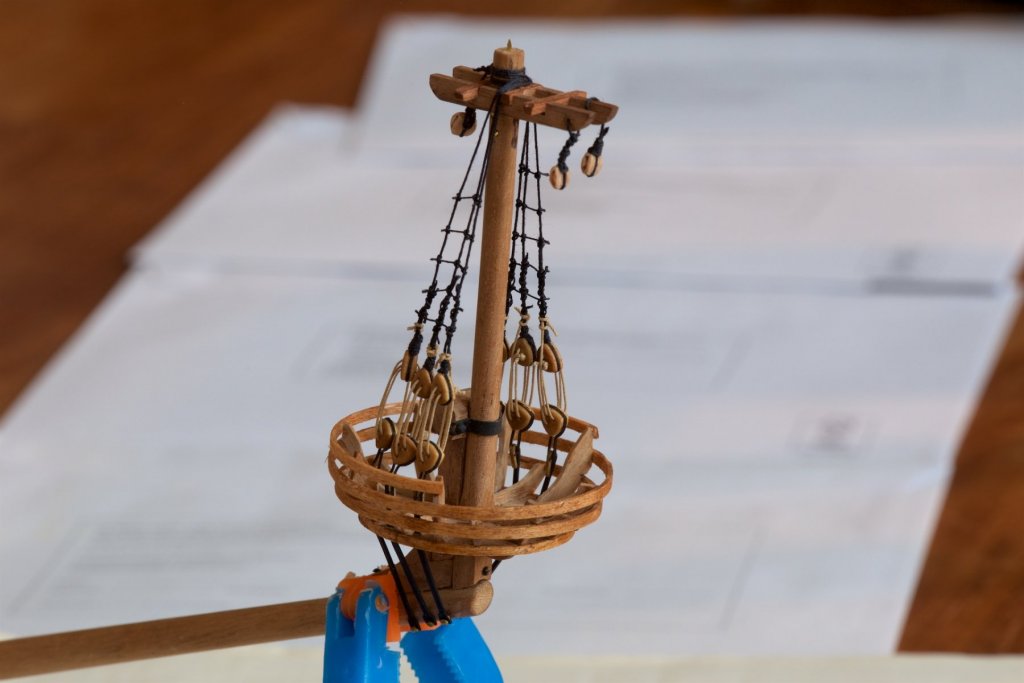
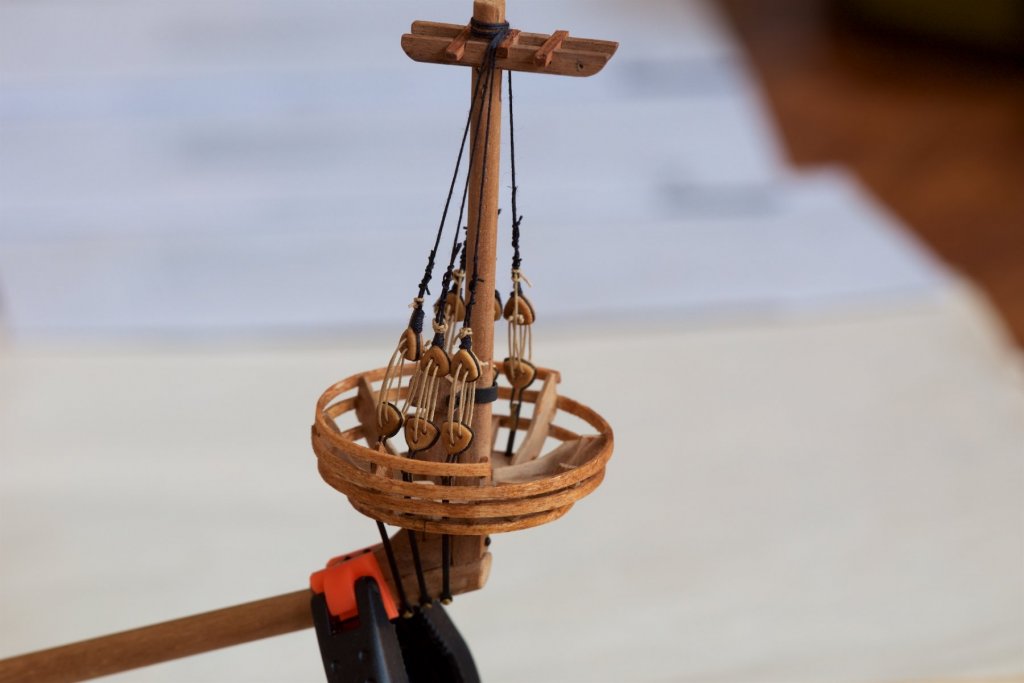
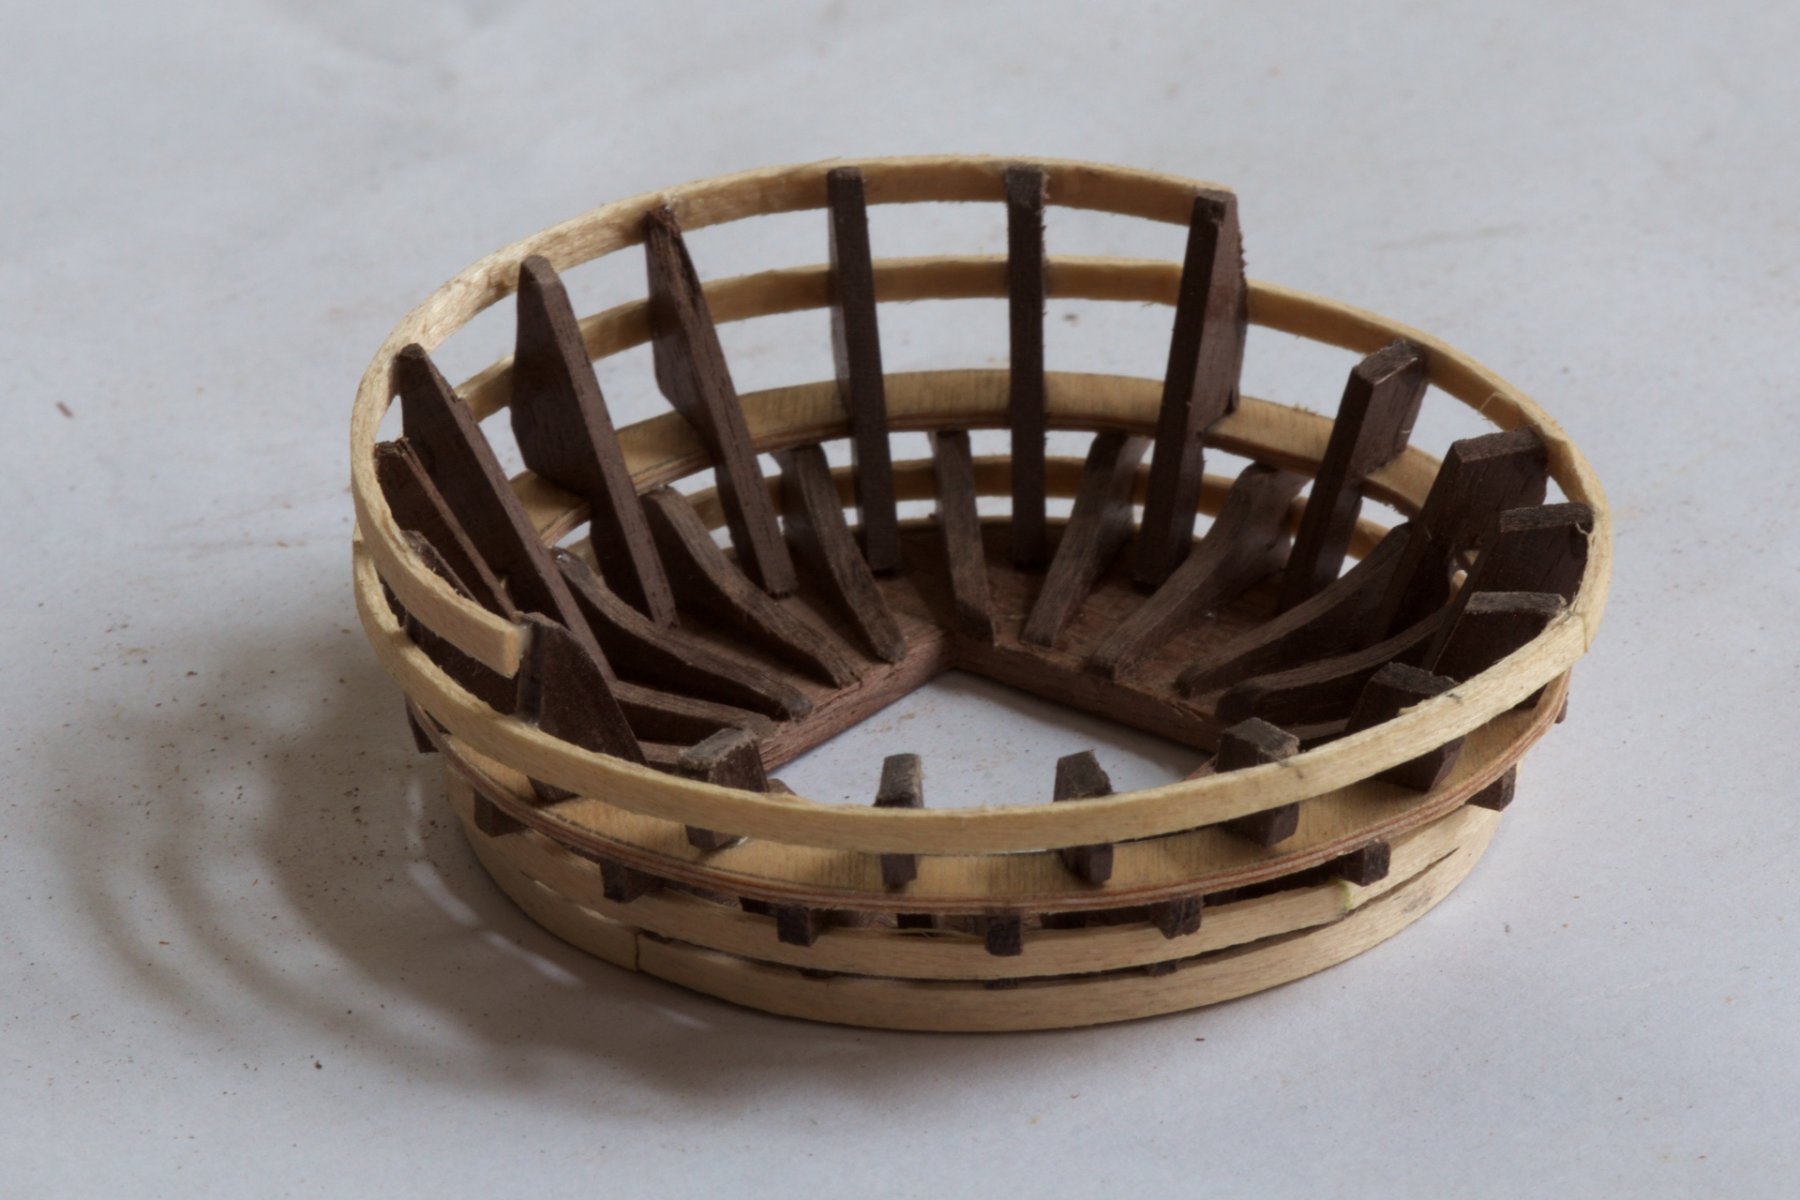
Made the first platform (crow's nest) for the fore mast. As always, looked carefully what others at MSW (mostly md1400c [Micheal]) have done and experienced. This in order to not run into the same hickups as others have found out. I used the Corel supplied metal ring as size reference for the bottom of the platform (fits in it), and the wooden ring (same size as the metal ring) through which later the deadeyes will go.
-
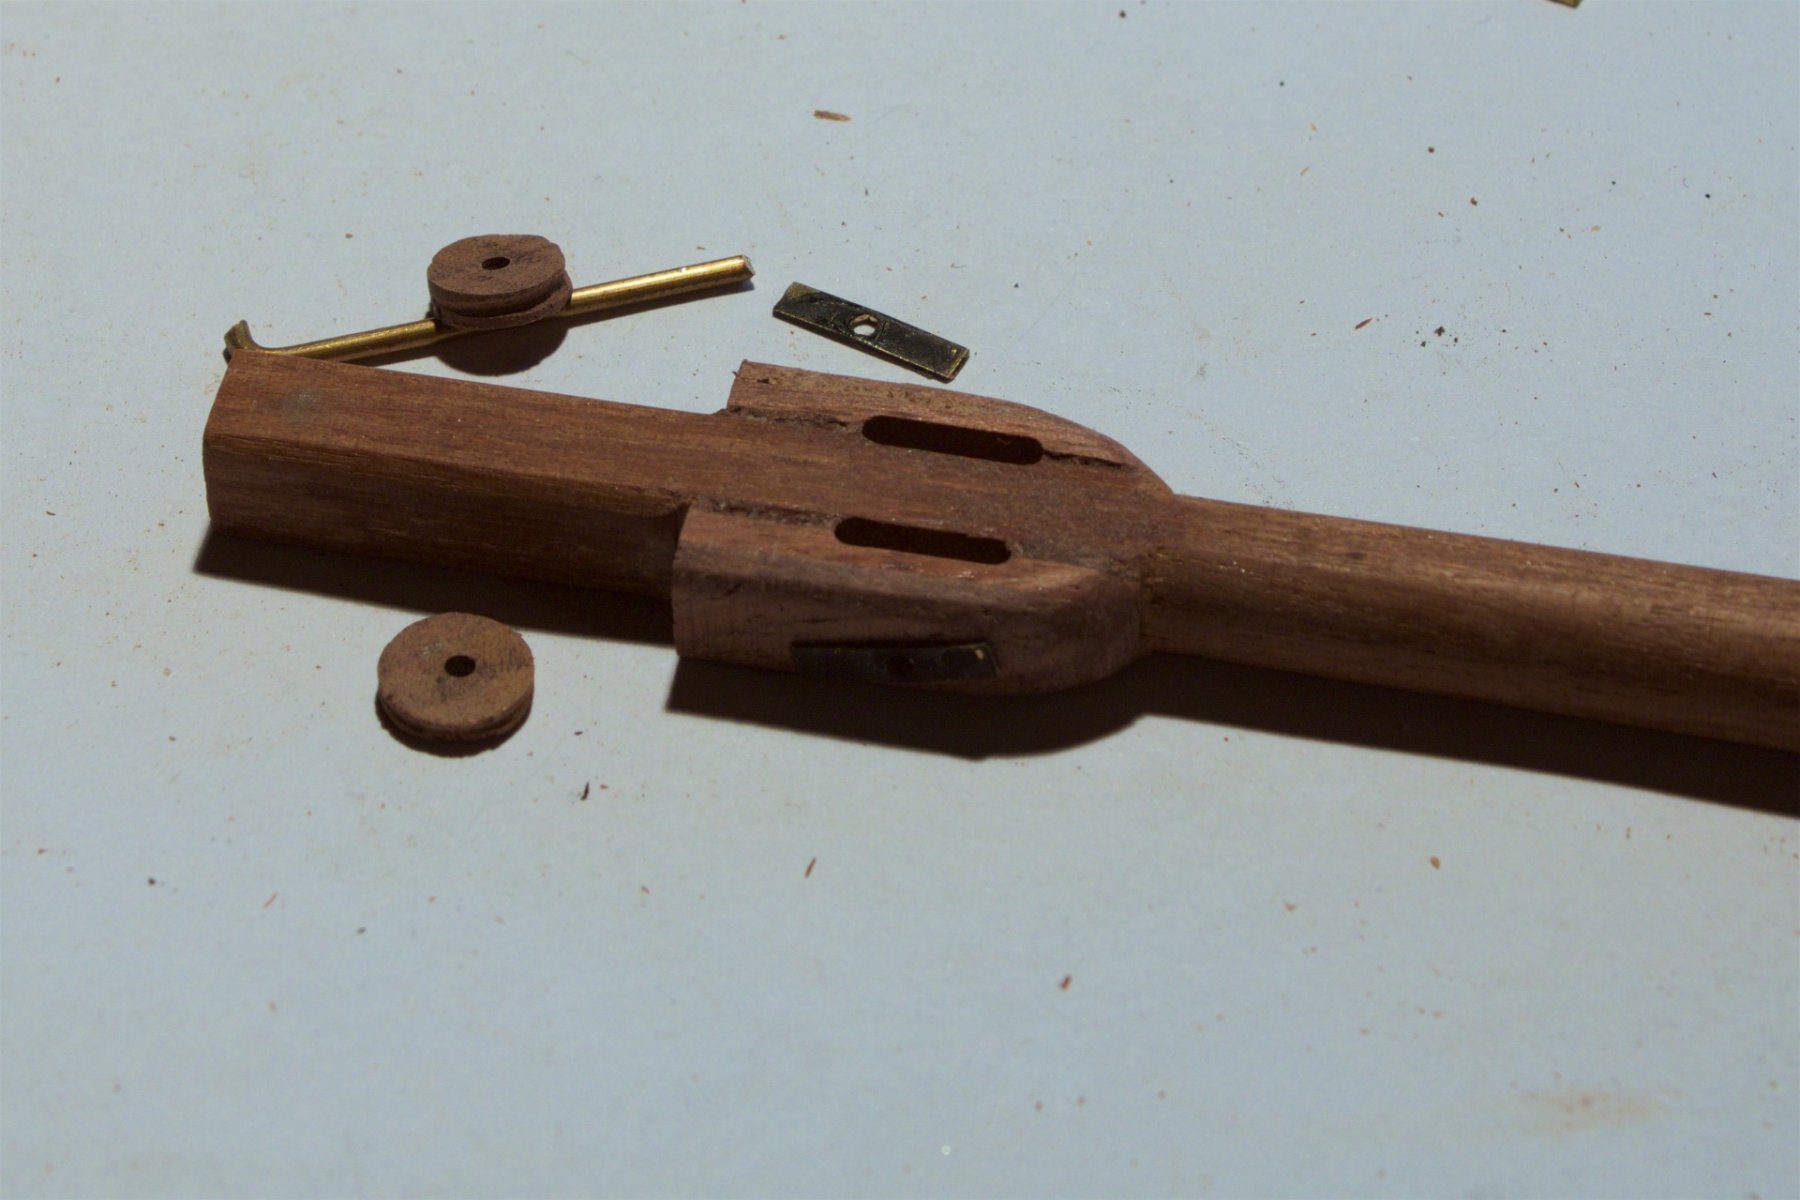
Now working on the fore mast. Made the lower mast part. Added the two pulleys at the top of the mast.

.thumb.jpg.1b0e2a3b3c79ca3bae3ab3513c6b2d3f.jpg)
-
My bowsprit is now more or less completed. Most of the blocks are now attached as well. I will follow rather the examples here than strictly the Corel plans, as the Corel plans apparently have only standing rigging. On the photo, I noticed that the knot, and rope from it, to attached the big block is rather big. Perhaps that I will cut the rope. But will do this only after fixing the positions of the blocks. Now only dry-fit of the bowsprit in the ship.
-
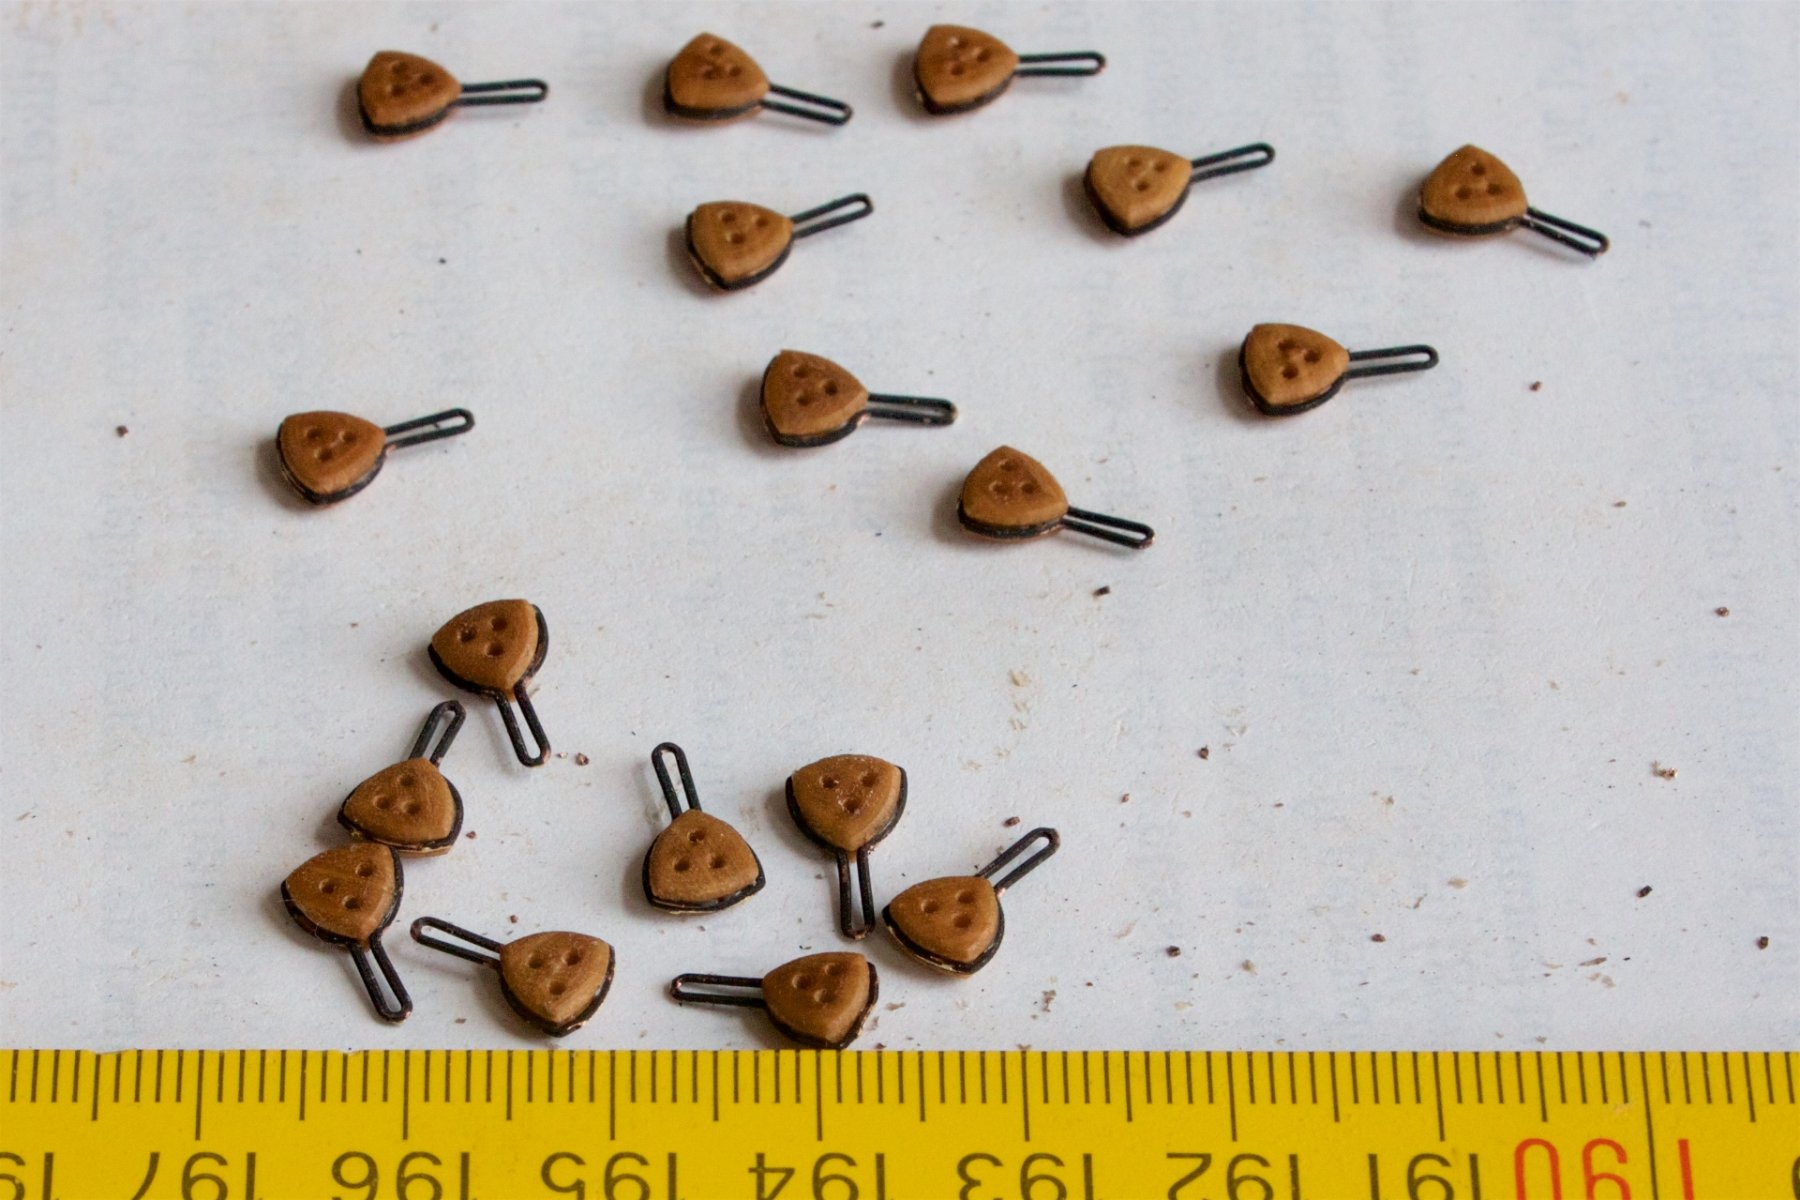
After again a long pause, I am now continuing with the bowsprit. To be able to have the knots good and strong on the deadeyes, I used the hangman's knot. I am not really sure if this is correct, but at least it fits well and is strong. I used triangular deadeyes, of same size (5 mm) as elsewhere. When comparing my crow's nest to the drawings, I noticed that I had made mine somewhat too large... But I am fine with it.

-
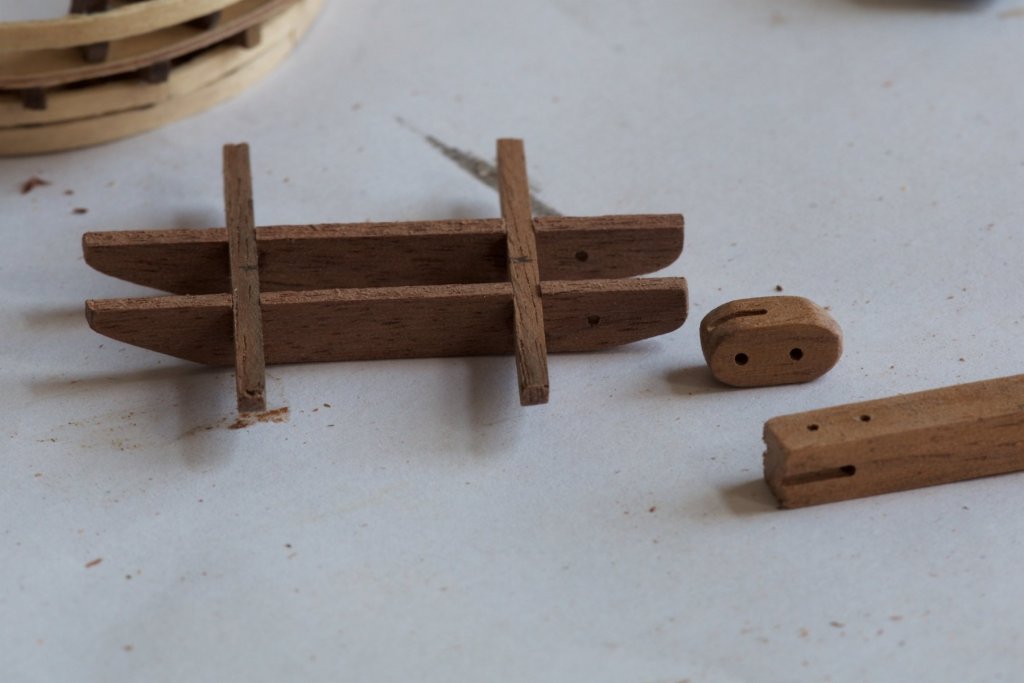
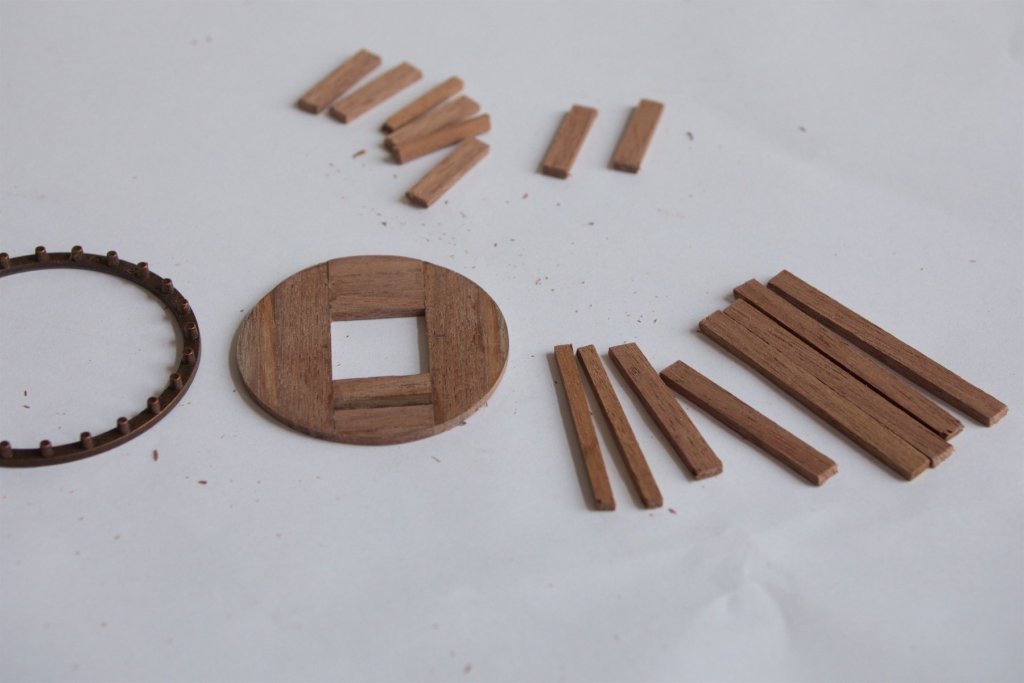
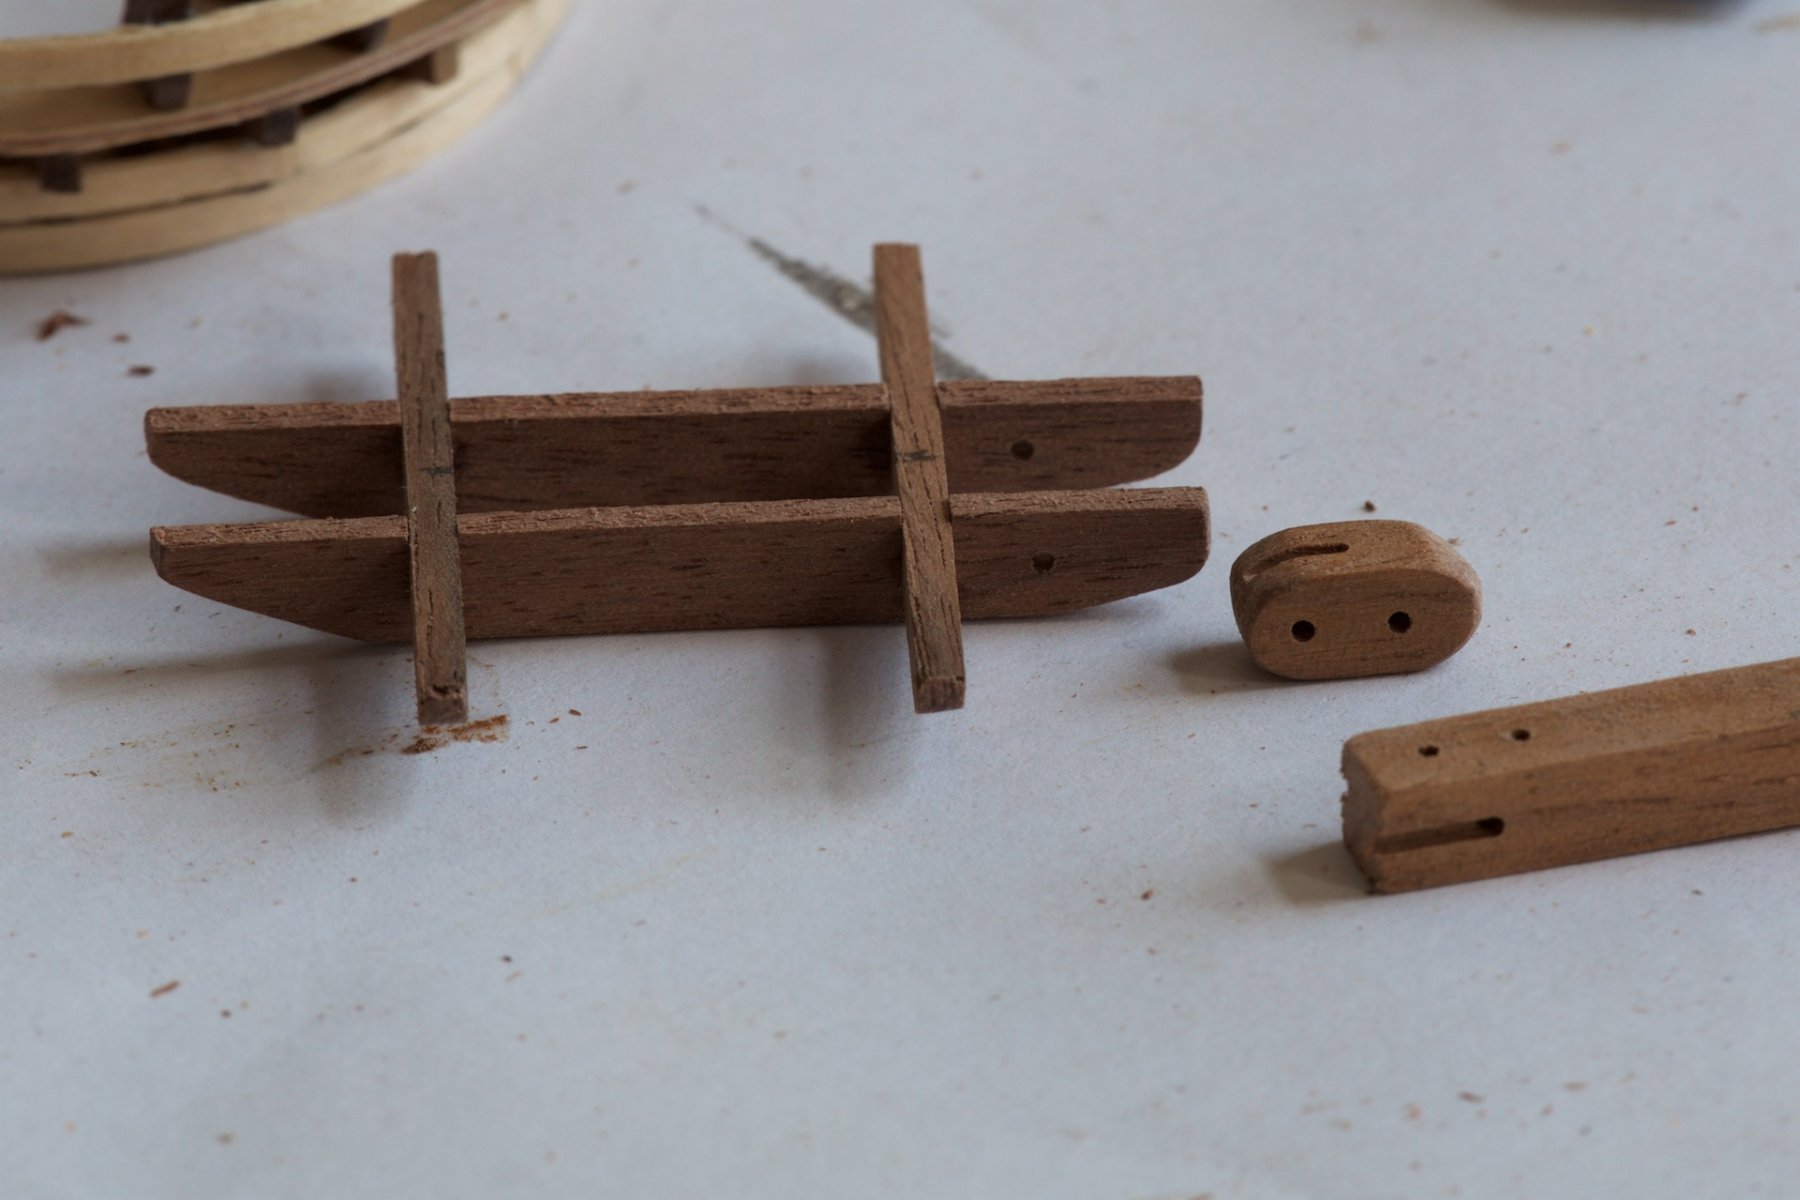
I have now started working on the bowsprit. Making parts one-by-one. I will do the assembly later on. For making the crows nest, I watched first the great examples by others on this website. To ensure that the spacing between the wood (basswood 2 mm by 1 mm) of the 'fences' is equal, I used 2 mm thickness wood as spacers. The basswood is still very white, but I will use some stain paint to darken it.
-
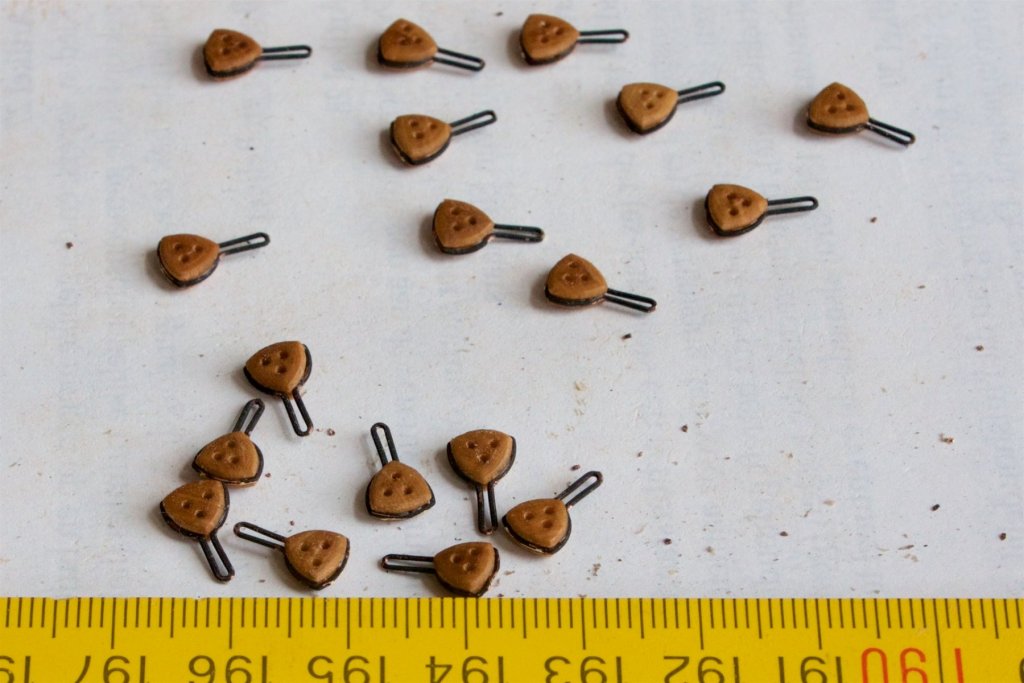
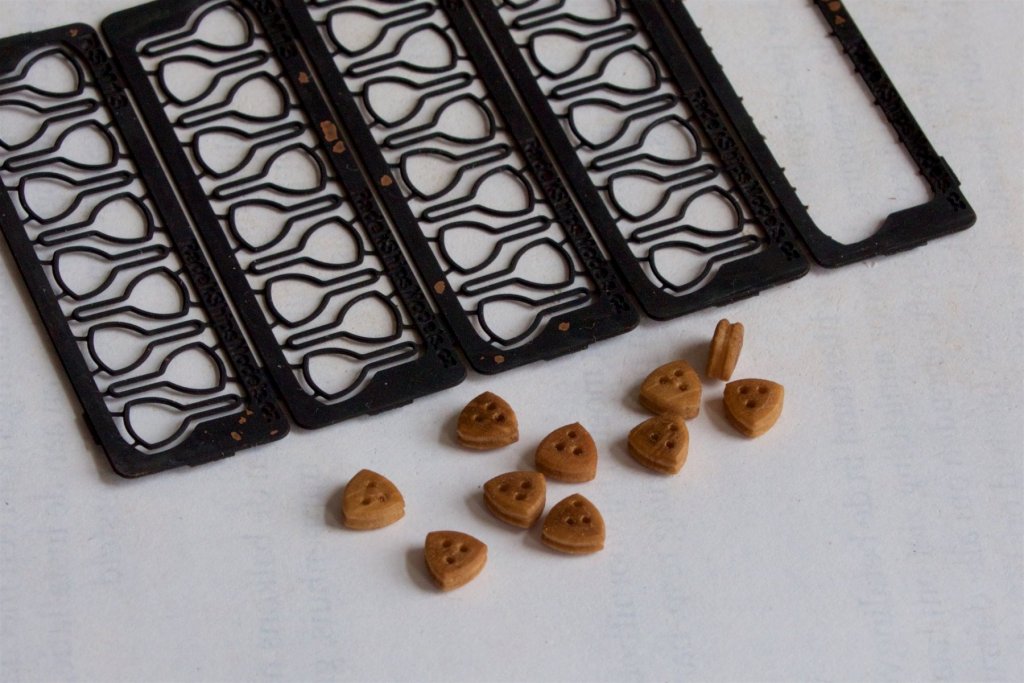
Attached the triangular deadeyes. Earlier, I did not manage to bend cupper wire around them, so I had thought to fall back to rope. However, I found conveniently on the Czech website photo-etched clamps for (triangular) deadeyes. It was not easy to get the clamps trought the holes in the metal bars, but I found that I could squeeze them bigger using a hand drill to open the bended metal bars.
- 206 replies
-
- 10
-

-
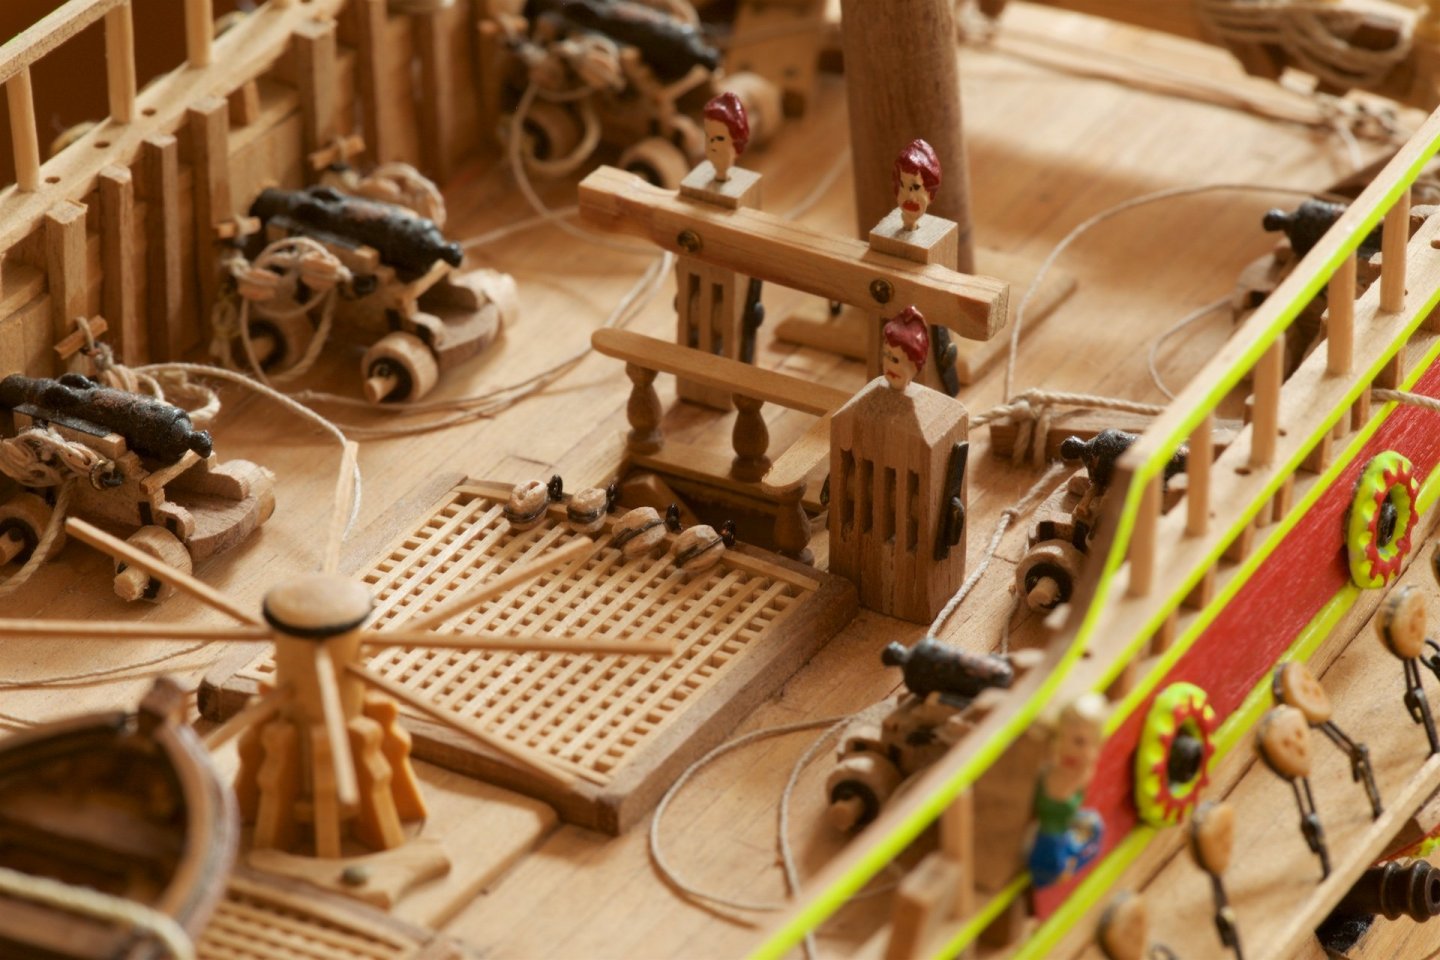
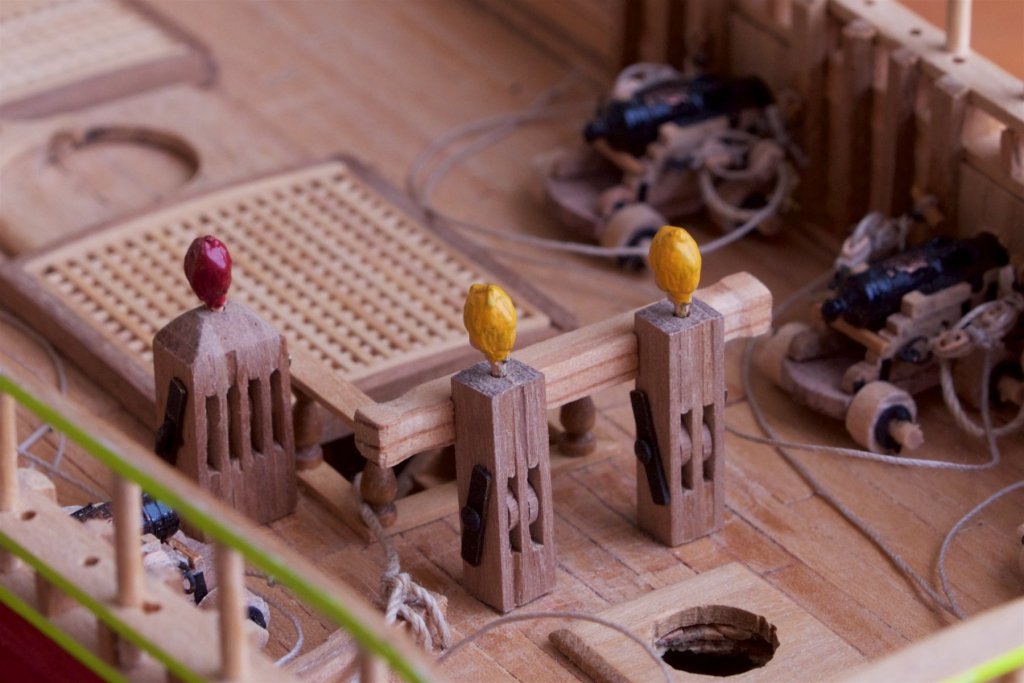
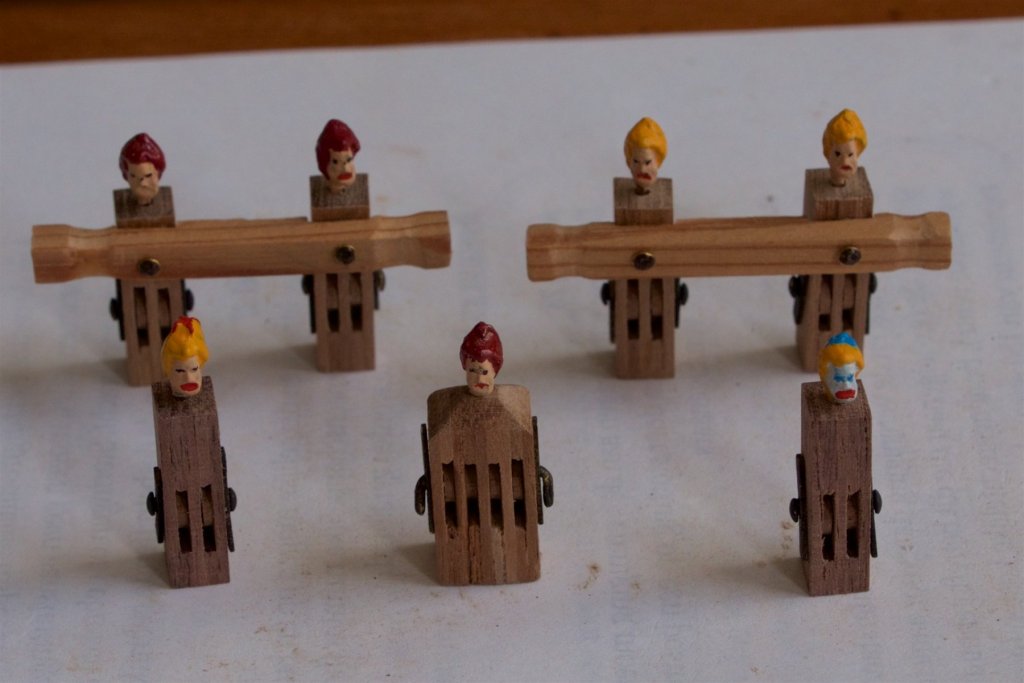
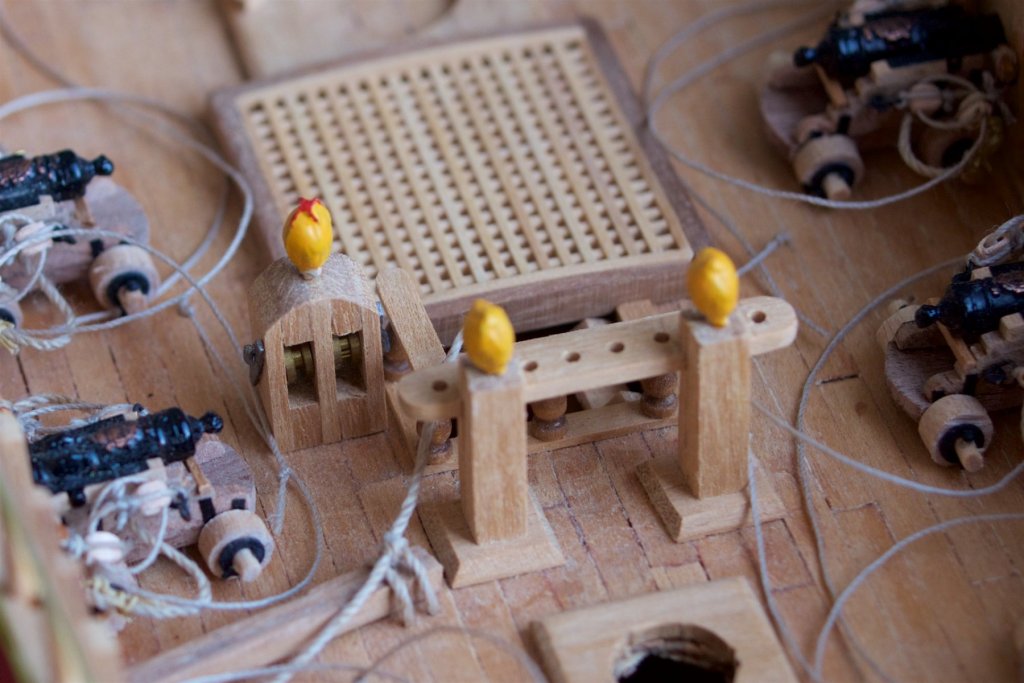
Continued with the items on deck. Previously, I had made blocks with 2 sheaves, in which I used some messing discs as the pulleys inside. However, inspired by fellow builders on this website (md1400cs; Michael), I decided to replace them in order to improve them. I tried to use my proxxon milling machine, but had no small milling tips. Therefore, I made from several layers of wood, like I had done before. I made the internal pulleys by sawing small parts from a round wood, used sand paper to thin them and then drilled a hole in them. The situation before the upgrade: Making the block from wood planks: All of them, before pplacing them on deck: The upgraded blocks on deck:
-
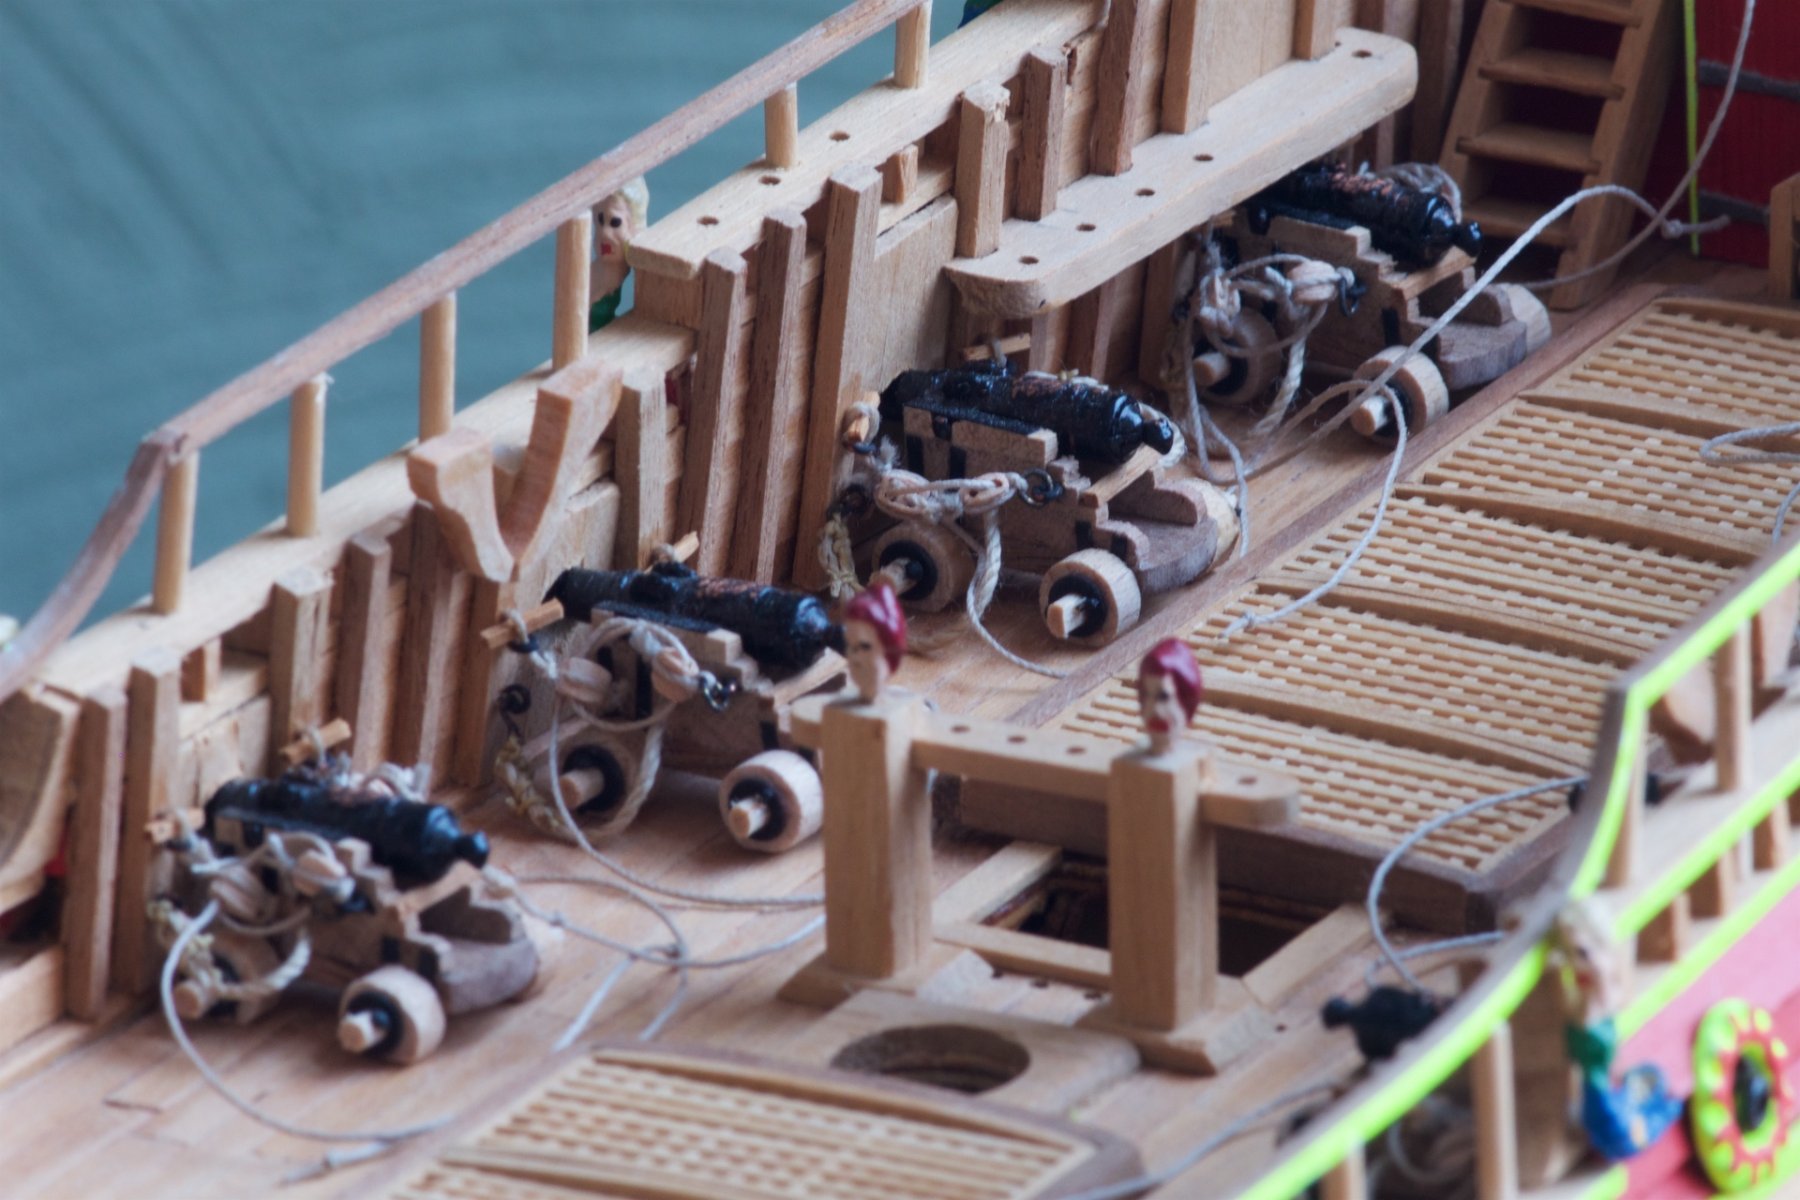
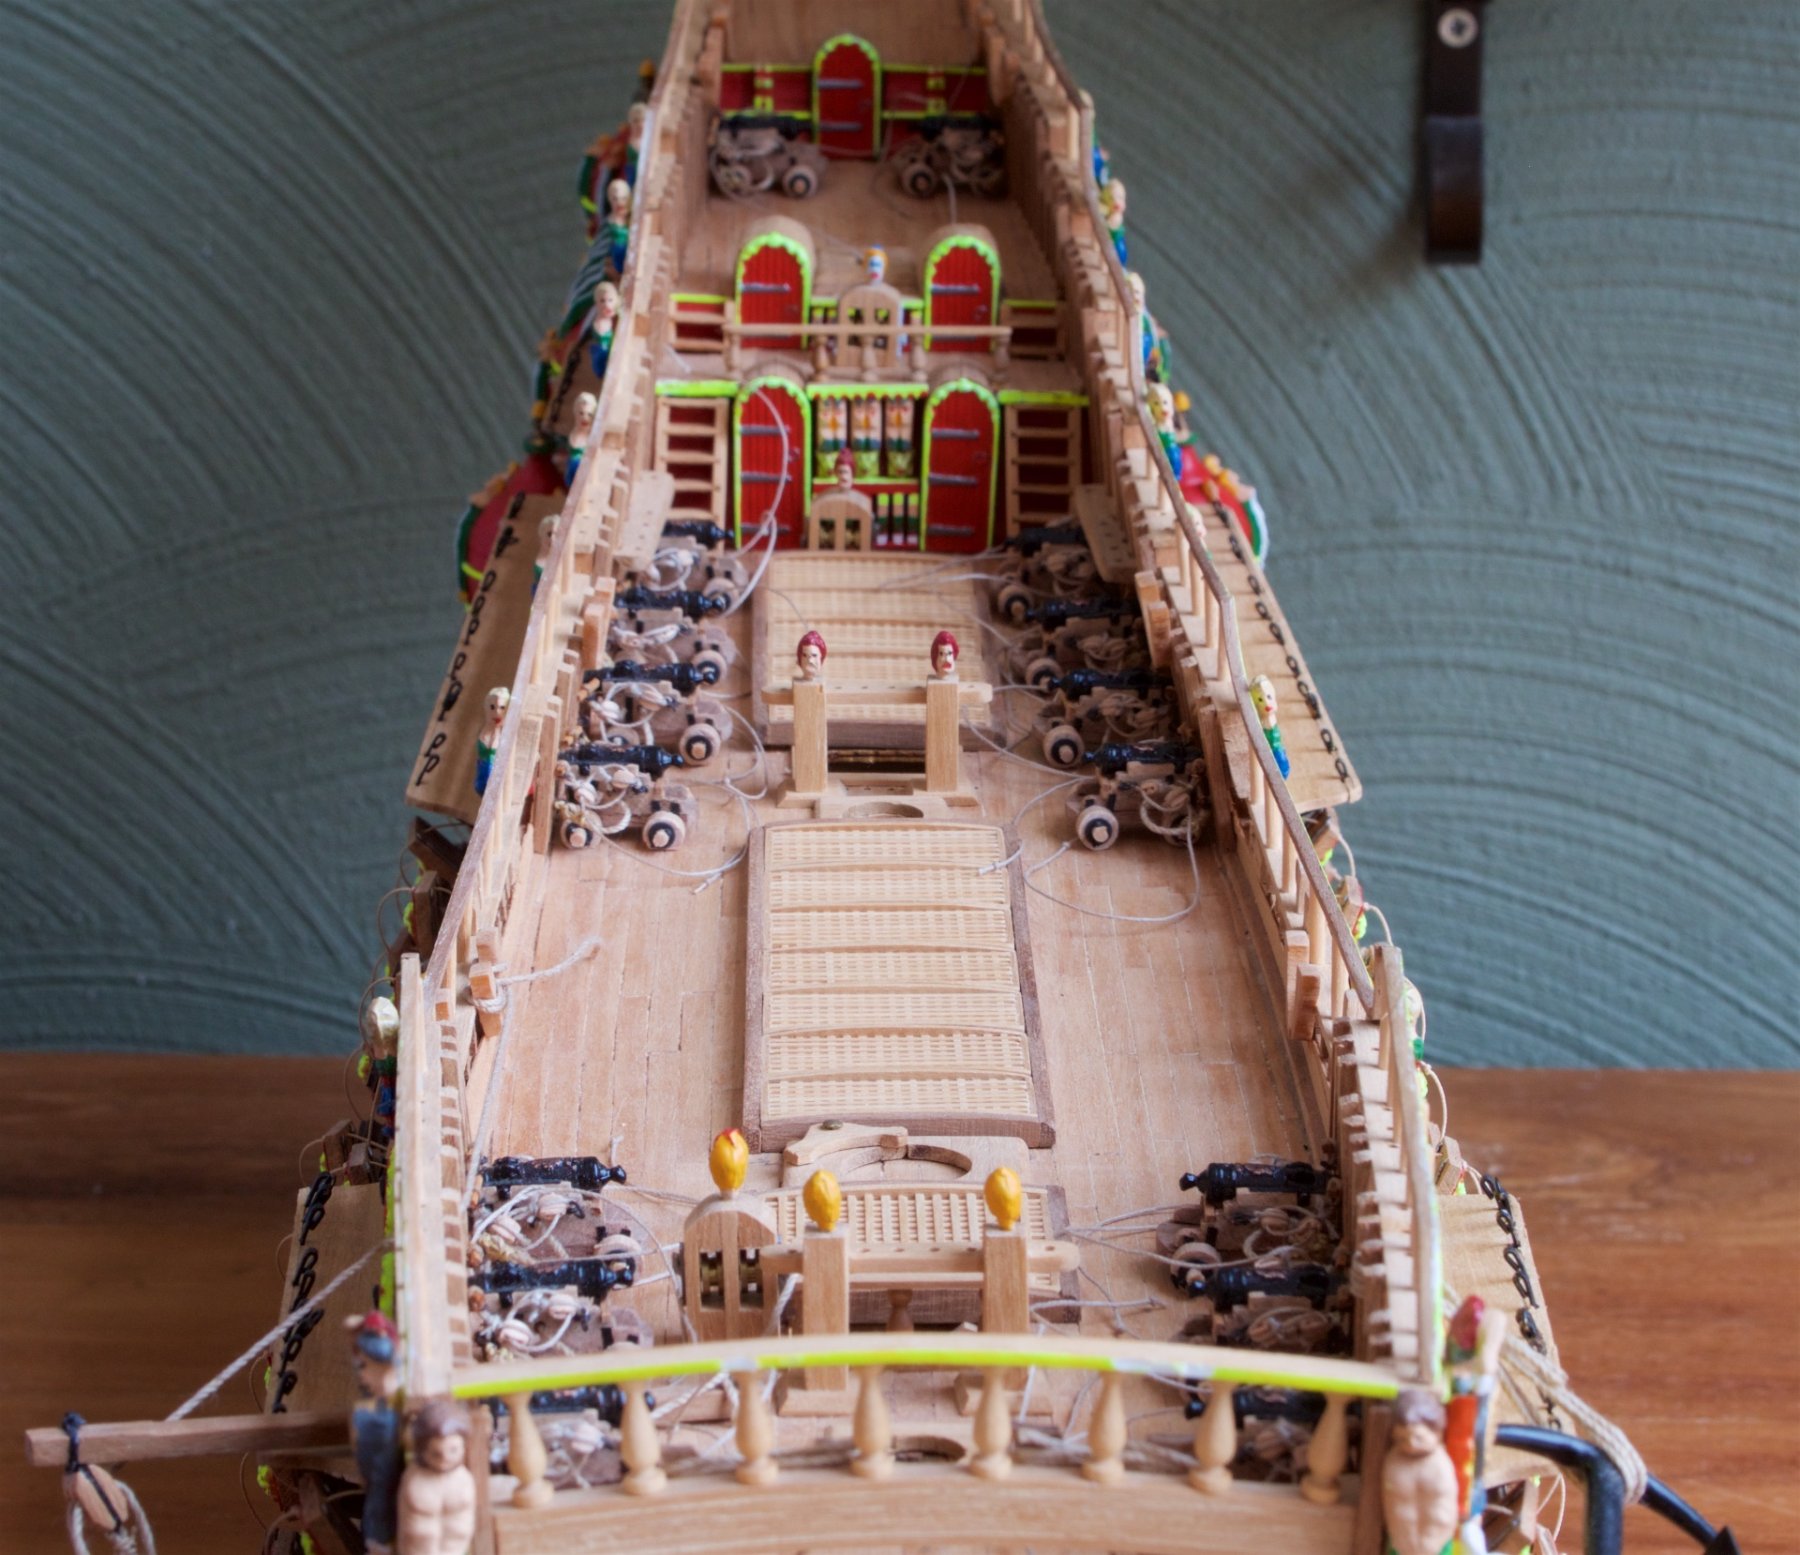
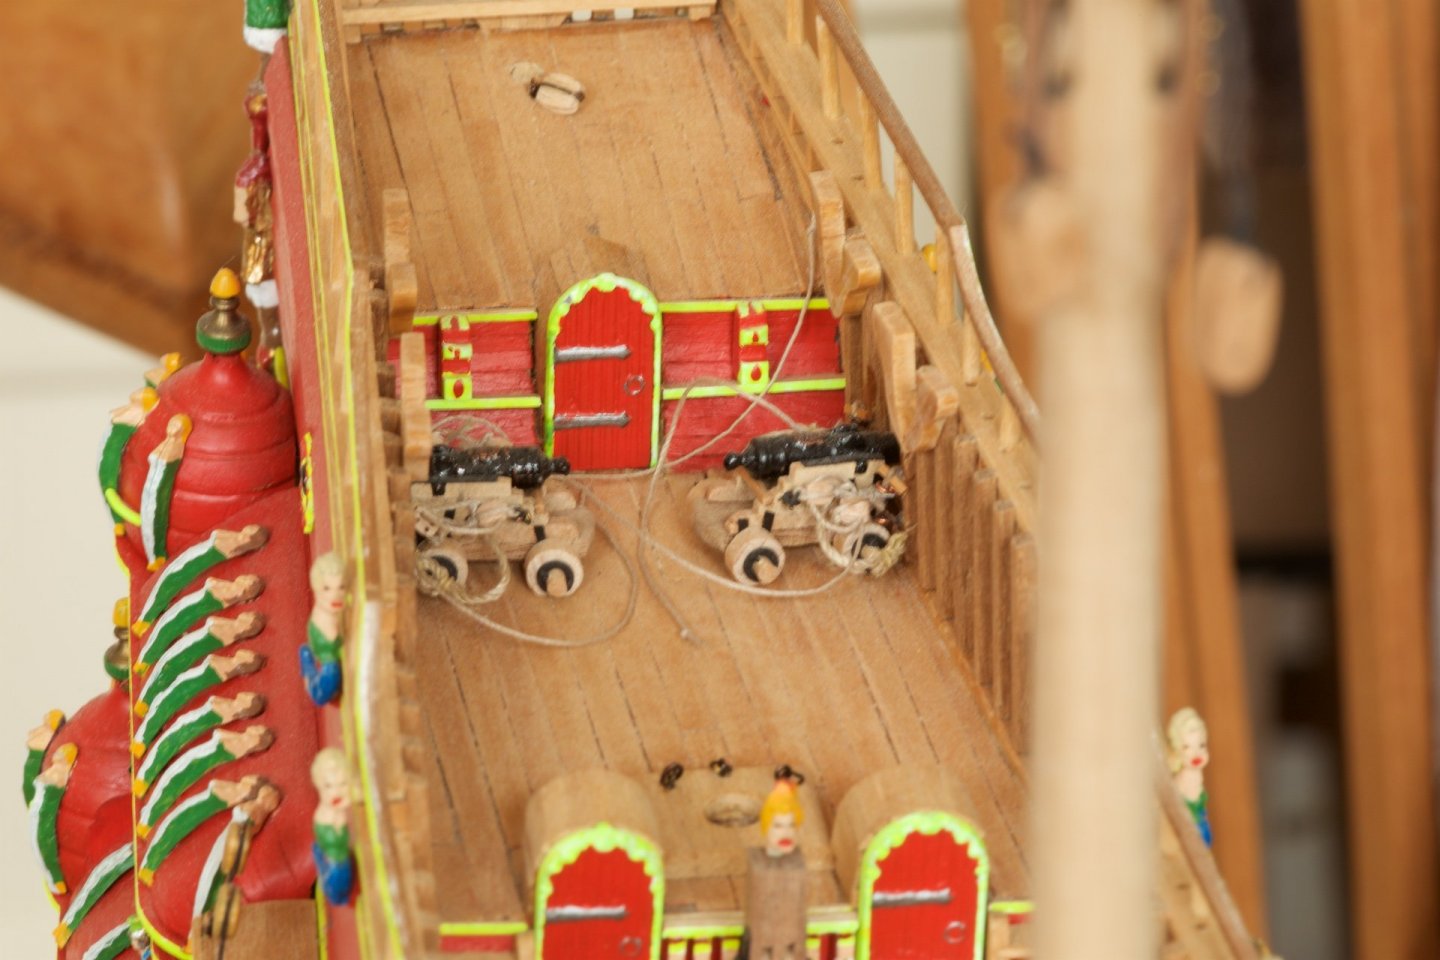
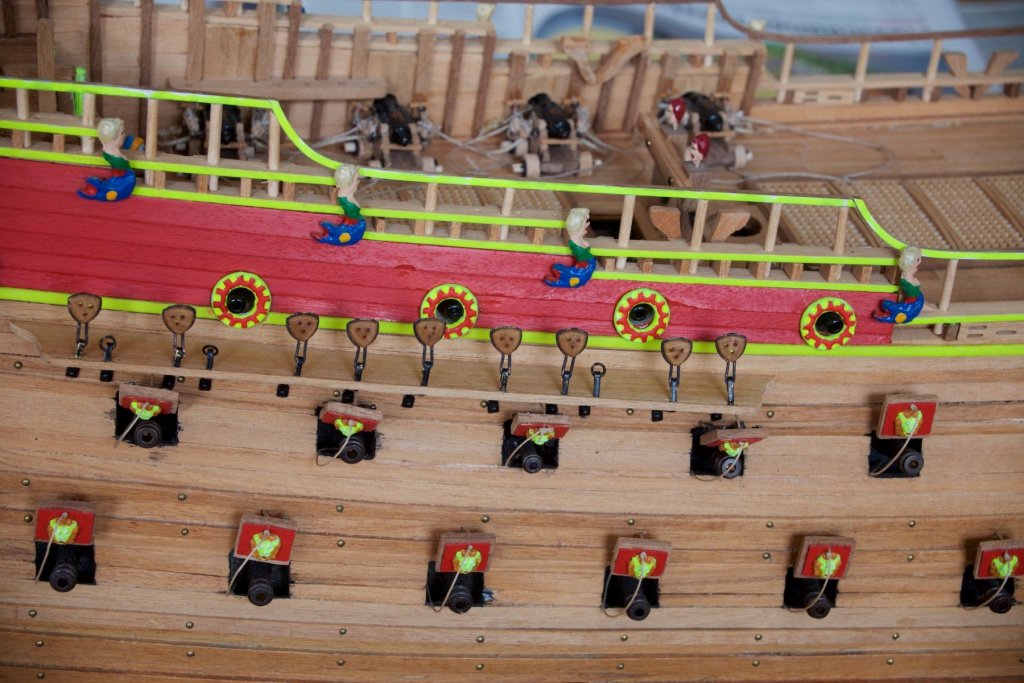
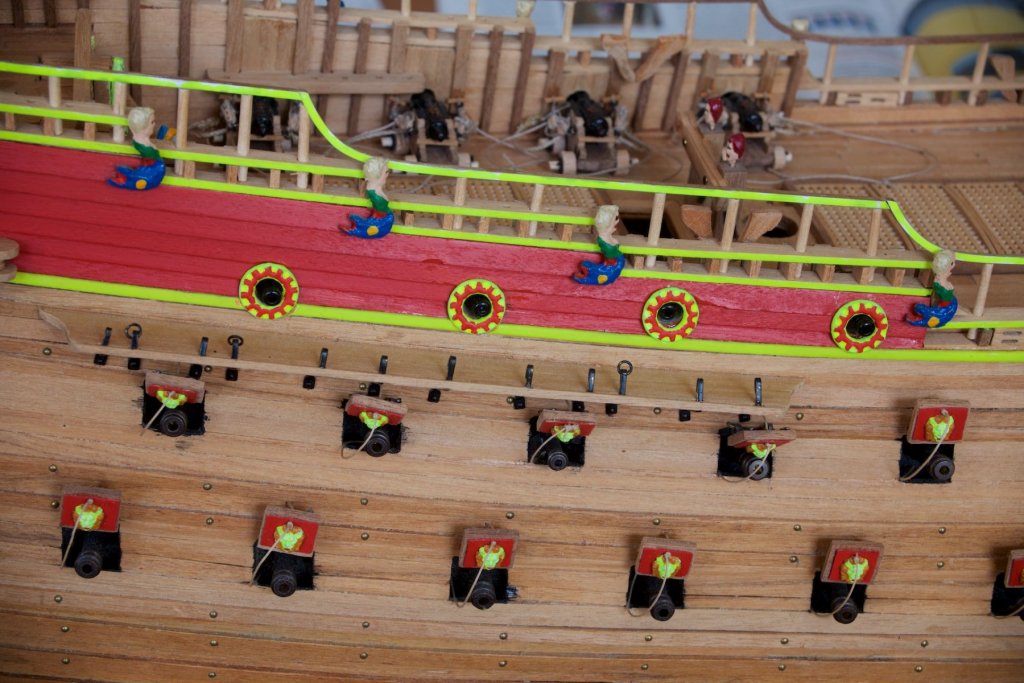
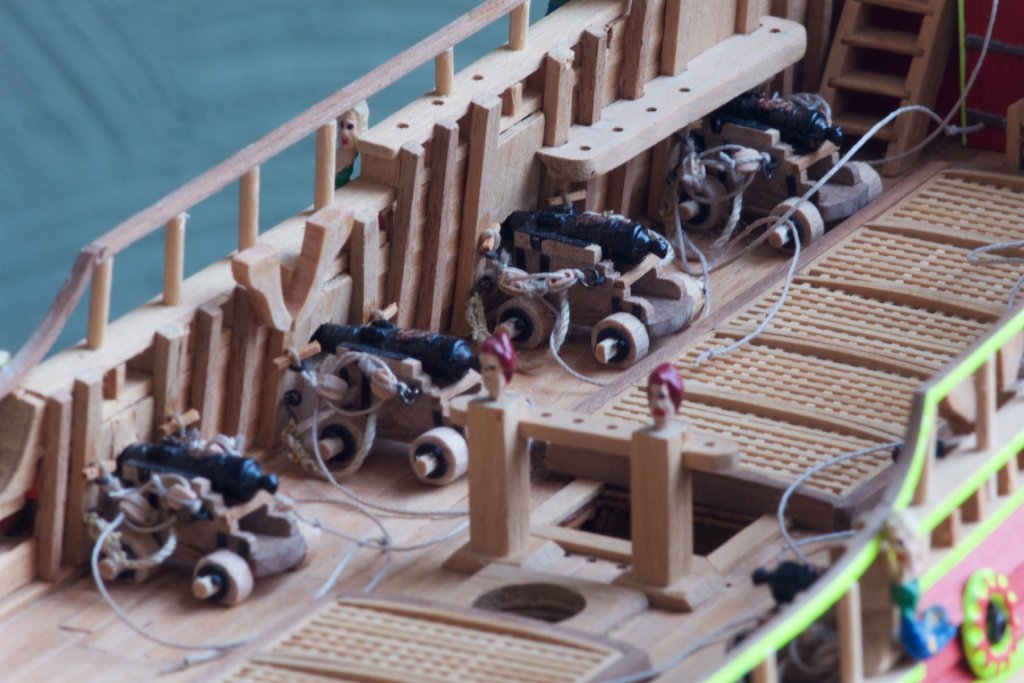
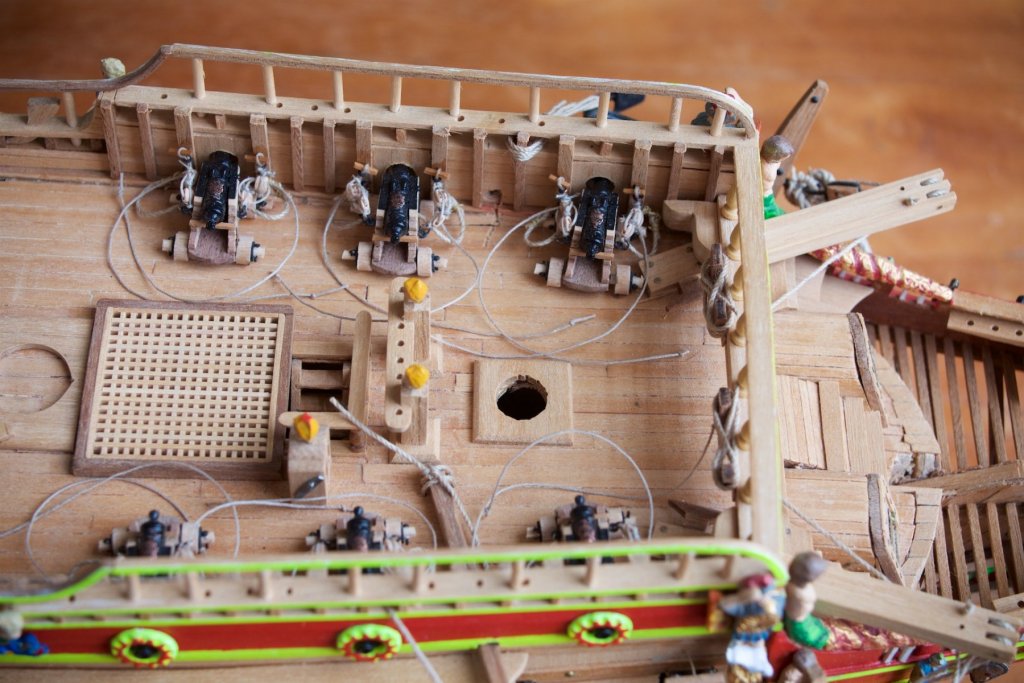
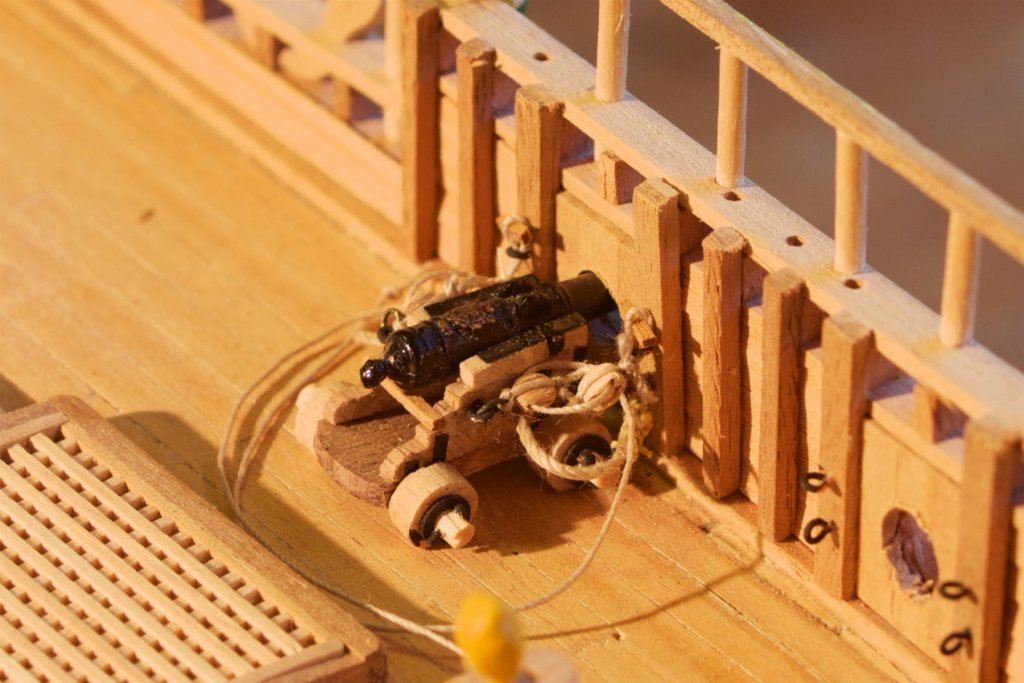
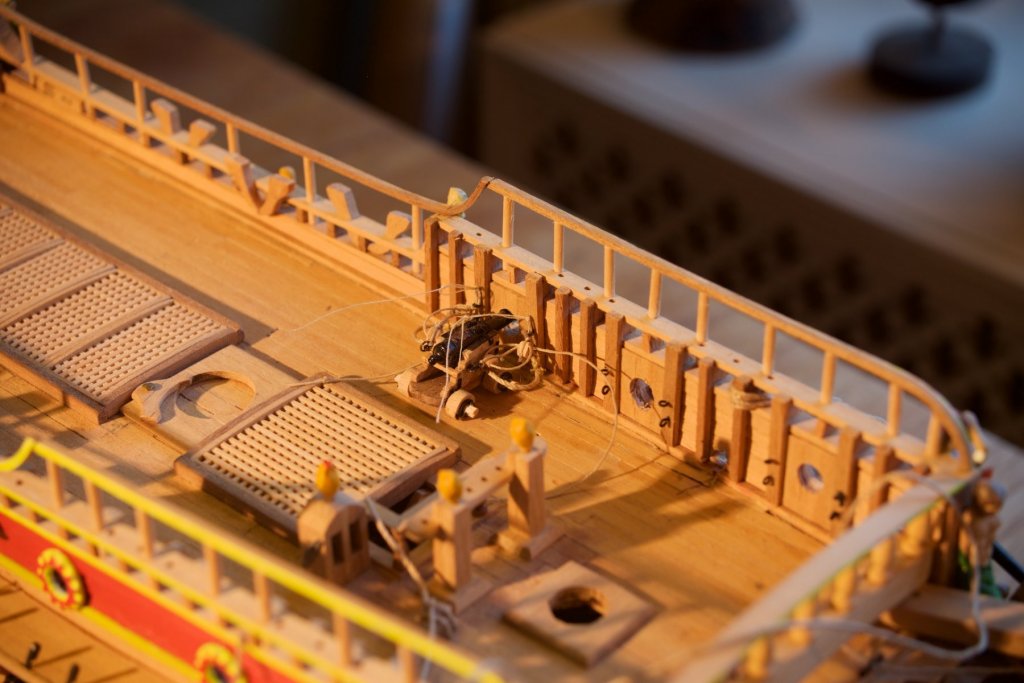
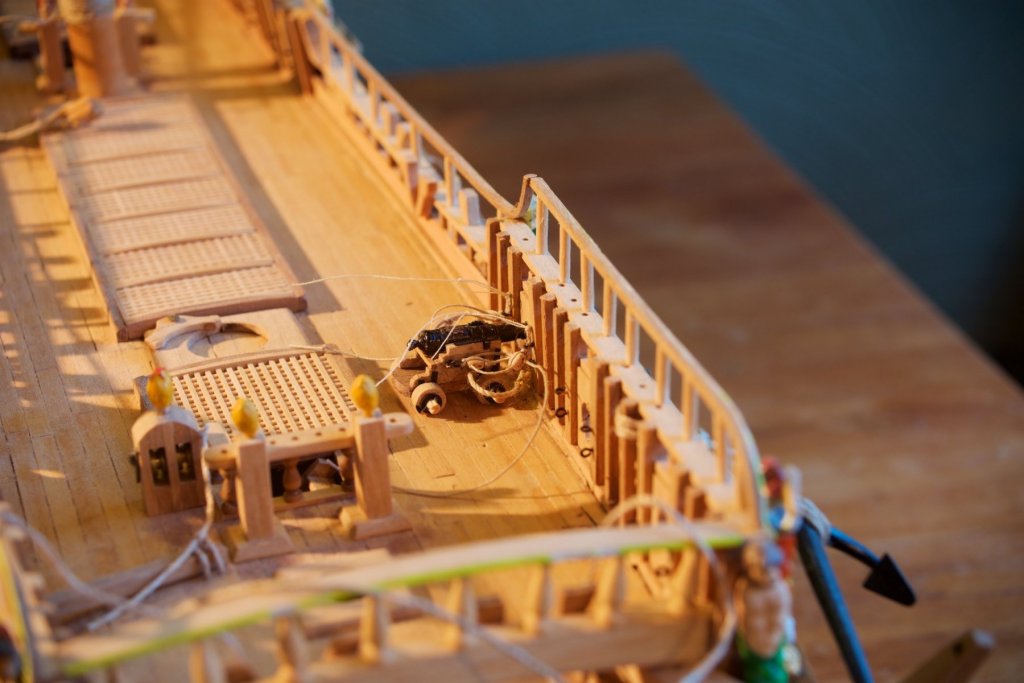
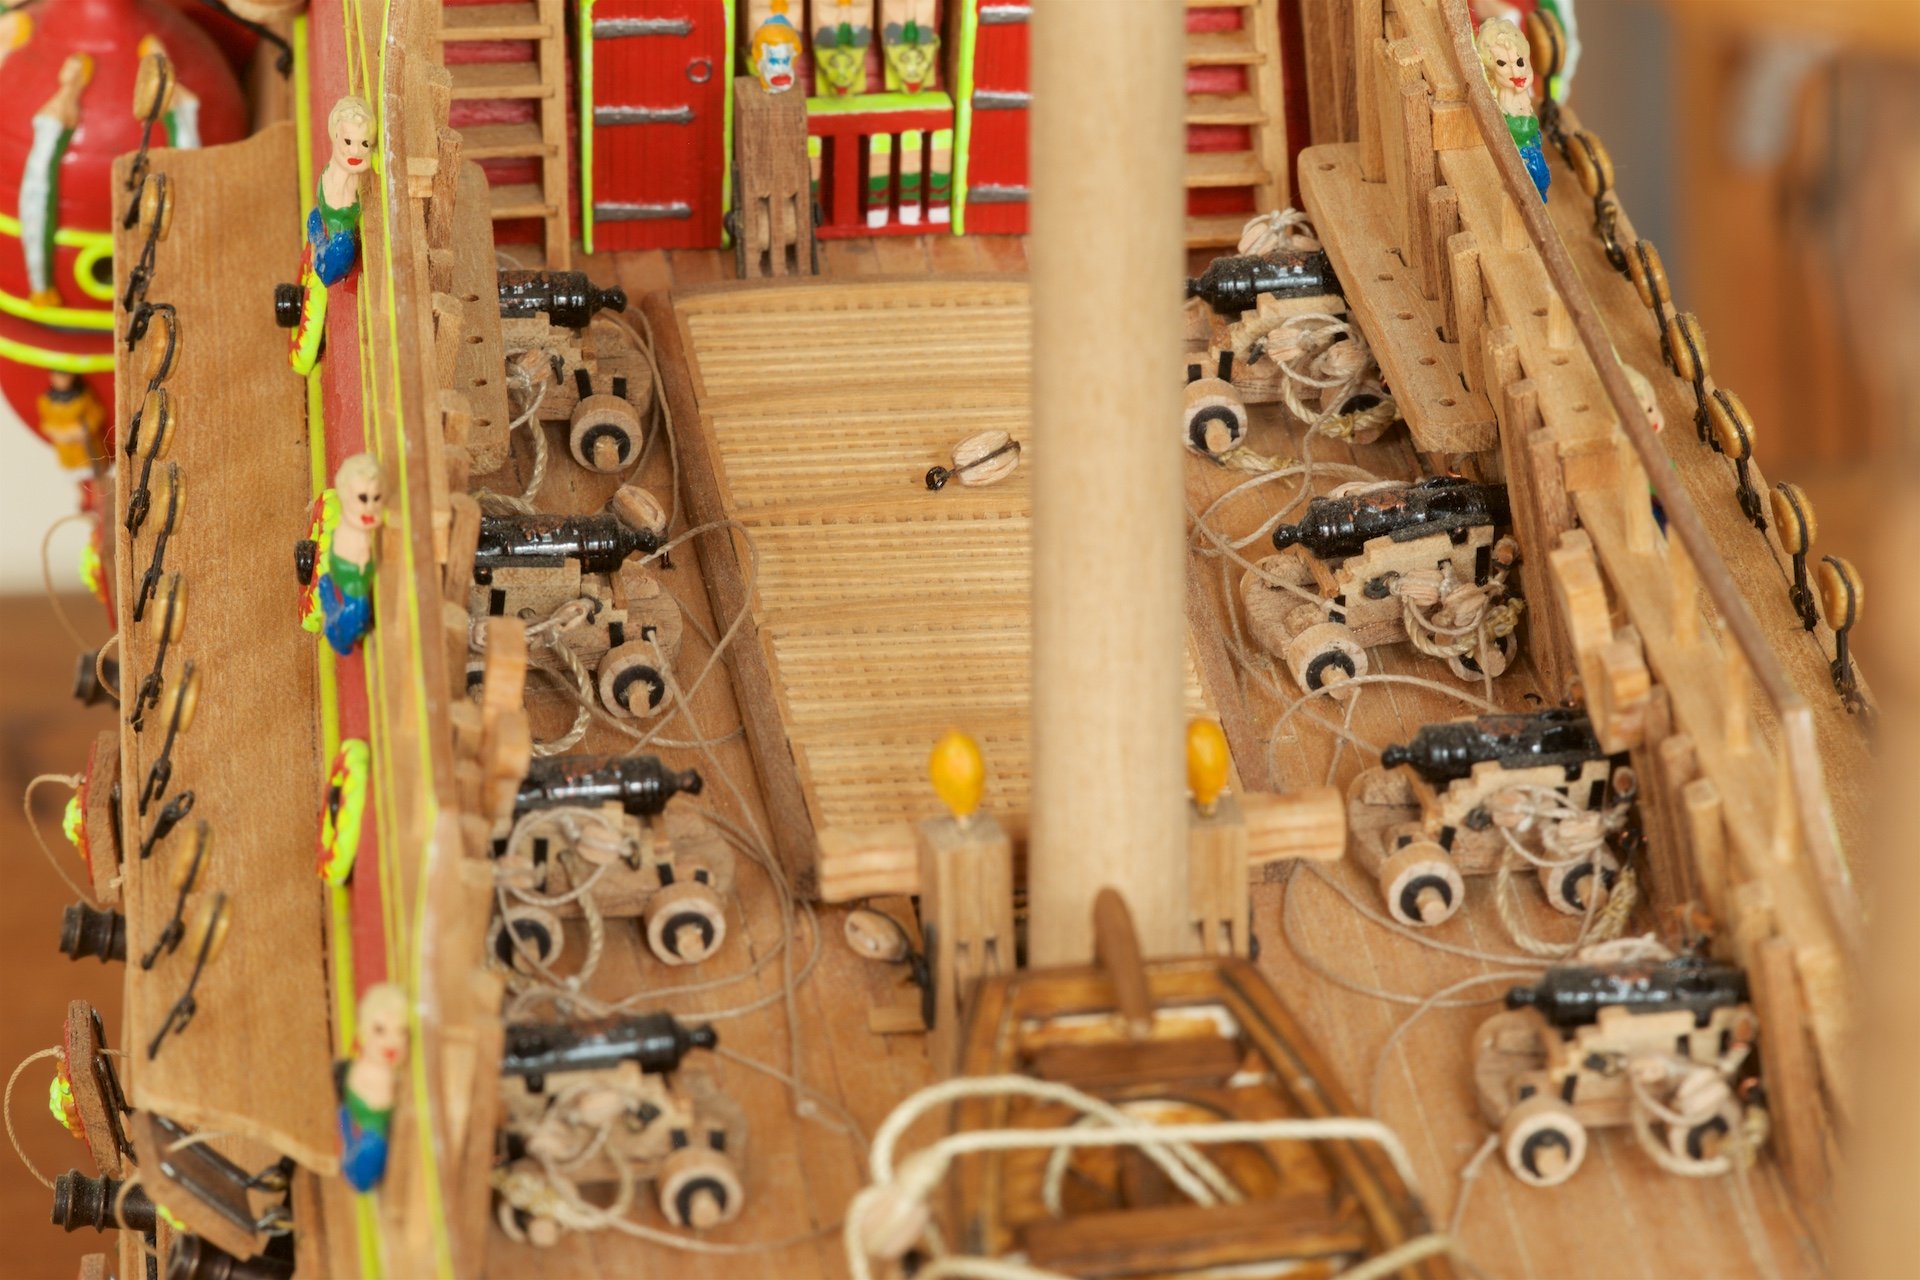
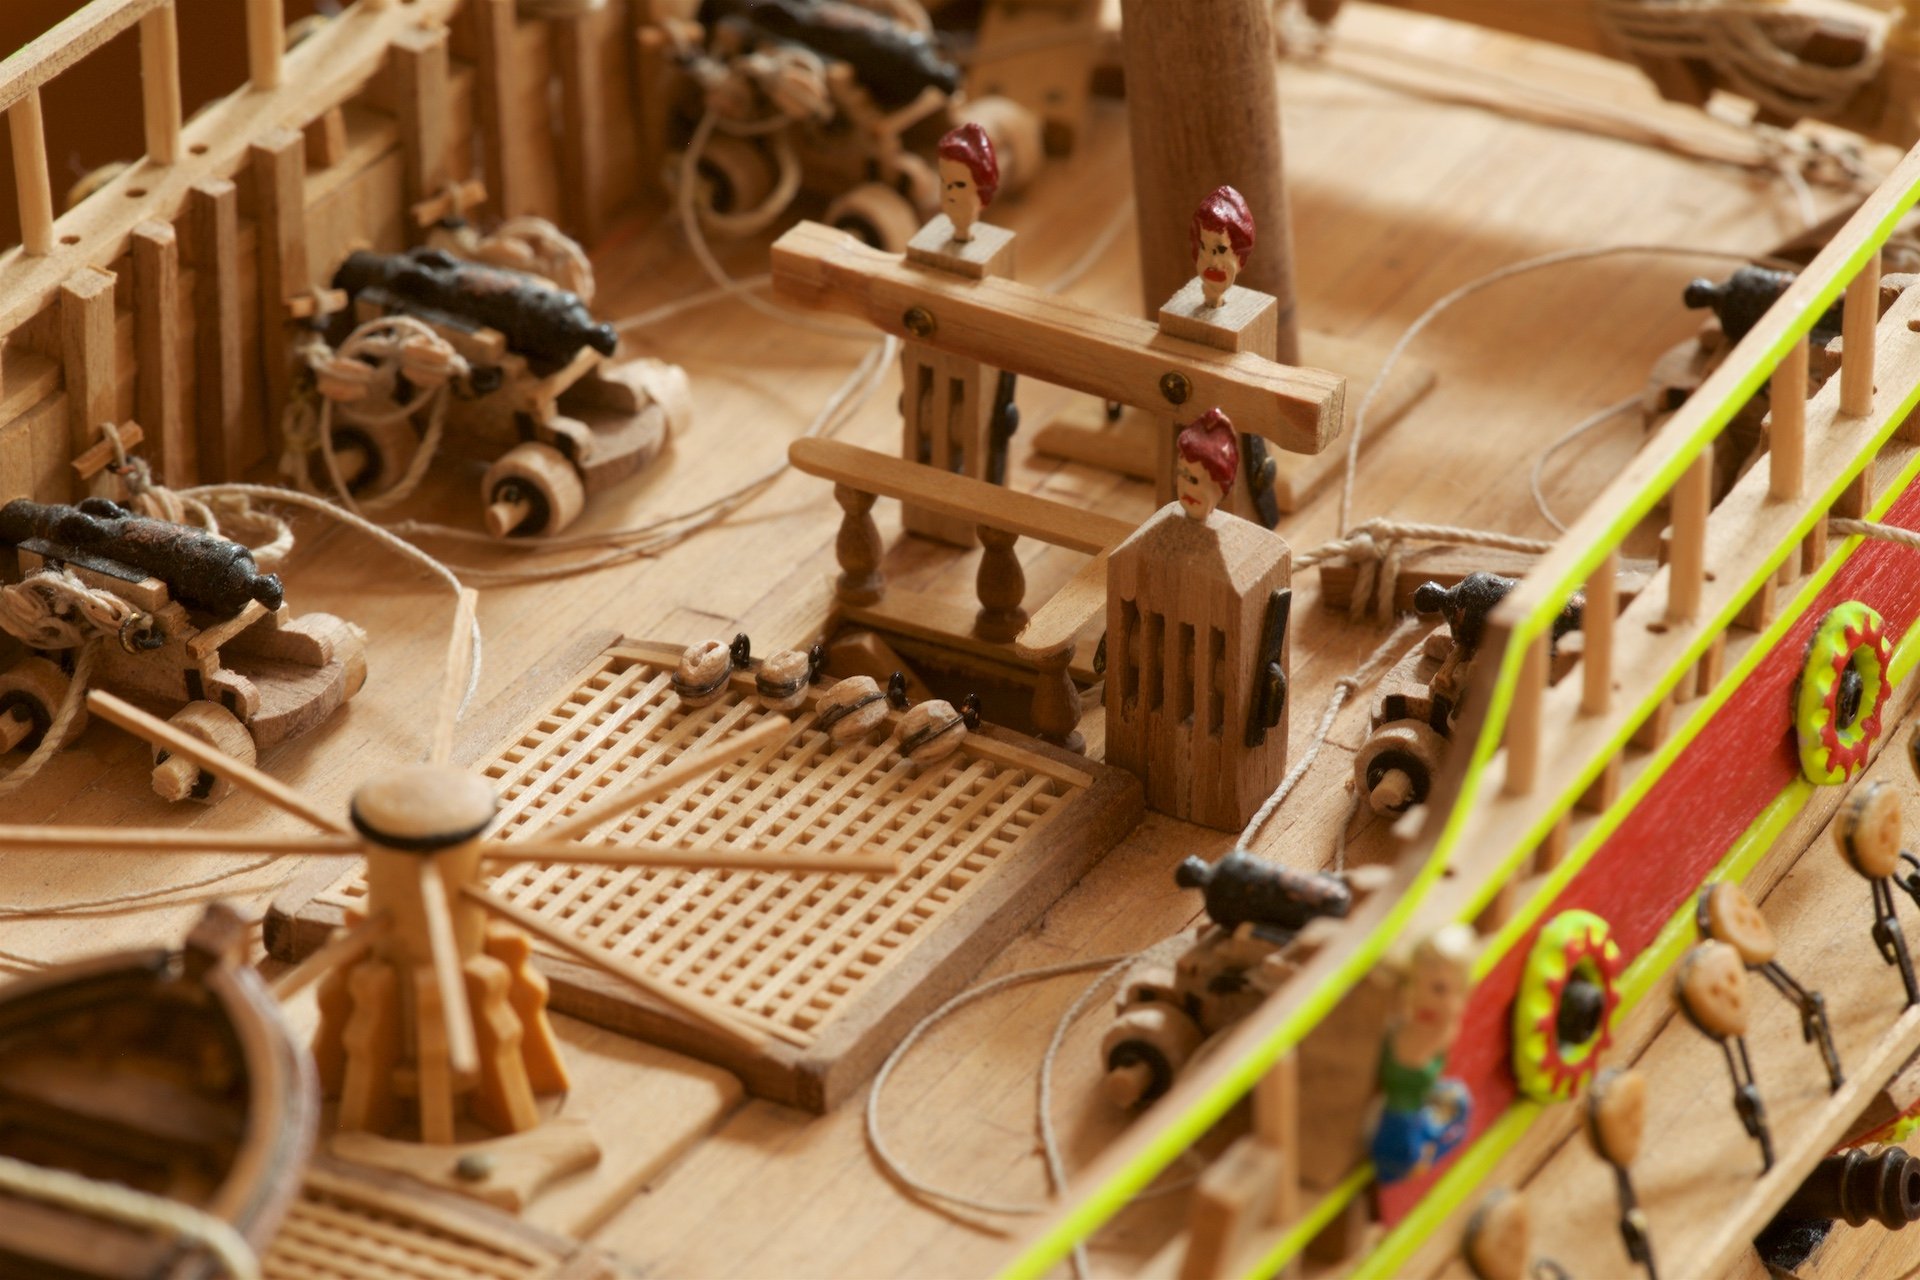
I have now also placed the other cannons on the decks. So, now all 16 are in place, including their ropes. Previously, I had to sand the bottom of the wheels somewhat in order to fit the cannons through the holes in the planking. This happens when you first make the holes and only later the cannon carriages... In the pictures, you can notice that the cannon barrels do not stick out much outside the holes. This is due to the relatively thick planking, which was caused by my restoration work, as I added more wood than there should be according to the plans... At the moment the cannon carriages are still movable on the deck. When I glue them in place, I will do so by pushing them more outside. Unglued, the tension from the ropes prevent this to be their 'natural' position. I did use diluted wood glue to fixate the small wood pieces to hold the rope loops. Overview of the decks with the cannons placed:

-
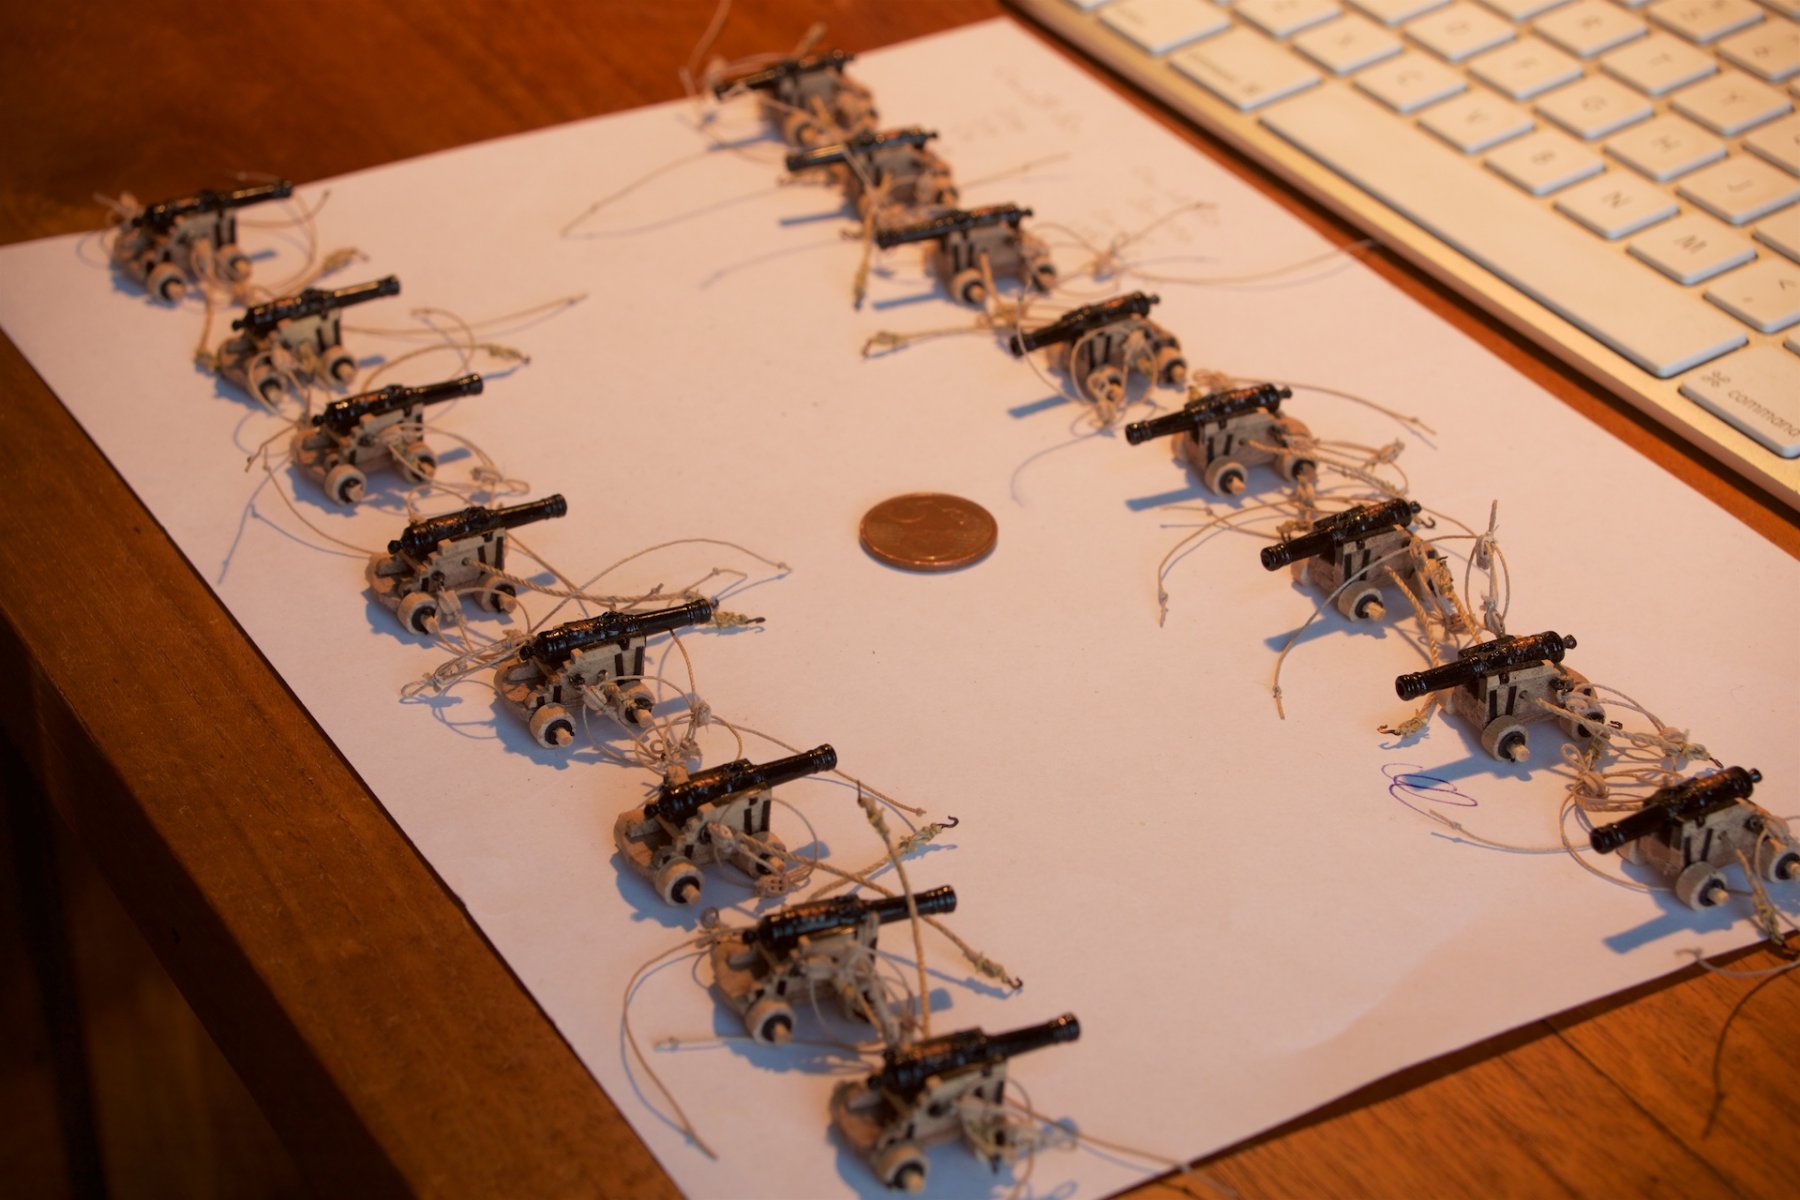
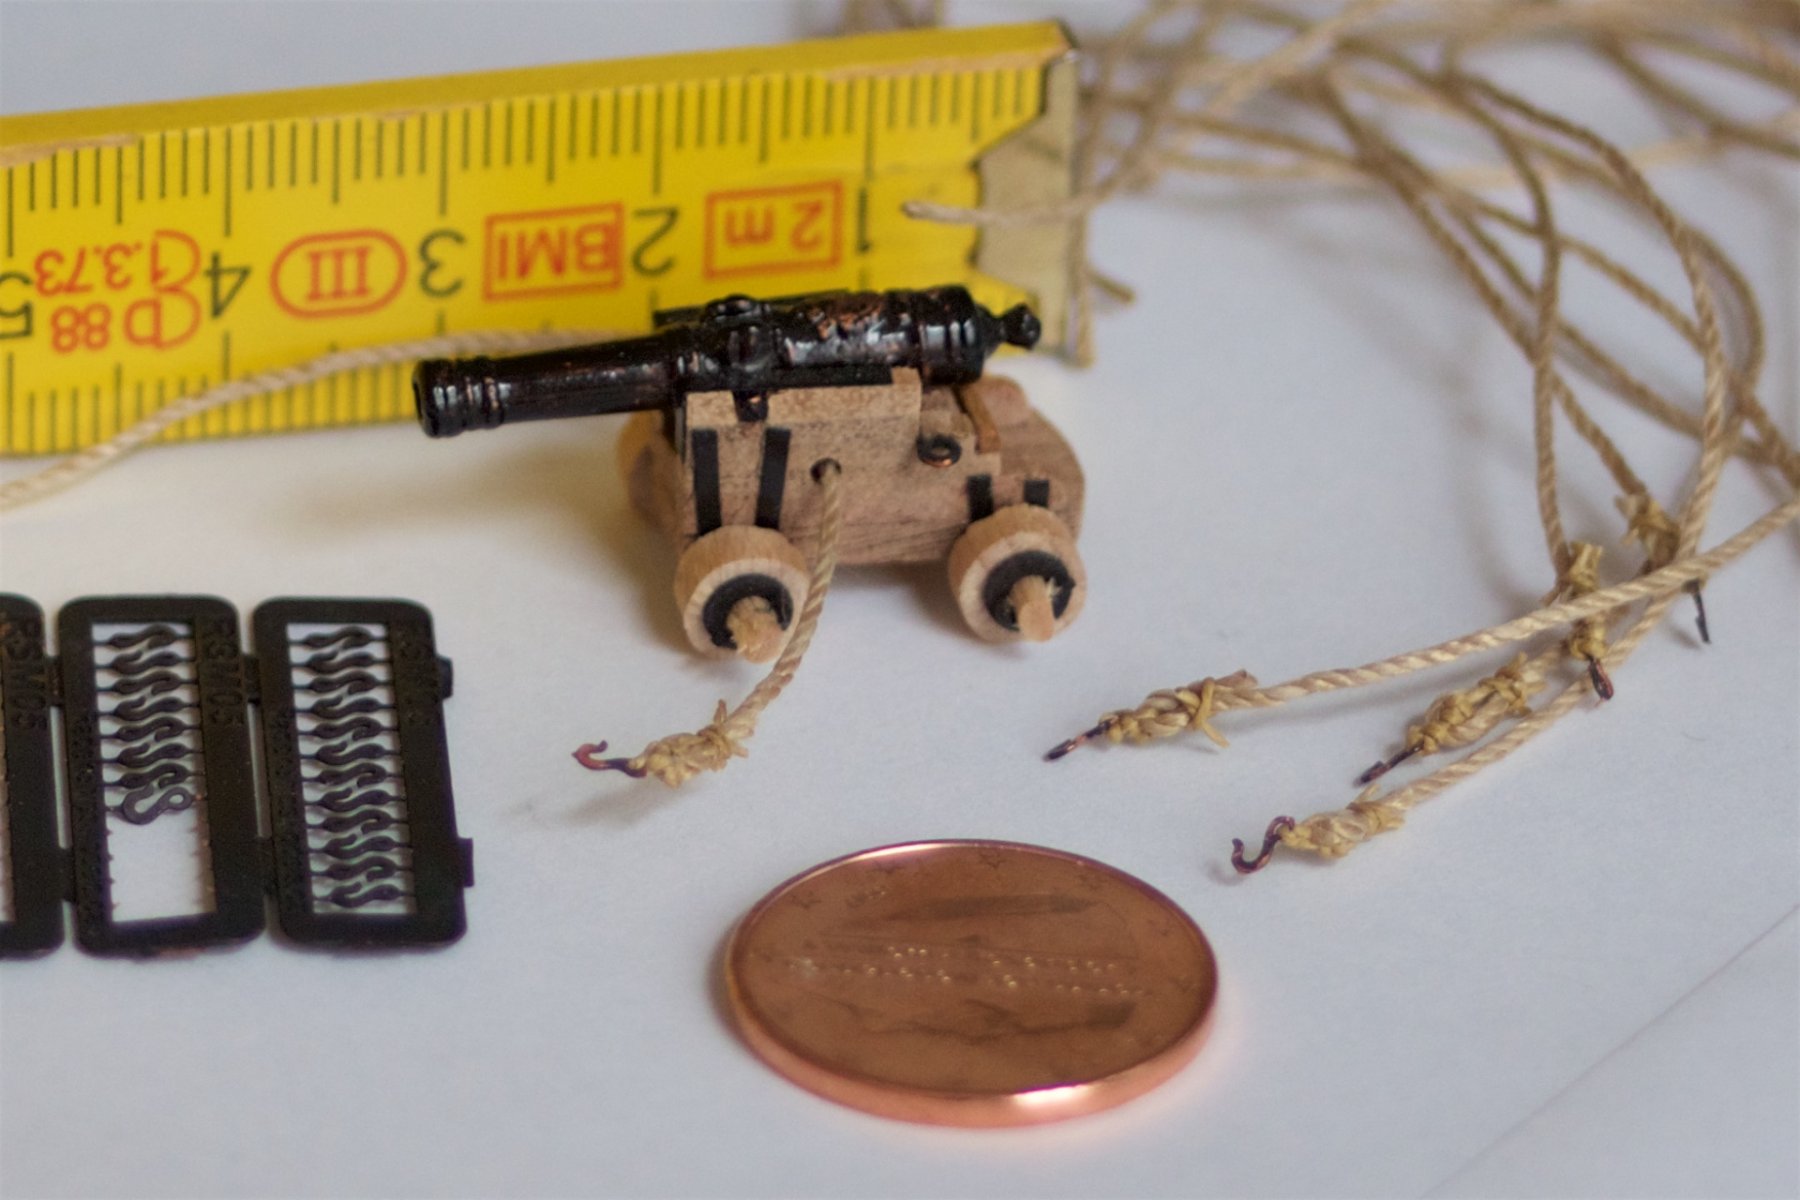
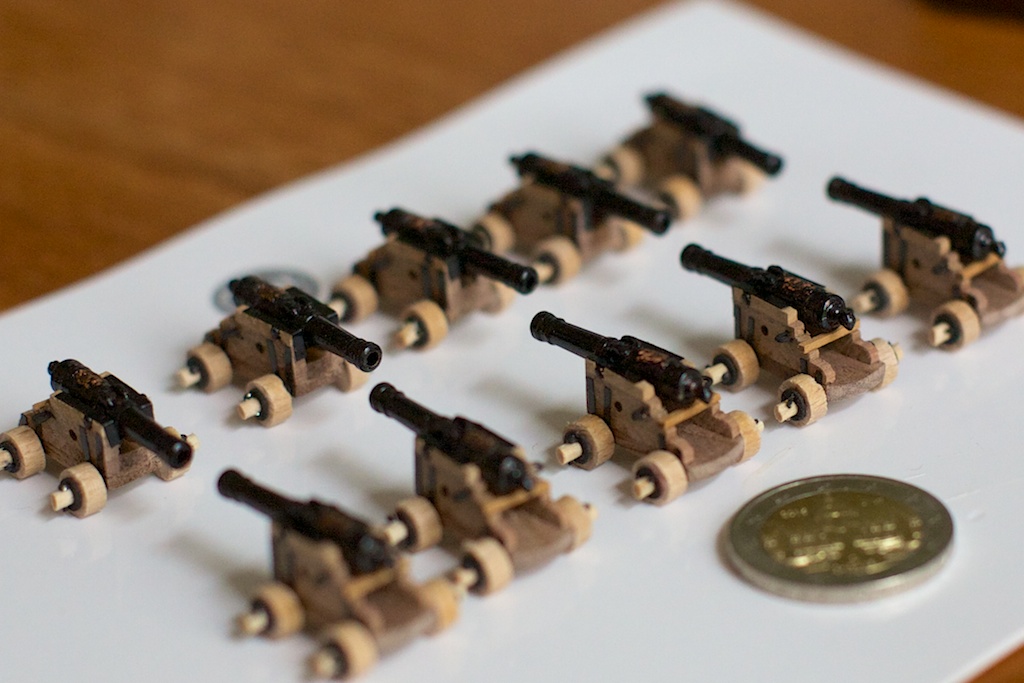
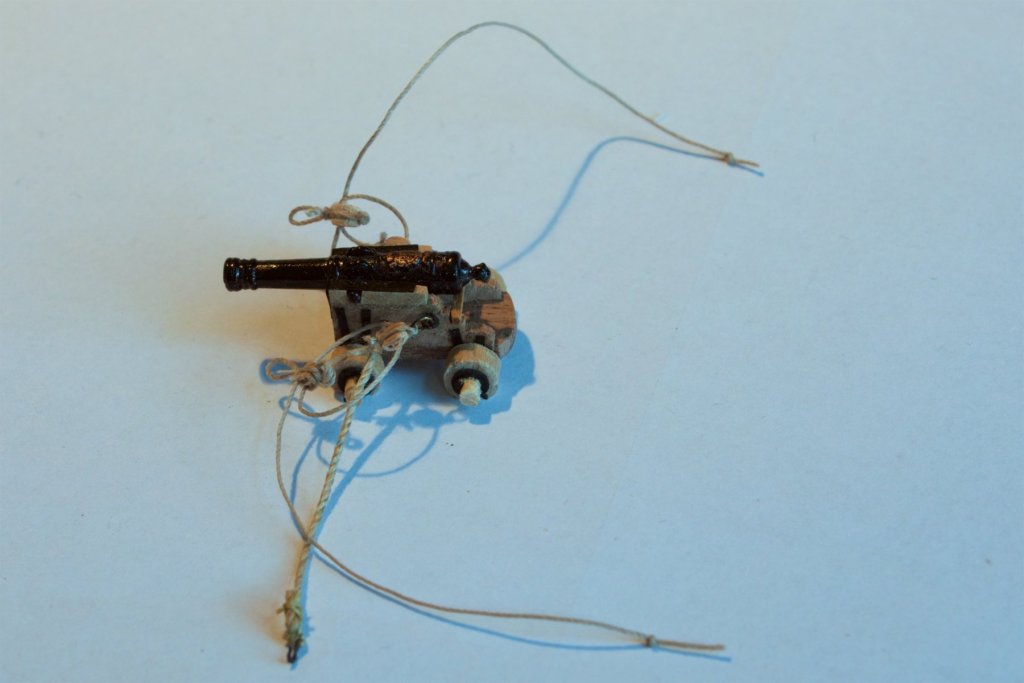
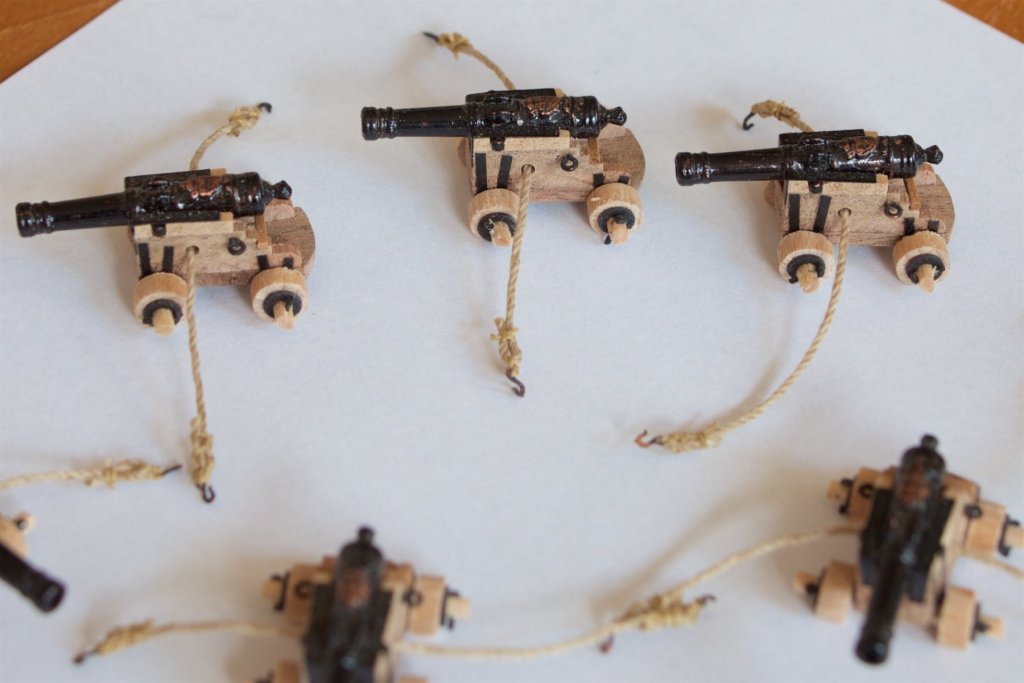
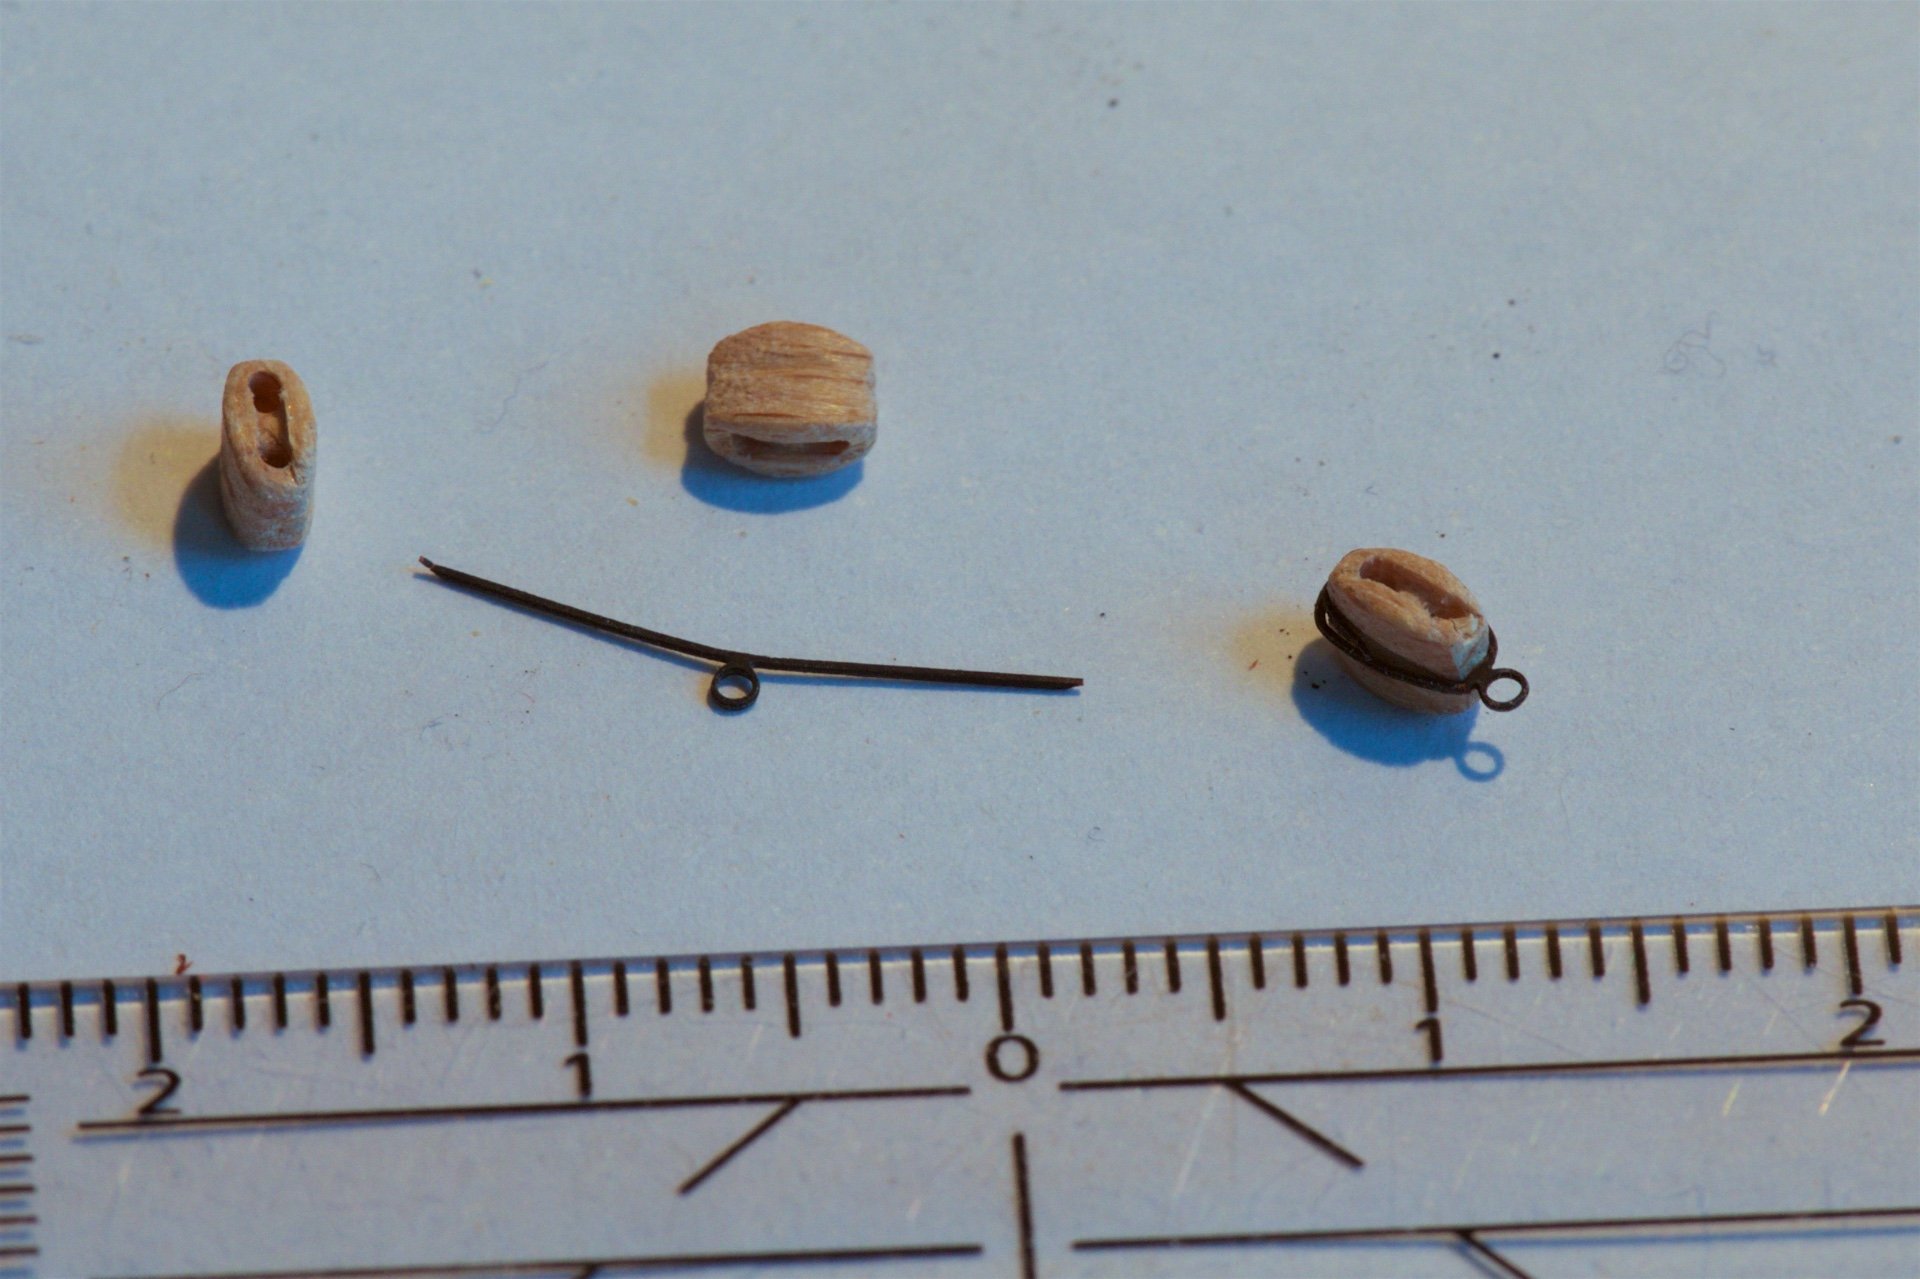
After not doing much on the Wasa for a long time, I continued with the cannons. Having read and looked carefully at the beautiful examples of other Wasa builders, I had a good example on how to attach the blocks and ropes to the cannons for placing them on deck. The 3mm blocks and the 3mm hooks were bought by me at a Czech website, as I had figured out that these parts should be that small indeed. The hooks were actually a bit too narrow with its hook opening, so I had to bent somewhat. The hole in the hook was therefore very small and I could not insert the medium thickness rope through the hole. As an excape, I used thinner rope to attach the hook to, and then attach this rope to the medium thickness rope. The knot became somewhat large, but still ok. Afterwards I fixated the knots with water diluted wood glue. The ruler is in cm. The blocks needed some extra drilling with 0.7mm drill to be able to insert the rope. First I prepared the double block to have an loop from rope. Next the single block to have the long rope to pass through the ropes and a ring on the other side, to connect it to the cannon. Here are all 16 cannons, with the blocks and ropes attached. The coin is a 5 eurocent. The next steps are the placing on the deck of the Wasa. Of course, the first one is the one with which to figure out how to do so. I used 1mm thickness wood pieces as sticks to holds the rope loop in place on top of the rings. So, 15 more to go...


- 206 replies
-
- 11
-
-
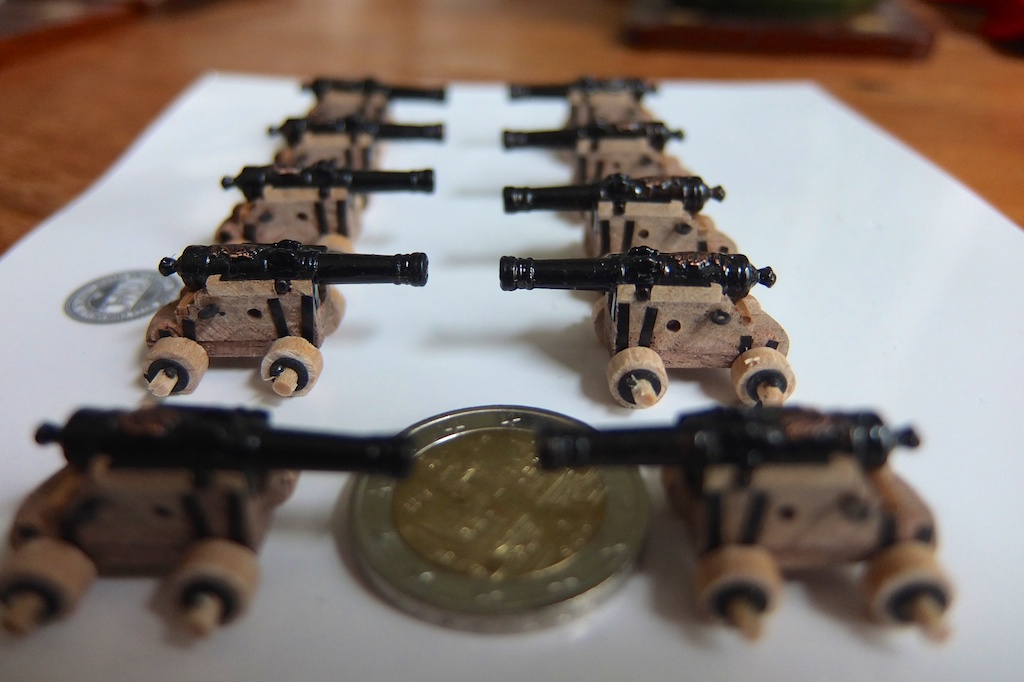
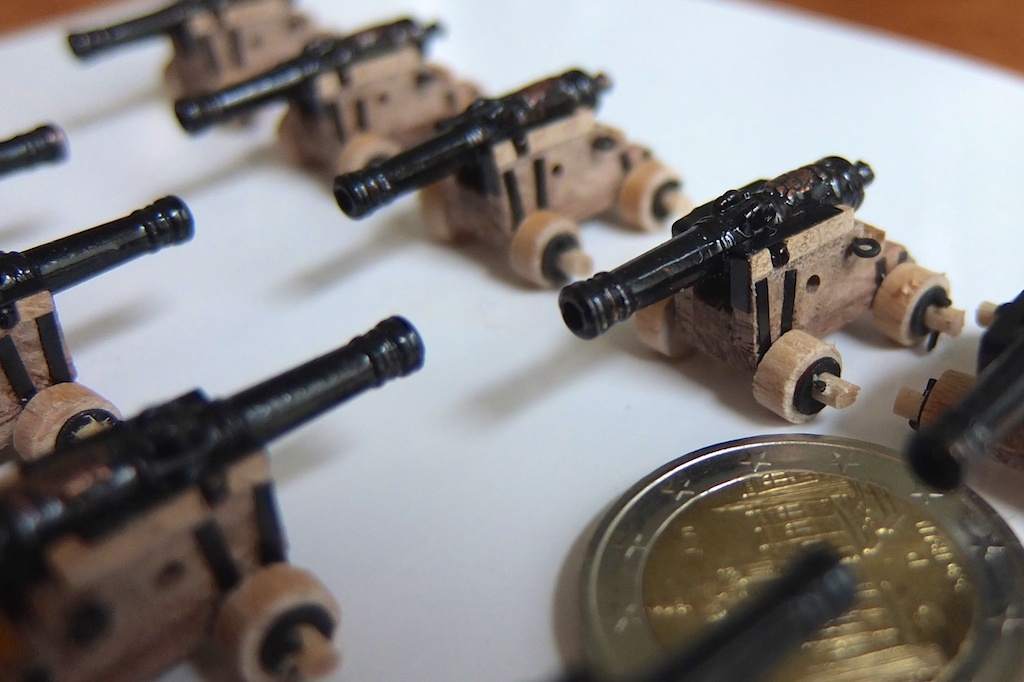
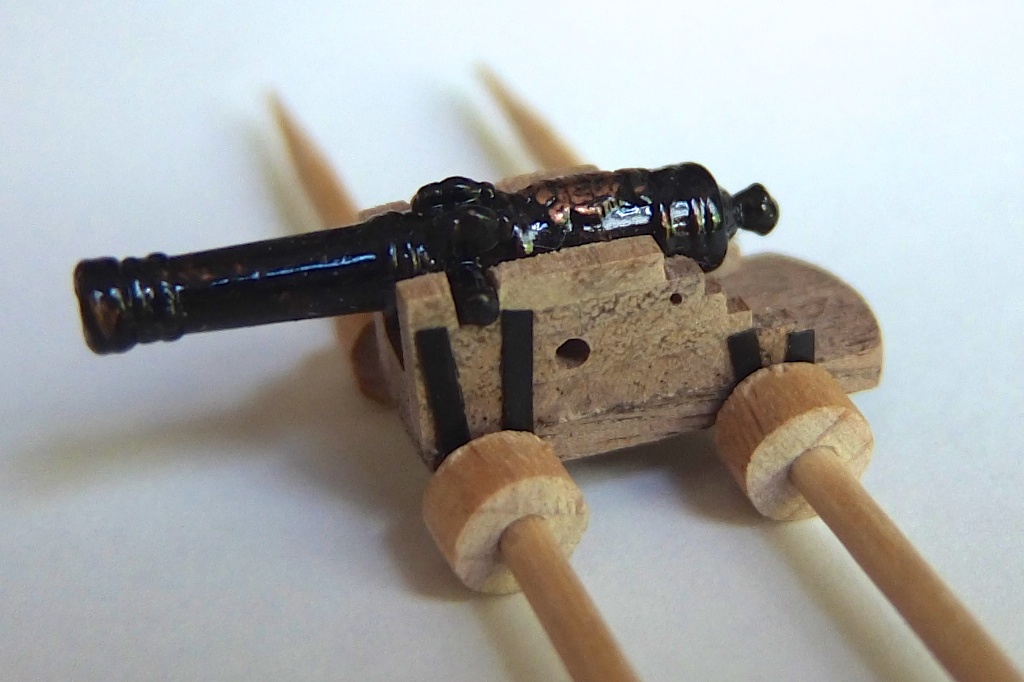
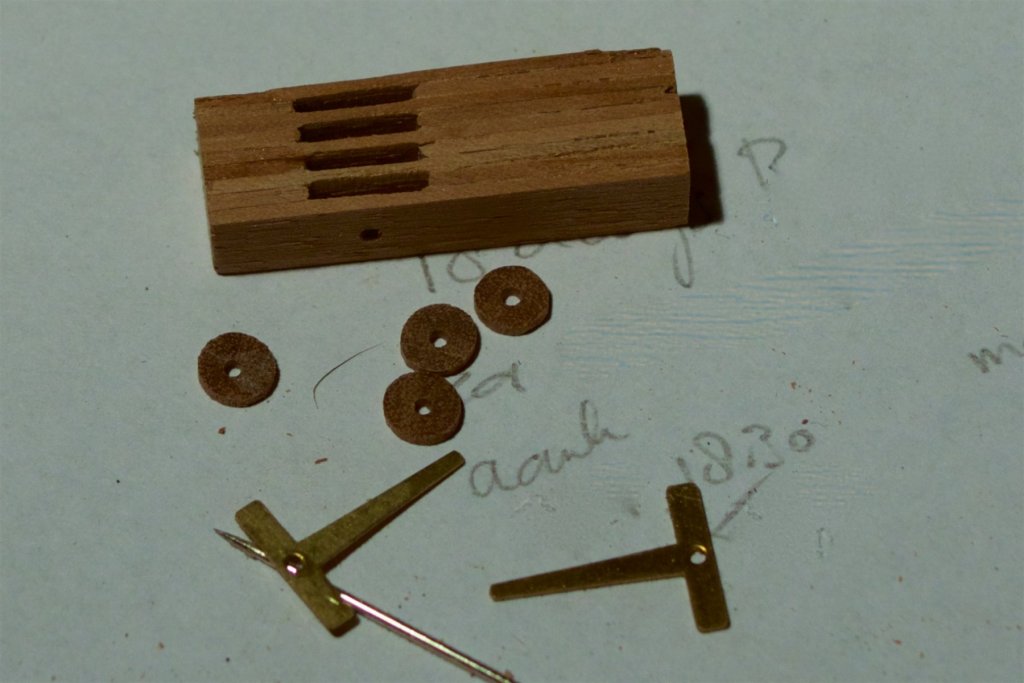
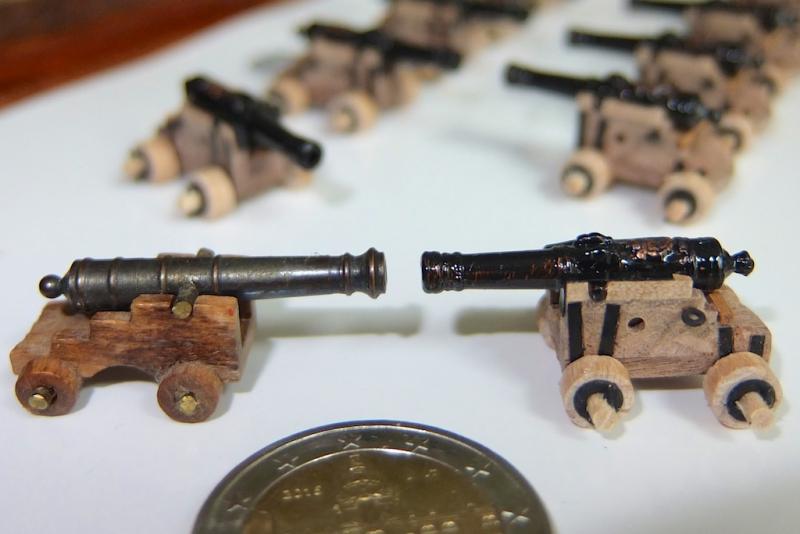
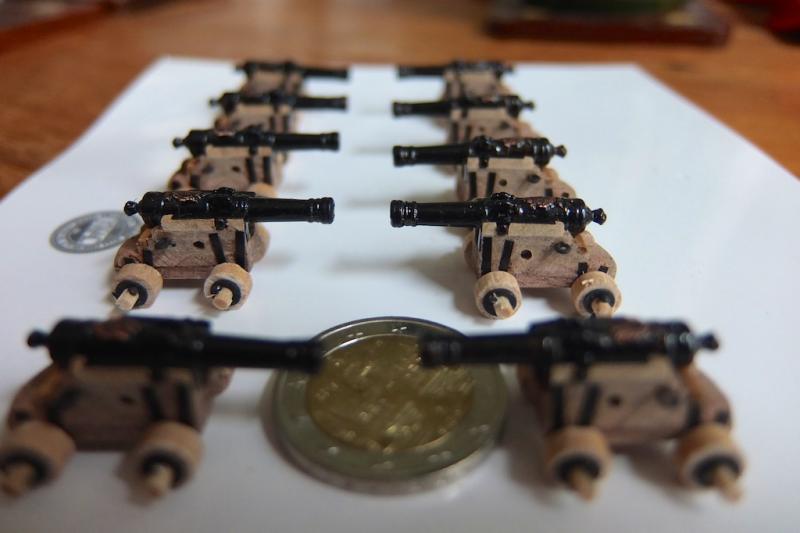
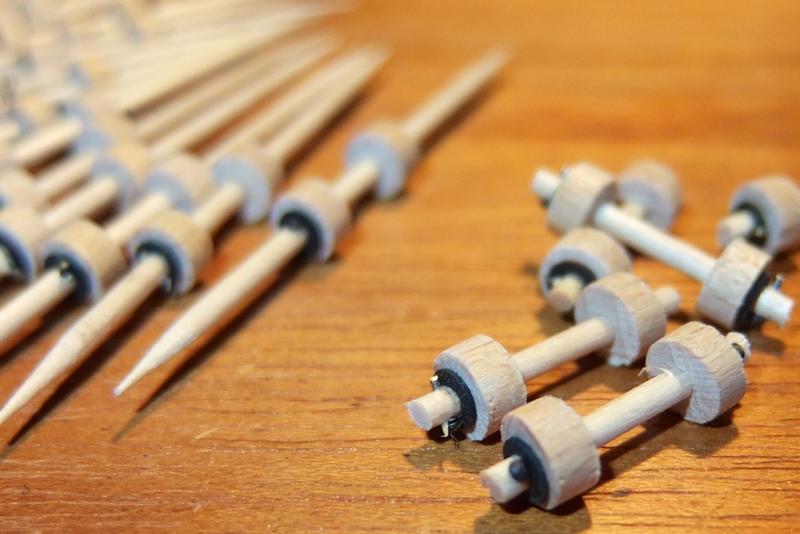
I have finished making the canons. I made 16 of them, also two for on the highest deck nearest to the end of the Wasa. I made the axes from soft wood, which were actually sold for use in the kitchen in food preparations. They have a diameter of 2 mm, which was the desired size. I used washers (bought from Amazon) with outer size of 4 mm and inner size of 2 mm for the discs next to the wheels. I spray painted them black. I drilled holes into the axis to be able to push small nails trought them. Because of the soft wood, I could use a knive to cut the axes to the desired length. Pictures of the canons. The coin is a 2-euro coin. Compared with the canon, as supplied in the kit....


-
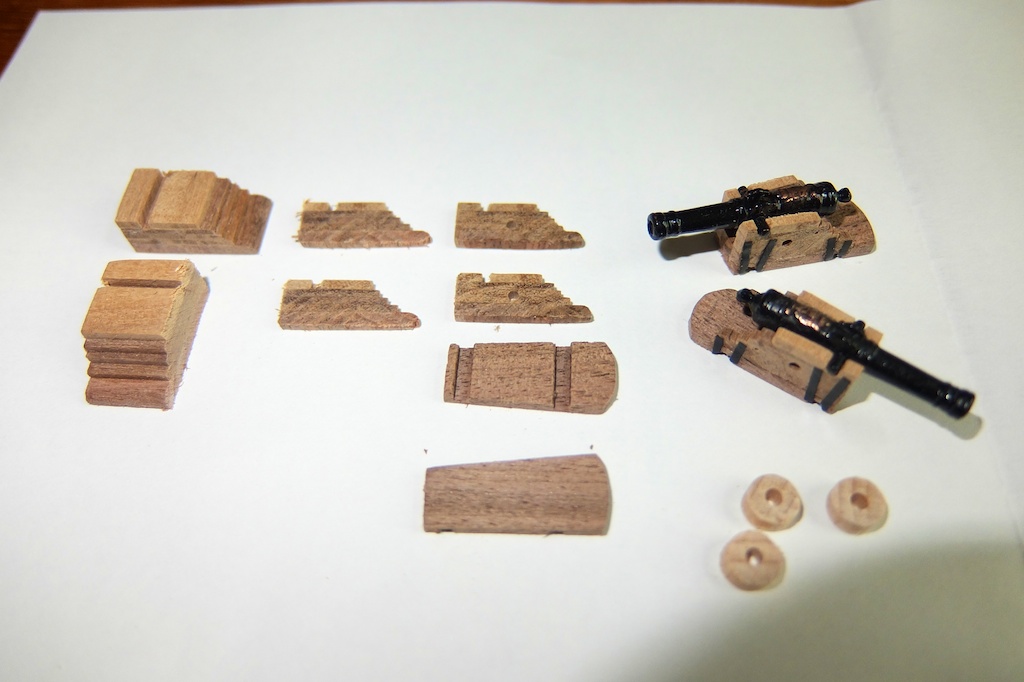
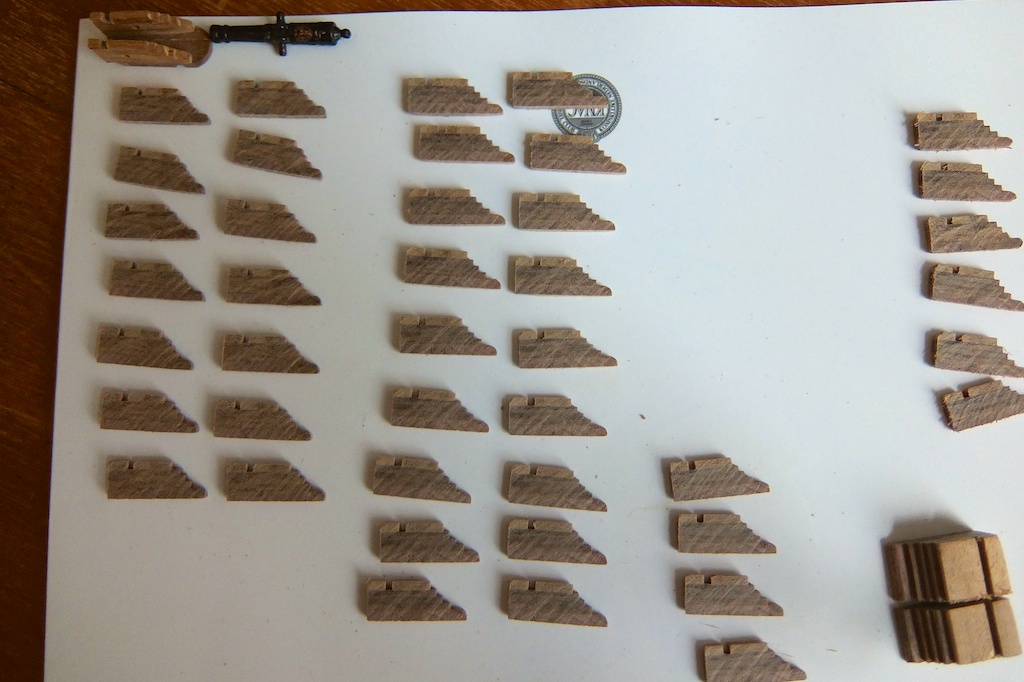
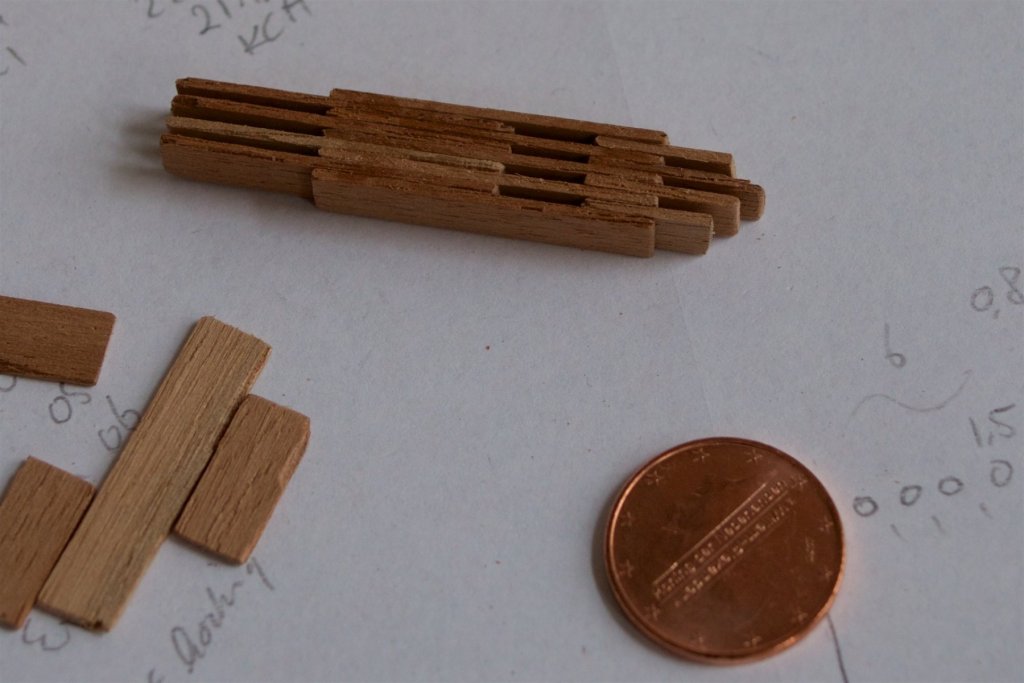
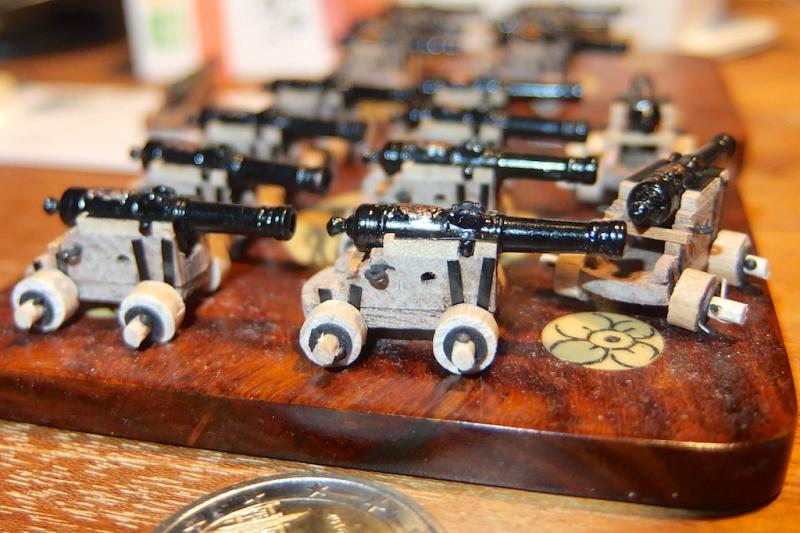
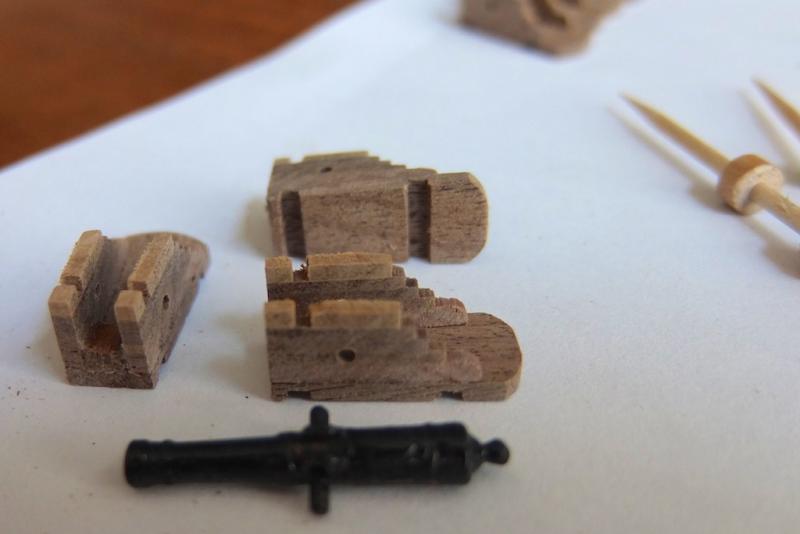
I finally continued with the canons. I had seen on MSW the method that I have used: glue together many strips of wood, so that the carriage profile is built up. Then I used my saw to cut slices from it. Of course, not all slices survived the sawing action, but I had made plenty. I milled two lines in the wooden strips used for the bottom of the carriages. Here the axis of the wheels will fit into. I had made some thin sheet of polyurethane in black color (I did so at work; I work in a coating company) of about 0.2 mm thinckness, from which I cut small strips to be used as wheels supports. These polyurethane strips are flexible and I could bend them somewhat. all the stepts combined in one picture, including the wheels that I made from a 6 mm wood and drilling a 2 mm hole in them (I made a small holder in order to drill them all straigth and in the middel): Next will be to add the wheel caps and attaching the axis & wheels to the canons.


-
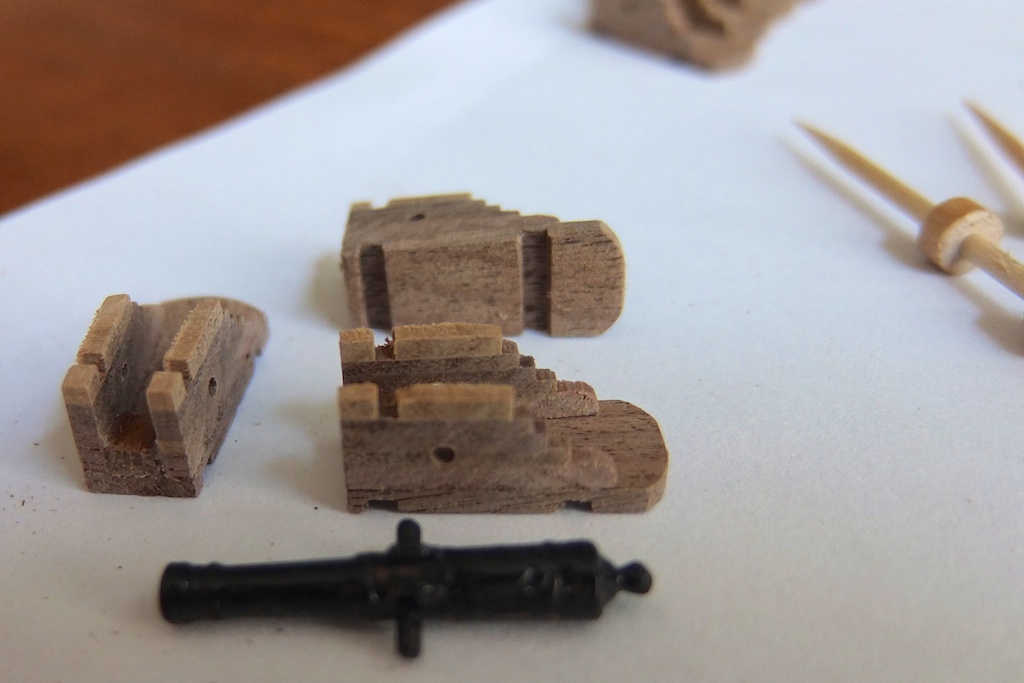
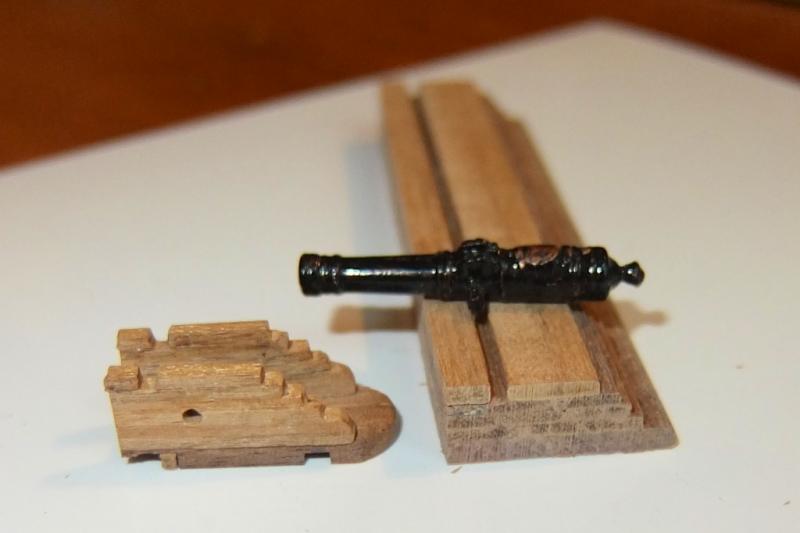
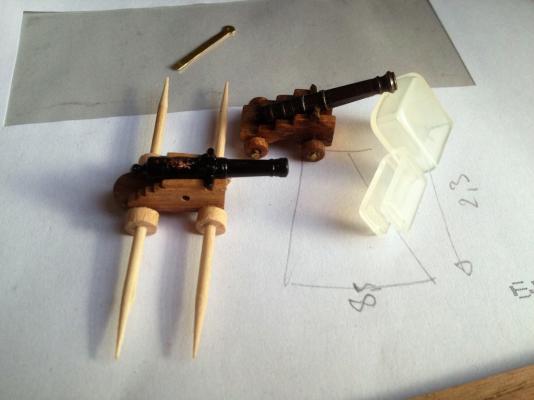
I have started with building a prototype for the canon carriage. Of course, I have looked carefully at the examples of the members of this forum. In the picture: the one in front is my (still in progress) carriage, together with an after-market gun; the one at the back, is the set provided by Corel. I will add metal parts and rings to complete the prototype. Once I have figured out the sizes and methods to make a nice looking and good fitting gun carriage from the various tiny parts, I will continue making the remaining 15 carriages and guns...


.jpg.b145c82b1371cd781597a5046c611863.jpg)