HOLIDAY DONATION DRIVE - SUPPORT MSW - DO YOUR PART TO KEEP THIS GREAT FORUM GOING! (Only 20 donations so far - C'mon guys!)
×
Andre
-
Posts
152 -
Joined
-
Last visited
Content Type
Profiles
Forums
Gallery
Events
Everything posted by Andre
-
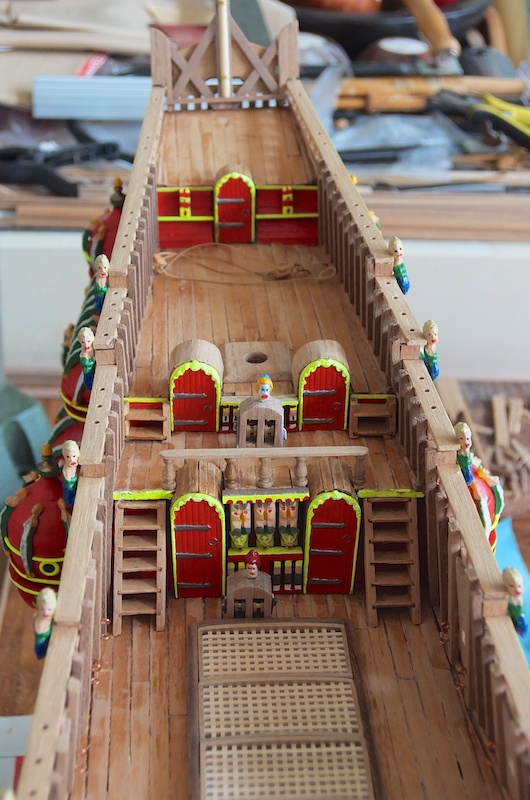
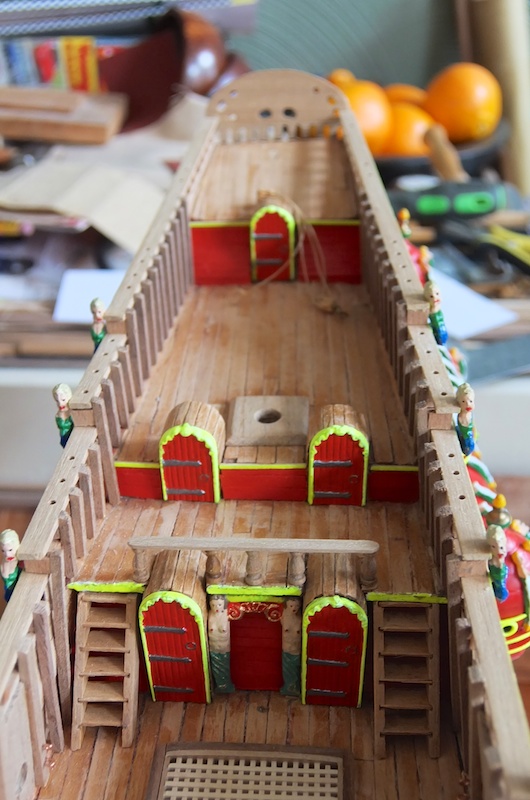
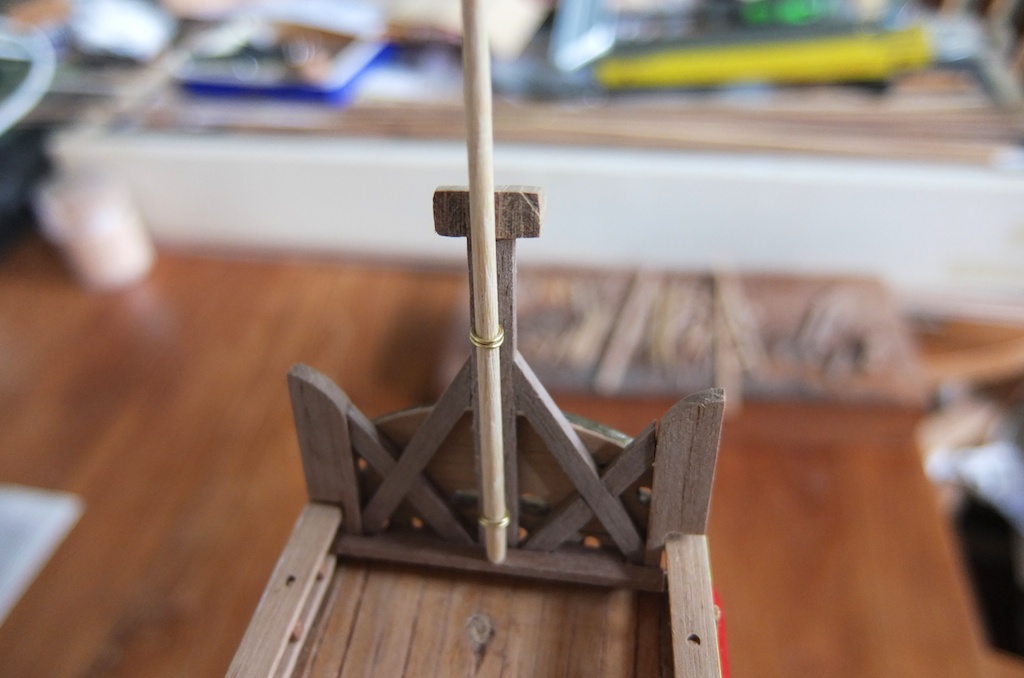
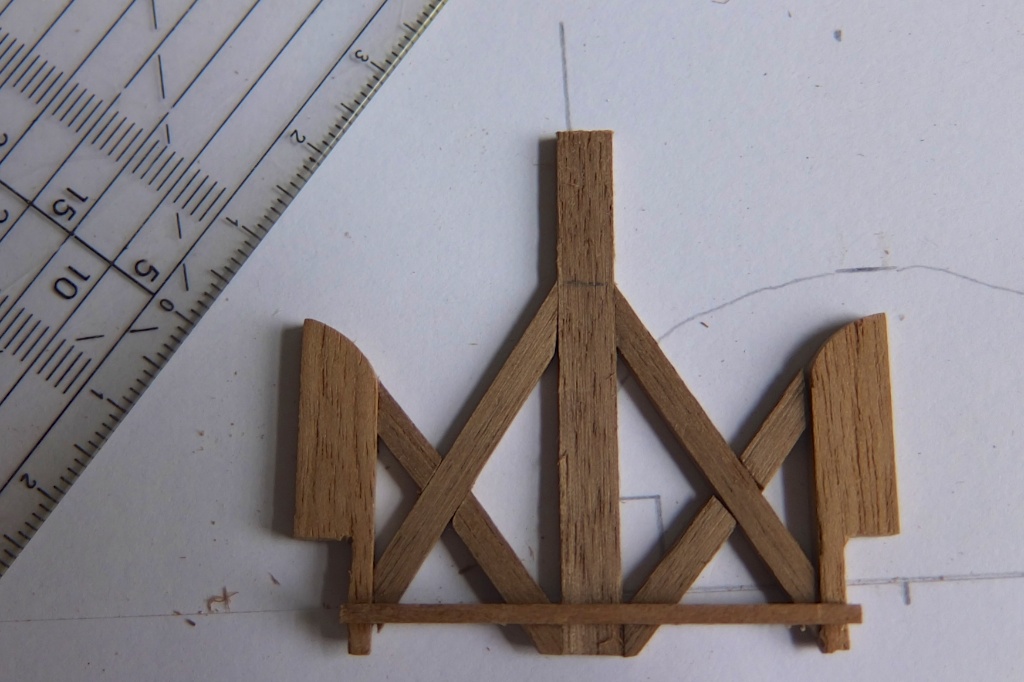
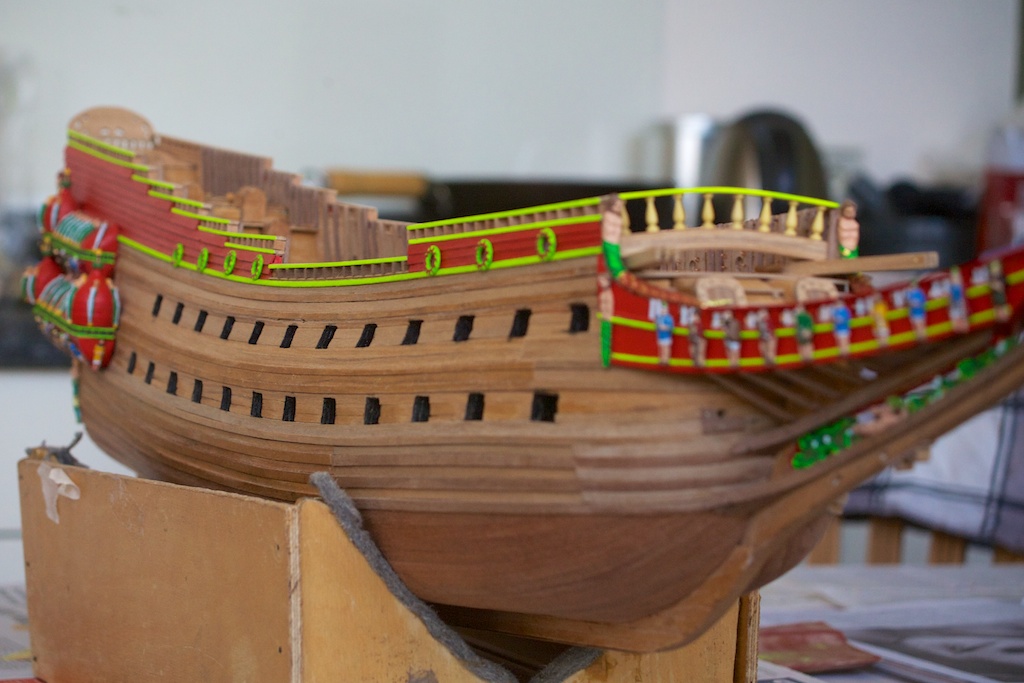
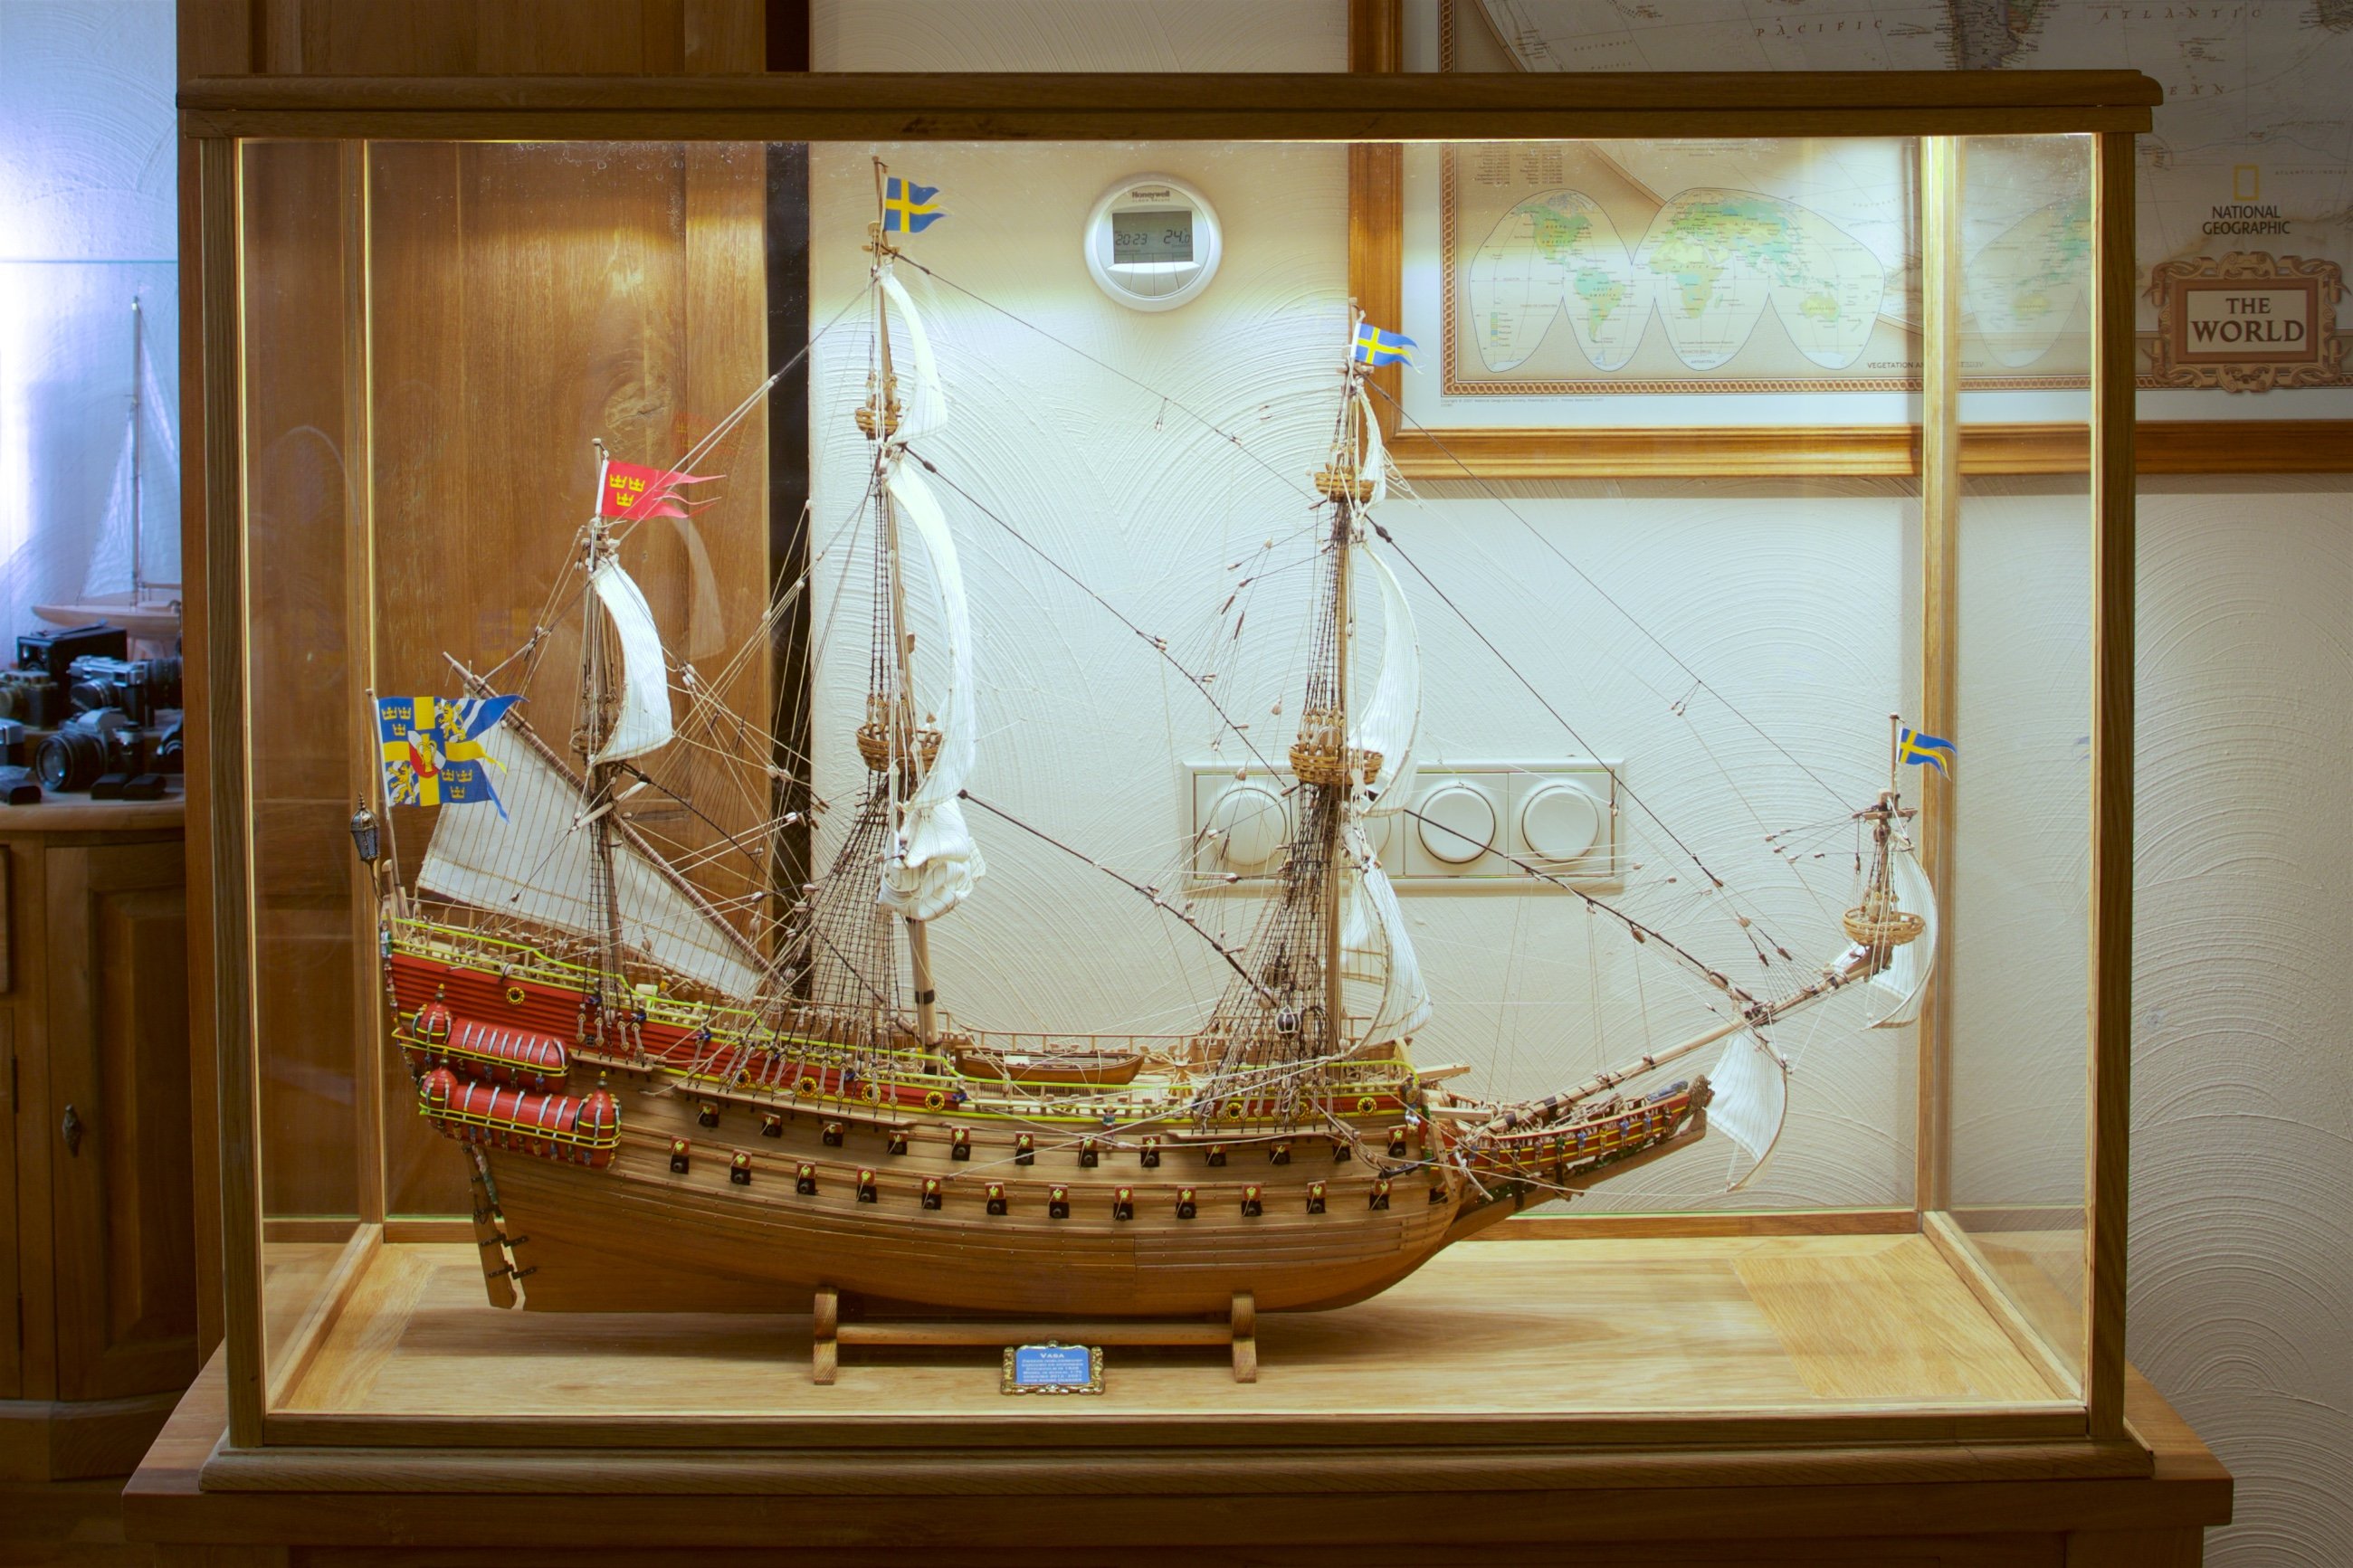
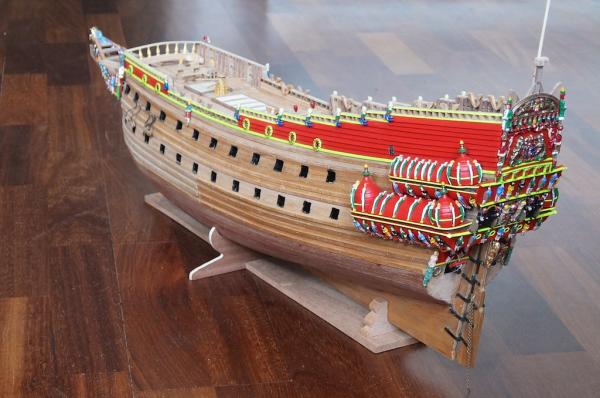
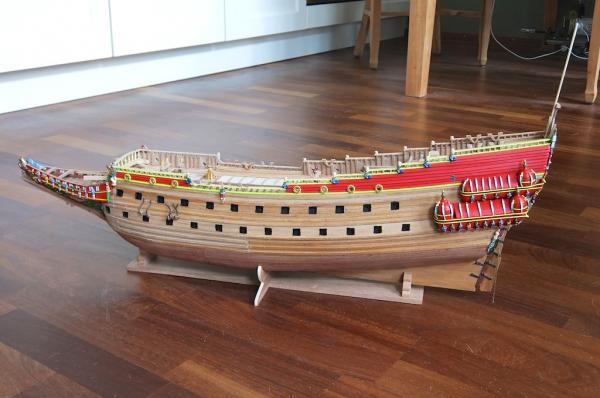
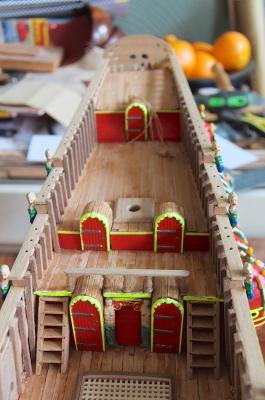
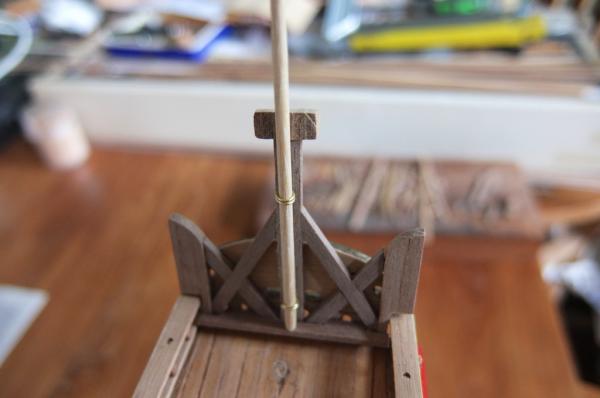
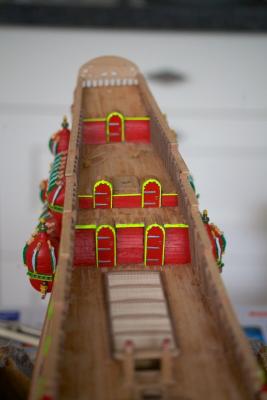
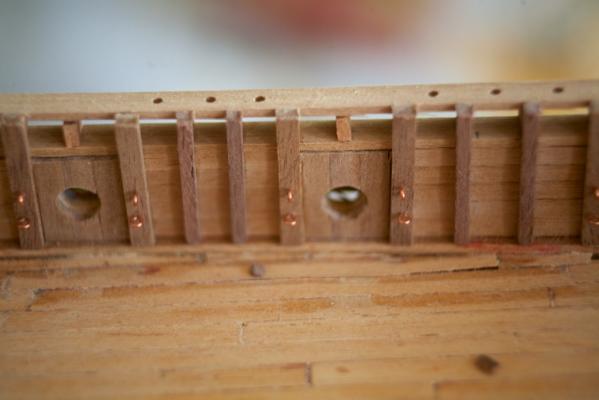
 I have made some additional parts on the inside of the hull: the wooden beams to which the ropes are attached (I do not know the names for these parts...). And I have made the stand. Previously, I had my Wasa on a 'working stand', but the view and appearance of the model on a proper stand is much more appealing. The pictures give a view of the complete model as it is now. My next efforts will be on the hand rails.
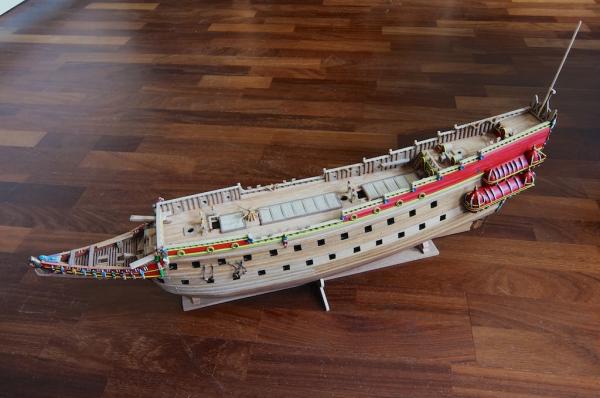
-
Hi Micahel, Nice to read your efforts to obtain the book. I have the e-book edition as well. Very nice book with great drawings, indeed. I would also honor a previous agreement for buying/selling, like you have done.
-
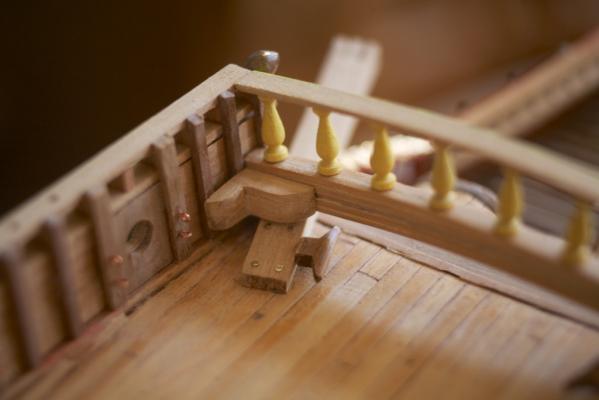
Michael, You were right about the railing in the Corel drawings. Your second and third picture of your post of Sept 1st are identical to the drawings of my Corel model. I had not looked into them for a while, and now I did notice (again) that indeed the railing is on the drawings, as depicted in your pictures. But the 1:10 model in Stockholm does not have that railing at that location.. About the Landstrom book: the prices are somewhat less high if you look via Amazon in the UK.
-
Hi Michael, Thank you for your compliments! I had made/adjusted my bow entry doors inspired by the pictures of the model in the Wasa museum and by the ones of your build ! The reference picture that you have found with seven musicians as pillars is actually of the interior. On page 108 of Landstroms book there is a very similar picture where he starts describing the interior cabins.
-
Matti, The railing at that section is not part of the Corel kit, nor is it present in the 1:10 model in the Stockholm museum. I had seen a shorter railing at that section in the build from Michael (md1400cs), and in my opinion it seemed a suitable location to have a small railing.
-
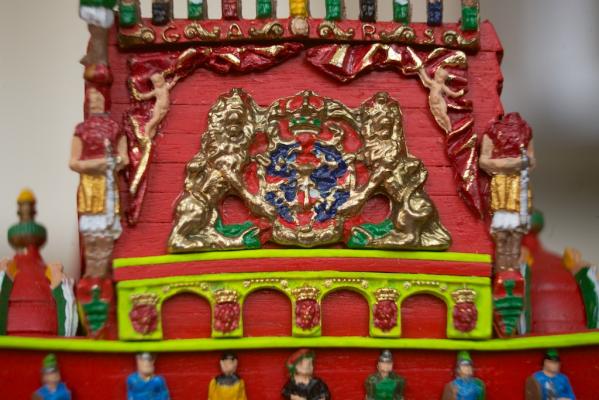
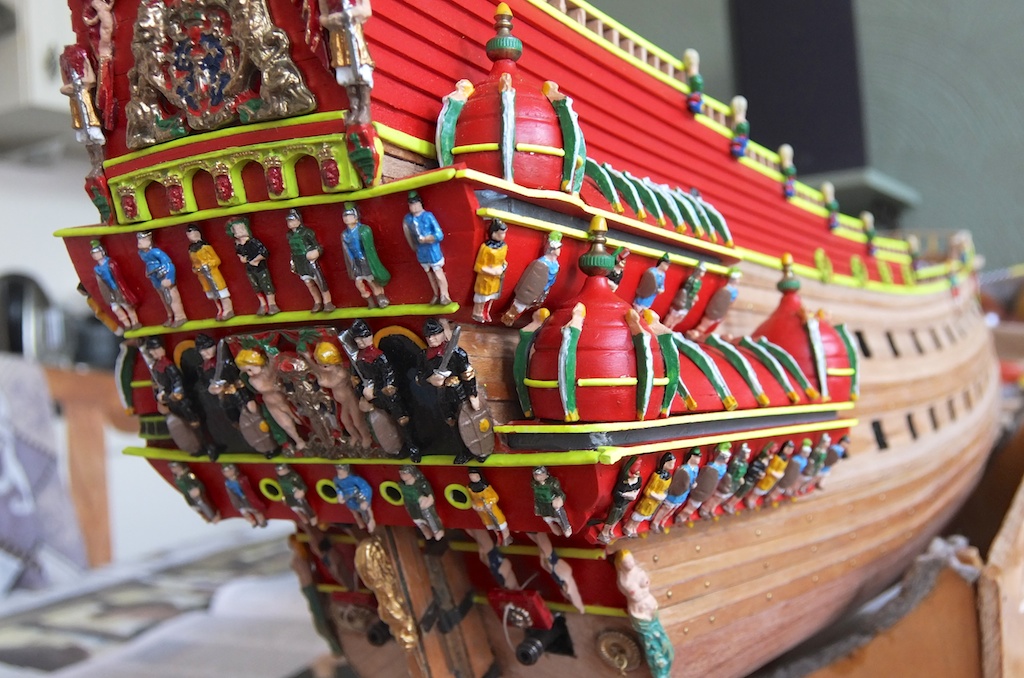
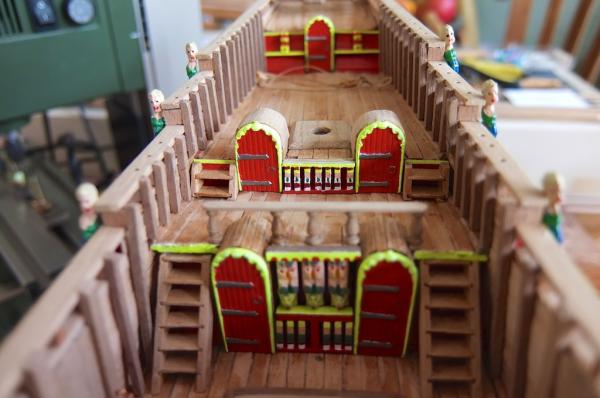
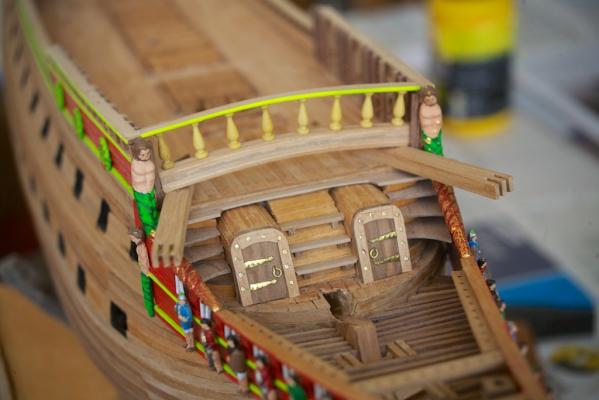
The last 2 weeks I have been busy with making the decorative parts between the stairs on the decks. In the 1:10 model in the museum there are several scluptures visible in these sections. Therefore, I decided to remove the kit-sculpture and make my own. I have emulated the very small sculptures by painted small pieces of wood, and I made some decoration that should emulate the sculptures that are visible between the stairs on the main deck. The pictures show how this turned out. Having done so, I also glued the deckhands to the deck.

-
Michael, Thank you for your nice words. We are indeed at almost the same stage in our build, but yours still serves as an example for me. Having found this forum is very fortunate for me, as I see many well build examples that are inspirational for me to try and improve and adjust on the standard model. Ans seeing that many photos of Wasa models is also very helpful, and indeed a reason to make more photos myself during my build.
-
Some text, although the pictures probably already tell enough.. I have meanwhile finished the yellow strips of the galleries on the port side. And have subsequently done some minor work on the bow section: I still had to make both gun ports closest to the bow. When rebuilding the bow section I had not yet made these ports. Luckily, it was solid wood underneath at this part of the bow, so it was only drilling until the correct dept was reached. I subsequently painted the inside of the gun port black, as I had done with the others. In addition, I have replaced the straight beams (with holes for the rope holders) with curves beams on the bow section (floowing examples on this forum). And made the deckhands to be placed on the deck. And have build the upper part of the stern, using the very detailed pictures of Michael (md1400cs) as guidance.

-
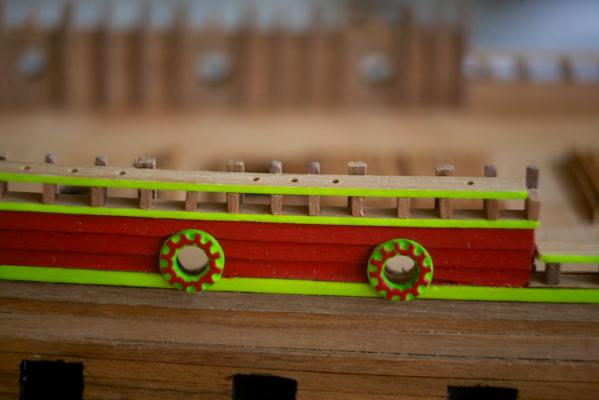
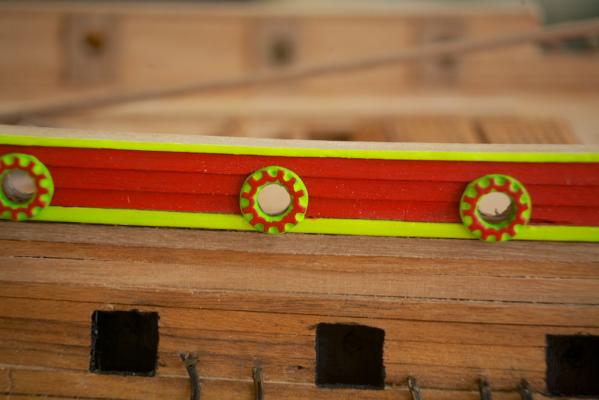
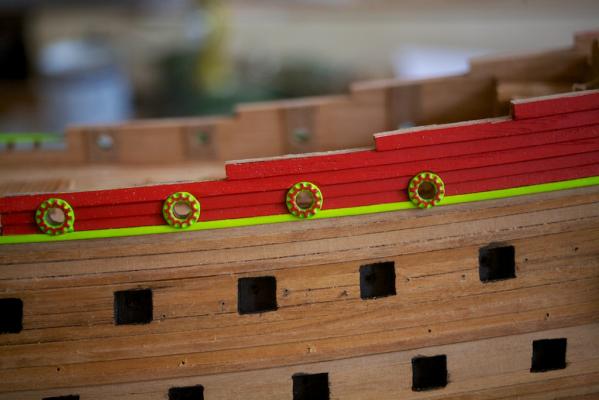
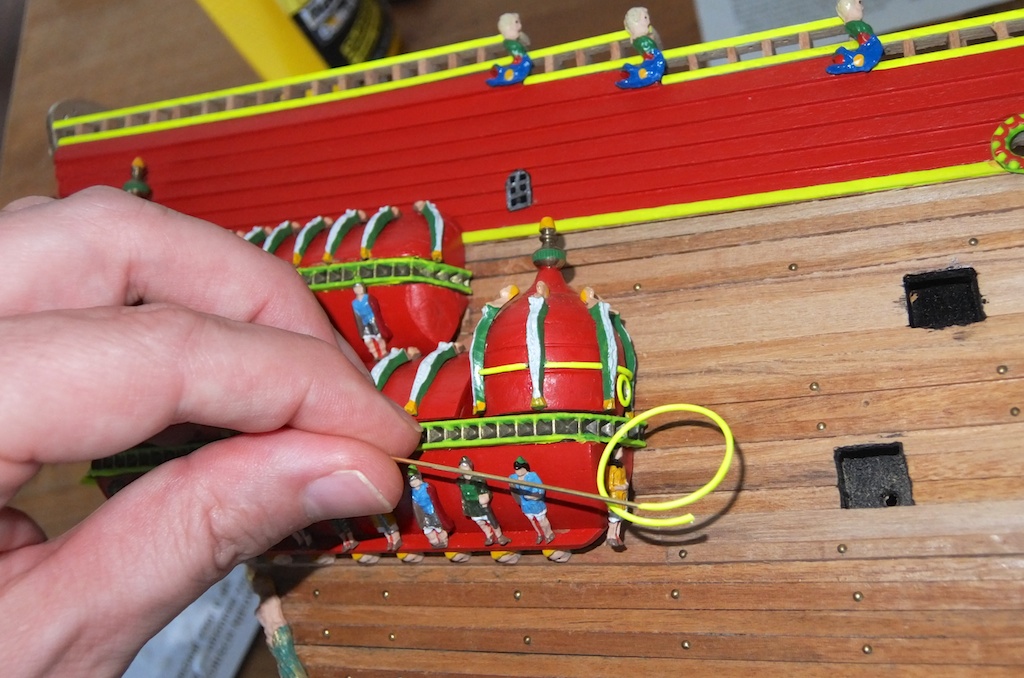
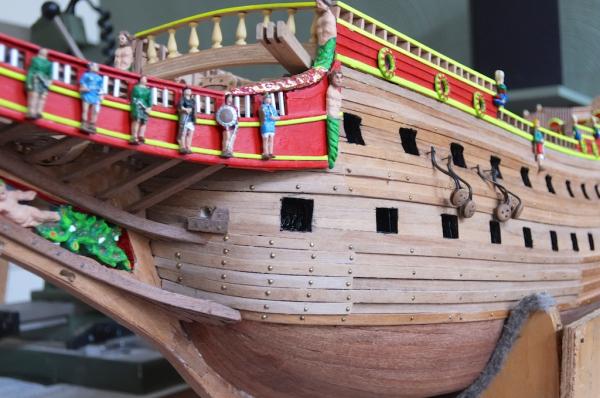
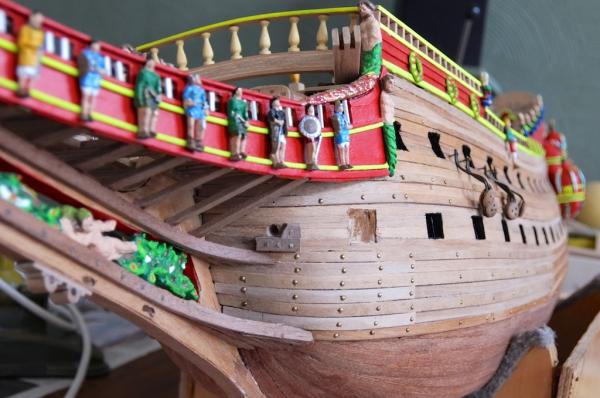
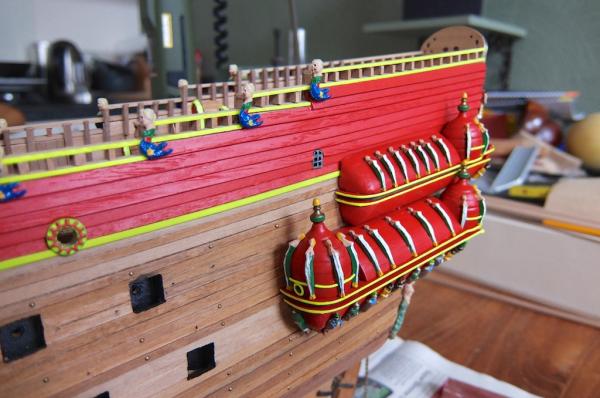
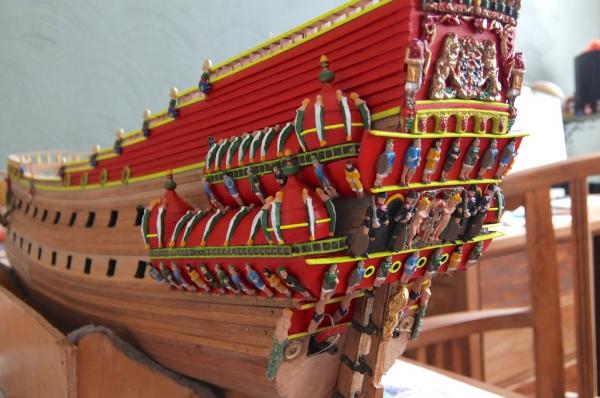
Like several other Wasa builders on this site, I decided to change and improve something: I was not really satisfied with the brass strips of the galleries. They did not stand out in my full color painted ship, also not when painted. Therefore, I have started replacing them with wood. I have seen this in other builds with good results and decided to try this myself as well. I have now done these strips on the starboard side and next is the port side... I will later decide if I can add some additional vertical bars/poles to simulate the standing sculptures along these mid-gallery strips. In addition to these gallery strips, I have also added some yellow decoration to the towers to simulate the painting as I see it on the Stockholm model, and have also added the circular holes in the lower galleries and in the stern. The pictures: I bent some brass wire circular and then clipped it to size and glues them to the towers: The starboard side of the stern: The port side of the stern:


-
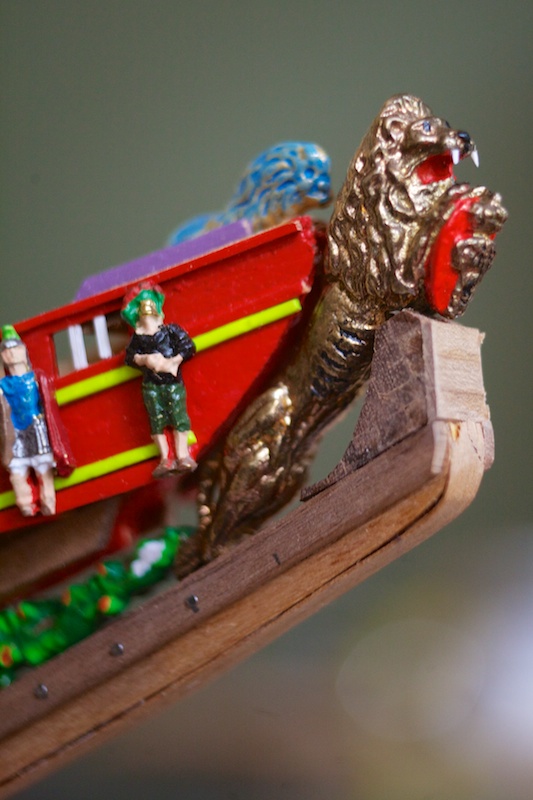
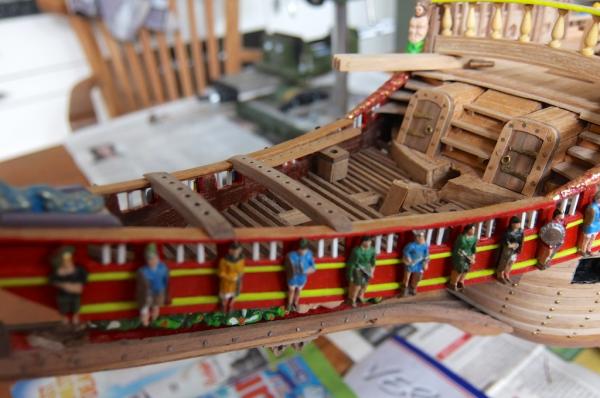
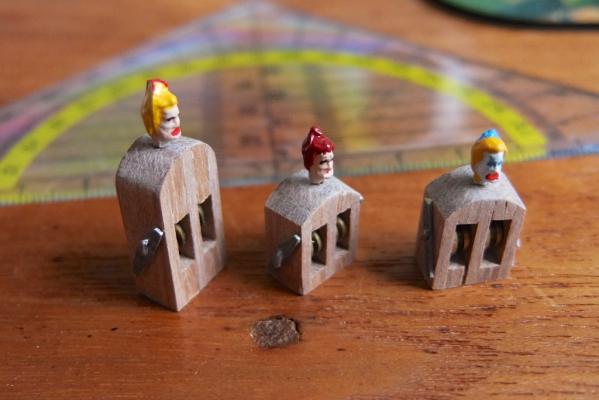
I had long thought about, but finally decided to add some nails to the hull of the Wasa. I had seen this on the Wasa model by Michael (md1400cs). I added nails to the thick beams running alongside the hull. In this manner these beams are more accentuated, because I found my hull somewhat poor in contrast and structure. I am satisfied with the outcome. See some of my pictures. In the front view, it can be seen that the beams leading from the bowbeam to the hull are not ending at the same position. I saw this too late and decided not to redo this, as probably the model will mostly be seen from the side or from the back... I added more details to the side of the hull by glueing some remaining figures, also to the railings alongside the deck. Later I will be adding the thin railings as well. These figures will not hinder me then. Furthermore, I added a window at the back of the side. (see photo)I followed here what I had seen in the recent pictures from Michael.


-
Again impressive. Always a pleasure to read and see your updates !
-
Jan, In your Dutch build log you asked for feedback on why your bow roster was too high. As far as I could see on your pictures, it seems that you have attached the outer parts of the bow sections somewhat too high. I compared your bow section against mine (the level of my roster is somewhat below the hull level) and the curve of the outer parts ends somewhat lower in my build than in yours. At the time when I attached them, I checked with the brass figures how high these bow parts should be. Hope this helps..
-
Nice to see another Wasa; and that it is from a different kit manufacturor than most others here. I like your copulas! Your time was well spent on these.
-
My build has been paused for several weeks. But this was for a pleasant reason: I have been on holidays for some weeks and subsequently busy with sorting and selecting my many photos from that trip. This week I did some small details on the railing and it was very enjoyable to create something out of nothing again. While being busy with my holiday photos, I realized that I had taken several photos during my visit to the Vasa Museum in 2009. At that time I had not even thought about building this ship model. Actually, I became interested in building a Wasa model because of my Vasa Museum visit. I have attached some of my these photos, and in some of these even interesting details can be seen. Until my next update on my progress, which will be soon I assume. My photos from the actual Wasa in the Stockholm museum:


-
I have been away on holiday travels for some weeks and am now catching up on all your efforts. As I said before: an amazing level of details that you are achieving!! My compliments!
-
Michael, Always a great pleasure to see your updates and photos. Your work is really amazing, and a real inspiration for me. I am looking forward to your next posts when you have returned to building again.
-
Thank you all for your compliments. I have several other kits waiting for me. Most likely my next build will be the Half Moon from Corel, which I have bought as a new kit. I had originally planned to do that one first, because it is rather small and does not seem to be as complicated as a full ship-of-the-line warship. But that was before I was able to purchase this Wasa...
-
The yellow that I used on the linings is Revell 312, a satin color. I am not really satisfied with this color, because it has indeed a somewhat greenish hue in it. And in artificial light the yellow is not really visible as a yellow color. Nevertheless, I decided to stick with this color, because I did not want to use gloss colors, and the only other satin yellow in Revell colors (310) has too much orange in it. I used this color 310 for some figures though.
-
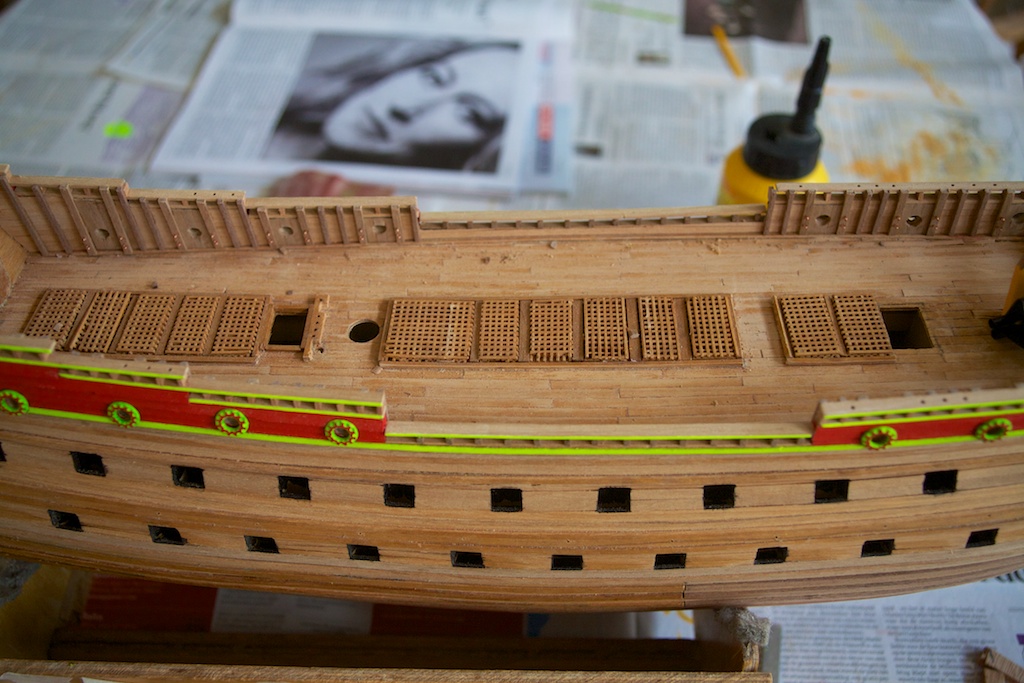
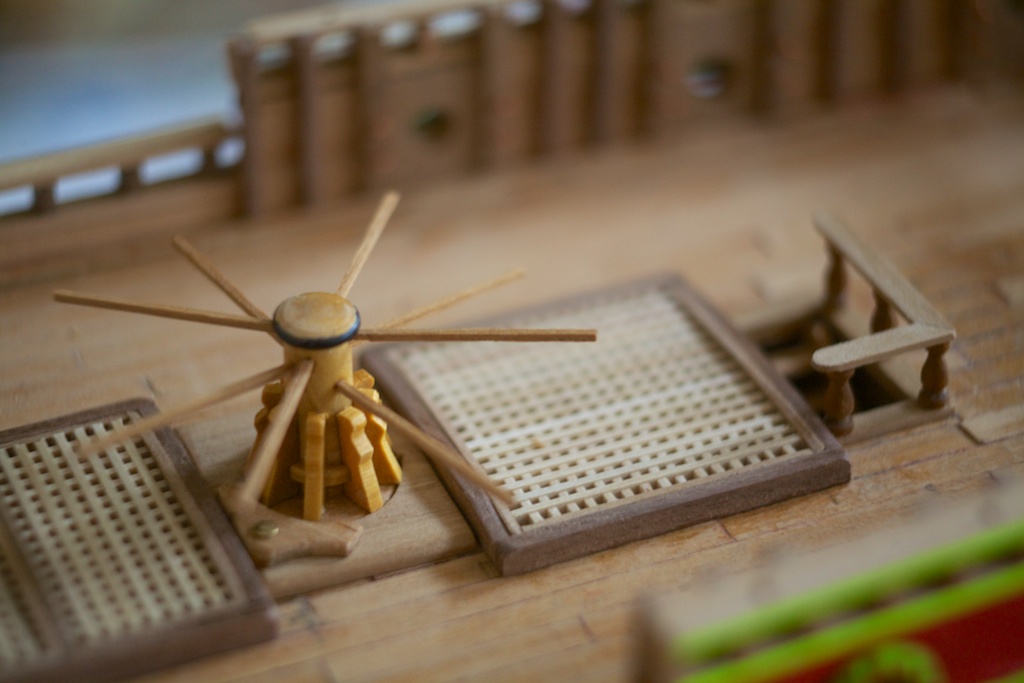
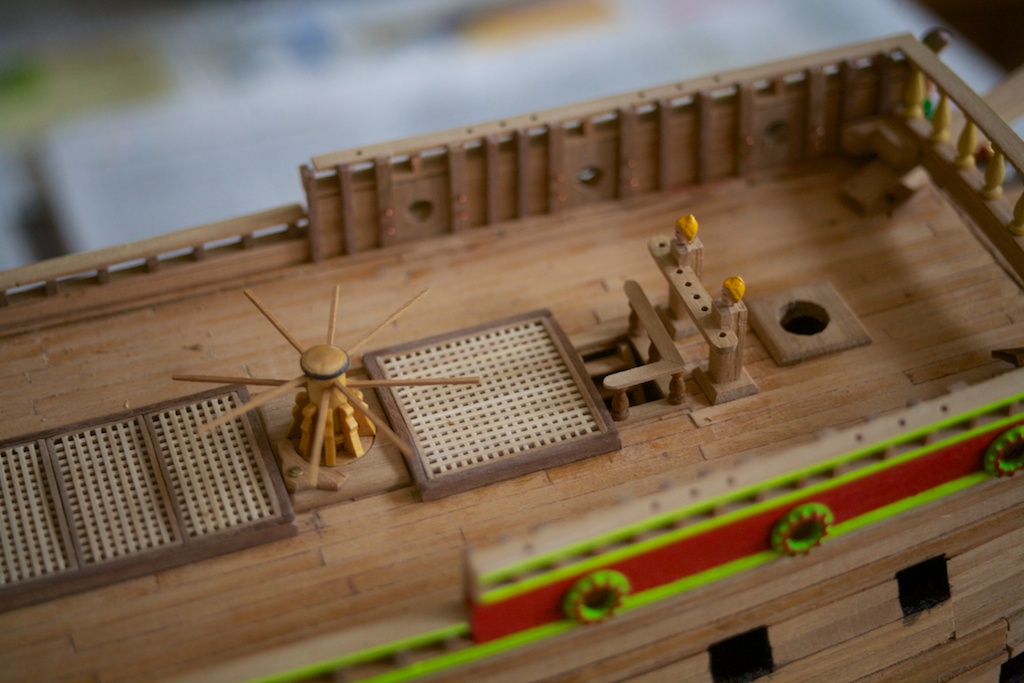
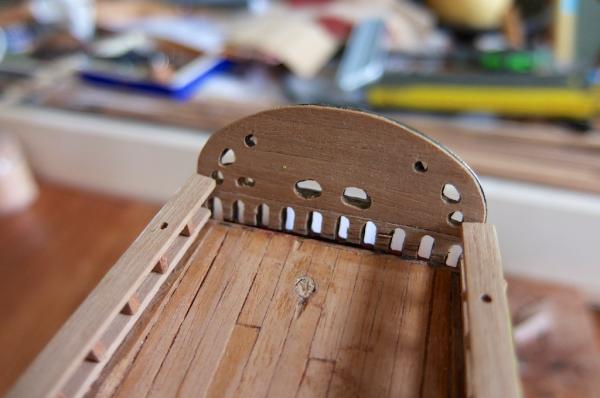
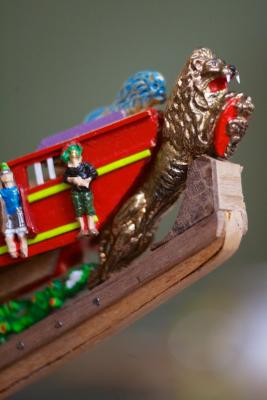
First thanks to all who are replying to and following my build. It is a tremendous stimulation to read all your remarks (and compliments). I noticed in the build by md1400cs and Janv that apparently the current kit is somewhat different from my older one. I have the kit with the blue box. In the build by md1400cs (Michael) the capstan is shown as from the kit and that Michael decided to build his own because the kit-version deviated too much from the original. I have (re)built mine from the parts of the kit, but my kit-version more resembles the original than his kit-version. I added the beams to the capstan myself. In the build by Janv I saw his bautifully painted lion figurehead and that its paws fall ouside of the bowbeam. Unfortunately, my older lion figurehead is different as the paws do not have an opening between them. Also the head is differently shaped. I added the white teeth myself. I have worked further on the items on the main deck. I made new gratings (I added a picture of the old gratings as well), and made them not according to the plans, but based on the museum pictures: gratings within a curved frame, and almost all gratings of the same size. As described above I made also the capstan, and having seen such in the build by md1400cs, I also added a 'brake'. I continued further with my coloring, as I now also painted some of the inside of the deck and the doors on the deck. the old gratings: my progress: My lion figurehead:


-
When I had decided to paint the model in colors I made it myself a little easier by limiting myself to the color palet of the Revell satin colors. I prefer the satin over gloss on models because I think this is nicer to see and also more realistic on scale. These satin colors included the yellow (nr 312) that I used a lot for the lines on the model, but I am not really enthousiastic about this color because it has a greenish hue and in artificial light it does not appear as yellow. But the only other satin yellow is nr 310 which has too much orange in it... Concerning the other colors: the model in the Stockholm museum has also mostly primary colors on it, but on the figures other colors are used. Hence, for painting the figures I had to do some simplifications. During painting I became somewhat more daring and also mixed some colors painting the larger figures at the bow and stern section and wiped some paint away to add some texture.
-
I have been busy with the upper deck and the railings along side them. I have added rings for the cannons in the beams adjacent to the canon holes. Next was the front side of the upper deck section. I have curved the lower beam, as I had seen that this was alsothe case for the real Wasa. I had furthermore added some support beam behind them, as I had seen pictures of the museum Wasa in the the build log by Nazgul. I have added the second row of railings. Here is a few of the linings seen from the bow. Next will be the gratings on the deck and the further items on deck...

-
I only recently became aware of your build log. I will be following it intensely because I am building a Wasa myself as well, but one from Corel. Since people always say that the Billings version is most accurate I will be looking at your pictures and your experiences with great interest. Also the photos from the museum are much appreciated because they provided some views that I could not find elsewhere (and at the time that I visited the museum myself I had not yet foreseen that I would be building a model of it sometime later...). Regards, Andre
-
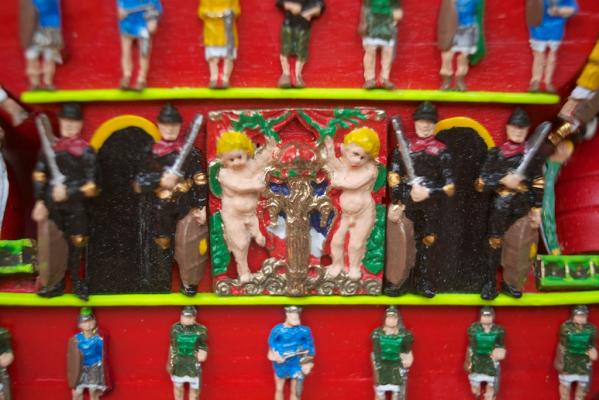
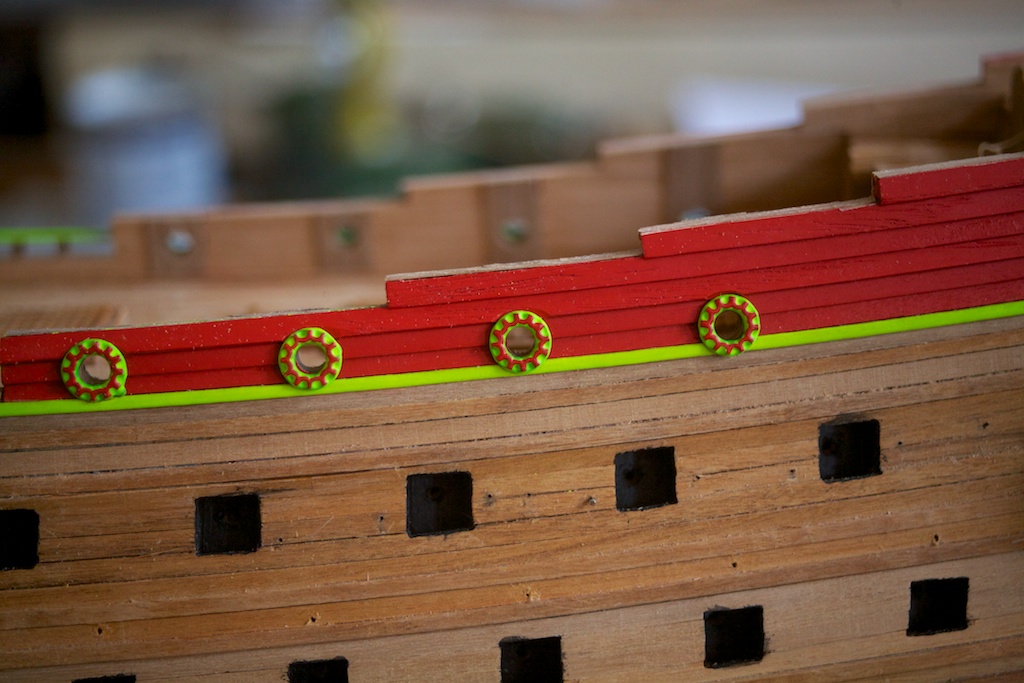
Thanks to all that gave me encouraging compliments. Highly appreciated !! I have meanwhile painted the decorative rings for the canon holes and placed them on the hull. I am currently busy with the railings and the sides of the upper deck. Because I added more wood to the sides, both on the inside and the outside, the thickness has become more than it should be. As a result, the beams that I placed on the inside of the railings will remain visible behind the railings. I have also added small rings to the beams alongside the canons, so that I can later add ropes on the canons. I will add a pciture of them later. I have now rediscovered the use of an extension tube on my camera to be able to make some macro pictures and I have added two pictures of the stern paintings.