HOLIDAY DONATION DRIVE - SUPPORT MSW - DO YOUR PART TO KEEP THIS GREAT FORUM GOING! (Only 20 donations so far - C'mon guys!)
×
Andre
-
Posts
152 -
Joined
-
Last visited
Content Type
Profiles
Forums
Gallery
Events
Everything posted by Andre
-
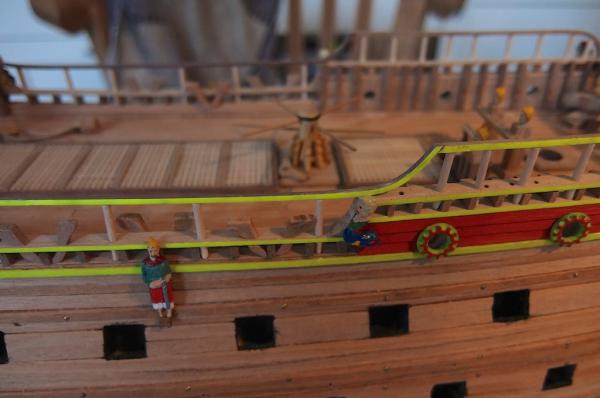
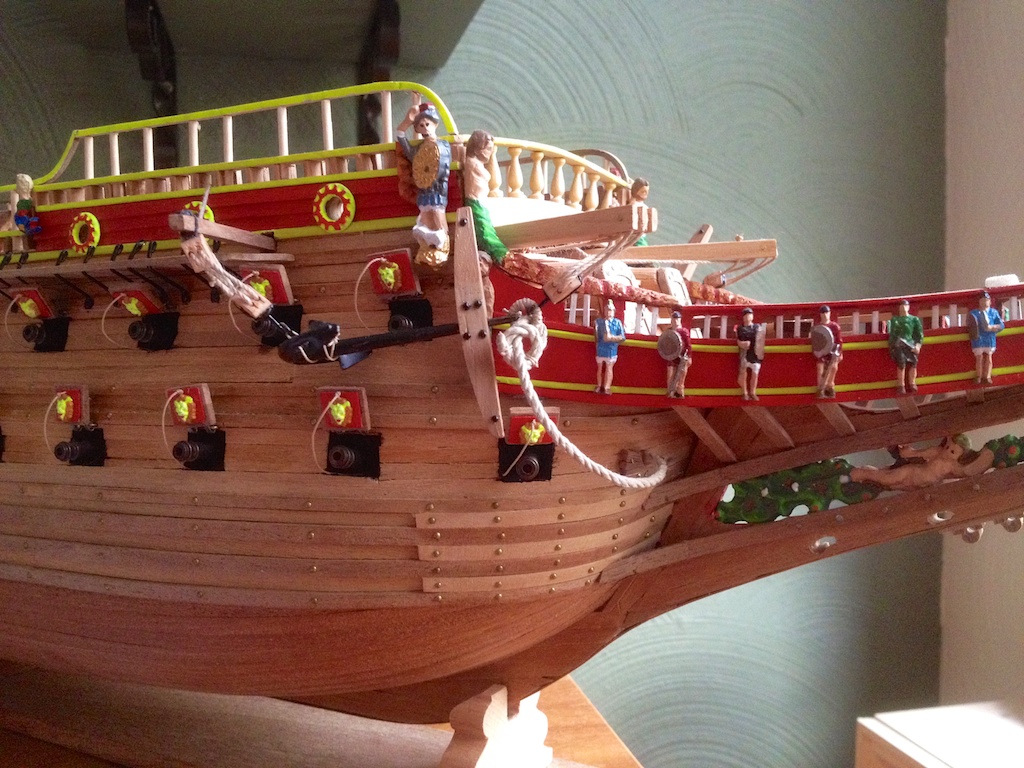
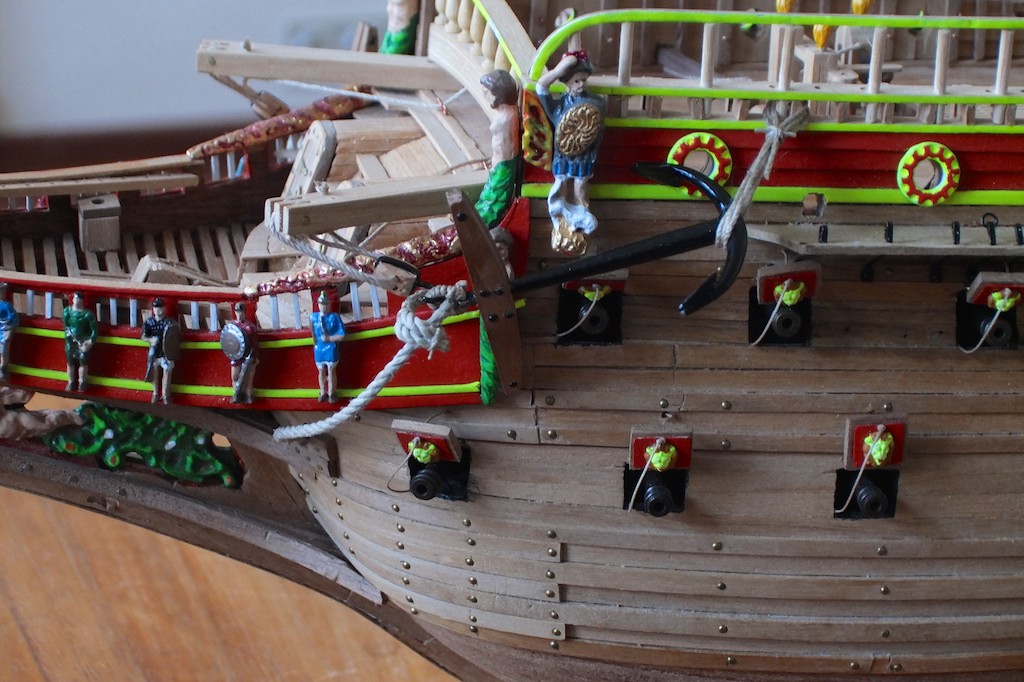
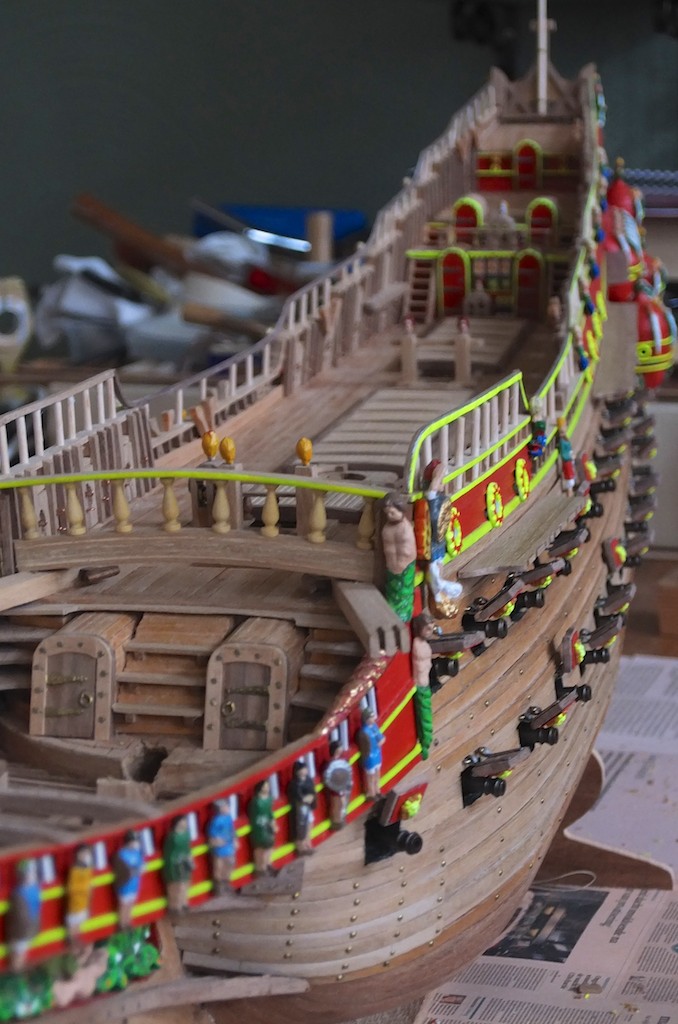
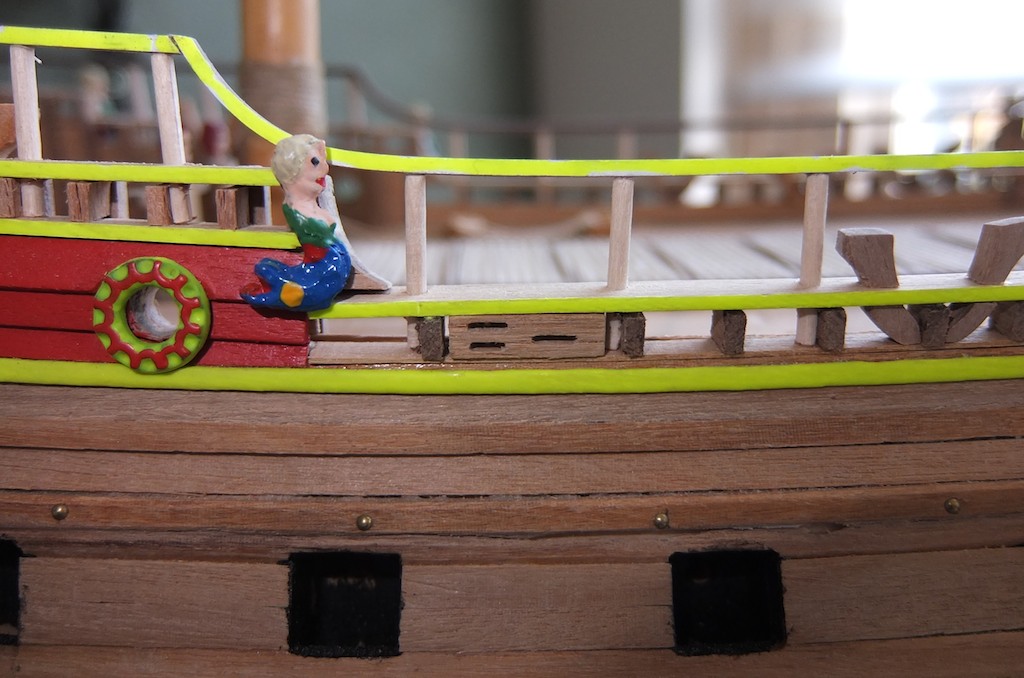
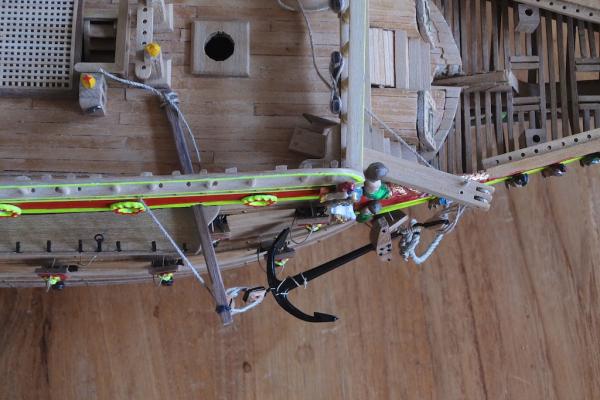
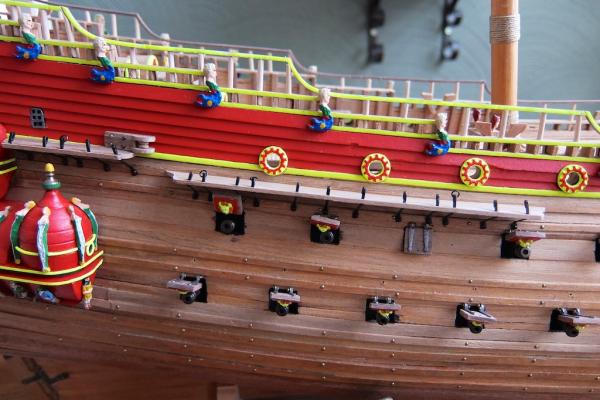
 Somehow, I did manage to install the gun port at the front, with enough space for the warrior between the gun port and the bowsprit side railing structure and with enough room to have the gun port open. However, if you look carefully, you could say that my gun ports do not align perfectly nearing the bowsection... Before attaching the railing structure, I first dry-fitted the warrior to check for sufficient space. I needed to remove part of the Corel-supplied railing structure to have enough space there.
-
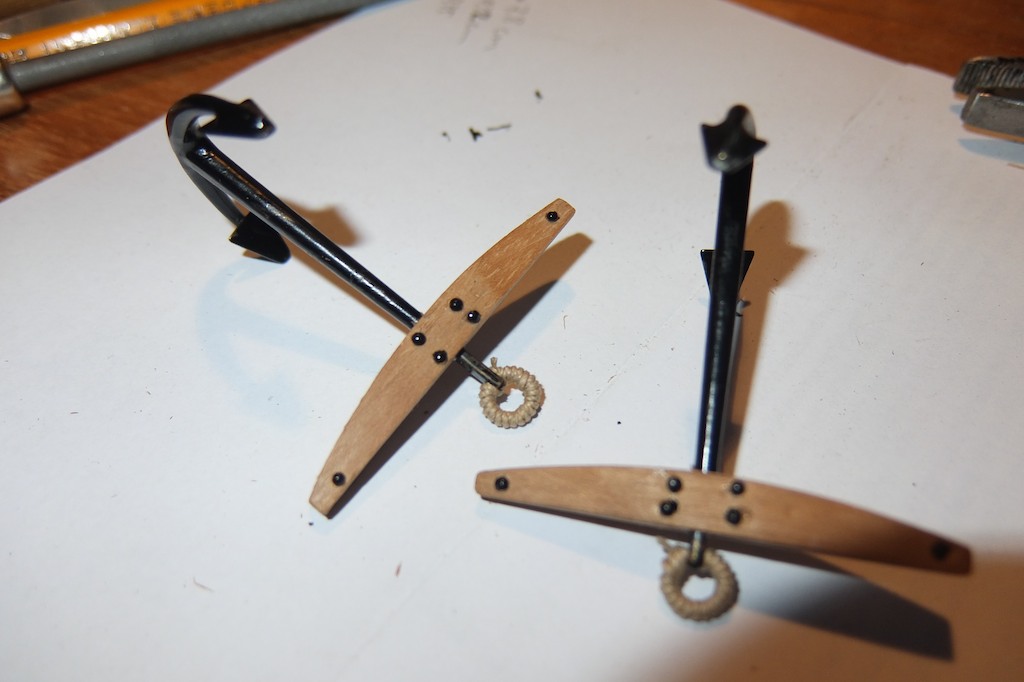
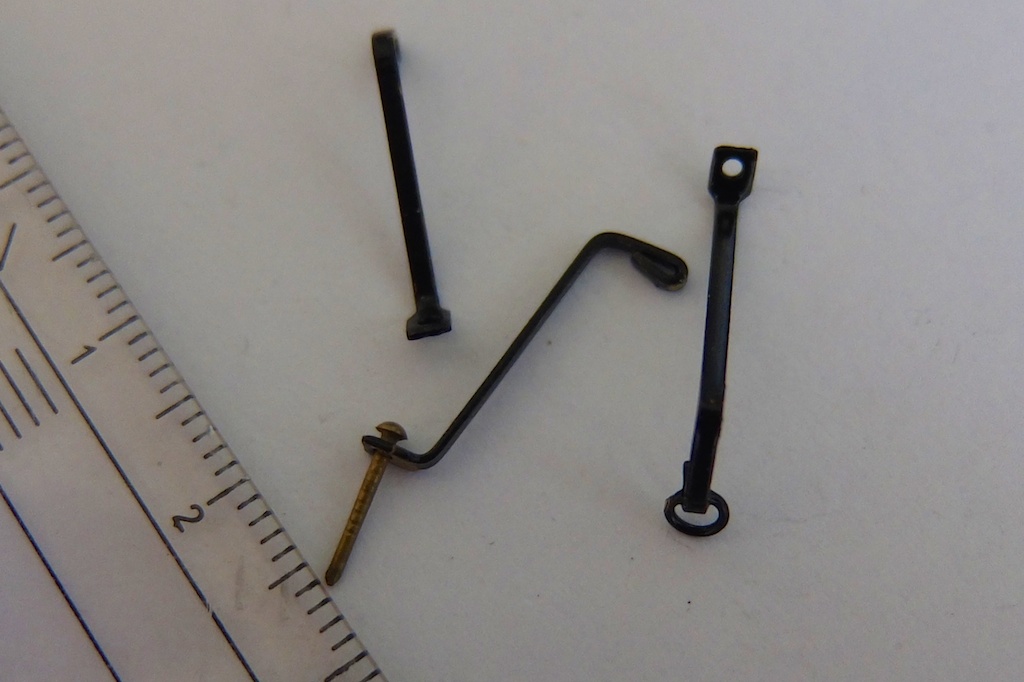
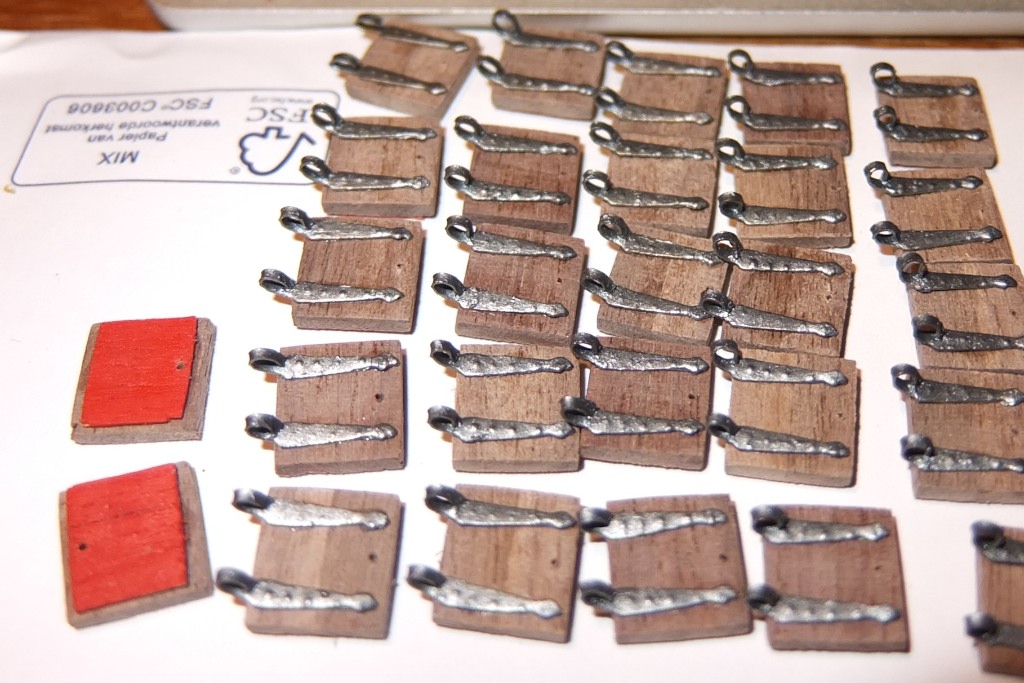
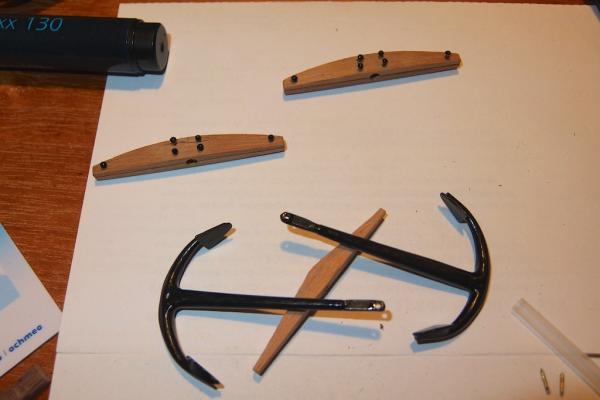
It has been many months of inactivity, but the last week I have resumed again with my Wasa. Following on my last post: I did eventually manage to retrieve the canon that had fallen into the hull. I have made the anchors, and following the examples of Michael (md1400cs) and FrankM, I used the drawing of the Landstrom to make a fish davit for holding up one of the anchors. I decided to attached the davit on the starboard side, as depicted in the book. On port side, the anchor is attached simularly to the model in the Wasa musuem. I did not use the stocks provided in the lit, but made my own from two pieces of wood glued together. I added small nail heads to emulate the treenails. I made the hooks on the blocks using brass and fixated the hooks using a brass piece that I had in my box of general parts.


- 206 replies
-
- 10
-

-
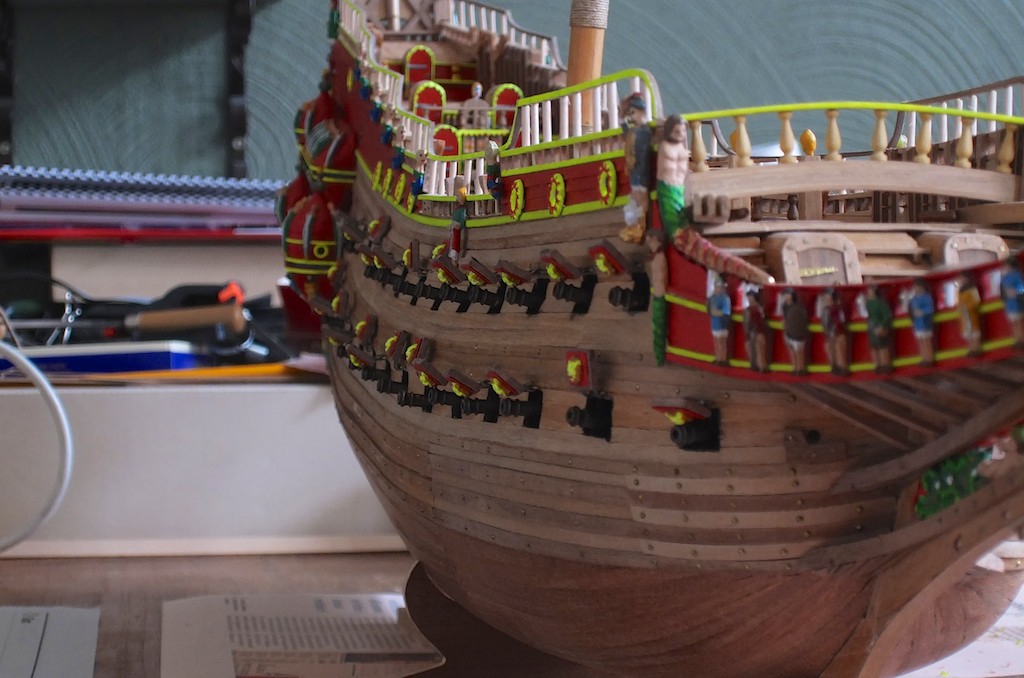
Keith, Indeed, I realized that I can purchase some additional after market canon to replace the one lost inside the hull. First, I will check if I can use the kit-supplied deck gun to fit into the gunport. I have already bougth 14 decorated guns for the deck canons, so I have some spares. About the threads of the gunport lids: indeed, I drilled a small hole through the lid and also drilled a hole in the hull above the gunport. I made a small knot in the thread and put it through the hole in the lid. Then is pushed the thread into the hole in the hull until the desired amount of rope was left. Next, I fixated the thread in the hull with some glue. Afterwards, gravity made sure that there is some tension on the rope between hull and lid. The thread at the 'inside' of the lid was cut to the desired length and then stretched somewhat and glued at the lower corner of the gunport. This resulted in some tension in that part of the thread as well. Thanks for reading and commenting!
-
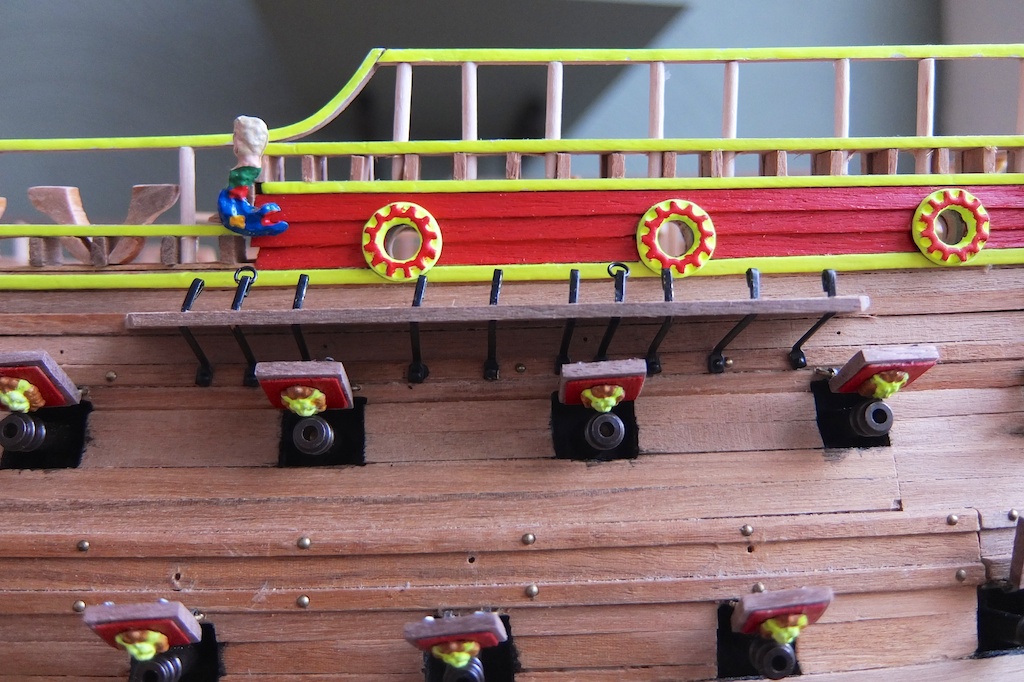
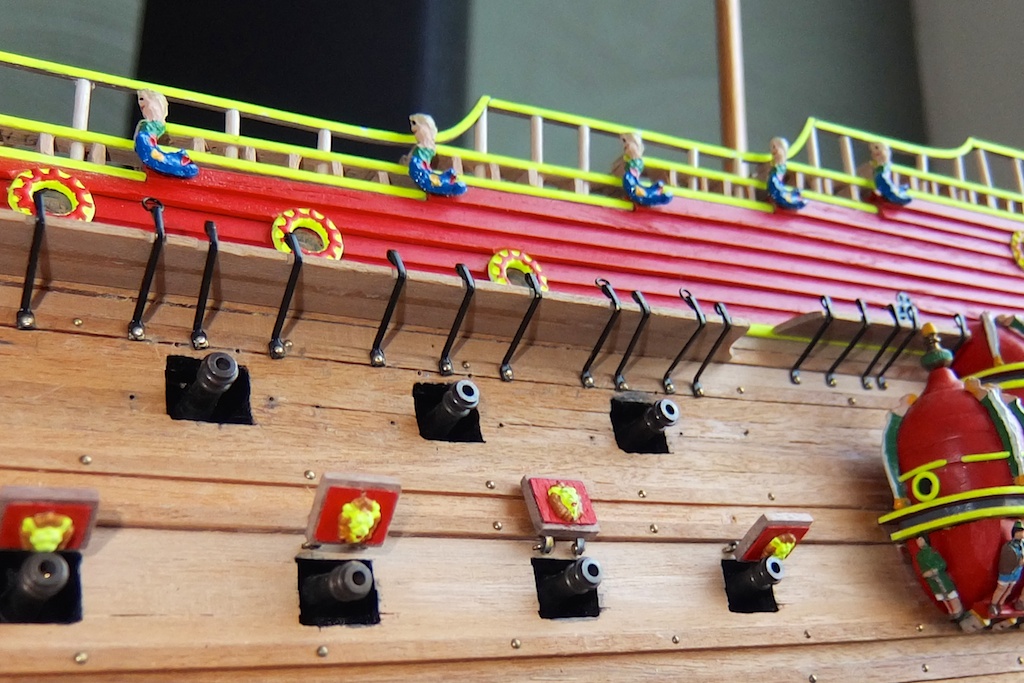
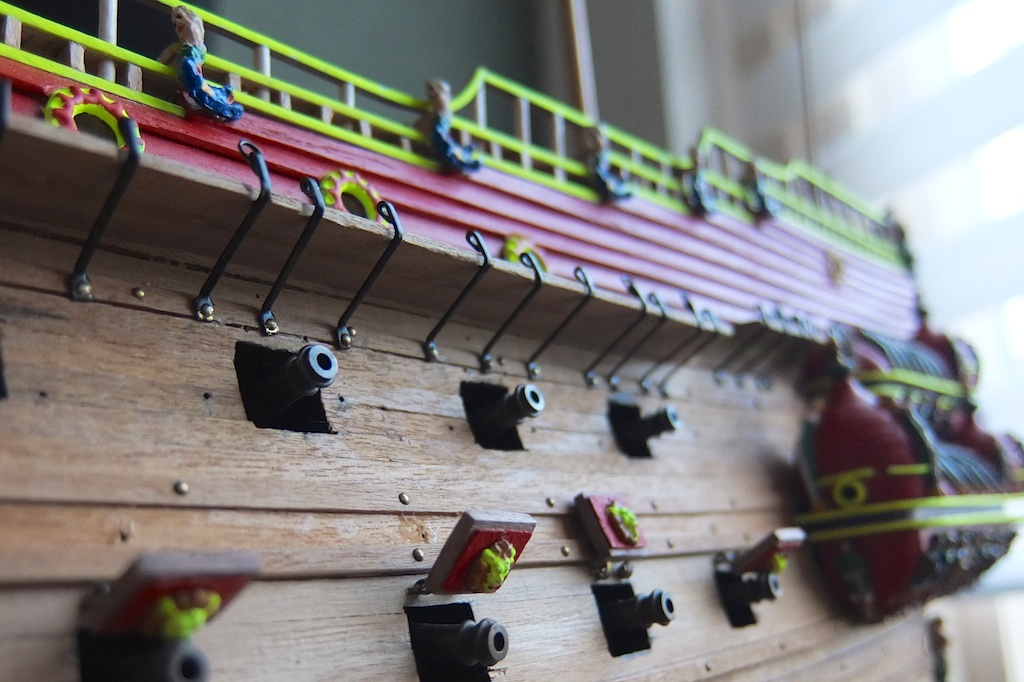
During the last days I have added the ropes that keep the gun ports open. (I do not know the exact name for them) The ones directly under the whales were most tedious because the attachment point to the hull was between the chain plates... Unfortunately, I am now permanently missing one canon. I lost it inside the hull when Itried to remove the canon before attaching the chain plates above it.. Some photos:
-
Karl, Thank you for your compliments. I use Revell paint. The cans read 'enamel paint', and they contain mekoxim. So I assume that they are acrylic paints. Regards, Andre
-
Karl, It is a pleasure to see the work of another skilled Wasa builder! Your bow section looks wonderful! I will be looking at your deck canons for inspiration when I start building my own... Andre
-
Michael, I am impressed, as always, with your level of detail! And I am lucky that I am a few steps behind you, so that I can learn from your experiences. Do you plan to paint the guns and/or the carriages? regards, Andre
-
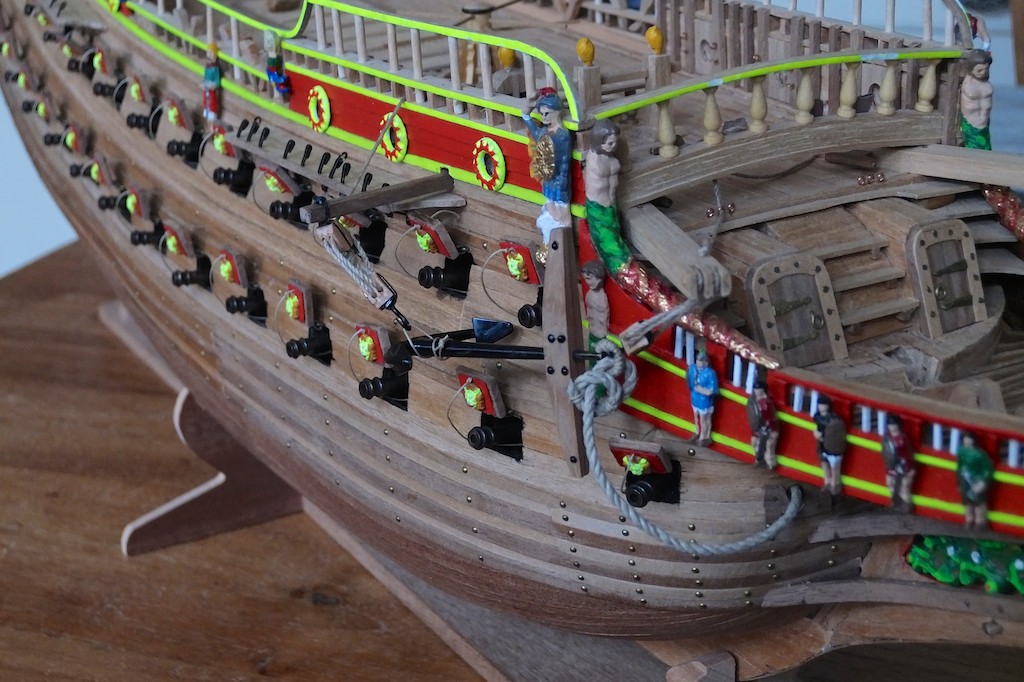
The last weeks I have been busy with the chain plates. I have now completed them, on both port side and starboard side. See the pictures. Lateron I will attach the deadeyes to them. Meanwhile, I have also made and installed the blocks that are located on the stern whales. I had seen them many times in the museum photos, but was only alerted to them when Michael mentioned them.


- 206 replies
-
- 11
-
-
Michael, I did align the chainplates' angles so that later the deadeyes and shrouds will line up. But I fear that I did not manage that 100% correct because of variations in my bending of the chain plates and on variations of the holes that I drilled. I did check with rope attached to the mast for the pre-aligning. Thanks for your comments!
-
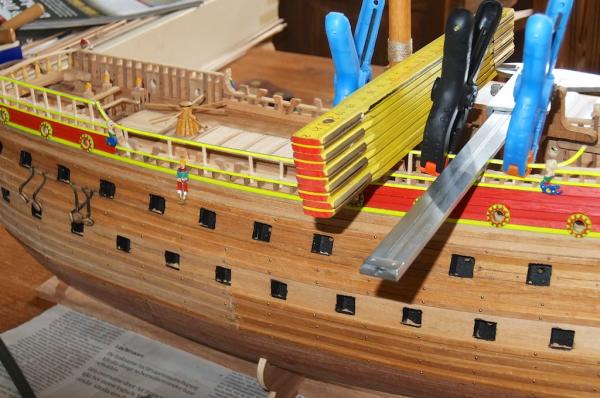
Earlier I decided to use the Amati chainplates by using only the base of it, but when I was sort of finished with preparing them all, I noticed that I had not ordered enough. So, I looked in my box with ship fittings and noticed same thinner brass parts that could also serve as chainplates. And to my surprise I had a lot of these parts. Therefore, I decided to use these found parts to turn them into chain plates. In the first picture they can be seen, after bending and painting them black. I have also started attaching them to the hull. Earlier, I had left spaces in the whales where the chain plates would go. They are not somewhat thicker, and I will need to compensate for that in the finishing wood that will be attached to the whales. As I expected, I had to remove some gunports to be able to drill holes for the chain plates. The results can be seen in the pictures, of the port side of the ship. Next will be the starboard side... Of course, I will paint the brass nails black, with which I fixed the chain plates.


-
Jan, A pleasure to watch your progress with the Wasa! I noticed that you have 6 figures on the stern above the (still to be added) windows, while in the Wasa-museum there are 5, so that these figures align with the five heads above them. Did you place them like this purposefully?
-
Mark, Matti, Thank you for your encouraging words. I appreciate that very much ! I have bought the triangular deadeyes, which were relatively cheap and could be ordered in the amount desired. Andre
-
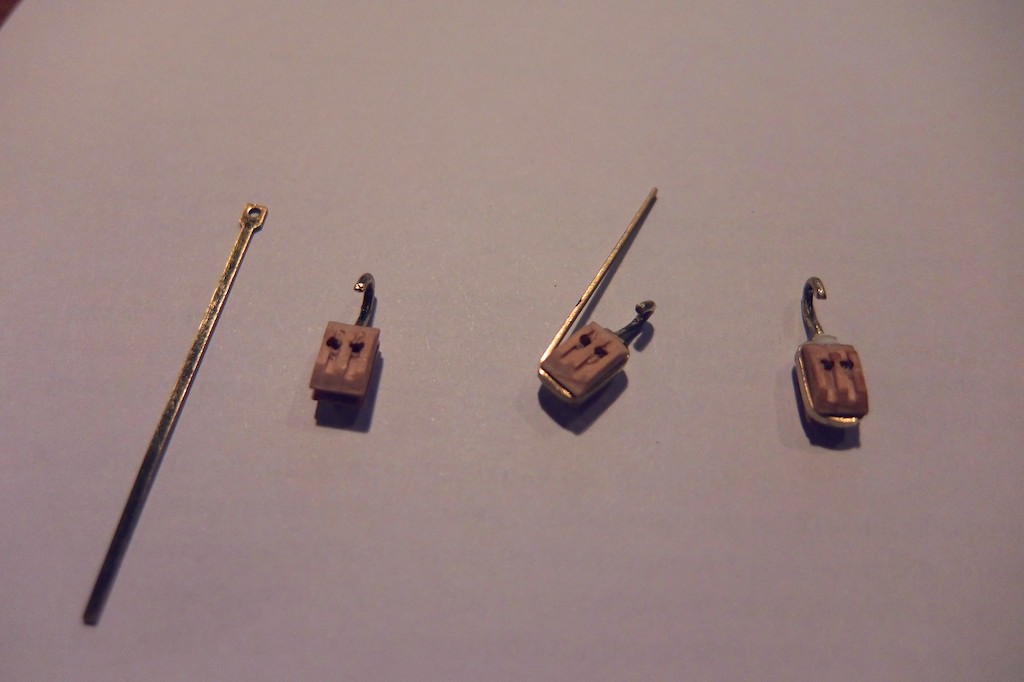
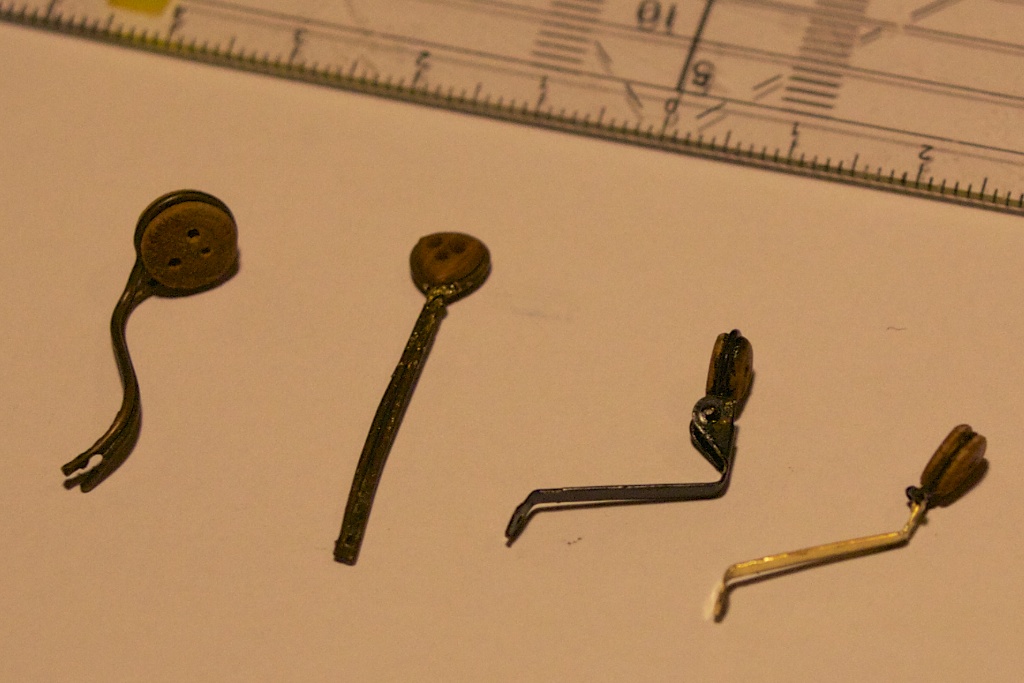
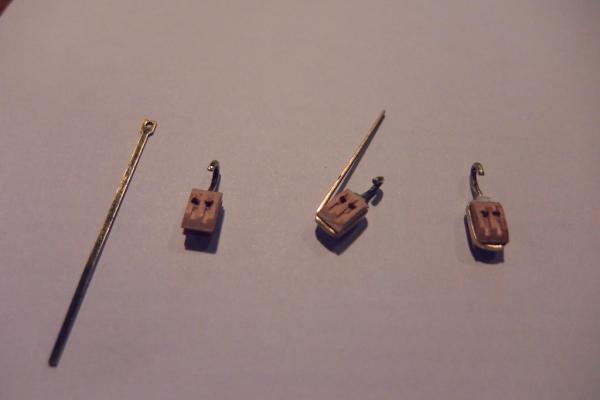
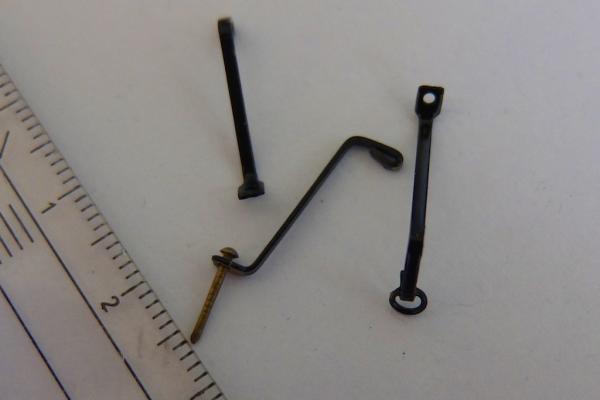
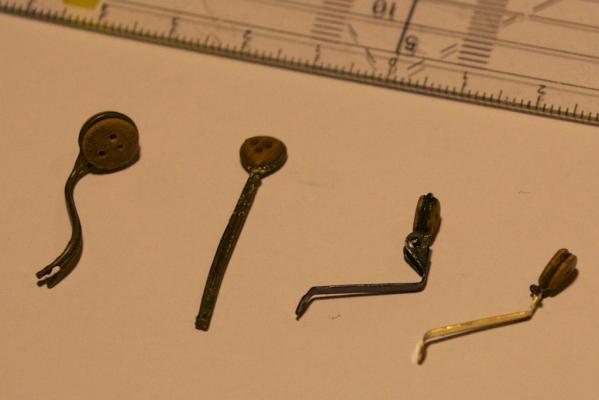
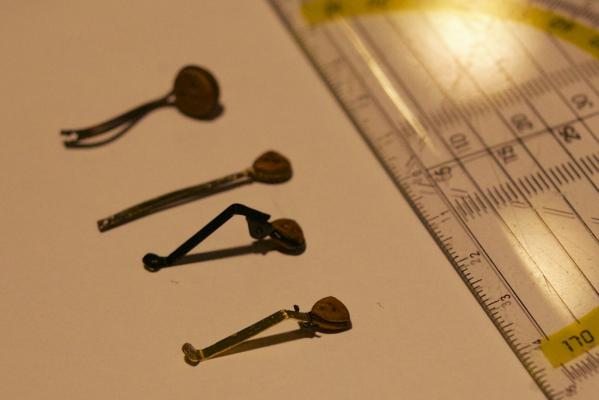
Like some others on MSW building a Wasa, I am currently working on the chain plates. I find it very difficult to prepare these items, so that they look ok, fit well and function satisfactorily, all at the same time. Following on the example from Mark, I have bought aftermarket chainplates from Amati, as well as triangular deadeyes. I have built the Amati chainplate as it is intended, but I am not really happy with it because of its bulky part to fit the deadeye. (picture: second from the right/bottom) Next I tried to follow Marks example by bending the plate and fitting the wire around the triangular deadeye, but I did not succeed in bending the wire around the deadeye and then be able to fit the wire properly. As a modification on this, I replaced the brass wire by very strong yarn (ijzergaren in Dutch) and knotted the deadeye to the vertical part of the chainplate. (picture: at the right/bottom) In the picture, there are two more/different chainplates: at the left is an example as was built by the previous builder (before my restoration), but there were only a few still attached to the ship when I obtained it. The second from the left, is after replacing the circular deadeye by a triangular one. I will appreciate your comments about by intention to continue with the yarn-version (the one at the right/bottom). Of course, I will paint it as well.
-
Matti, You have made amazing carriages for your canons. When I am at that stage (hopefully soon) I will surely have a thorough look at your example to see how I could come near to yours. Andre
-
Jan, I also experienced that the curvature of the figurines did not match the gallery. I have grinded a little bit the back of the heads, and also made some dents in the galleries to accommodate the heads, for which I used my Proxxon-tool. Still the curvature did not really match the curvature of the gallery, but with some glue I was able to position the figurines straight. Success!!
-
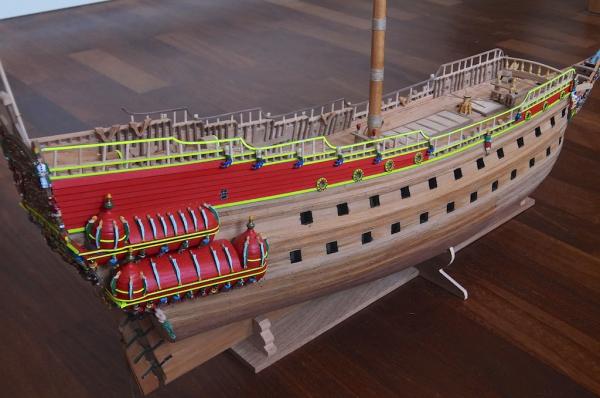
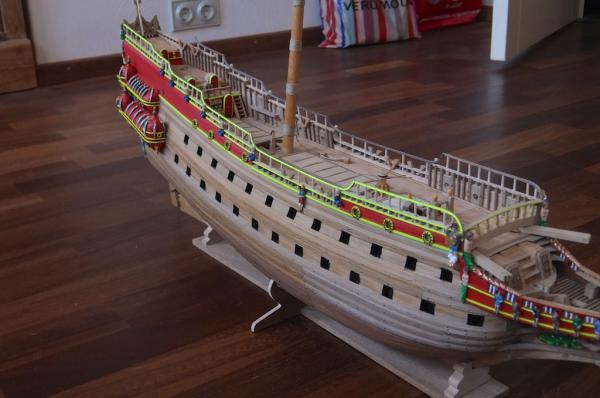
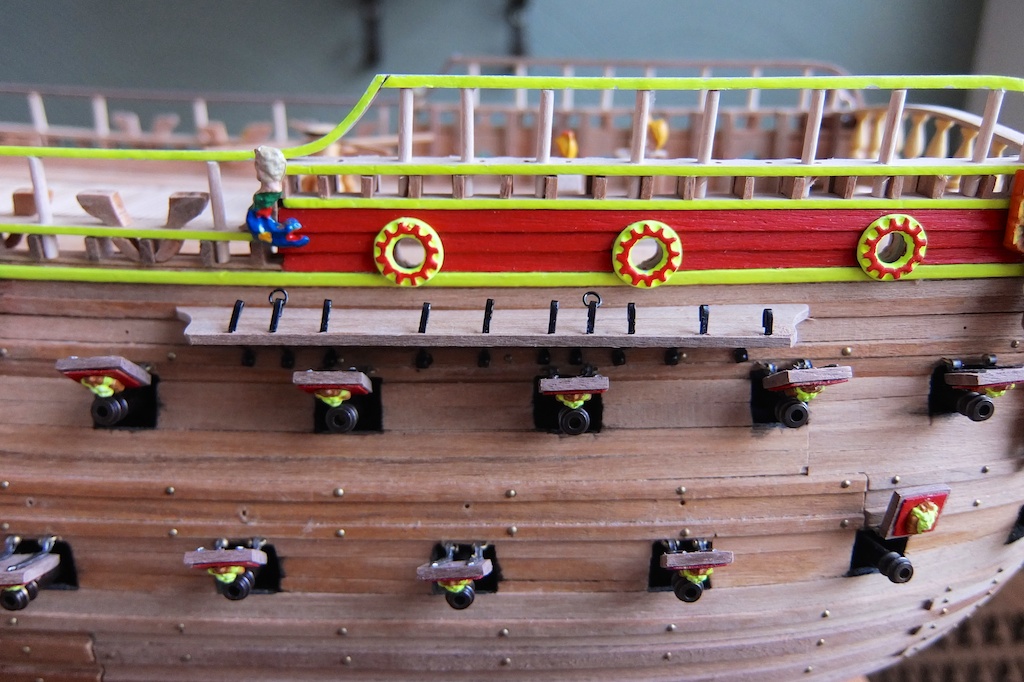
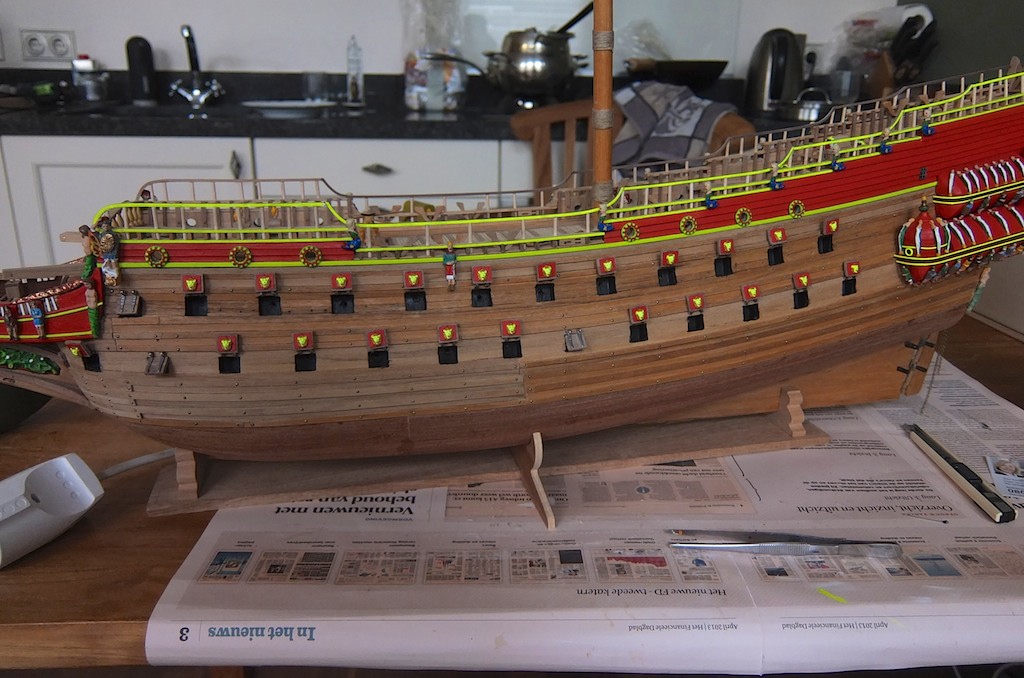
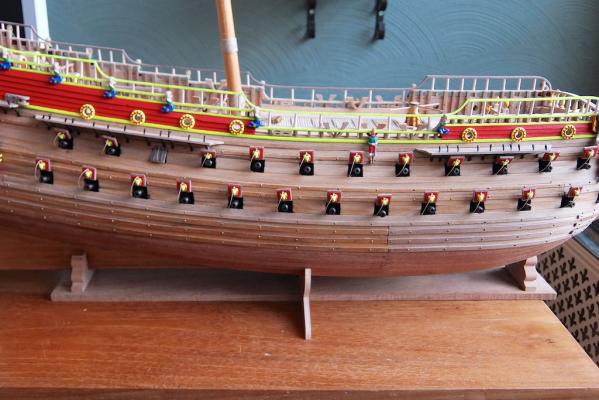
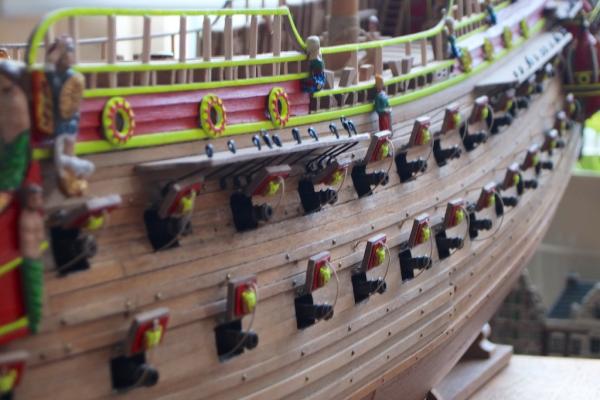
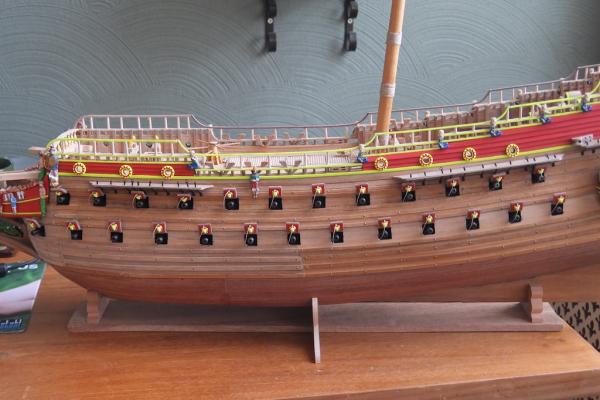
The last few weeks I have been working on the gunports, the hinges and have attached them to the hull of the ship. I have attached the hinges using bent nails, which I had seen on this forum as a good method. The gun port openings of my hull turned out not to match always the size of the gunport lids, but this is no problem to me, because they will be open anyway. It took a lot of patience to attach all 50 gunport lids. The pictures show the ship when I was half way with attaching these lids, and afterwards. Next, I placed the guns as well. The holes drilled by the previous builder were not always in the middle, and I have adjusted it as much as I could to have the guns in a continous row when looking along side the ship. The results can be seen, as I have included pictures of both port side as starboard side. I have to wait to attach the ropes to hang the gunport lids in the correct angle, because first the wales and the chainplates need to be in place. I have made the wales myself using nutwood beams. The picture shows my wales, coomparing them with the kit supplied versions. I have attached the wales to the ship using some metal pins (from nails) to have them secure in place. I have also added the extra gunopening at the upper deck. Corel was so nice to send me two of these rings when I e-mailed them that I was missing two of them. The pictures are before and after.


-
Mark, Thanks for your additional info and pictures. They did help me a lot in my choice. Considering the scale of my model, I have ordered the 5 mm versions from a UK on-line shop. Andre
-
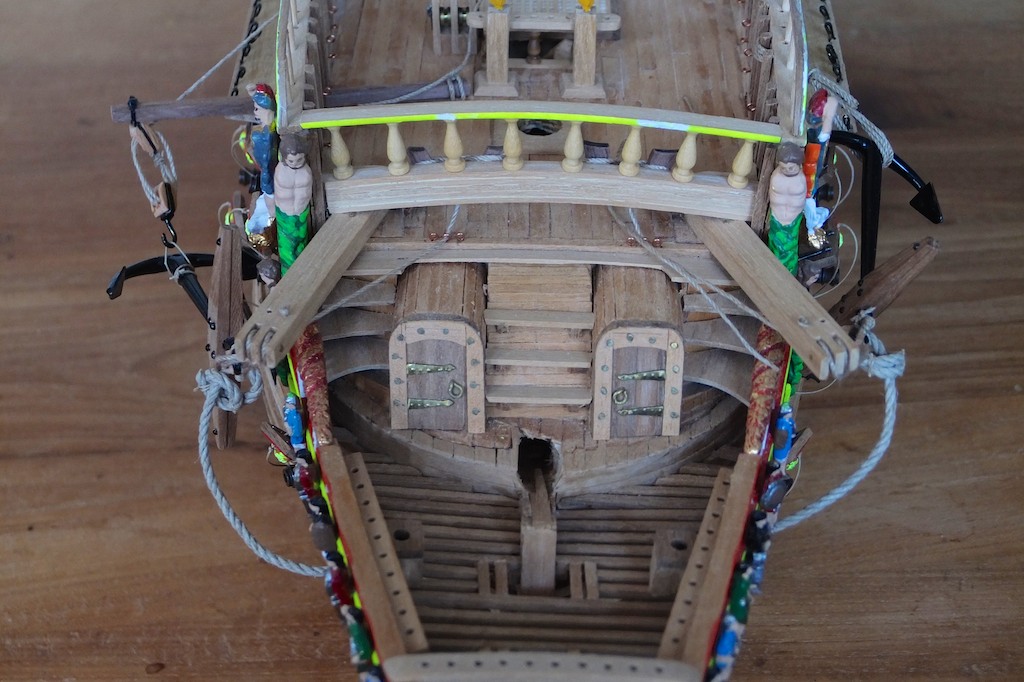
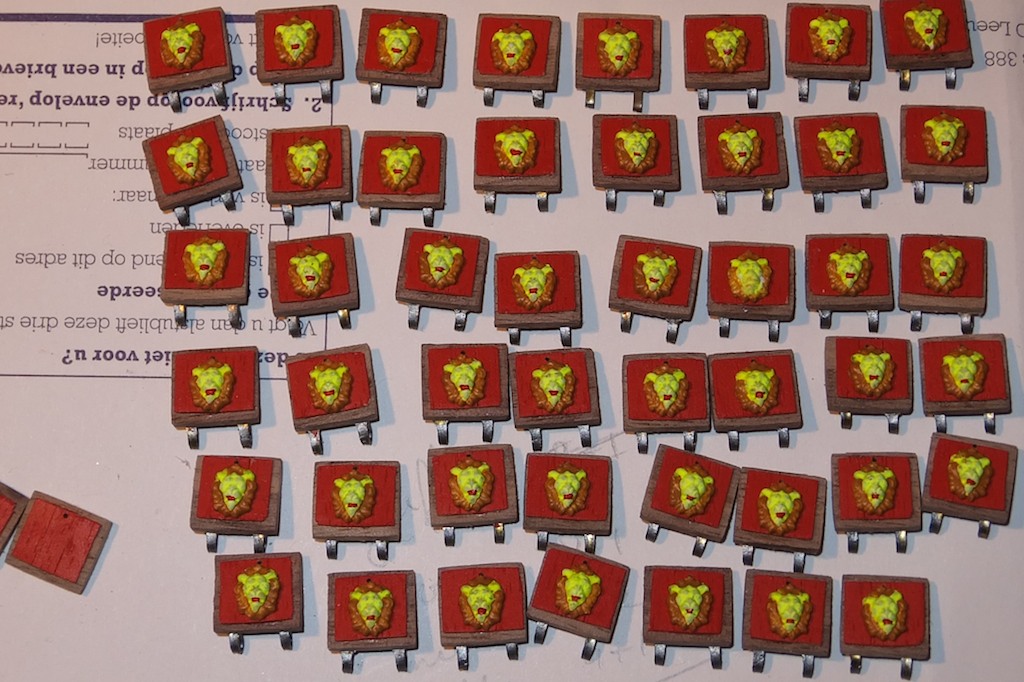
Insprired by Michael (md1400cs) I have made two rope blocks that are placed on the weather deck. I used my milling machine to make the grooves. I added only a brass axis inside of them and no pulleys, as it will function like this as well. It took some filing to fit them between the railings. I have been working on the gun ports. I decided to not use the lids that came with the ship, but made them myself. From 5 mm beams I made beams of 10 mm by glueing them together. Then sawing them into pieces of 10x11 mm. Next I made from very thin wood the red inserts of 9x8 mm. I painted the hinges into metal color and painted the lion heads as well. In the photo there are only 47 gun port lids. I missed three sets of hinges, which I ordered now. Next will be to attach them to the ship...


-
Mark, I will soon also start on the chainplates and stops. Until your post I was wondering how to replace my Corel parts, as I did not like them enough. I have searched a bit and found in my country similar parts as yours in an on-line shop. As there are two sizes I do not know which to choose: how long are the 5 mm and the 7 mm parts? Thanks for all your wonderful updates and photos! Andre
-
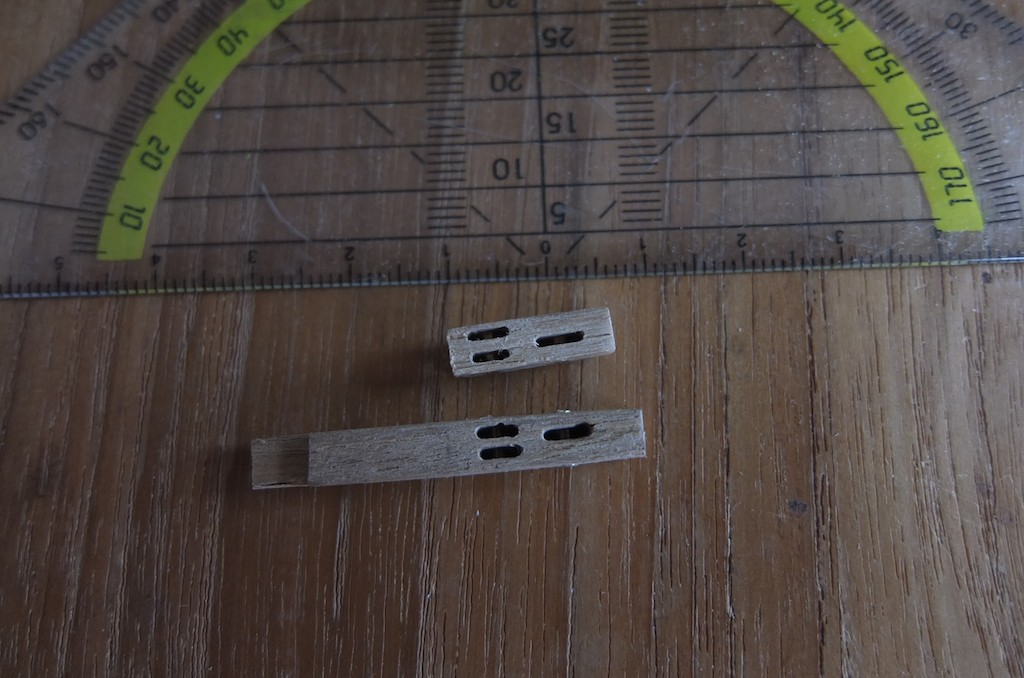
Hi Michael, I am glad that also my build provides some ideas to you! Thanks for you compliments on my hand rails. They took me a lot of time to make. The brass pulleys that I used to make the deckhands were in a box of mine. Some time ago (before working on my Wasa) I had bought that box with many shipbuilding items in it. I was told that the items were the remains of a model ship that had been broken beyond repair. For these deckhands, I have not used my milling machine, but compiled the blocks with thin beams, leaving some place for the pulleys.
-
Michael, I am very lucky that you are a little ahead of my own Wasa build: I can benefit from your tips and solutions and see if/how to use them on my own model. I have that same milling machine. I had bought it second hand, but it was hardly used. I will use it to try to make the blocks that you made. I used the milling machine to thin the small beams to make the hand rails.
-
Jan, Thank you for your respons. I have the impression that the handrails are quite sturdy and hope that I do not have problems with it during rigging. I will have limited space for the belaying pins because of the hand rails above it and some rods for the hand rails are close to the holes for these belaying pins...
-
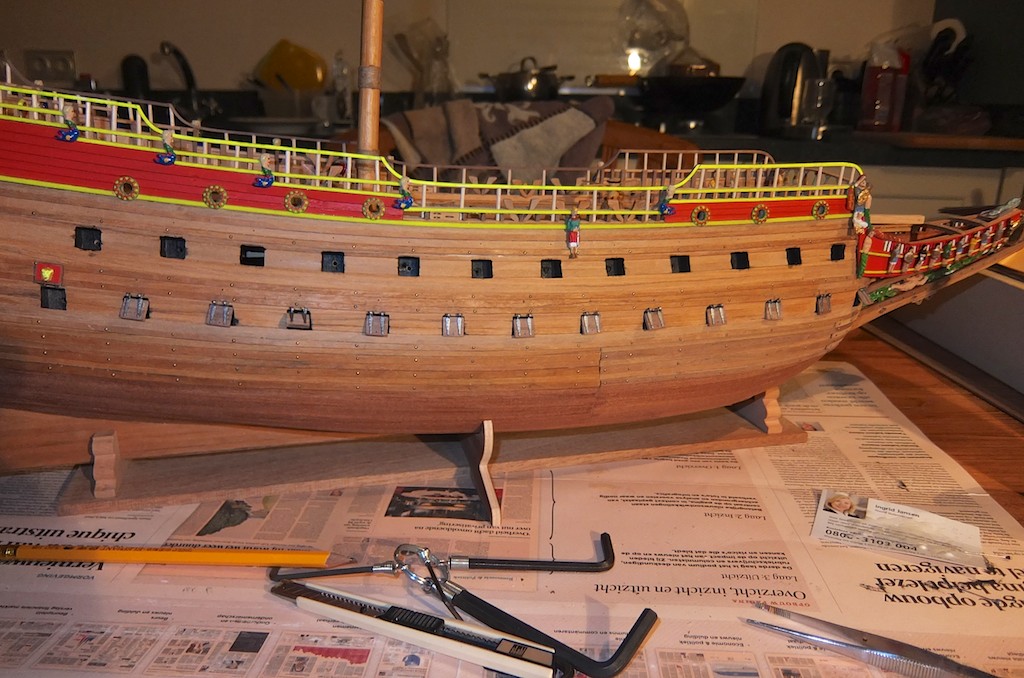
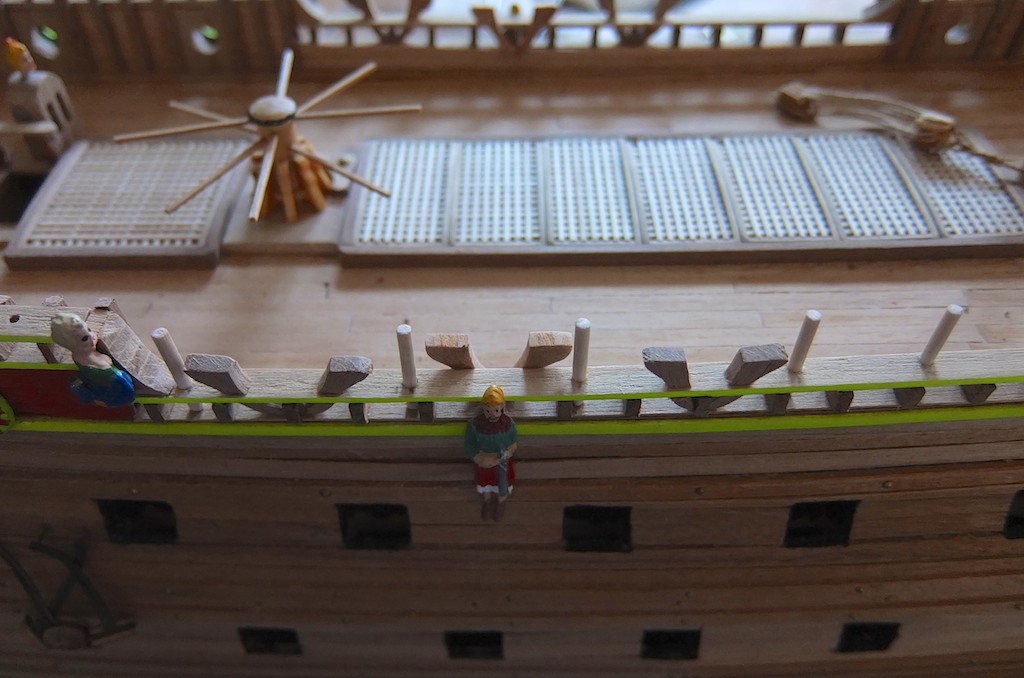
The last weeks I have been busy making the hand rails. First step was bending beams into the approx 90 degrees curve, but it was difficult to bend such sharp curves... Second step was thinning the beams using my (newly acquired) electric cutting machine. I made the beams about 2.0 x 1.6 mm. Then painting one side yellow, for which I used the same paint as I used on my other yellow parts. I did realise that the 1:1 model has square rods supporting the hand rails, but I could not think of a method to drill/make square holes in the lower rails. Therefore, I decided to use round supporting rods, as can be seen in the pictures below. The rails rest on the round rods, which have a diameter of 2 mm. In the pictures below the results can be seen. Next will be the cannons and the gunports...