Rich_engr
-
Posts
322 -
Joined
-
Last visited
Content Type
Profiles
Forums
Gallery
Events
Everything posted by Rich_engr
-
 Larry, Thanks for the compliment! I develop my processes as I go so I can speed things up a little and (most importantly) have repeatable results/quality. For sanding the blocks, I just came up with a jig- just some planks that make a trough that's as wide as the blocks, then load 20 or so in there, gently place in vice, and sand a side down. Flip bocks over and repeat. It's a lot easier than trying to hold w/ tweezers or fingers and sand 1 block at a time. . I promised some pics earlier, but the week has been busy. I'll work on getting some up tonight and show my deck and block sanding jig. . (Oh, and my deck plank tapering jig too!)
 -
Patrick, That's a good point. In order to keep things real and true to scale, I'll definitely have to check dimensions and the overall size of things. I was almost about to trust the kit's judgment and assumed that all parts were true, but it appears it isn't so. But that's part of the newbie learning curve, right? One thing I know I'll have to play with a bit in terms of size are the various rigging lines- it's a good thing I feel somewhat comfortable now in making my own rope (mostly using the line supplied in the kit, with the addition of some very thin thread for seizings and whatnot).
-
I'm drooling Patrick!!! She's gorgeous- what a foxy lady!! Can't wait til I'm almost there!!
-
Yep, I'm sanding down the DB's to bring them down to scale. After sanding I'll stain all blocks a dark brown for some uniformity of color. So now the "dance" is sand, strop, turn, seize, and reeve! Good times modeling!
-
One thing I just noticed is that the DB's seem a bit too big for the scale- may try to shave them down a little. Also, the lines need a little more "taming," since they're a little stiff and don't lay as flat as I'd like.
-
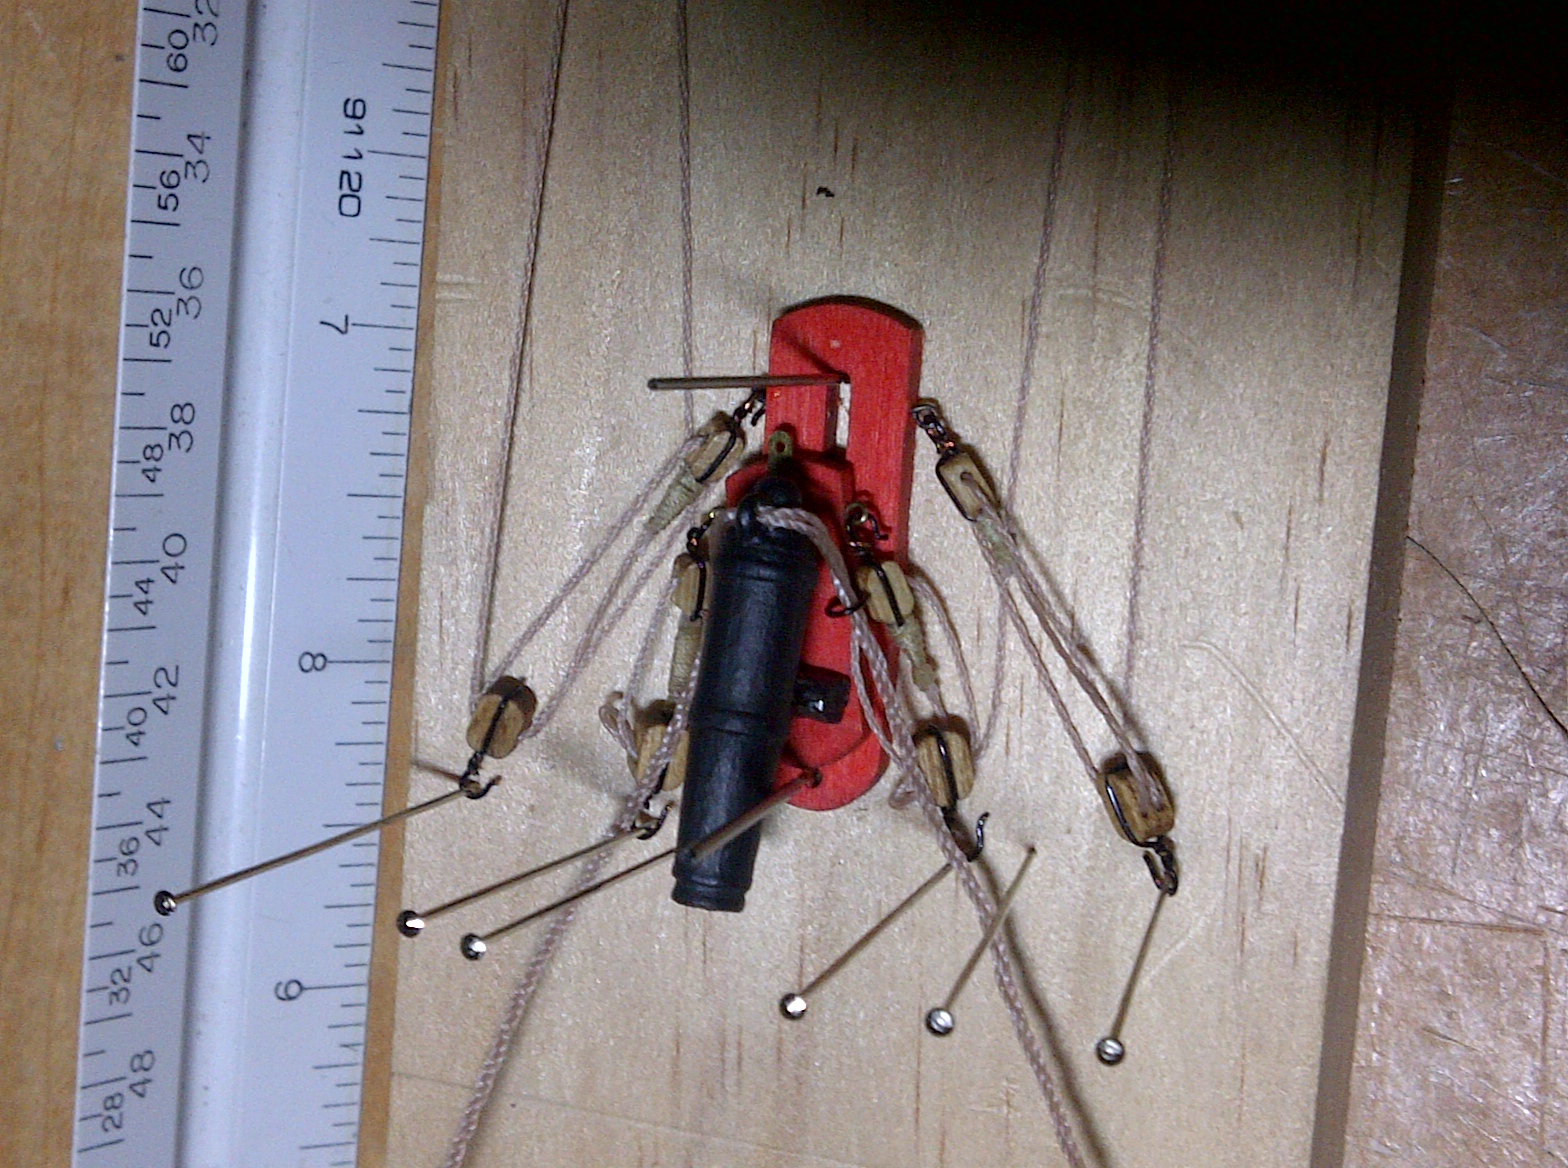
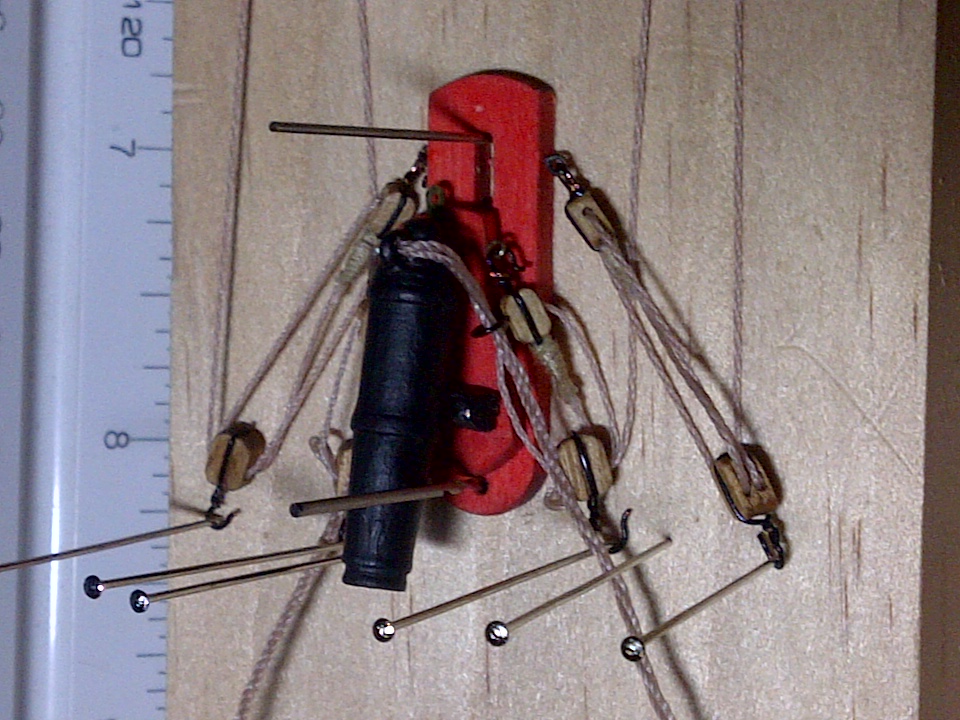
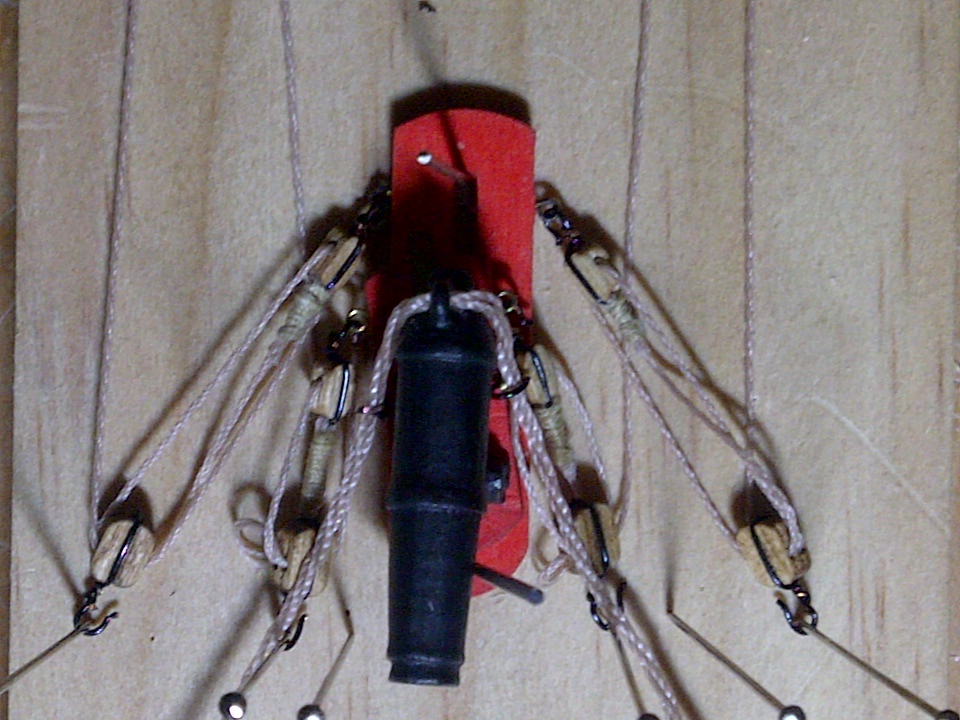
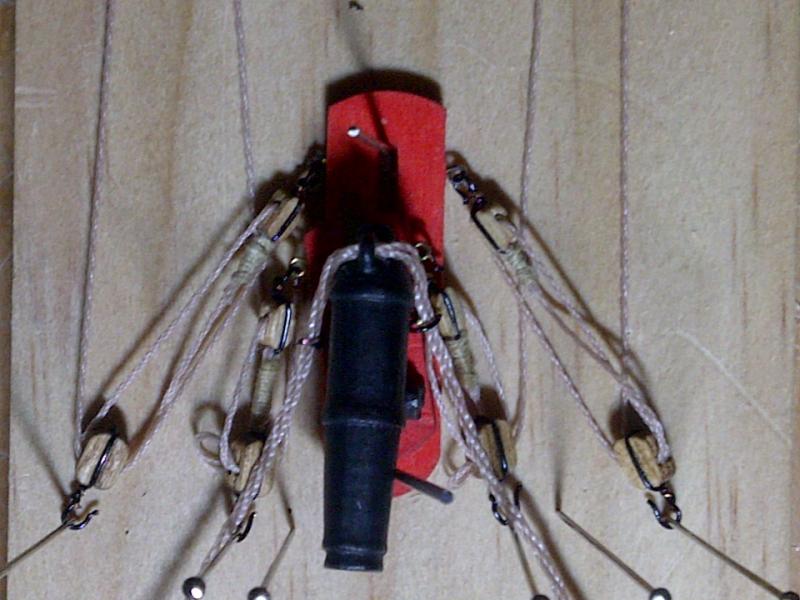
Here are some pics of the gun tackle I made up last night.


-
Now I've "upgraded" my seizing/block holding drill bit to a makeshift helping hands (actually 2 alligator clips from some test cables soldered onto some leftover chicken wire and clamped to the bench). Gotta get creative since the Admiral is disapproving when I try to buy tools & supplies (plus it keeps the mind sharp). So it's stropping the blocks, turning rope, seizing, then reeving. Strop, turn, seize, and reeve... and repeat. Sounds like some sort of box-step dance instructions!!
-
Thanks! Last night I made up the tackle for 1 carronade in about 2hrs- wasn't too difficult making the seizings and reeving the blocks. So one gun is about 80% done, 19 to go (prob take about 3 weeks, which isn't too bad). I think I need some clamping jig/helping hands to hold the work, since I only had the block stuck onto a small drillbit and worked around that.
-
Patrick, Making the ropes is fun and I think it will add to the realism and that personal touch. And it's pretty easy- I just stuck a drill in the end of the ropewalk and it cranks out 6ft of nice, even rope in about 2 minutes. . I just hope I don't go overboard with detail, since this is my 1st kit and I want done "right.". Next build (probably in 2-3 years at my rate) will be better.
-
Larry, et. al, This is a very interesting thread. For one, I am probably newer to wooden ship building than most here, so I count everyone as a valuable resource. Second, this topic of CA/glue allergies or reactions is a first I've heard of, and I wonder how prevalent it is amongst us hobbyists. This is definitely something that one should consider when taking up a hobby or using an unfamiliar material/chemical (makes me more paranoid about using my Blacken-It, therefore precautions will most certainly be taken). (Also, I wonder if there are wood or material reactions for people as well, since a lot of woods come from foreign locations....) As for me, I usually use CA glue for the majority of my build (good/bad??), but I need to try some alternatives so I have more tools at my disposal and have more flexibility. I like the idea of the forked sewing needle- I'm getting tired of picking dry glue from my fingers!!
-
Ok. Weekend update: made the pinrails for the bulwarks, made about 15ft of rope for the gun tackle (sticking a drill on the end of the ropewalk definitely speeds up having to turn 6ft+ of rope at a time!), and stained the deck (in between errands, cleaning the house, and playing with the dogs). I'll try to get some pics of the deck, etc. up tomorrow, as well as work on the gun tackle. Was a good, relaxing, yet productive weekend all-around!
-
Ahh... Friday evening... I just cut & marked the pinrails, now waiting for my pizza. Tomorrow is staining time, after my haircut.
-
I just use the good ol' Plankbender from ME. Soak my planks in regular tap water for about 10-15mins or so while the iron is heating up, then get right to bending them. After bending I'll gently use the iron to drive the rest of the water out- planks hold the exact shape I need. Never had swelling, shrinking, or springing out of shape. I LOVE that thing! That was probably one of my most useful tools "in the old days."
-
Sam, Thanks for the awesome tips!!! I'll have to try that when I get to some of the other fittings and maybe mast sections (and future builds once I finish this one first!). But I did stop by Wallyworld today and saw a stain by Minwax called Weathered Oak- looks really grey, and does add a touch of that weathered look. The original stain I was going to try, the Golden Pecan, had too much yellow. More coats of that got too brown. I got the weathered oak and applied it to a sample deck piece (on top of the conditioner), and it looks just about right. It's not too light, or dark/brown, and definitely no yellow (there's enough yellow & browns in my deck planks, which are somewhat hard to see in my aweful photos). I will probably go ahead and do the stain this weekend (conditioner then weathered oak), so I'll keep my fingers crossed that the whole thing turns out ok!!! I like the idea of experimenting with dyes for that really customized look- will have to try that someday. That definitely opens up the possibilities to fine-tune one's model and the look and feel of it all. Again, thanks for the info and following along- all help and suggestions are always welcome here!!!!! -Rich
-
Alright.... here's a good indication as to how much of a novice I am (still). How on earth does one seize the lines, as in gun tackle, shrouds, etc. I saw someone's tutorial on here before, but it was lost in the crash unfortunately. I tried to seize one end of the gun tackle on my Niagara (seize onto the single block's strop, then reeve through the double, then single,then back thru double). I tried a simple overhand knot (I know- no knots on ships!) to hold & start it, then just wrapped the line around the tackle (probably 1.5 times the length of the block), then did some sort of hitch knot at the top. (Btw, I still need to learn my knots- was not a boy scout.) Pictures that clearly show this would be great if any are available!!! Thanks! -Rich
-
Larry, I'm using the provided basswood- all materials are what was in the kit (exceptions may be somw wire and rigging later on). I'm still working on the deck stain issue- I'd like to have it done in a week or so... And yes, I'm happy with how the deck planks tapered using my jig- perhaps I can try to improve on it when I do my 2nd build later on... . I'll see if I can get some pics of how I did the full-length tapers.
-
More staining basswood
Rich_engr replied to src's topic in Painting, finishing and weathering products and techniques
Ahhh, that definitely helps! When making my samples, I noticed it looked best after I applied the conditioner (w/o staining). I'll try some different grades of sanding with just conditioner and see how that goes. Thanks for the post!!! -
Tried staining some deck samples this weekend- may have to try mixing some paint in to get the right color (one looked too yellow, the other too dark/brown)... So we'll see...
-
Stain for deck?
Rich_engr replied to Rich_engr's topic in Painting, finishing and weathering products and techniques
Ken, That's what I kind of want to do- keep it light, yet bring out some color in the wood. I just made some test pieces to try with Minwax Golden Pecan, so after dinner I'll try the conditioner, sand, then add the stain.... we shall see~~~ -Rich -
Yes, I agree with the planking- each and every single piece is custom-made. As a newbie, it took me foreverrrrrrr to plank the hull, but my patience was rewarded, as yours will be too! Before you know it, you'll be on to the deck and then masts & rigging!!! Very fine work indeed!!
-
Larry, that is one of the lessons I keep getting pop-quizzed on- sometimes it's super hard to wait, yet we must slow down a little to get the results we want. . She's coming along nicely there- you're about ready to plank the hull (which I found intimidating at first). Good luck and keep it coming... Steady she goes.
-
Stain for deck?
Rich_engr replied to Rich_engr's topic in Painting, finishing and weathering products and techniques
Ah, 8oz or 16oz is ok- just didn't need a gallon. I'll check Lowes or Michaels this weekend. -
Stain for deck?
Rich_engr replied to Rich_engr's topic in Painting, finishing and weathering products and techniques
Awesome advice guys! Thanks! I'll give that a shot on some test decking first. Q: Does Minwax have their prestain conditioner and stains in a small (8oz or less) size? -
Stain for deck?
Rich_engr replied to Rich_engr's topic in Painting, finishing and weathering products and techniques
Thanks Russ. If I want to stain it a color, is there any kind of sealant or basecoat I need to apply? I've never worked with stains before... -
I'm new to the world of staining, and I need some info on how best to approach this. I am ready to stain the deck on my Niagara, and was wondering what tips/process and product(s) would work. The wood is typical basswood and it's 90% sanded. Some pics are in my build log. Any info will be greatly appreciated!! Thanks! -Rich