


hof00
-
Posts
1,631 -
Joined
-
Last visited
Content Type
Profiles
Forums
Gallery
Events
Posts posted by hof00
-
-
Hi Chap,
Do you have this "Edition" or the older one?
Either way, am sure that you can "Bash" satisfactorily.
Cheers....HOF. (Harry)
-
Hi Marc,
This is the "New" version....
(Purchased 2005?)
Nice to think that's improved!!
Had to get the Brass stuff from the manufacturer..
I have made many Modifications, so I guess improved?
Billings/A/L/Etc.
(Bit of a "Bash")
Happy to share /answer you questions.
Cheers....HOF. (Harry)
- keelhauled and tasmanian
-
 2
2
-
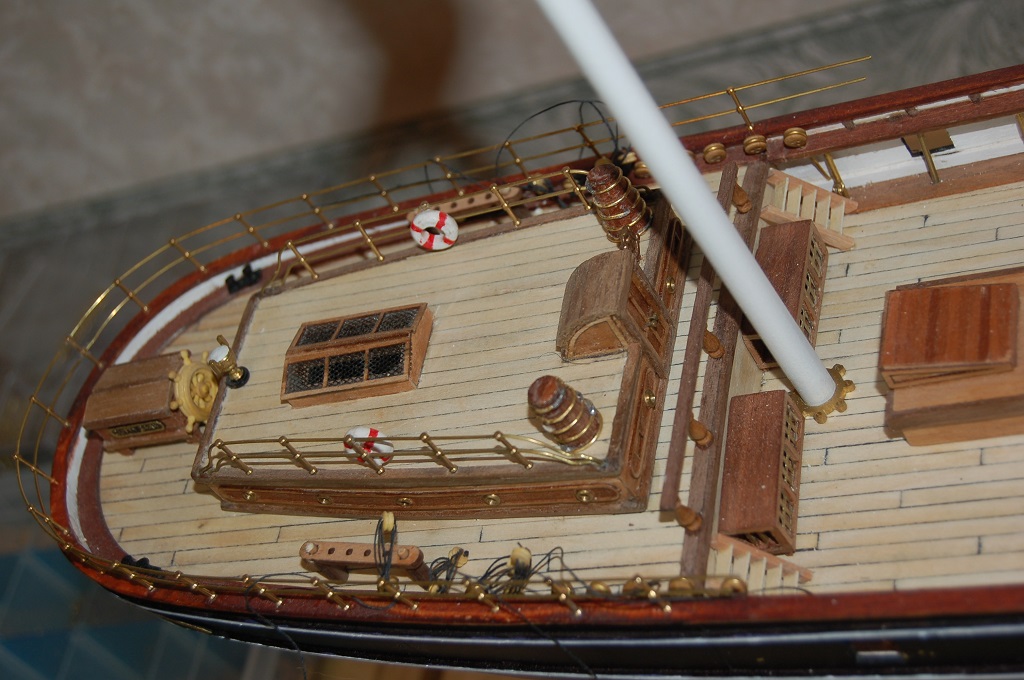
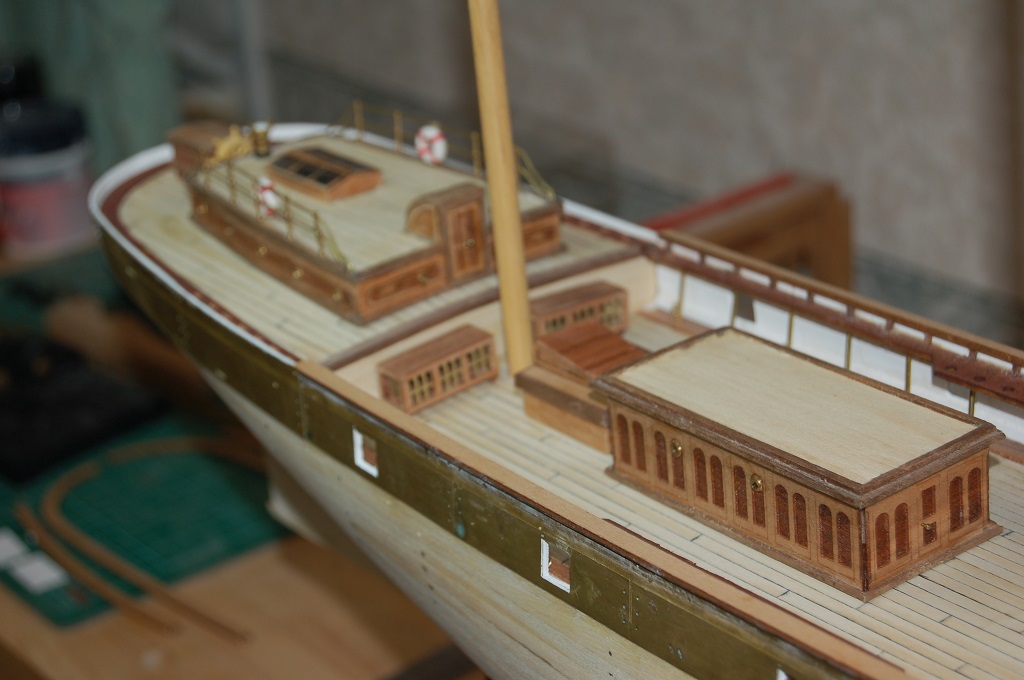
An important point here is that the Min deck Deckhouses should not be attached until the Fore and Main Dead Eye's are attached!!
The Poop Deckhouse is different, so go ahead and attach it....
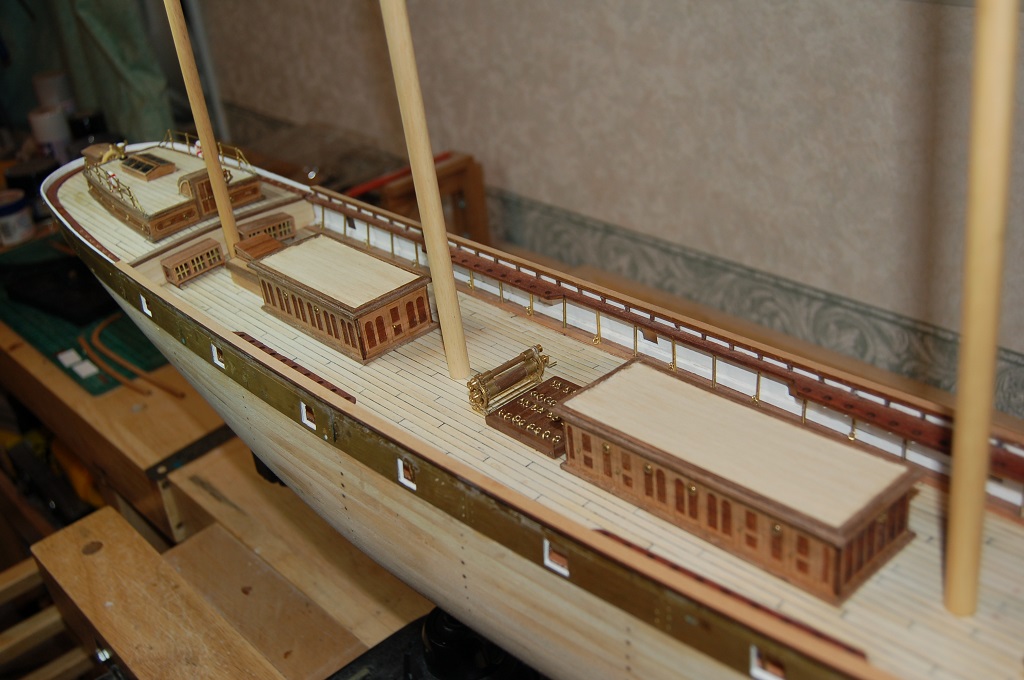
Regarding Main Pin Rails, there are many more Dead Eyes than holes in the Rails. (Fore, Main and Mizzen)
I decided to leave the forward most five holes for the Chain Plates and filled the rest.
Next, I created a template to drill the remainder in each Rail.
With this version of the kit, there are no Chain Plates supplied but instructions are shown for looping wire around the Dead Eyes. I gave this a go and, the result was o.k.
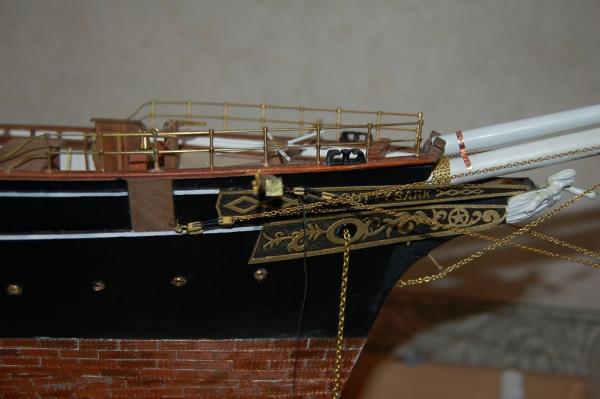
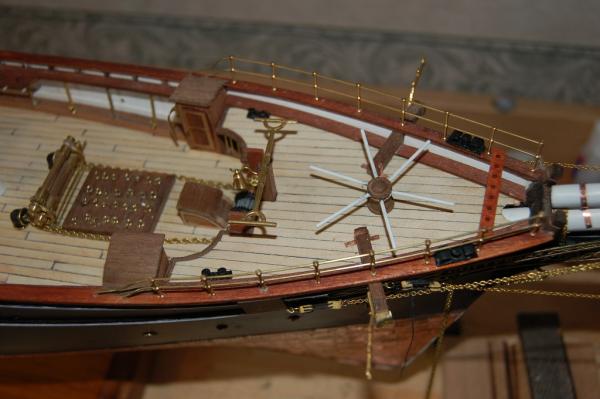
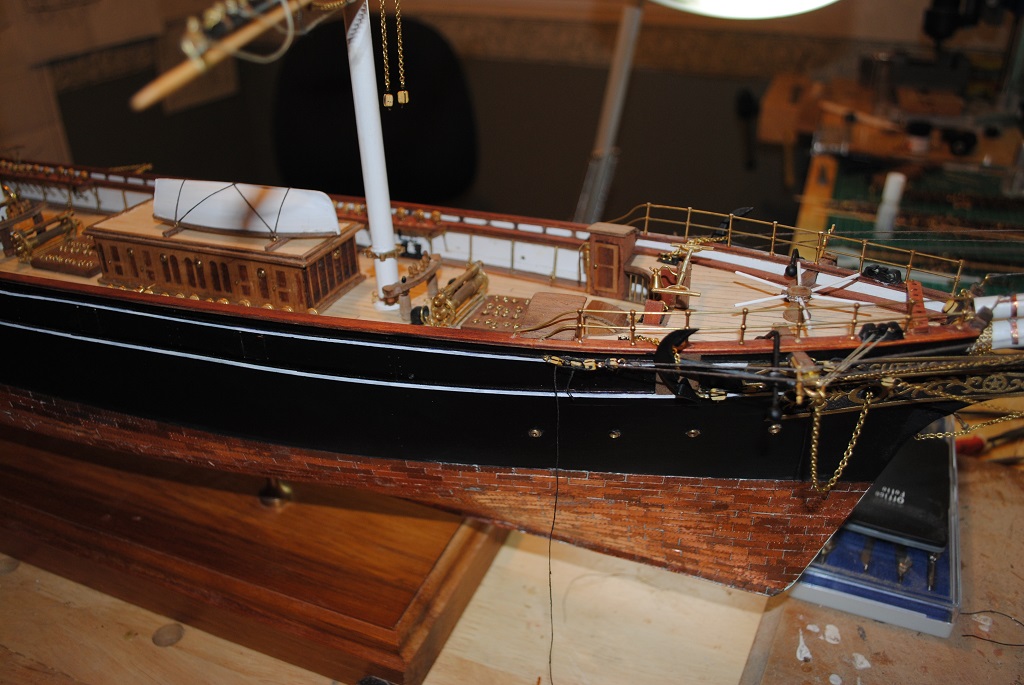
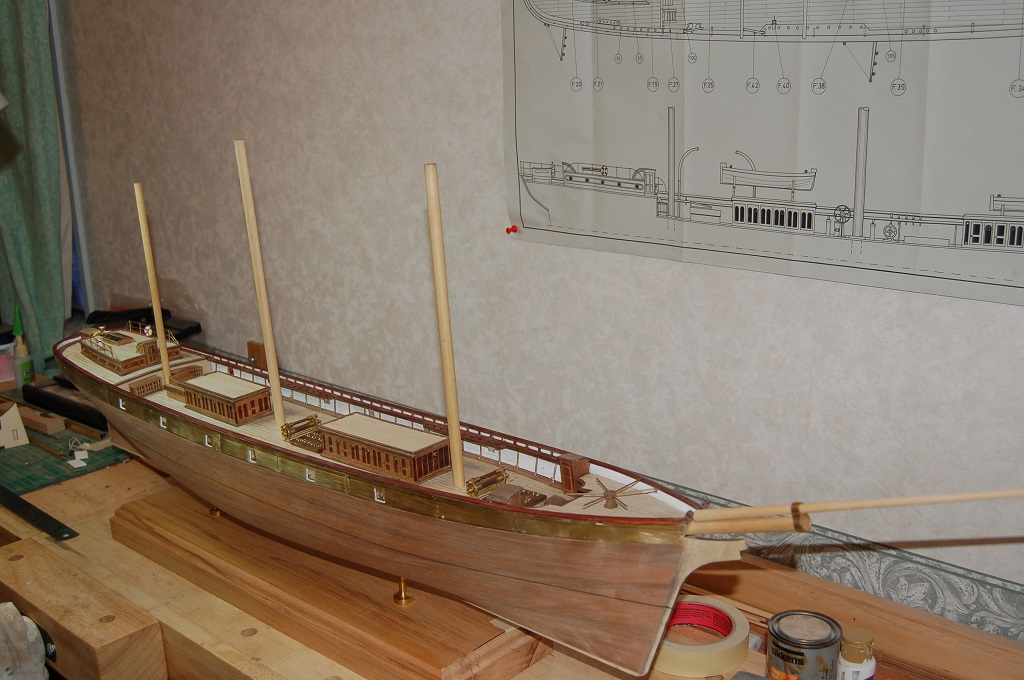
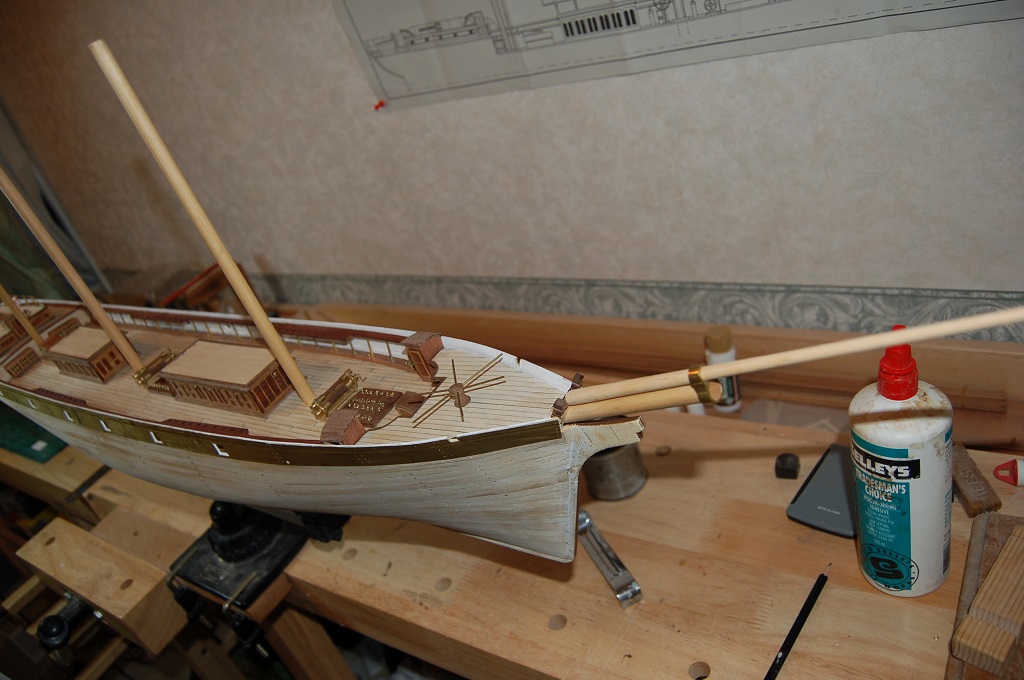
Various other pieces added, Anchors/Accommodation Ladder/Davits/Etc.
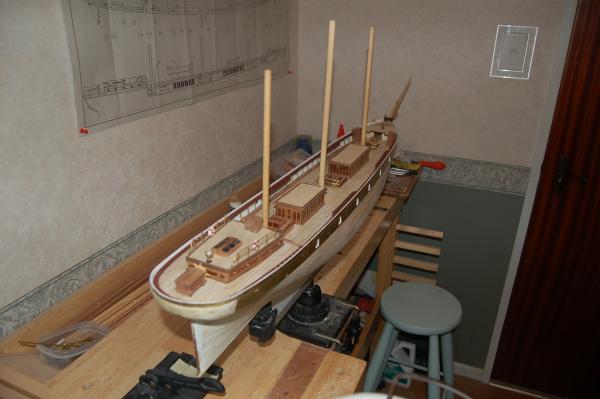
Masting was interesting, the kit plans show the 3 Mainmasts tapering, this is not the case and I had to get the Mast Caps modified, very careful Drilling of the Main Tops followed to cater for this also.
I used the kit supplied lifeboats but made my own Gig/Longboat from Block Balsa, planked and painted, since they are both upside down on their skids, no internal detail was required.

-
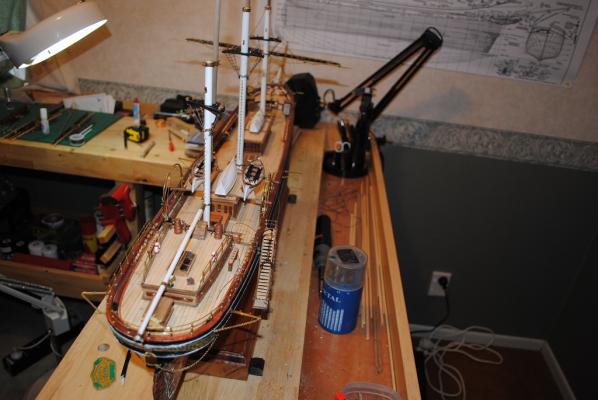
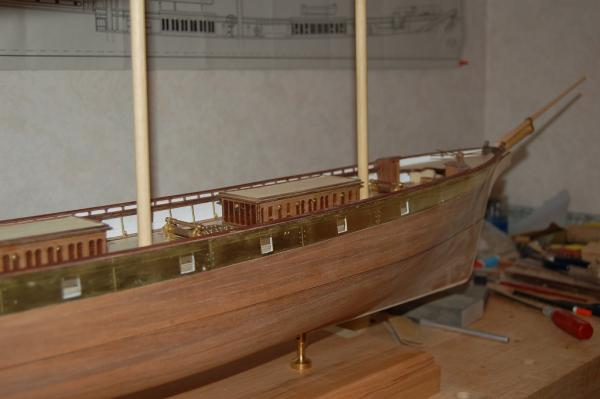
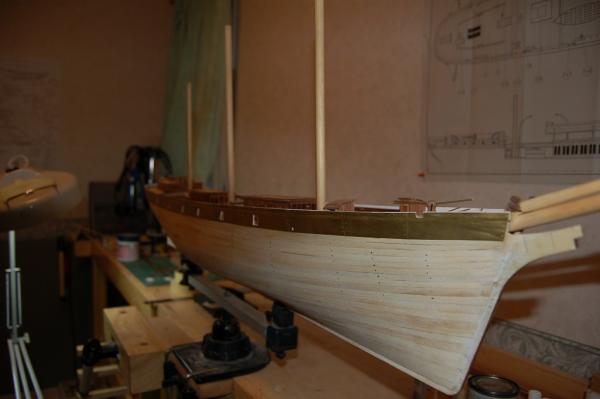
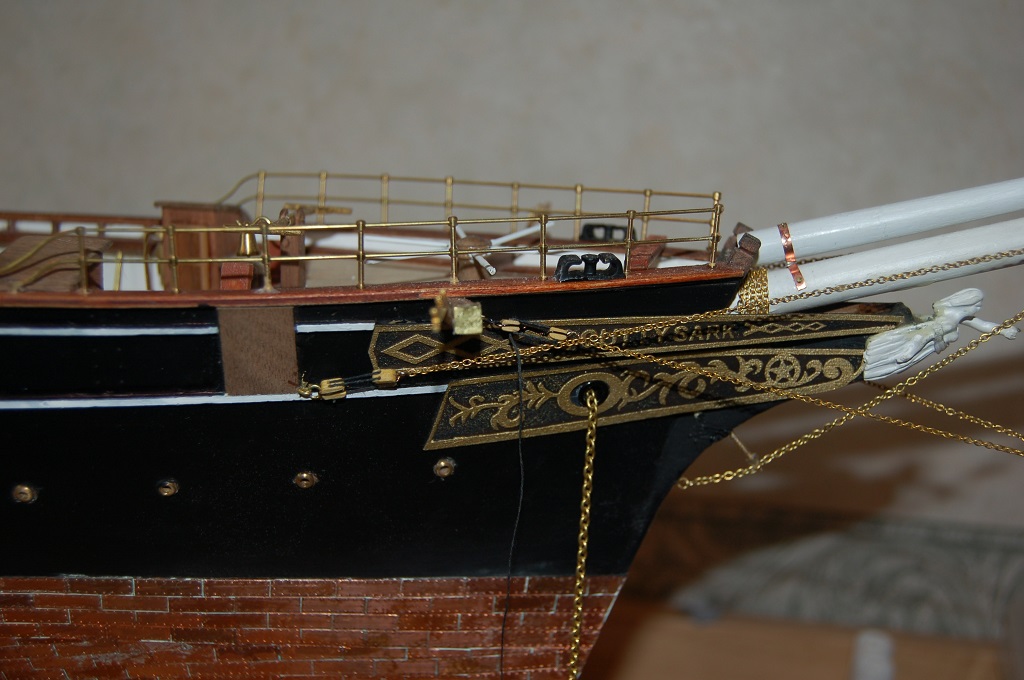
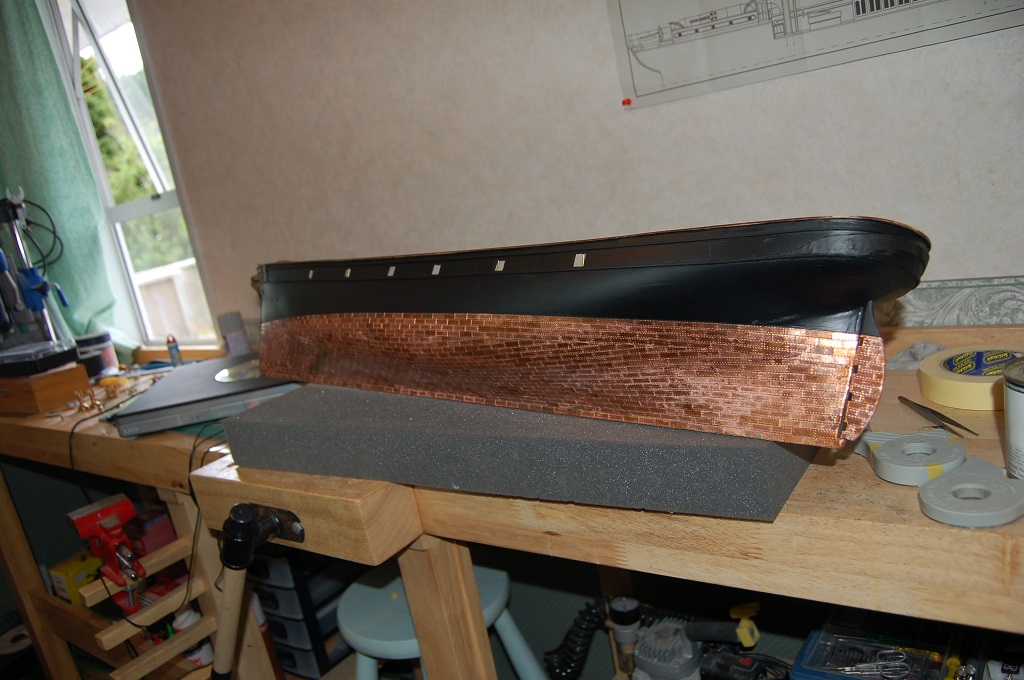
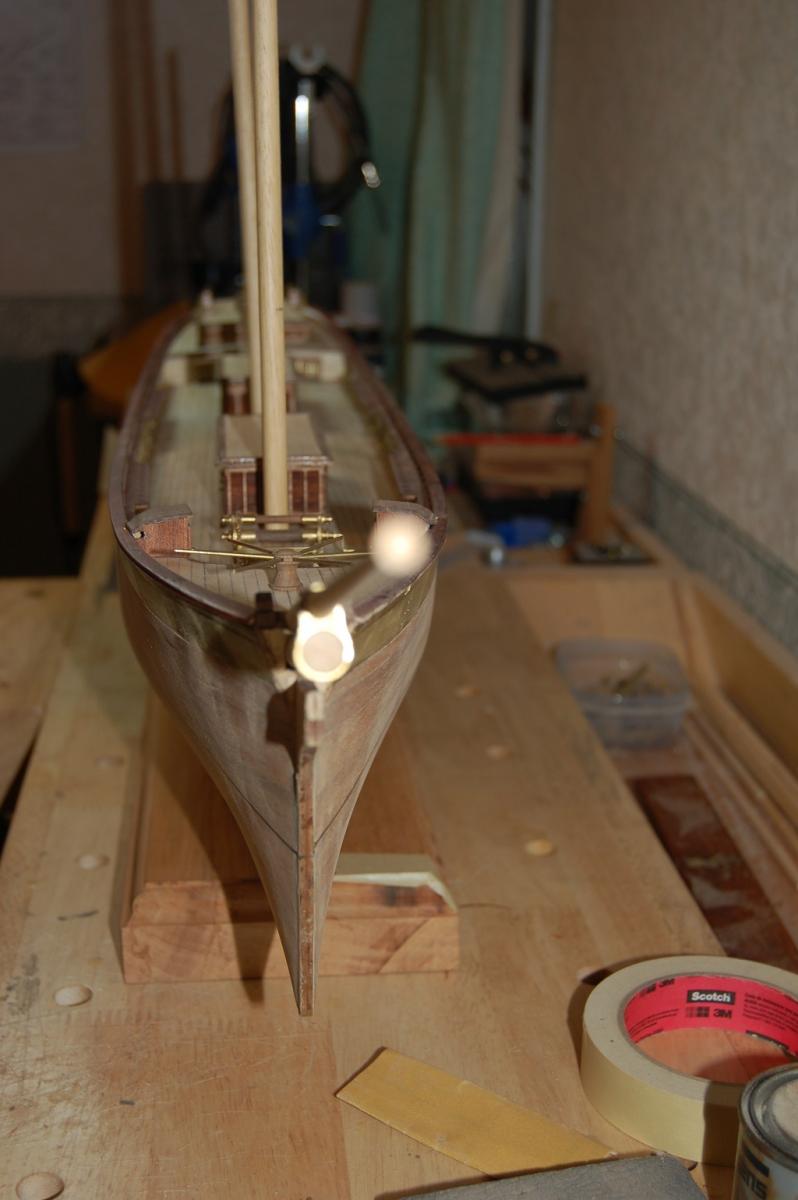
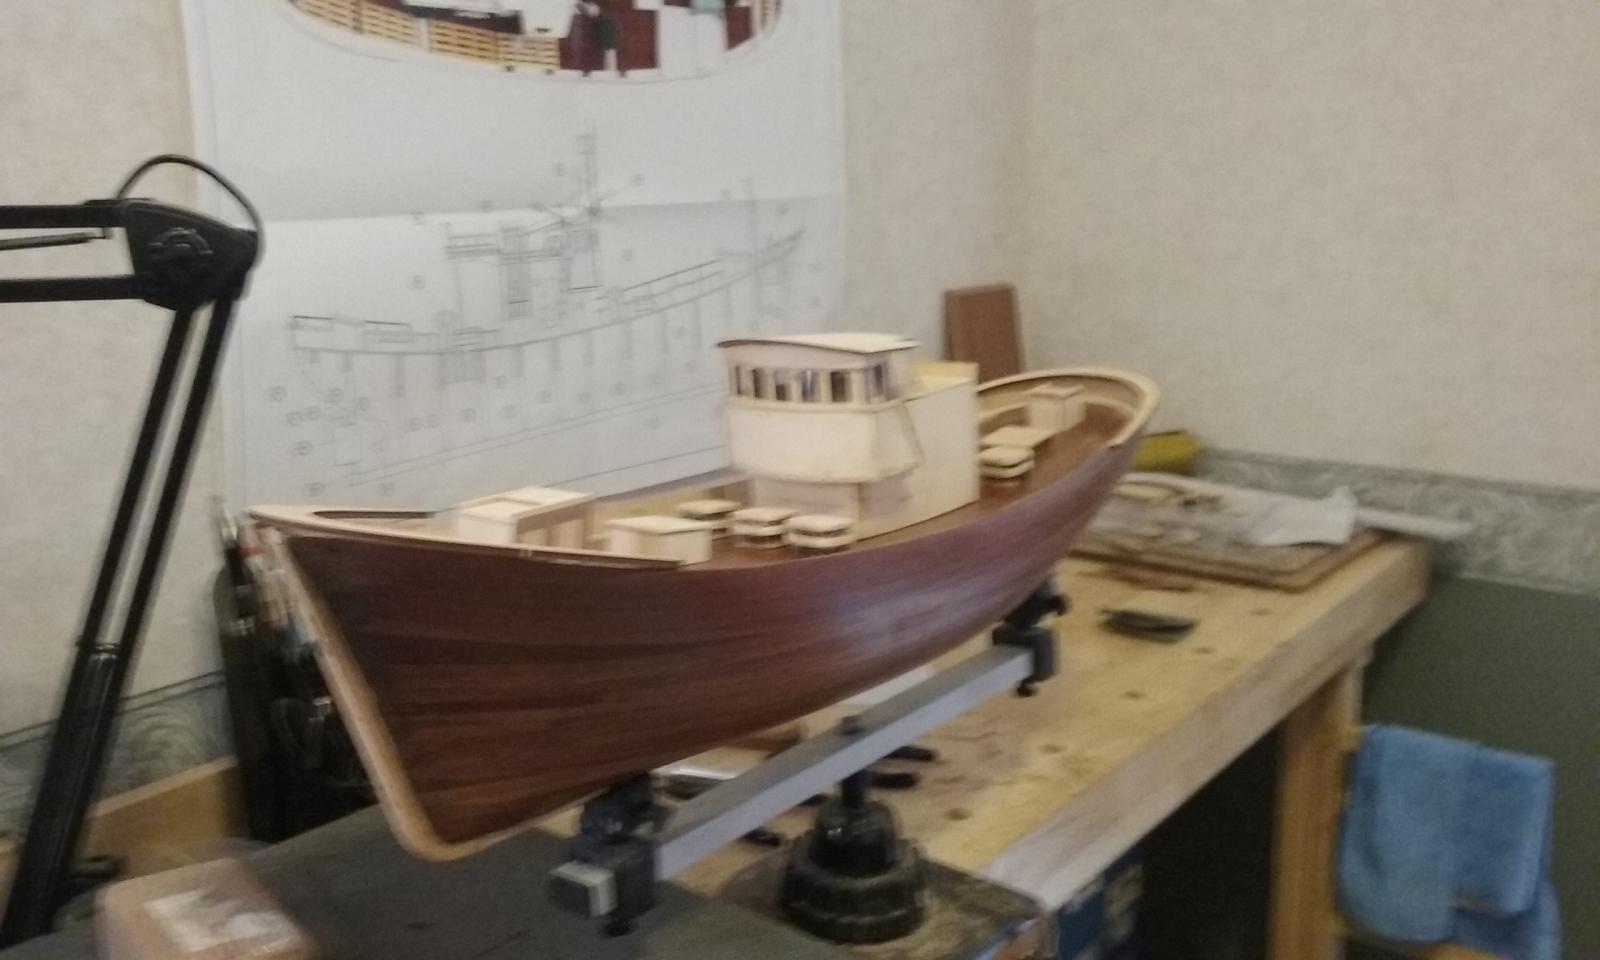
Once coppering complete, time to mount the Hull on its base so that various detail bits could be fabricated/affixed.
Name Boards/Hull decorations were sprayed Black. Once this was dry, I used a Wallpaper Seam roller and "Dry Rolled" Acrylic Gold to pick out the detail.
-
To continue....
Next "Cab off the rank" to prepare for Coppering.
Sanded the Hull and sealed with Sanding Sealer, 3 coats.
Copper Plates affixed with thick CA.
My first attempt was an unmitigated disaster, I wasted about 250 of them, the problem being was that somewhere while marking the Water Line my making gauge must have slipped!!
So, a step back.... Just as well I had ordered more of these a few months prior.
Second attempt much better.

- GuntherMT, tasmanian and Blue Pilot
-
3
-
Thanks Edwin,
The ship is (Complete, (See Gallery), just trying to write na Review/Log to assist others who wish to attempt this particular subject.
Cheers....HOF. (Harry)
-
-
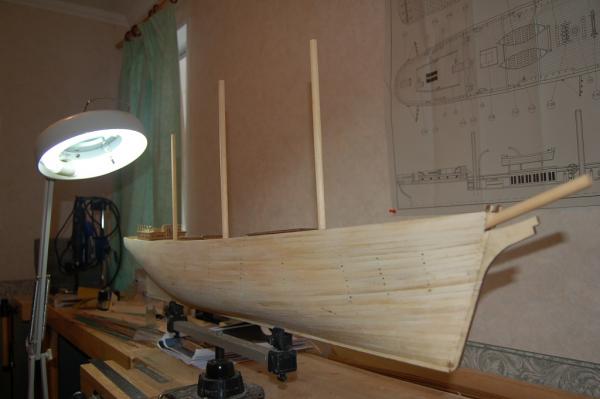
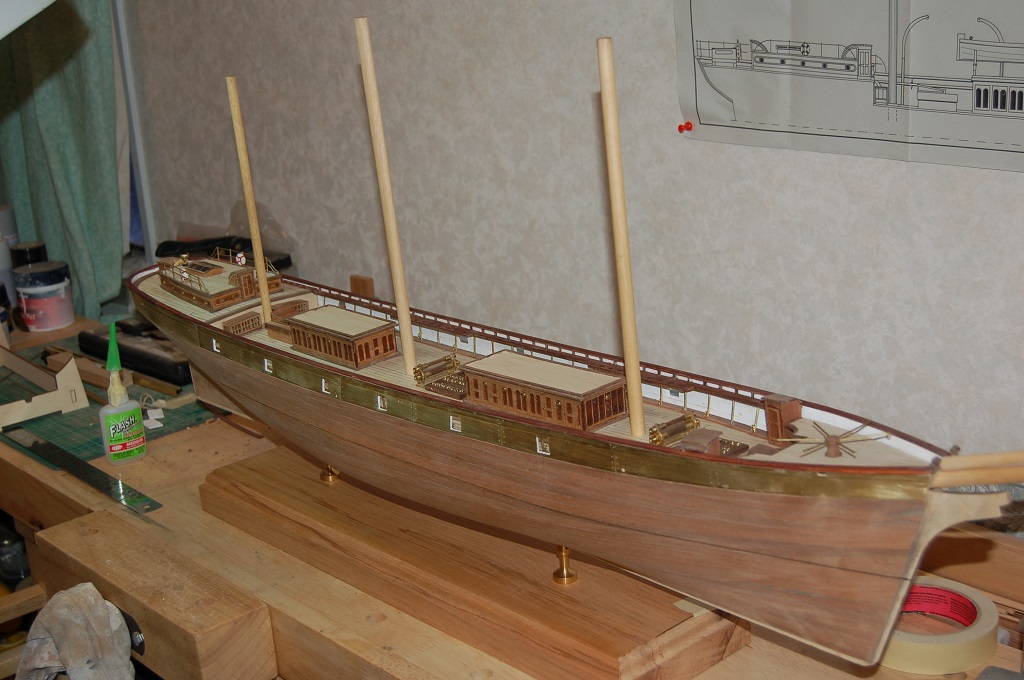
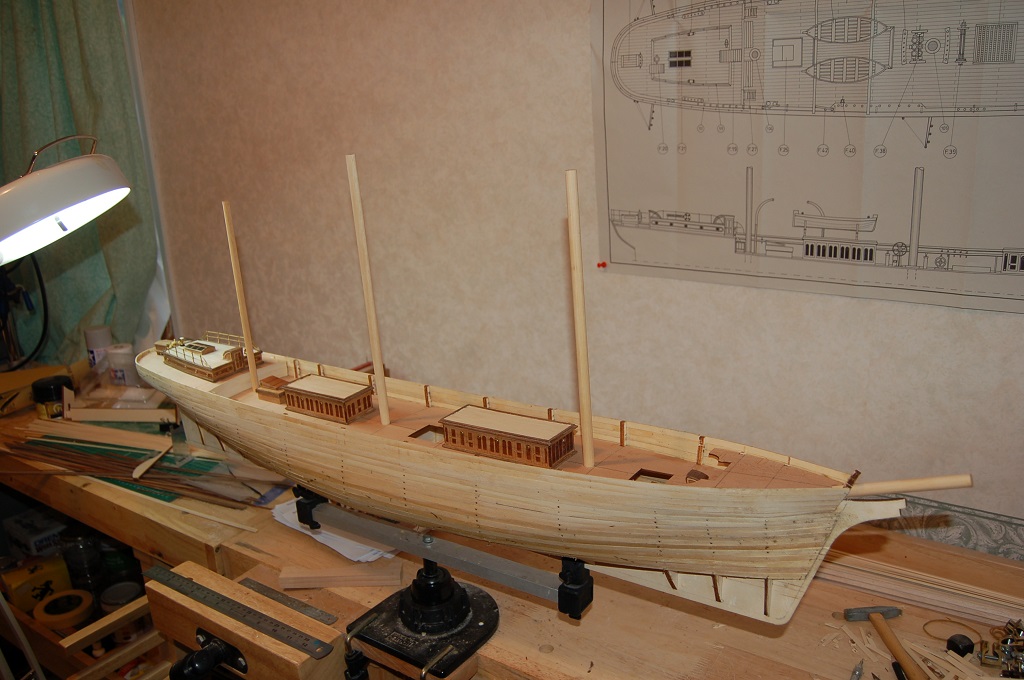
On to the second Planking.
No real issues here, Nice 0.5mm Walnut. I secured this with Aliphatic Resin and used an Amati Plank Benders heat to cure the glue, in this manner, the second planking progressed well.
It was also time to mount the model on its base to enable the waterline to be drawn.


-
-
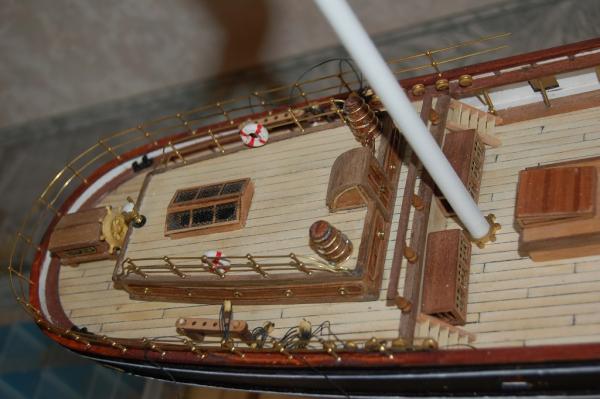
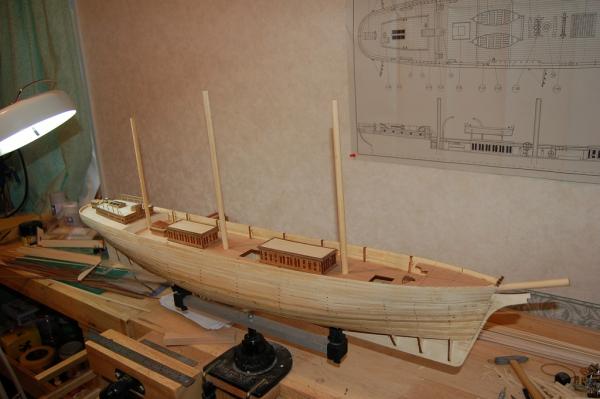
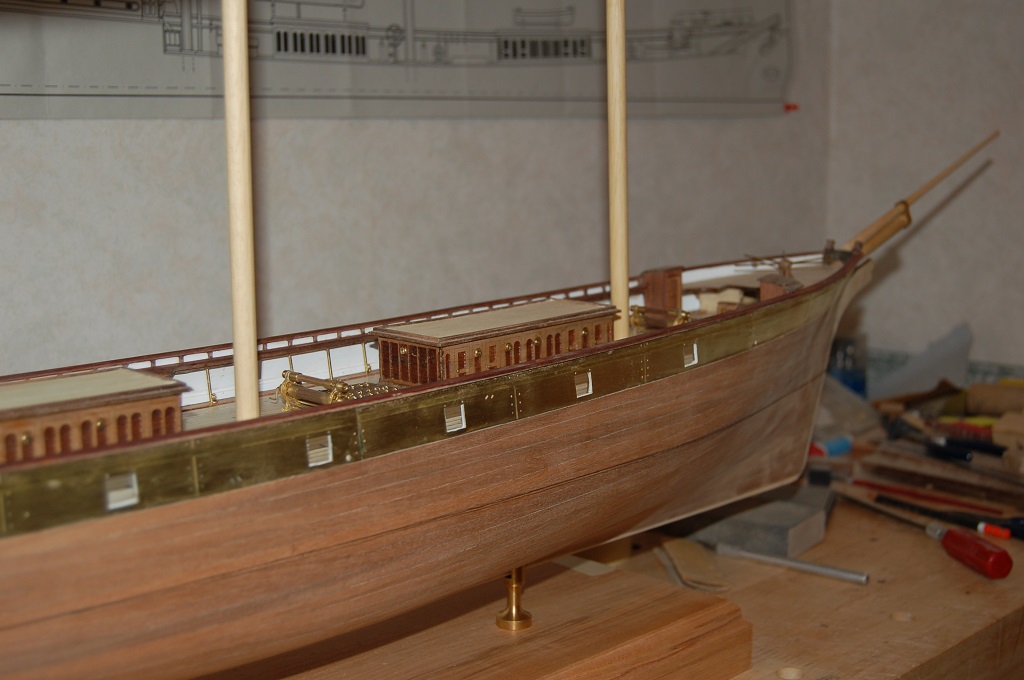
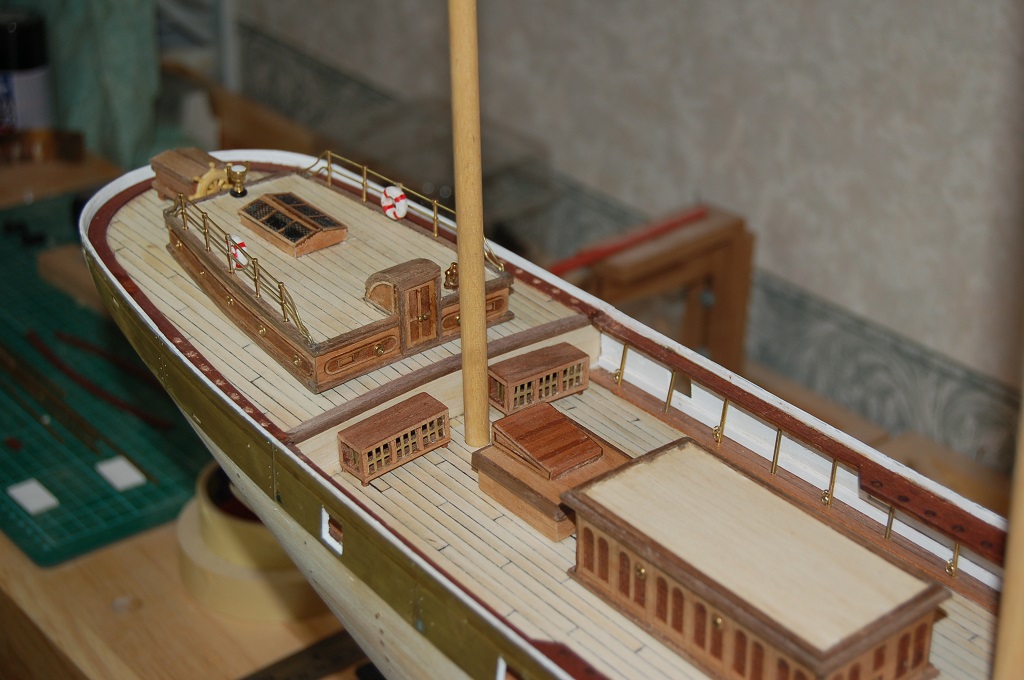
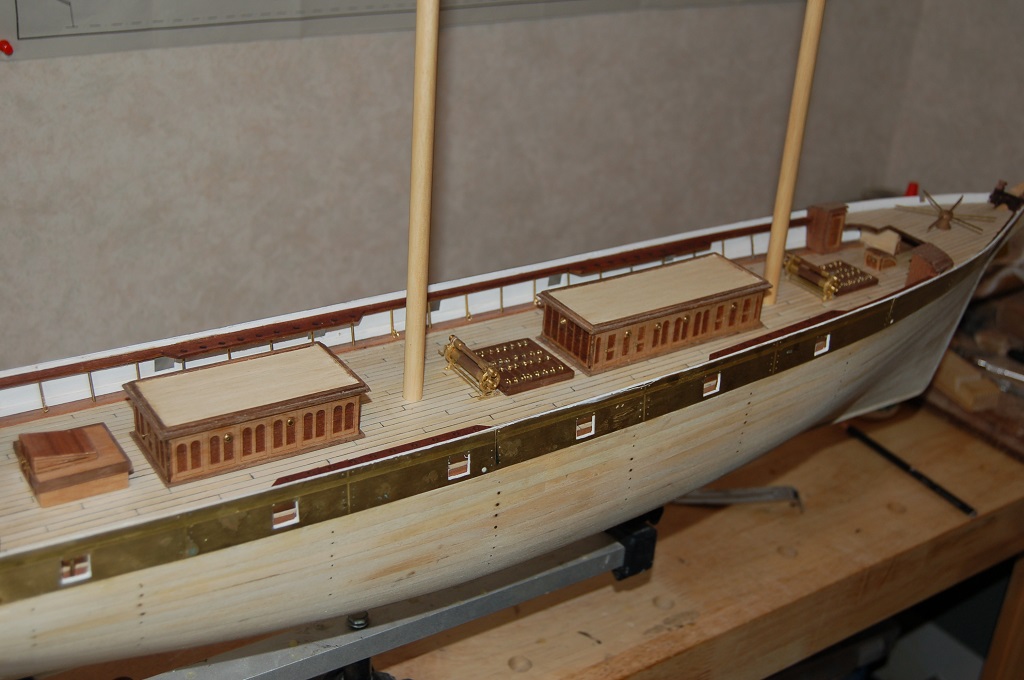
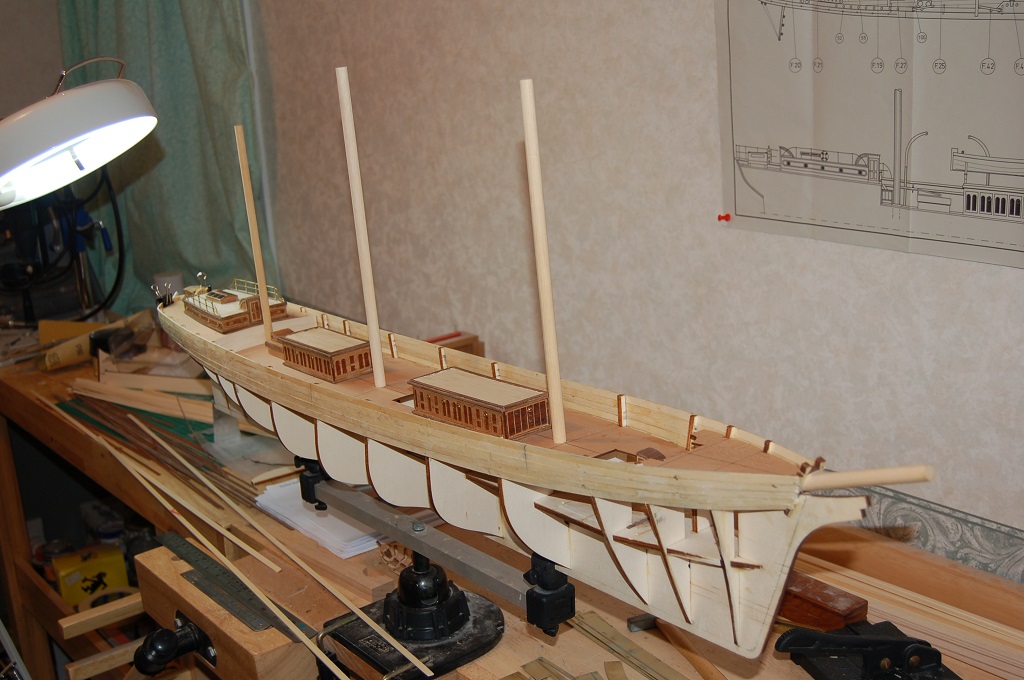
To continue, 1st planking complete and now my attention turned to the inside and outside of the Bulwarks, Main Rail, Internal Bulwark Stanchions and Brass Bulwarks.
Deck planking was completed, Cargo Hatches created, (NOT Gratings!!), and Waterways added.
I discarded the kit supplied Main Rail Stanchions and opted for Brass wire. Each one of these had a 2mm Brass Ring Silver Soldered on about 2 mm from the level of the Deck.
Cargo winches also assembled.
-
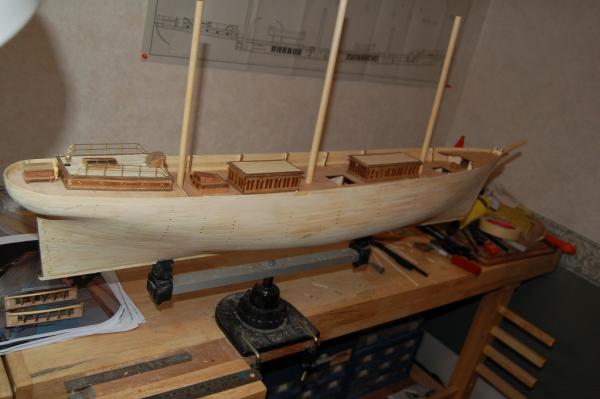
1st planking continued and I also "Fluffed" around with the Deckhouses as it sort of gave me a sense of achievement to get these underway and helped me visualize their future placement.
Rail Stanchions are from Bliiings as I did not like the look of the kit supplied items. I used these throughout, they gave a very pleasing result.
It was also nice to place the Masts and Bowsprit in position.
- GuntherMT, Blue Pilot, edmay and 2 others
-
5
-
 I purchased the Sergal version of the Cutty about 2005 and put it away for a year or so.
In the intervening months I managed to get my hands on the extras that I thought that I would require, PE sheet that didn't come with the later version of this Kit, Bulwarks/Deckhouse Sides/Etc.
I also ordered some laser cut Deckhouse Sides/Nameboard for Bow/Stern/Etc from "Double O Laser Products" in the US who make these specifically for this model. (And others.)
I also immersed myself in research and study regarding the Cutty, Log of the Cutty Sark and the supposed "Bible" for anyone attempting this model, Cutty Sark by Mr. Longridge.
Accurate Plans were also essential and the source here was the Cutty Sark Society in Grenwich.
(Plans that came with the kit were not hat "Crash Hot" especially with regard to Mast/Yards/Rigging)
I had also purchased the A/L version of this kit but my Cats put paid to this chasing a Bush Rat around the house and managed to destroy most of the wooden components after it fell off a reasonably high Shelf!!
So, I ended up with yet another source of information, A/L Plans and other bits and pieces. This turned out to be a blessing in disguise as I now had a great source of extra bits including Rigging Thread, Chain, Eyebolts, Etc, Etc.
So, a deep breath and in to it.
Structural components for the hull were beautifully Laser Cut, clean and most importantly nice and straight!!
False Keel got the bearding line marked on it, bulkheads numbered and glued in position. (The fit of these components was superb)
The Decks were the next o be fitted, no issues here either, really nicely engineered.
Bulkheads did not require to much chamfering, mainly just Stem/Stern.
The first layer of planking supplied is what I'd term as a Hard Balsa and long enough to happily go from Stem to Stern with just the right amount of flex to get around some of the compound curves of the hull.
I started the first planking at the top of the Main Deck and worked my way up to the top ofr the Bulwarks taking care not to affix planking to the bulkhead protrusions above the level of the Deck, these protrusions would be removed at a later stage.
-
A project more about my childhood and the memory of my farther
Feel free to add constructive criticism.
See you all soon.
-
Hi Bob,
Thank you for your kind words regarding the Cutty....
It only took 6 Years of weekends. :-)
I had a thought regarding your lighting, maybe you could run some wiring through the hull and down through the Pedestal or whatever you are going to mount your ship on. Is this a sensible Idea or is this something too late in the build process?
Cheers....HOF.
-
One other question, before you attached the Keel, did you cut in a Bearding for your planking to slot into?
I have done the A/L Bluenose and Mare Nostrum, I fitted the Keel after Planking.
I quite like the idea of fitting the Keel first.
Cheers....HOF.
-
Hi Bob,
Looking really good!! this is one kit that I purchased some time ago, languishing in my cupboard. (I guess I'll get to it one day.)
Your Planking is coming along very nicely indeed.
Like the Super-Detailing!!
Cheers....HOF.
-
-
Dear All,
Does anyone have experience with Spray Filer/Primer?
Am currently working on AL Carmen II and would like a rally smooth hull prior to paint.
I think that my issues are due to the badly re-engineered kits from this company but maybe that's my lack of skill.
Anyway, the idea was that this would be light relief after the Cutty Build.
Cheers....HOF.
-
Thanks Nick,
I sort of get what you mean but the thread must still go around each shroud?
I'll give it a go.
Cheers and Regards,
Harry. (HOF00)
-
Hi All,
I am in the final stages of finishing my Sergal/Mantua Cutty Sark.
I have the "Main" on Fore, Main and Mizzen Ratlines to tie. I had a go at this yesterday but after several attempts at tying these, I decided to "Walk Away" and have a think.
The problem is that I have left these to almost last and have all oter Standing Running Rigging in place, so, rightly or wrongly, this is what I have done.
I use a paper template/guide clipped to the shrouds and have use a needle and thread for Top-Mast and Topgallant Ratlines, no problem. The trouble with the "Main" Ratlines is that I cannot get the needle and thread to do my bidding.... Tension on The Shrouds is one issue as I cannot get a straight needle around!! I tried a curved Bodkin but while this went round each Shroud o.k. it was almost impossible to tie knots.
So, is there anyone there that has experience "Sewing" Ratlines through Shrouds?
Instruction/photos would be very much appreciated.
Cheers....HOF.


Cutty Sark by hof00 - FINISHED - Sergal/Mantua
in - Kit build logs for subjects built from 1851 - 1900
Posted
Hi chap. Happy to help with your Cutty and bash when you are ready. Cheers HOF.