


JSGerson
-
Posts
2,170 -
Joined
-
Last visited
Reputation Activity
-

 JSGerson got a reaction from goatfarmer11 in Rattlesnake by JSGerson - FINISHED - Mamoli - 1:64 - Using Robert Hunt’s practicum
The Stern Transom
Now it starts to get interesting. The practicum allows you to follow the original kit plan or jump off the deep end and start to perform major surgery from which there is no return and you are duly warned. So I took a deep breath and took the plunge.
The first thing I had to do was remove the stern bulkhead #12
You can see the squarish U-shape part I cut off to the right
-
JSGerson got a reaction from goatfarmer11 in Rattlesnake by JSGerson - FINISHED - Mamoli - 1:64 - Using Robert Hunt’s practicum
False Deck
Once more Mr. Hunt cautions the builder to make sure that the bulkheads don’t have any high or low spots where the false deck is to be installed. Again I tried to keep this in mind, but may not have been as successful as I thought as I did have some problems in this area as well later on.
The false deck is a bugger to put on due to the curvature of the deck structure and false ribs. It just doesn’t drop on the bulkheads. You have push, twist, bend, and pray it doesn’t snap. If it doesn’t feel right taking it off is as much a pain as it was putting it on. But once on, I glued it tight and didn’t spare the glue. Any excess would only show under the deck where it wouldn’t be seen.
-
JSGerson got a reaction from goatfarmer11 in Rattlesnake by JSGerson - FINISHED - Mamoli - 1:64 - Using Robert Hunt’s practicum
Building the Framework
The plywood Bulkhead-keel comes in two pieces and does not fit cleanly. So after cleaning, sanding, and squaring, the two pieces are glued together with Weldbond wood glue.
-
JSGerson got a reaction from goatfarmer11 in Rattlesnake by JSGerson - FINISHED - Mamoli - 1:64 - Using Robert Hunt’s practicum
After cleaning the edges and test fitting the pieces, looking for gaps, etc. the edges were darkened with artist charcoal to simulate tar chalking. The pieces were then glued together using another uncut copy of the stem as a template. Now the stem looks like what the shipwright would have seen when they completed the stem on the actual ship.
As Mr. Hunt points out, if I were to place my new stem on top the kit’s plan they don’t exactly match. Not only that, the kit’s figurehead won’t fit either but that’s OK because I jumped in with both feet on this build which means I will be carving a new figurehead from scratch when the time comes.
-
JSGerson got a reaction from goatfarmer11 in Rattlesnake by JSGerson - FINISHED - Mamoli - 1:64 - Using Robert Hunt’s practicum
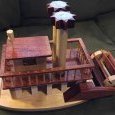
I final finished my first wooden boat, the Mini Mamoli British Schooner Evergreen, a 1:125 Scale Solid Hull Model after a two year build. This was my first attempt at such an endeavor in 30 years. I had started the Billings Boat’s POB Zwarte Zee , an ocean tug back then but got about only about 85% complete. I never finished it. So with a completed build under my belt, I set my sights on the 1781 American Privateer, The Rattlesnake. I considered the Evergreen my “training wheels” for this build. Although technically the Zwarte Zee was my first POB boat, all of the planking flaws were covered up with wood filler and paint. This would be my first true test in this construction method. What you see is what I built for better or worse.
This build was started in October 2010 and I have only now decided in May 2013, to post my build log. I was reluctant to do so because compared to the others members who post comments regularly and have submitted their many build logs, I am but a beginner. I have knowing or unknowingly made many errors, omissions, and mistakes. It would be like hanging out my dirty laundry. But after some prodding by some of the members, I agreed to post my build if anything to show the error of my ways to anyone who wants to follow a slooow moving project.
I had a choice of the Mamoli or the Model Shipway kit. After a little research I discovered Robert Hunt’s Practicum (http://www.lauckstreetshipyard.com/) and thought this is just perfect for me. Having struggled through the minimal instructions of the Norwegian translation for the Zwarte Zee and the simplistic instructions translated from the Italian for the Evergreen, and after reading the free sample Chapter 1 with its highly detailed instructions and detailed photographs, I was easily convinced to purchase Robert’s practicum. There I found that the practicum was based on the Mamoli kit, so I chose that kit to build. To be fair, Mr. Hunt did state that his practicum could also be used for the Model Shipway kit. The practicum was written to both supplement and enhance the original kit instructions or to kitbash the project. Because the “journey” to me is the purpose of building a model, rather than the destination, the final model, I chose to build the kitbash and plunked down my money:
· Basic kit - ~$240
· Robert Hunt’s Practicum (http://www.lauckstreetshipyard.com/) - $150
· Harold Hahn’s plans ¼” scale - $45
· Reduce the Hahn plans 74% to match the kit’s 3/16” scale (1:64) - ~$25
· Hobbymill Wood Package (http://www.hobbymillusa.com/) - $210
This not a cheap build/modification. This does not include the tools that I accumulated and still am accumulating for this project. Hell, it’s a hobby, so it’s OK, that and the fact that I just retired and am a bachelor.
A kitbash goes beyond what the basic kit instructs to make the model more interesting, challenging, and pleasing. In this case Mr. Hunt’s practicum is based on the model Harold Hahn, a master model builder, built using plans he created based directly from the original British Admiralty drawings. Although this is an American ship, it was captured by the British and it is from them we can thank for having the historical drawings and the name Rattlesnake. In this model Mr. Hahn used direct woods to create the colors of the ship. Therefore in keeping true the Hahn model, the practicum substitutes the basic kit wood with a wood package purchased separately from Hobbymill (http://www.hobbymillusa.com/); and has you purchase the Harold Hahn copyrighted plans which Robert is basing his kitbashing modifications. Since Mr. Hahn built his model in ¼” scale, the plans have to reduce to match the kit scale of 3/16” (1:64). Your ordinary office copy won’t do the trick due to the size of the sheets. You need a large copier and one that can do reductions, specifically 74%, the kind found at a large stationary store, graphics, or engineering firm.
-
 JSGerson got a reaction from PaddyO in Rattlesnake by Dave_E - Model Shipways - 1:64
I just discovered your build log today and admired your workmanship. I built the Mamoli Rattlesnake in 2017 as my first square rigged wooden ship using Robert Hunt's practicum as my bible. I could not have built my model without it. The build was a kit bash adding all kinds of details the kit did not have. and was a challenge for me as a first time builder, but I think it was worth it. The Rattlesnake is a beautiful ship. I look forward to your future posts.
Jonathan
-
 JSGerson got a reaction from Knocklouder in Rattlesnake by Dave_E - Model Shipways - 1:64
I just discovered your build log today and admired your workmanship. I built the Mamoli Rattlesnake in 2017 as my first square rigged wooden ship using Robert Hunt's practicum as my bible. I could not have built my model without it. The build was a kit bash adding all kinds of details the kit did not have. and was a challenge for me as a first time builder, but I think it was worth it. The Rattlesnake is a beautiful ship. I look forward to your future posts.
Jonathan
-
 JSGerson got a reaction from javajohn in Rattlesnake by Dave_E - Model Shipways - 1:64
I just discovered your build log today and admired your workmanship. I built the Mamoli Rattlesnake in 2017 as my first square rigged wooden ship using Robert Hunt's practicum as my bible. I could not have built my model without it. The build was a kit bash adding all kinds of details the kit did not have. and was a challenge for me as a first time builder, but I think it was worth it. The Rattlesnake is a beautiful ship. I look forward to your future posts.
Jonathan
-
 JSGerson got a reaction from Dave_E in Rattlesnake by Kenneth Powell - FINISHED - Model Shipways - American Privateer
Congratulations on a job well done!
-
 JSGerson got a reaction from Mr Whippy in Rattlesnake by Kenneth Powell - FINISHED - Model Shipways - American Privateer
Congratulations on a job well done!
-
JSGerson got a reaction from Knocklouder in Rattlesnake by Kenneth Powell - FINISHED - Model Shipways - American Privateer
Congratulations on a job well done!
-

 JSGerson got a reaction from Kenneth Powell in Rattlesnake by Kenneth Powell - FINISHED - Model Shipways - American Privateer
Congratulations on a job well done!
-
 JSGerson got a reaction from Kirby in USS Constitution by JSGerson - Model Shipways Kit No. MS2040
The last step was to add eyebolts on the inside face of the doors for the pull cord that opens and closes the door. Plain sewing thread was used. One end tied to the eyebolt and the other loose. Once the thread was stiffed with CA glue, the loose end was inserted into the round tunnel after the port doors were nailed to the transom. The stiffened thread looks taught, and no one can see it’s not secured to the inside the hull. The doors were positioned by bending the hinges, so they hung perfectly vertical.
-
 JSGerson got a reaction from KurtH in USS Constitution by JSGerson - Model Shipways Kit No. MS2040
The last step was to add eyebolts on the inside face of the doors for the pull cord that opens and closes the door. Plain sewing thread was used. One end tied to the eyebolt and the other loose. Once the thread was stiffed with CA glue, the loose end was inserted into the round tunnel after the port doors were nailed to the transom. The stiffened thread looks taught, and no one can see it’s not secured to the inside the hull. The doors were positioned by bending the hinges, so they hung perfectly vertical.
-
.thumb.jpg.6d6ee4bdbfaac2c58ecc77e7b80ae374.jpg) JSGerson got a reaction from Matt D in USS Constitution by JSGerson - Model Shipways Kit No. MS2040
JSGerson got a reaction from Matt D in USS Constitution by JSGerson - Model Shipways Kit No. MS2040
A few more images I forgot to post
-
 JSGerson got a reaction from histprof1066 in USS Constitution by histprof1066 - FINISHED - Billing Boats - 1:100
Your jib sails are very neat and clean. Well done.
You have constructed your model a whole lot faster me. I started in 2017 and five years later, I have still not completed the hull. Of course, my Model Shipway kit is a larger scale at 1:76.8 (more detail) and I decided to add the gun deck to my model. So, I have not reached the point where I have to make the decision whether or not to rig the model with sails. The only boat I've ever added sails to was the Evergreen (my 1st wooden model) which you can see in the little image I use as my identifier to the left of my comments, so I don't have a lot experience making them That being said, the reason I haven't made that decision is scale. When you scale down the thickness of the sail material which isn't thick to begin with, it's almost gossamer thin and semi transparent and I've had difficulty finding modeling material to emulate that. Just about every model with sails has dealt with that by ignoring the scale and gone for the appearance. You are doing a fine job in that department. I look forward to your next post.
-
 JSGerson got a reaction from usedtosail in USS Constitution by JSGerson - Model Shipways Kit No. MS2040
Looking at my efforts, I realized I needed to do this all over again but with a harder wood because the square edges of the boomkins were already beginning to wear down during the fabrication process. Using 1/8” x 1/8” stock pear wood that I had left over from when I constructed my Rattlesnake, the results were much better. They were then painted black. The brass bands held three eyebolts. Two eyebolts, one on the aft side and the other on the bottom of the boomkin, were aligned lengthwise following the line of the boomkin. The third eyebolt located on the top of the boomkin was installed perpendicular to the boomkin as was shown in the various photographs of the actual ship. To do this, a pin was used to make the initial dent in the brass for the #77 drill bit. The holes were drilled through the brass into the wood. After each hole was drilled, a full-size eyebolt was inserted so the brass band would not move while the next hole was being drilled. Then the eyebolts were removed, cut to size, and permanently installed with CA glue. This secured the brass bands as well.
-
JSGerson got a reaction from usedtosail in USS Constitution by JSGerson - Model Shipways Kit No. MS2040
Bow Boomkins
I was about to install the grating and fabricate the seats of ease in the bow when I realized that the pair of bow boomkins needed to be fabricated and installed first because they were physically below the grating. Surprisingly, the practicum did not address these components.
Initially, utilizing the kit’s 1/8” x 1/8” stock basswood, the boomkin were fabricated by tapering the pieces of wood to 3/32” x 3/32” at one end. Then, with a square cross-section needle file, the triangular indents on the tapered ends were formed. Using 0.005” brass metal sheet, two strips of the metal were cut to size, wrapped around the boomkins to form the brass bands, and then blackened.
-

 JSGerson got a reaction from robdurant in USS Constitution by JSGerson - Model Shipways Kit No. MS2040
Using a 1” nail with a flat head, I ground off two opposing side flush to the shaft. Then with a Dremel rotary tool and needle files, the remaining portion of the nail head was fashioned to look like a cleat. Next, the shaft of the nail was placed into the Dremel rotatory tool so it acted like a mini lathe. A file was clamped with a vise and the nail shaft was ground such that the shaft was narrowed down to a very small diameter while leaving a small section at the top, thick. When satisfied, the part was cut off resulting in two tiny cleats with a pin at their base which was inserted into drilled holes (#44 bit) on the fourth posts port and starboard.
-
JSGerson got a reaction from robdurant in USS Constitution by JSGerson - Model Shipways Kit No. MS2040
1/32” x 3/32” basswood was used as the planking material in lieu of the plan called 1/64” x 3/32” stock because that was not supplied in the kit as noted in the practicum. I believe that the 1/16” was a typo in the plans. Each plank had to be custom sized and shaped before installation. I painted the top and bottom planks black before installing them to make painting near the rails easier later on. Bothe sides of the planking were painted black.
-
JSGerson got a reaction from robdurant in USS Constitution by JSGerson - Model Shipways Kit No. MS2040
Using a 3/8” spacer, seven 1/16” x 1/16” vertical posts were spaced and glued into place from the second rail up to the first. The plans appear to show an eighth post right next to the hull, but since that rail would be buried behind the forthcoming planking, it wasn’t worth the effort to install it.
-
JSGerson got a reaction from robdurant in USS Constitution by JSGerson - Model Shipways Kit No. MS2040
The final major part of the bow is the bow top rail and the planking below it. Finally, a simple rail to construct. It is a straight piece of 1/16” x 3/32” stock basswood, cut to length, painted black with 1/64” white pinstripes added.
-
JSGerson got a reaction from KurtH in USS Constitution by JSGerson - Model Shipways Kit No. MS2040
Using a 1” nail with a flat head, I ground off two opposing side flush to the shaft. Then with a Dremel rotary tool and needle files, the remaining portion of the nail head was fashioned to look like a cleat. Next, the shaft of the nail was placed into the Dremel rotatory tool so it acted like a mini lathe. A file was clamped with a vise and the nail shaft was ground such that the shaft was narrowed down to a very small diameter while leaving a small section at the top, thick. When satisfied, the part was cut off resulting in two tiny cleats with a pin at their base which was inserted into drilled holes (#44 bit) on the fourth posts port and starboard.
-
 JSGerson got a reaction from Ryland Craze in USS Constitution by JSGerson - Model Shipways Kit No. MS2040
Using a 1” nail with a flat head, I ground off two opposing side flush to the shaft. Then with a Dremel rotary tool and needle files, the remaining portion of the nail head was fashioned to look like a cleat. Next, the shaft of the nail was placed into the Dremel rotatory tool so it acted like a mini lathe. A file was clamped with a vise and the nail shaft was ground such that the shaft was narrowed down to a very small diameter while leaving a small section at the top, thick. When satisfied, the part was cut off resulting in two tiny cleats with a pin at their base which was inserted into drilled holes (#44 bit) on the fourth posts port and starboard.
-
JSGerson got a reaction from Ryland Craze in USS Constitution by JSGerson - Model Shipways Kit No. MS2040
One last check of my photos revealed one more detail, a cleat had to be installed. I was going to check my supply of cleats I previously purchased building the Rattlesnake but for the life of me, I couldn’t find them. They were not where I thought I stored them. This gave me a chance to brush up on making them with a method I taught myself some years back.