72Nova
-
Posts
675 -
Joined
-
Last visited
Content Type
Profiles
Forums
Gallery
Events
Everything posted by 72Nova
-
 You're very prolific at building these card models, great work as always 👍 Michael D.
- 43 replies
-
- 2
-

-

-
- card
- Speeljacht
- (and 2 more)
-
I got lucky this time Ian, only 3... Michael D.
- 324 replies
-
- 1
-
-
- Sovereign of the Seas
- Airfix
- (and 1 more)
-
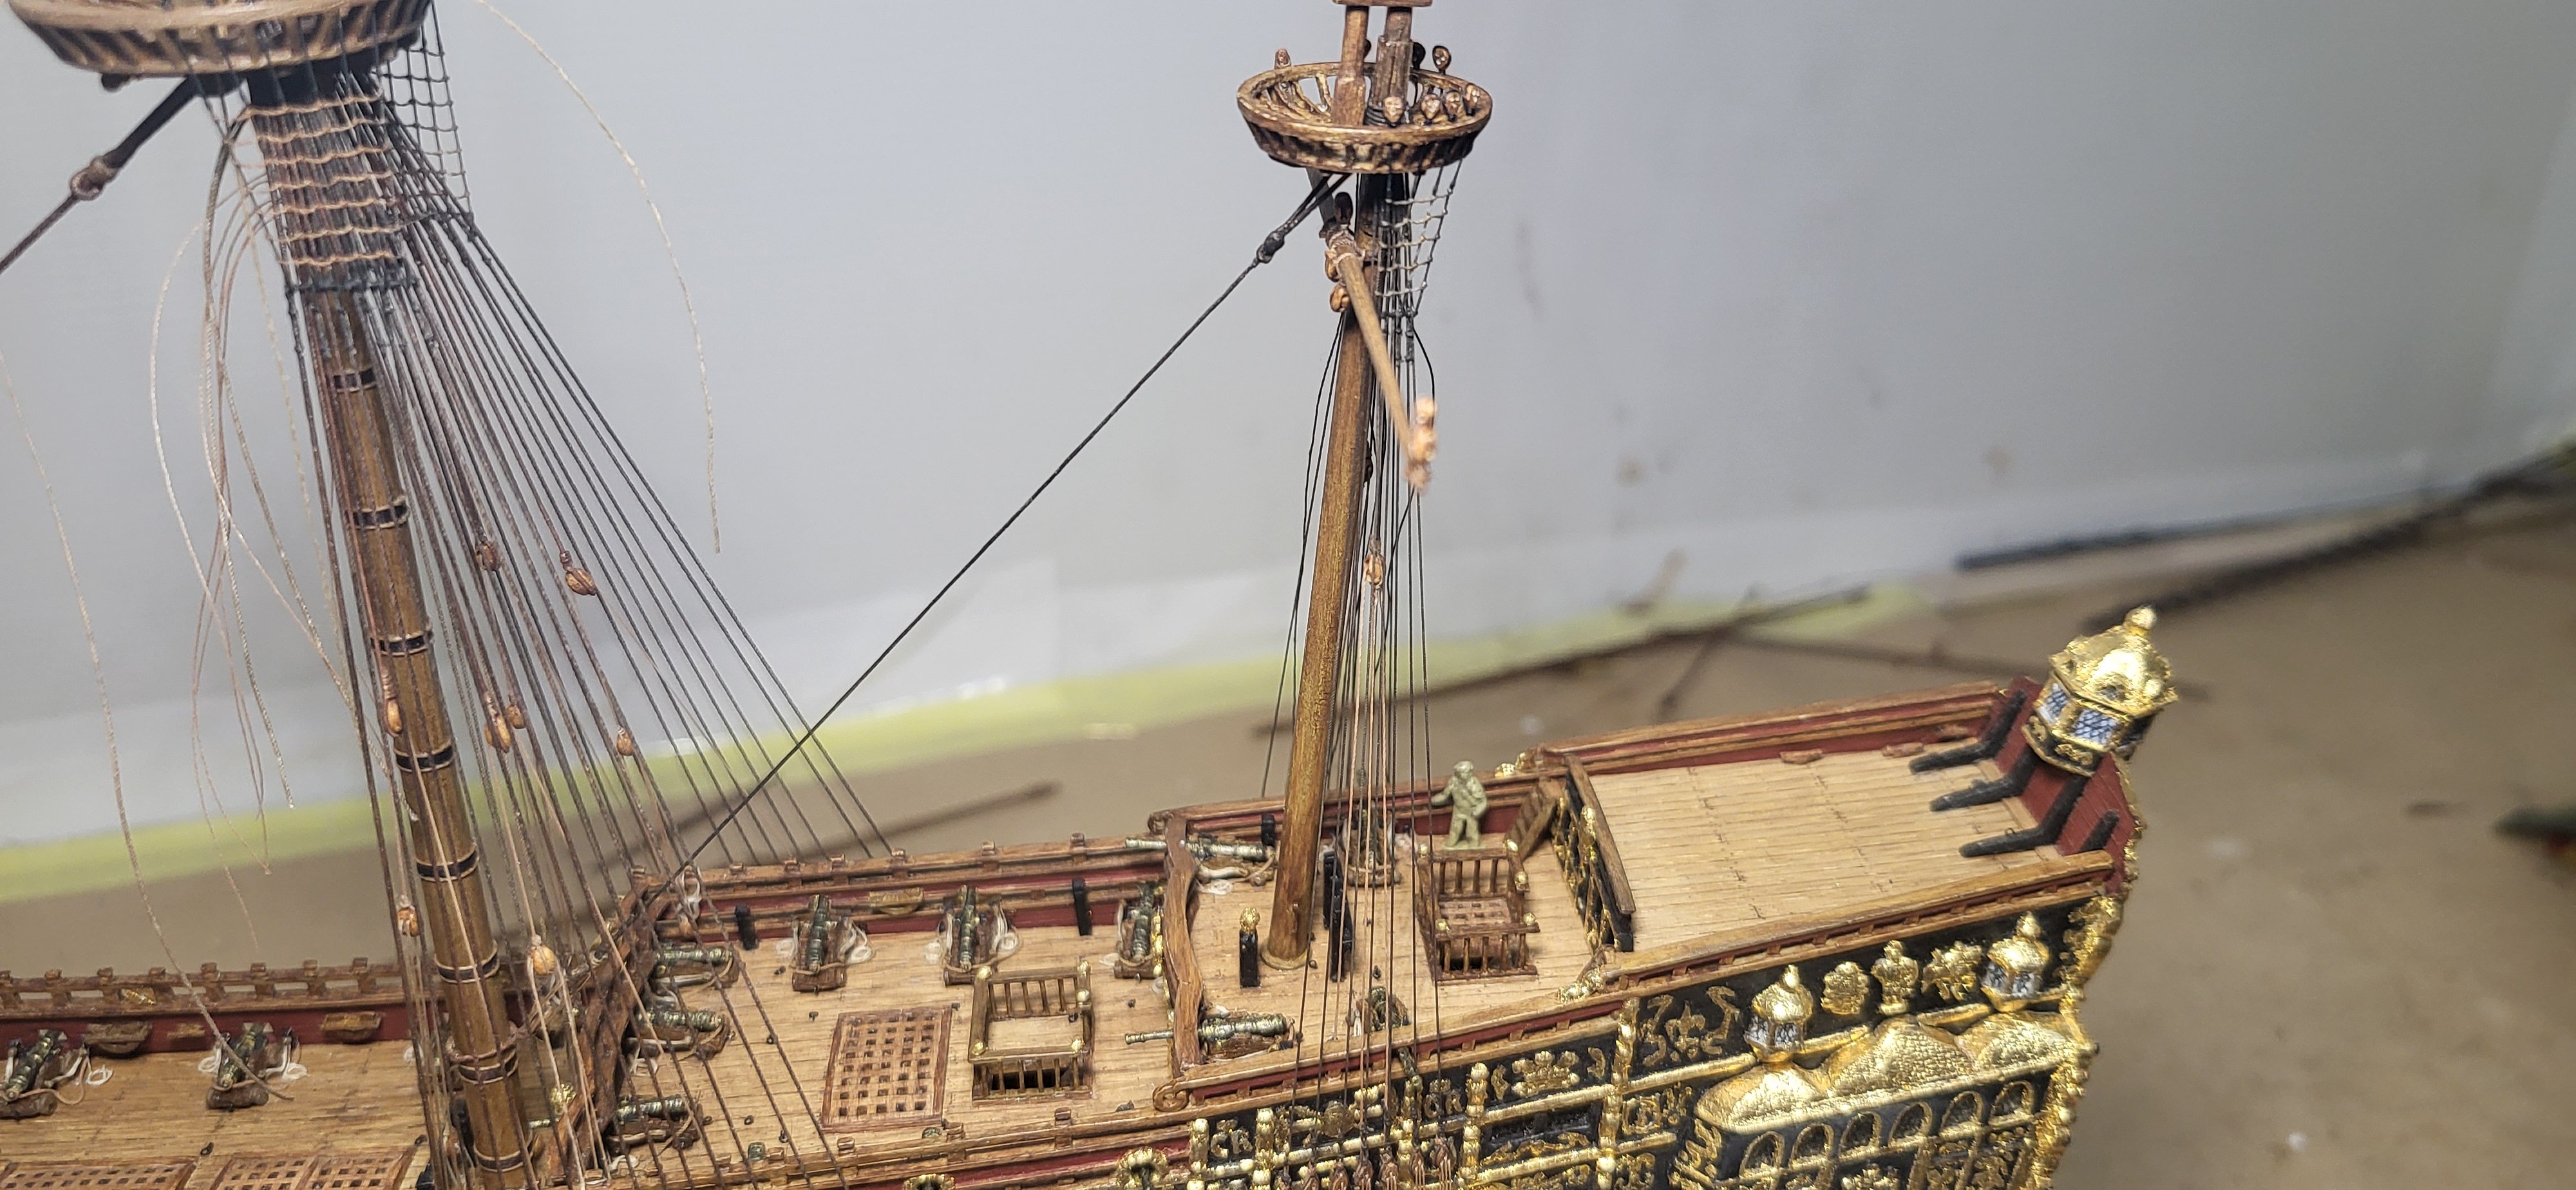
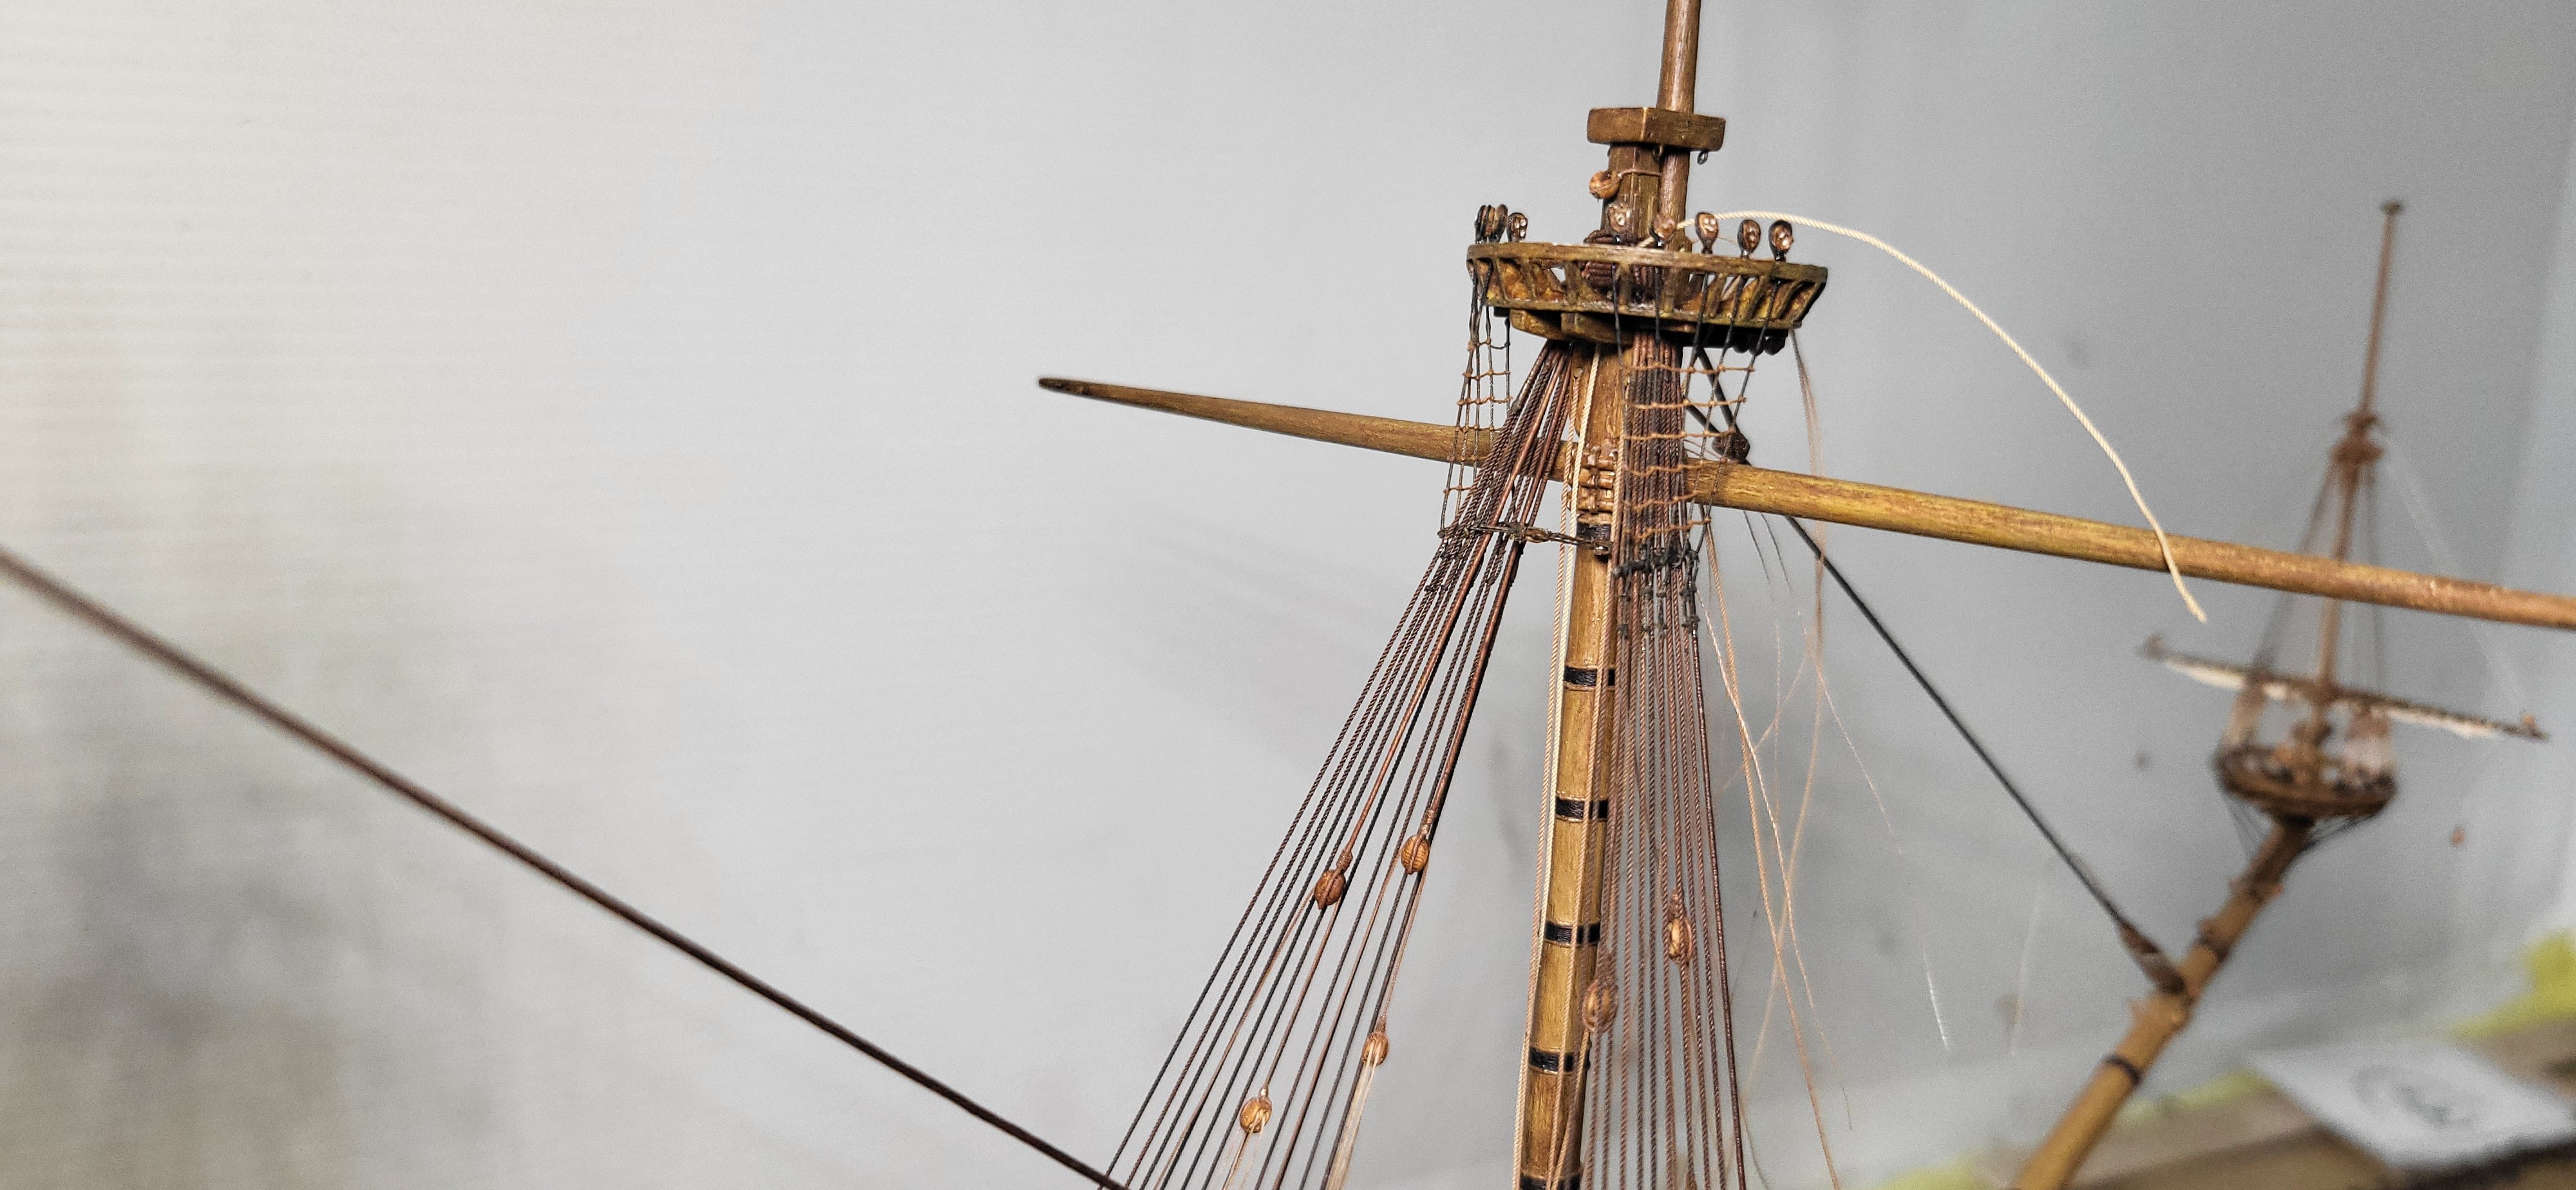
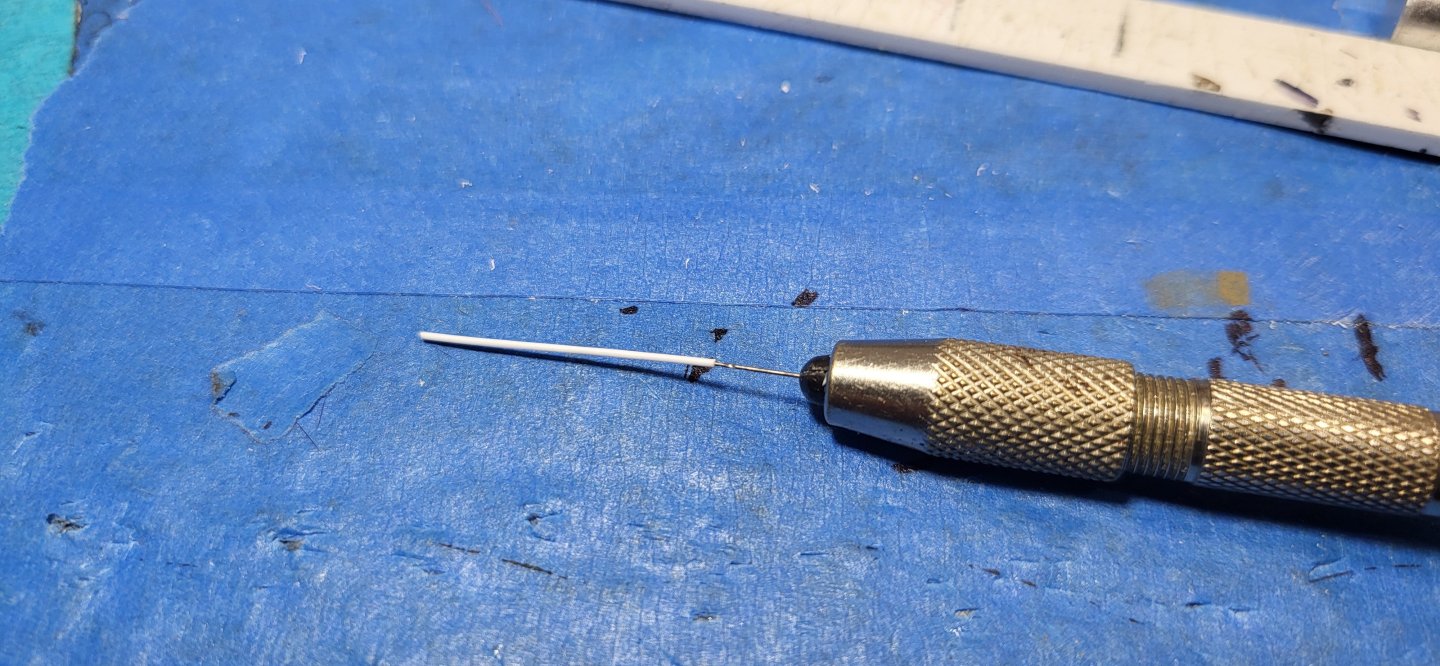
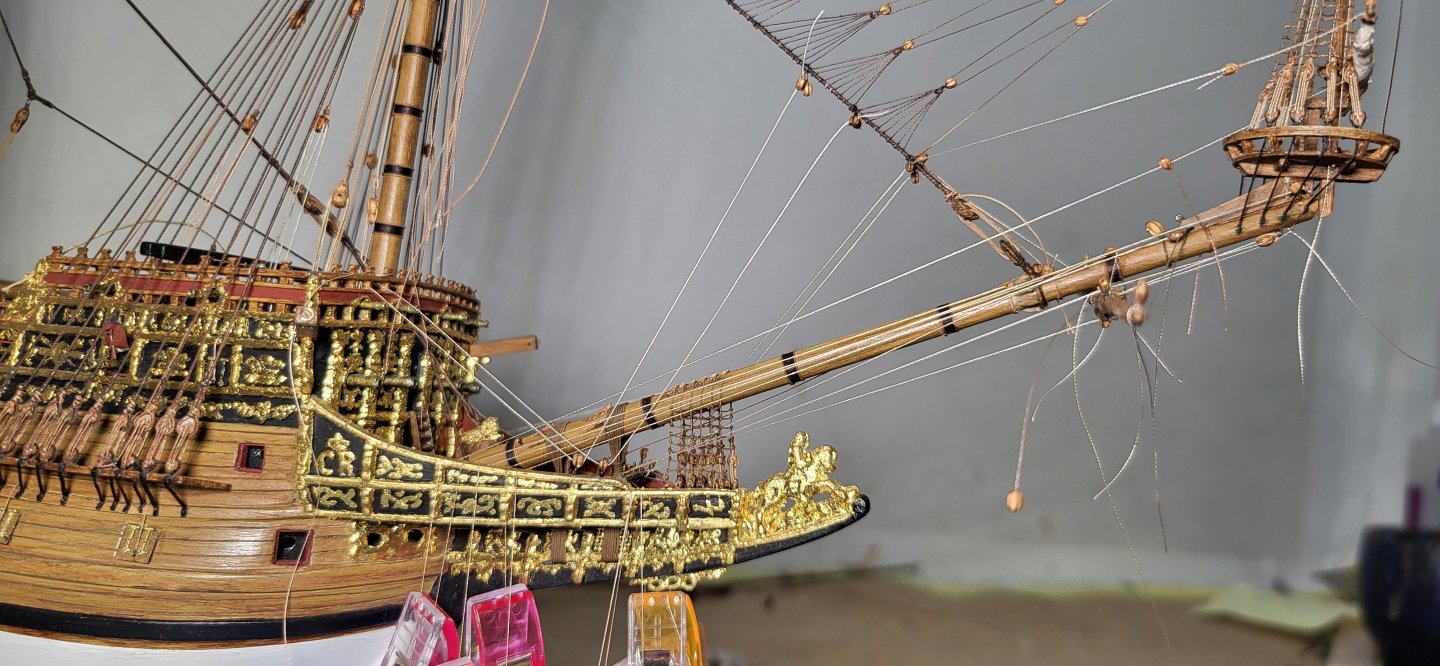
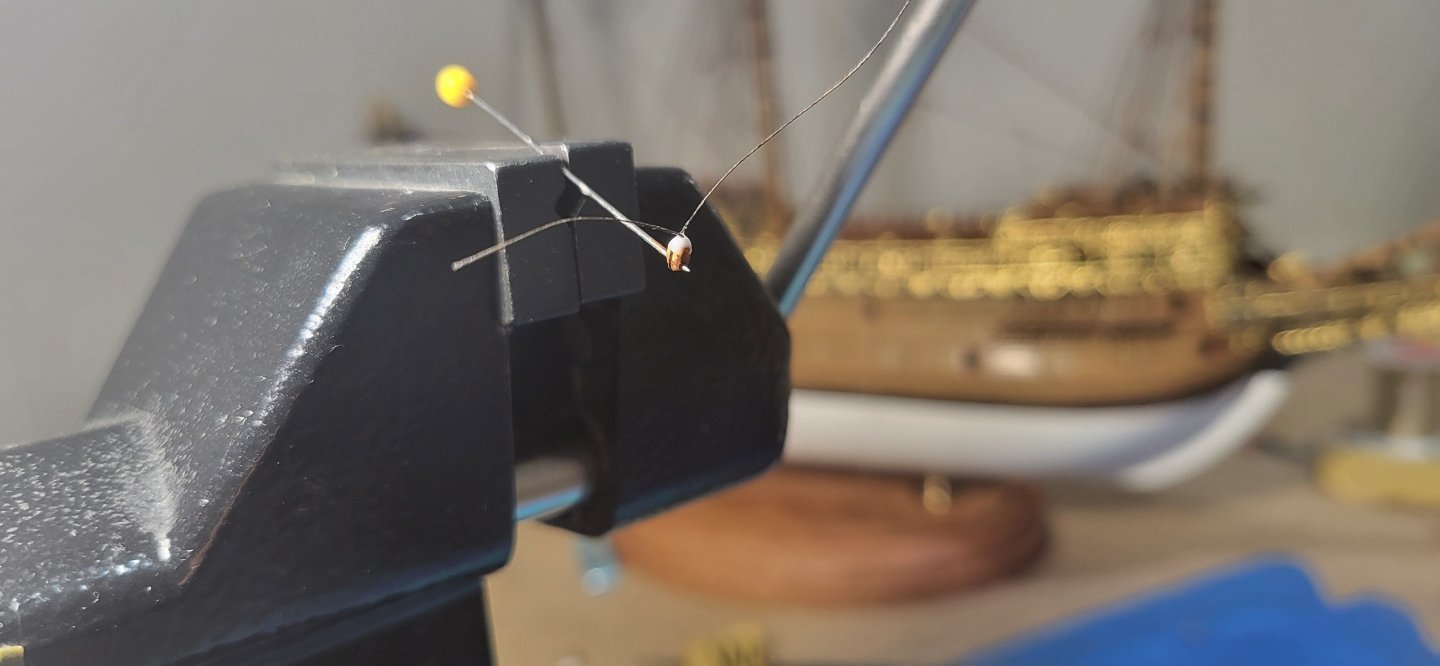
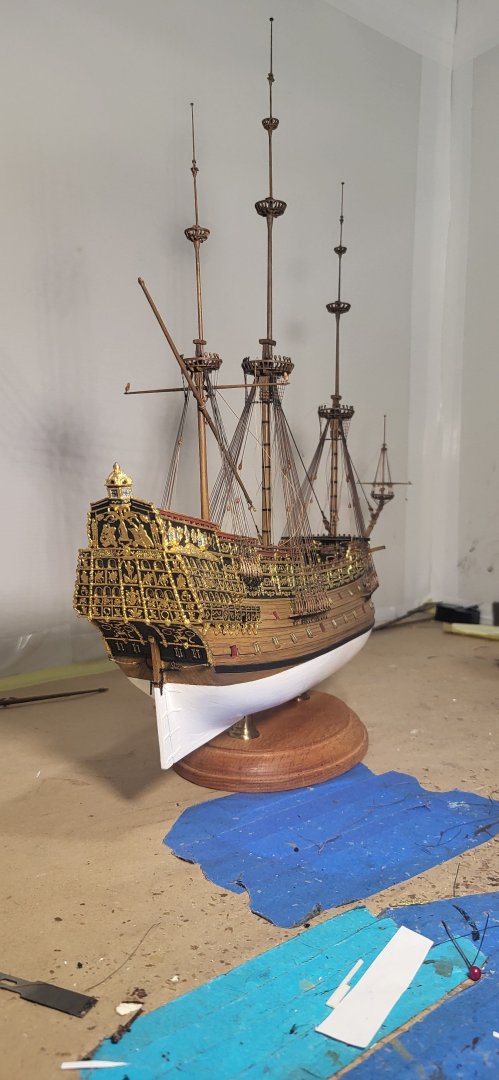
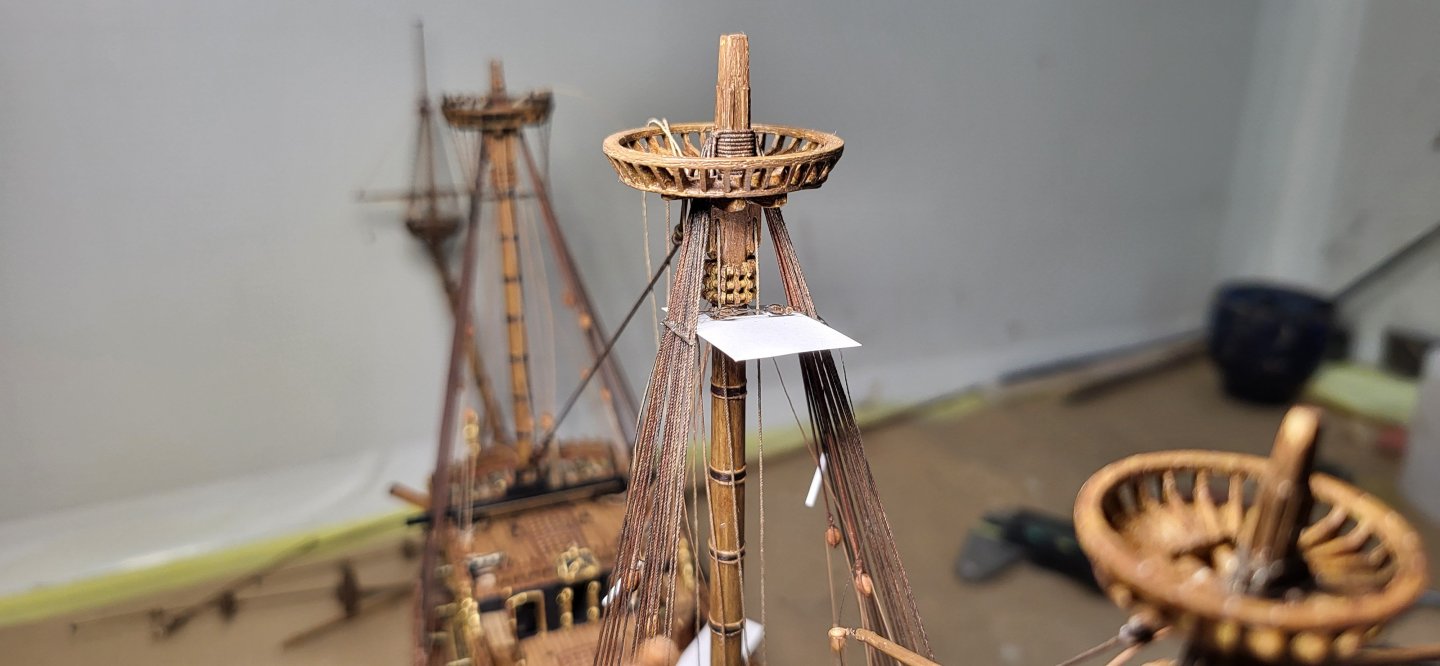
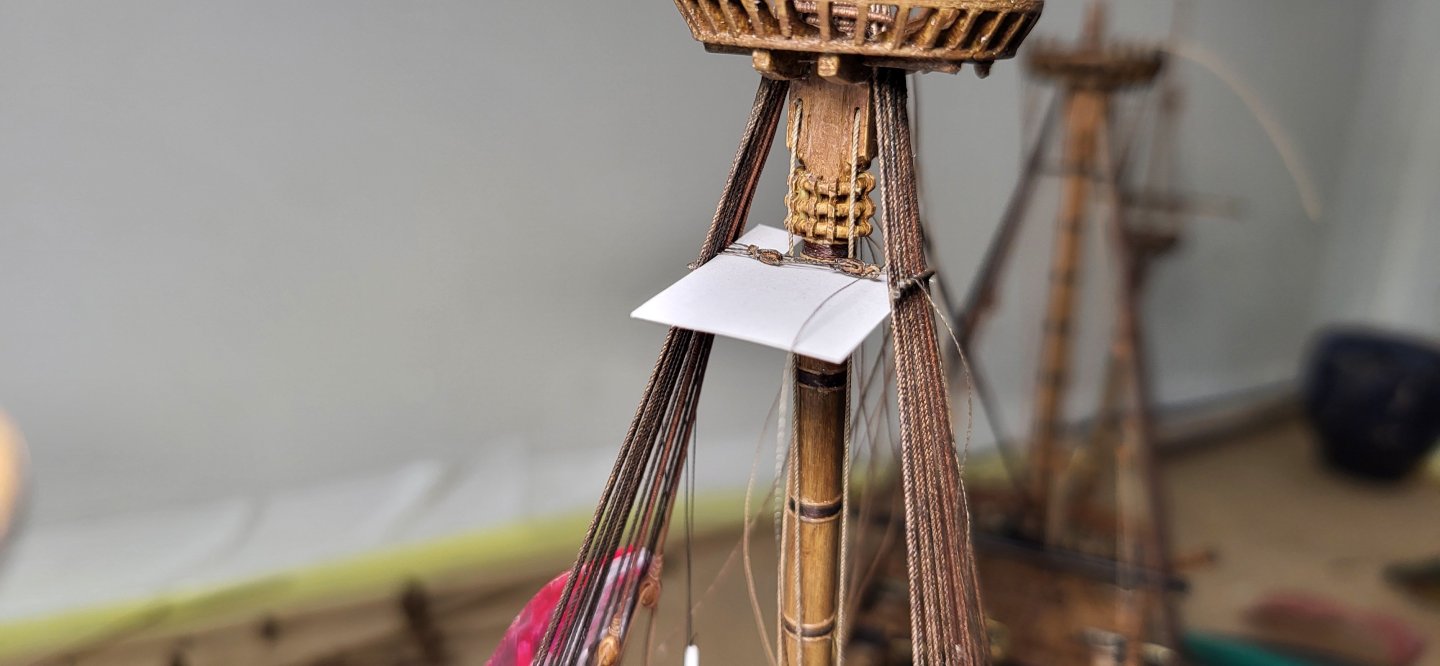
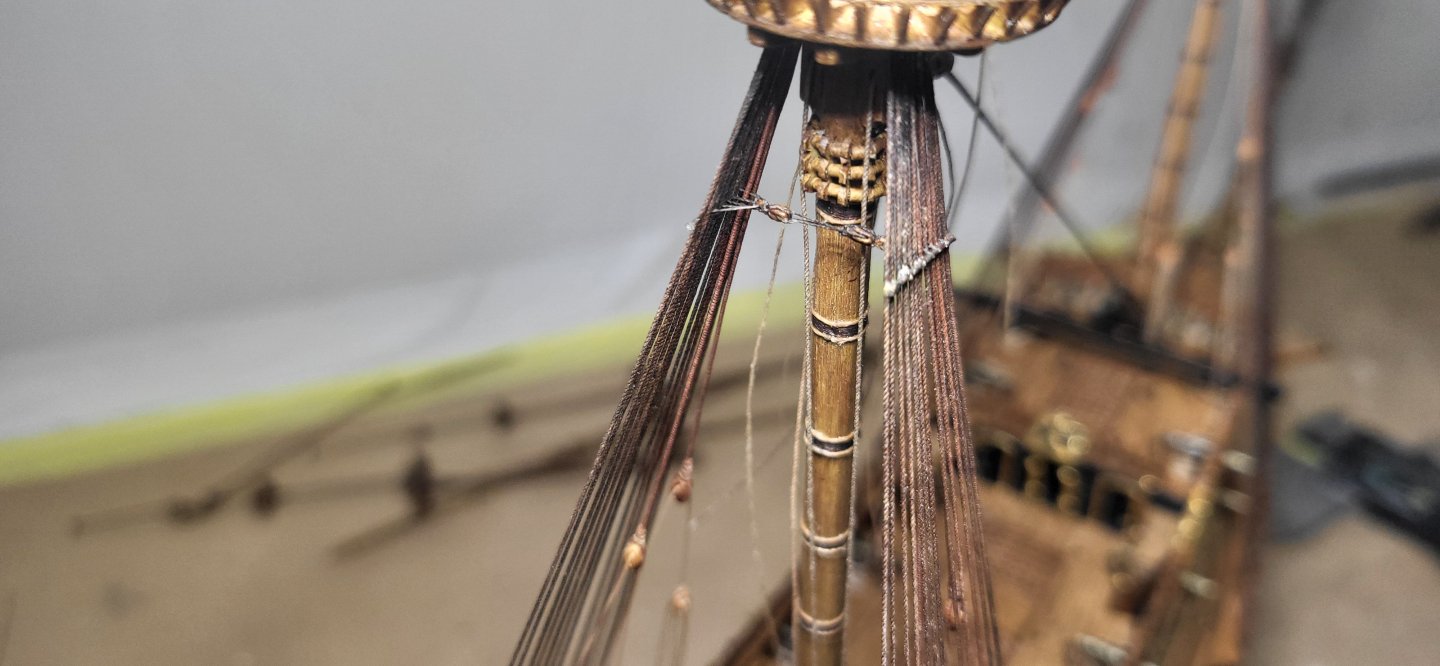
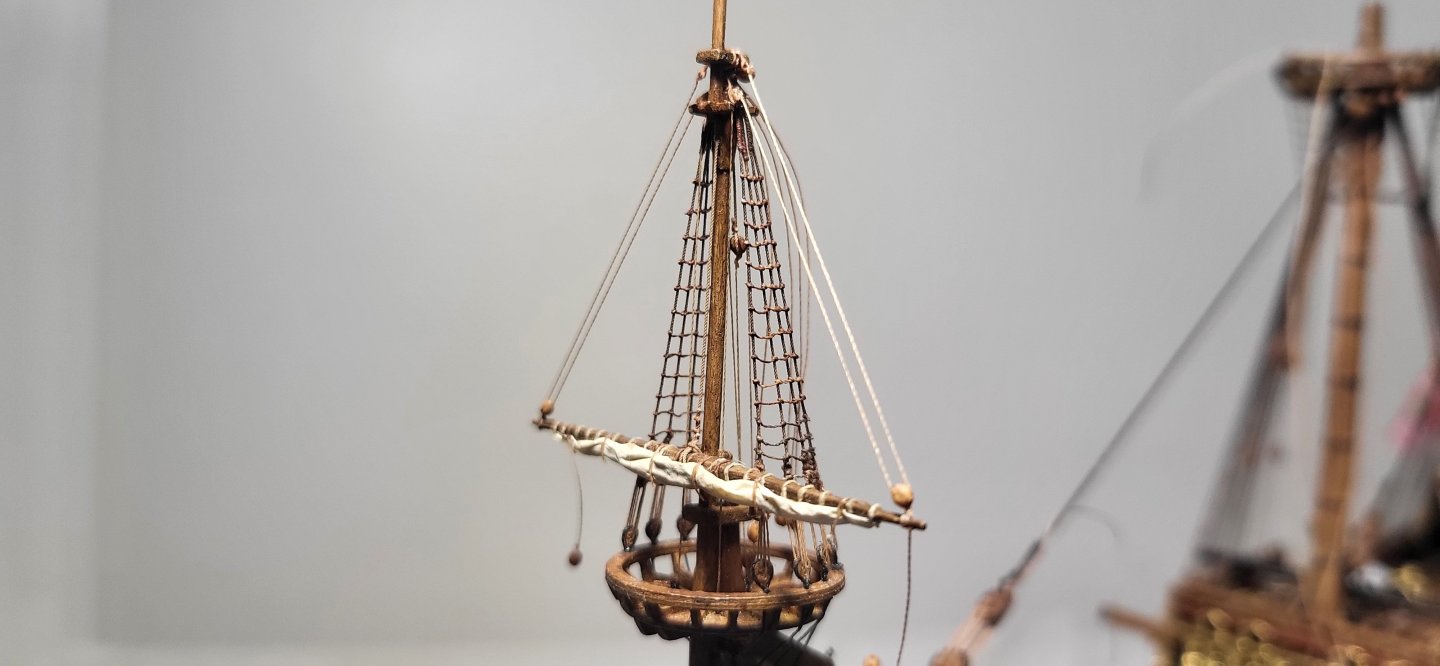
I started rigging the fore topgallant futtock shrouds and also did a little back tracking regarding the spritsail yard, Initially I was going to use a sling but I mistakenly added the saddle for it which was not in use at the time so I removed it and decided to use a parrel instead which was in use up to 1640 according to Lee's. The parrel ribs measure out at approx 2mm long and 0.75mm thick, for the trucks I used 0.75mm rod and a #80 micro bit for the holes, I do like the added detail of the parrel, keep in mind this is just slightly over scaled but one still has to be able to handle them and think visually it looks okay. Thanks for looking. Michael D.

- 324 replies
-
- 10
-
-

-
- Sovereign of the Seas
- Airfix
- (and 1 more)
-
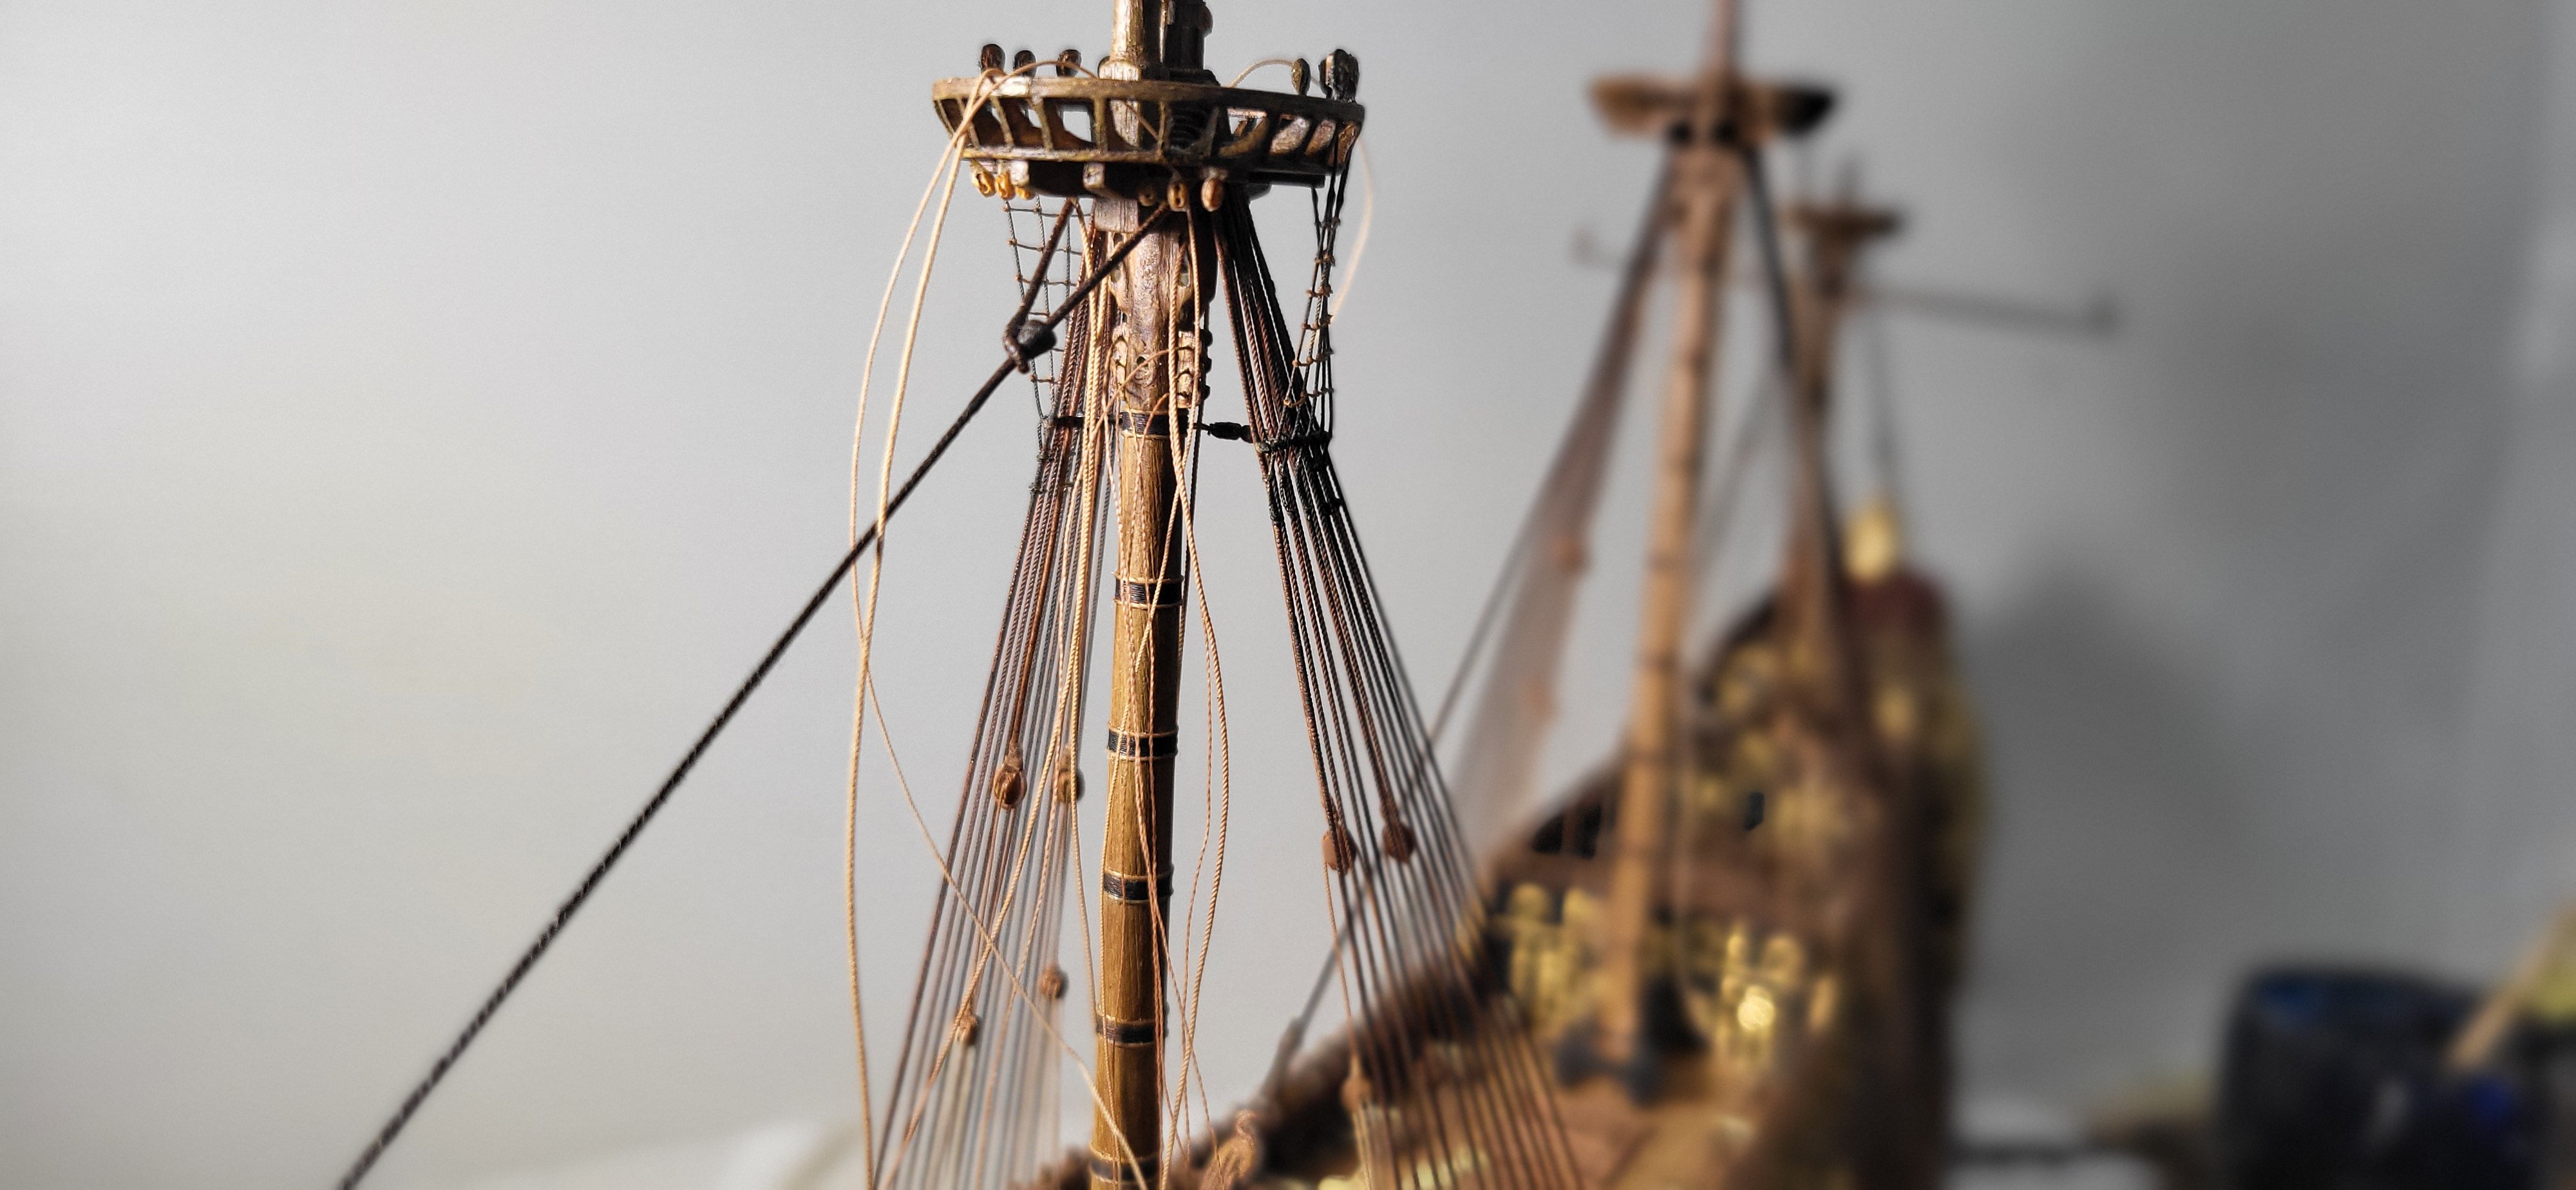
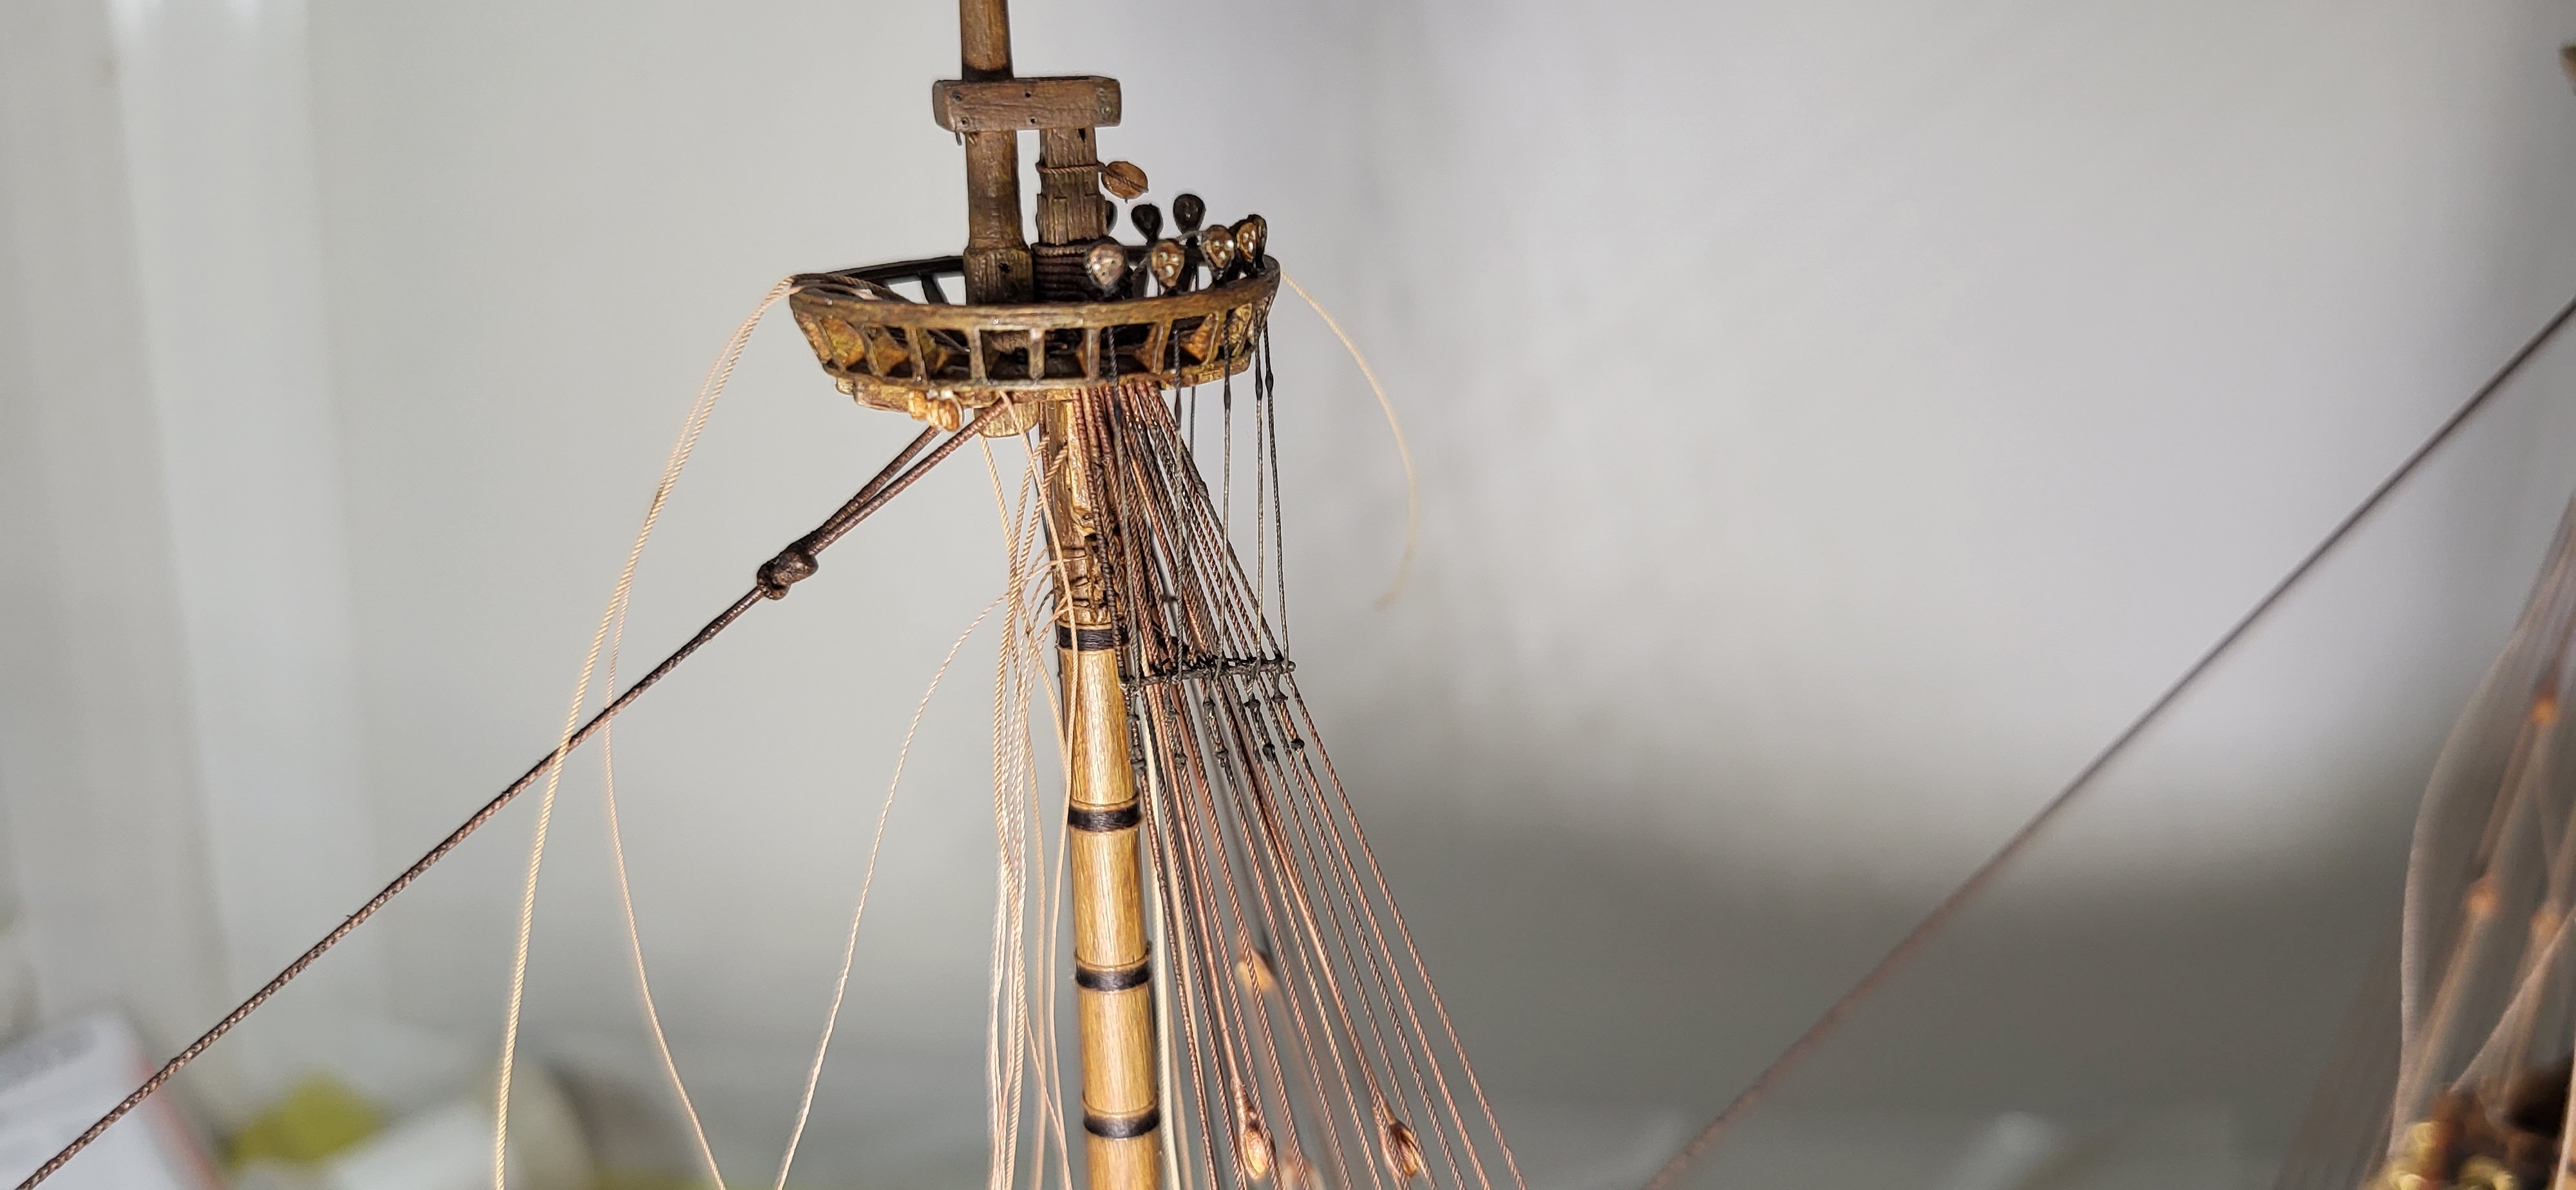
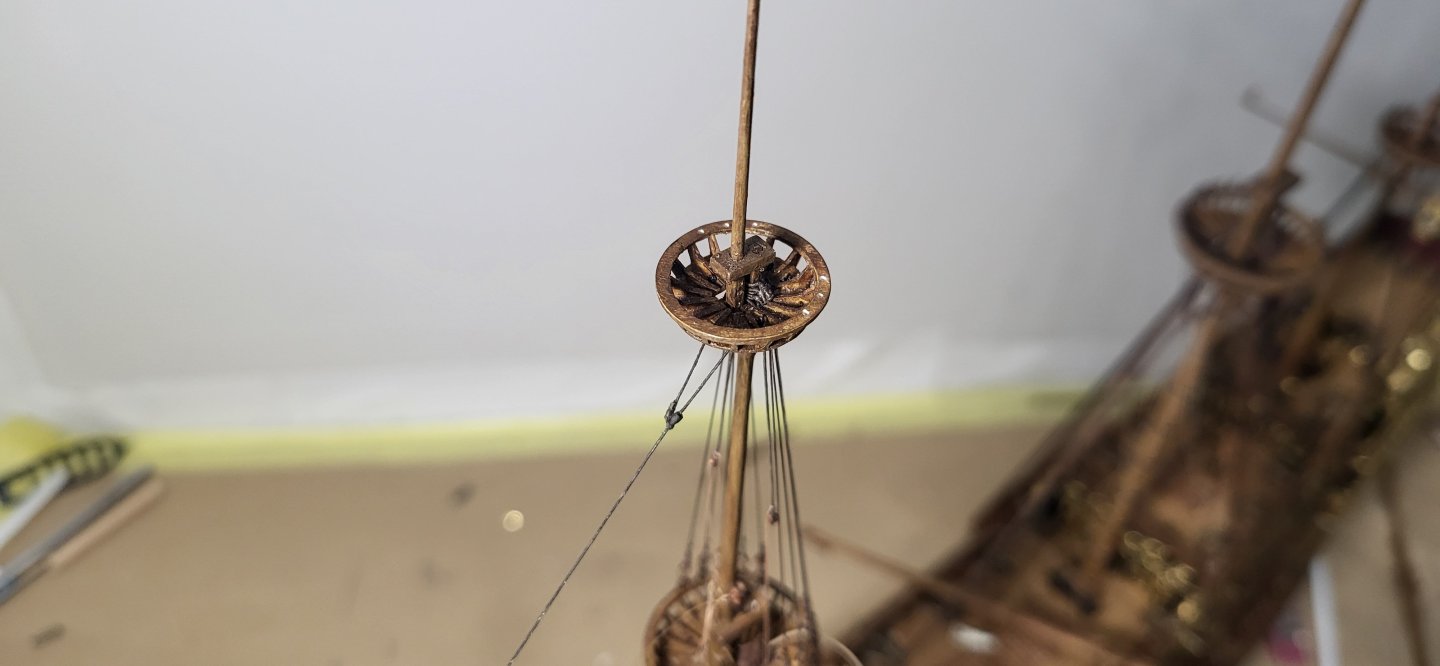
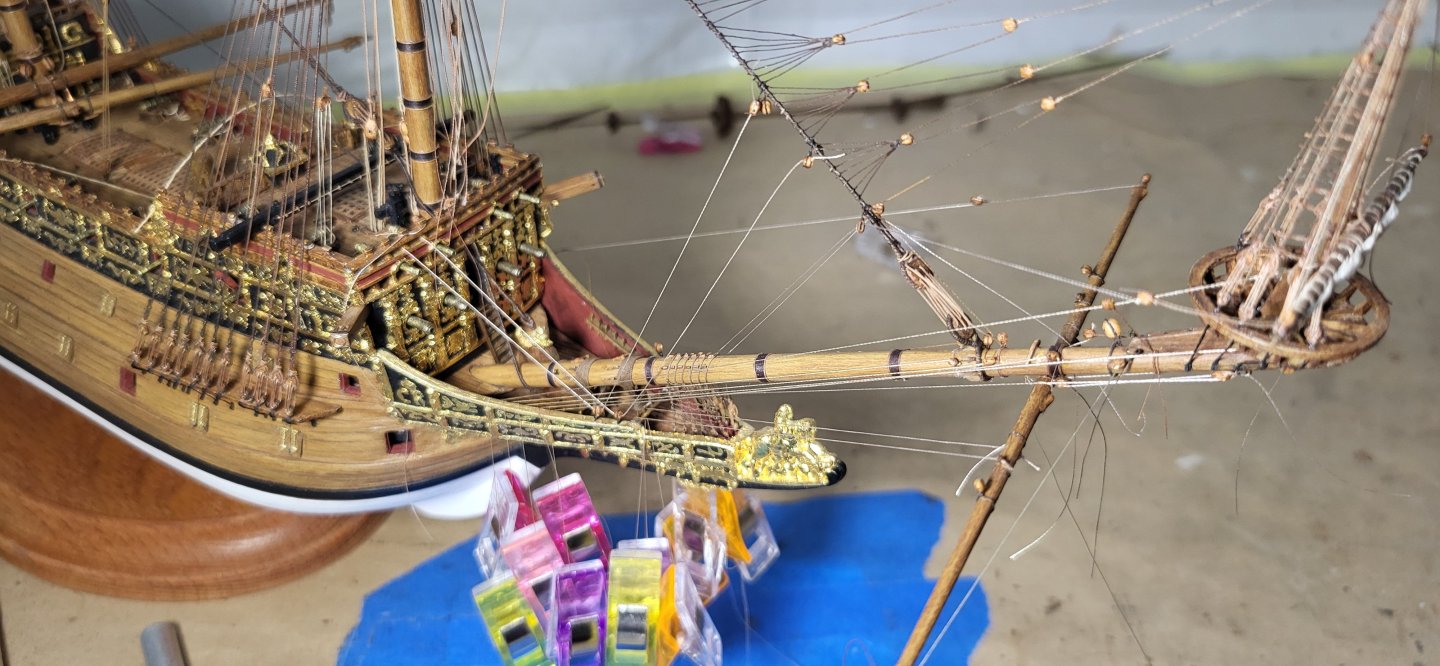
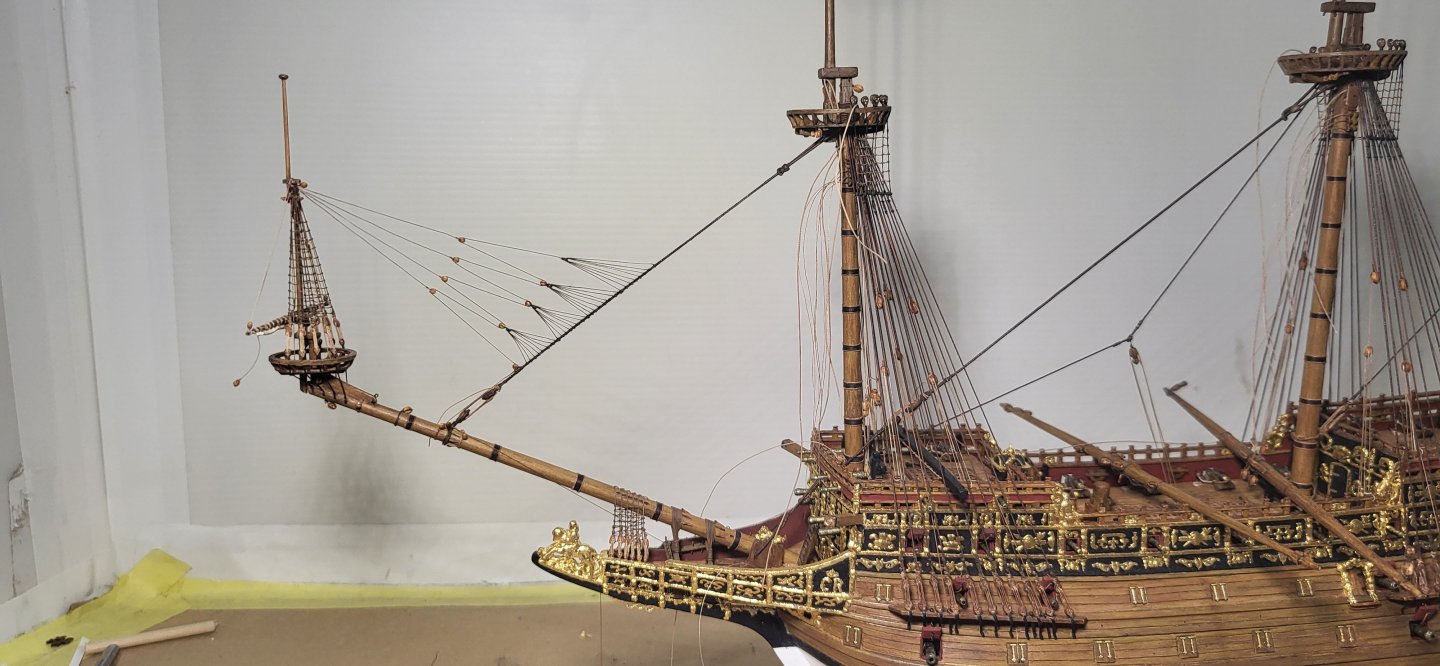
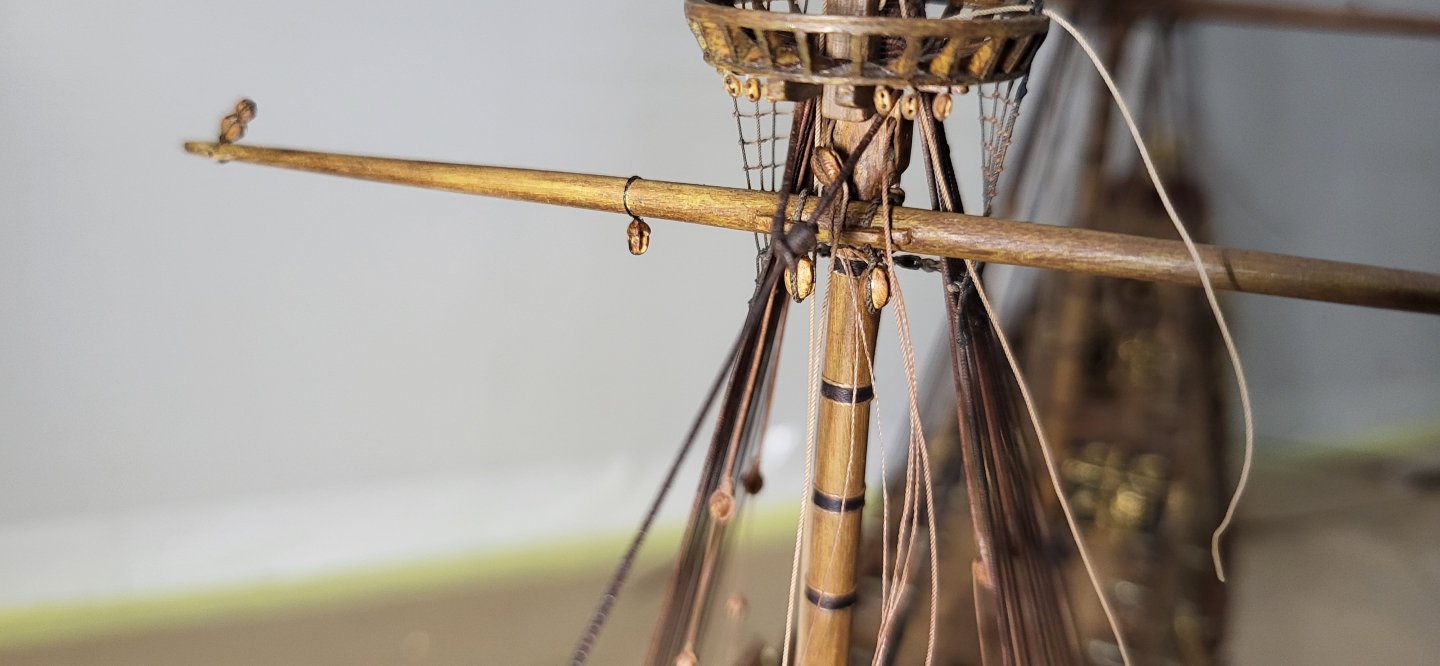
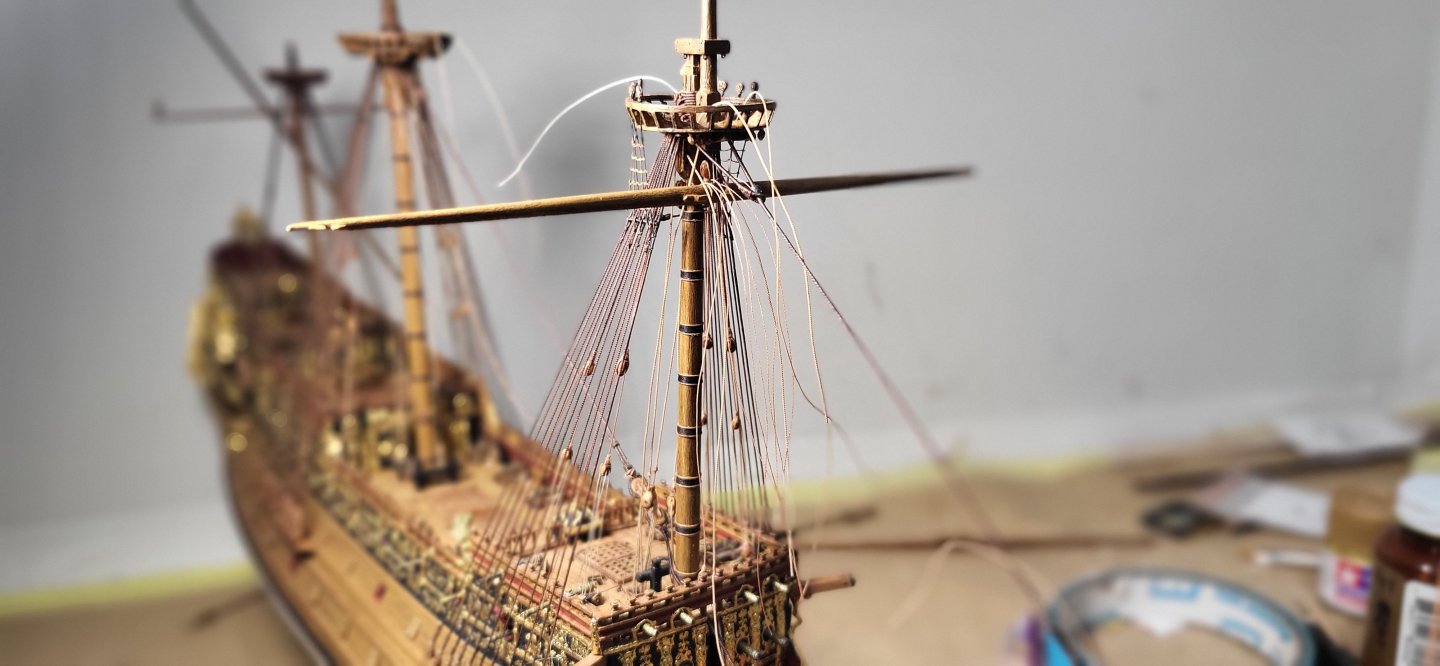
The topmast stay is completed using .25mm line with a 2mm single block seized at the end, the whip is .20mm line with a 1.5mm block seized at the end, for the fall I used 60wt thread that's led through a 1.5mm block stropped to the bowsprit and brought inboard into the beakhead area. Also, I finished up the topmast burton pendant falls. The topgallant stay will be rigged in a more conventional manner according to Anderson and Lee's, not as depicted in Payne's engraving but first I need to complete the topgallant shrouds, and this is where things start to get really delicate moving upwards. Cheers! Michael D.


- 324 replies
-
- 8
-
-
-
- Sovereign of the Seas
- Airfix
- (and 1 more)
-
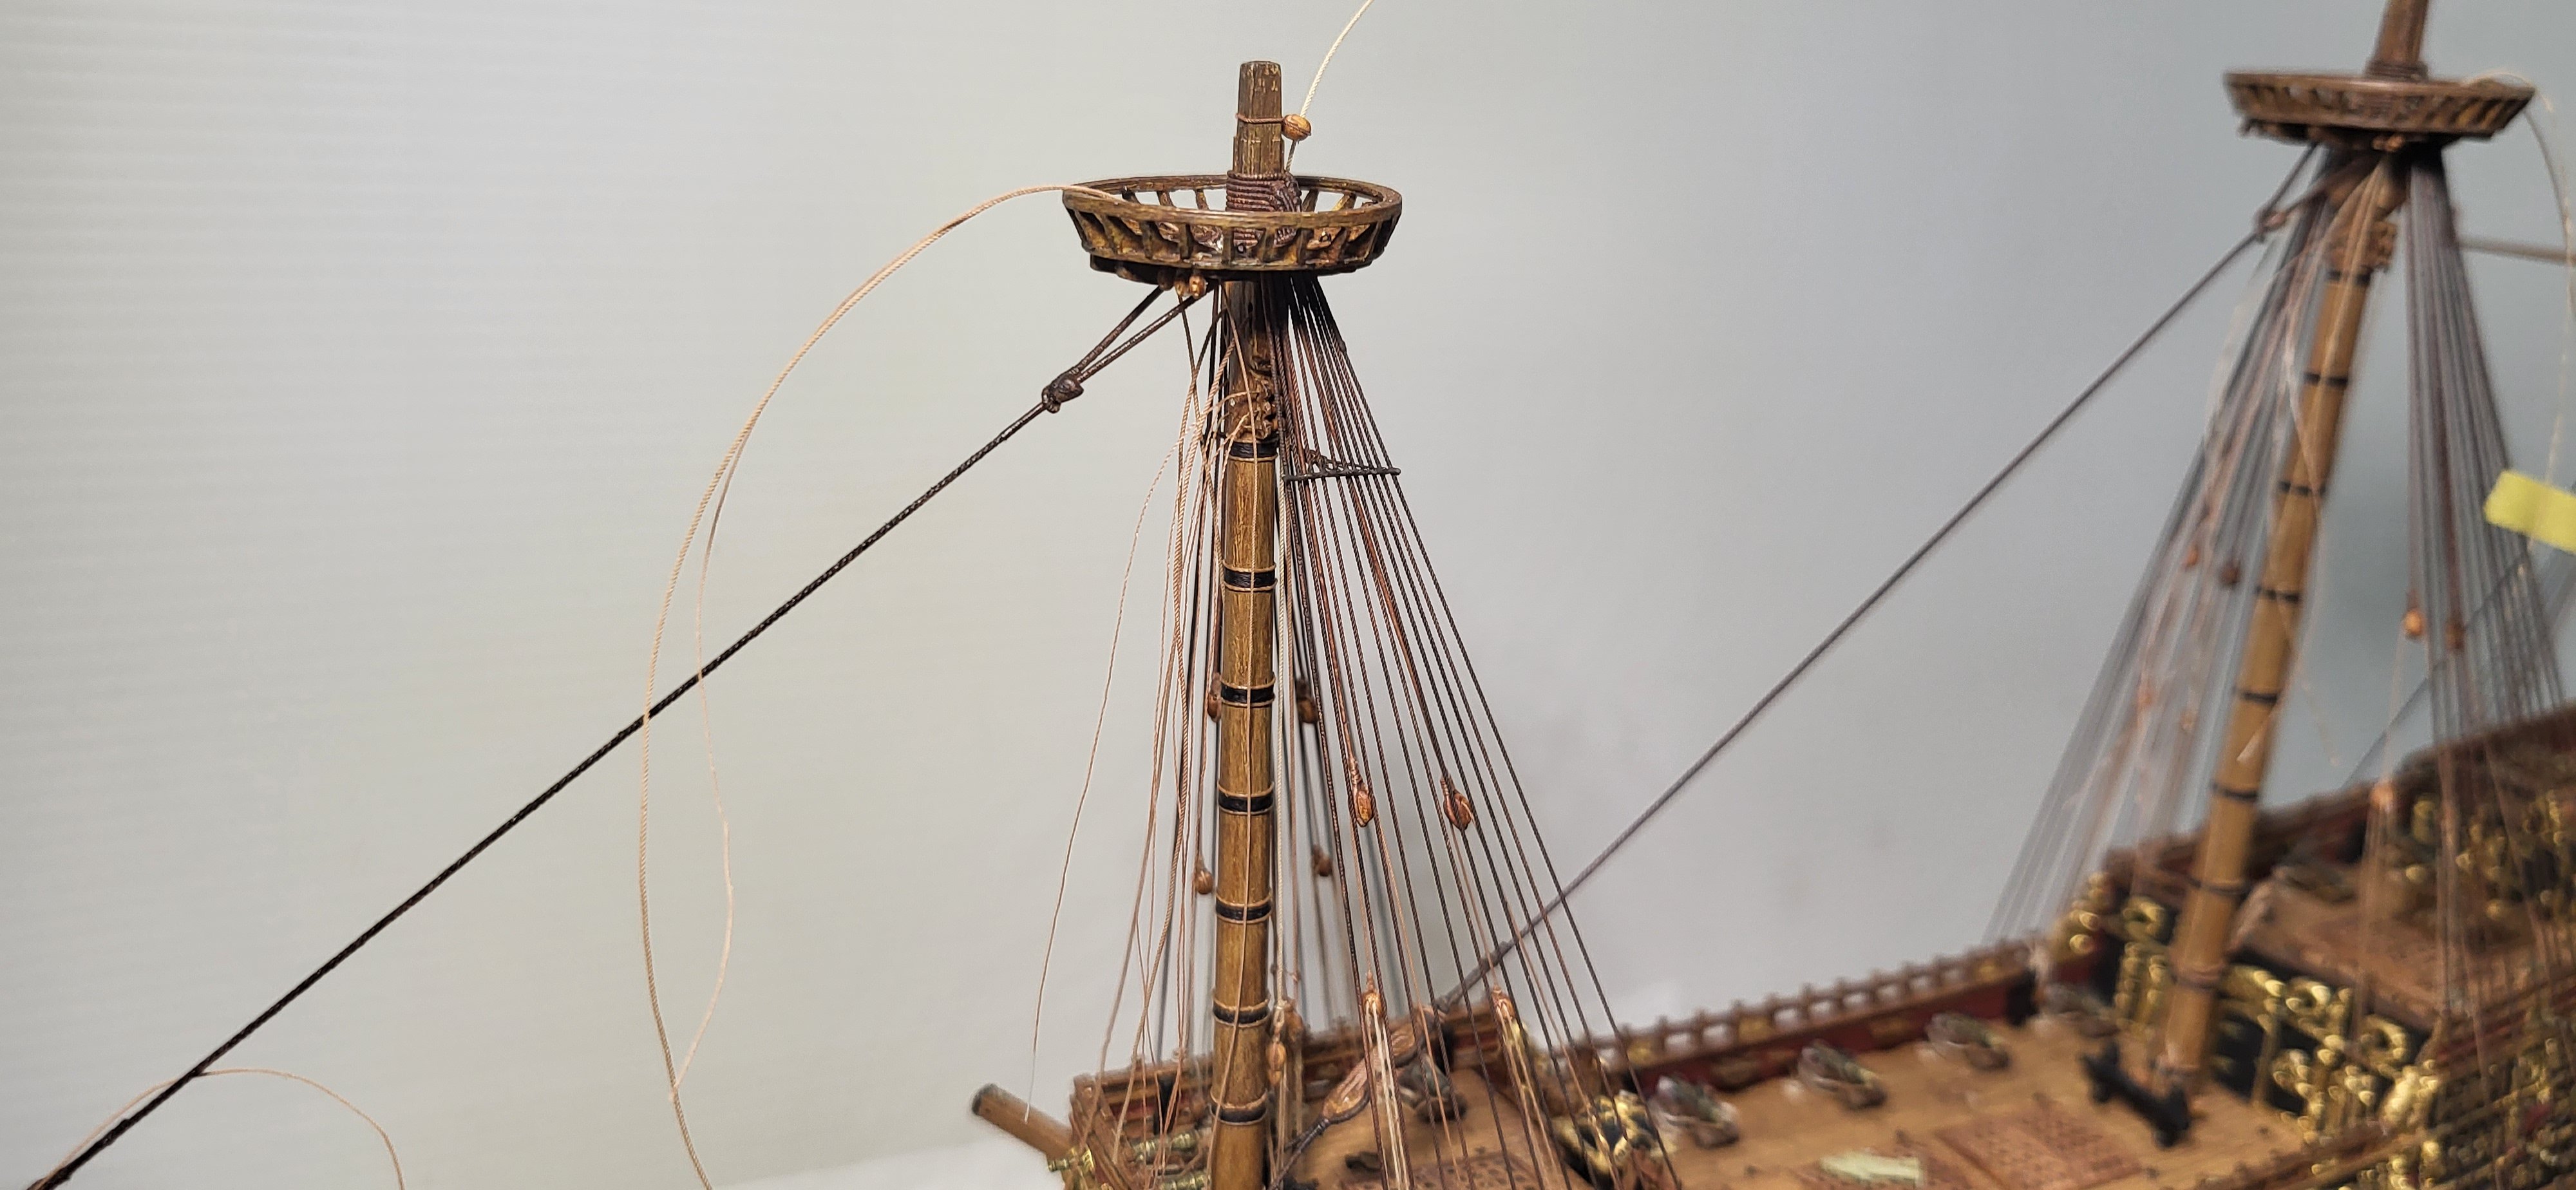
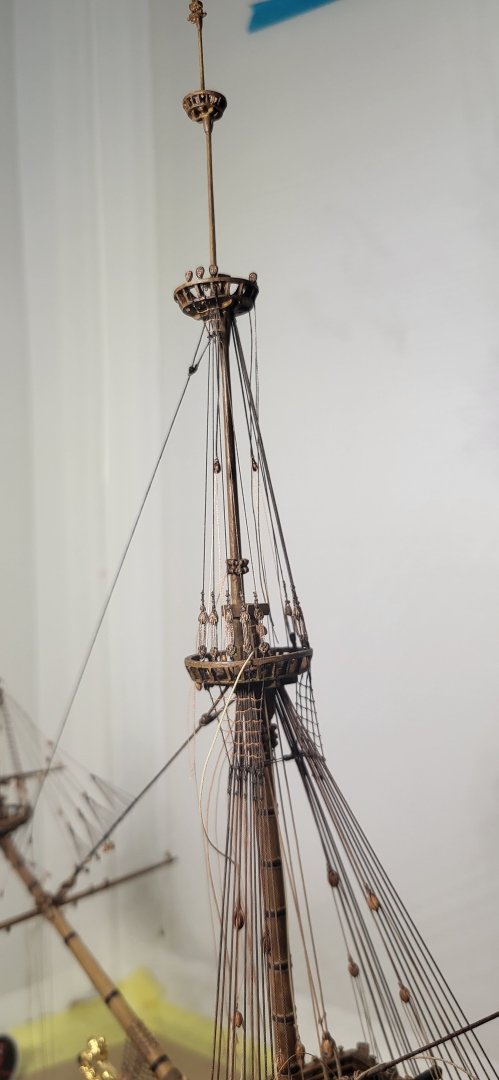
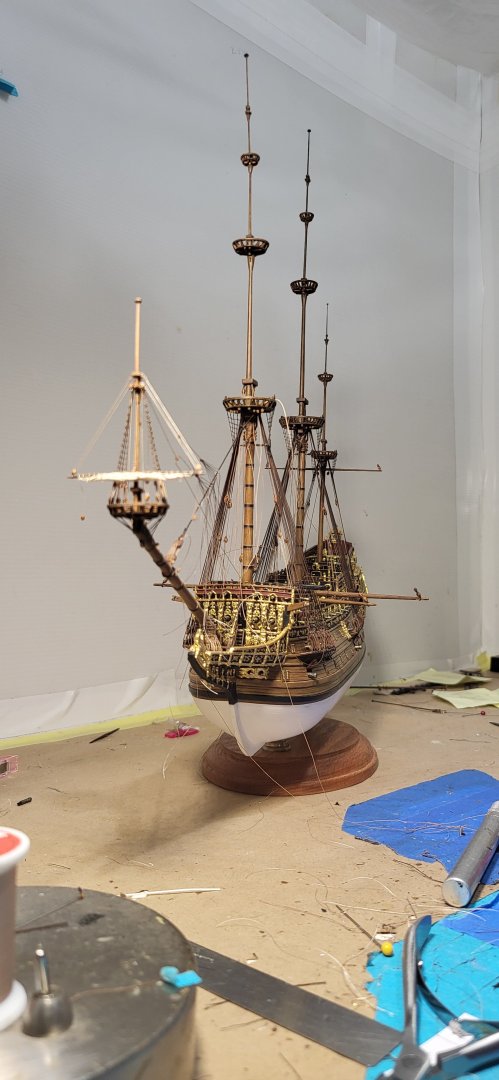
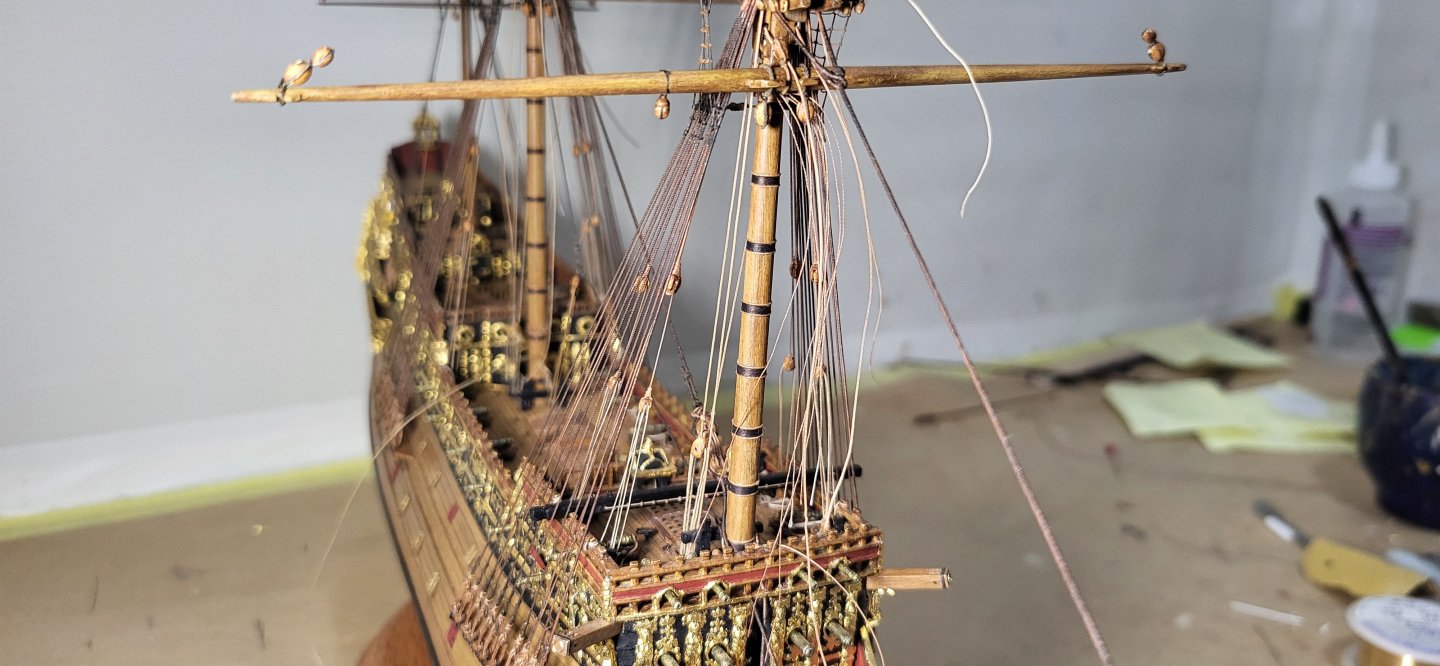
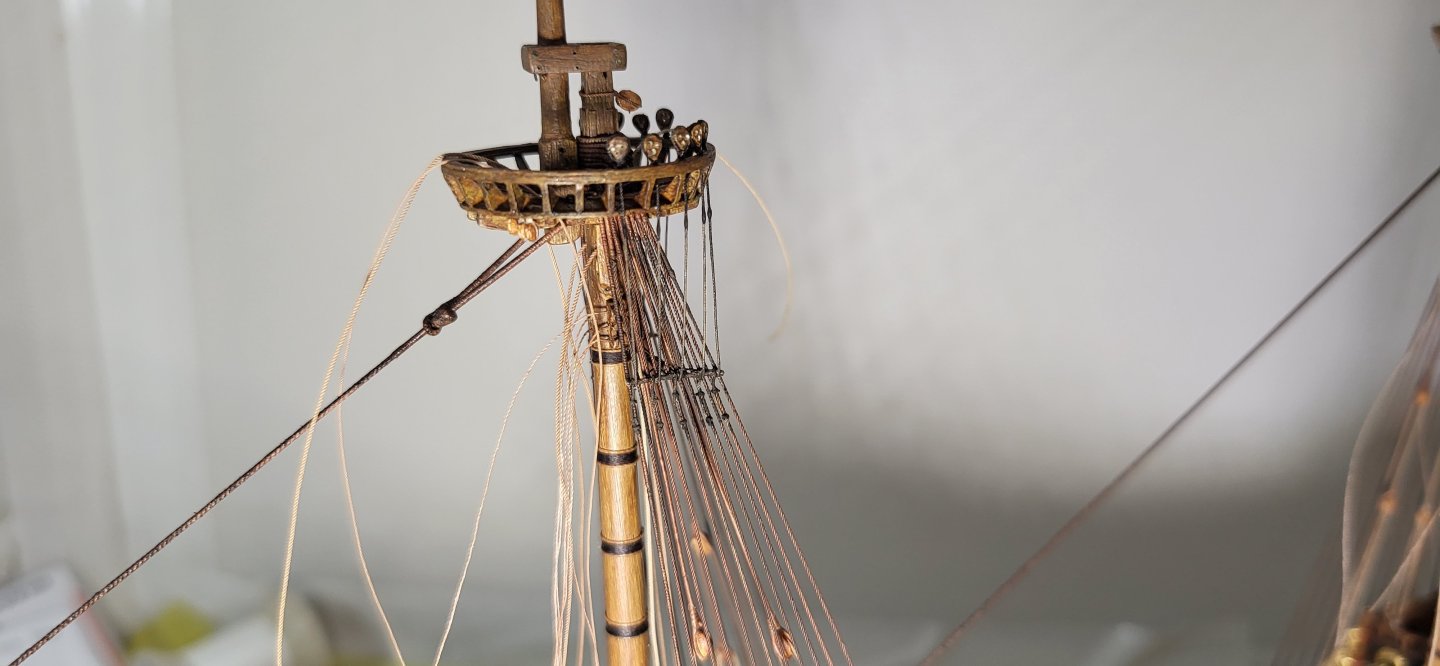
I haven't had a lot of time for my S.O.T.S but was able to complete a few steps, the topmast shrouds, burton pendants and the falls, topsail yard and blocks, parrel and securing the top rope, far from perfect but looks okay and hope you enjoy the photos. Up next will be the topmast stay. Thanks for looking. Michael D.


- 324 replies
-
- 10
-
-
-
- Sovereign of the Seas
- Airfix
- (and 1 more)
-
I believe the reality is the spritsail topsail was used very little and only in certain wind conditions like from astern, being braced horizontally limited its use as it was unable to be triced, no doubt the most dangerous area of the ship in certain conditions. Thank you for the compliment and your insights, Trevor. Thanks for the kind words, Marc, for the most part I use just two colors on the small parts, with that I can still achieve multiple shades, some flaws are unavoidable at certain scales as you know, I guess it's how good we are at hiding them...lol. Michael D.
- 324 replies
-
- 1
-
-
- Sovereign of the Seas
- Airfix
- (and 1 more)
-
Great stuff as always Marc, but what is vinyl Bondo out of curiosity? never heard of it. Michael D.
- 2,699 replies
-
- 1
-
-
- heller
- soleil royal
- (and 9 more)
-
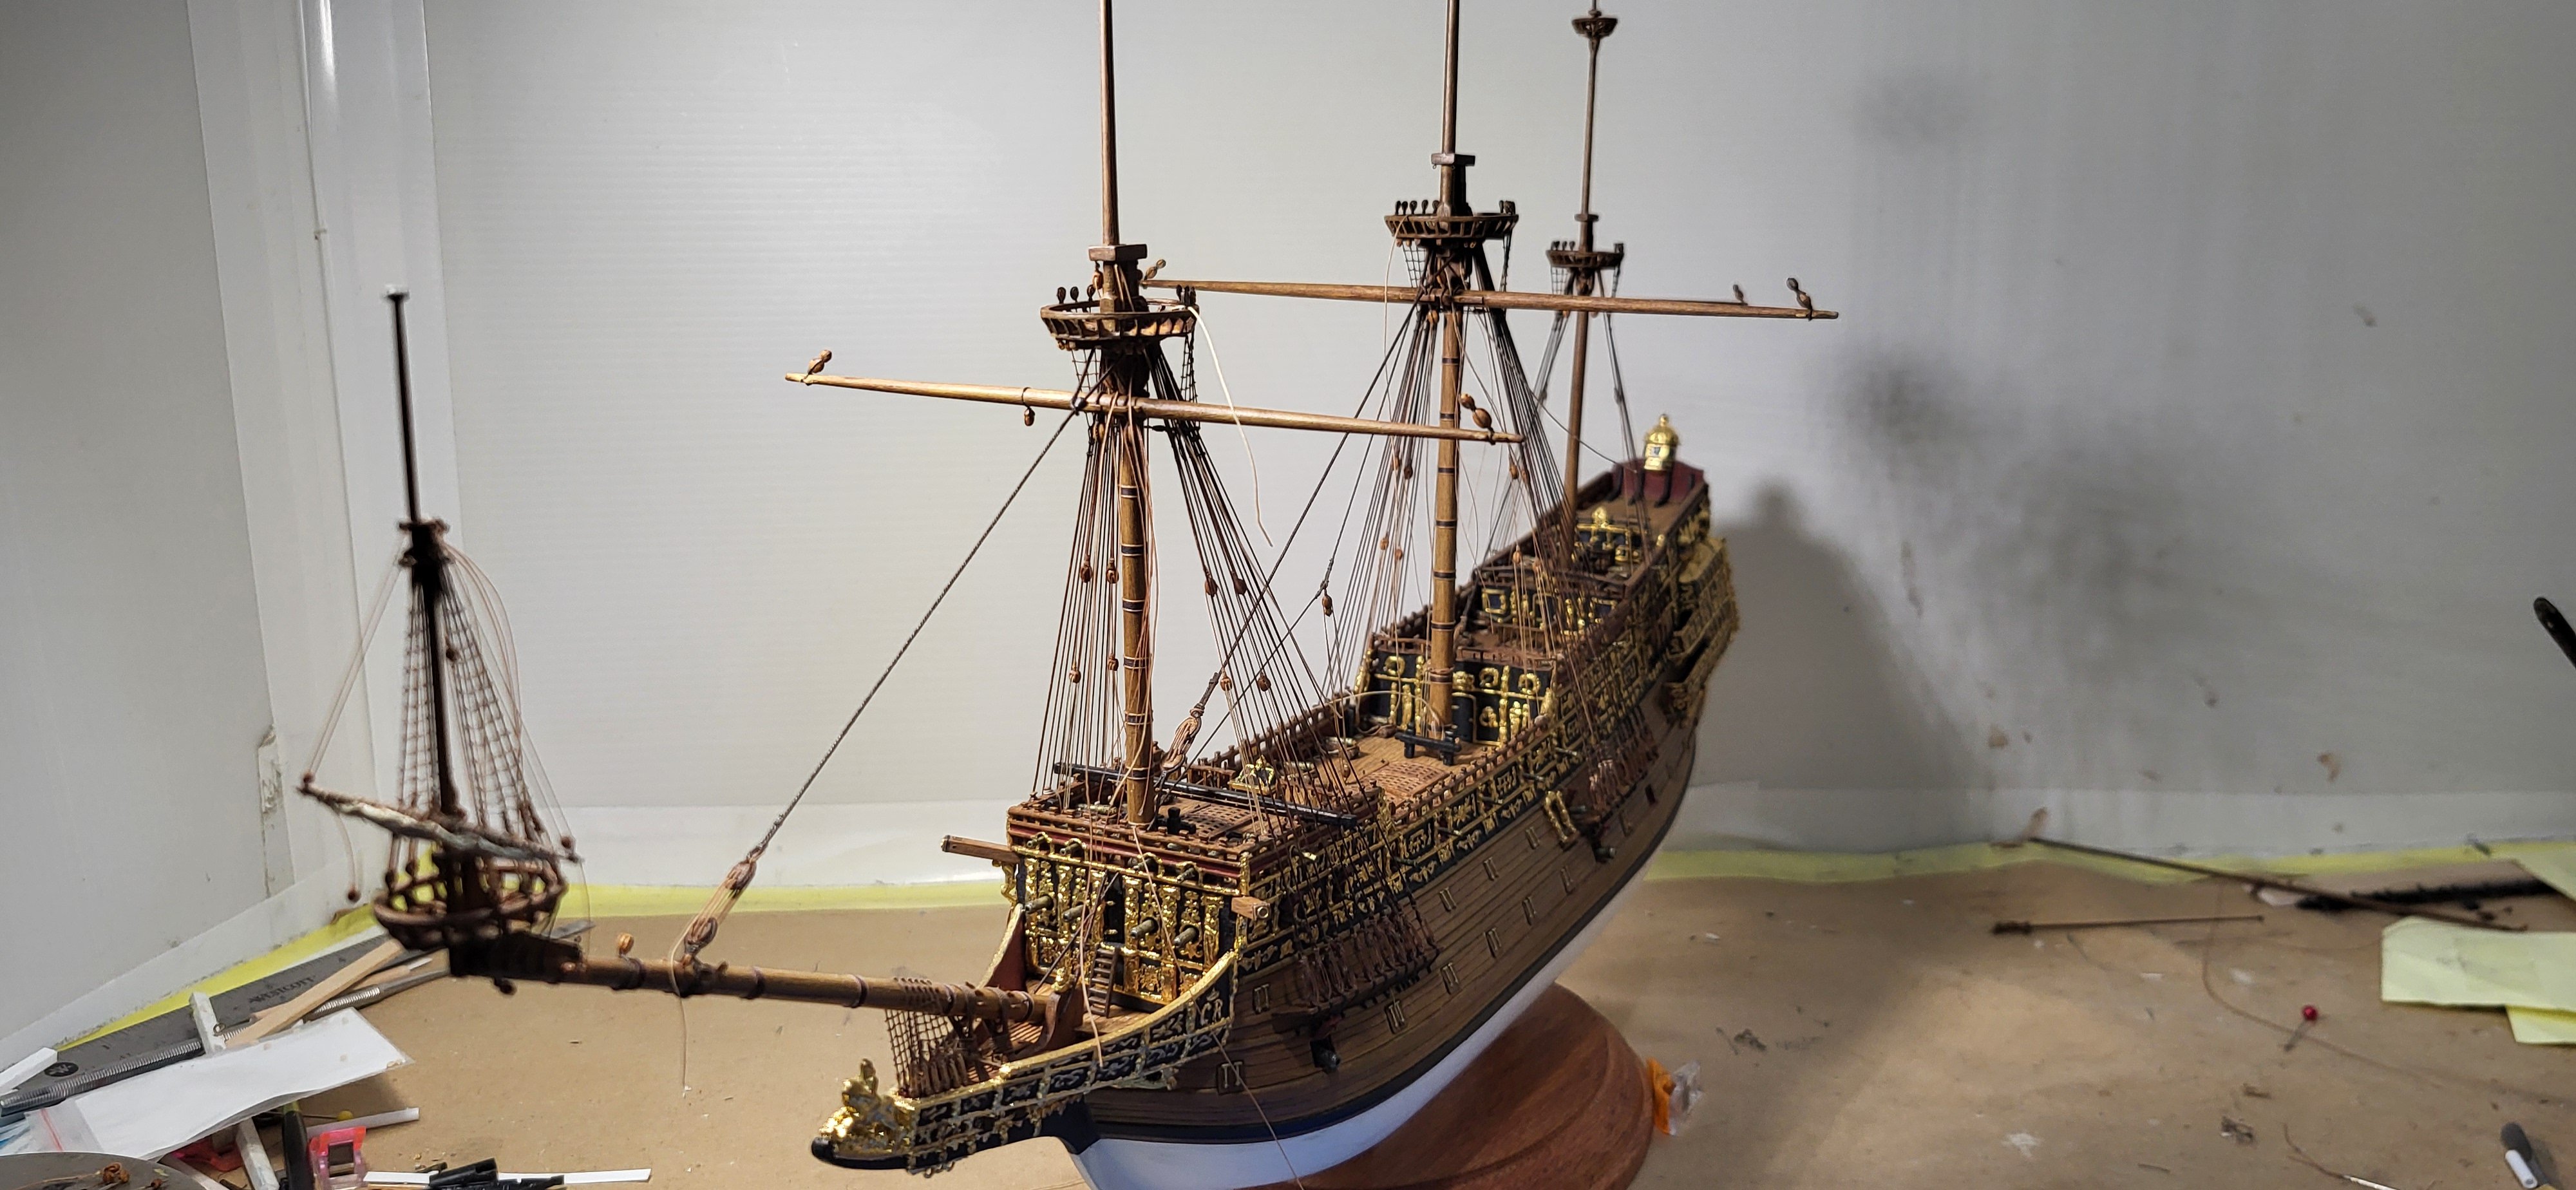
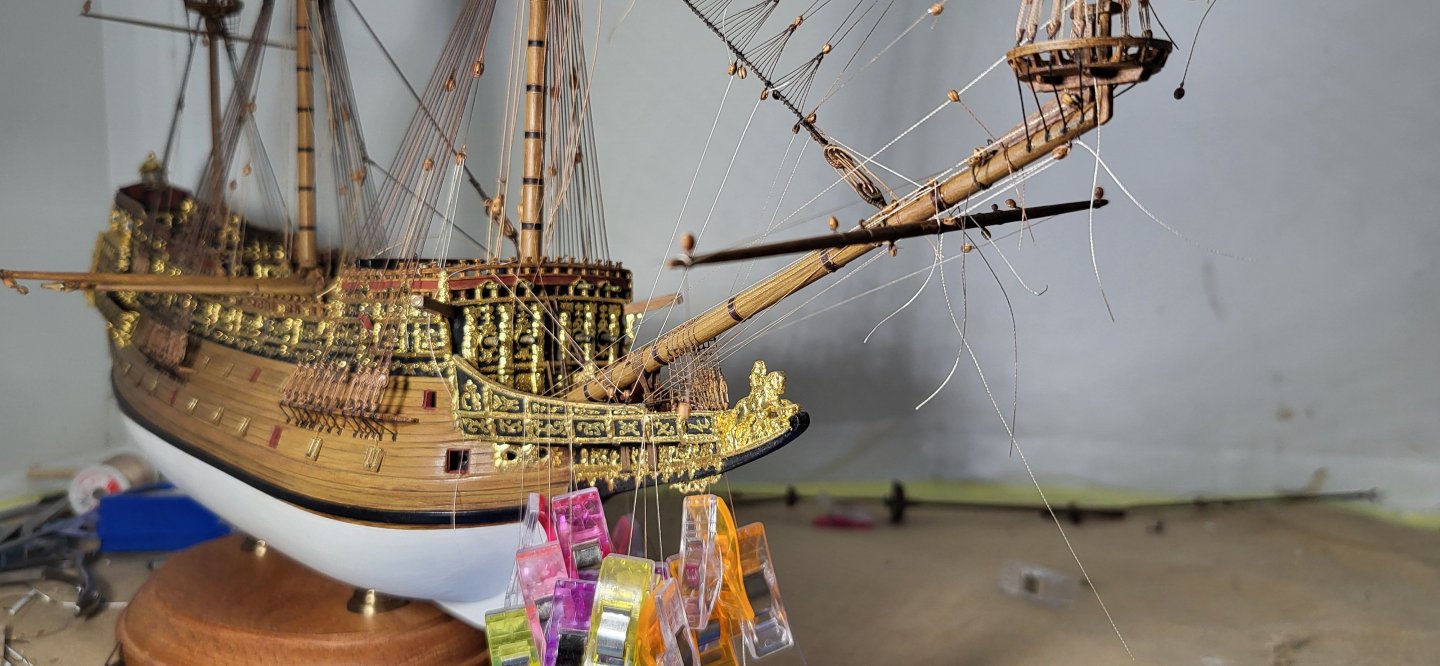
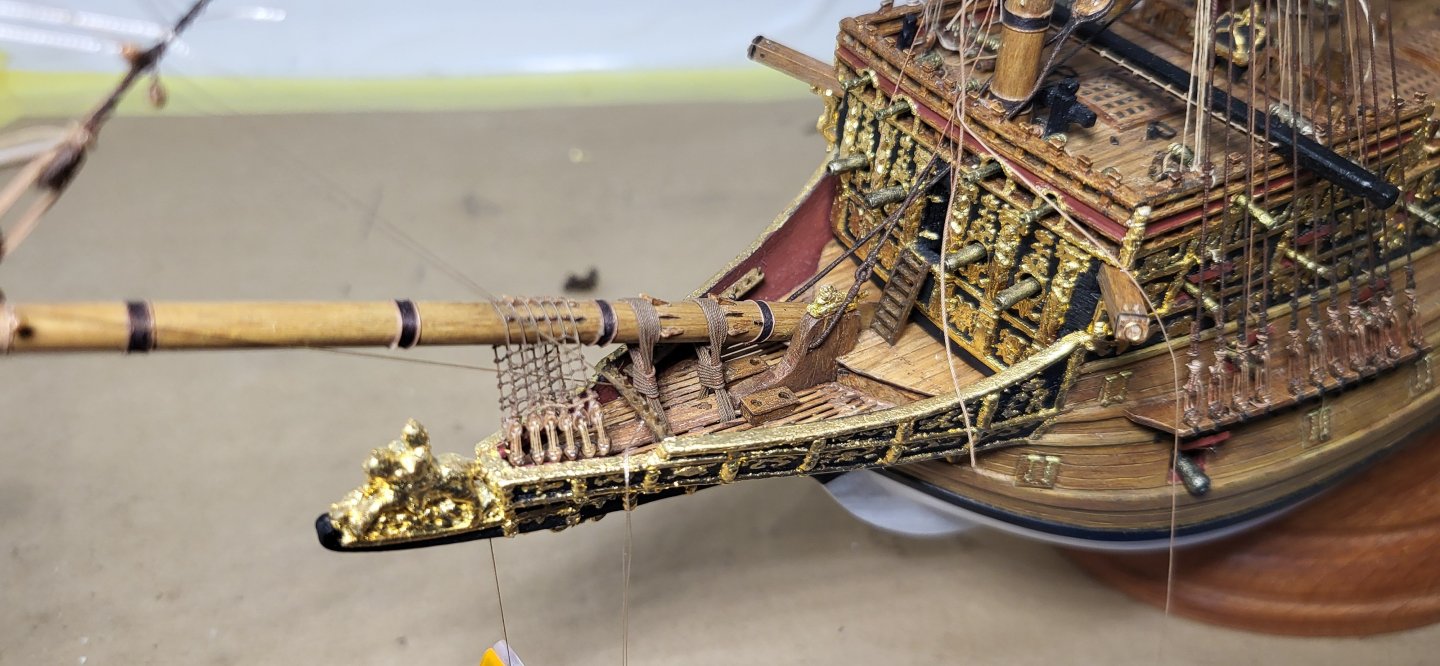
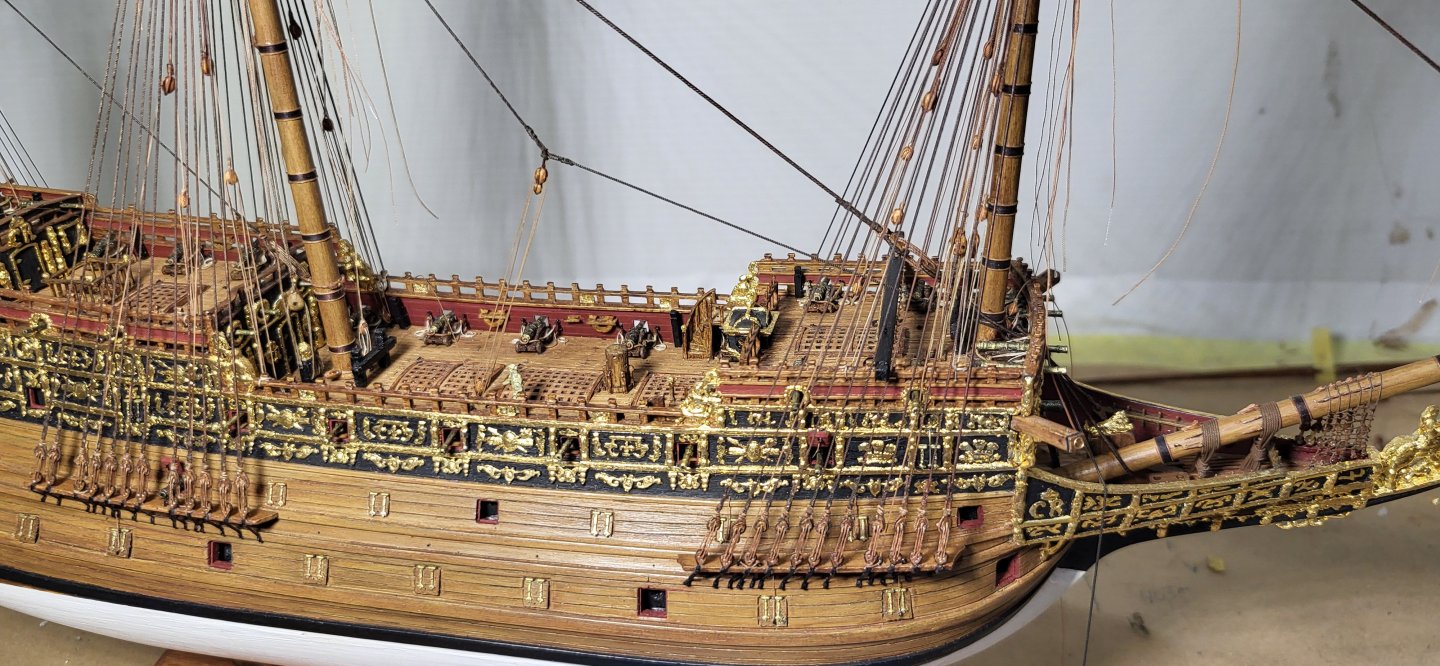
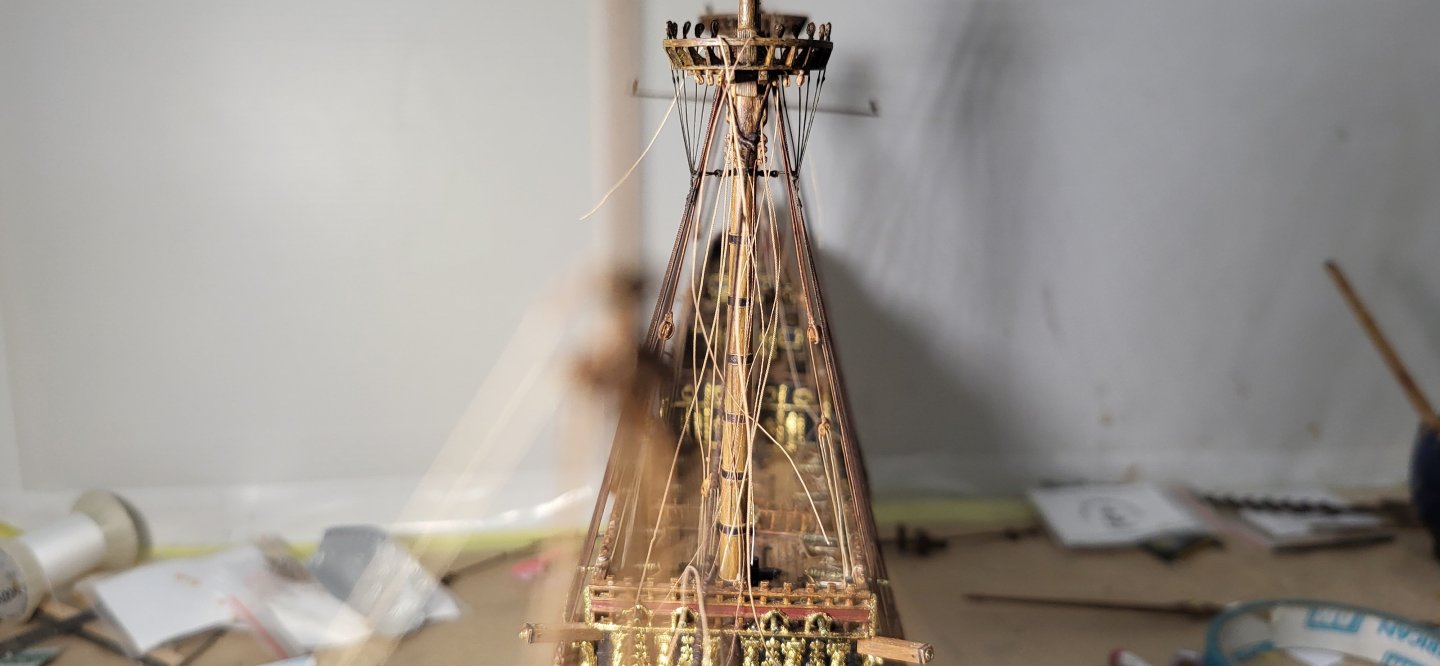
Work of late has been devising a belying plan in the beakhead area for all the necessary lines since I chose not to use the Gammon lashing block.... maybe I should have.... based on Payne's engraving which may or may not been correct. What you see here is just simply a mockup that I think works well using a combination of Lee's, Anderson and artistic license. Now I can remove all of it and continue the rest of the standing rigging on the fore mast, thanks as always for taking time to take a peek. Michael D.
- 324 replies
-
- 8
-
-
-
- Sovereign of the Seas
- Airfix
- (and 1 more)
-
Patrick your work is just exquisite mate!, and the pace at which you work is equally impressive, WOW!! Cheers. Michael D.
- 97 replies
-
- 1
-
-
- Corel
- Große Jacht
- (and 2 more)
-
Very nice work as always Marc, keep chipping away at it! Michael D.
- 2,699 replies
-
- 1
-
-
- heller
- soleil royal
- (and 9 more)
-
With the spritsail yard made it was time to mockup the braces, particularly the run form the headrail to the forecastle rail, Payne does not show this, but I'll follow Lees's and Anderson on this. Garnets will be next, but Anderson and Lee's differ on this, three-part tackle vs two-part, leading to the range vs forecastle etc. Thanks for looking. Michael D.

- 324 replies
-
- 9
-
-
-
- Sovereign of the Seas
- Airfix
- (and 1 more)
-
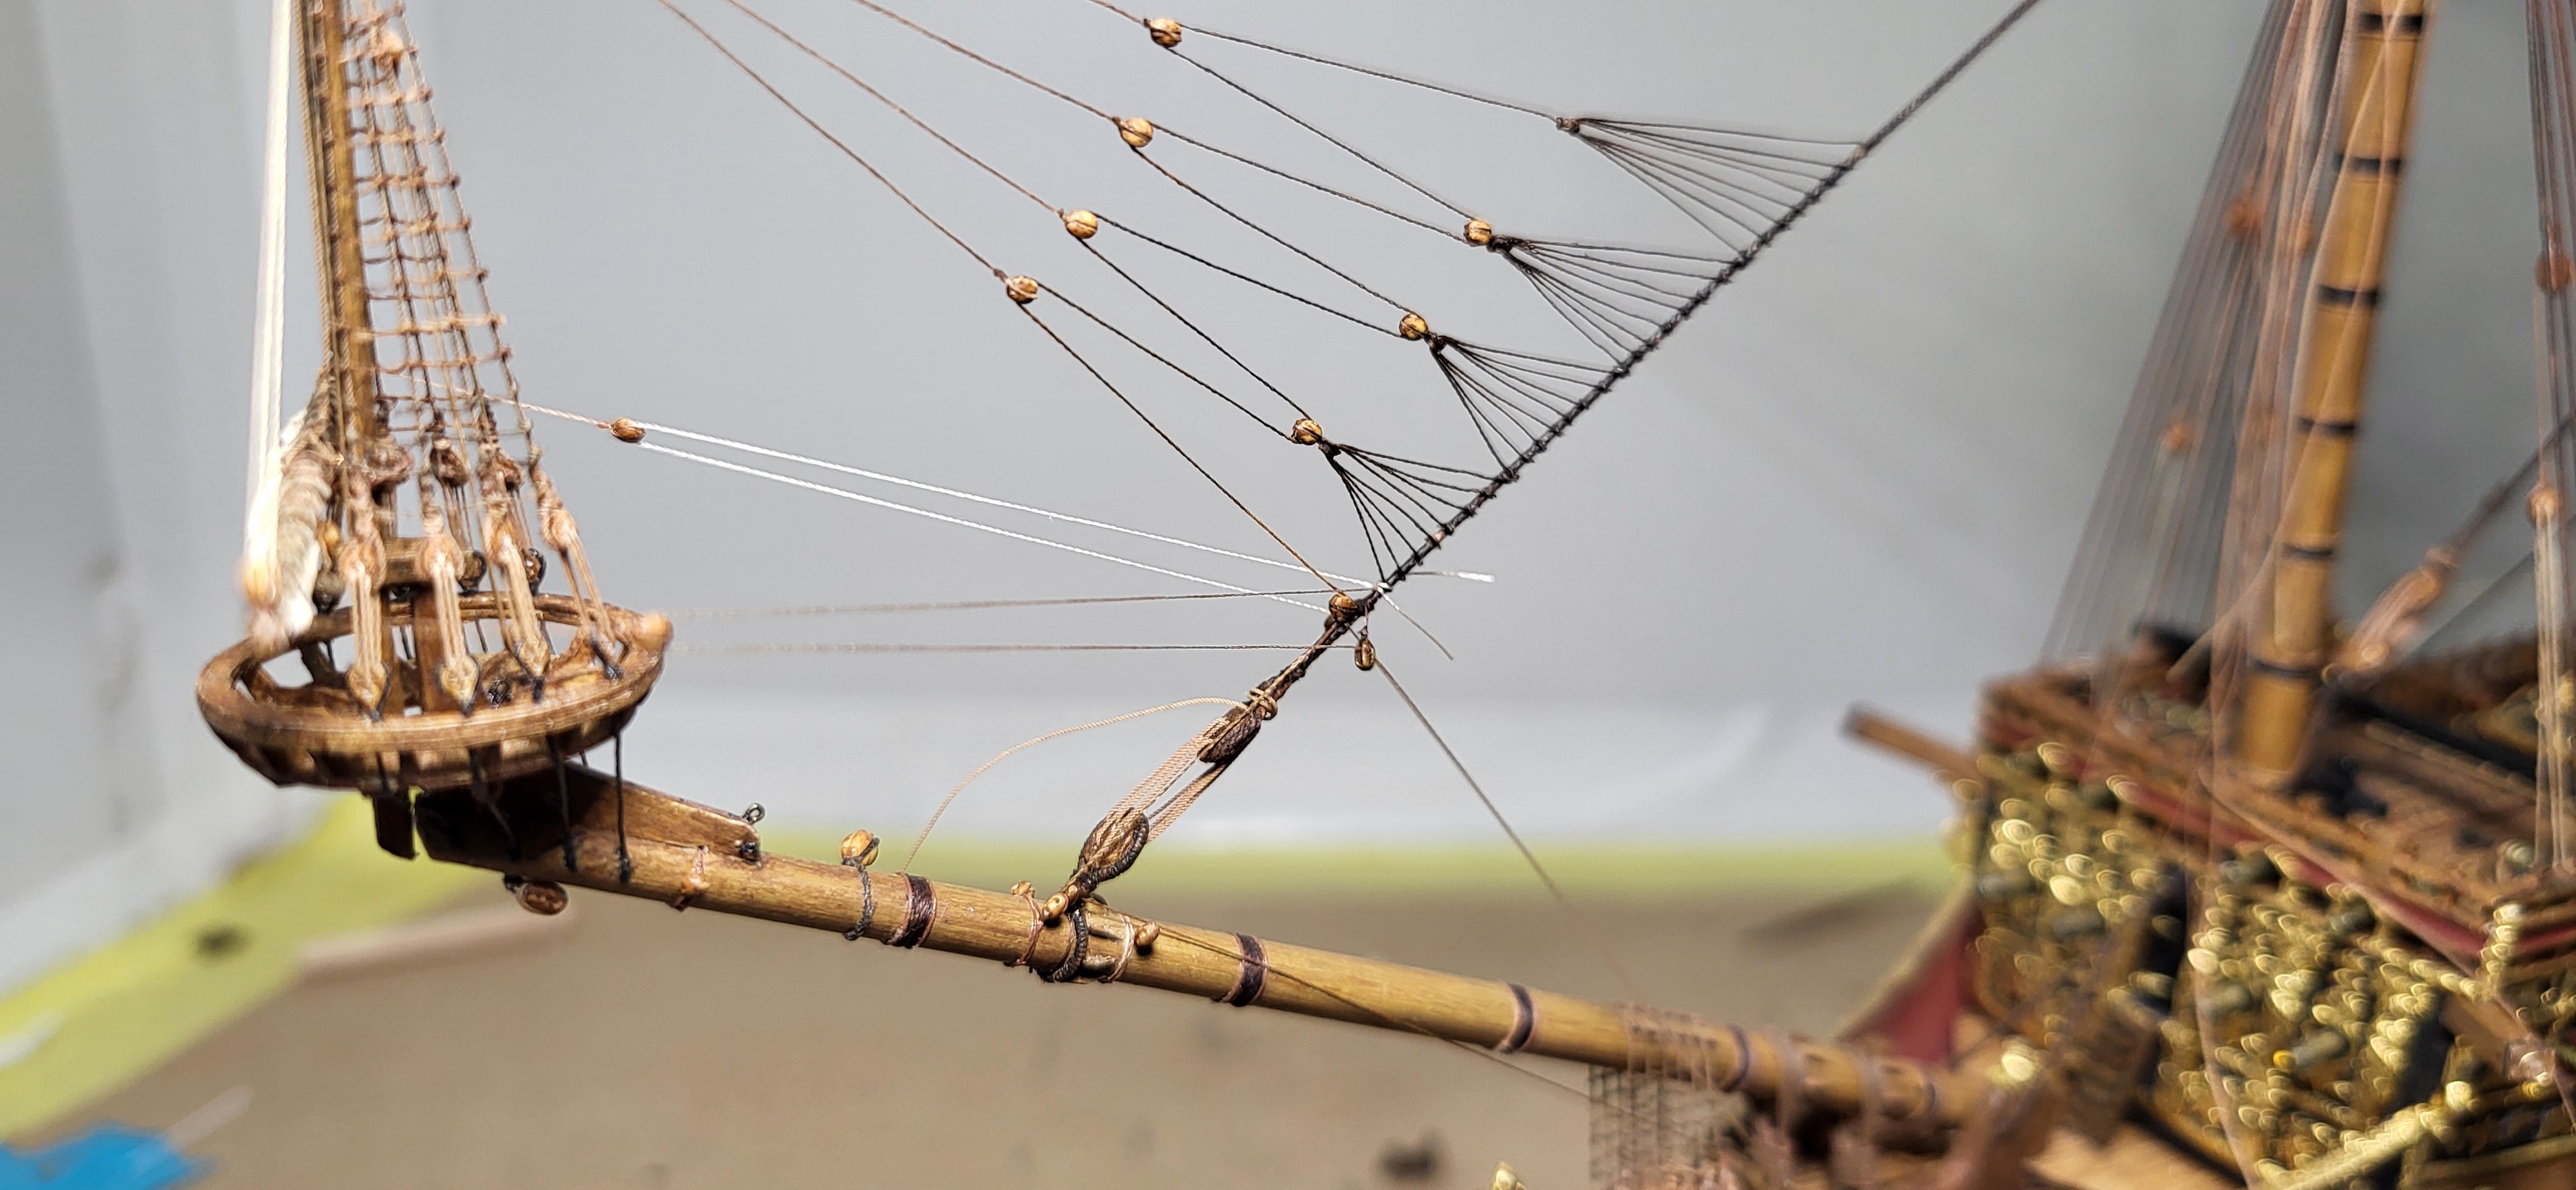
I did a mockup of the spritsail topsail braces and they will be belayed on the range rail, up next I need to turn a new spritsail yard and do a preliminary mockup of those lines also, but this rigging will not be finalized until all the stays are rigged/completed. Thanks for looking as always, very much appreciated. Michael D.
- 324 replies
-
- 10
-
-
-
-
- Sovereign of the Seas
- Airfix
- (and 1 more)
-
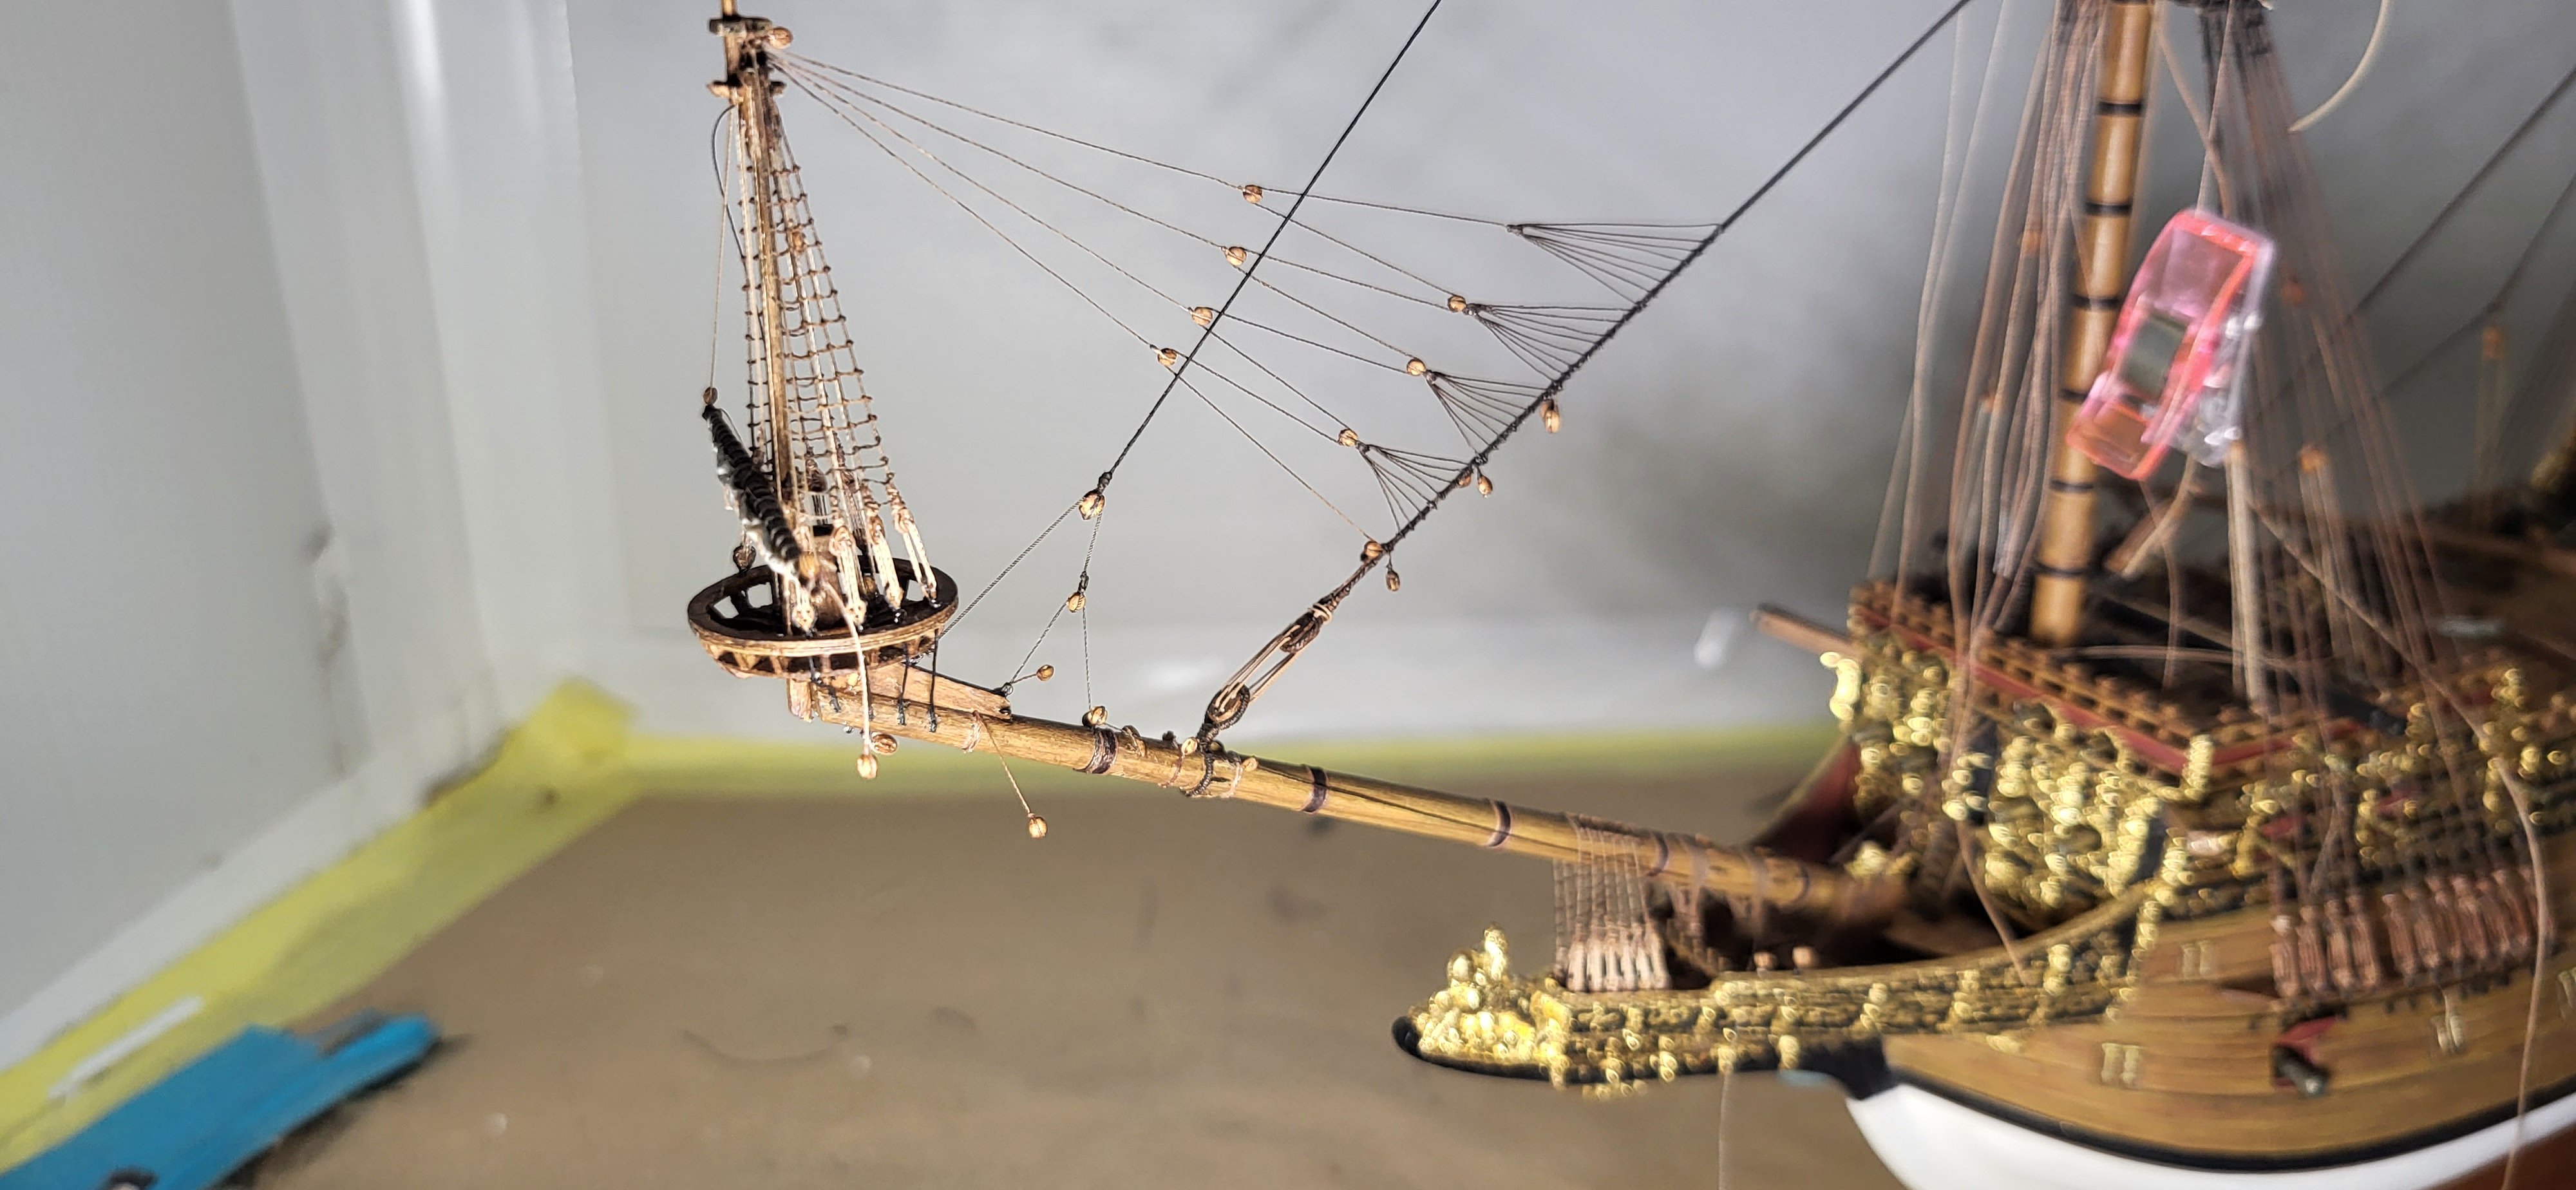
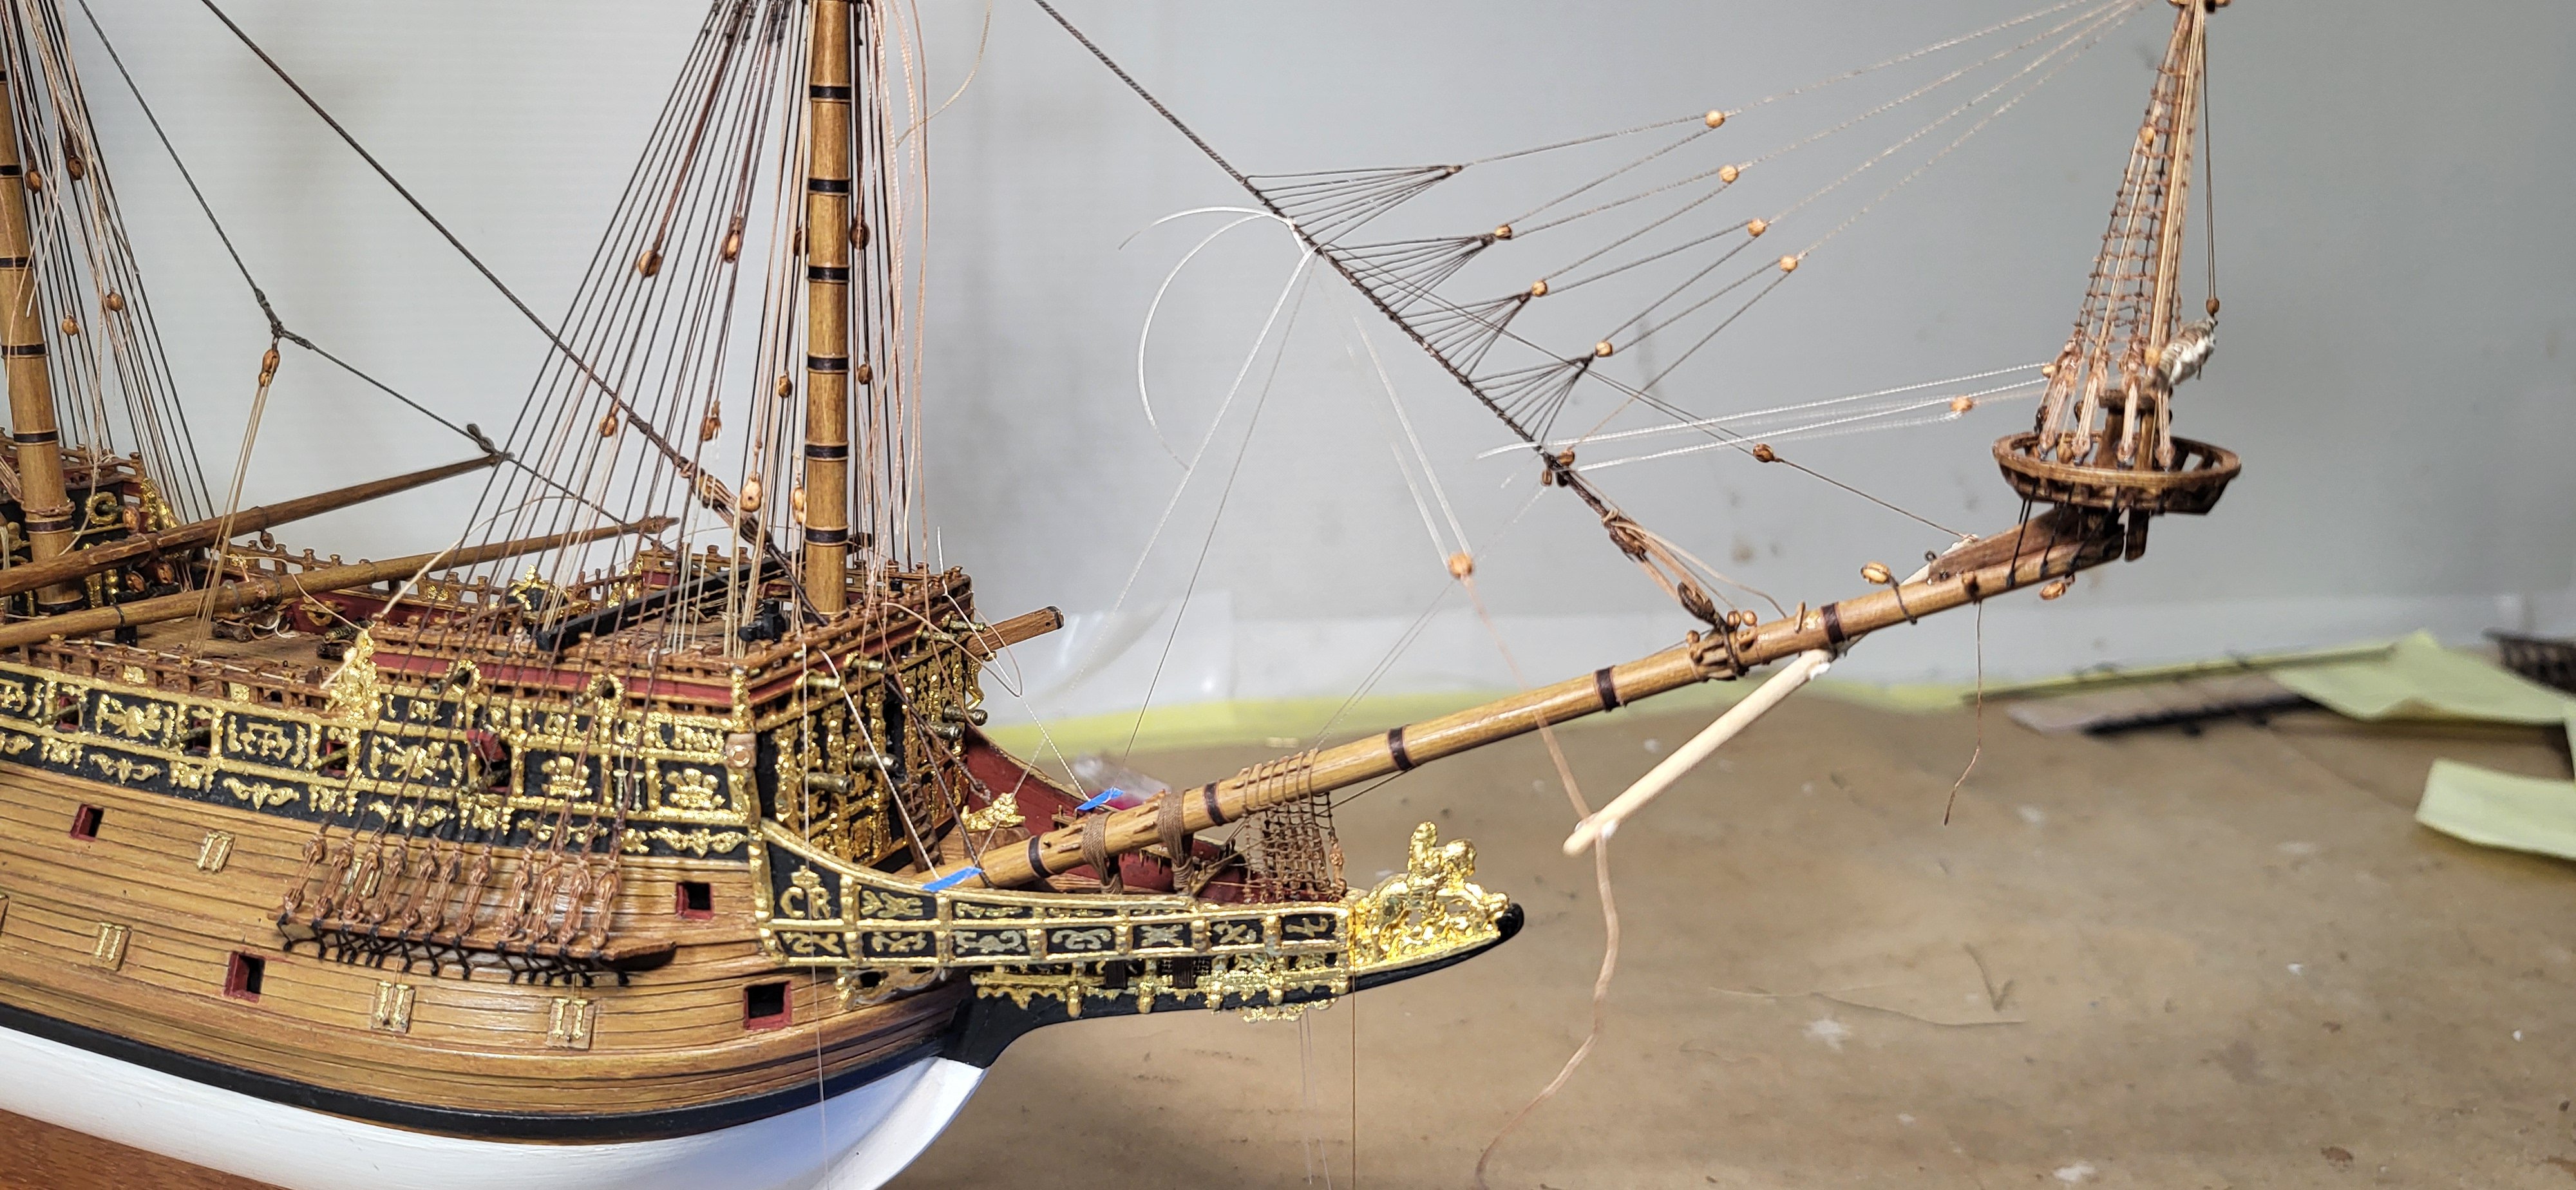
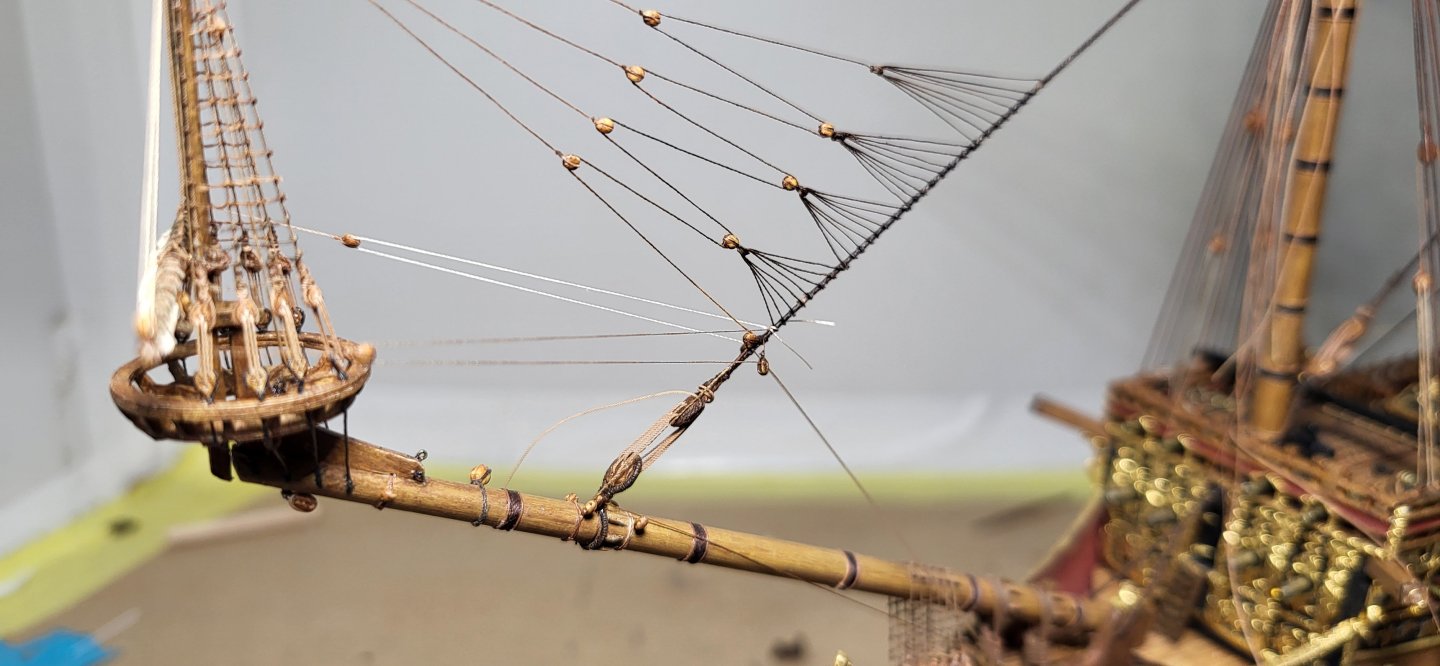
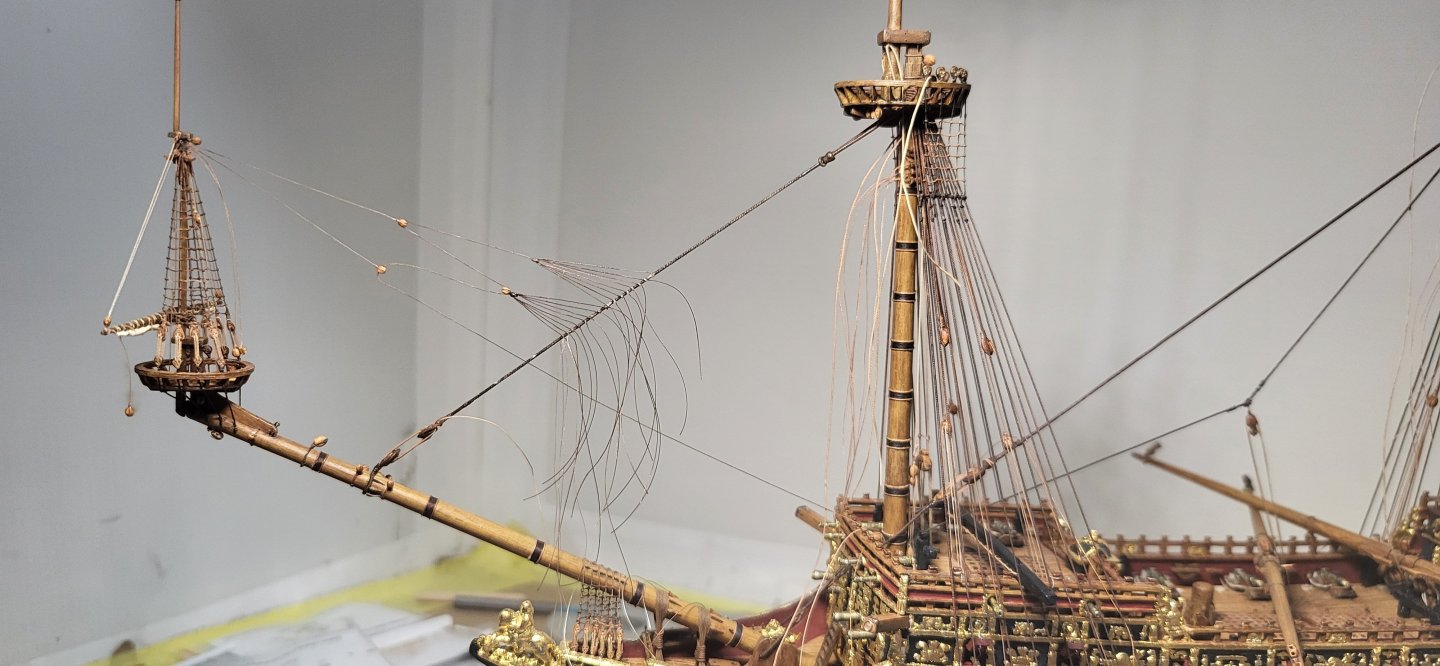
Well, the sprit topmast back stay exercise is completed minus some final crow's feet manipulation, the fall is led down to the range pin rail. Michael D.
- 324 replies
-
- 12
-
-
-
- Sovereign of the Seas
- Airfix
- (and 1 more)
-
A little better than a third of the way through, and the backstays are looking presentable, I'm purposely introducing a slight upward pull on the stay so when I rig the remaining stays the lower stay should relax a little, but if not I'm totally fine with it as is. Also, I still need to complete the furling on the sprit mast topsail yard, thanks for looking. Michael D.
- 324 replies
-
- 13
-
-
-
- Sovereign of the Seas
- Airfix
- (and 1 more)
-
This is an interesting take as an alternative and something I'd consider, but there is no evidence on how this would actually be rigged?, my main sources James Lee and Anderson make no mention of any rigging to counter react the pull of the sprit topmast backstays. Regarding the "wet and dangerous beakhead" the men would have to navigate out there anyways to reach the range pin rail and you make a valid point about the ratlines, but we really don't know as we only have images/paintings to go by in certain instances and even they differ. My take is their purpose is to help counter react the pull of the lower and upper stays would have on the bowsprit much like bobstays did at a later date. Here's an image that definitely shows some sort of shrouds forward of the gammoning, food for thought. Thank you Trevor for stopping by and offering up different possibilities, intriguing to say the least. Michael D.

- 324 replies
-
- 4
-
-
- Sovereign of the Seas
- Airfix
- (and 1 more)
-
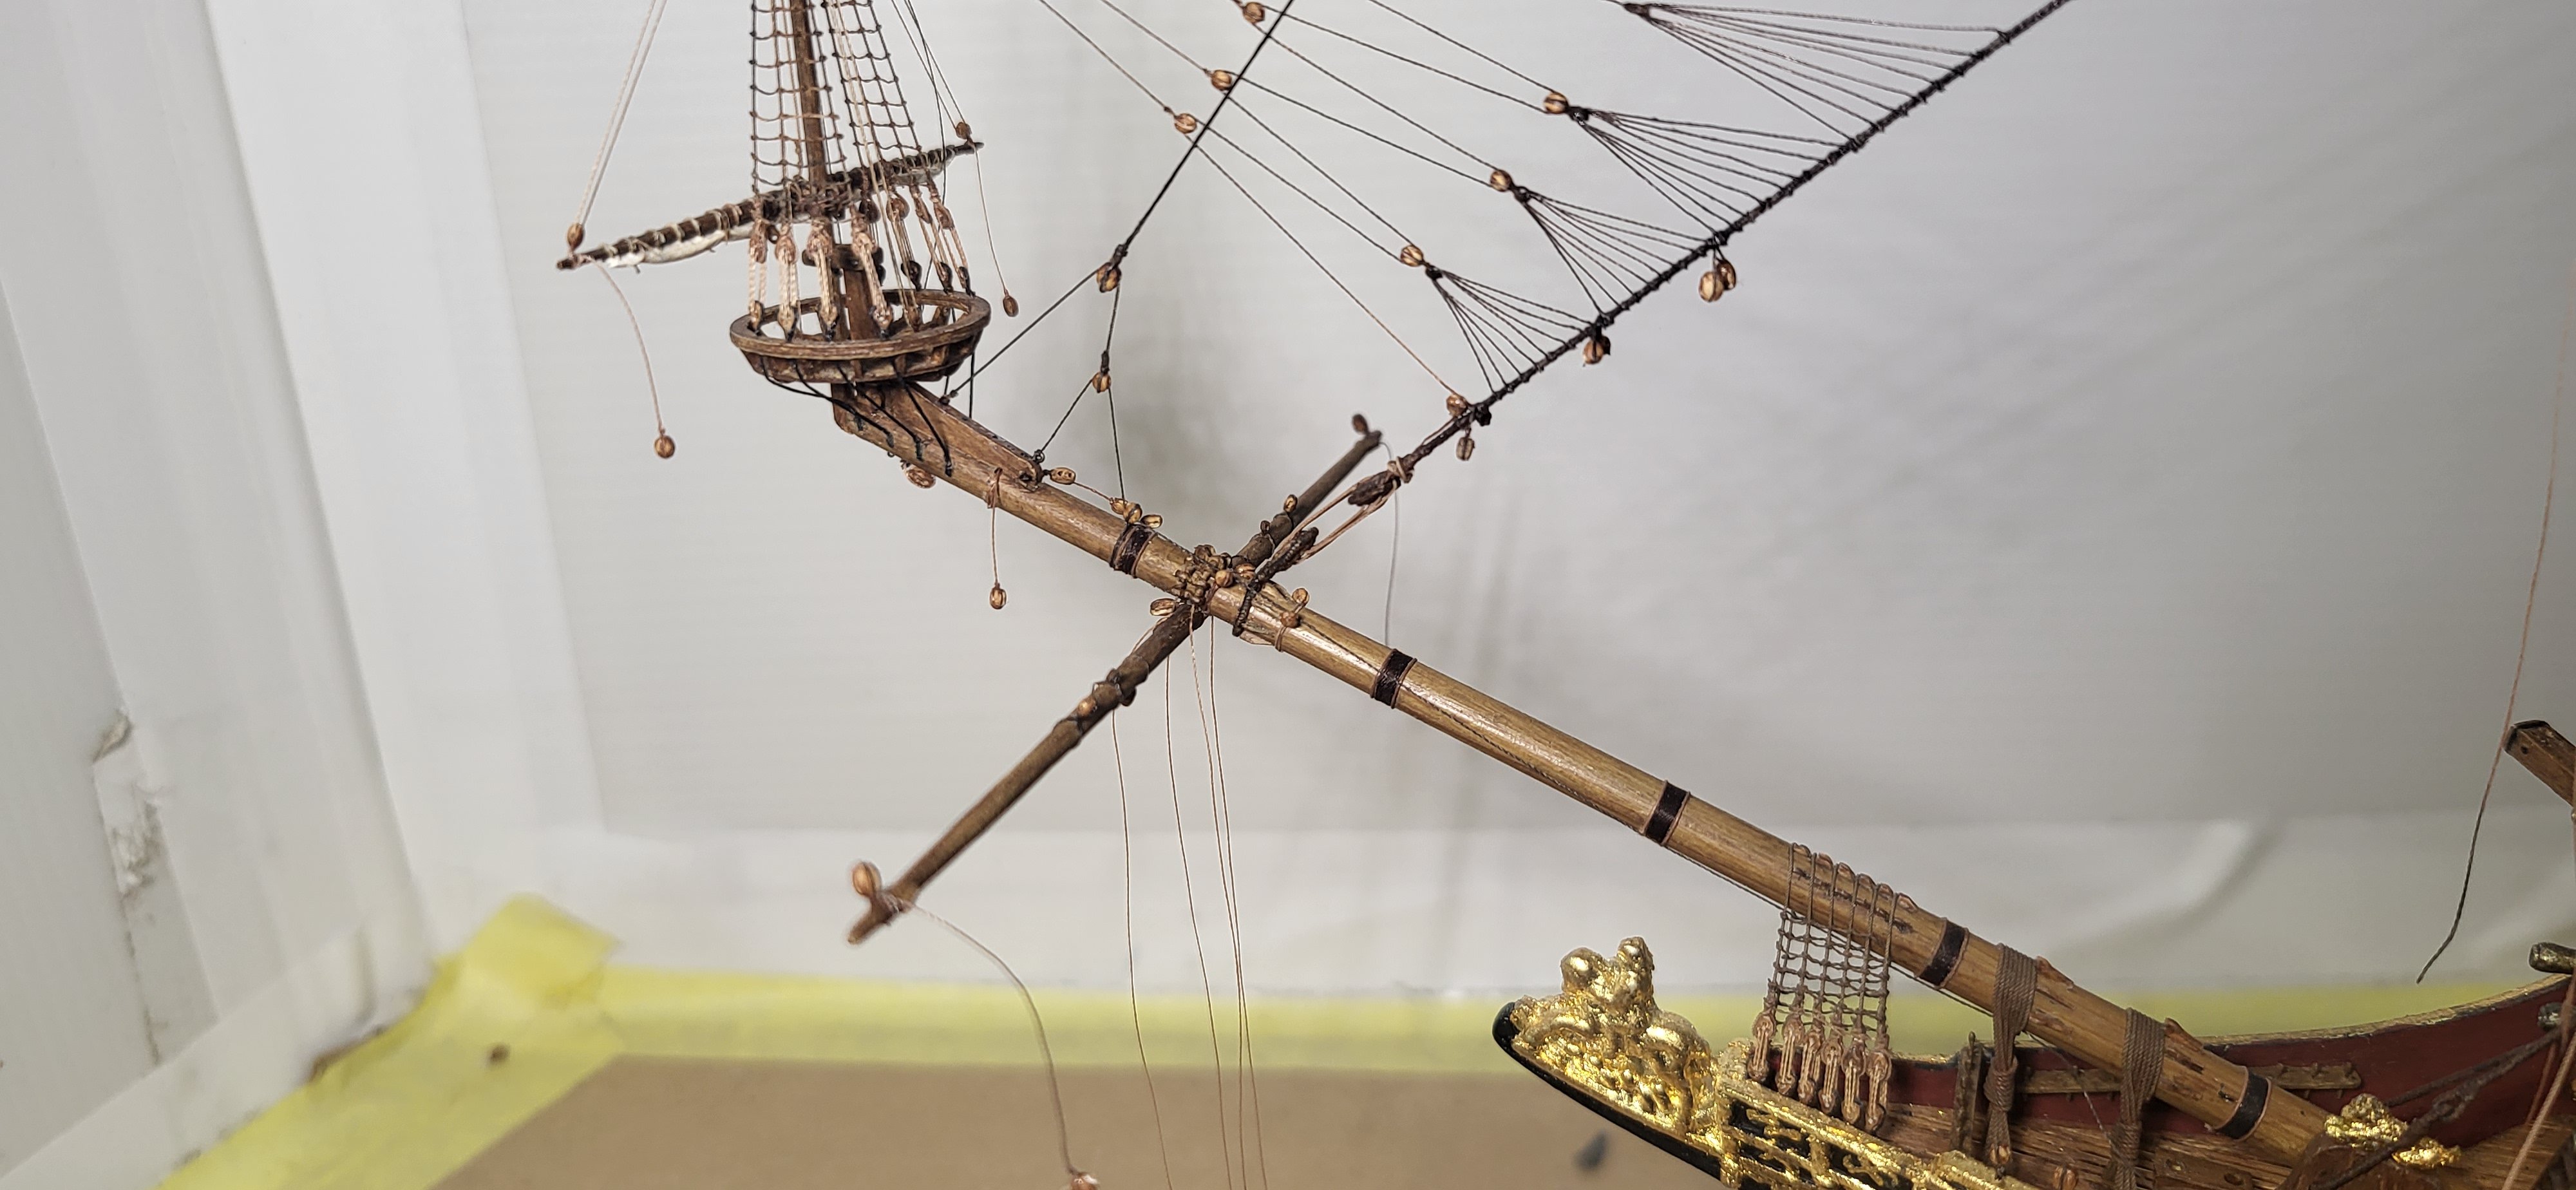
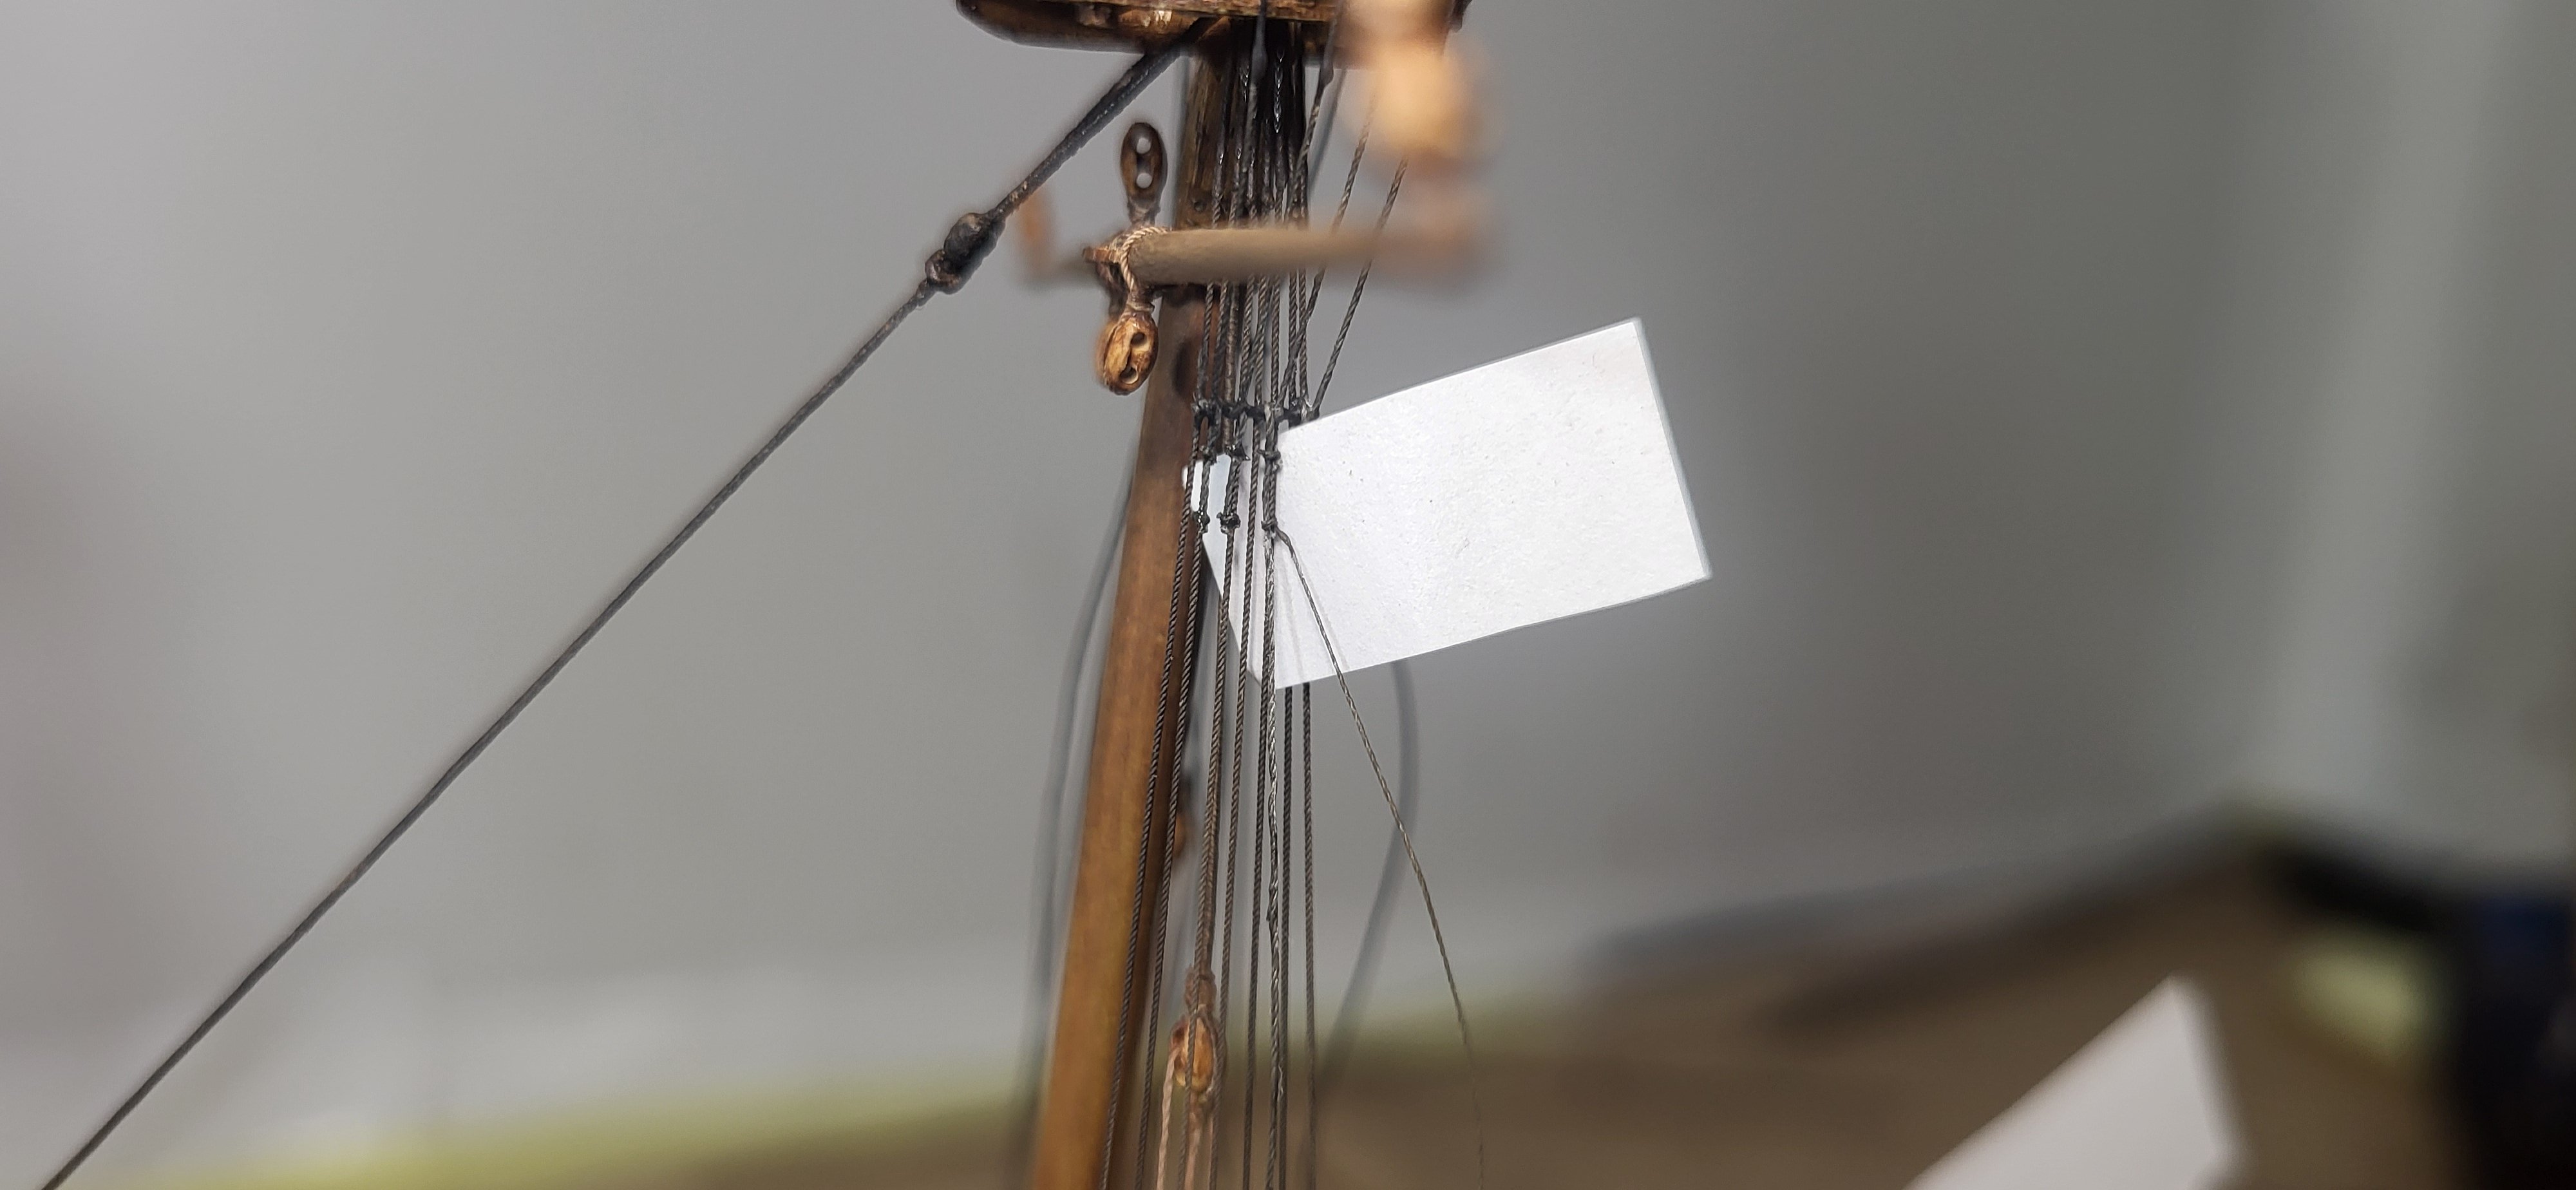
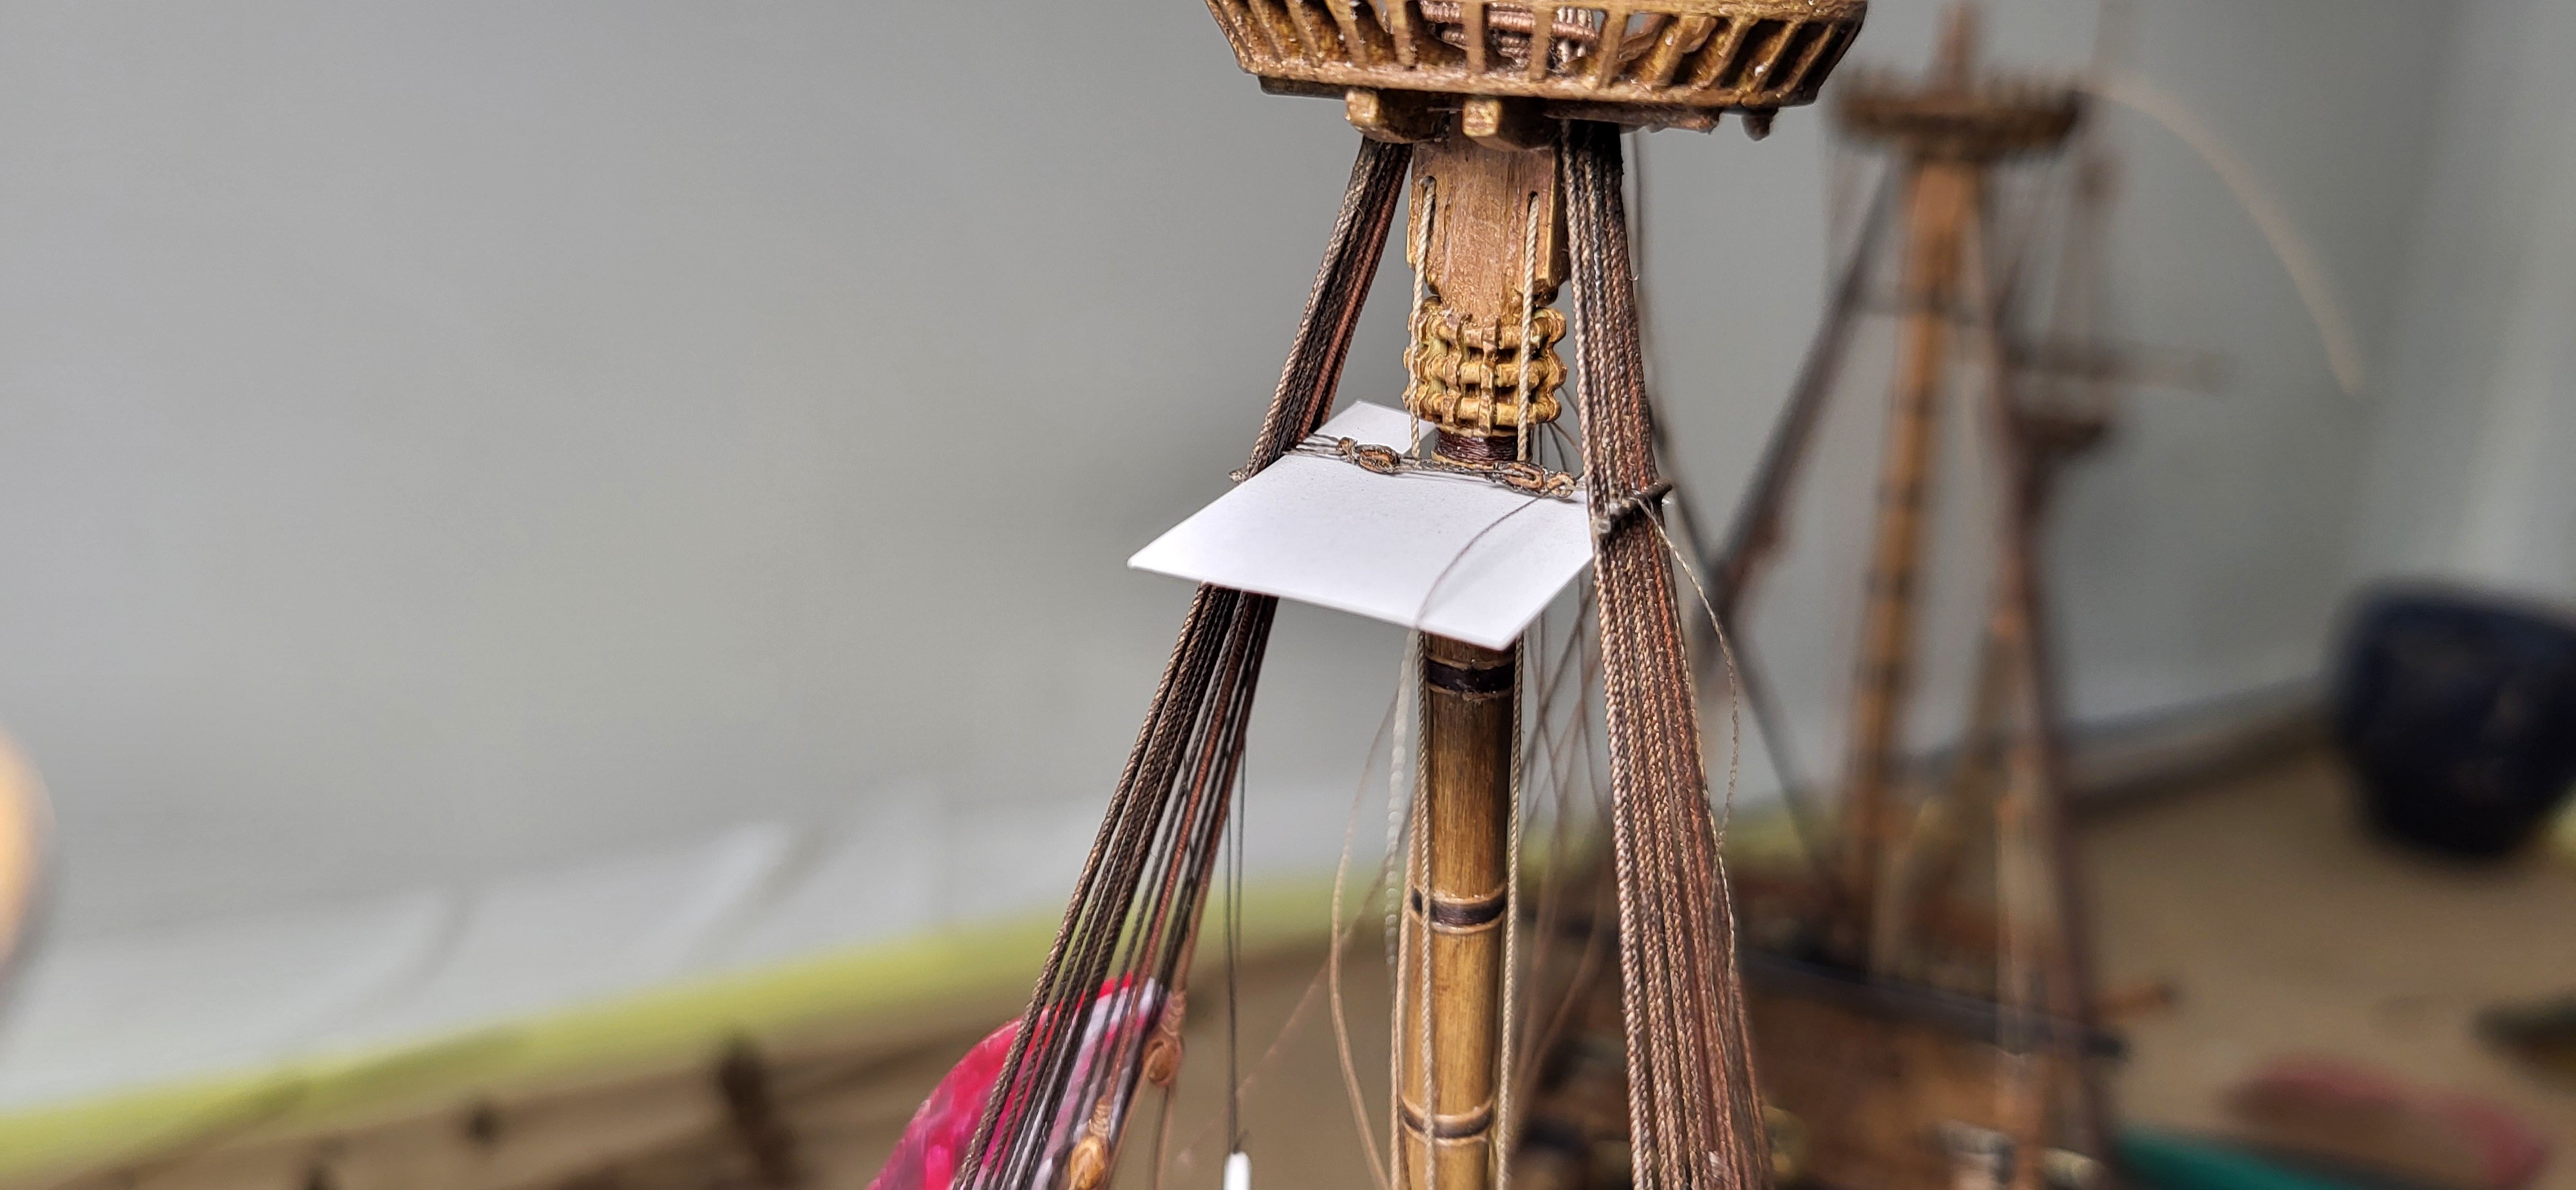
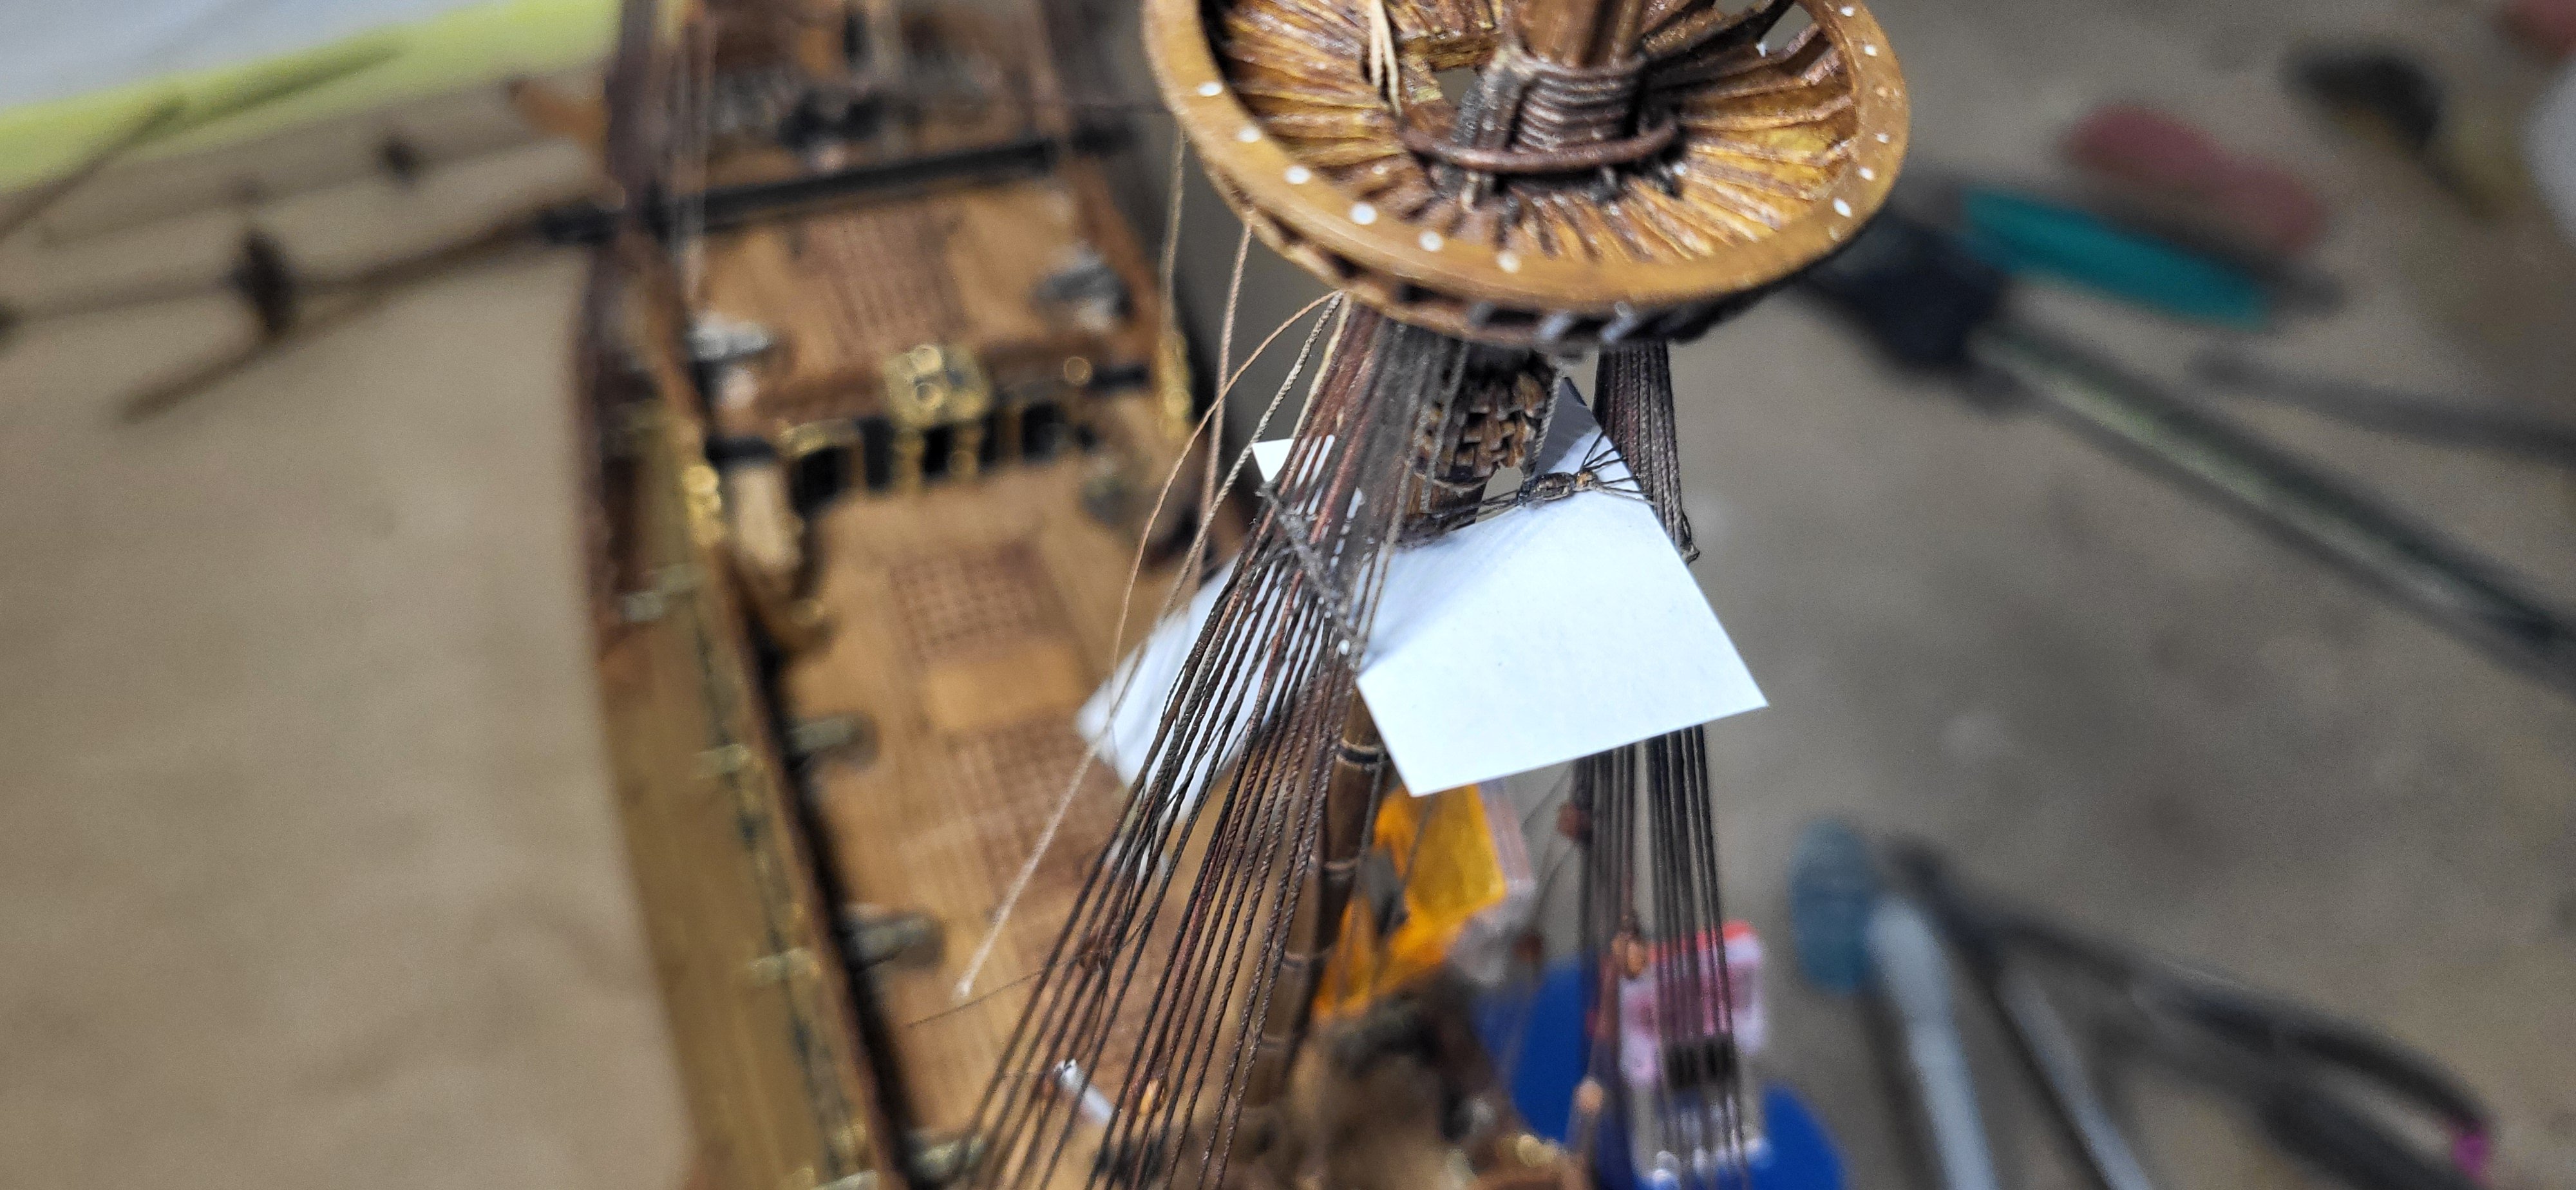
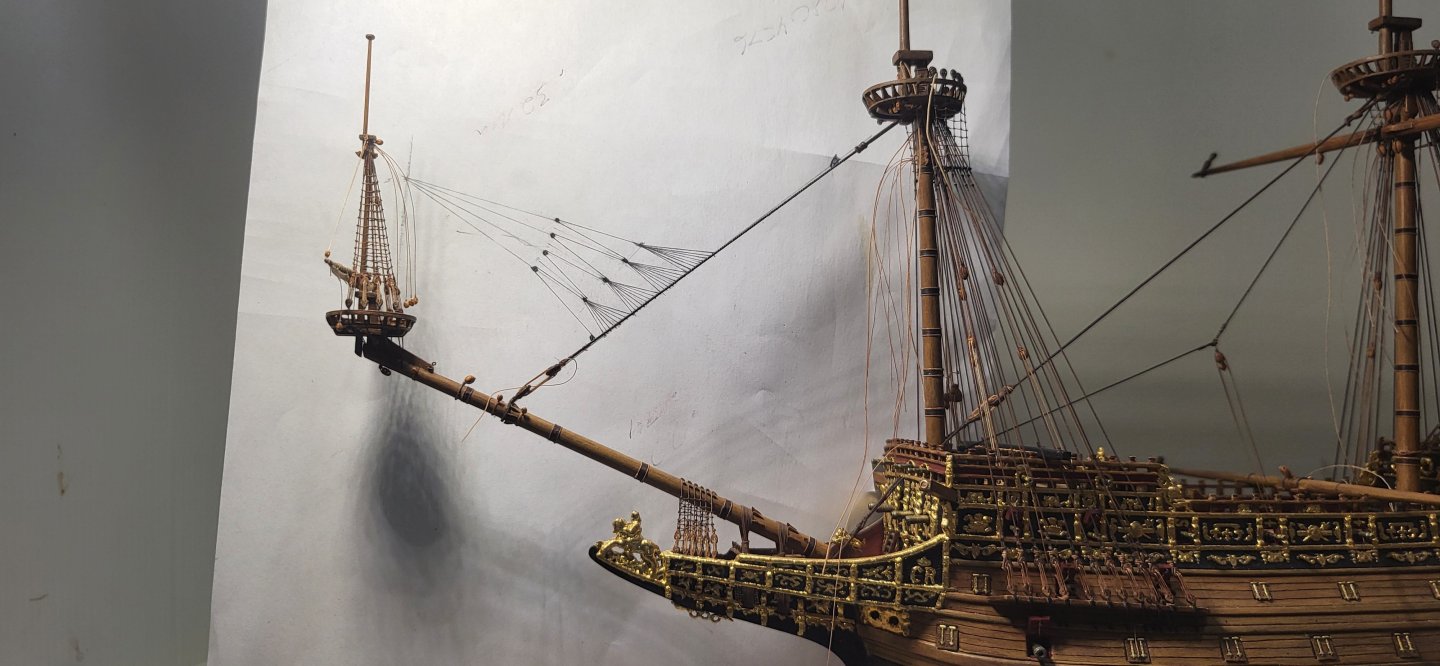
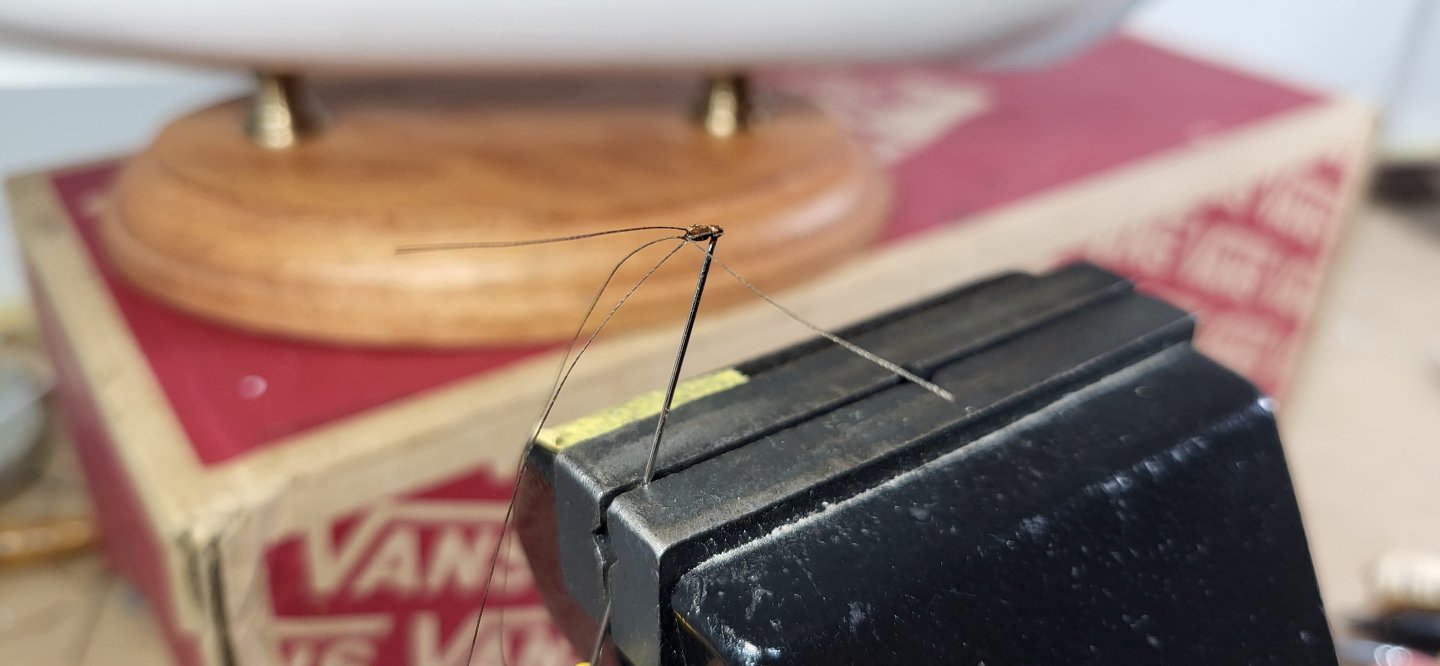
I haven't had any time for my S.O.S as of late, but here's a sneak preview of what's next, the sprit topmast backstay, this is drawn up on paper and placed in the background to give me an idea how it's going look, my main focus is the placement of the crow's feet and the total surface area along the stay, at this point I think it looks pretty good so I'll mark the stay with paint as a guide and proceed, this ought to be fun. Michael D.
- 324 replies
-
- 6
-
-
-
- Sovereign of the Seas
- Airfix
- (and 1 more)
-
My focus of late is dressing out the lower yards, the sheet/lifts blocks are completed along with the sheet blocks, the clue blocks were another story, after a few trials and errors this is the finished result, using a 2.5mm block that is pretty darn close to a 15" block at scale, at least to the human eye anyways, I stropped it first then used PVA glue and dabbed it on with a pin to form the unique shape, once dried and painted I think it looks fairly convincing at this scale. Thanks for stopping by and checking out the progress. Michael D.

- 324 replies
-
- 8
-
-
-
- Sovereign of the Seas
- Airfix
- (and 1 more)
-
I rigged up the winding tackle using .50mm line for the pendant and ,45mm line for the guy, the long tackle block measures out at .5mm, the single hooked block is 3mm and the fall is .25mm line. The guy is belayed to the lower headrail at the base of the fore mast; the fore jeer bitts is another option to belay the guy. Michael D.
- 324 replies
-
- 6
-
-
-
- Sovereign of the Seas
- Airfix
- (and 1 more)
-
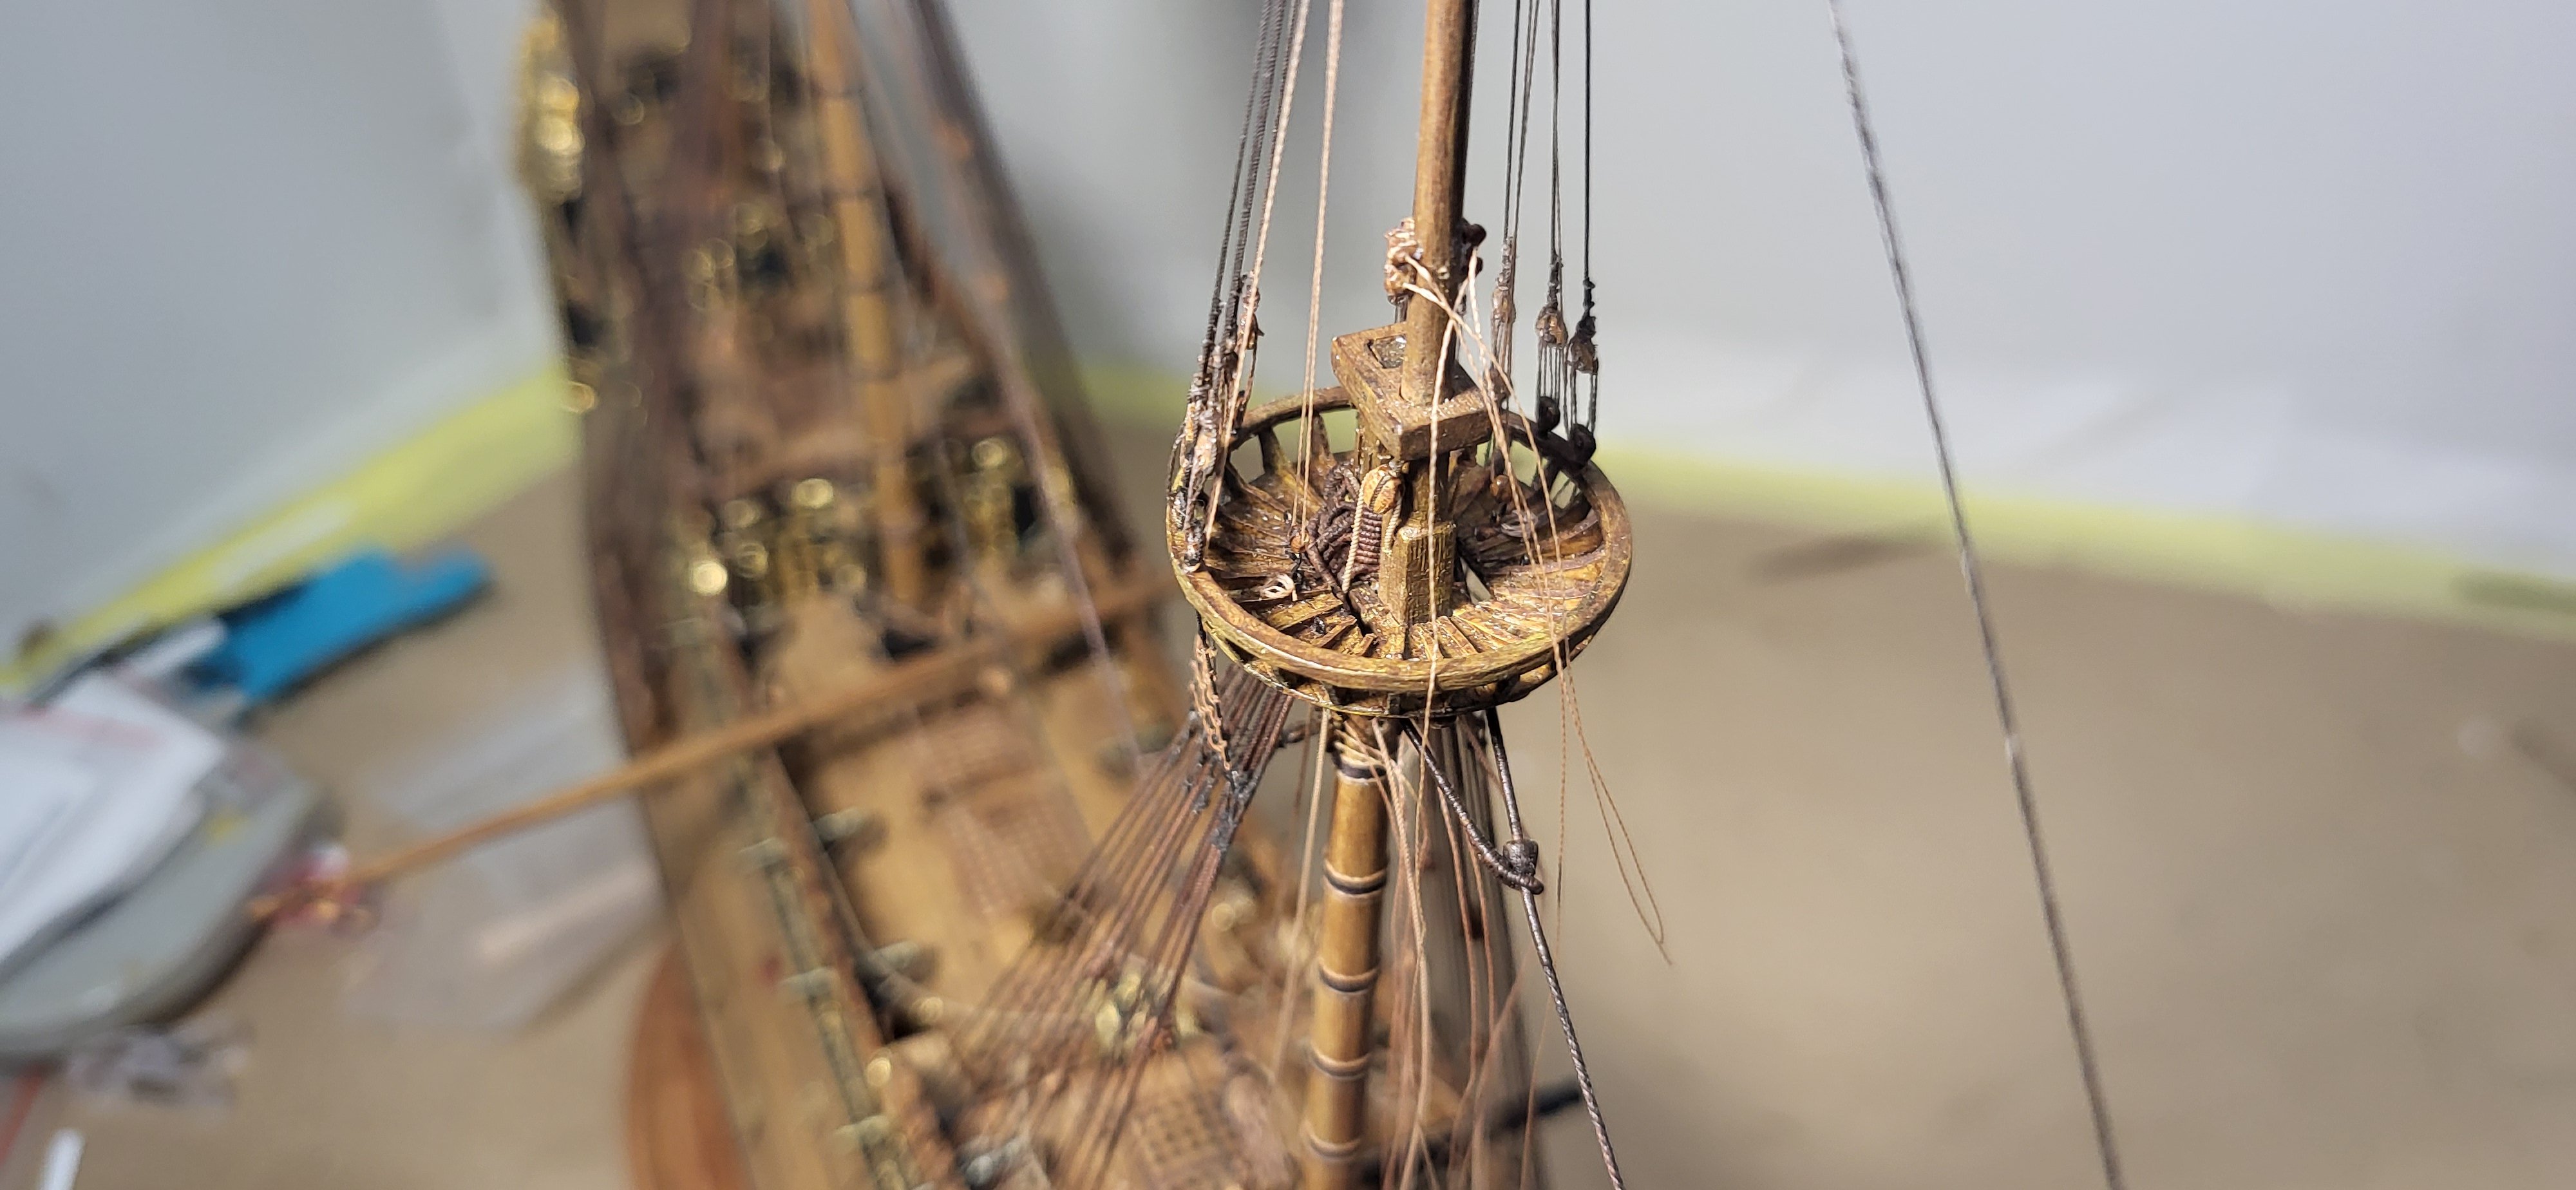
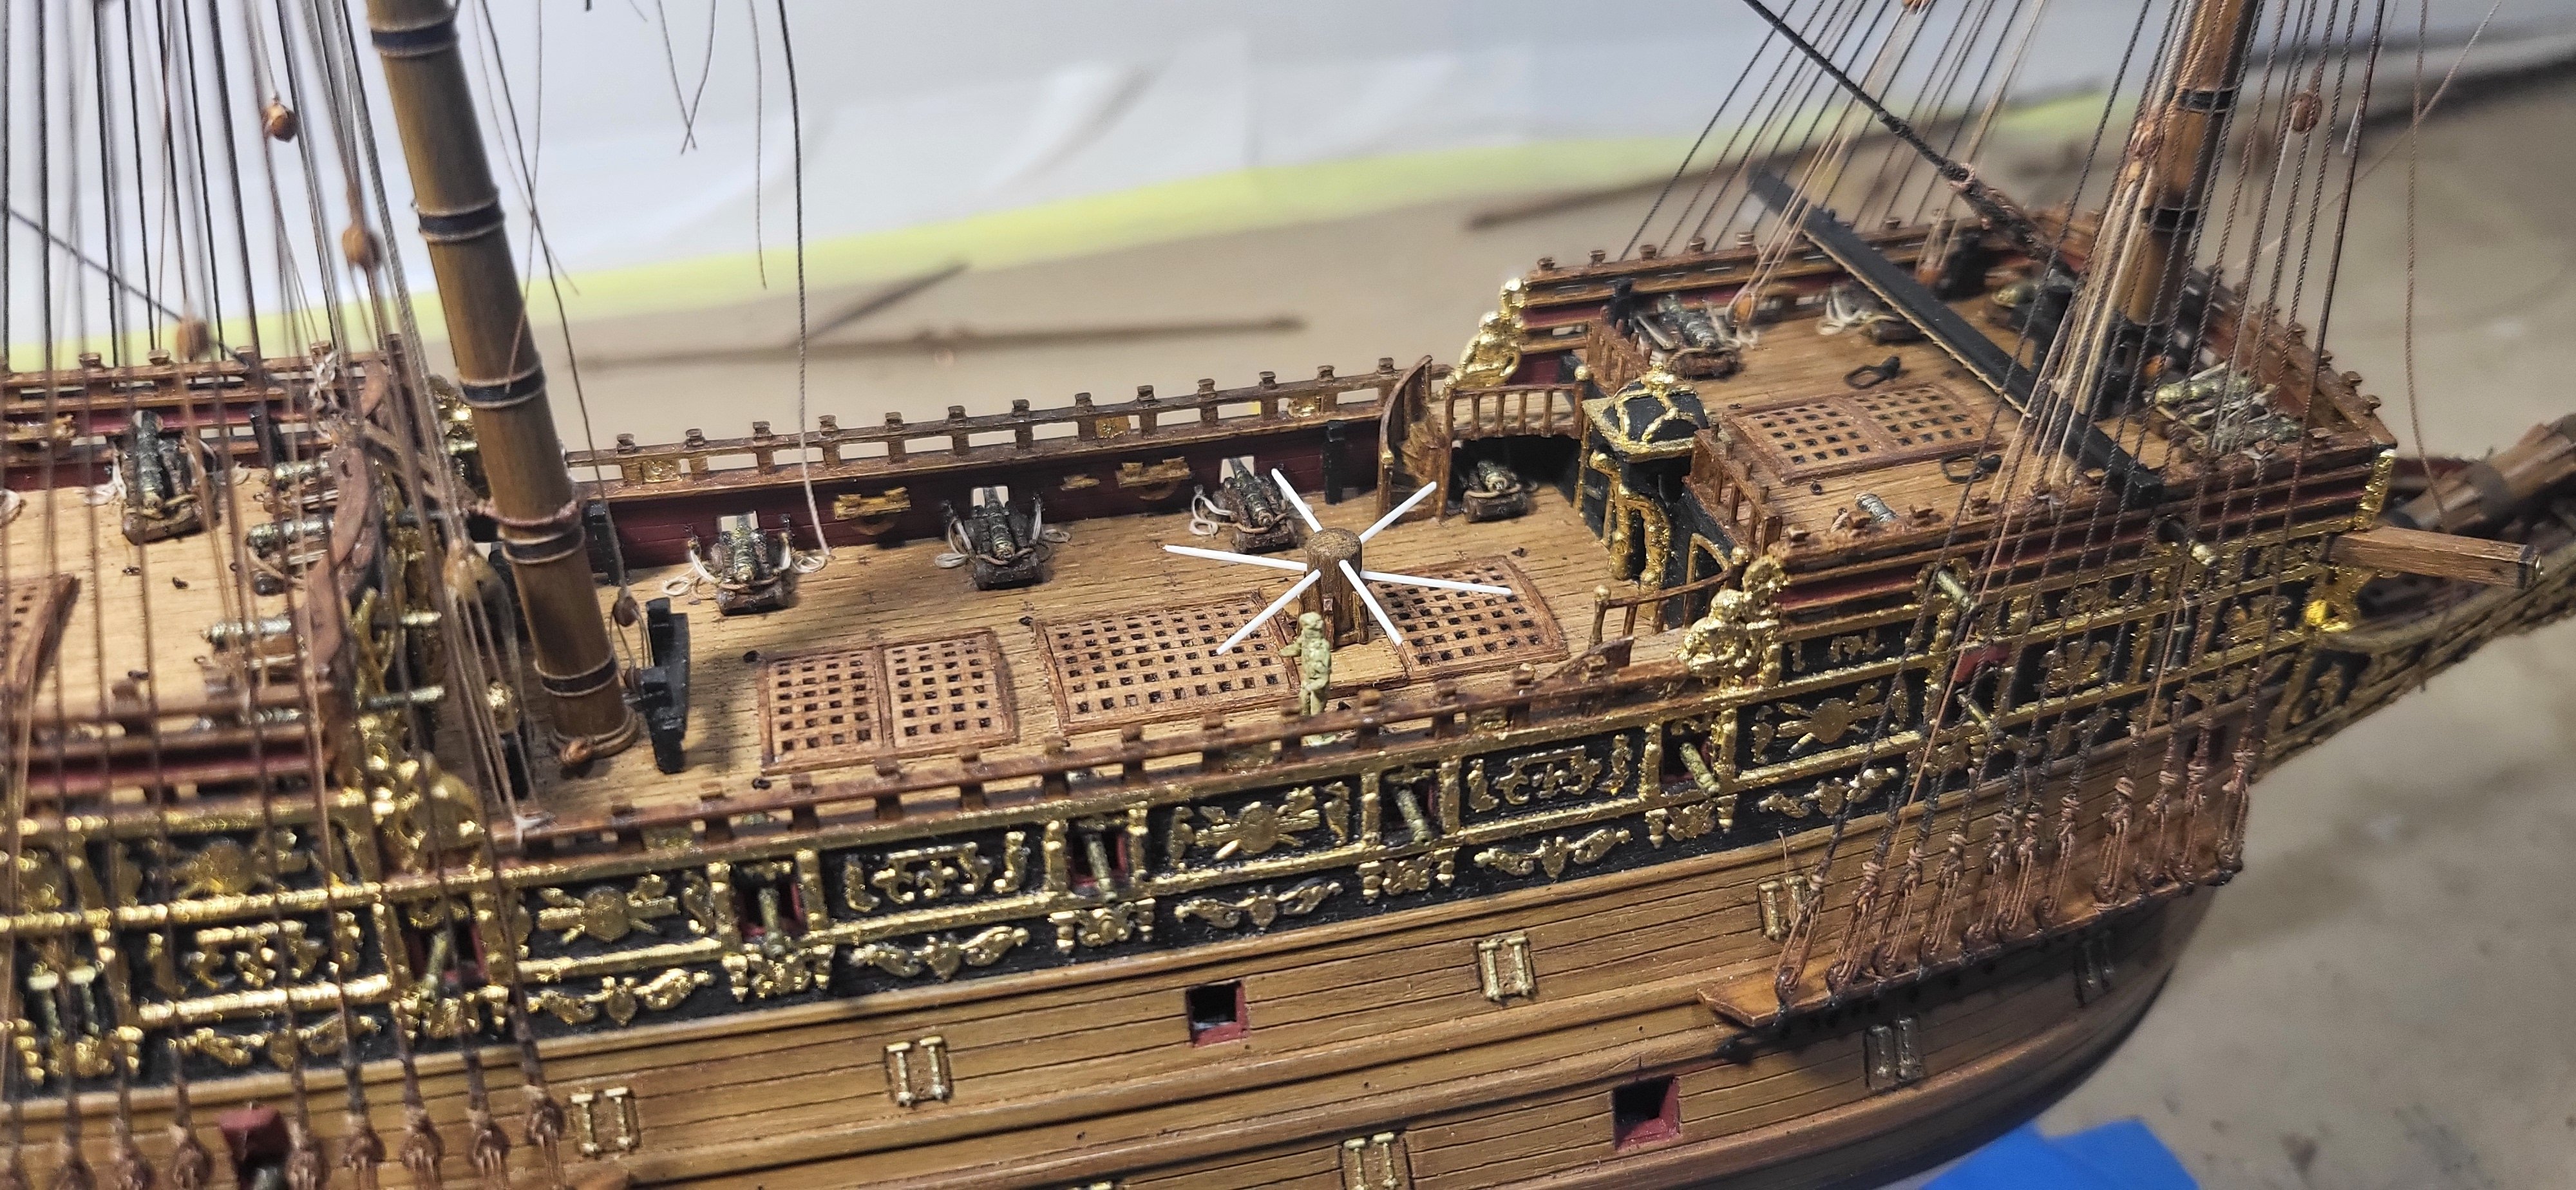
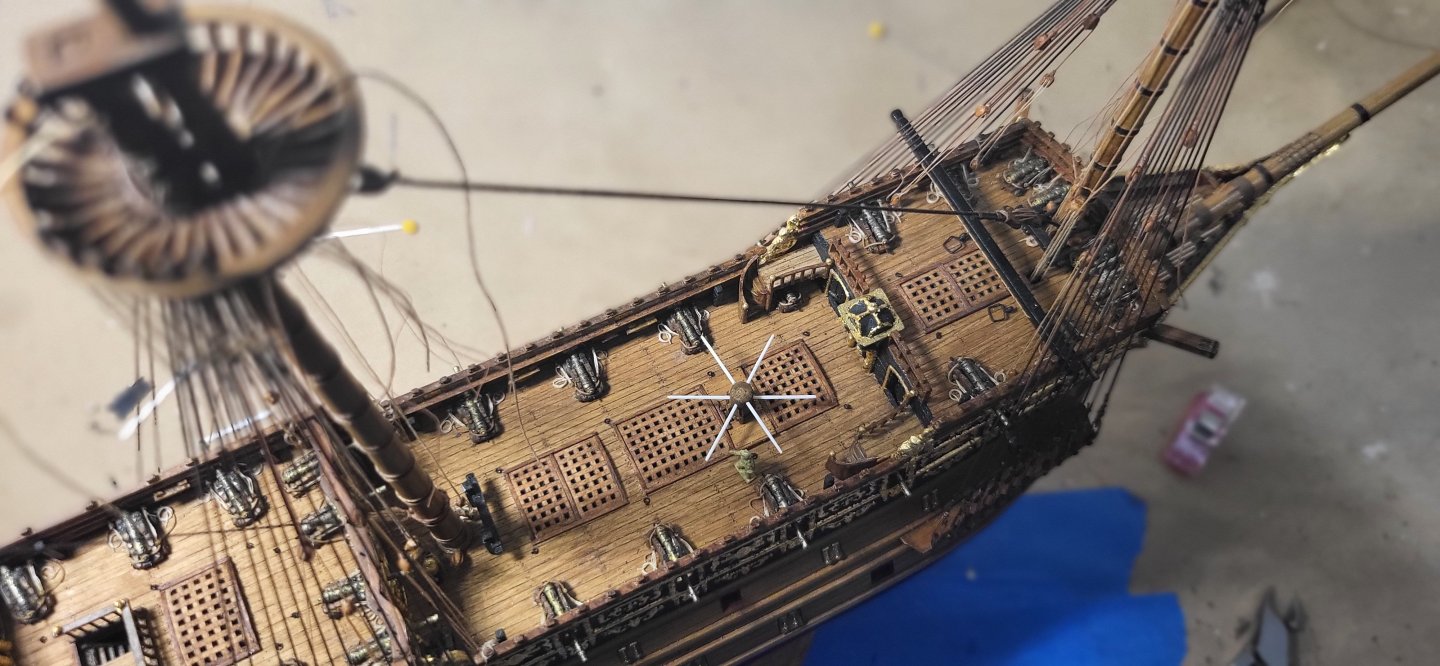
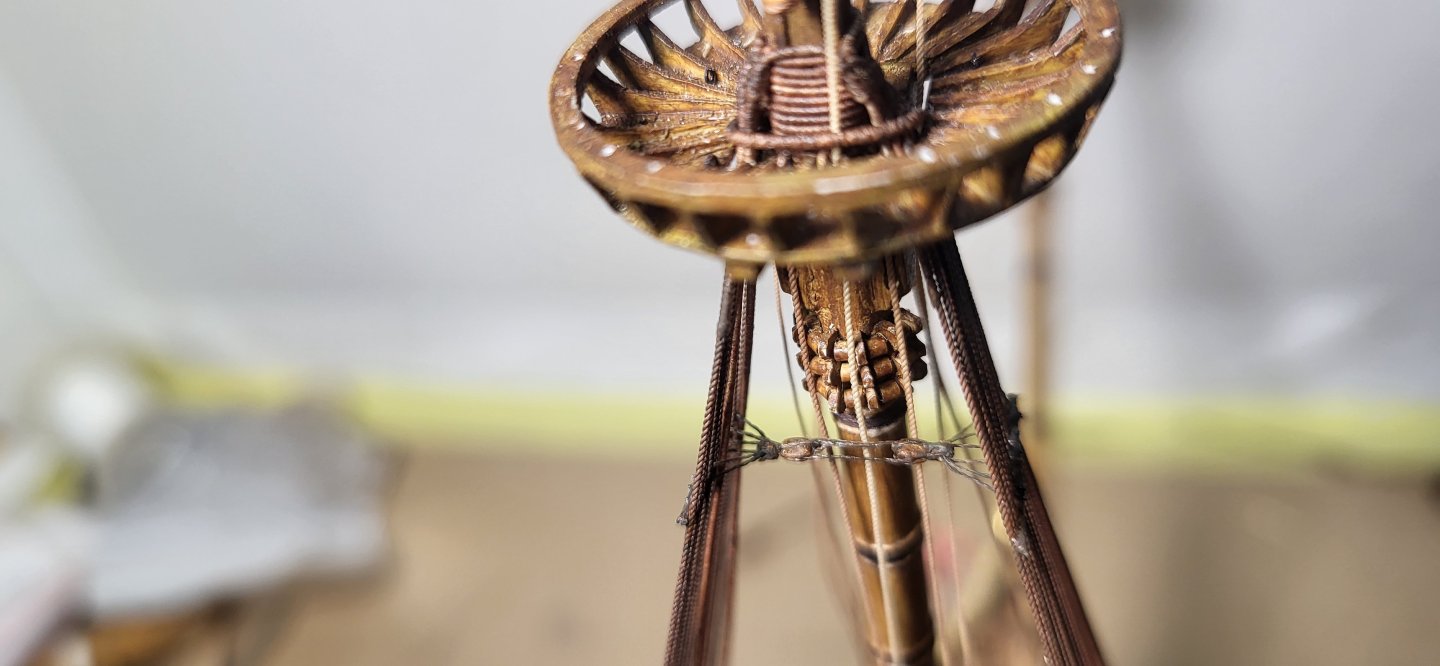
I spent some time making the capstan, this is based off the Vasa as a good example by some sources and works for me. Not sure yet if I want to display the bars as things are already tight in this area and might hinder access to belaying points, thanks for looking. Michael D.

- 324 replies
-
- 7
-
-
-
- Sovereign of the Seas
- Airfix
- (and 1 more)
-
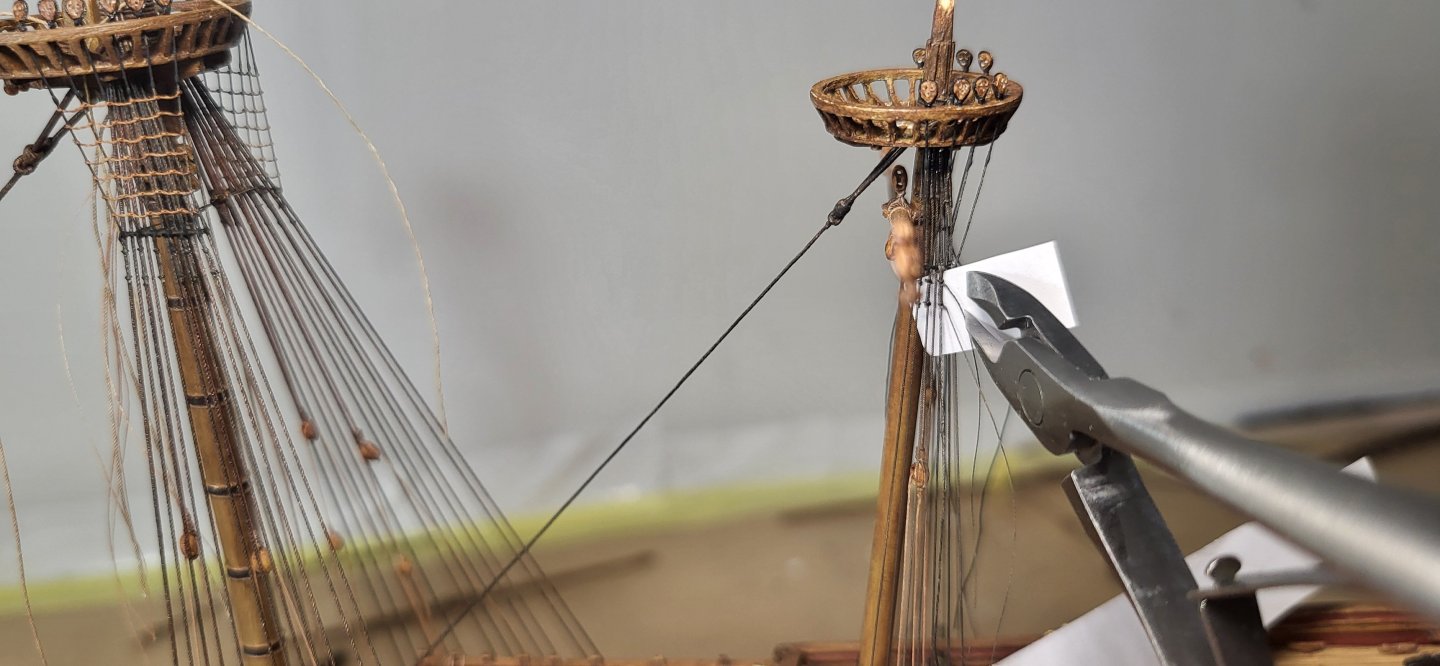
The lower futtock shrouds are just about complete, the upper Catharpins were not often rigged on the Mizzen according to Anderson and McKay mentions that they can interfere with the Mizzen course, I did a mockup, and the interference was with tackle for the jeers rather than the course, at least on this model anyways, so I omitted them and the lower shrouds show no distortion. Also, I figured it would be a good time to fit the ladders leading up to the coach deck. When the time comes for trimming the lashings I like to shield the adjacent shroud with paper to prevent a catastrophic snipping of said shroud, this is not much of an issue on larger scale builds. Michael D.


- 324 replies
-
- 8
-
-
-
- Sovereign of the Seas
- Airfix
- (and 1 more)
-
Thank you, gentlemen for the comments, it's nice to know one's work is appreciated and that means a lot coming from well esteemed modelers such as yourselves. Chapman, besides my continued enjoyment in building these, the biggest motivation is one day I won't be able to do this anymore, I'm no spring chicken, plus I have six more I want complete before that happens, Hehe. Cheers Fellas. Michael D.
- 324 replies
-
- 3
-
-
- Sovereign of the Seas
- Airfix
- (and 1 more)
-
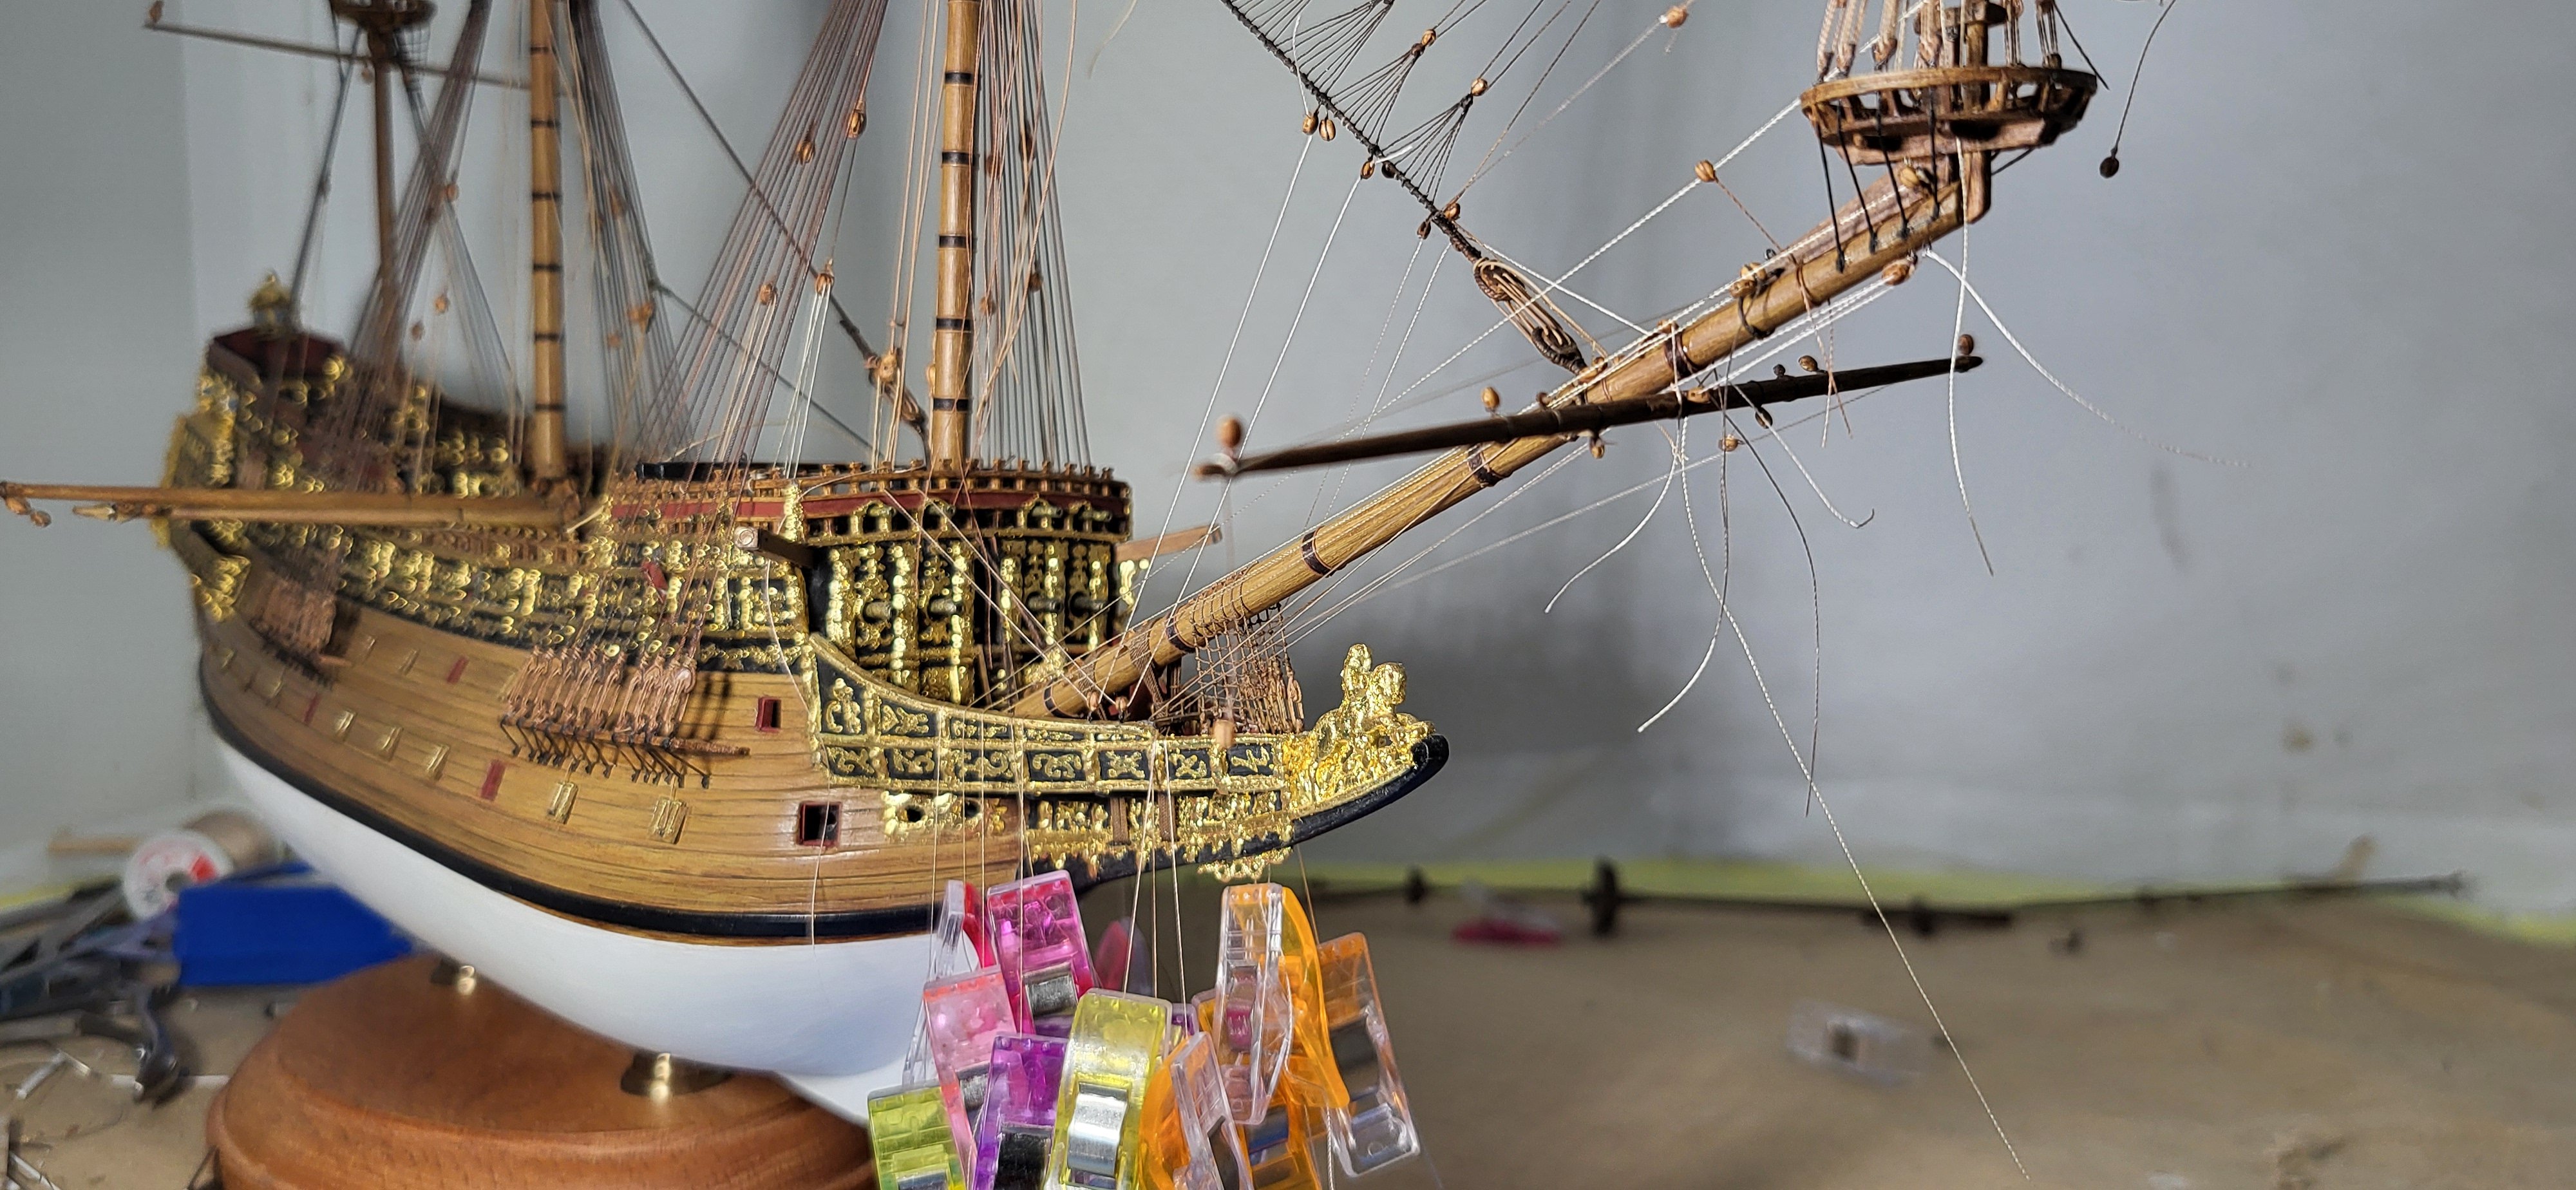
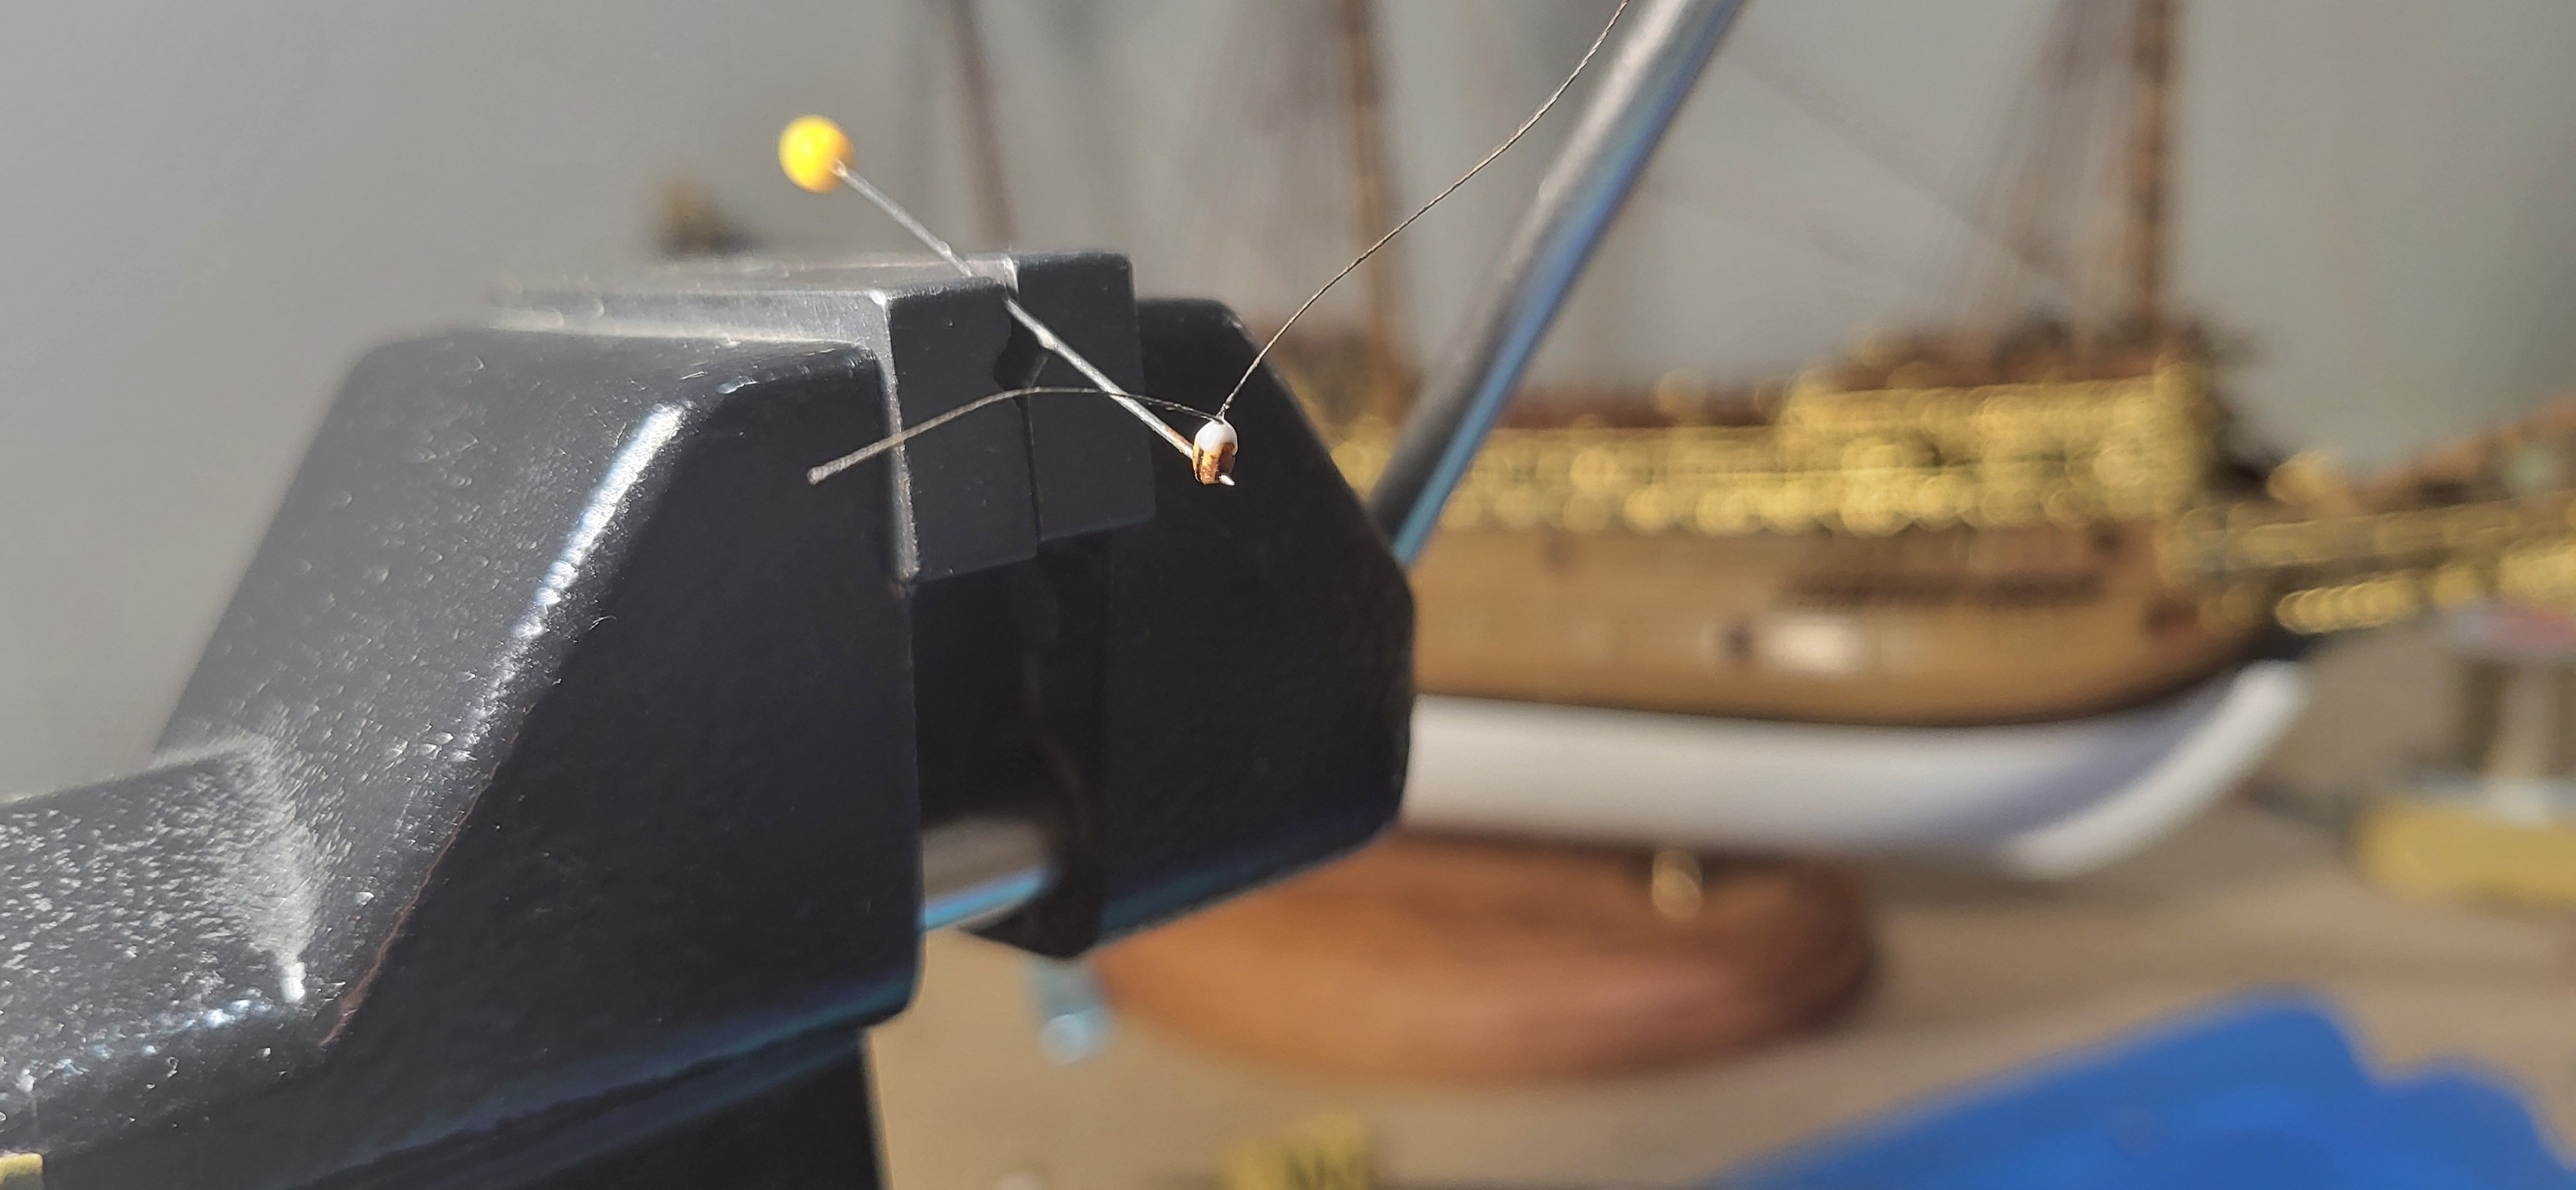
The main Catharpin is completed. After calculating the distance, I rigged the tackle on the bench and fed the lines for the center legs thru the bullseye, as mentioned earlier this should be a 3-hole dead eye, 4.5" at scale. I placed the tackle on a piece of paper and fed the center legs thru the appropriate shrouds and glued one leg each side, the white background allows you to see the lines and make adjustments before gluing, once dried I placed clamps on the other legs, this allowed me to center the tackle before gluing them, I used the same process for the other legs, nothing earth shattering here, just sharing the process I used working at this scale. I figured it was good time to finish up the spritsail top mast ratlines. Michael D.

- 324 replies
-
- 10
-
-
-
- Sovereign of the Seas
- Airfix
- (and 1 more)
-
The lower fore futtock shrouds are completed, the threat of snipping a shroud is real, the Vasa wasn't as fortunate, but made it thru unscathed so far. Thanks for all the likes. Michael D.


- 324 replies
-
- 7
-
-
-
- Sovereign of the Seas
- Airfix
- (and 1 more)
-
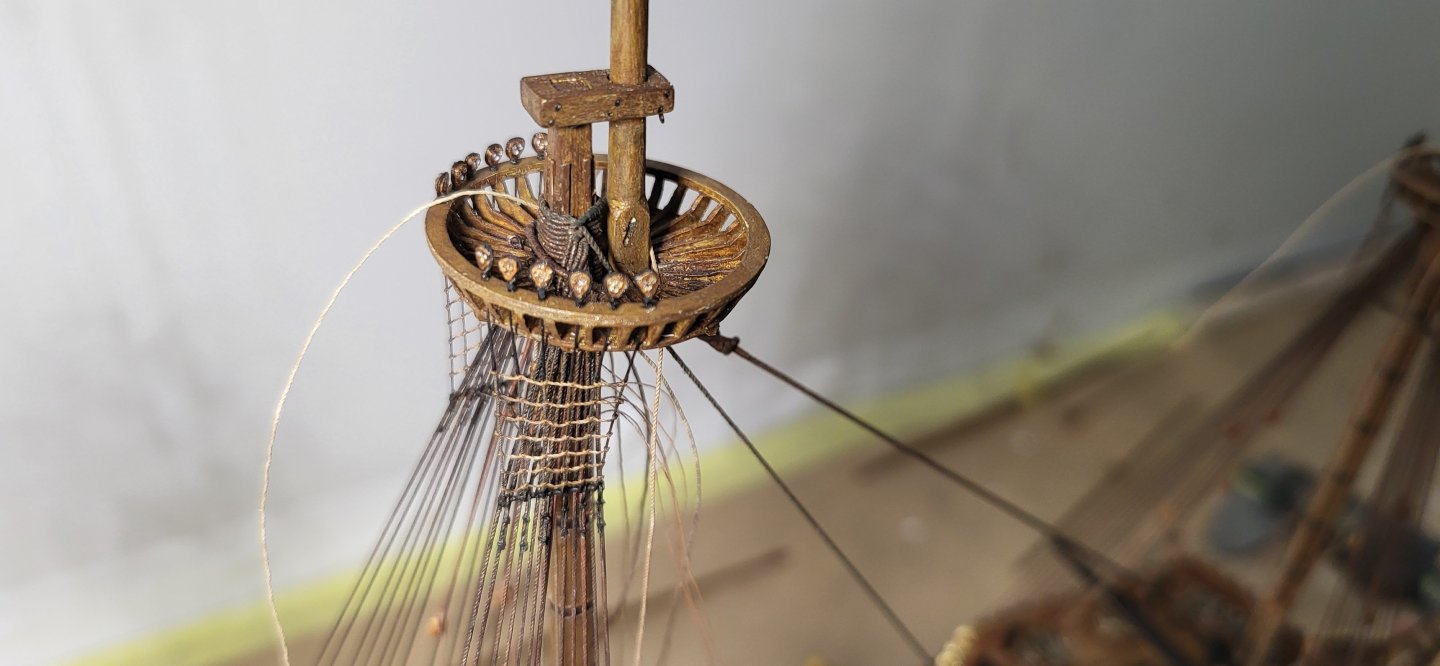
The last couple of days involved making up the top mast dead eyes and rigging the futtock shrouds, usually there is two sections, the puttock plates and shrouds, I did contemplate doing this way but at this scale I went the simpler route by stropping the dead eyes with the shroud and a dab of glue to simulate the union between the Puttock plate and shroud, It looks somewhat convincing. Thanks for looking. Michael D.
- 324 replies
-
- 6
-
-
-
- Sovereign of the Seas
- Airfix
- (and 1 more)
-
The lanyards for the lower shrouds are completed along with the futtock staves and upper catharpins on the fore lower shrouds, I used 1.5mm rod to simulate the dead eyes and 1.7mm blocks for the tackle, these blocks are made by fellow modeler Kevin and figured now would be a good time to show case them, I think scale wise the assembly looks pretty good. Michael D.


- 324 replies
-
- 7
-
-
-
- Sovereign of the Seas
- Airfix
- (and 1 more)