72Nova
-
Posts
675 -
Joined
-
Last visited
Content Type
Profiles
Forums
Gallery
Events
Everything posted by 72Nova
-
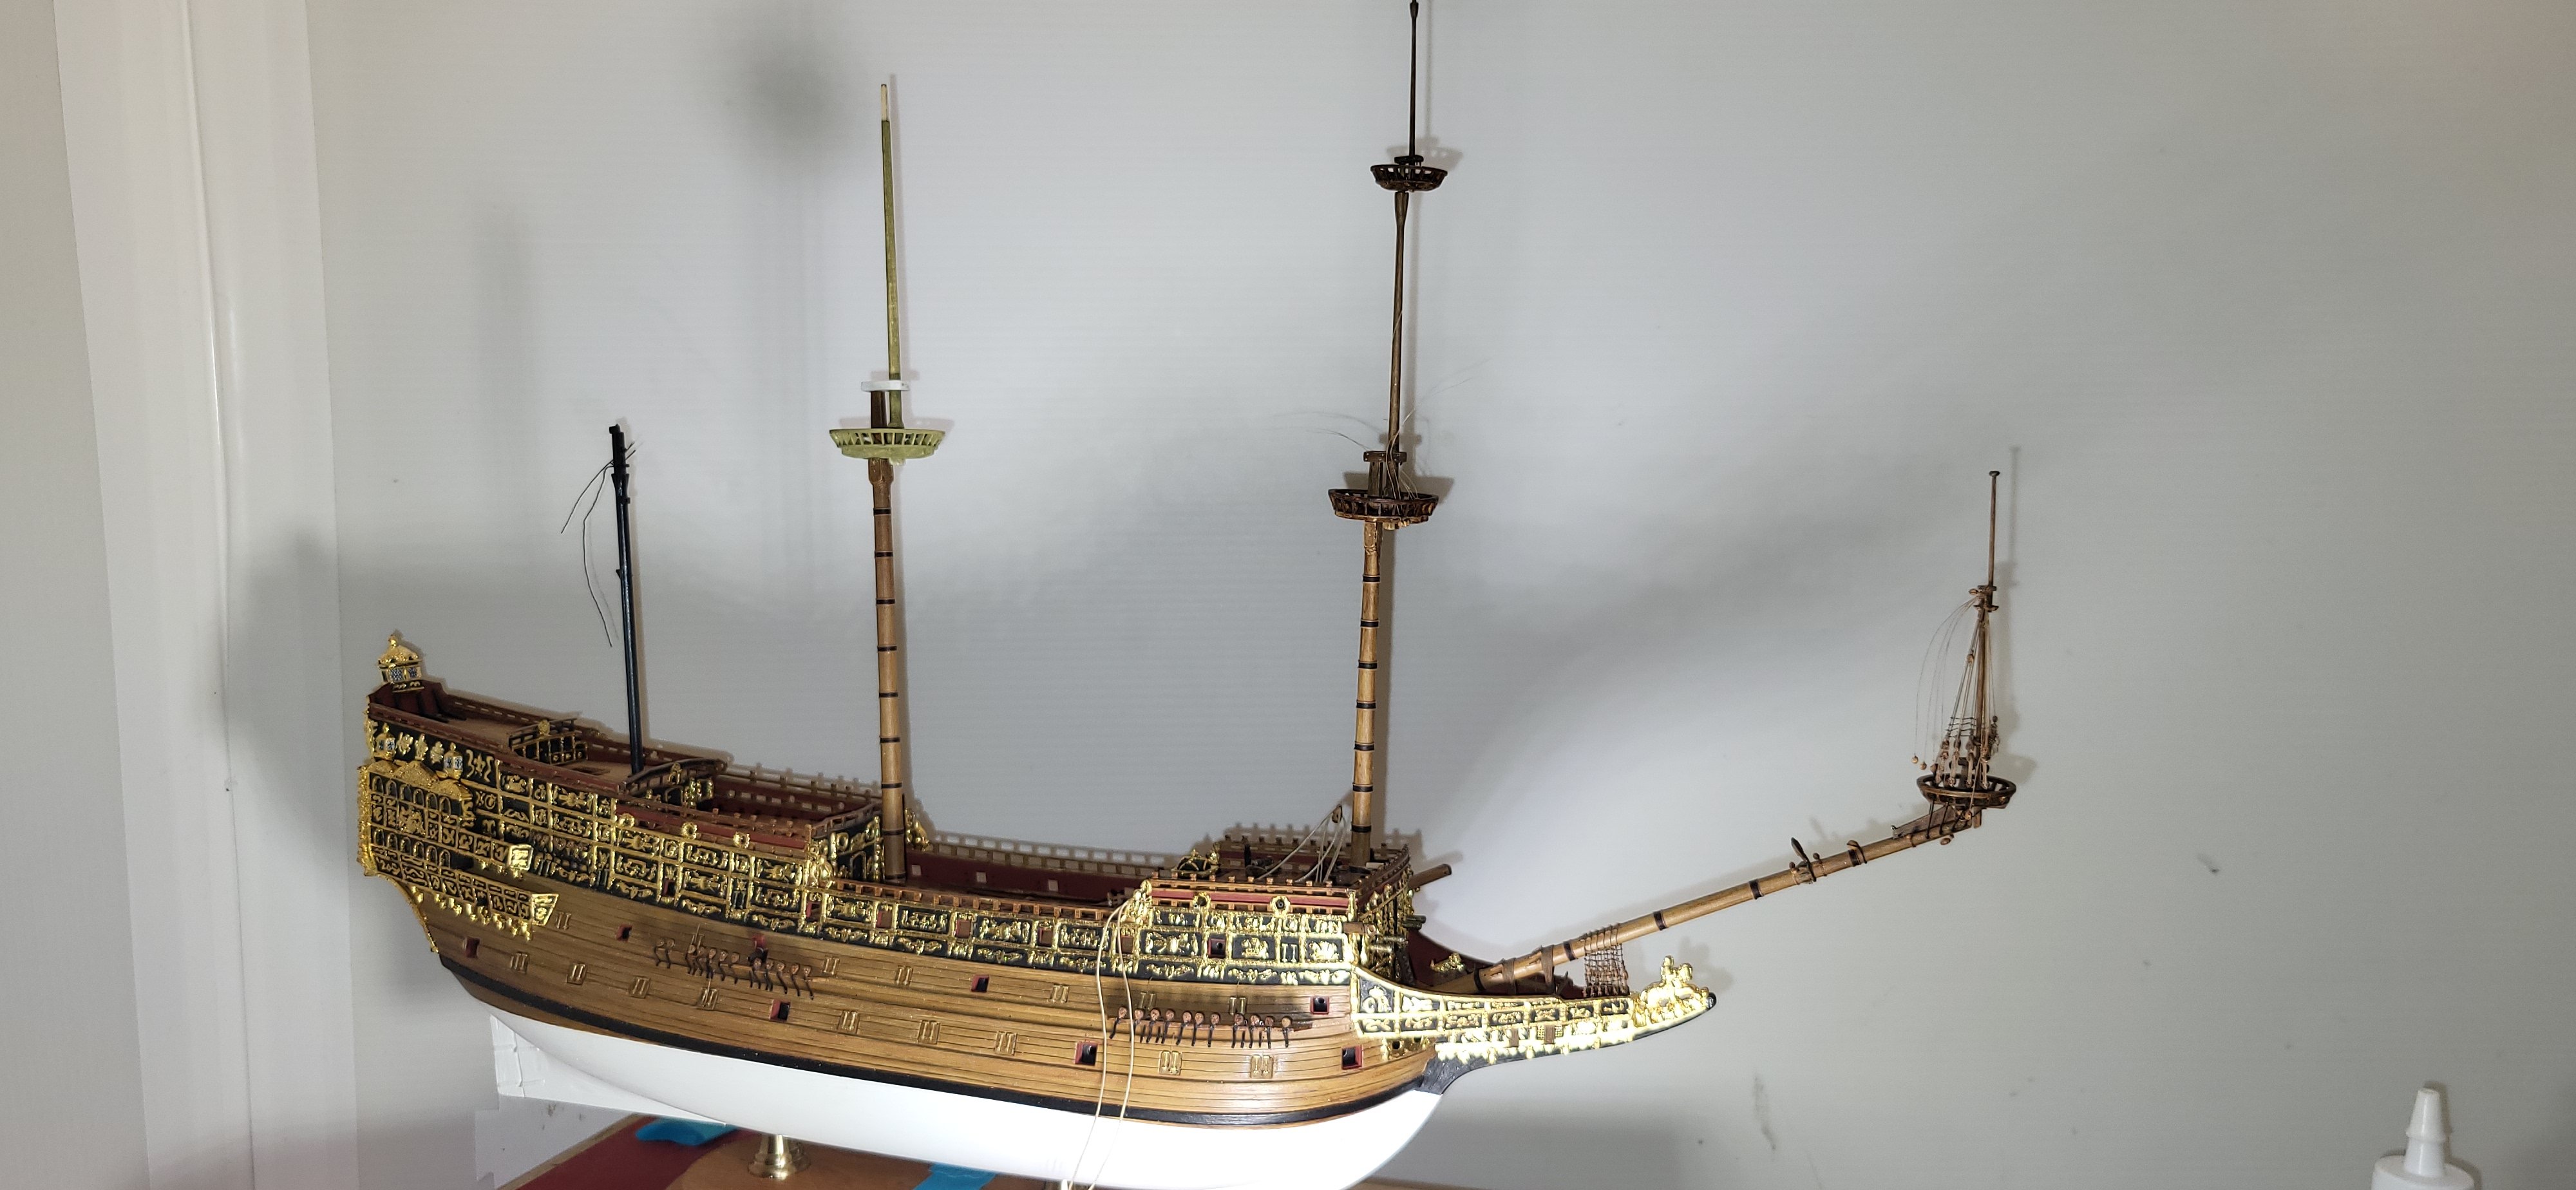
 A small update regarding the installation of the fore course buntline blocks, I used 1.5mm single blocks which are 12" at scale, simulated toggles to follow, also working on the main masts and tops. Thanks for looking. Michael D.

- 324 replies
-
- 9
-

-

-
- Sovereign of the Seas
- Airfix
- (and 1 more)
-
That's for sure Ian, I'll definatley be testing the limits of detail I can add, with some quite frankly impossible at this scale. Michael D.
- 324 replies
-
- 2
-
-
- Sovereign of the Seas
- Airfix
- (and 1 more)
-
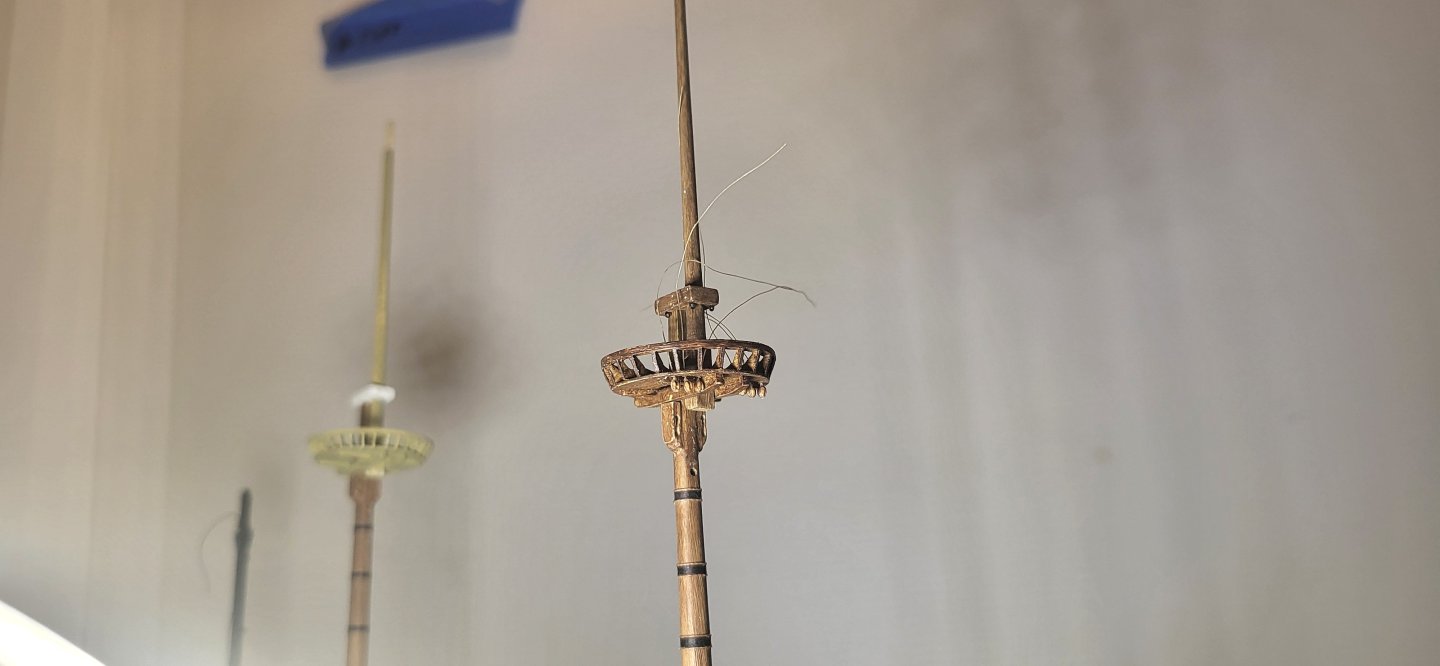
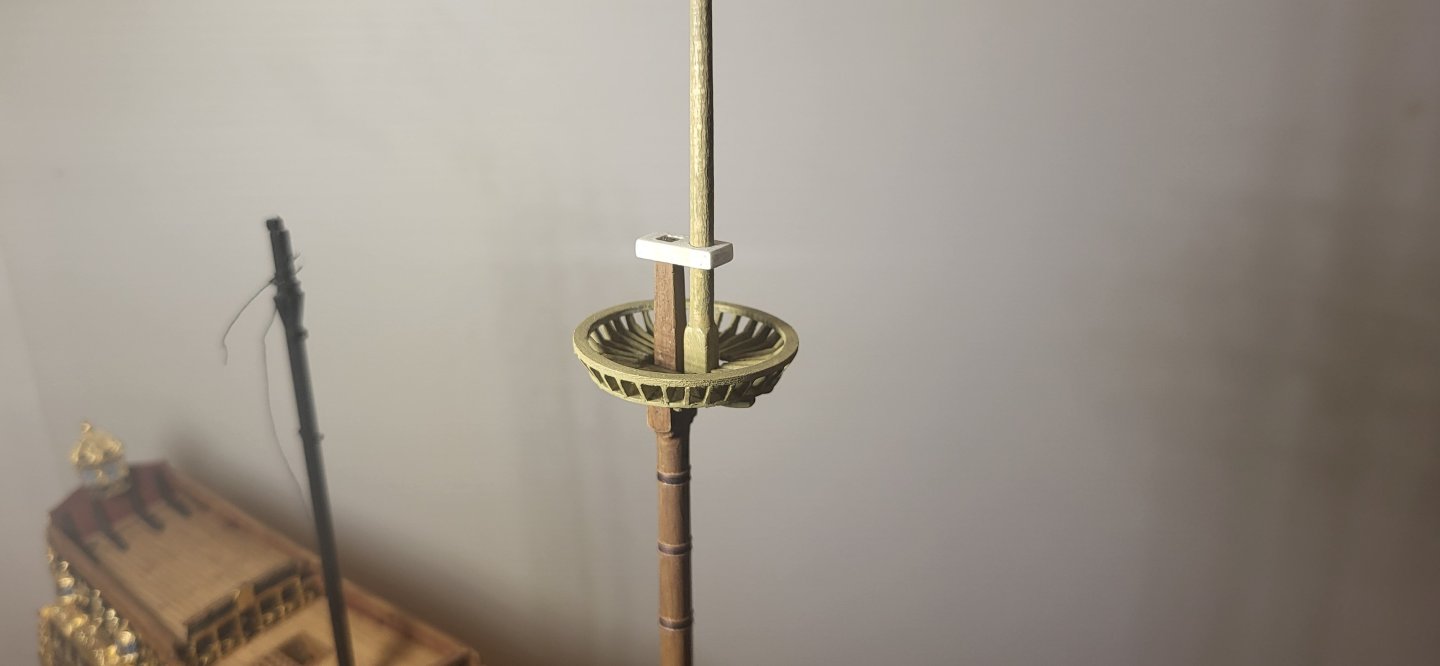
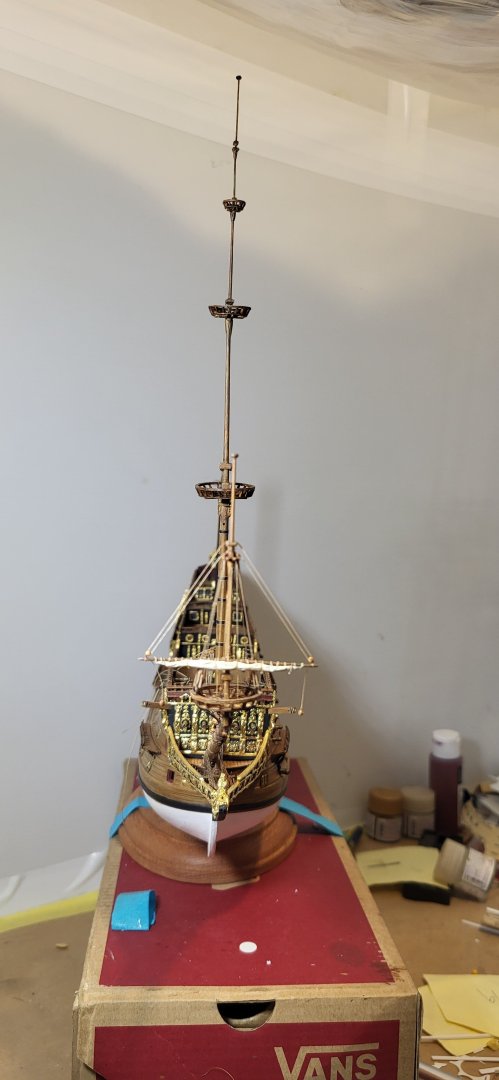
With the completion of the royal mast, royal trestle tree, flagpole and all required eye bolts in the tops I can now focus on attaching all the necessary blocks. Cheers. Michael D.
- 324 replies
-
- 8
-
-
-
- Sovereign of the Seas
- Airfix
- (and 1 more)
-
I can't believe I forgot about your wonderful Reale De France build, glad to hear you're on the mend. Sounds like a scratch build project that will be a pleasure to follow, I doubt I'll ever get to that stage. Michael D
- 324 replies
-
- 1
-
-
- Sovereign of the Seas
- Airfix
- (and 1 more)
-
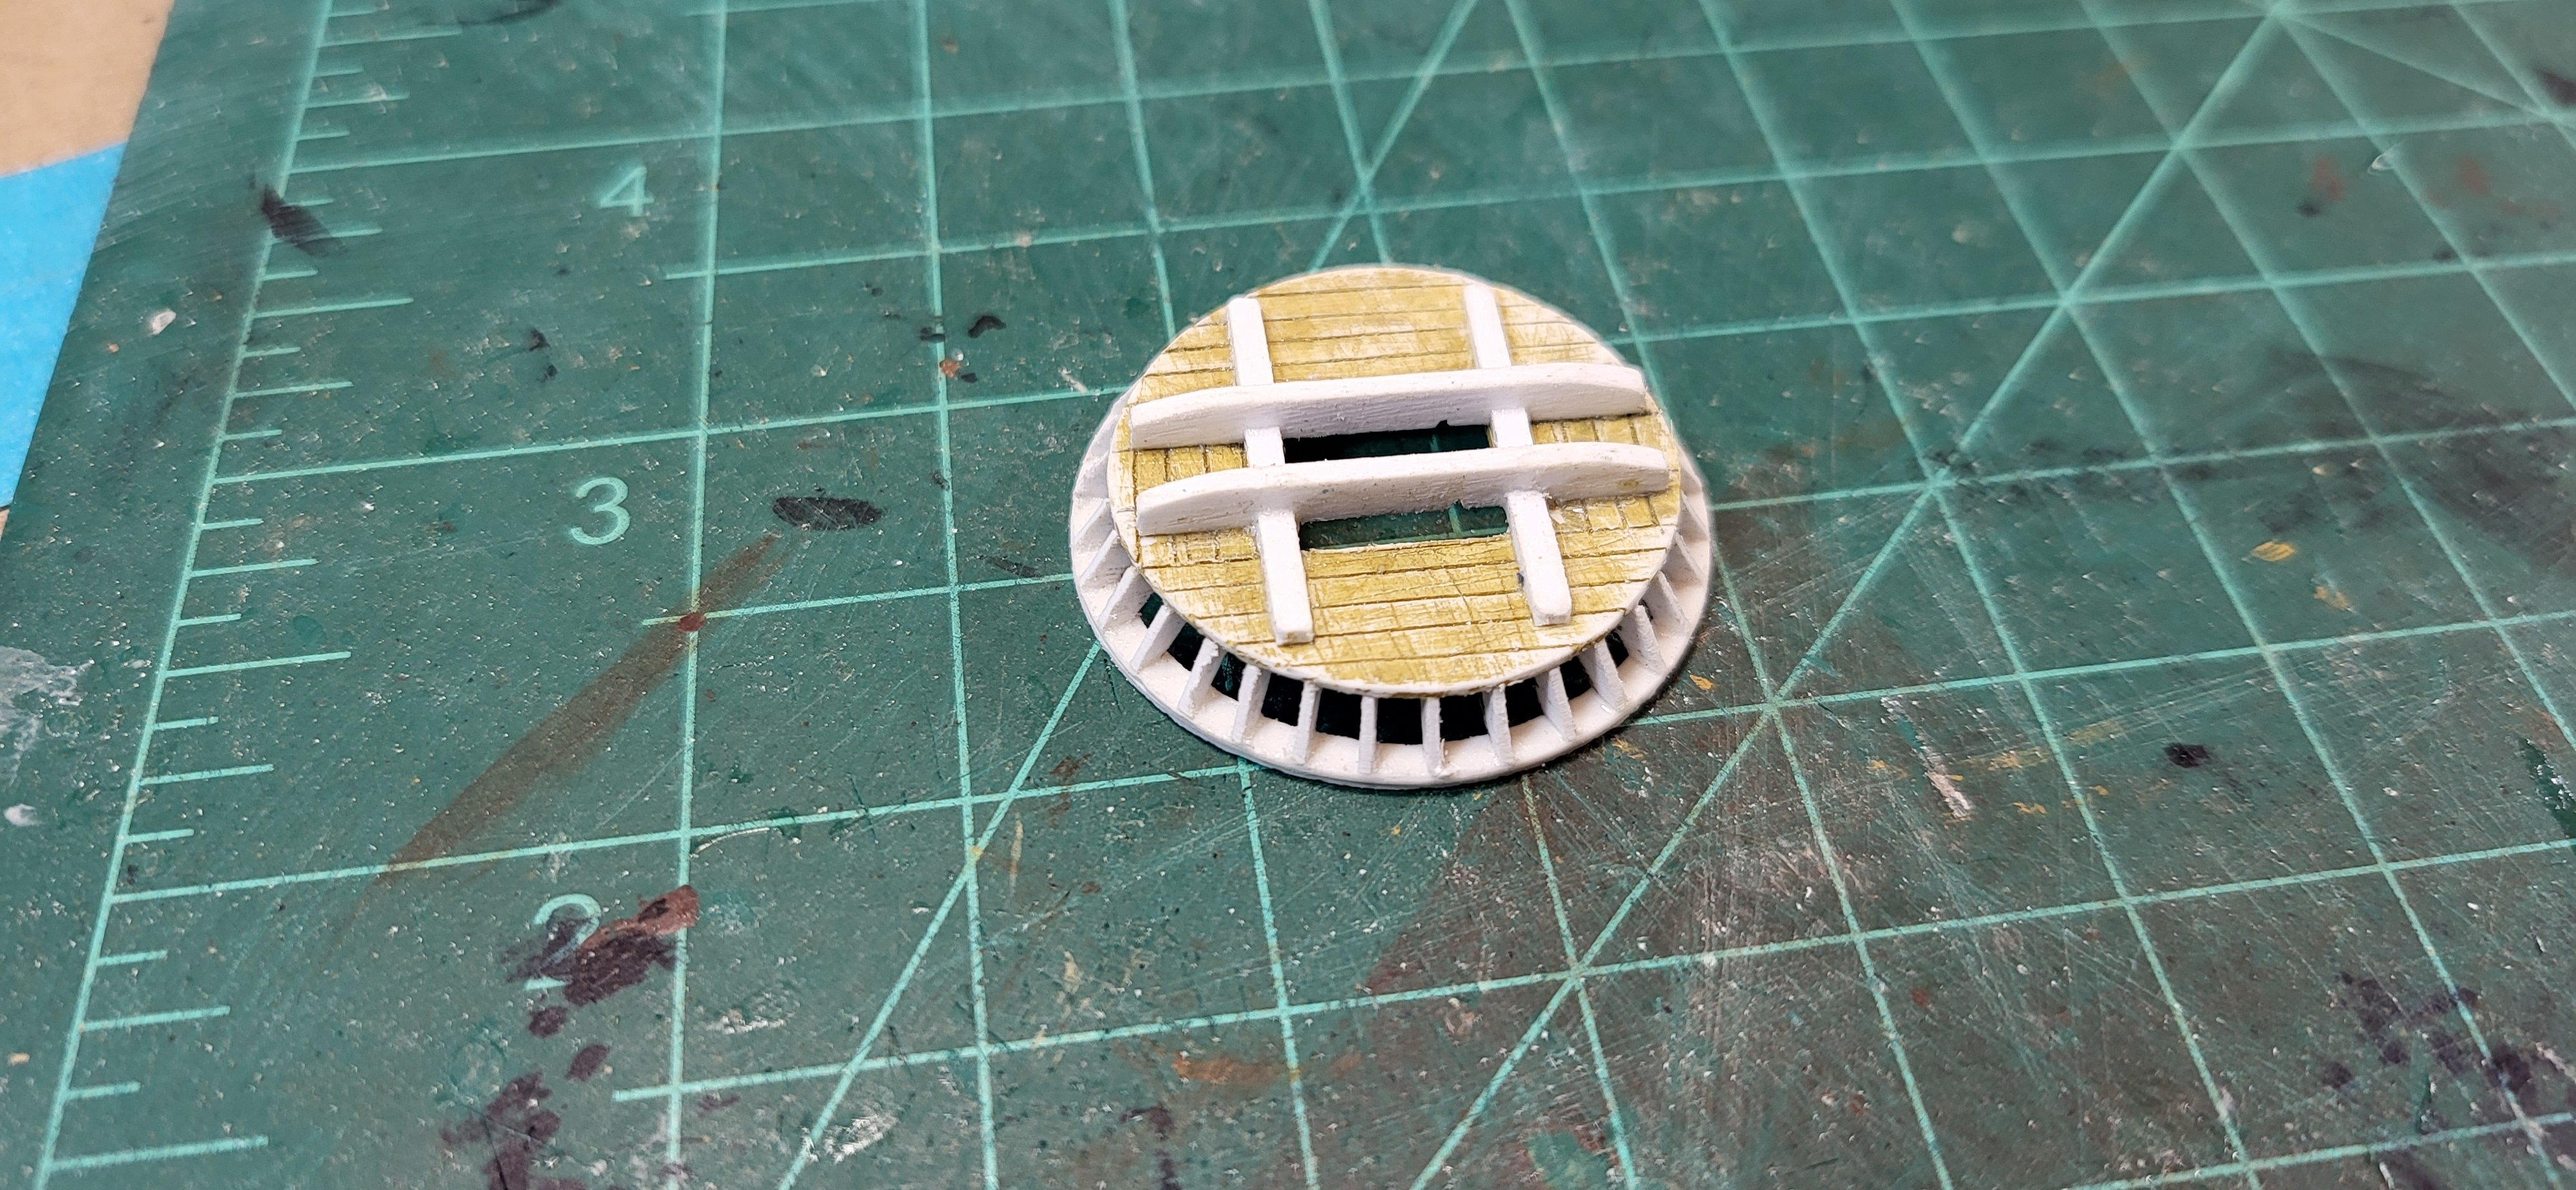
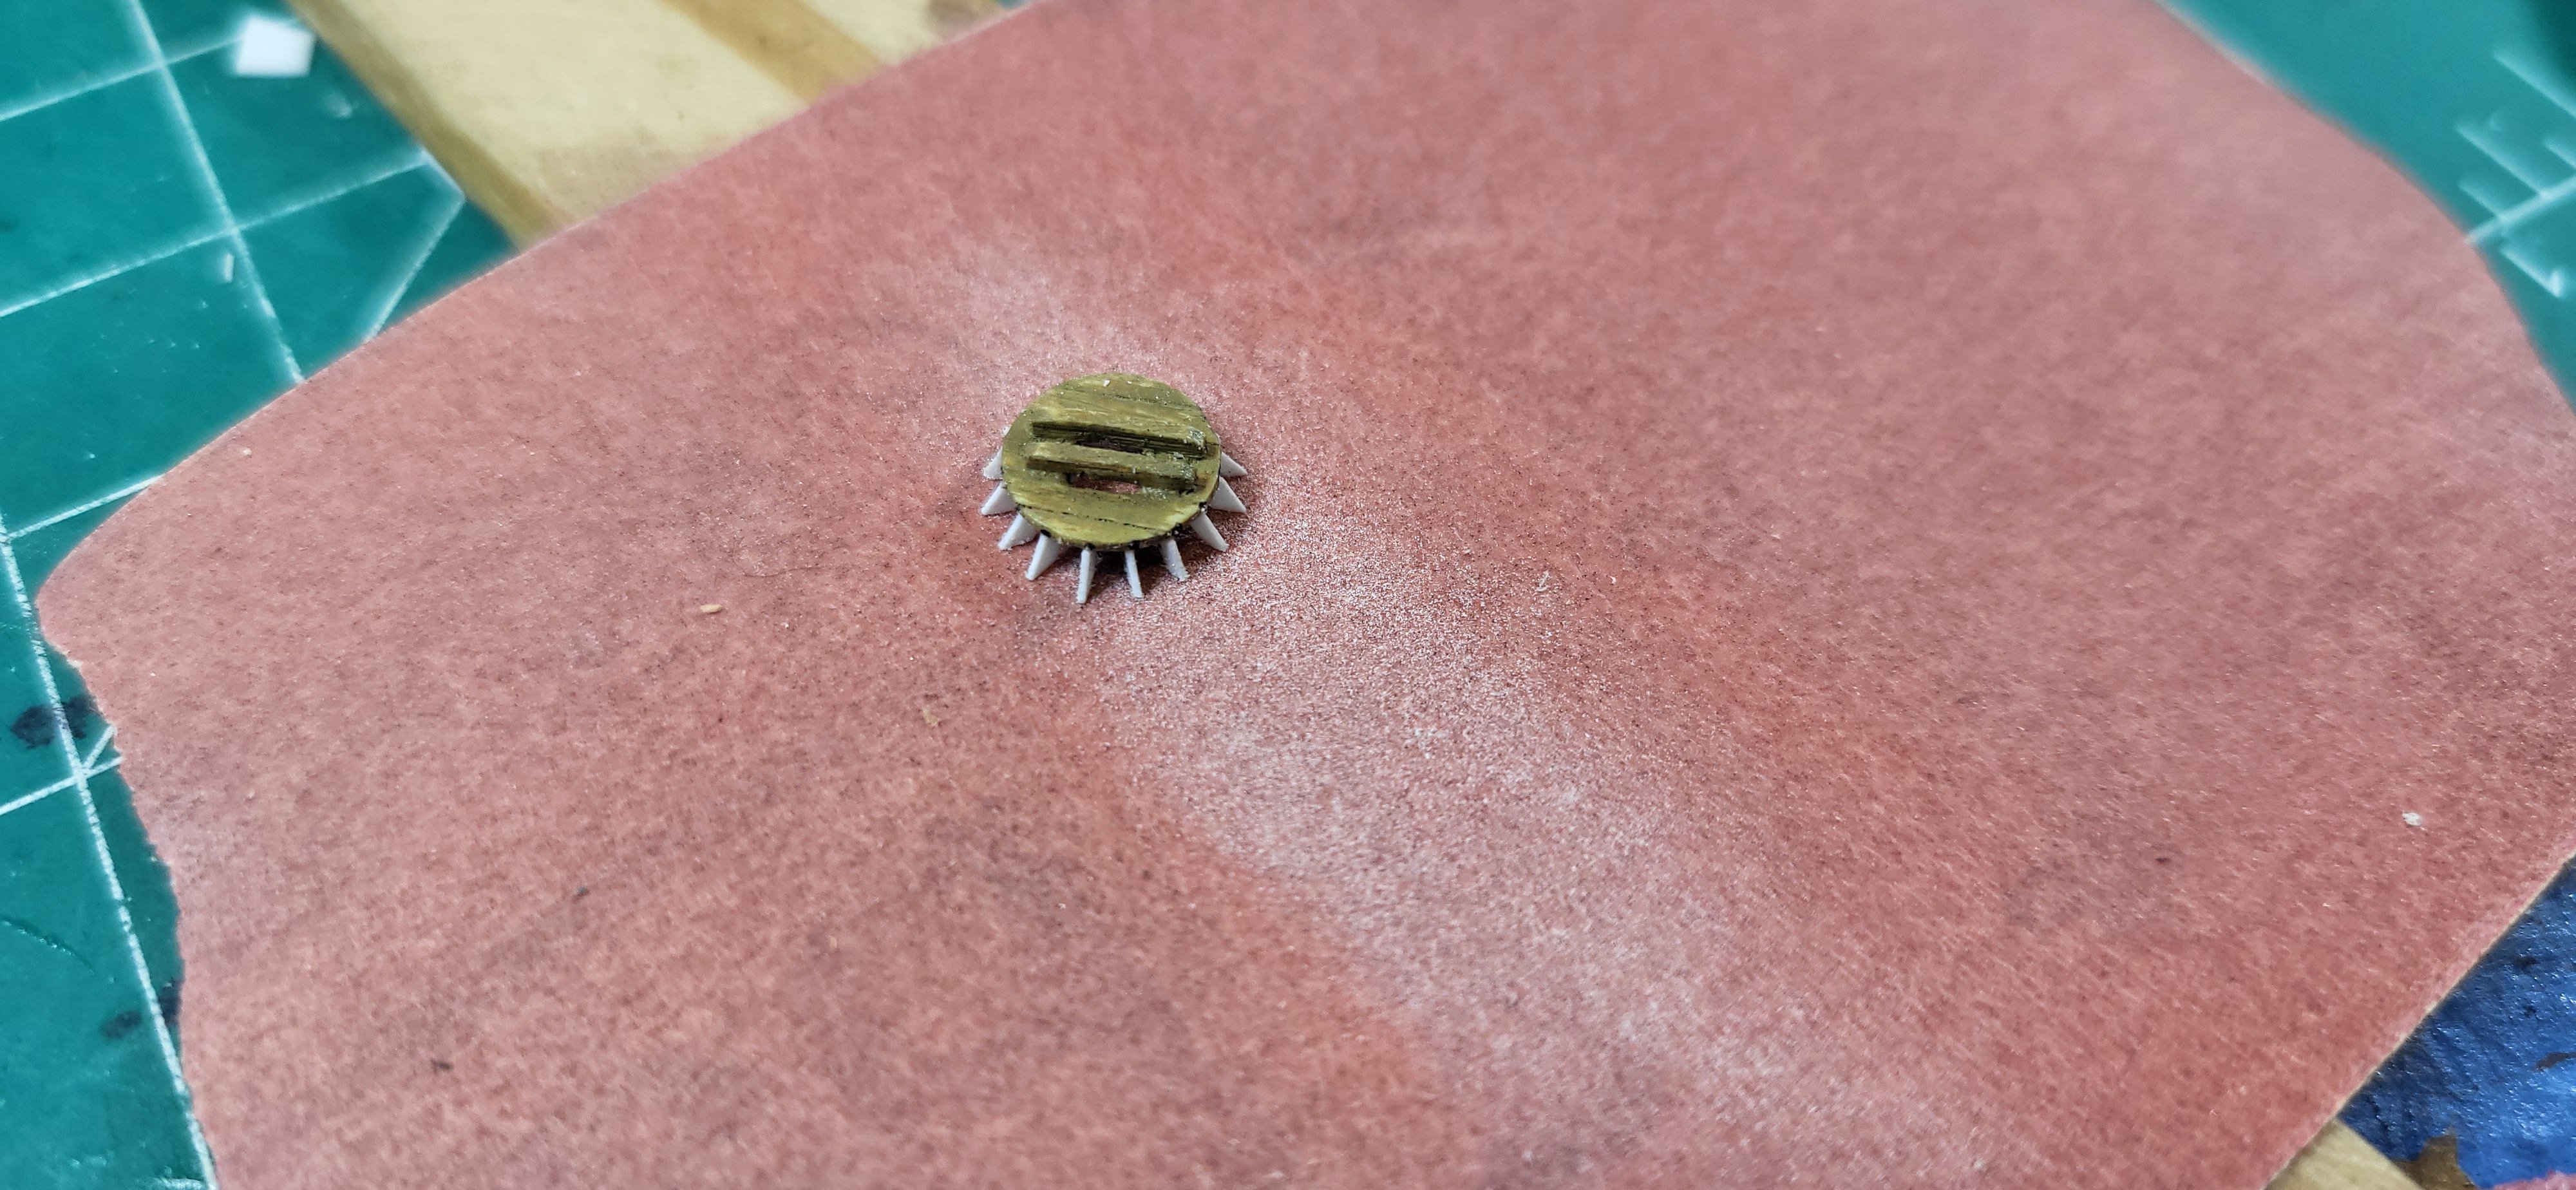
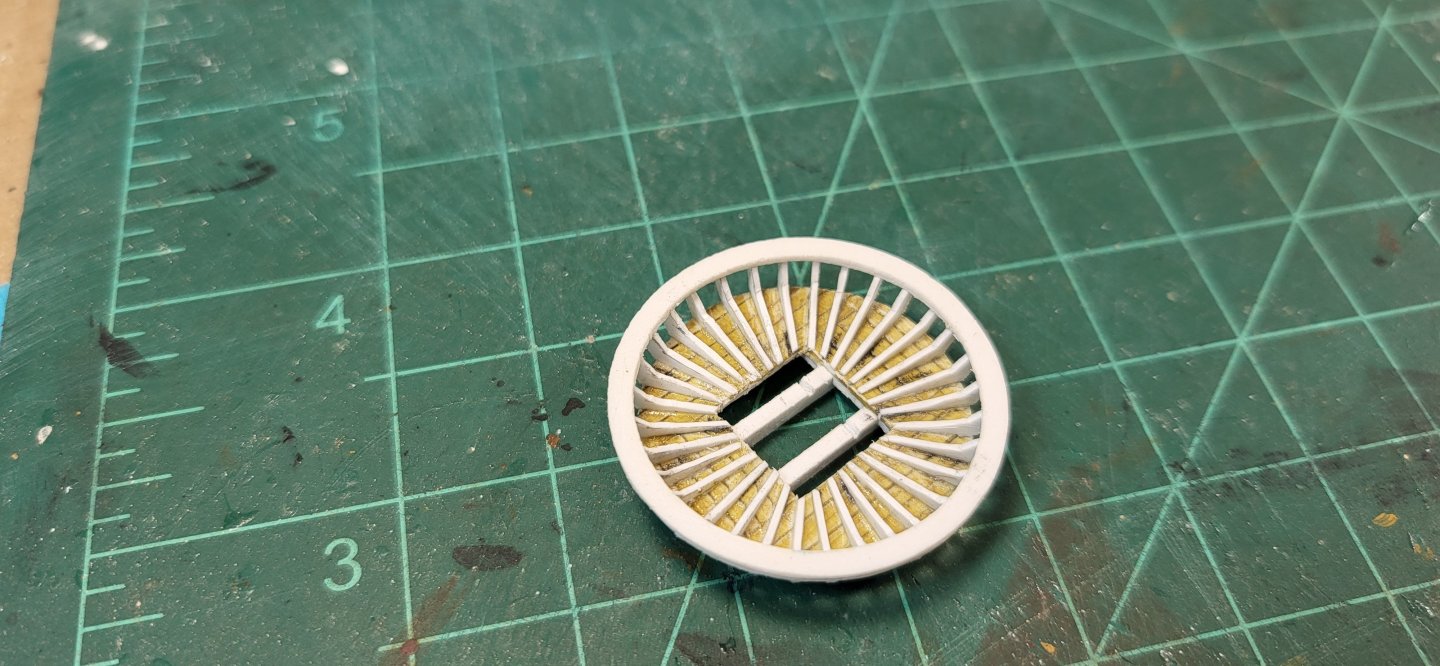
About 90% of the fore mast tops are complete with some detail sanding still left to do along with dead eyes, eye bolts and painting. On top of all this I still need to fabricate the trestle tree and flagpole, considering the scale I'm working at I think they look pretty good. Michael D.


- 324 replies
-
- 8
-
-
-
- Sovereign of the Seas
- Airfix
- (and 1 more)
-
Happy New Year to you too Frank, it does feel good. Have you started another project after your Vasa? All the likes are much appreciated. Michael D.
-
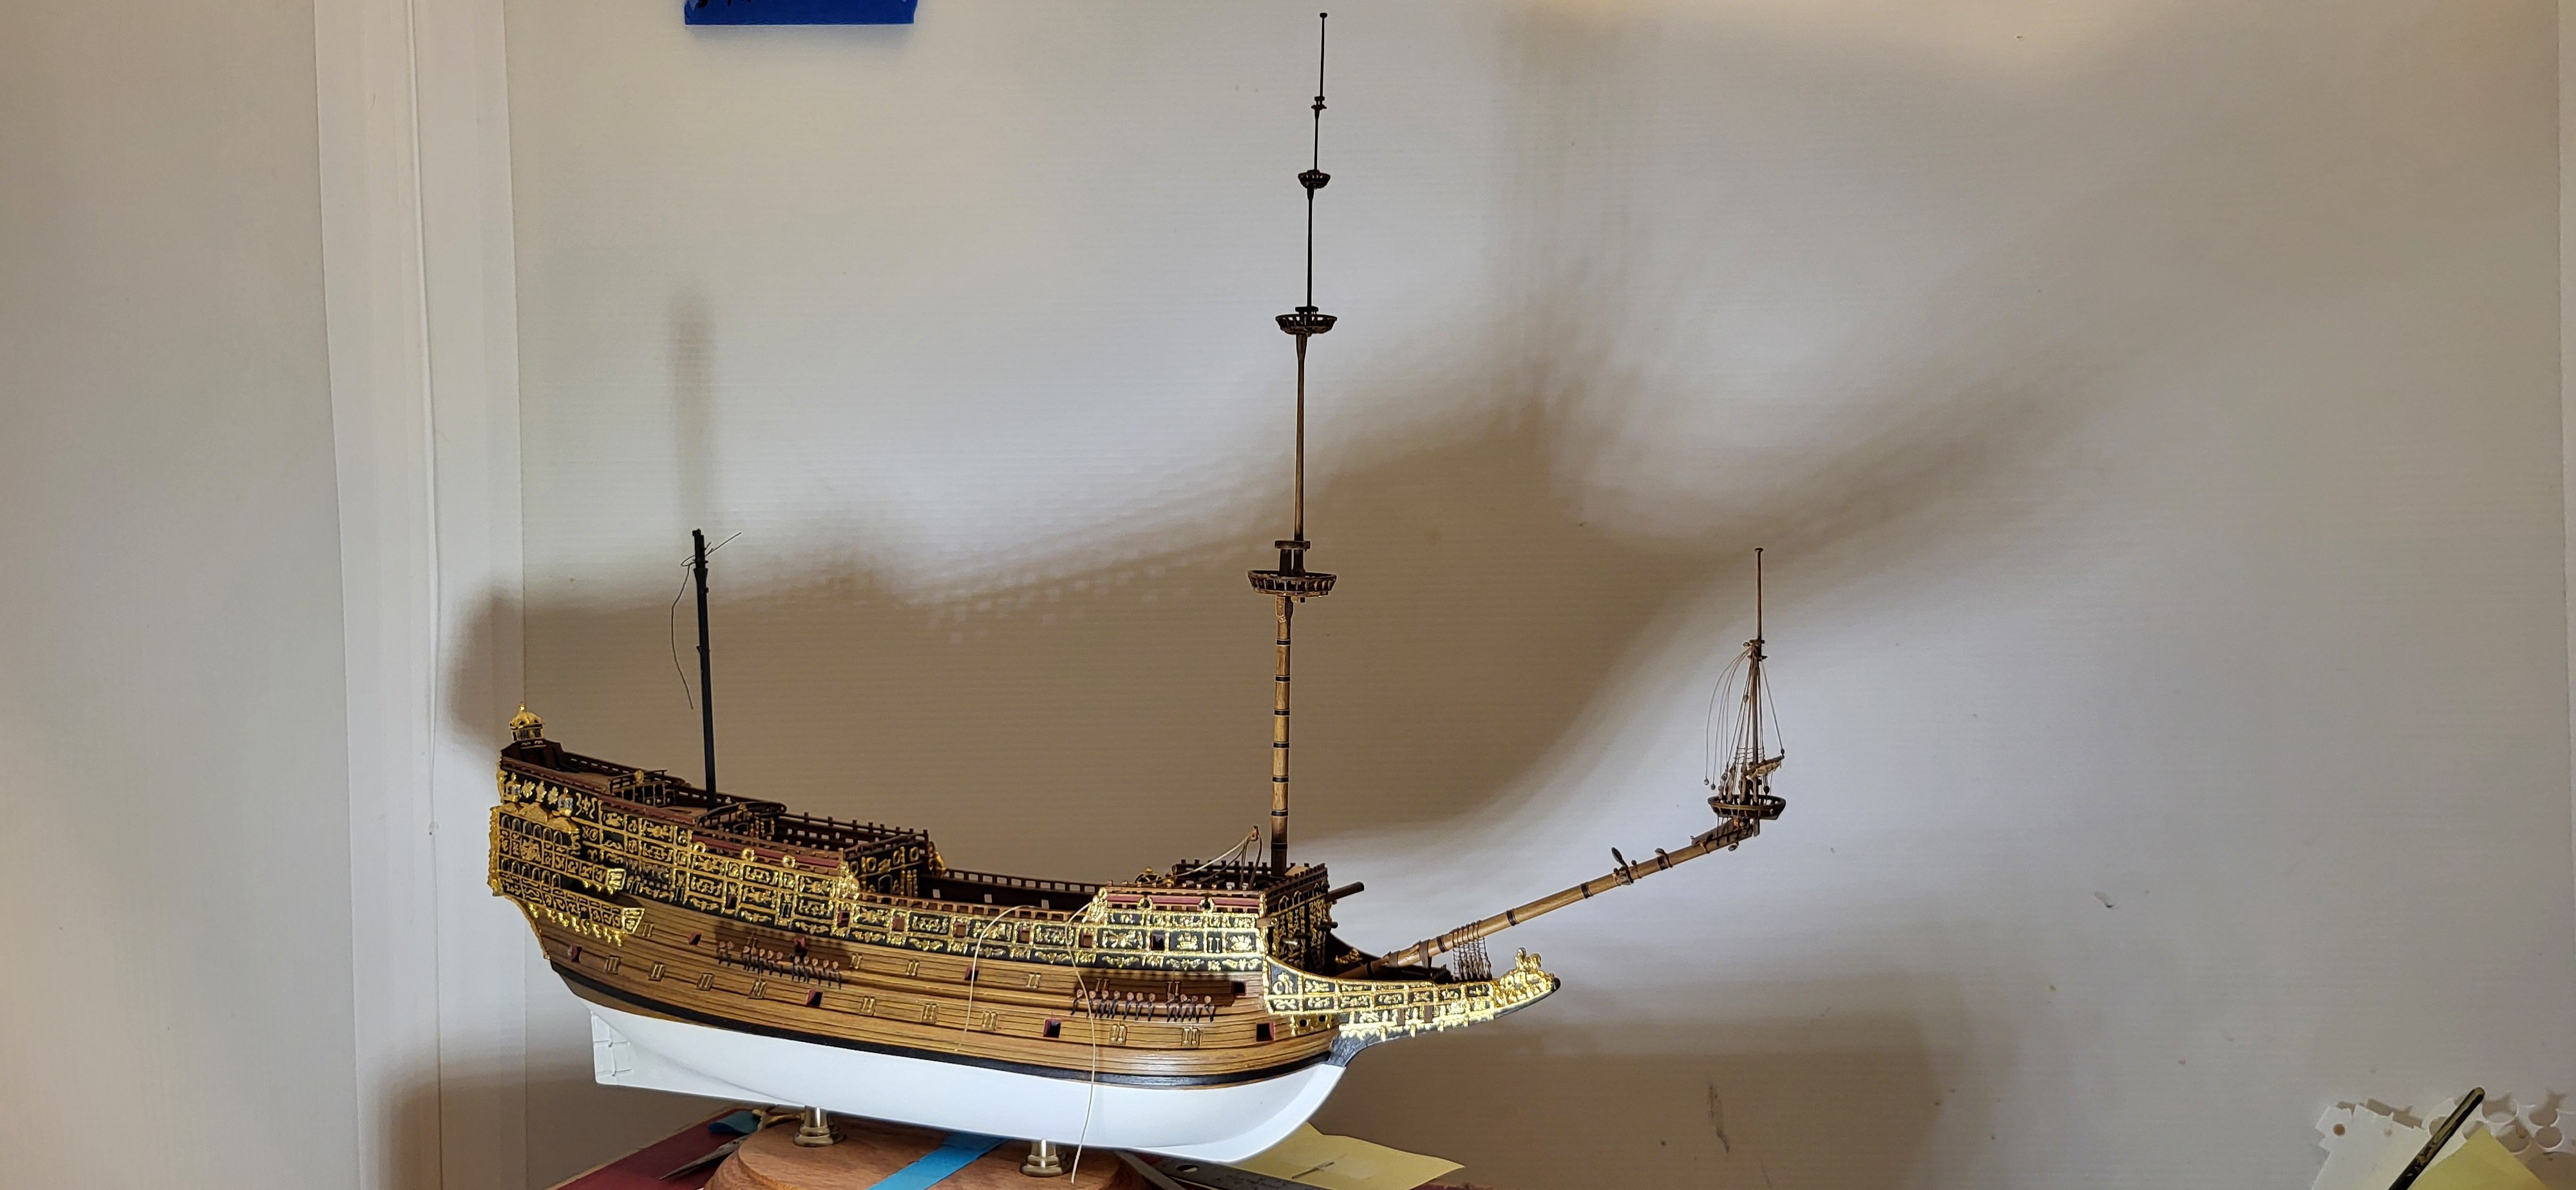
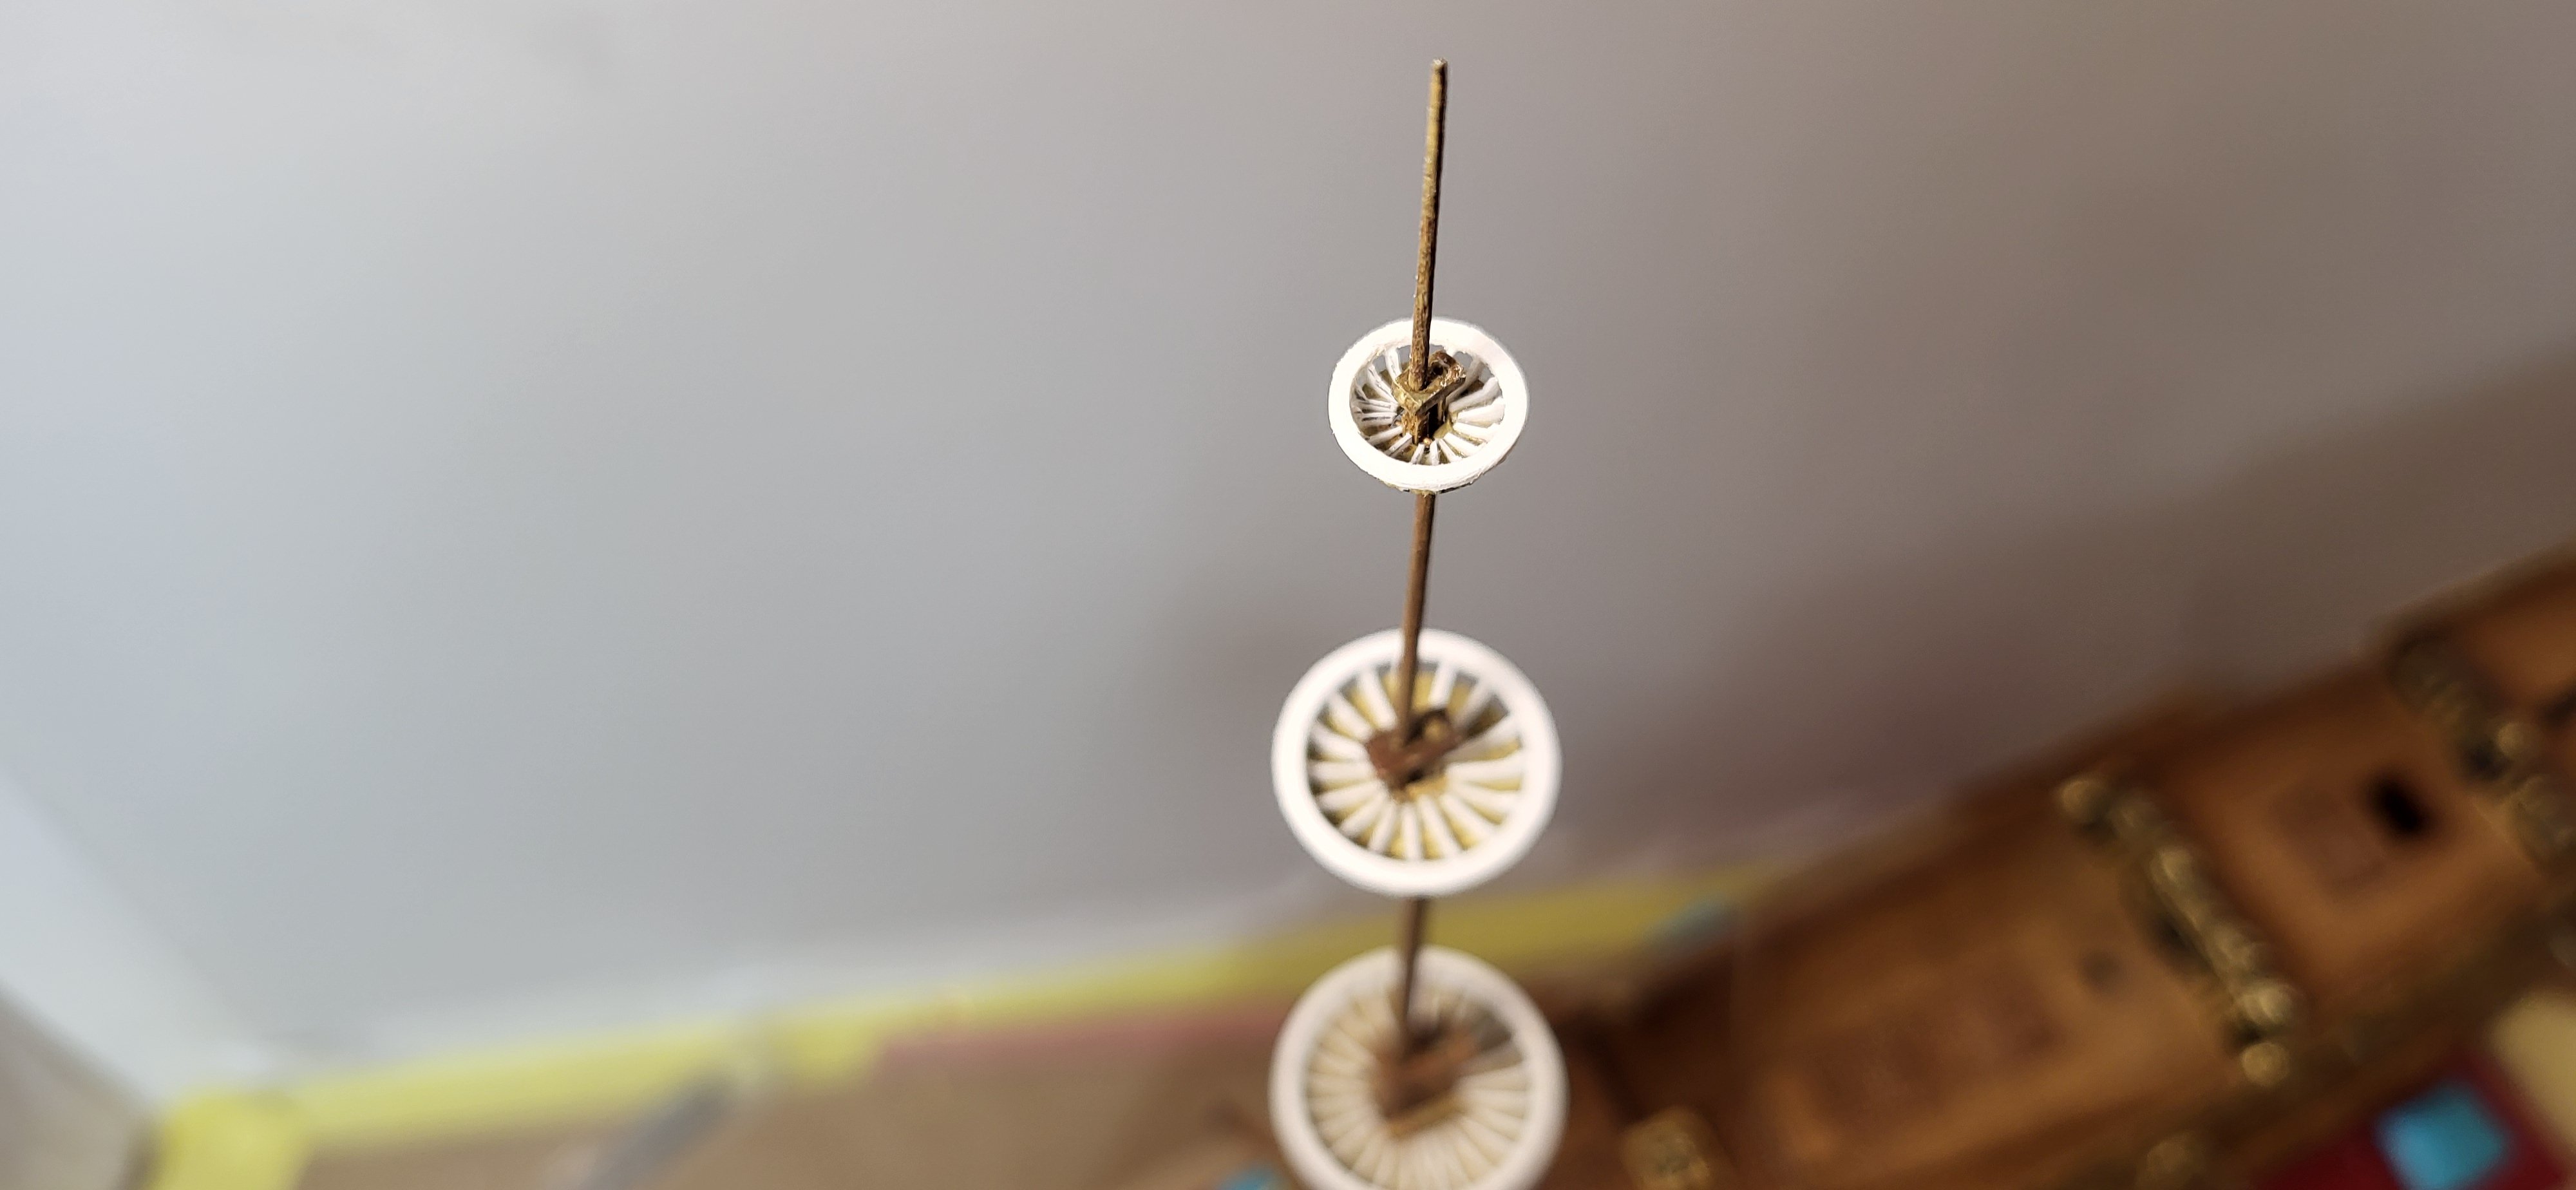
I've completed the fabrication of the topgallant and royal masts along with the associated top bases, these measurements are taken out of John McKay's book, this is all still in a very rough in stage at this point, fabricating the rest of the topgallant top will be especially challenging as the base only measures out to 8mm in dia = to approx. 4-1/2 ft at scale. Michael D.
- 324 replies
-
- 12
-
-
- Sovereign of the Seas
- Airfix
- (and 1 more)
-
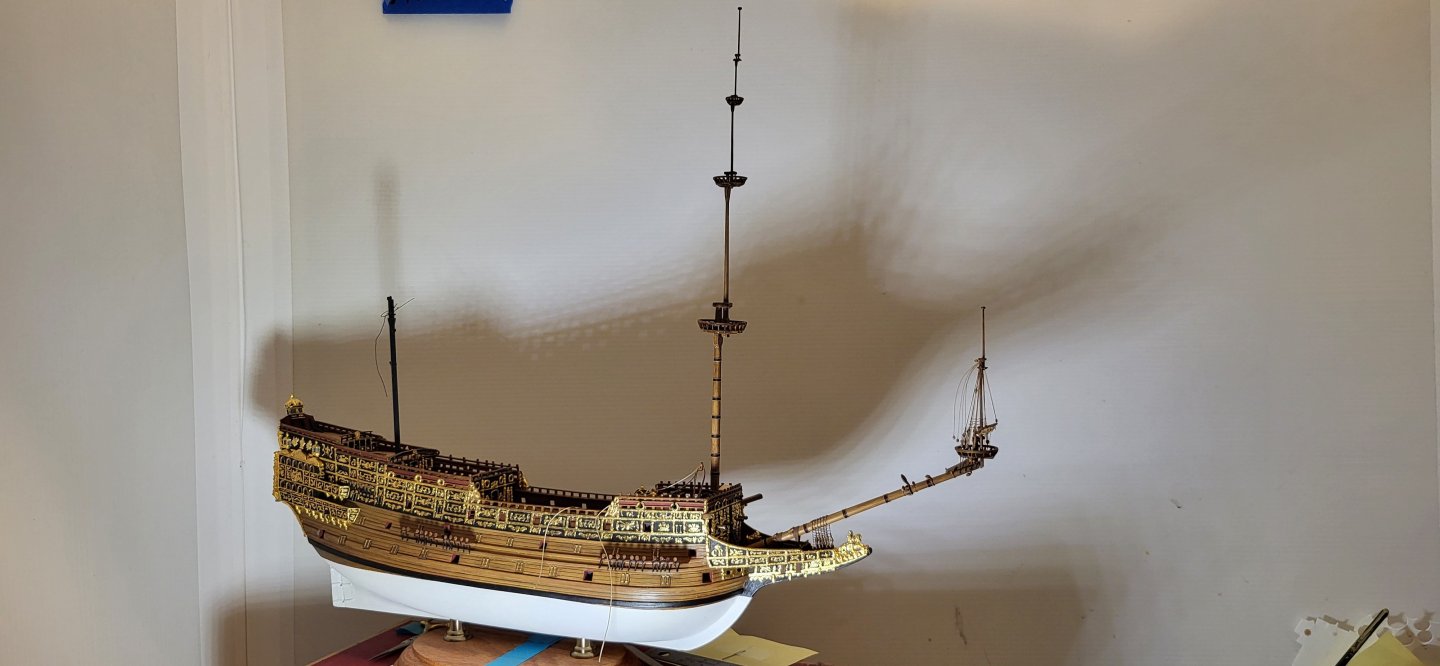
Hi all, after a short break I'm back on my S.O.S. In the last couple of days, I have completed the remaining port Fore lower dead eyes and chains, most of open gun port lids where the lower shrouds would hinder their installation afterwards, forecastle cannons in various stages with 2 of them completed, fabricated the 4 knightheads along the bulwarks and currently working the fore top and topmast with the goal of setting the fore mast assembly into the deck permanently real soon. Thanks for looking. Michael D.
- 324 replies
-
- 8
-
-
-
- Sovereign of the Seas
- Airfix
- (and 1 more)
-
Looks every bit as convincing as if it were made of wood, well done!!. Michael D.
- 146 replies
-
- 6
-
-
- Speeljacht
- Seahorse
- (and 2 more)
-
The starboard channels and lower dead eyes are completed along with the port Mizen chains and few cannon port lid ropes. Thanks for looking. Michael D.
- 324 replies
-
- 11
-
-
-
- Sovereign of the Seas
- Airfix
- (and 1 more)
-
With other projects under way, time has been limited on S.O.S but I was able to finish the main starboard channel, chains and dead eyes. Currently working the Mizen chains, I used a combination of flattened 24g copper and 28g copper to fabricate the chain, the dead eye measures out to 1.72mm, since there are no channels getting it so the shrouds clear the railing was a little tricky but I was able to make it work. Michael D.
- 324 replies
-
- 8
-
-

-
- Sovereign of the Seas
- Airfix
- (and 1 more)
-
The runner is hooked to an eye bolt and you are correct regarding the tackle. Michael D.
- 176 replies
-
- 1
-
-
- la reale de france
- heller
- (and 2 more)
-
Looking good, post #127 in my build log shows the runners. Michael D
-
Merci Beaucoup for the compliments Ian and Marc. Michael D.
-
The installation process for the tackle chain plates are different, I gave an explanation earlier but here's a visual to go along with it, the chain plate is led through a slot in the channel from above and the bolt fed through the hole and glued, then feed the bolt into the hull, as with the other chain plates I find no need to glue into the hull as the hole is drilled in a upward angle, the bolt is usually 1/4" to 3/8", snip off the extra with a cuticle cutter and touch up. Michael D. '
- 324 replies
-
- 10
-
-
-
- Sovereign of the Seas
- Airfix
- (and 1 more)
-
Moving along quickly, maybe too quick Michael, with your skill set improving I'd like to see you spend a few extra minutes detailing each part, like scraping away the casting ridges, filling sink holes and finishing up with a light pass of some fine sandpaper, you'd be surprised the difference it makes! Shes looking great so far👍 Michael D.
- 176 replies
-
- 2
-
-
-
- la reale de france
- heller
- (and 2 more)
-
Slow going on the fore channel but happy with the results thus far. After the wire is flattened and the bolt glued on and trimmed, I set it in the hull and bend it up against the channel then mark the cut line with black paint, cut and test fit, then paint and install. Thanks for your continued observation and likes. I had mentioned in the last post the size of the dead eyes which equates to 13" in dimeter at scale. Michael D.
- 324 replies
-
- 9
-
-
-
- Sovereign of the Seas
- Airfix
- (and 1 more)
-
You're welcome, I had the same issue, I rolled up couple of micro fiber towels to lean the hull up against, this actually gave me a better working angle. Michael D.
- 176 replies
-
- 1
-
-
- la reale de france
- heller
- (and 2 more)
-
Michael, Your skill set is vastly improving with each build👍 The challenge with this build is staying the course, there's just so much to do on each phase i.e.: painting, the numerous seats, supports for the outer decks, oars and their detailing etc, it gets monotonous at times like constantly tying ratlines. Michael D.
- 176 replies
-
- 1
-
-
- la reale de france
- heller
- (and 2 more)
-
Hi Ferrus, My railings looked much like yours and I used them, setting the posts is obviously the most crucial phase, just spend some time making sure they're plumb while,(most importantly) checking the line of sight along the edge to make sure they line up straight, then your railings will straighten out as you glue them to the posts, I glued a few at a time while working my way from one end to the other. Looking forward to seeing her take shape. Michael D.
- 176 replies
-
- 1
-
-
- la reale de france
- heller
- (and 2 more)
-
I haven't had much time for my S.O.S lately with home renovations going on but figured I'd post a small update, the catheads are finally completed and currently working on the starboard fore channels, the deadeyes measure out to just under 2mm and are stropped with thread, the chain plates are flattened 28g copper wire, the assembly process as follows, with the channels off the ship I'll glue the deadeyes into the notch and fold a short pigtail of the strop underneath and glue, next secure the channels to the hull and feed the chainplates for the tackles thru the channel from the top and secure with a length of copper wire to simulate the bolt/spike then cut somewhat flush with a cuticle cutter and lastly the deadeye chainplates with the bolt already attached will be fitted into the hull and the upper part will be glued into the remaining notch covering the deadeye strop. Thanks for your continued likes. Michael D.
- 324 replies
-
- 14
-
-
-
- Sovereign of the Seas
- Airfix
- (and 1 more)
-
Firdajan I just marvel at your work and the fact Its a card model is simply astonishing, just beautiful!! Michael D.
-
Thank you for the kind comment Jan, I follow your work and I'm equally in awe as well👍 Michael D.
- 324 replies
-
- 1
-
-
- Sovereign of the Seas
- Airfix
- (and 1 more)
-
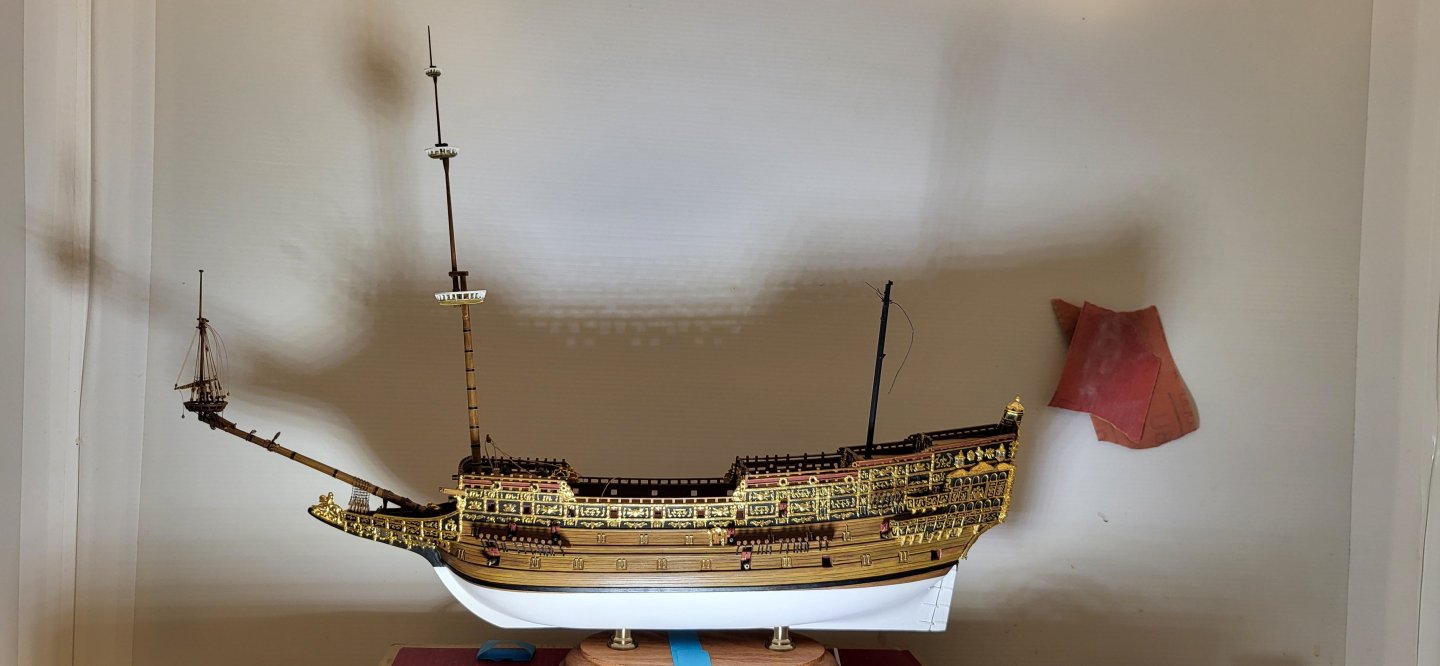
The bulkhead is nearing completion with the catheads, gilding touch ups and some minor details, I'll focus on the channels next along with the fore topmast. Michael D.
- 324 replies
-
- 11
-
-
-
- Sovereign of the Seas
- Airfix
- (and 1 more)