72Nova
-
Posts
675 -
Joined
-
Last visited
Content Type
Profiles
Forums
Gallery
Events
Everything posted by 72Nova
-
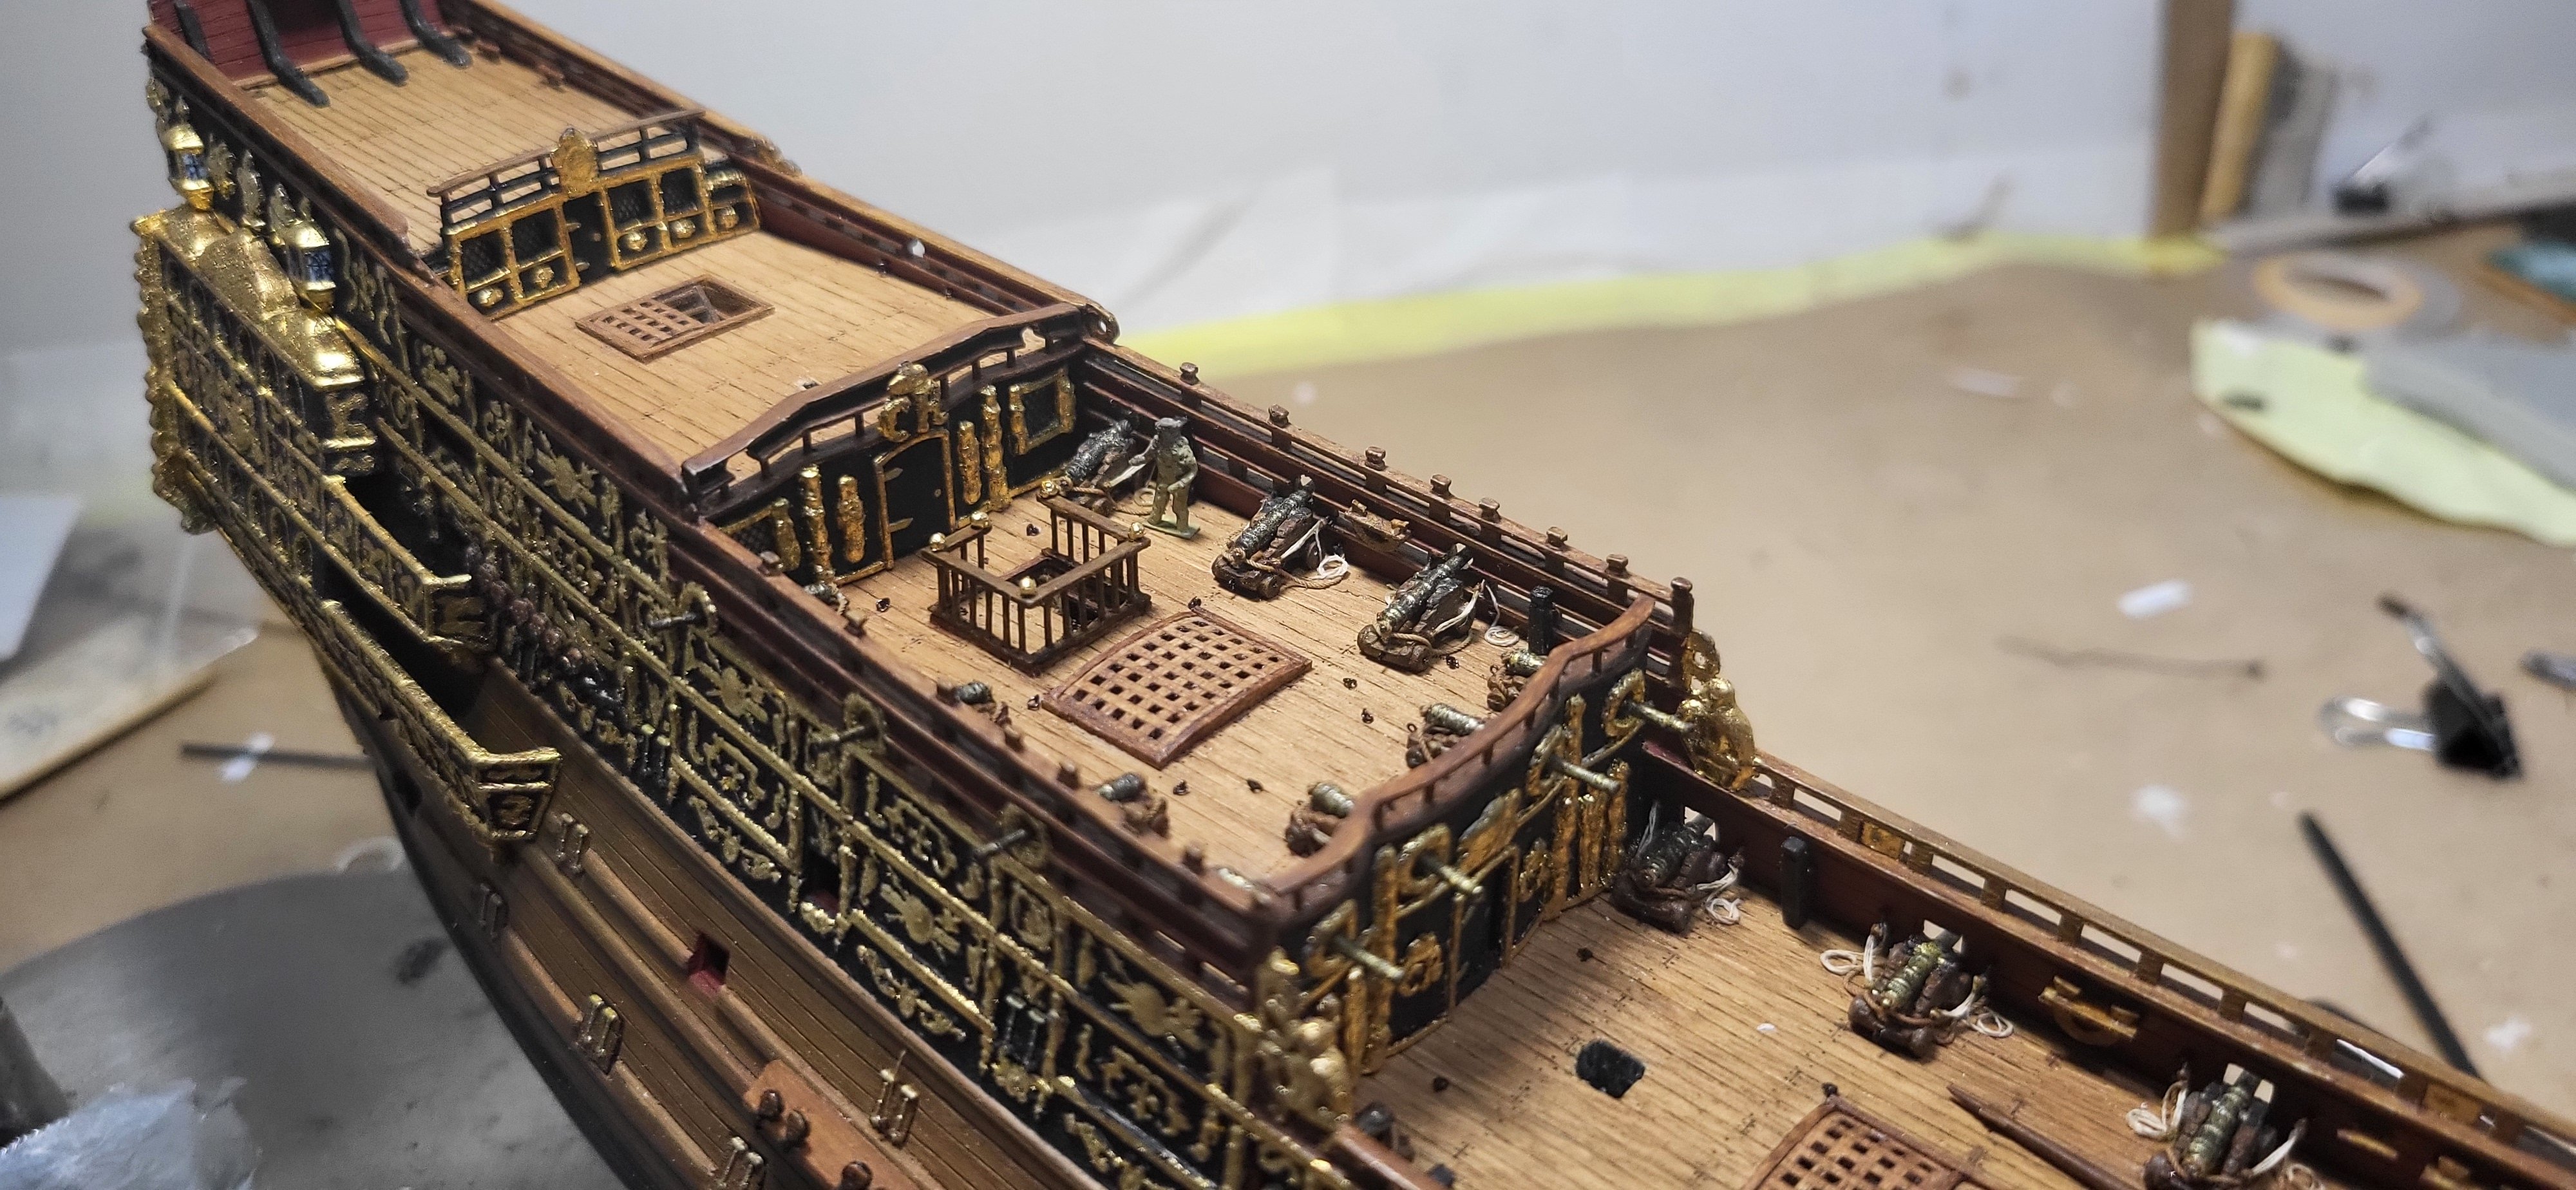
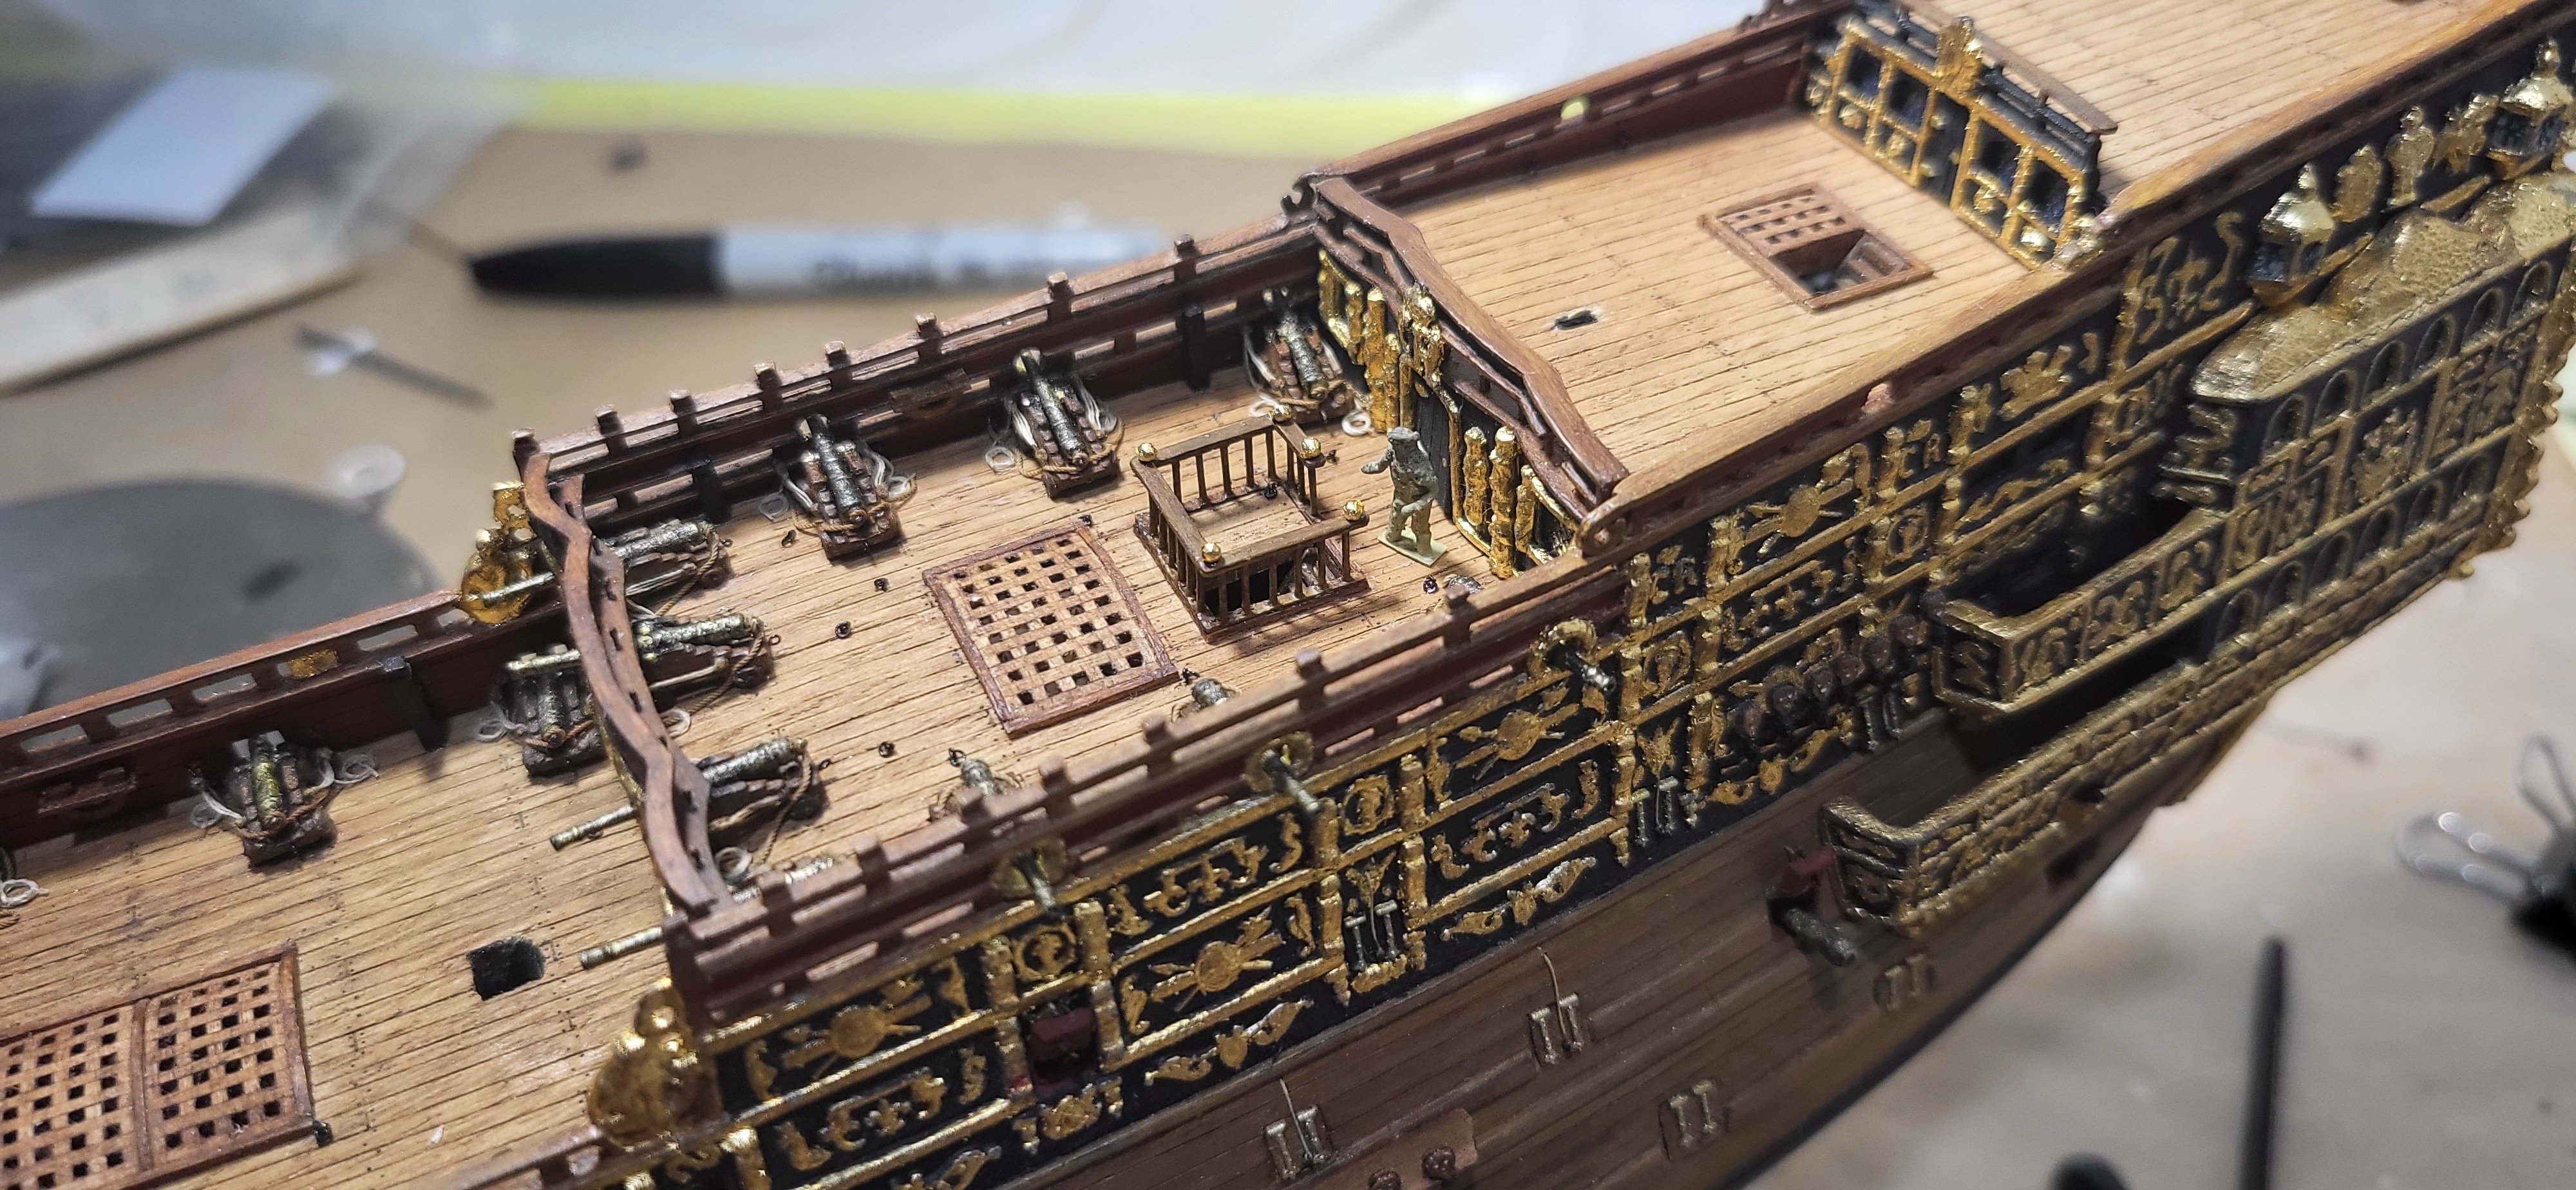
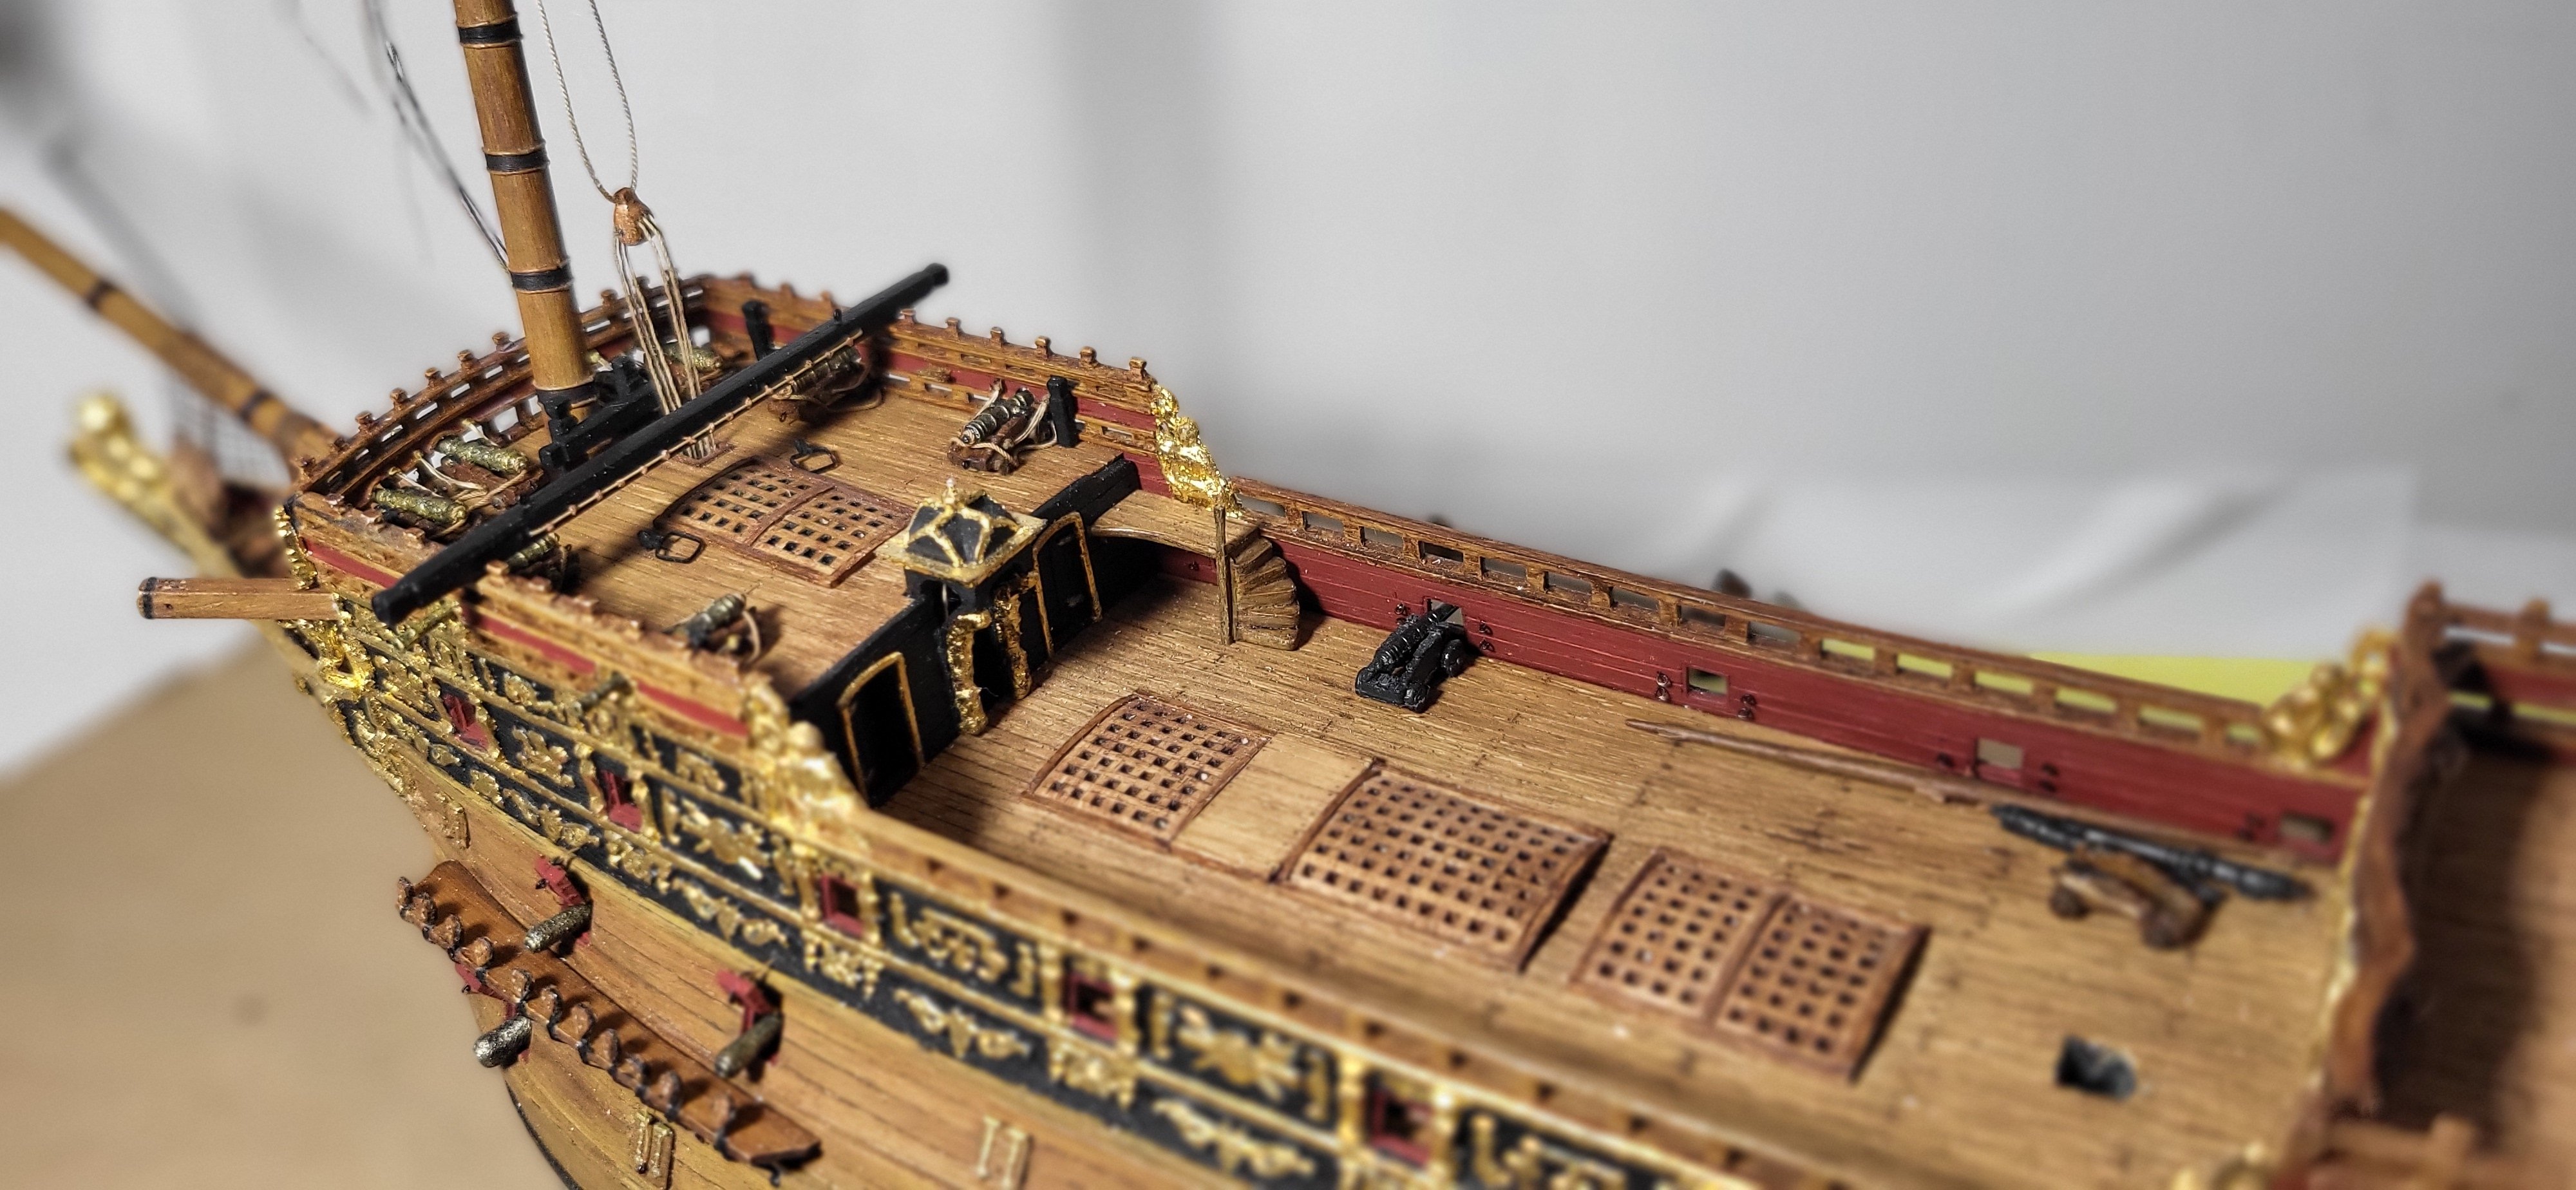
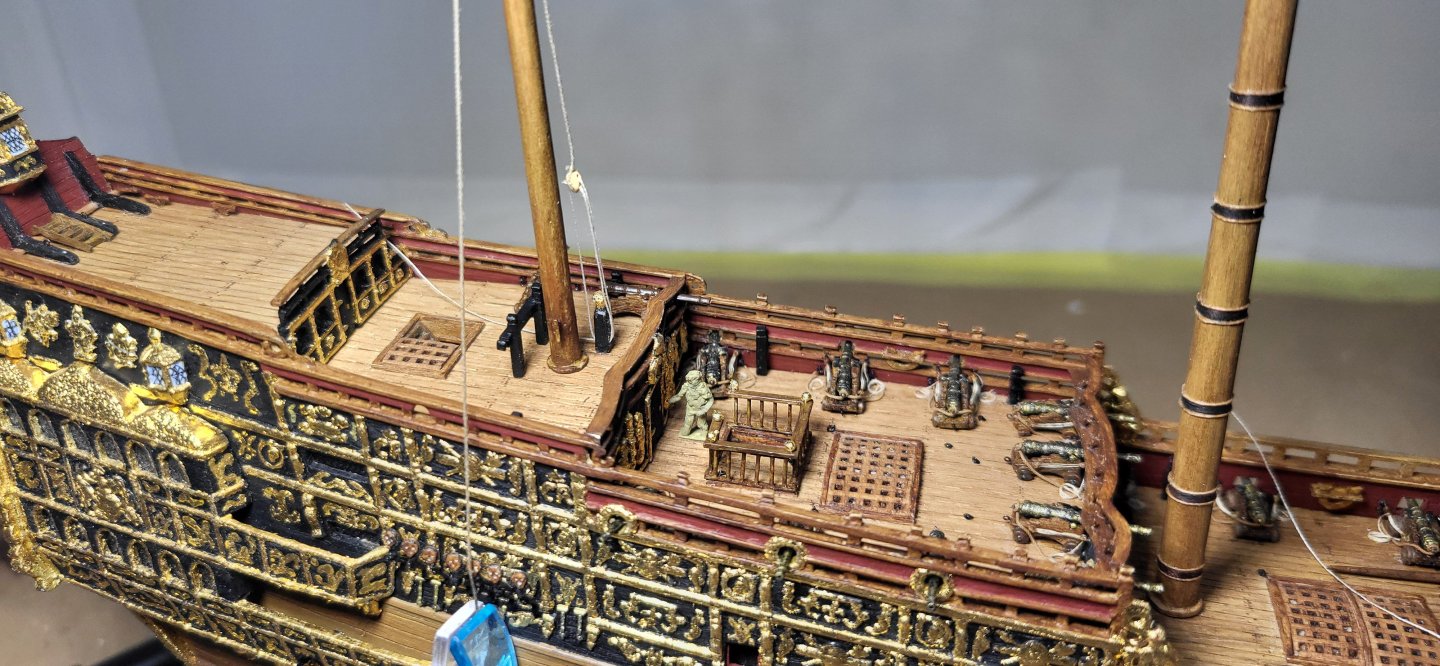
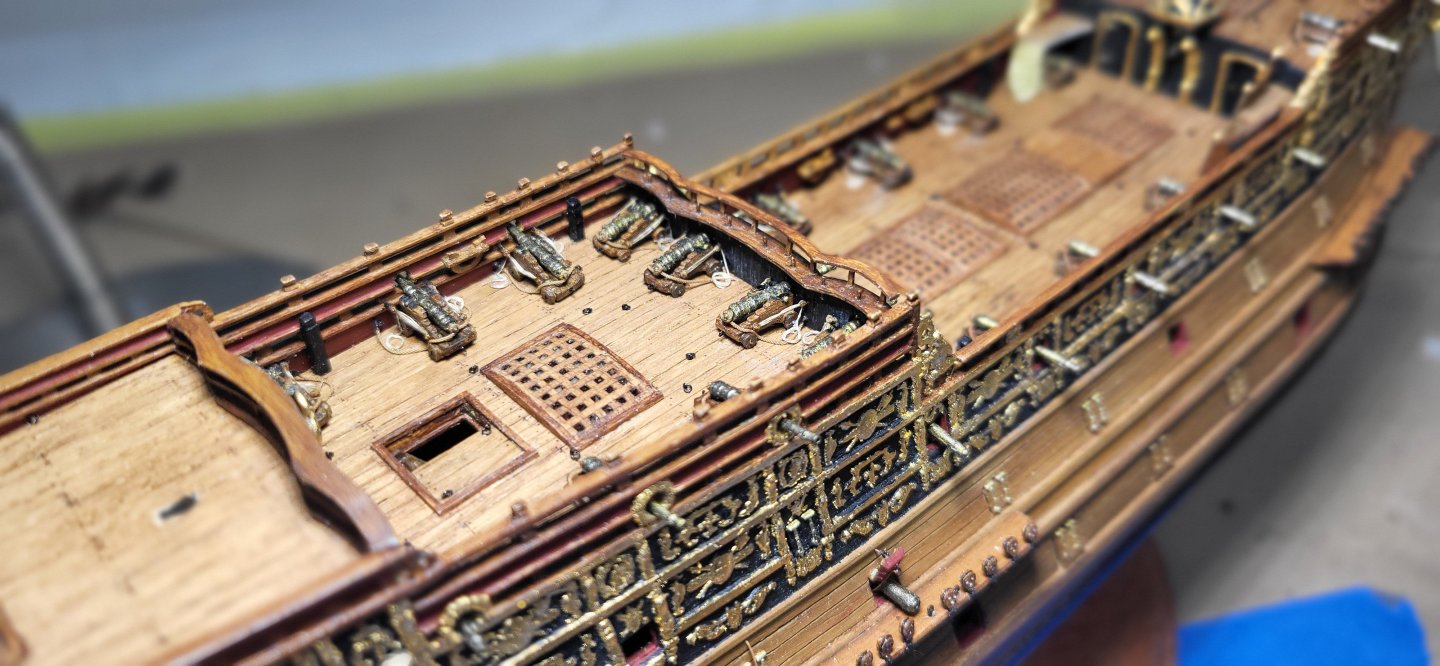
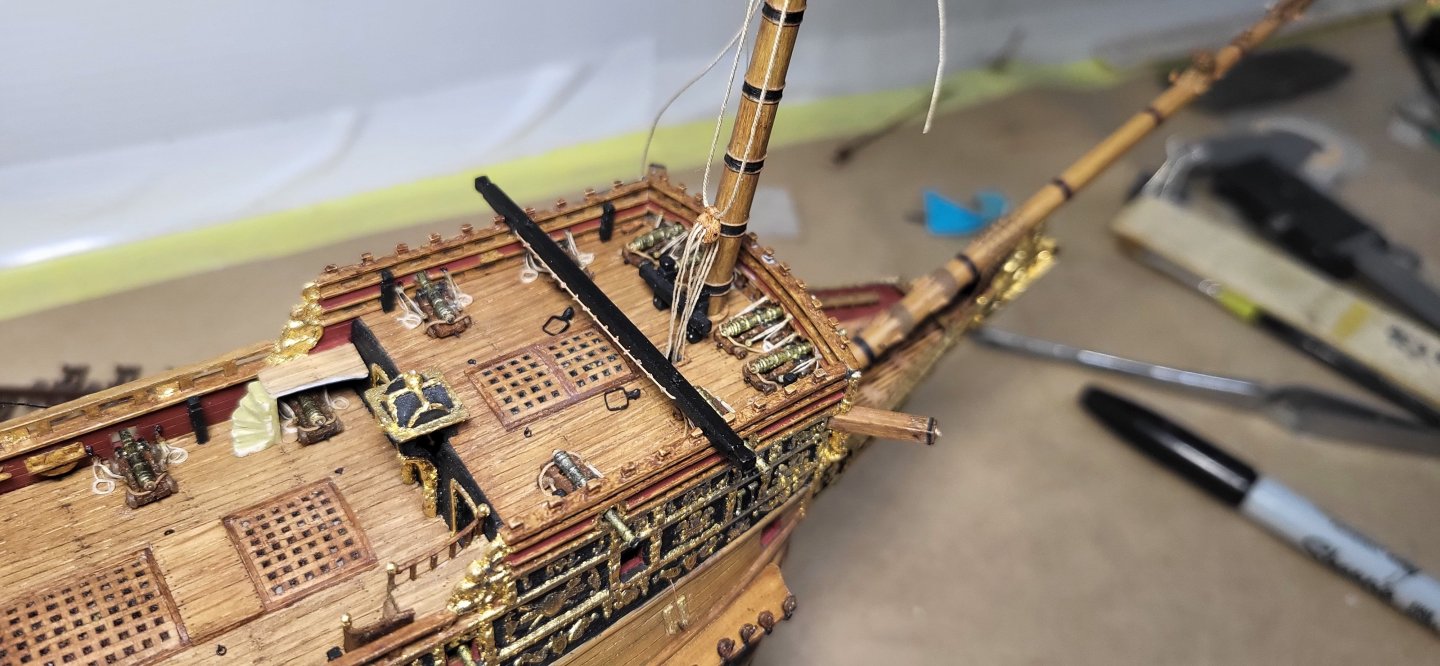
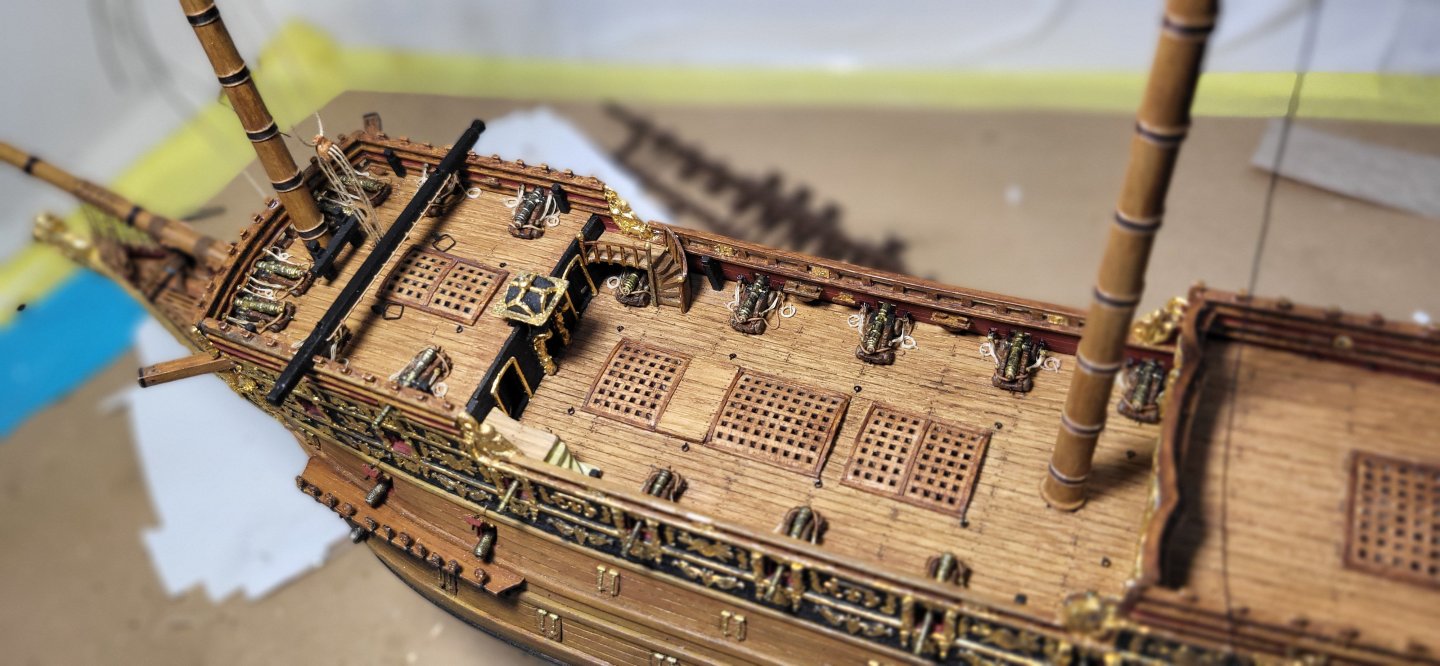
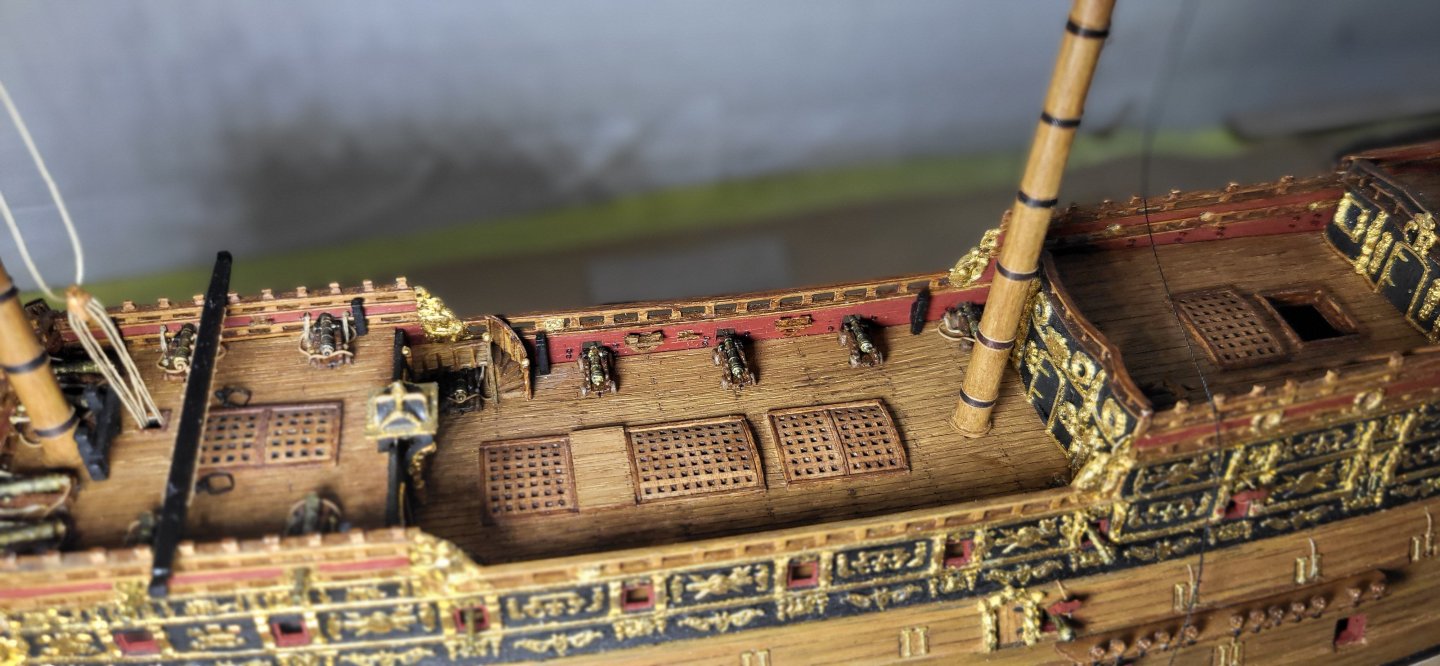
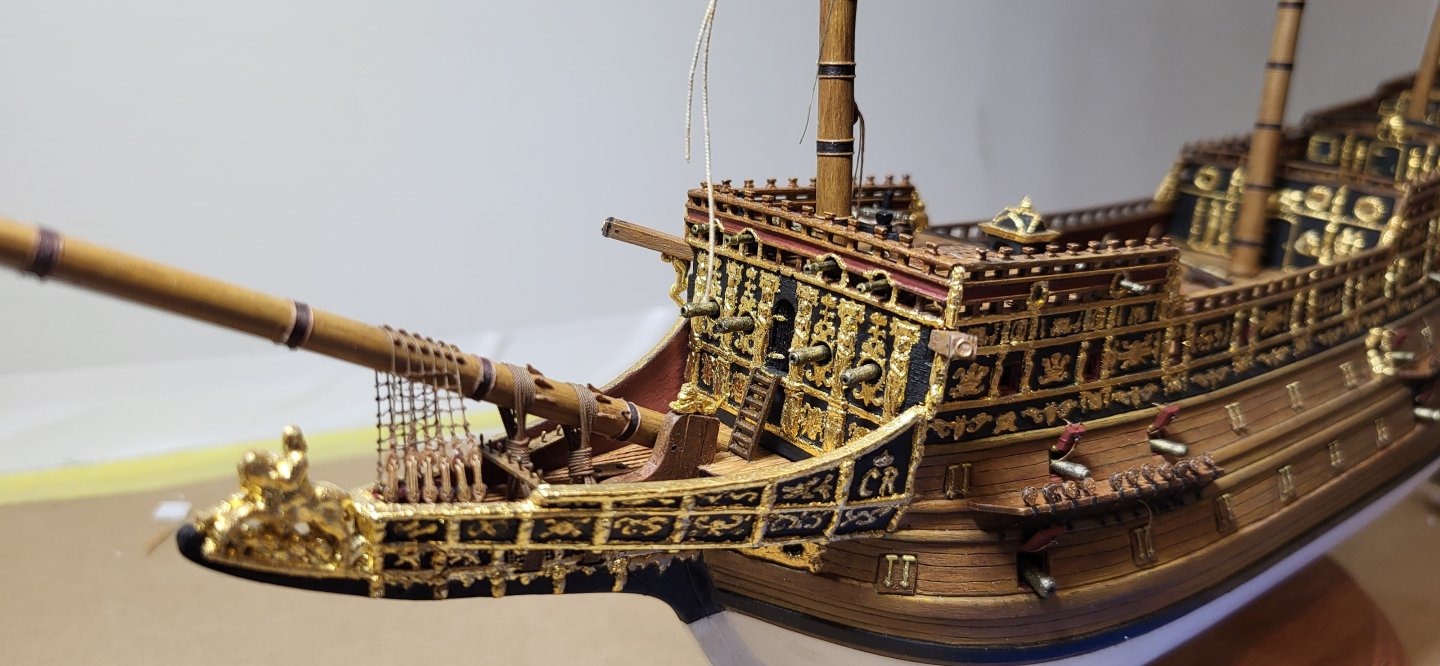
 Work is continuing on the upper Qtr deck, added more cavals, the mizen bits, the knighthead for the tie, mocking up the run of the tie and Hilliard and trial fitting the cannons, still much more work left to do in this area. Michael D.
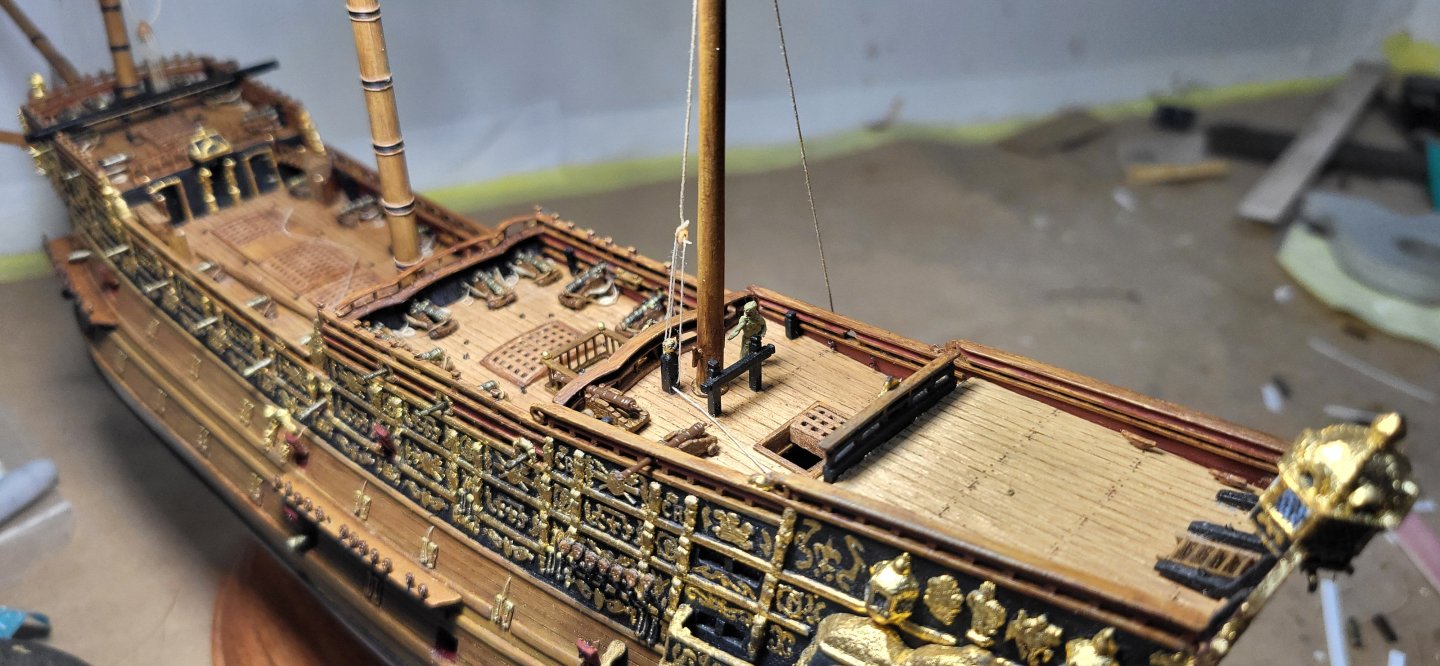
- 324 replies
-
- 12
-

-

-
- Sovereign of the Seas
- Airfix
- (and 1 more)
-
Great work, love it 👍 Michael D
-
It was my pleasure John, just glad you were able to make it work they look great. Last year the wife and I did the San Salvador tour out of San Diego Bay, while it wasn't open water, it was exhilarating being on a replica 16th century ship helping asisst in setting the fore topmast sail, quite the 45min experience. Michael D
-
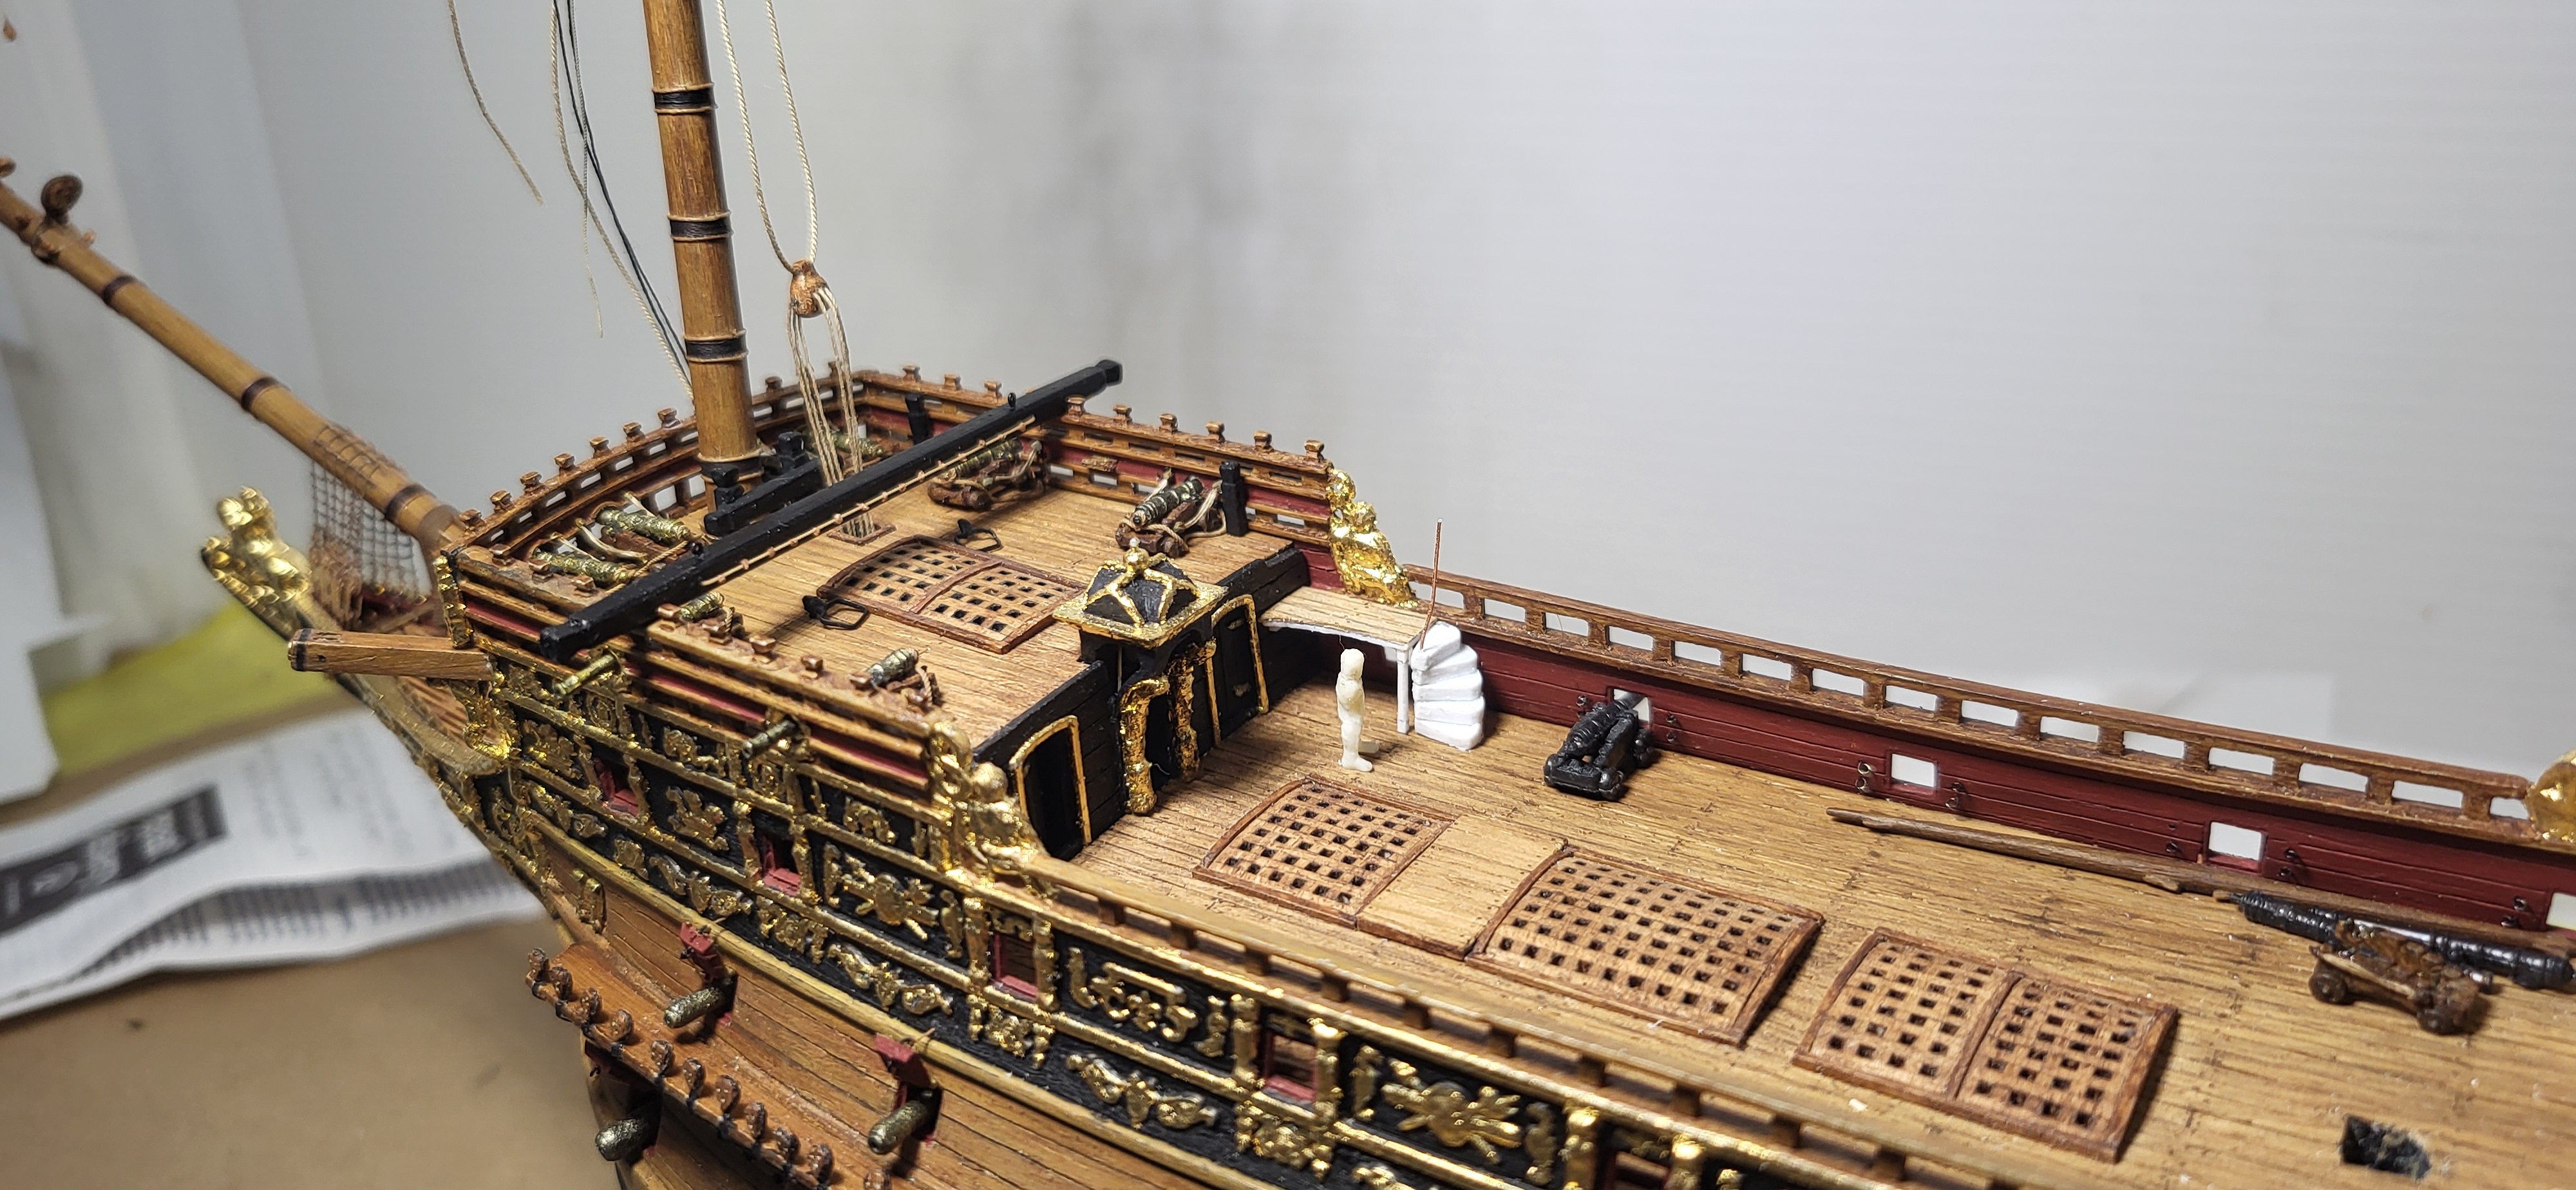
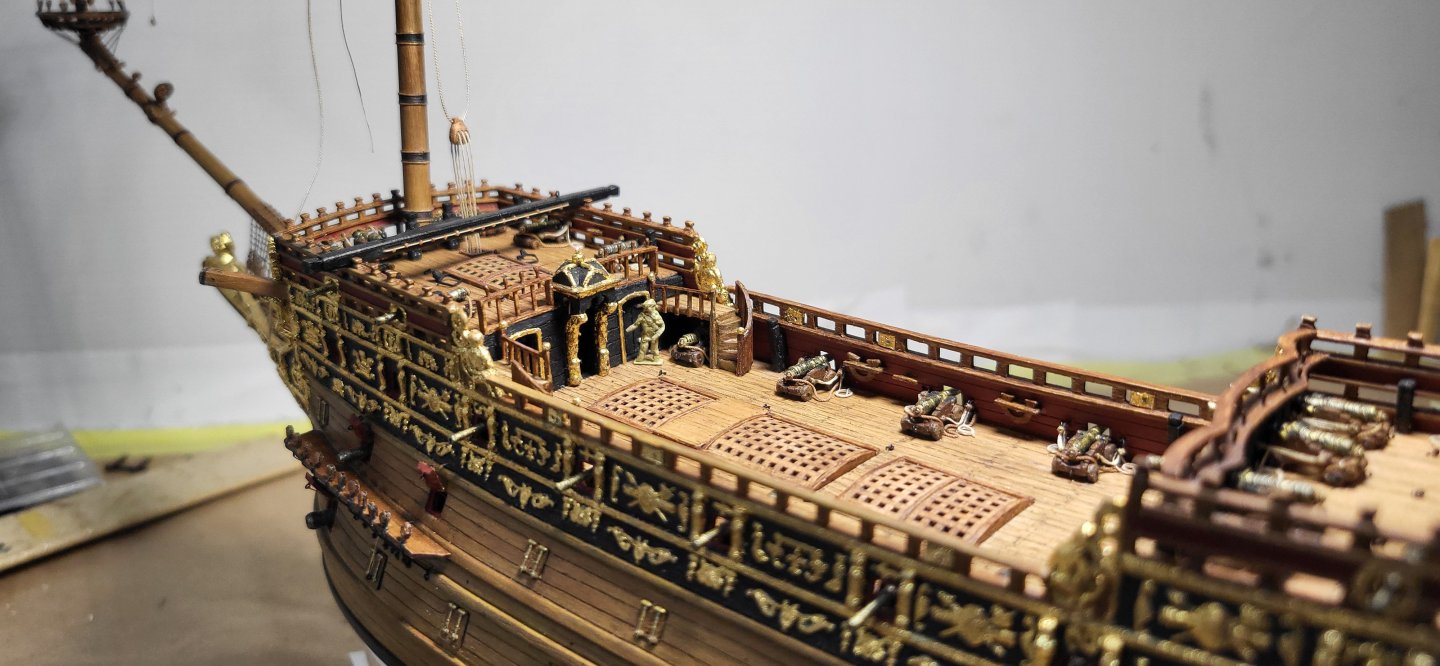
The staircase's leading to the forecastle deck are finally glued into place along with the railings on the forecastle deck, I still need to add one more step though, the figure stands at approximately 5"-10", scale wise looks okay to my eye. Michael D.

- 324 replies
-
- 9
-
-
-
- Sovereign of the Seas
- Airfix
- (and 1 more)
-
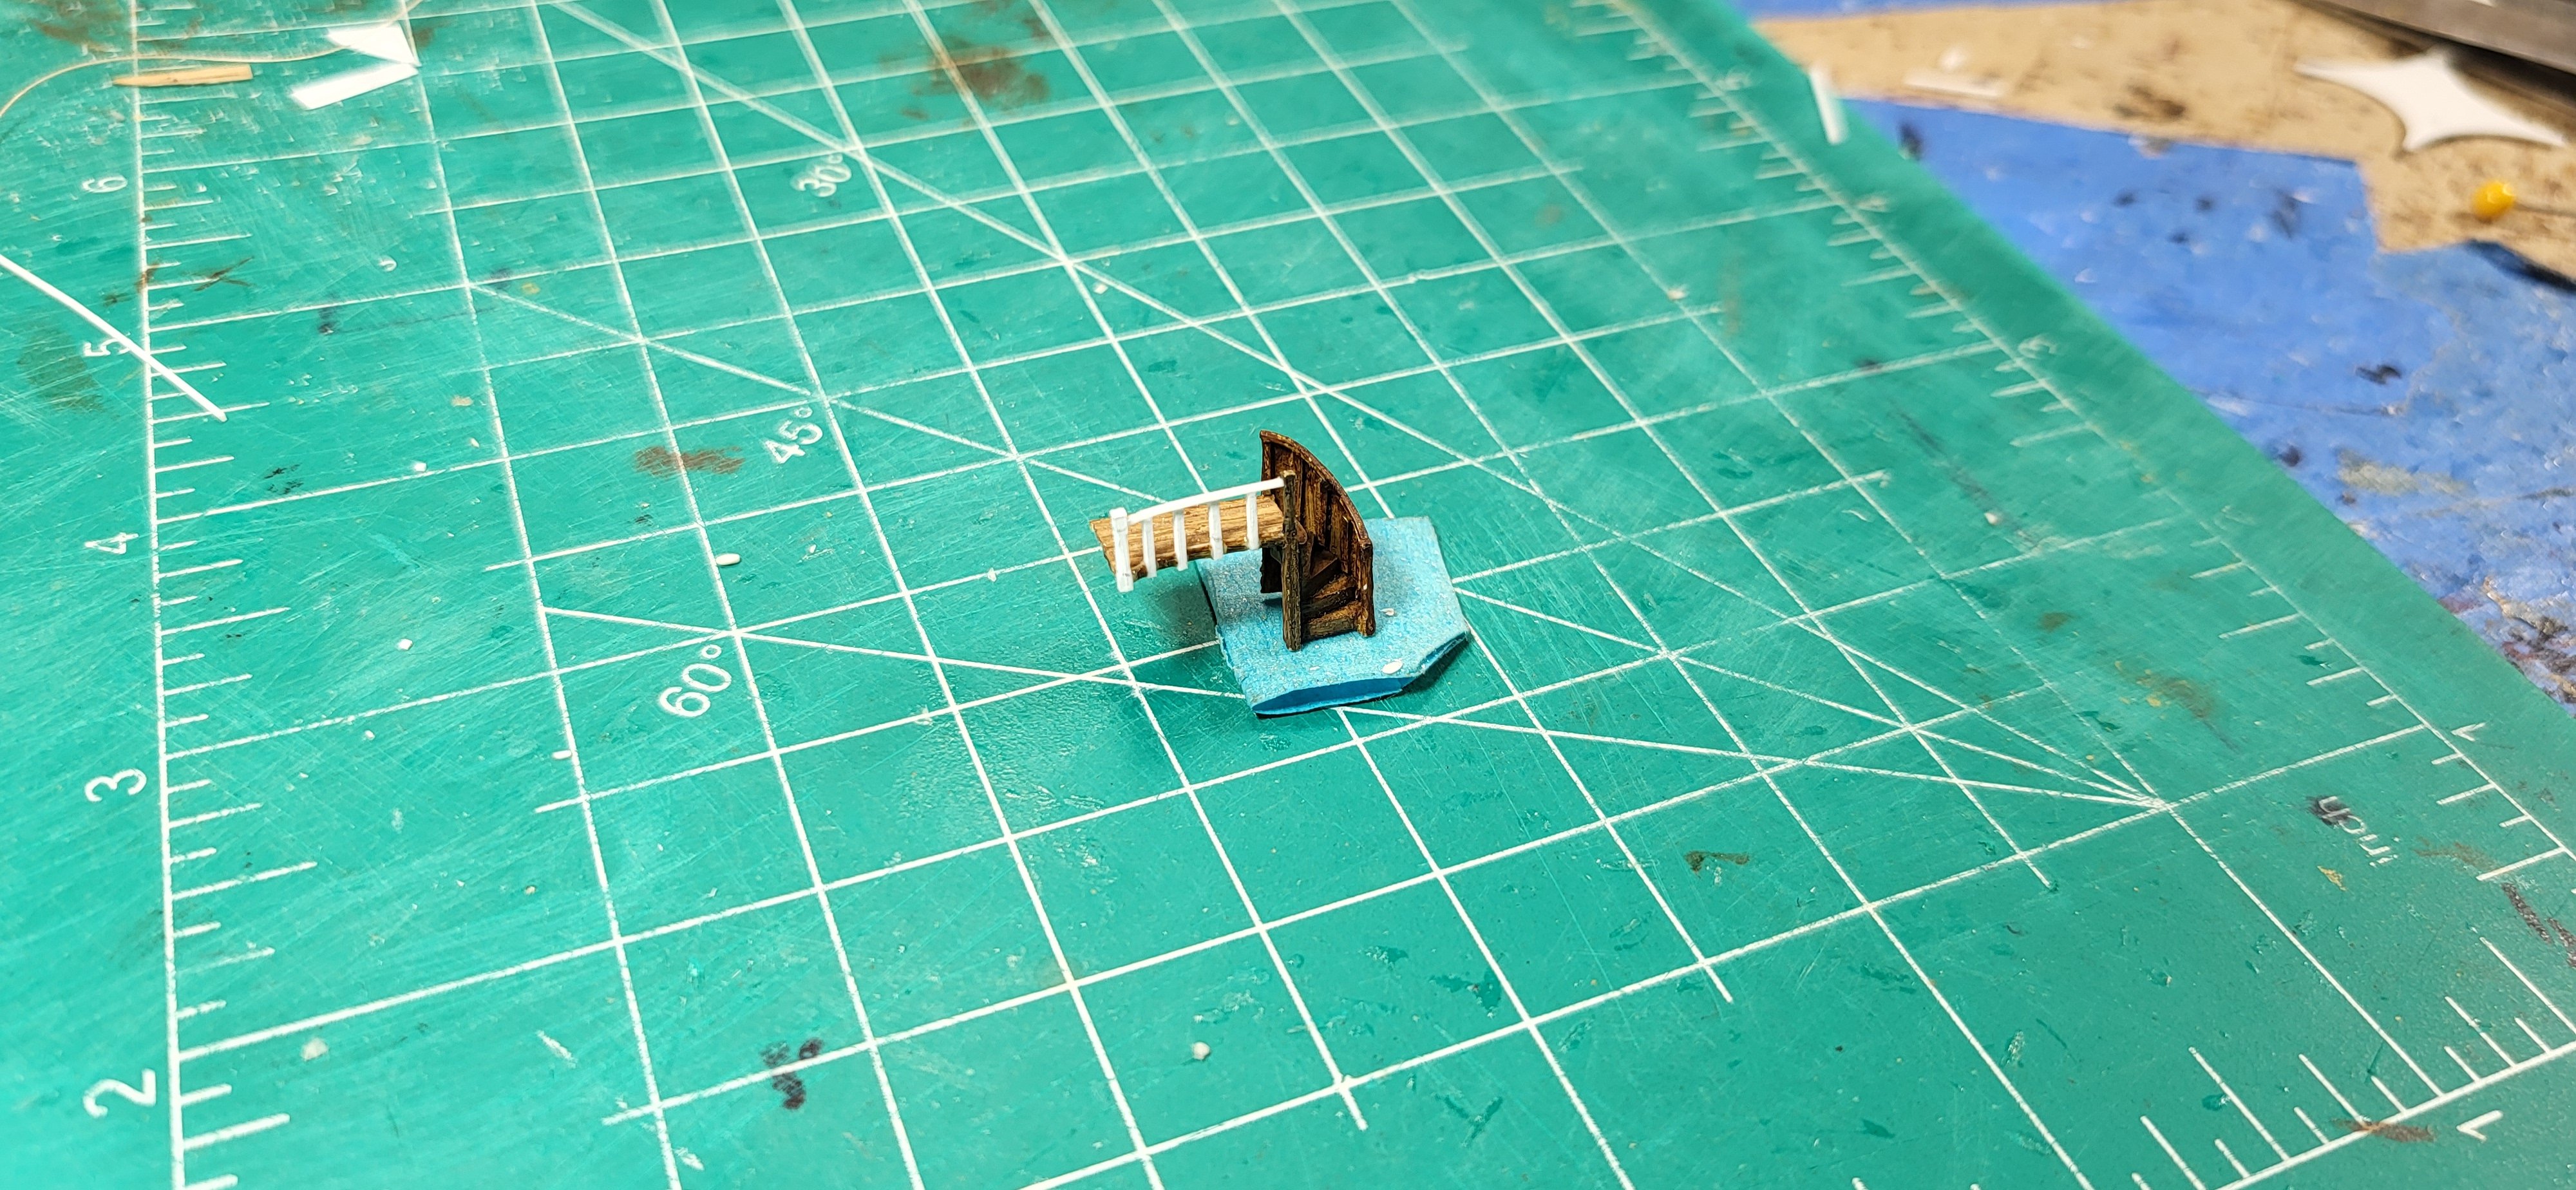
The major construction of the staircase is completed, minus the newel caps, this is a relief as this was very fiddly to construct. Michael D.


- 324 replies
-
- 10
-
-
-
- Sovereign of the Seas
- Airfix
- (and 1 more)
-
With the railing completed, I'll finish up the port side staircase along with completing the 4 remaining cannons on the upper Qtr deck, after that I need to add the timberheads to the railings at the waist. Michael D.

- 324 replies
-
- 7
-
-
-
- Sovereign of the Seas
- Airfix
- (and 1 more)
-
Marc, Yes, they are, while similar to knightheads, cavals are usually affixed to bulwarks, the break at the forecastle and Qtr decks etc, whereas Knightheads are free standing, I believe the ones you are referring to on the SR Marc are knightheads though and I could be wrong, when I built mine, I just used the Heller the plans, maybe some of your better well known sources show them as cavals on their deck plans? Shipman, I closely studied the models of Wolfgang, the Henry Culver model, Don Dressel's, National Maritime Museum in Greenwich and others before I committed to scribing them in horizontally, this seems to be the usual construction method on English ships from what I've found on my limited resources. All the best gentlemen. Michael D.
- 324 replies
-
- 3
-
-

-
- Sovereign of the Seas
- Airfix
- (and 1 more)
-
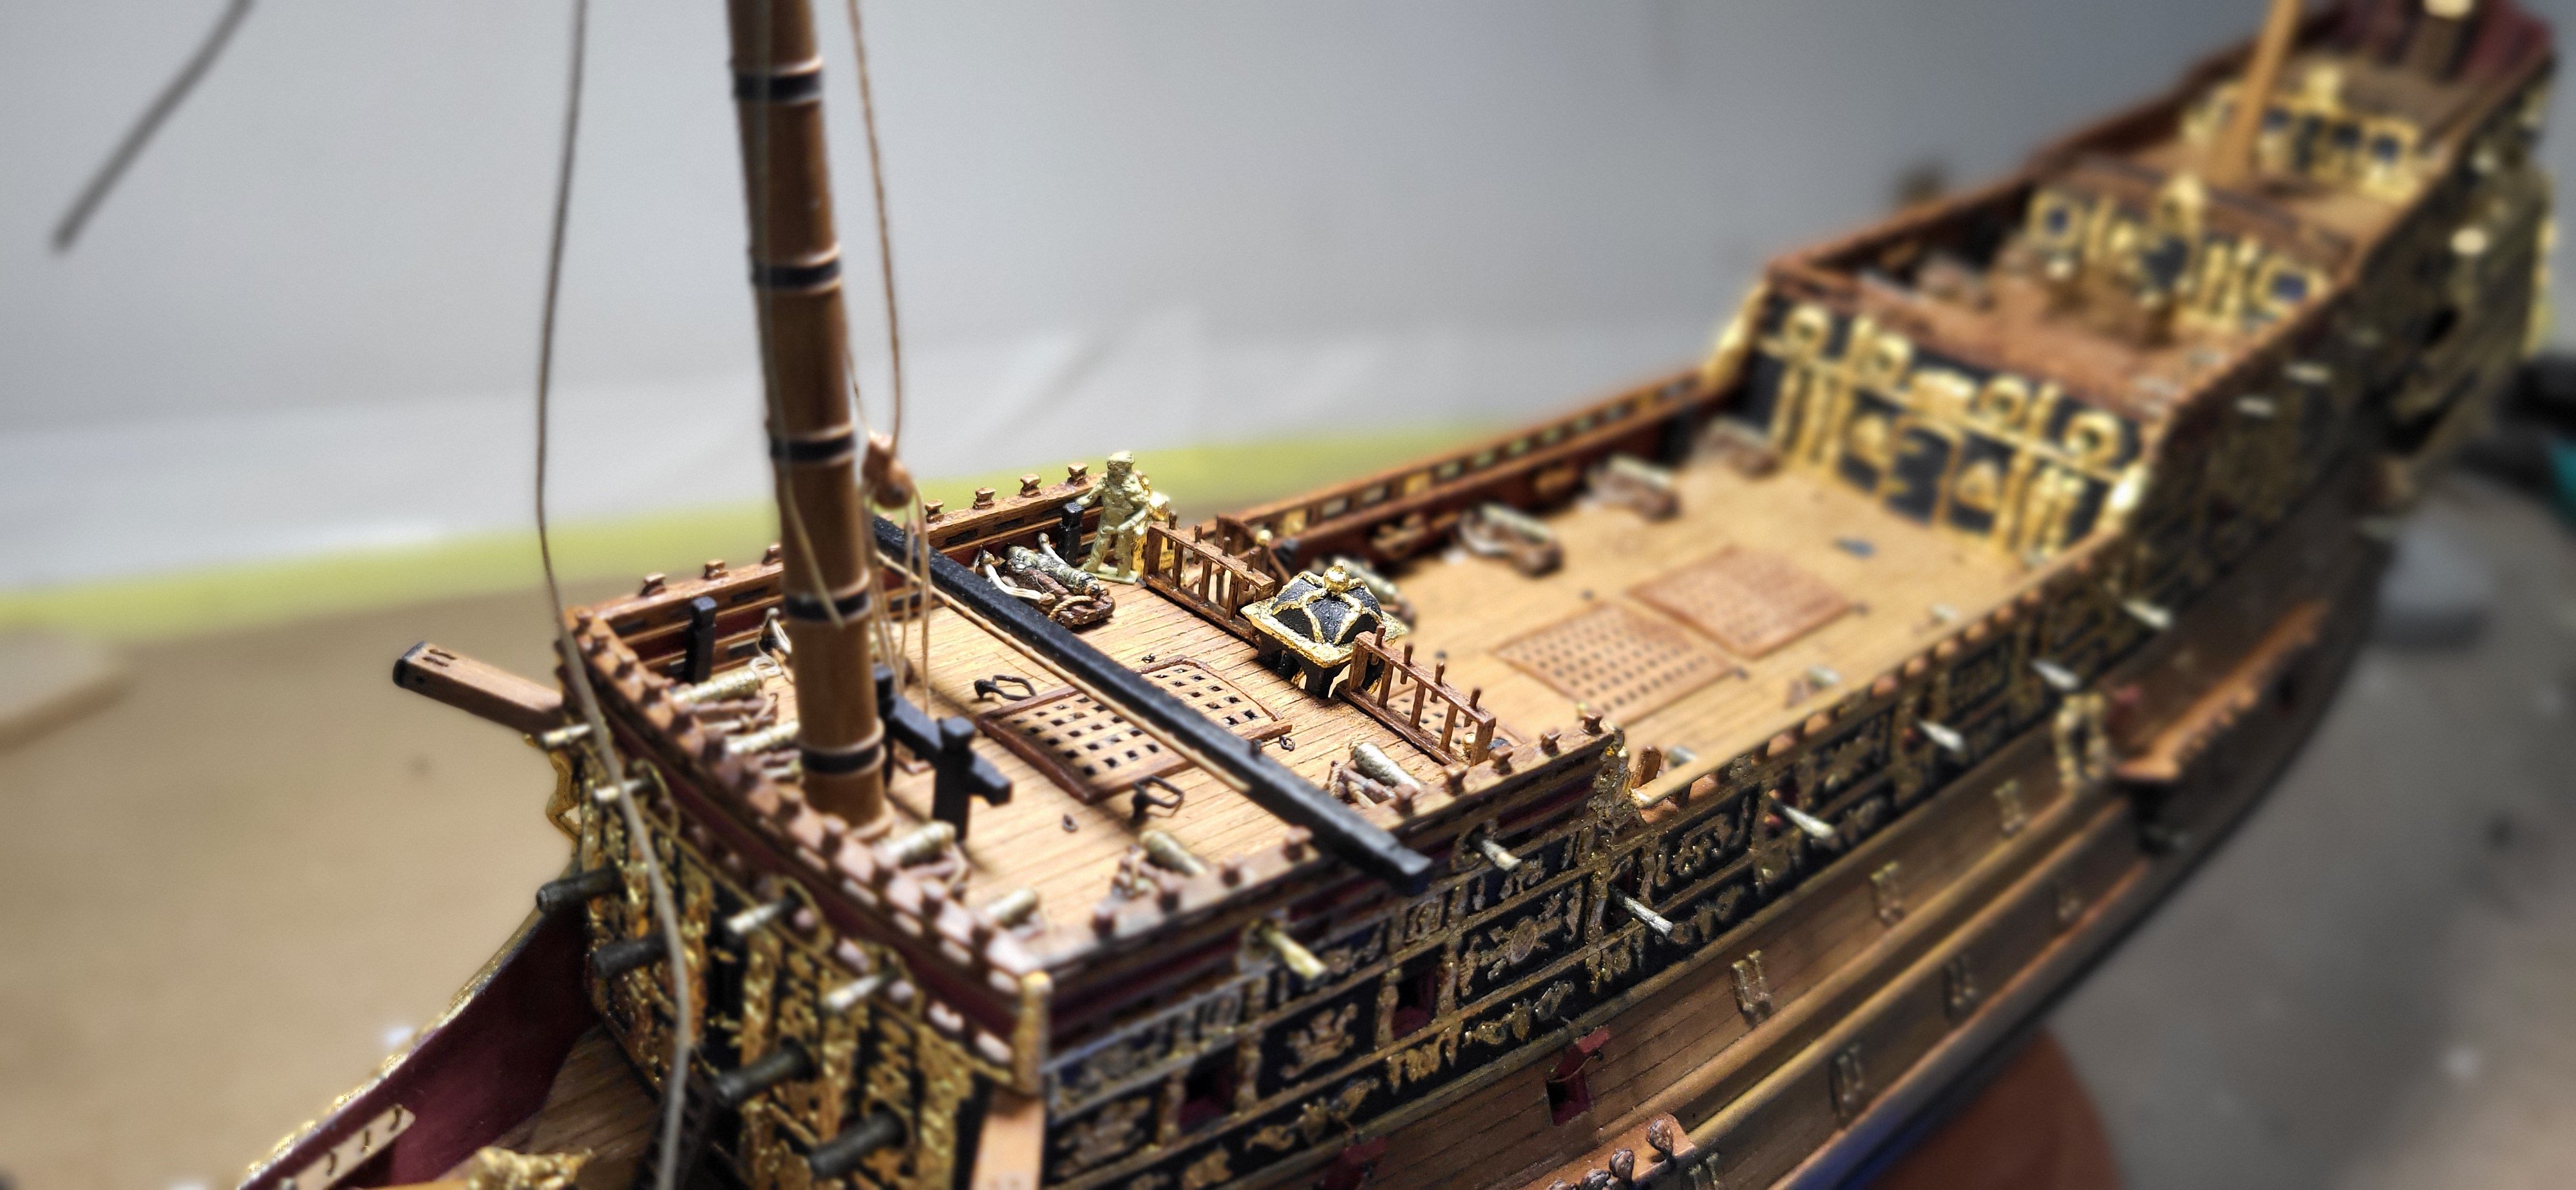
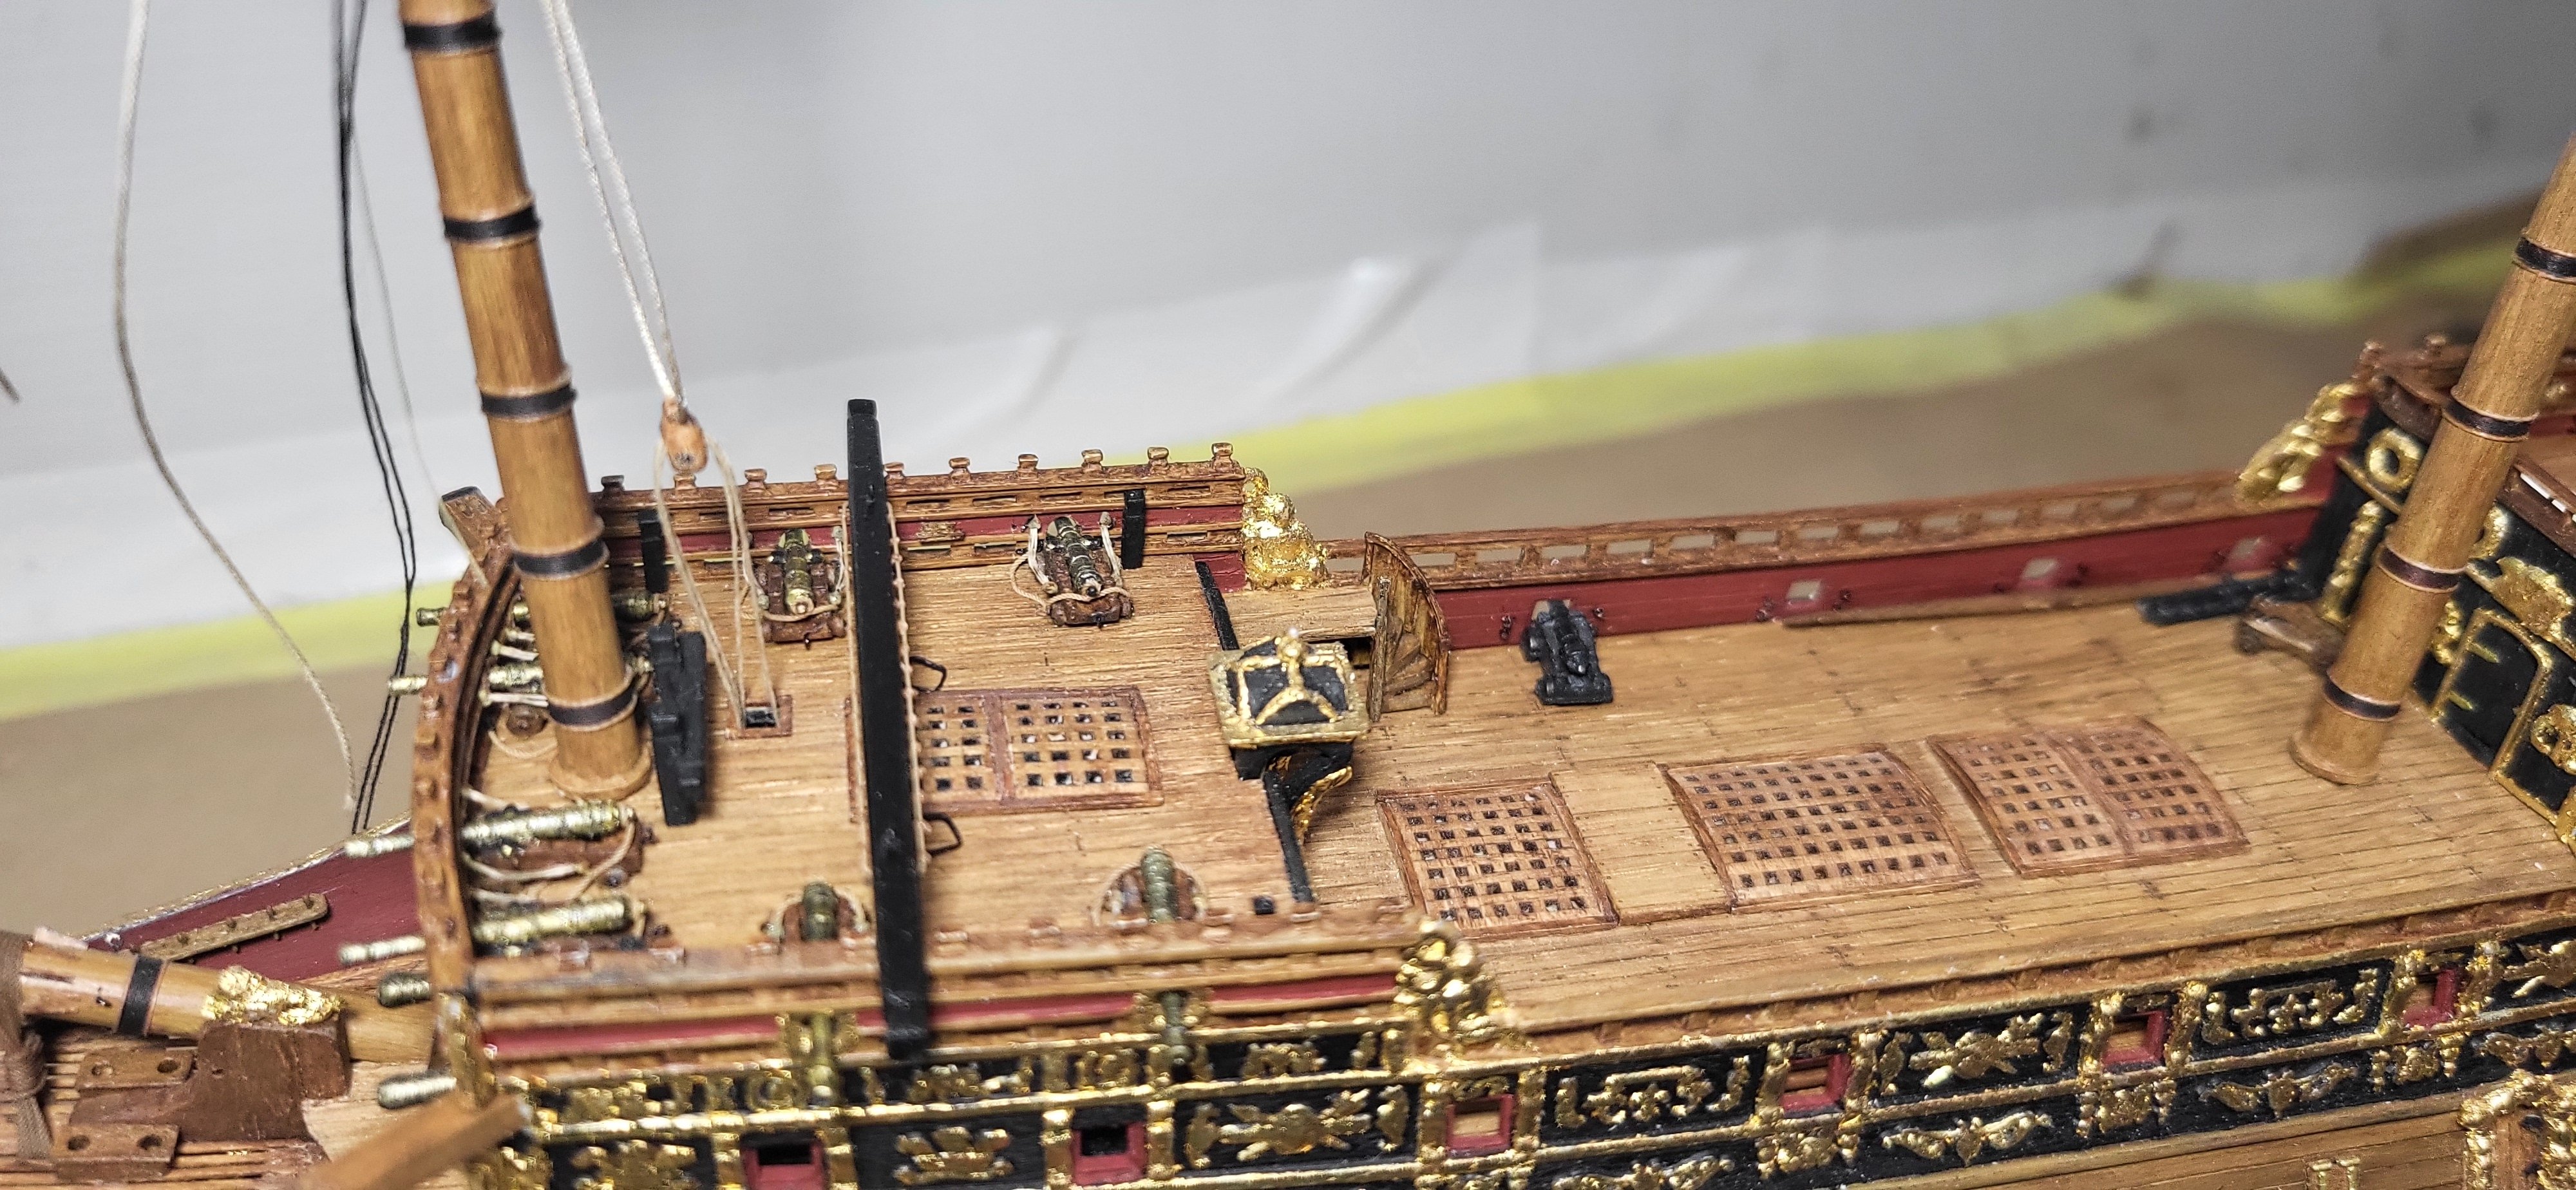
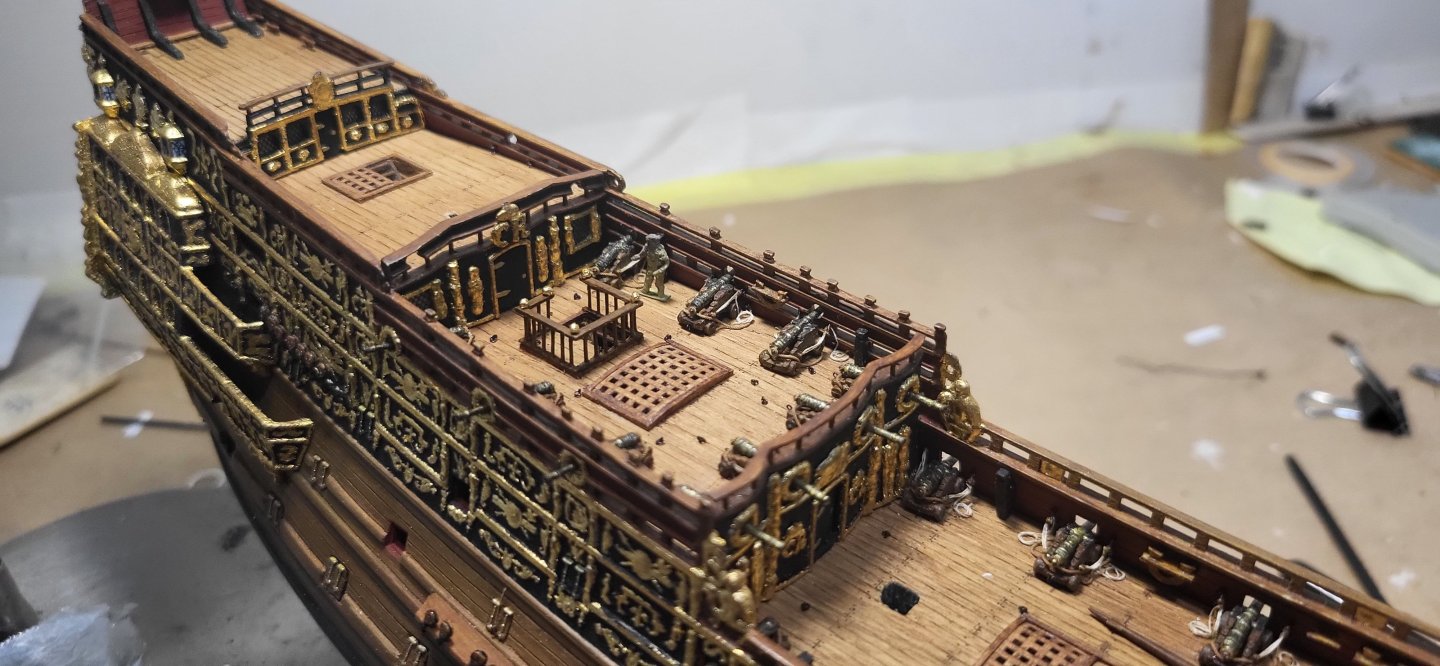
The cannons on the Qtr deck are completed along with adding the hatch, ladder, cavals and kevels, I still need to come up a railing arraignment though, thanks for looking. Michael D.

- 324 replies
-
- 7
-
-
-
- Sovereign of the Seas
- Airfix
- (and 1 more)
-
Thank you Kevin, always nice to know one's work is appreciated! likewise I love your work on your current builds👍Looking forward to showcasing your blocks! Michael D.
- 324 replies
-
- 1
-
-
- Sovereign of the Seas
- Airfix
- (and 1 more)
-
Beautiful work as always Marc, while the blocks might be a tad over scale size wise the eye is the final judge and they look spot on!👍 Michael D.
- 2,699 replies
-
- 2
-
-
-
- heller
- soleil royal
- (and 9 more)
-
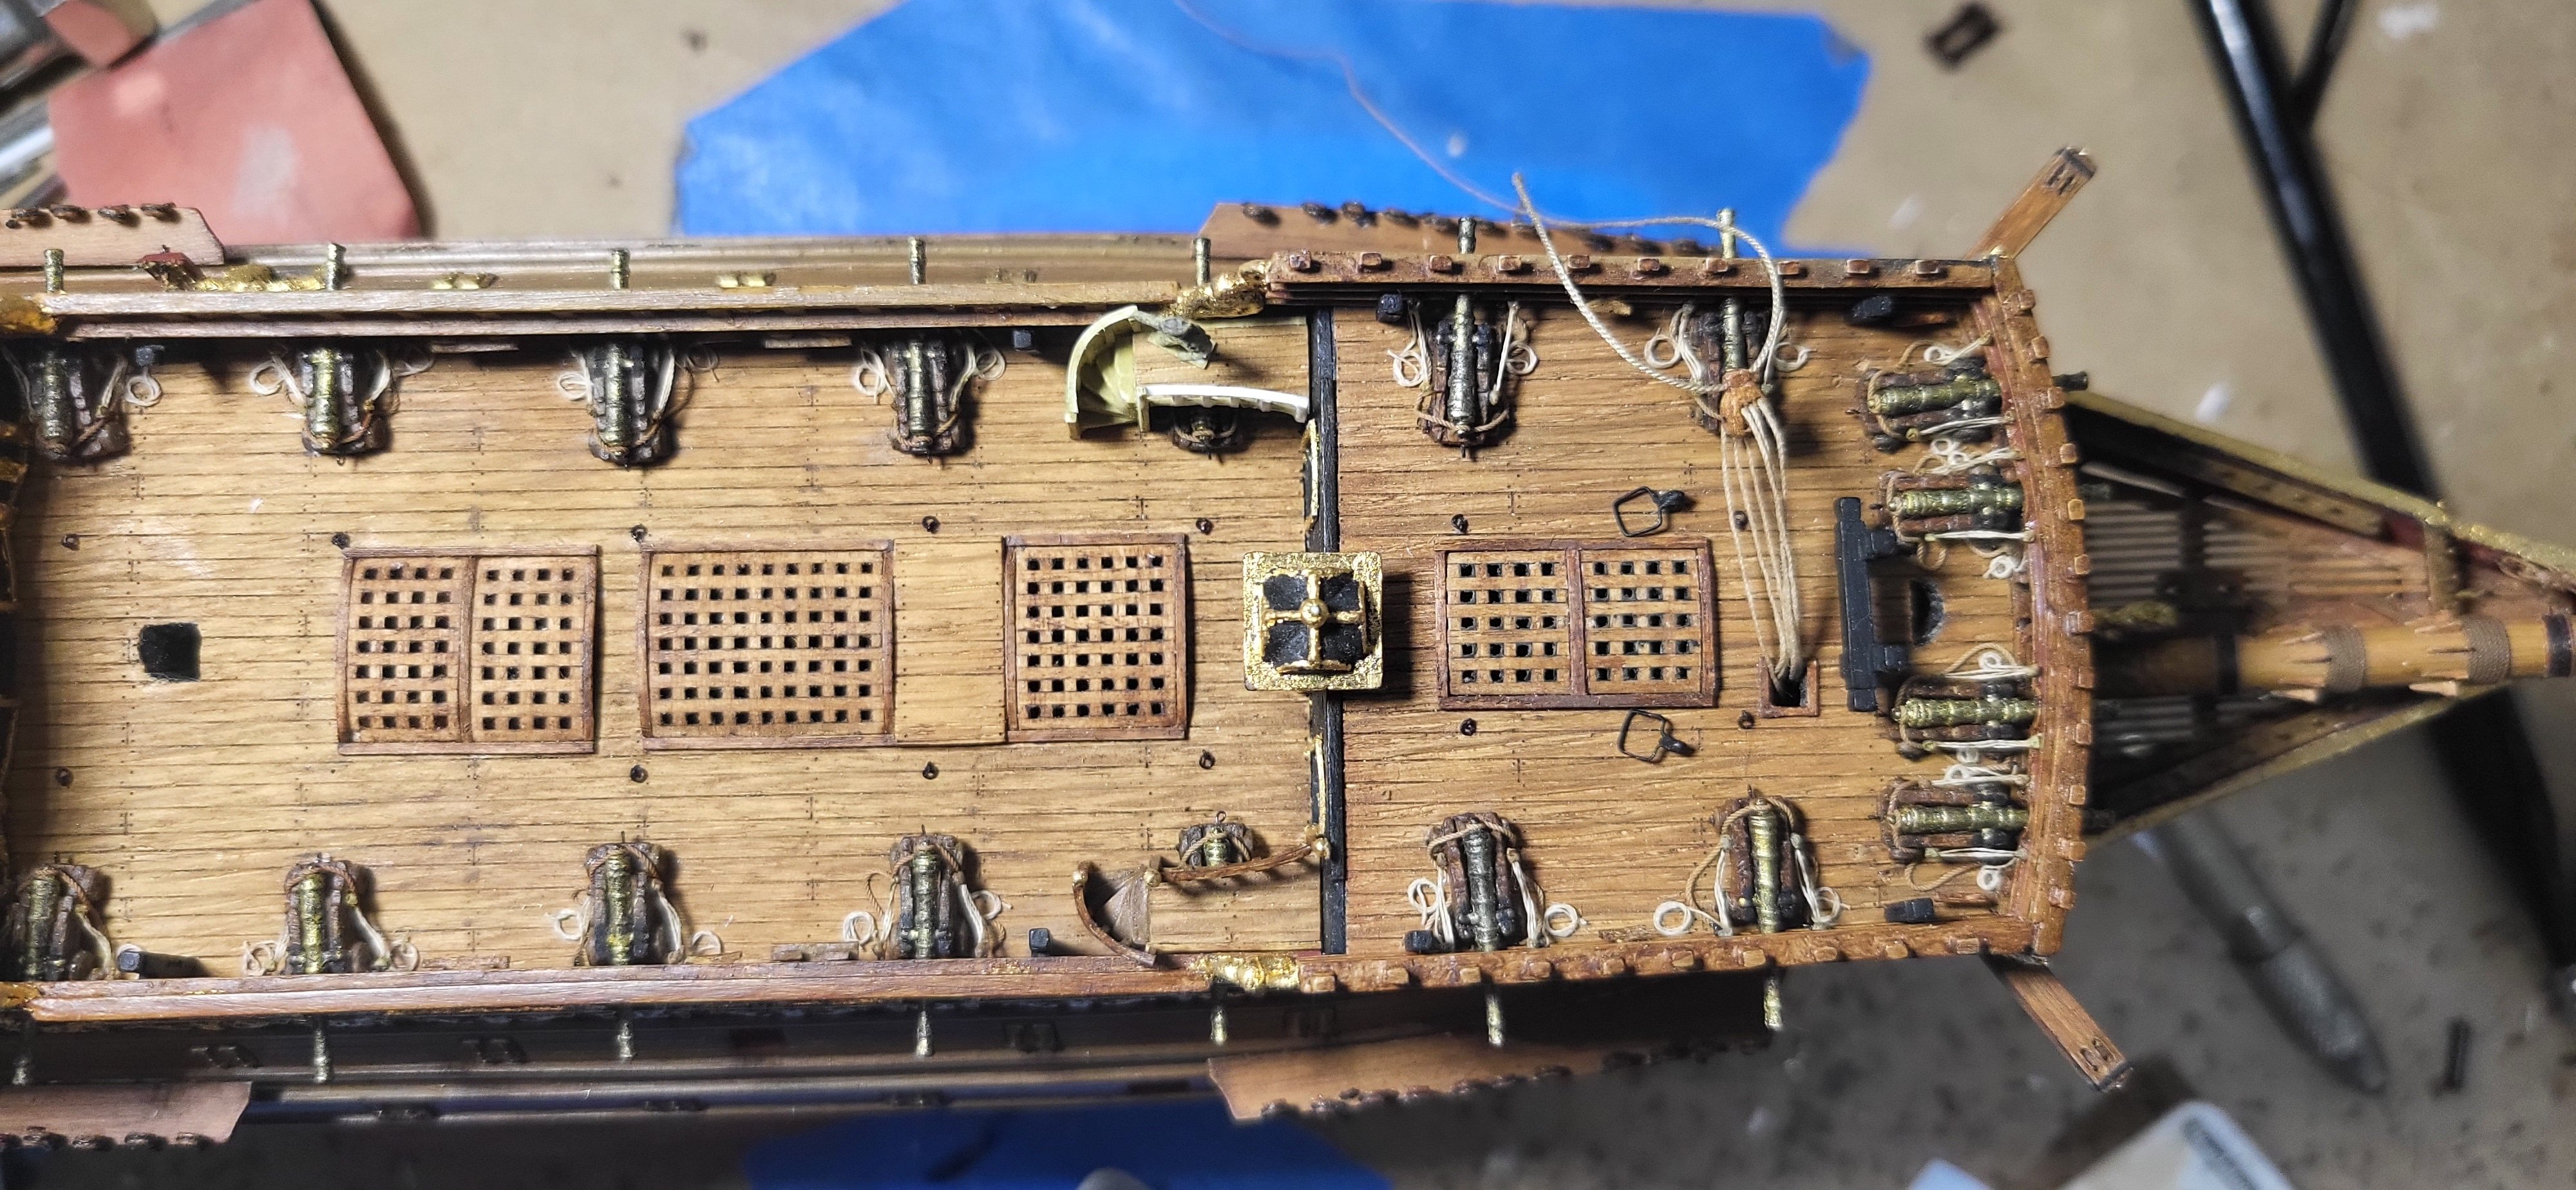
Kevin's build along with less than a handful are the benchmarks for sure. Hi Shipman, I bought mine about 20 years ago and she's been begging me to build her, when I do, I'll build it bare stick, ironically the Revell Cutty Sark was my very first ship model back in 1969 at age 10, completed it in like 10 days, I did not paint it but did rig it completely. I finally have the gun tackles and ring bolts completed on the forecastle and main decks, quite the exercise, 14 left to do. Michael D.
- 324 replies
-
- 6
-
-
-
- Sovereign of the Seas
- Airfix
- (and 1 more)
-
Ian, I try to push myself to see how much detail I can actually add and get away with it without looking too bulky. Thank you for the compliment! Thank you, Marc, short cuts obviously have to made at this scale to look somewhat convincing, which can be a blessing, I guess, I may have to start the 1:96 Cutty Sark after this to hone my skills on the larger scale...hehe. Michael D.
- 324 replies
-
- 3
-
-
- Sovereign of the Seas
- Airfix
- (and 1 more)
-
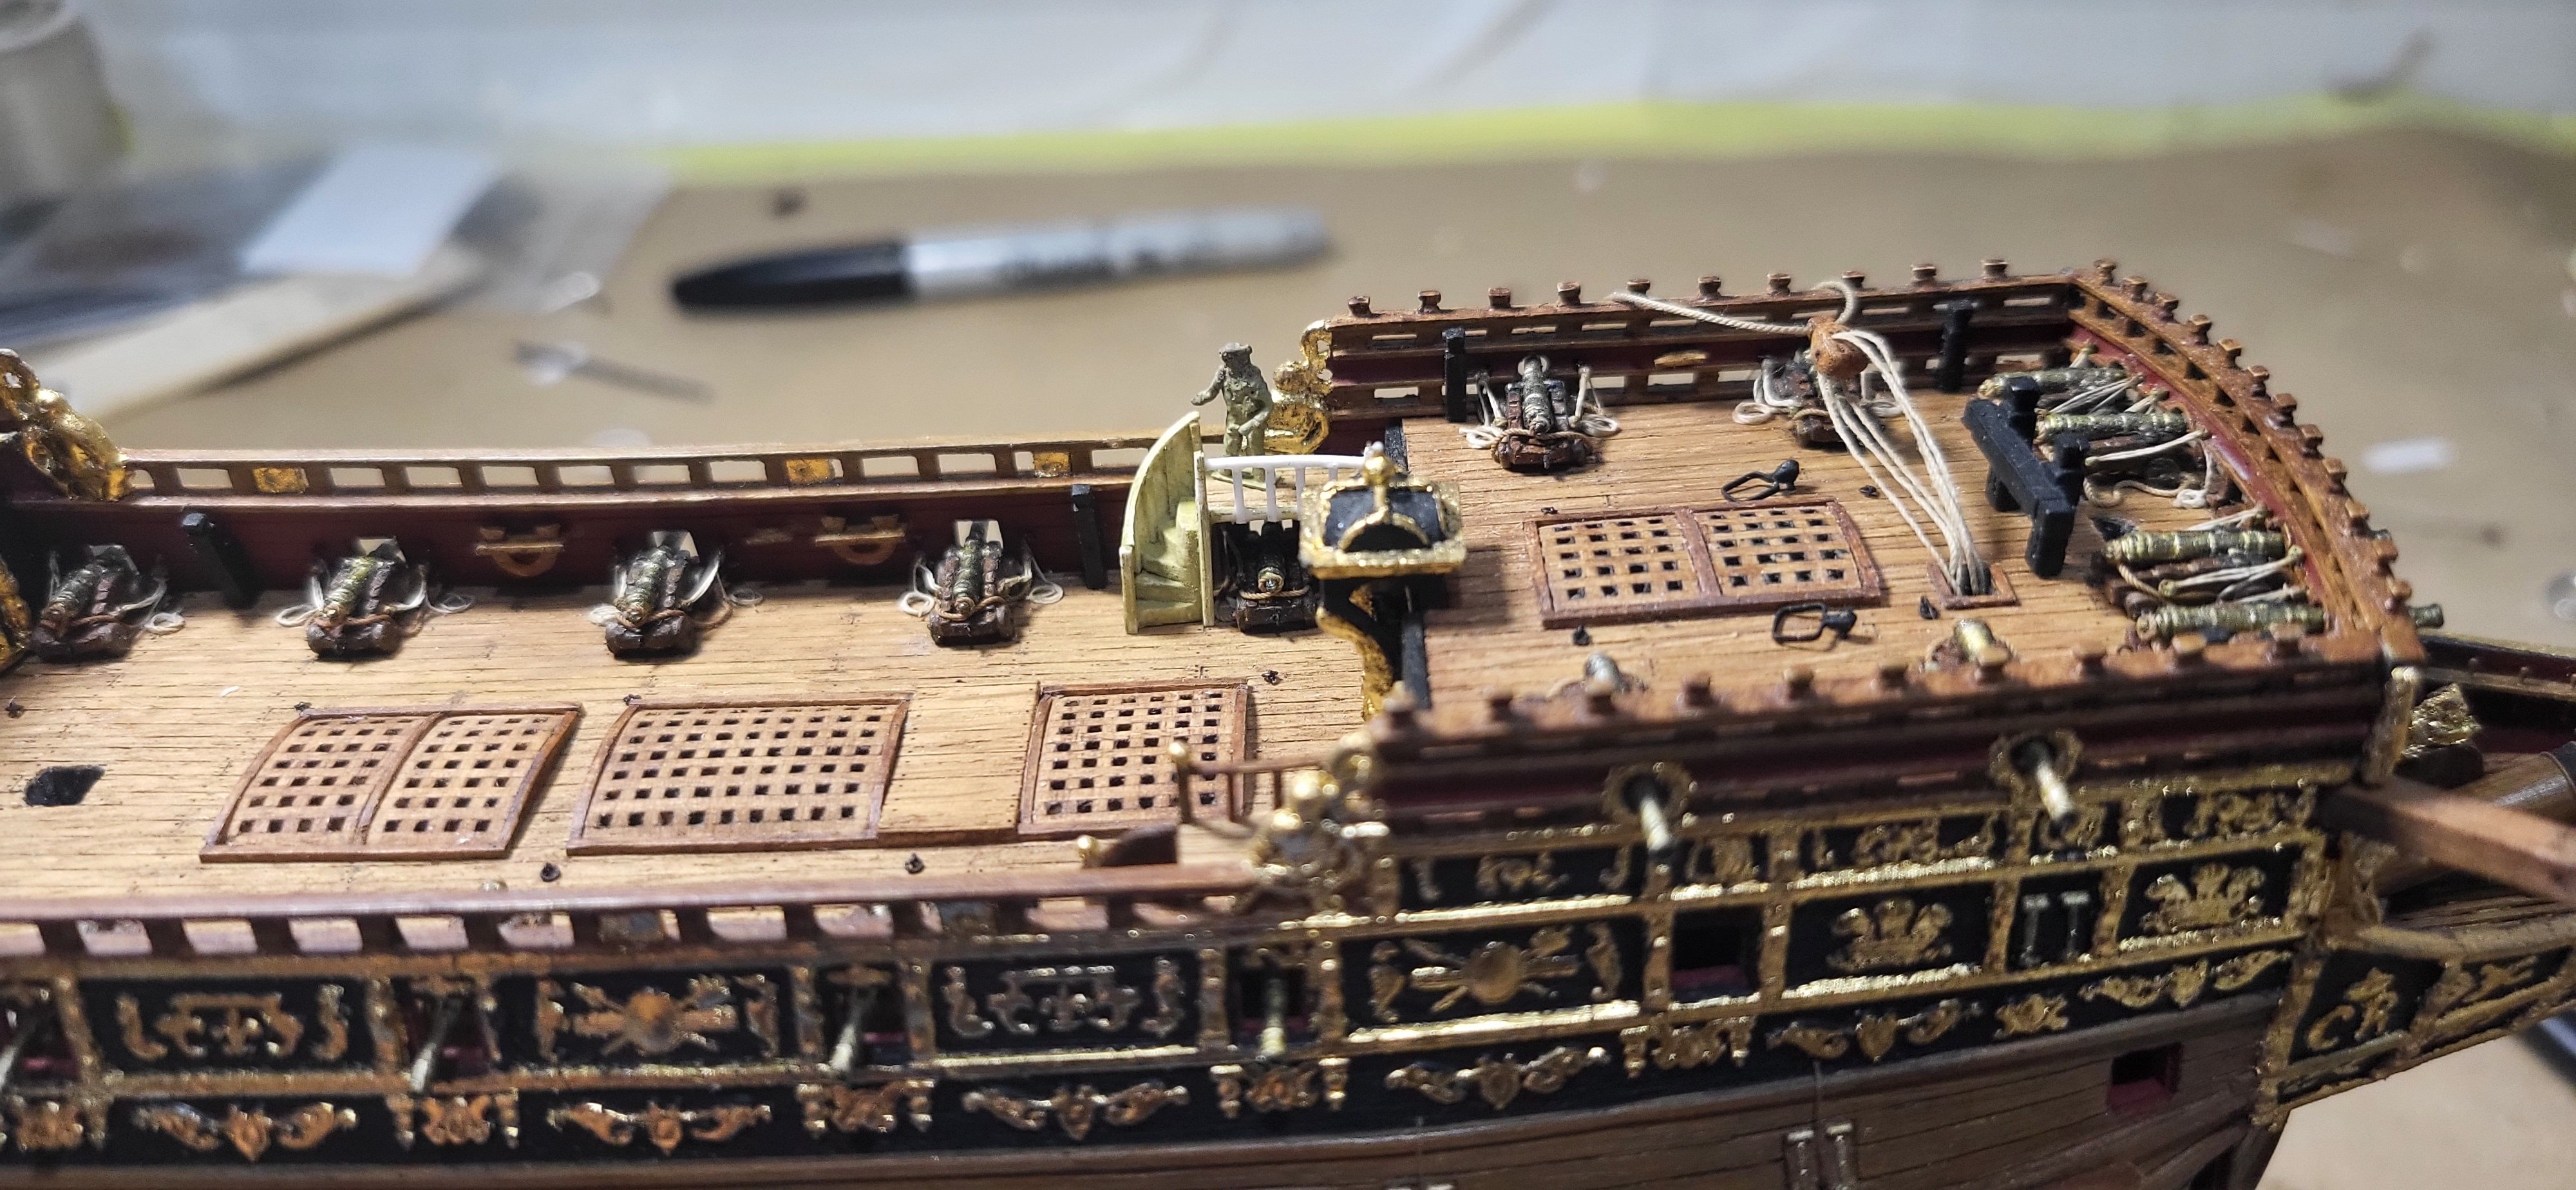
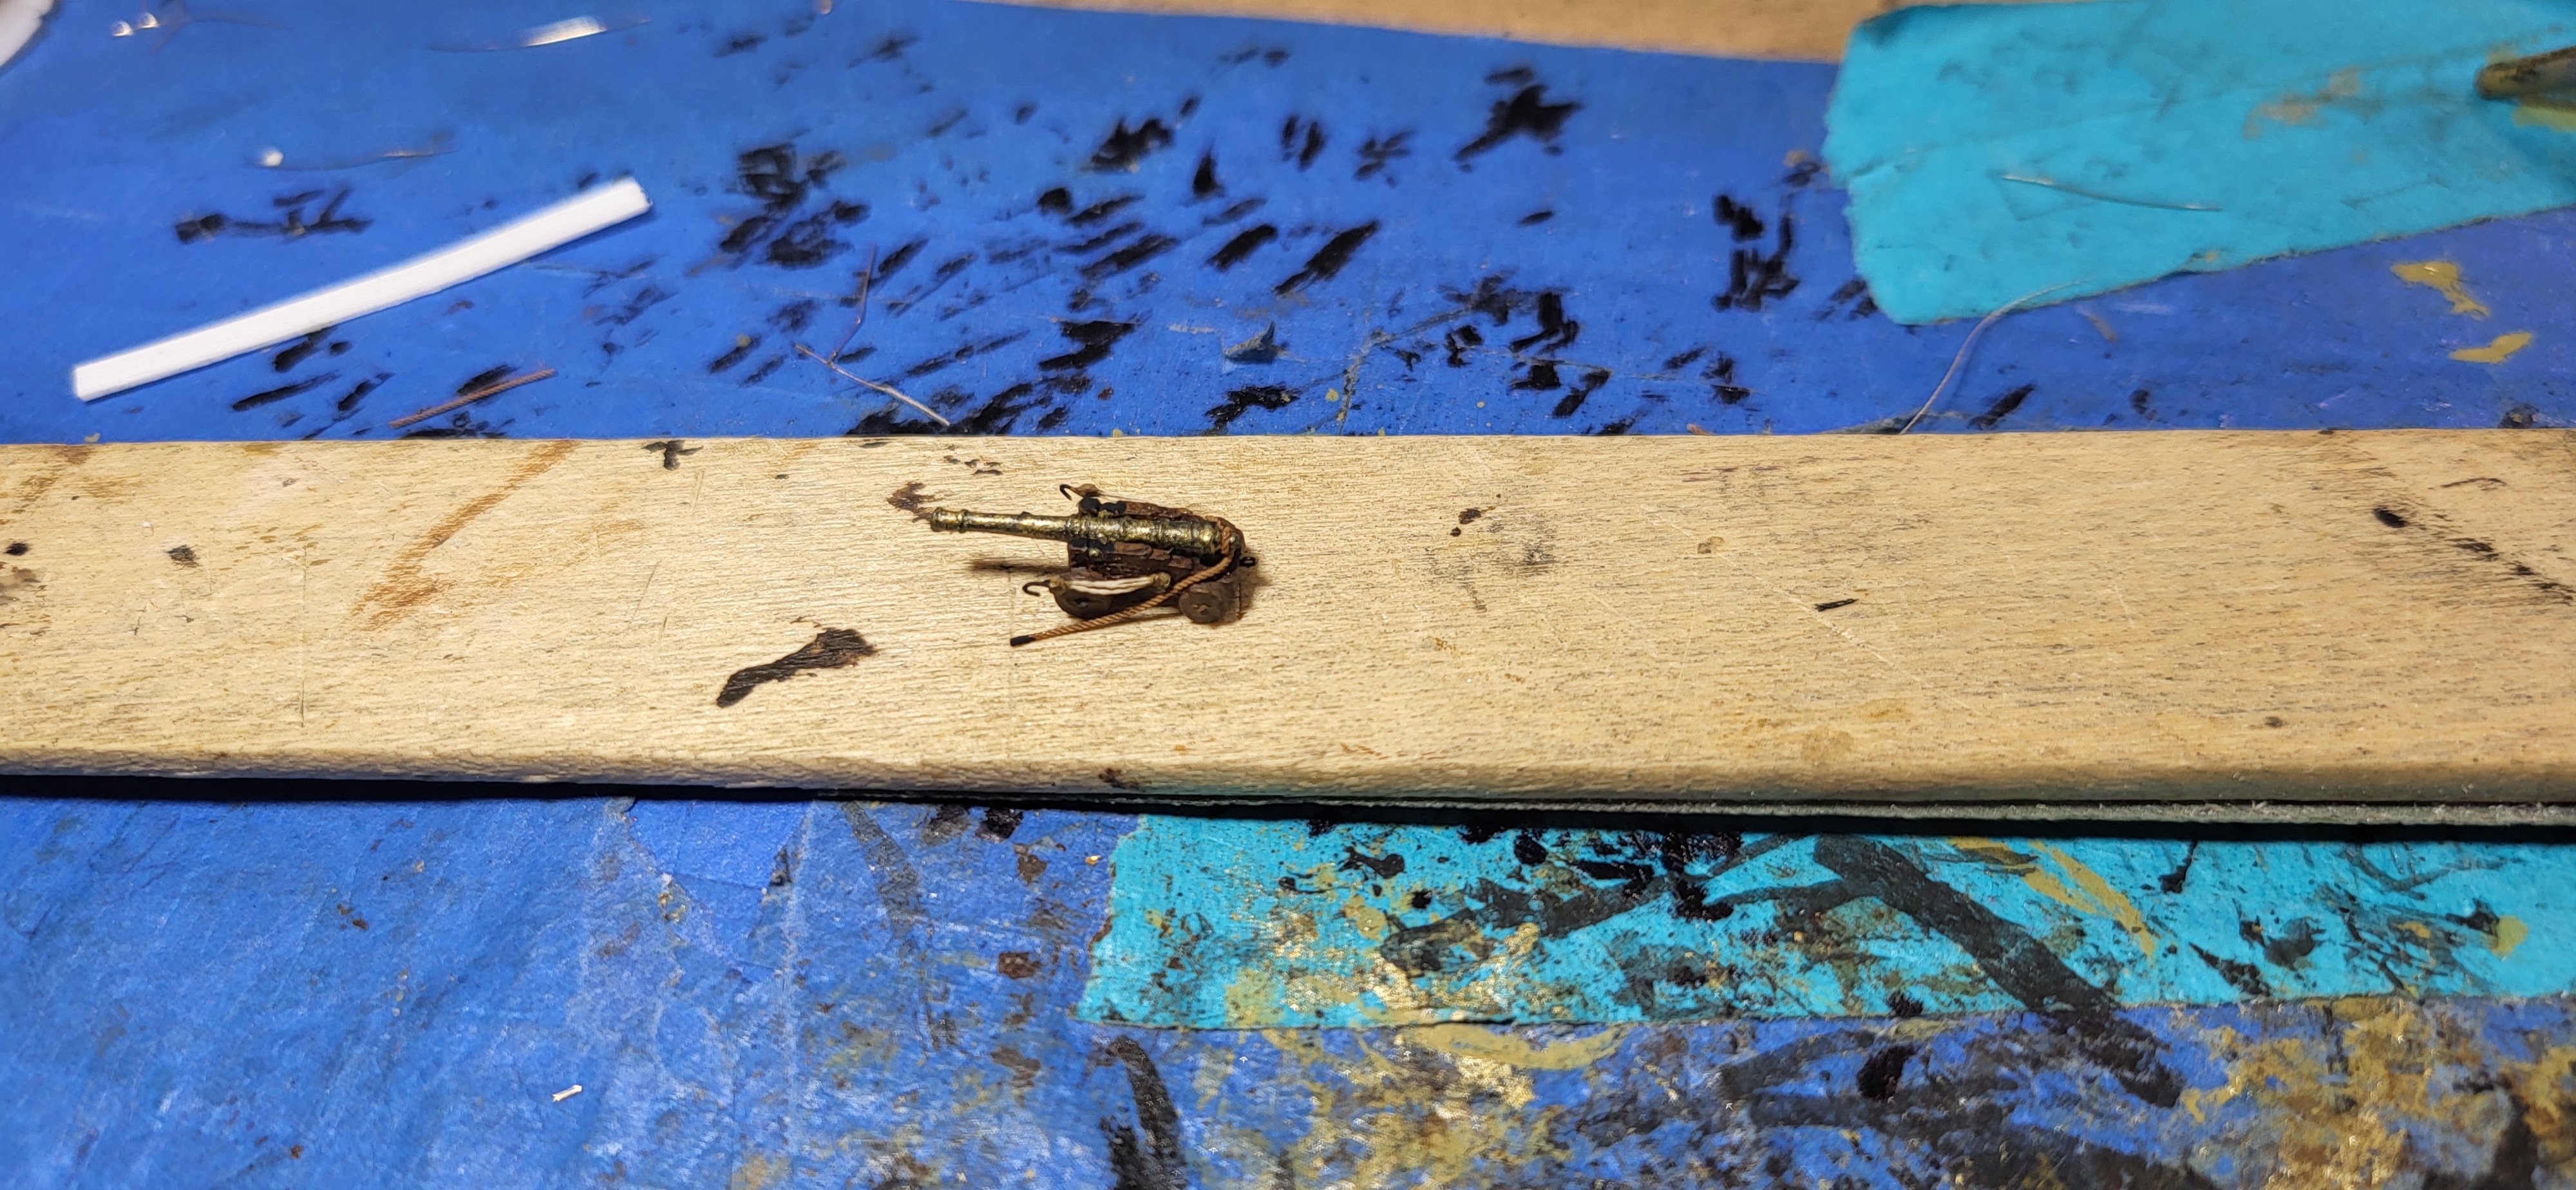
I finally completed the cannons on the main deck, so I thought! I decided to add the rest of the gun tackle rope. The gun tackles are made up from 100wt silk thread coated with flat clear, knots tied at each end, I used 32g wire for the hook on one end, normally one on each end, for the blocks I simulated them with paint. Thanks for looking. Michael D.


- 324 replies
-
- 6
-
-
-
- Sovereign of the Seas
- Airfix
- (and 1 more)
-
The scale on this one is 1:168, thanks for the compliment Marc. Michael D.
- 324 replies
-
- 1
-
-
- Sovereign of the Seas
- Airfix
- (and 1 more)
-
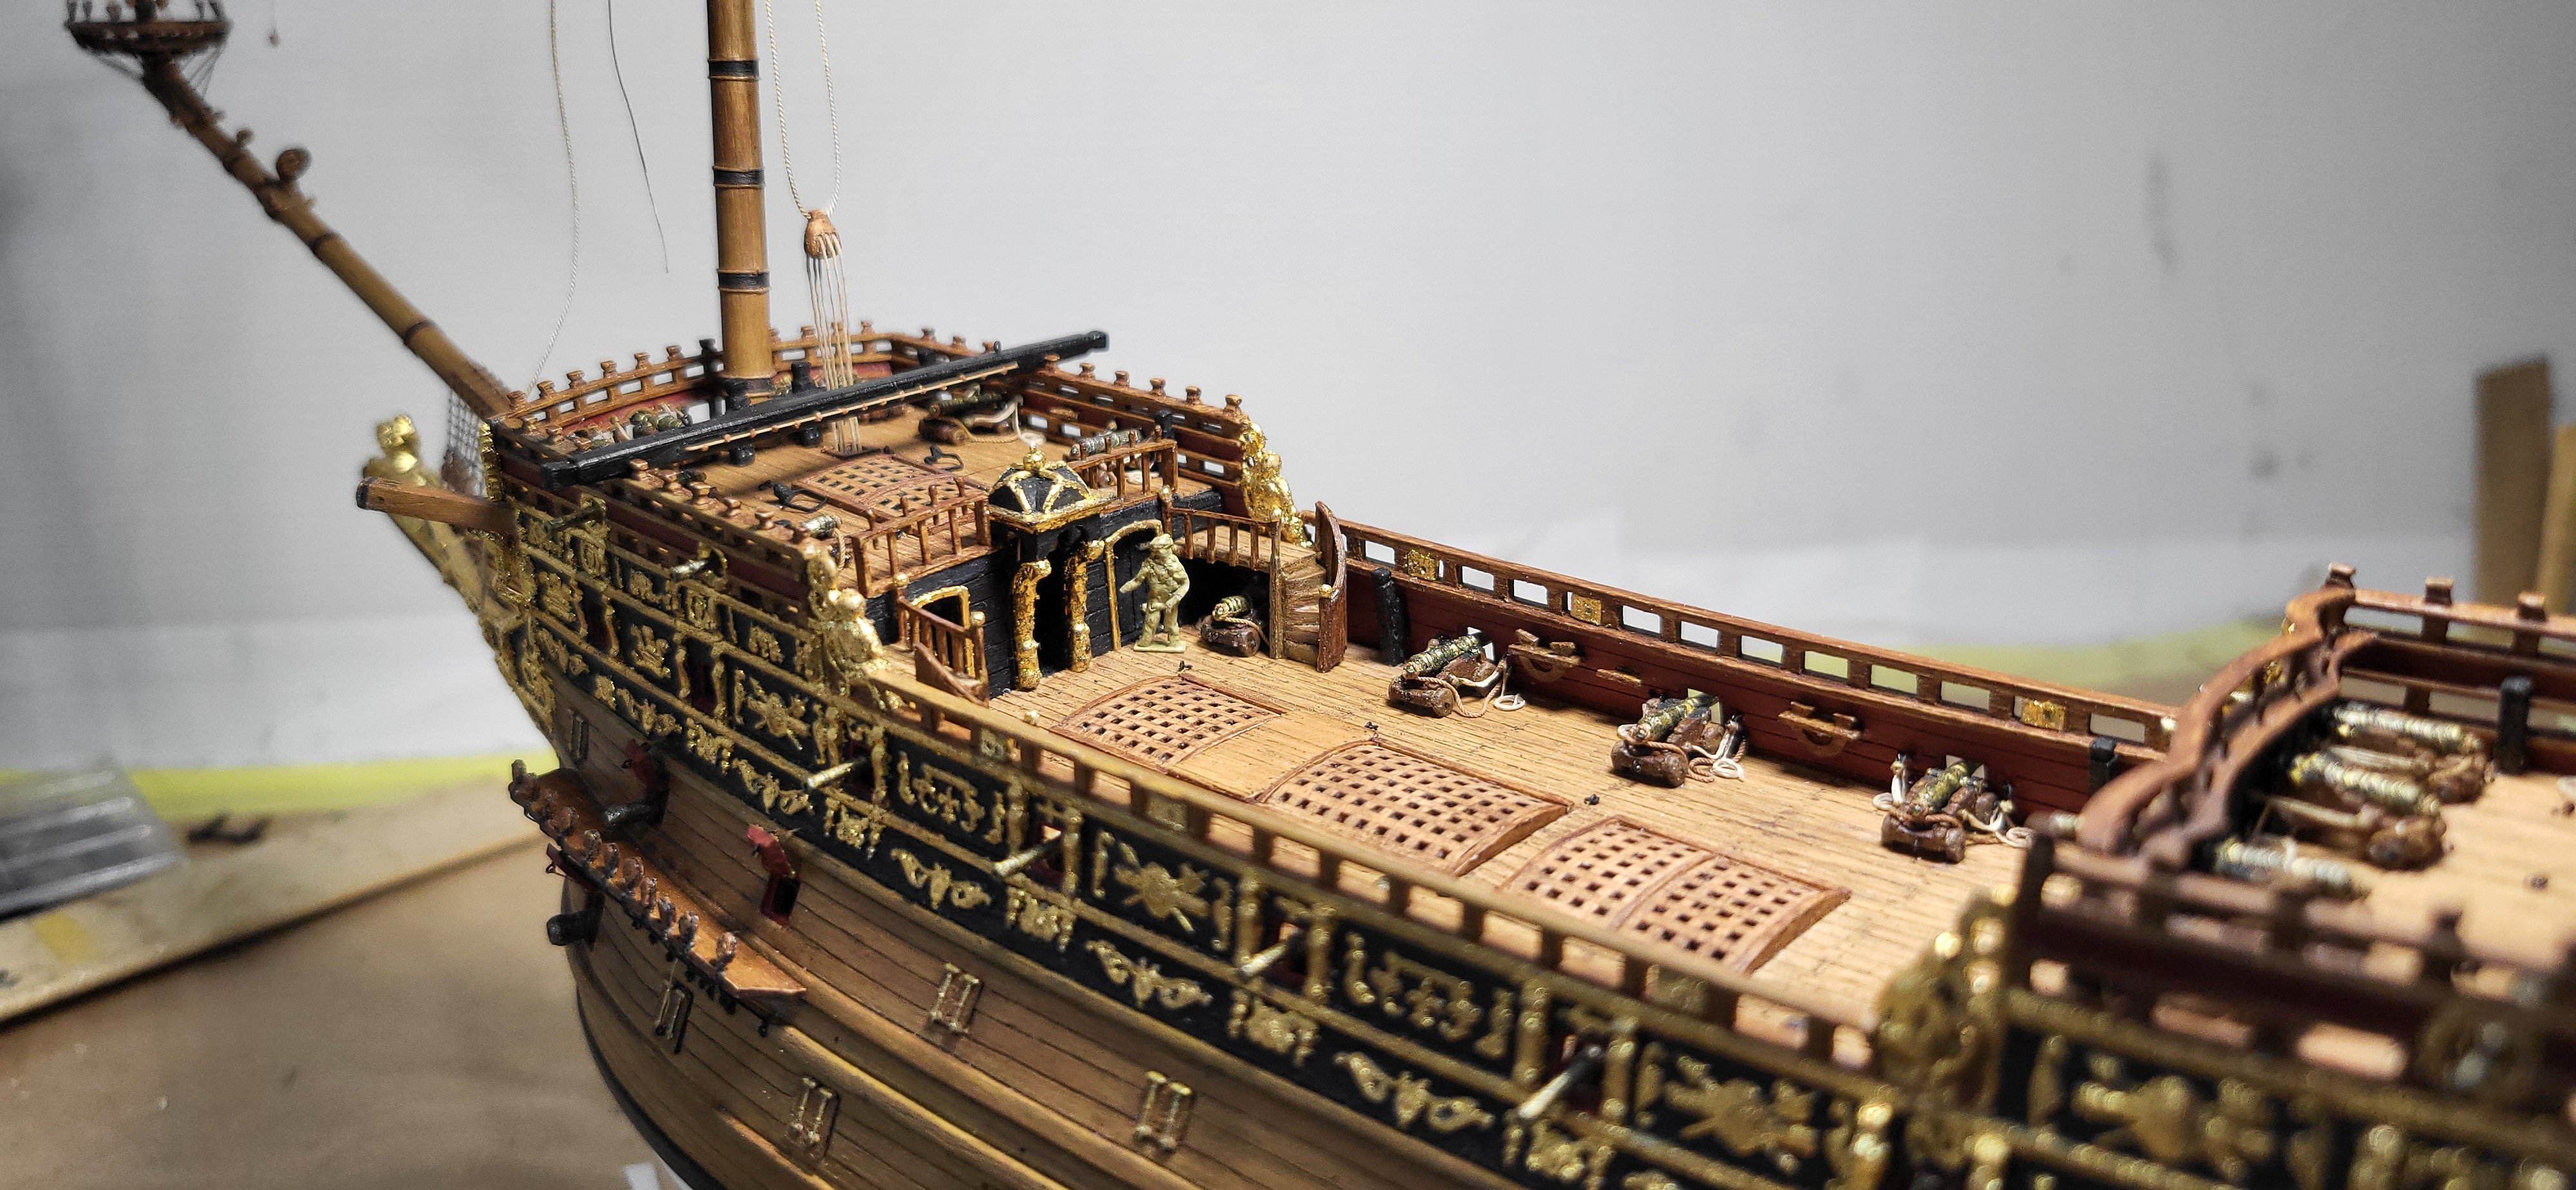
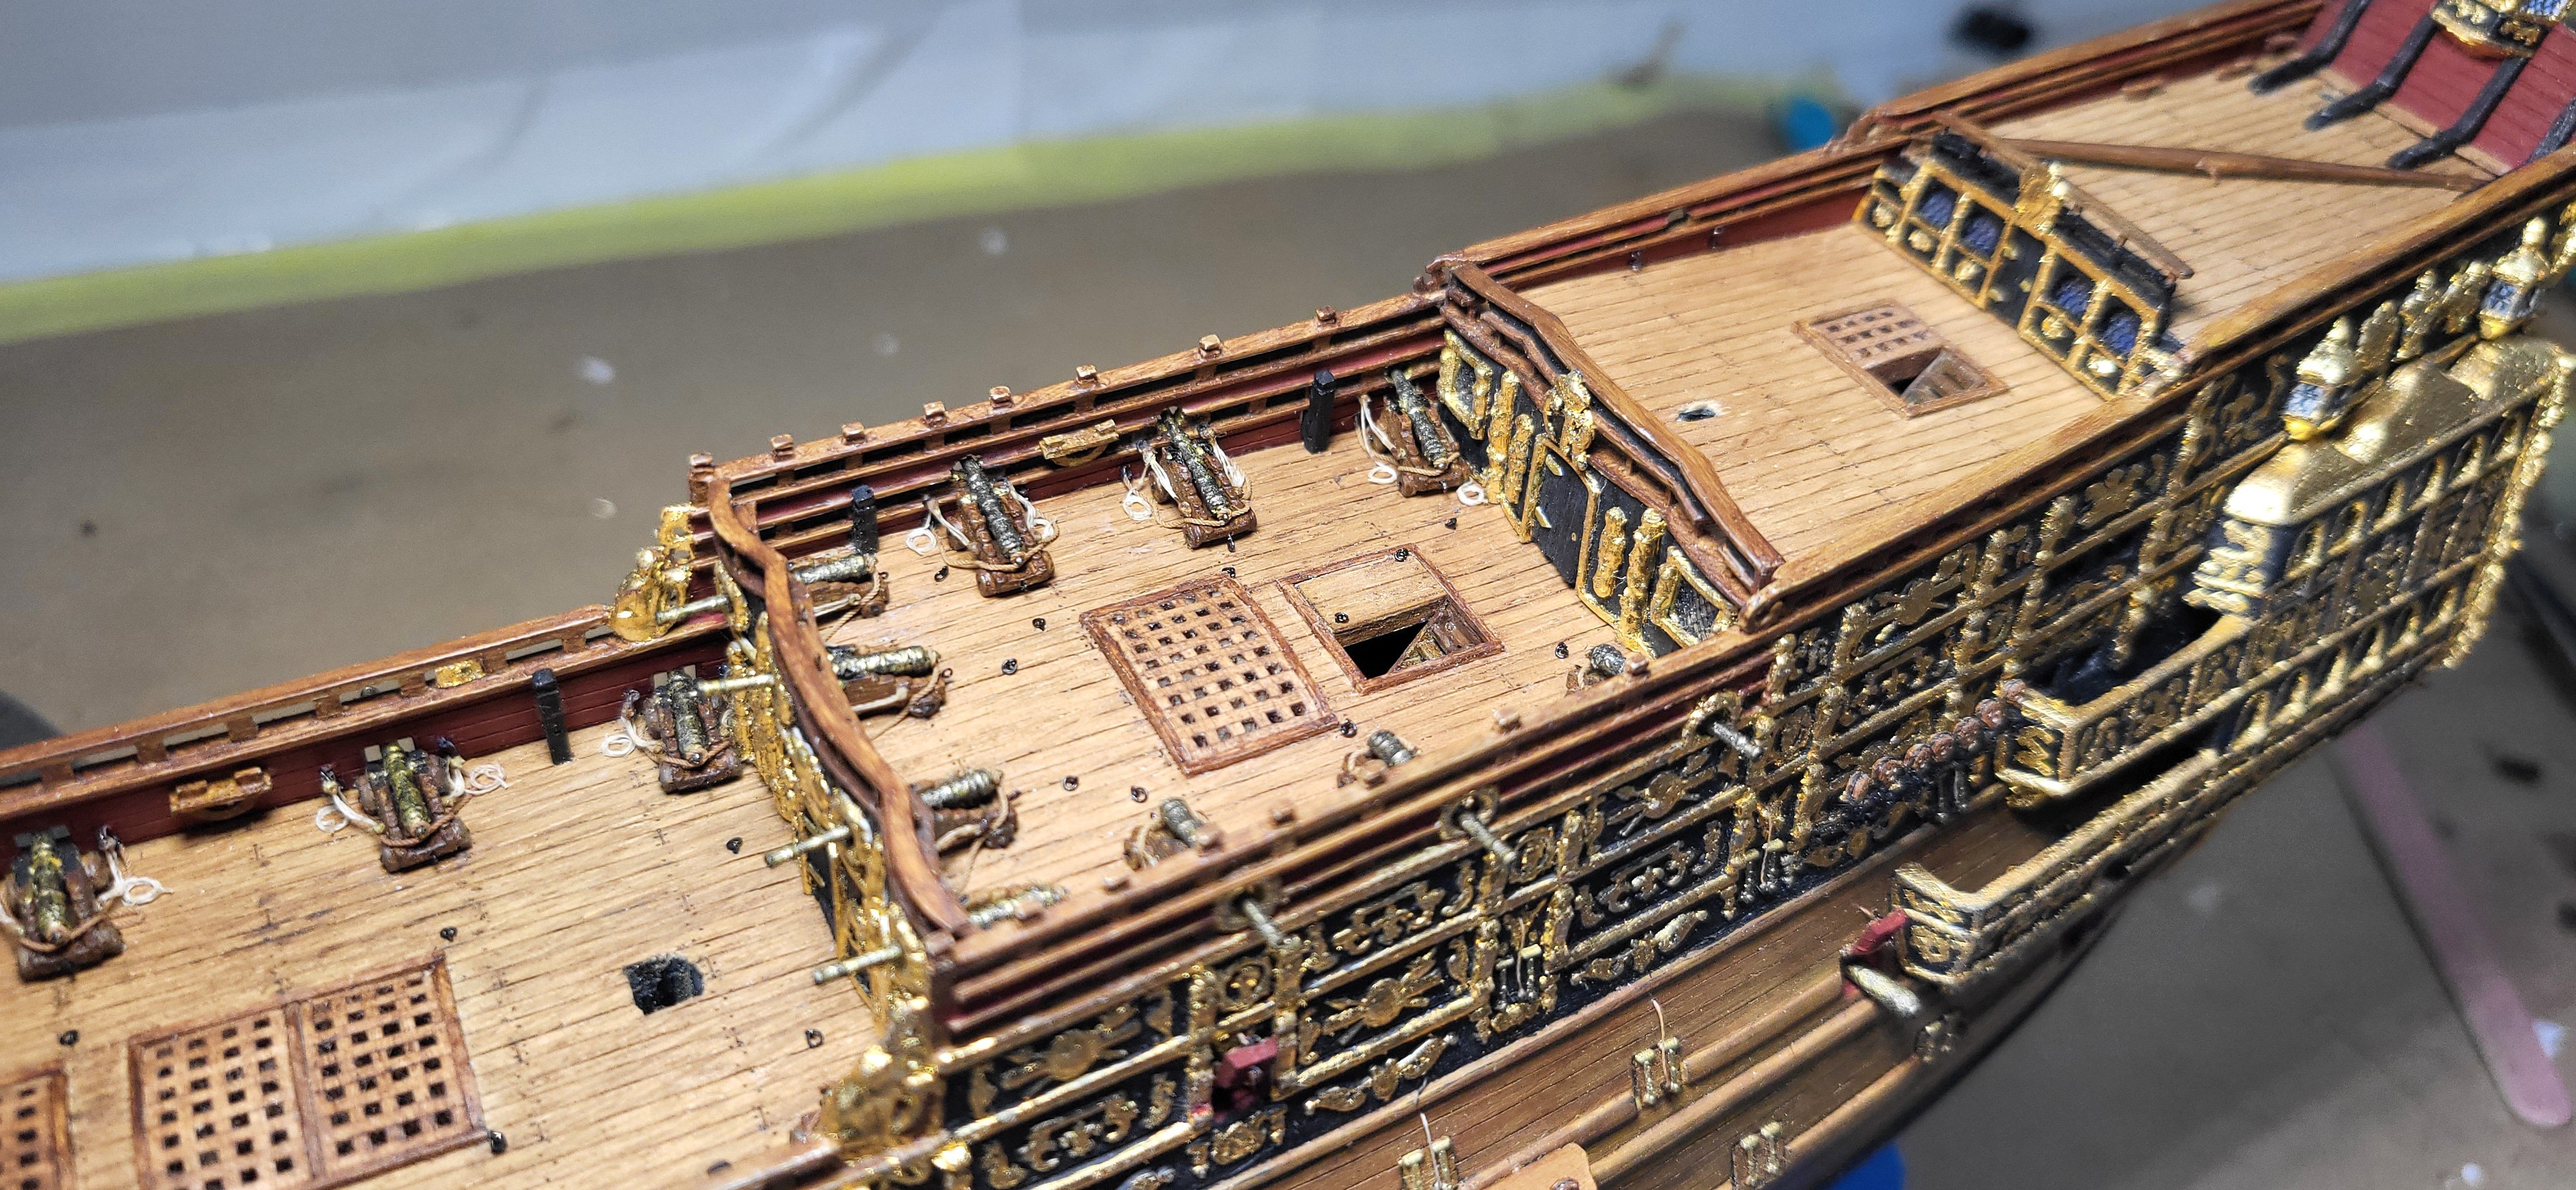
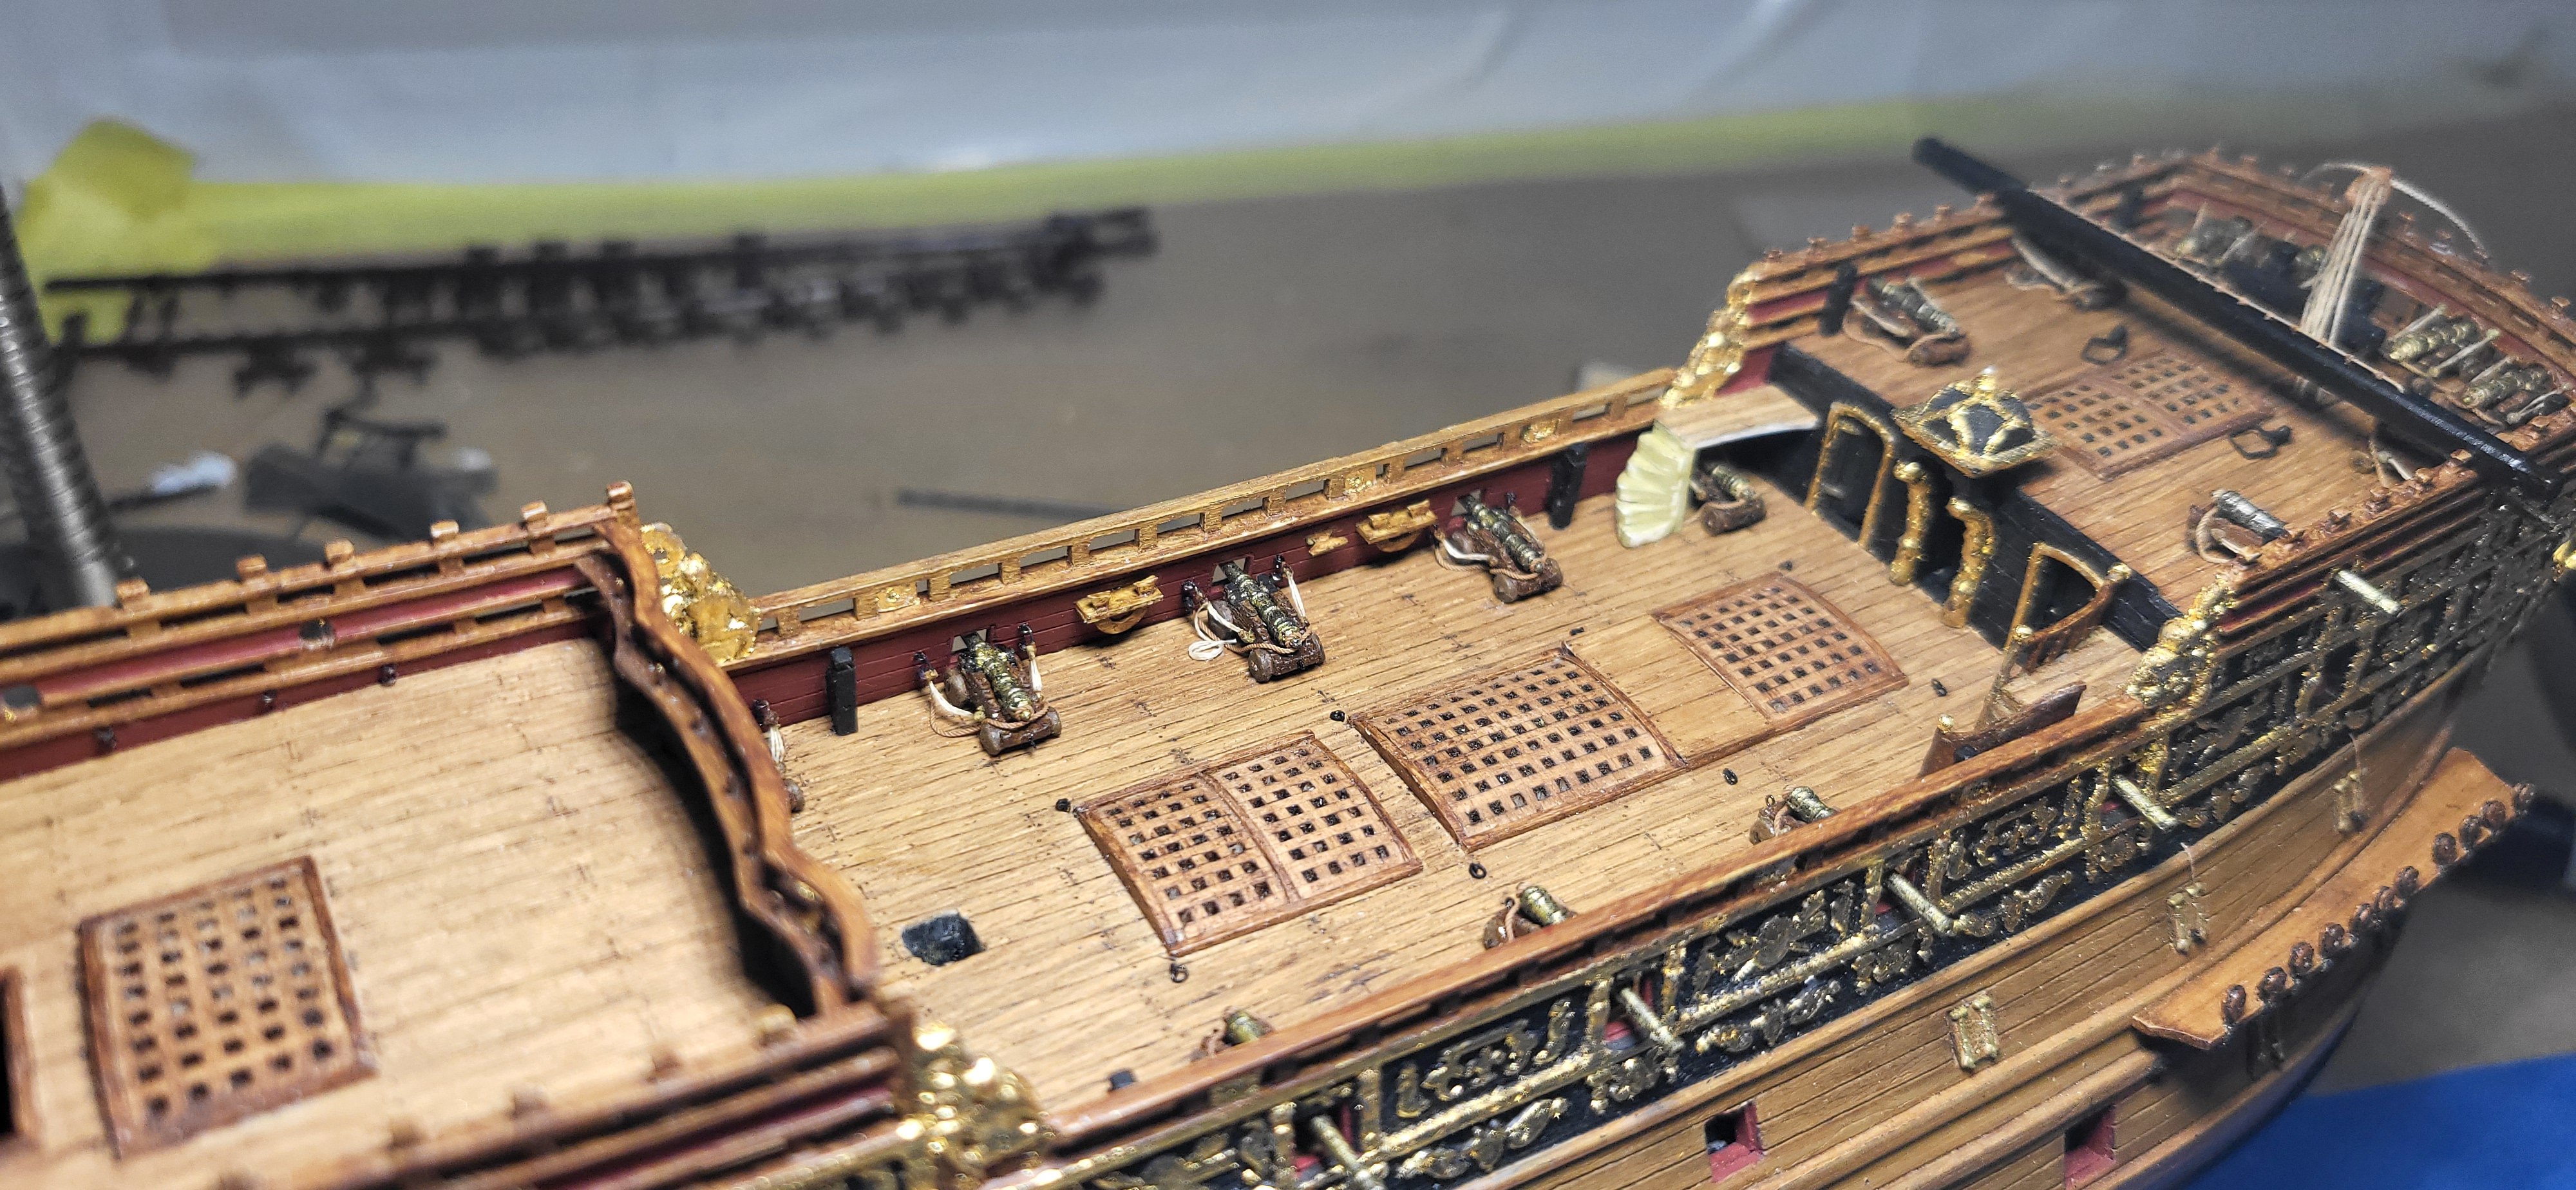
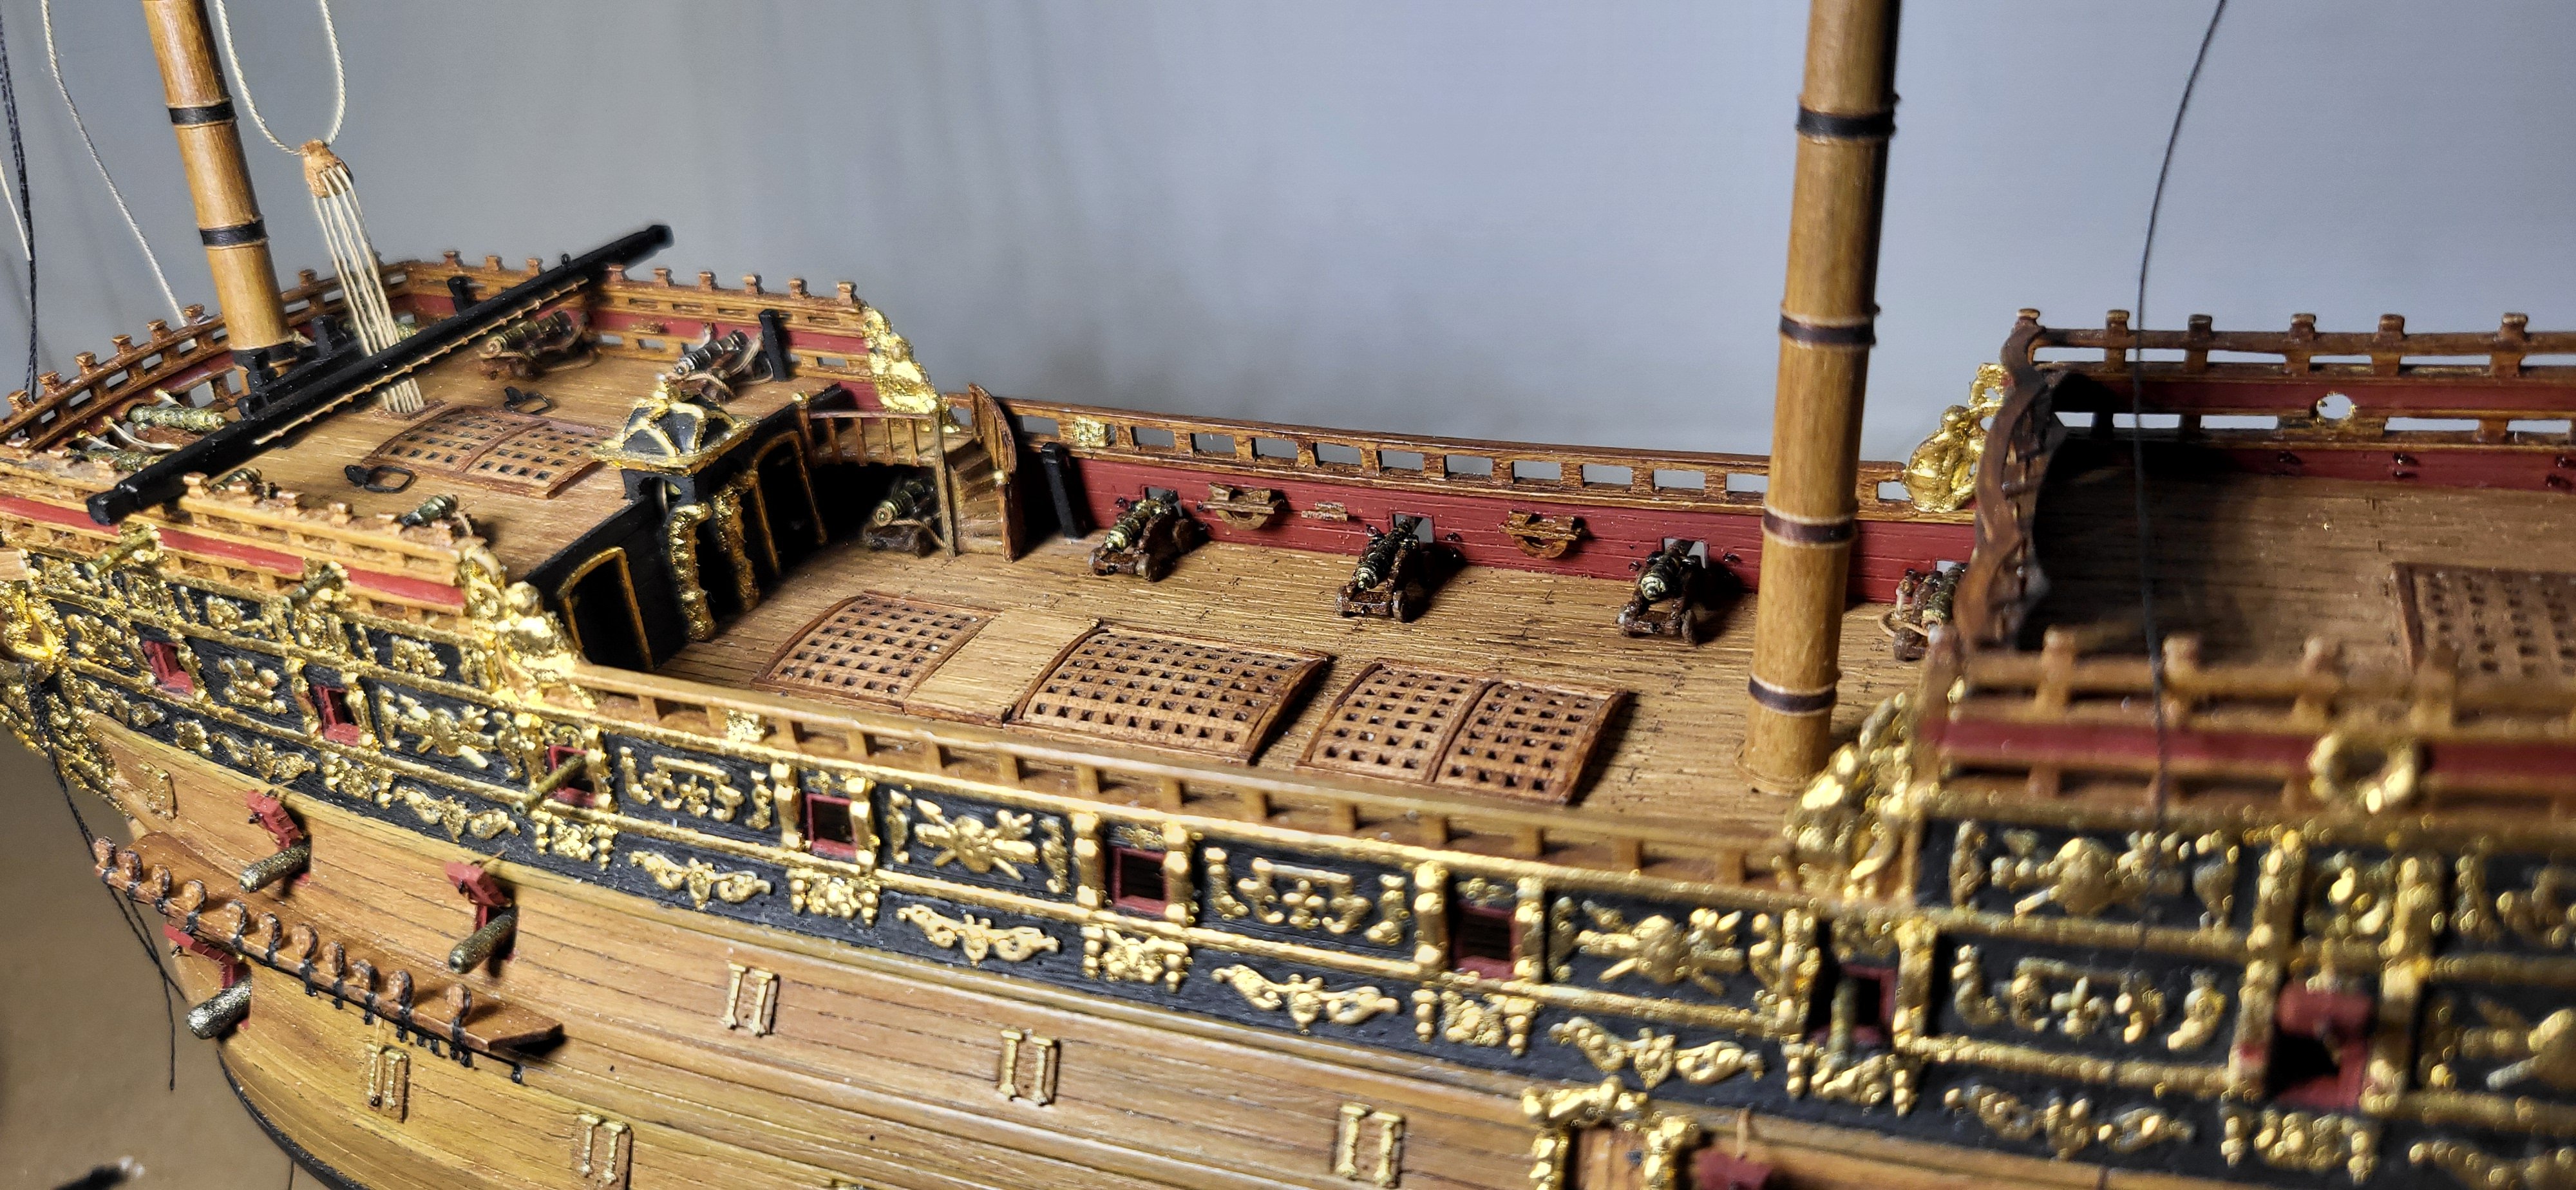
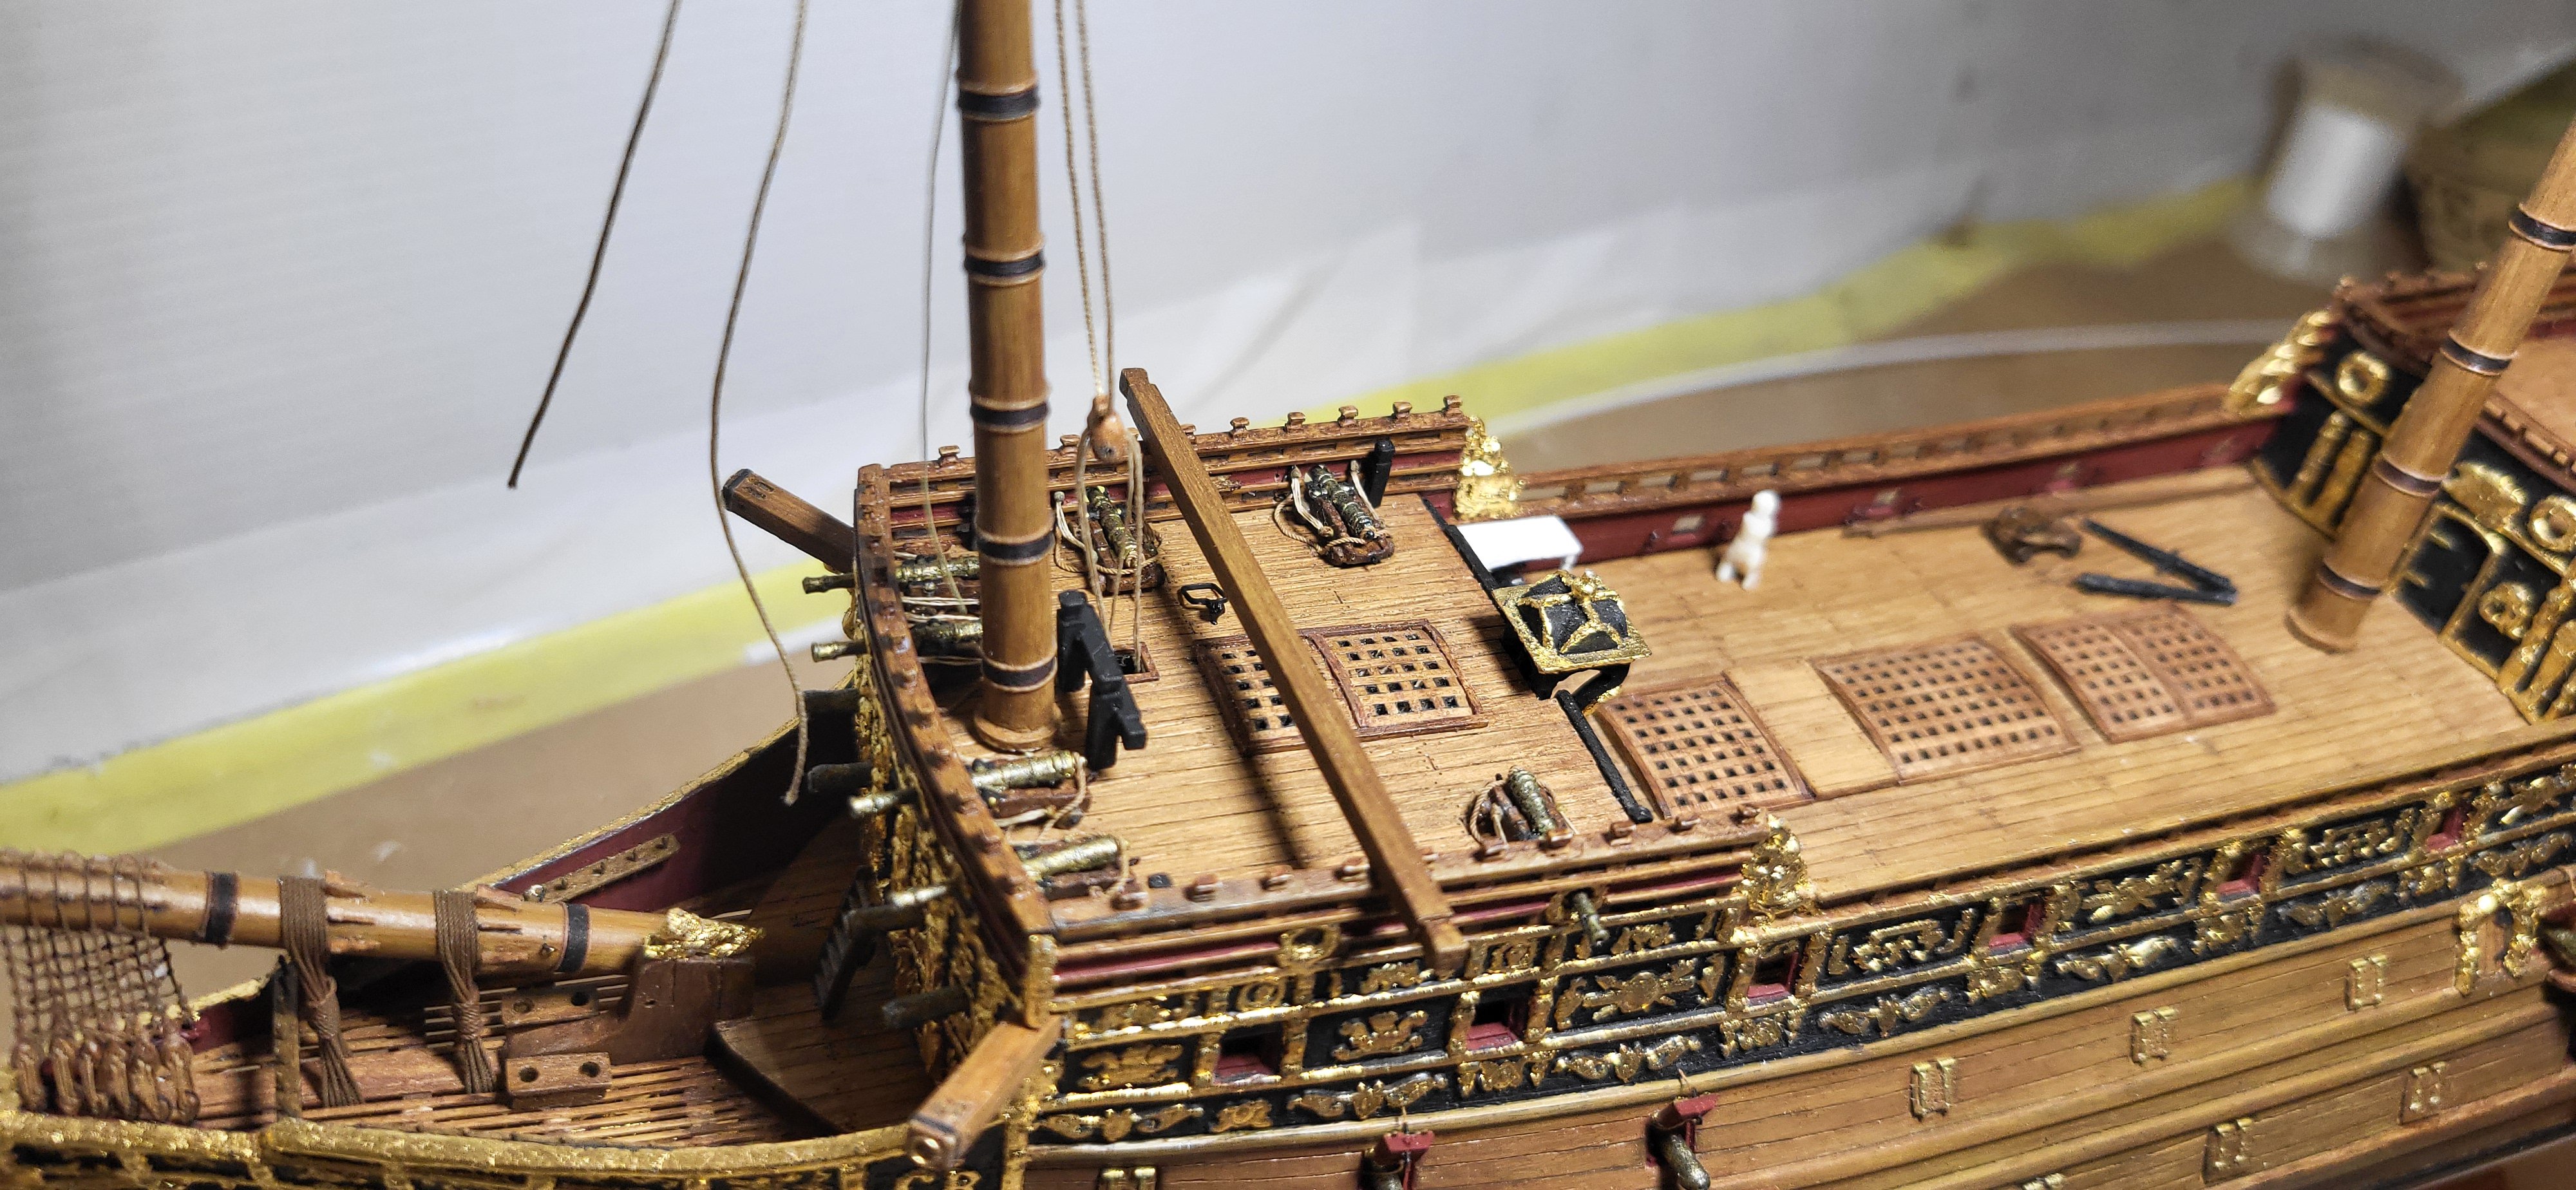
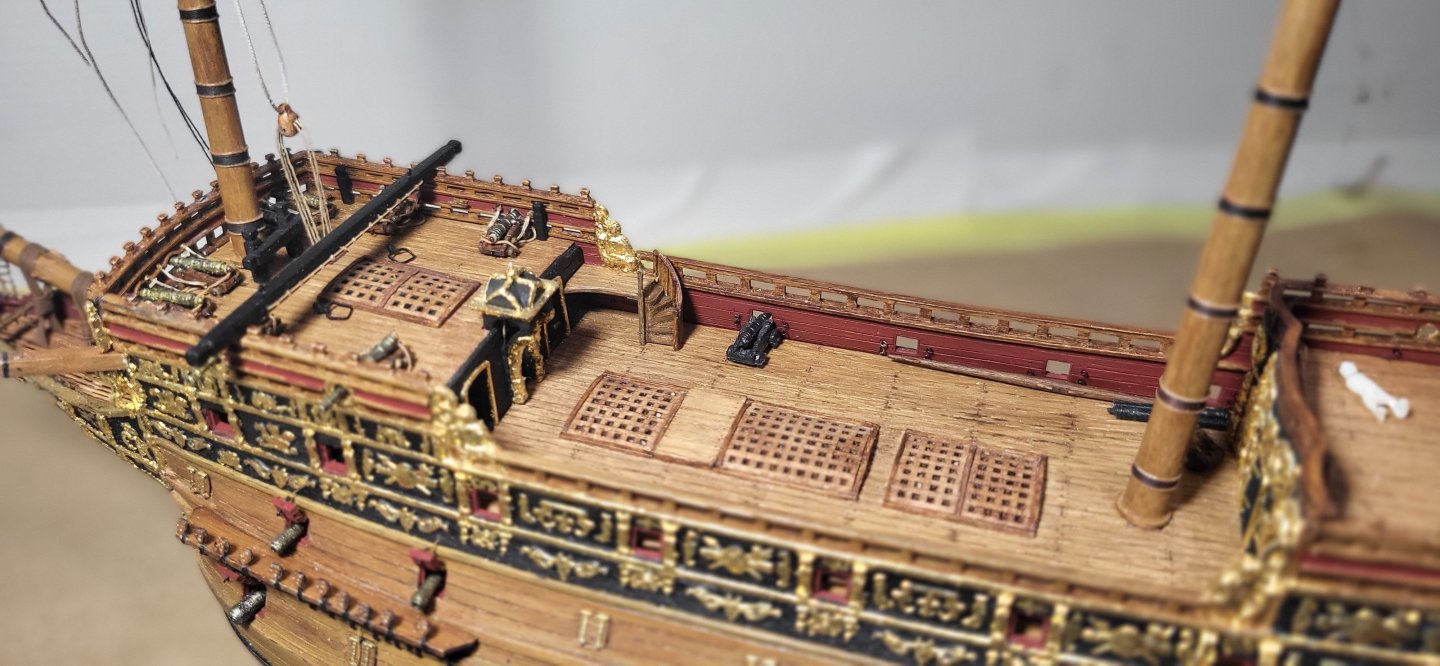
My focus lately has been dressing out the main deck, fabricating the necessary kevels, cleats and cavals along with the cannons, still much work left to do but looking promising. As always, I appreciate the comments and likes! Michael D.

- 324 replies
-
- 5
-
-
-
- Sovereign of the Seas
- Airfix
- (and 1 more)
-
Hi Waldemar, Thank you for the compliment, I went with McKay's measurement of 37"-7" and your right it seems a bit too long, so I looked closer into the hull construction section and McKay lists half breadth at 23'-6" so 47'. Lee's mentions the davit is 7/9 the breadth of the ship which equates to 36'-5", better than a foot shorter, here's a comparison, original one is 68mm and the revised version is 66mm, visually not a whole of difference and still extends out further than the one on Victory 1737, I suppose I could shorten it still? Thanks for pointing that out, Waldemar, all the best. Michael D.


- 324 replies
-
- 3
-
-
- Sovereign of the Seas
- Airfix
- (and 1 more)
-
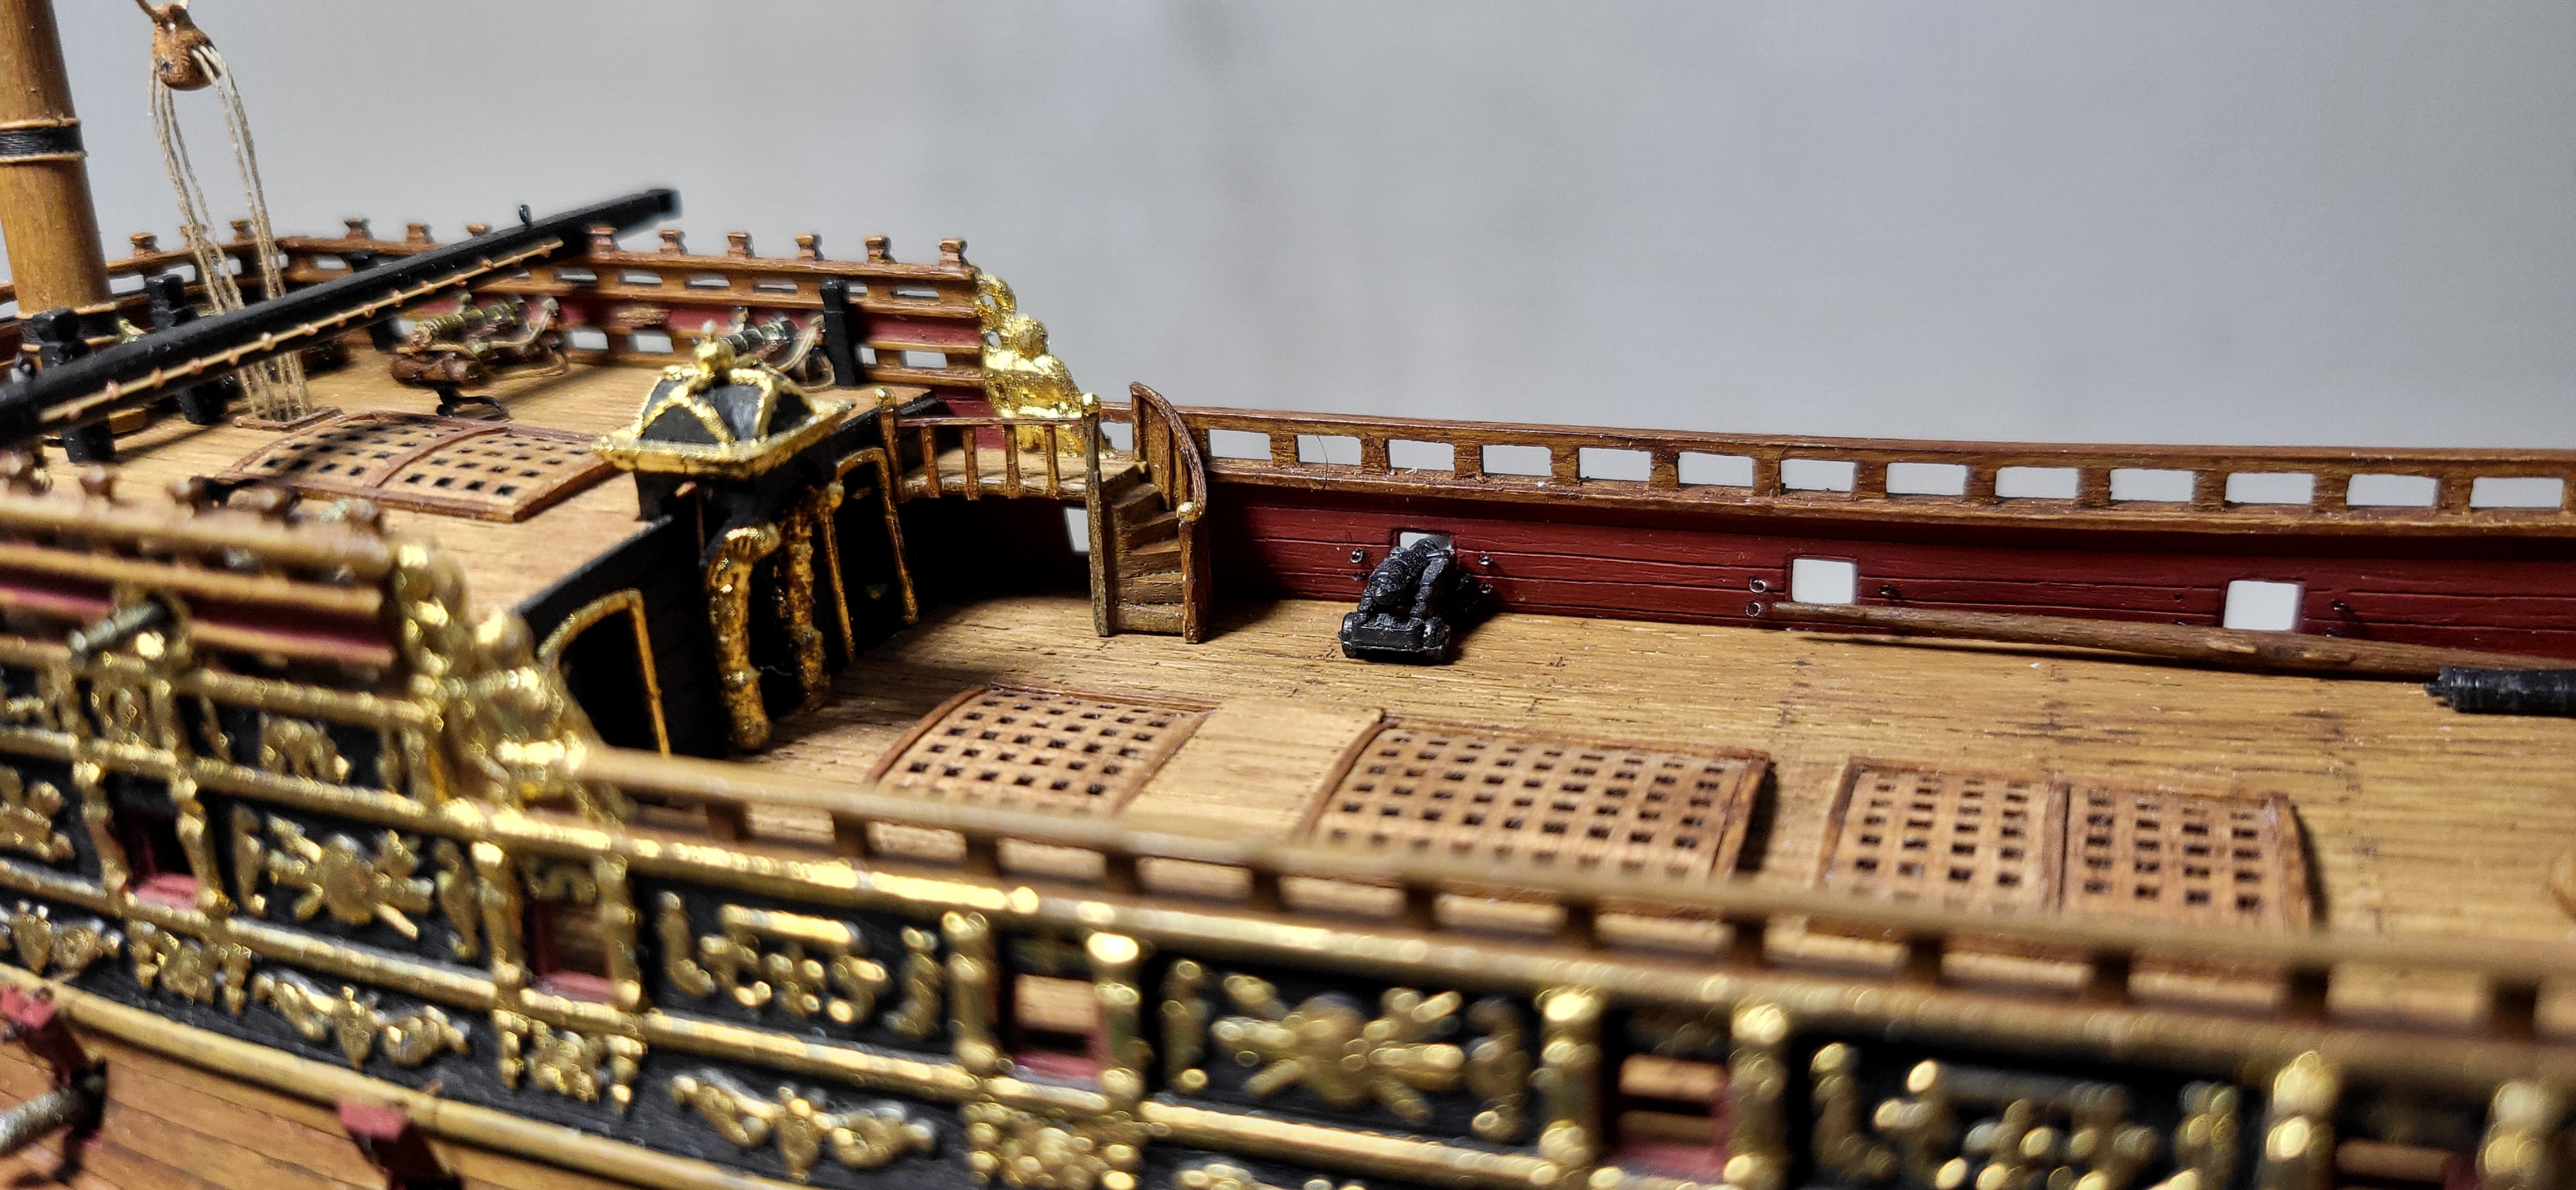
Thank you, Patrick, it means a lot coming from you! The staircase and gangway are finally completed, all in all I'm happy with it and now on to the port side. Michael D.


- 324 replies
-
- 6
-
-
-
- Sovereign of the Seas
- Airfix
- (and 1 more)
-
Thank you so much Ian, I used .20mm rope and 100wt thread for knots which are just overhand knots as to not look too bulky. A few progress pics, the stair railings are about complete minus the post caps, I wrapped the stairs with paper, glued in the balusters, coated both sides with CA and glued in placed, the cap railing is 0.38mm x 0.50mm. Thanks for looking. Michael D.

- 324 replies
-
- 5
-
-
-
- Sovereign of the Seas
- Airfix
- (and 1 more)
-
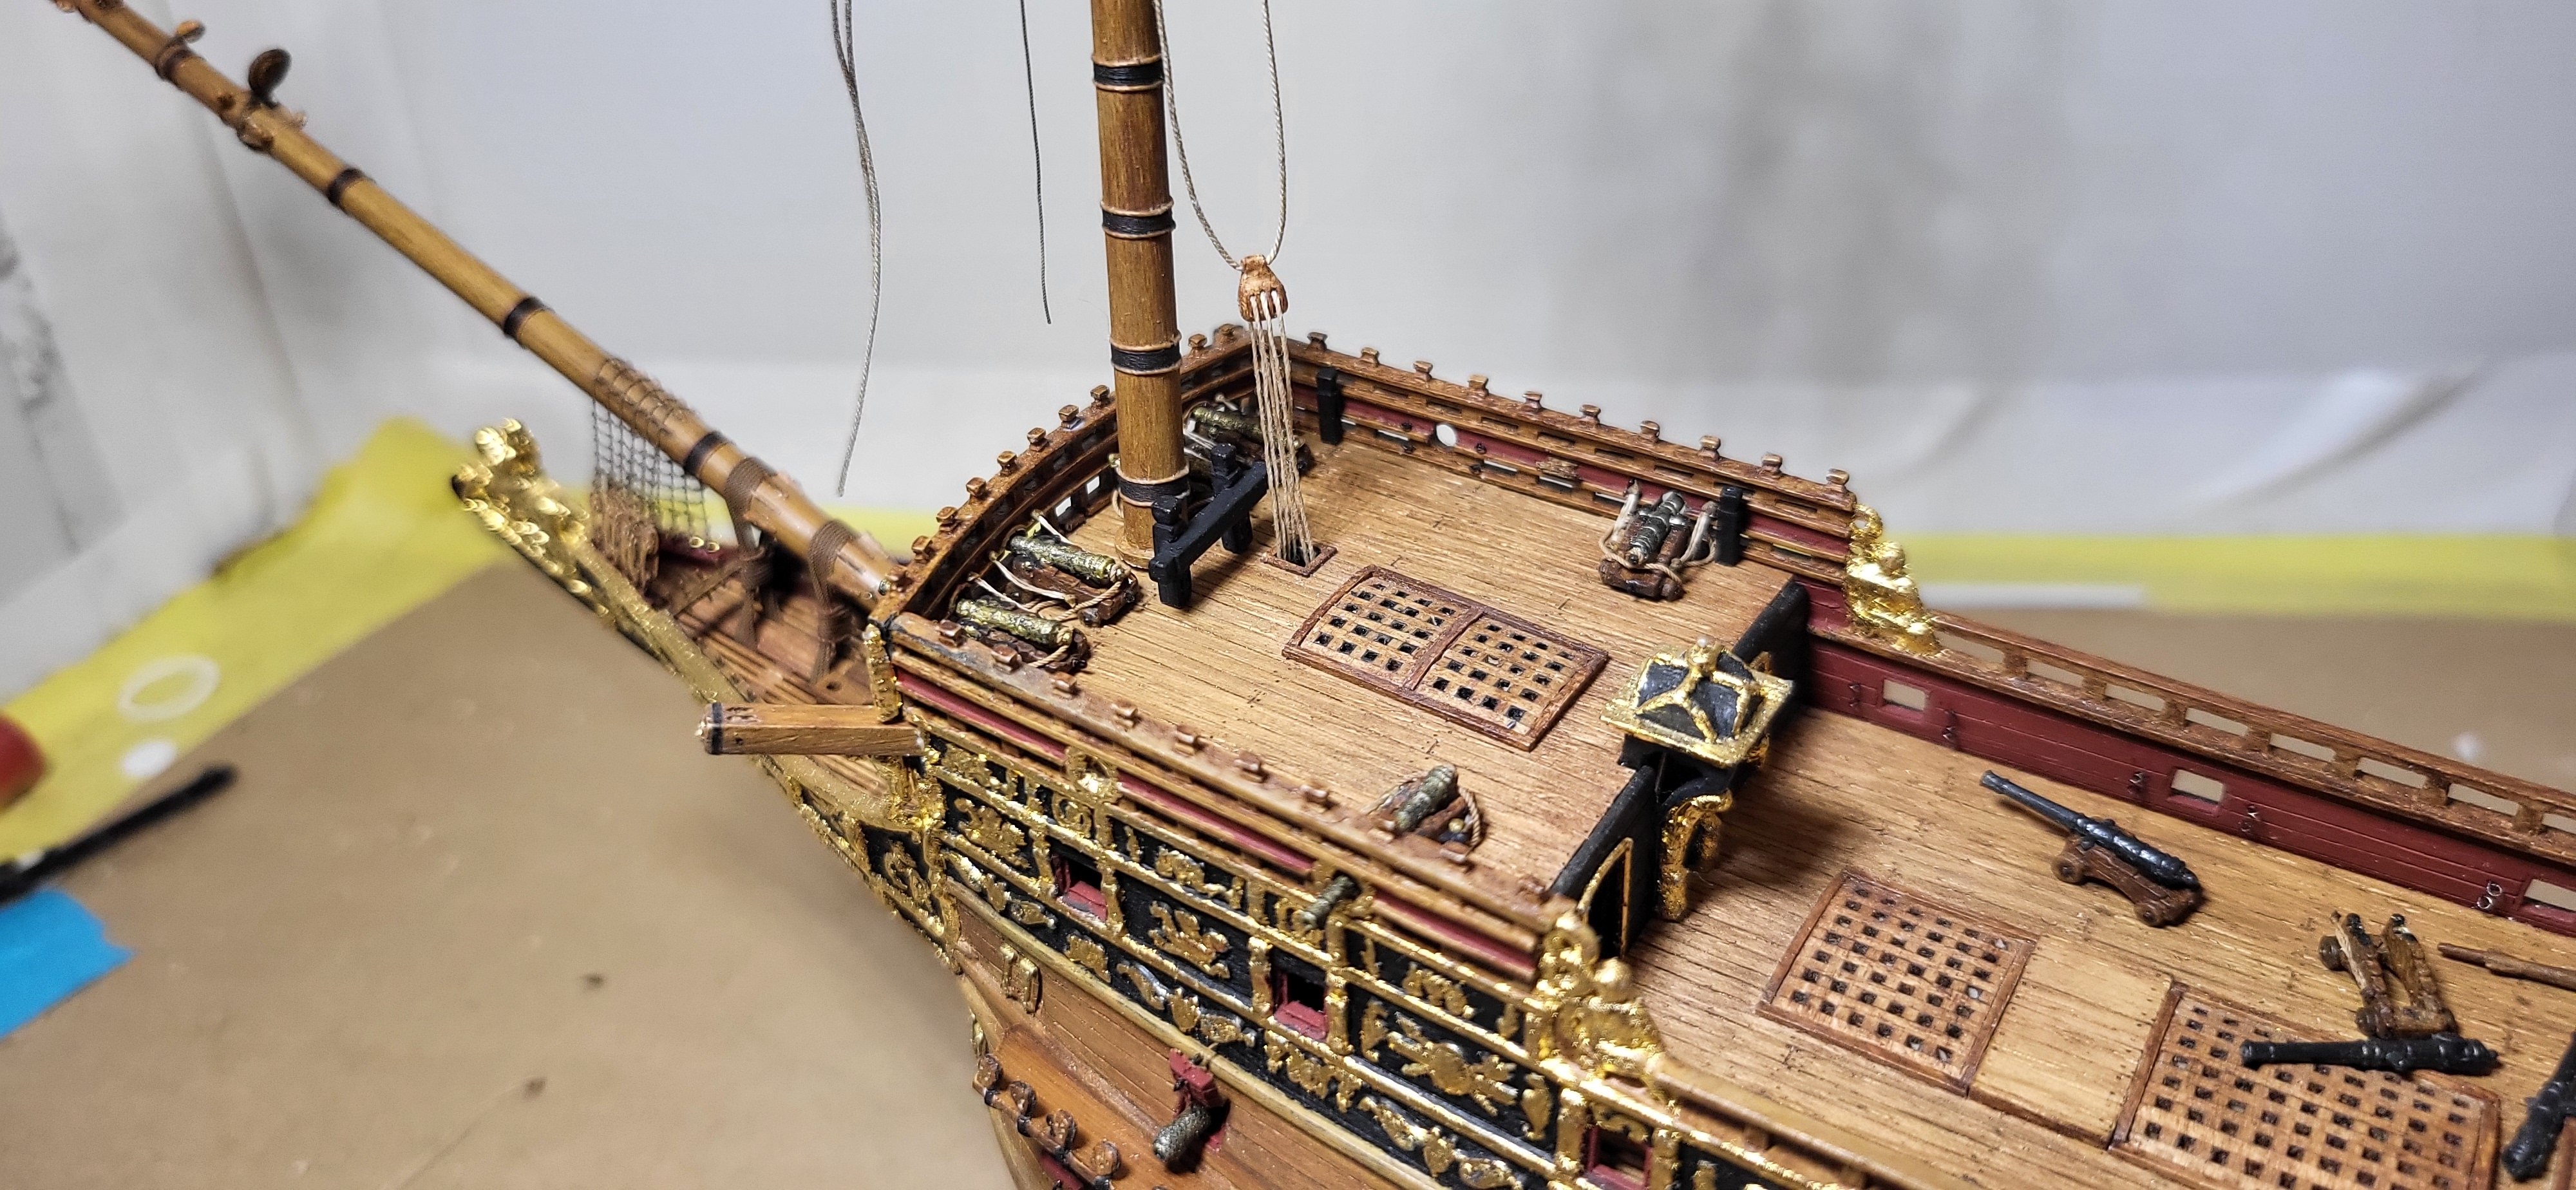
With the fish davit about 90% complete, I started work on the short gangway and stairs leading to the forecastle, I highly doubt they were in use early on especially with the grating covering the main deck, maybe a bit later? but I like the look of them, still a lot of work left to do regarding the railings. Michael D.


- 324 replies
-
- 5
-
-
-
- Sovereign of the Seas
- Airfix
- (and 1 more)
-
Hi John, It is a bit maddening working at this scale, my first attempt was the airfix vasa and currently working on the SOS and I'm actually enjoying working at this scale, check out my build logs, maybe you might something that may be of use to you? At scale those dead eyes would be around 13" in diameter, so less than 2mm at this scale, minuscule I know, my suggestion to you if you want to use those dead eyes would be to simply strop them with black thread, form a simple knot with and leave a pigtail, coat the knot and pigtail with CA to secure and stiffen the thread and feed into a hole in the hull, it'll look pretty convincing at this scale. I love those cannons by the way, I'll have to order some for my build. Michael D. '
-
Shipman and Marc, I've always wondered about this also, but found no info regarding storage of the fish davit other than what Lee's mentions that It's placed athwartship on the forecastle, also both HMS Victory of 1737 and HMS medway of 1742 show the fish davit placed across the forecastle, I followed suit on my Victory of 1765, I know these are much later, but some things didn't really change much in a 100 years. I think it wasn't until after 1773 the fish davit was reduced in size and placed on the fore channels or thereabout? Michael D.
- 324 replies
-
- 1
-
-
- Sovereign of the Seas
- Airfix
- (and 1 more)
-
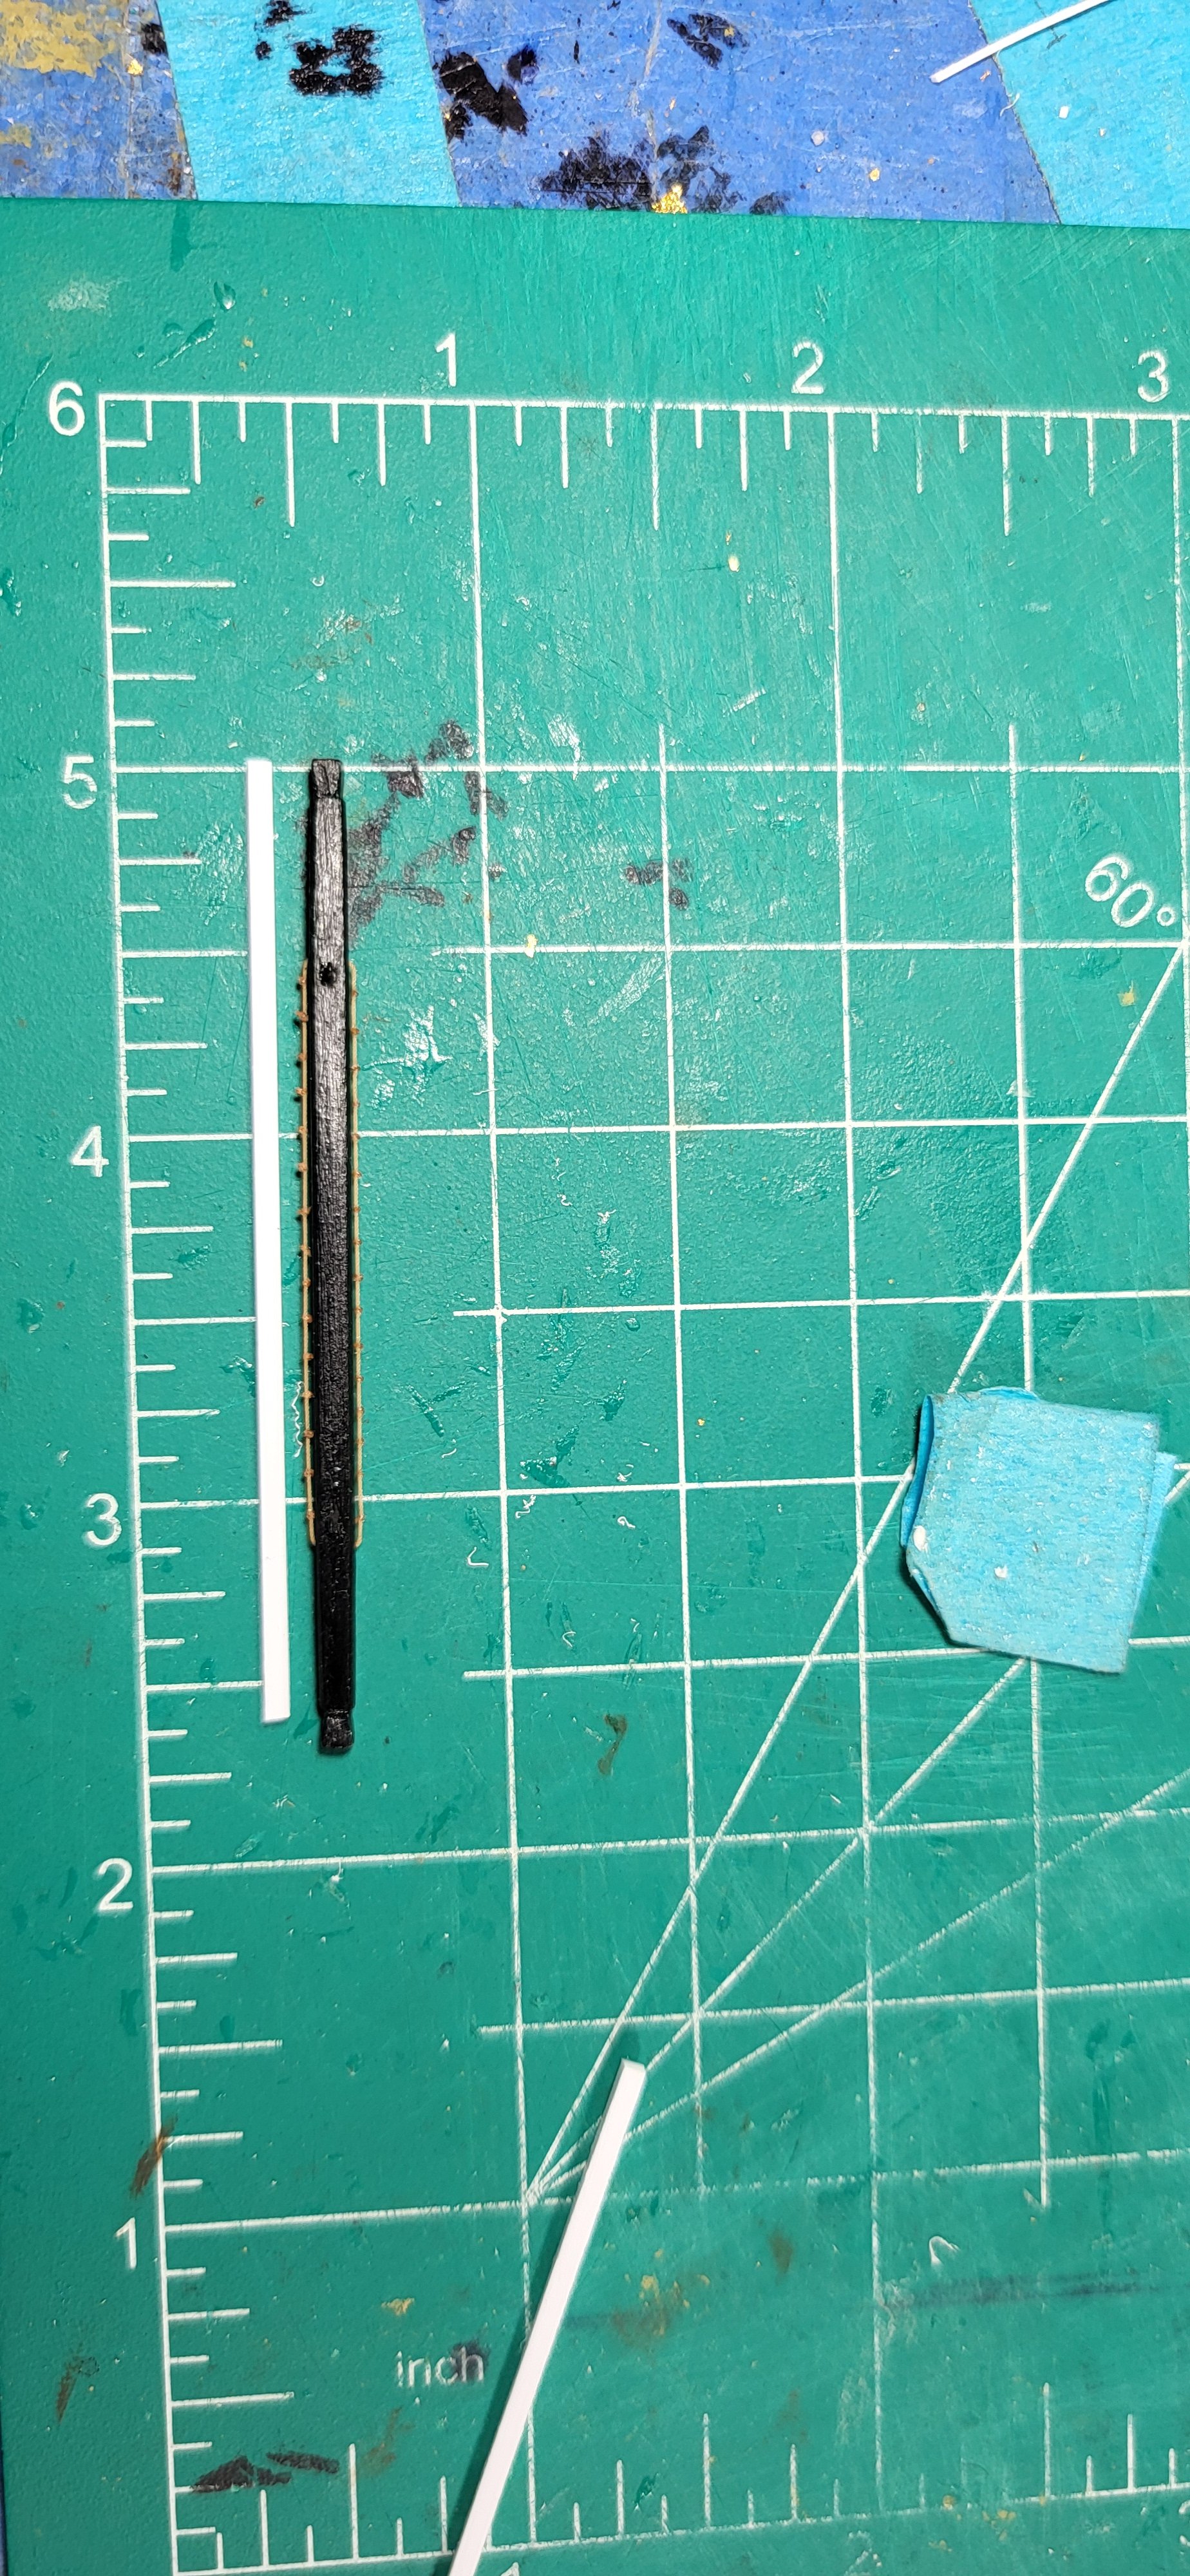
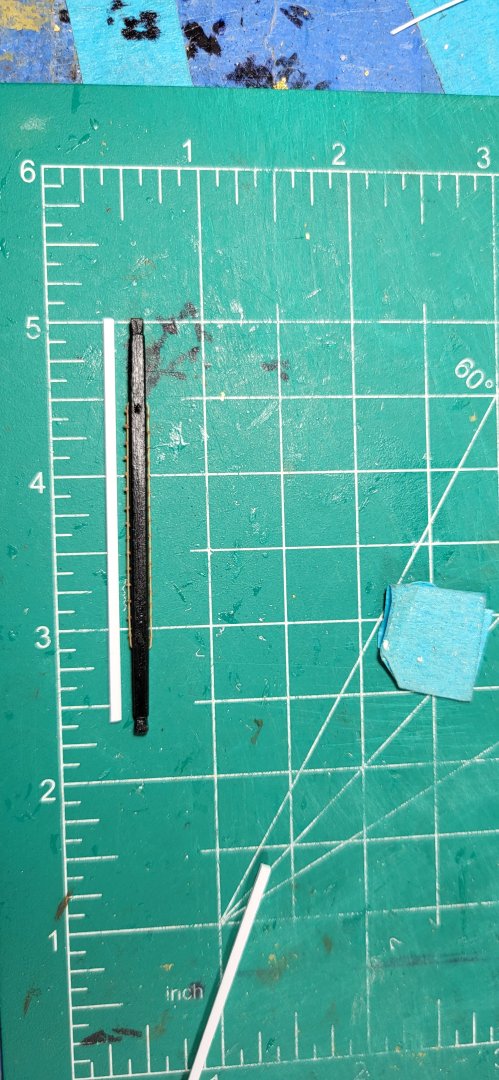
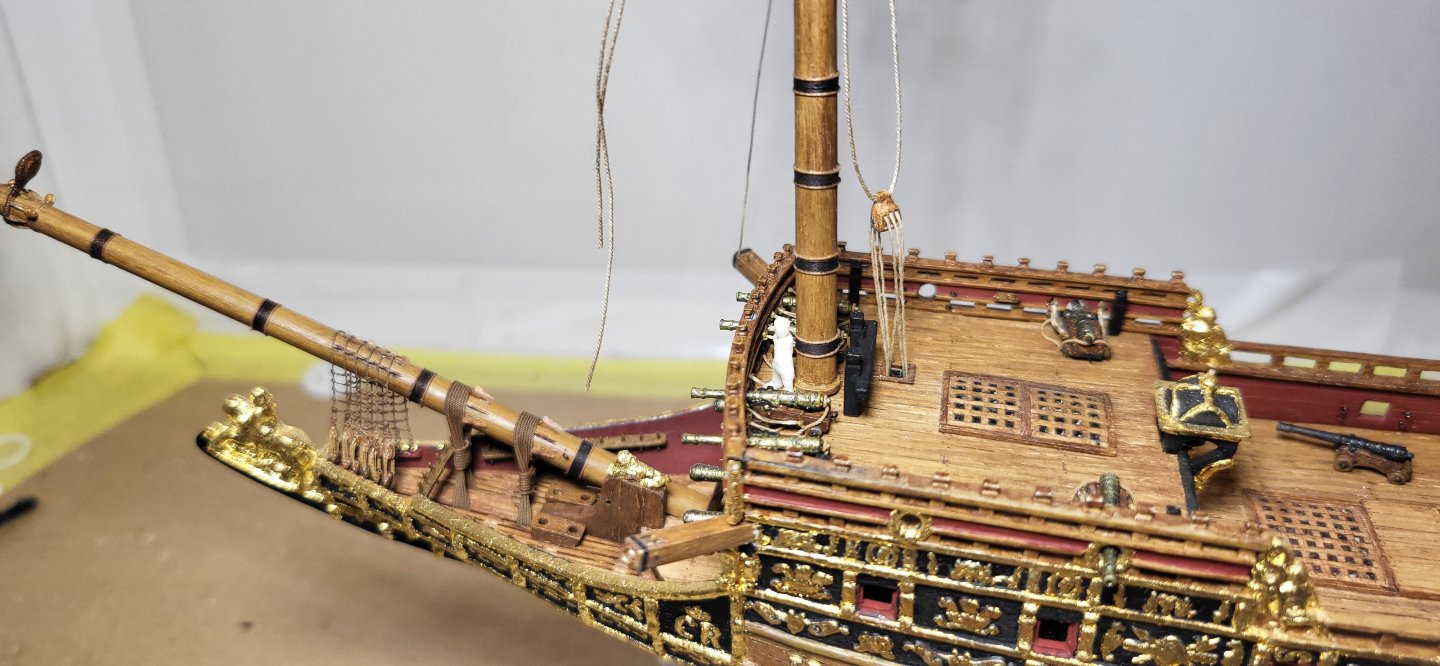
Forecastle deck is starting to get a little crowded, with one cannon left do I started fabricating the fish davit, I know this piece is usually never displayed, but I like the detail..... this measures out at 37'-7" and about 18" square, at this scale it's 68mm in length and 2.7mm square, also have one span shackle fabricated and I suspect these could be rotated out of the way or removed when not in use to clear the deck around the cannon? anyways everything is looking presentable at this stage. Michael D.

- 324 replies
-
- 10
-
-
-
- Sovereign of the Seas
- Airfix
- (and 1 more)
-
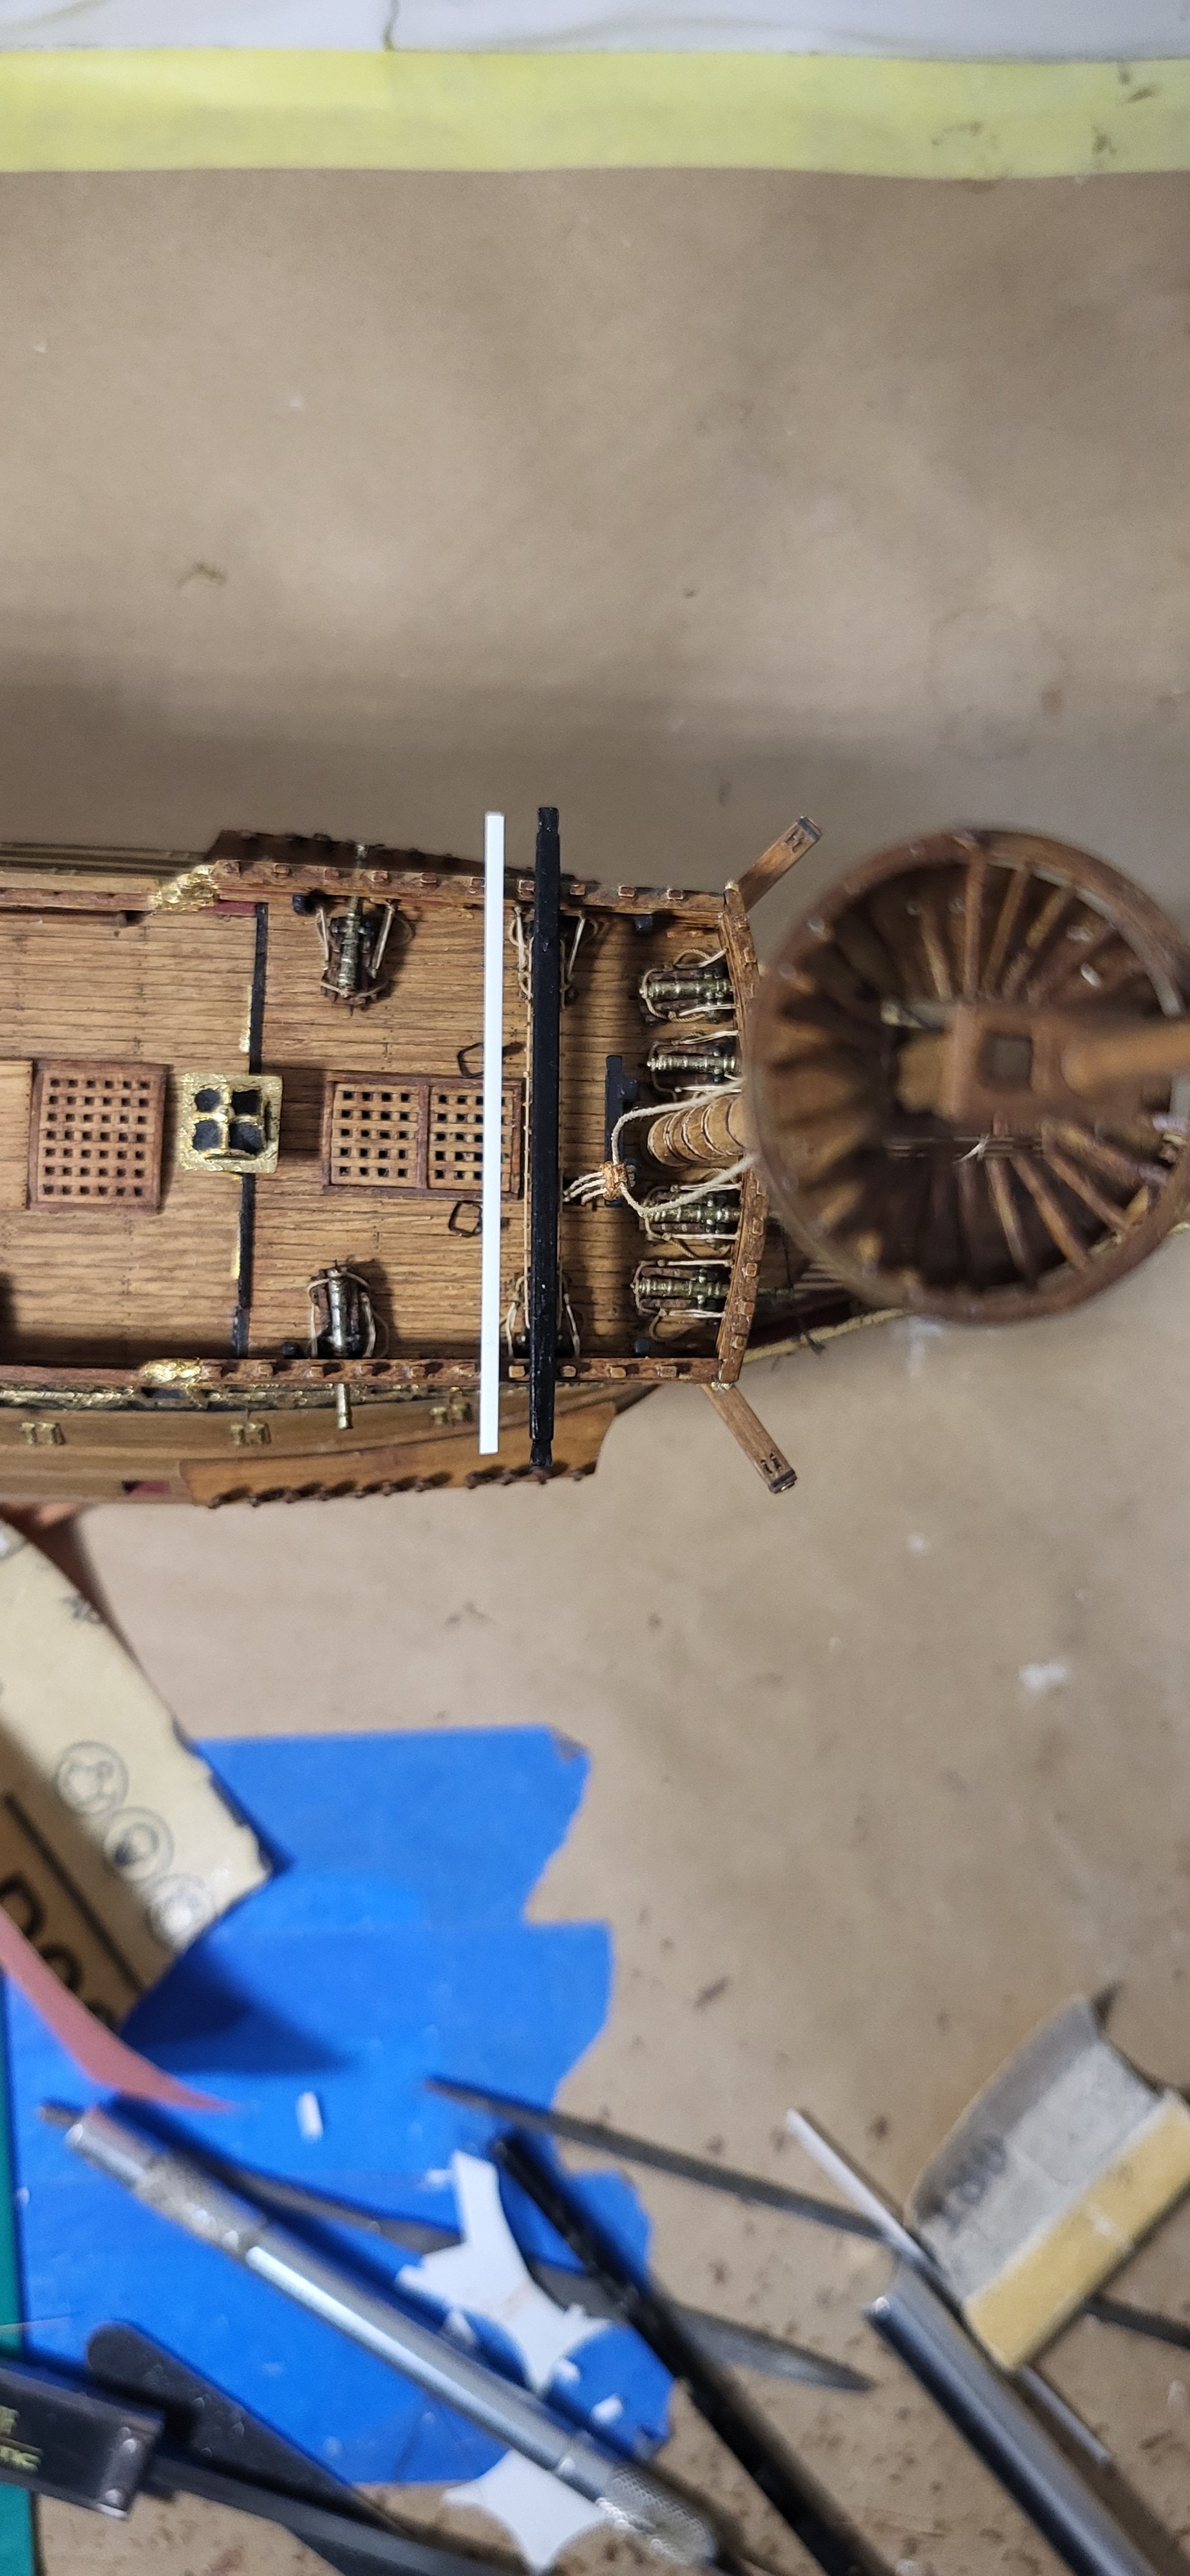
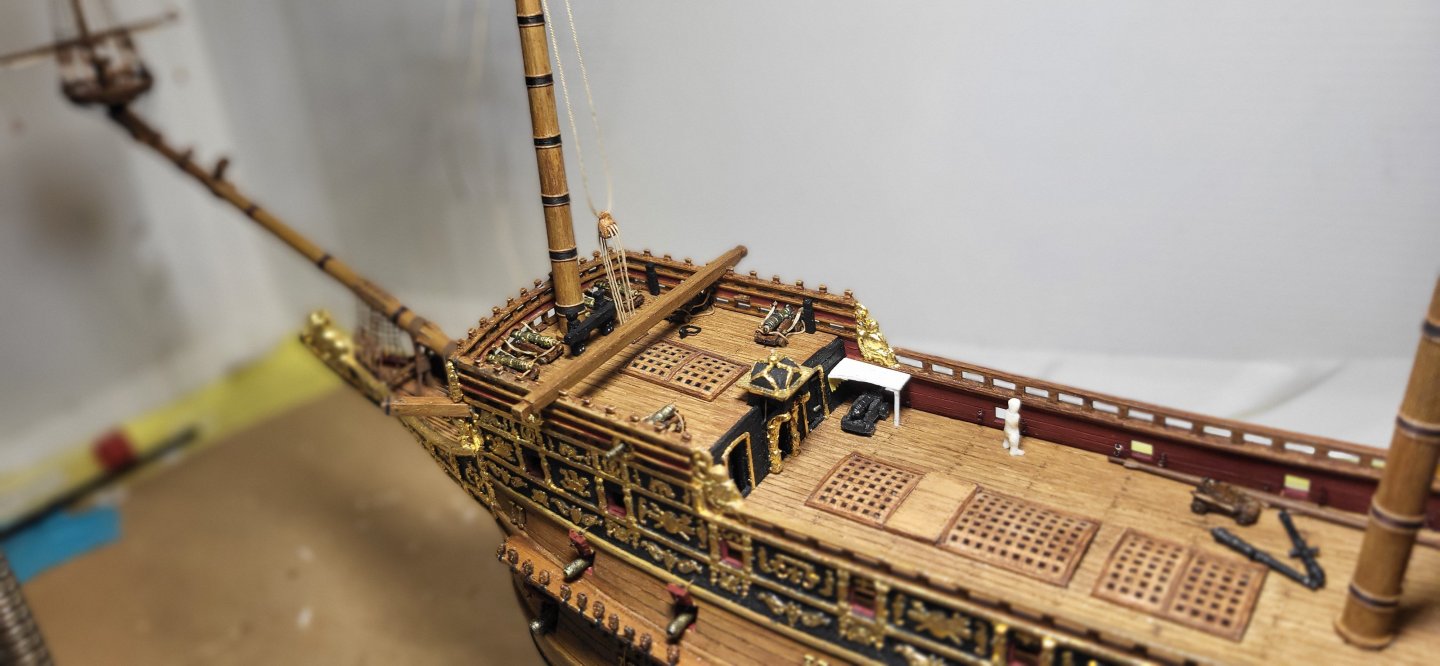
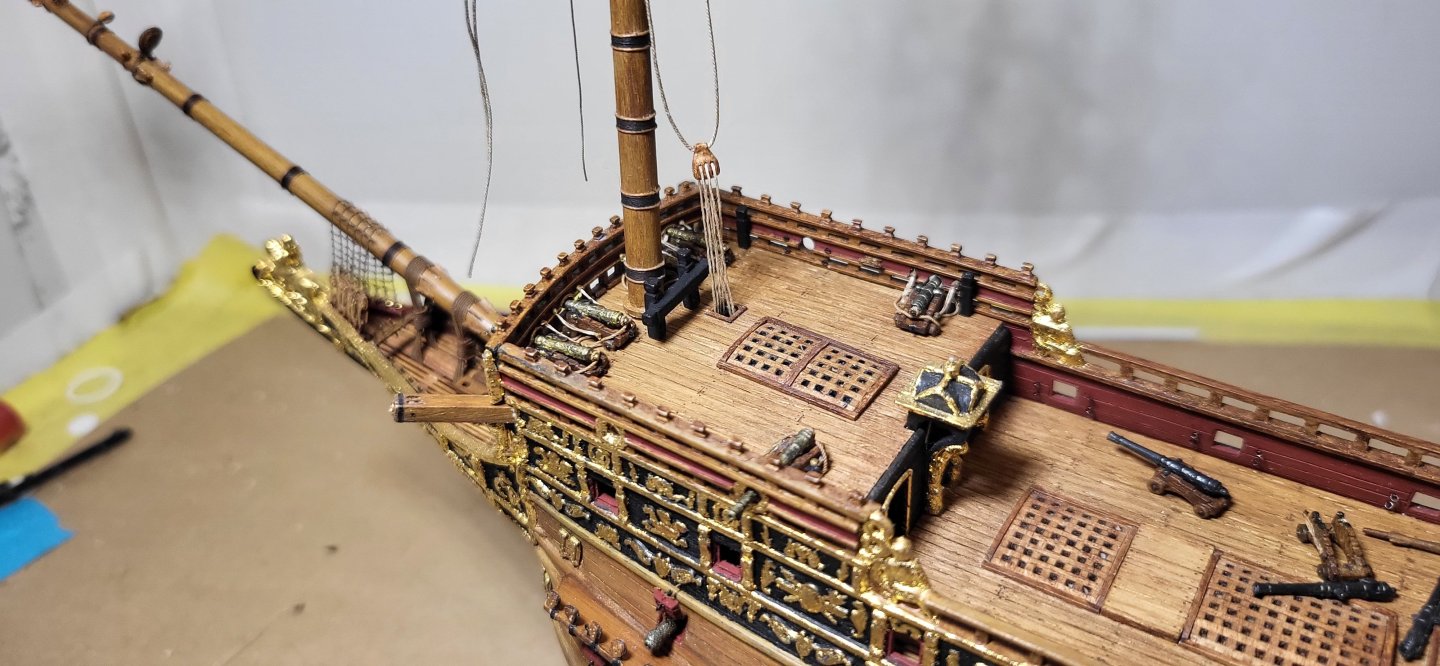
Now that the masts are completed, I shifted my focus back the forecastle by finishing up the cannons, fabricating the fore bitts and adding misc. cleats, still aways to go though. The armless crew member is there for double checking the scale, he stands around 5'-9". Thanks for looking. Michael D.
- 324 replies
-
- 8
-
-
-
- Sovereign of the Seas
- Airfix
- (and 1 more)
-
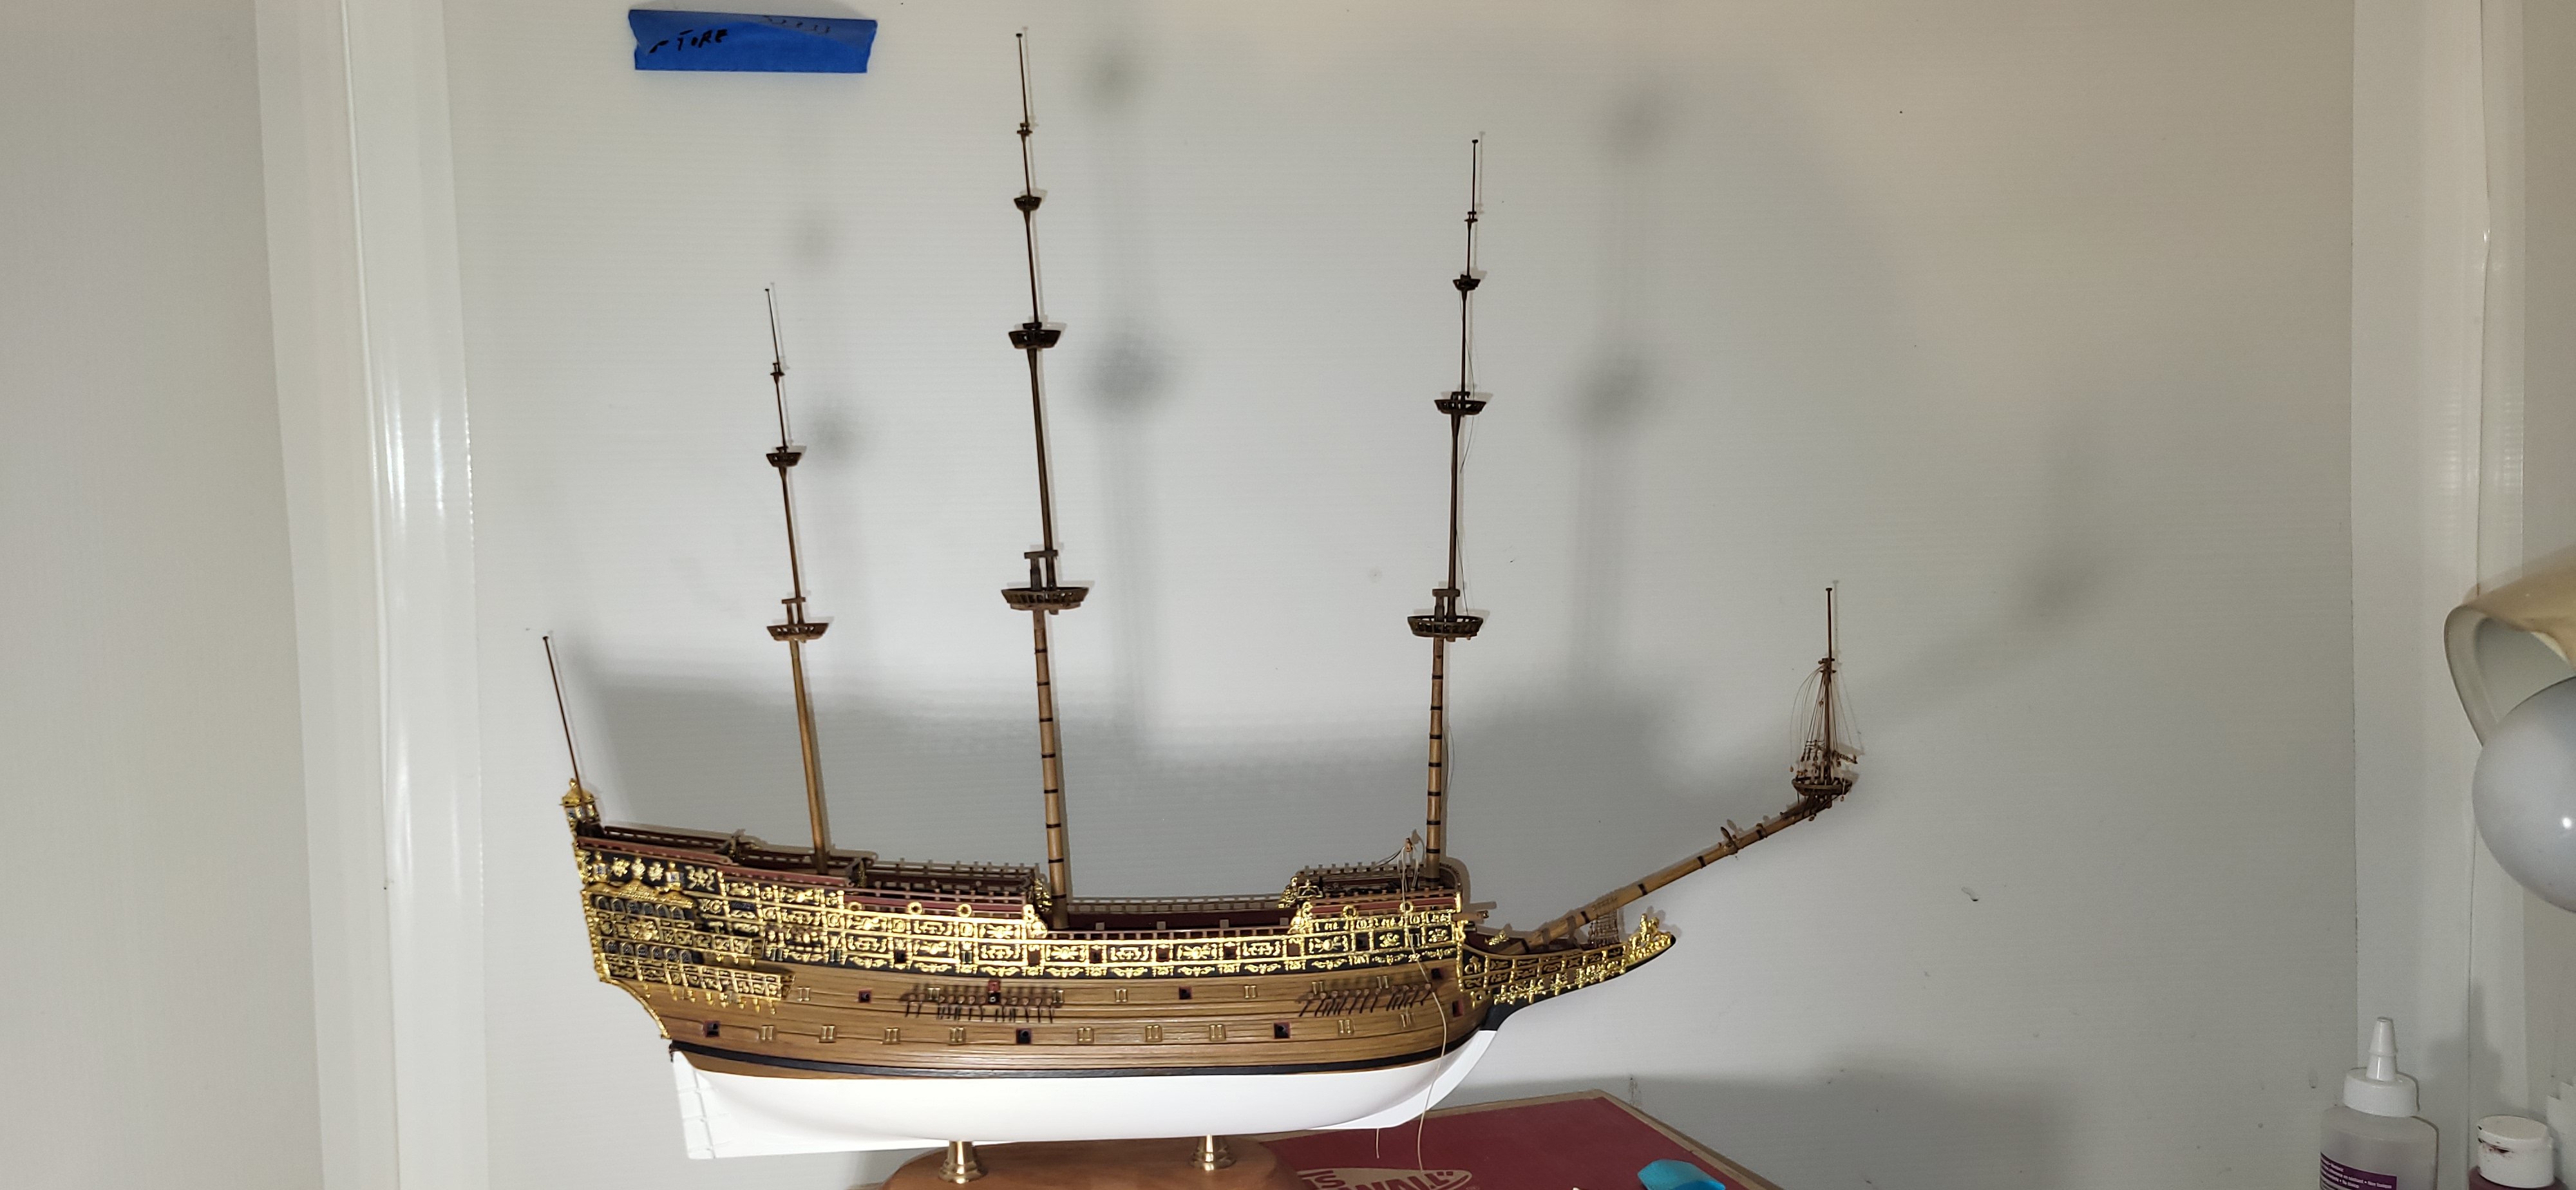
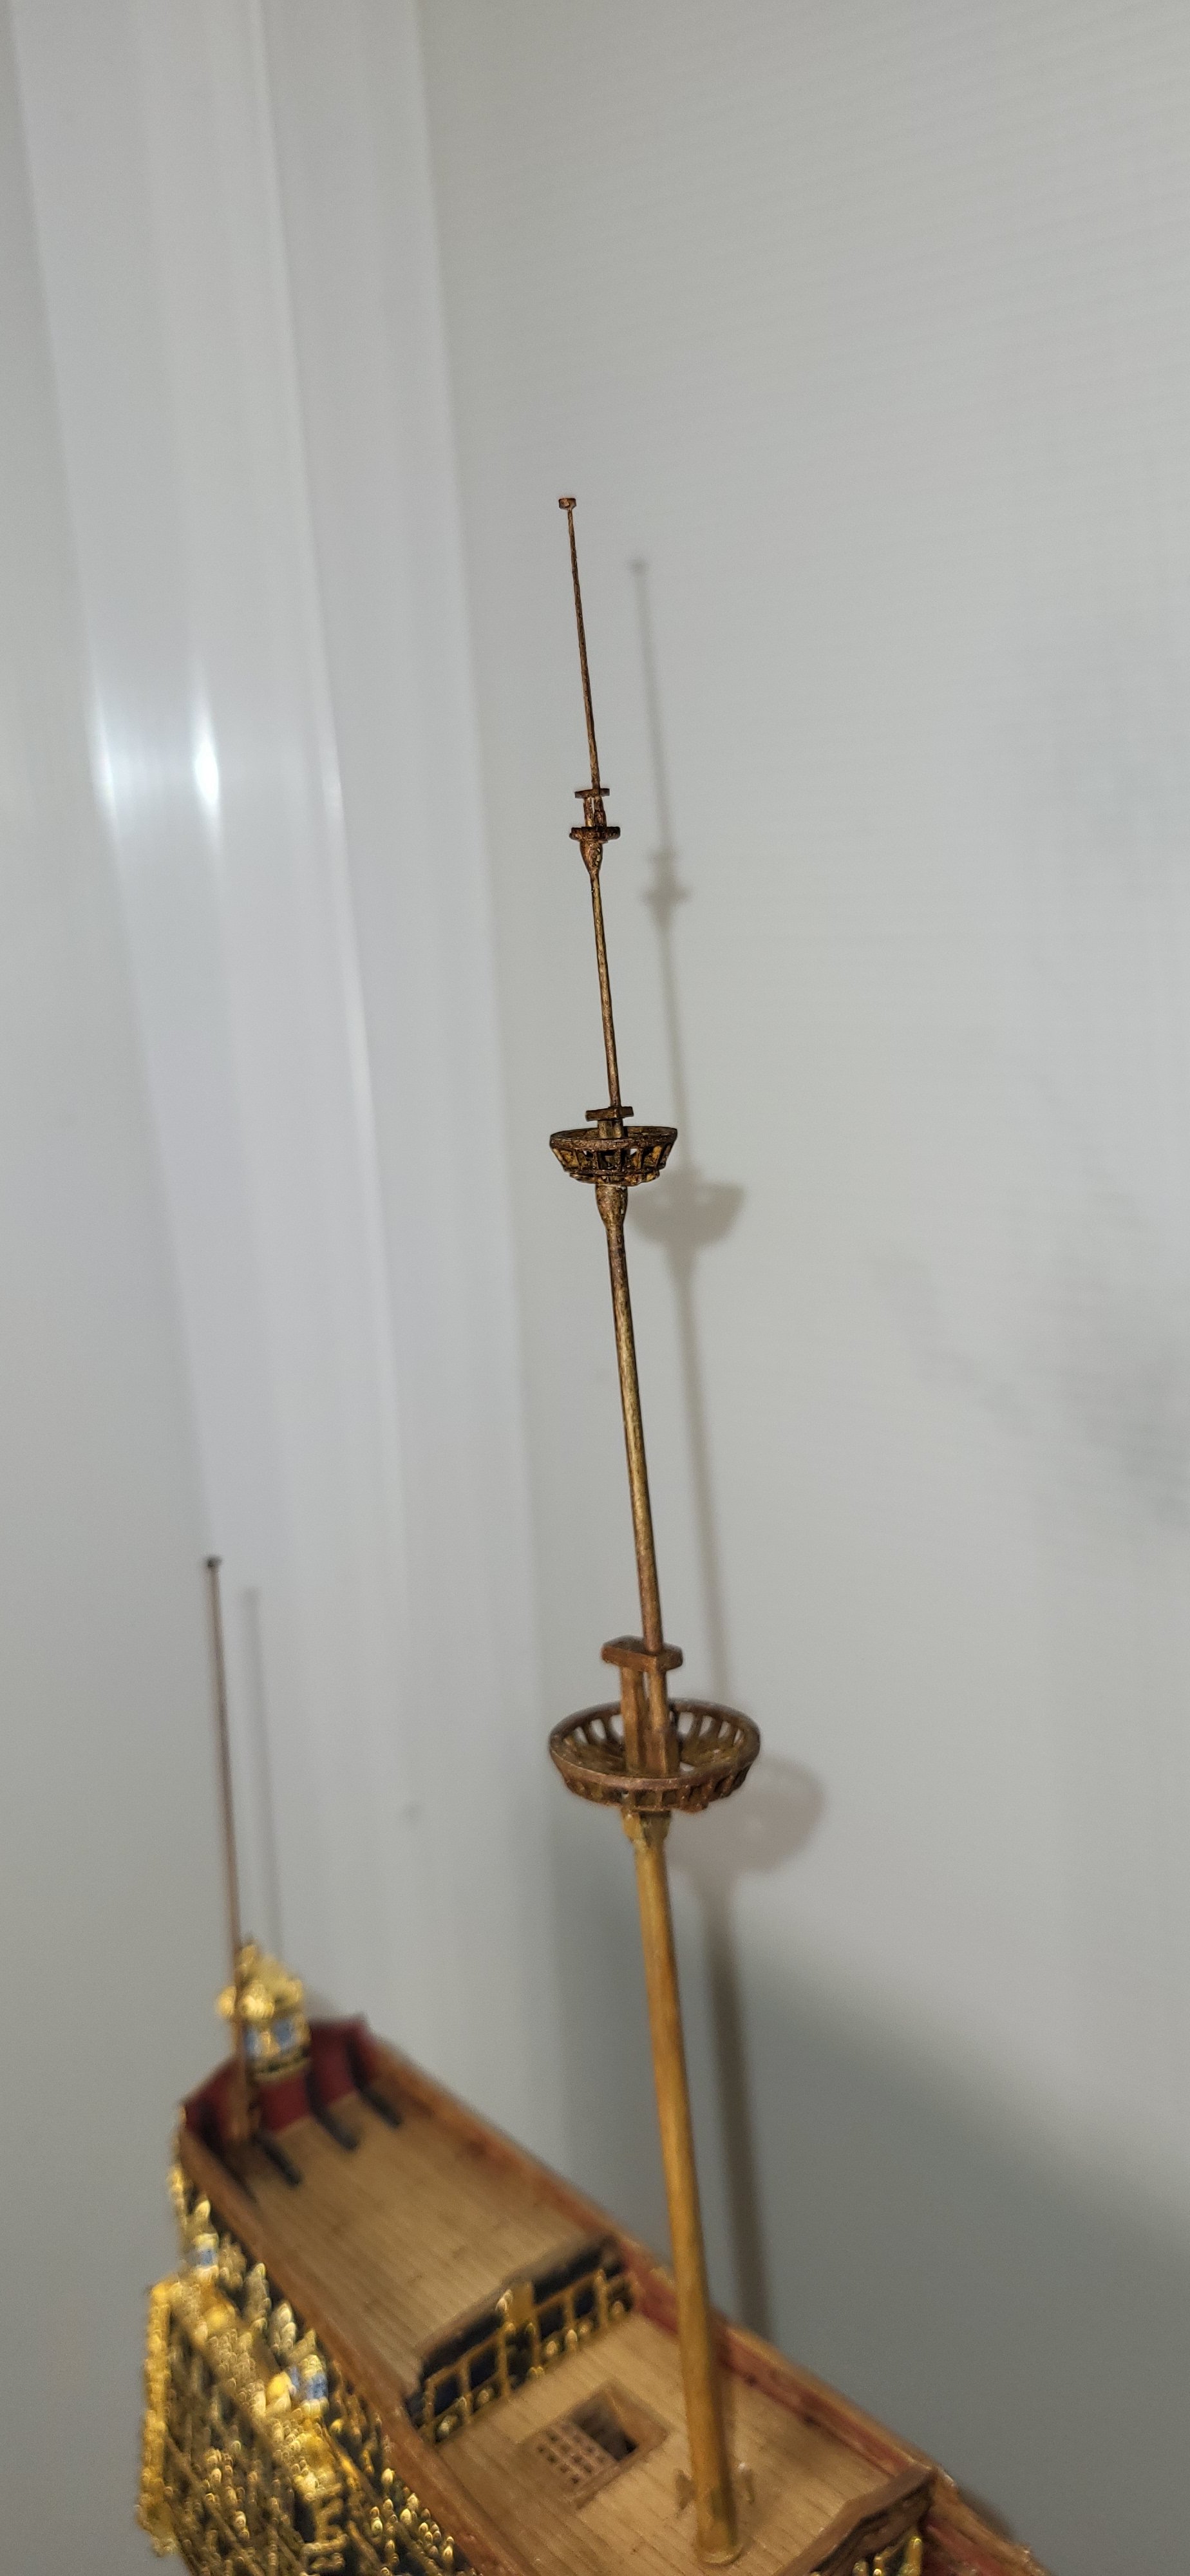
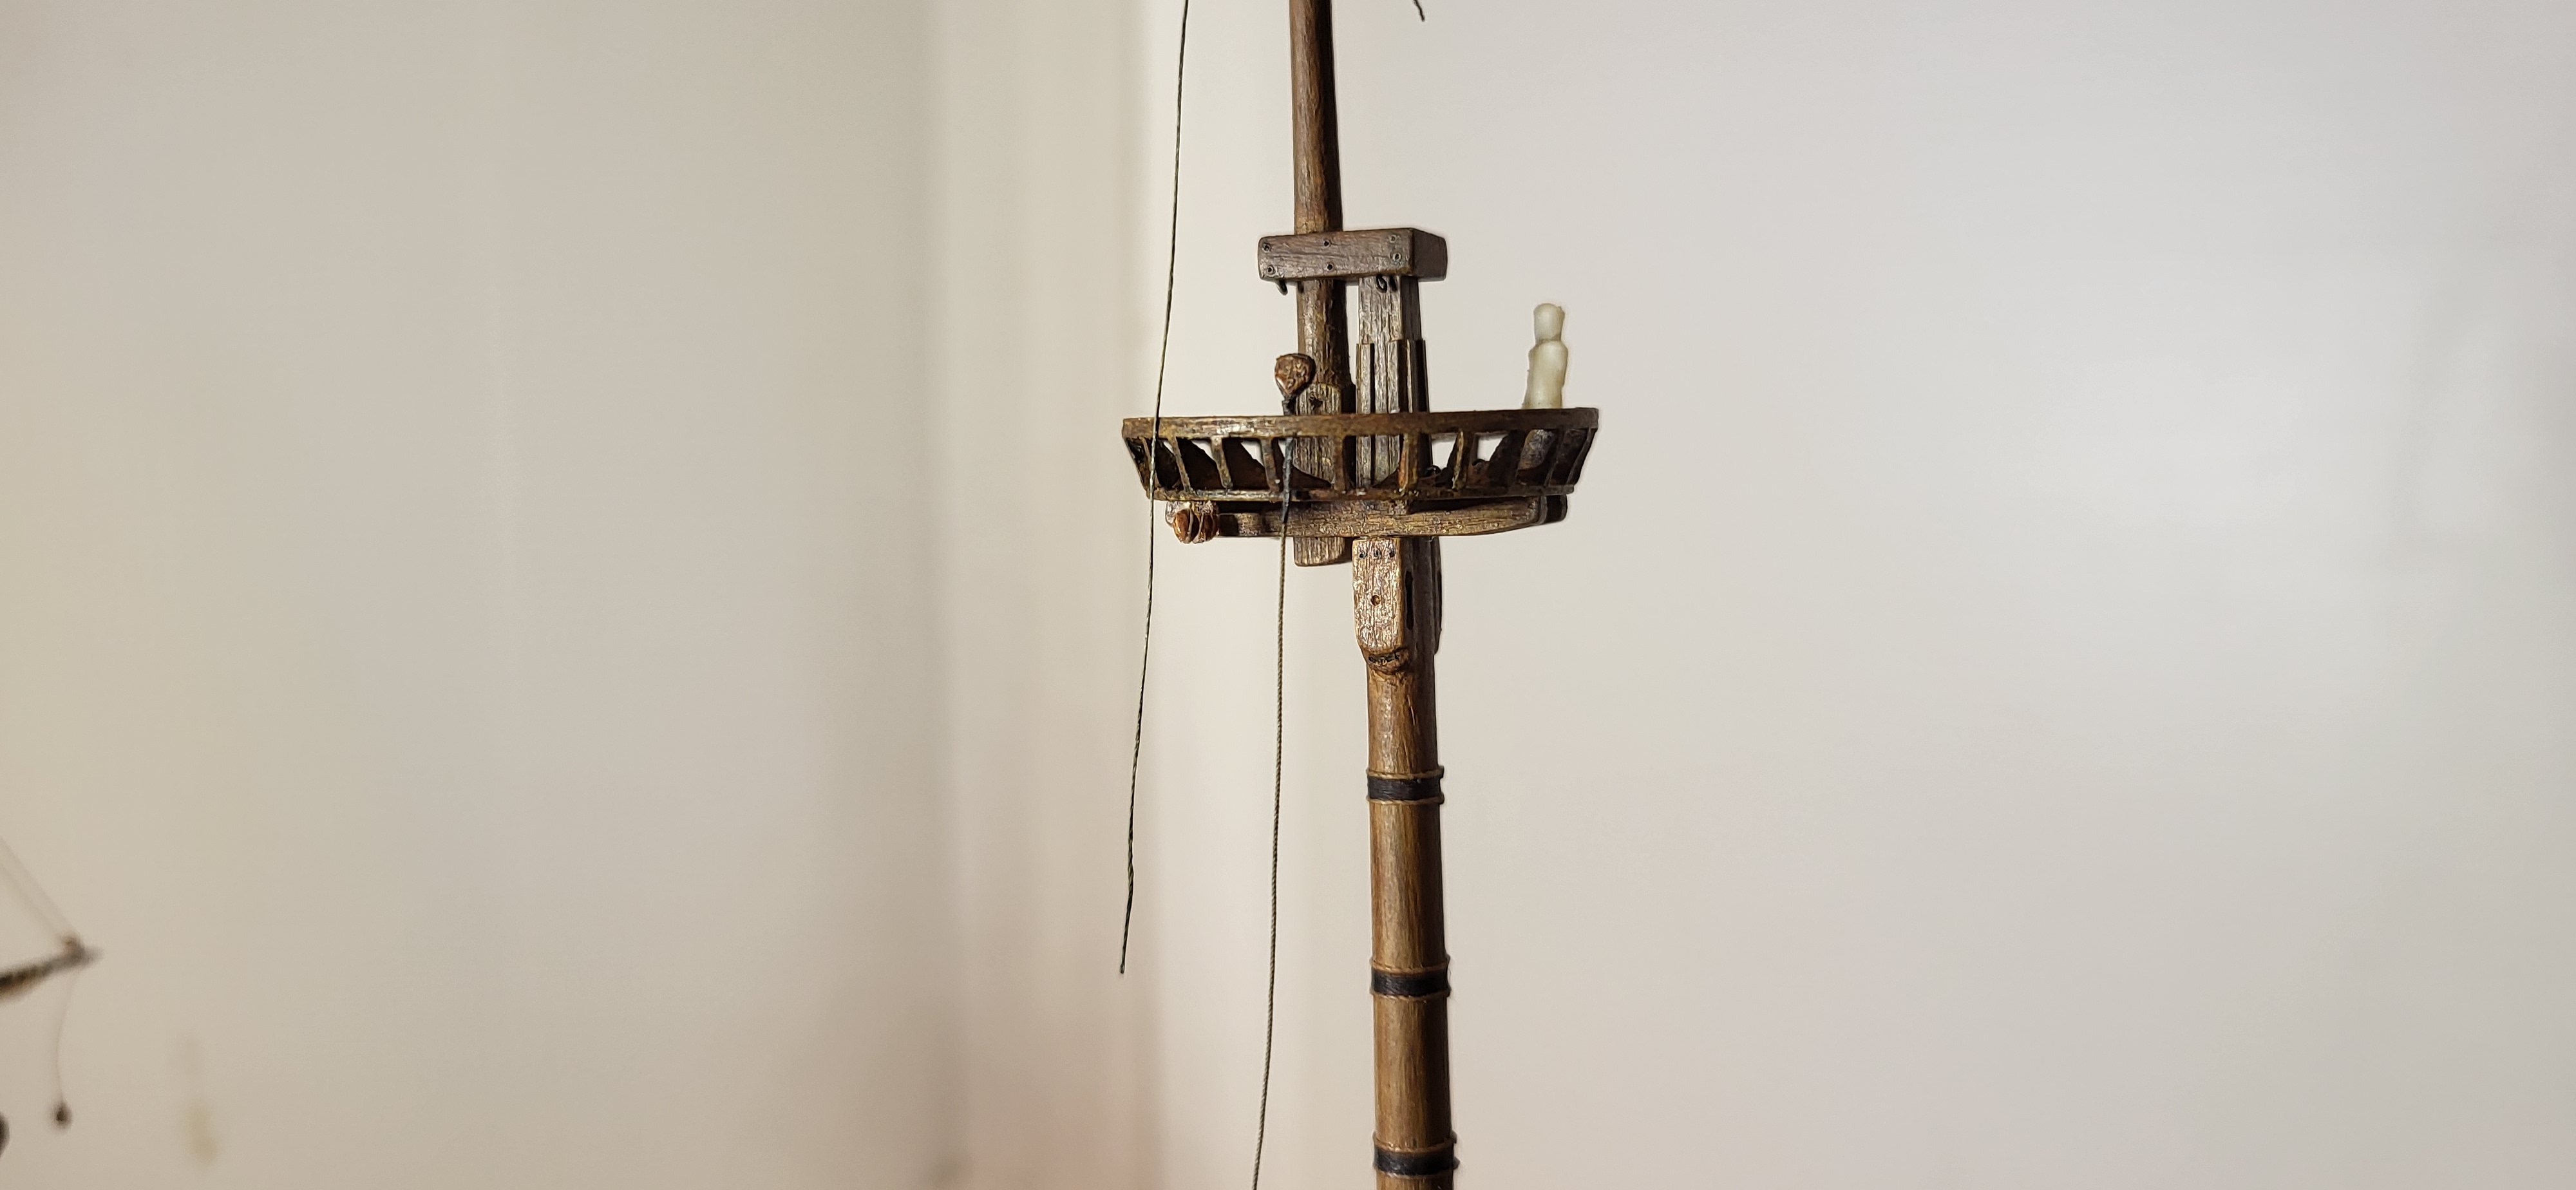
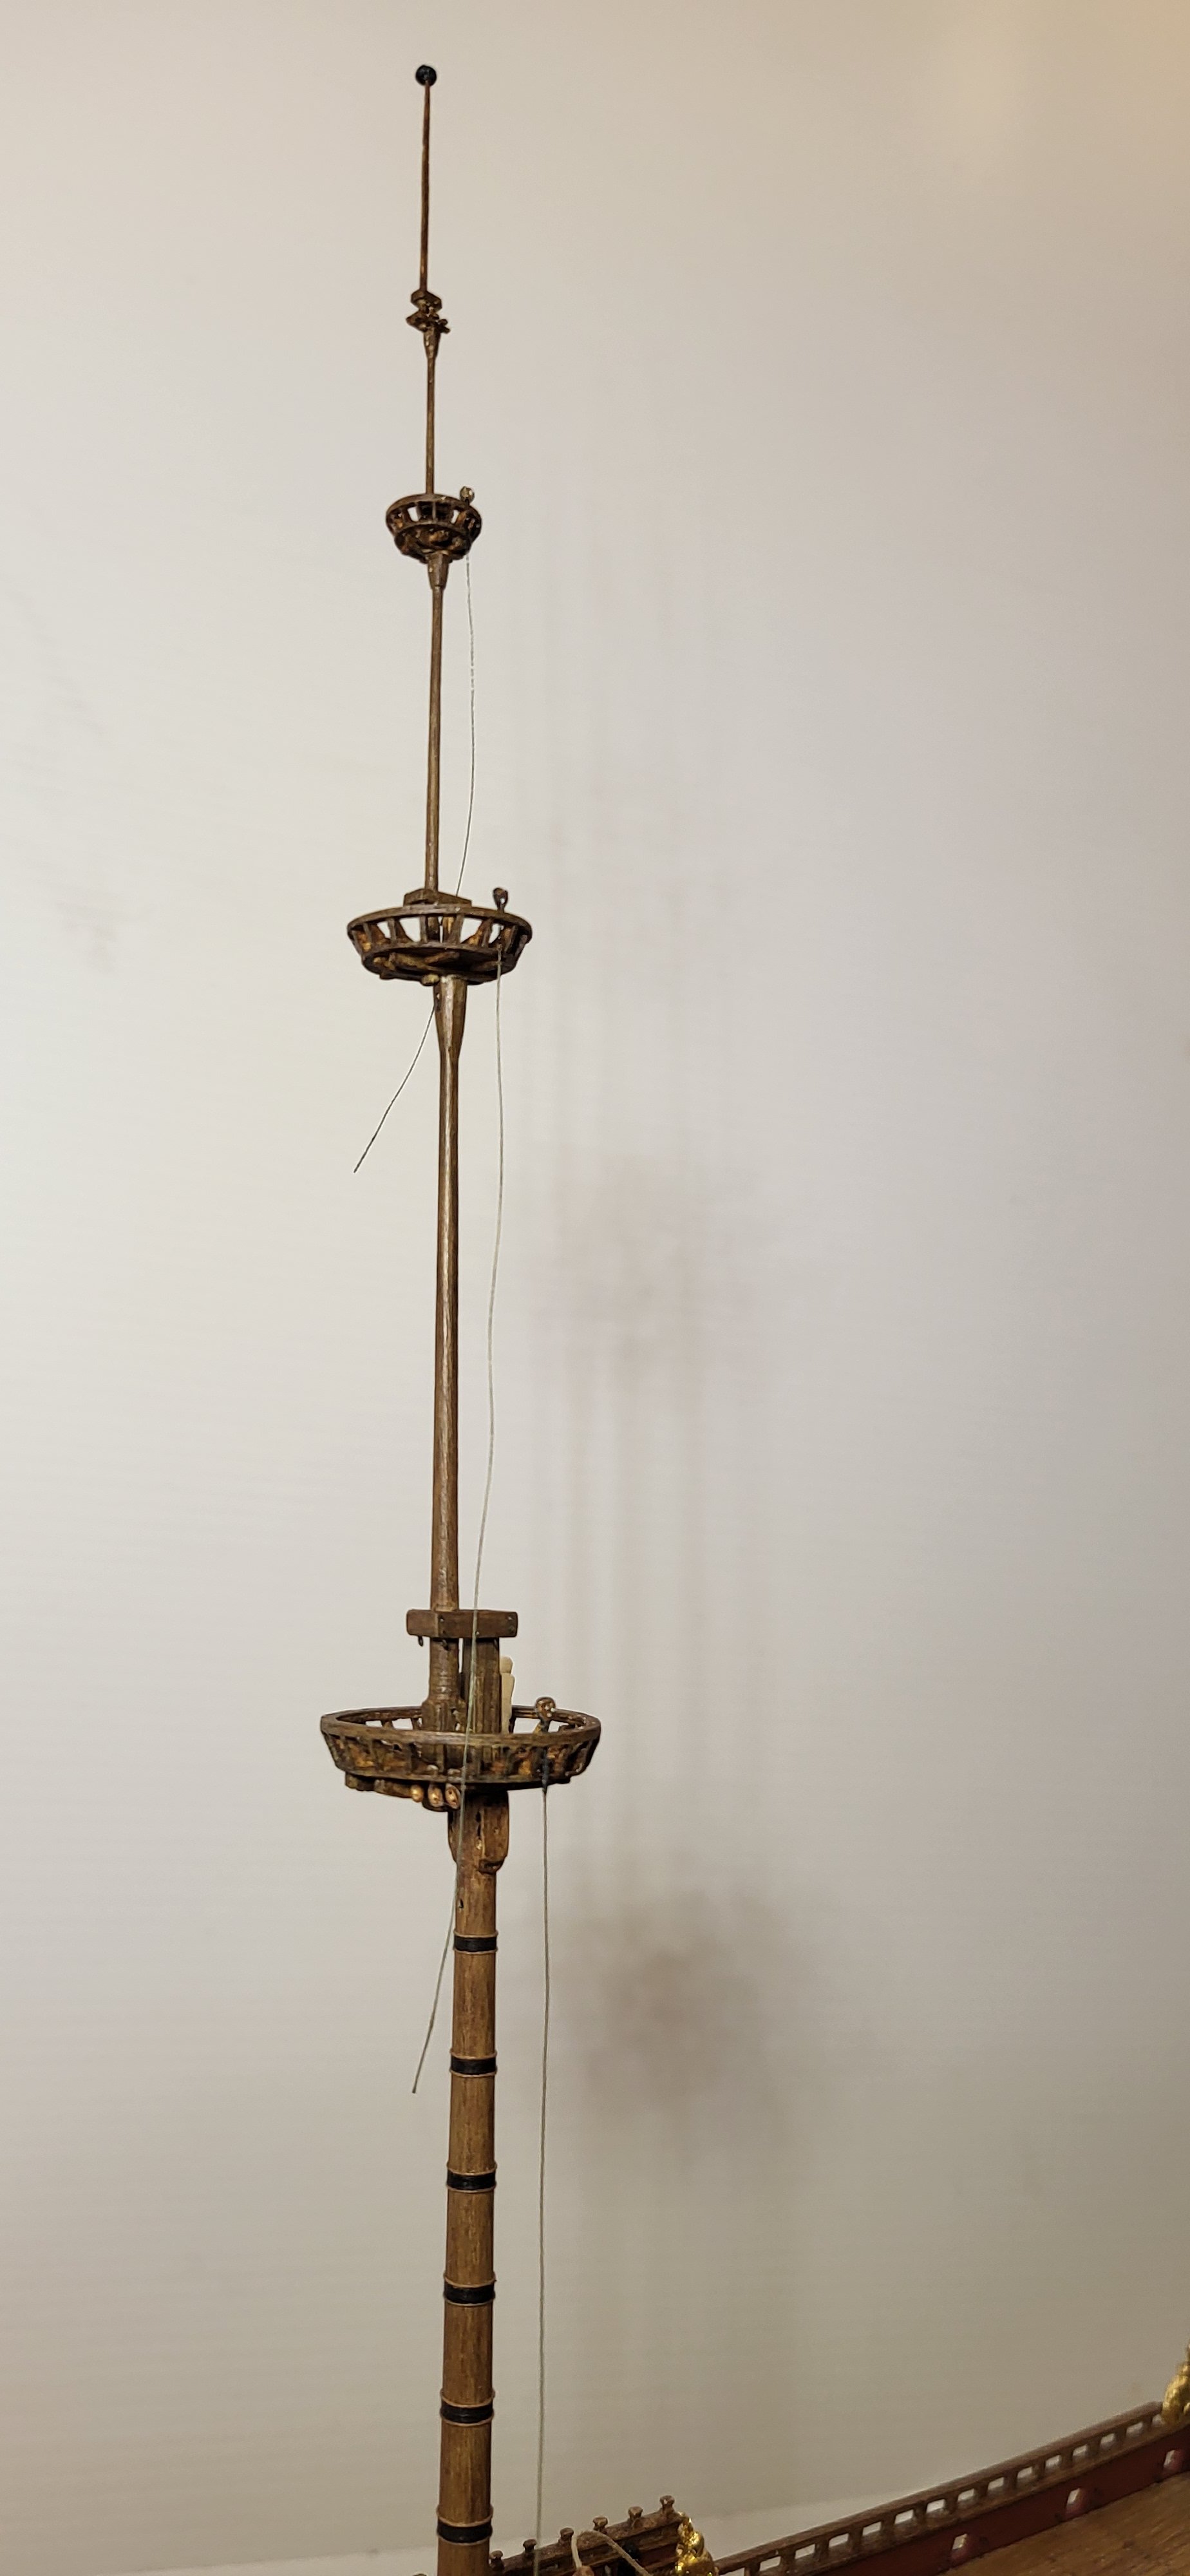
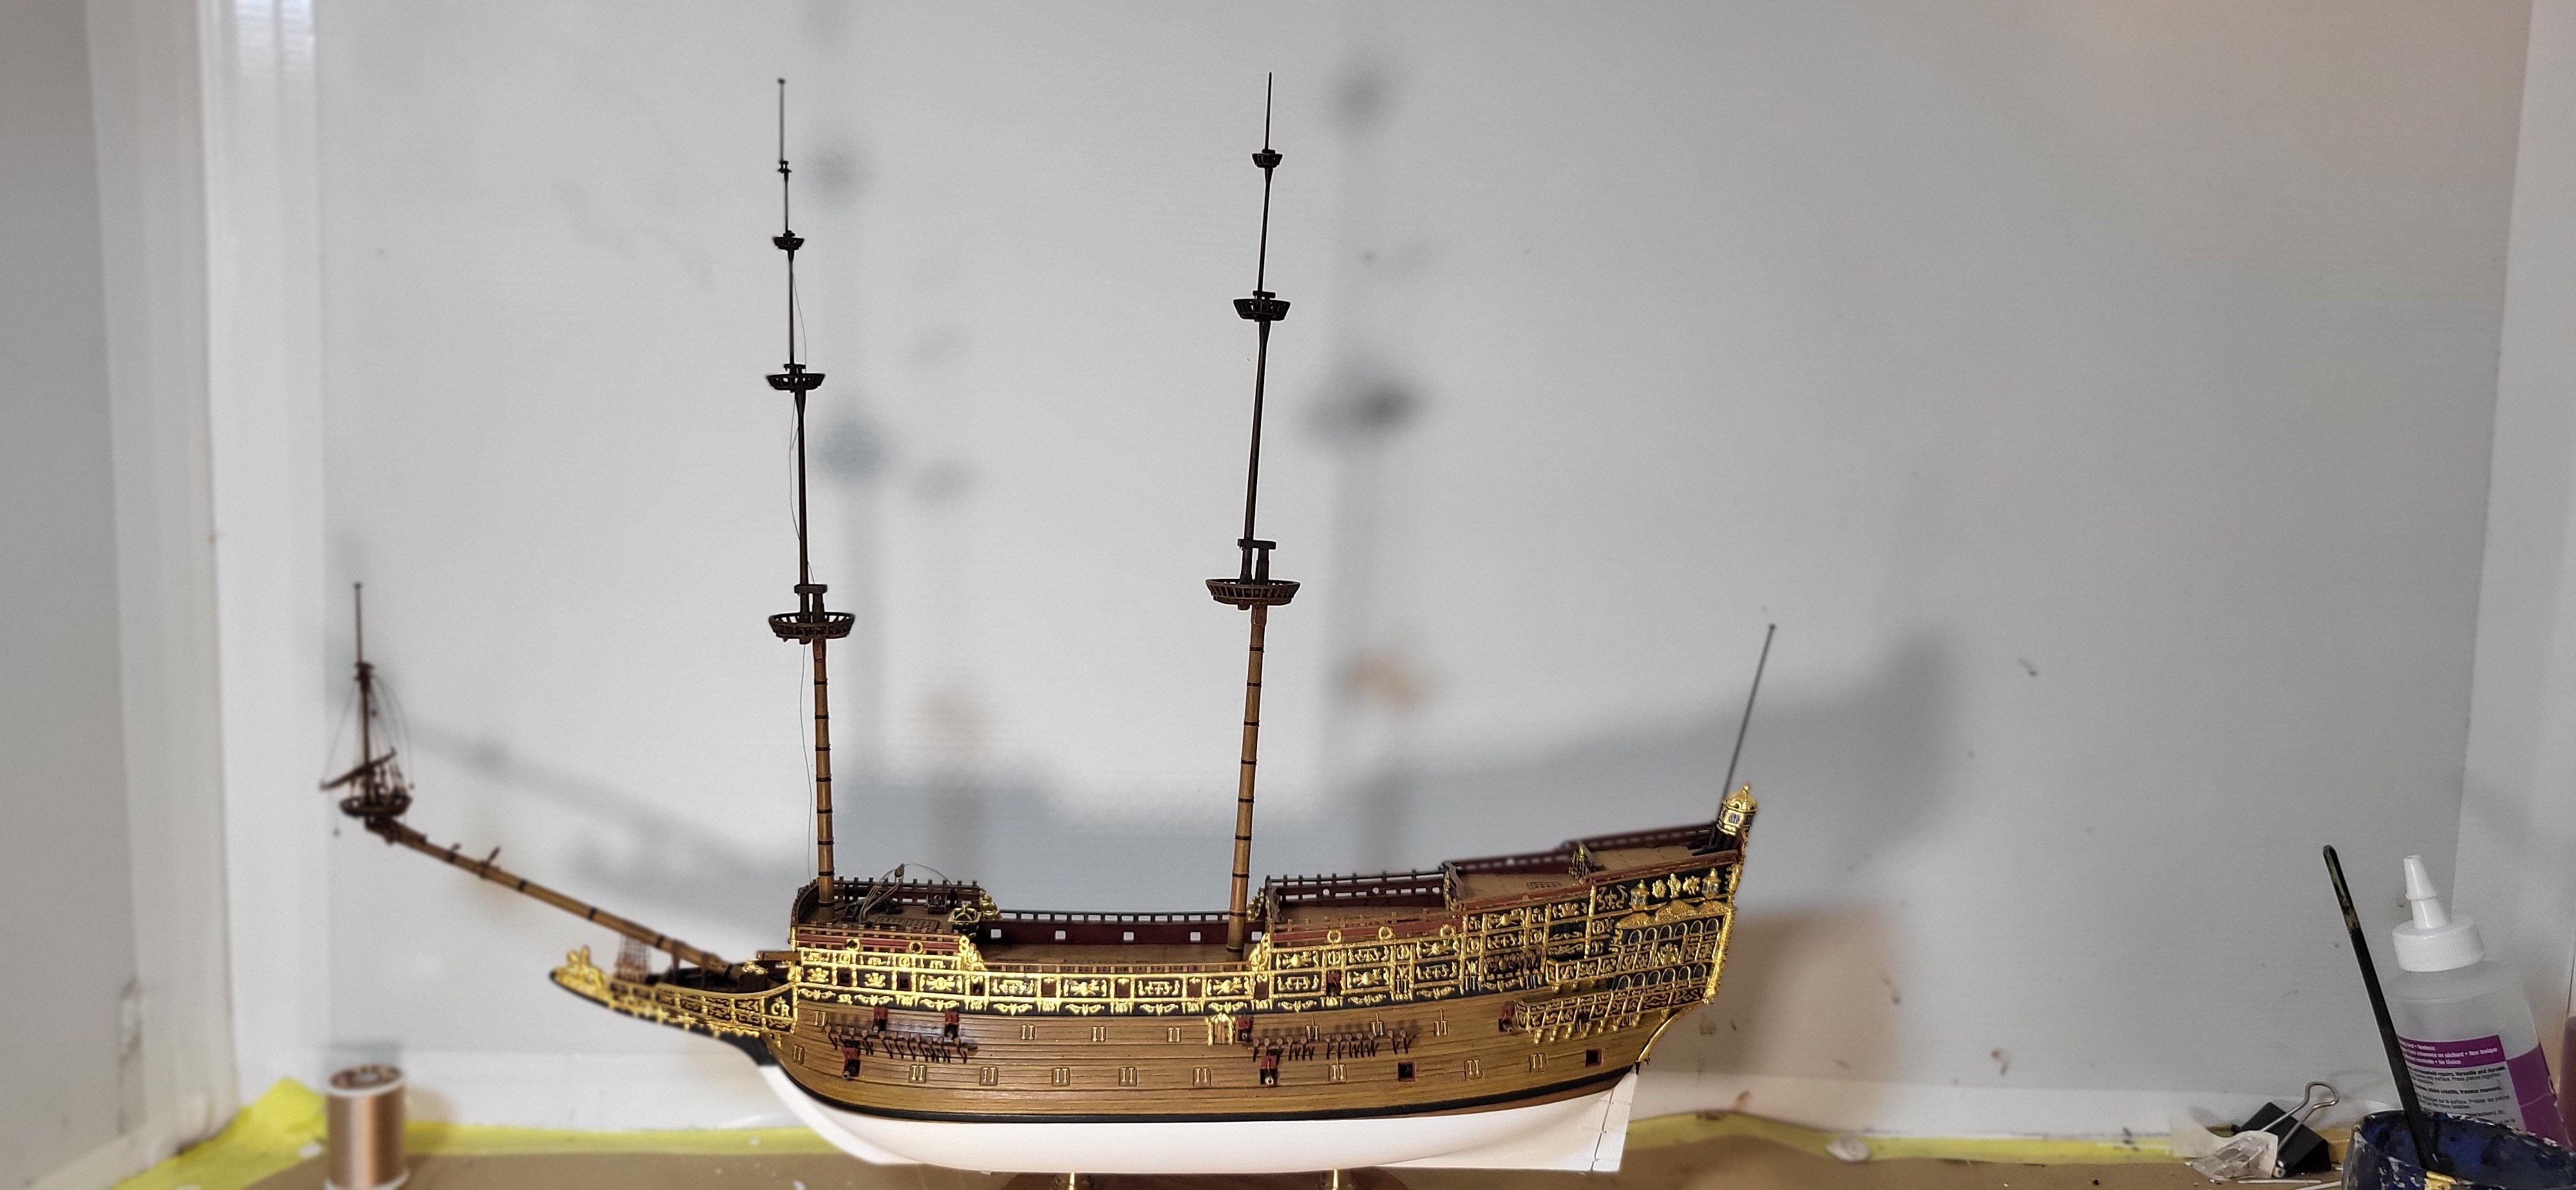
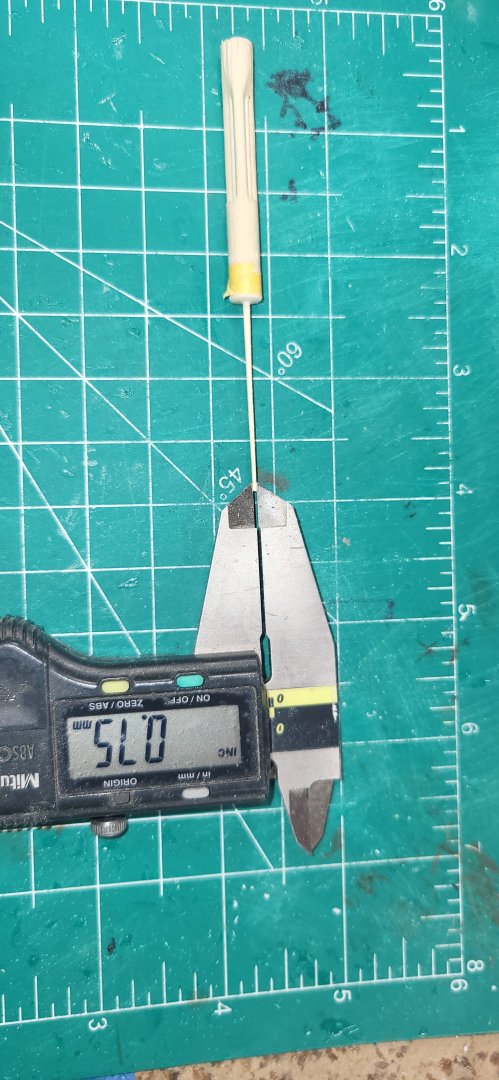
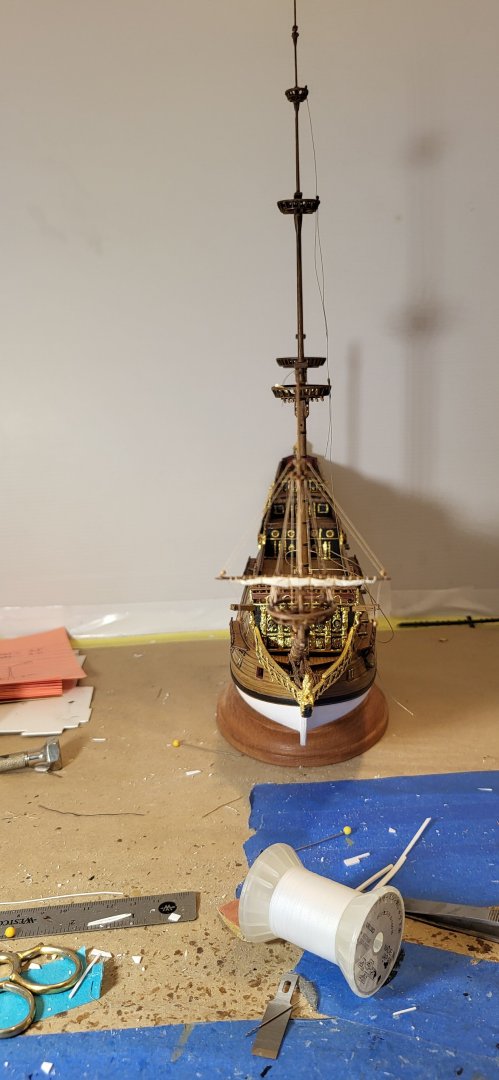
Somewhat of a crowning moment with the completion of all the tops, masts and flagpoles, the Mizen top gallant masthead measures out to 0.75mm with the Mizen flagpole a mere 0.40mm at the truck. The masts are dry fitted showing their approximate rake. Michael D.


- 324 replies
-
- 5
-
-
-
- Sovereign of the Seas
- Airfix
- (and 1 more)
-
Work continues on the masts and I'm quite happy so far with the results, as they line up true in the dry fit stage. Next, I had to calculate what size lines to use for the Fore shrouds and dead eyes, lower shrouds will be .35mm, topmast .25mm, top gallant 50wt thread and the royal shrouds are 60wt thread. Top mast dead eyes are 1.40mm, top gallant are 1.20 and the royal measure out to 1.10mm, these are just a tad overscale but look okay to my eye, I still may try to reduce them still, we'll see....at this scale the dead eye strops/plates are the futtock shrouds, I will use CA glue in the plate area of the thread so I can flatten it once it's dried to simulate the plates followed by some creative painting. The main royal mast is just about completed with the hounds still left to do, trestle tree, cap and flagpole. I also added the battens to the fore lower masthead. Michael D.


- 324 replies
-
- 7
-
-
-
- Sovereign of the Seas
- Airfix
- (and 1 more)