72Nova
-
Posts
677 -
Joined
-
Last visited
Content Type
Profiles
Forums
Gallery
Events
Everything posted by 72Nova
-
 Kirill, Your model looks stunning no matter the background, I especially like the last photo. Michael D.
 -
Thanks Michael, I've done somewhat the same in the past using transparent colors and all look good, I was really tempted to do a black background with the gold leafed tulle. Michael D.
- 327 replies
-
- 2
-

-
- Sovereign of the Seas
- Airfix
- (and 1 more)
-
Adding the diamond grid to the lantern really brought it to life!!, Aleene's clear gel tacky glue works very well for this, now on to the smaller lanterns. The ladder is just placed there for reference, but actually looks pretty good minus a landing. Michael D.
- 327 replies
-
- 12
-
-

-
- Sovereign of the Seas
- Airfix
- (and 1 more)
-
Kirill I might add the same diamond grid to the lanterns over the existing color I have now and see what it looks like, but as far as opening up the panes?, probably not, yes the large lantern would be possible without much effort, but the gallery lanterns as molded are solid and would require too much effort so this was a compromise. I still need to add the storied ladder, I bet it would hold 10 people after reading about it. The Vander Velde sketch showing the port side ladder leading to the port entry in intriguing also, I recall seeing only one modeller including this in their build. Michael D.
- 327 replies
-
- 4
-
-
- Sovereign of the Seas
- Airfix
- (and 1 more)
-
The lantern is about 90% complete, some touch up and repairs still left to do, filled the gap in the deck and fabricated the knees. While not entirely pleased with the look of the lanterns panes, they look presentable, but I might try something else with later. Michael D.
- 327 replies
-
- 9
-
-
-
- Sovereign of the Seas
- Airfix
- (and 1 more)
-
Adding some detail to the lantern and will need to address the gap between the poop deck and taffrail/stern, something I should've caught earlier but oh well and prep the deck for an offset Ensign staff. Michael D.
- 327 replies
-
- 10
-
-
-
- Sovereign of the Seas
- Airfix
- (and 1 more)
-
Thank you, for the gracious compliment's gentlemen. This first attempt in mocking up the rudder coat ended up being the final result, is it what It looked like in reality? who knows, I must say though it really adds a finished look for such a subtle detail. Once I had the tissue paper ready, I worked my around the perimeter using PVA letting each section dry before proceeding. I used a base of red brown and a black wash to achieve a darkened leather appearance. As always thanks for looking. Michael D.
- 327 replies
-
- 9
-
-
-
- Sovereign of the Seas
- Airfix
- (and 1 more)
-
The modifications to the rudder are completed, the shackles are in place awaiting the chain, something in the 30 to 40 LPI should suffice for this scale and contemplating adding the rudder coat, overall happy with the result. Michael D.
- 327 replies
-
- 9
-
-
-
- Sovereign of the Seas
- Airfix
- (and 1 more)
-
Starboard side of the gudgeons are completed, at this point I'm unsure if she carried chains or ropes for the rudder and their arraignment, I'm thinking chains and if so, I'll need to search for some super small scale chain. Cheers. Michael D.
- 327 replies
-
- 9
-
-
-
- Sovereign of the Seas
- Airfix
- (and 1 more)
-
Thank you for the kind comment, Frank. Rudder work continues, I modified the kits rudder by first cutting it away from the hull and then adding the details, the gudgeons are simulated by using .040" rod and .012" styrene, pintles using the same .012" styrene. Michael D.
- 327 replies
-
- 9
-
-
-
- Sovereign of the Seas
- Airfix
- (and 1 more)
-
Thank you, Ian. A majority of the stern work is completed, the gun port lids are installed and added the grid design above the upper glass panes to closely resemble that of the Pett painting, for this I gold leafed tulle as this stood out better than gold paint. Up next, I'll be reworking the rudder before moving back the beak head. As always, I appreciate you all stopping by and taking a peek. Michael D.
- 327 replies
-
- 11
-
-
-
- Sovereign of the Seas
- Airfix
- (and 1 more)
-
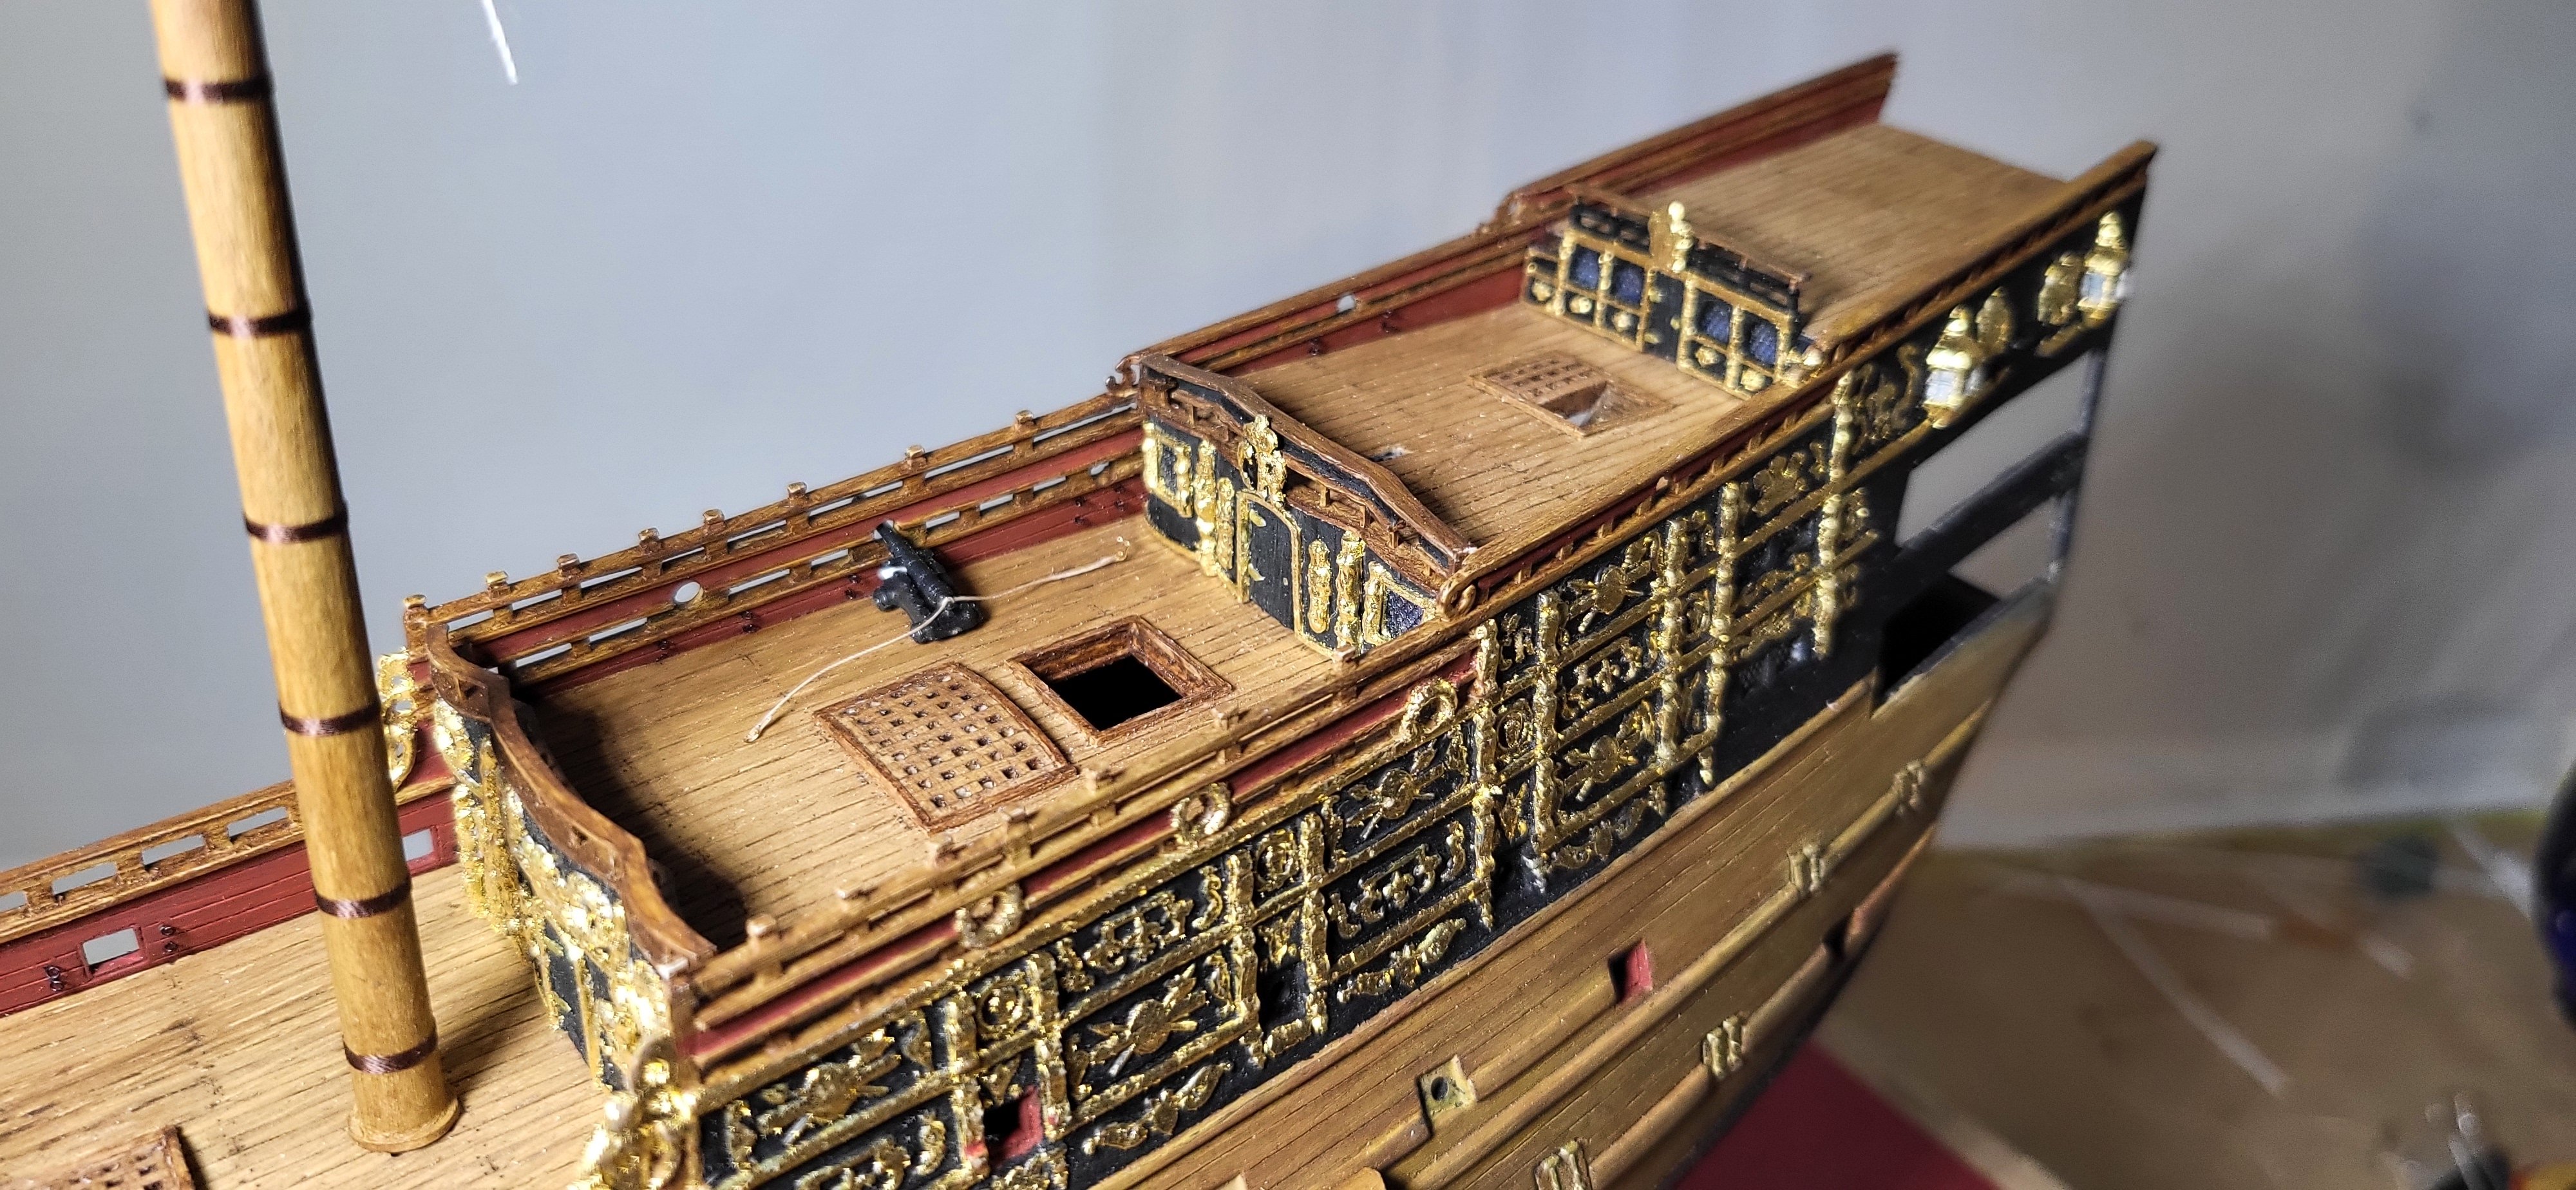
Somewhat of a crowning moment having finally glued on the stern and Qtr Galleries, all close gun port lids are on, minus the gun chaser lids and the tedious gilding is ongoing but looking pretty good thus far. Thanks for looking Michael D.
- 327 replies
-
- 16
-
-
-
- Sovereign of the Seas
- Airfix
- (and 1 more)
-
I tend to agree with druxey but your latest attempt looks solid Marc. I used thread to strop my dead eyes on the Vasa, I used thinned down PVA with paint and while still wet I rolled it out on a flat surface with a metal straight edge but a paint stick would work just as well, this seems to hold the fibers in check and the end result looks good. Michael D.
- 2,699 replies
-
- 4
-

-
-
- heller
- soleil royal
- (and 9 more)
-
Shifting gears a bit I decided to do a mockup of the canon/ tackles and breech rope, at this scale I simply knotted up the ends and painted to simulate the blocks, looks convincing enough to my eyes for this retina stressing exercise. These close-up shots are great for spotting where touch ups are needed. Thanks for looking. Michael D.
- 327 replies
-
- 10
-
-
-
- Sovereign of the Seas
- Airfix
- (and 1 more)
-
Your craftsmanship is on full display, just fantastic!!👍 Michael D.
-
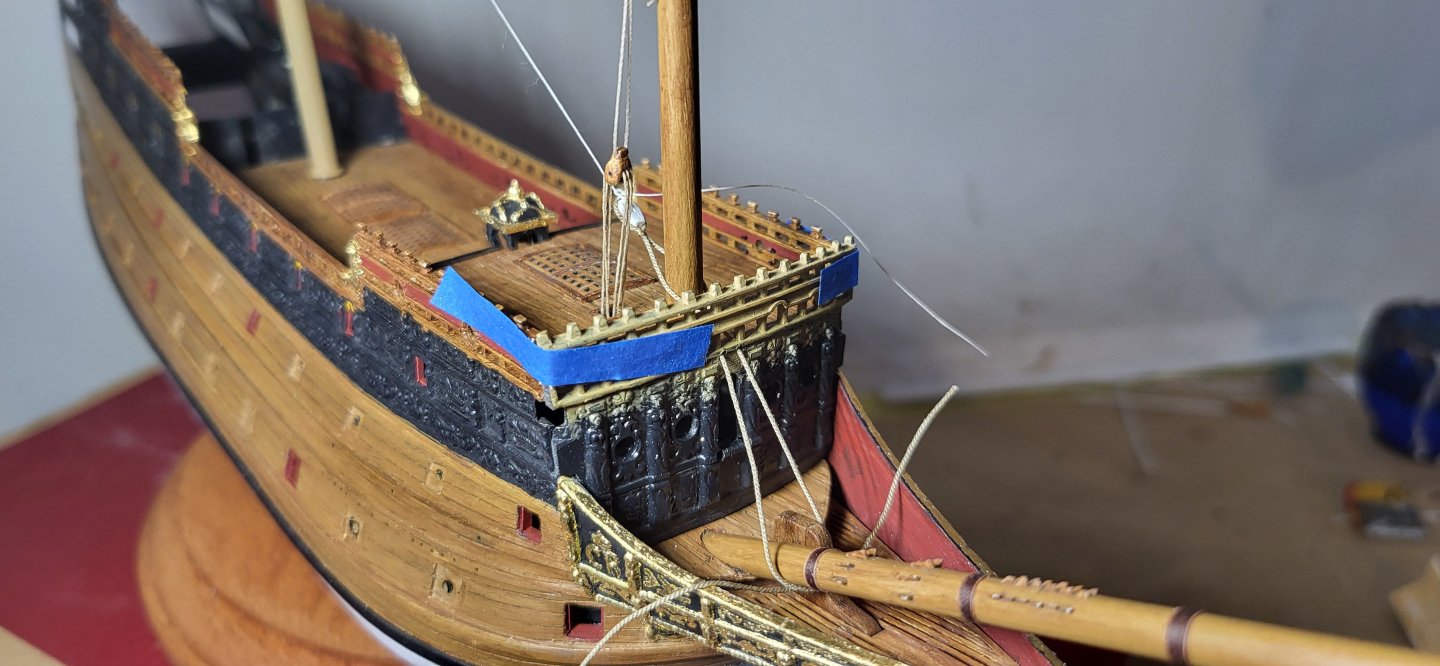
The inboard beakhead pin rails are completed along with the range pin rail, 28g brass wire is used for the belaying pins. I did spend a considerable amount of time to mock up the lines if using the gammoning sheave but did not like the run of the lines to the forecastle with the offset bowsprit. I'm still aways from setting the bowsprit assembly in for good but getting closer, while a bit premature I started prepping the Fore and Main stays....76mm and .88mm lines are used. Cheers! Michael D.
- 327 replies
-
- 7
-
-
- Sovereign of the Seas
- Airfix
- (and 1 more)
-
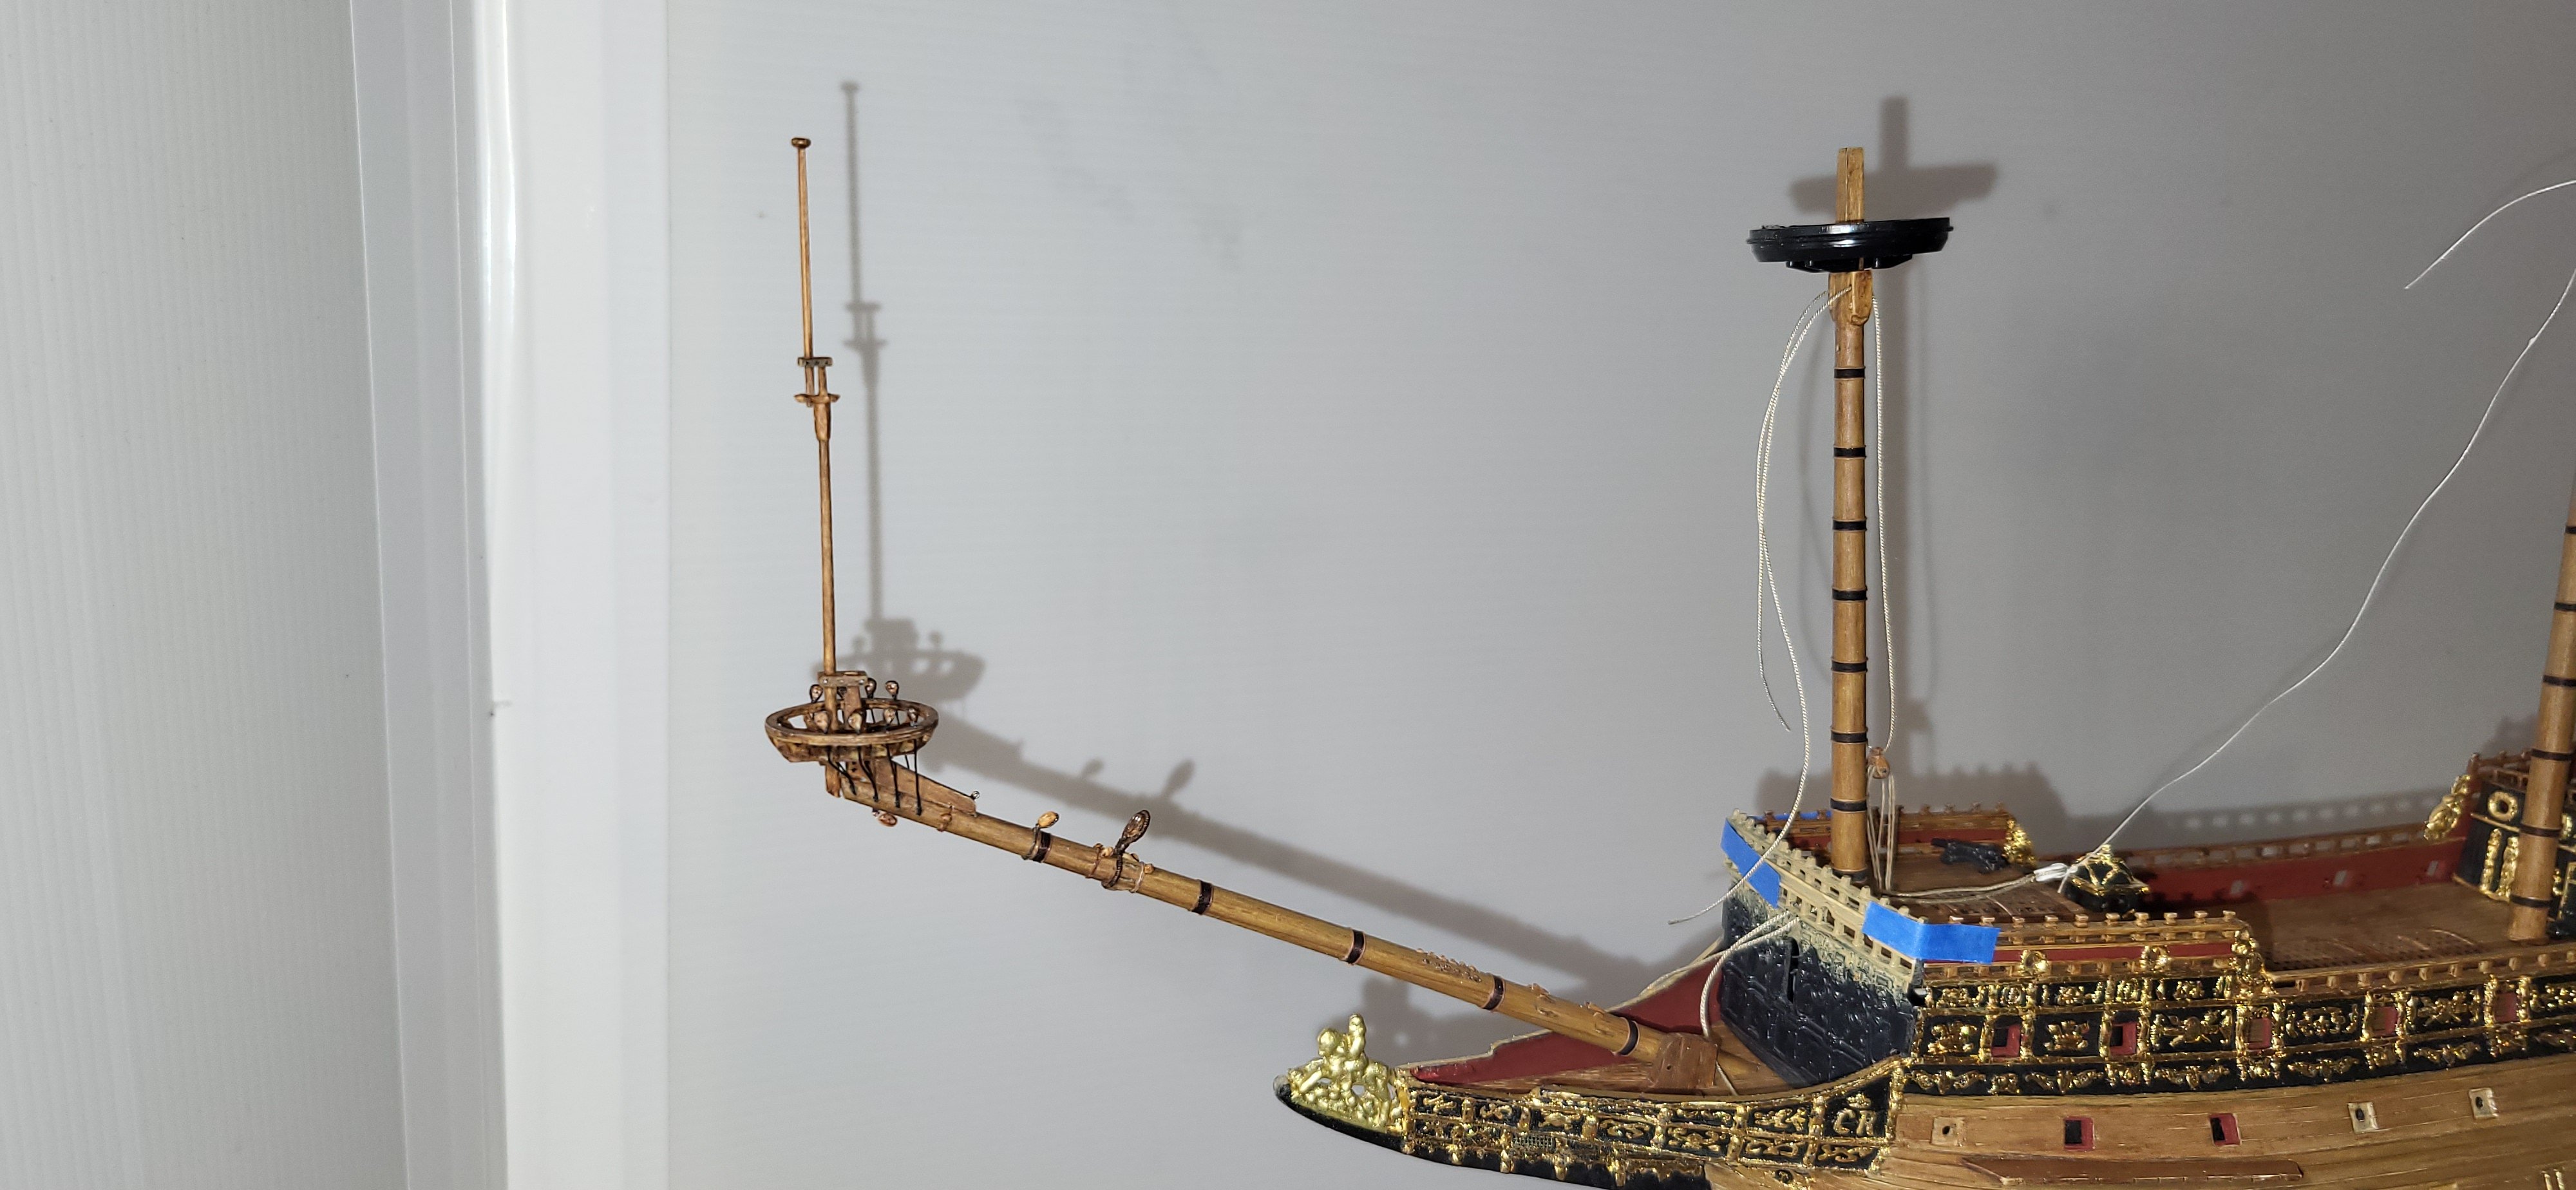
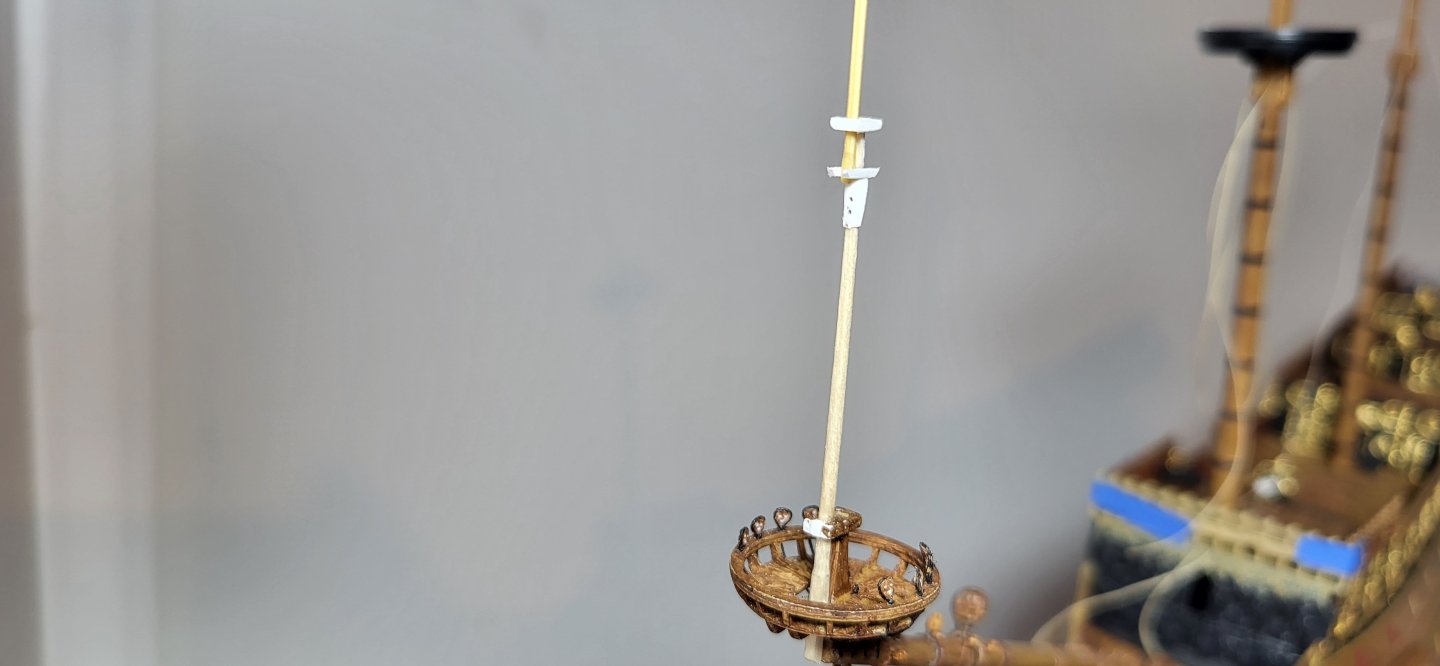
Thank you, Kirill. The sprit topmast for the most part is complete minus the necessary blocks etc, I'm quite happy with the result, up next my focus will be set the bowsprit in permanently but first I need to decide if I want to use sheaves secured to the gammoning or pin rails and a range..... looking at both Payne's and Van De Velde plates suggest pinrails as the lines run directly inboard of the beakhead so that's what I'll probably go with. Michael D.

- 327 replies
-
- 8
-
-
-
- Sovereign of the Seas
- Airfix
- (and 1 more)
-
Hi Kirill, I was anticipating your inquiry about the bowsprit, I used sprue from the kit to fabricate it with a slight crown, I did perform a makeshift load test on the bench and it's actually quite stout plus with the addition of the bowsprit shrouds, the wanna be engineer in me believes this will work out. Michael D.
- 327 replies
-
- 3
-
-
- Sovereign of the Seas
- Airfix
- (and 1 more)
-
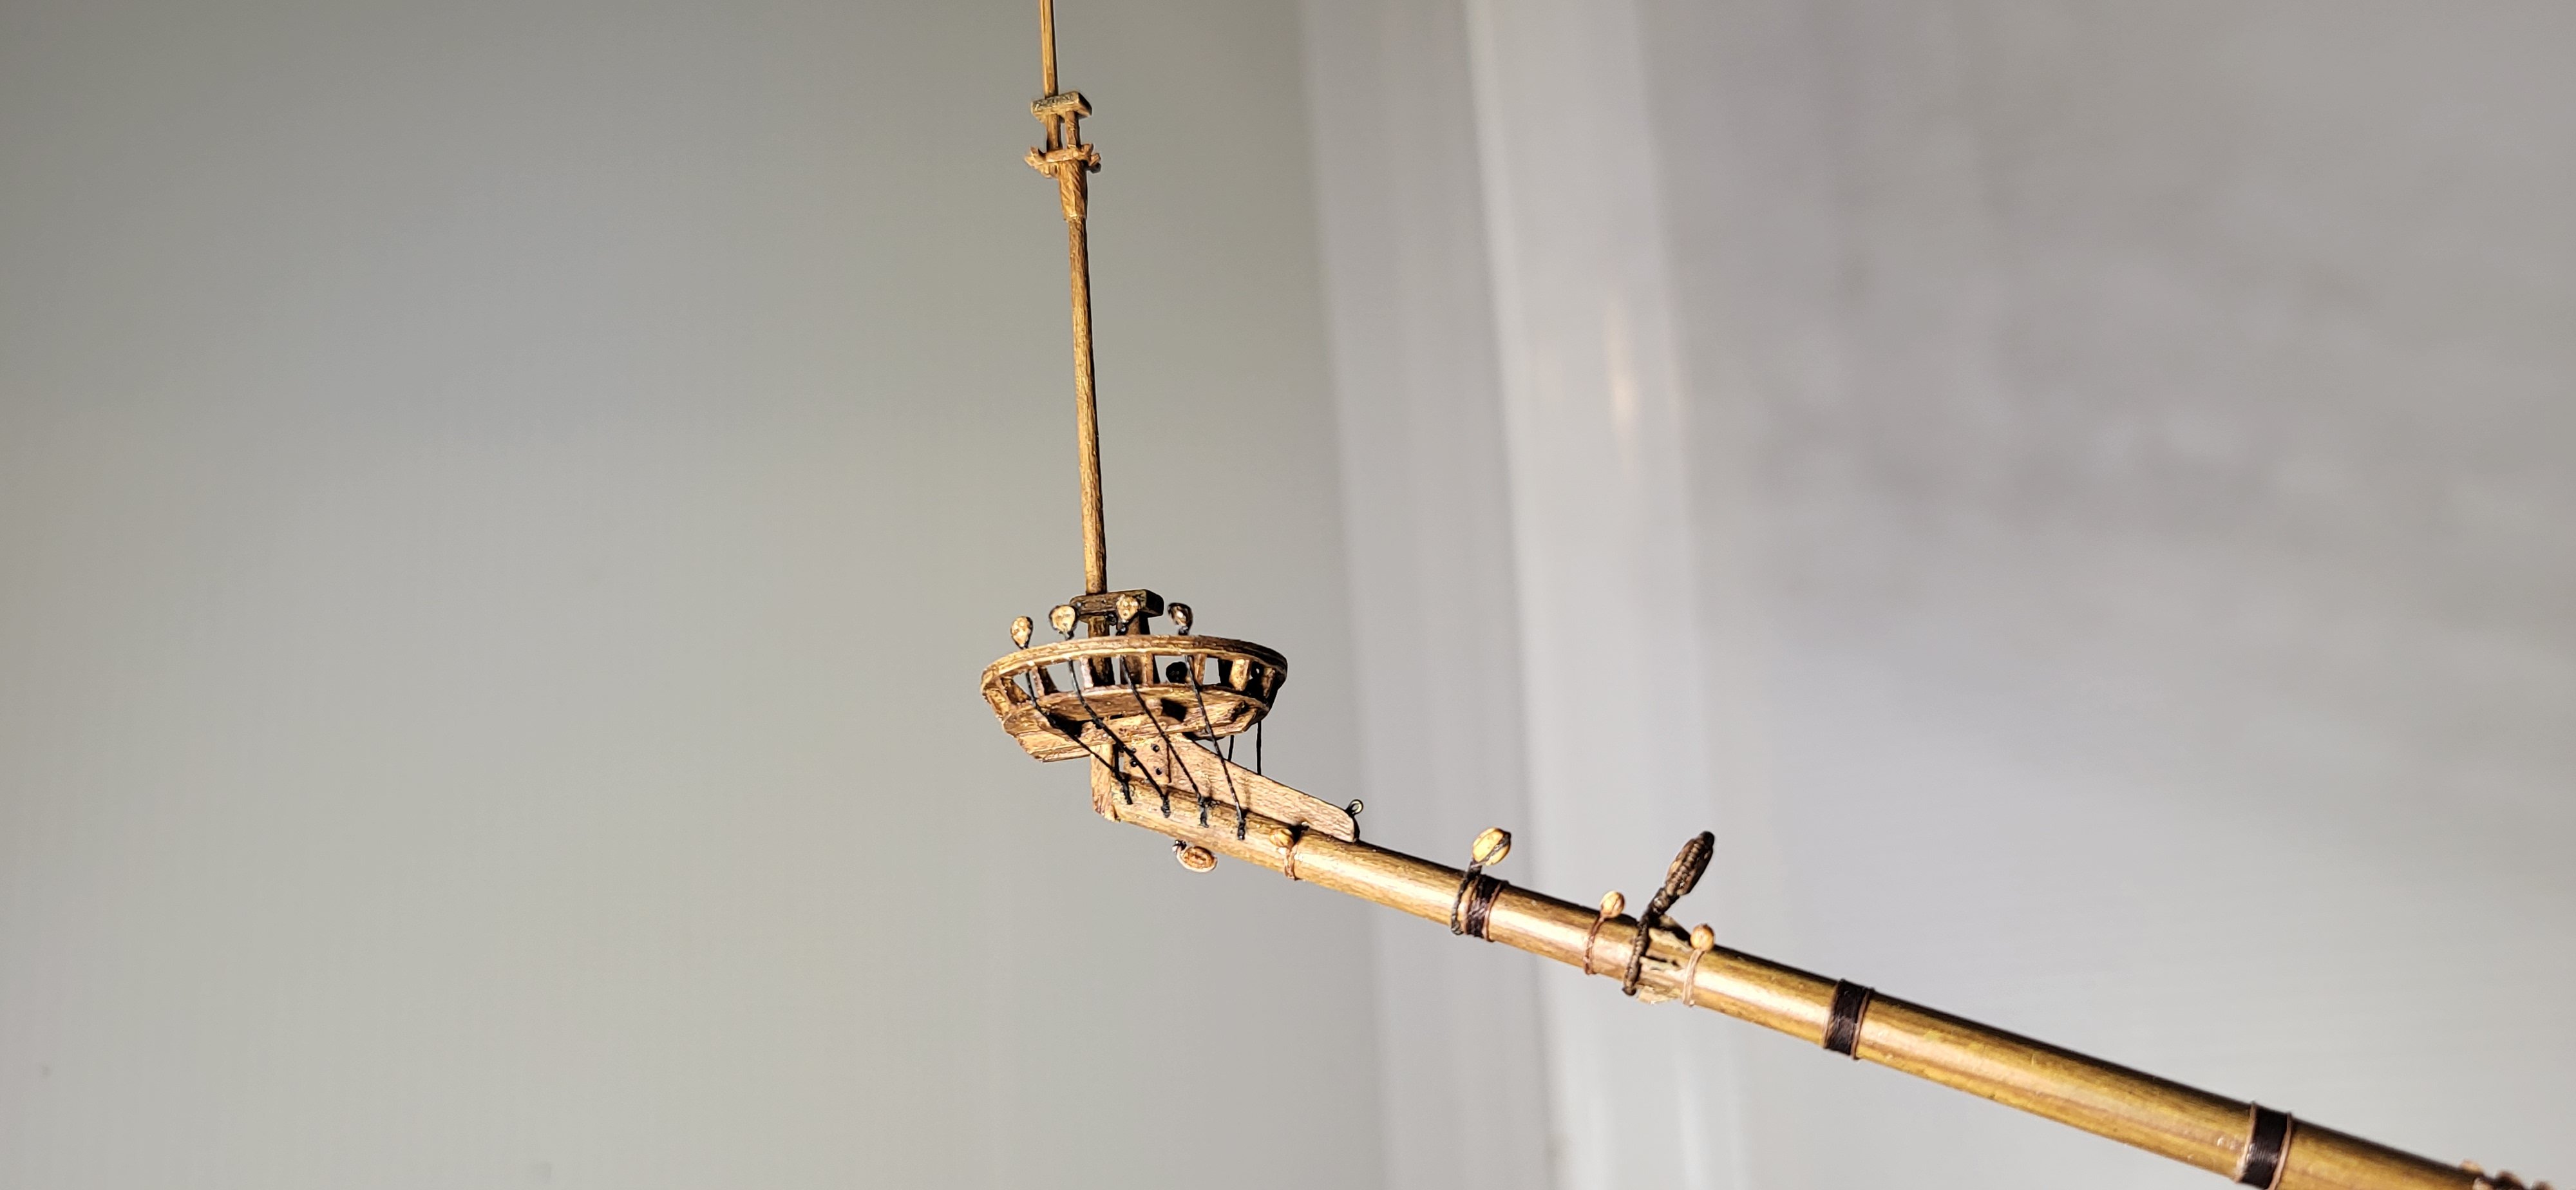
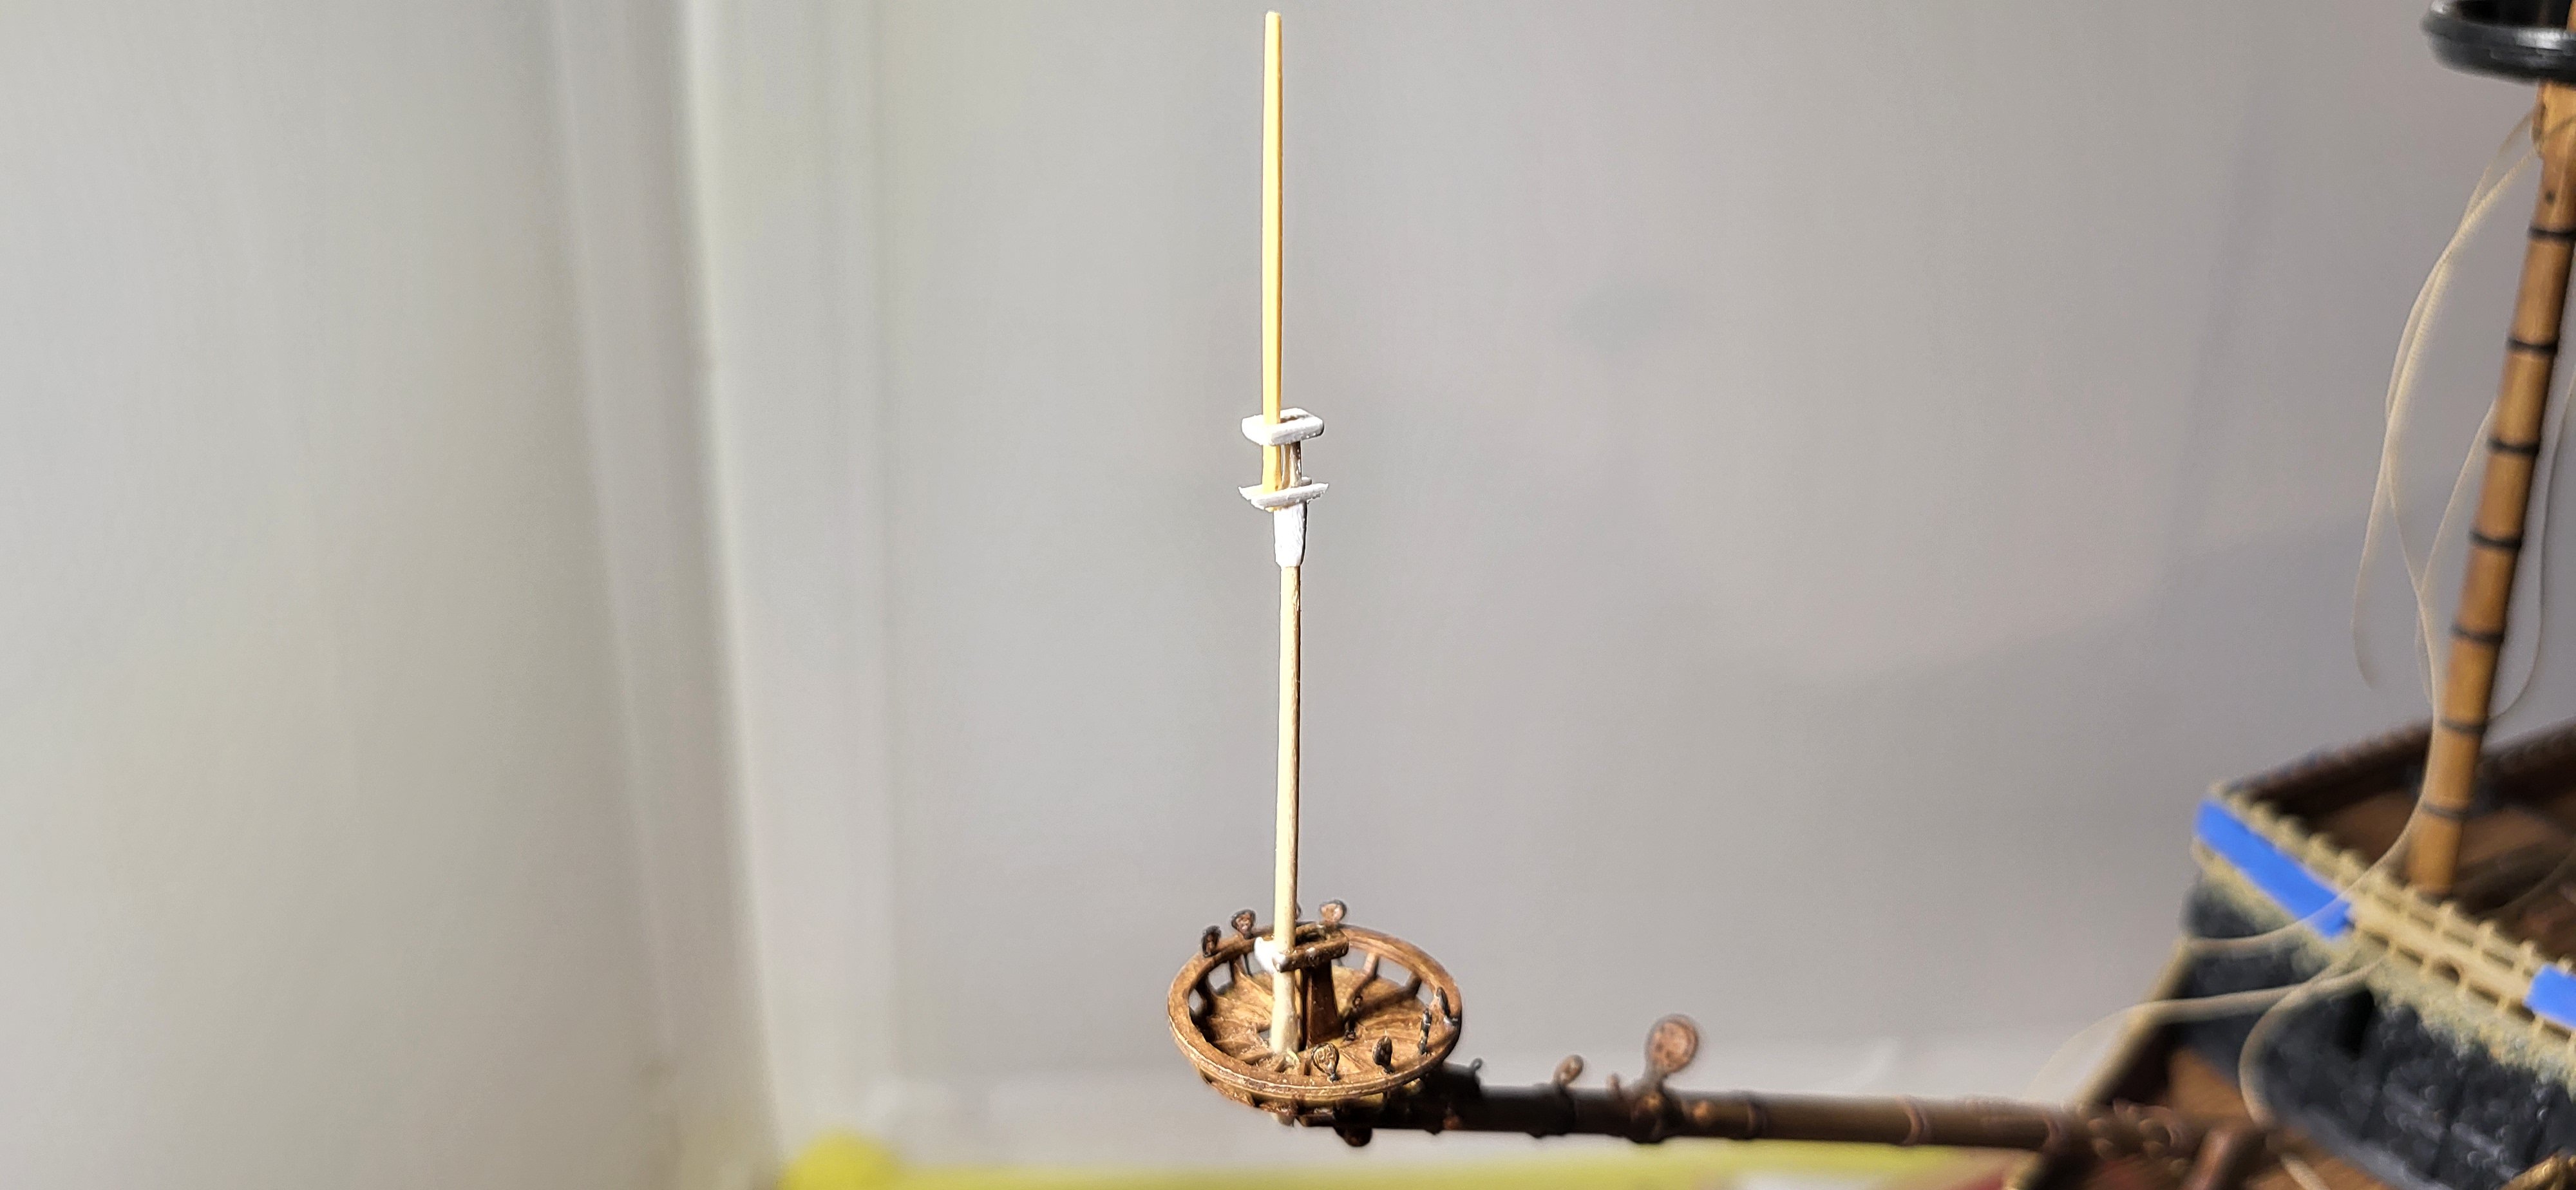
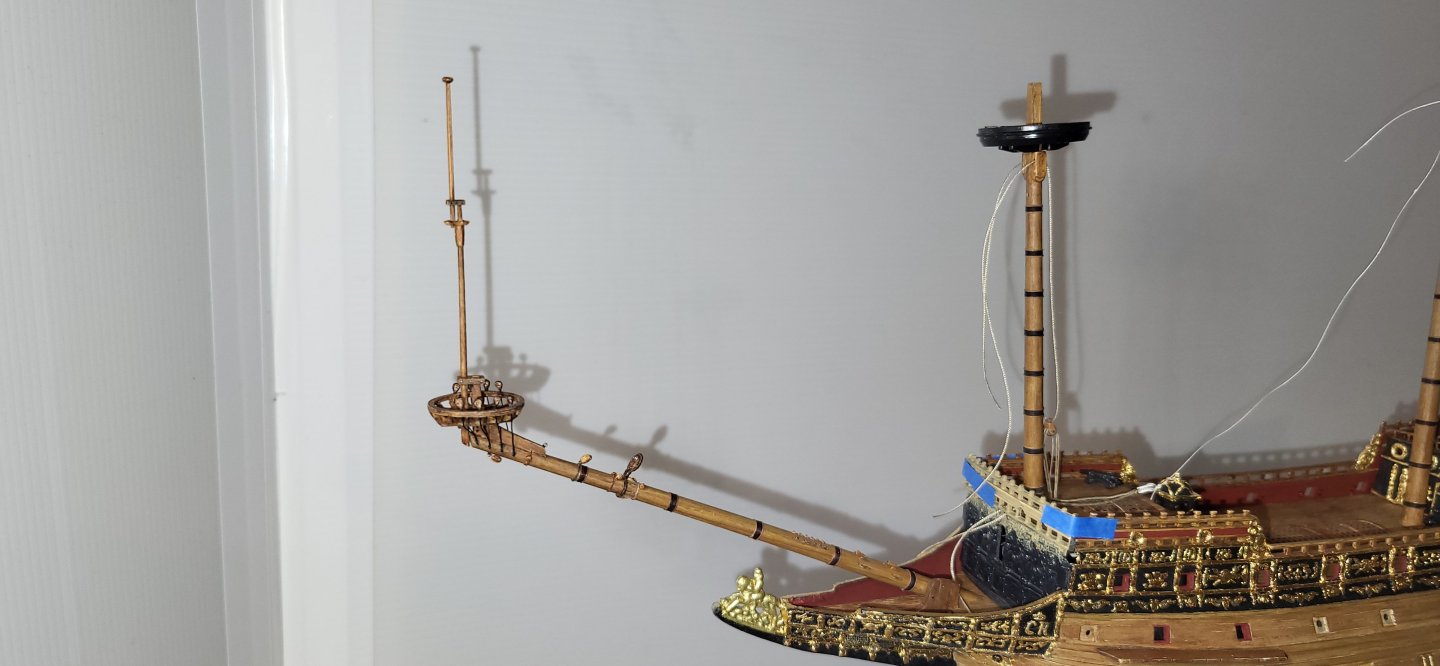
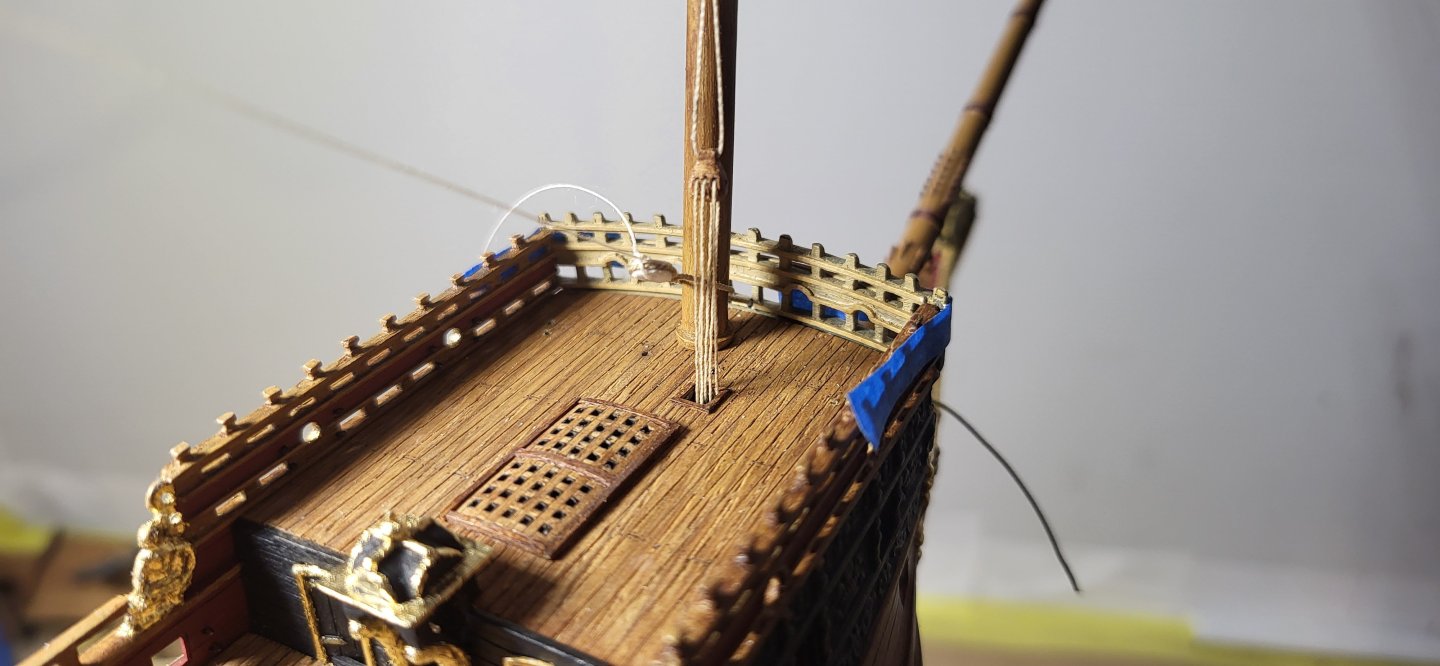
I've been working on dressing out the bowsprit, fore stay collar with 5-hole dead eye and misc blocks for the bowlines. I ended up scratch building the sprit topmast, usually I stay true to the medium I'm working with but in this case, I used toothpicks to hold up to the additional stress from the top gallant and royal stay crowsfeet attached to the shrouds , while still in the rough in stage it's looking pretty good, also the main mast wooldings are completed. Thanks for looking as always. Michael D.


- 327 replies
-
- 9
-
-
-
- Sovereign of the Seas
- Airfix
- (and 1 more)
-
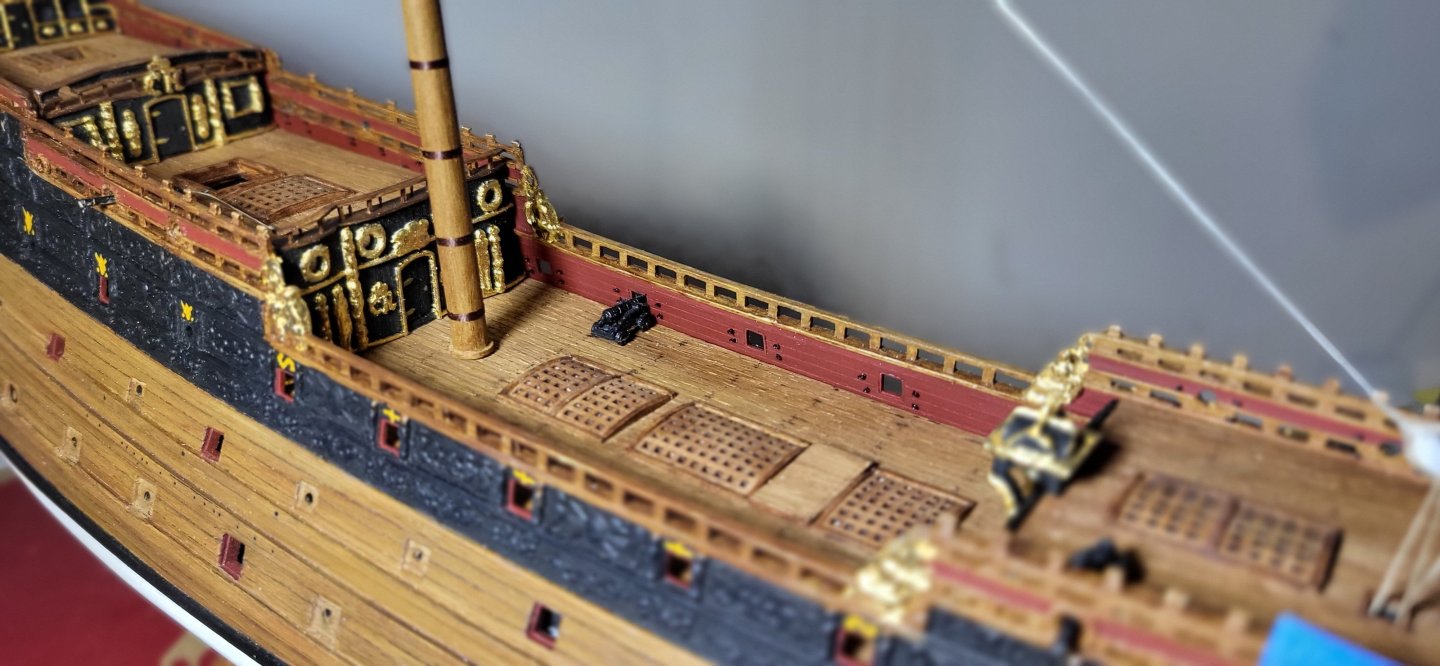
Kirill there is a hole in knee for the collar and yes the collar will be crossed outside the beakhead. I've completed the wooldings on the fore mast and still have the simulated wooden bands left to do on the main, also the remaining deck is place along with mocking up the canons, I'm not so sure the carriages for the main deck canons are entirely correct but I'll research that later. Michael D.


- 327 replies
-
- 11
-
-
-
- Sovereign of the Seas
- Airfix
- (and 1 more)
-
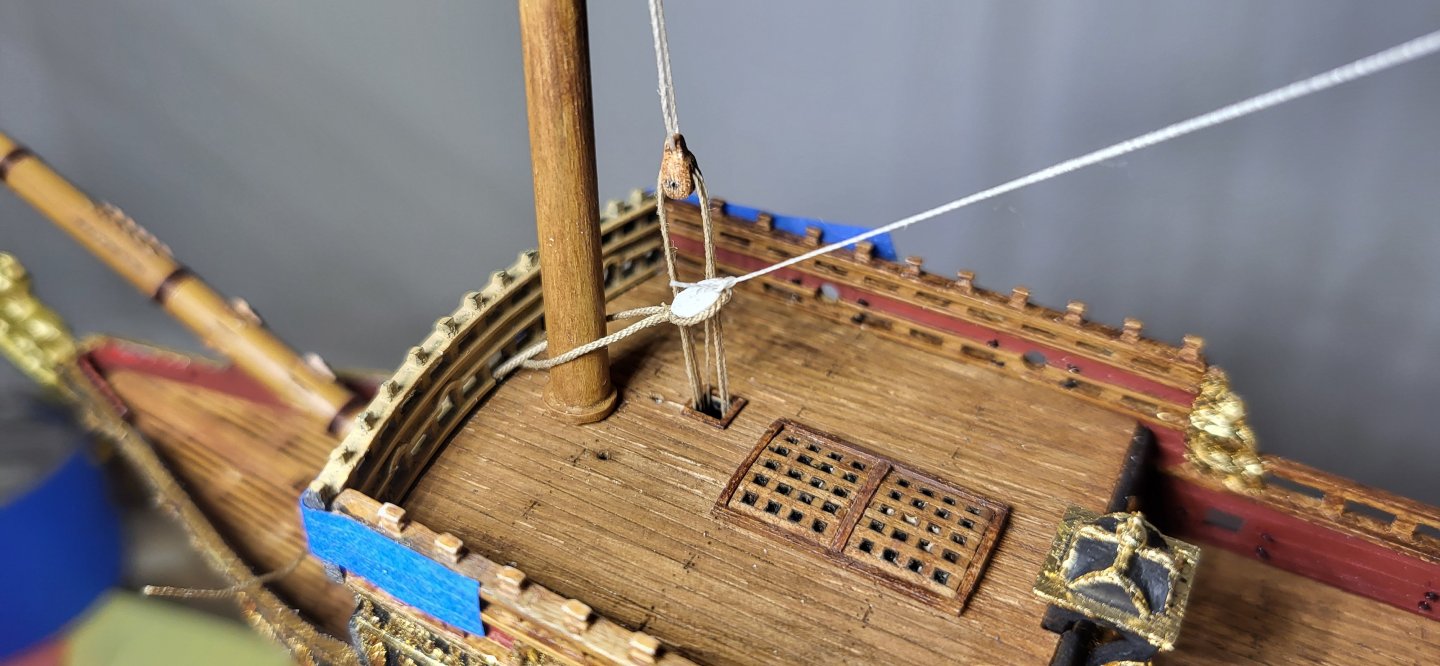
Thank you, Kirill, yes I still need to make a figure for the knee, neither of my go too resources...Lee's, McKay and Anderson mention the collar passing on the SB side, my thoughts are that may be the case the last part of the 17th century?. Anderson states during the first half of the 17th century that the two parts of the collar run either side of the mast. My second mock up is what I'm going with based on both resources and looks suitable to me. I was able to add the two sleeves in the beakhead for the collar to pass through, when I reach the point for the final, the splice will be on the PS and the collar will be fully served according to Lee's. Michael D.
- 327 replies
-
- 8
-
-
- Sovereign of the Seas
- Airfix
- (and 1 more)
-
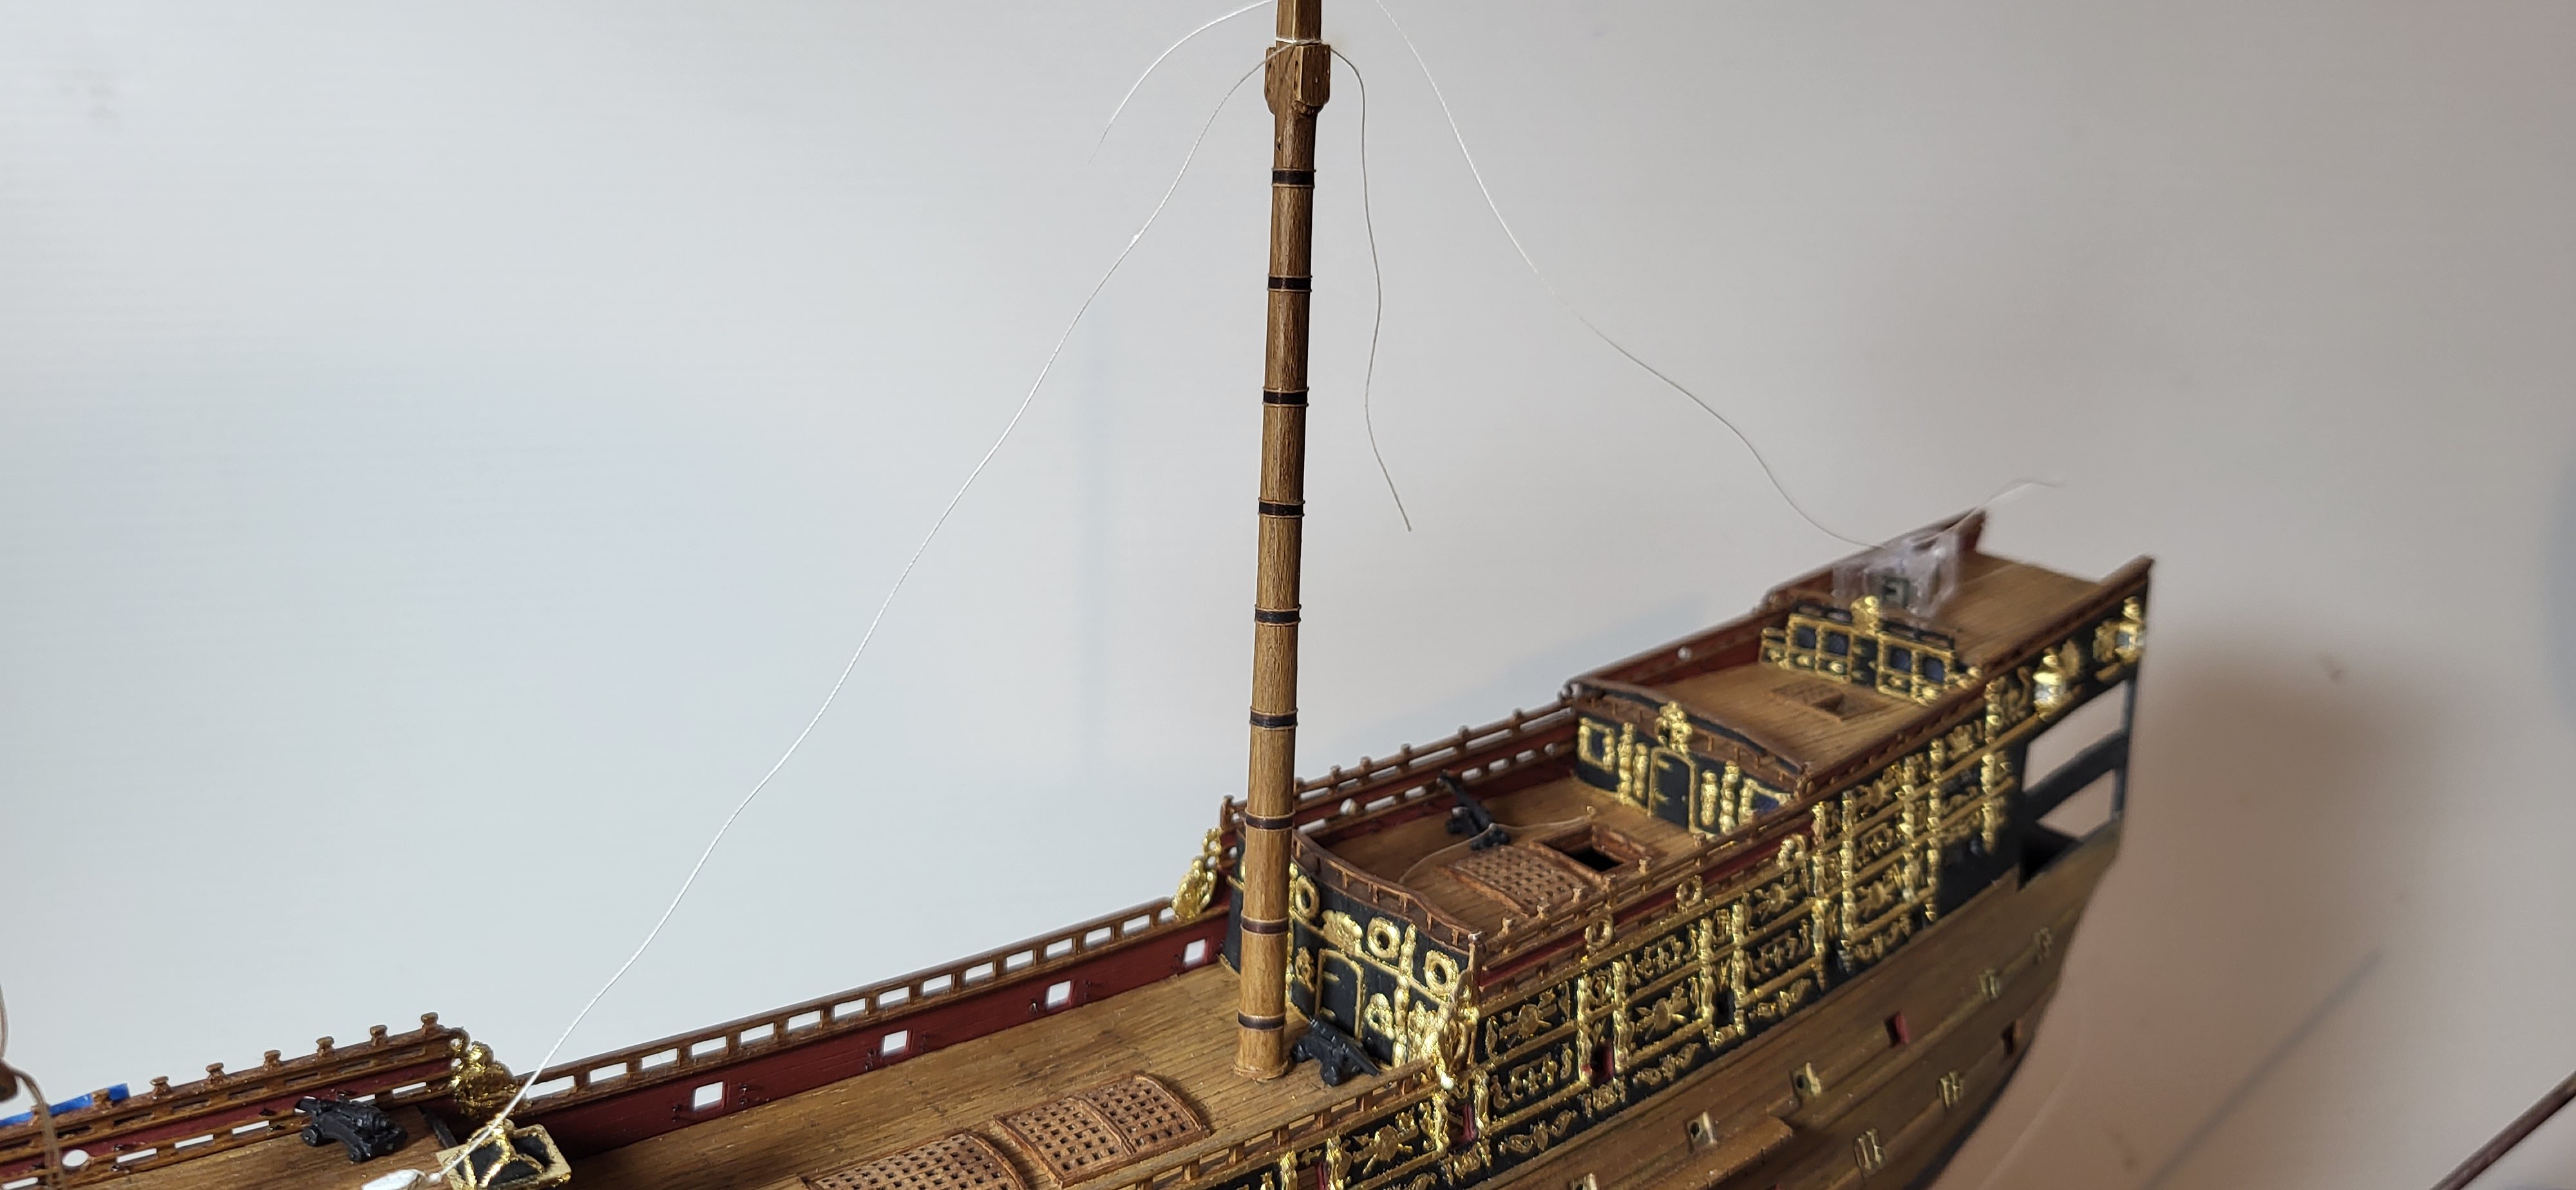
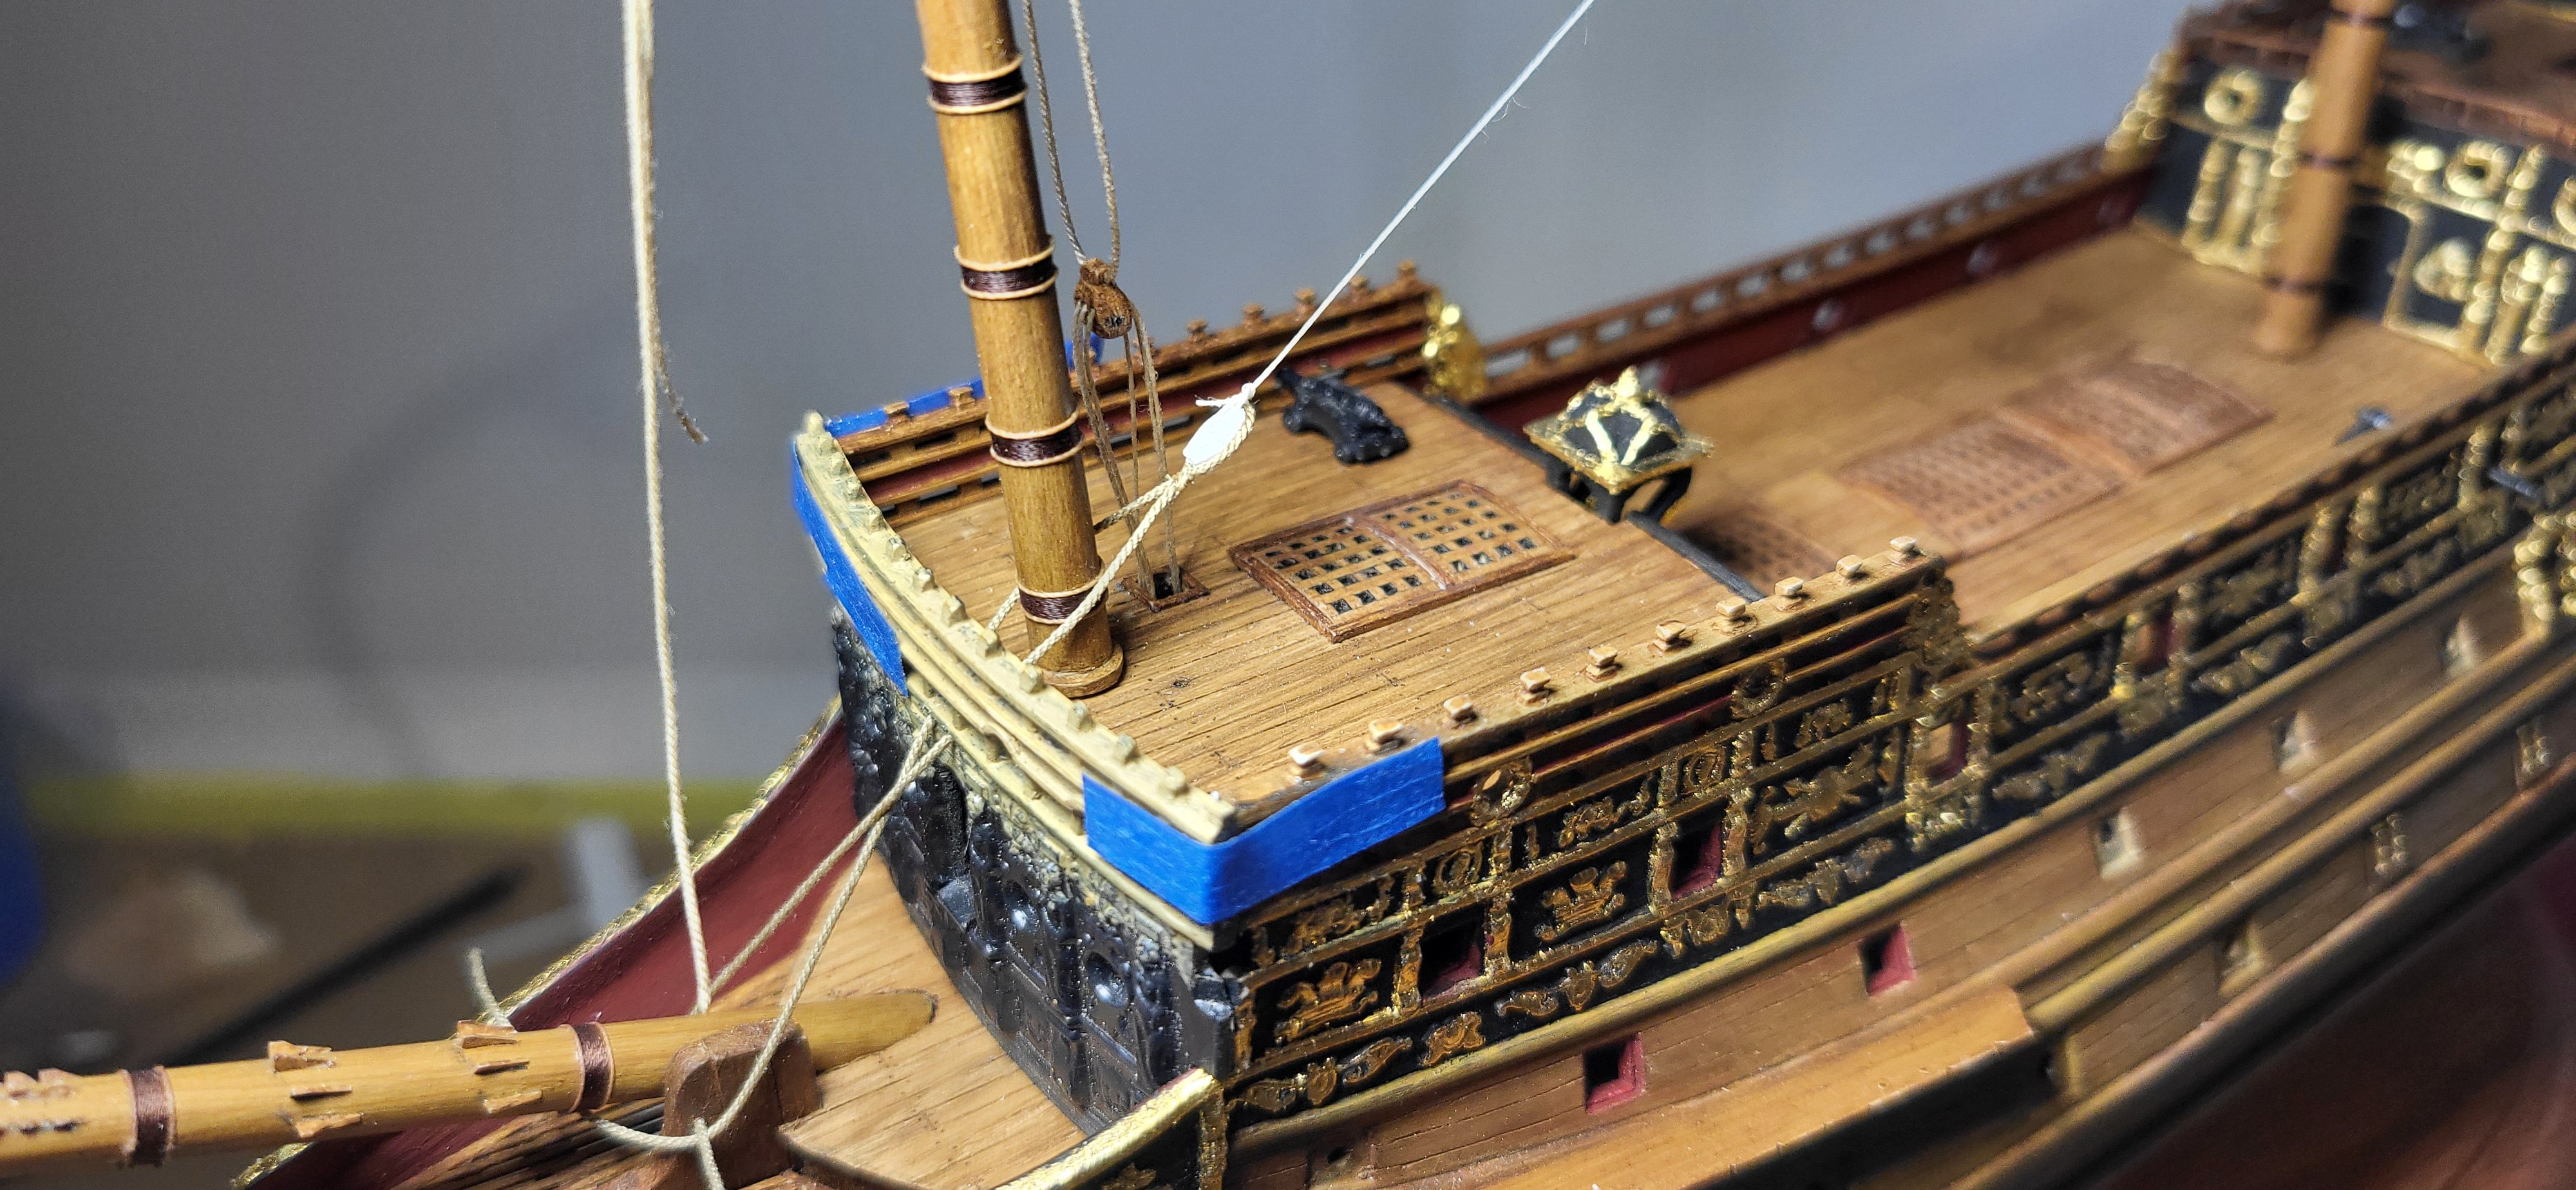
Since my last update I finally glued the hull together and made the base. Before setting the forecastle and main deck in place, I needed to finish the belfry and rig the fore course tie halliard along with adding the eye bolts for the cannon tackles, I used .32g brass for them. I needed to fashion a new main mast according to the dimensions in Mc Kay's book, here you see the difference from the kit supplied mast. Up next I need to make some modifications to the beakhead, one of those is possibly adding the sleeves above the door for the collar based on Paynes plate but that would require cutting holes in the deck to feed it up through and not so sure I want to do that, my preliminary mock up of the collar and stay looks pretty good. As always thanks for looking. Michael D.
- 327 replies
-
- 11
-
-
-
- Sovereign of the Seas
- Airfix
- (and 1 more)
-
Lovely work Jan, and the sunlight really bring the colors and wood tones to life. Michael D.
-
Thank you Jan, your compliment is much appreciated, I'm following your amazing SOS card build as well..stunning. John I really appreciate your gracious compliment, you have quite an array of completed builds, are any of them posted on the site?. Michael thank you for the kudos, that's very thoughtful of you, I do keep an eye out on your builds and see improvements with each one, keep up the good work. Michael D.
- 327 replies
-
- 4
-
-
-
- Sovereign of the Seas
- Airfix
- (and 1 more)
-
No worries, Marc we all have more important things to do in life. Thanks for the compliment, it's been a while since I had to paint details with crisp lines etc. Michael D.
- 327 replies
-
- 2
-
-
- Sovereign of the Seas
- Airfix
- (and 1 more)