Erik Nyren
-
Posts
184 -
Joined
-
Last visited
Content Type
Profiles
Forums
Gallery
Events
Everything posted by Erik Nyren
-
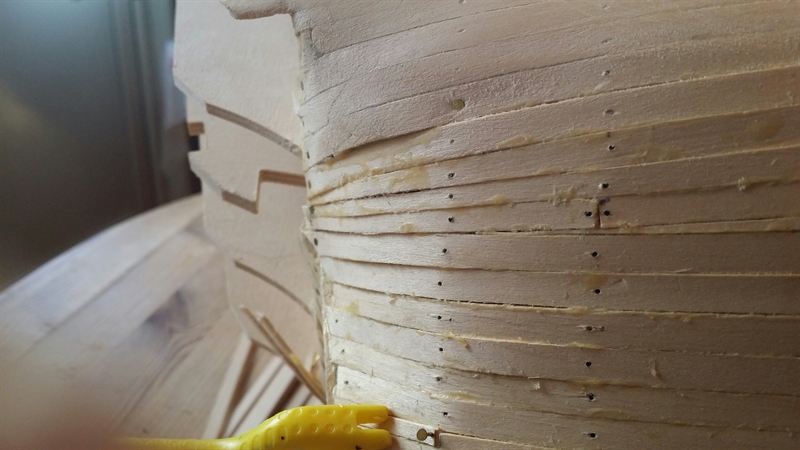
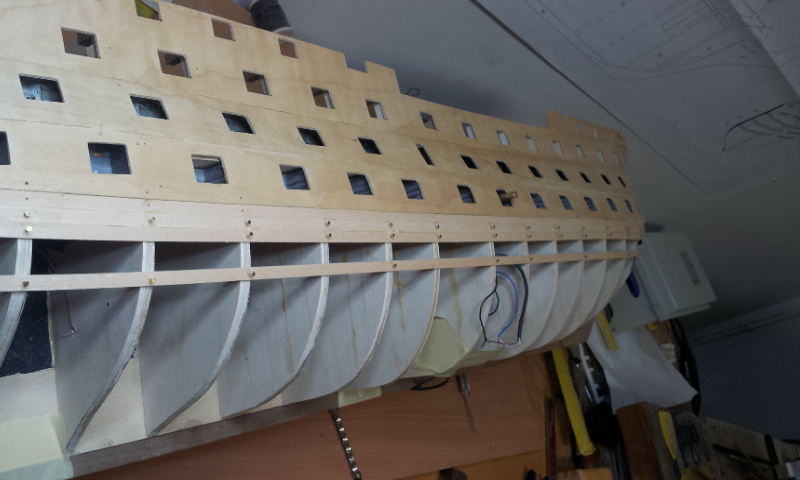
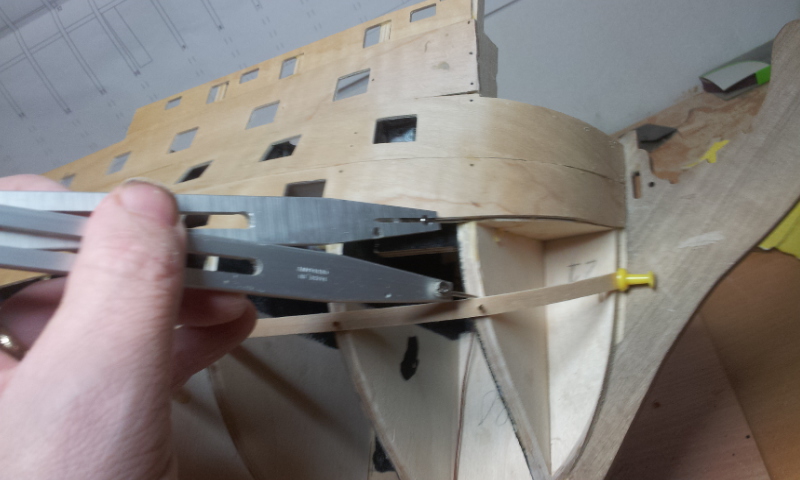
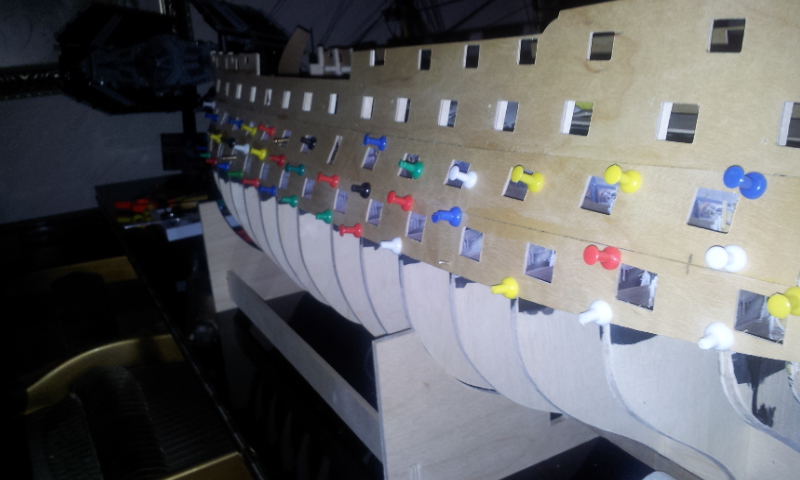
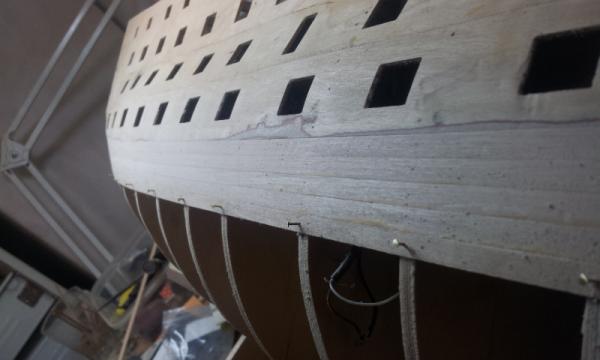
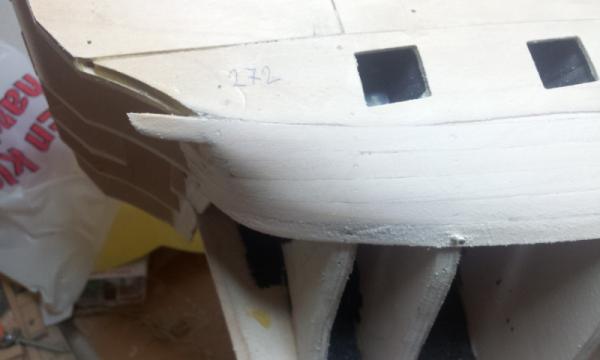
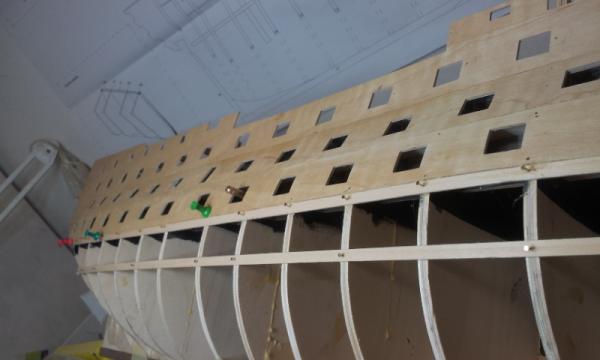
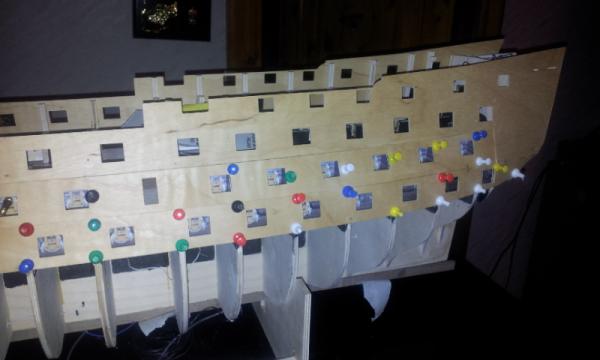
 Hello First excuse my English, the spellcheck in my webbrowser is going nuts. Win 8.1 is really starting to annoy me, you will have to live with my misspellings A few Words on planking this kit. The gunpatterns although practical when it comes to lining up the gunport, which effectly does it self. They do through the first planking a bit of and makes for a tricky start. I ended up with planks at a very steep angle upwards at the bow. As can be seen in the first Picture. The second planking will follow a more horizontal line and this will be less of a problem. There are a few planks on the stern which have a rather steep curve to them, a lot of filling and sanding will be required here to achieve an even shape to both sides of the stern. This resulted that my idea of following the rules of planking to make it as realistic as possible failed. Then again as the first planking is going to be covered with filler, sanded down and fitted with a second planking which then will be filled and sanded down and finally painted and coppar plated.. One will have to go to extreme messures to get to see where I cut some corners. Another thing on this topic is that kits often come with 5-6mm wide strips which does not suffice enough material to cut the strips to size for a perfect fit. Especially the garboard strake down next to the keel is hard to shape with such strips. One could opt for using home cut Wood but I did´nt want to use those preacious peaces for a hull that will be covered up.
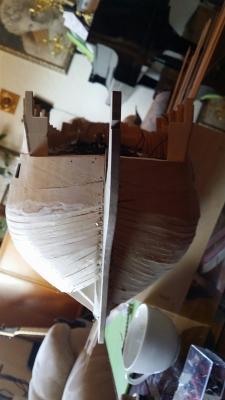

-
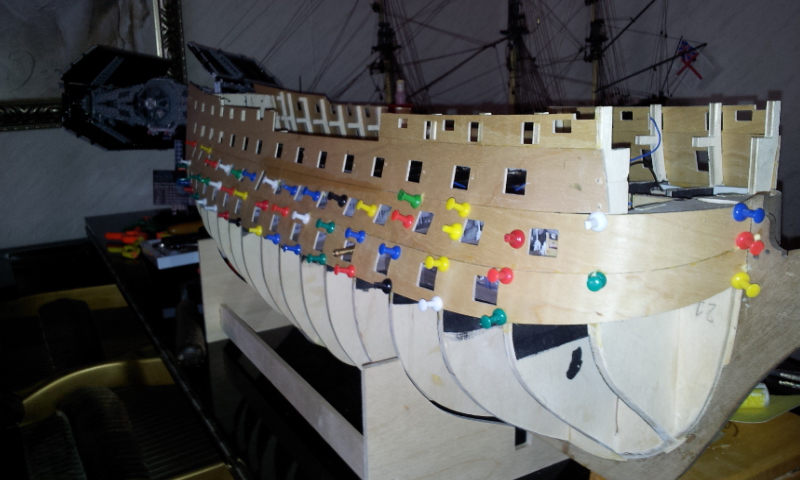
You have done a wonderful job on this kit, Billings has a few built in challenges. as you know. My Billing Vasa is on a hold.....long hold. hrm. What I noticed is how theese gunports at different elevation actually brings a lot of life into the display, I like it a lot. The wood stain with it´s aged look in contrast to the colours are also beautifully executed. A question: I take it that you have done your homework on the colorscheme of Vasa and although it´s an ongoing project at the museum I wonder, was the area around the gunports, the whales et.c. not painted? Regards Erik
-
Rob I doubt I will pass you, not that it matters. I have been spending a lot of nights in hotelrooms this spring and cant really bring the Vic with me. Imagine the horror of checking her in as bagage at the Airport........ I have fitted LED:s to all of the gunports as I found the false gun arrangement with the pictures were blocking to much of the light, thanks for the advice. I have not yet added lights for the upper decks. This will be done at a later stage. I´m about to Close up the first planking which is a bit scary........ the last Point where one has access to the basic wiring. Kind of an "All IN" kind of thing and I´m not much of a pokerplayer. How did you go about getting the flickering light effect.? Are those flickering LED:S or did you make some cleaver Electronic solution? Regards Erik
-
Great job Rich If you are refering to the part of bulkheads blocking the gunports in pic 13: yes they will be cut out at a later stage of the build. I dipped the patters in water for a few minutes which made the ends flexible and quite easy to shape. Caution though not to let them sit to long in water as the glue holding the ply together is waterbased and to much water can cause them to break up. Regards Erik
-
Thanks muggebigge Not much work done though, I travel during the weeks so progress is painfully slow. Erik
-
Thanks Rob You are right about the hull beeing covered with paint filler and coppar plates however I Always strive to do the planking at the best of my abilities. Practice makes perfect. Regards Erik
-
Molly does not fit in the box anymore , they do grow. I wish I could spend my winters in the Caribbean, theres like 14 celcisus below zerow and snow on the ground around here. brr Regards Erik
-
HMS Victory as I left her tonight. Regards Erik

-
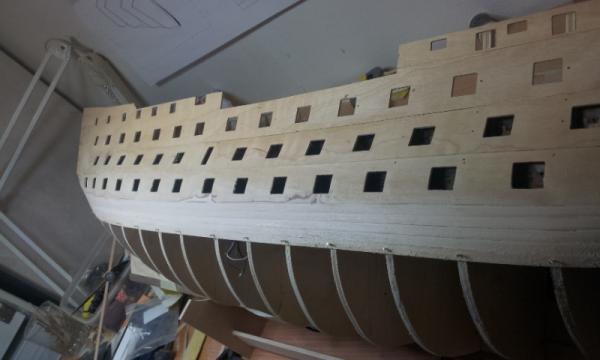
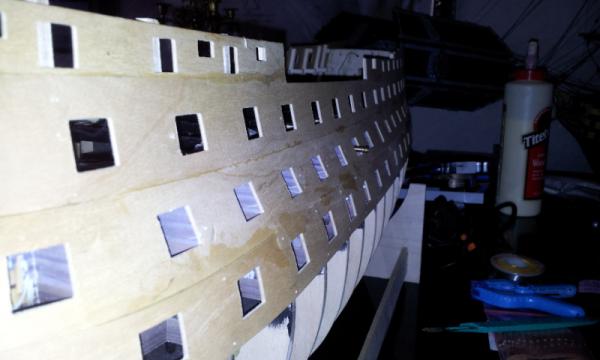
So far five strakes in place, the wood is quite soft and easily bent. Sanding is also pretty easy, having the boxwood of my Kingfisher kit in mind this is like cutting through butter. Sanding the gunport patterns that are made of plywood now thats another story..... Lets all give thanks to the man/woman who invented the dremel tool. Regards Erik
-
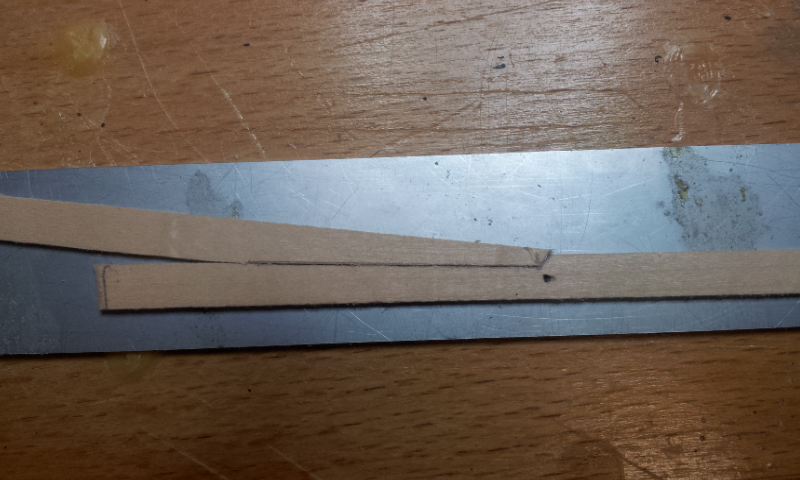
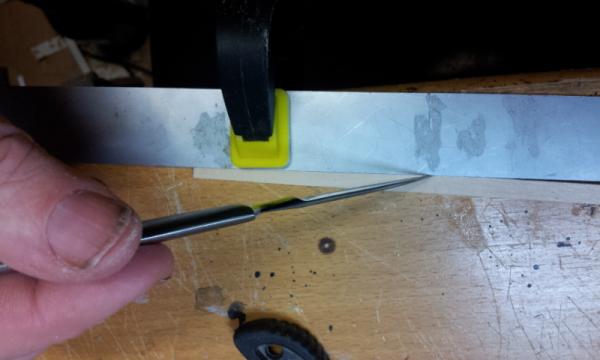
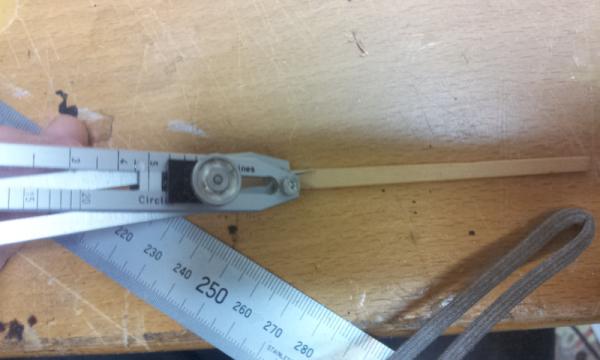
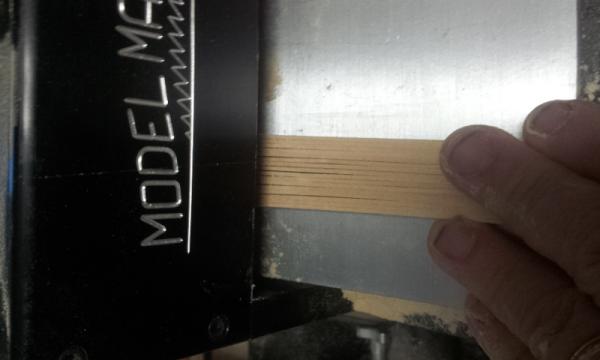
To make tapering easier I simply clamp a steel ruler against the strip and cut the taper with a knife. The instructions tells you to use many strokes and not to cut through the strip in one go. This is very good advice.
-
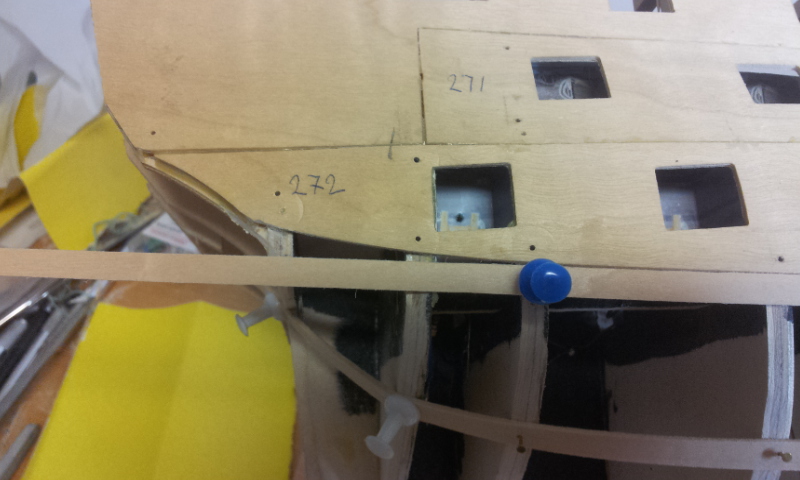
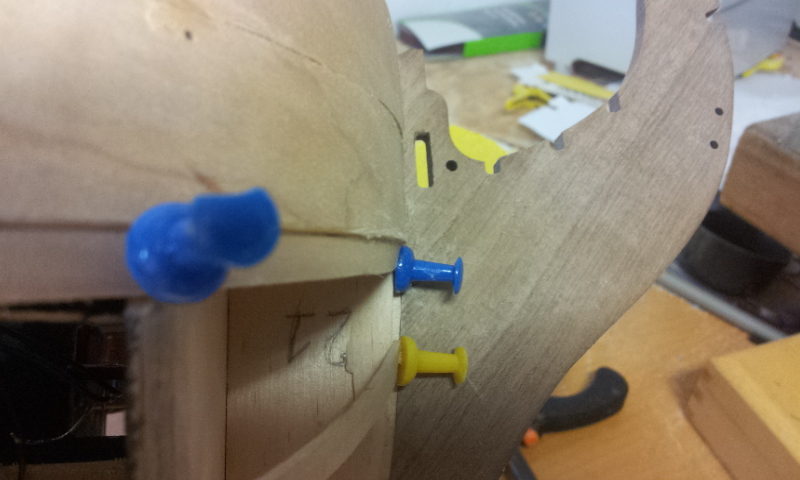
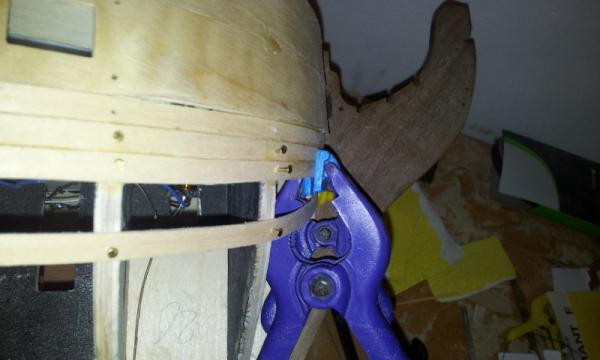
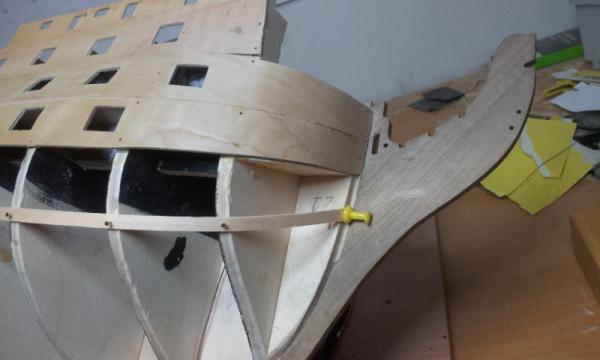
If the first strip was to follow it´s natural curve a stealer would have to be fitted below the gunport pattern, I decided against that as I did not want to fiddle with the curv of the pattern, a bit of force was therefore nessecary to fit the first plank, I did not get a perfect fit so a bit of sanding and filling will be nessecary here. I fitted a stealer between the first and the second strip instead.


-
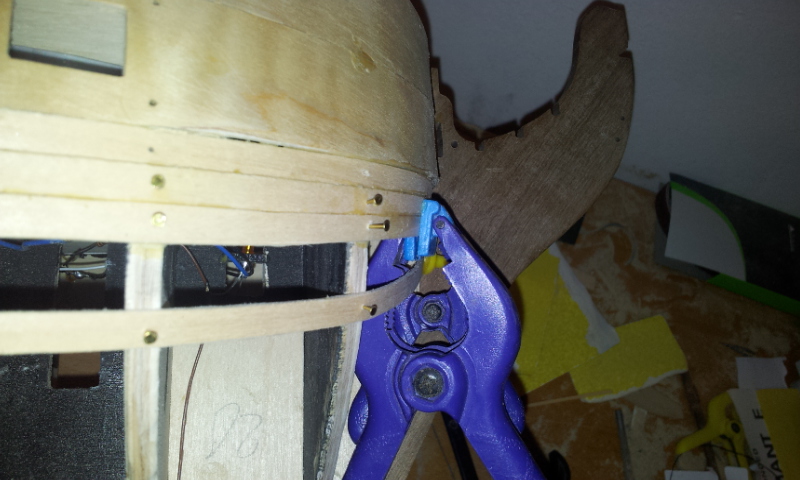
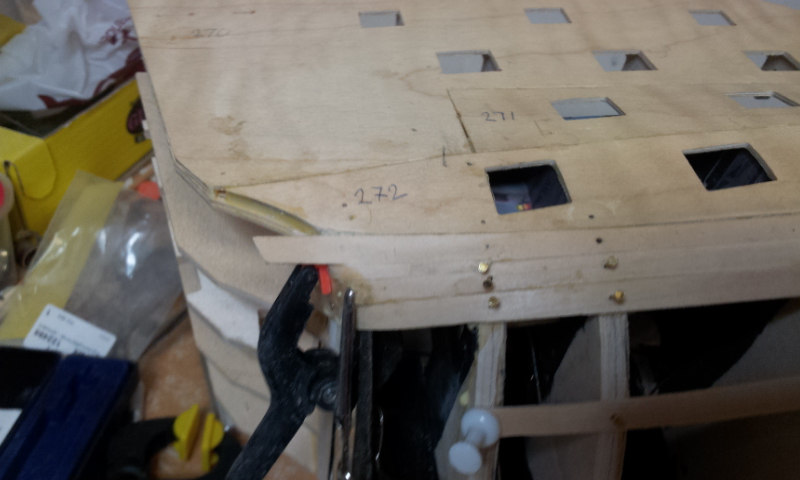
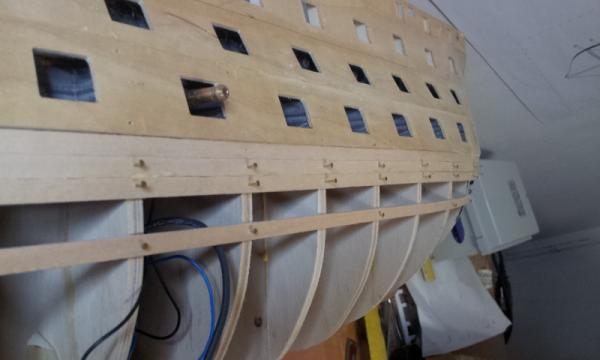
First strip of the planking in place using the brass pins that came with the kit to hold it down. I drilled 0.4mm holes in the plank so that it would not split when pinned down. The pins can be reused wich is nessecary as theres not enough of them to leave them in. Some pins I left in particulary at the stern and the bow along the apron as theese are areas that are particulary difficult and can do with some extra strength.

-
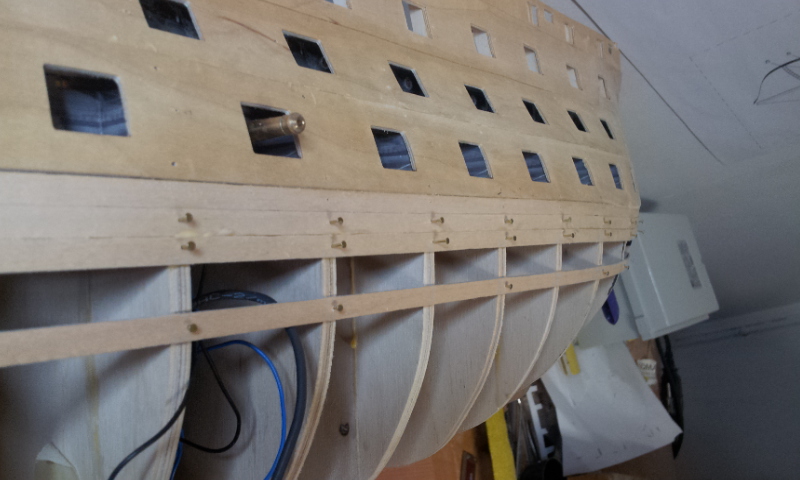
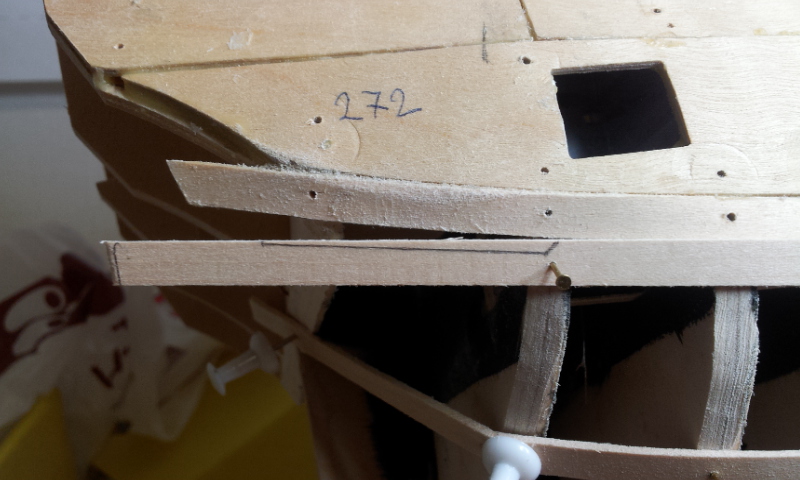
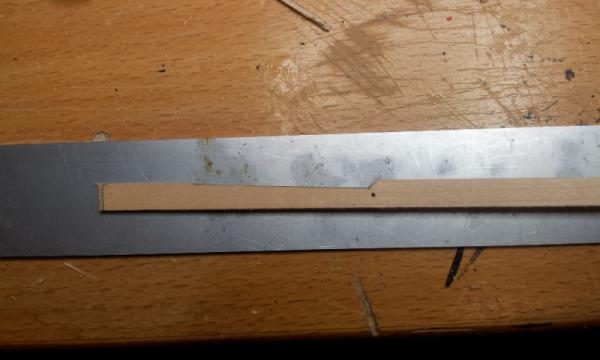
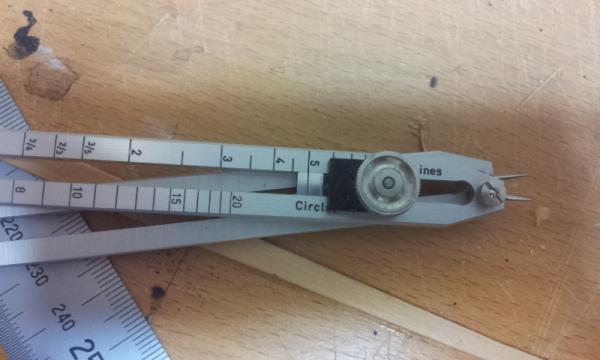
Setting my dividers on five I could meassure the distance on one bulkhead and the other end of the dividers shows me how much needs to be tapered at that specific bulkhead. There were a bit of tapering at the bow however the stern called for a stealer.

-
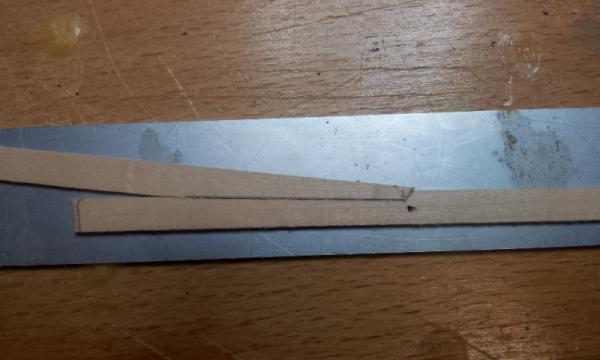
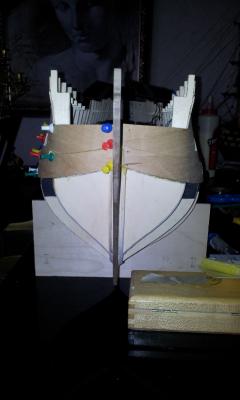
I measured out a space of five strips and placed a temporary battern on the side of the hull folowing it´s natural flow, unfortionally I neglected to soak it in water and alas it broke at the stern.........
-
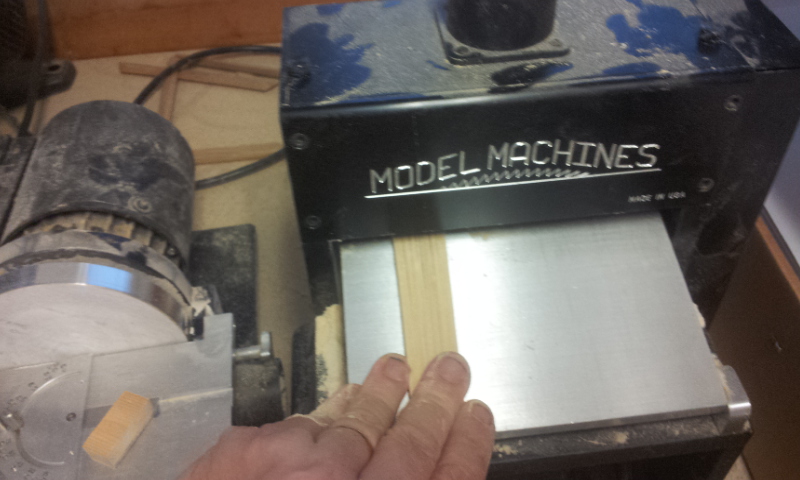
Finally some planking !!! It´s been a while and I´m looking forward to try my hands on using a set of proportional dividers. A first of two layers is perfect to try it out. I´m not to impressed with the cut of the first planking strips so I pushed them through a thickness sander.

-
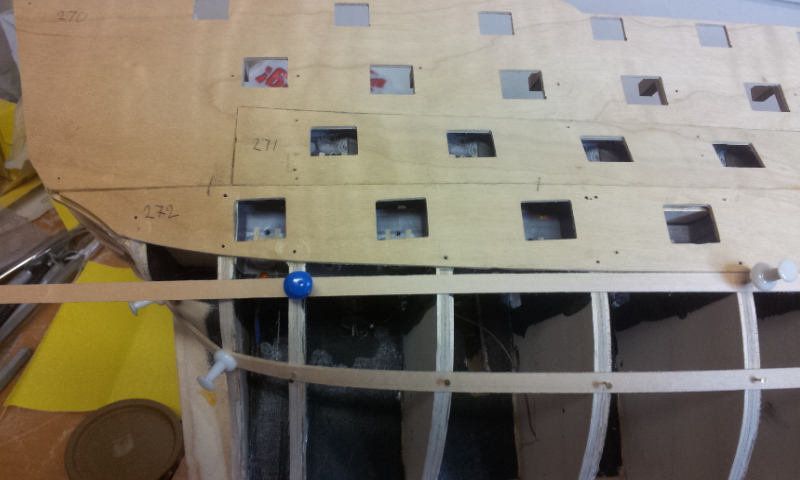
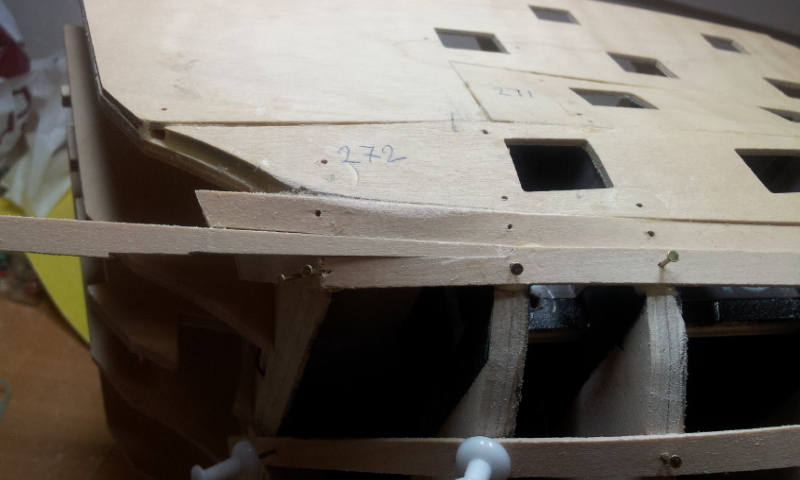
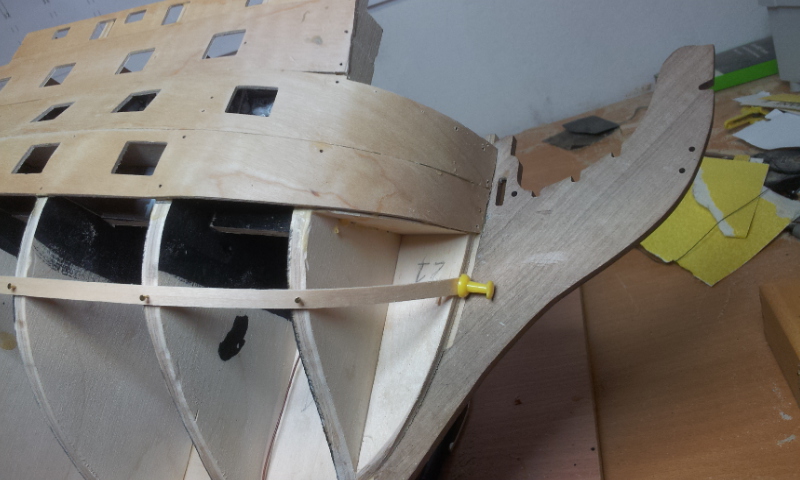
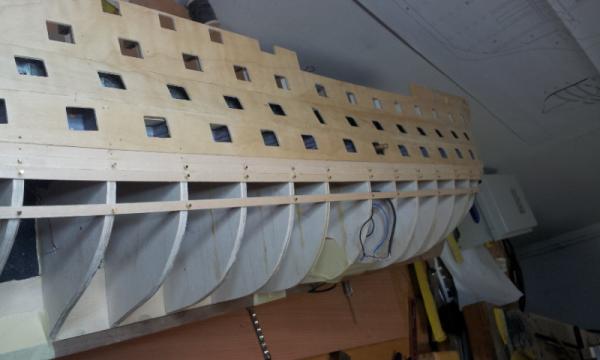
Now the patterns tilt upwards at the bow which will force the planking to do the same, This I believe is wrong. The planking should be more horizontal folowing the waterline or am I wrong? Anyway as theres a second planking, sealer and paint to go, so I guess it matters little to the final result.
-
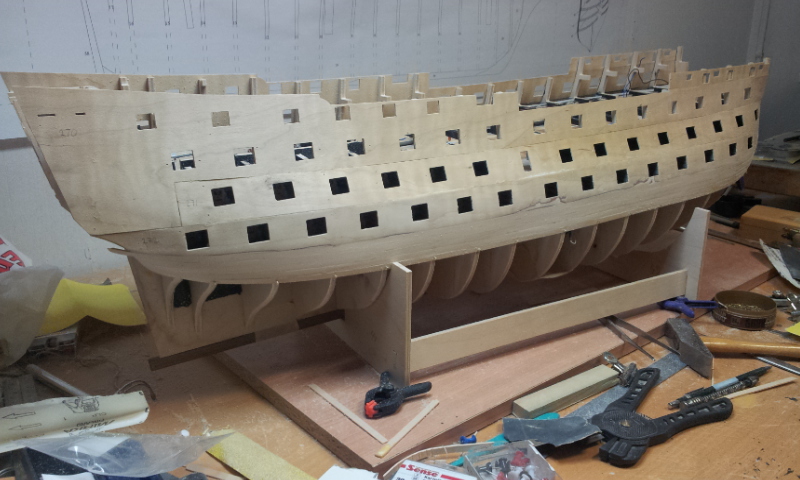
The patterns were quite straight forward with a pretty good fit right out of the box. At the stern middle row of gunports, bulkhead 17 (I think) was showing if I had the patterns perfectly aligned with the stern. I chose to adjust the patterns slightly to cover the bulkhead resulting in a less than perfect fit at the stern. I´m thinking it will be easier to cover the malfit at the stern rather than fiddeling with the bulkhead thickness. The future will tell.

-
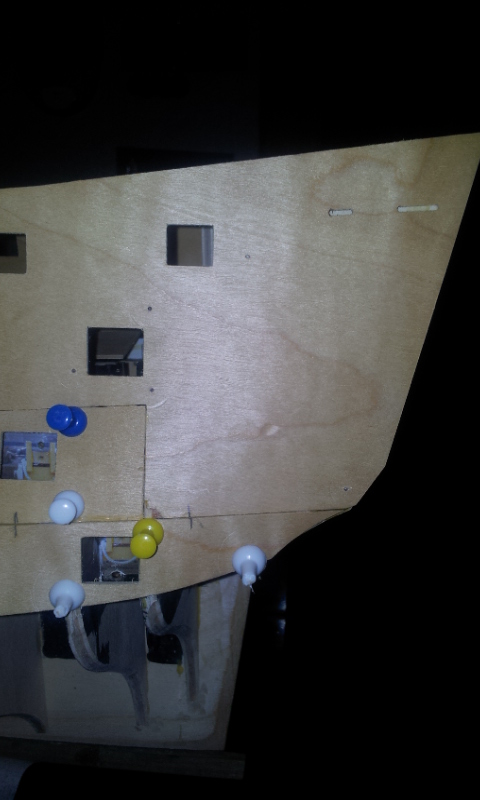
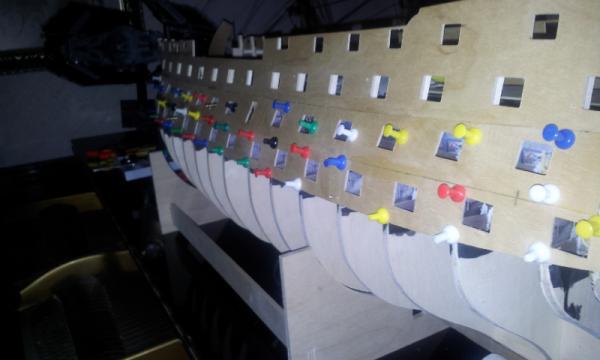
Finally I got the gunpatterns in place after a great deal of soldering. The pins made her look like a christmas tree though.

-
Hello I managed to lay my hands on one of theese HAT sets of figurines, It was the last one on that particular site but hopfully I can get more of them. Regards Erik
-
Hello Jotikas customer support strikes again I had an answer within a few hours, perhaps not the answer I was hoping for but fast . Mr John Wright of Jotika stated in his mail that they have never had figurines in their Victory kit so I guess the fellow I came across on the forum had mixed things up a bit. Regards Erik
- 5 replies
-
- 1
-

-
- Caldercraft
- HMS Victory
- (and 1 more)
-
Hello Matti Magnificent build. For sure your build will be my reference when I get a round to finish my Billing Vasa (next century probably). // Erik
-
Matti I tried to take some pictures but I´m unable to get any good shots of the LED system, To dark or to bright and all to bad for posting. I have started to glue the gunport patterns in place though and they are pretty straight forward Erik
-
Hello I bought my CC HMS Victory almost 10 years ago and have only resently gotten around to start building lt, and of course start a log I decided to post my question here though as it´s more of a general question rather than one connected to my build. As I was surfing the web I came across a fellow at another forum which had bought this kit in 2013 and claimed It came with some 90 figurines. Theese were not included in my kit so I was wondering if this is an update to the kit? Does anyone have any information about this? I have also sent a mail to Jotika asking about this, any response will be posted here. Regards Erik
- 5 replies
-
- 1
-
-
- Caldercraft
- HMS Victory
- (and 1 more)
-
Hello all. Thanks for all kind remarks, maeks it all great fun along with any feedback and tips I can get. Matti: Theres has been some progress, all LED for the lower gunports are up and running and the pictures for the lower and middle deck false guns are glued in place. This meens that I´m back to doing some actual wood-work wich is nice. Final fairing of bulkheads, fixing the gunport patterns and starting on the galleries is next along with the first planking. There will also be additional LED:s in the sidegalleries. Pictures soon Erik
-
5 cannon raised from wreck of Blackbeard's ship
Erik Nyren replied to BareHook's topic in Nautical/Naval History
I might be way of here but I believe that brass and iron beeing high prized and hard to come by in those days a good cannon was not layed to rest. This means that ships could carry cannons of different origins as they were prizes. Especially on privateer ships or pirates for that matter. Then again I suppose that a ship of the line would have had cannons from their "home country" It would be interresting to hear the thoughts of someone more knowledgeble on the subject. Oh, and is this were we can find the origins of BOFORS and the inspiration for Alfred Nobel?. Erik