Erik Nyren
-
Posts
184 -
Joined
-
Last visited
Content Type
Profiles
Forums
Gallery
Events
Everything posted by Erik Nyren
-
 Thanks fellows Kevin: I have cut out notches in the bulkheads and square holes to the keel to accomodate wires and LED lights. Could this be the difference or are there others I would be intressted to hear if Caldercraft have made changes to the keel. Patrick: Intressting remark on the manuals, perhaps I said to much, they do look good but I might change my mind when I used them for a while of cource. Oh and the child did not come with the kit Regards Erik
 -
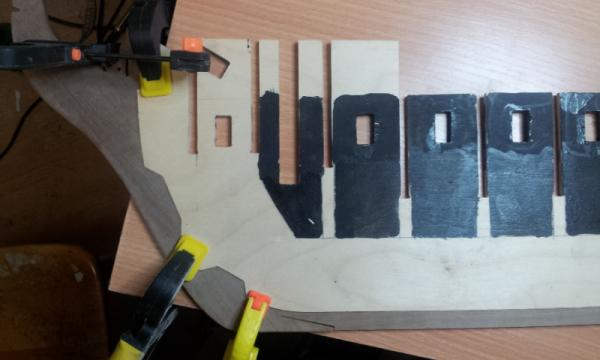
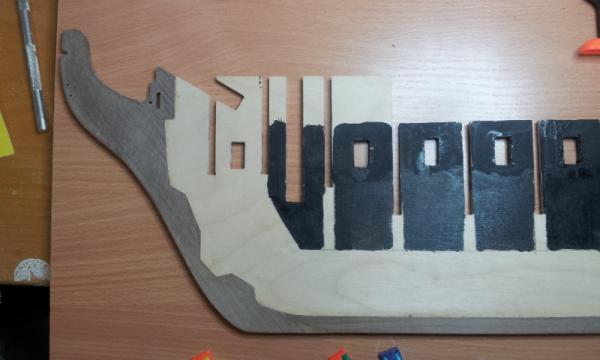
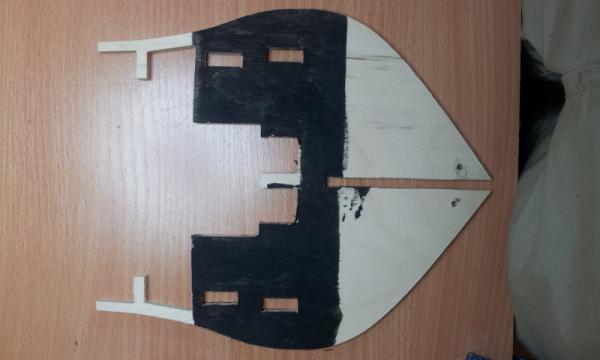
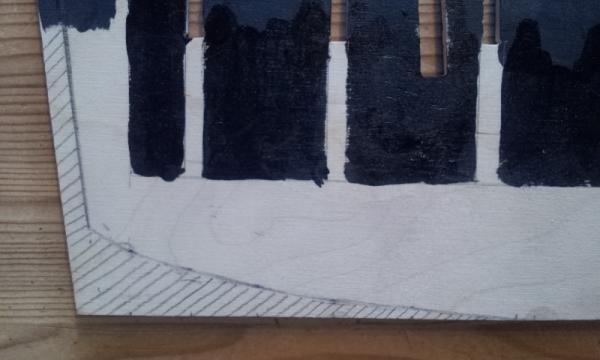
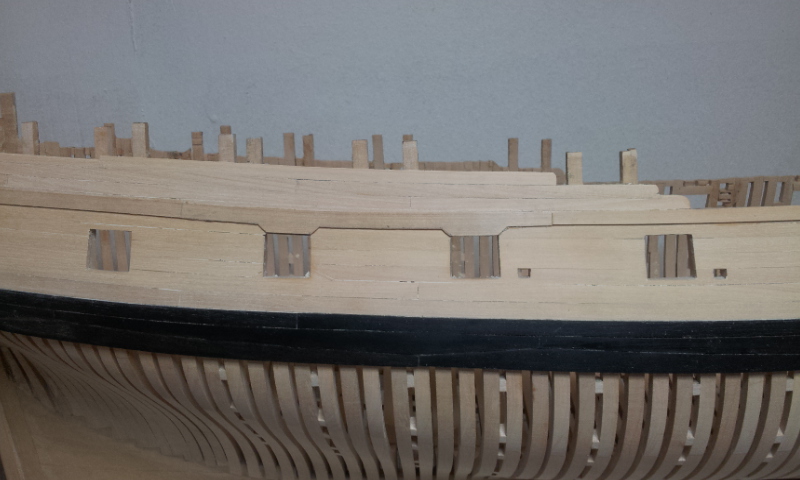
Some preparation to the keel and bulkheads, they are painted to make them less visible through the gunports. Some notches and holes were made to accomodate a LED light system and the bearding line has bee defined. It turnes out that my keel is about 8mm shorter than the picture on the sheet plan. Has anyone else experienced this? Is the plans not a 1:1 scale representation of the model, if not messurements can be tricky Now.....BBQ- sunday dinner Regards Erik

-
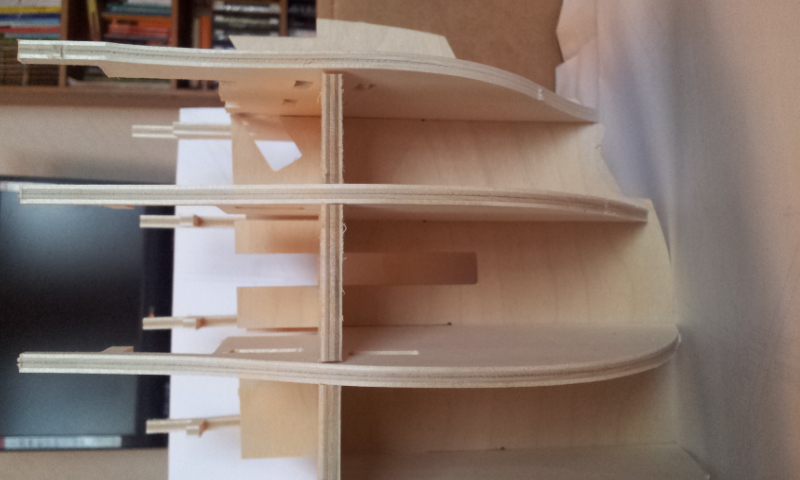
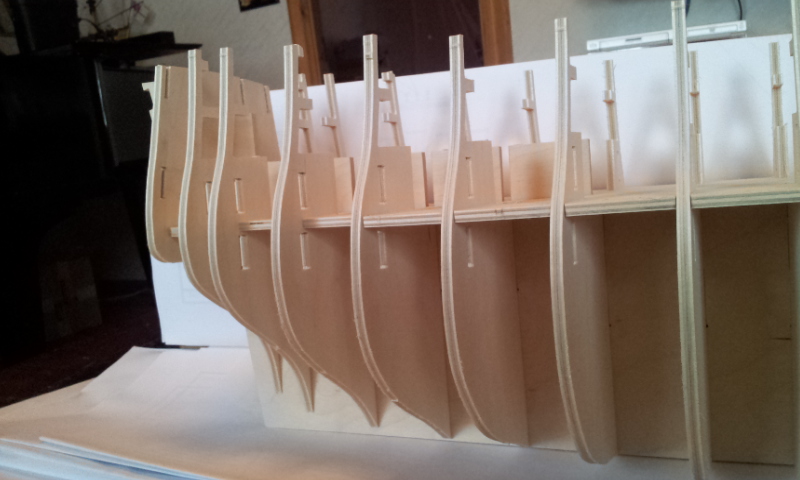
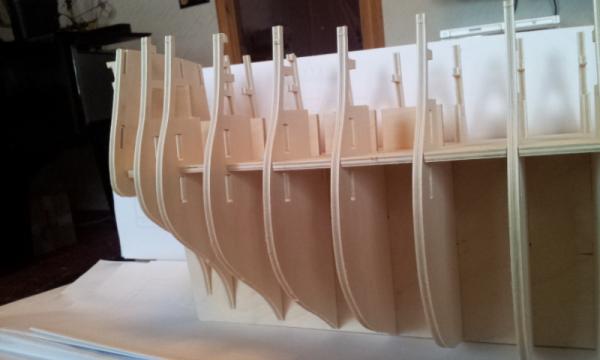
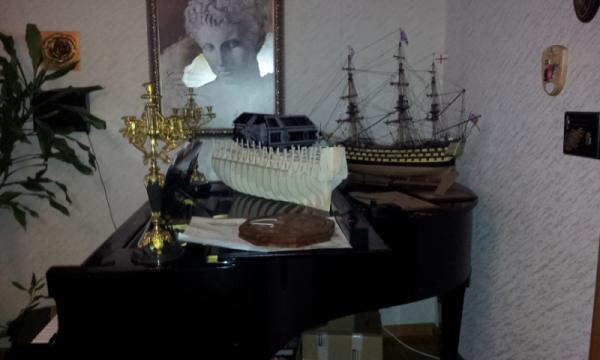
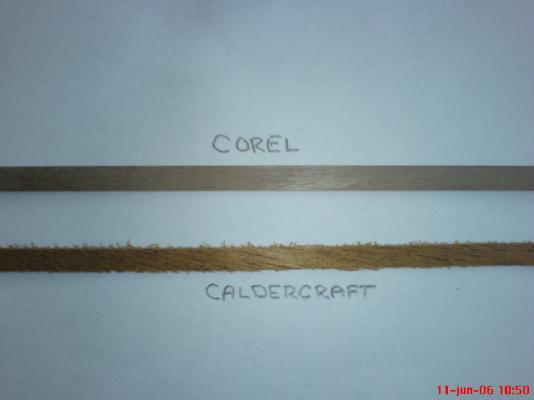
Starting out with some dryfitting The bulkheads fit exact into the keel, no adjustments needed and the tight fit makes a rigid assembly even without any glue. Í will use the Admiralty series of acrylic paints specially developed for the kit. The last pictures compares this kit to the Corel Victory (1:96 I think) and dont worry I´m not using the grand piano as a building board but the CC Victory will replace the Corel kit eventually.


-
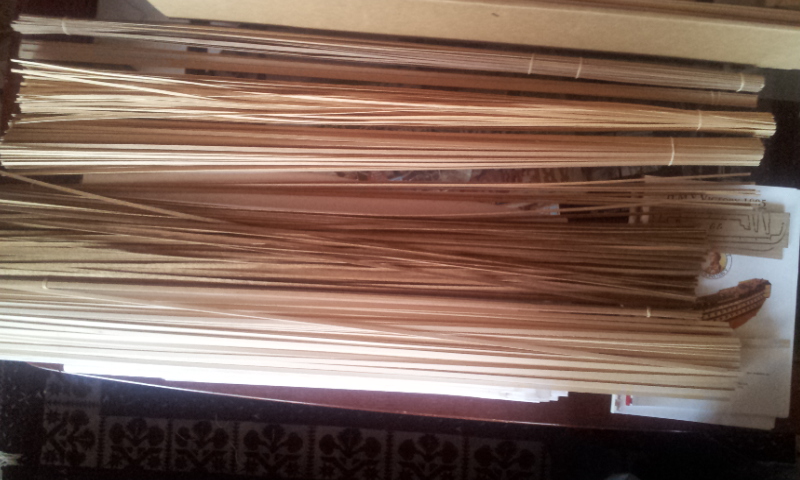
Theres a lot of stuff in this box Erik


-
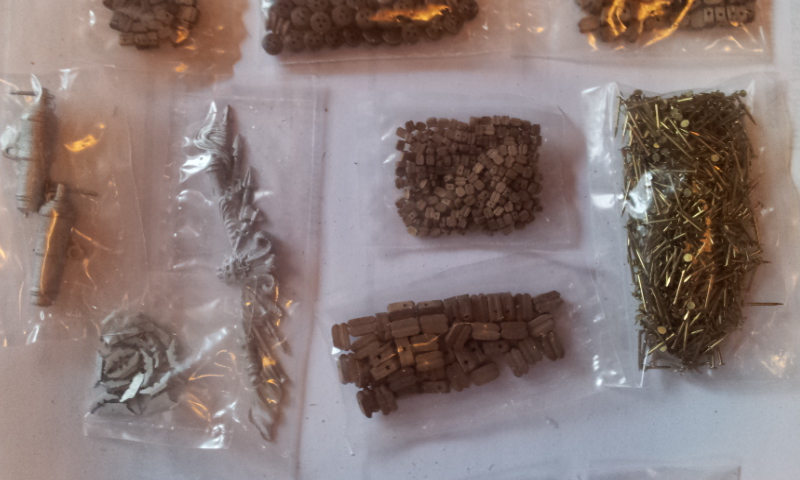
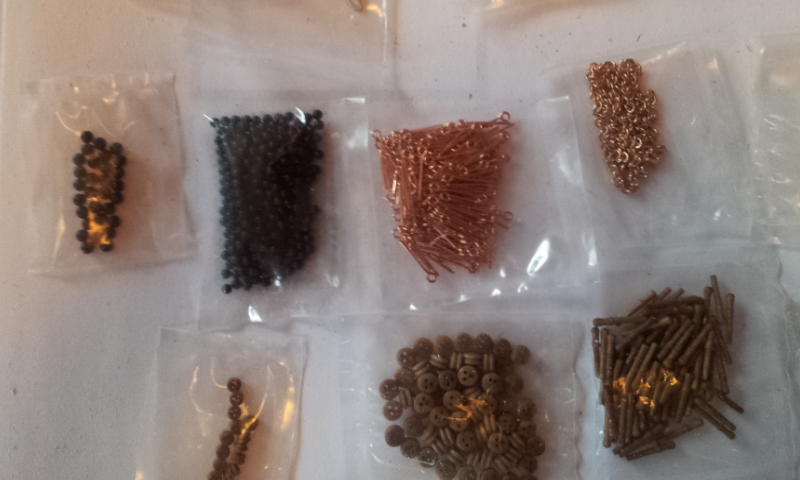
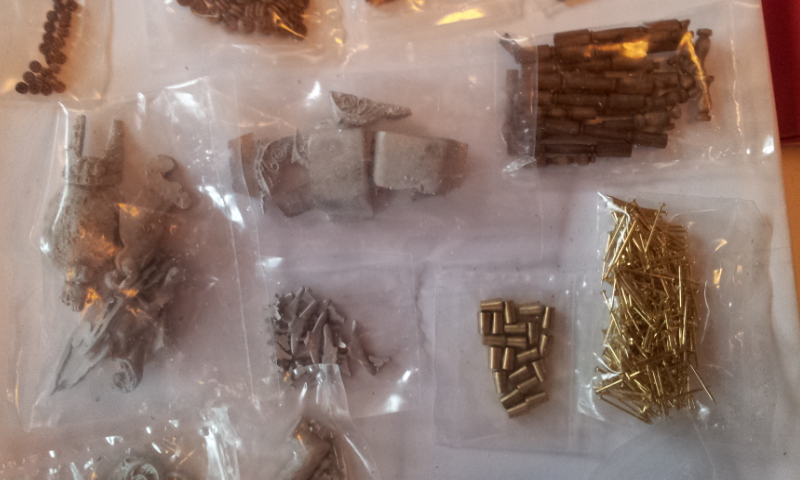
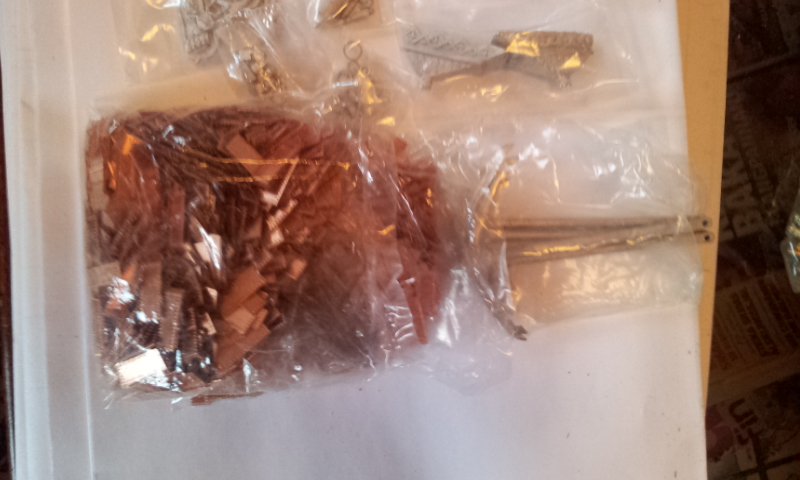
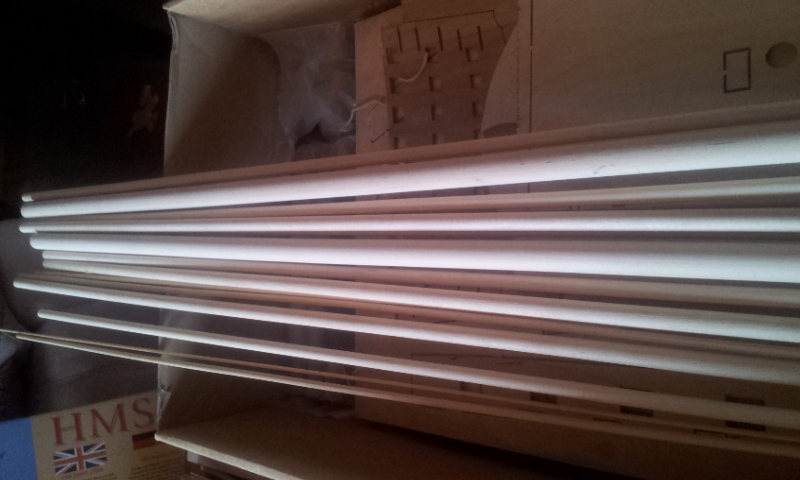
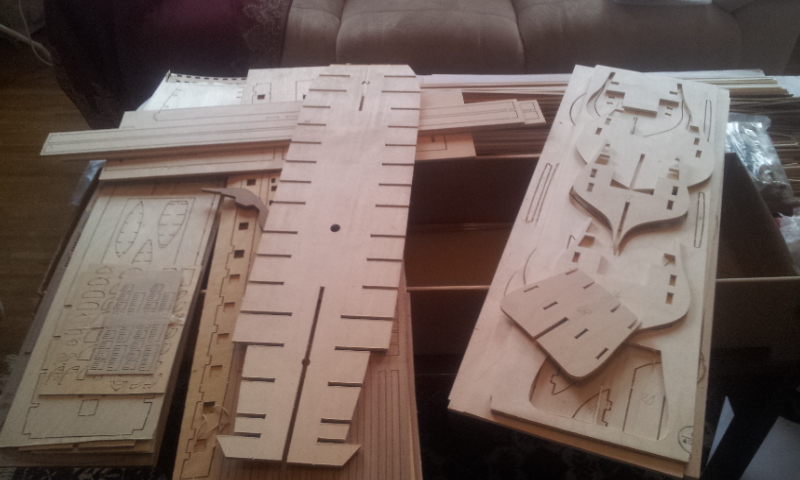
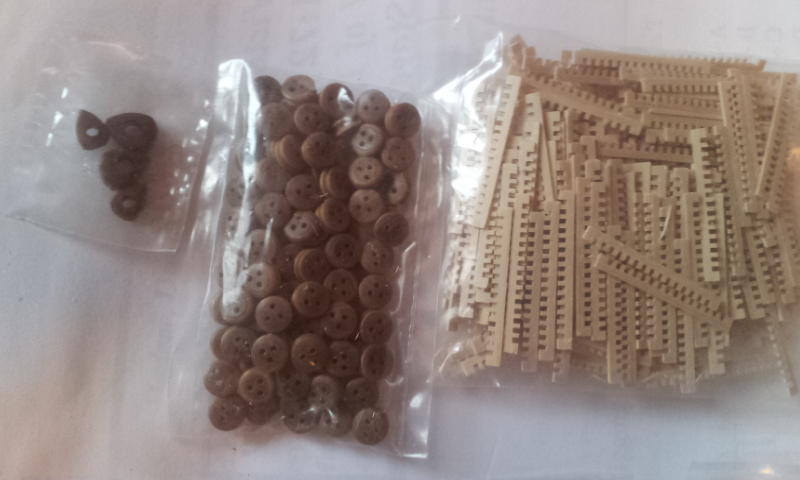
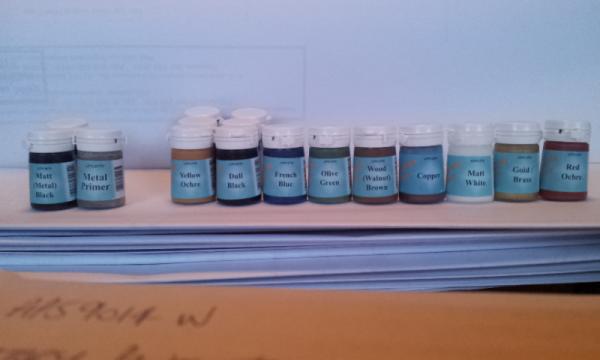
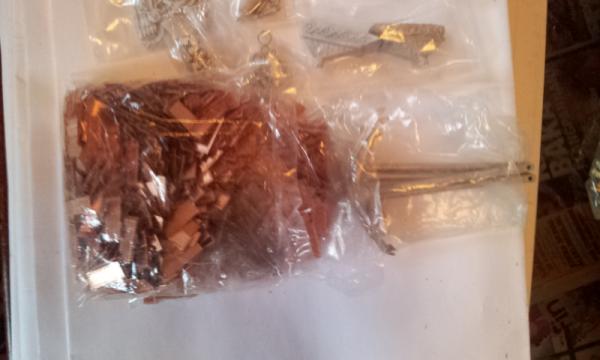
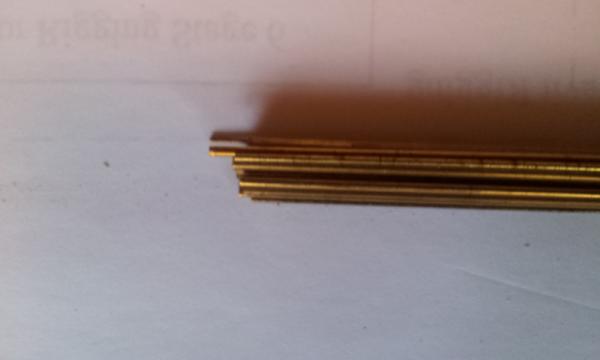
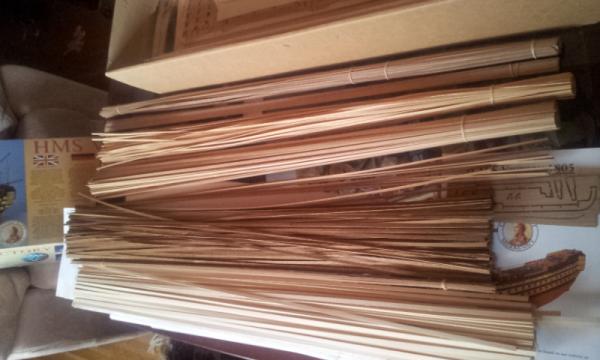
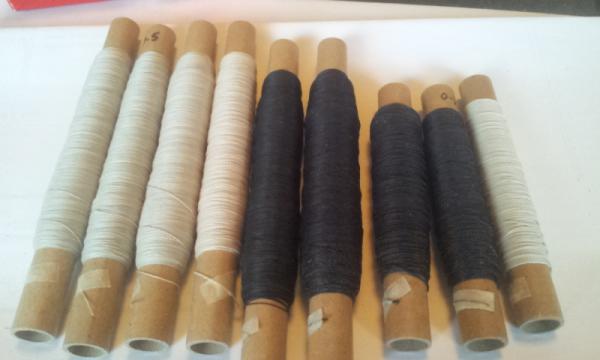
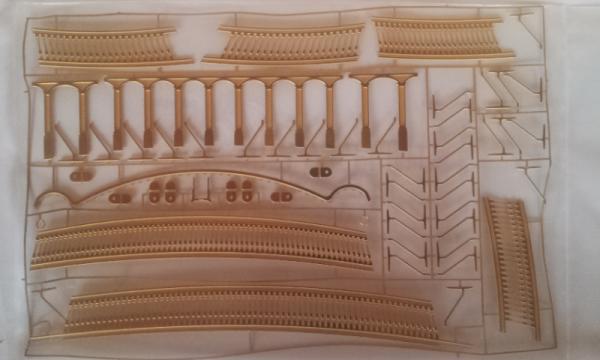
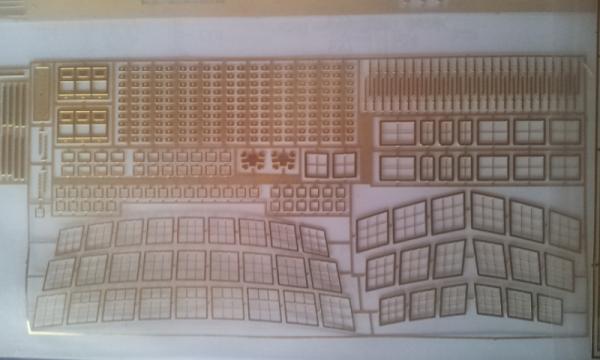
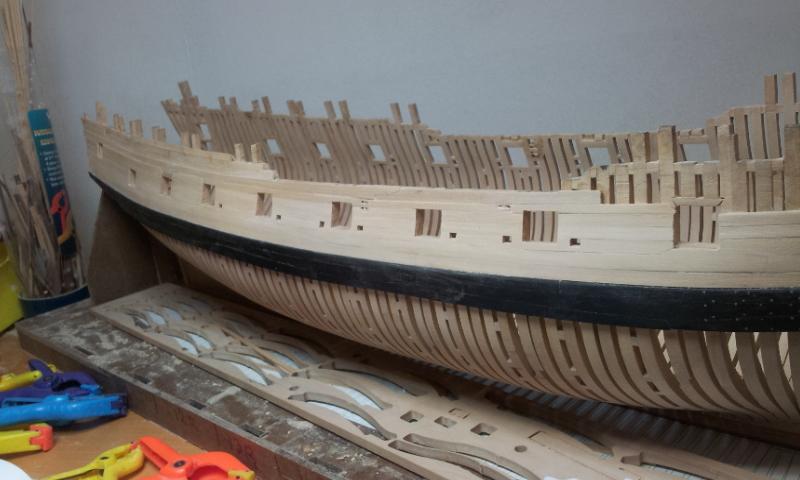
I was a bit disappointed and surprised over the quality of the wood strips which was pretty bad actually so I actually sent the picture comparing the Caldercraft wood to the Corel strips, to Jotika and they promptly sent me a complete new batch of wood strips free of charge. Actually they sent me two batches because the first one dissappered in the mail. I guess the wood guy at Caldercraft had a bad day when setting my kit up. The new strips were ok considering that the whole thing will be sealed painted and coppar plated. Of cource If one wants to build her with no paint I would suggest to get extra planking elsewhere, then again I bought the kit almost ten years ago, perhaps somone who more recently bought the kit can comment on the wood strip quality as of now. In short Jotika has an excellent customer support. Note that because of the situation described above the pictures shows about twice the amount of wood strips than is actually included in the kit. They were not sorted in any way or at least they are not sorted anymore (might be my fault) so I guess a lot of time will be spent searching for the correct strips or sorting the in to appropriate bundles. The ply bulkheads are sturdy and of great quality, there are some that are slightly warped and so is the keel. This however I suspect has occured during storage in my house as there were defenitly no warping when I first got the kit and did inventory. The warping is nothing alarming and when everything is locked in place the whole thing will straighten out but I´m going to watch out when assembling the keel and bulkheads to ensure squareness to the assembly. Worth noting is that Caldercraft has spared no expence on their fittings, no doubt the best I have seen in a kit and there are no generic parts the fittings are developed for this kit as far as I can tell.


-
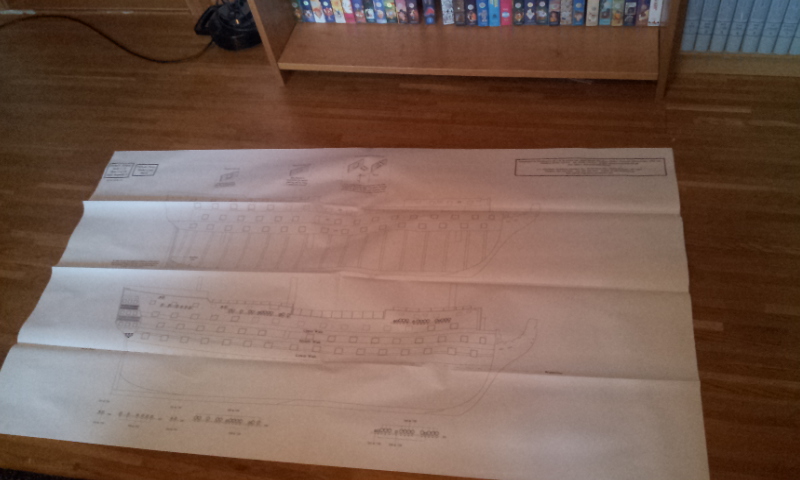
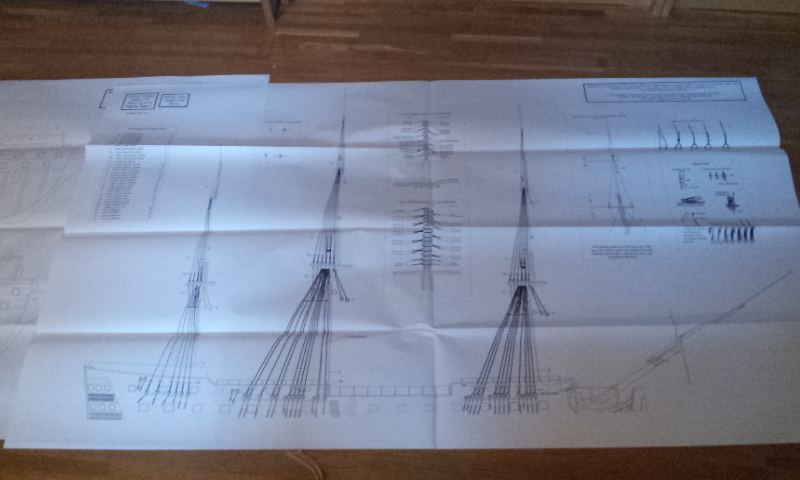
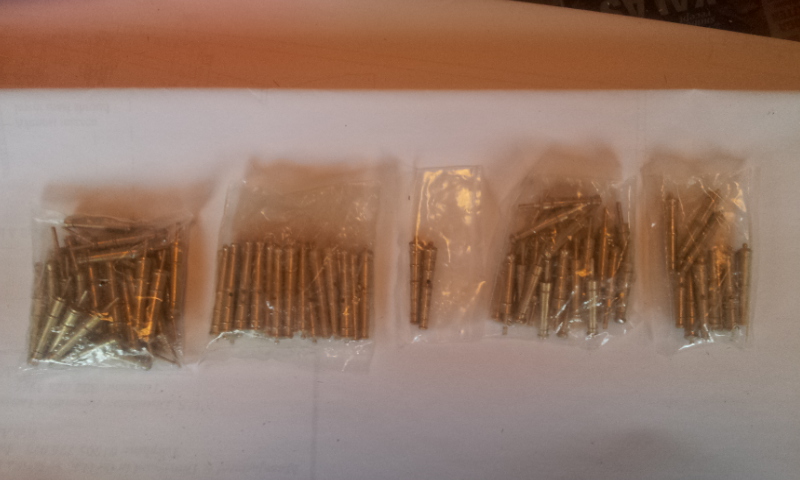
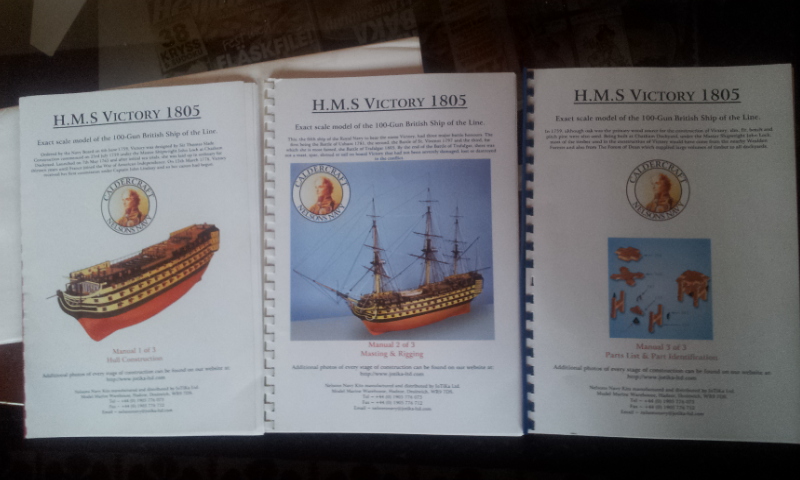
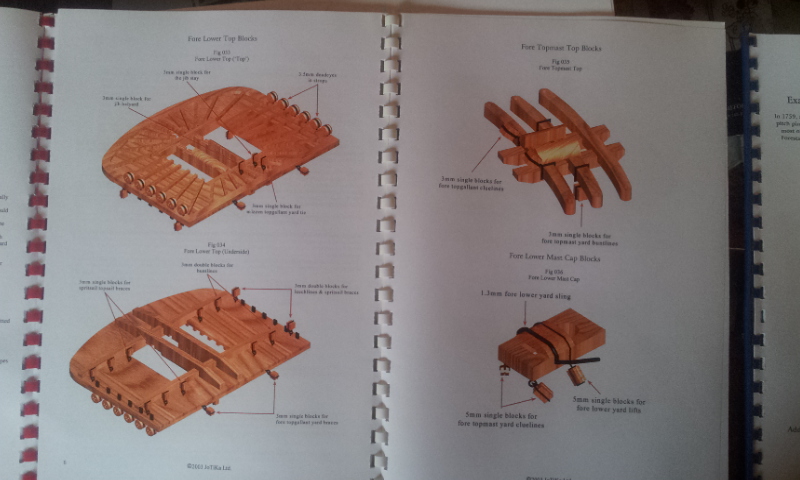
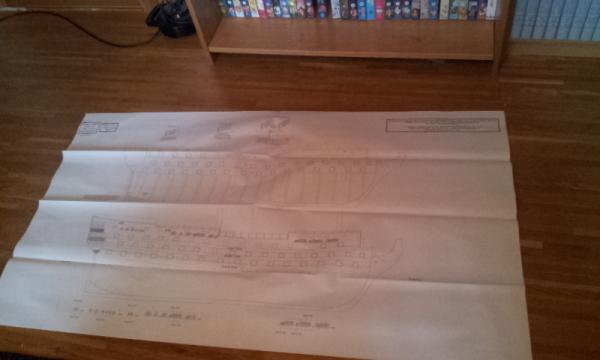
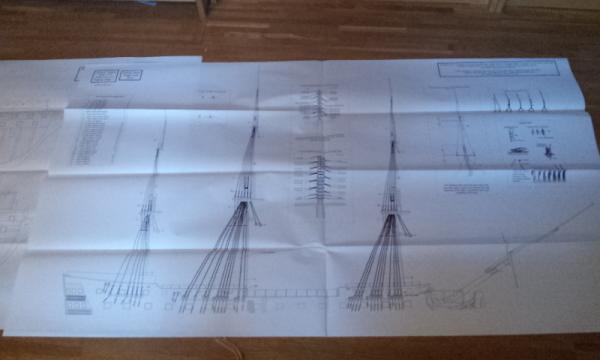
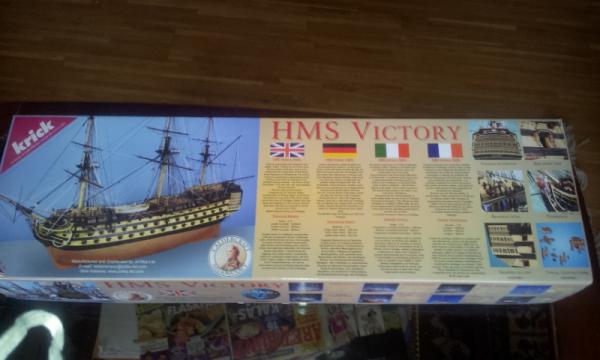
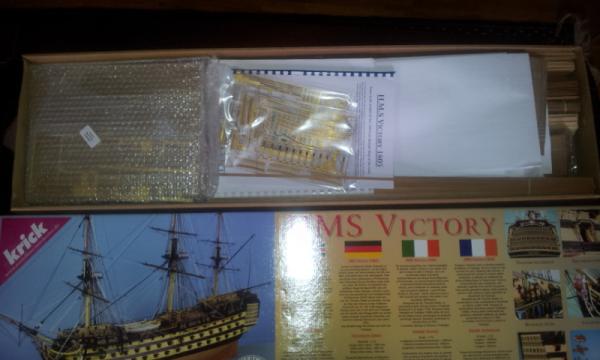
On to the actual kit I know there are a lot of pictures of the content of this kit on MSW then again if one considers this kit theese pictures can be beneficial so I will post the all the same. The Caldercraft 1:72 HMS Victory is a high end kit to say the least and by far the most accurate representation of her on the kit market. Excellent manuals and 18 sheets of plans but everything is BIG so space is important.


-
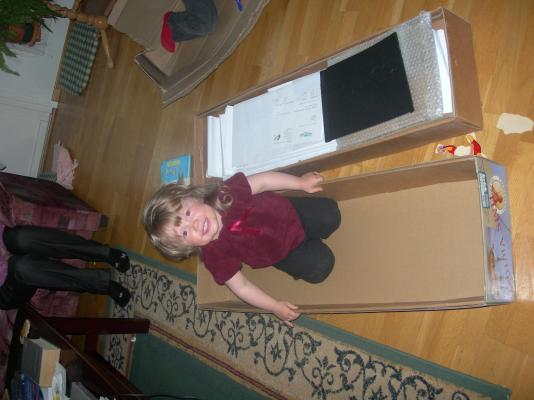
Hello Finally after looking at the box for almost ten years I have started on my Caldercraft HMS Victory. A lot of other projects has gotten in my way during the years and this will be a parralell build to my HMS Kingfisher build. Dunting task one might say but I could not help my self there are so many inspiring logs around here I had recently started my Corel HMS Victory all those years ago and during some research on the web for that build I came across some pictures of the CC HMS Victory beeing developed. Having realized that it was actually a kit and not a scratch build by someone, I had to have it !!! When I recieved my kit the first thing that struck me was the shere size of the thing. My daughter actually fitted inside the box Now that I have started the build she does not fit the box anymore Erik

-
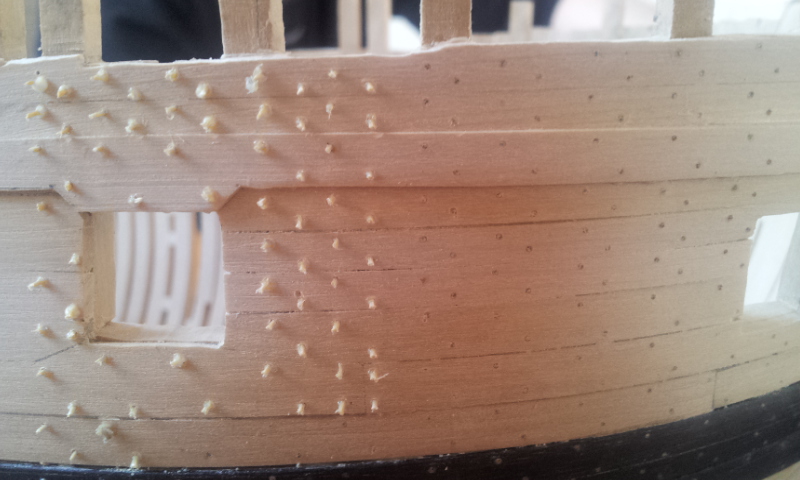
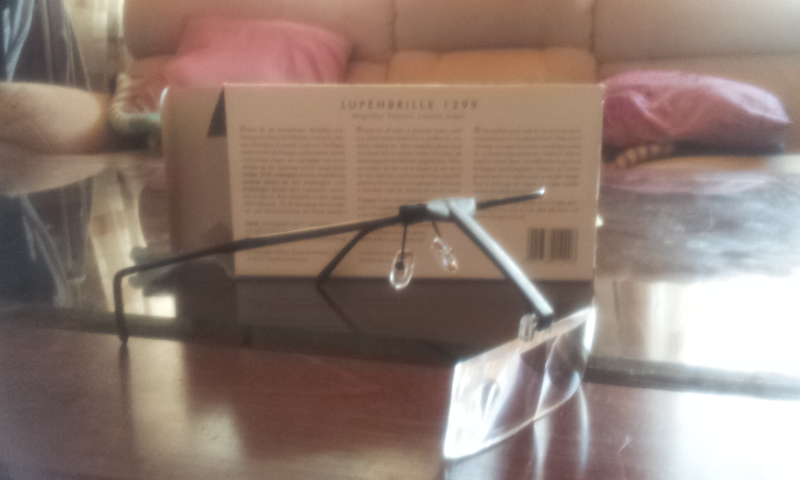
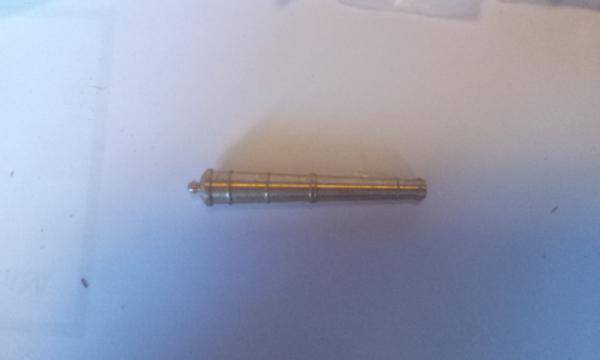
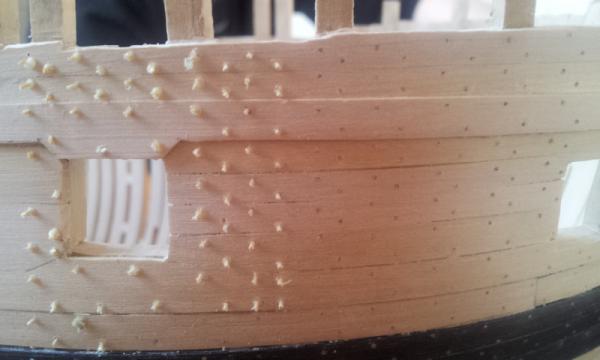
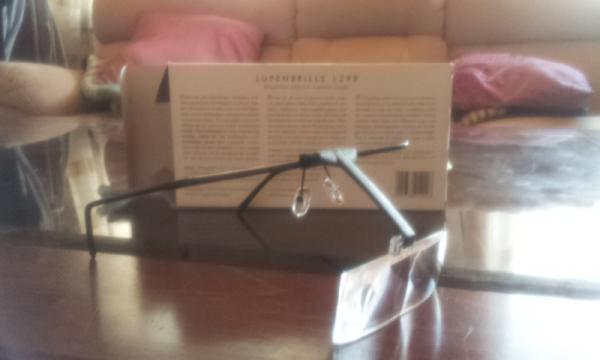
Hello Treenails, lots of them I make them from bamboo barbecue sticks using a drawplate from Byrnes Machines. they are about 0,4mm. The holes are drilled with a pinwise equiped with a archimedes screw a very neat and useful tool that allows you to press the drill whithout having to turn it by hand. I added a picture of my birthdaypresent aswell. A pair of excellent magnifying glases, the glasses can easily be changed between 1,5, 2,5 and 3,5 times magnification. Erik


- 43 replies
-
- 2
-

-
- lauck street shipyard
- kingfisher
- (and 1 more)
-
Great to see your log back. Ive missed your Souvreign carvings truly inspirational. Erik
-
kit review 1:85 HMS Pandora - Constructo
Erik Nyren replied to Erik Nyren's topic in REVIEWS: Model kits
Hello Karleop Your Pandora looks great. Come to think of it I did something similar as you did and tried to contact Constructo about the kit however the mail got astray as I apparently used the wrong mail. Subsequently I got an answer from the support department of Hobbico. They had noticed my mail and asked if I could help a customer of theirs whom had a little problems with the kit. I of cource contacted the customer and we exchanged mails over a couple of years. This is where a whole new world of online communities like Dry dock models and a bit later model ship world opend up for me which has contributed a lot to enlarge the experiences from the hobby. ( I still get christmas cards from the fellow in question) Strange how things works out, I never got any response from Constructo though. Regards Erik -
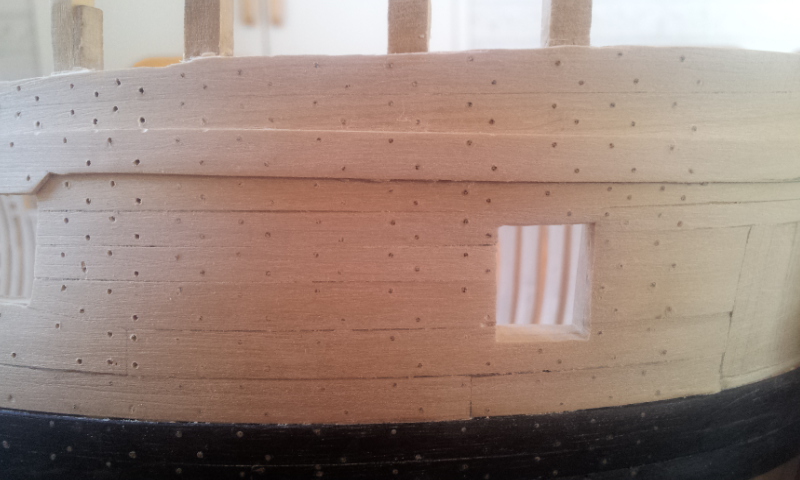
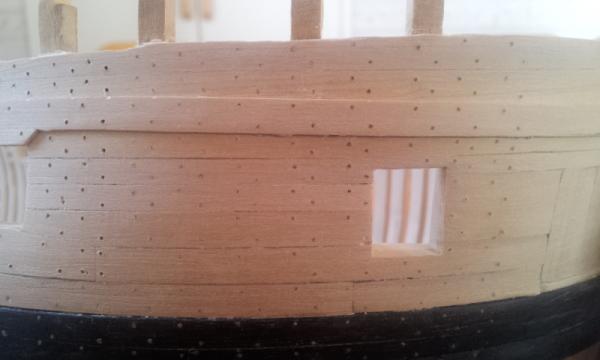
Hello Fixing the problem of forgetting to reduce thickness of the "stuff of the topside" I was having a lot of fun and became so eager to finish the planking that I became carless in reading up on the instructions. The "stuff of the topside should be 0.072" down by the Black strake and are thinned out as the planking rises and ends up beeing 0.042" at the point that the Sheer strake is placed. The Sheer Strake beeing 0.062" thick should protrude 0.02" from the hull planking. Having not reduced the thickness of the planking my Sheer Srake instead had a recess of about the same. To fix this I sanded down the hull to a smooth surface and in doing so reducing the thickness of the "stuff of the topside. I then went on and made a 0.02" (or there about) strip using a thickness sander. From that strip I refitted the Sheer strake ontop of the old one, actually achieving a better flow of the strake than the original planking. It still needs some sanding though Now back to treenails More to come
- 43 replies
-
- 2
-
-
- lauck street shipyard
- kingfisher
- (and 1 more)
-
Thanks AP for kind words and you are quite right, I will refrain from such comments for the remainder of the log as it does sound a bit bad and does not contribute to anything. More to come Erik
-
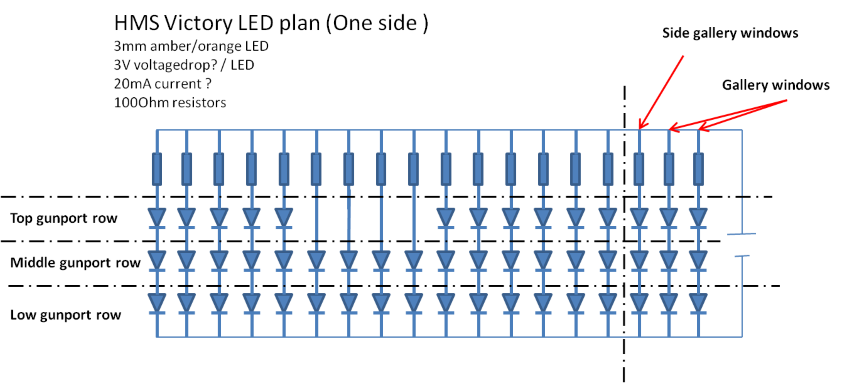
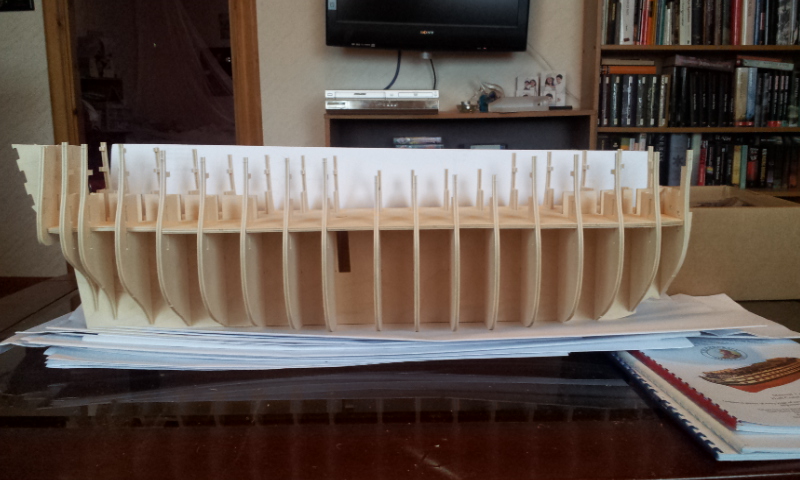
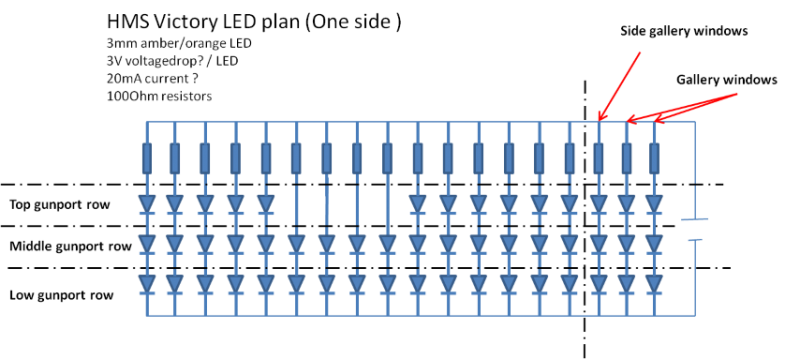
Wise words and this is exactly what I´m doing theese days. I have dry fitted all bulkheads to the keel (pic) and am trying to figure out the best way to light the ship. The most important lights are the gallery if you ask me. I dont want the ship to look like a christmas tree so reducing the number of LED:s to every other bulkhead or perhaps even less, and cutting some of the bulkheads to enable a reasonable spread of light is probably a good way to go. There has to be some opening of the gallery construction to allow for lights but I think thats rather straight forward. I attached some pictures of LEDs on the Billing Boats Vasa kit I made a few years ago. This kit differs as the keel does not part the ship in half which made the whole thing easier. Less LEDs made the wiring a lot less complicated aswell. One picture also shows the "Christmas tree" effect that I´m trying to avoid. For the Victory kit I want to use two parrallell circuits. One on each side. Some way to dim the lights could be a good idea aswell. Perhaps a potentiometer of some kind. I will start a buildinglog when I start to use glue on this project, its only planning so far. Thanks for good advise Erik


-
Hello Because of the bulkheadsI figured I needed one light for each gunport but perhaps I canget away with one LED/bulkhead space. For purchasing electronics check out ELFA Distrelec on the web. They have about everything concerning electronics. Erik
-
Hello I´m planning to use 3mm LED to light my Caldercraft Victory. If I have to put one LED for each gunport due to the bulkhead construction I would end up with about 40 LEDs for each side (includes the gallery) Is this at all realistic / possible and if so how much voltage would I need. Should I settle for lights in the gallery? Erik
-
Thanks Geoff Dont forget to check out Remchoes log of this kit to. Its a true masterpiece. Erik
-
Thanks Terry It sertainly helps. Great link, now why did I not think of looking at those cd pictures.... What I have done wrong here is I forgot to reduce the thickness of the "Stuff of the topside" as mentioned in the instructions and I imagine TFFM. To fix it I will sand the hull smooth and add a second planking on the Sheer strake to make it portrude from the rest of the hull as it´s suppose to. Sanding and making treenails will occupy my buildingtime in the next few weeks, we will see what that does to my mental health Im considering starting a little side project like ....... my Jotika HMS Victory kit ?? Regards Erik
-
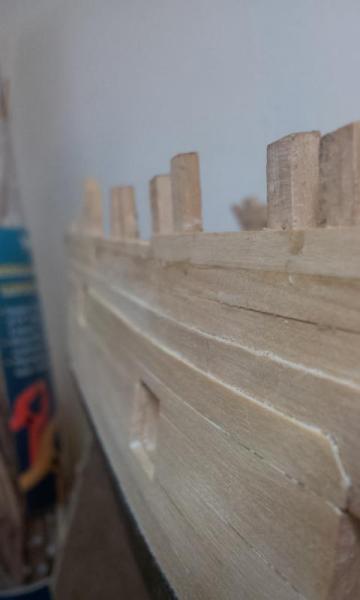
HMS Kingfisher almost dressed, It´s very interresting and fun to work with a planking pattern in contrast to simply laying the planks along as they come. Next up are more ribbands on the other side of the ship, a LOT of sanding and about a trillion treenails. A question for more experienced Swanclass builders. The planks have different thickness making some of them portrude. Of cource the whales should do som but should the the rest be sanded down to a smooth but camferd surface or should theese "edges" be left intact? The last picture shows the edges I´m speaking of. Erik
-
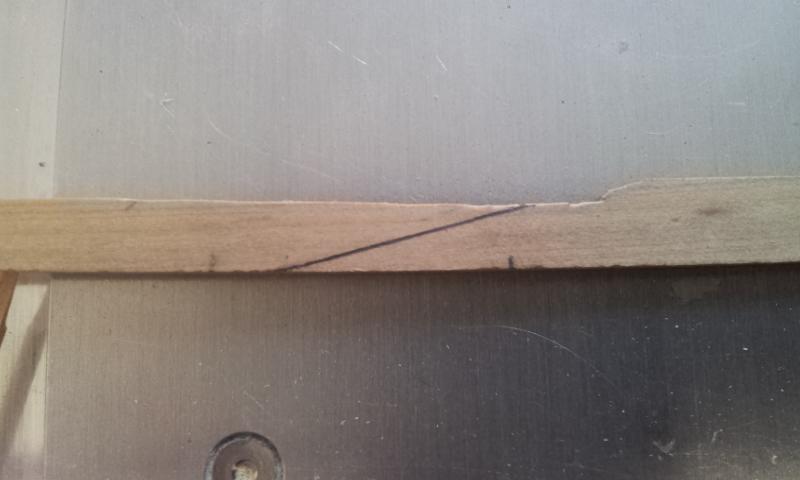
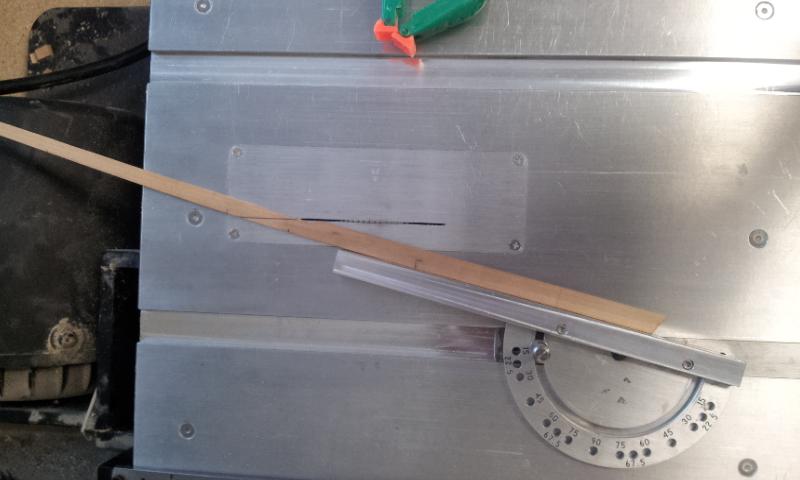
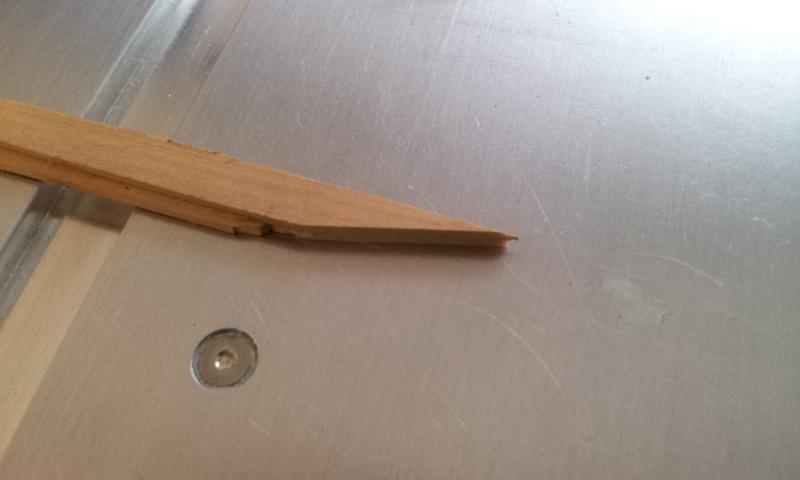
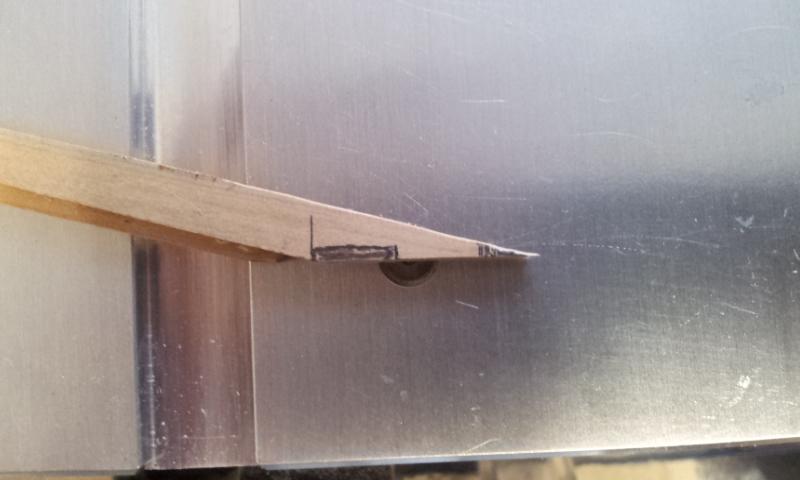
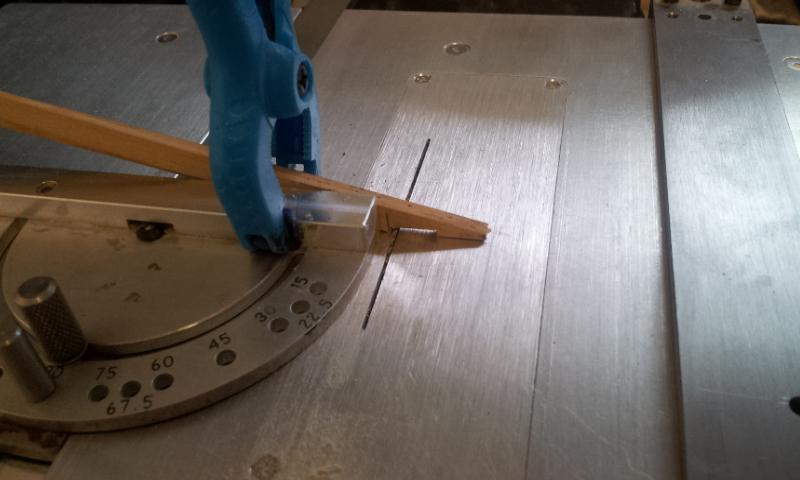
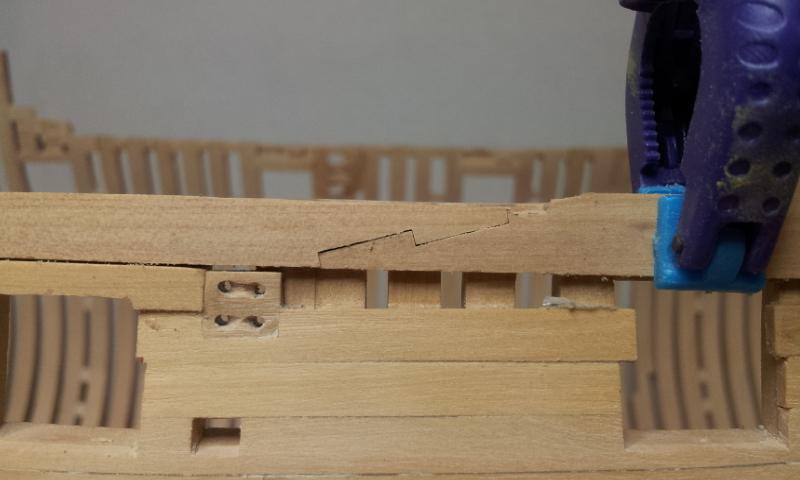
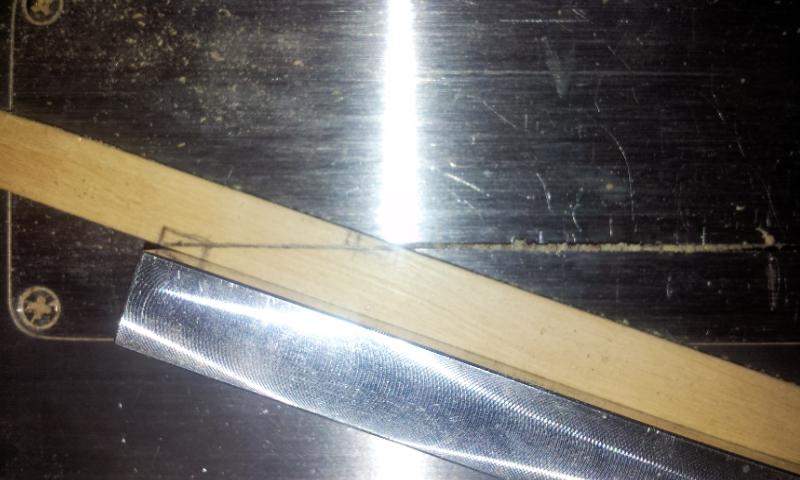
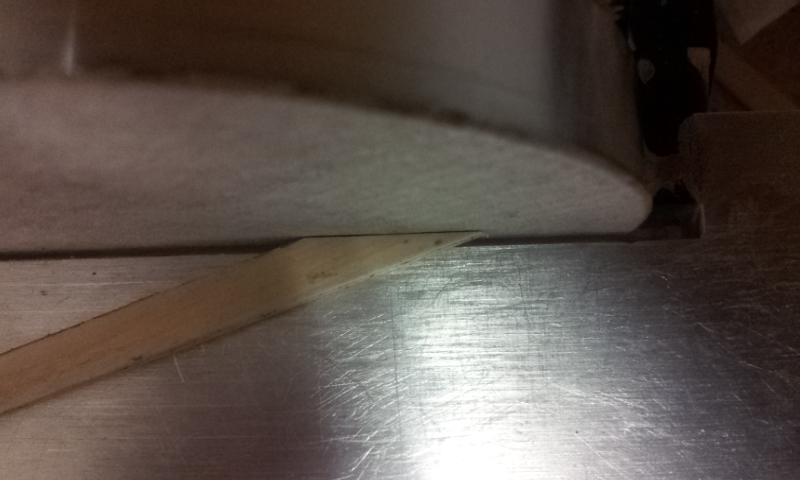
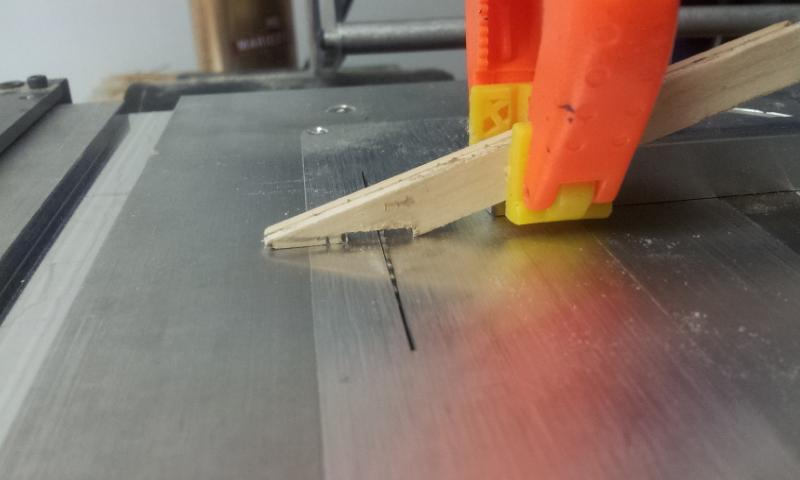
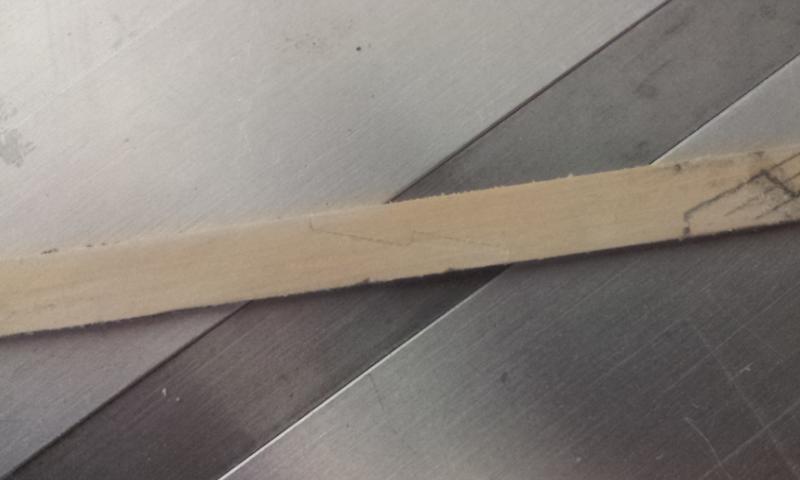
Shaping the sheer plank became a challange I tried to follow the plankingpattern but theres a few deviations. I shaped the sheer one step at a time as I wanted to avoid tapering away half of the hooked scarph joint which I learned to to pretty well now. I dont think this is the ideal way to make a plank though. Started to taper the plank up to the scharph, then I made the scarph and continued to shape the plank forward to fit the top of the hull framework. This is why the pictures of making the scarph is a bit messy. The scarph was done by making a diagonal 20mm cut, then gluing the two halfs together using rubber cement. I marked out how the cut should be made and set my tablesaw at 1,5mm and started to chip away until I had a 9mm groove corresponding to the 9mm hook. thw 2mm missing was from cutting the tip of the joint to a 1,5mm hight. Pics makes more sence The last pic is a bit of dryfitting, I used a led pencil to have the joint stand out a little bit. One can also see that the plank below the sheer is narrowing. I'd rather have that strake narrowing and not the sheer strake More to come
-
Thanks all Rich, she took me about 4 years but you have to take three kids and a fulltime job in cocideration. I get 4h buildtime a week if I´m lucky. Erik
-
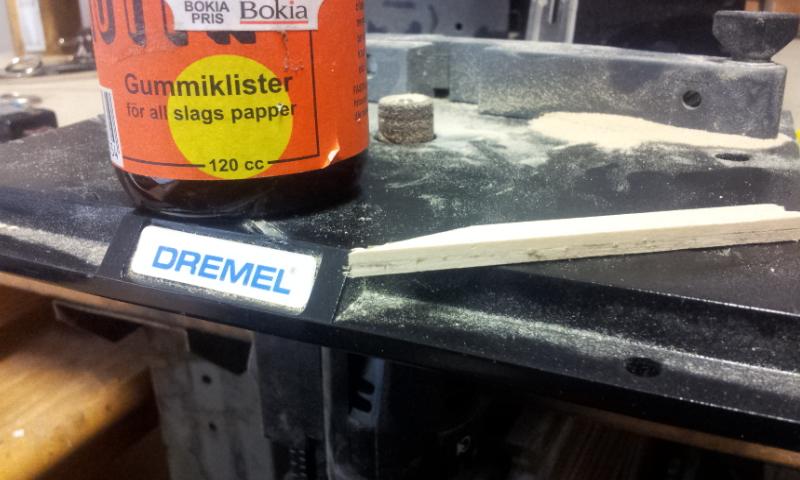
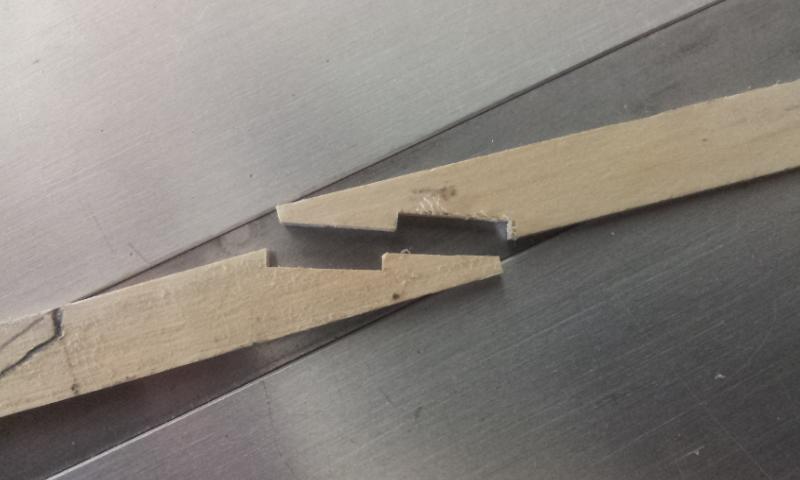
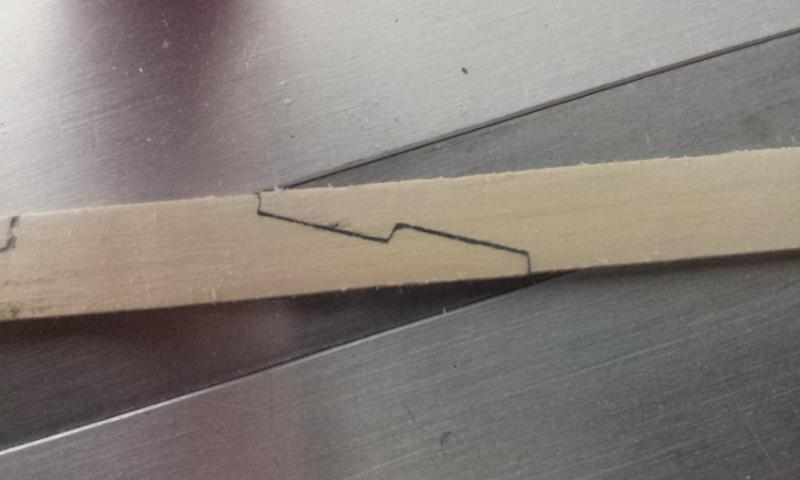
Hello Thanks for the guidance, having read your answers I started to mess around with some apple strips. From my plans I could find that the joint is 20mm so I messured out a diagonal through 20mm on a plank Then I cut the strip on the table saw and rubber glued (gummi klister) the two pieces together. A bit of sanding on a disc sander to ensure a perfect surface. Then I marked the middle of the cut, set the table saw blade on a 1,5mm hight and started to cut out a notch. Separating the strips and well nothing less than magic, I had two fitting strips Very little sanding was needed to fit the parts resulting in a joint that was actually har to see Believe me I was surprised !! I then tried to use a bit of black acid free paper for chaulking, it weakened the joint but made it visible. I will not use paper on my actual ship as that would make this particular joint scream out from the rest of the planking.

-
Hello I was wondering if anyone has any tips on how to cut a hooked scarph joint in an easy way, is there one?? Of cource one can easily simulate such a joint while planking using a pencil or a small blade but I would like to make the real thing. Help please Erik
-
Byrnes table saw accessories
Erik Nyren replied to Neill's topic in Modeling tools and Workshop Equipment
I have most of the accessories. As my shippingcosts for heavvy machines to Sweden are well expencive. I figured I might aswell get it all in one go. The most used are no doubt the micrometer stop. When you get the hang of it, it gives you fantastic precision to your cuts down to 1/100 of a mm. The extended rip fence and miter extension is also very practical to cut angles and save fingertips I suppose. A few different blades Is a good idea. I usually use the slitblade as I mostly cut tiny stuff. A zero clearance insert is a must have for your slitblades as it ads to the safety of the machine as small parts wont get jammed by the blade. Ask for a few extra screws and bolts as they have a tendency to run and hide in the sawdust. I recently bought the tilting table but have not yet tried it. Basicly if you are a kit builder you will enjoy the micrometer, extended rip fence a slitblade and zero clearance insert. If your looking at scratch building and therefor more advanced use of the saw . Well the more the merrier perhaps. Hope it helps a bit and good luck with your purchase. You will not be dissapointed. Erik -
Beautiful Greg always a pleasure to watch the professionals. I notice you use paper of some sort between the joints which results in a very clean fine black line. could you in short terms describe the tecnique or point me towards a description somewhere Regards Erik
-
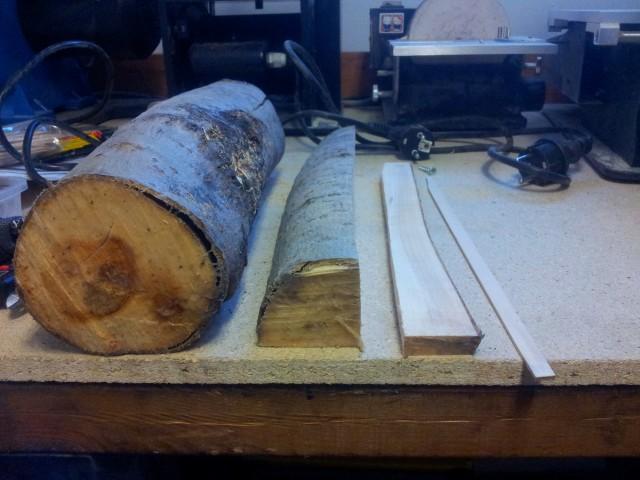
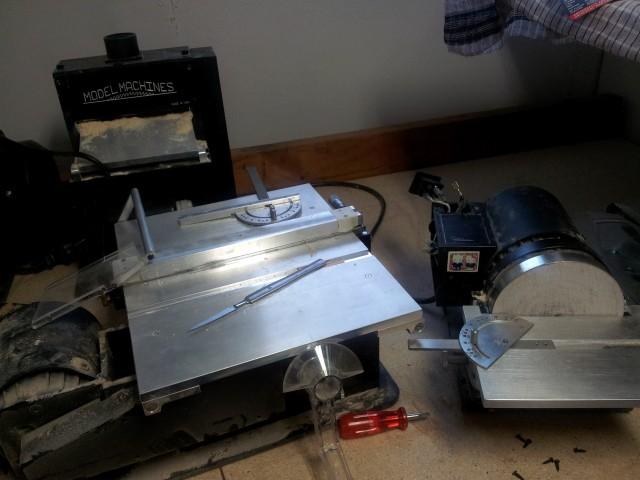
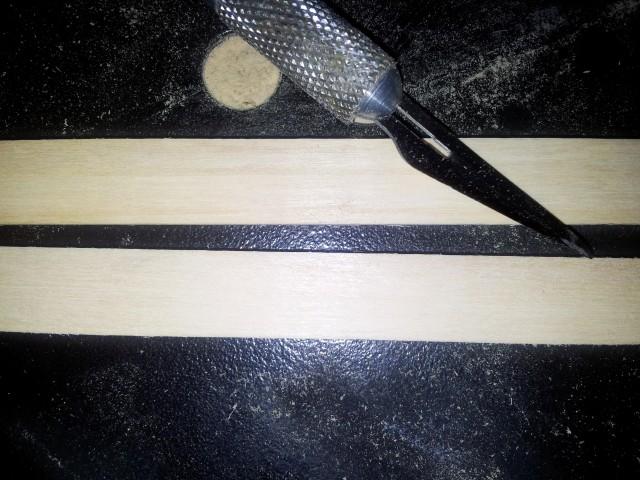
Hello I have planned for many years to go fully scratch, over time I have bought machinery like the Byrnes tablesaw, disc sander and thickness sander. I still have no lath or mill but thats another story I tried my hands on milling some strip wood for the first time the other day. So I figured I´d show you what can be done whith theese machines and a little practice I have had some Apple logs on seasoning for a few years, the ends of the logs were covered by silicone so there is a minimum of cracks although some of then do have cracks. I used a hand held mitre saw to cut the log lengthwise. this was hard work but I had to achieve a straight cut in order to use the bandsaw. My bandsaw is a low quality machine with a thin blade that tends to wander of if I dont have a straight cut up against the ripfence. Using the band saw I cut billets about 1cm thick and as straight as possible, I guess a better bandsaw can be an idea but they cost a lot of money and let´s face it how often do we cut logs.....I think I will contact a carpenter for some help in cutting the rest of the logs I used the Byrnes thickness sander to flatten the billets and then the table saw with a slitblade (to minimize loss of wood) to cut strips from the billets. Finally I pushed the strips through the thickness sander yet again to make sure they are of equal thickness. Comments are wellcome of cource Regards Erik