


Erik Nyren
-
Posts
184 -
Joined
-
Last visited
Reputation Activity
-

 Erik Nyren got a reaction from PeSt in 1:85 HMS Pandora - Constructo
More pictures from my HMS Pandora
-
Erik Nyren got a reaction from PeSt in 1:85 HMS Pandora - Constructo
And the final result, today serving as a church ship in the chapel of the Swedish Camp Northen Light in Afghanistan
-
 Erik Nyren got a reaction from Nirvana in 1:85 HMS Pandora - Constructo
Thanks Joe
But as this topic is meant as a review of a specific kit, I dont think mixing up the pictures with scratch built versions of the ship is a good idea.
I suggest that you create a topic of your own and post the pictures there as I´m sure many are interrested to see them. Make sure that Copyright wont be an issue first though.
Regards
Erik
-
Erik Nyren got a reaction from Nirvana in 1:85 HMS Pandora - Constructo
And the final result, today serving as a church ship in the chapel of the Swedish Camp Northen Light in Afghanistan
-
Erik Nyren got a reaction from Nirvana in 1:85 HMS Pandora - Constructo
More pictures from my HMS Pandora
-
 Erik Nyren got a reaction from Bill Morrison in 1:85 HMS Pandora - Constructo
Hello Karleop
Your Pandora looks great. Come to think of it I did something similar as you did and tried to contact Constructo about the kit however the mail got astray as I apparently used the wrong mail. Subsequently I got an answer from the support department of Hobbico. They had noticed my mail and asked if I could help a customer of theirs whom had a little problems with the kit. I of cource contacted the customer and we exchanged mails over a couple of years. This is where a whole new world of online communities like Dry dock models and a bit later model ship world opend up for me which has contributed a lot to enlarge the experiences from the hobby.
( I still get christmas cards from the fellow in question)
Strange how things works out, I never got any response from Constructo though.
Regards
Erik
-
 Erik Nyren got a reaction from etubino in HMS Victory by Erik Nyren - FINISHED - Corel - 1:98
I have to admit the rig is not yet finished, I have some ratlines to do but theese wil be dealt with in time.
Comments. questions and well whatever is always wellcome.
Erik
-
Erik Nyren got a reaction from etubino in HMS Victory by Erik Nyren - FINISHED - Corel - 1:98
Starting on the masts I suppose
Still looking for pictures
-
Erik Nyren got a reaction from Bill Morrison in 1:85 HMS Pandora - Constructo
More pictures from my HMS Pandora
-
Erik Nyren got a reaction from Bill Morrison in 1:85 HMS Pandora - Constructo
Please note that I built this kit 15 years ago so there might have been uptdates to the kit that I´m unaware of.
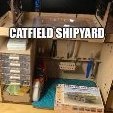
Review HMS Pandora Constructo 1:85
ref.80824
Background
HMS Pandora is best known as the vessel sent to capture Fletcher Christian and the mutineers of Bligh´s Bounty. After arresting the majority at Tahiti and then spending four unsuccessful months combing the South Pacific, Captain Edward
Edwards decided to give up the chase and steer for England. In attempting to discover a new, more direct passage through Cook´s Endeavour Strait, between the northeastern trip of Australia and New Guinea, HMS Pandora was wrecked on the Great Barrier Reef on 29 August 1791. Thirty-one of the crew and four of the mutineers went down with the ship. Edwards, with the ninety-eight survivors, sailed four of the ship´s boats 1200 nautical miles to the Duch settlement of Coupang in Timor and eventually made their way to Batavia ( Present day Djakarta)
There, those that did not die as a result of their privations, found passage back to England. The eventual court martial of the ten remaining mutineers resulted in three being hung at Portsmouth from the foremast yard of HMS Brunswick. The fate of Christian and the others who had sought refuge at remote Pitcairn Island was not discovered until 1808. By then, all but one were dead. ( Text from the manual)
Construction of the kit
Length: 32,5 Inches ( 78 cm) Height 24 Inches (58cm) With: 11 Inches (26,5 cm)
The Constructo HMS Pandora is a plank on bulkhead construction with the option to make it a single or double planked hull. The colour and quality of the first planking strips are good enough to be left without the second planking. The second planking consists of veneer 0.6mm. thick which is relatively easy to work with but I find it a little too thin for hull-planking.
Materials
The wood in the kit is of mediocre quality and strips break easily while soaking and bending. This is compensated with the fact that there is a great deal of spare wood. The strips are made from Mulkaly (light Ochre), Sapelly (Dark Brown), Ayous (Ivory). The different colourations of wood strips results in less need for painting of the hull which displays the beauty of the wood. All fittings are either wood, brass or cast metal there are no plastic parts.
Fittings
The kit contains a lot of standard or generic fittings that are out of scale. What I mean is parts that you can find on other Constructo kits, so if you are looking for historical accuracy you will have to do a bit of research and scratch building.
The cast metal parts are not the best I have seen and the transom is a disaster. It’s heavy, hard to fit and looks out of place when fitted to the ship.
Manual
List of parts and manual are in seven different languages which is commendable but the backside is that the different languages are mixed up. Every part is presented 7 times resulting in a manual that is a little hard to follow. The Manual is
easy to understand when you finally find your own language but you need to have some previous experience in ship modelling to completely understand the instructions. The level of detail in the manual is at an intermediate level but
this does not include the rigging. The rigging is explained by the plans and some very poor photographs this is not a task for a beginner. You really need to read up on rigging before trying to understand Constructos attempt for a
rigging instruction. The pictures are in black and white and of poor quality. Constructo needs to improve the picture
department a lot. There are also a few numeric errors meaning that the pictures and plans do not correspond to the numbers in the list of parts.
Plans
The plans are ok and mostly in scale admitting you to take accurate measurements. It helps if you have had some experience reading plans. For instance a plan showing the fittings on deck does not reveal both sides of the deck. You are to understand from experience that certain parts are to be fitted the same way on both sides
Building experience
I had some trouble with the poor wood quality but then again this improved my skills. I had no plan of making a historical accurate ship so the prefabricated standard parts did not bother me that much. Although I might sound negative I had a
great time building the ship and the learning experience was over the top. The Constructo HMS Pandora was my second build and I can recommend it as a second or a third build. It’s of great help if one has already done the rig of a ship
with at least two masts and has some experience of plank on bulkhead models.
Reading my review might deterrent you from buying a Constructo Pandora-kit but keep in mind that these are my personal thoughts and I’m a little picky.
Summary
If you are looking for that second or third challenge but your wallet struggles against you, the Constructo HMS Pandora is a great kit for learning the skills of the hobby. It’s well worth the money you pay for it and is sure to give you many
hours of fun and pleasure along with some aggravation but that’s part of the hobby. With a few scratch-built fittings and some book reading on the side, your model will look great.
If you are a little more experienced and are looking for a high quality model kit with historical accuracy and perfected instructions the Constructo HMS Pandora is not for you.
Ps: This is
my first review ever so if you have any questions about the review or need some
guidance building the kit, feel free to contact me through PM.
Erik Nyren
-
Erik Nyren got a reaction from Bill Morrison in 1:85 HMS Pandora - Constructo
And the final result, today serving as a church ship in the chapel of the Swedish Camp Northen Light in Afghanistan
-
 Erik Nyren got a reaction from coalman in Proportional dividers and how I use them.
A Word on cutting. My kit is old meaning dry wood that splinters ieasily and much care has to be taken not to have a bladerunner ( yep fan of the Movie too) with the grain of the planks.
I use a steel ruler as a supportbast for the plank, a small one above to mark the cutting line and last a wood block to hold the plank in place so that it does not move with the blade.
Many lite strokes with the blade is the trick. Never ever try to cut through the plank in one go, it will be a mess, I assure you.
And the last one...well that would be me wearing all the binocular aid I need to make a decent job on planking.
I hope this will be of use to some of you, comments, questions, ideas and opinions are of cource wellcome.
Best regards
Erik
-
 Erik Nyren got a reaction from GrandpaPhil in Fair American by Erik Nyren - FINISHED - LSS - POF (kit discontinued)
My Fair American finished and mounted on a display-board built from some mahogany I had in my closet. One detail is still missing and that is the personal nameplate that is provided free of charge from Lauck Street Shipyards upon completion of the model.
This project was started in October of 2007 and finished by May 2008.
Thanks for Viewing
Erik
-
Erik Nyren got a reaction from GrandpaPhil in HMS Victory by Erik Nyren - FINISHED - Corel - 1:98
I have to admit the rig is not yet finished, I have some ratlines to do but theese wil be dealt with in time.
Comments. questions and well whatever is always wellcome.
Erik
-
Erik Nyren got a reaction from GrandpaPhil in HMS Victory by Erik Nyren - Caldercraft - Scale 1:72 - slightly bashed
I have posted a decription of how I use my proportional dividers during planking of HMS Victory. As I figured more builders than HMS Victory folks could be interrested I posted in the "Building, framing, planking" section of the "Ship modeling tips, techniques and research" section of the forums.
I would put a link in but I cant get it to work
Regards
Erik
-
 Erik Nyren got a reaction from clearanceinventory in 1:85 HMS Pandora - Constructo
And the final result, today serving as a church ship in the chapel of the Swedish Camp Northen Light in Afghanistan
-
Erik Nyren got a reaction from clearanceinventory in 1:85 HMS Pandora - Constructo
More pictures from my HMS Pandora
-
 Erik Nyren got a reaction from Sargon in 1:85 HMS Pandora - Constructo
More pictures from my HMS Pandora
-
 Erik Nyren got a reaction from maddog33 in HMS Victory by JPett - Corel - 1:98
Hello J Pett, great to see you buildlog up. I seem to remember the same problems with part 15-16 on my kit although it was a long time ago. I had a look at the ship and theres no false keel. I simply glued the pieces together and then sanded down the excess of part 16 to achieve a straight keel. I have attached a few pics of how this stage looked on my kit.
Regards
Erik
-
 Erik Nyren got a reaction from mrjimmy in Milling my own wood
Hello
I have planned for many years to go fully scratch, over time I have bought machinery like the Byrnes tablesaw, disc sander and thickness sander.
I still have no lath or mill but thats another story
I tried my hands on milling some strip wood for the first time the other day. So I figured I´d show you what can be done whith theese machines and a little practice
I have had some Apple logs on seasoning for a few years, the ends of the logs were covered by silicone so there is a minimum of cracks although some of then do have cracks.
I used a hand held mitre saw to cut the log lengthwise. this was hard work but I had to achieve a straight cut in order to use the bandsaw. My bandsaw is a low quality machine with a thin blade that tends to wander of if I dont have a straight cut up against the ripfence.
Using the band saw I cut billets about 1cm thick and as straight as possible, I guess a better bandsaw can be an idea but they cost a lot of money and let´s face it how often do we cut logs.....I think I will contact a carpenter for some help in cutting the rest of the logs
I used the Byrnes thickness sander to flatten the billets and then the table saw with a slitblade (to minimize loss of wood) to cut strips from the billets. Finally I pushed the strips through the thickness sander yet again to make sure they are of equal thickness.
Comments are wellcome of cource
Regards
Erik
-
 Erik Nyren got a reaction from Captain Poison in Milling my own wood
Hello
I have planned for many years to go fully scratch, over time I have bought machinery like the Byrnes tablesaw, disc sander and thickness sander.
I still have no lath or mill but thats another story
I tried my hands on milling some strip wood for the first time the other day. So I figured I´d show you what can be done whith theese machines and a little practice
I have had some Apple logs on seasoning for a few years, the ends of the logs were covered by silicone so there is a minimum of cracks although some of then do have cracks.
I used a hand held mitre saw to cut the log lengthwise. this was hard work but I had to achieve a straight cut in order to use the bandsaw. My bandsaw is a low quality machine with a thin blade that tends to wander of if I dont have a straight cut up against the ripfence.
Using the band saw I cut billets about 1cm thick and as straight as possible, I guess a better bandsaw can be an idea but they cost a lot of money and let´s face it how often do we cut logs.....I think I will contact a carpenter for some help in cutting the rest of the logs
I used the Byrnes thickness sander to flatten the billets and then the table saw with a slitblade (to minimize loss of wood) to cut strips from the billets. Finally I pushed the strips through the thickness sander yet again to make sure they are of equal thickness.
Comments are wellcome of cource
Regards
Erik
-
 Erik Nyren got a reaction from coxswain in 1:85 HMS Pandora - Constructo
More pictures from my HMS Pandora
-
 Erik Nyren got a reaction from Robert29 in HMS Victory by Erik Nyren - Caldercraft - Scale 1:72 - slightly bashed
Now the patterns tilt upwards at the bow which will force the planking to do the same, This I believe is wrong. The planking should be more horizontal folowing the waterline or am I wrong?
Anyway as theres a second planking, sealer and paint to go, so I guess it matters little to the final result.
-
 Erik Nyren got a reaction from rivdvm in HMS Victory by Erik Nyren - FINISHED - Corel - 1:98
I have to admit the rig is not yet finished, I have some ratlines to do but theese wil be dealt with in time.
Comments. questions and well whatever is always wellcome.
Erik
-
 Erik Nyren got a reaction from les101 in LED lighting below decks
Hello
I´m planning to use 3mm LED to light my Caldercraft Victory.
If I have to put one LED for each gunport due to the bulkhead construction
I would end up with about 40 LEDs for each side (includes the gallery)
Is this at all realistic / possible and if so how much voltage would I need.
Should I settle for lights in the gallery?
Erik