palmerit
-
Posts
1,116 -
Joined
-
Last visited
Content Type
Profiles
Forums
Gallery
Events
Everything posted by palmerit
-
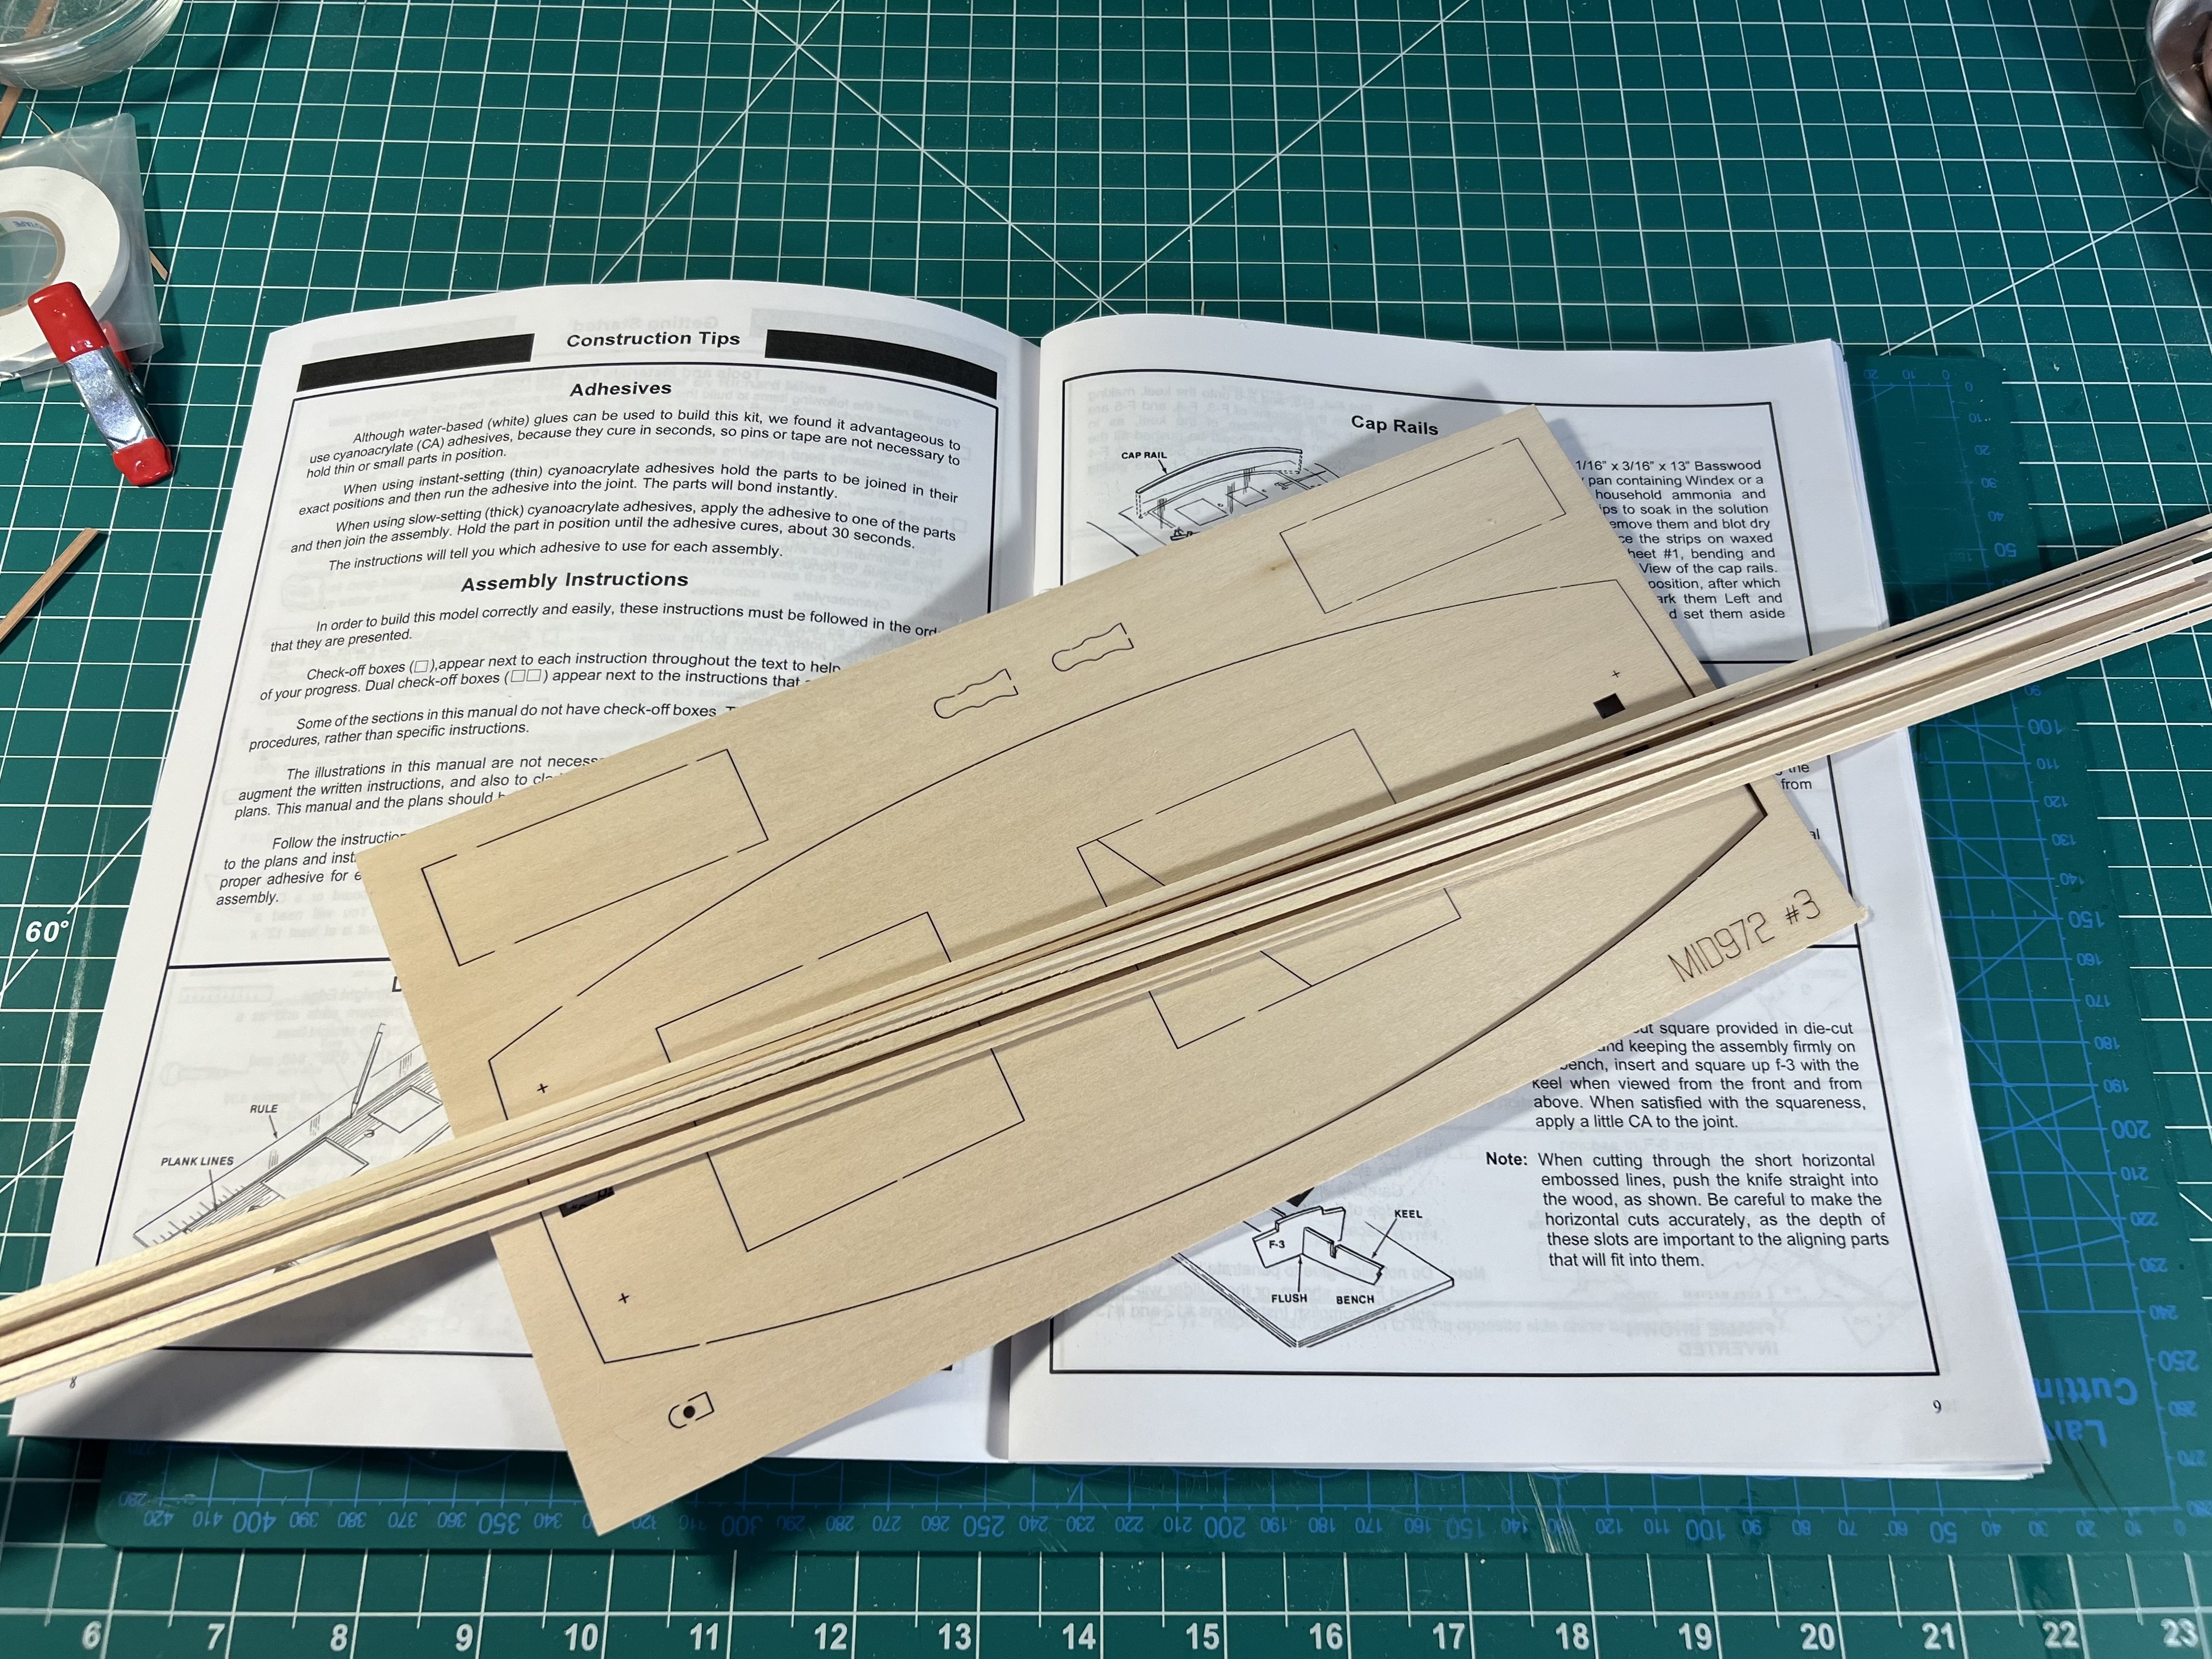
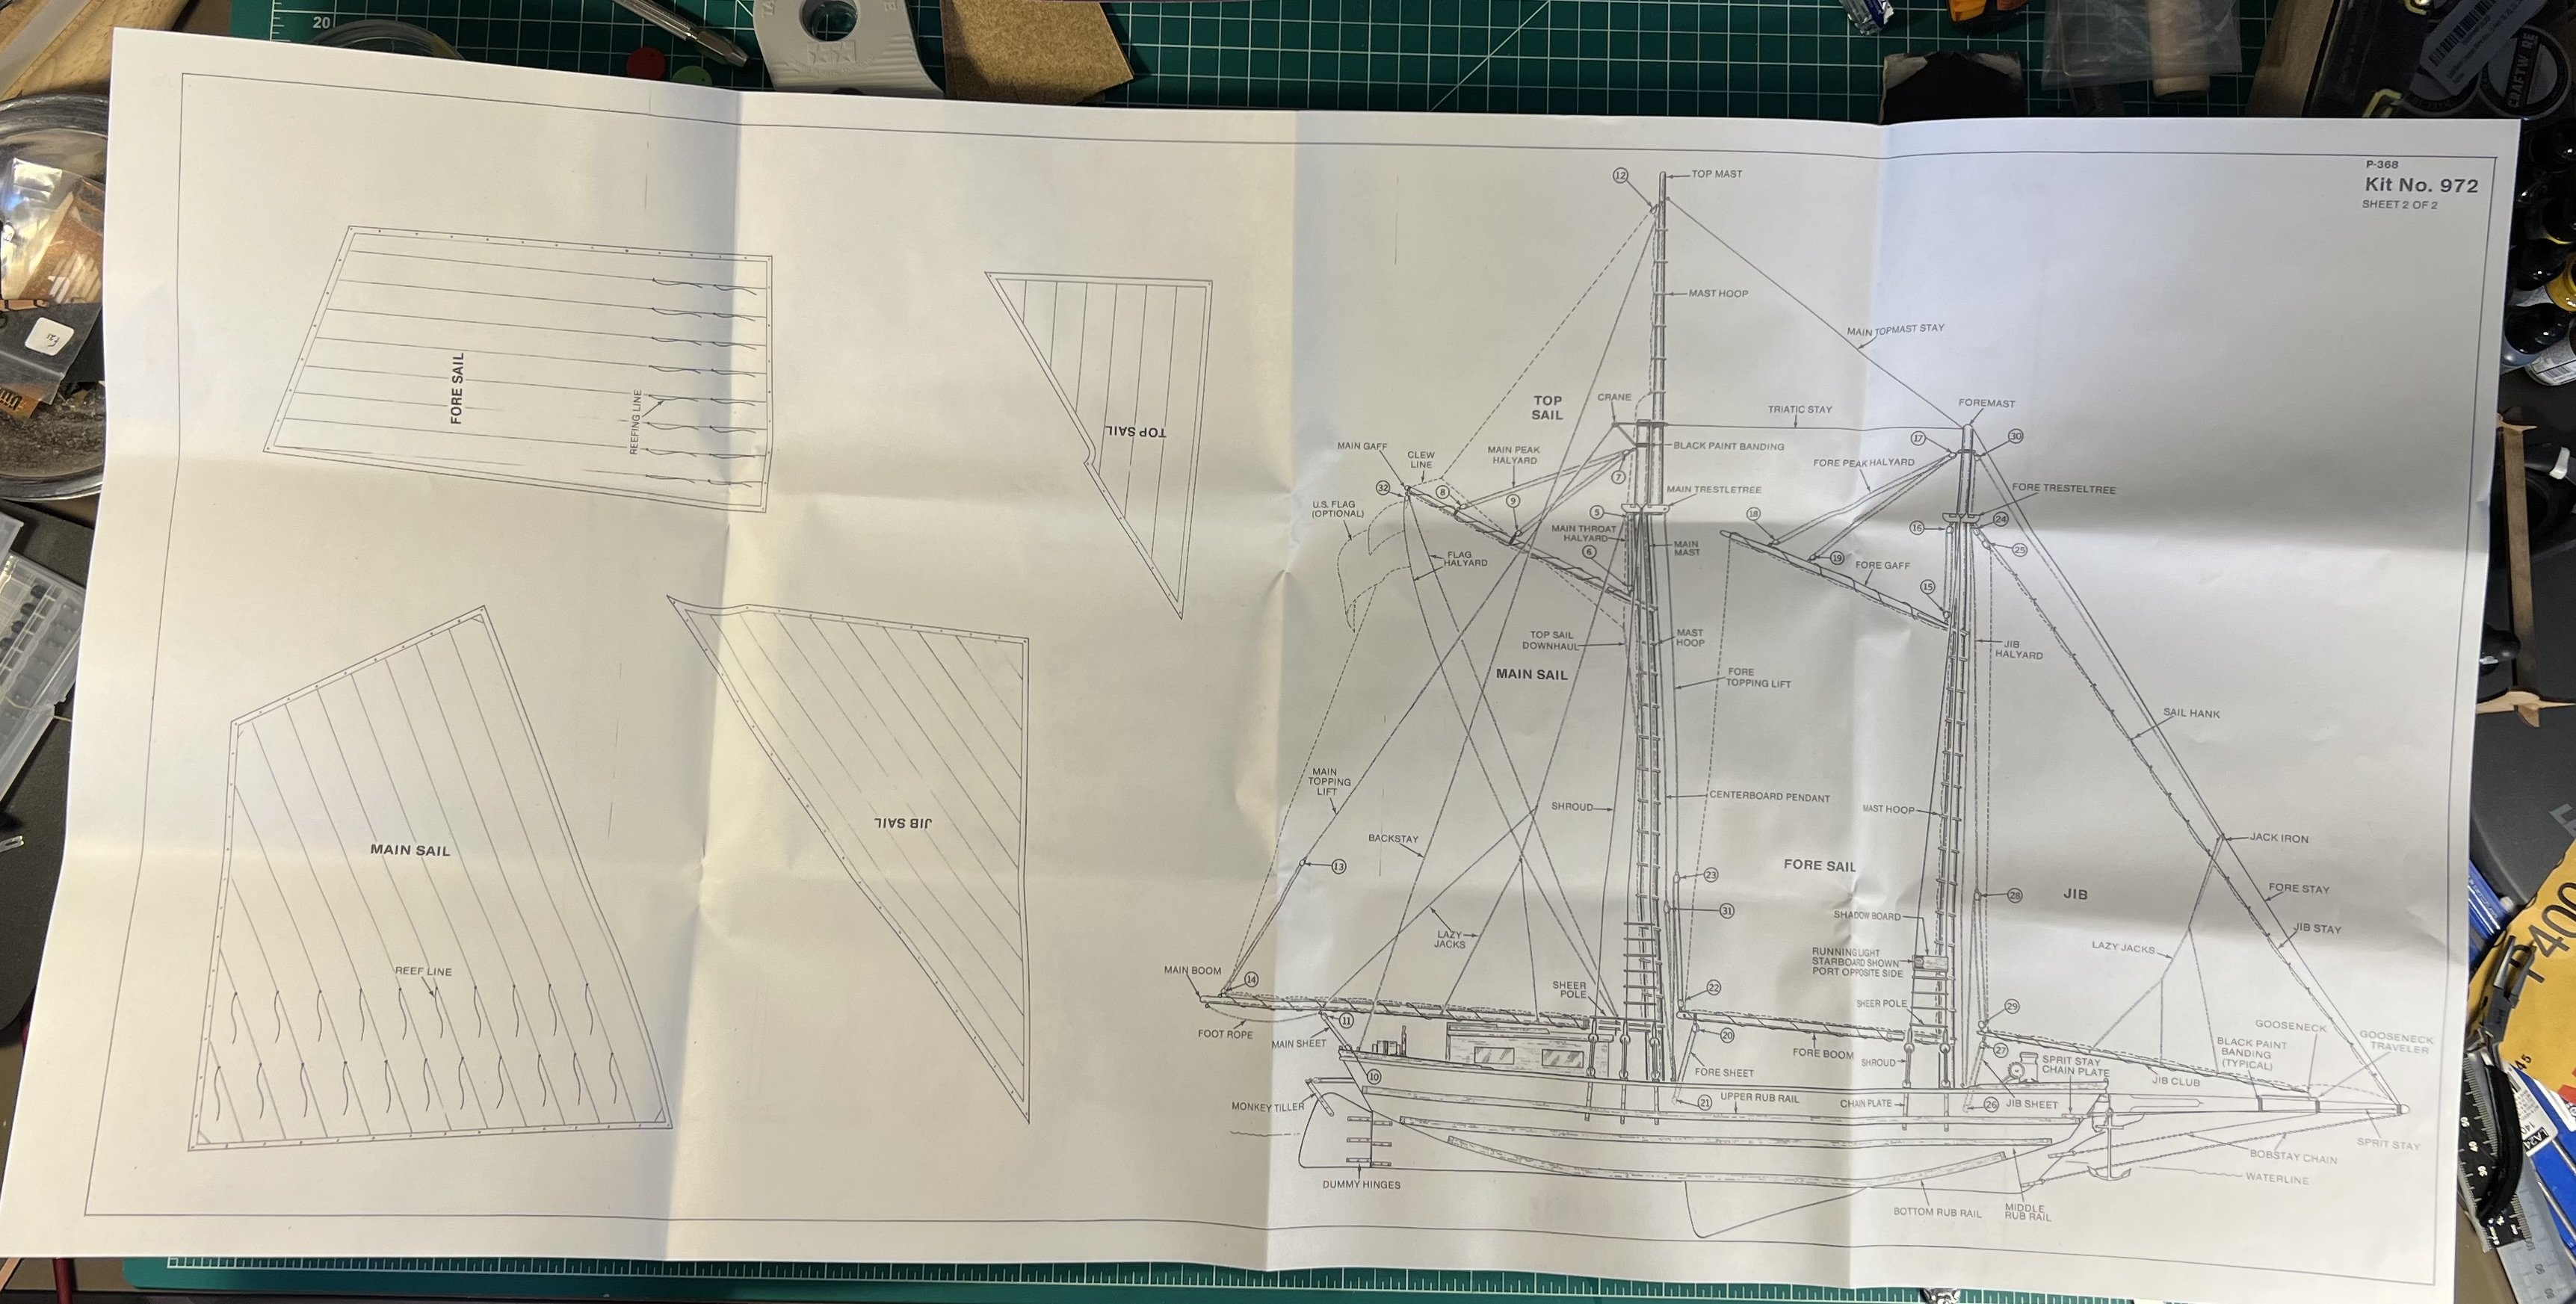
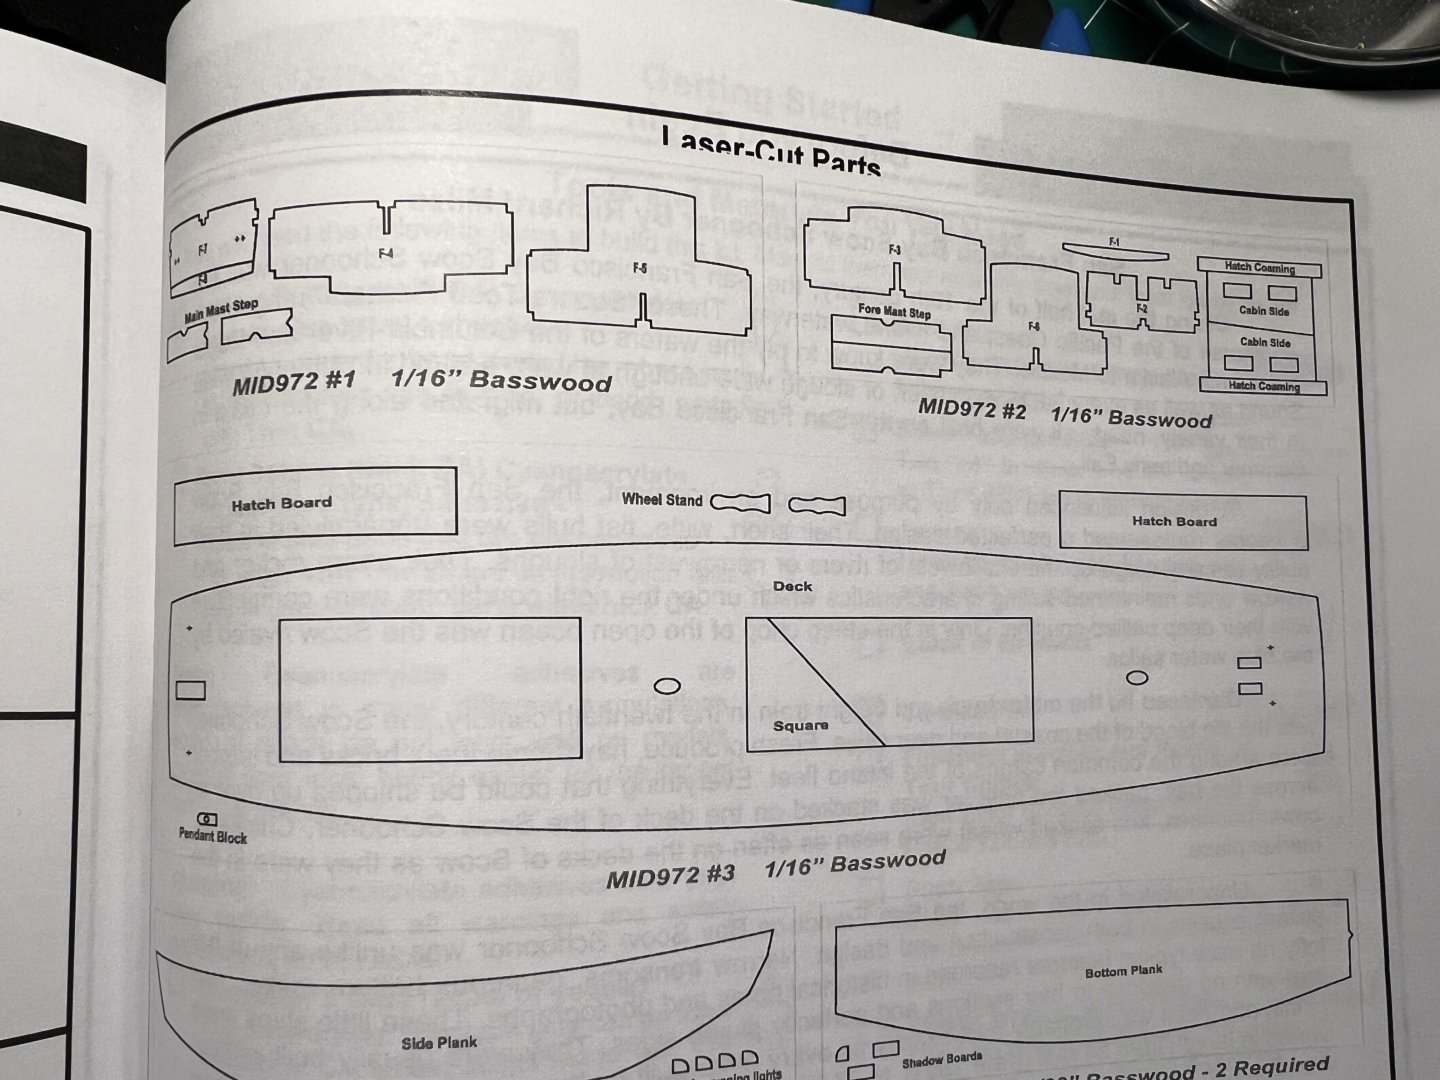
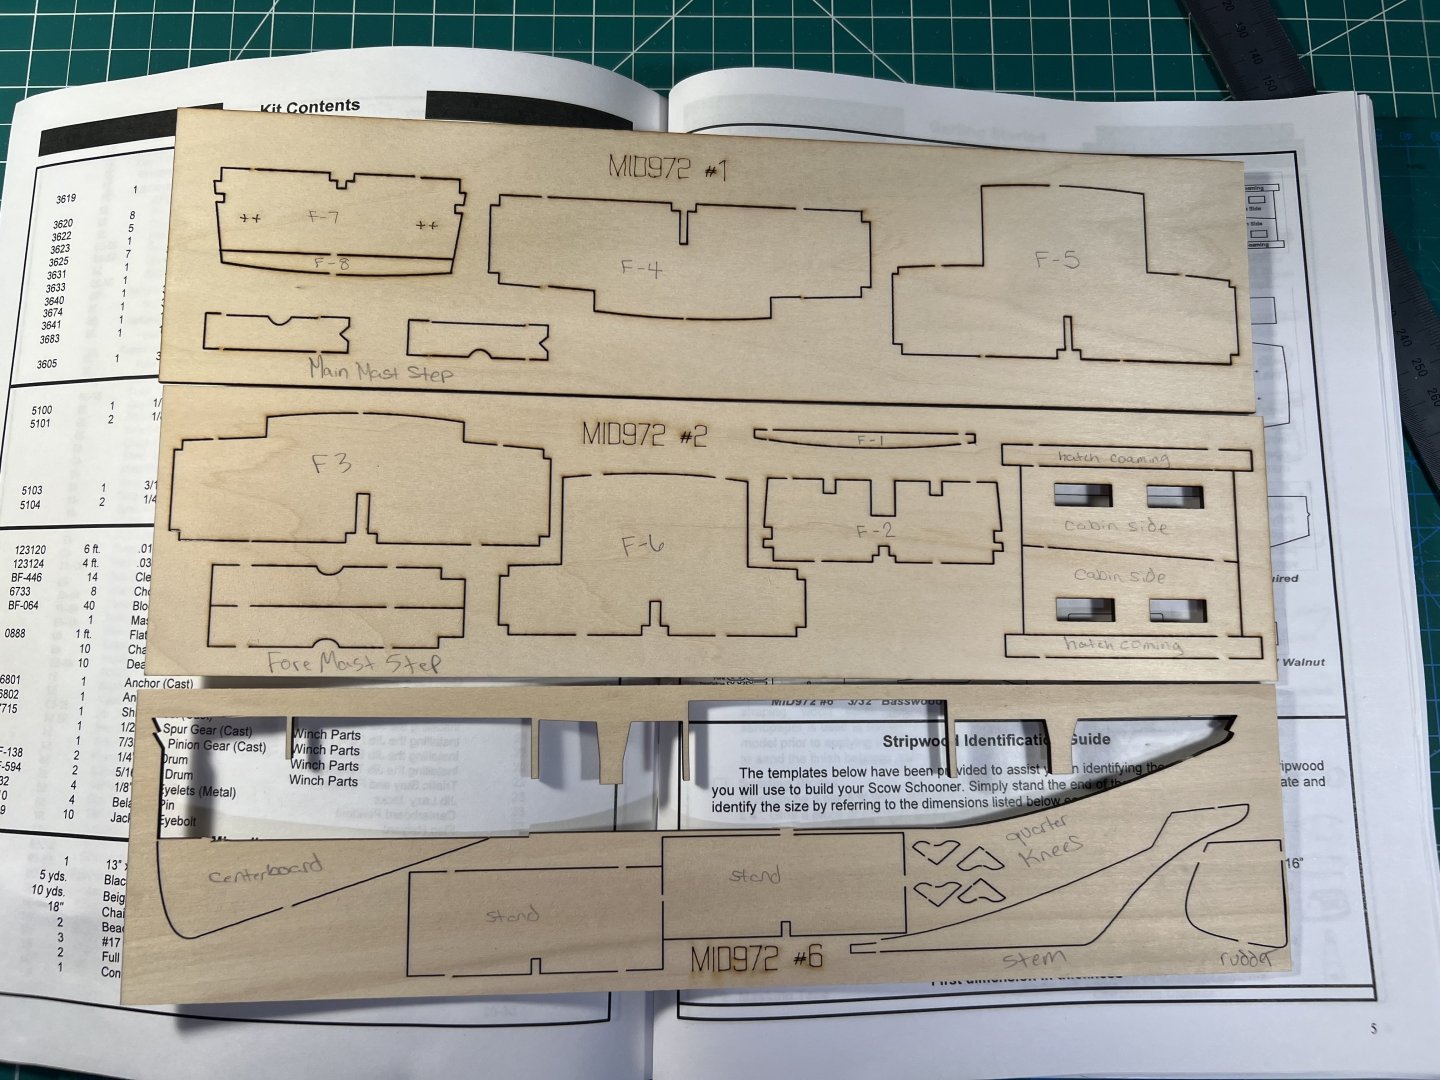
Need to write the part numbers on the sheets, following the layout map on a page at the start of the instructions.
- 48 replies
-
- 1
-

-
- San Francisco Bay Scow Schooner
- Scow Scooner
- (and 1 more)
-
I thought I had seen that some of those "battle station" kits might be available some time some place - I can't remember if it was on the NRG web site or Syren. But the kit says "limited edition" of 25 so maybe not.
-
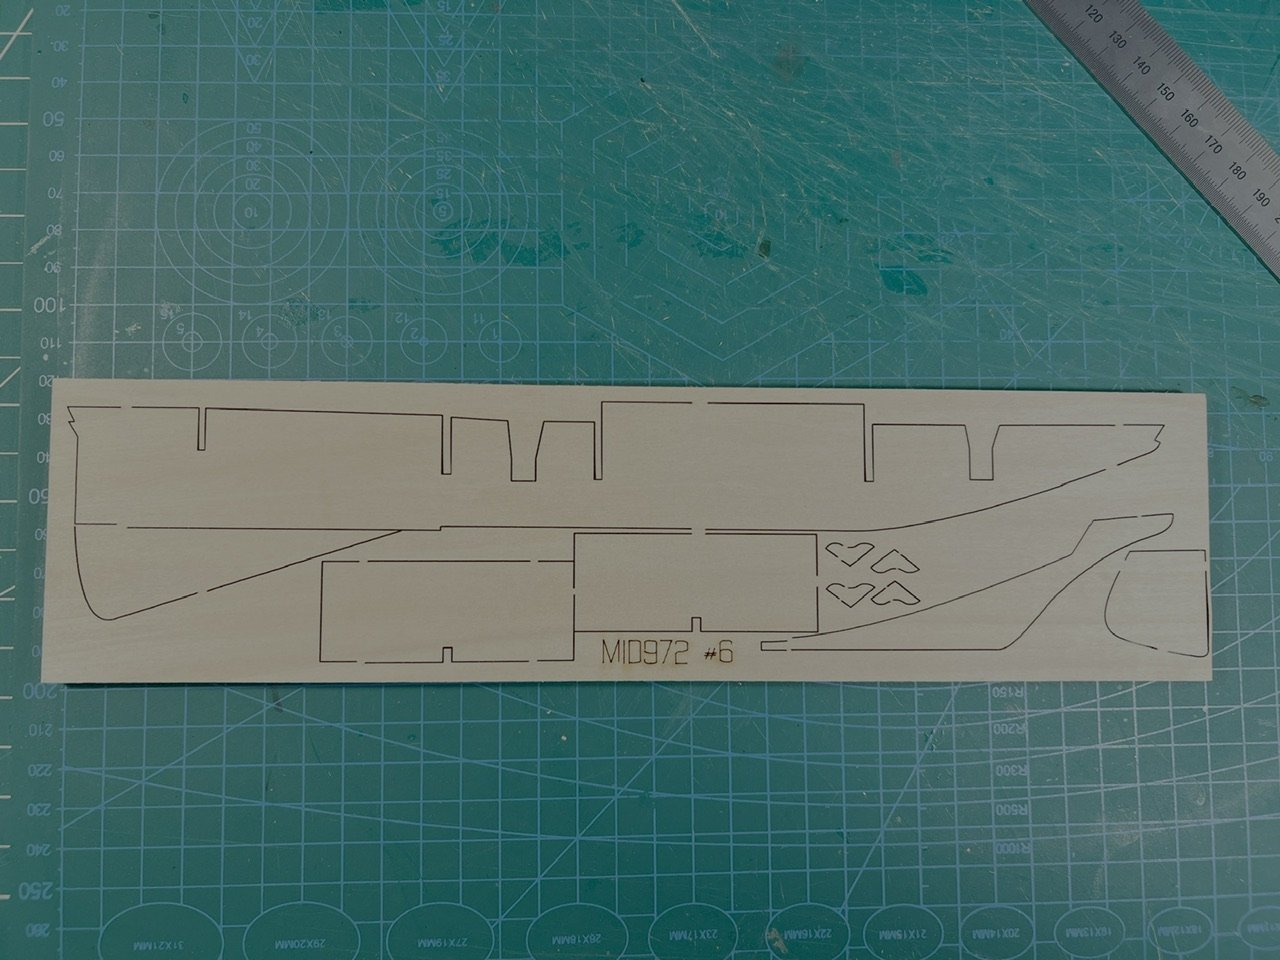
Kind of frustrating that for a “new” 2024 reissue they didn’t get the laser cuts right on the keel.

- 48 replies
-
- 1
-
-
- San Francisco Bay Scow Schooner
- Scow Scooner
- (and 1 more)
-
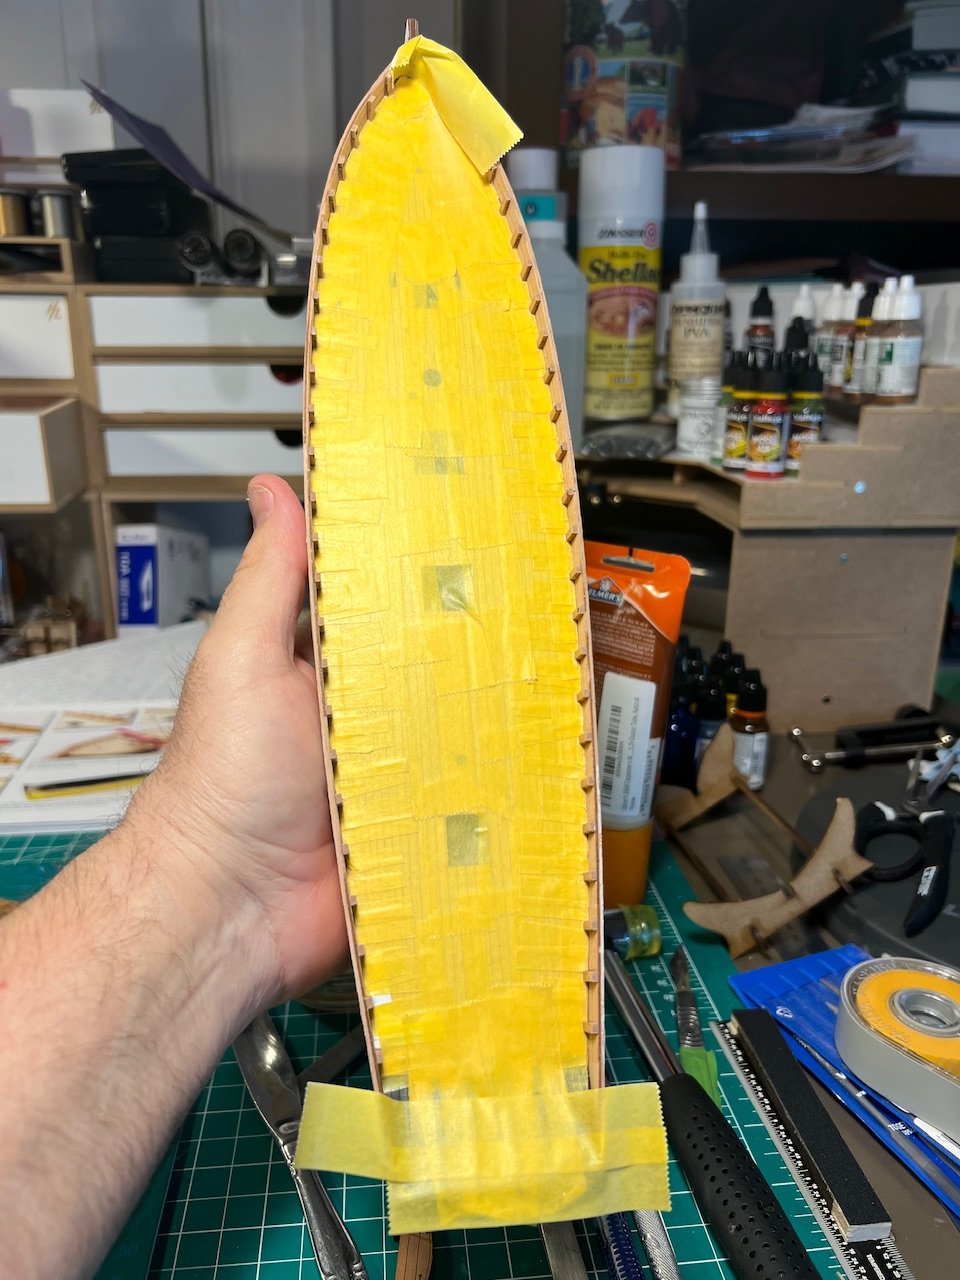
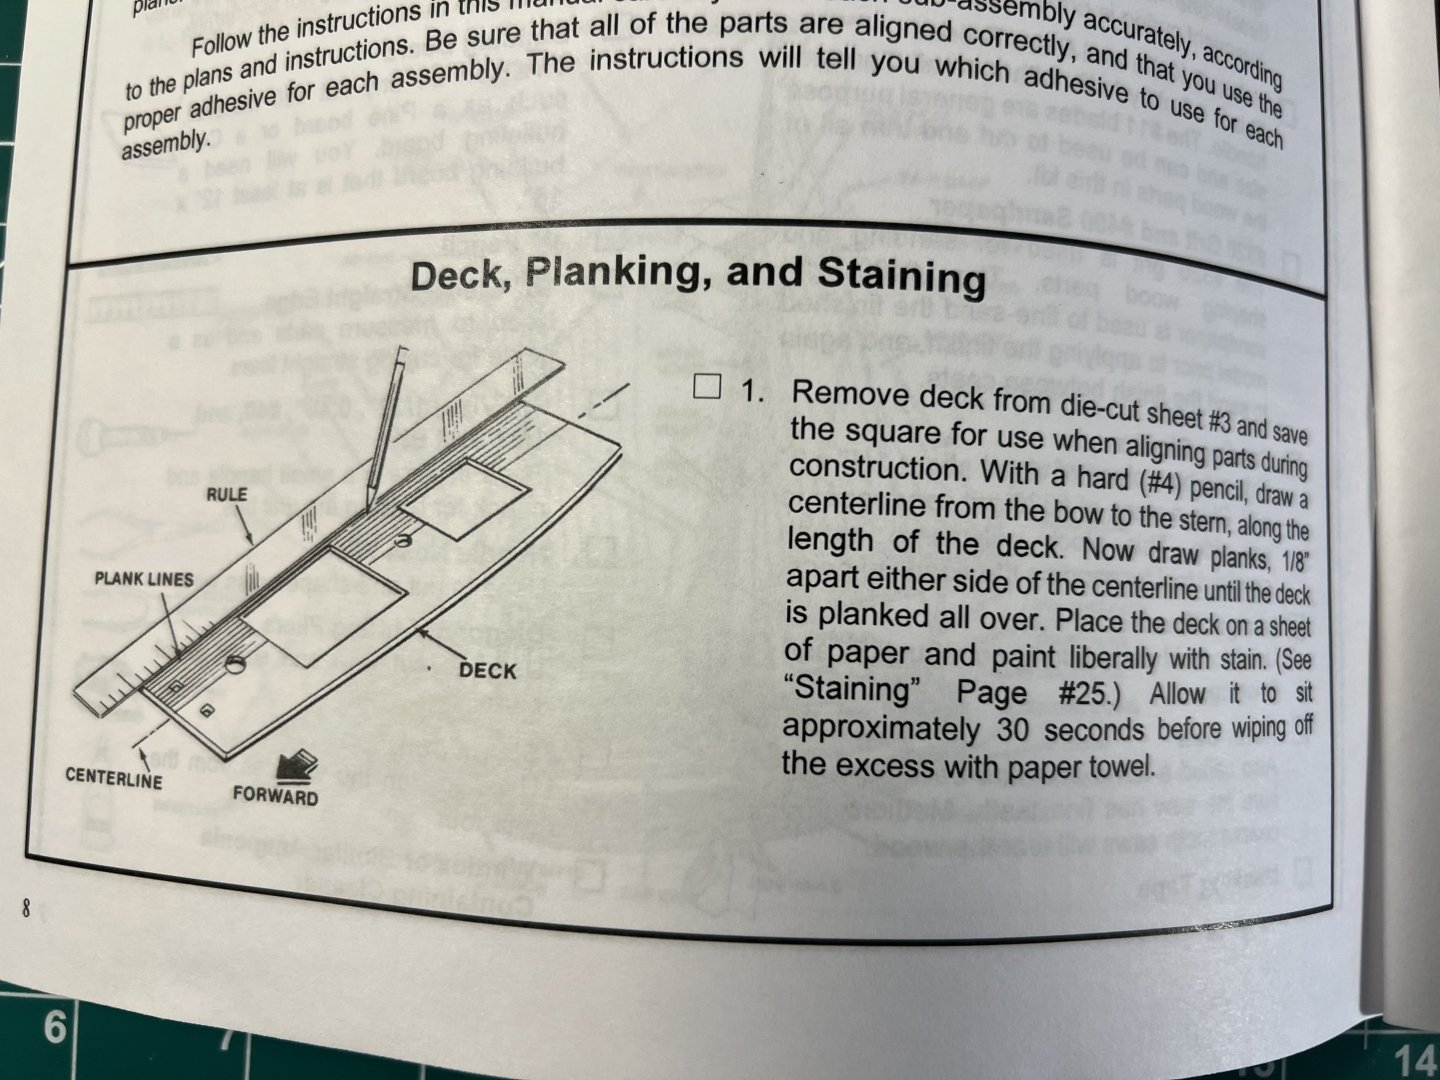
The instructions call for drawing on the deck planks with a pencil. I’m going to try adding actual planks. A first. And first deviation from instructions. We’ll see how it goes.

- 48 replies
-
- 2
-
-
- San Francisco Bay Scow Schooner
- Scow Scooner
- (and 1 more)
-
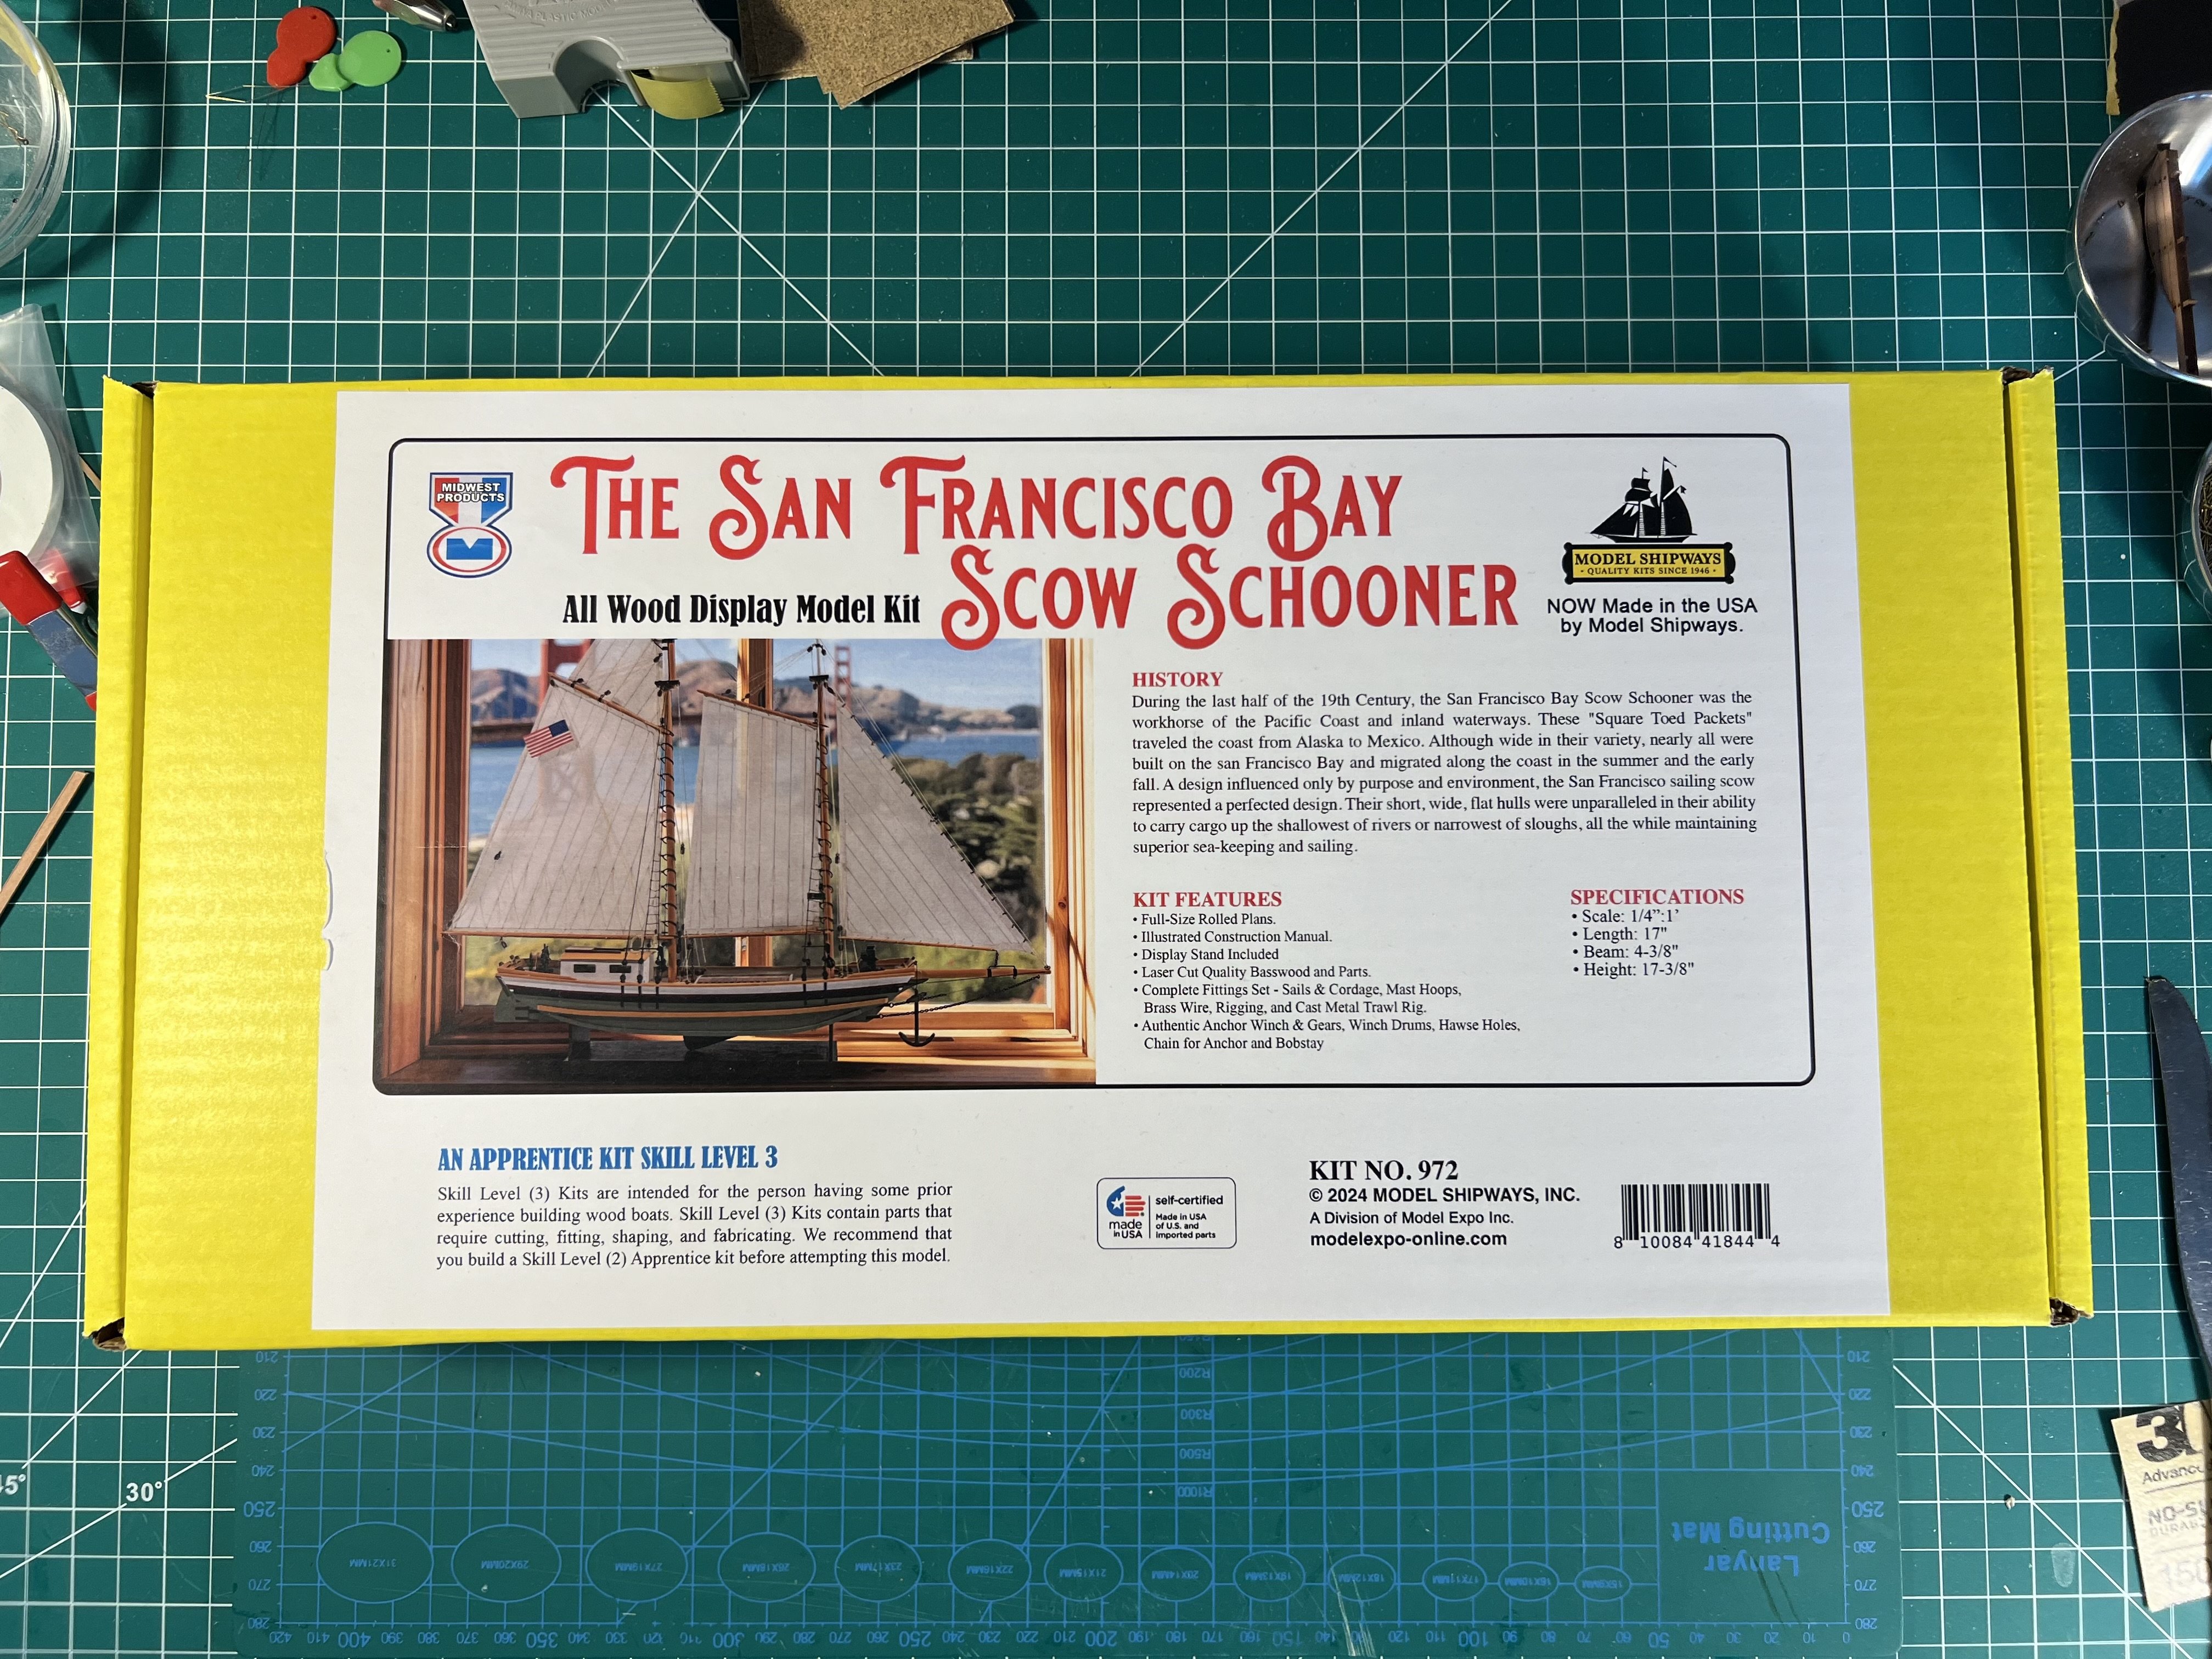
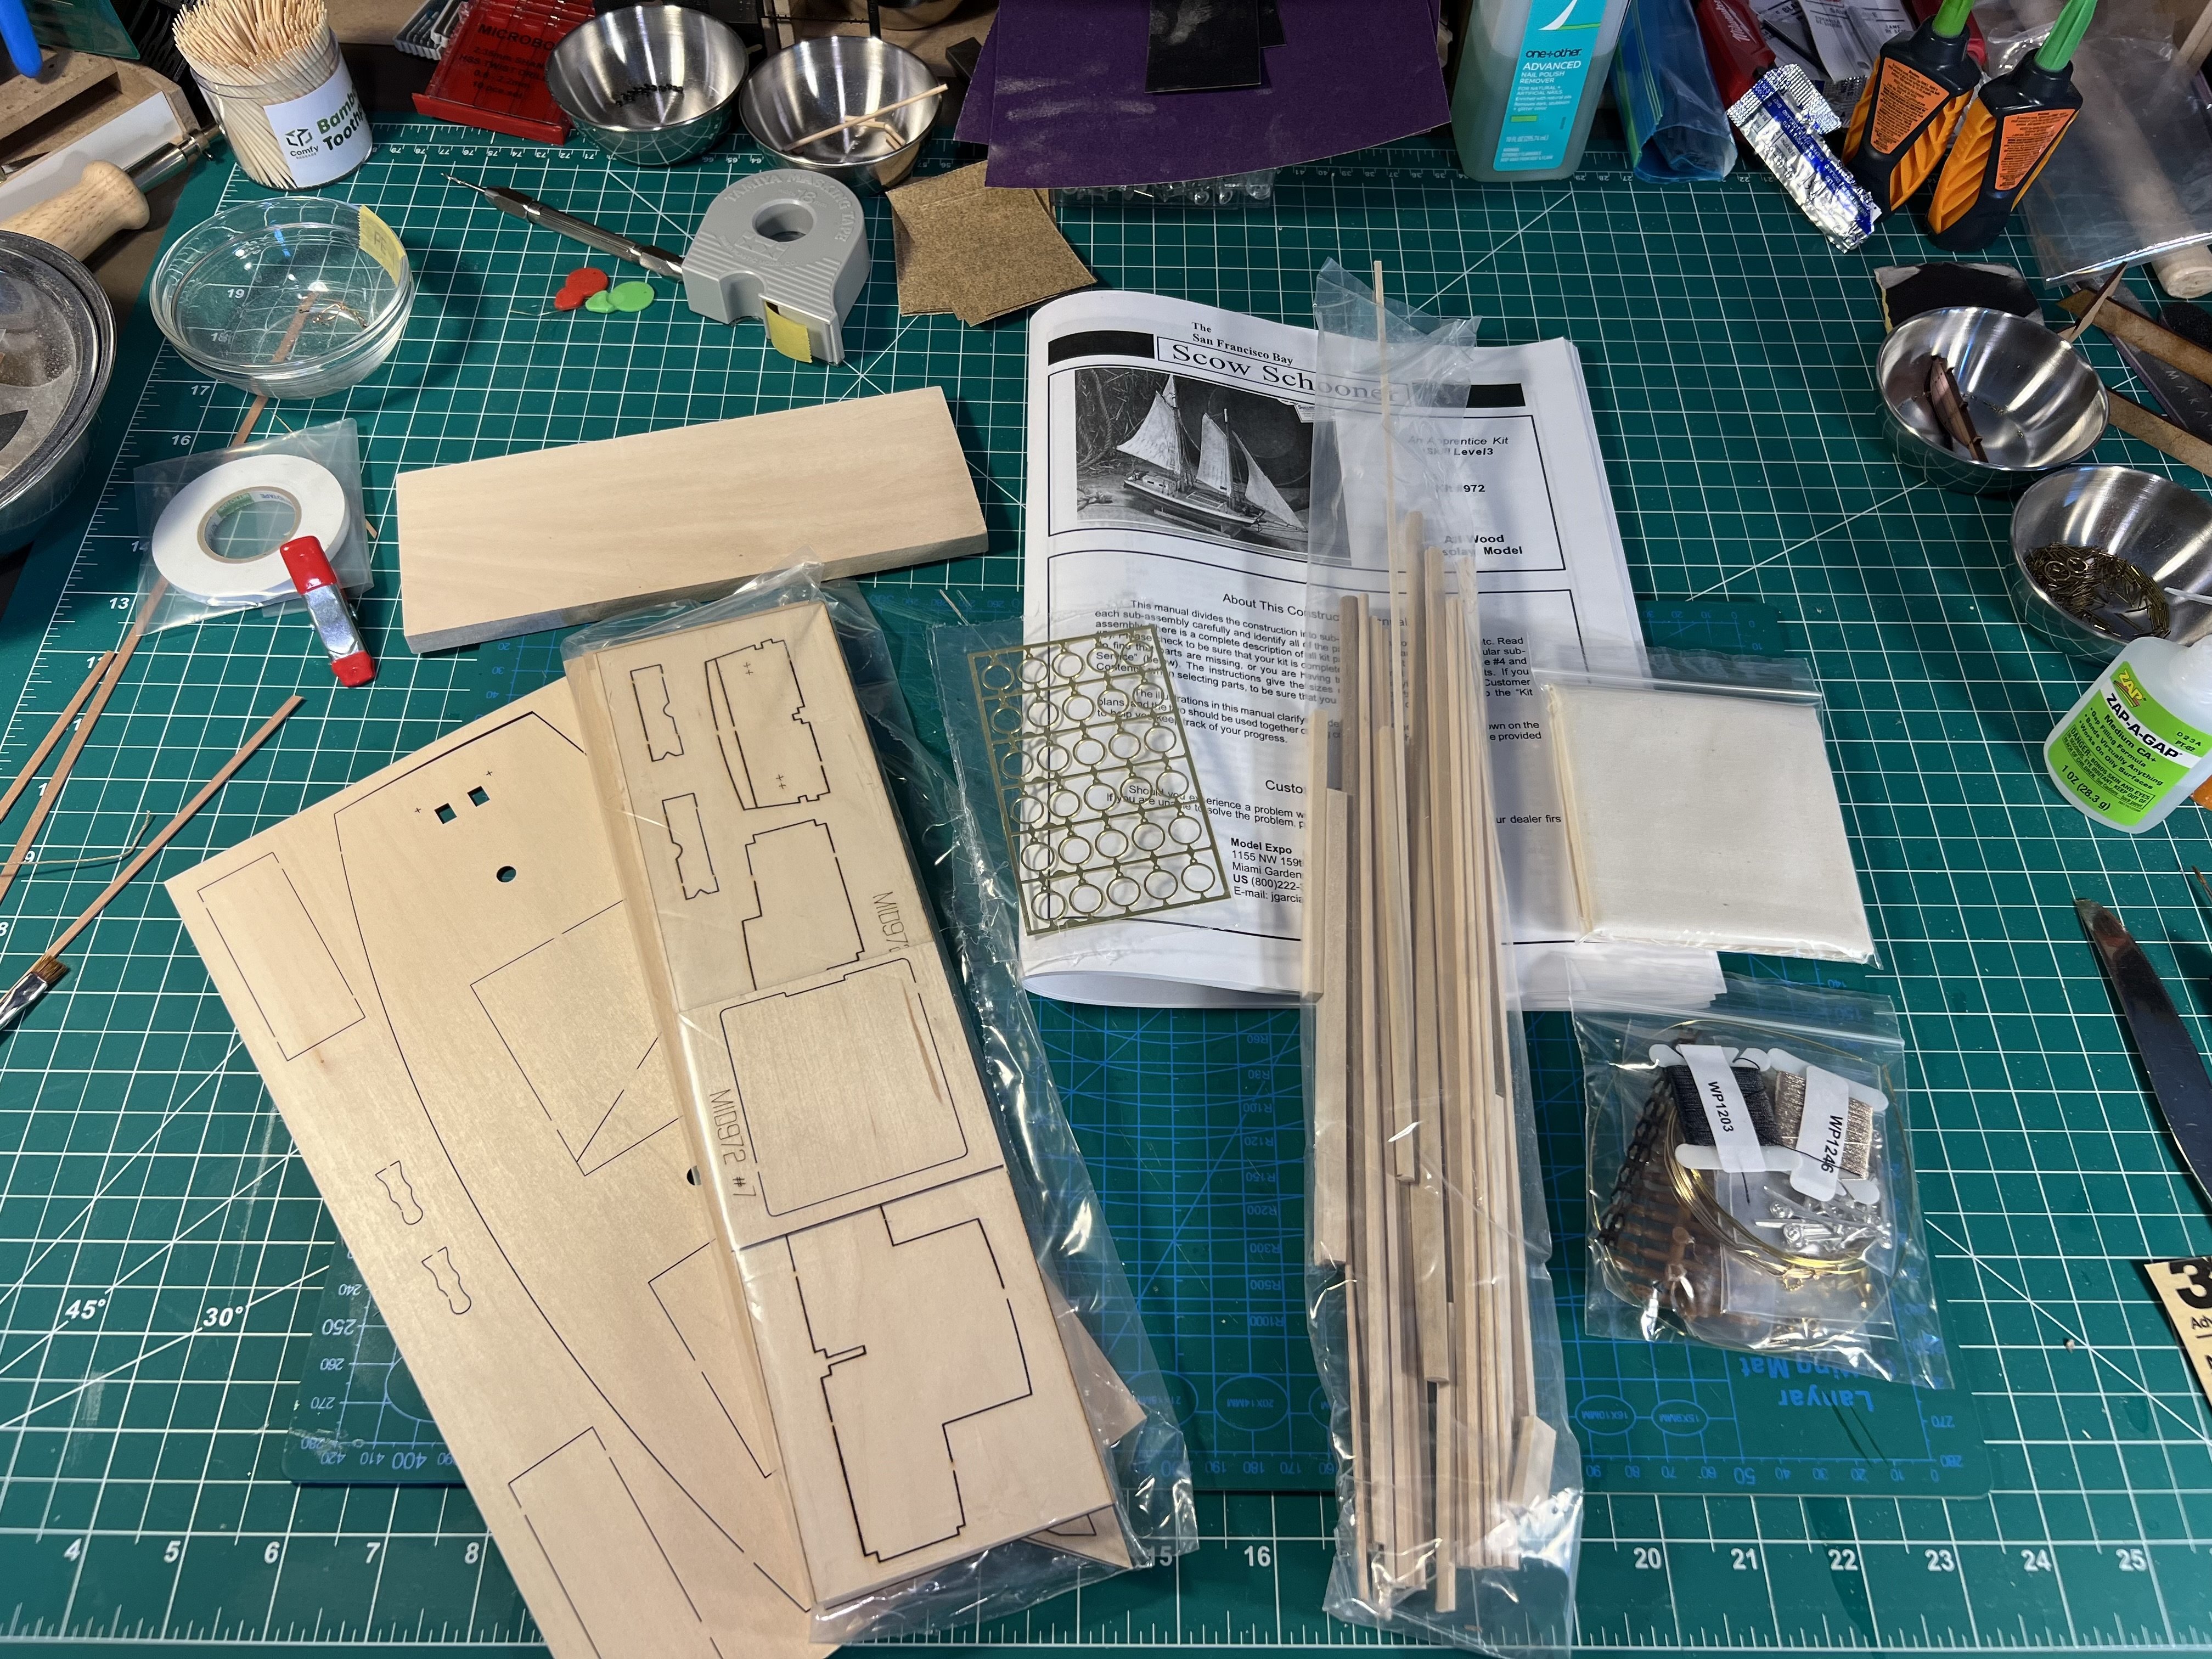
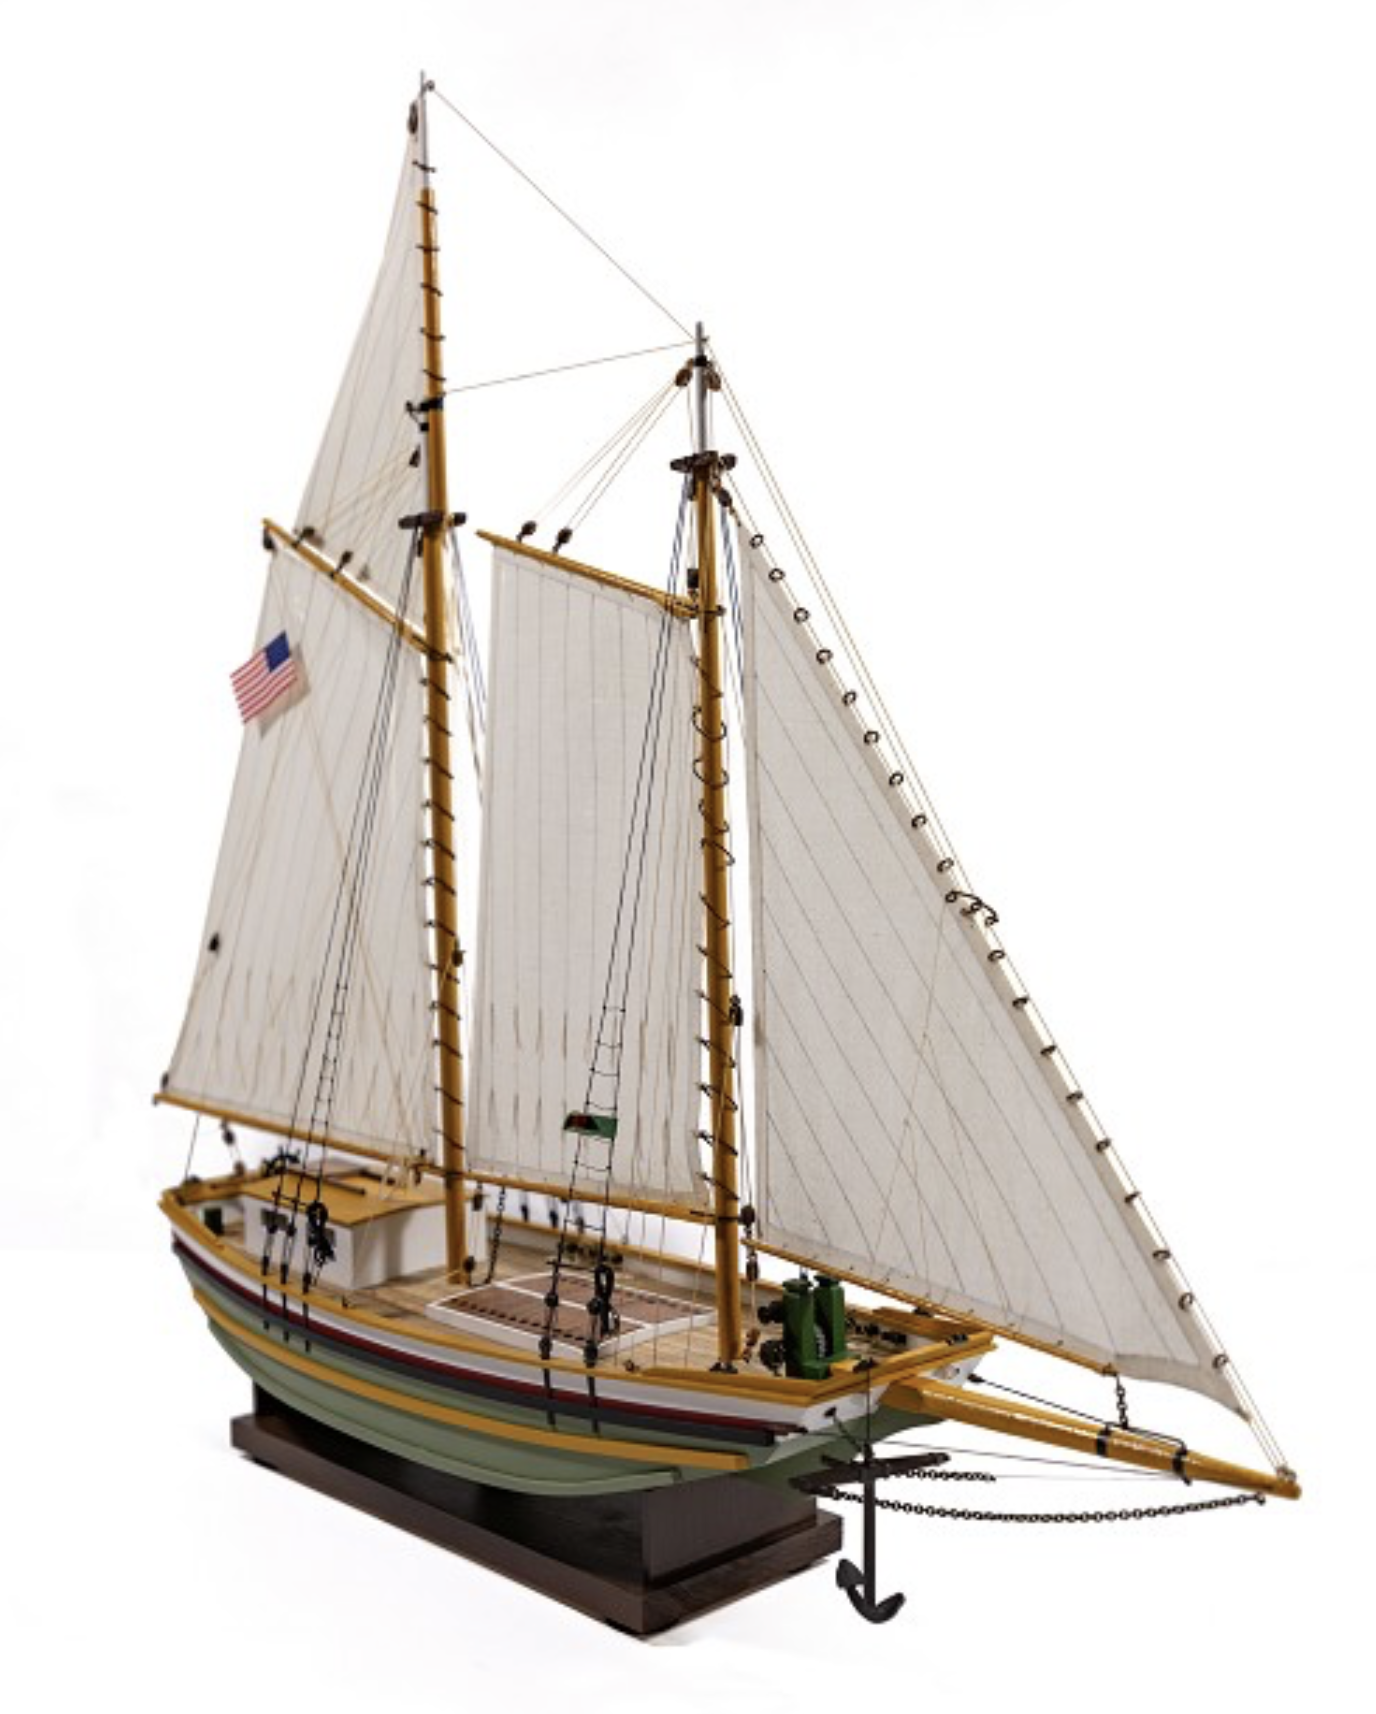
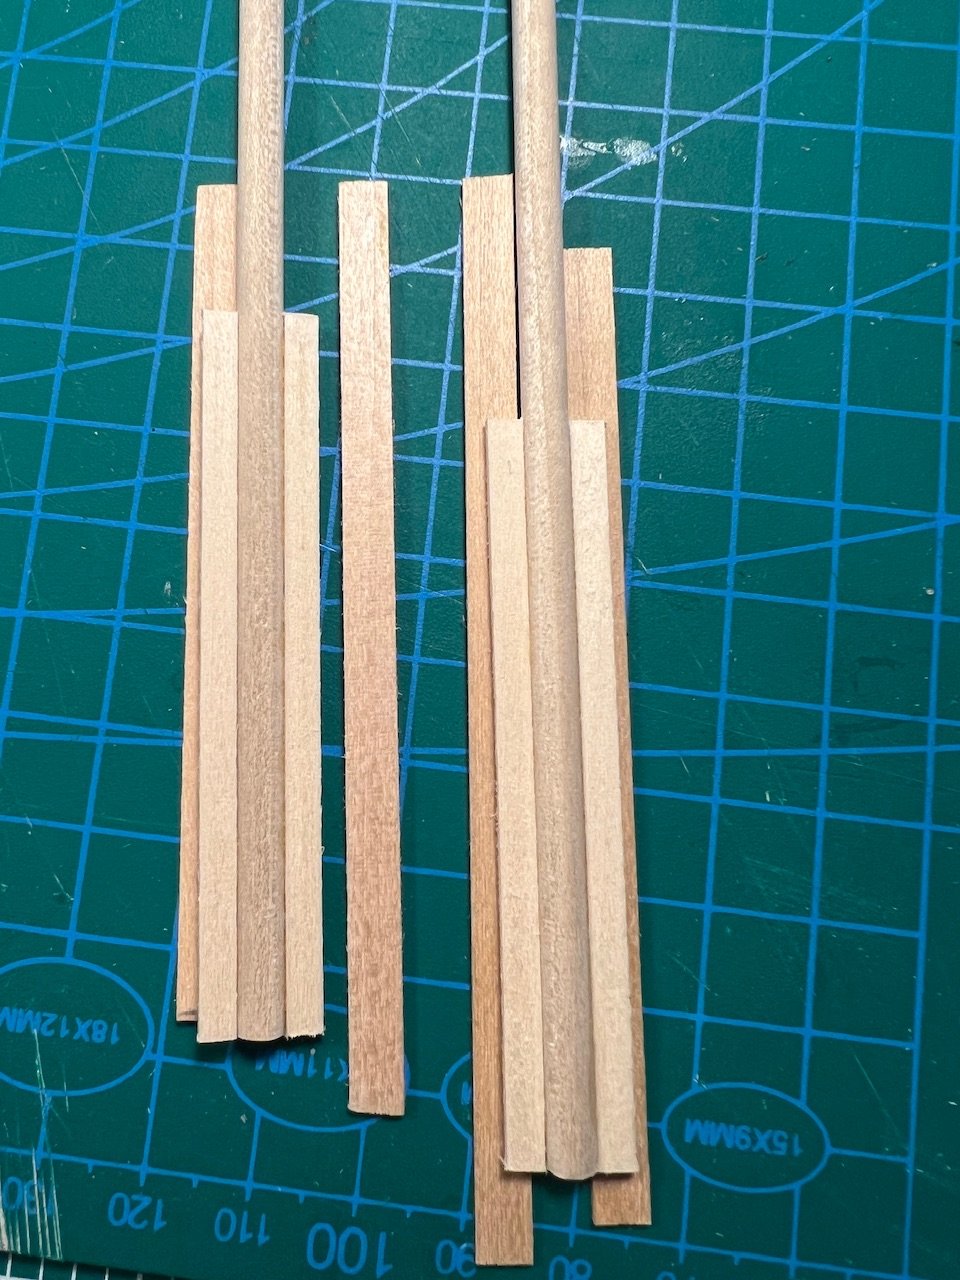
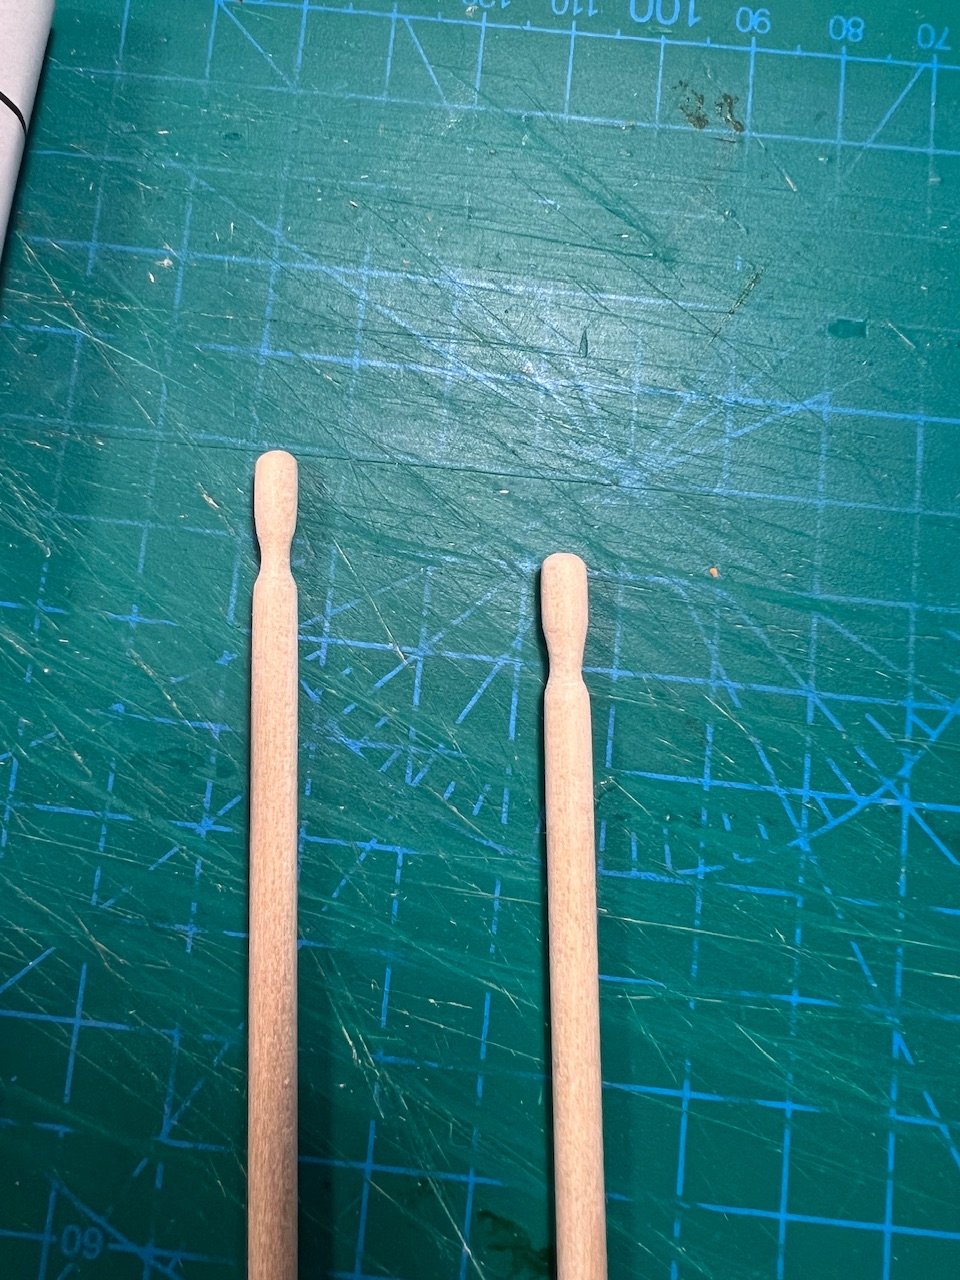
For my next model, I'm doing the San Francisco Bay Scow Schooner by Midwest (sold by Model Shipways / Model Expo). This is another example of a Midwest model that Model Shipways / Model Expo has reissued. It looks like this came out just last October 2024. I picked it up for a fairly cheap price, more than 1/2 off, during a Model Expo sale a couple months ago. It looks like it has been redesigned a bit. Someone online said that it does not look quite the same as the model they build in the 1990s. I found online a link to an article describing these scow scooners: https://www.wisconsinshipwrecks.org/Files/scow-schooner-regional-context.pdf I'm continuing my approach of having multiple models going on at once. It lets me just let paint or glue dry on one model and work on another model. It also lets me work on something that I'm keen to work on rather than feeling like I need to plough ahead on a step that I need to think hard about, research, or that I need a break from. I liked how this model looked and it seems like a straightforward build. I might try on this model to do a few things that deviate from the instructions, which would be a first for me. I think this might be the first build log for this reissued model. I couldn't find any other in a search. It'll also be a first for me to go solo. Some notes, thoughts, assessments of this kit (for future builders): - As is the case for many of Model Expo's re-issues of Midwest kits, do not assume that the instructions align with what is available in the kit. They have made essentially zero edits to the instructions (aside from a page or two at the beginning) so do not assume that instructions wrt parts and their labels or even their dimensions align with what is actually included in the kit. - Like model Model Expo kits, nearly all the wood is basswood. Basswood is cheap. It's easy to cut. Easy - too easy - to sand - as in if you're a bit too aggressive you can sand through pieces inadvertently. I get why they include it for kits at this price point. But one thing to note is that in this kit you do need to do some shaping of parts from fairly thin pieces of basswood. Basswood splits easy, does not hold a shape all that well, does not easily give you crisp edges, and is just kind of frustrating to work with. You have a bit more wood supplied in the kit than you need, but you might need to supplement with additional basswood. Just know that you might need to make a few attempt - and cross your fingers - when shaping some of the pieces as instructed in the kit.

- 48 replies
-
- 6
-
-
- San Francisco Bay Scow Schooner
- Scow Scooner
- (and 1 more)
-
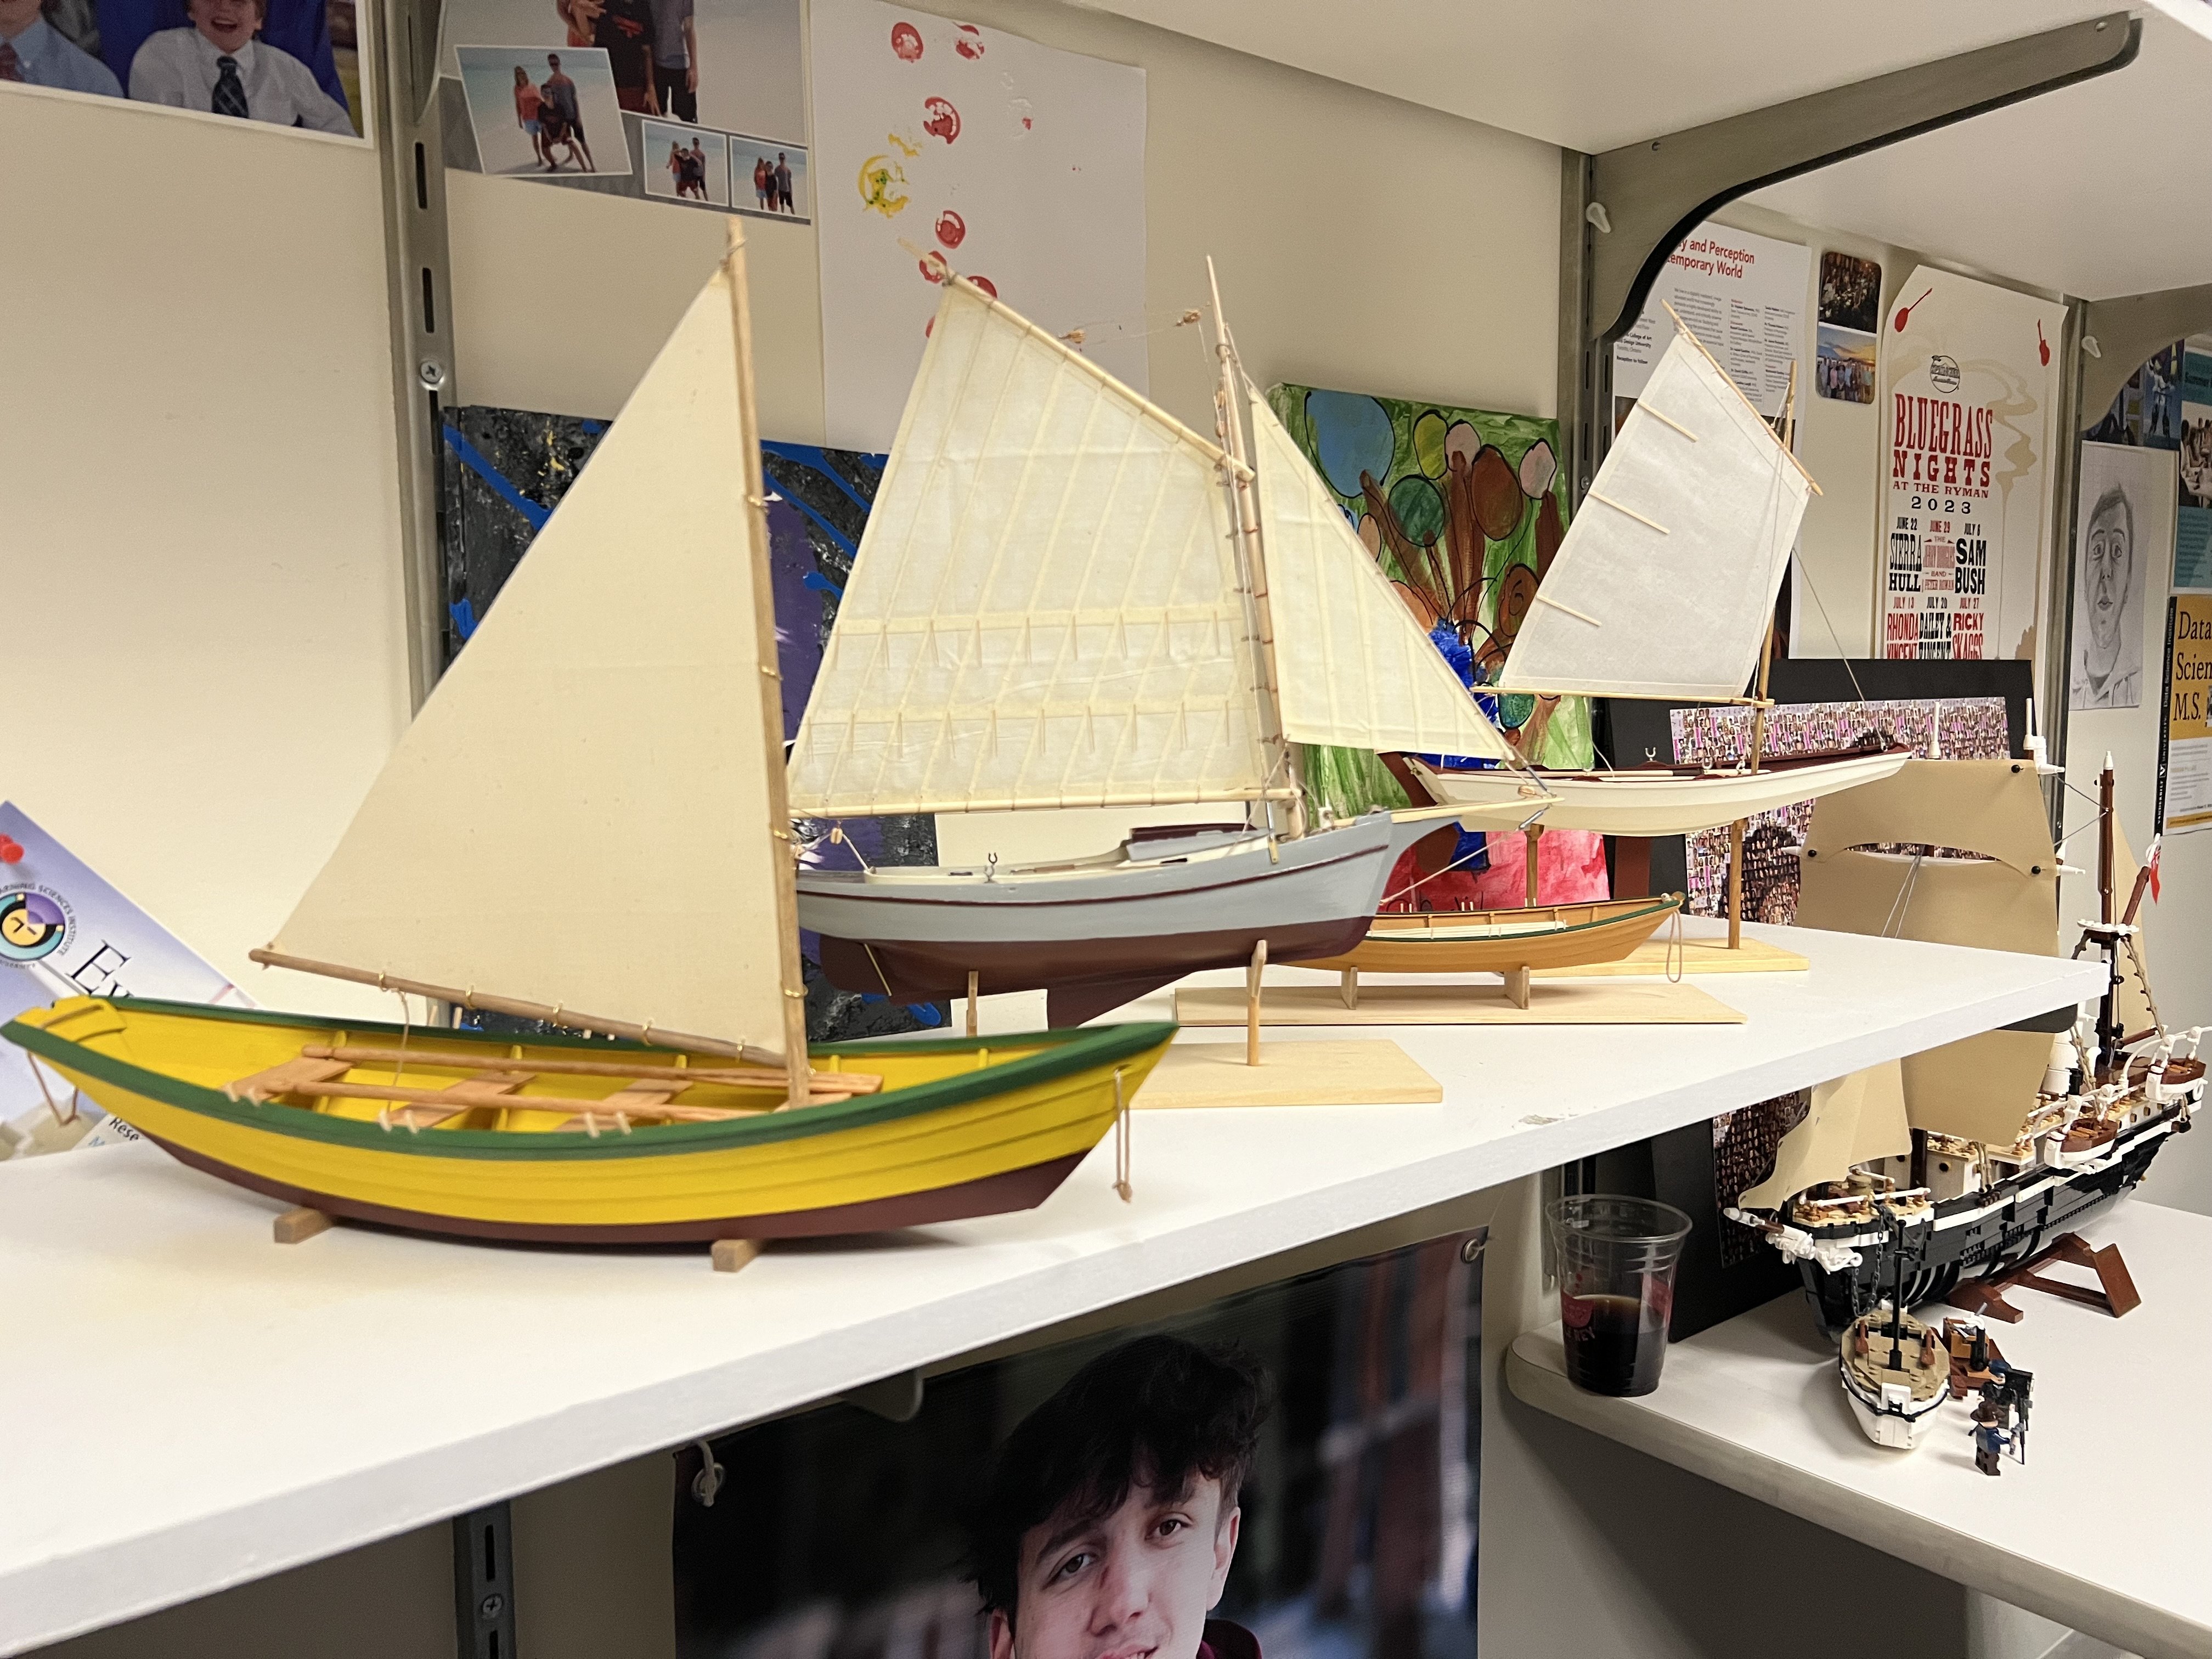
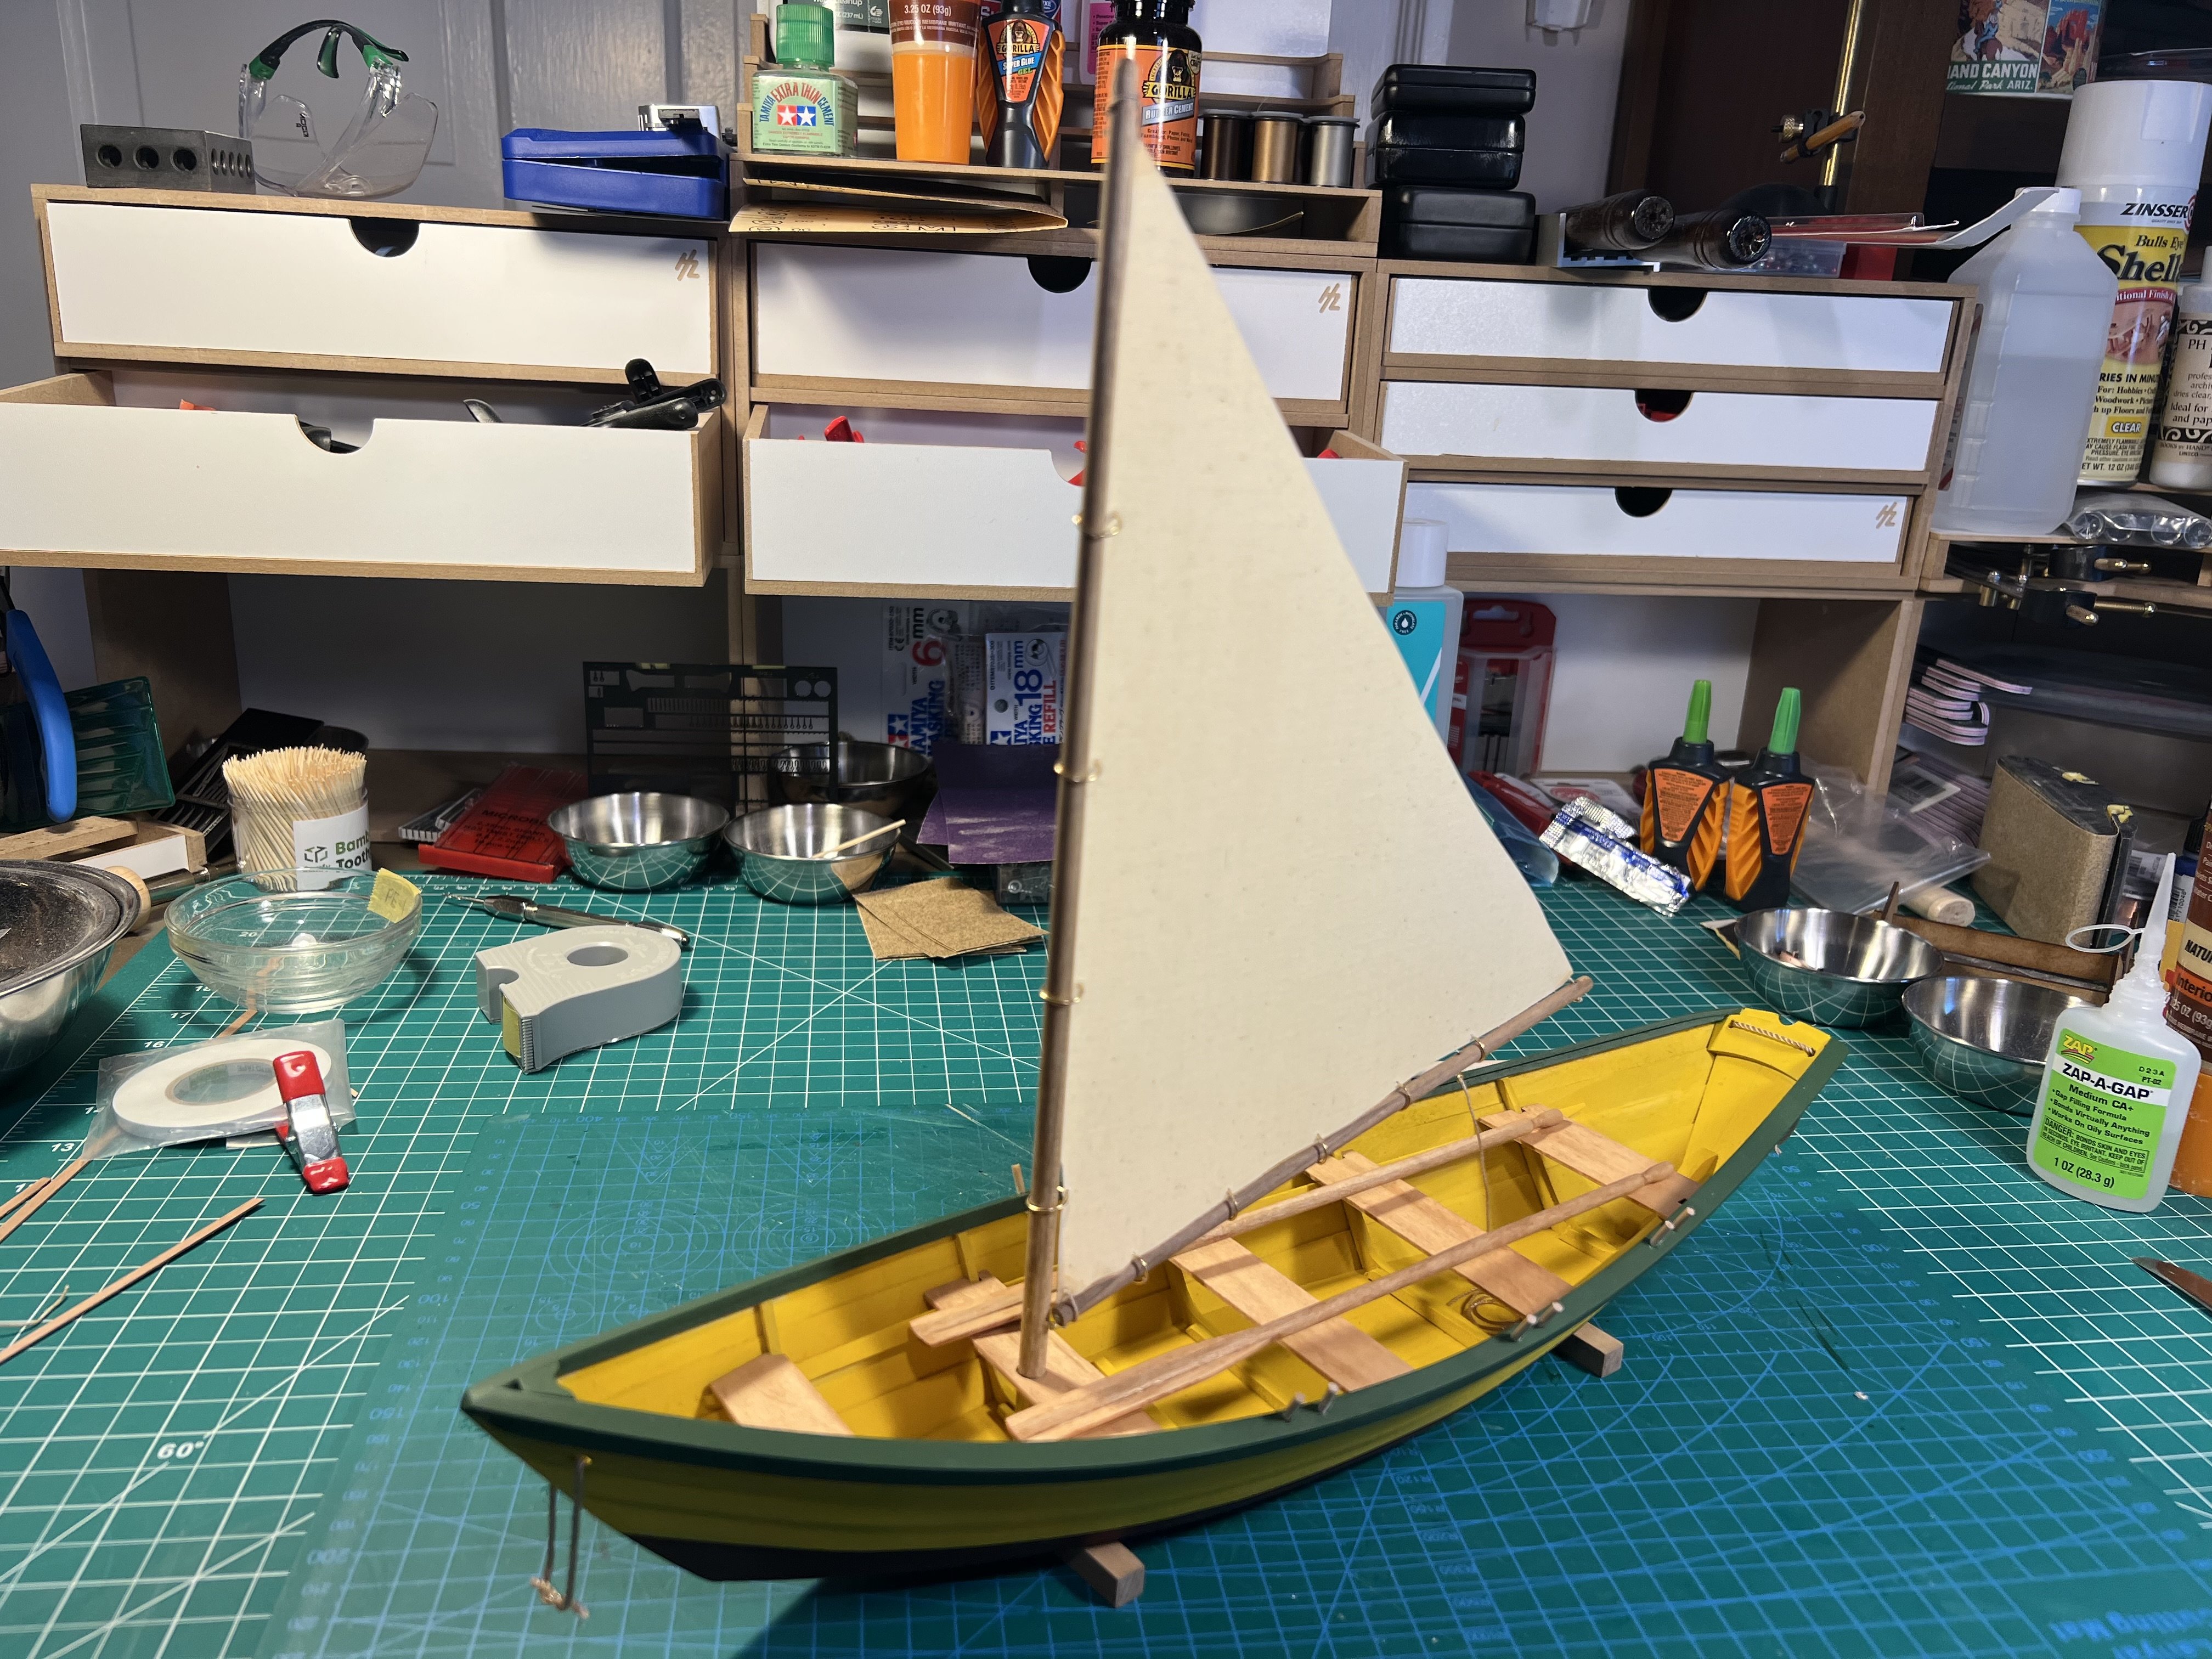
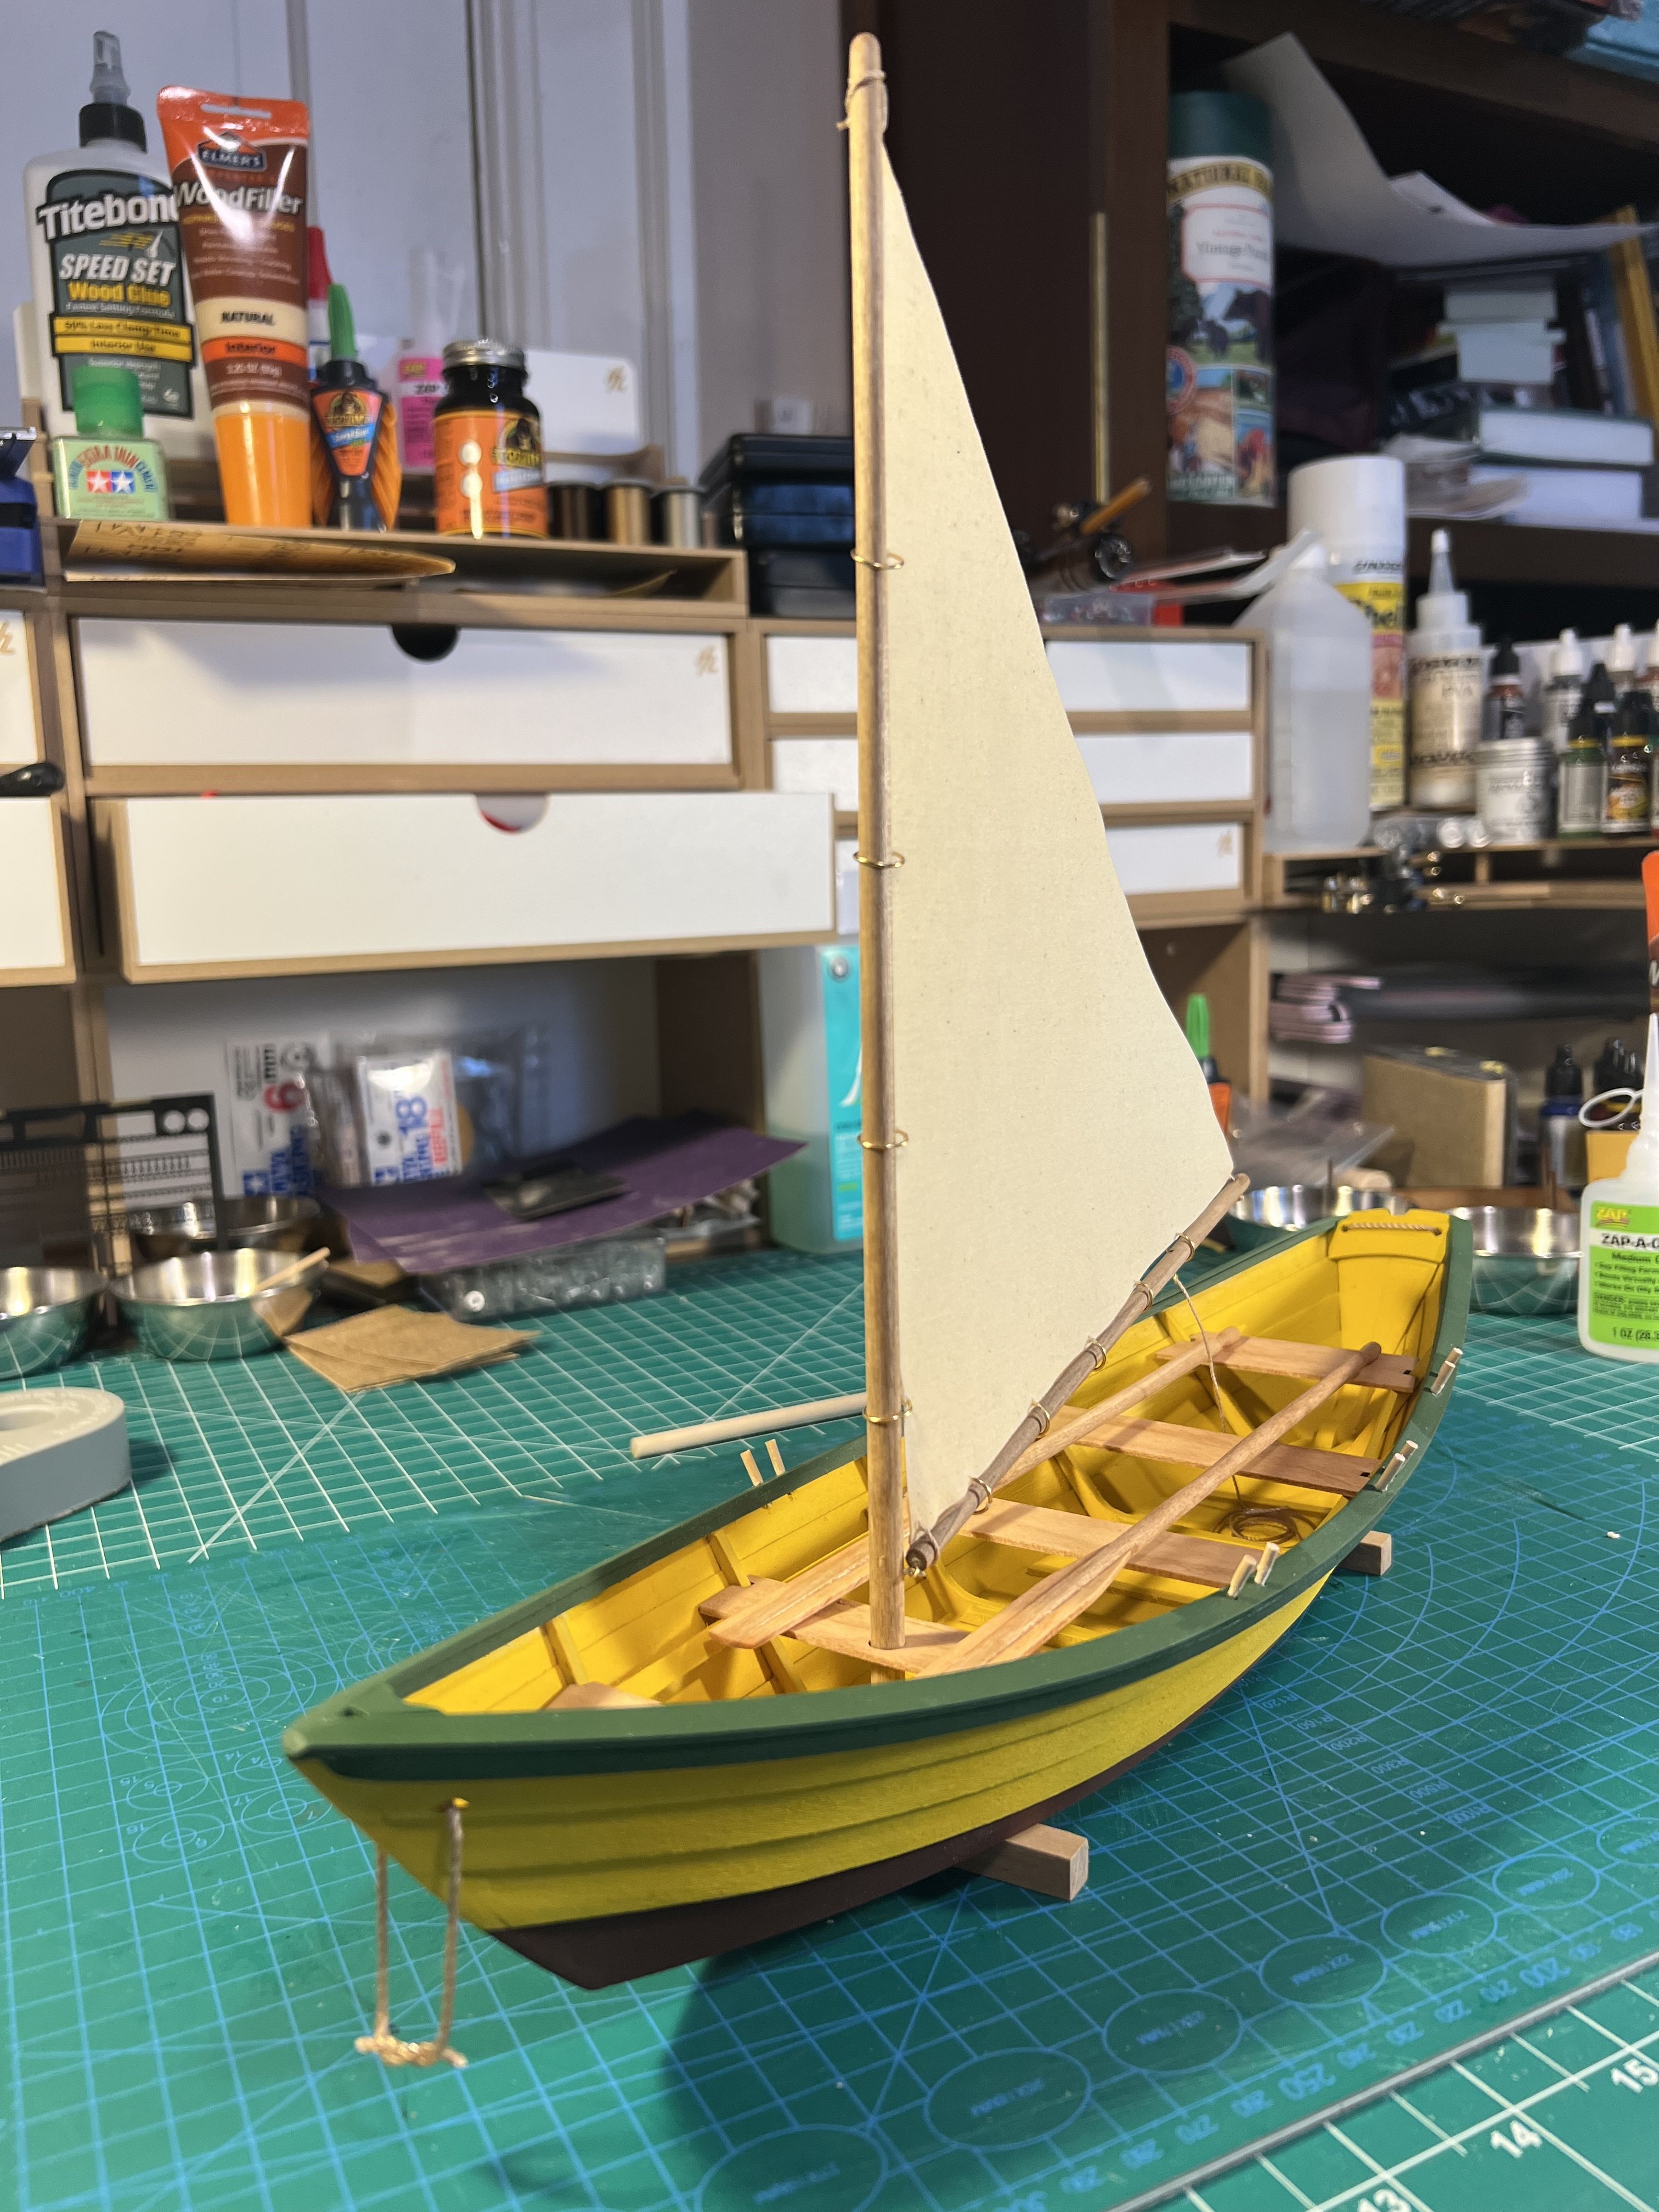
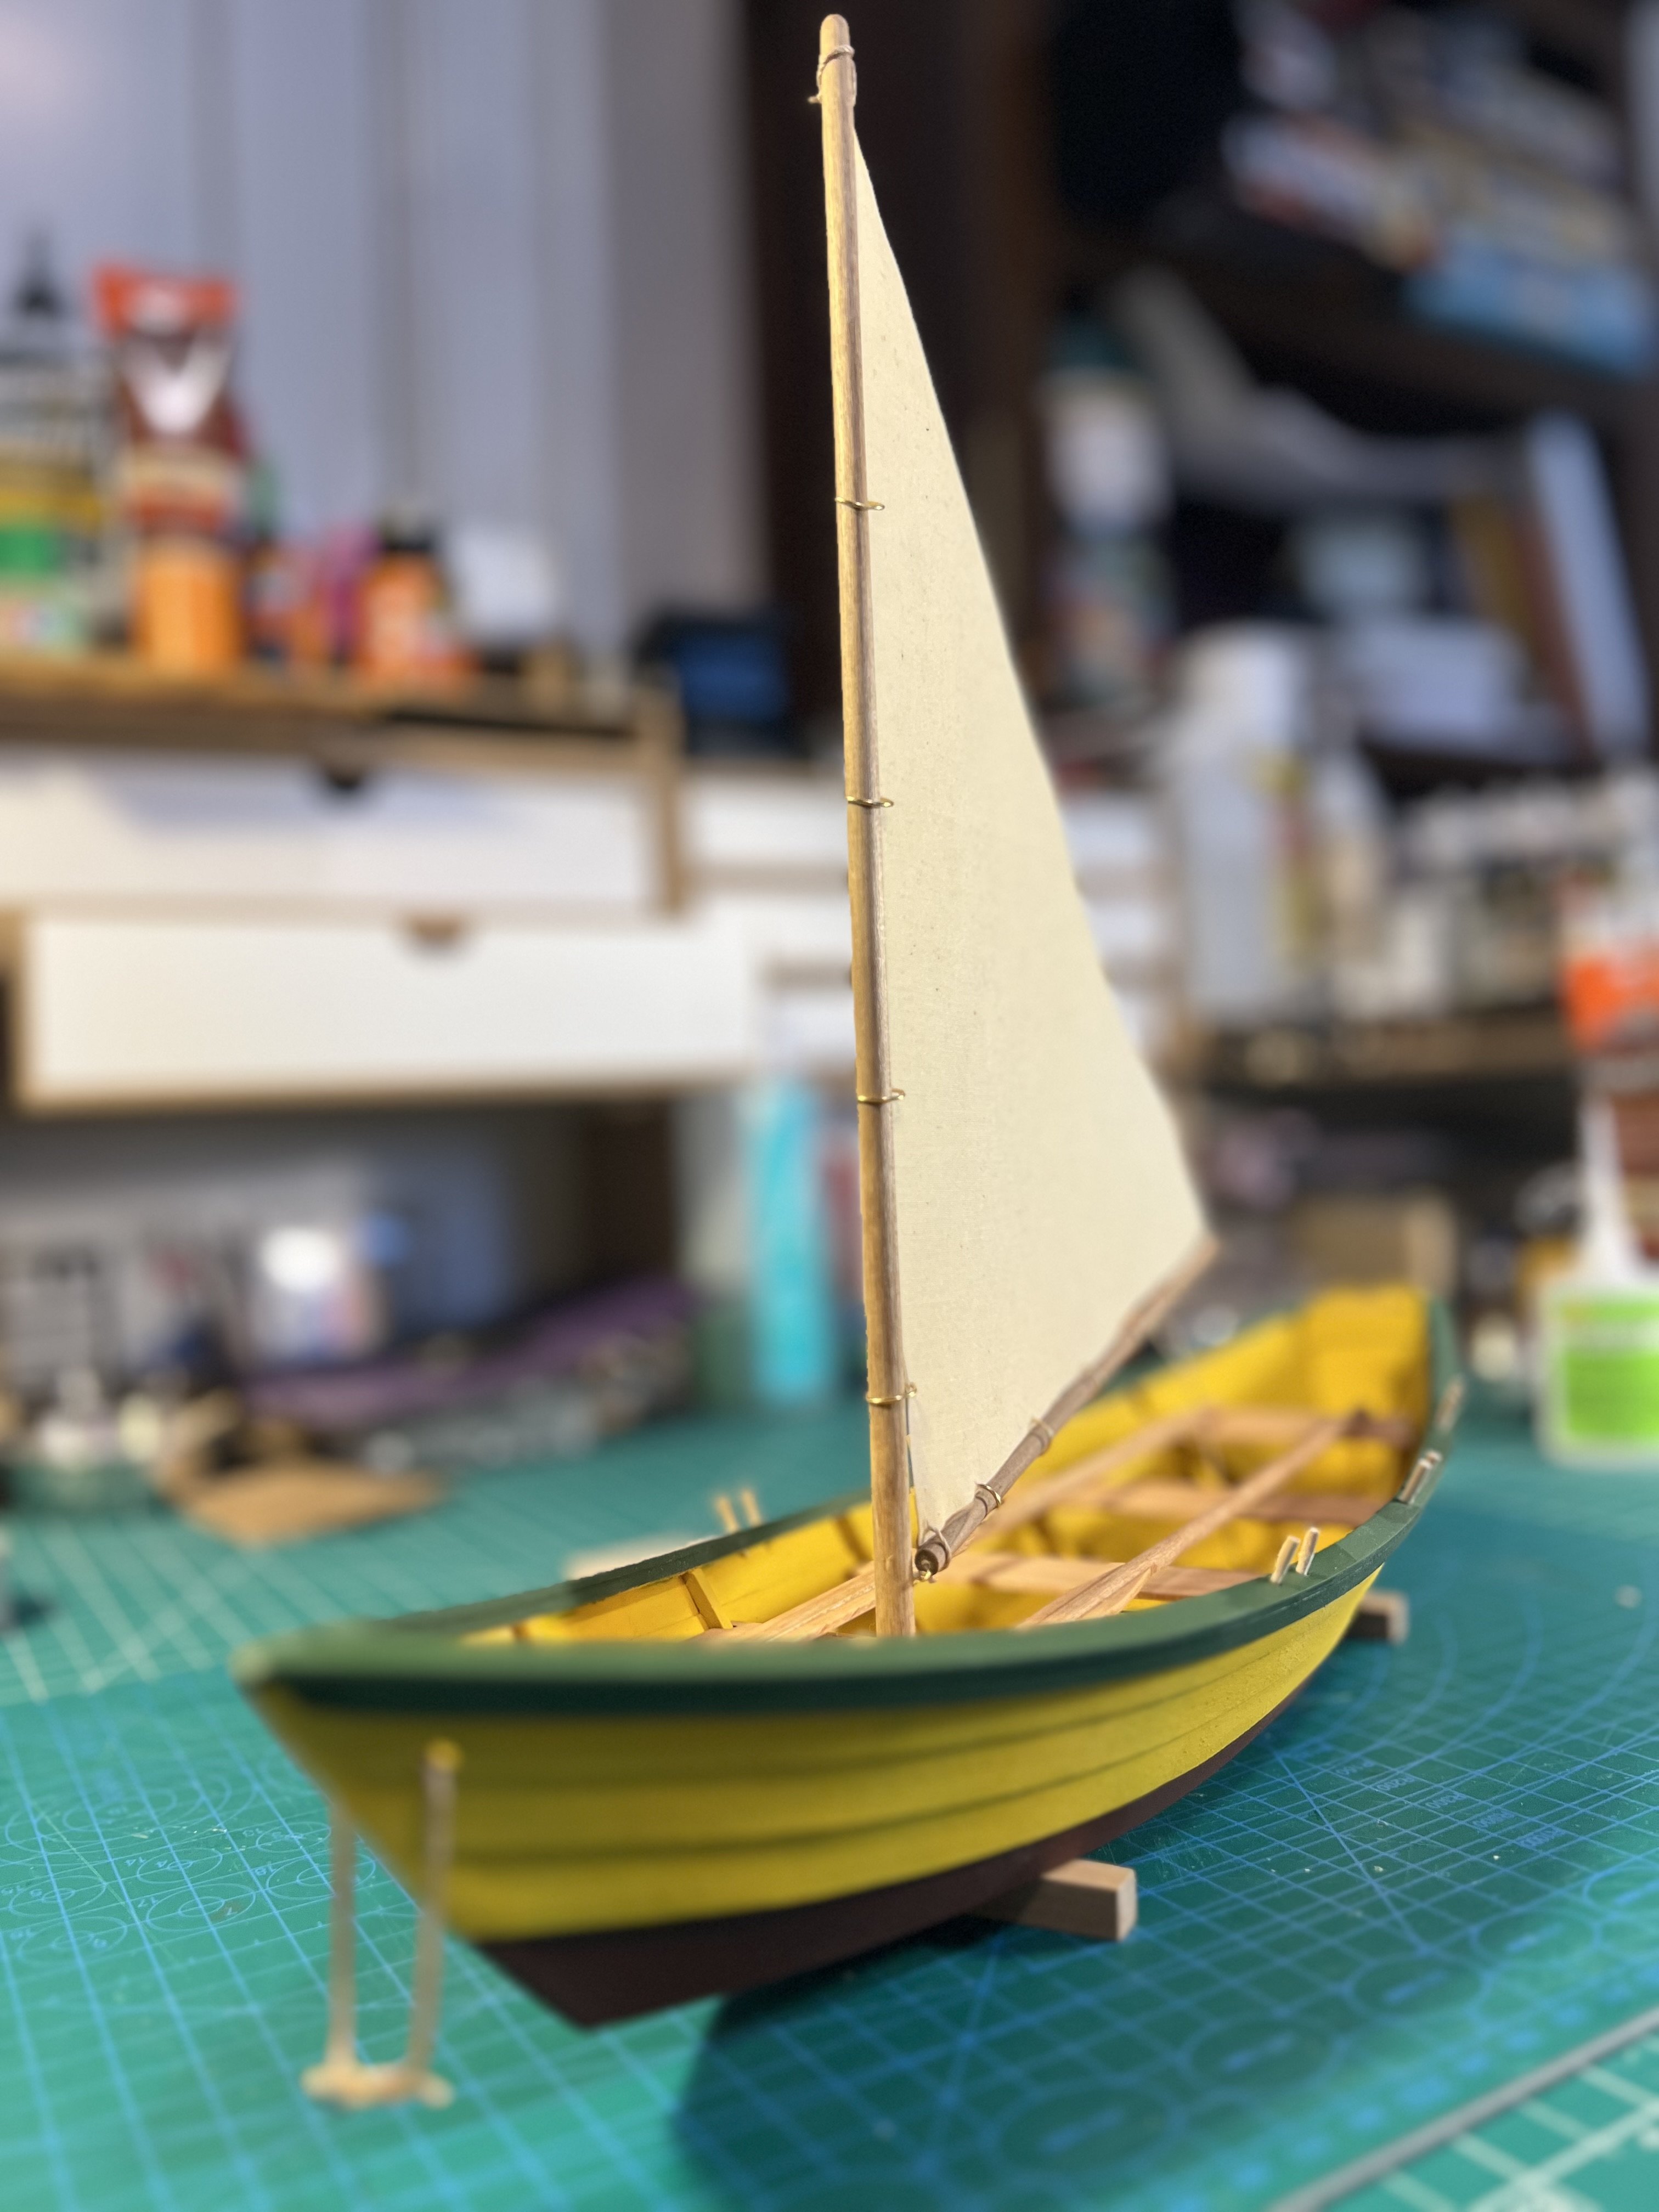
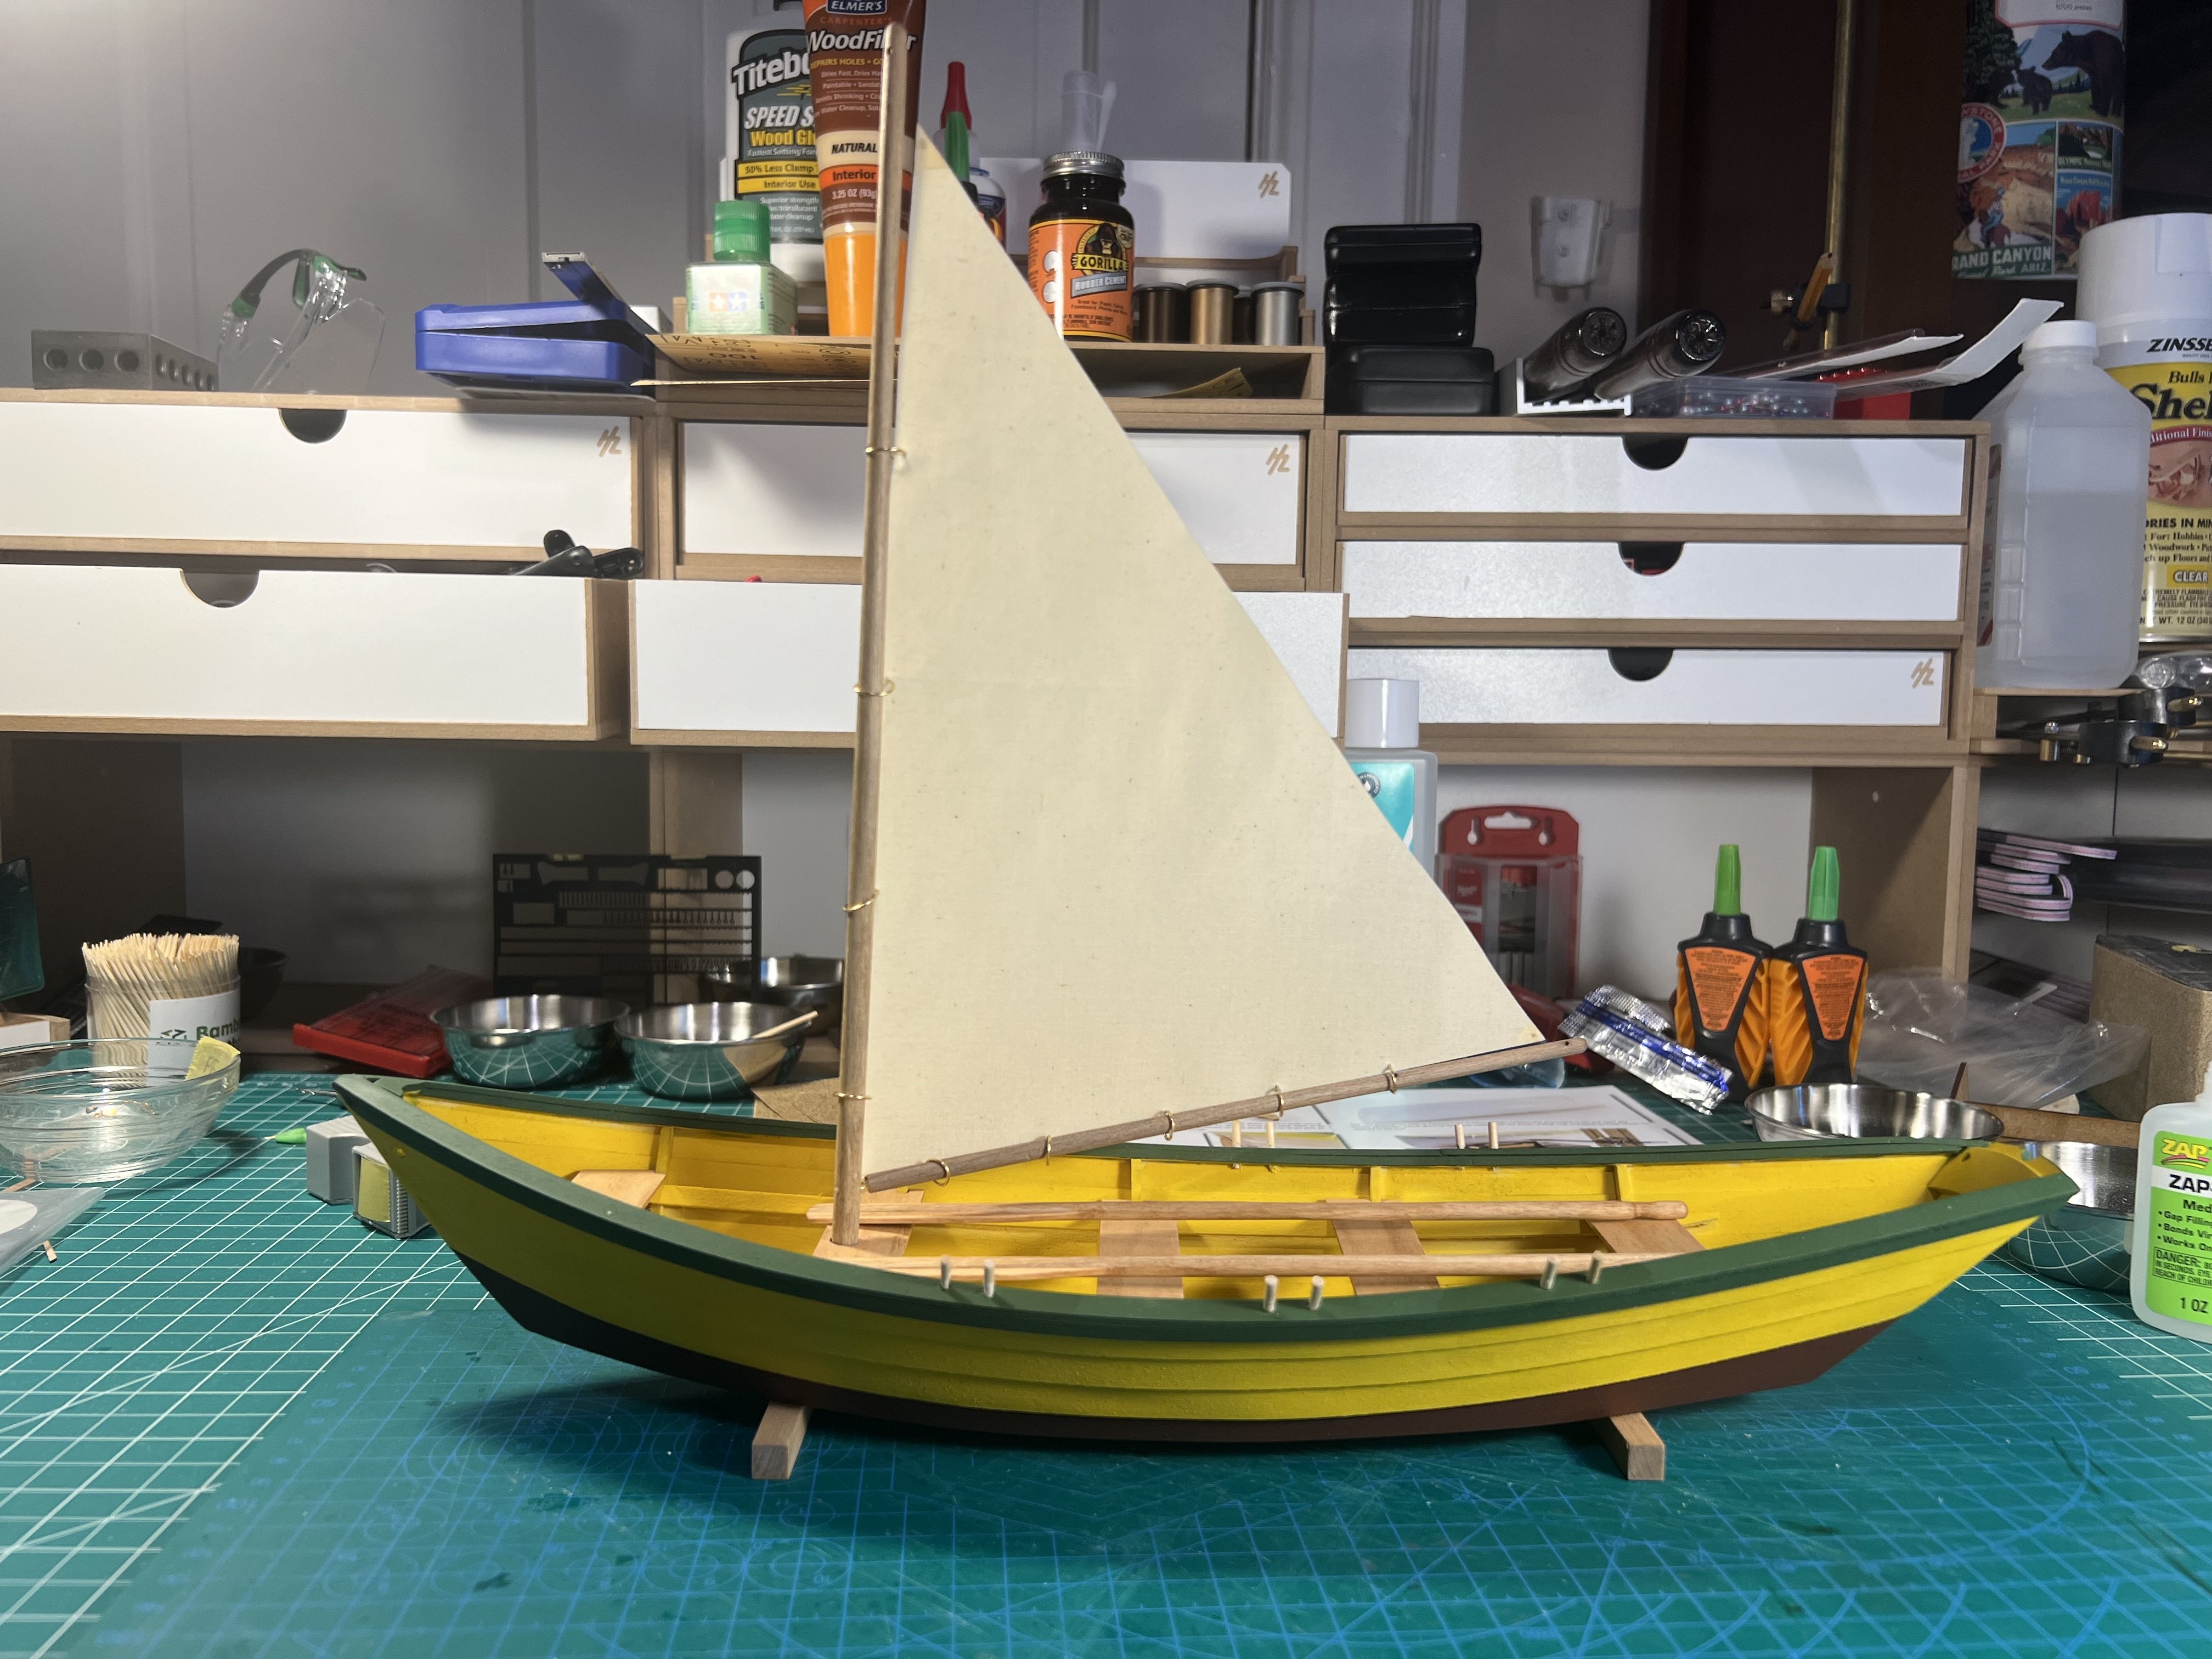
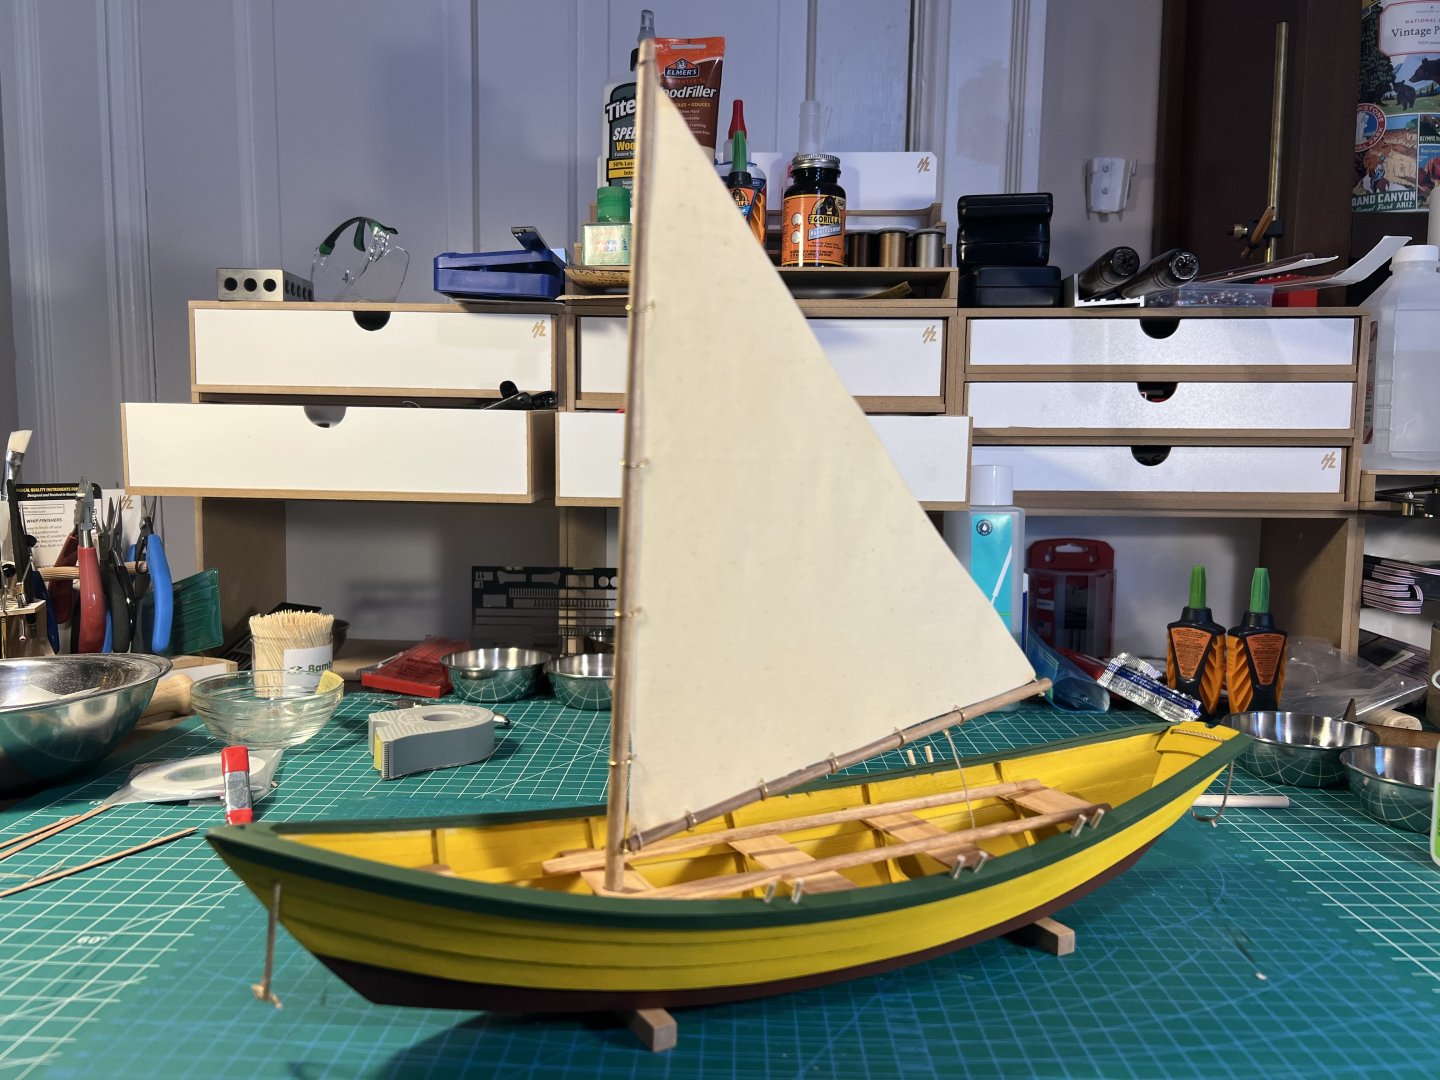
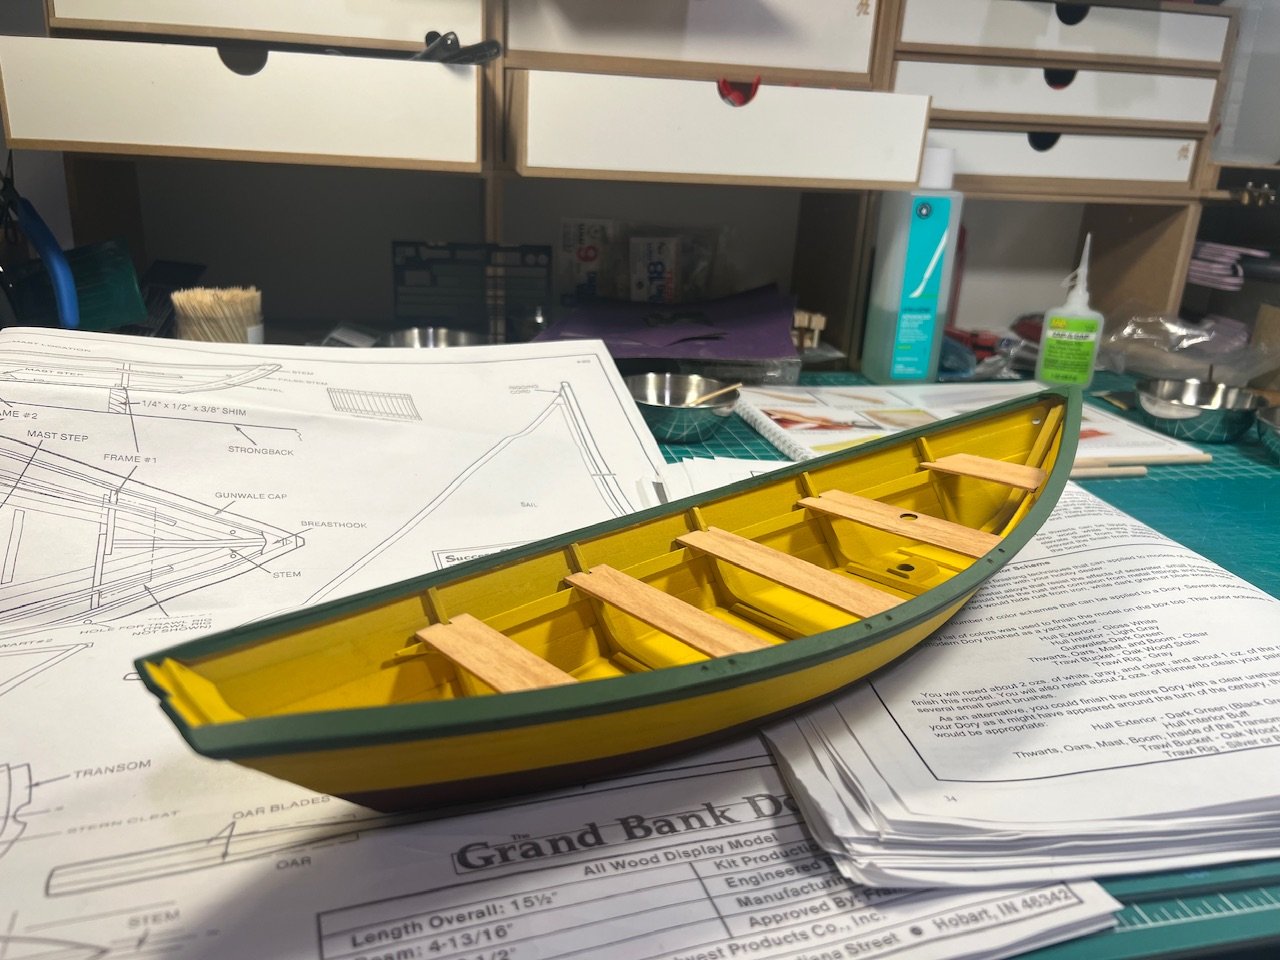
Well, the Midwest Dory is finished. It was a nice easy build with just a few hiccups. Pretty different in a number of ways from the Model Shipways Dory, and not just in scale.


- 71 replies
-
- 7
-
-
- grand banks dory
- midwest products
- (and 2 more)
-
What kind of knot do you have attaching to the anchors?
-
Have just a bit of rigging to do and need to add the beckets (ropes).

- 71 replies
-
- 2
-
-
- grand banks dory
- midwest products
- (and 2 more)
-
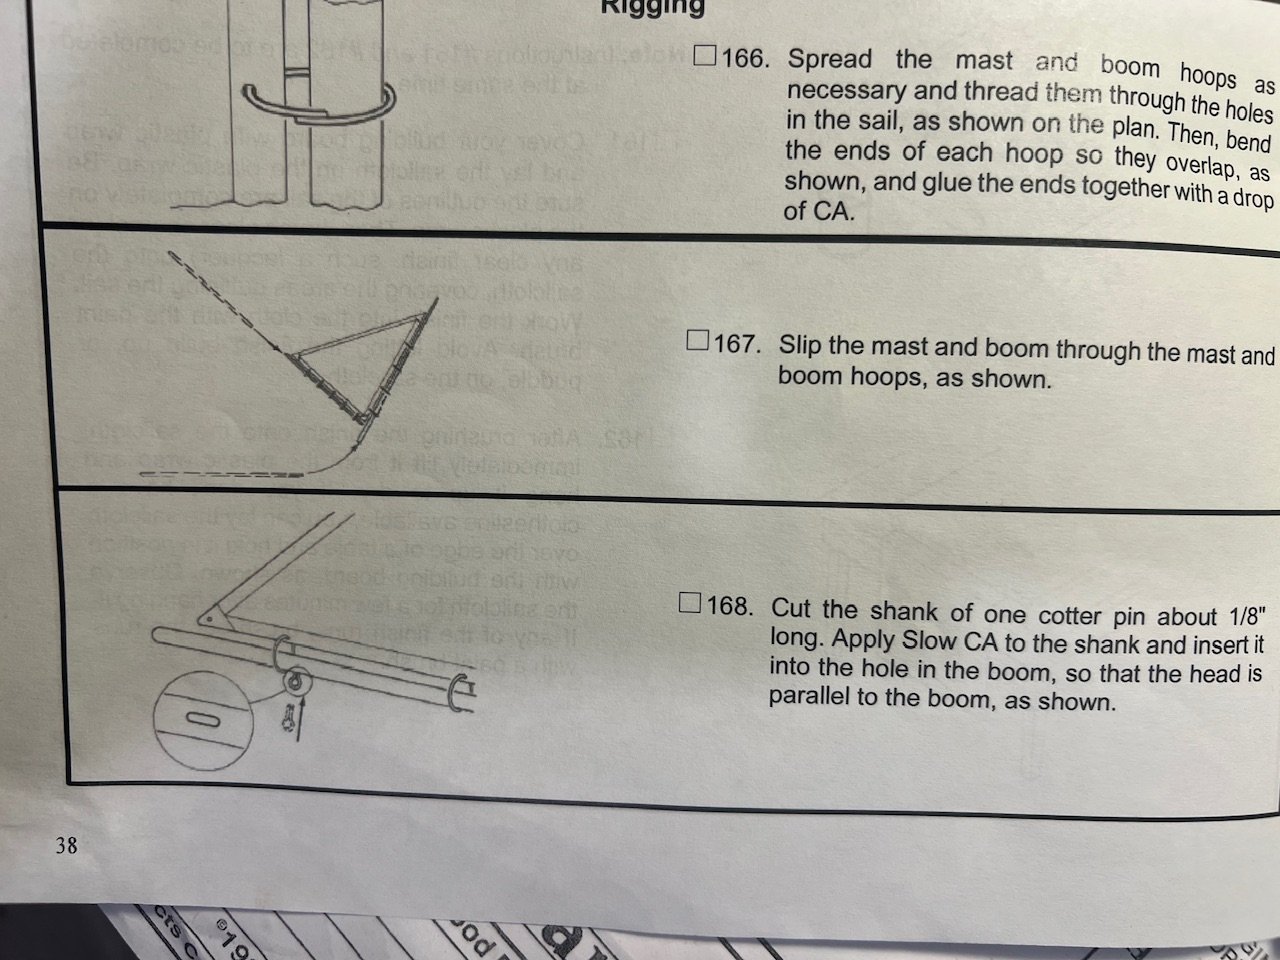
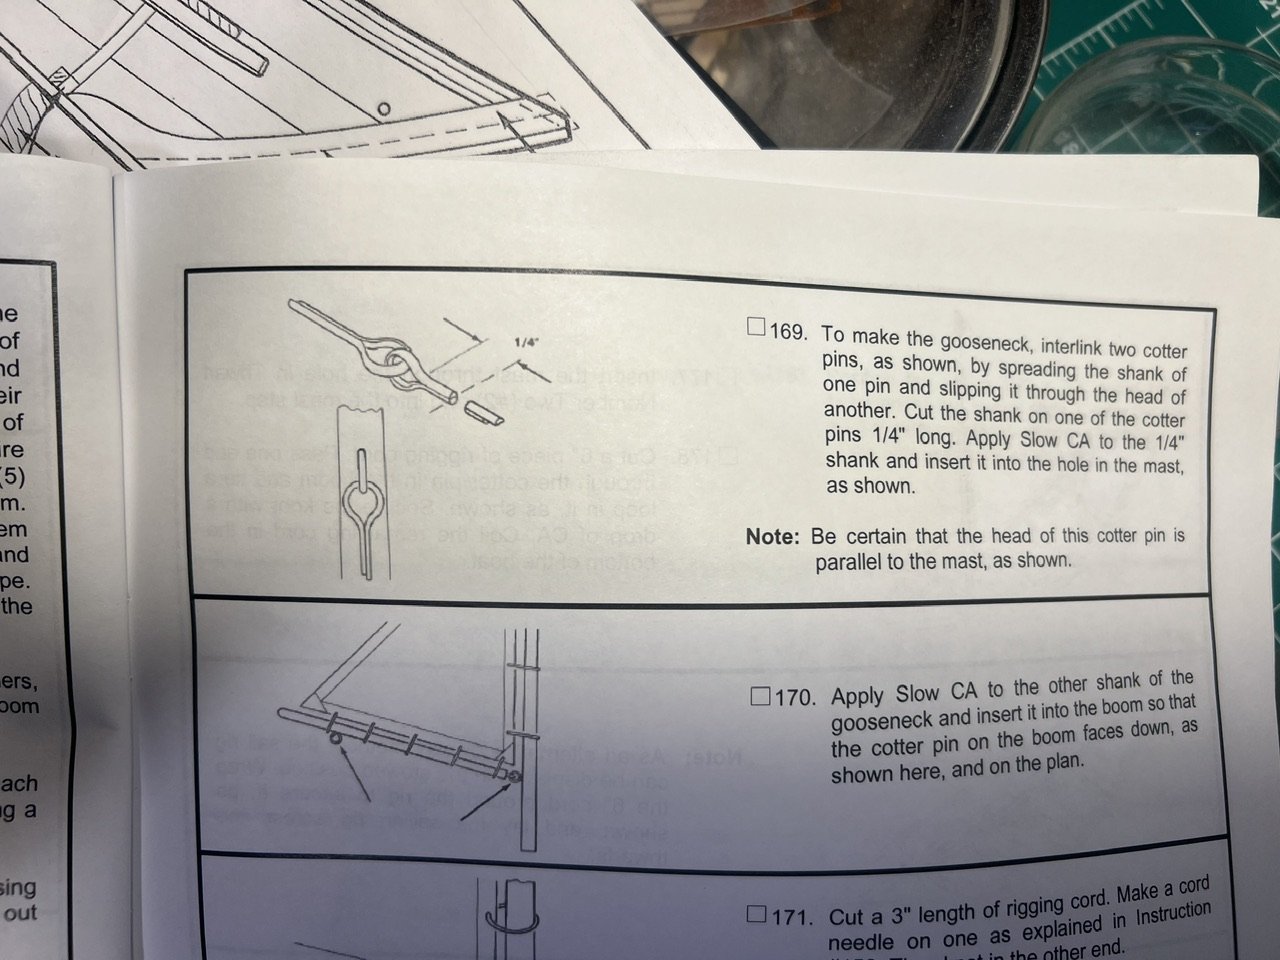
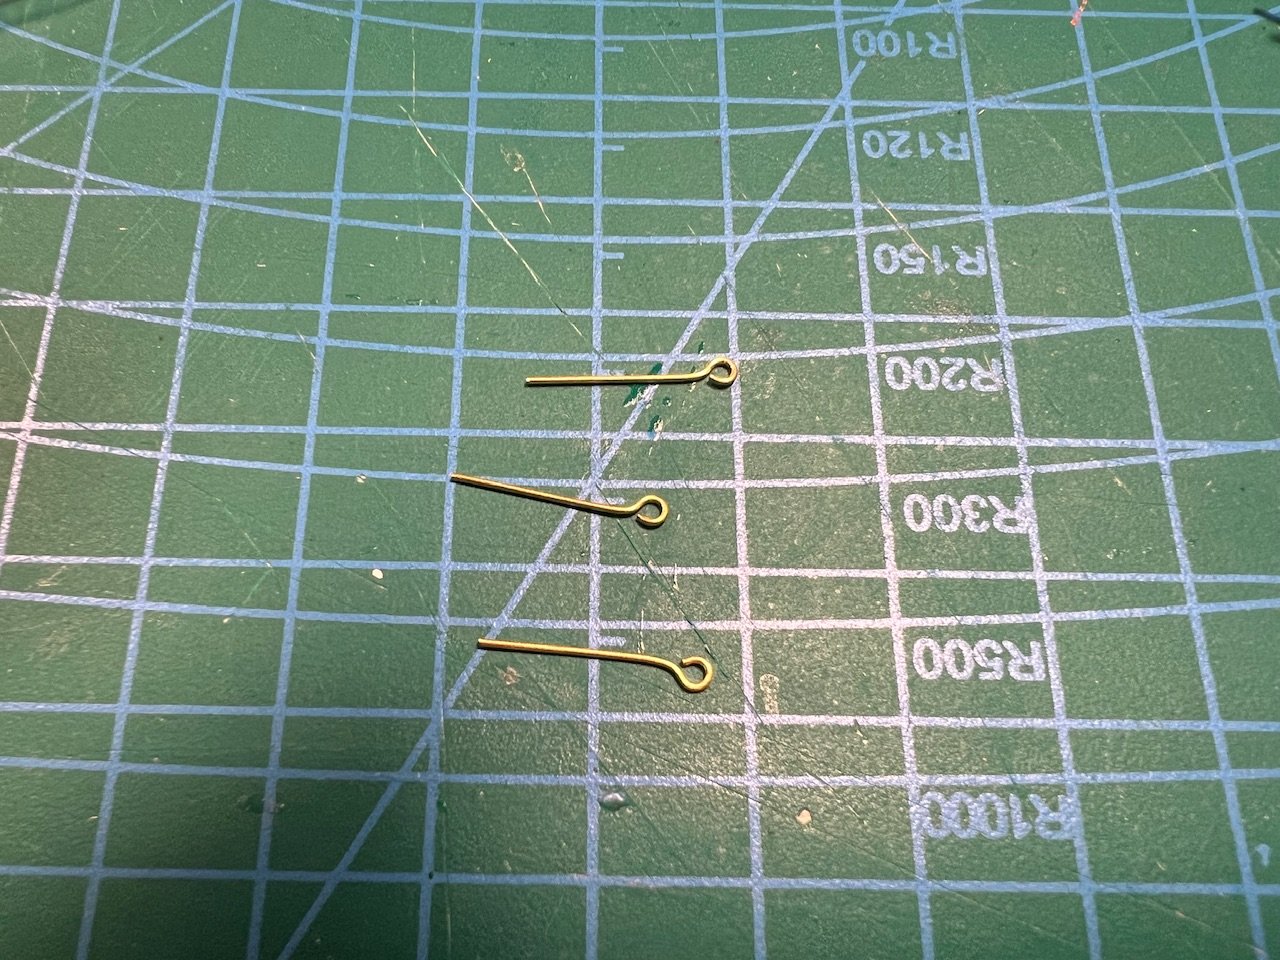
Argh. A mismatch between instructions and parts. The instructions describe and illustrate the ring bolts as double width cotter pins and have you drill a hole to accommodate that width. The actual parts are single width, so my holes are too wide. I could have tried bending over the end but instead I used some filler and superglue.
- 71 replies
-
- 1
-
-
- grand banks dory
- midwest products
- (and 2 more)
-
I haven't replaced a blade yet, but I probably need to - the last time I used it (a few days ago) it seemed like the blade was getting a bit dull. These blades don't seem to wear down as much as something like the scalpel blades I use, which I replace pretty often. Maybe because I don't use it as much but probably also because they're always cutting straight down, as opposed to my scalpel blades that get used in all sorts of angles that will wear the blade down and sometimes get glue or other matter on them or get rubbed against something metal and dull. I ordered a few packages of replacement blades when I ordered the chopper. They're 10 blades for 5 dollars. I'm not at home, but I think they came with instructions on the specific kind of upholstery cutter blade you need to buy. You could email them and ask what specific kind of blade it uses: info@ultimation.ca I just found it easier to buy from them when I ordered the chopper originally. I probably got two packages of 10 blades. I suppose someday I'll need to research where to buy replacements. But I'll probably just order from them. The shipping is probably going to cost more than the blades I imagine. I think they use these particular blades because they're (apparently) way sharper than a regular razor blade. When I ordered it I also got some of the replacement rubber disks that fit inside. Those do seem to be proprietary. They're pretty cheap though. The cutter is pretty small. And since it's light and easily moveable, I just keep it (and my sander) under my work table. With their sander, they tell you what kind of sanding disc sandpaper to order. To be honest, I wish they just sold replacement sandpaper themselves. It'd be easier just to order through them since it takes a bit to find the specific kind they recommend. It's available online, but it's not just something you can buy at a local store.
-
I'm in the midst of both the Vanguard Sherbourne and the Vanguard Ranger (one of the six fishing boats). Both of these would use some similar kinds of construction approaches to the Occre kits you mentioned (though the Vanguard hull skeleton is way more robust). You'll also see recommendations here of the Model Shipways Shipwright series (Dory, Pram, Smack), which I built and are fun beginner models in a progressive series (if sometimes frustrating) but they're also a very different kind of model (especially for the hull) - some of the Midwest kits are similar to these in construction. If you want a model before doing one of the other ones you mentioned, I think the Vanguard models would be a better option. You can see the full sets of instructions for Vanguard models (and Model Shipways and some Midwest models) on their web sites. Occre I believe has most of theirs too, which are often just photos and often Youtube videos with no commentary, which is a different approach. I'm pretty new to this hobby, having just started last summer. I remember being lost in a sea of options, not knowing how to pick one. If I hadn't researched suggestions people made here, I probably would have picked a model in the middle of the difficulty hierarchy assuming I could handle it, got frustrated quickly, and likely abandon the hobby. It's easy to make a false analogy to the ratings on plastic models or a Lego models. I'm sure most adults could build a middle-level plastic model kit or any of Lego's 18+ models. Beginner plastic models are for 8 years olds, beginner Lego models are for 5 year olds. Wooden ship models are different beast. Novice wooden ship models are challenging to most adults. Maybe since you come from a woodworking tradition, you'll find them easier than many of us. I’ve never seen someone post that they regretted starting with a novice model because they found it was too easy - to the contrary, most end up finding lots of challenges, and a lot of the abandoned build logs are from people who started a model beyond their skill level. One thing nice about a novice model is that you can complete it in weeks to months rather than years. Olga Batchvarov has a YouTube channel with group builds (and lot of other content) - she's about to start one for the Model Shipways Philadelphia (not a beginner model, but also not an advanced one): https://www.youtube.com/c/OlhaBatchvarov There are also a couple of YouTube playlists on building the Vanguard Sherbourne. Even with great instructions from Vanguard, and lots of build logs here, it's sometimes helpful to see a video of someone building the model and talking about the approach.
-
Vanguard Models has great kits, great materials, great instructions and plans.
-
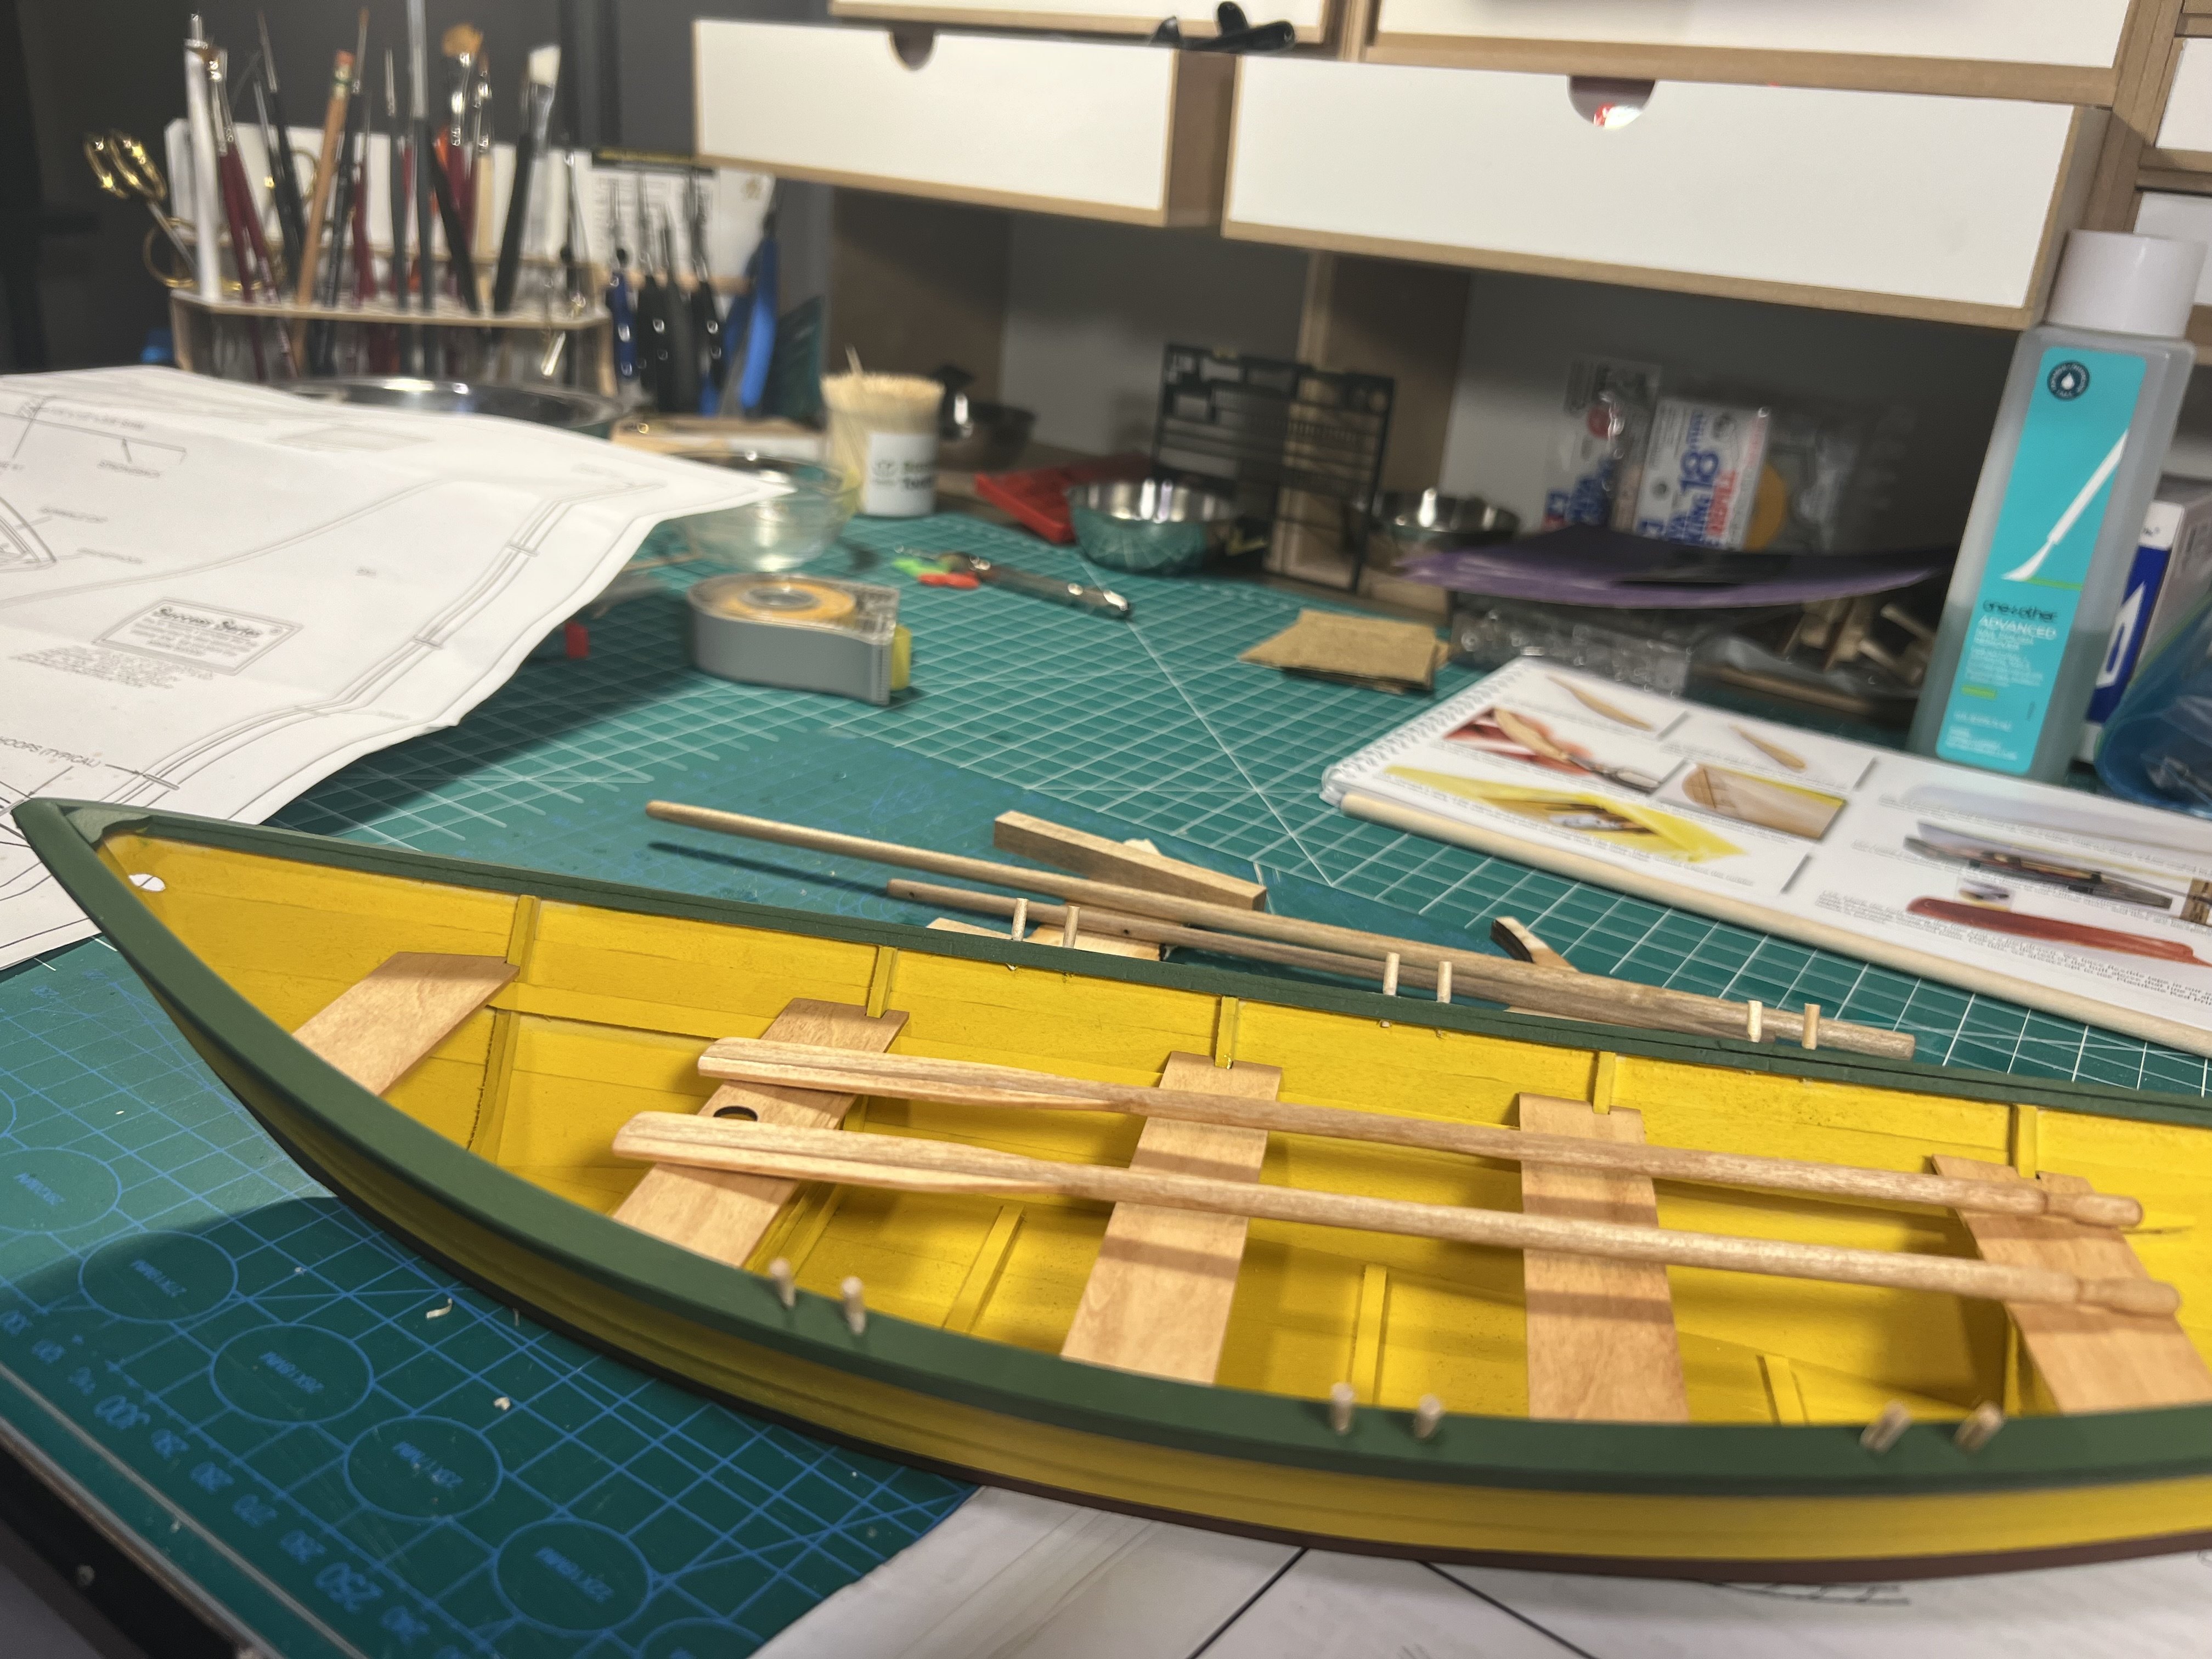
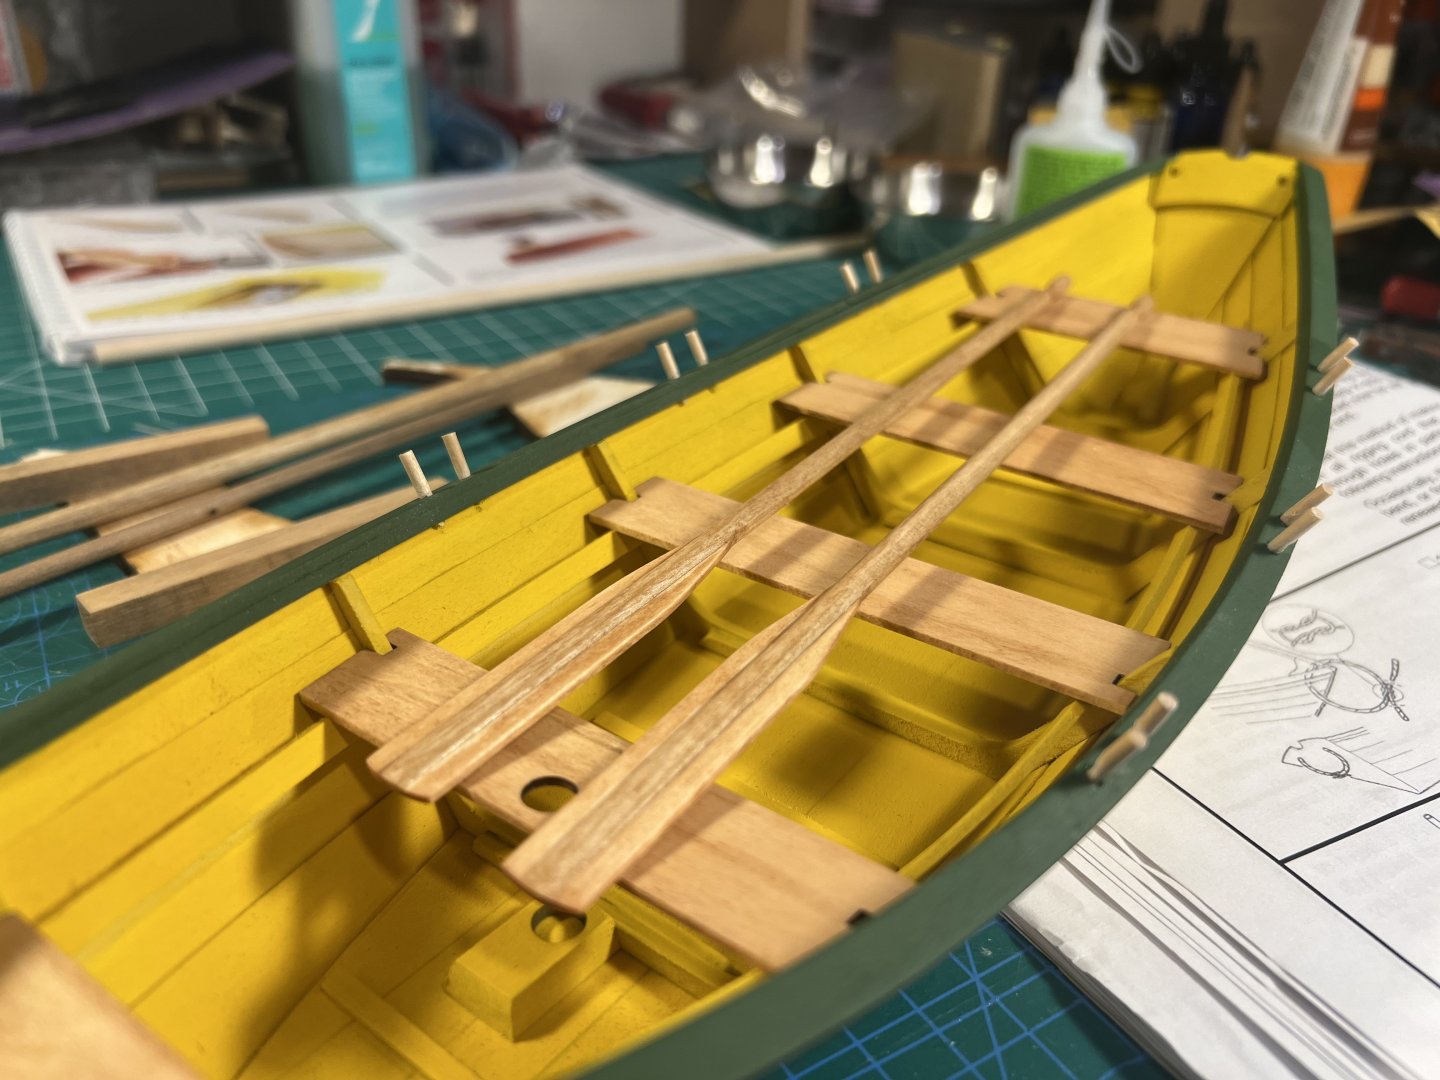
Completed the oars and added the thole pins.

- 71 replies
-
- 4
-
-
- grand banks dory
- midwest products
- (and 2 more)
-
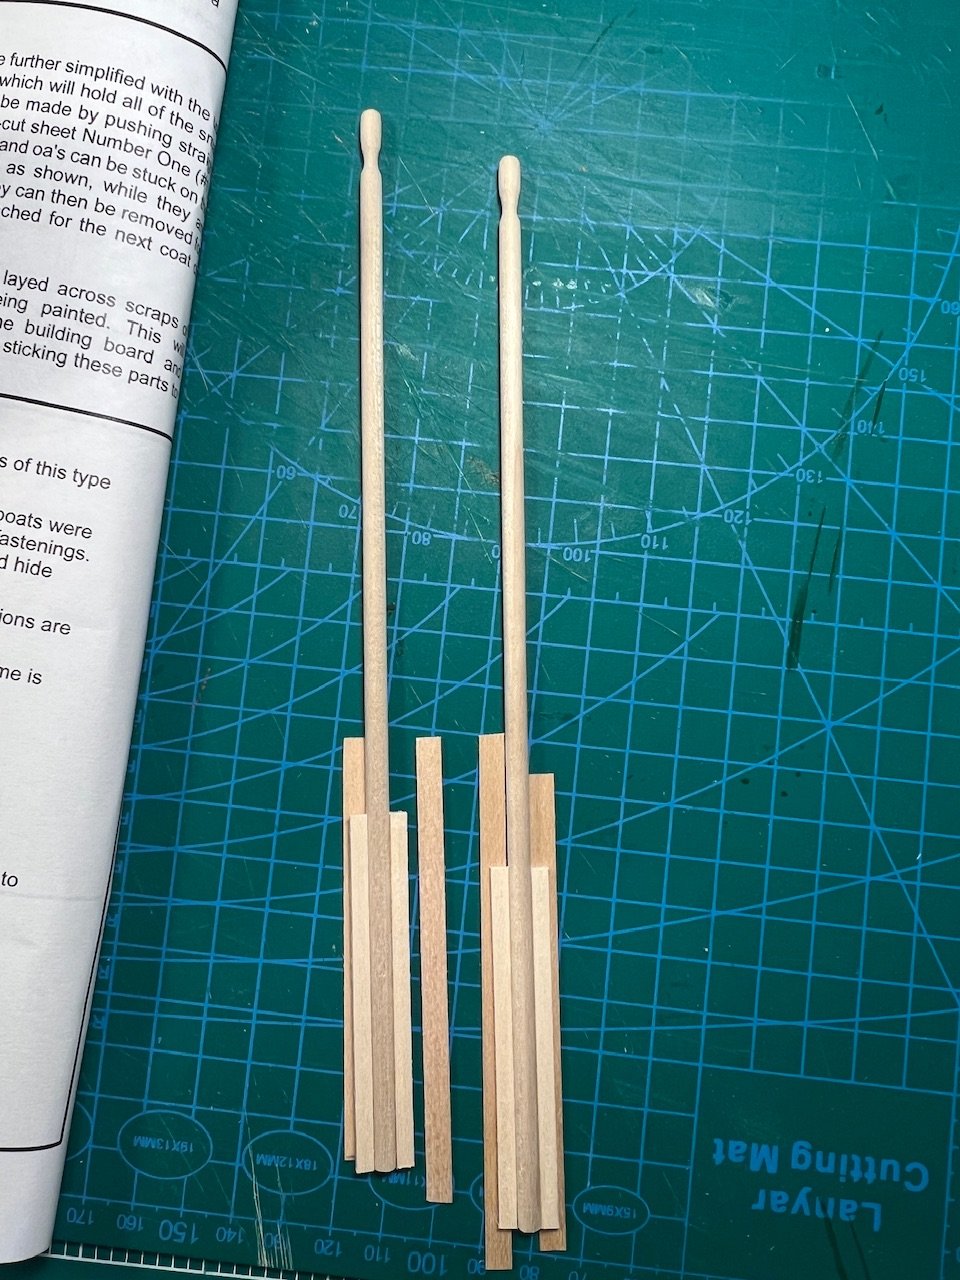
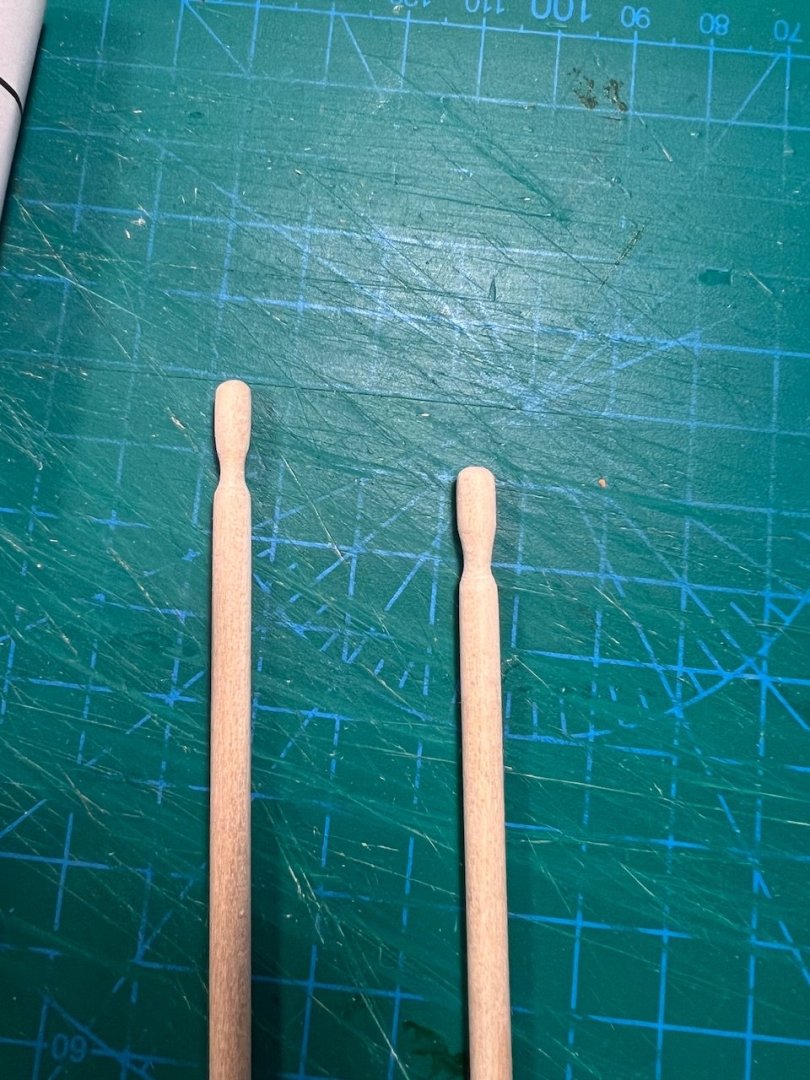
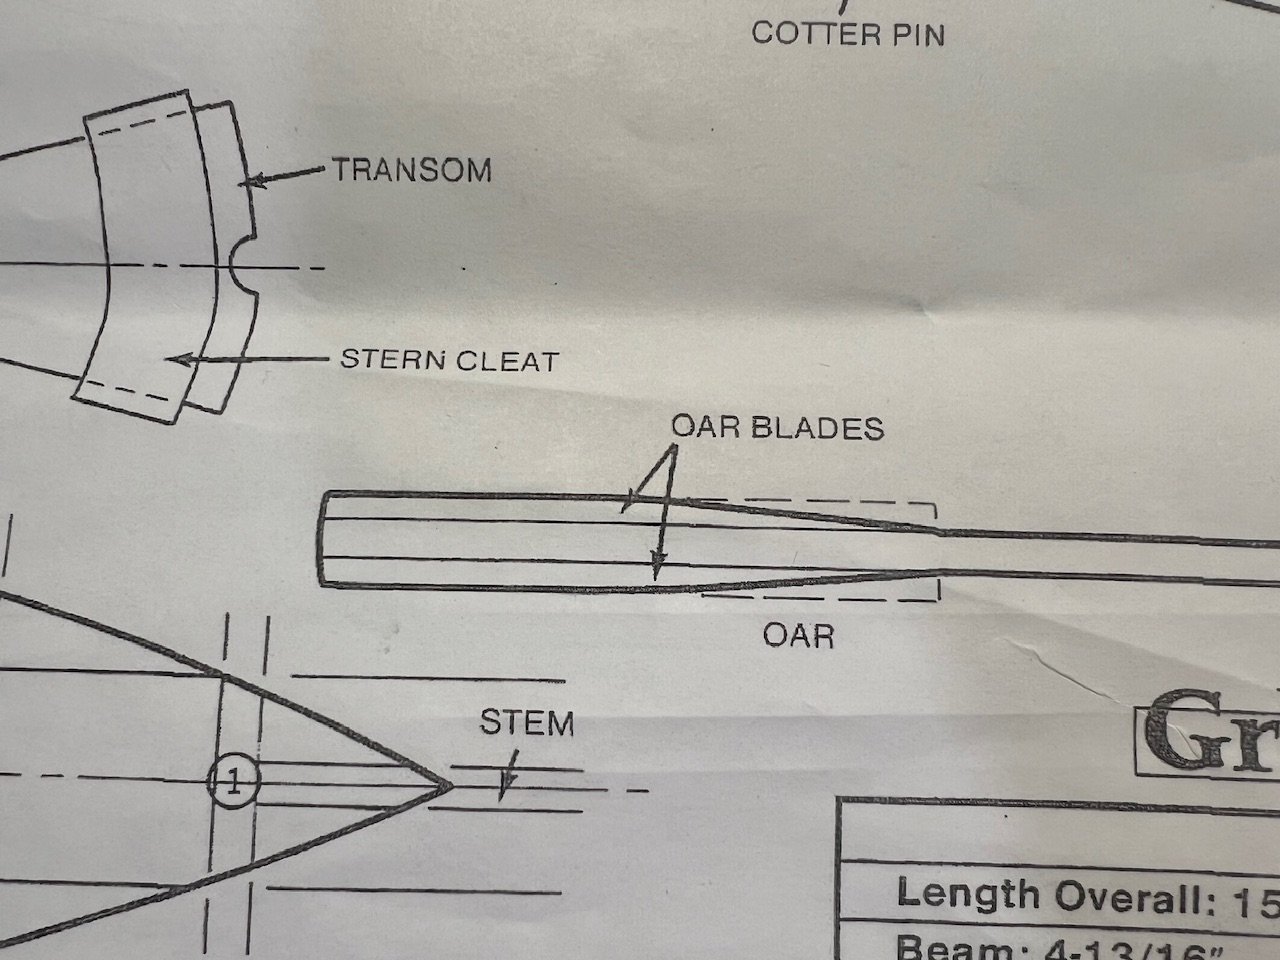
Making the oars. In the Model Shipways Dory, oars were in laser cut sheets that needed to be sanded to shape. In this Dory, they’re constructed from a dowel for the handle with flat pieces of wood for the blades. After the glue dries I’ll need to shape the oars per the instructions and plans.


- 71 replies
-
- 1
-
-
- grand banks dory
- midwest products
- (and 2 more)
-
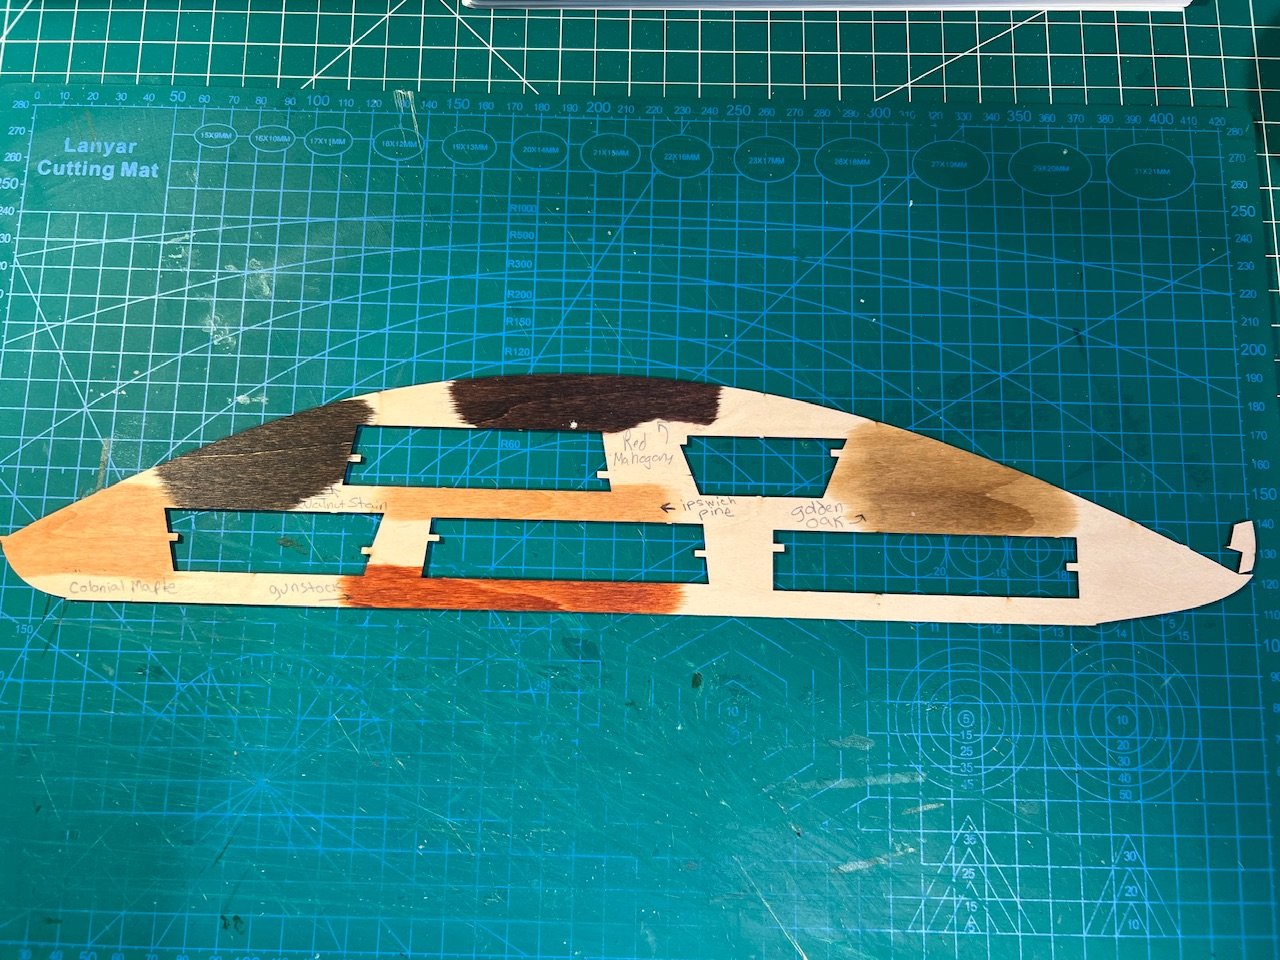
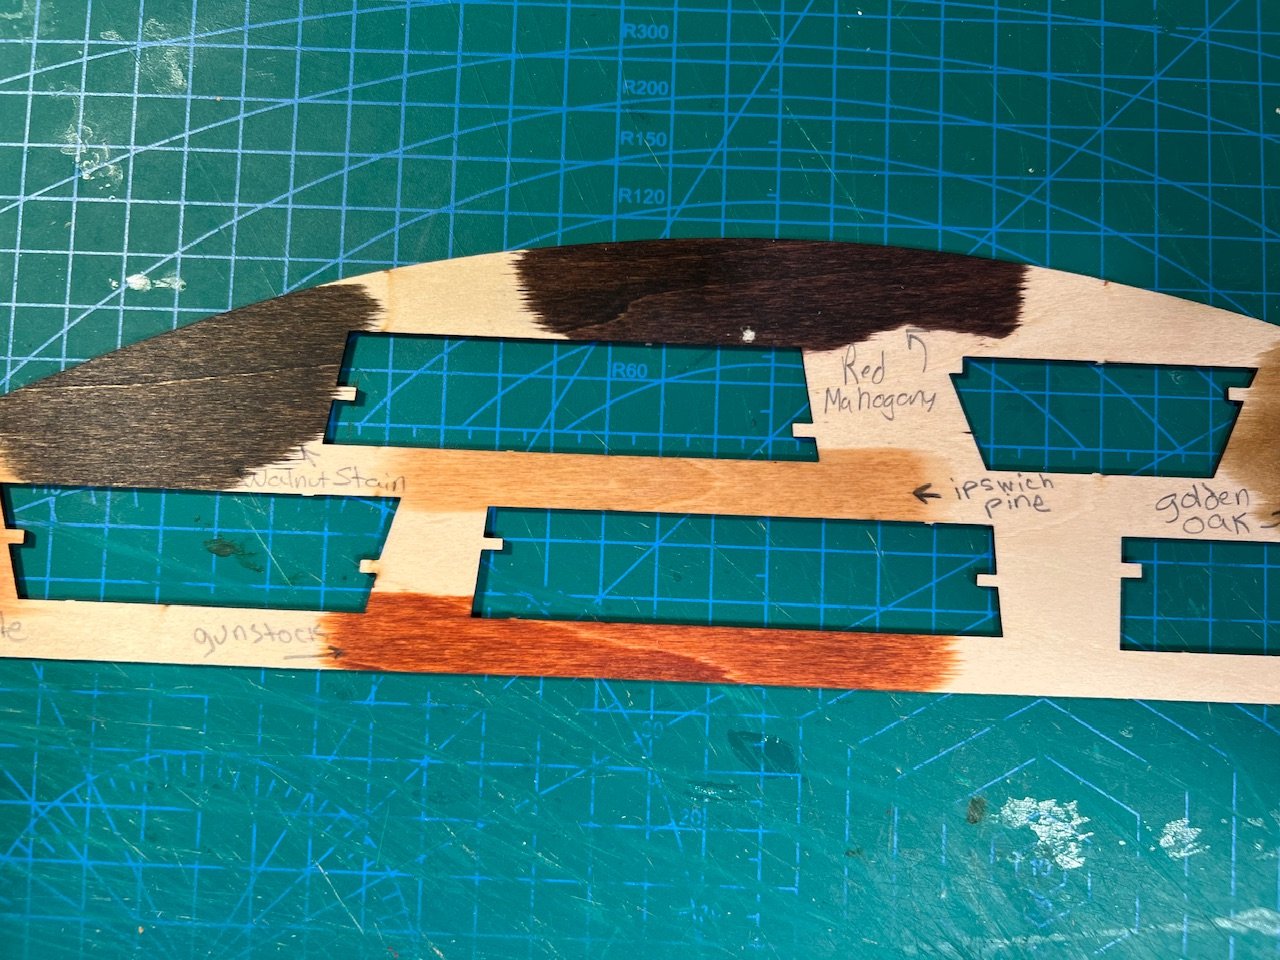
Added the thwarts. I ended up staining them ipswich pine.

- 71 replies
-
- 4
-
-
- grand banks dory
- midwest products
- (and 2 more)
-
This the single sail for the fairly large scale Midwest Dory kit. The only effect I’m trying to achieve is “sail”. As in I’m still a novice trying to understand why I would use water+glue vs. shellac vs. nothing. I’m guessing the first two add stiffness. I’m don’t know why I’d pick one method over the other. Maybe it doesn’t matter?
-
I hadn’t thought of adapting other hardware. Sadly, no lathe. Someday maybe. I asked about options because I was looking to see if there might be something other than Amazon or Model Shipways. In a previous post I asked about pin vises and drill bits. Yeah, I can find a ton of cheap imports on Amazon. But some people suggested other places with a wide selection that I never found googling around.
-
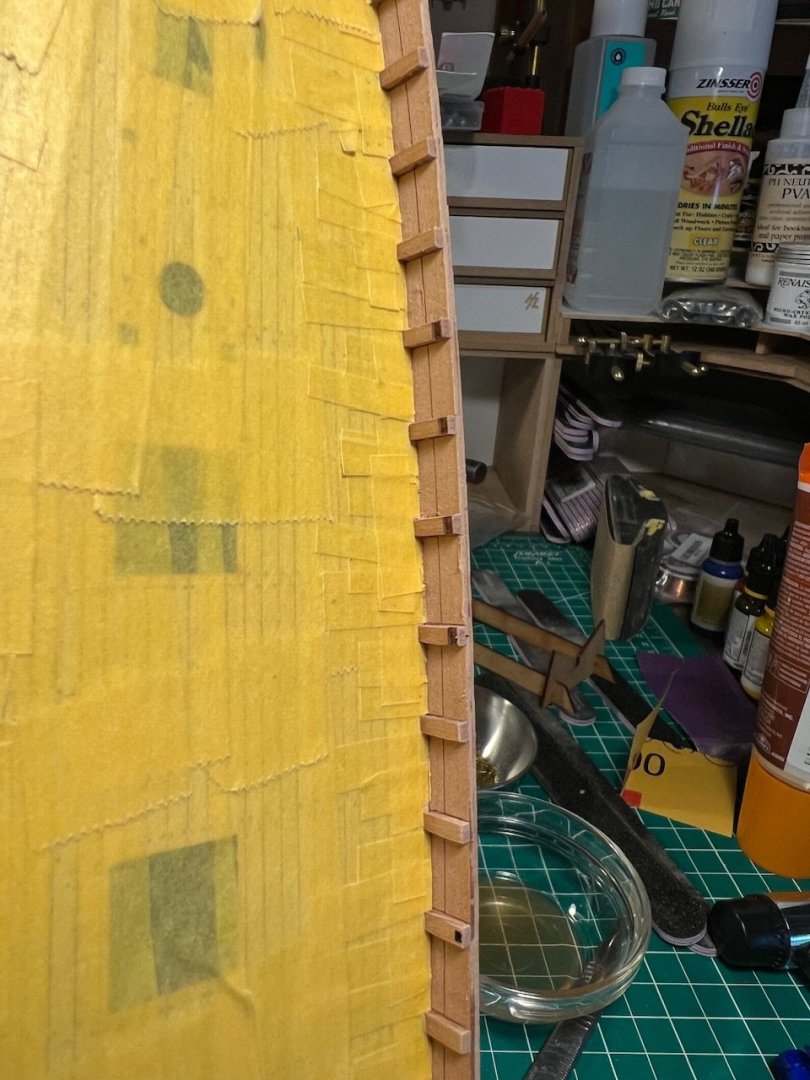
The interior has you add faux timberheads. I tried to sand off the char but to get all the char off I’d have to sand these tiny parts pretty far down. So after installing, I decided I would airbrush the interior black. That meant lot of tedious application of Tamiya tape to protect the etched deck before I could paint.

- 133 replies
-
- 5
-
-
- Ranger
- vanguard models
- (and 1 more)
-
I picked up a couple more stain colors (these are the small 8oz), gunstock and ipswich pine.
- 71 replies
-
- 1
-
-
- grand banks dory
- midwest products
- (and 2 more)
-
When I set mine on my green cutting mat, it stays in place for me. I can imagine if you had it sitting on a wooden table top it might move around.
-
I ordered my Oseberg directly from Pavel Nikitin and was able to have them include the patina and stain kit. I don't know if you can also get that if you order their models from other resellers.
-
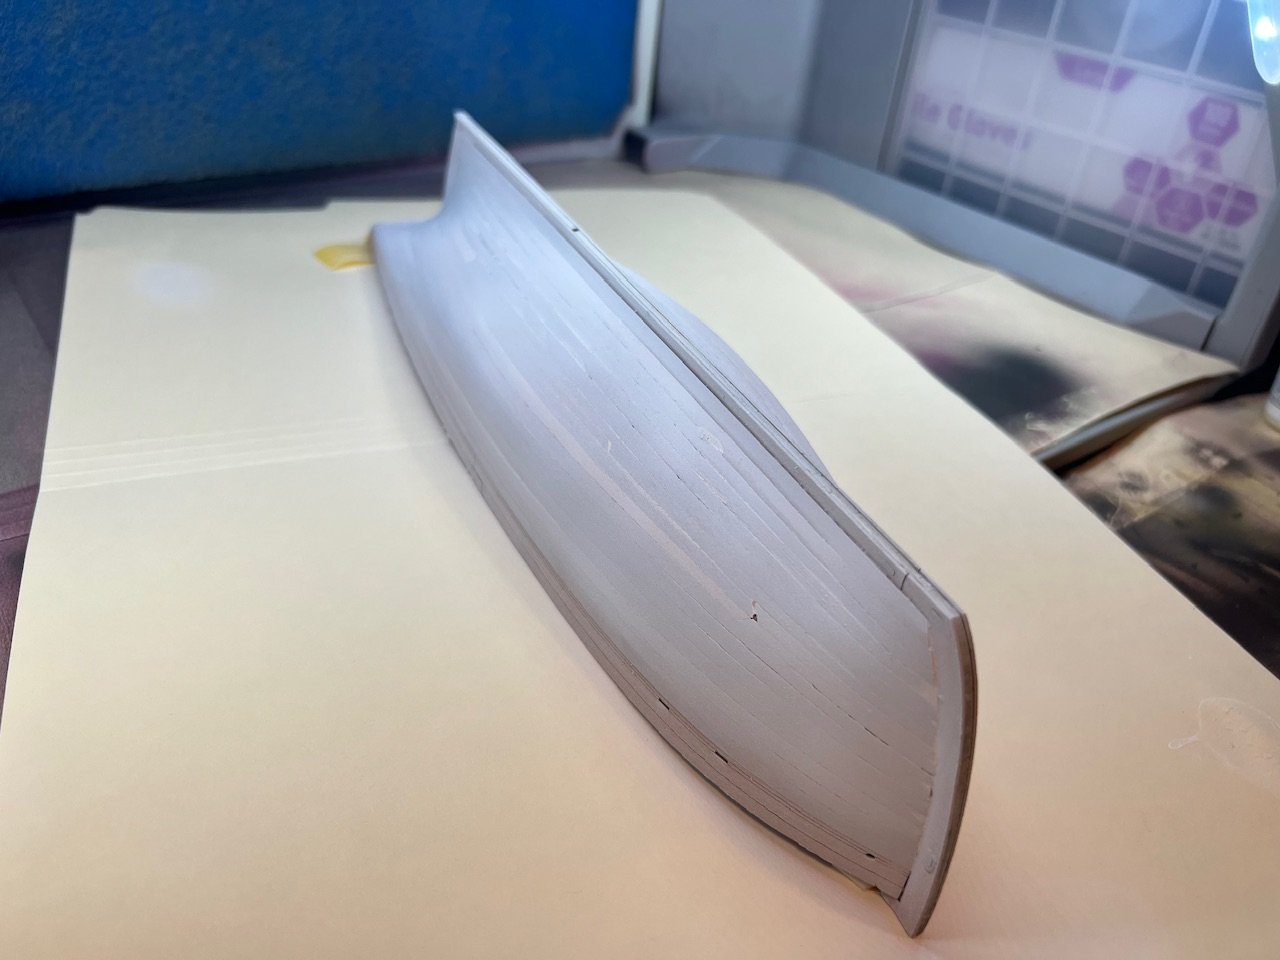
The instruction recommend a bare wood layer. I’m not happy enough with the planking along the top so I’m going to paint that section green instead of leaving it bare wood. Laying down a white primer layer.

- 133 replies
-
- 3
-
-
- Ranger
- vanguard models
- (and 1 more)
-
I know this is an old post, but Model Expo recently re-issued the Midwest San Francisco Bay Scow Schooner: https://modelexpo-online.com/midwest-san-francisco-bay-scow-schooner.html?srsltid=AfmBOop9OnLk-m3Ep5S6xX3uBuC9oQCTqTKFUGE08JyG0ZqA_O4r5K2m