HOLIDAY DONATION DRIVE - SUPPORT MSW - DO YOUR PART TO KEEP THIS GREAT FORUM GOING! (Only 27 donations so far out of 49,000 members - C'mon guys!)
×


captain_hook
-
Posts
685 -
Joined
-
Last visited
Content Type
Profiles
Forums
Gallery
Events
Everything posted by captain_hook
-
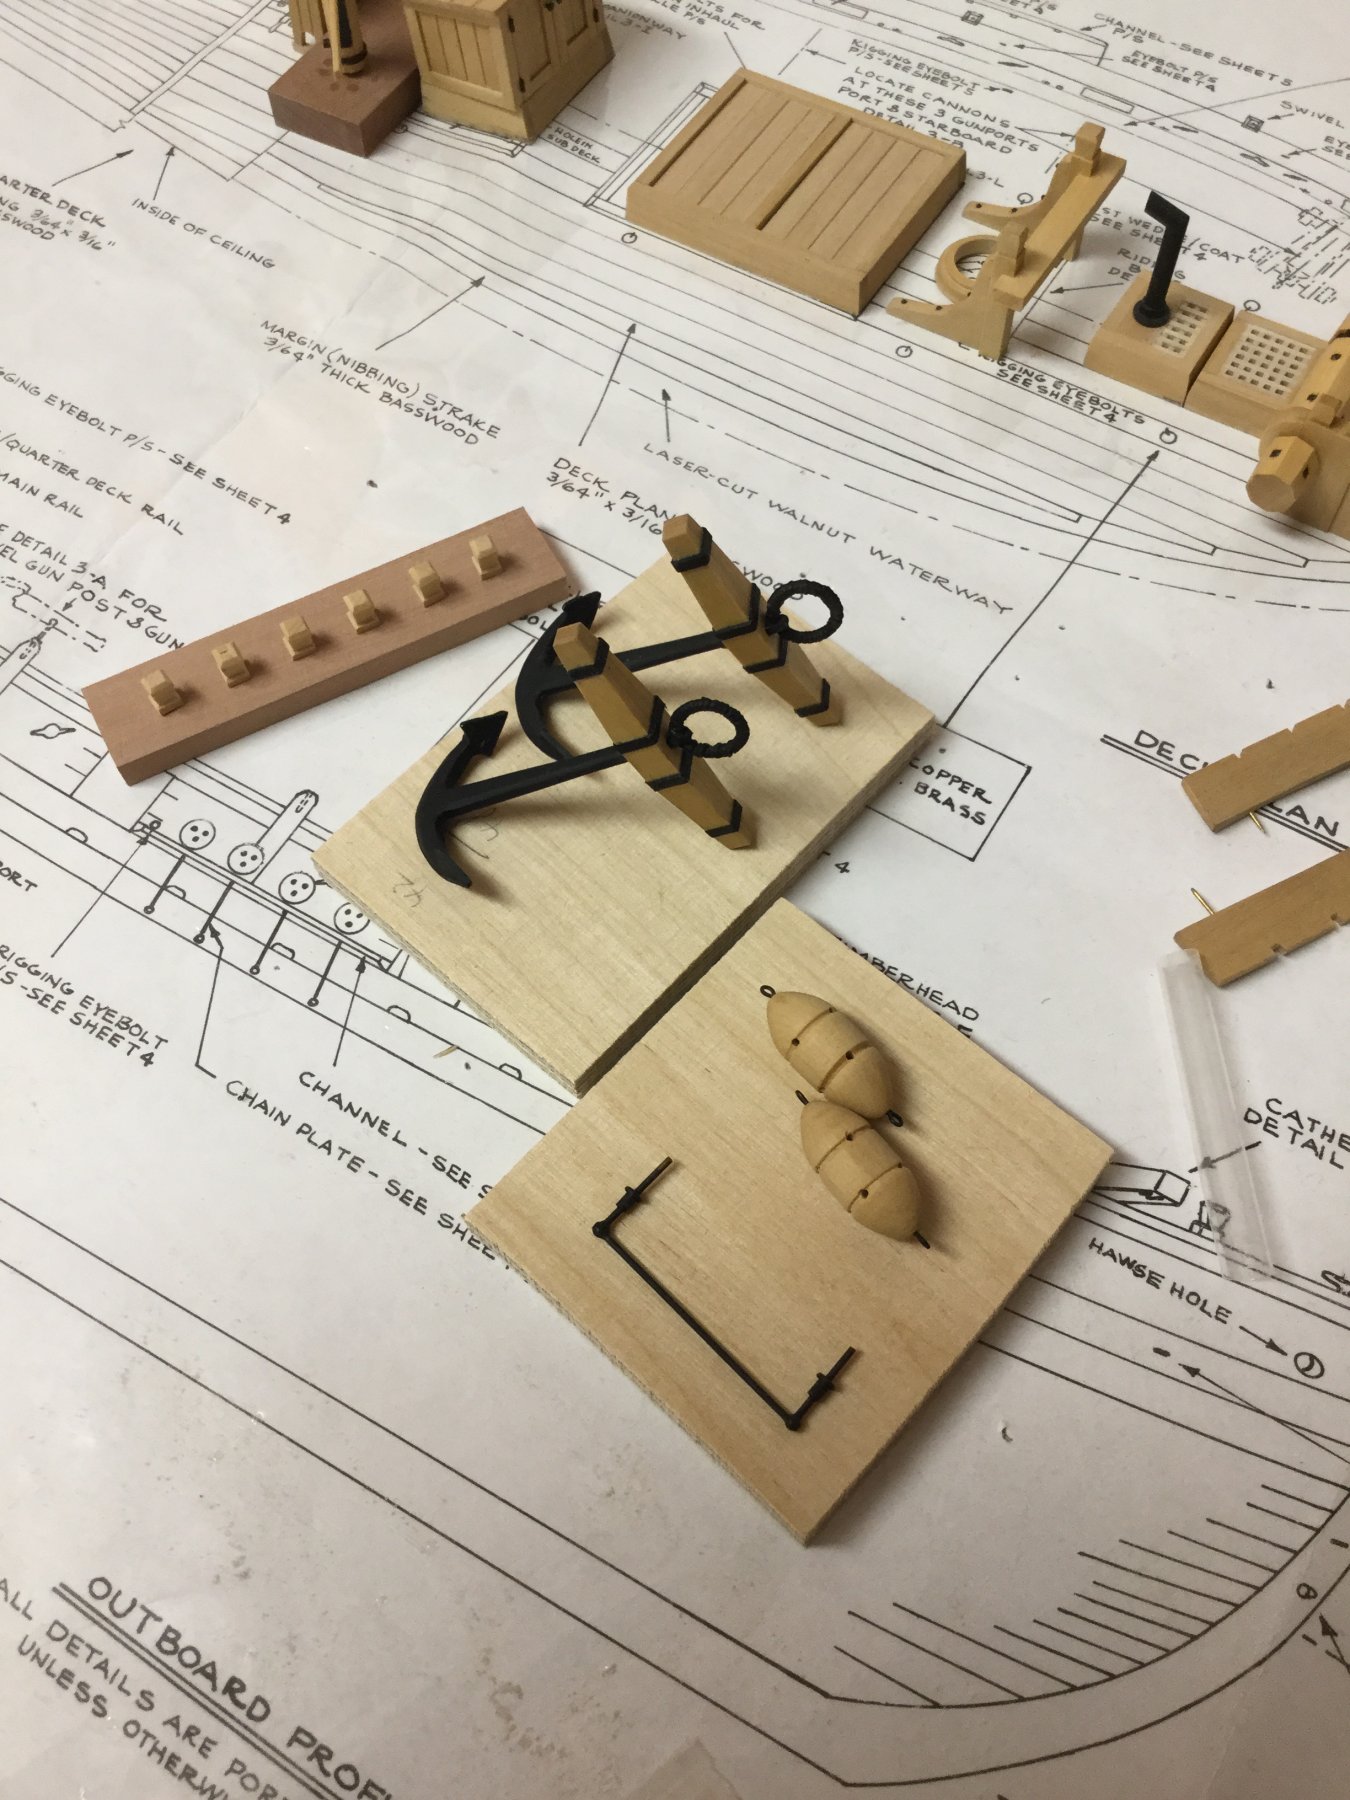
 Thank you for the kind words and comments. I made a special boom sheet traveller and the anchors. Finished the timberheads too. The anchors supplied in the kit seem to be very small in comparison to the ship size. So I decided to use some bigger ones, about 4 cm length.

- 231 replies
-
- 6
-

-
- model shipways
- armed virginia sloop
- (and 1 more)
-
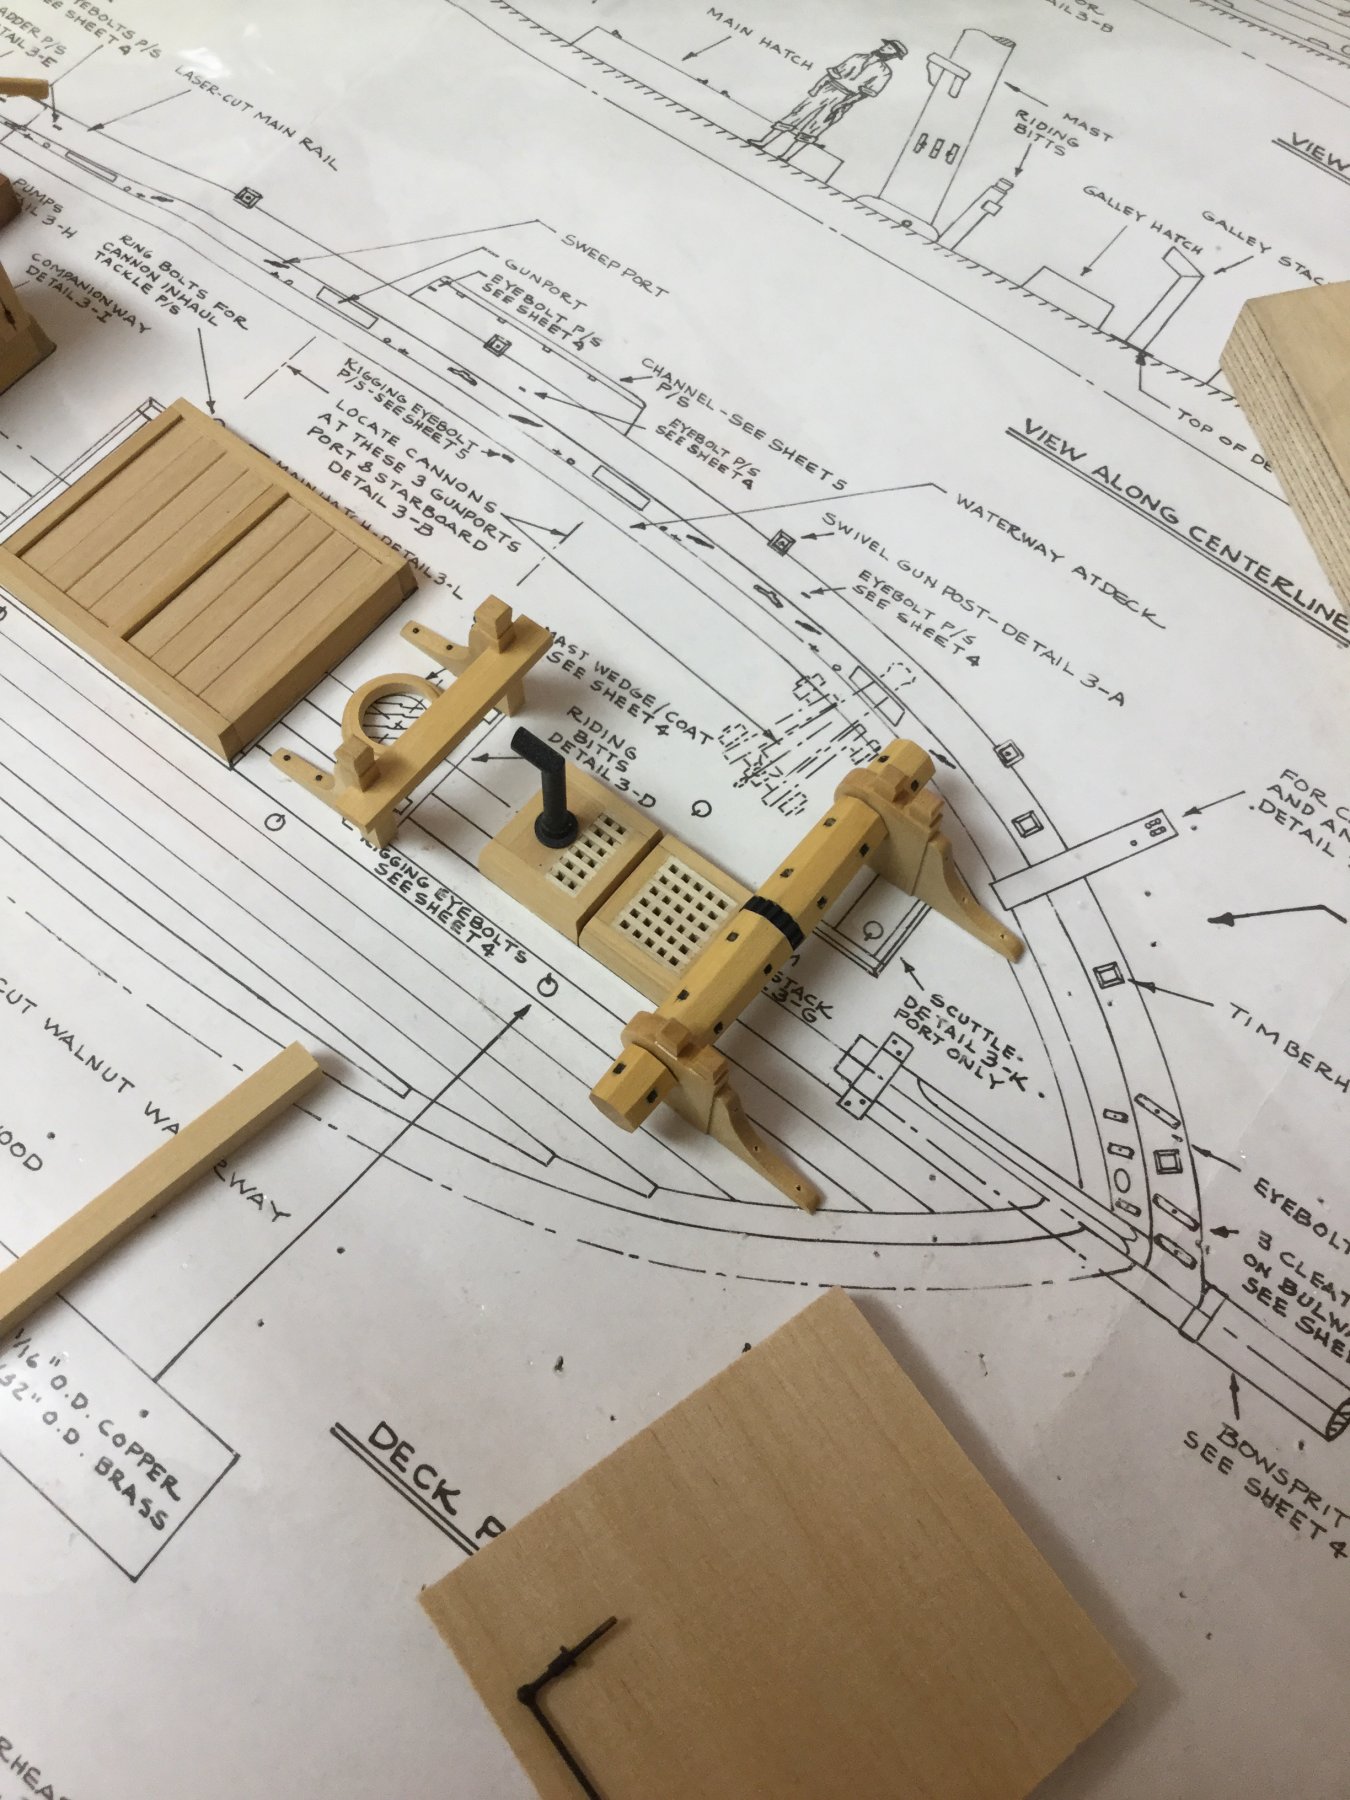
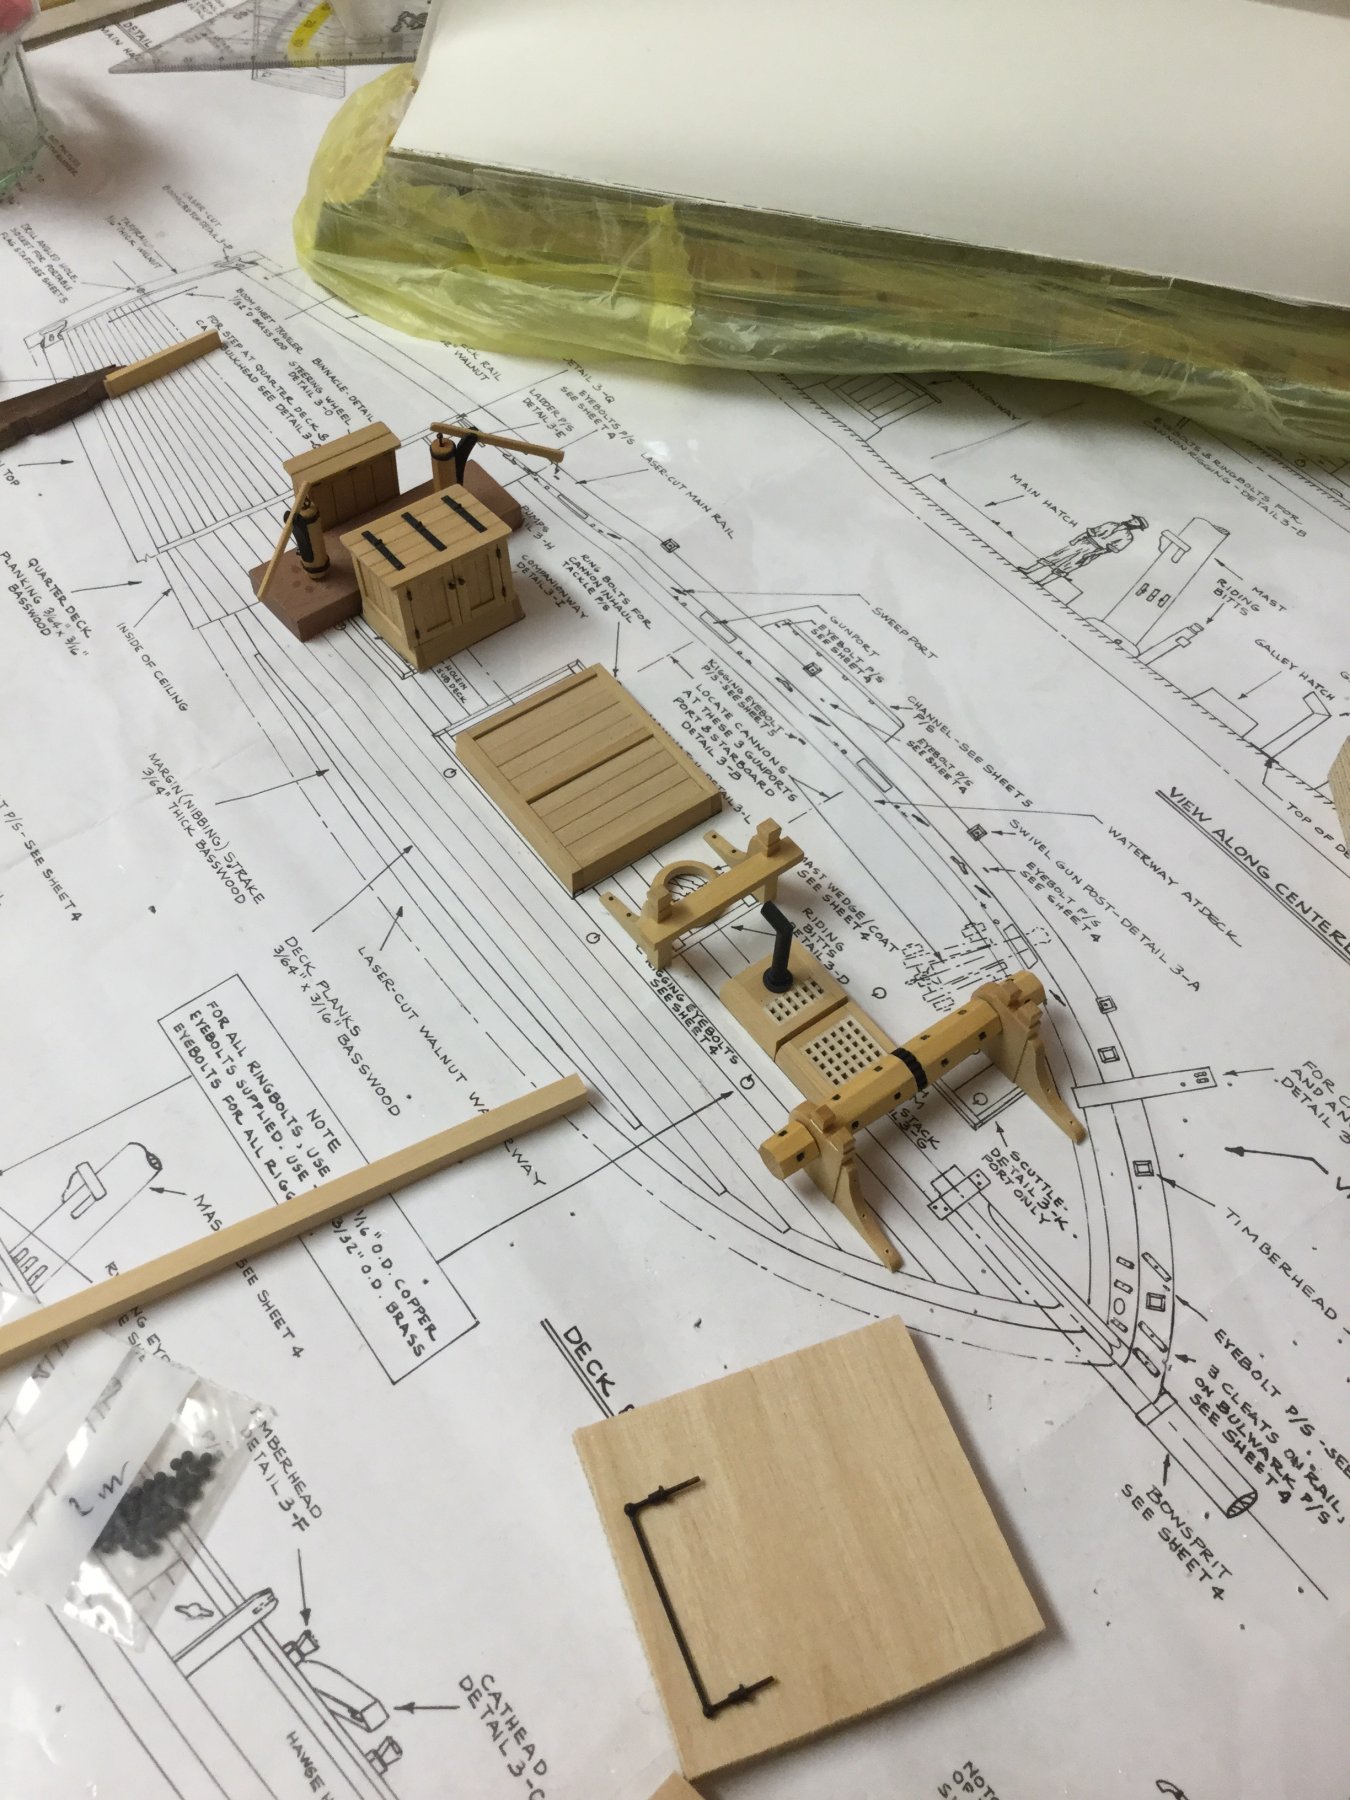
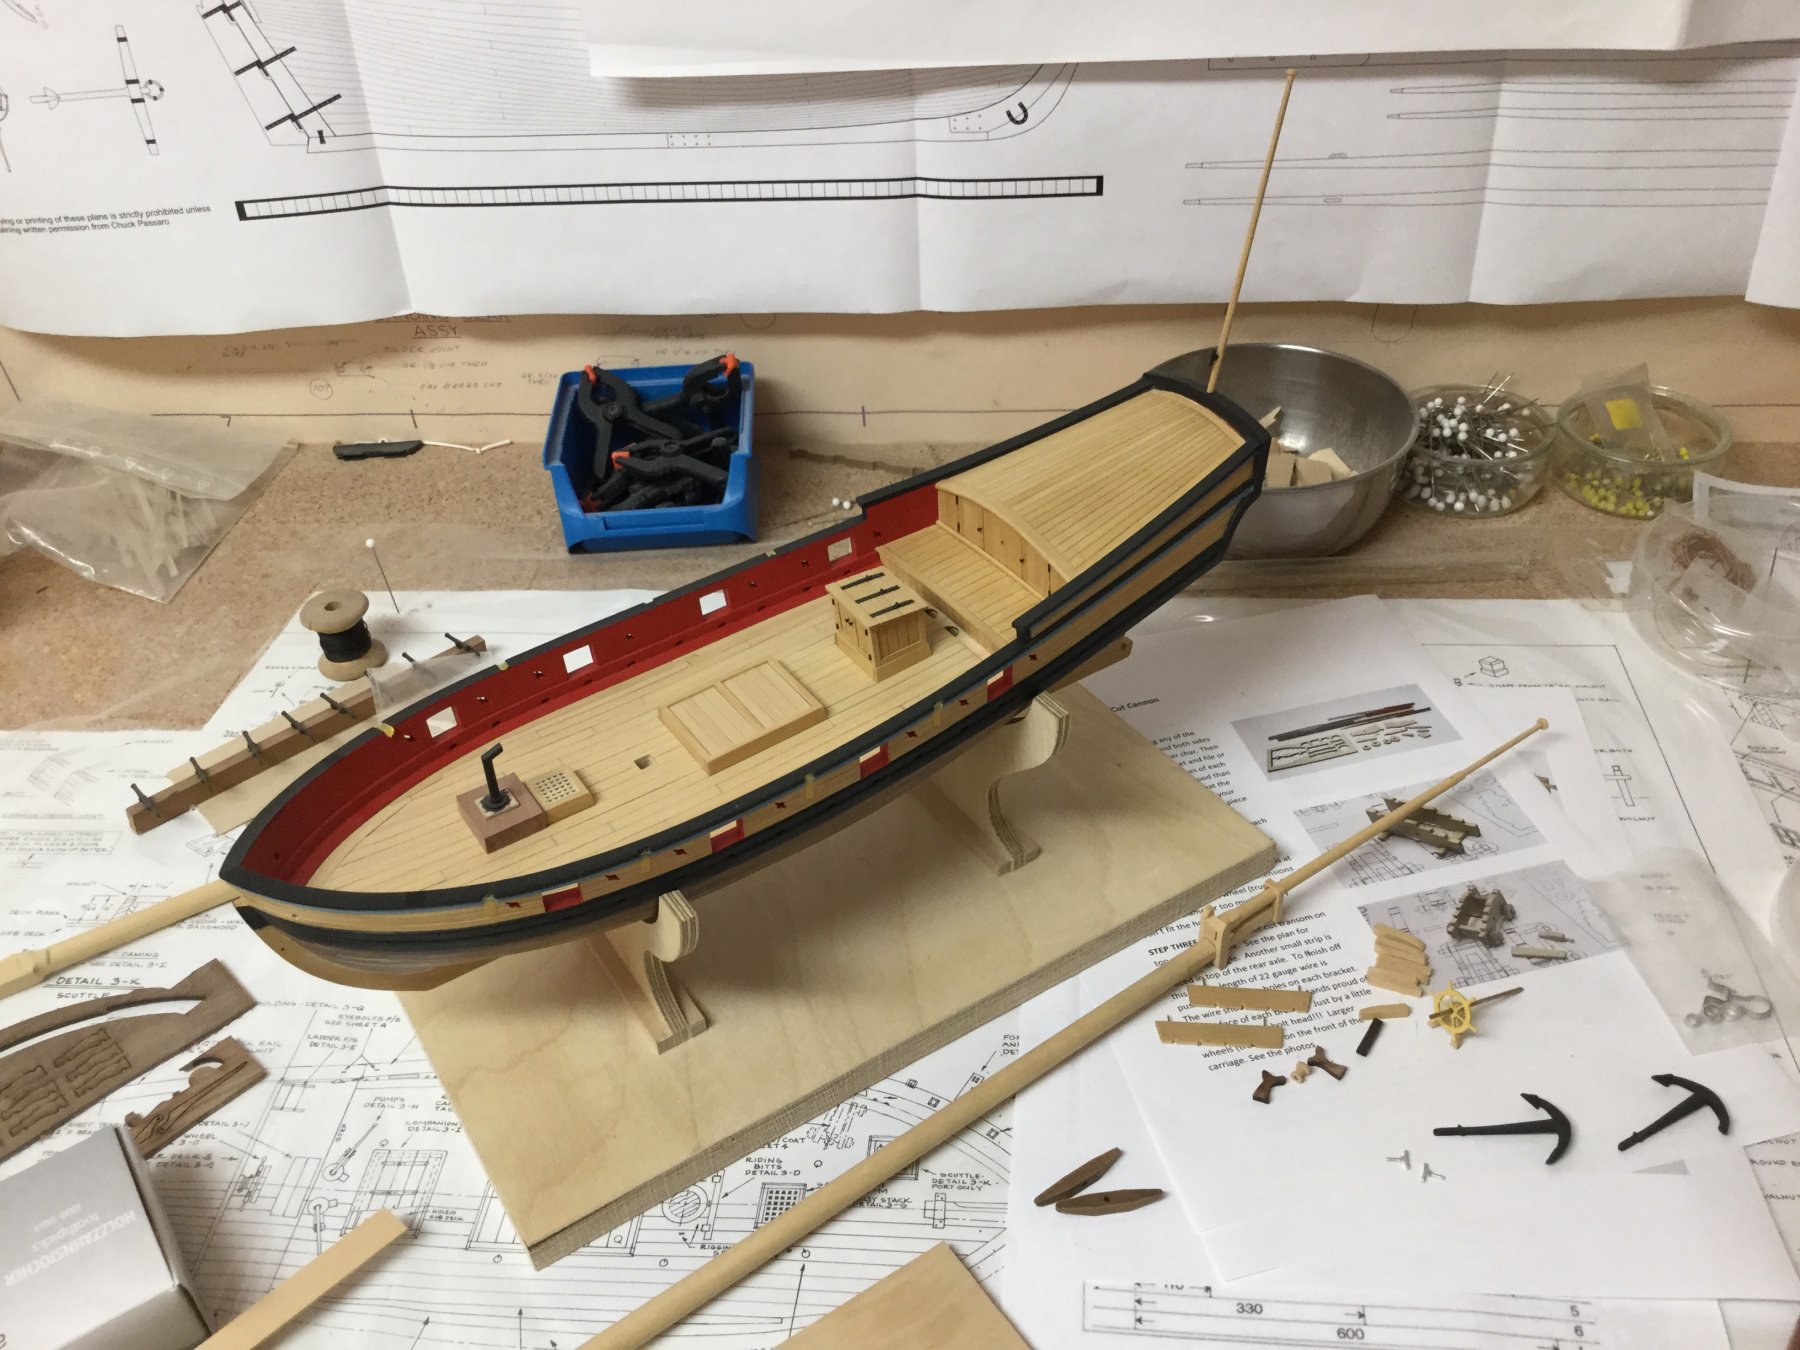
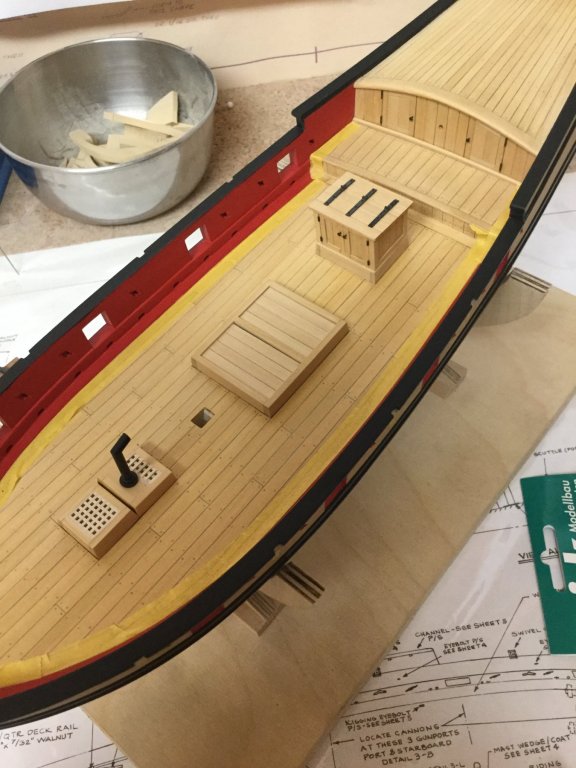
Made a simple windlass. But haven‘t decided to either paint it red or leave it unpainted. It looks quite a bit large when fitted on the deck. Maybe I leave it off. All deck items are now modeled. Next is finishing the painting of the hull.


- 231 replies
-
- 7
-
-
- model shipways
- armed virginia sloop
- (and 1 more)
-
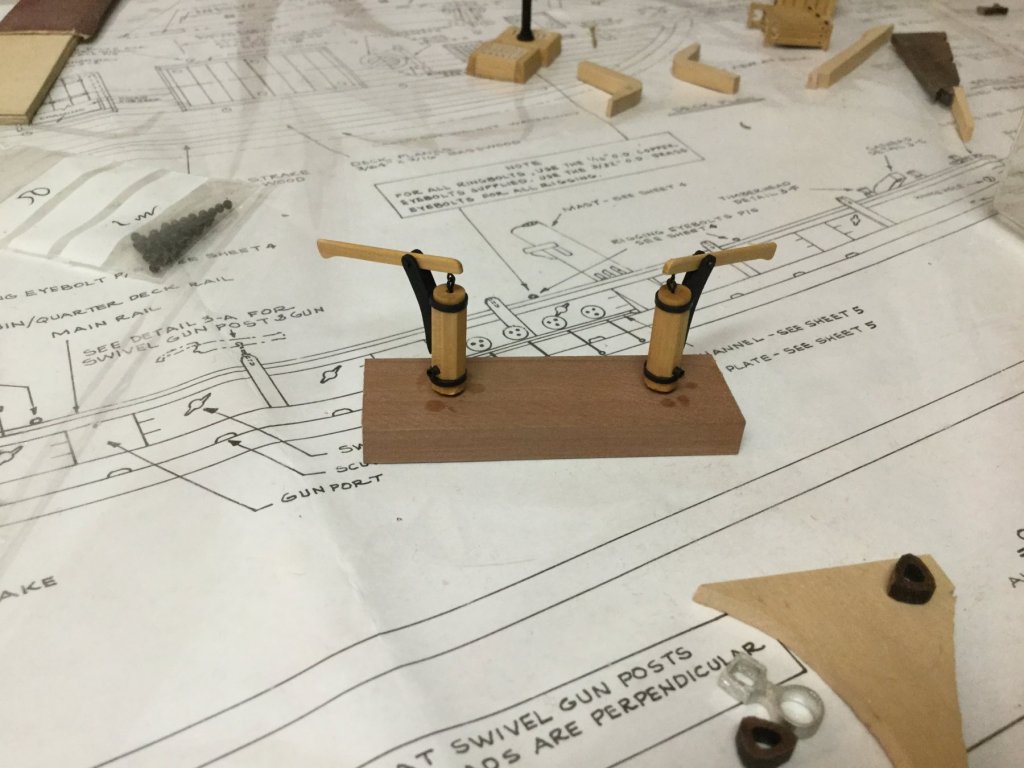
The pumps are done. Next I will paint the hull white. Will take some time.
- 231 replies
-
- 4
-
-
- model shipways
- armed virginia sloop
- (and 1 more)
-
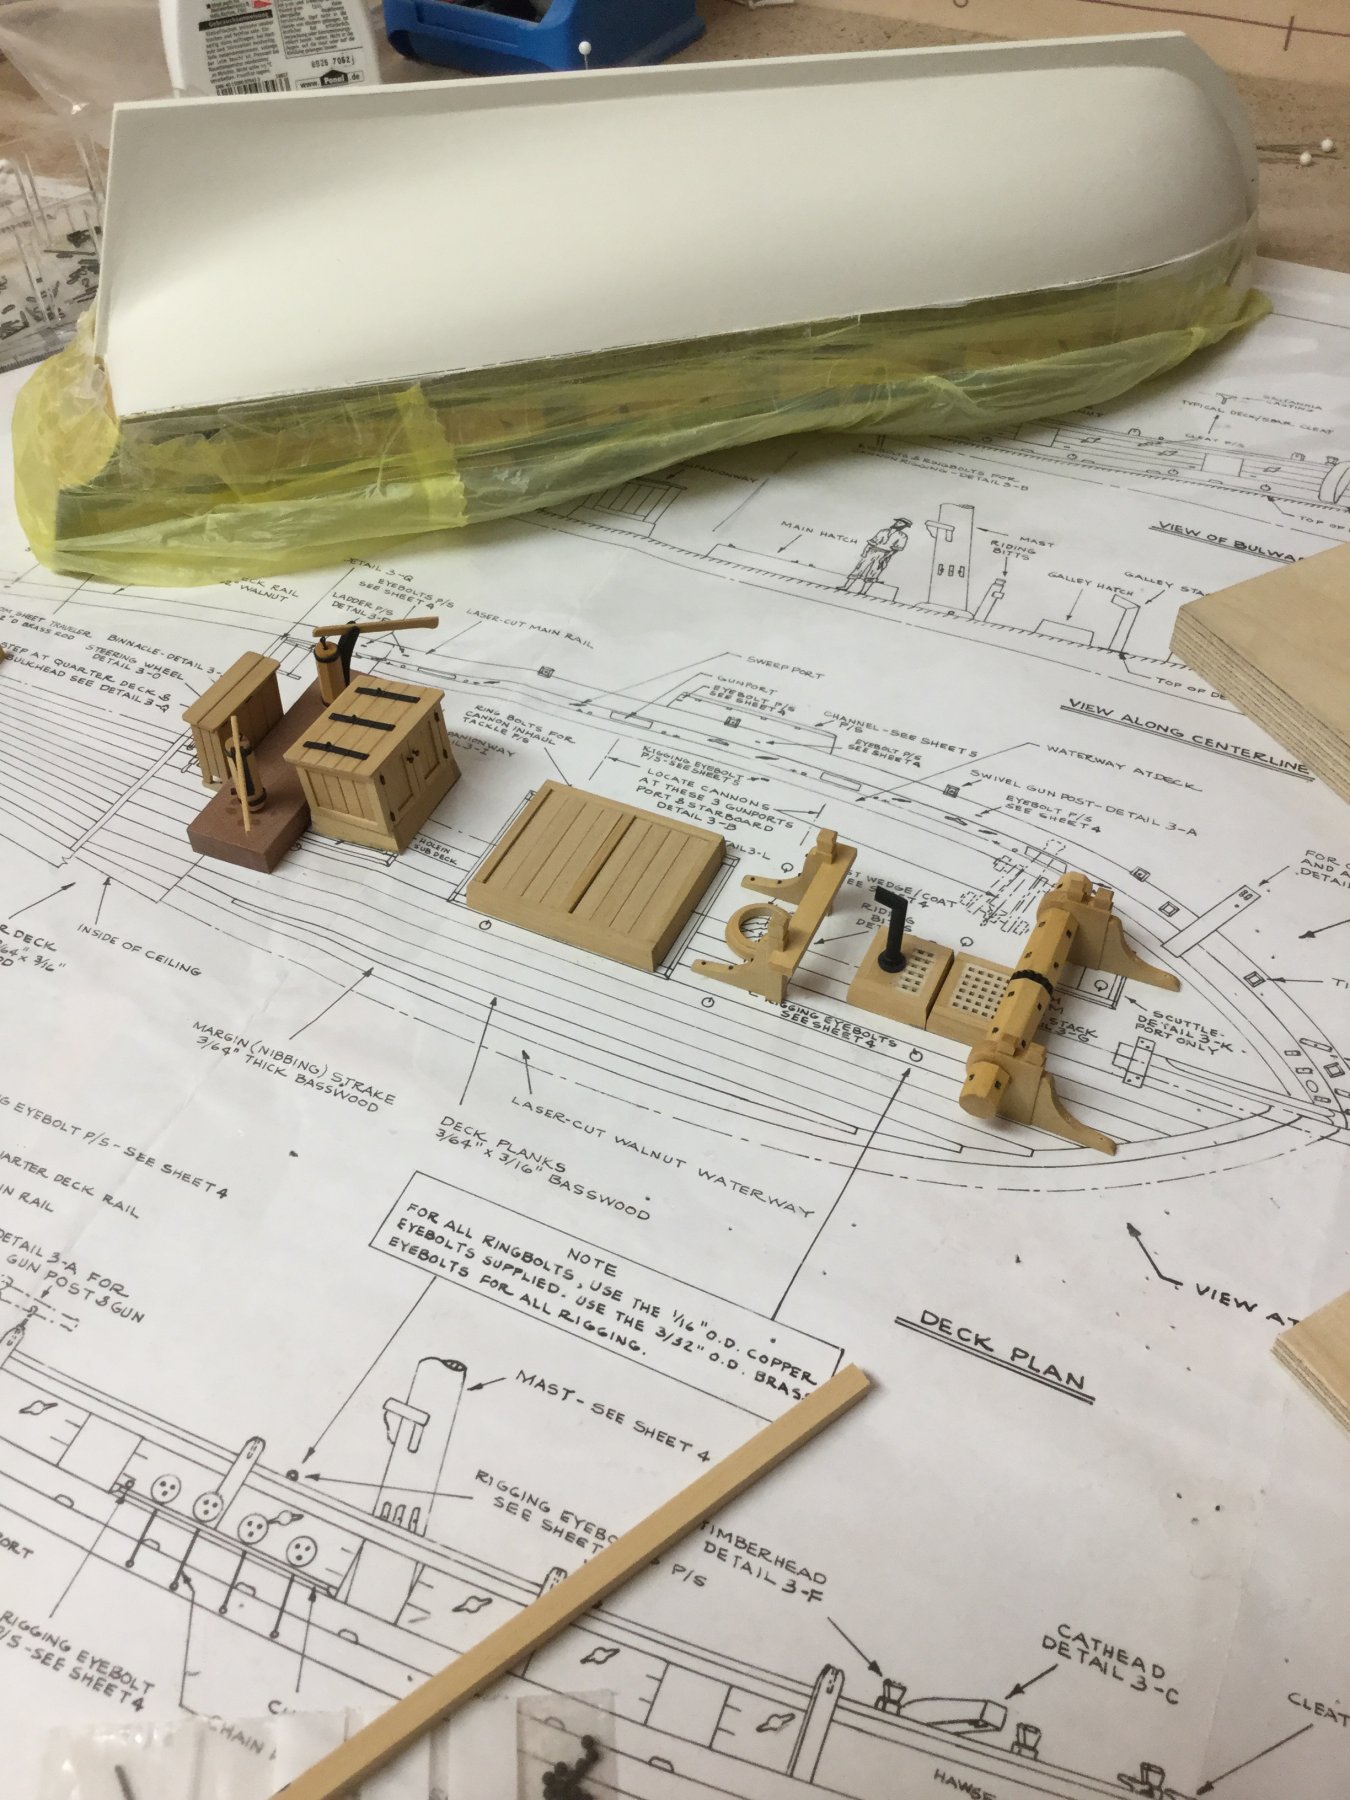
Wow, Captain Rathbun was very lucky indeed. But it is nice to have some guns available - in case you need them. I completed the 6 ones for the AVS. I used Syren 1/64 6-pd guns with carriage in exchange for the 1/48 3-pd casting barrels. They look a little thinner than the supplied ones but have equal length. Need to rig them but I have to do some more work on the hull first.

- 231 replies
-
- 4
-
-
- model shipways
- armed virginia sloop
- (and 1 more)
-
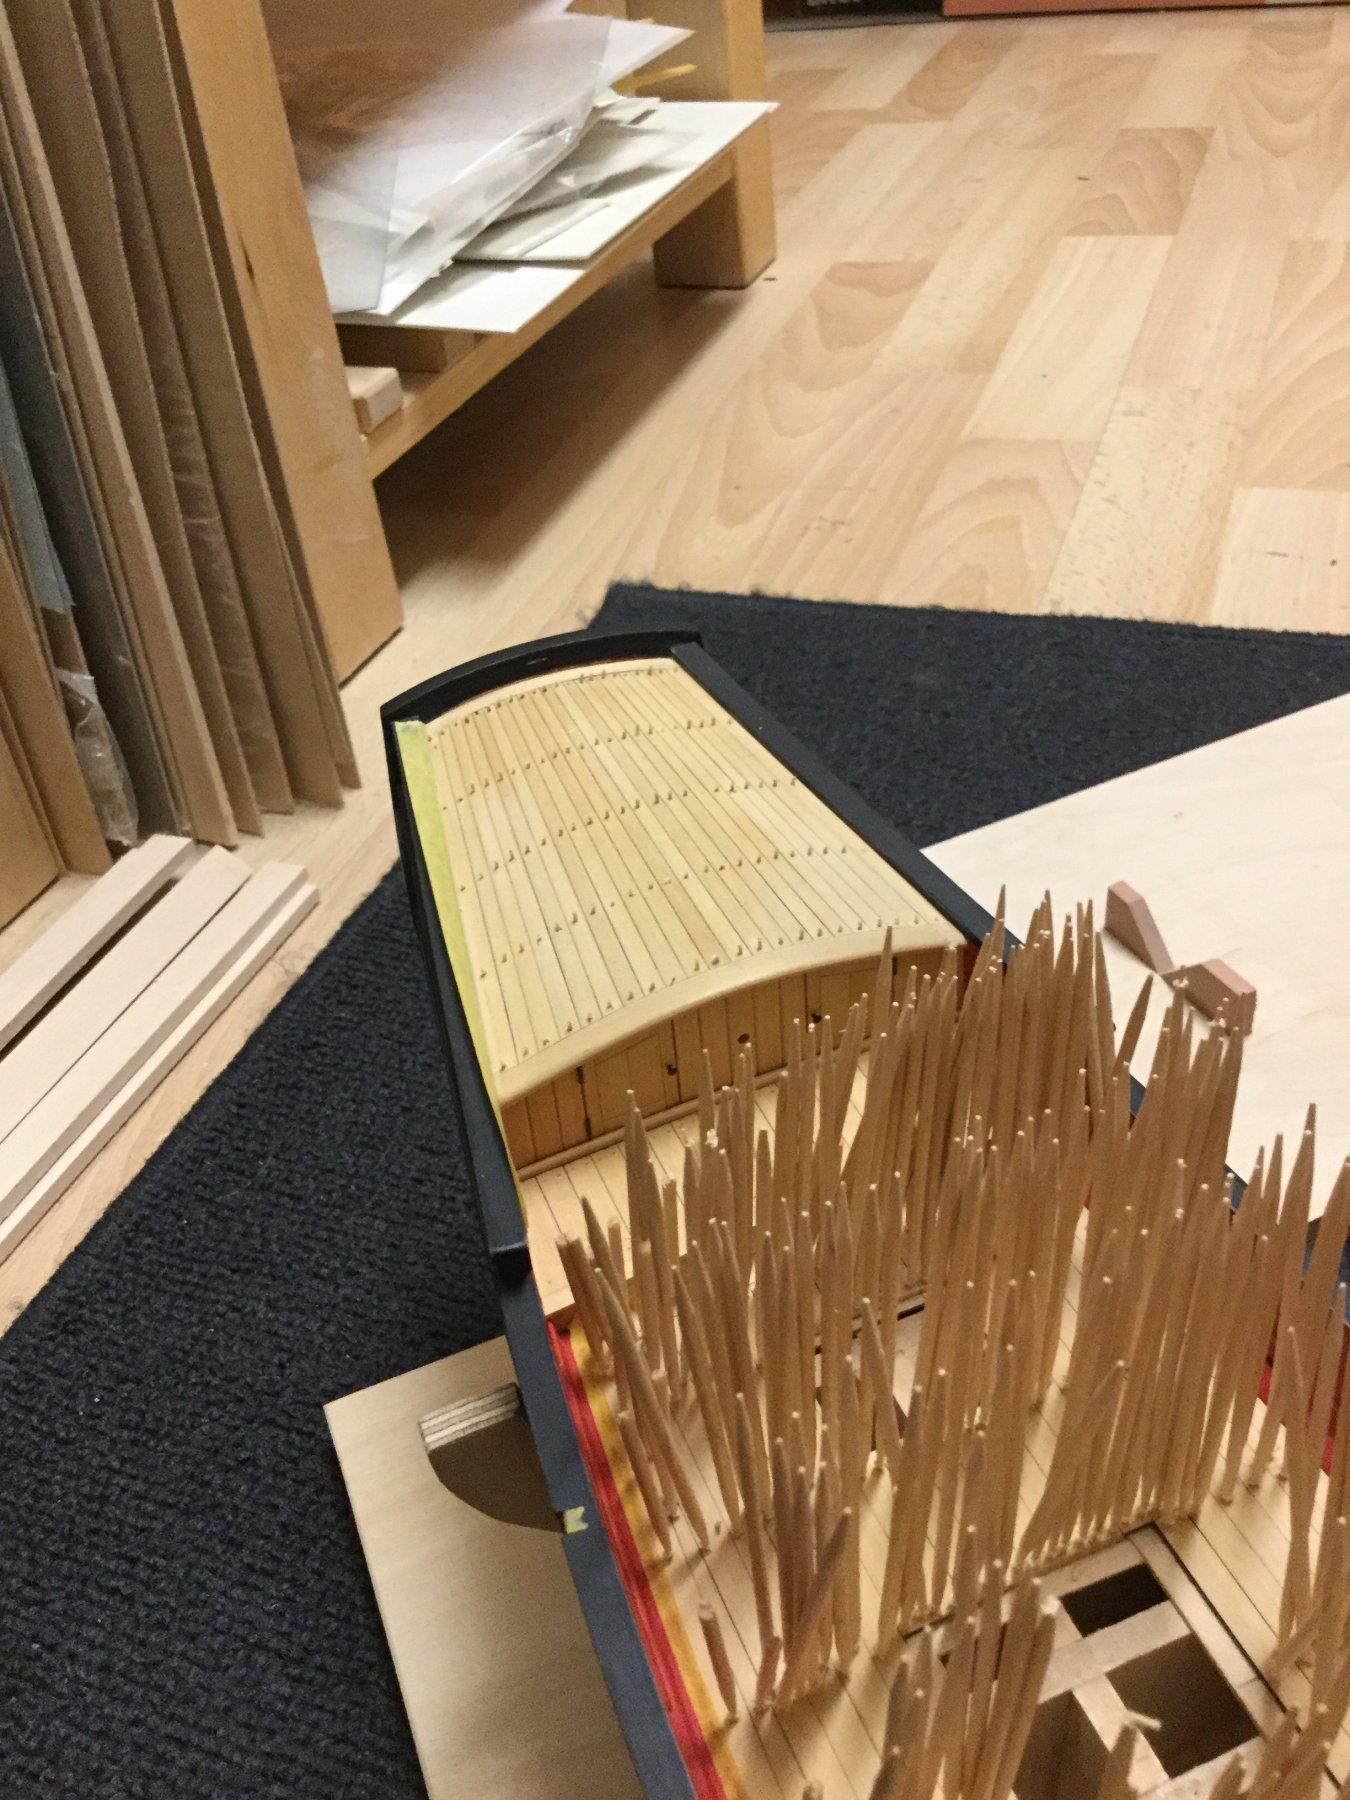
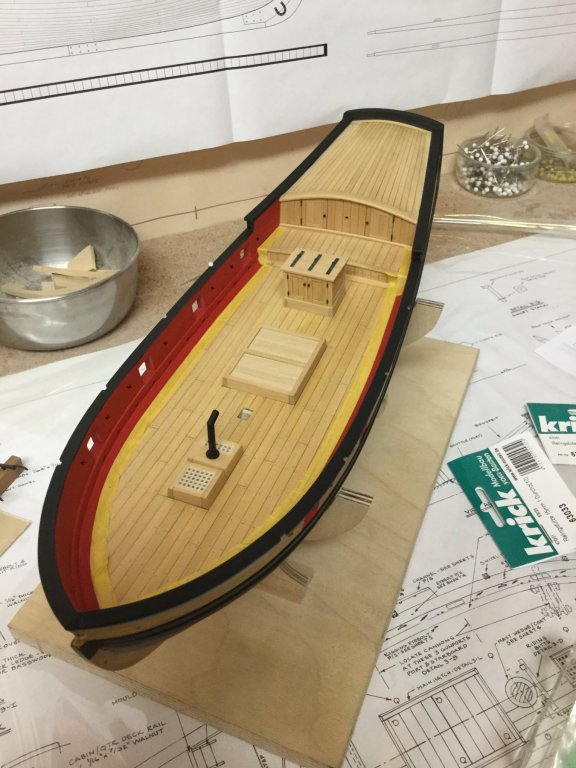
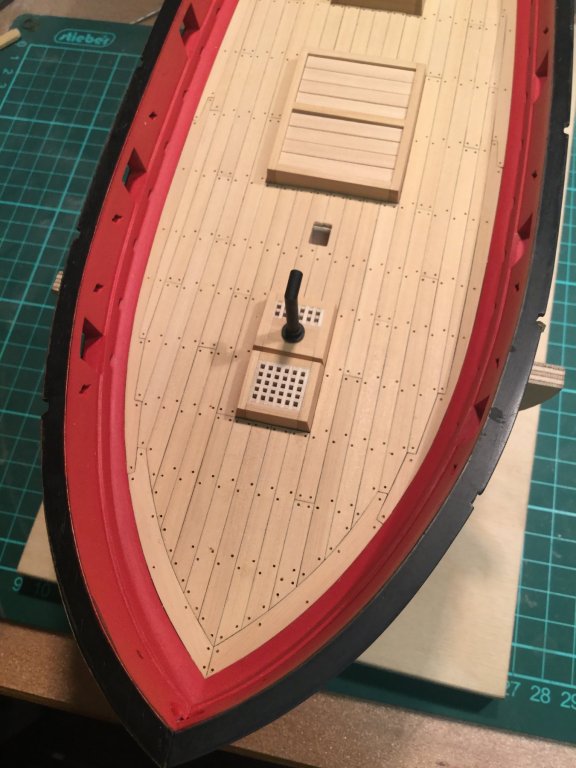
Finished the deck. The toothbrushes are made of basswood so the treenails don’t contrast the boxwood too much and are rather discreet. I had to fix up some paint. Started to make the cannons so the crew won‘t have to throw stones at enemy ships any longer...

- 231 replies
-
- 10
-
-
- model shipways
- armed virginia sloop
- (and 1 more)
-
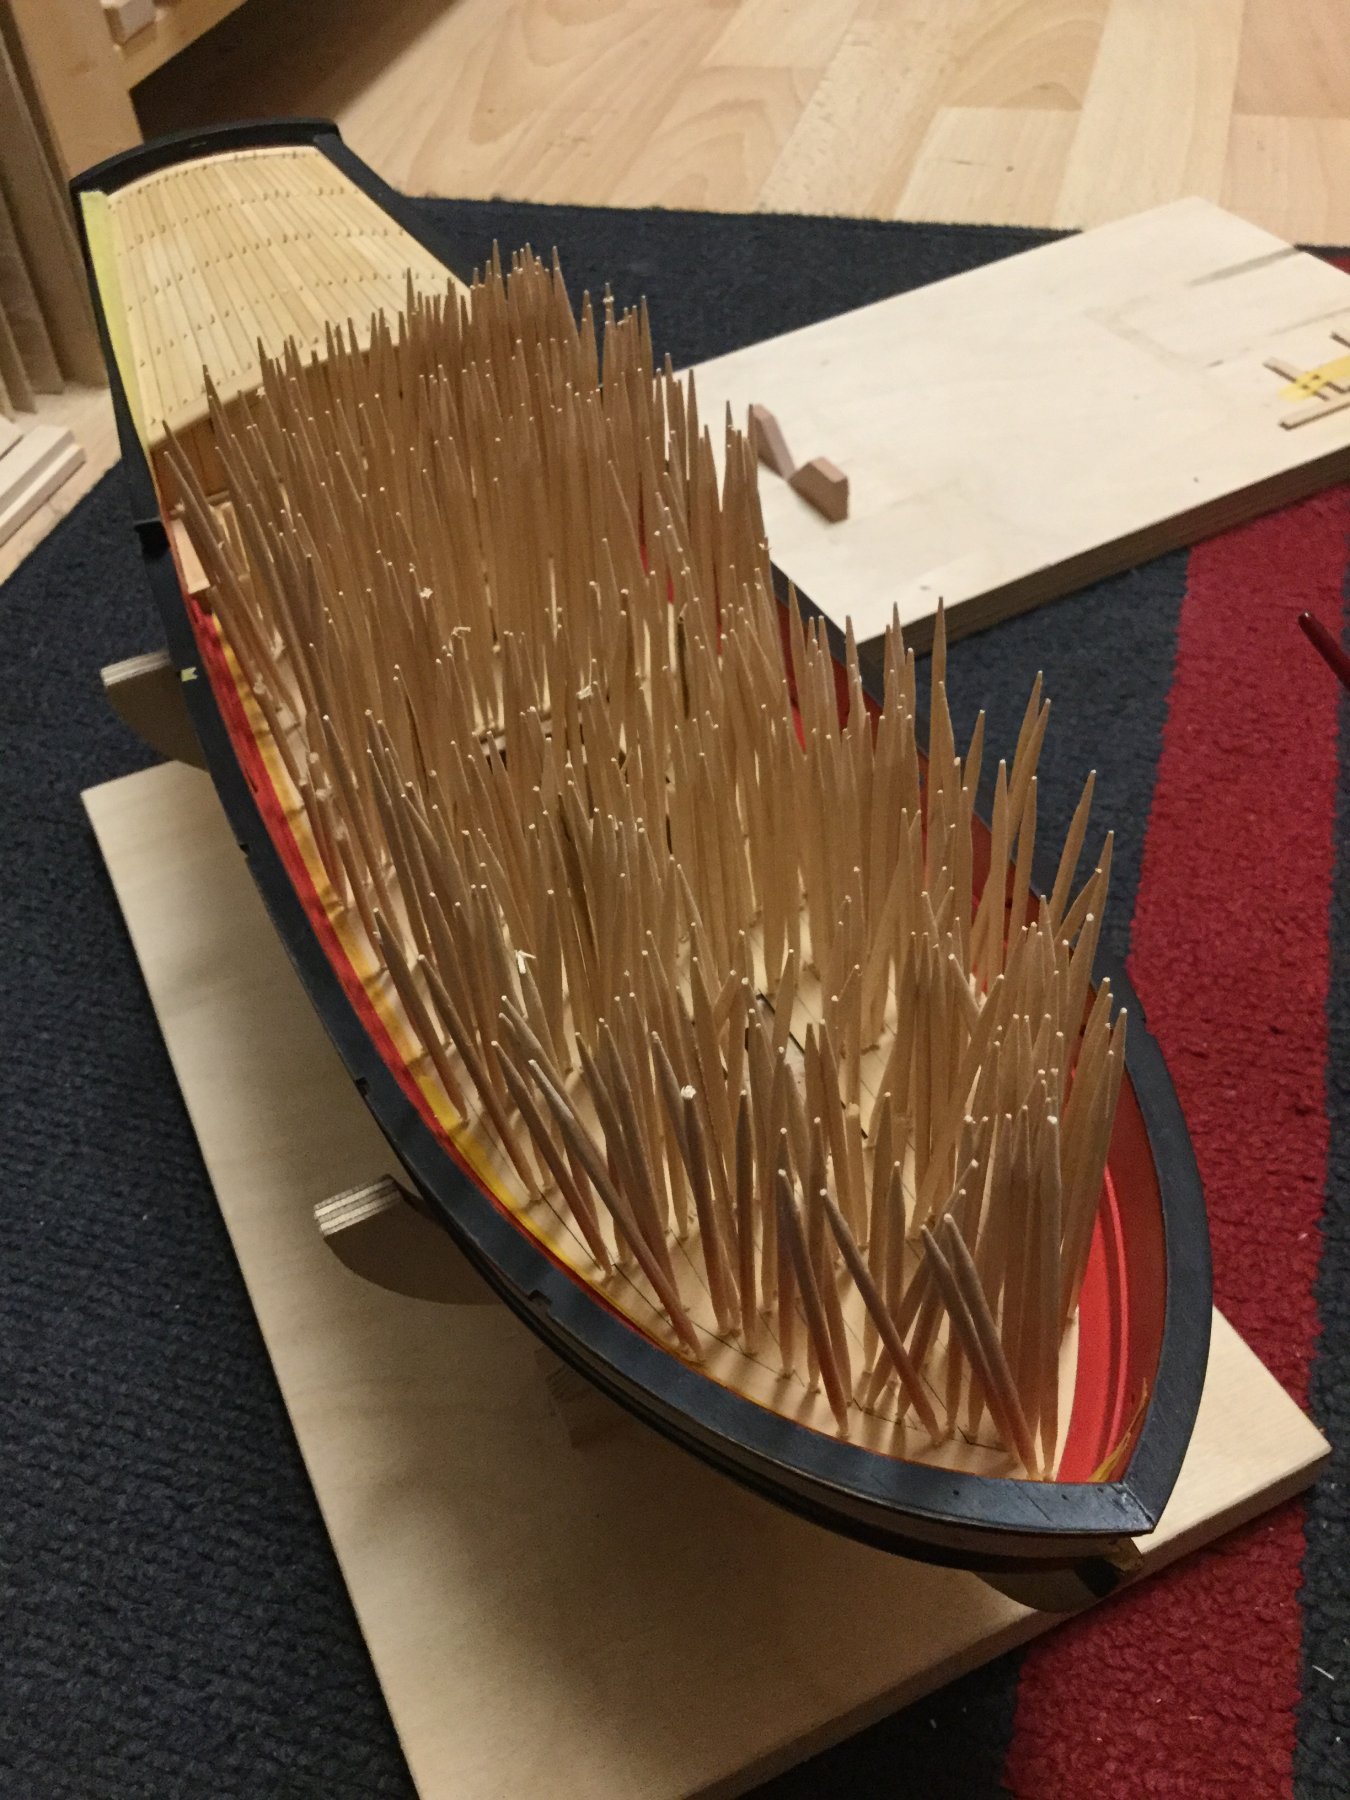
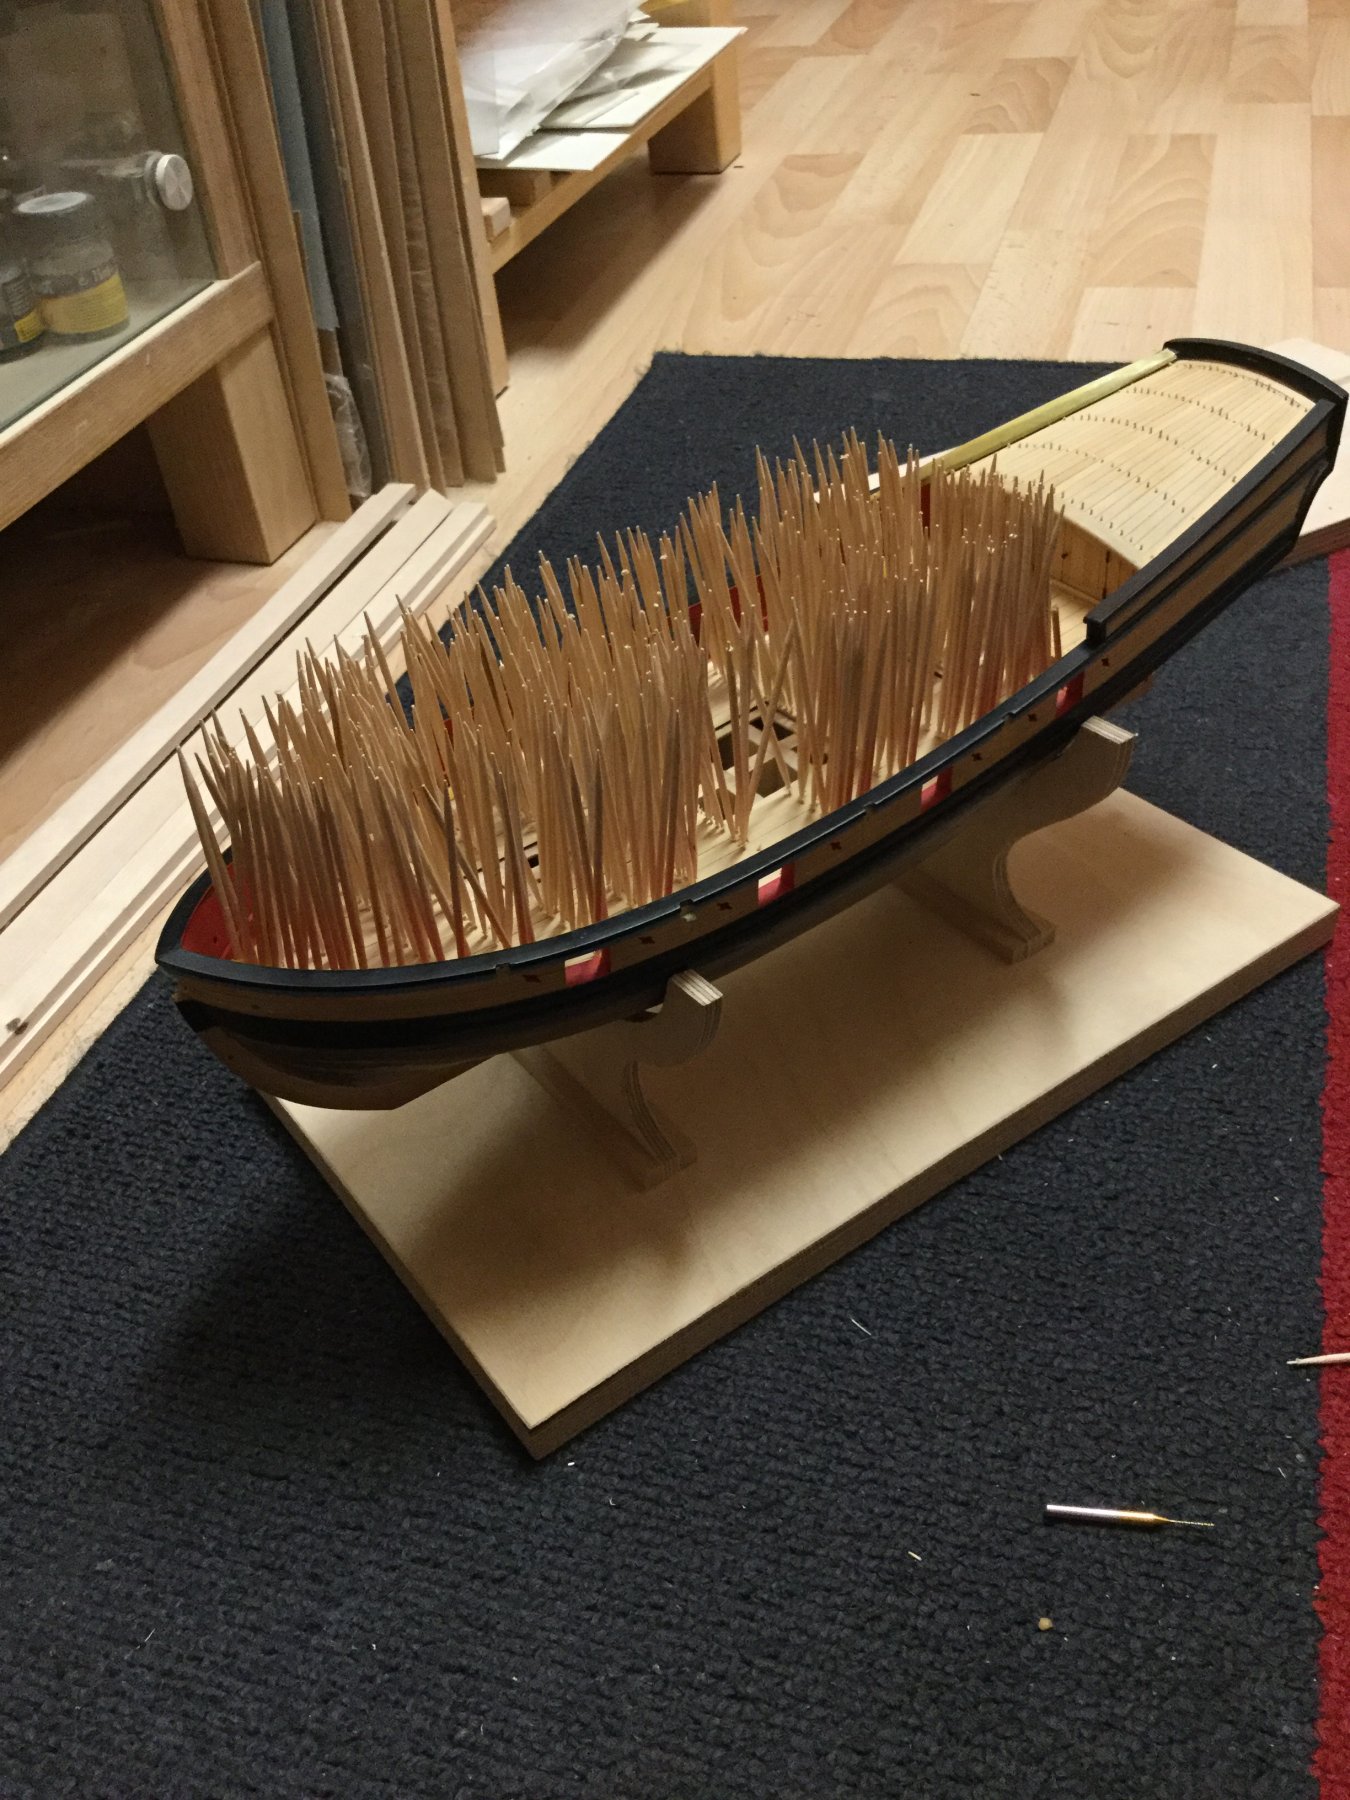
Looks more like a hedgehog than a ship.. 🤔


- 231 replies
-
- 5
-
-
- model shipways
- armed virginia sloop
- (and 1 more)
-
Yesterday I started treenailing the deck. First I used some 2mm tape to line up the holes. Then I used a I pricker to pre-drill the holes. AND THEN I started drilling....... and more drilling ... and even more. Took me about 4 hours yesterday and another 3 hours to position and drill all the holes by hand. Hard to estimate how long it would last to completely treenail a quarter scale swan class sloop. Used a 0,6mm drill (that would be about 3 cm for a real treenail). Lucky me, no broken drills. I will start inserting toothpricks tomorrow, because my battery is more than empty for today...... After that I have to paint some areas again.

- 231 replies
-
- 12
-
-
- model shipways
- armed virginia sloop
- (and 1 more)
-
Today I added all stop chocks, the boom jar rest and simulated the Iron bands on the gaff and boom with stripes cut from black card paper. Added some eyelets too. I will paint the masting parts just before I will begin rigging. As the masting material is almost finished I have no more reasons to postpone deck treenailing. Will start with that tomorrow ... or next week.

- 231 replies
-
- 7
-
-
- model shipways
- armed virginia sloop
- (and 1 more)
-
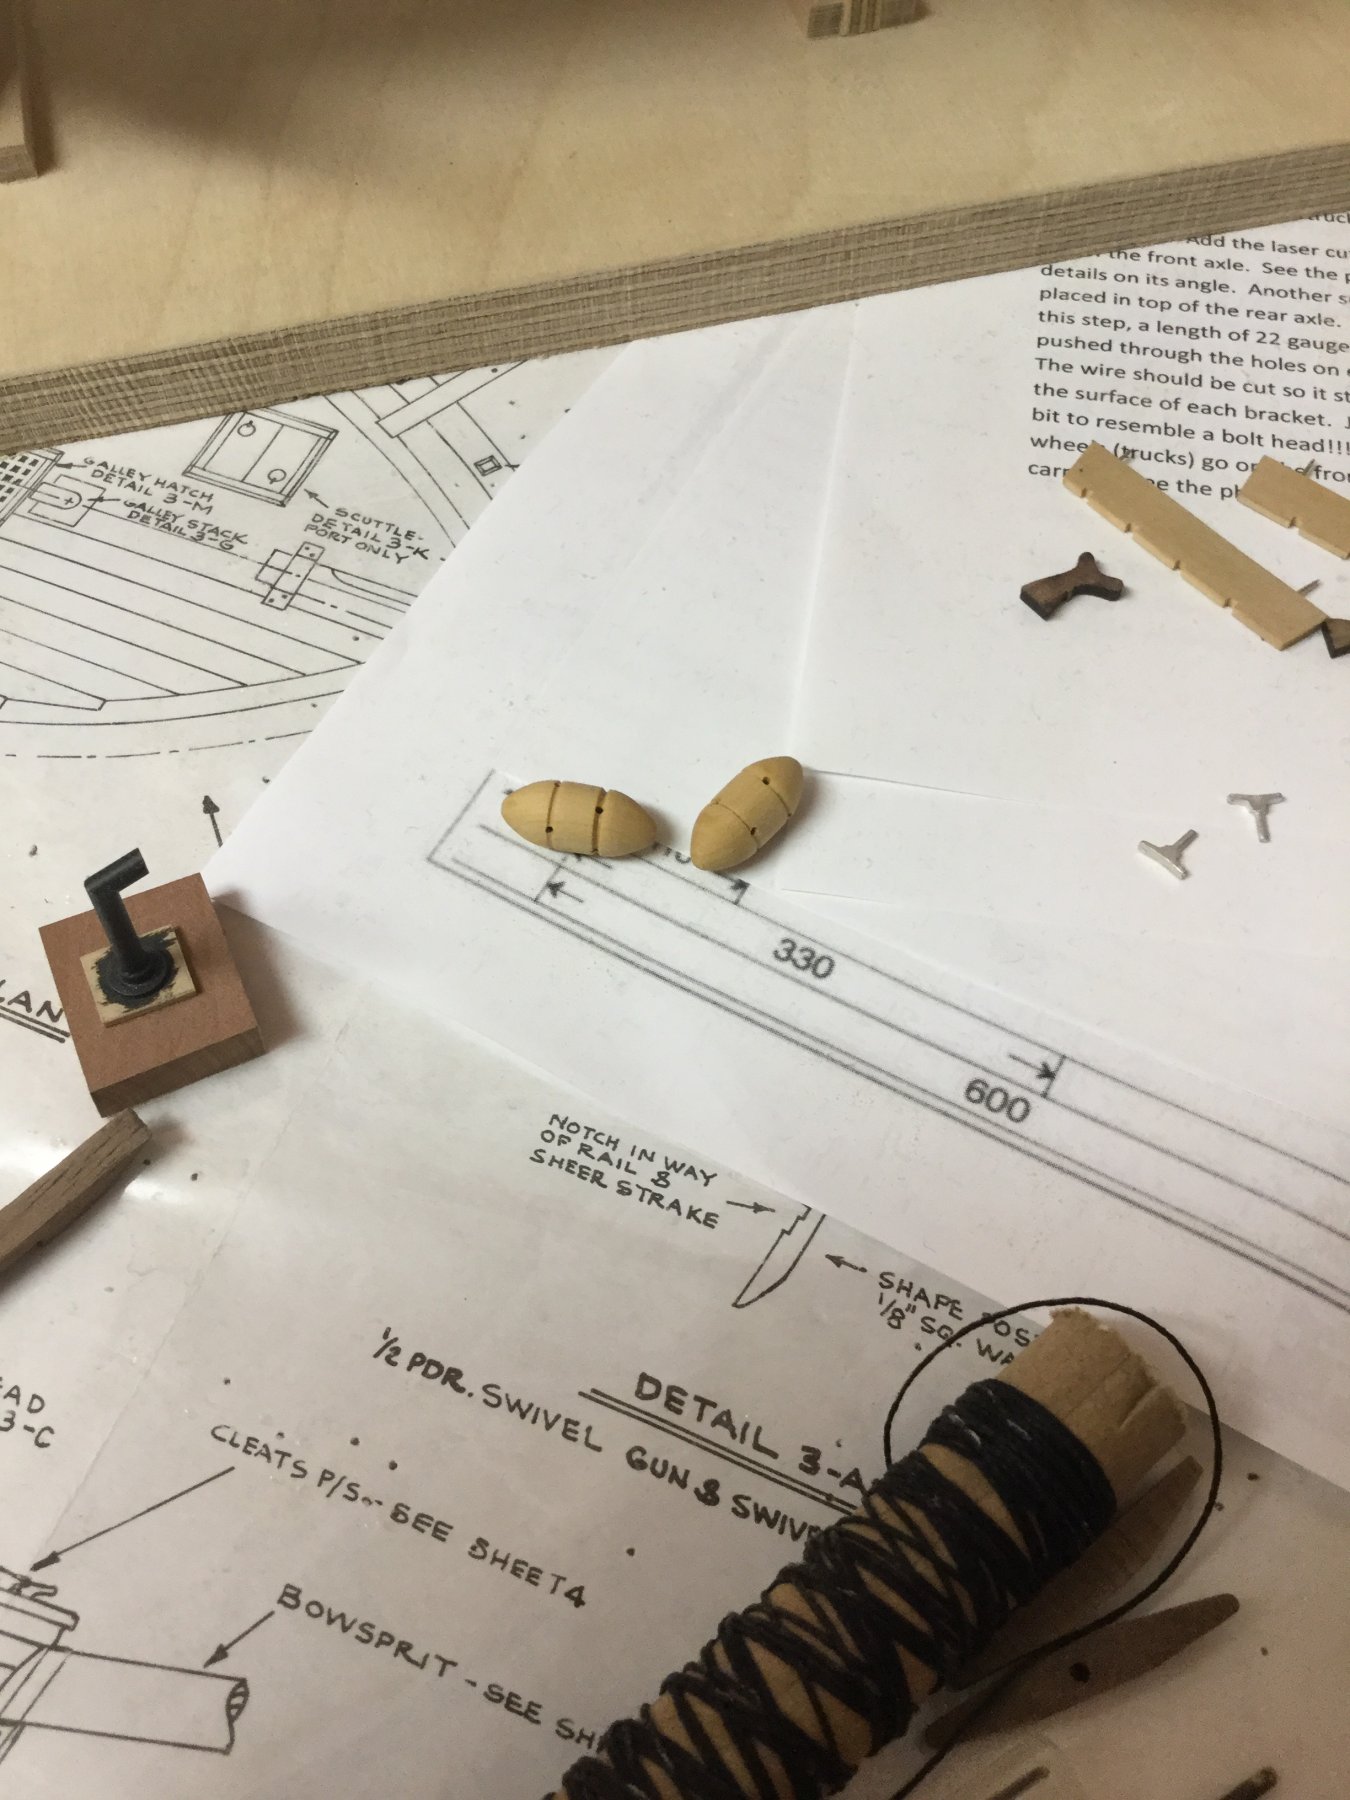
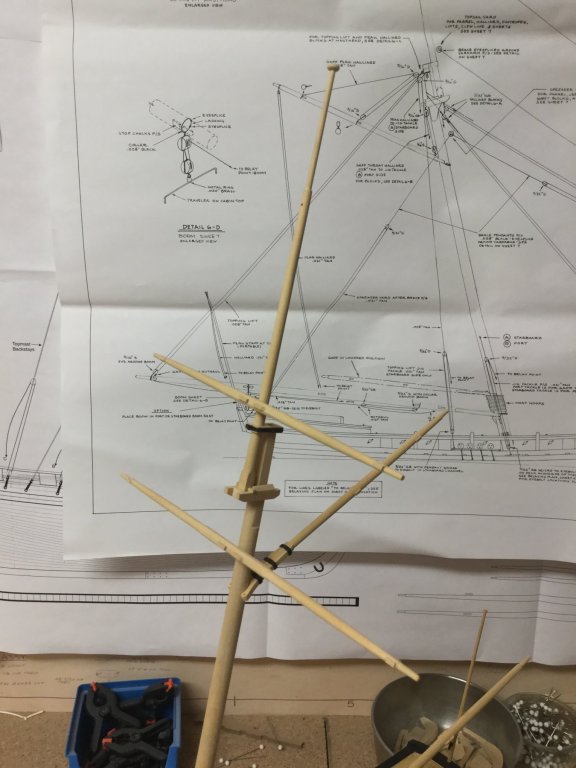
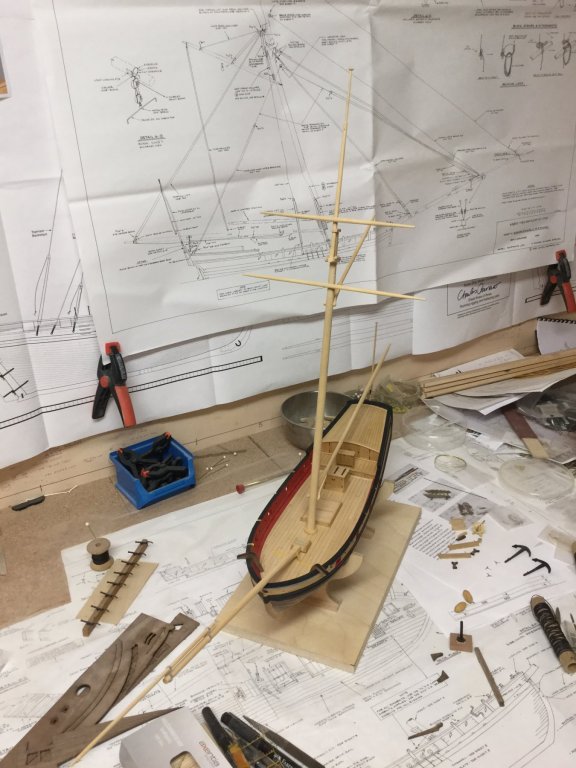
Thank you all for the nice comments and the likes. Did the gaff, boom and the yards today. Also prepared two anchor buoys from a scrap part of the spar I made the mast of. Will add all the stop chocks and the boom jar rest tomorrow. I put it all together for a test dry-fit.


- 231 replies
-
- 3
-
-
- model shipways
- armed virginia sloop
- (and 1 more)
-
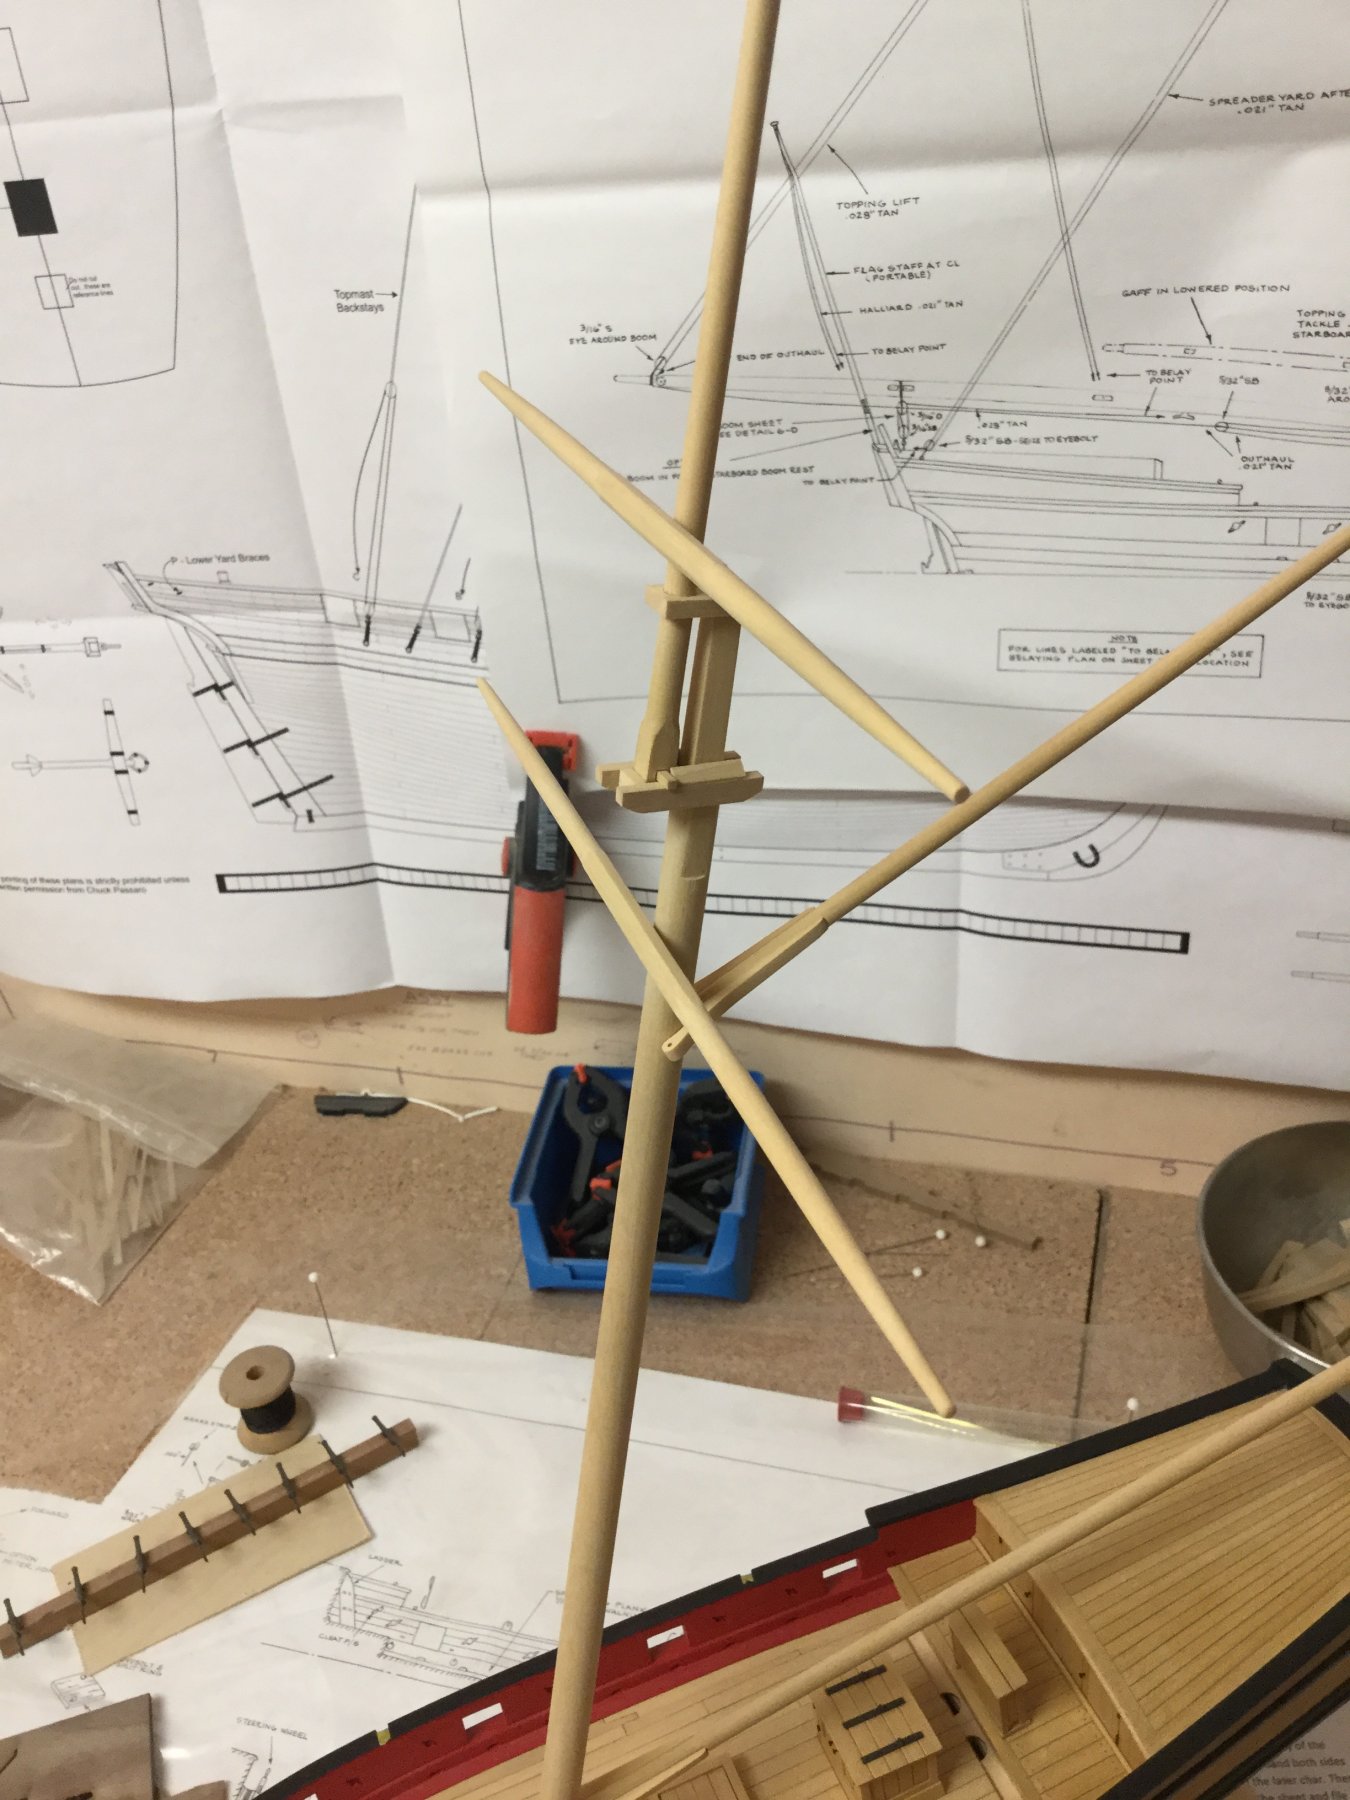
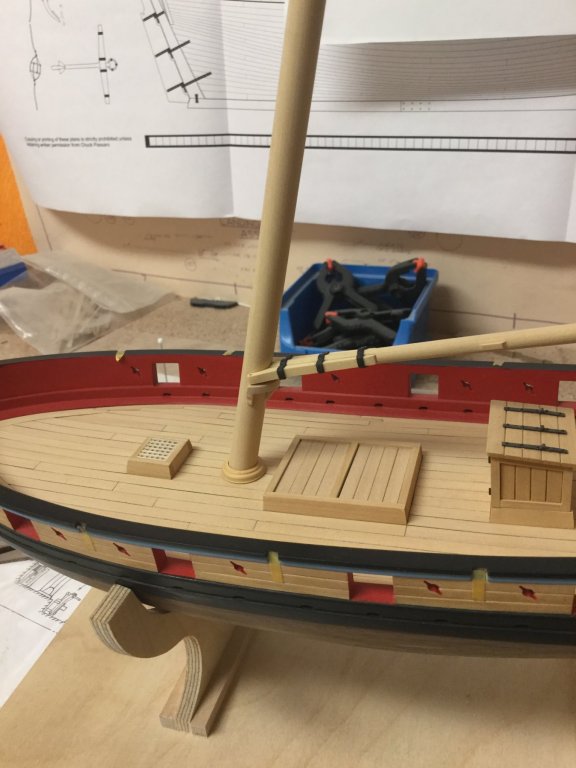
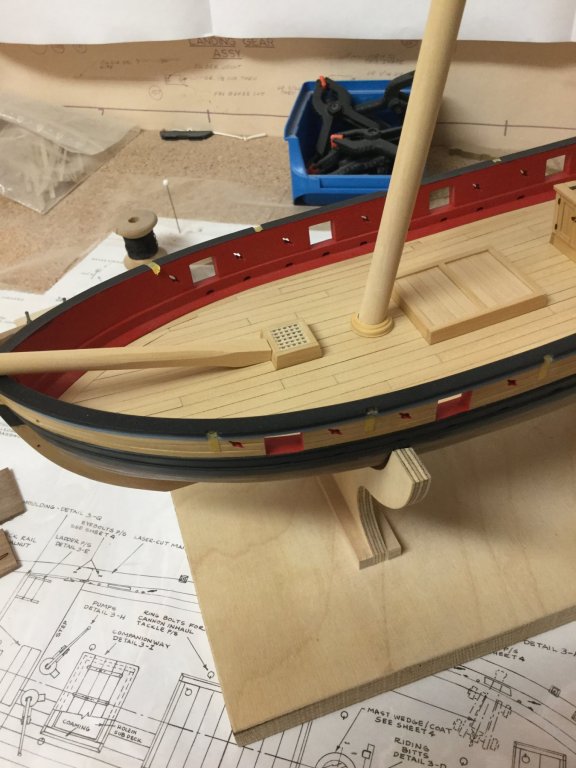
Thank you very much for the nice words. I finished the mast and the bowsprit and dry-fitted them on the ship. It is curious to see such a large mast on the small hull.
- 231 replies
-
- 8
-
-
- model shipways
- armed virginia sloop
- (and 1 more)
-
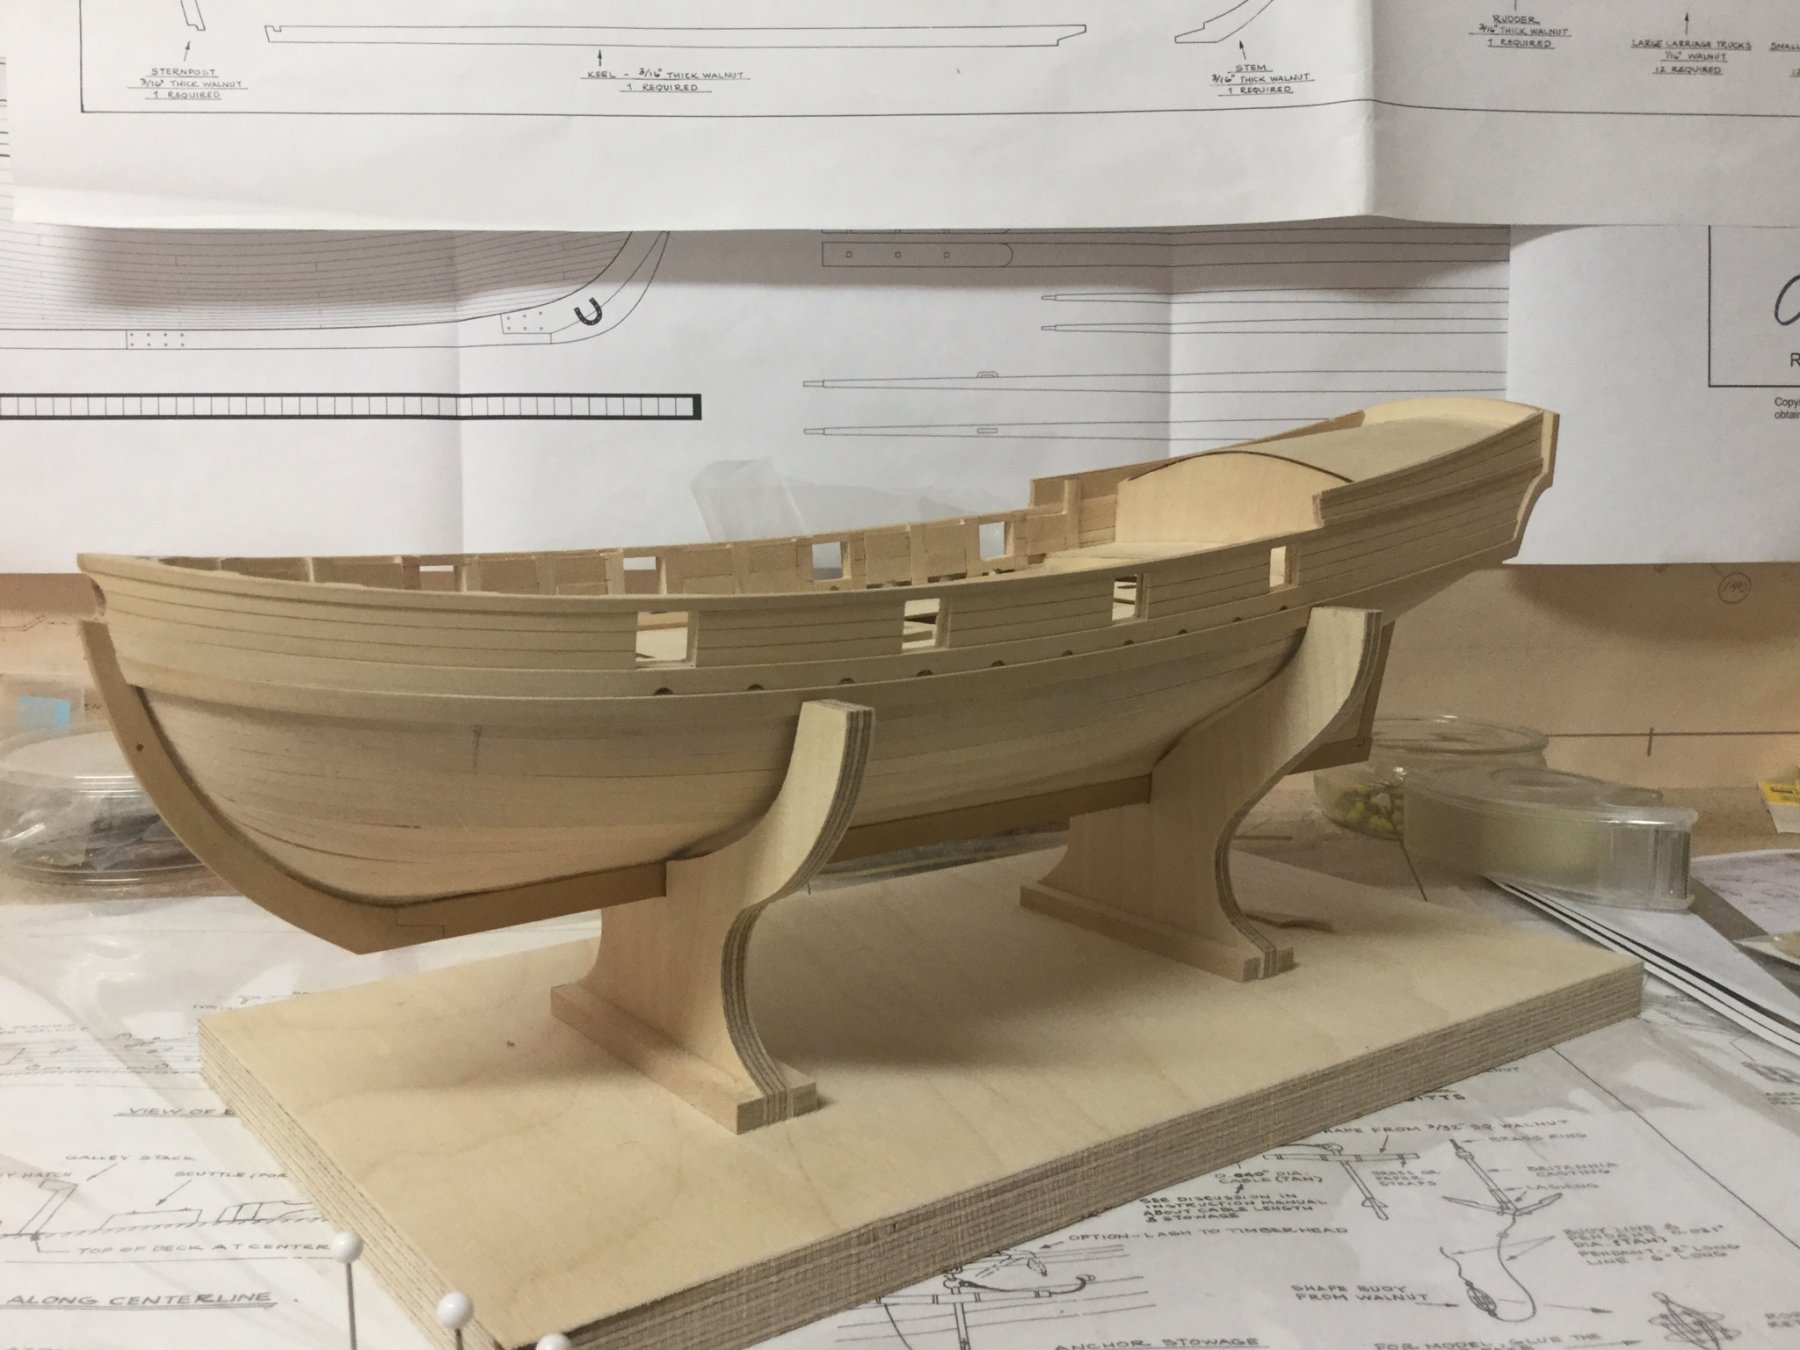
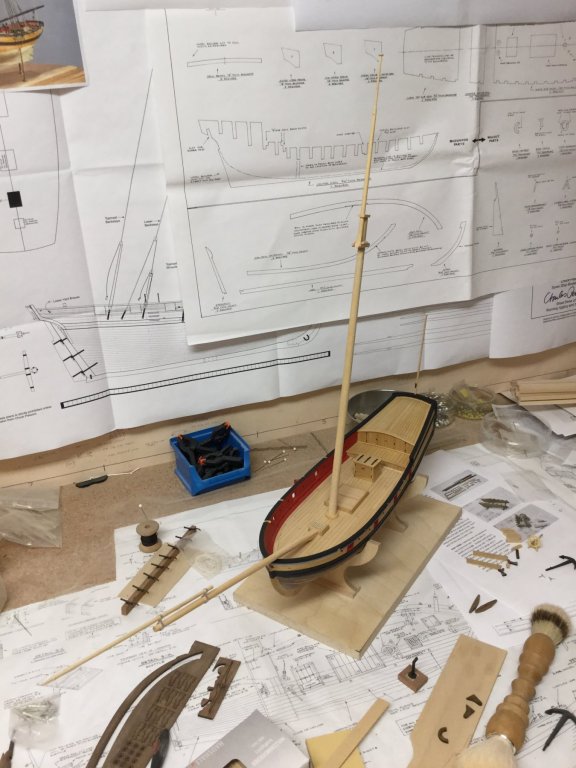
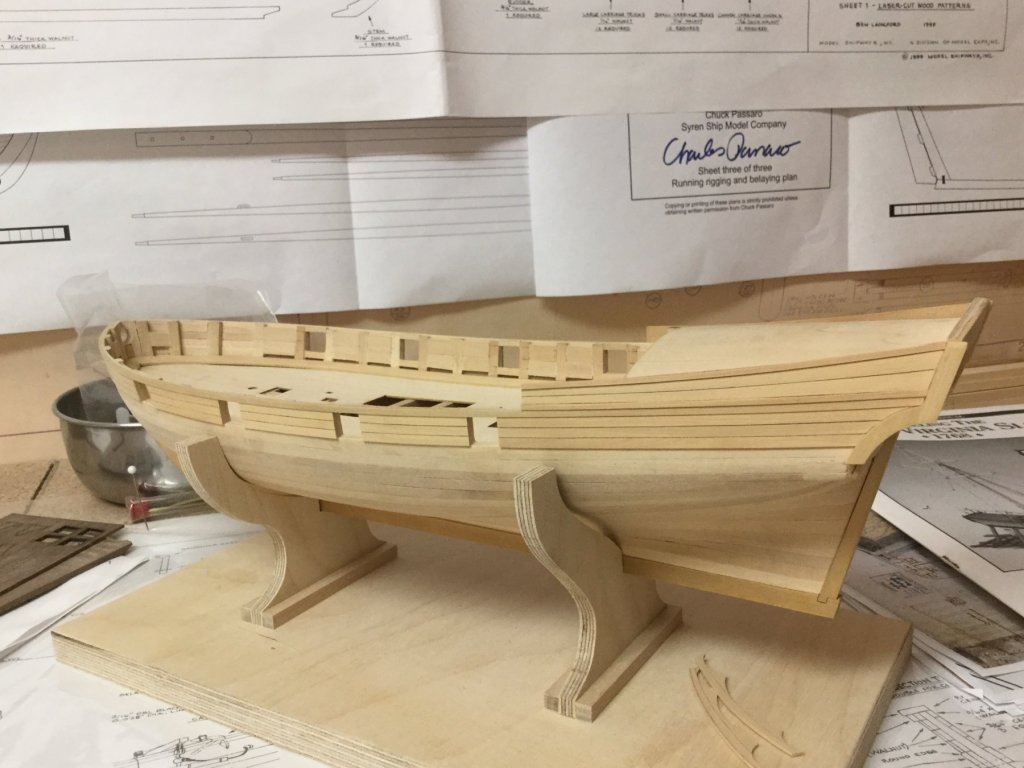
That is the actual status of the model. I decided the do the mast, the boom etc. first before I start to treenail the deck and the cabin. That will be hours of fun....

- 231 replies
-
- 8
-
-
- model shipways
- armed virginia sloop
- (and 1 more)
-
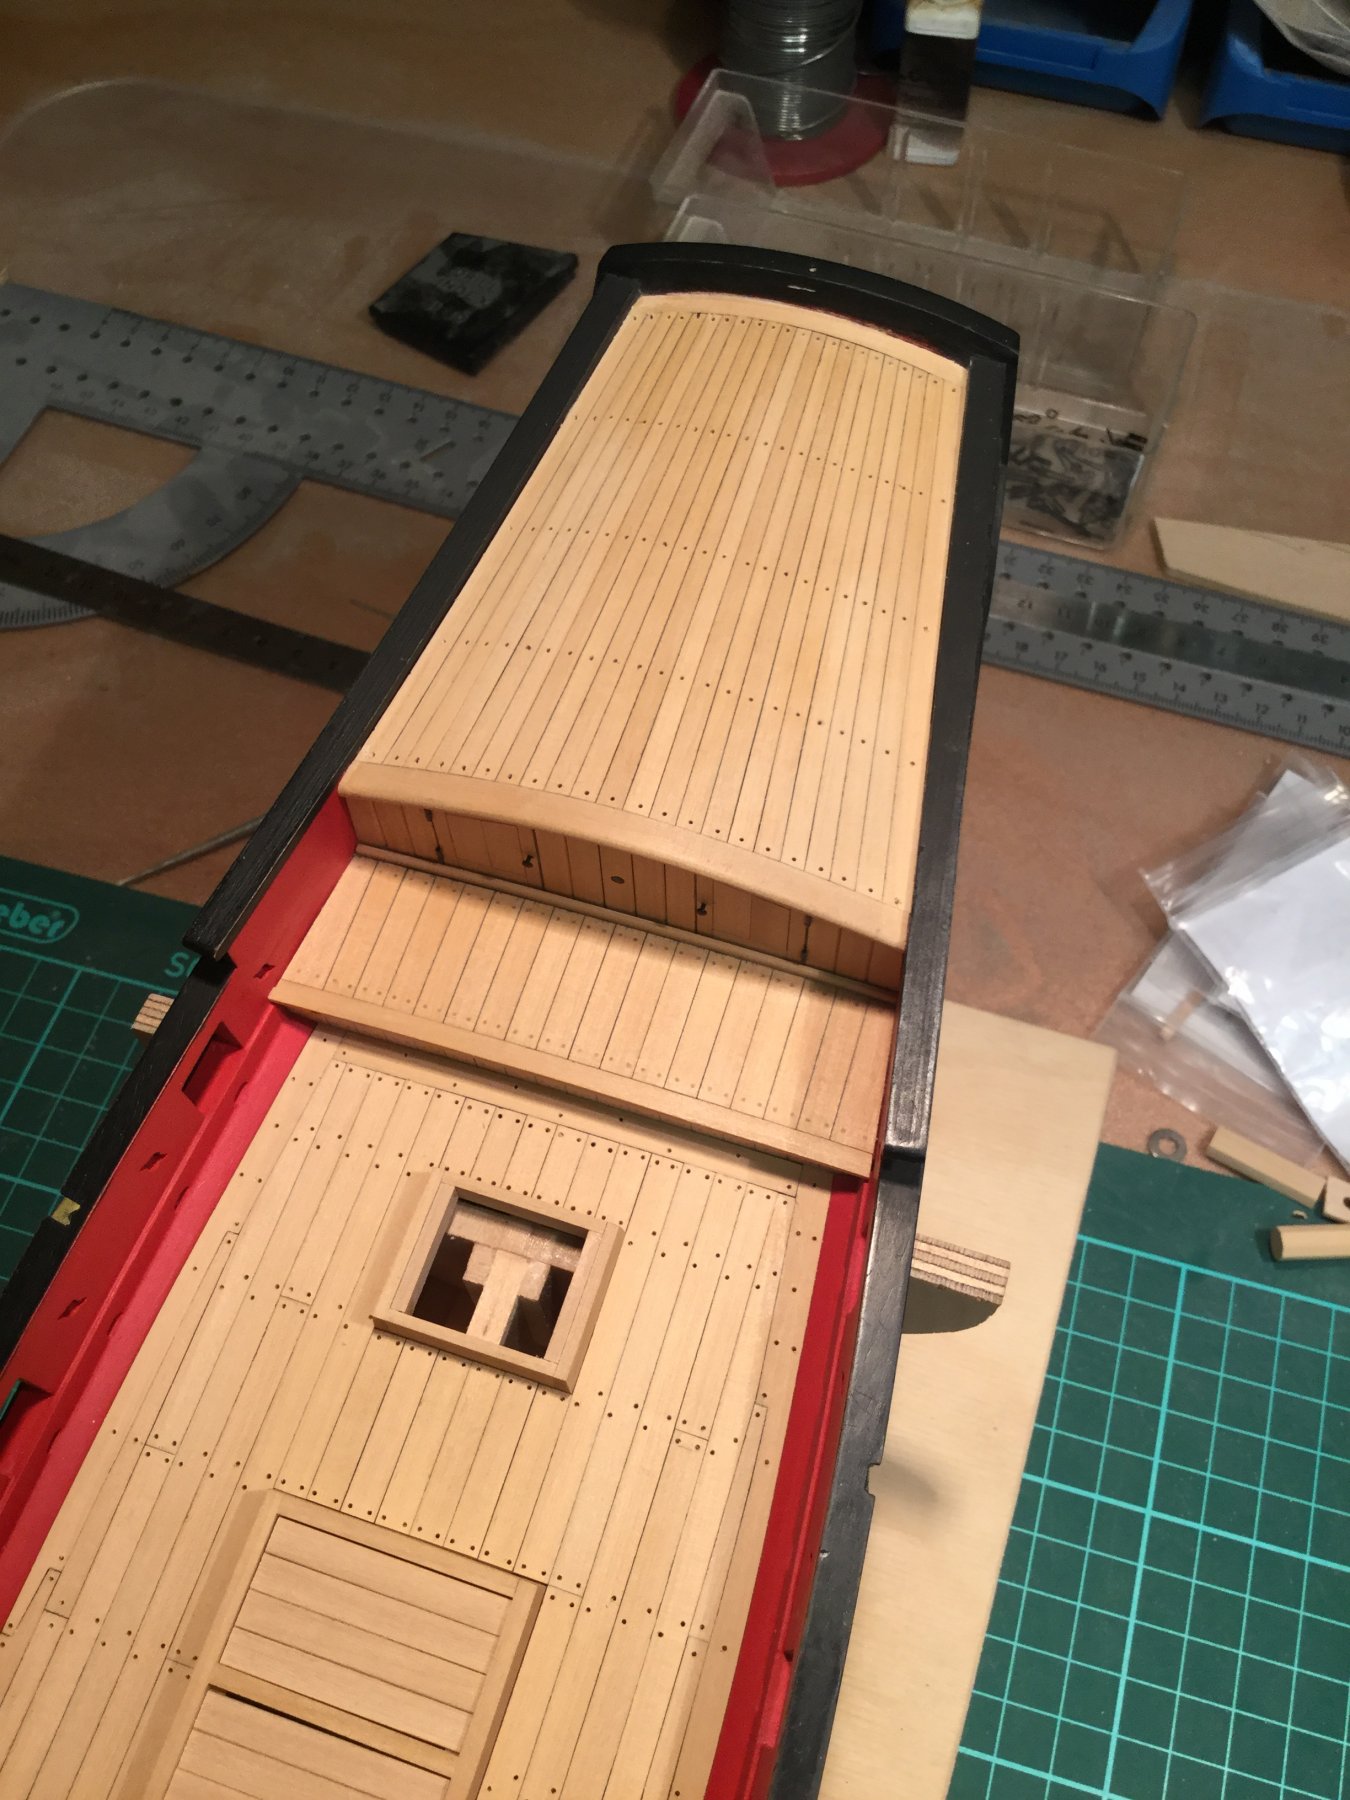
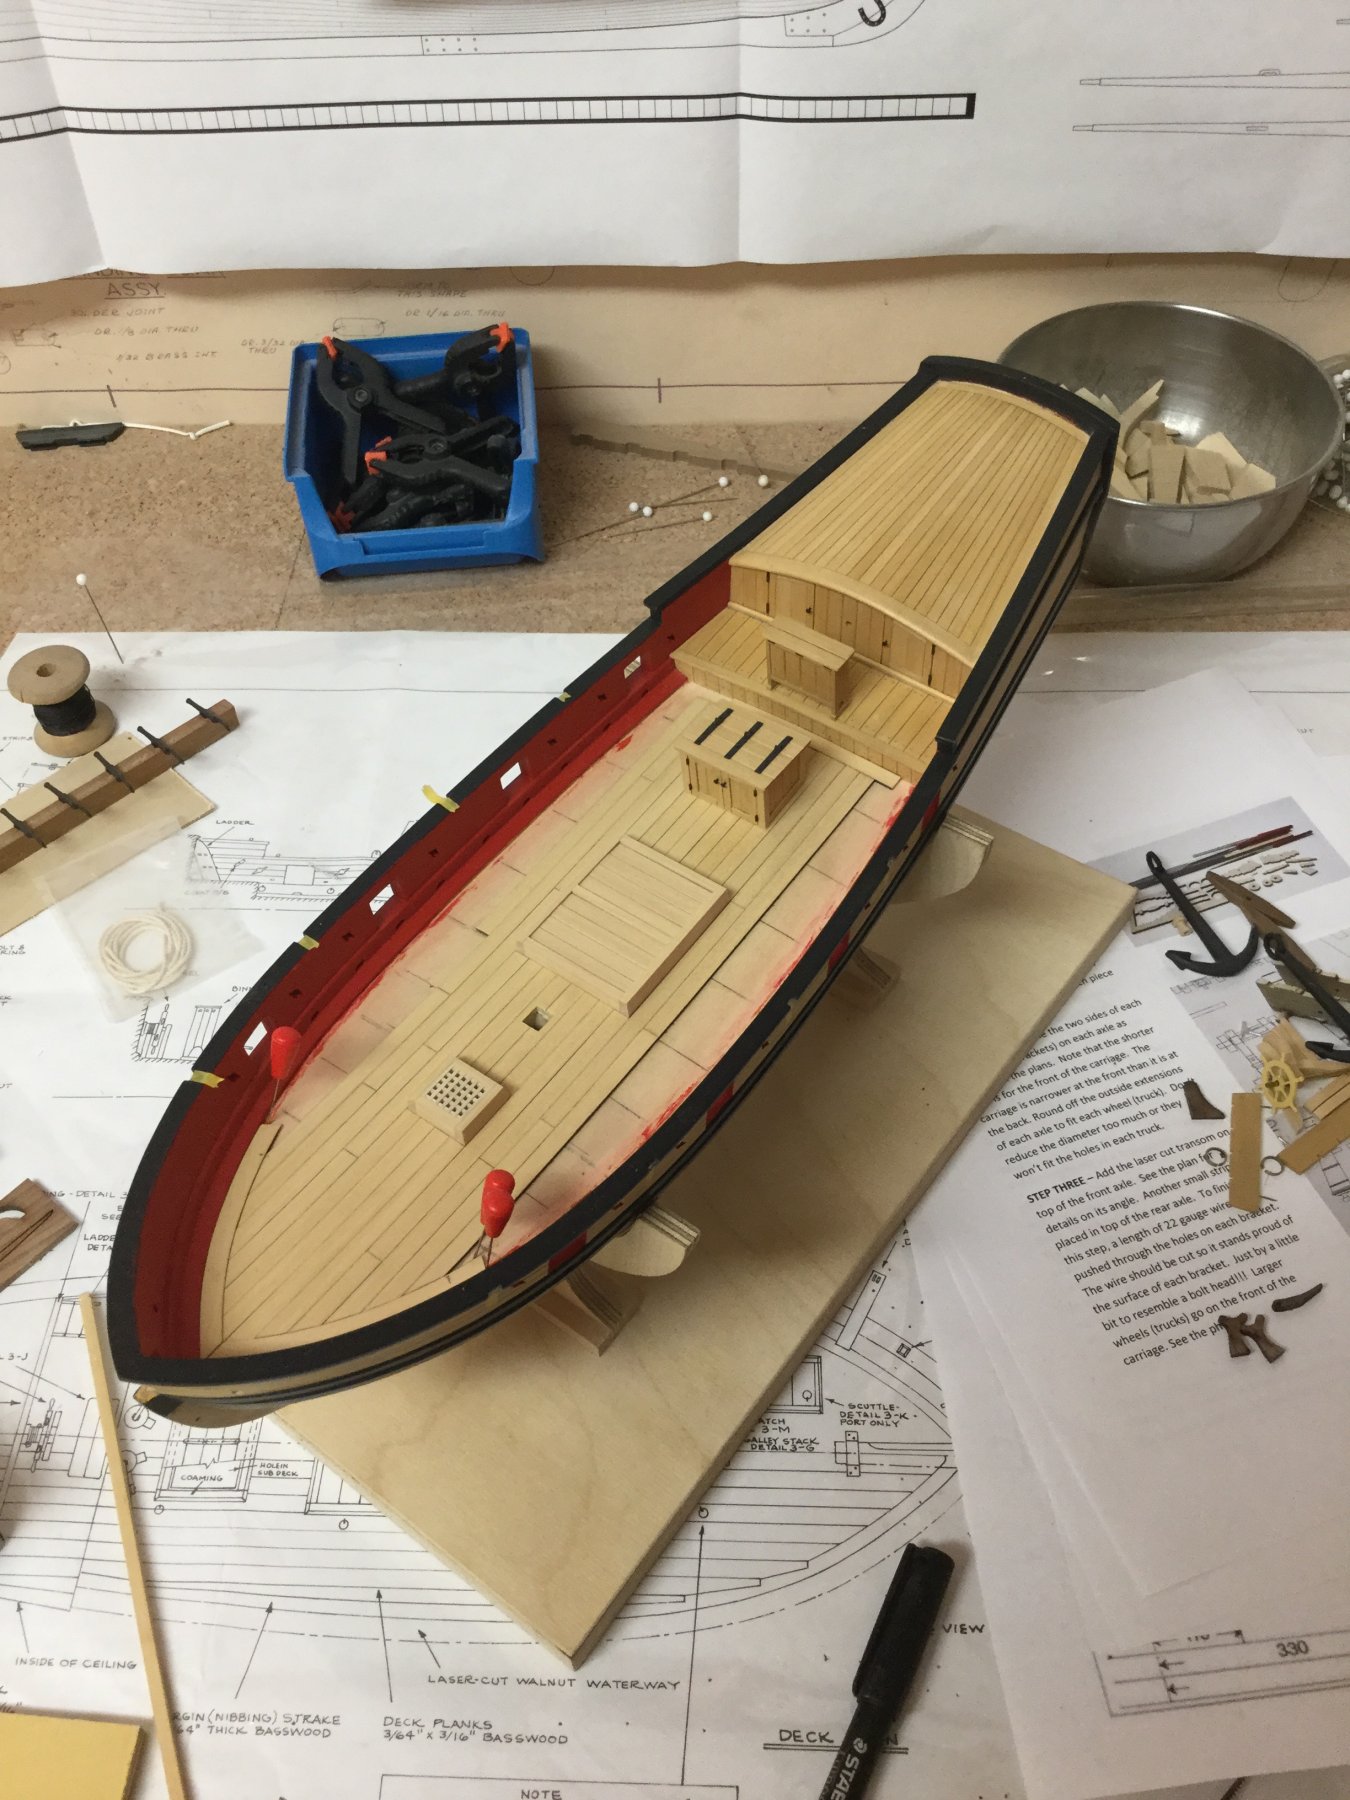
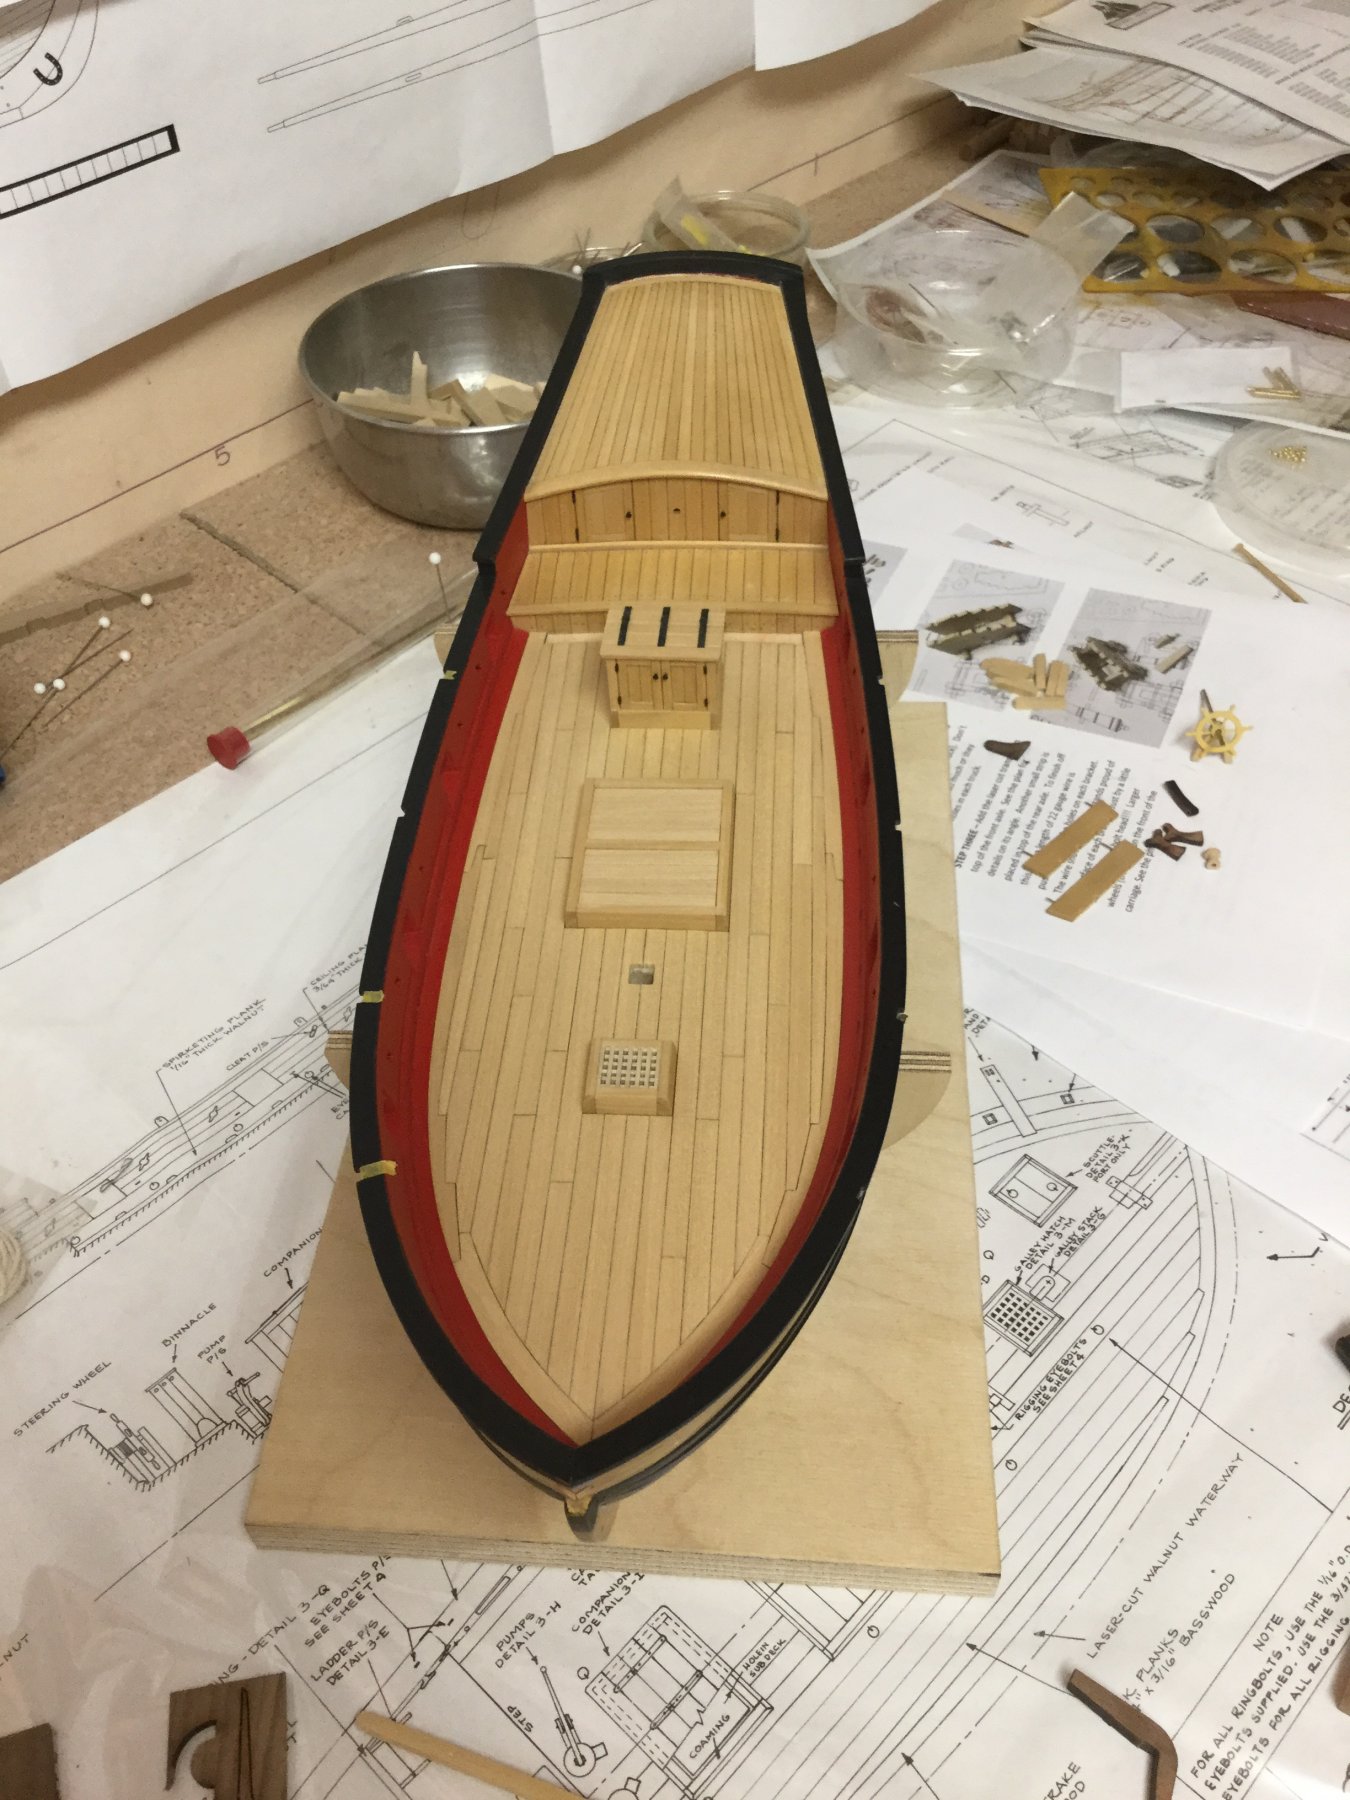
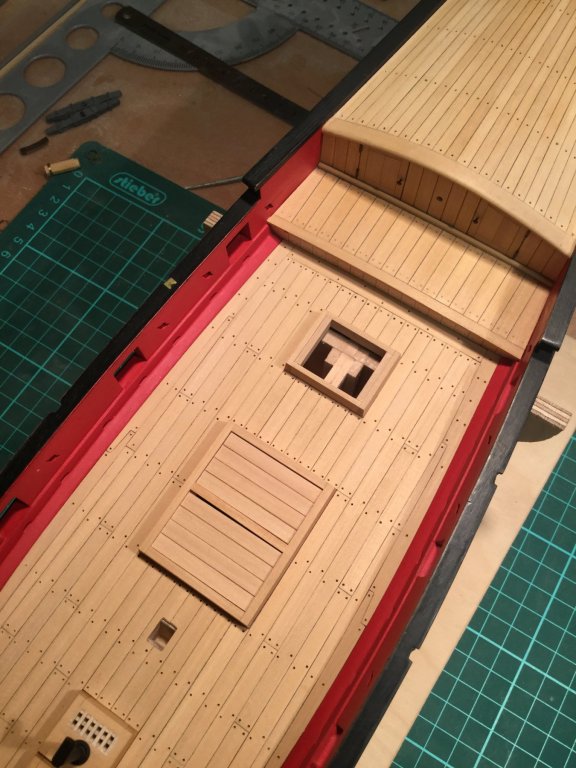
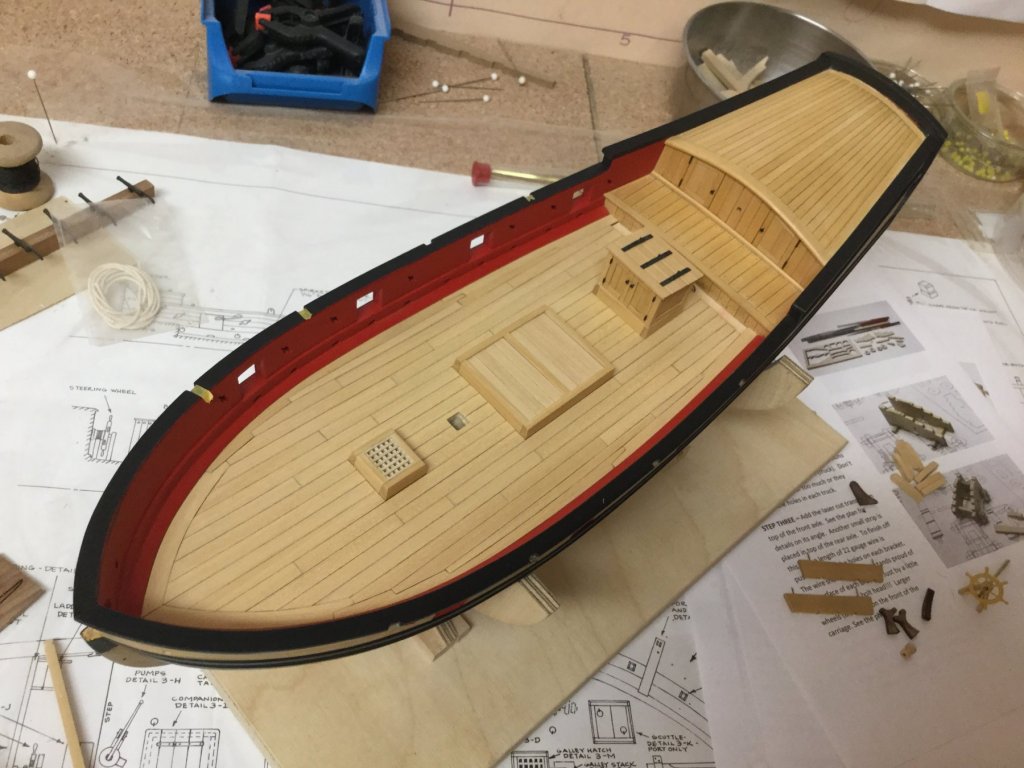
Two weeks ago i started planking the main deck. I mostly used the layout proposed by the plan, only some minor addons. The companionway, hatch and light are fitted inside the deck planking. I decided to skip the front hatch because i will add a windlass later and need the space for that.


- 231 replies
-
- 5
-
-
- model shipways
- armed virginia sloop
- (and 1 more)
-
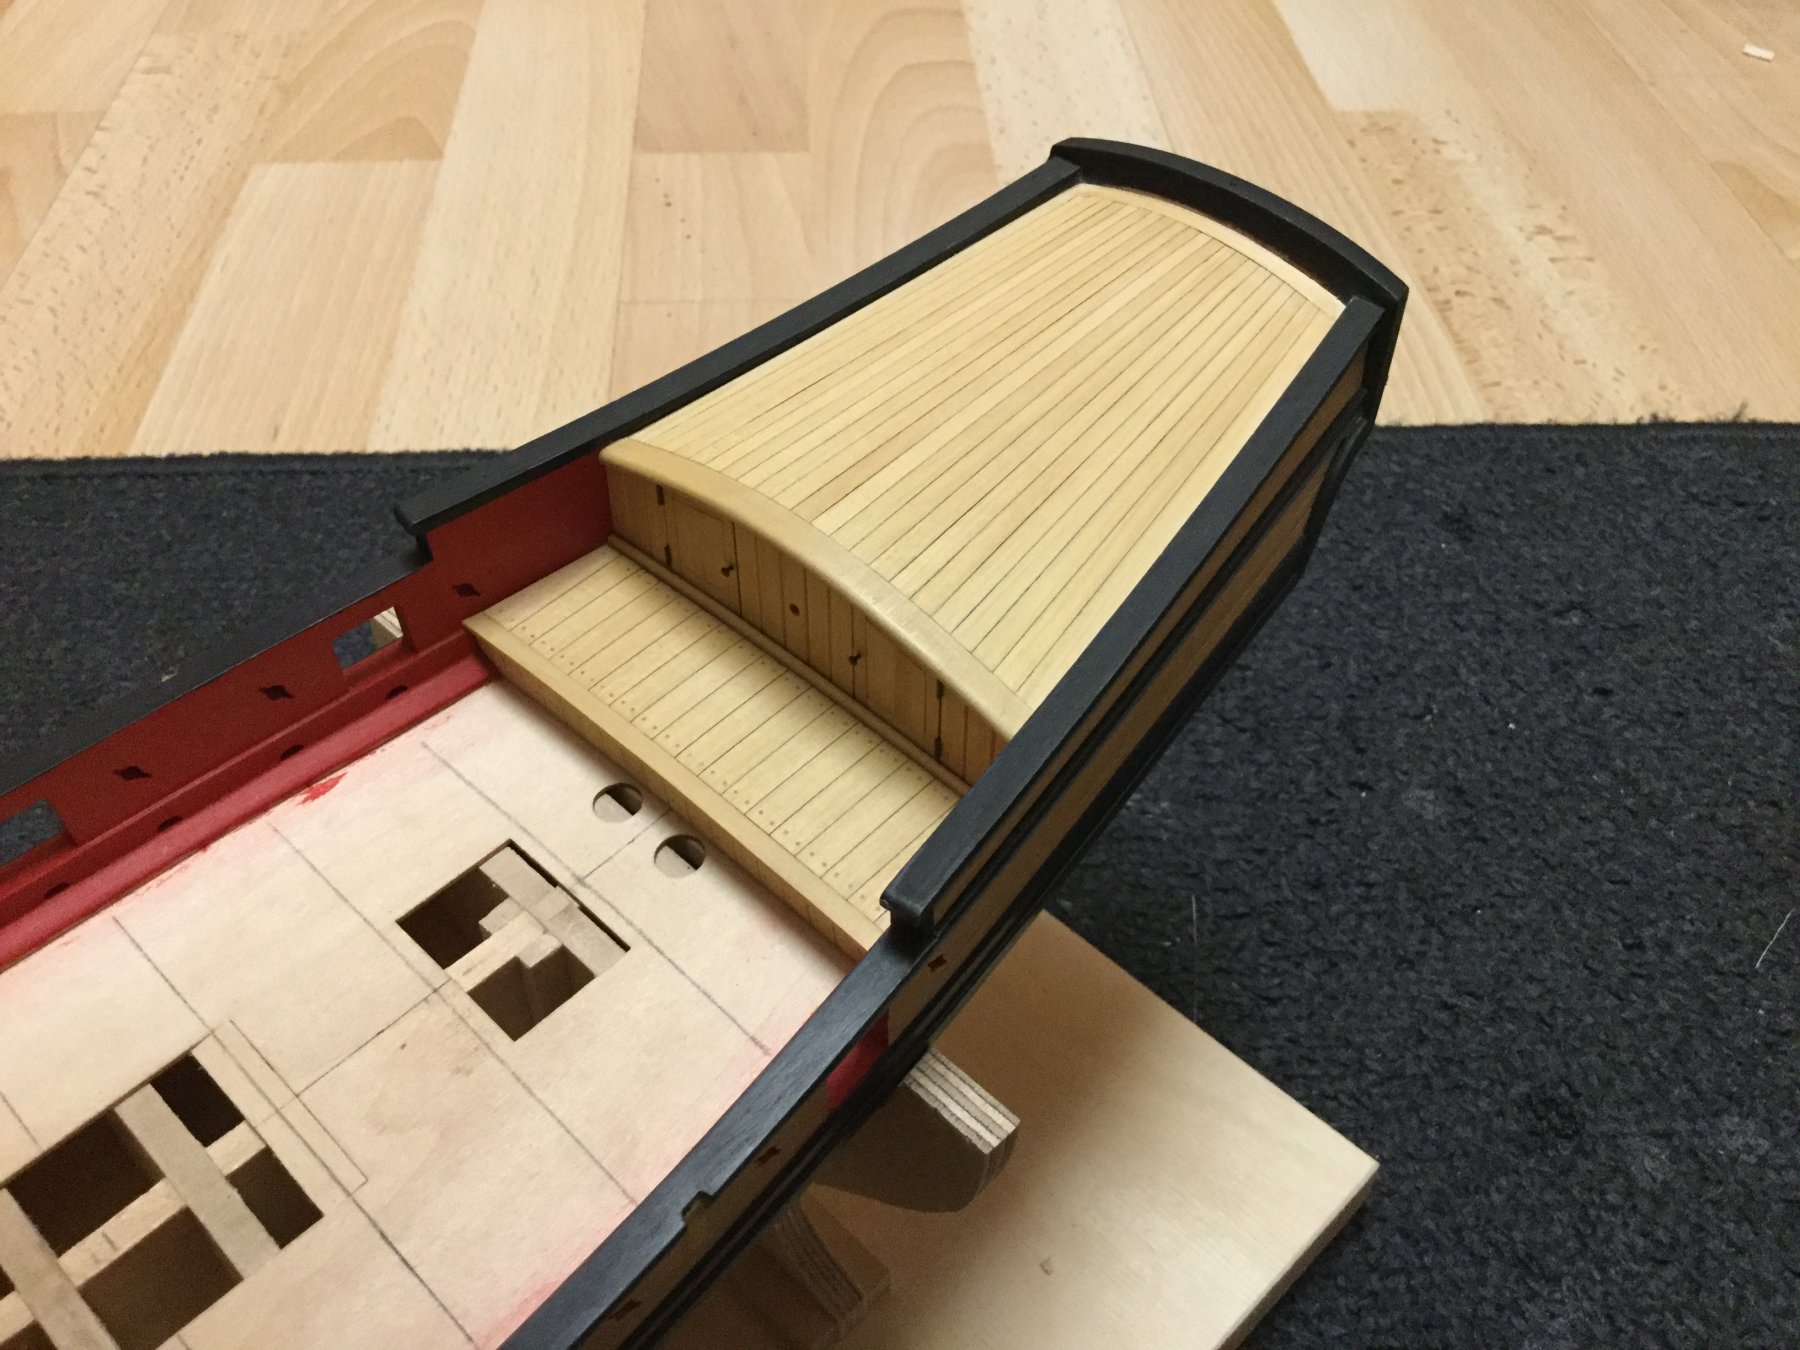
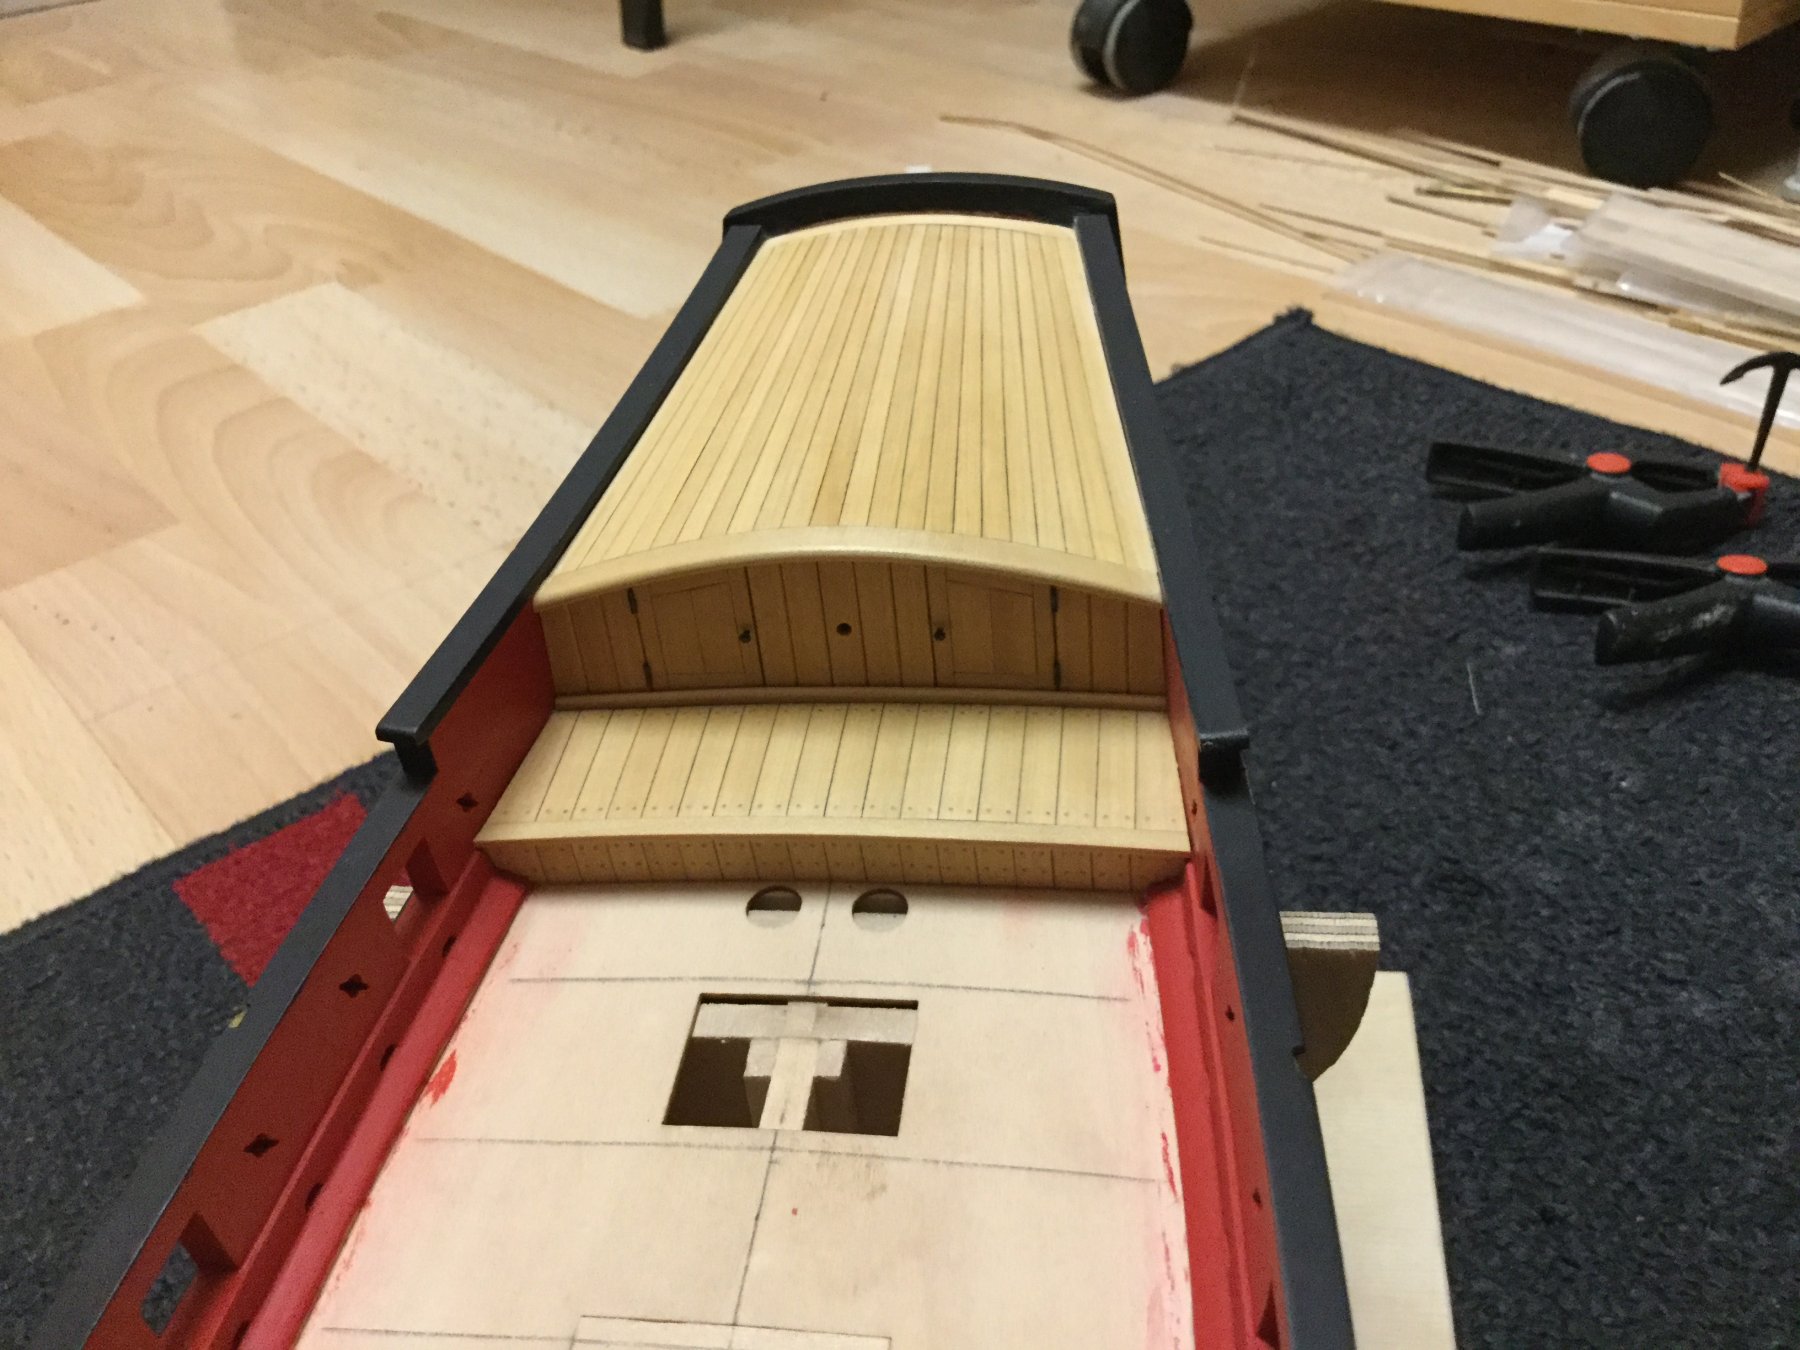
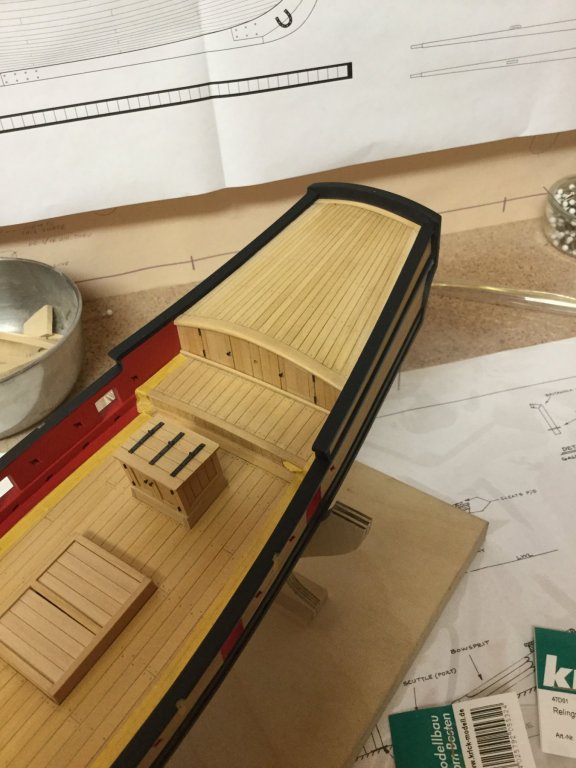
Next step was planking the cabin top.


- 231 replies
-
- 6
-
-
- model shipways
- armed virginia sloop
- (and 1 more)
-
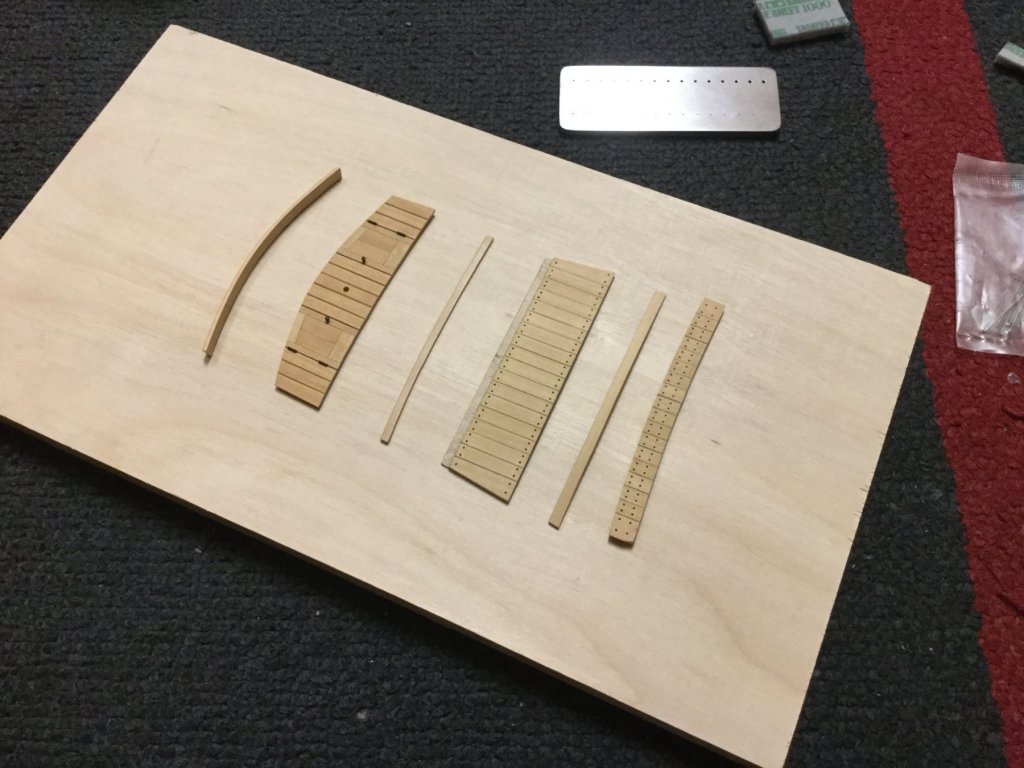
For the deck I started with the cabin front and the step. I prepared the parts, drilled the holes for the treenails (0,6 mm) and inserted them before gluing the parts in place.

- 231 replies
-
- 6
-
-
- model shipways
- armed virginia sloop
- (and 1 more)
-
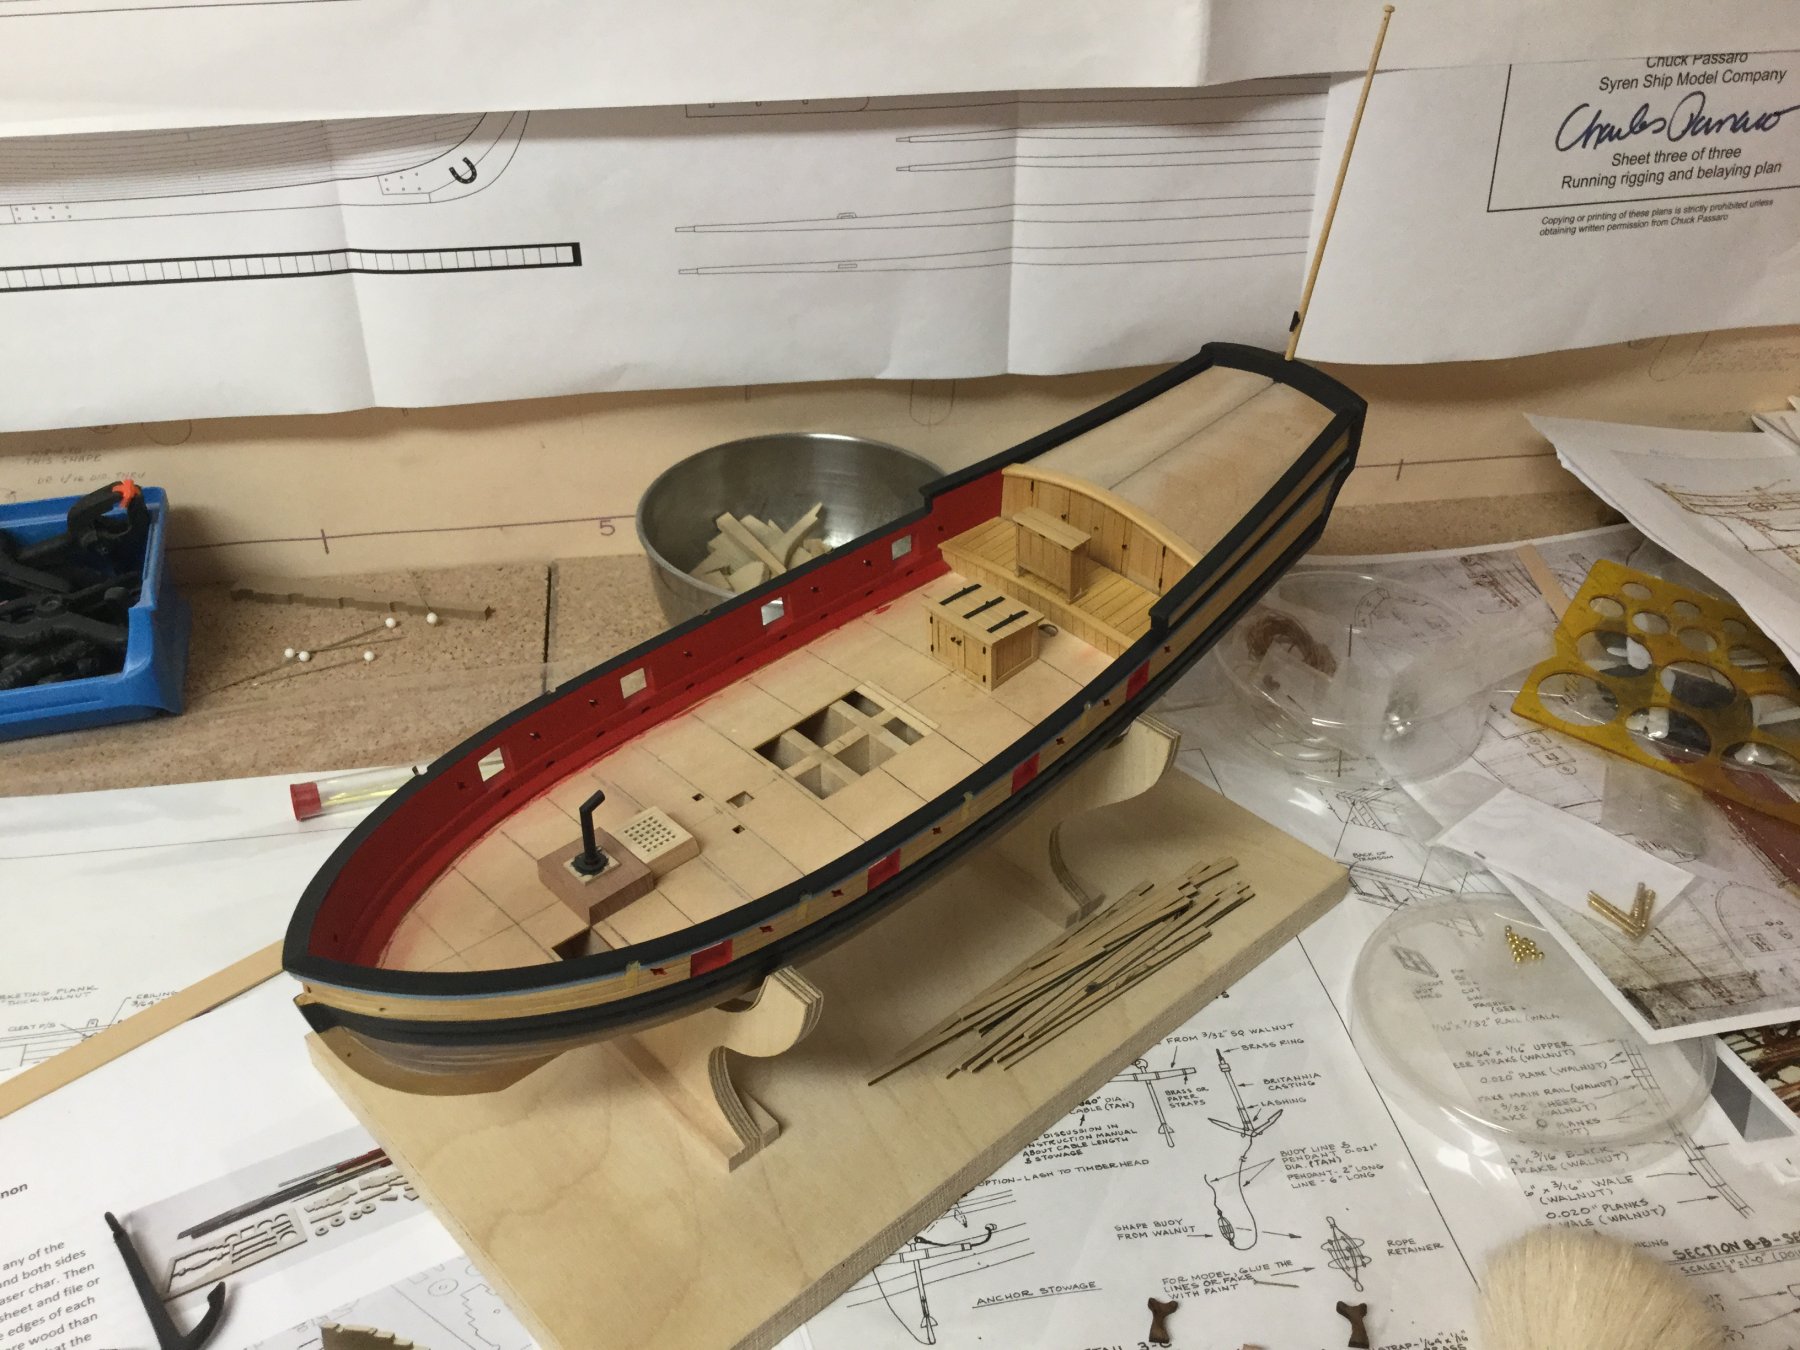
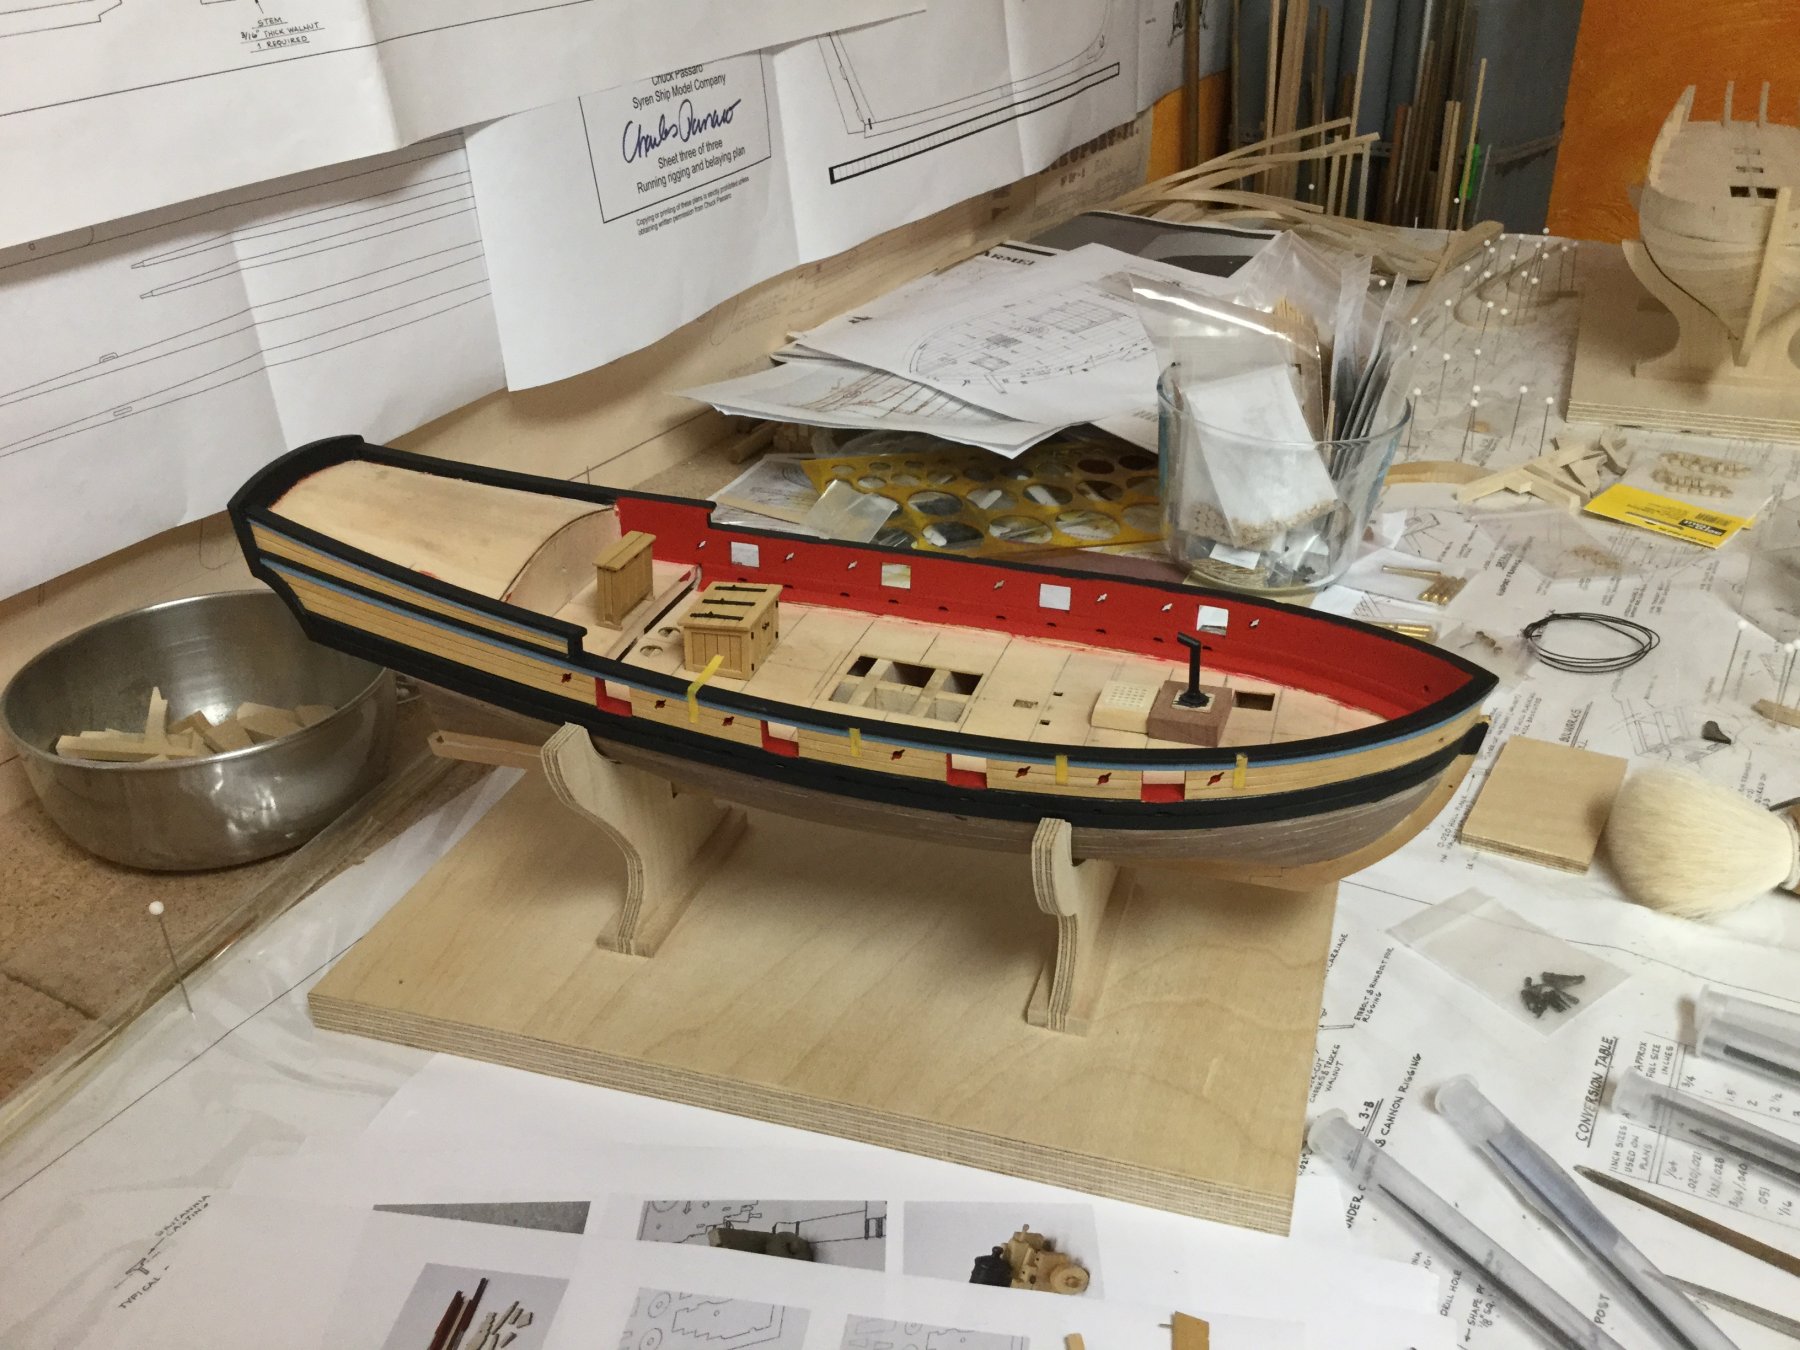
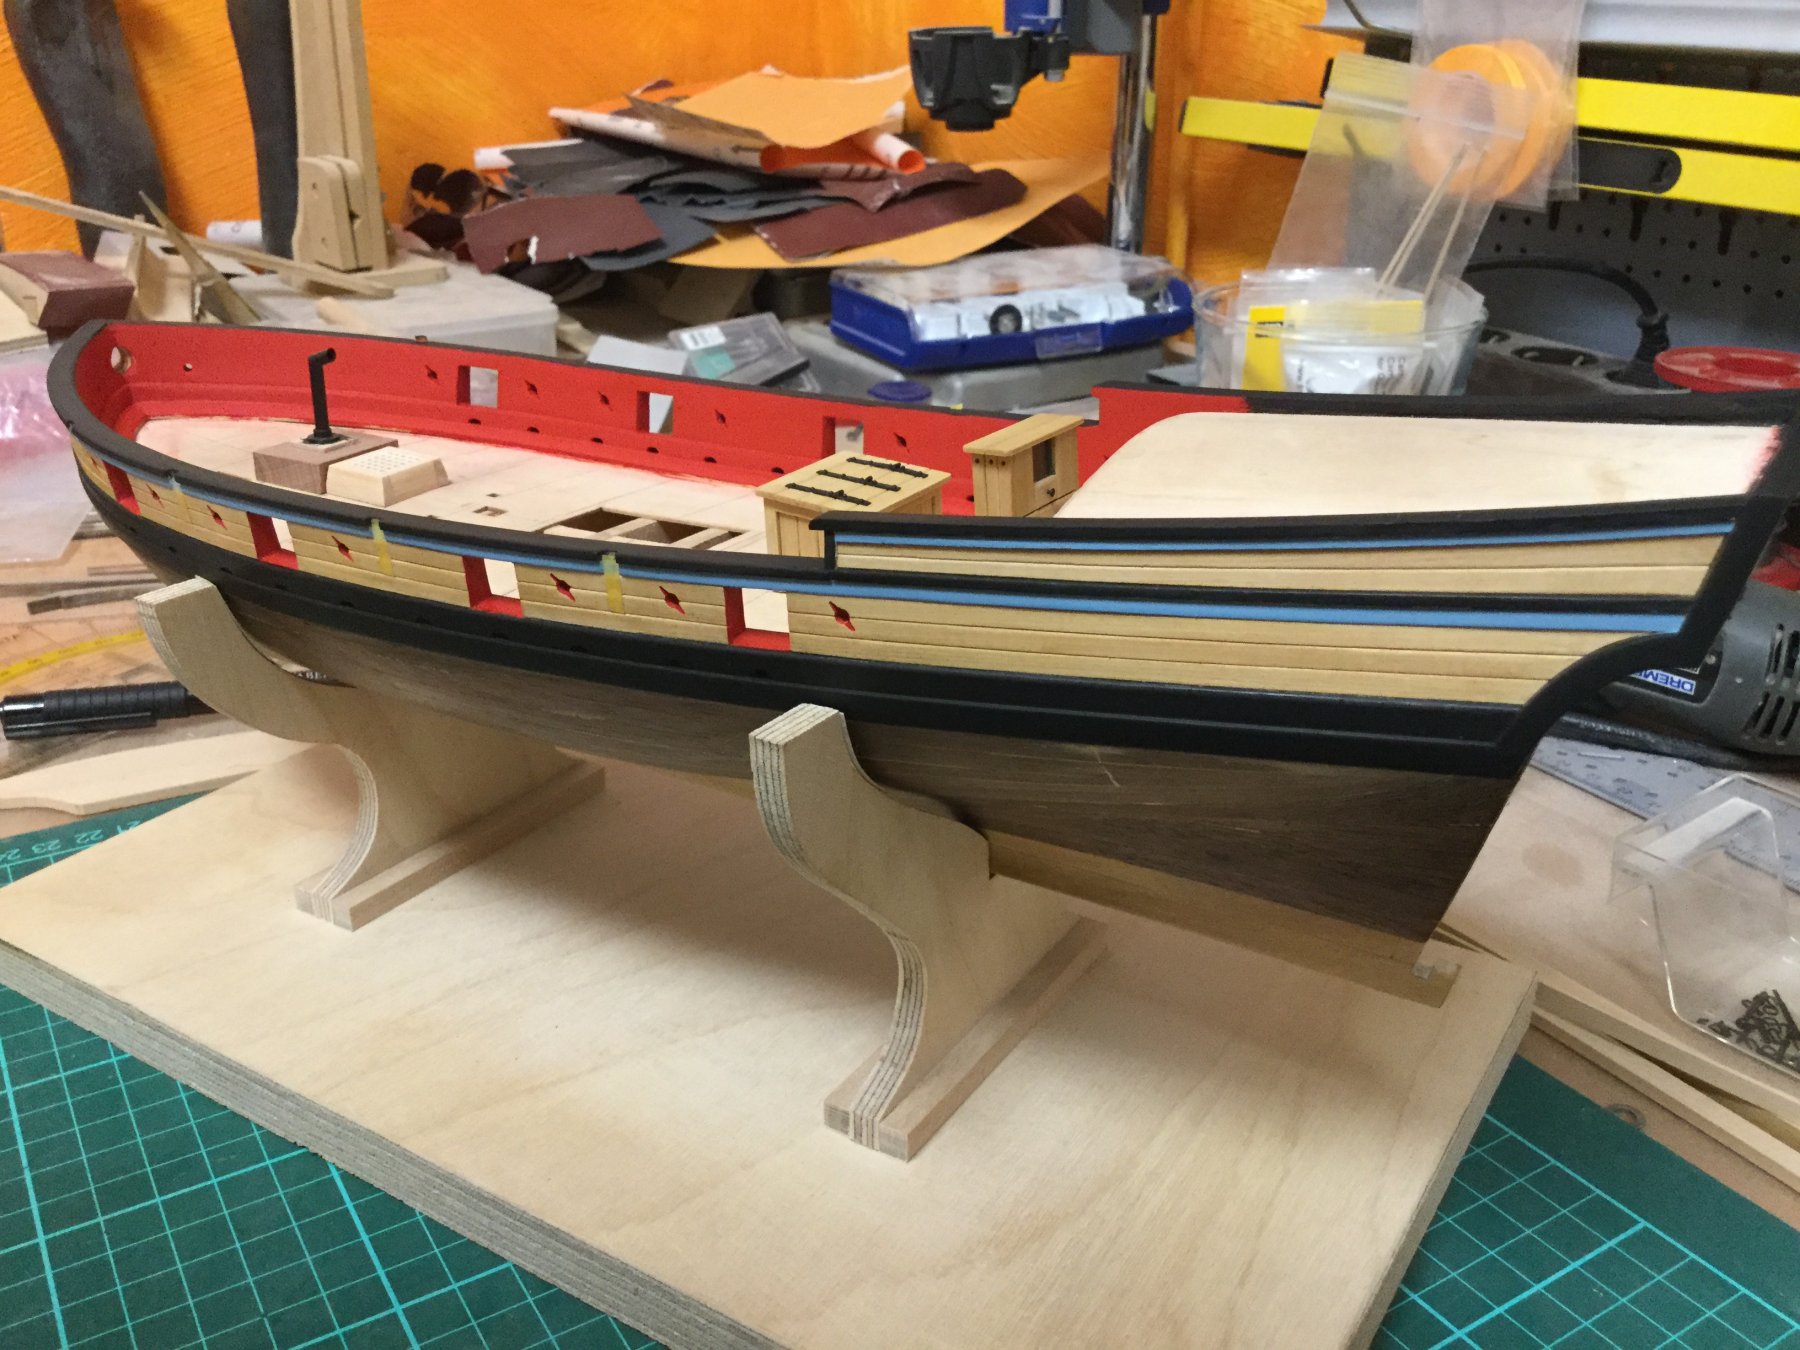
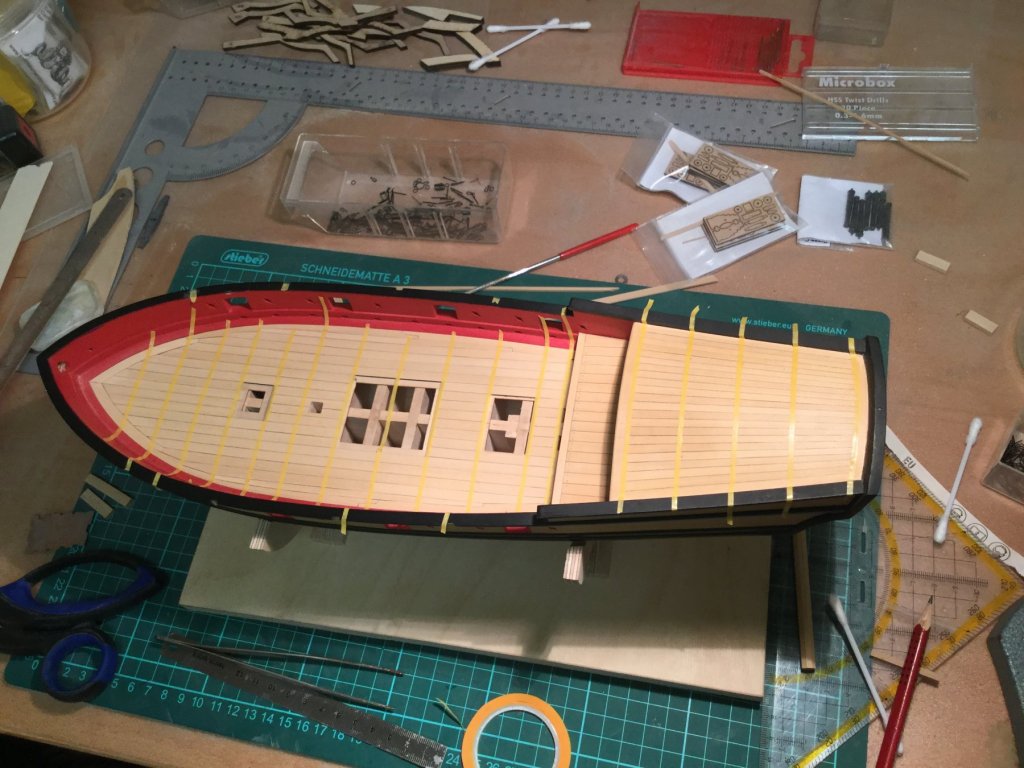
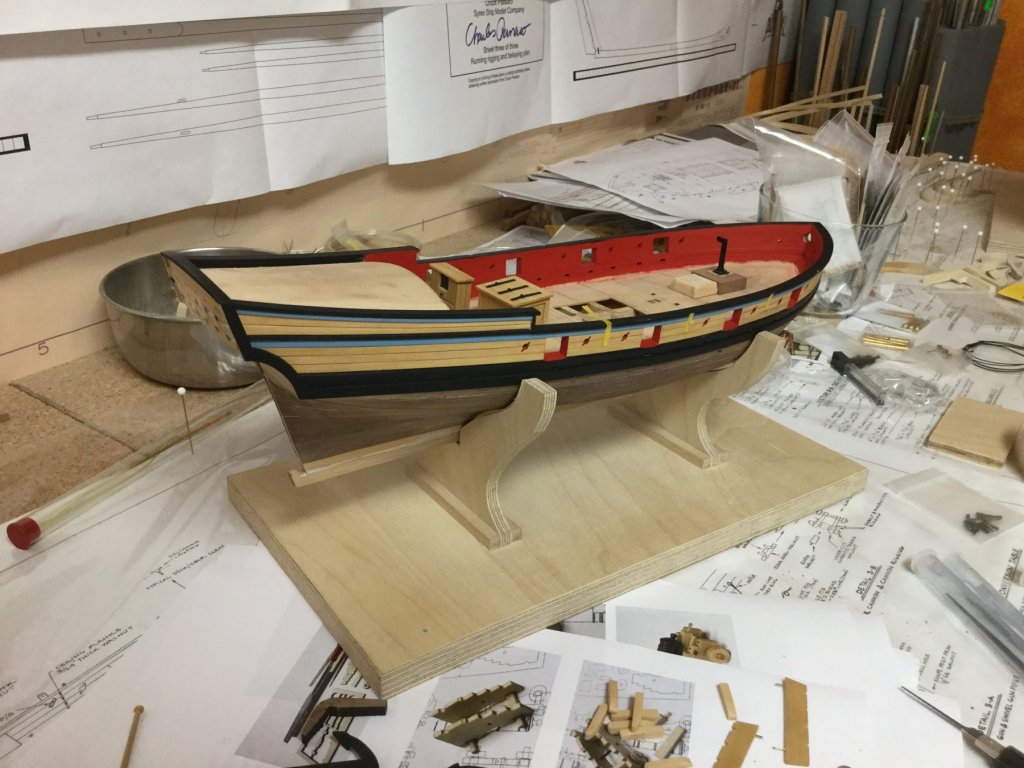
The ship then needed some color. I started to give some areas several coats of thinned color. For the red I used a mixture of 66% Tamiya XF-7 red and 33% vallejo dark vermillion red. In my opinion the tamiya is the best (red) acrylic colour available but covers bad even after several coats. But mixed with vallejo it covers well after two or three coats.


- 231 replies
-
- 7
-
-
- model shipways
- armed virginia sloop
- (and 1 more)
-
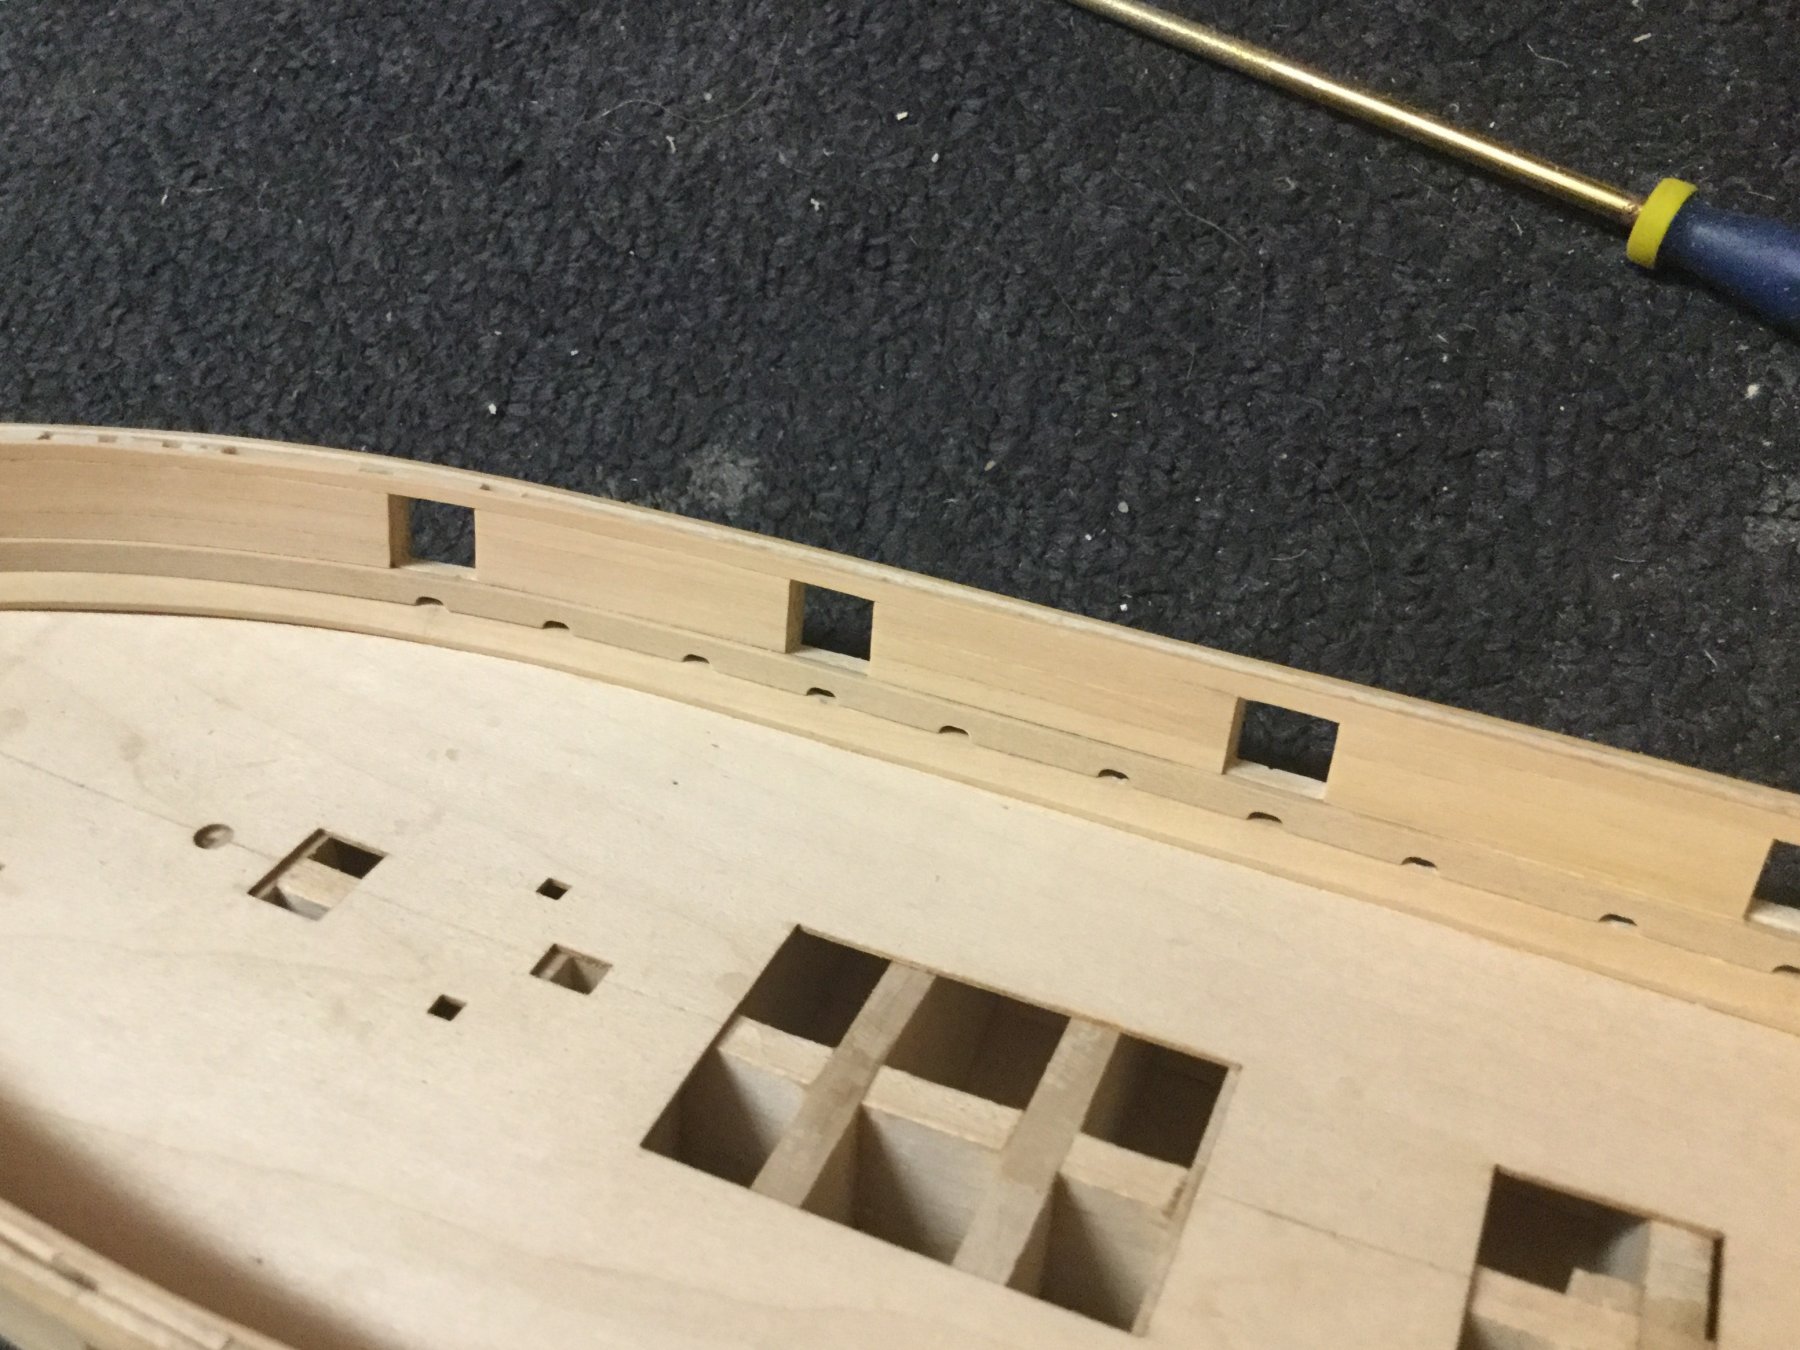
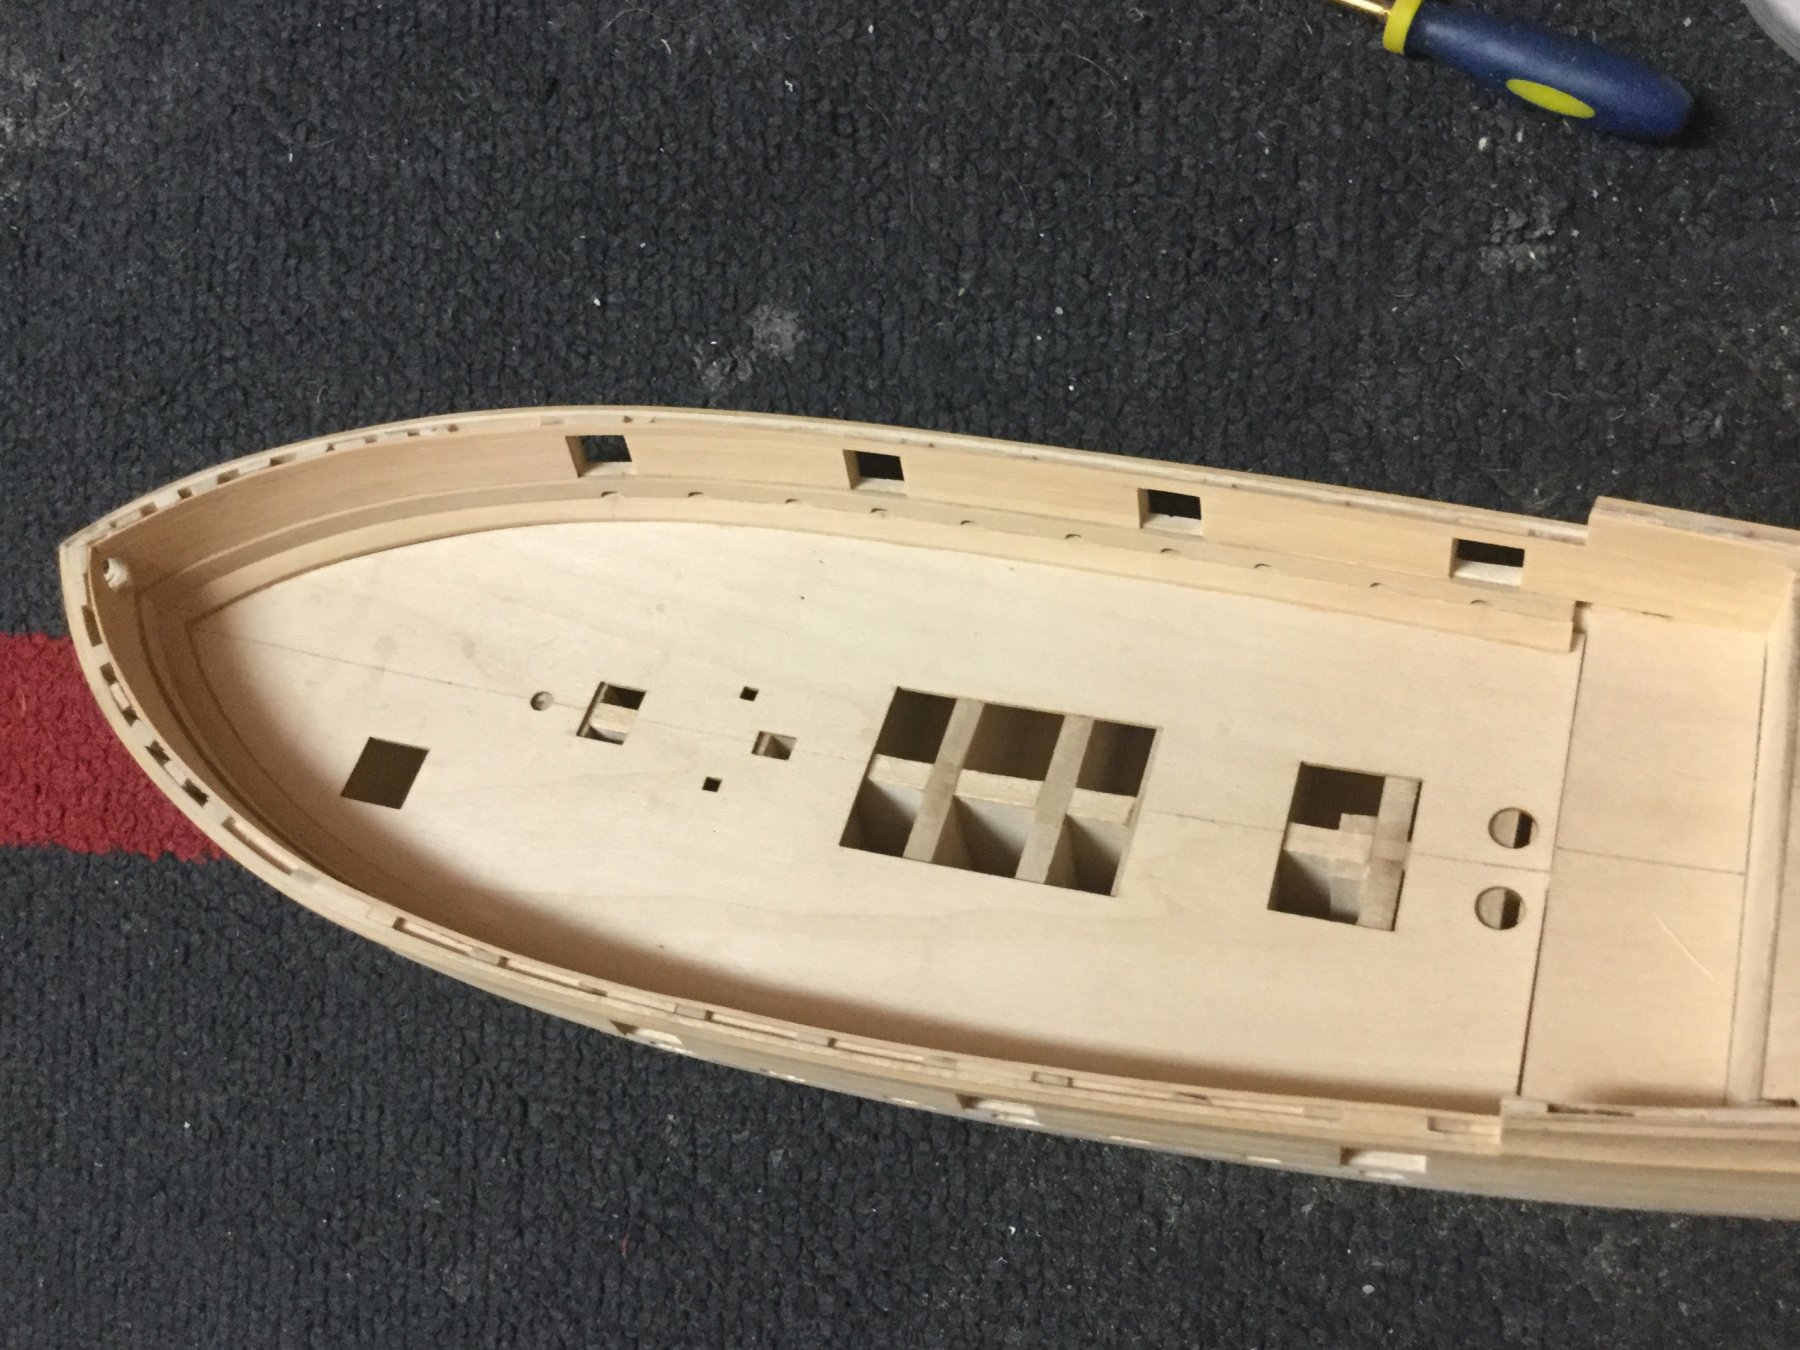
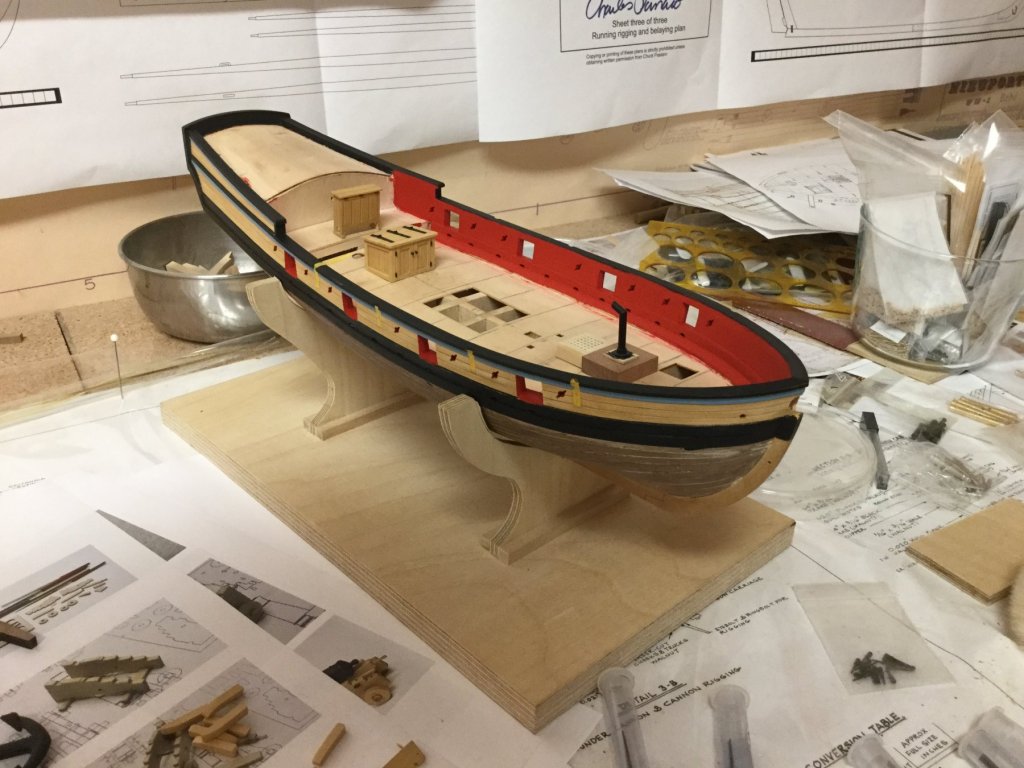
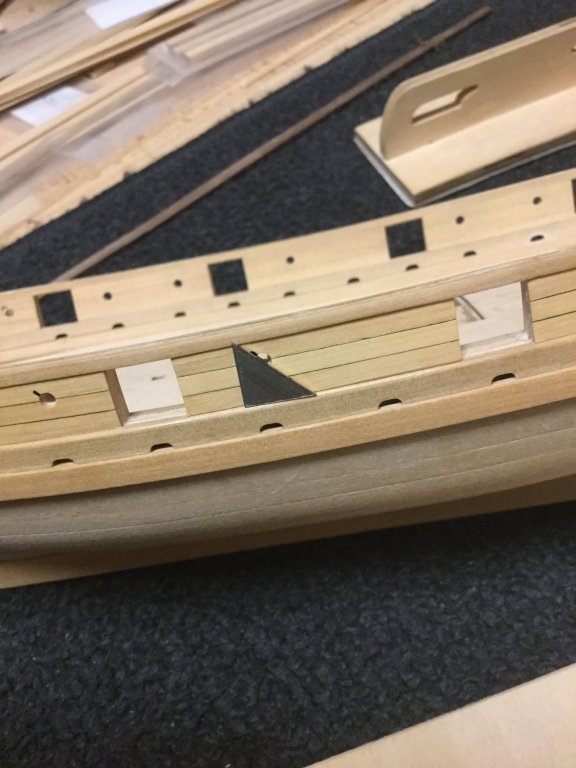
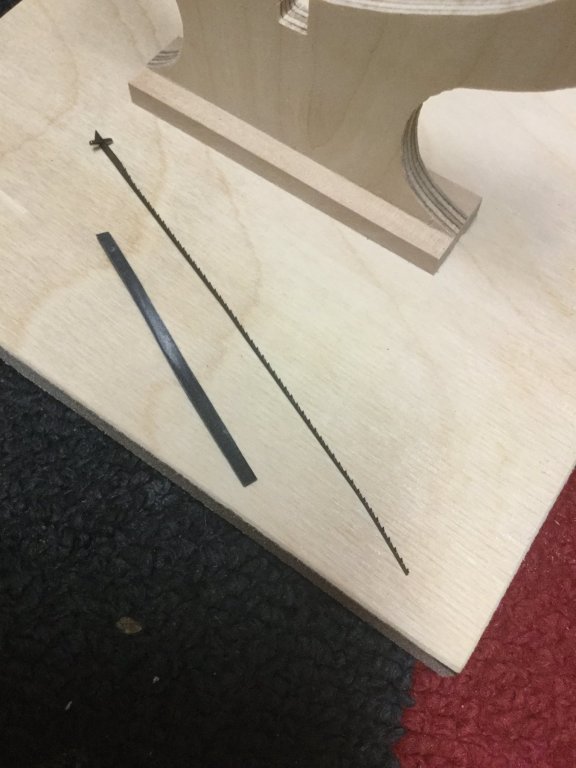
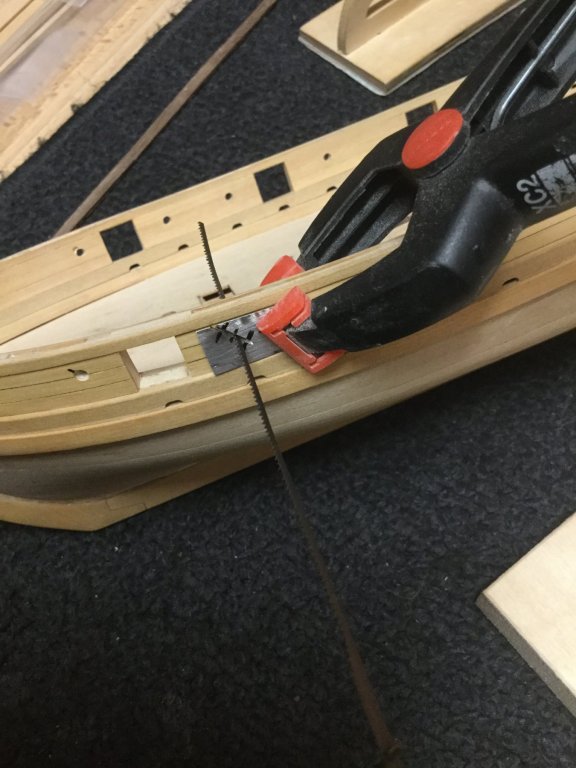
Long Time has passed since my last update due to the endless summer this year. I was a bit lazy with the build log, so I will post some updates. The sweep ports were done with a micro-saw-blade and a needle file for finish.


- 231 replies
-
- 4
-
-
- model shipways
- armed virginia sloop
- (and 1 more)
-
Thank you very much for the fast replies. That is very helpful.
-
Hello everyone, may anyone help me please. I’m going to build a 1/48 scale british revenue cutter and having trouble to identify the correct size of a 3-pounder gun. Most scale guns seem to be oversized. I remember a 3-pounder gun having a gun barrel length of about 5‘ , is that correct? That would be about 30mm for the correct size of a scale 3-pounder barrel in 1/48 scale - equal to a 6-pounder gun barrel in 1/64 scale.
-
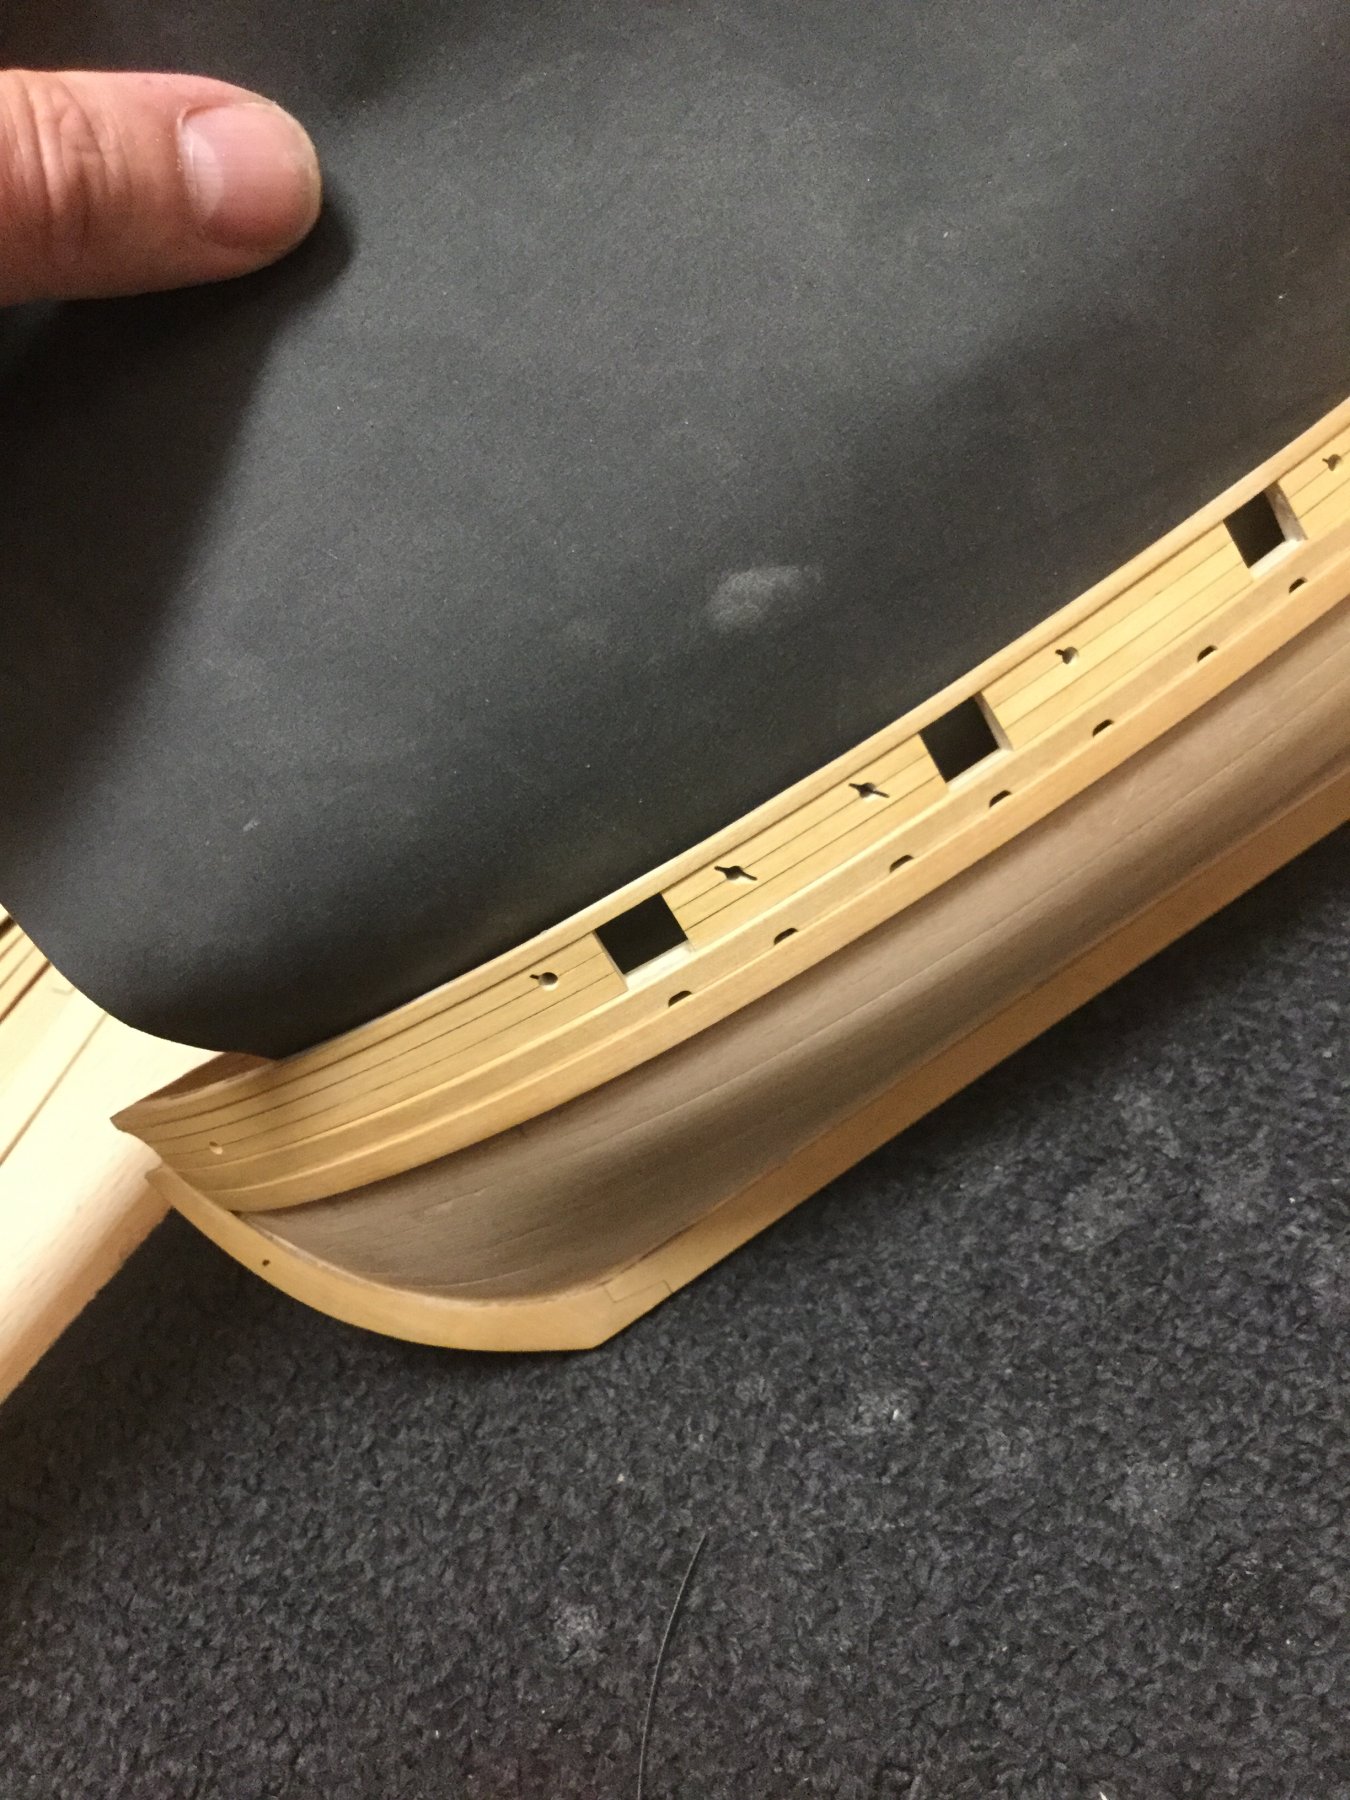
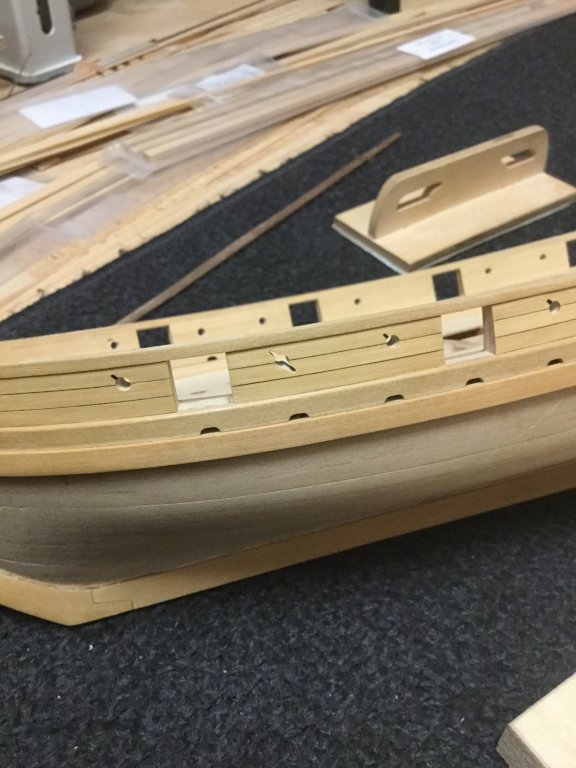
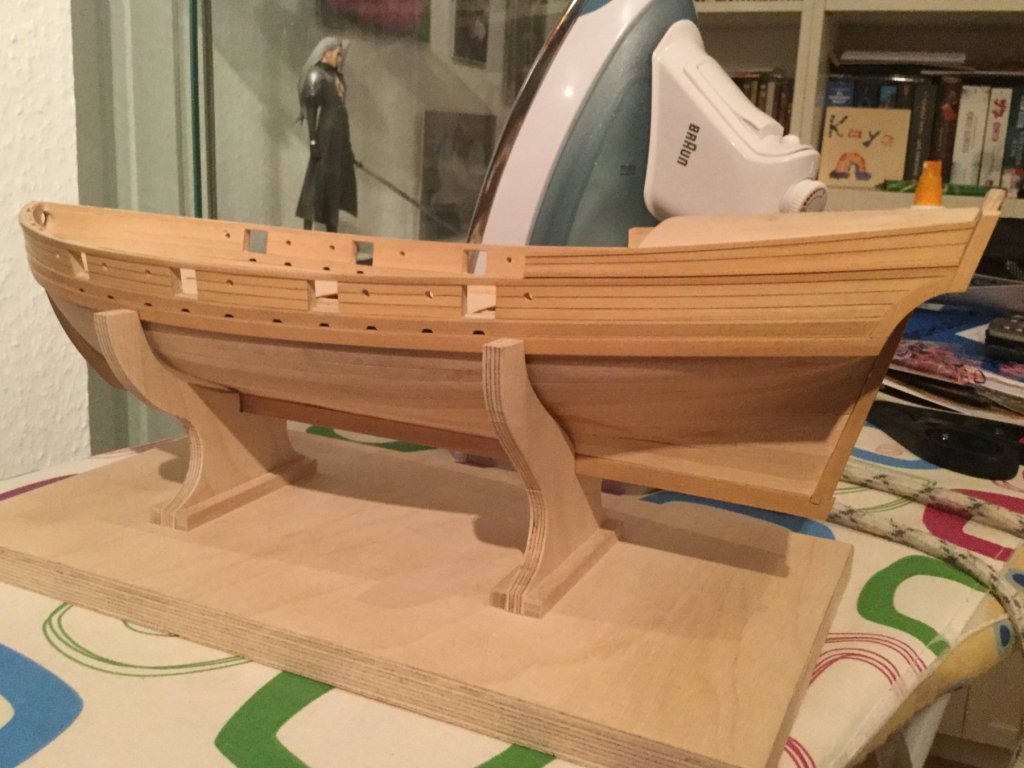
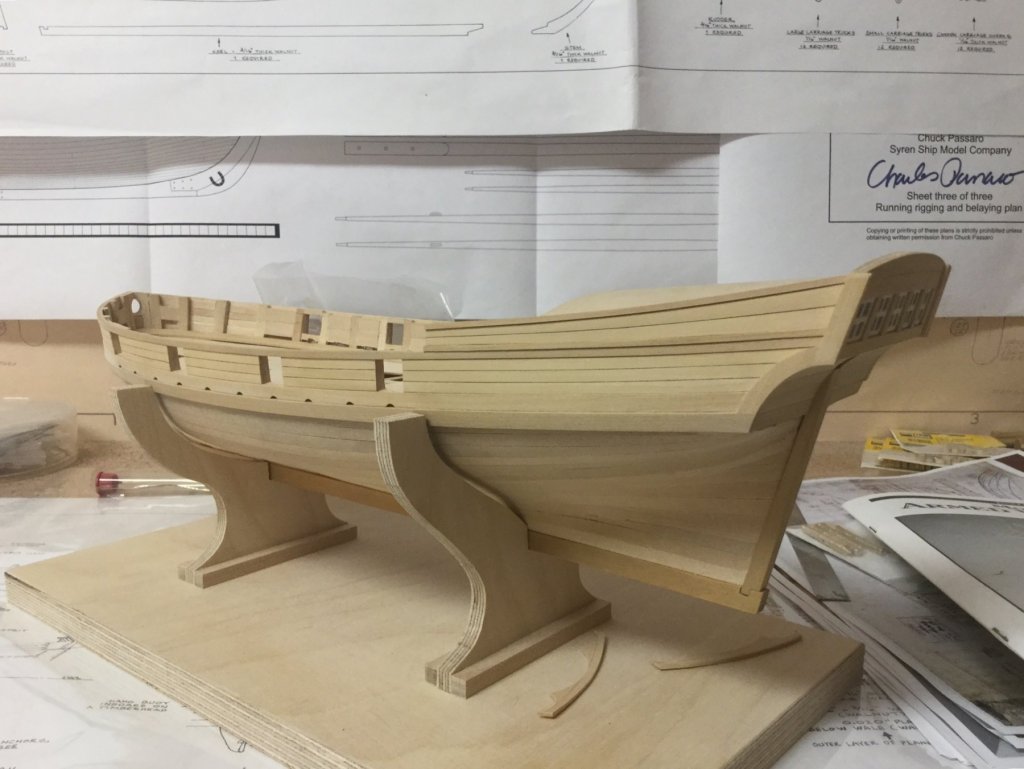
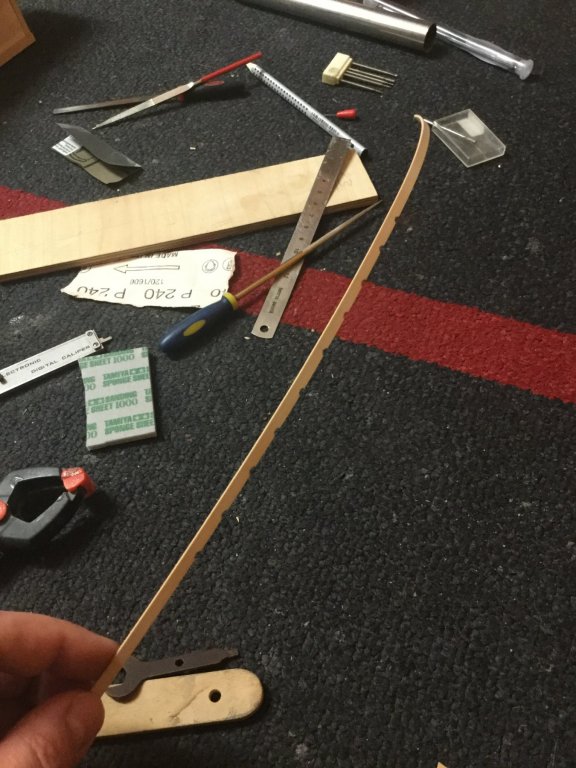
The stem part is not fixed yet, I wait with that until second planking is finished. Cut the round holes of the sweep,ports in both sides. Used a 1,5mm drill to drill basic holes and then finished the holes with a needle file to prevent the wood from breaking and to secure the holes are in the middle of the chaulking. Don’t know if I should also cut the spikes of the sweep ports because I‘m afraid the boxwood will split or break. Put on a coat of clear vanish to protect the wood. As I‘m going to paint the area below the wale flat white as suggested in the manual I will use walnut supplied in the kit for the second planking to save boxwood for the deck. Will start with second planking next weekend. BTW. Sorry for the iron in the background of the picture.

- 231 replies
-
- 7
-
-
- model shipways
- armed virginia sloop
- (and 1 more)
-
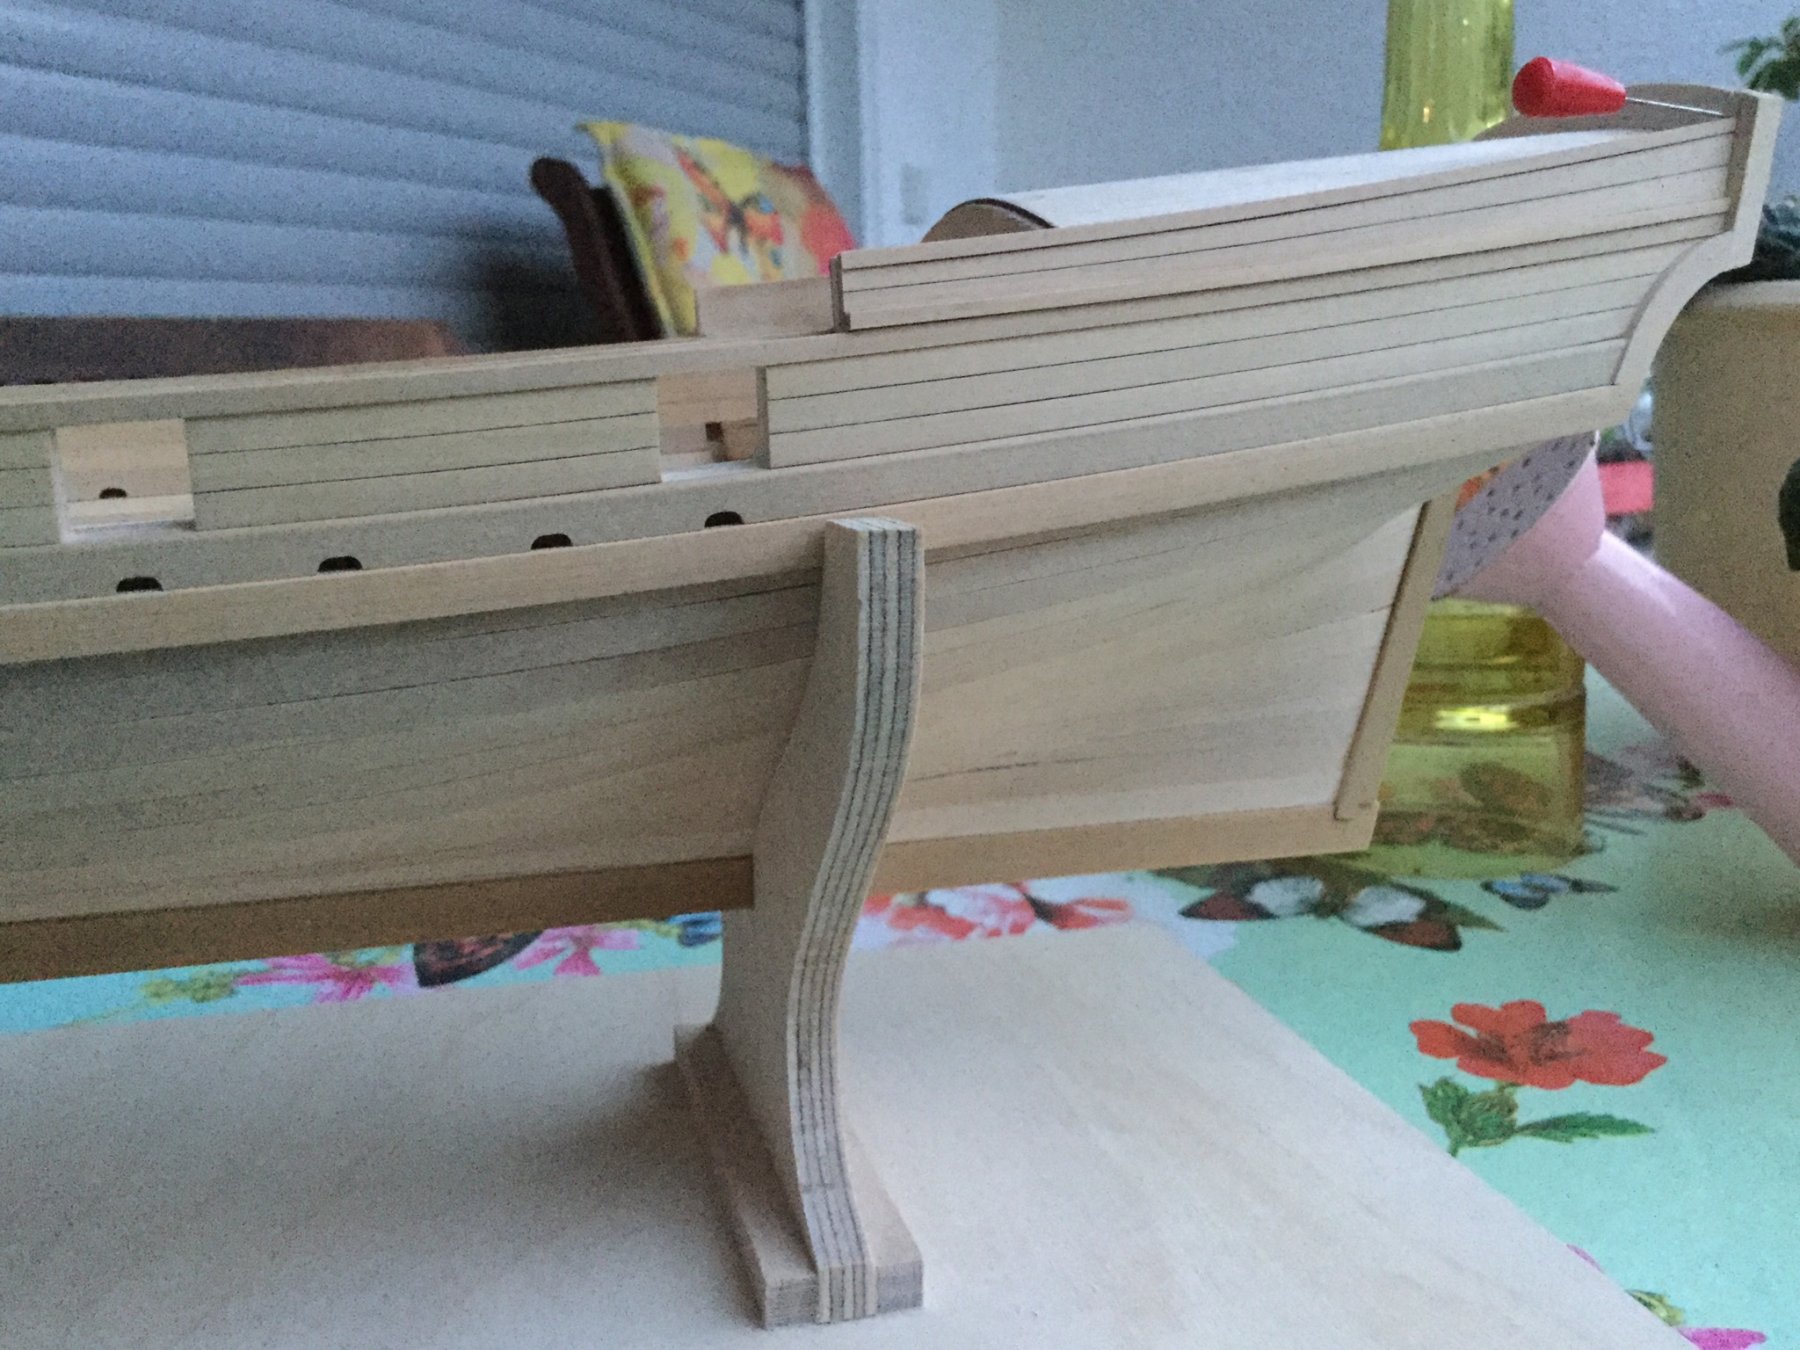
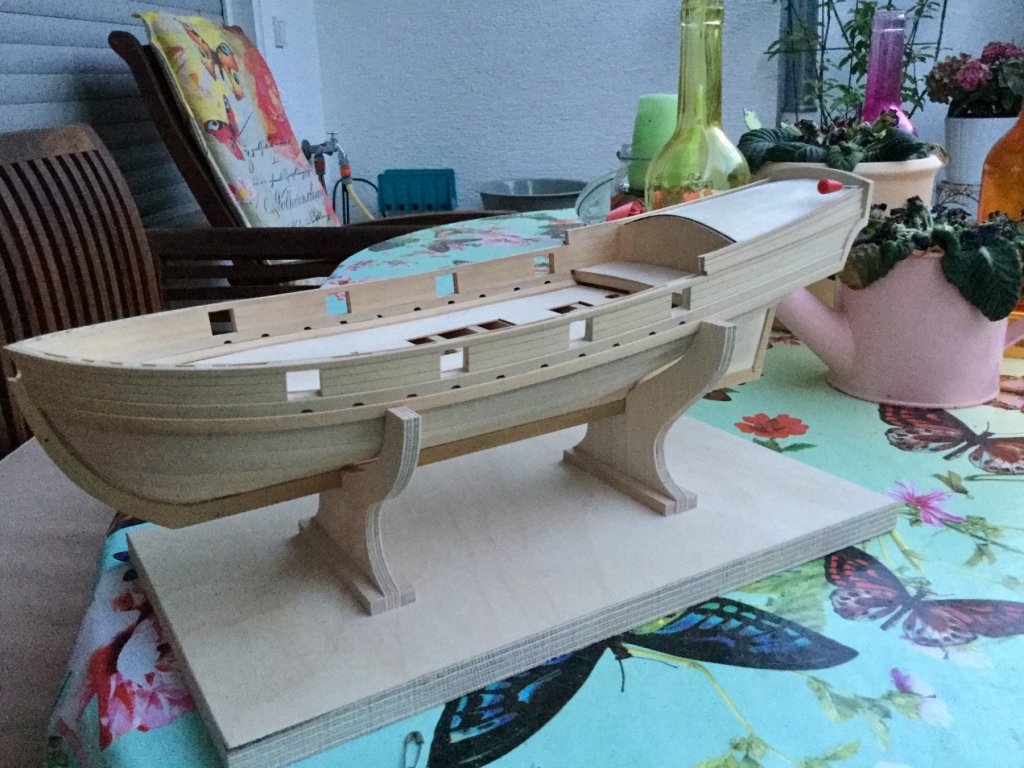
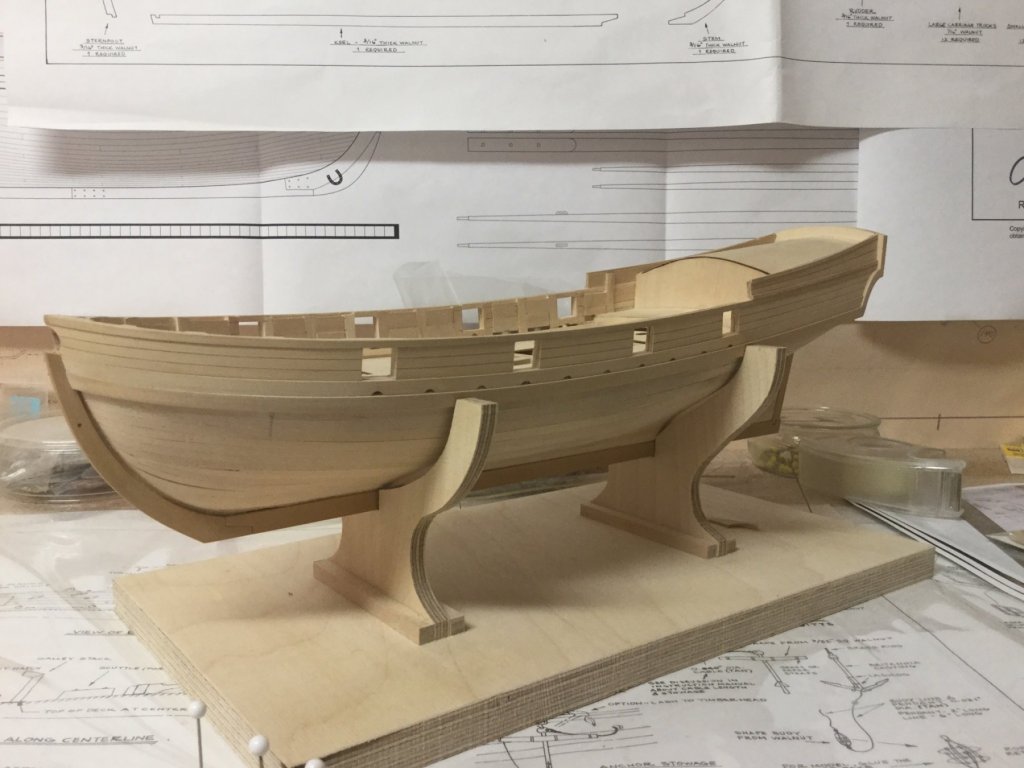
Not much progress so far. Did some rebuilding because I was not satisfied with the outcome. I lowered the cabin sides so they look more like the plan. Made the openings for the water more look like the ones in the plan. Will cut the sweep ports next, still a little afraid of that. Sorry for the bad image quality, sun was drowning already, don’t realized the time.

- 231 replies
-
- 7
-
-
- model shipways
- armed virginia sloop
- (and 1 more)
-
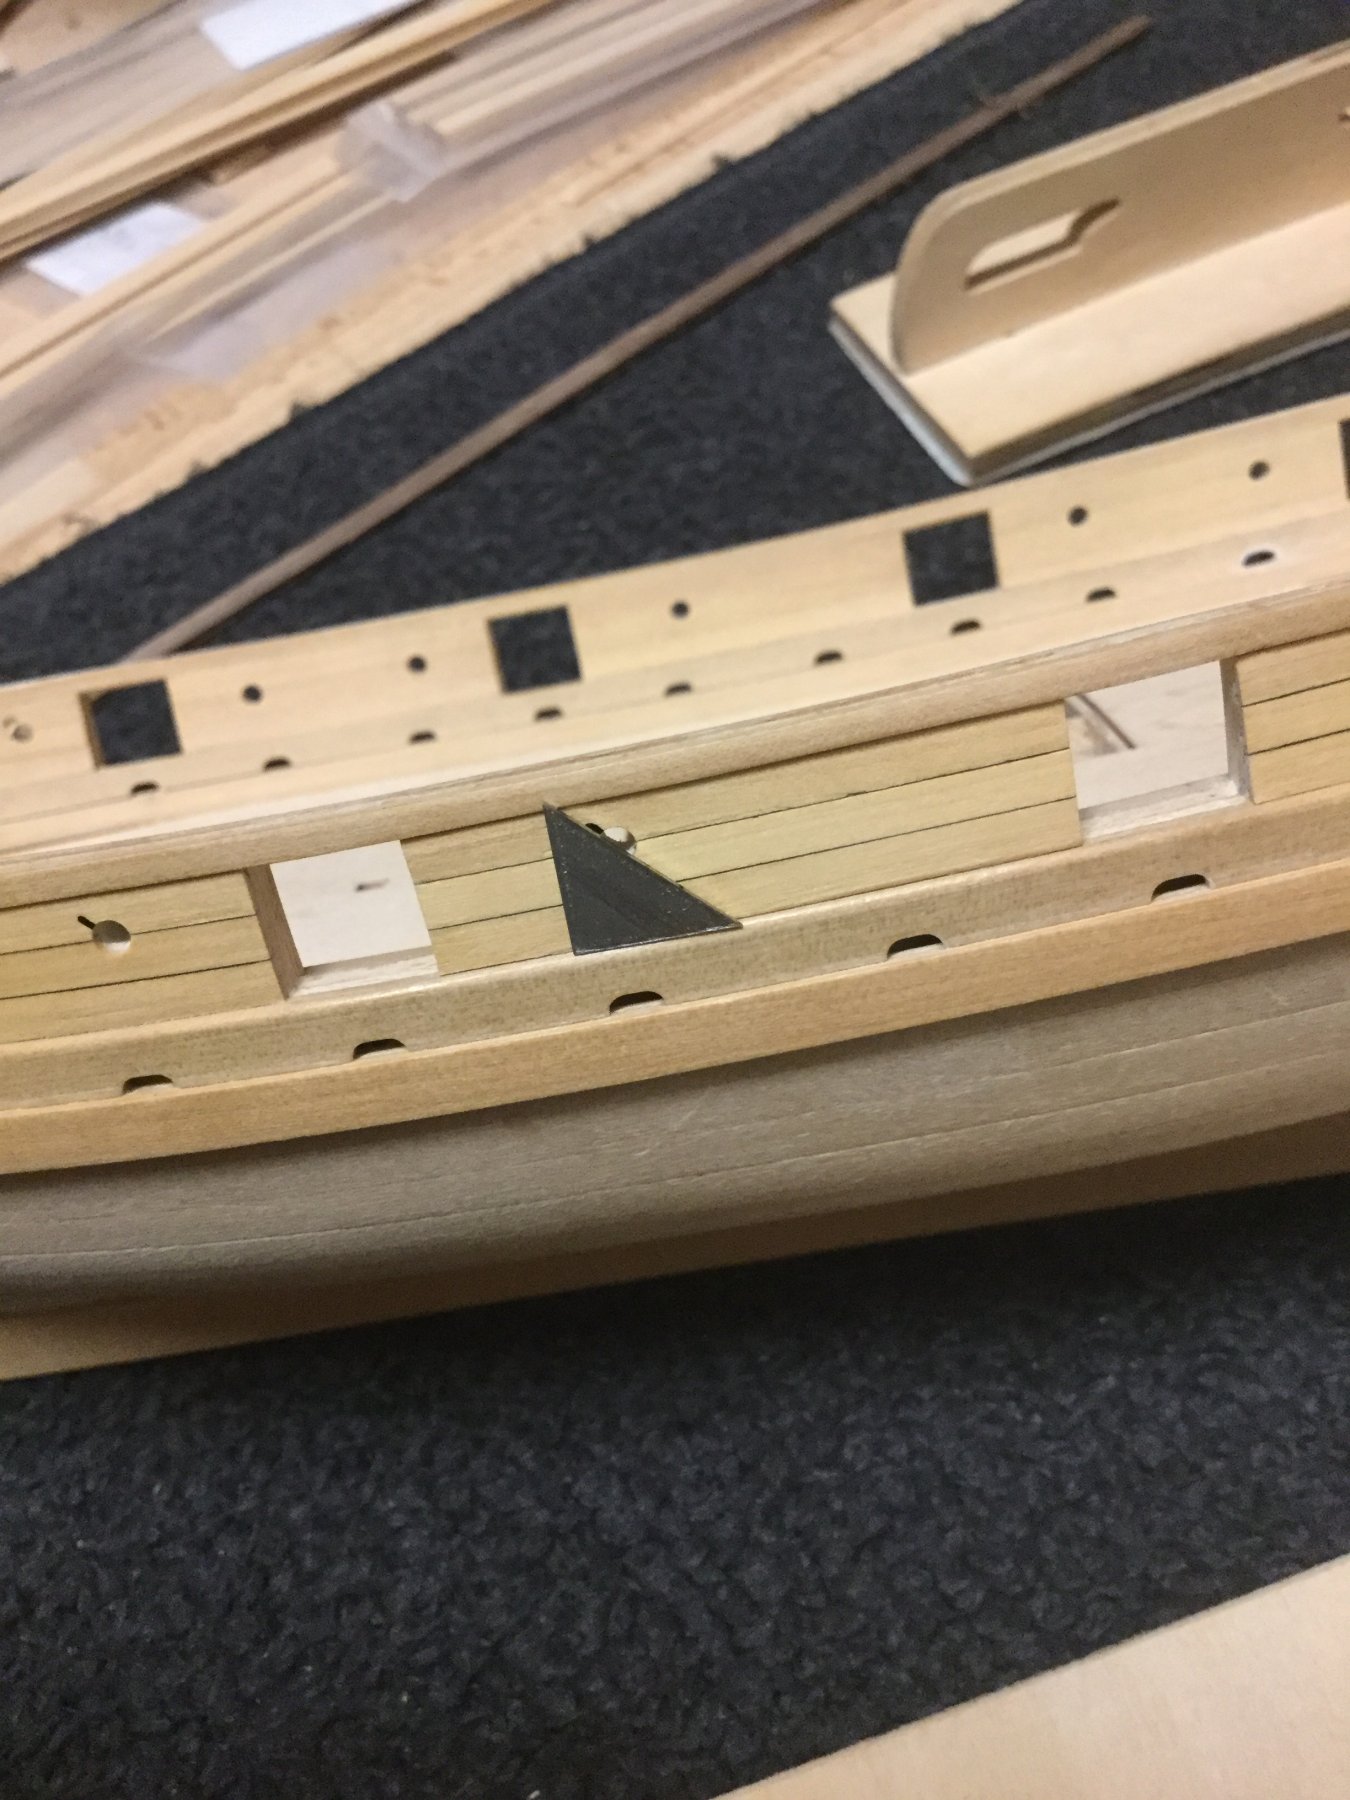
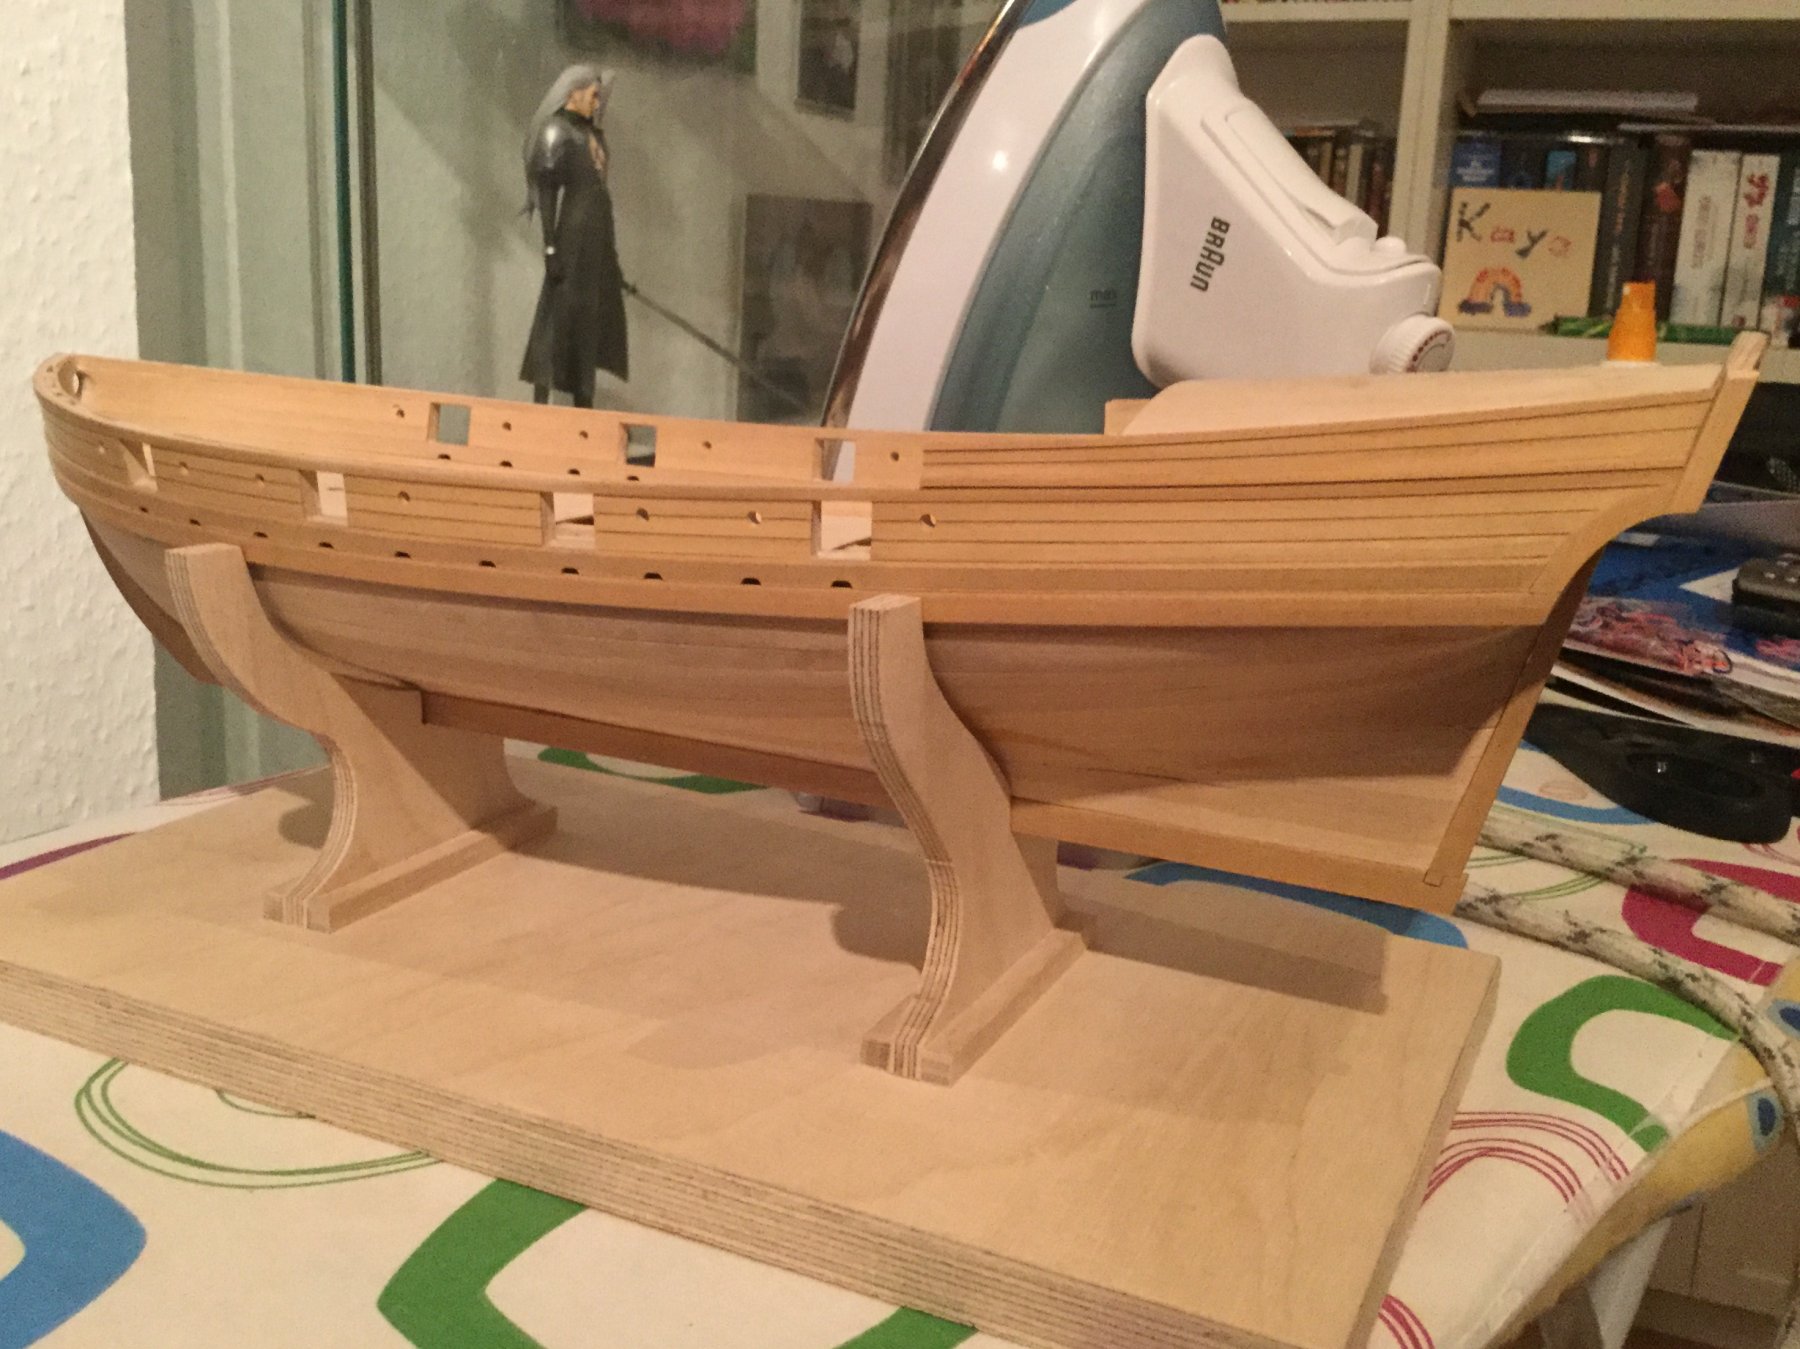
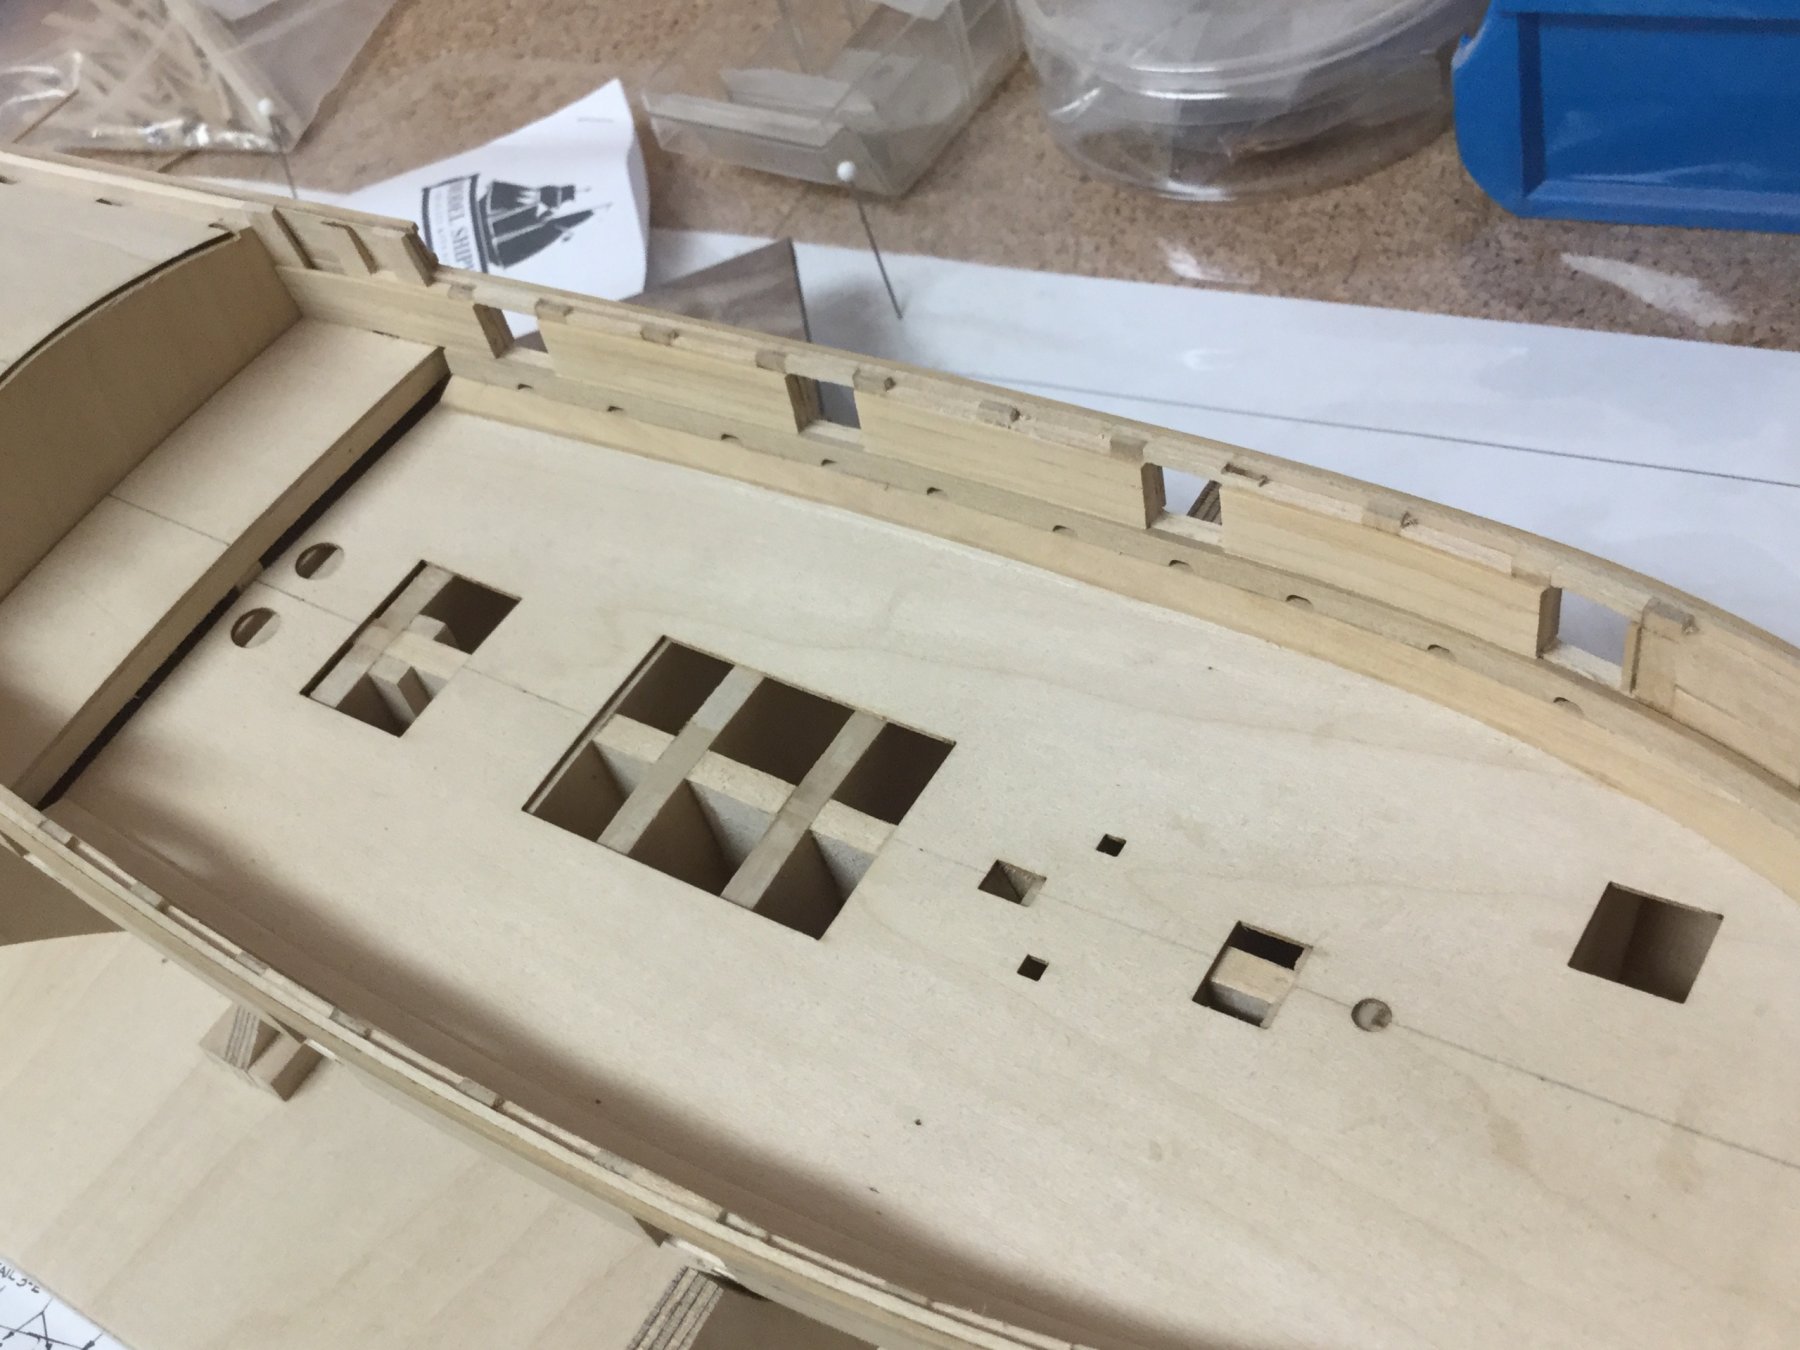
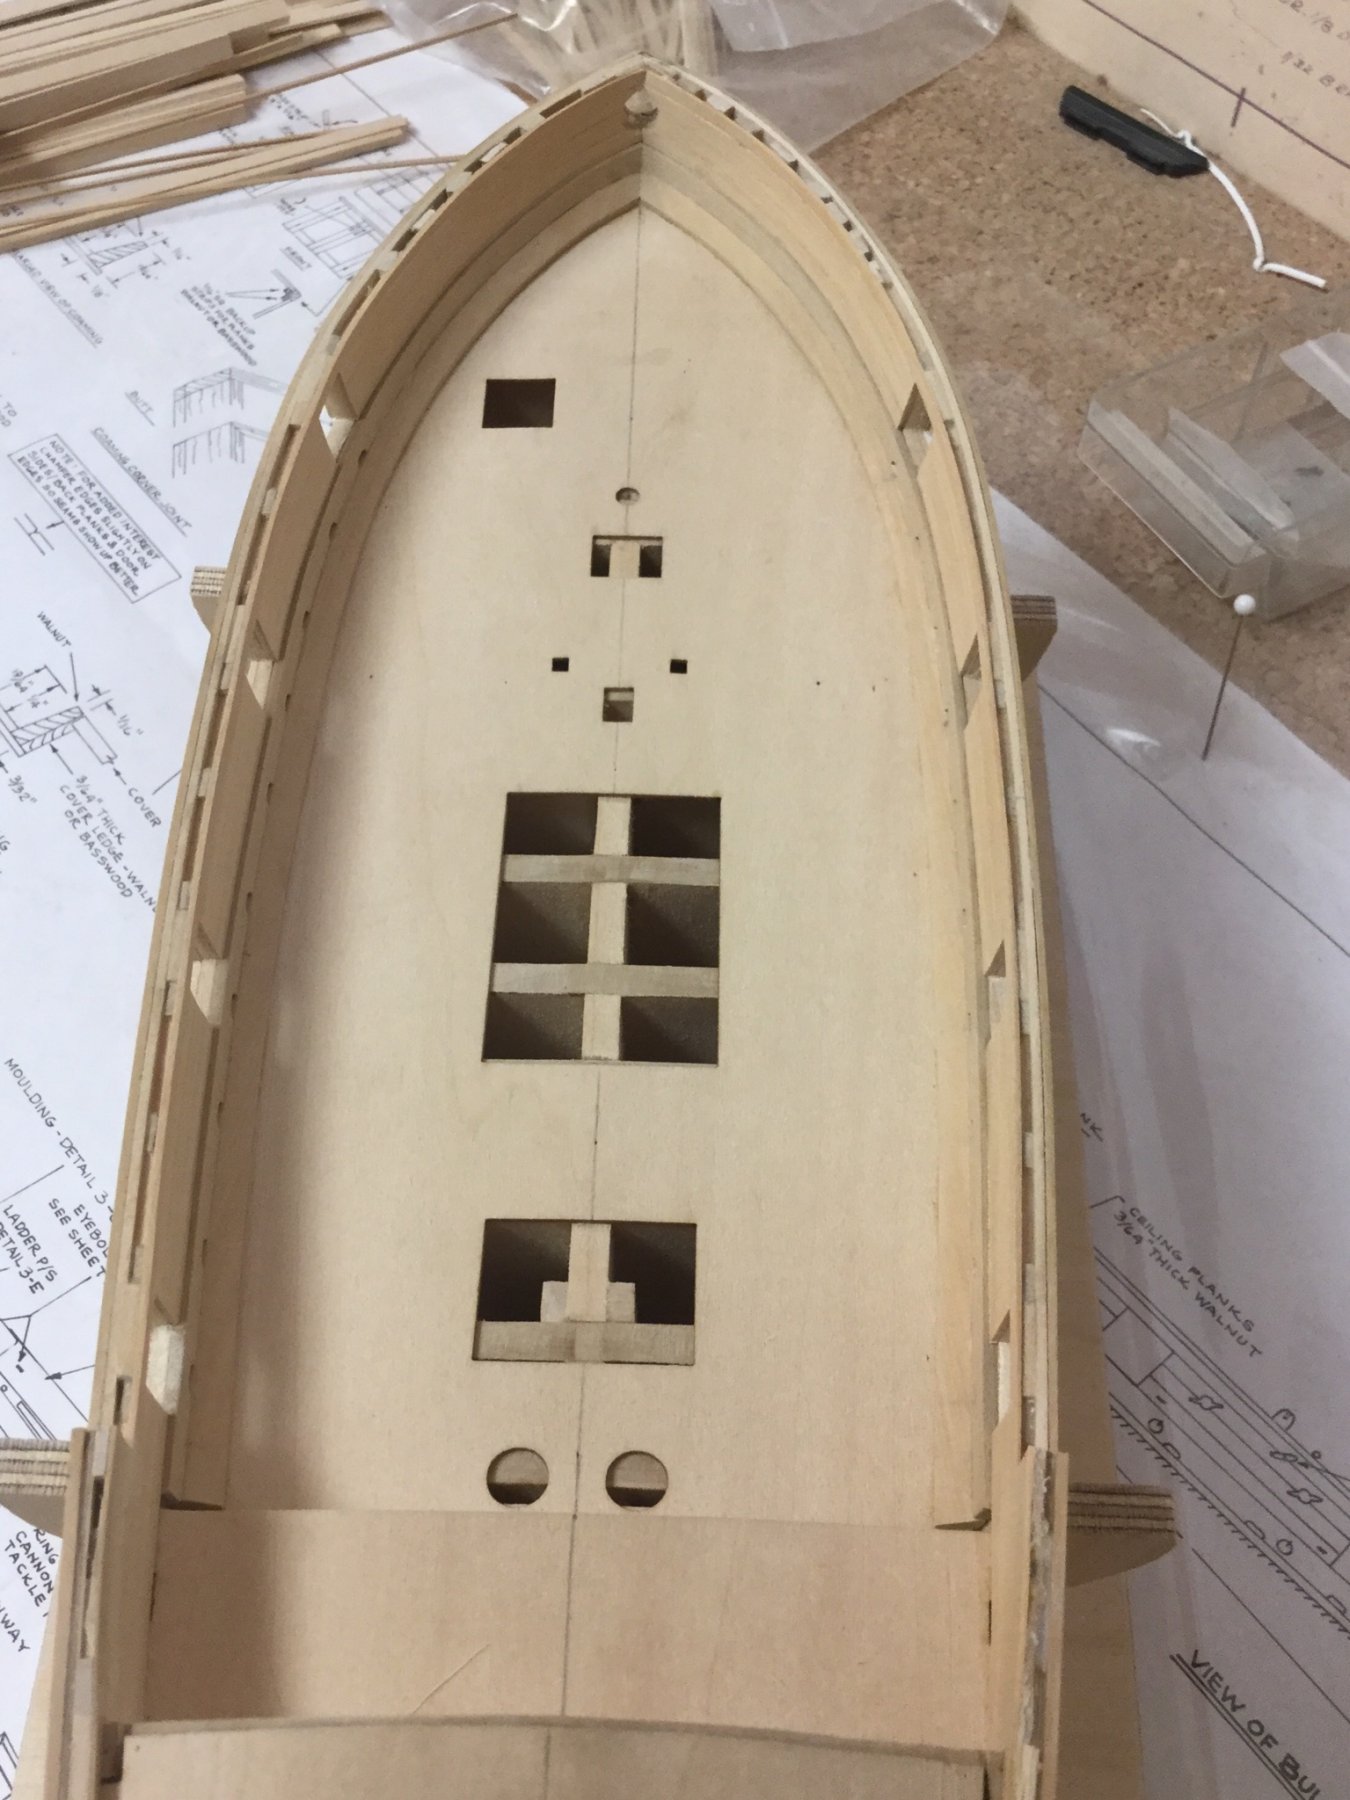
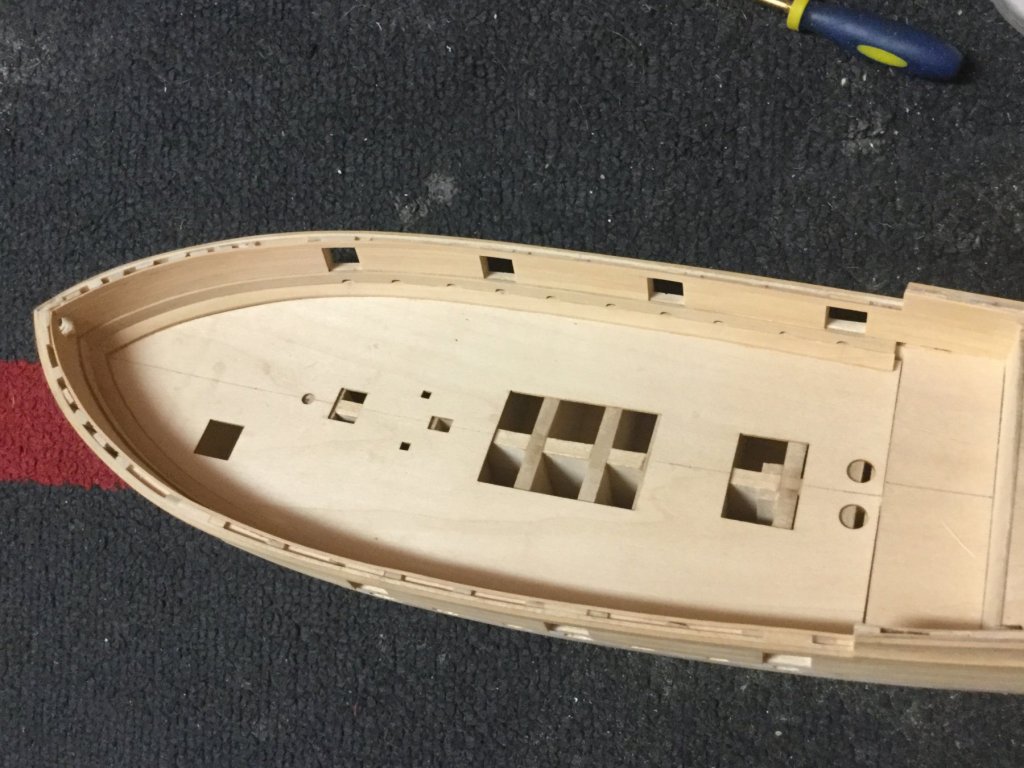
Inner gundeck planking is complete. Next step will be cutting the sweep ports. I have to first think about the best way to cut that tiny holes into the ship. Maybe I will prepare another stainless steel template. To be continued next weekend.


- 231 replies
-
- 9
-
-
- model shipways
- armed virginia sloop
- (and 1 more)
-
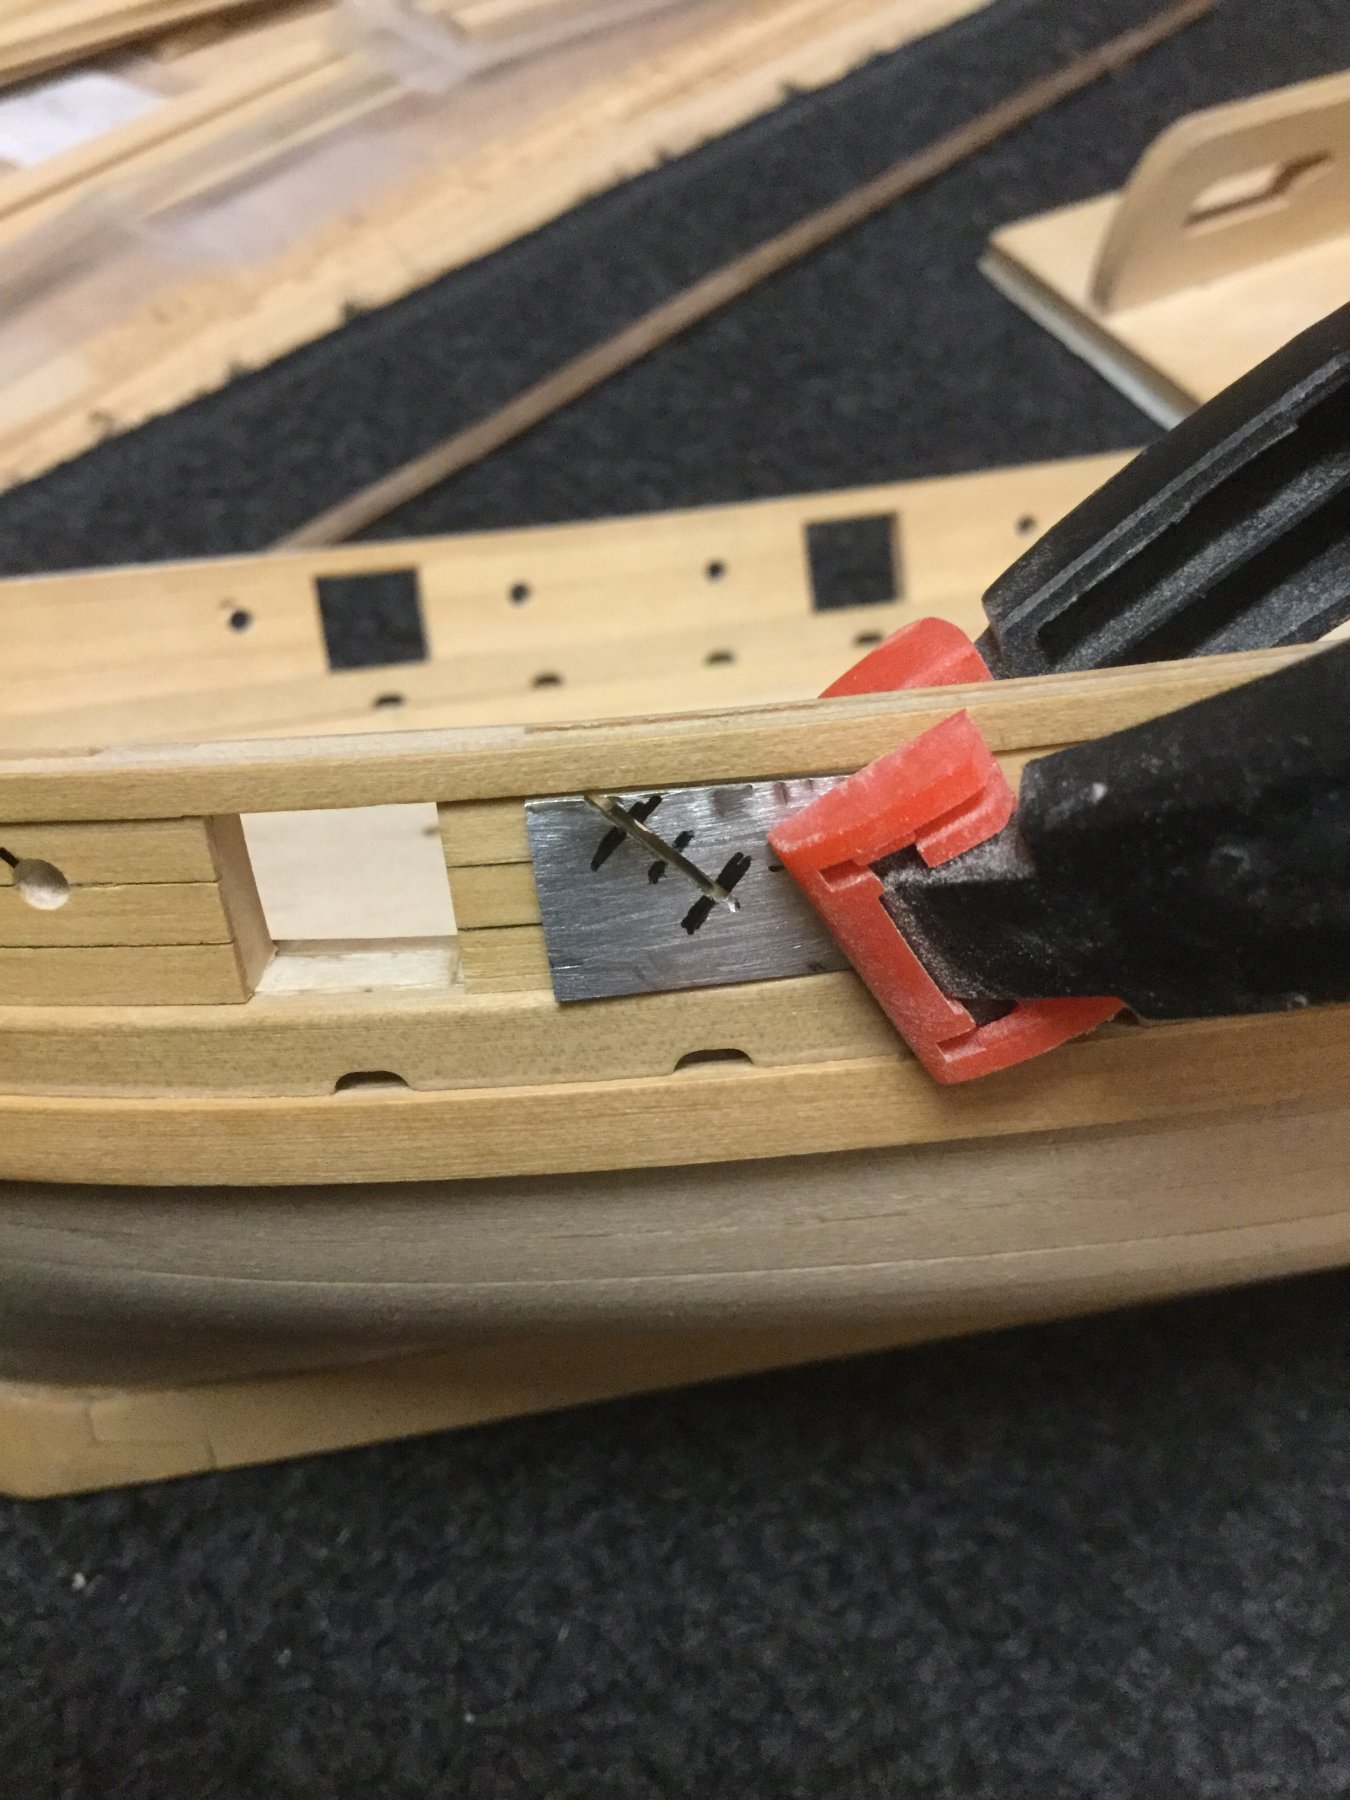
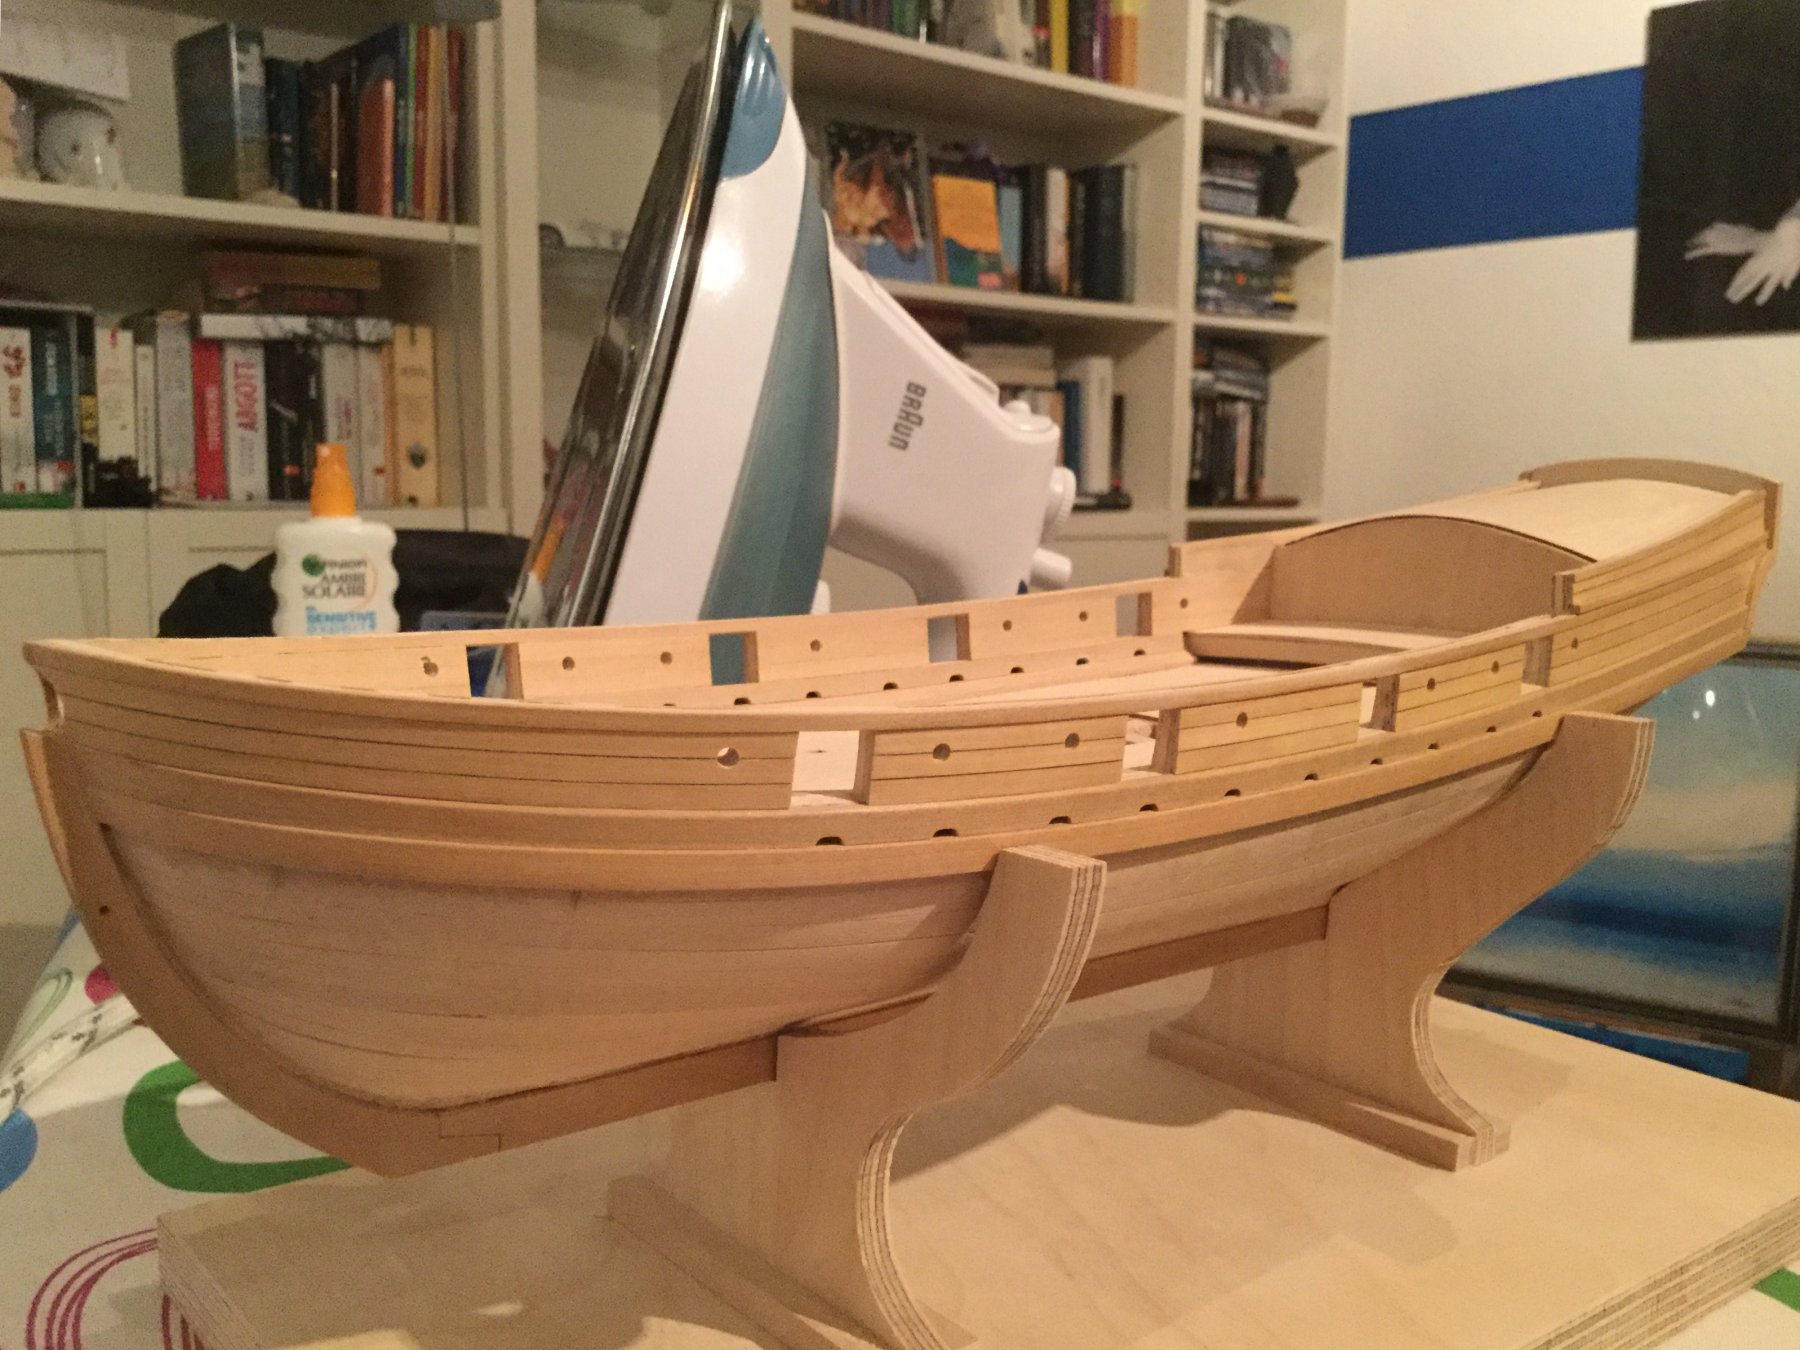
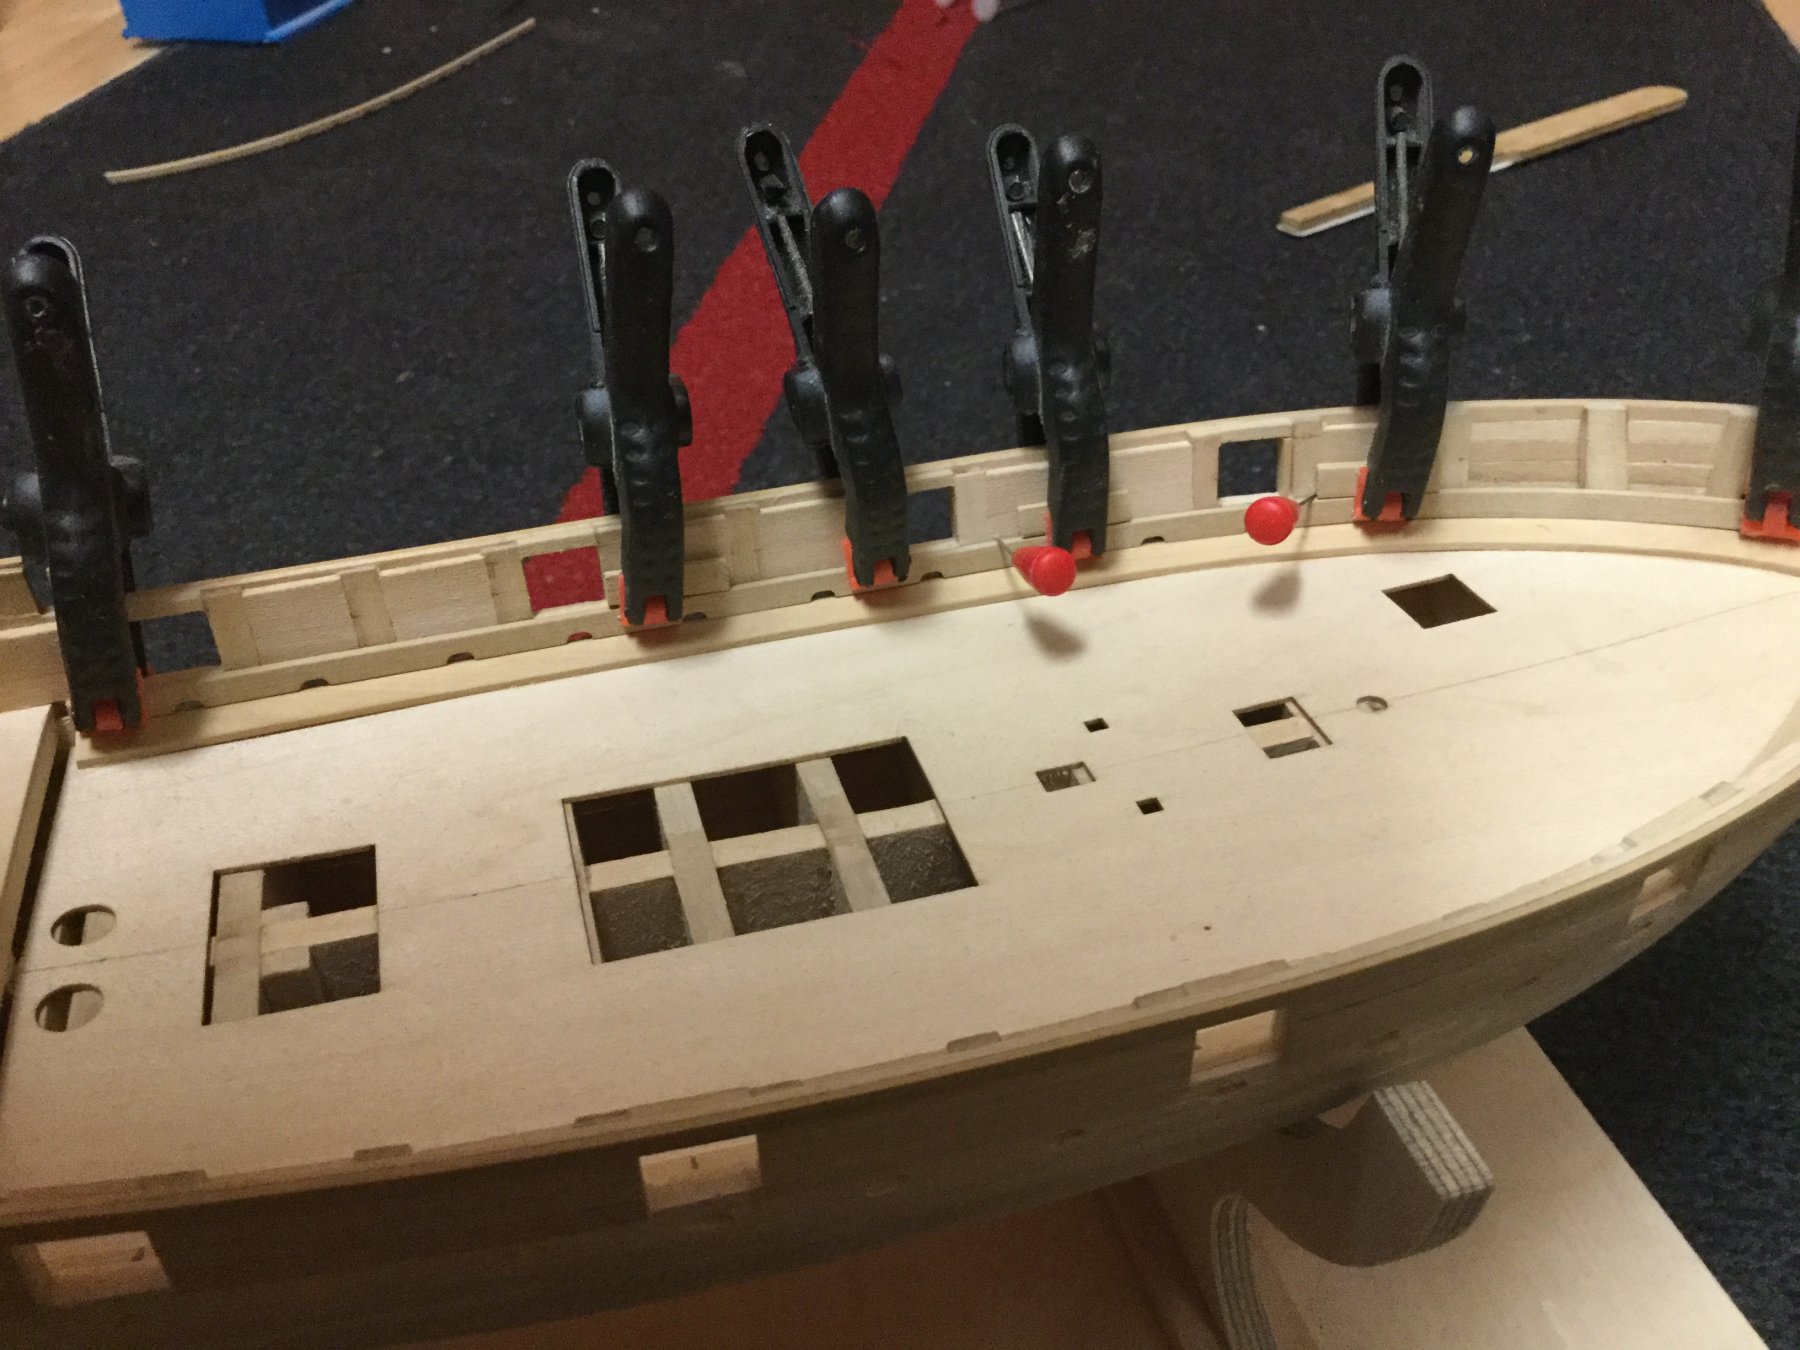
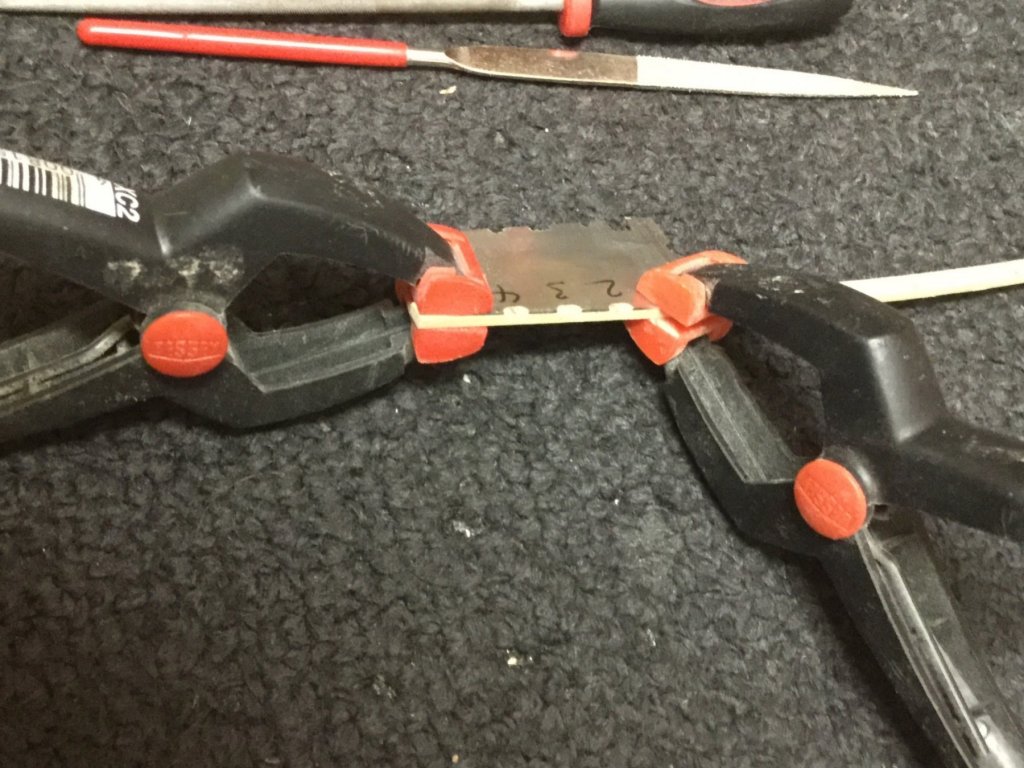
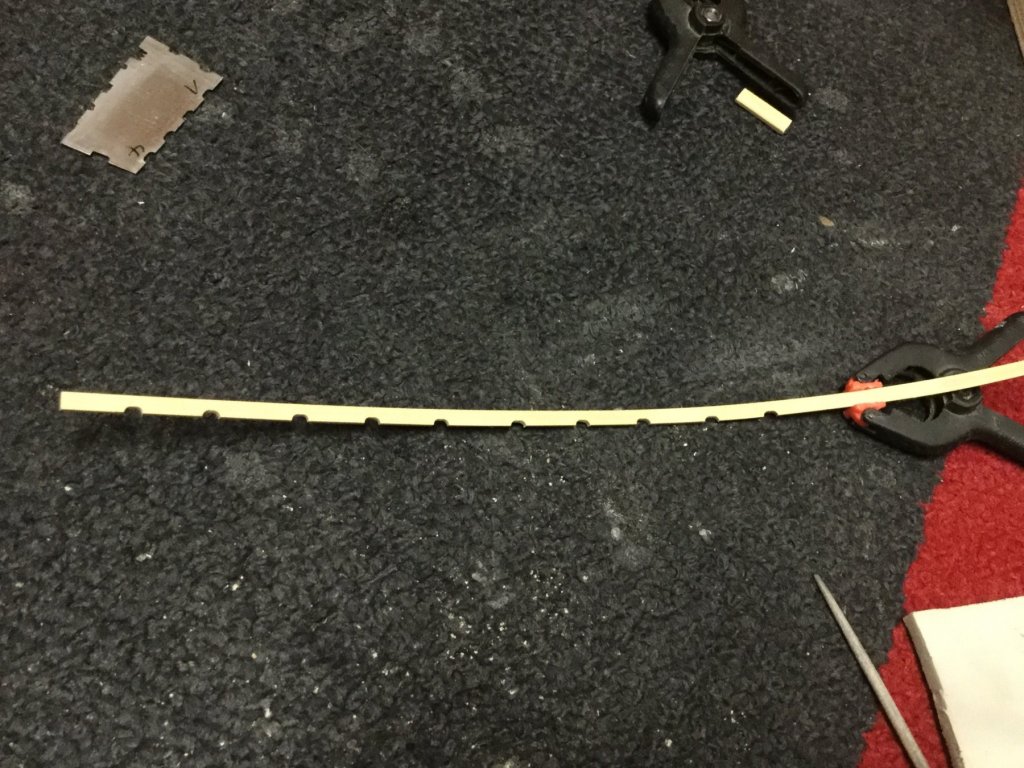
Started to plank the inner side of the gundeck. I may cut the sweep ports prior to planking the rest of the ship. So if the planking is damaged I have to redo the section or to paint the outside like proposed by the manual. To cut the scuppers I first marked the positions of the scuppers on the strip, made a template for the scupper out of stainless steel (0.5 mm), fixed that template onto the strip with two clamps and then cut the scupper with a needle file within the scupper-template. Dry-fit looked not to bad.

- 231 replies
-
- 11
-
-
- model shipways
- armed virginia sloop
- (and 1 more)
-
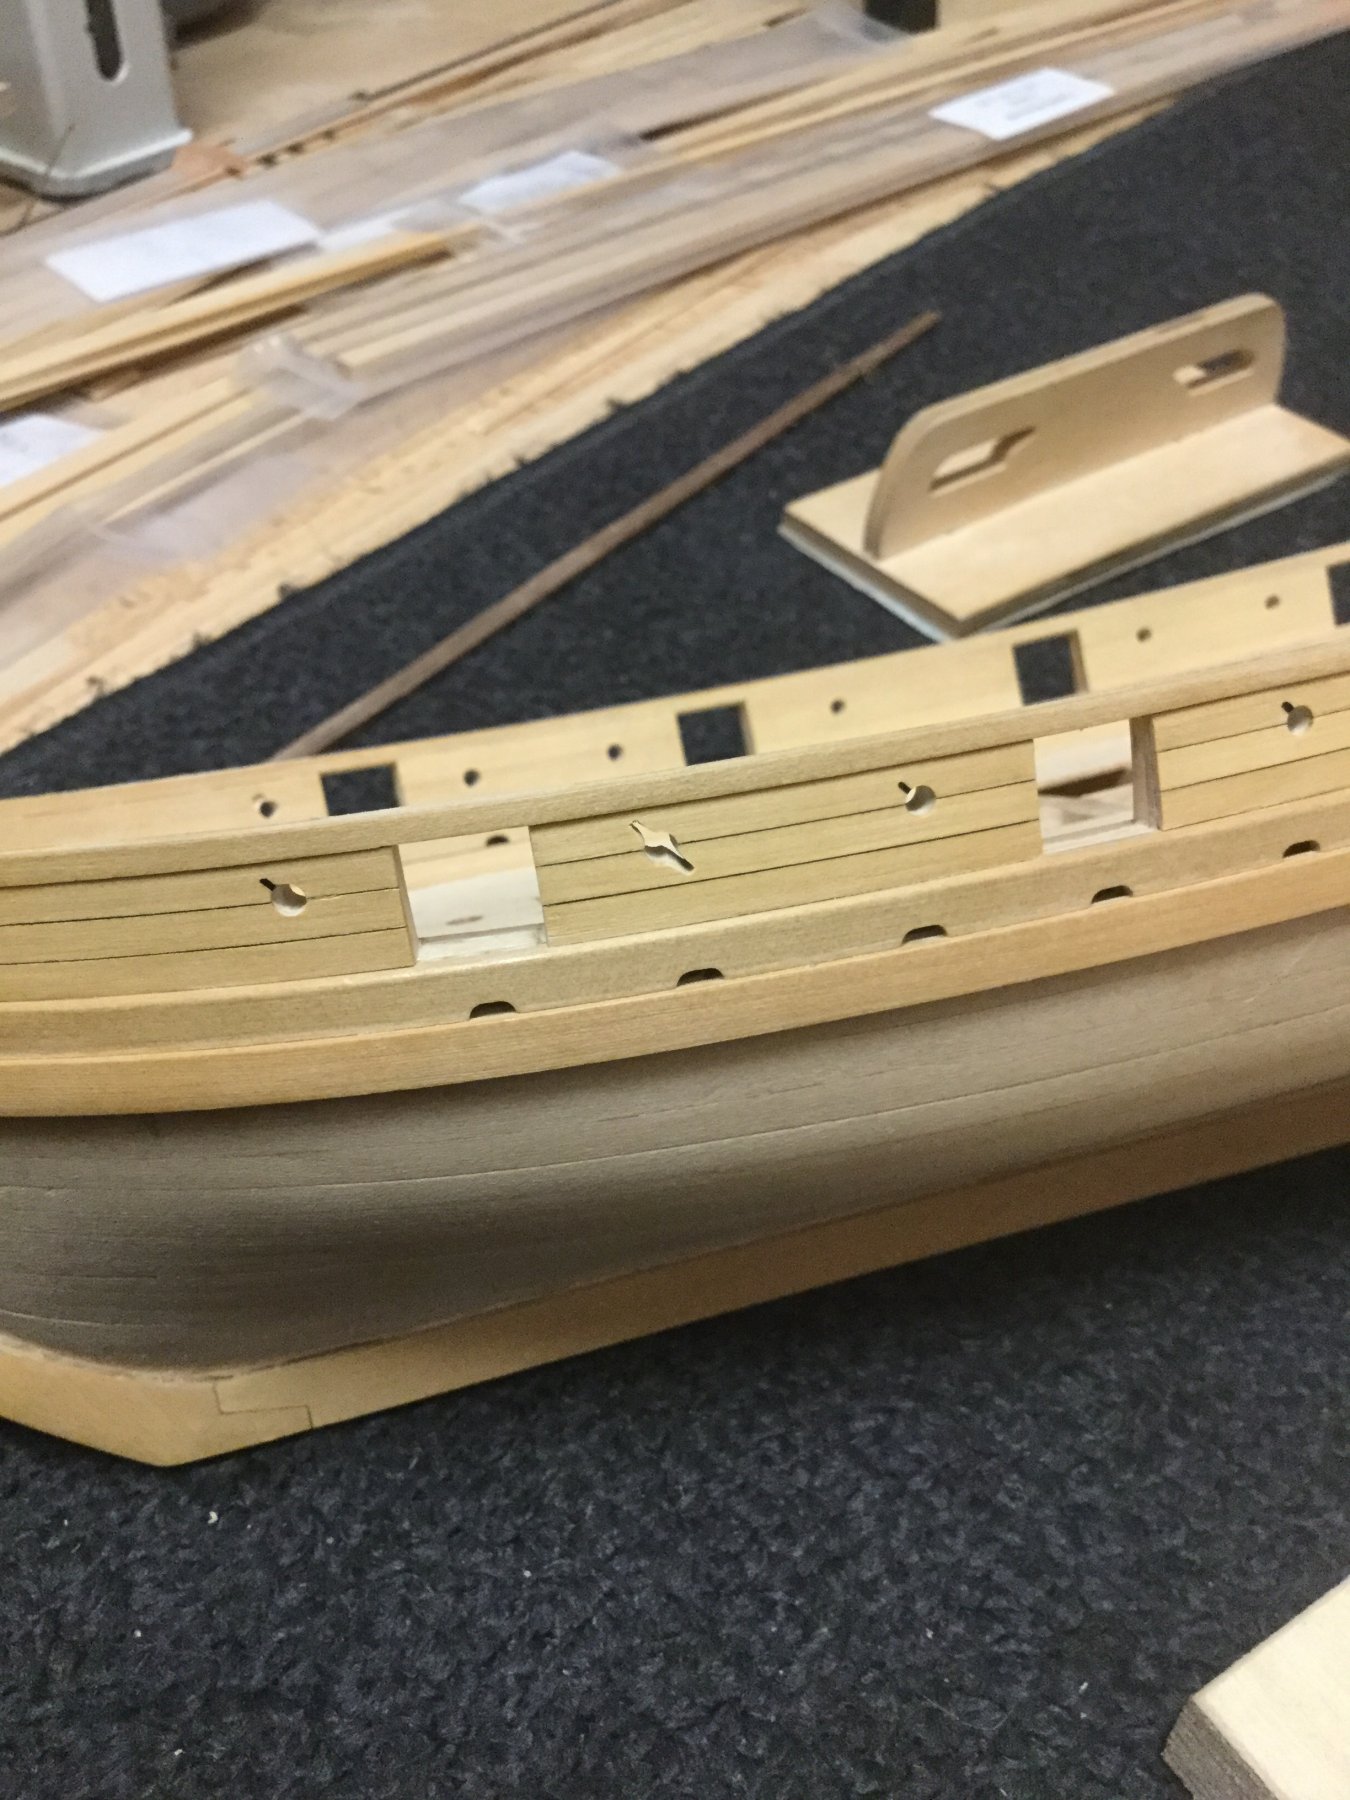
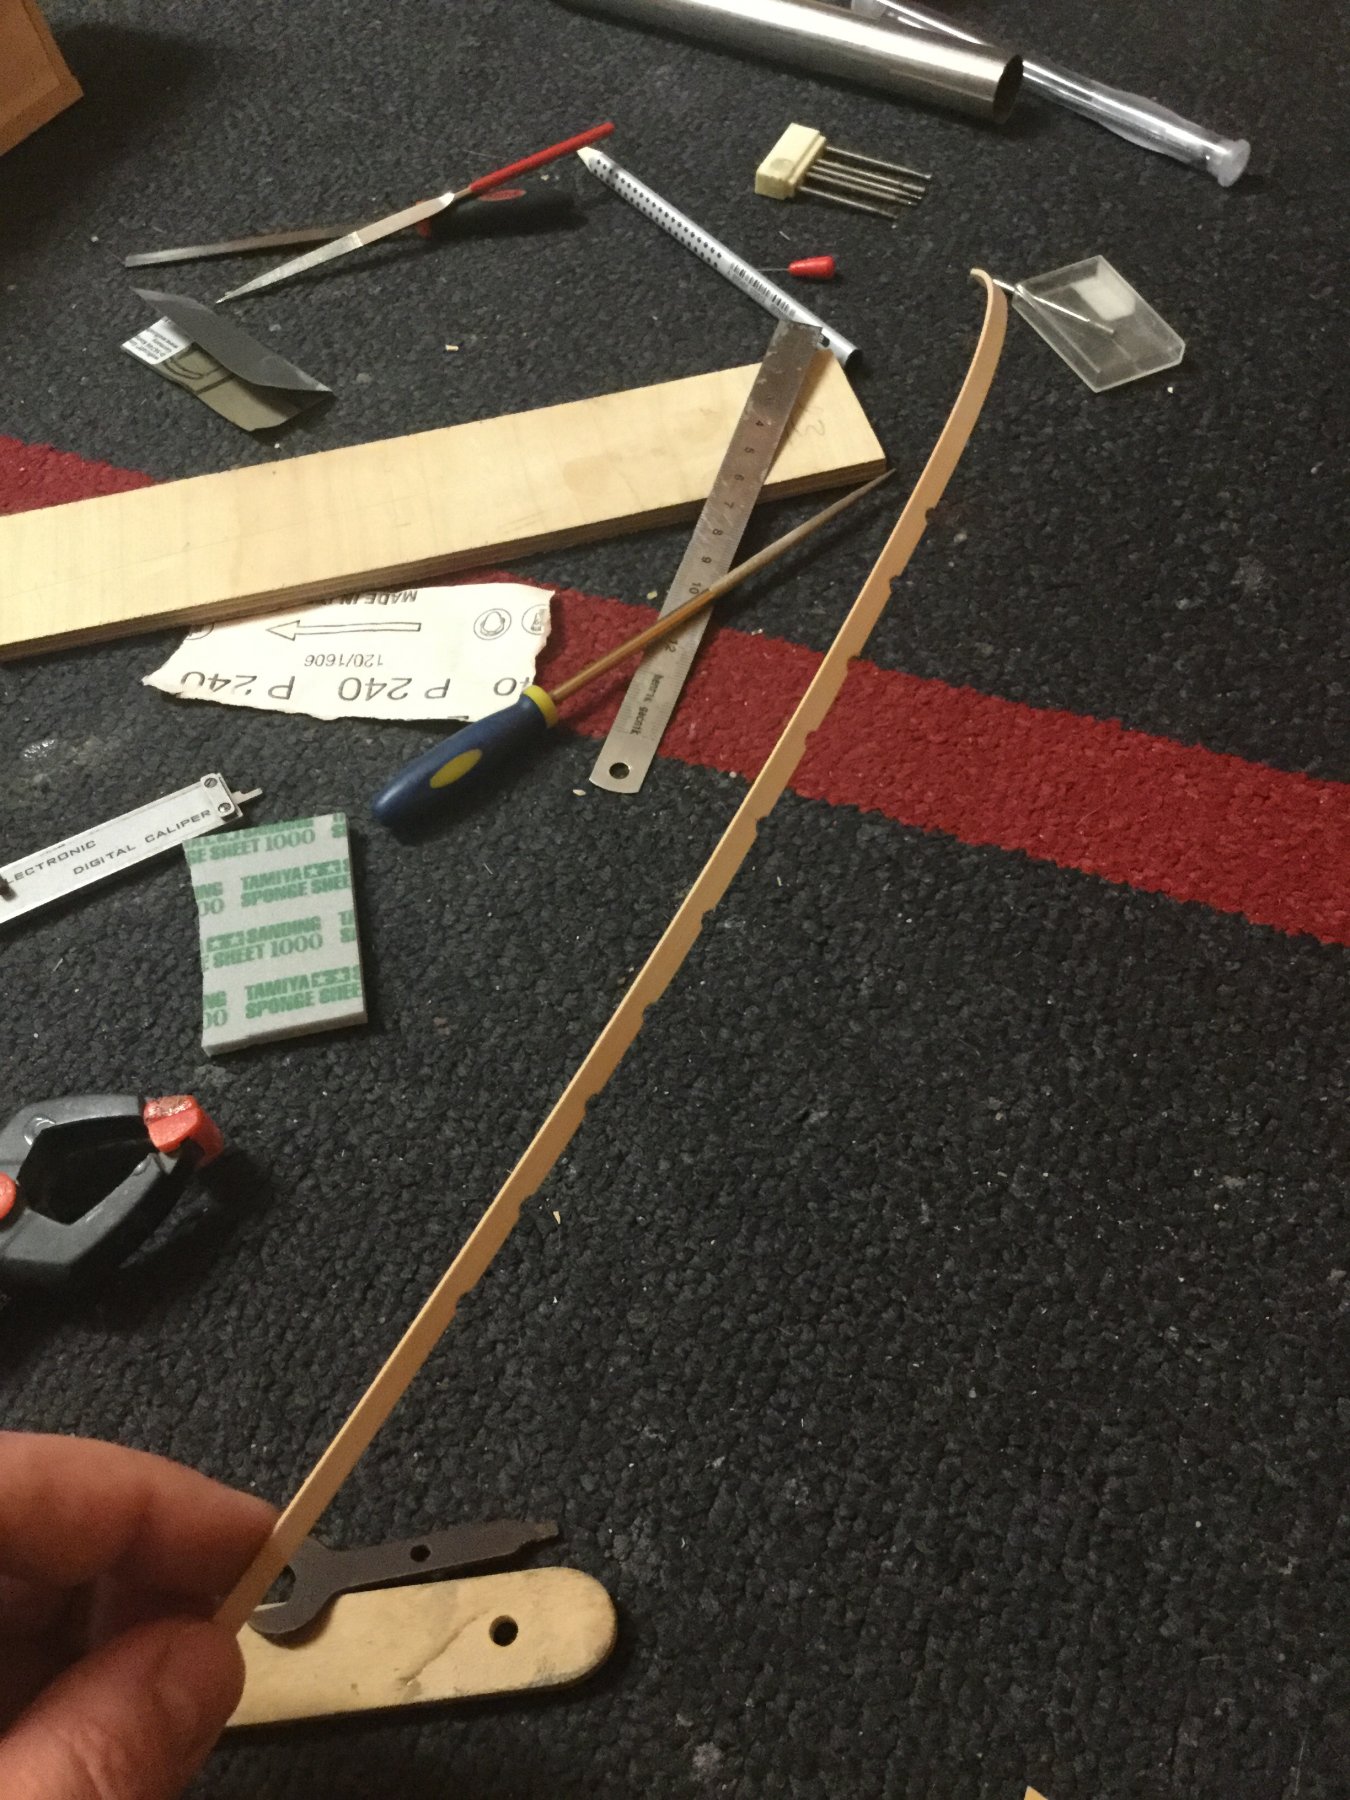
Then glued the strake in place followed by the wale. Sanded the fashion piece, so the lower edge of the fashion piece is flush with the wale.
- 231 replies
-
- 9
-
-
- model shipways
- armed virginia sloop
- (and 1 more)
-
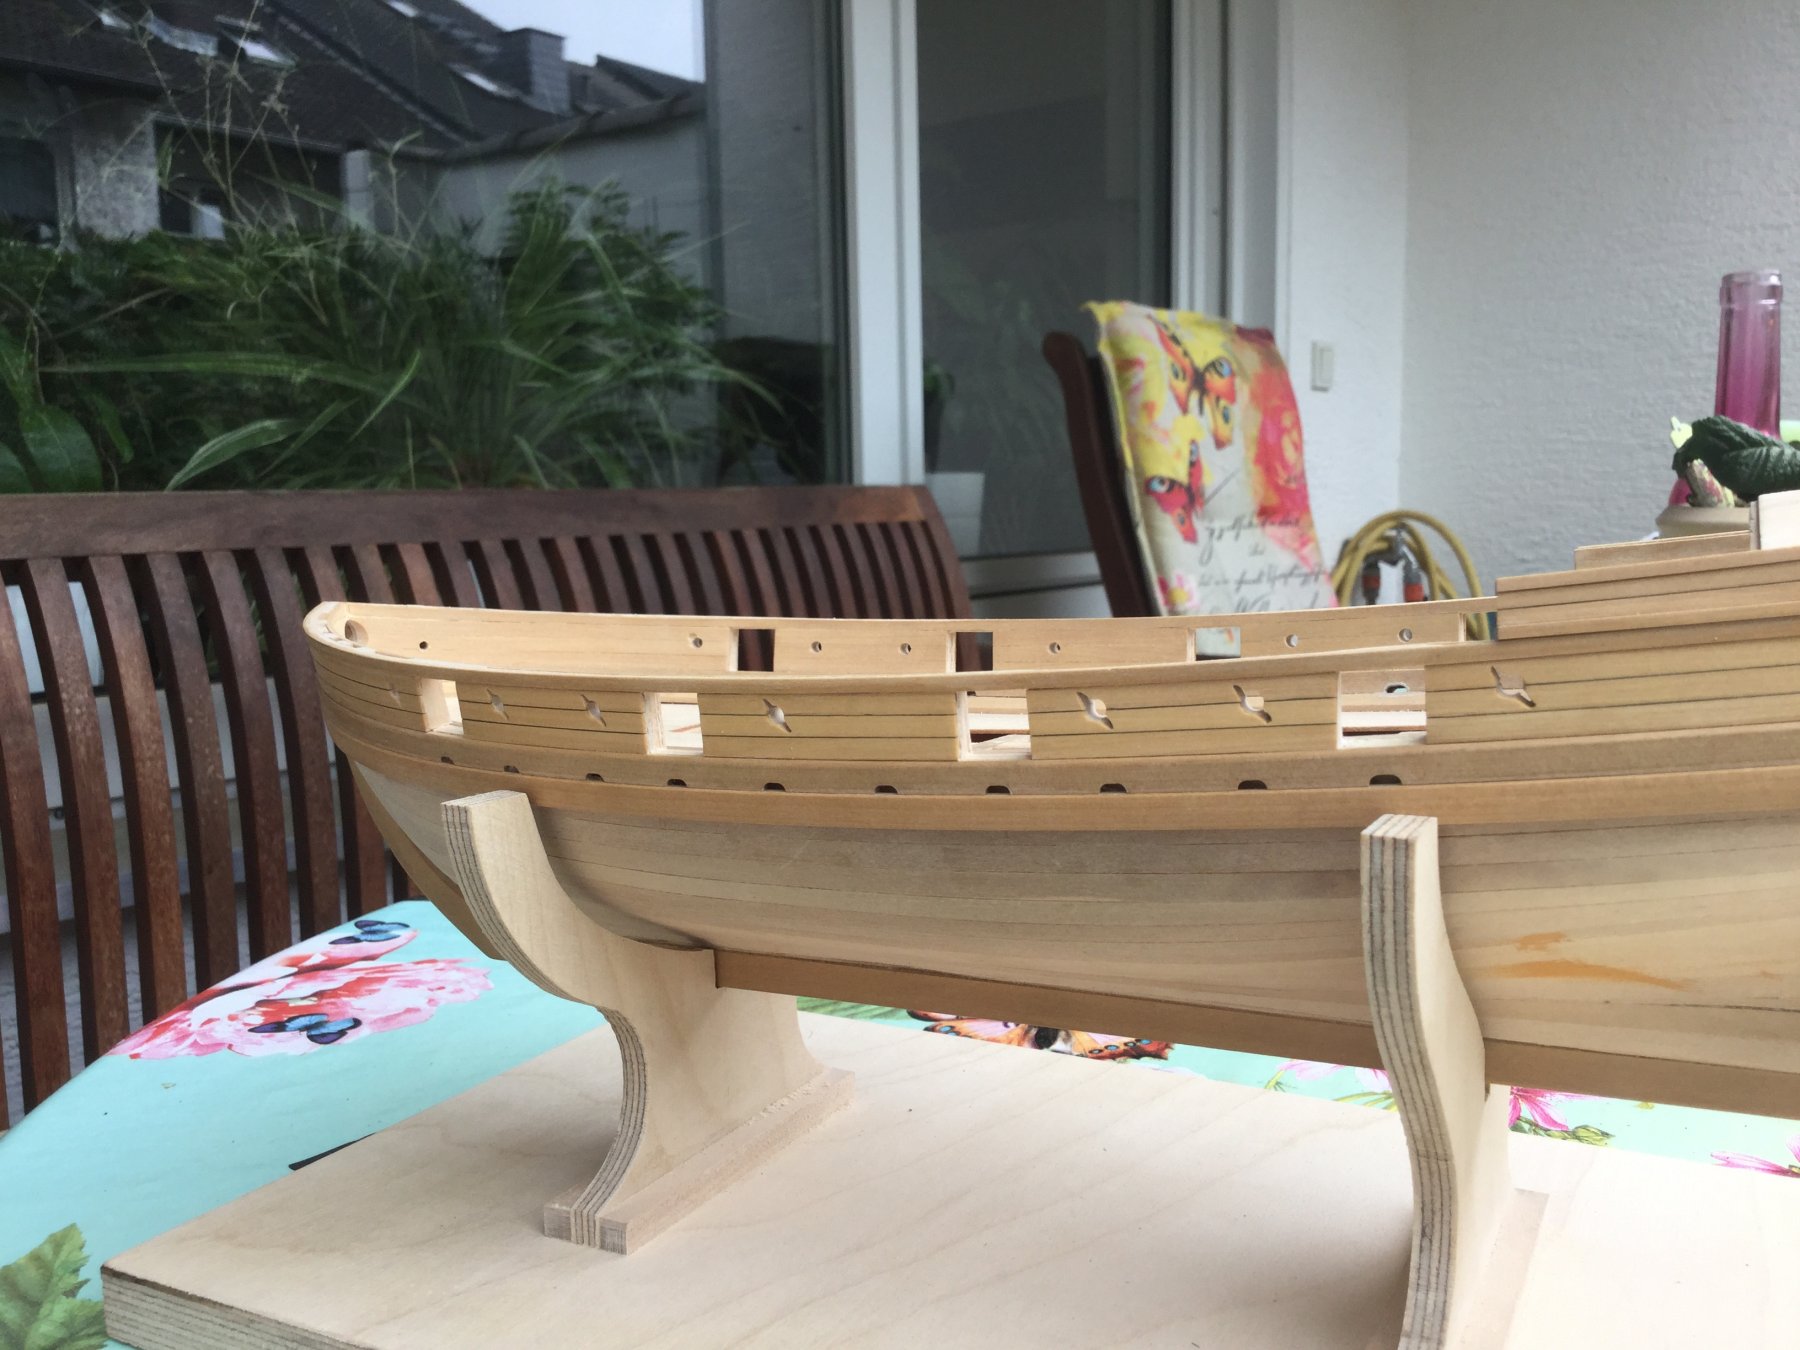
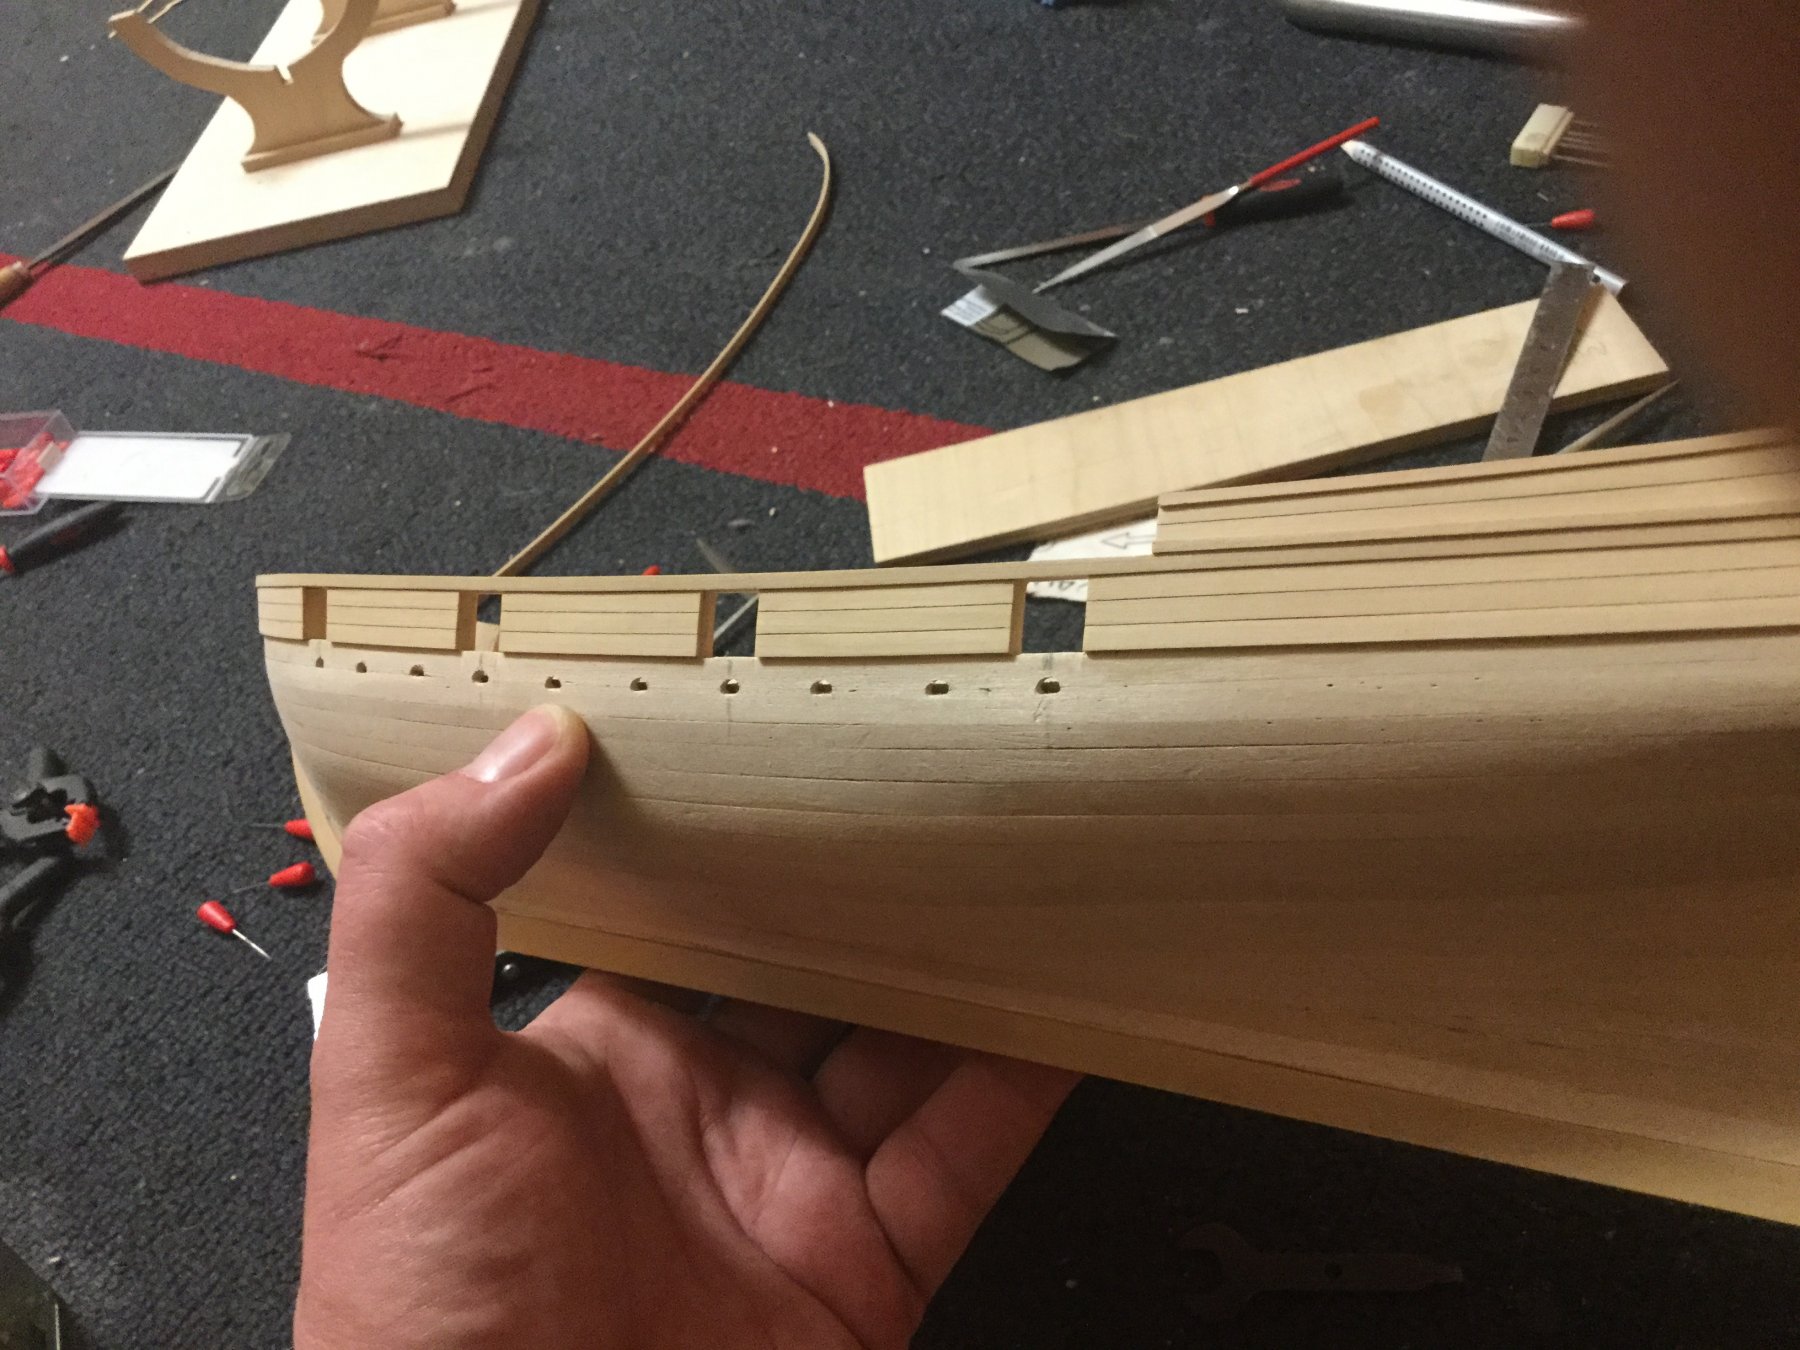
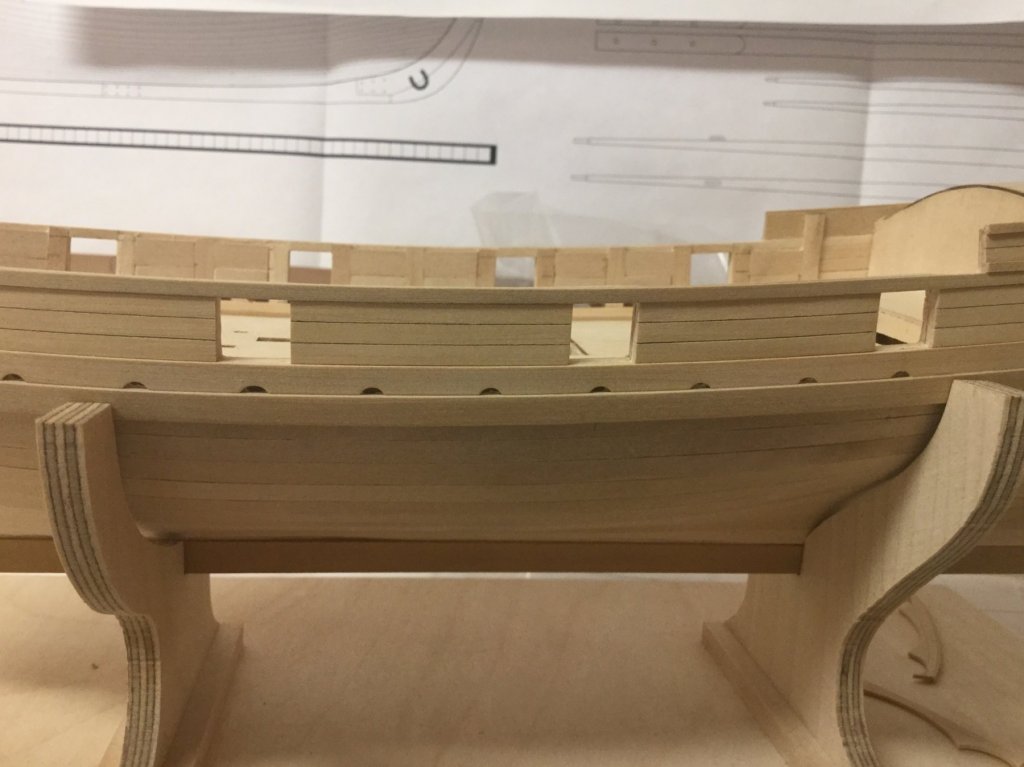
Next update: I prepared the strake running above the wale. I cut the holes for the water first into and test-fitted the strake on the hull. Transfered the position via pencil on the hull and cut the holes into the basswood.

- 231 replies
-
- 5
-
-
- model shipways
- armed virginia sloop
- (and 1 more)
-
Started to plank the outside of the cabin. Will do the other side tomorrow.

- 231 replies
-
- 7
-
-
- model shipways
- armed virginia sloop
- (and 1 more)