HOLIDAY DONATION DRIVE - SUPPORT MSW - DO YOUR PART TO KEEP THIS GREAT FORUM GOING! (Only 36 donations so far out of 49,000 members - C'mon guys!)
×


captain_hook
-
Posts
685 -
Joined
-
Last visited
Content Type
Profiles
Forums
Gallery
Events
Everything posted by captain_hook
-
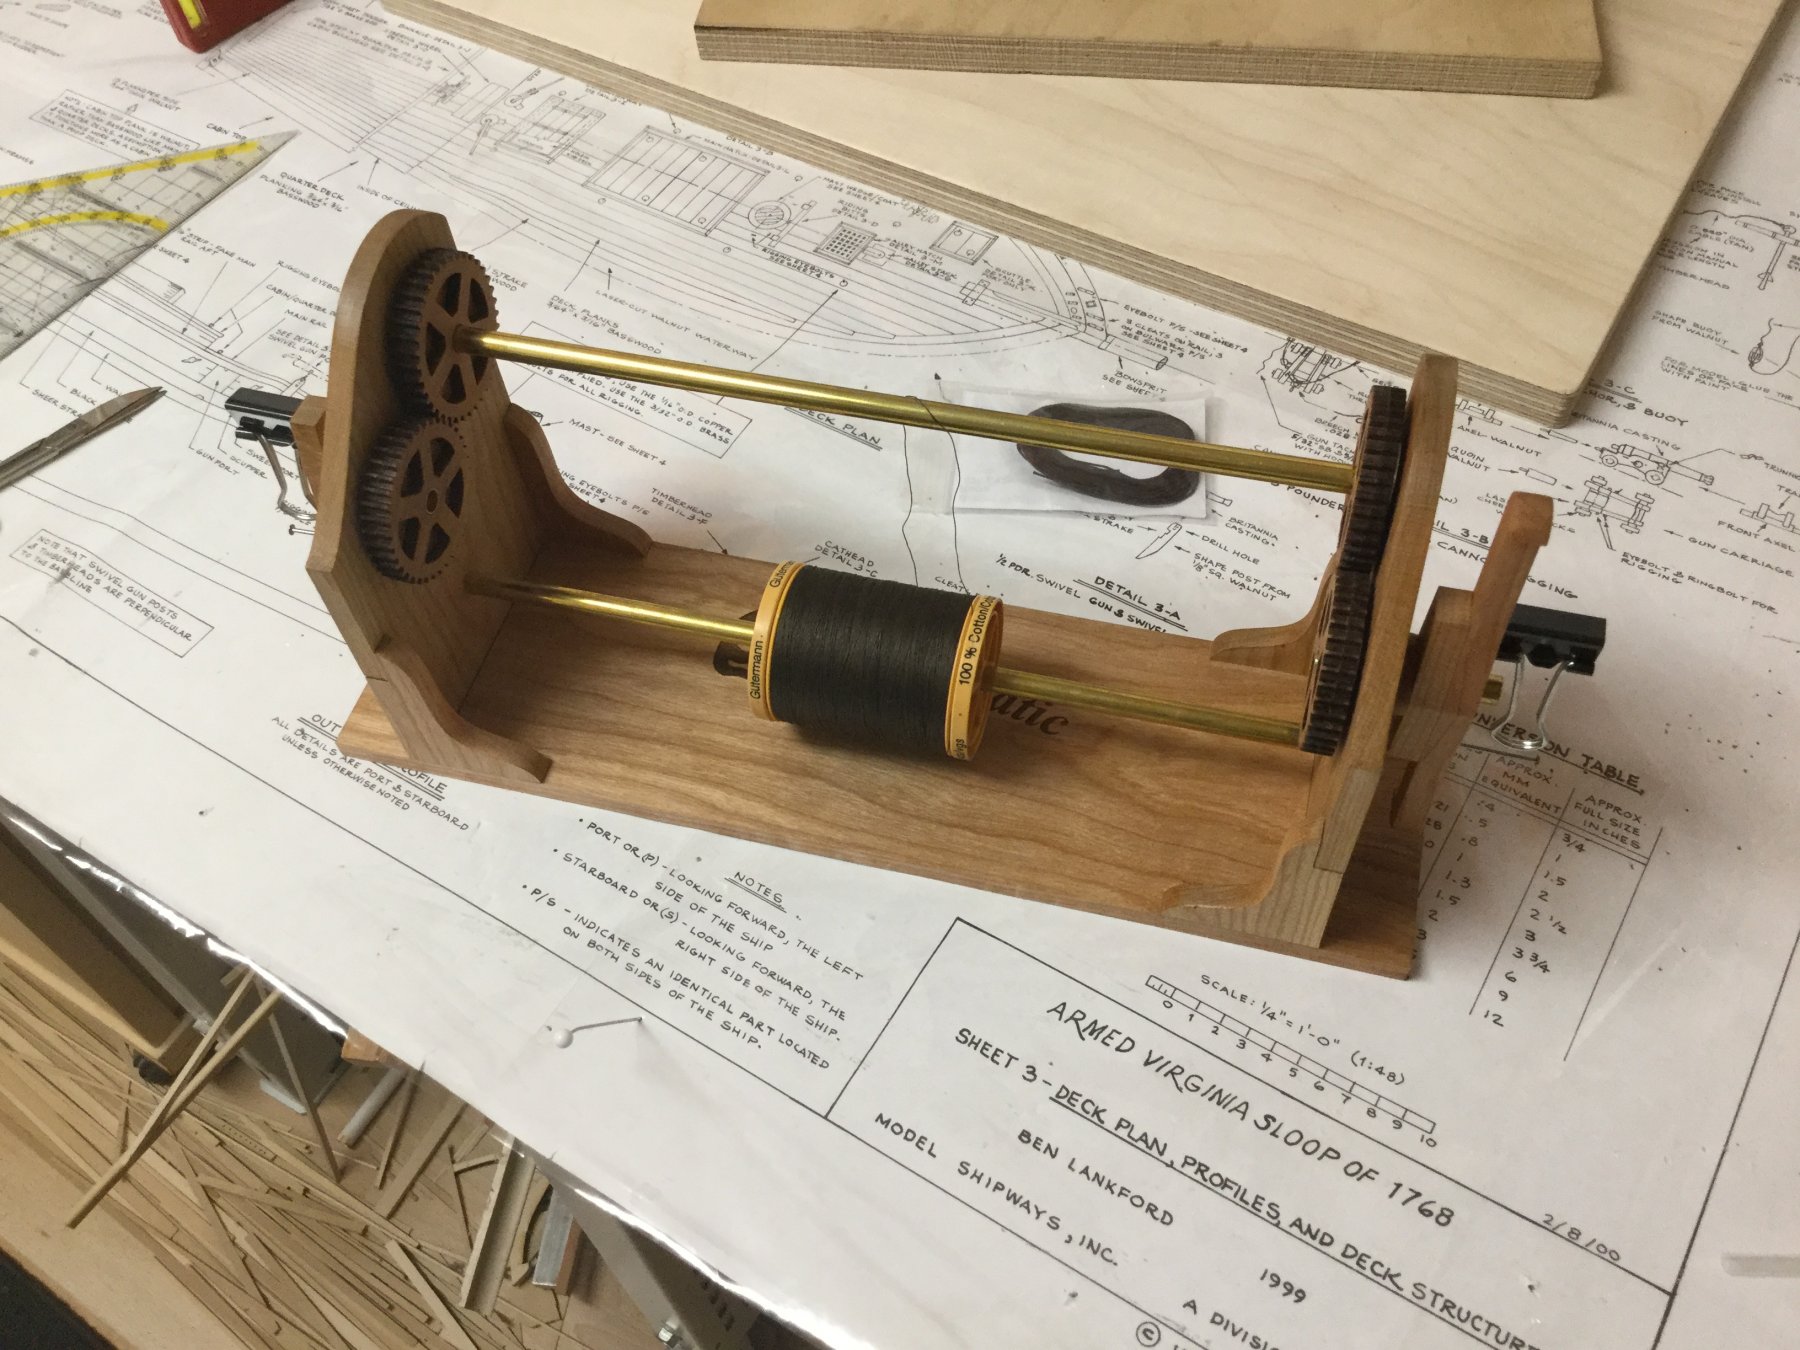
 The summer holiday has passed and I have assembled the syren serving machine. I am a great fan of any kind of tool and the serving machine is a simple but very useful tool. Ordered some guterman dark brown cotton threat as well, it will fit the syren standing rigging rope very well. It is a pity that over the last years almost all modeling related hobby stores in Germany have disappeared. I remember a store in almost every shopping mall 20 years ago but nowadays they are all gone so I have to order almost everything I need from Amazon et al. But I think this is part of a more complex problem that only a few people left to accept a lot of time and patience for example to build a model ship (and a lot more modelling related like plastic modelling - I remember a lot of kits in hobby and toy stores but today only few kits are available there). Anyway I am very thankful that companys like syren are ,swimming against the stream‘ and provide useful tools, kits and assessoires to keep ship modeling alive.
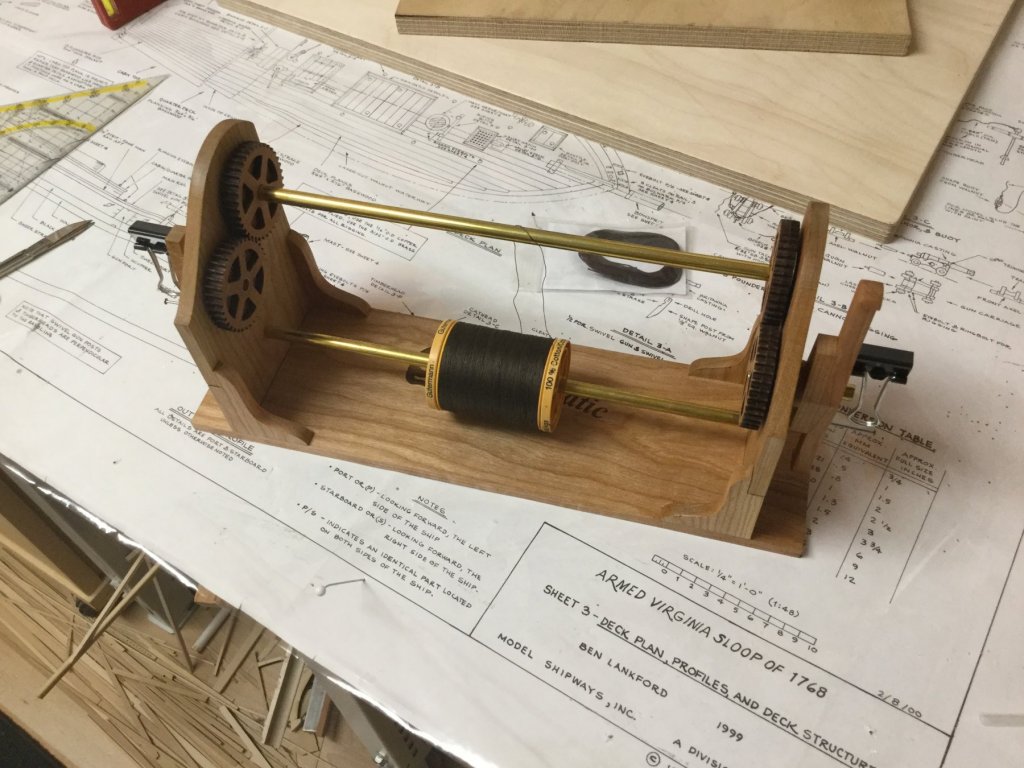
- 231 replies
-
- 7
-

-
- model shipways
- armed virginia sloop
- (and 1 more)
-
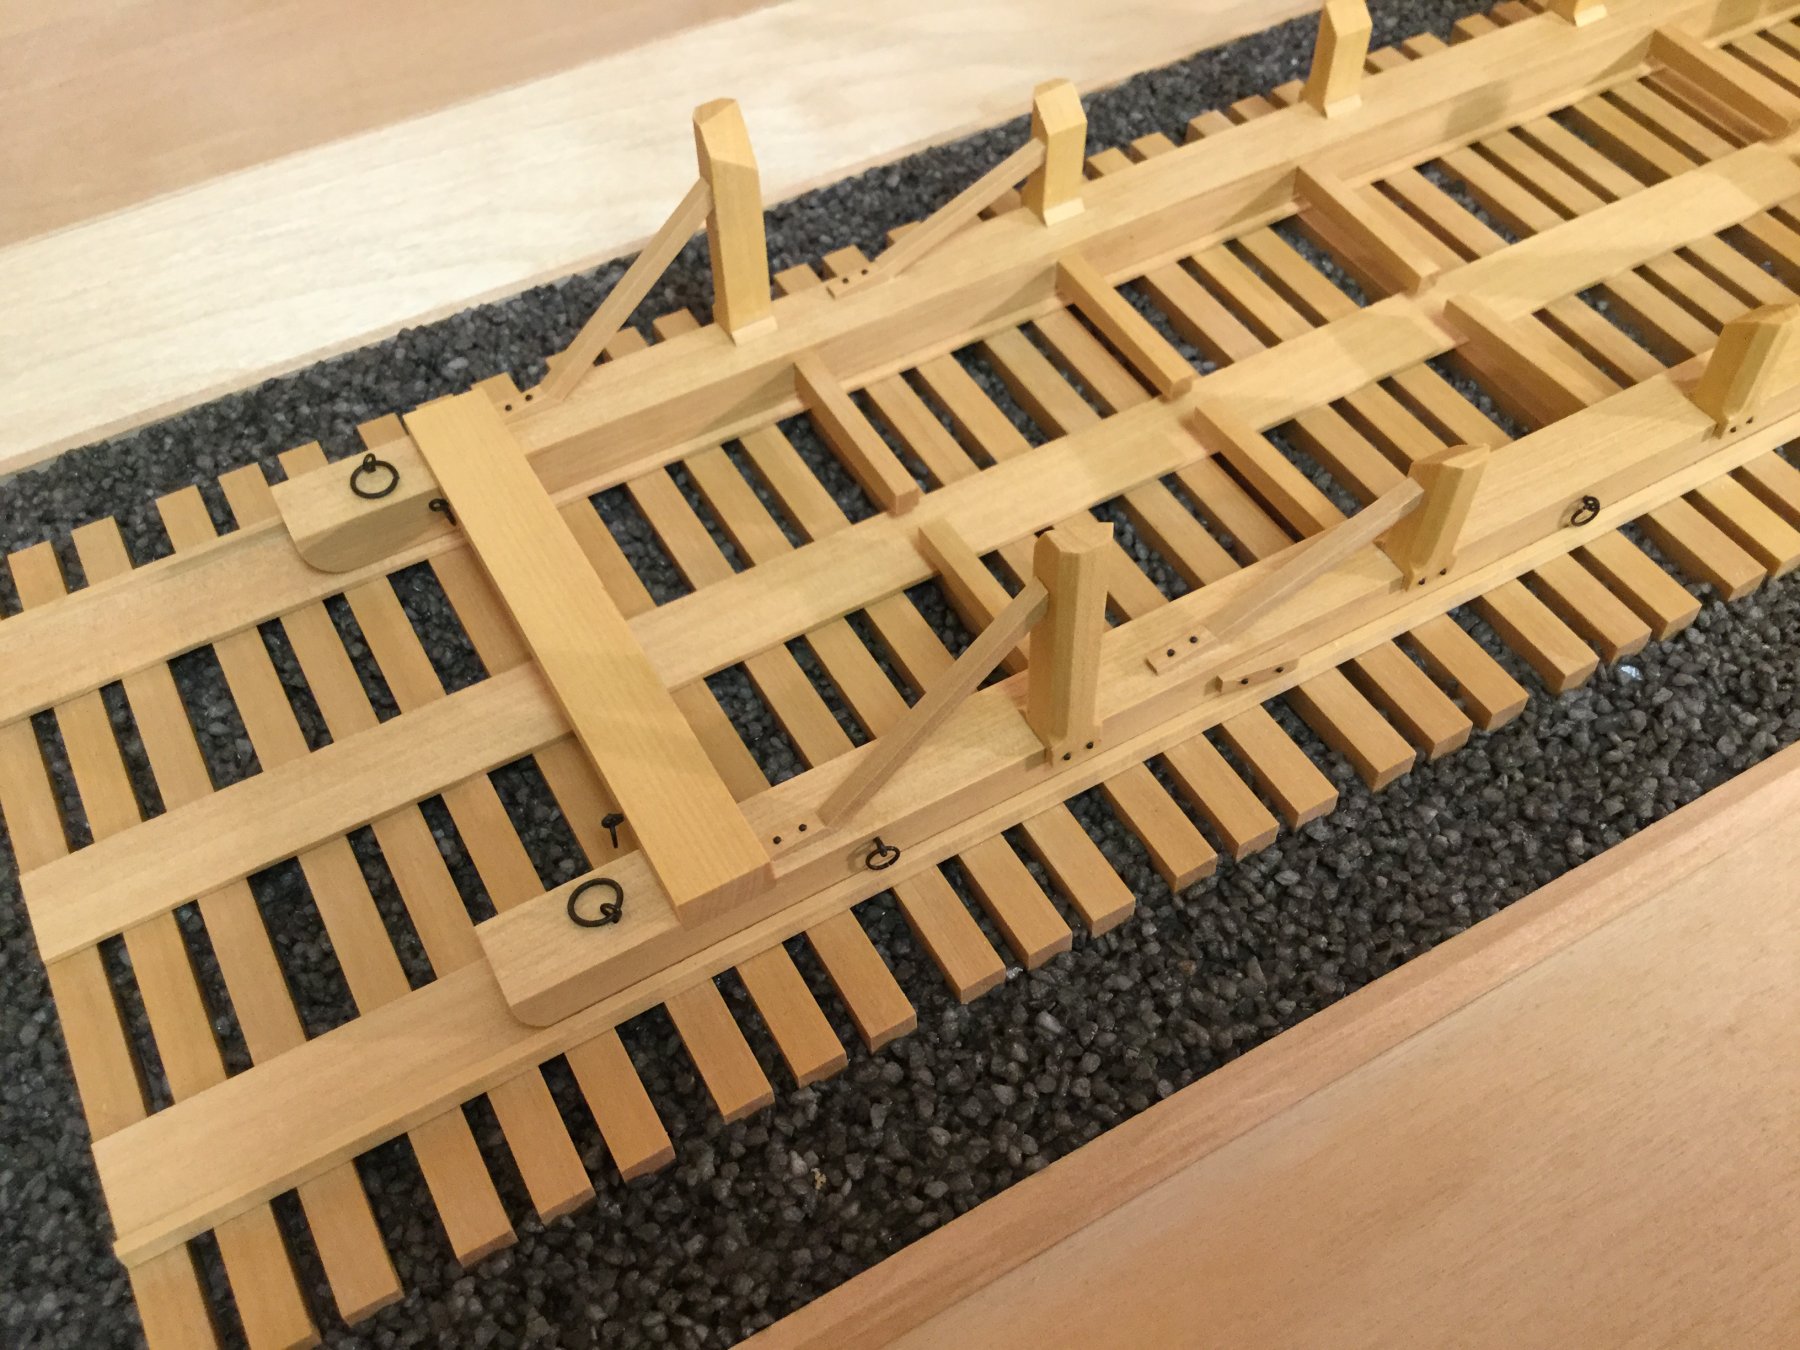
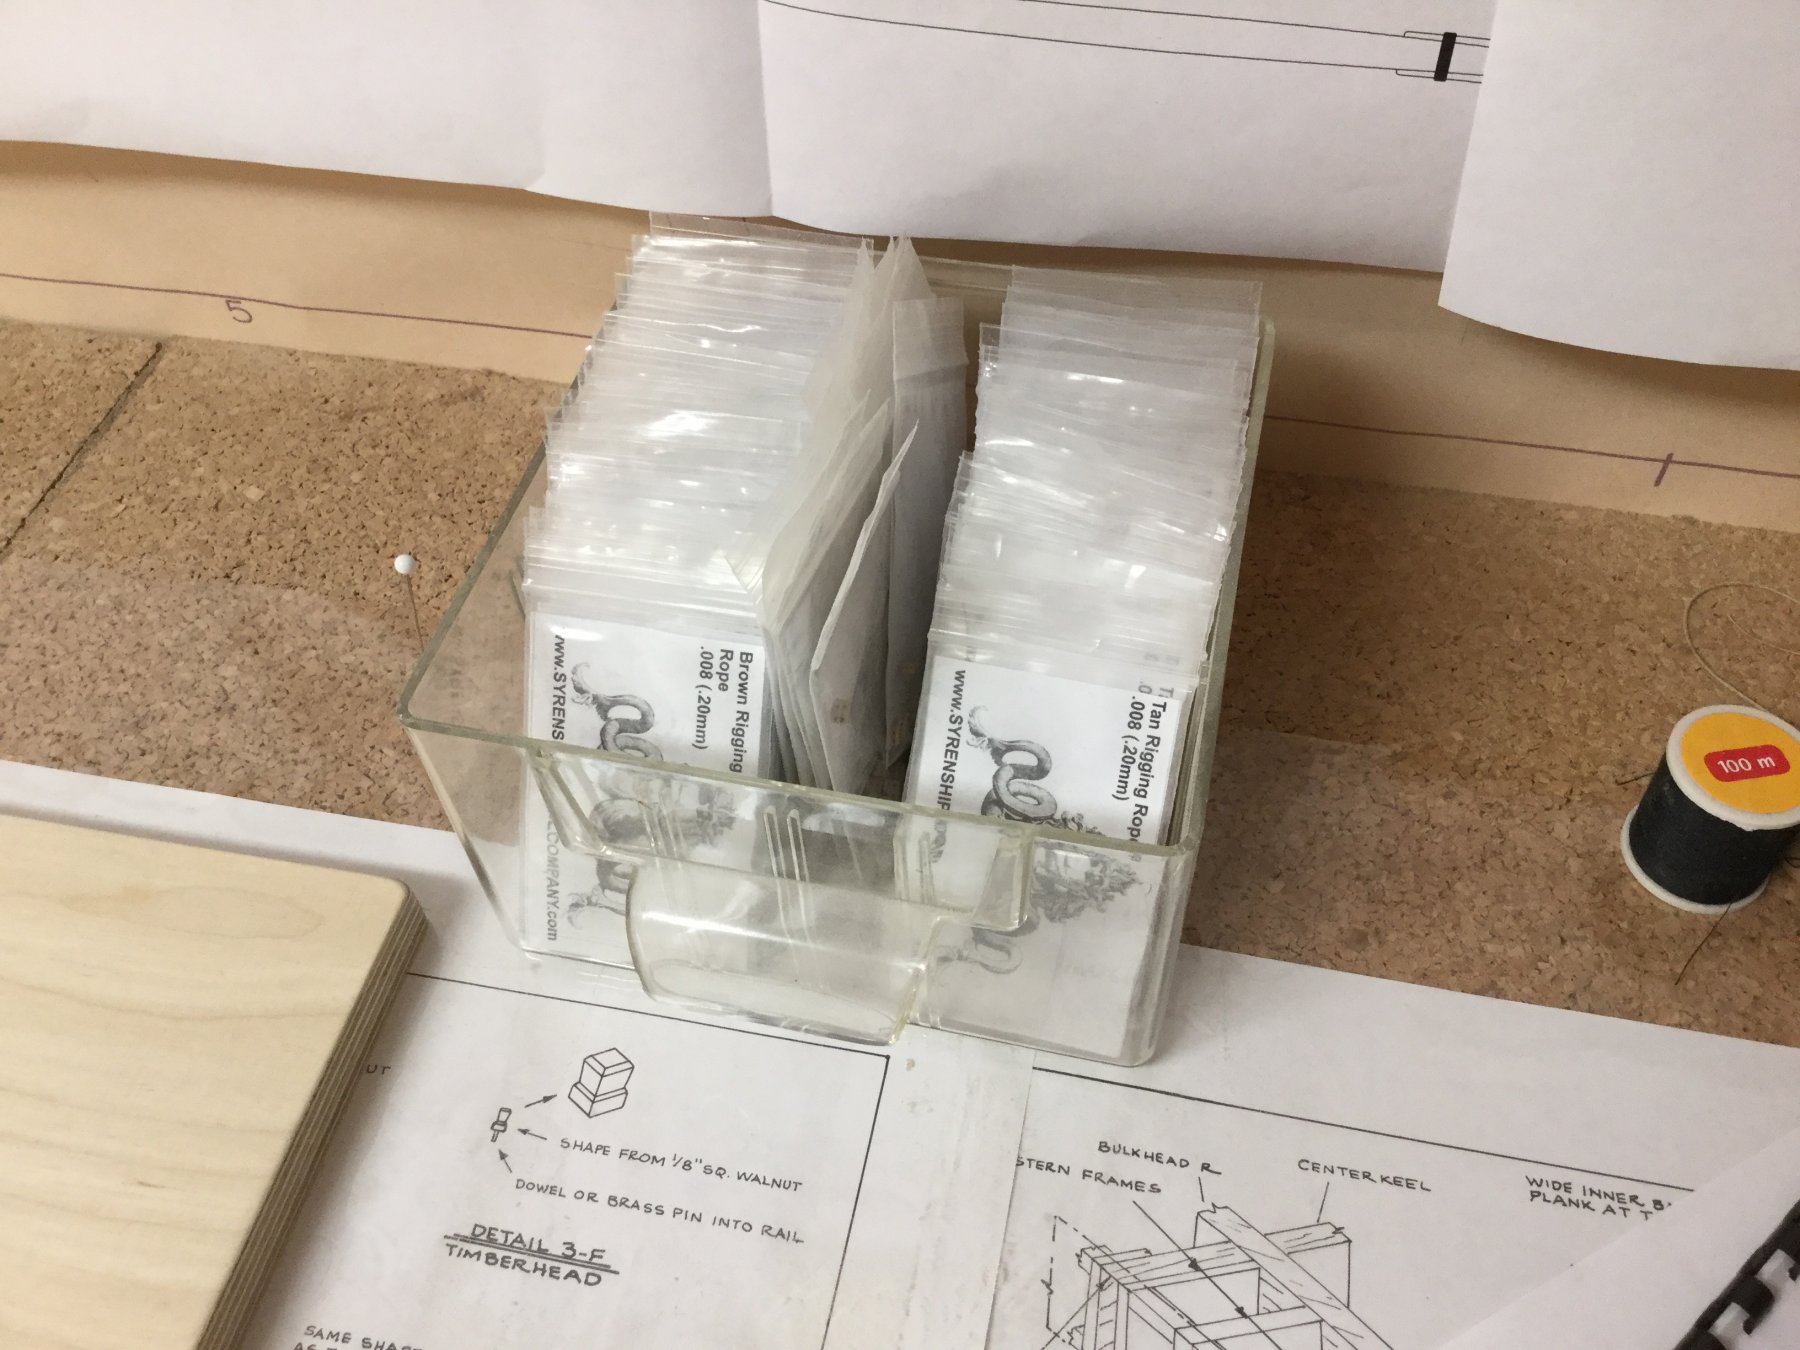
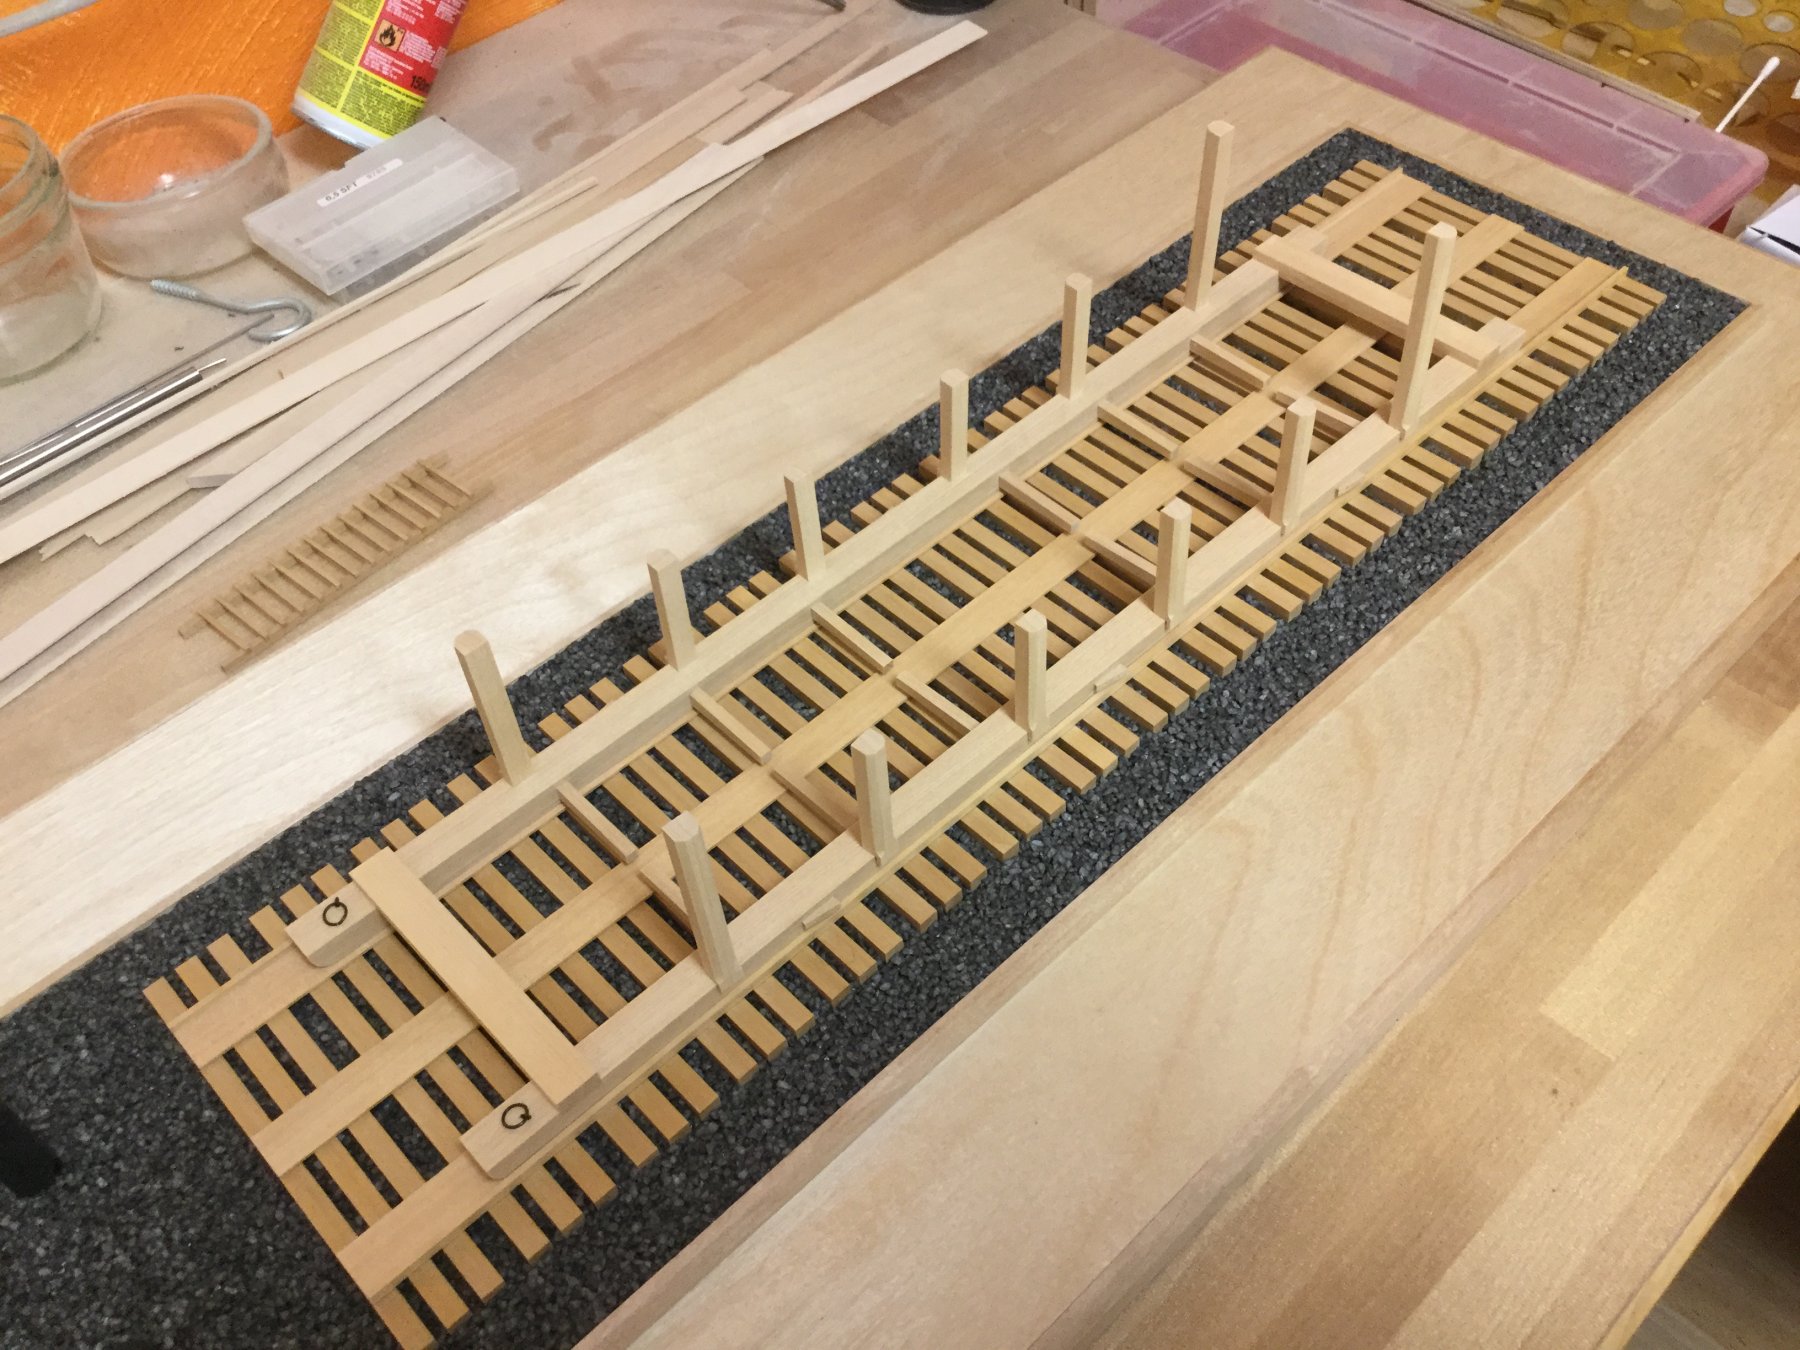
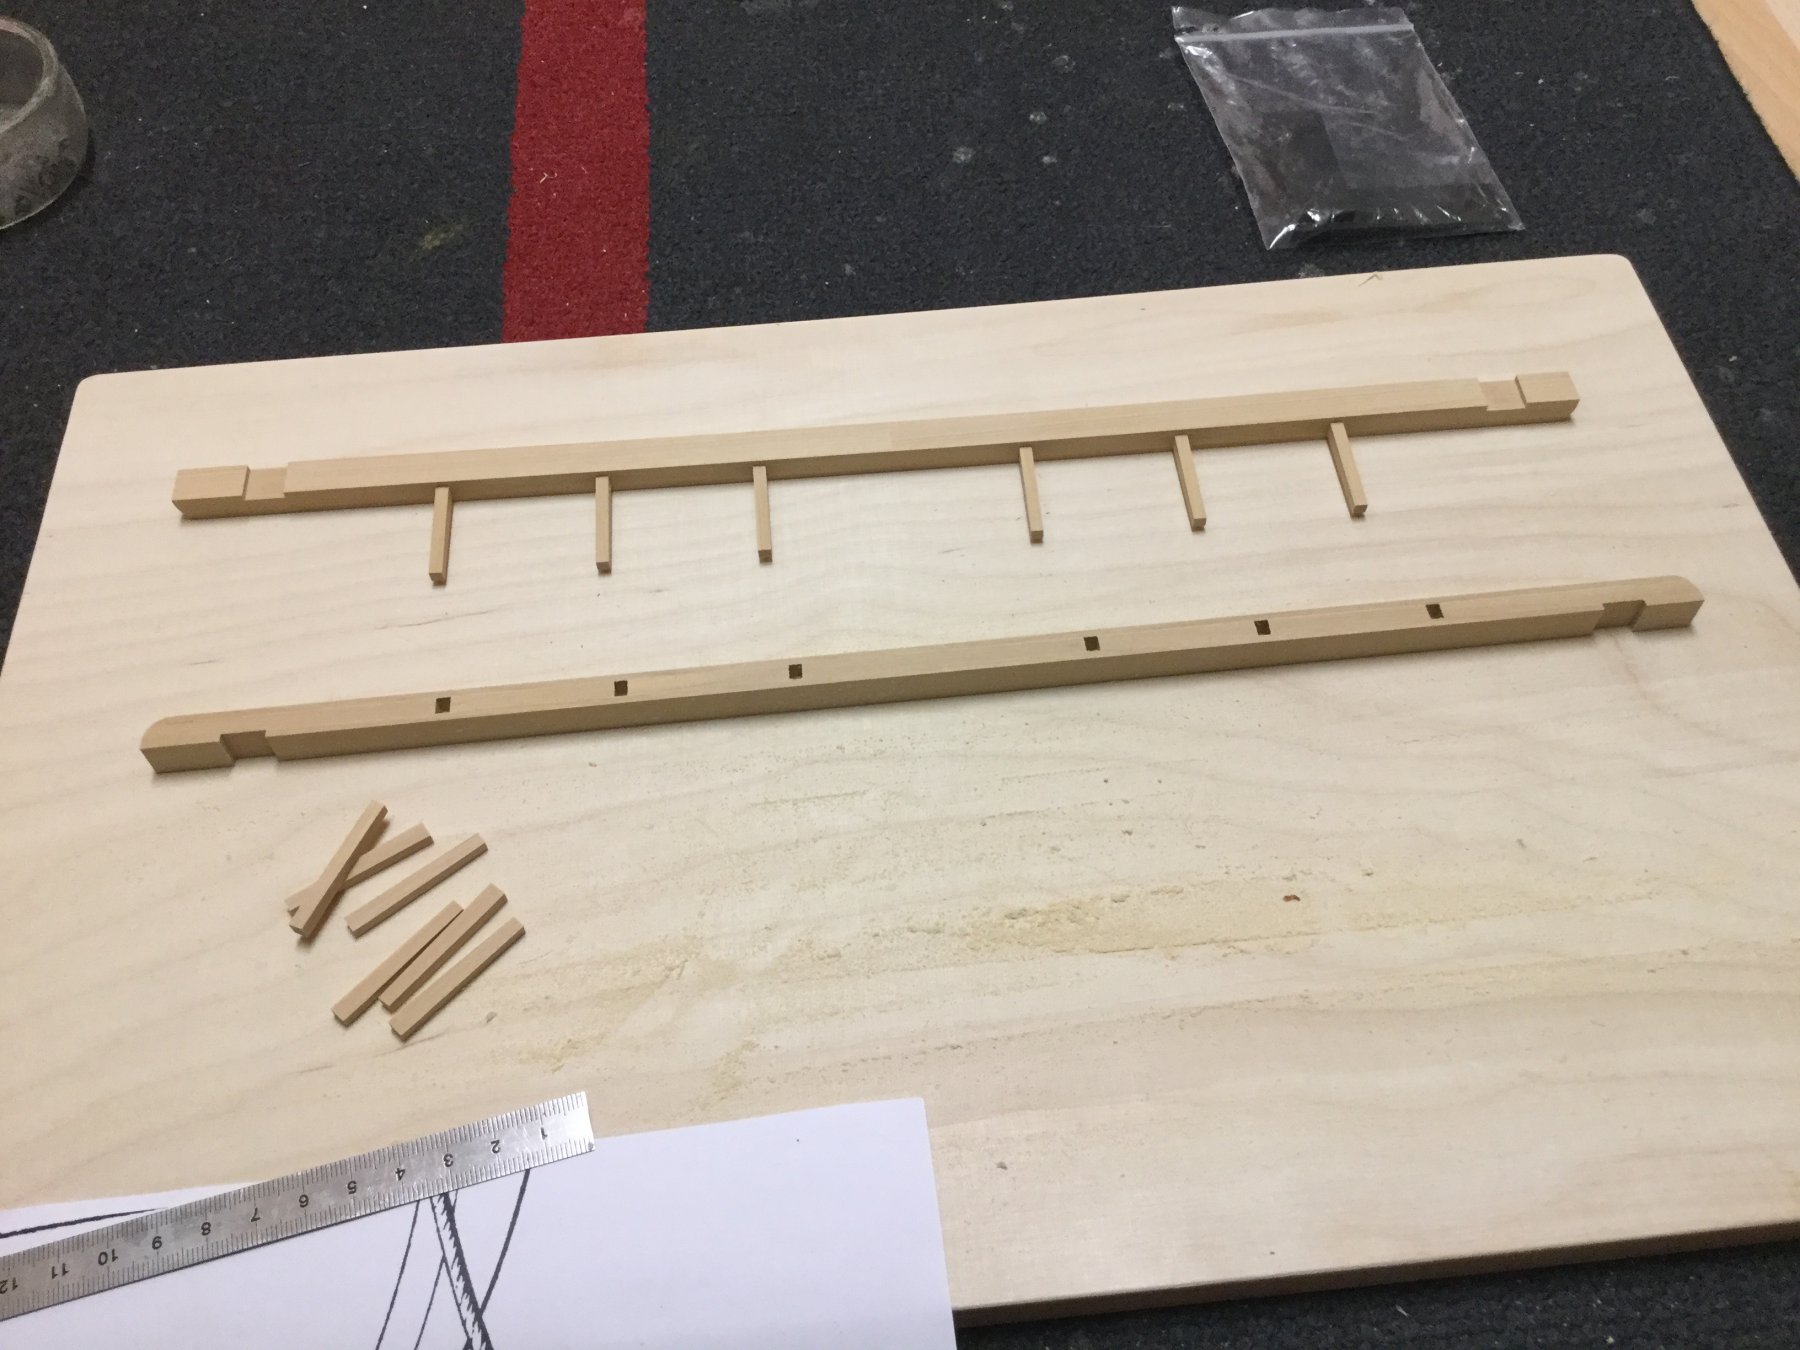
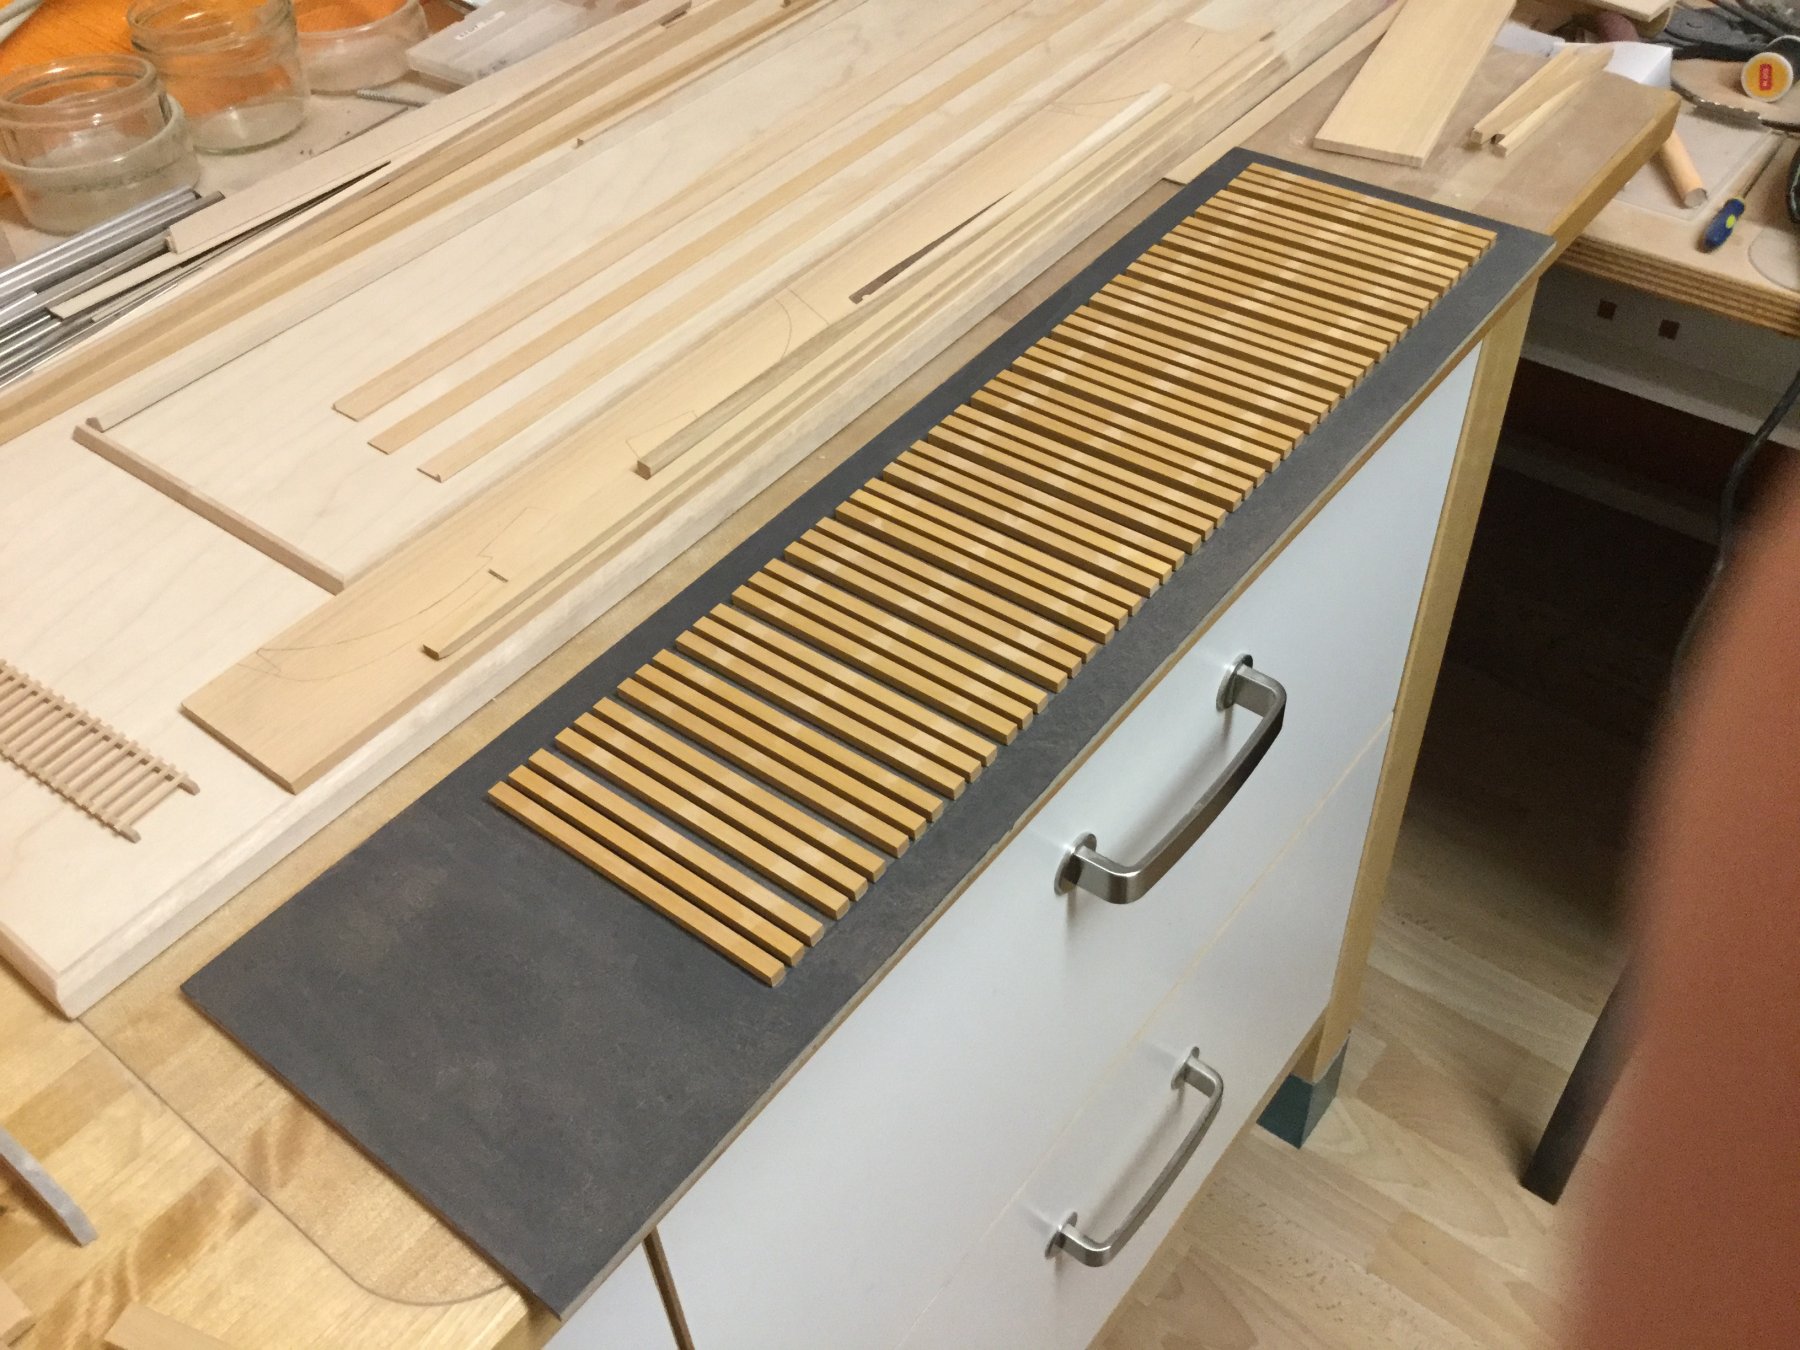
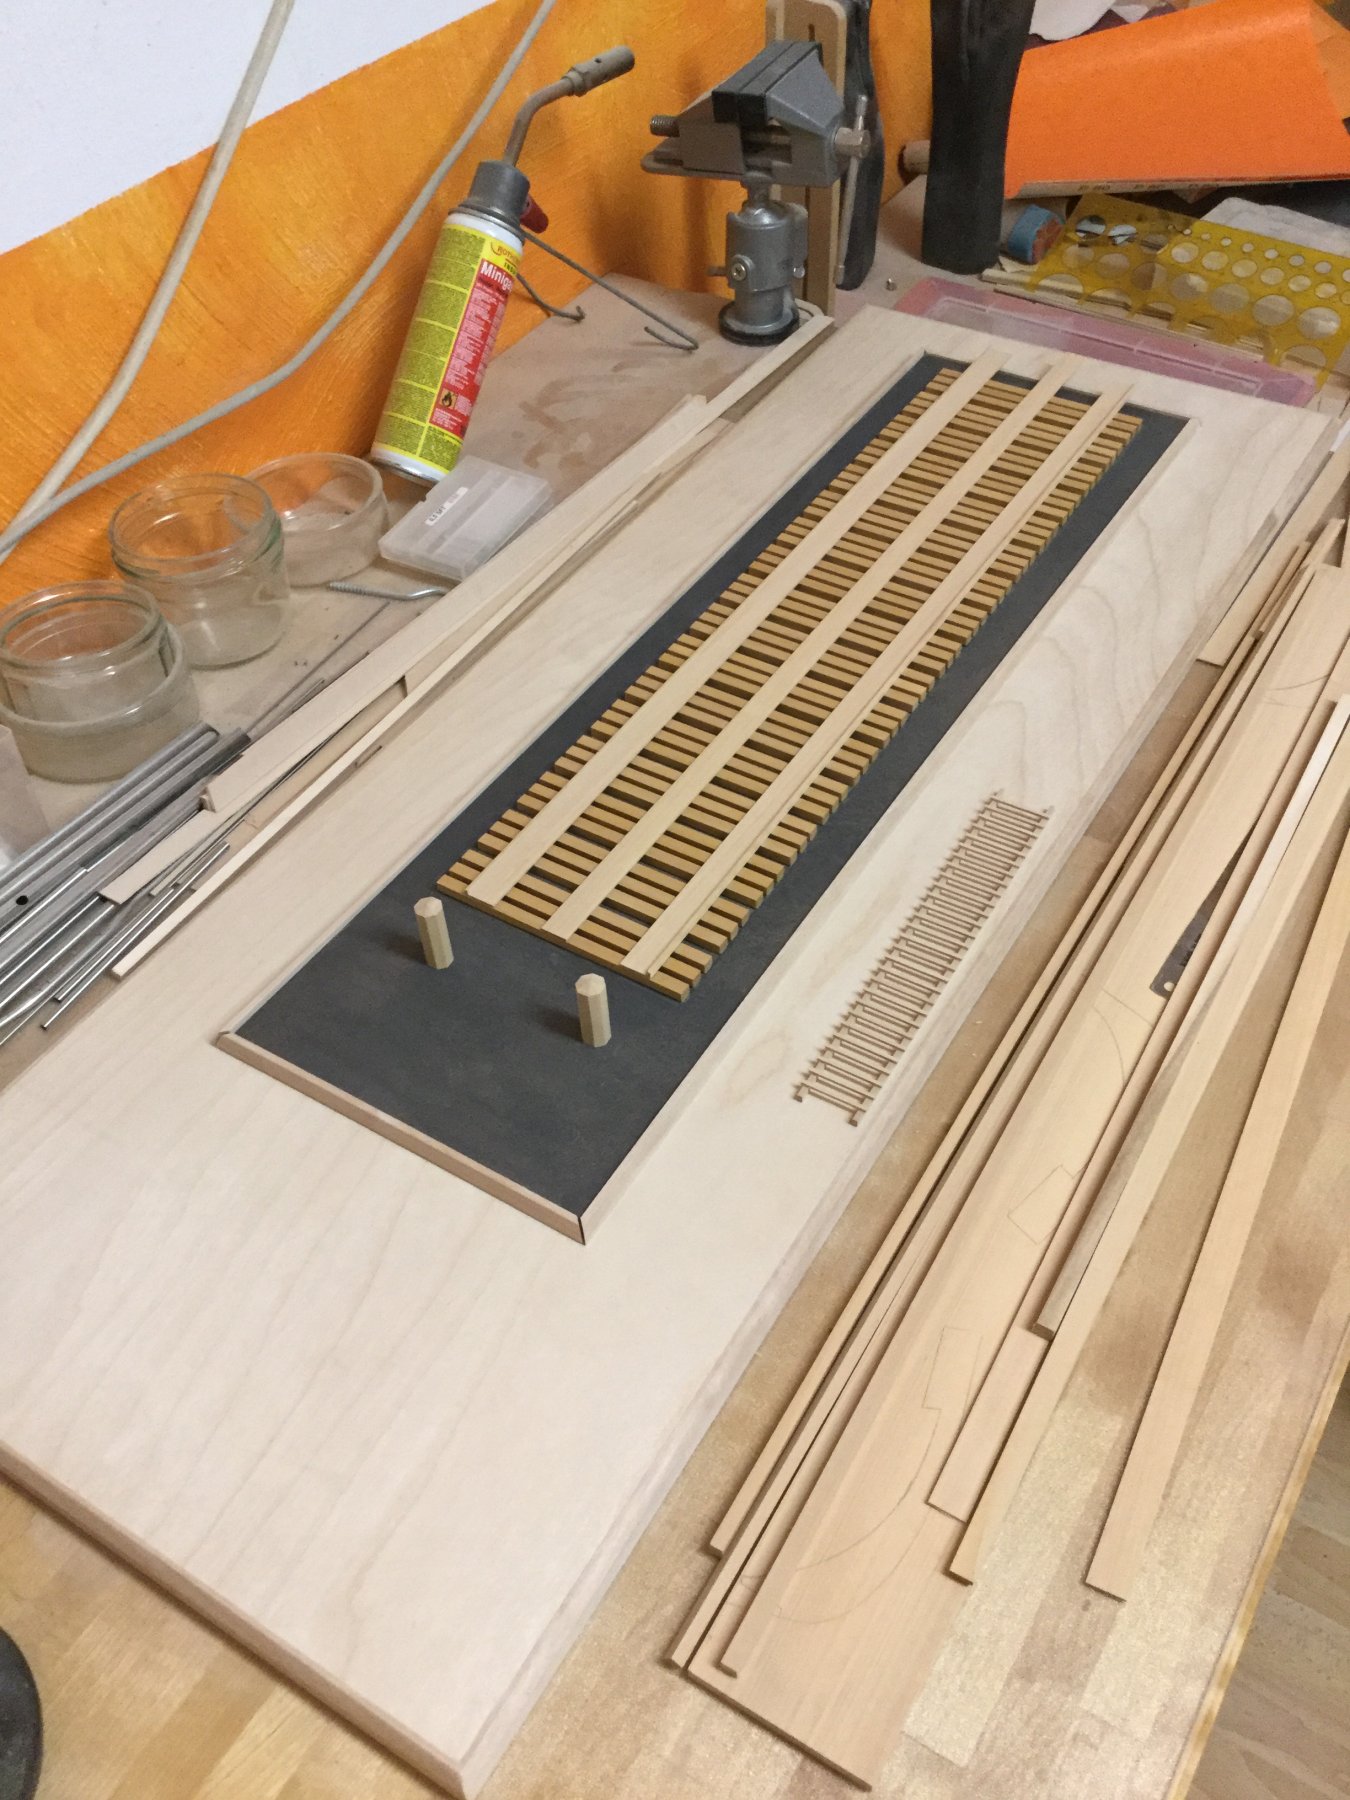
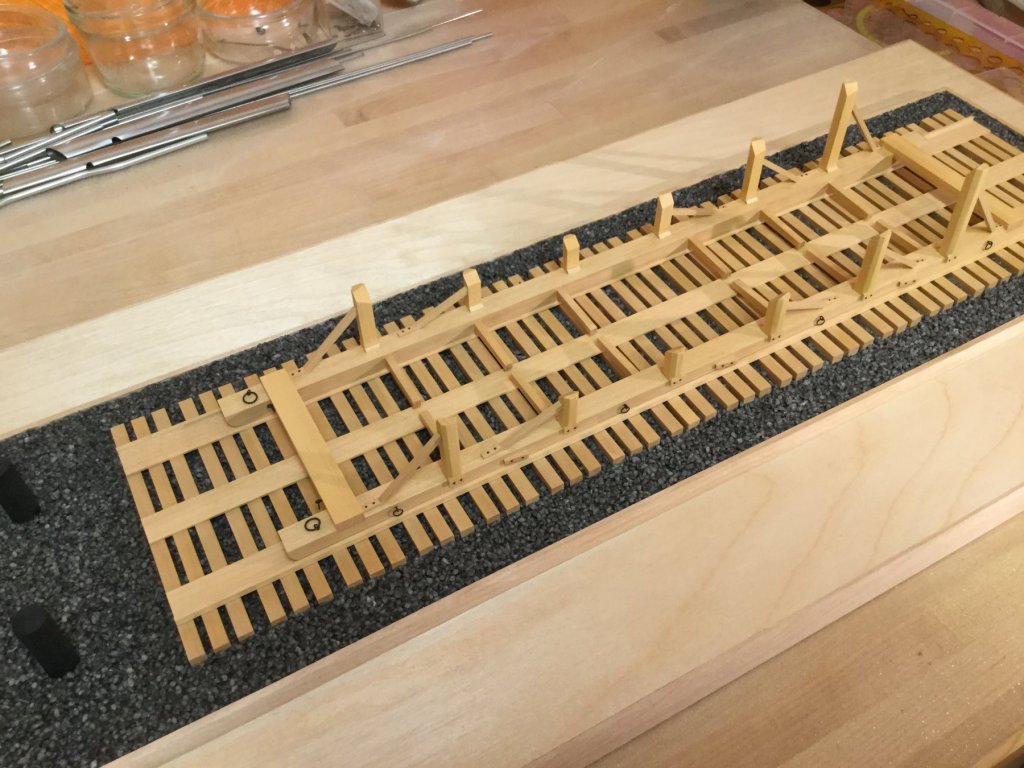
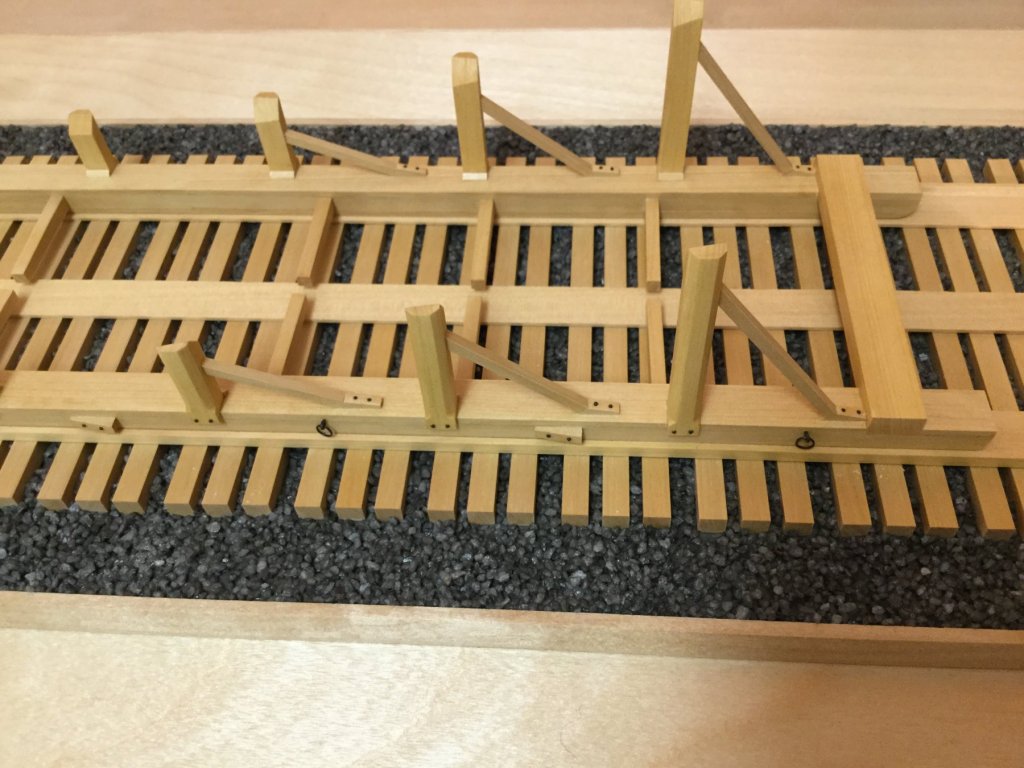
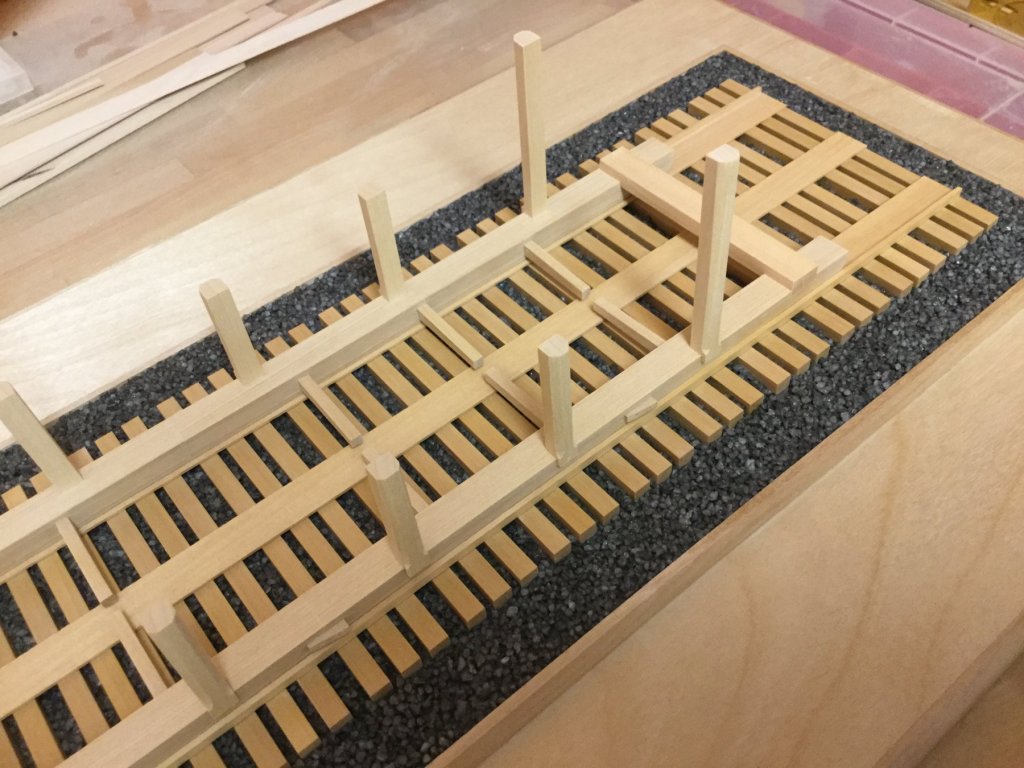
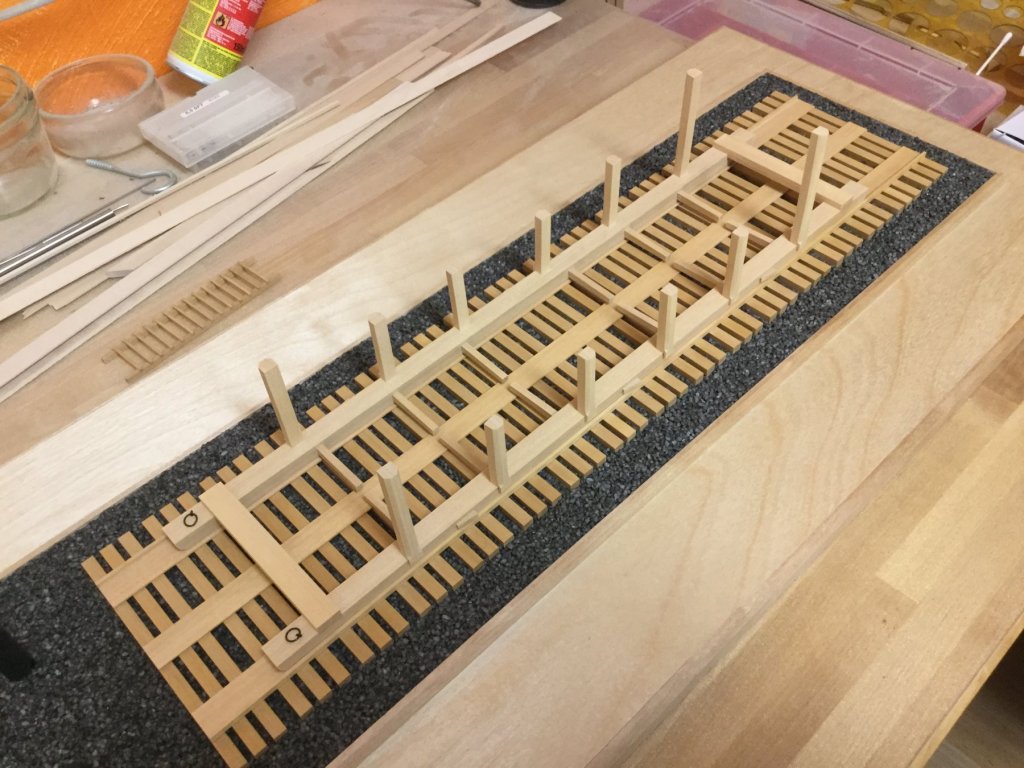
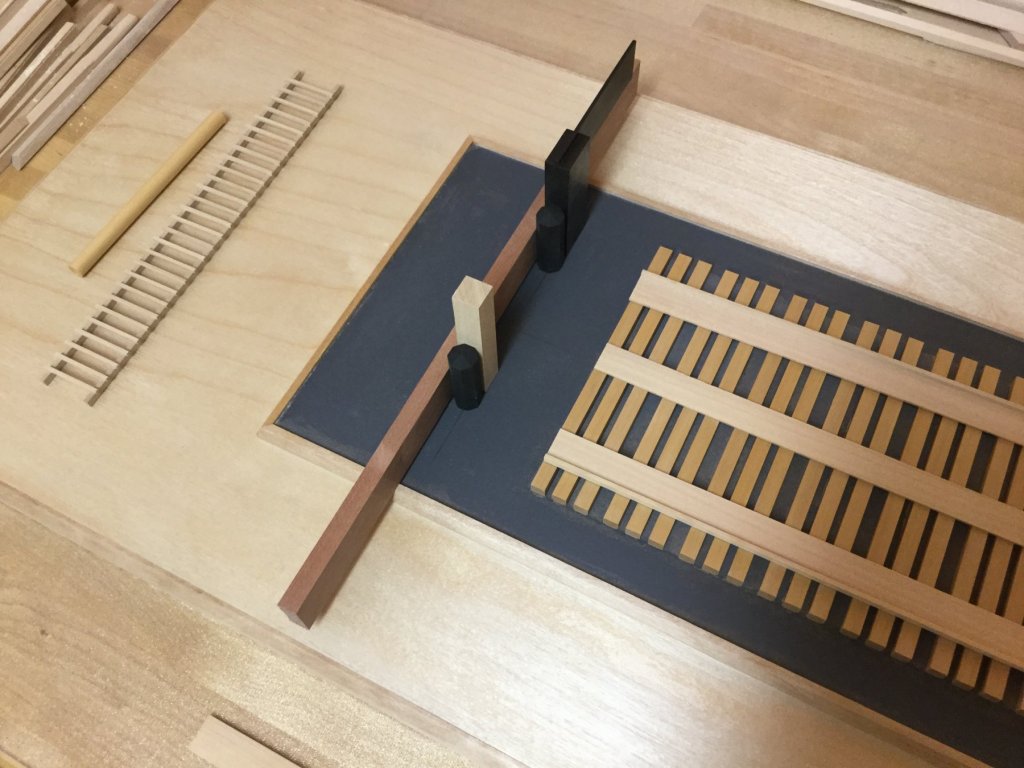
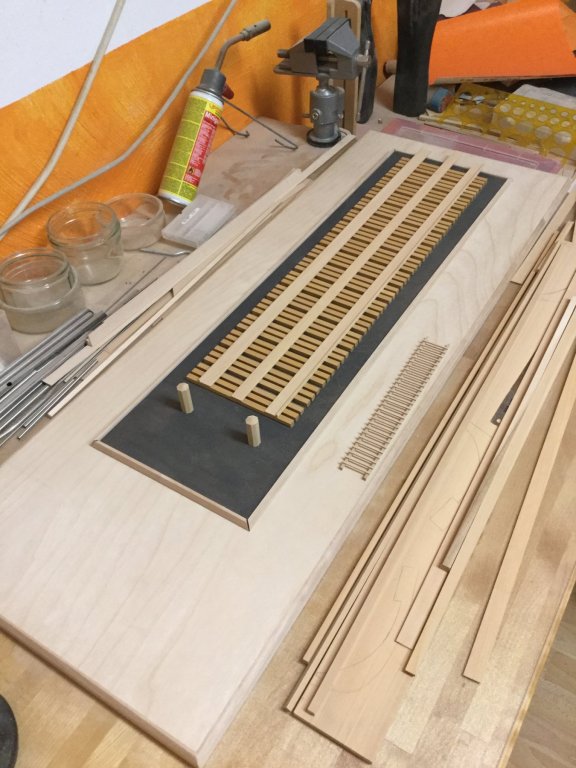
Next time I should think twice of releasing every crazy idea. Three weekends have passed and I have finally finished the carriage. A small ship like the AVS wouldn’t have used that complicated type of launchway but it was a good practice for future builds. Only some rope missing to secure the carriage to the bollards. Next and almost final step is rigging. The kit-supplied rope is polyester so I decided to exchange it completely with cotton rope from Syren SMC - I wonder how many orders like that until Syren is out of stock. I need a ropewalk...

- 231 replies
-
- 7
-
-
- model shipways
- armed virginia sloop
- (and 1 more)
-
Ahhhh!! Can‘t wait to see a Bristol kit (and to get one).
-
And to bring the ropecoils to shape you may use dilluted white glue. That don‘t add to much shine to the coils after the glue has dryed. The right mixture may be 1/1 water to white glue but you may try that first with some spare rope - the consistency should be something like milk. You may soak the rope first, then form the coil around a piece of brass tube and leave it onto a piece of styrene or something with a smooth surface to prevent the coil from sticking to it. You can add more glue until the coils doesn’t soak that any more. If you have added to much glue, use a Q-Tip to wipe off the excess. Let it dry for at least an hour. This method works well with cotton rope but I haven‘t tried this method with polyester rope (supplied in the kit) before. Maybe someone can tell about his/her experience. You may also check cdrusn89‘s Niagara build log (about Side 6), he documended his method very well with pictures.
- 27 replies
-
- 2
-
-
- armed virginia sloop
- model shipways
- (and 1 more)
-
The cannon rigging is truly time consuming, even with only 6 guns to rig. But you have made a good start already. If you want to use smaller blocks and you have some issues to work with them this is the way I did my cannon rigging on the AVS. I used 1/8´´ blocks (single and double) and used a small drill to enlarge the pre-drilled holes. The Syren blocks I used are made of castello, so they do not tend to break as easily as the supplied walnut blocks when you enlarge the holes. You may use a very small needle file as well and a magnifiing glass is also of use if you are visually handicapped. You may add after market brass hooks to the blocks, so you only have to hang the finished gun tackle into the installed eyebolts on the ship and cannon. I also used some superglue on the rope‘s end to make it stiff, so you can easily thread it into the block and it won‘t untwist or stuck inside. I first installed all cannons with the breach lines only and then added the gun tackles later, so there is no rope mess on deck. An more easy way to add ropecoils is to cut the tackle about 1 cm after last passing through the block and glu it directly onto the deck. Then make a separate rope coil and glue that onto the tackle‘s end. But this is only one possibility. You may also check JpR62’s AVS build log for his method of gun rigging. Anyway keep up the good work.
- 27 replies
-
- 3
-
-
- armed virginia sloop
- model shipways
- (and 1 more)
-
Since I am stuck with my alternative launchway, you might be able to finish your AVS before I do. Nice work, looks very good.
- 164 replies
-
- 1
-
-
- first build
- model shipways
- (and 2 more)
-
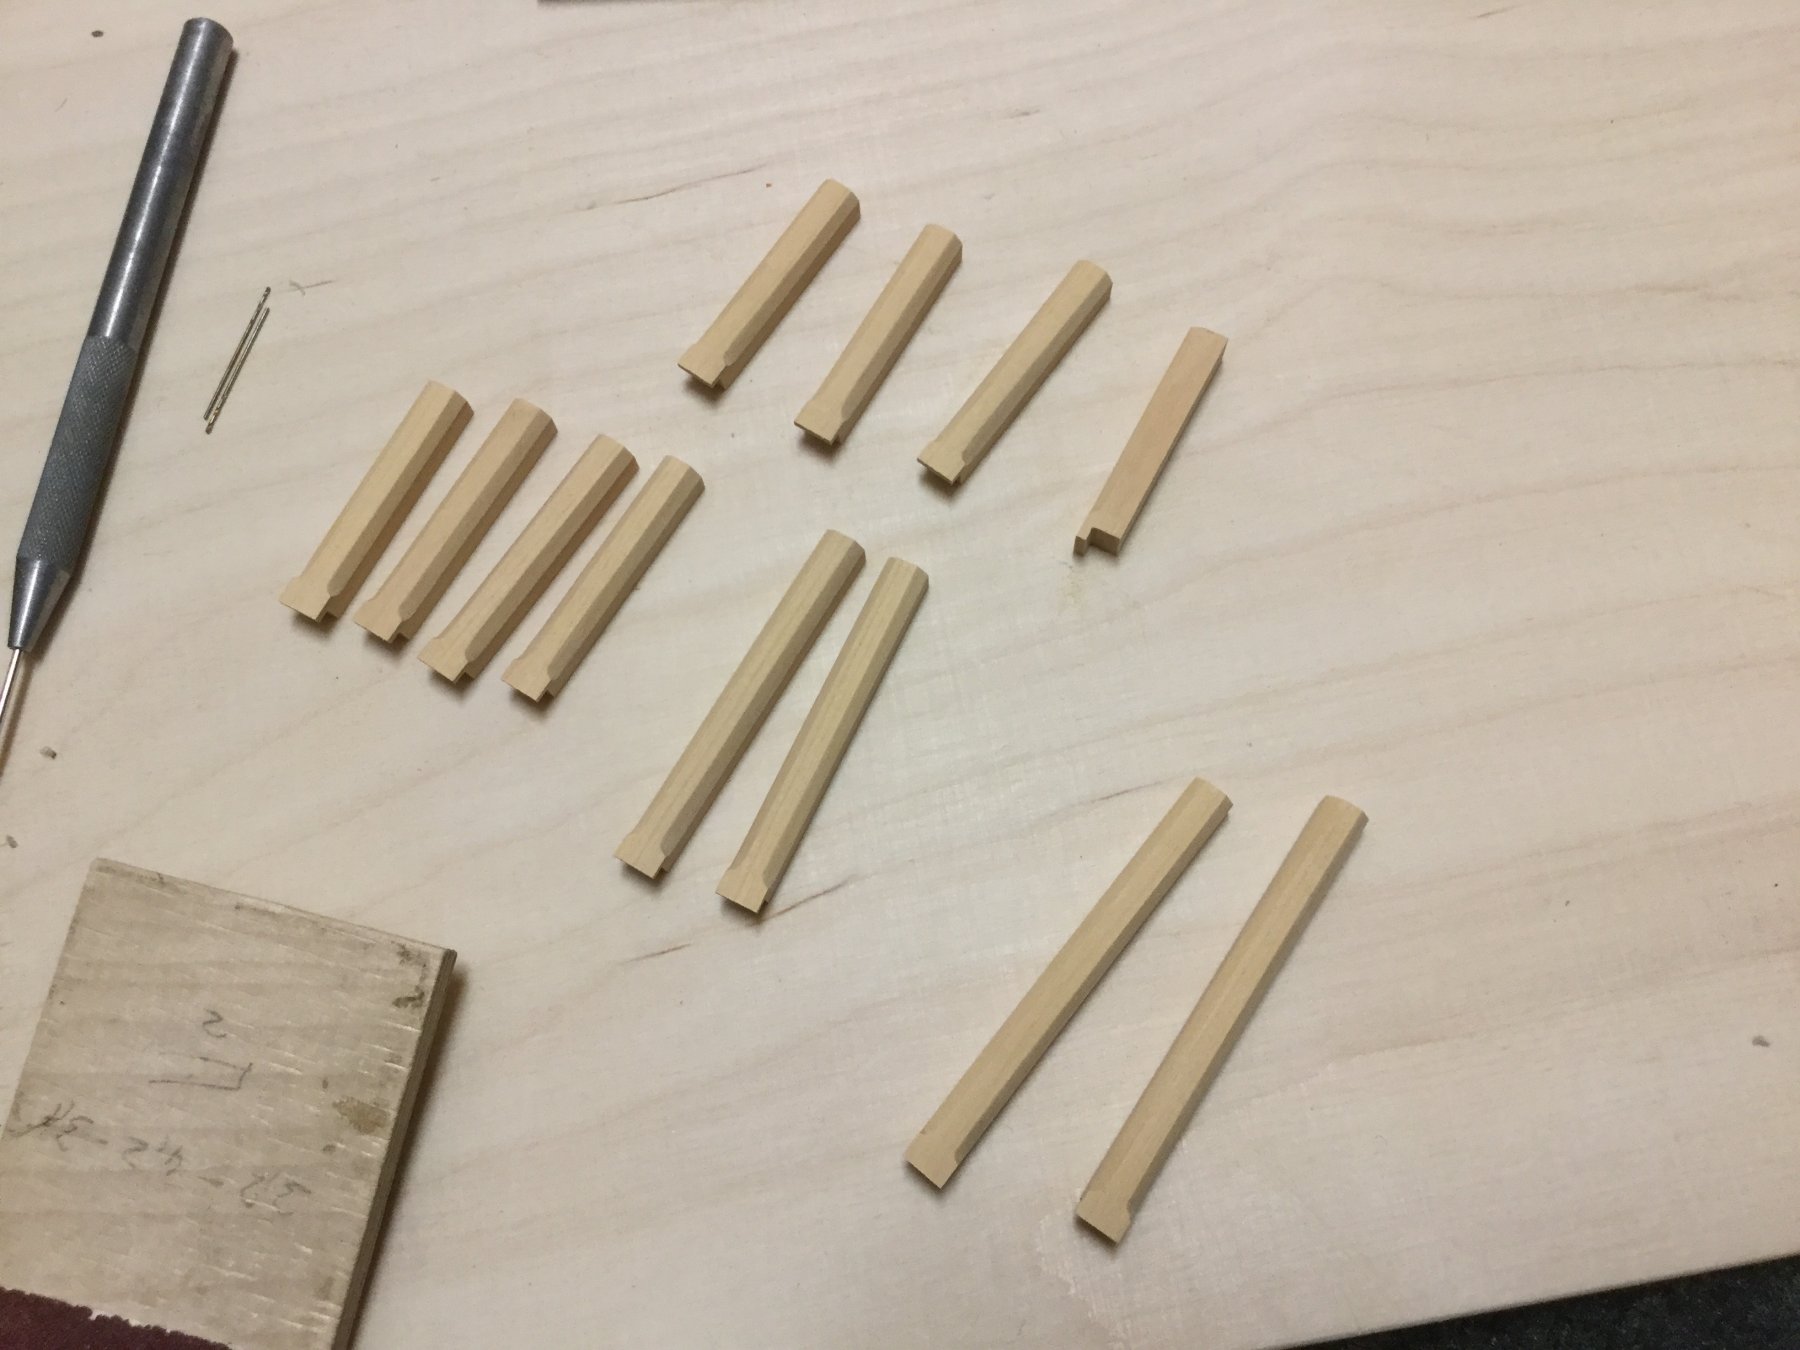
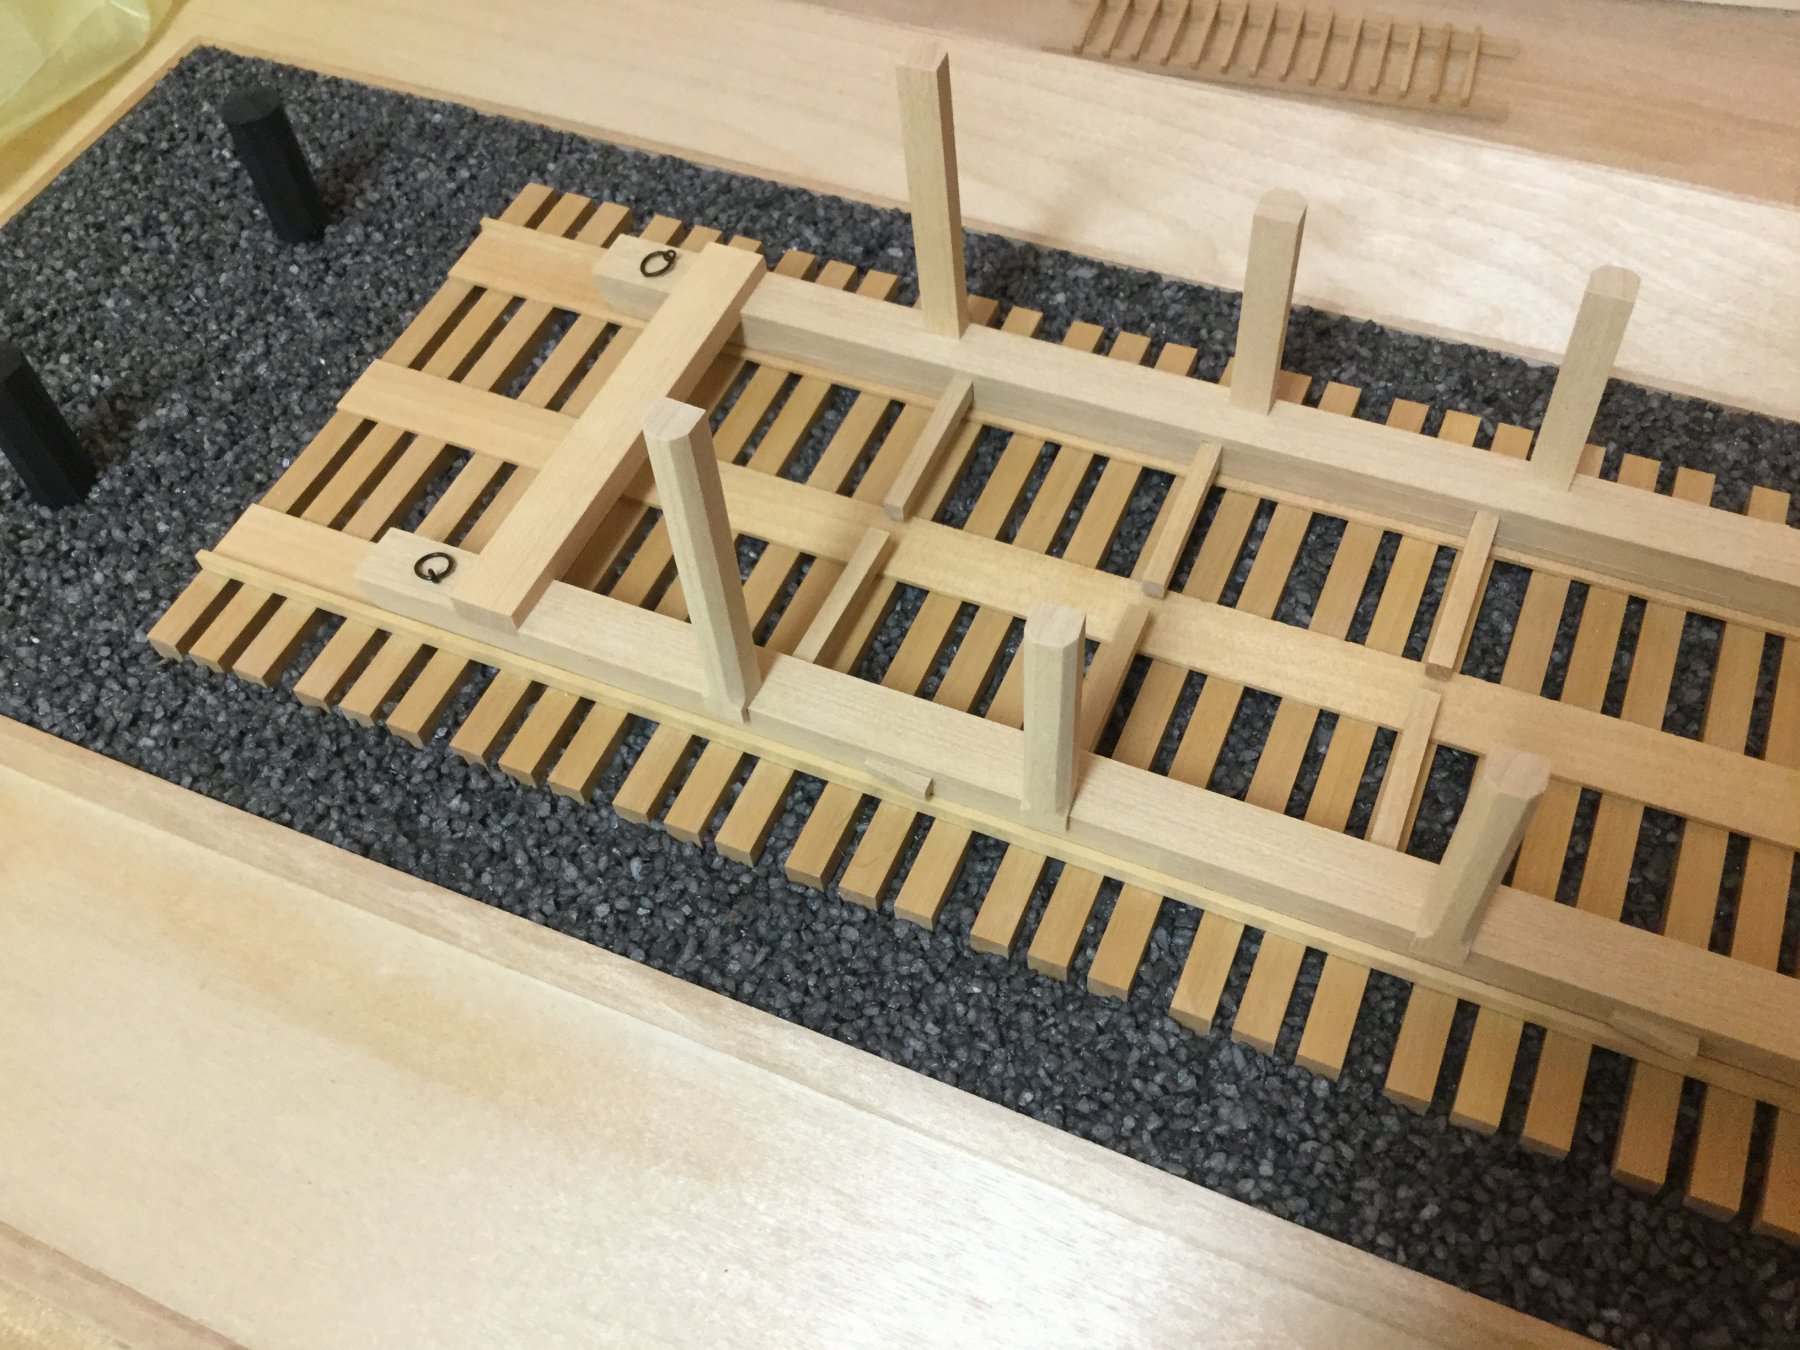
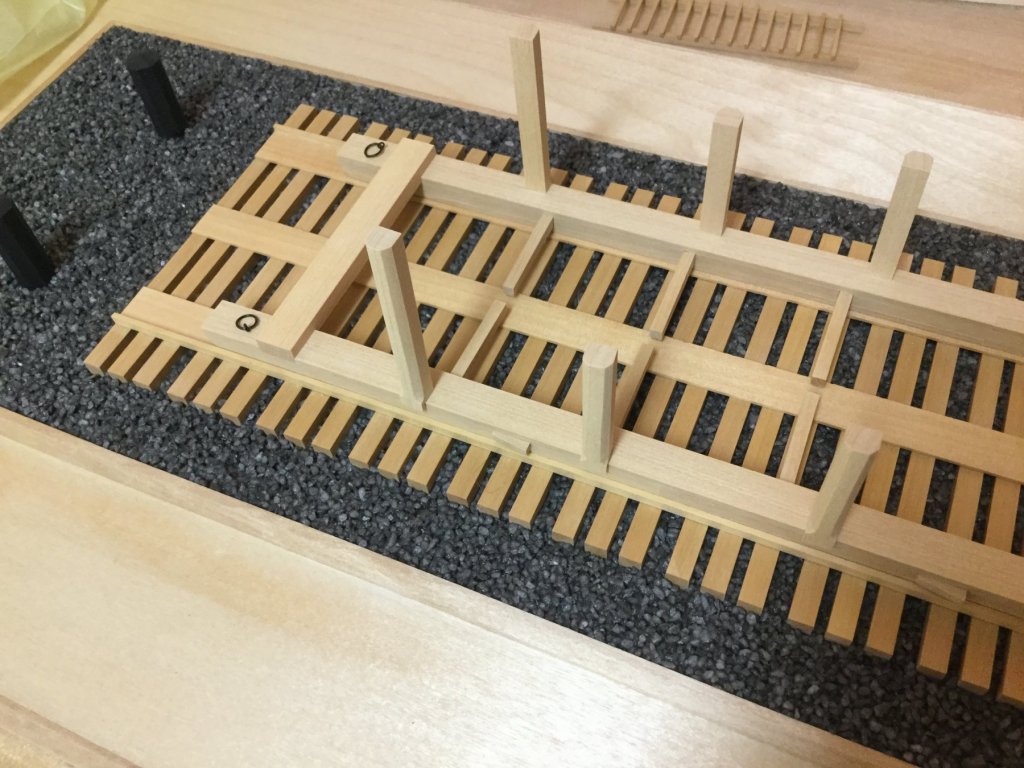
Some progress on the support timbers, I will use 12 of them. Still only dry-fit. The stop chocks are fitted on the carriage too.

- 231 replies
-
- 9
-
-
- model shipways
- armed virginia sloop
- (and 1 more)
-
You have done a very good Job. And you’re right - family comes first. Thank you for all the nice castello you have supplied over the years and I wish you all the best.
-
Hello Dwight, you shouldn‘t think about your model that way because you may get a bad attitude towards it and then it will get more difficult for you to get back on it. Although not every model looks clean, crisp or precise the same way they are all pieces of art with hundreds of hours spent into it.
- 231 replies
-
- 2
-
-
- model shipways
- armed virginia sloop
- (and 1 more)
-
Thank you for the nice words and the likes. Some more work on the carriage. The two skids are made of three layers of wood and the lower front and rear sides are rounded. Nothing is glued yet only dry fitted. Next will be installing all eyebolts.

- 231 replies
-
- 8
-
-
- model shipways
- armed virginia sloop
- (and 1 more)
-
You‘ve done a pretty nice job. She looks great.
- 550 replies
-
- 2
-
-
- confederacy
- model shipways
- (and 1 more)
-
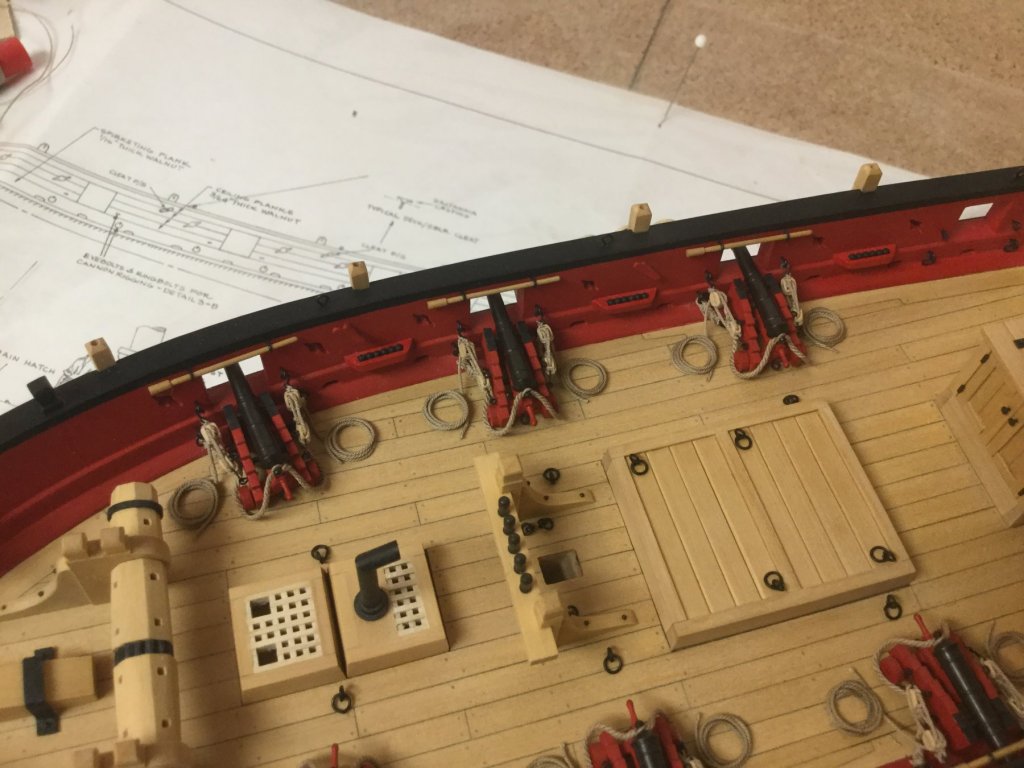
You have made nice progress, looking very good. In my opinion the more easy way is to cut the tackle about 1 cm after last passing through the block and glu it directly onto the deck. Then make a separate rope coil and glue that onto the tackle‘s end. I find this way more appropriate to make sure all rope coils are of equal size and position next to the gun.
-
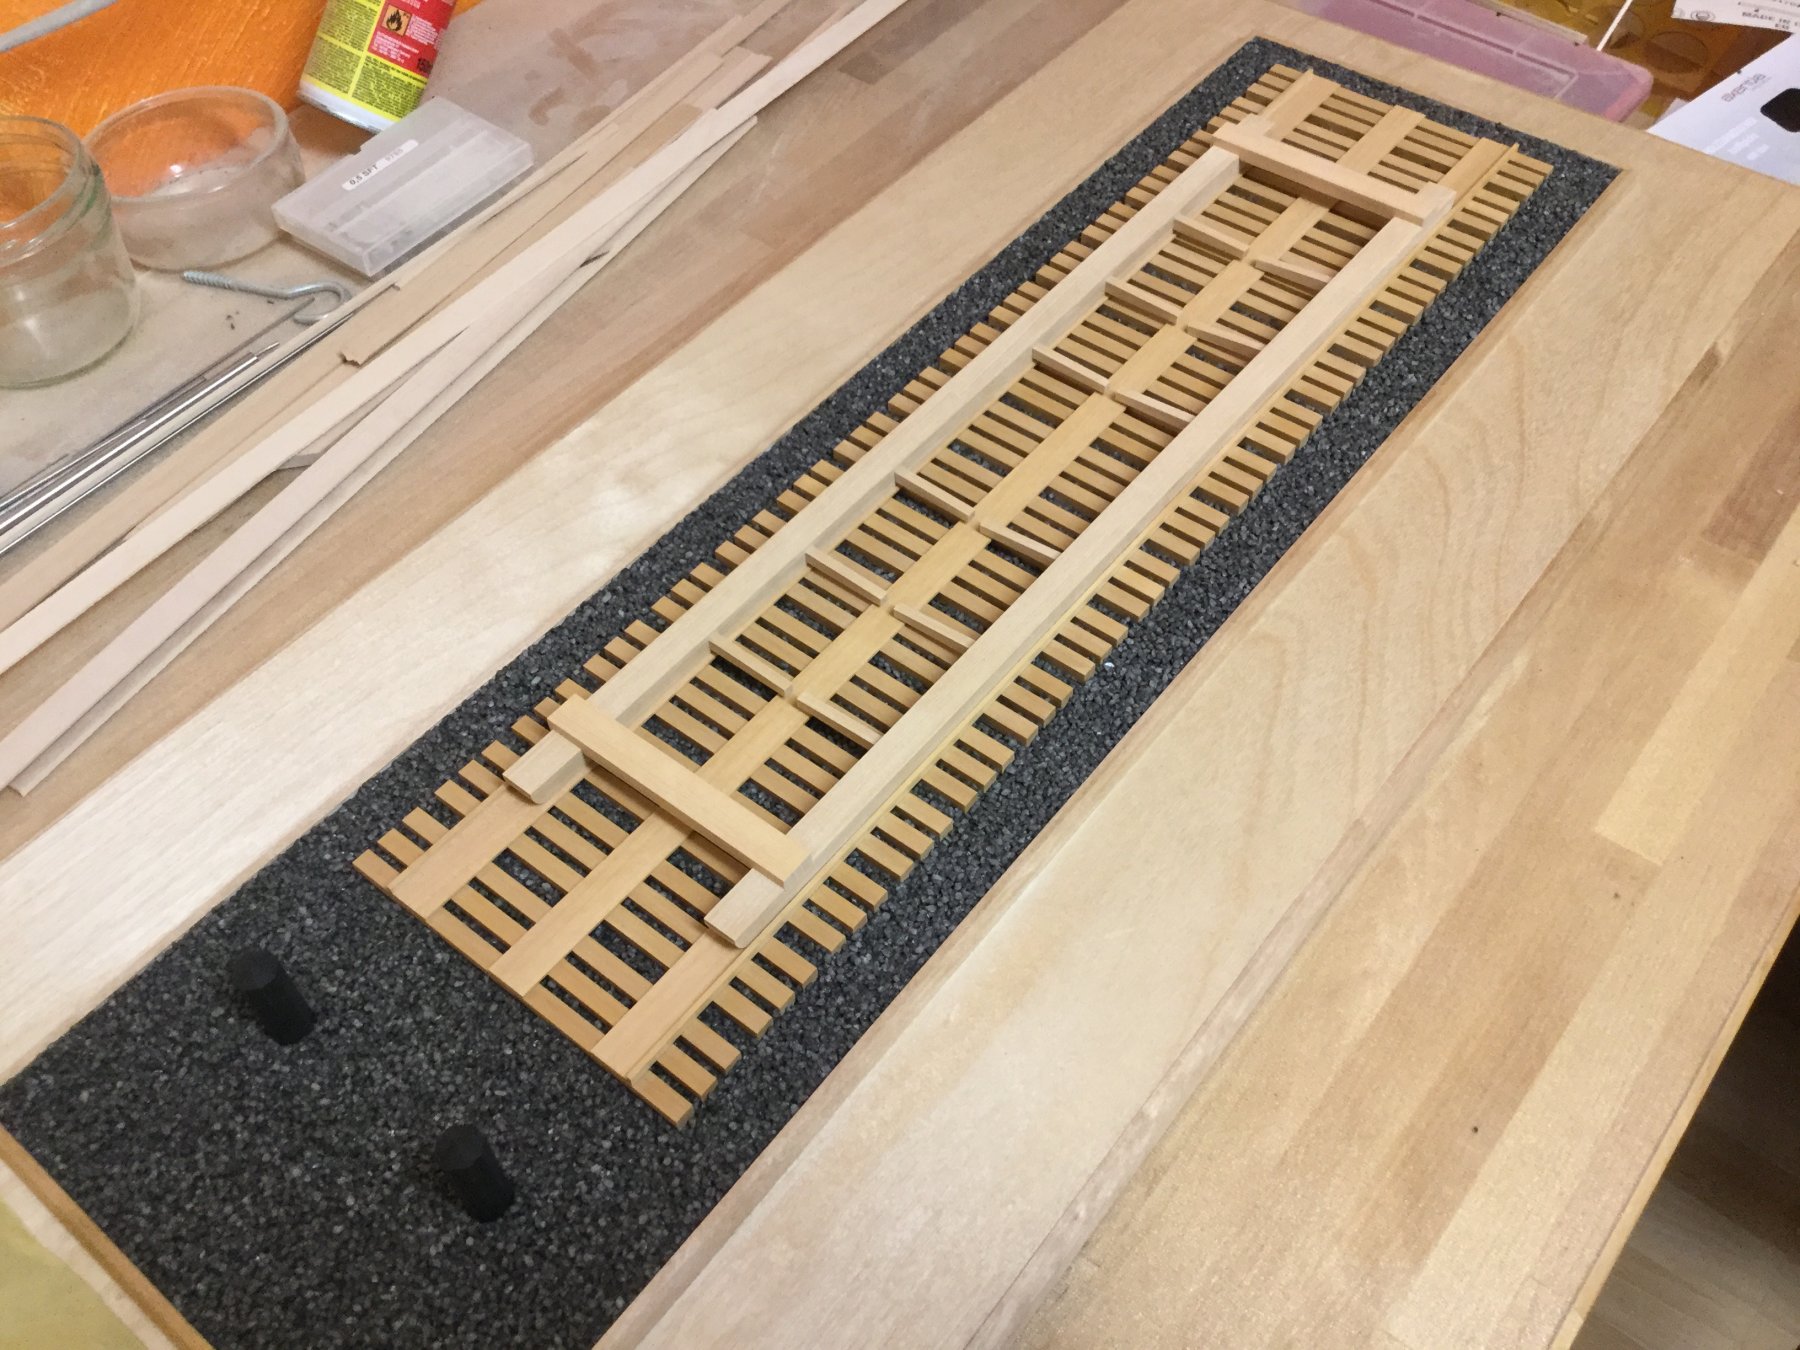
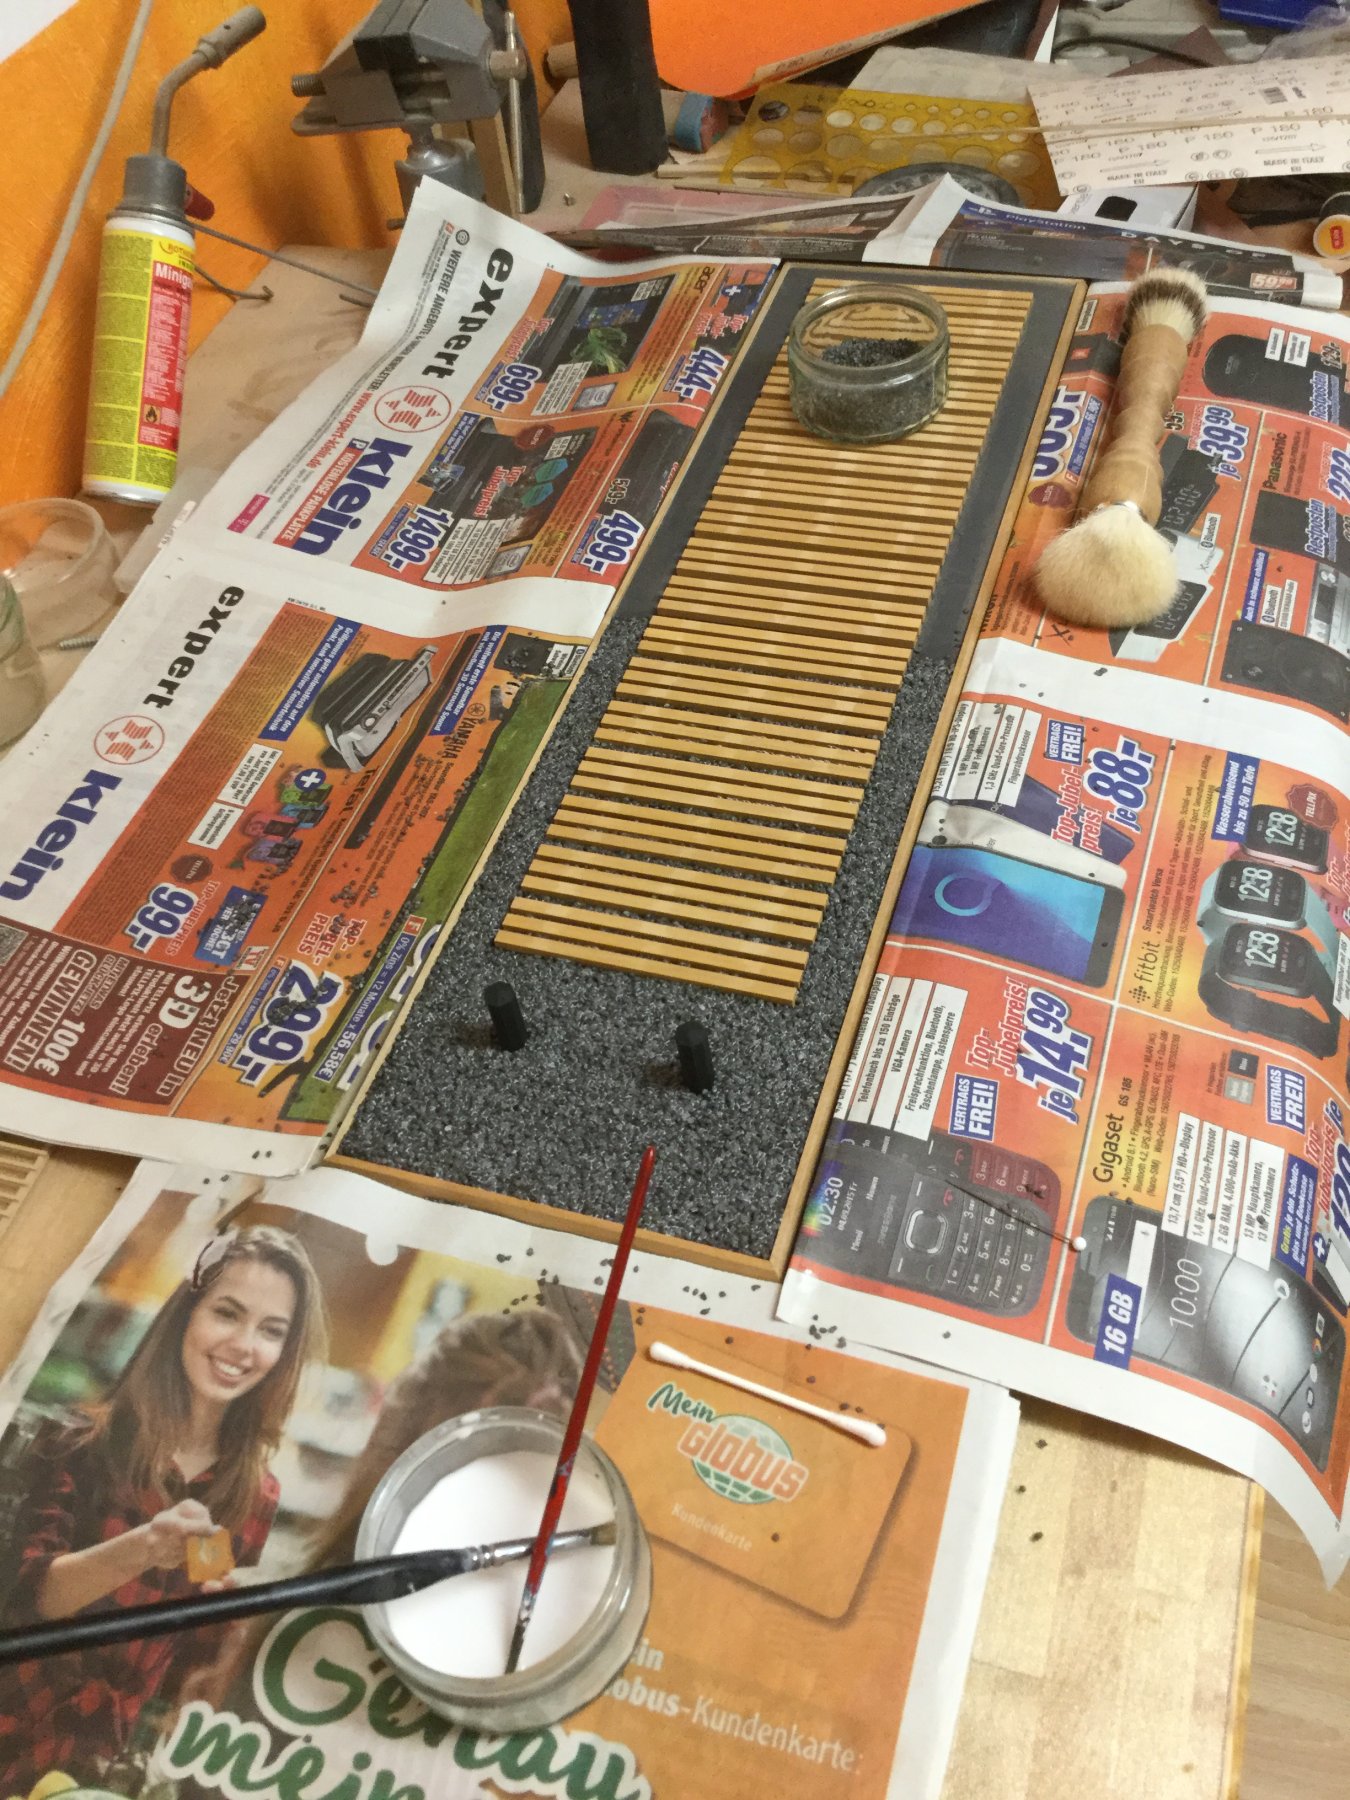
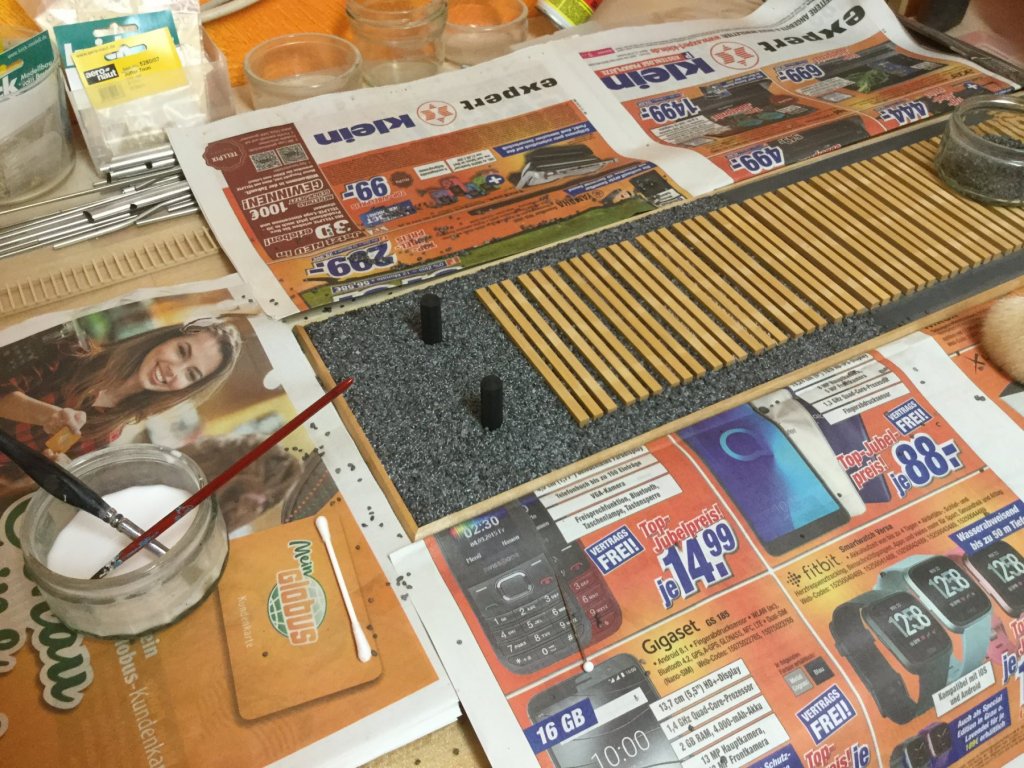
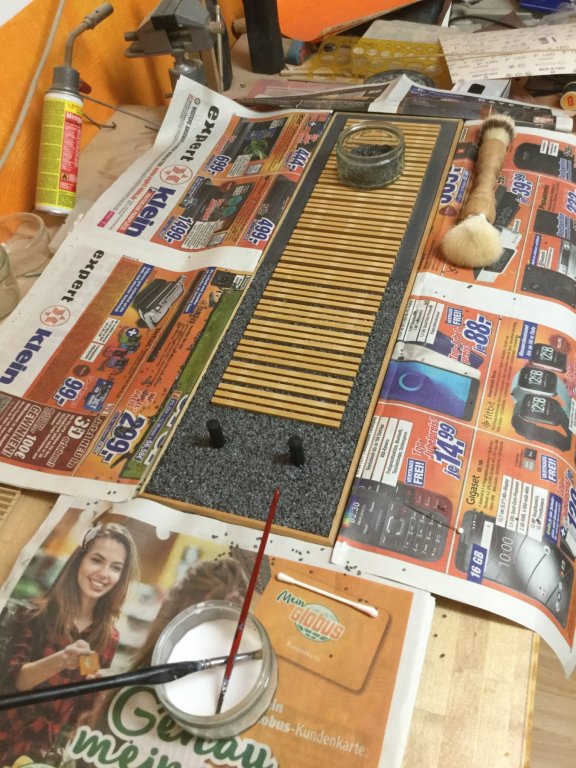
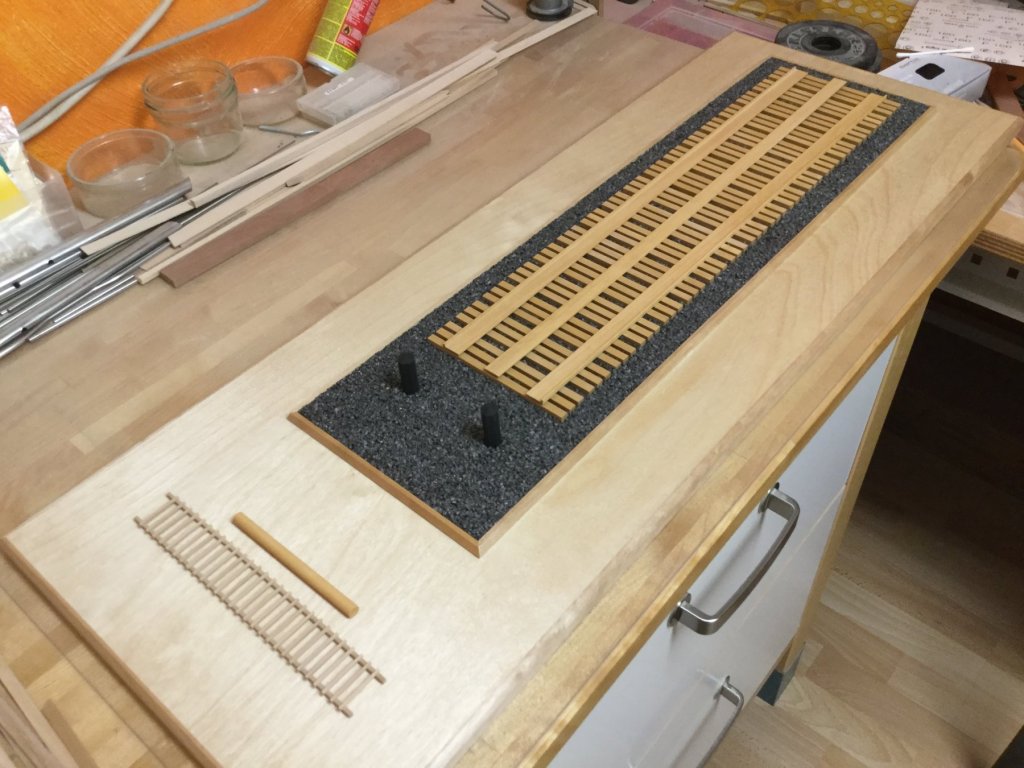
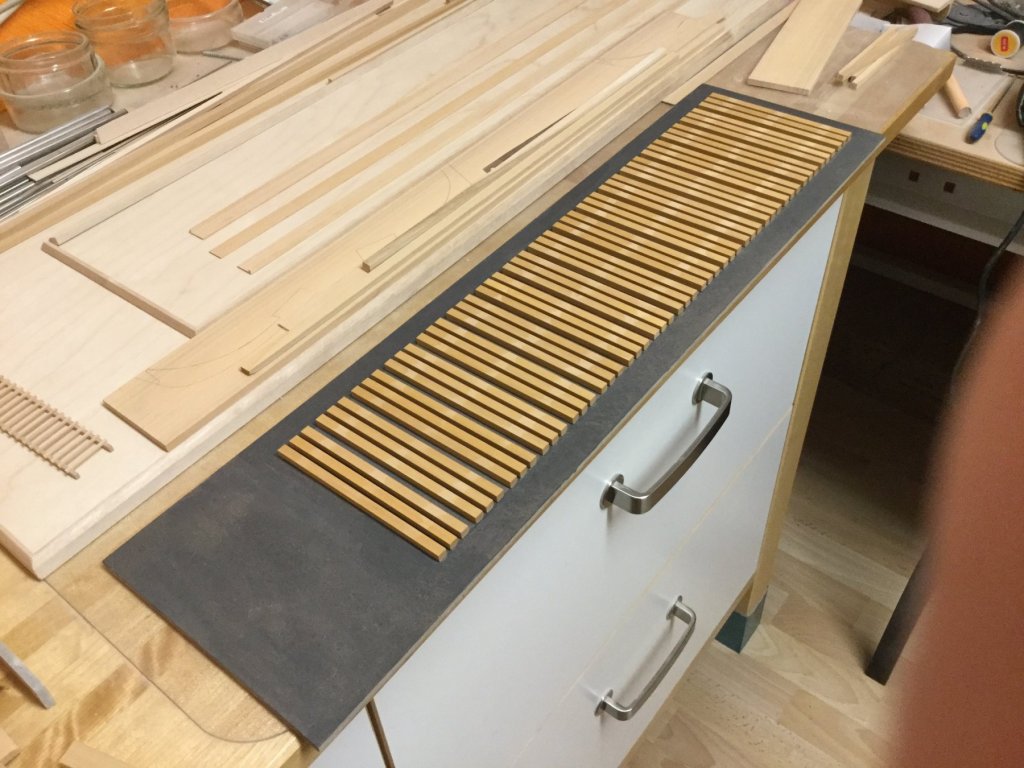
The gravel is glued with with white glu dilluted with water (50-50). I first brushed a thin coat, then strewed the gravel onto the base. Used a brush to cover the gravel with dilluted glu to fix it permanently. It has to dry at least for several hours. Then I can move on to the second part, the carriage.
- 231 replies
-
- 12
-
-
- model shipways
- armed virginia sloop
- (and 1 more)
-
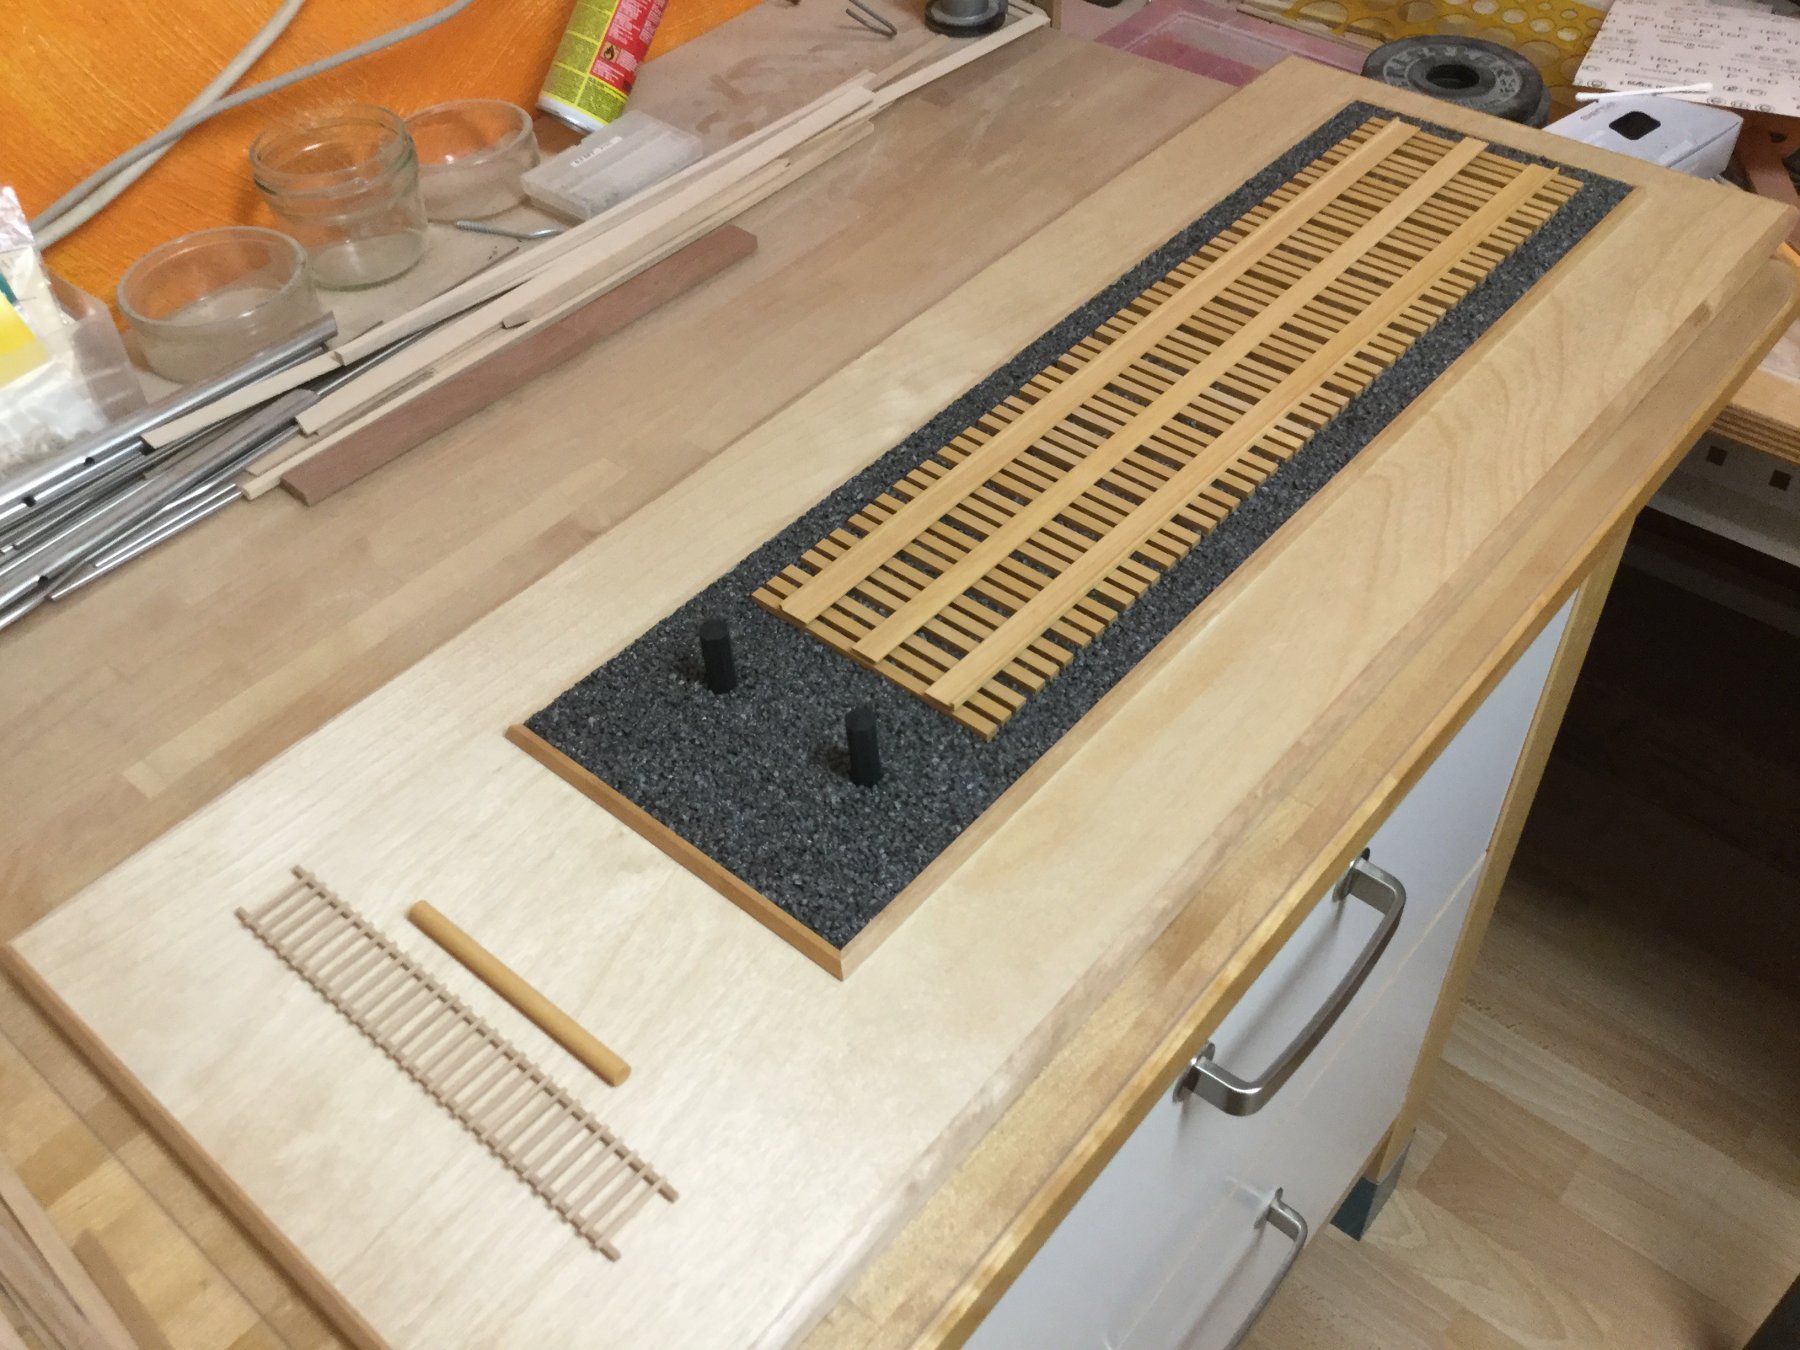
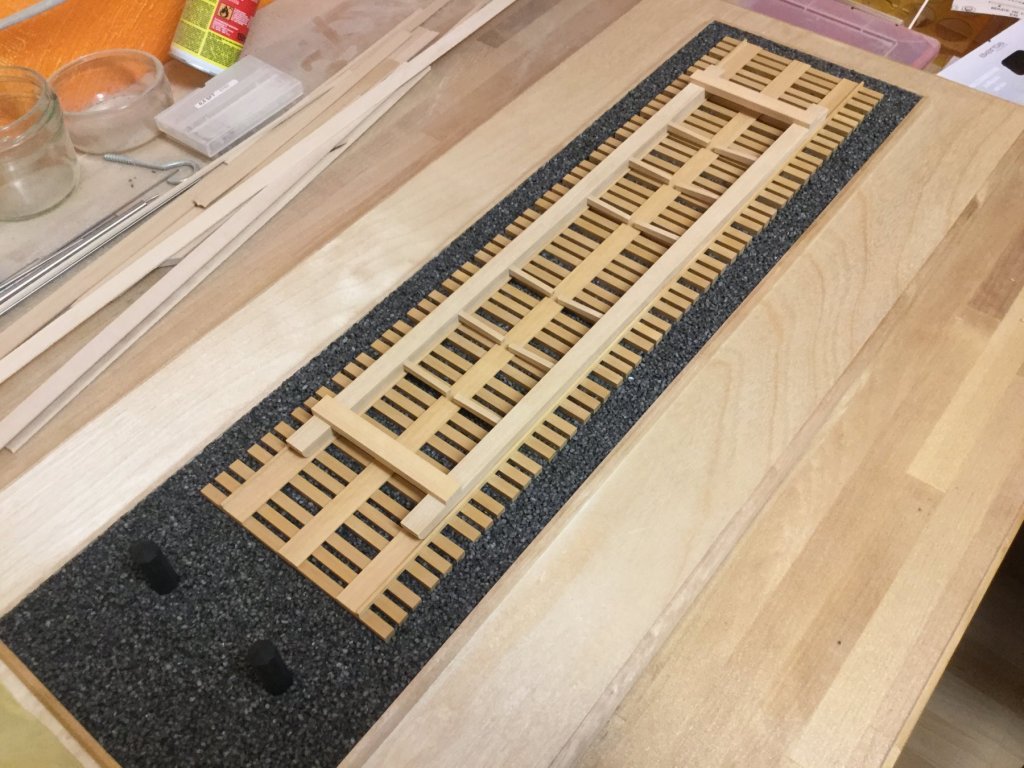
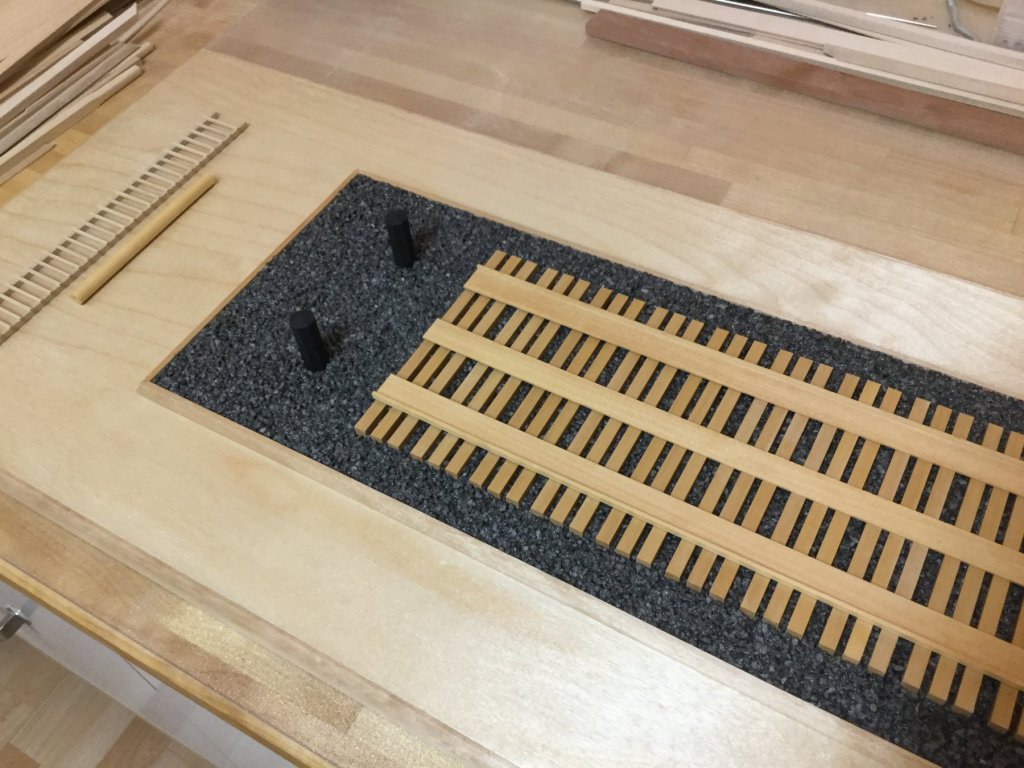
Only small updates. I have painted the base with satin varnish, installed the 4 cover stripes and two octagon bollards painted black.

- 231 replies
-
- 10
-
-
- model shipways
- armed virginia sloop
- (and 1 more)
-
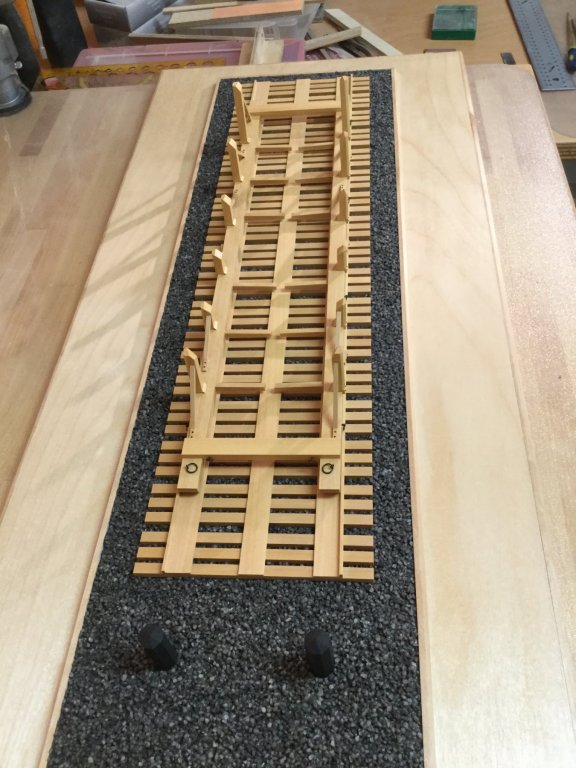
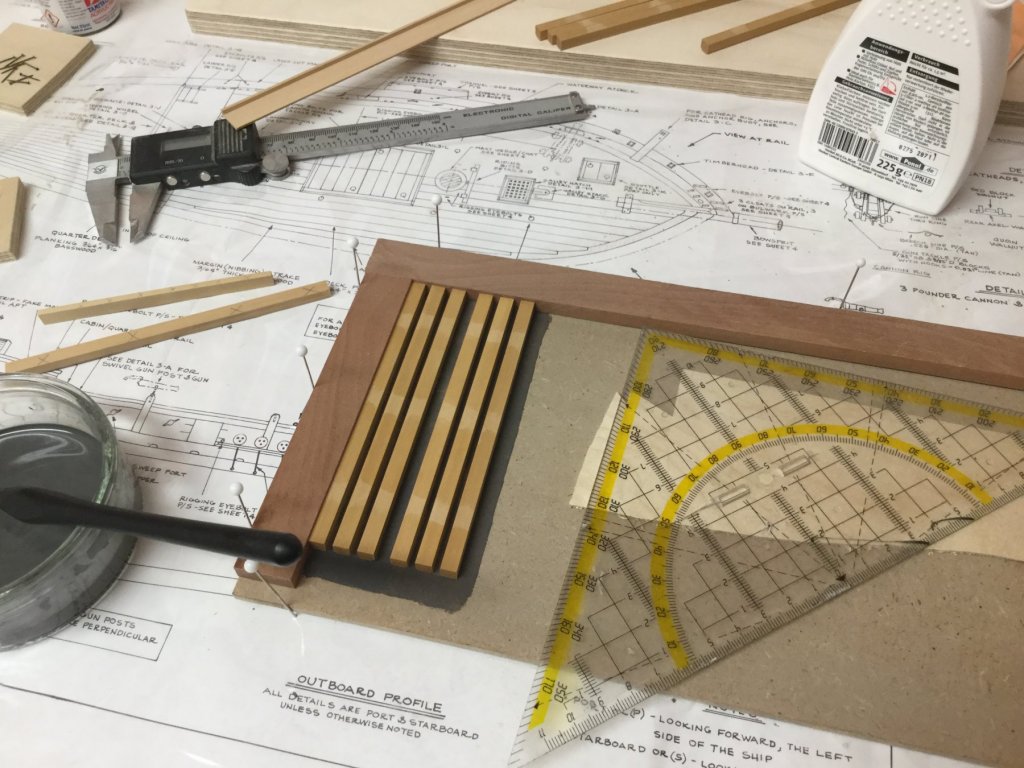
Before I will get to the final chapter - the rigging - I have thought some time about a more realistic launchway and have made a start already. Next step will be gluing the launchway onto the board, cover the sides with the prepared birch strips and cover the painted area with grey gravel (1,2 - 1,8 mm).
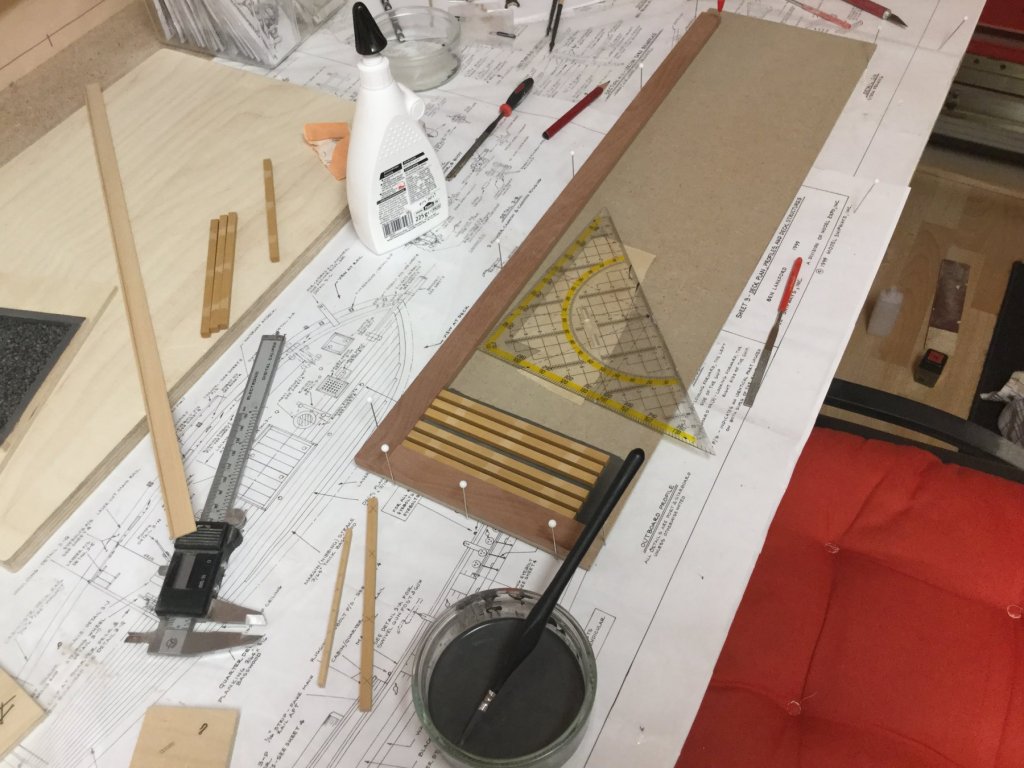
- 231 replies
-
- 9
-
-
- model shipways
- armed virginia sloop
- (and 1 more)
-
A beautiful model and truly a piece of art!
-
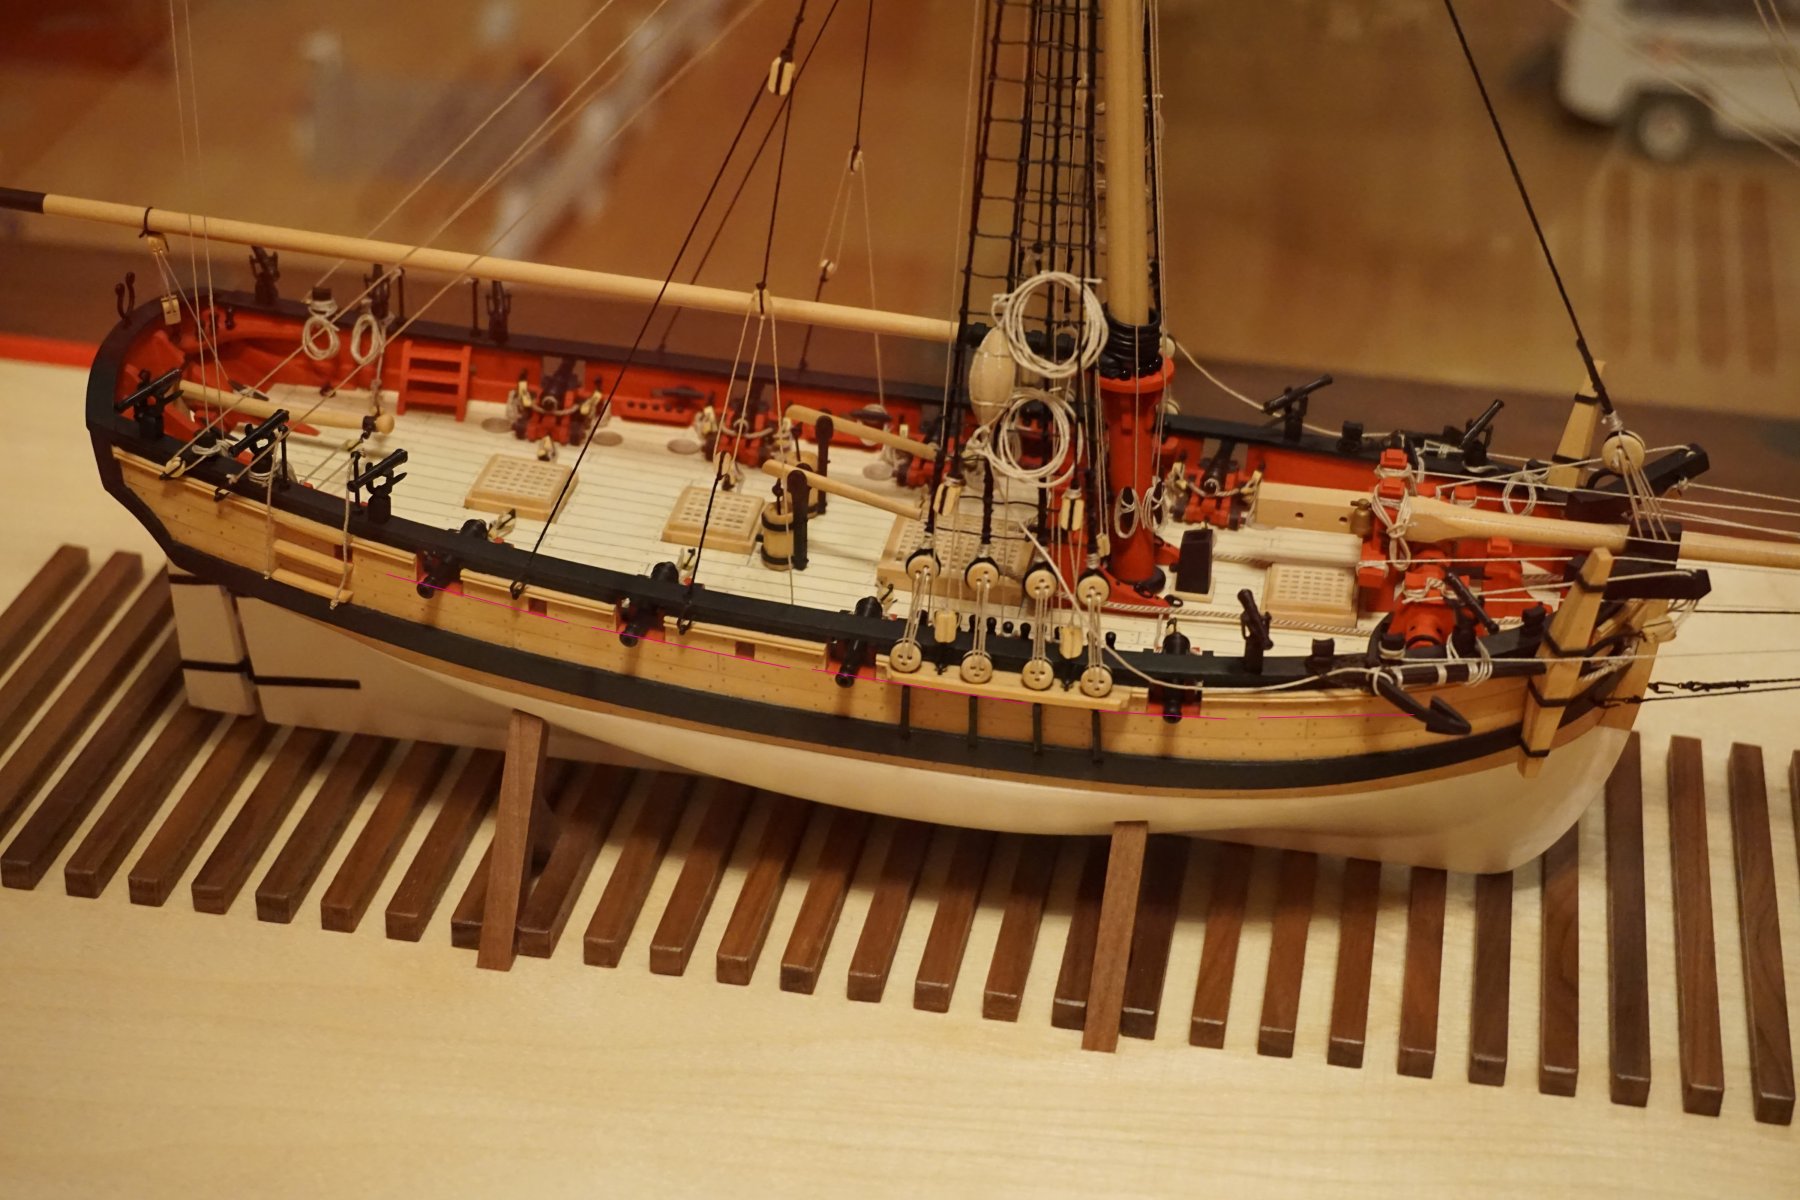
Hello, it seems that the pre-cut plywood sheet does not support a correct gunport alignment. This may be a kit-fabrication mistake because I have seen this in some sherbourne builds before. AFAIK the distance between gunport bottom and false deck should all be the same. I've modified a picture from a recent post (red line) so you get an idea of what i mean. In comparison another picture of the sherbourne I build three years ago. If you follow the plank below the gunports, you see that all gunports are lined up (purple line). Best regards, Andreas


- 84 replies
-
- 2
-
-
- sherbourne
- caldercraft
- (and 2 more)
-
Very nice work!
-
That looks fantastic, very beautiful work.
-
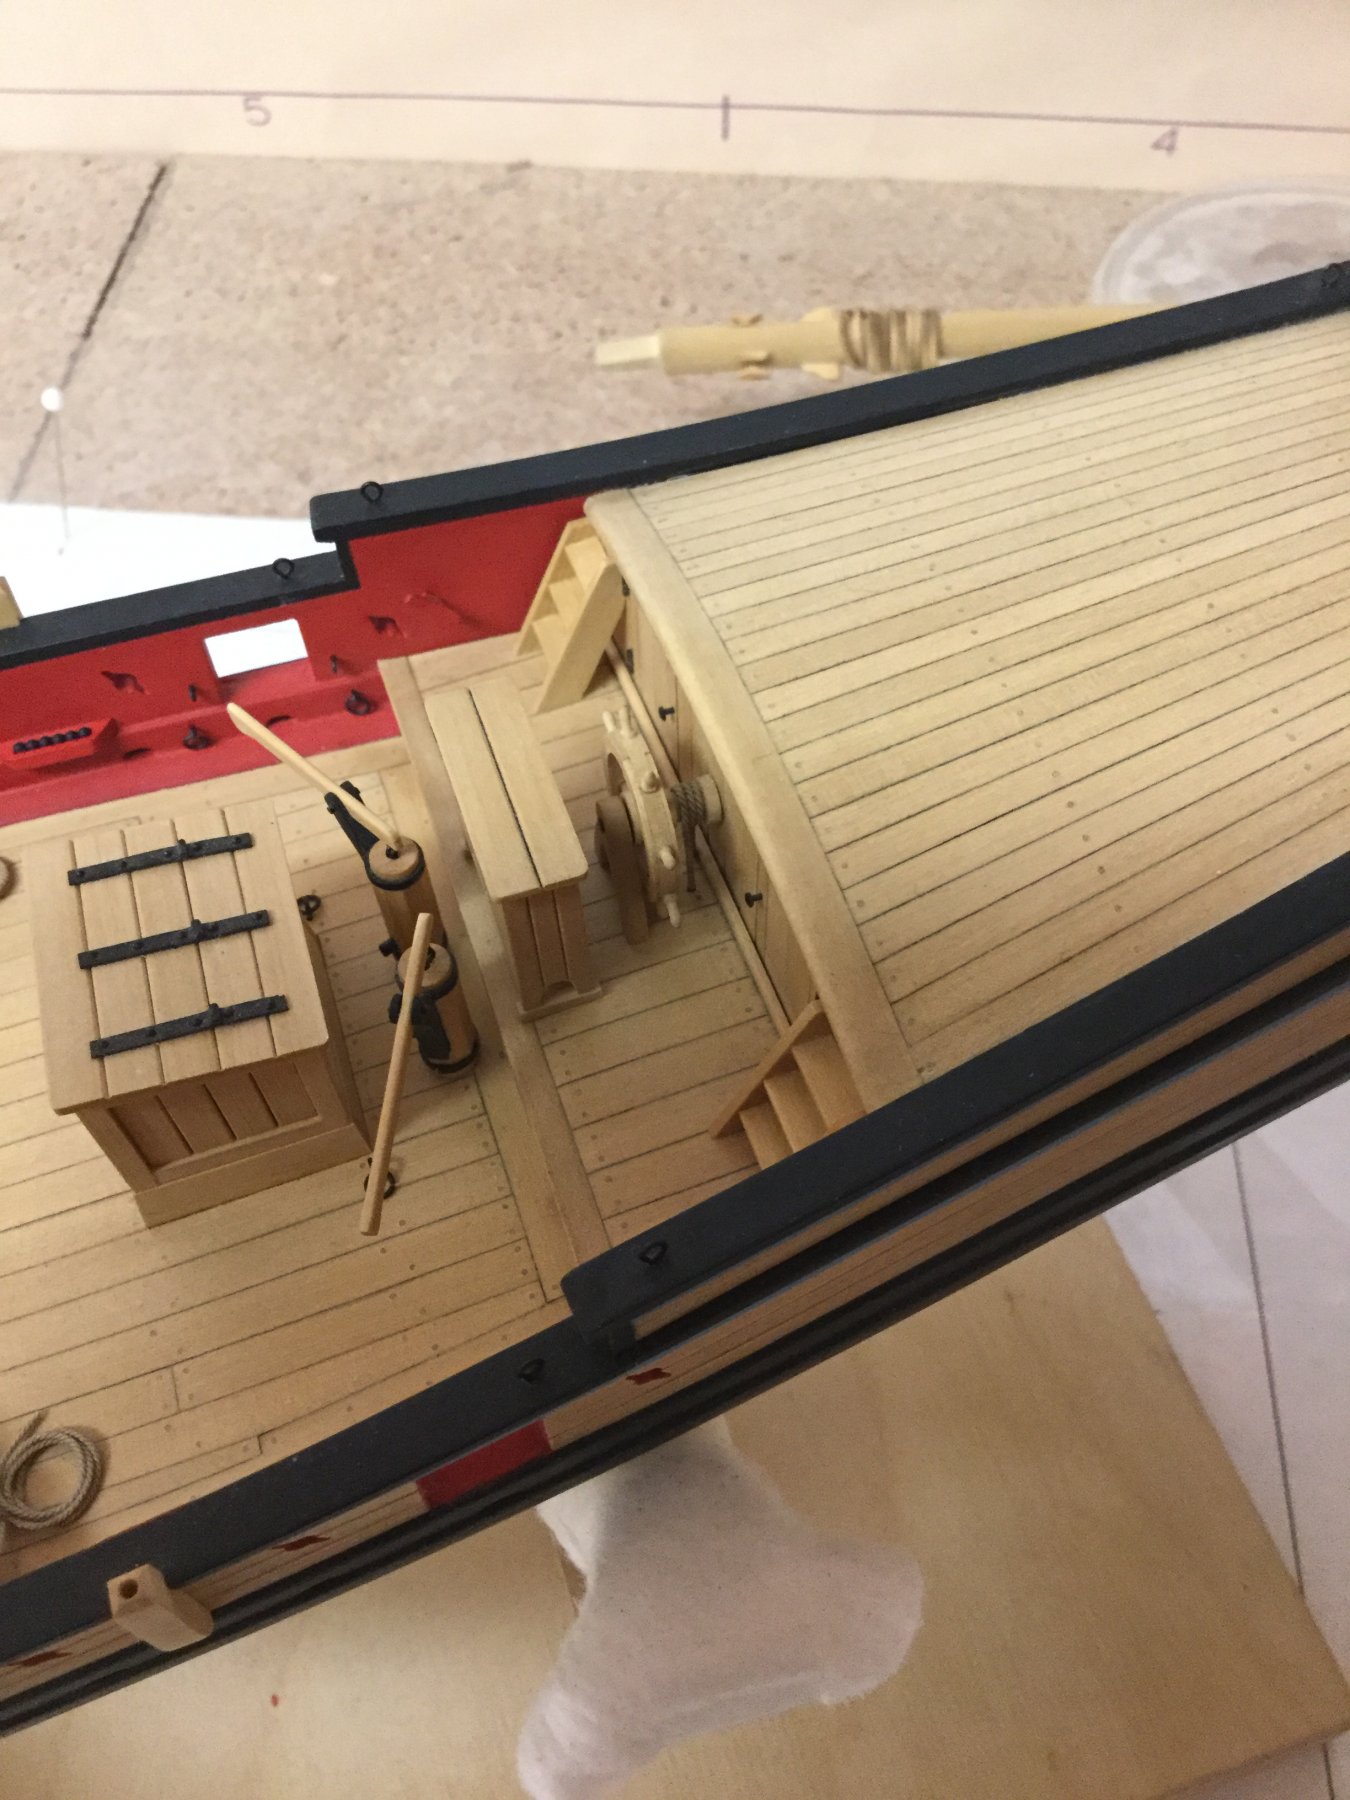
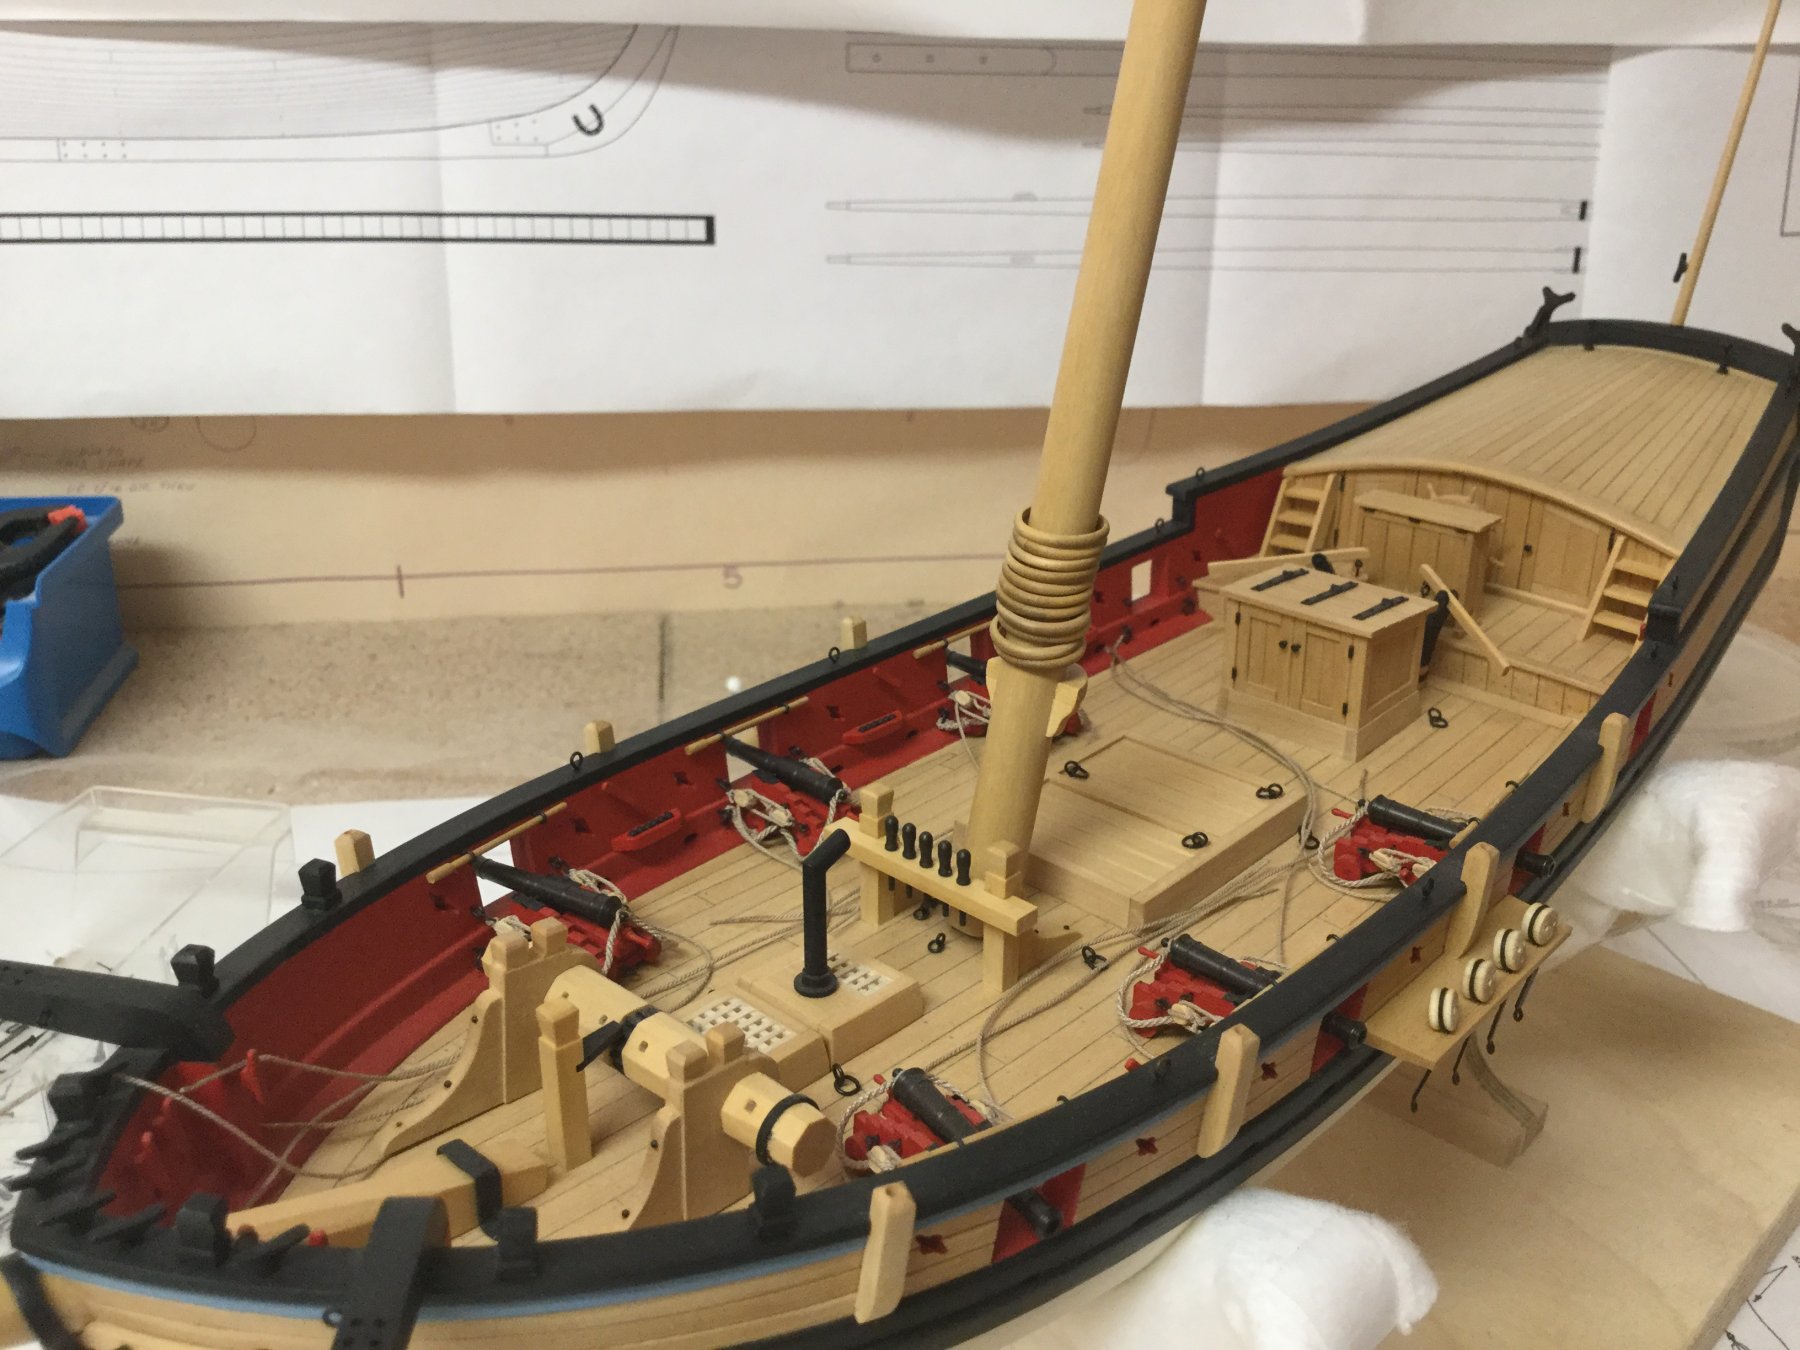
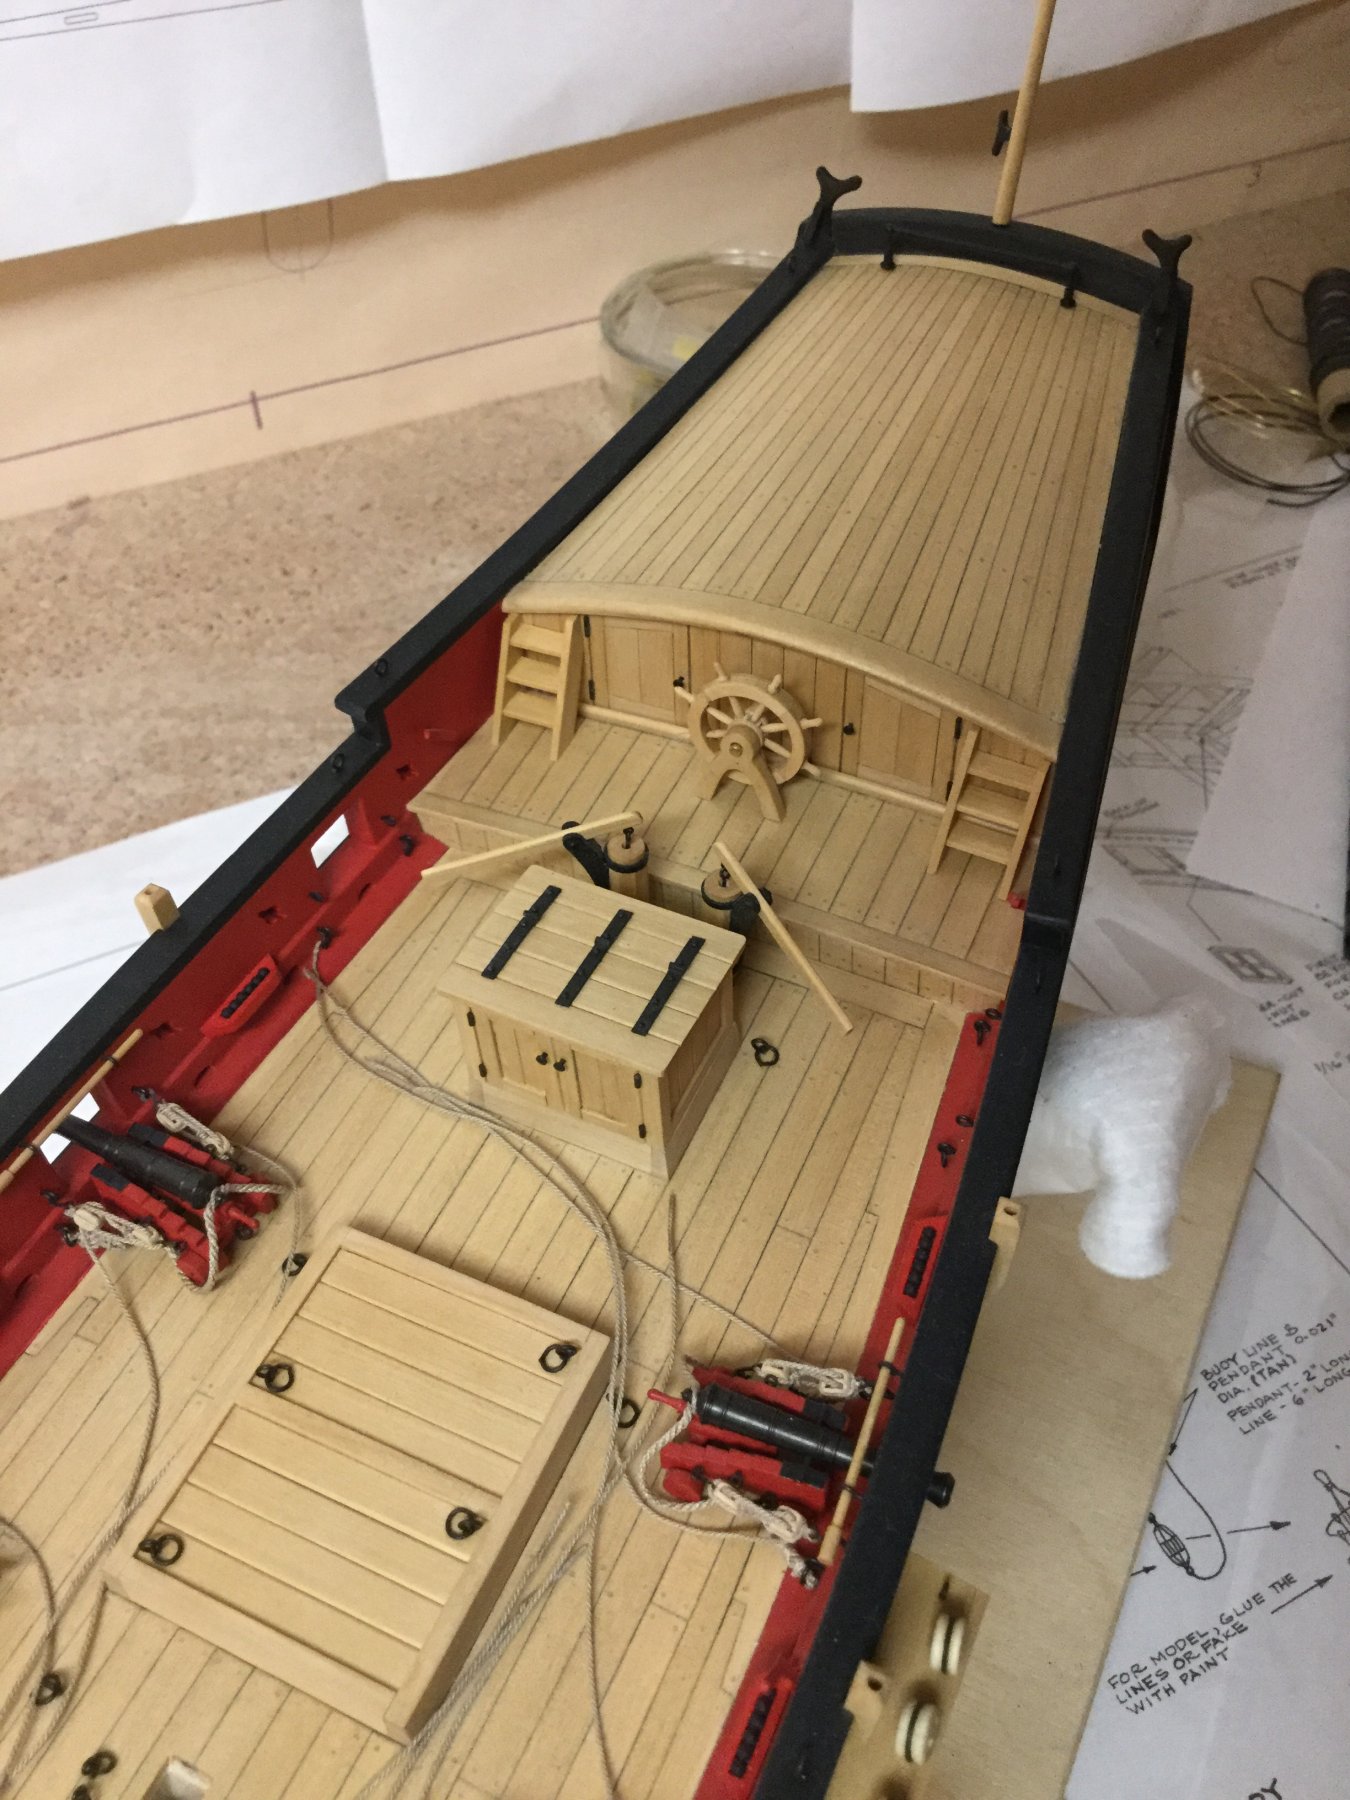
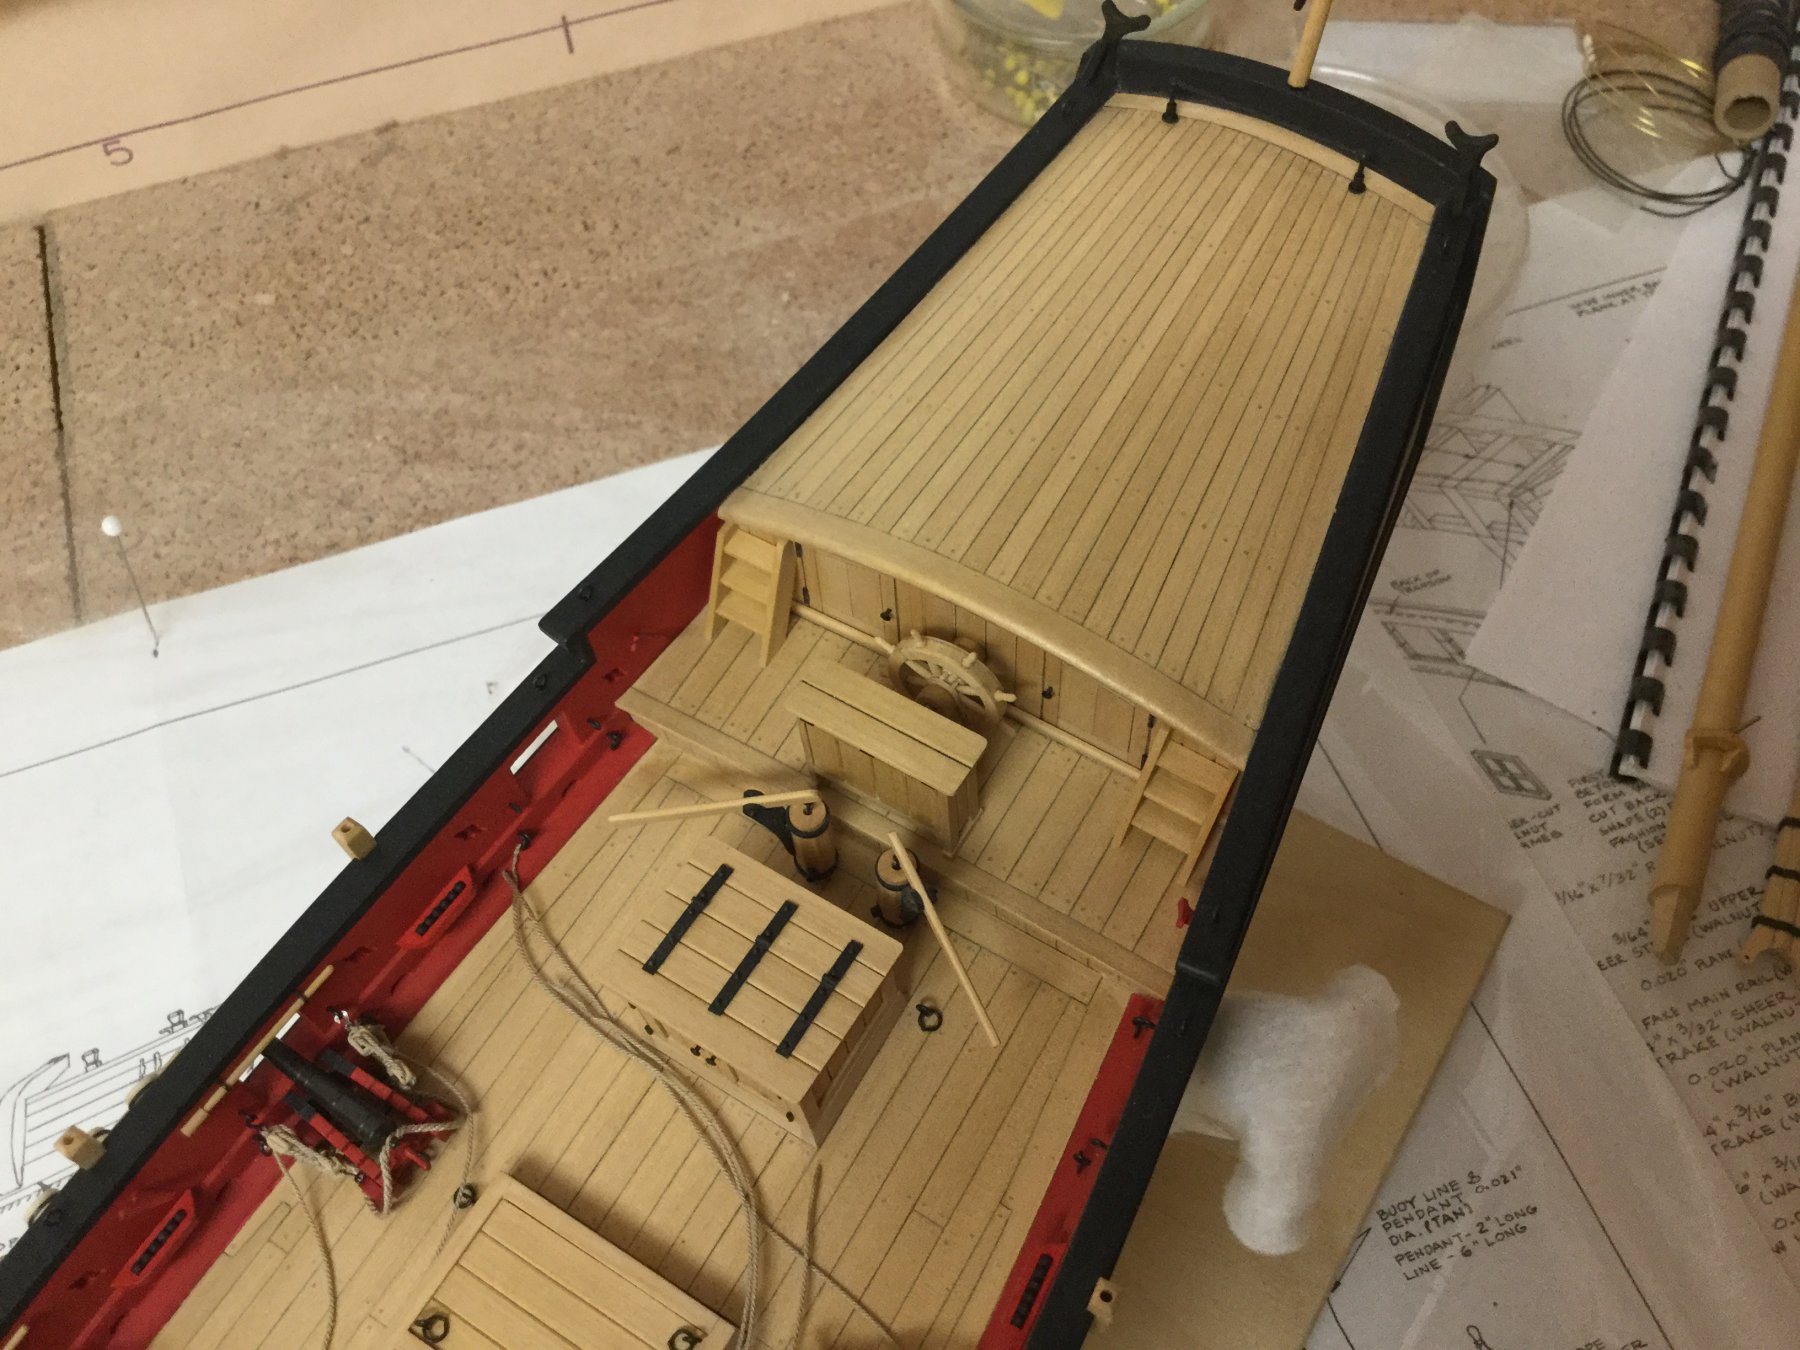
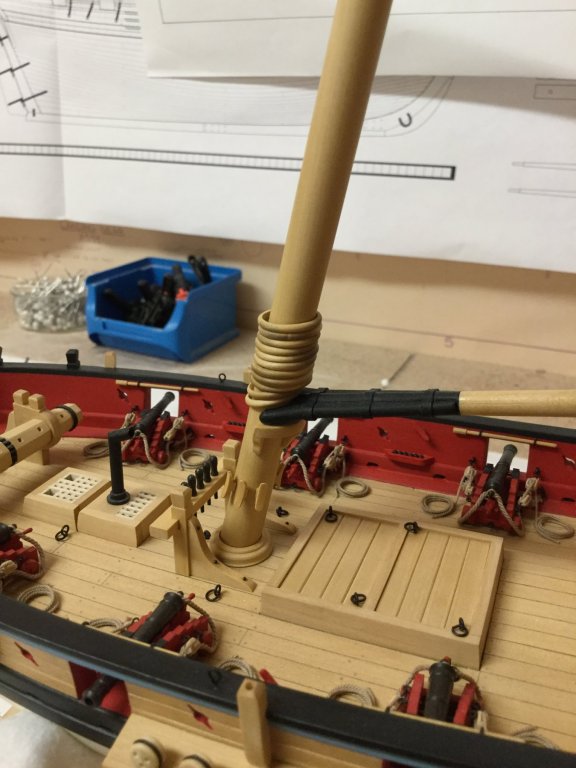
Thank you for the nice feedback and the likes. The ship‘s wheel has been completed and all deck items are now glued in place. Time to start prepairing the rigging and completing the mast. I have to finish the base too.

- 231 replies
-
- 10
-
-
- model shipways
- armed virginia sloop
- (and 1 more)
-
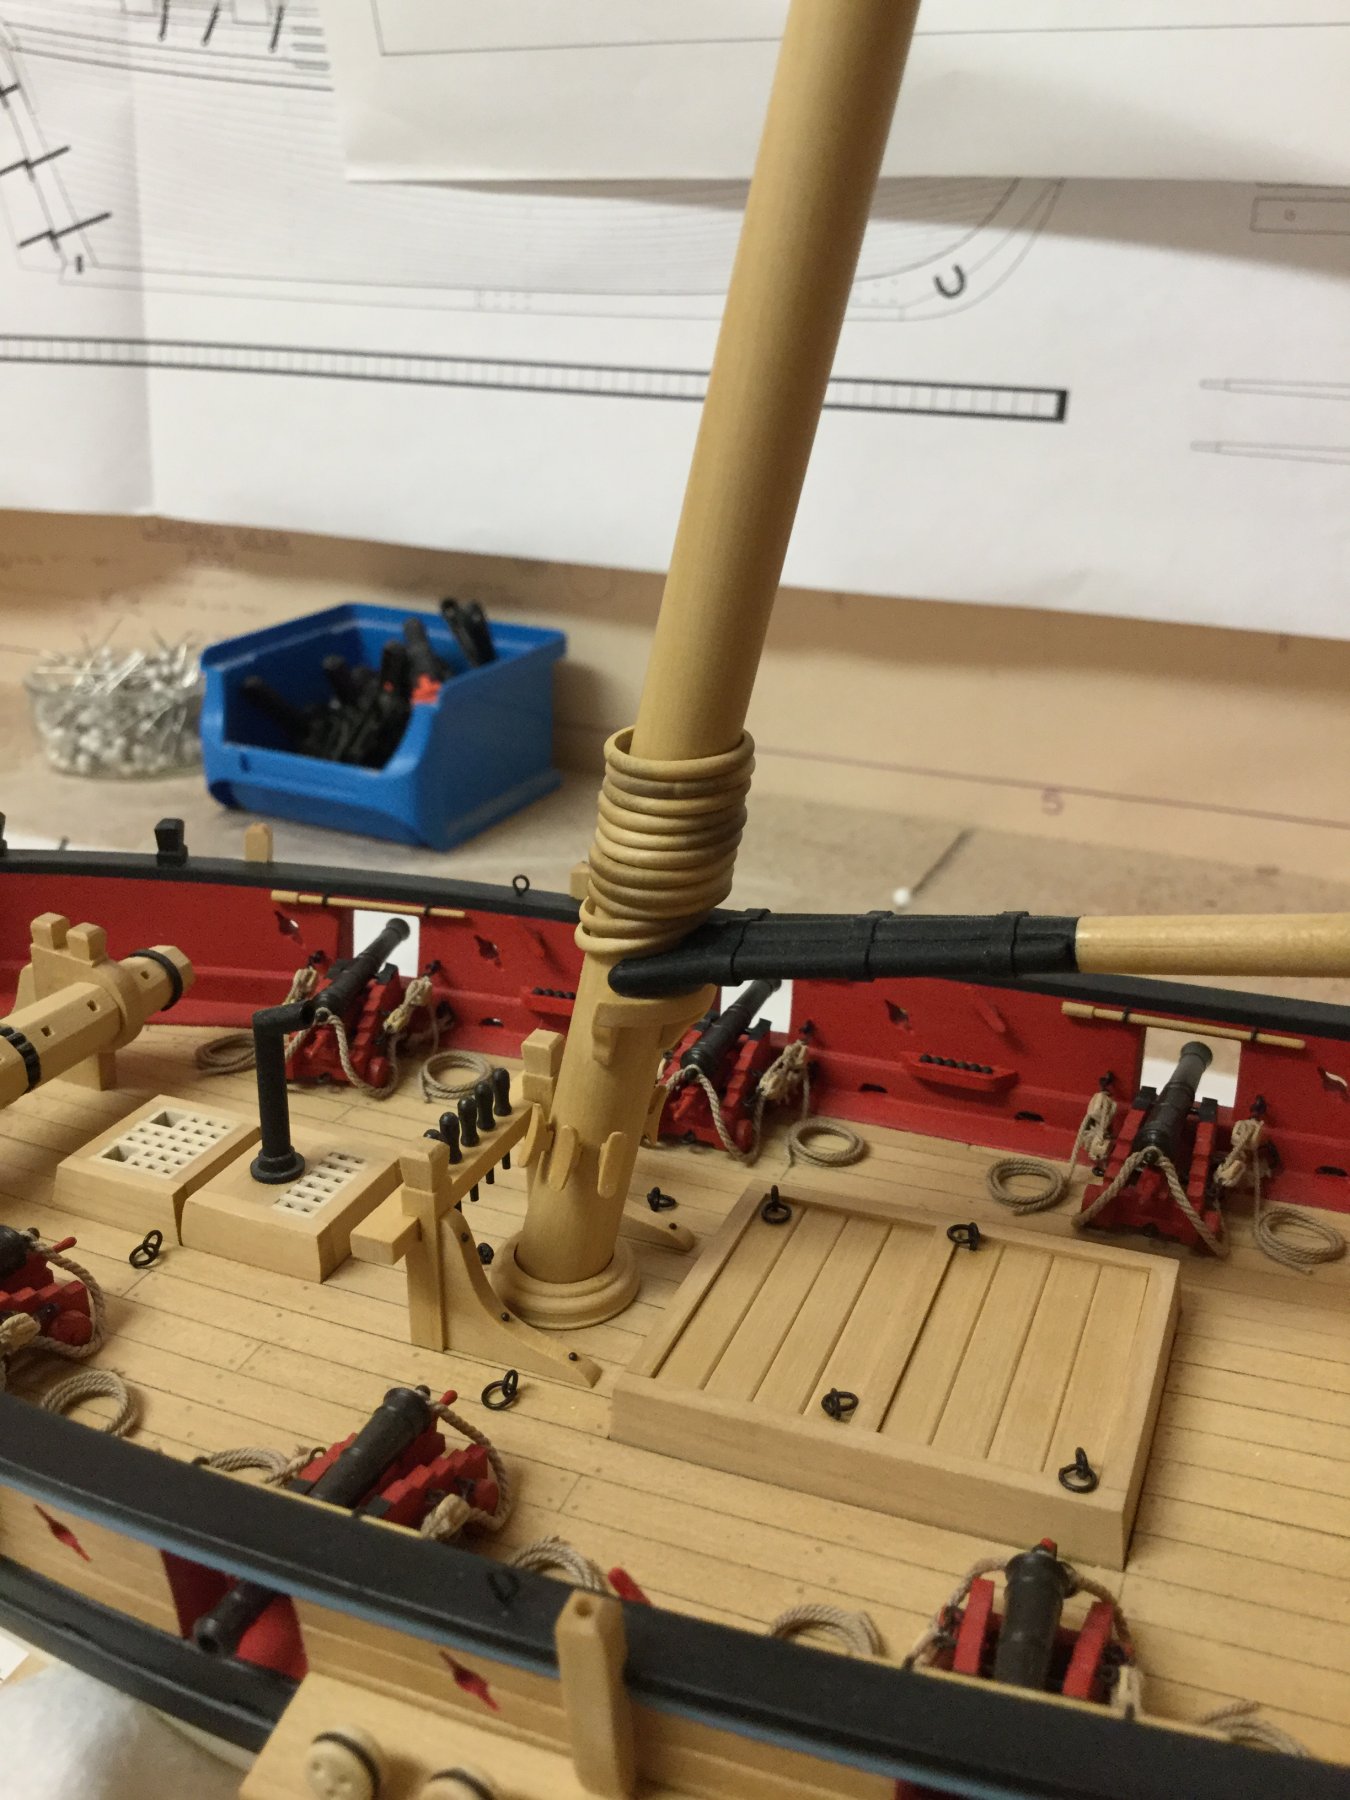
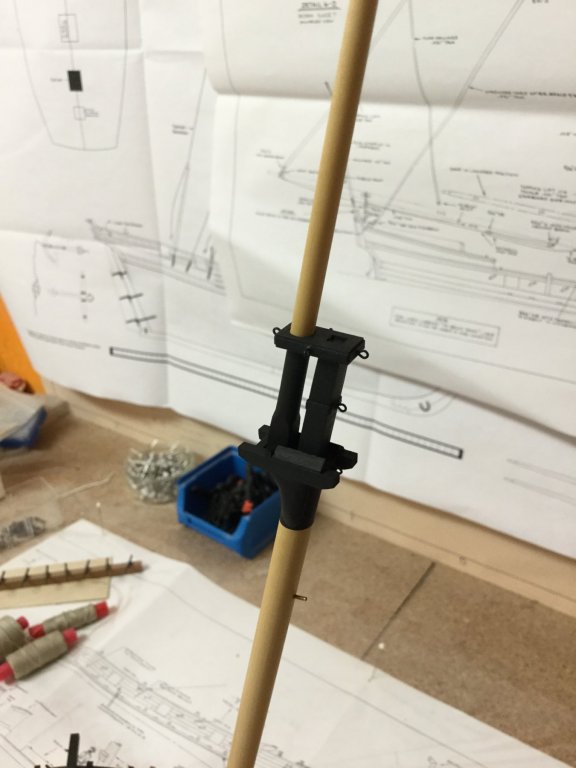
Thank you very much for the nice words and the likes. Been working on the mast today, added wooden clamps and redone the mars so that it stays parallel to the deck. For now all parts are only dry-fitted.

- 231 replies
-
- 11
-
-
- model shipways
- armed virginia sloop
- (and 1 more)
-
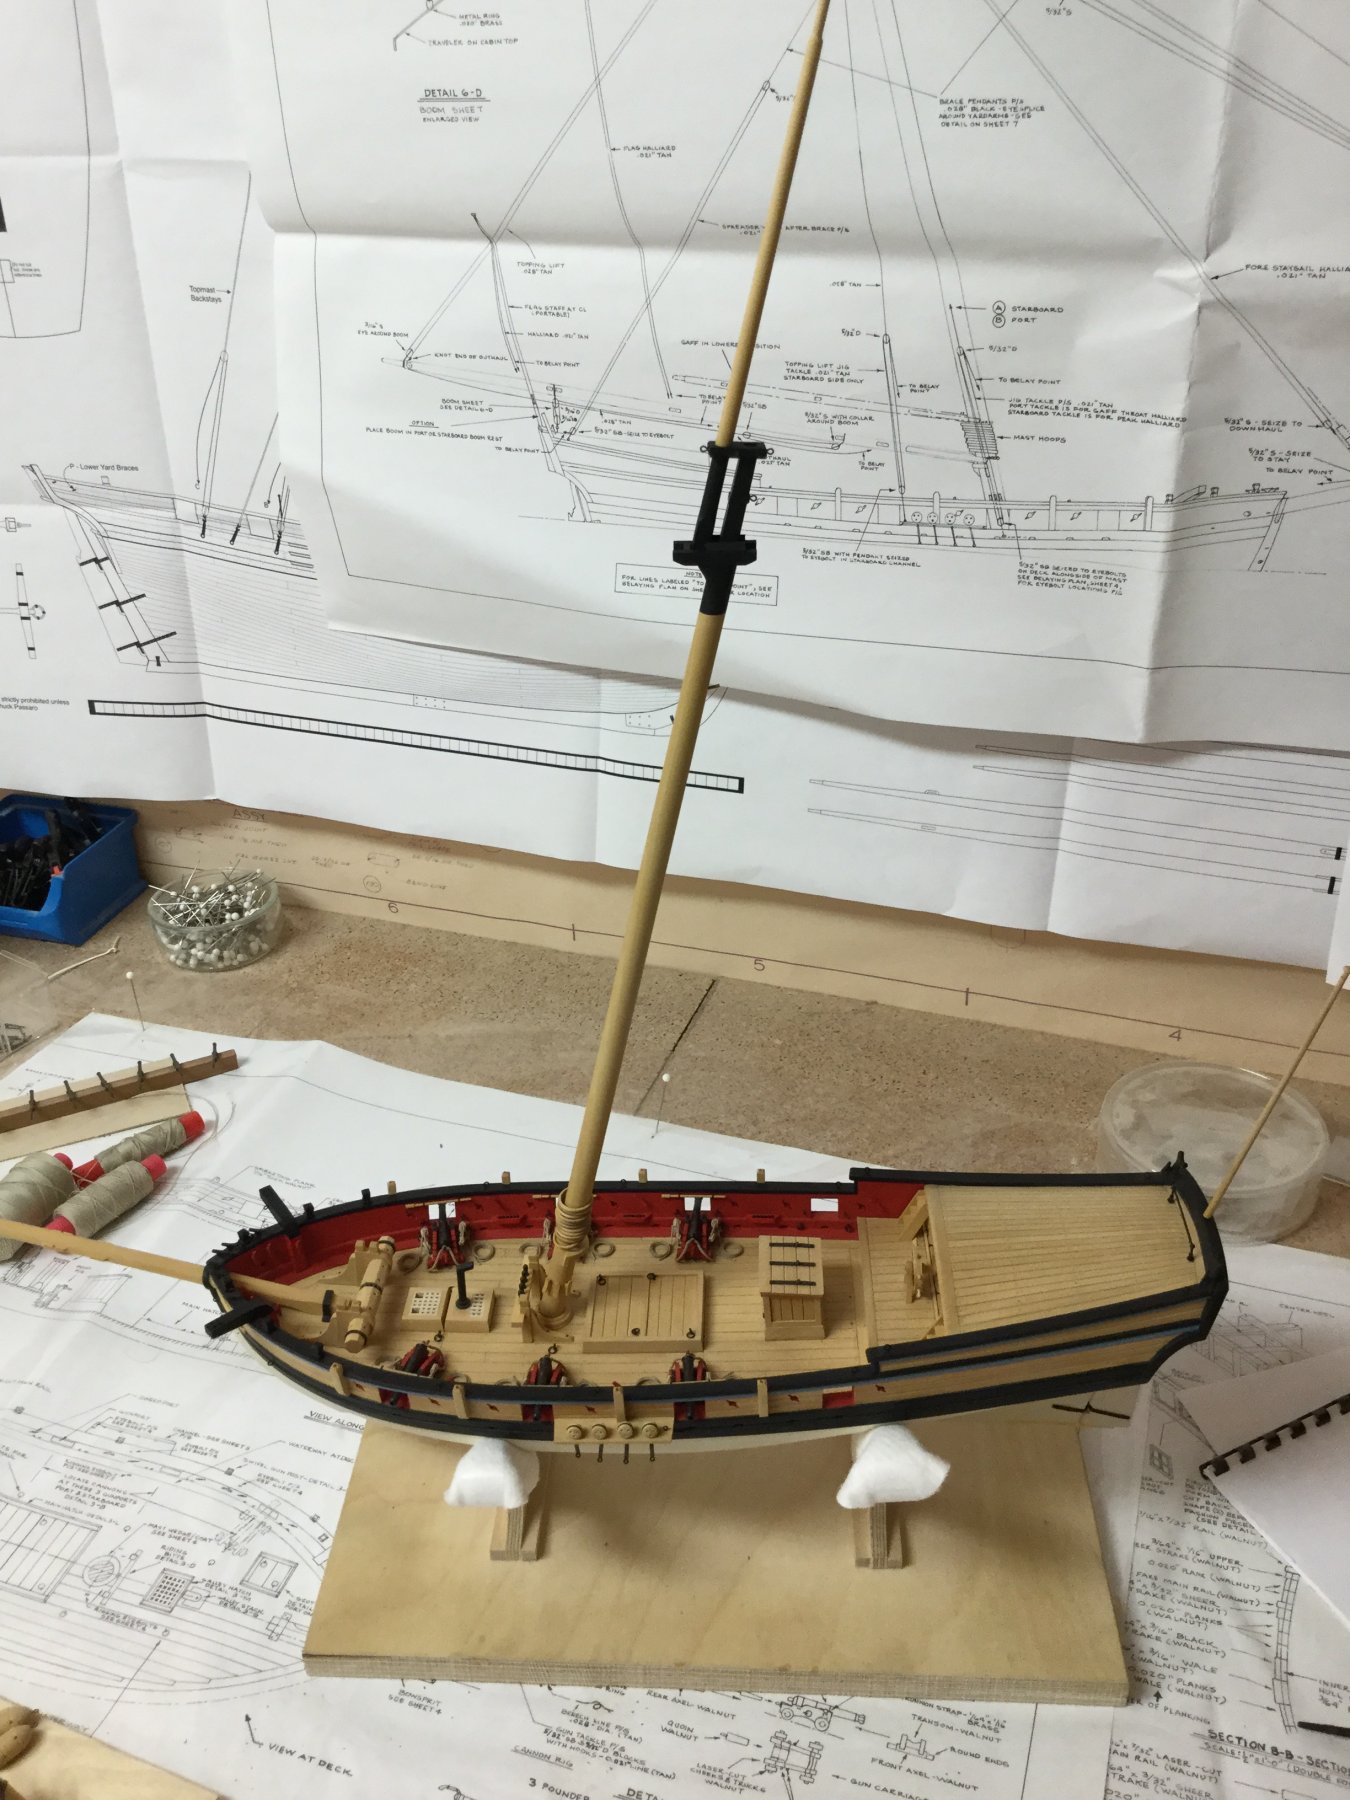
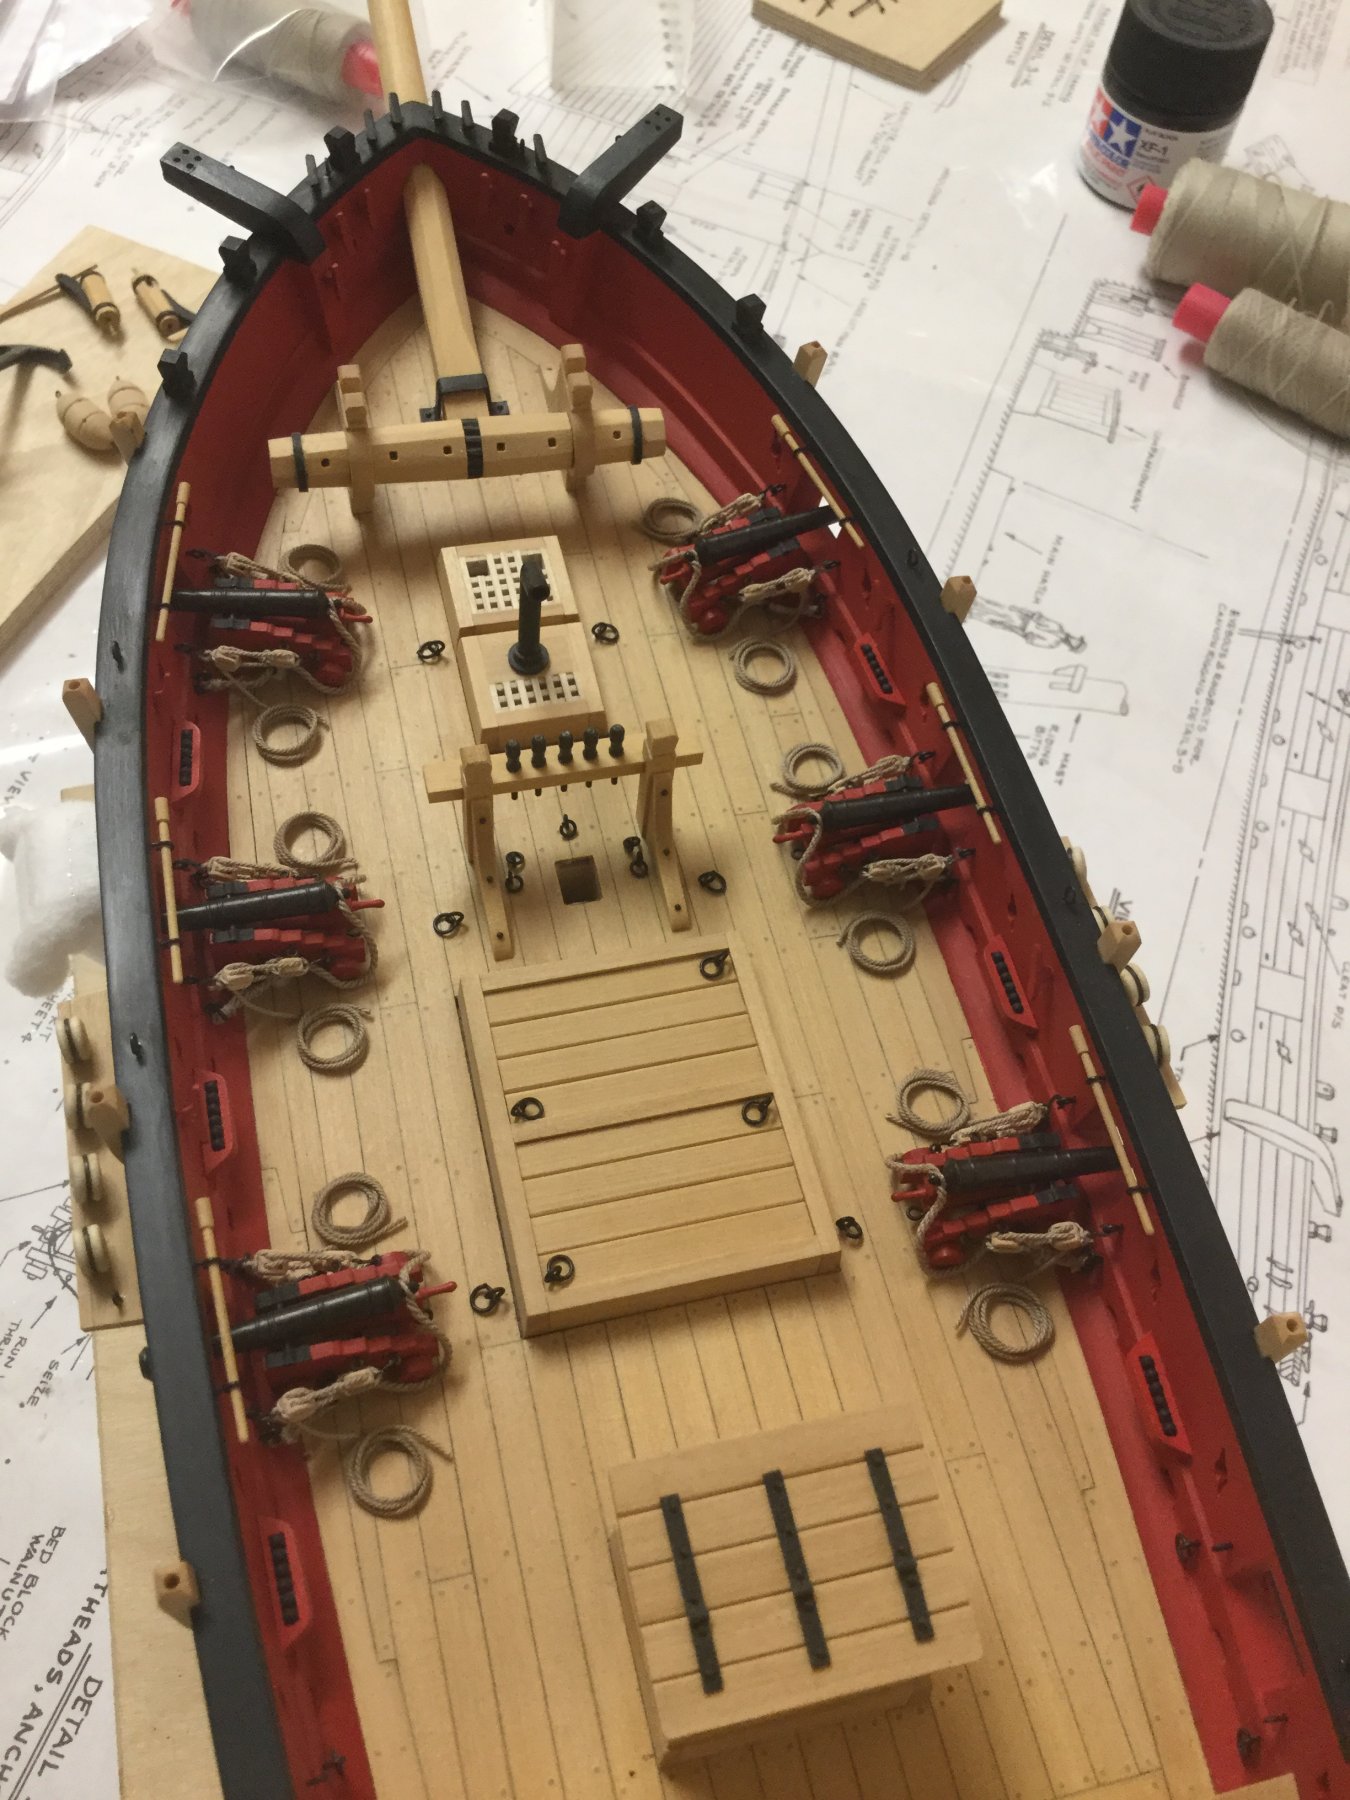
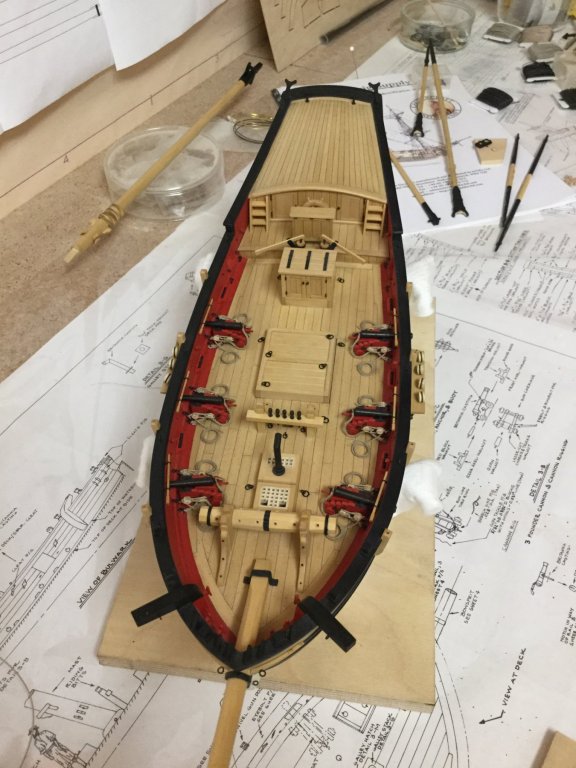
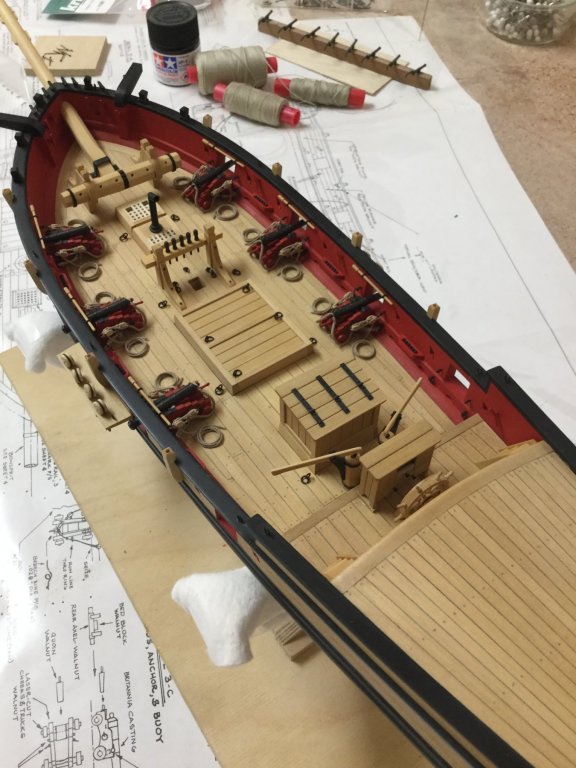
Finally the gun rigging is complete. A mast? We don‘t need it. ATTACK!!


- 231 replies
-
- 13
-
-
- model shipways
- armed virginia sloop
- (and 1 more)
-
I haven‘t found the time yet to finish the gun tackles due to some nice spring weather to go out with family. But finished some mast hoops to replace the cast ones.

- 231 replies
-
- 14
-
-
- model shipways
- armed virginia sloop
- (and 1 more)
-
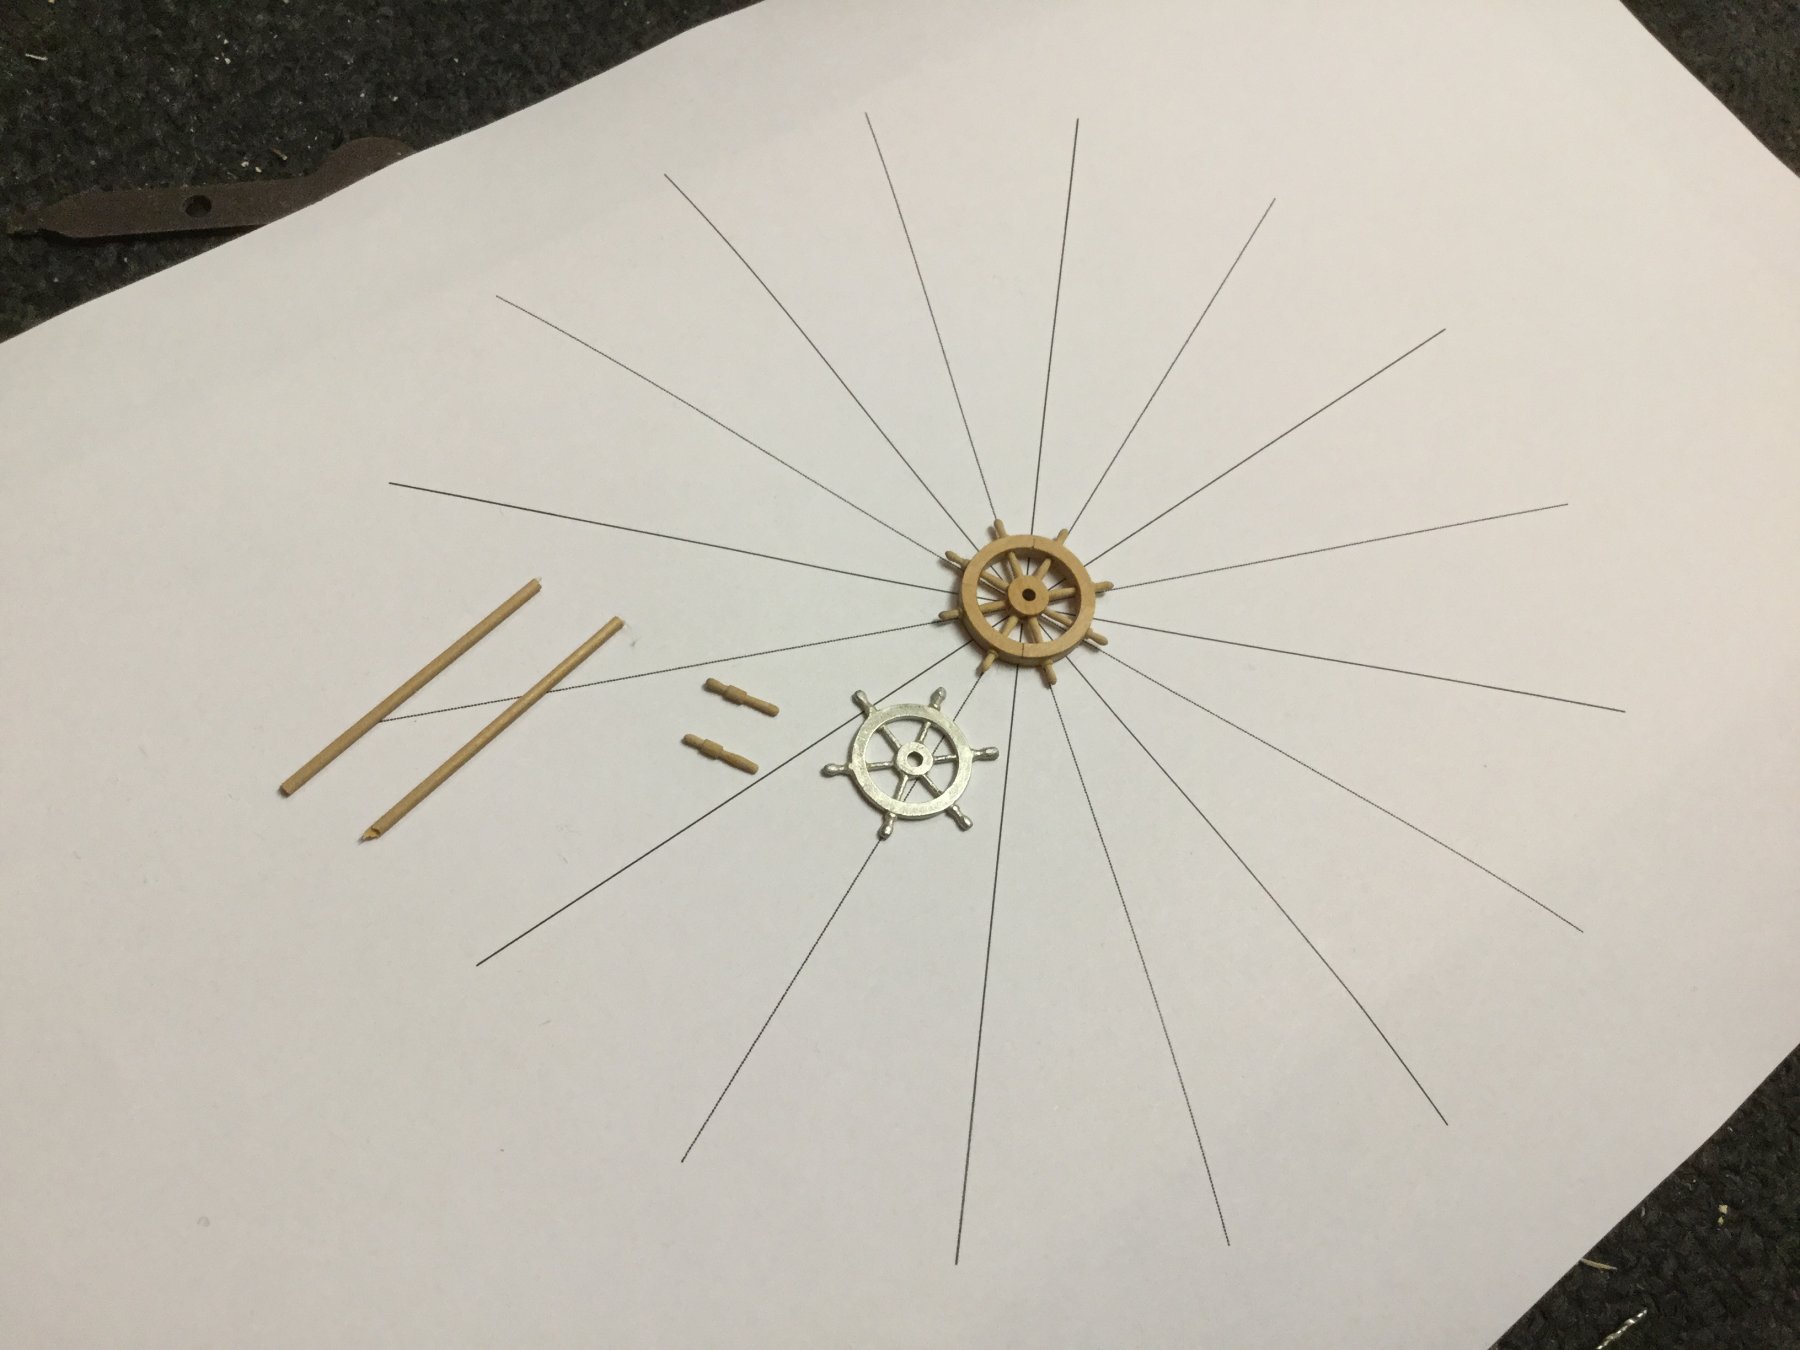
As I slowly move towards rigging, I thought about adding some last details to the hull before adding the mast. The supplied ship‘s wheel is made of britannia casting and I decided not to use it. So I made a 8-spoke 23mm ship‘s wheel scratch build made of castello. It is a shame that it will be almost covered by the binnacle.


- 231 replies
-
- 16
-
-
- model shipways
- armed virginia sloop
- (and 1 more)