HOLIDAY DONATION DRIVE - SUPPORT MSW - DO YOUR PART TO KEEP THIS GREAT FORUM GOING! (Only 36 donations so far out of 49,000 members - C'mon guys!)
×


craigb
-
Posts
72 -
Joined
-
Last visited
Content Type
Profiles
Forums
Gallery
Events
Everything posted by craigb
-
 I agree with everyone here. Most important is good instructions. Hands down #1. As a side note, Chuck's Phantom instructions also emphasized that messing things up is part of the hobby, and it is okay. His whole model building philosophy, actually, seems spot on. Great for beginners, especially those that may have started over in plastic models. With a plastic model, if you totally screw up a part it can be a project killer. With a wood ship, it might be frustrating but making new parts is not bad at all. #2 is probably parts that fit together out of the box.
 -
A question on working mizzen lateen sails
craigb replied to Stevinne's topic in Masting, rigging and sails
I can add that the Sunfish, a very popular small boat, has a lateen rig and yeah, you just let it blow the wrong way sort of on one tack. -
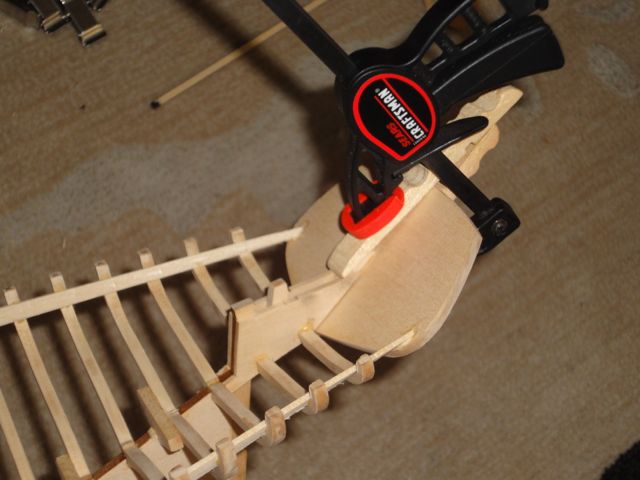
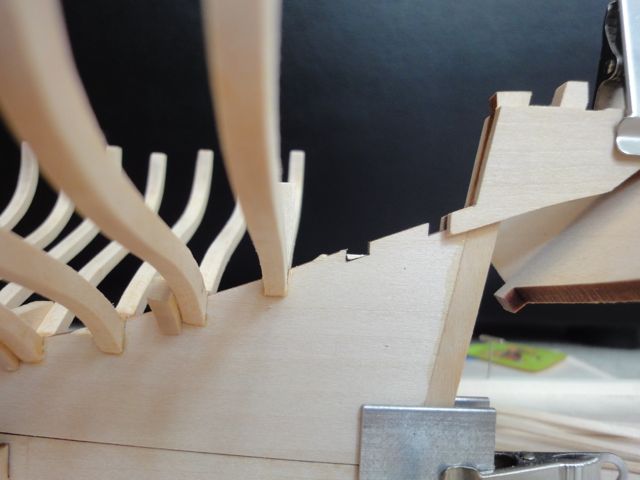
Wayne: thanks for the advice. I will be fully detailing the interior including ceilings- this will be a warm up for planking the hull outside. After thinking about it for a while, and staring at the plans for hours, it seems the entire interior of the boat depends on the location of the wet well. So, I started building that. I faired the inside of the hull, mounted up a few temporary deck beams to mark the location of the wet well hatch, then marked and cut the... thing. I don't have the plans in front of me and I forget what it is called . It is the beam at the bottom-most part of the wet well sides and it has to be carefully to fit the deck beams. It took a while of going slow to get the fit up pretty good. Early on the fit was bad, and I considered starting over but I slowly worked on shaping it and it eventually fit well. One weird thing I noticed is that most of the deck beams are not lined up with frames. Some rest just on top of the clamp, "floating" between frames. Weird. I would think structurally it would be much better to have all the deck beams fixed to a frame.


-
Memorial day was a good long weekend to get some modeling done. Well, I faired the hull and it looks exactly the same to the camera as a couple of posts back, so no photos. But fairing up a hull really points out how careful you were when you lofted the frames. Mostly great except one or two frames that got a little thin... I will never tell which and, if you can tell, "get your nose off the glass" as another member here put it! QUESTION Is there any reason not to plank the hull right now? I figure if I put in the deck beams and interior details now, before planking, it would make it harder to clamp the hull planks in place. Also, the hull is easier to clamp in upside-down from the keelson now, just making the thing a bit easier to work with, without deck beams in the way. Thoughts? thanks! --craig
-
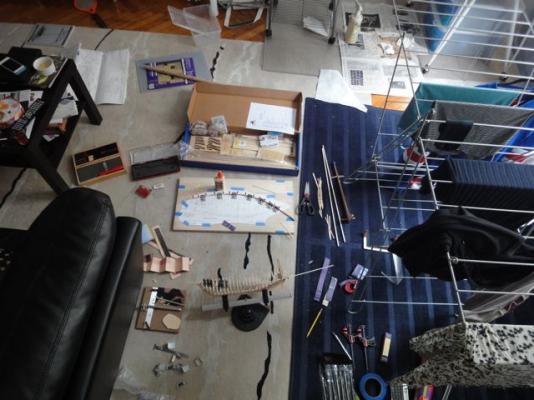
When I take my photos I try to have a nice, clean workbench. But reading this site it is obvious that, just maybe, we all put our best face forward when posting up photos. With that in mind, I invite any modeler, novice or experienced, to look at the nice, clean sterile photos of my hull a couple of posts up. Then look at the following photo of my workshop (floor of the apartment) that I was hiding by creative framing, and not feel so bad!!!
-
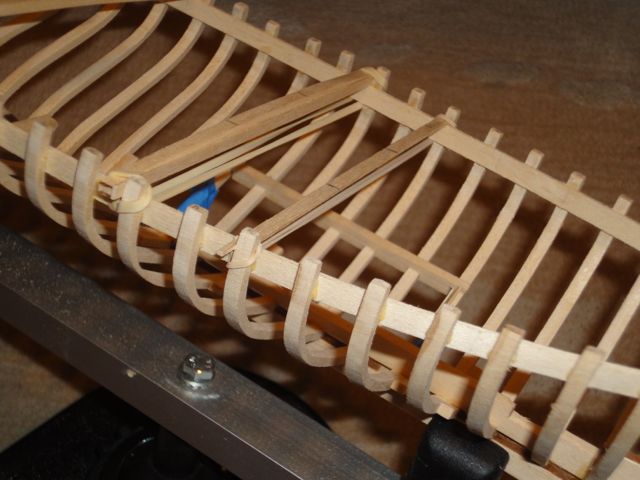
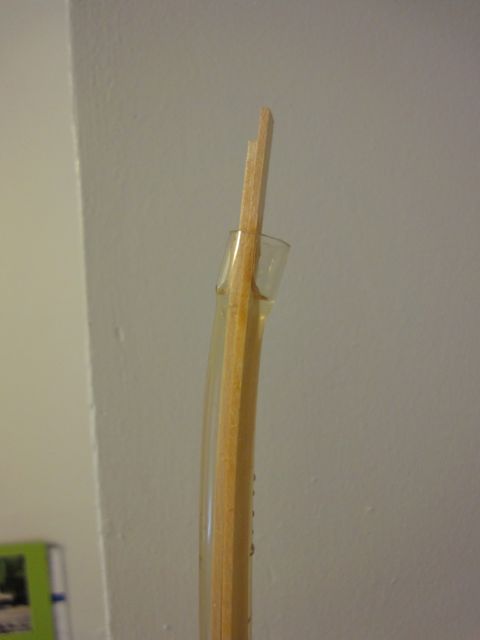
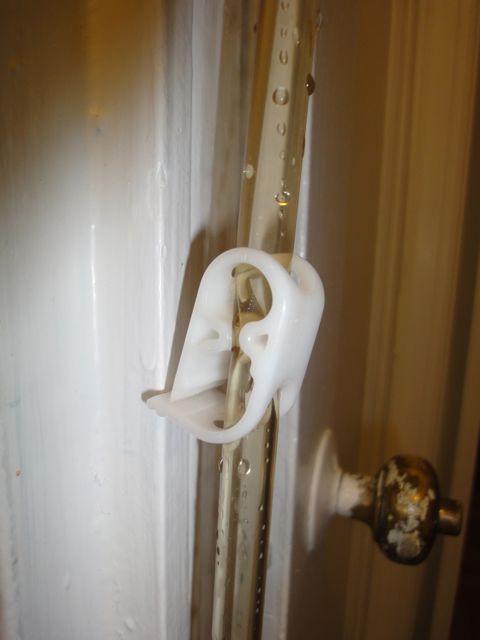
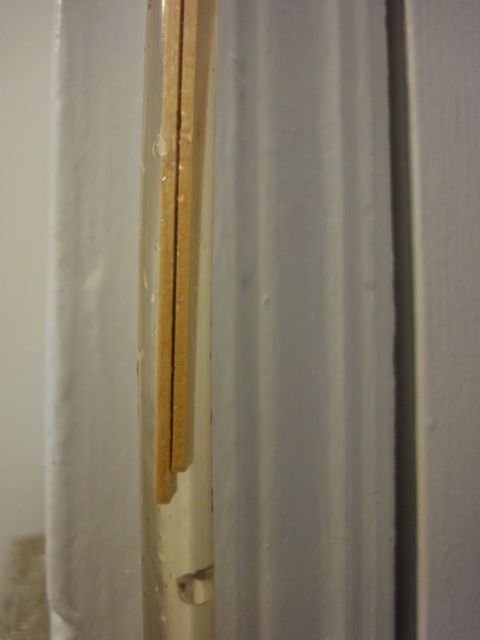
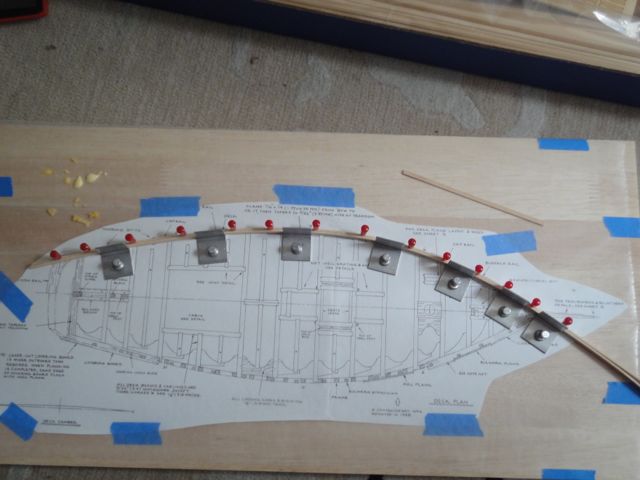
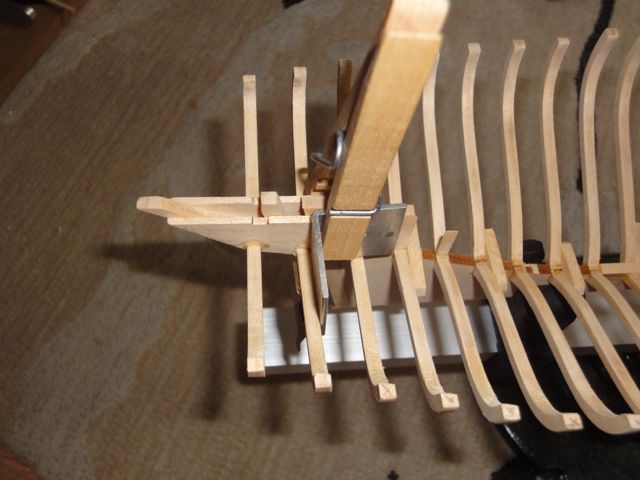
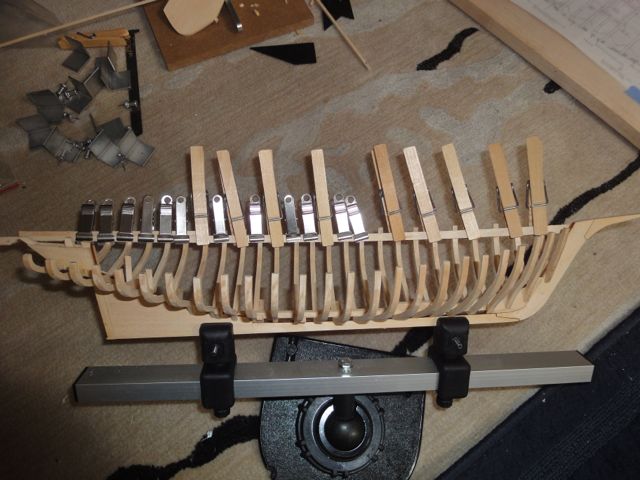
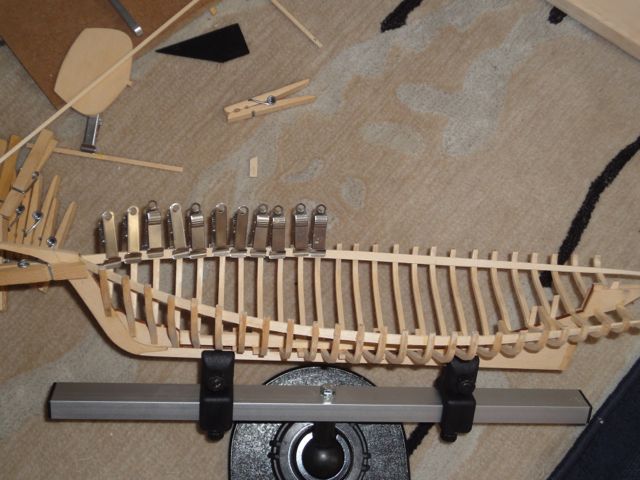
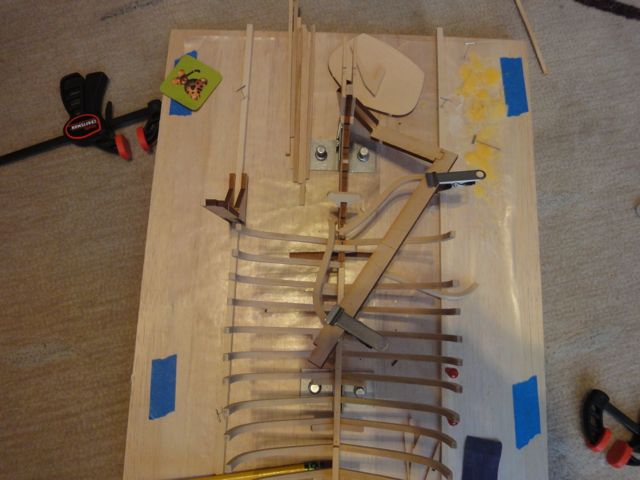
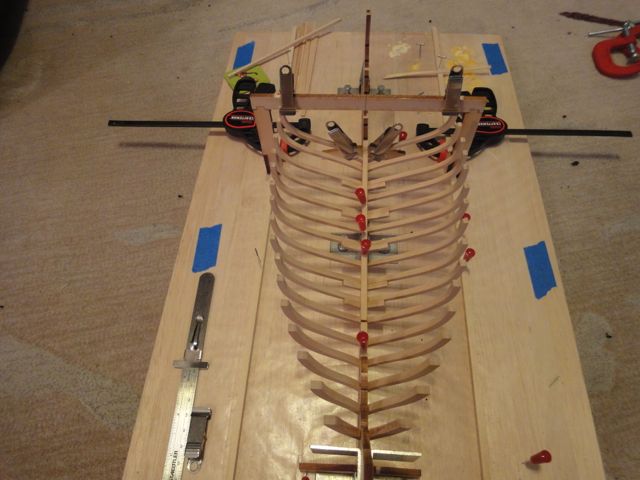
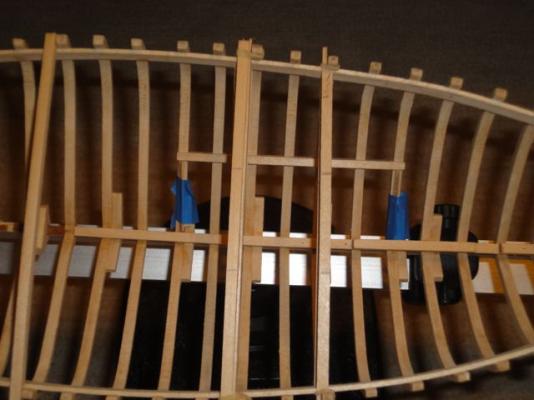
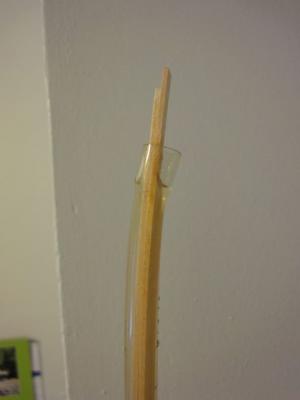
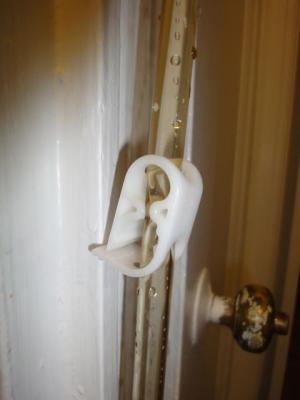
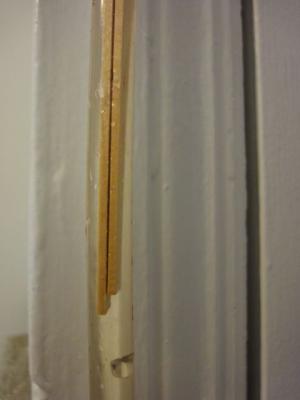
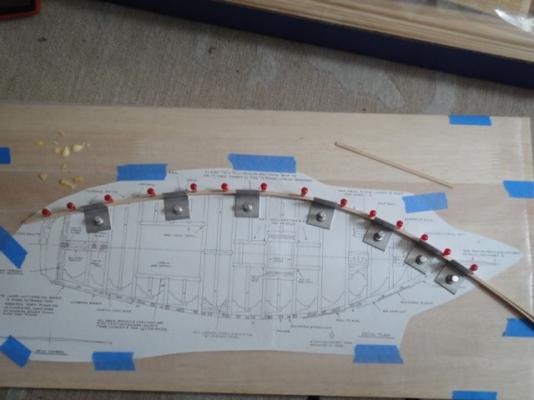
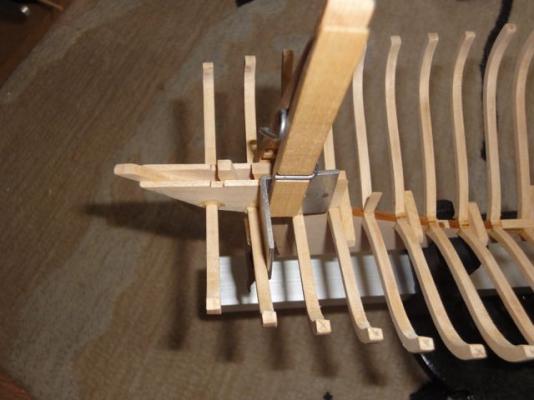
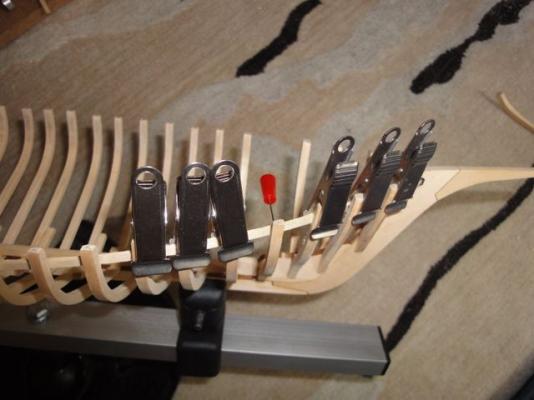
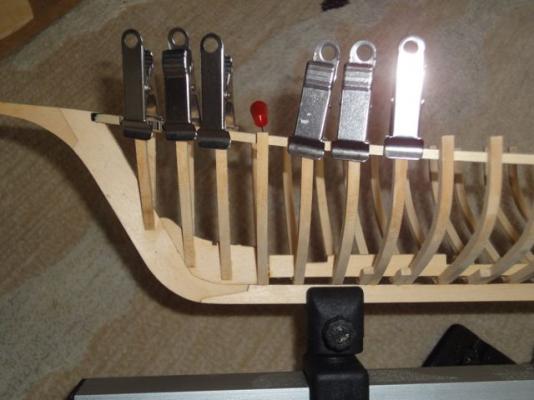
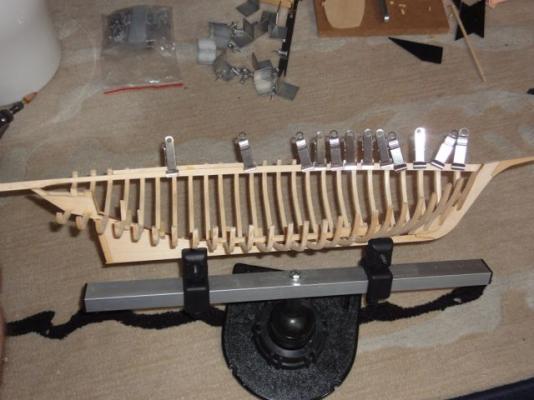
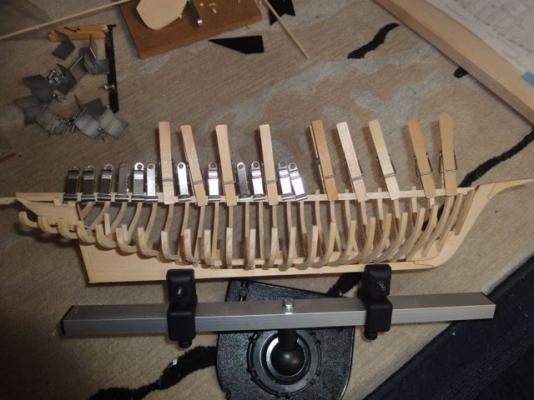
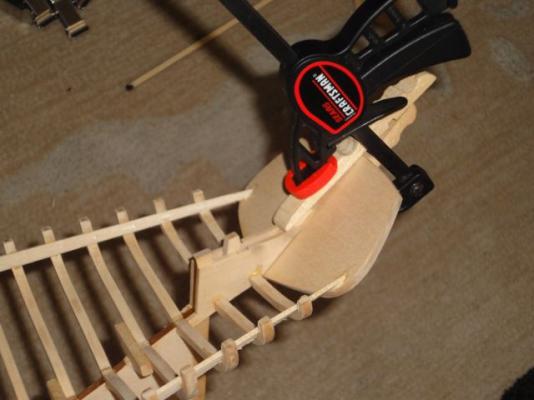
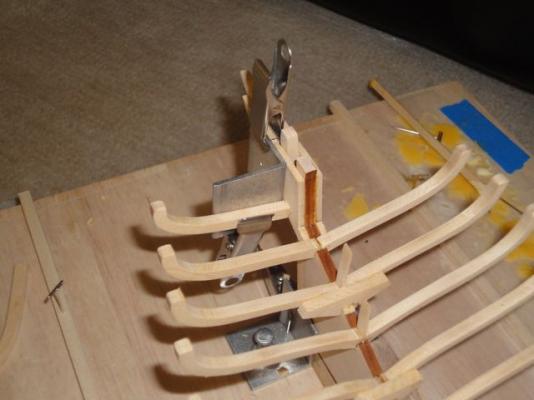
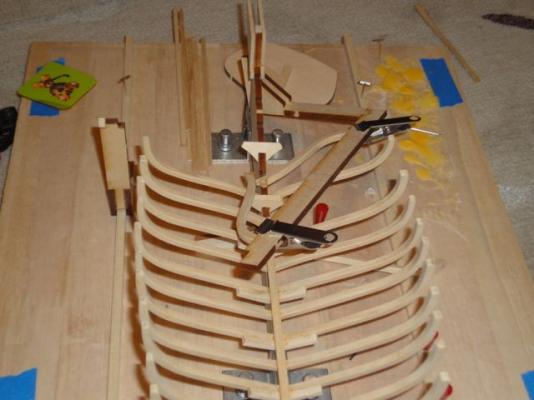
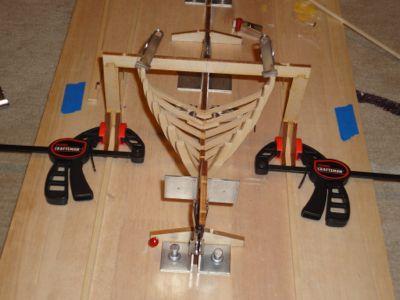
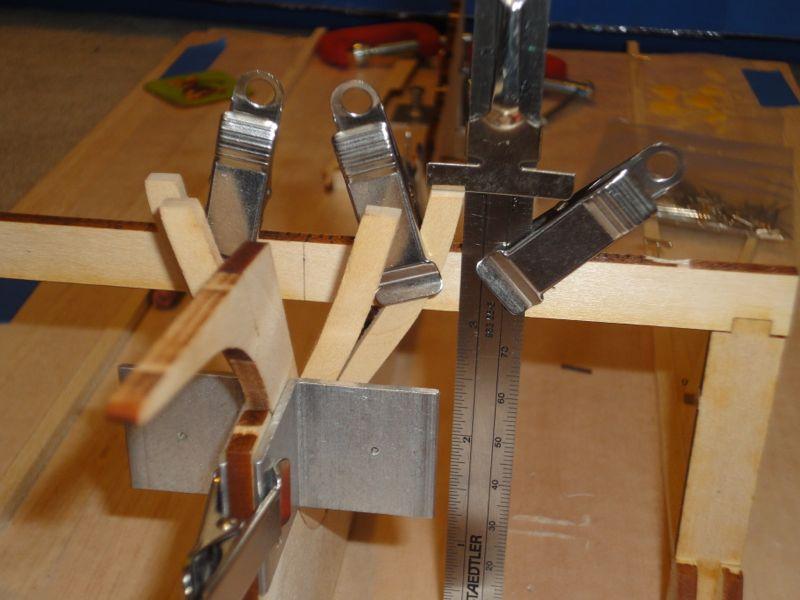
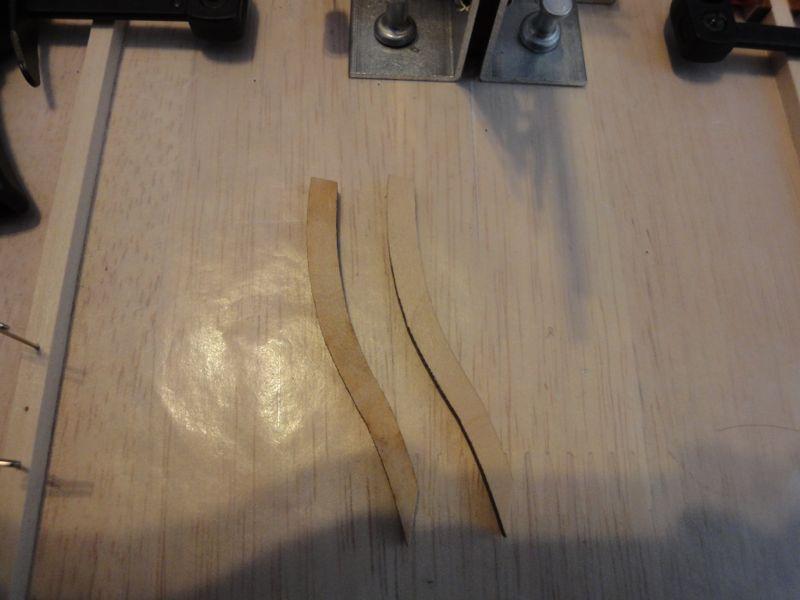
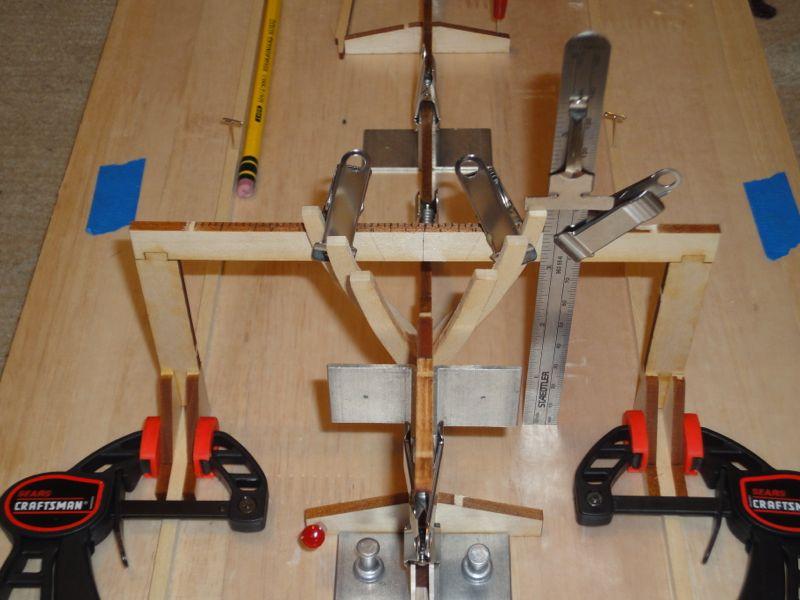
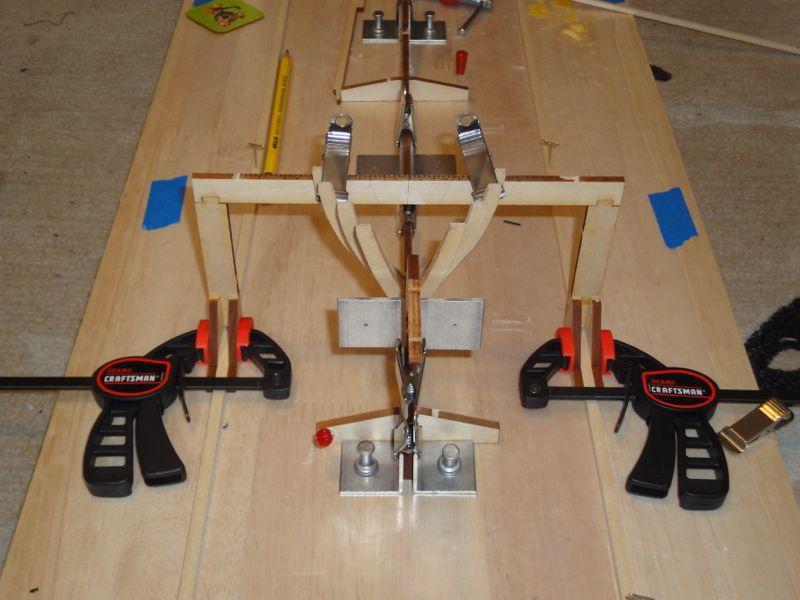
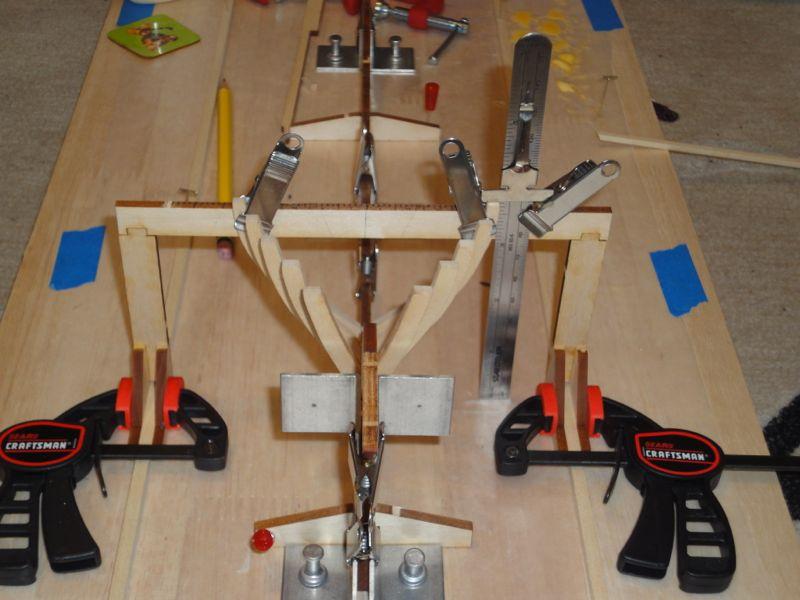
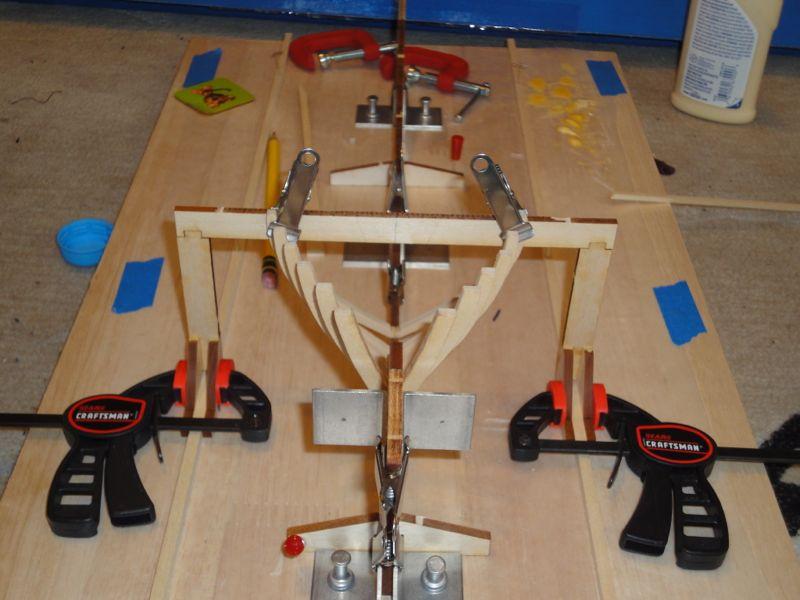
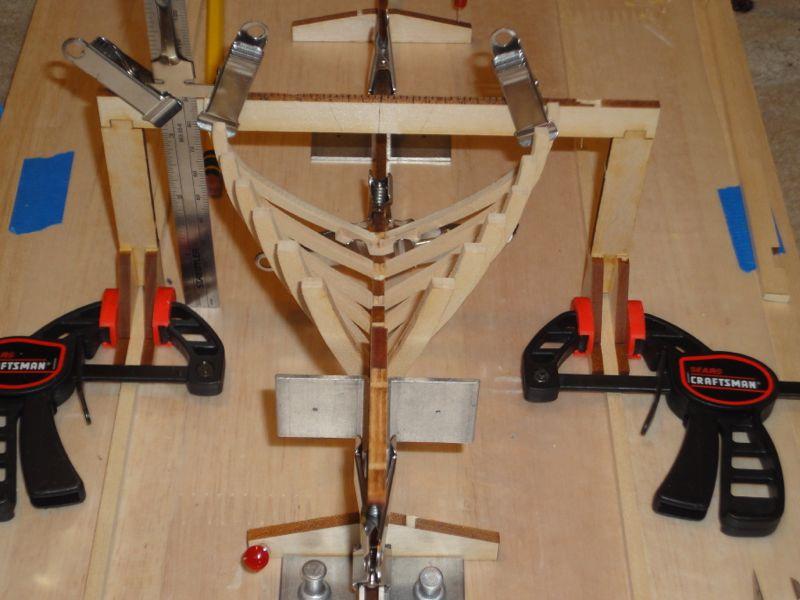
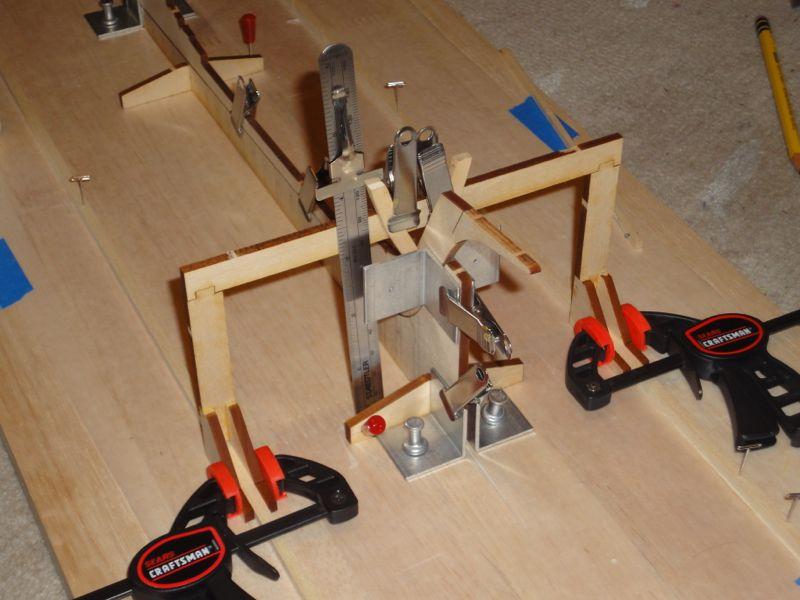
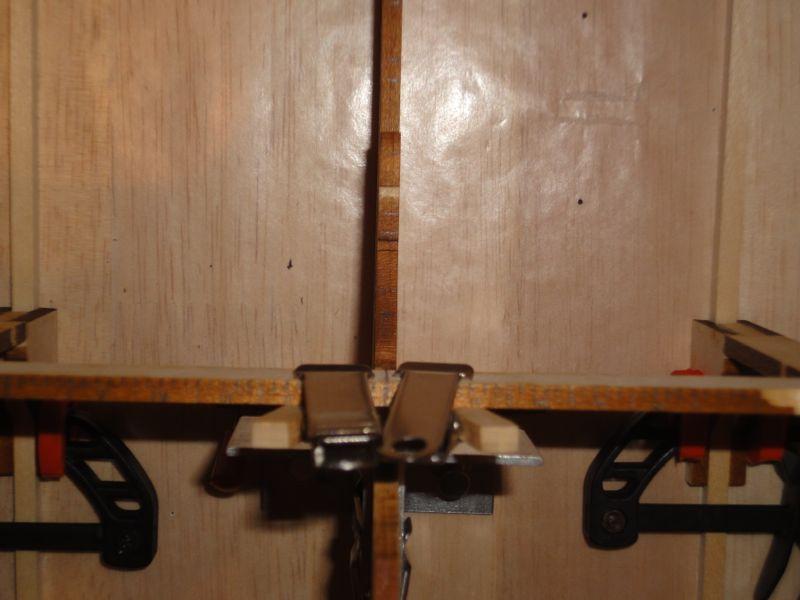
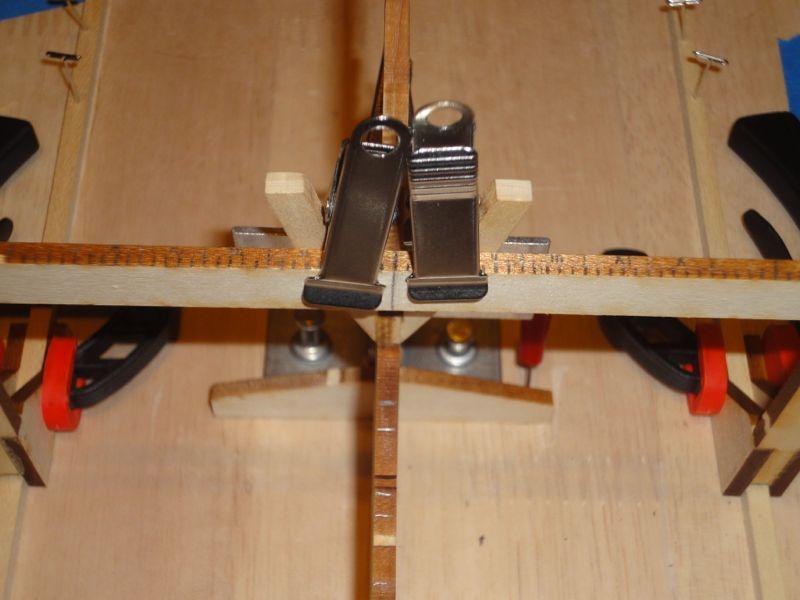
The LONG version... I figured hanging the clamps would be a simple job. First, I had to fair the inside of the frames so that the clamps would have a good surface to be glued to (preposition ended sentence not withstanding). Obviously, I knocked off several of the frames and had to re-glue them. This was much, much more difficult without the framing jig. But I made do. Both aft-most frames got knocked loose at some point, as well as the third-in-from-the-stern frame at some point. Somehow. Such is the life of a POF modeler. First, though, I soaked and pre-bent the clamps. Yet another not-so-trivial statement. How to soak a plank that is somewhat long? First, clear off the building board of all the scraps, framing jig in its entirety, and glue-junk left over from lofting frames (mistake). I looked around, and thought about soaking long planks in the bathtub, but finally settled on re-purposing my beer making hose. I clamped the distal end, filled the hosing with water, and jammed the planks down in there for a couple hours soak while I worked on other things. In the meantime, I taped the hull layout to the building board with a piece of waxed paper over it and set up a bunch of pins to get the curve of the clamps mostly right. The larboard and starboard planks were bent side by side. Now to fair the inside edges of the frames. How to sand it? The "regular" sanding block is long and straight, which would never work for the inward curve. I eventually folded up a bunch of newspaper and taped sandpaper to that. This is actually a pretty good system: you can "live-fold" the semi-rigid sanding block to the curve you want, as you sand. I should also mention that I try to be a purist. I don't so much like using power tools but that is mostly because dust gets all over my workshop (tiny NYC apartment living room). But. But. My wife was kind enough to point out that the frames were laser-cut, so that is already as high tech as it gets. So. I started using the Dremel tool to rough out the fairing of the frames and, let me tell you, this is the way to go!!! Fast, easy, accurate. Can't complain! At this point, I decided to take a step back and make sure everything was okay before I proceeded. Frame number 4 both larboard and starboard always seemed a bit off to me, and running a temporary batten over the hull confirmed this. It just wasn't right. The bearding line (still haven't carved that) wouldn't follow the frame correctly with the frame mounted like that. So I did every scale ship modeler's favorite thing: Got out a chisel and tore that baby out! Then I fitted up another temporary clamp inboard, and used that to help hold the re-fitted frame #4 for gluing. This was much, much more difficult than lofting the frame correctly using the building jig in the first place. I should have noticed this before and not settled for less-than-perfect results. With those simple, 8 hours of work preliminaries, out of the way, It was a simple matter of tapering the now-dry clamps from frame #17 aft to dimension. Then I fitted and progressively glued the clamps in place from bow to stern. I only have 12 metal clamps so I glued the clamps in place in two steps. (note in the photos: the trusty Starbucks stirring stick used as a spacer for the eventual deck beams) I also got out the less forceful clothespins to help. The same process was repeated on the starboard side, first gluing the 12 or so frames from the bow to the clamps then re-positioning the metal clamps with clothespins and gluing up the after frames to the clamp. The transom was glued in using a creative disassembled clothespin and mini squeeze clamp set up. And we arrive at "simply" putting on the clamps.


-
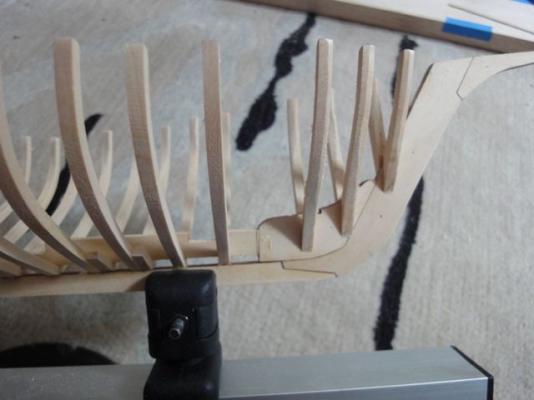
This post is dedicated to Yves. Since the day I started this build, I looked forward to fitting the clamps. So I can finally be done with accidentally knocking frames loose and having to re-jig and re-glue. The very short post: I fitted the clamps and, yes, this is momentous. The hull is now very rigid and my wife is free to kick it all she wants For the long version, please vide infra. Like so many things in ship modeling, the simplest results often require quite a bit of unseen labor.
-
I very much prefer POB over solid hull. I think. I have built many airplanes in, essentially, POB fashion and one model boat that was solid hull. And my current POF build is more fun than the solid hull too. I don't like solid for a lot of reasons. If you mess up and over sand a POB model, you can rip off the offending bulkhead and replace it without too much trouble. Take too much off from a solid hull, you can fill it (I guess..) or start over. Also, with a solid hull you can't model interior details which I really enjoy. Carving a solid hull to proper profile, even if it is rough-shaped in the kit, is very tedious and difficult. More difficult, I'd say, than bulkheads which are probably 95% the way there right from the kit and much easier to sand to shape besides. Maybe someday I will build a half-hull model. But, in the near term, I can't think of a single reason a solid hull is superior to a POB build unless, again, the whole point is to demonstrate your skills in shaping a chunk of wood to an extraordinarily complex shape cheers
-
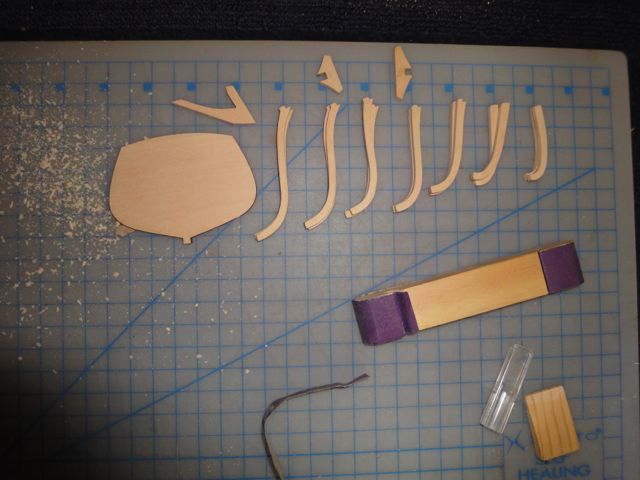
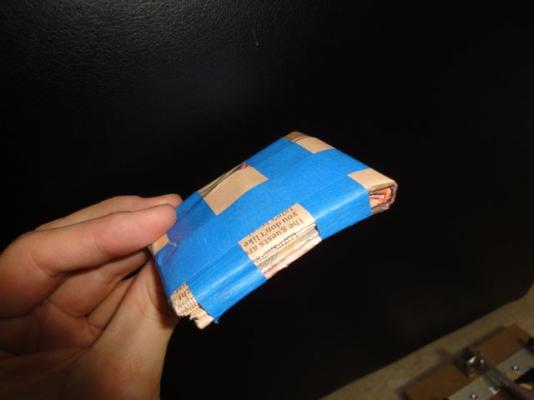
UPDATE (or, misadventures in case-building) Several years ago I needed to fabricate some simple plexiglas (acrylic) that had to be cut to shape. So I bought the sheet, the scoring tool and a pair of weird plastic pliers used to start the break. As I recall (more later) I scored the plastic, snapped it to shape, and the job was done. Easy. SO after looking at the Phantom sitting there, I decided it needed a case and, as I already had all the tools needed to cut plexi to size, why not a plexiglas box to put it in? The very short version is I made some very careful measurements and designed the display case, went to Home Depot, got a new sheet of plexi, came home and tried to make a case. Tried. To make. A case. ARG I don't know what I did the first time but this time, I guess I didn't score the sheet enough, and the thing fractured all in the wrong direction, not along the scores at all. Basically destroyed a $27 piece of plexi. After that was all messed up, I did some practice cuts (should have done it BEFORE destroying $$$) and, I guess, remembered some pointers. Then I looked at the TAP plastics website, and found out that for $41, shipped, I could have got the same plastic cut to shape perfectly. Basically about $15 to cut and ship it. Totally worth it. As it sits now, I'm waiting for the plastic from TAP.
-
Need help regarding specialized drill bits
craigb replied to md1400cs's topic in Modeling tools and Workshop Equipment
1) End mill will do it no problem 2) Any rotary burr will work 3) you can often buy used dental drills (mini end mills sorta) on Ebay a bag at a time for cheap 3) My preferred method would just drill a hole at the end of each prospective slot and use a jeweler's saw to connect it into a slot -
Wow, I just noticed your centerline string. Brilliant! I'm definitely using that on my next build. Nice looking progress on lofting the frames. It must help to have teeny tiny workmen helping out.
-
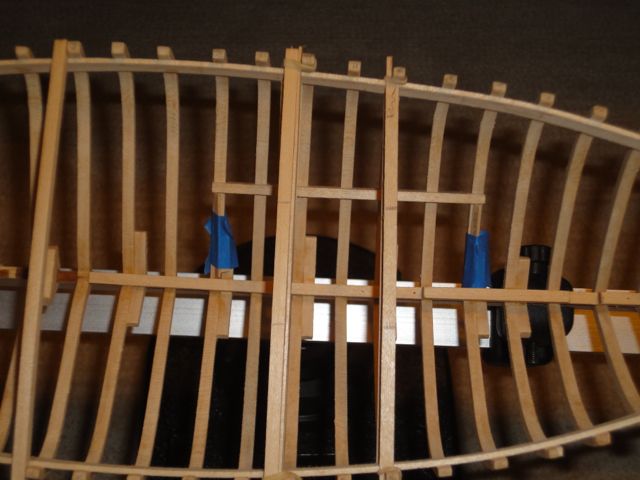
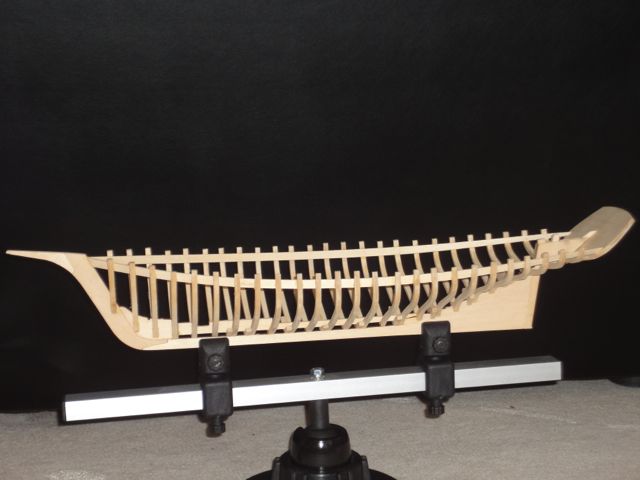
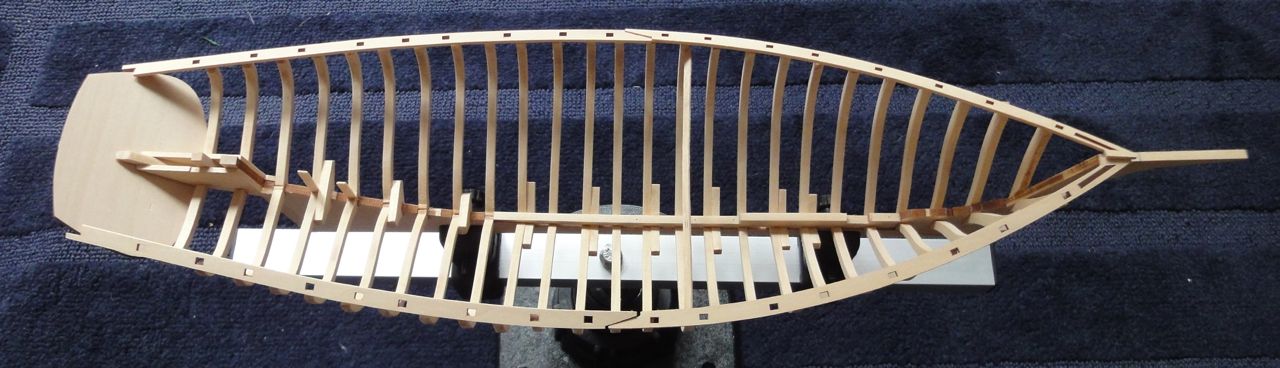
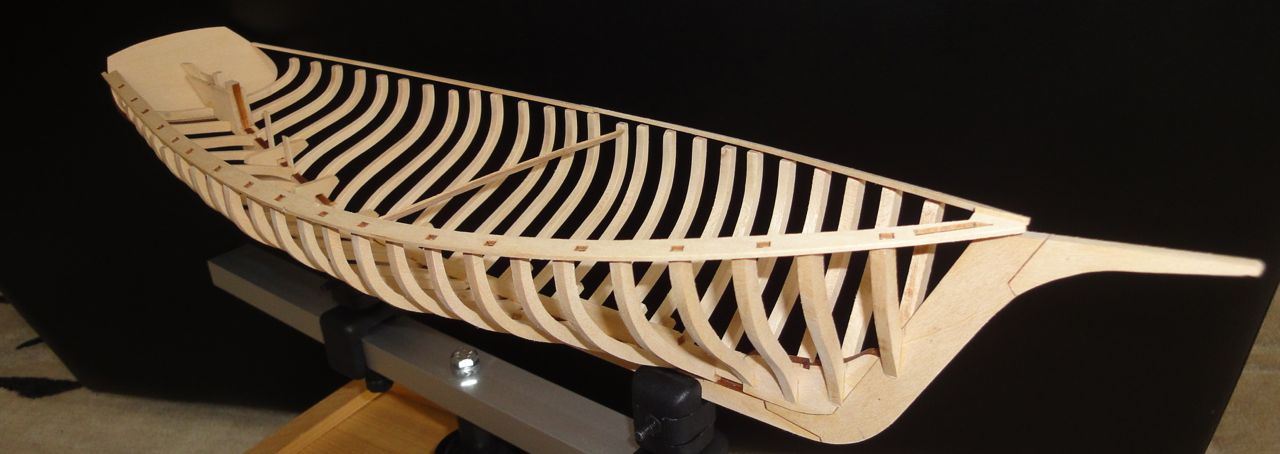
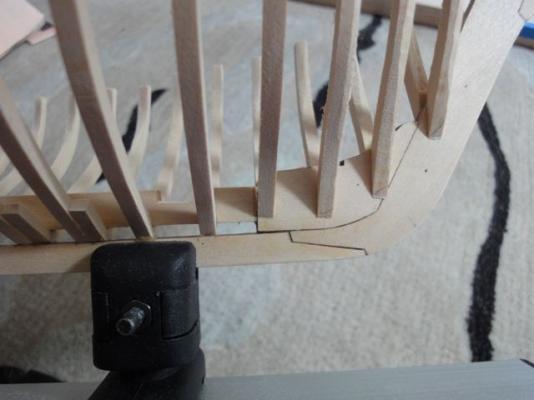
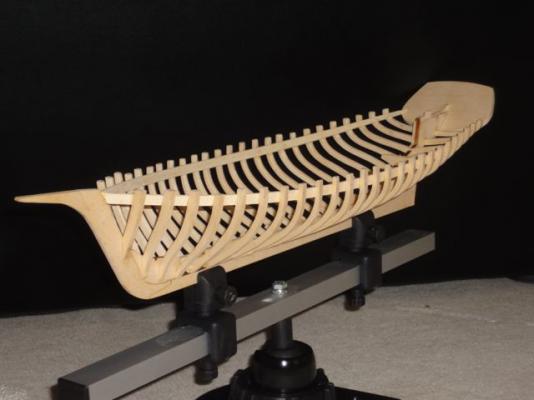
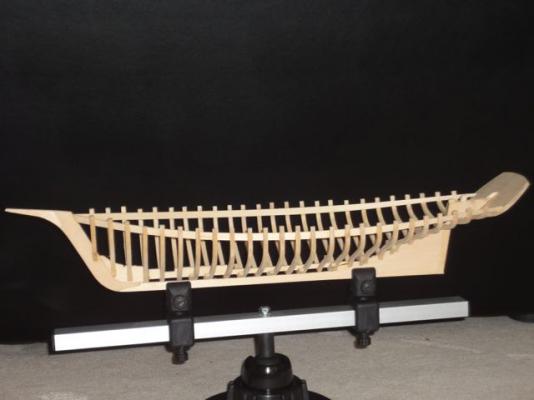
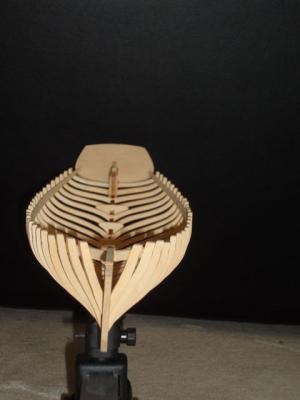
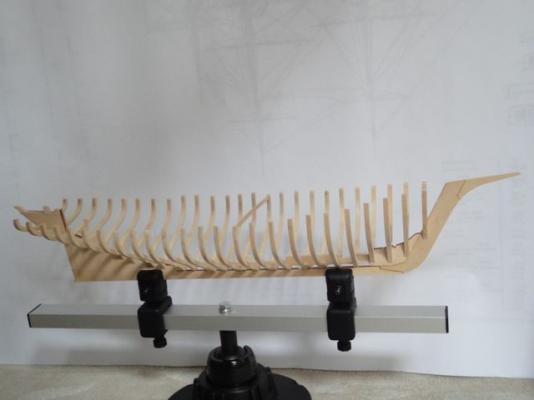
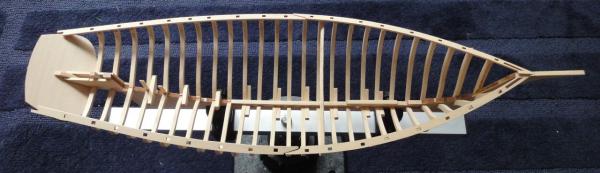
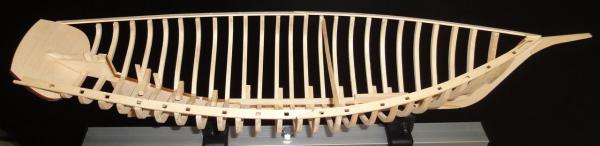
I'm sitting here looking at the model, and a major milestone has been reached: All frames mounted! I also mounted the model in the shipbuilding vice (Christmas give from my father) and it is fun to see something that looked sloppy while in progress look so clean and nice for a change! The frames came out pretty well, mostly to dimension. In the photos above you can see that I put a proper length faux deck beam at frame #11, which highlights the fact that the ship is a few mm narrow in the middle. Better than having the ol' girl (or any girl! haha) be a bit wide in the waist (hahahahaha). Moving on... When I get to putting the clamps in, I'm going to make a full set of temporary deck beam "spreaders" to hold the hull to the proper shape for gluing on the clamps and also to make fairing a lot easier. A few other comments -The plans call for pre-fairing the frames a bit, which I didn't do. -I also have not cut the bearding line/rabbit yet. I figured it would be more intuitive once the hull is faired. I'm going to build a little rabbit cutting tool, I think. Stay tuned. -At the stern, the notches for the frames are angled so I put little wedges in the bottom so the frames would sit properly and have a surface to be glued onto. -The framing jig was too low to be used for the last two frames, it hit into the rudder box area. So I used some 90 degree angle jigs to hold the last two pairs in place for gluing. Getting them in the right spot in 3-d space was tricky and basically came down to trial and error. Then removed for gluing, and again trying to get them just right before the glue set up was... not fun. If I had to do more than the two pairs this way, it would be worth it to devise some sort of repeatable jig set up. In conclusion, the framing was mostly uneventful, and not nearly as repetitive or dull as I'd expected. Right pleasurable, in fact. Next steps will be soaking wood for making the clamps and pre-bending to approximate shape, then sanding them to taper towards the stern. Then while that is drying making frame-spreaders (temporary deck beams, whatever they are called). Then the clamp can be attached, which I'm really looking forward to. A couple more photos where I just set the covering boards in place and taped on the transom to get a feel for the hull outline. It really is a classy boat with smooth lines. The shallow draft and high stern make it look very fast. Donfarr: I don't know how you keep 3 projects all going at the same time! I know if it were me I would get all the parts mixed up, and also just make a huge mess of the "shop" immediately resulting in reprimand by the Admiral.


-
Getting the keel flat is hard, and keeping it flat is hard too. Once you get it the correct width, it is easy to sand off your crisp edge as you shape the rest of the hull. I used a bit of drafting tape to mark off the keel and it worked really well. the "c" should be the centerline. Also, I used gouges to help rough shape the hull then sanded to final shape. Especially around the stern with the narrow keel area, it was much better to just get aggressive with the gouges to remove wood in a hurry. In that area, the keel meets the hull at a rather acute angle whereas the blank is shaped with a really gentle curve that isn't even close. Watch your fingers! It is pretty easy to get carried away and plunge that gouge into a finger if you don't think about how you are holding the hull as you work on it!!! All this is to say yes, indeed, the rough hull blank is sort of hull shaped, but getting it "correct" takes a ton of work. After building a bunch of balsa airplanes (essentially "plank on frame" method) I found working with a sold hull a total pain! cheers!
- 85 replies
-
- 2
-

-
- phantom
- model shipways
- (and 1 more)
-
SHIPWRECK! It happens to the best of them. My wife got loose in the shop and accidentally kicked the model. Good news and bad news. It certainly doesn't help that my "shop" is the floor of our tiny NYC apartment. The entire floor. So I can't really blame the gal for trying to navigate across the living room with about 1/2 a square foot to step. But the good news is that it only ruined the last two frames I hung that were still clamped to the framing jig. And one other random one in the middle somewhere. Also it broke the framing jig, but that was a simple fix too. Nothing destroyed beyond repair, and I didn't have to rebuild any frames. So, after a couple hours I'm back to where I started. I must admit, I had a good time hanging frame #19 first time, but it was slightly less fun the second time. PS to Wayne. The best I can say is set everything up with much care and don't settle for anything less than than you want it to be. But at the same time, also know that no matter how hard and "good" your set-up is, it will not be perfect. You will break stuff. Your wood will be less than straight. The model doesn't exactly match the plans but probably it is only me that knows the difference. I assume that real, full size, wood boats are just the same.

-
Carl and Keith: Thanks for the kind words! NIce build logs for the both of you as well! I look forward to the planking steps. Continuing on, I lofted a couple more frames, and went ahead and sanded out all the rest of the frames. That way I don't have to sand off burn marks for a bit. In another evening or two, the frames will be totally attached! I continue on this project like the last (Phantom) where I'm building it as best I can according to the plans, but often significant details are left off. So, I just sort of "go with it" and not stress. For example, the alignment of the "side horn timber unit" isn't very clear. So I stuck it on where it seemed like it should go. Till next time --Cheers!

-
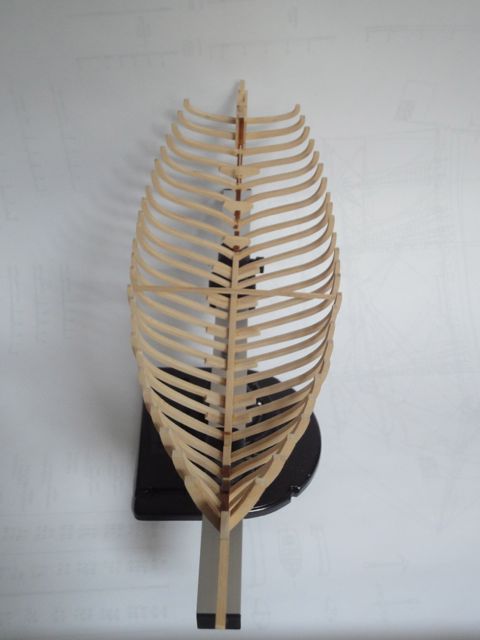
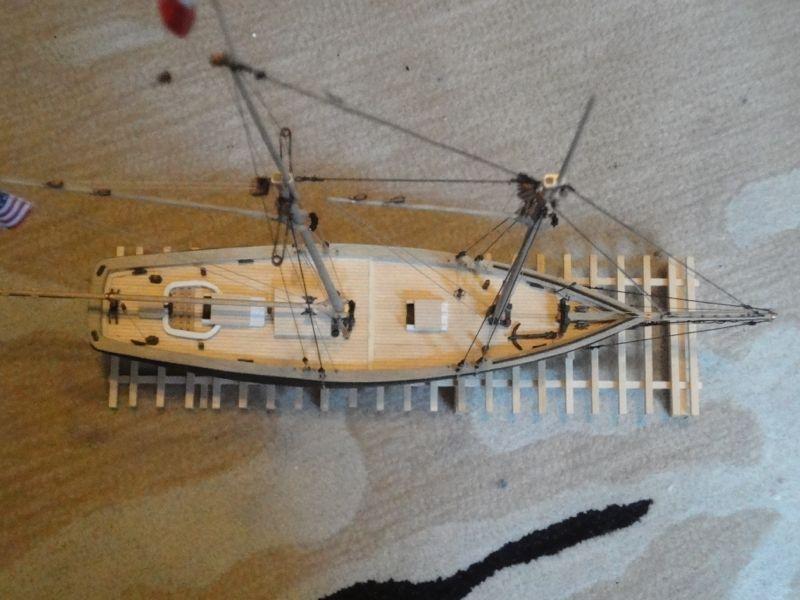
Wow! Tons of progress over just a month or so! Good looking build so far, and I like the photo of the boat end-on. It really shows how shallow the draft of this boat is. It looks fast. cheers --cb
-
Has been a while. Slow going, but that is how this hobby goes. Life gets in the way of model boat building, sometimes. Anyway, I lofted frames up to #16, and glued in the keelson. Sometimes I get into the Zen of model boat building. Like how the sandpaper pulls and cuts better when fresh, and has a certain feel to it. And after sanding off the burn marks, and making sure the corners aren't flaky, I sit there and admire a single frame for a second, a perfect part all to itself. But I still don't like burn marks.

-
It needs saying again: Wonderful build so far! The model already looks great as it. Seeing the fully fitted out bunks and inner details with the full POF skeleton around it makes it look like a museum piece or demo model or something. Like the cut away engines at auto shows sort of.
-
Nothing too exciting. Mounted frames 8 and 9. Slow and steady progress.

-
Your work area looks remarkably similar to mine, location wise! Except way cleaner than mine! Although, honestly, I mostly just do all the work on the floor where I can really spread everything out and try to have it cleaned up before the Shipyard Boss gets home. Your Harriet Lane looks like a very interesting build from an interesting point in nautical history. I'm looking through your build log now. good stuff! cheers
-
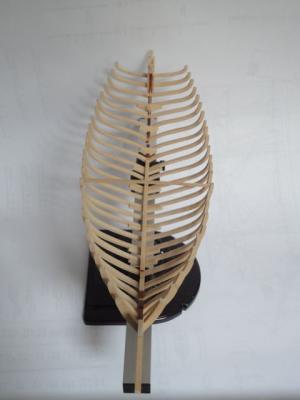
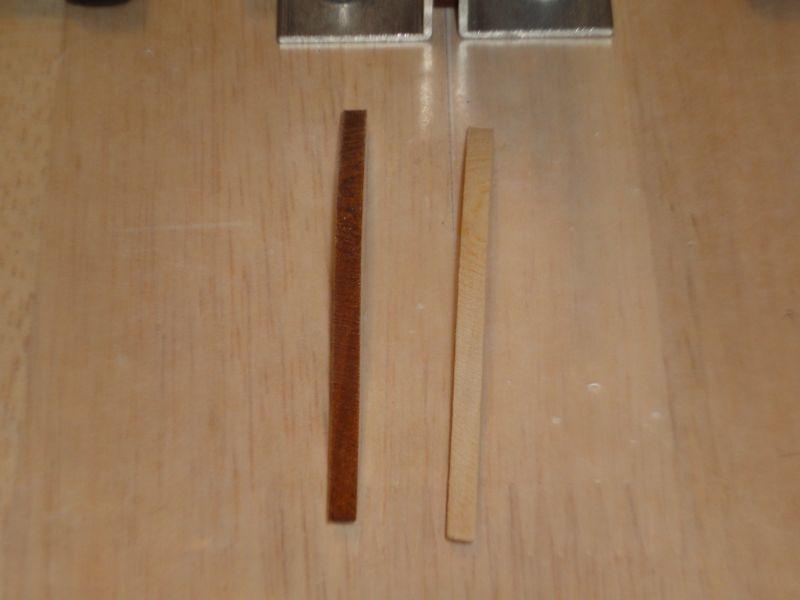
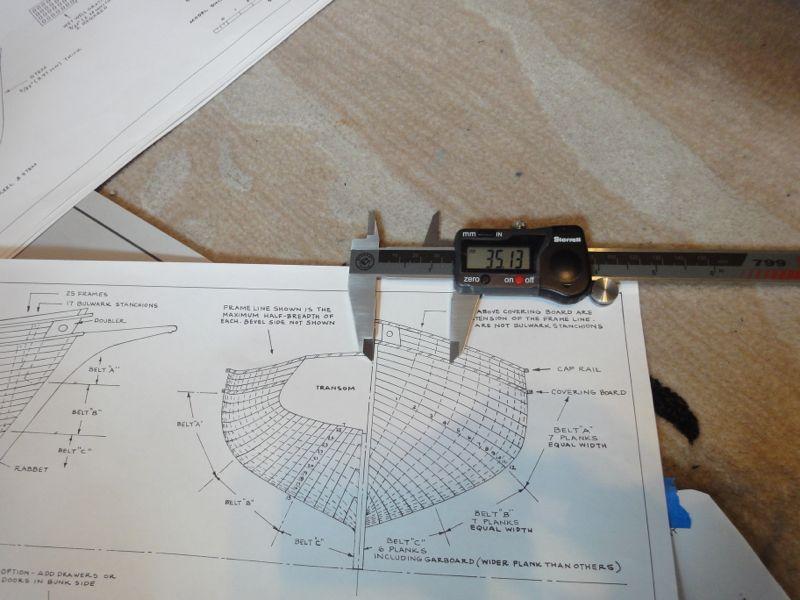
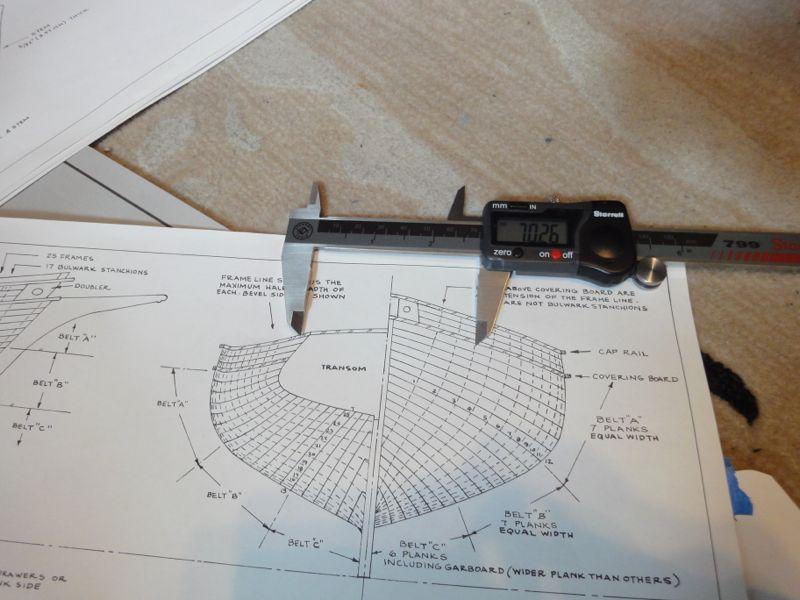
Work continues lofting frames, setting up #2-7. Each took about an hour: the part was removed from the laster cut sheet, and then all the burn marks sanded off. Not a fan of sanding off burn marks, but I should get used to it. Sanding the curves was time consuming. I figure it is going to be way easier doing it this way then when it is on the boat. While glue was drying from the previous frame, I prepped the next one. By the time all the sanding was done, the glue was (mostly) dry and the framing jig advanced and the process repeated. Frame with burn marks sanded off (Right) compared to as-removed from laser cut sheet (Left) Frames 1-4 are mounted on the sides of the stem. Frames 5 through 7 that I put up today meet in the middle. Mounting 1-4 went well. Frame 2 set Frame 3 set up. Here is a little mini-how to. I set up my ruler according to the height as determined from the plan. Then I measured the half-width and doubled it to get the distance between frames. I later realized I could have just directly measured this distance from the plans showing each frame. Then everything was lined up, re-measured, and the moving T-bar on the ruler set up so that the frame was at the right height, with the frame right in the corner to maintain Left-Right symmetry. The width between frames was double checked with the caliper. This rig let me take the frame out and quickly set it back into perfect position for glueing. Frame 4 set up When it came time to set up the frames that meet in the middle (5+) things got a bit weird and my system didn't work so well. It was actually supposed to be a bit easier because the frames are mounted on the centerline, so all I had to do was get the height right and the width should take care of itself. Should being the operative word here. There is a small discrepancy (3-5 mm) between how wide the frames are at the top as measured from the half-bredth plan and how wide they end up in reality. So, I did what I usually do in this situation: sort of ignore it. I got the heights "right" and sighting along the frames, everything looks reasonably lined up. And unless someone really, REALLY knows the Emma well, no one will ever know the craft is a teeny bit narrow. Frame 5 Frame 6 Frame 7 A shot of what it looks like now. Definitely approaching "fishbone" stage! You can also see the floor in front of Frame 7 glued and clamped in place. Cheers! --cb

-
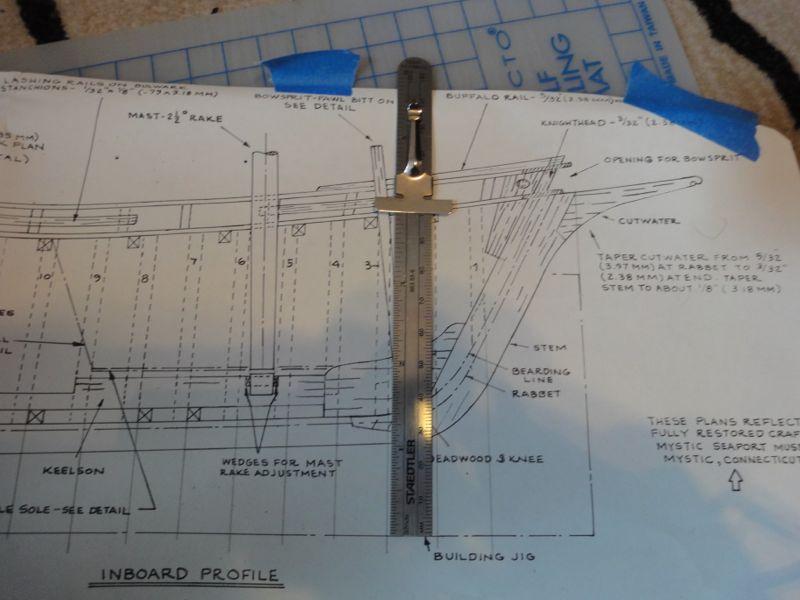
Work continues, and the first frame is lofted. I underestimated the complexity of mounting a complex shaped frame in 3-d space: it has to be matched for height, as well as distance between larboard-starboard (I love POB novels!) and symmetry. So! I used the framing jig to fit everything up without glue. Height using an adjustable rule, width using a digital caliper locked from the measurement from the plan, and left-right symmetry by marking 2 mm increments directly onto the framing jig and sort of eye-balling equal distances. This took hours. Messing with one adjustment messed up all the other measurements. Once I was satisfied, I marked the outline of the frame directly onto the framing jig with a pencil. Then a deep breath was taken, one side's frame was removed and glued using Titebond II to allow for some fiddling. While the glue was drying, all measurements were checked and re-checked and messed with while sweating bullets. This was repeated for the other side. One frame done. Twenty-some to go. It was actually really, really fun! I aim for a frame a day for the next month. Certainly, like most things, it will get easier as it goes. Here you can really see the markings I made on the framing jig- marked every 10 mm with 2 mm increments to try to get Left-Right symmetry mostly correct
-
To all: Thanks for the comments! bhermann: coming from a background of building model airplanes, where essentially all fuselage construction is sort of "plank on frame" but with very, very fragile balsa, building a POF ship of bass wood isn't so bad! This is a working craft, though, not a warship, so I probably won't get too tied up in the monotony of frame construction. trippwj: I, too, have a "Shipyard For(woman)" that dictates one project must be complete before starting another. It is probably for the best, otherwise I'd never finish anything! Don and Yves, I too am excited to share this experience with others.
-
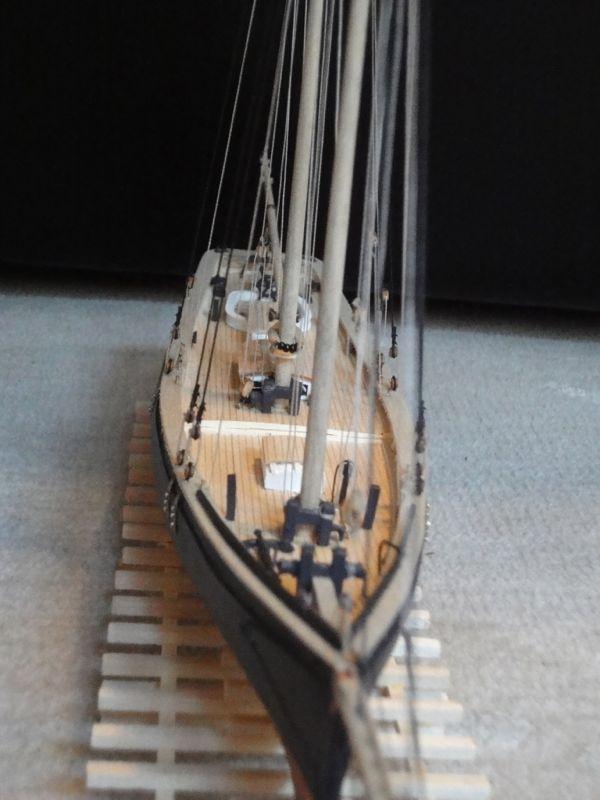
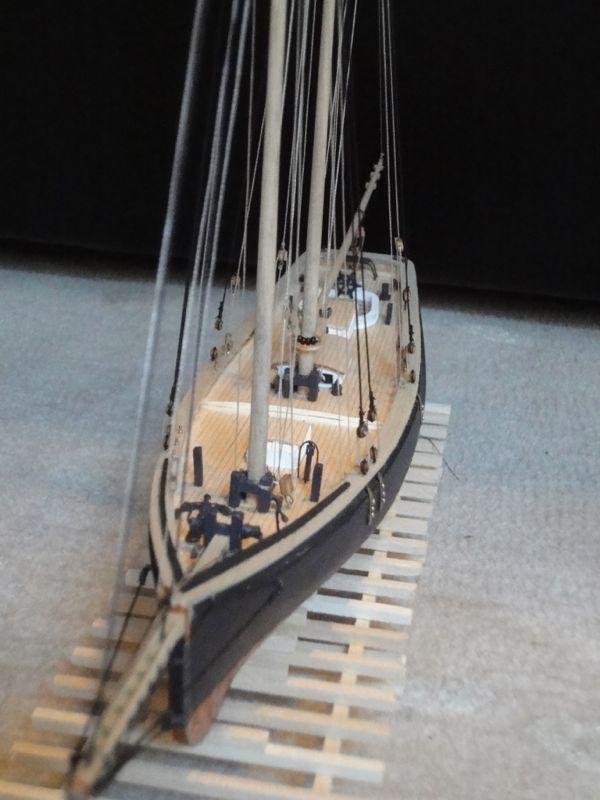
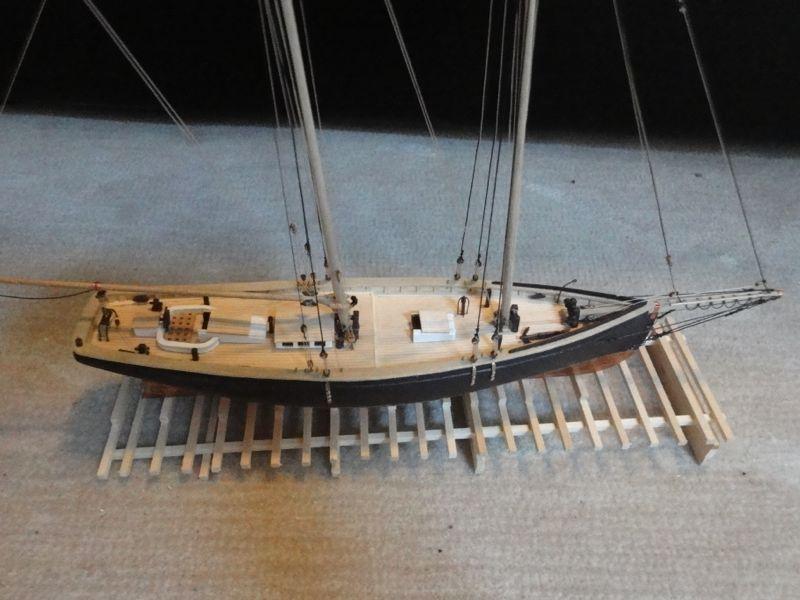
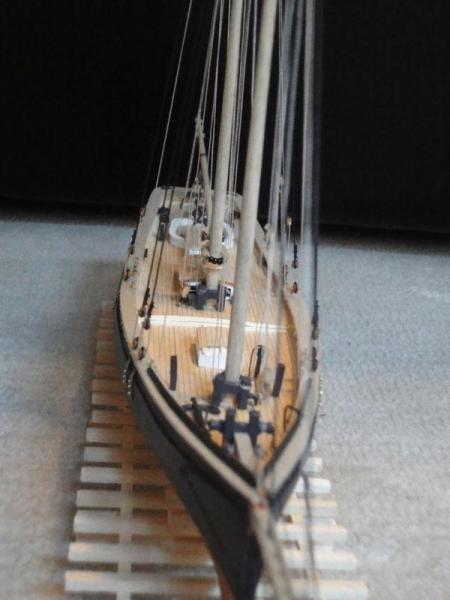
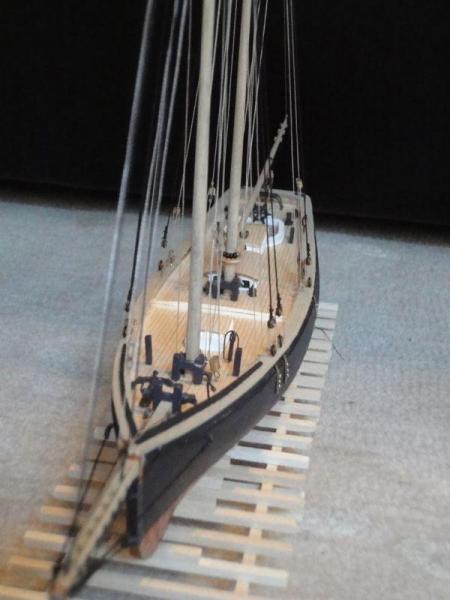
Well, I hope this (re-issued!) build log has been helpful. I can say that when I was building the Phantom I followed ALL the current build logs, without commenting! So If that is you, doing that, with this build log, I'm very proud to thank YOU for taking the time to read though my verbose "b-log". I also found myself, on many sleepless nights, reading through all the other MSW build logs and simply enjoying the gorgeous pictures posted by other builders, and fantasizing about someday attempting to build such wonderful things, knowing well enough that it might be impossible, then drifting off runing through various fabrication steps in my mind. Maybe I'm weird but I bet others on this site are the same! Fodder for wonderful dreams, none the less. Here are some photos of the completed Phantom. I would describe the overall build as "clean" or maybe even "sterile" without rope coils, weathering, etc. Maybe a consequence of the time crunch (build for free program), but I do enjoy the timeless clean, non-cluttered lines of the gorgeous, historic, and now personal vessel. Cheers --cb PS in closing, I would like to sincerely thank Mr Chuck Passaro for so much. For encouraging me through his writing to enjoy this hobby, for creating a practicum truly written for beginners, for managing this website that has given me so much inspiration, and for simply building gorgeous model ships. Also, thanks to the entire MSW community for the (now lost) comments on this build.


- 20 replies
-
- 6
-
-
- phantom
- model shipways
- (and 1 more)
-
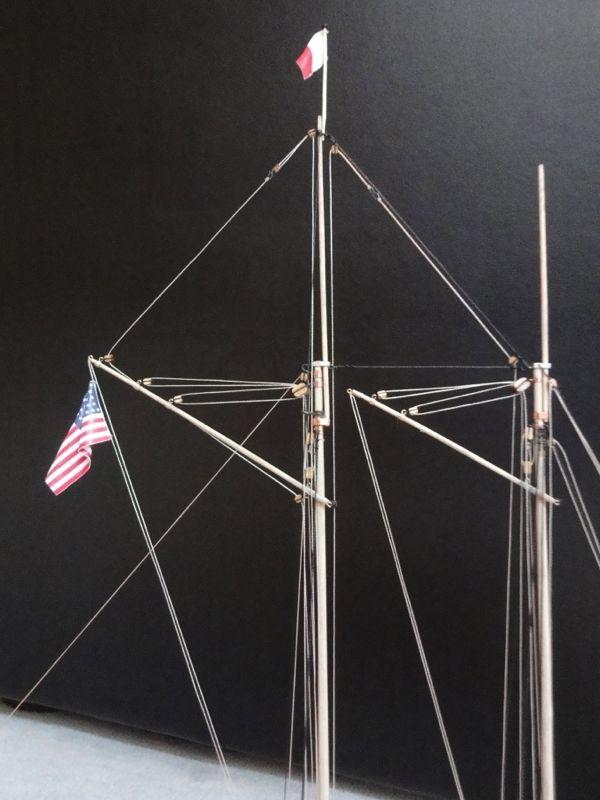
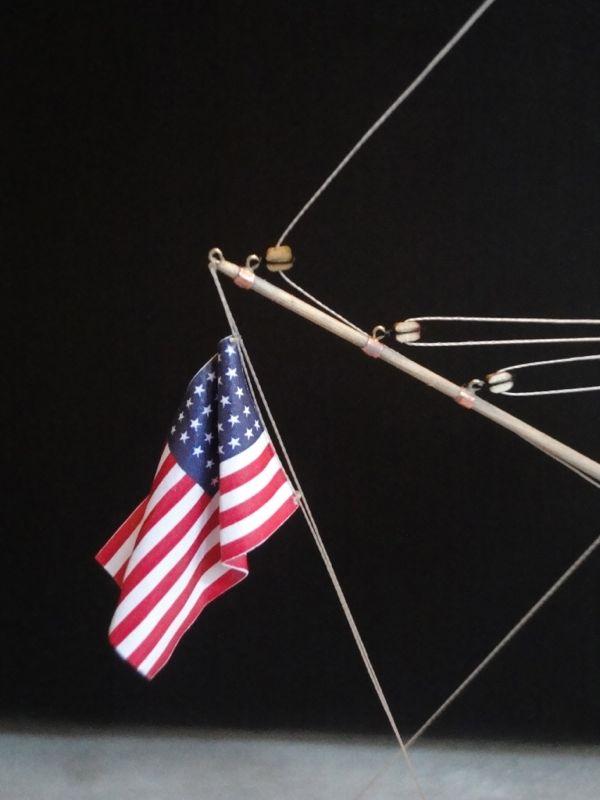
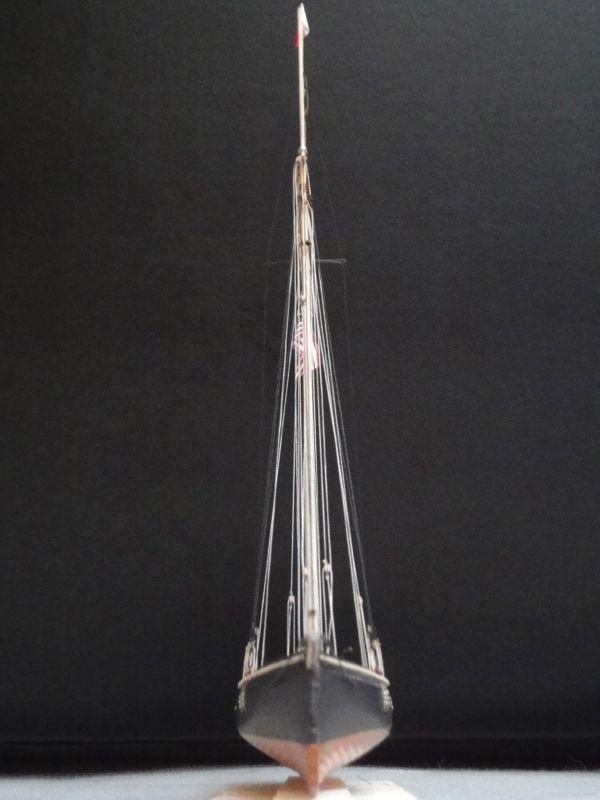
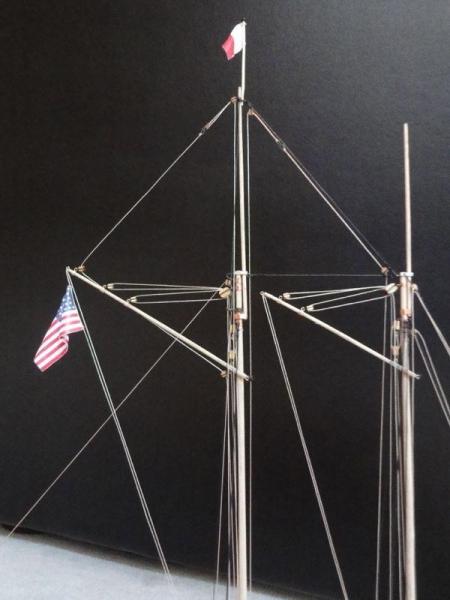
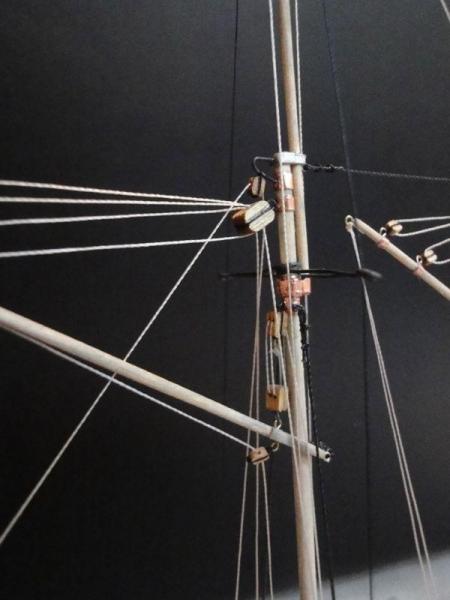
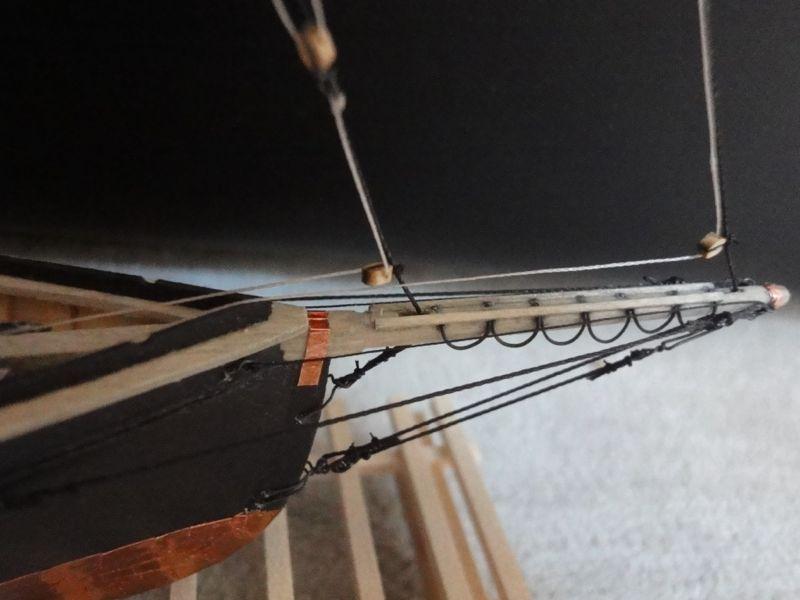
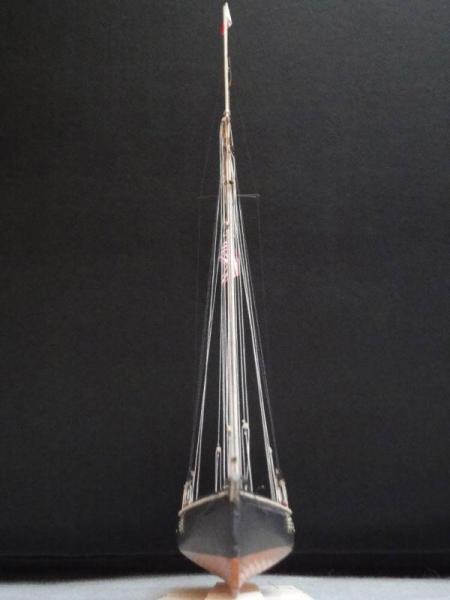
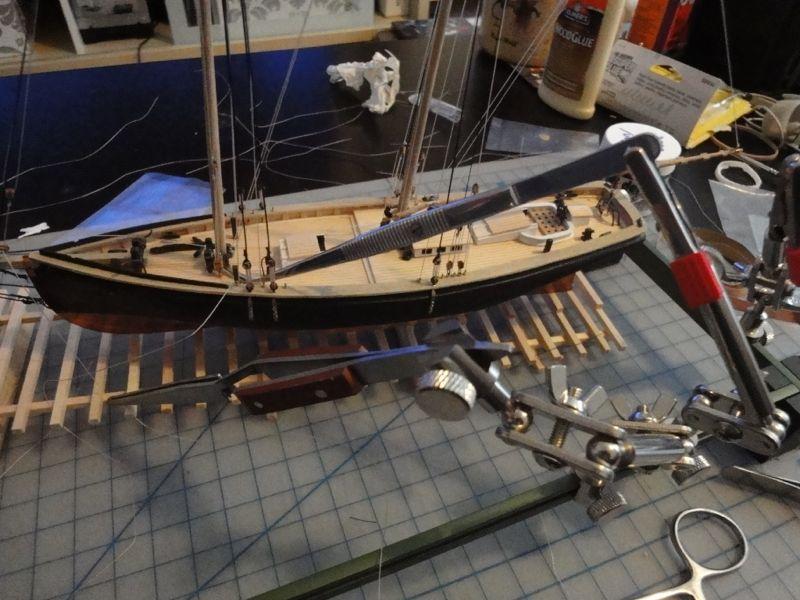
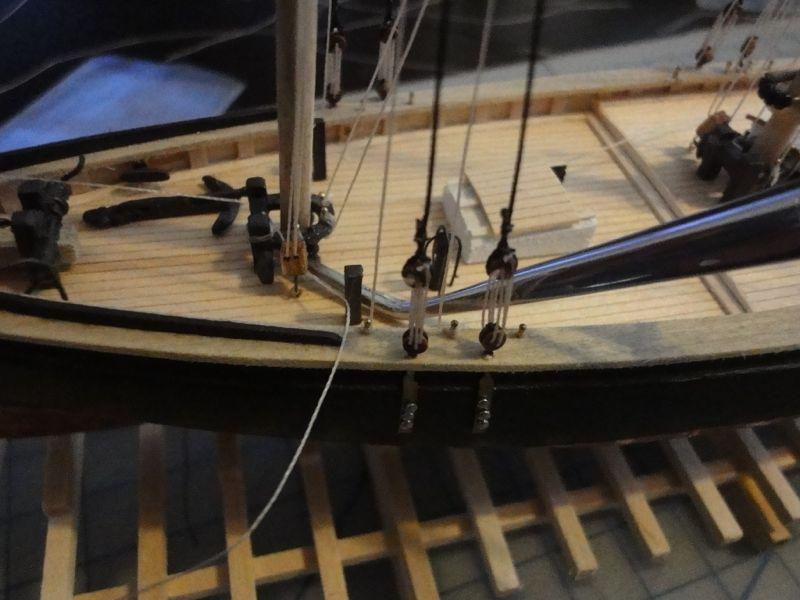
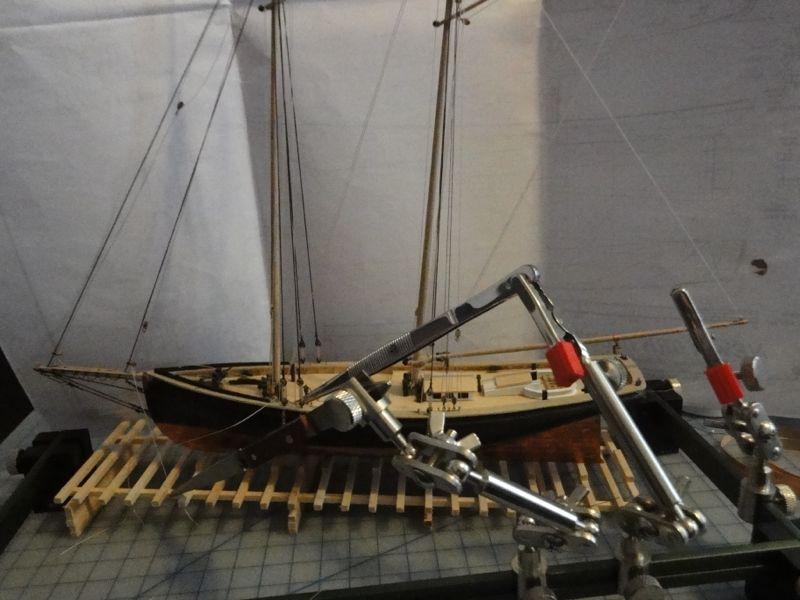
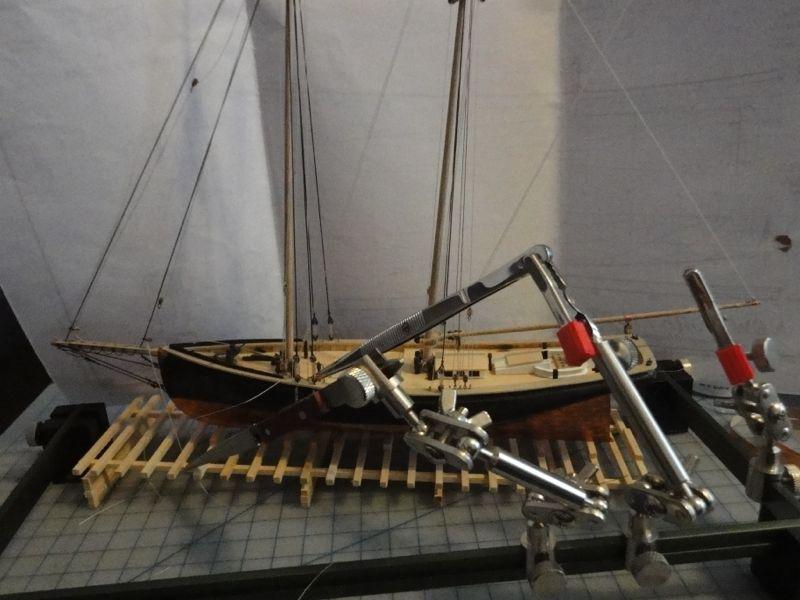
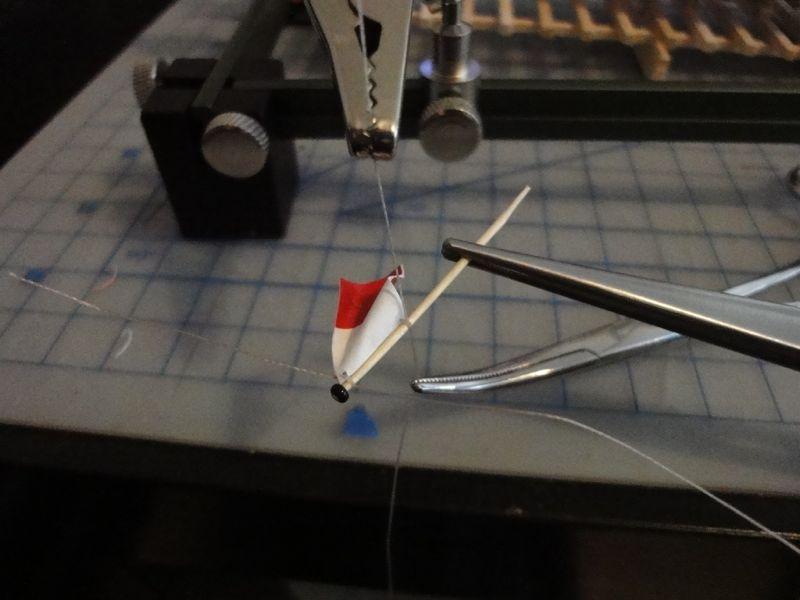
The next photos show rigging the vessel. It adequately demonstrates the absolute mayhem involved. I have a great "fifth hand" jig that I picked up a long time ago- it has aluminum beams and various clamping and holding armatures. I think I got it from Micro Mark but don't quote me. Without this, I would have given up at this point. With this jig, rigging was fun and a pleasure. There has been much written on getting deadeyes to the proper height, mounting blocks, etc. So I won't repeat. I will say that I often spent about an hour EACH rigging eyes or strops, or hooks to blocks. Steps: get everything "just so", tighten knots, etc, then inspect, make sure I'm 100% satisfied, then maybe touch with some superglue and ignore for an hour. Each! Without the holding jig, it would have been impossible. Buy a holding jig. That is the point here! Even something as trivial as tying on a flag involves holding the spar, holding the two ends of the line (three hands already!) then touching with super-glue. Nightmare without a holding jig, pleasure with it. By the way, I spent a LONG time shaping the glued together "Pilot Aboard" flag to hang nicely, as though it was a flag just luffing in the wind. Traditionally, adding the flags to a model signifies the completion of the model, and this is no exception. The next post shows photos of the completed model. Cheers! --cb

- 20 replies
-
- 1
-
-
- phantom
- model shipways
- (and 1 more)