


RevKB
-
Posts
51 -
Joined
-
Last visited
Content Type
Profiles
Forums
Gallery
Events
Posts posted by RevKB
-
-
Wow I wonder if you were one of the people who I was bidding against on ebay, or perhaps those other new Niagara kits popping up.
I tried to win the bid on this kit for over a month, but it always seemed to just go abouve my budget for my first ship of this size. I to
I look forward to seeing.your progress as Im praying Santa claus puts one under the tree for me this year.
in his dust RevKB
-
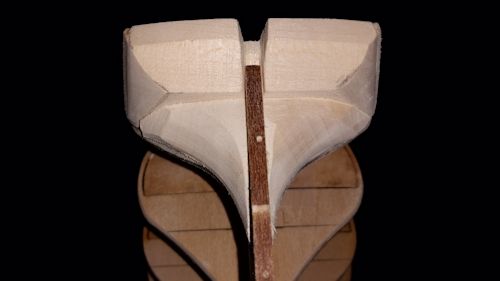
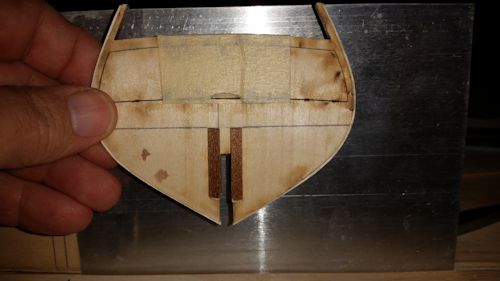
Ok so after about 2 hrs of repairs, and a deep disire to work to the plans, here is what i accomplished.
I repaired the huge holes i made for the previous knights heads.
Next i had issue with the knights heads laying properly to allow the fo4castle bases to sit flush and easy . So i cut a notch where the forcastle bases sat and turned the knights so they would lay flush , while maintaining enough wood for strength.
All fit and glued together, im pretty happy with the results, it was worth the extra time. Also this way i can easily remove the forcastle bases for other fittings.


- JPett and Kenneth Powell
-
 2
2
-
Yea that was what I was planning on doing , Im feeling a little better about removing this when I realized that the forecastle bases were supposed to over lap the planking, that changed the whole outlook of what I had . Ill keep ya'all posted..... wait did I just slip from seaman to southern boy in one sentence?

In His dust kenny
-
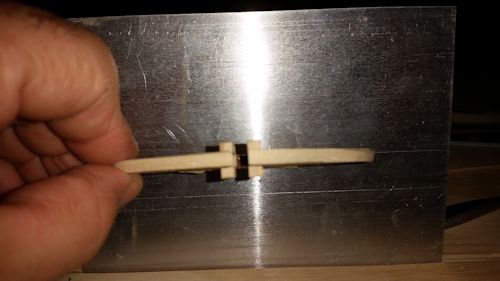
Thanks Guys for the input , last night i found myself trying to make these "work", they were not working .... so I took them out and will fill the holes with putty and go back to the original way the plans call for .
I was able to fashion knights heads that work through the forecastle piece. I will work on it some more and post what I have .
In His dust Kenny
-
Howdy Jpett,
I do like the directions from MS but for this particular step they were all but useless. I have been looking over the blueprints and once again this step is way vague. but I guess thats what makes it fun
In His dust kenny
-
Thanks JPett,
I would have figured the directions here would have been more clear, so far this has been the biggest challenge, even as far as the blood curdling sound of a bulkhead POP!
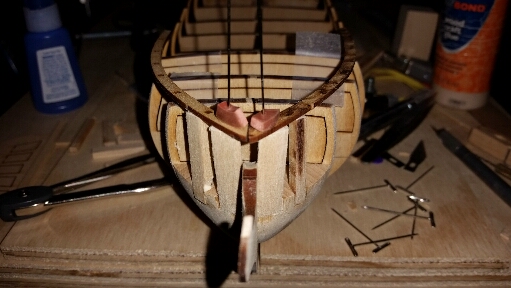
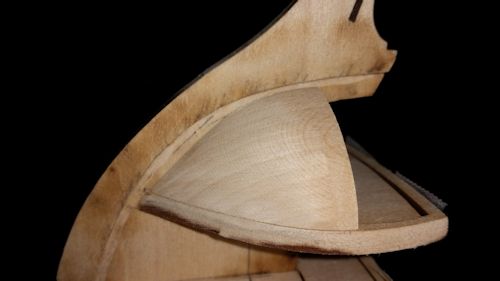
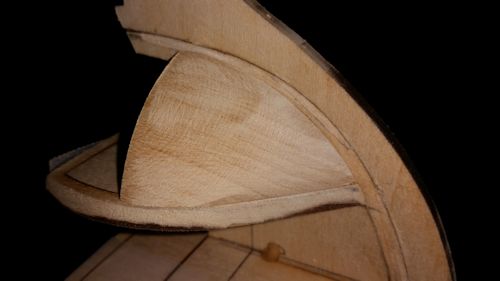
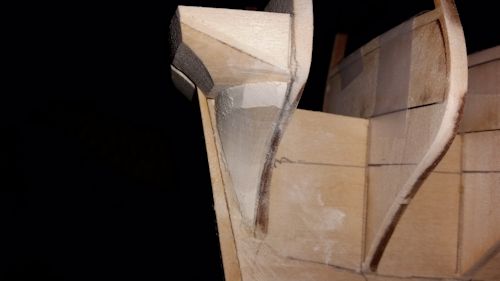
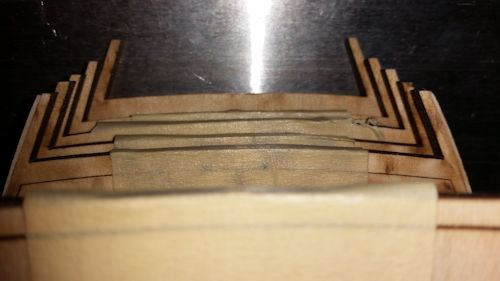
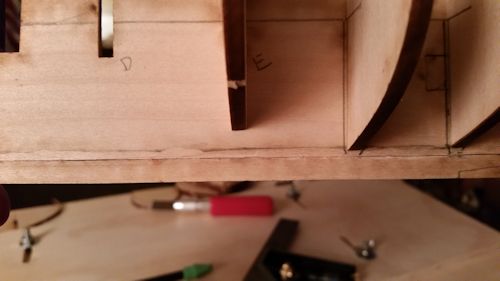
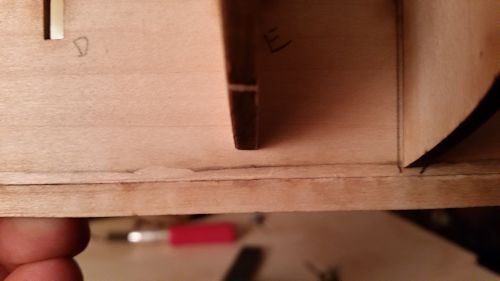
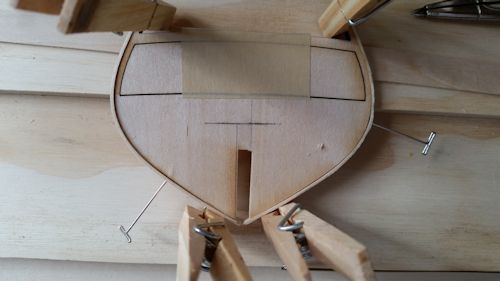
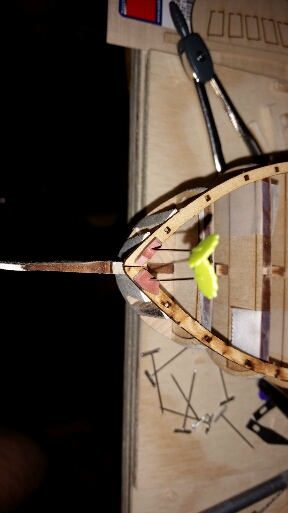
Well here are some pics for todays confusion, i am pleased will the stern as it has turned out. For right now I think I will wait on gluing the stern on because it seams to me it will save ample time matching up the planks.
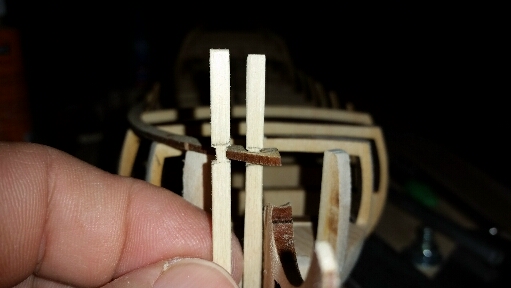
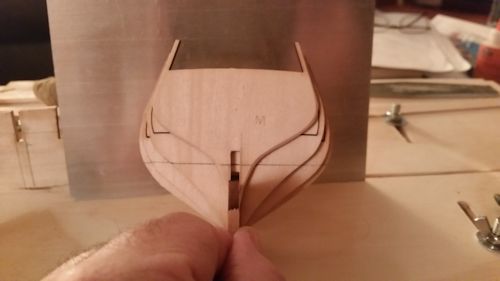
As for the timber and knight heads , you will notice i had only the diagram to go off of, and placed the knight head in the wrong place.So i came up with anothe solution that seems to work better for alignment.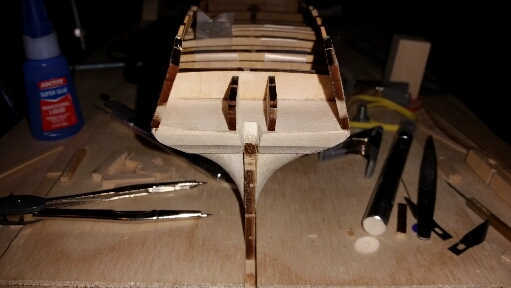

Here we can see the flow of the windows into the counter, I plan on leaving this until after the plamnking is done so I can better shape the ends as they flow into the back side of the stern. Also thinking this may save some time.
Here was my first mistake, the knight heads were to far away from the keel and thus had to be removed and moved closer to the center false keel.


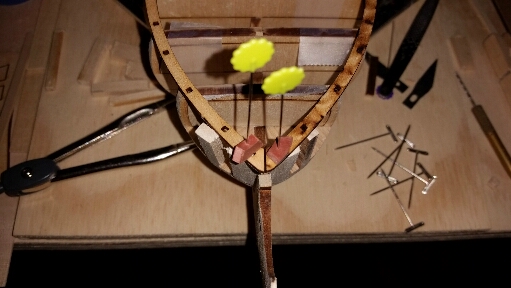
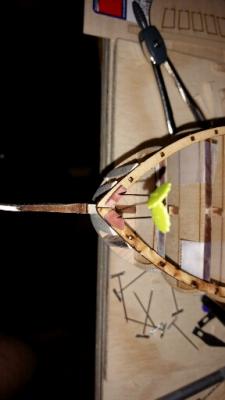
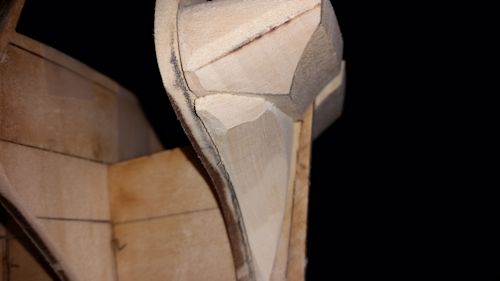
here I took Jpetts advice and pinned the forcatle covering board to find alignment . Now one thing I am going to have to figure out is my Knightsheads are to big to fit through the piece, so I am thinking I will have to make it and then glue it to the top of the beefy Knightshead I have in there. Im not overly upset as this area will be covered by planking and trim work. But I may need to be more careful as I would like my finished product to be stained. I would hate to have to paint this ship because I have to hide mistakes. Only time and the Lord knows.
-
Thanks Scott,
Today I installed the rest of the stern and shaped the counter to fit the windows,
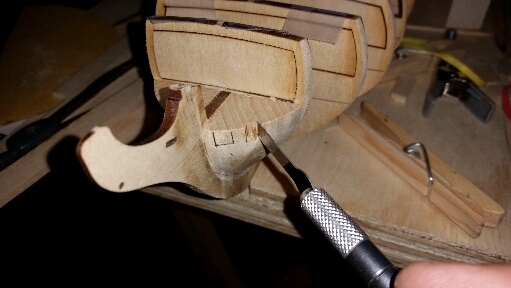
But I ran into a problem with the Knight head and timber head , none of the directions are clear and I have already cut the notches out of the bow fillers. Is the forecastle and deck rail supposed to fit up against the knight head?
Im looking around to other Rattlesnake build logs to see if anyone else had this issue.
In His dust kenny
-
Yea Scott I have been doing just that , although I am finding that the Rabbet from the directions is a little unclear as to its purpose. I mean by that , that the bevel is not what the directions convey, or maybe I just didn't understand them clear enough . I often wonder if the difficulty is based upon the vagueness of the directions and not upon the skill required to build .
I will post some more pics tonight with how the stern filler came out all sanded up . I looked at your build Jpett and others to see how you resolved the flow of the planks to the stern. Im looking forward to seeing how my understanding plays out .
Now on to the next step , what are your recommendations?
In His dust kenny

-
Ok boys , the past week has been a busy one , new bay window in the house , barn half ripped apart and a deer hanging in the tree makes for a very busy week. But I have had some time to work on the old Rattlesnake.
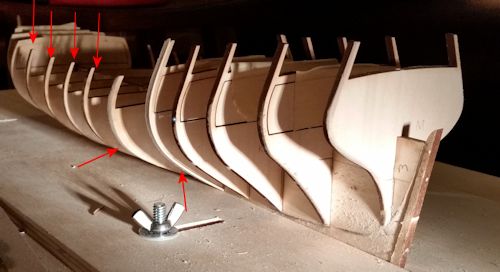
Well ships log for this week has been a refining of the trueness of the hull. I have had to add some shims to a few bulkheads; I have to say I am very happy with the results.If you look closely you will see the added shims .

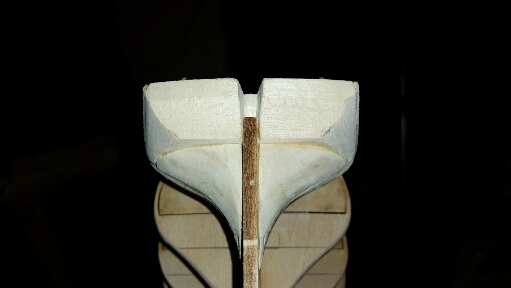
So on to the next step, the bow fillers and the stern fillers.
Here are the bow fillers ,
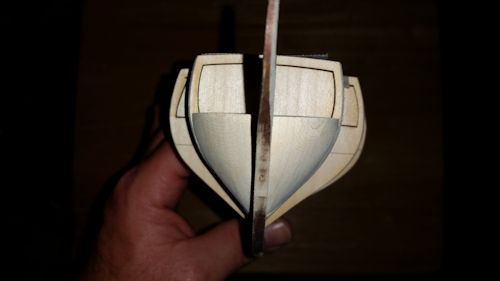
Now the stern fillers presented a little more fineness,I started out getting the basic shape
The I looked at the blueprints to fine tune but ran into a small problem
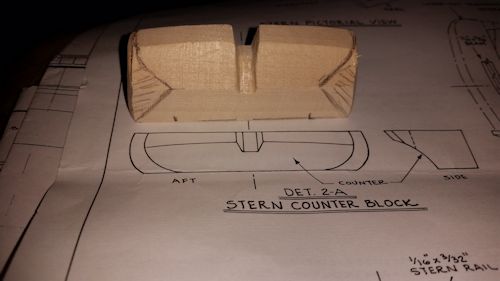
Here I had to add shims in order to make the curve of the last bulk head

Now just working on some more fine tuning to see how the planking flows to the rabbit
This ends the Ships log for week ending October 25 2014
- JPett, Kenneth Powell and GuntherMT
-
3
-
Lol no Farbieness here myfriend! So many nights around a camp fire on some distant battlefield discussing "stitches" or the lack thereof.
:-)
-
Ah love the pun Jpett
Is that better Jerry ?
In his dust kenny
-
Wow love the Jenga blocks Idea, I looked hard at this ship along with the Niagara and settled on the Rattle snake. I hope you enjoy this build as much and if not more than your first. God bless
In His dust Kenny
-
Thanks Scott,
I placed arrows upon the pic to show what can be found by this method, A side not you can do this to a hull that has already been completed and see the same results. The light will show high spots and the shadows low spots. One cool thing I think my work here for planking is shadowing the hull as you sand to see any missed areas to touch or fill.
Of course in these pictures they are stills so the total effect of this procedure is lacking but if you move the light back and forth up and down you can use light references to get a better picture of how your hull looks.
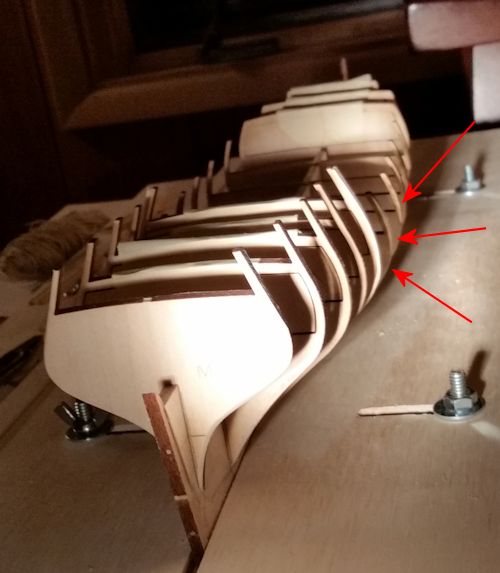
Here is the Port view from the stern, Notice the arrow pointing to bulkhead H , if you notice there is more light shining upon the bulkhead than the bulkhead before or after , this would indicate the bulkhead needs more sanding or realignment. The four arrows from the top indicate what the light should naturally be on bulk heads that are true.
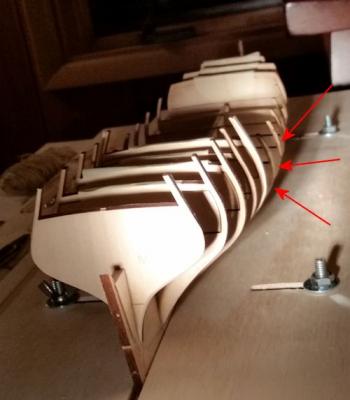
This pic is the starboard side from the stern, Notice the same bulkhead has no light shinning upon it , that would indicate the bulkhead is not center aligned . This was the bulk head I realized was misaligned and thus caused me a problem after gluing/
Hope this answers the question for yea Scott.
In His dust Kenny
- GuntherMT, mtaylor and Kenneth Powell
-
3
-
Great Job Scott on this build, i stayed up until 2am last night reading through the whole thing. I was blessed that you commented on a few things i was curious about. One thing that still puzzles me though, where do you find the messurement for the whale line? Im sure i will find out with further reading, but if i ask then i can check that off my list and think on new things.
In His dust Kenny
-
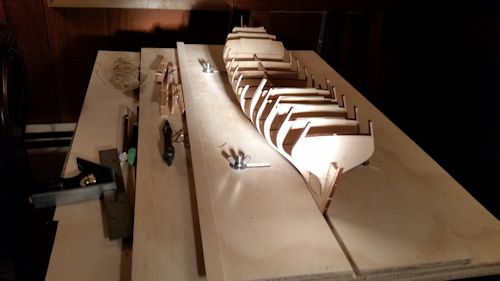
Thanks Kenneth , I did spend a considerable amount of time making sure the bulkheads were as true as I could make them ....... and then!

So here a few pics of my process of making sure I have my bulk heads looking nice , One thing I used to say to customers was if you wanted perfect you should have gone with plastic and not wood. I enjoy the imperfections in wood I think it adds to the beauty of Gods creation. So to when it comes to woodworking , little imperfections give the piece character. So while I am doing this build I am not looking for absolute perfection, its OK if little wobbles and bobbles come up as long as they do not stick out like a sore thumb.
I must say this is contrary to my personality, I like to have cuts and joints perfect but what I found was I was driving myself crazy to attain that perfection. I learned this the hard way in my construction business when I spent a considerable amount of time on a cherry bathroom only to have the person not notice. Now on to the build...
Here using a string to check the flow of the hull lines is useful
Here is a old sheet rock trick , run a light down the side to see the shadows and a misaligned line will show out like a sore thumb
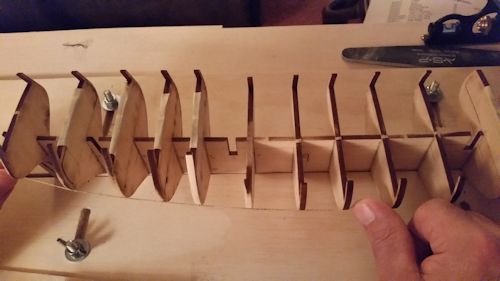
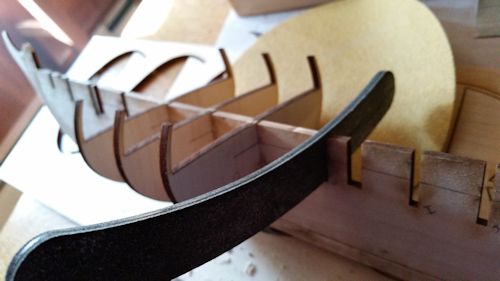
These next few pictures are all the bulkheads placed together on a single piece of scrap, when they are together you can check them for center and flow with the others.
Bow to midship
Midship to stern
Keel alignment looks nice
Poop deck looks nicely aligned
The one bulk head that caused me problems with center I needed to center on the Upper keel and then glue on square scrap to make sure I had center when glueing.
Little did i know when I glued all these finally to the keel last night , I woke this morning to find that one ,Bulk head H had shifted while the glue dried. I thought about making a new piece and cutting out the old one , but alas the old adage came back to mind , If I wanted perfect I should have went with plastic. In the end I decided taking out the glued one may cause more problems than if I sanded it a little, It was the right decision and it looks great now!

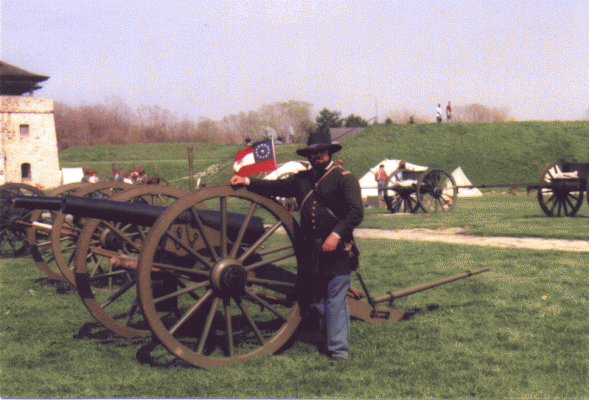
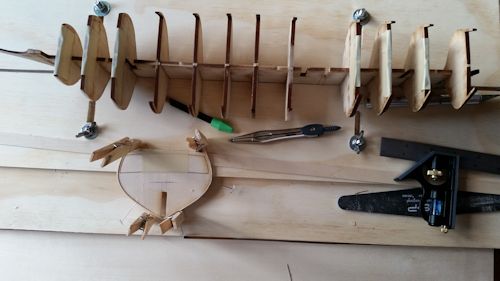
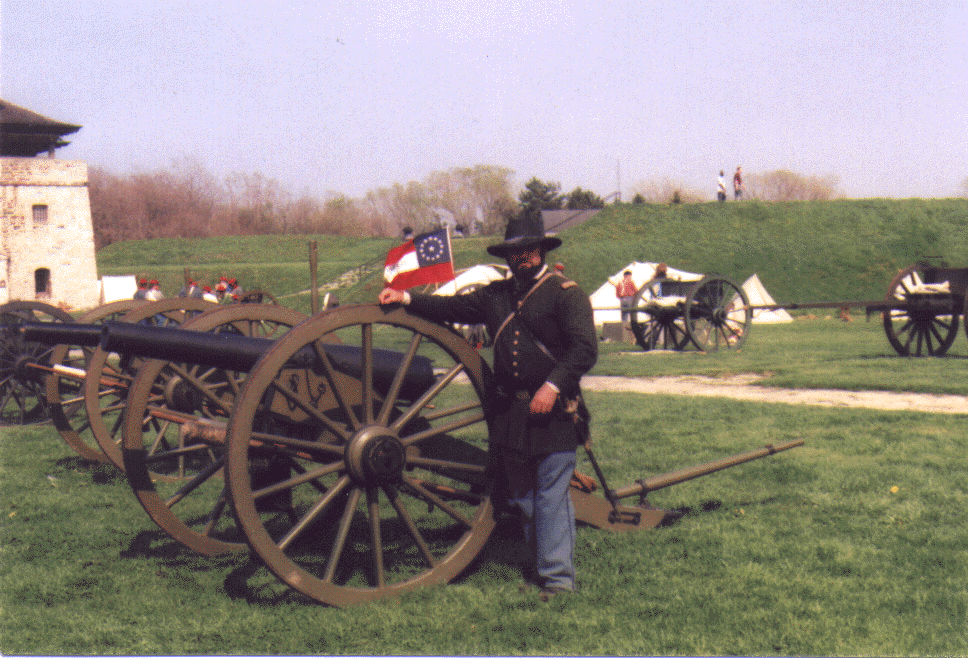
While the bulkheads were drying I decided to work on some guns, all those years of Civil war reenacting I always knew I would one day own my own 6 lber. But I never knew it would be so small.

Me, training on a 6lb James rifle in Ft Niagara school of the piece.
This week I am also working on putting a new bay window in the living room, and working on rebuilding a neighbors Barn , so the wood chips are really flying.
In His dust Kenny

-
This is an amazing build, im not sure which i will pick next this one the victory or the vasa, but i have my hands full right now with the Rattelsnake. Your build is truly inspiring. GREAT JOB!
IN His dustKenny
-
This is an amazing build, im not sure which i will pick next this one the victory or the vasa, but i have my hands full right now with the Rattelsnake. Your build is truly inspiring. GREAT JOB!
IN His dustKenny
-
Ok so i do have two questions that i have been thinking about this week.
First is i notice the plans on this ship call for a tiller and not a wheel, although i know from history a vessel of this size did not usually have a tiller. Any thoughts ?
Second, i notice on my bulkheades the deck lines line up great, a little sanding is needed to follow the shape of the keel, however they all evenly lay about 2 mm above the false keel, do any of you recomend taking them all the way down to the center line of the keel? I didnt think this was necessary as , so far as i can tell this centerline is covered up anyhow.
Oh and another question just popped in my head, i noticed on scotts build that he was leveling the decks to level, shouldnt they be trued to hull?
Thanks for the help in advance
In His dust Kenny
-
First of all I want to thank all of you for the reply’s and heads up on some potential problems. I enjoyed looking through some of the other Rattlesnake builds and found some very valuable information.
Yes ScottRC, we did make a trip to Sally’s nail supplies for some new tools this week , I never would have thought I would be excited to spend more time in the nail salon supply store.
Thanks MOG and Jpett for the heads up on the bulkheads, your information made me go back and take a closer look at the bulkheads and I did find one that was misaligned and not center. I could have shimmed the one side and been done with it but found that caused a hull flow problem . It looked a little pregnant on the one side at this bulkhead. Just so happens it was bulkhead I that was wrong. I will show how I remedied it.
Kenneth, I laughed when I first saw you and Mog, Jpett talking about breaking these bulkheads as I though How rough can these guys be on their models , then I snapped off the Bulkhead/mast piece on the false keel and quickly understood where you guys were coming from.
Mog, I am looking into picking up those books, Barns and Nobles didn’t even hear of them , so off to amazon I go !
Oh and here is something I thought you guys may like to listen to when working on your models .
https://www.youtube.com/watch?v=rfeEY71r9Vc
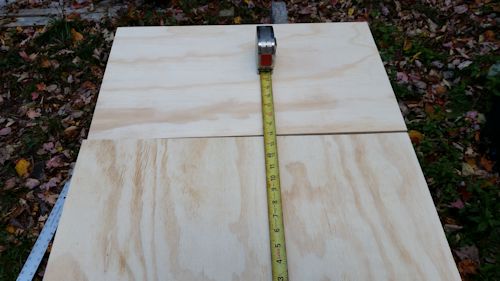
The week started off very busy and it wasn’t until late Thursday night that I finally got to work on the work station. I purchased 2 2X2X3/8 ply with finished side for $6 each, I then cut them to 14 inches by 24 with the grain going in perpendicular to each other.

The extra pieces are for doing the planking, the points will hold the Hull upside down, I built this jig for the future models and it will hold up to a 24" flat keel. I also wanted a jig wide enough o protect the Bowsprint during rigging.
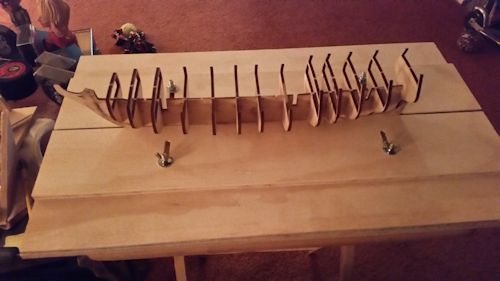
I then made 2 pieces 24x4 inch pieces to serve as the vice. Making sure the touching edges ran true and straight are very important for a plum keel.
Ok something I found is that the laser cut pieces are beveled toward the laser side and placing them with the bevel pointing toward the bow or stern respectively will aid in truing the hull.
After many measurements, centering the bulkhead I found the only option left was to shim both sides and file them back down to being true to the hull line.
Yes I did take the advise of Jpett, and MOg and tapped back in the cutouts.
I used another technique from my construction days that helped a lot in this area.
I took a flash light and shined it down the hull length wise to see if the bulkheads were even. I will show pics next week of that .
This completes the Build log for week ending ,10/11/2014 now off to see the Opening night Binghamton Senators Hockey game .
In His dust Kenny
- VonHoldinghausen, justsayrow, JPett and 4 others
-
7
-
Thank you J.Pett,
I am please you recognize the reference to my signature.I am currently working on finishing my Masters degree at Baptist Bible college and you would be amazed how many other students do not understand the reference.

I'm curious what issues you had with the bulkheads? I have them all in place and aligned but not glued. I like to make sure everything fits in an area like this before gluing it fast.
As for a jig, I already have one in the works , so I guess great minds think alike
 .
.In His dust Kenny
-
Thanks J.Pett,
Right now I'm working on posting Pictures of my first few steps. I looked through your build and see that Model ship ways has changed the kit. My version is the 2010. I really like the picture over lay you posted and though it a wonderful way to represent the next steps .
As for my build I over the years used some unconventional tools and short cuts to help in the building process.
In His dust Kenny
-
This is a build log of my progression through the Model ship ways Rattlesnake kit.
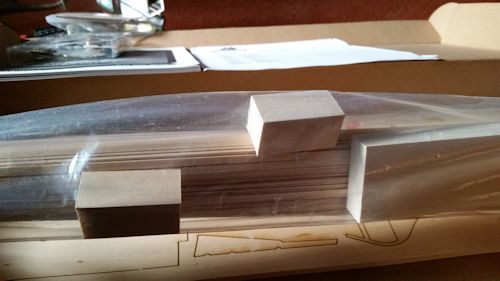
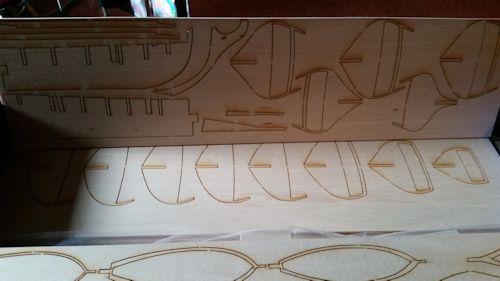
The beginning, Opening the kit,

Nicely Packaged,
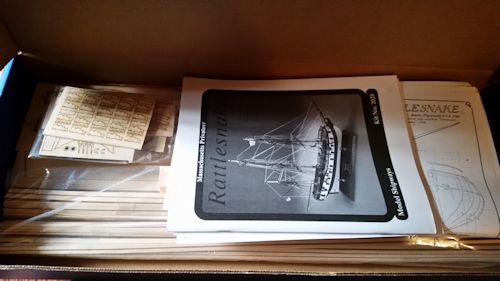
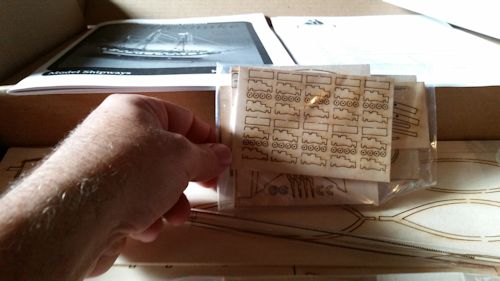
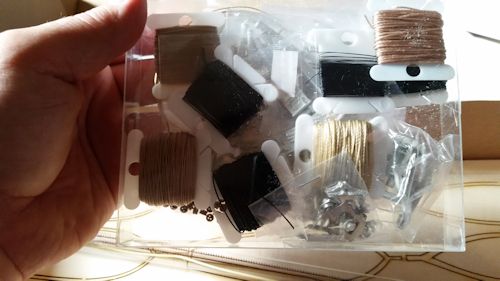
Laser Cut Pieces,My first time experience with these, I found the laser side was a tiny bit more beveled than the finished side.Cuts are very precise. Even though they are precise, some adjustments to the pieces may be needed .
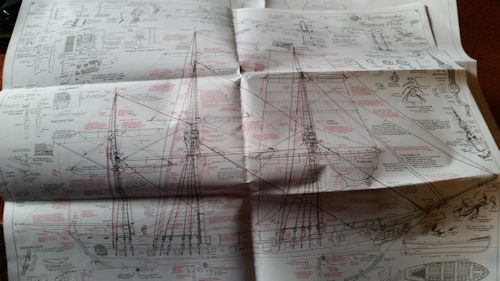
The Blue prints are fantastic! and to scale, However the directions do assume your are at the Intermediate level of experience with some decent knowledge of ship design and woodworking experience.
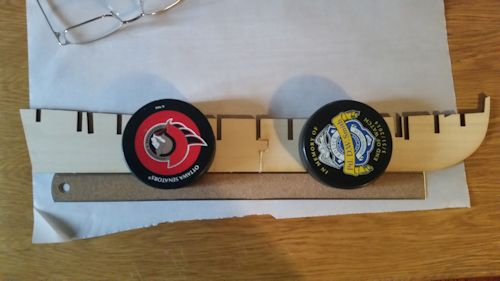
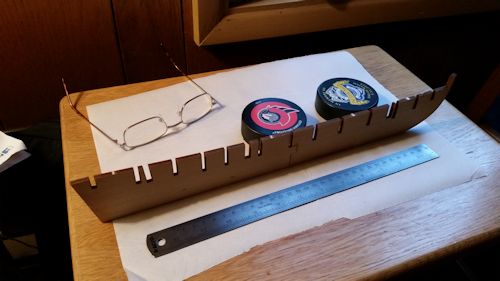
On to the Build , Gluing the Keel . This is singly the hardest part of any project for some. The beginning step, I have found jumping in with both feet to be the best way to start, you may make mistakes, but there is no better way to learn than to make a mistake. Besides one of the fantastic parts of building a Model ship way project is they will replace any part you break or mess up . Often using things you have around the house helps during the assembly process. Yup those are Hockey pucks . I am a HUGE, yup almost obsessive Binghamton Senators hockey fan and by extension an Ottawa senators fan .
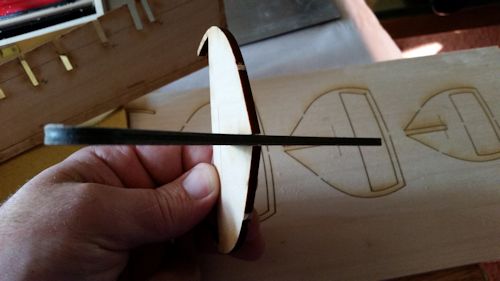
A straight metal edge is always useful when looking for plum.
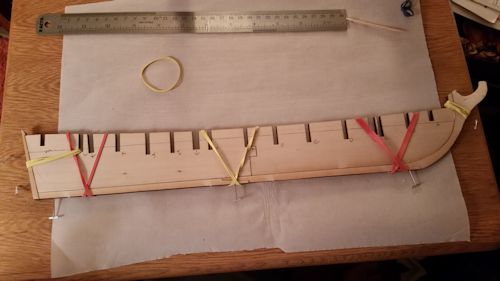
Using my wife's Nail jewelry drill to pilot hole and pin with t-pins for precise alignment of Keel while glue sets.Rubber bands are very helpful to vise these peices, But a word of caution, ( do not make them tooo tight as they will twist the pieces away from plum)
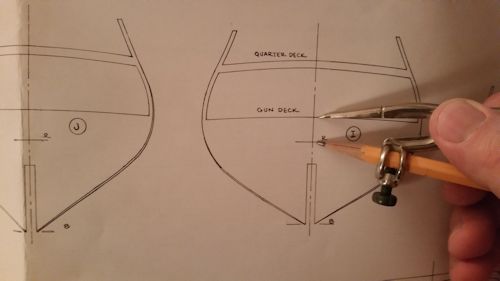
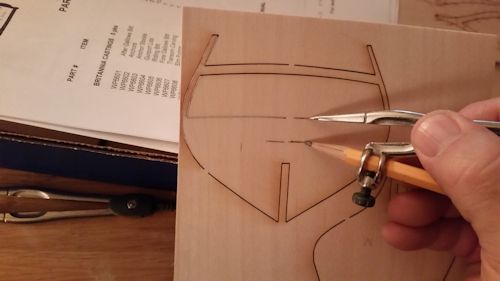
While the Glue on the Keel is drying lets move on to marking the reference points on the bulkheads. using a pencil compass find the distance on the blue prints and transfer that distance to the bulkhead while still in the laser cut template, this is for two reasons , 1st, you use the lines made by the laser as a guide for your compass. 2nd,it allows you to measure for precision before you cut.
Old woodworking commandment " measure twice, cut once" lastly use a straight edge and a pin caliper to double check plum.
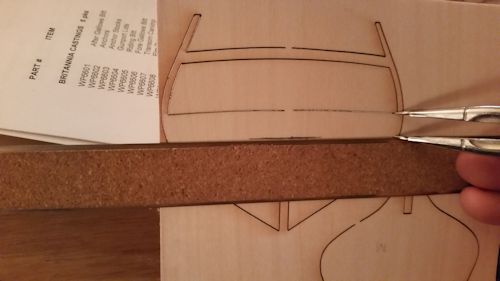
Lastly for this step , Using my wife's nail file sand the bulkheads and the Keel , dadoes to align before gluing .The nail file is flexible, however a little sand paper may be needed to fit the file in the space.
Build log for the week ending 10/4/2014
Rattlesnake/Cormorant 1780 by RevKB - Model Shipways - 1/64
in - Kit build logs for subjects built from 1751 - 1800
Posted · Edited by RevKB
Howdy All, I have had a busy few weeks here, Bow Hunting season has rolled around and the Lord has blessed me with two ample does for food this winter. yesterday rifle season opened and our Girls are coming home to hunt so that will be a blast. I have also been crazy busy at the church and working on a repair on a local barn.
Here I am with the corner post and support post in hanging the cross joist.The whole time I was working on it I was imagining working on the ship.
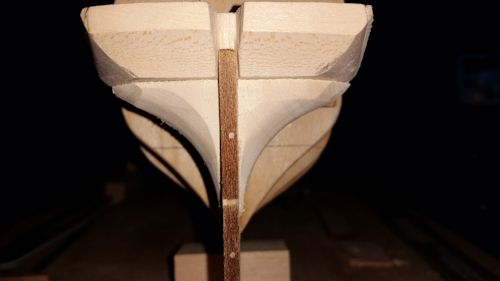
when I have been able to sneak in a few minutes on the old Rattlesnake I have made some good progress. Here are the resent improvements.
Here I soaked down the water boards and held them in place and let them dry, they dried great and held their shape well, making the gluing much easier
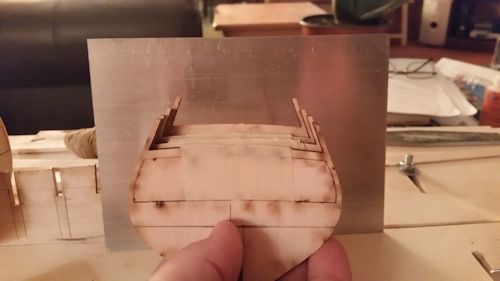
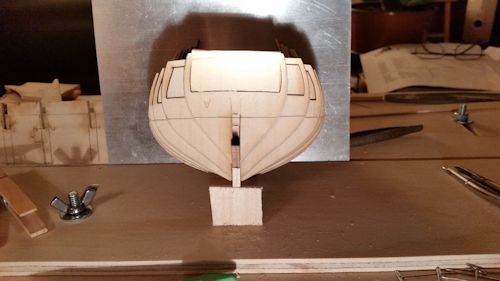
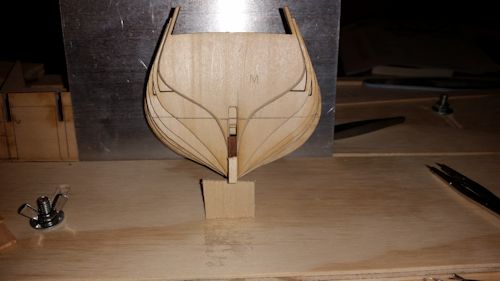
Then I measured the gun and ore ports and cut them and glued them on this piece of aluminum.
when they dried I was able to sand and fit them into position.
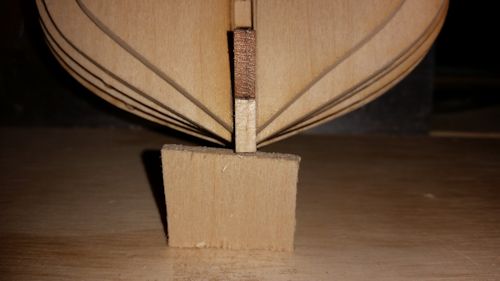
I also added the extra support to the foredeck for the planking .
As of this posting I have completed all of the gun and ore ports and plan on placing at least 1 gun in the captains quarters and maybe even finishing off the captians area so I can leave the gun ports open to see the detail.
As for the over all flow of the ship I am pretty pleased with the hull thus far.
this is my ships log for week ending Nov 15 2014
In His dust RevKB