


wernerweiss
-
Posts
209 -
Joined
-
Last visited
Content Type
Profiles
Forums
Gallery
Events
Everything posted by wernerweiss
-
Hello Harshil, Thank you for the drawing shown in the link, so I have to see that I am wrong, but, as said, it was just an idea. I don' t know if there is a special reason for directing a ladder towards a grating, but ok, it is as it is..... I look forward to your progress with this model..... Werner
-
Hello Harshil, as always very good work! The last picture shows the ladder ending upwards towards the grating as it is shown in the instructions. Regarding this detail, I thought by myself that this would have meant that every man going down or coming up the ladder had to step - or run in case of haste - over the grating. What when the grating was put aside for any reason? So I decided to glue the ladder showing forward instead of aft. Perhaps I am totally wrong..... Greetings Werner
-
Hello Harshil, Glad to see you back here! Greetings and a happy new year! Werner
-
Hello Jeff, looking at the moulding strips above the foremost gun port I am wondering why the run of the moulding strips does not match the run of the planks. Is that intended?
-
Thank you very much!
-
Hallo Jeff, sorry, it seemed to me that the caprails were already glued to the waist pieces....I was wrong. As another builder of the Confederacy I will furtheron follow your build log with interest.... Best regards Werner
-
Generally, imo it is much too early for details like the moulding strips......I would rather FINISH the planking first - hull, inner bulwarks and the decks. Details like the moulding strips (together with the channels) come much later.......
-
Hello Jeff, whenever I can help you.... what I want to say is that the upper molding strip runs just 1/16" lower than you glued it, so that it sits on the outer edge of the lasercut caprail, see picture...
.png.b51721a0d7f7679bf7fb0fda1ddeb711.png)
-
I had a look in the instructions.....yes, the caprails along the waist are not glued before the planking of the inner bulwarks is finished. Concerning the moulding strips I chose a different sequence and glued the moulding strips together with the channels, thus avoiding removing them where the channels are placed.
-
Hello Jeff, Sorry, but it seems to me that the upper moulding strip coming from aft ends ABOVE the level of the caprail, and why did´nt you glue the caprail in the waist first? So you had to interrupt the run of the moulding strip.... Greetings Werner
-
Hello Jeff, Congratulations for your choice! I also built the Confederacy and stained/painted the complete model except the decks which were only sanded. Greetings Werner
-
Hi, it would have been easier to taper the upper fore edge of the stem lying flat on the table - before glueing - to fit the figurehead..... Greetings Werner
-
Hello Bug, thank you very much for your appreciation, and if there will be a build log of your next Confederacy, I will follow with big interest! Werner
- 60 replies
-
- 1
-

-
- Confederacy
- Model Shipways
- (and 1 more)
-
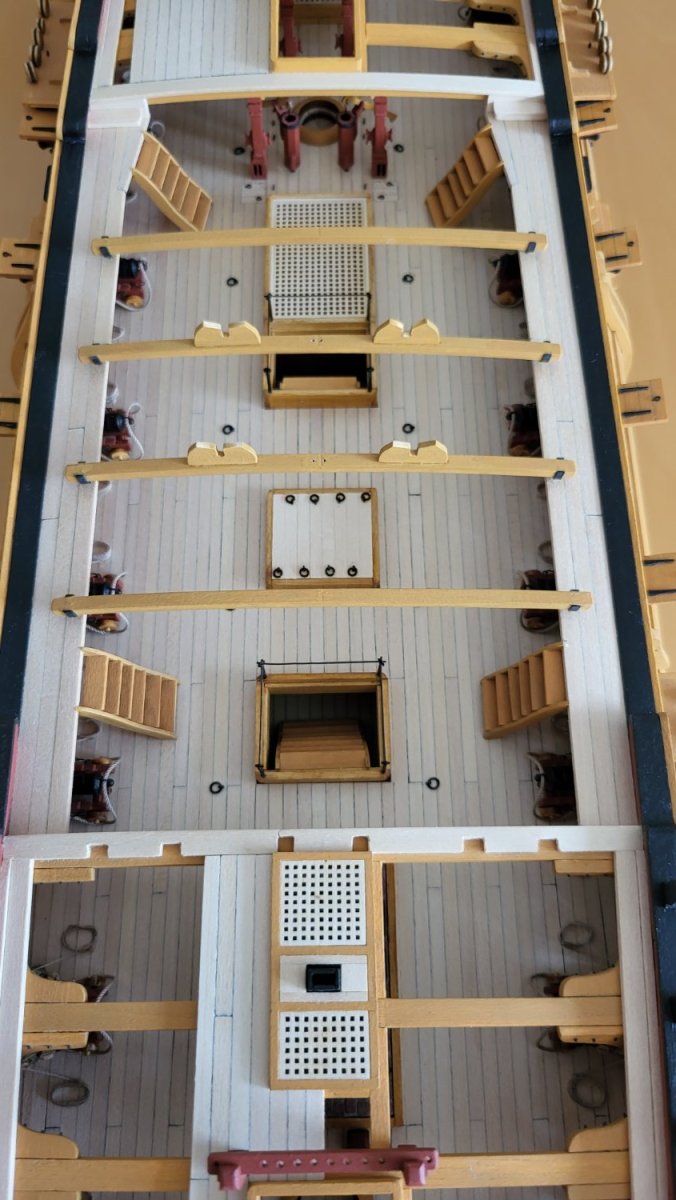
Hi modelers, Meanwhile I took a series of pictures of the finished model, and I just loaded them up into the gallery of finished models. Any remarks, questions and constructive criticism welcome. Thanks to all co-builders of this model who gave me inspiration by following their build logs. Greetings Werner
- 60 replies
-
- 1
-
-
- Confederacy
- Model Shipways
- (and 1 more)
-
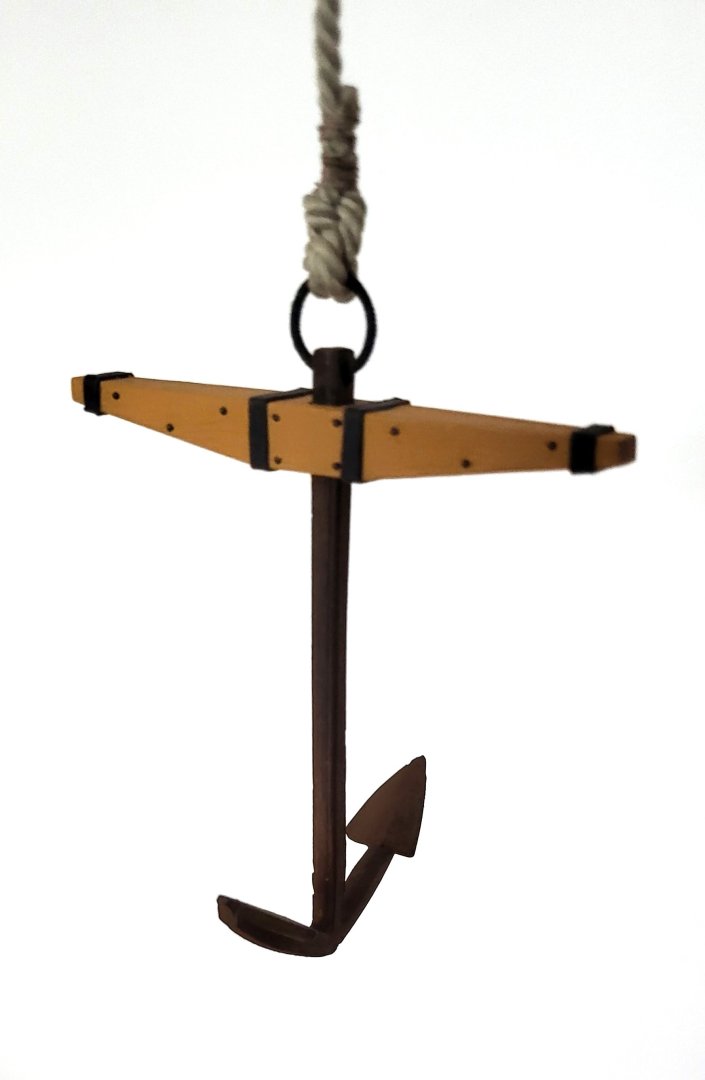
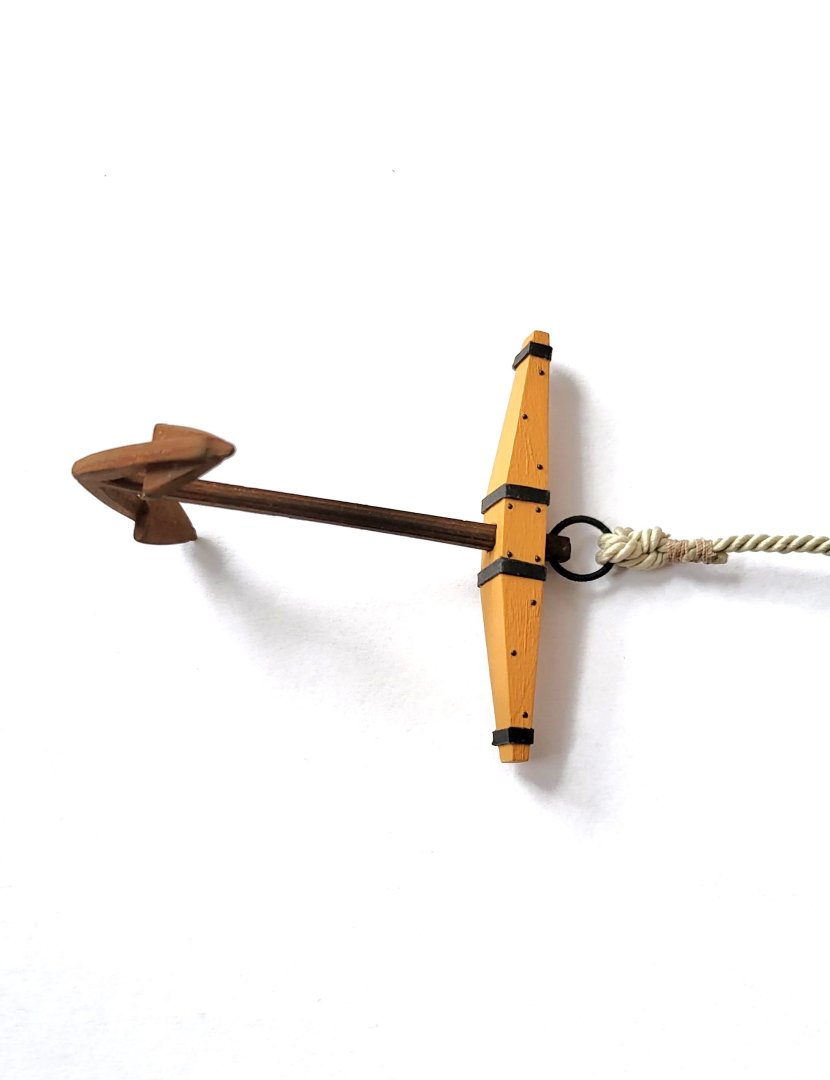
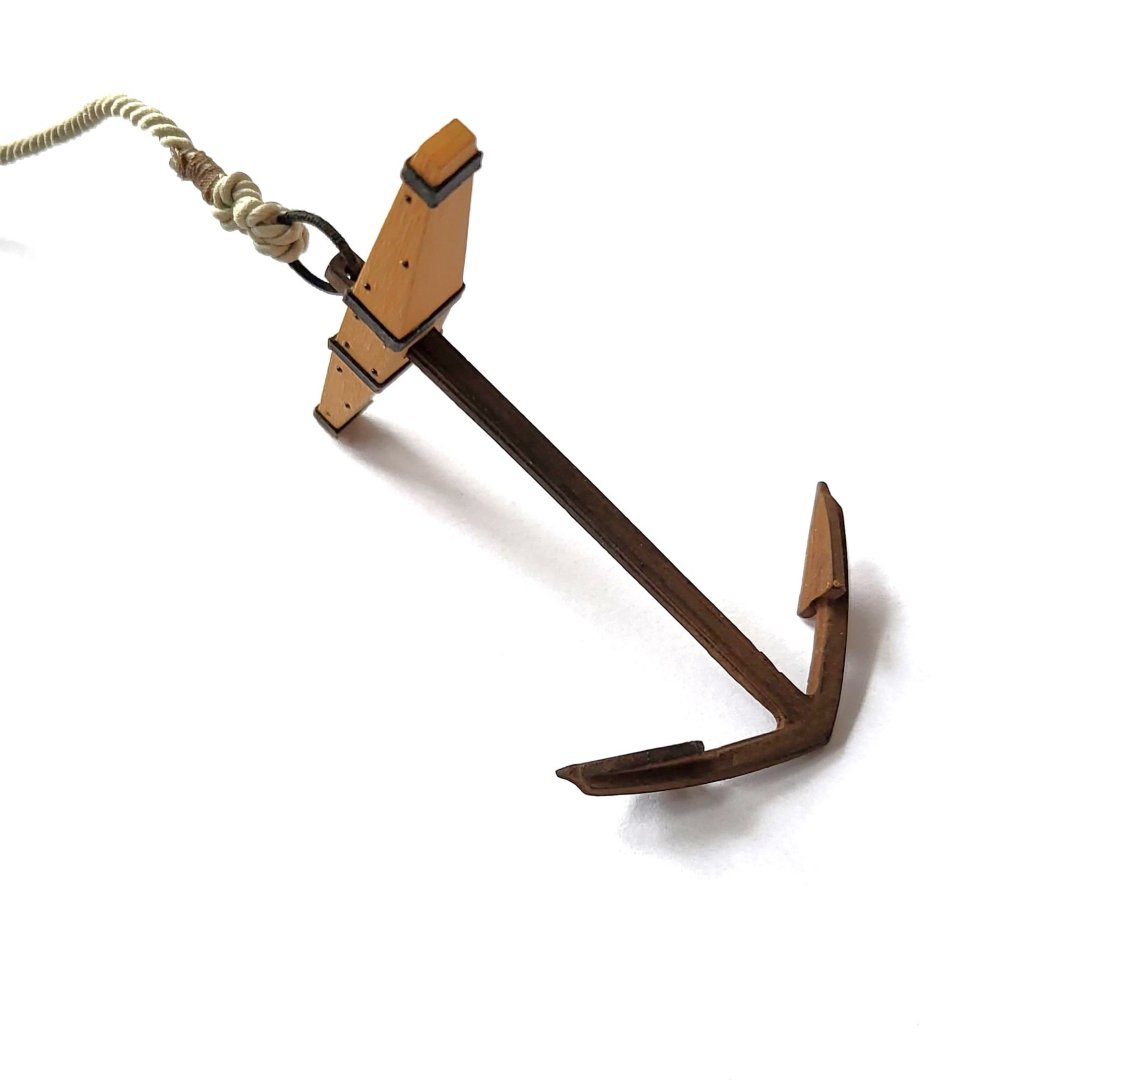
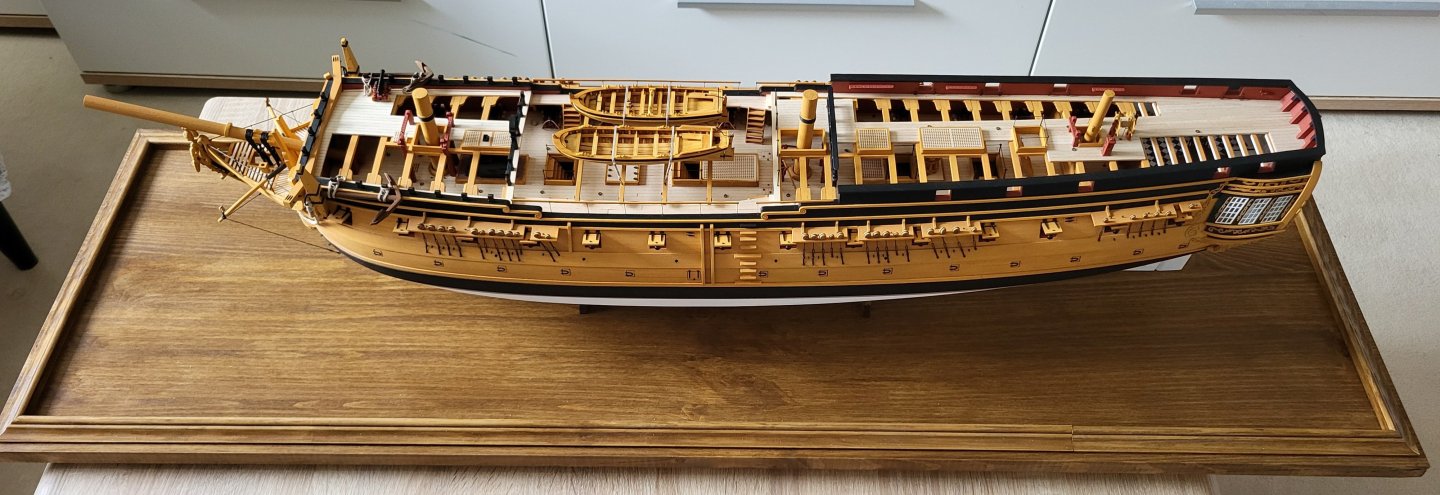
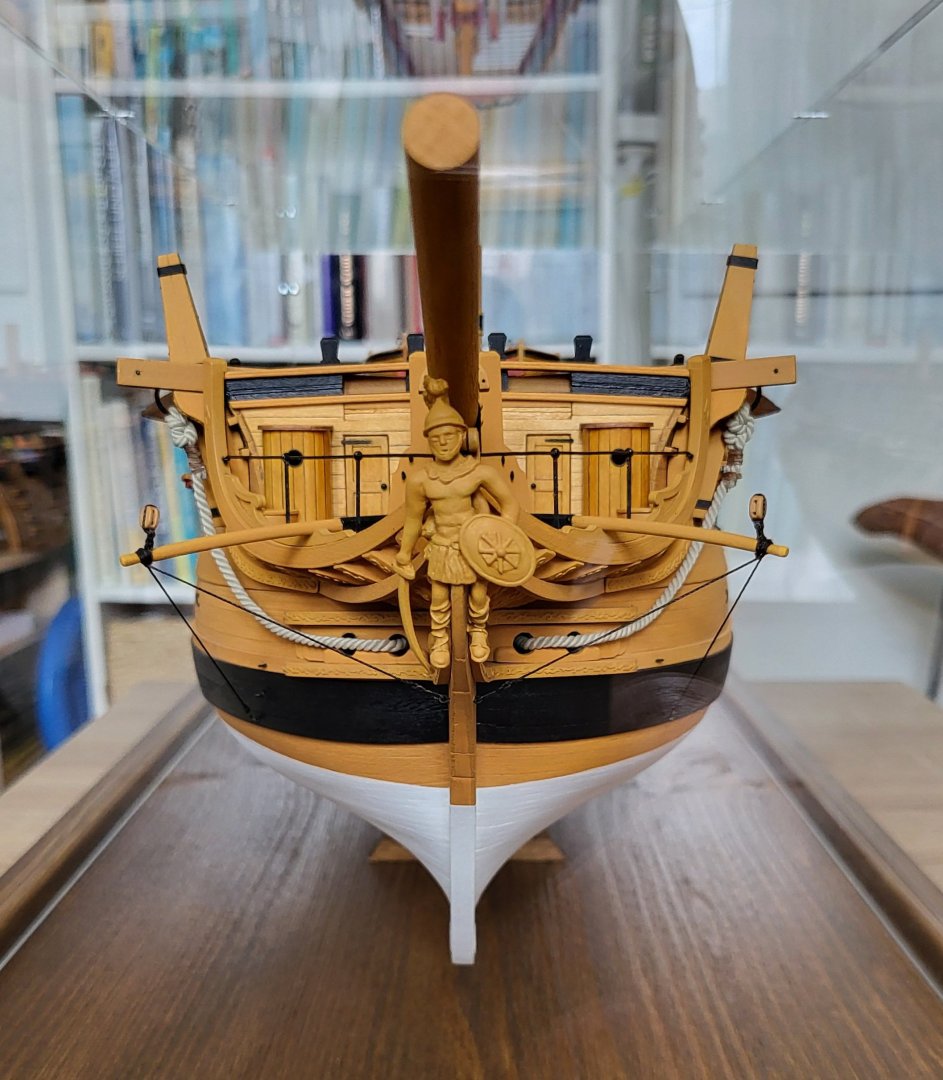
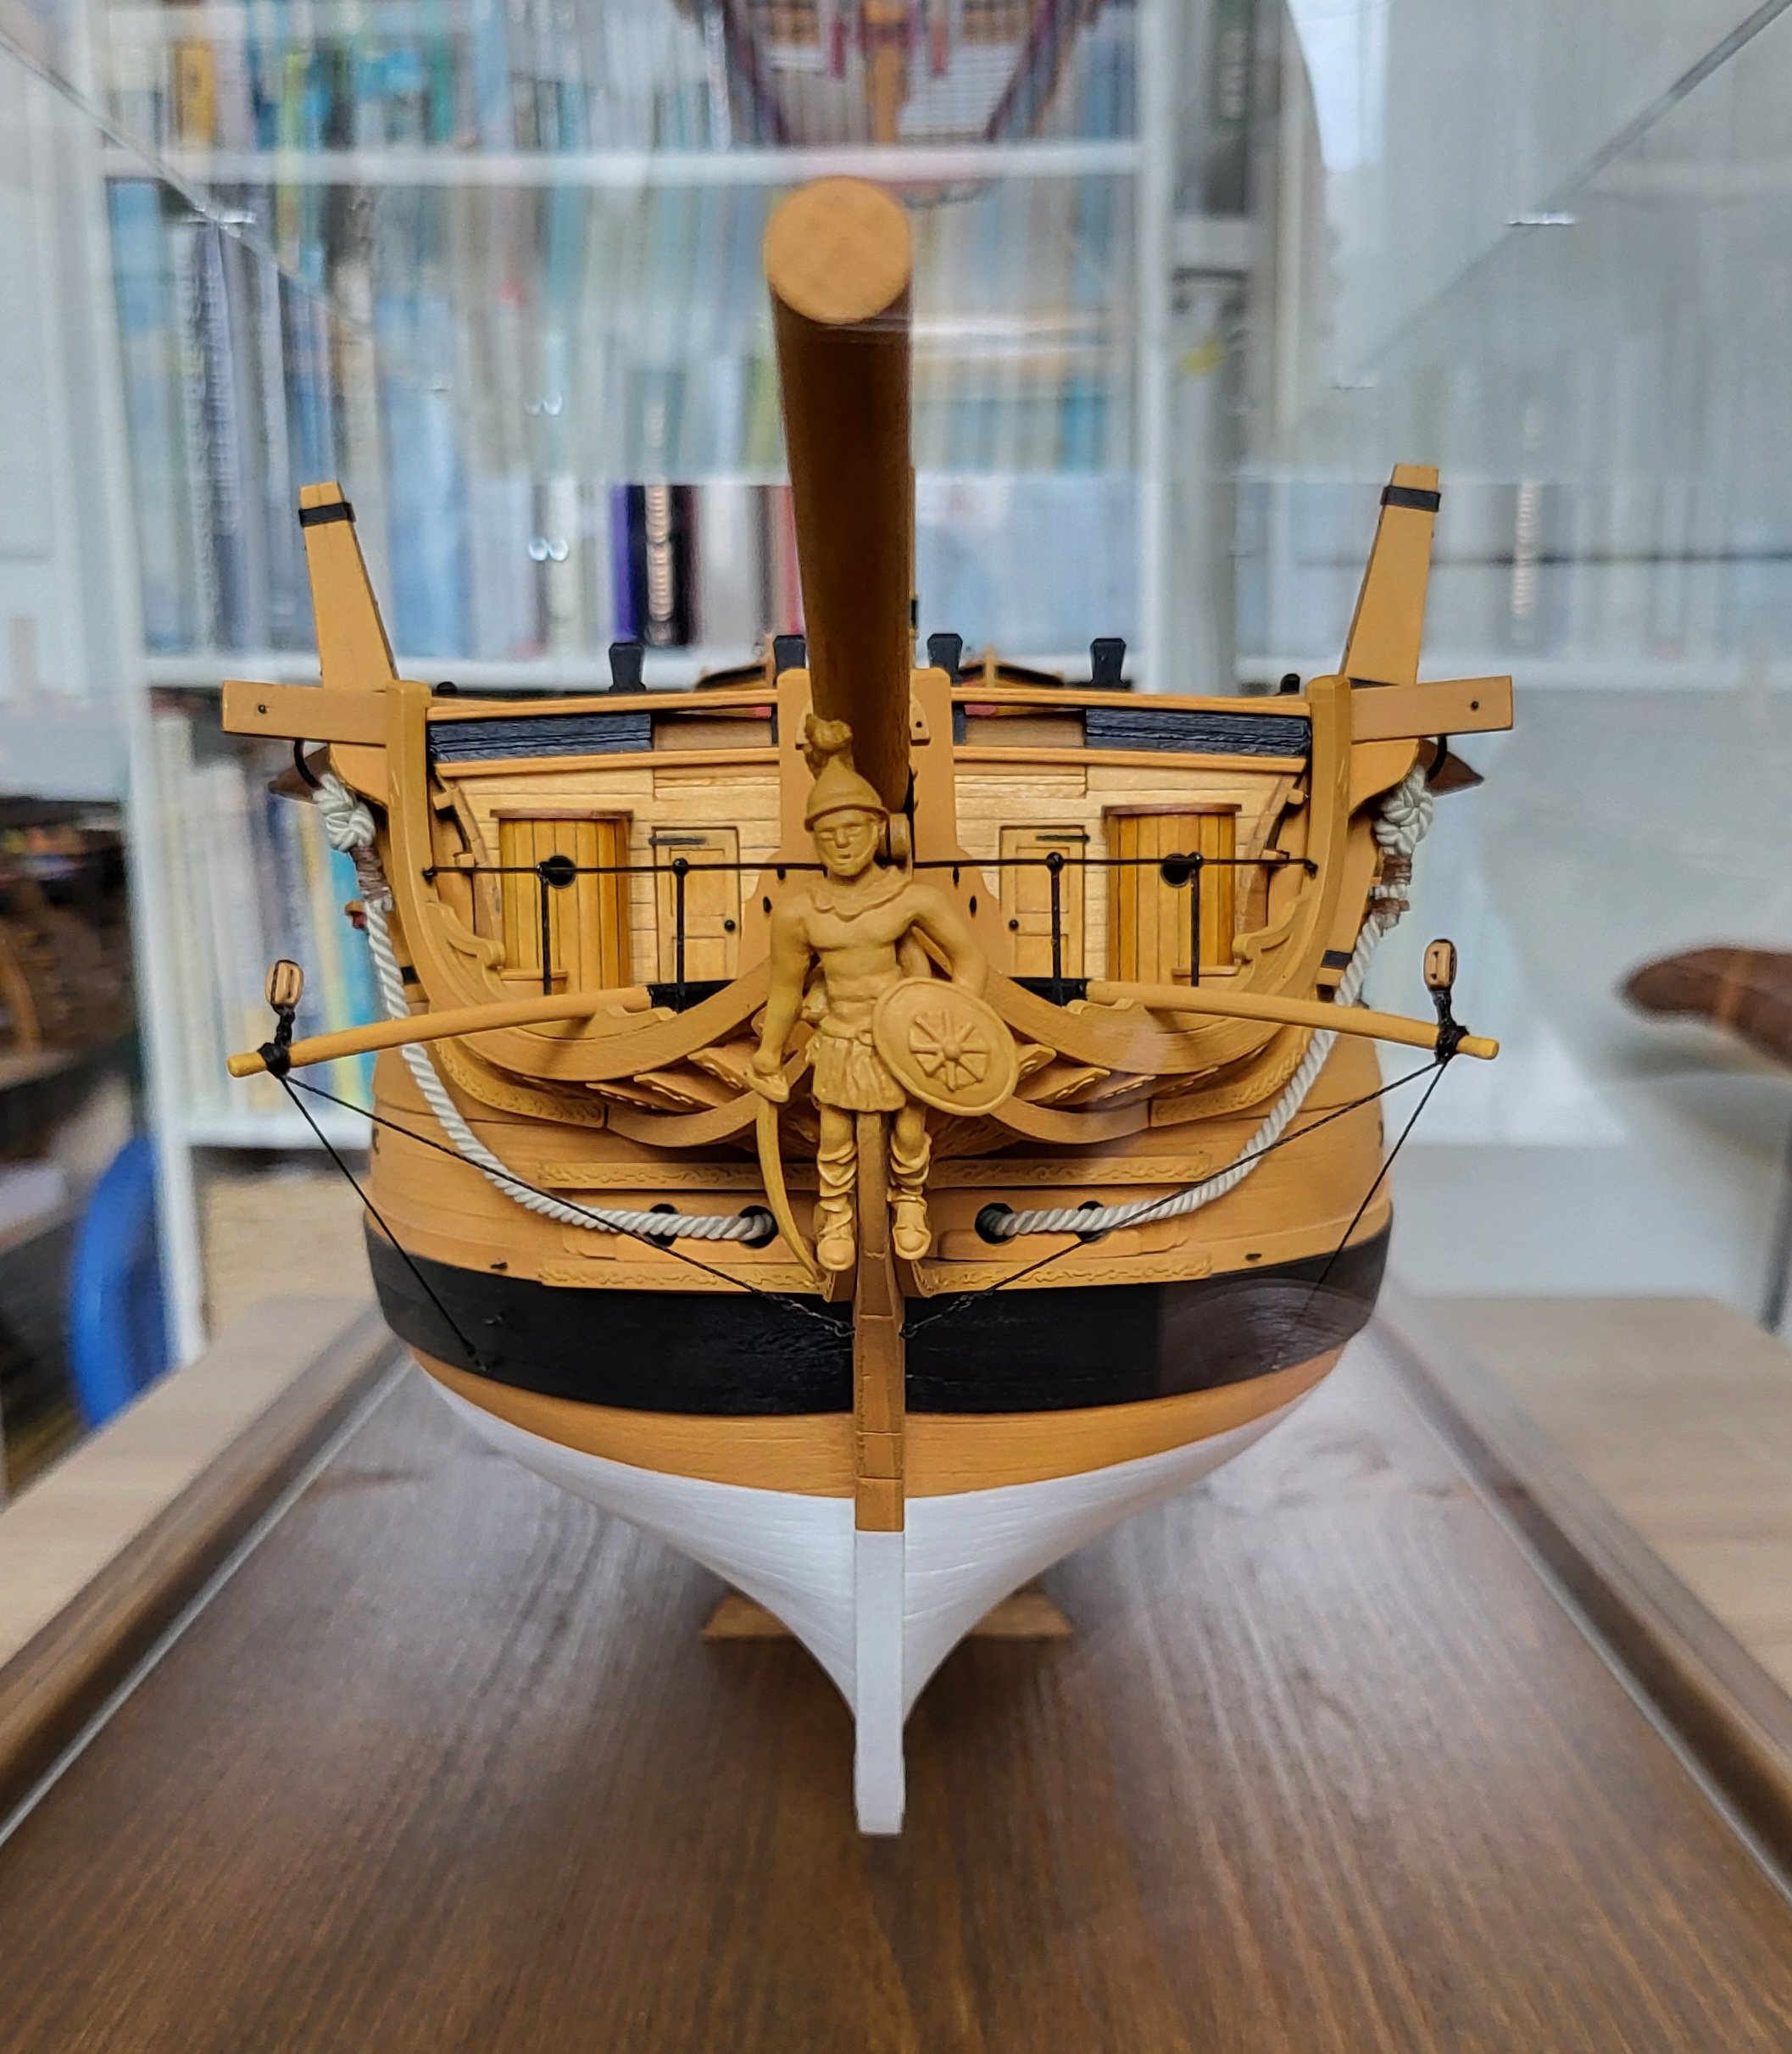
Hi folks, what a birthday present! Just yesterday on my 67th birthday I got my Confederacy FINISHED...... The pictures of the anchor were the last I took from the unfinished model, and in the last days before yesterday there were only some steps left......mounting the rudder, the ship´s boats, the waist rails, the mast stumps, the quarterdeck railings and finally the figurehead as the very last part to be glued in place. Yesterday, the only remaining work was to make some paint touch-ups on the stern decoration figures and the figurehead. What I also meanwhile did was to build the showcase. In the moment I cannot say when I will take the photos for the finished models gallery, but I let you know when it´s done. At least here two pictures as a first impression.... The next model I´m going to build is an AIDA cruiser ship from Revell which was a christmas present from my sons meanwhile a few years ago..... Always happy modelling..... Greetings Werner
- 60 replies
-
- 9
-

-
-
- Confederacy
- Model Shipways
- (and 1 more)
-
I´m convinced it will, take your time .....
-
Hello Kenny, imo there is no alternative to unglue the false deck from the bulkheads and add some spacers.....is it the same on the starboard side? I have had the same problem with some bulkheads, and the opportunity to fix the problem is now, later on no way.....makes the deck planking much easier. Werner
-
Hello Kenny, thank you very much for visiting my build log and your appreciation! Besides mine there are many other build logs here where you can profit from. Greetings Werner
- 60 replies
-
- 2
-
-
- Confederacy
- Model Shipways
- (and 1 more)
-
Hello Kenny, Congratulations to your decision from another Confederacy model builder Greetings Werner https://modelshipworld.com/topic/31187-usf-confederacy-1778-by-wernerweiss-model-shipways-164/#comment-884281
-
Hello Rick, thank you very much for your appreciation! 1. No, I didn´t use any whitewash or special wood at all, I just used the provided 1/8 x 1/16 inch basswood stripes. The only treatment was sanding the deck when finished. 2. As red for the bulwarks (Schanzkleid in german) and deck fittings I used red ochre as recommended by Caldercraft especially for period ships, see the pictures below. It is easy to find when you google.... I hope I could help you Werner
.thumb.png.0e8e411d435443acc7d4fe030cb0718f.png)
.thumb.png.d940d3597d57080a303994aab90eaddc.png)
-
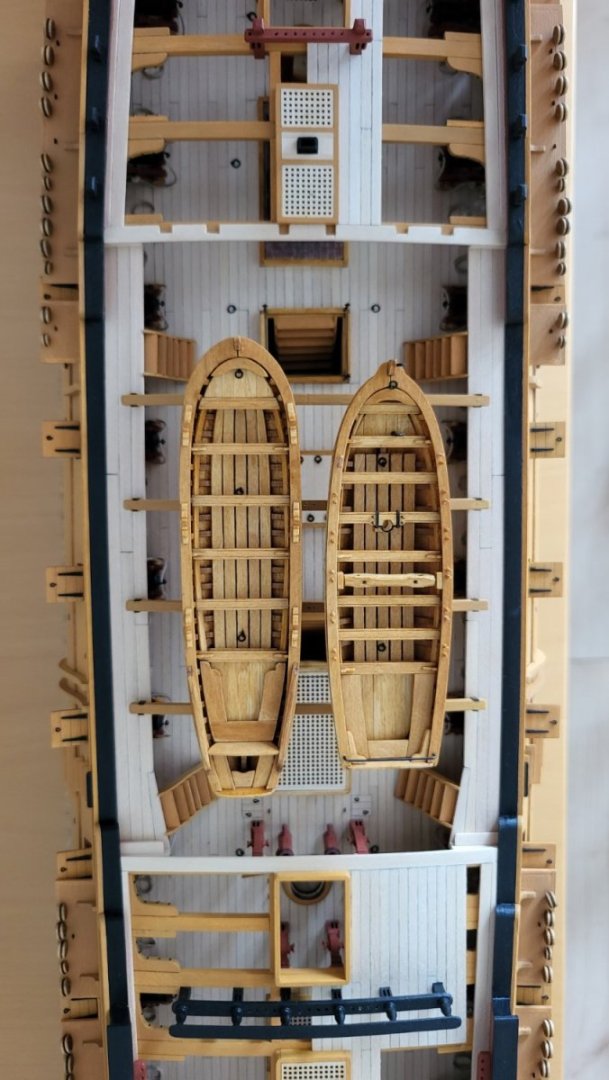
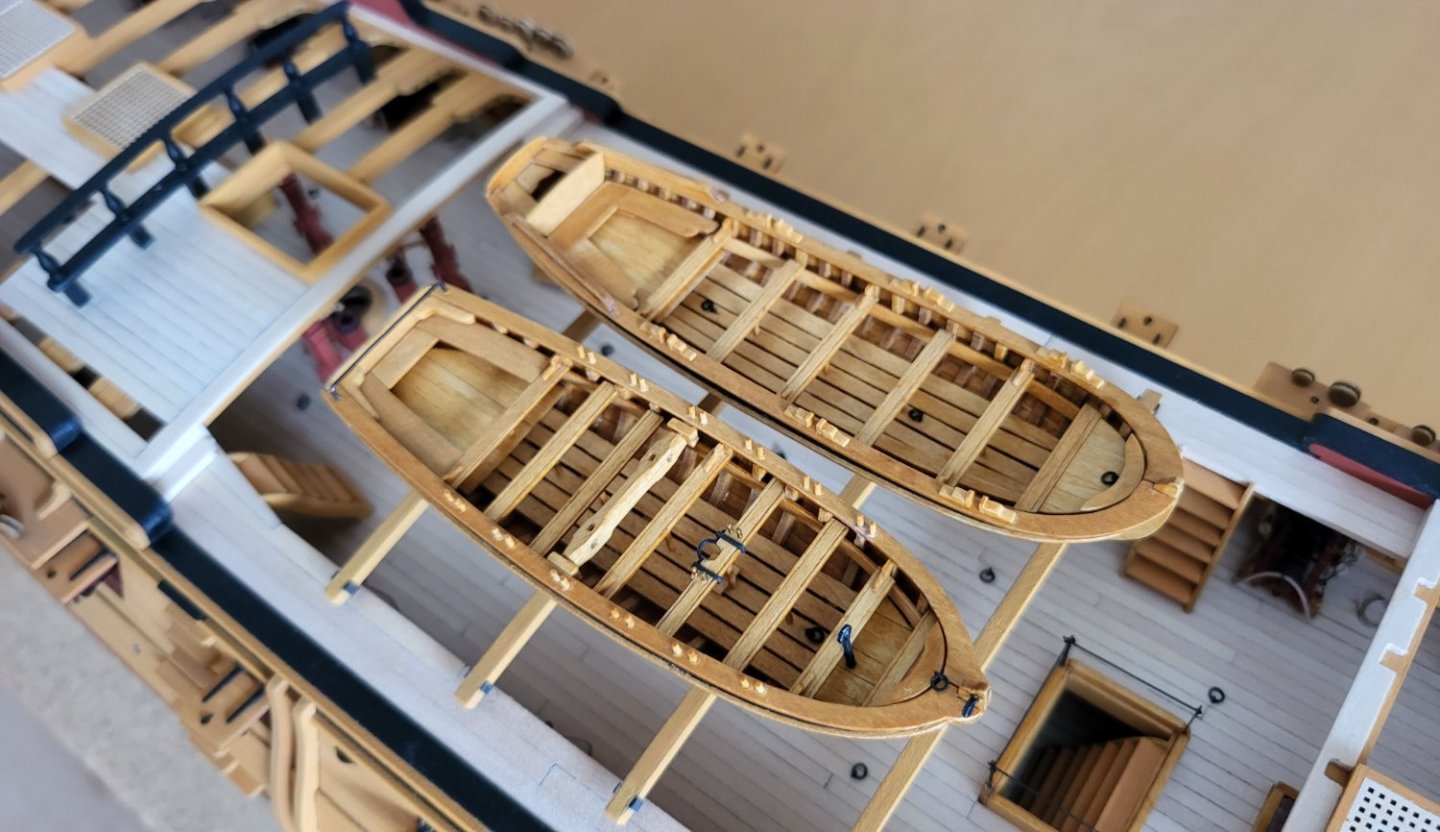
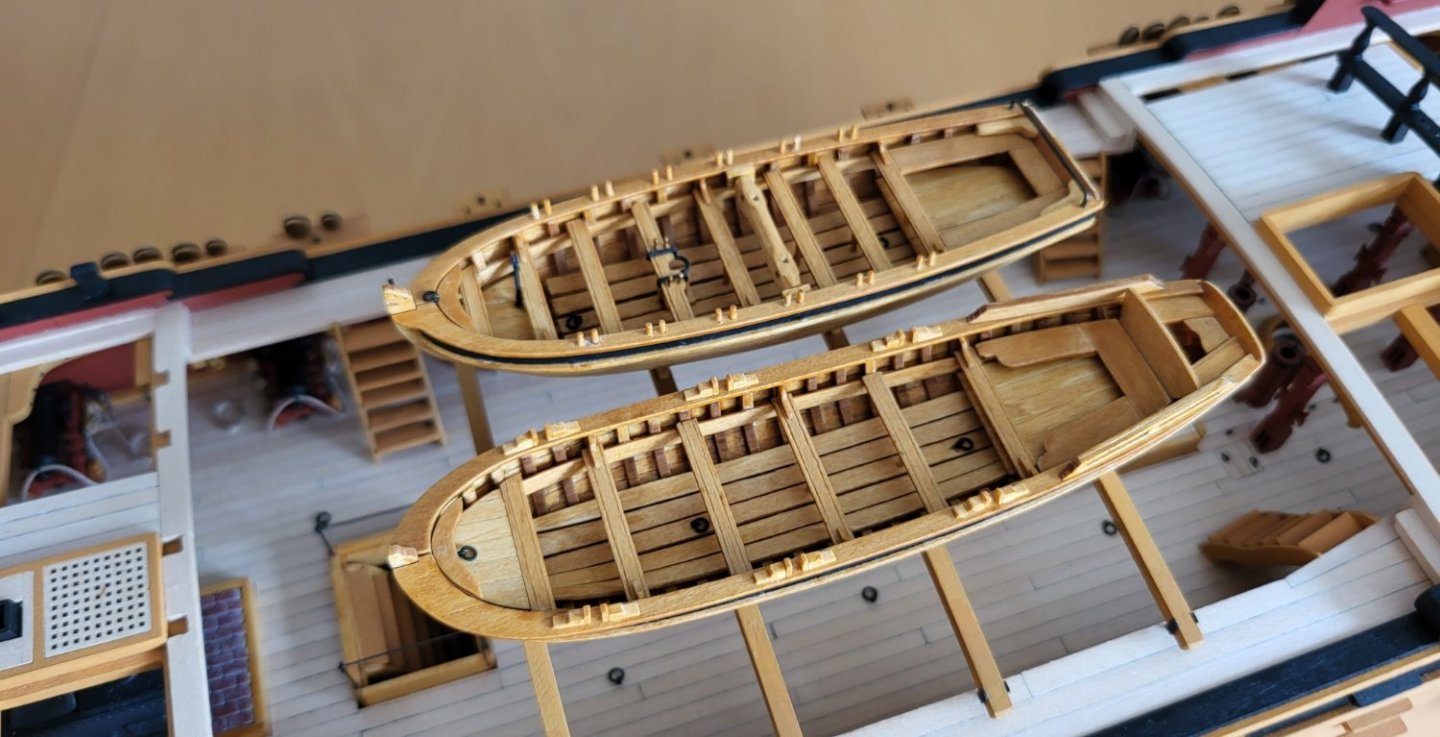
Dear modelers, tomorrow my last post is exactly four months ago, and there is much progress with the model. The ship´s boats were placed only for the photos and are not yet glued. I intend to have the model finished soon, because the next model is waiting.... Comments and questions welcome. Greetings Werner
.thumb.jpg.6cdd2c13b493fd9e153d86ab07c518a9.jpg)
.thumb.jpg.d6009aee4d43df574d1c65571e38d383.jpg)
.thumb.jpg.bc0410777be5eb1943386fbec9af15b8.jpg)
.thumb.jpg.190de58b740d47f280c765f3802d16c5.jpg)
.thumb.jpg.28fcac646a4a41a4935ecadf7a1532ad.jpg)
.thumb.jpg.9b50facb7970a714e5d99c299995b10f.jpg)
.thumb.jpg.22aa5f15644bac188310d7ebd186e46f.jpg)
.thumb.jpg.25efa8bbd4da0ce67a1c33aafff21073.jpg)
.thumb.jpg.5cb3893f69ecb42478fec215e9c71571.jpg)

.thumb.jpg.e92b7166a23e131558f07a3206f305c3.jpg)
.thumb.jpg.e019791e45198efca183a1a0a38a630e.jpg)
.thumb.jpg.b5cdfa6805c2936d8108ce2047363d56.jpg)
.thumb.jpg.3a6aae1e621edd4e71695637250feae7.jpg)
.thumb.jpg.f5b081adc06a01d54ca458588146ca57.jpg)
.thumb.jpg.9d5ac1ec33a218711bd19bd09ab33475.jpg)
- 60 replies
-
- 11
-
-
-
- Confederacy
- Model Shipways
- (and 1 more)
-
Hello Ian, good progress so far.....I myself had not glued the railings at this time. There is still much work to be done on the superstructure, and there is always danger of accidently touching the railings resulting in bending
-
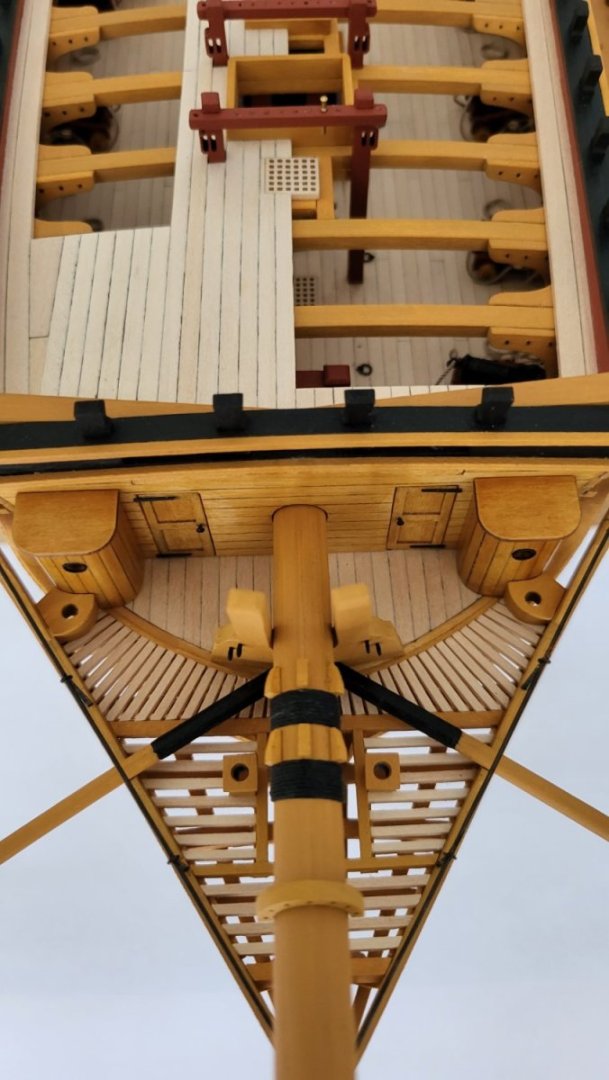
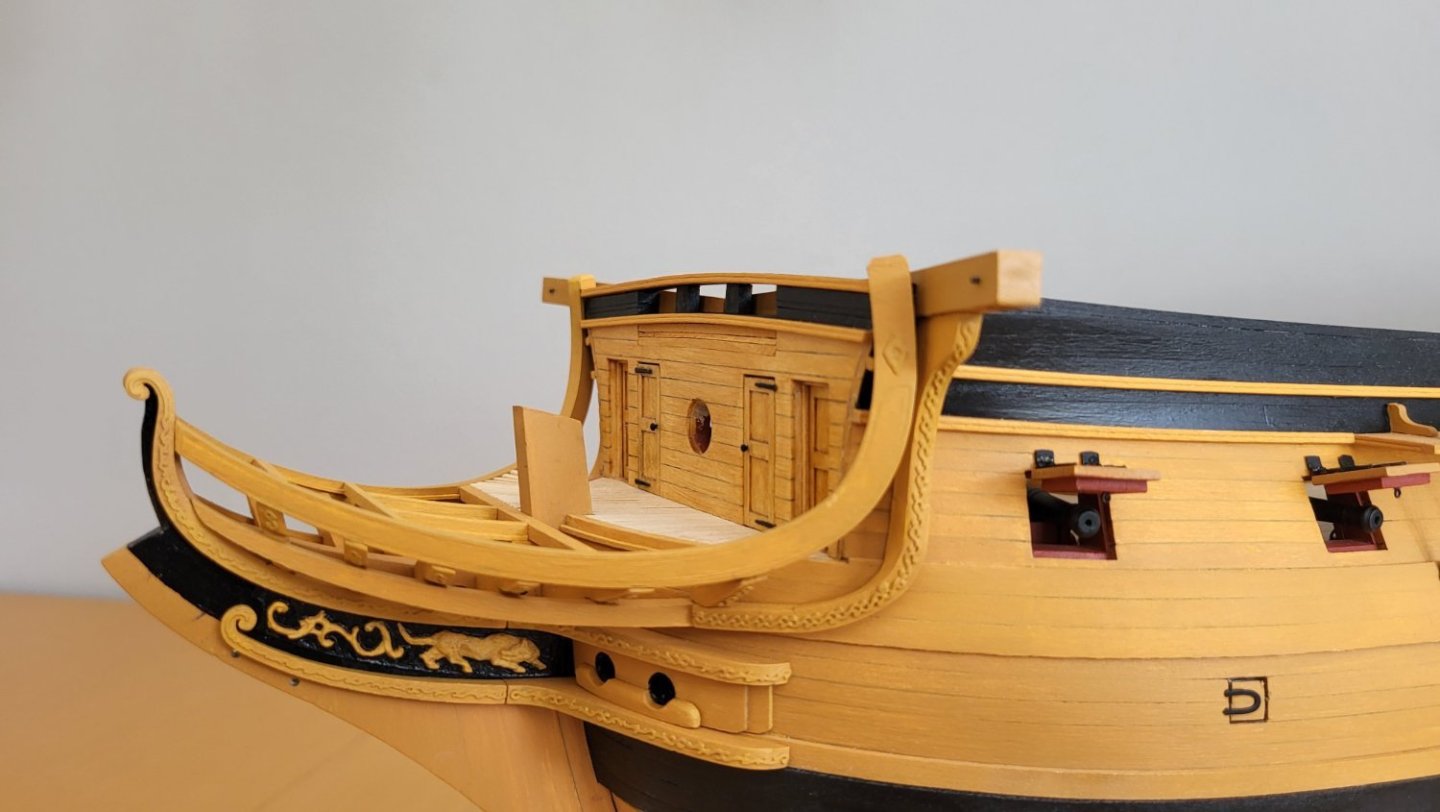
Hi modelers, here the next steps to be posted.....the middle rails and the cathead support knees are done, the framing for the head grating is done, and I started with the grating timbers. Note the additional stripes along the framing and the main headrails as a support for the framing timbers. The cathead support knees were notched instead of removing the hull molding stripes. Greetings Werner
.thumb.jpg.78c4692faa881572bc8fccd9b7643703.jpg)
.thumb.jpg.68fd86c7eaac271fc03b0e45fadc4bb9.jpg)
.thumb.jpg.35ec4229fbd3dbcf8ea01ef00277c9d9.jpg)
.thumb.jpg.15382d185ea6f9ecc0ab1d184c749304.jpg)
.thumb.jpg.170277e43d103b577f2f7f266e89a1a6.jpg)
.thumb.jpg.d7d0323607a85a7b089dbfb35ada8ea6.jpg)
.thumb.jpg.40f31f5ab5039c1ebdbb0b8ec5518245.jpg)
.thumb.jpg.1a52cf399d89e6c597730209e9d63c07.jpg)
.thumb.jpg.20c4385c39cf817e437a96e624c16338.jpg)
- 60 replies
-
- 9
-
-
- Confederacy
- Model Shipways
- (and 1 more)


.png.2bcf4b925d2b3e9e242f132150be7320.png)
.png.1e2d45ea28b94b127e1b7509dfd2da05.png)
.jpg.2c007d5964874968966e9350f8820e76.jpg)
.jpg.1e76a74b0f2a72cc5389c259fe93eb95.jpg)
.jpg.ad61000b81b9377ba1aa44c03f69384c.jpg)
.jpg.2c4b4e4c5b4969e03125ad59f23caa5d.jpg)
.jpg.1e96294c6301376c1665af7b50fb8e45.jpg)
.jpg.9aa1978c9397c3c5ac5e09f44f622eaf.jpg)
.jpg.06f3114f267b9fe7f33b6e38a08a160e.jpg)
.jpg.f7fb6bcd2f50281a56d25cb8fbbb7e5f.jpg)
.jpg.3c98e575f51edd99cd229b71132aa0ee.jpg)
.jpg.ae5d1dfee2ee3308e9f4143d8b611929.jpg)
.jpg.f451ec8576e130557d70676ec1714801.jpg)


.jpg.f6e3f72d4441dee01faeea5edb187fd8.jpg)

.jpg.23bf35ecd152416f30353c10f5b0e78c.jpg)
.jpg.b7d217237bb5f8f93e8e85afd748d152.jpg)
.jpg.04dcb7a63f97d3858574528d262e060a.jpg)
.jpg.1030682bf72aaa07e47e5dd968da046f.jpg)
.jpg.b0c0317a4c2c50457d03506e35bd39e5.jpg)
.jpg.5f2e8b2045a69ddcab9567ea632ad29d.jpg)
.jpg.b92831101475528f762d2d04a70544e1.jpg)
.jpg.f82e05ecb1af1430237487a36cd35271.jpg)
.jpg.444448c5577e02cb959f03f43b44dd5d.jpg)
.jpg.bd7a9cb2b1cef8d9c63ddcdf69e36dfe.jpg)
.jpg.92112d07a2daf26a0ace8bd662eb3b4e.jpg)

.jpg.c764d56a40eca9ea47c1ac849ce7c6dc.jpg)