
highlanderburial
-
Posts
148 -
Joined
-
Last visited
About highlanderburial

- Birthday 03/02/1973
Recent Profile Visitors
1,817 profile views


-
 highlanderburial reacted to a post in a topic:
Sloop-rigged packetboat by Strelok - 1:35 - based on Chapman plans - POB
highlanderburial reacted to a post in a topic:
Sloop-rigged packetboat by Strelok - 1:35 - based on Chapman plans - POB
-
ccoyle reacted to a post in a topic:
USS St. Louis (CL-20) by highlanderburial - FINISHED - 1/200 scale - 3d Print and 1/150 Restoration
-
mcb reacted to a post in a topic:
USS St. Louis (CL-20) by highlanderburial - FINISHED - 1/200 scale - 3d Print and 1/150 Restoration
-
 GrandpaPhil reacted to a post in a topic:
USS St. Louis (CL-20) by highlanderburial - FINISHED - 1/200 scale - 3d Print and 1/150 Restoration
GrandpaPhil reacted to a post in a topic:
USS St. Louis (CL-20) by highlanderburial - FINISHED - 1/200 scale - 3d Print and 1/150 Restoration
-
GrandpaPhil reacted to a post in a topic:
USS St. Louis (CL-20) by highlanderburial - FINISHED - 1/200 scale - 3d Print and 1/150 Restoration
-
GrandpaPhil reacted to a post in a topic:
USS St. Louis (CL-20) by highlanderburial - FINISHED - 1/200 scale - 3d Print and 1/150 Restoration
-
Canute reacted to a post in a topic:
USS St. Louis (CL-20) by highlanderburial - FINISHED - 1/200 scale - 3d Print and 1/150 Restoration
-
highlanderburial reacted to a post in a topic:
USS St. Louis (CL-20) by highlanderburial - FINISHED - 1/200 scale - 3d Print and 1/150 Restoration
-
yvesvidal reacted to a post in a topic:
USS St. Louis (CL-20) by highlanderburial - FINISHED - 1/200 scale - 3d Print and 1/150 Restoration
-
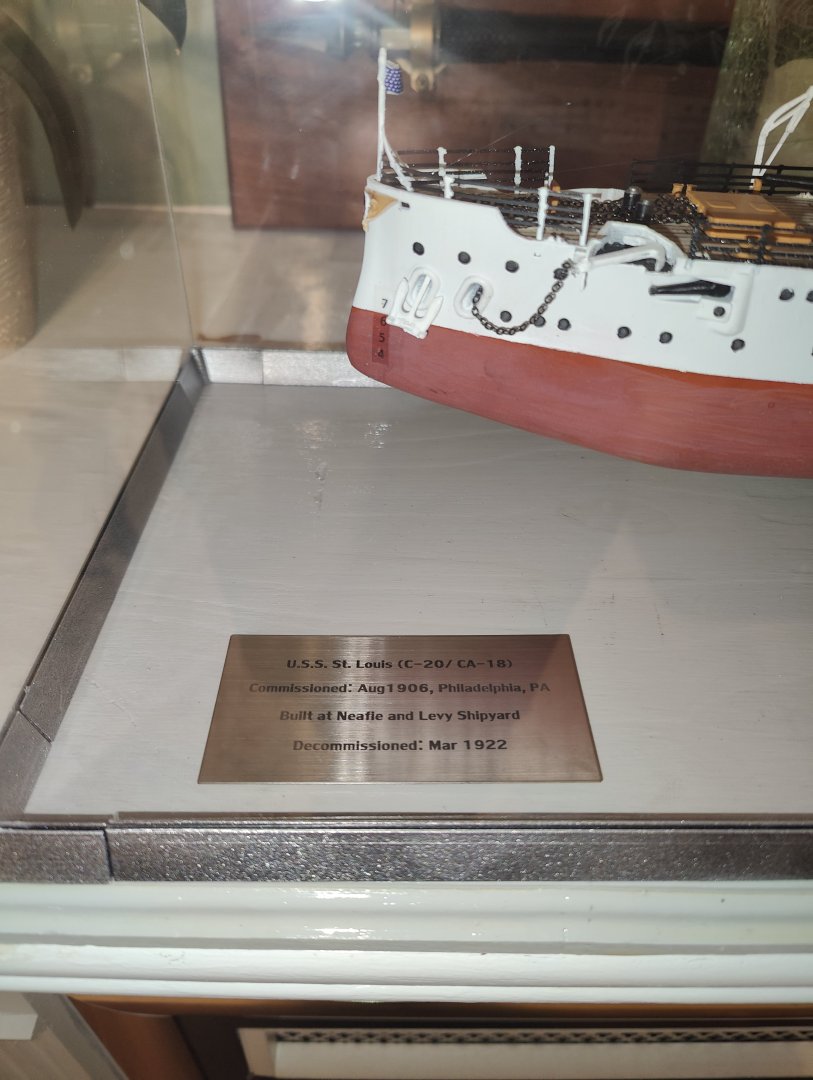
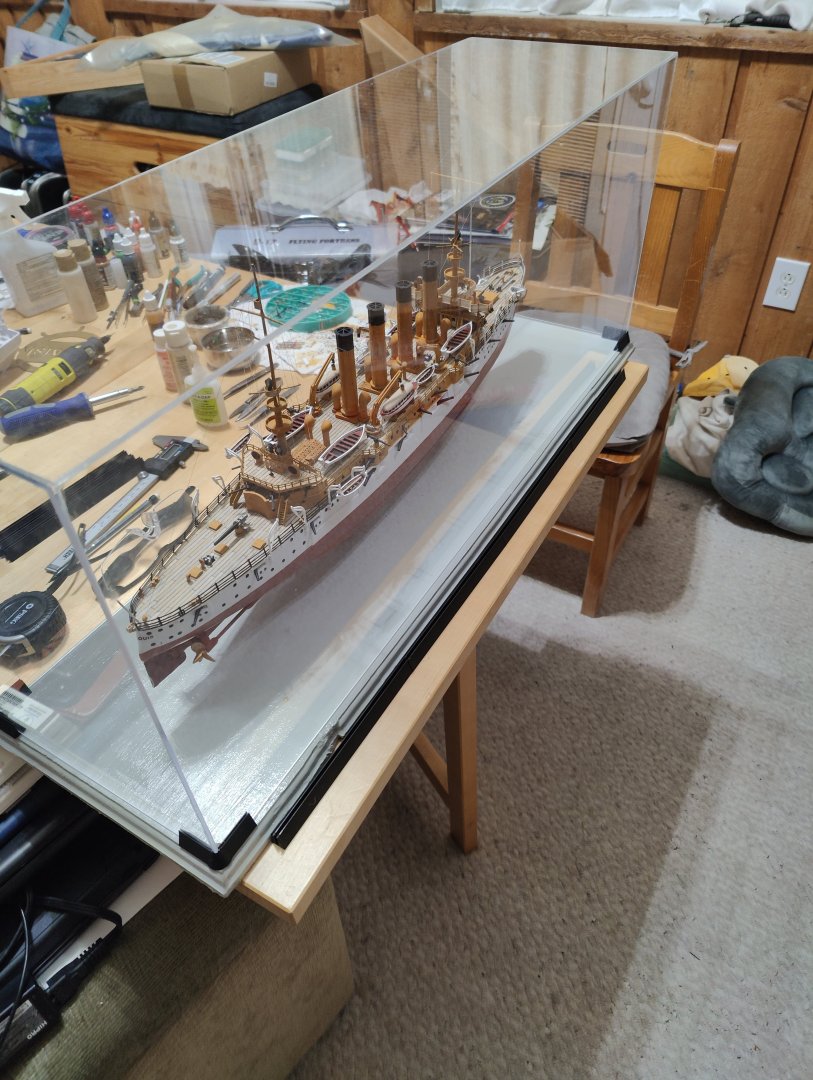
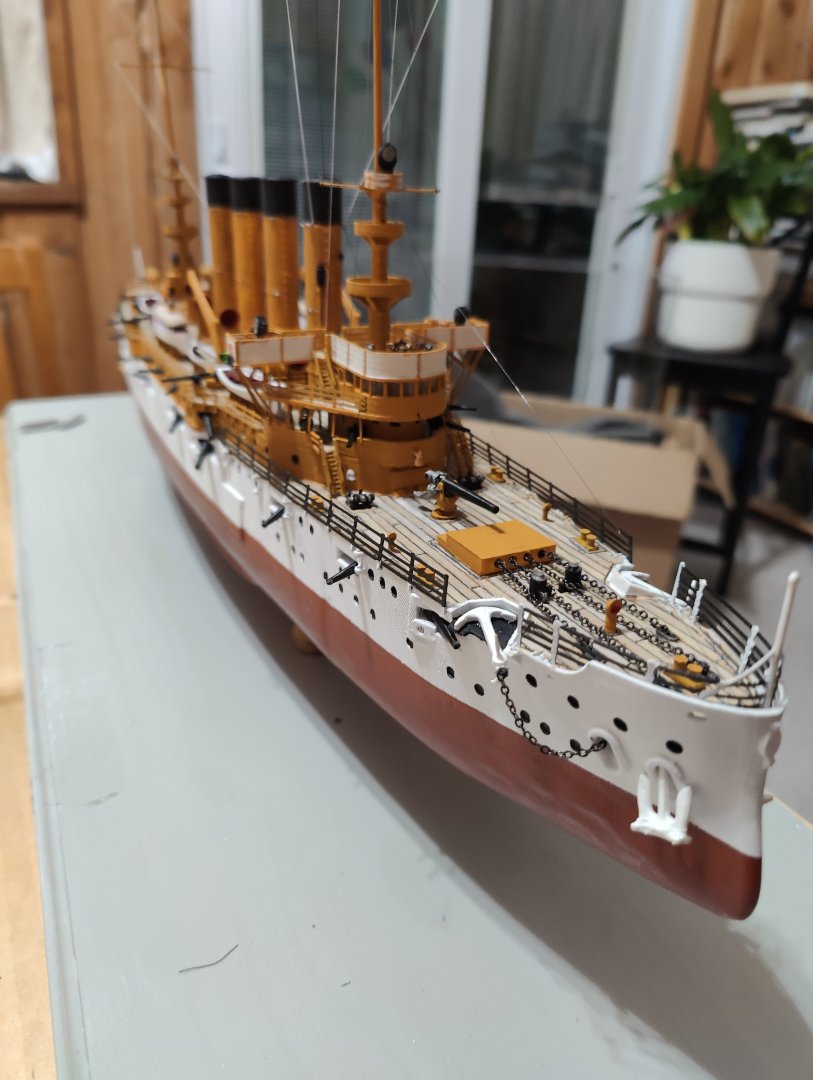
 Sort of side by view of both models. They were dropped off at their new home at the museum yesterday. (The National Iron and Steel Heritage Museum, Coatesville, PA. www.steelmuseum.org) I donated to them because it is VERY likely this is where the steel and iron for the original ship came from! This was a cool project that took some very weird turns and came out better than I hoped. Thanks to everyone who followed and commented.
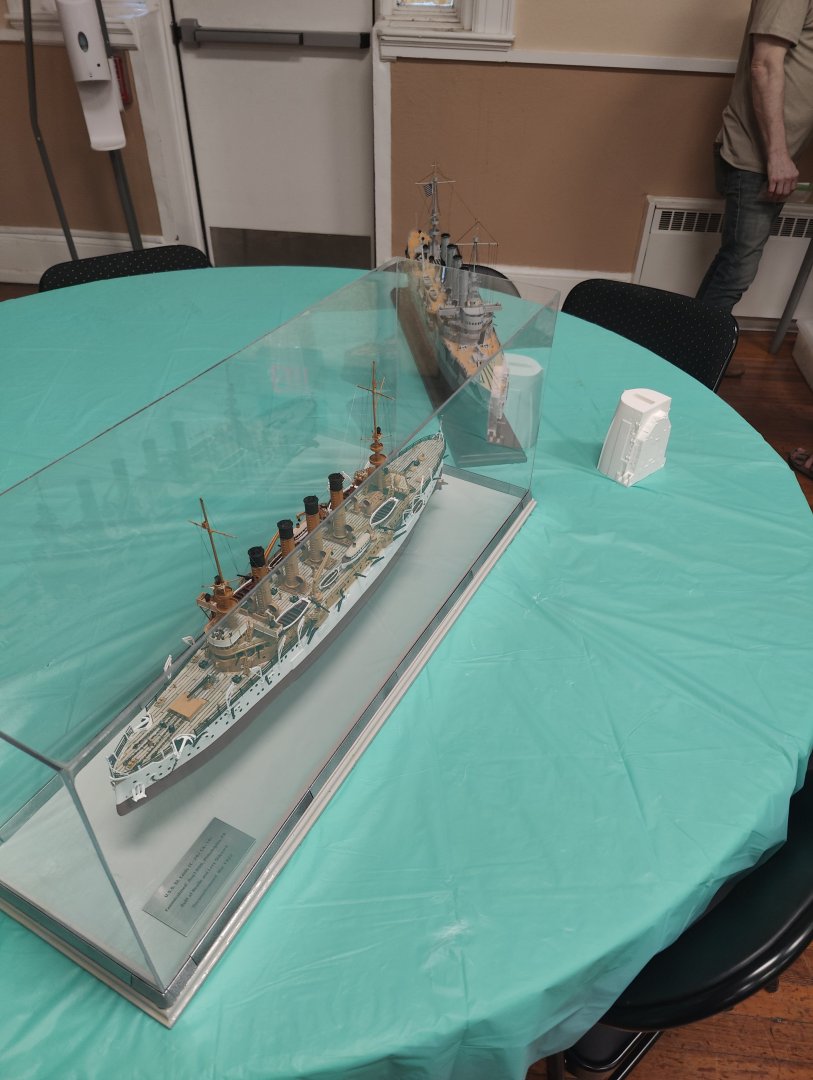
- 32 replies
-
- 5
-
-
-
- St Louis
- 3D Printing
- (and 2 more)
-
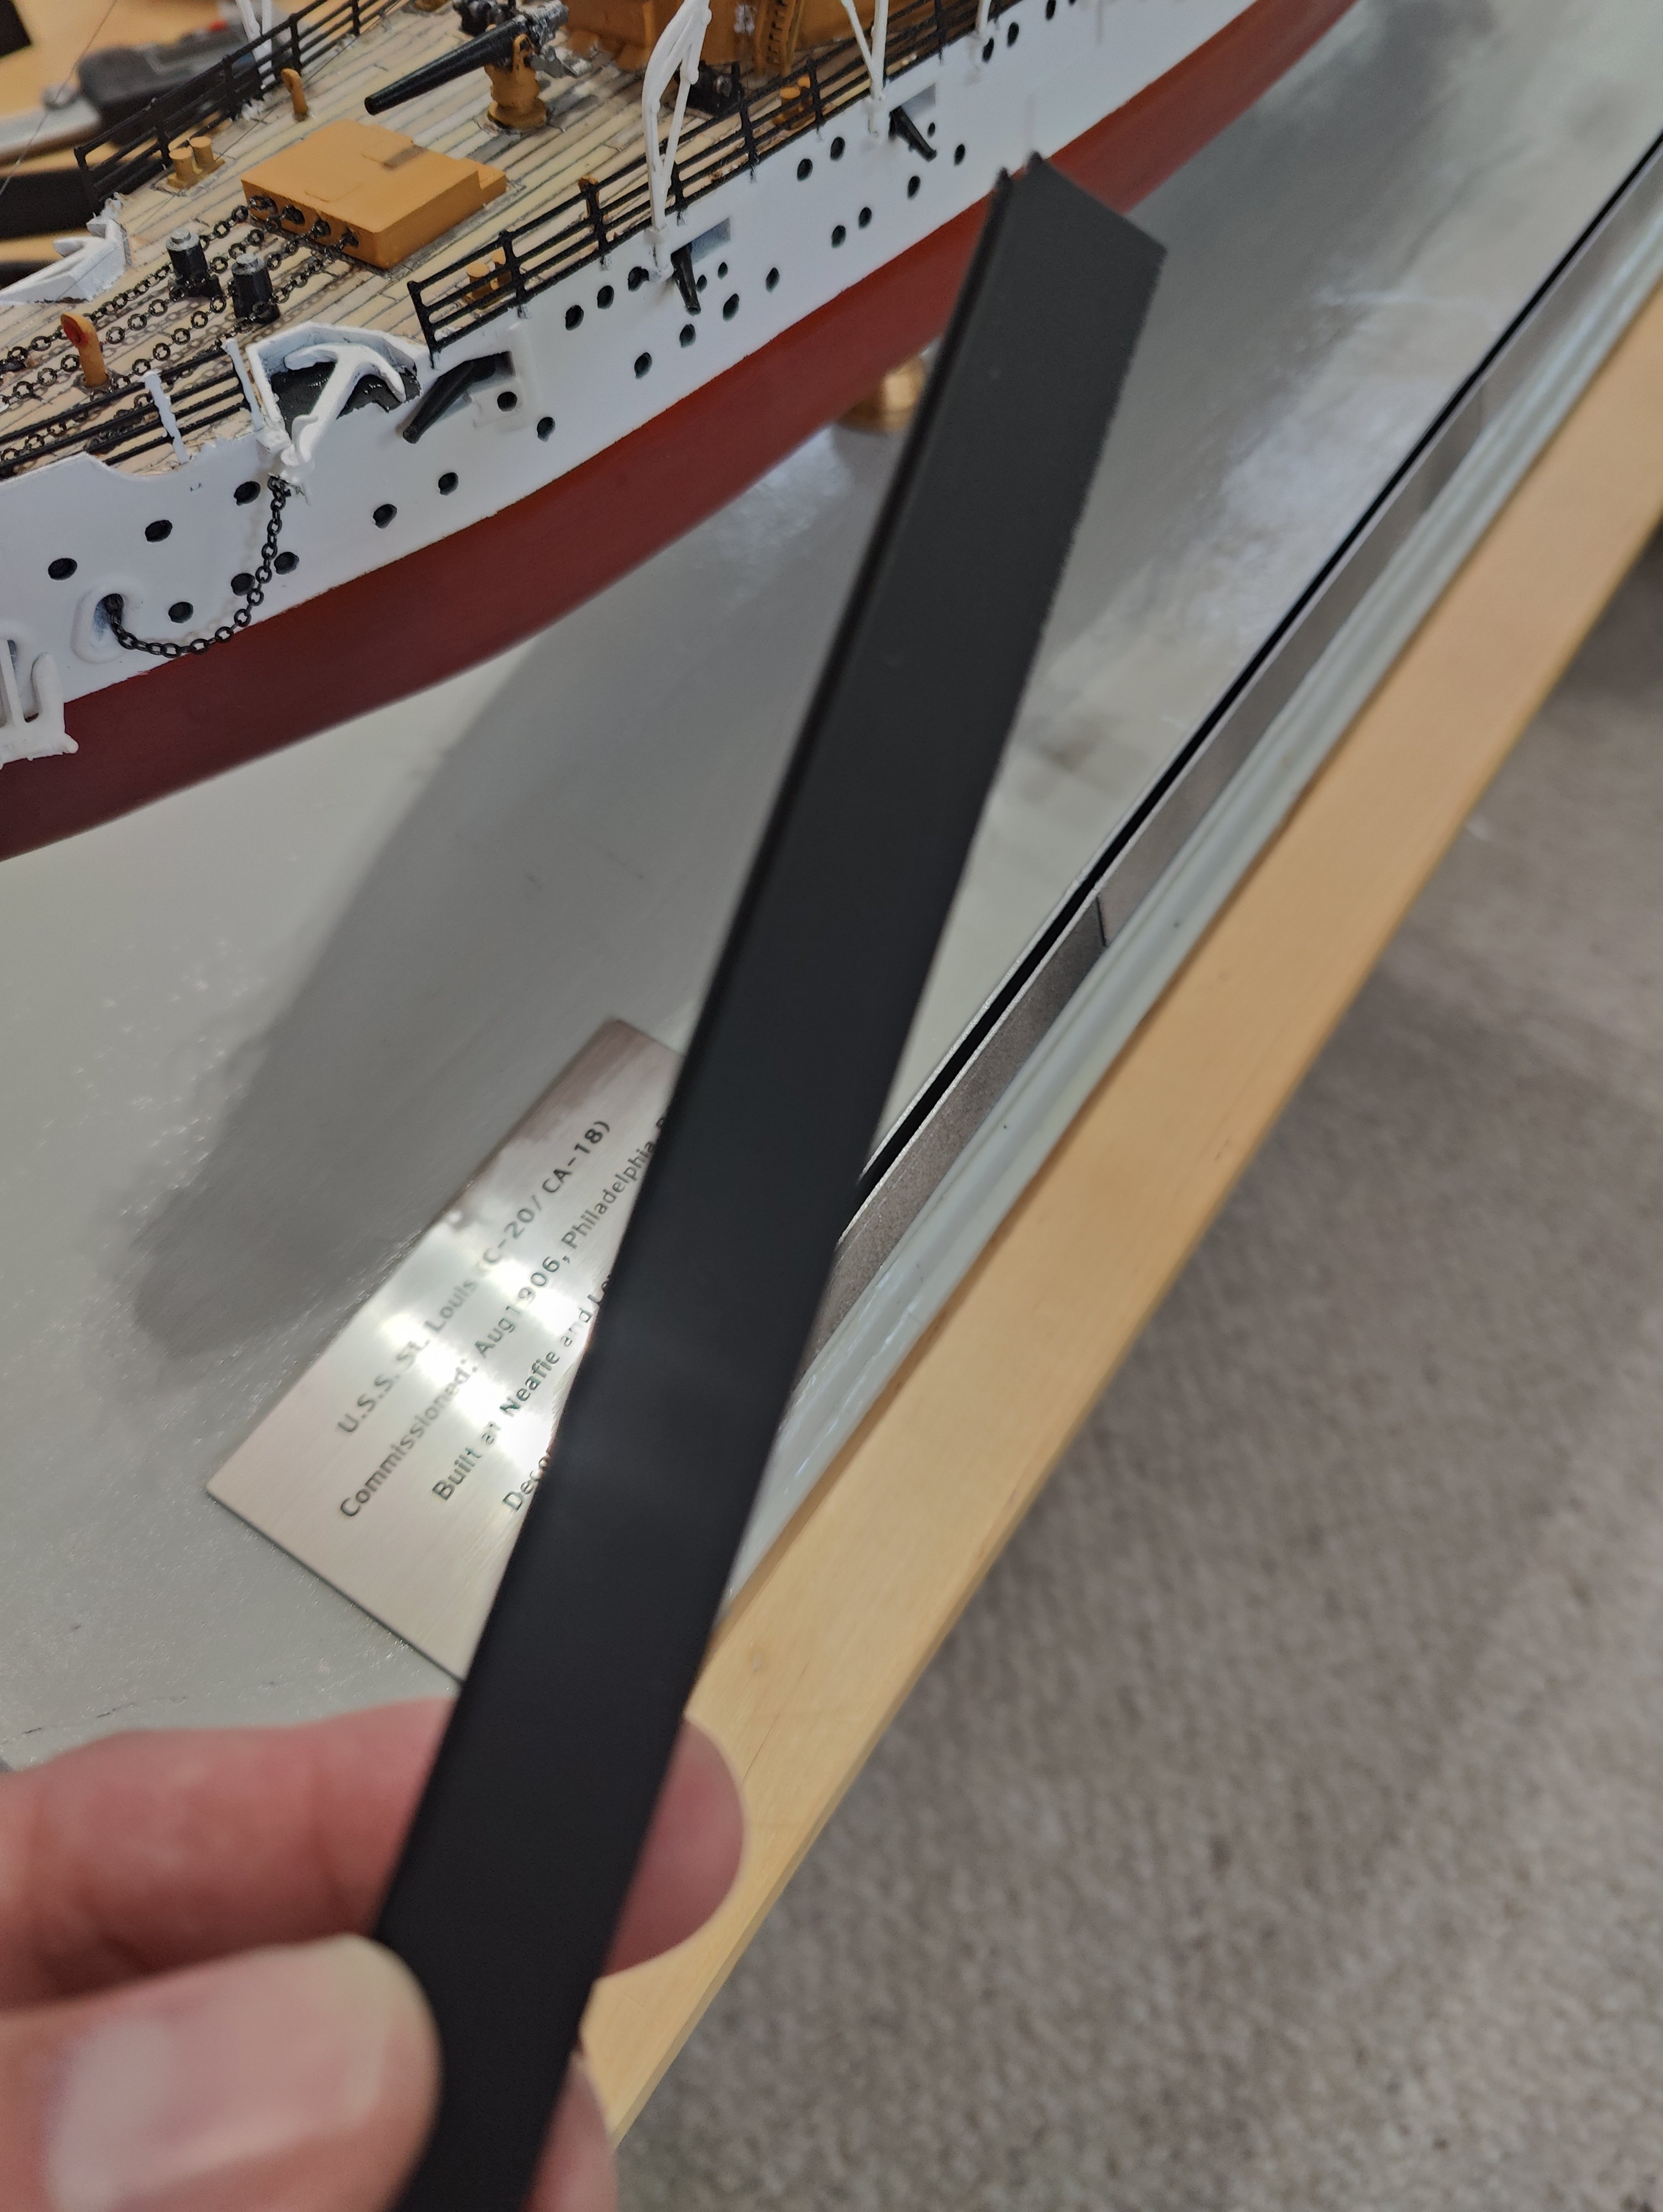
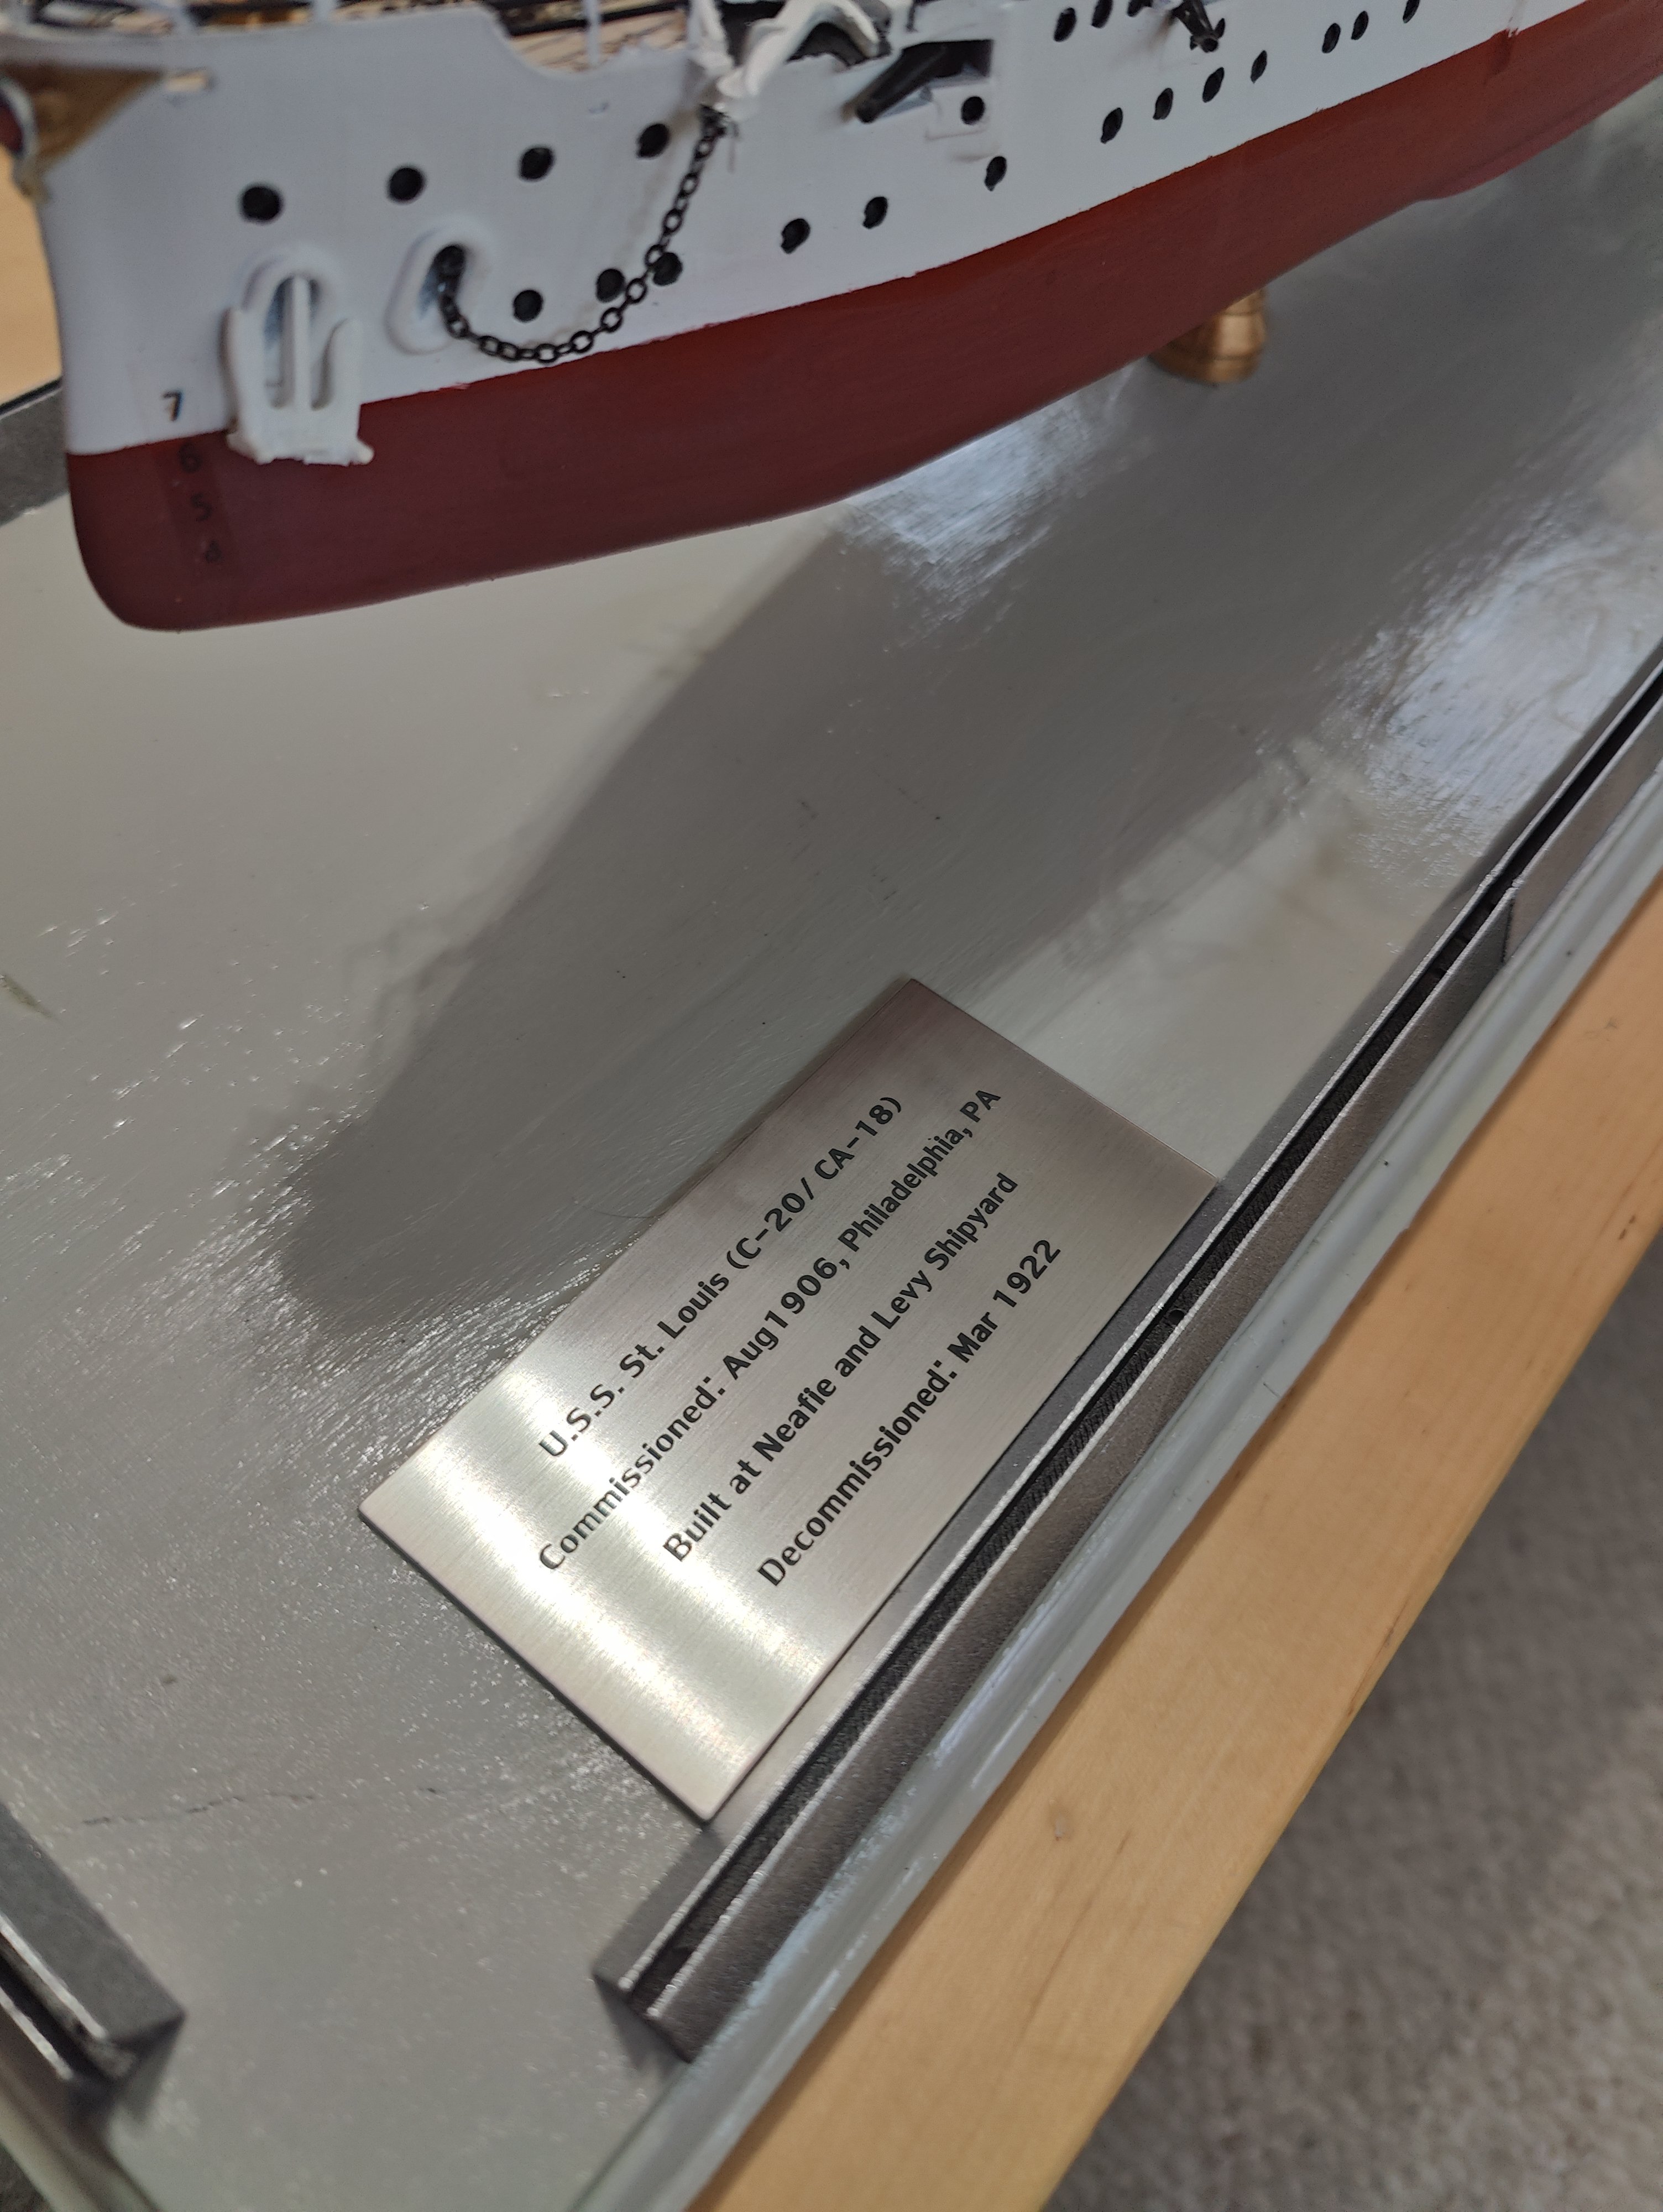
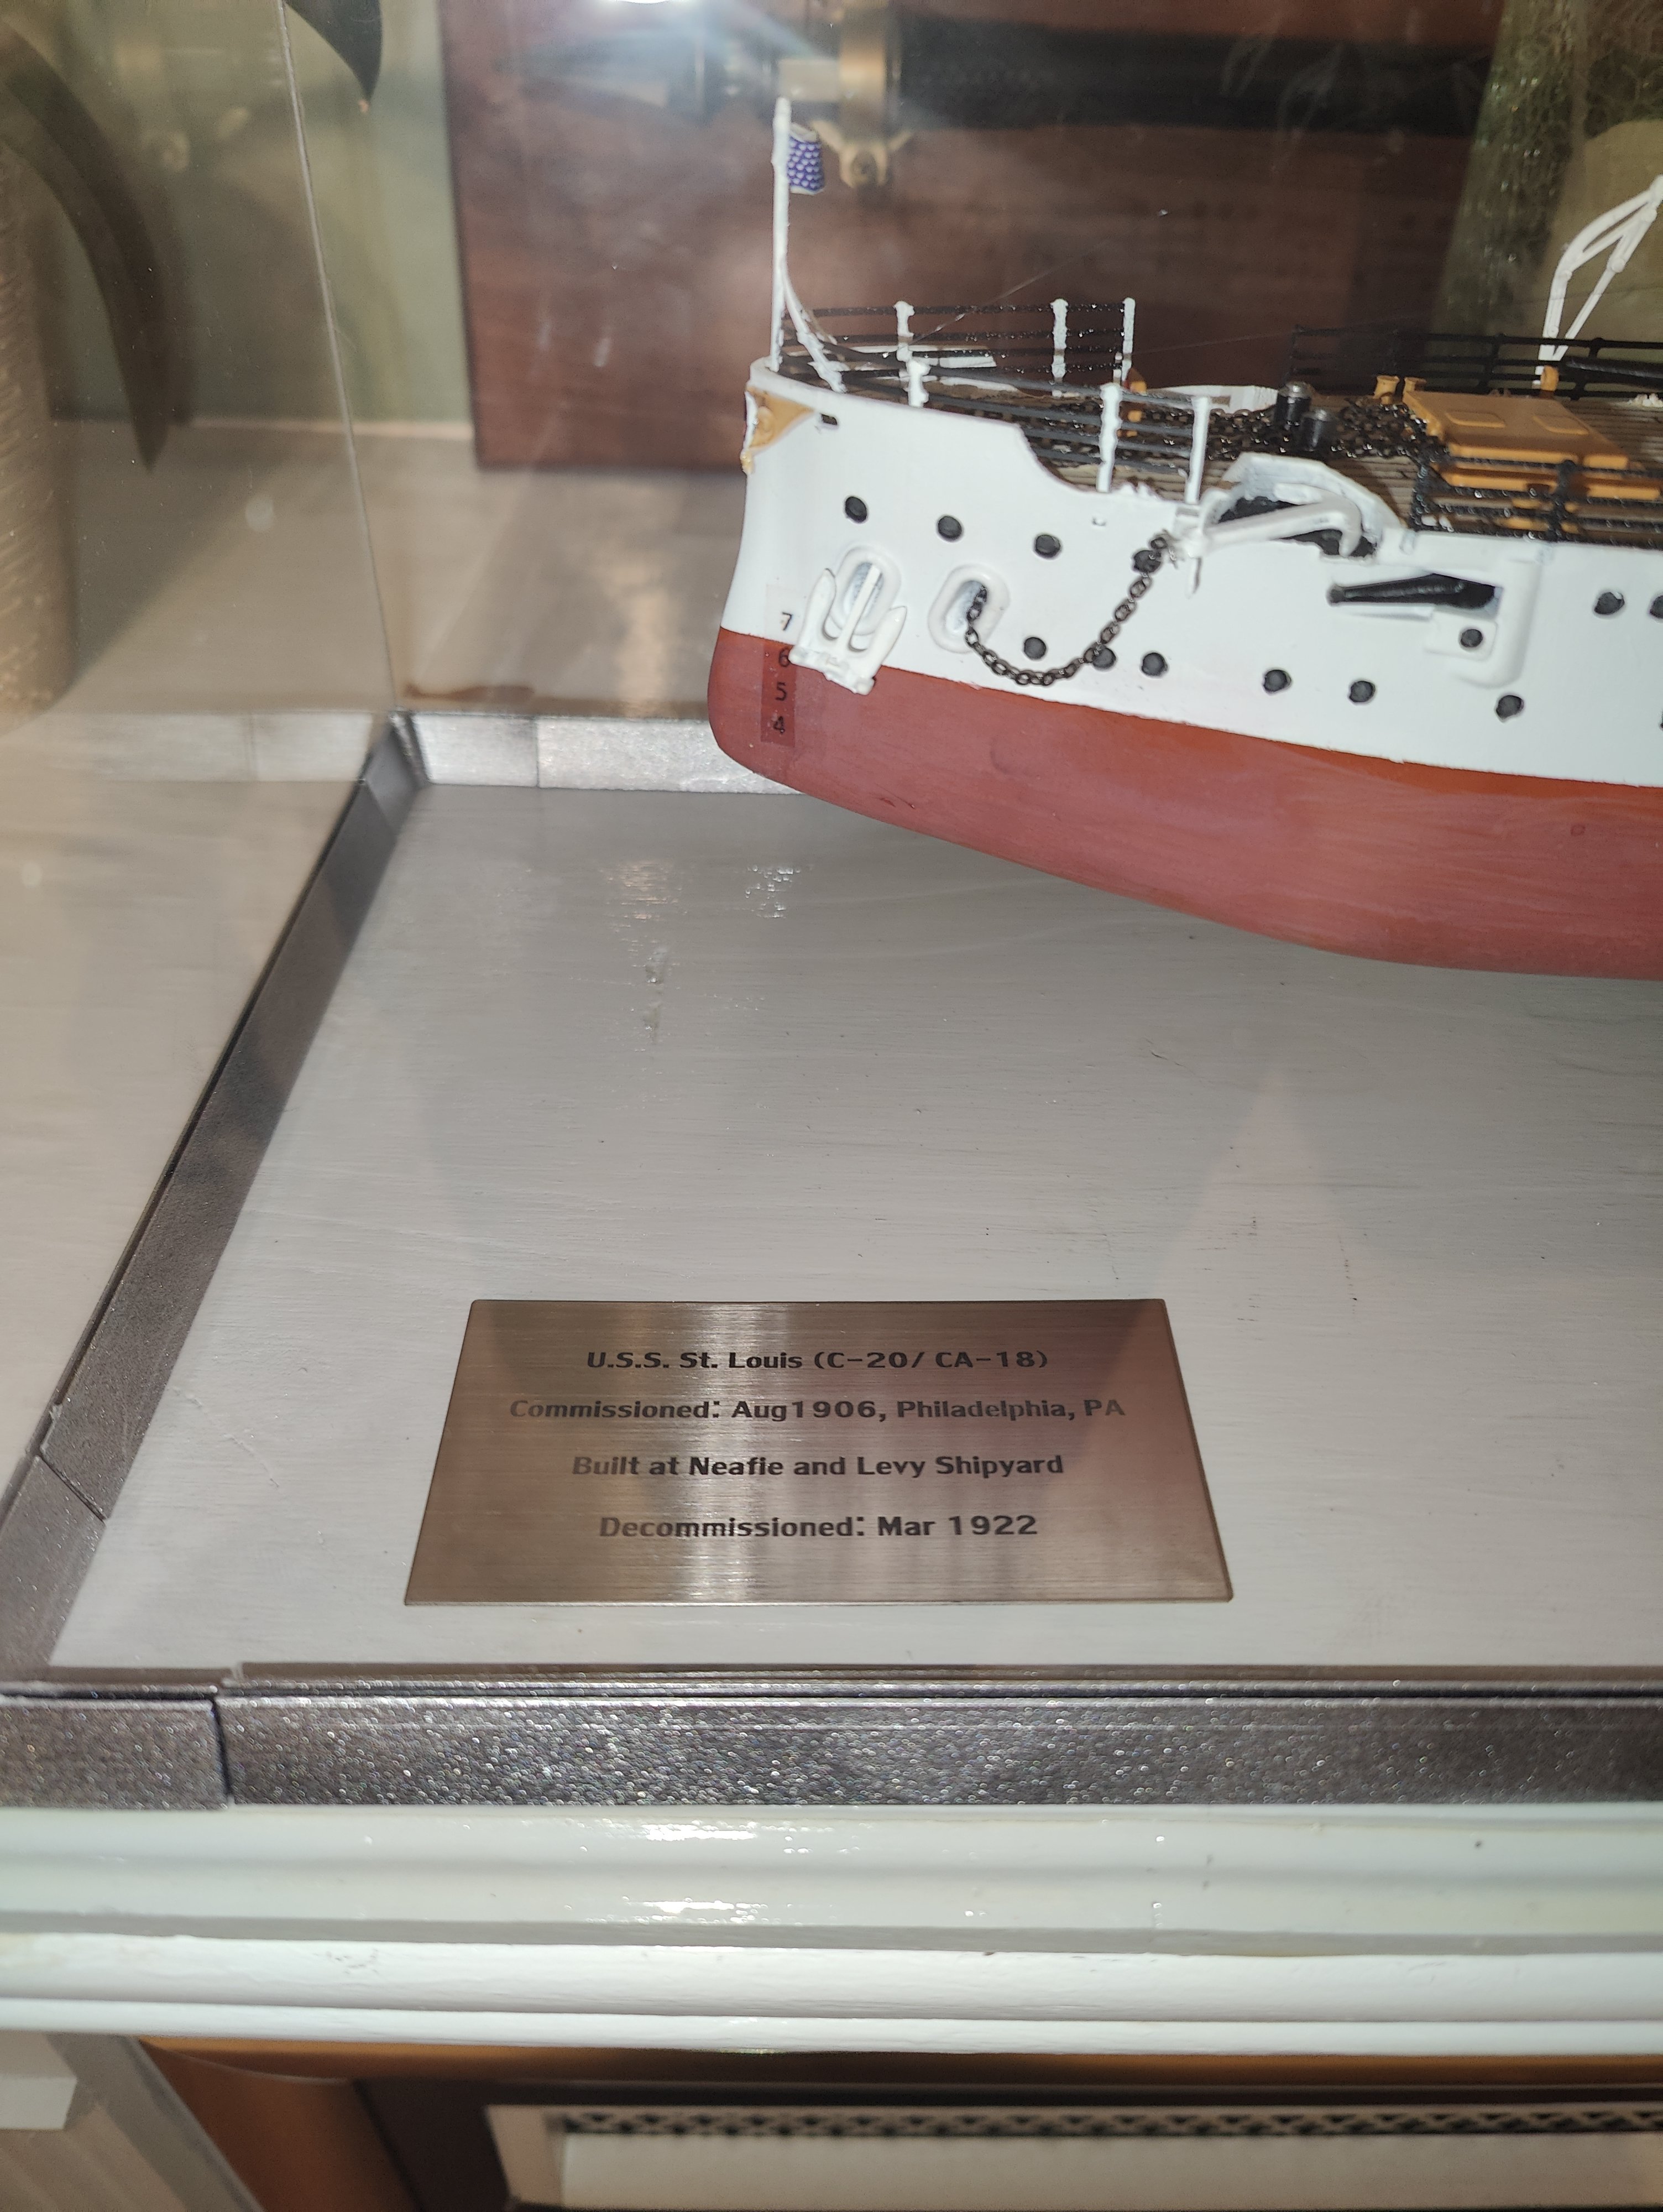
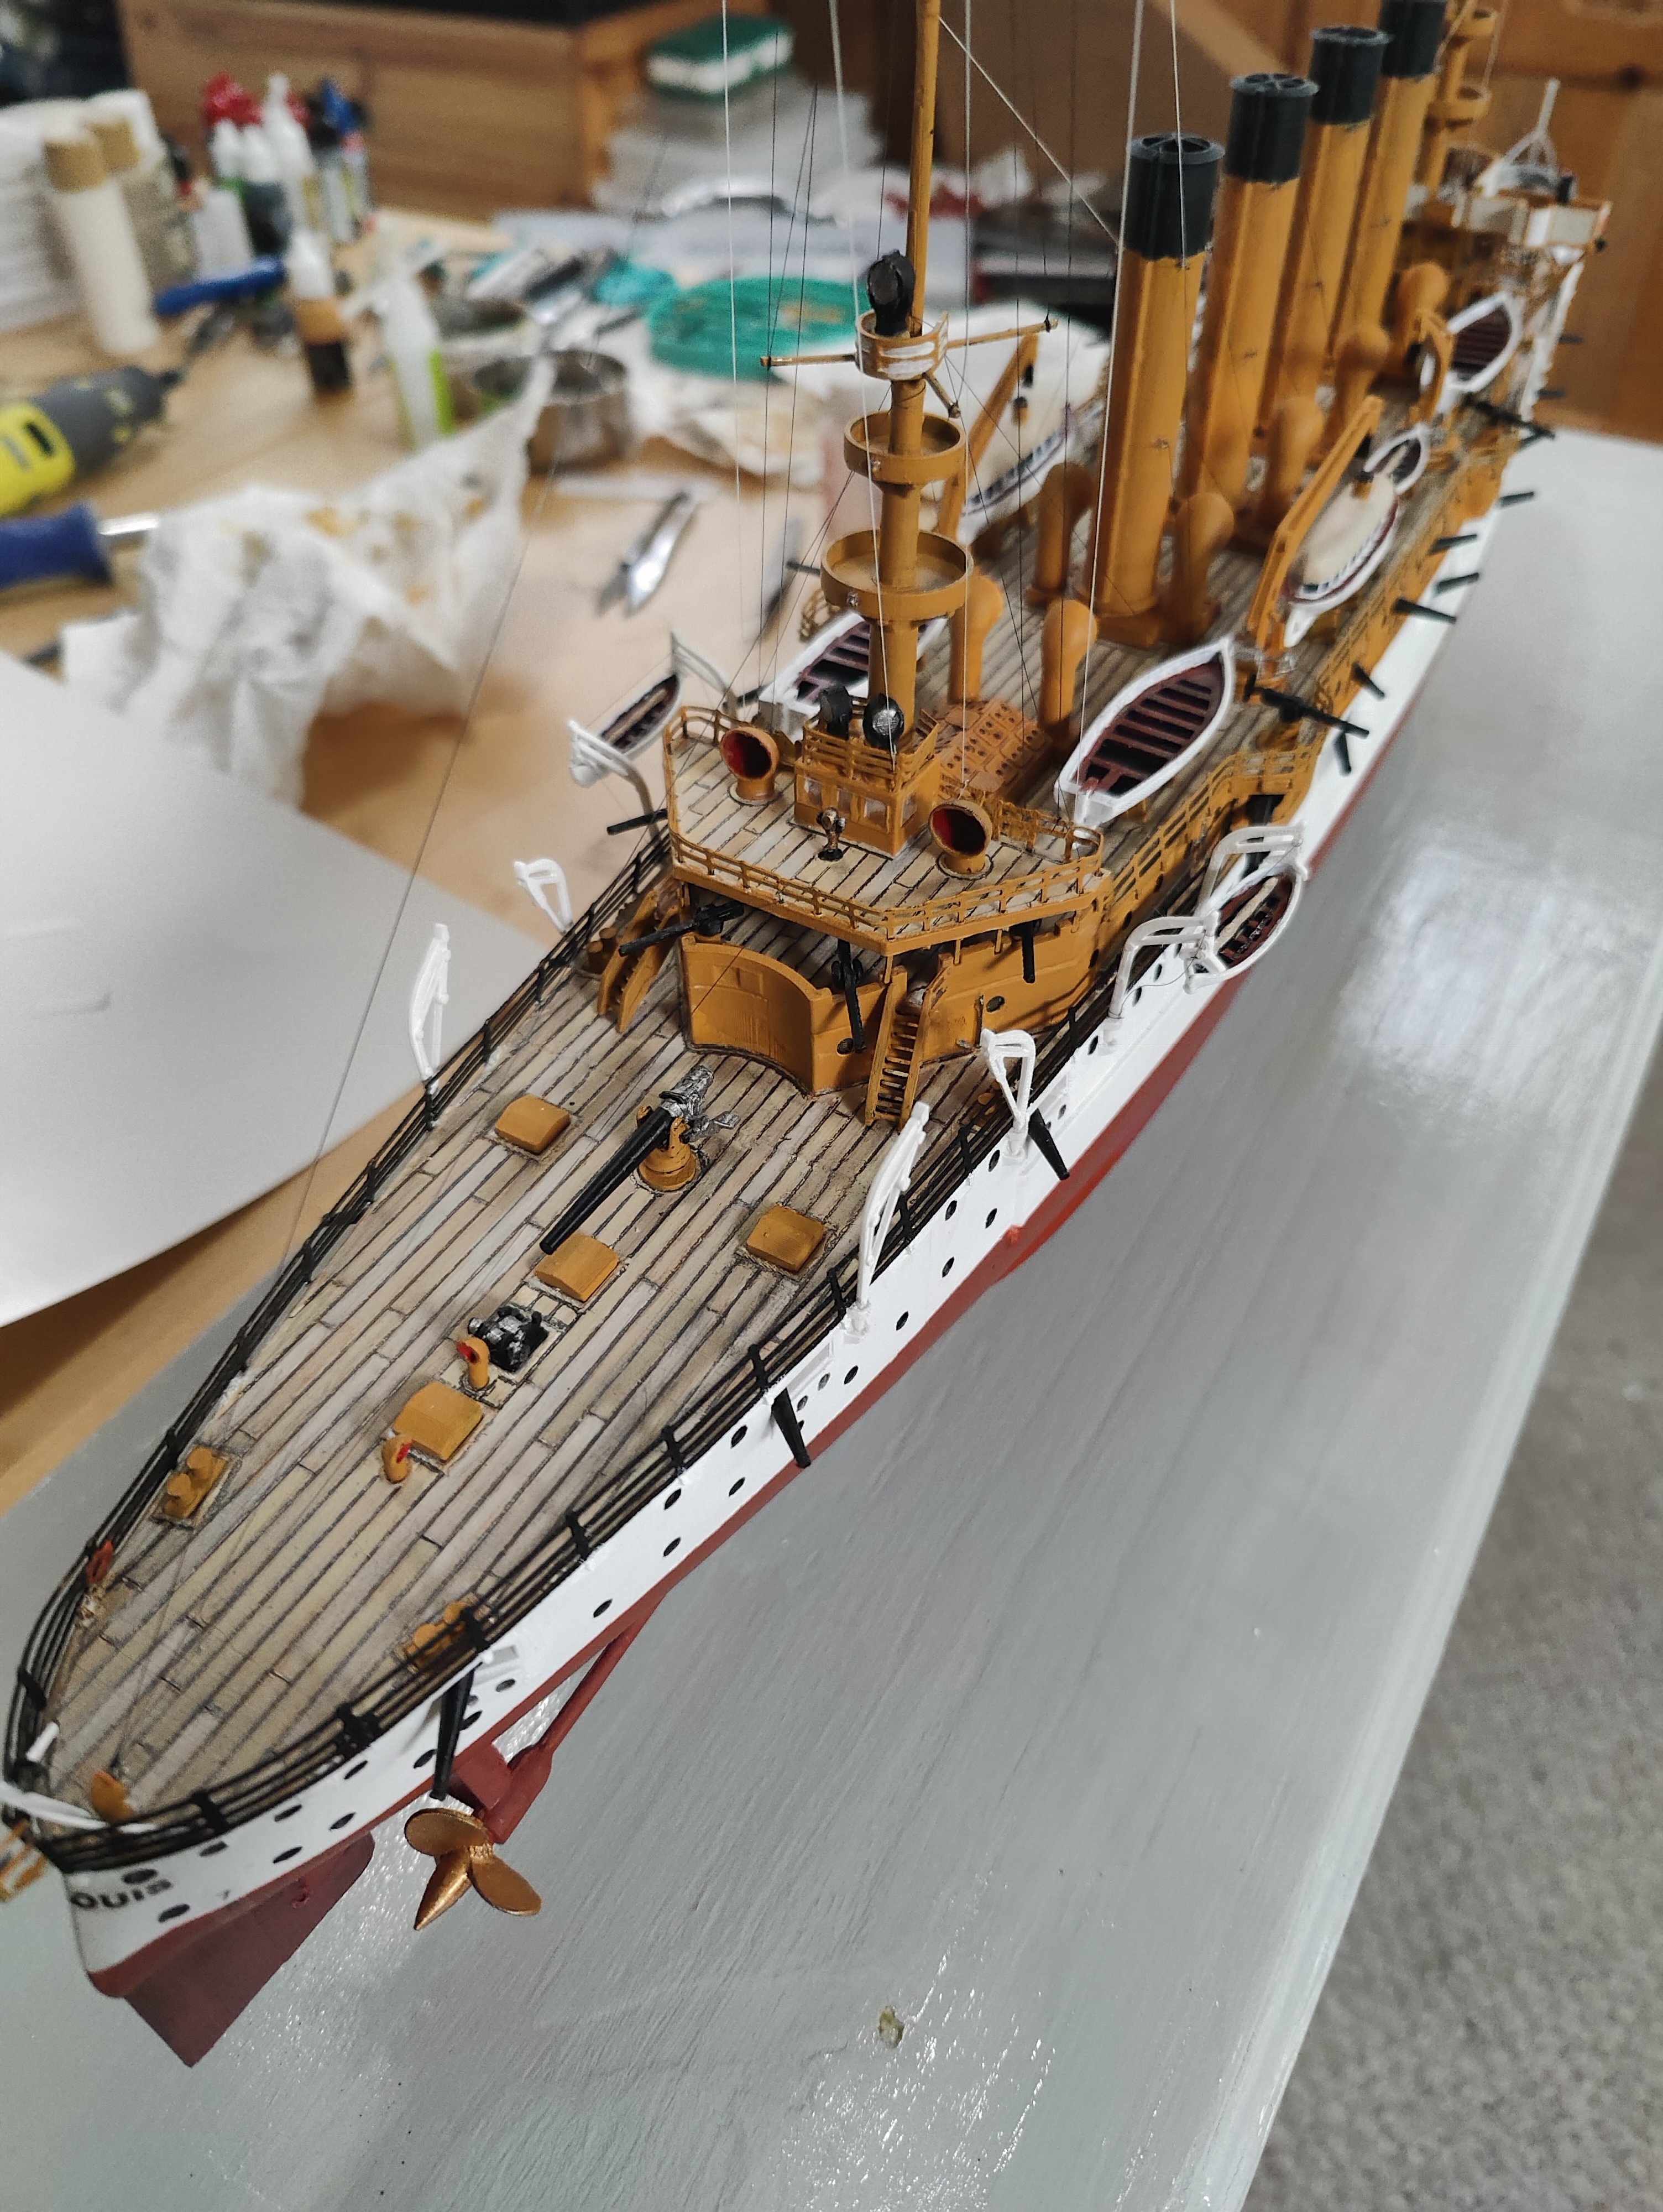
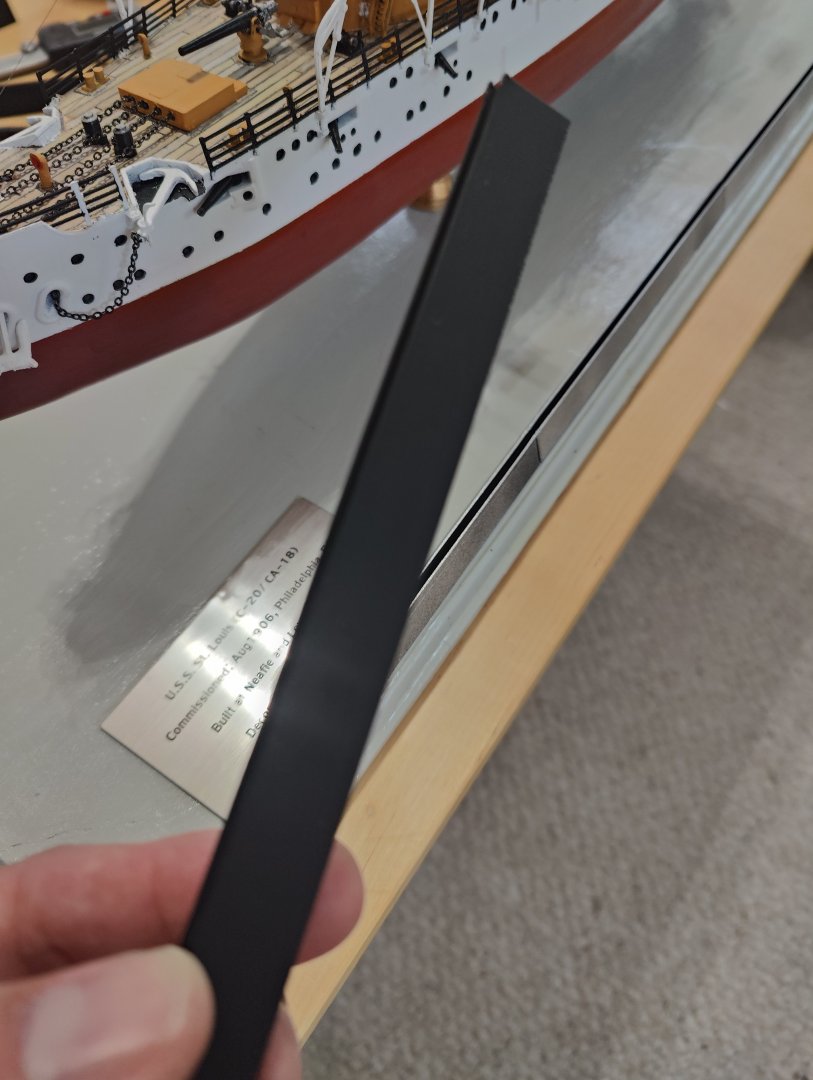
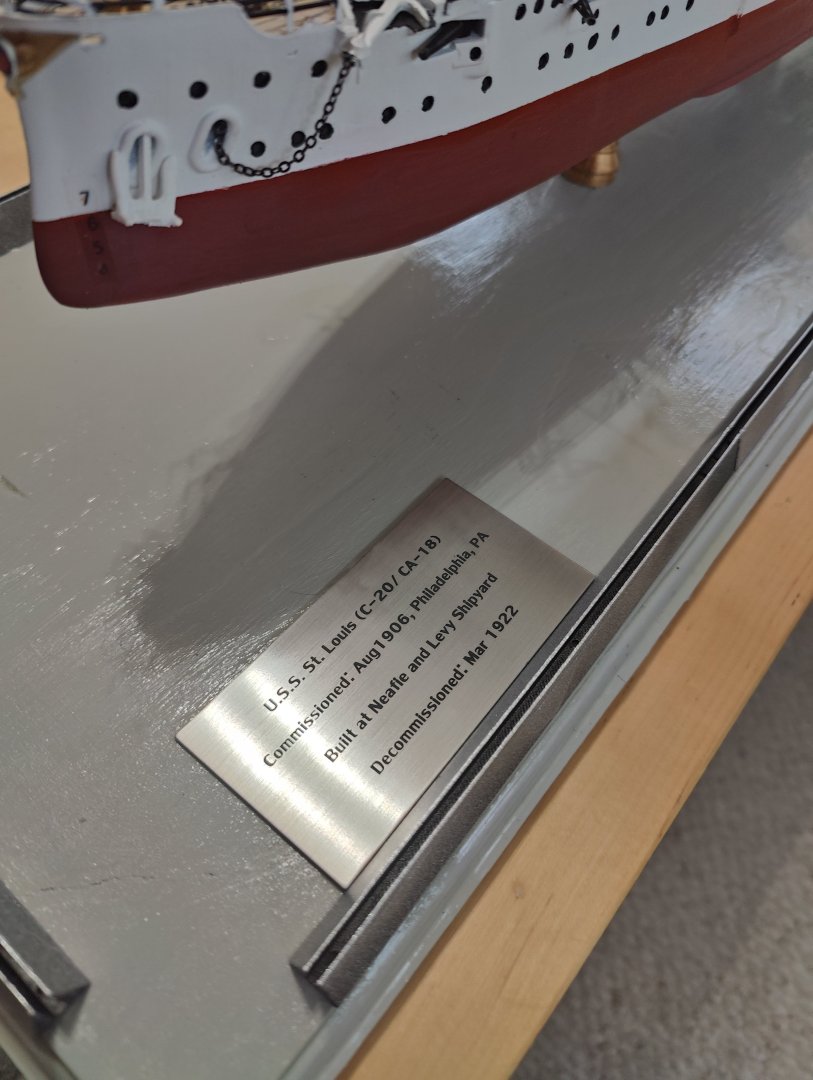
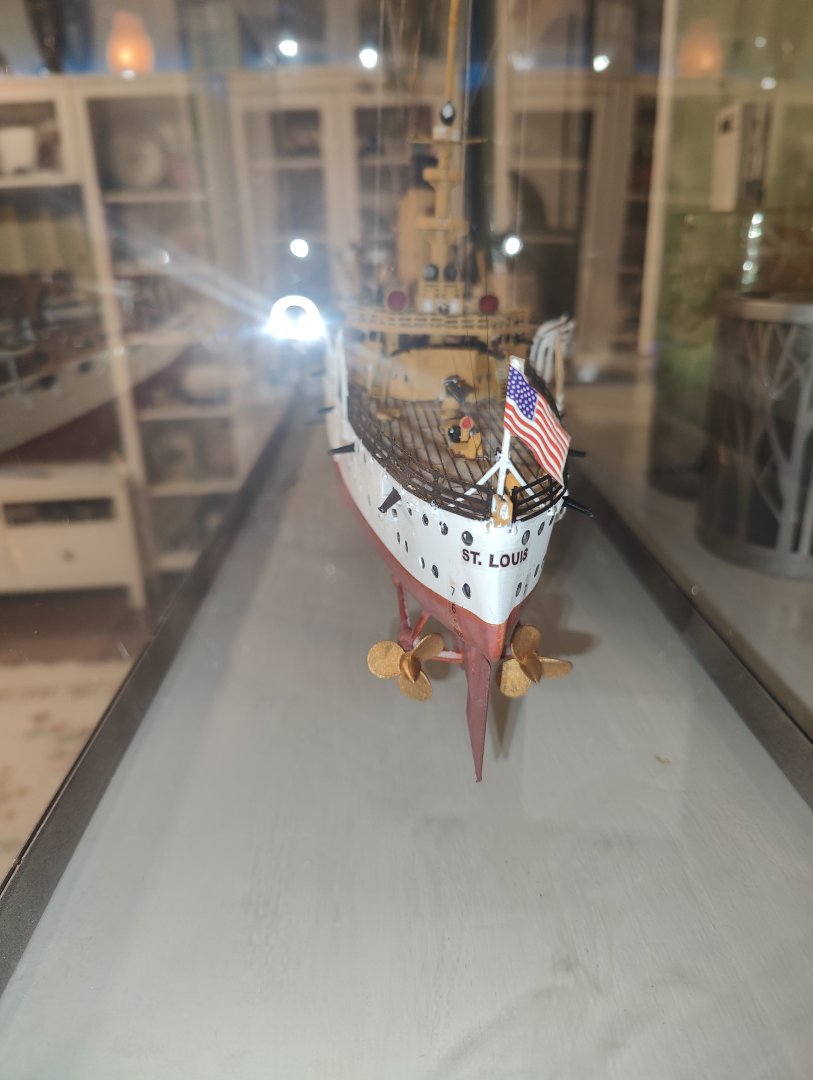
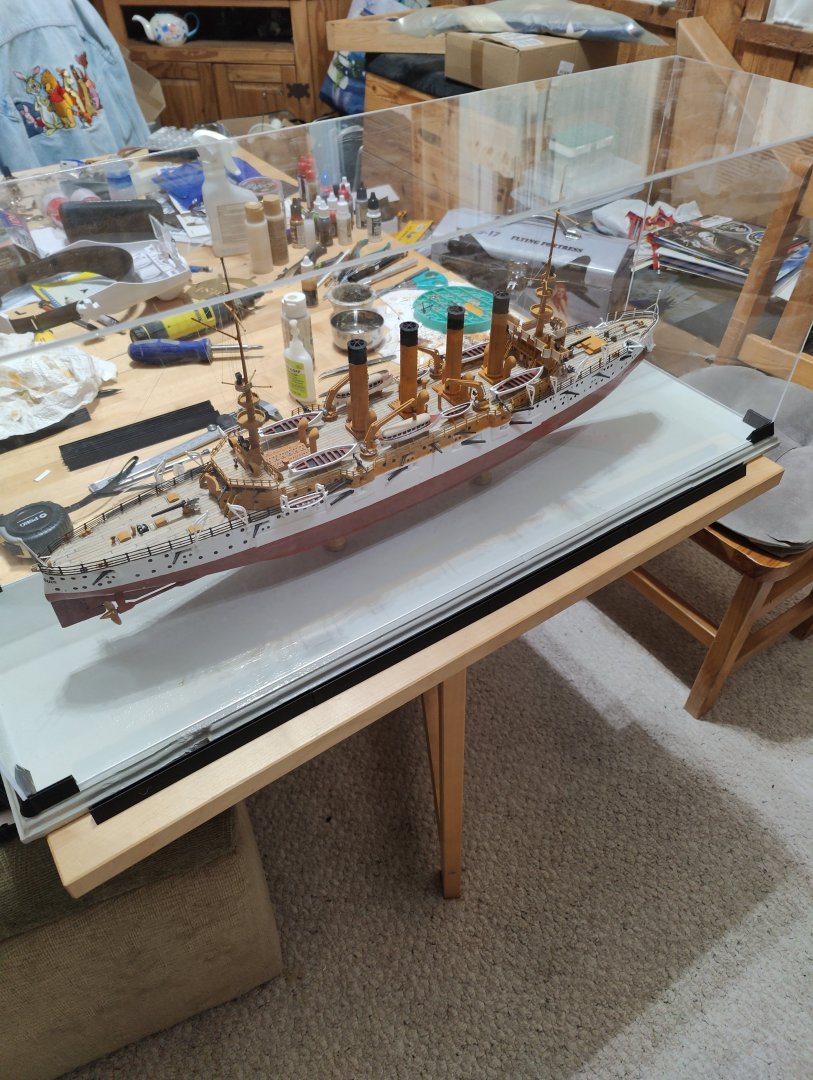
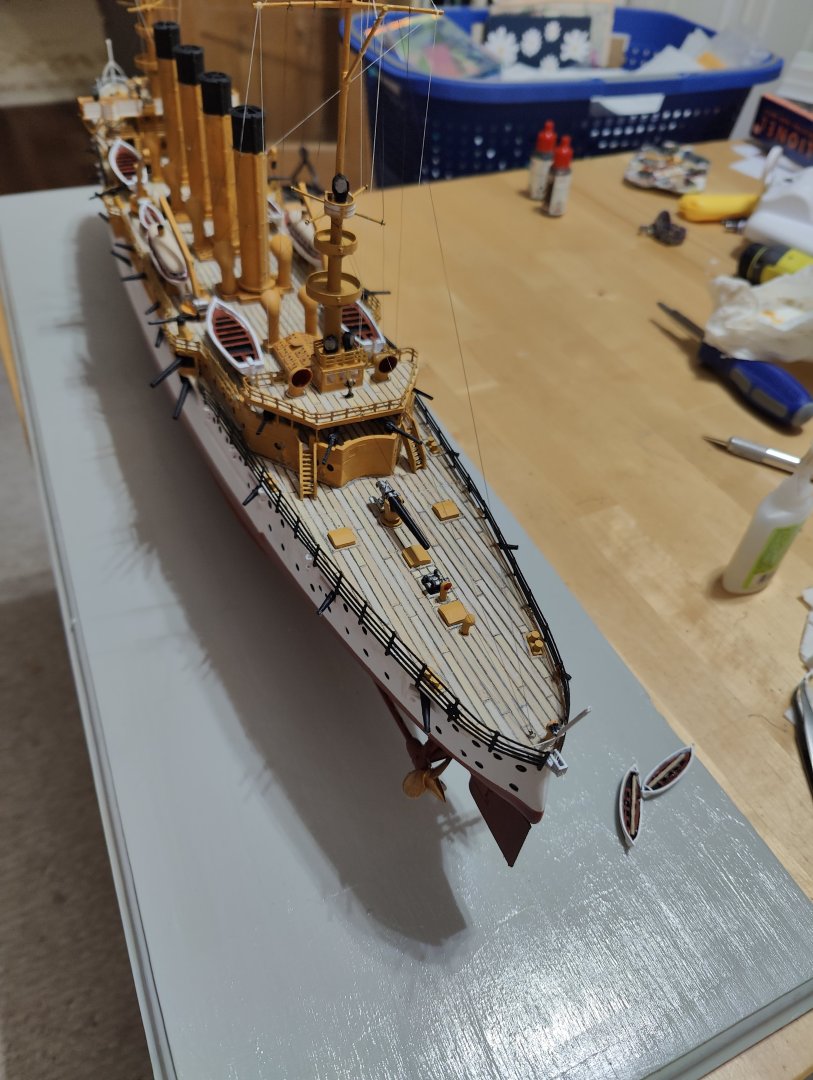
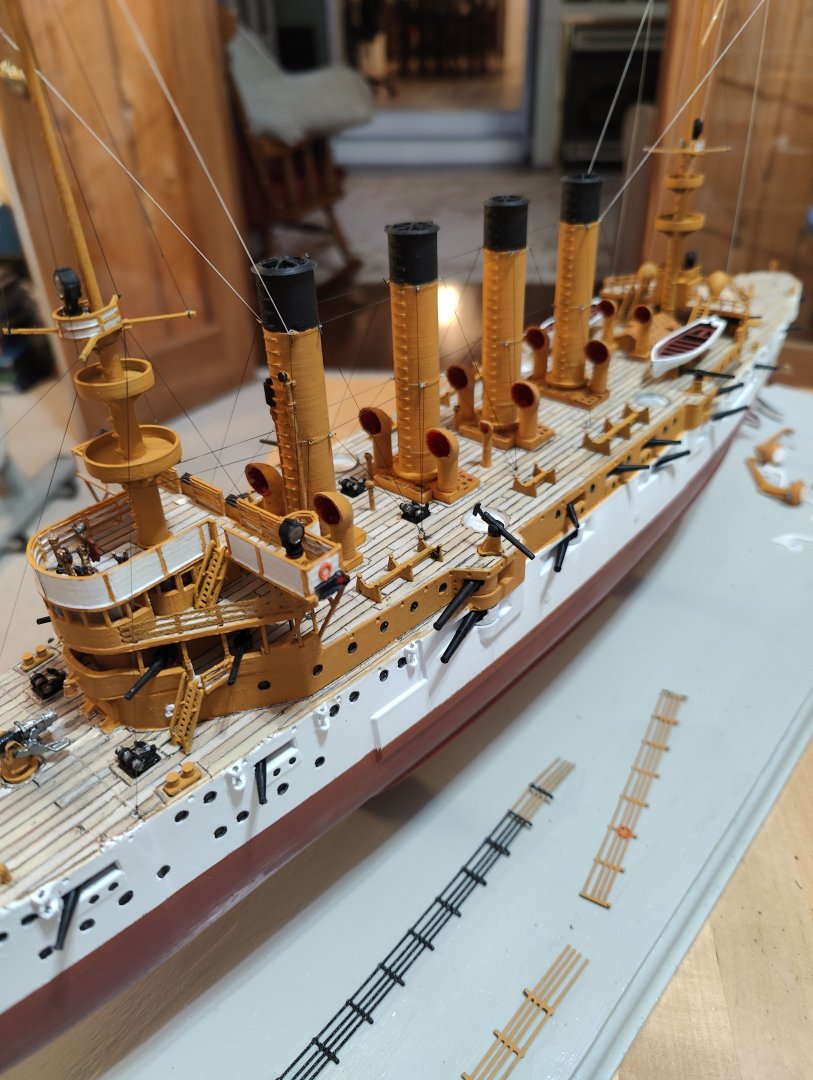
Welp. I torched up the acrylic glass and put the novis polish to it. I 3d printed the rest of the guides and painted them steel silver. I added the info plate. I then secured the rails to the base and added the ensign and jack. I think this is a wrap. I will take some photos up at the Joint Clubs Northeast Conference and maybe a few after it gets to its final home.


- 32 replies
-
- 8
-
-
-
- St Louis
- 3D Printing
- (and 2 more)
-
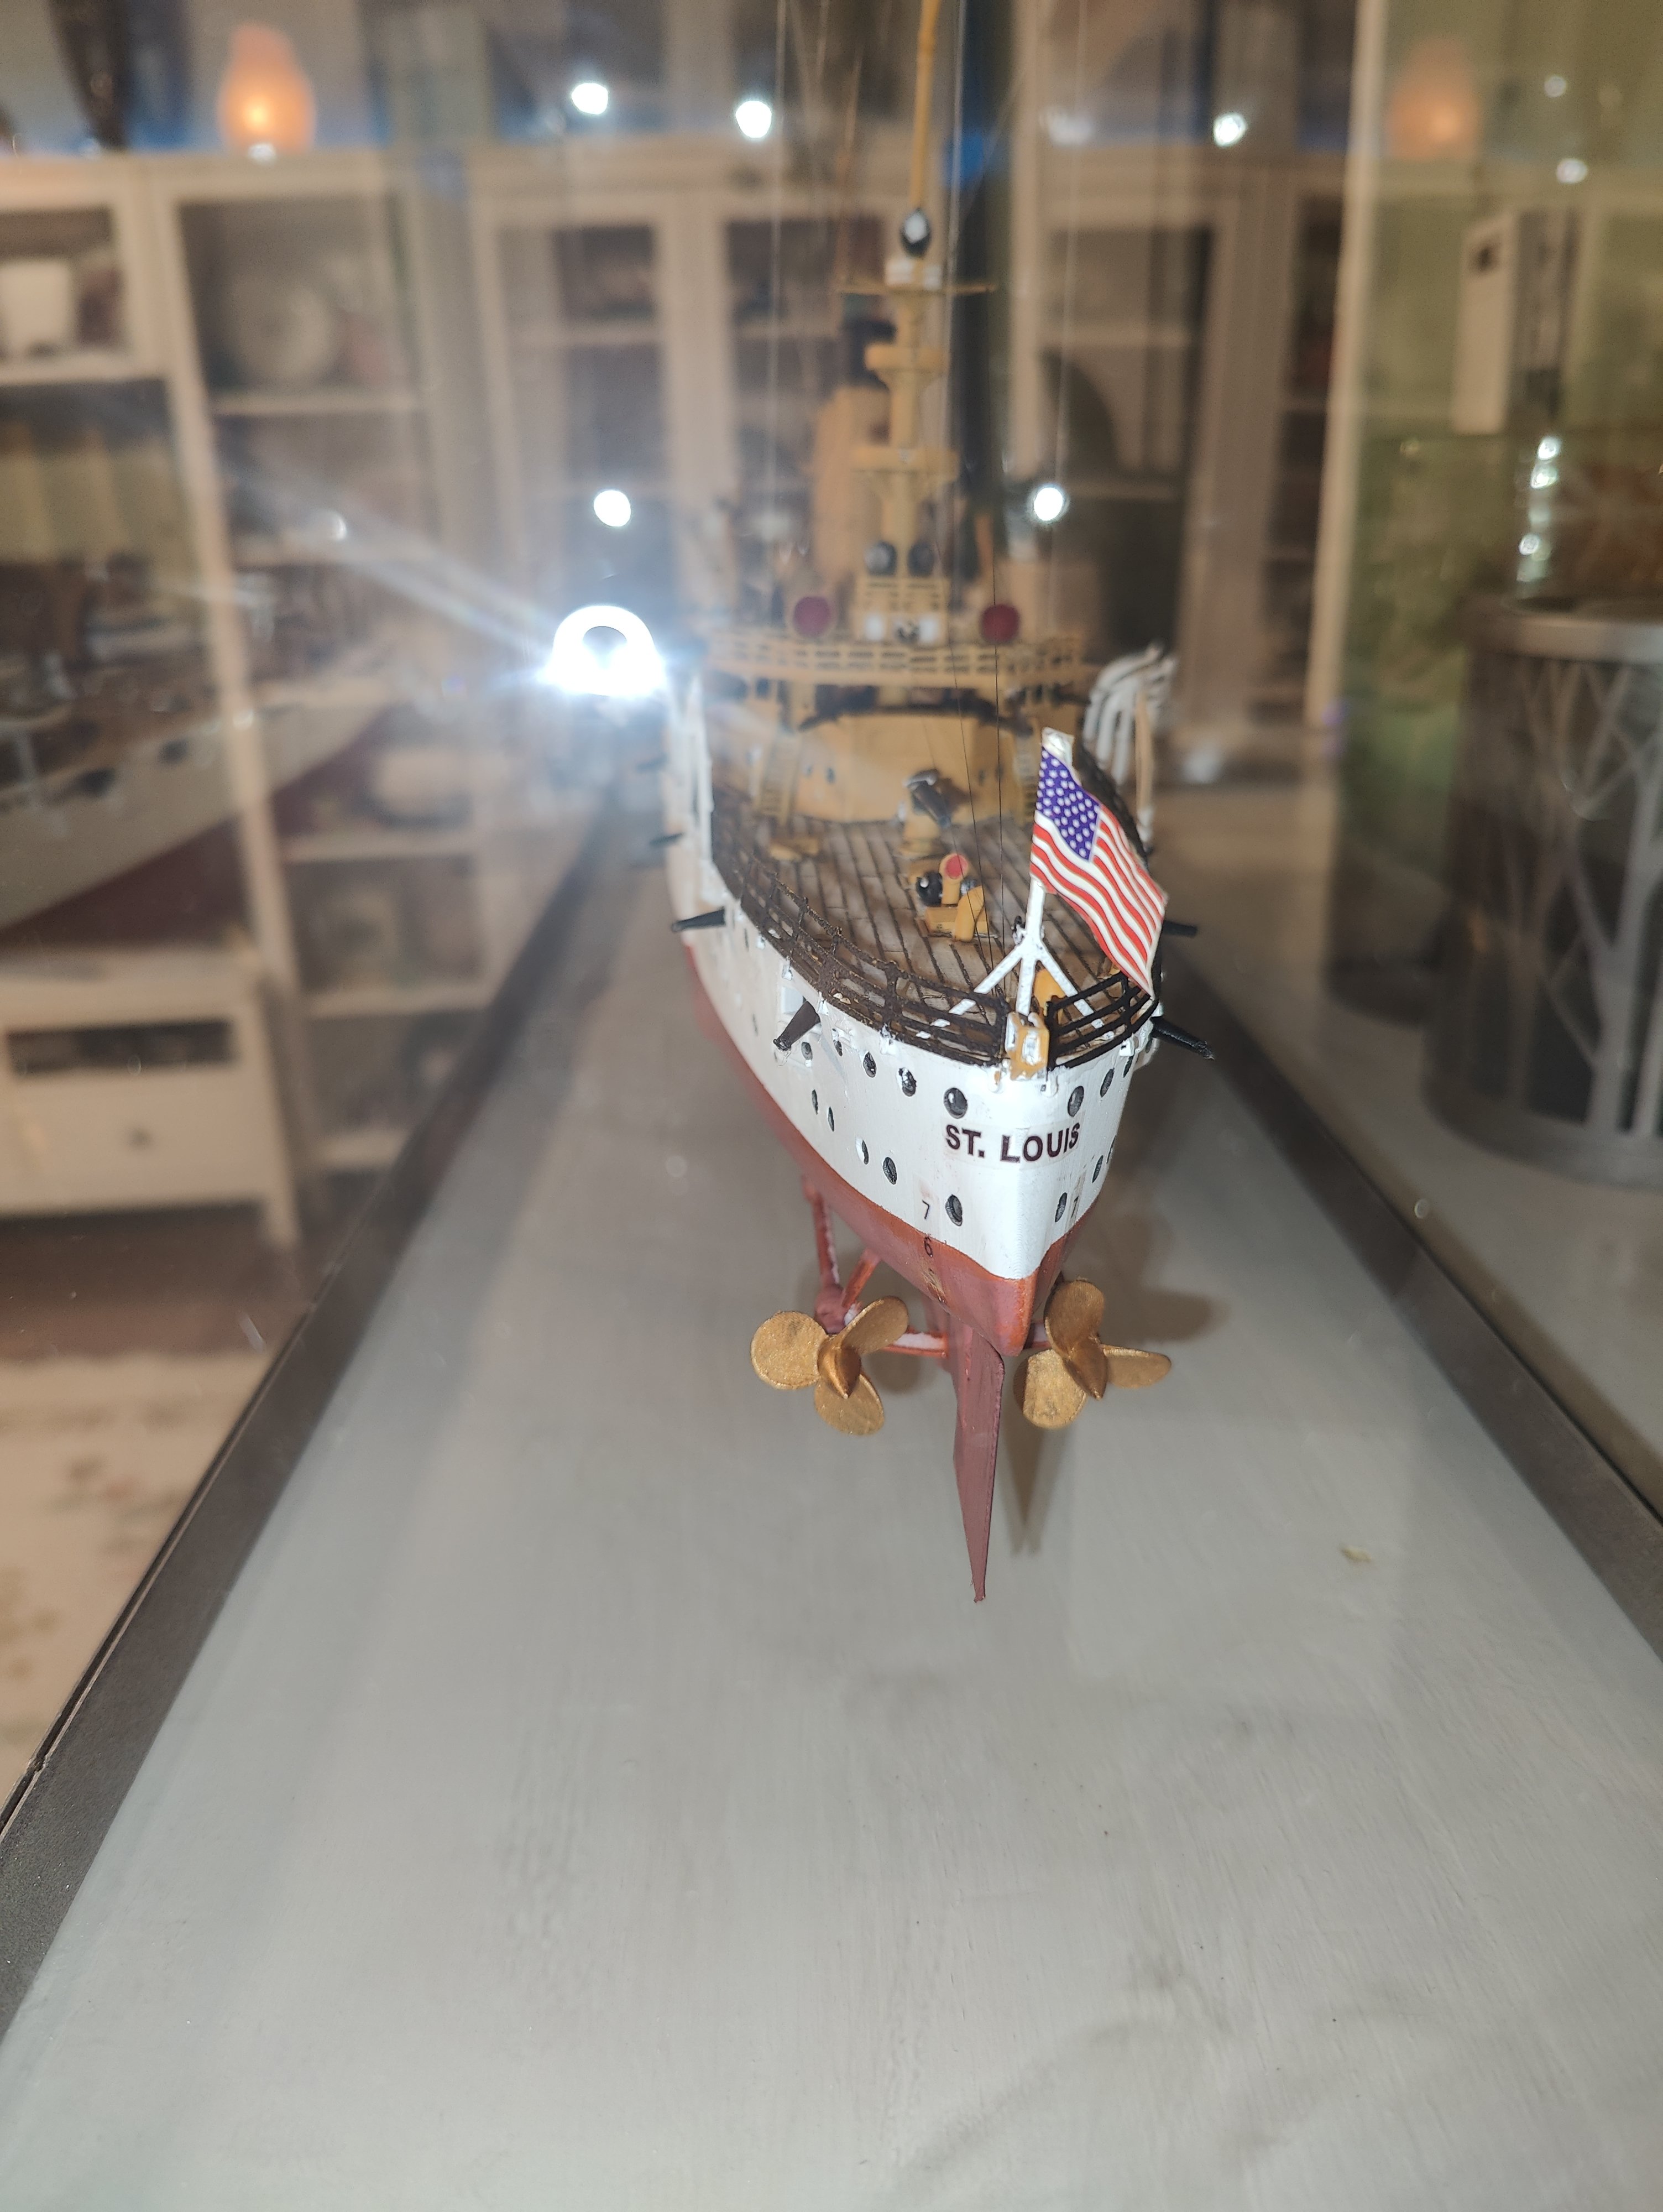
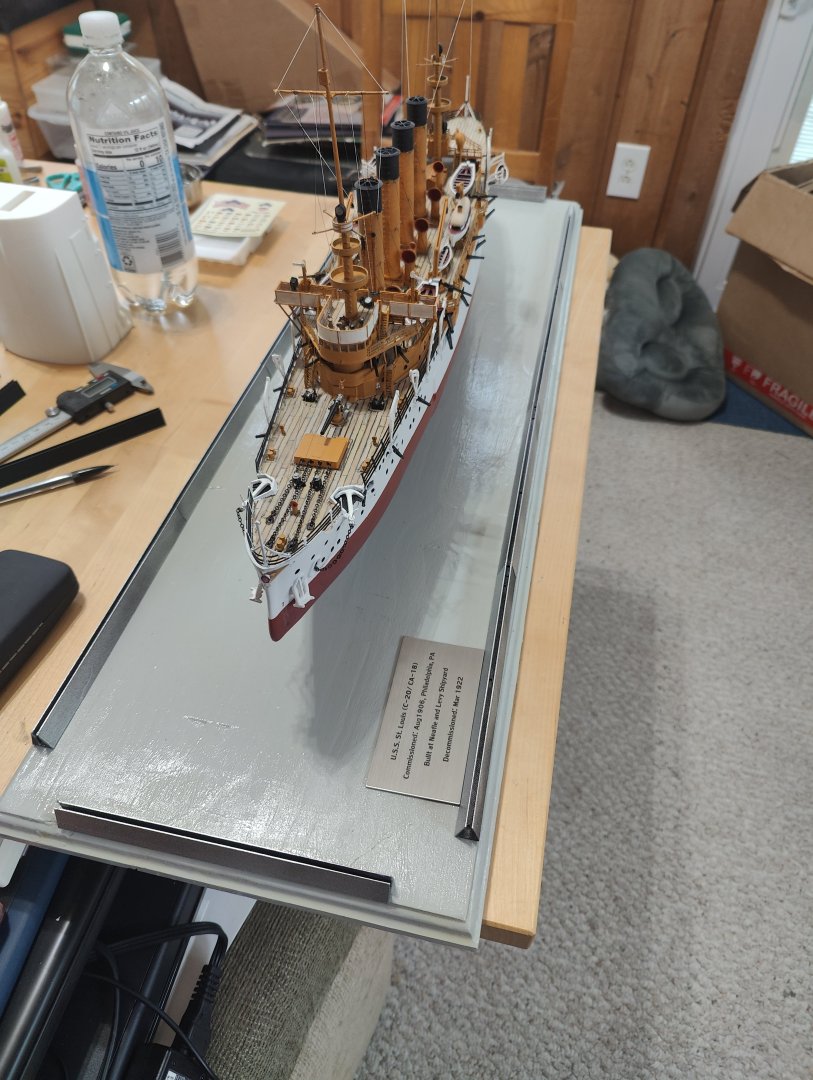
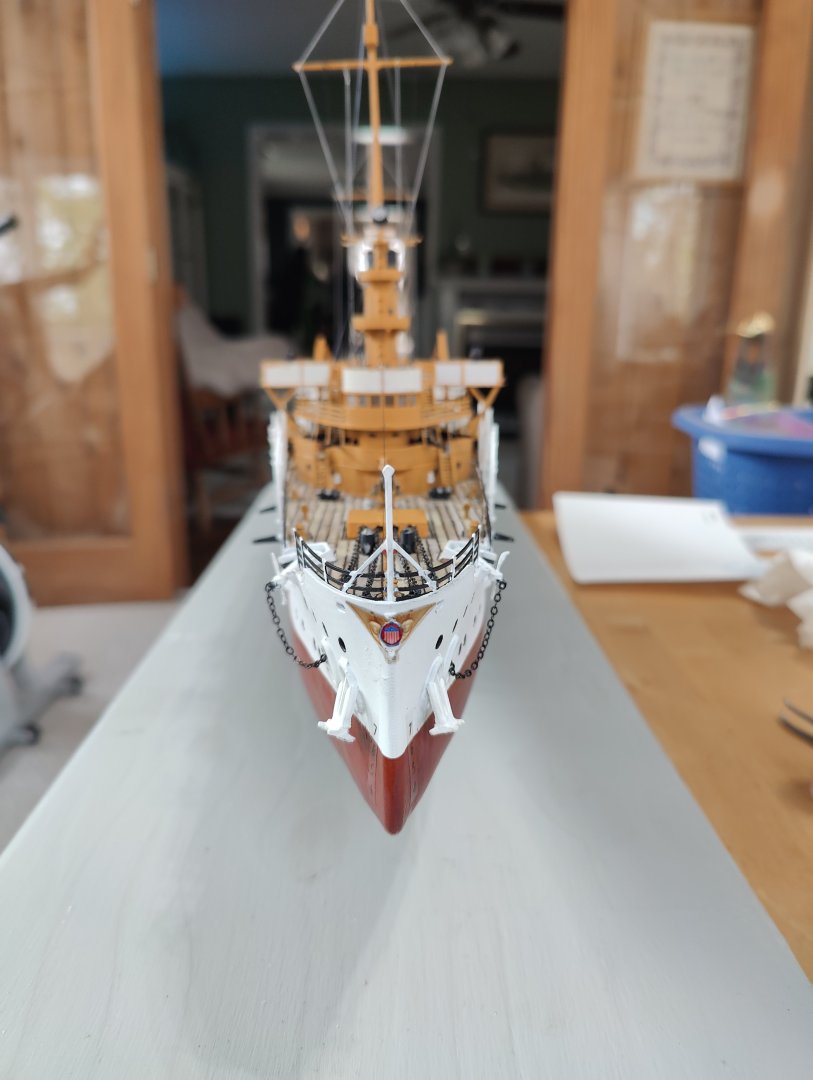
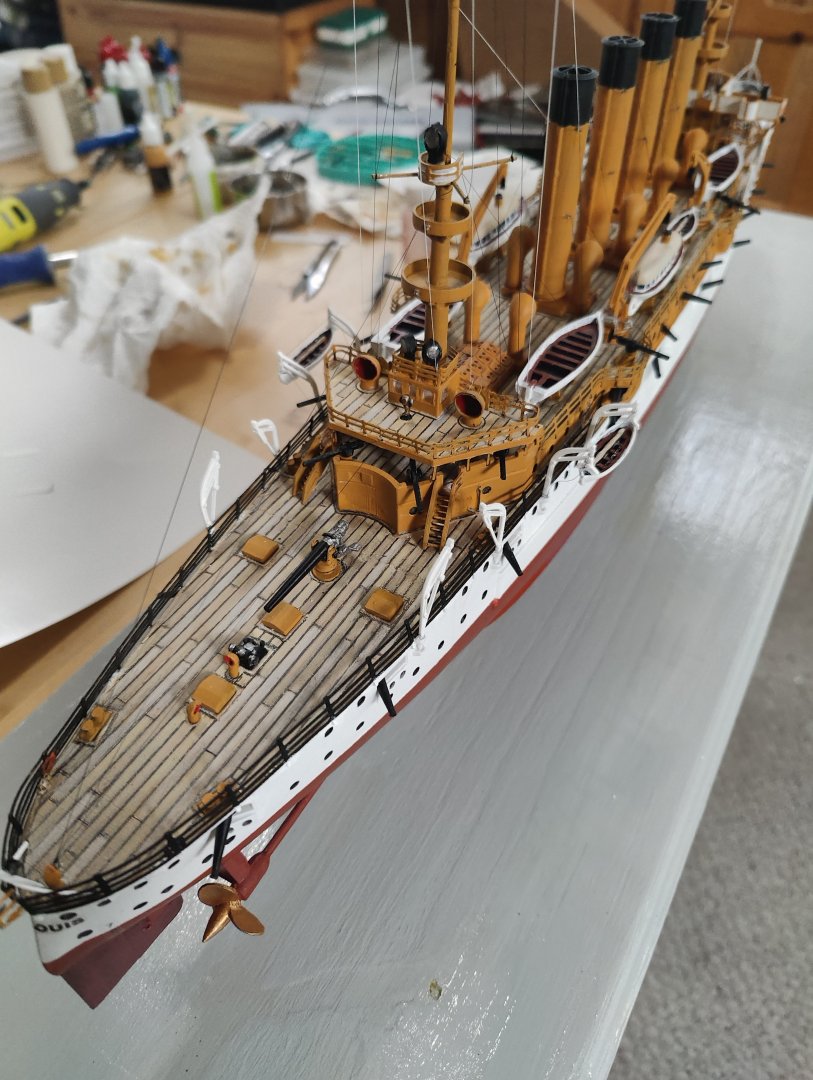
Last of the parts on the ship build. I put on the decals and they came out way better than I thought. Life boats and davits installed Bridge signal arms and davits lines on life boats. I am now 3d printing some display case guides to hold the case to the base.

- 32 replies
-
- 7
-
-
-
- St Louis
- 3D Printing
- (and 2 more)
-
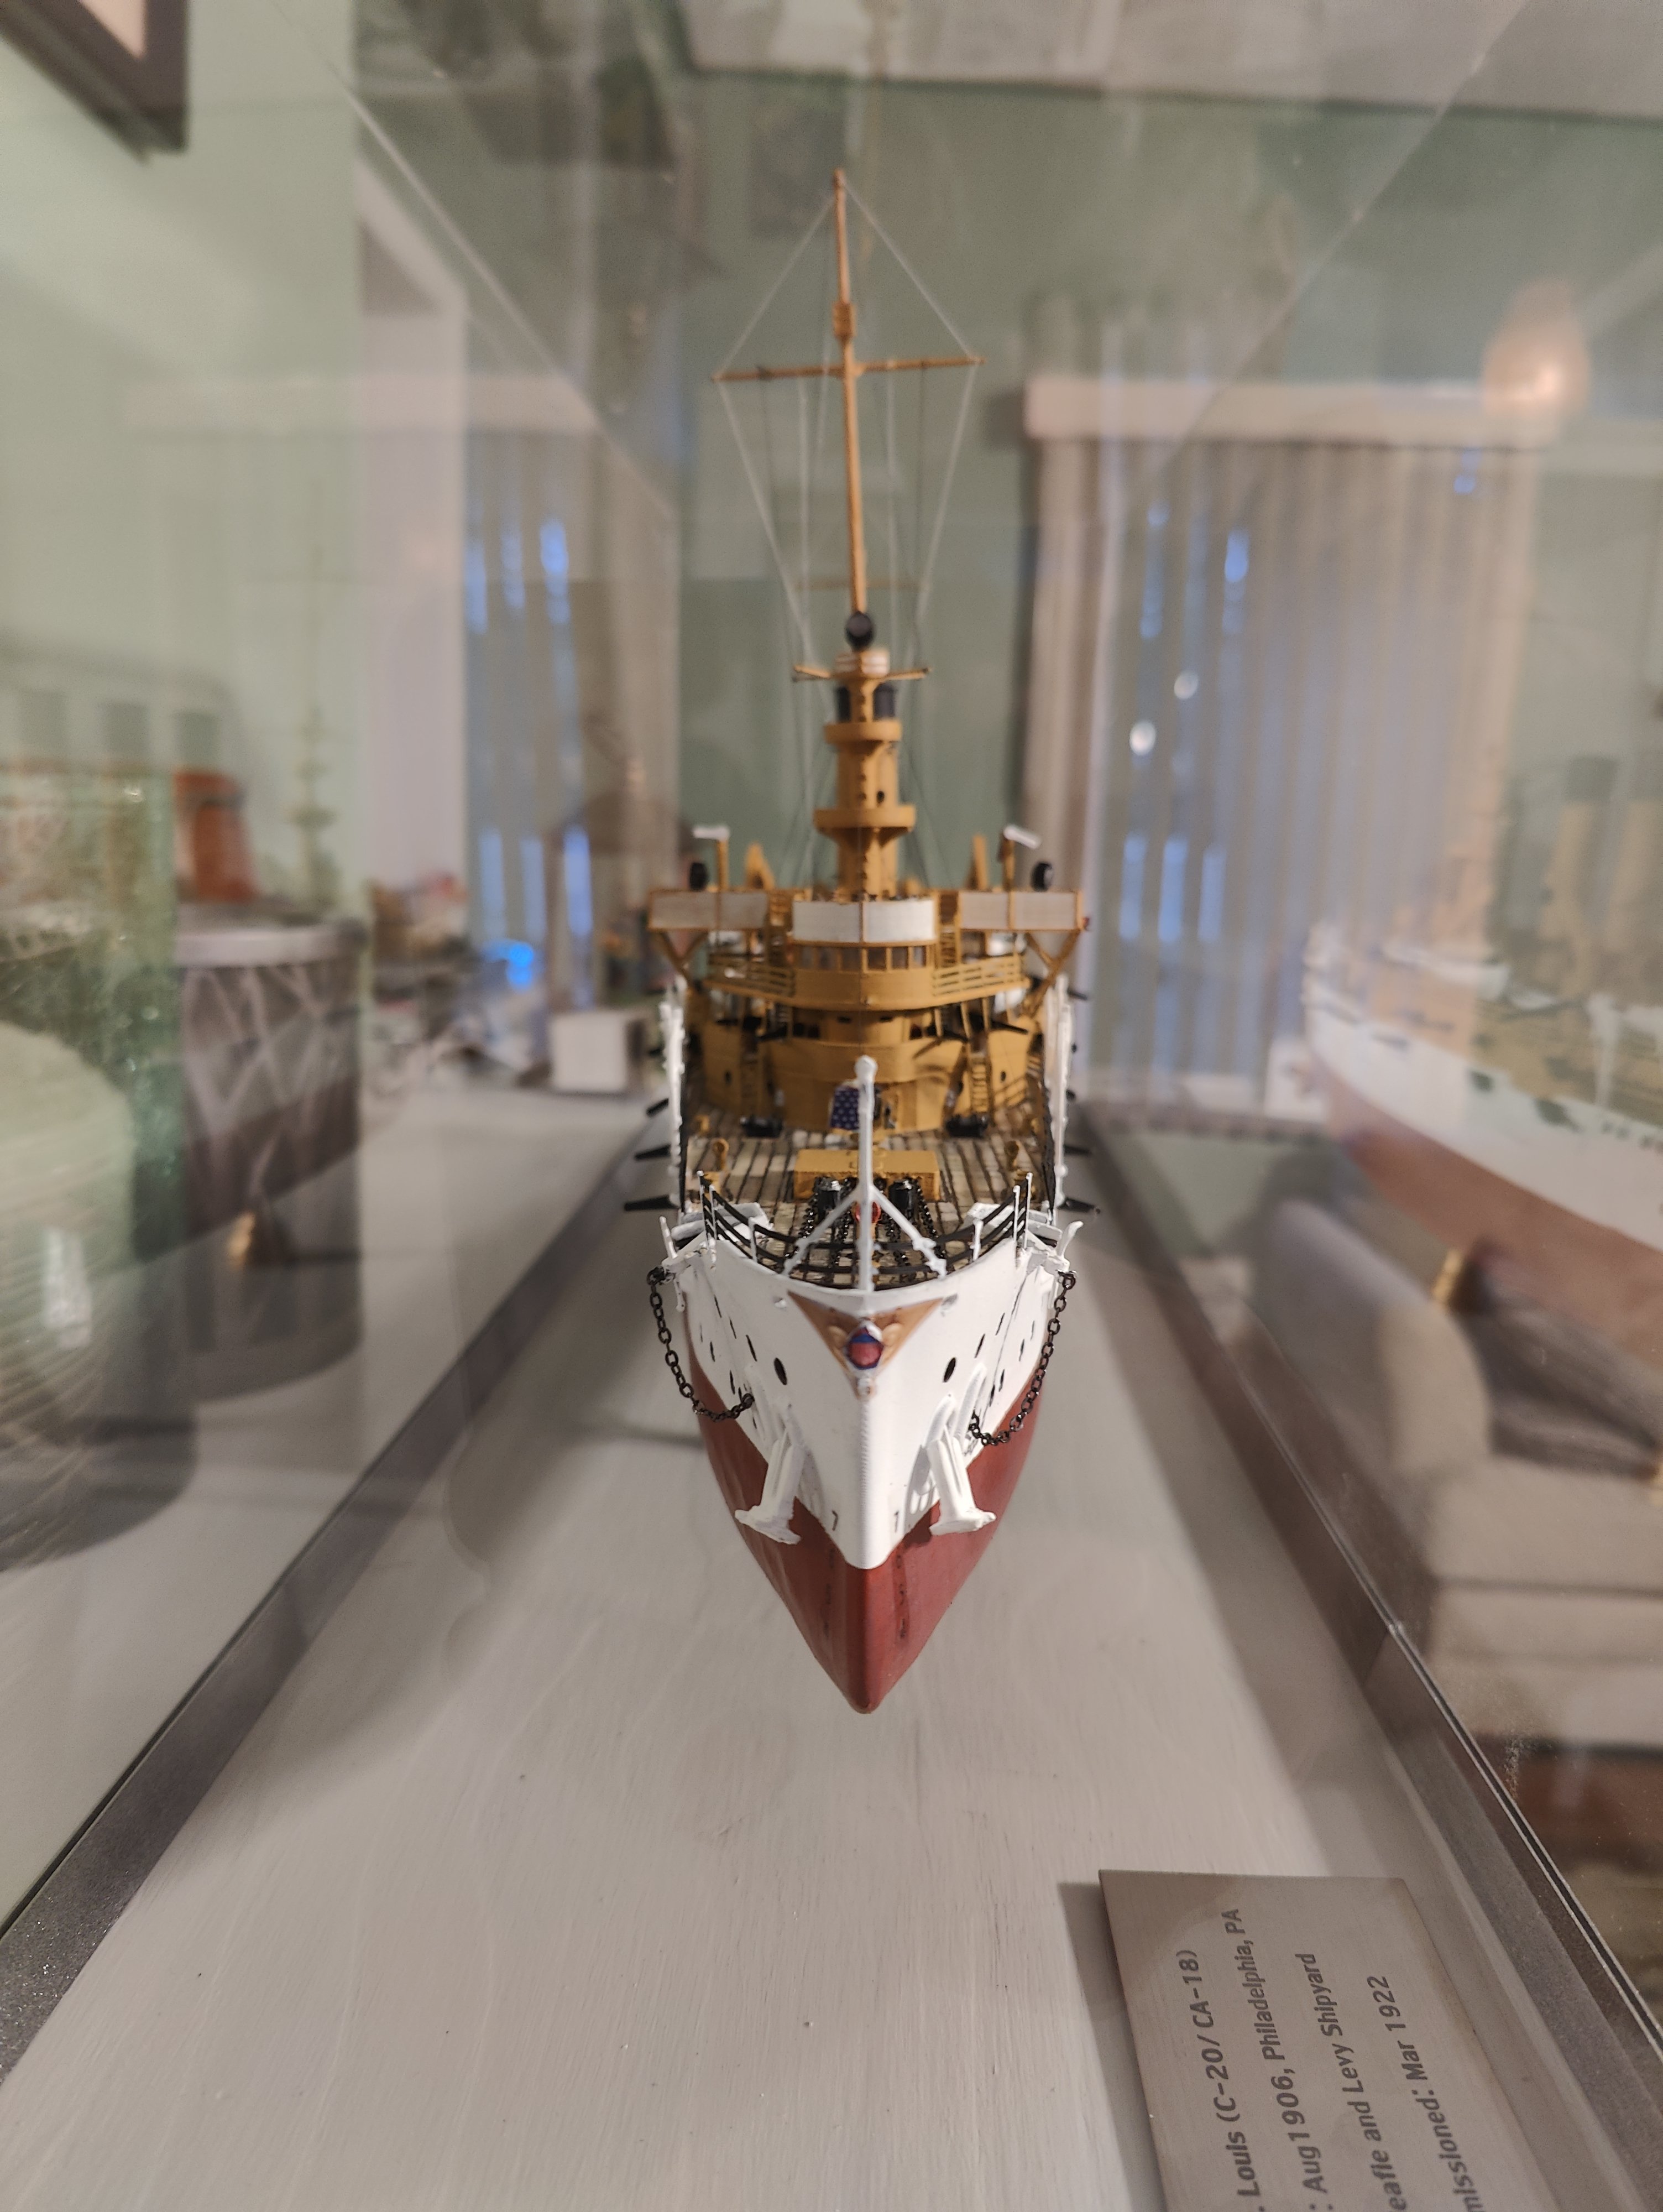
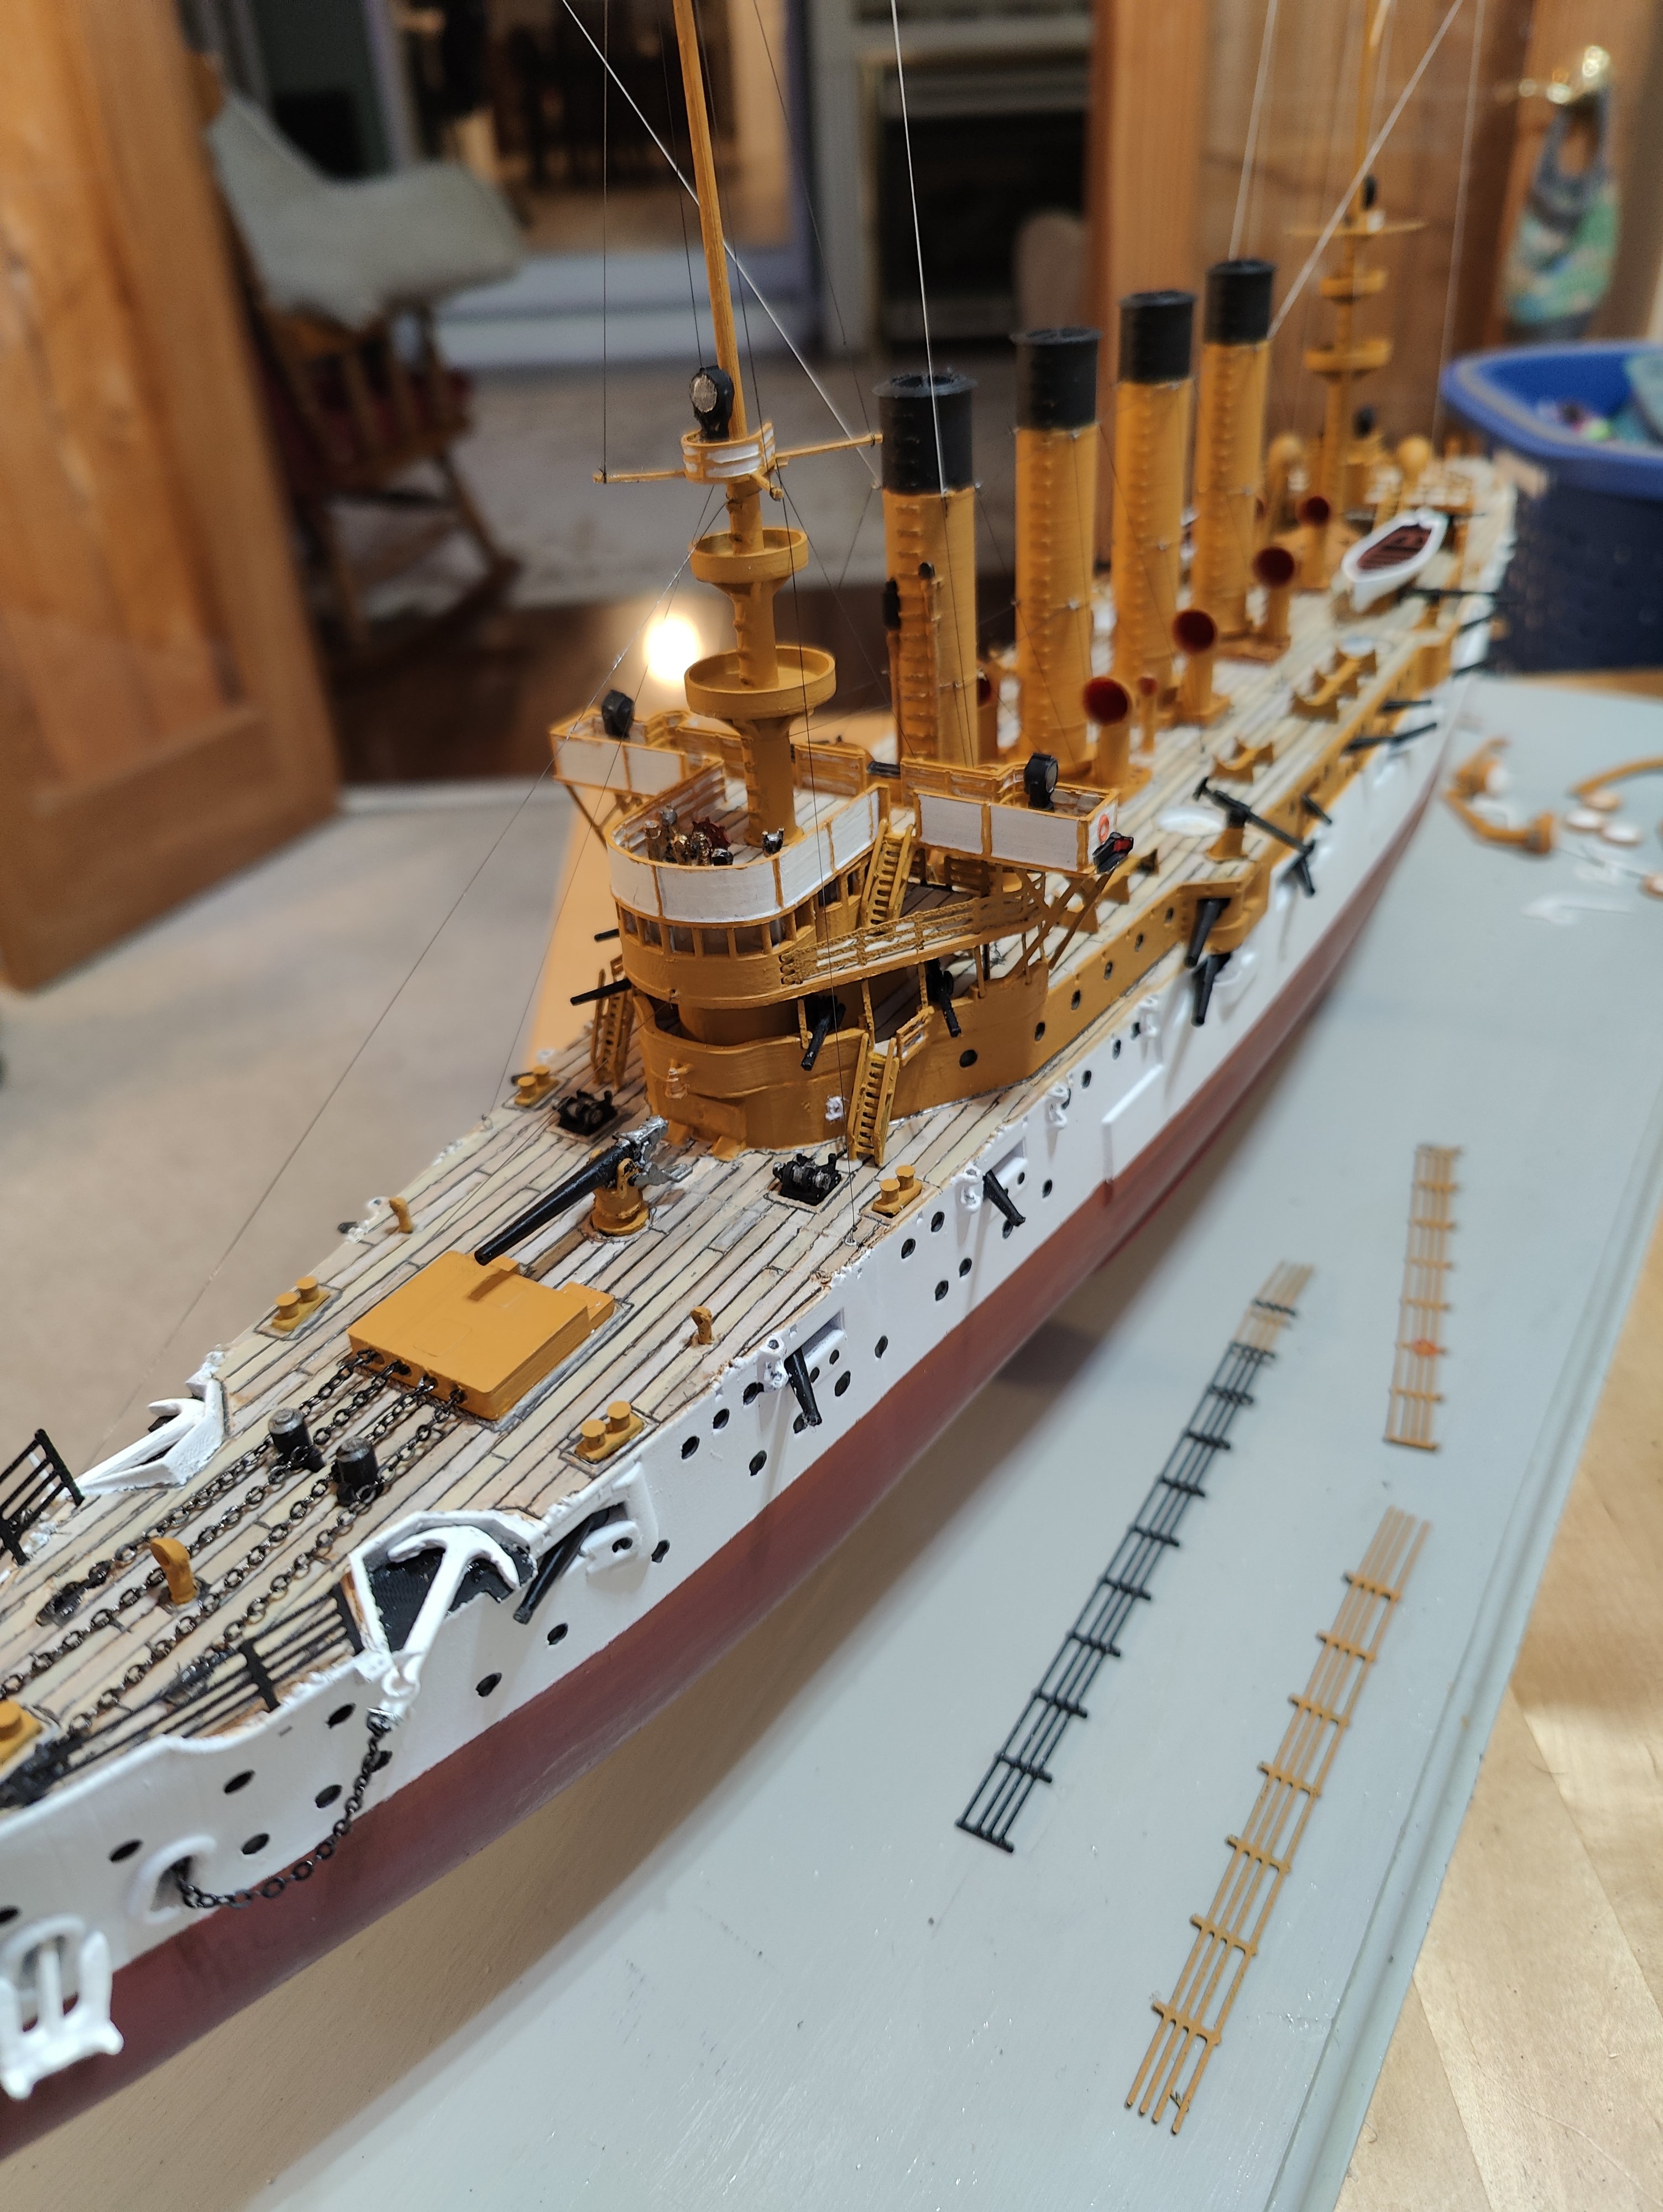
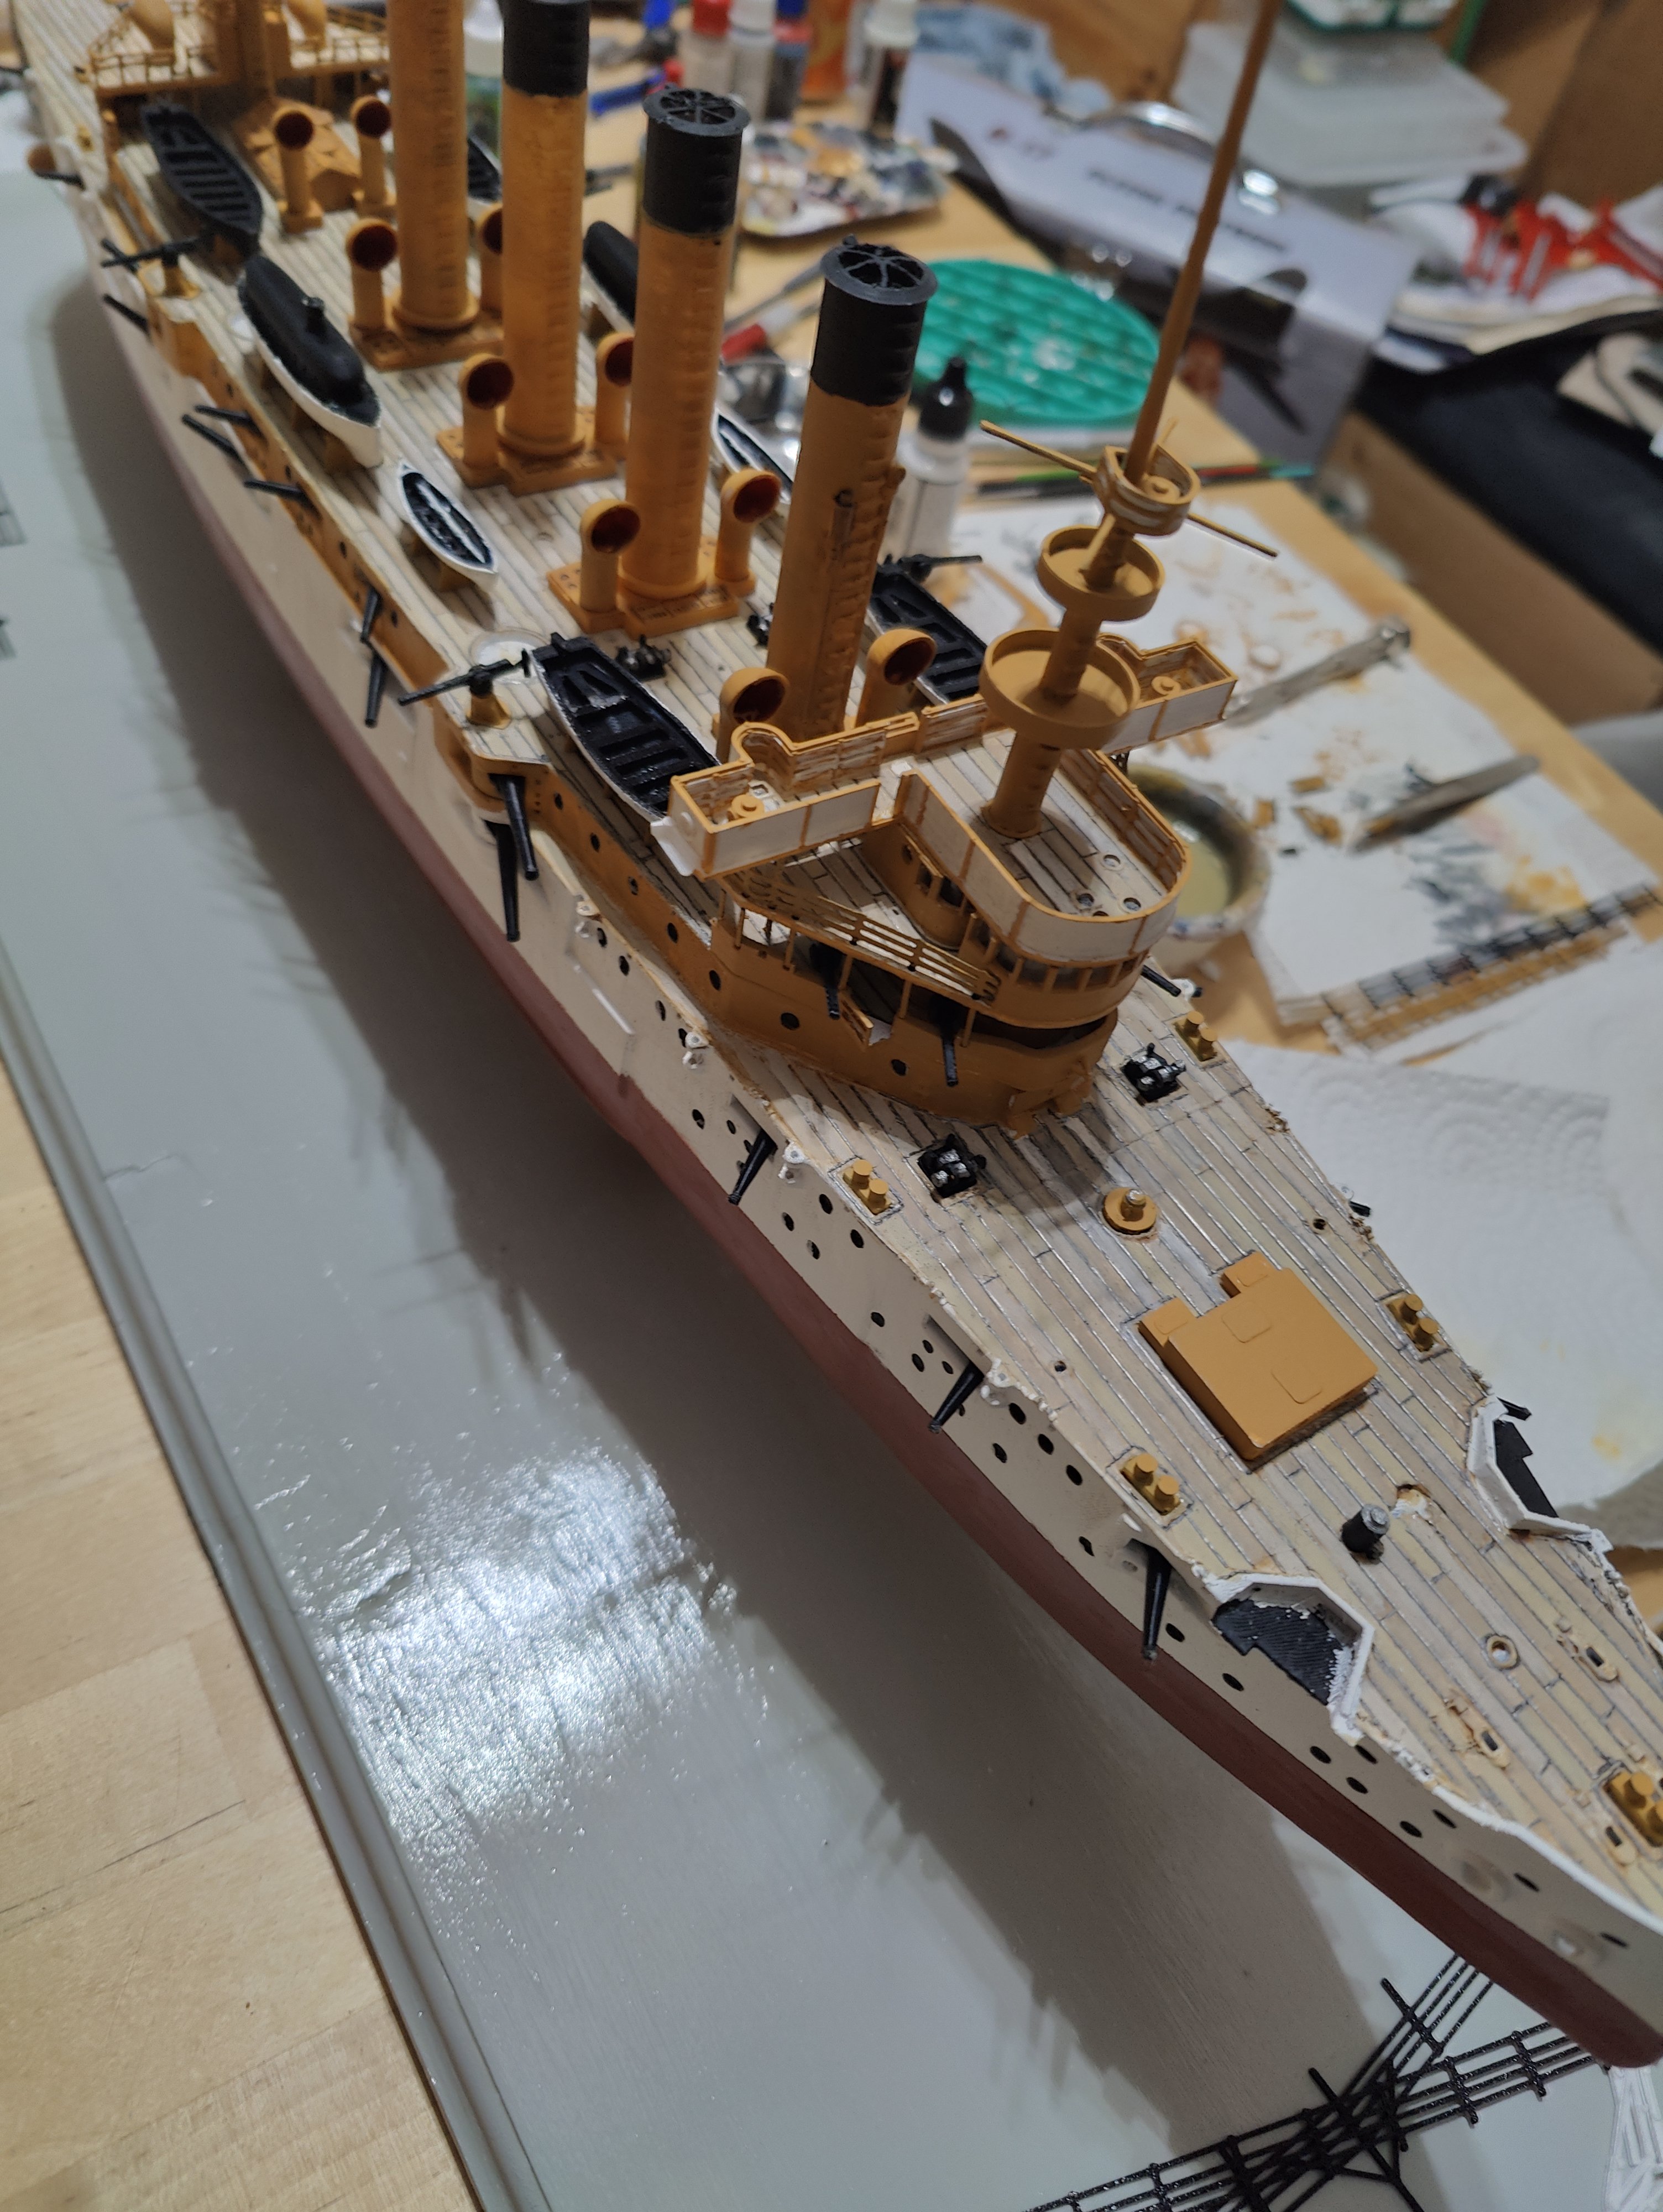
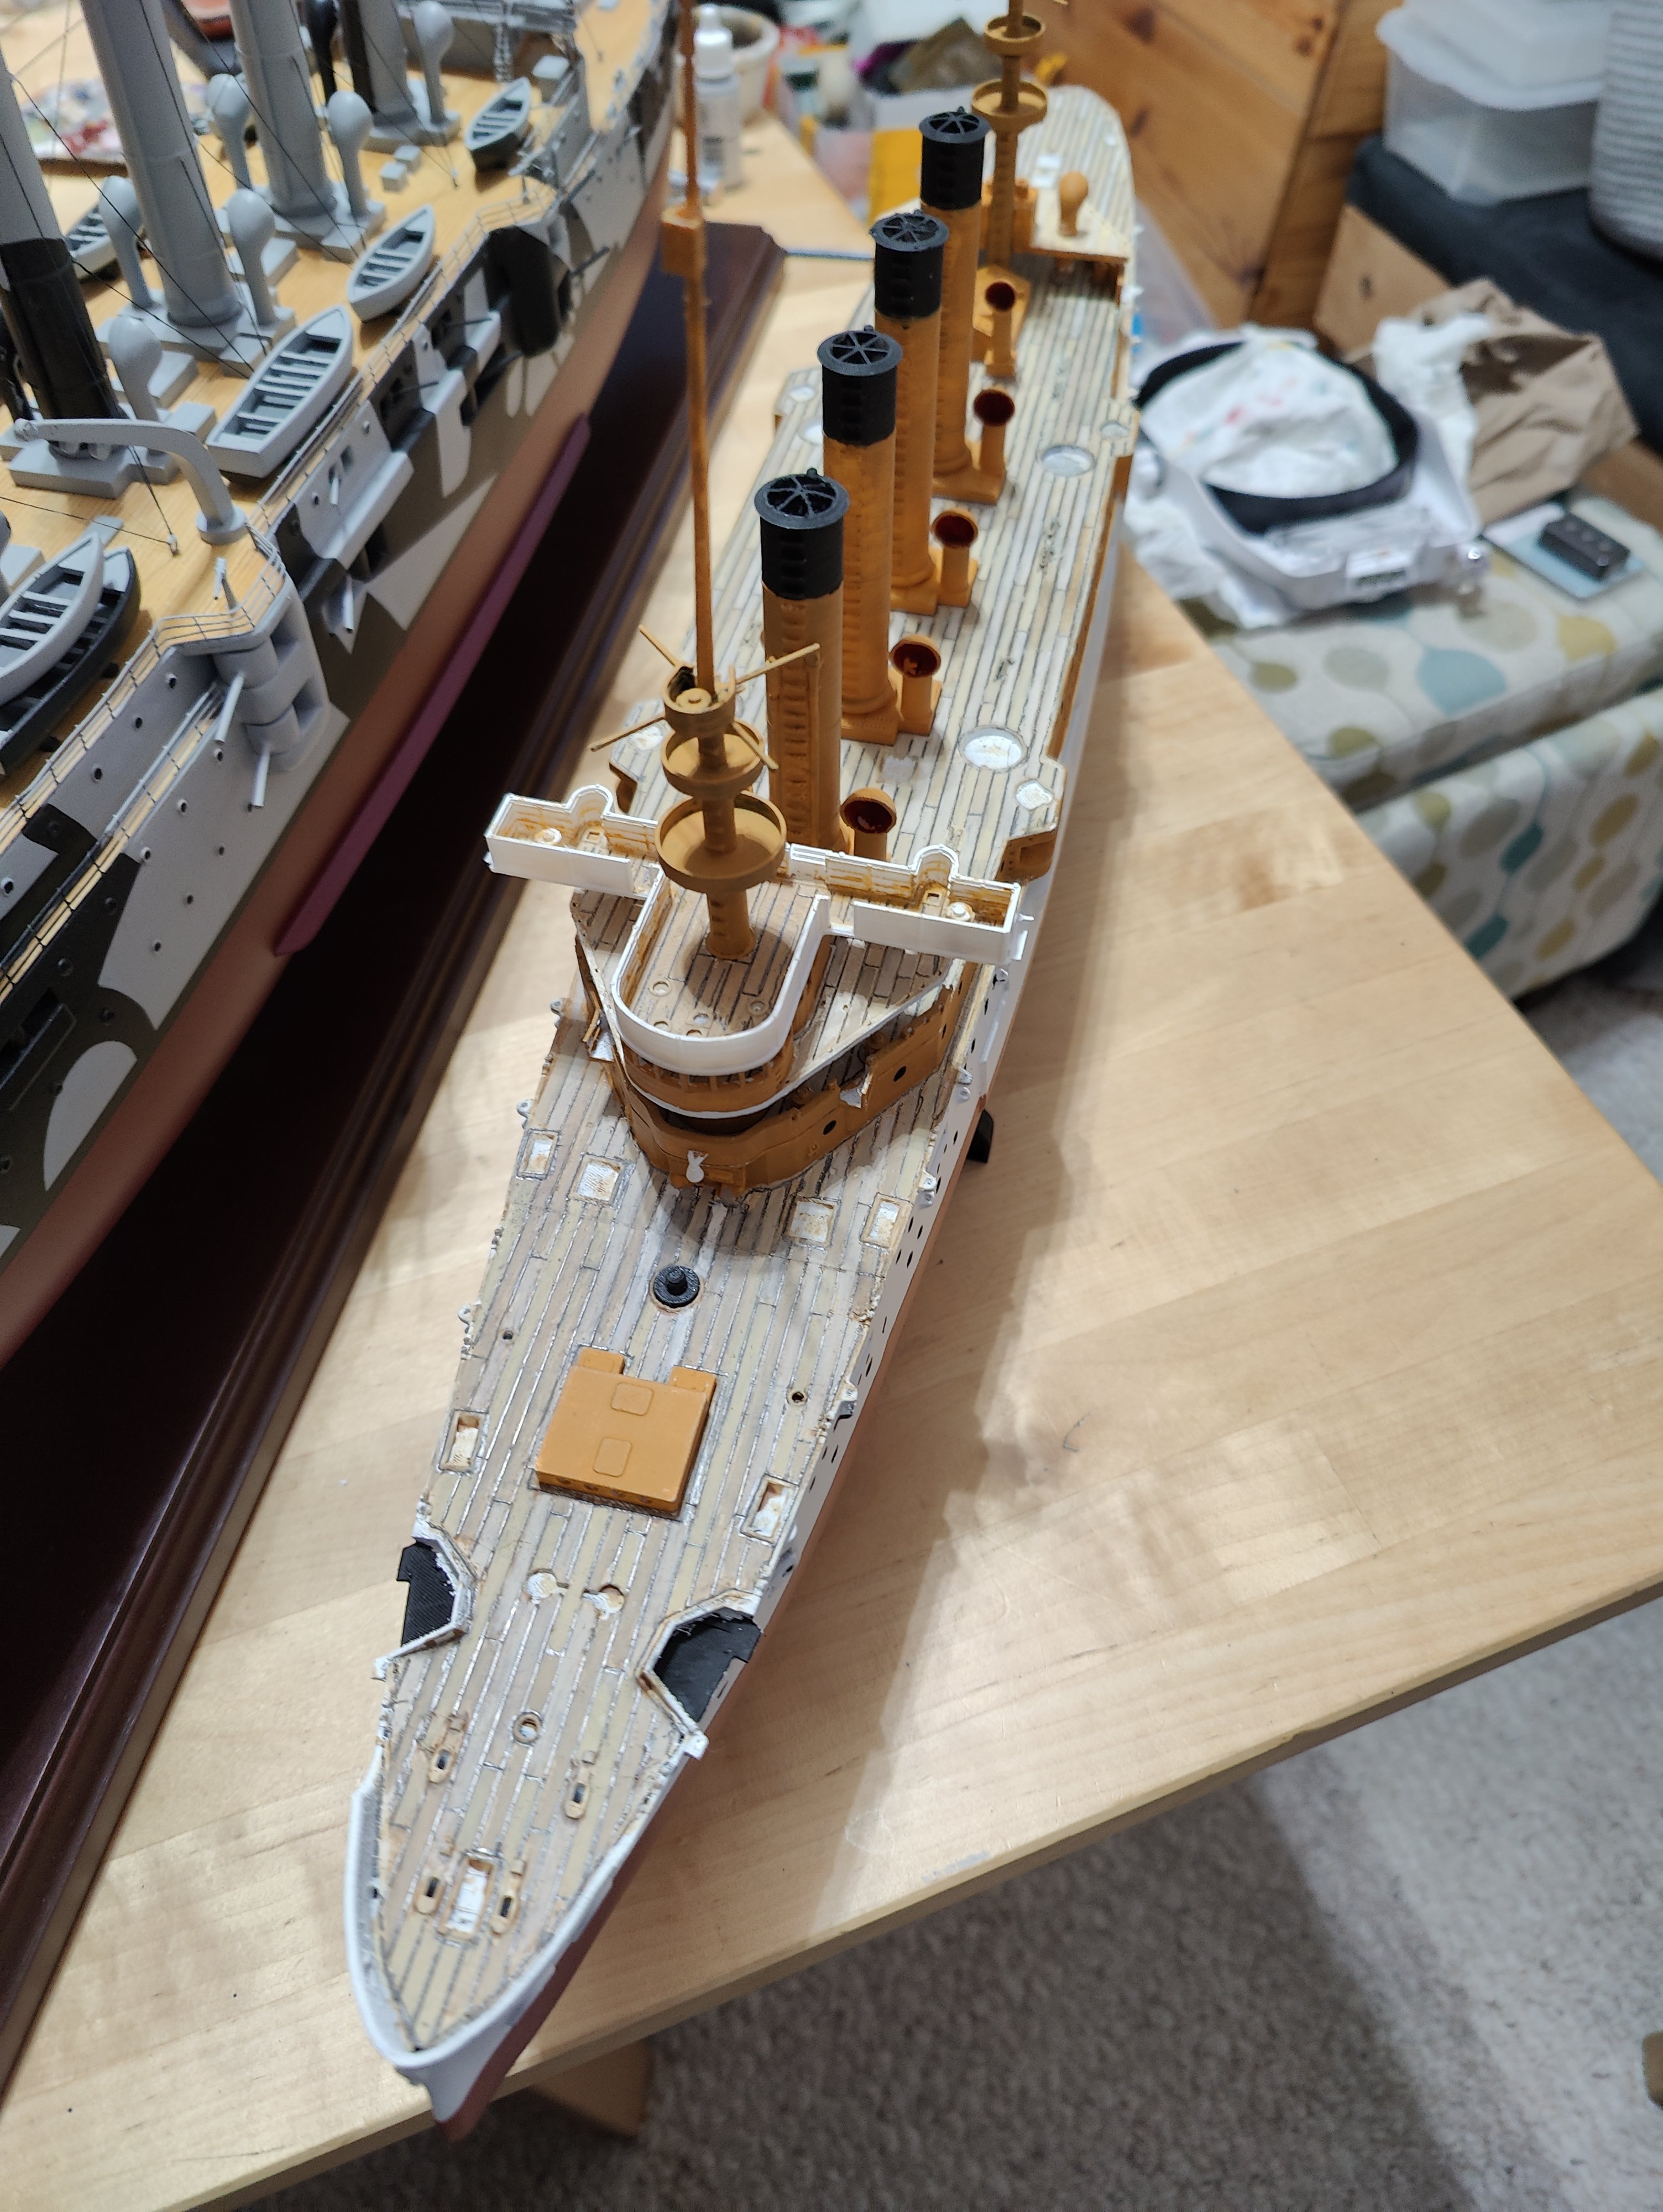
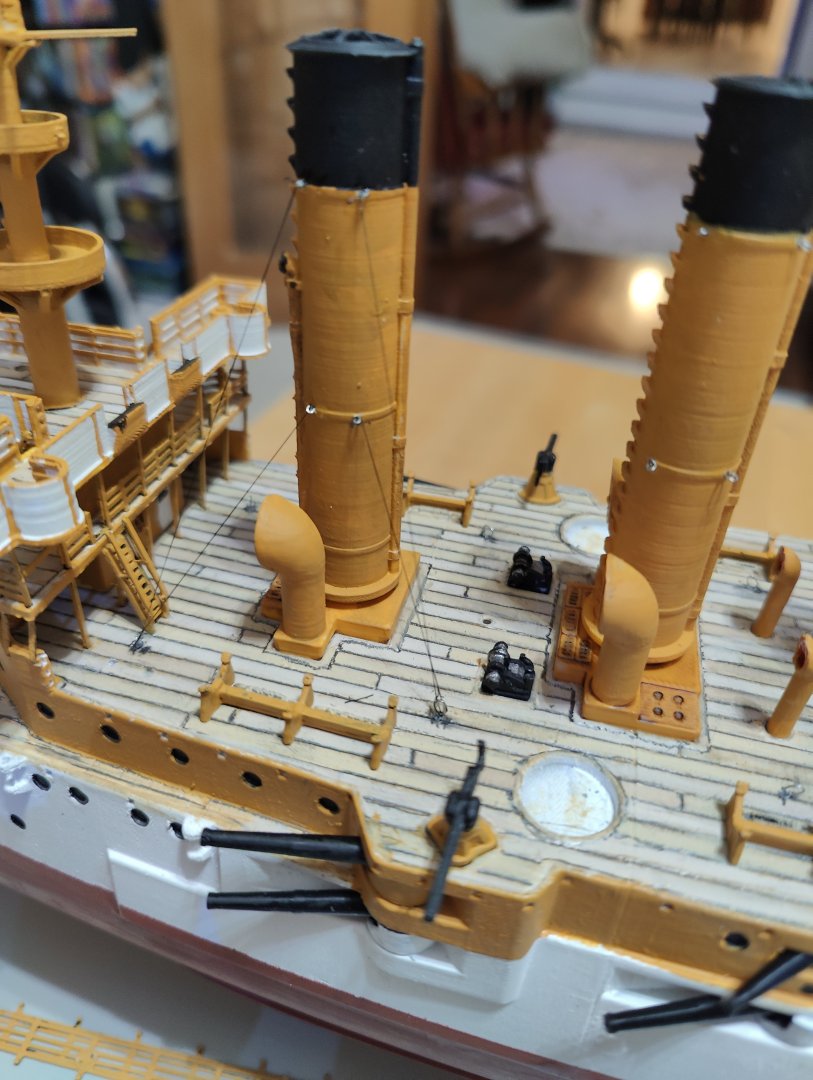
Handrails installed. The actual ship had some very high bow and stern rails with a high rail that presumably supports canopies. Coming up on a finish on this as the Joint Show is in a week!

- 32 replies
-
- 5
-
-
- St Louis
- 3D Printing
- (and 2 more)
-
highlanderburial reacted to a post in a topic:
USS St. Louis (CL-20) by highlanderburial - FINISHED - 1/200 scale - 3d Print and 1/150 Restoration
-
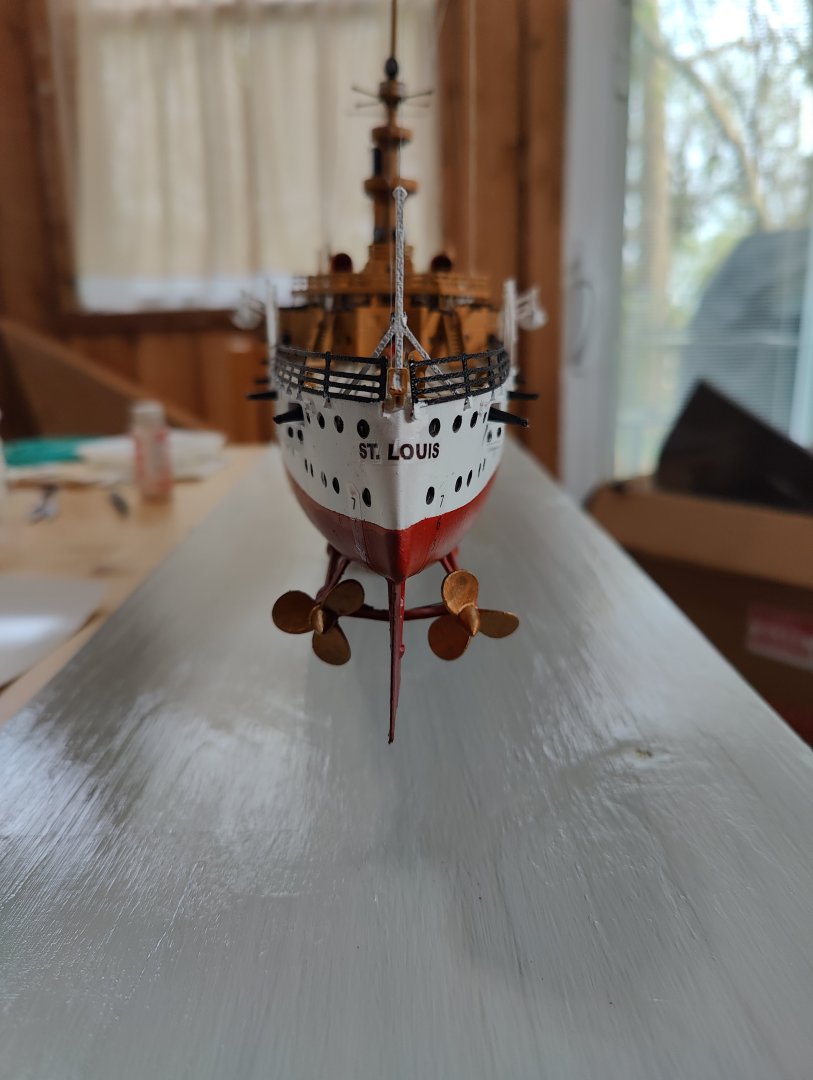
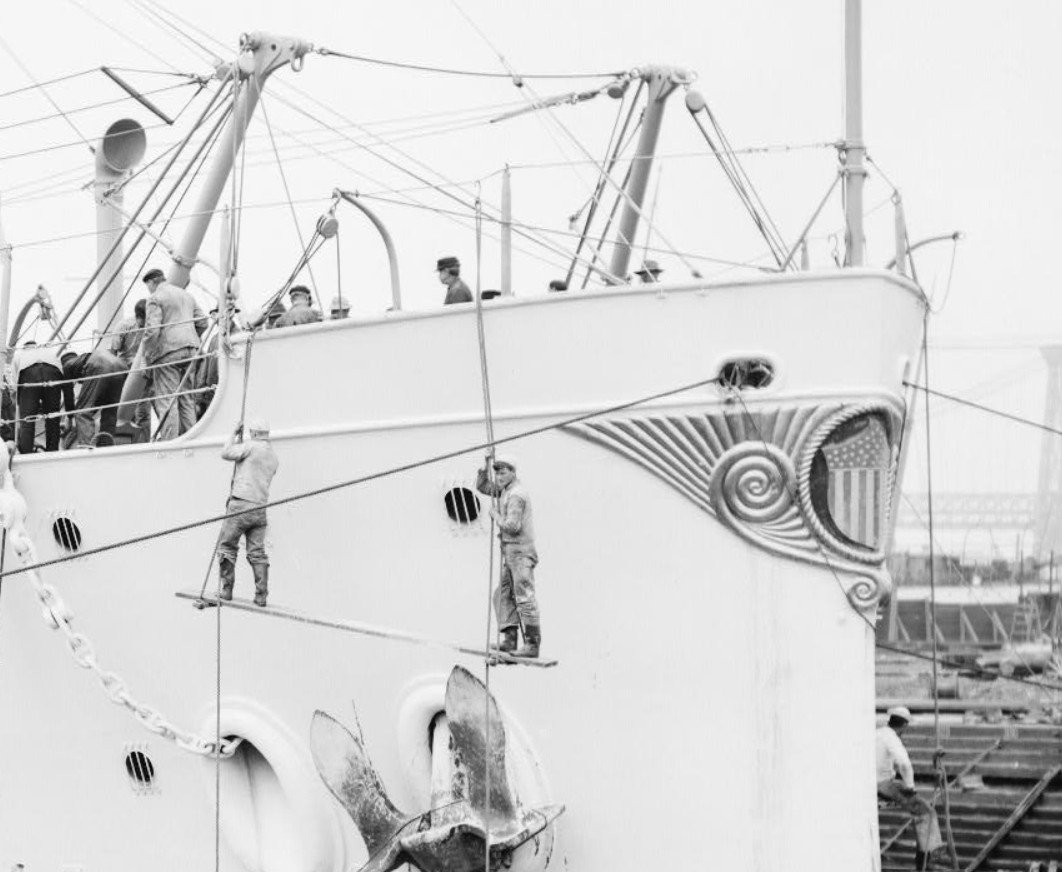
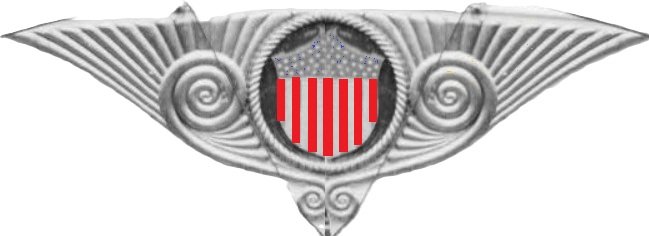
A little different line of effort tonight. I wanted to put on a bow ornament decal at some point and event though it will be microscopic, it was distinctive on these types of vessels. I found a photo of the bow ornament and then altered the photo. I then used AI software to colorize it. I will now convert that into a decal which will go on the front.


- 32 replies
-
- 5
-
-
- St Louis
- 3D Printing
- (and 2 more)
-
Hank, The entire kit is available here: USS St. Louis - official 3D printable model from WoWS by World of Warships | Download free STL model | Printables.com The price is FREE! This was a trial by the very popular game World of Warships to see if there was interest in them converting their digitized designs (which are fantastic btw) over to 3d printable models. I have BEGGED them to make these files available. As to your request on the weaponry, I am afraid the 3d kit maker left a LOT to be desired. Most of the parts were VERY vague and I had to even resculpt a few of the smaller weapons to look decent. If there are parts that you need or can use than they are all there! Thanks for commenting. I love these buff and white colored vessels, but this is my very first attempt at this kind of ship modeling and so far it has been pretty positive. V/R Todd
- 32 replies
-
- 2
-
-
- St Louis
- 3D Printing
- (and 2 more)
-
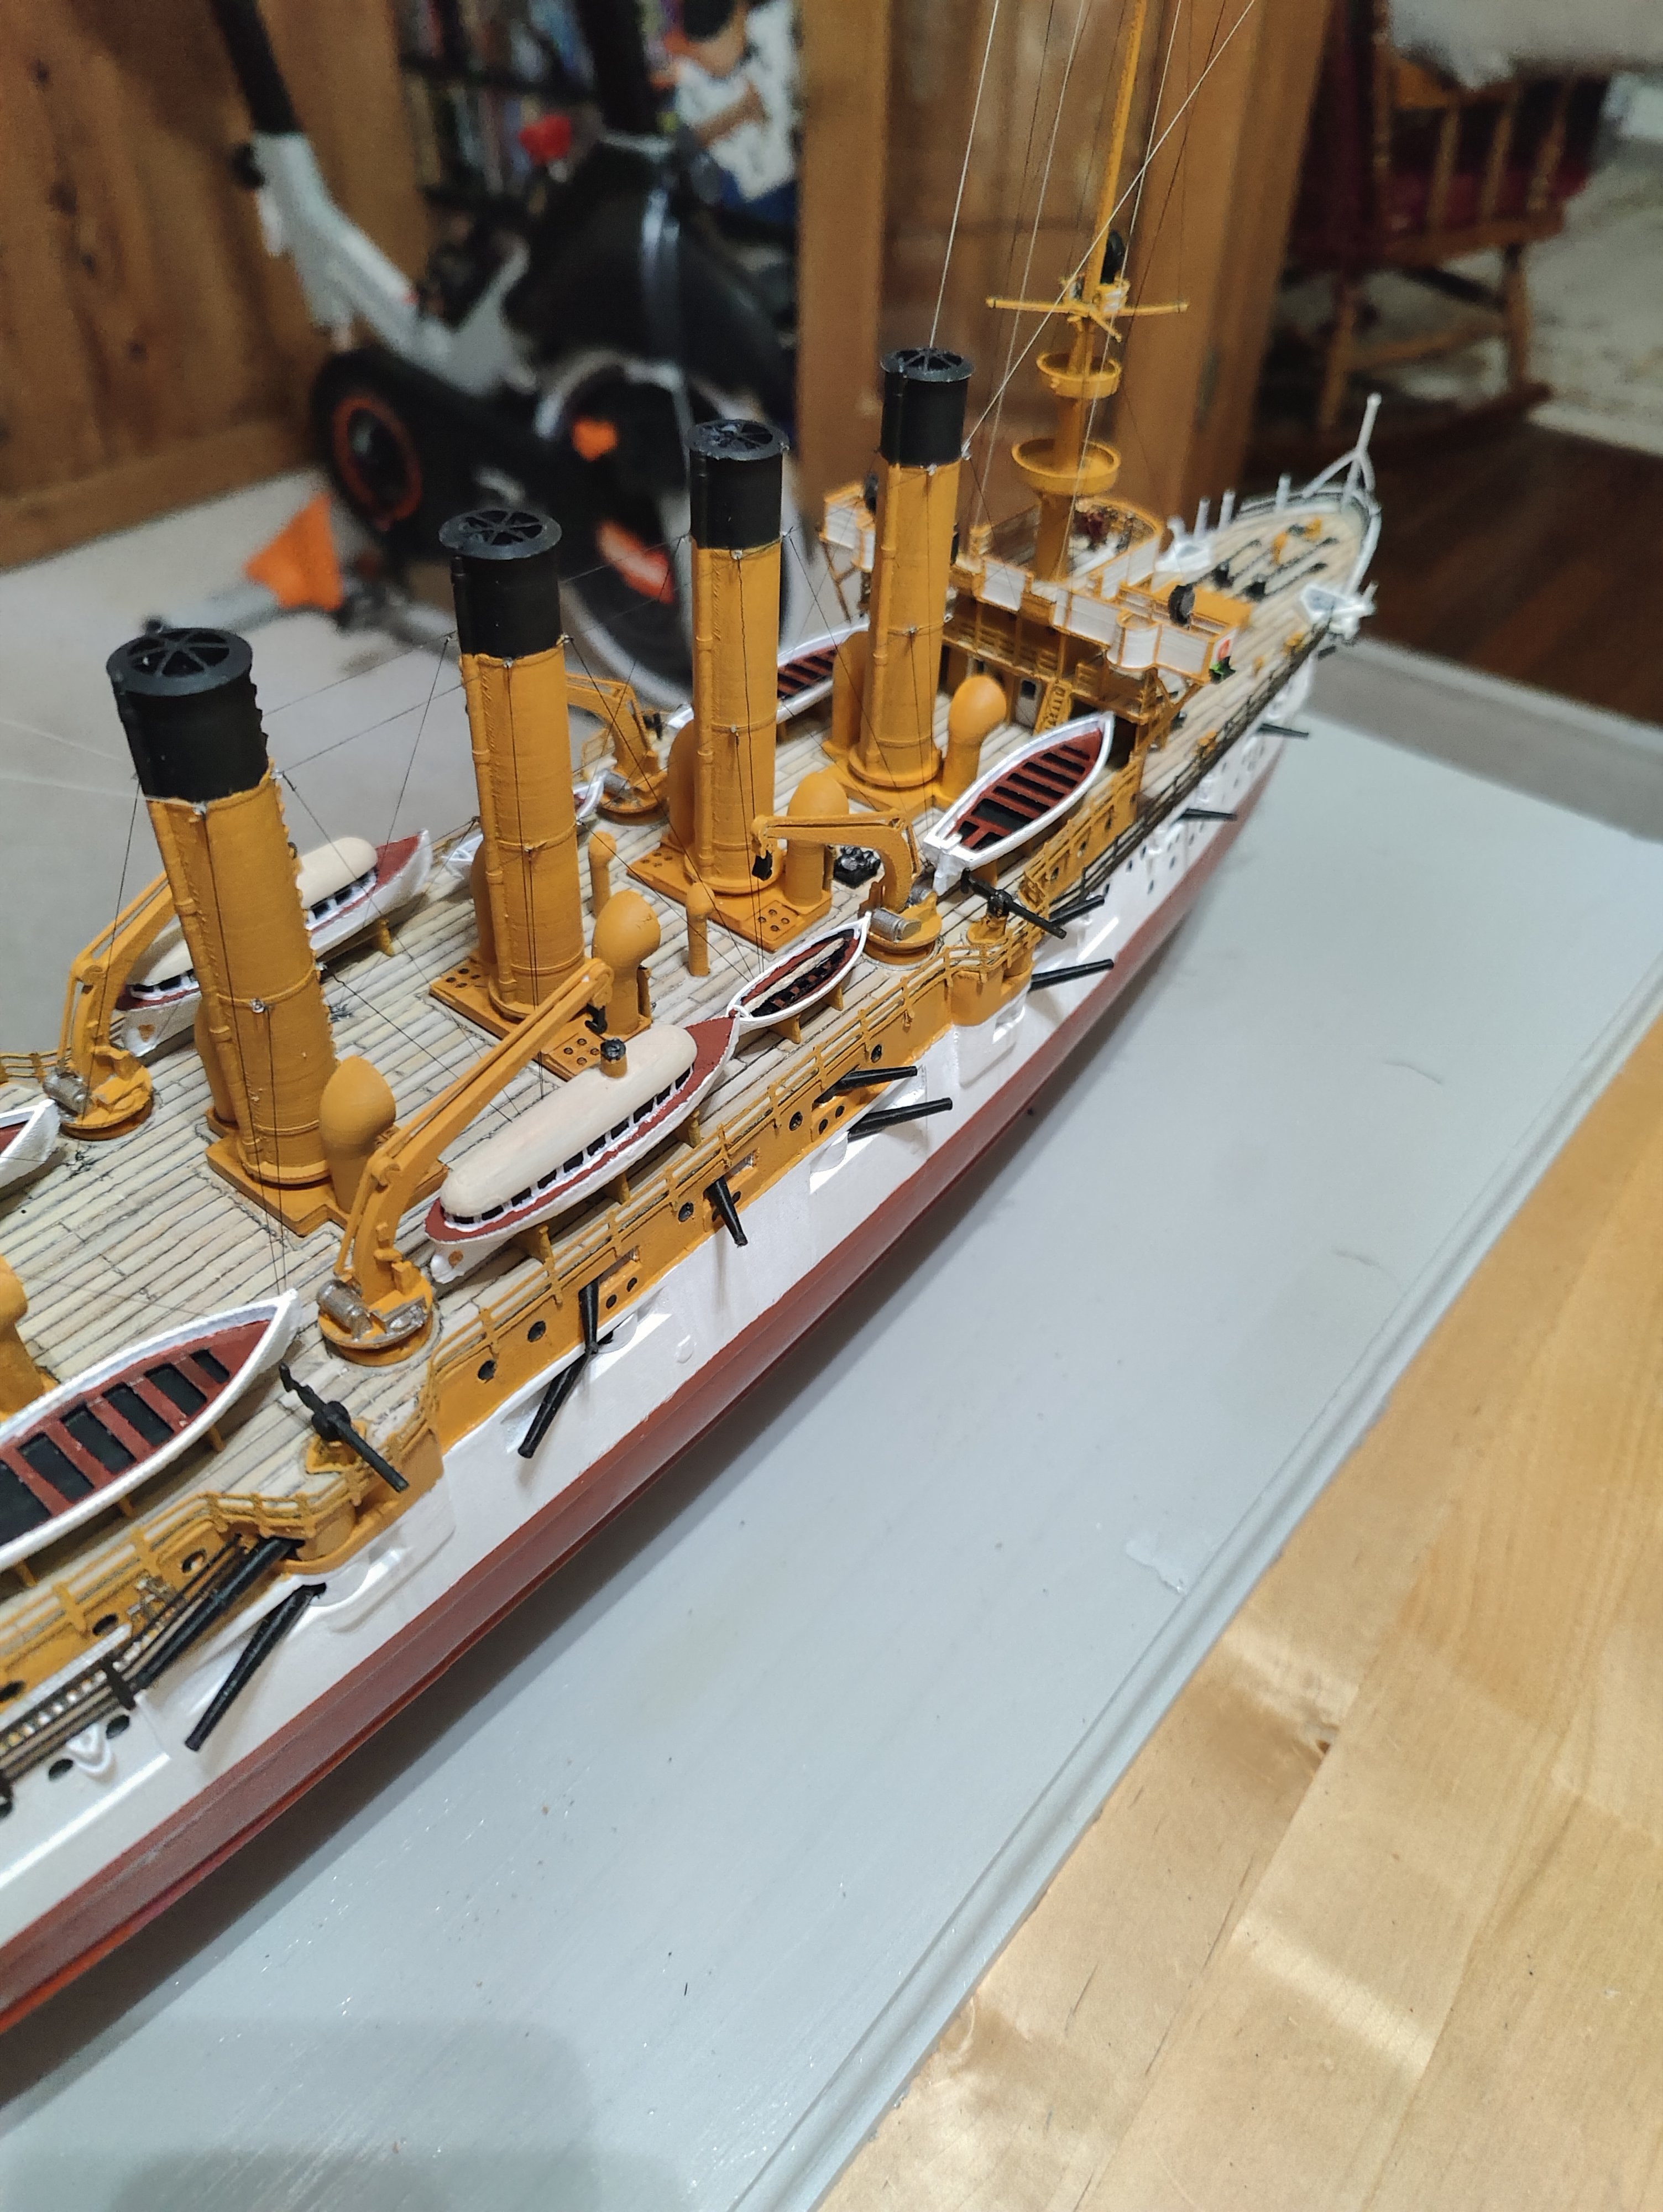
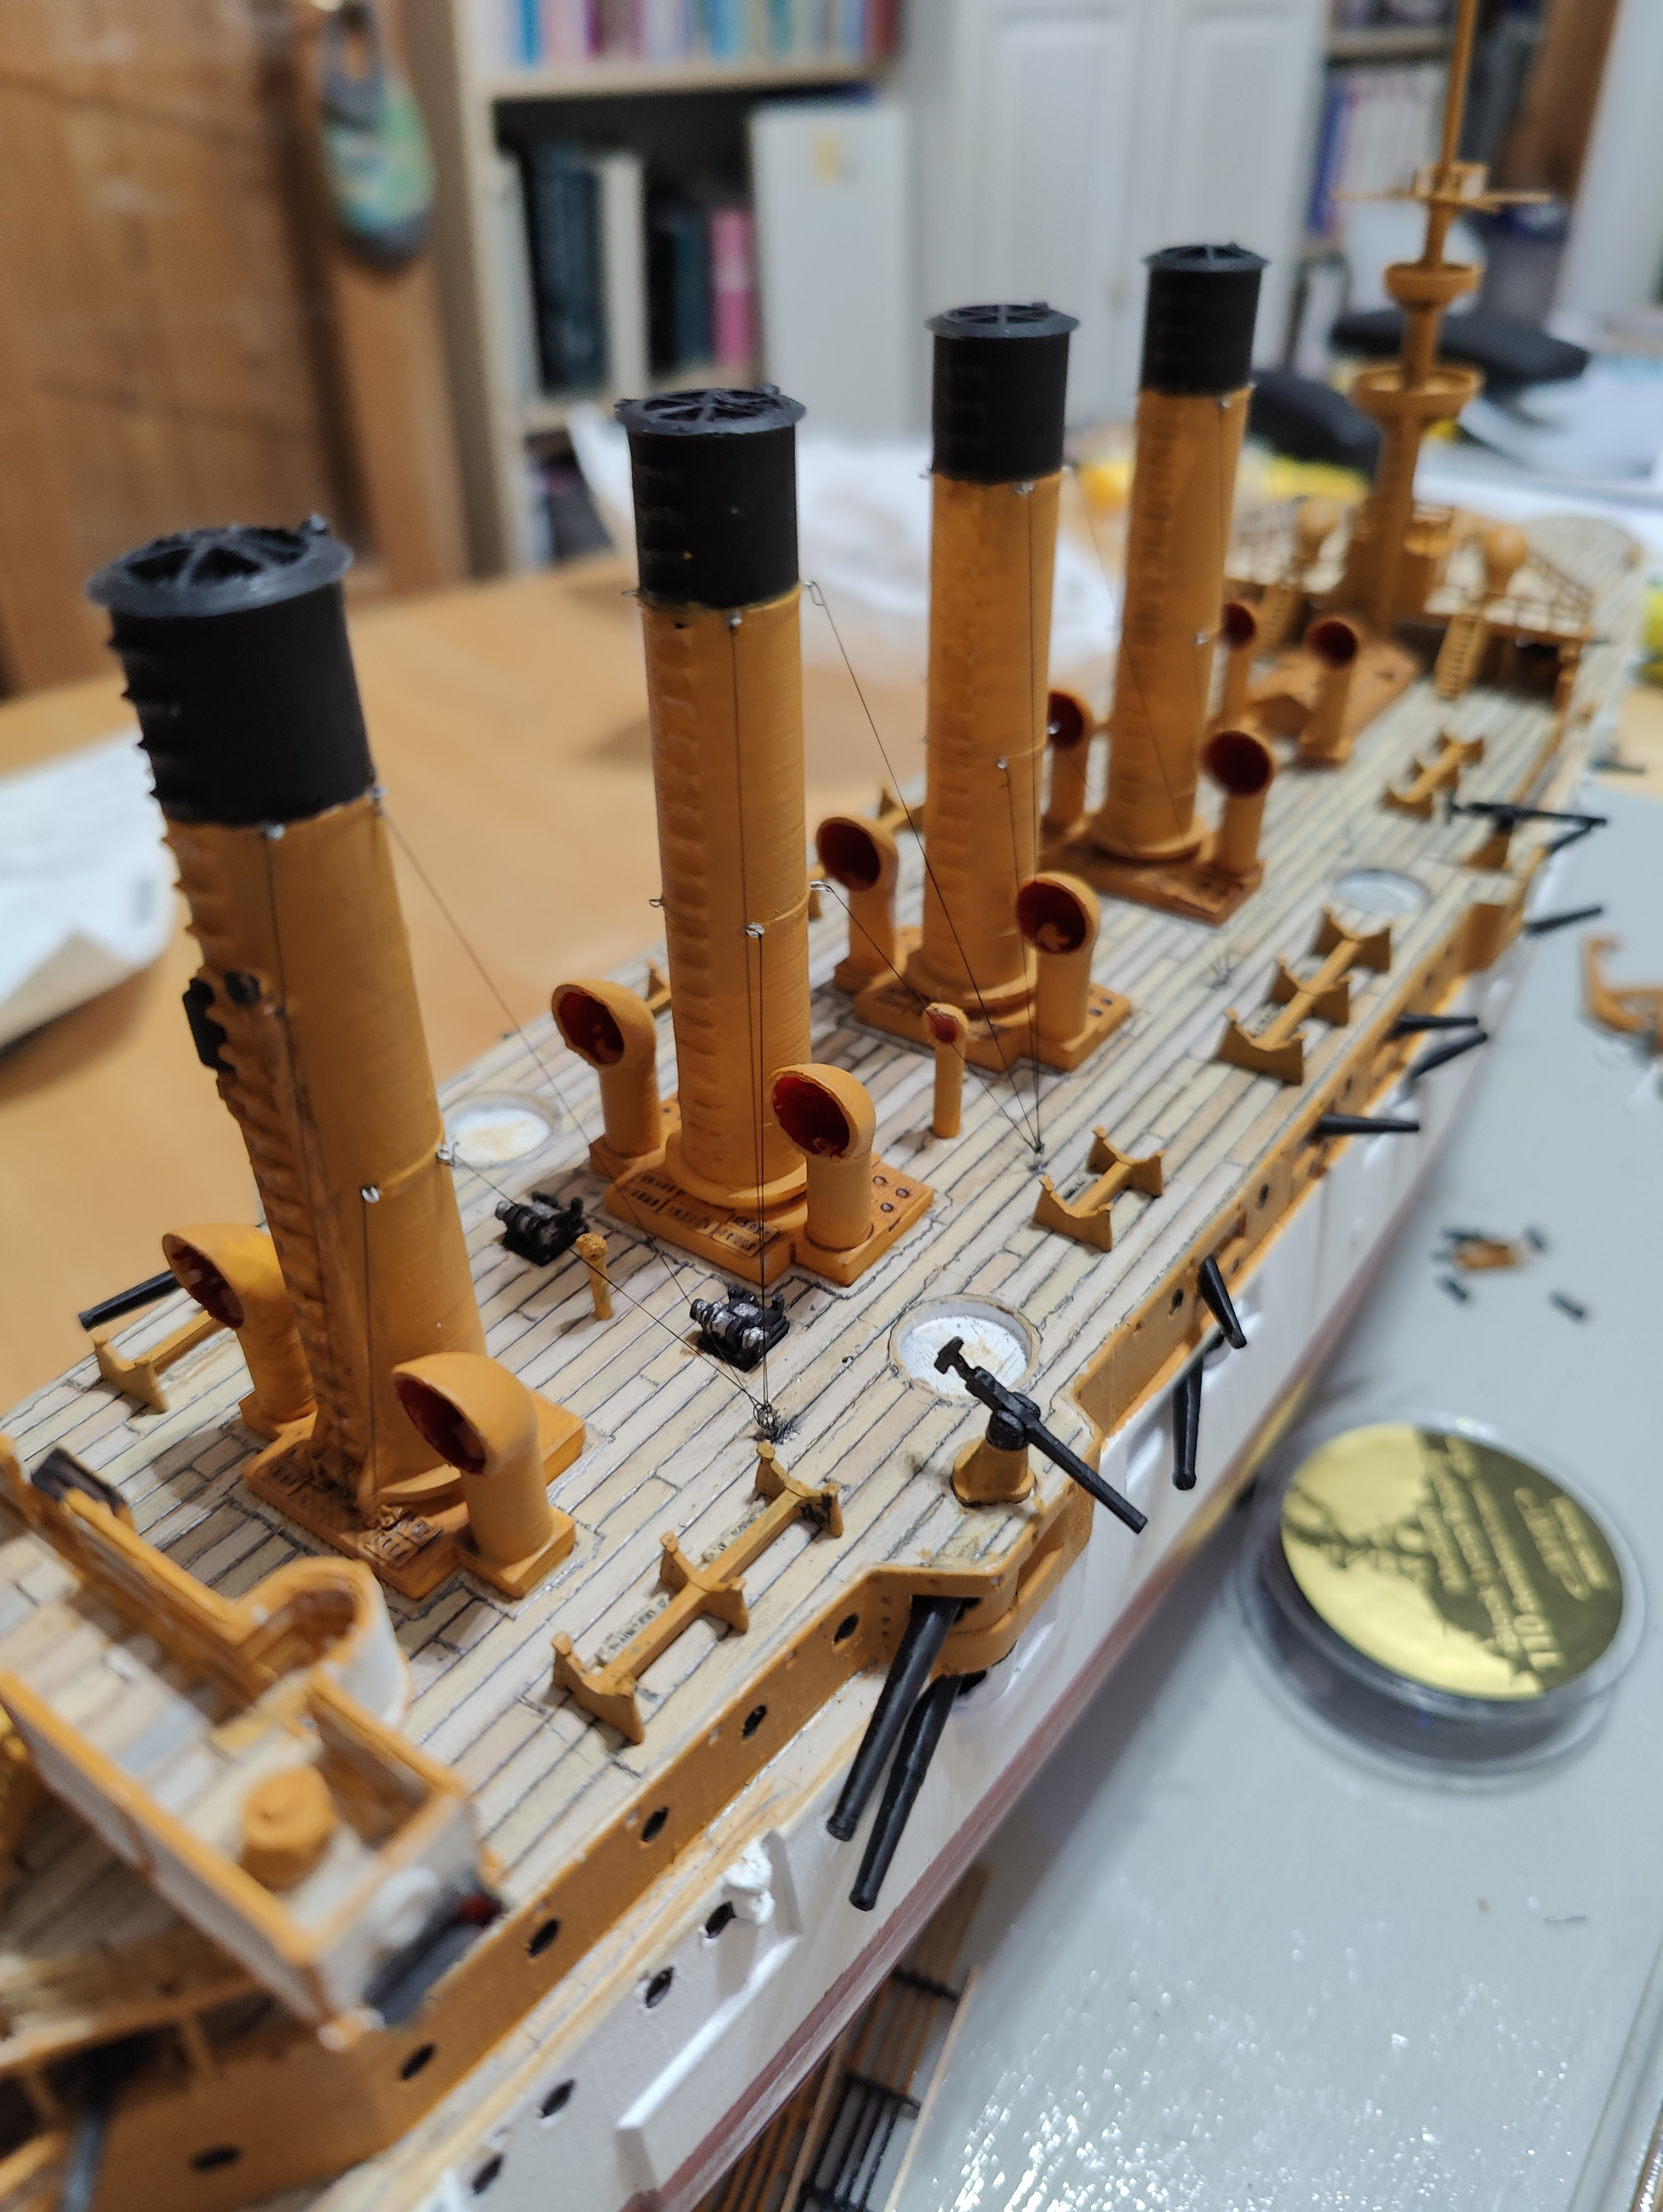
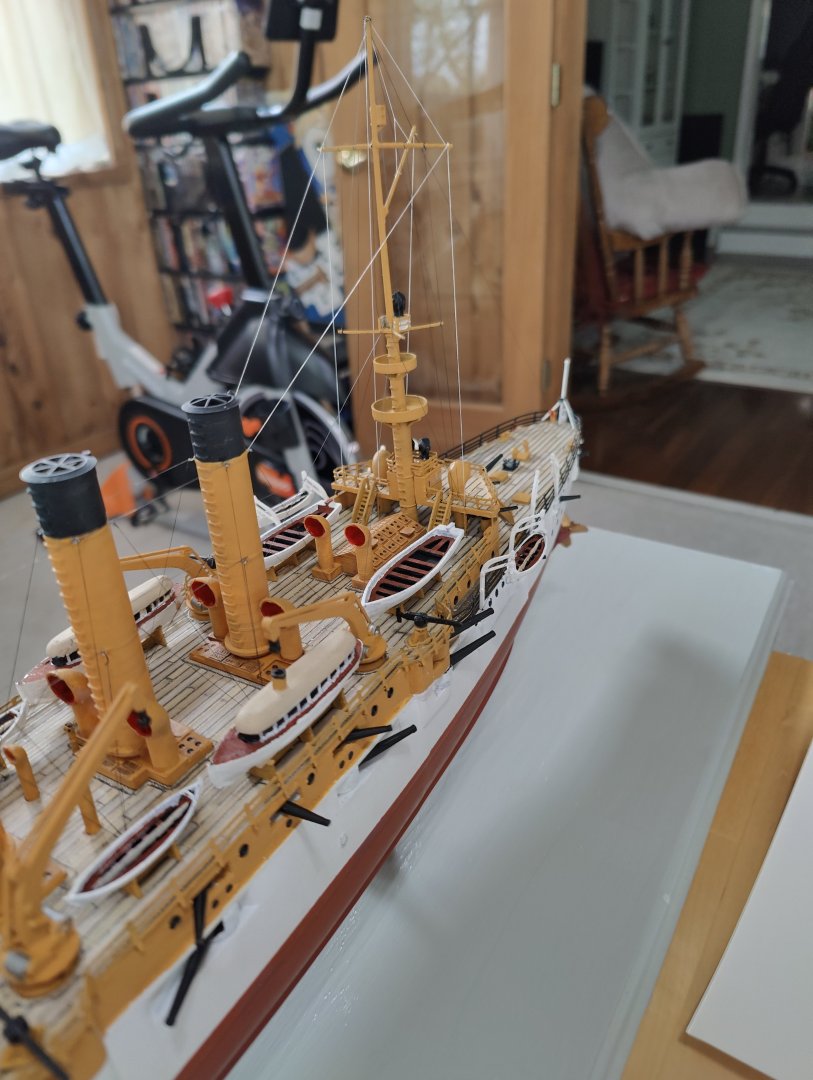
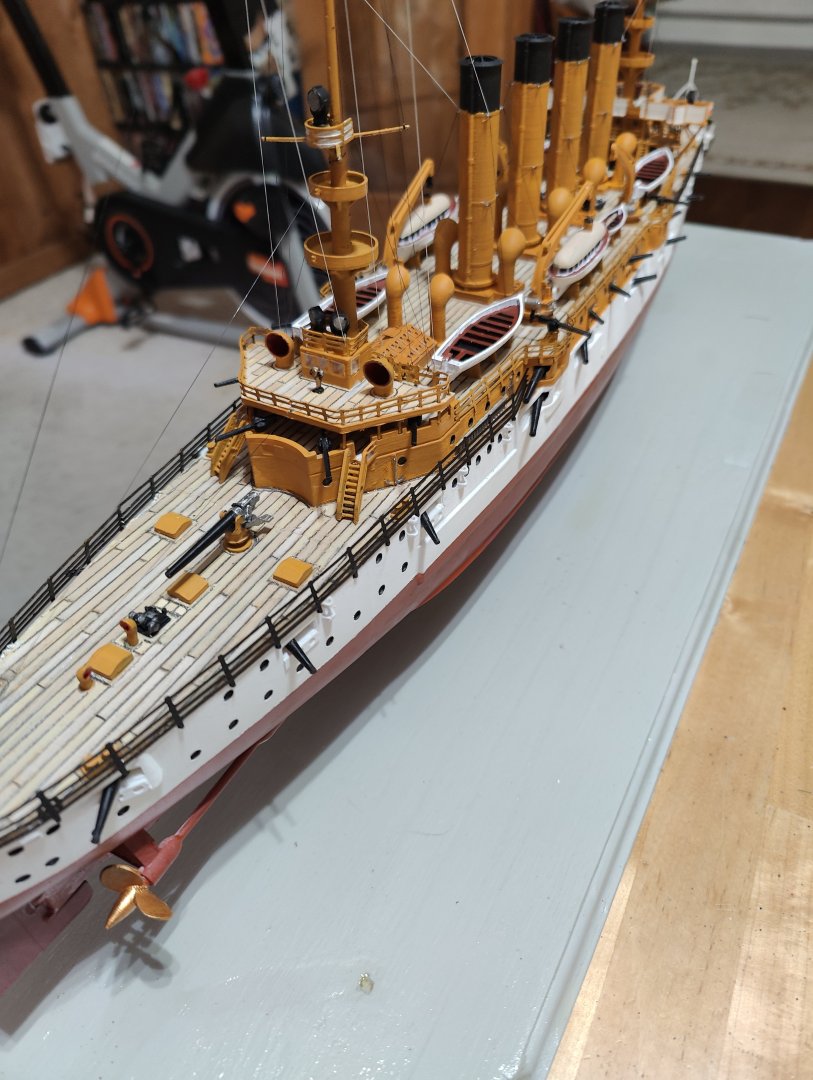
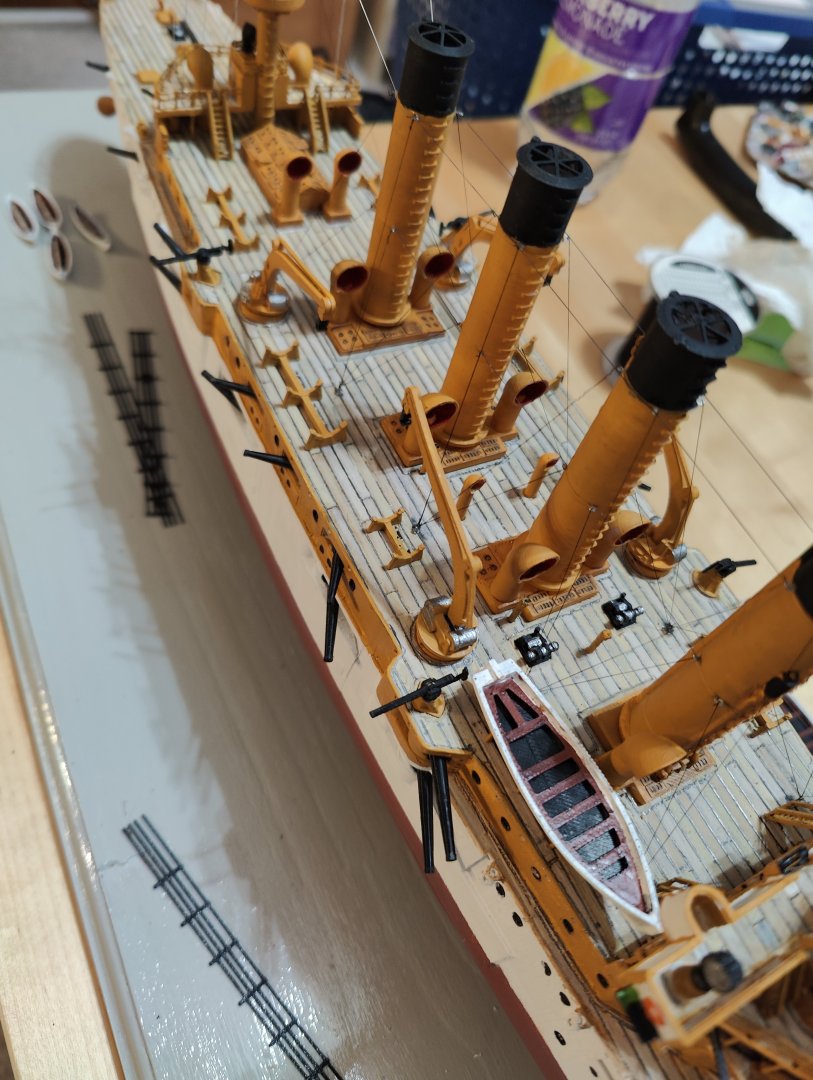
Finished the remaining rigging. Let my eyes rest and then installed the four massive steam cranes on deck.


- 32 replies
-
- 5
-
-
- St Louis
- 3D Printing
- (and 2 more)
-
highlanderburial reacted to a post in a topic:
USS St. Louis (CL-20) by highlanderburial - FINISHED - 1/200 scale - 3d Print and 1/150 Restoration
-
Thanks Chris. I guess I am just used to seeing a lot of models using the classic thick sewing thread or dense stretches sprue. I am almost going blind comparing the model rigging to photos and I feel it matches, so your comment is very validating.
- 32 replies
-
- 2
-
-
- St Louis
- 3D Printing
- (and 2 more)
-
highlanderburial reacted to a post in a topic:
USS St. Louis (CL-20) by highlanderburial - FINISHED - 1/200 scale - 3d Print and 1/150 Restoration
-
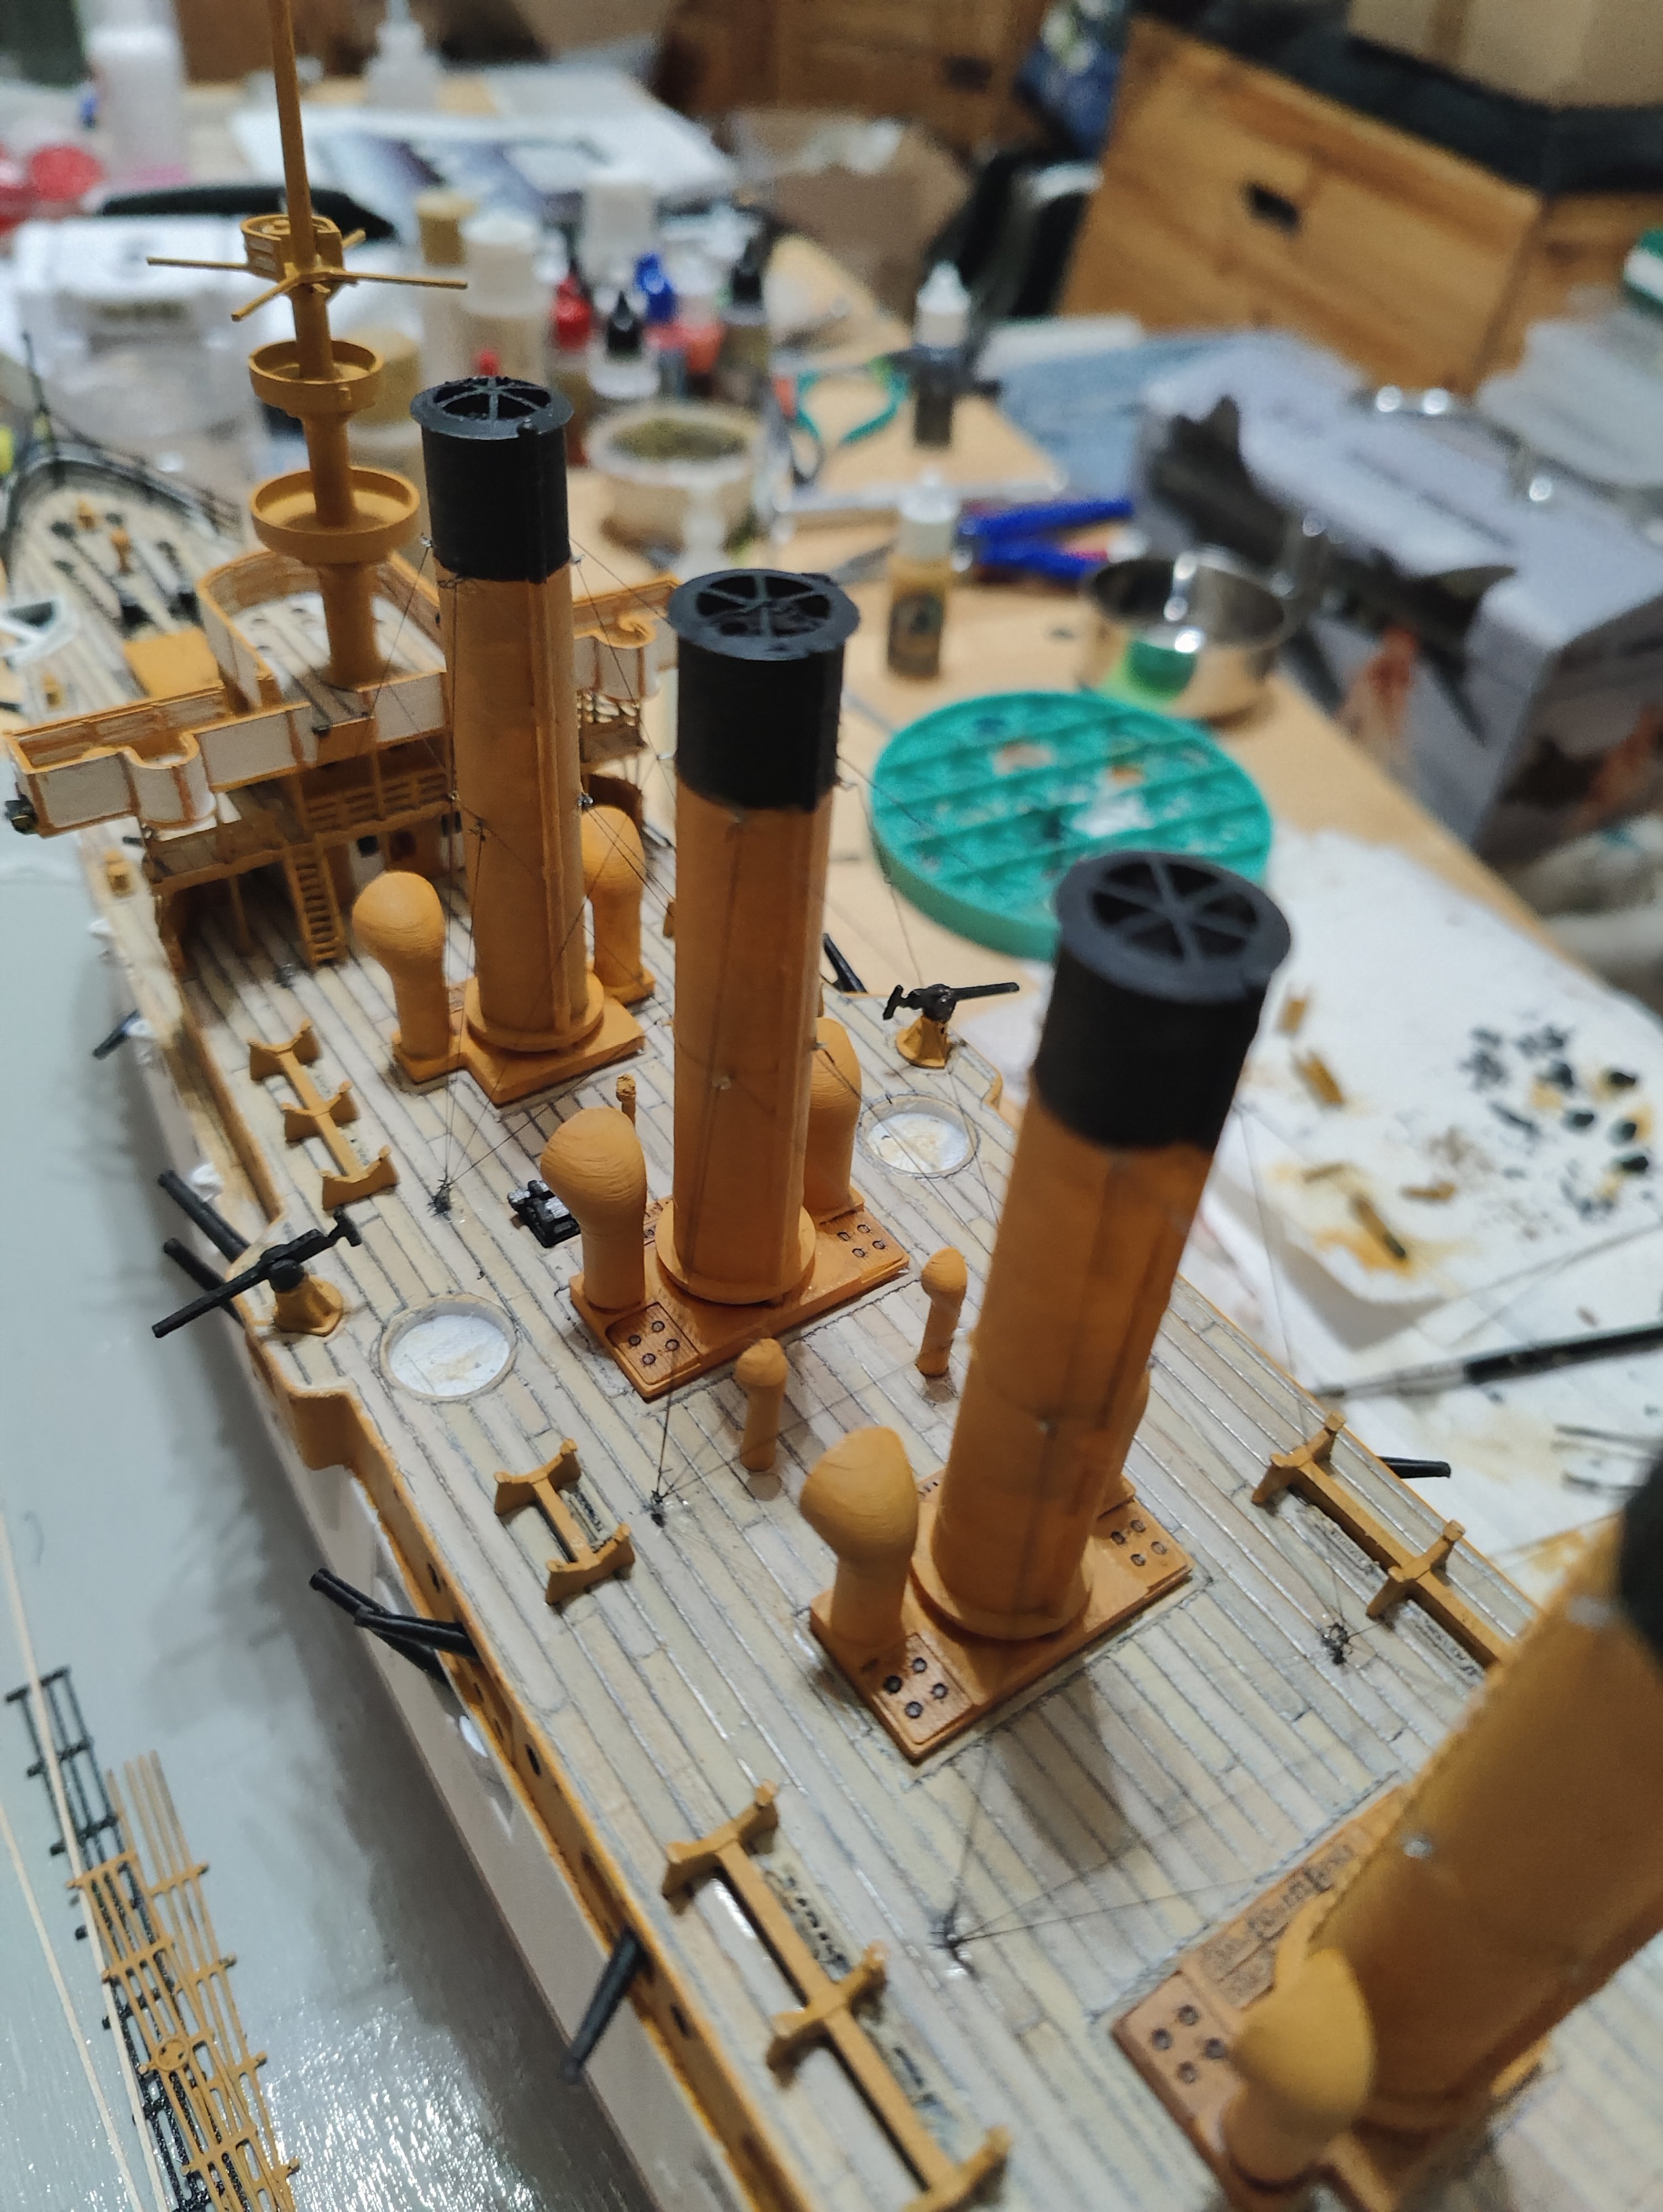
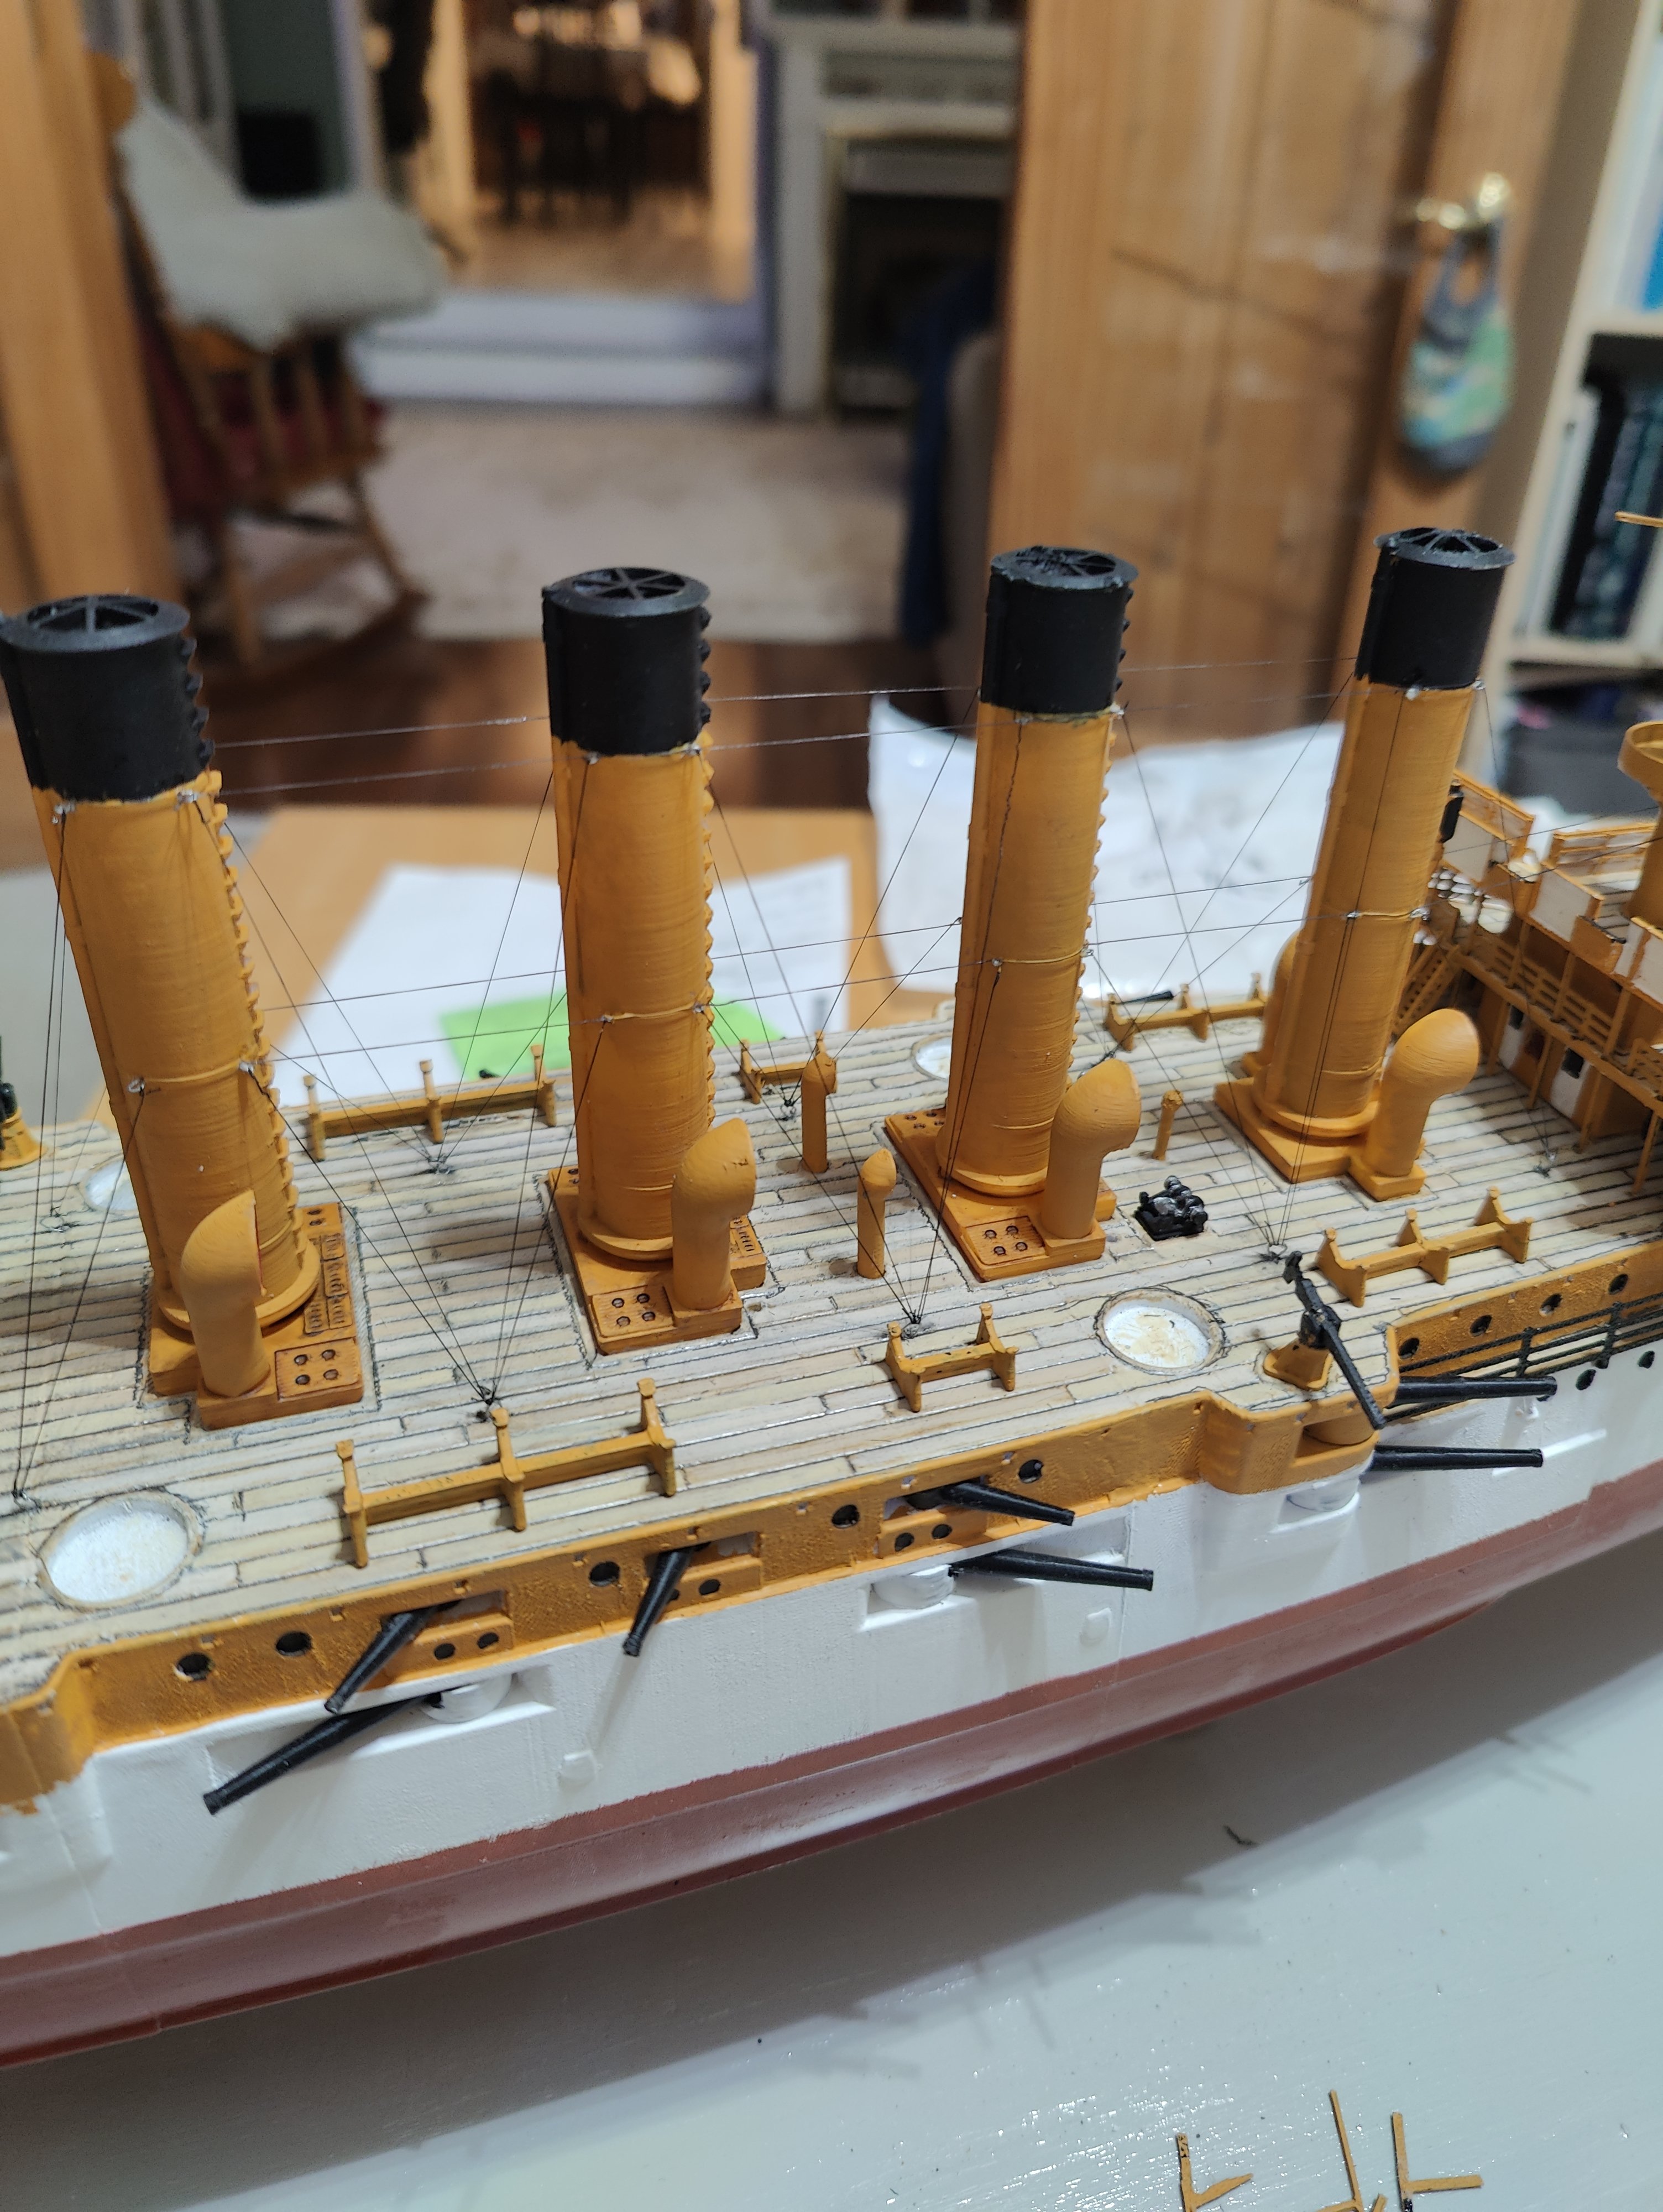
I got through some more of the very thin rigging. I saw somewhere that much of the support cabeling stays were 5/8 inch or 3/4 inch wire rope. This would have put much of it on the model at about .004 inches or .10 mm by my math. I used super nylon line and Lycra rigging for the model in roughly those sizes. To my eye it seems small though.


- 32 replies
-
- 6
-
-
- St Louis
- 3D Printing
- (and 2 more)
-
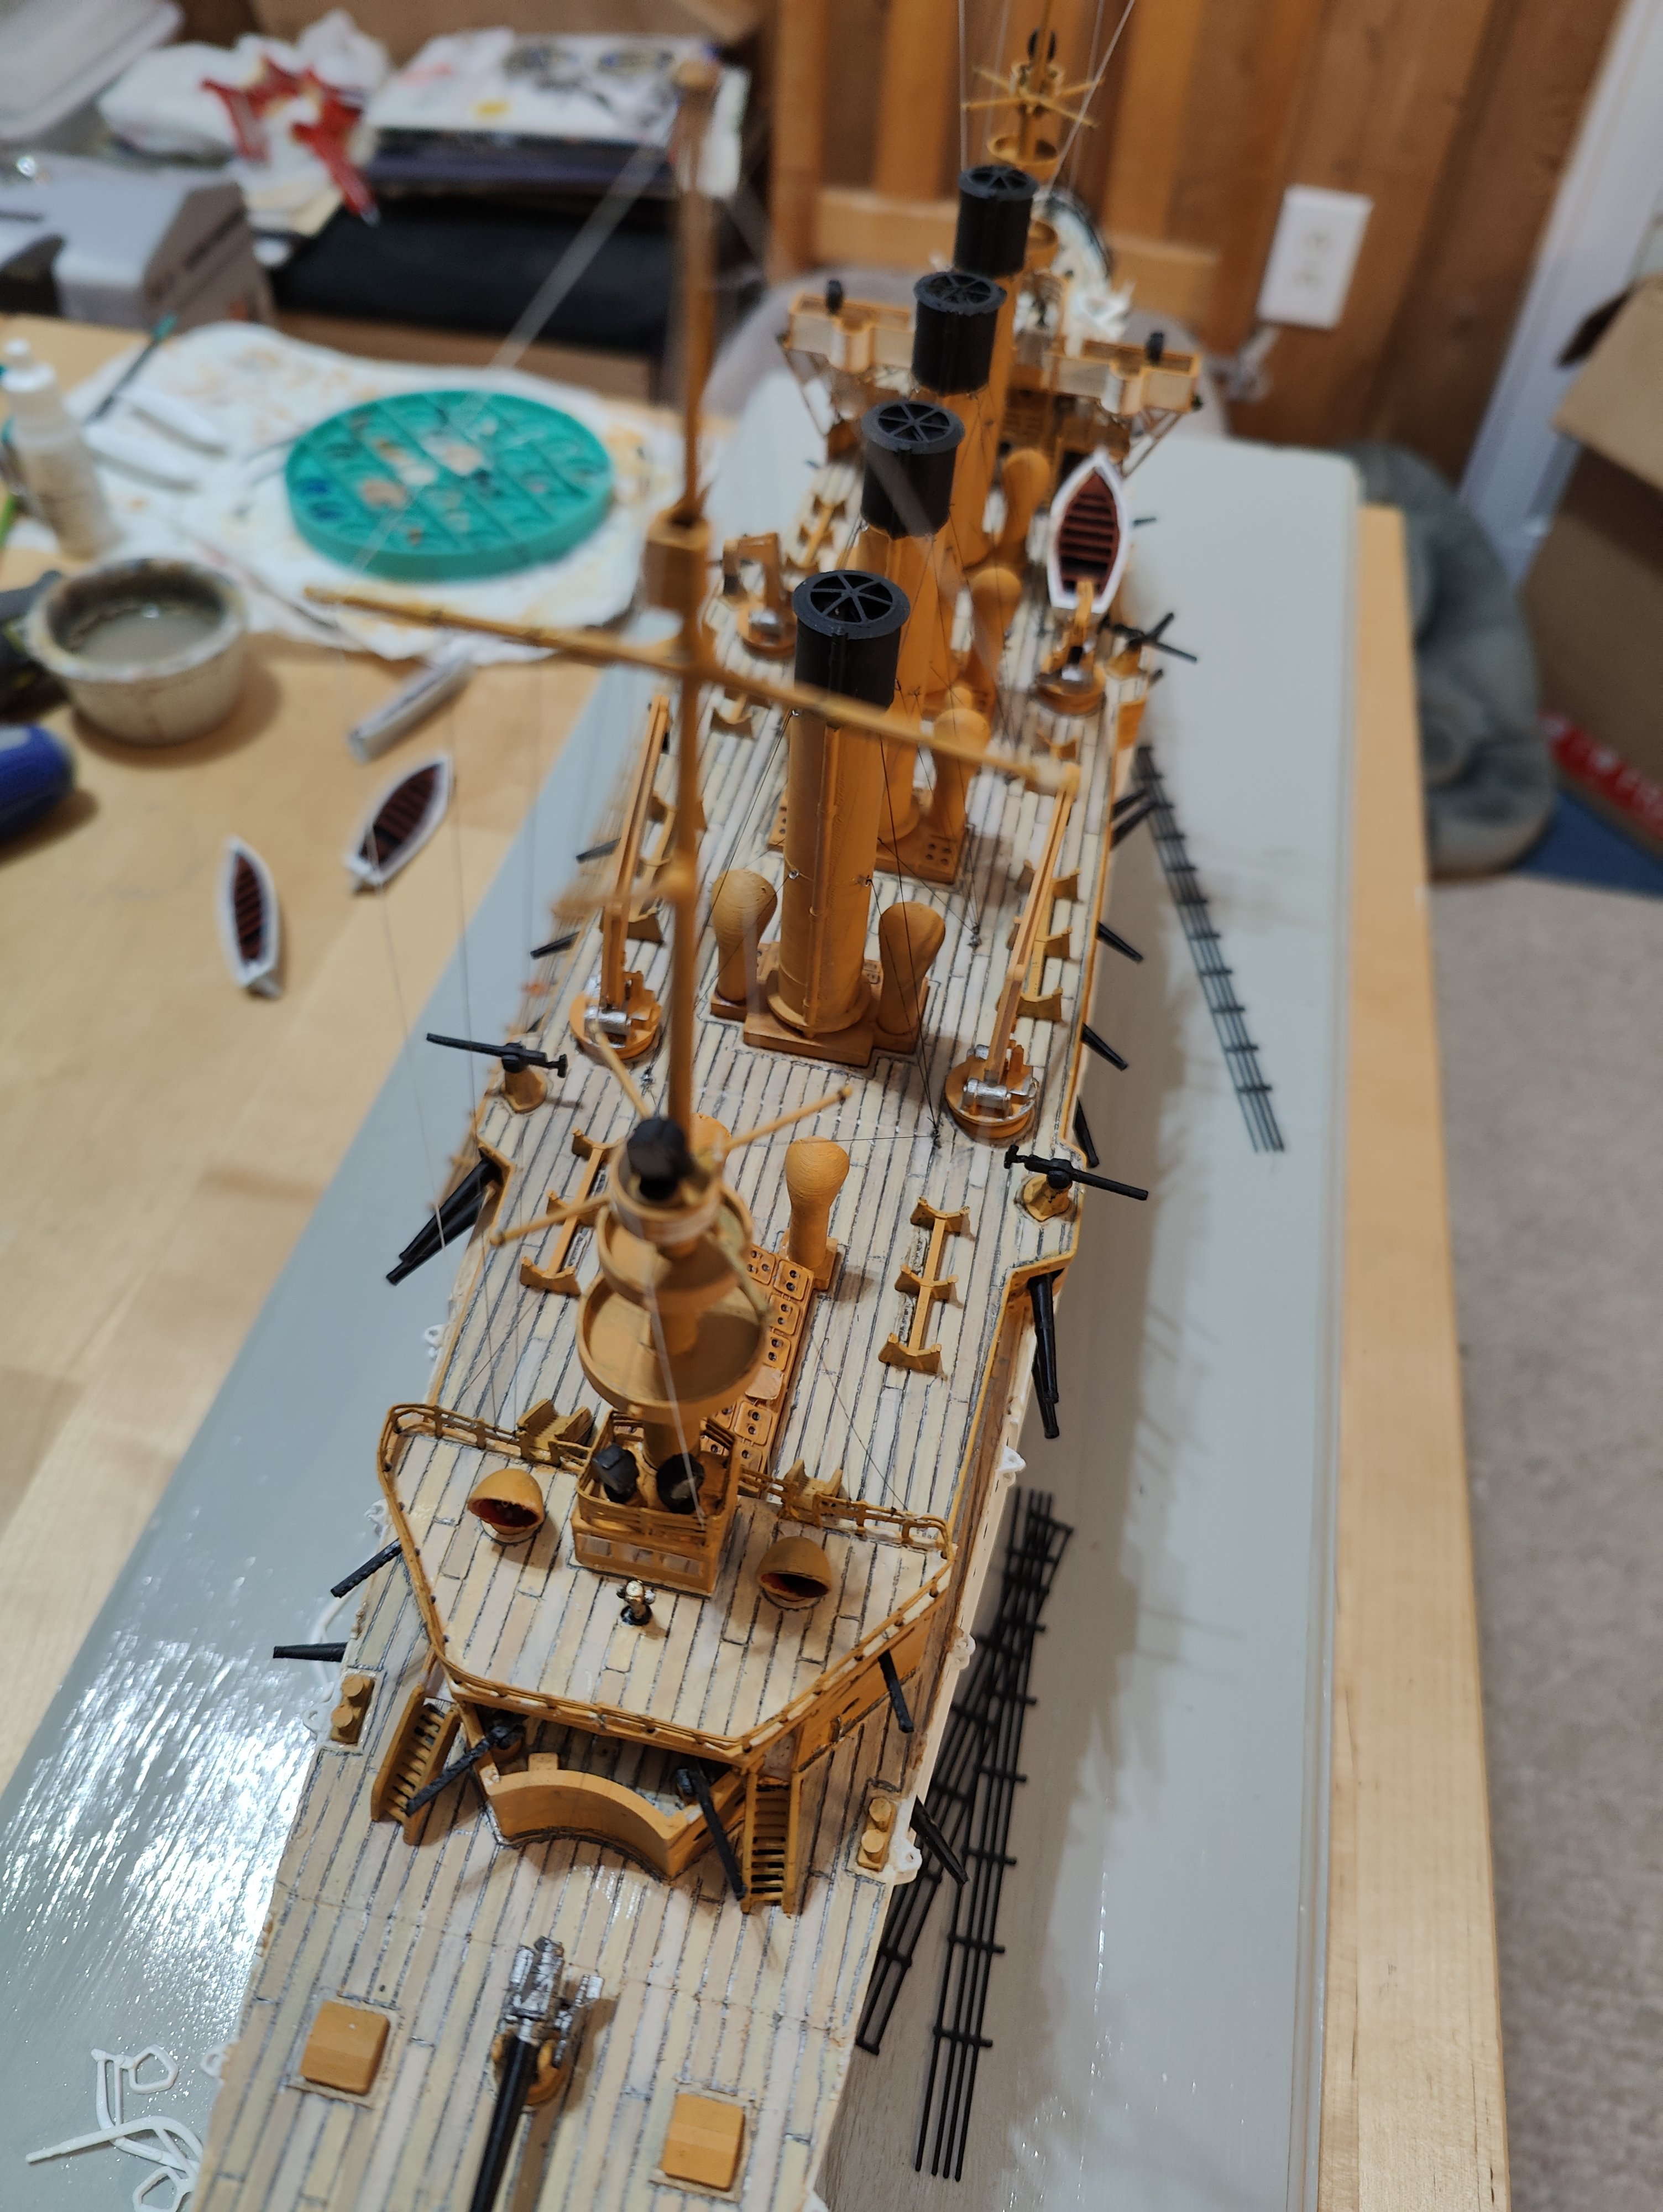
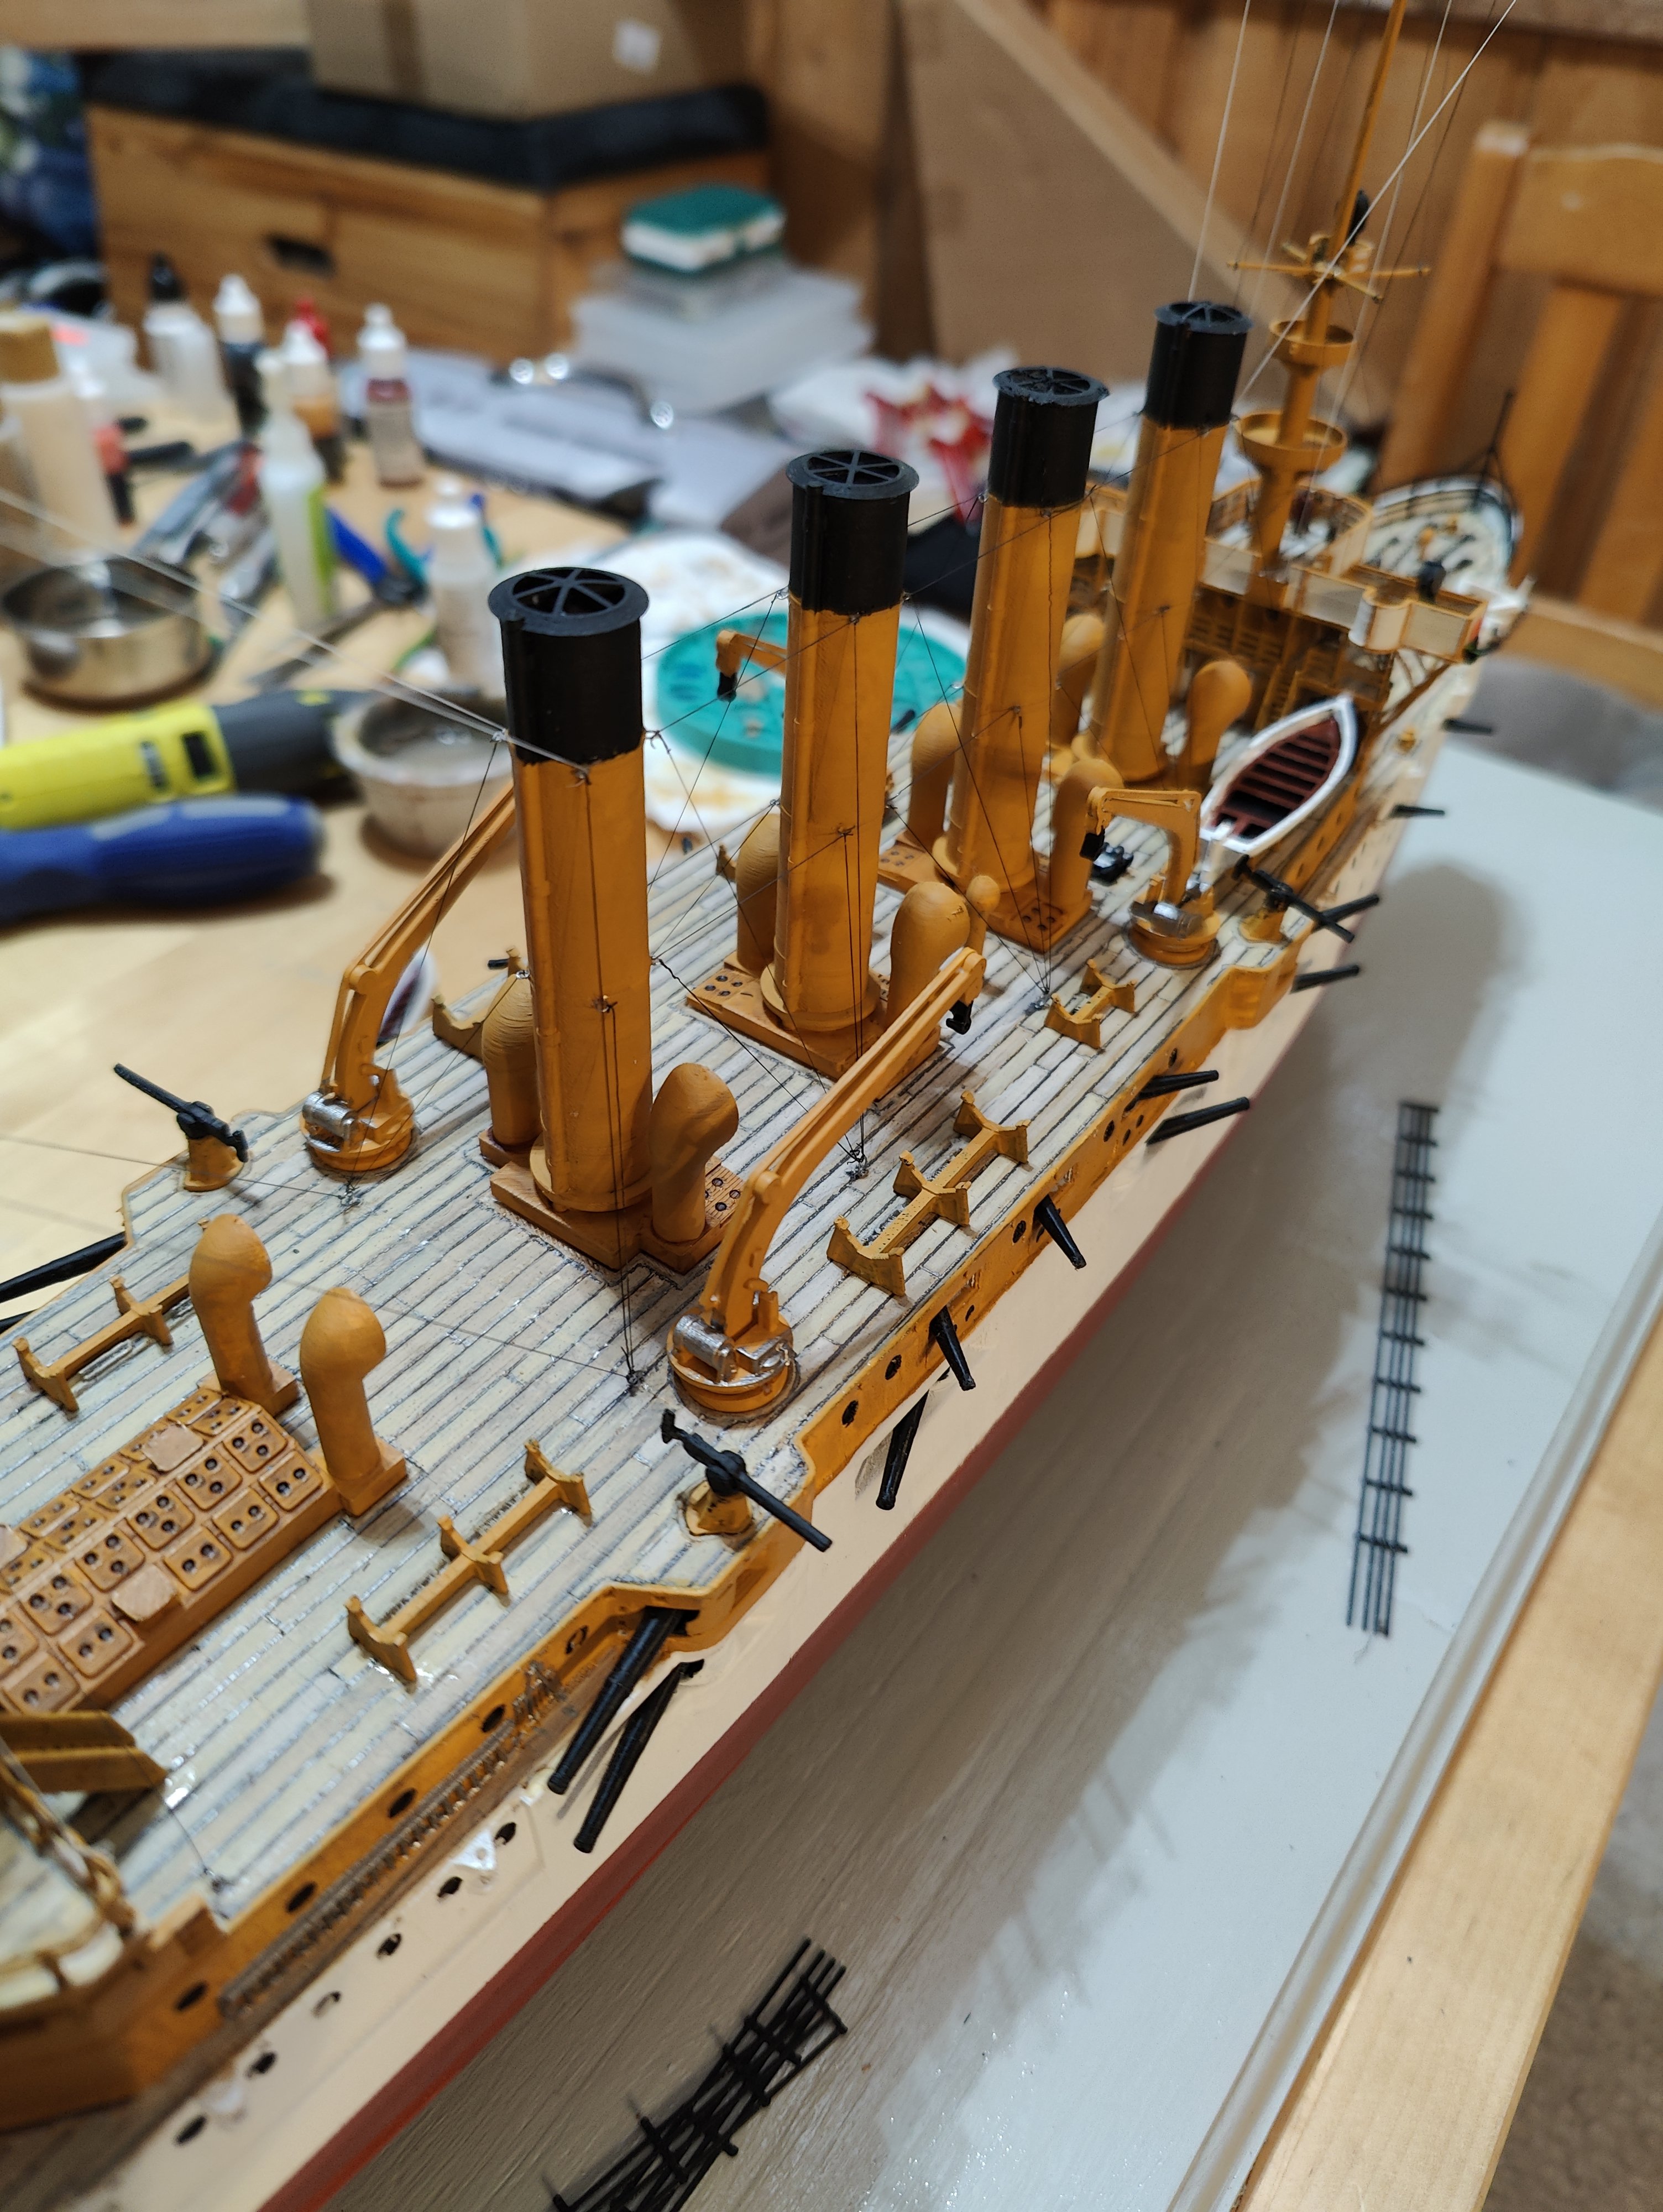
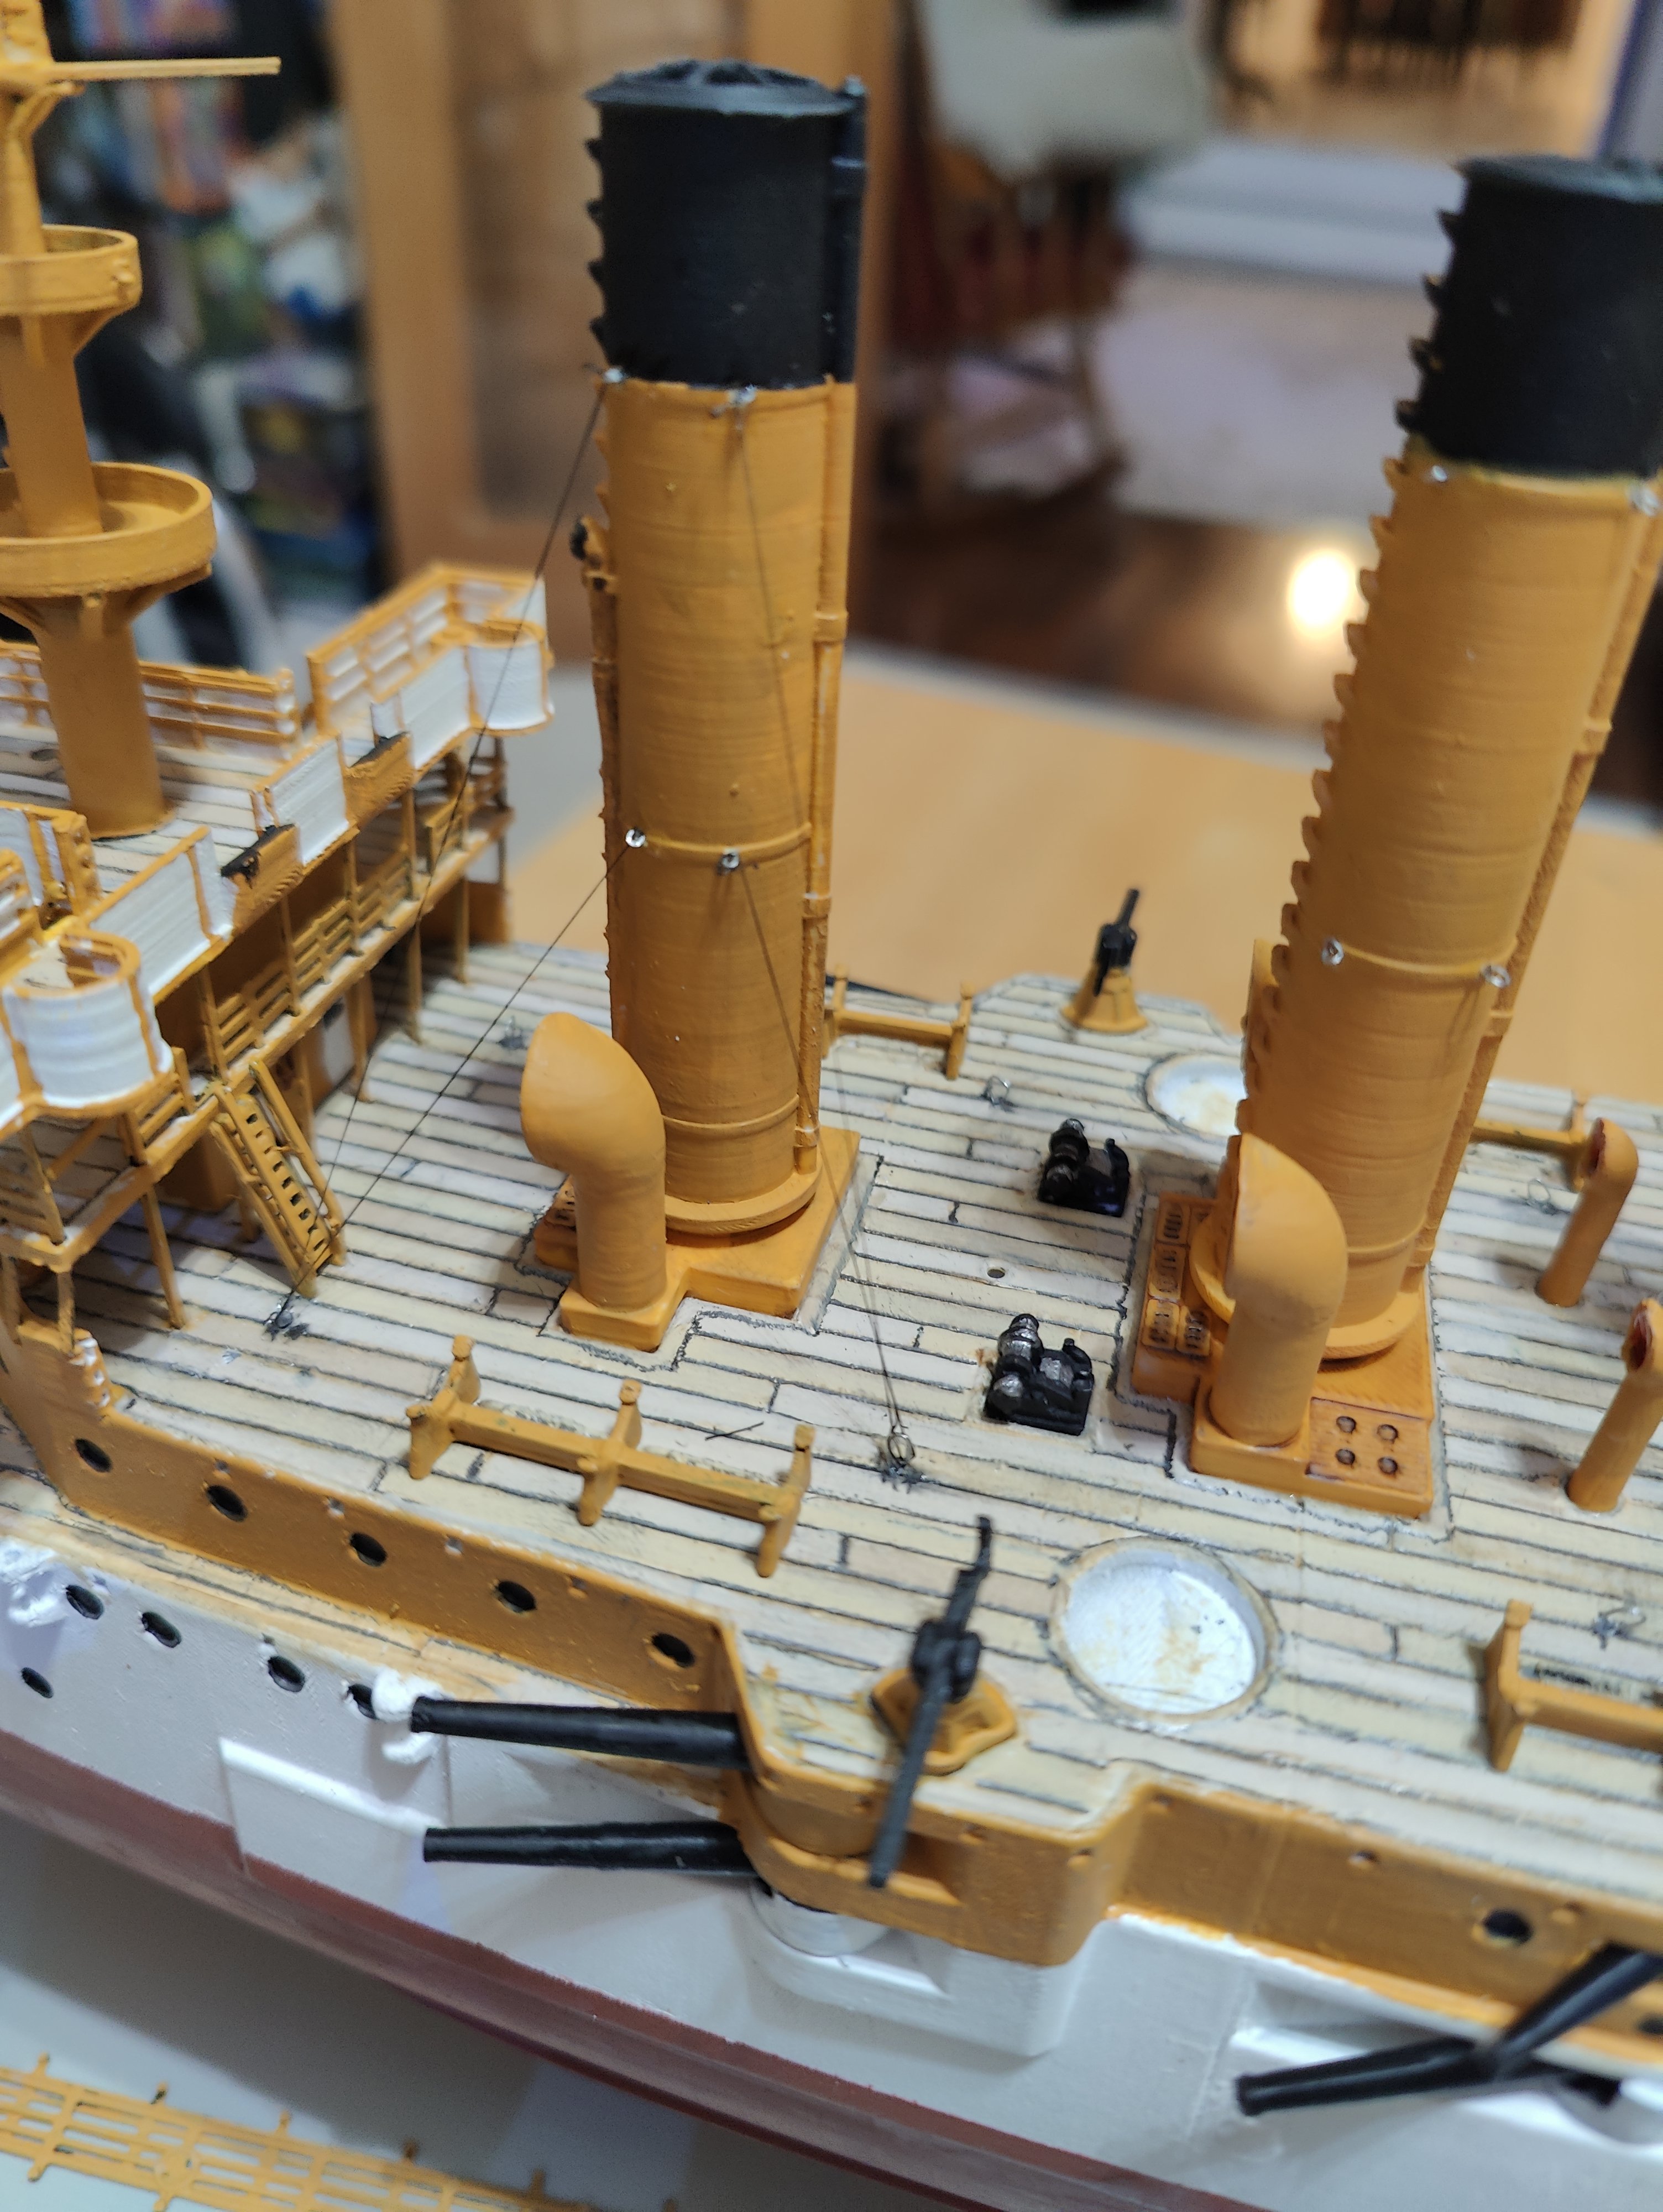
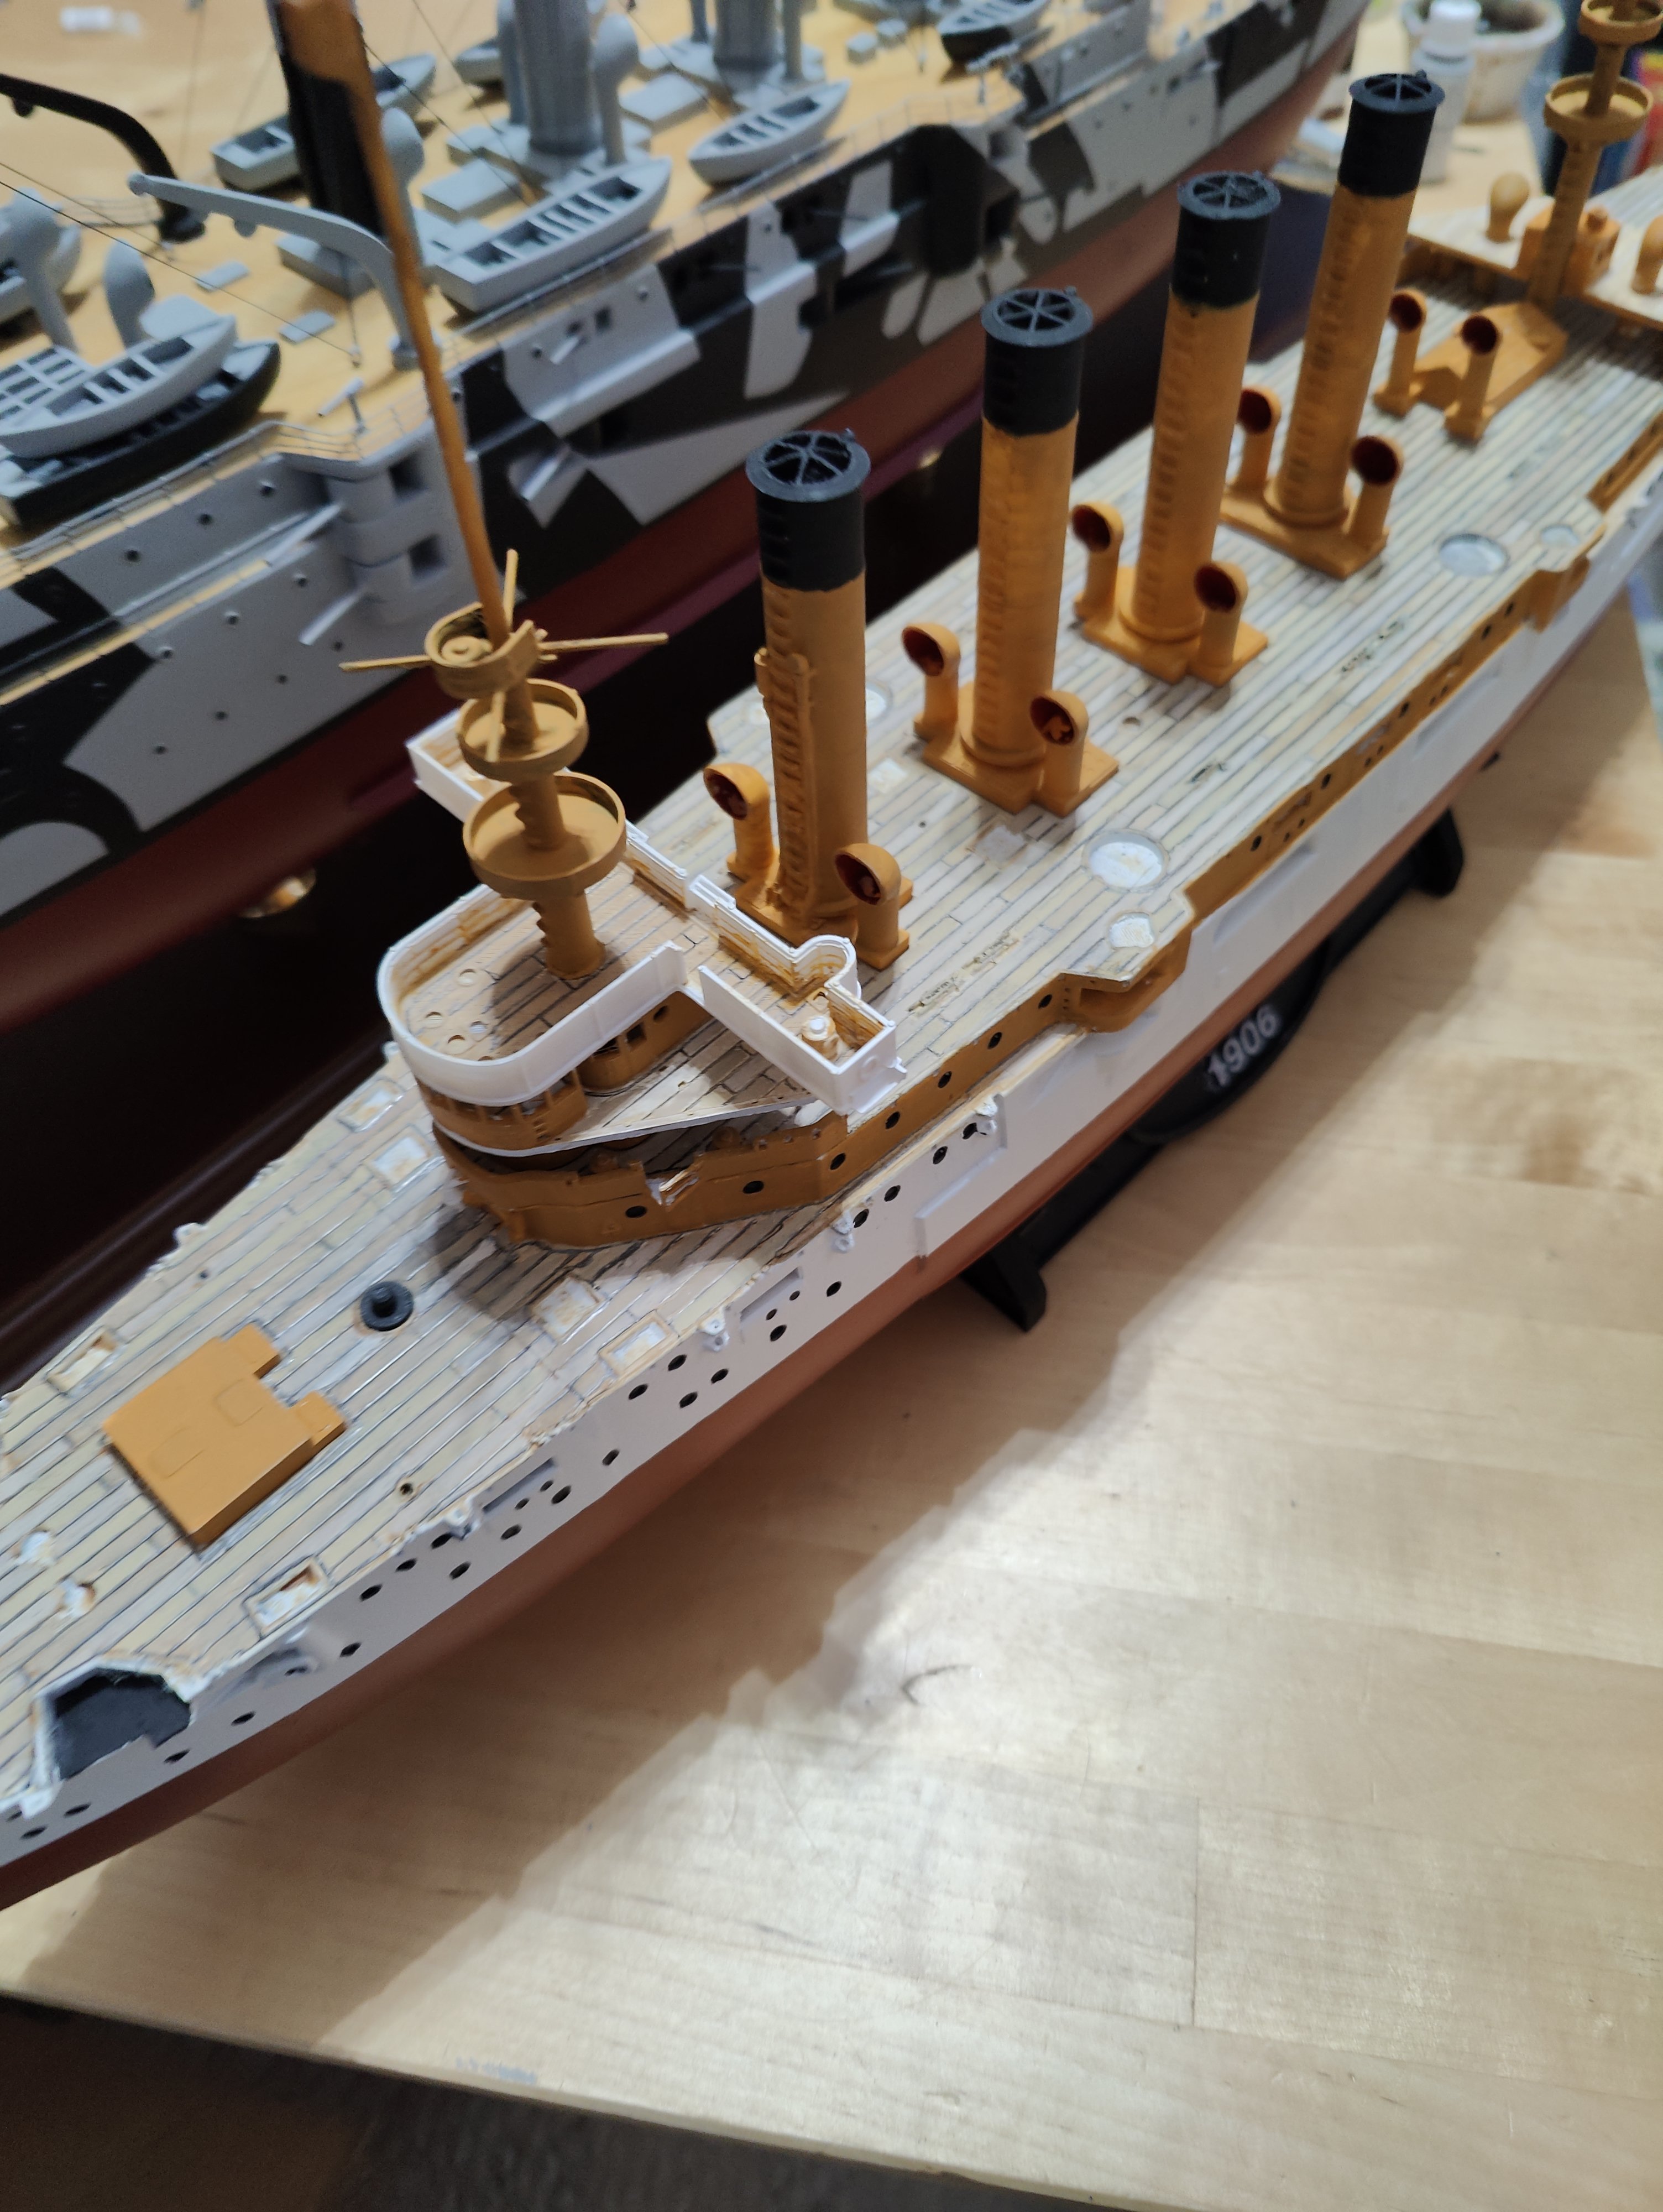
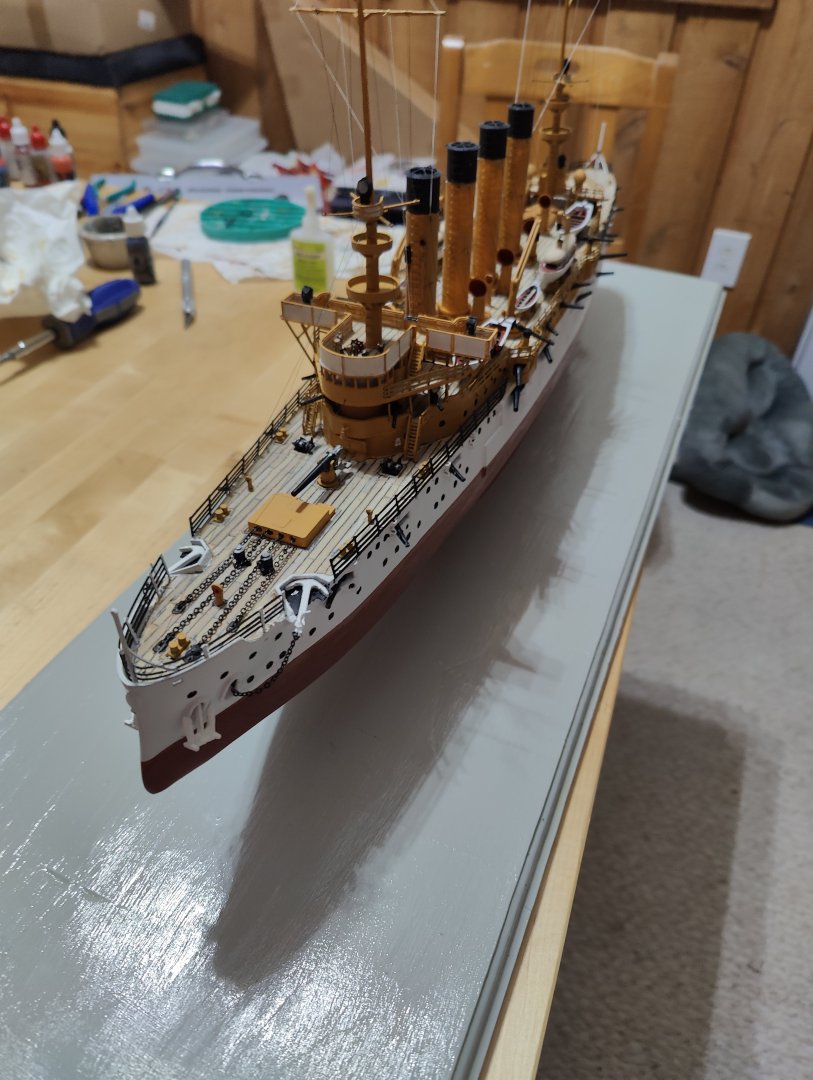
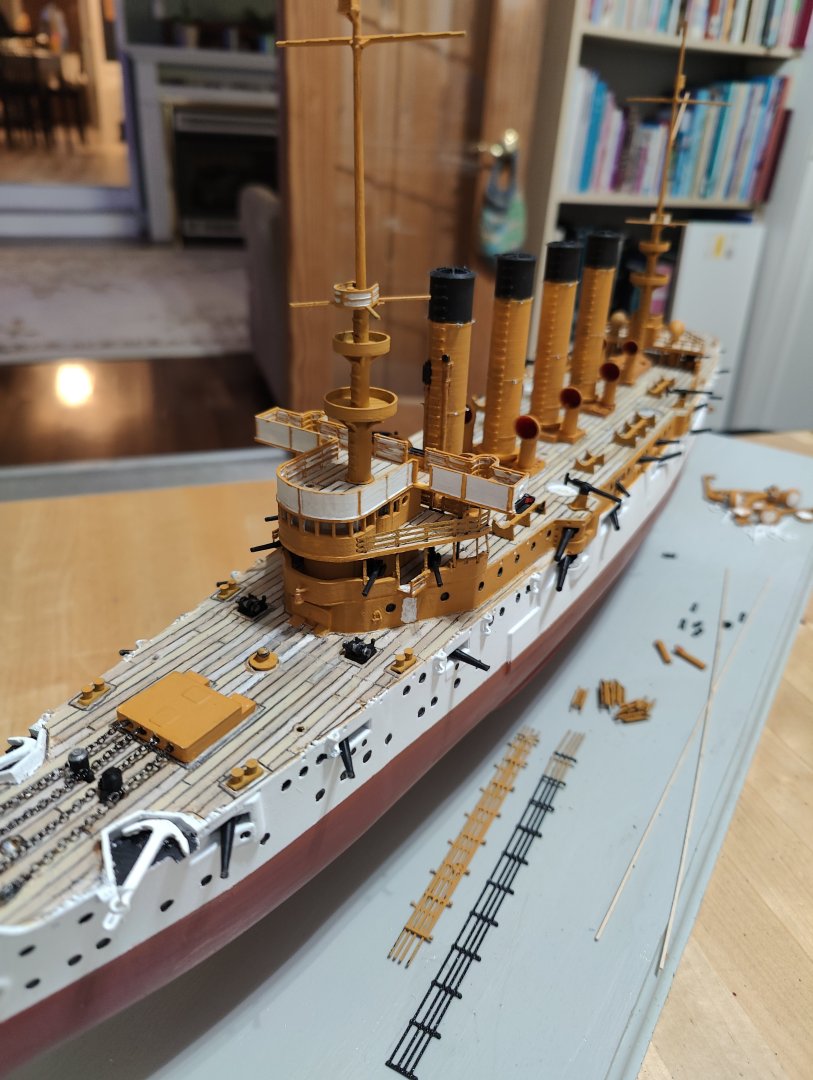
The complex web work around the stacks complete and test fit of the forward hand rails.


- 32 replies
-
- 6
-
-
- St Louis
- 3D Printing
- (and 2 more)
-
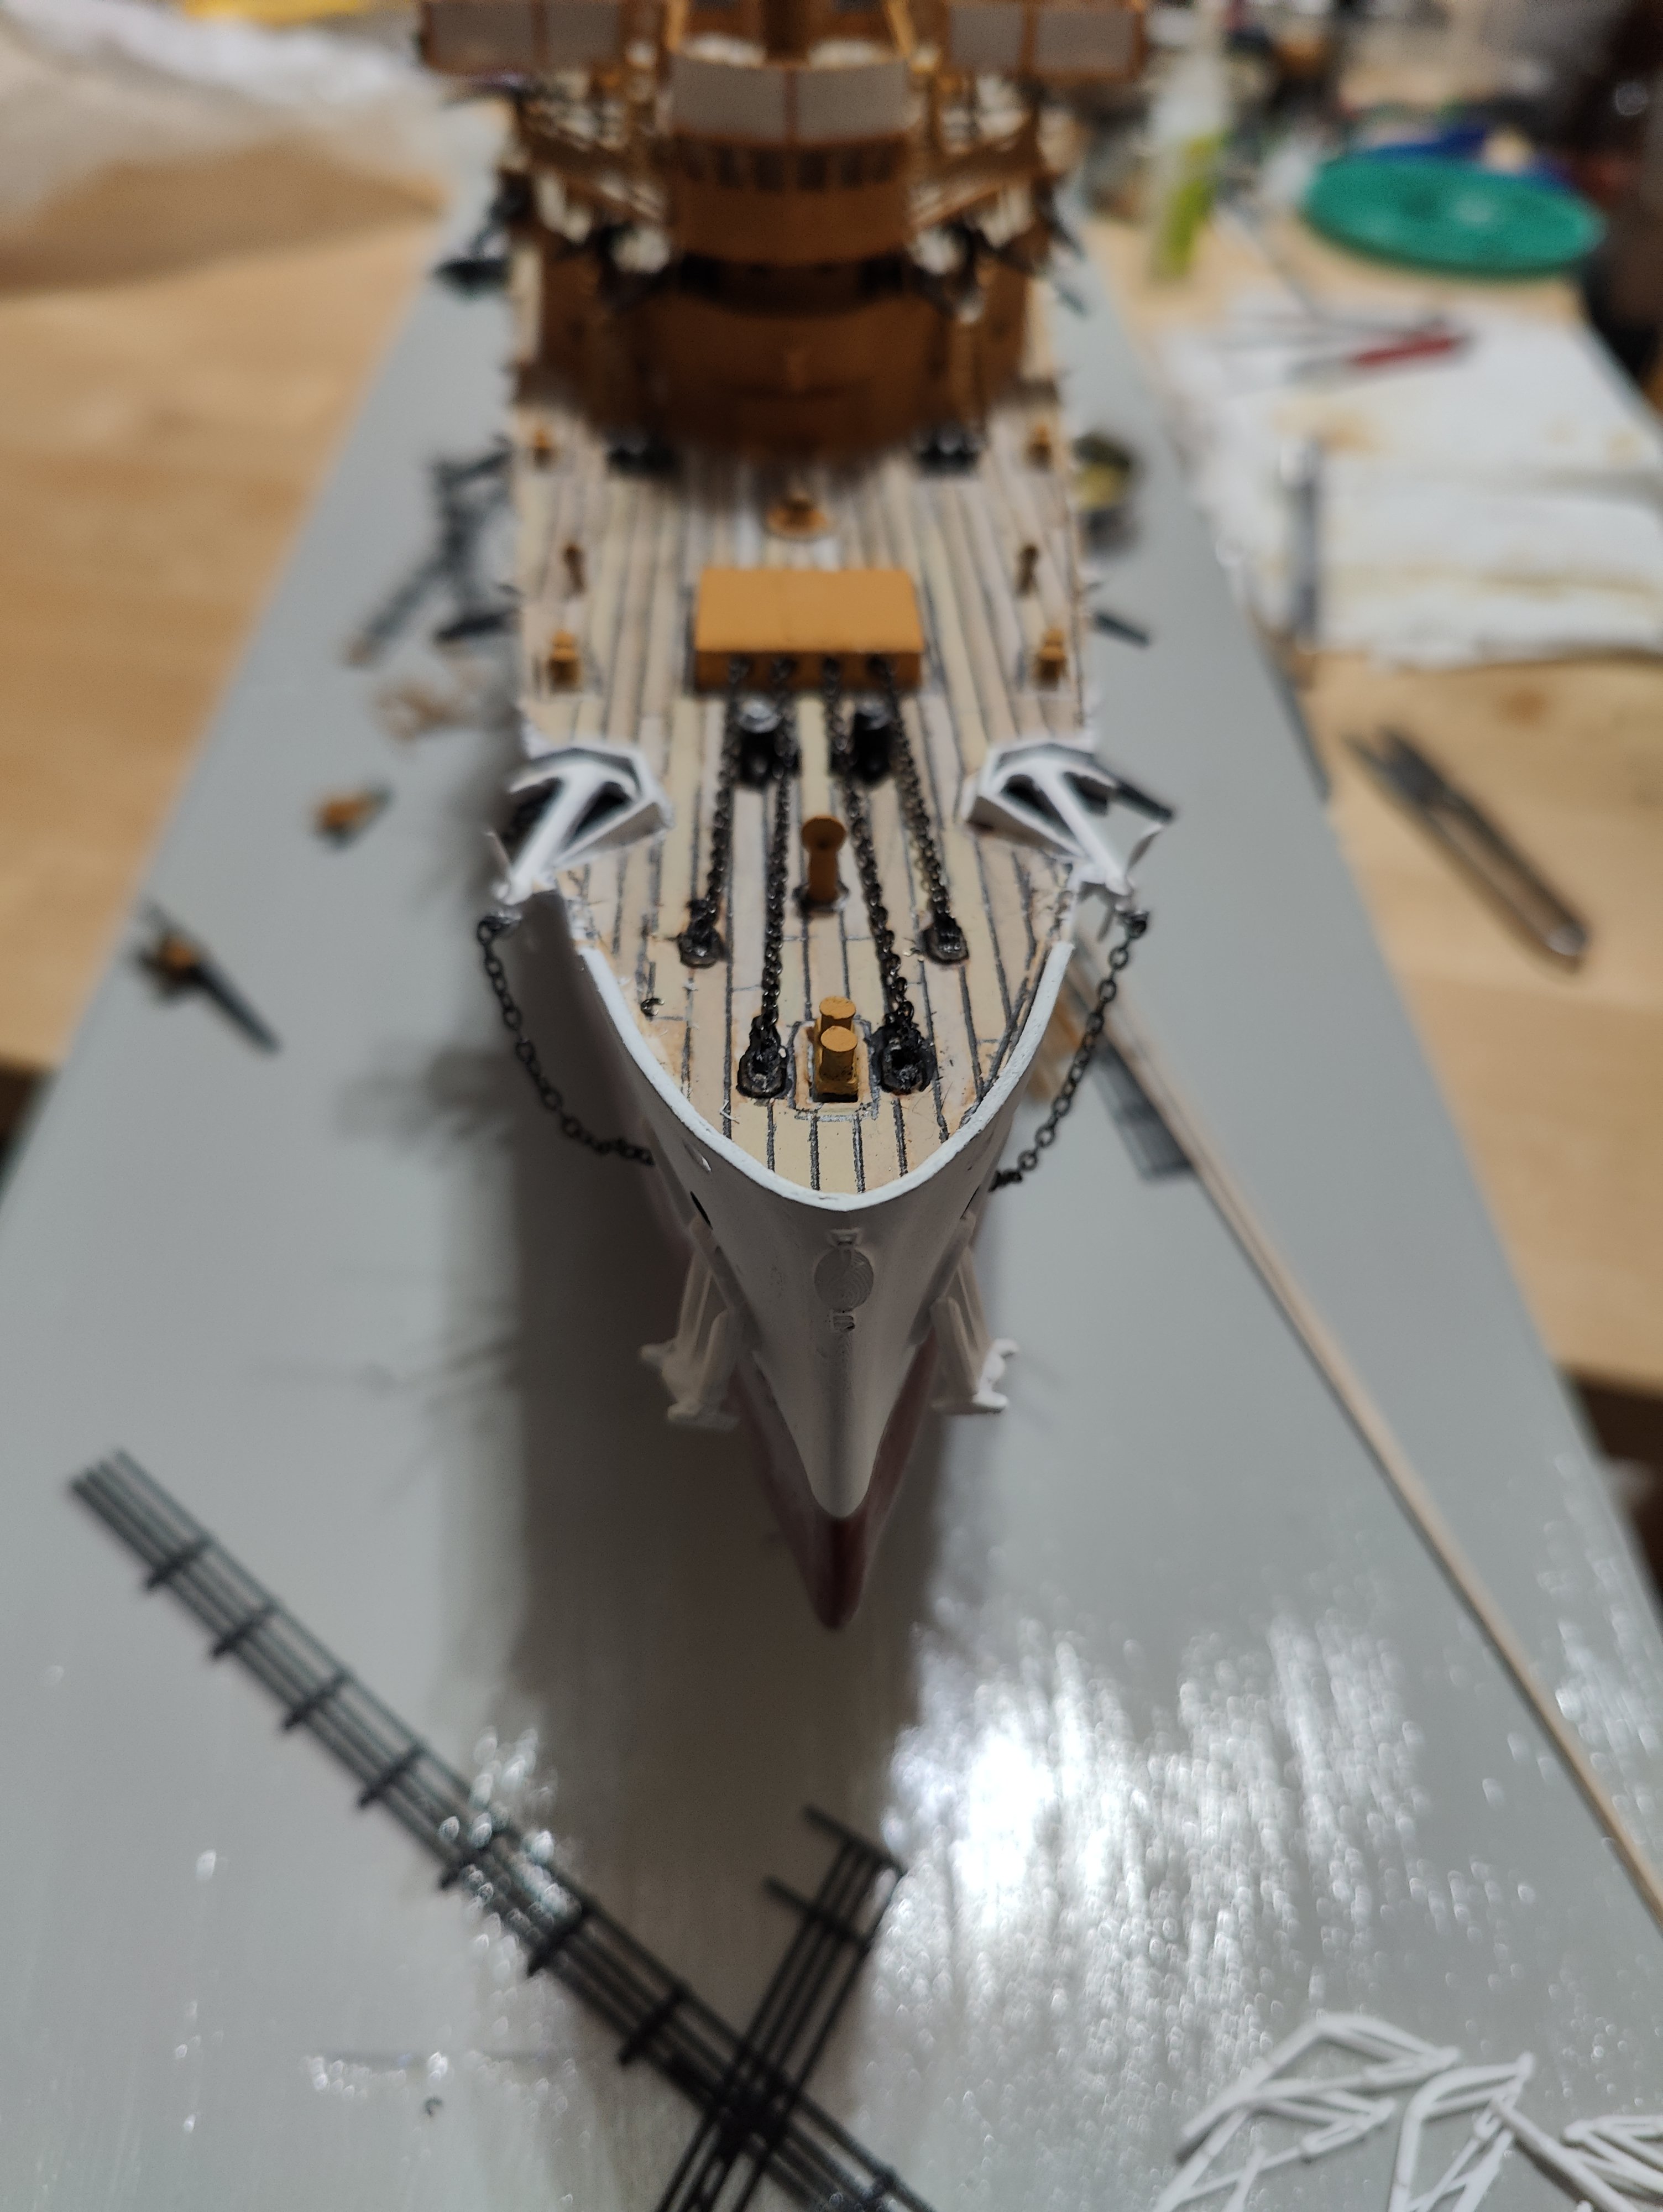
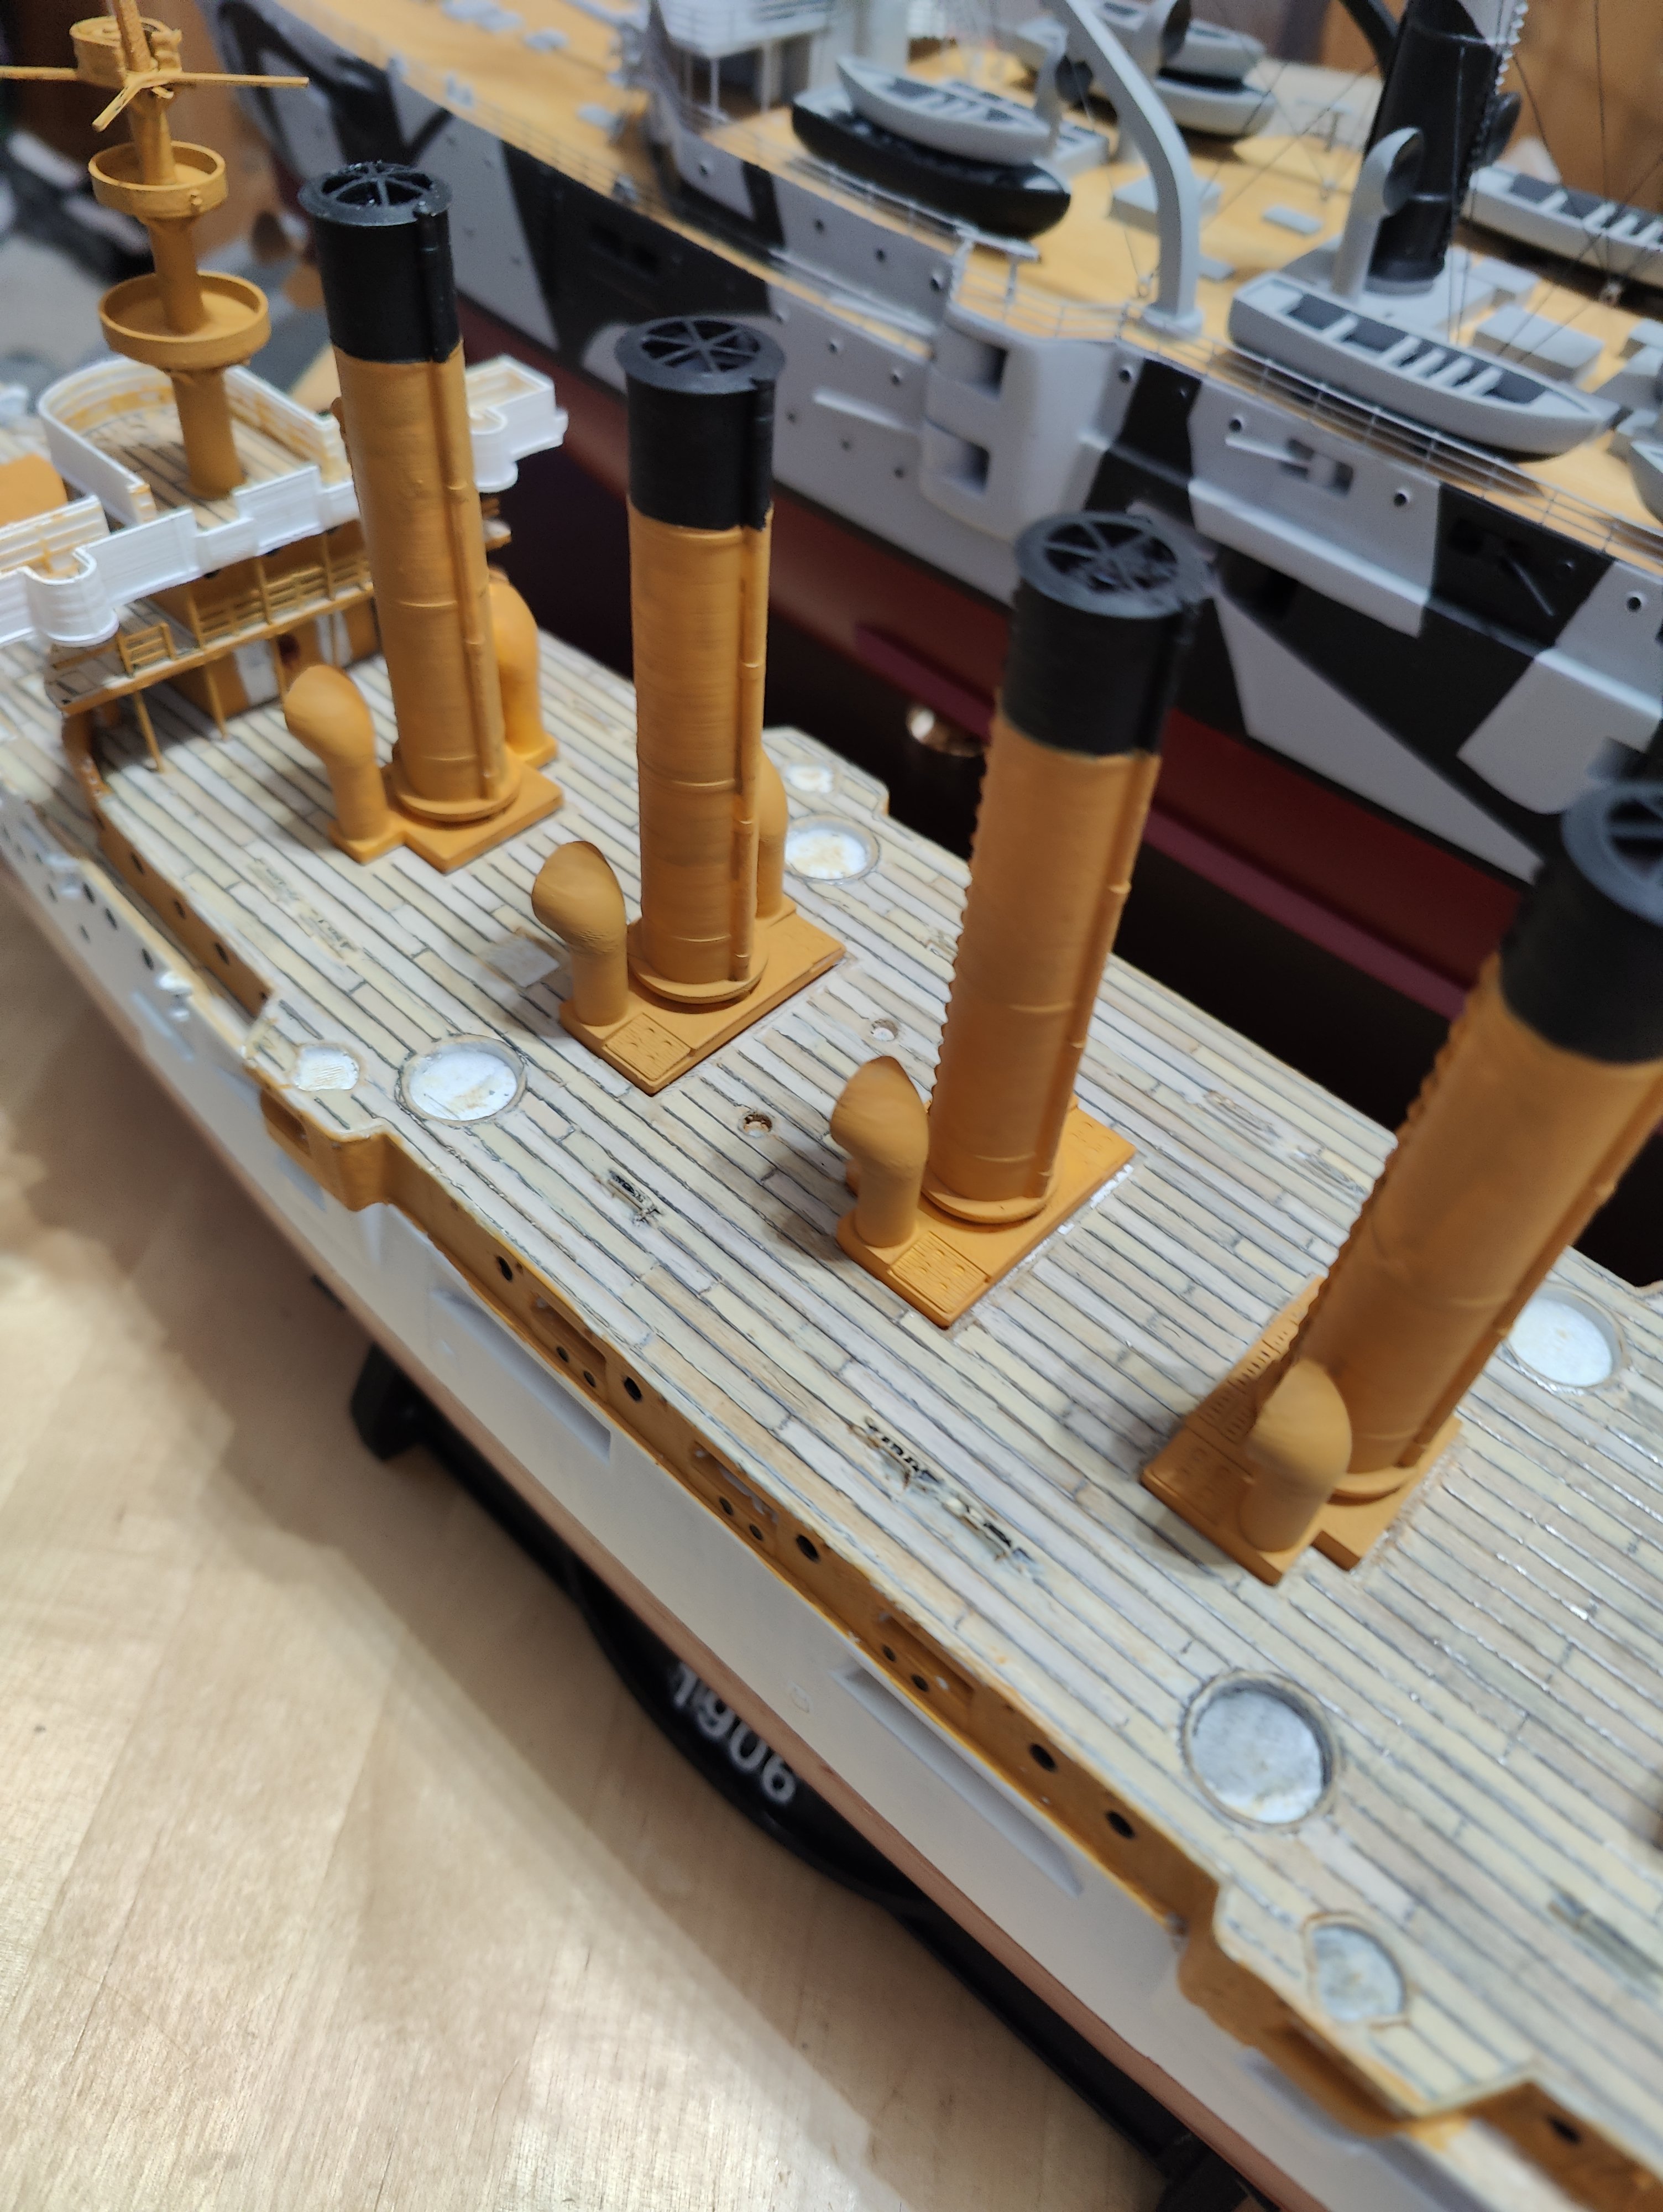
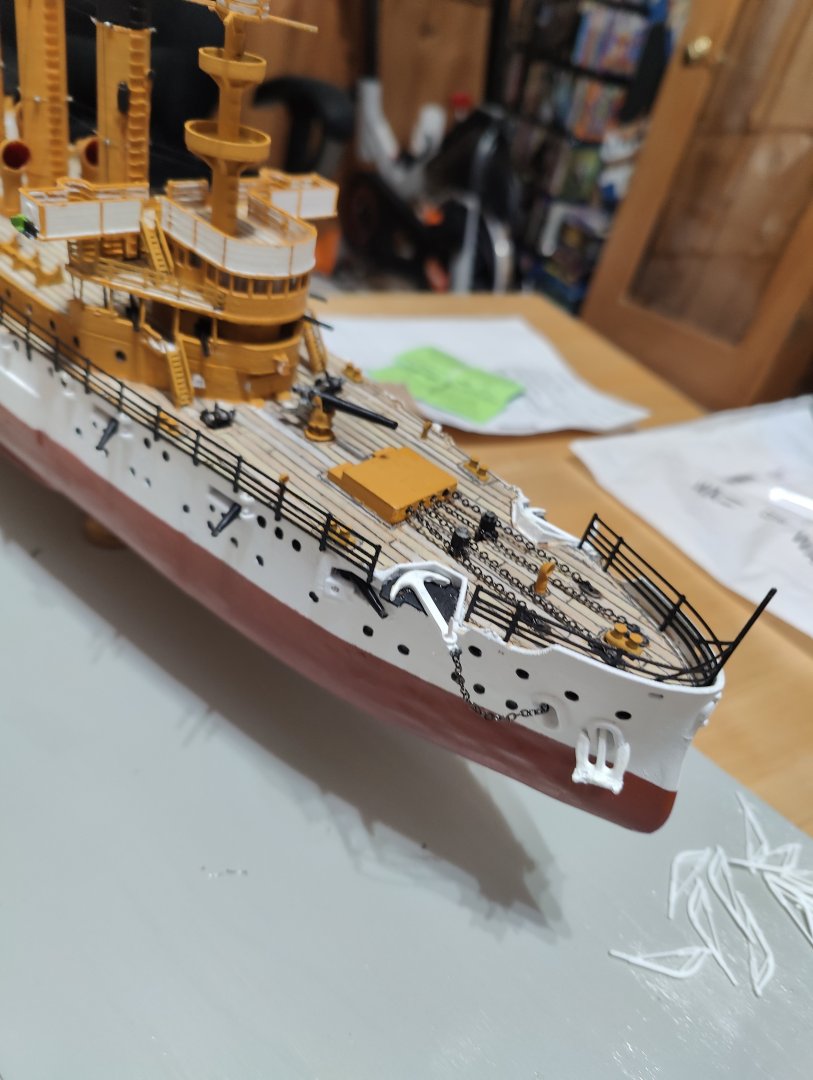
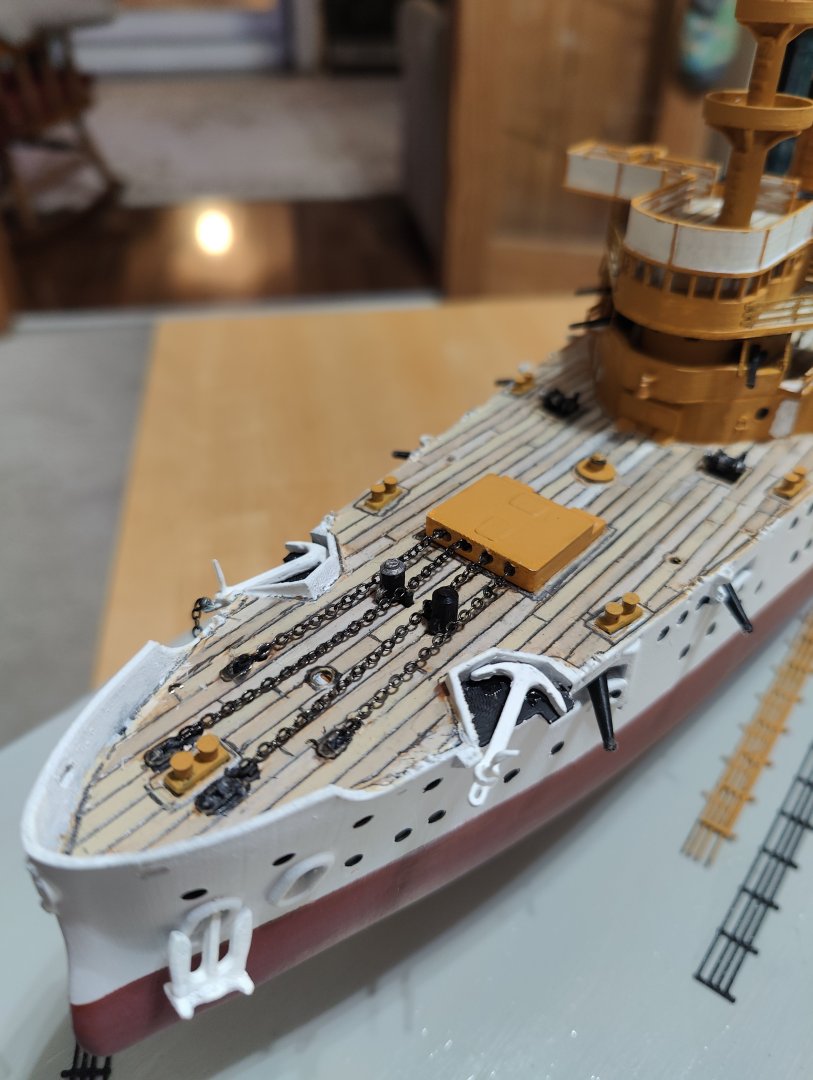
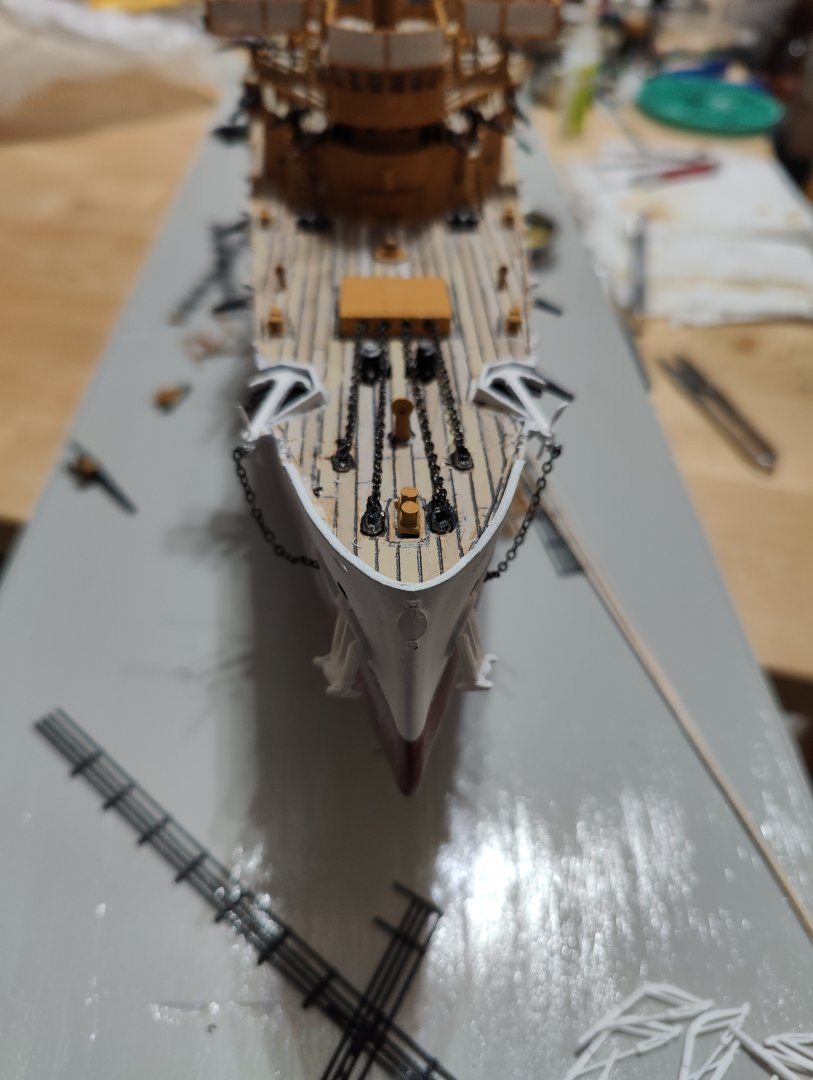
There be anchors here. Of all the unique features on this vessel the fact it carries both stocked and stockless anchors each on their own chain is very cool to model. I also started on the ultra fine stack rigging.

- 32 replies
-
- 8
-
-
- St Louis
- 3D Printing
- (and 2 more)
-
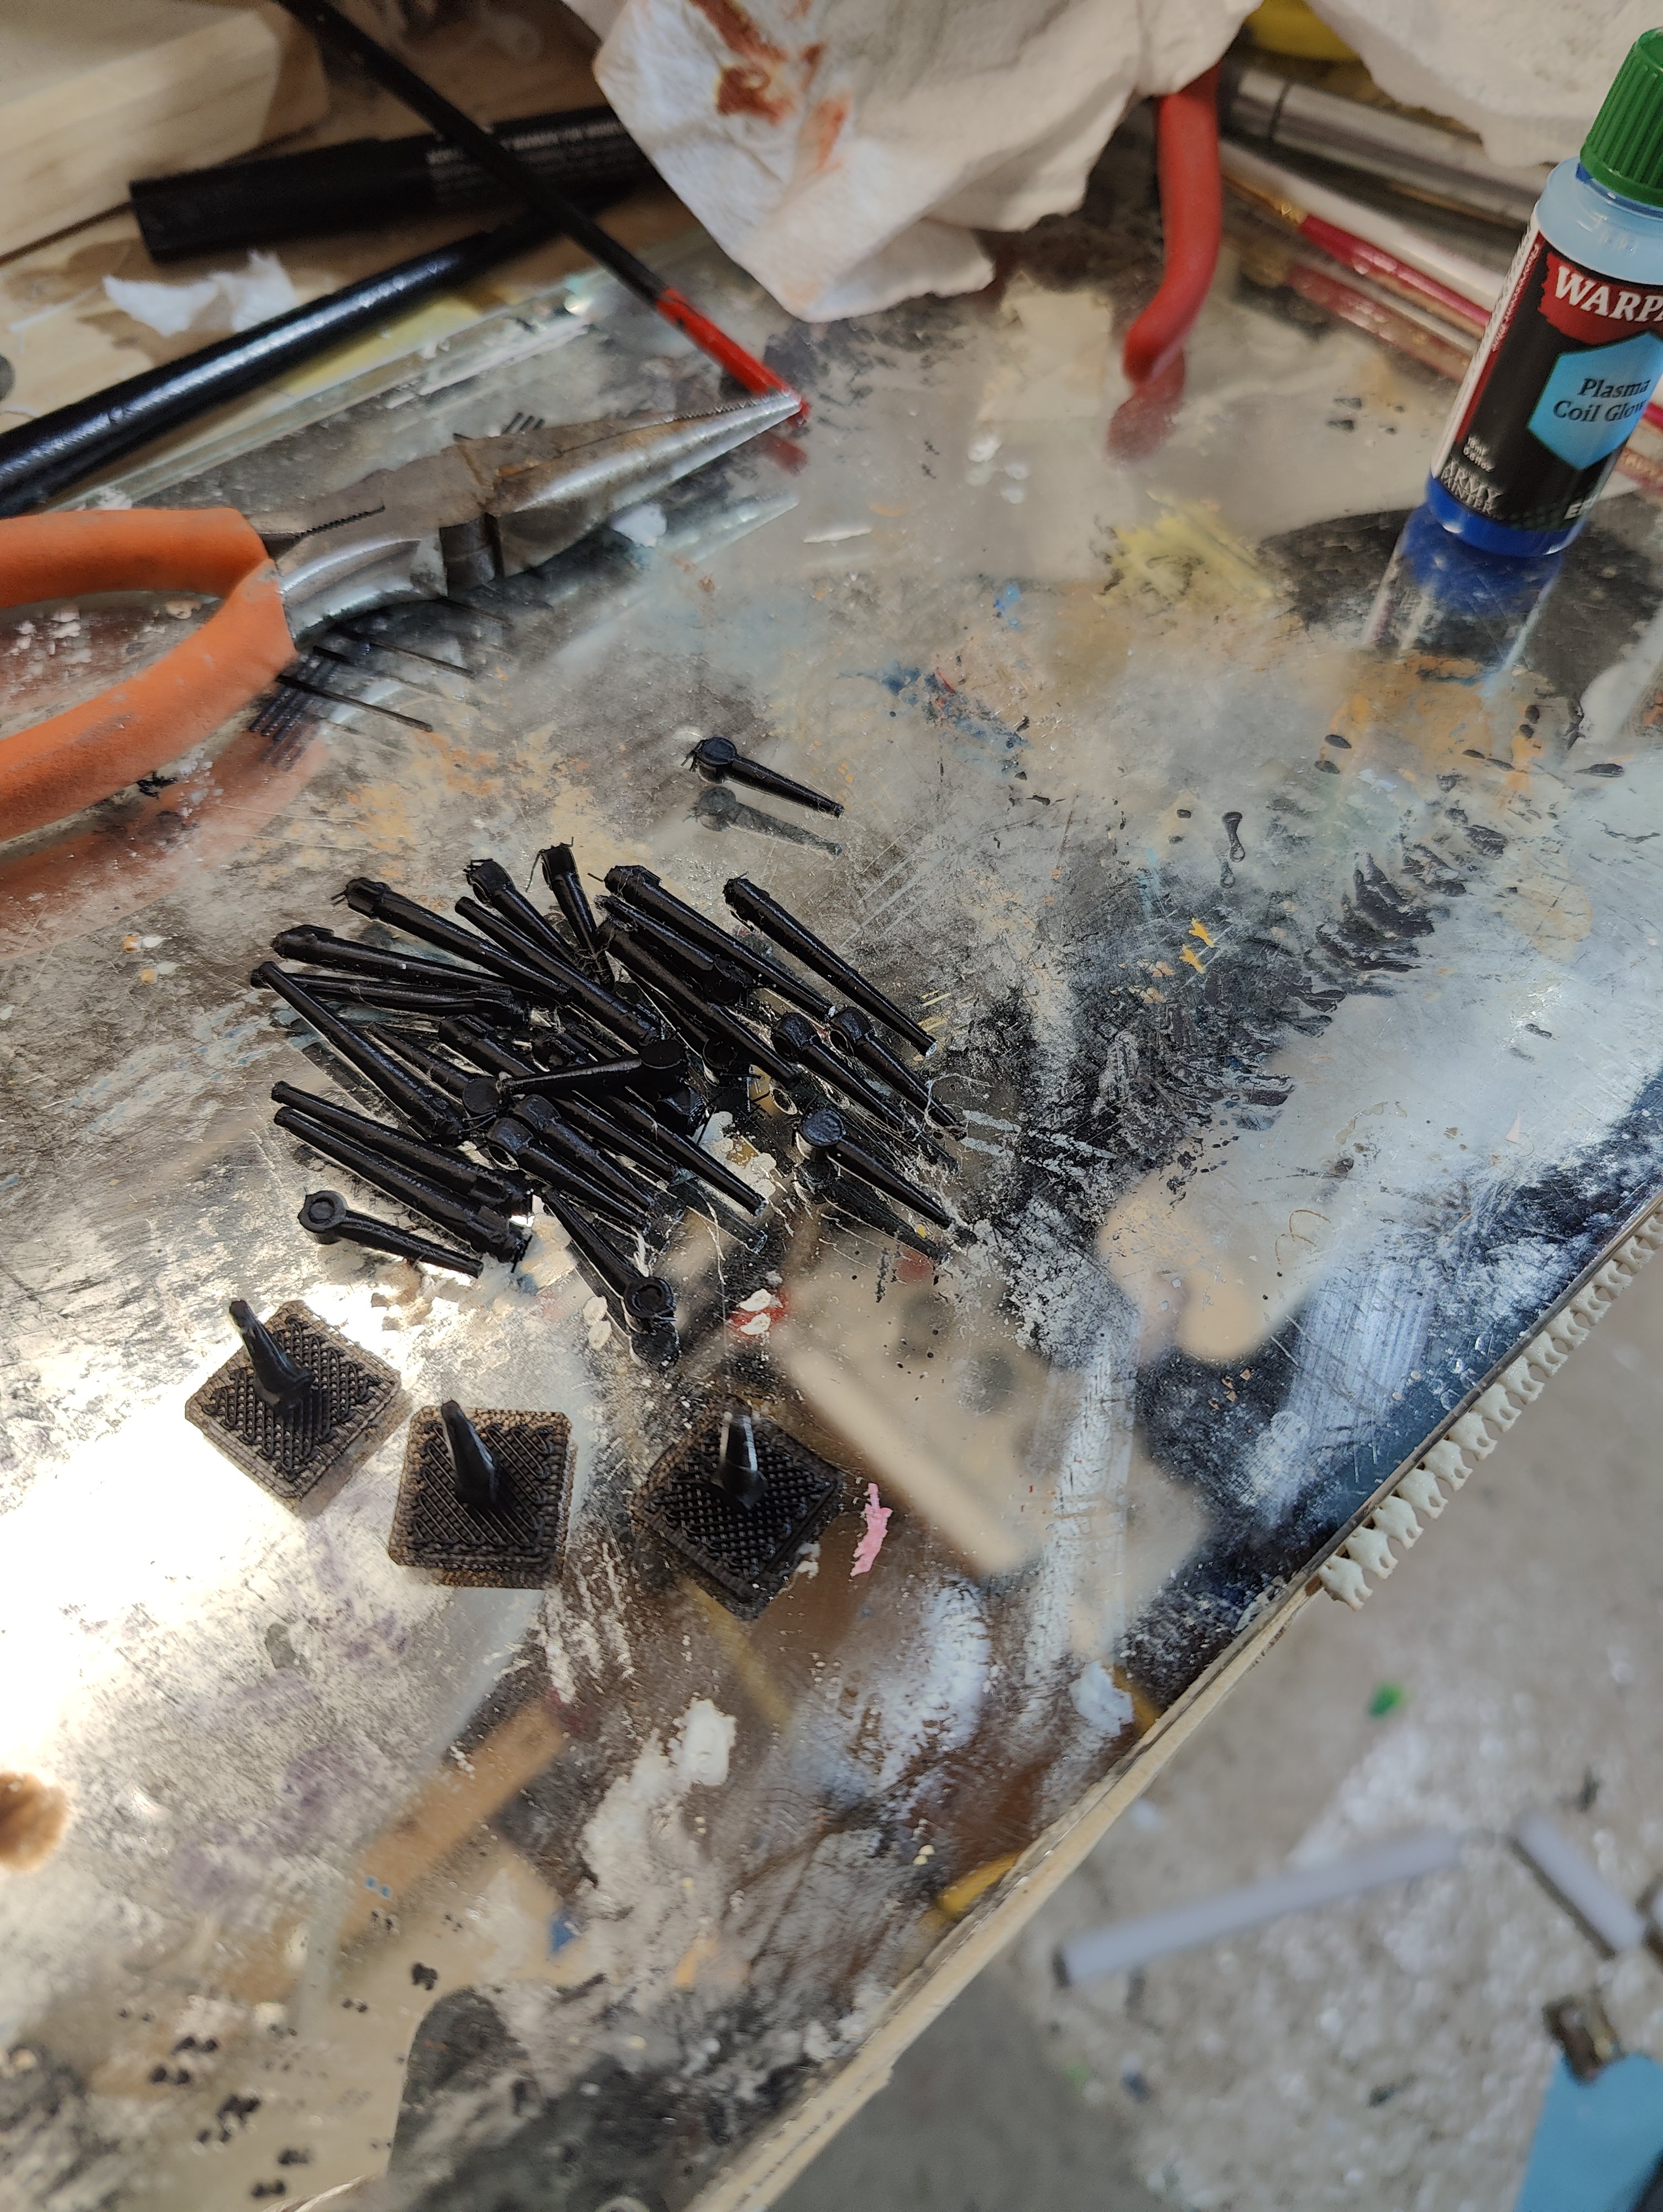
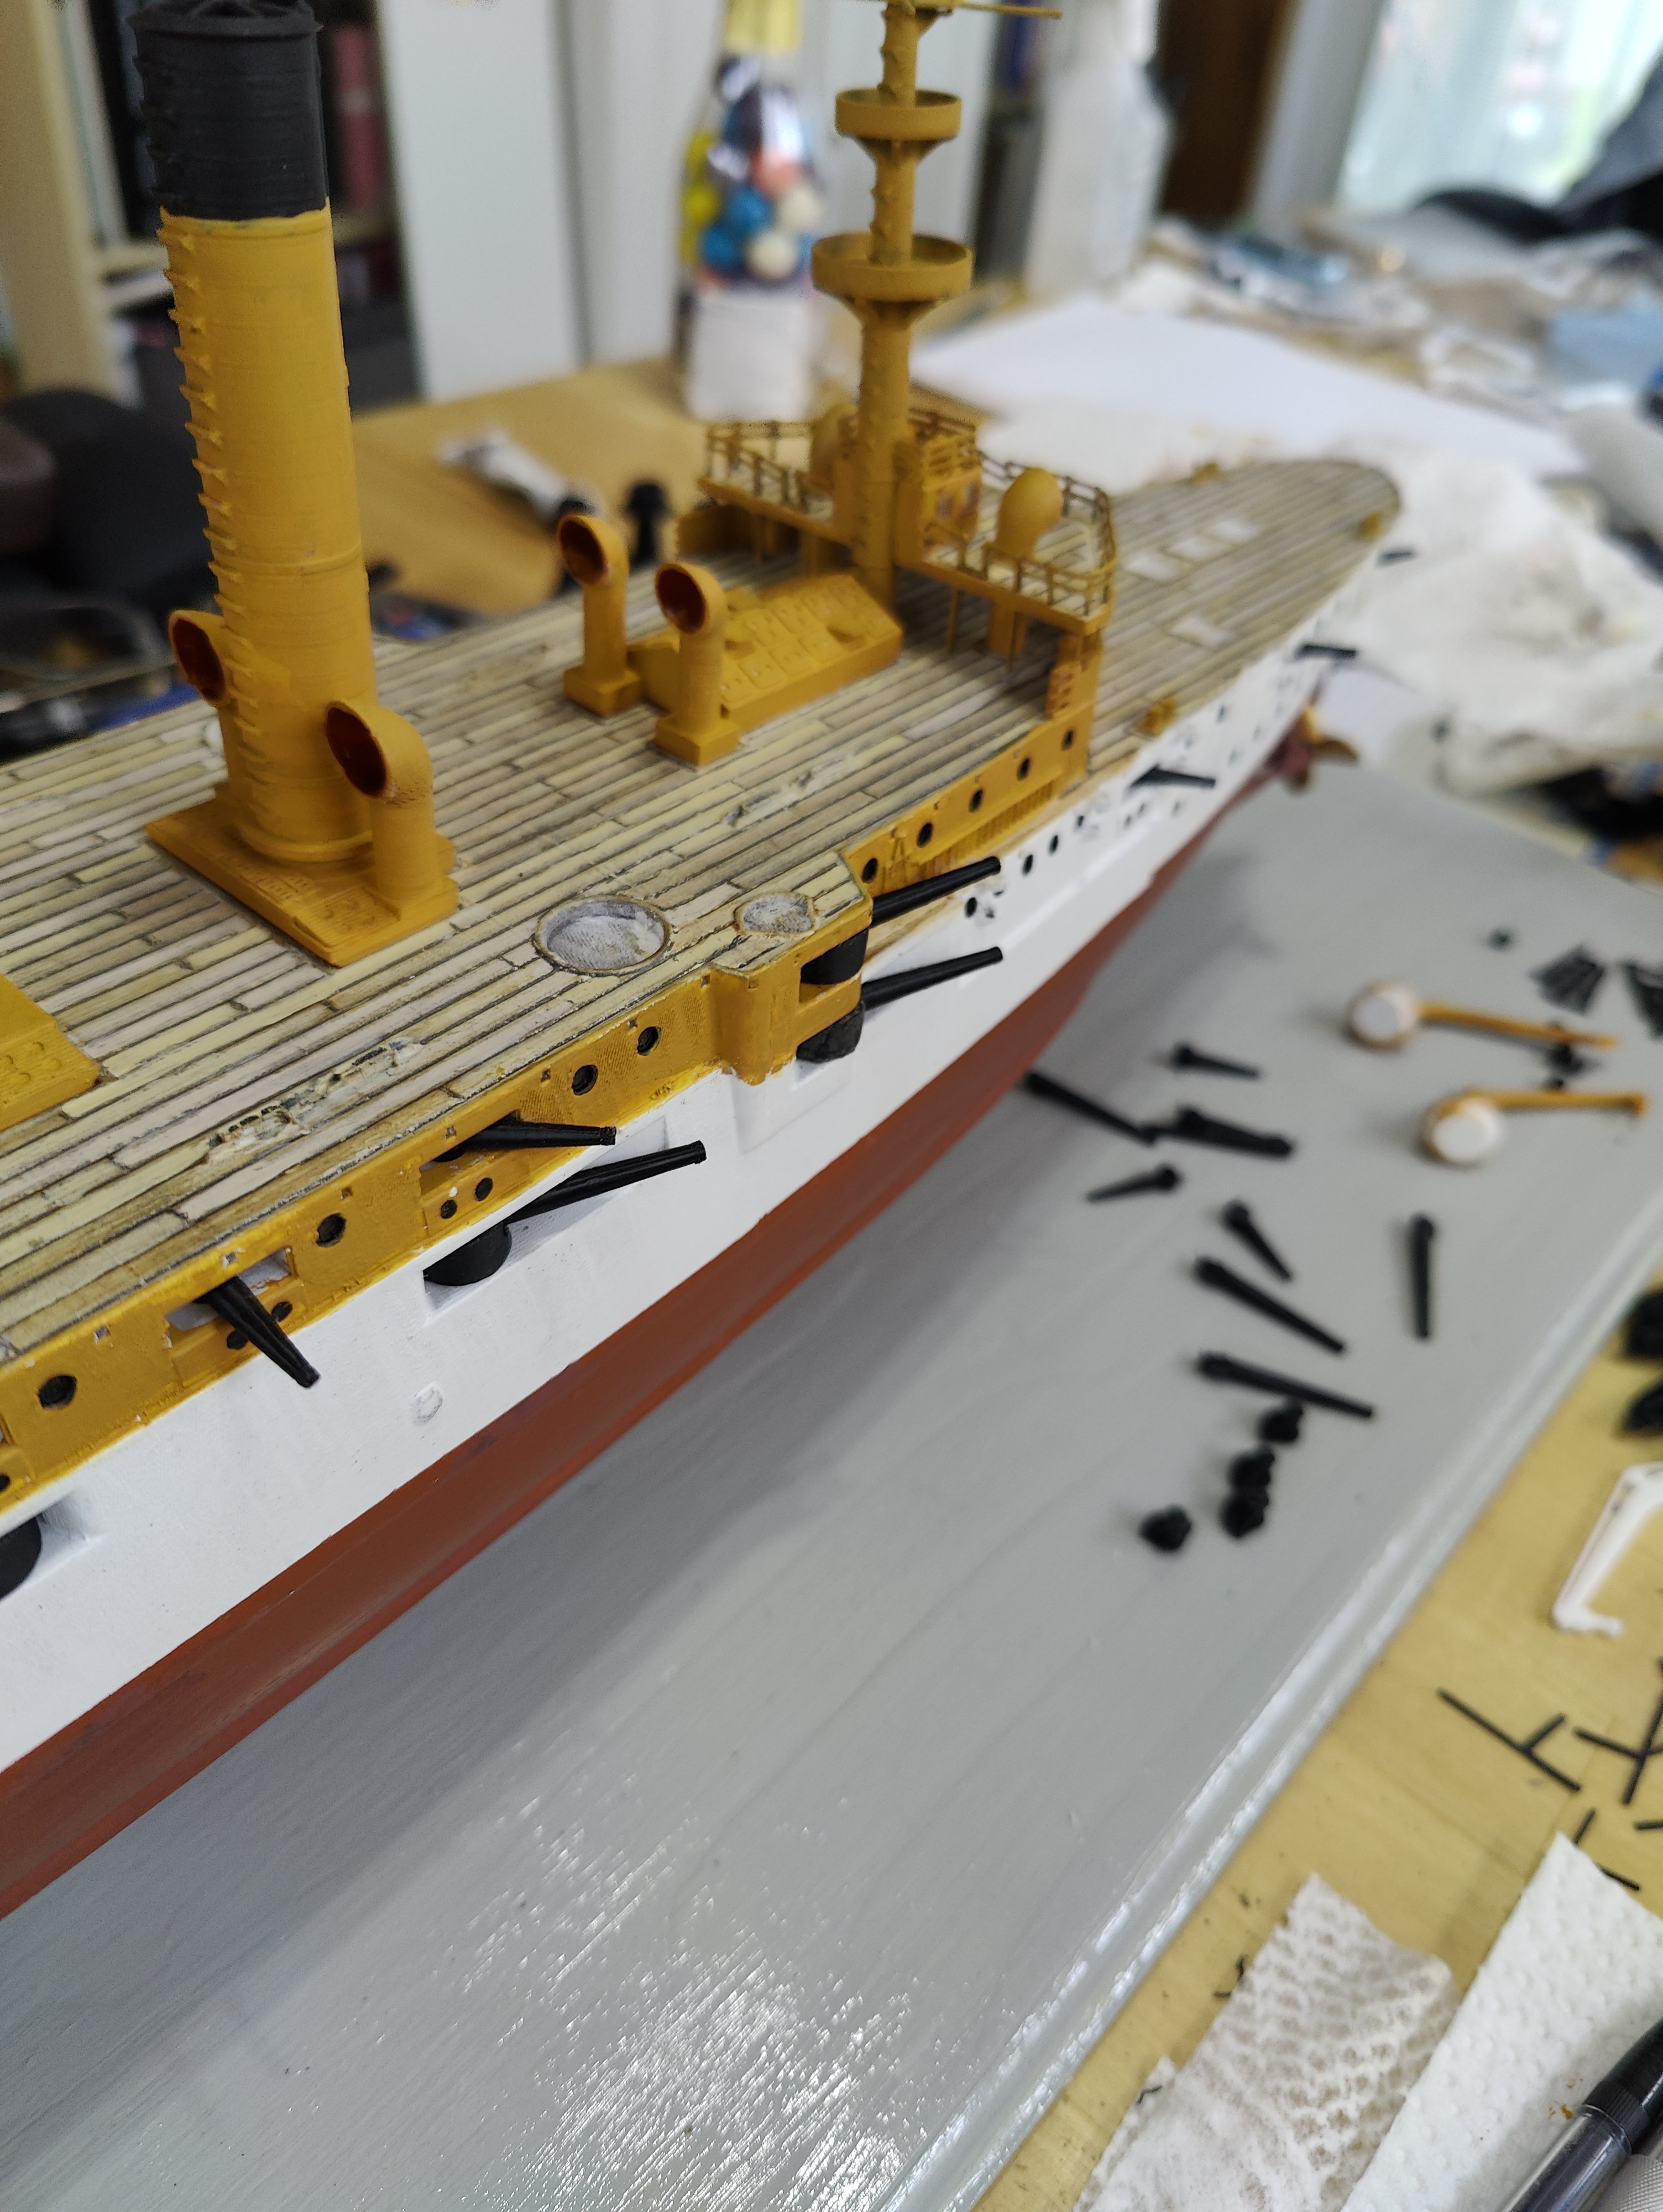
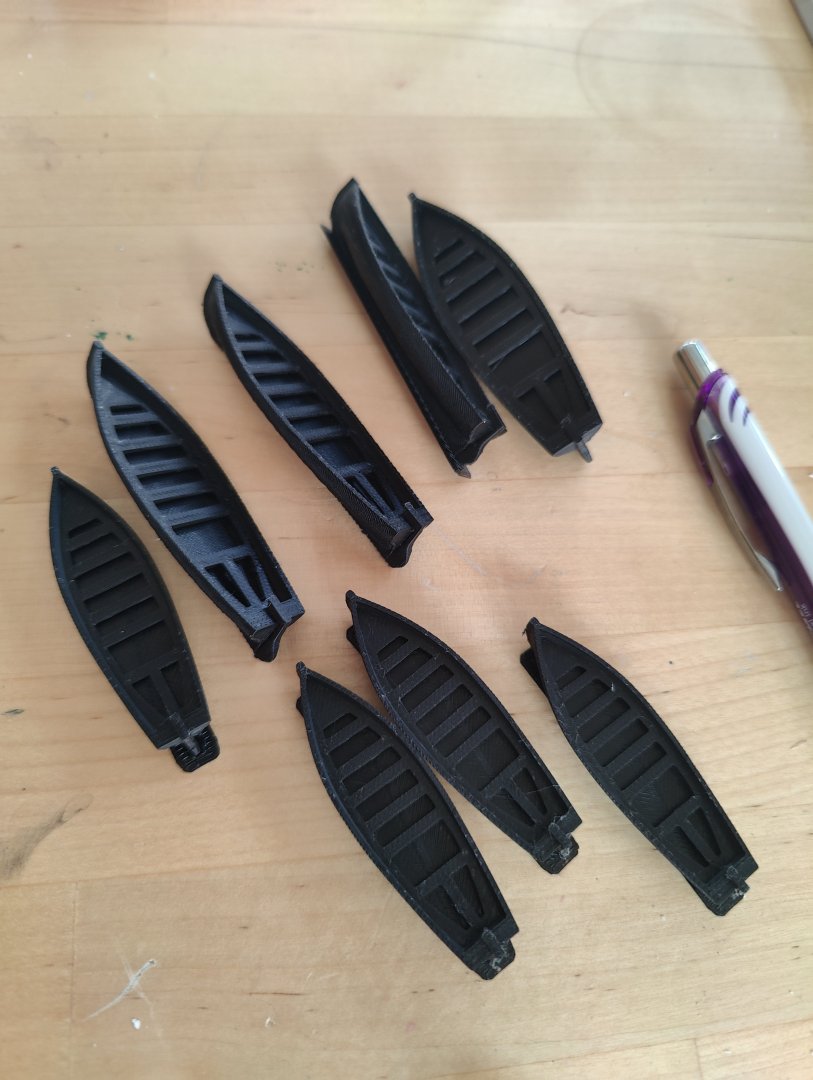
More progress. I quickly printed off 4 of the larger long boats. I realized after I tried to fit them up that I forgot to shrink them down to 1/200 scale which was a 81% (hard to see in the pic but the boat on the far left is the right size and the top four are too big.) The other photos show the new Gatling gun mounts and test fitting the boat mounts.


- 32 replies
-
- 5
-
-
- St Louis
- 3D Printing
- (and 2 more)
-
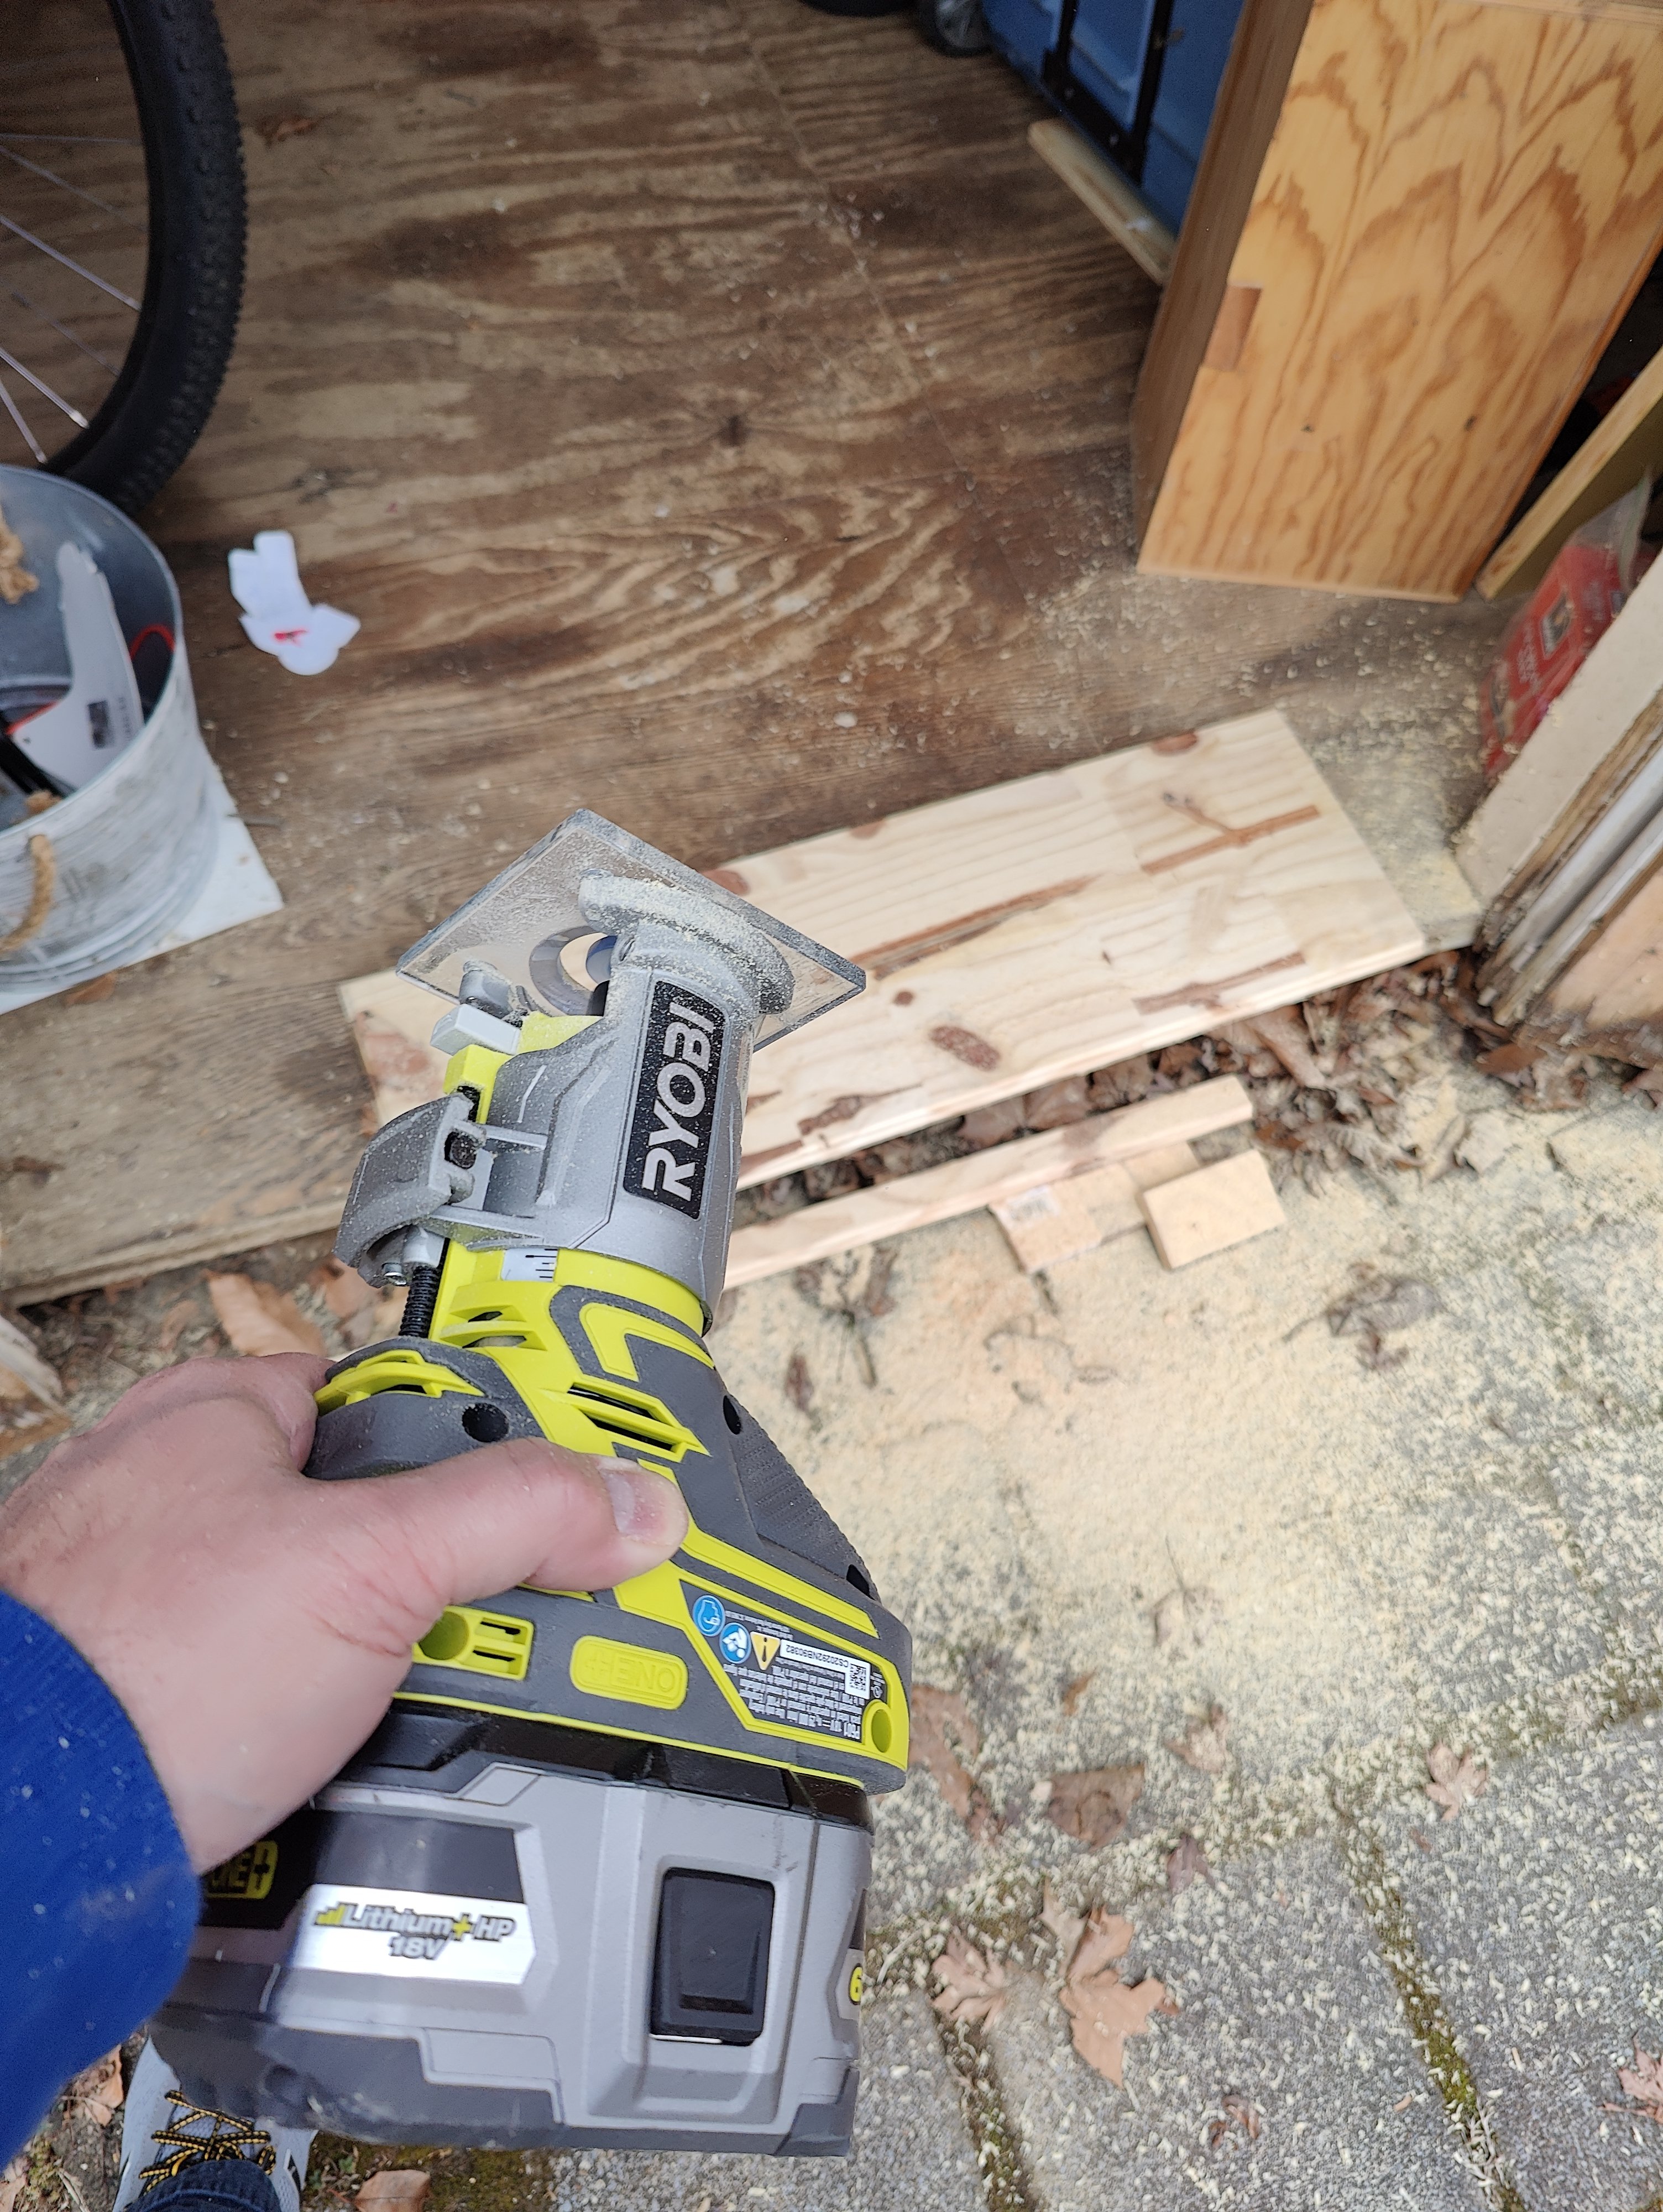
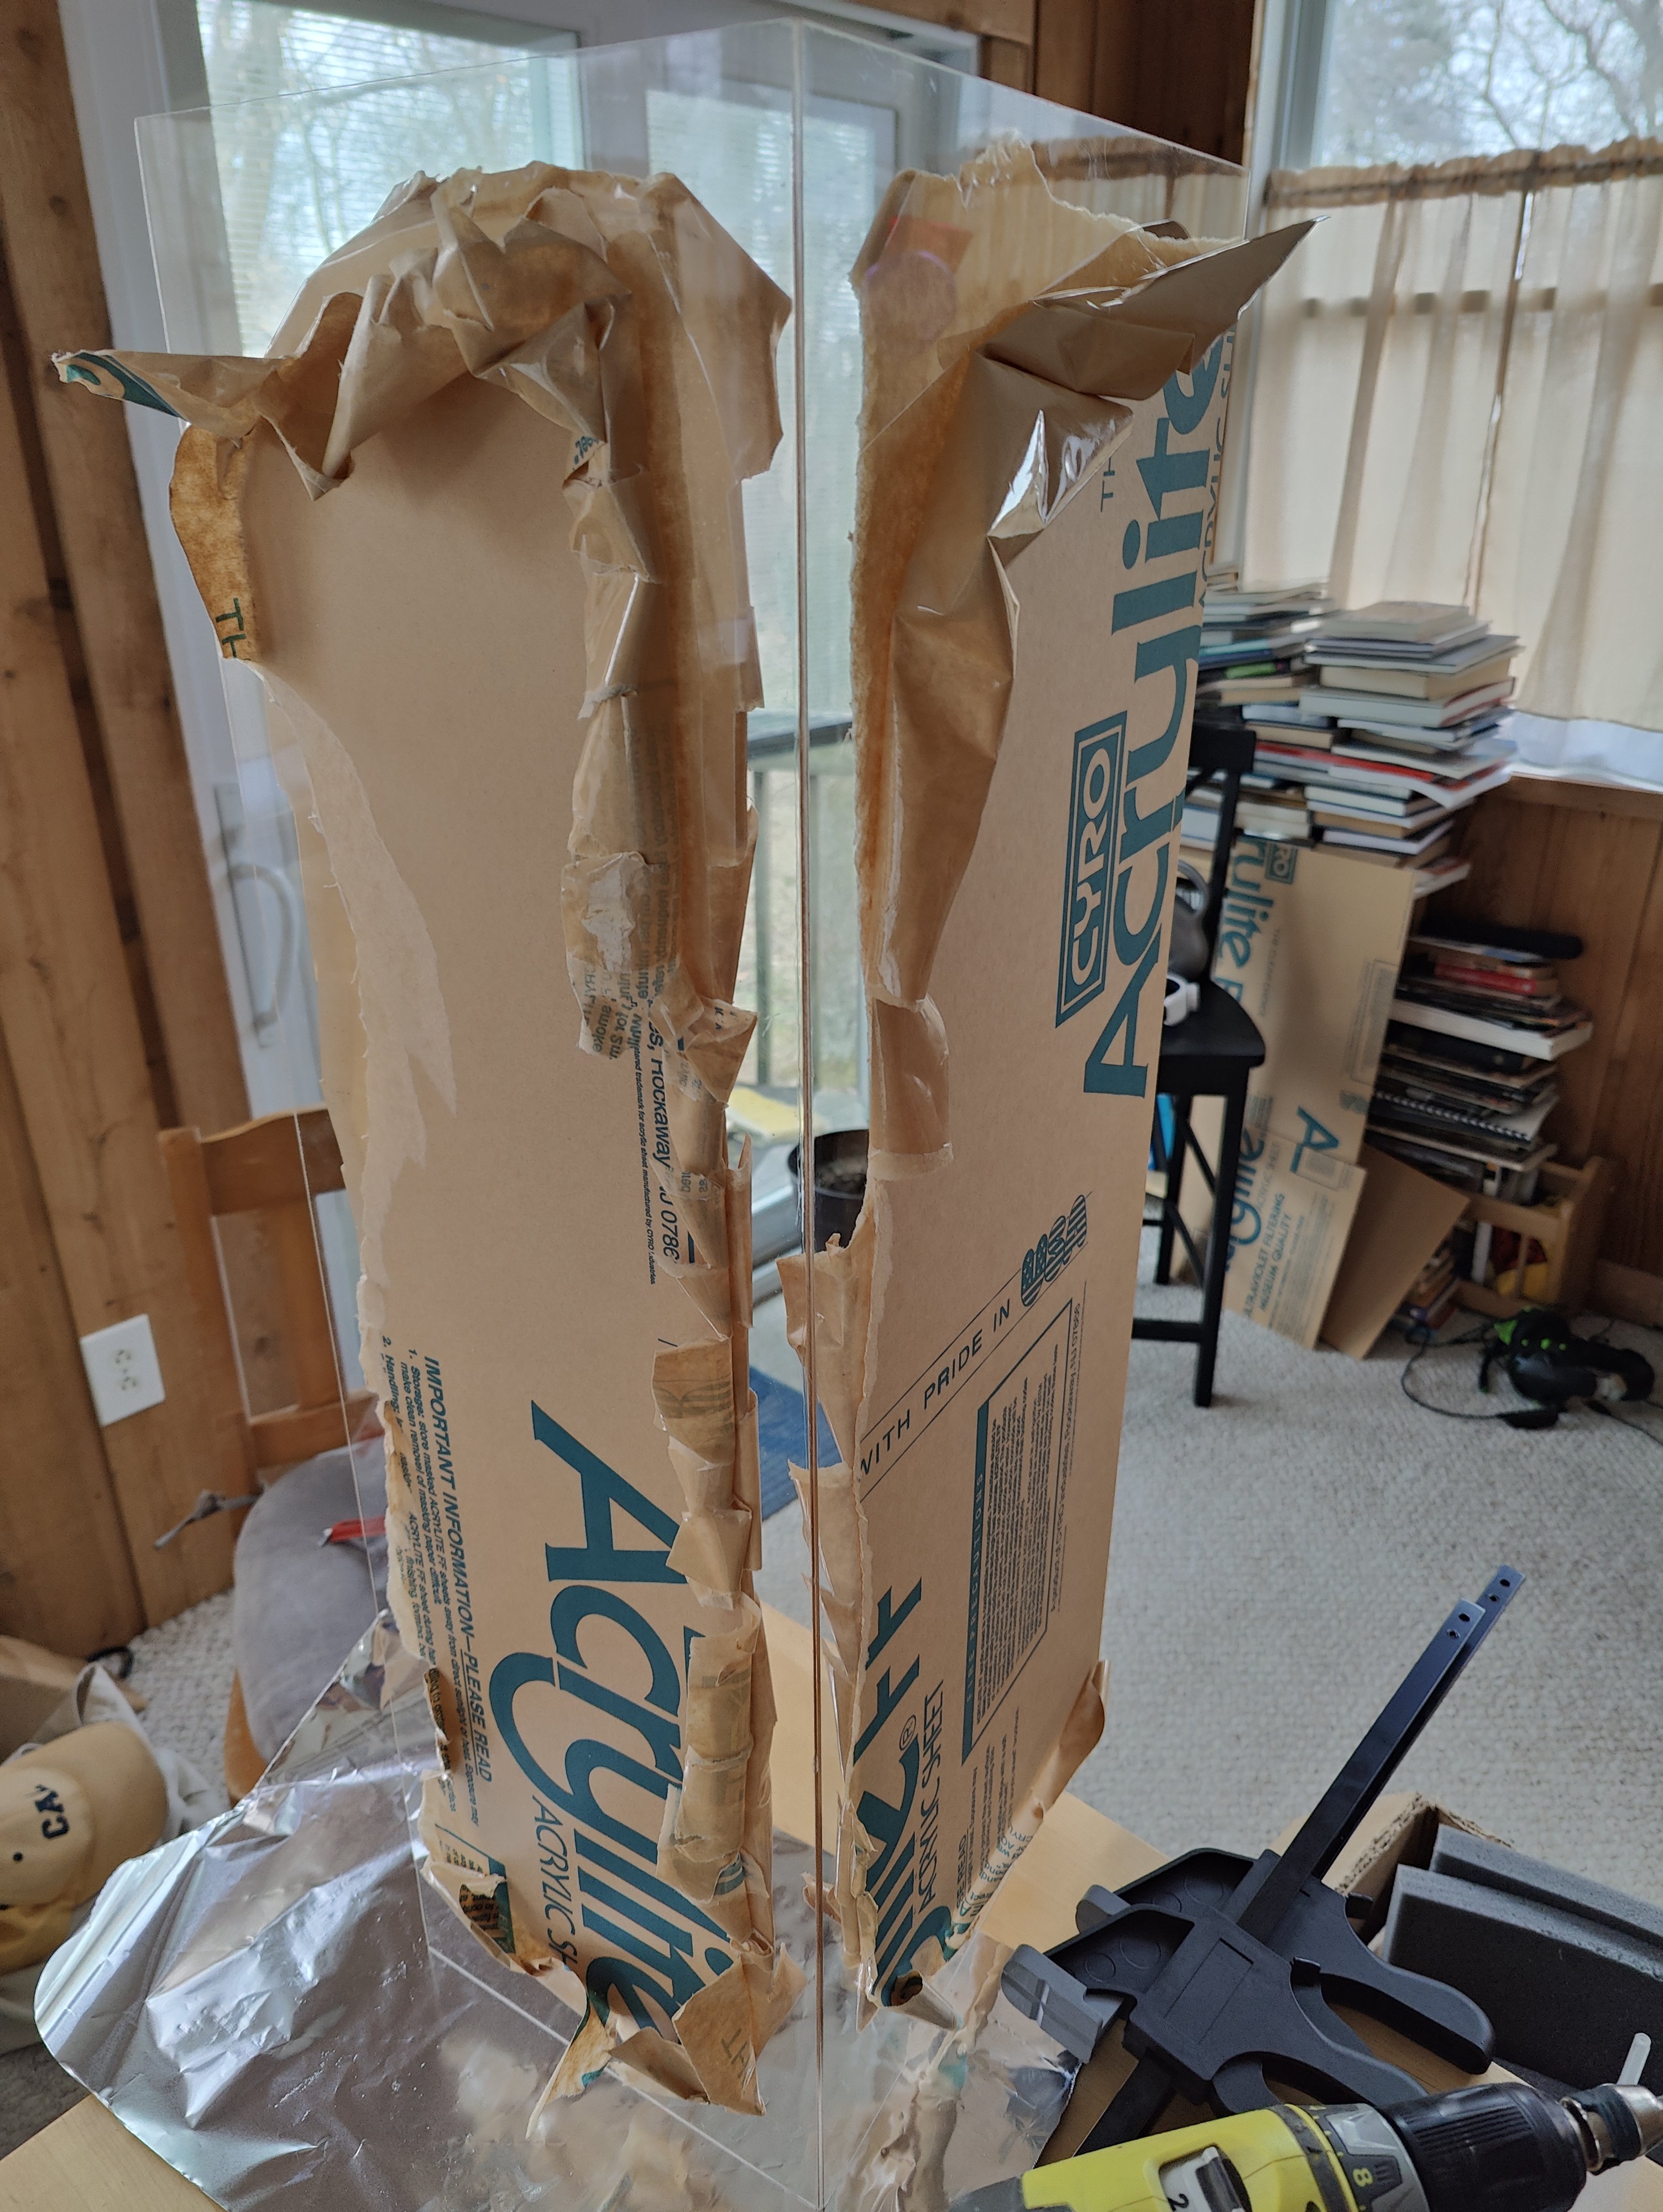
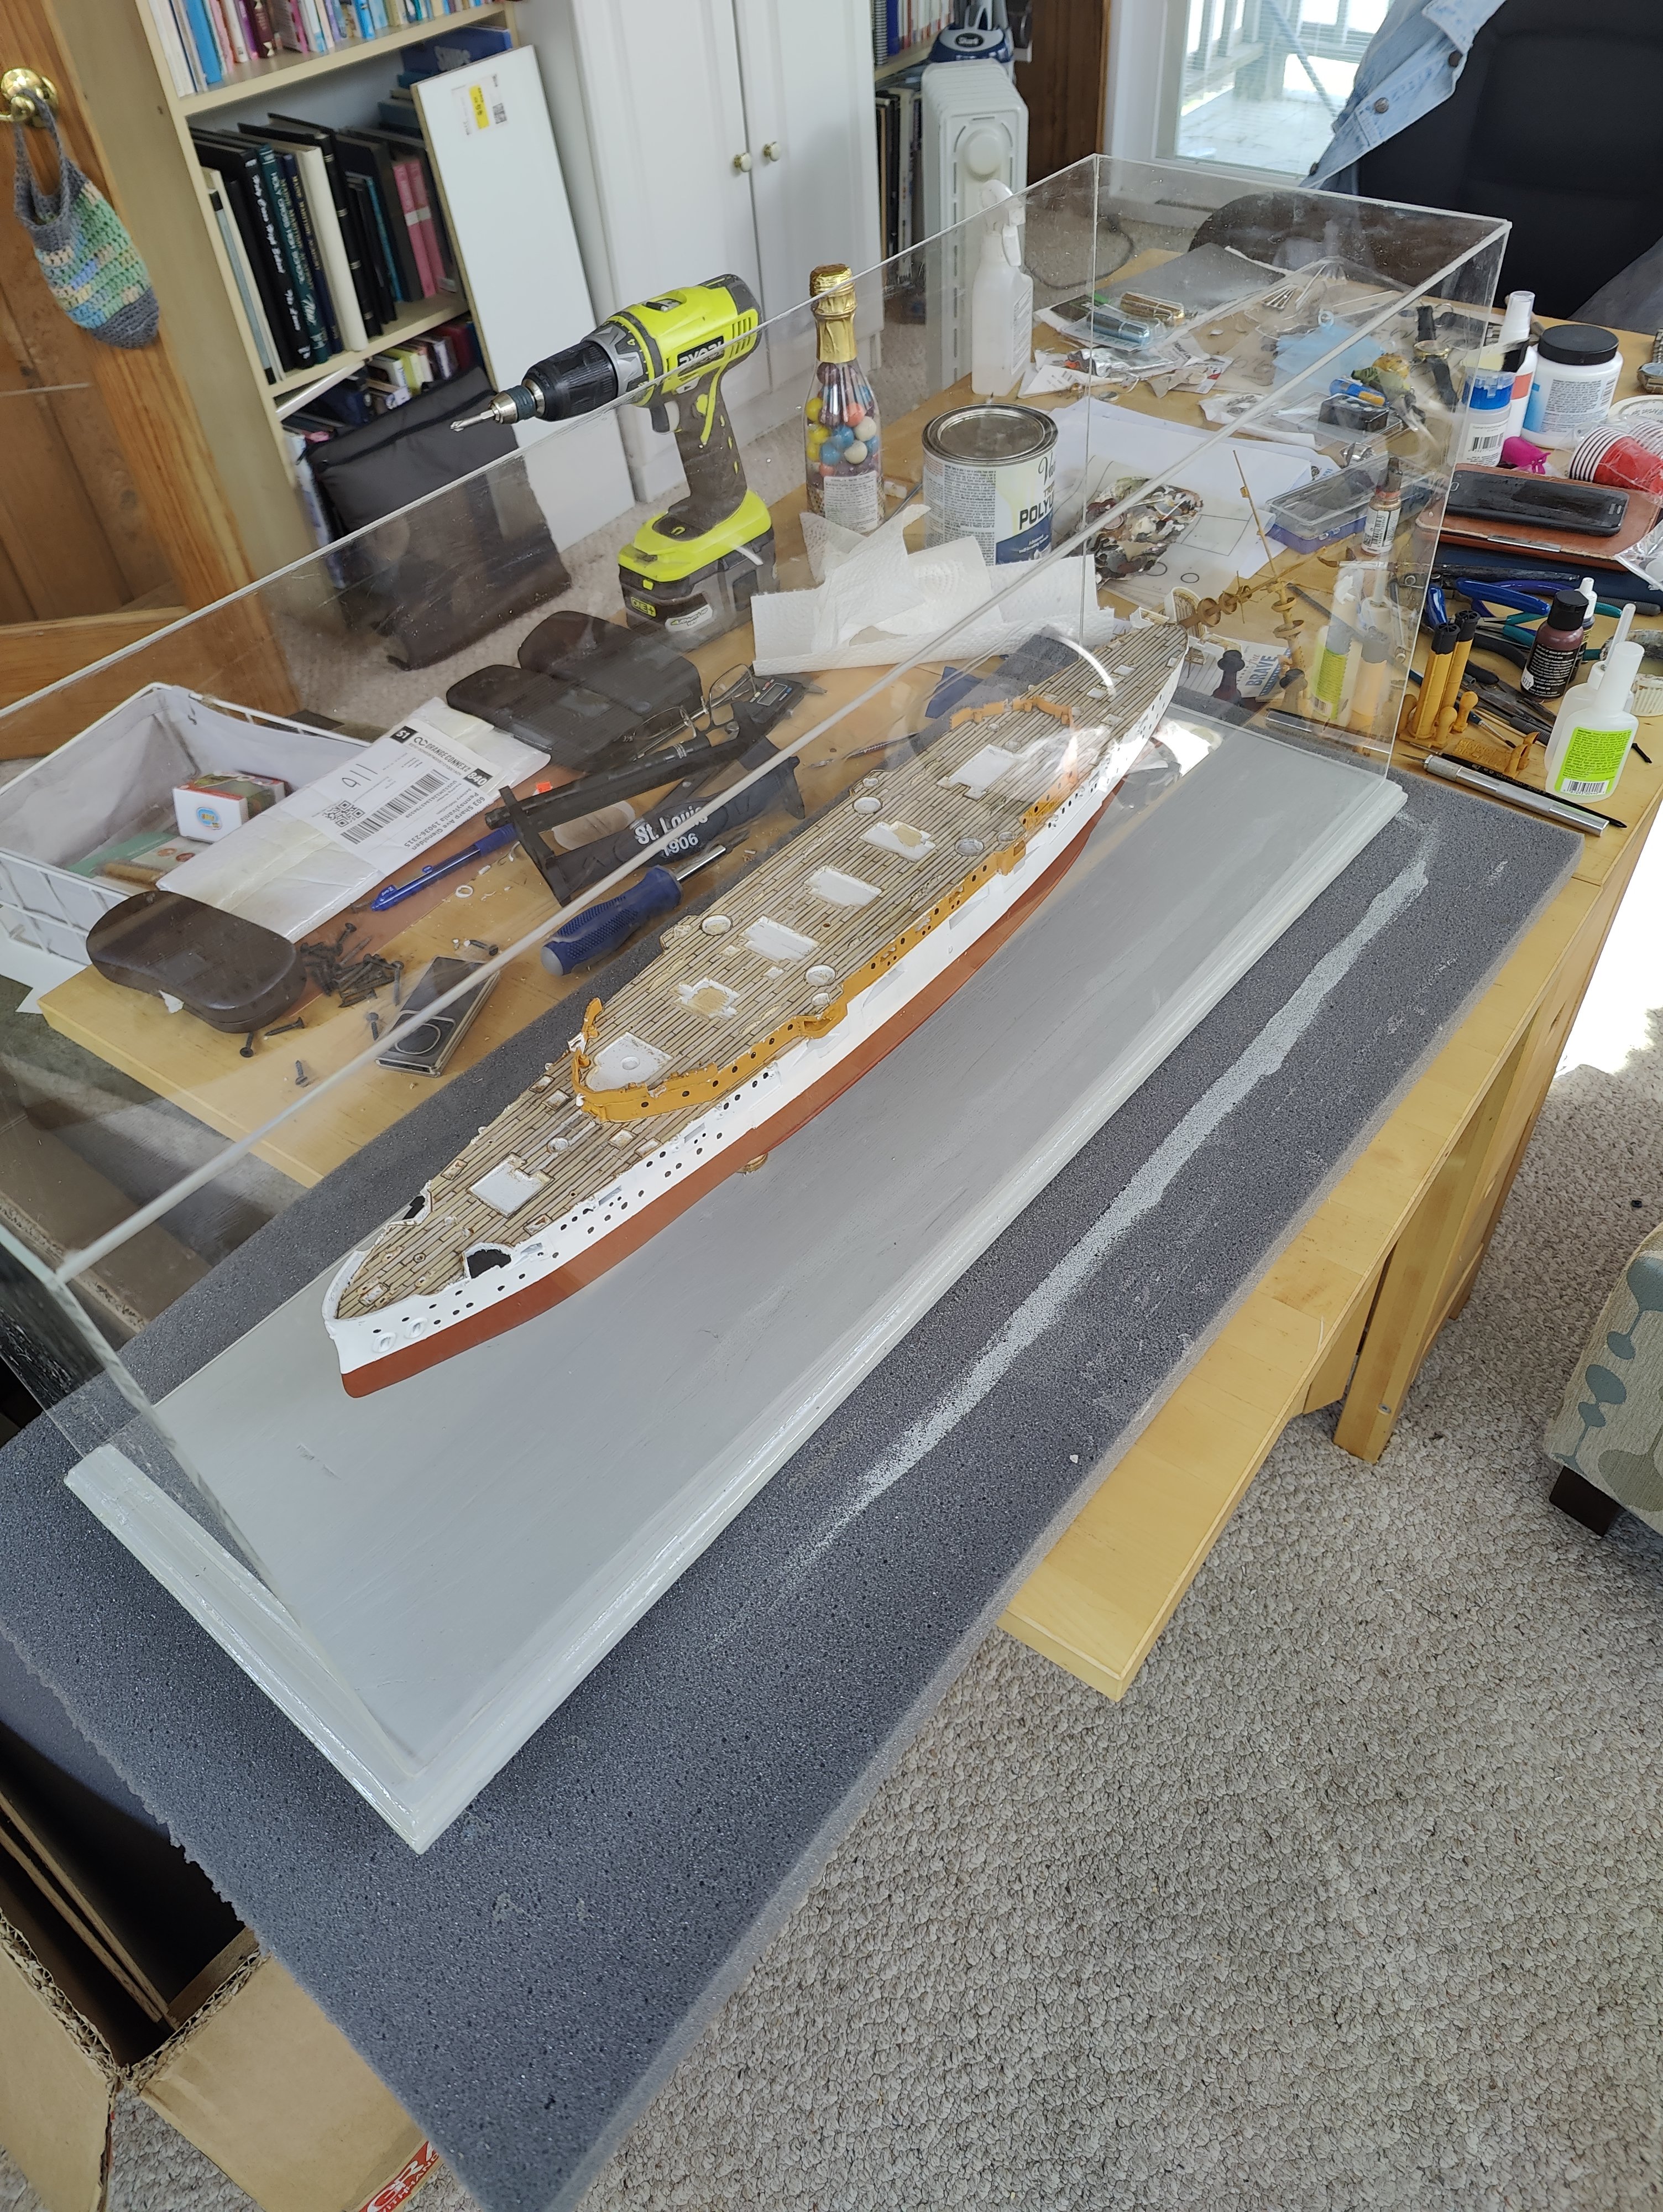
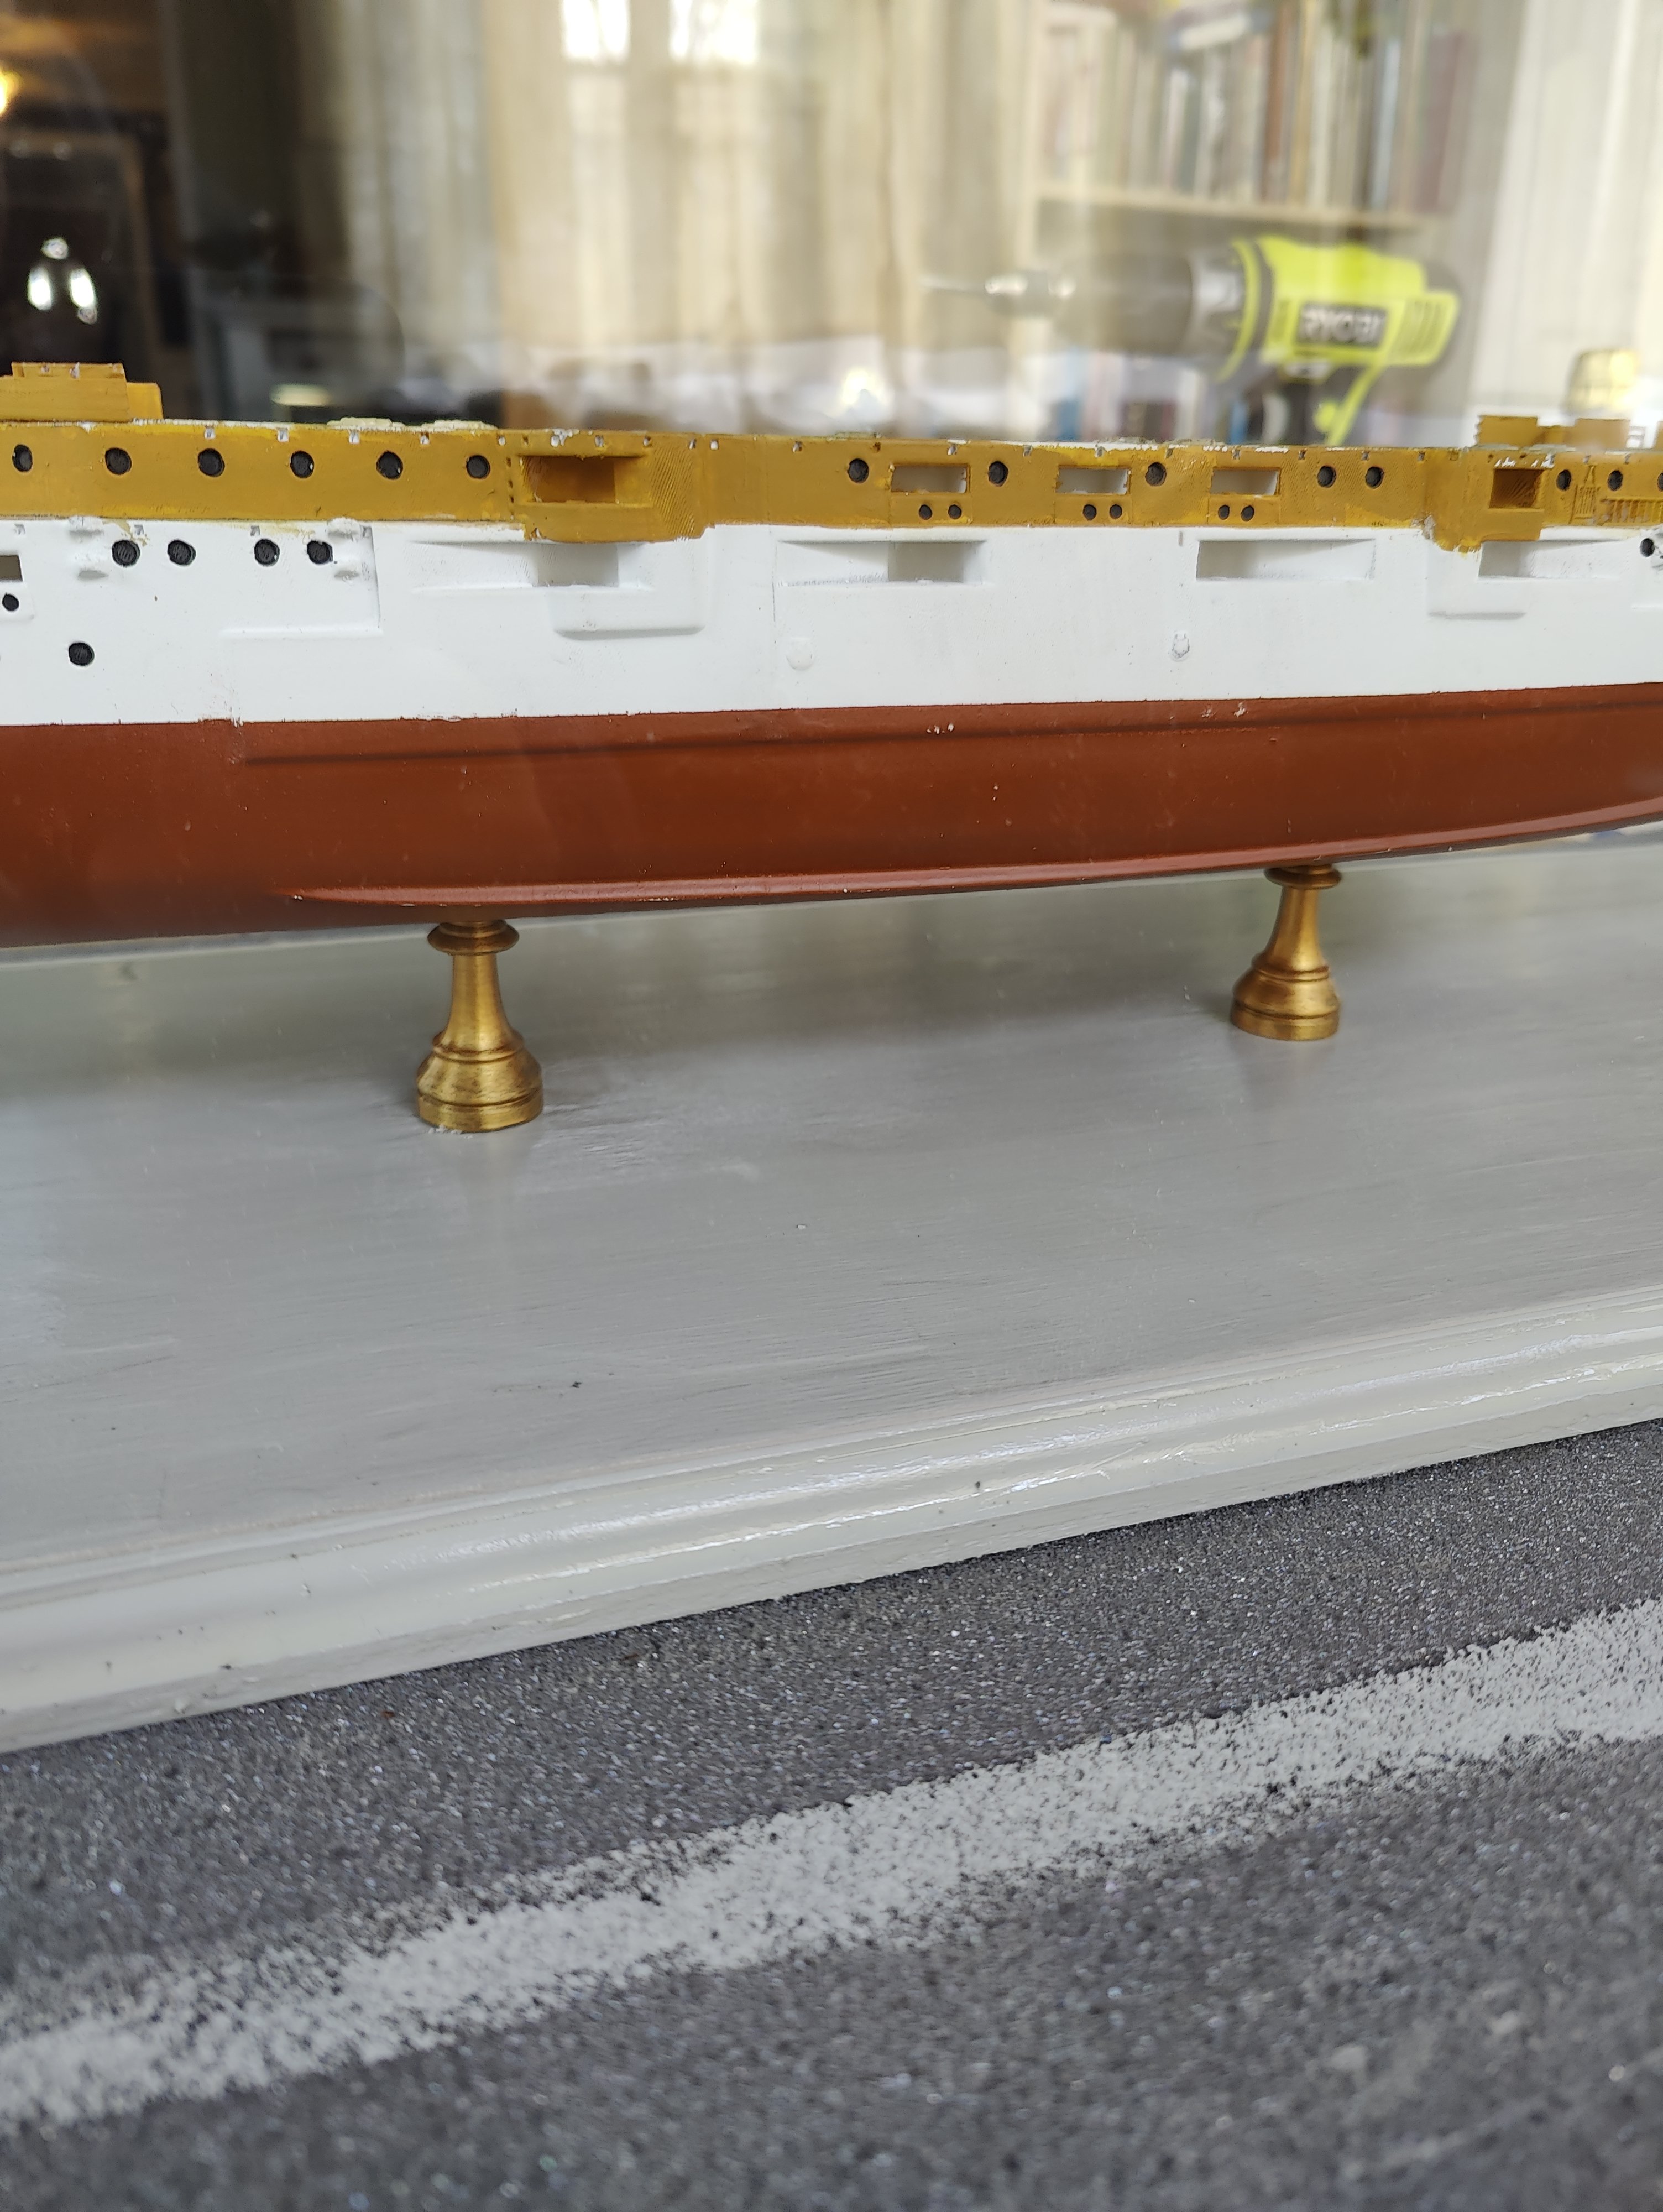
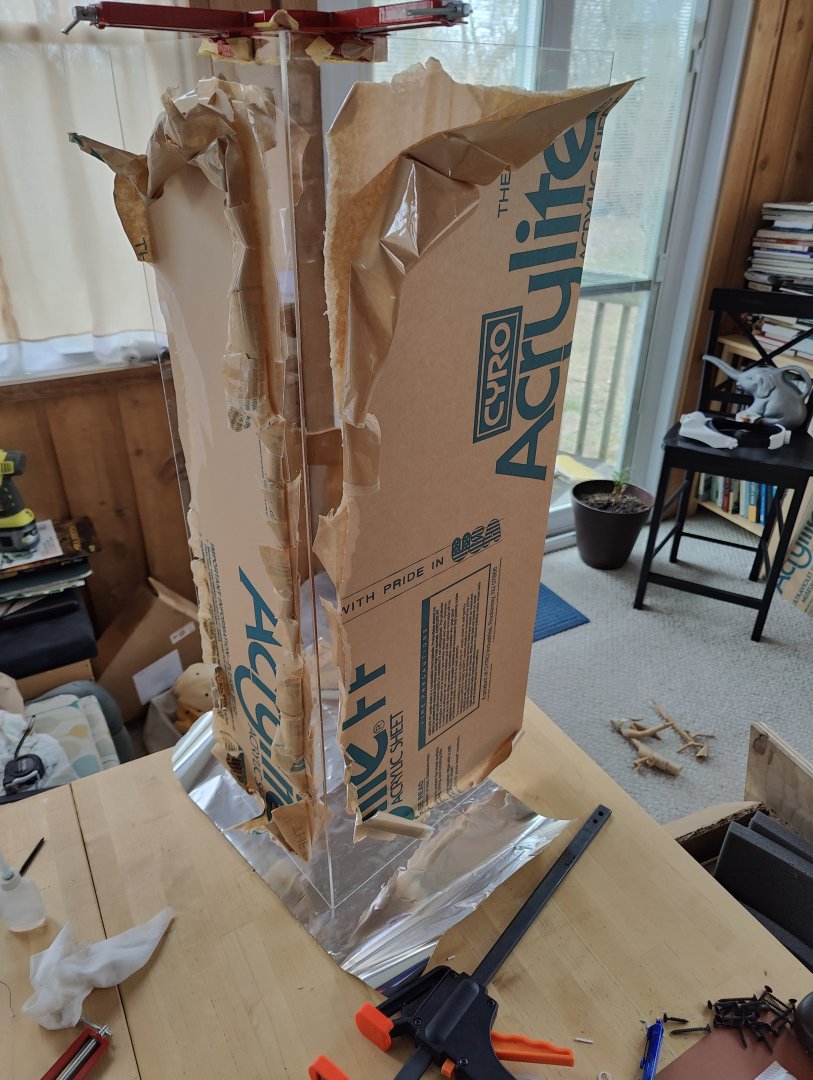
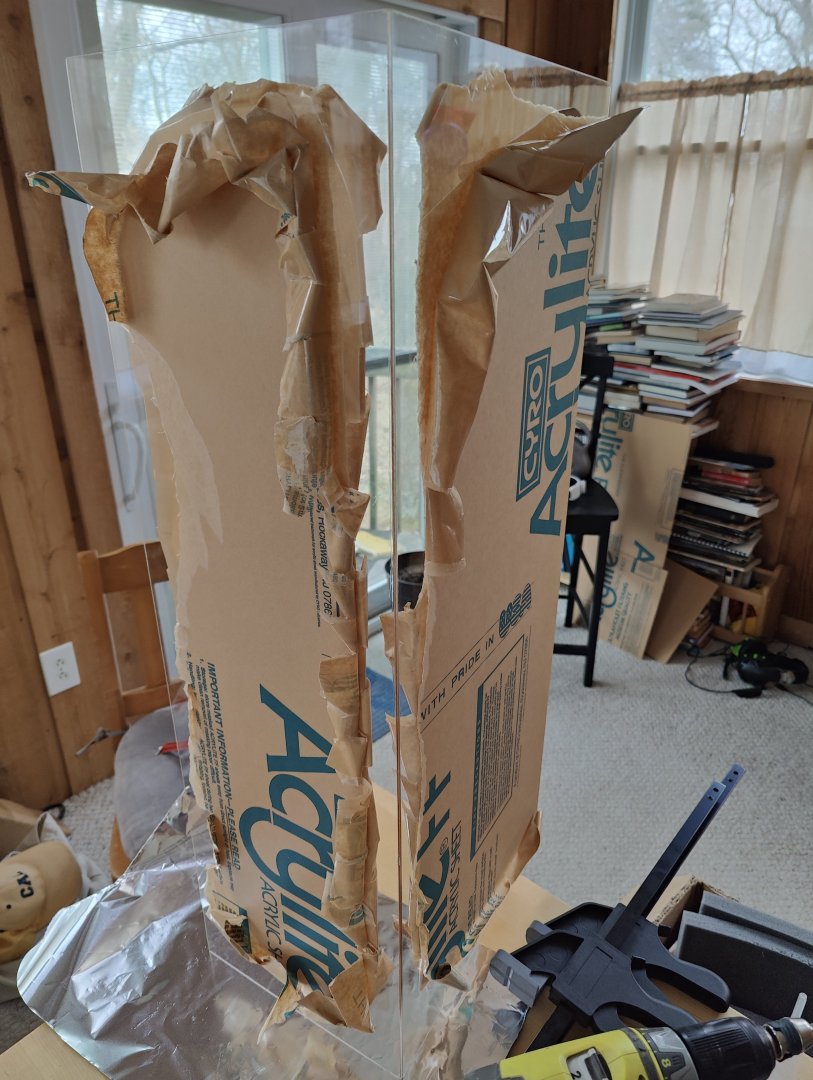
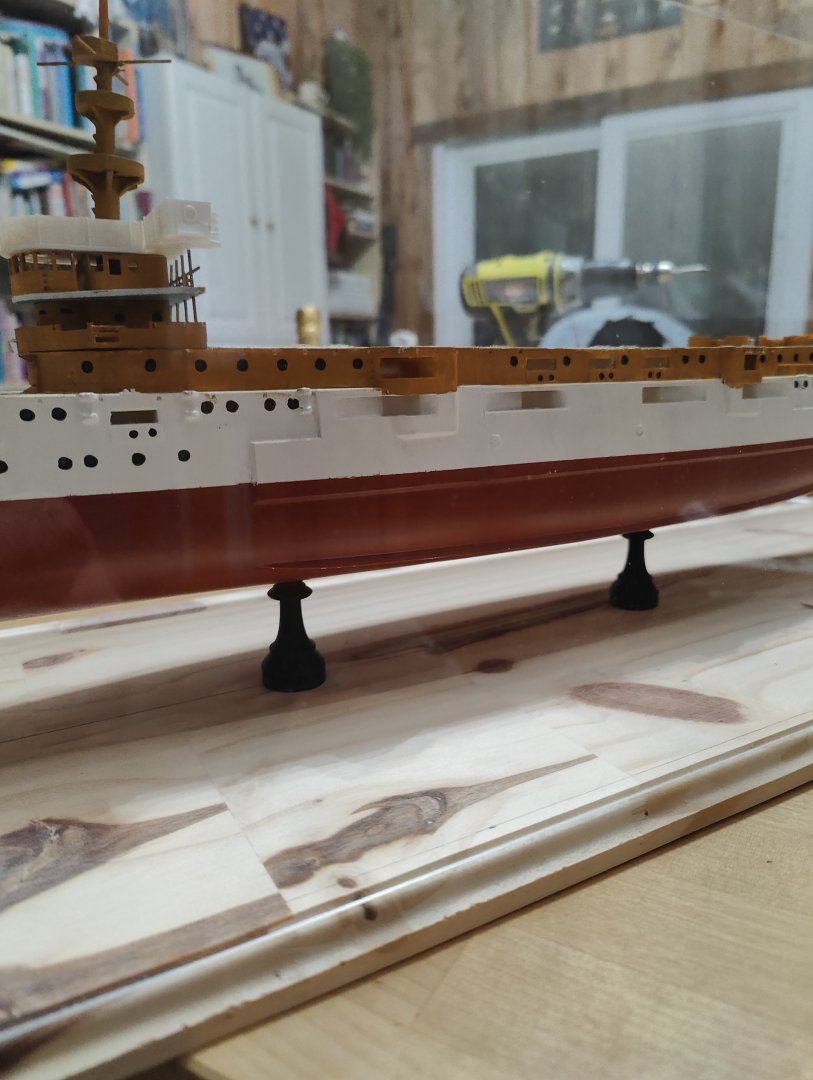
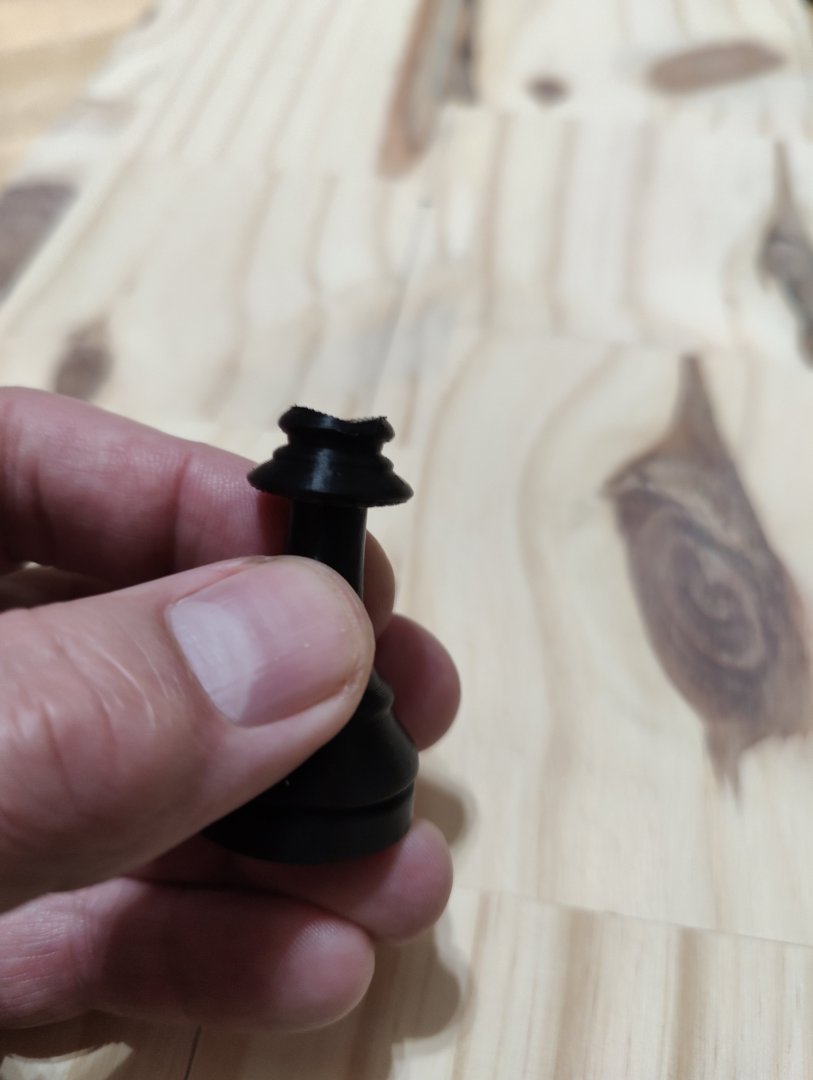
Back to my build. Work on the pedestals, case, and side gun mounts . I managed to router some scrap wood and find some UV resistant acrylic sheet which I welded with poly chloride bonding agent. I painted the base gray and layered on 3 coats of polyurethane. The pedestals were printed to fit and painted bronze. I then layered over brass wax paint with sealer. The model was screwed into place using 3 inch self tapping.


- 32 replies
-
- 6
-
-
- St Louis
- 3D Printing
- (and 2 more)
-
Keith, On the printer I am using you can adjust the settings from draft .2 mm to fine .08 mm. There are multiple settings in between. The advantage with some is to give your piece strength vs detail. I have both a resin and FDM printer. The resin will give you details down to the 10 micrometer range. It will not give you much strength however. The FDM which in the past has never been great for details has come a long way and I am using it almost exclusively for this build. Cheers! TW
- 32 replies
-
- 2
-
-
- St Louis
- 3D Printing
- (and 2 more)
-
highlanderburial reacted to a post in a topic:
3D Naval Guns 1850s ~ 1870s
-
highlanderburial reacted to a post in a topic:
Yet Another Pandora 3D build