HOLIDAY DONATION DRIVE - SUPPORT MSW - DO YOUR PART TO KEEP THIS GREAT FORUM GOING! (Only 13 donations so far - C'mon guys!)
×


russ
-
Posts
3,086 -
Joined
-
Last visited
Content Type
Profiles
Forums
Gallery
Events
Everything posted by russ
-
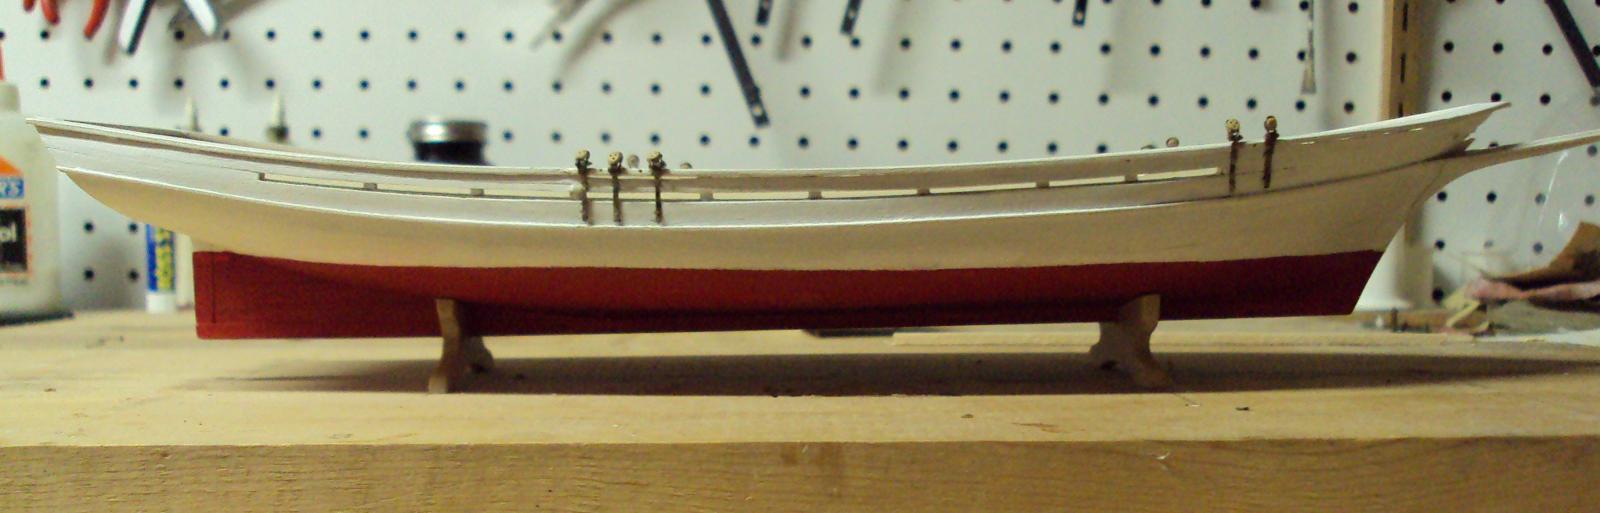
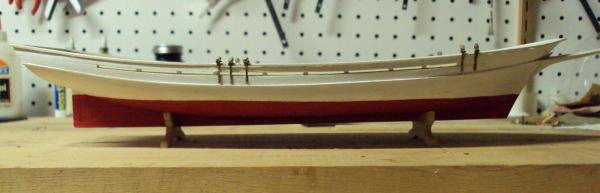
Chuck: Thanks. I am hoping that the waterline will be okay. Those pics are about as close as you can get to seeing the underside of the model when it is on its cradle. Maybe it will work. Russ
-
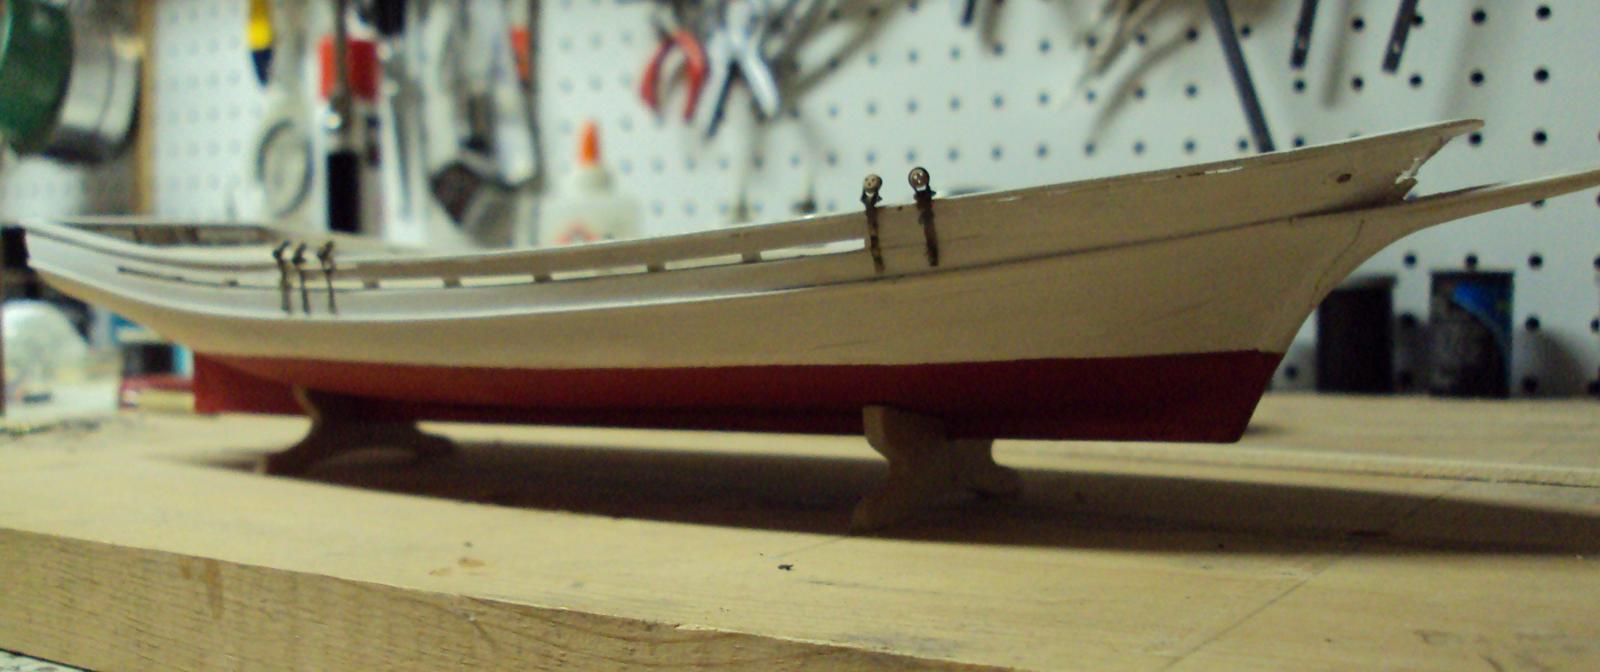
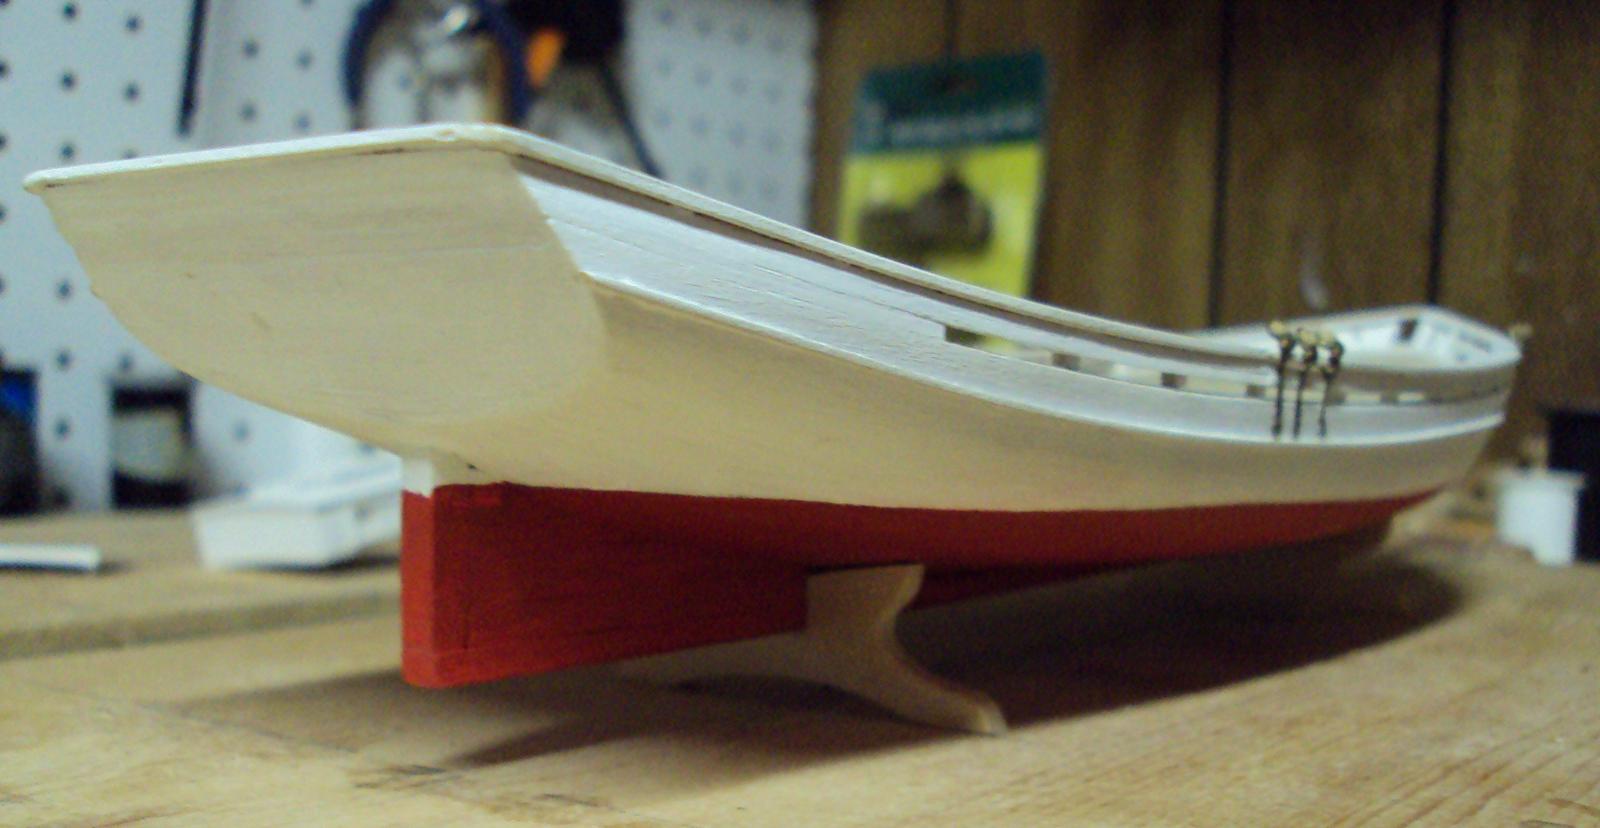
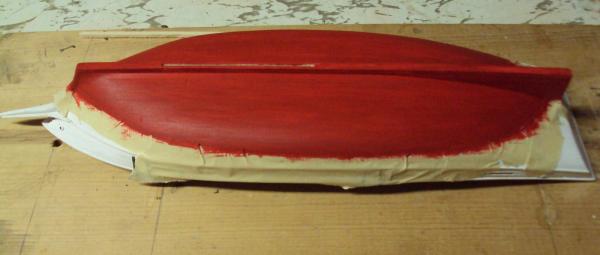
Here is the nearly completed red bottom. I see from the stern photo, I need to a little touch up around the sternpost. The camera always finds these thing. In any event, it does not look too bad. Russ


-
John: Thanks. Russ
-
Sam: Thanks. Still working. Russ
-
Michael: Thanks. Russ
-
Mark: Thanks. I have just been busy with other modeling projects, research, work, family etc. Russ
-
Thanks. I am glad to be able to get some more work done. I am hoping to get her completed some time soon. We will see. Russ
-
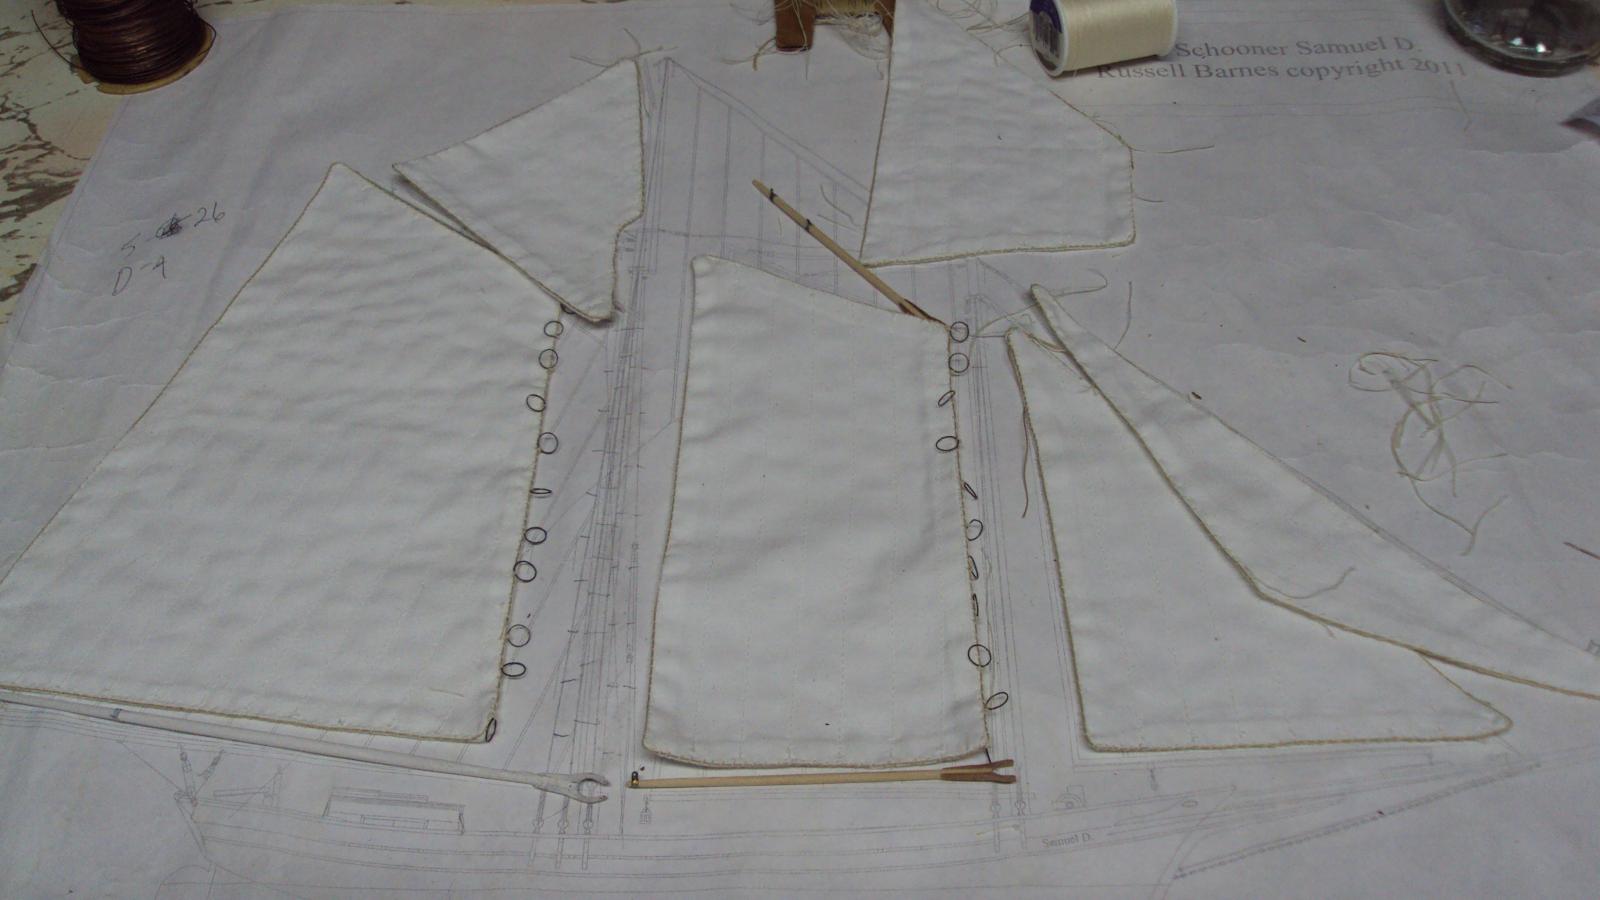
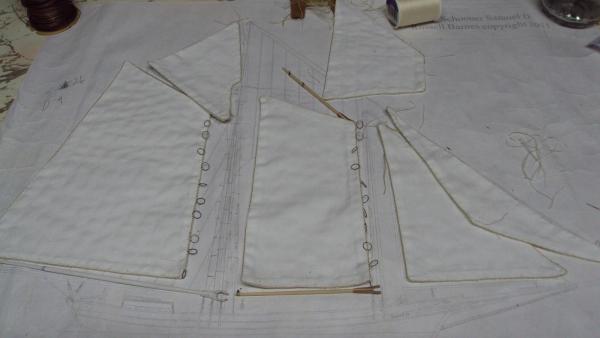
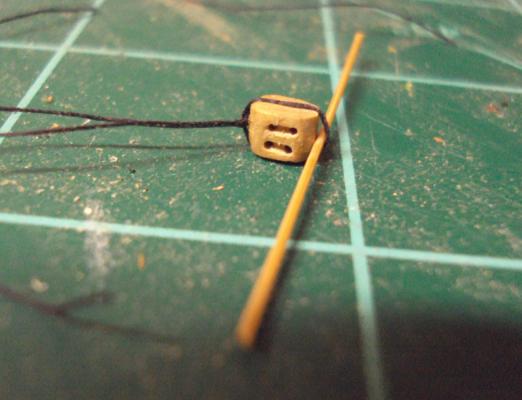
I know it has been a long time, but I am still working on this schooner. I had to take time to do all sorts of other projects including a large scale model restoration last year. In the meantime, I have been getting a few things done on this model, here and there. Here is where I am at right now. I am painting the bottom of the hull red. This has a several very thin coats and it will need a few more yet. I have the sails almost ready. I still need to attach the hanks for the forestaysail and the jib. The main and foresails are both ready to go on the masts right now. In preparation for rigging, I am making some blocks. Here is the double block for the main gaff halyard. Russ
-
Experience with BlueJacket metal toners?
russ replied to Cathead's topic in Metal Work, Soldering and Metal Fittings
I have used their Brass Black and Brass Brown. I work in a small shop just off the den and I have not noticed a lot of odor. I have applied with a brush and I have soaked. It will tone brass, copper, and aluminum. I have always used it full strength. Quite often it is necessary to apply the toner, wait a bit, rinse off, blot dry, and reapply, repeating until you get the depth of color you want. For small parts, I usually hold the piece with cross locking tweezers and brush on the toner, dunking in water and blotting on a paper towel each time. Using a toner takes some time and patience. It is not something to do if you are in a hurry. Russ -
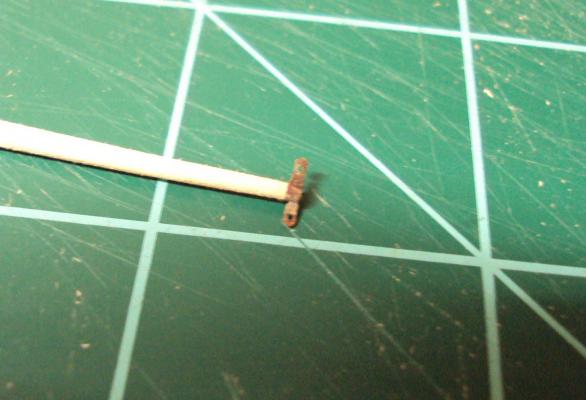
Those are called catheads.
-
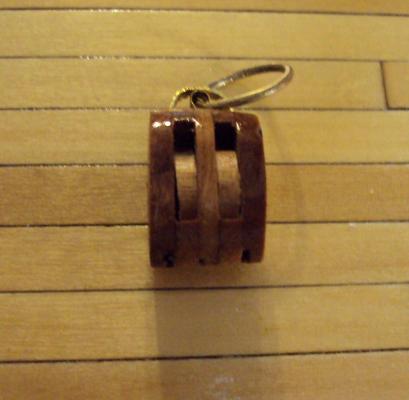
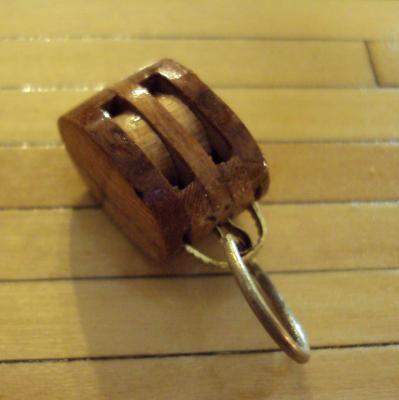
Here is a photo of a double sheaved block I made a while back for a model.
-
That is about the smallest scale I would even think of trying to make such blocks. I have made them in larger scales with little difficulty. I use a 4" table saw with a zero clearance insert and the blade lowered to make the grooves on the inside face of the shell for the strop to fit into. Russ
-
Allan: What sizes are you looking at? Shell length? Scale?
-
Adam: Thanks for the kind words. I will be getting back to this model in due time. Russ
-
Jud: I understood your idea, but I was saying that adding the glue to the thread before tapering makes it easier to do the taper. Russ
-
Jud: Stiffening the thread with glue before cutting the point will make it easier to cut the thread to a point. You need that stiff end to the thread to be able to cut the pointed end. Russ
-
I would use a small drill bit to drill out the hole in the gunport cover. Then, use some CA (super glue) to harden the very end of the thread so that it is very rigid. You can even use a hobby knife to cut along the edge of that hardened end to get the very end of it to a point. Then pass that pointed end through the hole in the gunport cover. Tie a simple overhand knot in the other end of the thread so that when you pull the thread through the hole, the knot acts as a stopper to hold the cover open. Russ
-
replacement for blacken it brass?
russ replied to rtropp's topic in Metal Work, Soldering and Metal Fittings
Bluejacket Shipcrafters sells a Brass Black solution that I have used for years. It seems to be very good. Russ -
John: That deck looks great. Wonderful job. Russ
- 745 replies
-
- 2
-

-
- francis pritt
- mission ship
- (and 1 more)
-
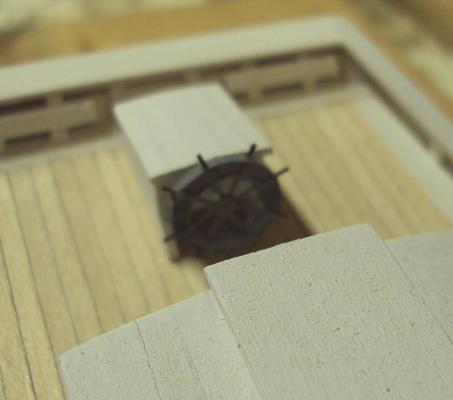
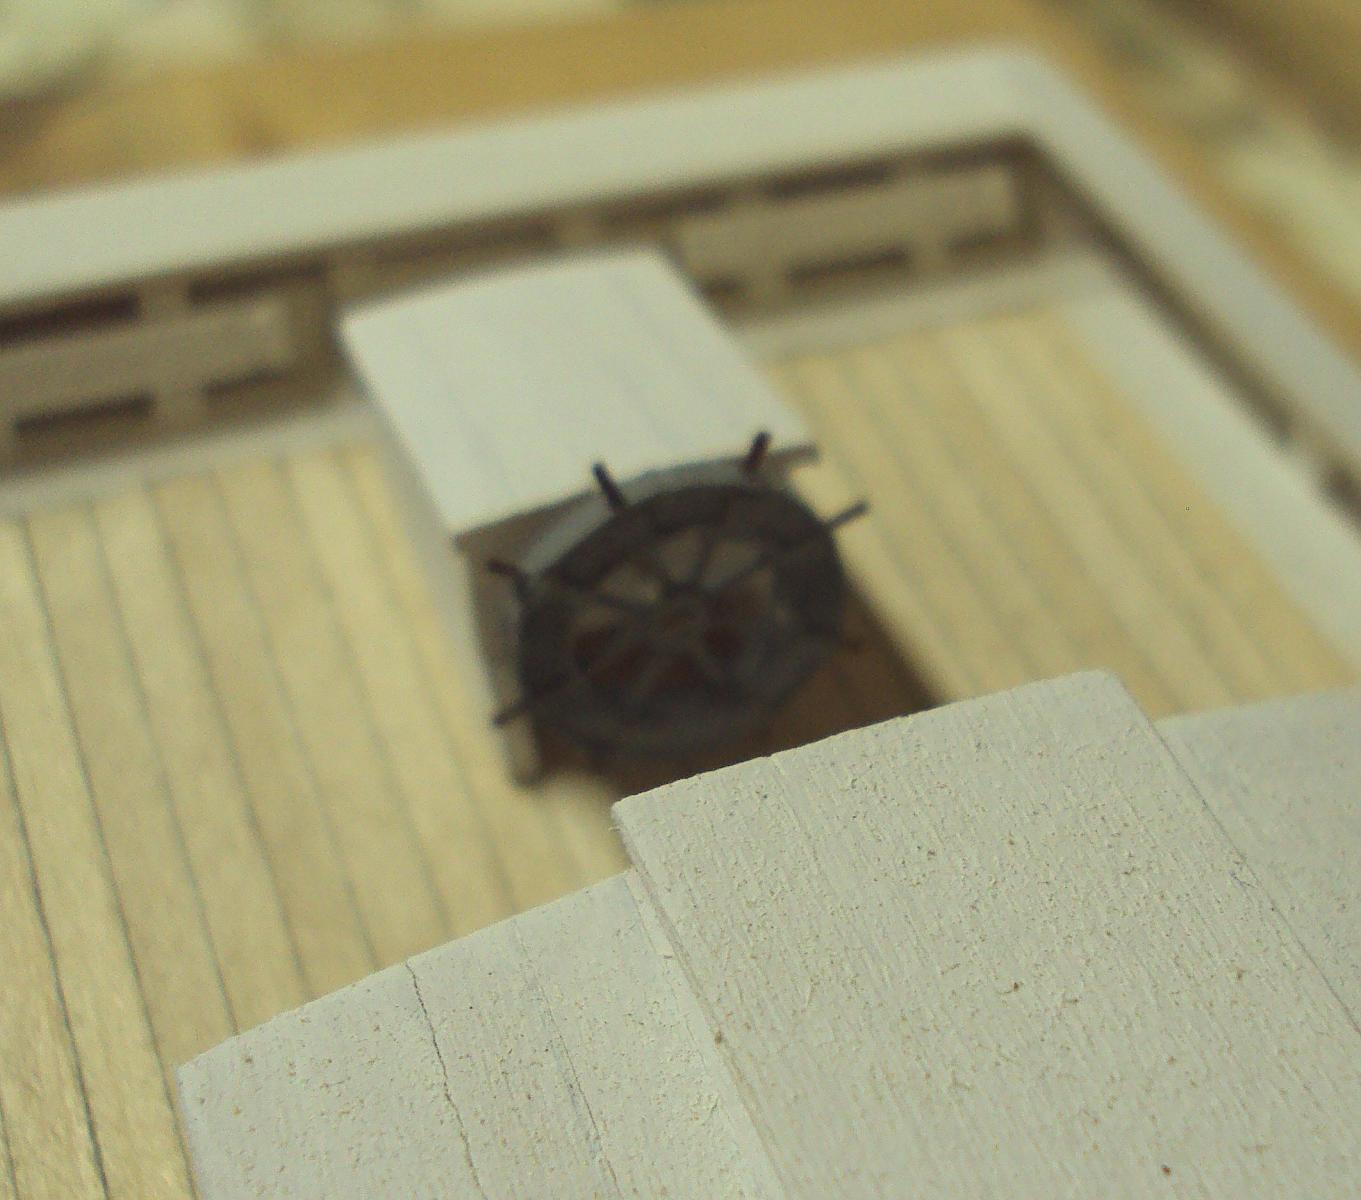
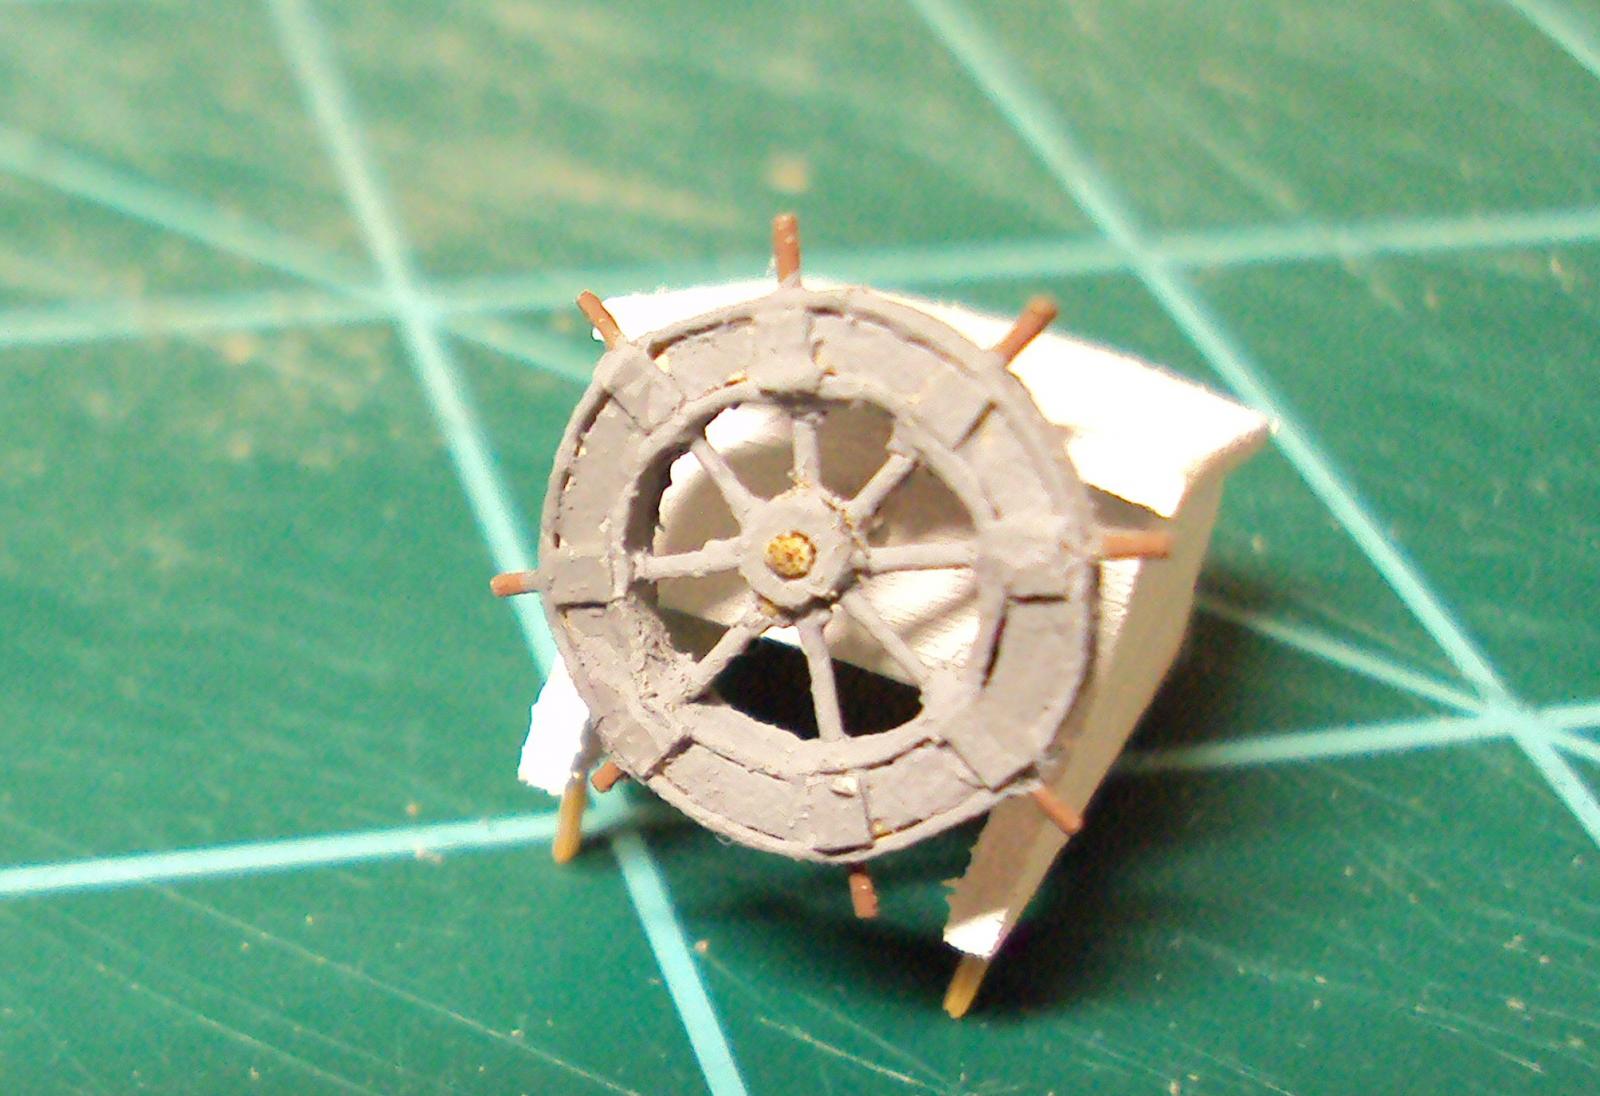
Martin: I freely admit that I could have made a better job of the wheel. Close up, the paint work should be better for sure. However, it is not too bad when you look at it from a distance. The boss and the rim are of boxwood. The rim piece was cut out and the inside section removed. Files were used to clean up the inner and outer surfaces. The spokes are of bamboo. Each spoke extends through the rim and then is cut off to form the handles. The outer and inner rims are of poster board, as are the pieces set onto the rim at each spoke. Russ
-
Kenneth: Thanks. I think the camera shows all of the mistakes. Russ
-
John, Sam, and Nils: Thanks for the kind words. Also, thanks for all the likes. Russ
-
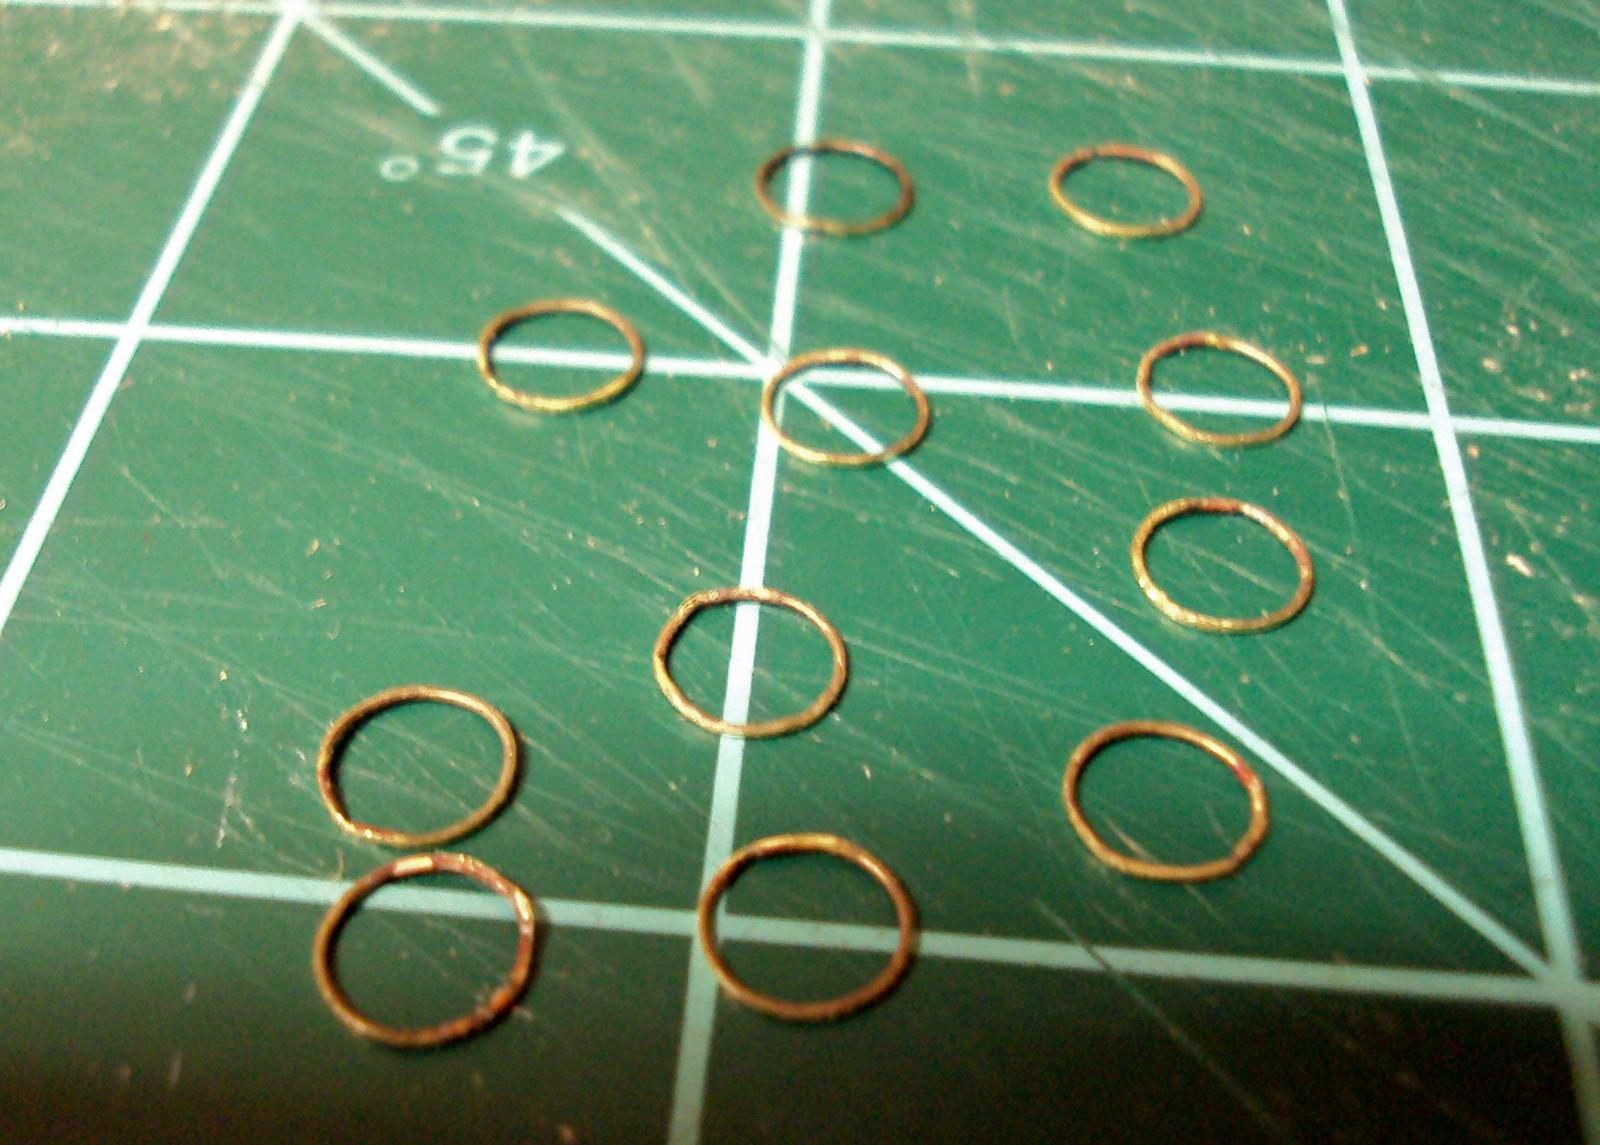
One challenge that I have been working on is the mast hoops for this model. At 1/48 scale, I have been trying to come up with a way to make them small enough to blend into the scale of the model. I need 22 hoops, 11 for both mainsail and foresail. Here is what I came up with. Brass wire is soldered into a loop and the piece cut off with a tail. The piece is then fitted over a dowel that acts as a jig to make sure that the hoop is circular and that it can be filed up with no problem. Once the tail is cut off, the hoop is filed to remove the evidence of the joint and then it is filed all around the outside to make that side somewhat more flat. The last thing will be to chemically tone them with Bluejacket's Brass Brown. Once sewed to the boltrope and in place on the mast, they should look enough like wood at this scale. Russ

-
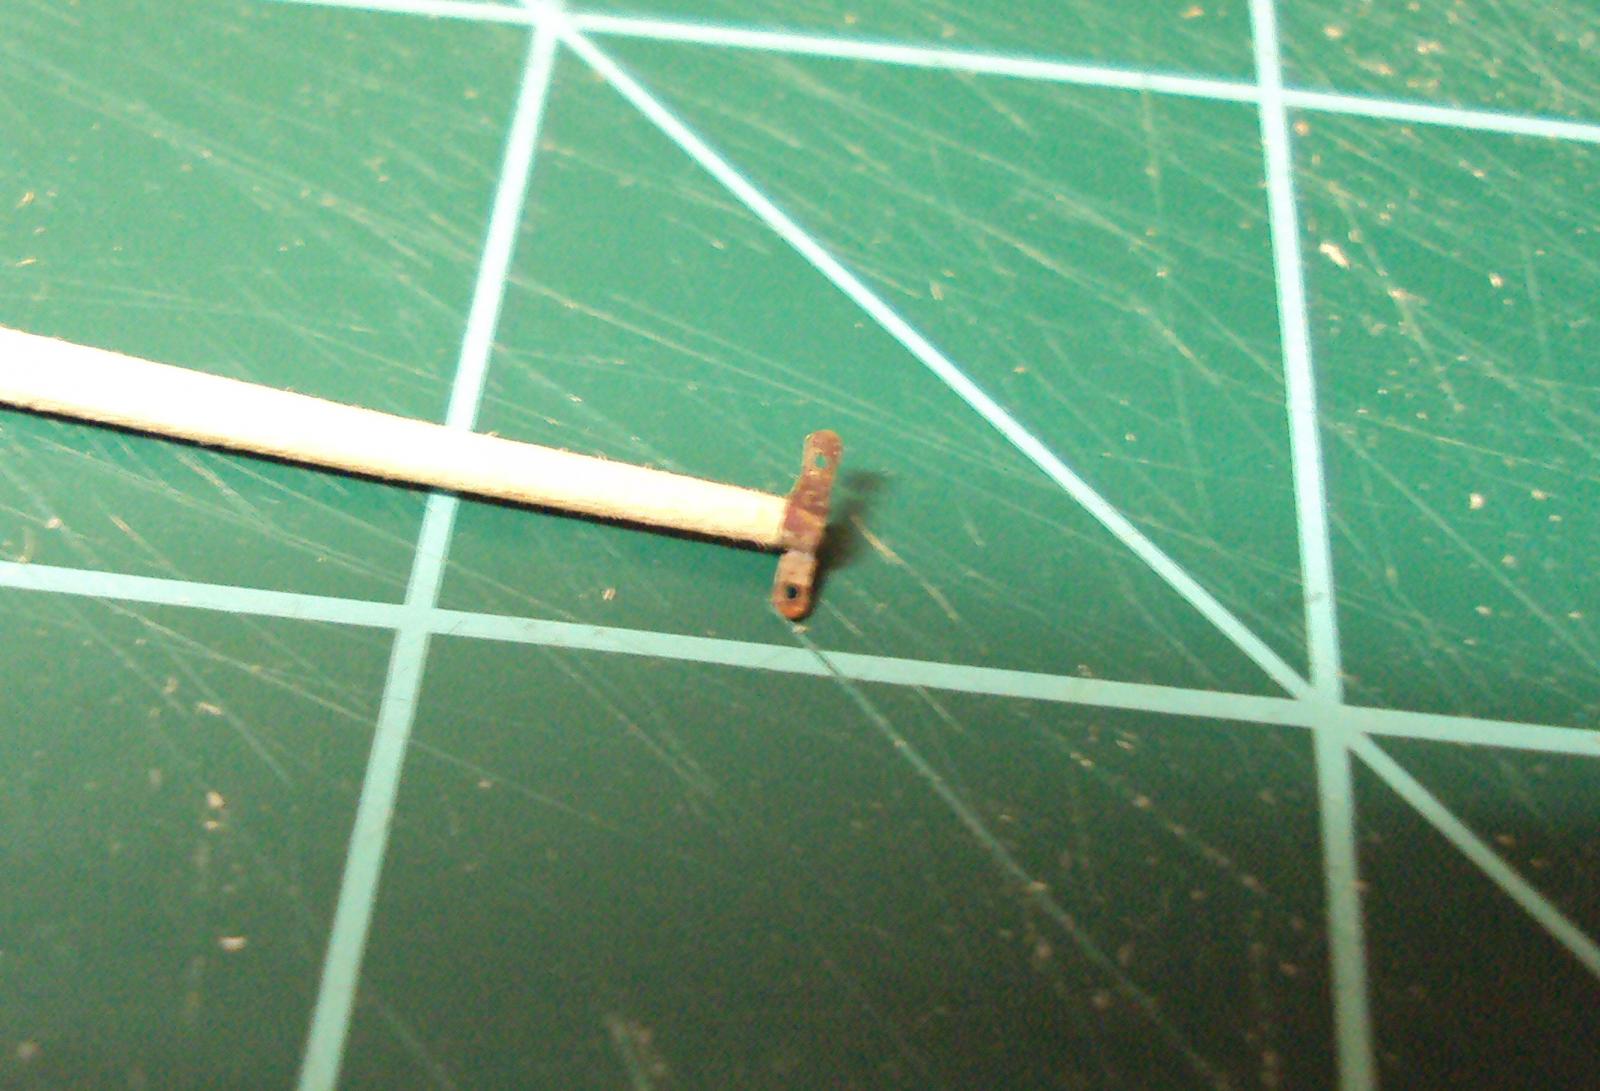
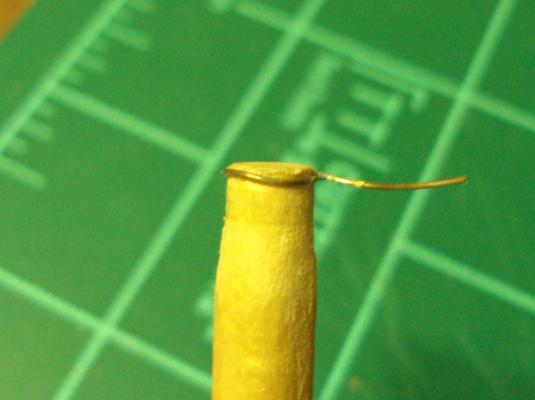
I have been working on some metal pieces as well. Here is a shot of the band at the top of the topmast. The entire topmast will be painted white, as will this band. Russ
-
It has been a while since I had a real update, but it has been busy, both in the shop and out. Work gets in the way, but I have also had several commissions of late, some of which I will bring to your attention in time. Here is a look at the wheel. The close up looks rather nasty, but once it is on the deck it blends in quite well. Russ