


ir3
-
Posts
321 -
Joined
-
Last visited
Content Type
Profiles
Forums
Gallery
Events
Posts posted by ir3
-
-
-
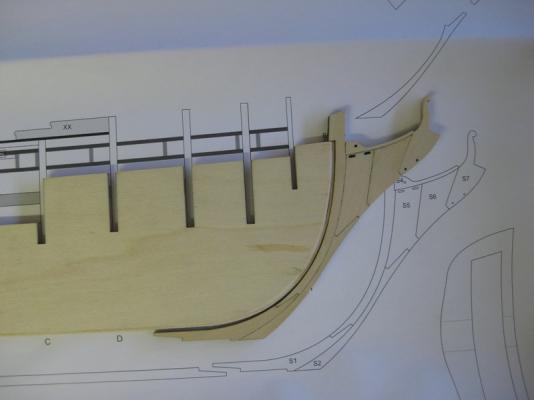
Filler and bow blocks are in. Next task, the lower gundeck planking. I am now up to Rev.1 on the keel clamp. I saw this on Augie's thread and found one on line. Not an easy item to get.
There are 3 sets of bow blocks that are marked Mizzen, Main, and Fore mast. I haven't found these in the instructions as of yet. I assume they are used of one is going to install stump masts or fully rig the model.
Have a great new year and "Live long and prosper".
IR3
-
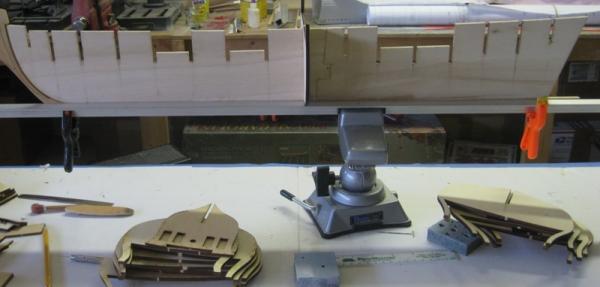
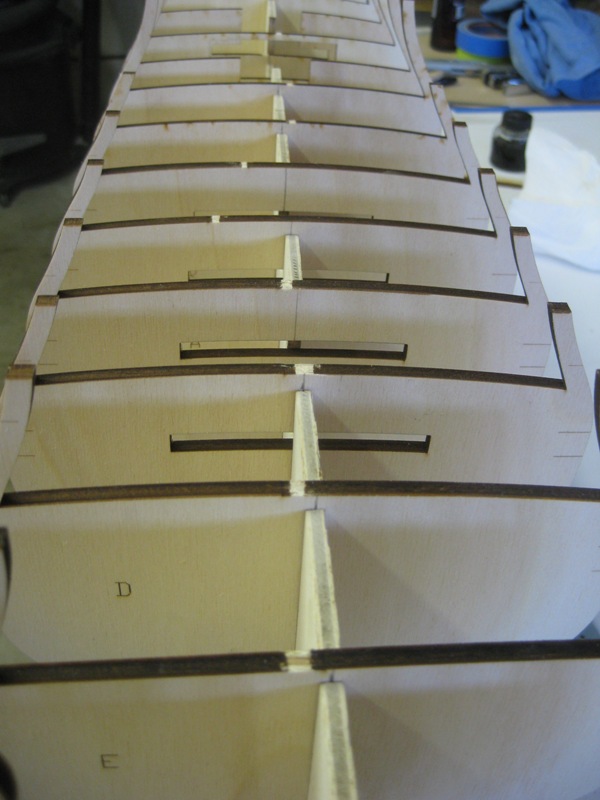
All of the bulkheads are now installed. It reminds me of a part of "Inherit The Wind" with Spencer Tracey where he has Bryan on the witness stand and he is talking about progress. I don't remember it exactly but he talks about the telephone but you lose your privacy. He also talks about the airplane but you lose the beauty of a bird in flight.
Now in this hi tech day and age we have cameras that can record the finest details and scanners that can accurately scan these fine details. And then there is the very acurate laser cutter. We enjoy the ability to produce very accurate and concise parts for our hobbies but "we spend hours removing the laser burn"
I spent a good deal of time removing laser burn on the edges of the frames before it dawned on me that this will resolve itself when the hull is prepared for planking. Live and learn.
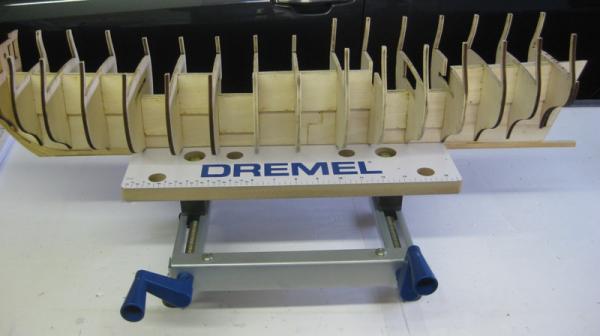
A few pics showing my high tech keel clamp and the 2" machinists right angle plate.
The pics show the start of adding bulkheads and the hi tect equipment associated with the process.

-
I have never used boxwood before and have no idea of the color. Following Ben's recommendation, the boxwood will be left natural. When I picked up the MinWax stains I did see the pre-stain but did not pick some up. Will do next time I am in the store. Yes Chuck, I did not build above the plan which was a big error.
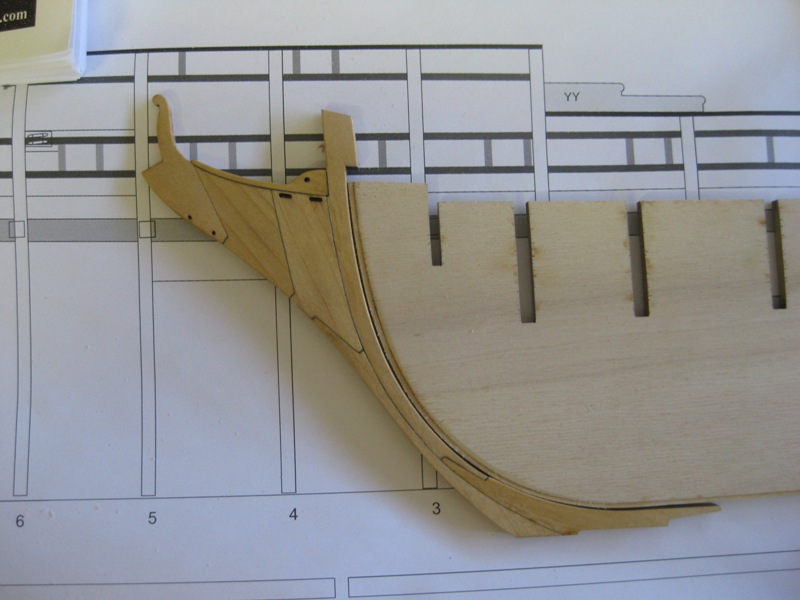
 However, with a bit of sanding the stem fit very nicely and I followed up with the keel and false keel installation.
  There is lots to learn and it is great that there is a lot of expertise to draw from.
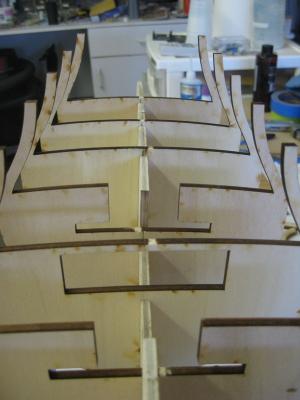
My next attention went to checking fit of the bulkheads. I started with center lines on the bulkheads and they match up perfectly with the center of the bulkhead former. They are dry fitted for now only to check the centering. the pictures are a bit distorted due to the wierd camer angle. As each one is glued in they will be set 90 degrees to the bulkhead former. It almost feels like lining up the fuselage formers on a model airplane.

Until next time,
IR3

-
Thanks for the input on the kit differences for the stem. I have the stem thinned and stained. I am starting with the 30 - 70 percent mix and I find it quite nice. I am a bit confused as to why the stain is darker on one side of the stem than the other but attribute to perhaps differences in the wood grain or I just went a bit heavier on one side.
I will be doing the planking and decks in boxwood. I have never worked with boxwood before but I understand it easy to work with and takes stain evenly. It will be a while until Jeff can get the boxwood order filled so I will get the hull ready for planking and do some other items that can be worked while off the hull such as the cannons.
Until next time,
IR3


-
Hi Ben,
Thanks for the information. Yes, I believe this is an early kit since the parts list is early 2012, although the list matches the 2013 list. I will proceed as you did and hopefully there are no show stoppers for a while. Since there are some great build threads, I will not be doing step by step updates but just where there might be a difference in the other builds or I run into a problem. I will, however do some summary updates after completeing a major section of the instruction manual.
Happy New year to all,
Iran Ausley
-
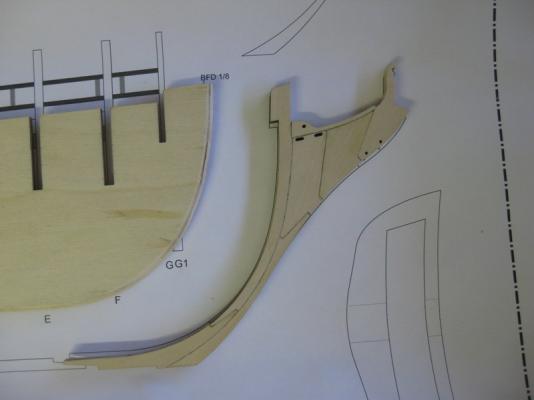
The build has started and has met it's 1st question of many. It appears that the completed stem is 1/8" taller than shown on the plans. This causes a serious misfit on the bulkhead former. I can fix this by adding some 1/8 filler in the stem but I am curious as to how this might have happened. Any thoughts?
IR3
-
Hi Augie,
I managed to find a seat in the back but the view is excellent. I just unpacked my kit and went through the inventory and will be starting very soon. The best part of coming in this late is that one can follow some great threads and get a lot of learnin that you will not find in books. I will be asking a lot of question. It seems that there are a lot of top notch builders contributing and with Chuck administering, it will be a fun build.
Keep up the great work,
IR3


Frigate Confederacy by ir3 - Model Shipways
in - Kit build logs for subjects built from 1801 - 1850
Posted
Thanks Ben for the advice on keeping her clamped. She is still perfectly straight.
Still playing catchup and have the hull ready for fairing. I am employing the high tech hull clamper to get this part of the job done. Quoting Augie, a lot of time has been spent on the hull so far and "...I am only on page 11...". But this is OK since the success of the model depends entirely on taking care of the early stages of hull construction.
Until next time,
IR3