HOLIDAY DONATION DRIVE - SUPPORT MSW - DO YOUR PART TO KEEP THIS GREAT FORUM GOING! (89 donations so far out of 49,000 members - C'mon guys!)
×


monkeyman
-
Posts
96 -
Joined
-
Last visited
Content Type
Profiles
Forums
Gallery
Events
Everything posted by monkeyman
-
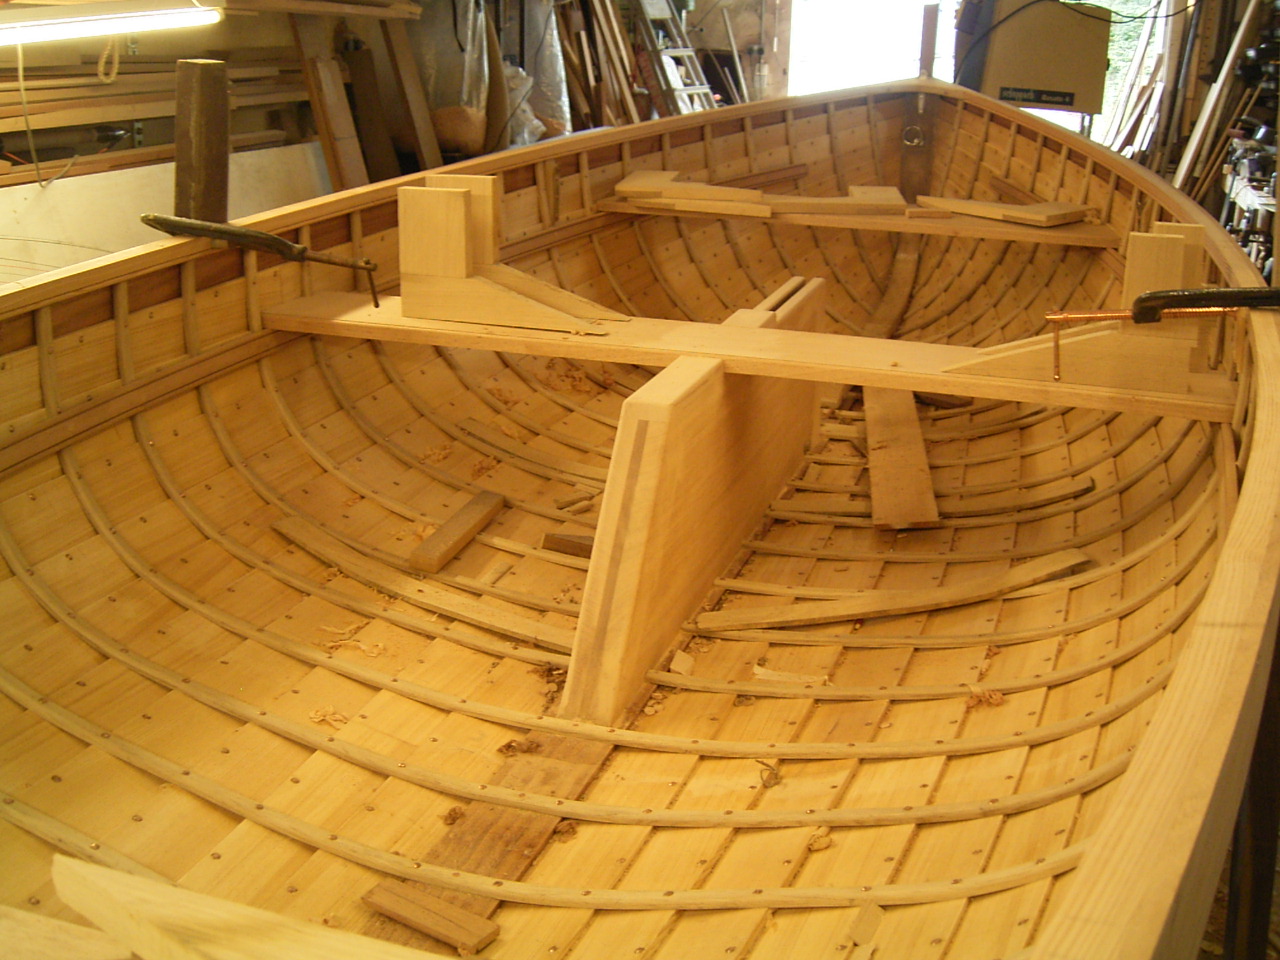
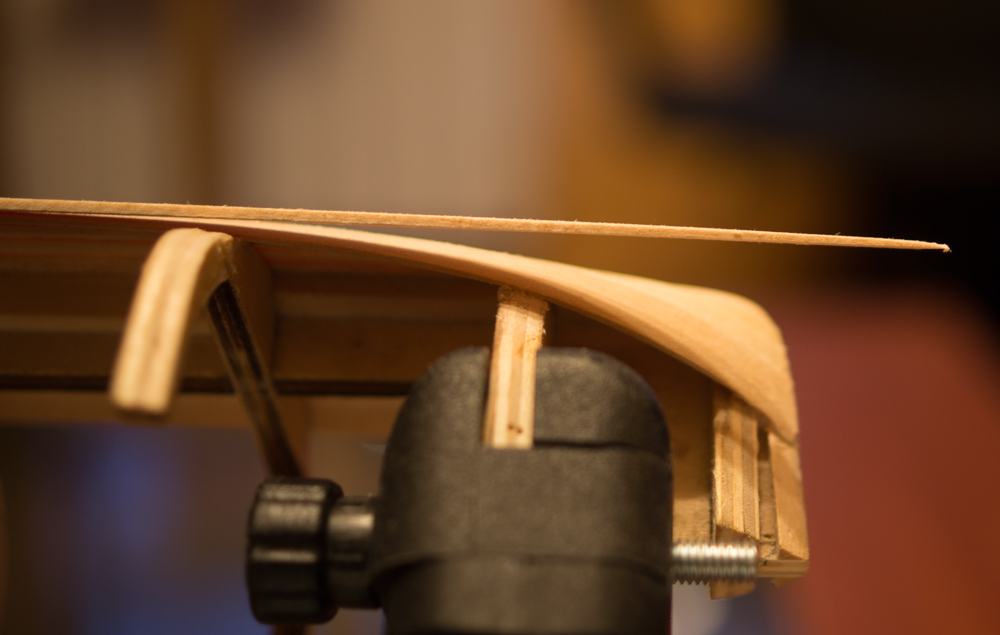
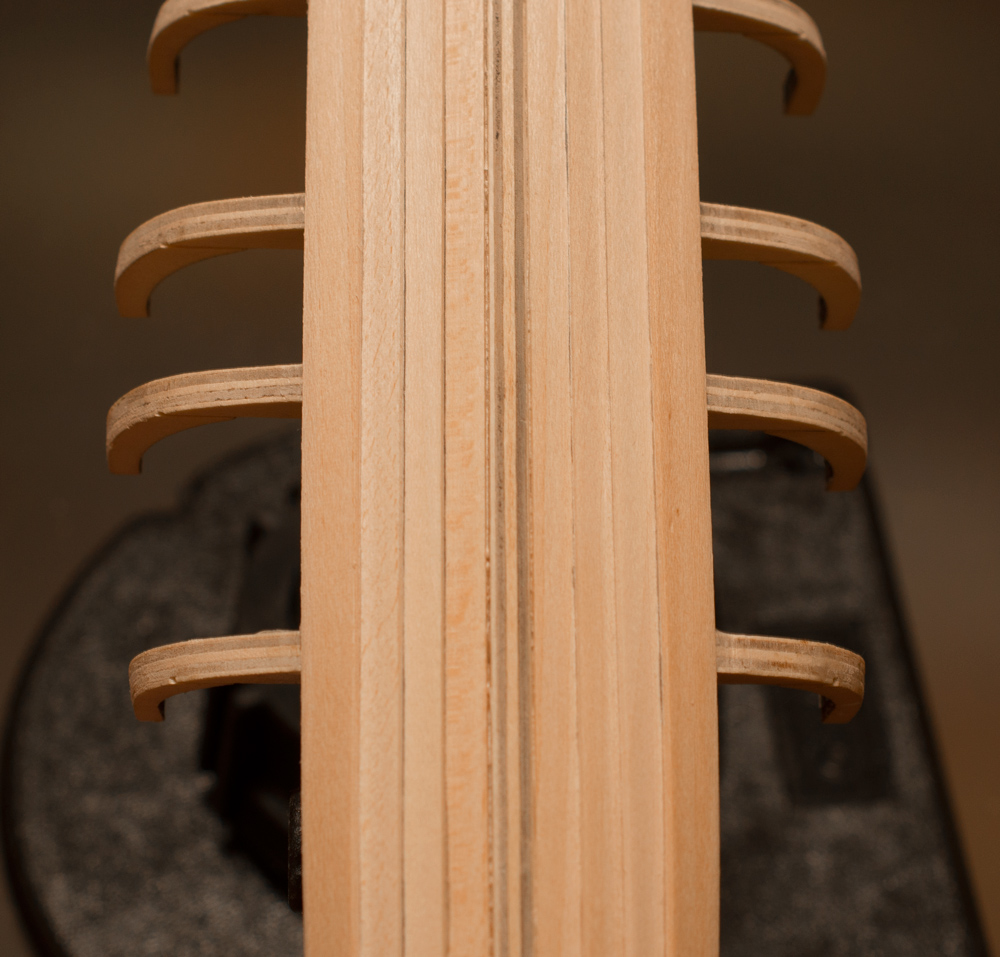
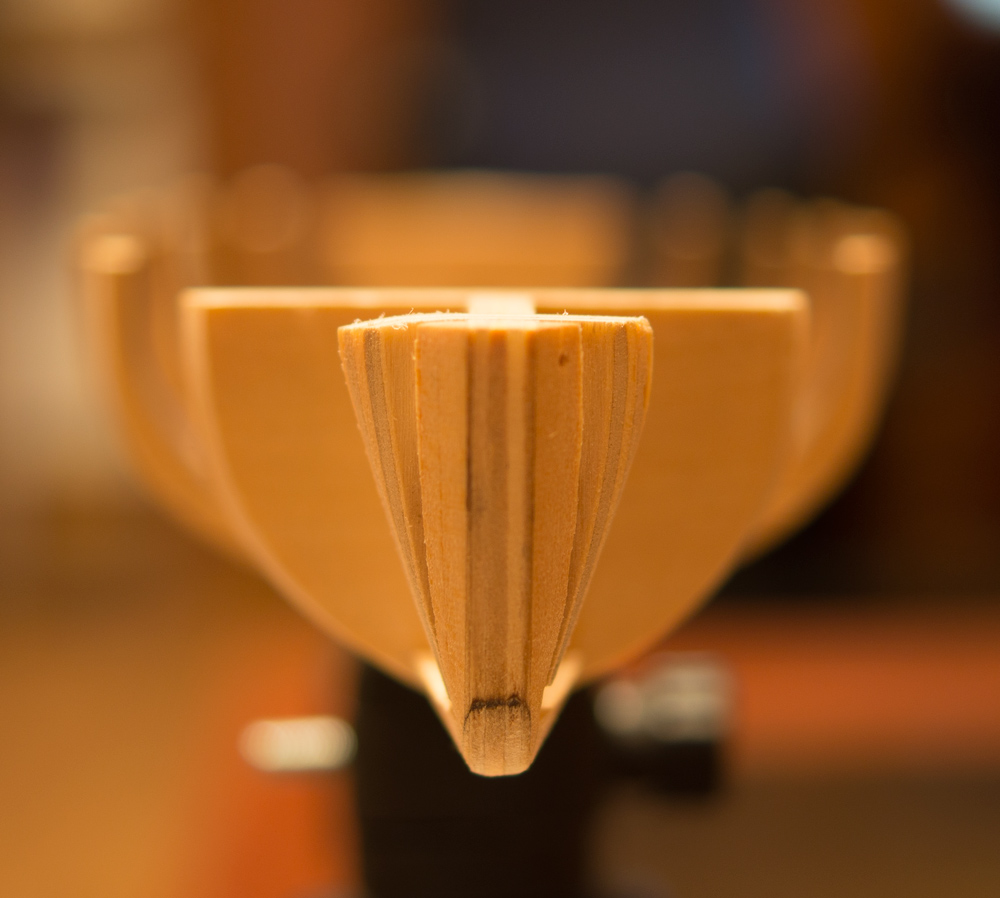
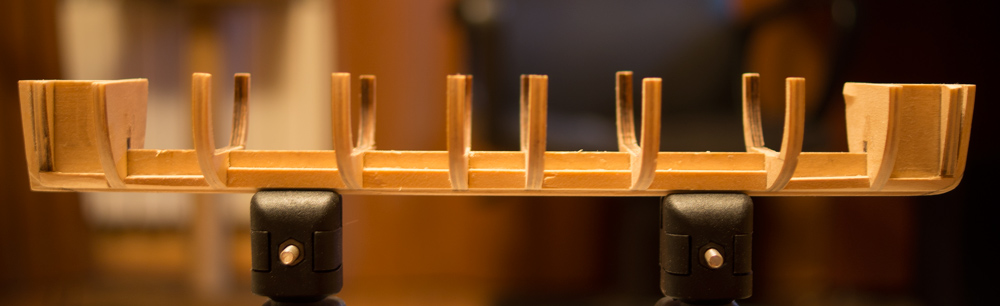
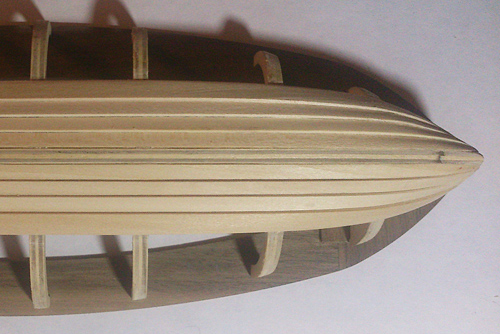
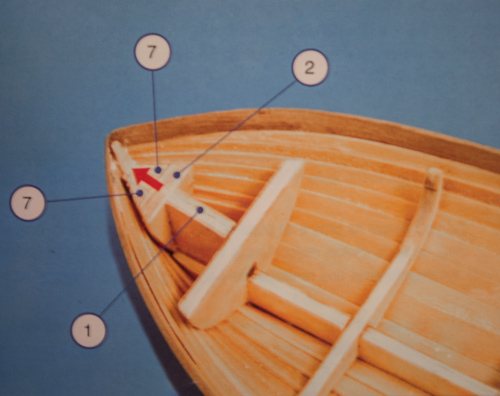
 In case anybody interested in properly reproducing the clinker build, here's what awaits you after you finish the planking: Bulkheads should be removed and ribs (timbers) installed. This is how they do it in real life: bulks only serve you at initial stages. Titanic's lifeboat had 38 ribs. Only their tips will be visible on this model, but I'll try to reproduce them in full anyway. Just for fun. Might take some time and effort, but should look nice. This is why I'm shaping the hull right now - deck must perfectly fit itm before I start with the ribs.
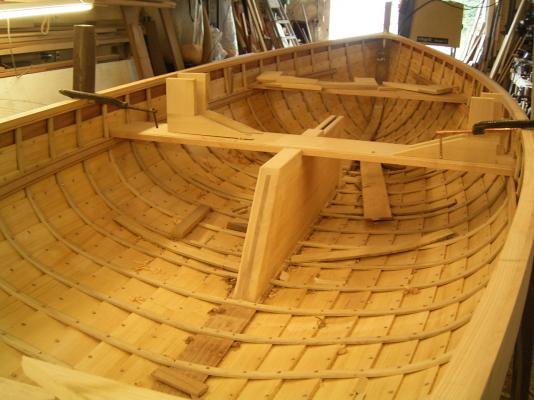
-
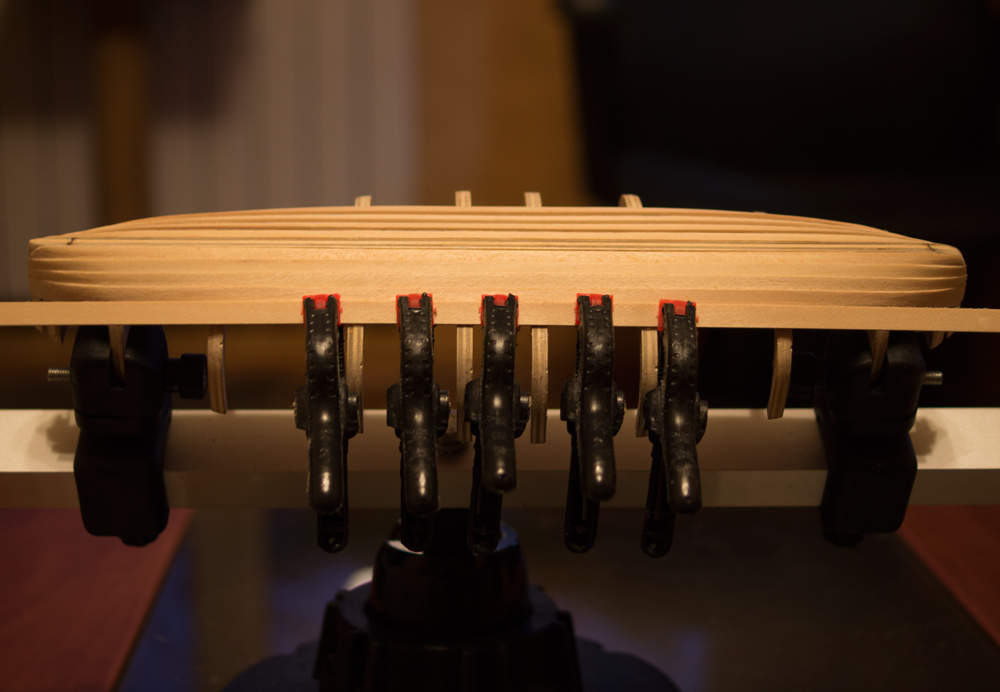
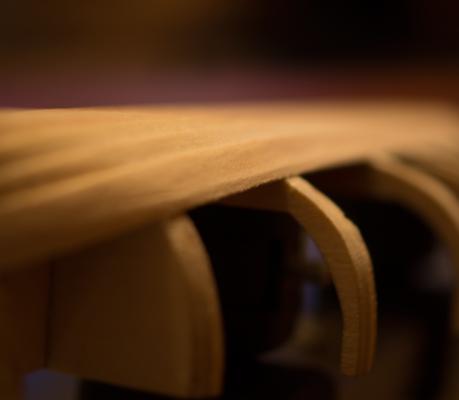
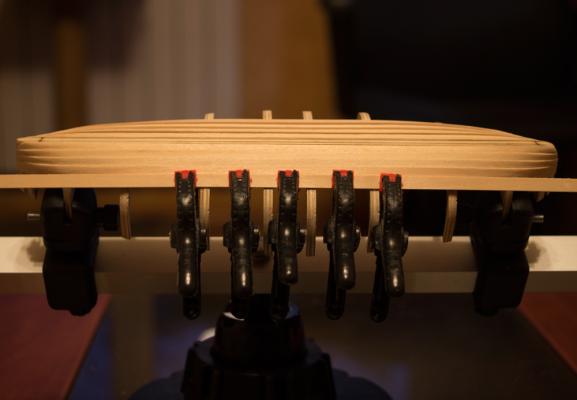
Mucho gracias, amigo! This boat causes me pain, so I'll be happy, if my sorting will help others avoid painfull stuff :-) I've finished with planking, by the way, and now shaping the hull to fit the deck. I'll draw a couple pictures next time and explain, how to do the shaping. It's pretty easy, just takes some time. Meanwhile, I've made a water barrel for my boat. It doesn't come with the original model, but should be on any lifeboat as well as rations packages, which I'll add a little later. Here's my barrel: It's far from perfect (stupid hairs on the rope didn't burn well!), but hey, it's my first barrel! So don't be picky :-)

-
I've almost finished with planking, only a few planks for each board left. Unfortunately, they are the most difficult ones due to insufficient bulkheads' width. I removed the bulkheads's tops already and currently doing a "guess-planking". Uggh... For all those who decide to build this boat, I'd suggest to either replace bulkheads with proper ones or at least widen them a bit to the width of the deck. Here's a plan of the same Titanic's lifeboat, which might help: Note, that each board has 15 planks.

-
Uuuugh! I hate this model developers with all my heart! Had to remove a couple planks on each side, because the final result made it impossible to fit the deck. Meanwhile, I've updated my advanced tutorial with some fresh tips. God, give me strength to finish all this!
-
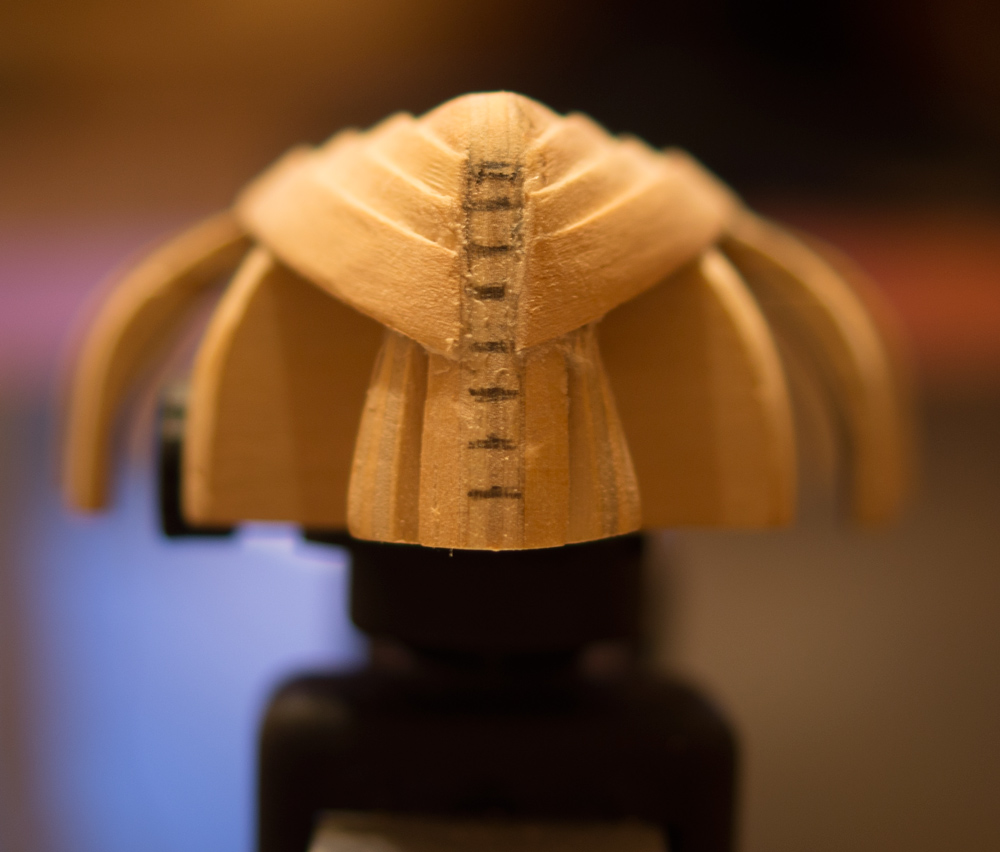
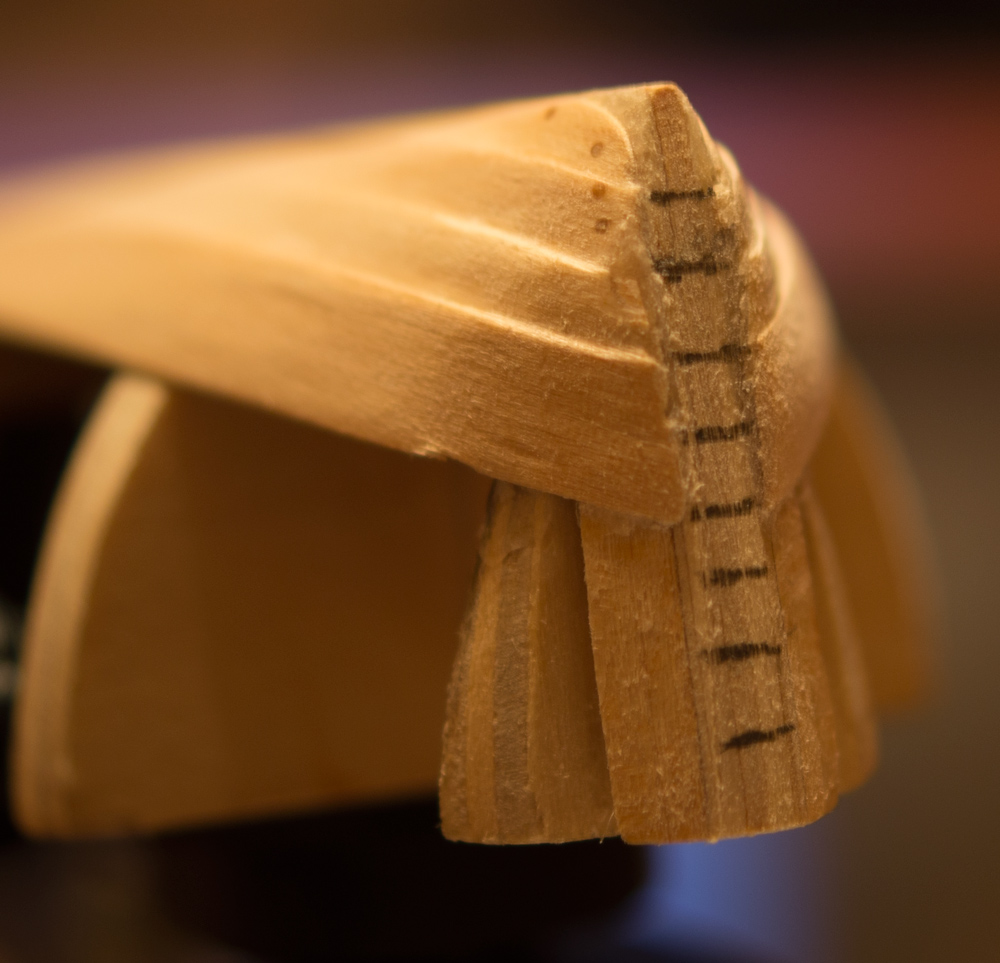
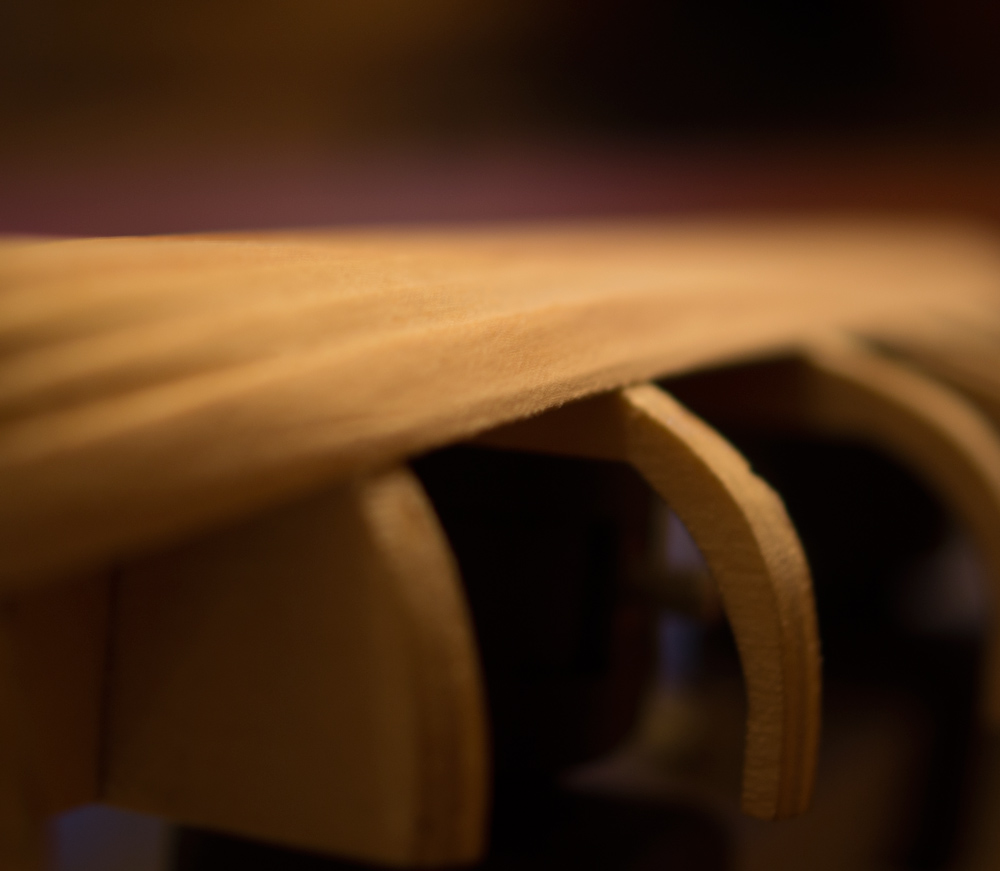
I'm starting to write Advanced Clinker Planking tutorial, but it'll take some time. Right now tutorial is marked as uncompleted and will be updated. Advanced Clinker Planking Tutorial (Uncompleted) This planking tutorial is based on real life clinker built and covers all important stages. The order of described operations solely depends on your model's scale. For example, 1:35 scale were not enough for th Titanic's lifeboat to go easily with nails, had to imitate them (see below). First of all I'd like to share some tips & tricks, which will help you get through clinker planking smoothly. Use PVA only! This is the only type of the glue, which allows you to fix flaws. Just use hot iron (2 dots tops), warm up glue a bit and move your planks any way you want. You can even remove planks, carefully warming and pulling them slowly. Do NOT install the keel! It'll make you sanding life WAY worse. You'll also spoil your model's keel for sure, despite that in real life they plank the boat with keel installed. Use thin planks, for they are easier to fit. In this very model the original planks are 7 x 1.5 mm. Despite that this particular model has 1:35 scale, I had to soak planks for a while, which took a lot more time to do the job. On my second attempt to build Titanic's Lifeboat I used 1 x 6 planks and didn't even soak them. 1. Tapering marks Before you start with planking you have to put tapering marks on false keel. This will help you keep tapering even. The most tricky part here is to count the number of the planks on each boardside. You can either try to figure out yourself or see the blueprints. NOTE: the more the difference between visible plank width in the middle and tapering value, the less planks will fit. For example, on this very boat 5 mm at the middle / 3 mm tapering will allow you to have about 12 planks. But 4 / 3 mm will get you to 13-14 planks. 2. Beveling In real life, when you put a next plank, you make a bevel on the previous one. This is because new plank must be installed with an angle, not just straight forward. I'd suggest to do a little beveling on the model as well. It's pretty easy: just use a sanding paper or any other sanding tool on the edge of the plank. NOTE: Starting from the middle of the board you'll have to increase the angle of the bevel, otherwise your hull will go sideways and become too wide. 3. Initial glueing This step is pretty straighforward. Just glue the plank at the center and fix with clamps for a while. NOTE: Remember, that at some point planks will also bend vertically. You can either soak them before glueing or do the dry bending slowly glueing small parts of the plank. For example, for this boat I did dry bending: added some glue, fix approx. 2 cm of the plank in required shape and position, wait for a while, add another portion of glue, etc. 4. Pre-sanding Sand down both edges of the plank, but not too much. This will help you A LOT with fixing the plank to bow and stern, because plank becomes much more flexible. You'll have to sand it down anyway, so just make it two-part job. NOTE: If you sand too much, plank may crack, when glueing. Don't worry, this is not a big deal. Just add some glue in the crack and sand it later - won't leave a trace. 5. Final glueing Now you can fix the rest of the plank. It should go very easily. If not, use iron to fix unwanted stuff (see the tips above). 6. Final sanding Sand down the plank, when it's glued compeltely. NOTE: Try to do final sanding with small overlaping of the false keel. It'll help you later, when installing a keel. 7. Adding ribs and nails When you finished with planking, you may remove bulkheads and add ribs instead. It'll make your boat look more realistic, especially if its boards are mostly visible from inside. Titanic's lifeboats didn't have much of a board visible, when deck installed, but in many other cases you can clearly see it. [cool picture is here] Ribs can be fixed with nails, if your model's scale is high enough. But if it's not, you'd better imitate nails with toothpicks like this: [cool picture is here] NOTE: This step will require a lot of patience and some skill, so be prepared.


-
Paint brush verses air brush
monkeyman replied to medic's topic in Painting, finishing and weathering products and techniques
I'm not yer much into painting, but I've tried both brush and airbrush. I'd do small stuff with common brush and large areas with airbrush, for it give you VERY smooth surface, which you won't get with common brush. -
Ah, so THIS is the main ship-builder's secret, everyone is talking about? I see... Feeling myself at least like a mason (and under mason I mean the guy, attracted to free masonry) or rosicrucian, who have just learned, how to conquer the world :-)
-
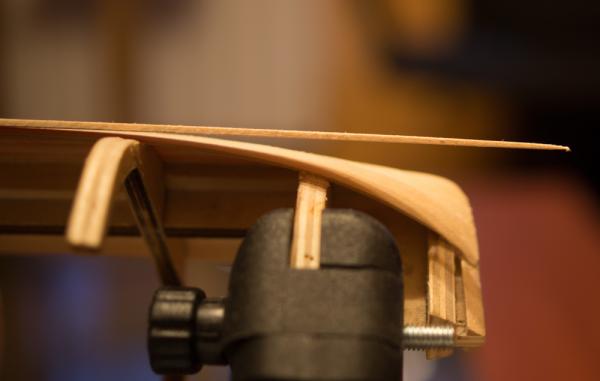
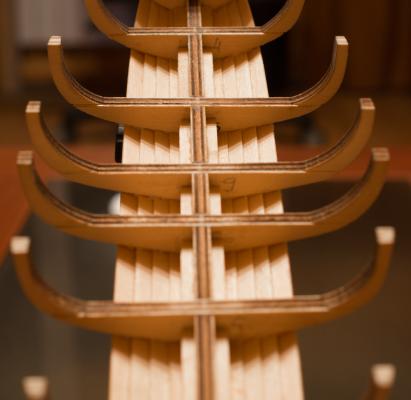
Model authors were surely too high, when doing their project on Titanic's lifeboat. Planking is the worst part. This is how boat's frame "fits" the deck: And this is how they suggest you to handle their "original planking ideas": See, that gap between bulkheads and planks? It's intentional and without it deck won't fit. Basically, you have to guess, how your planking will end! Why, WHY did they do it?! I'm so kicking them in the groin for this!
-
I've started with planking and this time the result is much better. It looks much more accurate, all planks and taperings are equal, I don't do too much sanding and glueing. I did learn some tricks and will post an advanced tutorial a bit later, as promised. Just a quick peek on first planks:

-
So you say, I'm not the only one, who had to start over? :-)
-
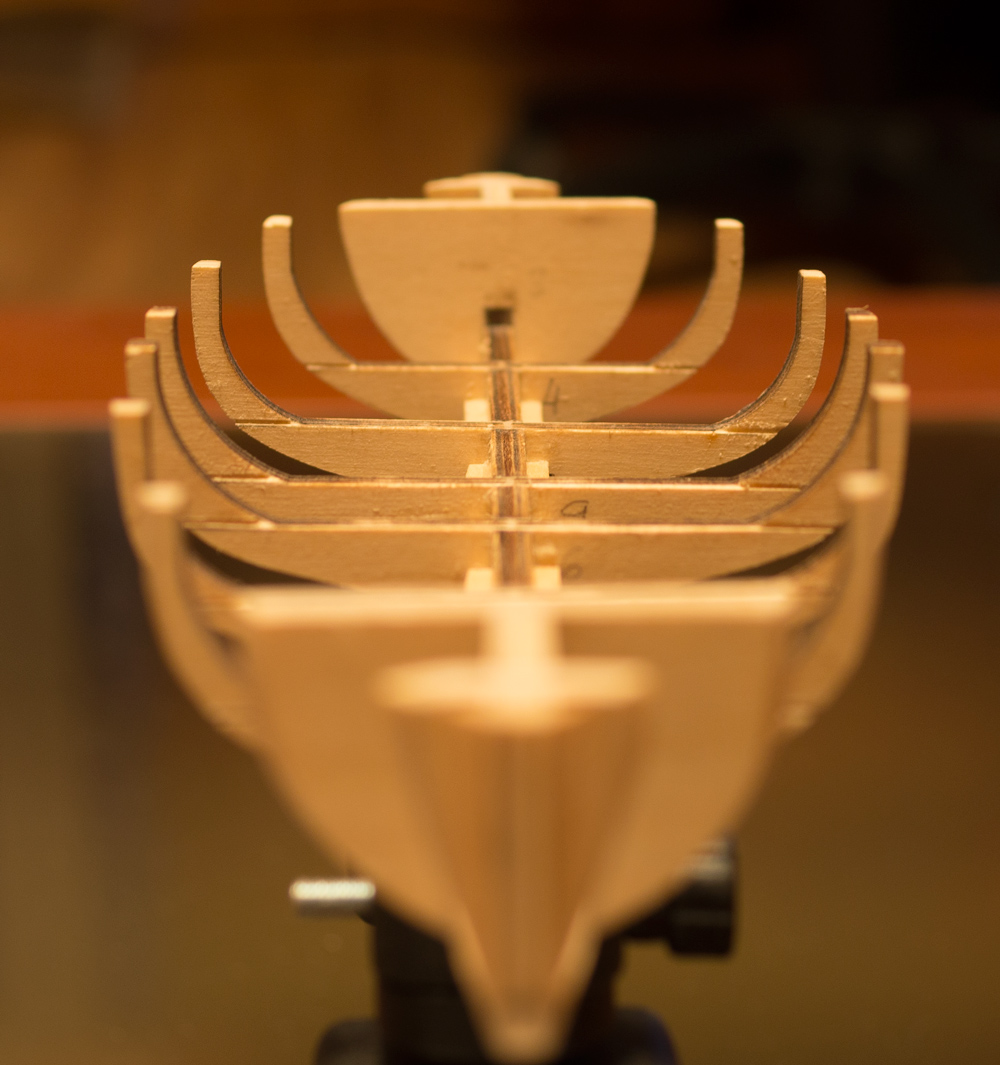
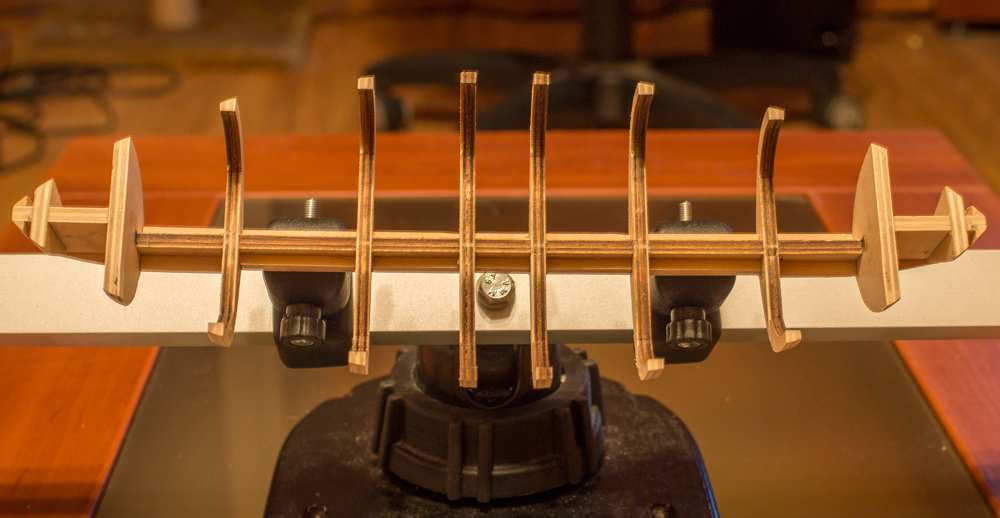
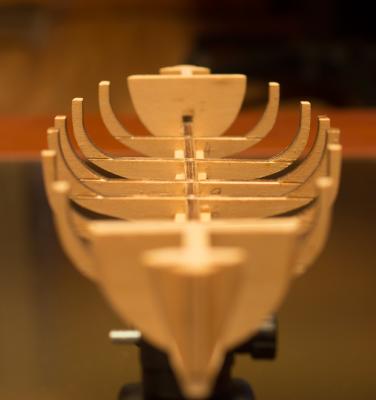
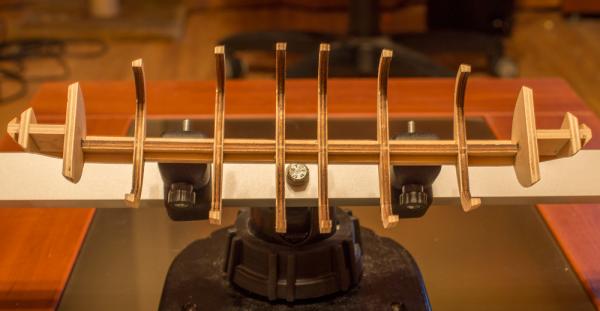
I've prepared my new lifeboat for planking, considering all the previous changes, that were made during my first attempt to build this pesky model. As I already mentioned, the kit's false keel is plain stupid. Here it is: So the first thing was to make it more close to the original one: I've also strengthened the false keel at the bottom, bow and stern, which you can clearly see on pictures: Then, of course, I did a little shaping: And finally made cuts to some bulkheads, which will help me to remove the top parts after planking completed:


-
Looks pretty good to me. Why did they tell me, that Billing Boats' kits suck and have tons of plastic?
-
First of all, wish you the best with your project. As for OcOre kits, I find them pretty much mediocre. I had a San Juan model once, which is still alive, but won't be finished - can't tell the difference with Artesania Latina. Pretty much the same to me. The final quality will solely depend on your desire to do some investigation of the current ship and do suctom stuff. I'd recommend to google La Candelaria and see, what you an improve. OcOre and AL models are not very accurate. Well, mostly.
-
OK, let's start a new life or a new blog actually. And we will call it... Building Titanic's Lifeboat 2: Duck the Manual Here's a little background story first. Adam Sandler on the island fell in love with the coconut... walt, it's another story. Here's mine. I did some serious research on clinker build and somehow liked it a lot. I don't know why, but watching people building clinker boats looks like a state of art to me. Super sexy! For those interested, there's a Traditional Maritime Skills channel on YouTube. They have a 5 part video set, which shows you how to build a clinker boat. VERY detailed stuff, and I totally recommend to watch, if you want to understand, how to do this kind of planking. These are the basics, a theory of it. I actually find information about clinker pretty scarce. I mean, in ship modelling business, not real life. Made me do a little digging before I started rebuilding the Titanic's lifeboat. Right now I'm planning to reproduce clinker built on my model and show all the steps in Advanced Clinker Planking Tutorial. Will start posting stuff tomorrow, since I already begun.
-
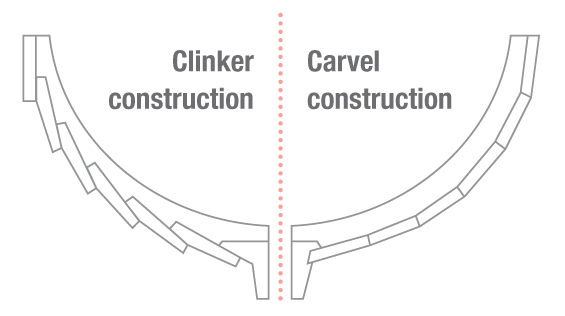
Well, you can call carvel an "original planking", I guess :-) Double planking allows you to fix the mistakes. You simply do it first time and then sand, fill, more sand, more fill if required. And only then you cover it with thin finishing stripes. Single planking is much less forgiving. Yeah, you're a bit wrong, pal :-) I'm not even starting over, I'm making it BETTER! Read a bunch of stuff on clinker and actually will try to reproduce it in real life. Or follow it as close as possible. Already finished the skeleton, but need something else to do before posting.
-
Actually, I'm already back, Stever :-) Found a new box ot Titanic's lifeboat today and will continue posting soon. Studied clinker build a lot and will try a bit different technique and building order this time.
-
After a couple painting and woodstaining attempts I've decided to completely rebuild this boat. My clinker build wasn't perfect and now I can do it much better. Wil all that marking of the tapering and stuff. Also decision to build the deck first was partially right. It's much better to assemble the whole deck block separately and glue it at the end of planking. This might seem weird, but in my case, with all those improvements, separate deck building will allow to do everything much more accurate. Right now it's not, whcih I totally dislike. Oh, and I should never EVER read this stupid manual! Painting the hull at this stage is suicide. All the painting and woodstaining should be made, when hull is completed. Otherwise you have a huge chance to spoil the white colored bottom of the boat. Which I did at the end. And finally, my so super improved build required to add frame ribs (the ones above the deck) before bulding the deck. But again I looked in the manual and was a bit lost. But no more! So I'm off for some programming right now and will return with the new version of the lifeboat. No idea, when it's gonna happen, for it's a supprisingly rare model here. And the most important part: no rushing. Ever!
-
My native's Russian, but I live in a different country now. And thanks for the kind words, pal :-)
-
Yes, that "I would know" feeling is what messes with us mostly :-) I also look at my projects and tell myself "there's a problem here and there", but any 3rd party viewes never notice them. But hey, I'm a perfectionist too!
-
Looks good, but I guess you could've just drilled smaller holes thru the planks and glue the cannon balls on top. On this scale it shouldn't be noticable, I think, but in general could be easier to implement. Never did this myself, so just guessin...
-
My friend, you're an alien for me. Seriously. Your skills are ungodly. I must kill you and steal your skills to conquer the world!
- 425 replies
-
- 5
-

-
- bounty launch
- model shipways
- (and 1 more)
-
Damn, indeed I never thought of resolution! Guess it's not really inportant and noticable in this scale. The only thing that bugs me is sanding. What if you try to sand this "gapped" planks? Won't they chaotically fill your 0.2 mm craks and spoil them?
-
Ah, I see... I never saw such method of caulking and it's actually not even caulking at all - more like spacing :-) I didn't came to any perfect method for myself right now, but I've tried black paper. Pretty time consuming right now, but no gaps. As I can see, your method leaves gaps between the planks, which is... well... a bit strange for me. There was a guy who added an ink of some sorts to the glue and got a good results. I'm thinking of trying this myself next time.
-
Looks cool, yay! How did you imitale cracks between deck planks? Sorry, I missed that somehow.
-
Thank you, my friend, for kind words. In the country I came from we don't usually support each other, but more like critisize like "Oh, duck, you're such a wuss! Go clean the streets!". So any encouraging stuff from professionals like yourself is more than welcome and helps to improve. Really appreciate that.
- 755 replies
-
- 2
-
-
- finished
- caldercraft
- (and 1 more)