Check out our new MSW Sponsor Innocraftsman
×

Lt. Biggles
-
Posts
342 -
Joined
-
Last visited
Content Type
Profiles
Forums
Gallery
Events
Everything posted by Lt. Biggles
-
 It’s such a good feeling when you finally find the piece you thought was lost forever!! This afternoon I dropped the last set of 1:350 brass binoculars... gone! But got lots of little bits primed and undercoated as well as dirtying up the anchor chain areas. Will just give it a hint of use as I’m sure they would have washed off all the salt water and kept the area pretty ship shape, but surly that chain would be pretty harsh on the area too!?

- 211 replies
-
- 6
-

-
- prince of wales
- tamiya
- (and 2 more)
-
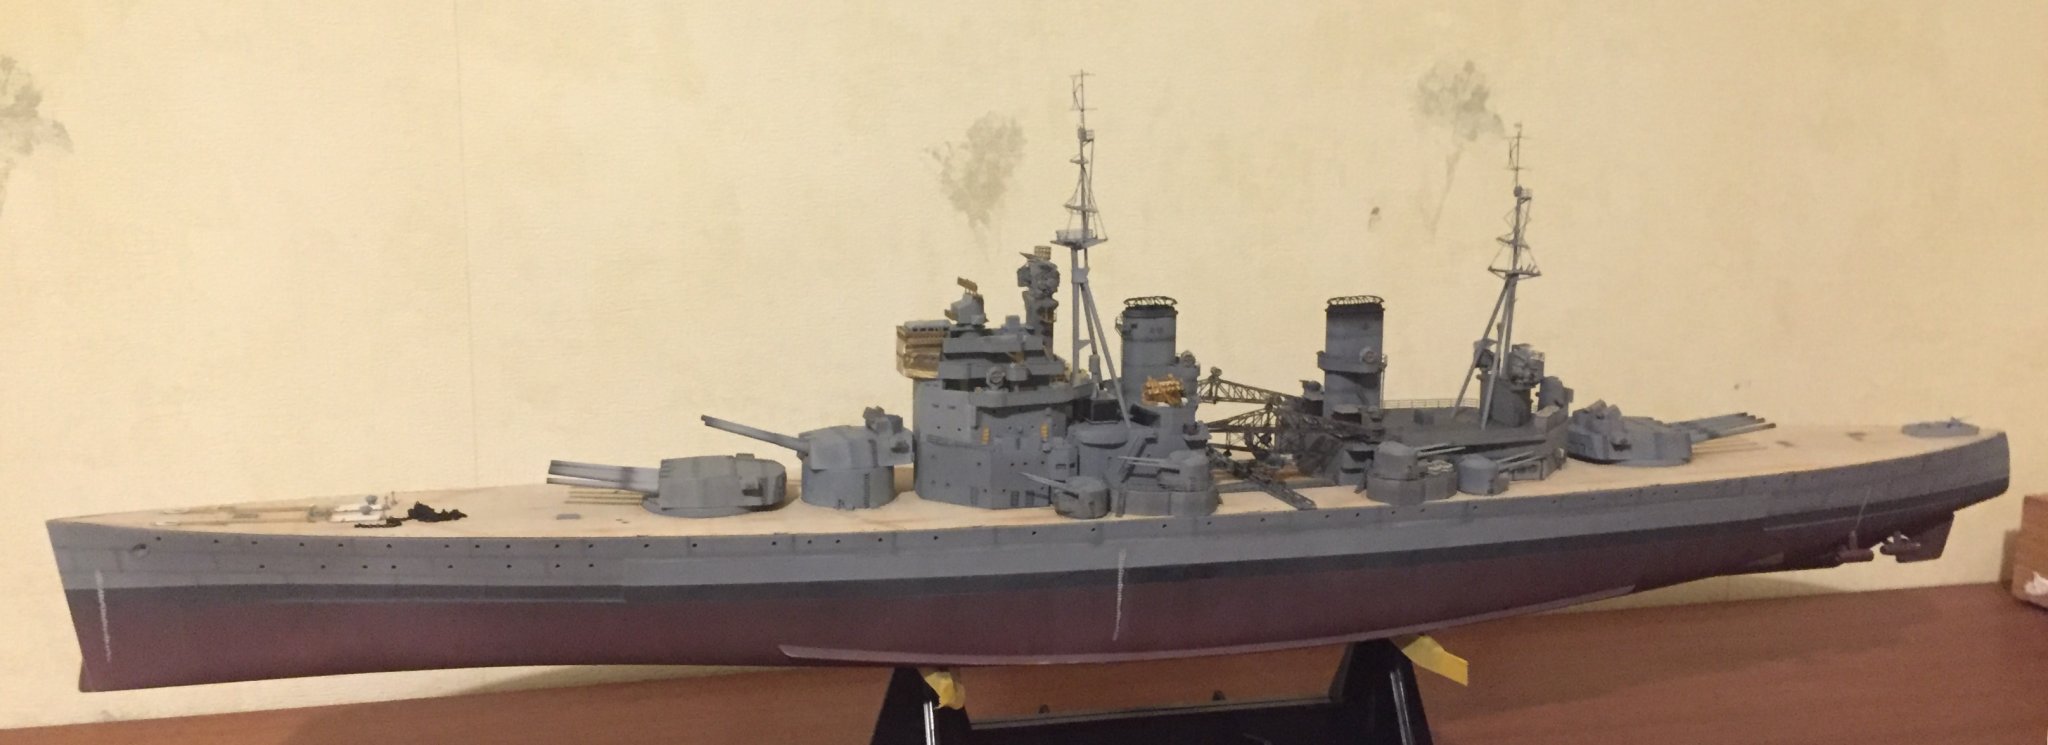
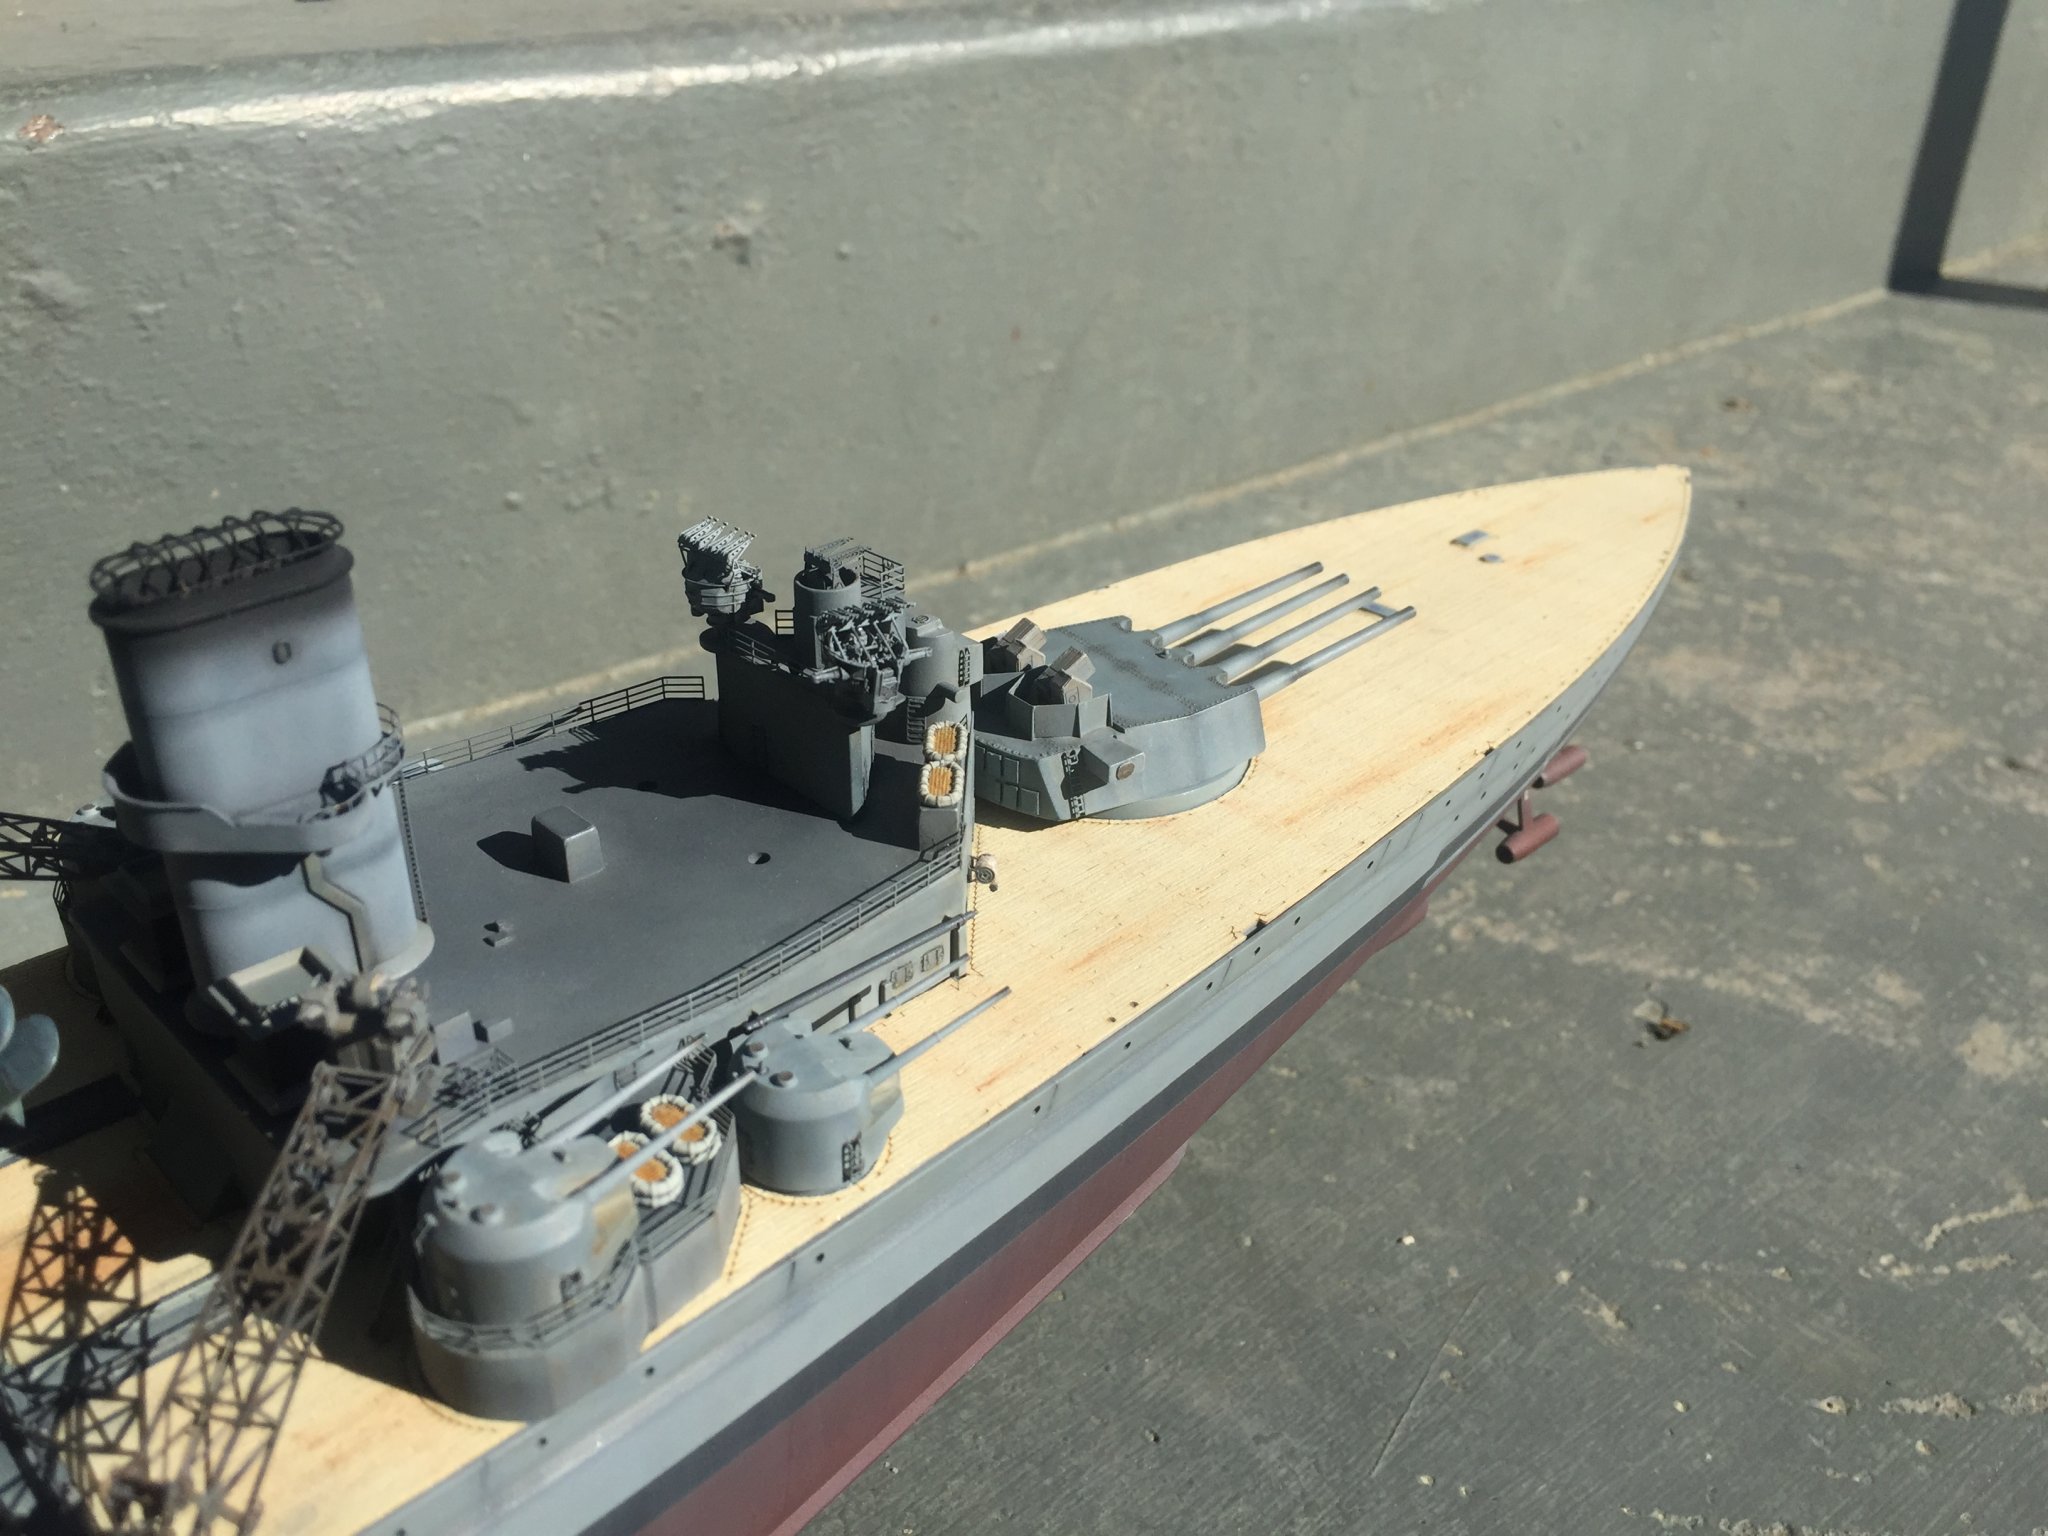
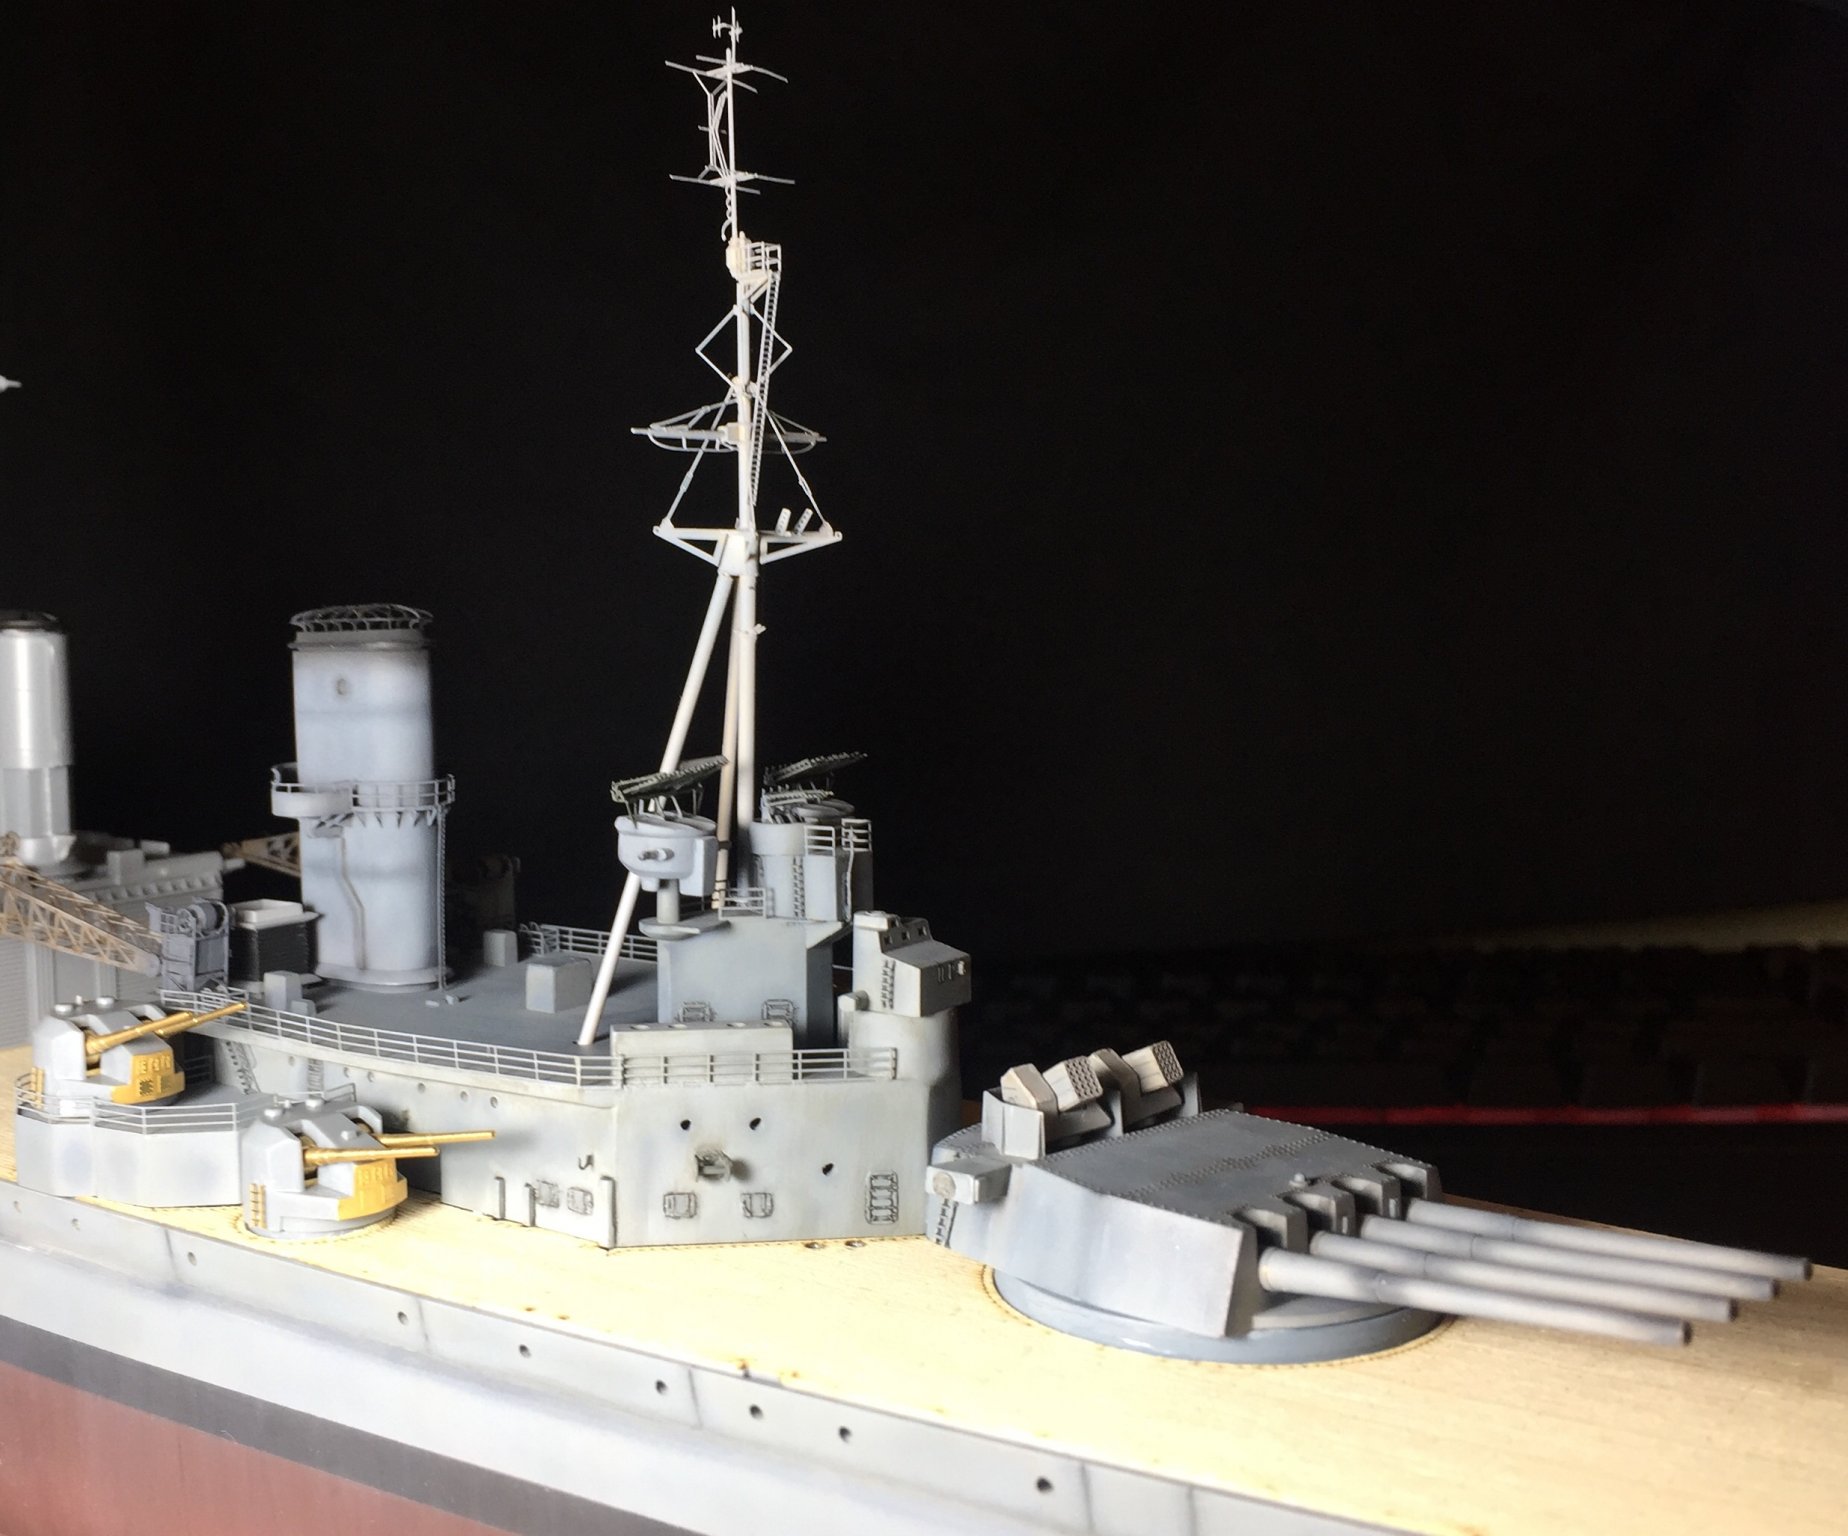
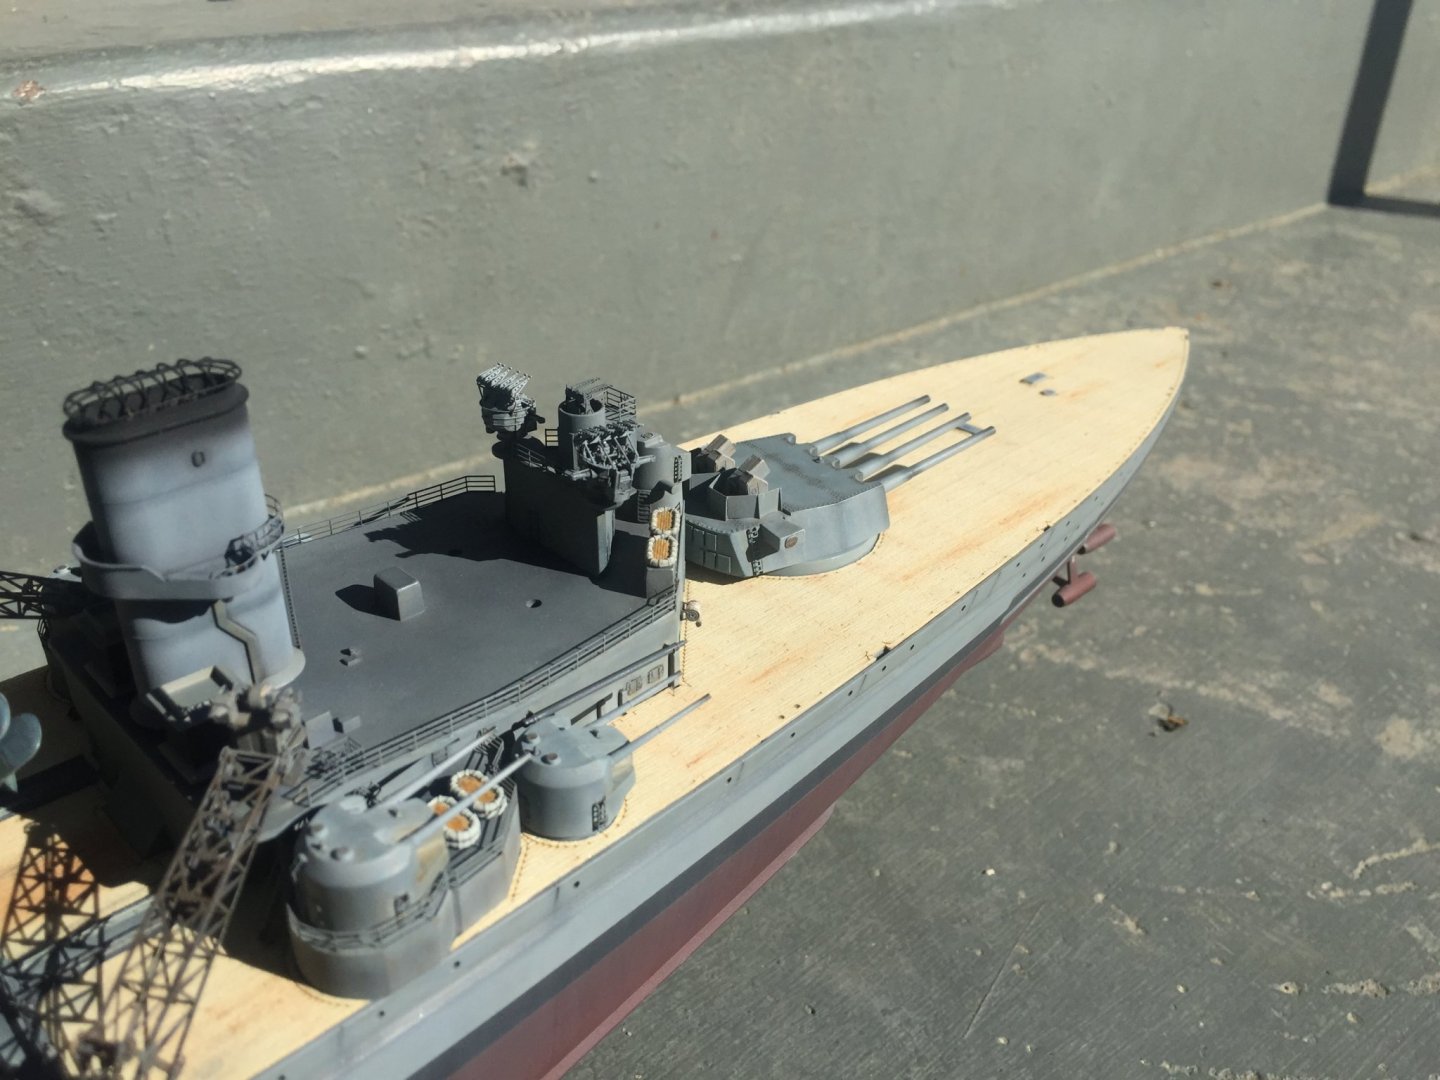
A progress update so you can see what she looks like at this stage. Hard to get a pic of the whole ship and also any details!


- 211 replies
-
- 10
-
-
- prince of wales
- tamiya
- (and 2 more)
-
Thanks for the tips guys, I think I’ll leave it how it is and then once everything is on come back and if it stands out then try some dry brushing and perhaps get some washes but I’ll leave that for now as it’s ground the build almost to a halt waiting for it to fix itself!! I’ve been lacking spare time but apart from making 12 little binoculars and putting the A/A guns on I’ve completed the super structure build and just have to paint it. Everything now seems to take ages to do tiny details. Negotiated with the carpet monster... traded an hour of my time for one tiny piece of PE! Made 6 searchlights and cut out some of the windows as I think it looks better but it’s fiddly work and had to glue some of the frames back on as the knife loved taking them clean off! but once on looked the part. also started on the anchor area. so will have to research that to try get it looking right. To add to the slow progress everything has to be made then painted away from the ship. No more sub part construction like the superstructure, which I really enjoyed. Feels like I’m moving into the final third of the build now. Deck furniture and all the small but many details

- 211 replies
-
- 6
-
-
- prince of wales
- tamiya
- (and 2 more)
-
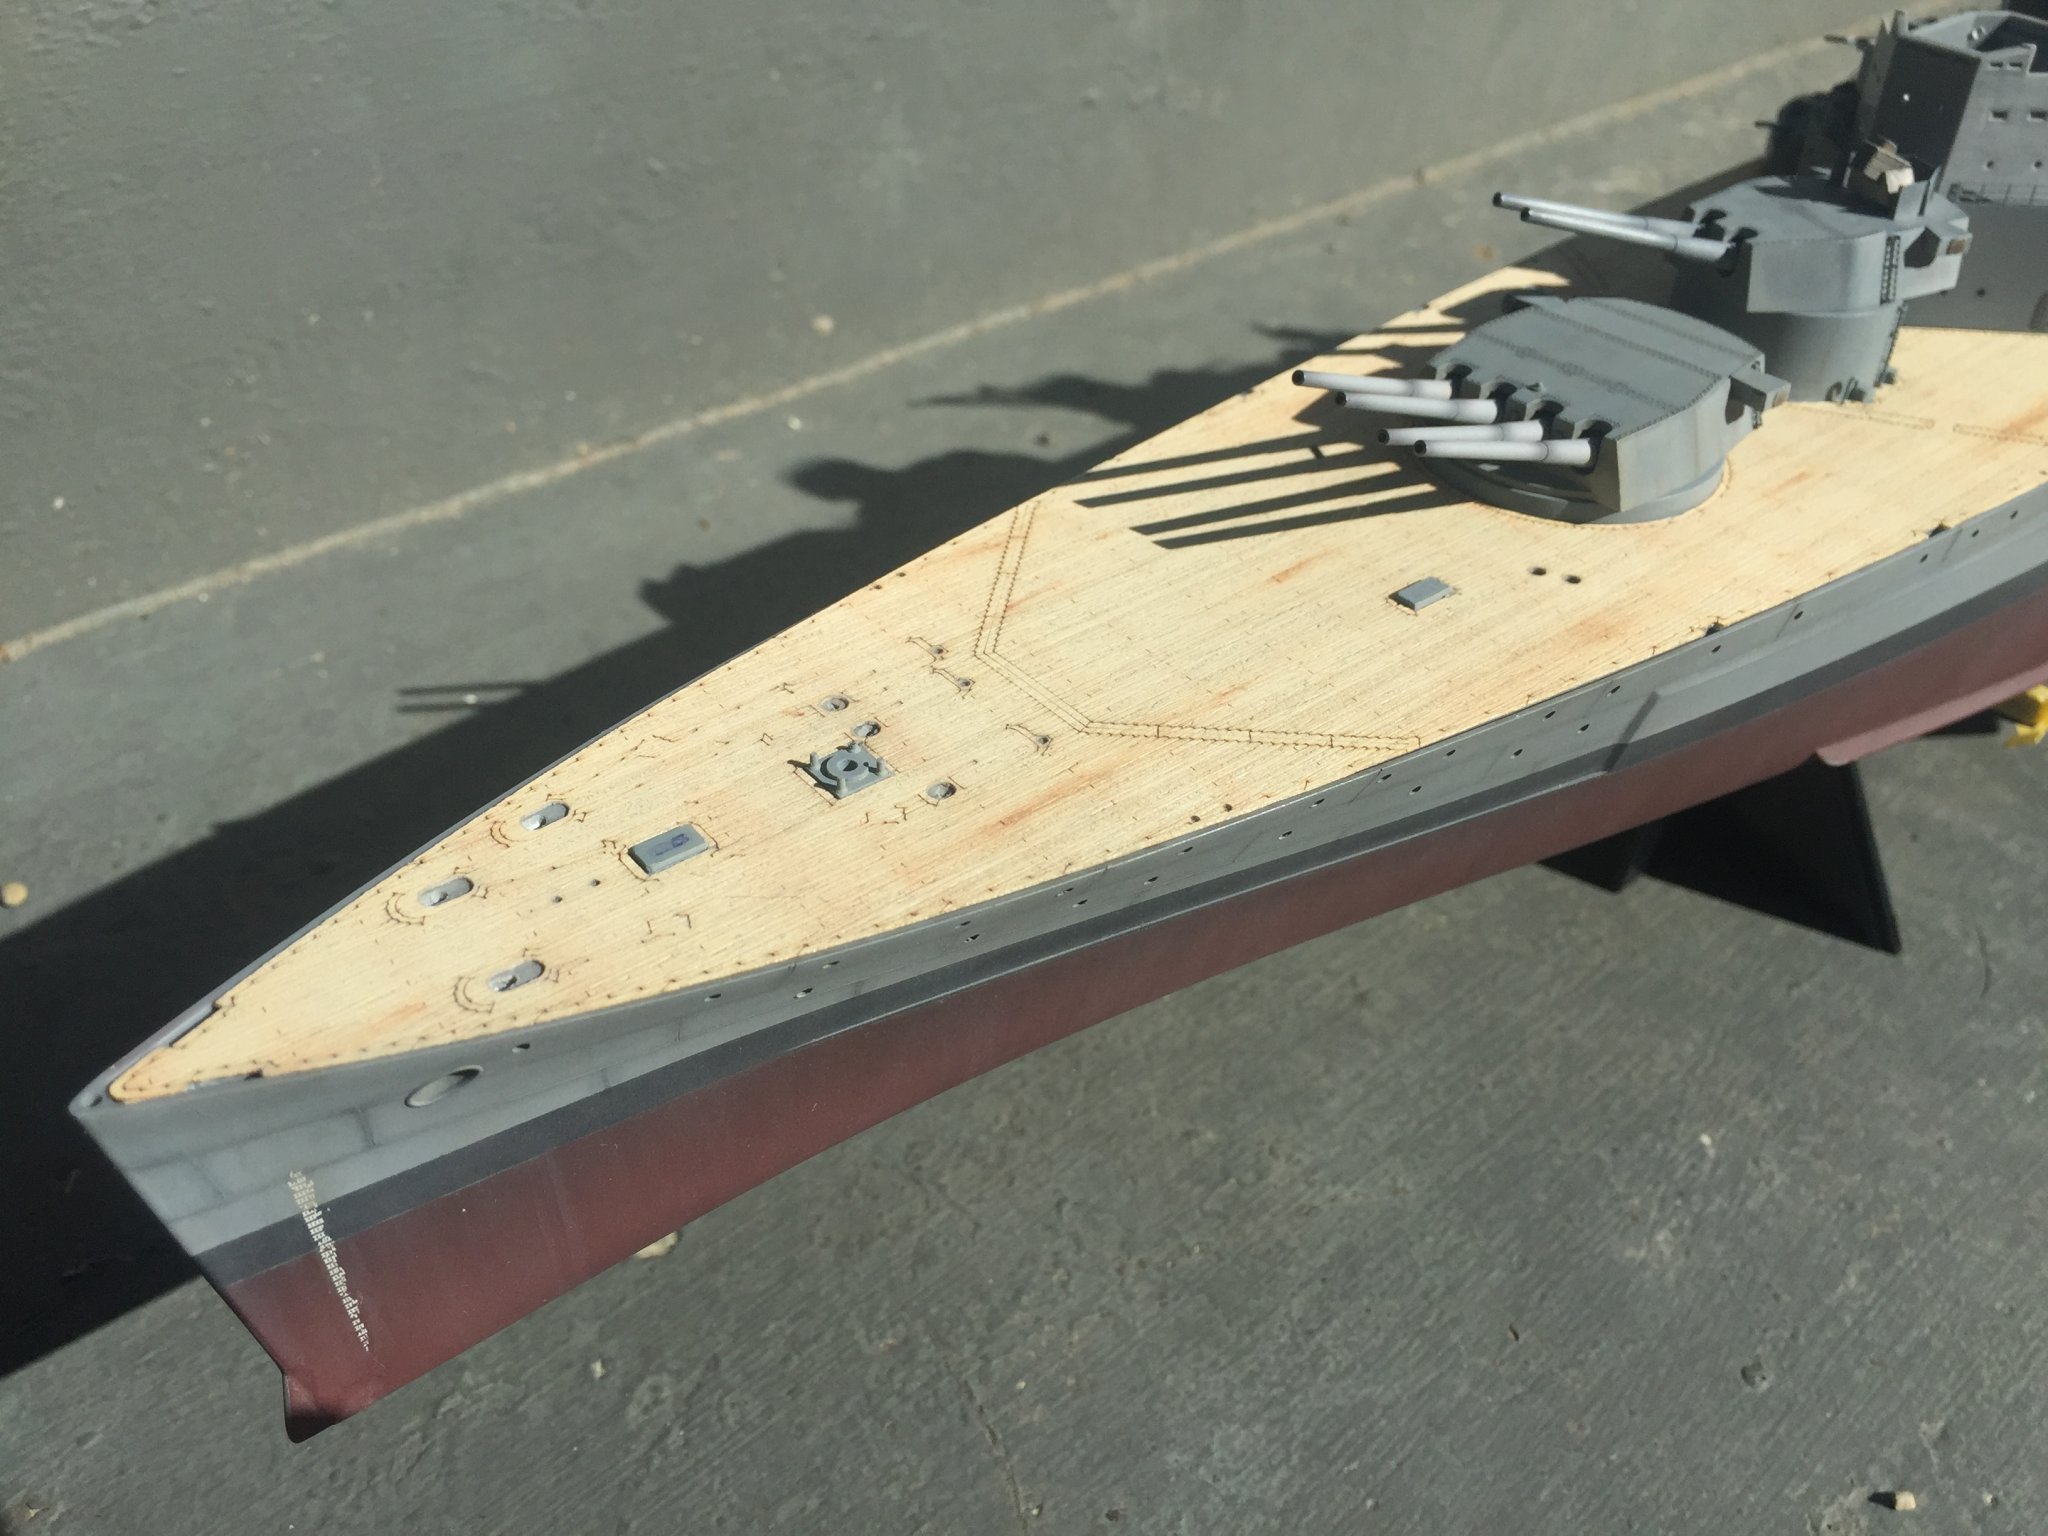
I took the pictures in sunlight which seems to bring out the badness in the deck. I don’t think it’s ruined at all just a lot different than I was imagining. But I think you are right, there is a whole lot of deck furniture to add that will break the deck up... in a good way. I’ll leave it how it is and see how it looks at the end of the build. Thanks in a few weeks I’ve a feeling I’ll be up to the final detail parts, of which there are a lot! I’m just really happy I don’t have to make 3000 anti aircraft guns! Hehe
- 211 replies
-
- 4
-
-
- prince of wales
- tamiya
- (and 2 more)
-
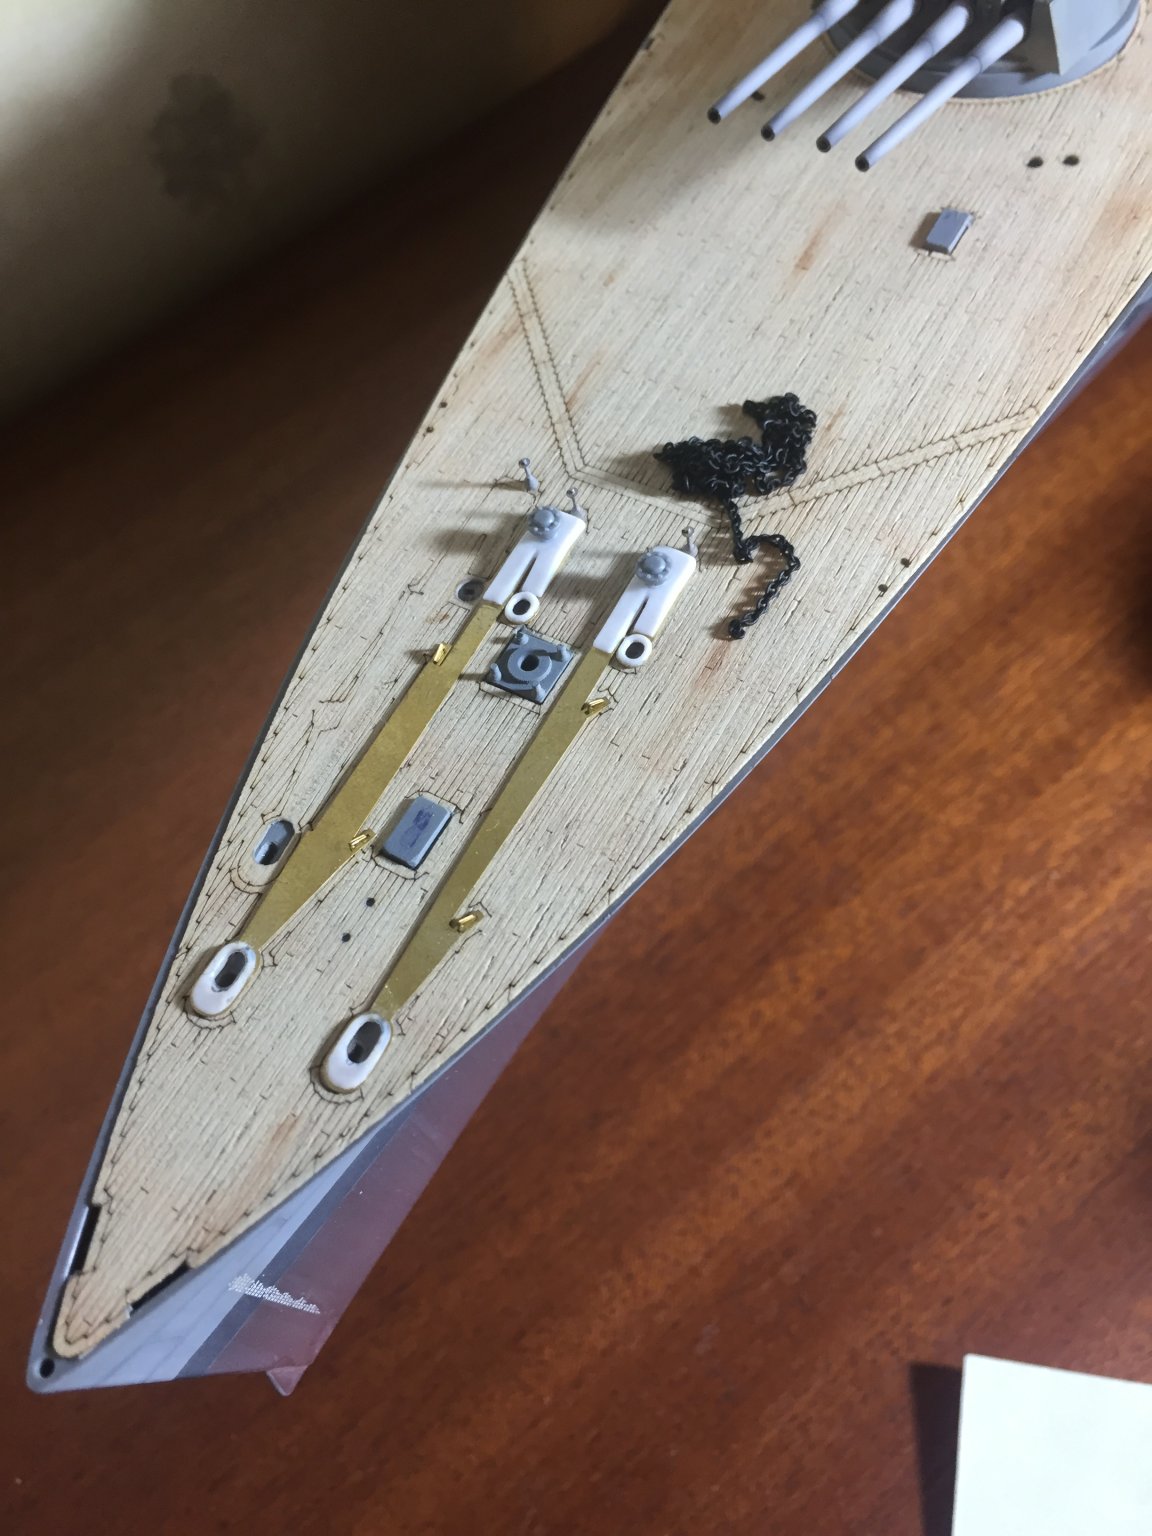
Here is the deck as it is now, I added tiny bits of pigment and put some streaks on it to try break it up, which I think looks horrible... probably should have masked the area instead of just a general smudge but can’t reverse it now. I think It’s just missing something to make it blend into the ship and not look out of place... I just don’t know what though. Maybe I just leave it alone and move on with the build. Anyone have any thoughts? Honesty is welcome.

- 211 replies
-
- 8
-
-
- prince of wales
- tamiya
- (and 2 more)
-
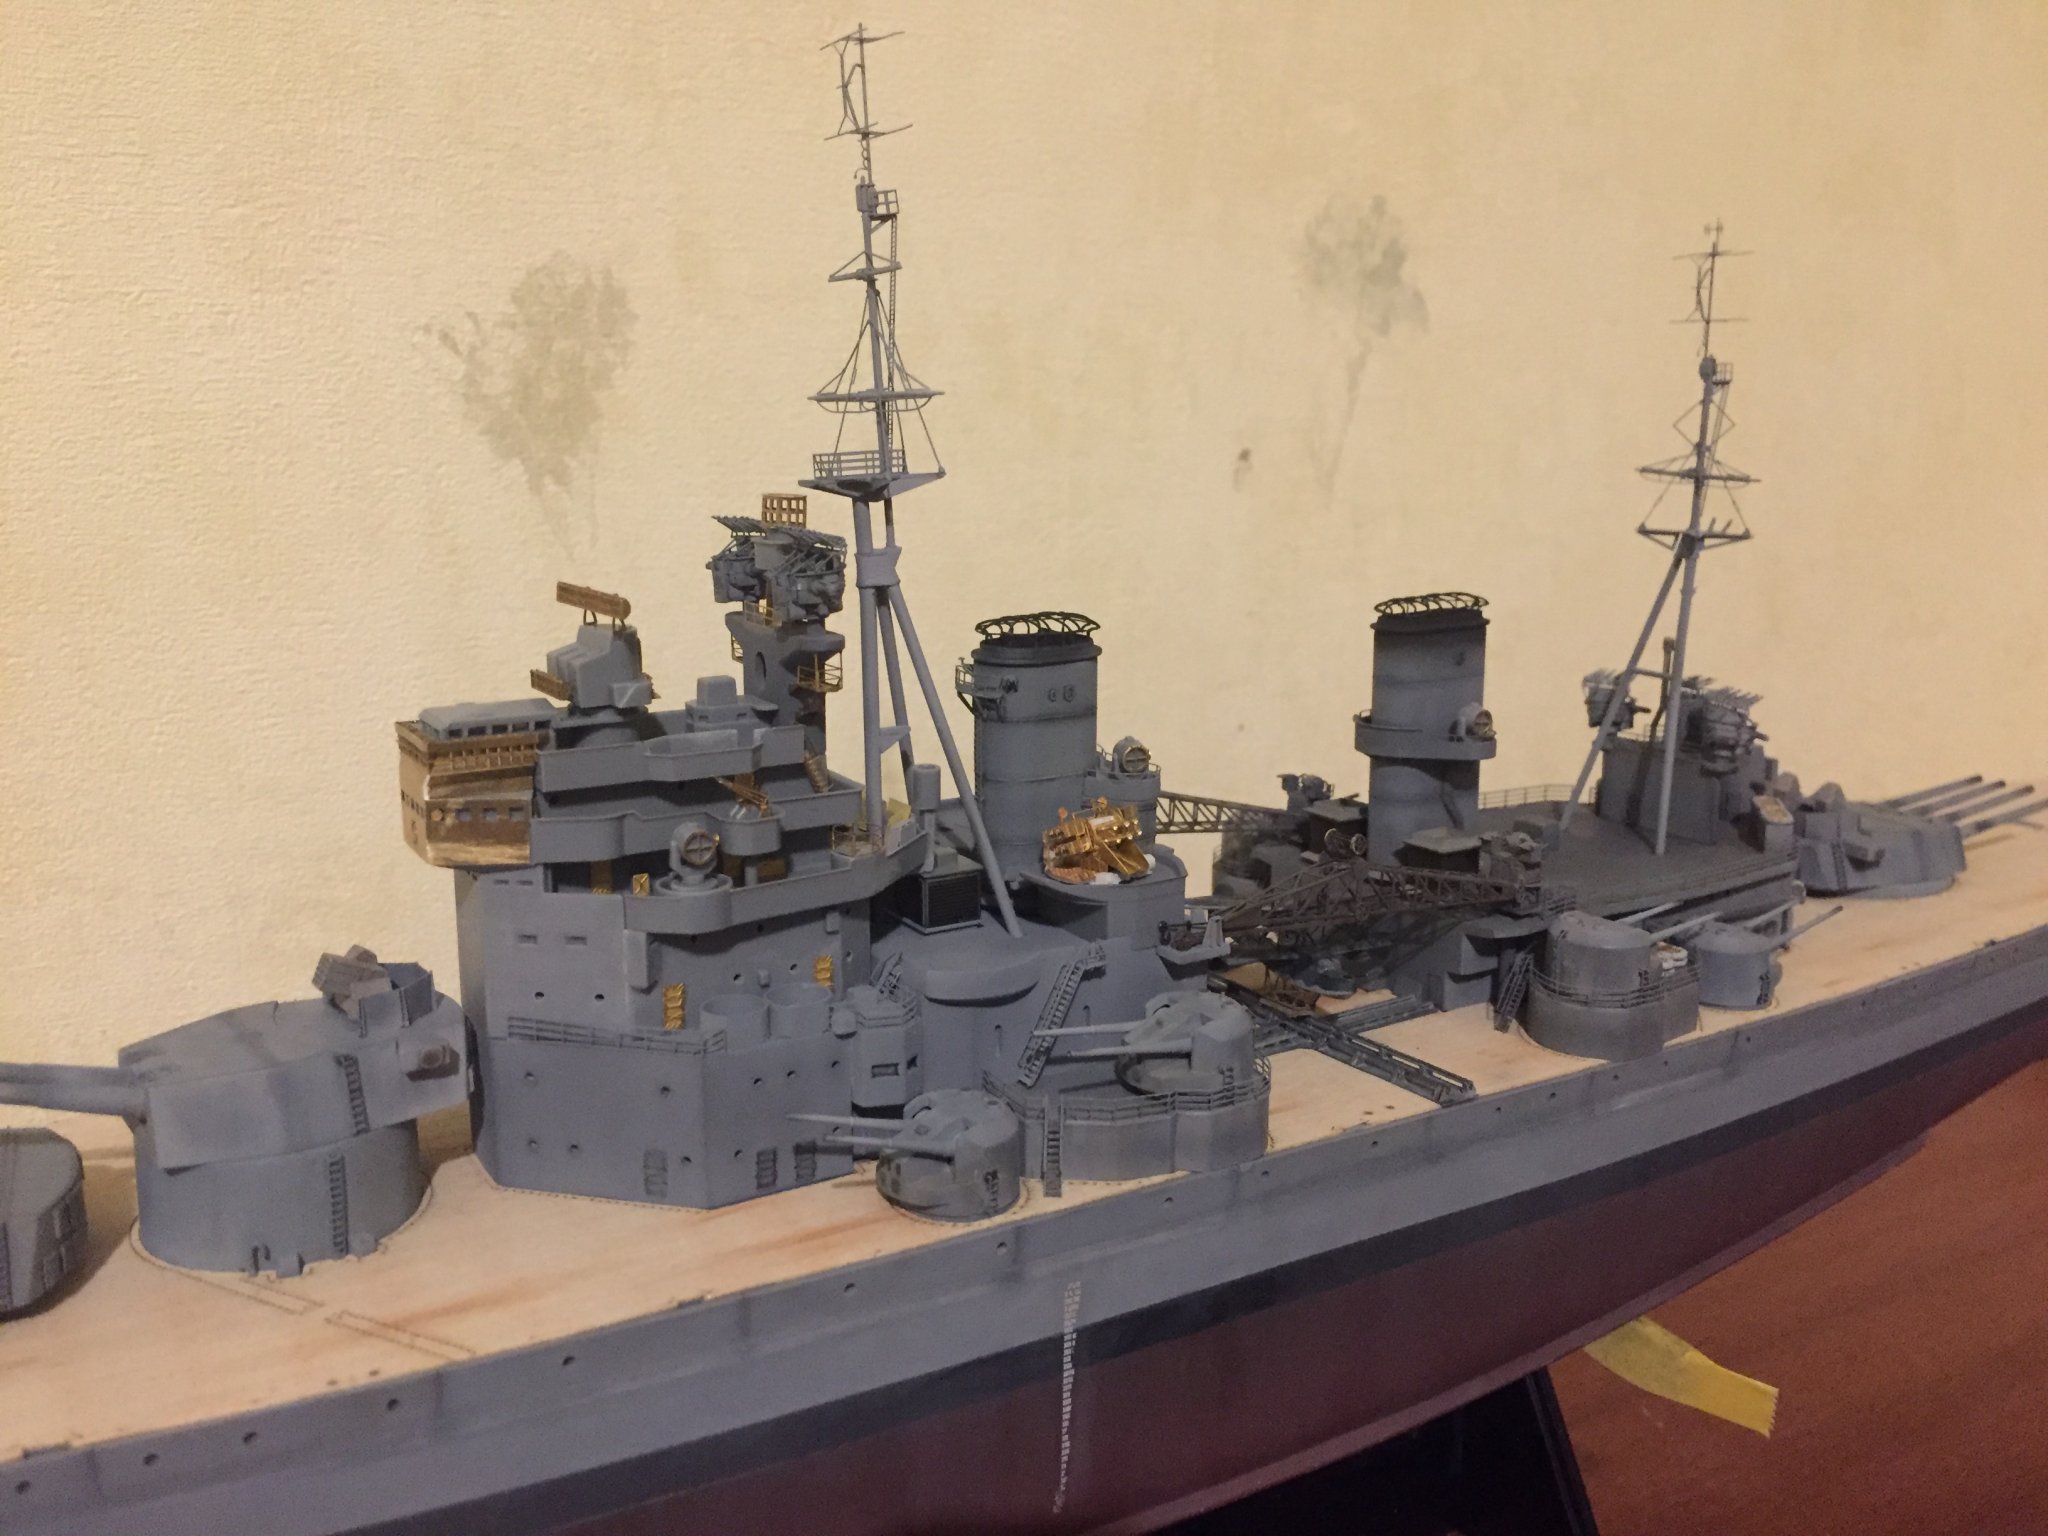
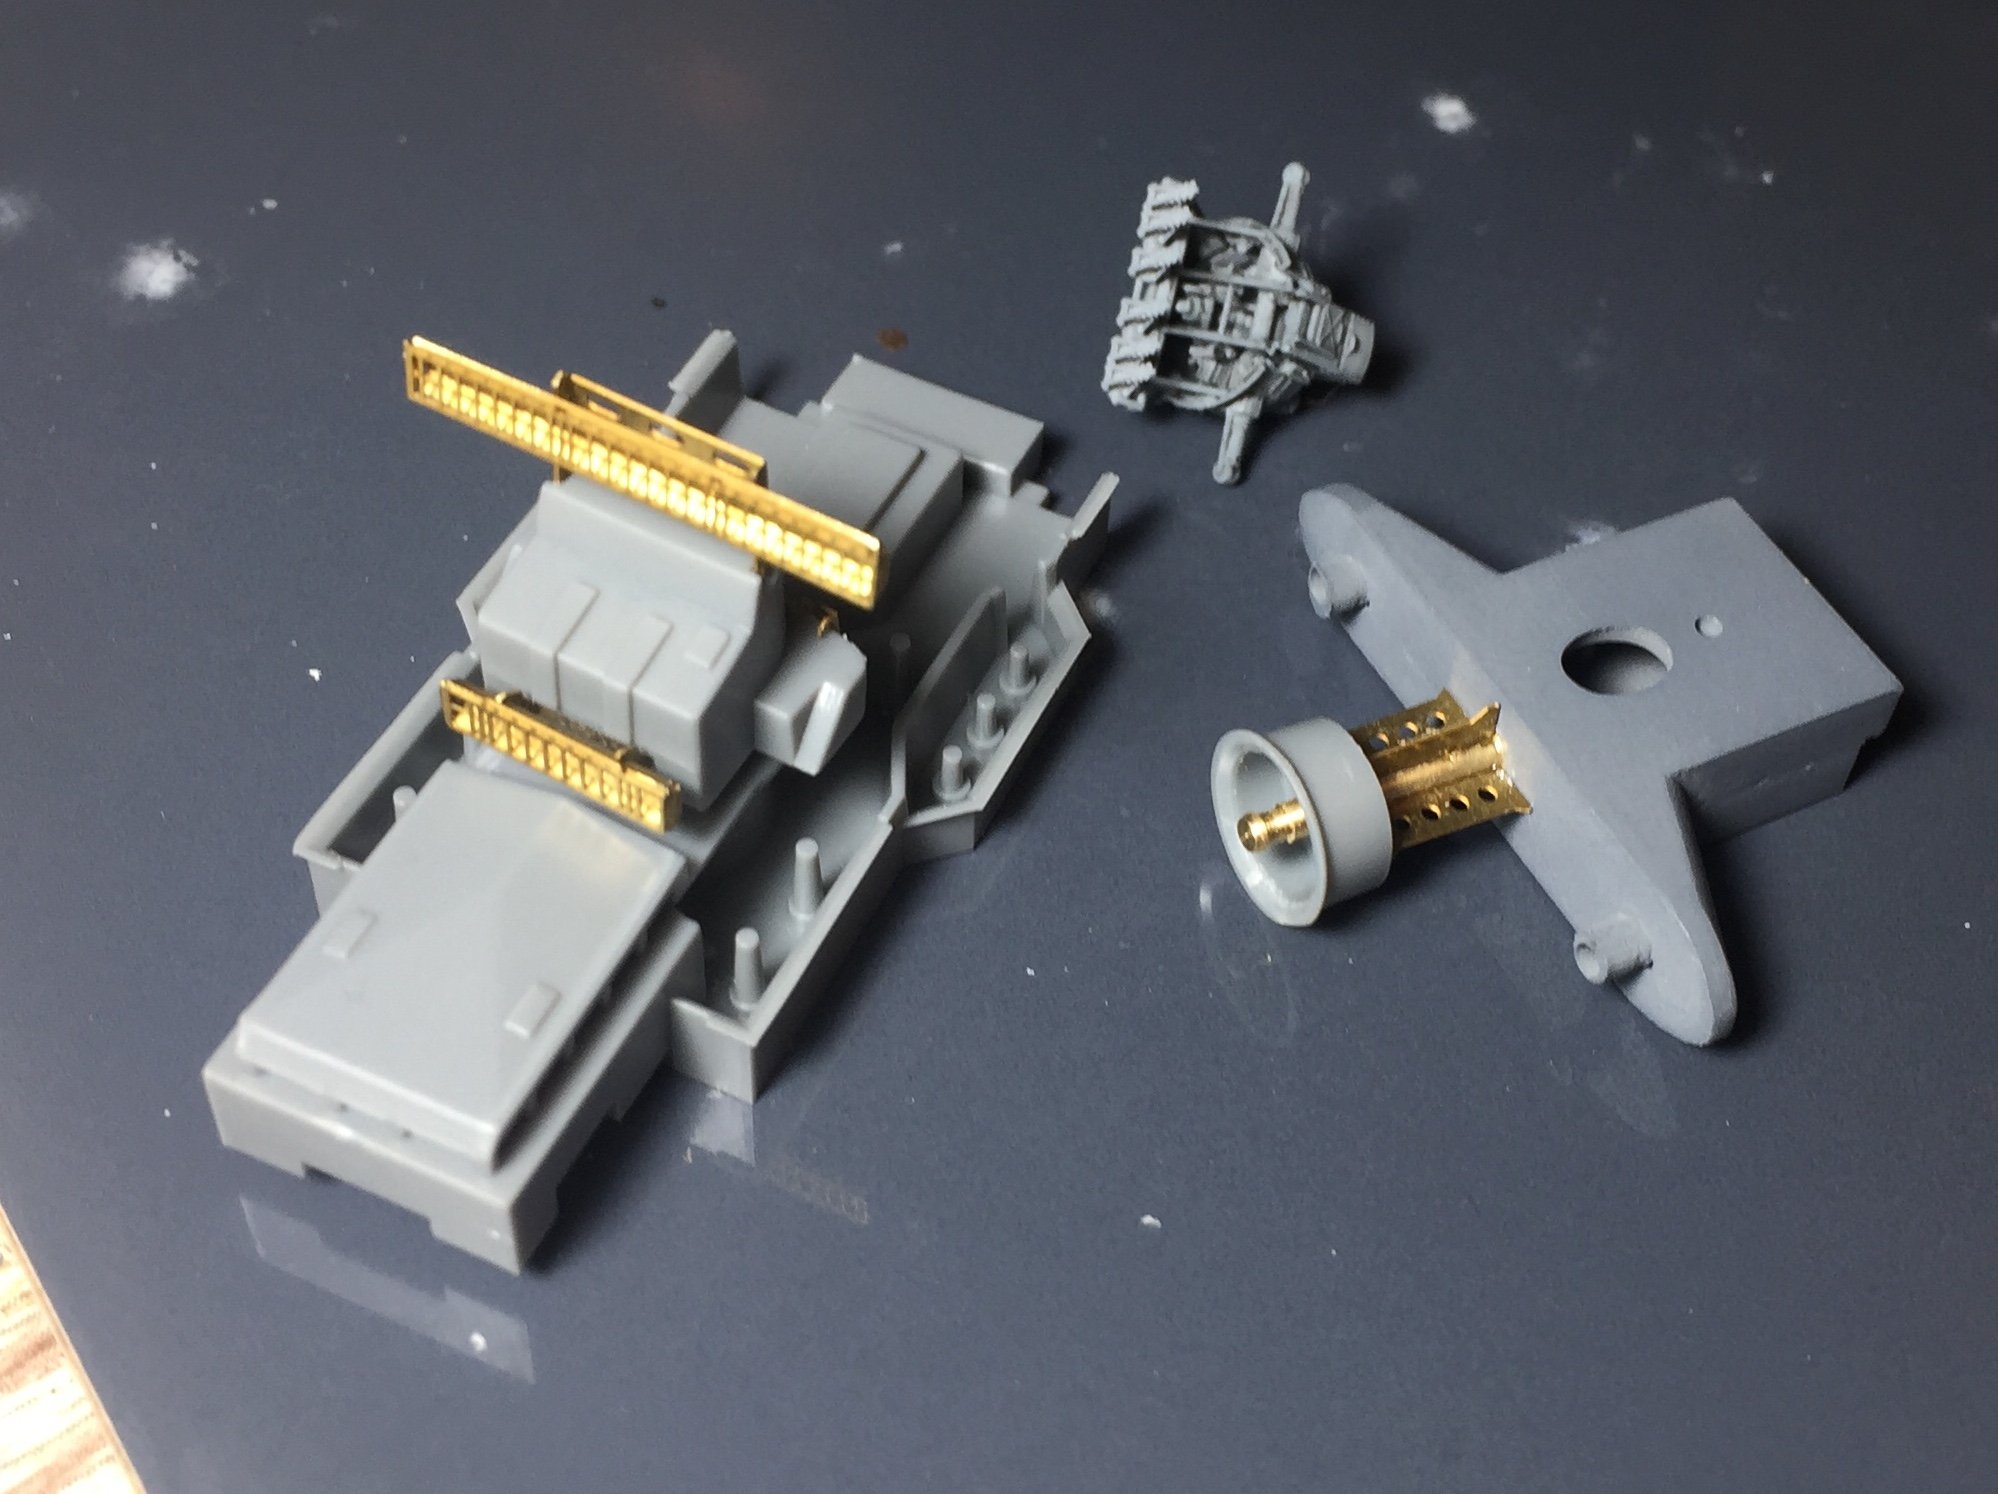
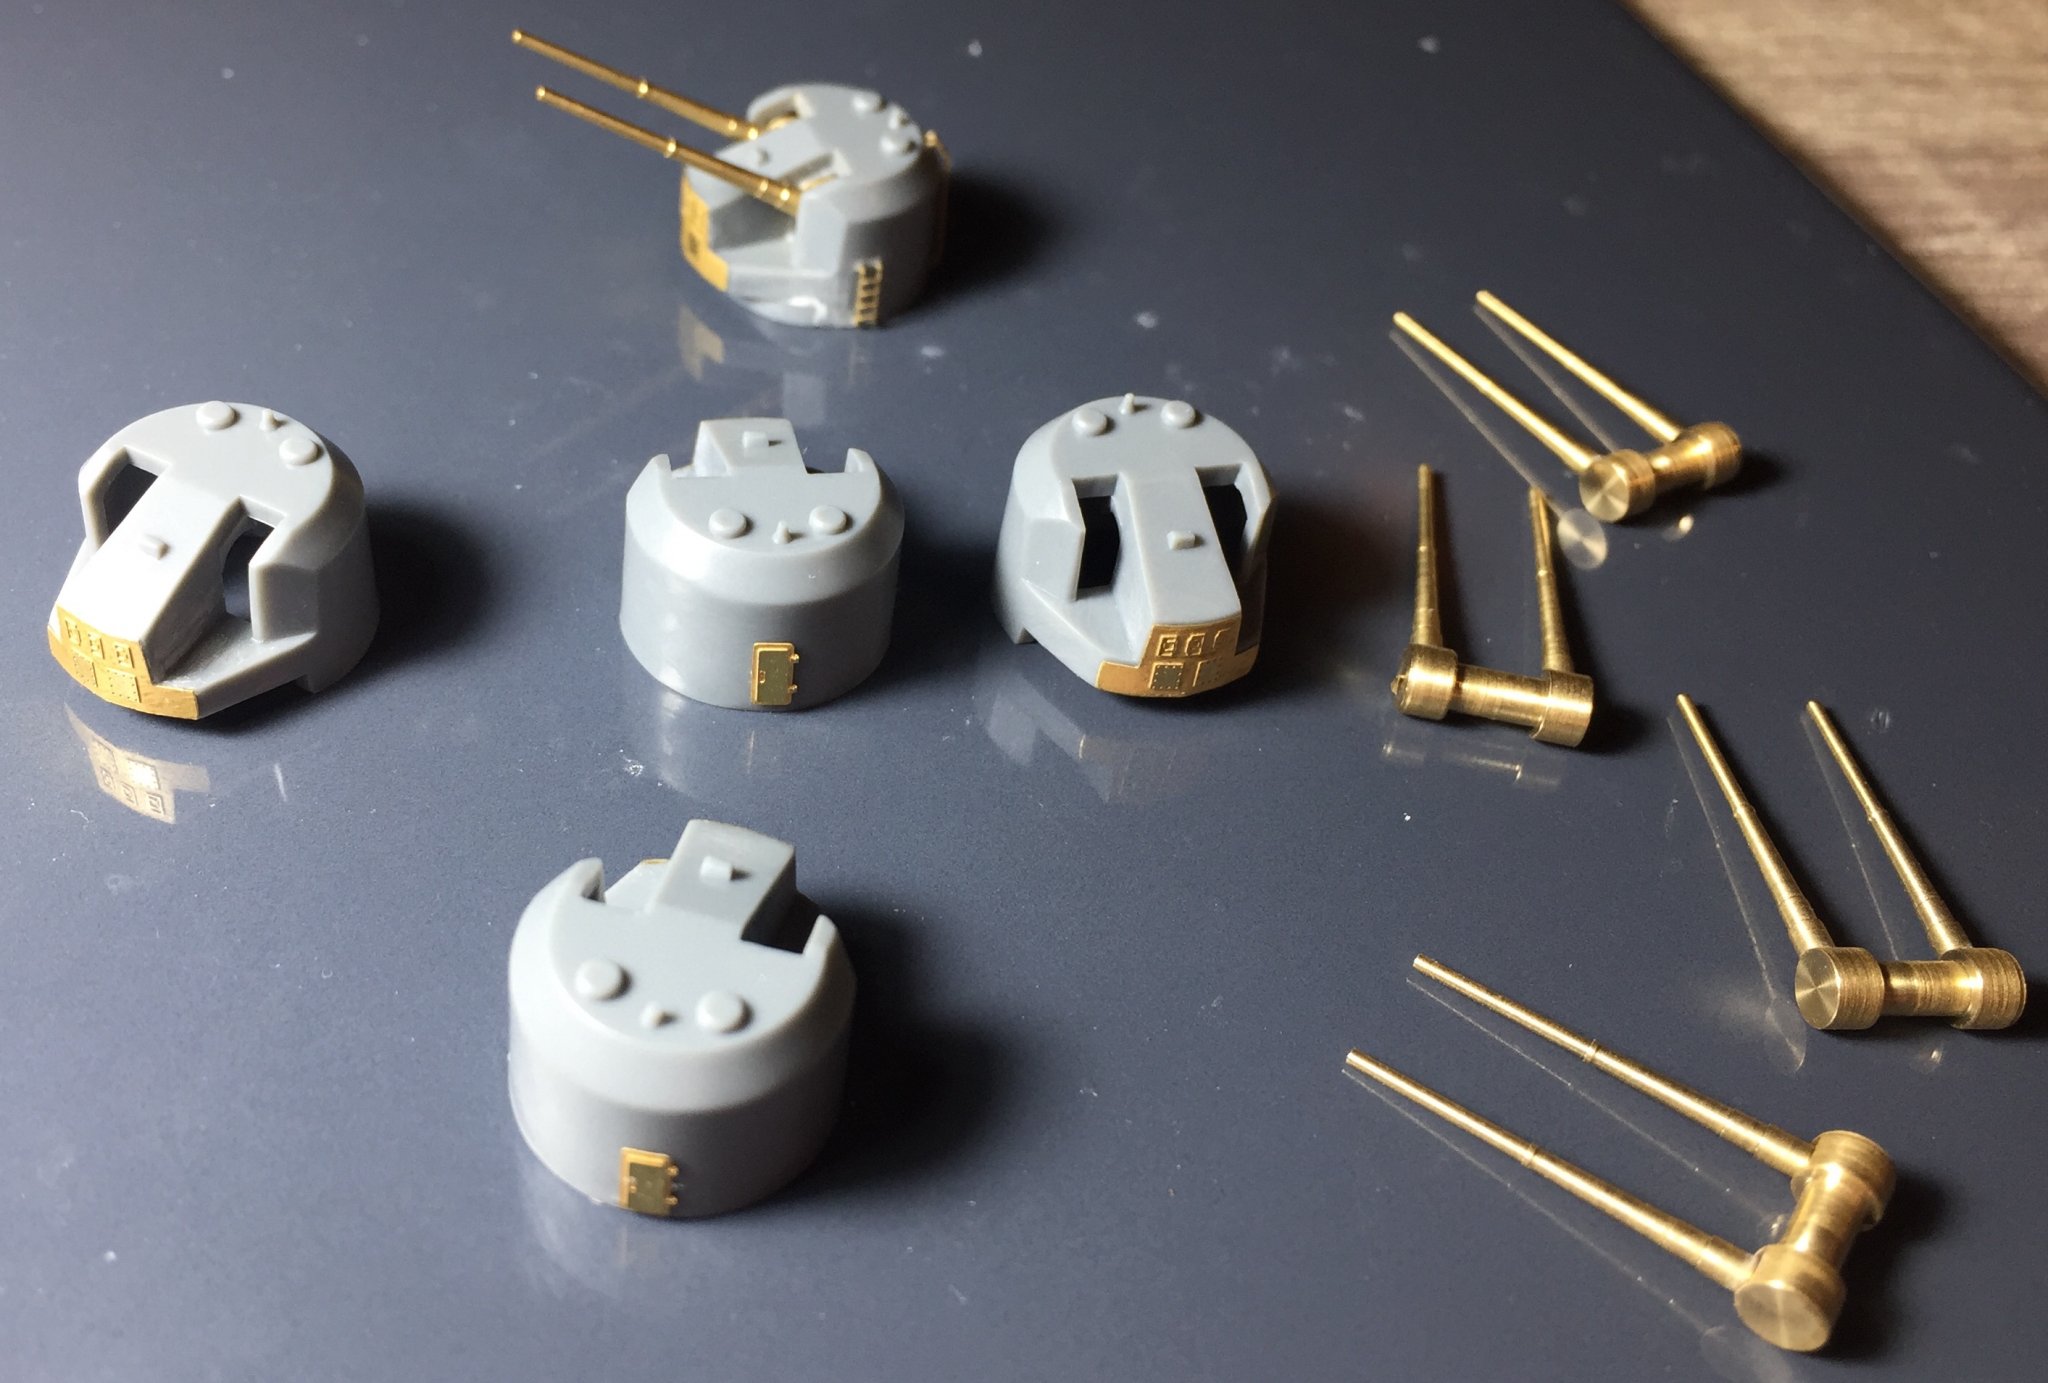
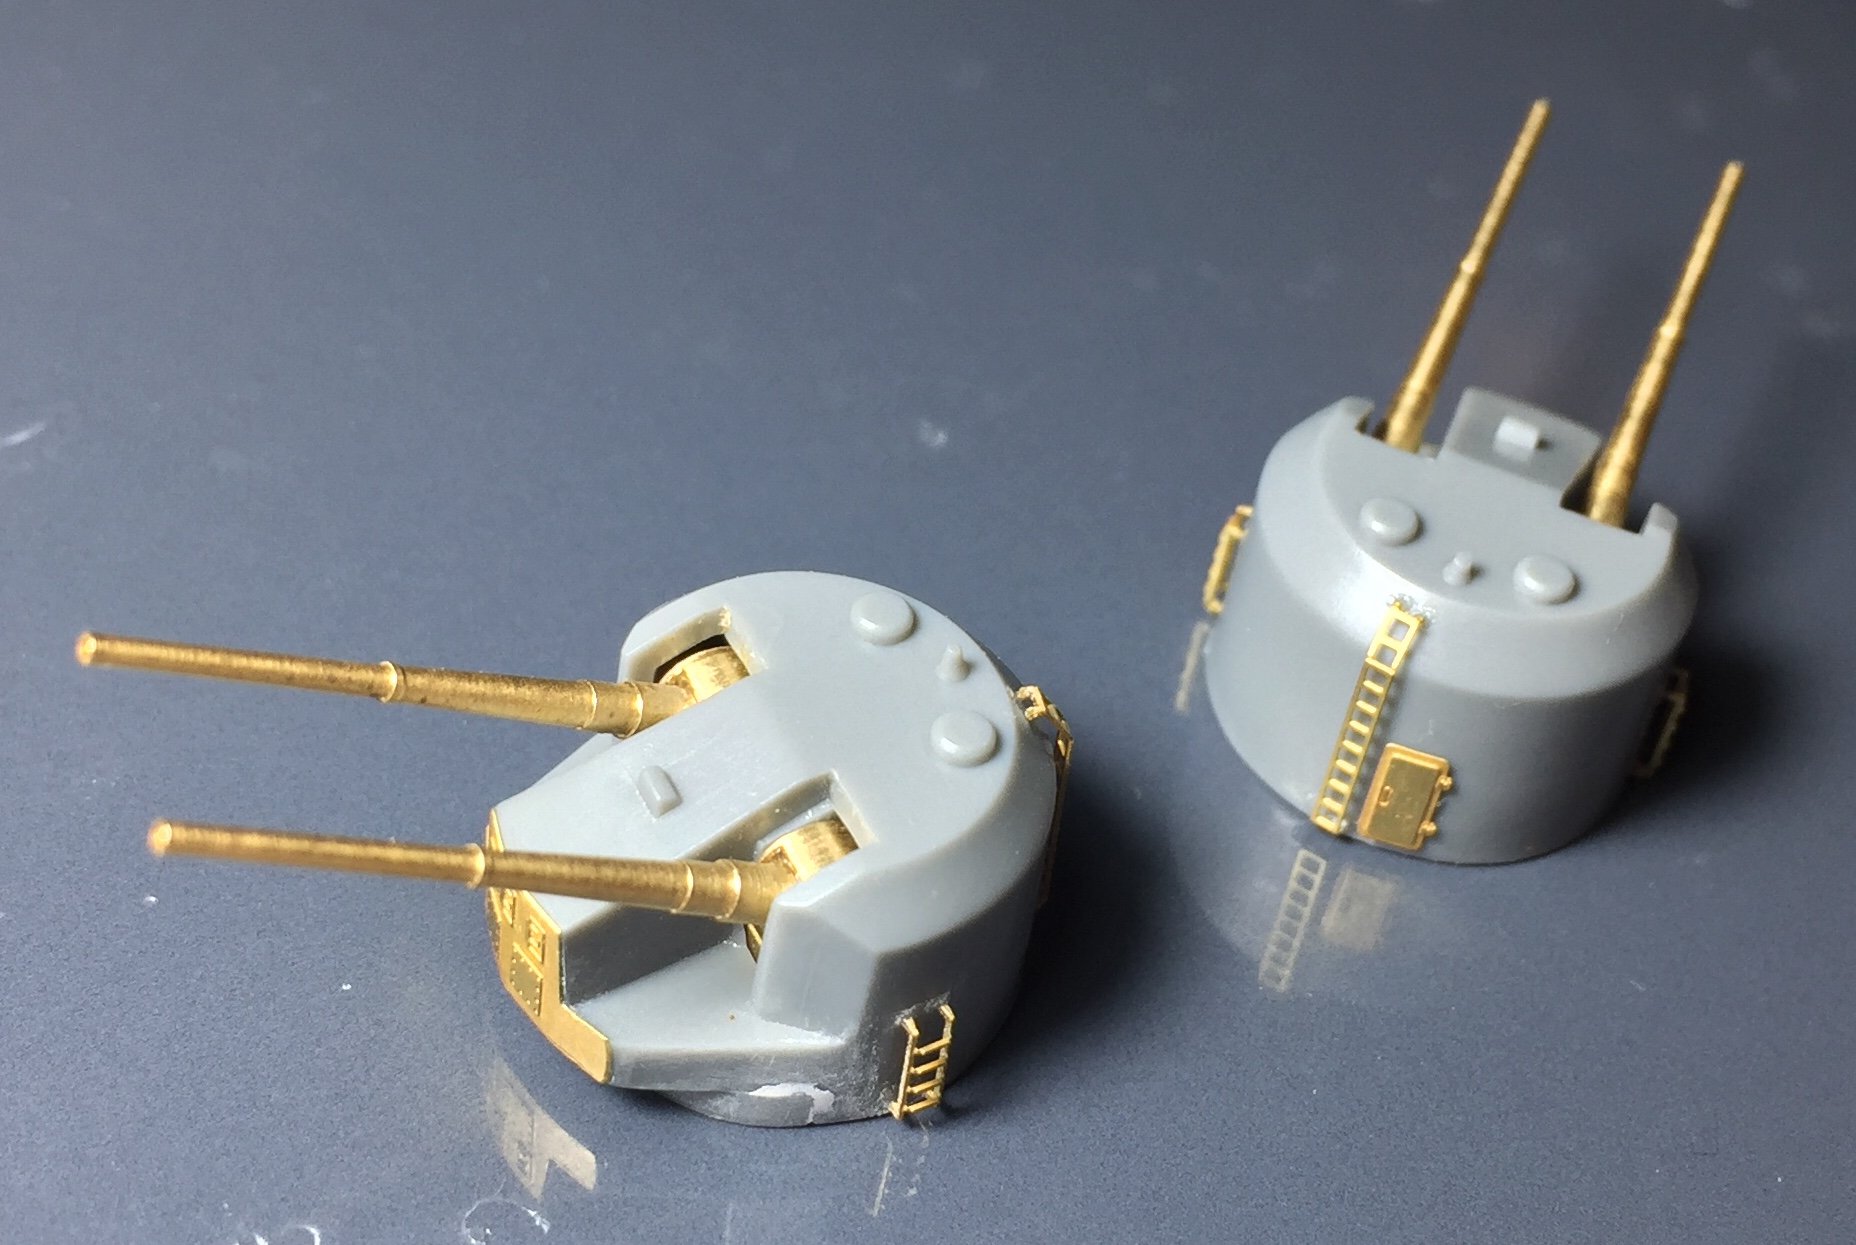
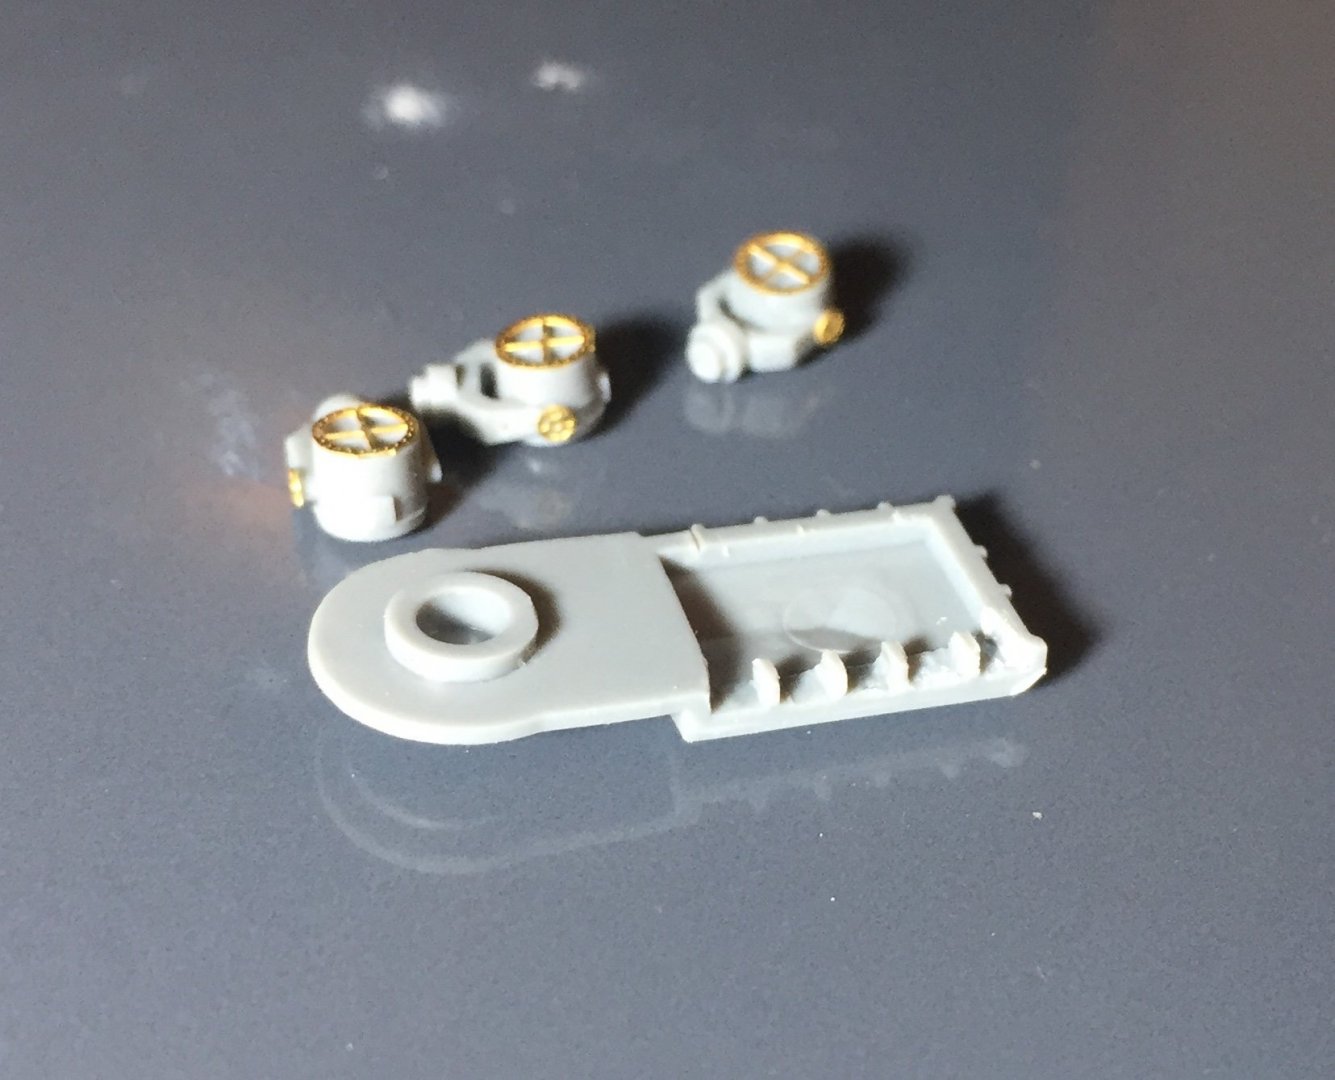
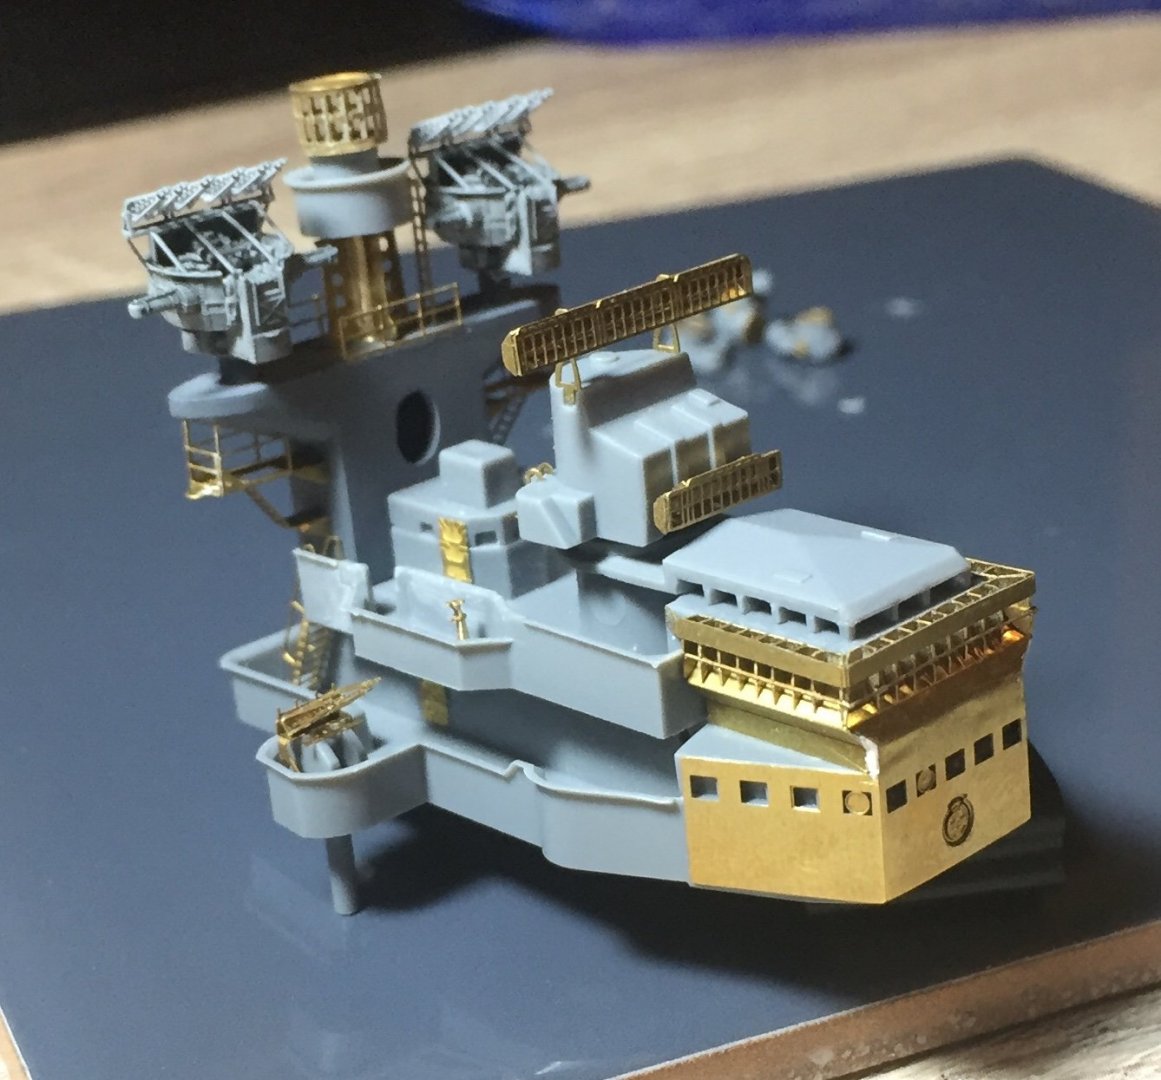
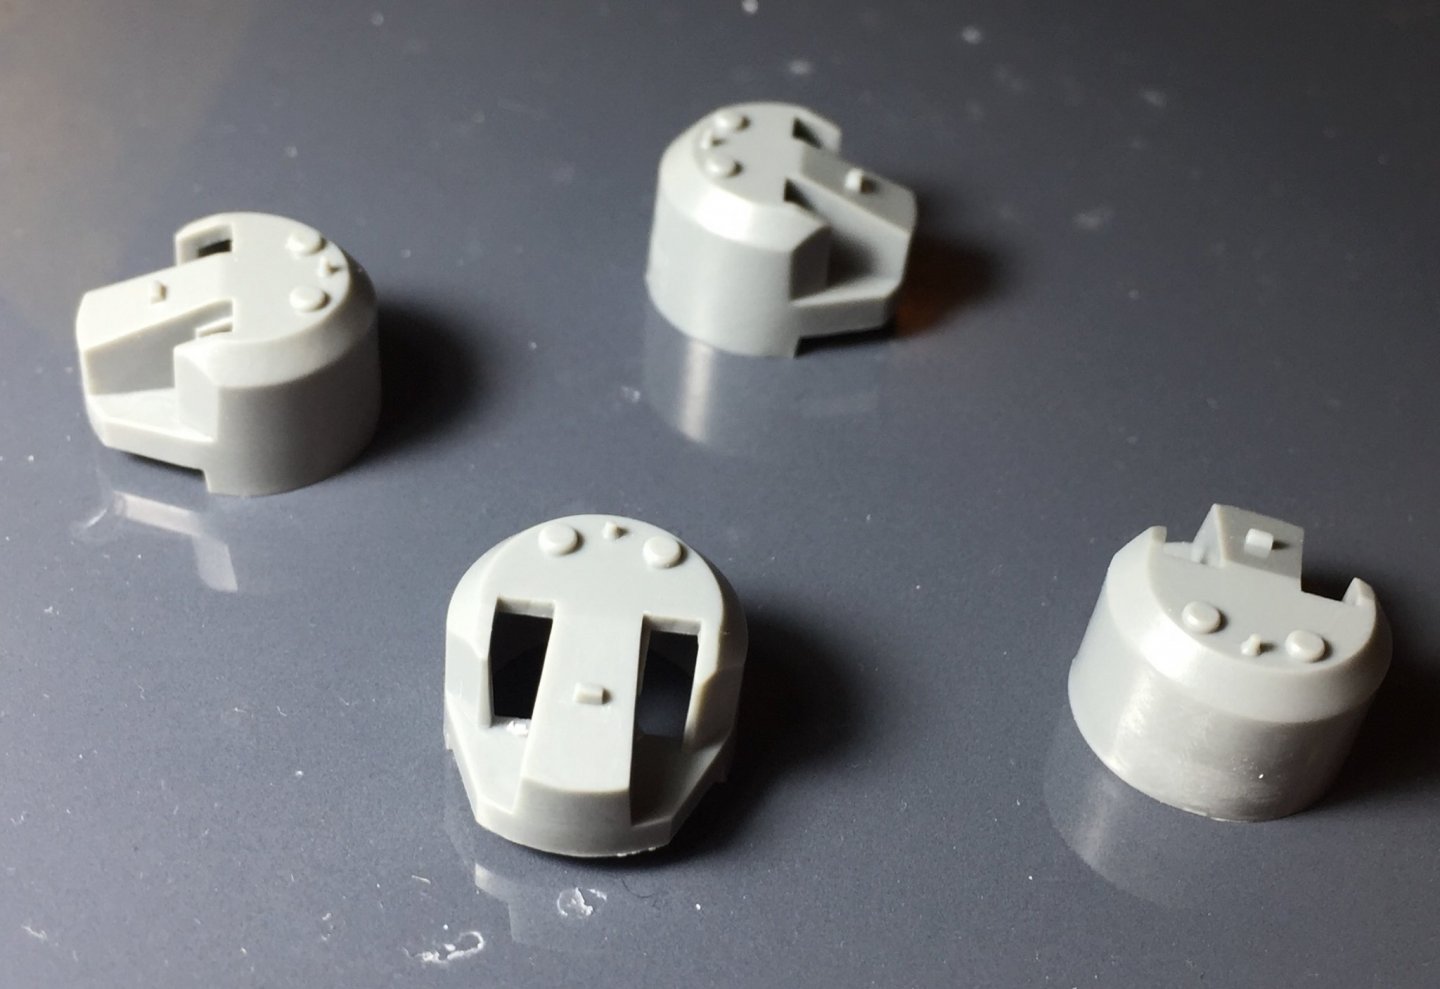
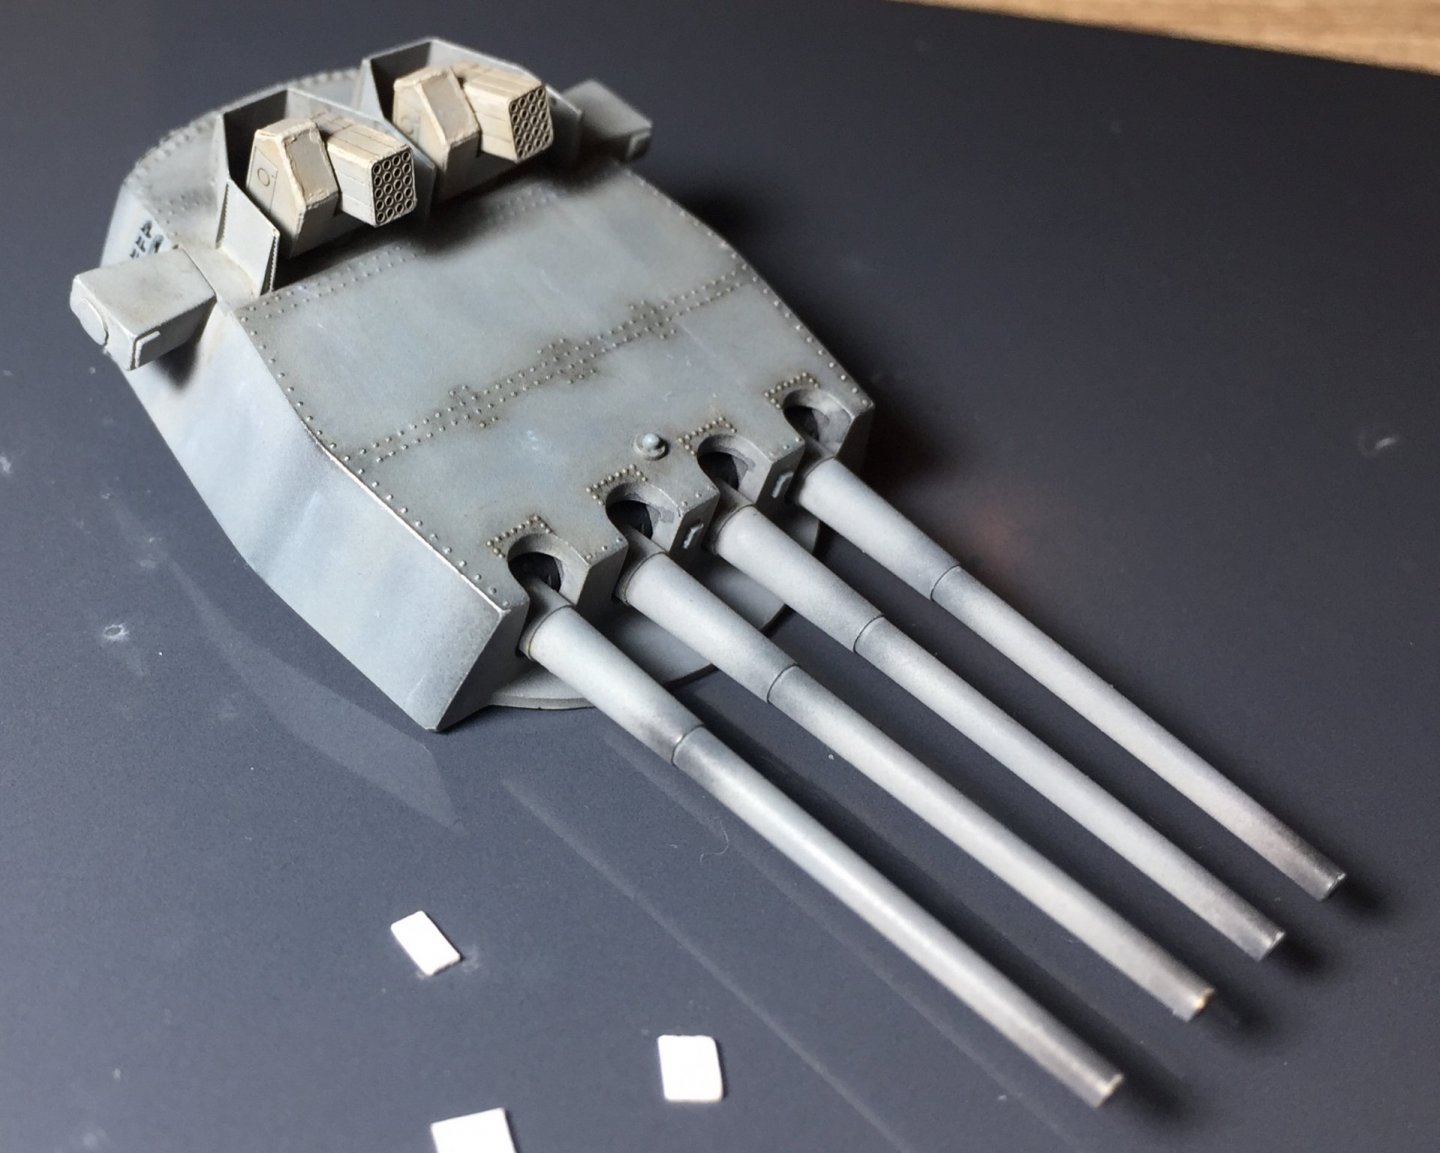
Have made some good progress on the main super structure just doing it in a very unstructured order, got the main lower structure done and jumped to the top and am working down... will get there in the end. I also got 4 aftermarket rangefinders for the 5.25” guns which do add some nice extra detail which you can see two of them here.


- 211 replies
-
- 4
-
-
- prince of wales
- tamiya
- (and 2 more)
-
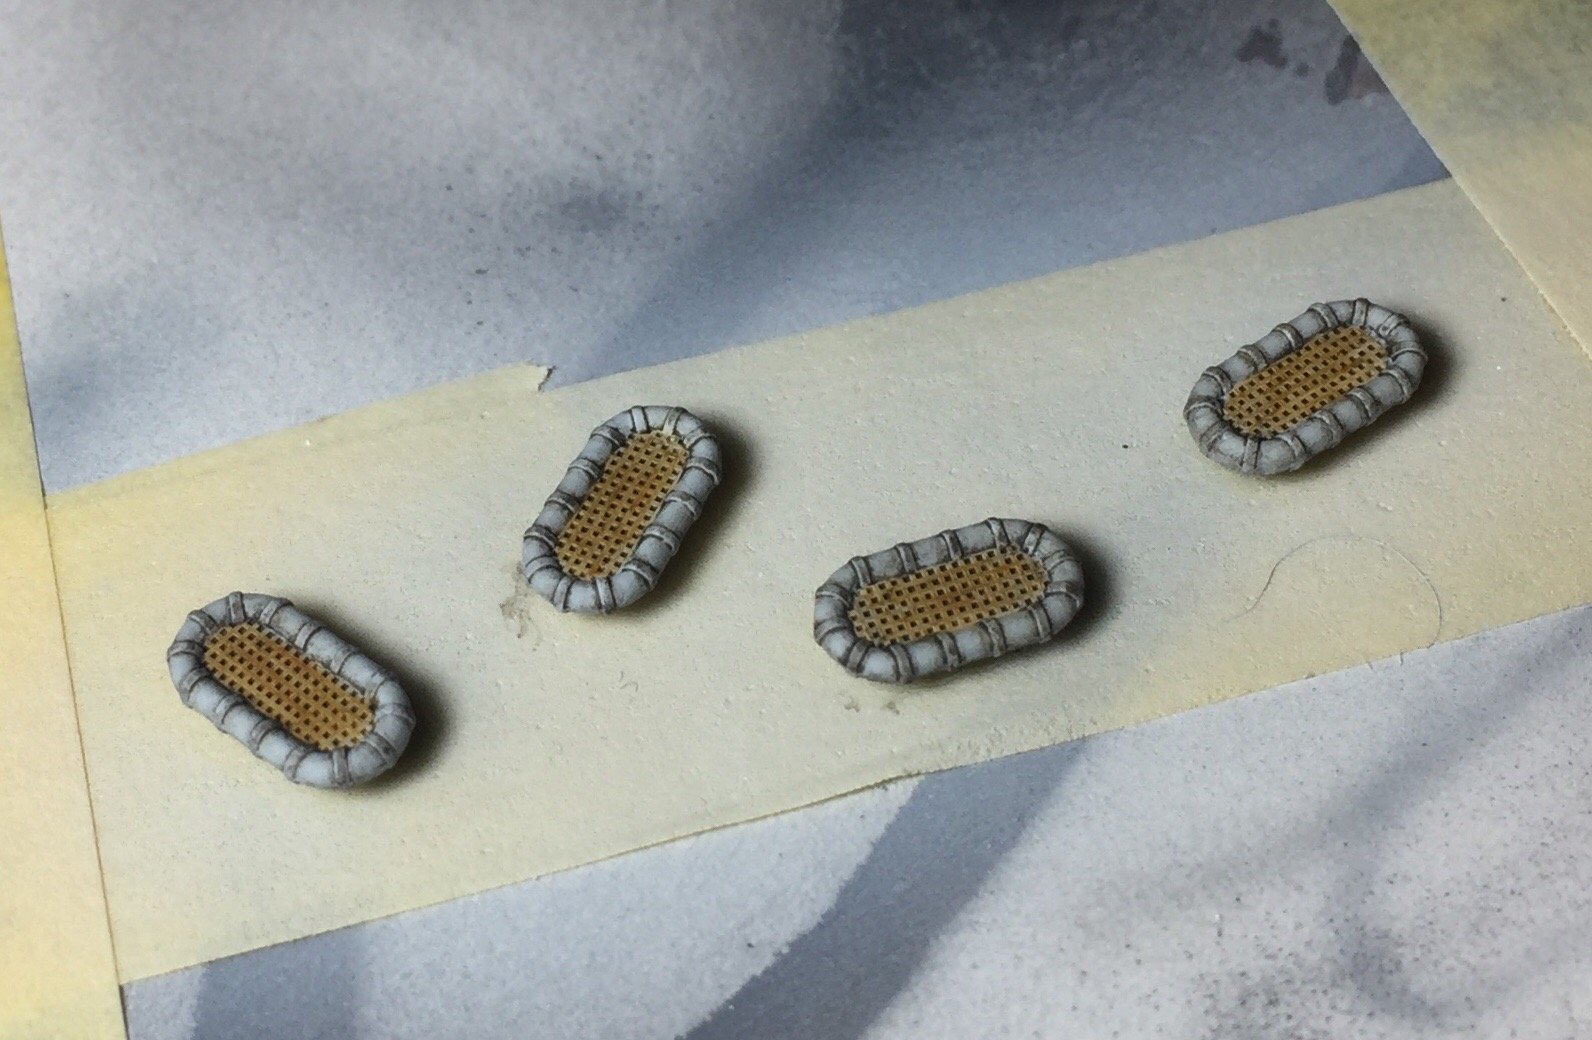
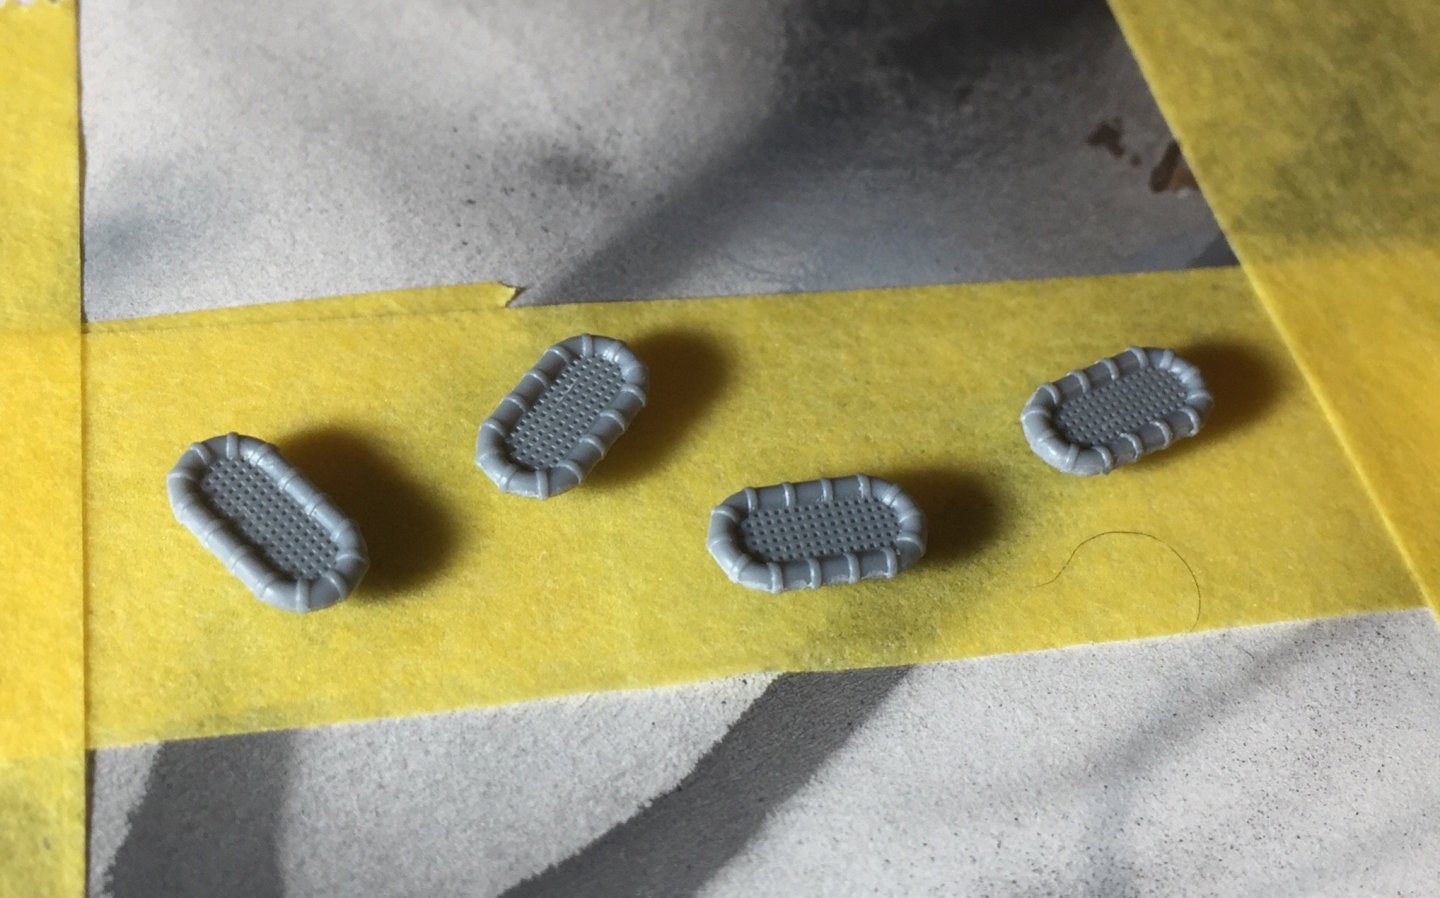
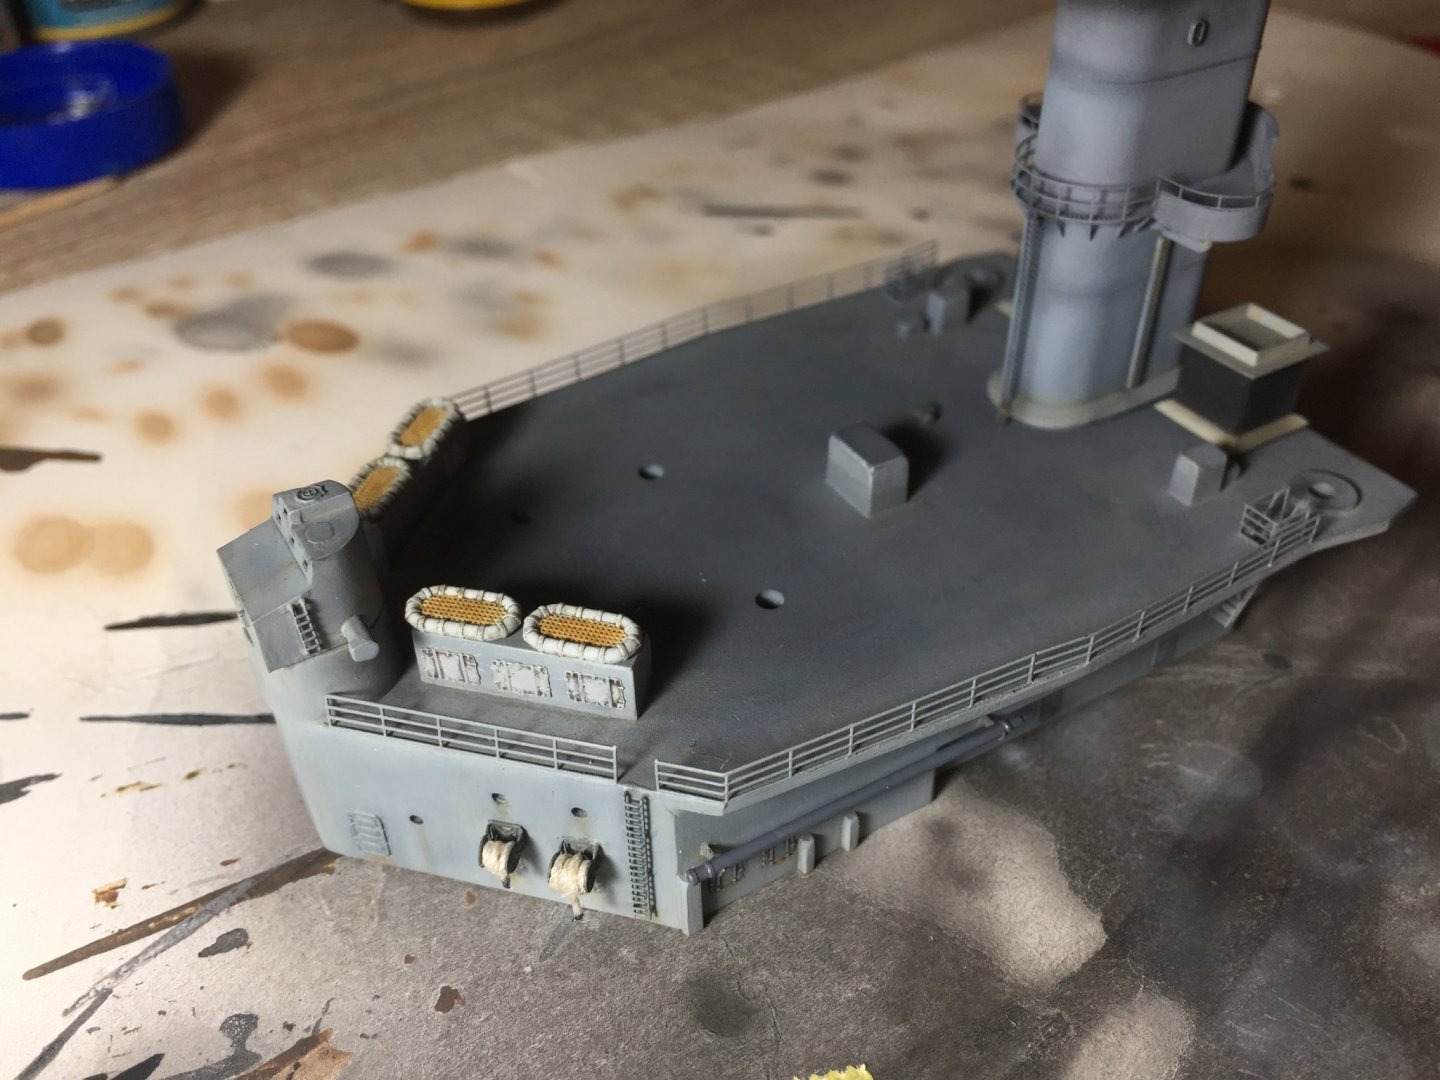
I’m still try work out how to get the wood deck looking right. Nothing seems to work on it so far, it’s still too yellow. Hope I don’t ruin it. So while I wait for that to happen I’ve been doing some little details like these life rafts. Nice to get some colours on that aren’t a shade of gray!

- 211 replies
-
- 5
-
-
- prince of wales
- tamiya
- (and 2 more)
-
Seems I’ll finally get to follow one of your builds in real time for once! Those NZ made guns do look great, I had a look there for getting some replacement life rafts but they would have cost more than my whole ship, so didn’t! Have fun
- 136 replies
-
- 3
-
-
- strasbourg
- finished
- (and 2 more)
-
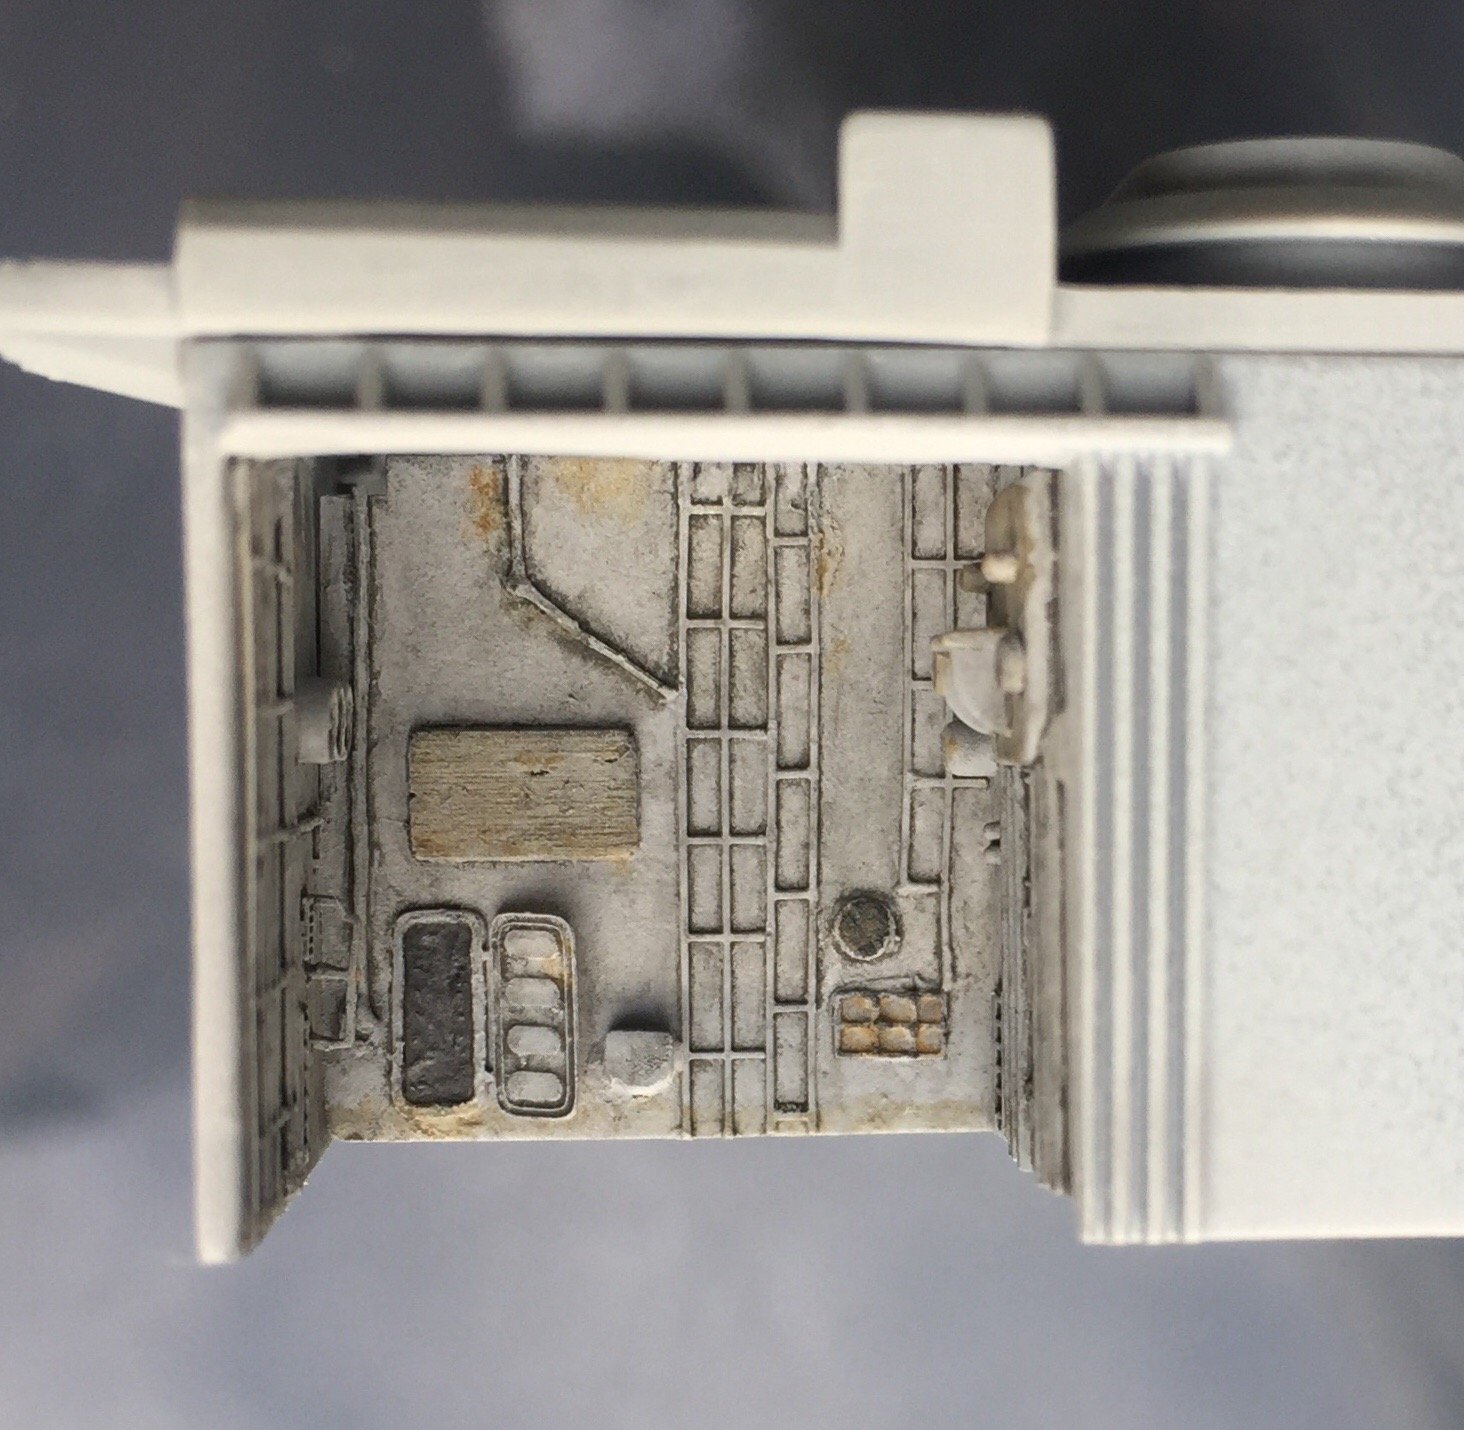
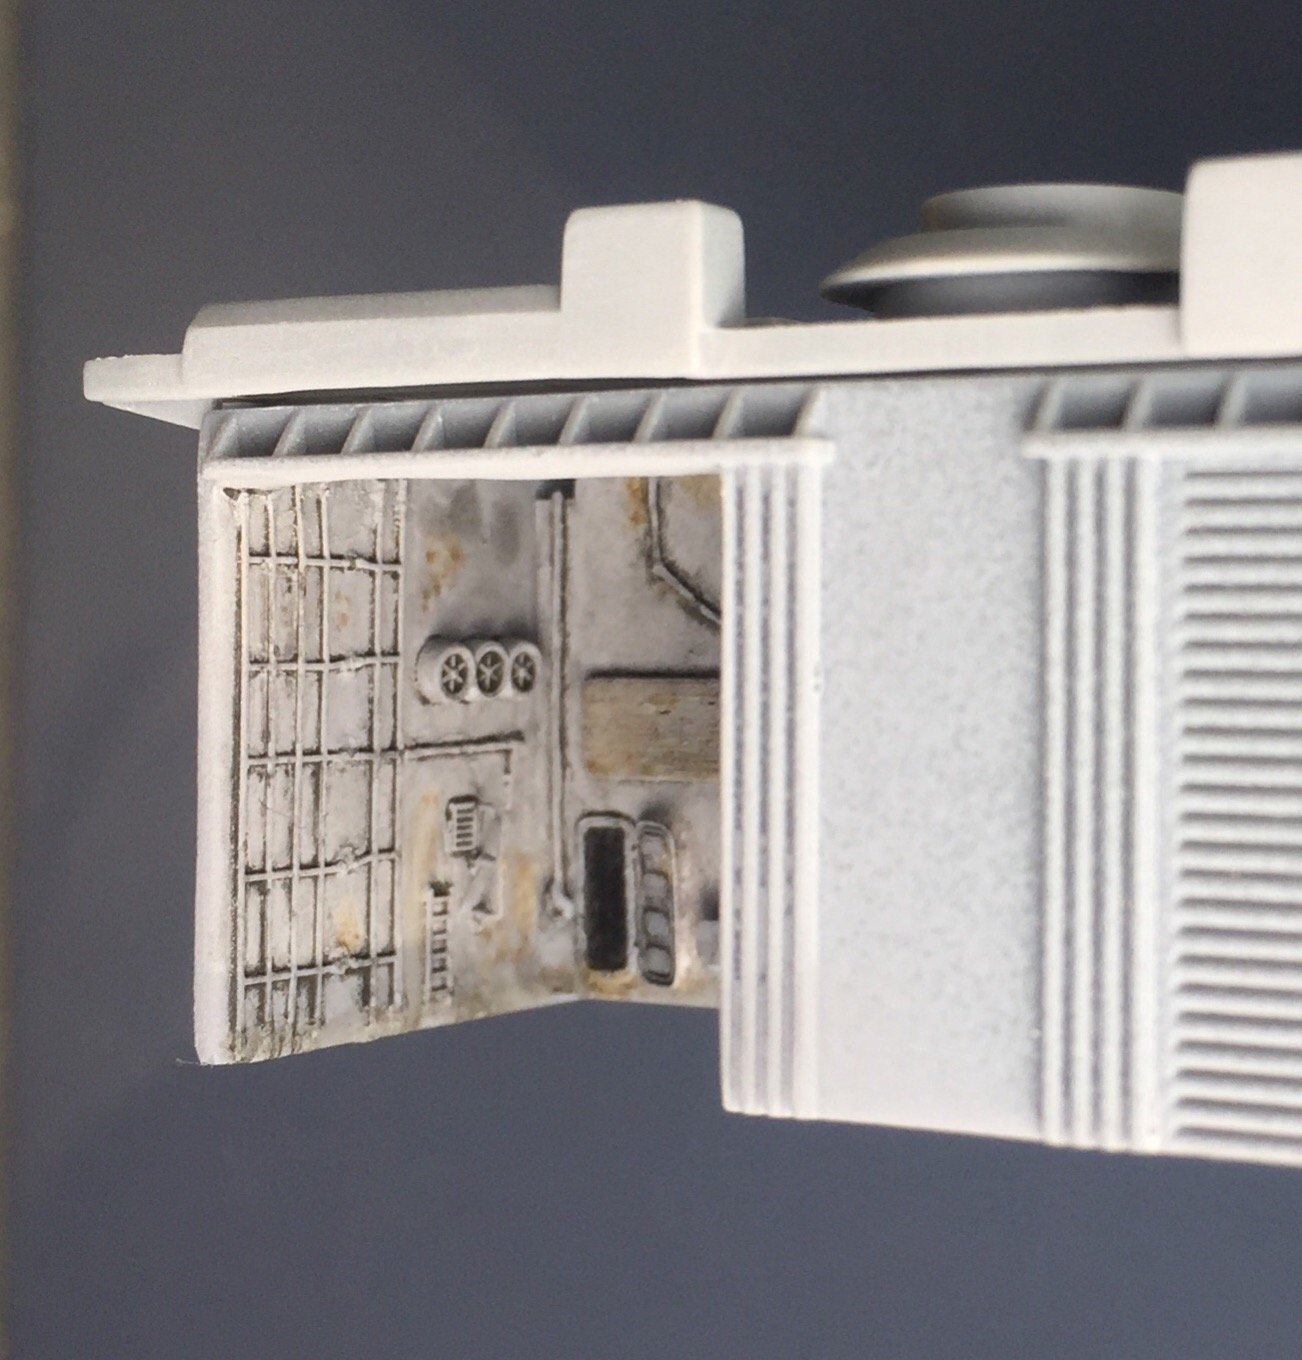
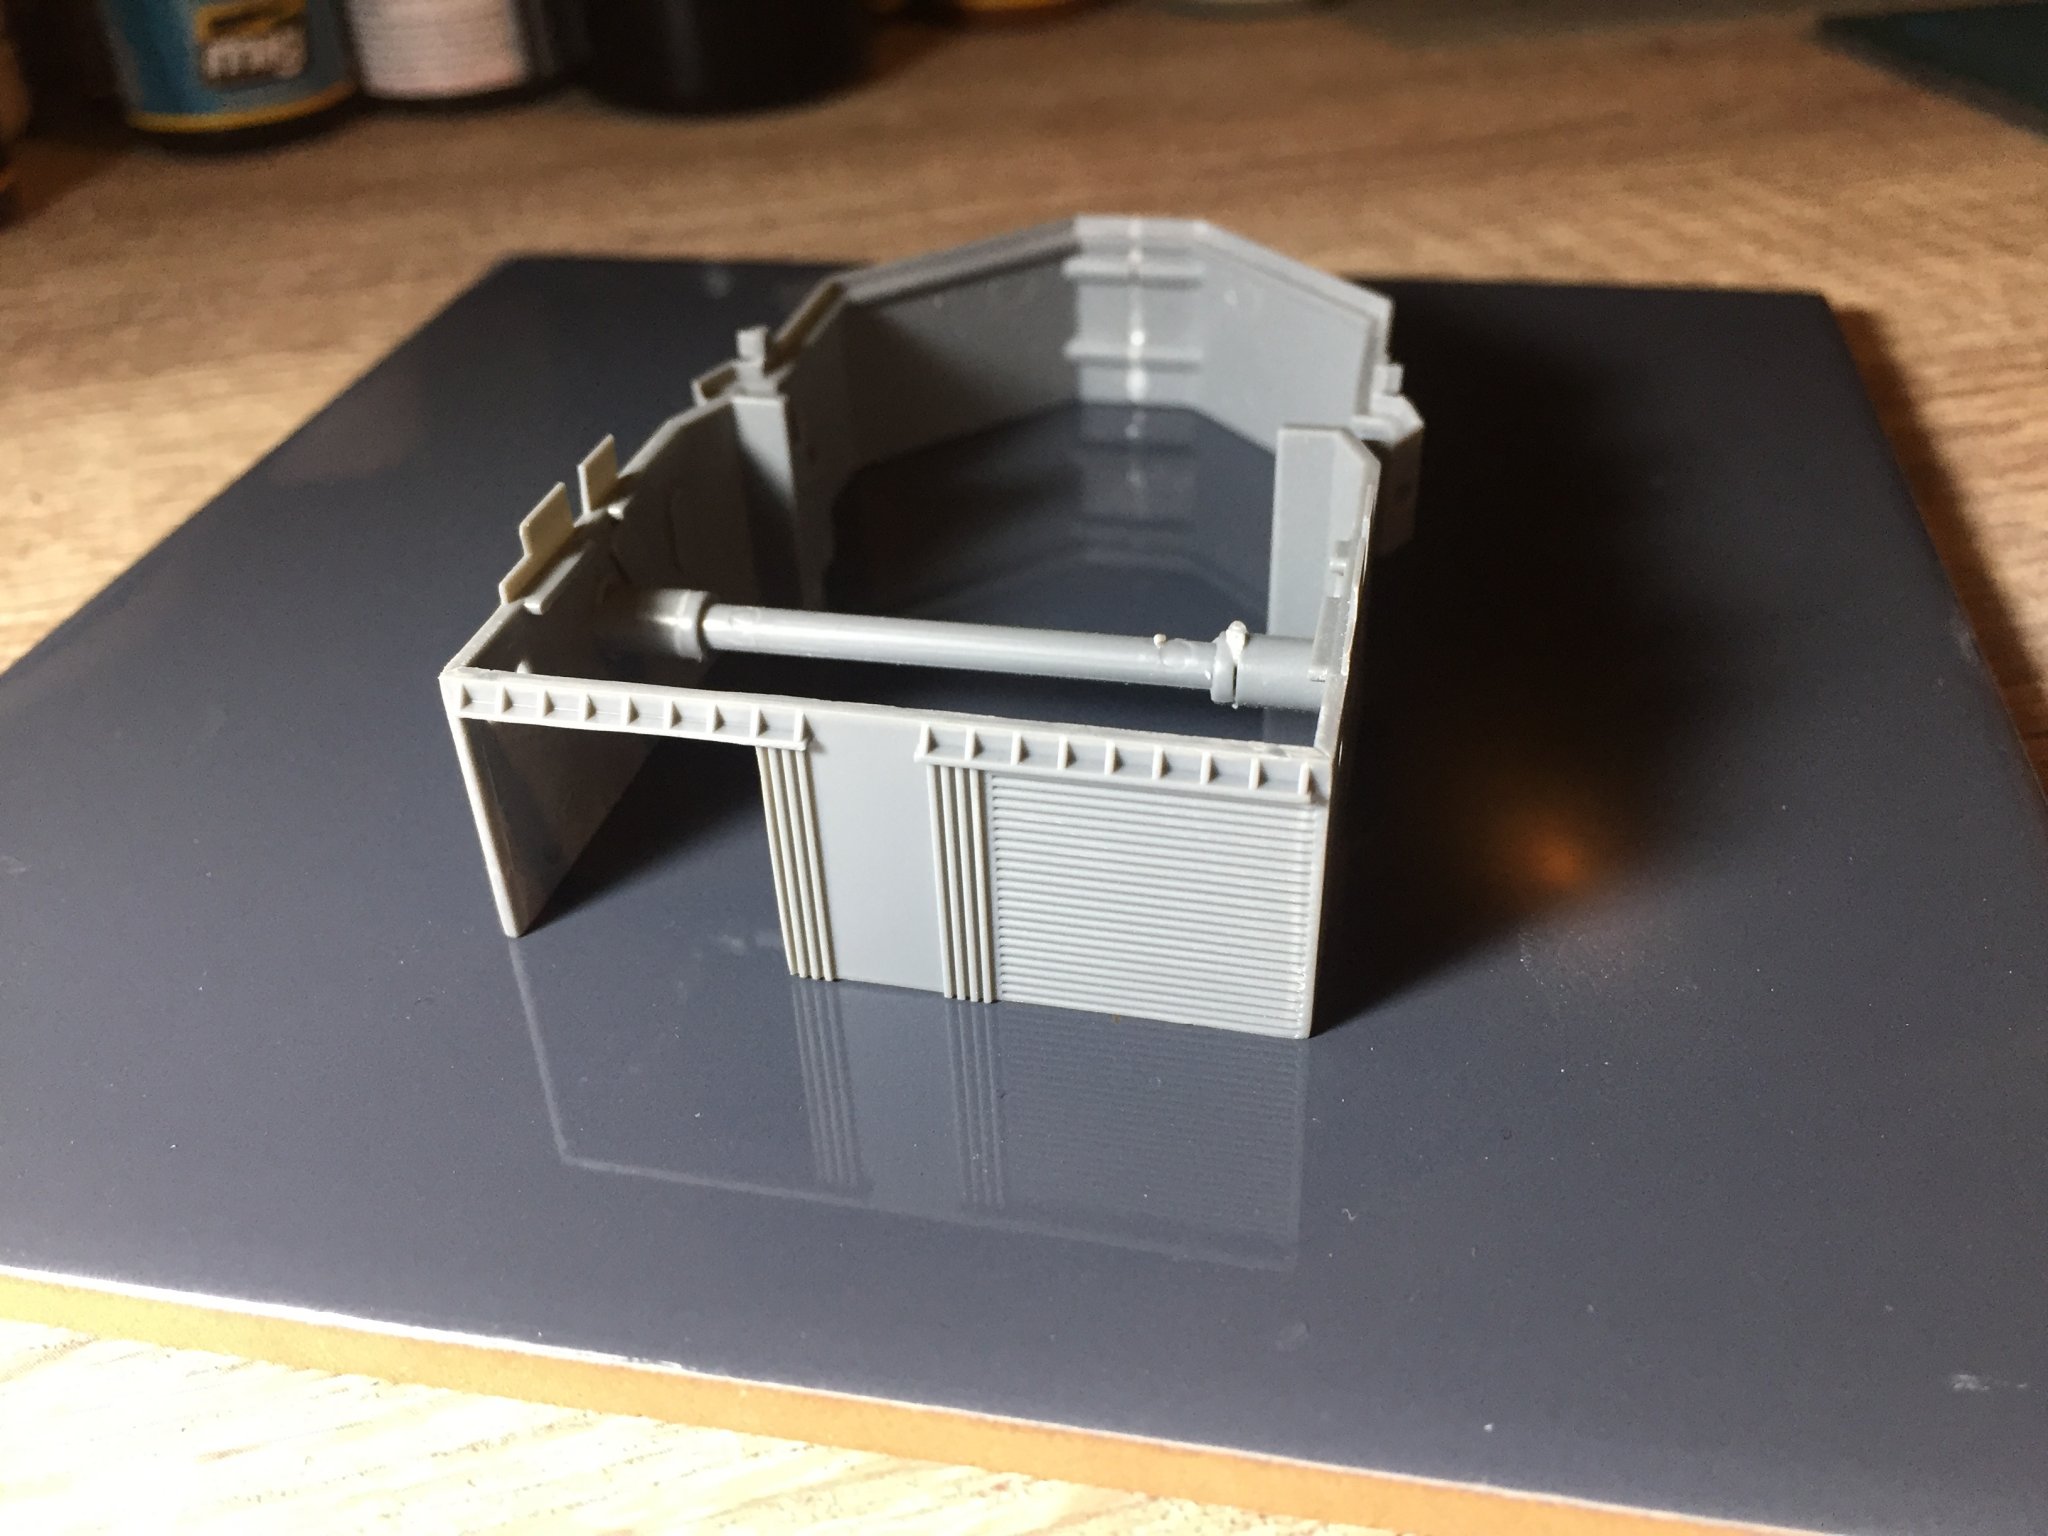
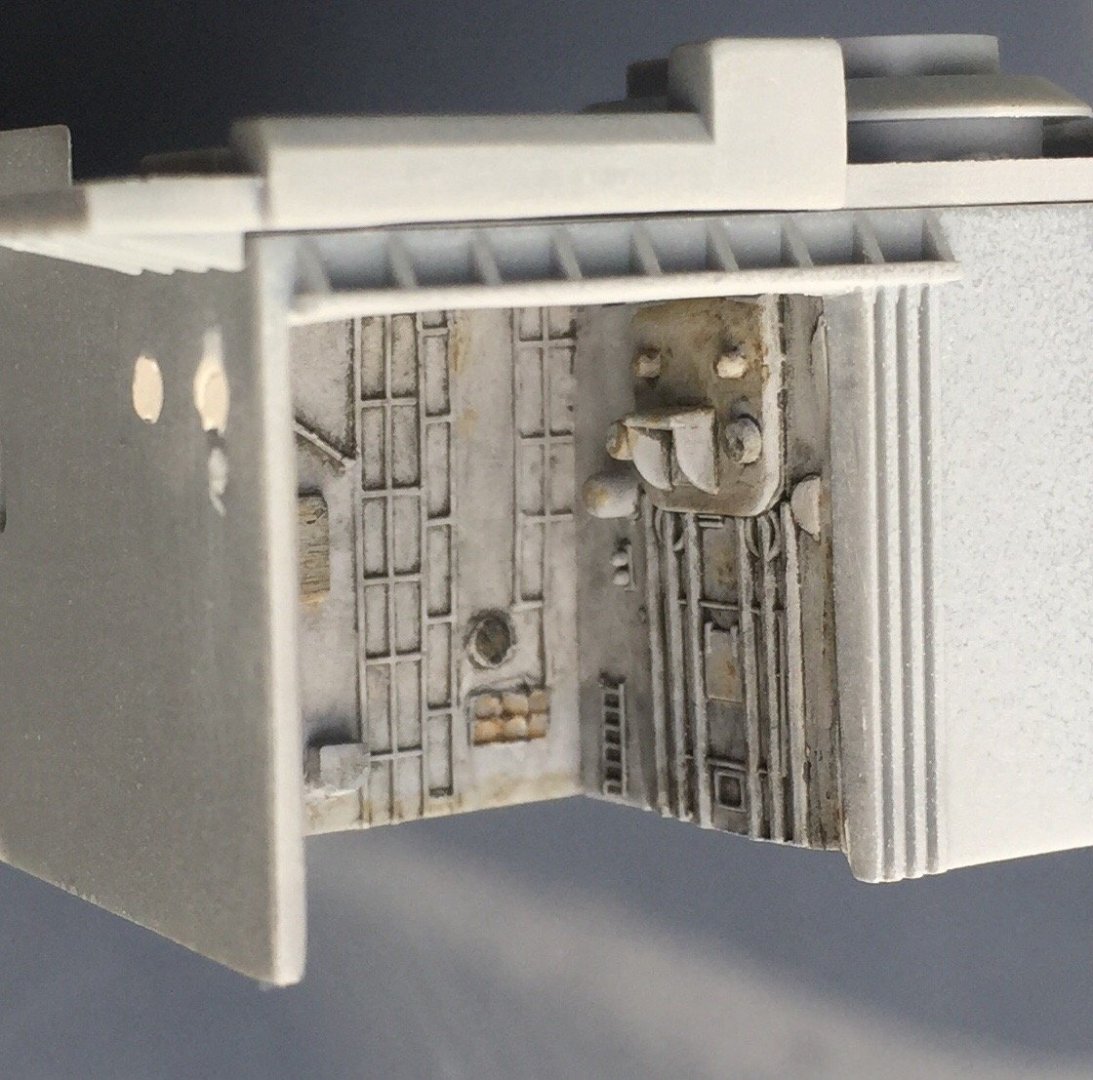
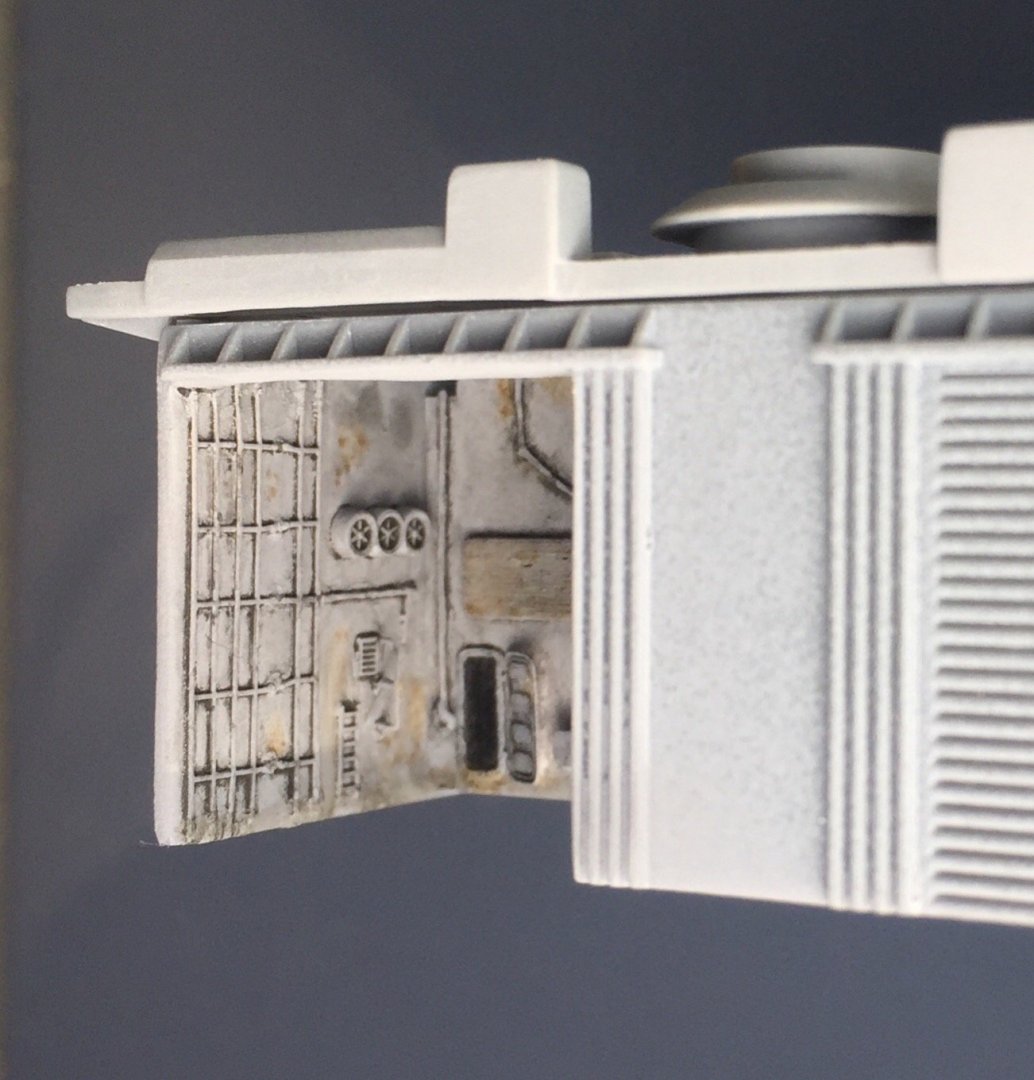
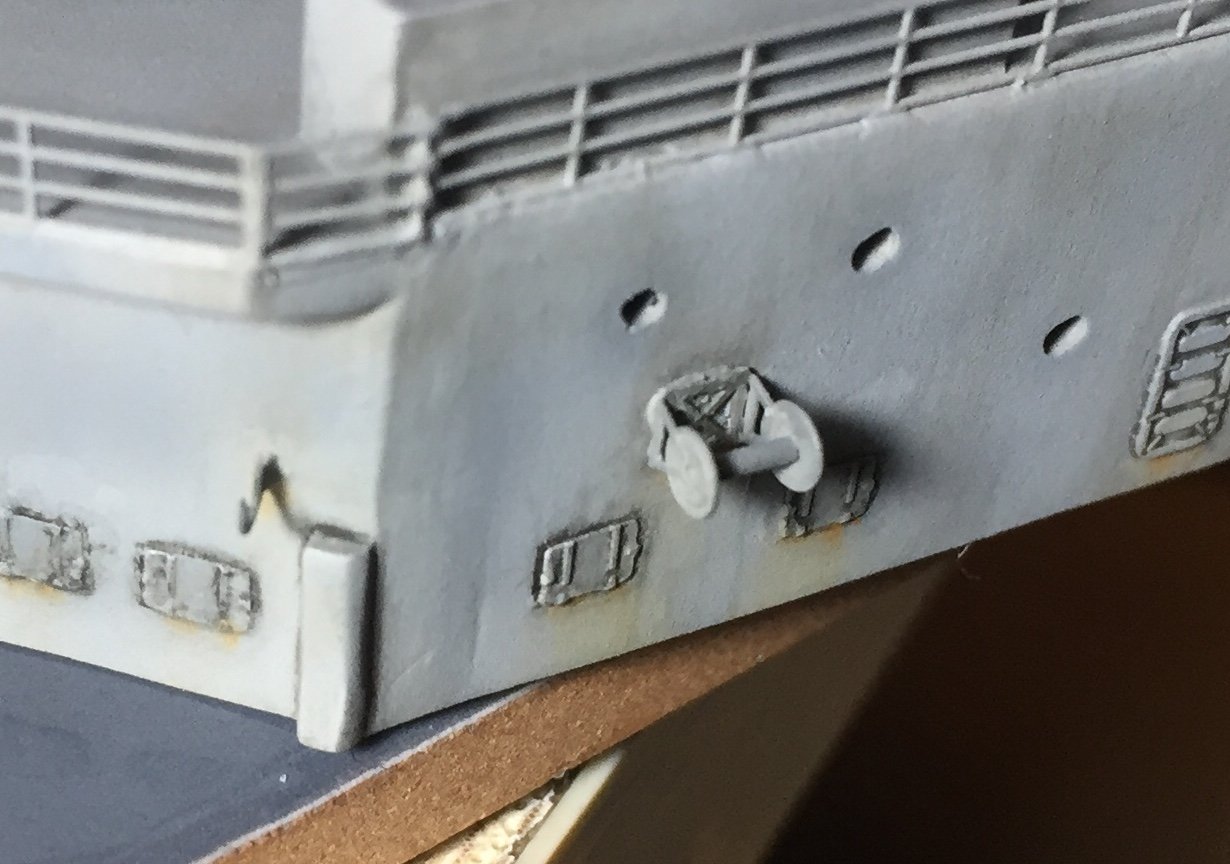
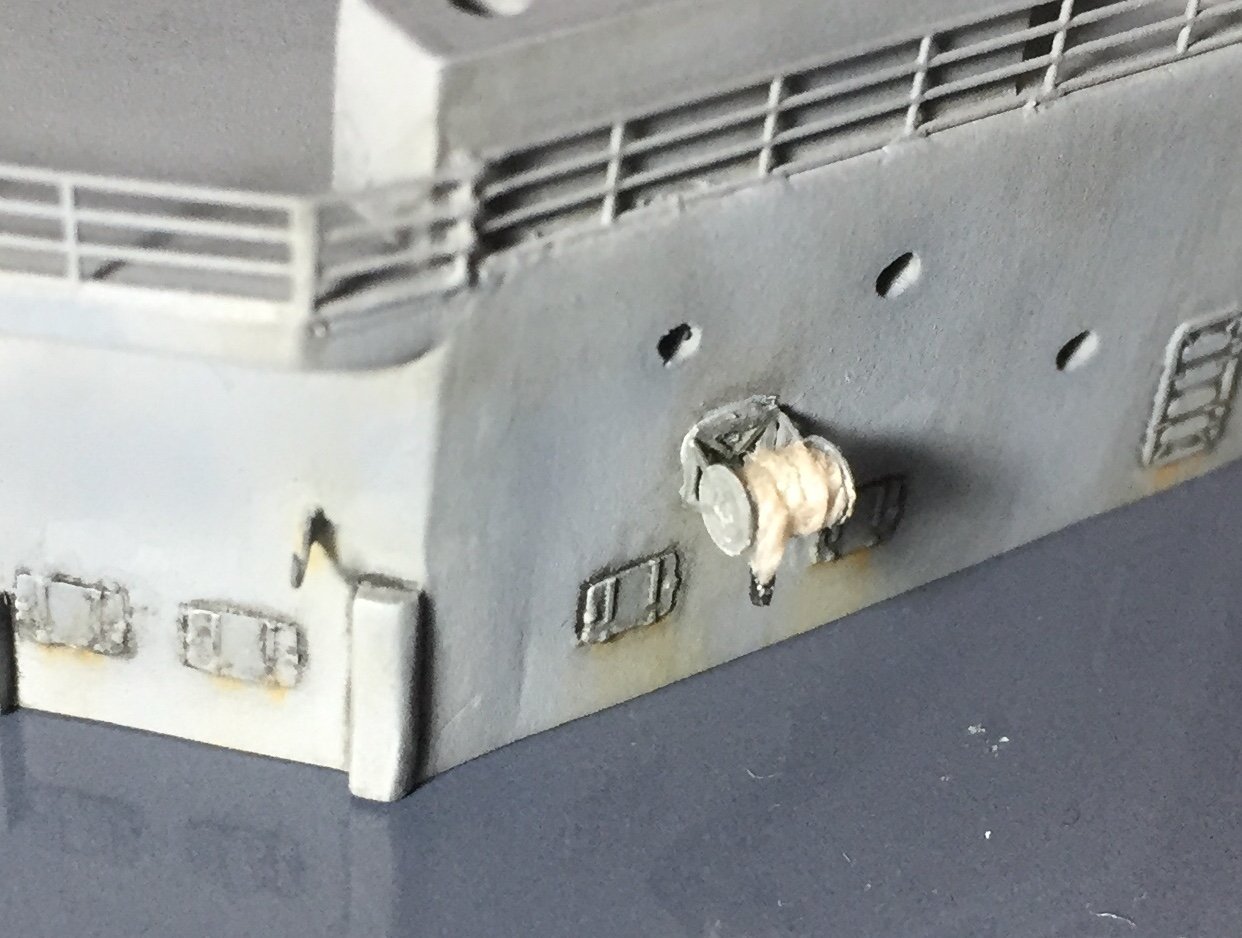
I had a whole afternoon to play around with the a/c hangar, it’s not full size due to internal supports that I wanted to keep intact and also I don’t know how big it is meant to be. But for what I’m after it works well seeing it will be mostly hidden.

- 211 replies
-
- 7
-
-
- prince of wales
- tamiya
- (and 2 more)
-
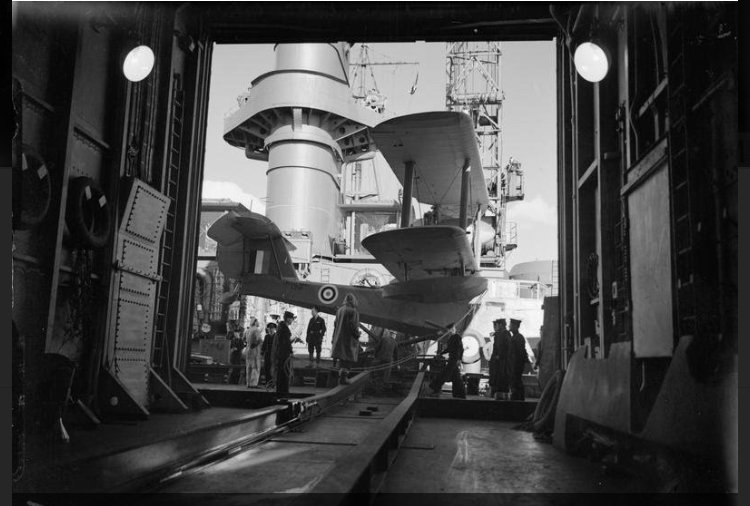
Sweet thanks, basically a typical closed in car port! this is the pic that got me thinking. And I guess I’m committed now!

- 211 replies
-
- 7
-
-
- prince of wales
- tamiya
- (and 2 more)
-
I’ve started on the main superstructure. I’m still waiting for a few supplies to arrive and one of them is a book that I got for a really low price. I found googling pictures quite hard with the new carrier having the same name... so maybe the book will help me with the details. Which is why my build has slowed down as I’m at a place where final decisions have to be made and I don’t know what to choose so I’m taking my time... hopefully it pays off. One of those details are the aircraft hangers. If the book has them in any detail I might have one door open. I quite like the idea of having some internals visible seeing all the doors are closed and an open one gives an idea that the inside isn’t just hollow. Any thoughts?
- 211 replies
-
- 5
-
-
- prince of wales
- tamiya
- (and 2 more)
-
Hey, thanks for the feed back. Its right on point too as last weekend I unrigged the crane and actually ordered some EZline... so it’s already on the way. Any other recommendations feel free to hit me up, I’m all ears. When end I was a teenager made lots of model aircraft so picked up techniques from there but didn’t have paints for ages. Then last year decided I needed a hobby so got an airbrush and a tank and plane model and just used them to practice layering and painting and then weathering. Looked at lots of tips online and buildlogs on here showing step by step painting and followed along. Seeing RGL’s Yamato build finally got me to try one for myself... and here I am
- 211 replies
-
- 8
-
-
- prince of wales
- tamiya
- (and 2 more)
-
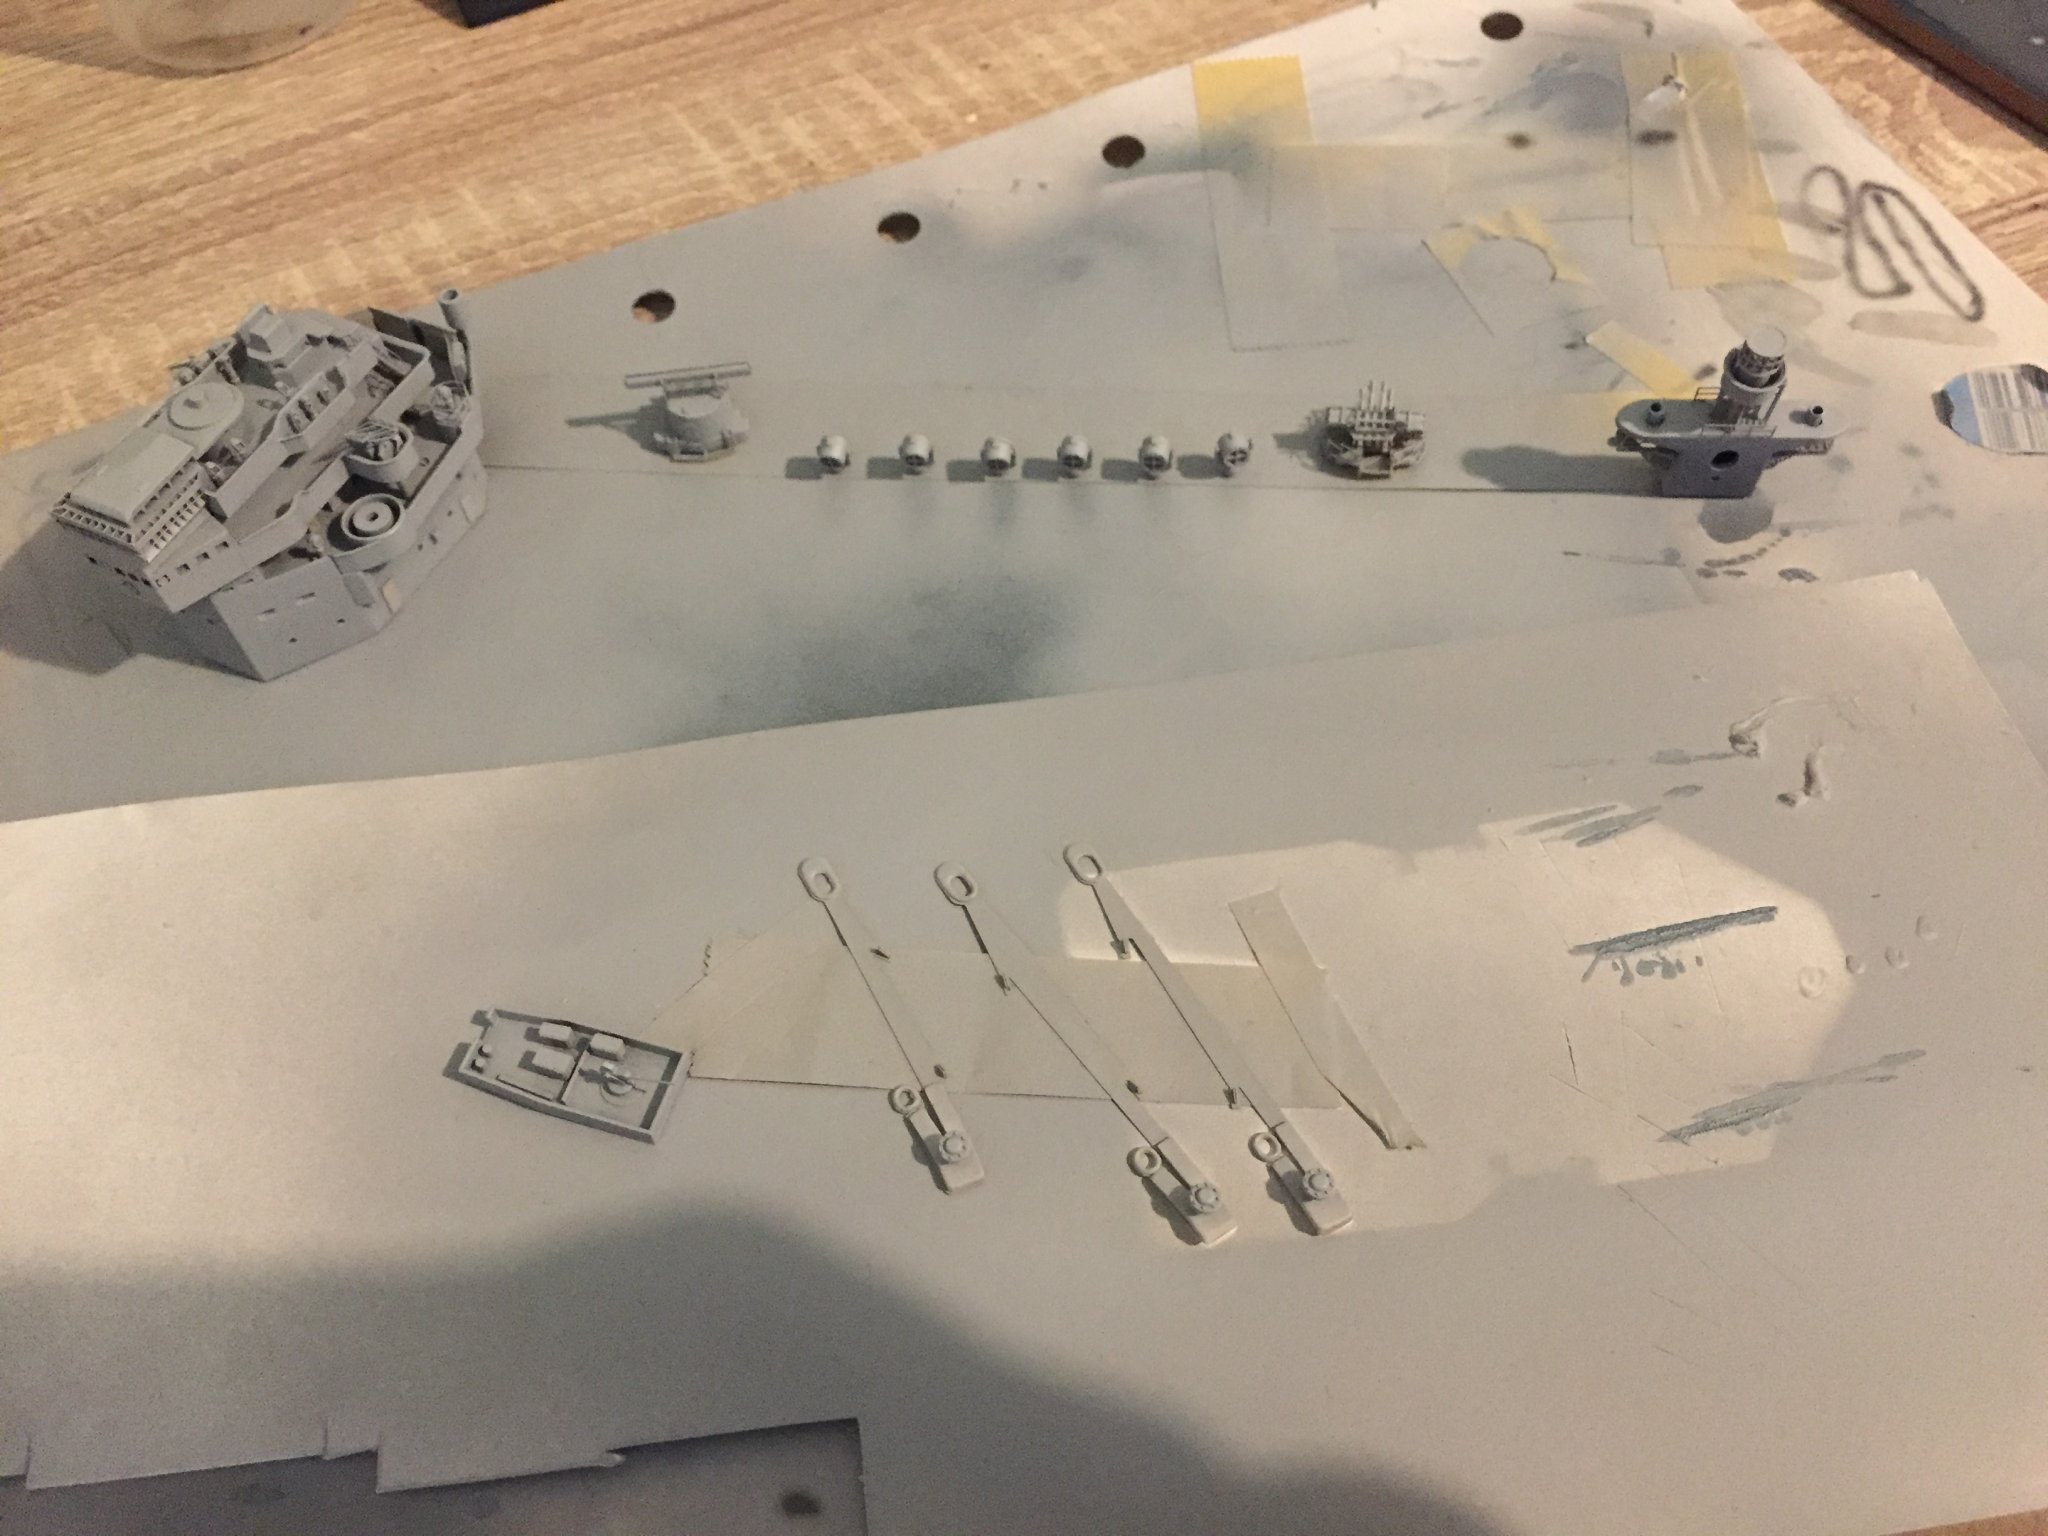
Got a lot of finishing touches done. Once the deck is finished I’ll be able to glue at least half the parts straight on. Just haven’t started on the forward superstructure yet so plenty to do! Some before and afters. As usual a lot of the details can’t be seen at a distance but do add a nice effect to the whole rather than being a feature.

- 211 replies
-
- 6
-
-
- prince of wales
- tamiya
- (and 2 more)
-
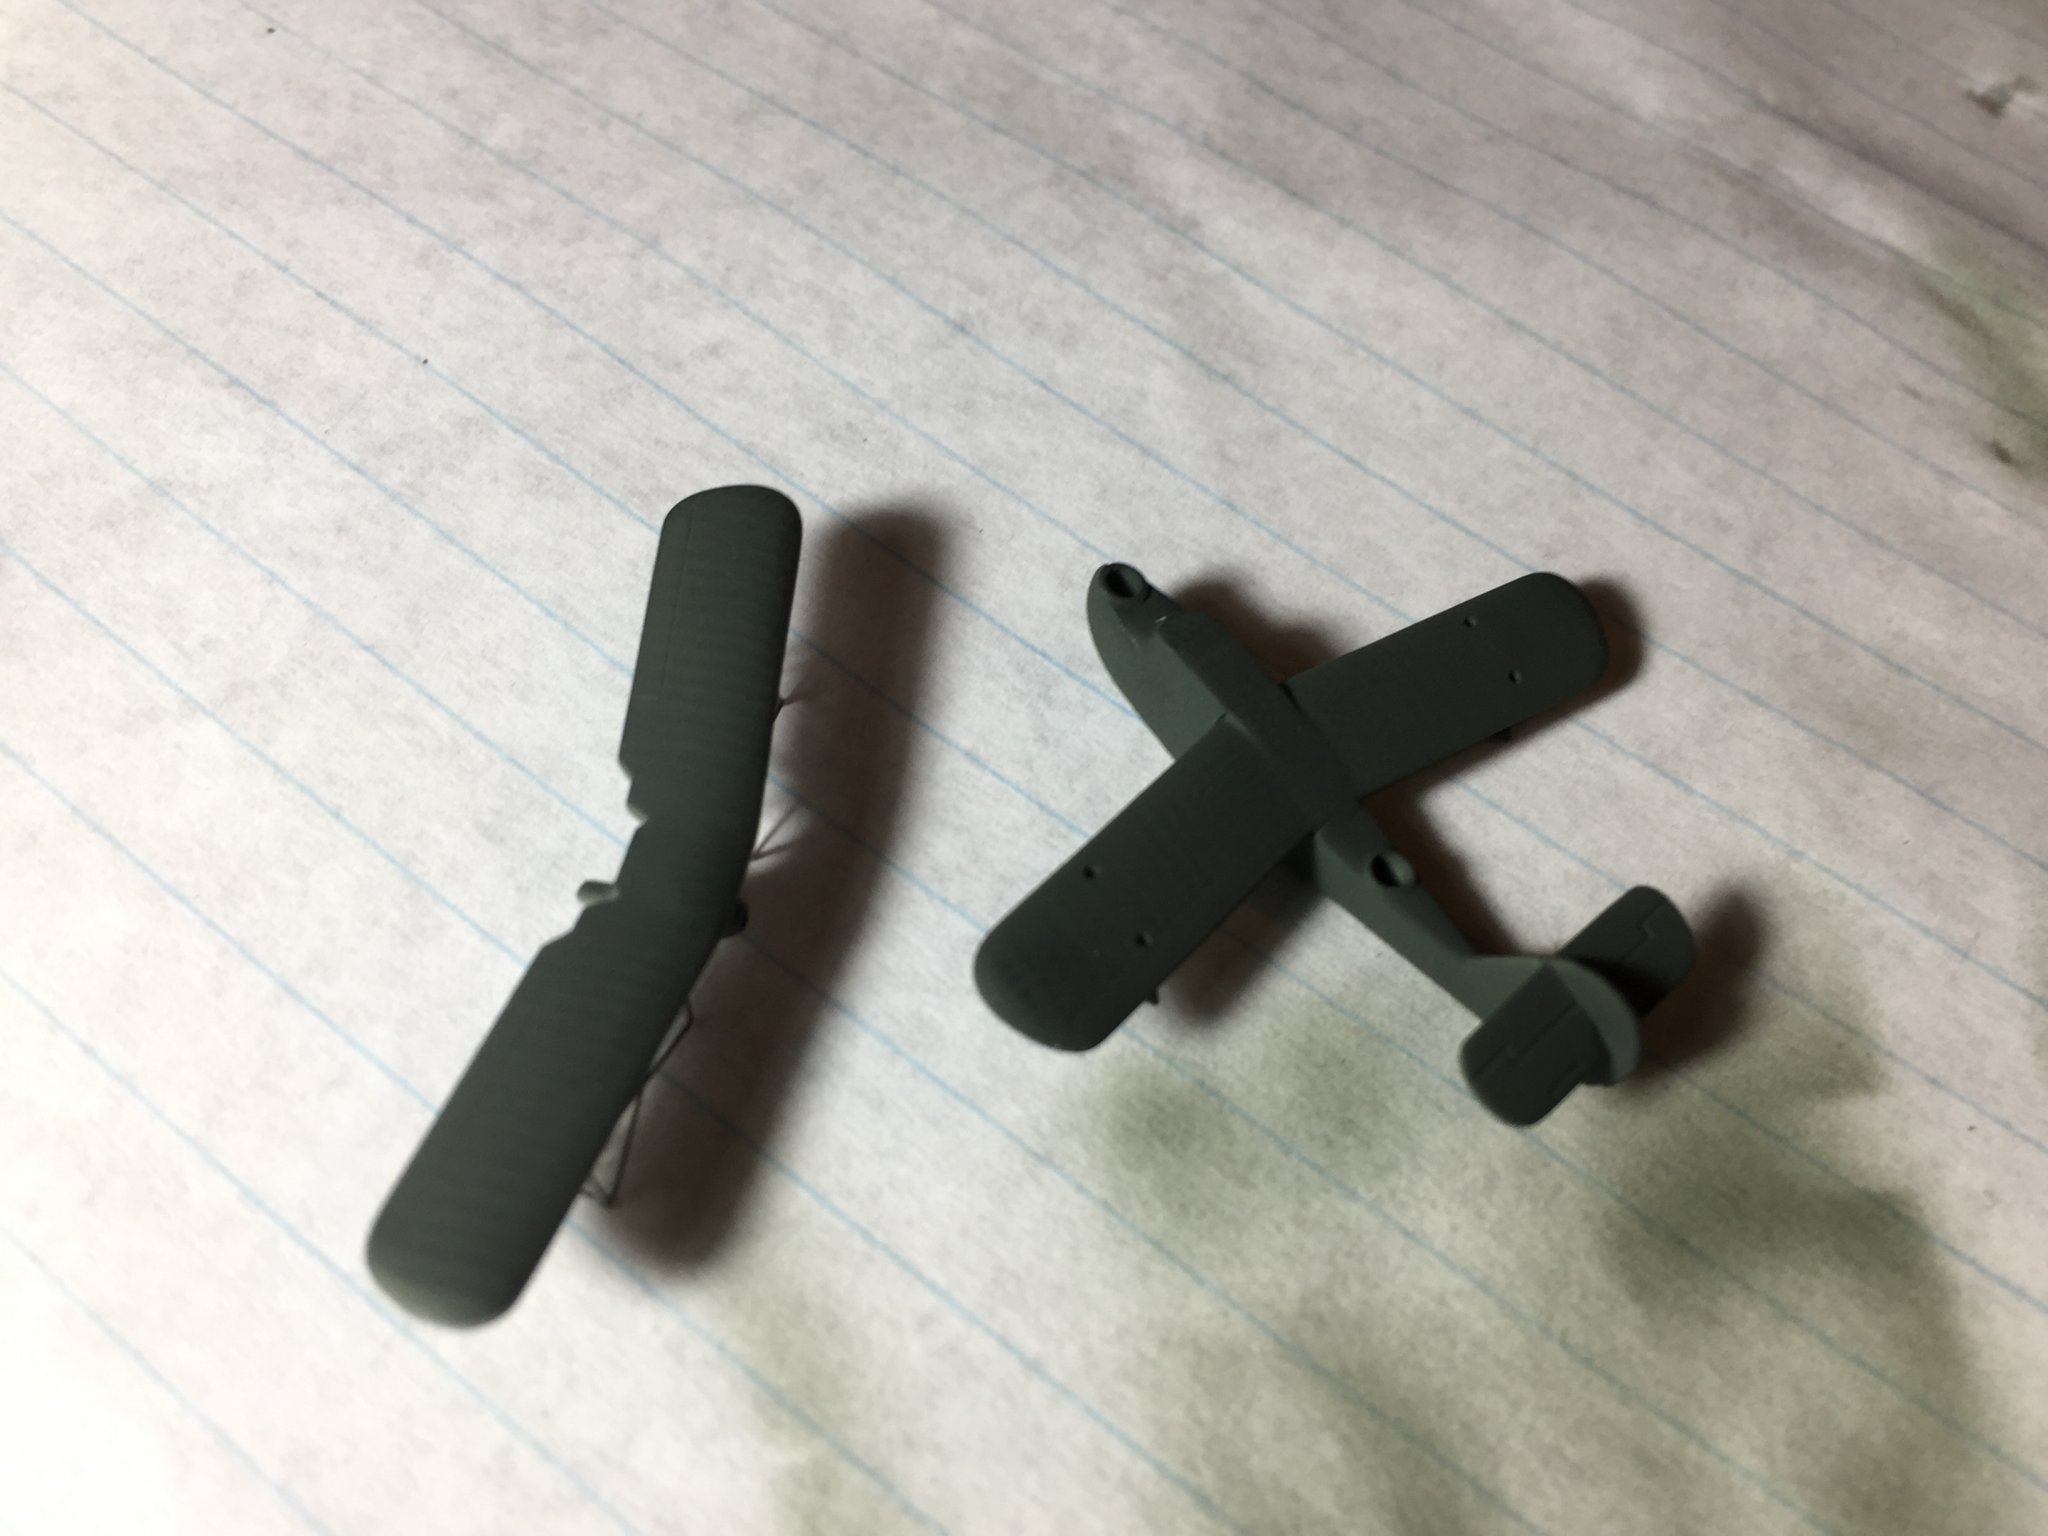
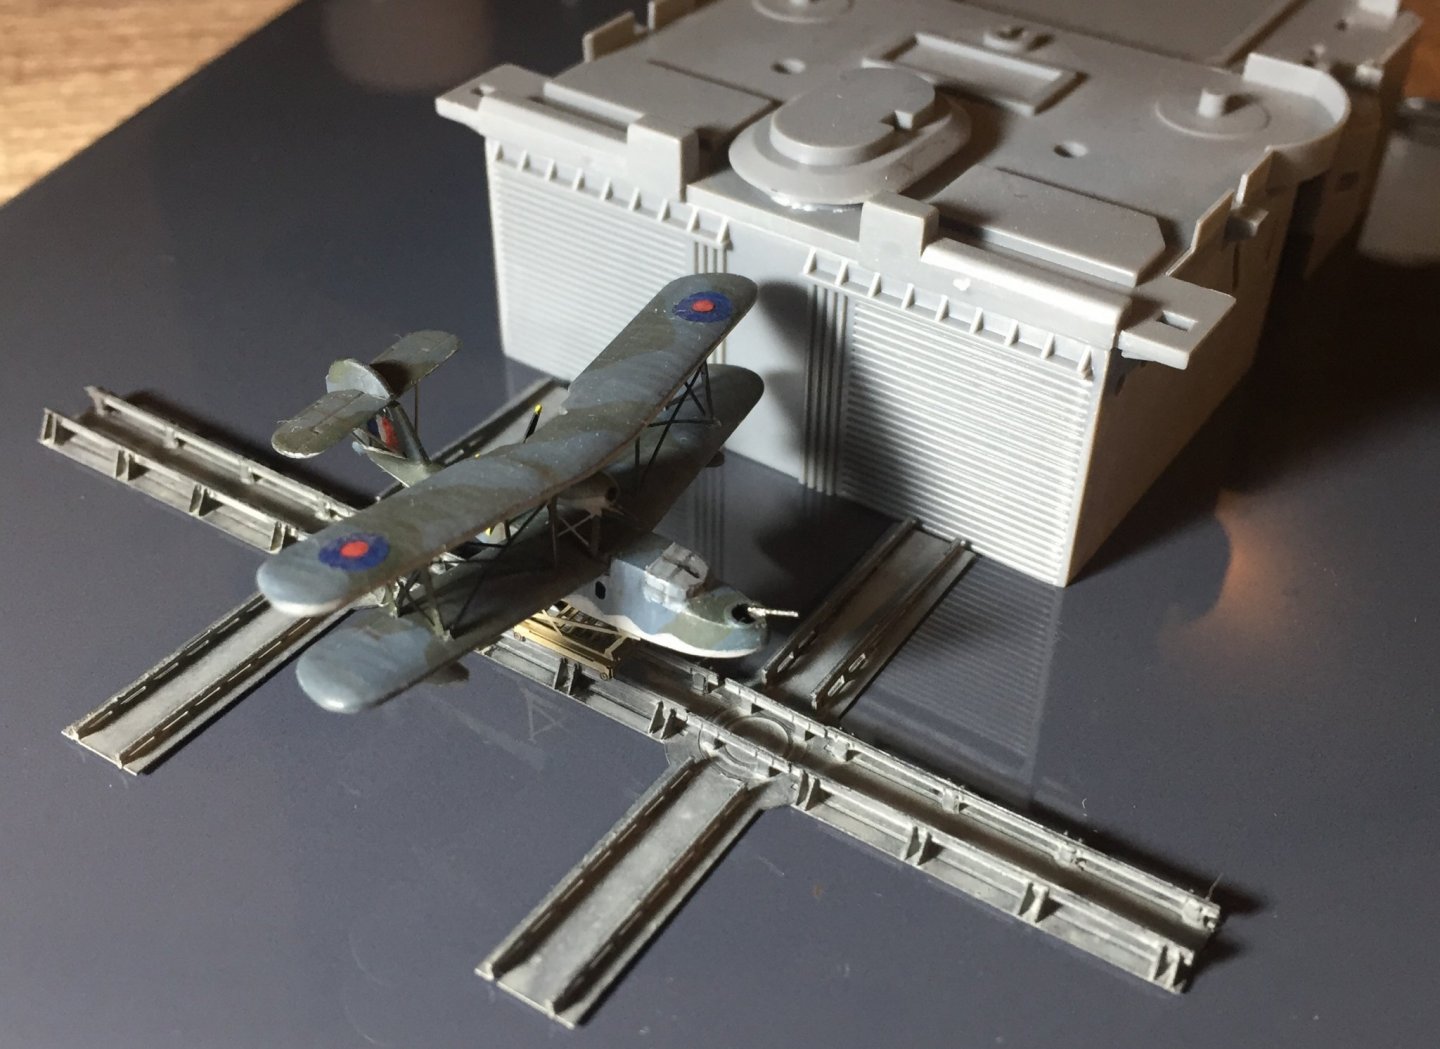
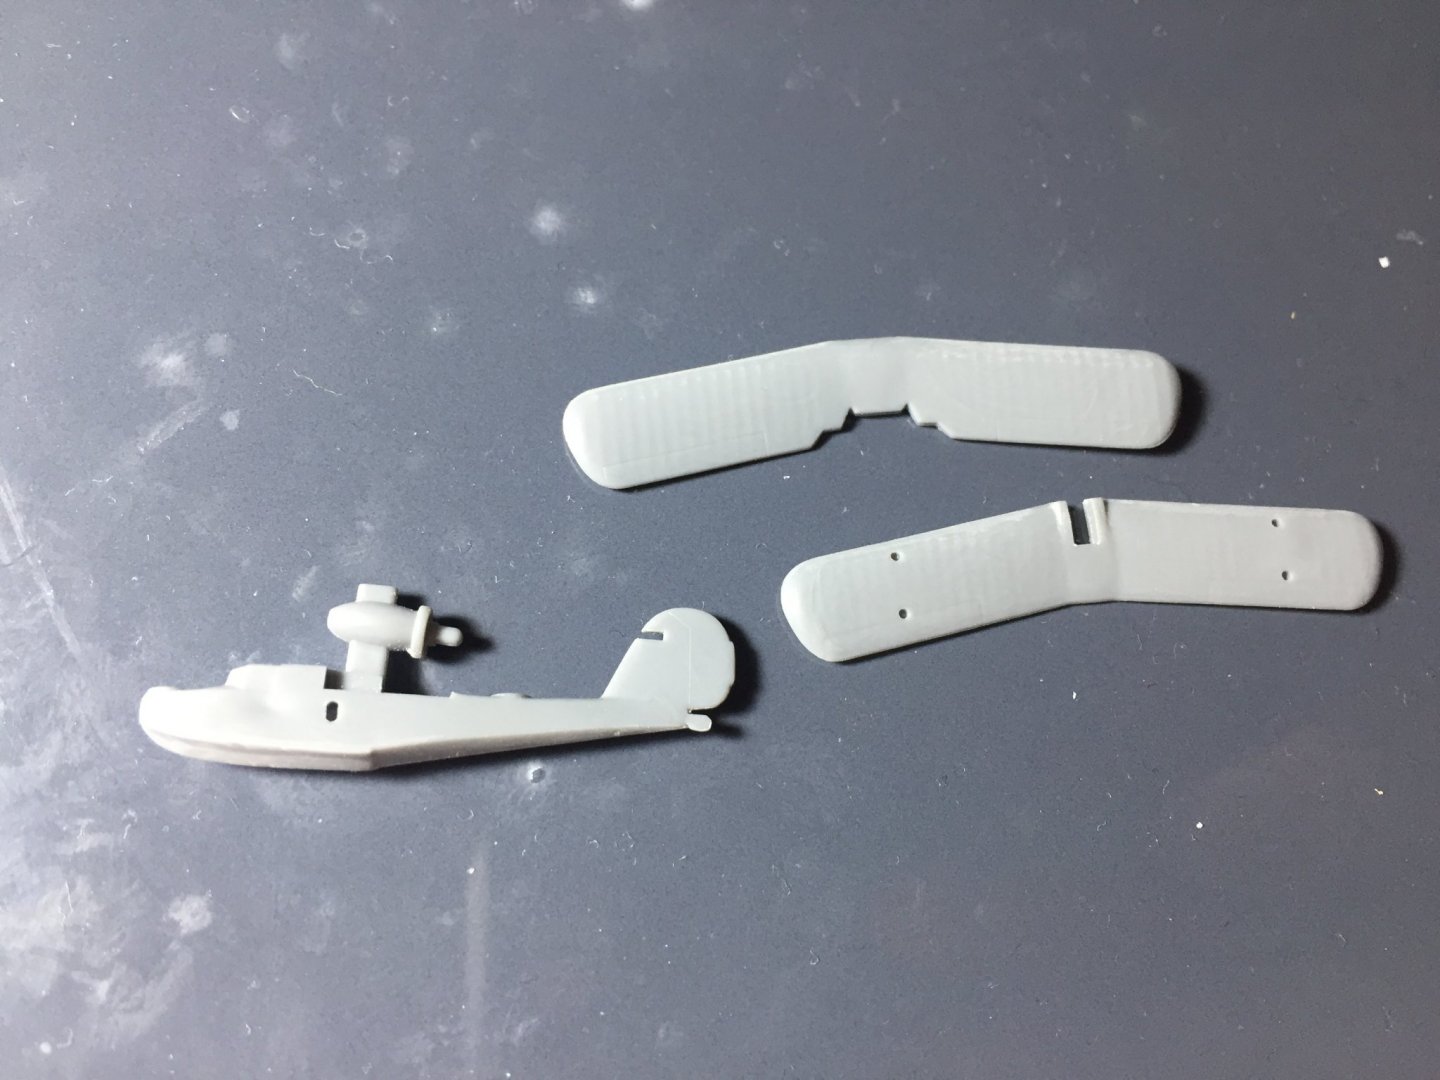
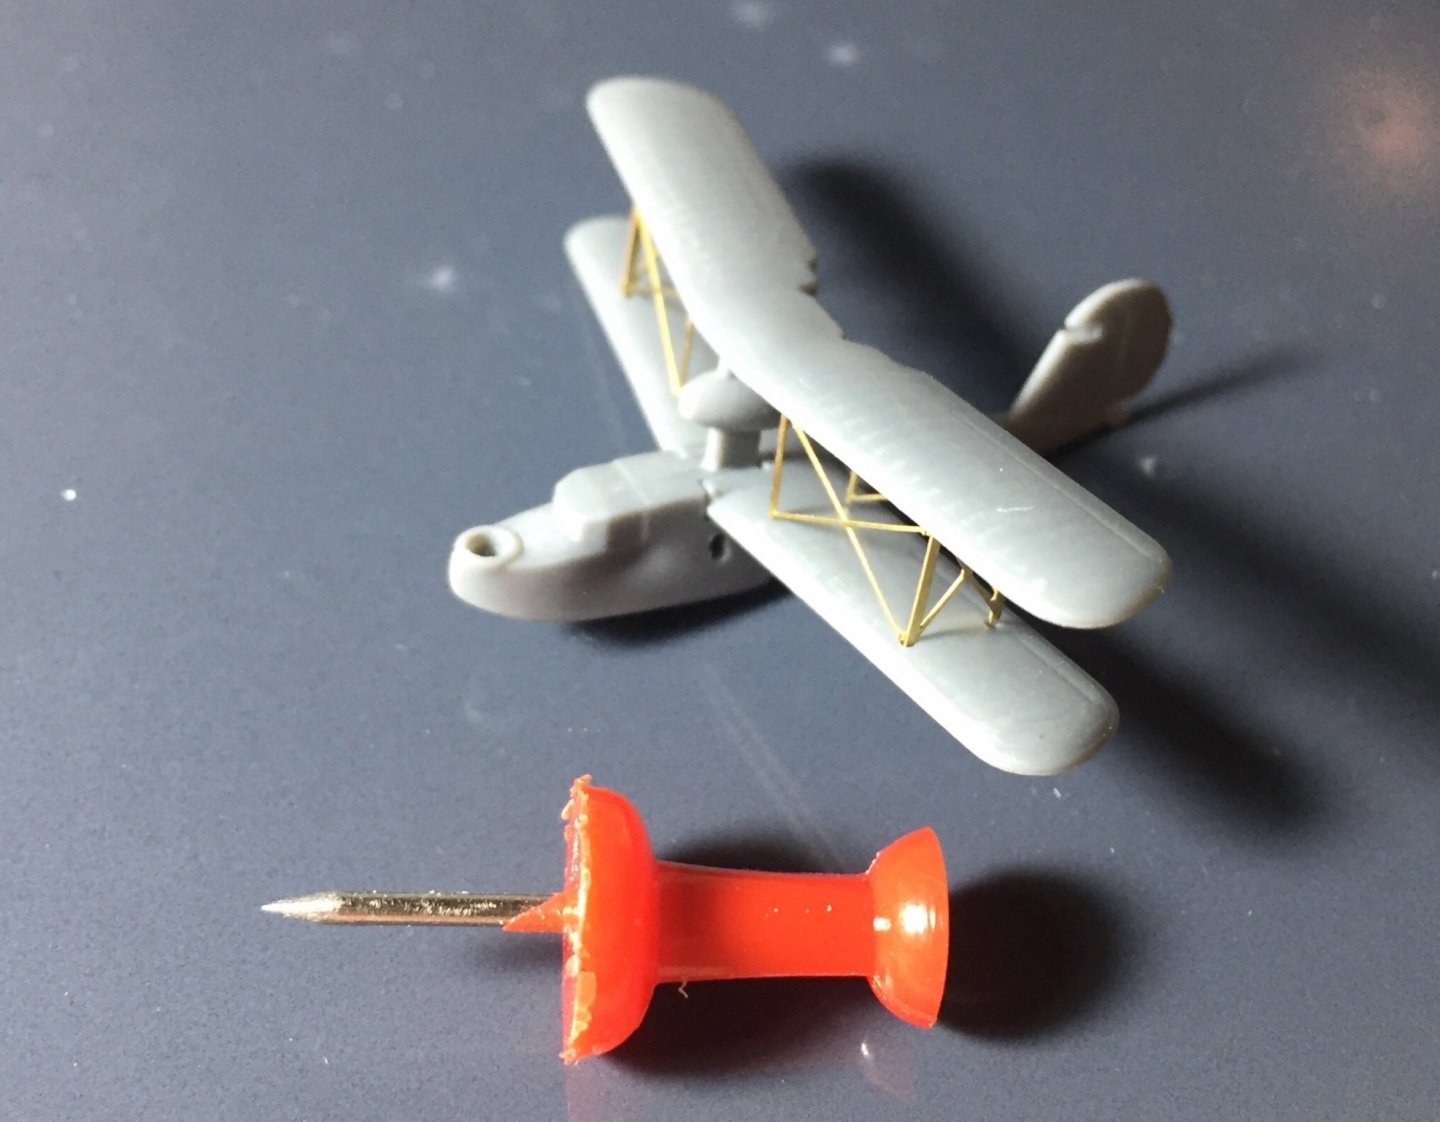
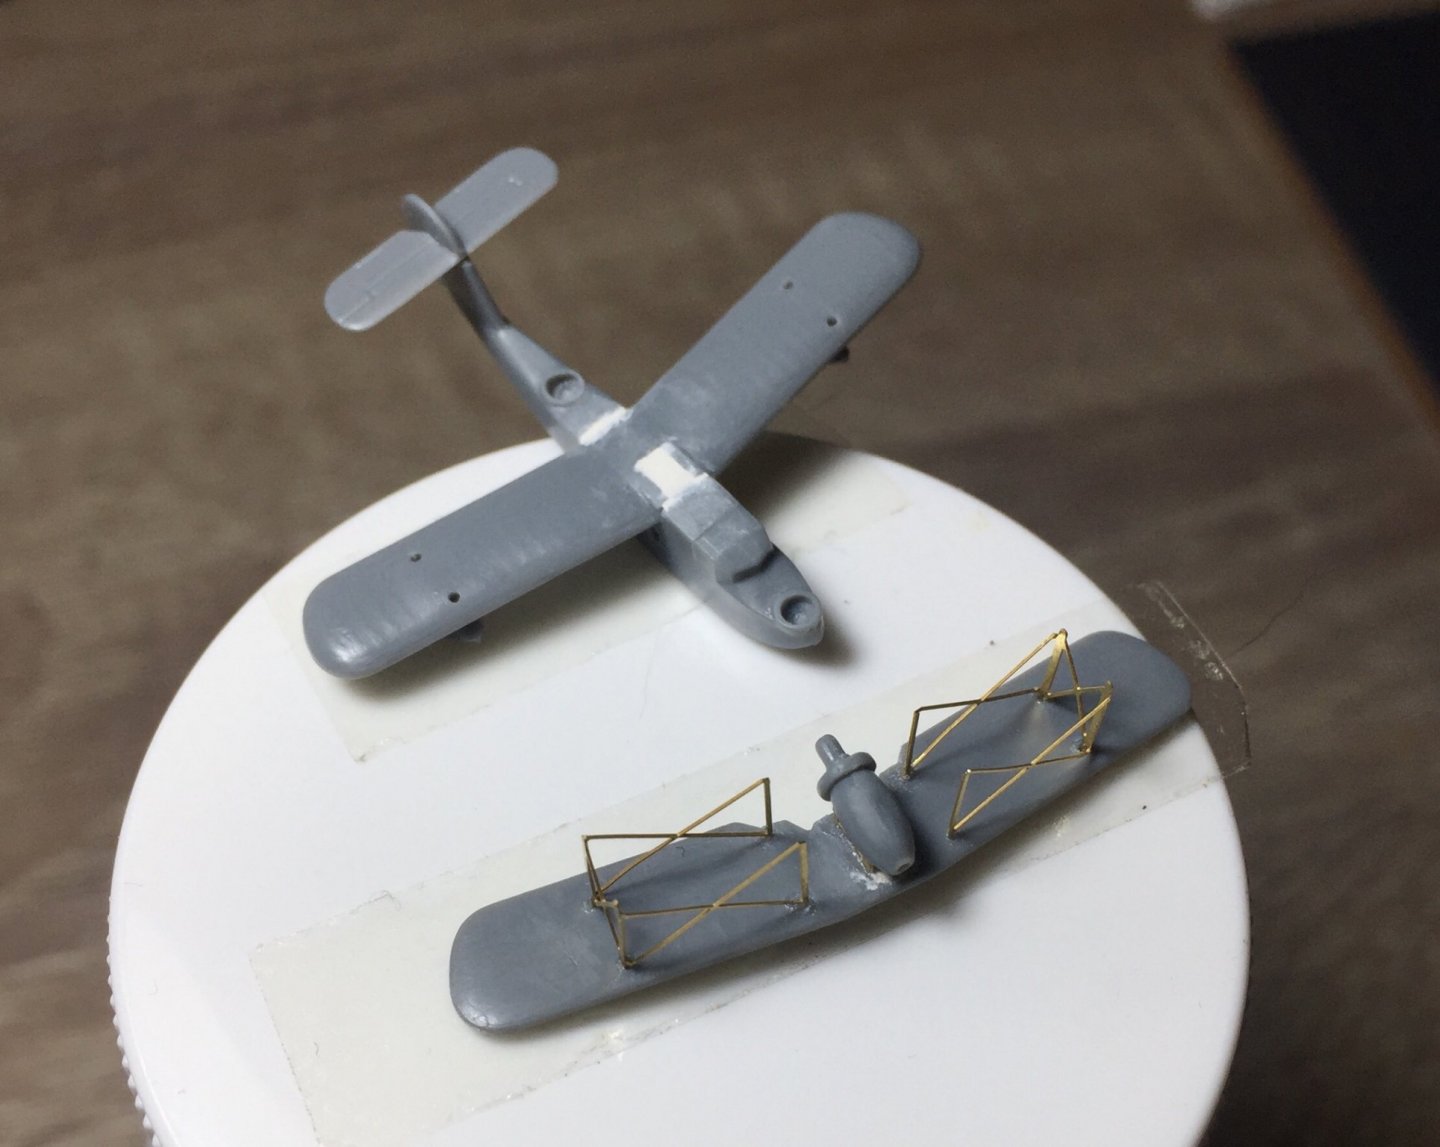
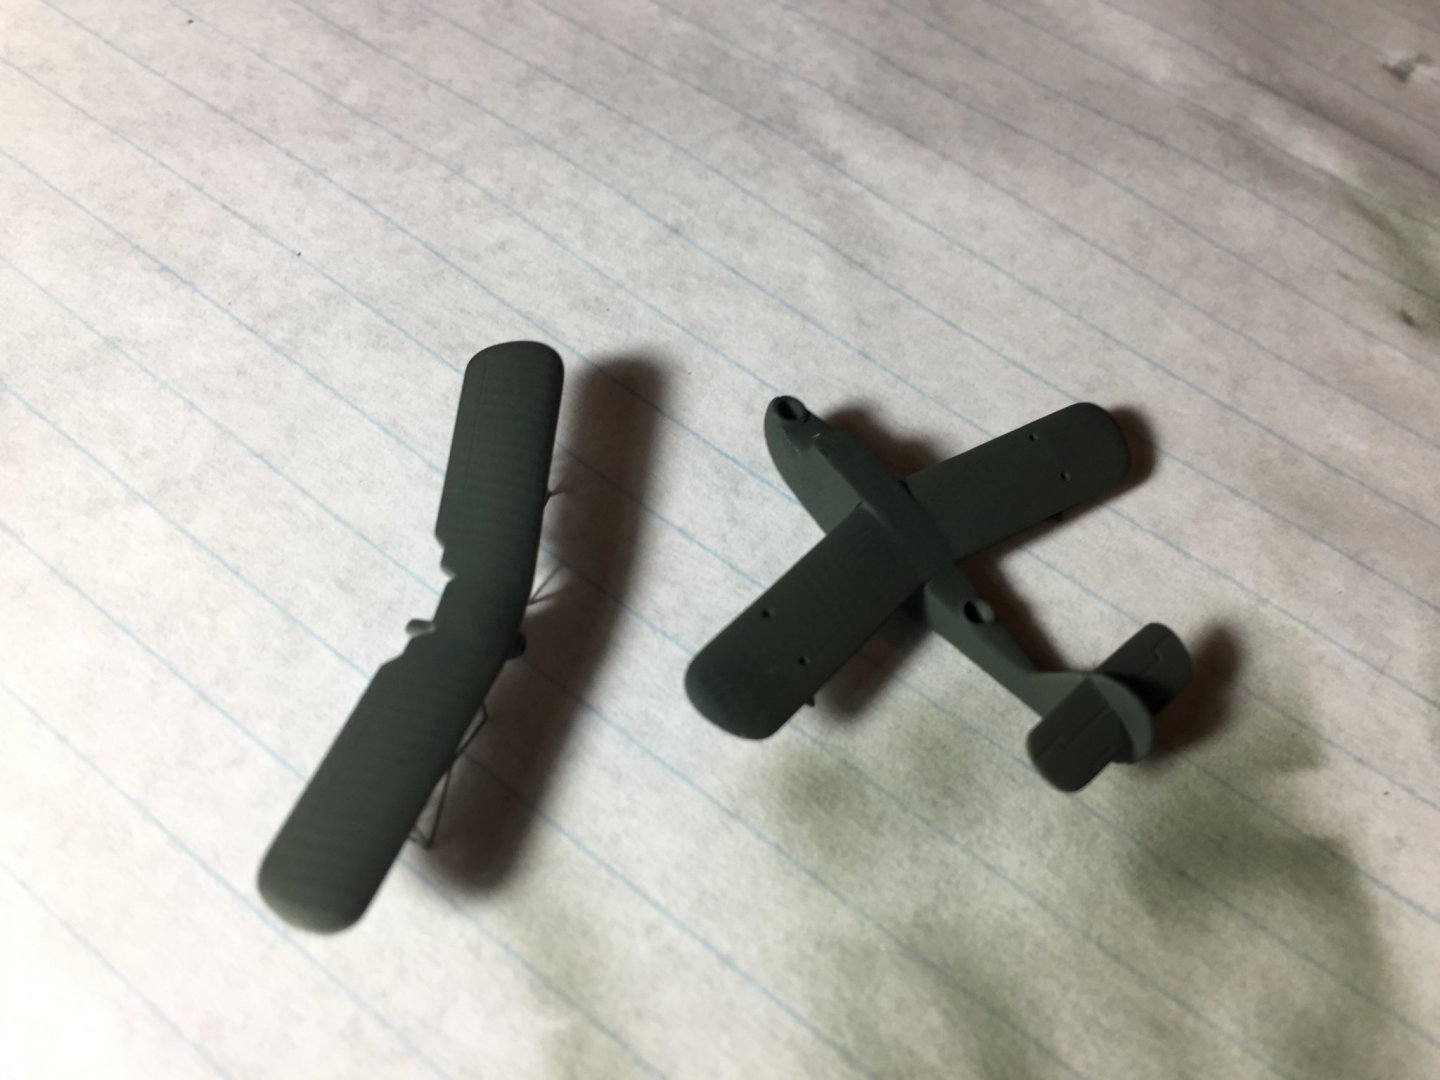
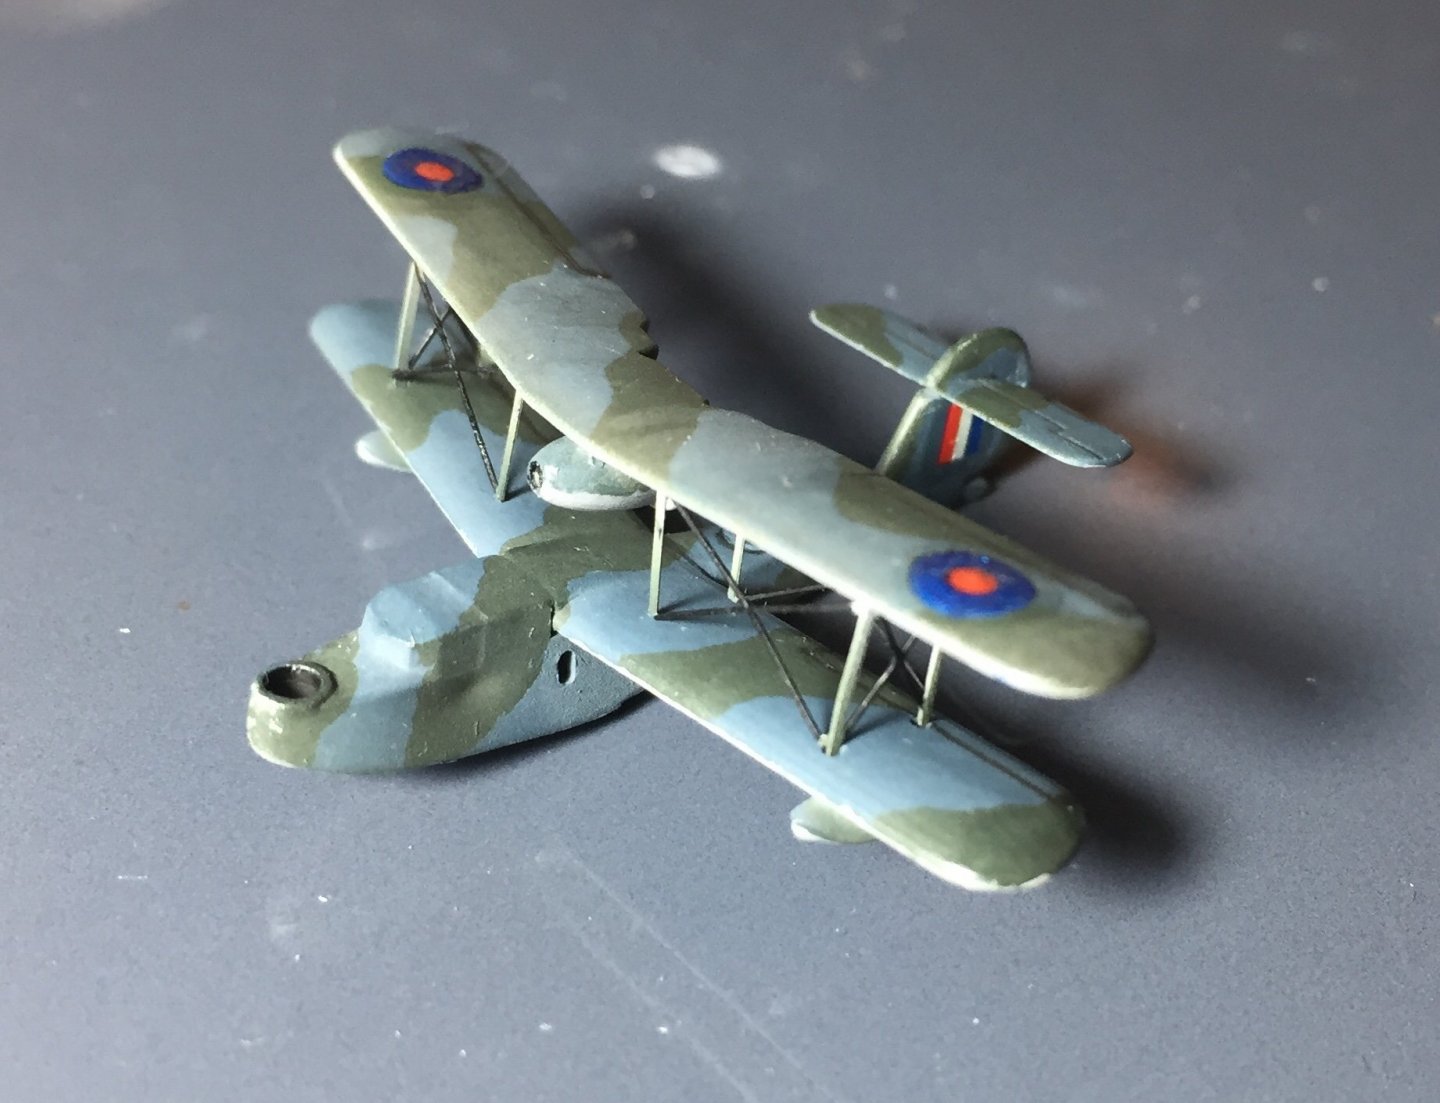
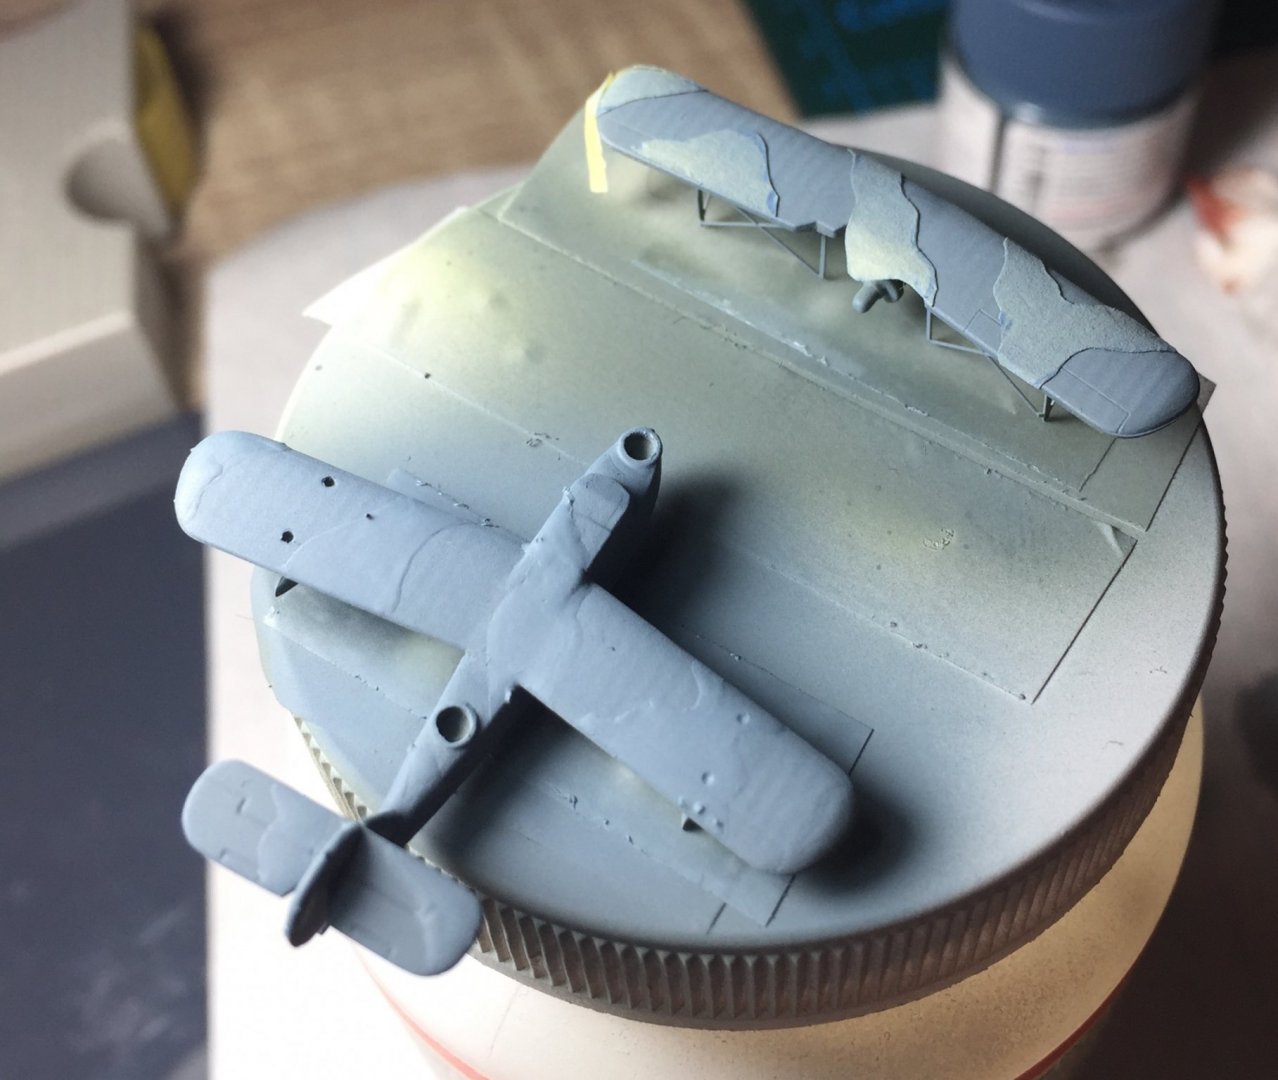
Hello all, hope you are all well. Thanks for the comments and encouragement along the way! I’m back from my holiday recharged and will slowly get back into my build. decided to make the Walrus as aviation is my job, will help me get back into the swing of things, it’s quite fun if not abit small! Took a few days of planning how I’d do it. Customised a few things to add that extra bit of detail, like drilling out the 2 gun stations and mounting the engine more accurately. slowly built up from there with any spare time I had its not finished yet but a good chuck is done. im quite happy with how it’s coming along. Some of the decals were pretty poor quality so had to add some paint to get them acceptable. Not sure how I’ll do the canopy frames yet but Ive a feeling getting them right will make or break it. once it’s totally complete I’ll post a picture.

- 211 replies
-
- 8
-
-
- prince of wales
- tamiya
- (and 2 more)
-
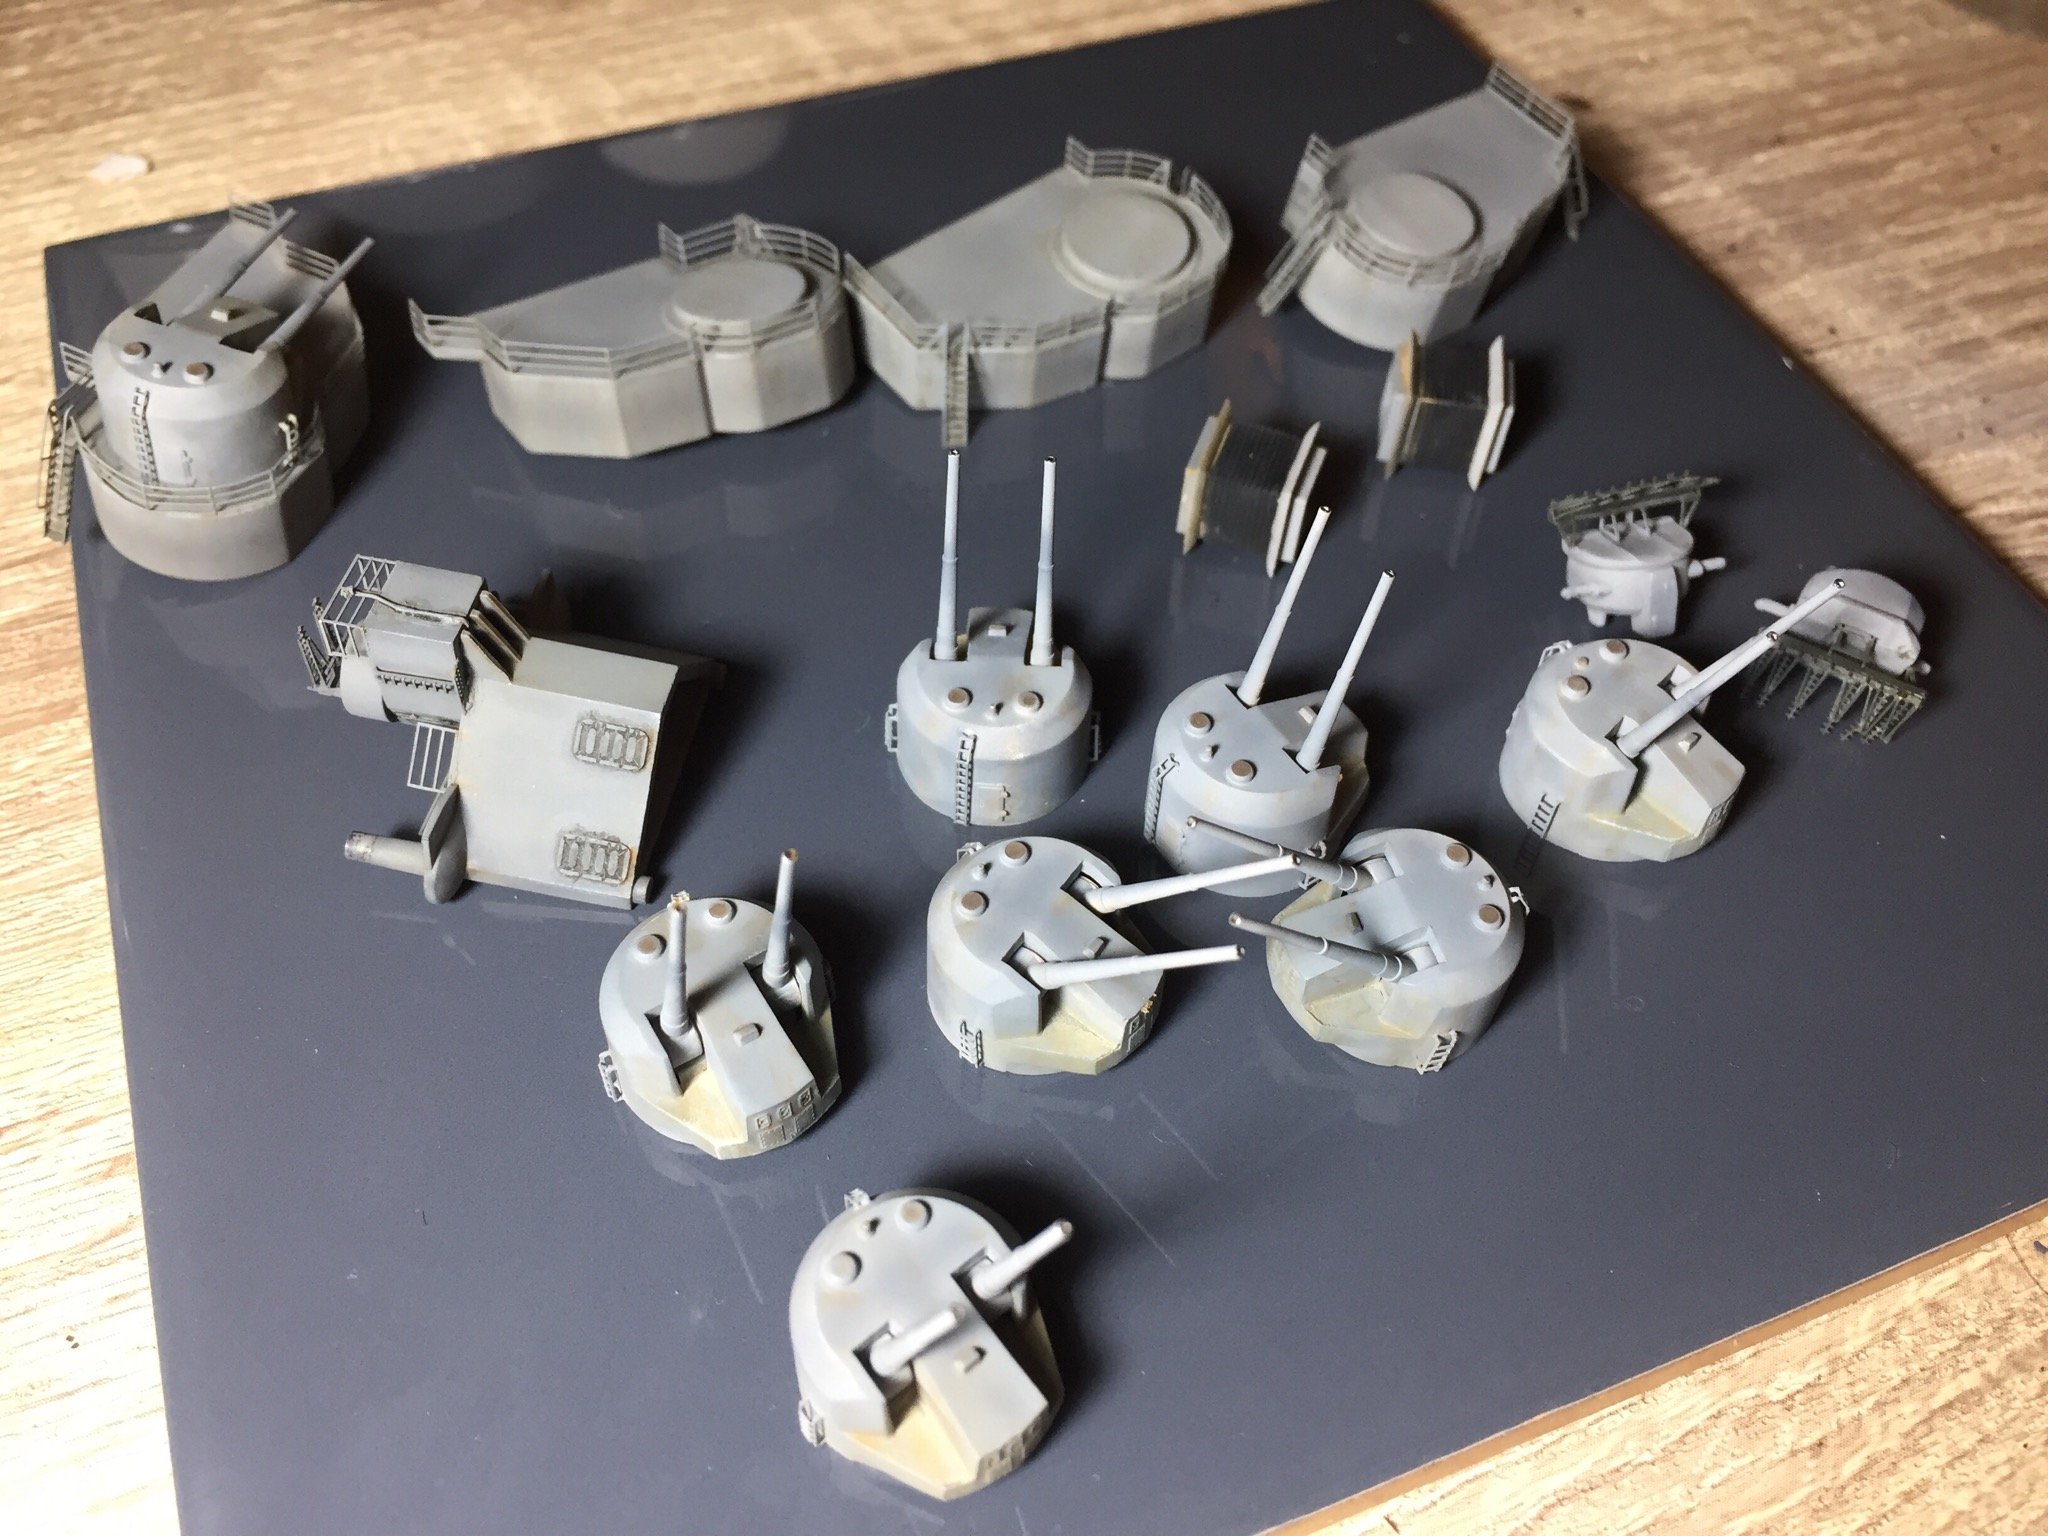
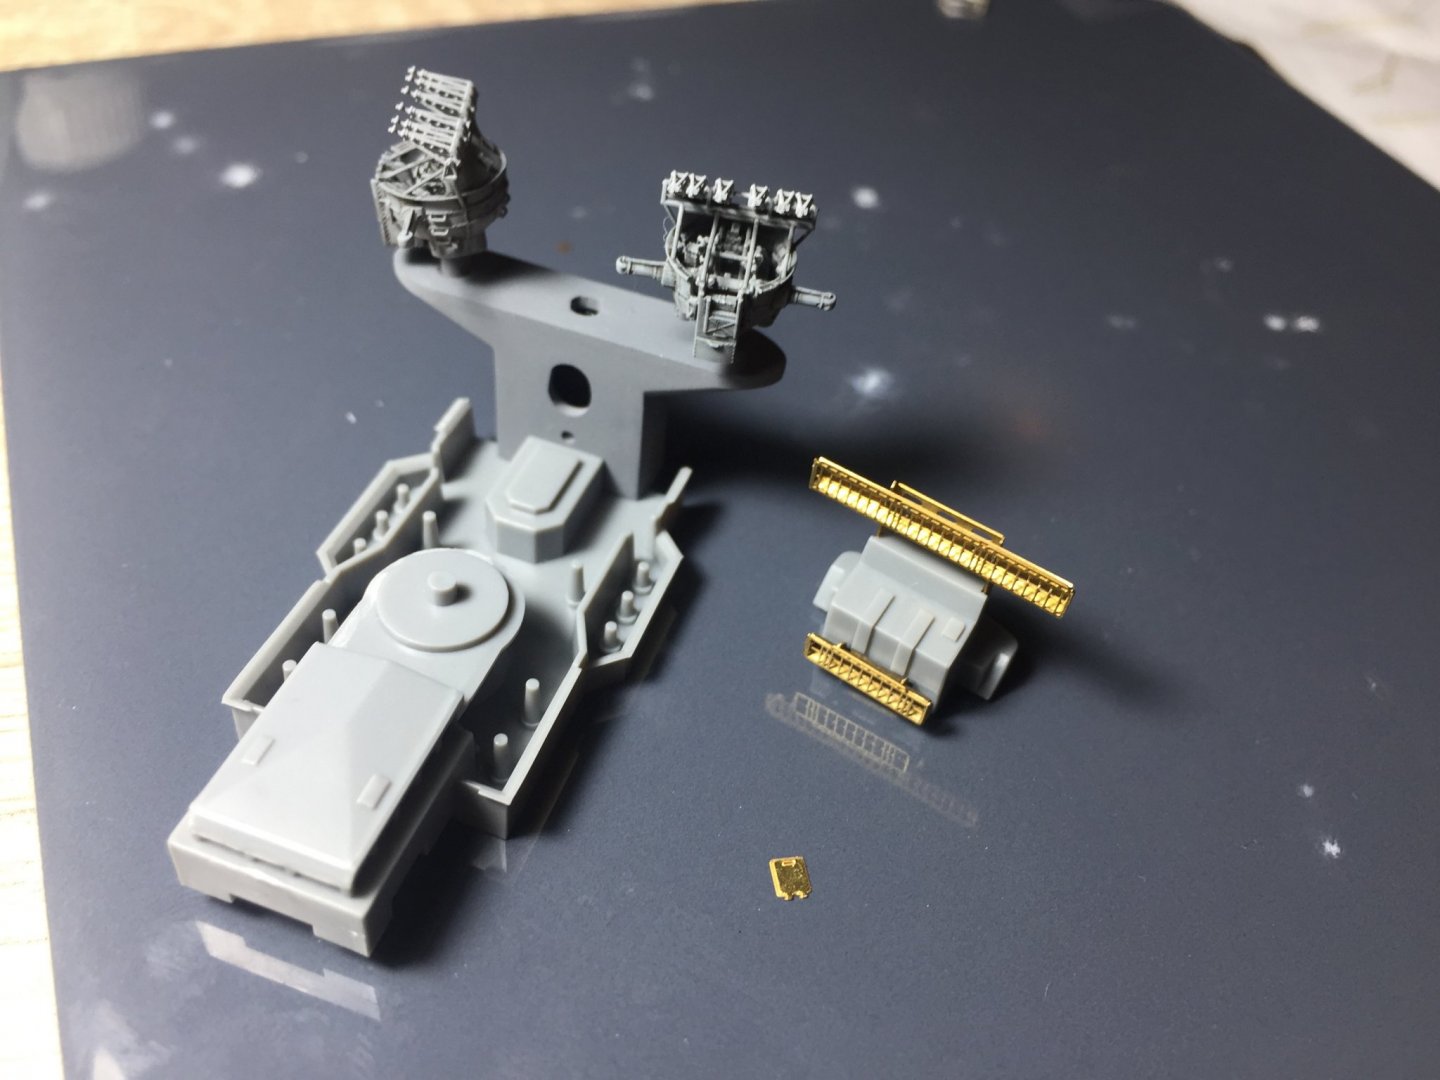
Haven’t had much time recently but it’s still moving along well. Once the deck is glued down there will be a big jump in visible progress. Started working on the eight 5.25 inch guns. I’m going away for a few weeks holiday, won’t be much happening till I’m back so here is a dry fit of the rear superstructure so far. It’s really hard to get an all in shot and get details too.


- 211 replies
-
- 11
-
-
- prince of wales
- tamiya
- (and 2 more)
-
Thanks for the tips! Awesome. Have you done a build with this technique per chance? Would be great to get a visual reference as to how it should look to give me an idea if there are any build logs were this has been used? I’ll try the pastel idea and try give the wood a bit of life. Yes the PE really changes how it looks! Was well worth getting the set.
- 211 replies
-
- 5
-
-
- prince of wales
- tamiya
- (and 2 more)
-
Hey, the German ships do look great! At this stage I think I’ll go static or if I’m brave do some tests on putting it on an ocean... will see. But haven’t thought about remote control so don’t think I’ll do it.
- 211 replies
-
- 5
-
-
- prince of wales
- tamiya
- (and 2 more)
-
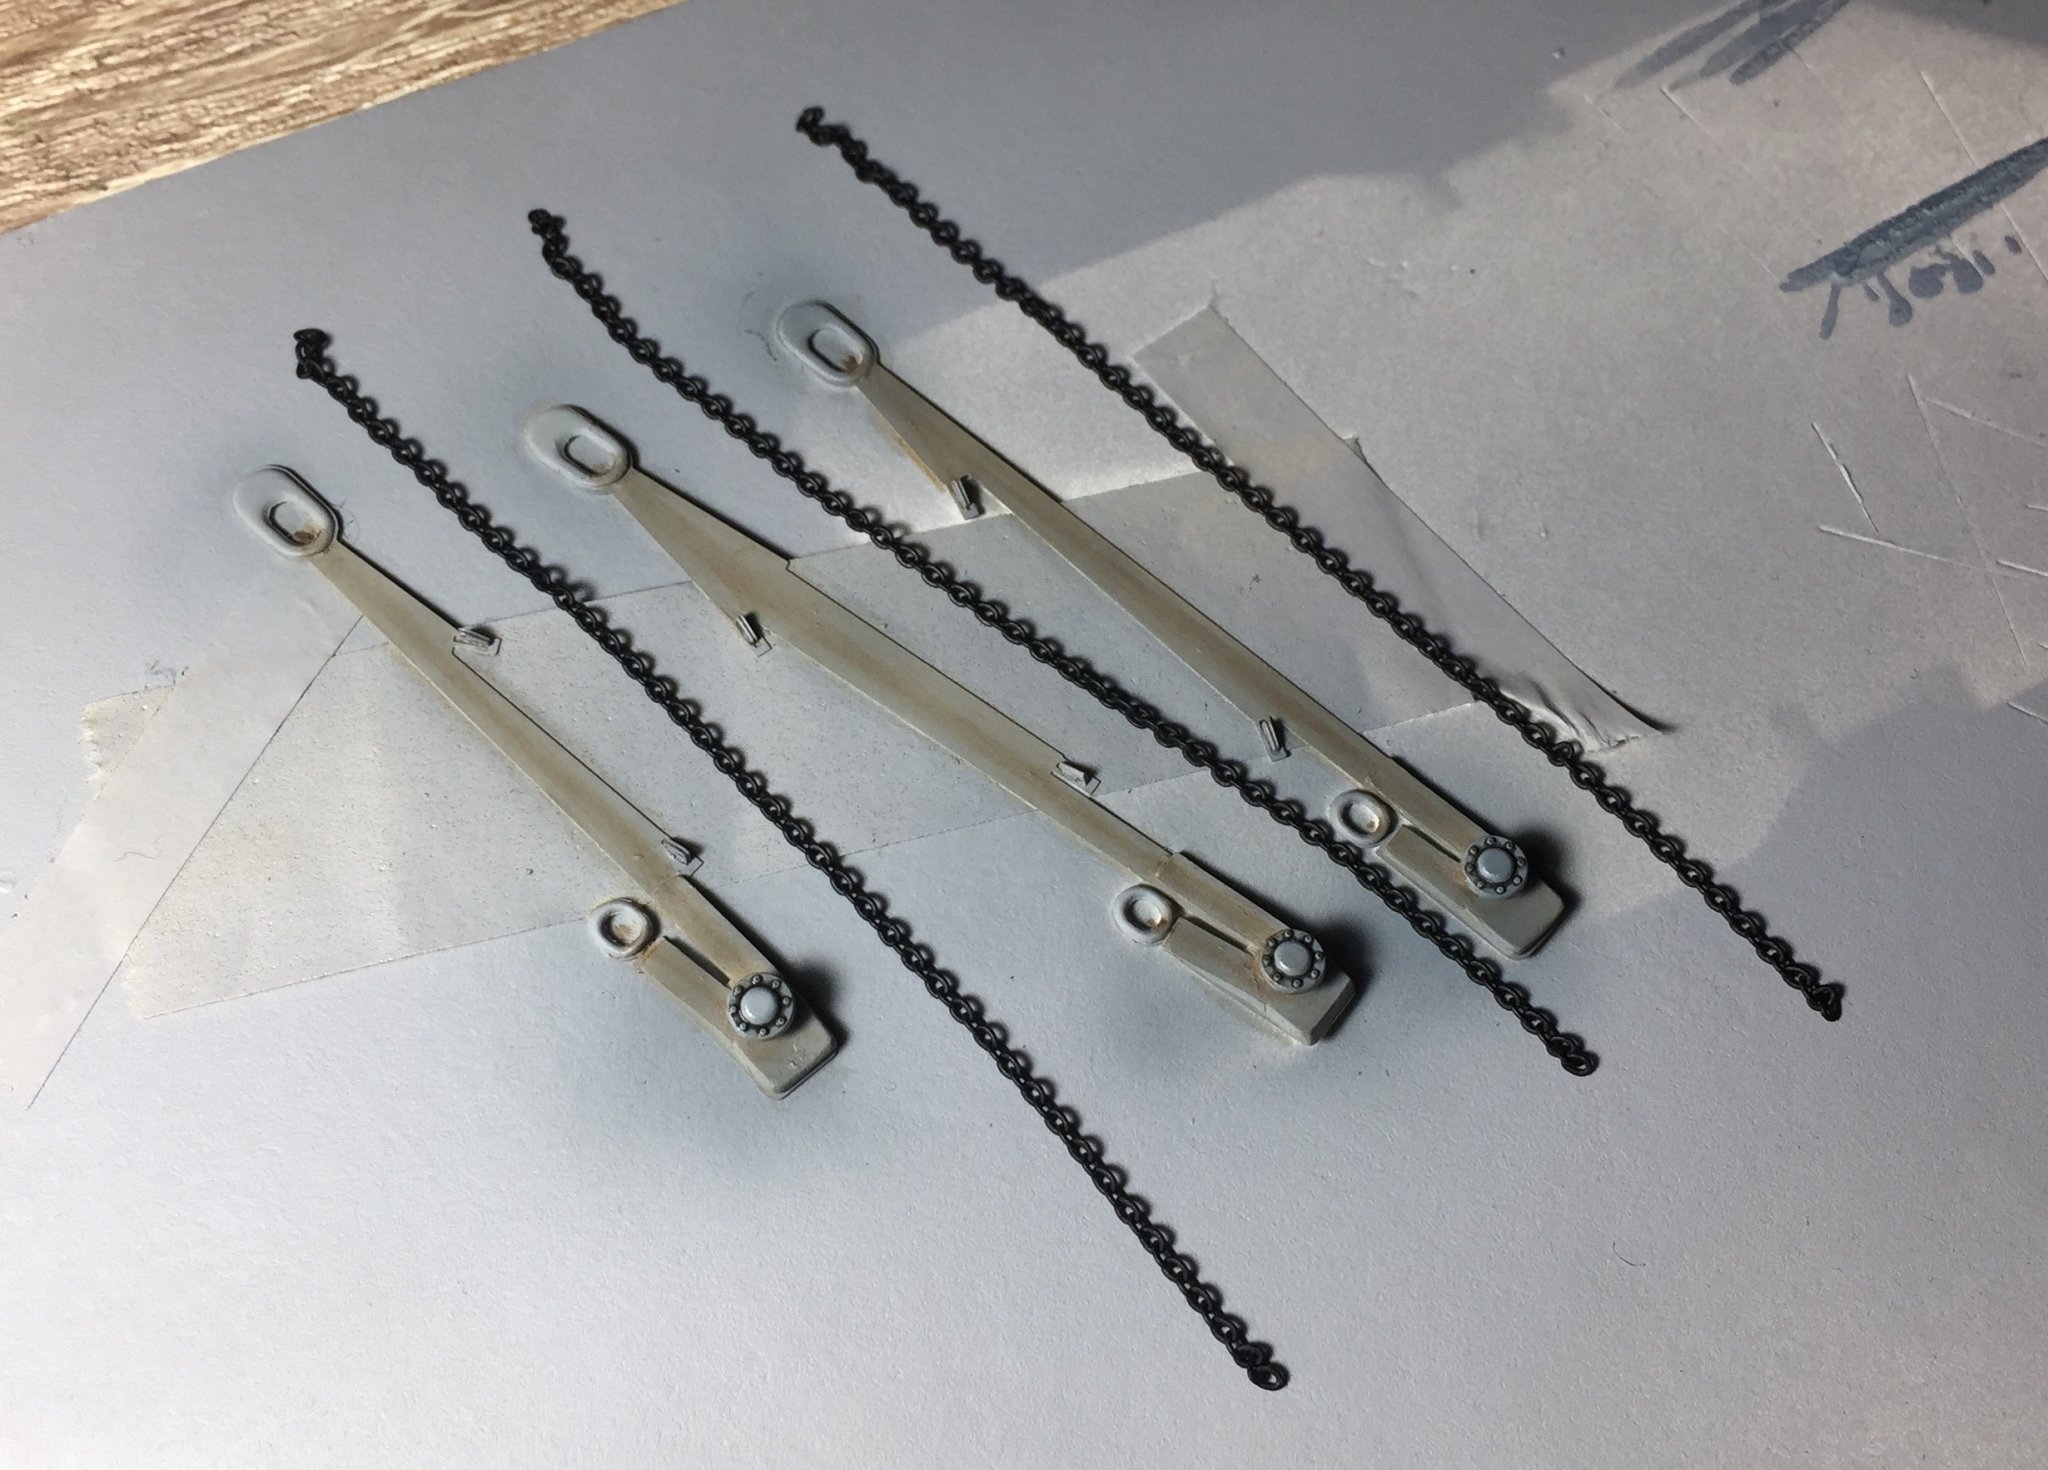
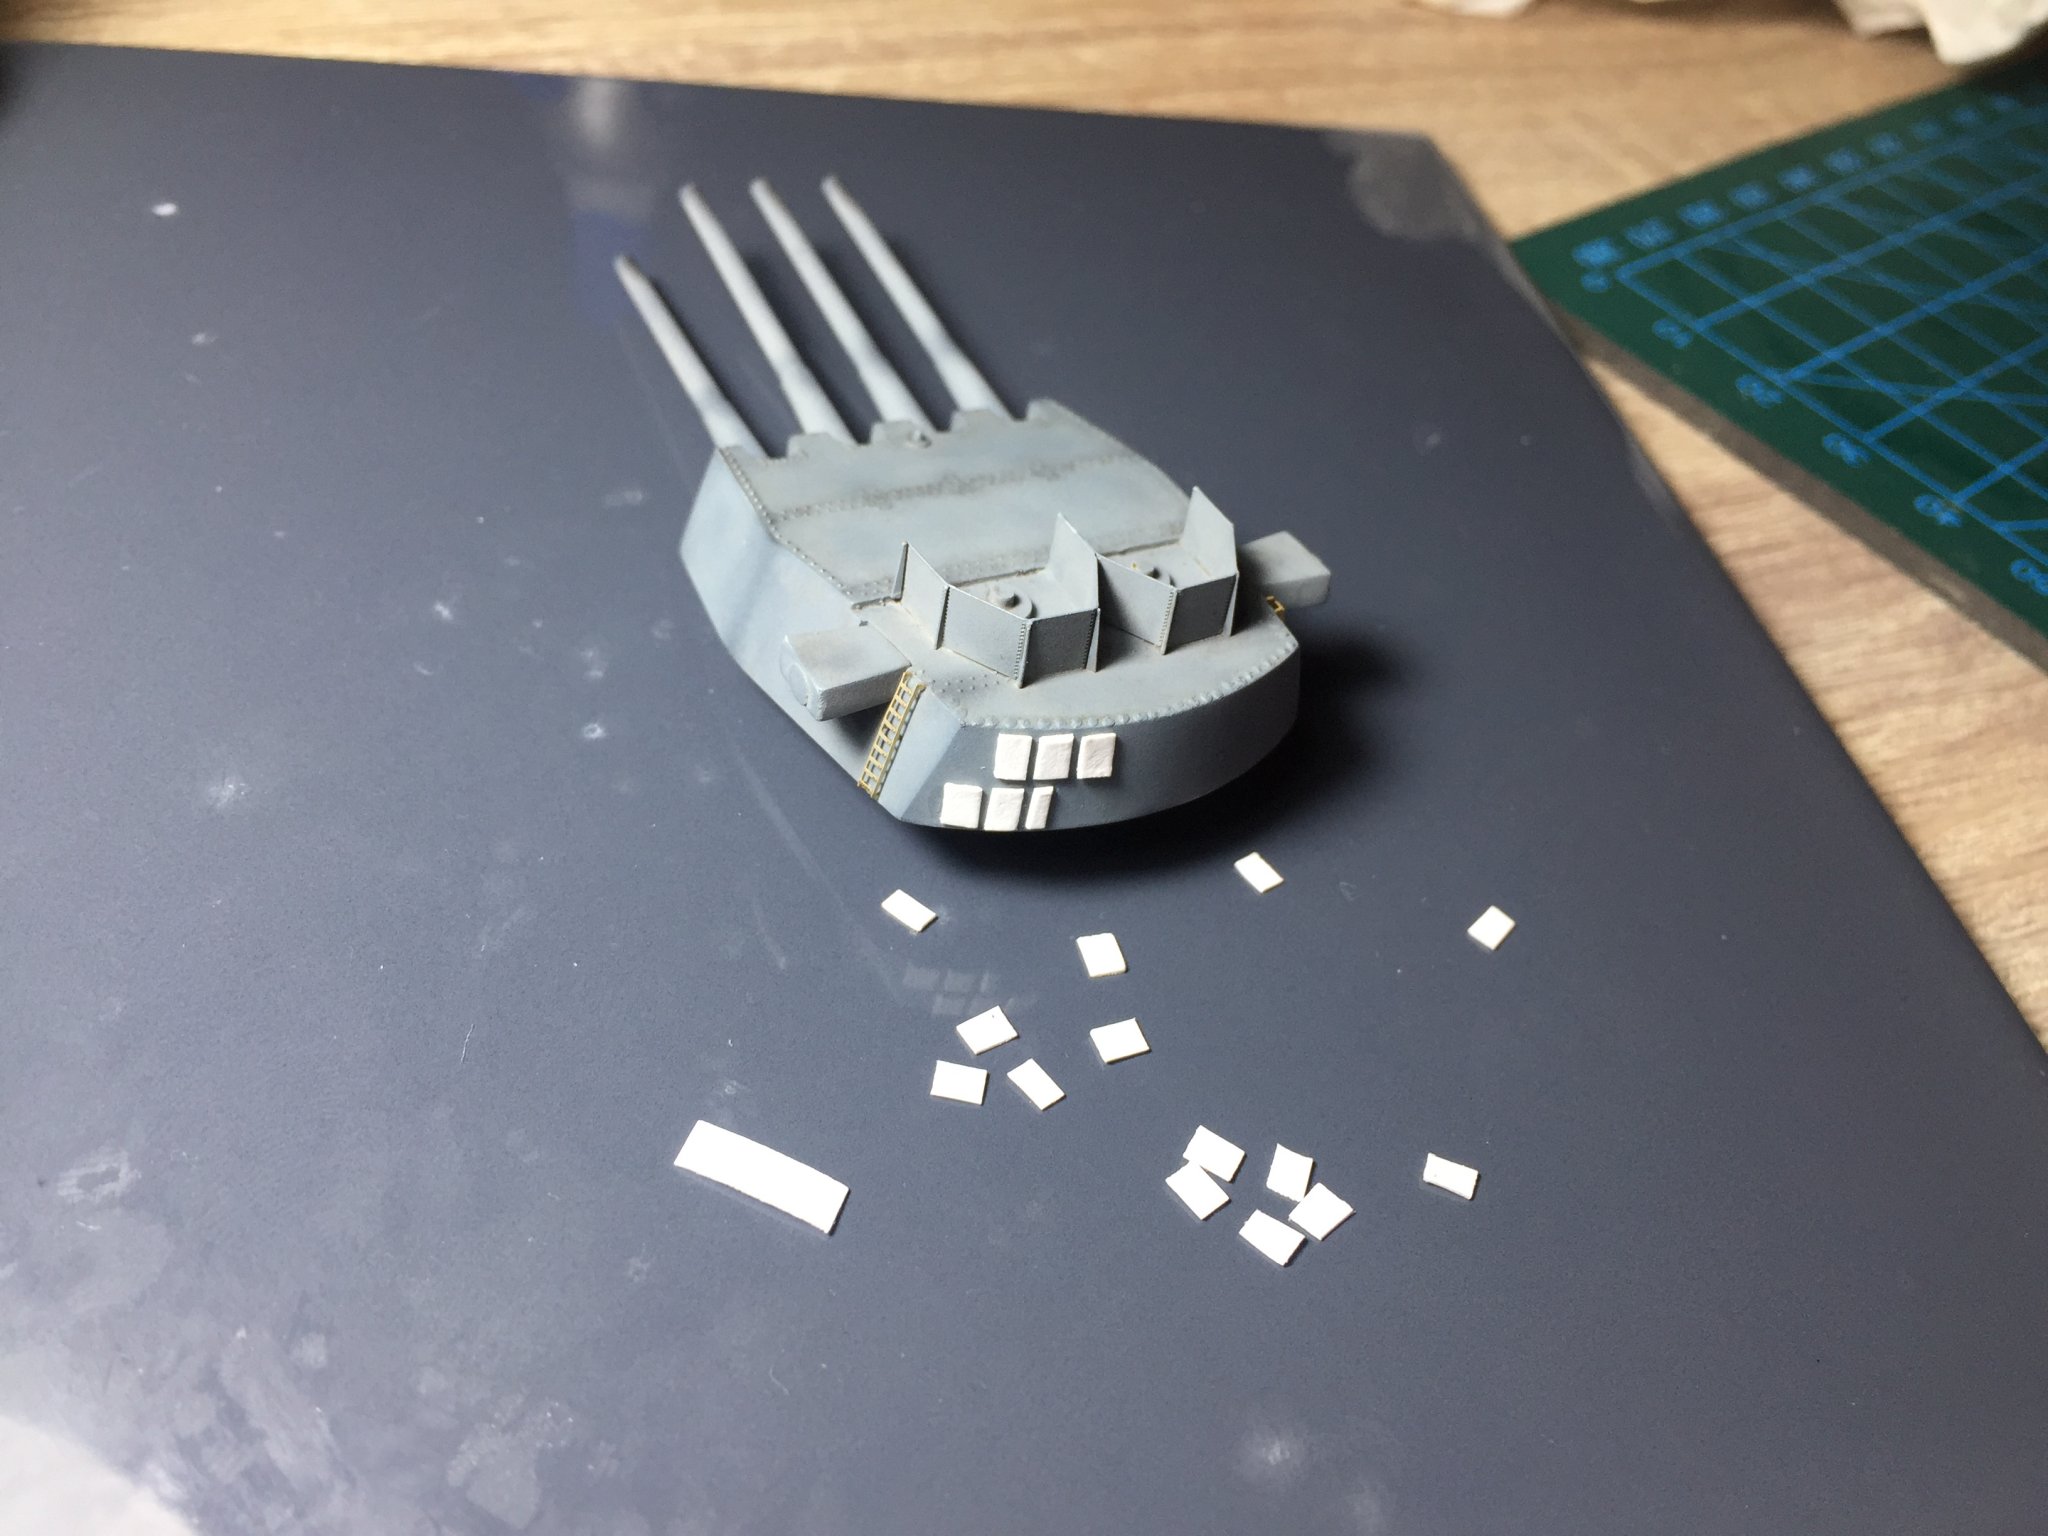
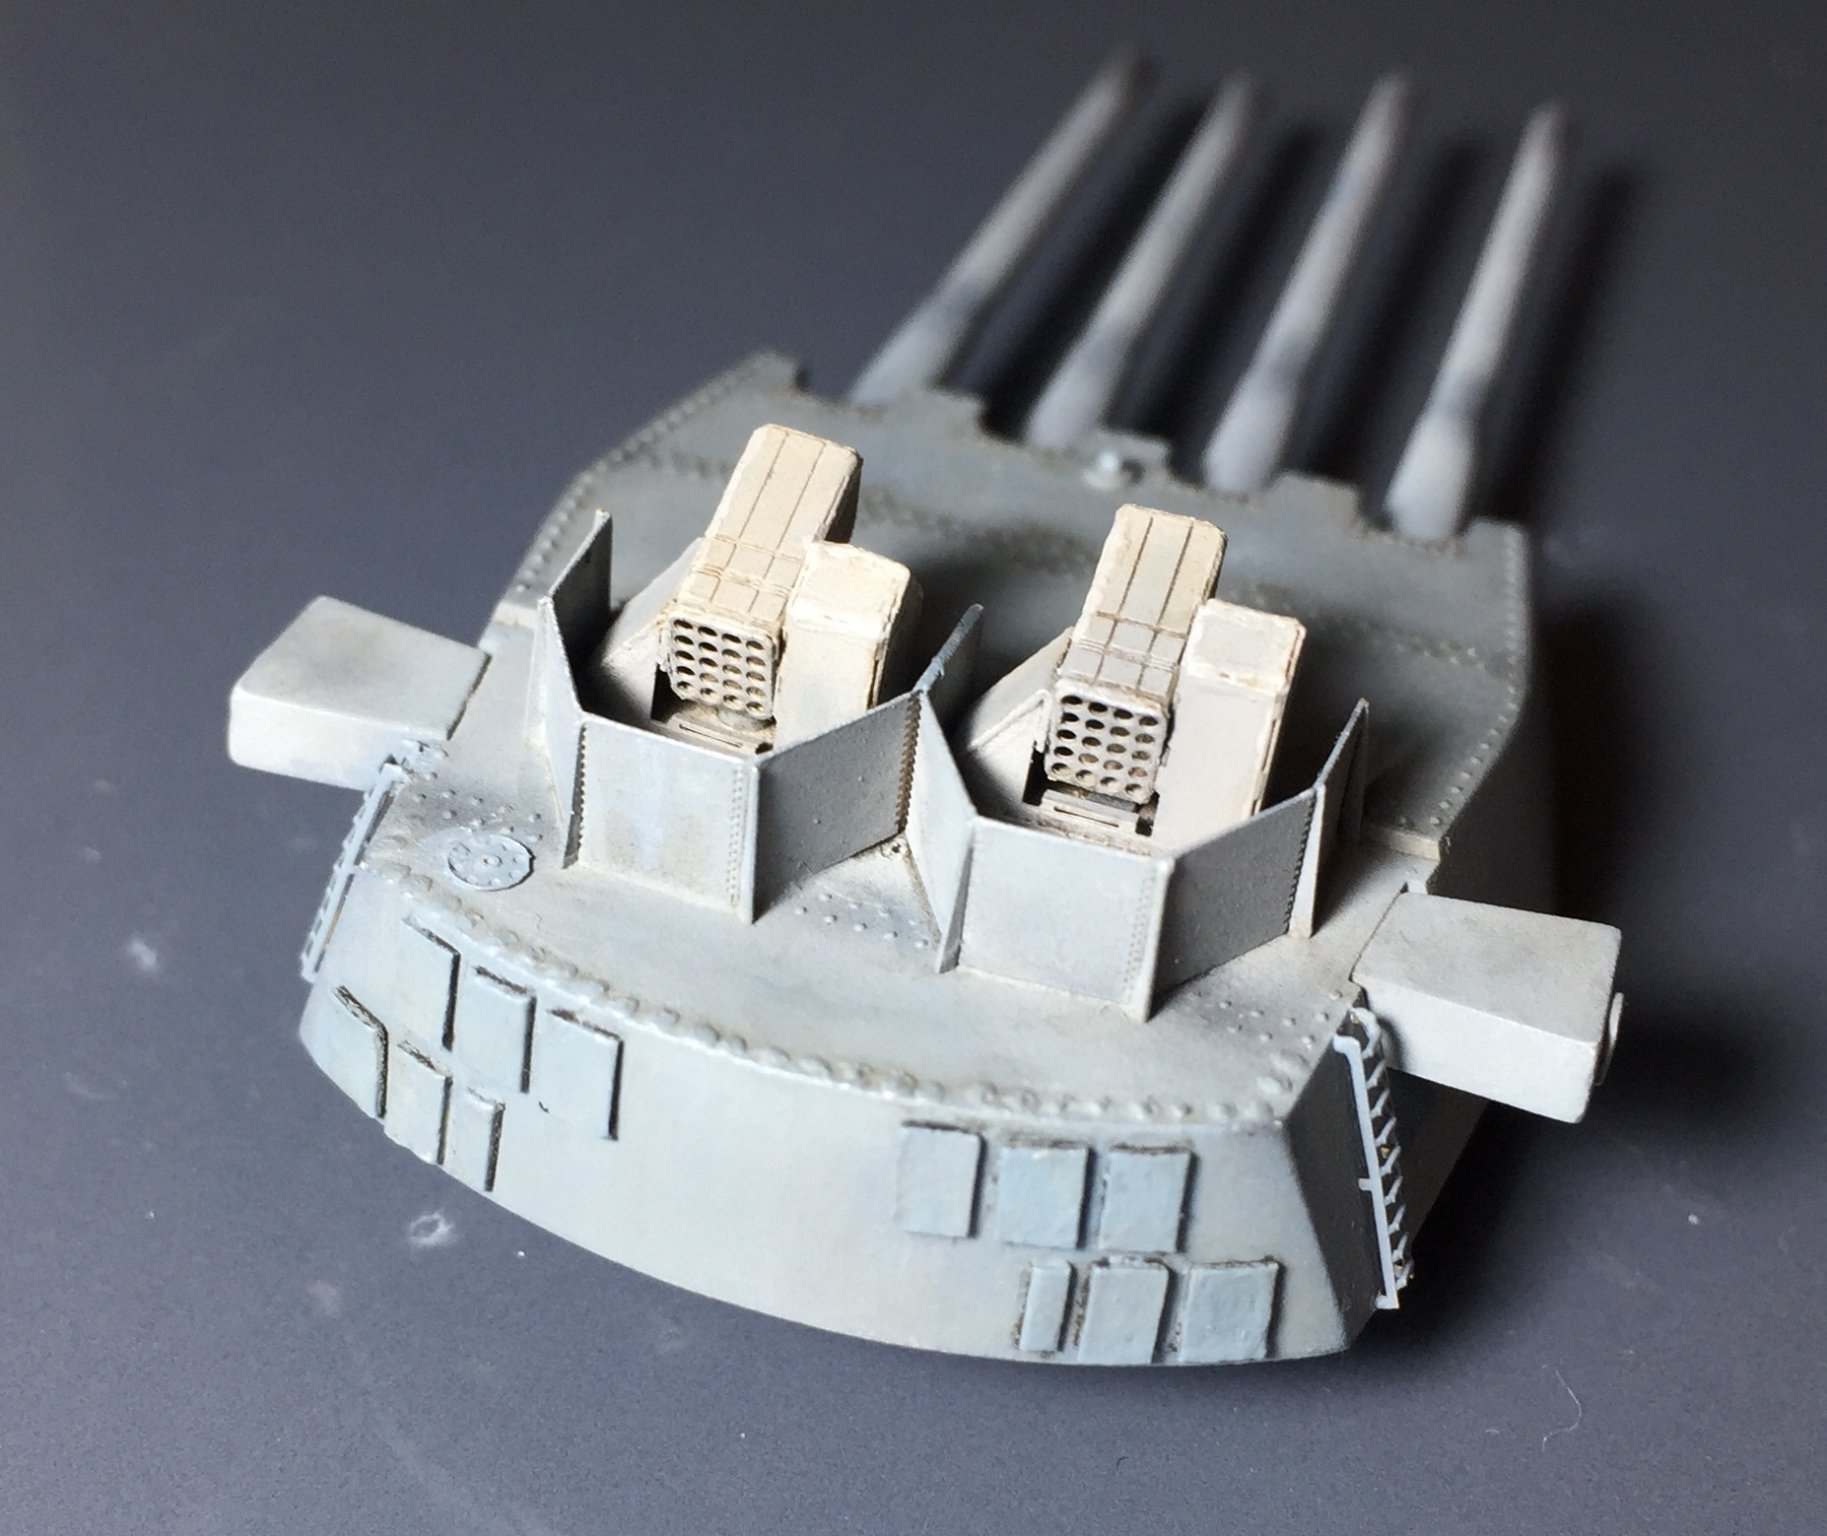
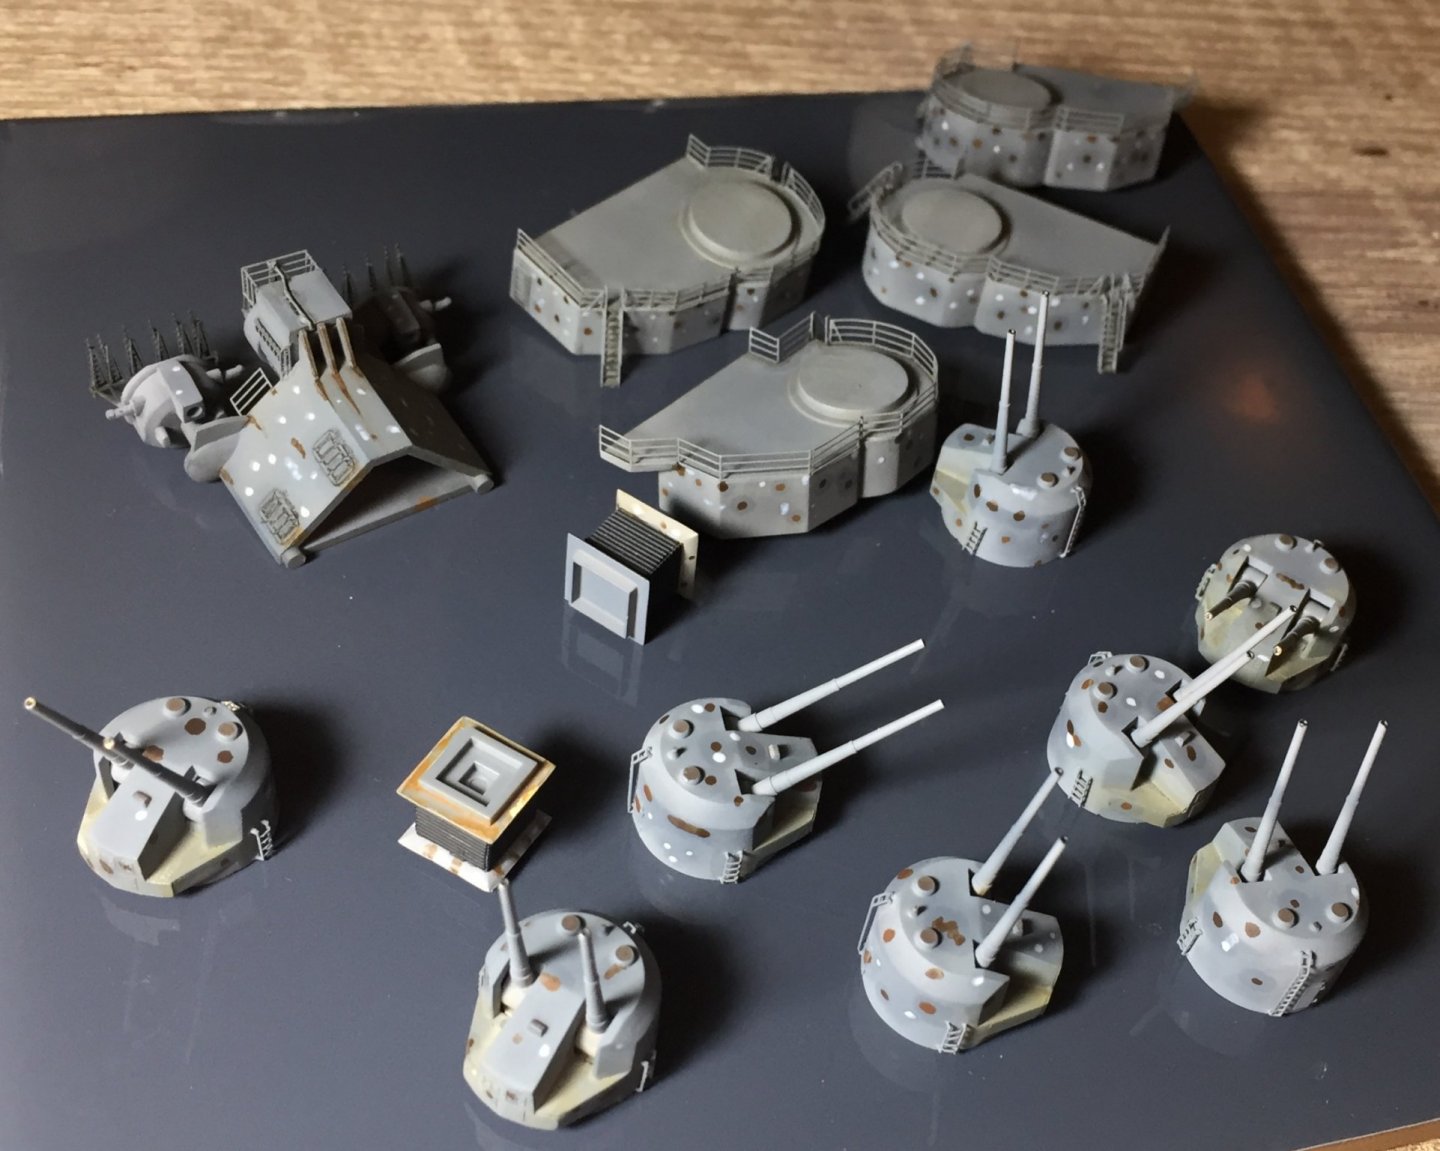
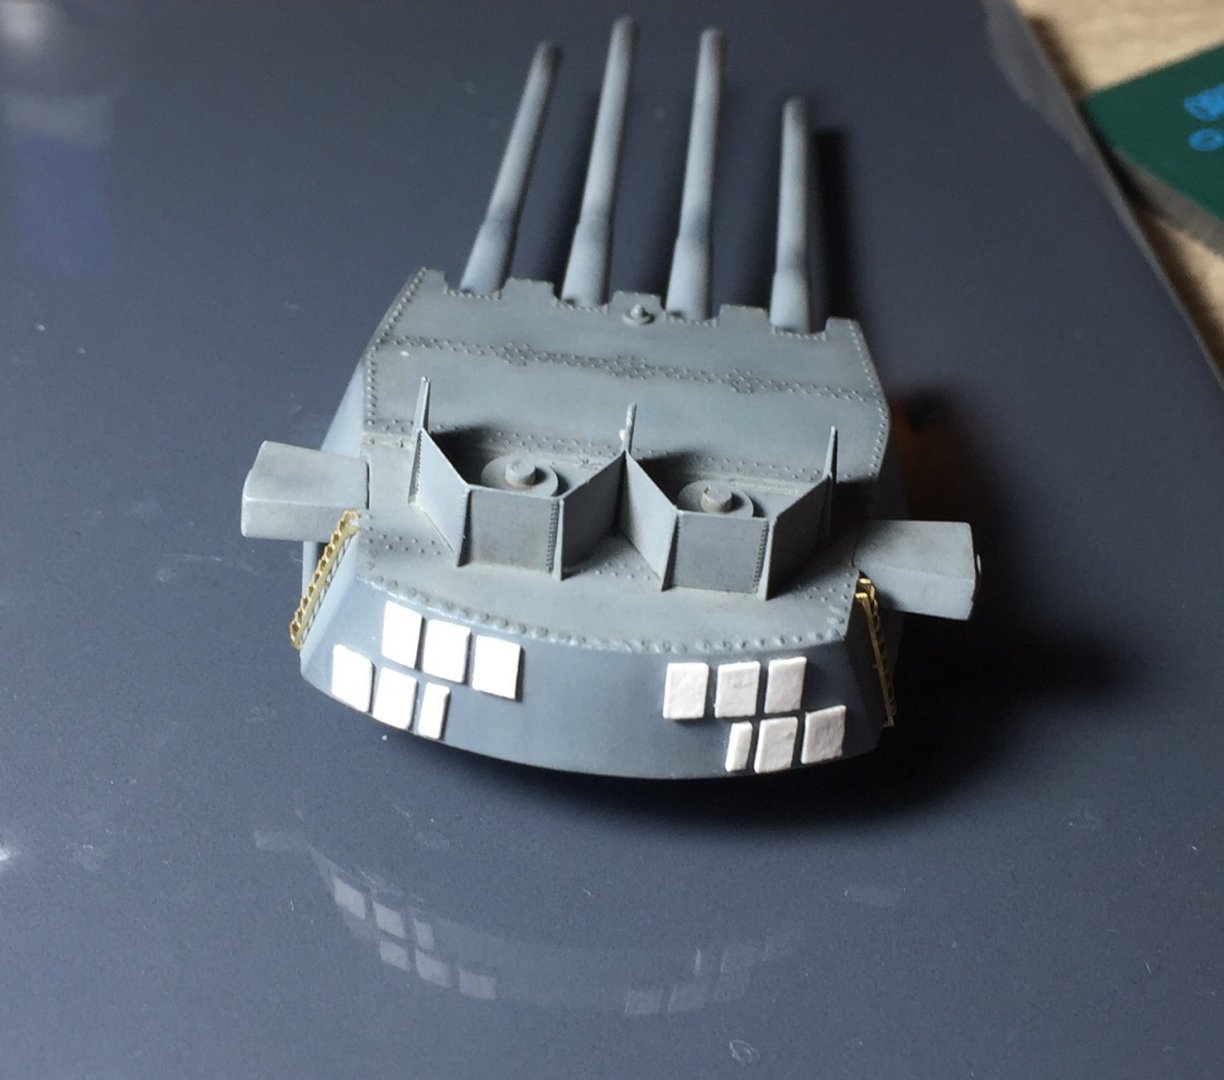
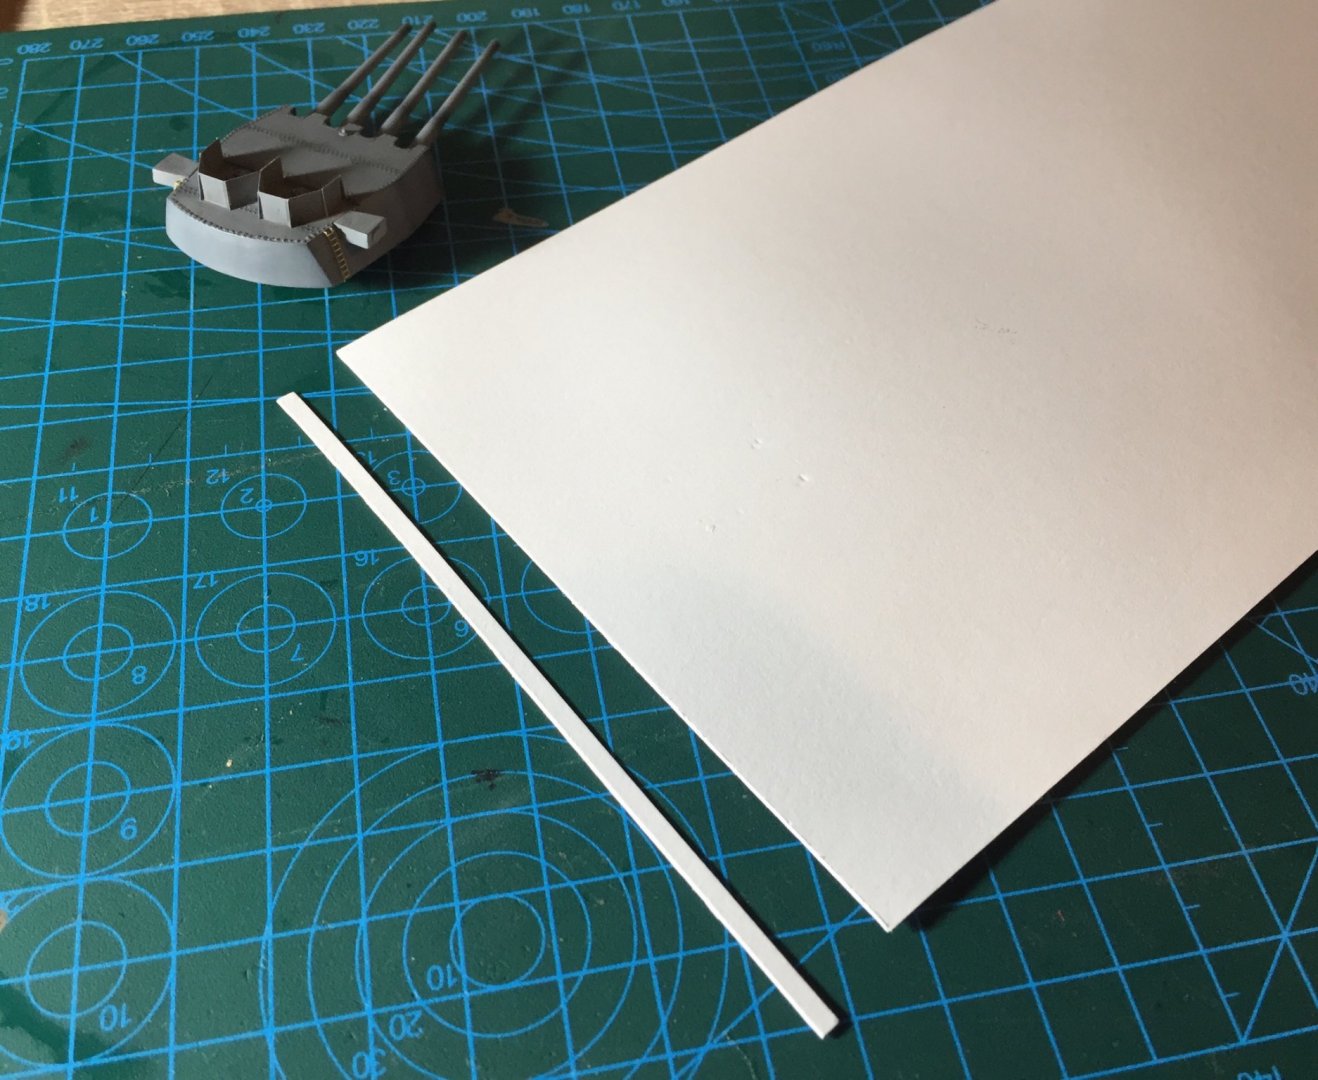
I think I’ll try doing a light coat of grey wash through my airbrush and see if that gives it abit more life and abit less yellow. I forgot to add some ladders to my rear main gun and in putting them on noticed that the plans show some bits on the back and front that aren’t mentioned anywhere else so gave building them a go. Its not much but I think it adds a bit to the guns, quite happy how they turned out and enjoy adding extra details from scratch like this.


- 211 replies
-
- 9
-
-
- prince of wales
- tamiya
- (and 2 more)
-
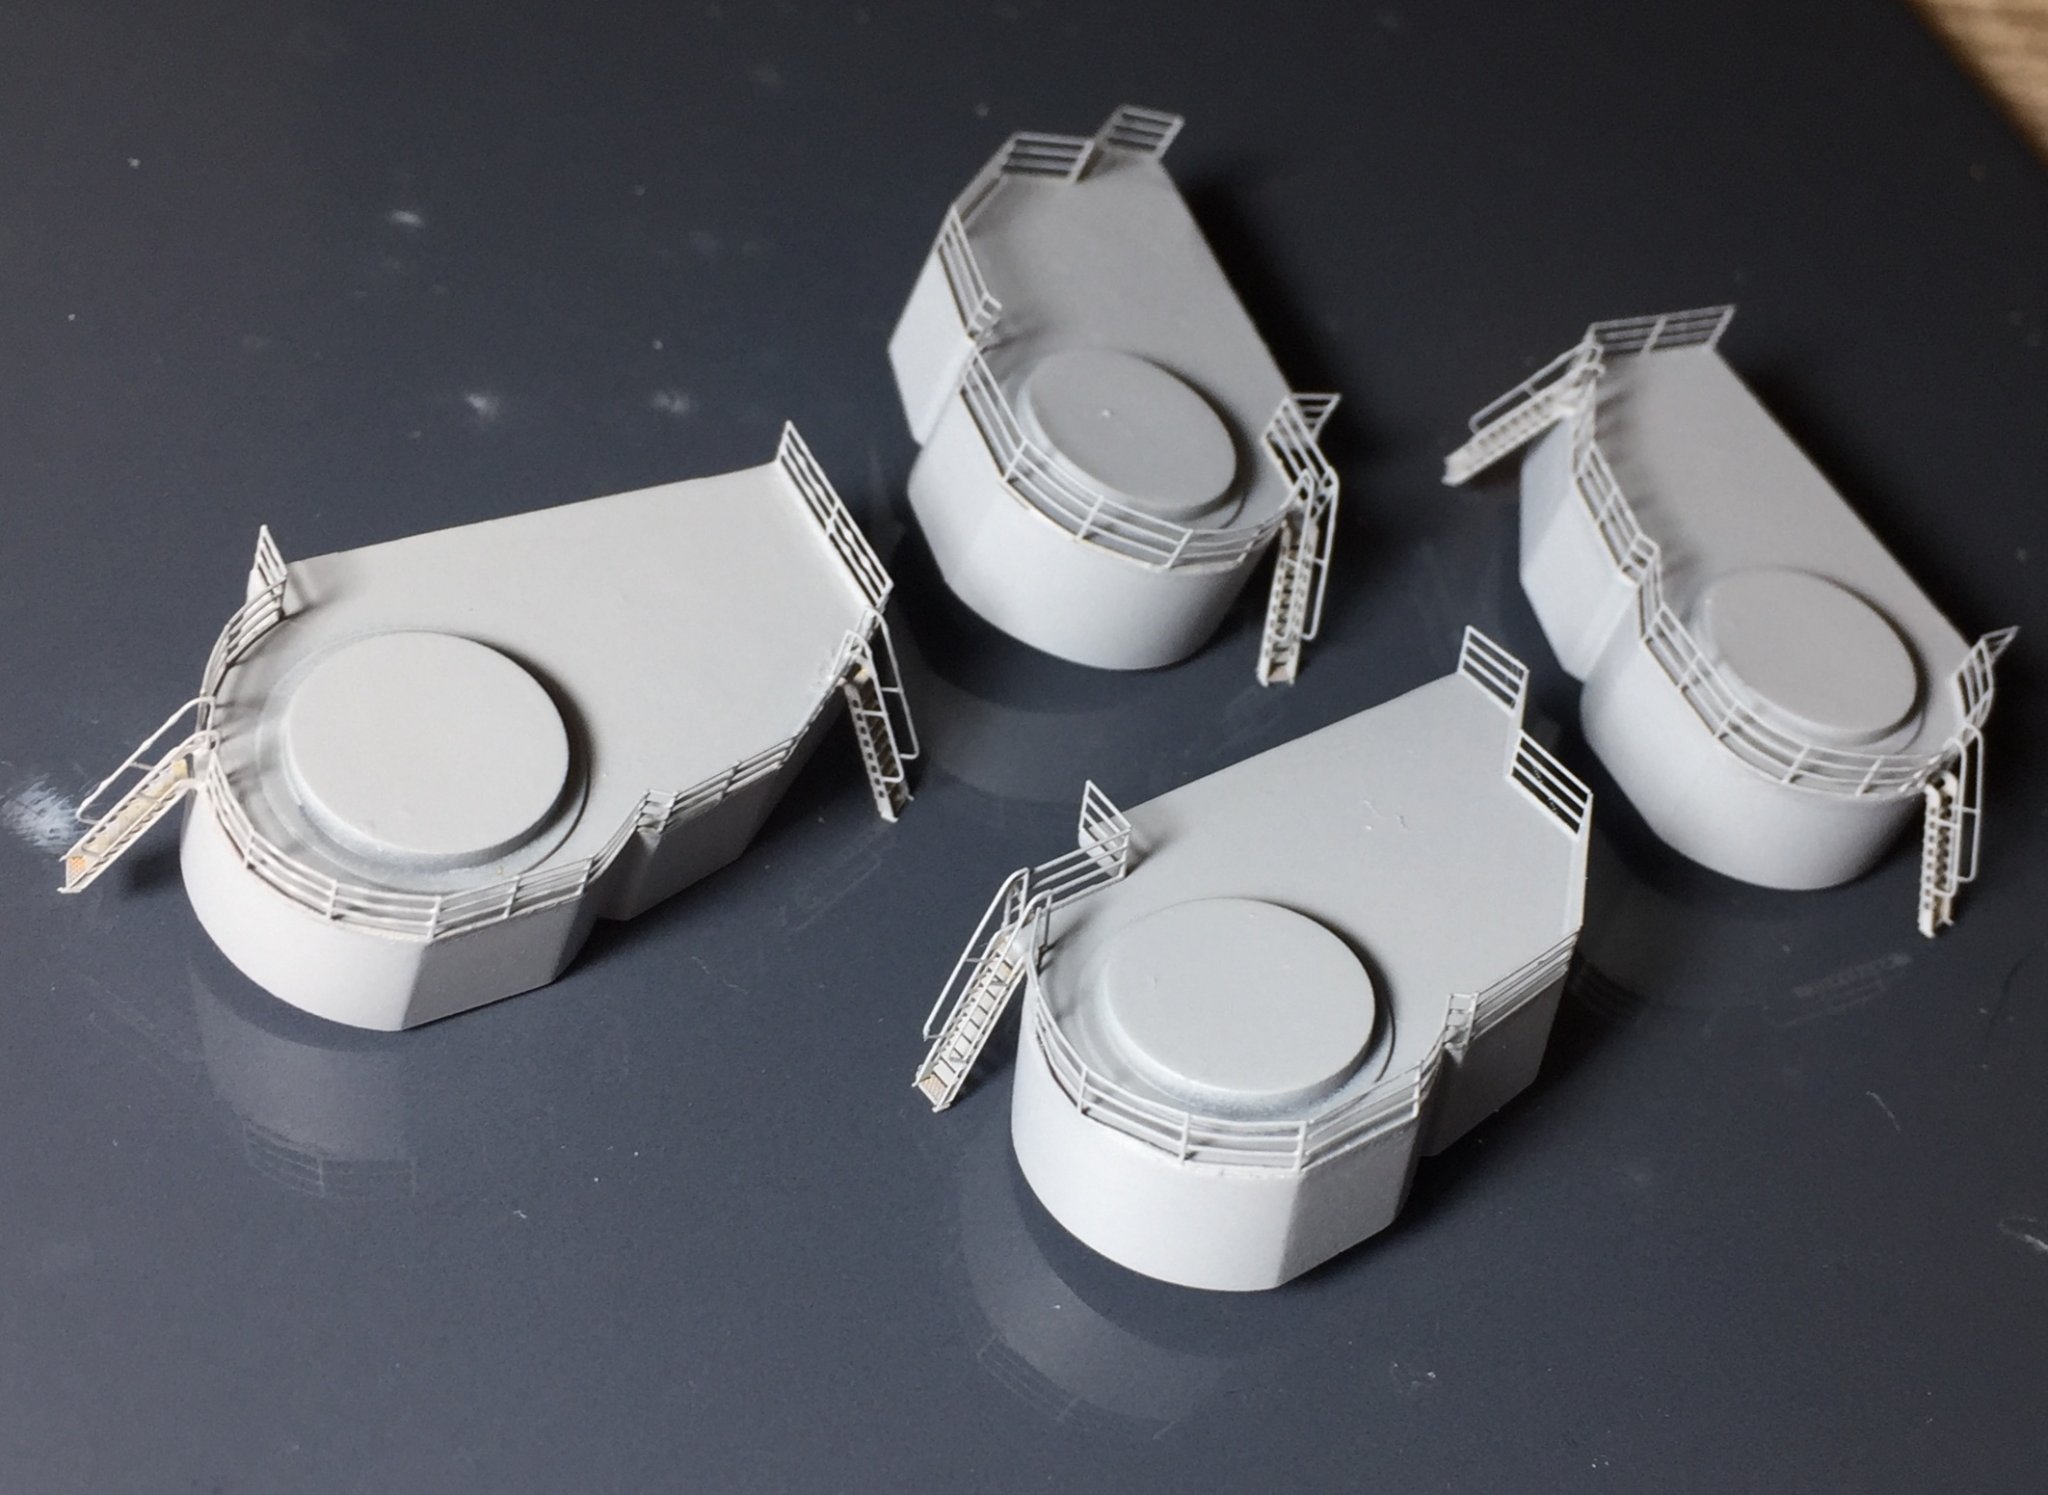
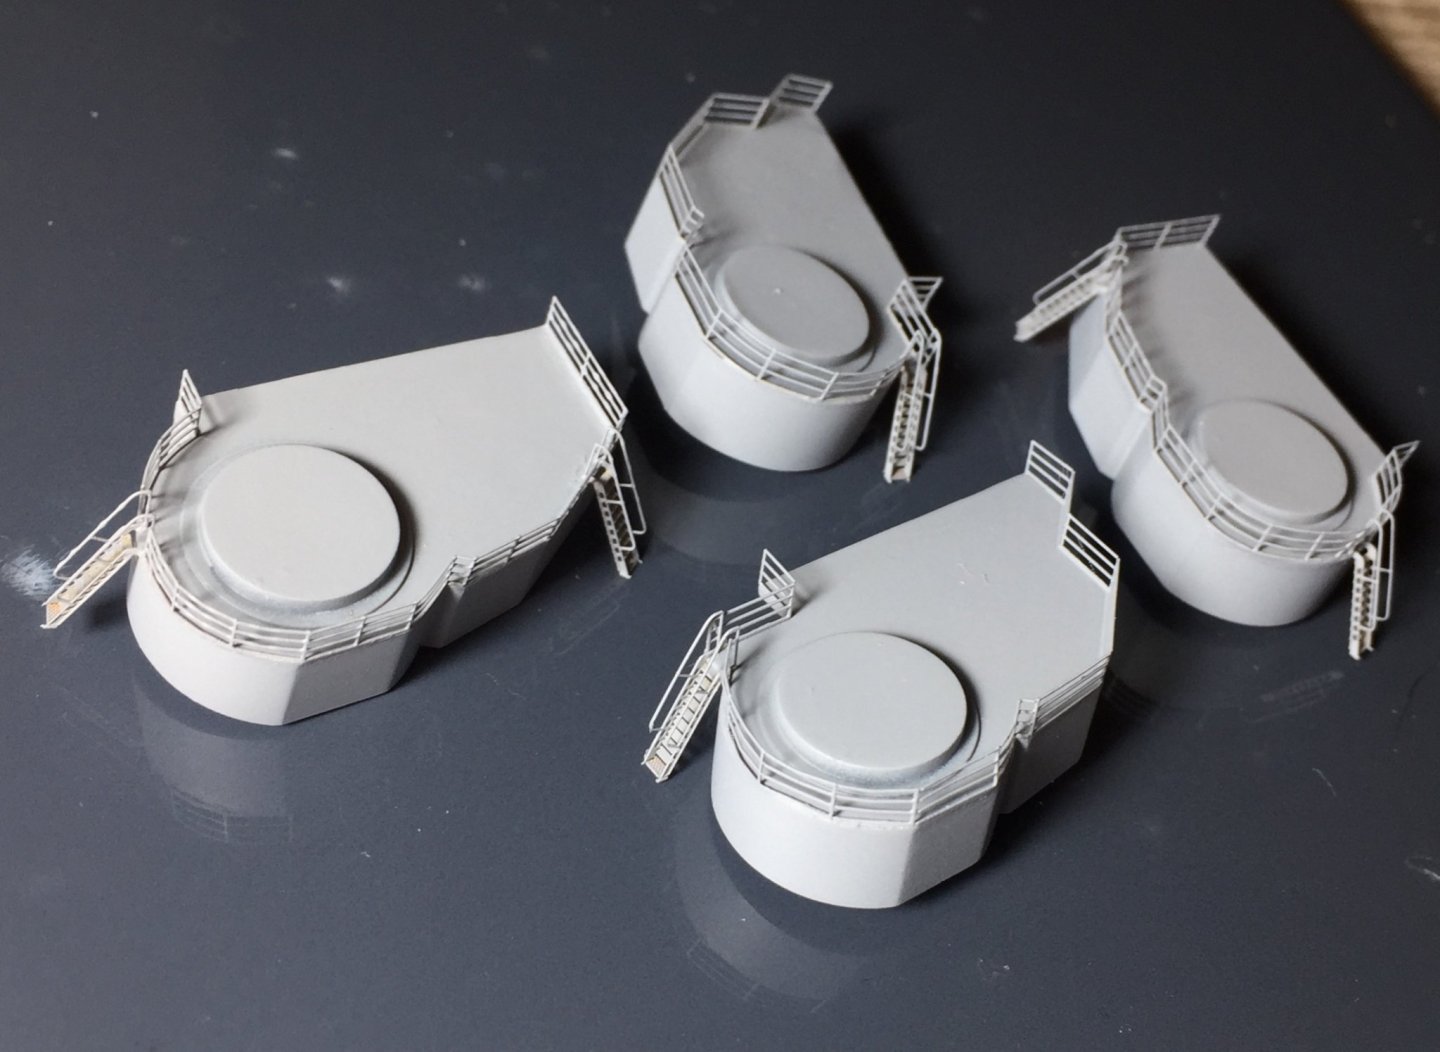
I’ve not used enamel based paint in my airbrush before, always been abit unsure if it will clean properly. For acrylics I remove excess paint with water then use isopropyl alcohol to clean it properly and then water again to remove the alcohol. Guess for oils I just solely use alcohol. Will give it a google. today I finished the final 2 upper deck parts for the secondary guns. And primed all 4. First one I sprayed the primer straight through some stray spider webs so gave an interesting texture. Also primed the masts. Haven’t glued the deck down yea as I’m still looking into how to weather the wood deck. But getting a few of the parts together so when it’s ready I should be able to stick a lot of pieces to the deck pretty fast.
- 211 replies
-
- 8
-
-
- prince of wales
- tamiya
- (and 2 more)
-
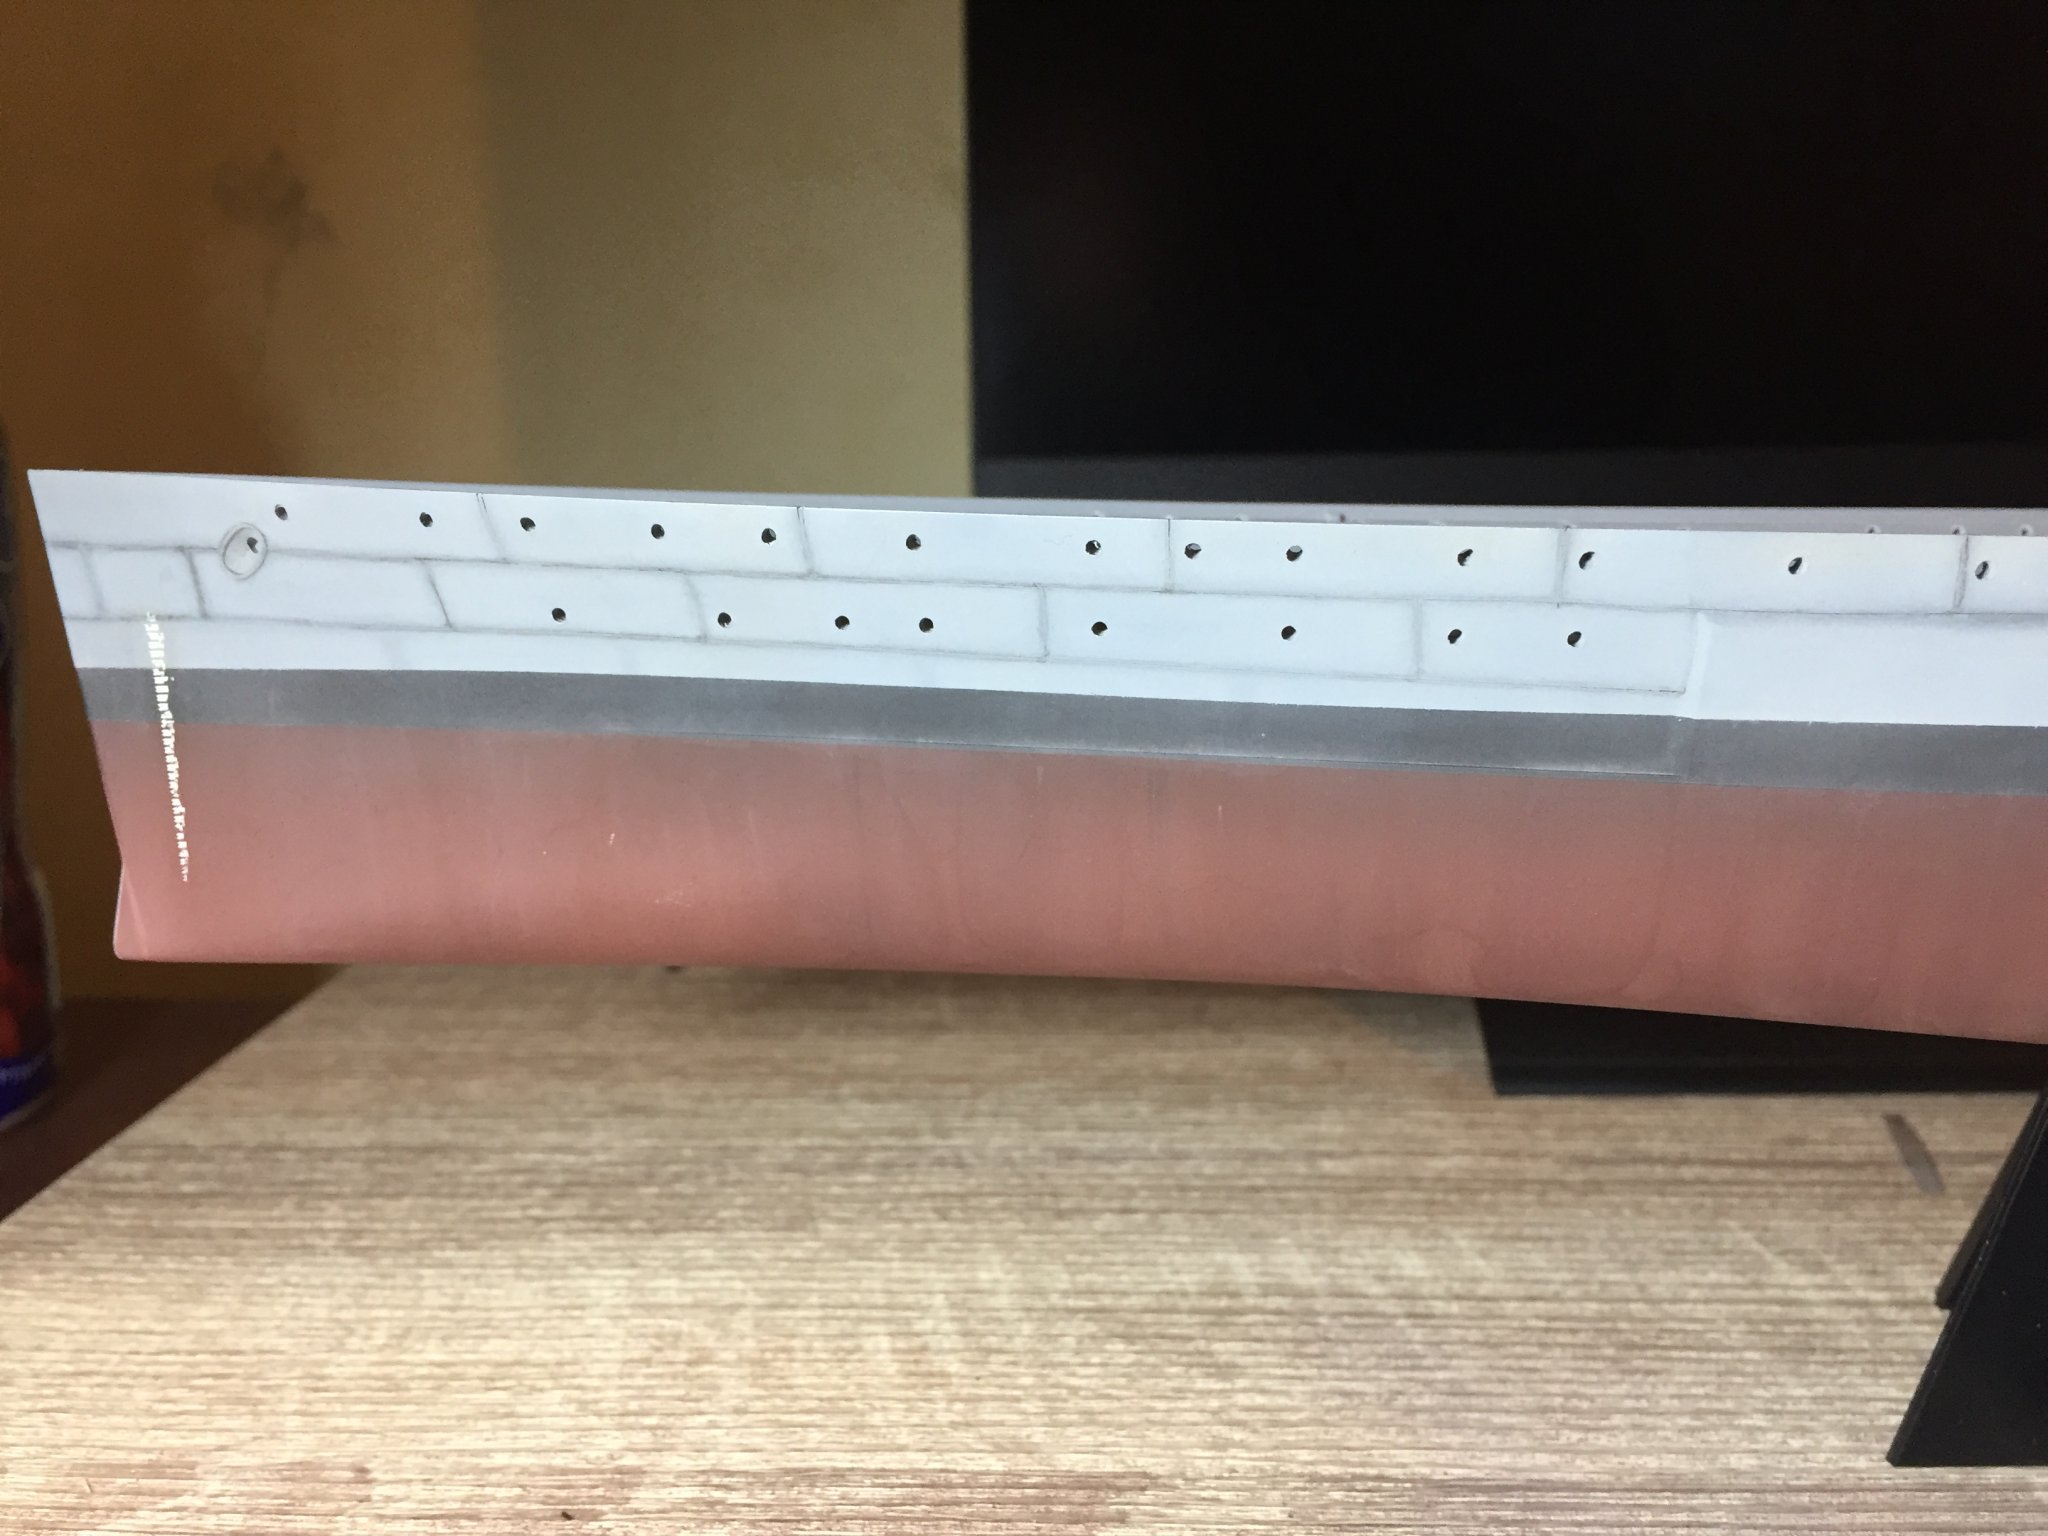
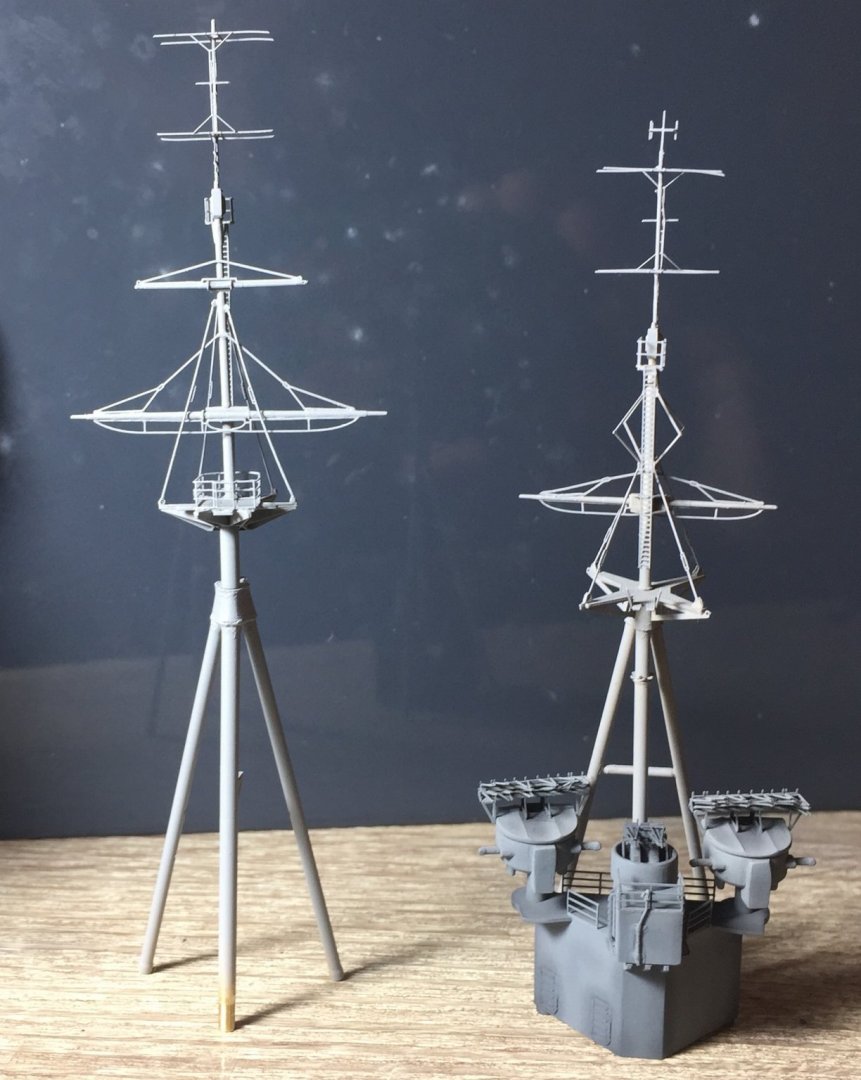
The weathering side was the part I was quite looking forward to as I’ve not tried it on a ship before. Slowly making progress with it. Went through and darkened the panel lines and next will do some grey washes to blend it all in. Have yet to add the last layer of vertical panel lines. I know the panel lines are not accurate but I was trying to get them from photos of the real ship, which is hard work and then my plans turned up and I saw I was a whole level of panels out... but there are a whole lot worst mistakes I could have made so in the big picture it’s not so bad. And also been doing more PE. Got the fore mast put together today but took a good chunk of time. Was too cold to prime so will do that tomorrow. my competency with putting PE together has improved a lot since I made the main mast!


- 211 replies
-
- 9
-
-
- prince of wales
- tamiya
- (and 2 more)
-
Thanks for that RGL. I’ve never used dry transfers... Thought the protective plastic was on both sides to peel off. Took awhile to realise it was only on one side! Had my fingers all over the sticky side, so hope that doesn’t make them fall off. I’m giving the hull a few days between oil based washes and weathering to dry so won’t have many updates for a bit, and then probably won’t make good pictures as weathering is really hard to get good pics of.
- 211 replies
-
- 3
-
-
- prince of wales
- tamiya
- (and 2 more)
-
Hey all, have another question if anyone has any experience with the Pontos hull draft mark dry transfers. Will they survive all the enamel washes and effects and white spirits? Or do I need to seal them in? normally I weather straight on acrylic paint as I’ve had issues with the acrylic clear varnish getting eaten through and turning into muck. Thanks in advance.
- 211 replies
-
- 5
-
-
- prince of wales
- tamiya
- (and 2 more)
-
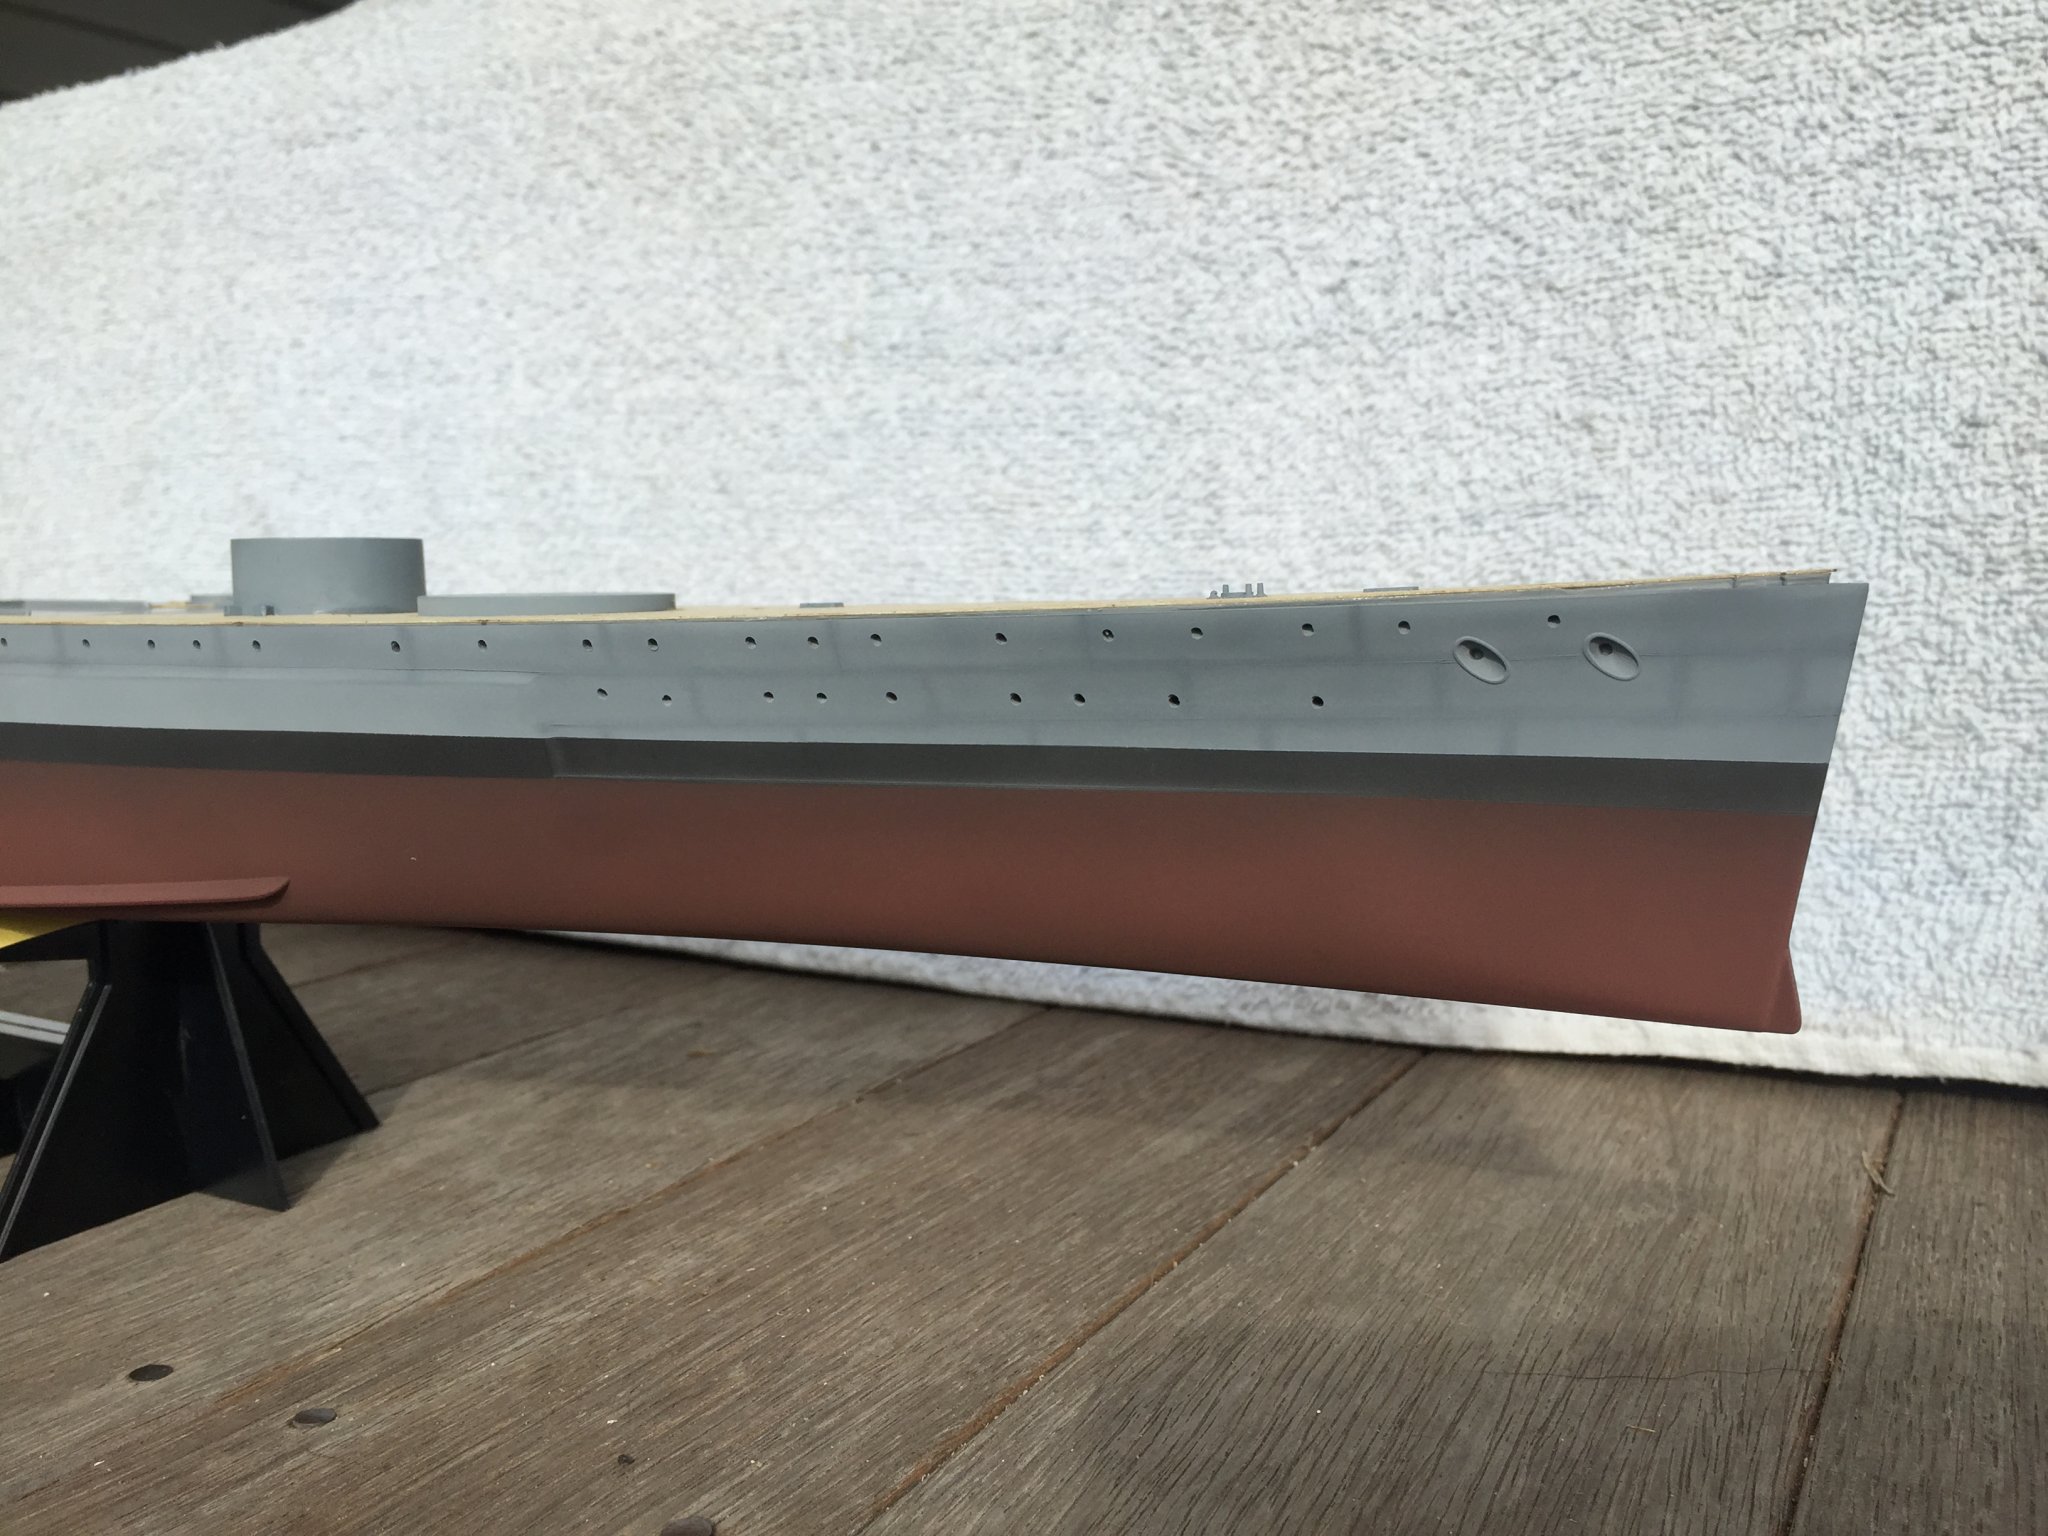
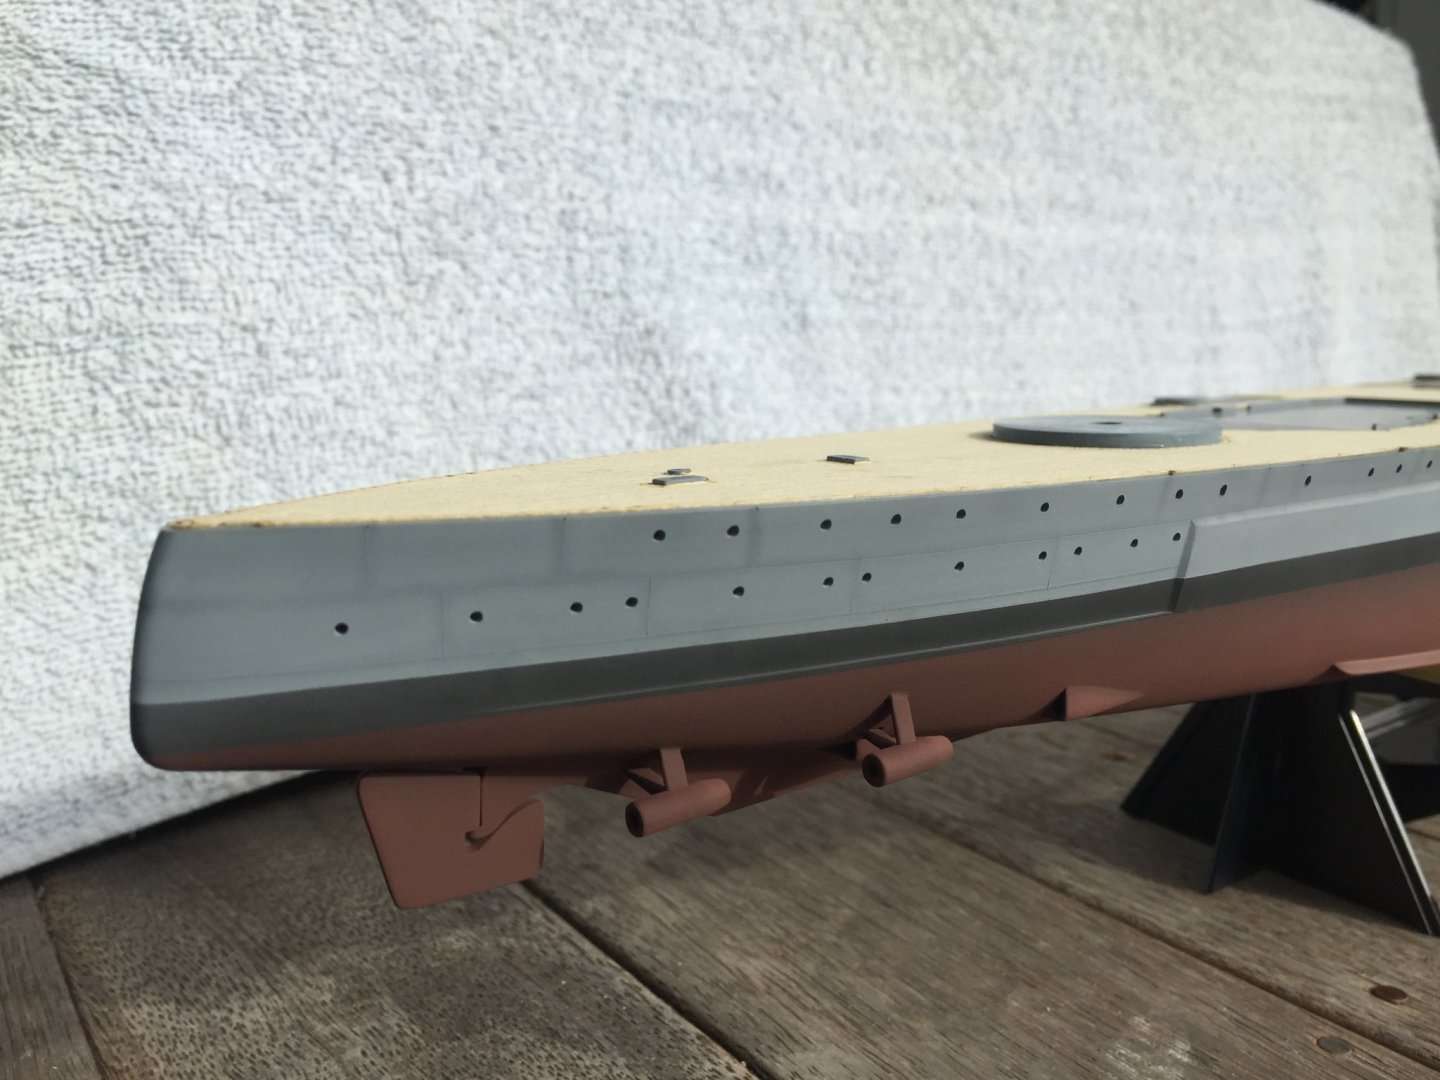
Base coat on the hull is done. No washes, effects or weathering yet just a plain canvas. From a few test I’ve done I found it super easy to get carried away with weathering and over do it, so will try my hardest to not do that! One way to find out though!!


- 211 replies
-
- 10
-
-
- prince of wales
- tamiya
- (and 2 more)
-
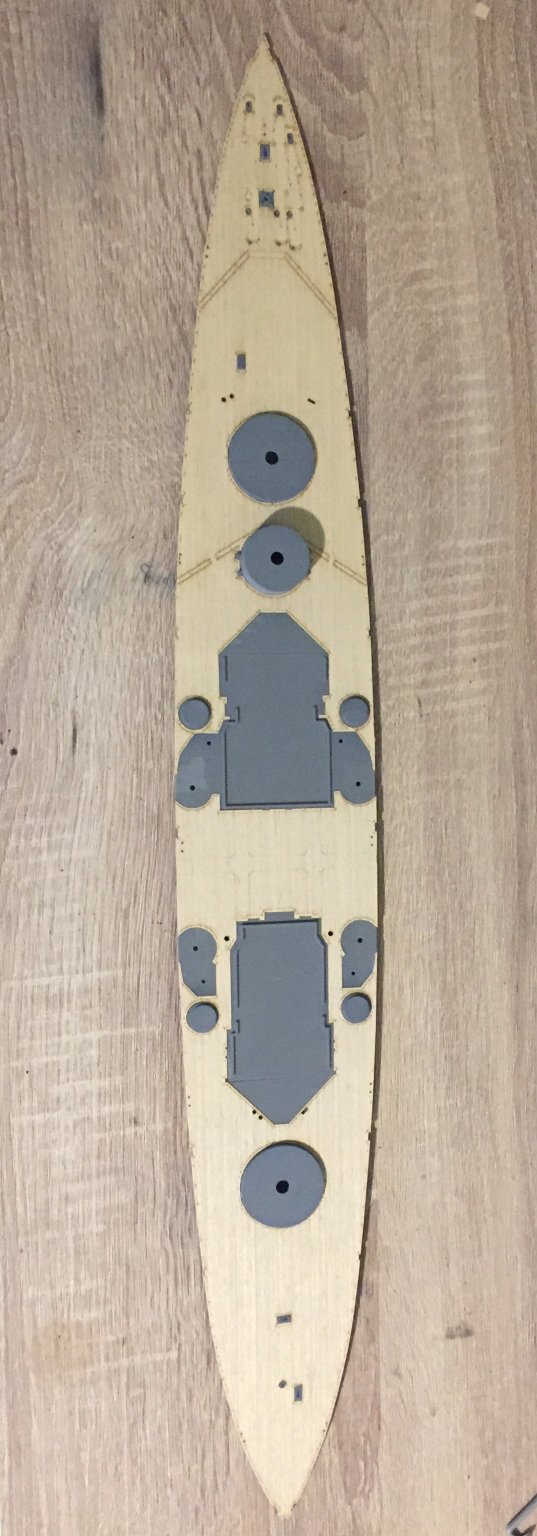
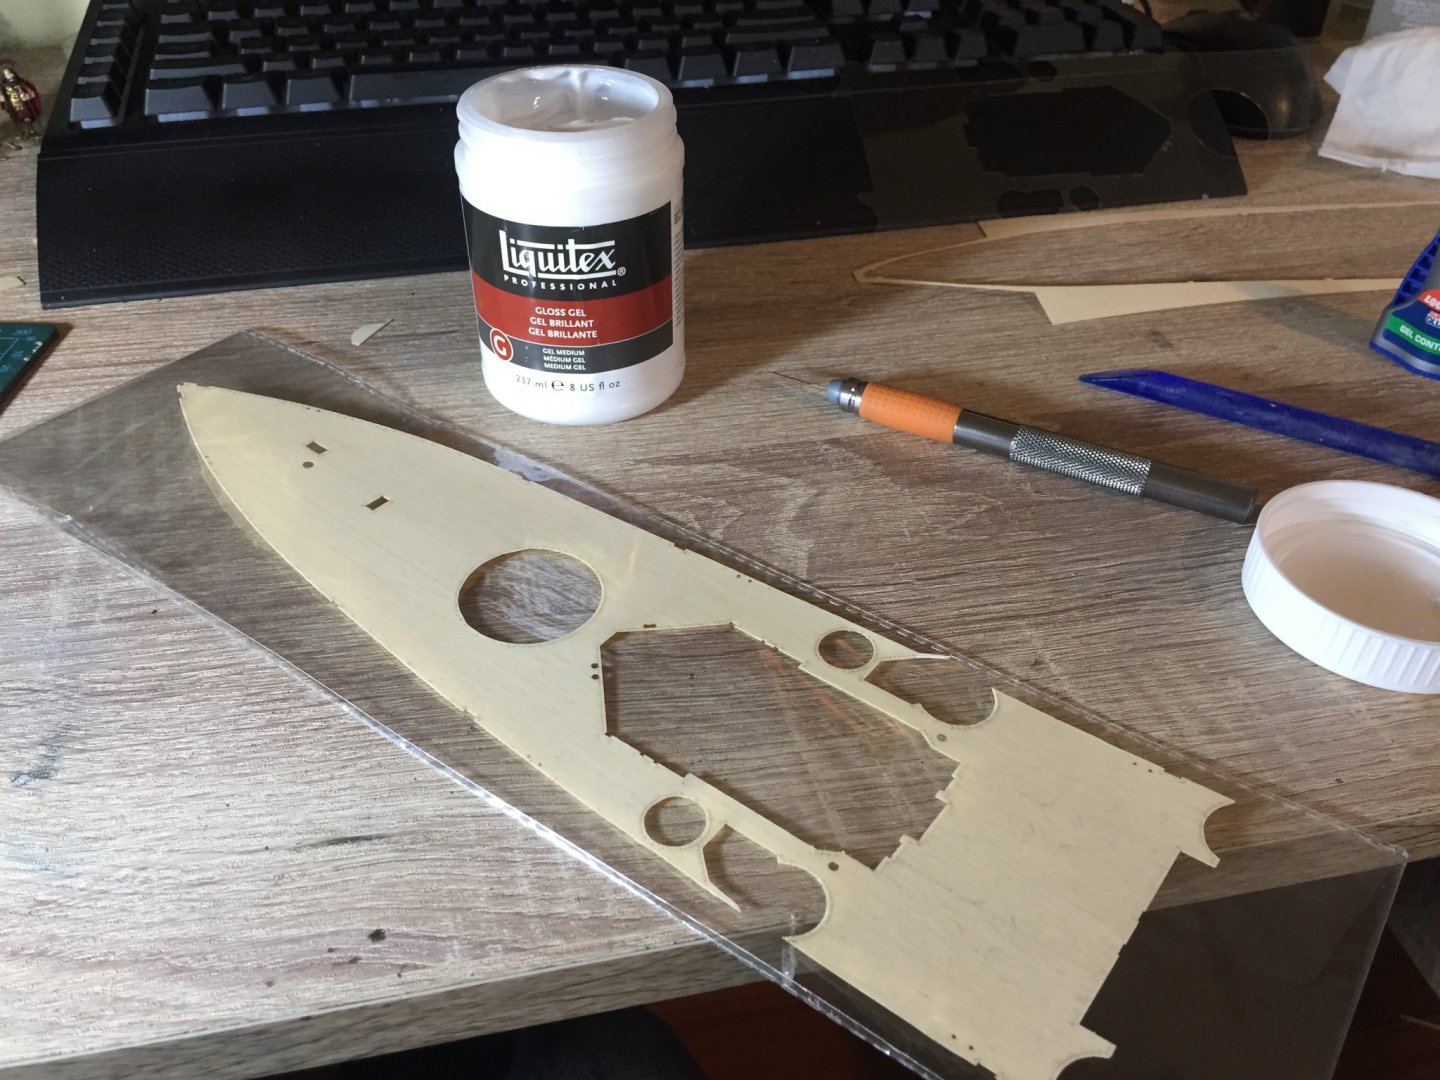
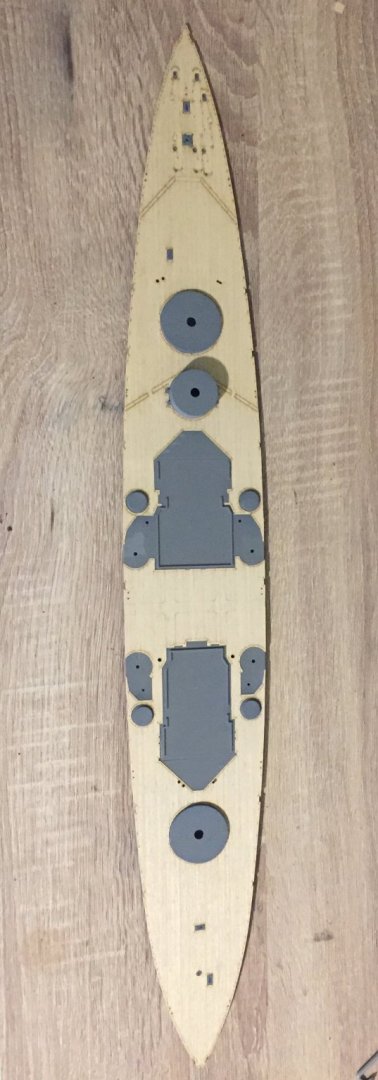
After lots of research and dry fittings the wooden deck is in place and I’m pretty happy with it. I coated the sticky side with some gel medium and the glued it down with more medium so I could get it right where I wanted. Ill do some tested once it’s dried and work out how to weather the deck on the scrape parts. Seems people say to use a light grey wash? Any tips as to the best way to get it looking right with the least chance of overdoing it and ruining the whole thing would be much appreciated? It needs something to take the “brand new” look away even though they would have been kept looking pretty new.
- 211 replies
-
- 7
-
-
- prince of wales
- tamiya
- (and 2 more)
-
Hey Mate, thanks. I’m a Tauranga boy, but due work have found myself in Gisborne... so needed to find a hobby!! Used to do plastic planes as a teenager so thought I’d do something similar but this time have some money so can buy paint! Haha your HMS Endeavour looks amazing! The replica sailed here few months back and looked great anchored in the bay! I wouldn’t know where to start on a all wood model.
- 211 replies
-
- 6
-
-
- prince of wales
- tamiya
- (and 2 more)