HOLIDAY DONATION DRIVE - SUPPORT MSW - DO YOUR PART TO KEEP THIS GREAT FORUM GOING! (Only 24 donations so far out of 49,000 members - C'mon guys!)
×


M. Pajulahti
-
Posts
126 -
Joined
-
Last visited
Content Type
Profiles
Forums
Gallery
Events
Everything posted by M. Pajulahti
-
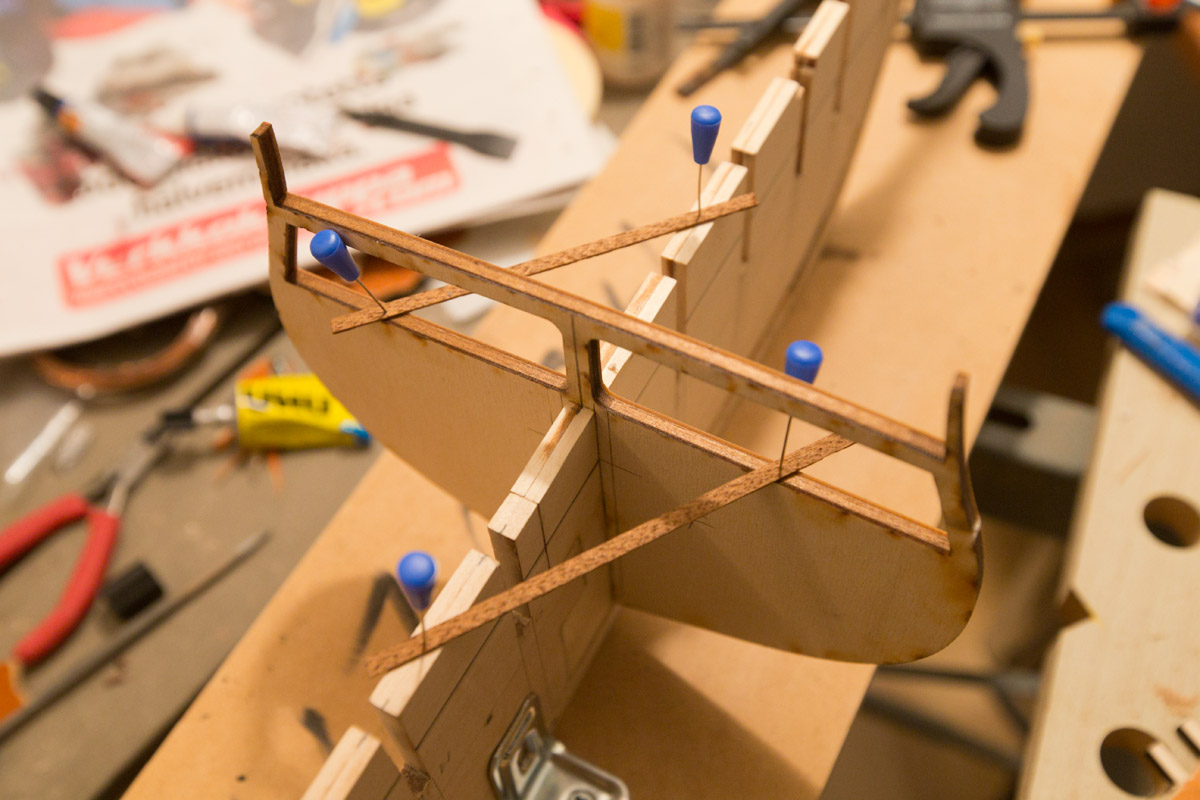
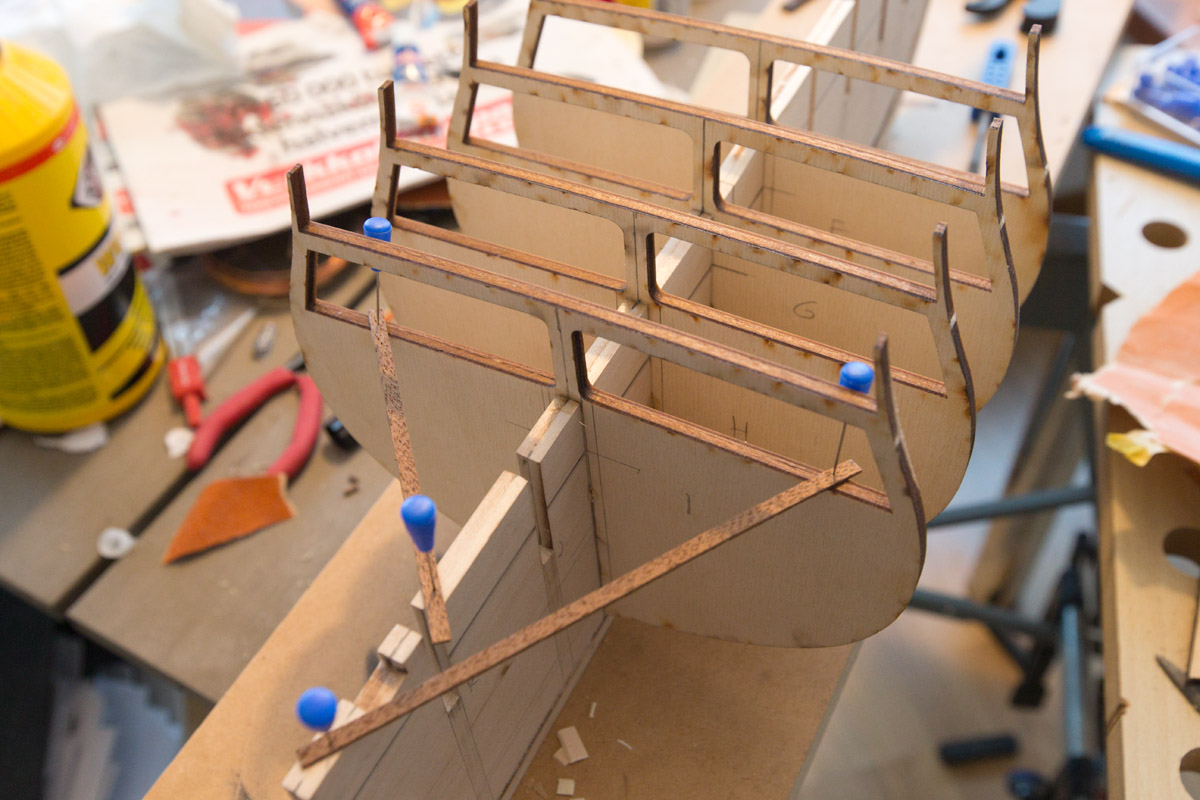
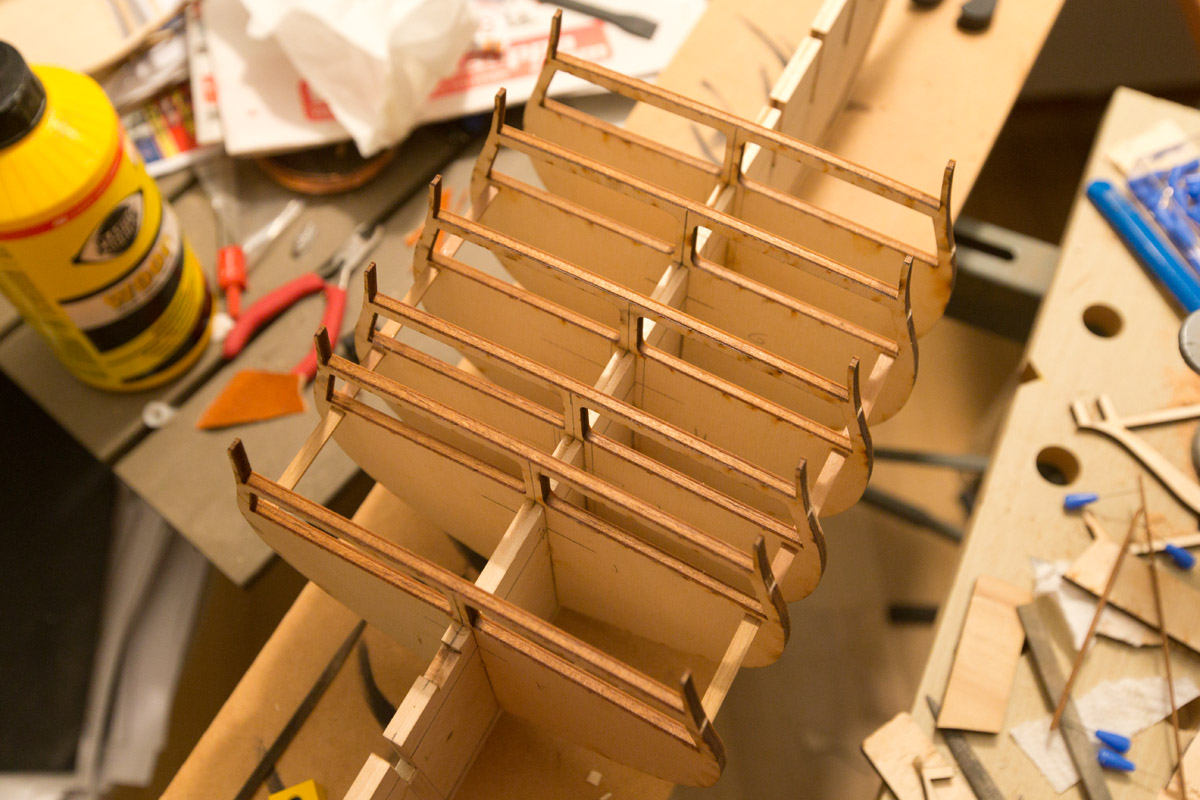
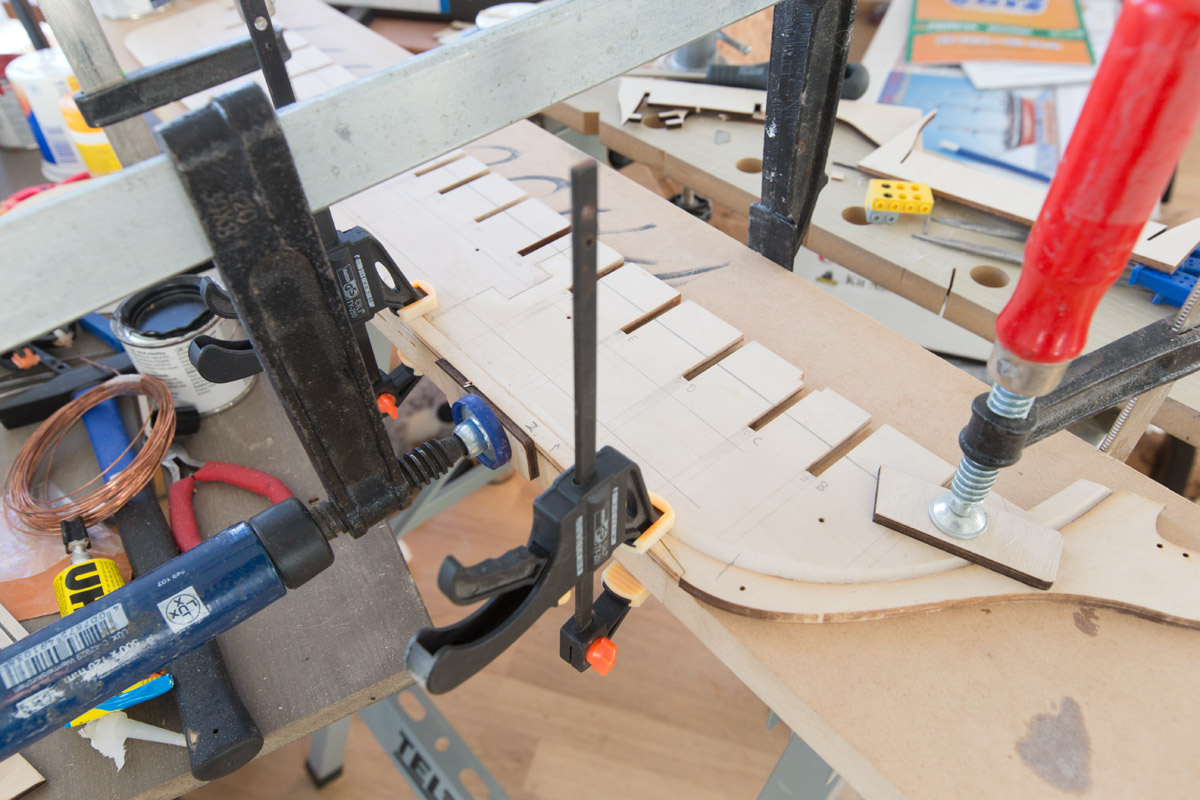
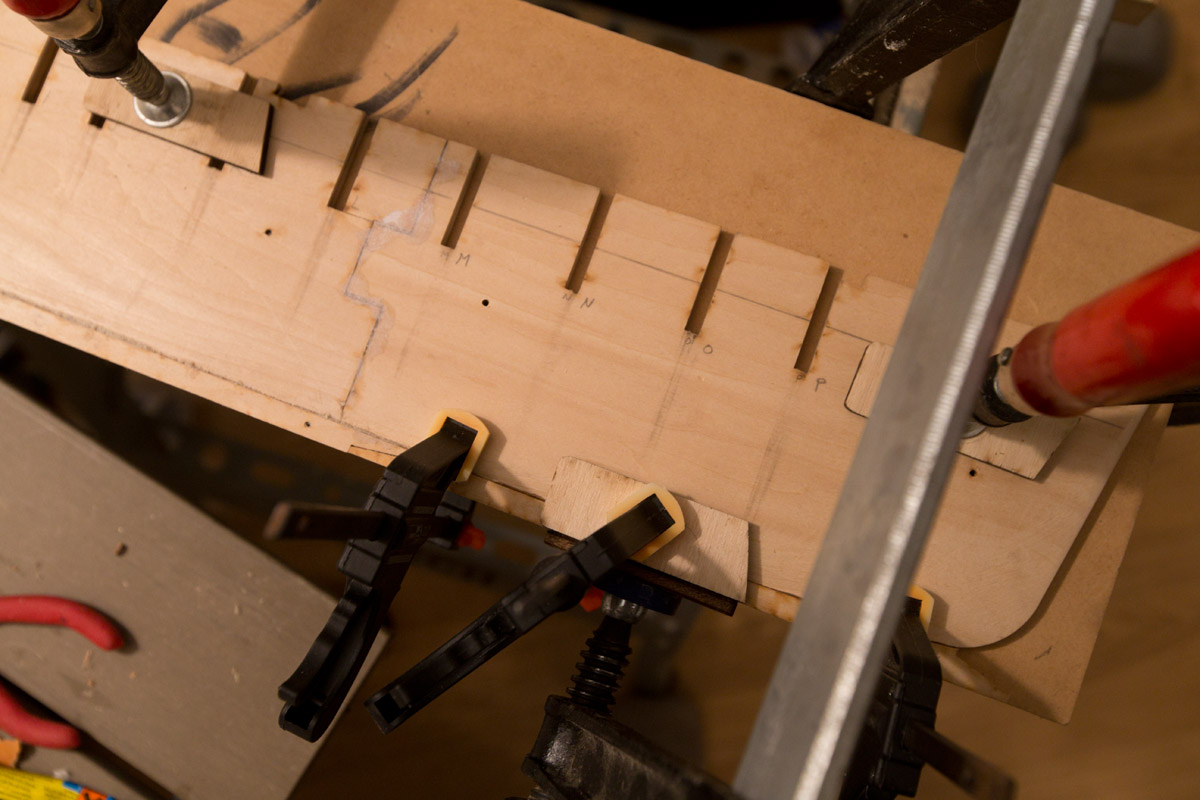
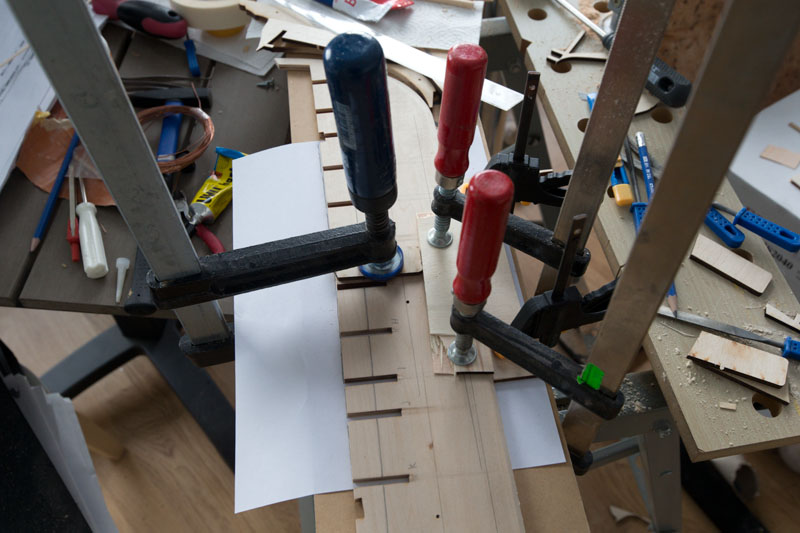
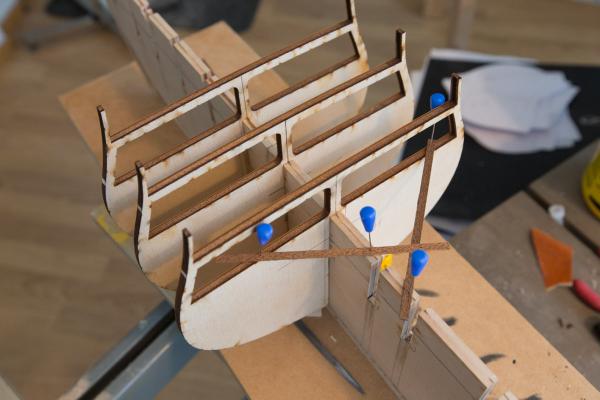
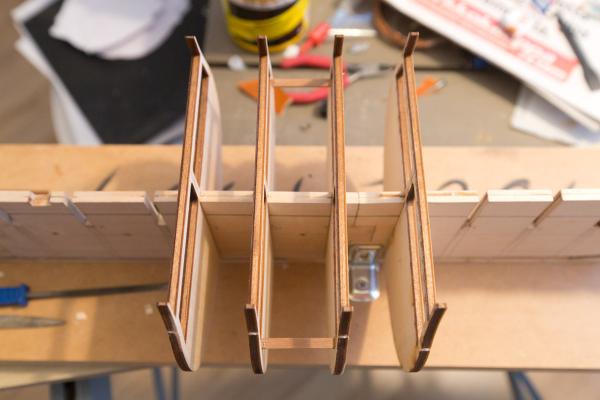
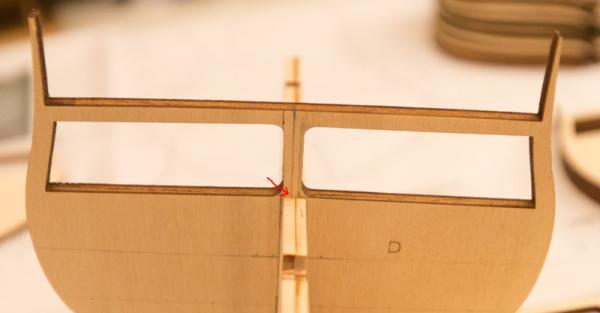
 I tapered the stem and sternpost, and finally started glueing the bulkheads! Here's the first one. One small step for mankind, one giant leap for ship builder. Three already... And four... Those damn bulkheads has a predilection to go awry after glueing. Permanent struts are great idea to keep everything straight. Now I have already six bulkheads glued. They're pretty much straight and OK from deck and underside. Instead of that extensions for bulwarks are not in line, but need to see later what can I do with them. Also bulkhead G has 1mm extra in right side, which needs to be removed. I'm focusing to keep the deck lines and lower hull lines in balance, and everything else comes after that. I also spent some money today. Ordered some Dremel tools. I will show them when they arrive. Markku


-
Thank you CaptainSteve and Rich. Yes, I know these first steps are the very important ones, and if there would be some mistakes, they would follow me forever. I'm gonna use many years with this build, and not going to do it with mistakes, that I would always know they are there. I was pretty surprised to found so many errors in lasercut parts and plans. Even they are all just 1-2mm or 1° errors, I was excepting higher quality from MS. Maybe this is just so popular kit and they have done so many copies from it, that there's born some manufacturing errors during the processes. Well, at least in instruction book there is a mention of it: "manufacturing errors can occur". That's why It's important to check and re-check everything. Markku
-
Hei Rich, Nice progress. Your ship is looking good. Precutting gun port planks is a nice idea and it works well. Could it be a possible idea to cover the open gun ports with a longer planks fastened by tape? Just a temporary solution to protect the ports. But maybe when you get the framing done, they will be strong enough. Markku
- 1,756 replies
-
- 1
-

-
- constitution
- constructo
- (and 1 more)
-
I've been following your build. Looking super good so far. Your boats look very real. I'm hoping my own boats will be even close as good. Markku
-
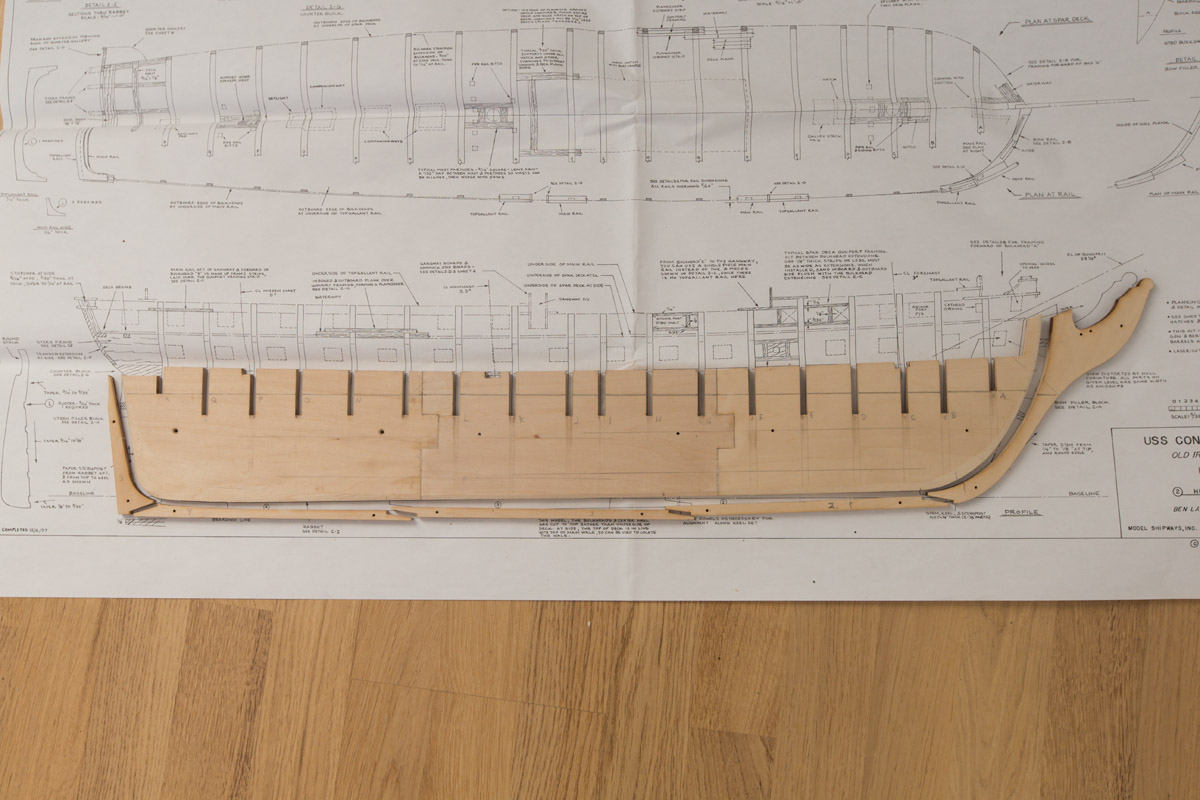
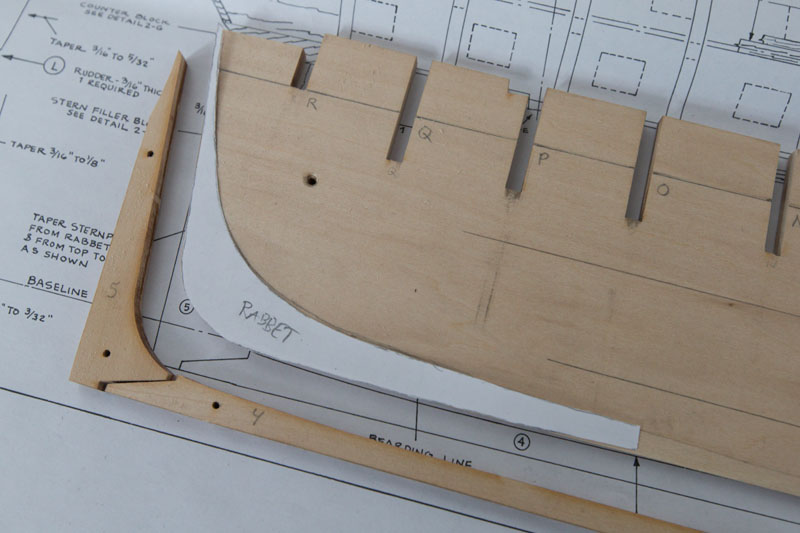
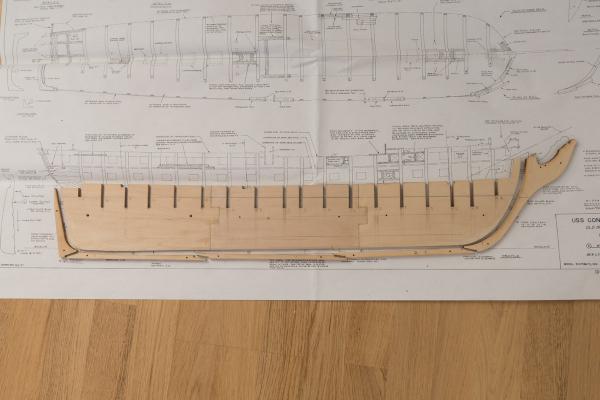
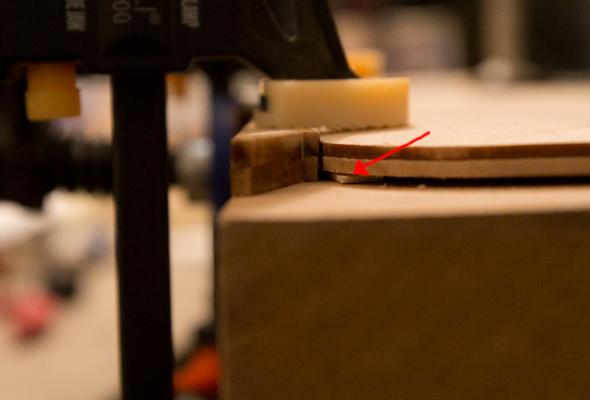
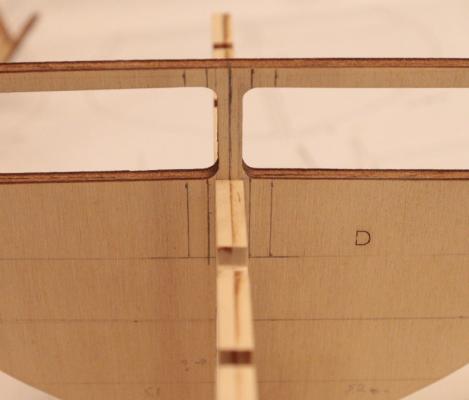
I have a pleasure to report that I've glued the false keel and it's very straight and looking good! I compared it to the drawing of plan sheet 2. Then i've been fairing the bulkheads. And found out, there still was small errors with bulkheads J, K and L. Glad I checked them many times to find out that. I hope I can get the hull lines to set properly with those bulkheads I've filed and turned to fit better with their symmetry. Today I've been glueing the keel pieces. Everything good and no problems. Because I cutted the rabbet before keel assembly, needed to add little scrap wood piece to hold the stern in right place. Now the middle point sets correctly with the keel. Markku


-
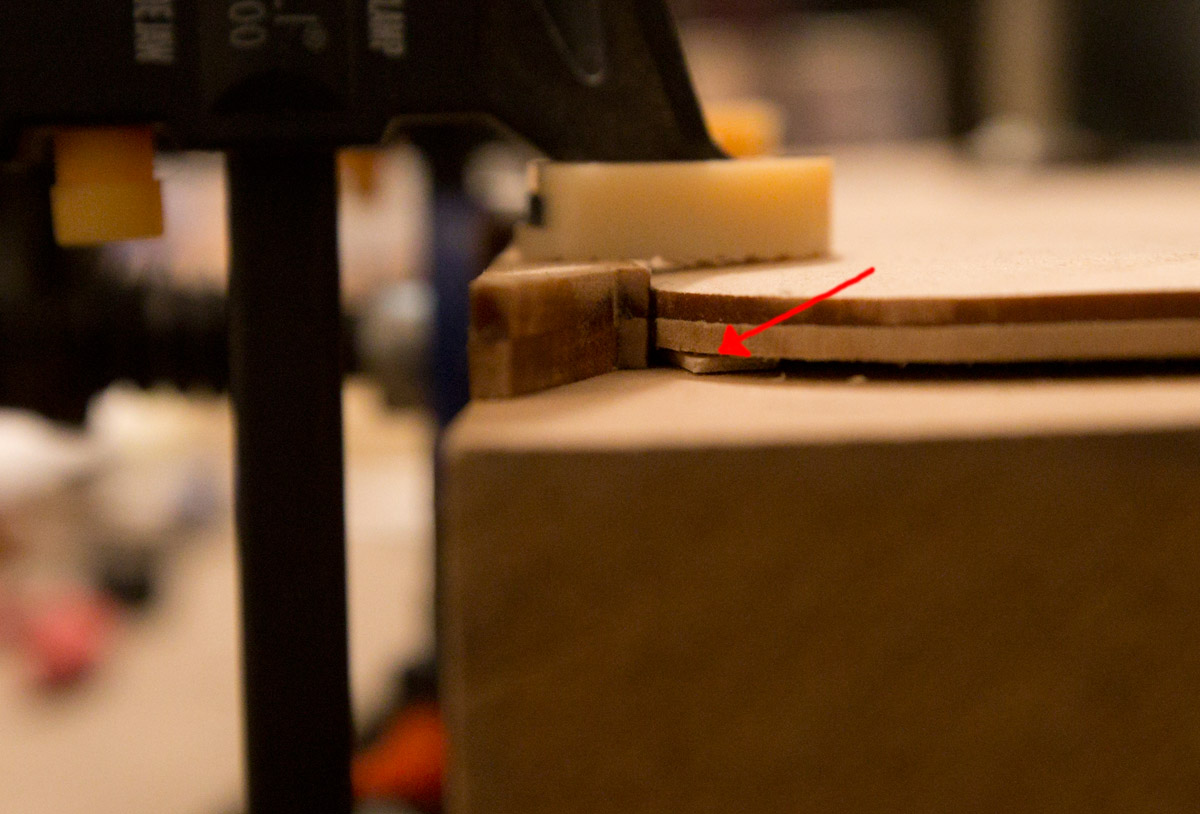
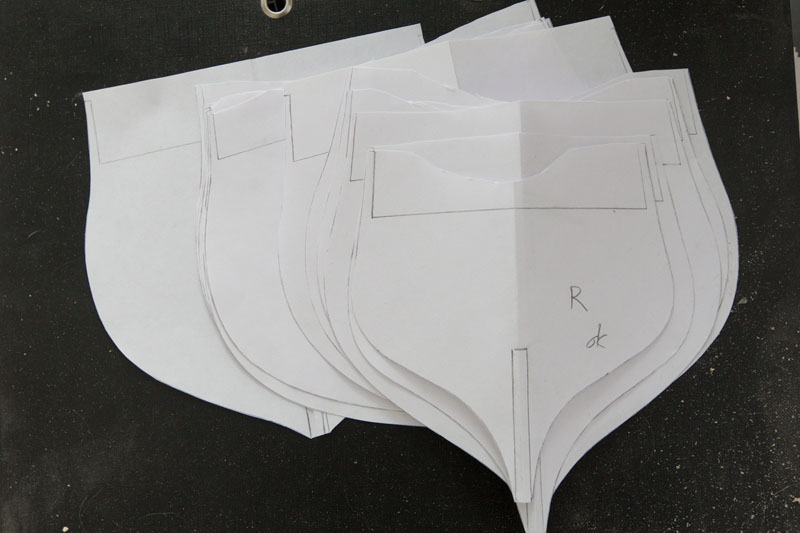
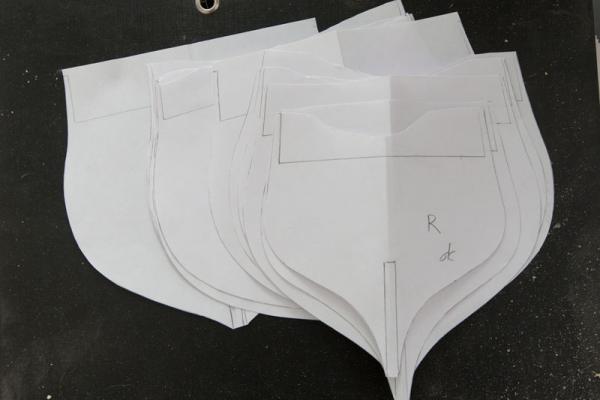
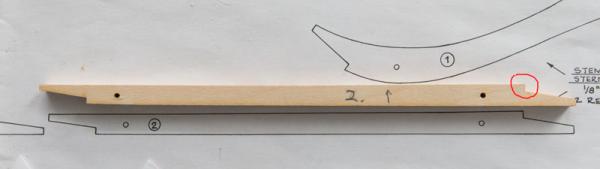
I have checked now all of the bulkheads using paper templates, which I learned from Frank Mastini's Shipmodel Simplified -book. Good news are, bulkheads symmetries were OK in all of them! No need to fix anything. Just a little notable thing next. The shape of keel part 2 is almost the same upside down. The only difference is 0,5mm higher other end. Small, but important thing, because if this part goes backwards, there will be small space between keel and false keel. Now i've cutted the rabbet. I used paper template for the stern part, so both sides would be symmetrical. And then I have finally glued the first keel parts together after million checks that it goes right. I noticed the reference line in plan sheet 1 isn't 100% straight during all the parts, so I have glued the parts like they are in plan sheet 2. There is the final result, how they should be after glueing. Markku


-
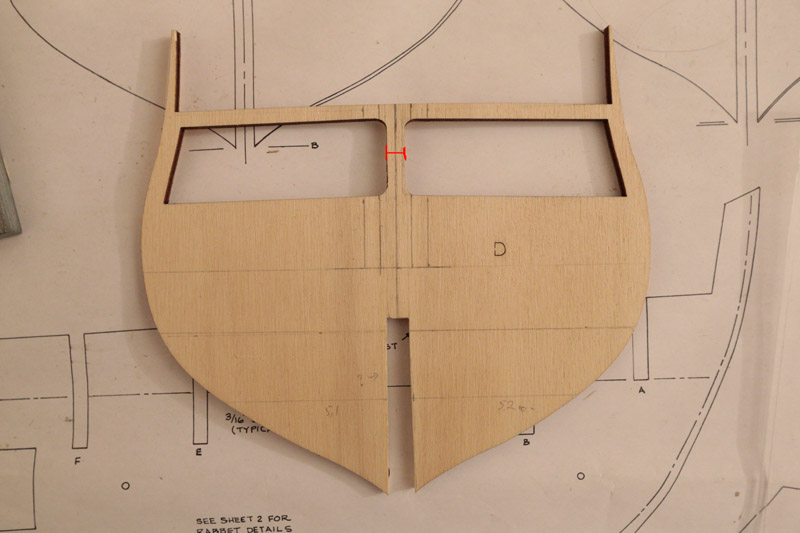
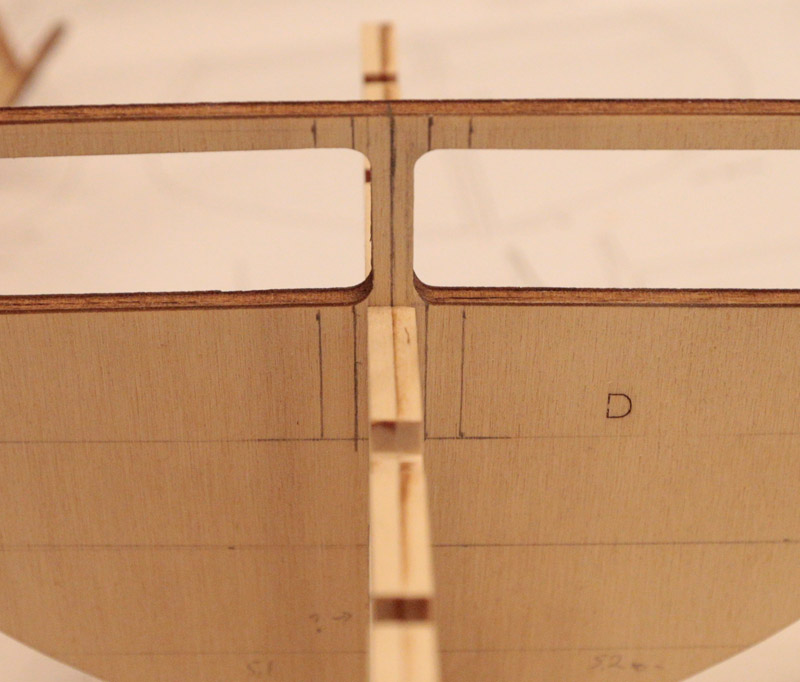
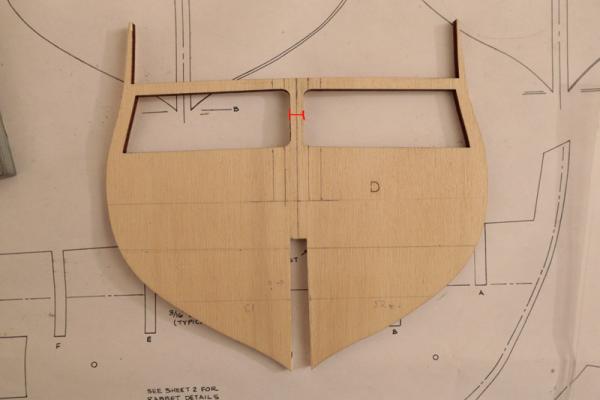
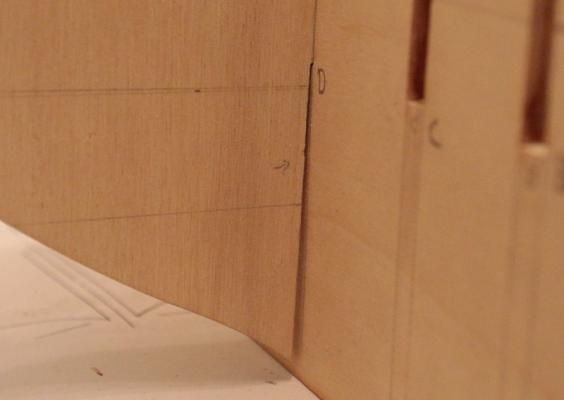
After few days i've figured out some things. At first, I measured the width from different points, but I did it overall, from side to side. And the results were wrong, because these parts are not symmetrical. Next I found out THESE lines are perpendicular to the deck lines in ALL of the bulkheads, so they must be correct, and I measured the middle points from there. I was glad to found out the rest of the bulkheads were OK, and the biggest problem was just with bulkhead D. I filed it to be straight and now the middle point is where it should be. Filed out from keel slot to turn the bulkhead in it's right angle. The difference was 1 degree, and I wasn't sure if the deck will go awry when i turn the slot's angle. I think everything will go pretty OK, since now I've drawed all the reference lines, checked all the bulkheads and found the right middle points. Well, I still have this result, but it won't be a problem. I had the same troubles with my Corel kit. Next I'm gonna draw the rabbet lines. Not sure should I file the bulkhead bevels before or after the assembly, since there seems to be some differences in bulkhead symmetries and hull lines, which I will see perfectly only after gluing. Need to think about that. Markku
-
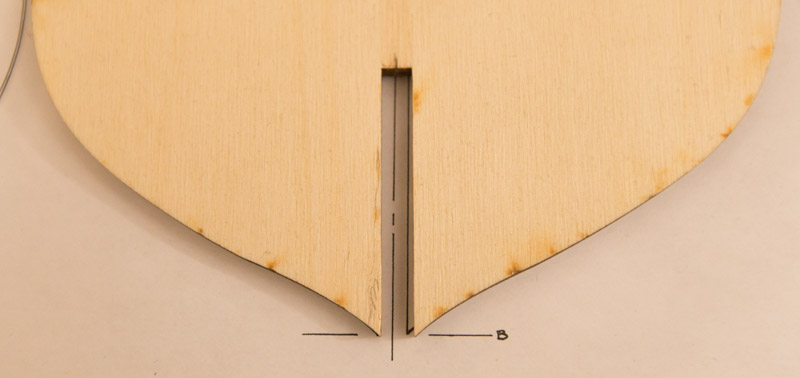
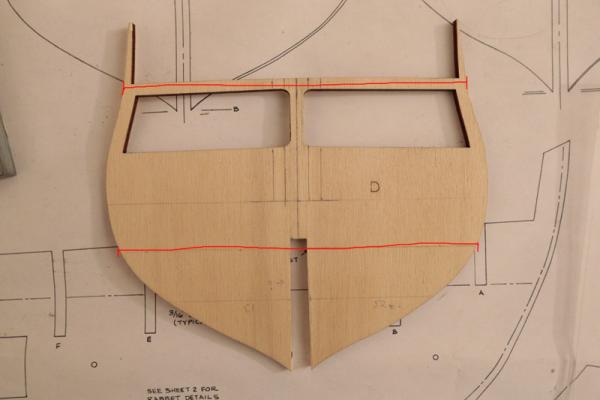
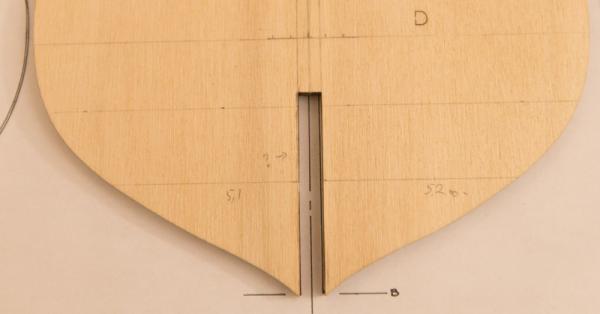
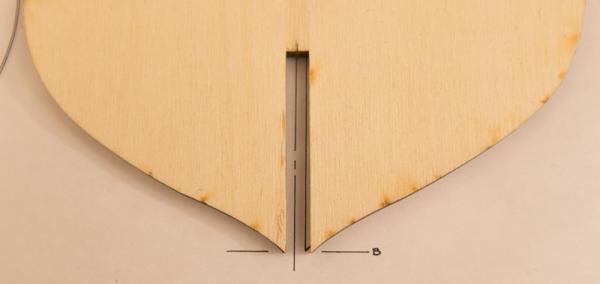
So... the first problem. I found an error from the plans. Maybe someone else has found the same thing... I've been checking the bulkheads and drawing reference lines, until I found out something's badly wrong with the symmetry. Everything seems ok there: Same part from the other side: Not good at all. The slot for the false keel is not straight. And you can see the result here: Midpoint isn't where it should be. For now, i've found the same problem is with bulkheads C,D and E. And i'm yet not sure how to calculate the right place since the plans won't help, and where those changes will lead in the upper side of bulkheads. Seems the deck levels will go awry? Any ideas? Markku
-
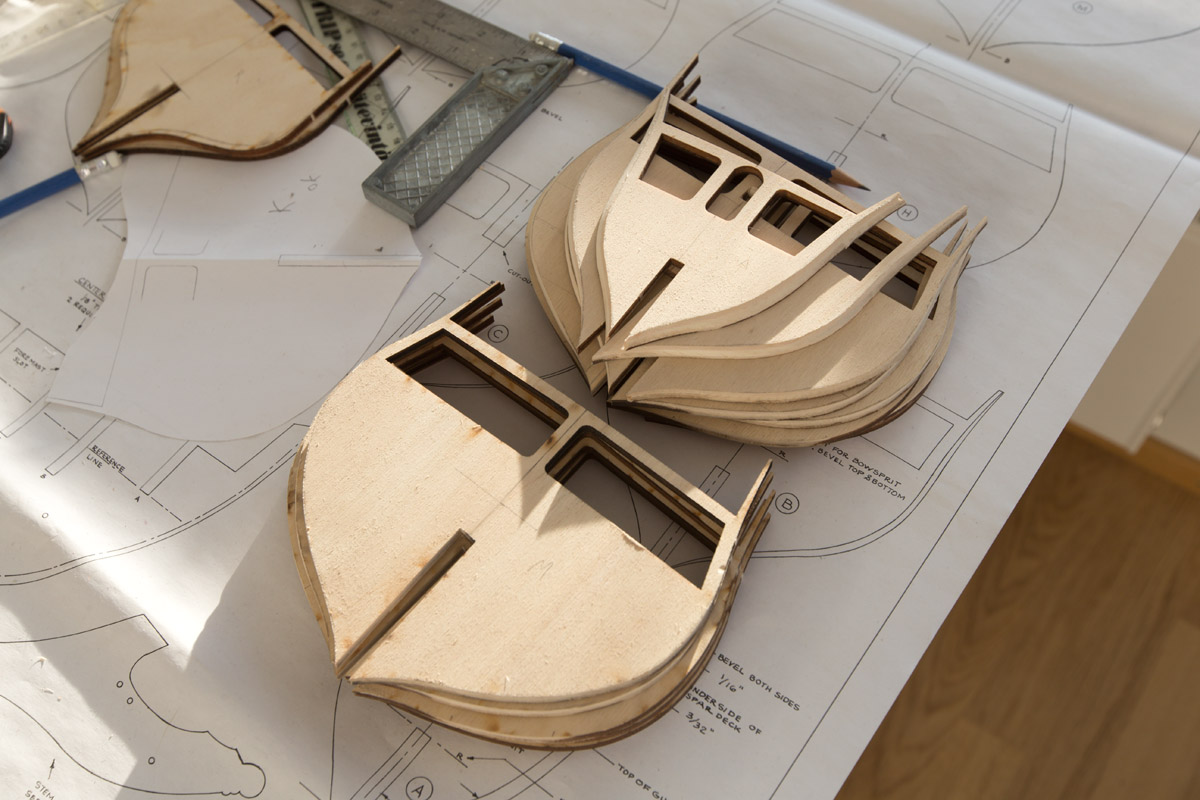
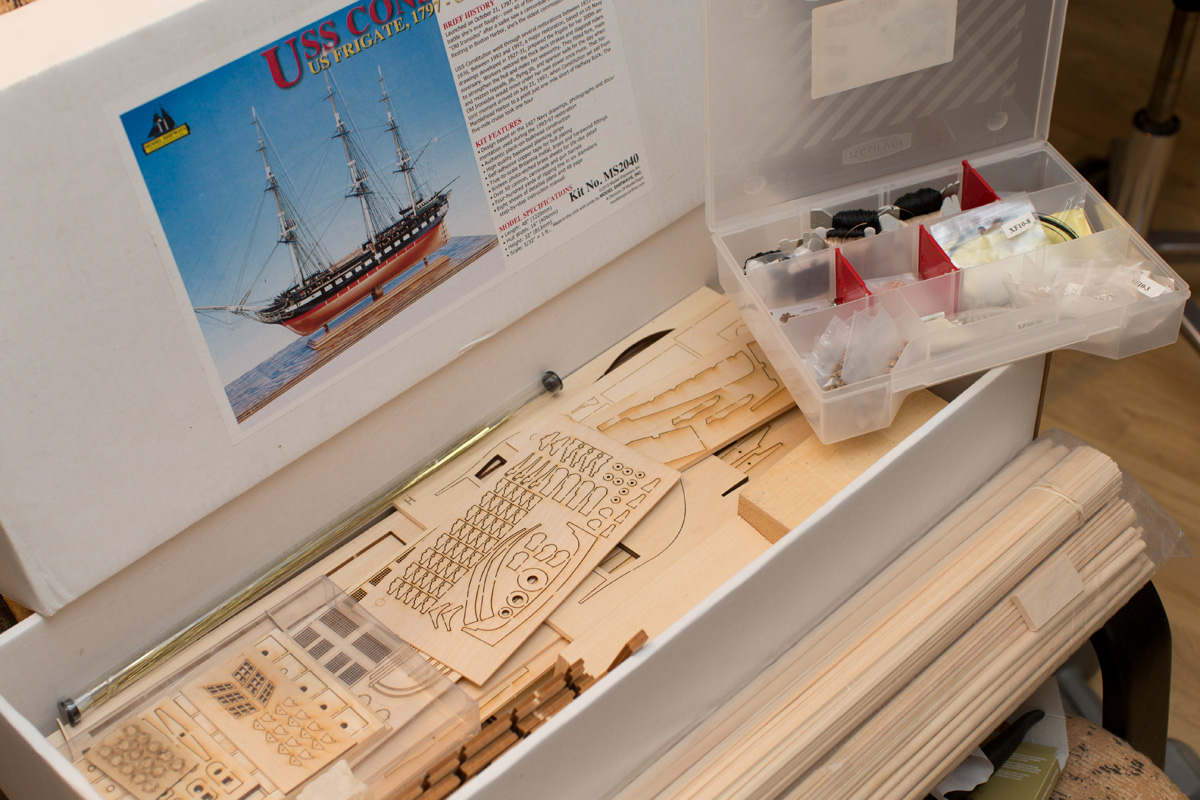
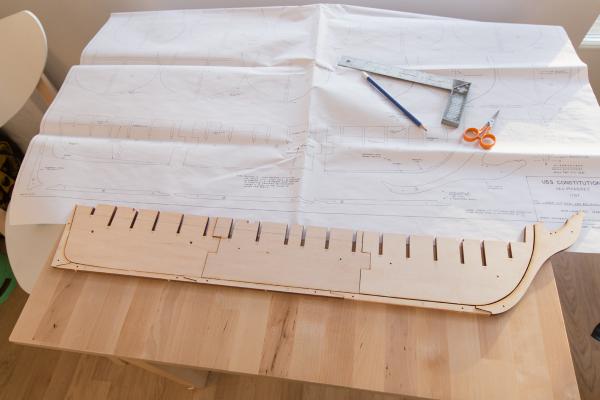
This is my first build log. I started this hobby about three years ago and here are my previous builds: Revell - Dom Fernando II e Gloria Artesania Latina - Mare Nostrum Corel - Flattie Now it felt i'm ready for something bigger, so I bought the USS Constitution. Why? Basicly it just felt like a good choice, and I like the ships of that period. Also, I wanted the best quality kit for that, so my choice was Model Shipways. It's funny, because I'm from Finland (if you don't know, it's in North Europe) and everyone around here are building just european or asian model kits. In finnish modelbuildingsite they don't even mention MS in a list of manufacturers, so I guess i'm really the only one around here who is building this. So this will be my third wooden build, but the first wooden sailing ship and first in this size. For now, it feels pretty big challenge, and I know it will very long build, but I'll always enjoyed building and thought that it's more fun if there are a lot of pieces. The kit looks excellent and i'm very happy to get started. Here are the first photos, just setting the keel pieces... Markku

-
This is a very nice ship you're building there. Did you finished your Norske Love already?
-
Hey Nick, I saw you got a lot of nice tools there! Looking good I have that billing's building slip too, and the same problem here with the keel - I just didn't added the real keel there yet to make it fit. I made some "helping blocks" instead of that. And also, my false keel was pretty warped, but i got it ok. And, my billing's building slip's importantest part, the one that keeps the bulkheads straight, is also very warped in every direction. How this feels so unfair? Yours is so straight and good! I don't know what to do with it, but it's not a problem right now because i have already succesfully installed all the bulkheads in this ship. Thanks for adding so many nice photos! -Markku
-
Yes, i have the same metal gunports with guns in them. Also, my other cannons are full metal too. Very ugly! You are lucky to have even some parts of those in wood. I was planning to make them from wood too. I was studying about the stern and figured out it might be pretty ok after all: the parts in the kit doesn't need much modifying, which is very good. I want to make some little interior in the captains cabin, and the only problem is the floor (part no 16), which maybe need some little modifying. I have already started that build, and i have the keels and bulkheads glued together. I've been also making the gundeck larger.
-
That's wonderful to hear you're gonna do it the same way than I. Maybe I should give it a try and start it too, so we can change our tips about modifying. Since i'm pretty newbie myself, we're in the same line in this. Biggest thing i've been trying to figure out, is the stern. It's a bit different in real ship, and i don't know how to modify it properly. I guess it needs to be lowered, because it should be higher. Big challenge, indeed.
-
Hello Nick! I have the same kit in my closet. Maybe you know they are rebuilding the real ship in France, it should be ready in 2014 if i remember correct. Ships original name was Hermione, rebuilt one is L'Hermione. There is a video of launching the ready hull: However, that project reminds us, how bad those AL's kits might be: totally unreal, unhistoric and way too different than the real ships. Plus those horrible metal parts (in my kit, there is even more metal parts, than yours)... I thought that i'm gonna built the real Hermione instead of that unhistoric awfullness what AL suggests, but that process wasn't at my skill level yet. Which version you're gonna build? Good luck with the process. I'm following your build in high interest.