Sizzolo
-
Posts
85 -
Joined
-
Last visited
Content Type
Profiles
Forums
Gallery
Events
Posts posted by Sizzolo
-
-
Good news for the project -
1. Appointment at the Kew National Archives this week to investigate the ordinance and hopefully confirm exactly what she had between 1804-1810
2. Appointment at Chatham next week to be shown two of the original HMS Diana models.
Please do let me know if you want any specific details confirmed and I’ll do my best. I’ll take pictures where/when possible.
-
-
I just found an old video of my recent stay at Bucklers Hard where I built up all the cannon carriages in the Master Builders hotel. I highly recommend a stay for any ship fans. When booking, make sure there’s no weddings going on (v different experience!).
-
For info, the process followed is;
- cut the plank to the correct dimensions,
- drill holes for the trenails using a pile drill,
- soak then bend the plank with a bending iron and repeat until until it fits perfectly without needing any tension when test fitting,
- push the tiny trenails in to the holes, glue on the backside of the plank then sand down front and back surfaces
- glue the plank (wood glue for the boxwood, superglue for ebony)
- bring the surface up to a high polish
- add finish (oil/wax/varnish etc).
To retain the contrast of the walnut trenails on the ebony wales I will polish them and use wax on the planks before glueing so that the oil is less likely to effect them. The other hull planks in boxwood will receive Tung oil. I’m trying to avoid using oil until the planks are glued in case it affects the glues.
Red and Blue planks will receive an Ink coat before a satin varnish sealant which is consistent with the oil and wax finish.
- mort stoll and dunnock
-
 2
2
-
-
-
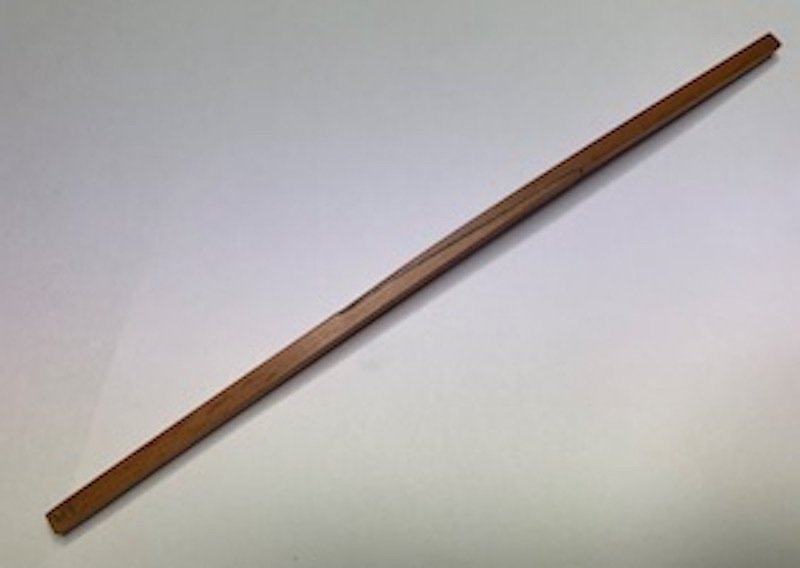
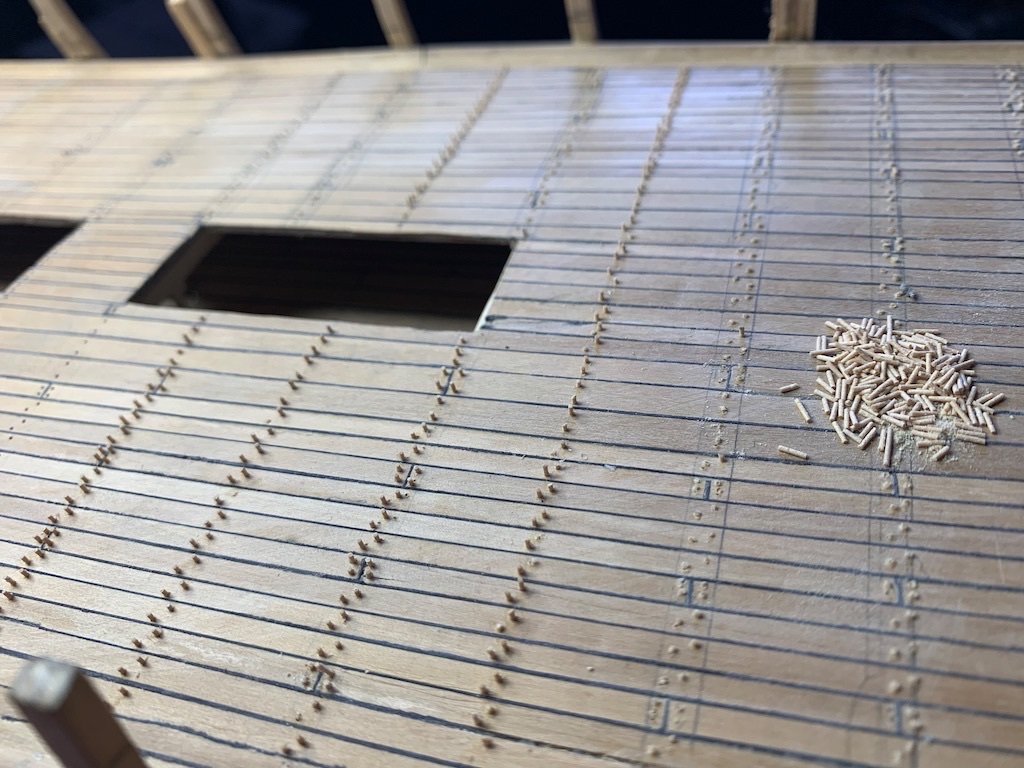
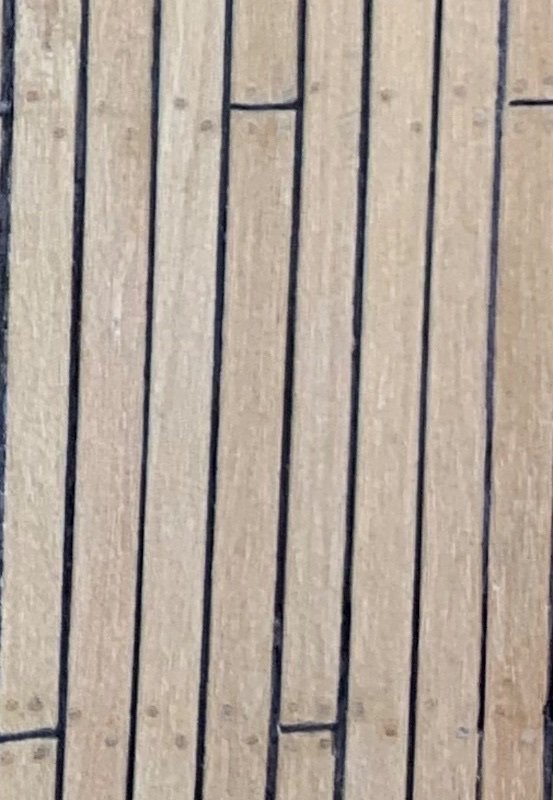
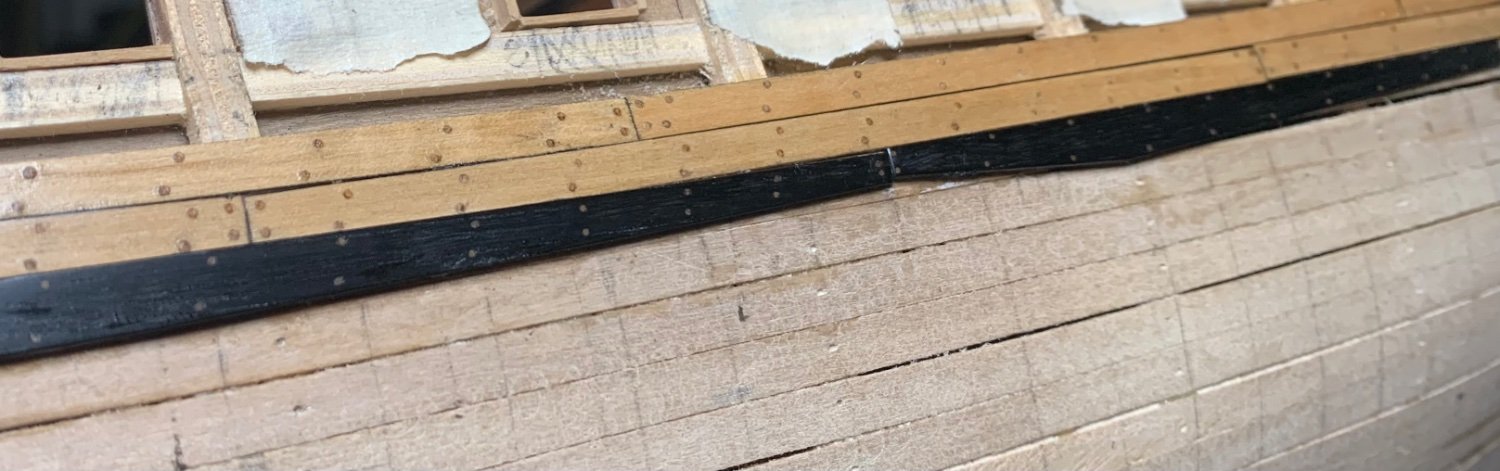
Test trenails (x2…see if you can spot them!) for the wales. I used walnut trenails but soaked them in black ink. I don’t think the ink makes much difference, plus, it’d be nice to have a small visual indication of the time spent.
The boxwood nails in the above pic - I think I made the holes too large which has ended up with them looking more prominent so I’ll do it correctly on the port side. As mentioned previously - it’s good to learn from mistakes and evolve techniques! The test nails on the wale test plank are correct (3/4 inch nails, scaled).
Incidentally, there’s something very satisfying with ebony and boxwood once it’s highly polished. Maybe it’s just me?
-
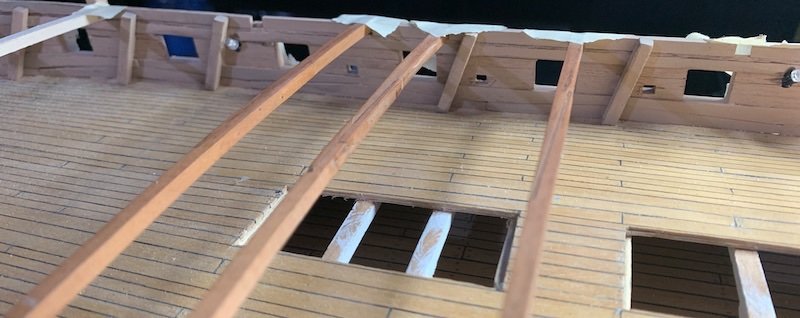
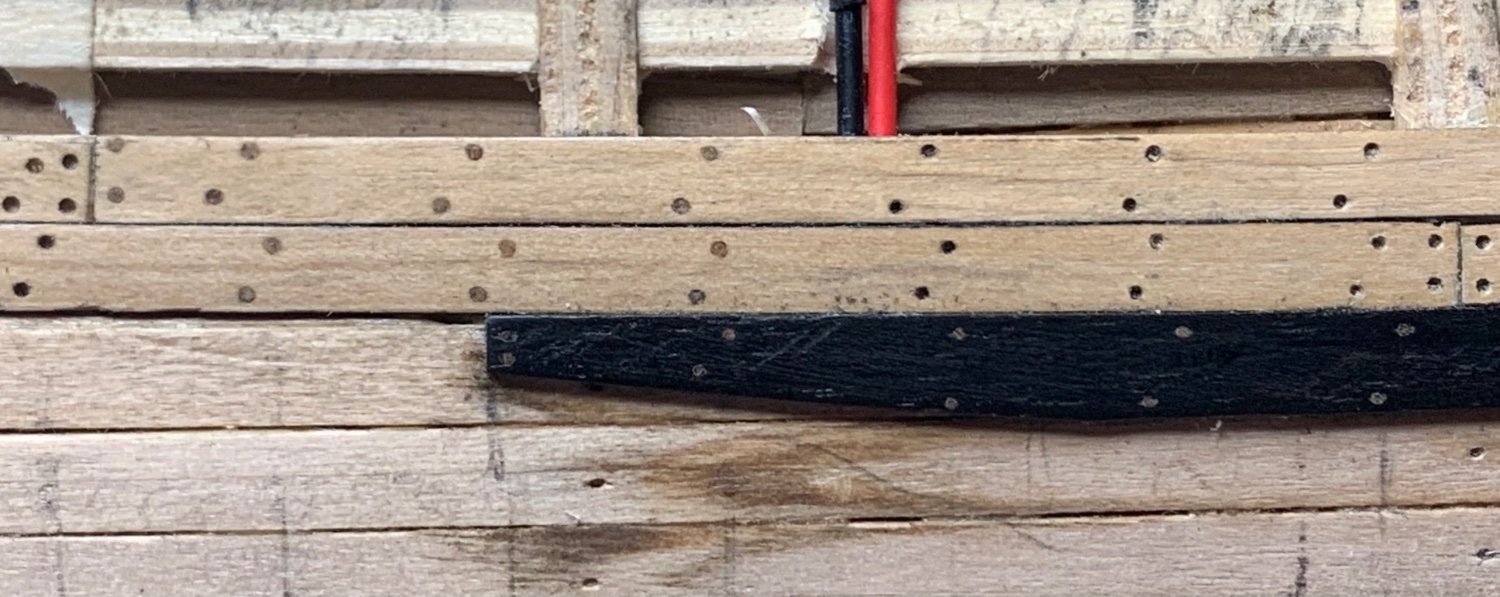
First couple of test outer planks added. I’m being pedantic by varying the plank thickness exactly as noted on the plan. Why not, eh?
Trenail holes drilled by pile drill to the plank before fitting (because.. ug.. there are wires under the first planking so I can’t just drill directly into the hull anymore. This complicates things a little bit). The good thing about starting with smaller ships is learning from design issues as one progresses. I may change my approach on the next build.
Estimated location of trenails taken from the new plan above shows the frame positions. I think it makes sense and aesthetically it looks good.
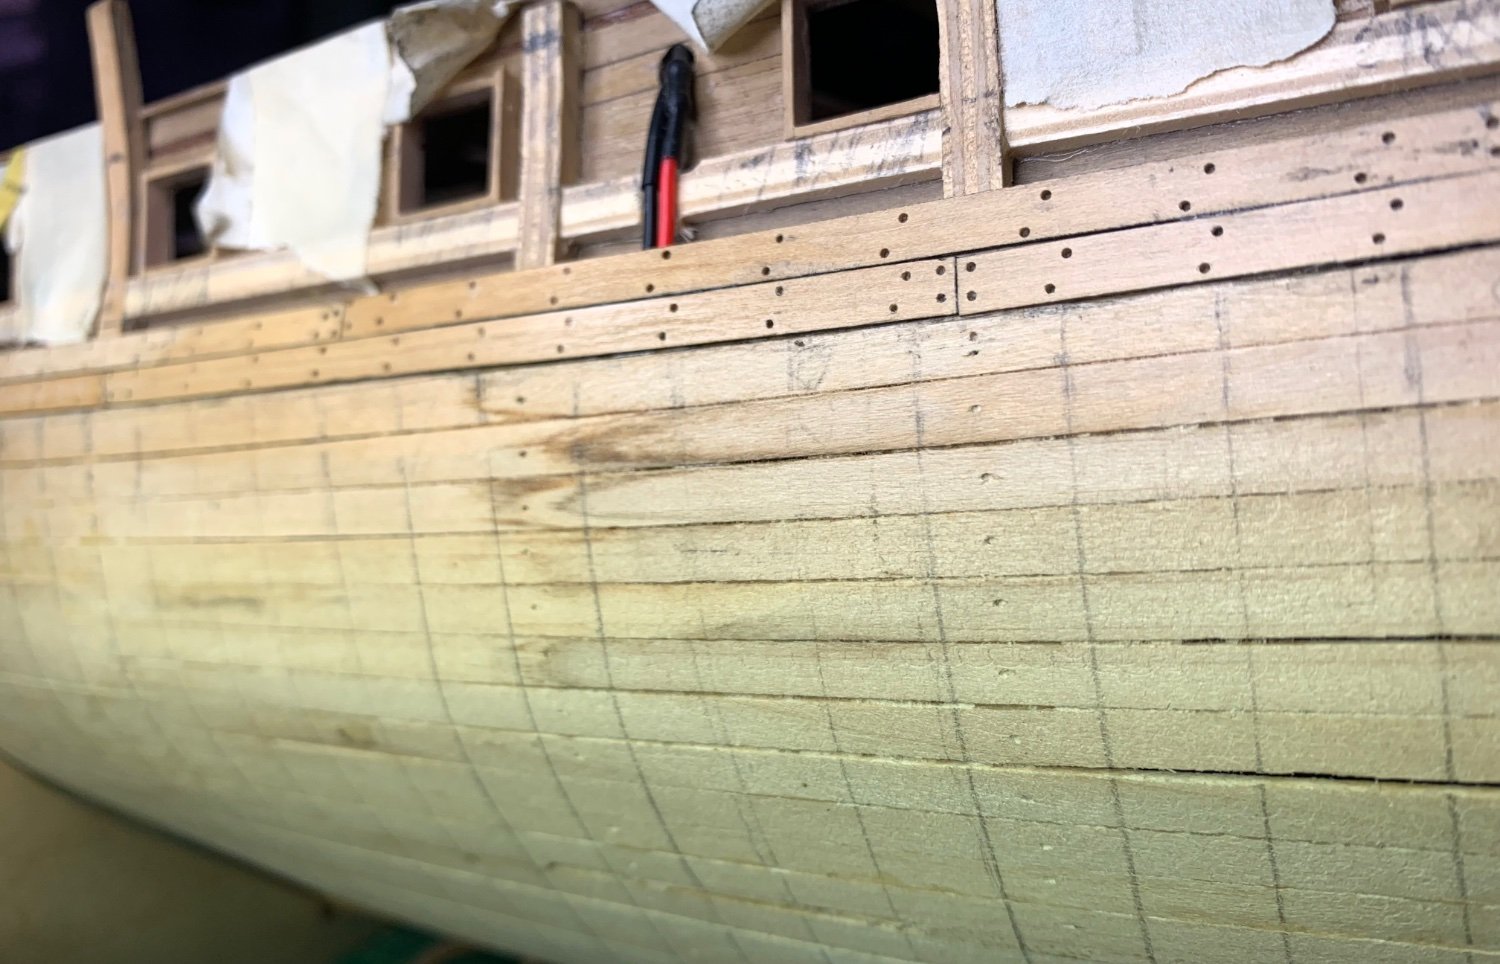
Added some tung oil after the boxwood trenails (to boxwood planks) and interestingly the nails darken quite heavily (I previously used antiquax on the boxwood deck planks as you can see above). I’ll have a think about the results and decide on wax vs oil finish. If I decide to switch to wax instead of oil I’ll have to rip out the test planks. Not a major issue.
Your opinion on darker ‘oiled’ nails vs almost invisible waxed nails would be appreciated. (Only top two planks done).
Trenails and tung oil are added just to the three frames of the left of the wires..the rest are holes in the planks, yet to be filled etc. (only top two planks relevant, below ports, above where wale will be).

- dunnock and mort stoll
-
2
-
Hi Mort. Thanks for your kind remarks.
I'm not totally sure of the rules around advertising here so won't past the link but if you google vanguard models in the uk you're sure to find the page. They recently produced the HMS Indefatigable - you can find a great build log here on MSW. Watching the progress of that kit really helped me get back to Diana and gave me a lot of inspiration.
- mort stoll and allanyed
-
2
-
Totally agree - I think these measurements would be the pre-feng-shui plank (if you get my meaning).
One of the plankers would probably take the basic plank to the ship, or a pre-fitter, and the result would be much bending and shaving until it fitted neatly - much in the same way as we do with outer planking on our kits.
So:
Artist > planker > Feng Sui chisel-meister.
I bet the plankers were constantly blamed for all the issues arising between the plan and the resultant ship…
-
Many thanks all for the nice comments. 😀
Allanyed. I did something similar to your suggestion. The plank lengths are quoted so I took a length measurement of every plank between each gunport and that gives a variable scale between 1/36 and 1/37.5. I think what the artist/draftsman is representing here is what you’d get if you flattened the side of the boat. Obviously not an exact science as he’s still showing where all planks meet the keel, hence a variable scale.
I think his priority was to have something to give to the ‘plank-gang’ (I’m sure they’ll have a proper name! ‘Bunch of plankers’?). So in theory if all the planks are cut to the lengths and thicknesses on the plan they should fit correctly on the ship. It’s a numbers-heavy plan which might be why they used a larger scale (and uses yet another freaky way of writing ‘8’s!)
Measurements ‘written’ on the plan adhere closely to the profile plan (as one would hope!). However if you’re using it to measure between two points you will need to calculate the local scale using the nearest figures (because, as above, the scale is not wholly consistent).
Its perfect for where I am at this stage as I just need to make a bunch of planks on the thickness-sander and get stuck in, using just the figures stated on the plan.
Pics to follow once it’s got some boxwood planks fitted.
-
I love it when a plan comes together...
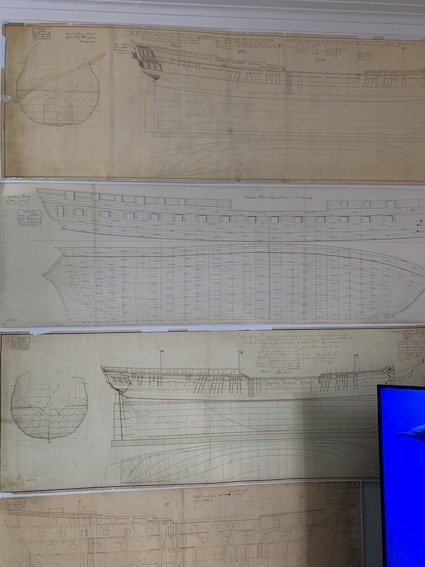
The outer works print arrived this morning. I originally thought the small markings on each plank were indicating where they would be nailed but actually they are the exact plank length, and at the midships section it indicates the thickness of the planks at each level. Perfect!
(edit - also, the outer works plan is not to scale, likely because of the curvatures involved. The figures as written shows the scale is roughly 1/36. I had a minor panic on the sizes of my port holes until I compared the outer-works plan against the main profile plan as you can see in the pic (second from bottom).
-
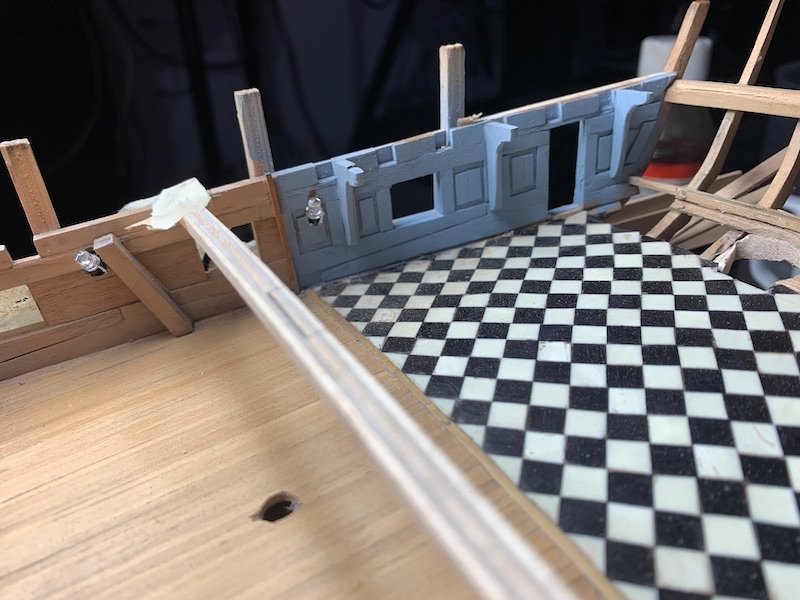
Update showing current state:
Skid beams: Pearwood with nails (wire) and a finished with tung oil (I use tung on all unpainted pear)
Some skid beams in position. You can see the colour of the walls here - I chose the new paint colour from HMS Victory (ended up with a big tin of the stuff). The inner walls will all be this colour but the 'yellow' of the outer works will be represented by unpainted boxwood and ebony for the black.
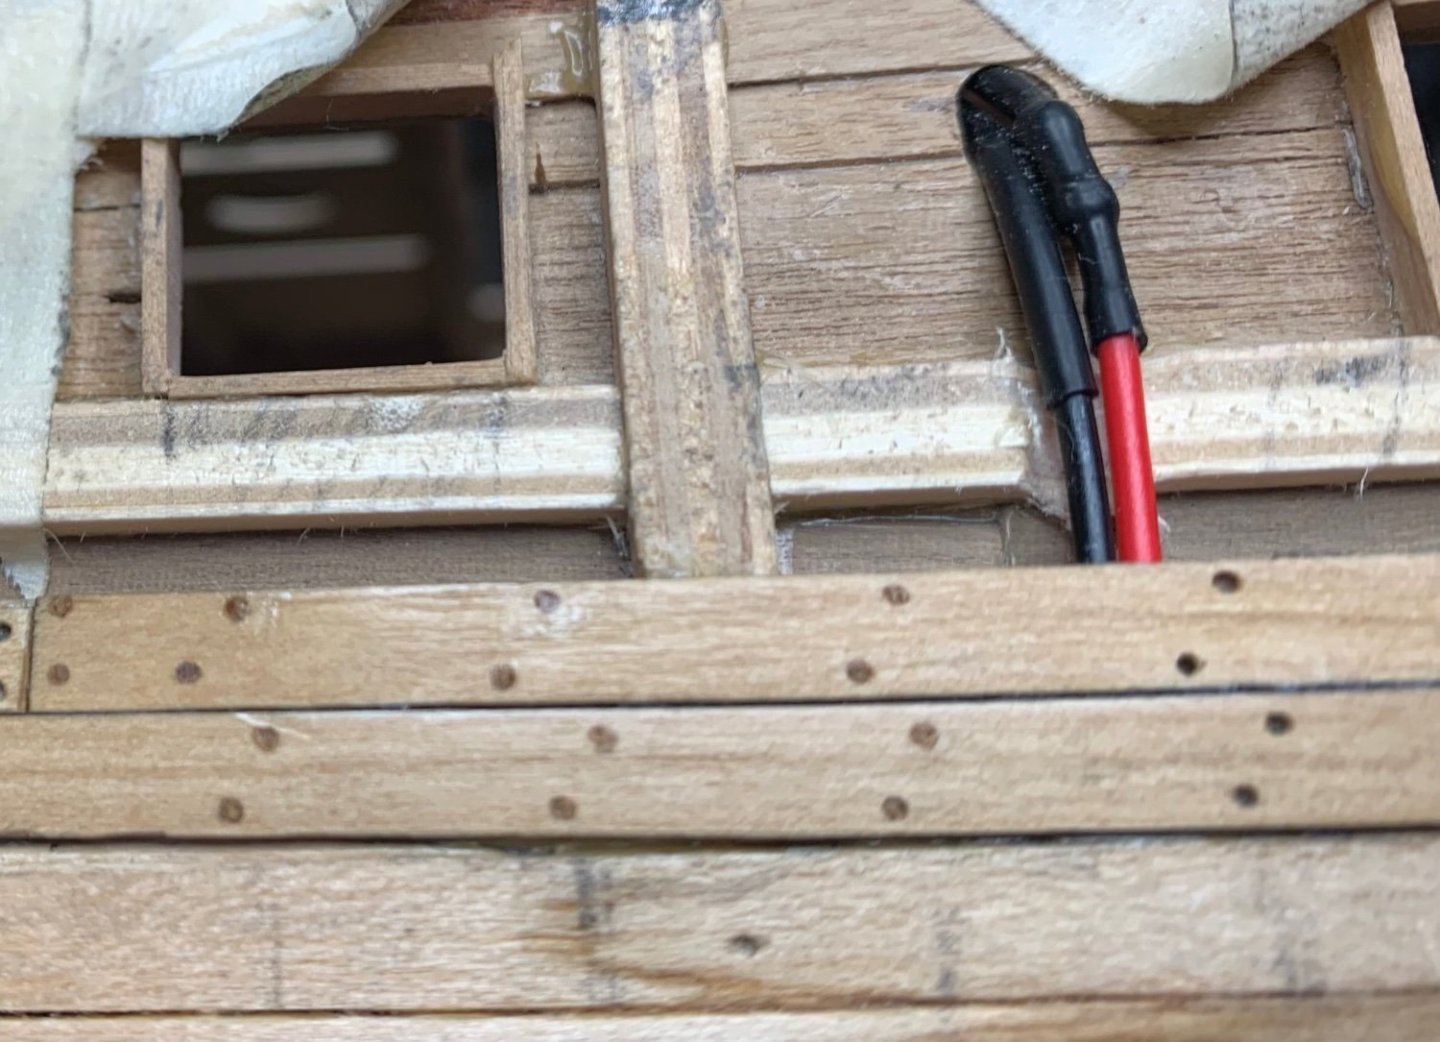
Captains quarters: you can see the LED's here but they're not so obtrusive once the deck and everything is in place. I plan to paint them anyway to disguise them a little more.
Here's my prototype of the chain pump but after getting the chainpump kit from Vanguard Models I'm going to use them instead - I've modified the kit a little bit and really love the sharp details.
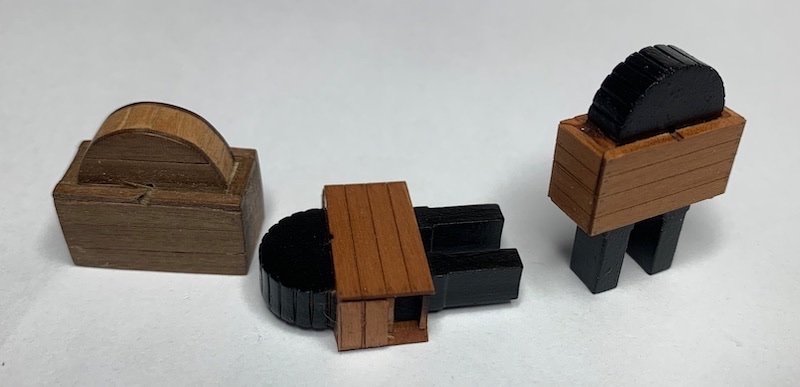
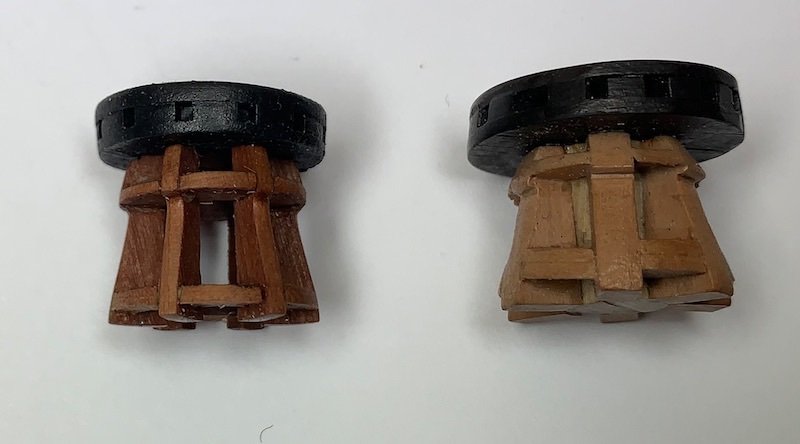
Similarly, I'm going to use the vanguard model capstan instead of my prototypes; prototype on right in pear and ebony.
Slightly modified vanguard kit;
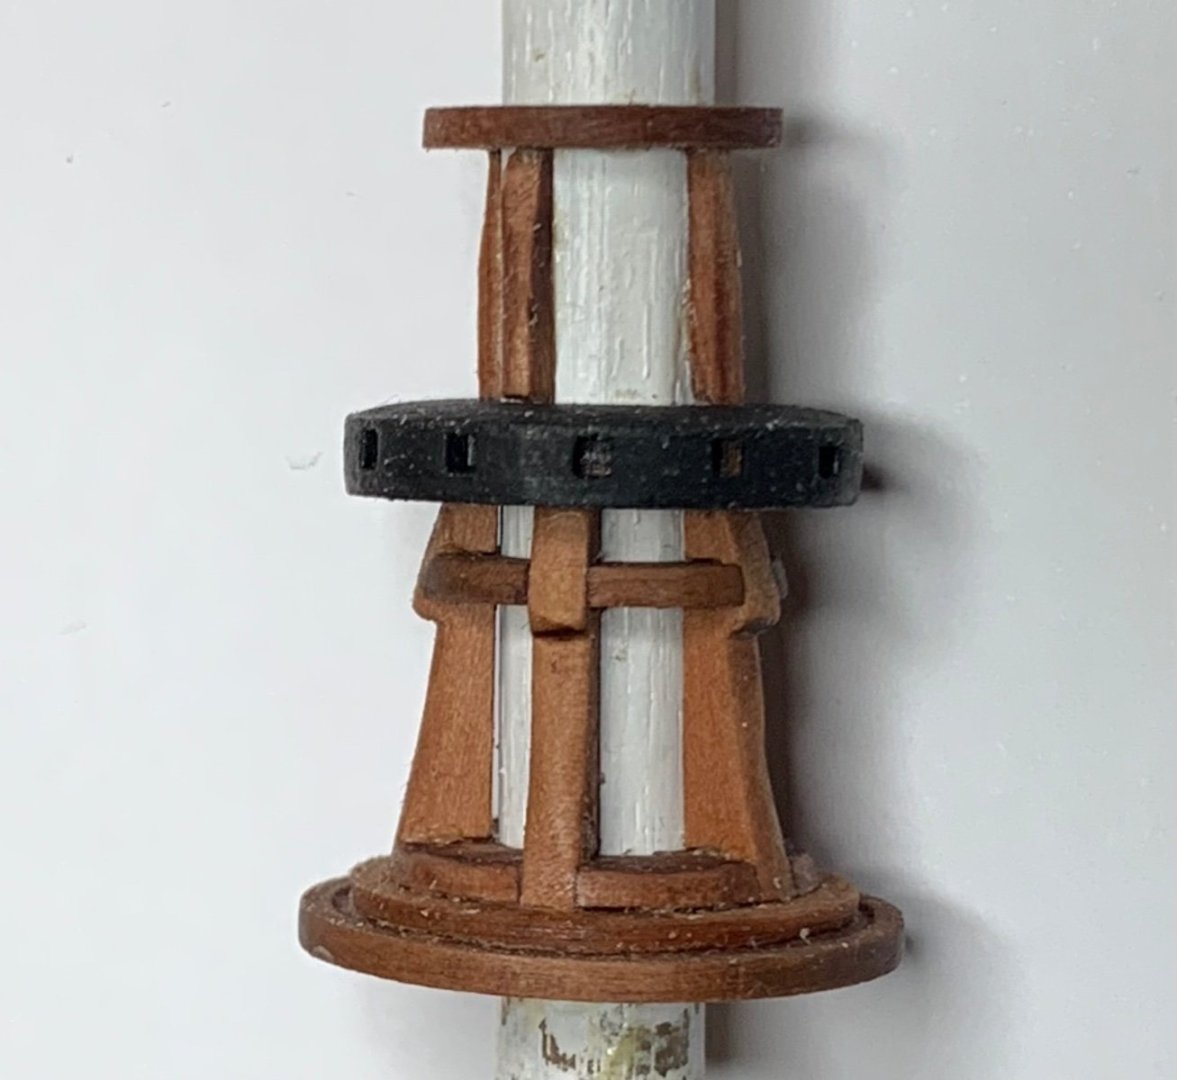
Prototype in pear and ebony;
- DaveBaxt, KARAVOKIRIS, Thukydides and 4 others
-
7
-
I've been wanting to start a log here for some time on this build as it's been an on-and-off project for years (purchased in 2006, started in 2009, currently at the stage of planking outer hull). I've taken some pictures over the years which you can see below. These show progress to-date and I'll update this build-log as I make significant progress going forward.
Summary:
As a project I intend to use the caldercraft kit as the base but will replace and enhance much of it where I can, because I love adding details, even if they're not going to be seen. I also really enjoy working with hardwoods and have a good set of Byrnes model machines which are a joy to use (disk sander, circular saw, thickness sander and rope walk). My first completed kit was HMS Sherebourne which I also heavily modified and my high level plan is to start with smaller ships, then the large frigate, a 74 then, if there's time (!) a 100+ gun ship, all from the same period and same scale of 1:64.
I plan to represent her after her 1801 refit, with full sails and replicating the same planking patterns shown in the admiralty plans and the Anatomy of the Ship book. The captains quarters will be fully fitted and lit, as well as additional details on the lower deck.
Stern and rudder, made from boxwood. Rudder shows some original testing of coppering which I've since removed and plan a different technique.
Lower deck planking (boxwood). After testing a few different techniques of representing the caulking between deck planks I settled on using strips of cartridge paper which I felt resulted in the most pleasant finished product. However, it's a lot of work! You have to cut long strips of the paper, stick it down one long edge of the plank with wood glue before adding the next plank. At the end you shave it back and sand. The bands you can see on the pic below were used to squeeze the planks together as they had a tendency to spread. This results in the occasional exploding plank but, well, the end results are nice! (you can see shaved planks in the lower centre of the pic)
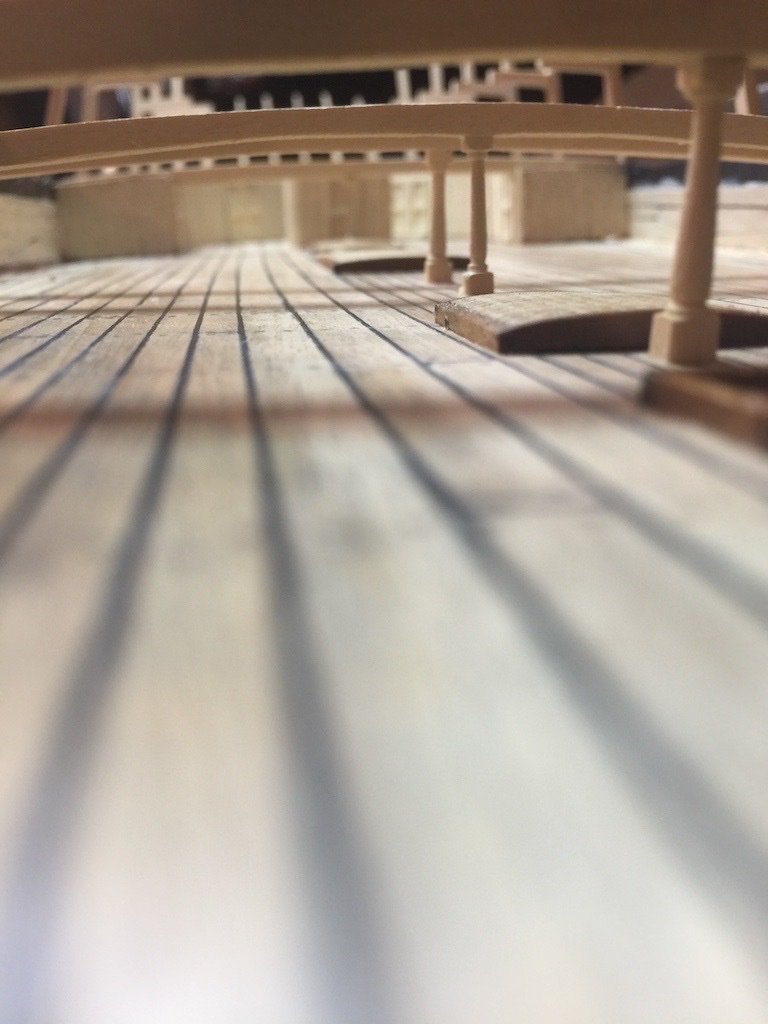
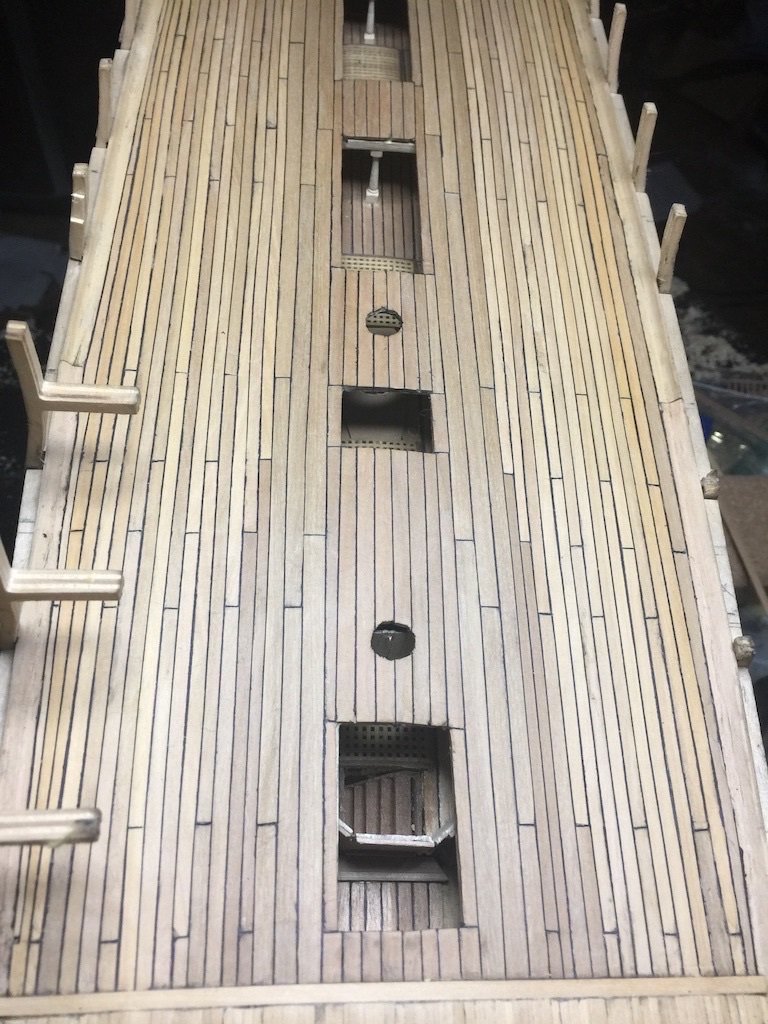
Rear lower deck and some details of roughly built cabins which are unlikely to be seen. You can see how the planking has progressed however including those tricky odd-shaped planks near the waterway. Also visible is my earlier version of trenails, and earlier version of gratings.
Details of the central pillars on lower deck and you can see how nicely the caulking worked out.
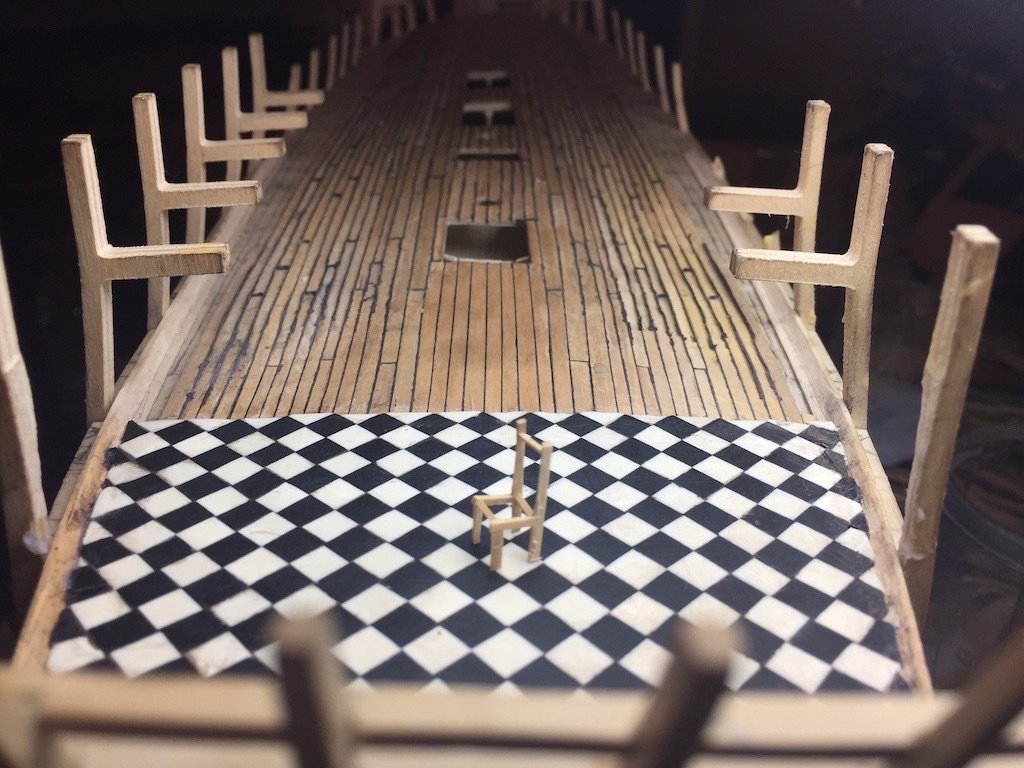
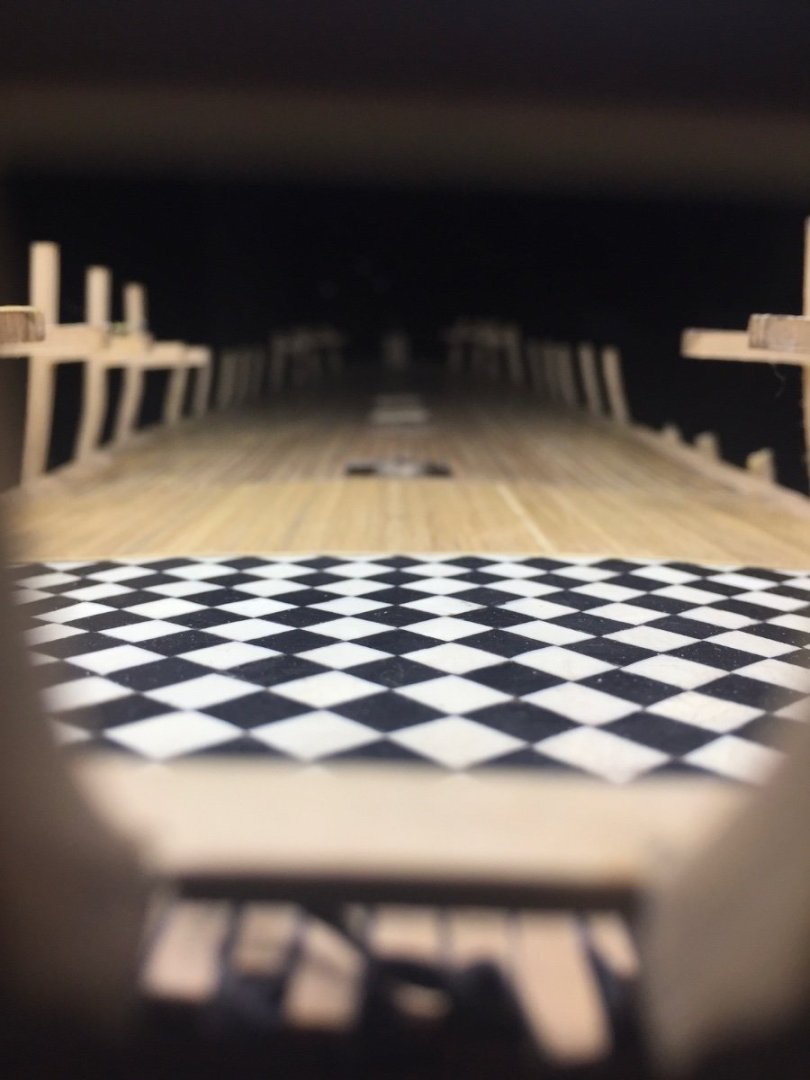
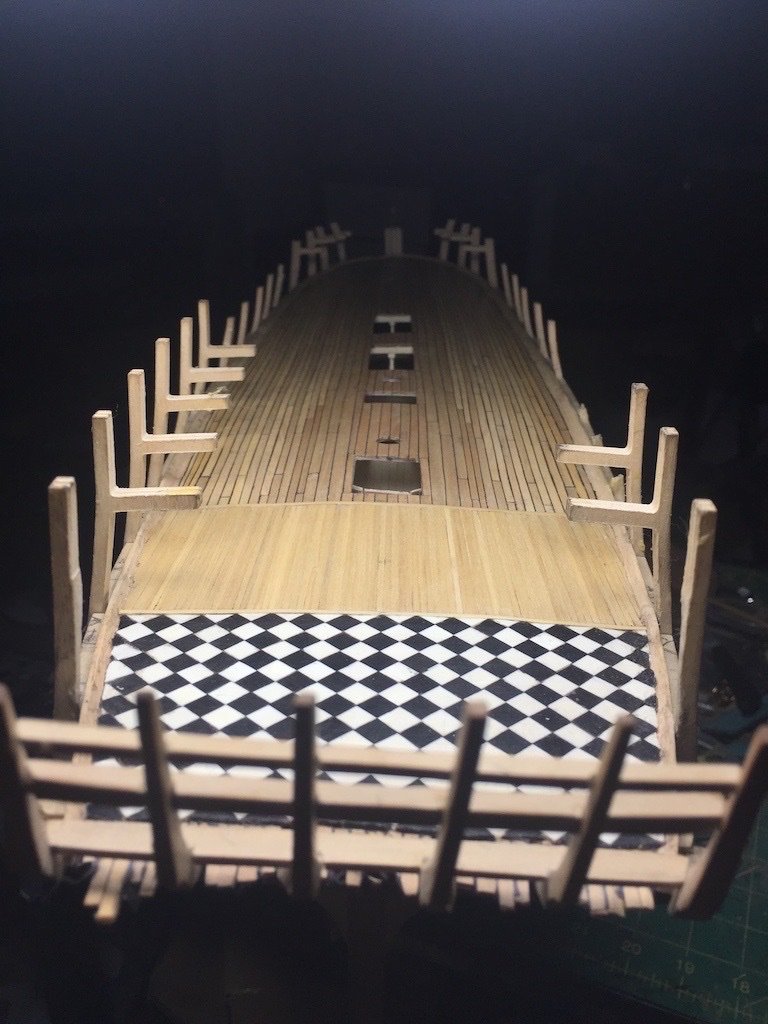
Gundeck started: Same method of caulking. Captains quarters floor is decorated with ebony and artificial ivory tiles. The chair is just there to help remind me of scale.
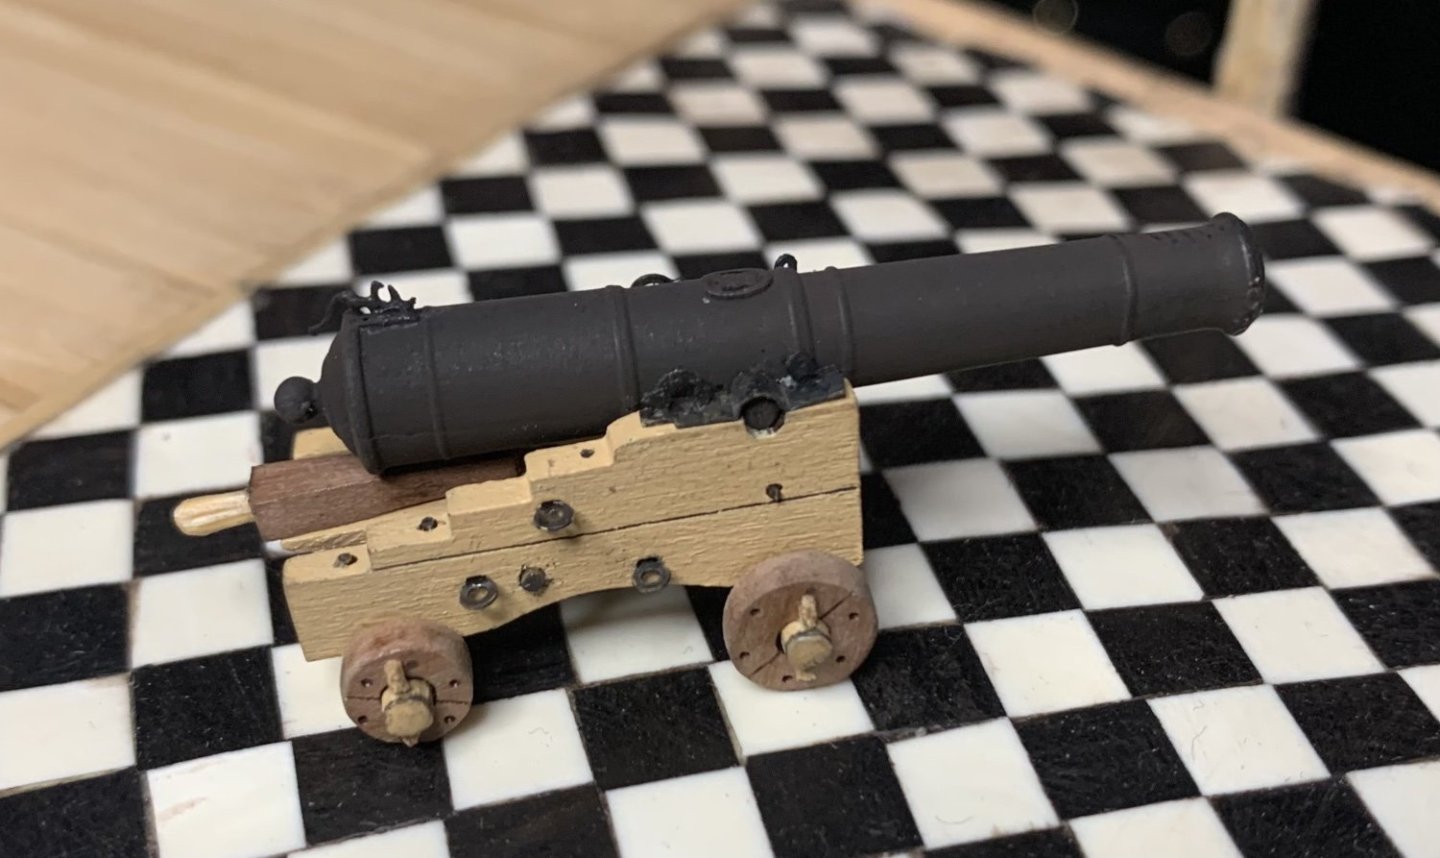
One of the cannon; a slightly modified Vanguard Models 18lb carriage gun - lovely kit.
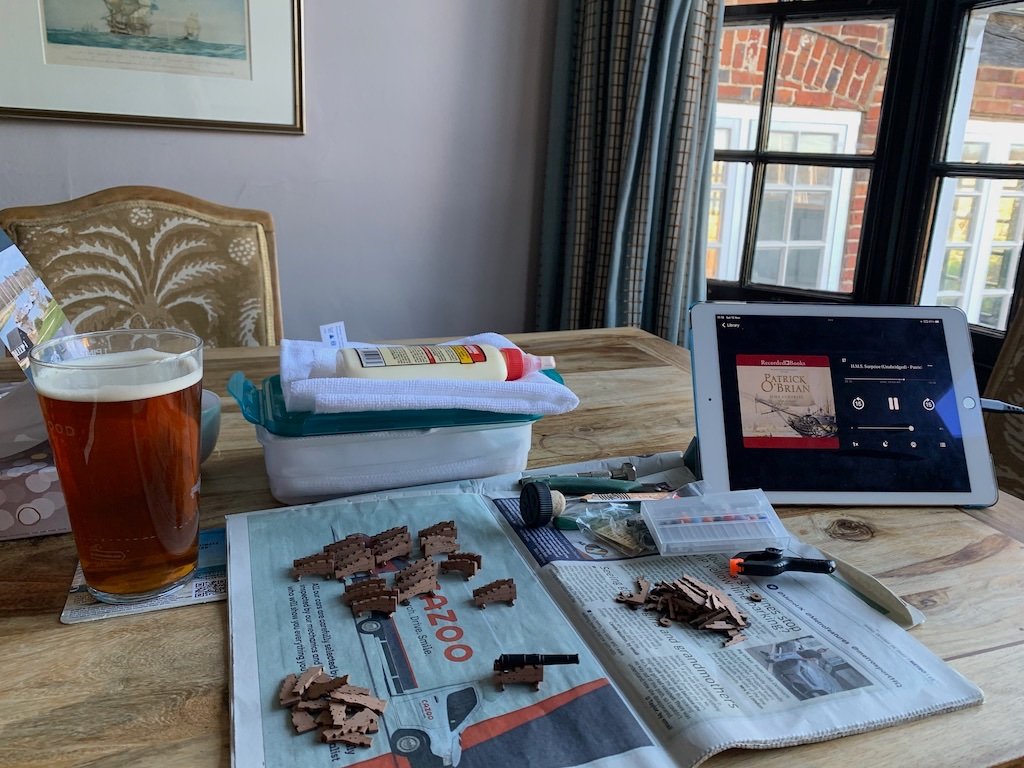
I've spent some lovely days in the Master Builders hotel at Bucklers hard; on this occasion you can see my 'workbench' as I build all the gun carriages.
Gundeck planking finished but no trenails yet...
(smaller planks for the officers quarters - an idea I pulled from the plans of the '74 gun ship by Boudroit
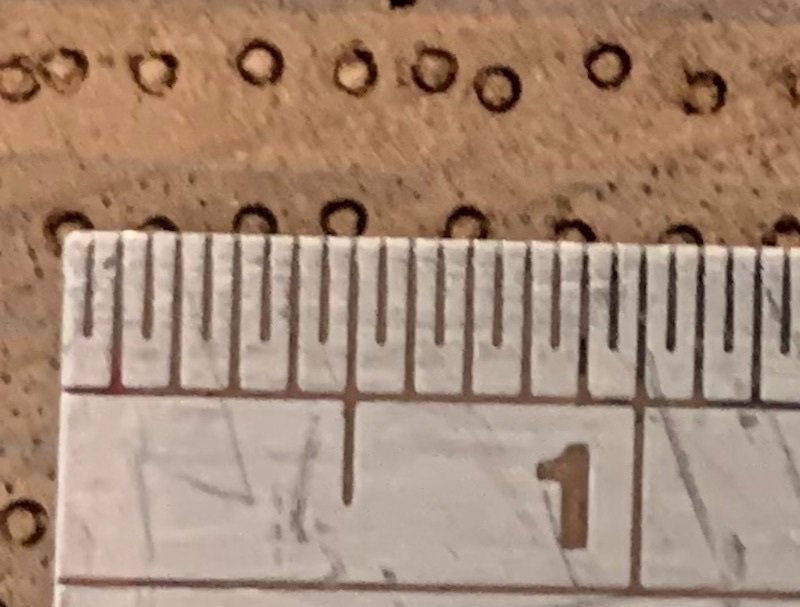
And now... the tedious bit! Trenails! I chose the 'syringe' method which is where you take 19 guage syringes, insert them into a pile drill, press into boxwood block and slice the top off the block. I went through quite a few syringes, and it took days to get enough made. The end result, hysterically, is very accurate trenails. So accurate however that you can't really see them. It would have been easier to see if I used pearwood instead of boxwood planks. However, I decided at this stage to go for accuracy instead of aesthetics.
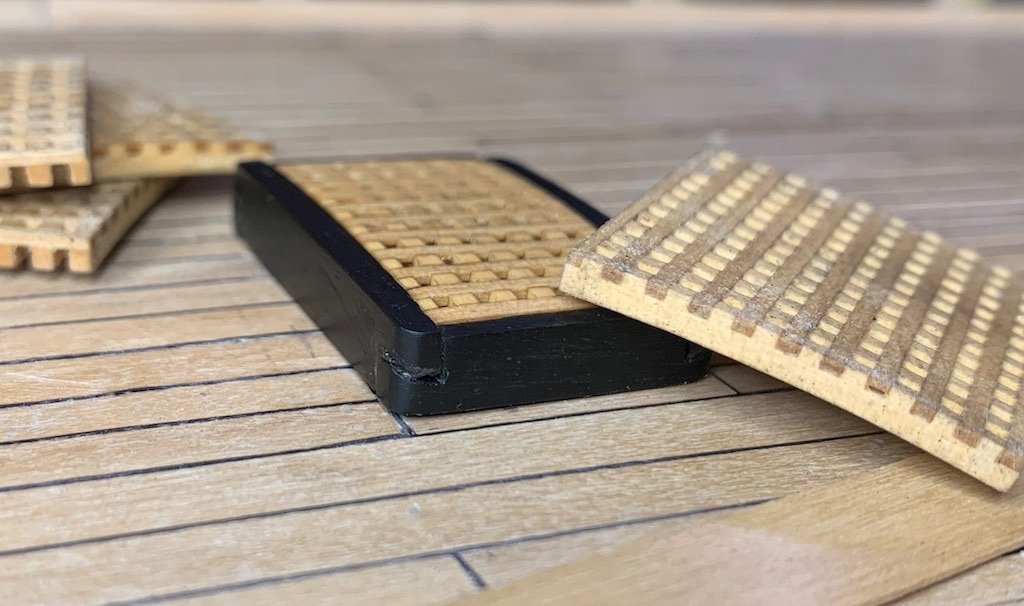
I needed a healthy break from the build after completing all the trenails! Instead of starting on the outer planking I decided to build some of the fun bits on the gun deck. I built these from scratch (boxwood gratings and ebony coamings built with the correct corner fitting).

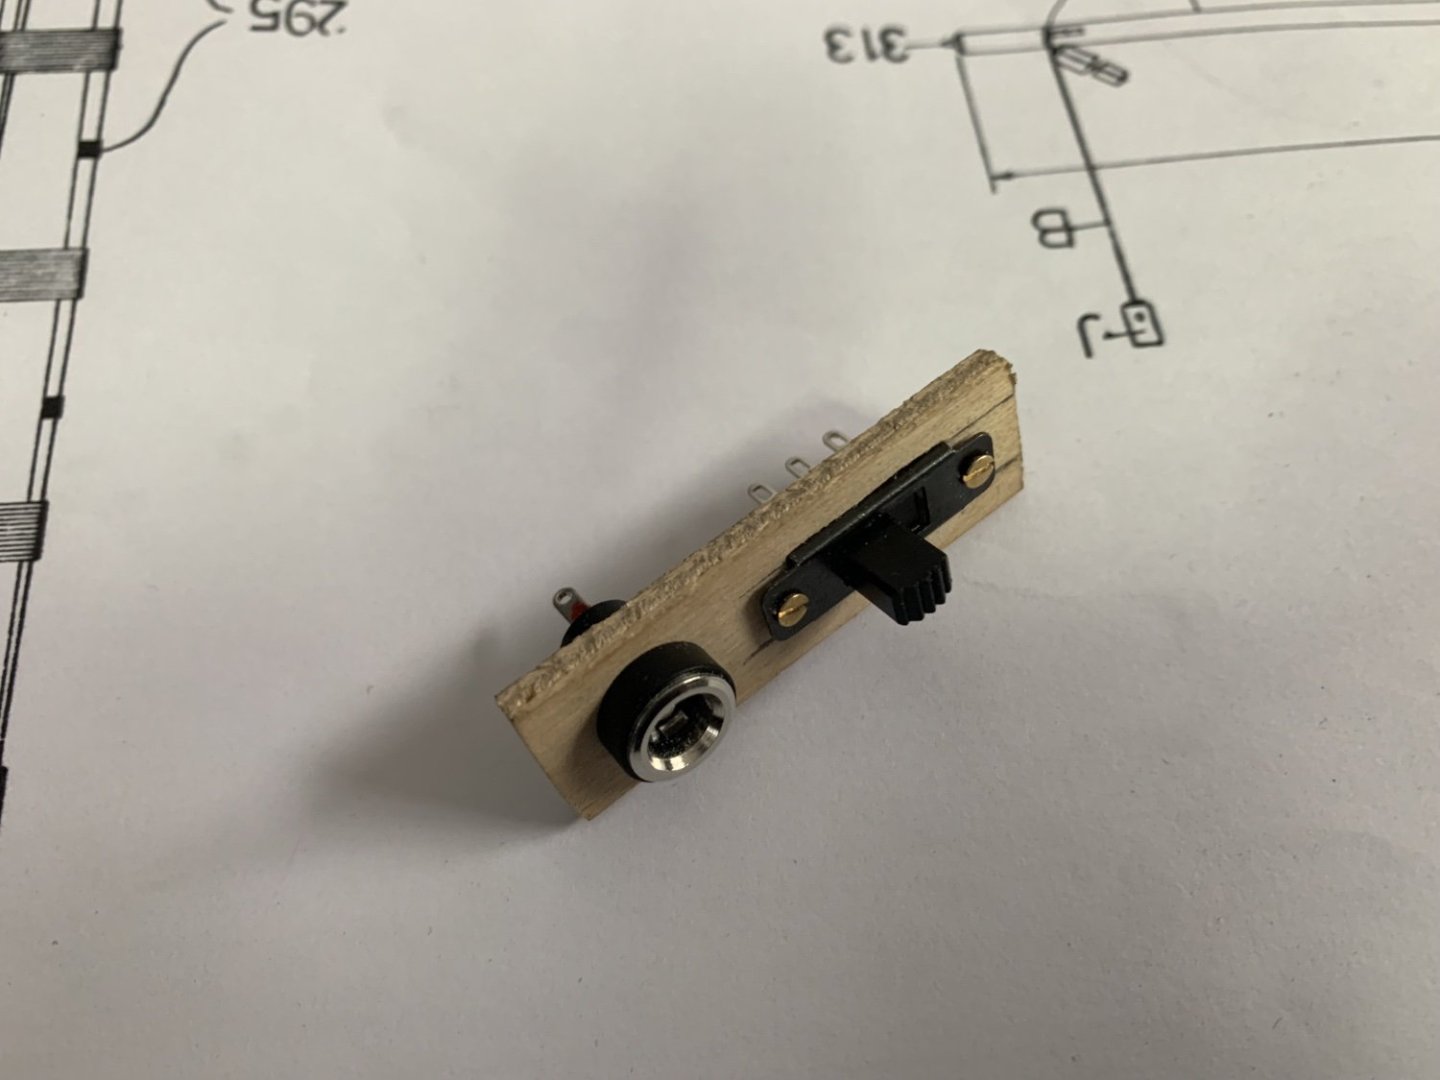
Finally, here's the switch built into the base which is for the lighting. This is fitted near the keel and the planking surrounds it. The lights are yellow flickering leds (I'm yet to figure out a way to upload a short movie showing the lights in action).
...more to follow.
- Dave_E, Knocklouder, Thukydides and 8 others
-
11
-
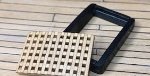
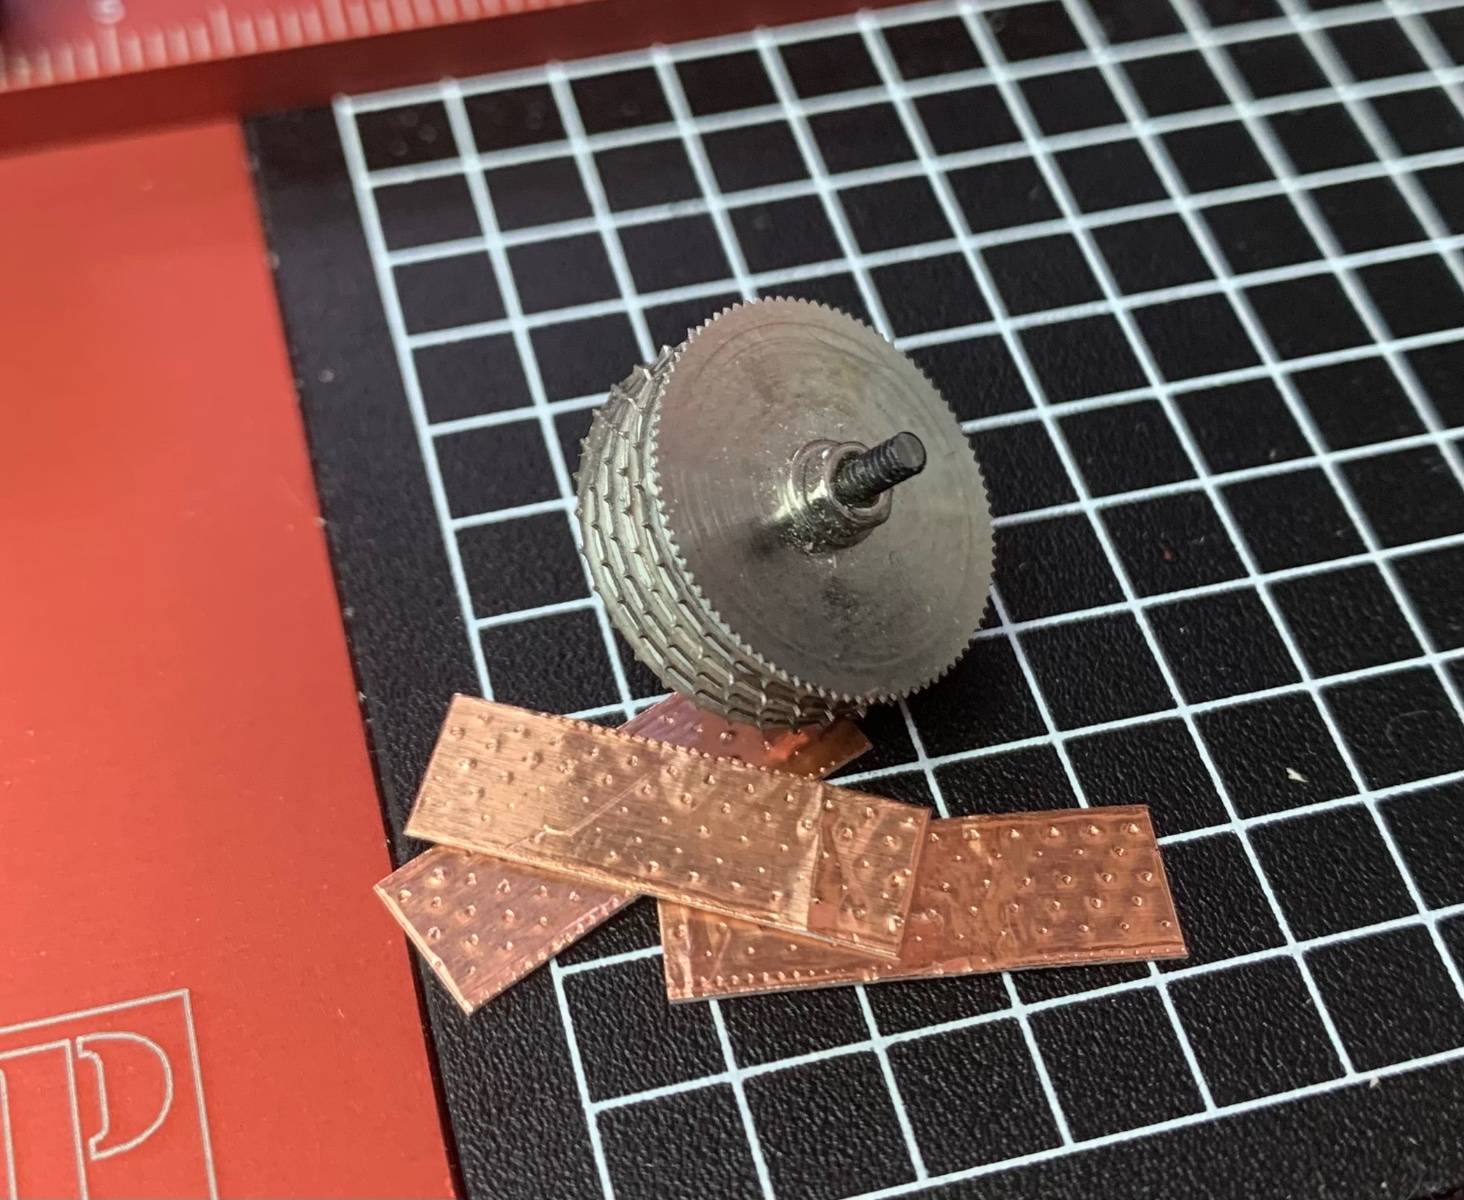
Hopefully a picture says 1000 words (see attached pic). This is my solution (in progress) to the nail pattern.
I started by watching this YouTube clip:I found the exact dimensions from a great article on the plates on USS Constitution.
https://www.academia.edu/358814/The_Introduction_and_Use_of_Copper_Sheathing_A_History
Then I had to find wheels with the right width and space between prongs. I found only one - in China, that was a set of 5 different wheels. I needed 5 copies of one wheel from the set but unfortunately they aren’t sold individually so it cost me quite a bit to get 5 sets. At least now I know I can use it for thousands of plates for all future builds though.
Final step is to build a jig for the nail barrel so that I can just slot in the copper tape and pull it through.
Hope u all have success at this too!
Loving this build Chris/James. Has really inspired me. Thank you.

(V brief edit added on 5 Jan 2023: Possibly a good way of coppering one’s Indy kit hull might be to copper after planking, and then heavily mask over all the copper and remove the masking as the last step in the build. The copper can get easily affected (aged) by fingerprints and scratched by fingernails. Only guesswork from me as I haven’t got to that stage yet and I’m only hypothesising).


HMS Diana by Sizzolo - Caldercraft - 1:64
in - Kit build logs for subjects built from 1751 - 1800
Posted · Edited by Sizzolo
A day in the archives but no luck finding HMS Diana ordnance yet…