HOLIDAY DONATION DRIVE - SUPPORT MSW - DO YOUR PART TO KEEP THIS GREAT FORUM GOING! (Only 13 donations so far - C'mon guys!)
×


gsprings
-
Posts
67 -
Joined
-
Last visited
Content Type
Profiles
Forums
Gallery
Events
Everything posted by gsprings
-
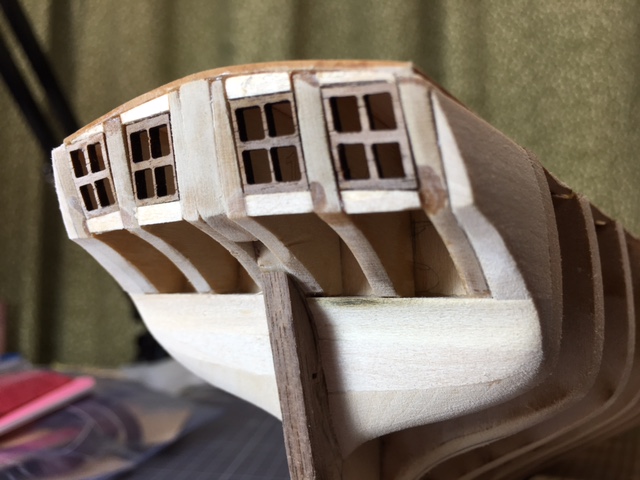
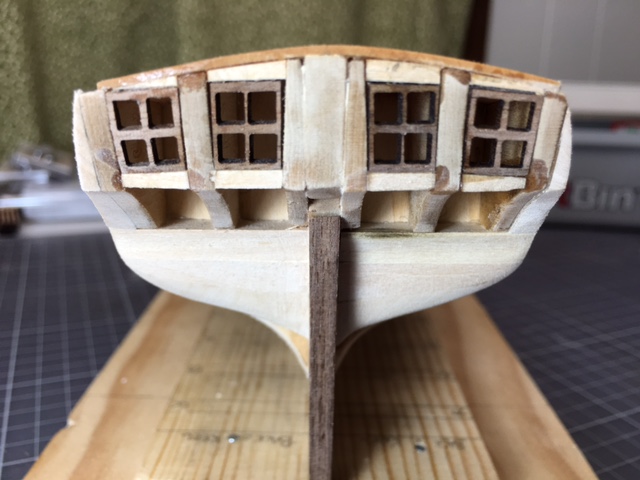
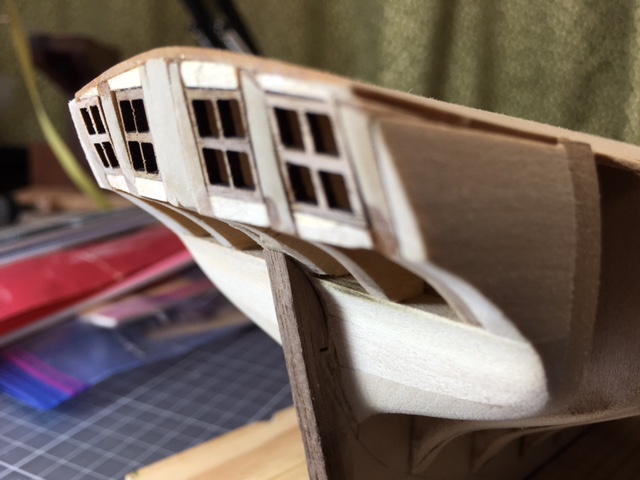
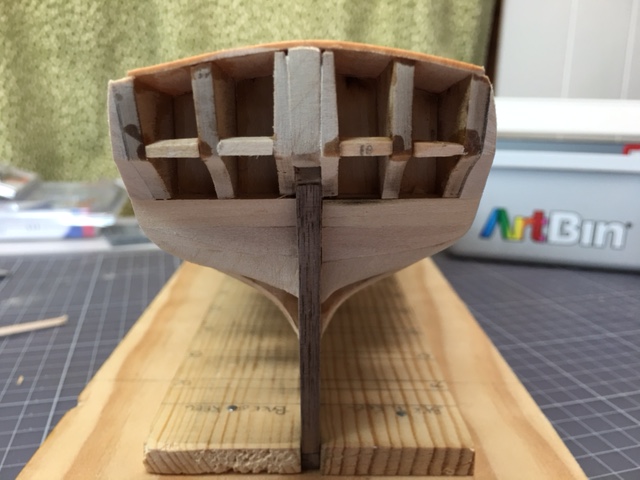
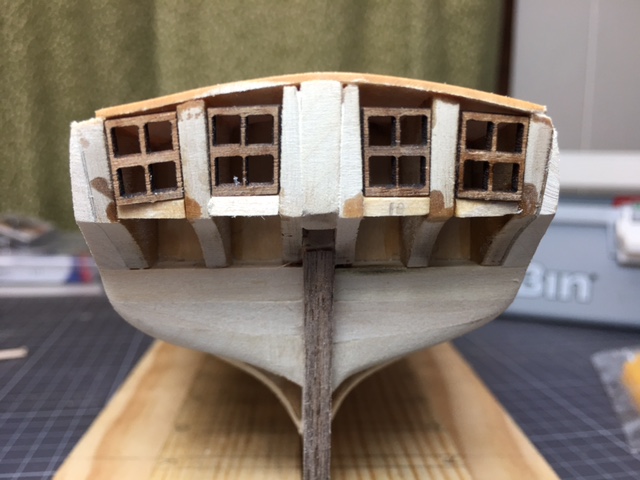
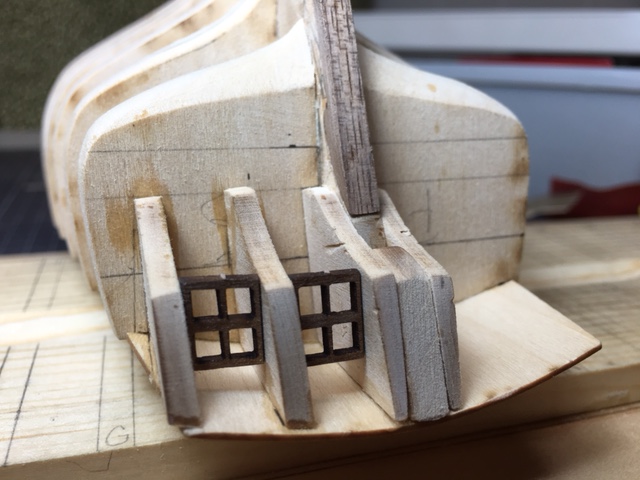
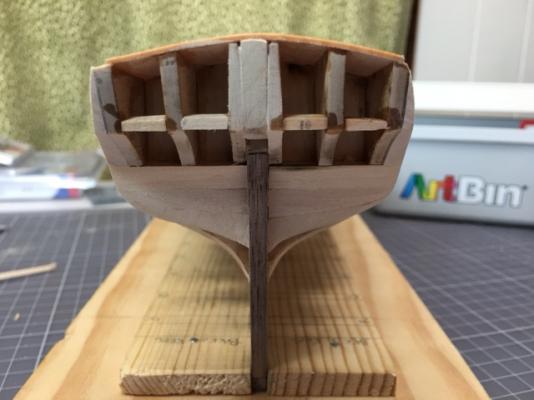
 Thanks for the pics, David. Your transom looks great. From all of the builds I've looked at, it seems like the transom and the stern lights have the most variation in approach, many of which look great. My approach was to try to track as closely to the plans as possible in term of the angles of the tops and bottoms of the windows and the overall "arched" look to the planks on the transom. I got the top frames installed following that approach. Here's the current look with the windows in place (to be removed and placed later).
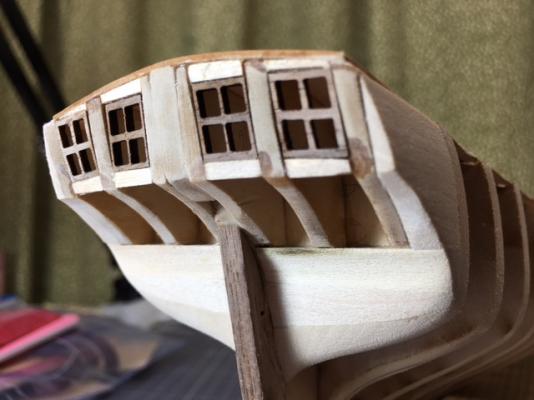


-
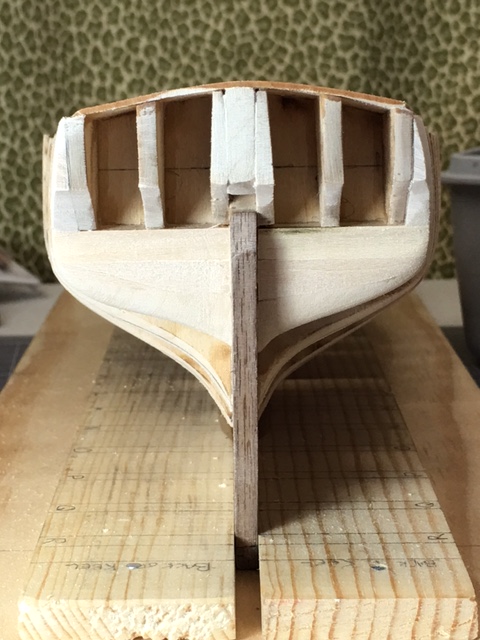
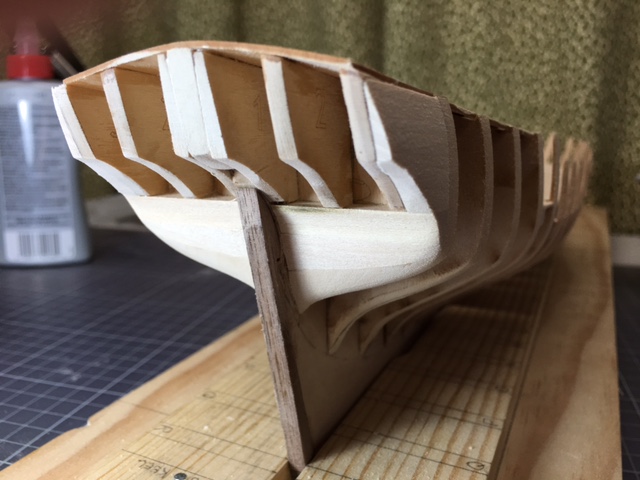
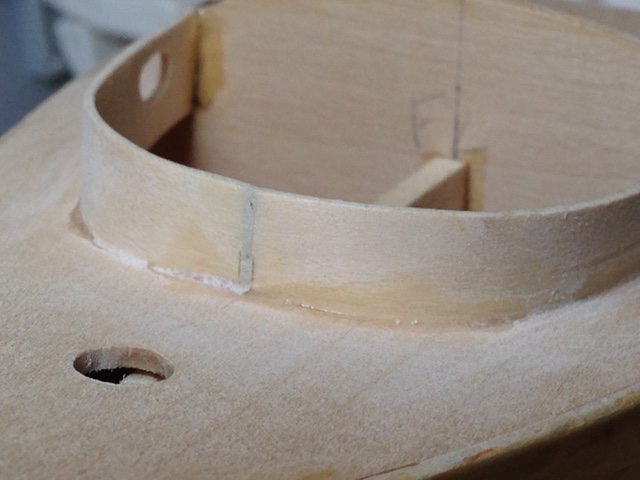
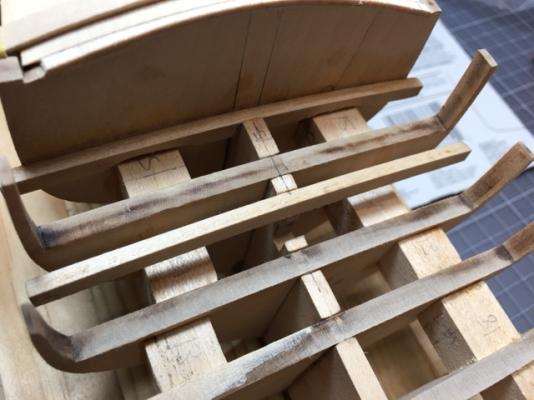
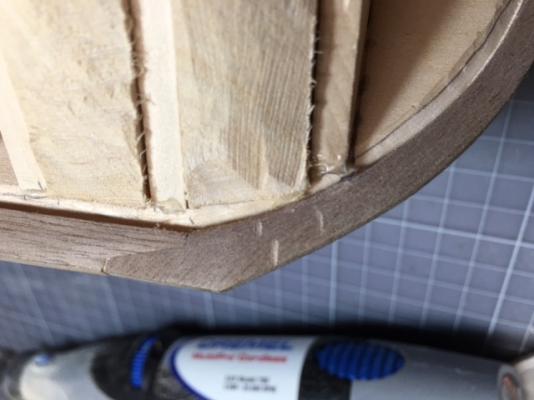
Thanks for the comments and encouragement. Brian, thanks for the visuals of the cabin deck trim piece. Looks like I'll have to remove the filler piece that I put in to ensure the deck covered the full width of the bulkhead. I need to do more reading ahead! With the stern frames installed, I cut and roughly shaped the wing transom and filler piece and then glued them into place below the stern frames ... Then sanded to continue the curve of the lower stern frames all the way into bulkhead R ... Then came the hard part -- the installation of the lower window sills for the stern lights (or windows). I sanded the top edge of the curved part of the stern frames to make sure that I had a straight line across all four spaces where the stern lights would go, I then cut the 3/32" square basswood strip to fit. I held the stern lights in place and adjusted the bottom window sill pieces until I was happy with the alignment of the windows, checking against the flow of the alignment across all four windows. Then I glued them into place. This process requires aligning the windows to create a curved flow of lines across the six frames. It also requires tilting the windows forward at the top to align with the lines of the frames. For me, getting all this alignment right resulted in the lower outboard corners of the outboard windows protruding from the frames. To address this, I will sand the windows flat. They should be wide enough to handle the removal of the extra material at the bottom outside corners of the windows. Here are some pics: So now I am wondering how to best size and shape the tops of the window sills. Could I temporarily "tack" 3/32" square strip to the tops of the windows (maybe with rubber cement?) and then try to put them in place, using trial and error to shape the top sill? I could then detach them from the windows once shaped and glue them in place. Any better ideas?


-
Glad to see someone else taking on the AVS at the same time that I am! I'm a little ahead of your build, but am looking forward to watching your progress. Good luck!
- 194 replies
-
- 4
-

-
- armed virginia sloop
- model shipways
- (and 1 more)
-
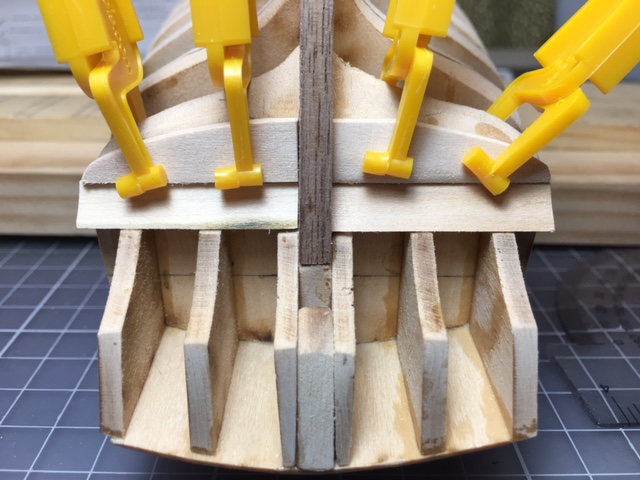
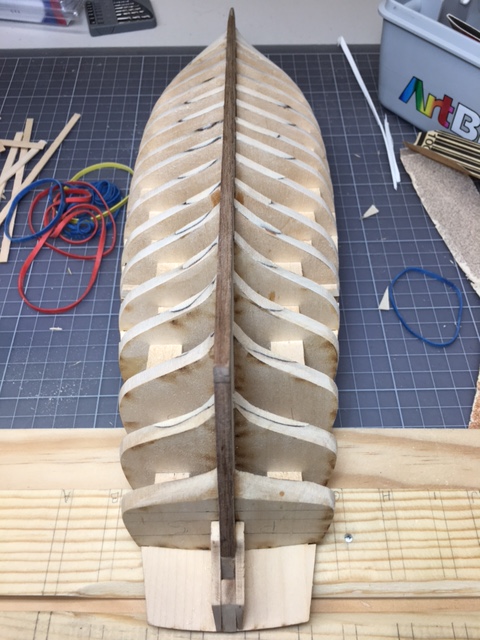
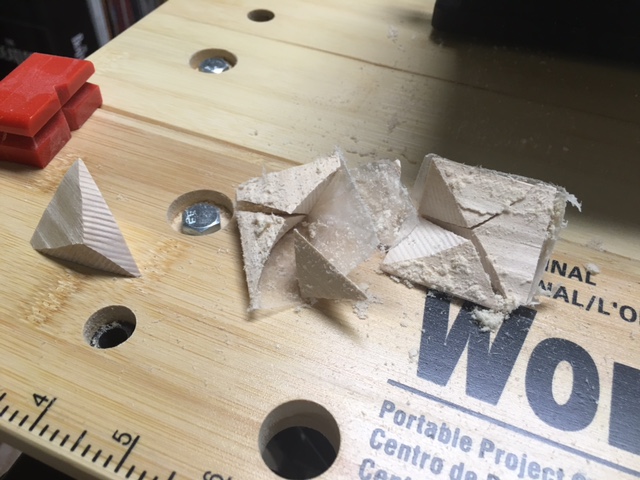
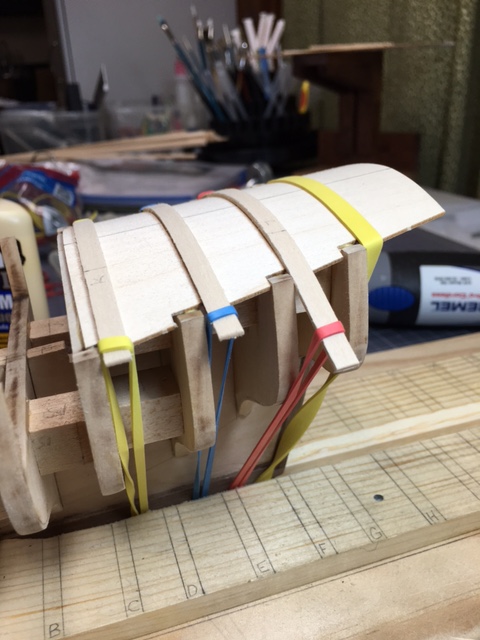
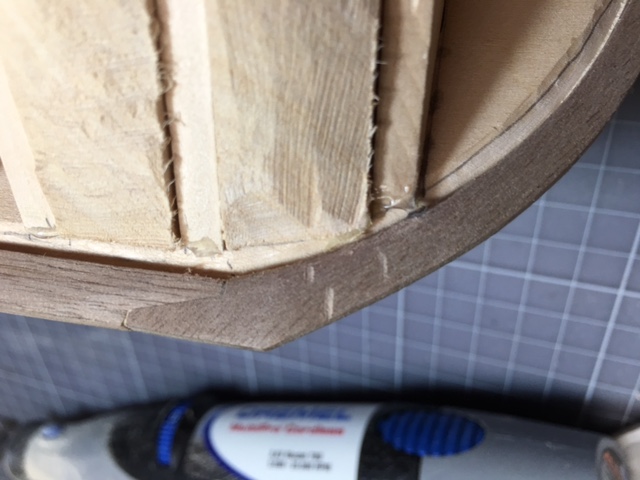
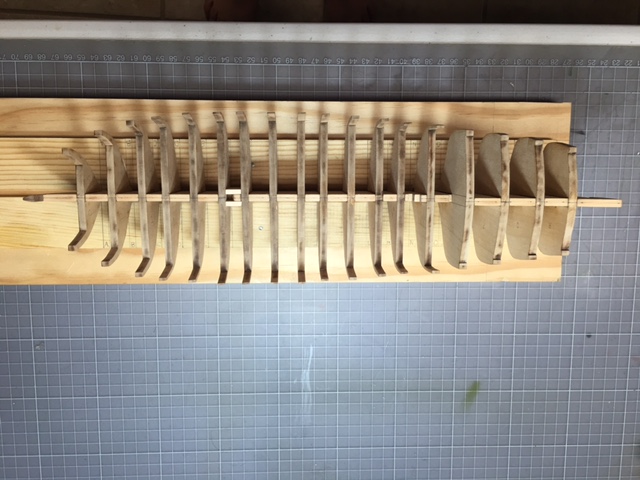
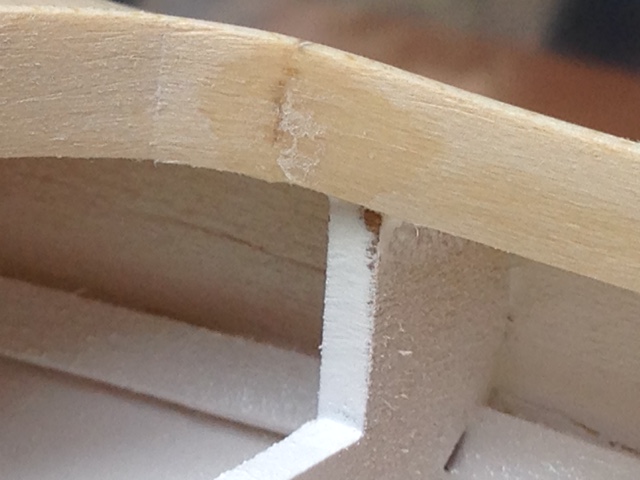
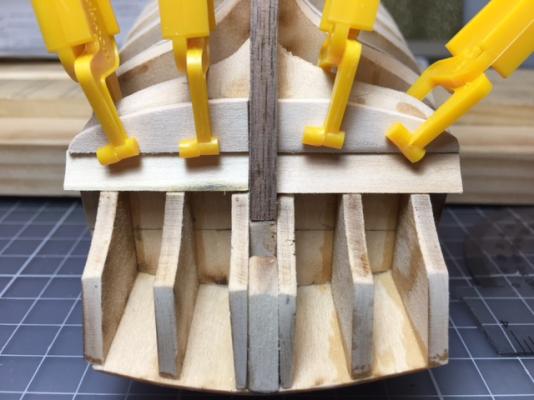
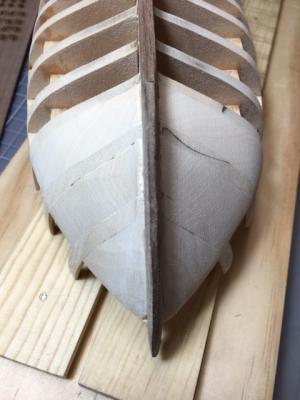
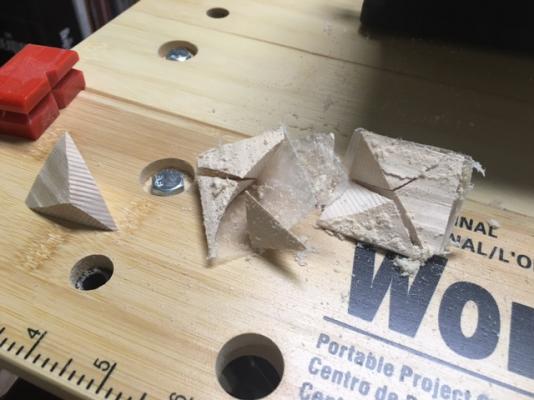
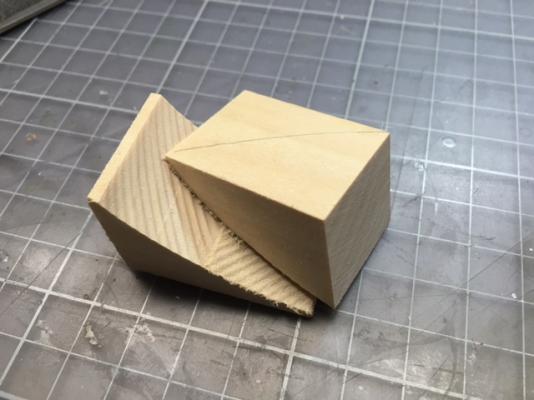
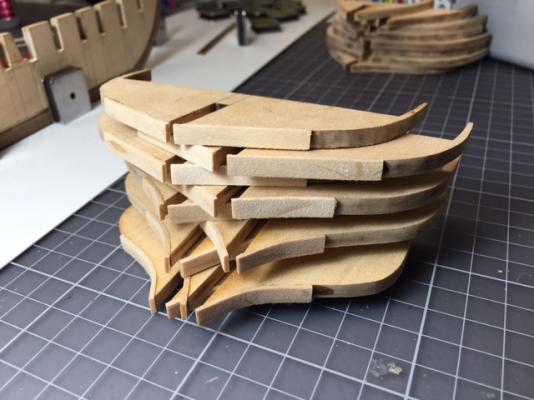
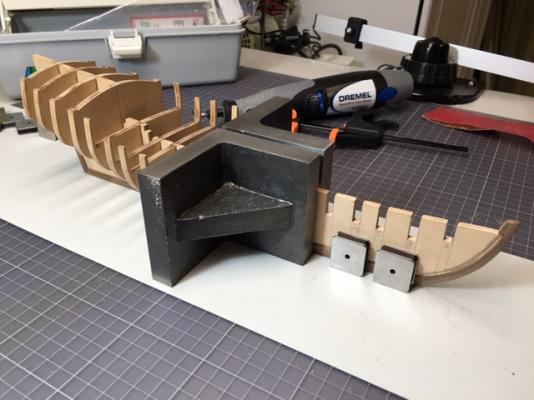
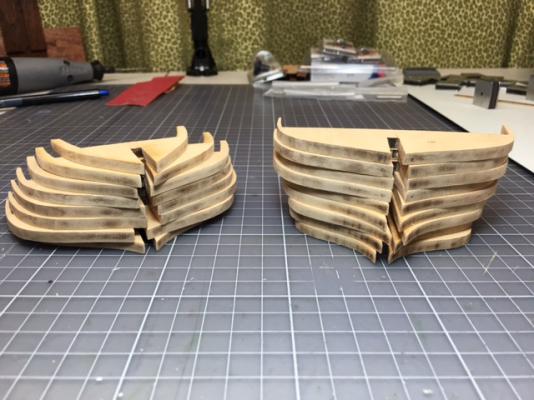
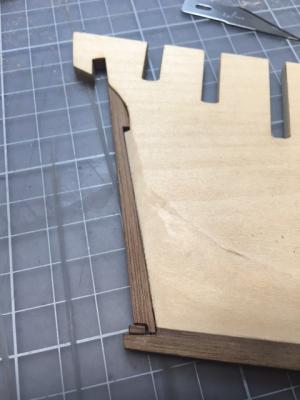
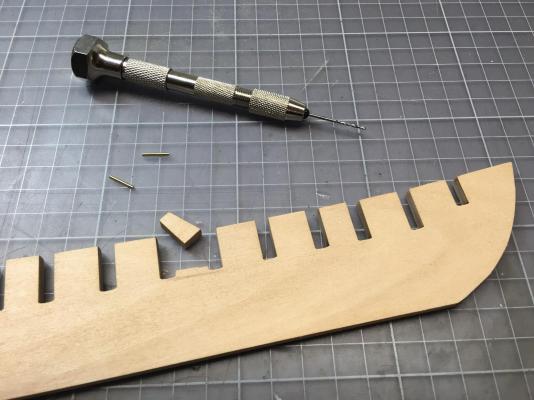
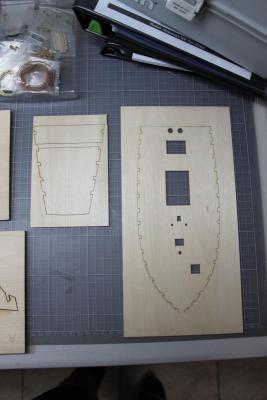
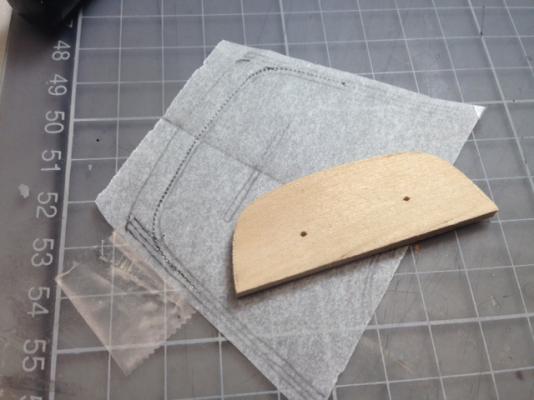
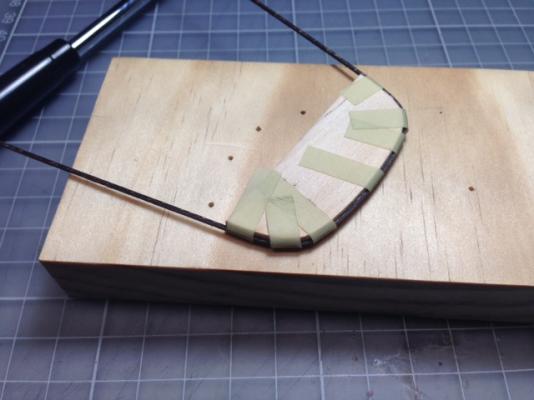
The past few days have been highly productive ones in the basement workshop. (I've been shirking the work I get paid for.) I wanted to go ahead and install the bow filler blocks before I got to work on the fairing. I saw a scroll saw technique (used for making very nice 3D Christmas ornaments) that I thought I might deploy on the blocks to reduce the amount of carving / sanding. The technique involves using the scroll saw to make cuts in all three dimensions. This is enabled by using packing tape to hold the pieces together as the separate cuts are made. The sequence goes like this: 1) Trace the rabbet line onto the wood block and make the cut. I then used the disc sander to sand the deck angle into the top of the block. 2) Draw the line of the larger of the two adjacent bulkhead lines onto the piece of the block that will ultimately become the filler piece. (See first photo.) Put the two pieces back together and wrap with clear packing tape. Cut the bulkhead line with the scroll saw. 3) Take the piece that will become the filler piece (there should be four pieces now, after two cuts) and trace the deck outline onto the top. Then put all four pieces back together, tape it up and make the final cut. The piece you end up with is on the left in the second photo below. It is much easier to carve and / or sand to final shape (see third photo). After I got the bow blocks in place, I went about fairing the hull, testing at various point along the bulkheads with a plank. Think I got it to a pretty good point. This is the first time that I have faired a hull, so I fully anticipate downstream issues, though I tried to be thorough. With the fairing complete, I moved to the transom. As I mentioned in my last post, I have paid much attention to the issues that Brian identified with frame #1. As he ably illustrated, the plans (and the kit instruction book) are very clear that frame #1 is to be beveled to create the necessary angle to get the neighboring window installed correctly. However, the practicum that he and I used seems to have missed this detail. So I measured to find that the upper width of the frame is about half of the bottom of the piece. I drew a line along the midline one the top of the frame and sanded to give the frame a good approximate of the angle need. Frame there, I held the inboard window in place to located frame #2 and the outboard window to locate frame #3.


-
Thanks for the kind words, David. I have been blatantly ripping off ideas from Brian's (GuntherMT) AVS build. Stolen ideas include: 1) Planks and rubber bands to hold down the decks while glue dries 2) Full filler blocks between A-B and B-C to better anchor the planks fore 3) Beveling angle into transom frames #1. (Plans show the angle, Hunt practicum ignore them. Brian caught it in his build.) Already have broken one bulkhead extension. I got lucky -- the break gave me a fair bit of surface area to glue. I plan to wait to thin the inboard sides of the extensions until after I've got at least some planking on the provide some stability.
-
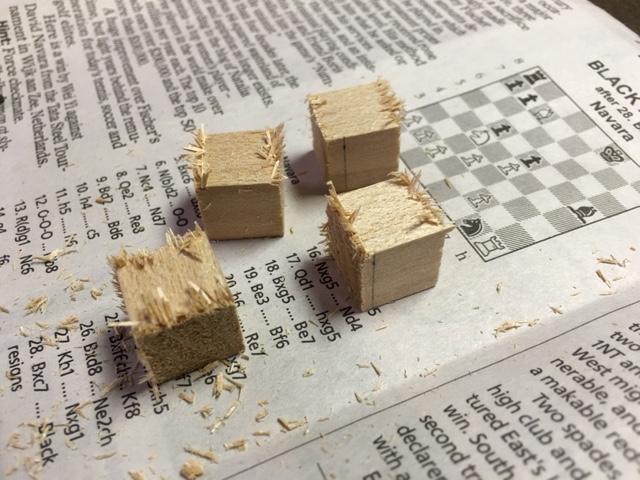
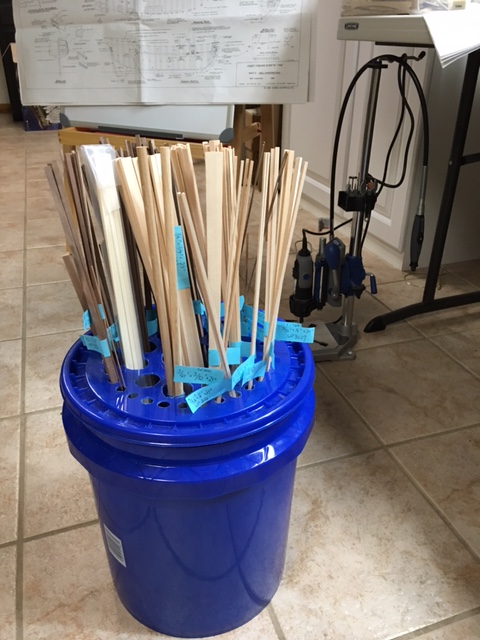
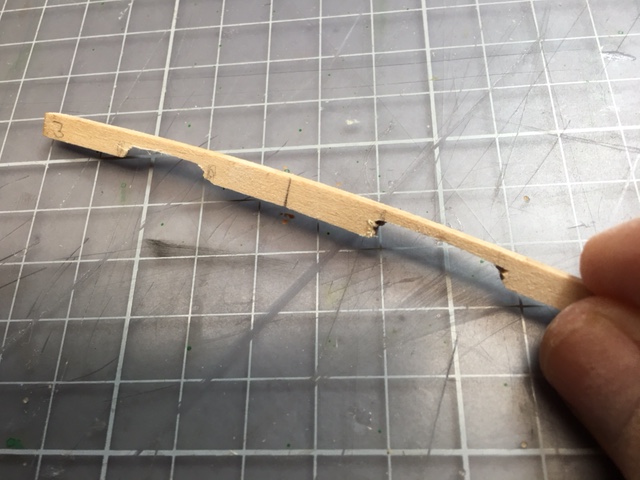
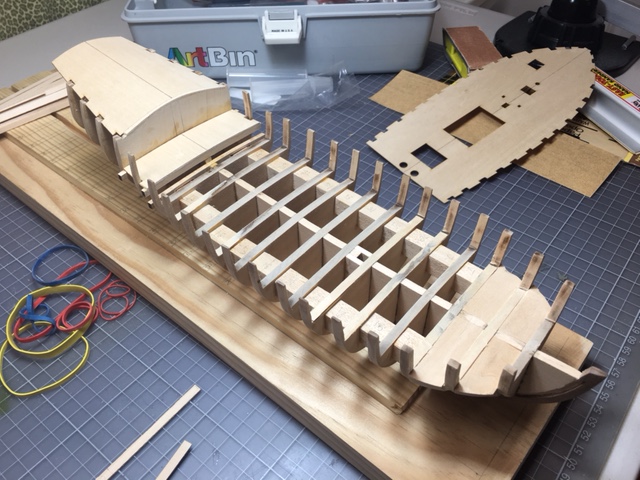
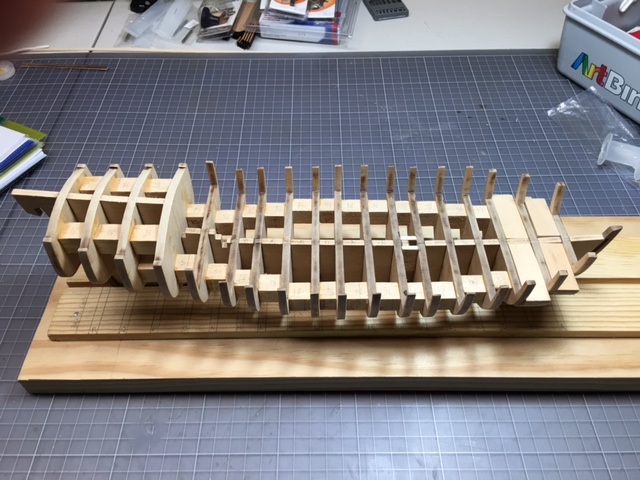
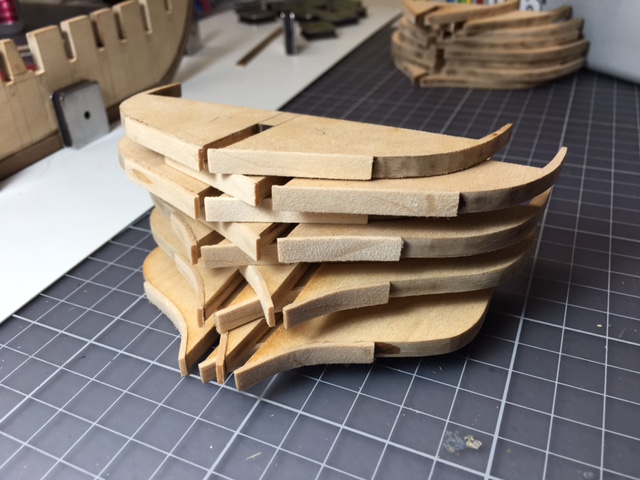
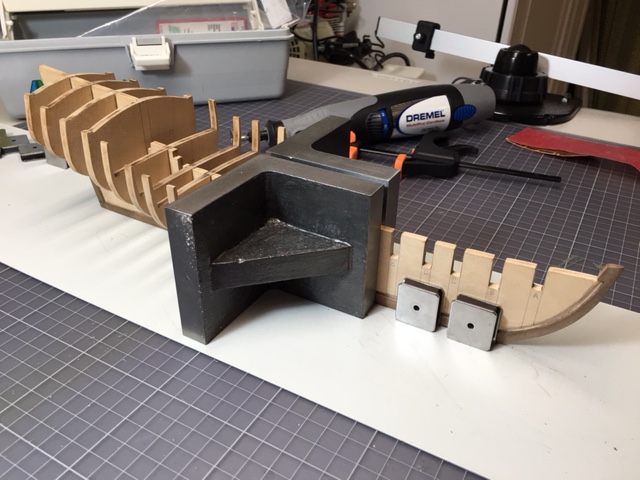
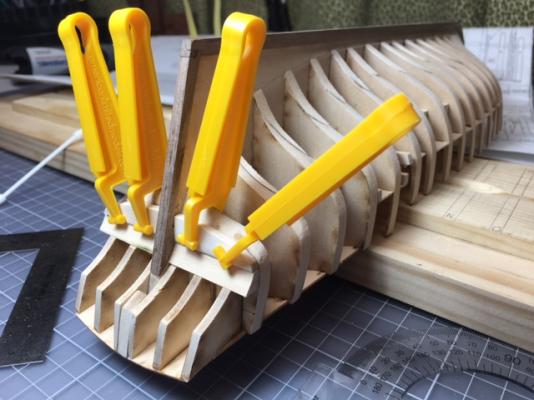
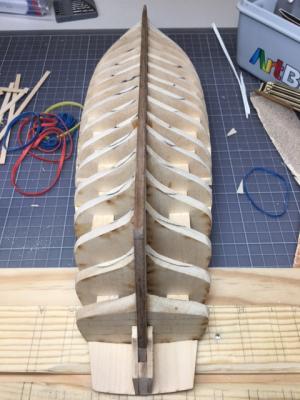
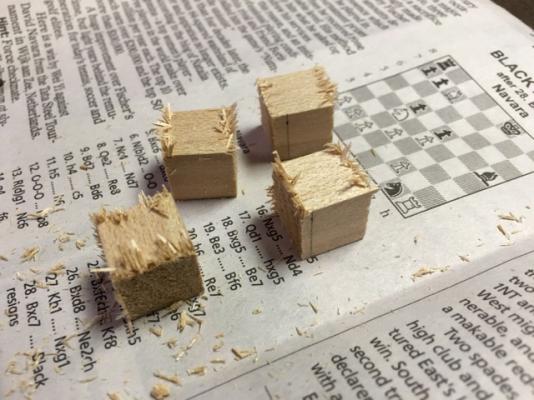
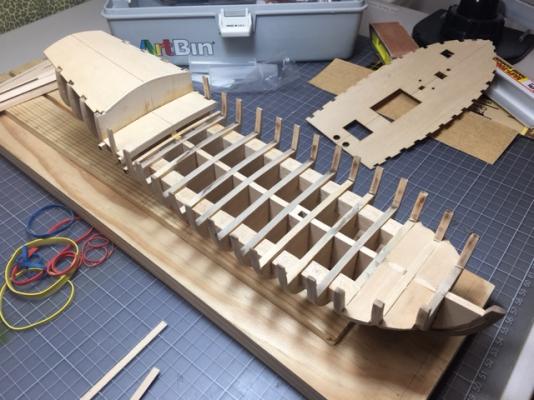
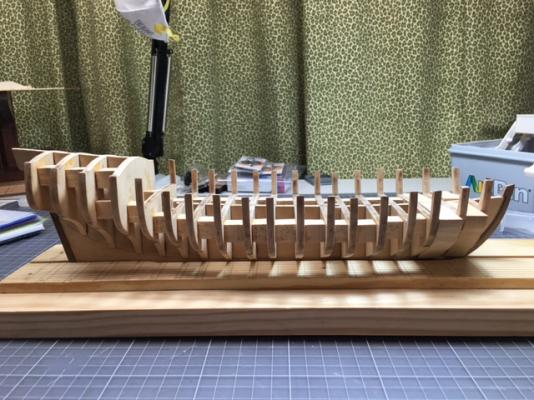
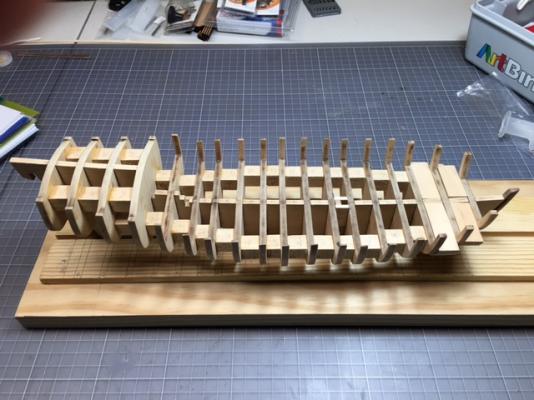
More progress to report! Given how clumsy I am and anticipating the high likelihood that I might somehow break the model, I decided to add reinforcing blocks between all the bulkheads, including full shaped blocks between the A, B and C bulkheads (thanks, Brian, for the inspiration!). So I measured all the gaps between bulkheads to size the blocks and cut up a long 1/2" x 1/2" square piece of basswood. I used my Byrnes table saw to do the cross cut, but as you can see, the blocks turned out very ragged and I had a lot of cleanup to do. Any suggestions for how to get clean cross cuts is appreciated. These blocks are very handy not just to provide a lot of strength and stability, but also to let one correct any bulkhead distances that might be a millimeter here or there. As I noted, I decided to do full shaped blocks to help with plank layout between bulkheads A-B and B-C. Unfortunately, I got a bit careless with the Dremel drum sander and put some fairly deep cuts into my keel. Not thrilled, as there a tad too deep to completely sand out without getting the keel too thin. Now much chastened, I moved onto the false decks. I put a centering line on all the decks and proceeded to glue on the cabin deck. Like others, I found the deck to be a tad short, so I cut a this strip to cover the foremost bulkhead. You'll see that in later photos. Then I went on to install the horizontal deck beams, which provide support to the quarter and main decks. That process led me to discover that I had installed the reinforcing blocks too high on the bulkheads, and they now interfered with the main deck beam. I took the lazy way out and just cut some material out of the bottom of the beam to allow for the blocks. (I could have unglued the blocks and reinstalled, but I thought this would work fine.) I also found some time, between all of this stuff, to cut holes in the top of a paint bucket lid to create a "wood bucket."


-
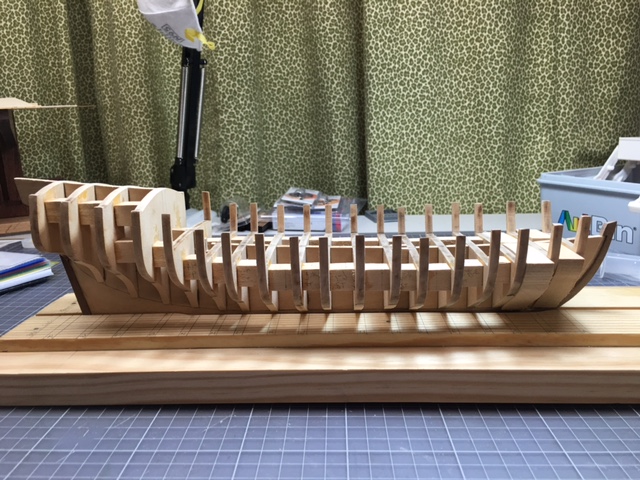
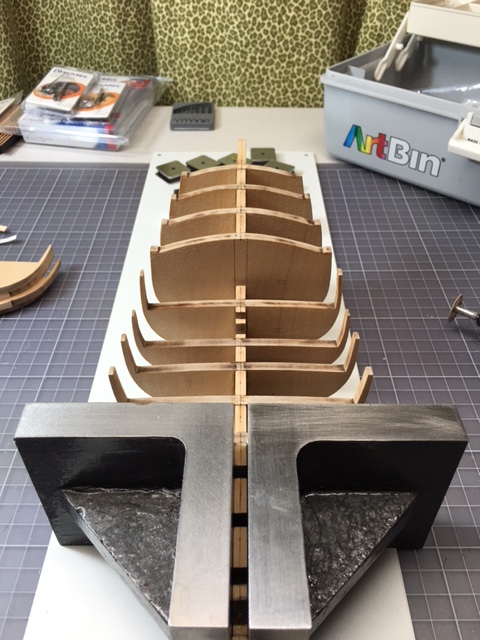
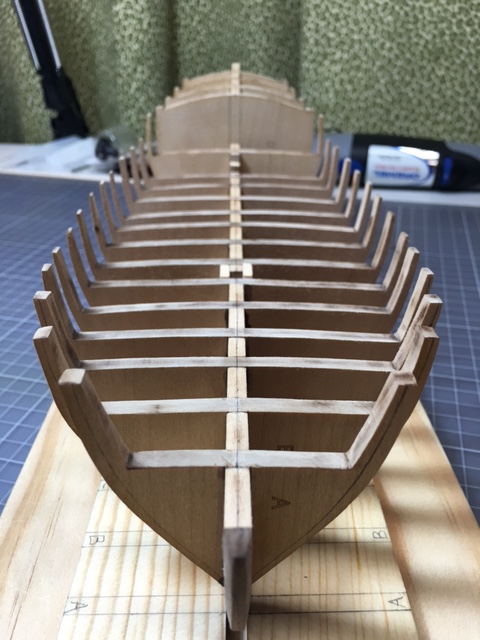
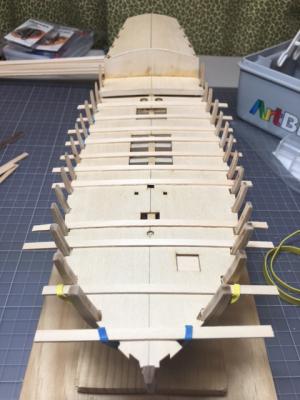
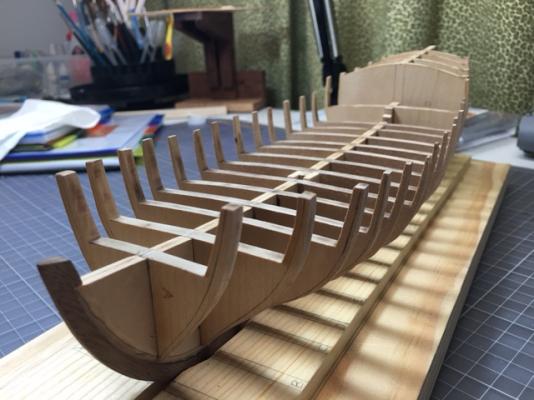
With the rabbet cut, 'twas time to fit the bulkheads. Like many other AVS builders, I found that some of the bulkheads did not completely reach the bearding line when seated so that the tops of the bulkheads aligned with the top of the center keel: So I used some basswood strip to add material to the bulkheads and faired the upper end of the shims into the bulkheads: And then went to work on installing the bulkheads: Installing the bulkheads revealed that I did not do the best job at fixing the angles created in the center keel bulkhead slots by the laser cutting of the parts. The result of these angles not being 90 degrees is that a couple of bulkheads might be off a millimeter here or there. (Once I realized what was happening, I corrected on later bulkheads.) I will correct for this when I install strengthening blocks between the bulkheads. Anyway, I was pretty happy with how the bulkheads turned out: Then I created a building board and installed the pieces to complete the mast mortise. (Installing these pieces would get very difficult once I put in the strengthening blocks between the bulkheads. I'll be removing the mortise pieces to get a tracing of the mast box to better shape the mast tenon later: This brings the log up to date.


-
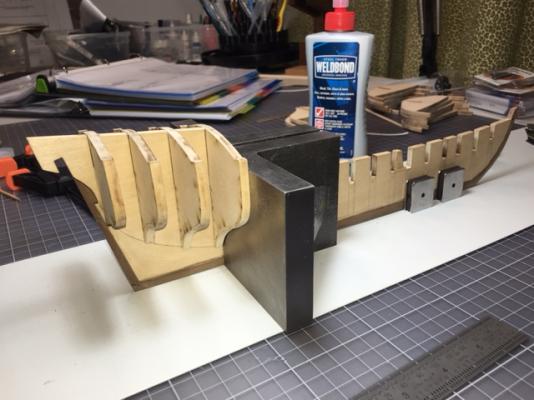
Dave: I, too, am using Weldbond, on Bob Hunt's recommendation. I hadn't used it before, but it seems to be working really well. I had a bulkhead that I installed with Weldbond that I decided to reinstall, so I used acetone (nail polish remover) to free up the glue. Worked like a charm. Think I'll try the alcohol idea to free up the sides of the mast mortise to get the tracing. Thanks for the tip.
-
The more, the merrier, Al. Welcome! A brief warning ... this build is likely to move along at a fairly leisurely pace. Five teenagers and a 70 hour a week job ...
-
David, thanks for the "watch-outs" in the practicum. I will definitely be posting for guidance when I see instructions that don't seem to make sense. Dave and Zoltan: welcome aboard, glad to have some seasoned AVS builders watching over my progress. Dave, I've been following your work on the POF AVS closely, Impressive job. Your suggestion about doing a tracing to prepare for shaping the mast tenon is a great one. Unfortunately, I boxed the mortise already. But I think I'll use the acetone to unglue the box and make the tracing. Serves me right for not keeping my build log up to date.
-
As I noted in my previous post, I'm a bit further ahead in my build that I am in my build log! (I'll try to be better!) Here are some more pics to show more of my progress -- these won't bring us fully up to date, but closer ... A look at my clean(ish) bulkheads after removing the laser char: Like many others who've done this build, the bottom piece of my keel was too long, which resulted in the slot for the stern post being in the wrong place. So I widened the slot to align with the sternpost tab thencut the top half of the bottom keel horizontally and slid it over to close the gap created by what was now a slot that was too wide. It looks a little rough in this picture, but I've since cleaned it up and will use some sawdust filler to hides the new seam created where I made the cut. (Having just read this description of what I did, I am sure to have thoroughly confused any reader. Maybe this pic will help.) I must admit that I was really very apprehensive heading into the process of cutting the rabbet along the keel. But now, having completed it, it wasn't nearly so hard as I thought it would be. Don't know that it's the best job ever (I simplified the task by just using the keel itself as the bottom cut of the rabbet, rather than try the more accurate, and difficult, methods out there). Here are the results:


-
Thanks for the comments. Brian, I saw in your build that you had ordered a replacement from Model Shipways for a warped keel, but it's good to be reminded of Model Shipway's great customer service for when I break the next part! Popeye, I am actually further along in the build (it turns out I'm not good at keeping my build log up with my build!), so I have learned that I could have used the mast mortise pieces that create the box for the mast to anchor that broken piece. I need to do more "reading ahead" in the instructions. David, did you do a build log or post pics of your AVS? I'm trying to build a list of all the previous builds to use as reference and haven't seen yours. I should note here that I have bought and am using Lauck Street Shipyard's practicum, along with John Earl's practicum from modelboatyard.com and all of the previous MSW bulids that I can find for reference.
-
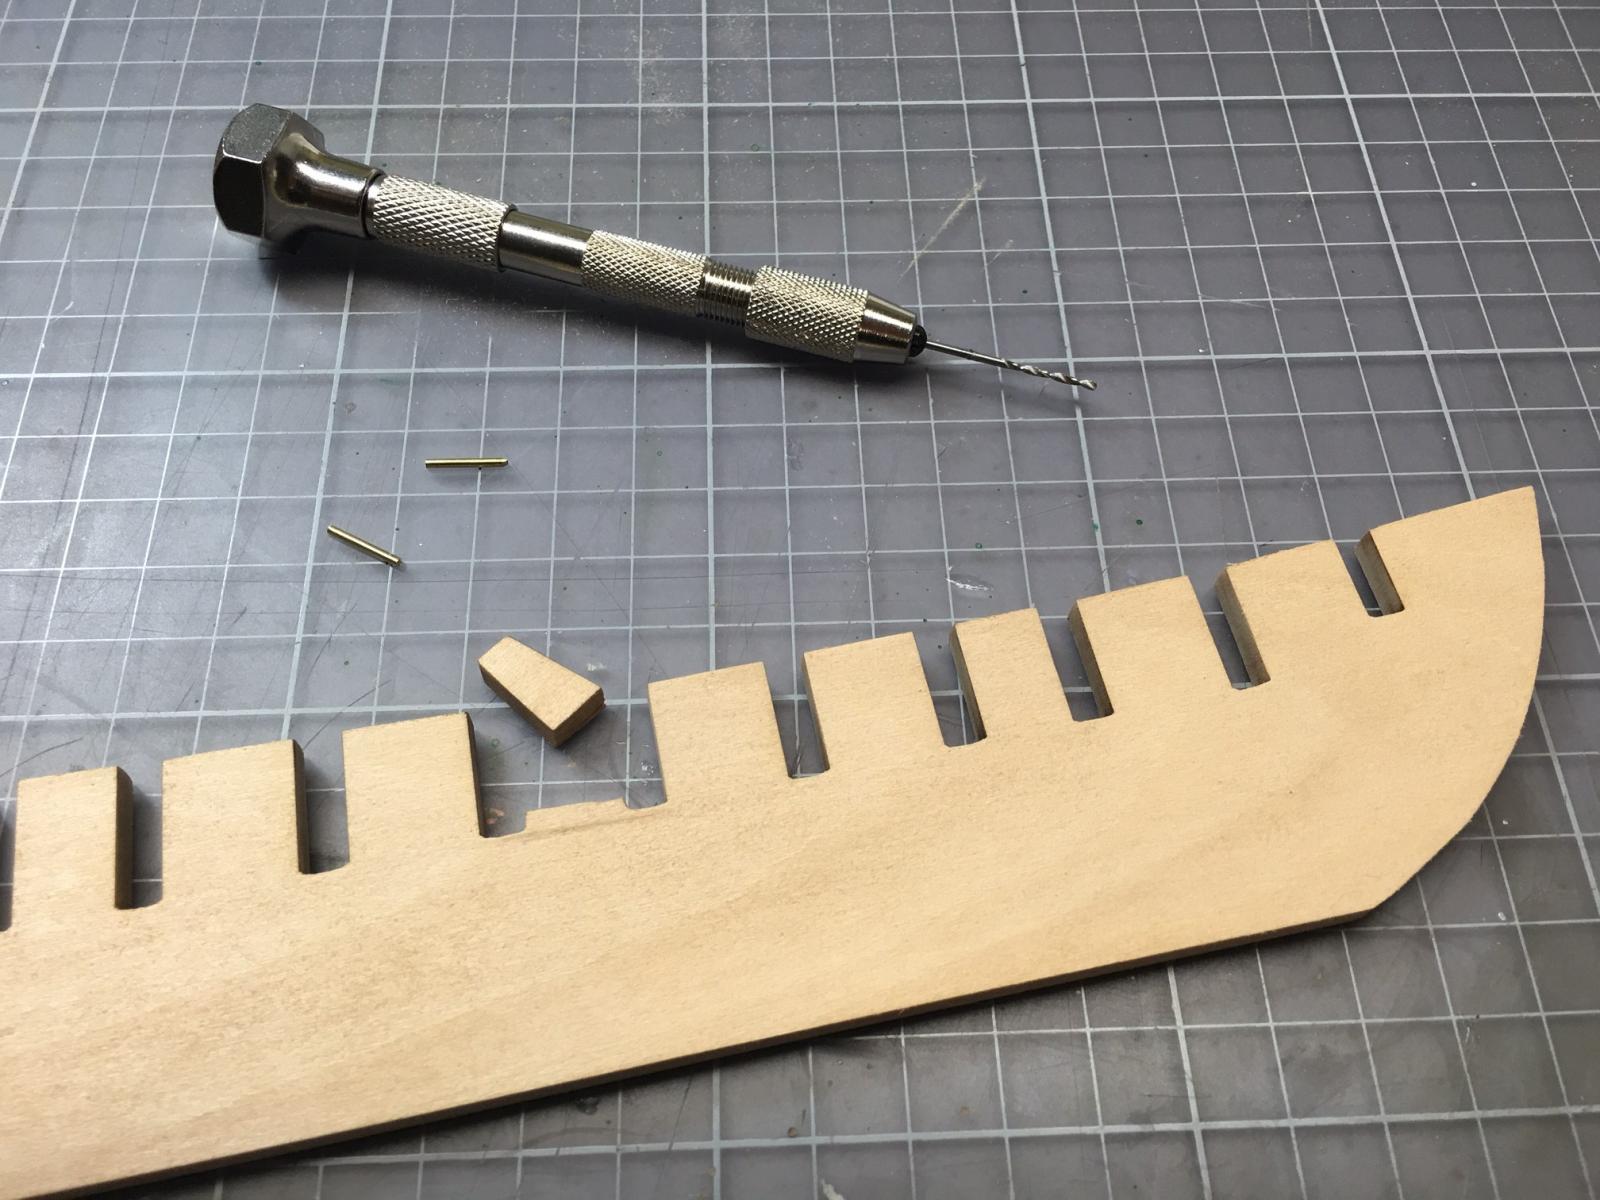
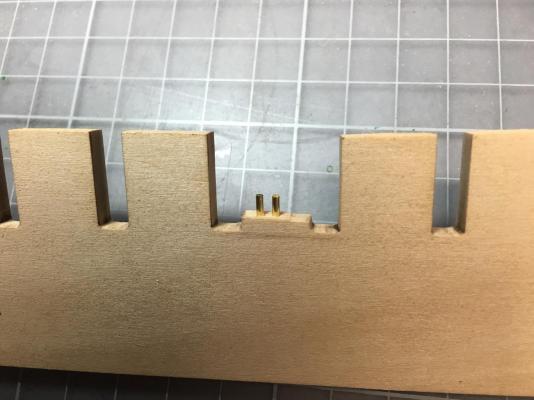
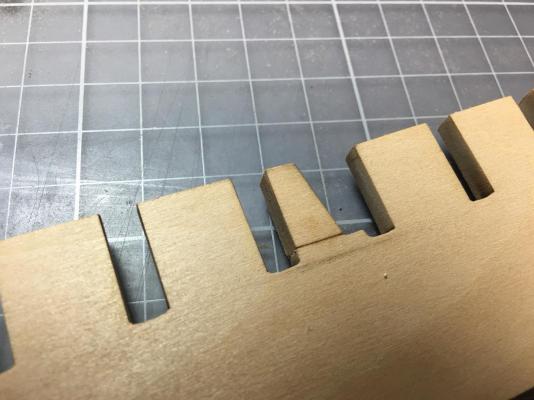
So I started removing the keel and bulkhead parts for laser burn cleanup. It took me less than five minutes to duplicate a mistake I made on the lobster smack. I was sanding char off the top of the false keel and broke off a piece that separates the F and G bulkheads. This might have been the worst place for a break, as it happens to be where the mast mortise box gets created. Unlike last time, however, I have learned (from reading many build logs on MSW) that CA and side braces are not the best way to take care of the problem. (On the lobster smack, the side braces got in the way of later construction.) Instead, I got some brass rod, drilled a couple of holes and made some pins to reattached the piece. From there, it was an easy process of drilling holes in the broken piece and reattaching (with CA).
-
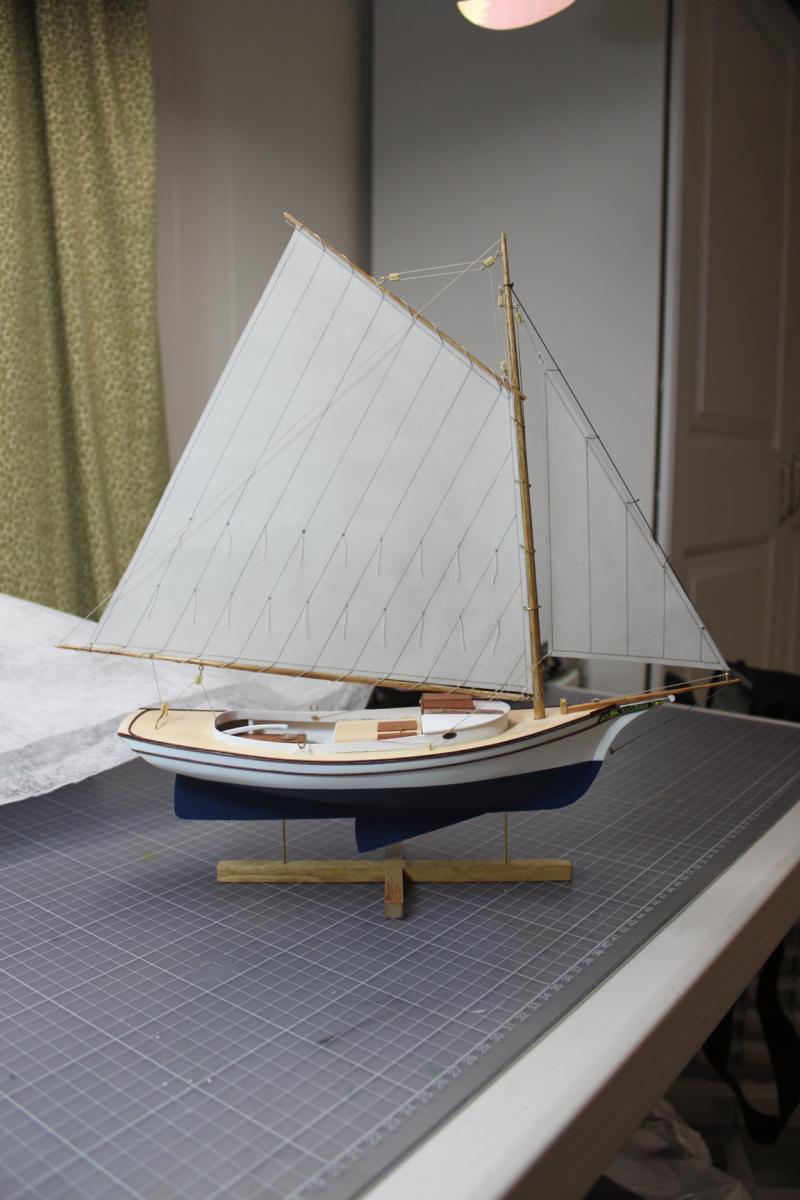
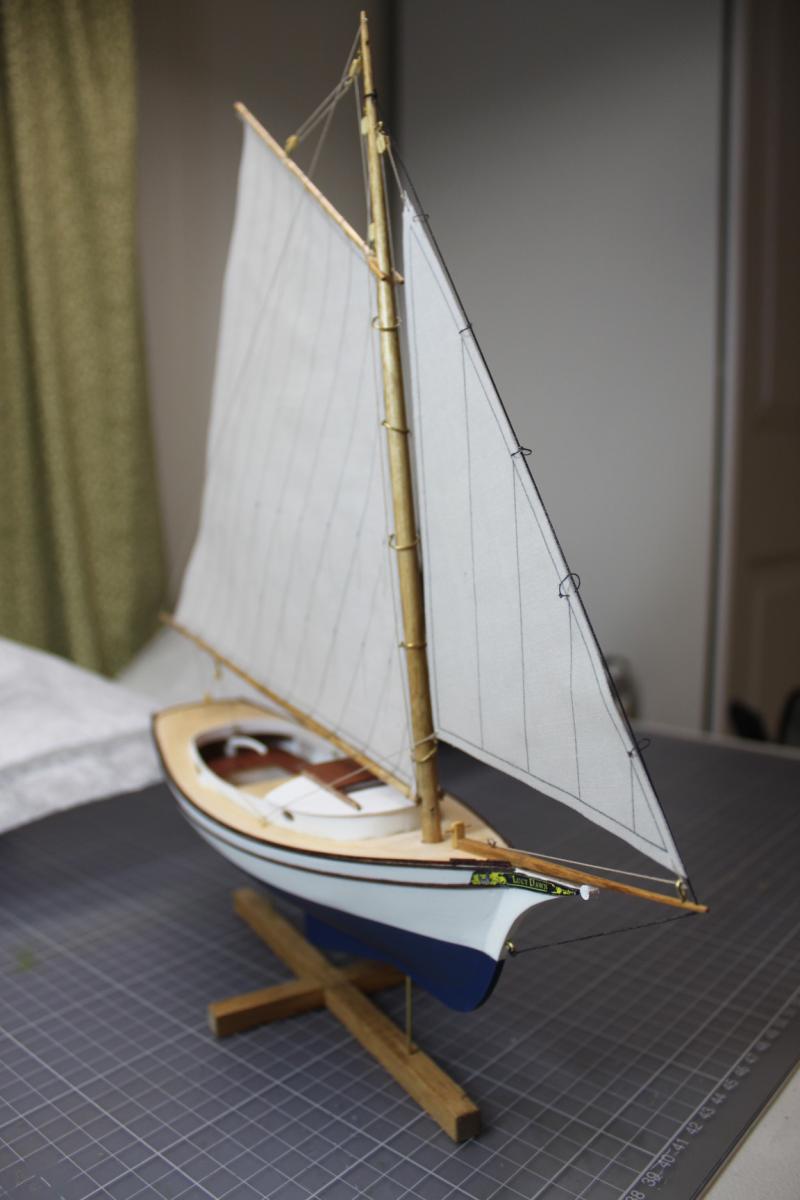
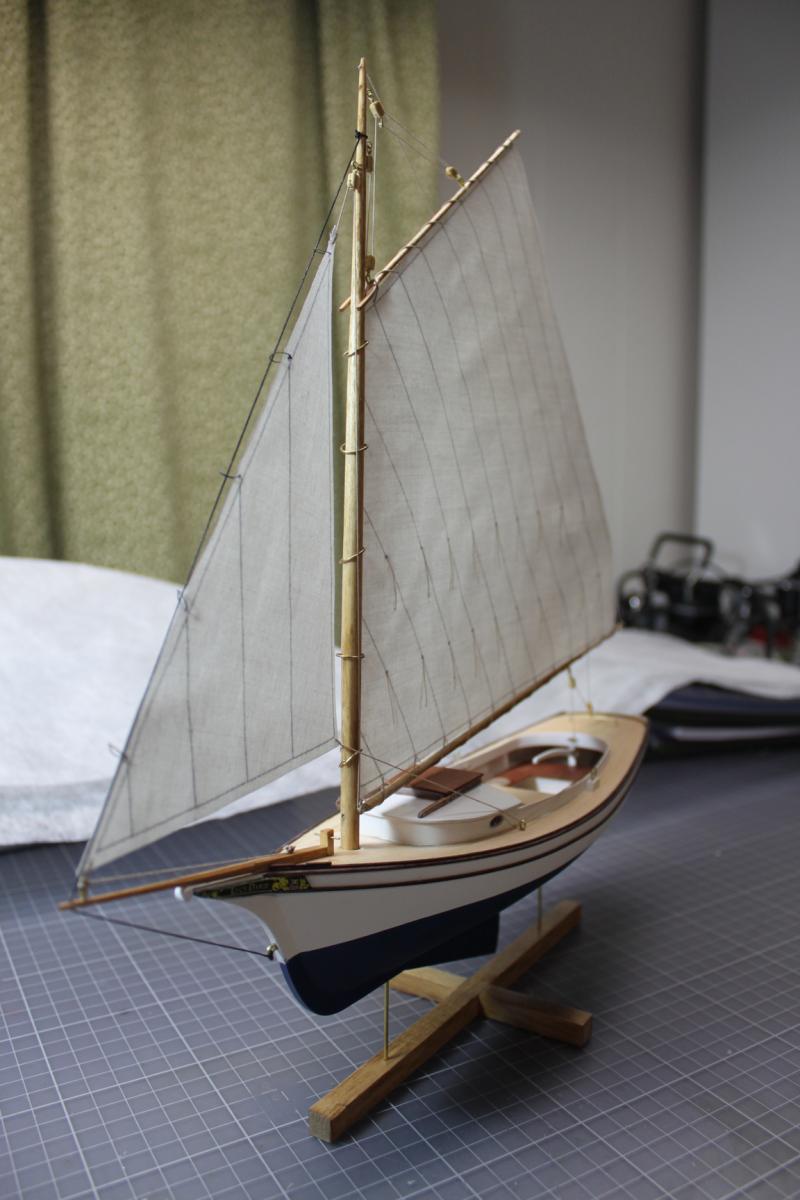
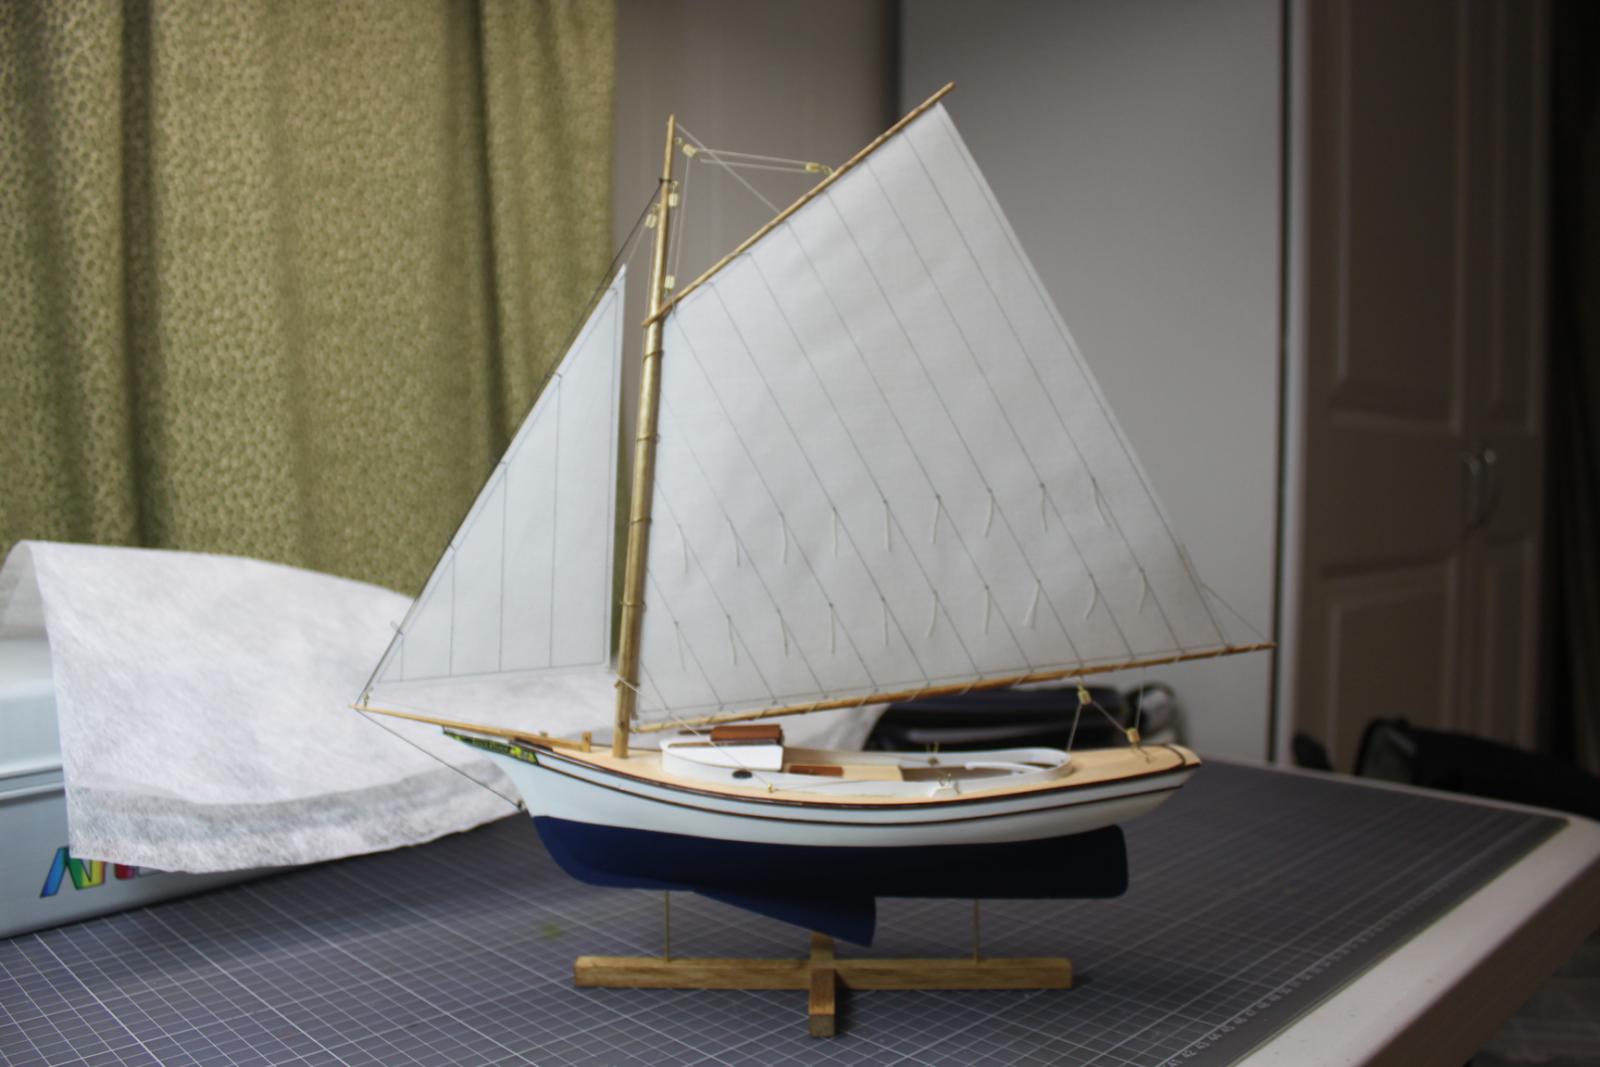
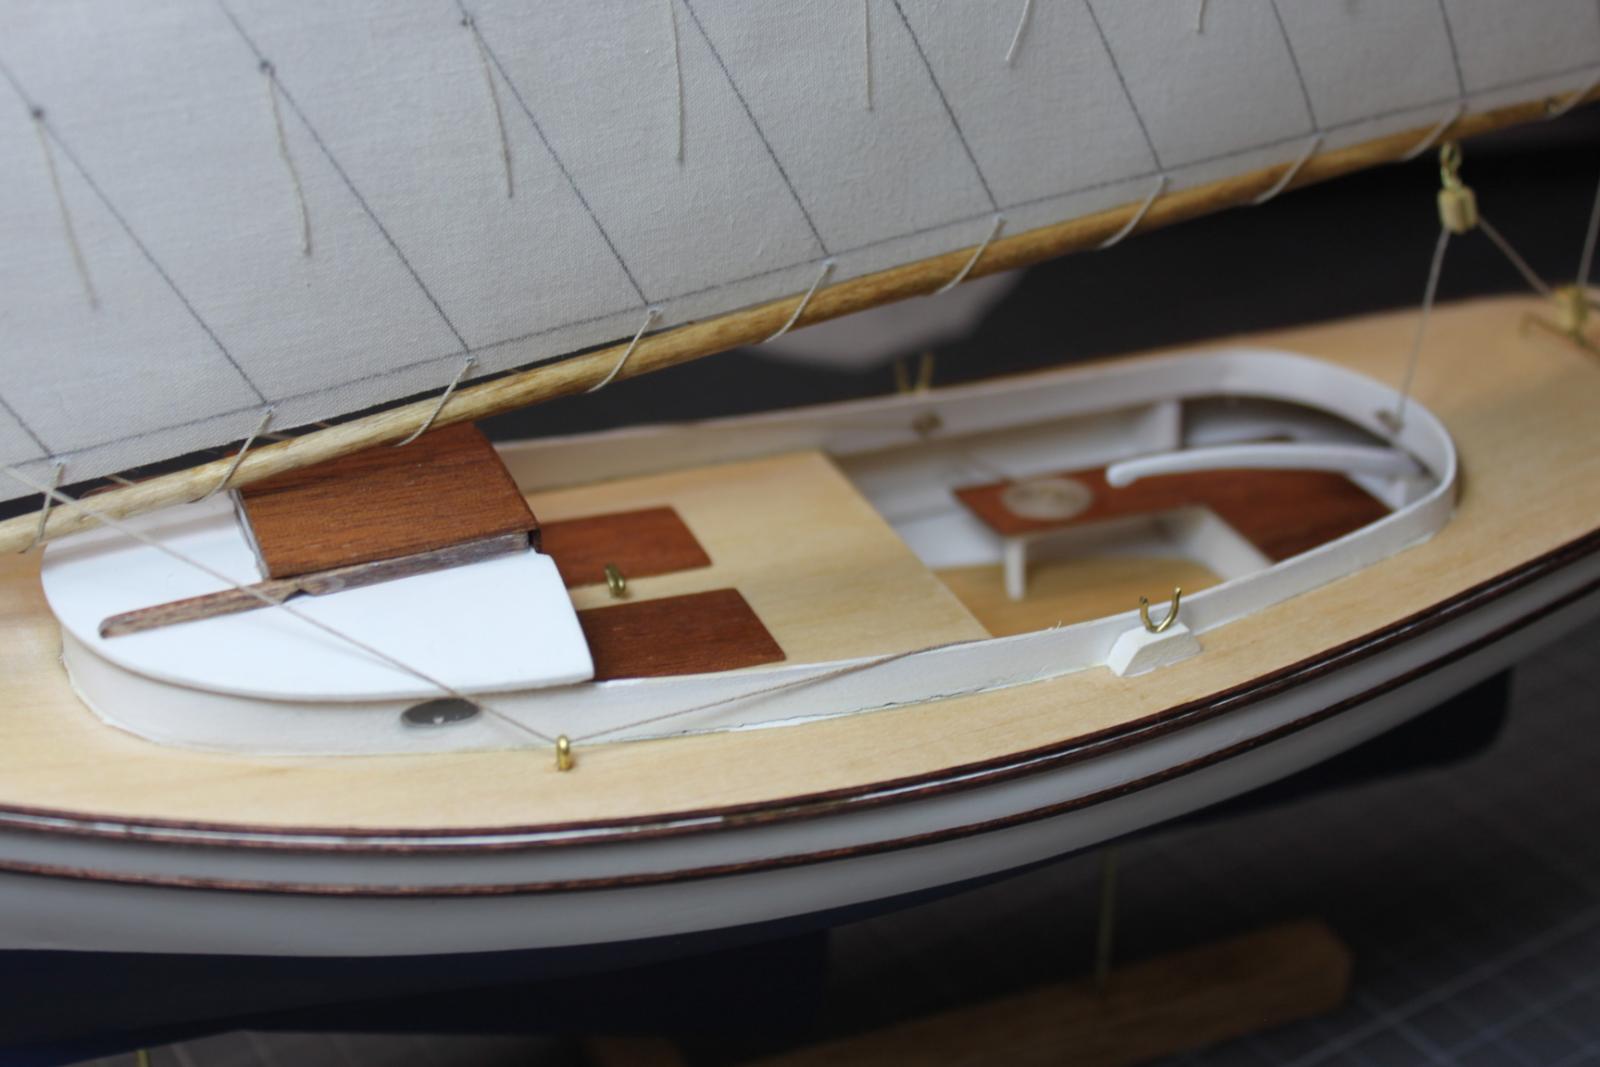
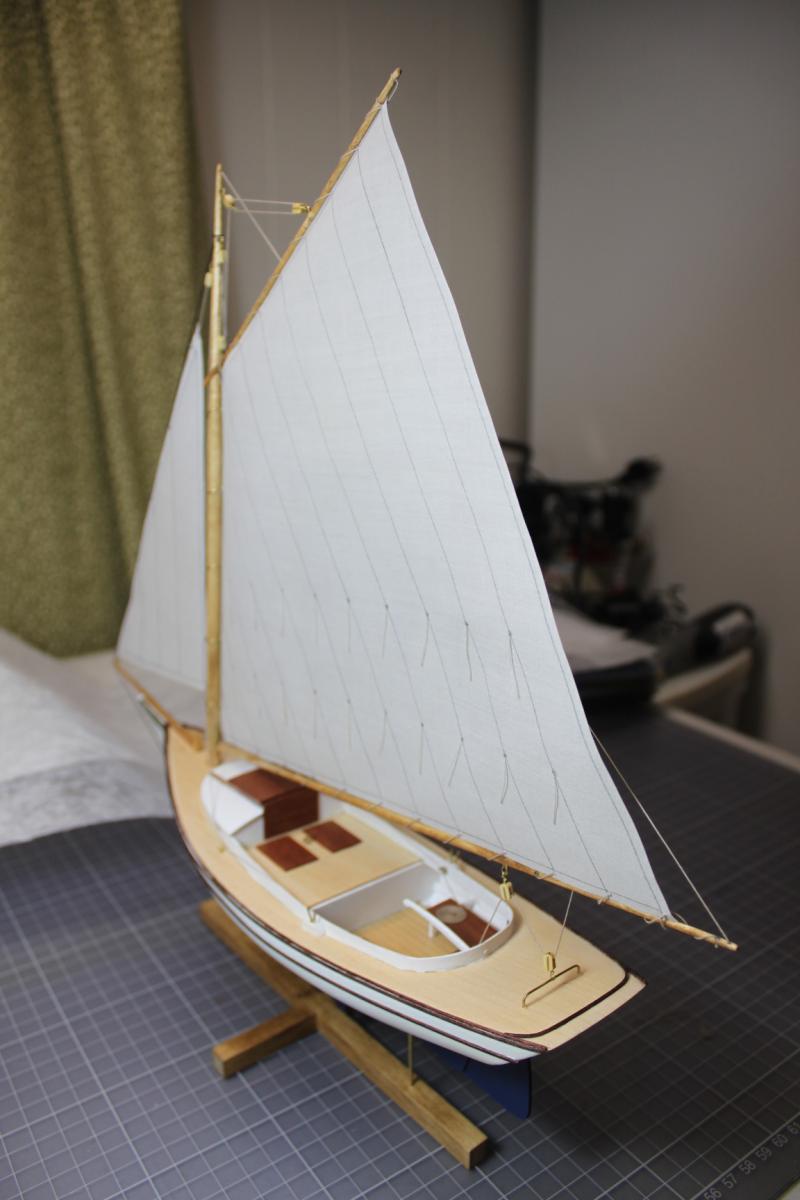
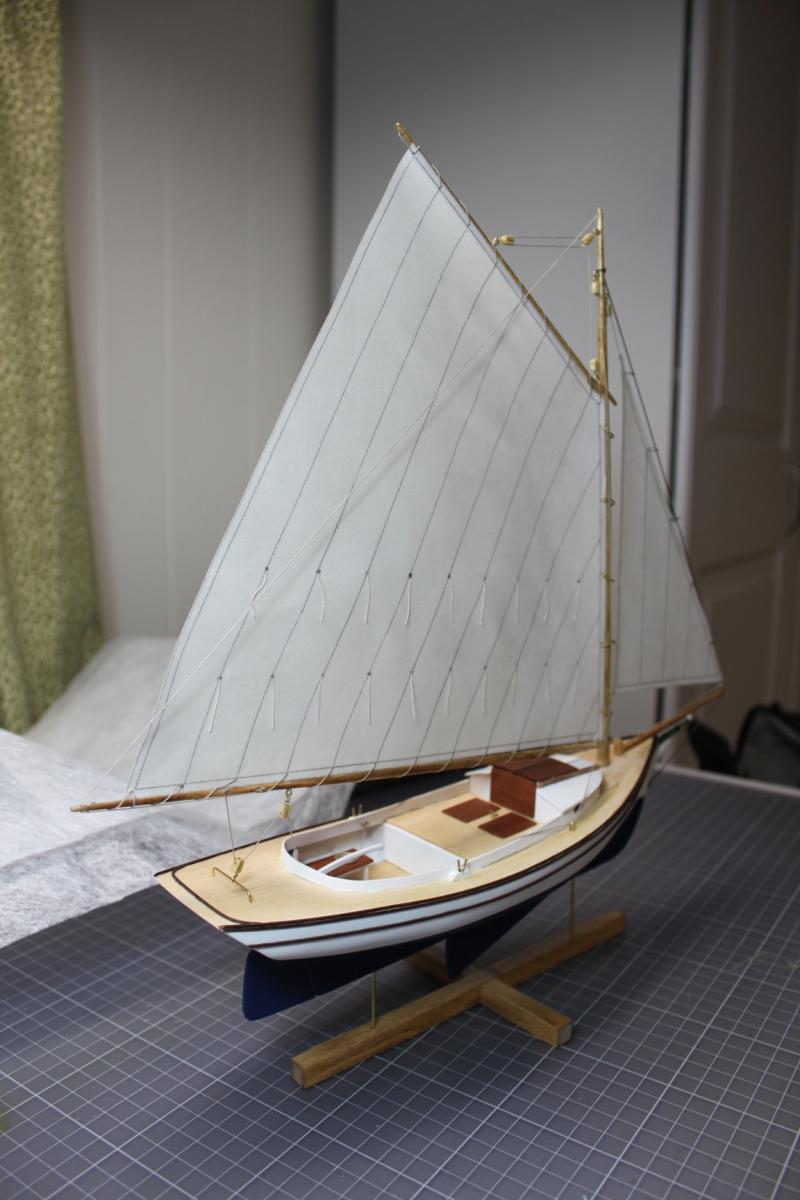
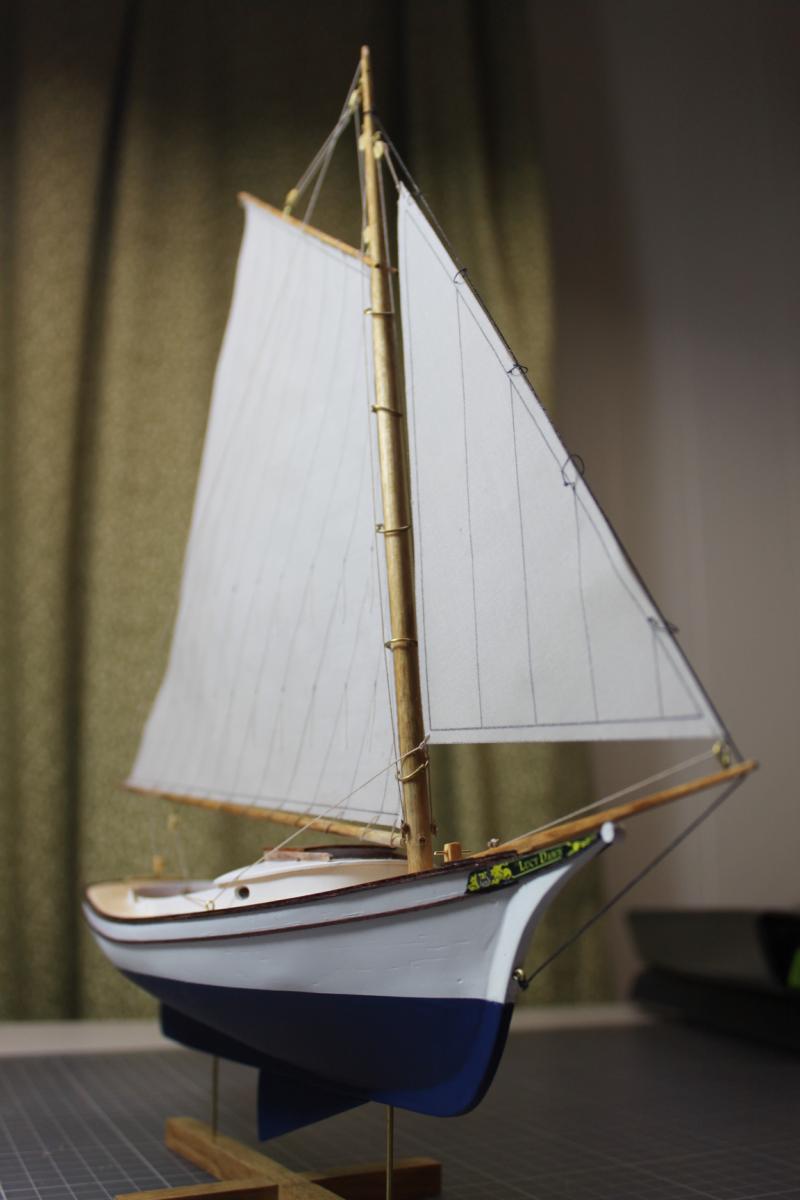
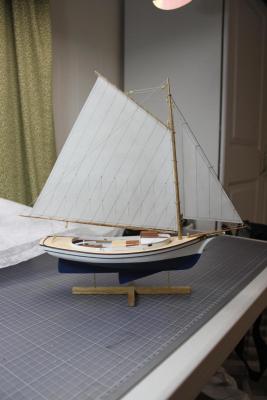
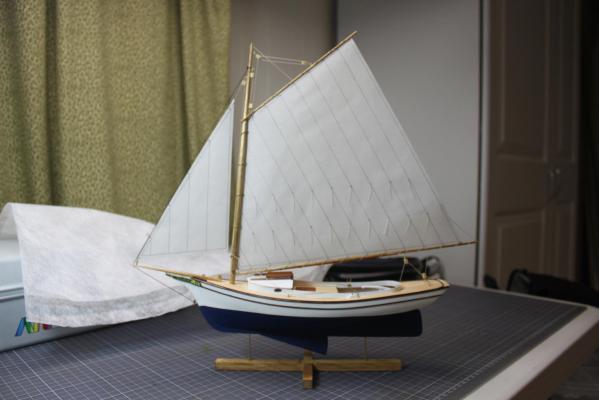
So ... the holidays rolled around and despite entertaining the Admiral's extended family at our home this year, I found time to FINISH the smack. That's right, I've reached the end of the long road I started in May. First wooden model done. And I loved every minute of it. I'm hooked. Lord knows it isn't perfect, but I am very happy with how it turned out. And I've learned a ton. I couldn't have done it without the valuable assistance of all the MSW lobster smack and friendship sloop builders before me. Your logs (and I read all of them that made it onto MSW v2) were an incredible reference. I also want to thank everyone who helped me along the way, patiently fielding all my dumb questions. I'd especially like to thank: Chris Coyle Joel Sanborn Dan Sweeney Dee Dee Yves Vidal Mario (Cap’n Rat Fink) Popeye Altduck Chuck Passaro The bad news for all of you is that I am gearing up to start Model Shipways' Armed Virginia Sloop, so expect a whole new slew of dumb questions. Here are lots of pics, let me know what you think:


- 52 replies
-
- 7
-
-
- muscongus bay lobster smack
- Midwest Products
- (and 2 more)
-
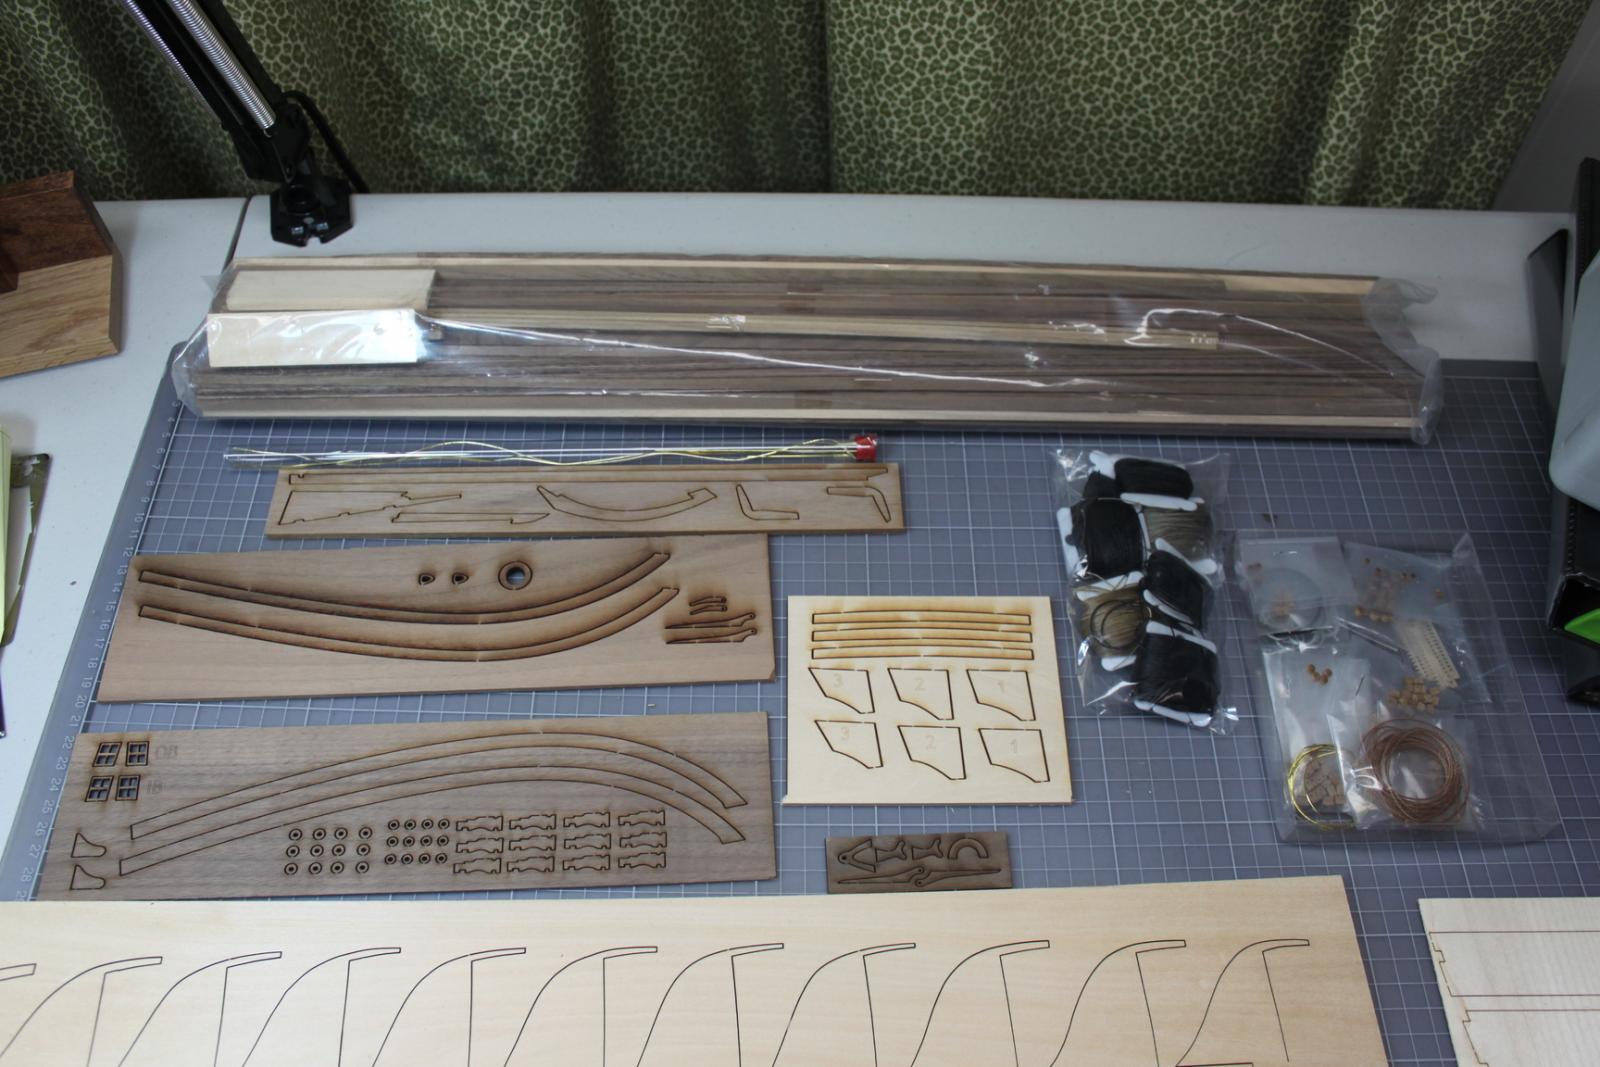
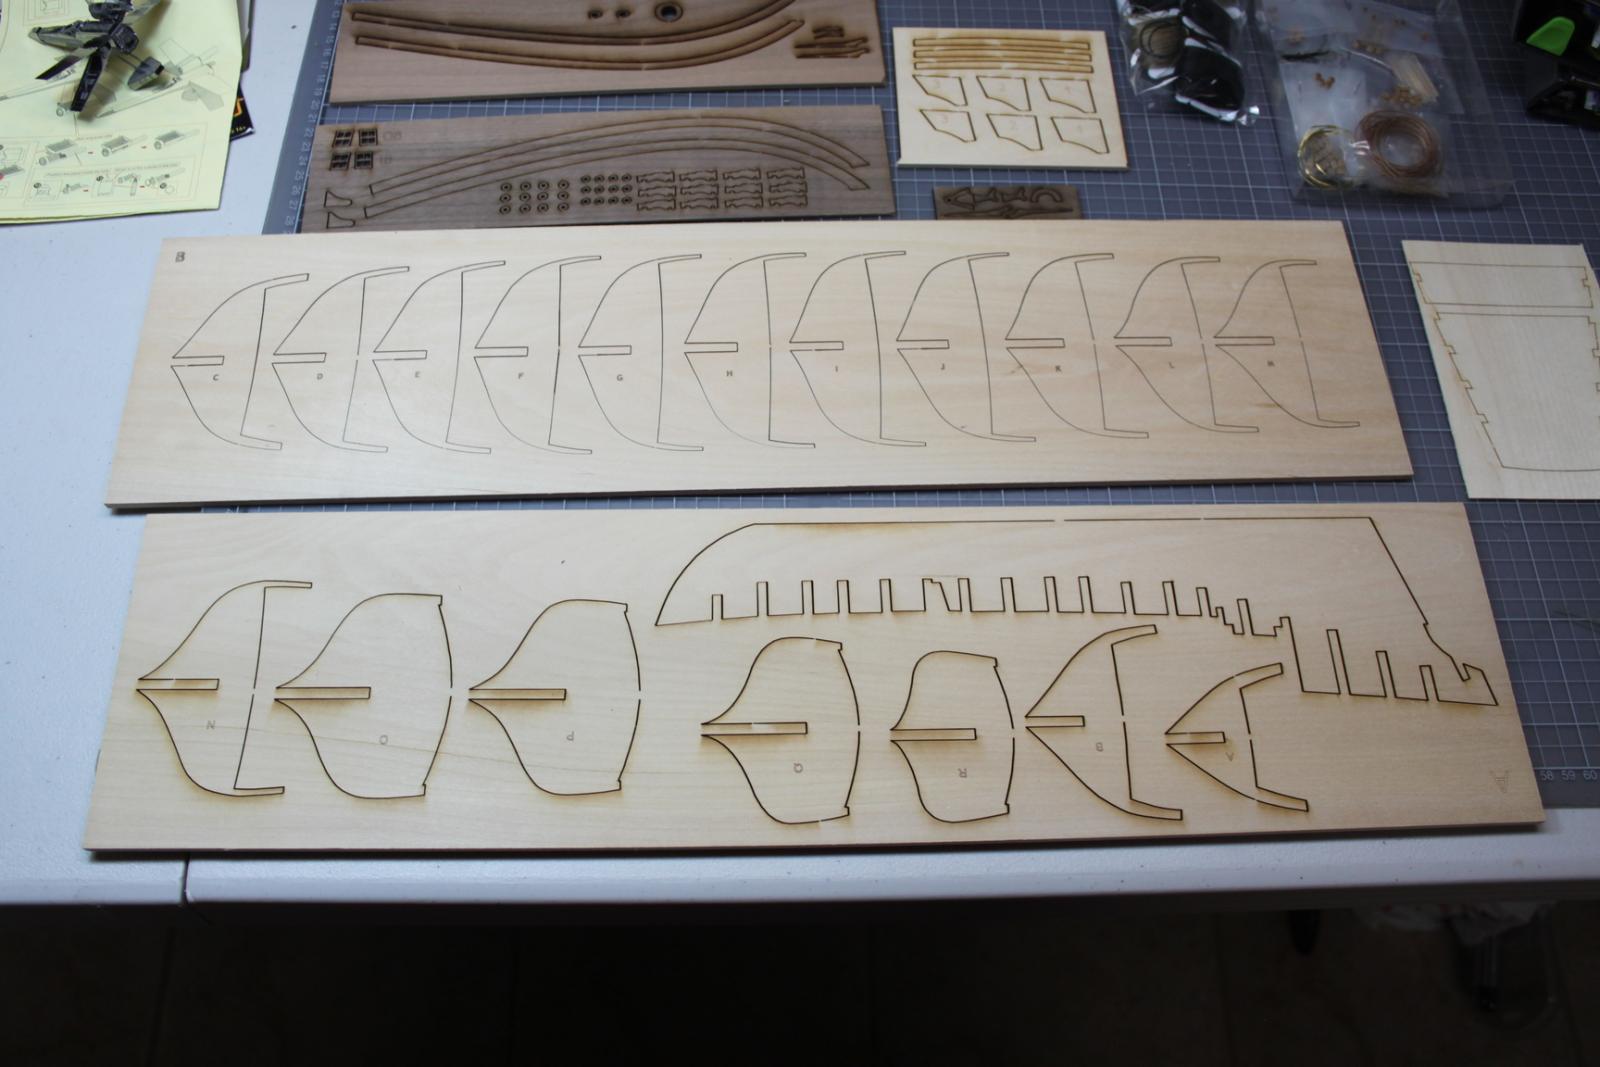
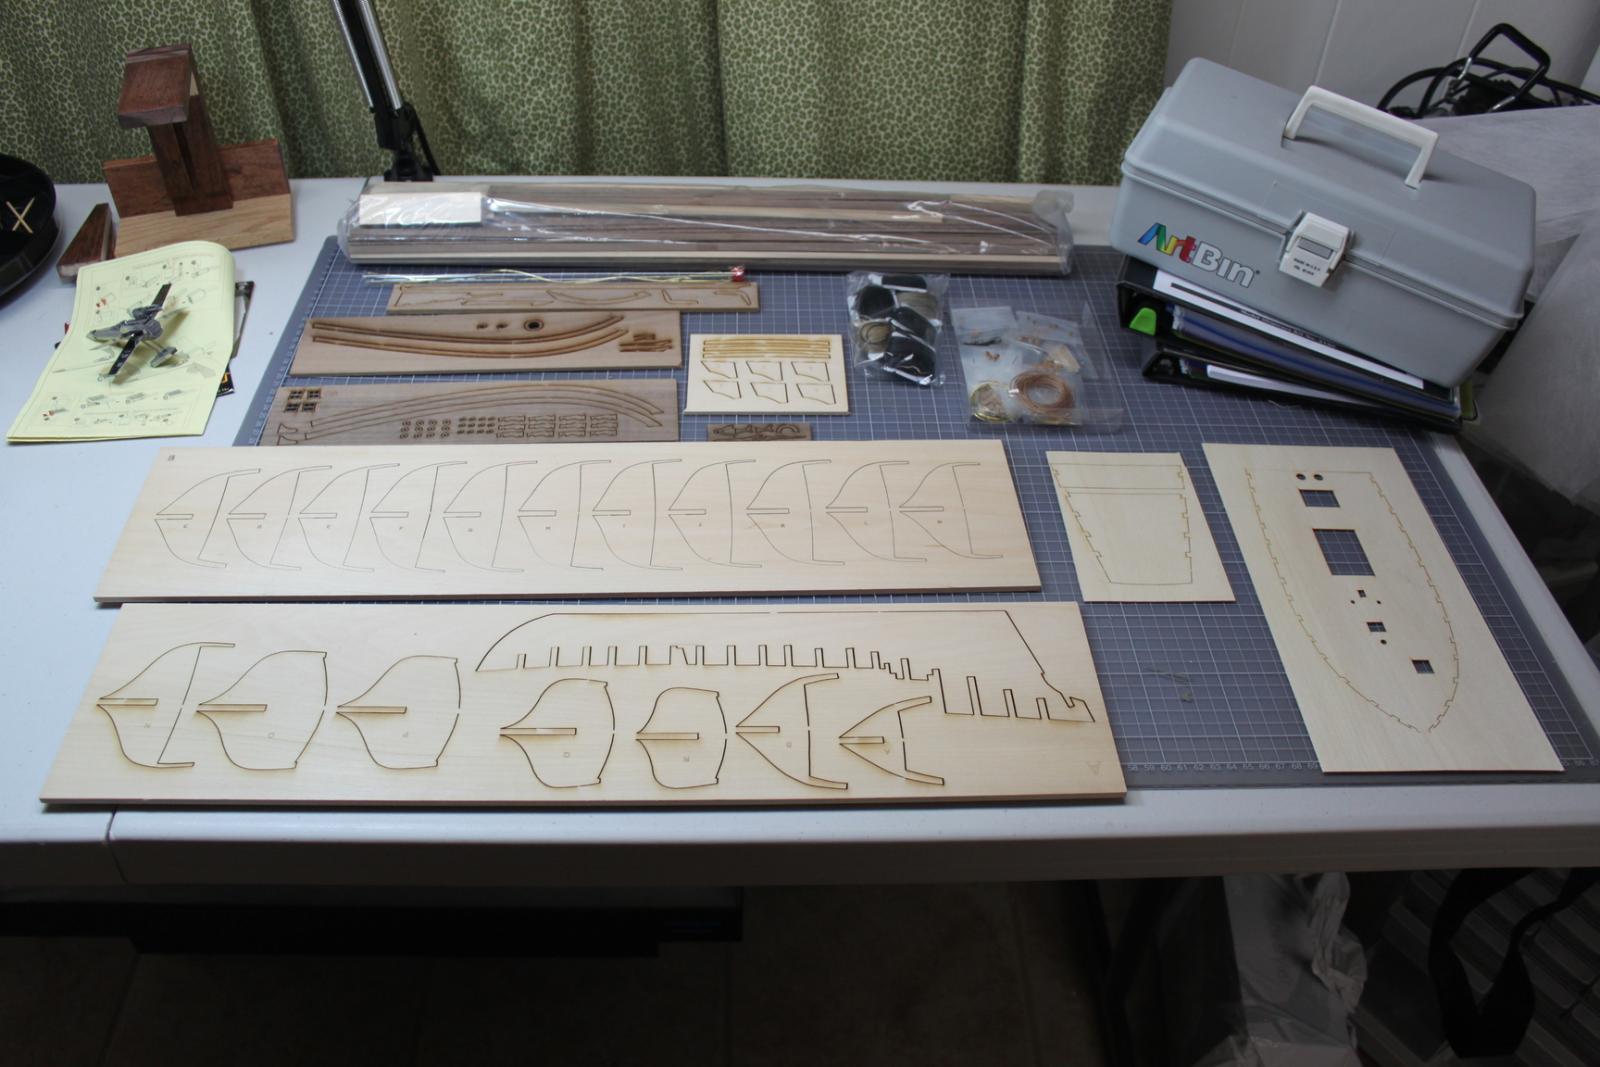
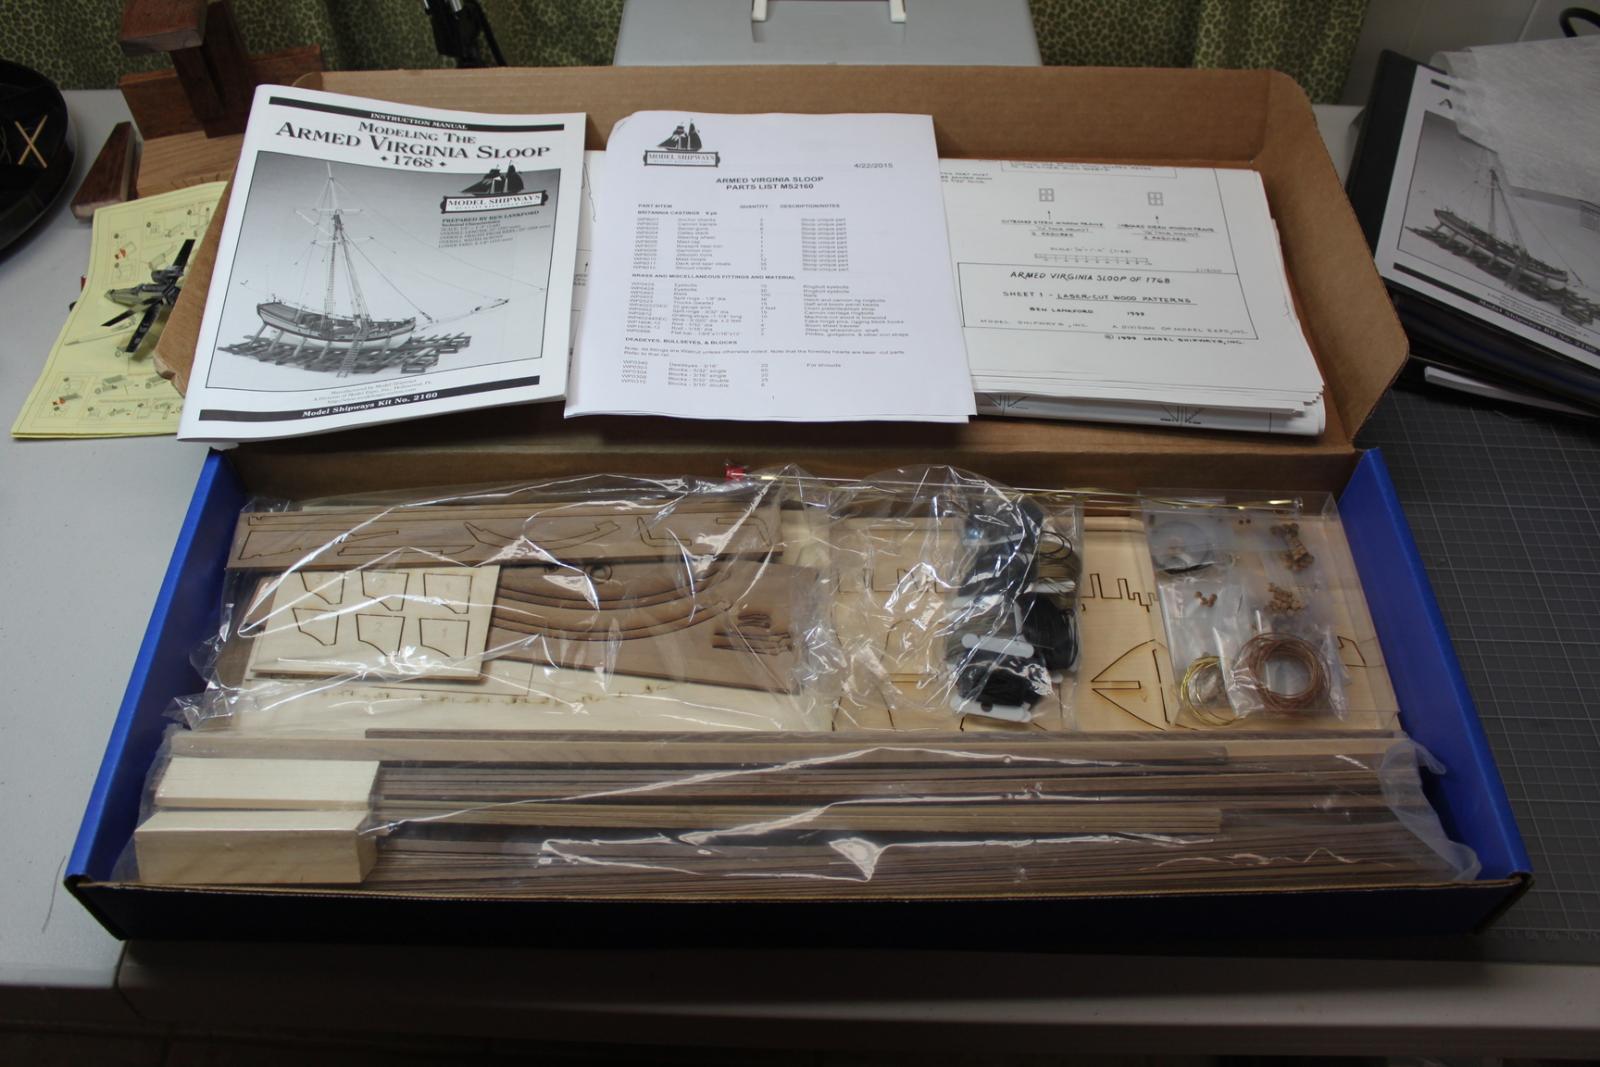
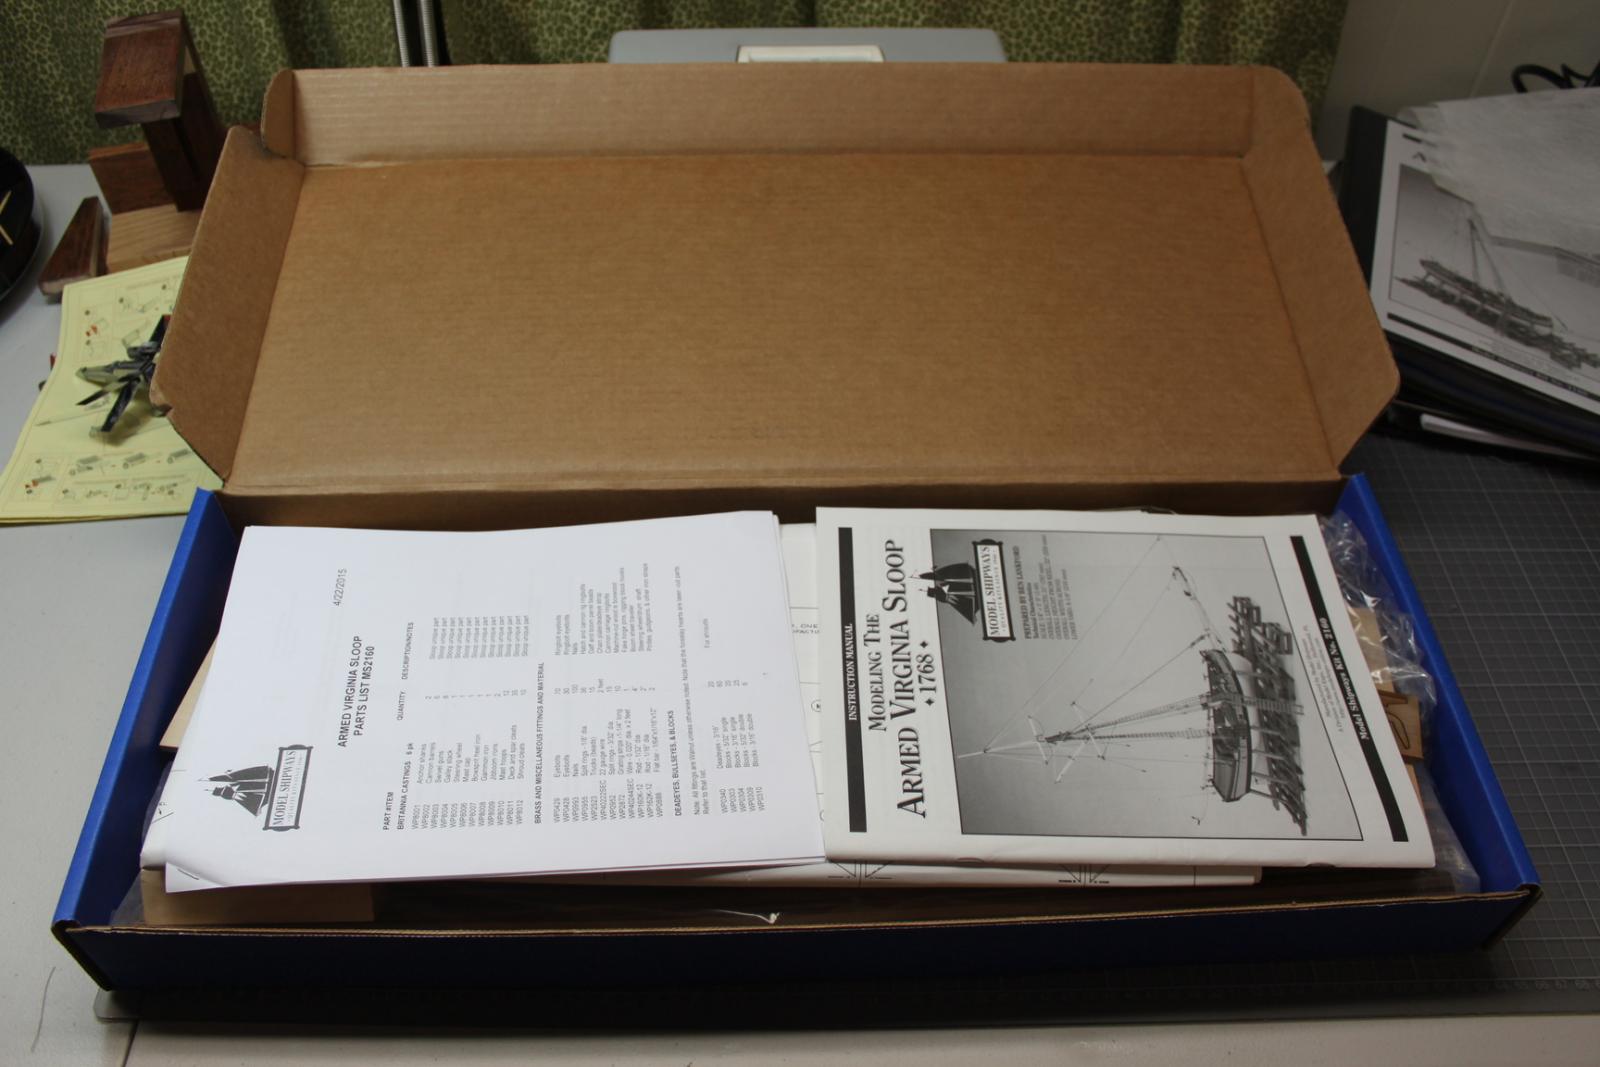
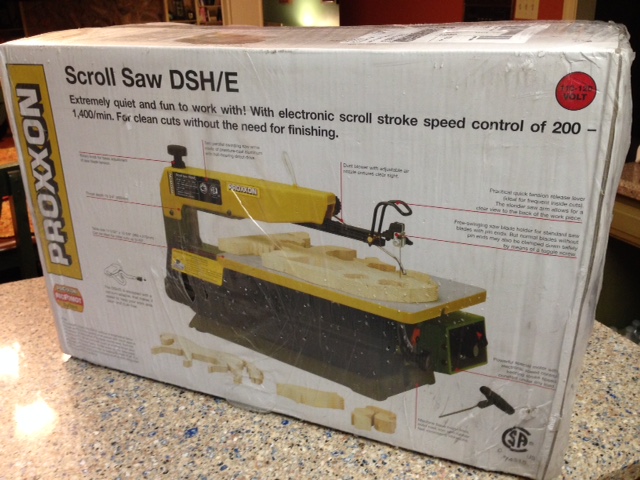
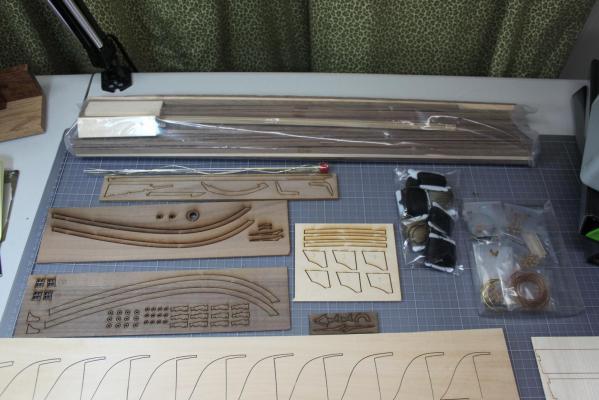
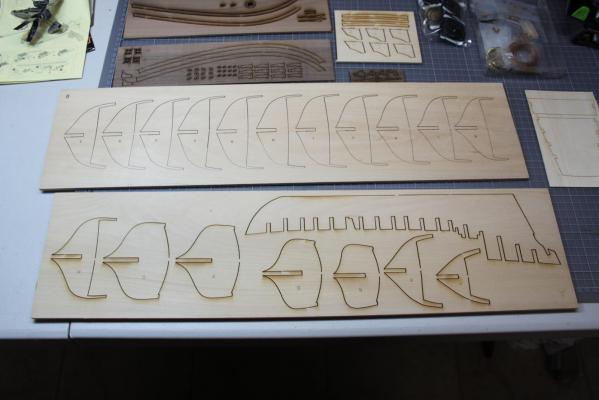
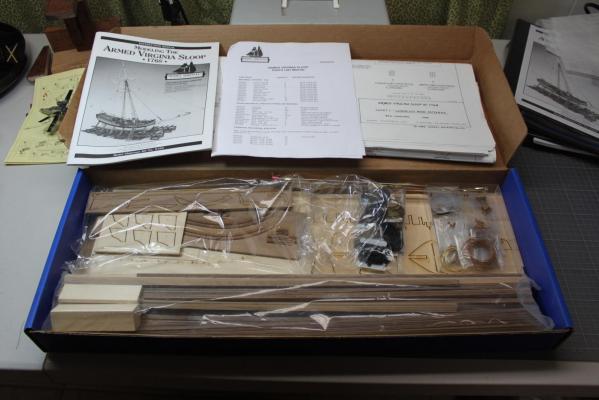
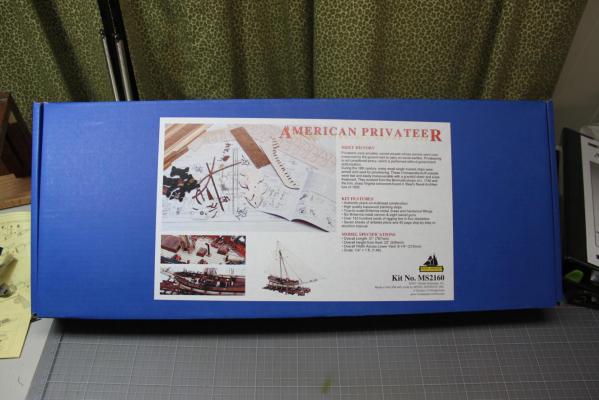
So the Muscongus Bay Lobster Smack is done and I am taking on a new challenge. Really looking forward to working on the AVS and my first planked hull build. Given how the smack went, you can count on this one taking a while and on lots of basic questions. If my experience to date is any indication you won't let me down! (I know I'll be leaning heavily on GuntherMT's comprehensive build log, which is fantastic, if you haven't checked it out.) I haven't started inventory-ing and organizing all the parts, but wanted to get a few "unboxing" pics up. I've got replacement rope and blocks on the way from Chuck and am looking to get some holly from Crown or the Lumberyard for the deck. Here's what the good folks at ModelExpo sent:


-
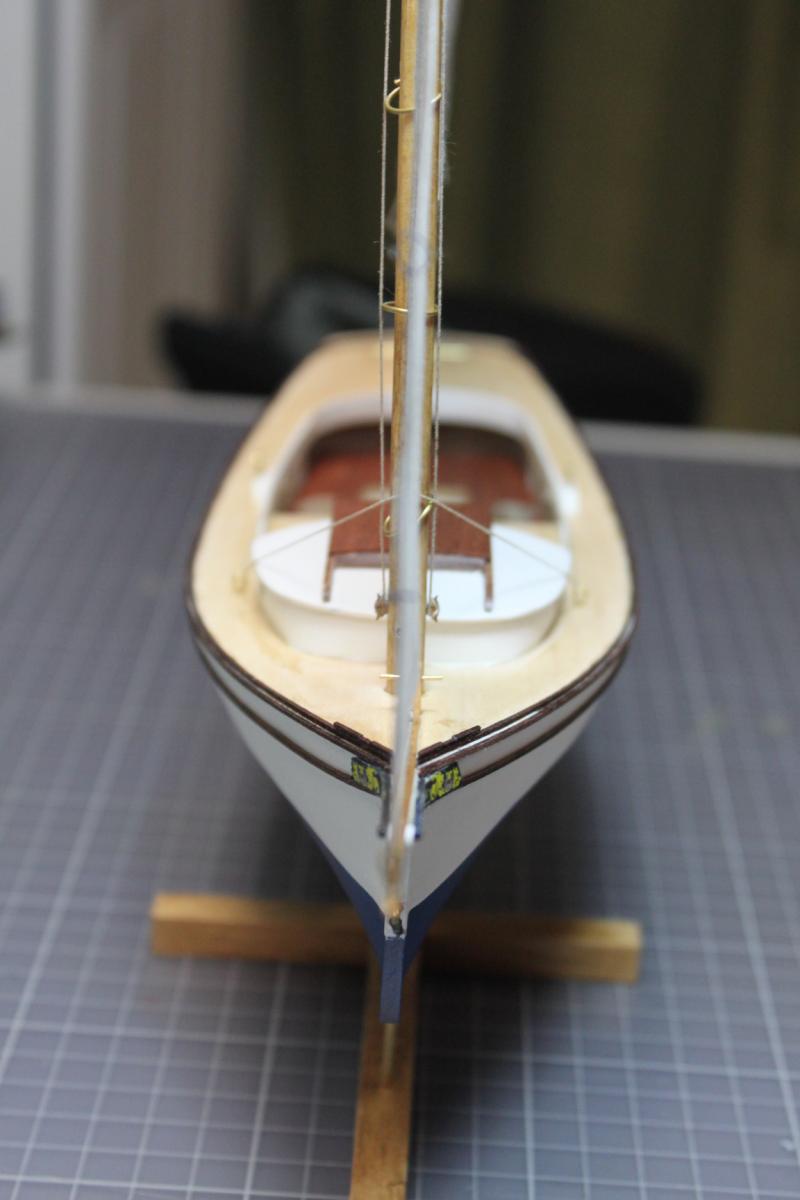
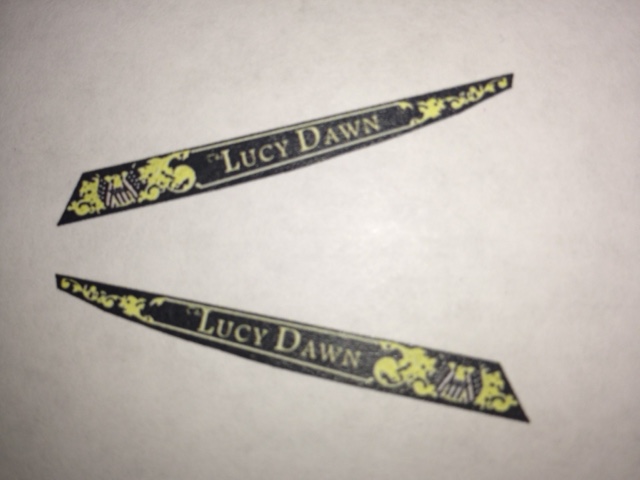
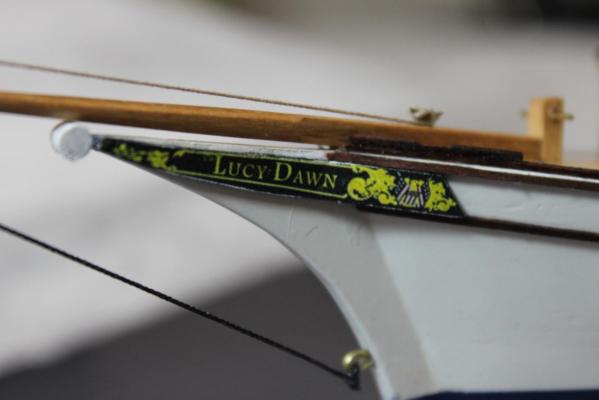
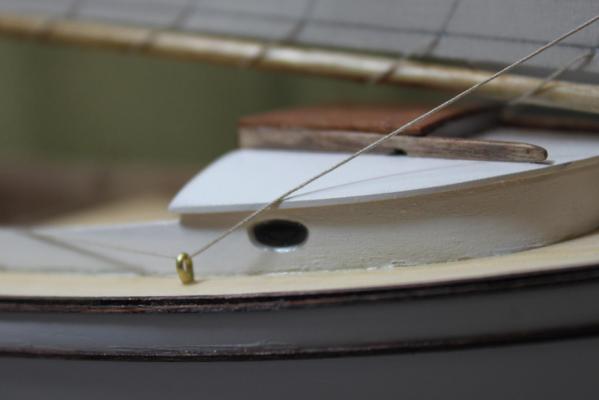
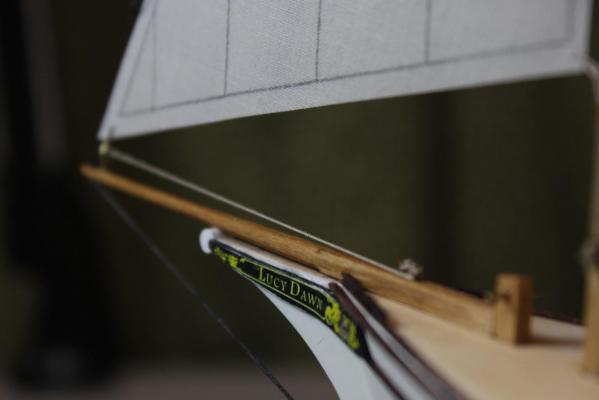
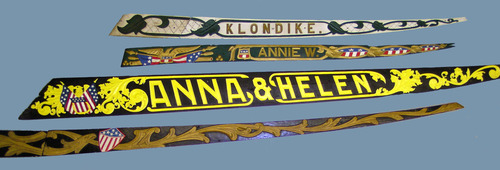
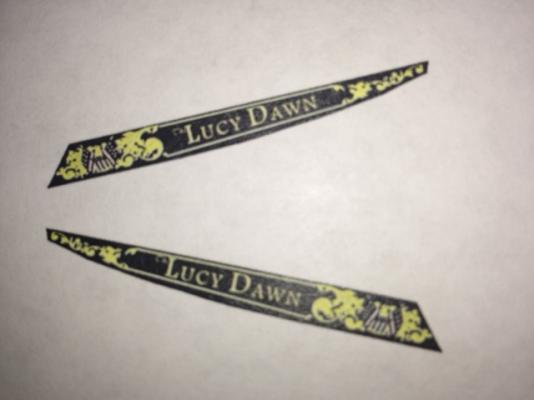
I've been installing the toerails and the upper side rails. Painting has been done for awhile and I know that I owe pics, but in the meantime I've been thinking about the trailboards. I've really liked some of the decorative trailboards that I've seen on this model here at MSW, but wondered if I could take it to the next level. So I did some quick Googling for inspirations and came up with these examples: Given that I wanted to name the boat for the admiral, I set about using PPT to make changes to my favorite of the trailboards in order to fashion a printable decal that I can affix to the trailboards on my model. Here's the result: We'll see how well this prints to decal paper and makes the transfer to the wood pieces. I plan on using gloss lacquer to prepare the surface to take the decal, but any guidance in this area is much appreciated as I've only used decals on plastic and have never before used Testor's "do-it-yourself" decal-making kit. Best, Greg
- 52 replies
-
- 3
-
-
- muscongus bay lobster smack
- Midwest Products
- (and 2 more)
-
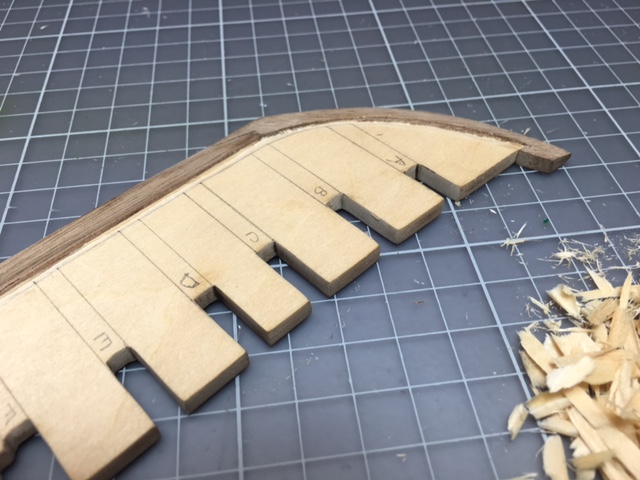
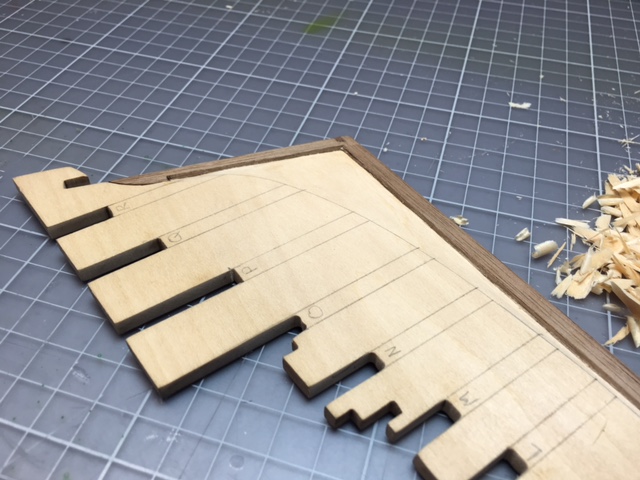
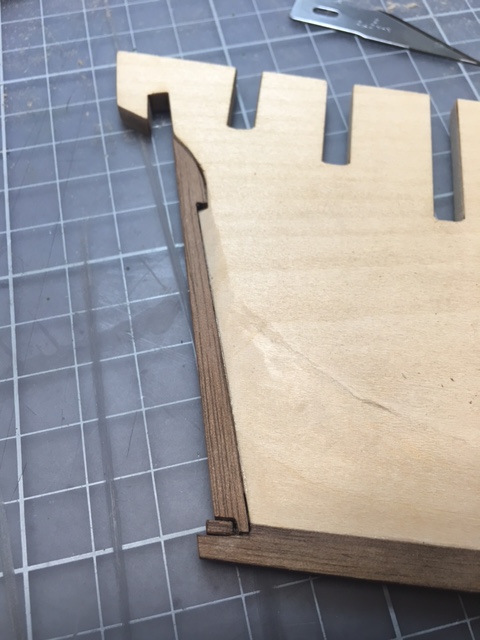
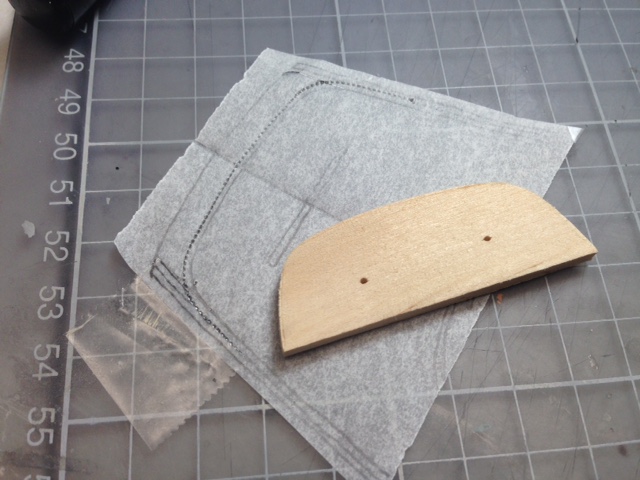
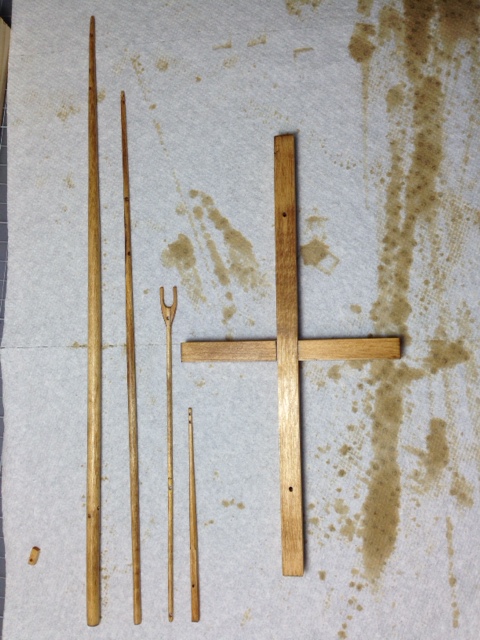
Great suggestions! So I decided to take Dee Dee's advice and run the side toe rails all the way to the stern, with the idea of fashioning a cross piece. I like this idea better than the Midwest plans, which call for the two toe rails to meet in the middle of the deck. I also liked Joel's idea of creating a "blank" to shape the cross piece. So I traced the piece, transferred it to some scrap and shaped it on the Proxxon scroll saw. I wet the 1/32 x 1/32, wrapped it around the blank and taped it tight. Letting it dry now ...
- 52 replies
-
- 3
-
-
- muscongus bay lobster smack
- Midwest Products
- (and 2 more)
-
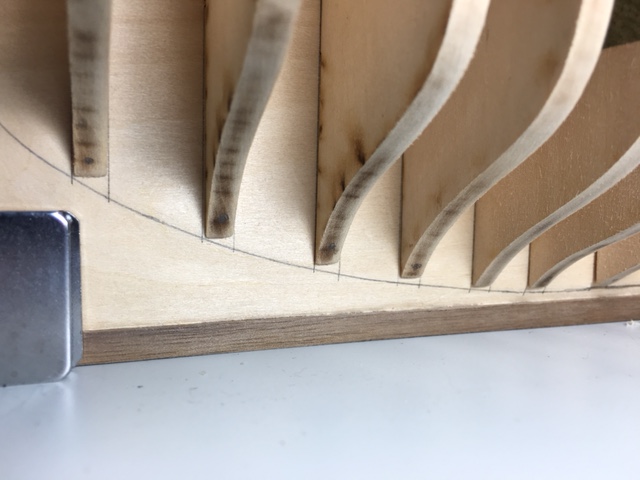
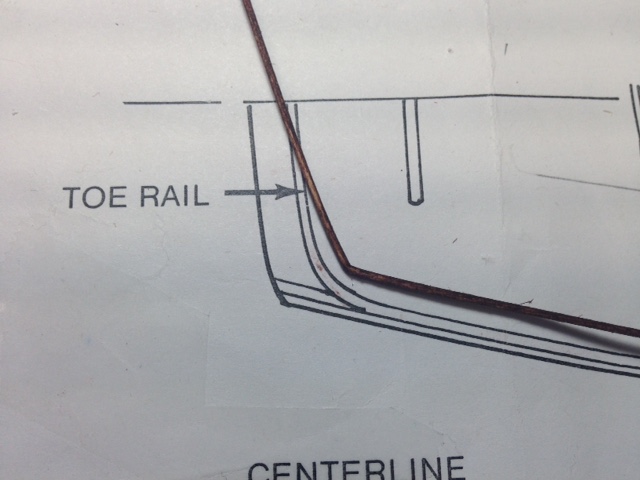
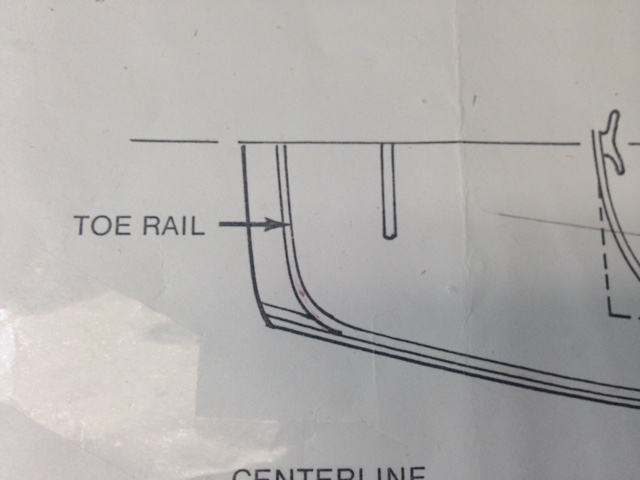
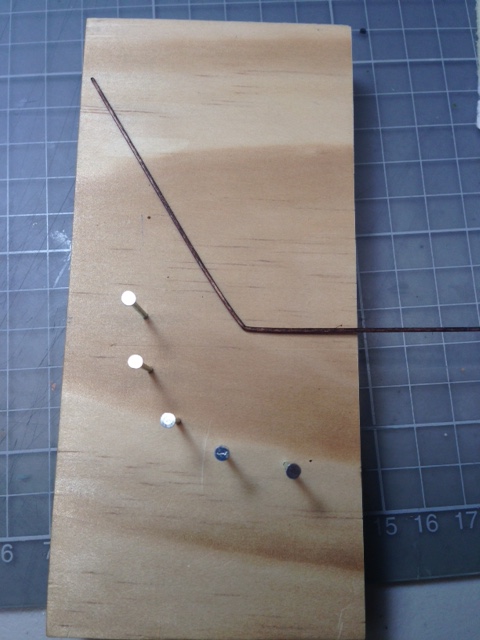
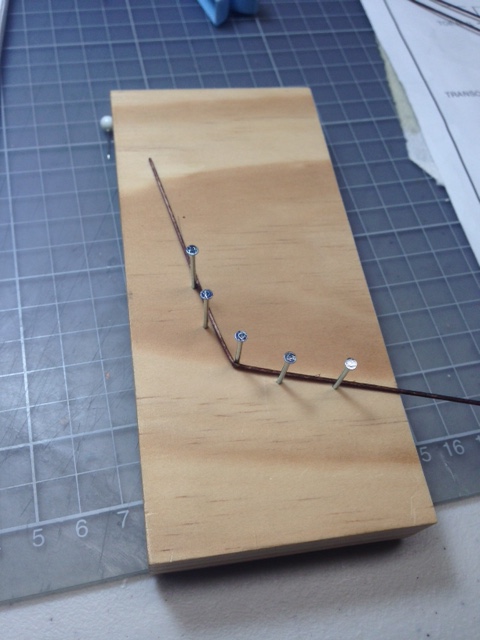
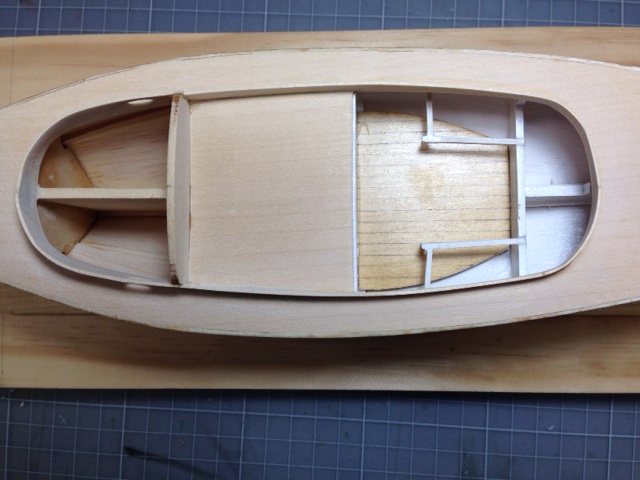
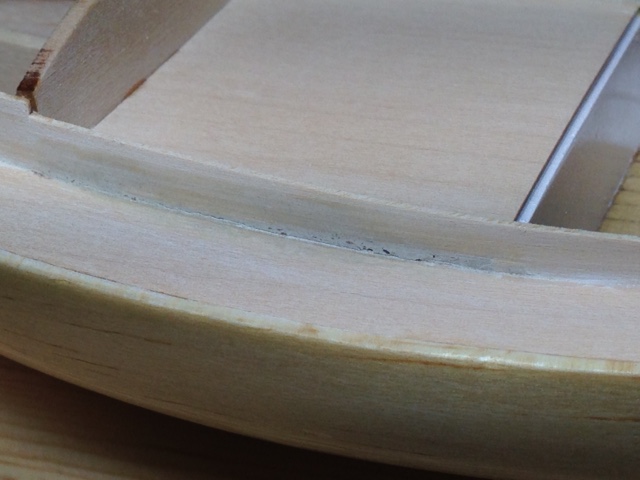
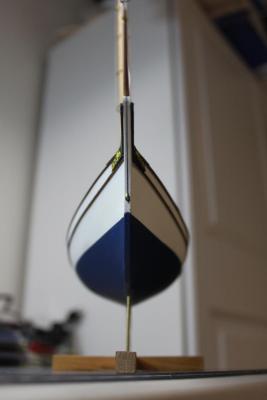
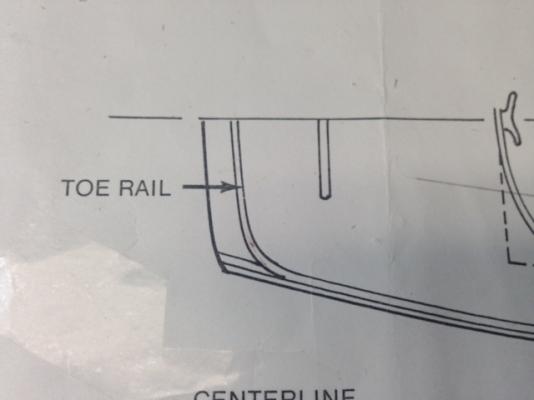
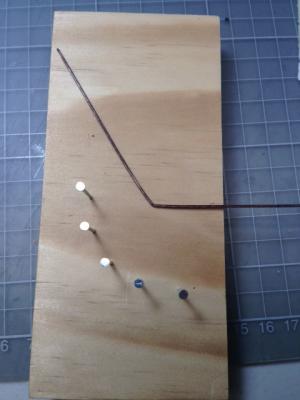
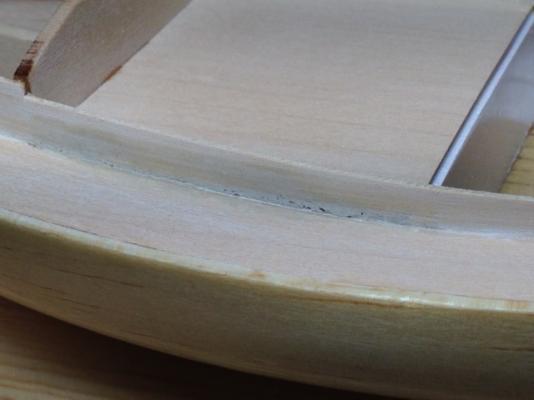
So, I'm having some trouble working with 1/32 x 1/32 basswood for the toe rail. You can see from the photo below that the wood has to make a fairly severe turn at the back of the boat. To shape the wood, I built the jig below, soaked the wood, heated it with a hair dryer and worked it into the jig. The problem that I am having is that while the wood is not snapping (which it is very prone to do), it is developing a kink rather than a smooth curve (see below). Any thoughts on how to correct to get the smooth curve that the plans call for?


-
We should definitely NOT try to immolate them. I actually think that might be illegal, in the U.S. at least.
- 1,051 replies
-
- 8
-
-
- cheerful
- Syren Ship Model Company
- (and 1 more)
-
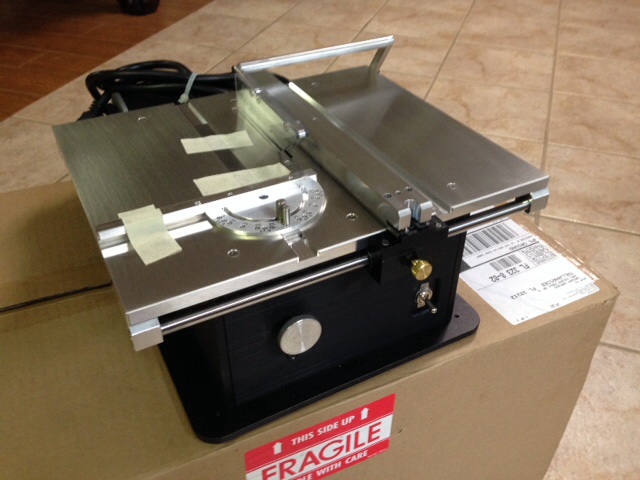
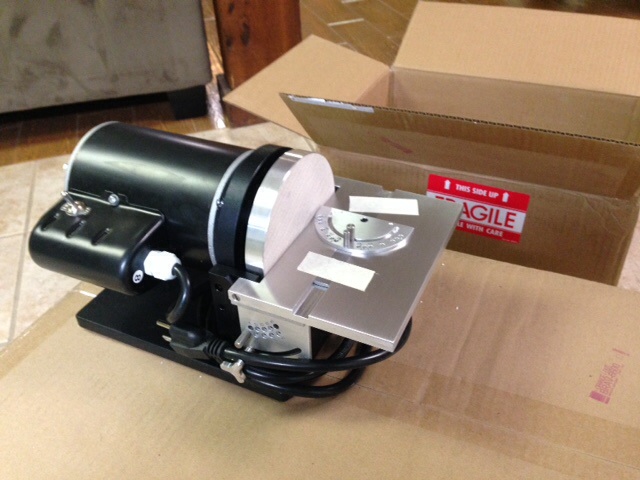
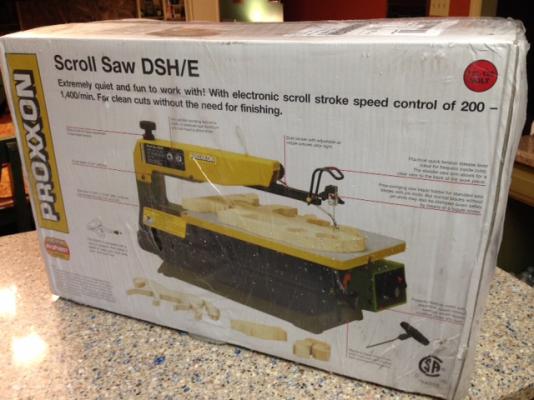
Some new toys, courtesy Jim Byrnes ...


- 52 replies
-
- 1
-
-
- muscongus bay lobster smack
- Midwest Products
- (and 2 more)
-
Brian, I will soon be starting the AVS with the same practicum that you have been using. I am very interested in learning from your experience about where the sequencing in the practicum can be improved. Will that be apparent reading through your full log, or are you keeping a list that you can share? Any help is much appreciated as she will be my first real ship build. (I'm current working on the Lobster Smack.) Thanks, Greg
- 831 replies
-
- 3
-
-
- Armed Virginia Sloop
- Model Shipways
- (and 1 more)
-
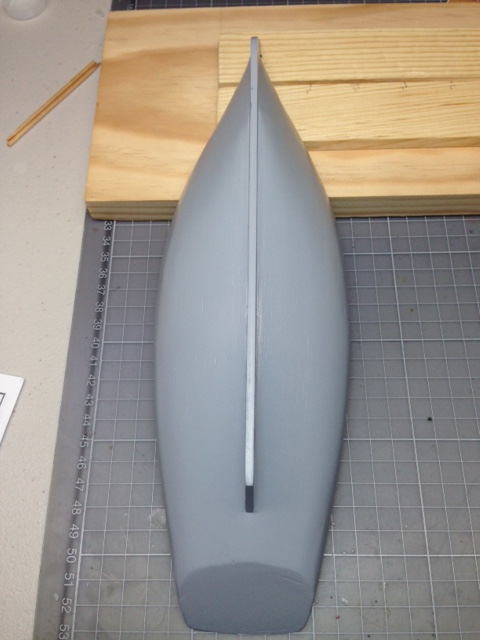
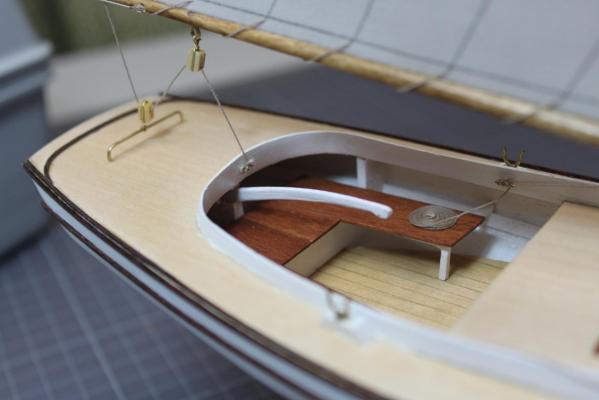
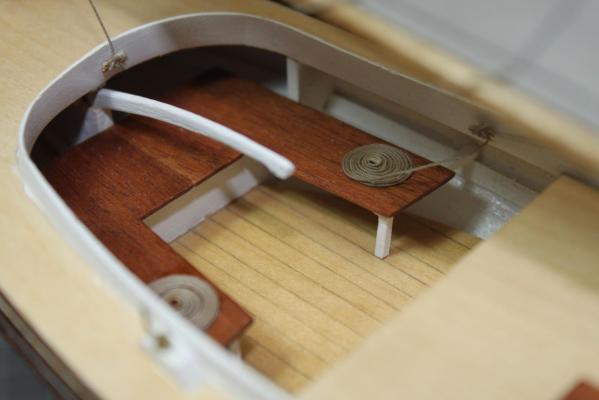
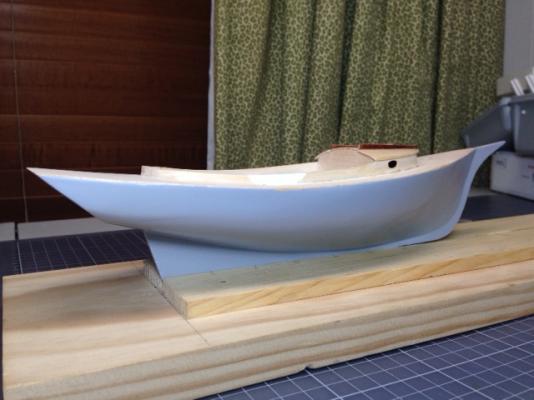
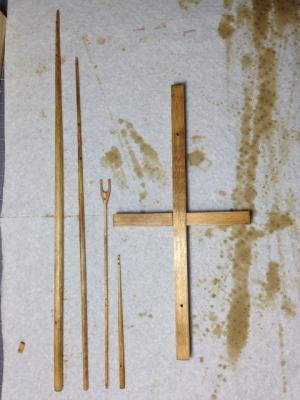
So, I finally quit procrastinating and tackled the coaming. It was not easy. I followed the directions and soaked the wood in alcohol, which did give it some pliancy. But not nearly enough to make shaping the severe curves easy. Here's the finished product: It turns out that my apprehension to undertaking the coaming was warranted. The coaming broke in two cleanly at the near right-angle curve on the back of the cockpit area. Rather than make a new coaming half and reinstall, I applied a bunch of cyanoacrylate and sanded it smooth. You can still see the crack, but it's smooth to the touch. A coat of white should cover it cleanly I had to use filler in a couple of places. I used it to smooth the join where the two halves of the coaming come together, as I have seen others have to do in their build logs. However, I also had to use it to fill gaps that were left between the bottom of the coaming and the deck on both sides of the boat. Finishing the coaming let me make a couple of final installations ahead of painting, including the main hatch rails and the oar blocks. I stained the hatch rails with mahogany stain to try to match the hatch cover. I also painted the area of the coaming behind the blocks and the blocks themselves white. I will finish painting the full coaming white later. Then it was on to priming the hull! I used a spray can of Mr. Surfacer 1000 to put a good coat on. Now in the process of waiting a couple of days for the primer to dry completely ahead of a good wet sanding to prep for a super smooth final coat (fingers crossed). The primer did surface a couple of fairly minor dents and dings in the surface (darned balsa wood!), but I don't think I'm going to try to fill them. It is a first-time effort, after all. And lastly, I finished shaping the mast, boom and gaff. As noted in other build logs, the suggested holes to be drilled in these pieces to accommodate cotter pins are very, very large given the diameter of the pieces. I was able, using the Dremel drill press apparatus, to get the prescribed holes made. However, I should have listened to the other build logs, because where these holes represented a significant percentage of the diameter of the piece, there was a good bit of structural weakness -- particularly on the gaff, the thinnest piece. I actually broke the gaff in two at a drilled location. I inserted brass rod into the gaff to bring the two pieces together with some structural integrity. However, this necessitate a 1/8" move of the new hole for the block further up the gaff. Chalk it up to first-time inaccuracies. It took me two attempts at making the bowsprit to get a convincing octagonal shape. Learning from my experience with the gaff, I decided to downsize the size of the drilled holes on the bowsprit. We'll see if this comes back to haunt me when running the rigging. In any event, the pieces got done. I stained them in golden oak to get a nice contrast with the other wood colors on the model. The stain looks a little uneven -- dark in some places, light in others. I tried to control for this in the application, but I'm guessing the wood grain has a lot to do with how it looks. Any suggestions on how to modulate the color to get it more even would be much appreciated. So, the next big step is getting the white and blue airbrushed onto the hull with an ACCURATE, STRAIGHT waterline. Still thinking about the best methodology to get an accurate line. Any and all suggestions are welcome. (I'm currently thinking a pencil jig is my best bet, but am wondering how to get enough stability / rigidity in the jig to make sure the pencil doesn't slide down the hull when it comes into contact.)


- 52 replies
-
- 5
-
-
- muscongus bay lobster smack
- Midwest Products
- (and 2 more)
-
Here's the new toy ... First step down the road to the Dark Side?
- 52 replies
-
- 2
-
-
- muscongus bay lobster smack
- Midwest Products
- (and 2 more)
-
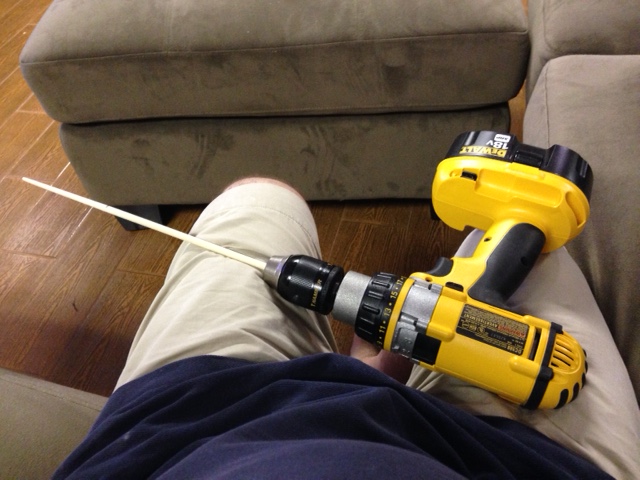
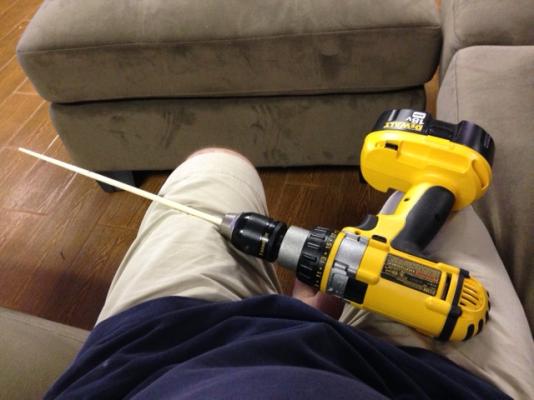
Yep, did it on the sofa. The finished basement doubles as my workshop and a kid pit, complete with big screen TV, lots of video game consoles, a treadmill, bunk beds, pool table. So I watched "Whiplash" while turning the mast, while sitting on my Costco sectional. I think when my power tools start arriving (scroll saw, table saw, disc sander), the admiral is going to kick me out. She's already complaining about the dust.
- 52 replies
-
- 2
-
-
- muscongus bay lobster smack
- Midwest Products
- (and 2 more)
-
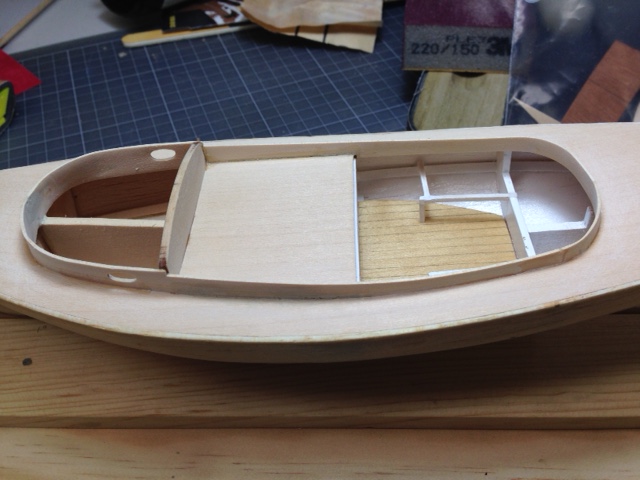
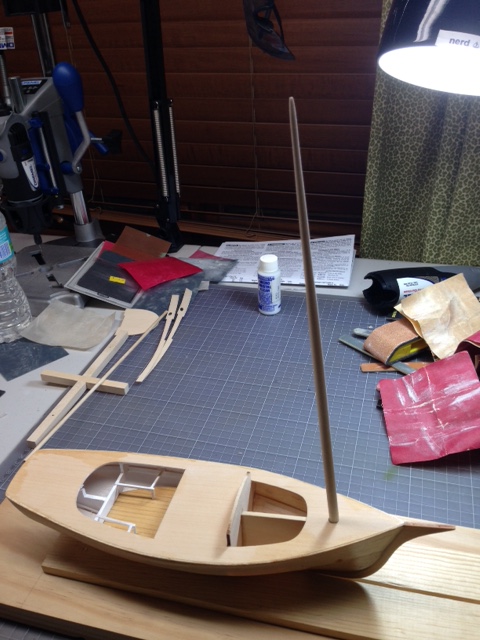
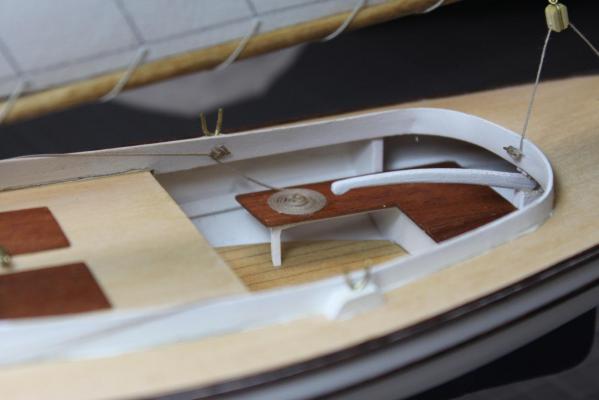
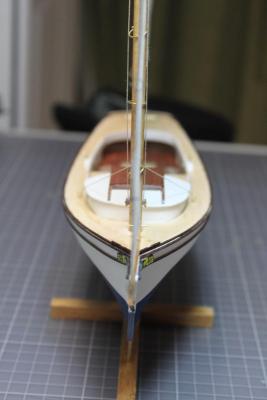
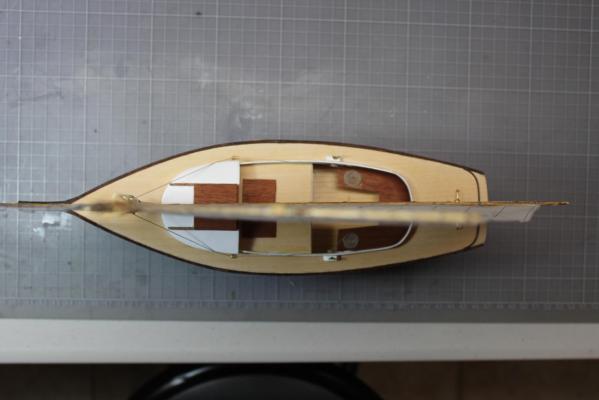
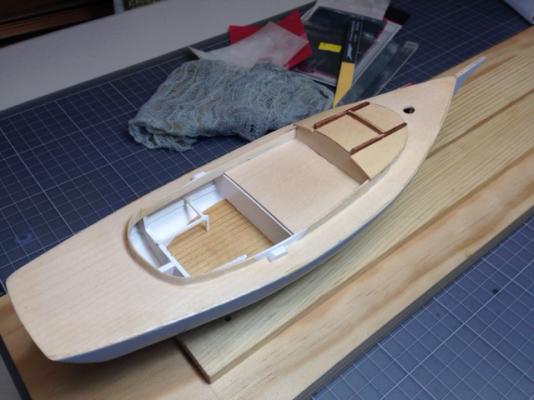
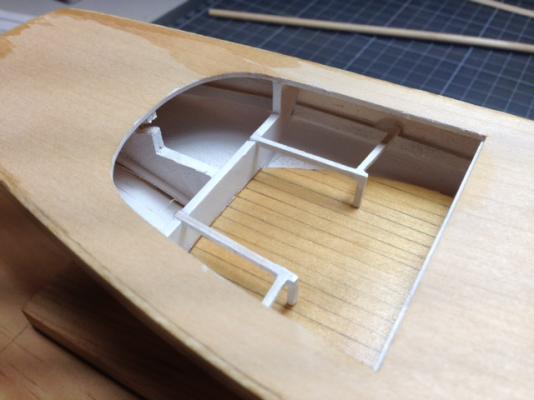
So, a teeny bit more progress this weekend. I may have mentioned that I was not fond of the natural wood look inside the cockpit, so I painted it white. It's a bit stark now, but looks better when the mahogany seat goes in. I'm skipping around in the build a bit, so I decided to try my hand at my first mast. No lathe here at Chez Springs, so I chucked the mast in the drill and used handheld sandpaper to taper the mast. It took awhile (maybe my grit wasn't low enough?), but I got it done. Checked the measurements with my digital calipers and it checked out pretty close. I've been crafting a few of the fiddly bits at the same time, including the cockpit seat, the oar lock blocks and the hatch frame parts. I've also been applying multiple coats of poly to the hull in an attempt to see how smooth I can get the balsa sheet to turn out under paint. Need to work up the guts to try affixing the cabin / coamings, but I think I'm a tad intimidated for some reason. As always, any and all feedback welcome!

- 52 replies
-
- 4
-
-
- muscongus bay lobster smack
- Midwest Products
- (and 2 more)