gsprings
-
Posts
67 -
Joined
-
Last visited


-
 CiscoH reacted to a post in a topic:
Armed Virginia Sloop by gsprings - Model Shipways - Scale 1:48
CiscoH reacted to a post in a topic:
Armed Virginia Sloop by gsprings - Model Shipways - Scale 1:48
-
CiscoH reacted to a post in a topic:
Armed Virginia Sloop by gsprings - Model Shipways - Scale 1:48
-
CiscoH reacted to a post in a topic:
Armed Virginia Sloop by gsprings - Model Shipways - Scale 1:48
-
CiscoH reacted to a post in a topic:
Armed Virginia Sloop by gsprings - Model Shipways - Scale 1:48
-
CiscoH reacted to a post in a topic:
Armed Virginia Sloop by gsprings - Model Shipways - Scale 1:48
-
CiscoH reacted to a post in a topic:
Armed Virginia Sloop by gsprings - Model Shipways - Scale 1:48
-
CiscoH reacted to a post in a topic:
Armed Virginia Sloop by gsprings - Model Shipways - Scale 1:48
-
CiscoH reacted to a post in a topic:
Armed Virginia Sloop by gsprings - Model Shipways - Scale 1:48
-
CiscoH reacted to a post in a topic:
Armed Virginia Sloop by gsprings - Model Shipways - Scale 1:48
-
CiscoH reacted to a post in a topic:
Armed Virginia Sloop by gsprings - Model Shipways - Scale 1:48
-
 I am nearing completion on my first major effort (it's been a long journey) and have a fairly basic question. All the rigging is hitched to all the appropriate cleats, etc., and I need advice as to next steps. Do I glue the hitched line to the cleats and cut off any excess rope? If so, what glue best to use and how closely should I clip the line to the cleat or other belaying point. I want to create rope coils off the model and hang them from the cleats as I don't think I've got the skills to use the actual excess line to create the coils. How do most folks do this? Thoughts?
- 1 reply
-
- 2
-
-
So, it's been a long hiatus on this project, but I'm looking to draw it to a close. I've made much undocumented progress since my last post, and am at the point where the rigging has been finished. (Will post a current status pic soon.) Question: All the rigging is hitched to all the appropriate cletes, etc., and I need advice as to next steps. Do I glue the hitched line on the cletes and cut off any excess rope? I want to create rope coils off the model and hang them from the cletes as I don't think I've got the skills to use the actual excess line to create the coils. How do most folks do this? Thoughts?
-
gsprings reacted to a post in a topic:
HMS Victory by James H - Amati - 1:64
-
gsprings reacted to a post in a topic:
Medway Longboat 1742 by Chuck - FINISHED - 1/2" scale
-
gsprings reacted to a post in a topic:
Armed Virginia Sloop by gsprings - Model Shipways - Scale 1:48
-
gsprings reacted to a post in a topic:
Armed Virginia Sloop by gsprings - Model Shipways - Scale 1:48
-
Decking (using some beautiful holly from Jason from Crown Timberyard):
-
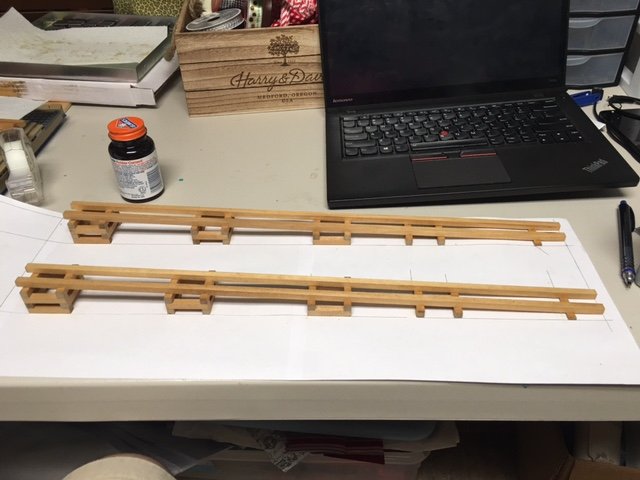
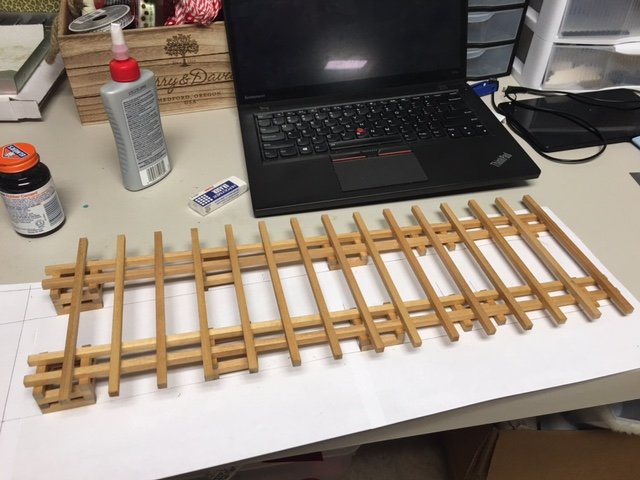
Launching ways (Fun because I got to use trig to compute angles for machining channels in support beams):

-
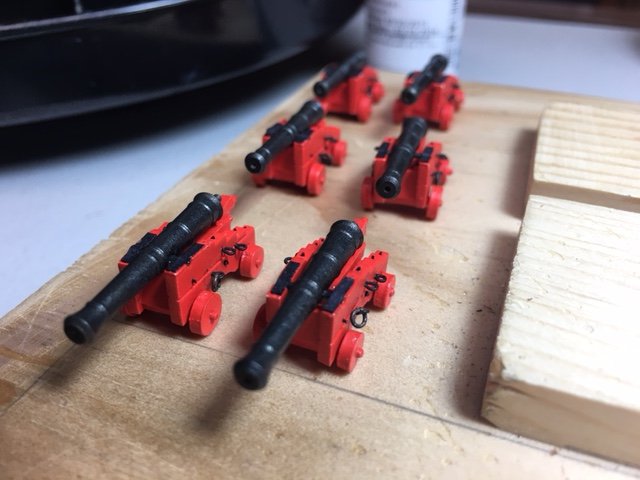
Completed cannons from Chuck at Syren:
-
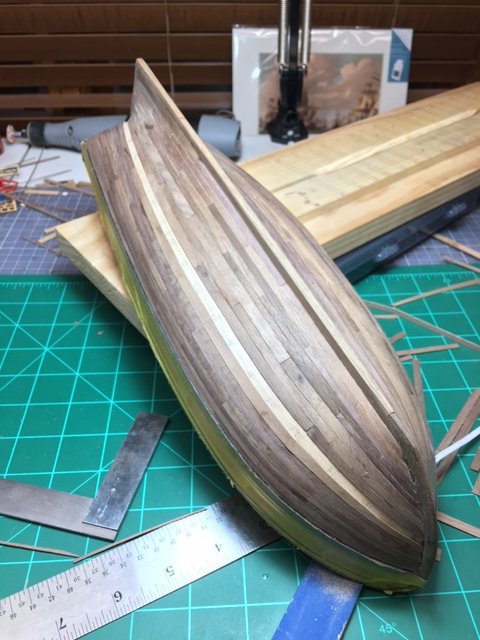
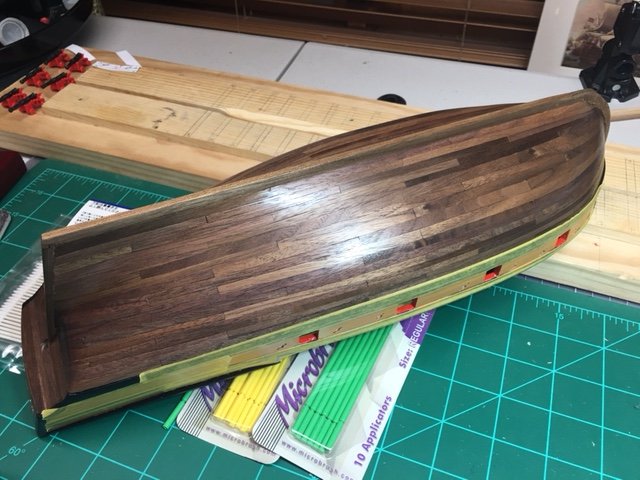
Long time, no update. That's not to say progress has not been made. Here are a series of posts to bring you up to speed. Completion of walnut layer planking. All in all, I'm pretty happy with how it turned out, despite some errors.
-
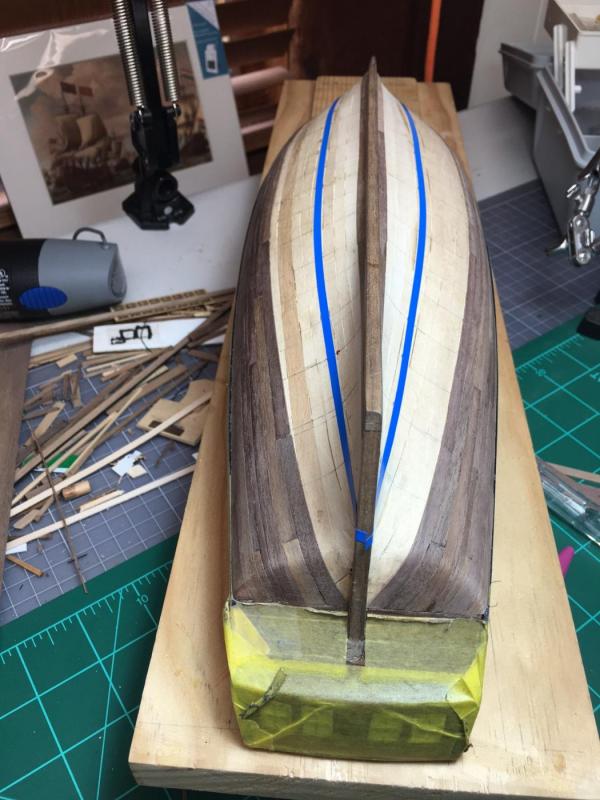
Progress to report! Second-layer planking has begun! Finally got up the nerve to start laying down the walnut layer of planking. I think I've said it before, but I'll say it again -- planking really intimidates me. However, so far, it seems to be going okay. I am focused on learning rather than on getting all the rules of butt joints right and all that. (I misread my practicum and screwed up the butt joints -- I've got the joints repeating every four layers instead of every five.) So for me that means a smooth layer with as few gaps as possible and no user of stealers or drop planks, if I can help it. I've got the first belt and the garboard strake done on both sides. Used water to bend the planks around the stern. So far, so good. For me, based on the first layer, the hardest planks are the ones that hit at the transition between the transom and the sternpost. We'll see how that goes ...

-
Great looking start, Captain! Will be jealousy watching as your progress zooms ahead of mine. Stupid job.
- 231 replies
-
- 2
-
-
- model shipways
- armed virginia sloop
- (and 1 more)
-
gsprings reacted to a post in a topic:
General / organisation of wood
-
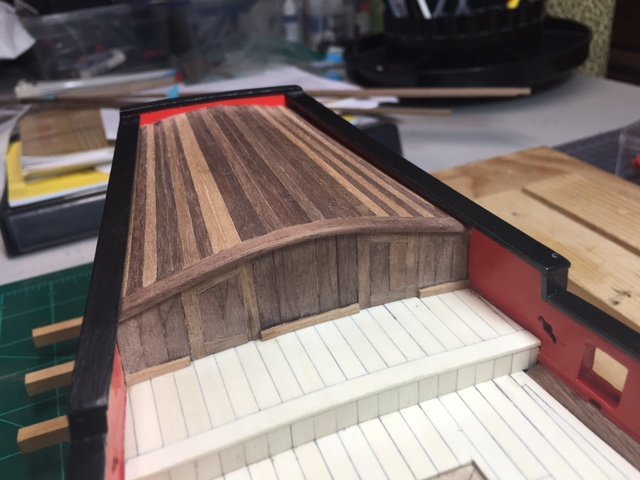
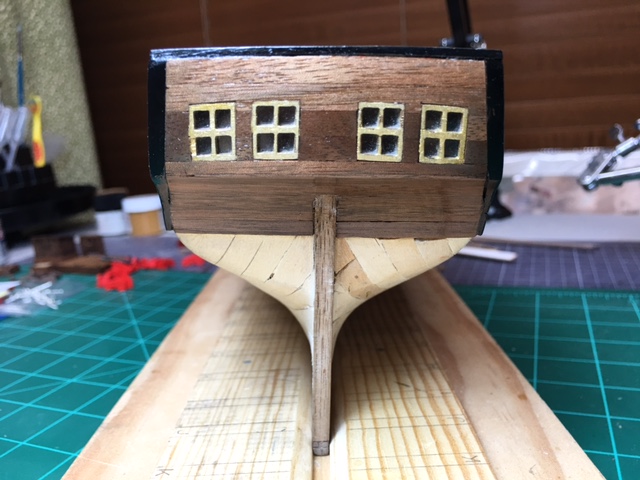
I just went to look at the Hunt practicum to see what wood planking I used for the transom walnut layer. Specifically, I looked at chapter 2.2.3, which details the two layers of planking for the stern transom. I actually couldn't find any specific mention in that chapter of the thickness of planking to use for the walnut layer (walnut planking starts on chapter 2, pg. 19). So, like you, I used the thinnest walnut planking in the kit, which is listed as 0.020" in the kit instructions (page 14) and 0.030" in the parts list. I would note that I sanded the transom and recoated it with satin multiple times to get the finish that you see in the photos. However, now that I've got some paint down, inboard and out, and coated with satin finish, I'm not sure that I like the glossier look. I may end up flattening it down with clear flat spray.
-
gsprings reacted to a post in a topic:
Armed Virginia Sloop by Hill202 - Model Shipways - scale 1:48
-
Joe, Great to see another AVS build up and running! At your pace, you'll be ahead of me in just a couple more weeks. (My job's slowed me to a snail's pace.) Mind if I pull up a stool and watch the progress? I'll be getting pointers from you not too soon. Looking great so far! -- Greg
-
gsprings reacted to a post in a topic:
Armed Virginia Sloop by Hill202 - Model Shipways - scale 1:48
-
Comparison of Victory kit manufacturers
gsprings replied to dchrismiller's topic in Wood ship model kits
Chris just resurfaced this week with news that the Victory is done. Check out this thread for news and pics of the finished model: http://modelshipworld.com/index.php/topic/985-amati-and-chris-watton/page-33- 19 replies
-
- 3
-
-
- Victory
- kit manufacturers
- (and 5 more)
-
gsprings reacted to a post in a topic:
Newsworthy updates from Chris Watton
-
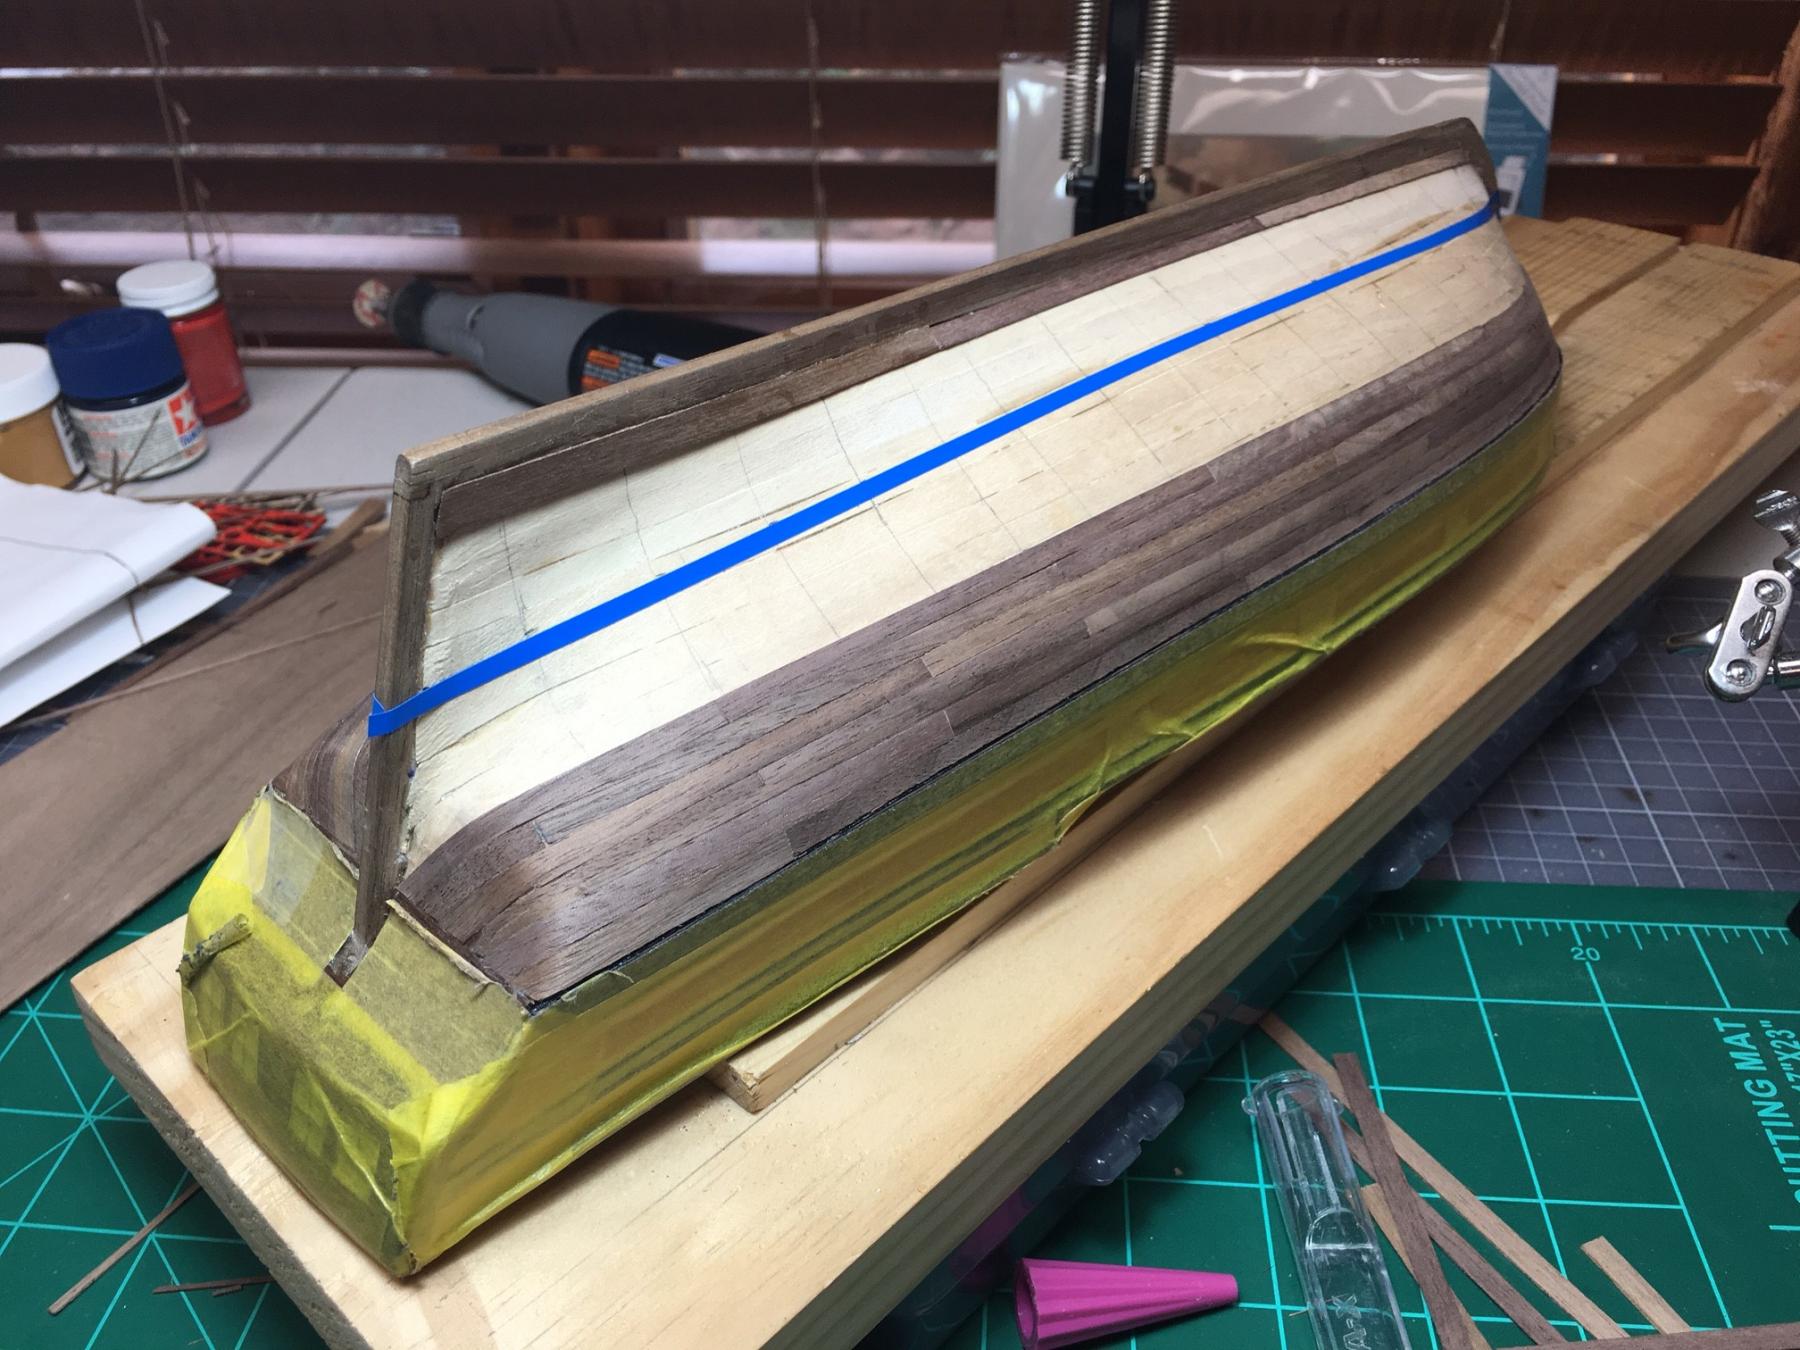
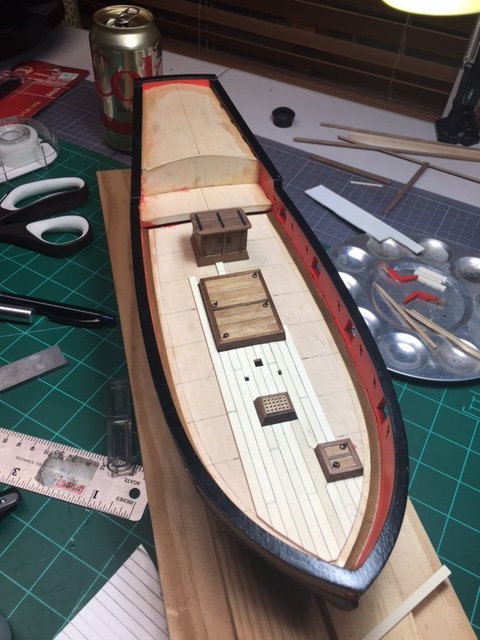
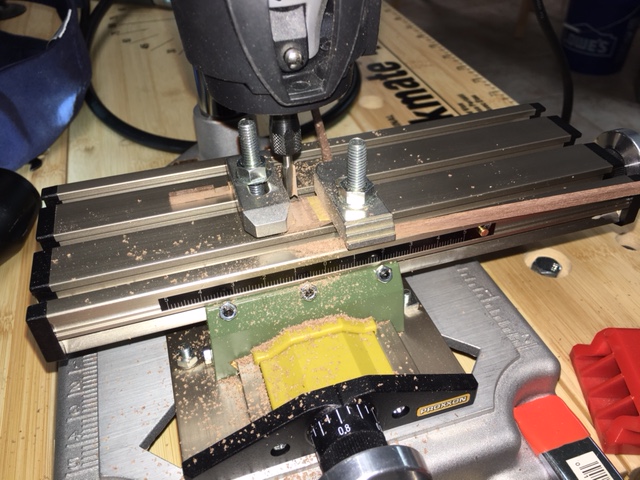
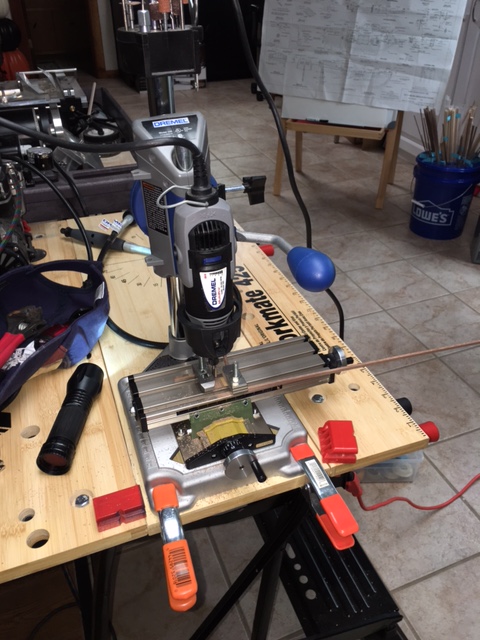
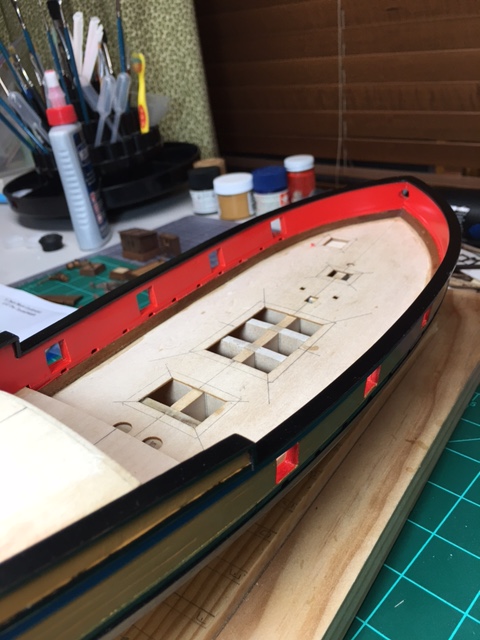
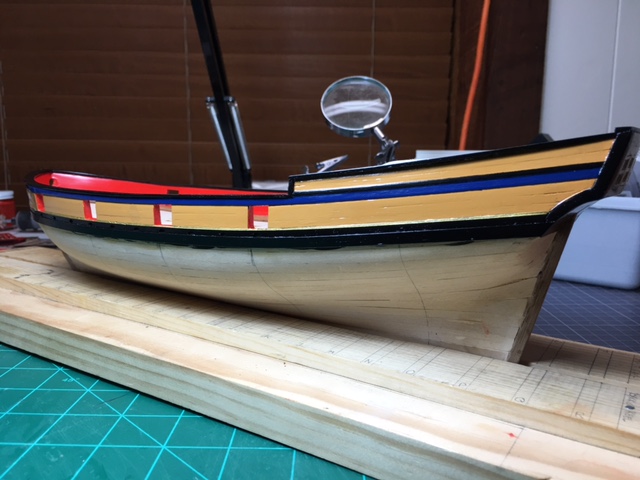
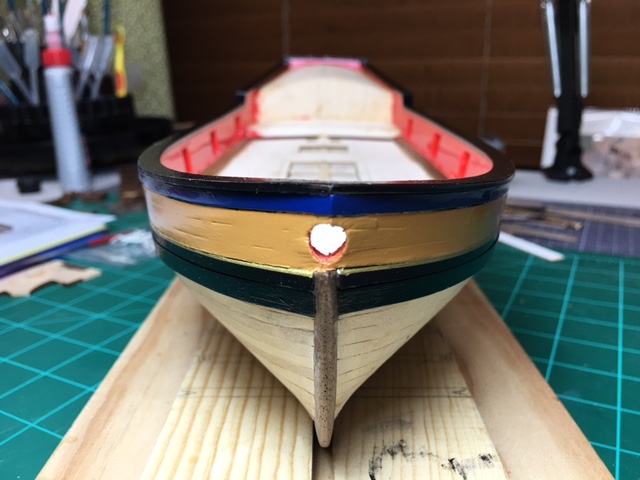
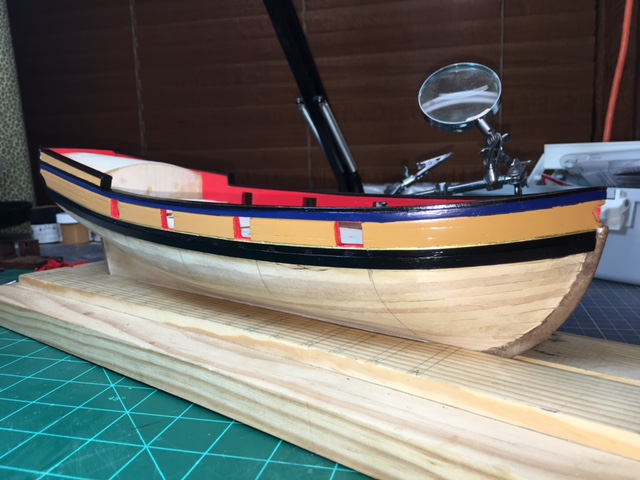
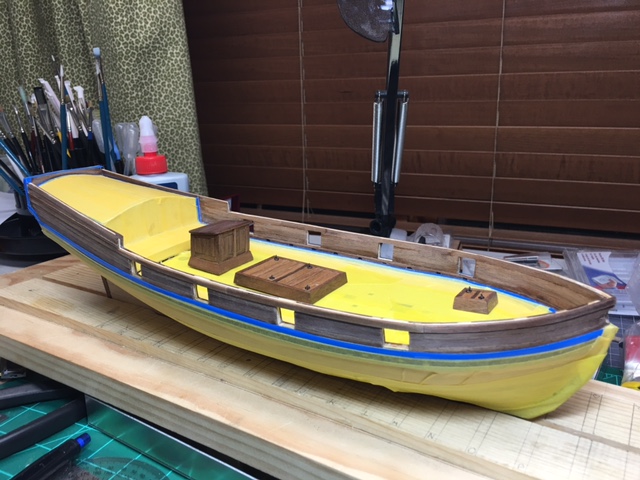
Much time consumed over than past 4-6 weeks doing the painting and applying rail caps. I am not a huge fan of painting, and this process taught me a couple of things: 1) Do NOT use spray cans because you're too lazy to set up, take down and clean the airbrush. It's too easy to flood the area. 2) Be choosy about how you use different kinds of masking tape. I love the blue stuff, because of its ability to conform to compound curves, but it's a little thick, which creates some places where the lines are not so clean. Should have used the thin yellow Tamiya stuff in those places. Here are some pics of the current state: I've had a ton of time to work on other stuff (e.g., deck furniture) while waiting for coats of paint to dry. One of the things I'm most happy with is my new makeshift mini-mill. Rather than buy one, I mounted a Proxxon X-Y table to my Dremel workstand, bought a bunch of compatible routing bits and voila, instant mill! (Hat tip to Cap'n'Bob for the inspiration!) I tried it out to carve the channels in the swivel gun stancheons. Here are some pics:

-
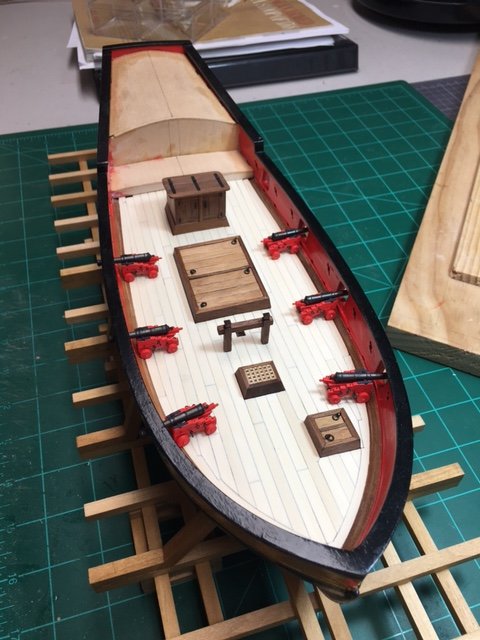
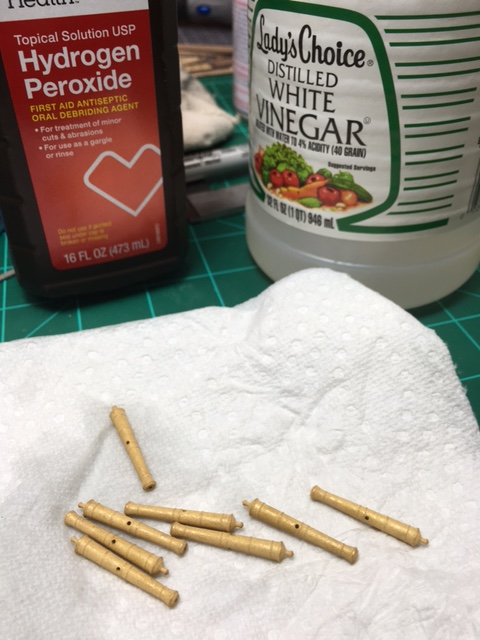
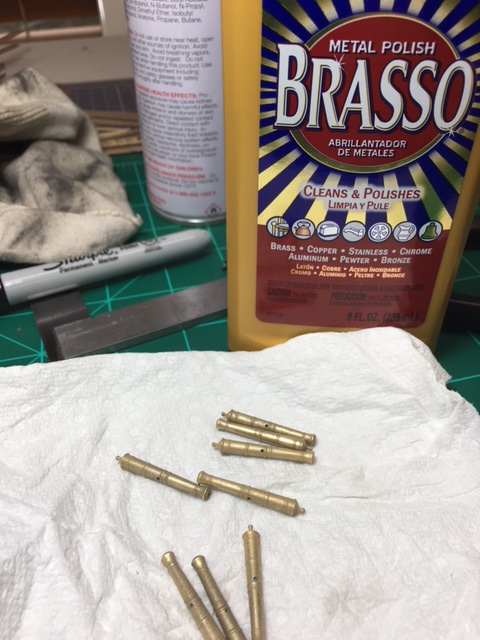
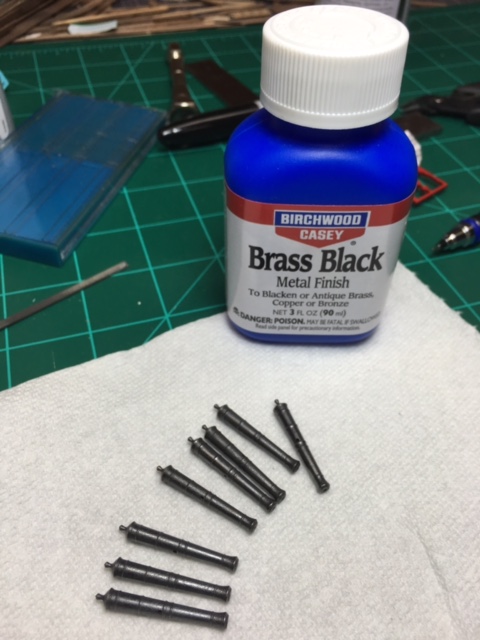
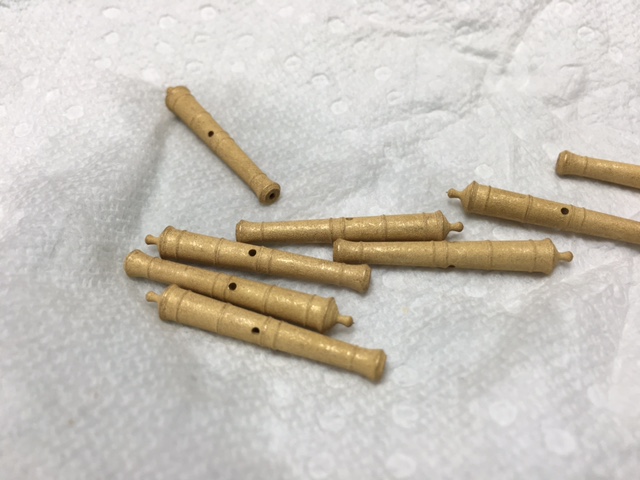
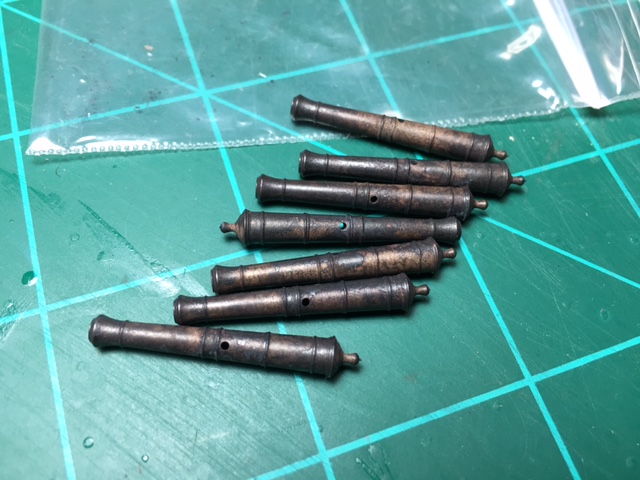
Thanks, guys. JP, I am definitely planning to spray paint. I bought the Bulwarks Red acrylic paint from Model Shipways, which I had planned to airbrush on, but the color looks a little too bright to my eye. So I've bought a few different spray can reds to see if I can find a version of red that I like better. In the meantime, I've had quite the odyssey with my Syren brass cannons (all my fault). I originally blackened the cannon using the Birchwood Casey Brass Black and got them all polished up. They came out really well and I was very pleased. So I put them all in a small plastic bag for safekeeping. The next morning, when I got back to the workbench, the cannons had developed a pinkish "crust" on them. Best I can figure, without really knowing the chemistry, is that I did not wash off all the blackening chemical and it continued to react with the metal overnight, somehow bringing the copper in the brass to the surface. Here's how they looked: So, after some research into how to clean them, I soaked the cannons in a 3:1 mixture of hydrogen peroxide and vinegar and scrubbed them clean with a soft toothbrush. They cleaned up pretty well, but unfortunately there was a good deal of pitting on the metal, which I could not polish out with sandpaper without losing the details. Here's how they looked after cleaning. I thought it might be helpful to polish them the best I could before trying to re-blacken them. So I used Brasso and the Dremel with a polishing pad to see if it would help. Only helped a little bit, given the pitting. Assuming that I had done as much as I could to get the cannon back in shape, I went ahead and used the Birchwood Casey Brass Black to reblacken the cannons. They came out pretty well. The pitting is harder to notice with the blackening color applied. This time I made sure that all the chemicals were cleaned off. I have seen some actual cannon that have an irregular surface to them, so I am going to pretend that's the effect I was going for with the pitting. And I'll chalk it all up to a learning opportunity.
-
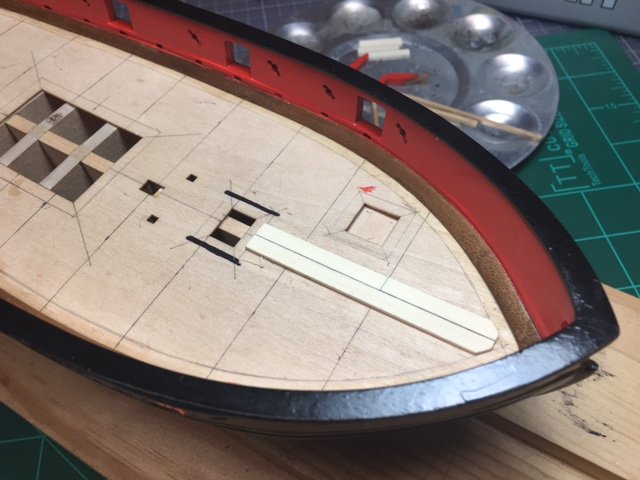
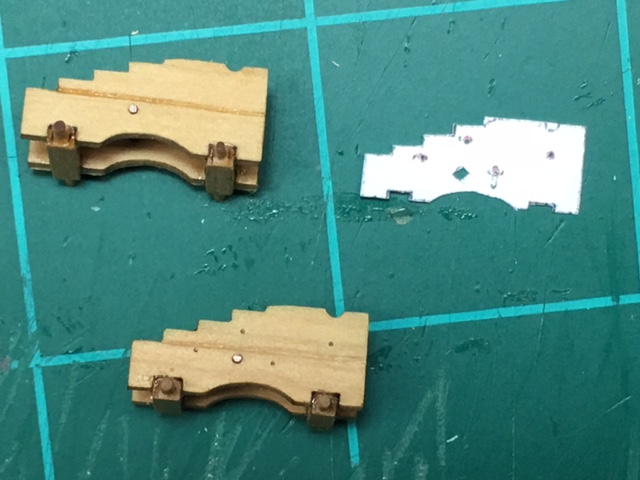
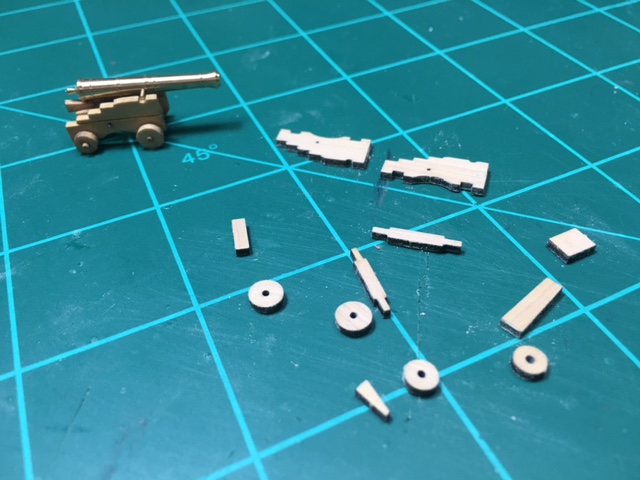
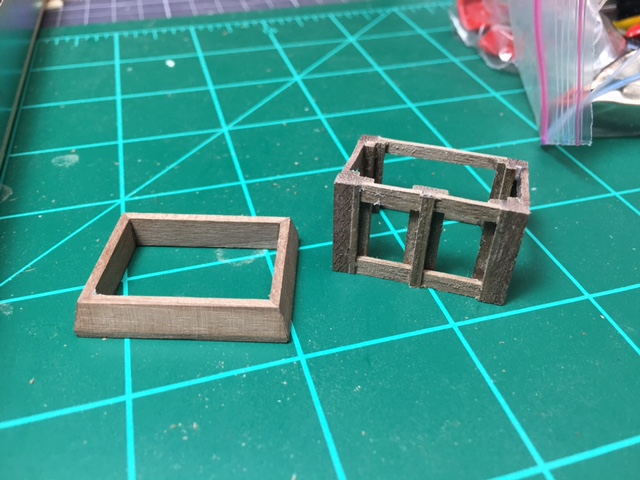
So all the summer activities really slowed progress. But I did take a couple of snaps to show what I've been able to get done. In progress on the companionway: More deck furniture, completed and located on deck (masking in place in preparation for painting): The piece parts of Syren's cannon and carriage: Template for locating drill holes for carriage ringbolts and boltheads: I'm looking to accelerate progress over the next few weeks. Painting awaits. I wanted to get the cannon carriages done so that I could do the red on the bulwarks and the carriages all at once. (I should mention that painting is not my favorite thing to do.)
-
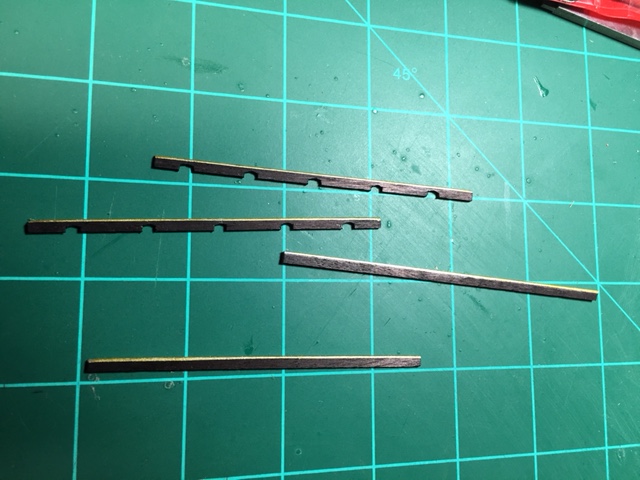
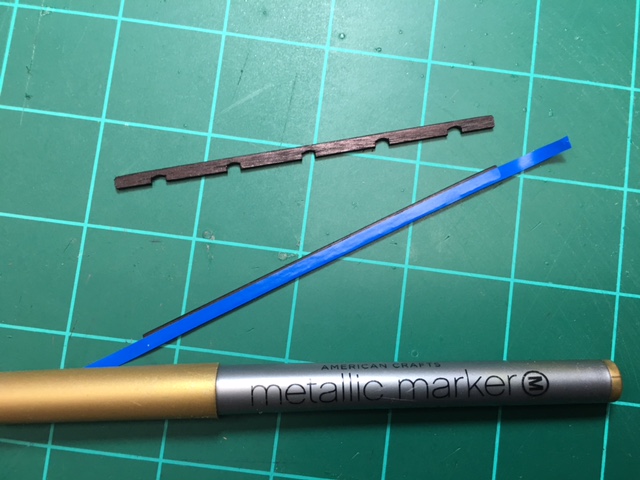
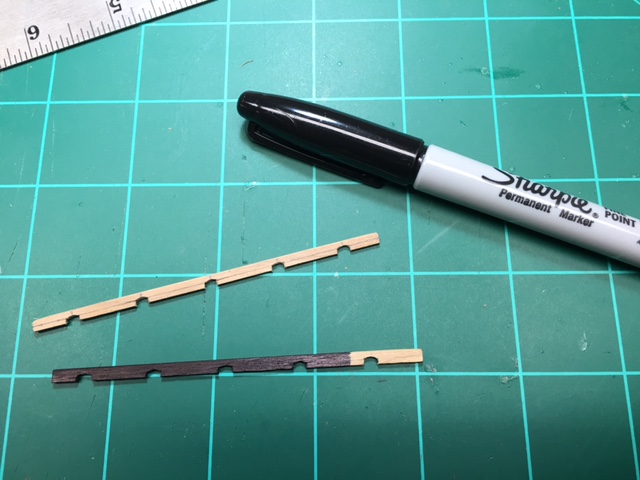
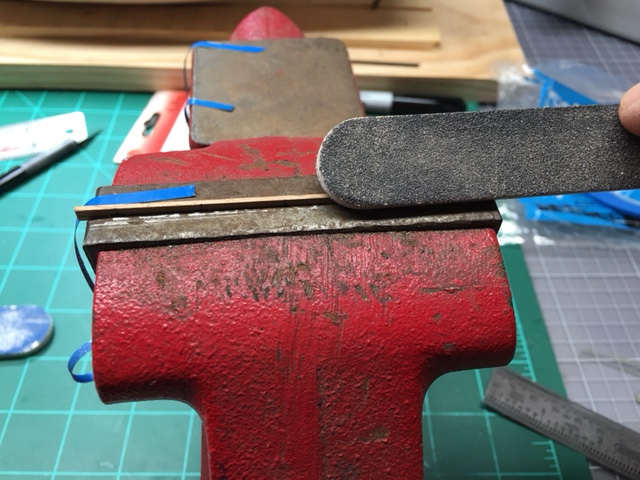
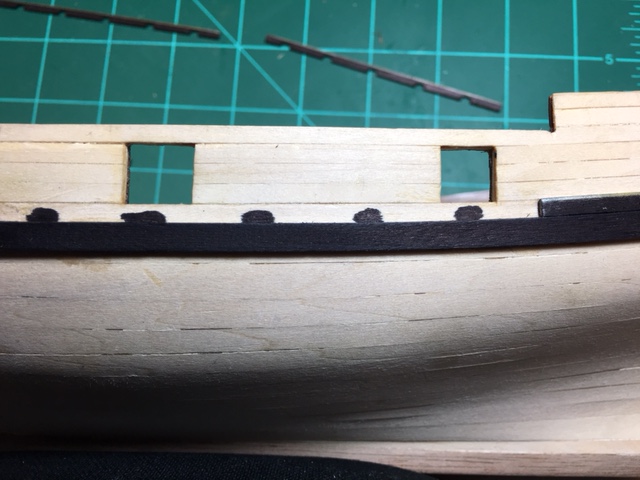
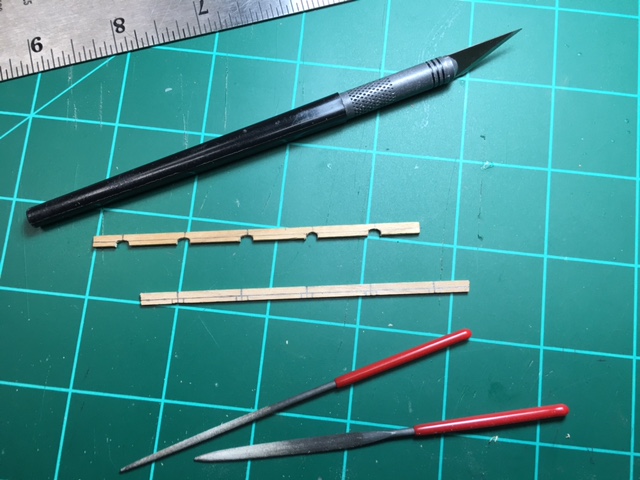
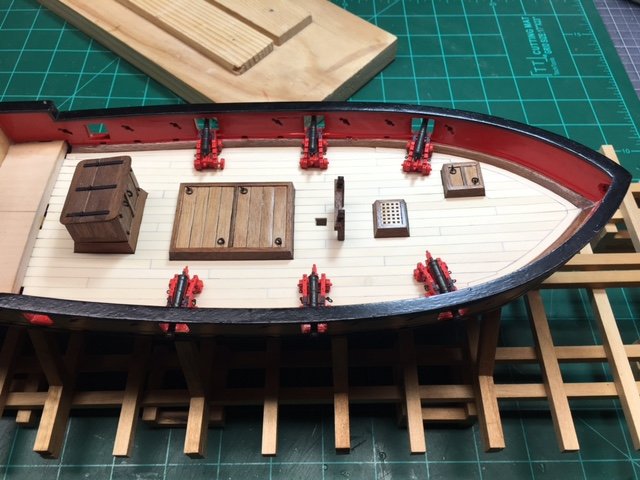
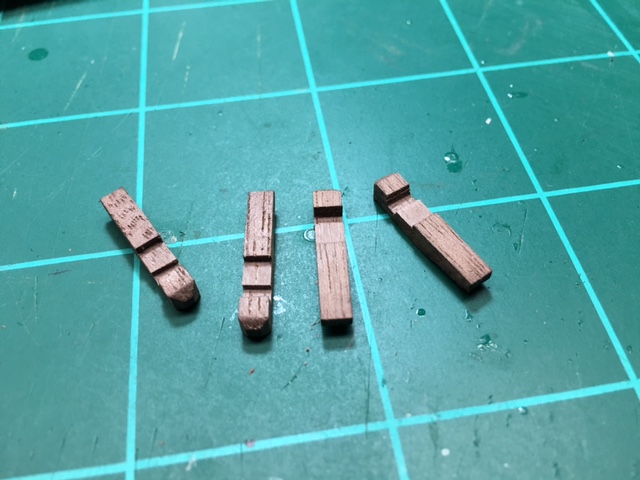
Have made more progress and will post a fuller update with photos later, but wanted to do a quick photo essay on my approach to creating the scuppers and gold pinstripe on the top of the black strake.' First, I measured, cut and filed the scuppers. I am not very happy with the overall shape of the scupper. Not rounded enough. But in the interest of making progress, I'll live with what I got. The overall shape is not going to be very visible anyway, once I blacken the planking behind the scuppers. Then I clamped the piece in a vise and sanded to round the top outer edge ... With that done. I used a Sharpie to "paint" the piece. Much easier than painting and looks the same under poly ... Then I used 3M blue masking tape to mask for the gold stripe that goes at the top of the black strake ... I found that a gold metallic marker was highly effective at "painting" the gold stripe. Gave me a lot of control ... Then I darkened the planking behind the black strake where it will be visible behind the scuppers and installed the black strake a piece at a time ...